HOLIDAY DONATION DRIVE - SUPPORT MSW - DO YOUR PART TO KEEP THIS GREAT FORUM GOING! (Only 13 donations so far - C'mon guys!)
×

firdajan
-
Posts
211 -
Joined
-
Last visited
Content Type
Profiles
Forums
Gallery
Events
Everything posted by firdajan
-
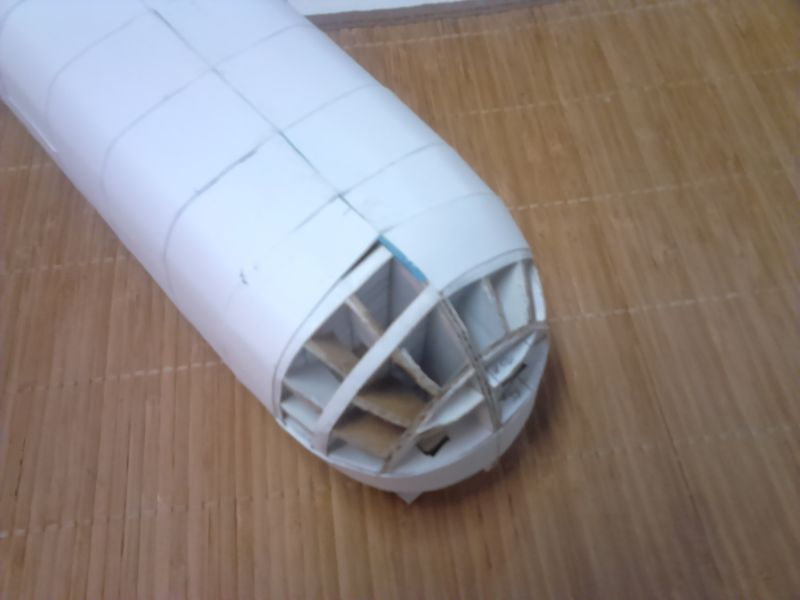
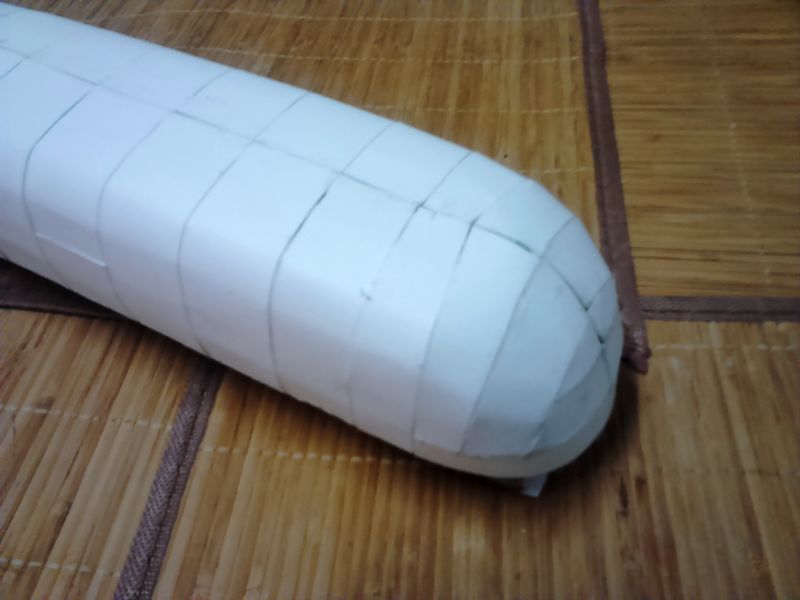
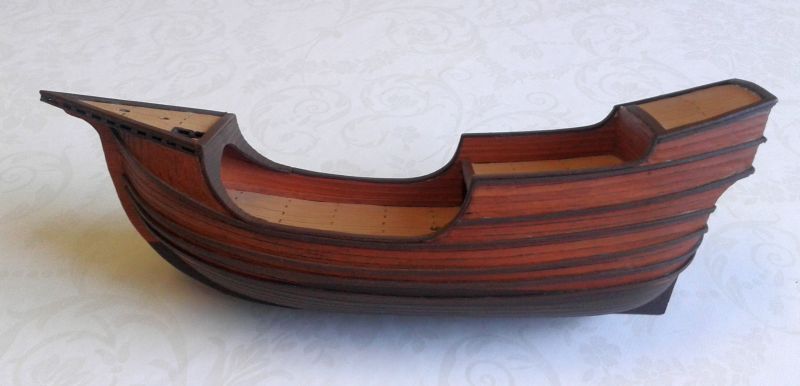
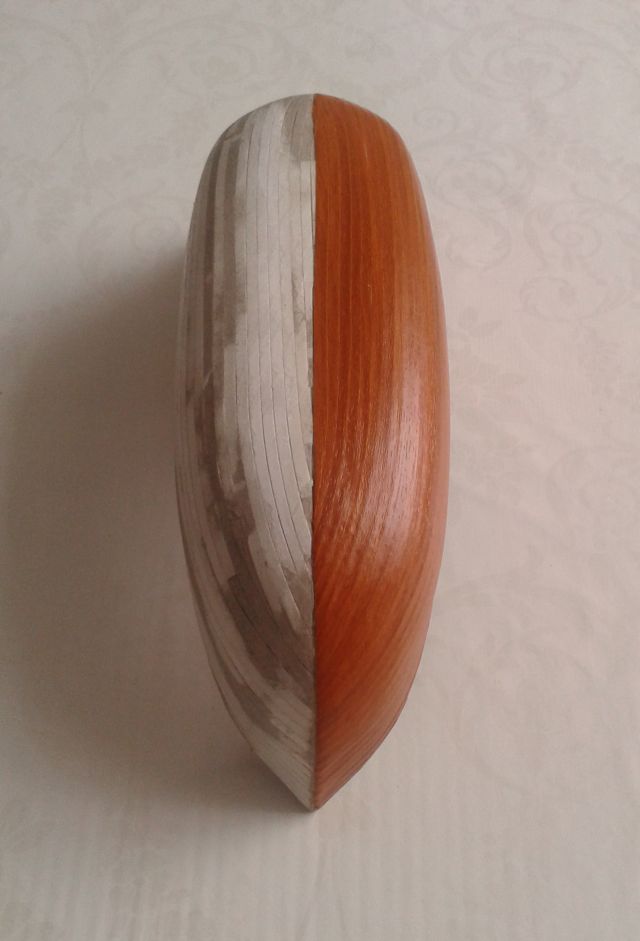
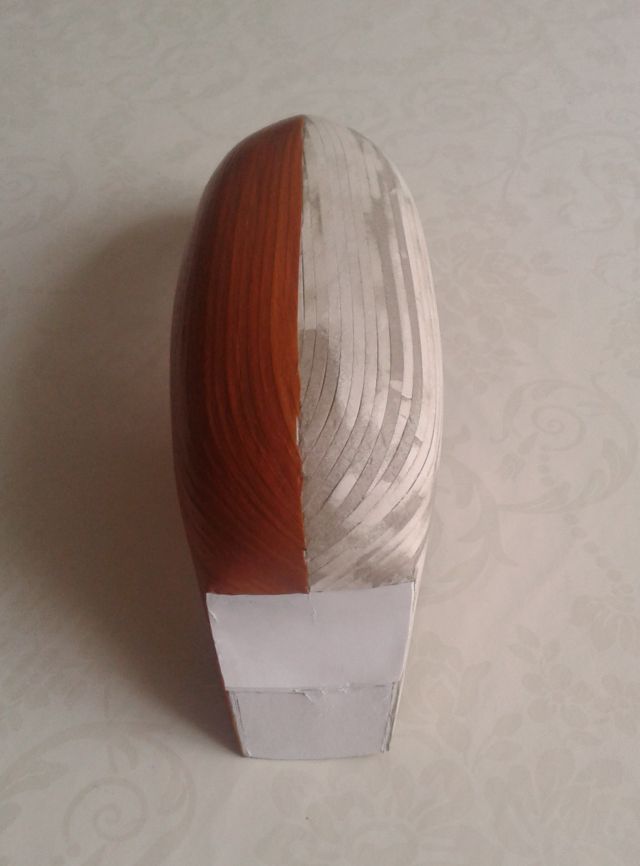
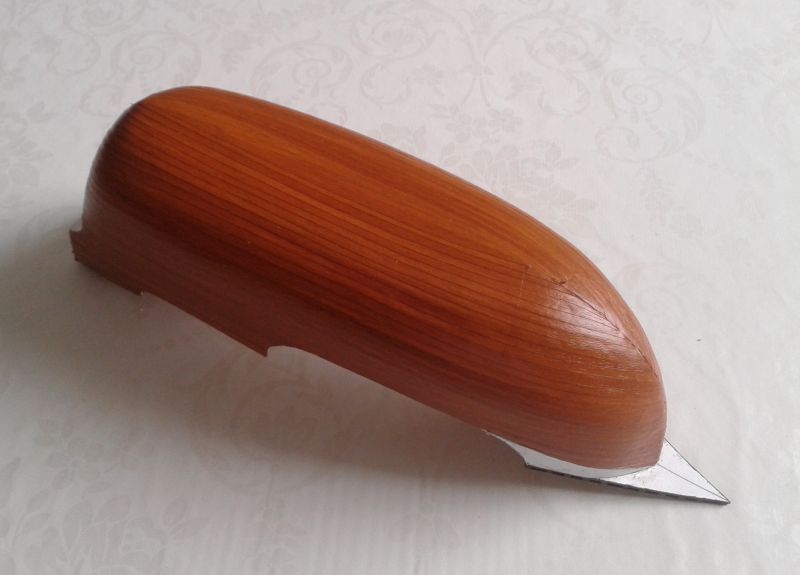
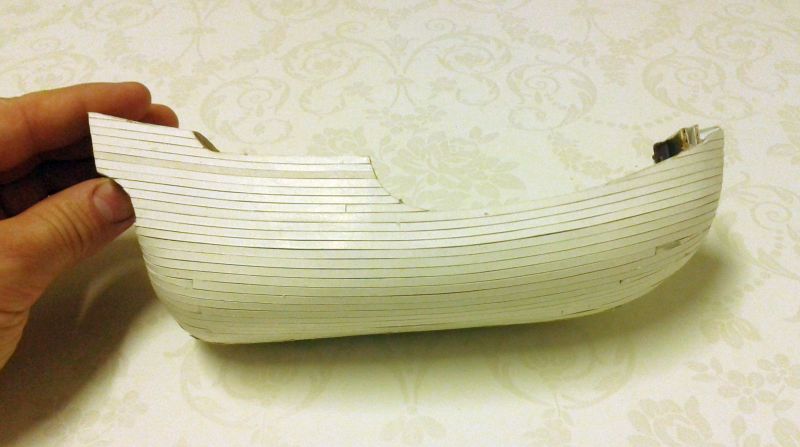
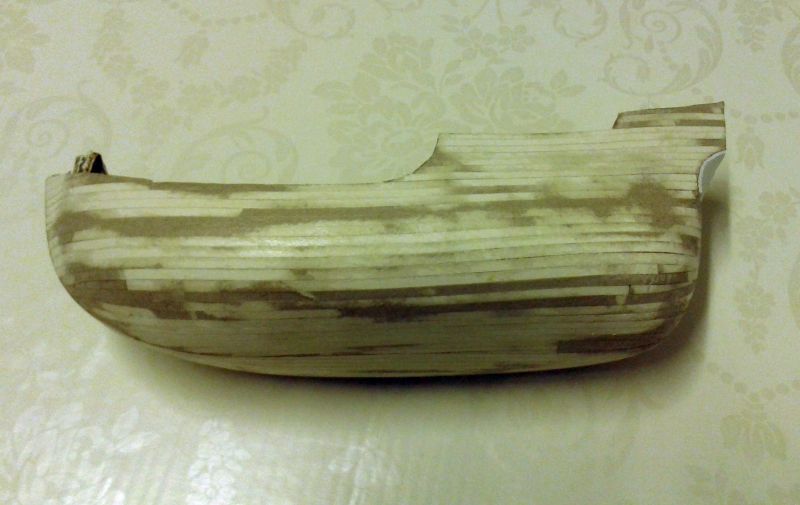
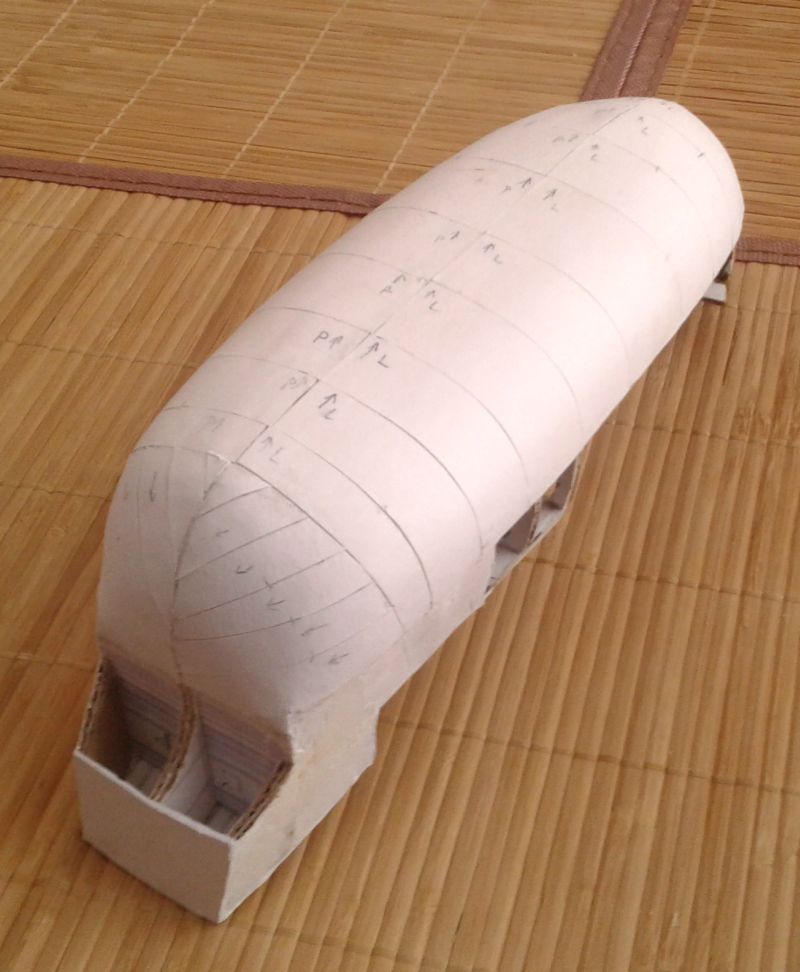
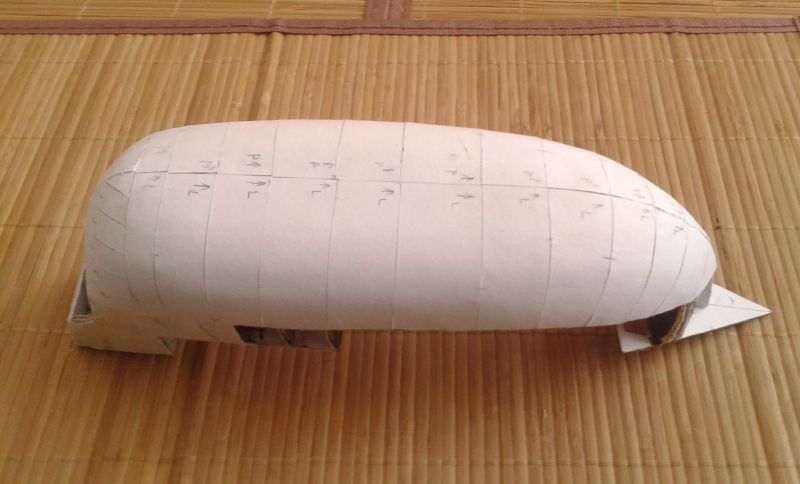
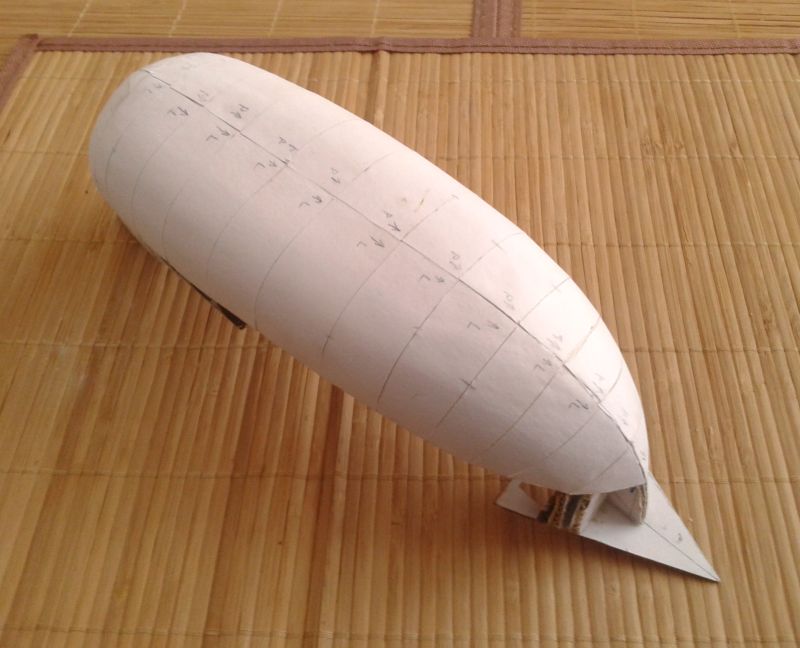
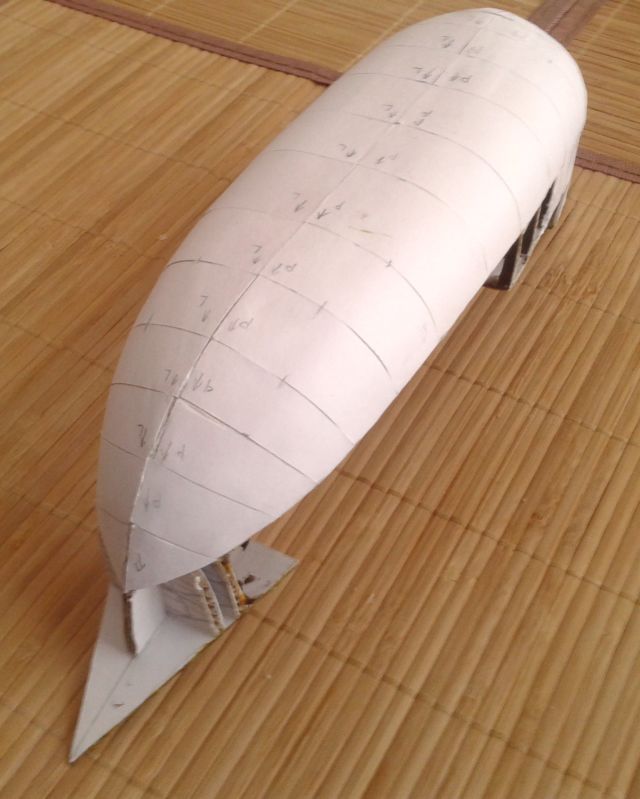
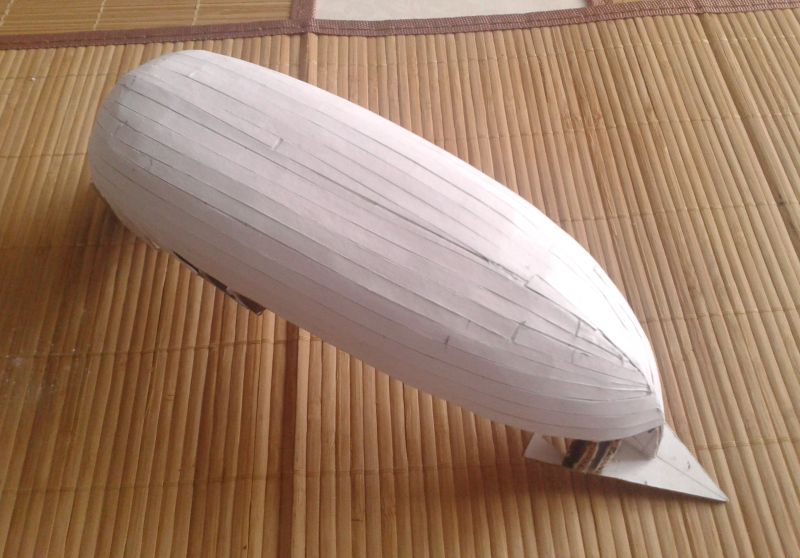
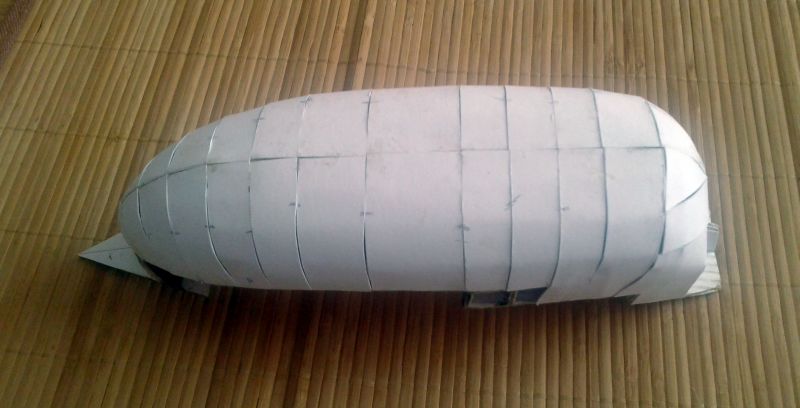
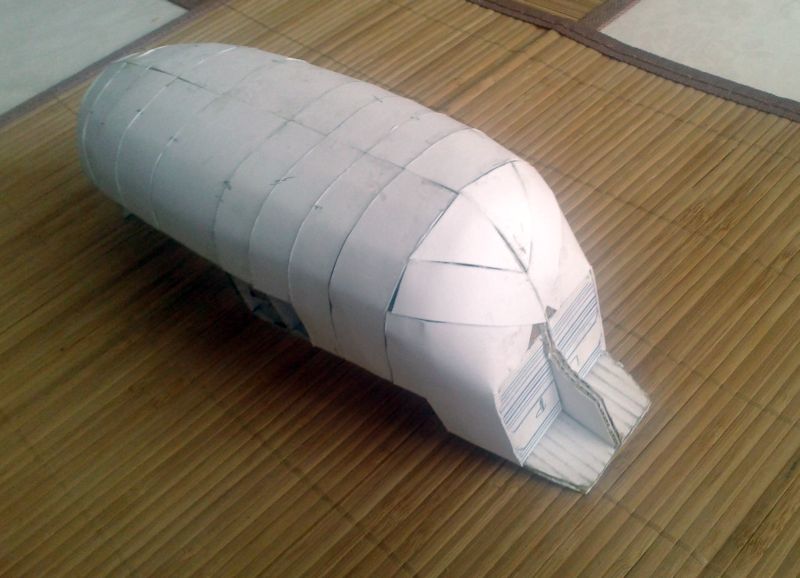
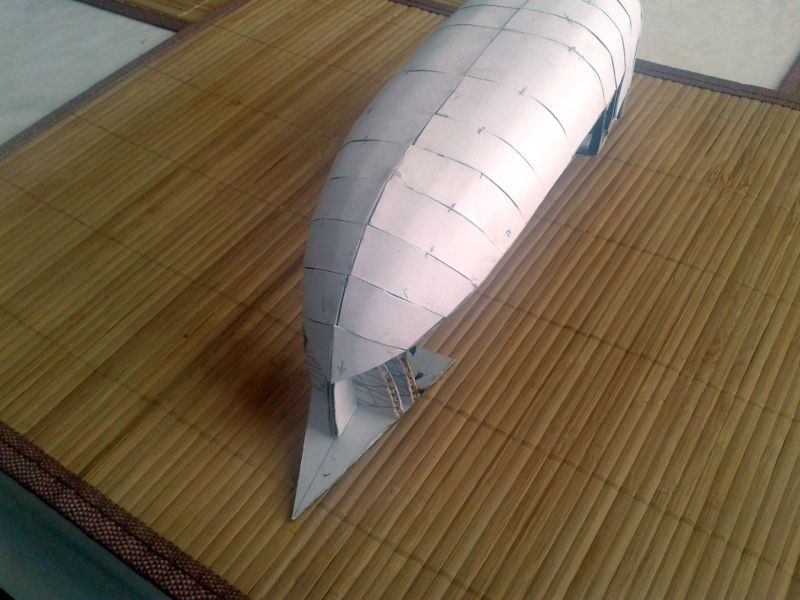
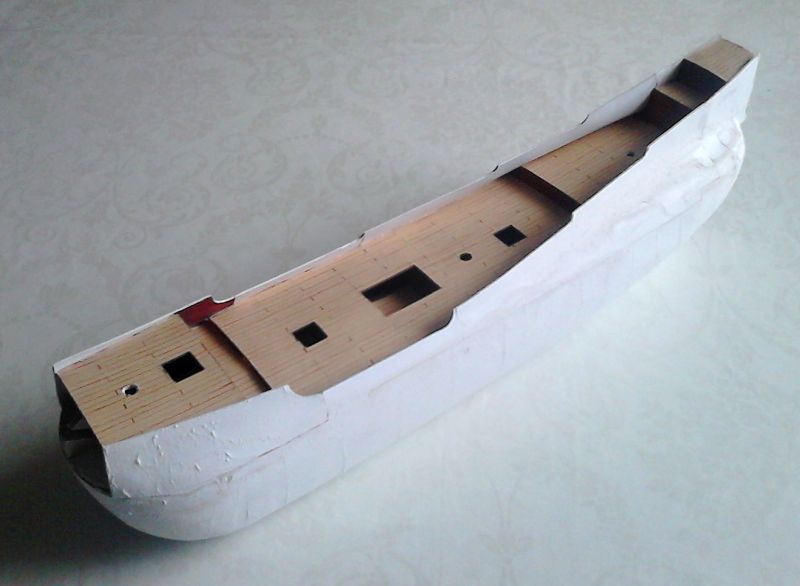
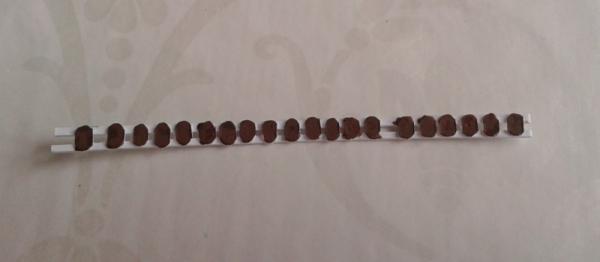
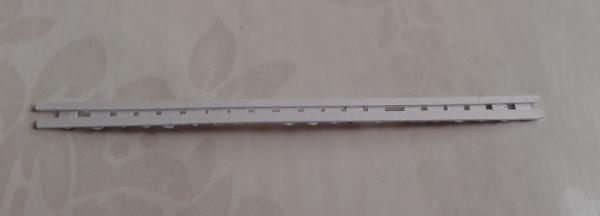
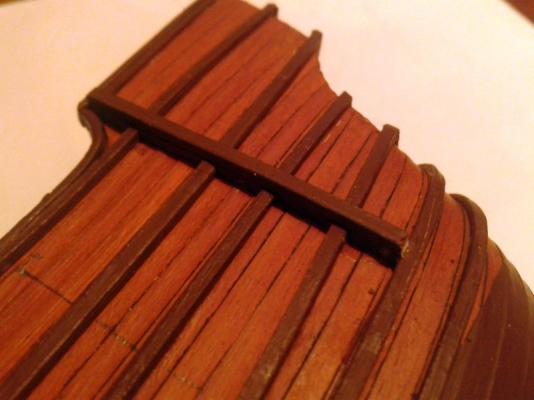
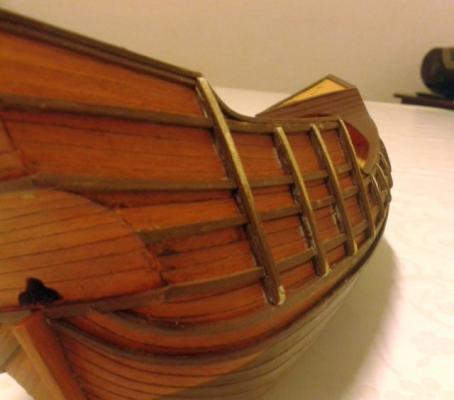
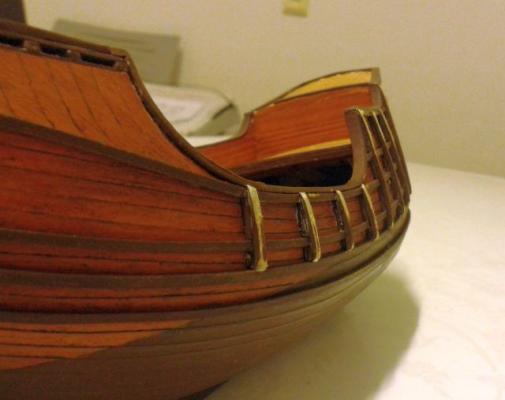
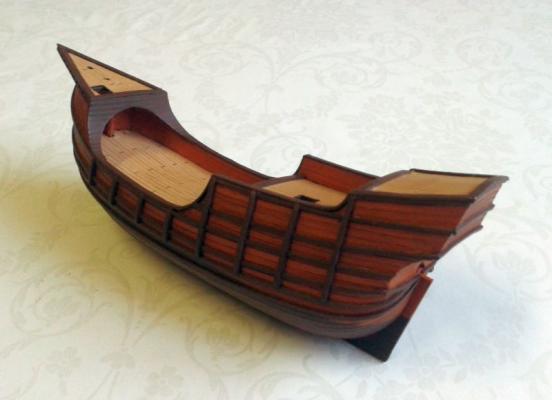
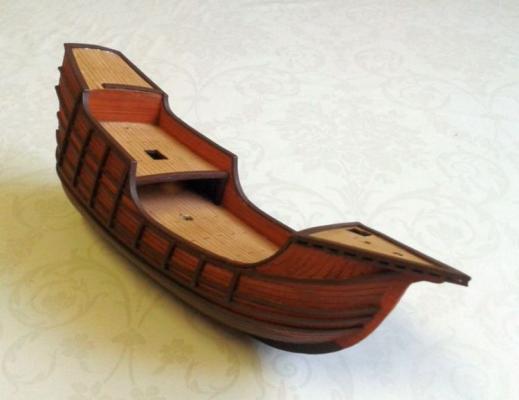
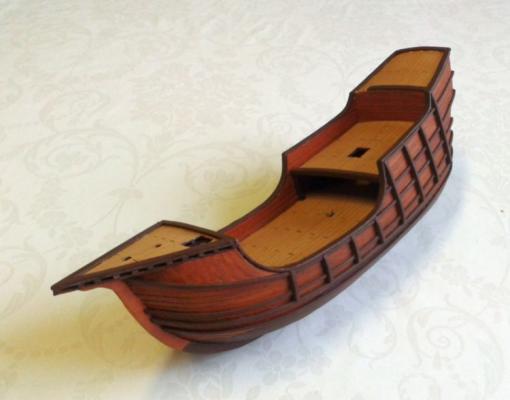
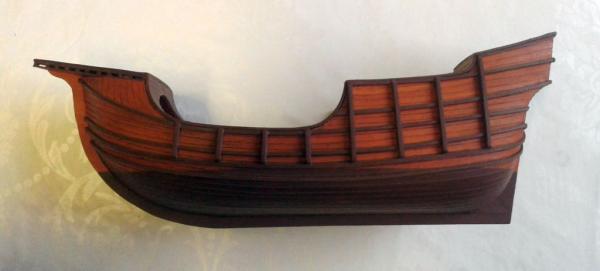
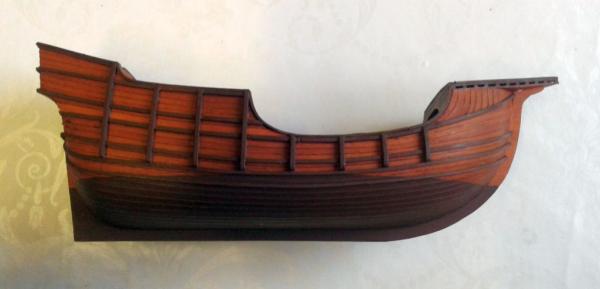
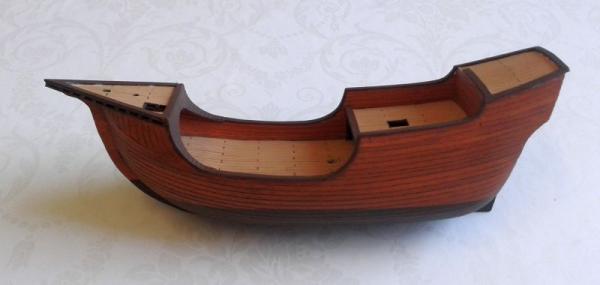
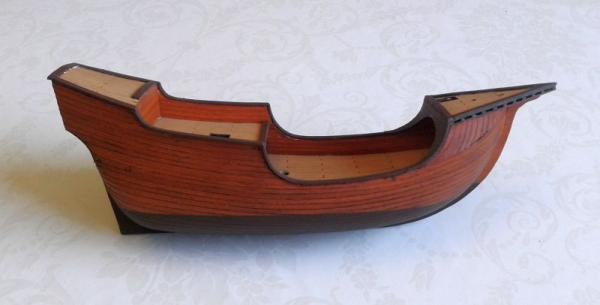
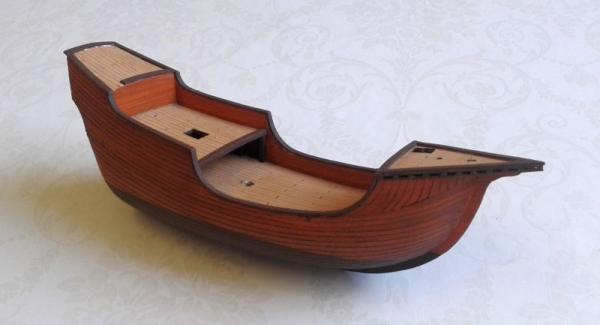
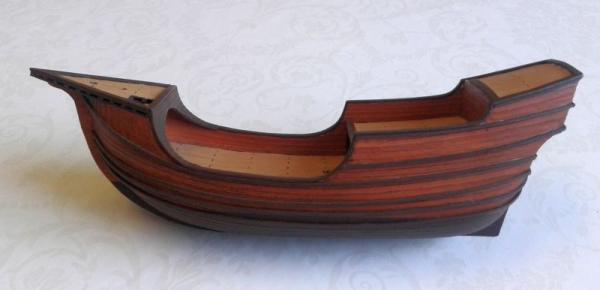
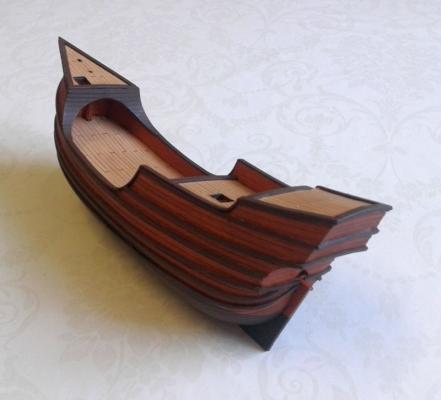
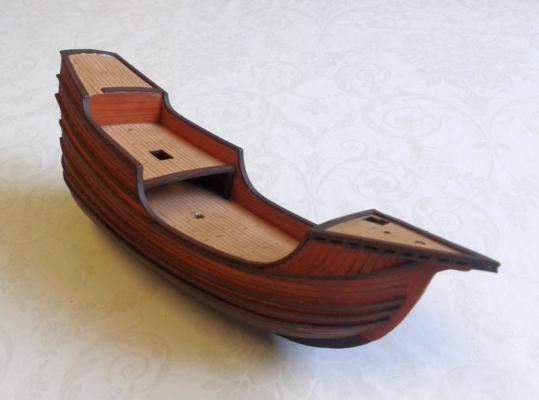
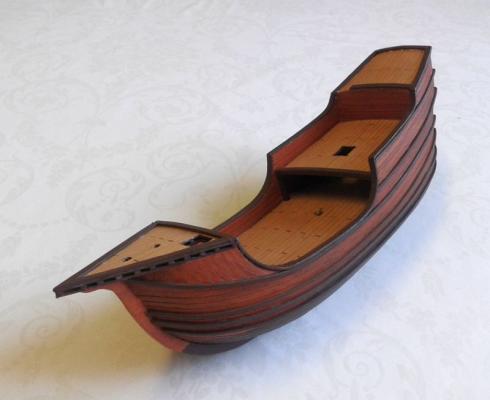
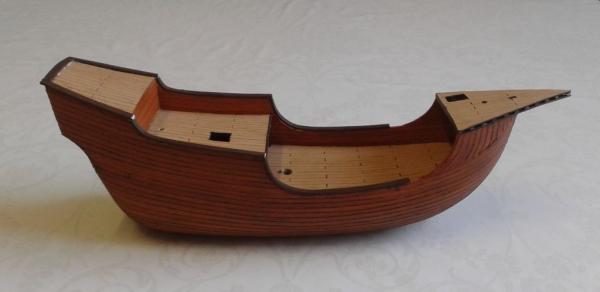
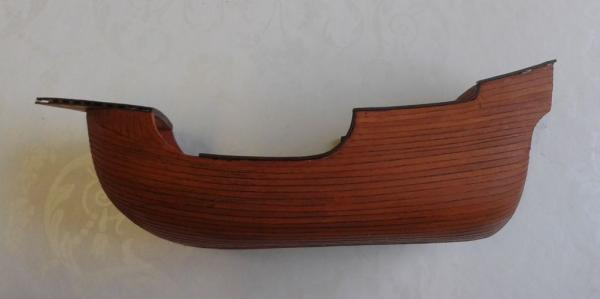
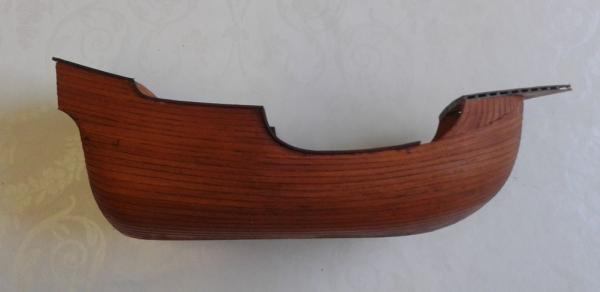
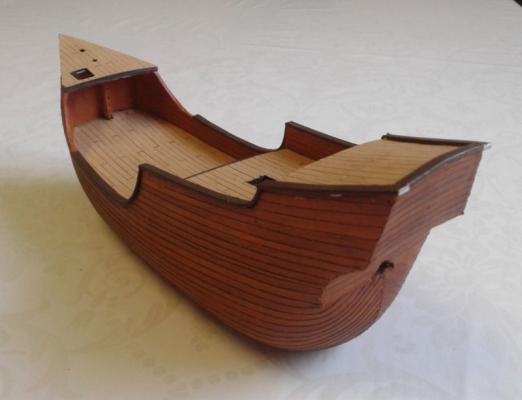
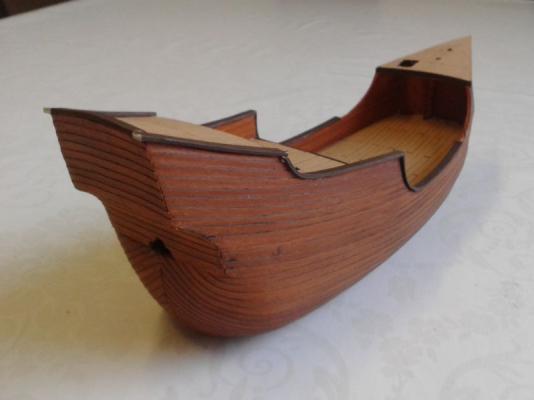
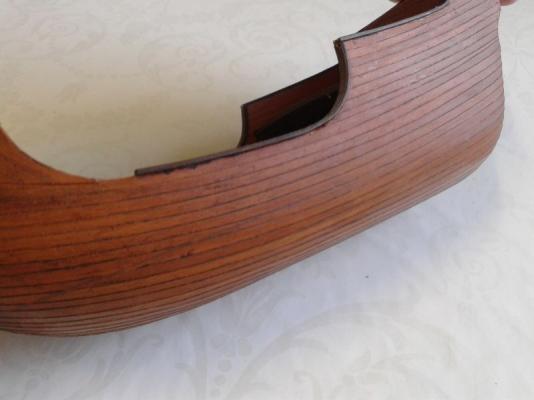
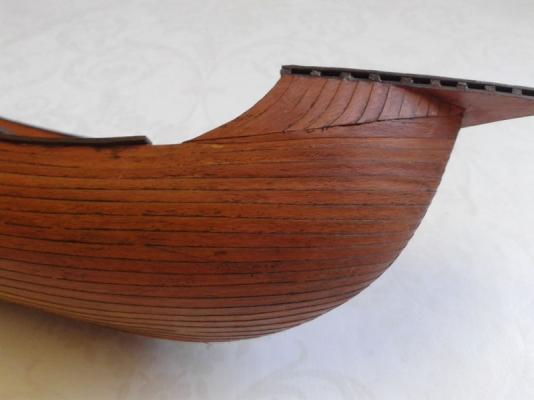
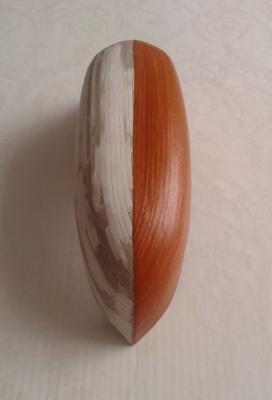
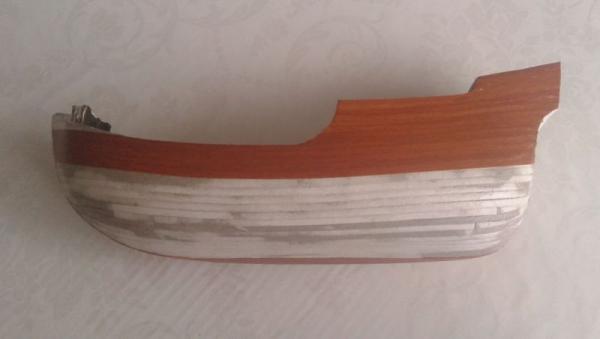
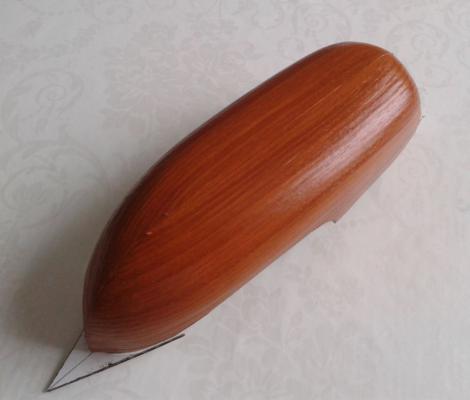
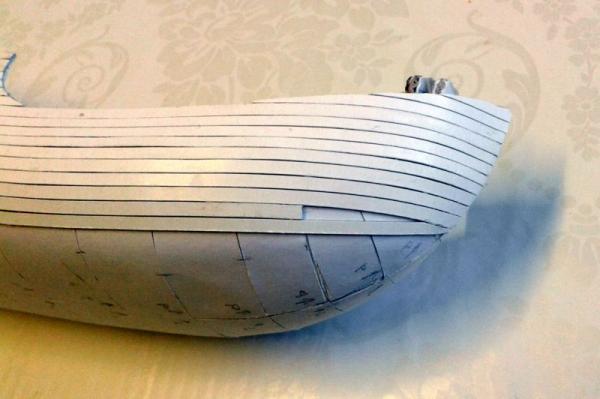
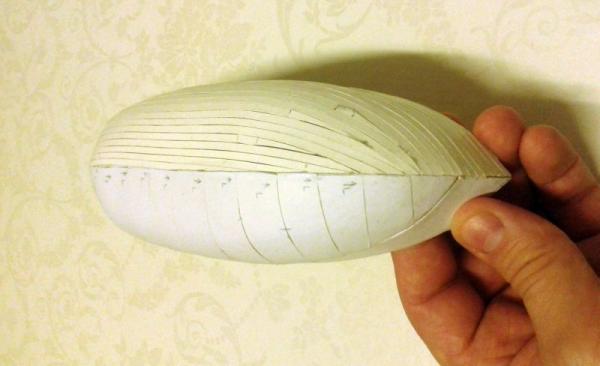
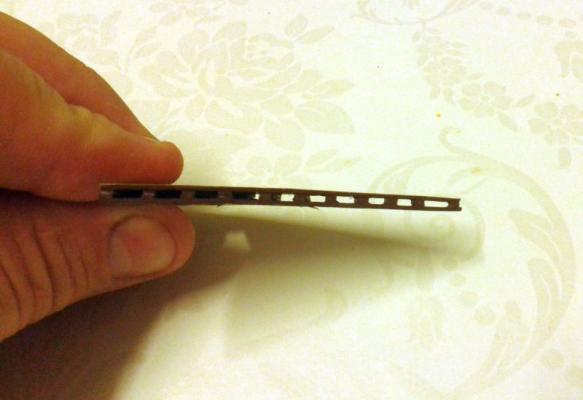
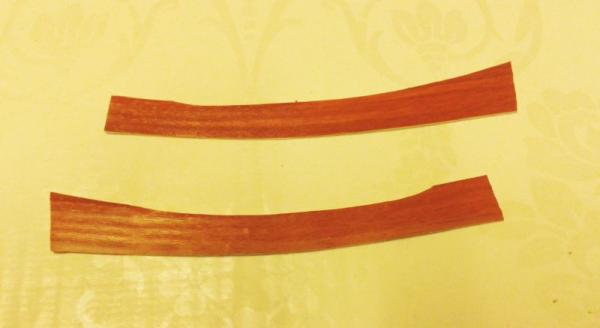
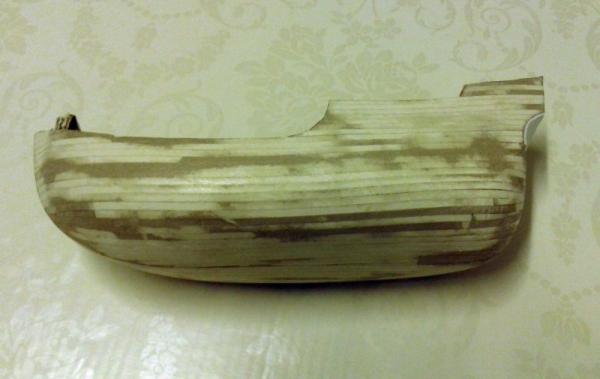
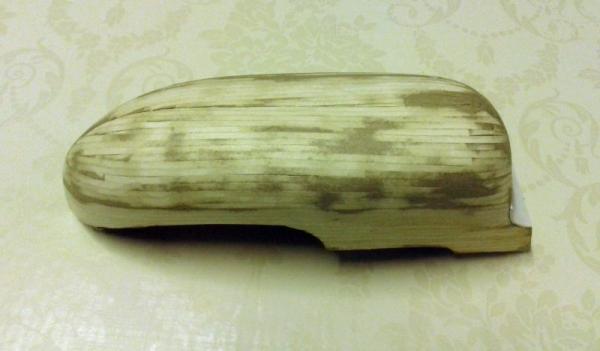
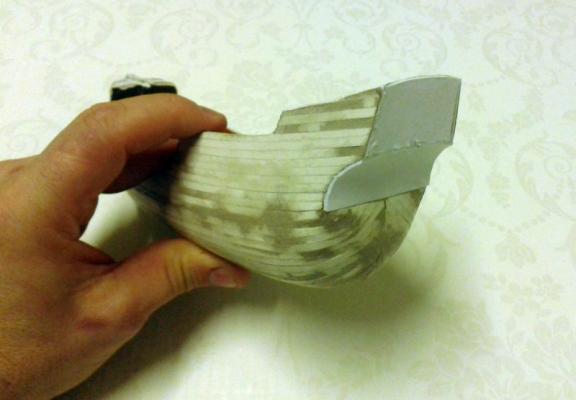
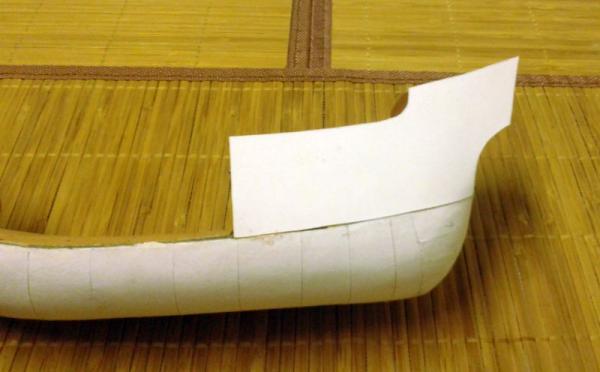
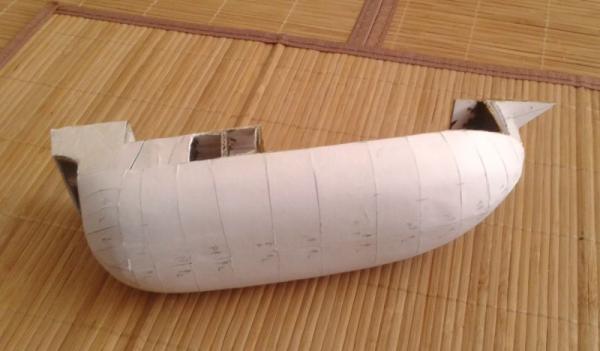
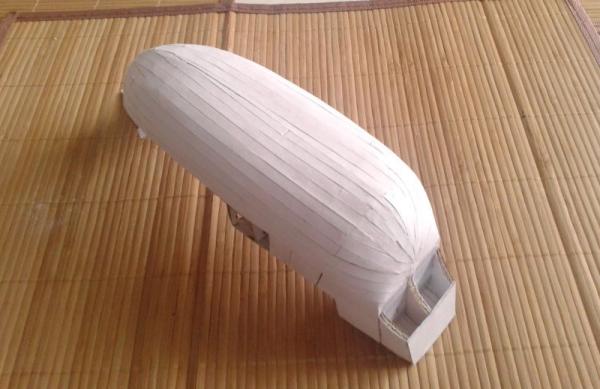
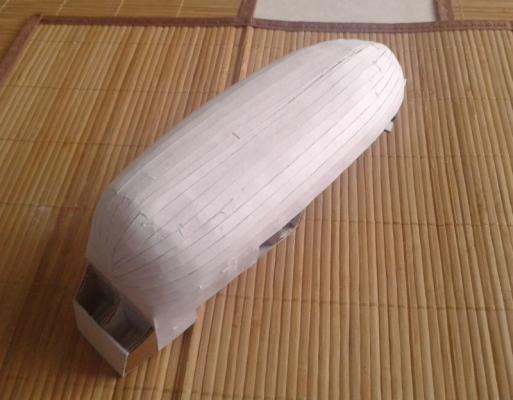
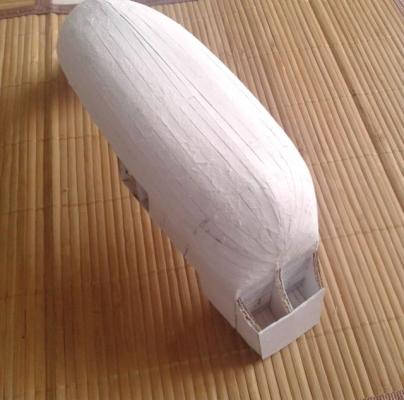
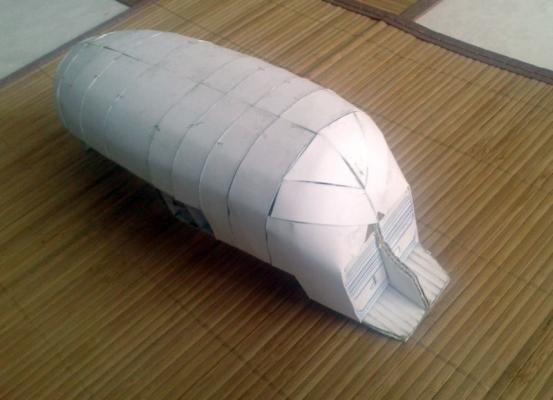
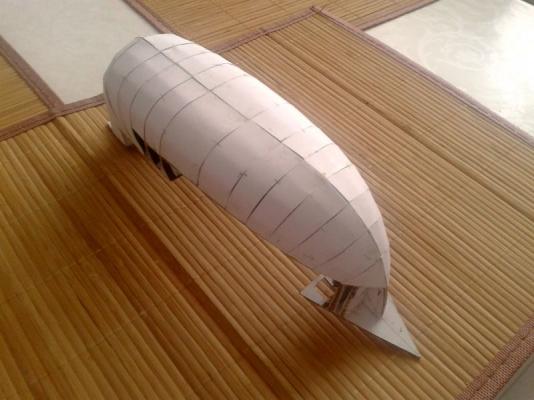
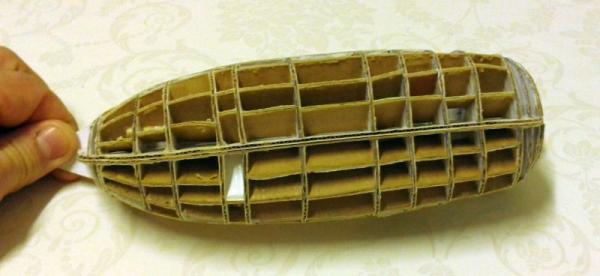
 Then I continued with second part of layer of the bottom part of planking using 5 mm strips of drawing paper, I glued them across the first layer. Third layer of planking followed and the upper part of planking. The upper part of planking I made from four parts, the curvature on the aft I had to make separately. I sanded each part of planking.
-
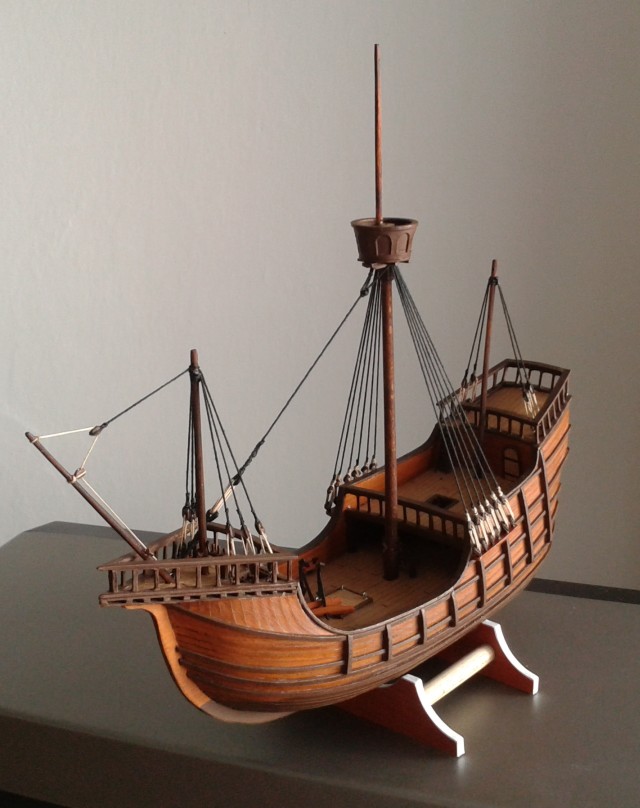
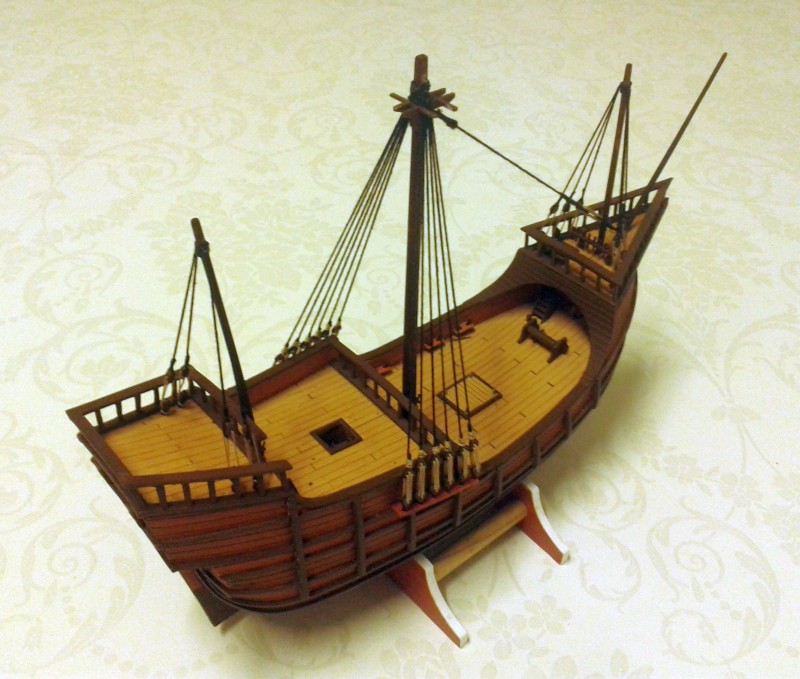
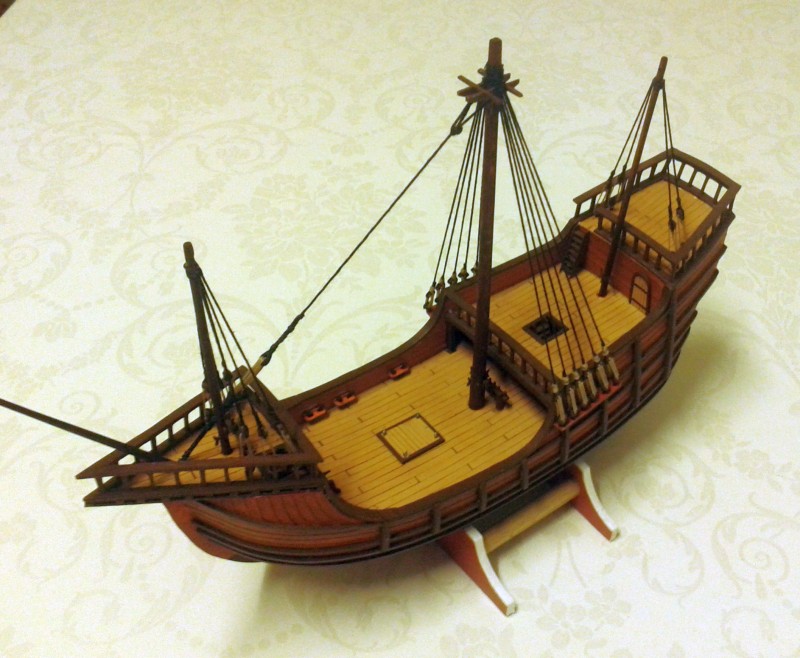
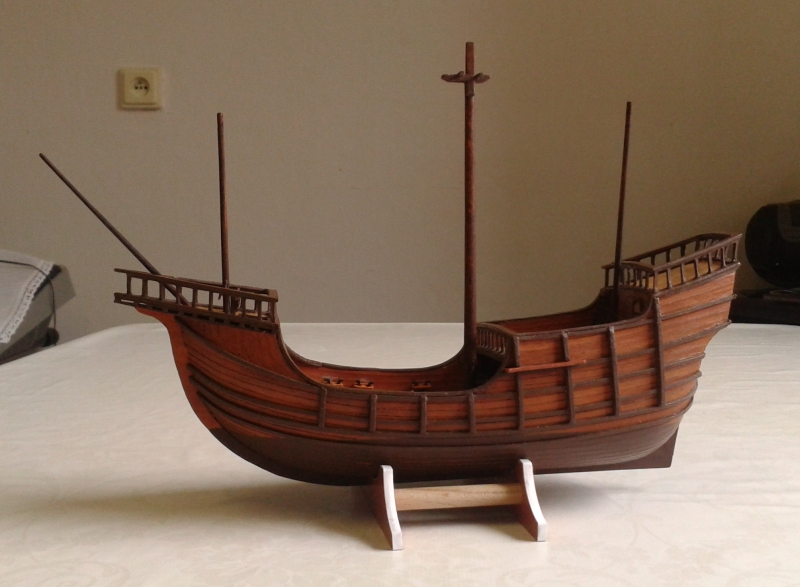
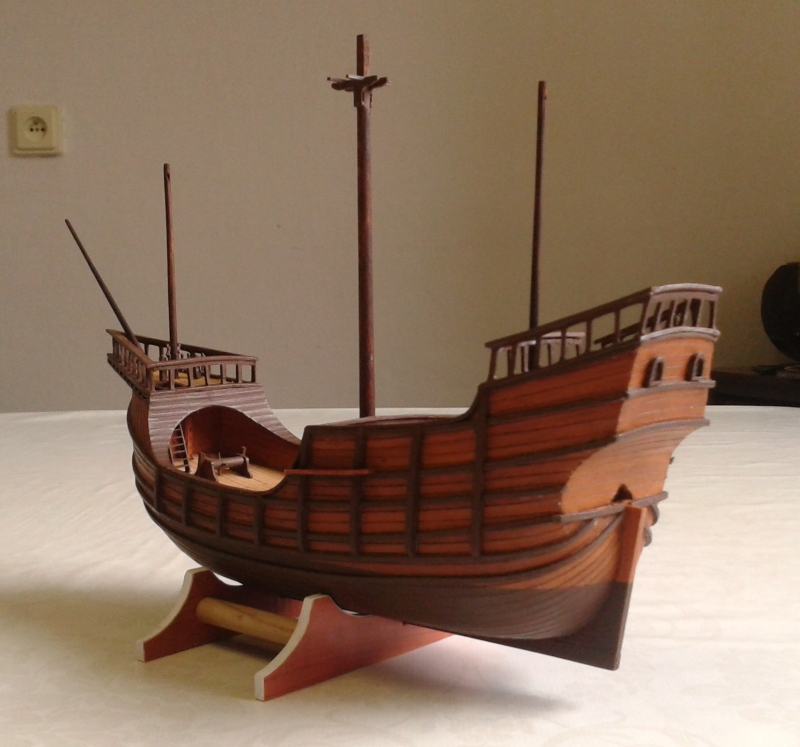
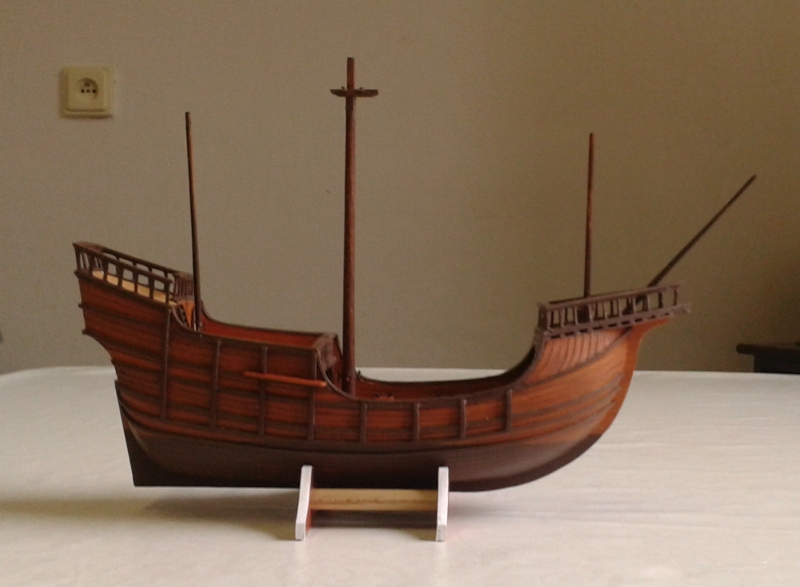
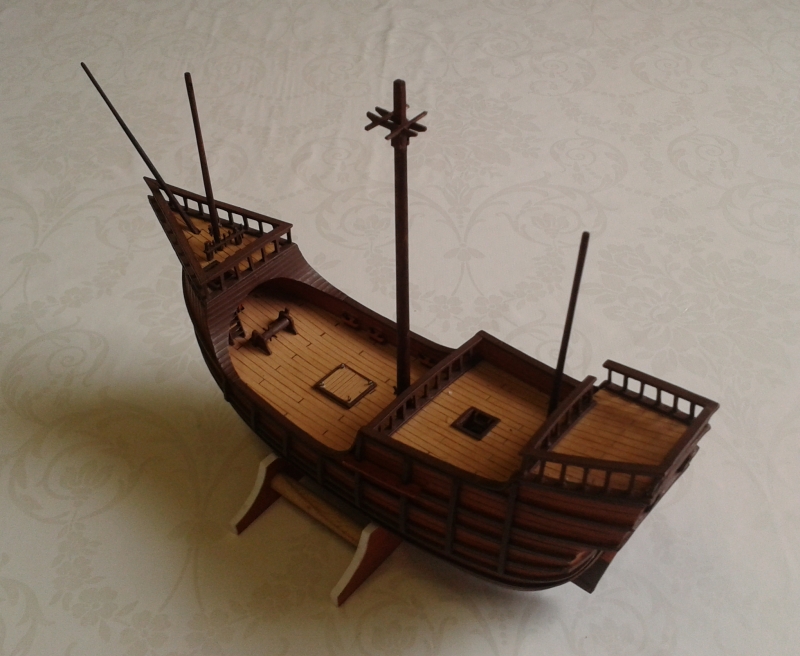
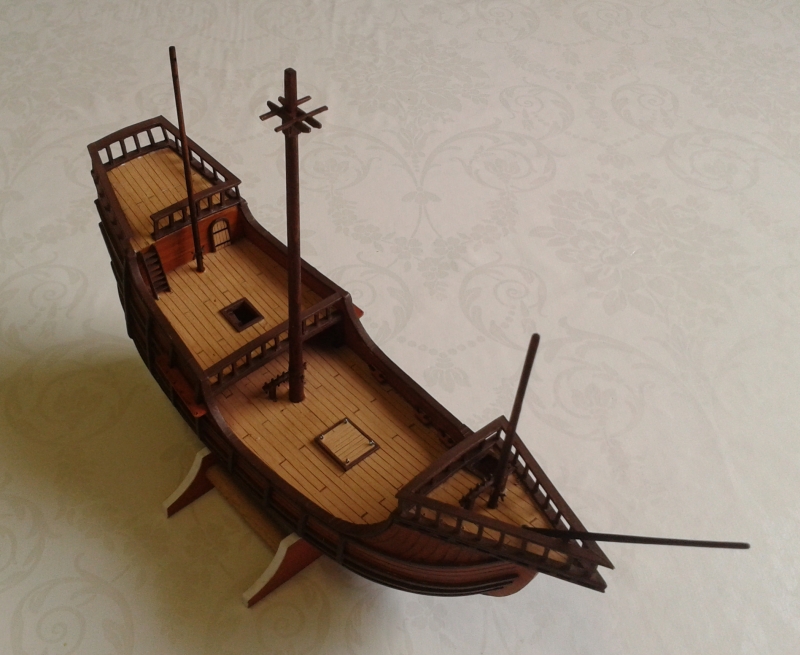
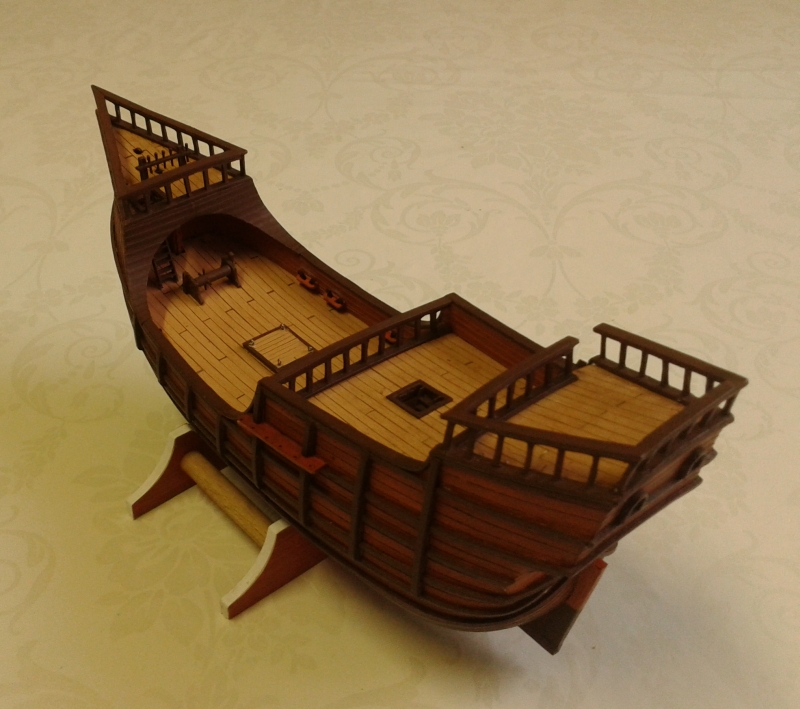
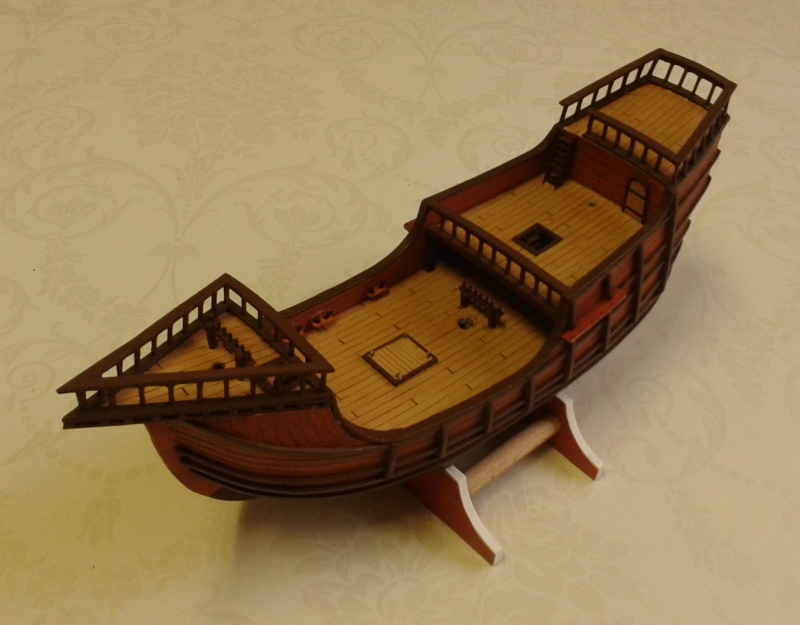
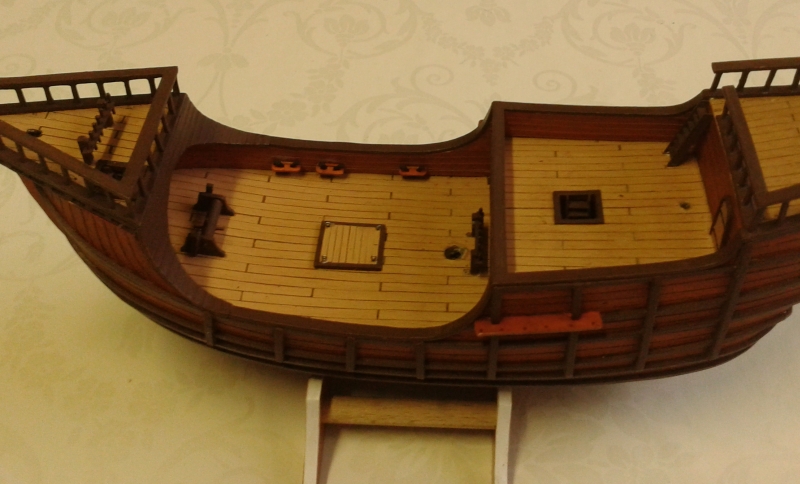
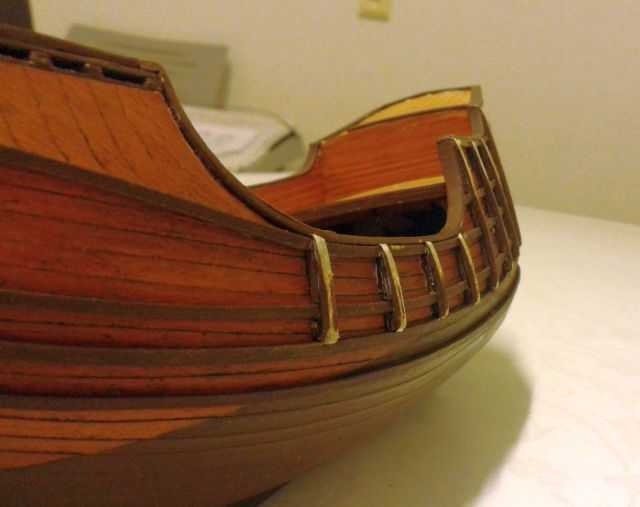
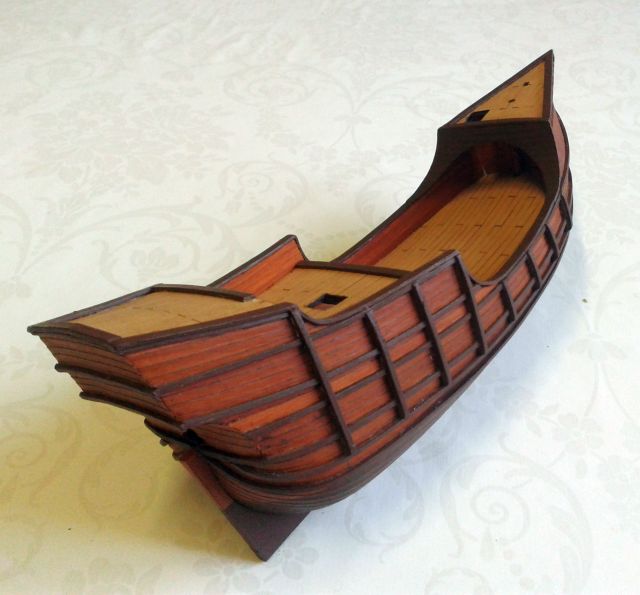
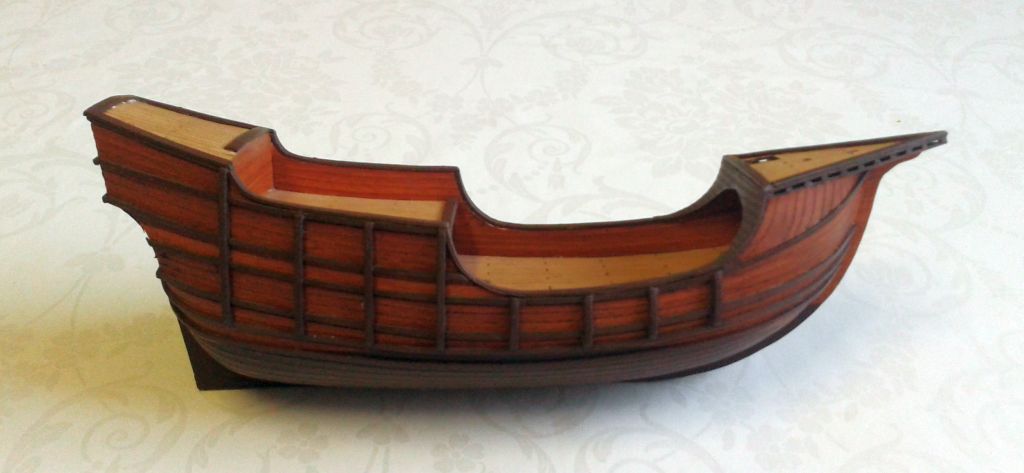
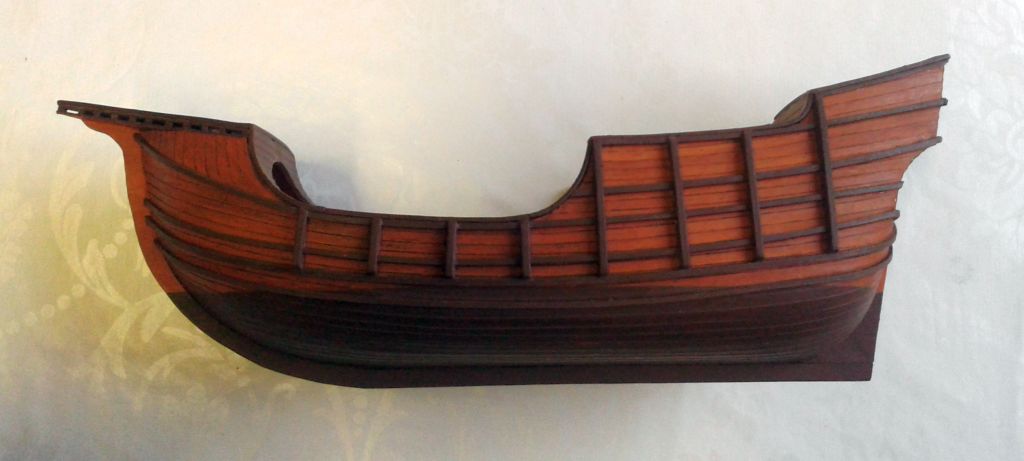
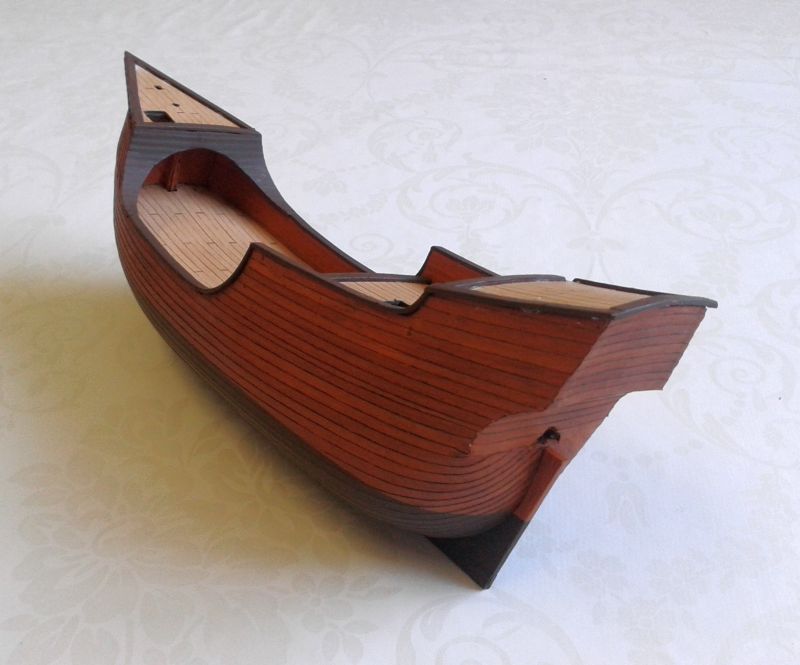
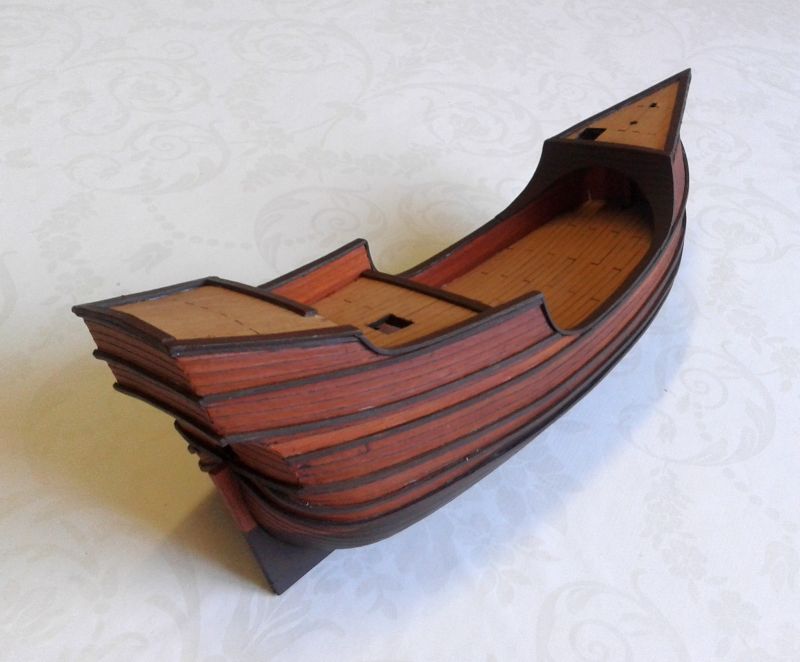
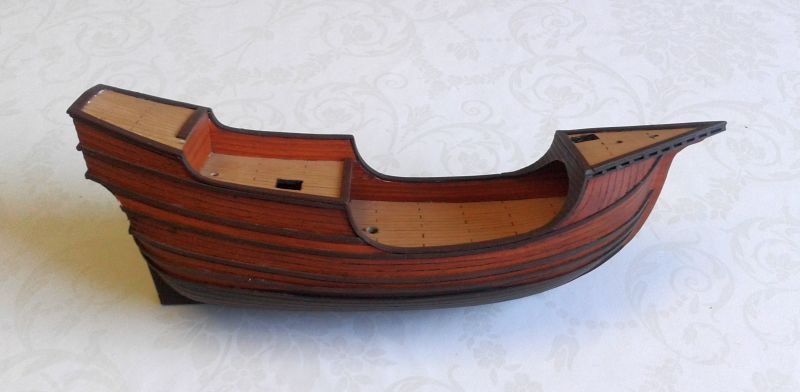
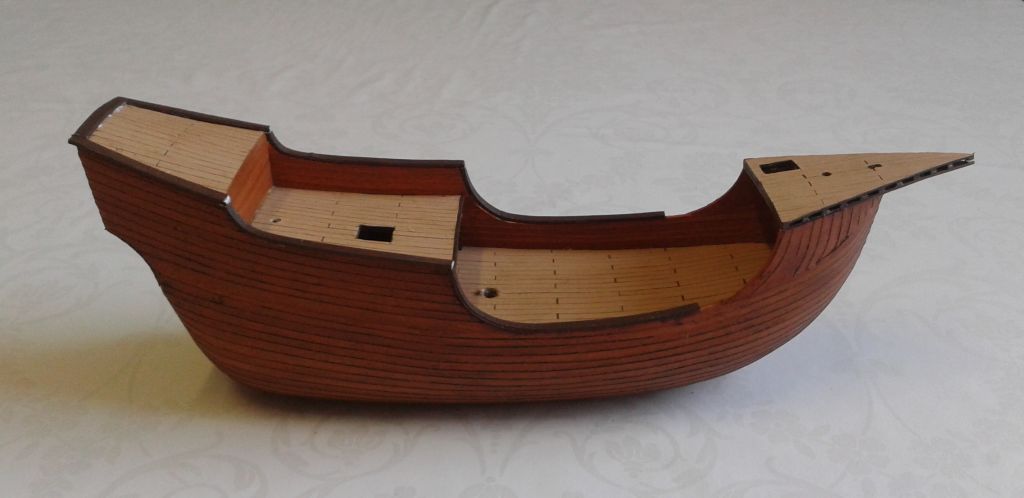
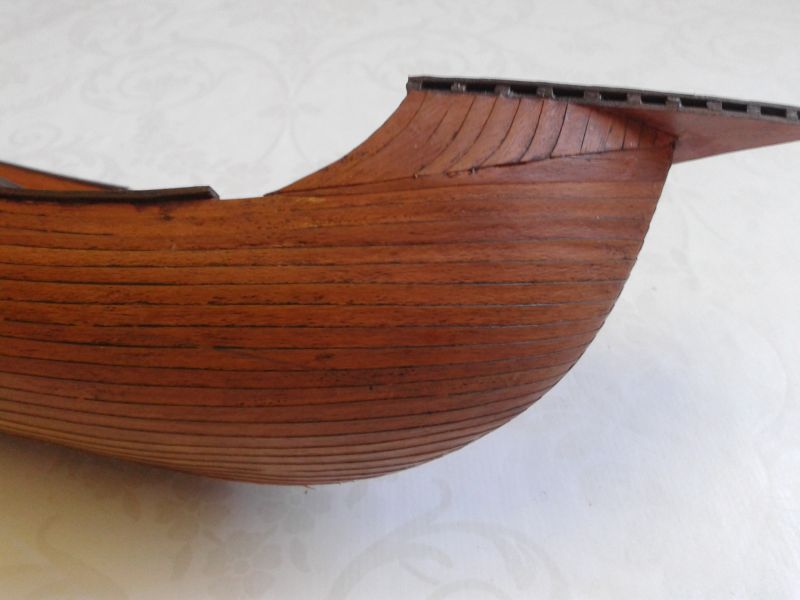
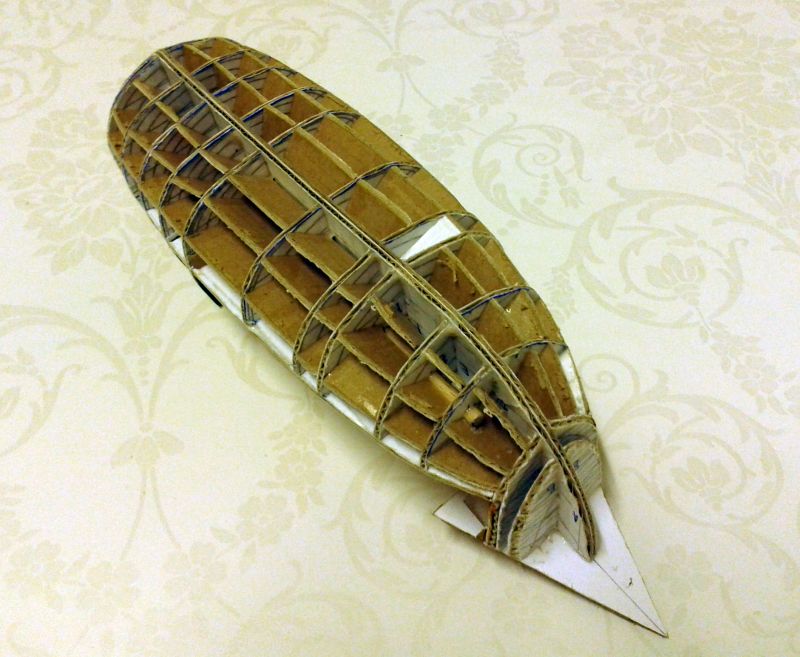
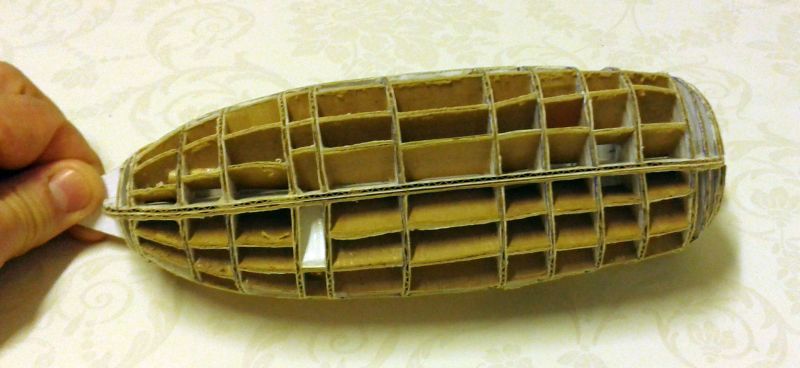
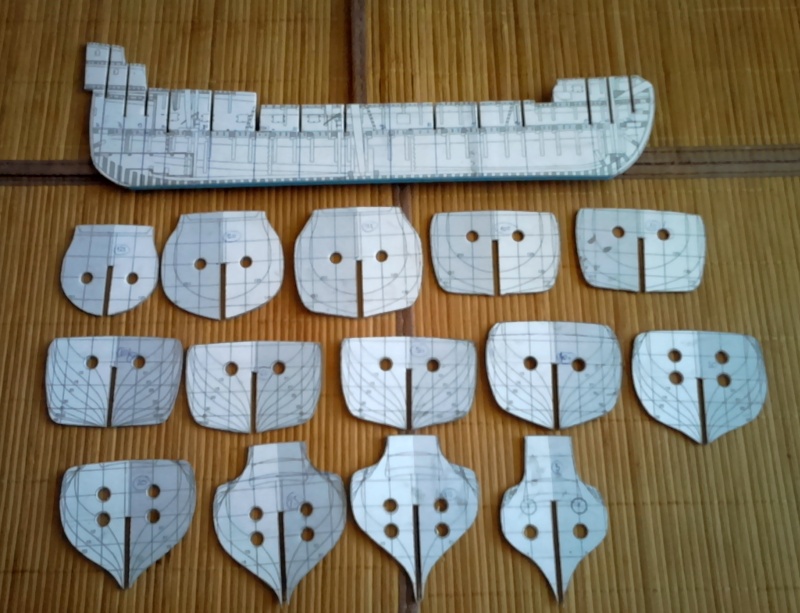
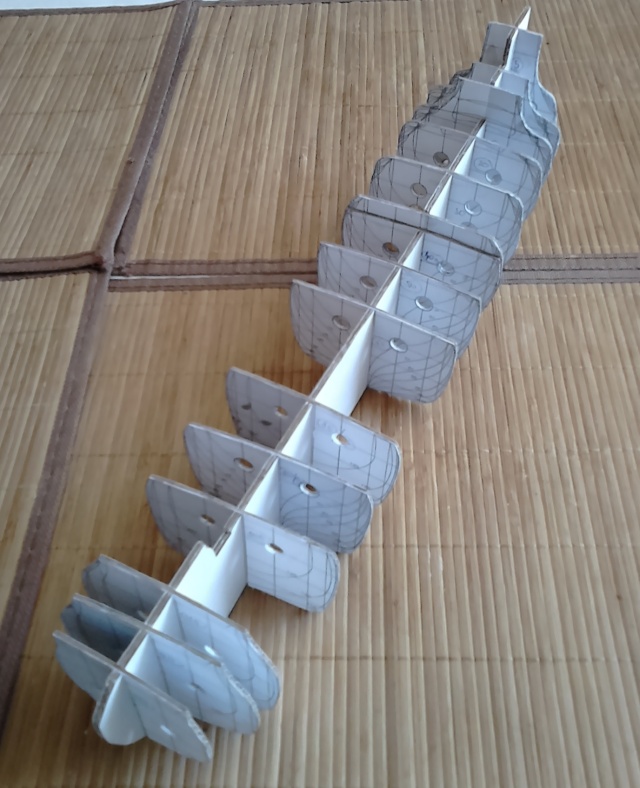
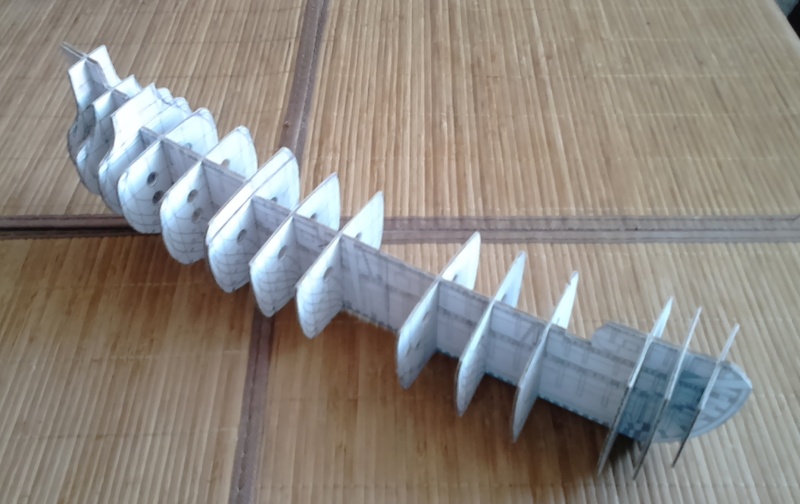
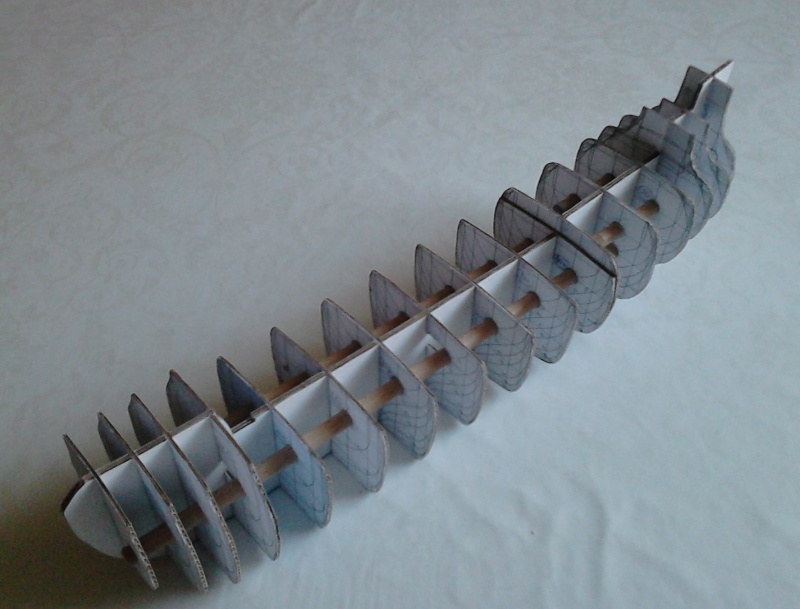
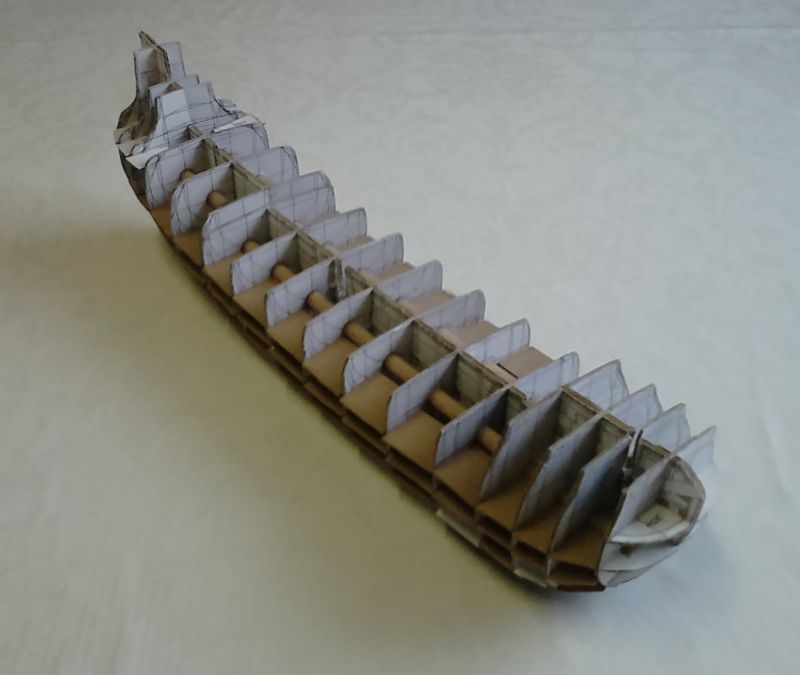
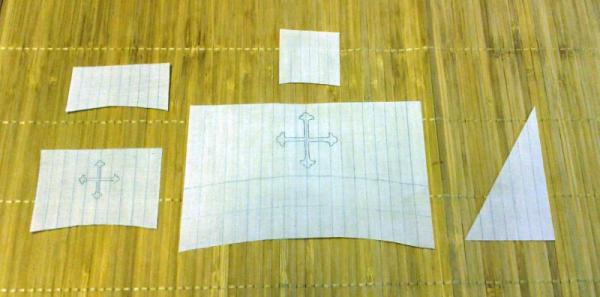
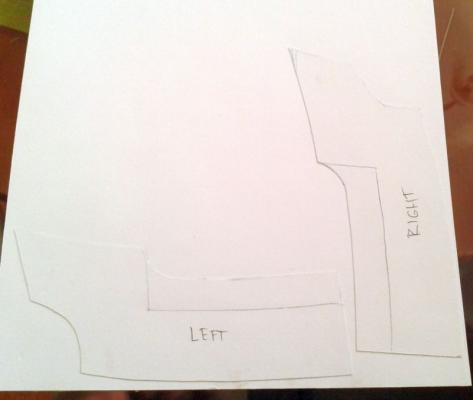
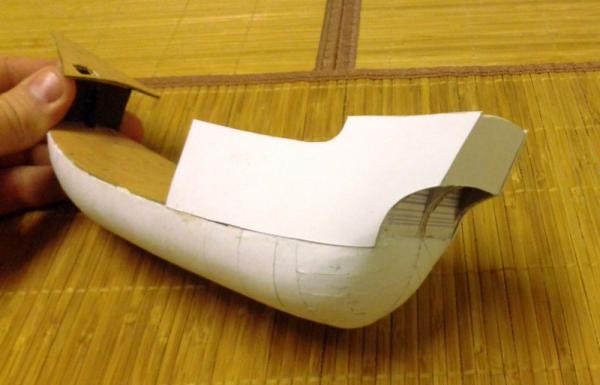
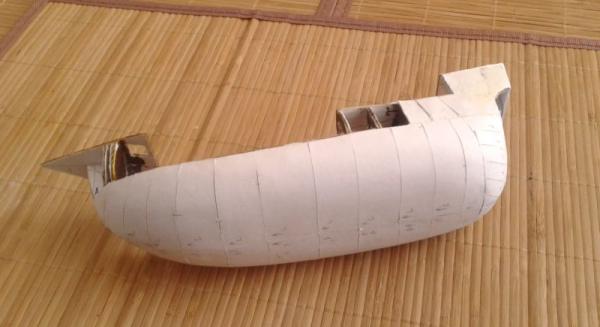
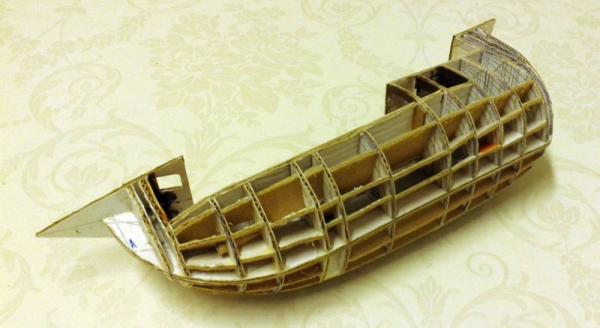
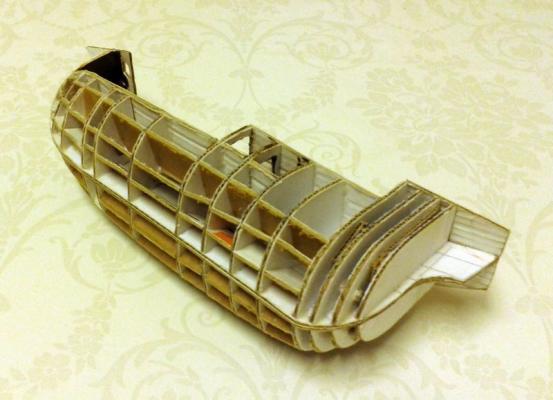
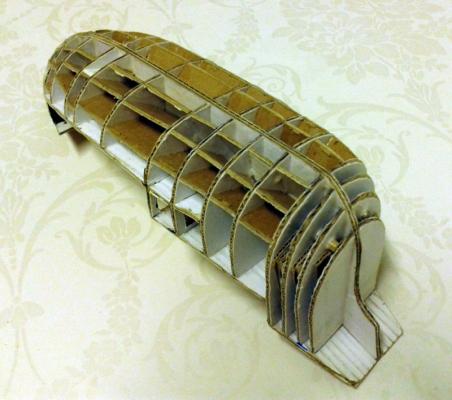
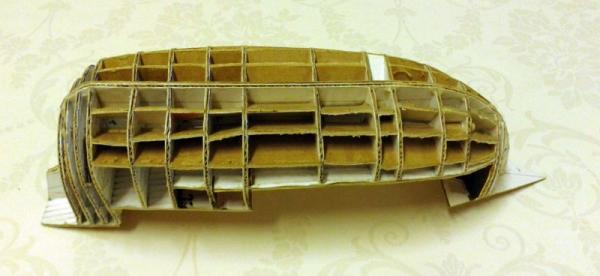
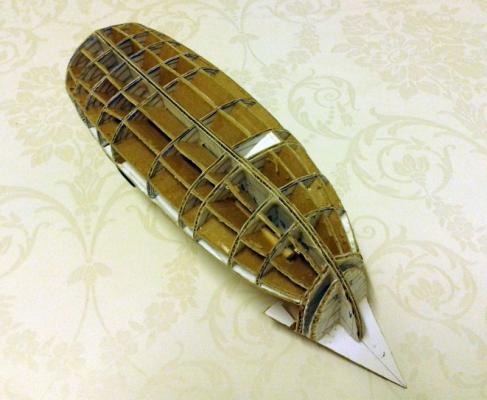
Dear friends, At the end of the last year I was deciding, what a ship will be next. I put aside all my favorites ships, and try to find something, what I never built. Then I found some informations of the wreck of fluit, lying next to Dalaro - and I decided for this one. Simplified history: Anna Maria was built for consortium of 15 shipowners in Swenden for trading route to Portugal and back, trading iron, copper and wooden planks from north and salt and wine from Portugal. In the winter 1708 / 1709 the ship stayed locked in ice in Dalaro. The crew was sent home except 5 sailors, who had guard the vessel. At the evening of 6 th february, after supper, the crew left the ship, and very soon she catch the fire and sunk under the ice. Shipwreck was found and identified by amateur divers in 60´ts. I found plans on russian webpages, they were created by Cor Emke, Bussum Netherland. Dimensions are in Amsterdam feets, so it was very easy to transform it to 1:96 scale. I will using all my technologies as always. I started the build in march of this year, but I didn´t have time to publicate on several forums. As 1st step, as always, I transform hull lines to 3d, create holes for strenghtening and strengh the frame by wooden bars. As you can see, I had to create two ribs which aren´t included in plans. Next pics showing frame with horizontal ribs and decks.


- 88 replies
-
- 15
-

-
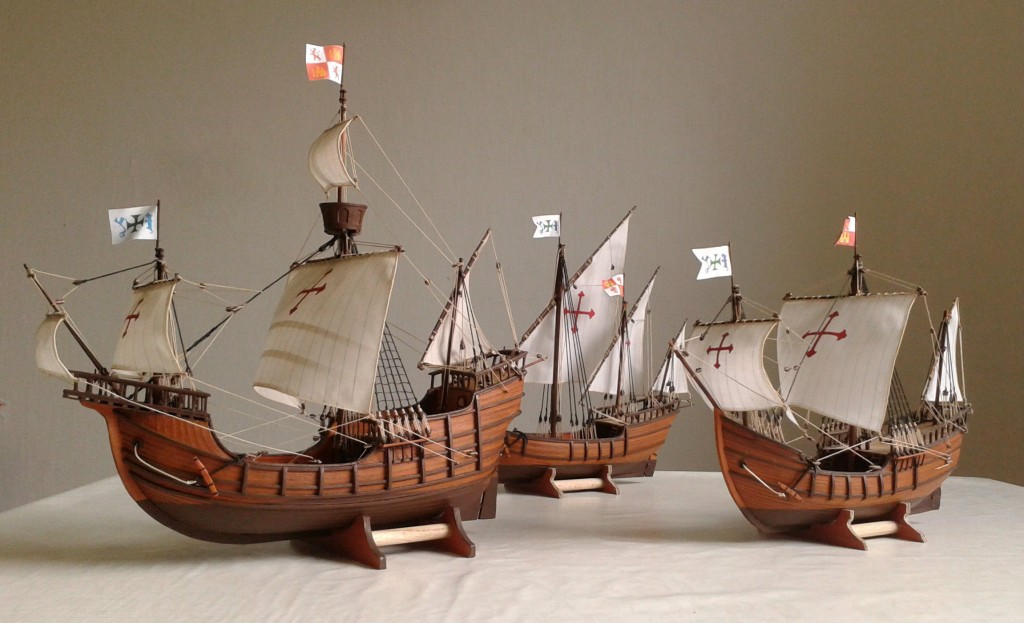
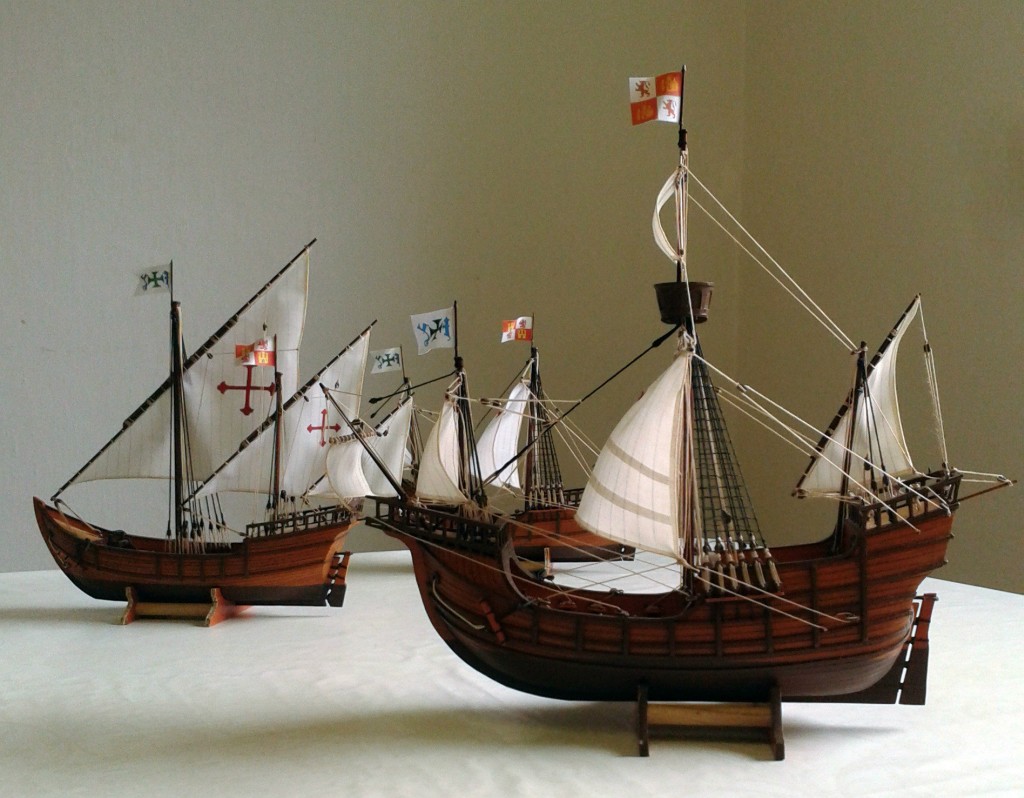
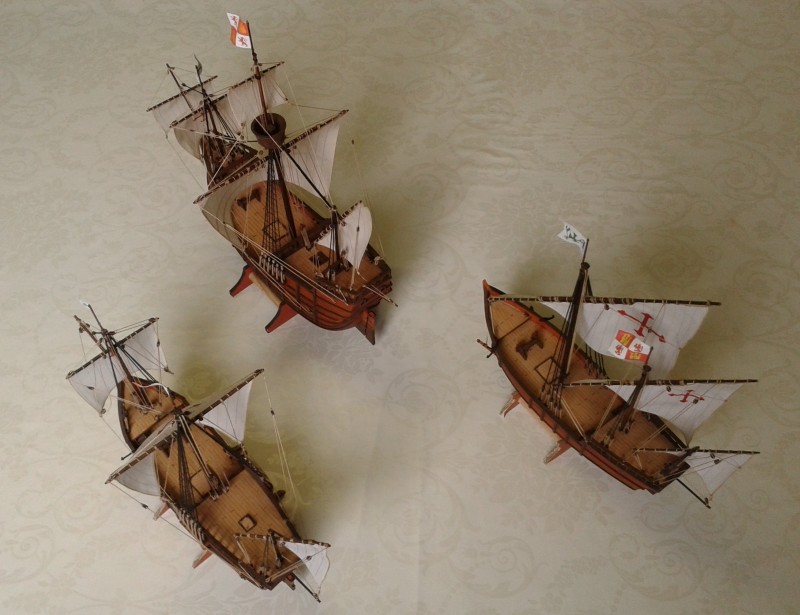
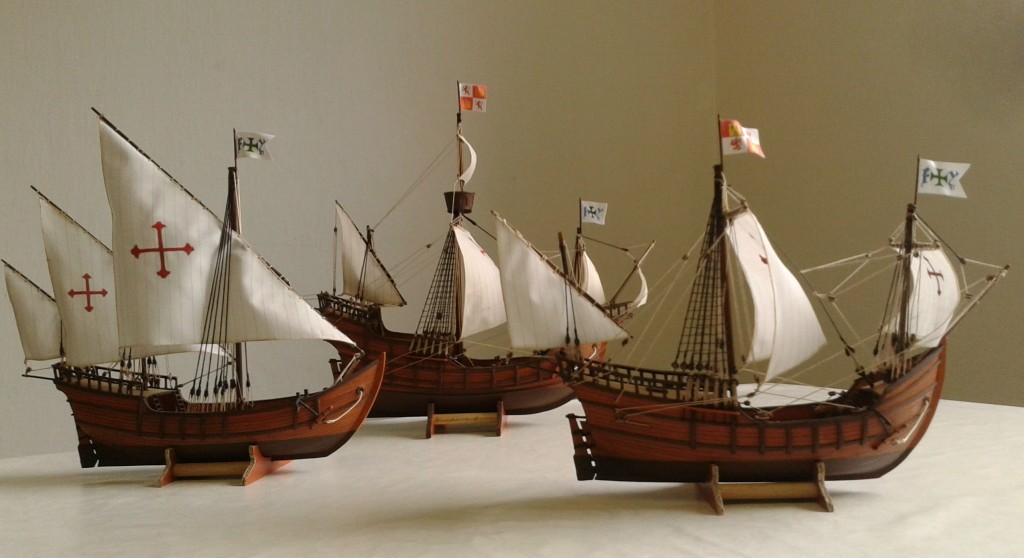
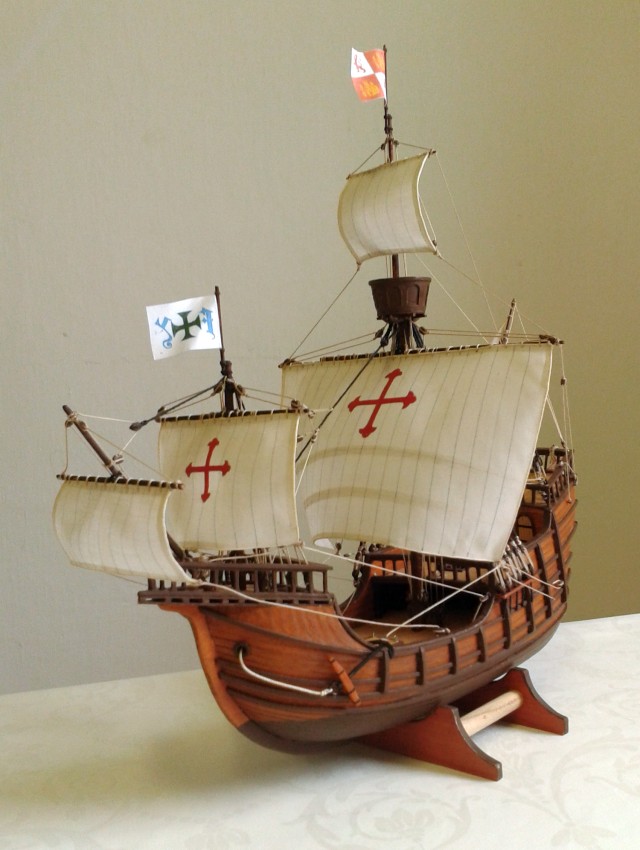
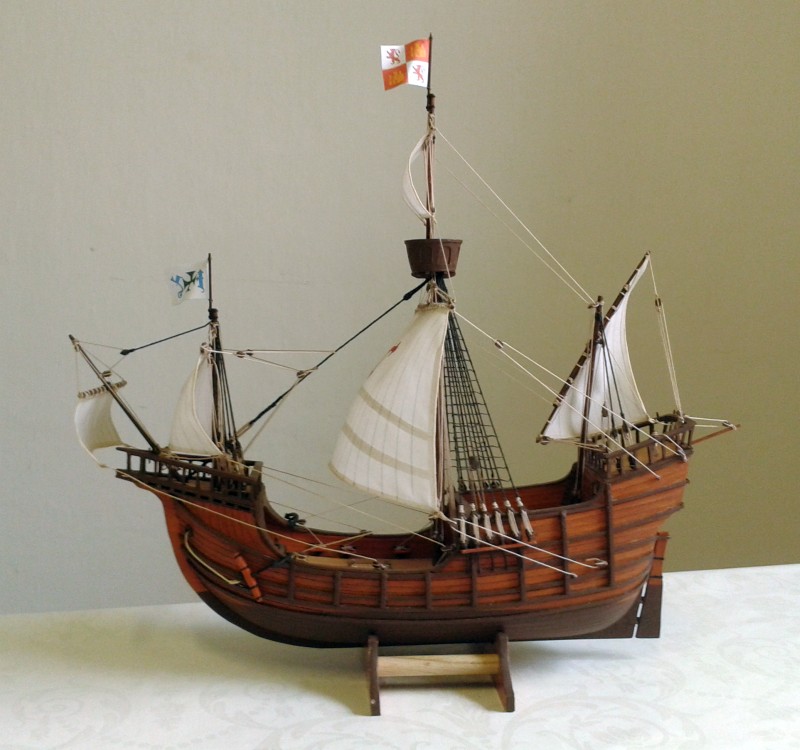
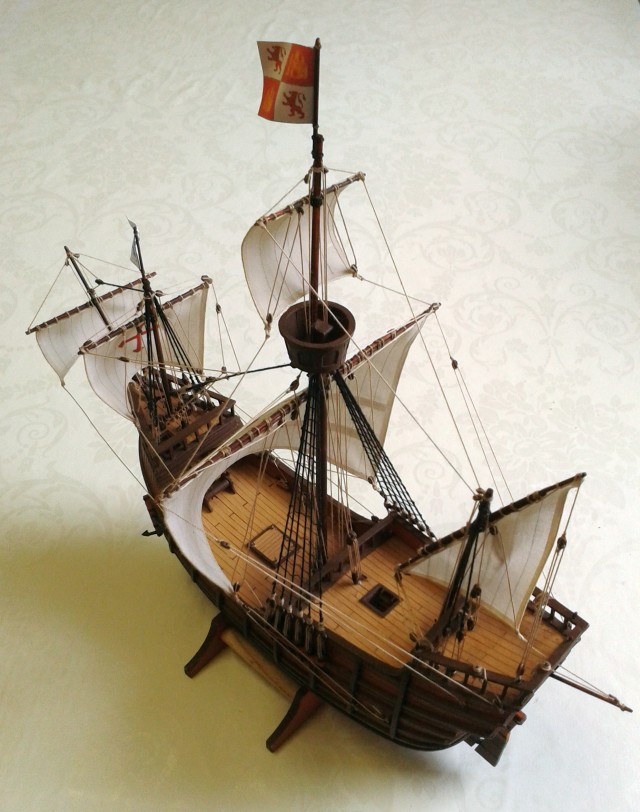
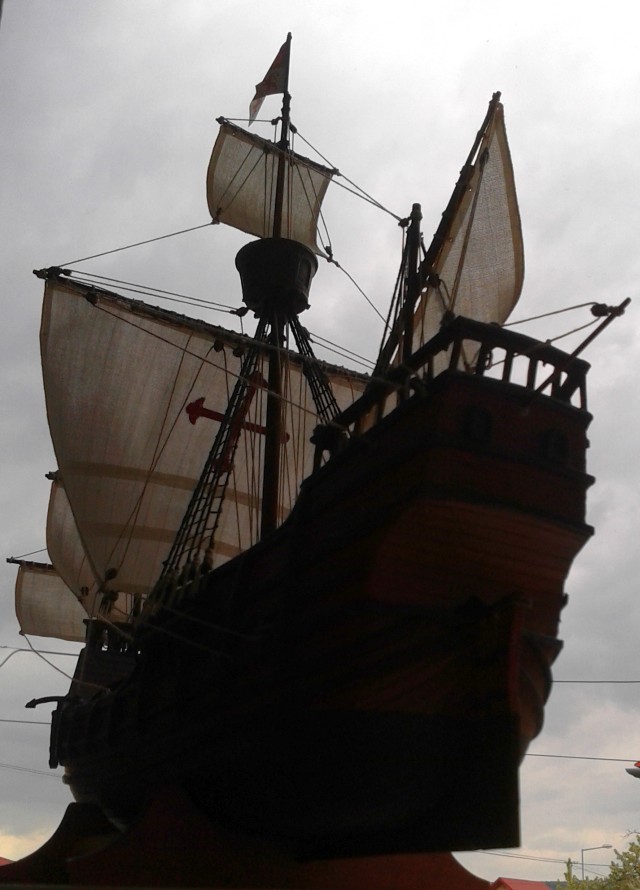
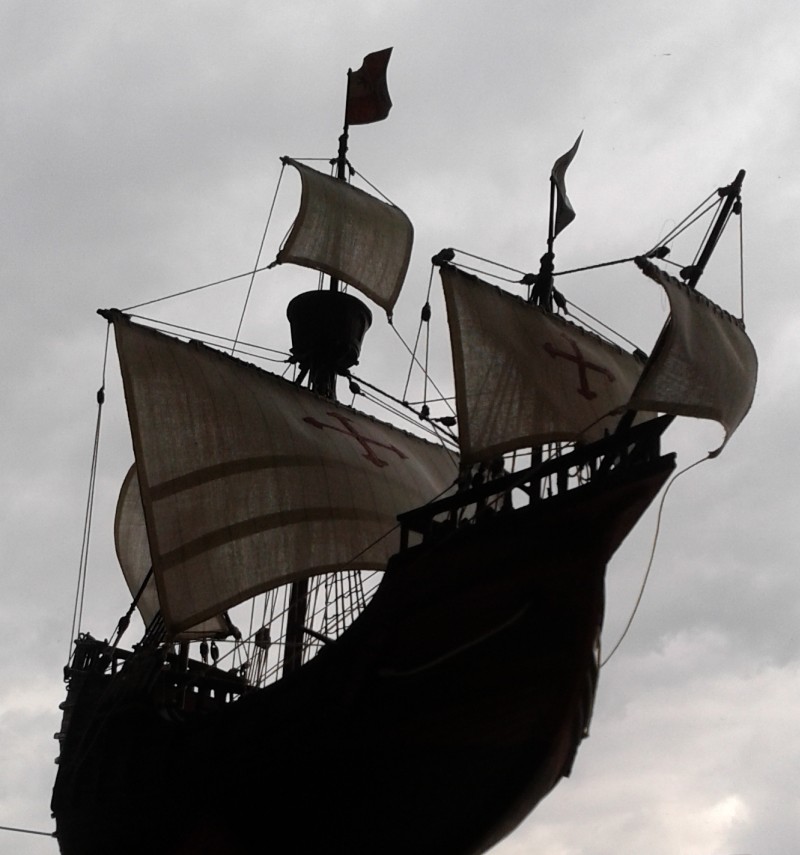
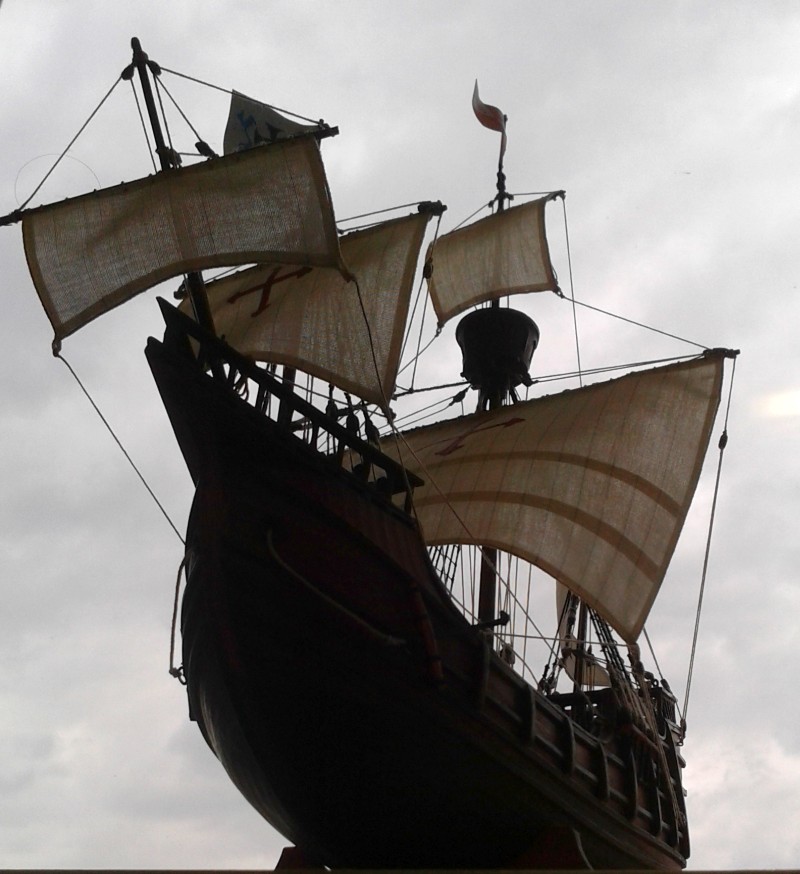
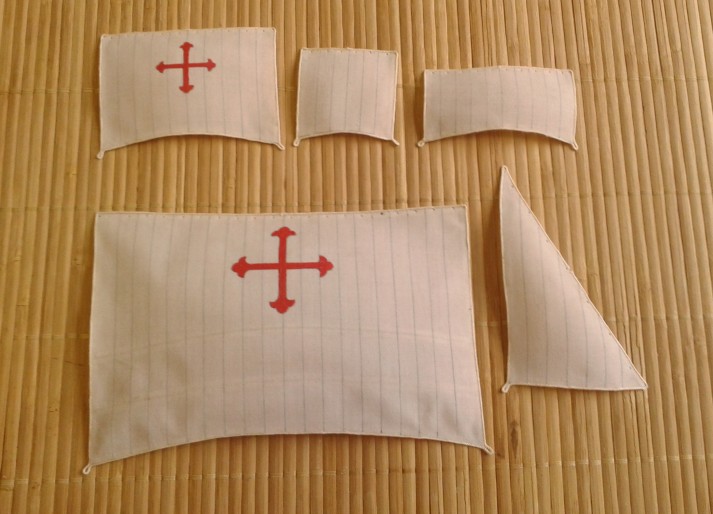
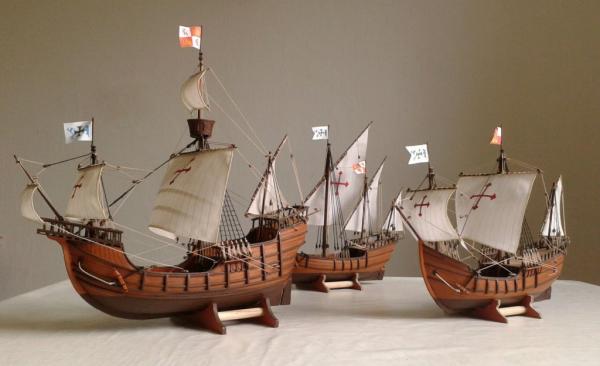
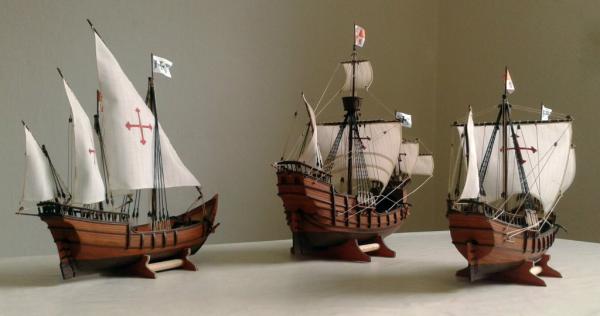
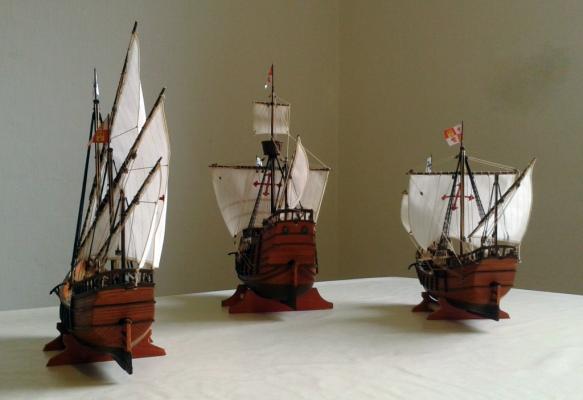
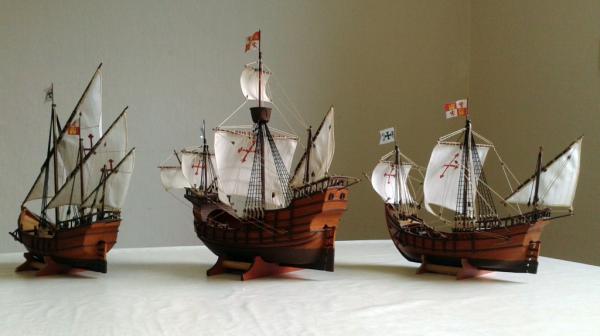
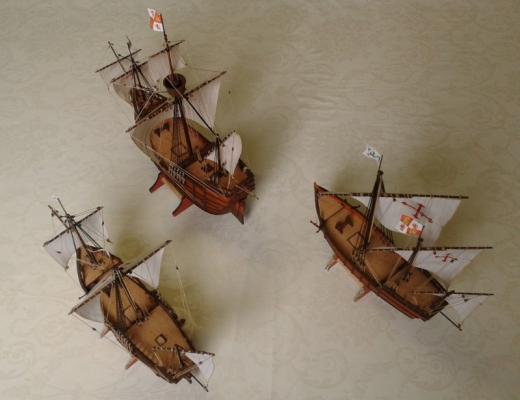
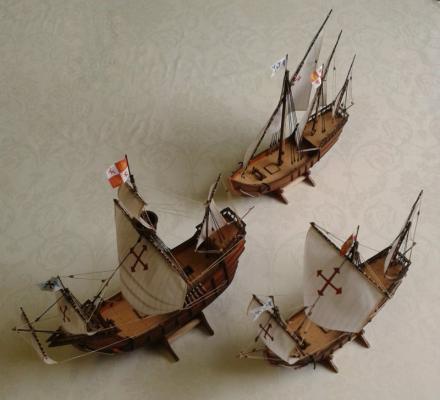
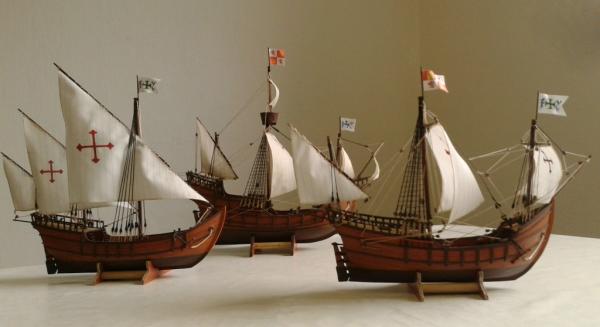
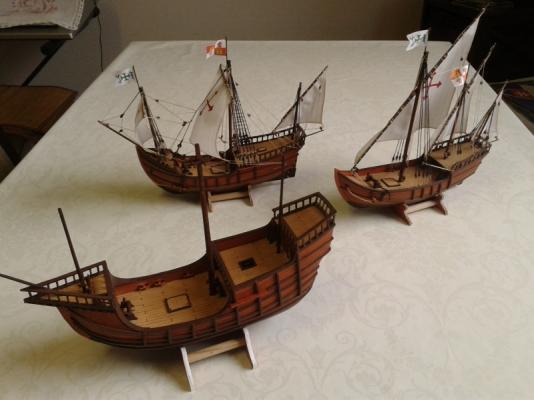
Dear friends, here are promised photos of Columbus´ fleet. Jan

- 53 replies
-
- 6
-
-

-
- santa maria
- carrack
- (and 2 more)
-
Thank you, my friends. Today I will try to take some photos of the whole fleet and put them here. Jan
- 53 replies
-
- 3
-
-
- santa maria
- carrack
- (and 2 more)
-
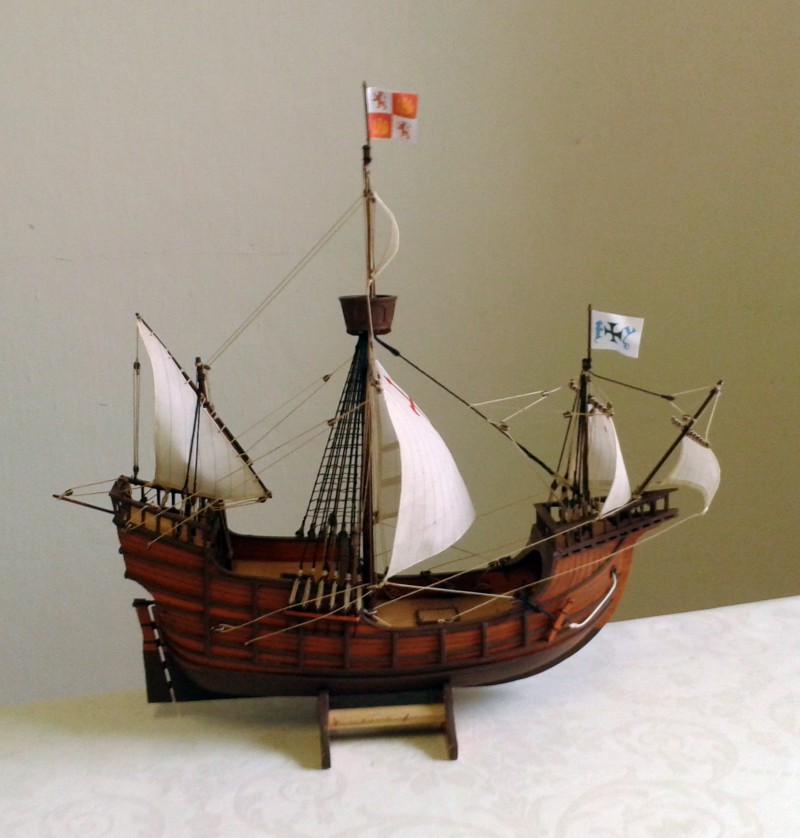
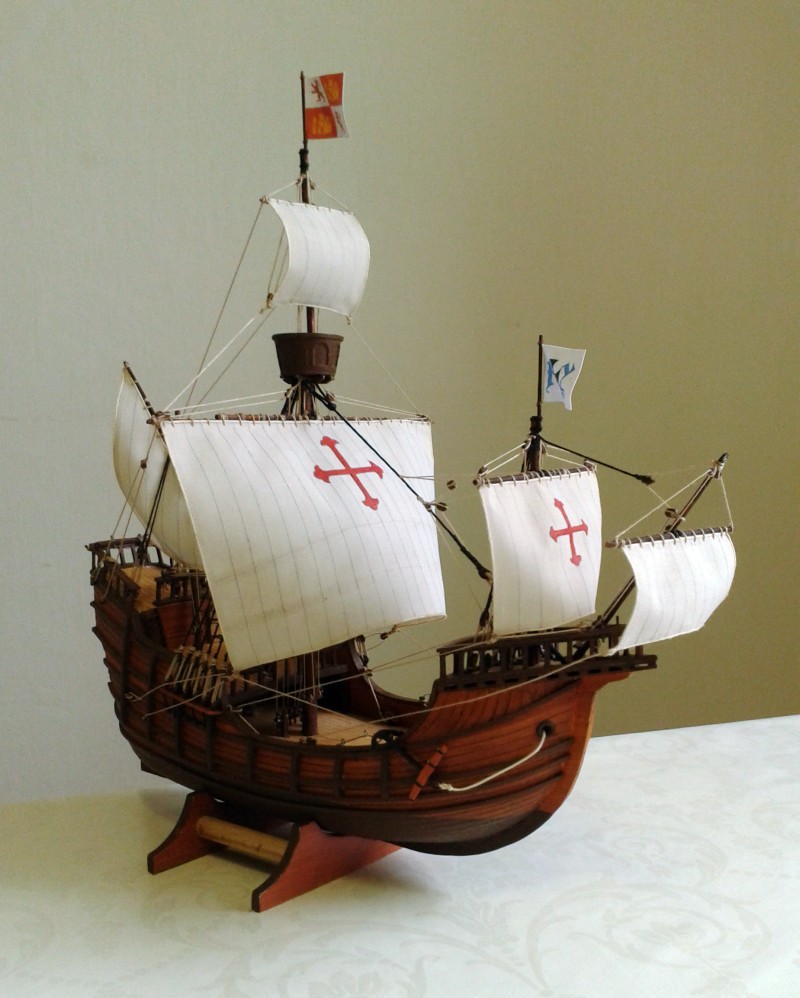
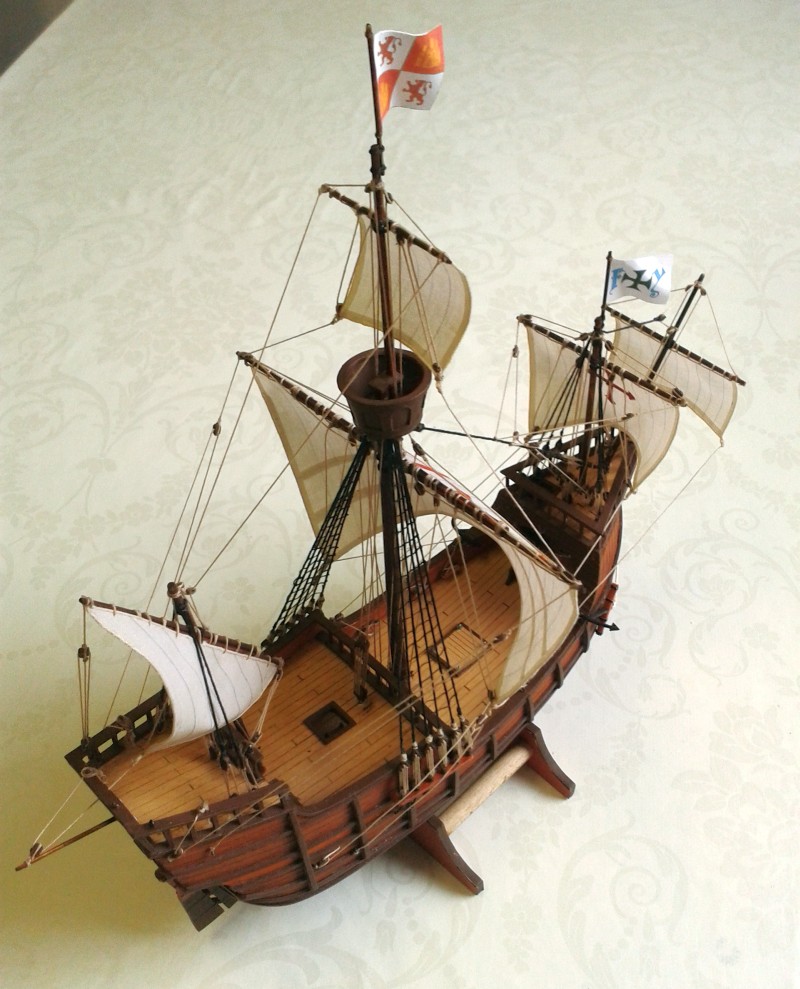
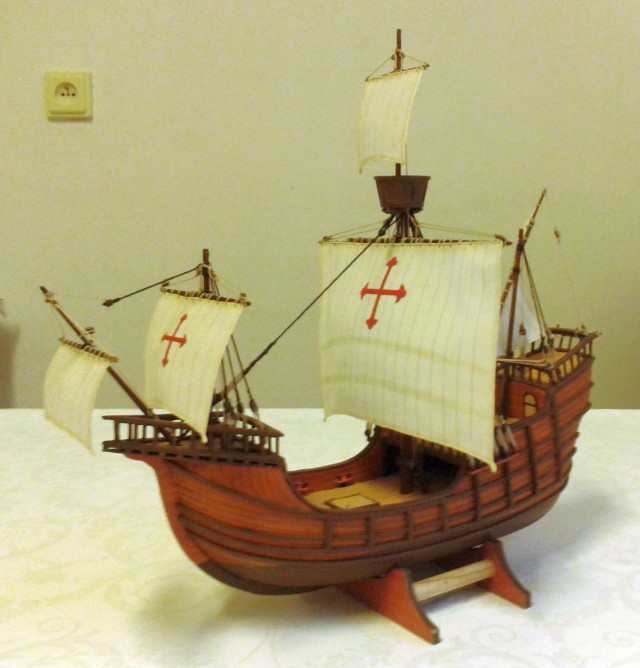
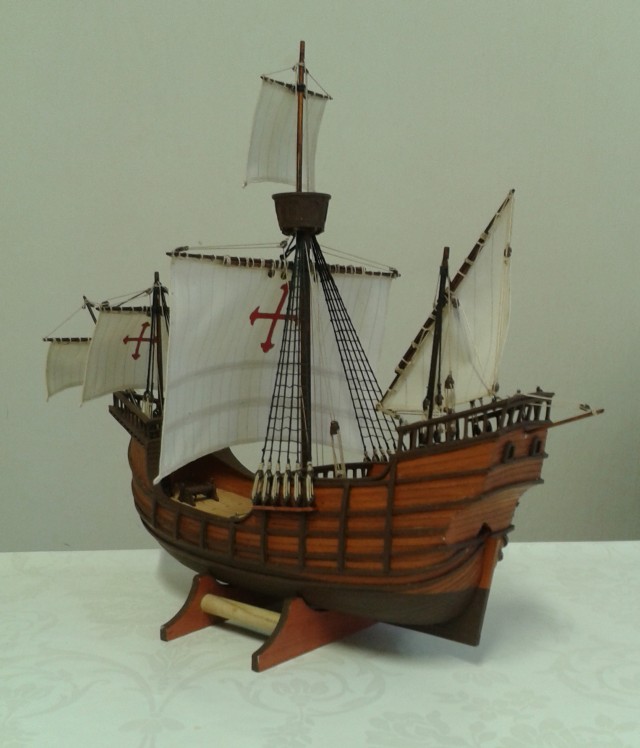
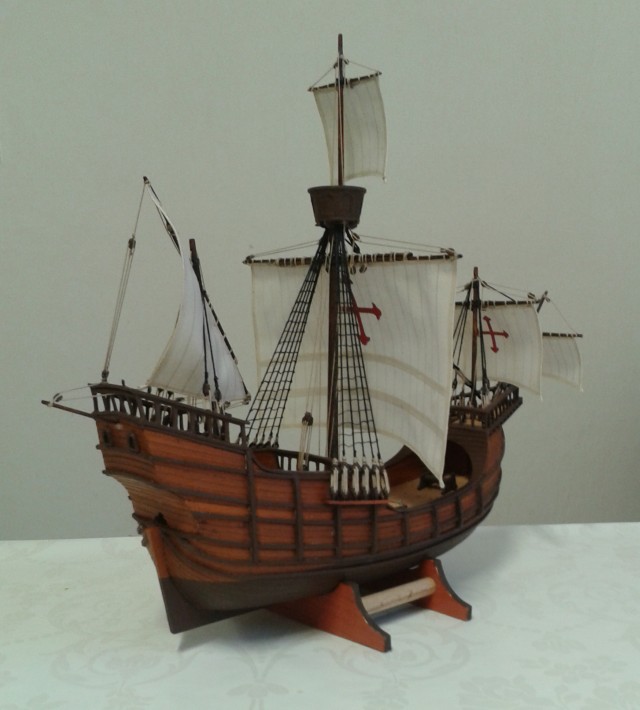
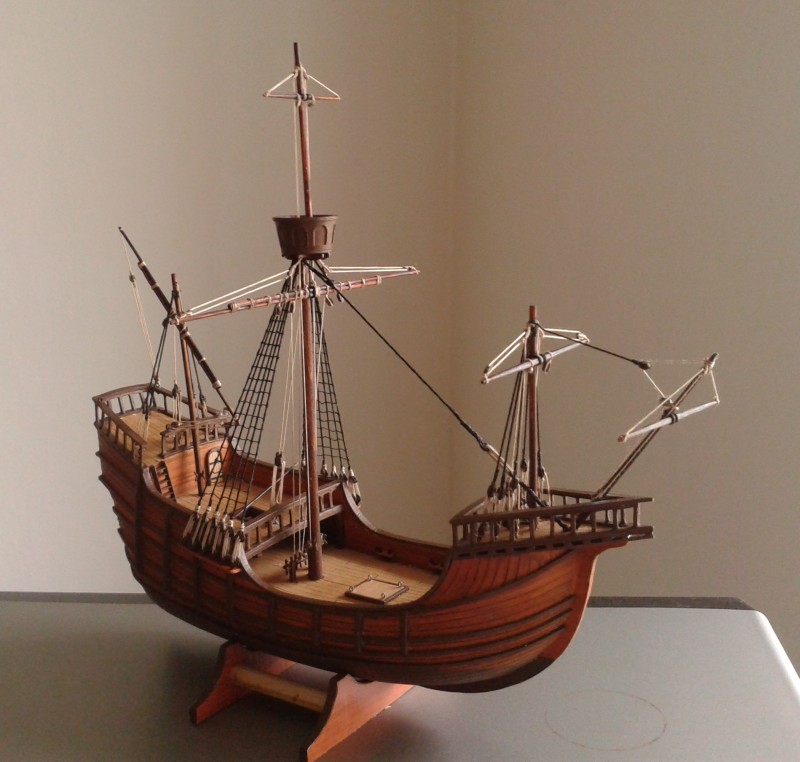
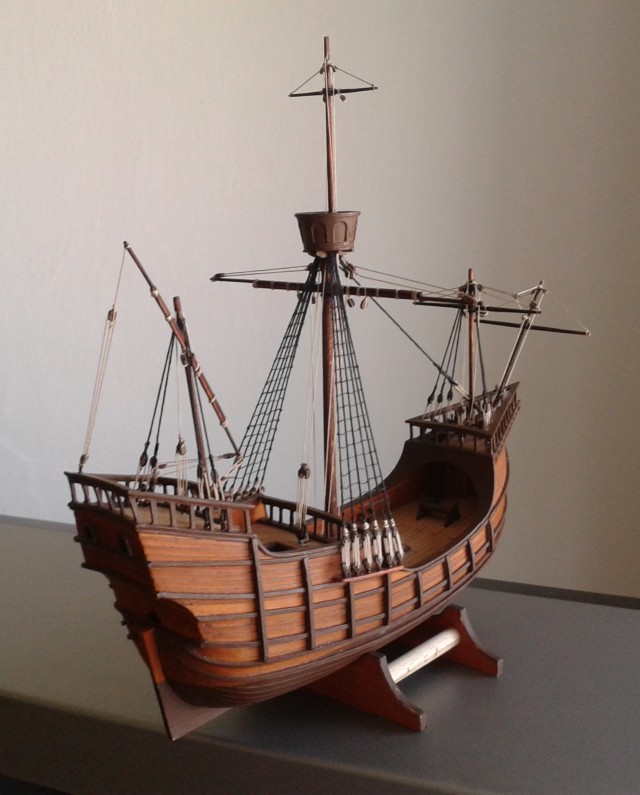
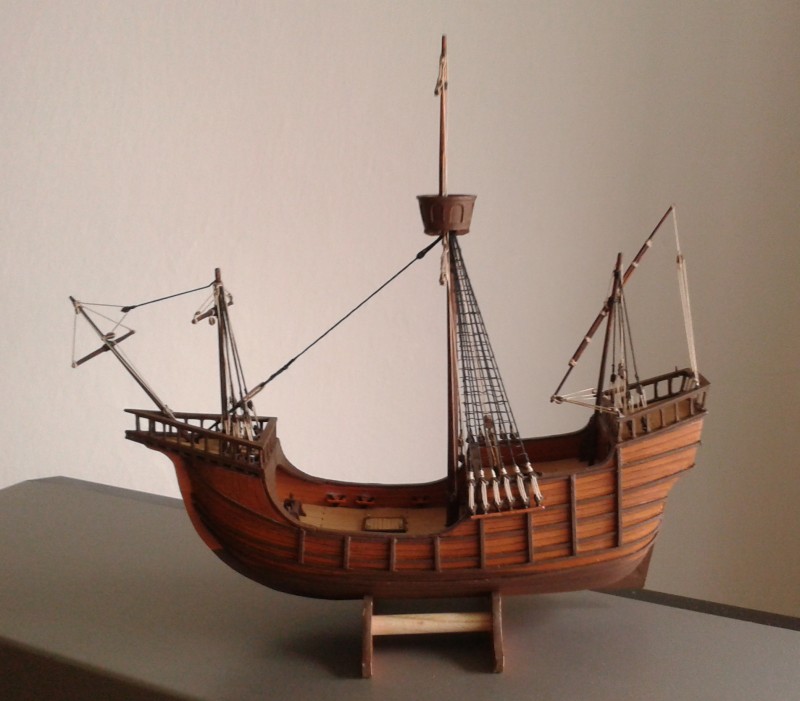
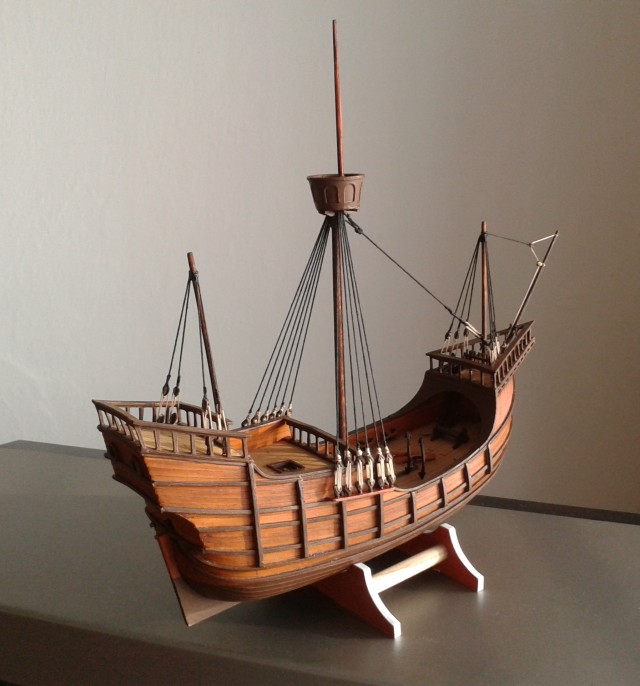
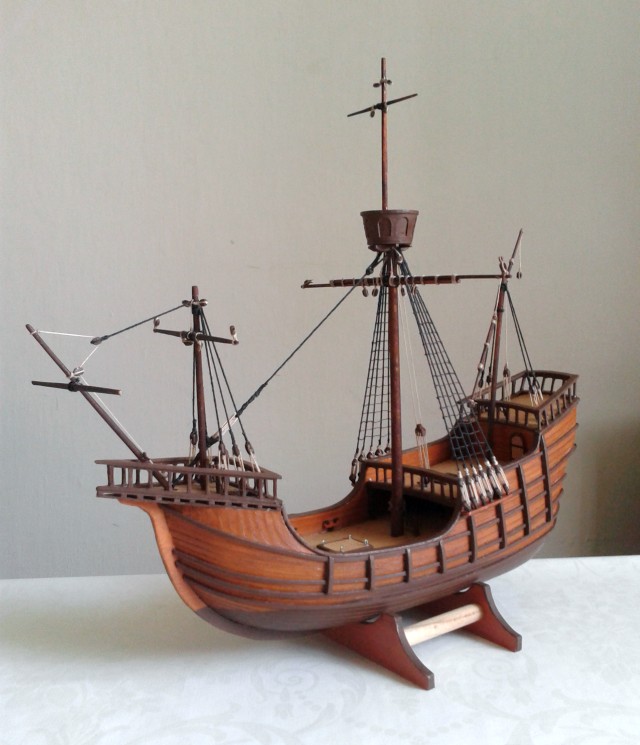
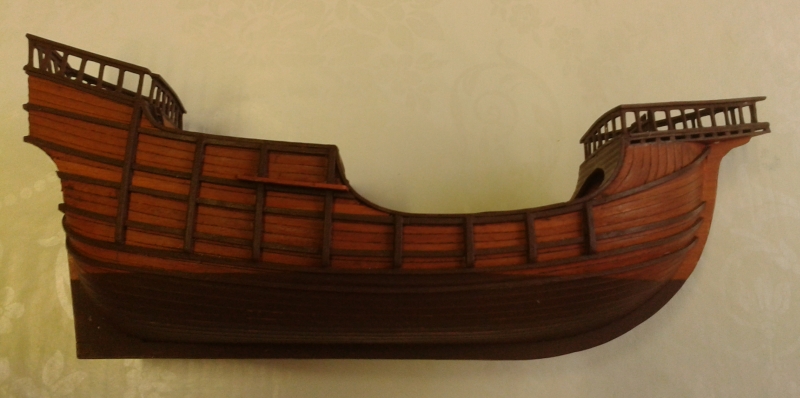
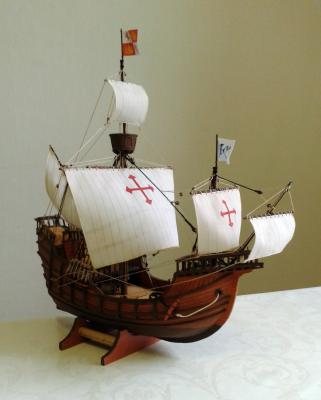
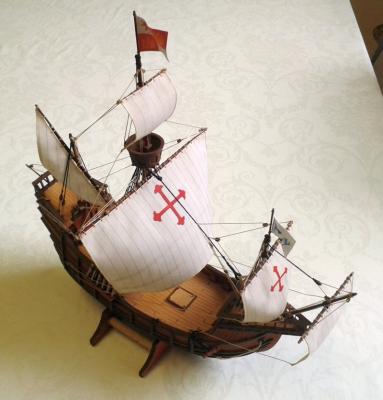
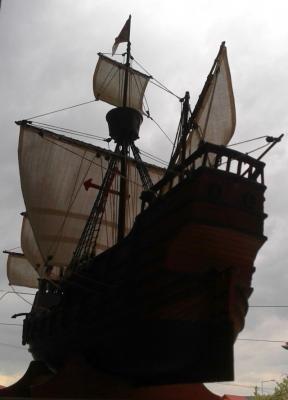
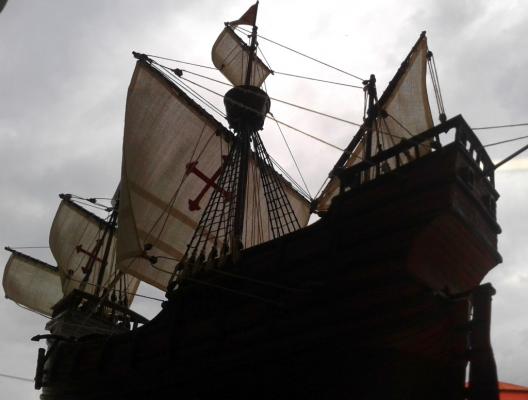
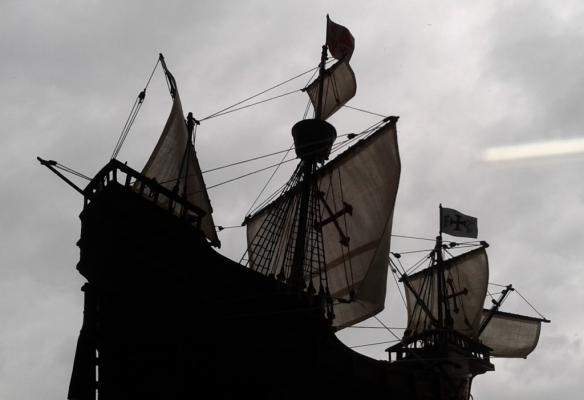
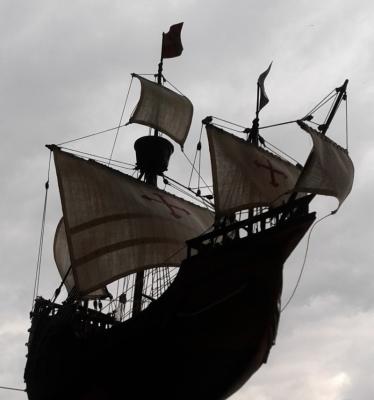
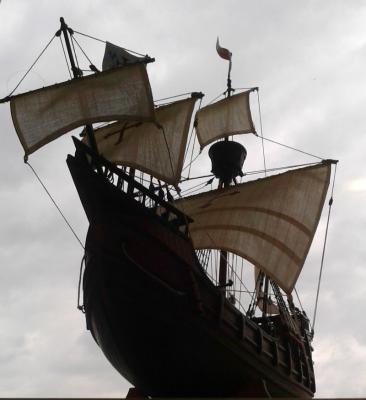
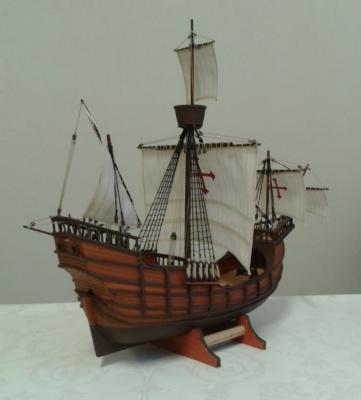
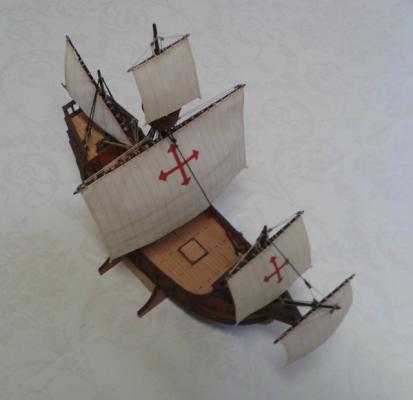
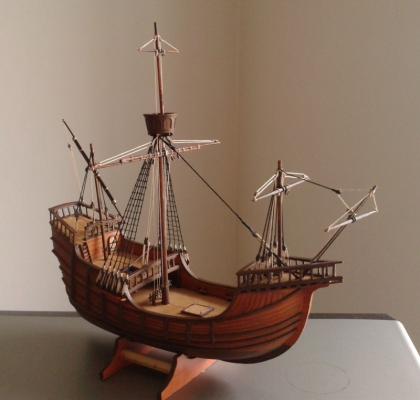
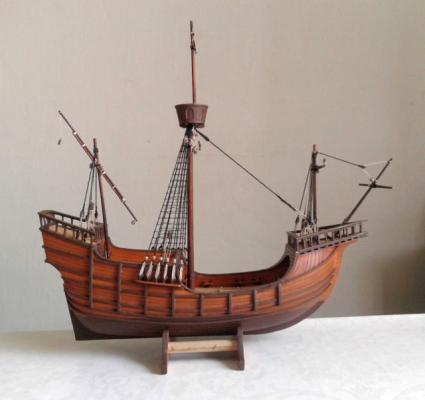
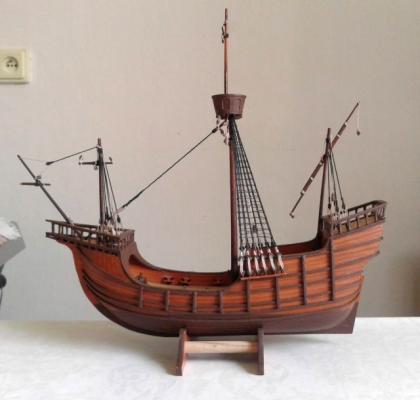
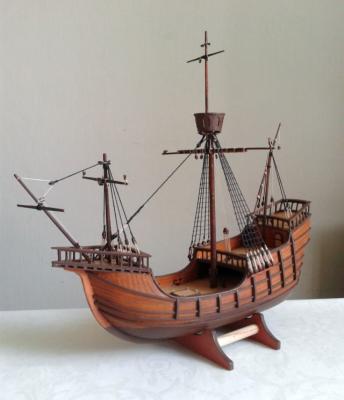
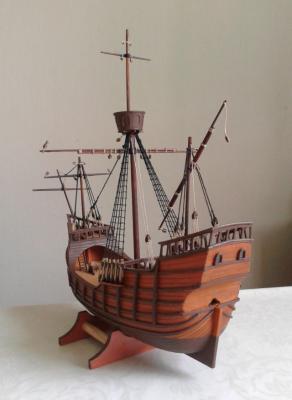
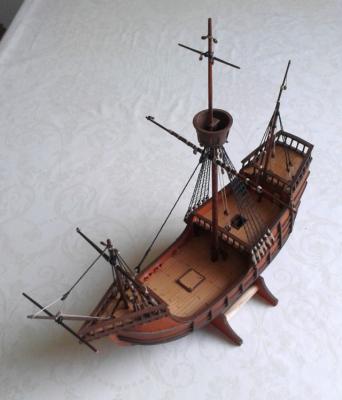
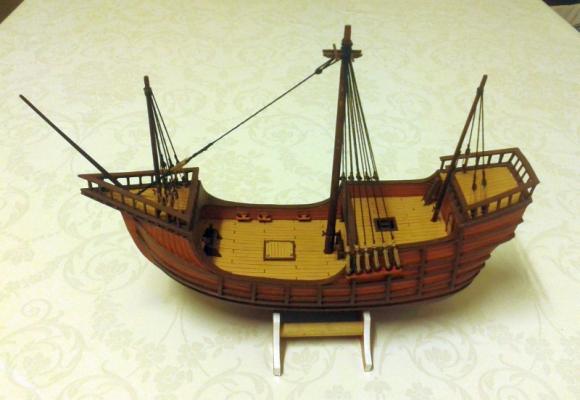
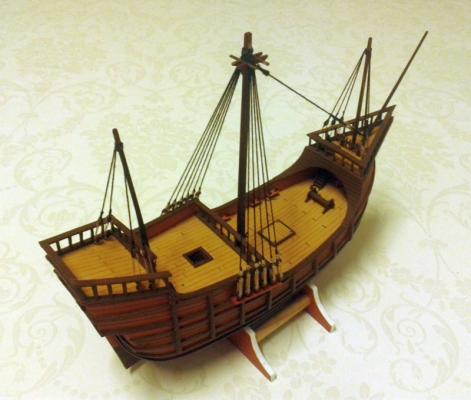
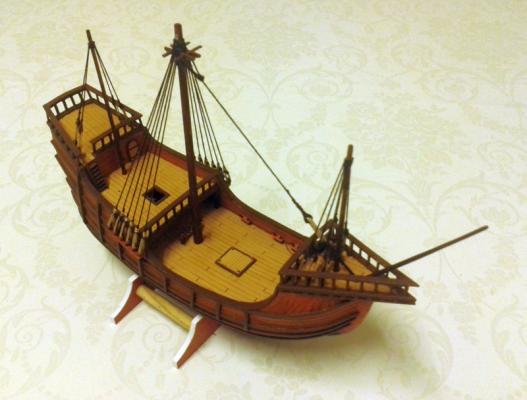
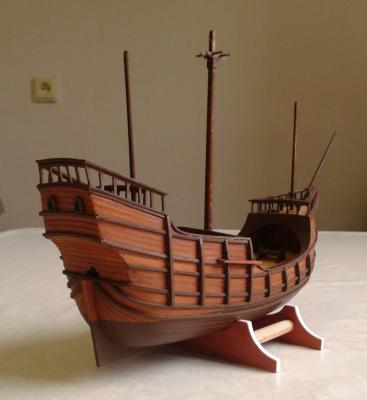
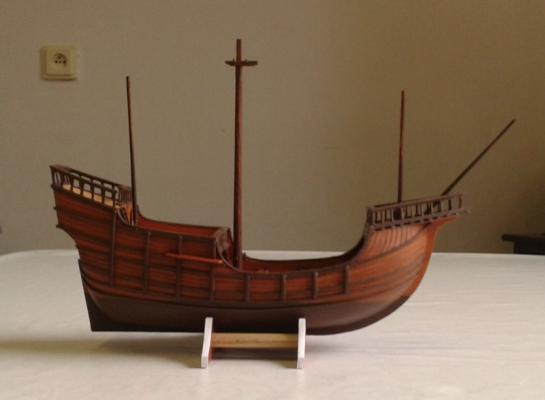
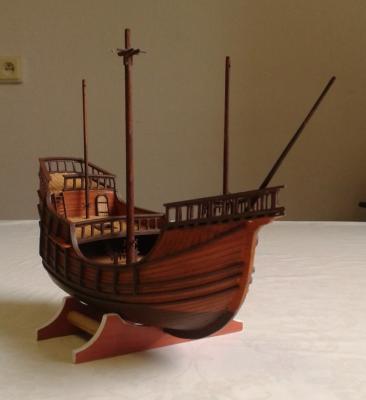
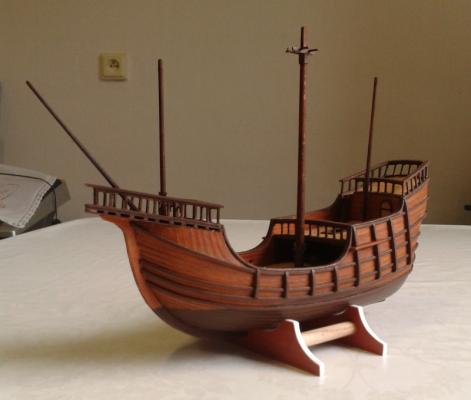
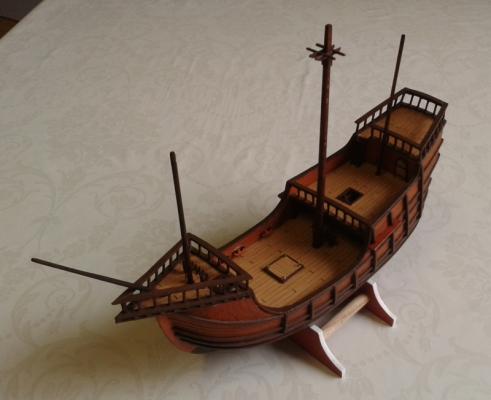
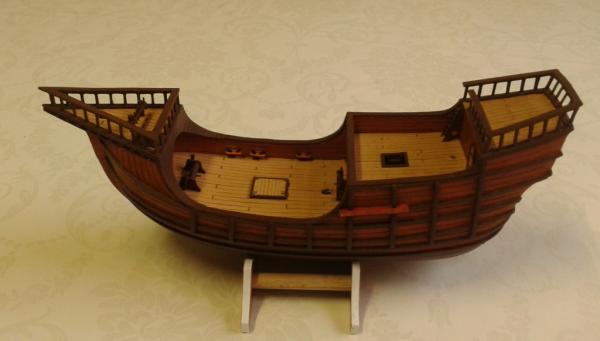
Thank you, friends. After finishing of the second part of running rigging and some details ( rudder, anchors ), I can say - the model of Santa Maria is finished. It was one of my wishes - to have models of the whole fleet of Christopher Columbus. Now it is fulfilled. I would like to say a big Thanks for your attention, comments and likes. Thank you very much !!! See you at next ship model. Jan


- 53 replies
-
- 7
-
-
- santa maria
- carrack
- (and 2 more)
-
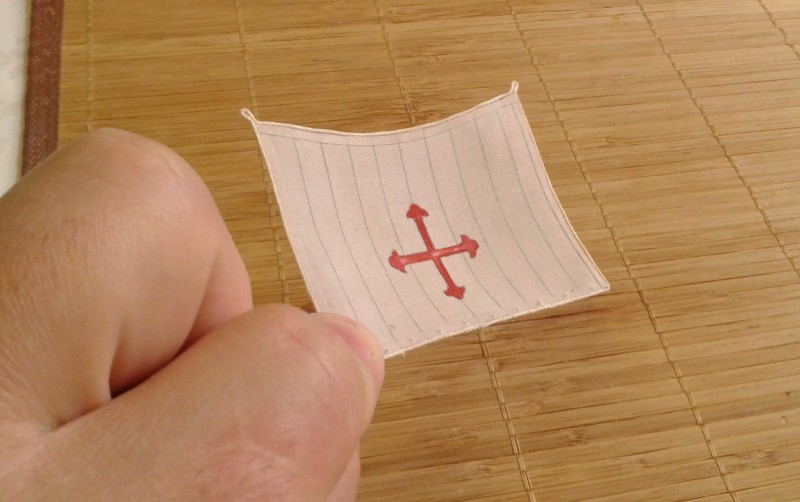
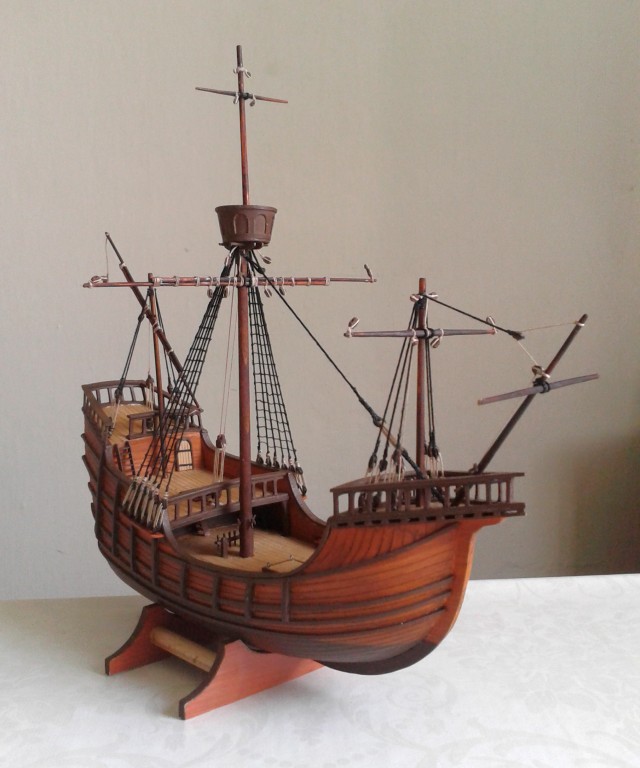
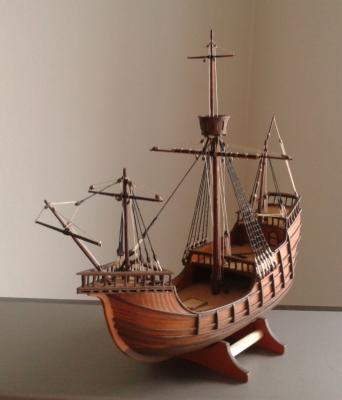
Thank you, Matti. About your question - I still want to build a model as a new ship, I never though about weathering , it doesn´t make me a sense, to make weathered model - but each man has another taste . It is possible to do - but just by painting. As you know, I´m usin foils for surfacing, and this material is uncomparable to wood. I´m just patinating it by water colours ( see pictures at 1 st page ). Back to the ship: sails are convexed and hung on the ship. Now I can continue with the second part of the running rigging. Jan


- 53 replies
-
- 8
-
-
- santa maria
- carrack
- (and 2 more)
-
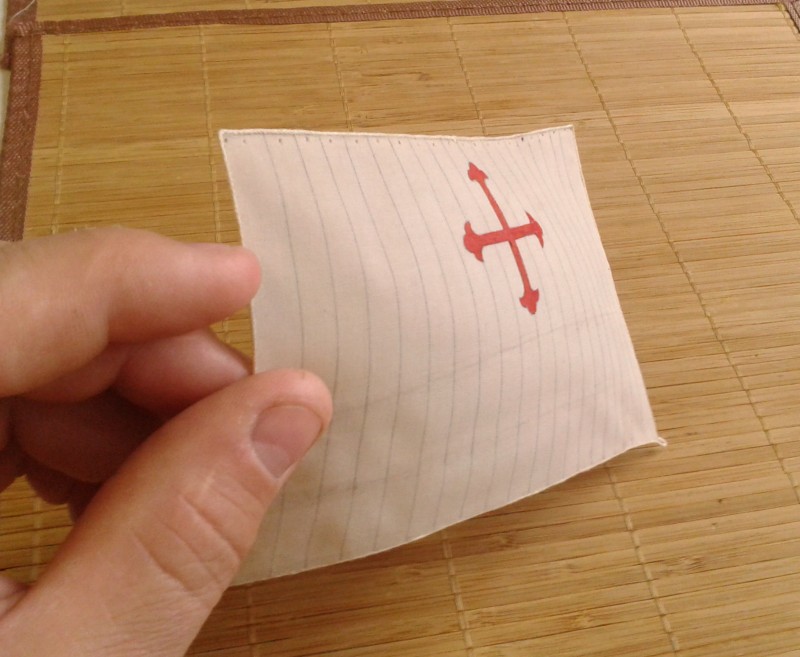
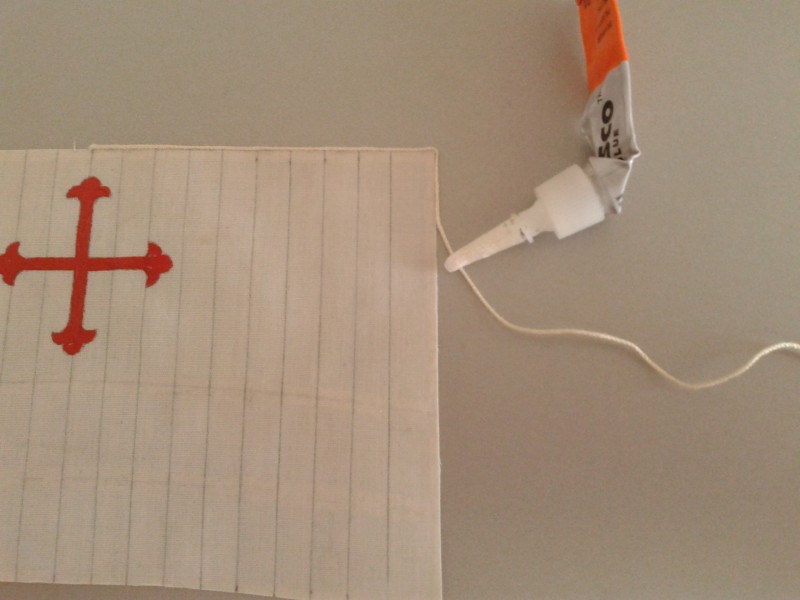
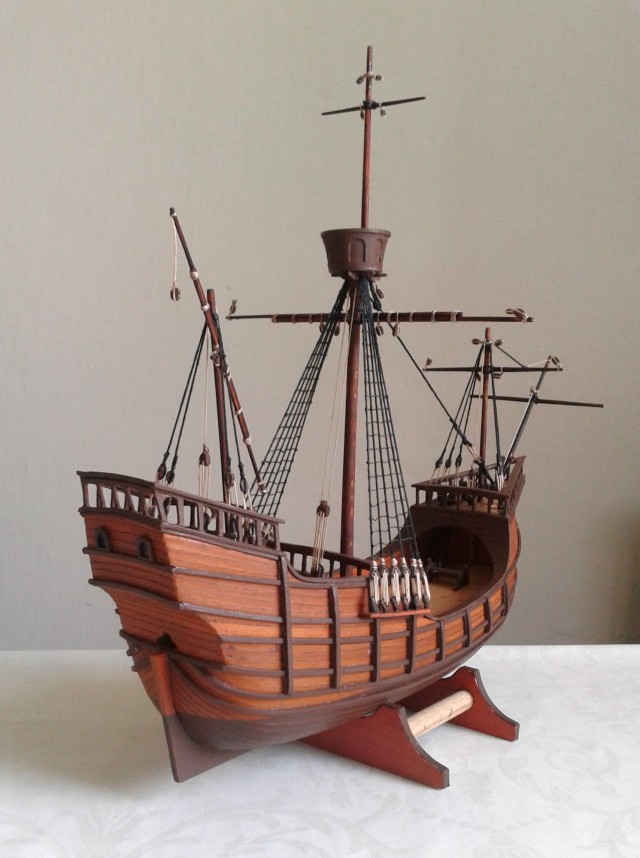
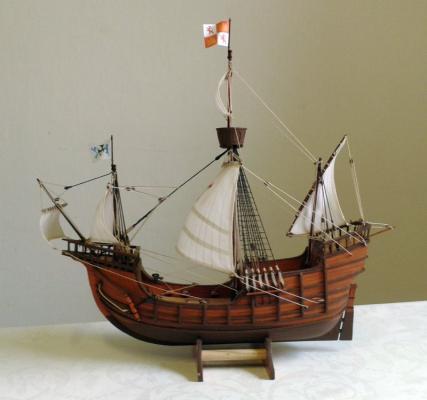
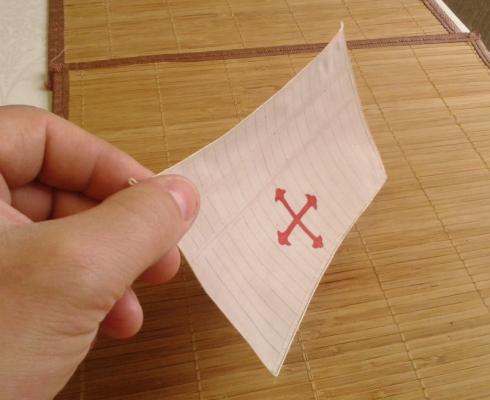
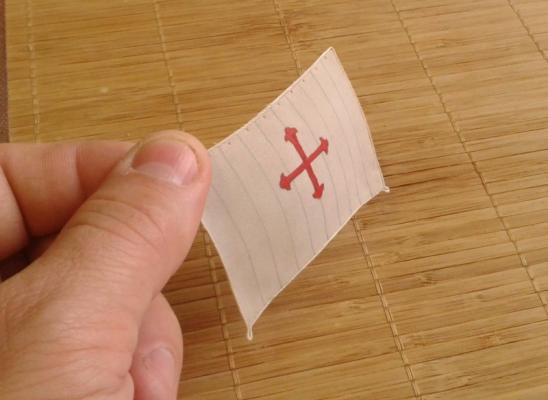
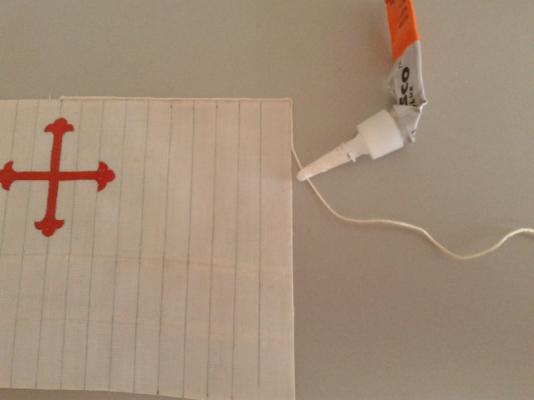
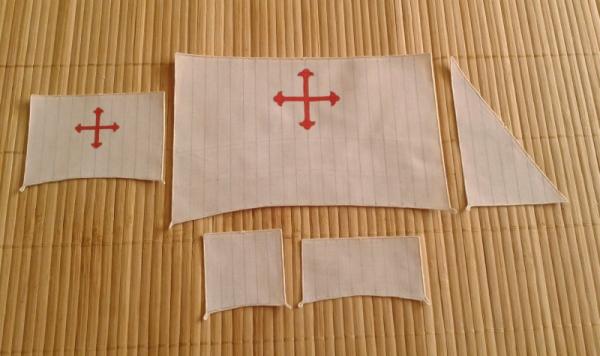
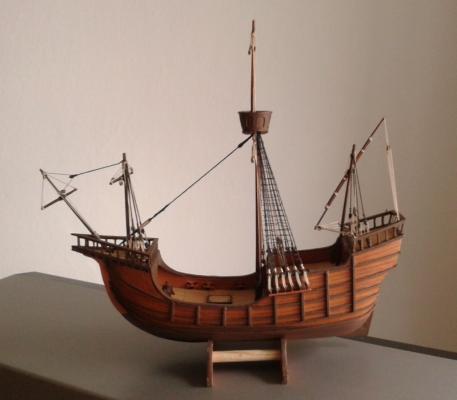
Thank you, friends Sails are almost finised. I made them from the piece of silky shirt ( this is the same material as " batyst " ). Before cutting I impregnated it by thinned glue. Now I need just to convex them. Jan
- 53 replies
-
- 7
-
-
- santa maria
- carrack
- (and 2 more)
-
Gripen 1591 by NAZGÛL (Matti)
firdajan replied to NAZGÛL's topic in - Build logs for subjects built 1501 - 1750
Hi Matti, Good choice, nice design. As I can see, you used similar hull design as Vasa has. I love galleons, I´m sure it will be the perfect build - I will watch it with great interest. BTW, what is the scale of this model? The frame looks quite big. Jan -
Thank you, Nils. The first part of the running riggin is done, ship is quite small - there´s just 5 yards I´ve just started working on sails. Jan


- 53 replies
-
- 8
-
-
- santa maria
- carrack
- (and 2 more)
-
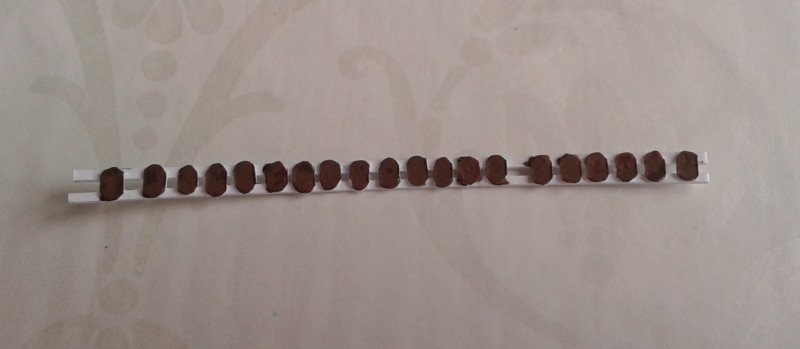
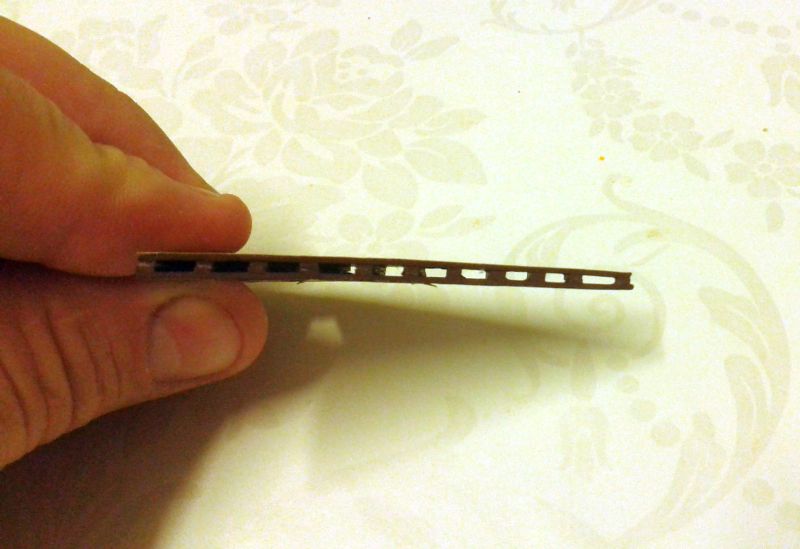
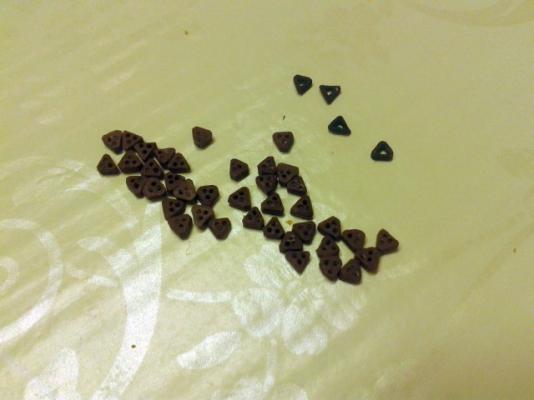
Thank you, my friends, for your replies. dgbot: I once answered this question to Reg, but I´ll do it again for you, David I use normal drawing paper, thickness 0,2 mm. 1 st layer is from two papers glued together = 0,4 mm + 2nd layer 0,2 mm + 3rd layer 0,2 mm = 0,8 mm. 4 th - final layer is made from strips of cartoon thickness 0,5 mm. I´m gluing next layer acrocc the previous one. Then I sand the hull - it must be extremelly smooth. Thickness together after completing is cca 1,5 mm. My aim is to make extremely strong hull ( and now it is ) and extremely smooth because of using foils - so this is not paint what shows the planking effect, but patinated strips of foil. I pratically made someting like plywood Now back to the ship. I made some blocks - you can see the part of progress on first photos, I´m producing semifinished block - I can to complete simple, double or triple blocks now. Smaller blocks are 2,5 mm. I finished standing rigging, made and completed yards and hung up them. The ship is ready for the first part of running rigging now. Next progress very soon. Jan


- 53 replies
-
- 8
-
-
- santa maria
- carrack
- (and 2 more)
-
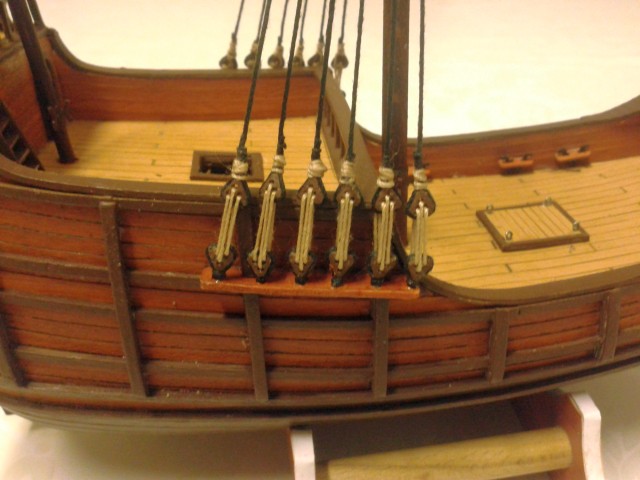
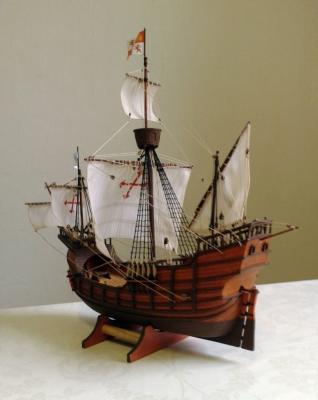
Thank you, friends, for your replies. I´m continuing - deadeyes are made, there´s just a few on this ship . Main part of standing rigging is made also. Now the progress is as on any other sailing ship model, I use the same materials ( just deadeyes and blocks are made from paper ) and methods as you. Jan


- 53 replies
-
- 7
-
-
- santa maria
- carrack
- (and 2 more)
-
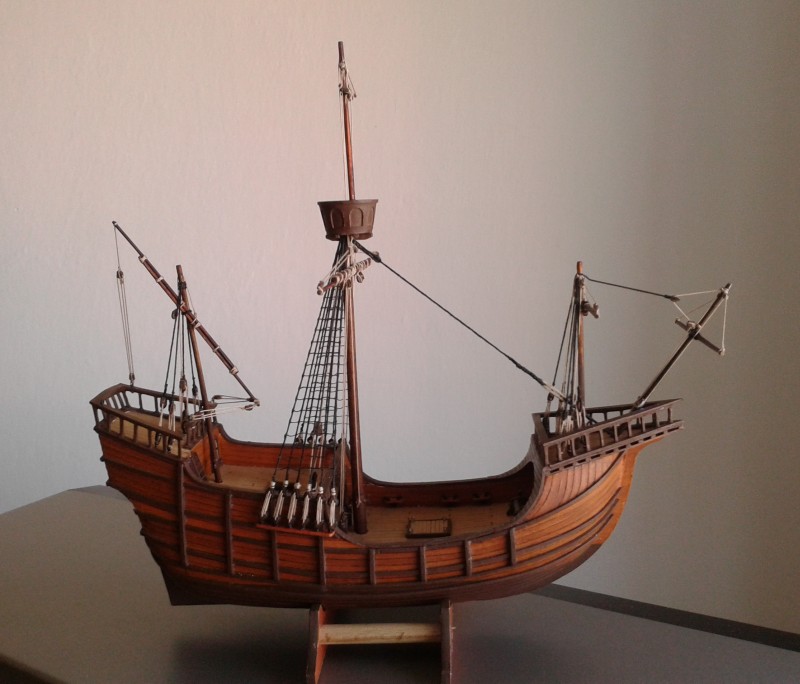
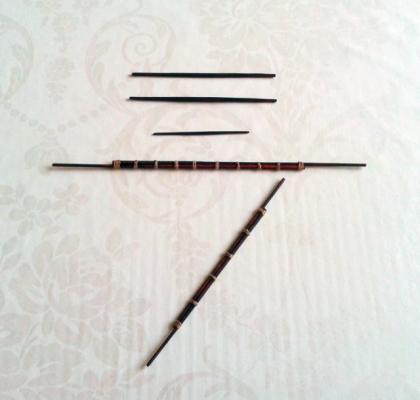
Thank you Greg. I made masts and fix them into the ship. They are made from beech bars, cutted to necessary lenhts and formed to necessary dimensions using hand drill and sandpaper. Now I can start to work on my beloved deadeyes and blocks The last picture shows the whole fleet. Jan


- 53 replies
-
- 8
-
-
- santa maria
- carrack
- (and 2 more)
-
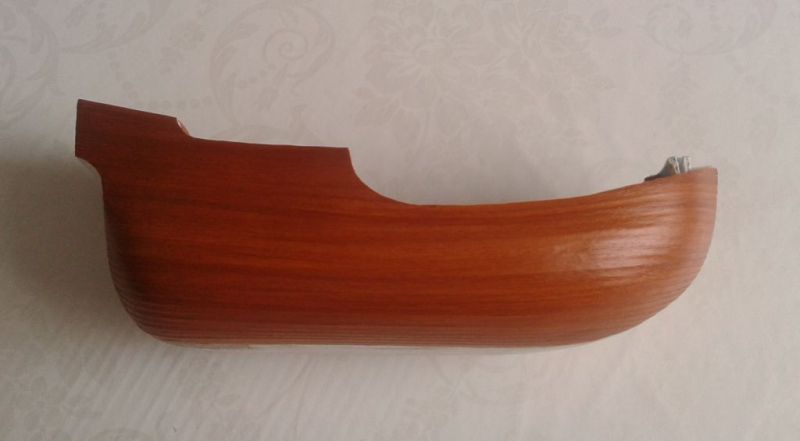
Thank you, friends. Rudi: I´m using DC Fix or Patifix foils with wooden structure, mainly in cherry type of wood, and I patine it by aniline water colors ( and finally I coat the surface by matt uncoloured paint - I use revell paints ) The hull is finished - just the rudder is missing ( I hope the result is nice to you ). It´s the time to start with the propulsion. Jan


- 53 replies
-
- 7
-
-
- santa maria
- carrack
- (and 2 more)
-
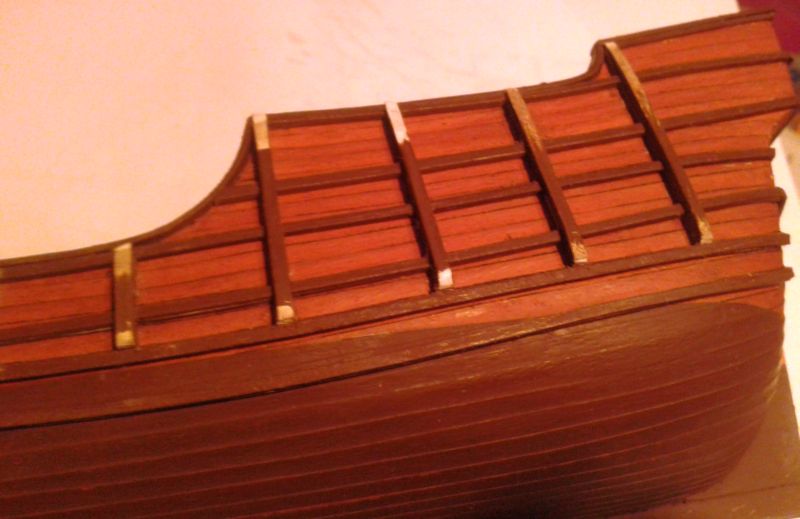
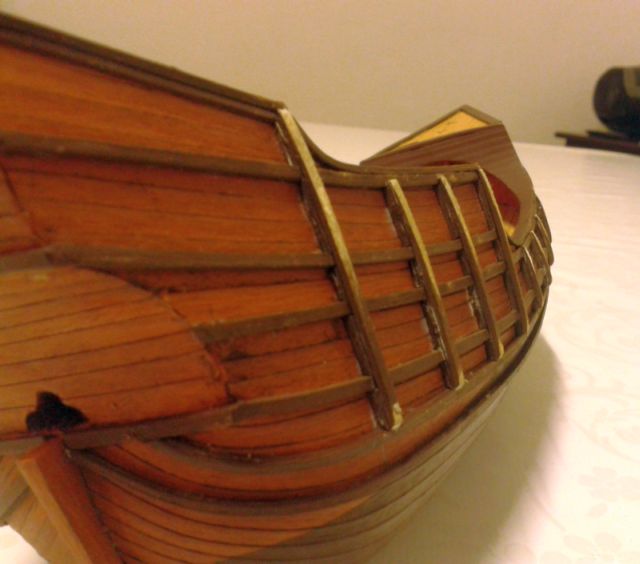
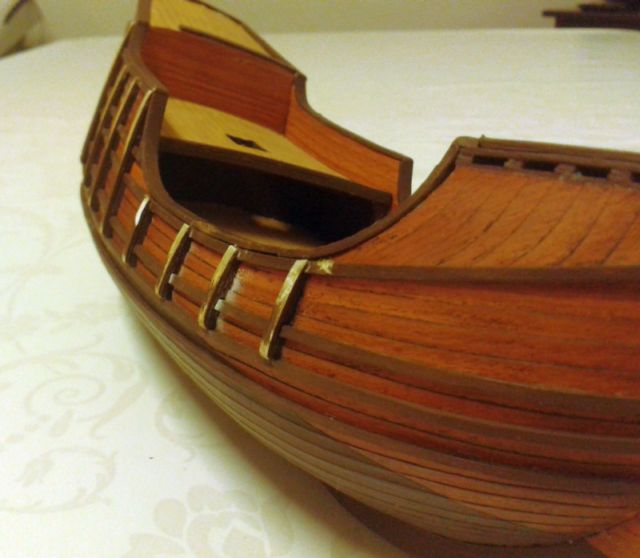
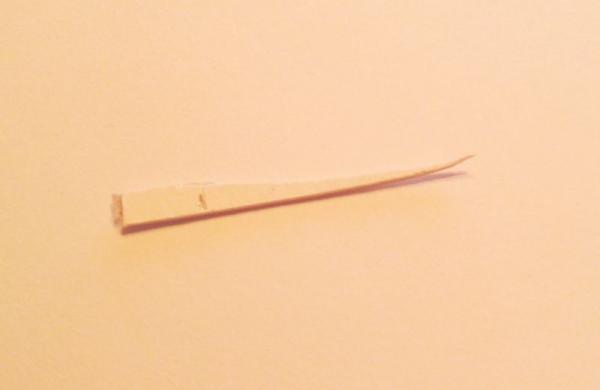
Reg: Thank you. Wales ( and futtock riders ) are made from carton. Wales and Futtock riders are finished. I took pictures of the whole process of making of futtock riders, is better to see more than write a lot. Now I will continue in production of some smaller pieces ( windlass, ladders, handrails, etc. ) Jan


- 53 replies
-
- 8
-
-
- santa maria
- carrack
- (and 2 more)
-
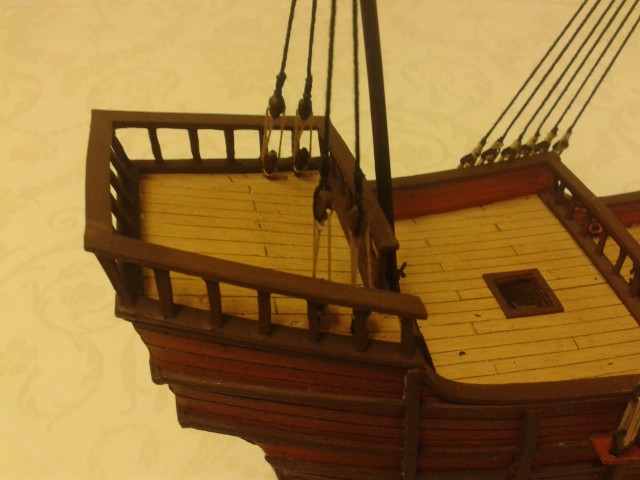
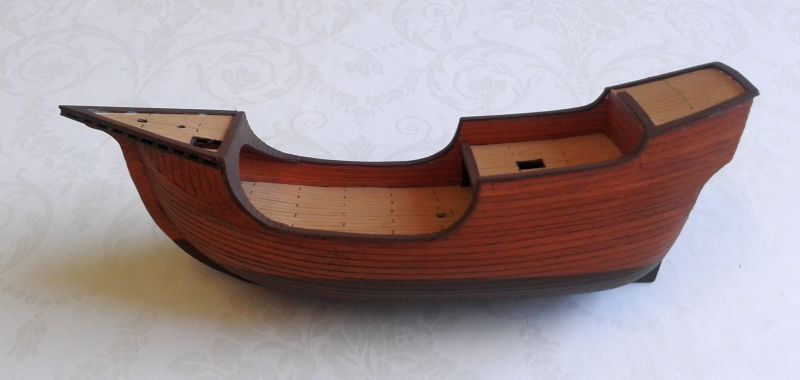
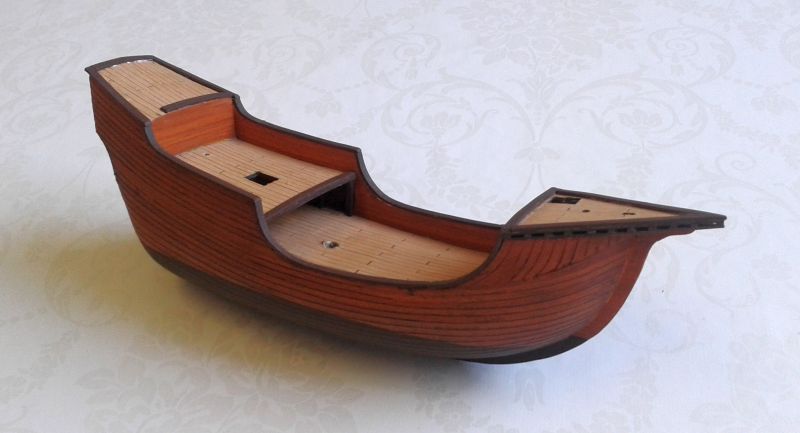
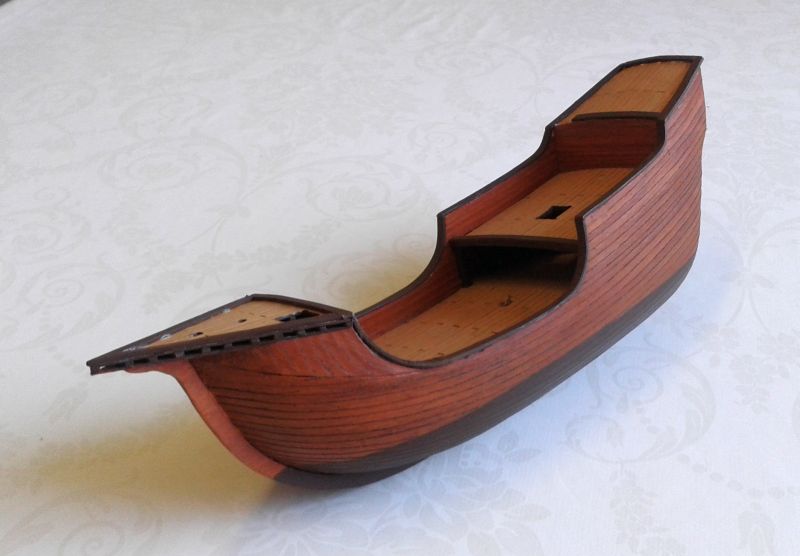
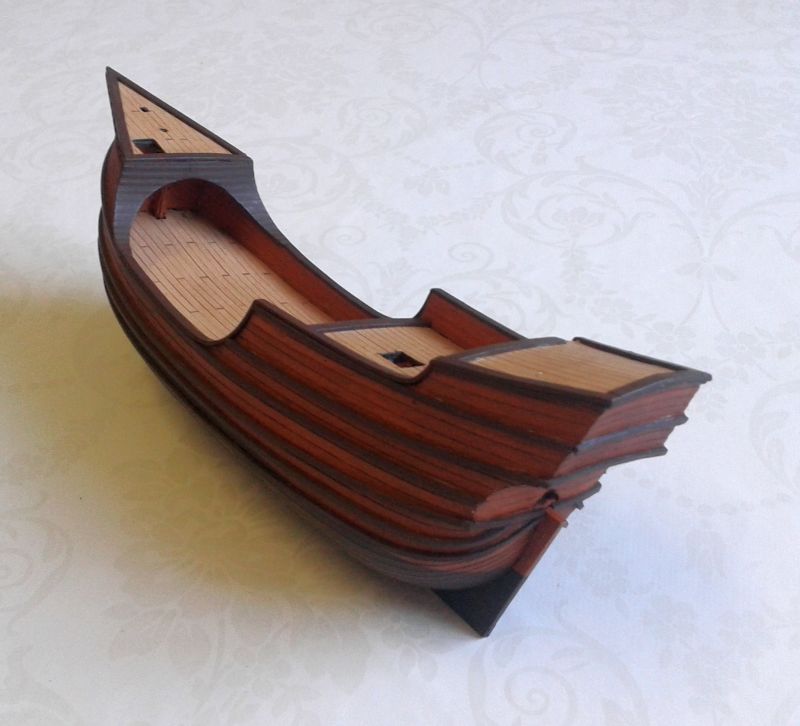
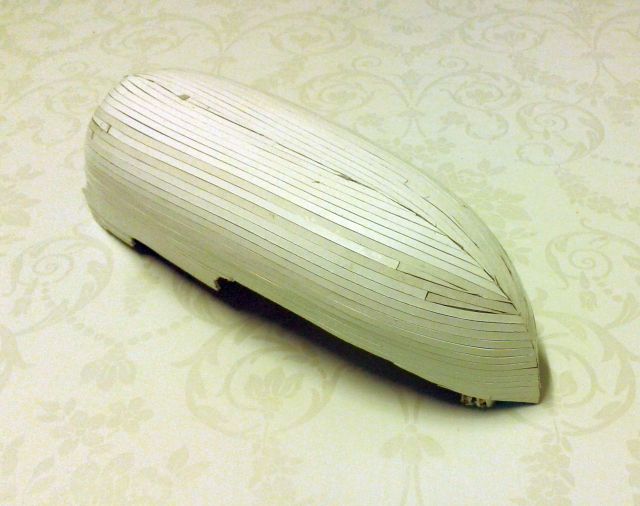
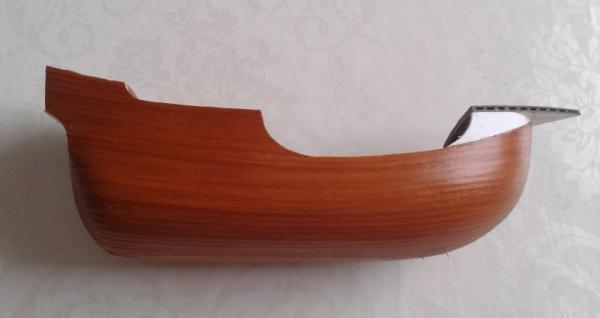
Now, after completing of the basic hull, the progress is the same as with any other ship ( maybe ). I made and glued the keel, then painted the bottom part under waterline with matt dark brown colour, and start with wales. See photos below:) Jan


- 53 replies
-
- 8
-
-
- santa maria
- carrack
- (and 2 more)
-
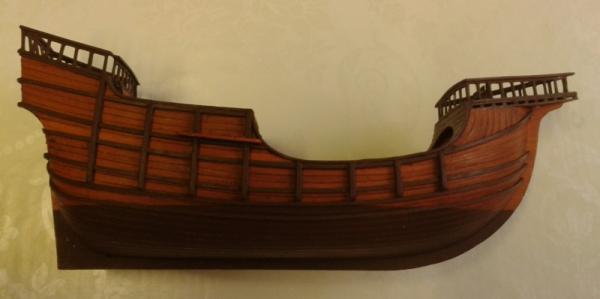
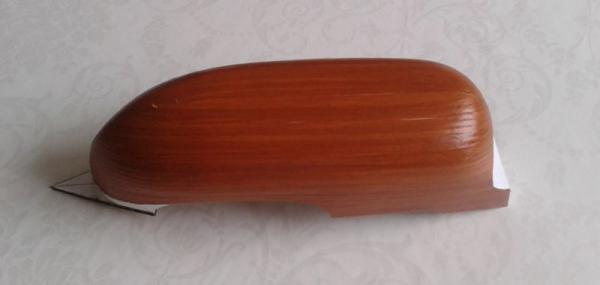
Here are promised photos of patinated hull. I used aniline water colors and spread it simply by finger ( so it was very hard for me to make some photos of progress ) It took me 15 minutes. Ten I coated hull by colorless matt paint. Jan


- 53 replies
-
- 9
-
-
- santa maria
- carrack
- (and 2 more)
-
Omega1234: yes, you didn´t know it ? I still build ship by te same way ( I have several topics here on the forum - La Couronne, Revenge, Nina & Pinta ). I learned it from Doris. Are you disappointed? Here is the first photo of patinated Santa Maria - now it looks almost like wood. More photos later Jan
- 53 replies
-
- 4
-
-
- santa maria
- carrack
- (and 2 more)
-
Reg: I use normal drawing paper, thickness 0,2 mm. 1 st layer is from two papers glued toether = 0,4 mm + 2nd layer 0,2 mm + 3rd layer 0,2 mm = 0,8 mm. 4 th - final layer is made from strips of cartoon thickness 0,5 mm. Tickness together after completing is cca 1,5 mm. At first I sand and then coat the hull. I sand just the final layer after coating. My aim is to make extremely strong hull ( and now it is ) and extremely smooth because of using foils. I pratcilally made sometin like plywood I use the same glue as for gluin other parts - glue for paper or wood produced in our country( Herkules, Duvilax ) I start with imitation of planking - as always by strips of foil. After gluing strips of foil I use hairdryer to heat foil for better adherence. I glued prepared forecastle, made and glue missin parts of the hull under the forecastle. Today I´ll finish the planking and improve the surface by patination - now it looks too artificially. Jan


- 53 replies
-
- 7
-
-
- santa maria
- carrack
- (and 2 more)
-
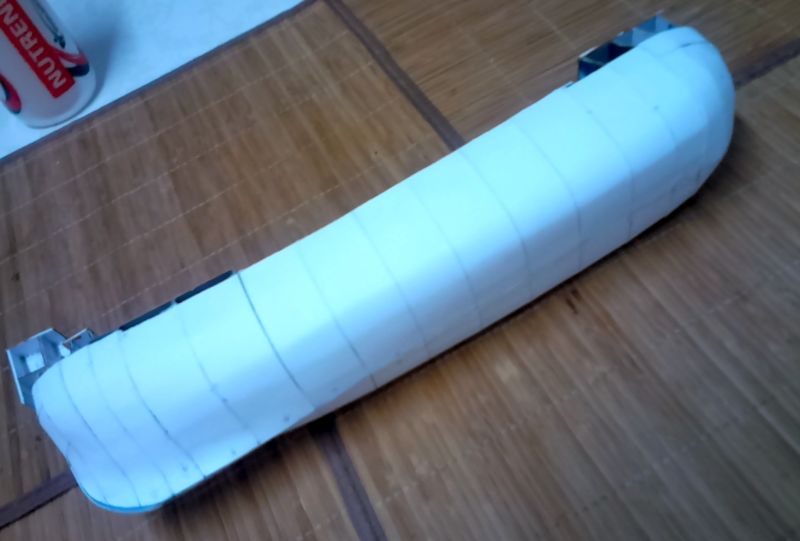
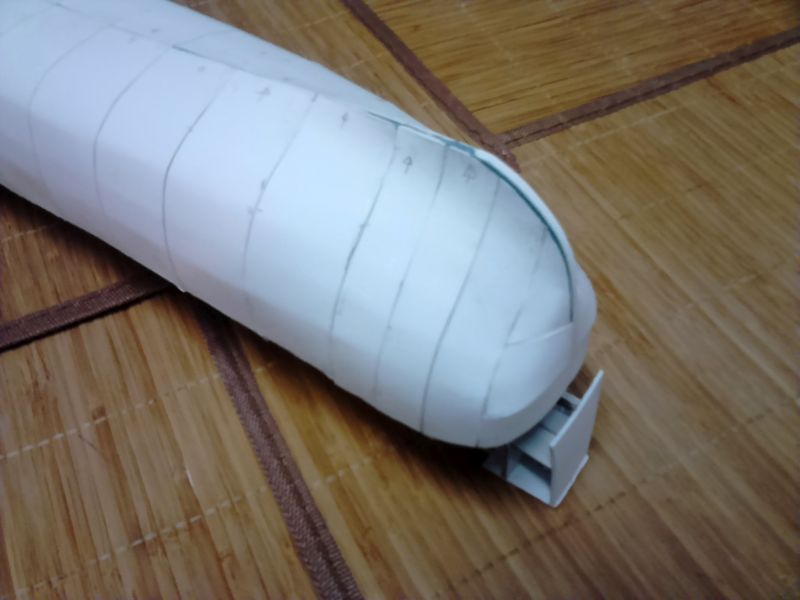
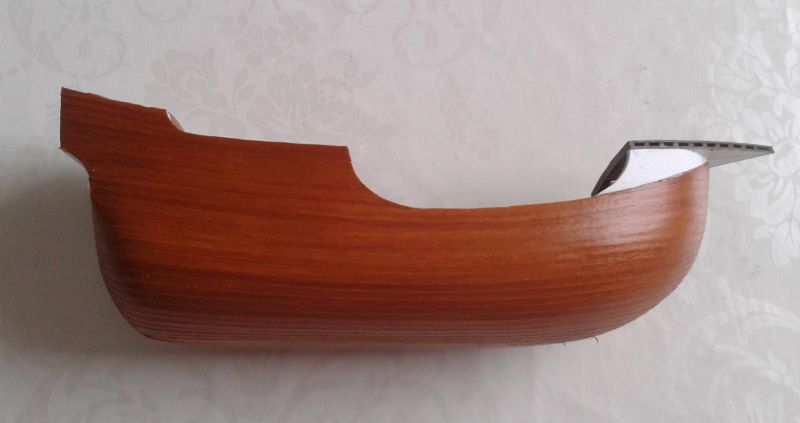
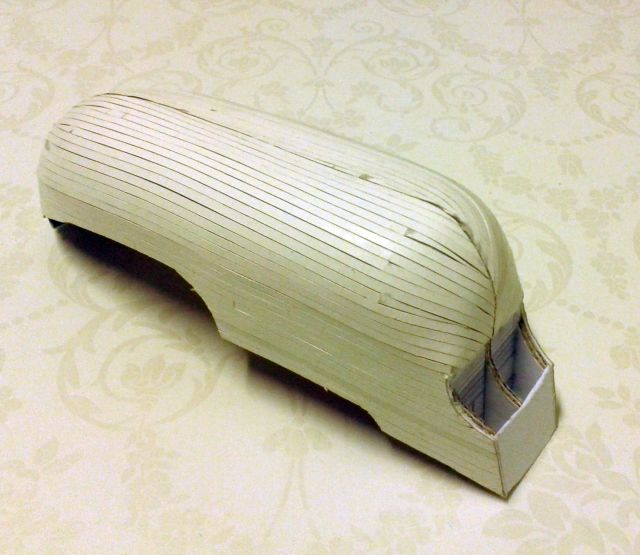
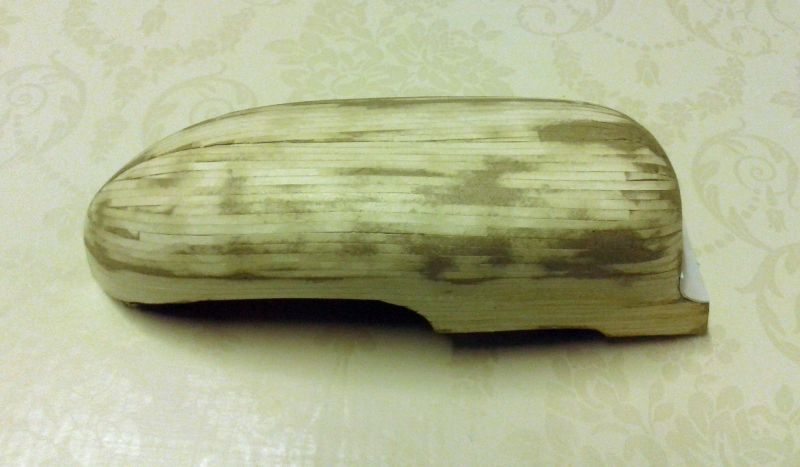
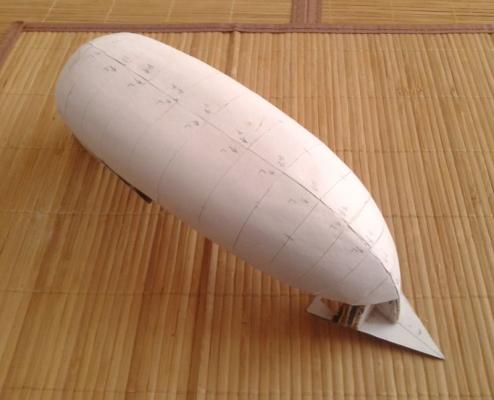
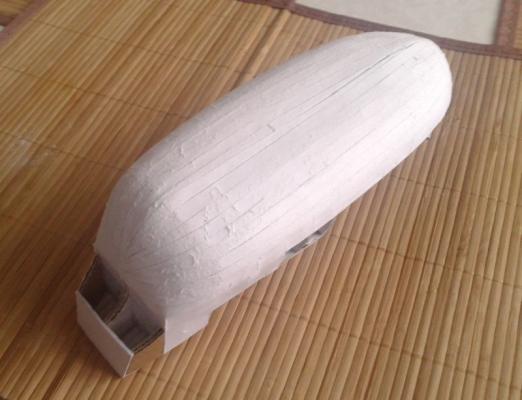
Omega 1234: Thank you, Patrick The progress continues. I glued the final layer of the planking on the whole hull - it made the hull compact. Then I painted the hull with glue and smoothly grind it after drying. It took me 1,5 hour approximately. The aft is finished and I made the floor of the forecastle also The hull is extremely smooth and strong now. It´s time to start with surface finishing. Jan


- 53 replies
-
- 4
-
-
- santa maria
- carrack
- (and 2 more)
-
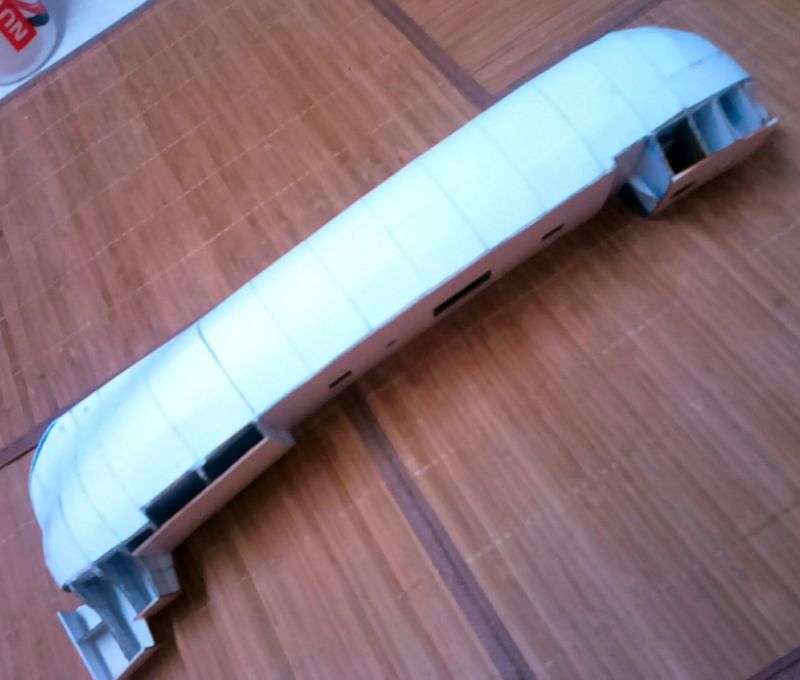
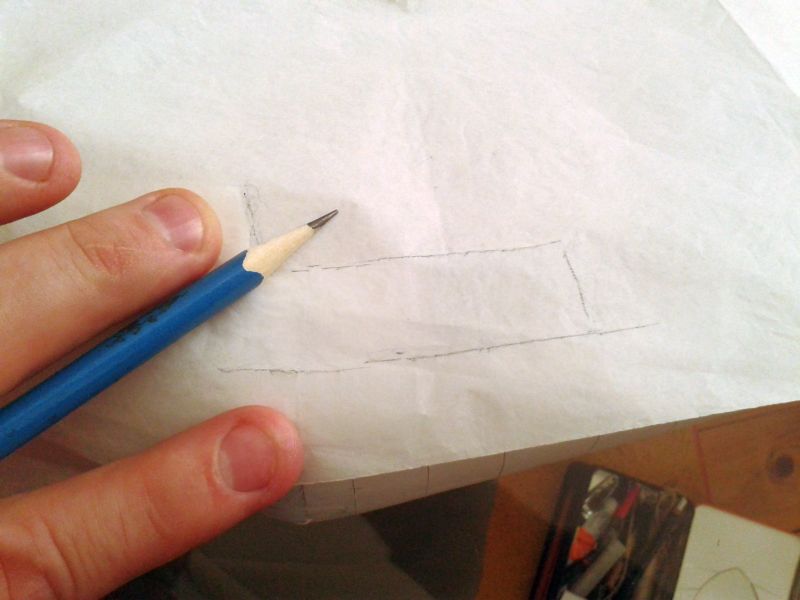
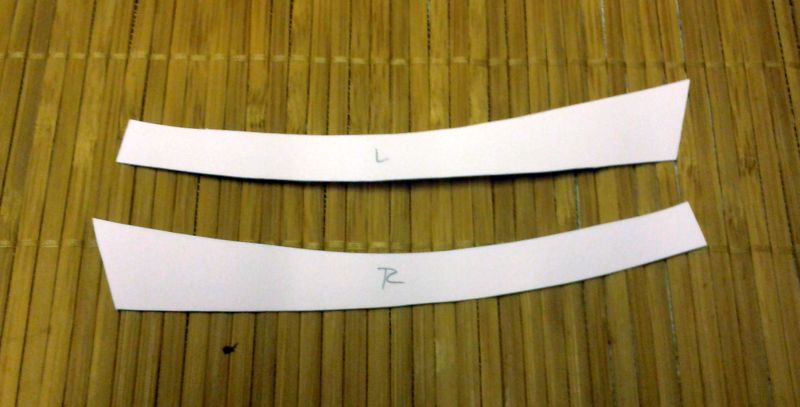
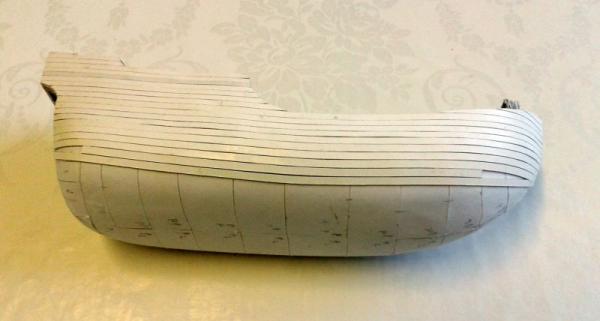
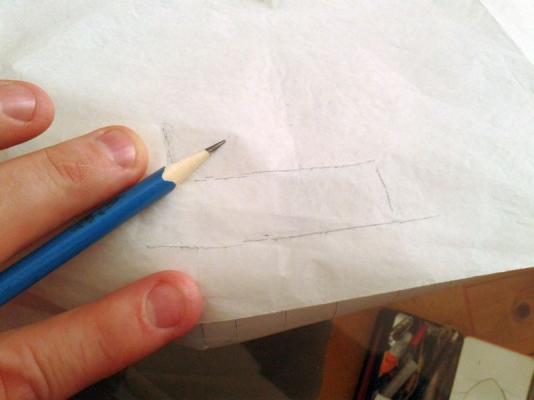
Omega1234: Thank you, Patrick, for your nice words. I´ll try to describe the progres as best as I can. I glued sides of the ull - as I mentioned I divided them into two main and two finisin parts. I used temlates I made usin vellum paper and plans. The part of shape under the forecastle is missing - I wasnt satisfied so I have to make a new forecastle. Now I´m going to glue fourth - and last - layer of planking Jan


- 53 replies
-
- 6
-
-
- santa maria
- carrack
- (and 2 more)
-
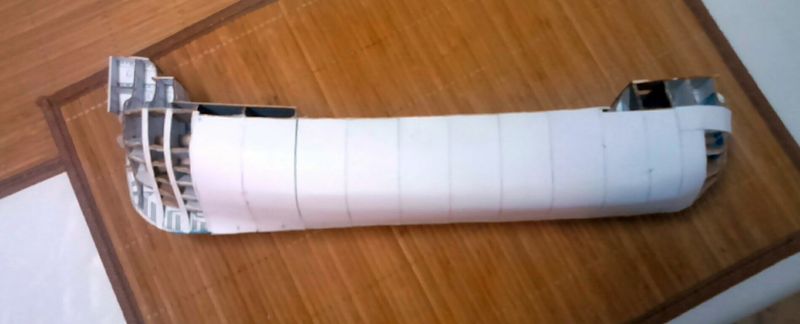
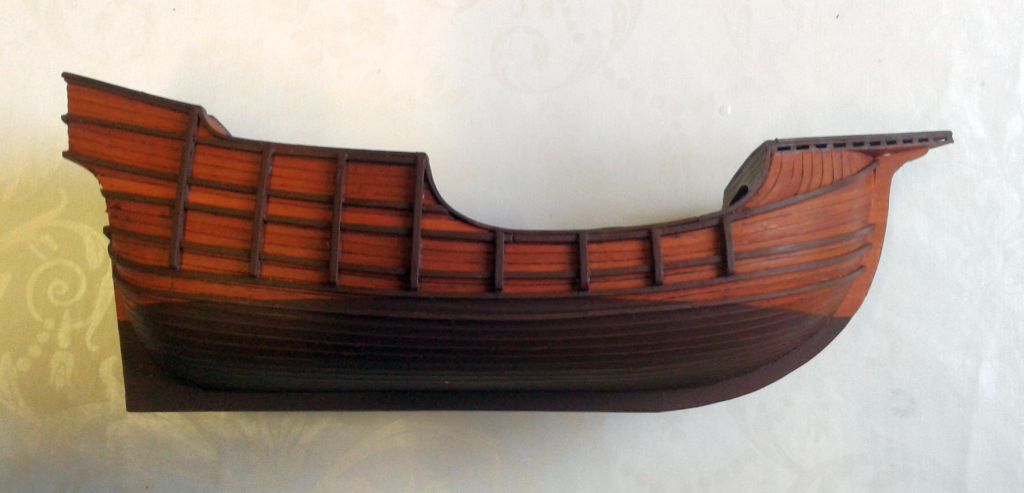
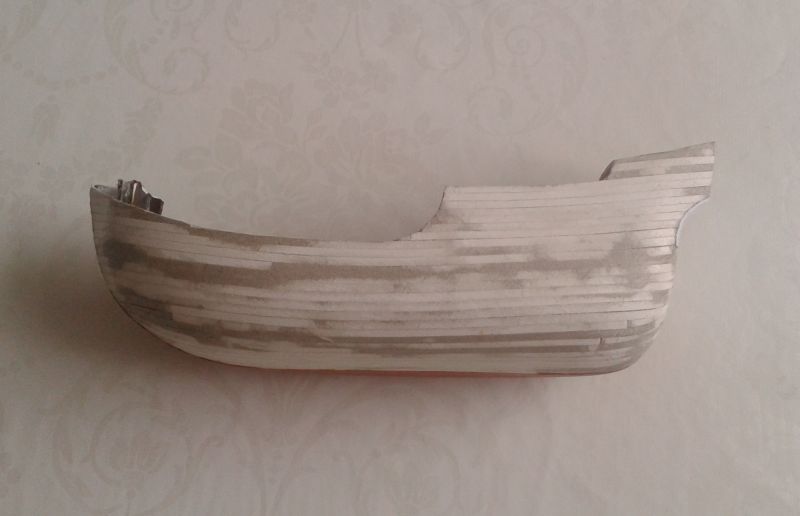
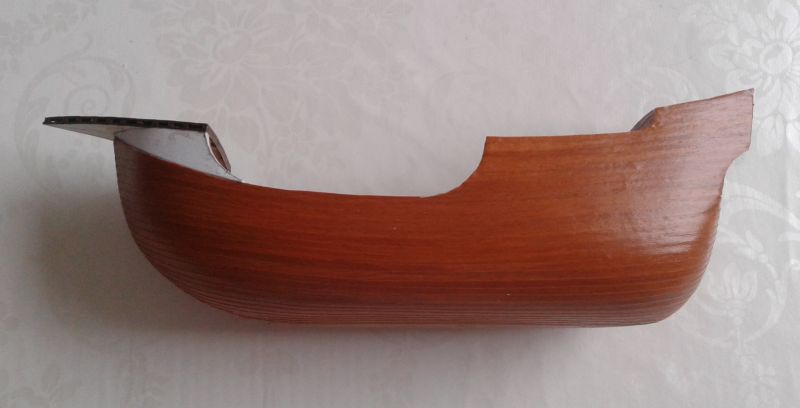
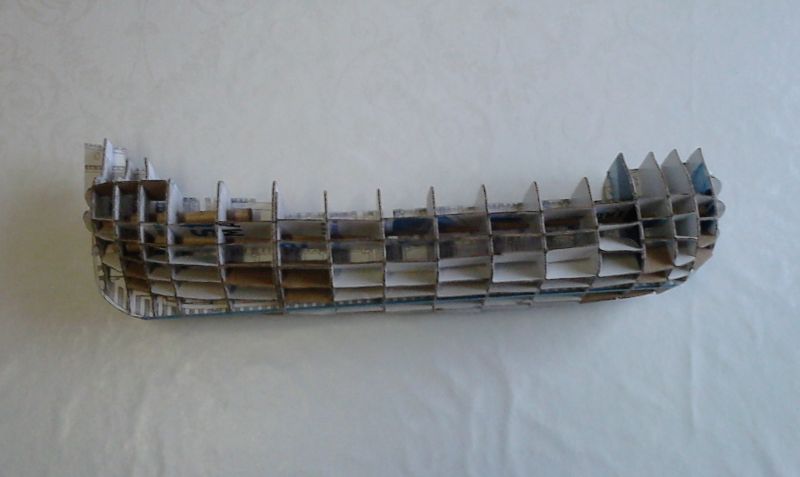
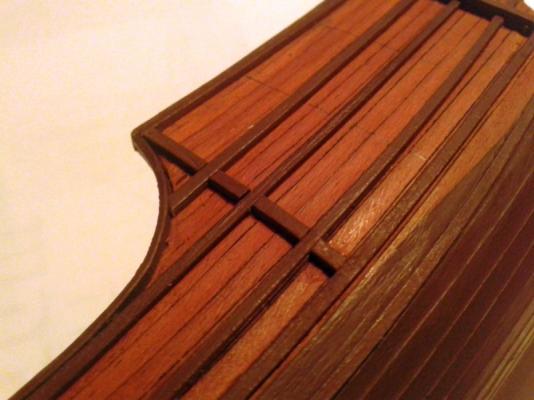
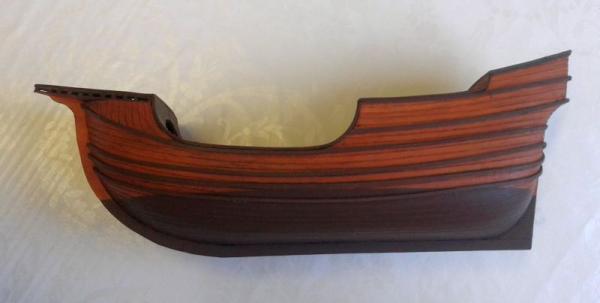
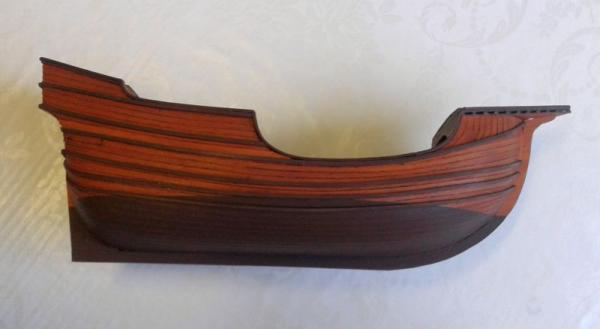
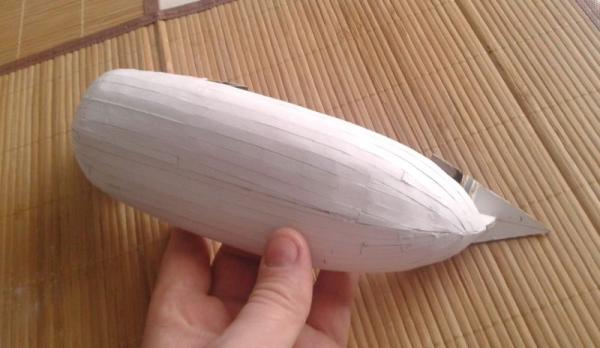
Thanks my friends for your replies Third layer of planking of the bottom part of the hull is finished. Now I´m satisfied ( I used this progress on all of my ships ) It´s time to continue with upper part. Jan


- 53 replies
-
- 6
-
-
- santa maria
- carrack
- (and 2 more)
-
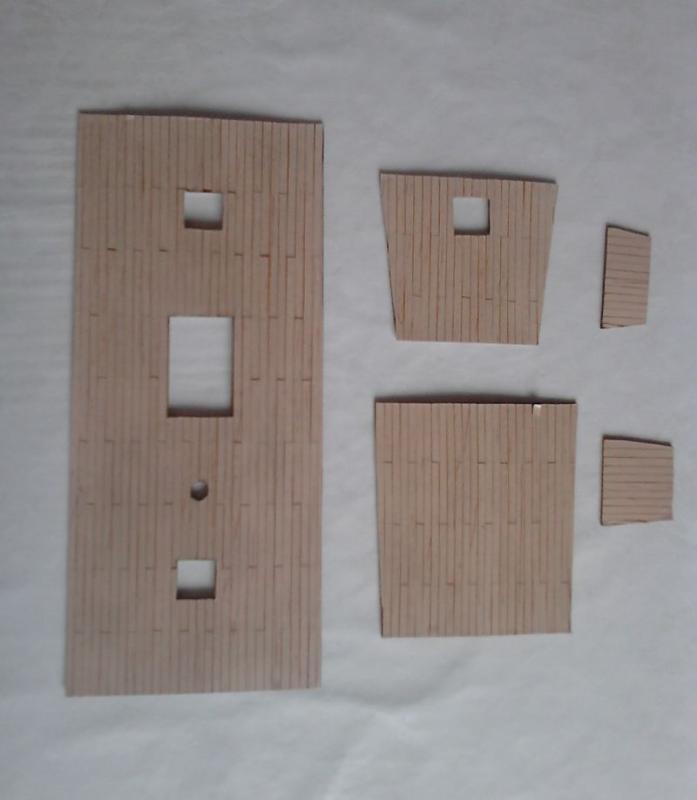
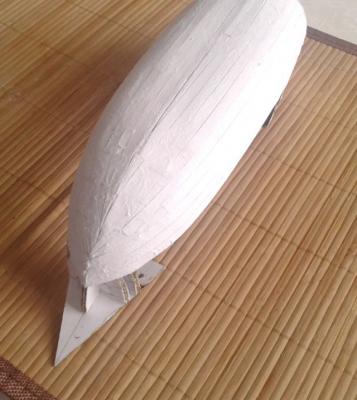
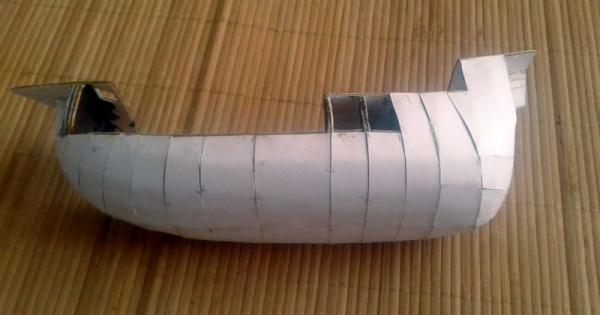
Here is the second layer of plankin of the bottom part of the hull. I used strips of paper 5 mm wide. It took me 3 hours to cut, glue and grind both of them. I always apply the glue on the surface after grinding. Pictures show the second plankin before and after grinding. The third one will follow - I´ll send some pictures tomorrow Jan


- 53 replies
-
- 7
-
-
- santa maria
- carrack
- (and 2 more)
-
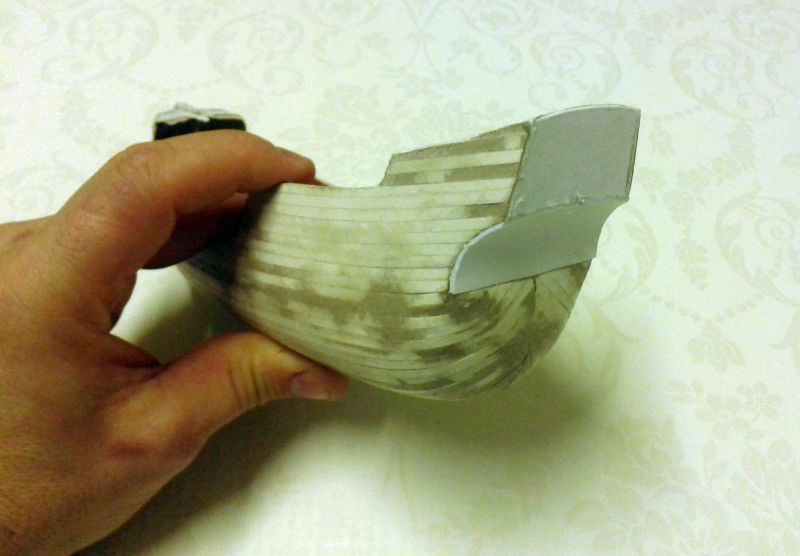
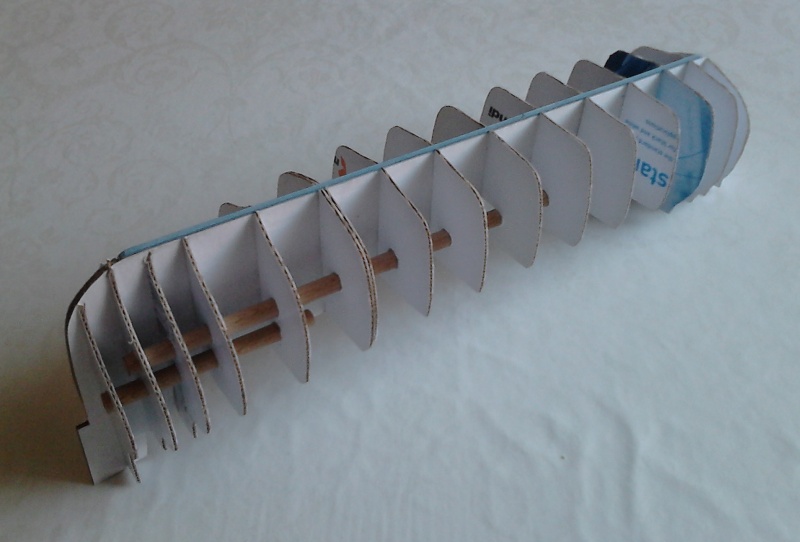
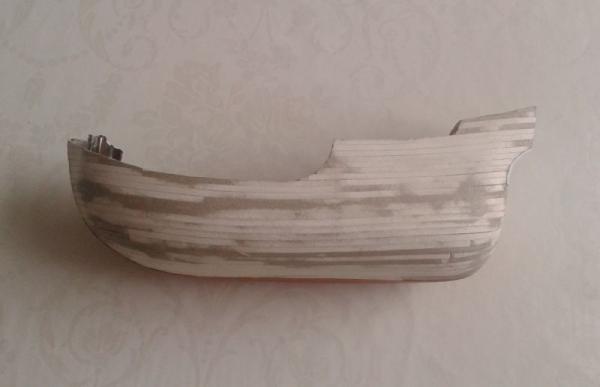
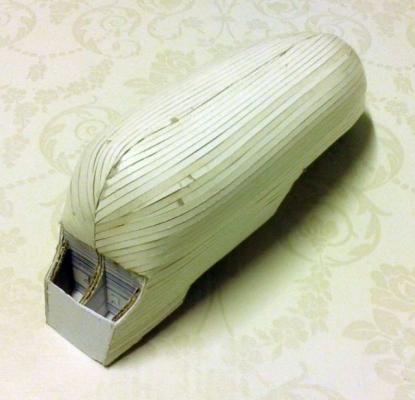
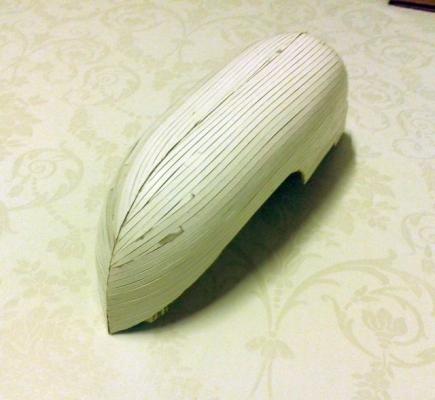
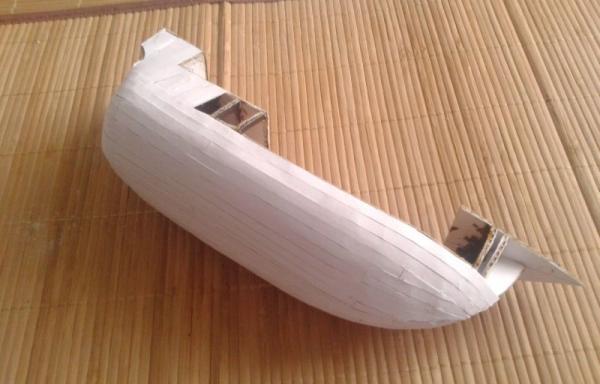
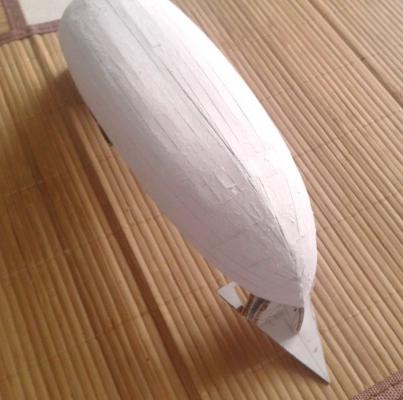
First layer of the bottom part of planking is glued. Now I´ll grind it and two next layers will follow. After finising of the bottom part I´ll glue sides - each from one or two parts. Jan

- 53 replies
-
- 10
-
-
- santa maria
- carrack
- (and 2 more)
-
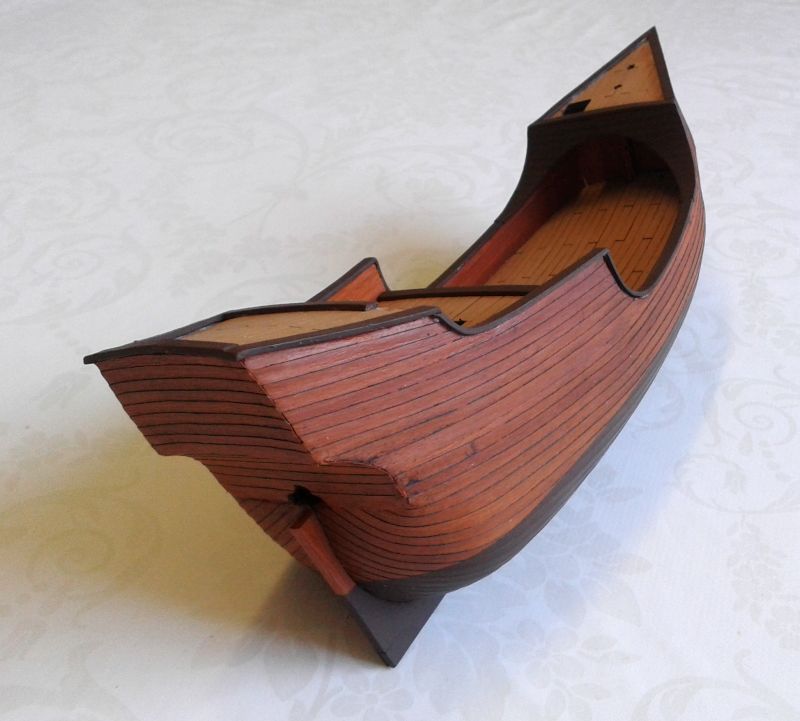
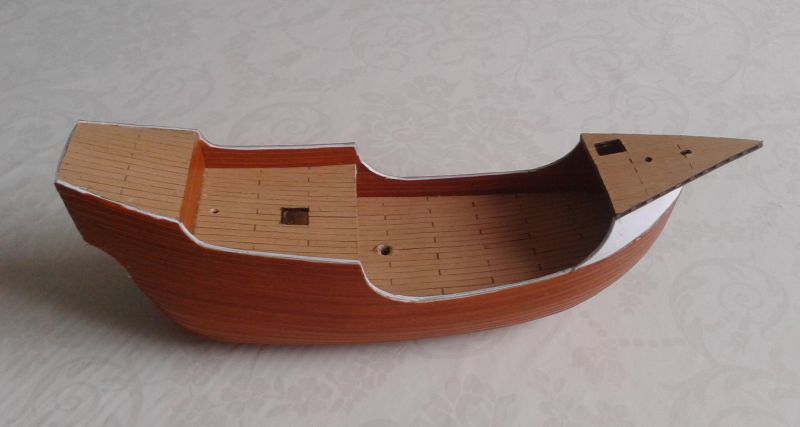
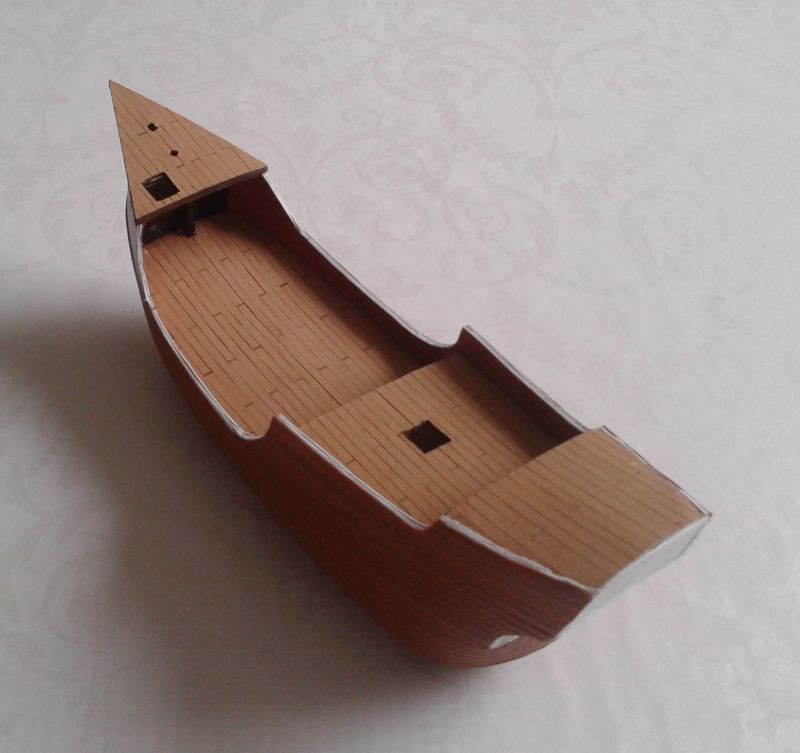
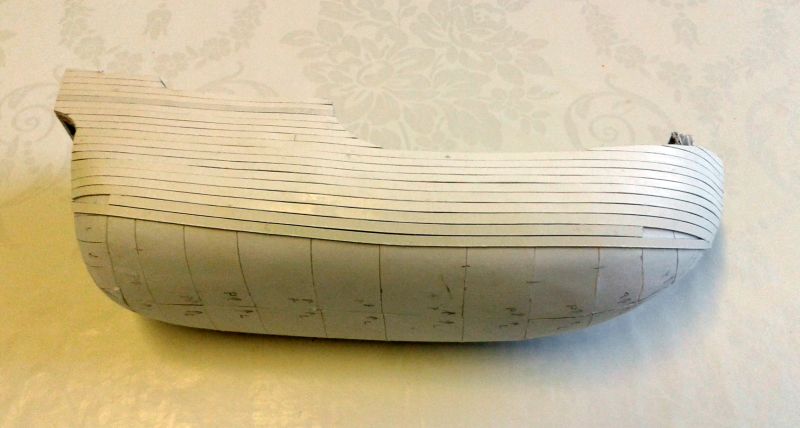
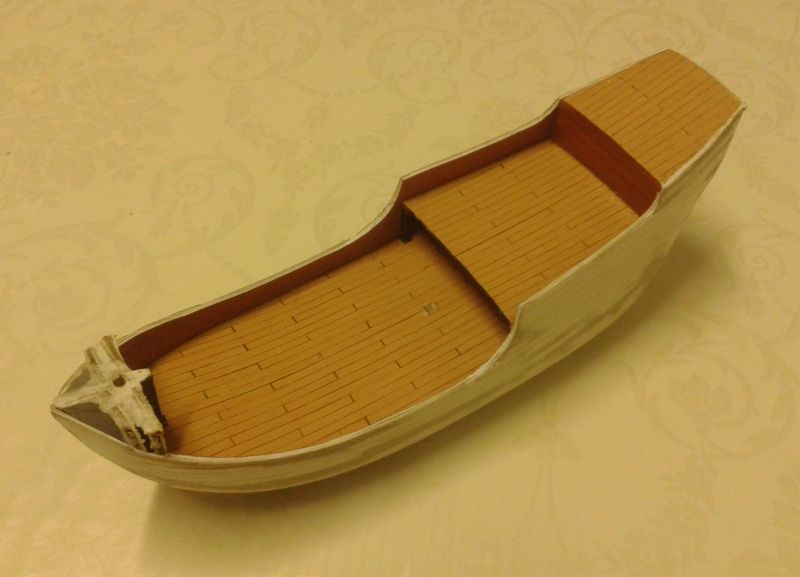
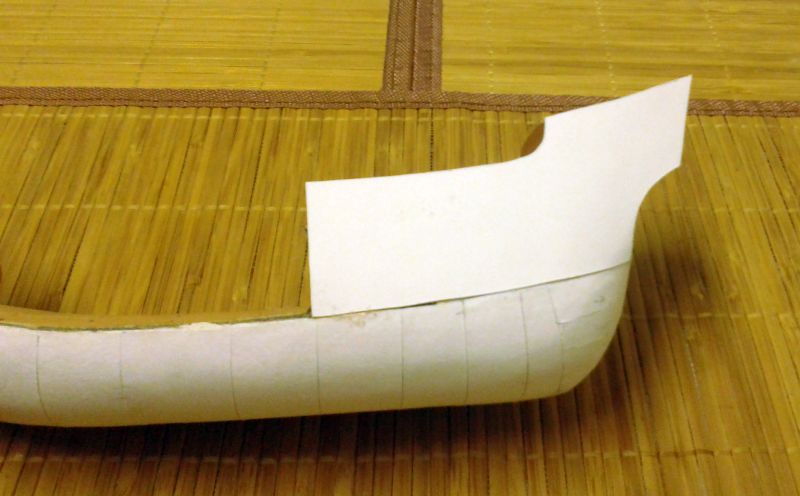
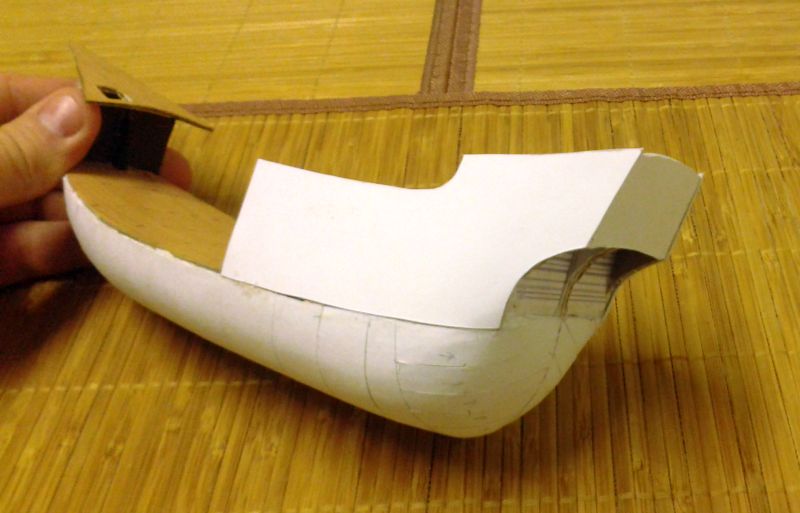
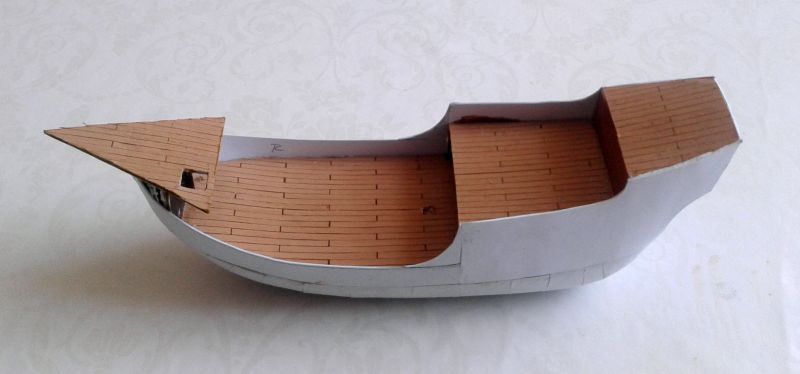
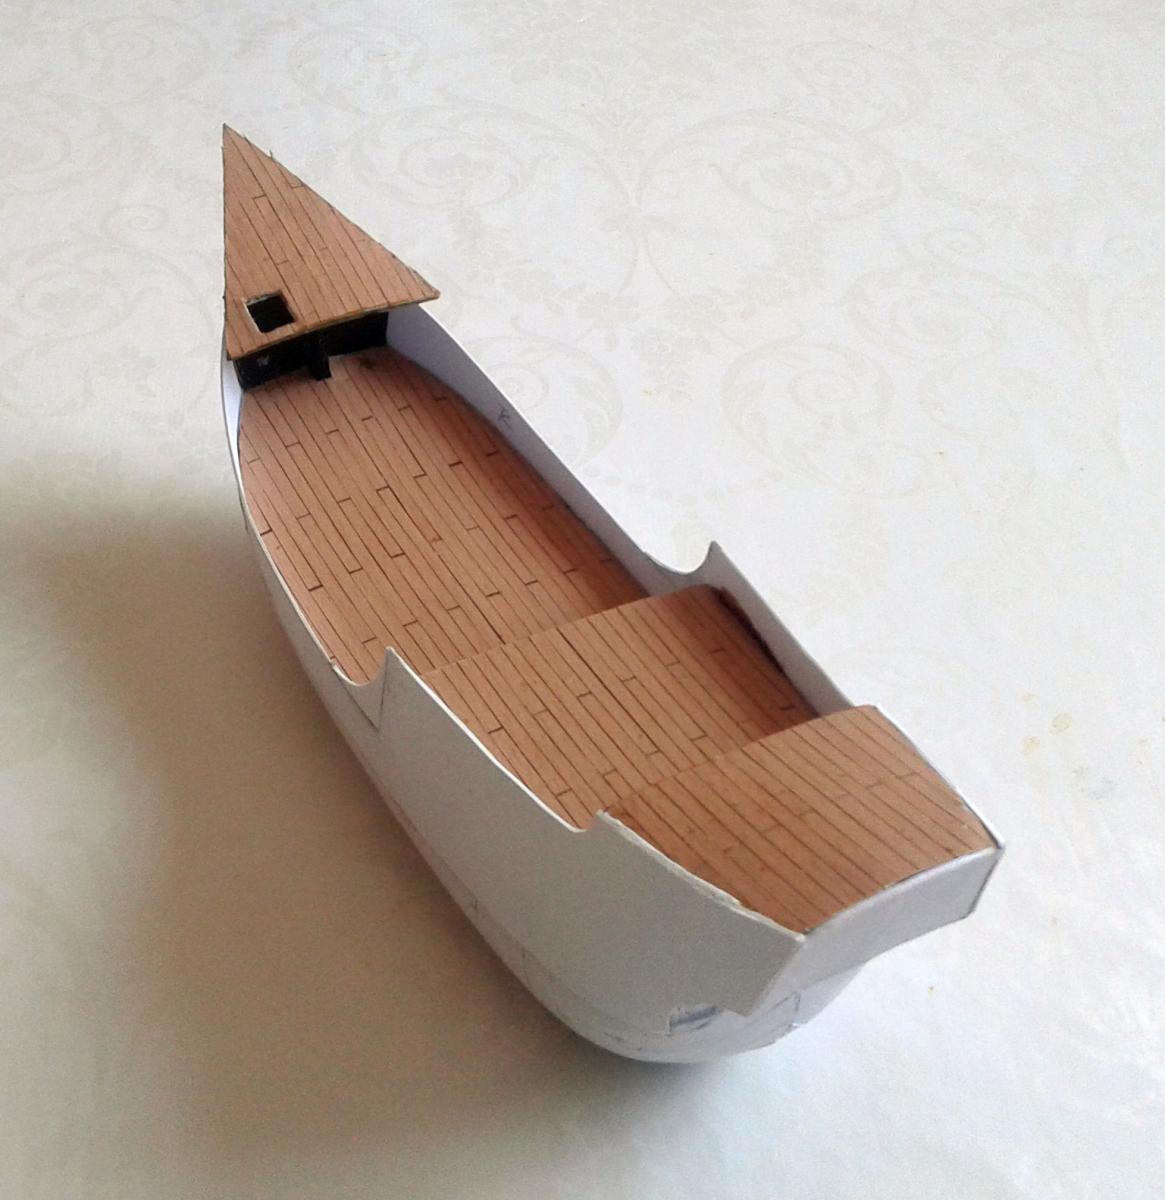
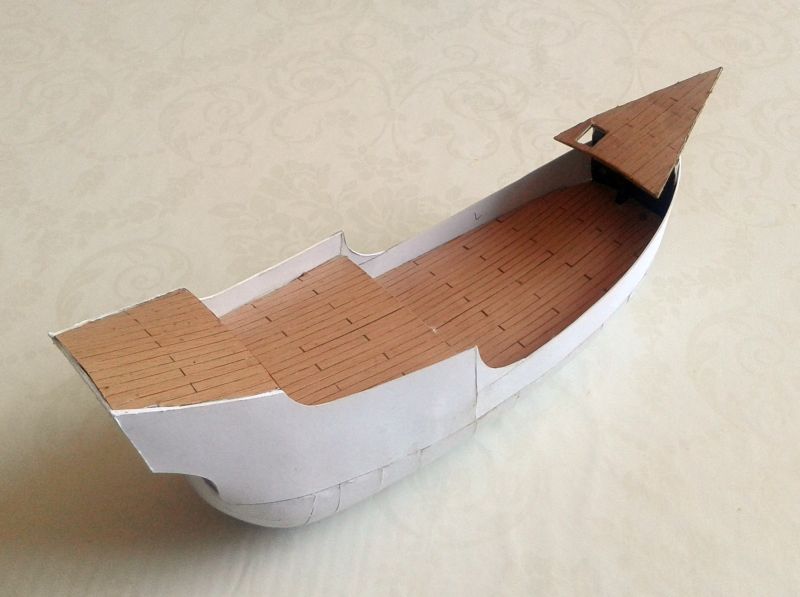
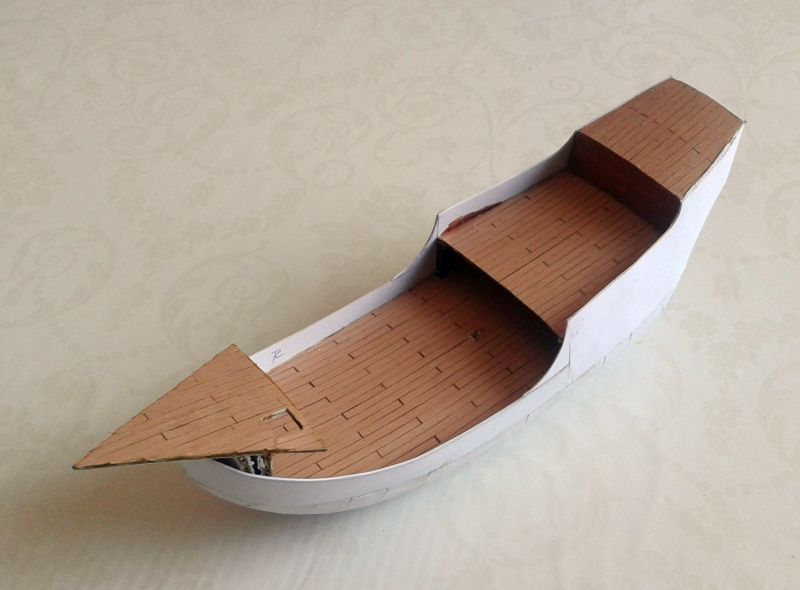
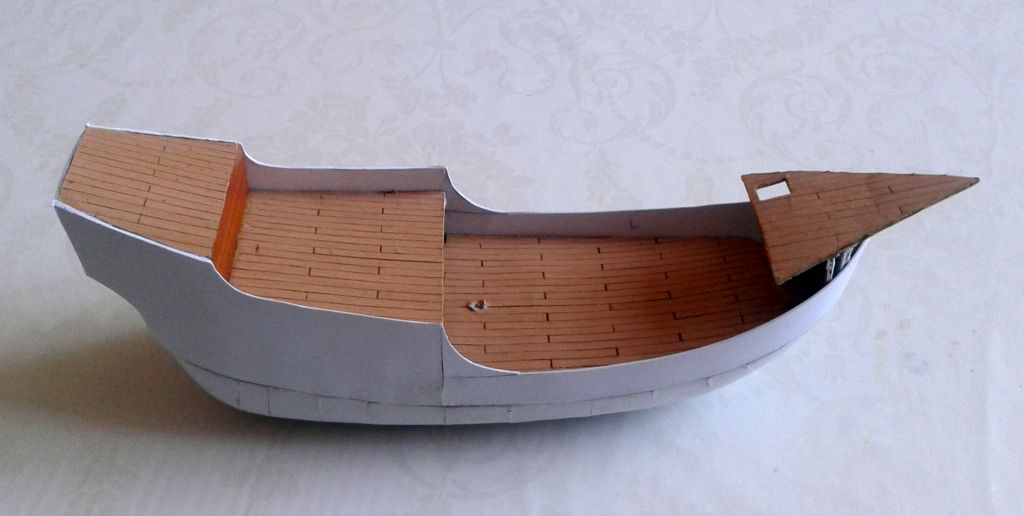
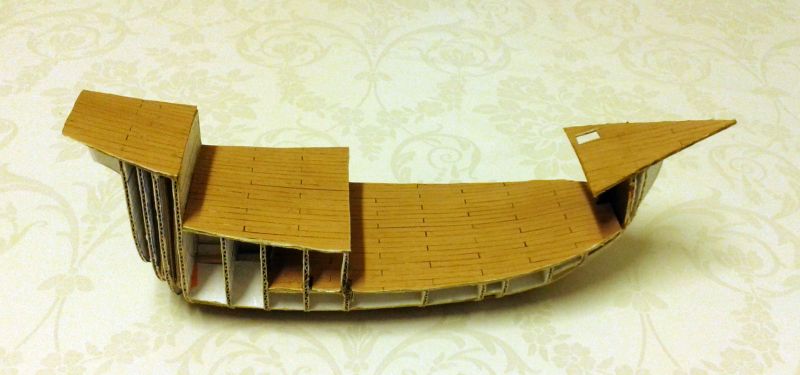
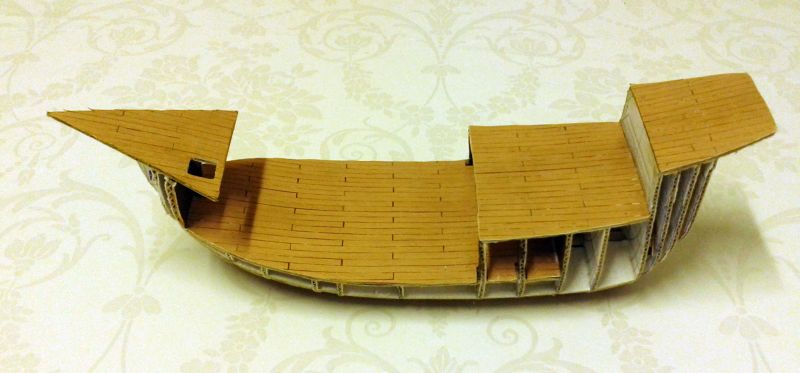
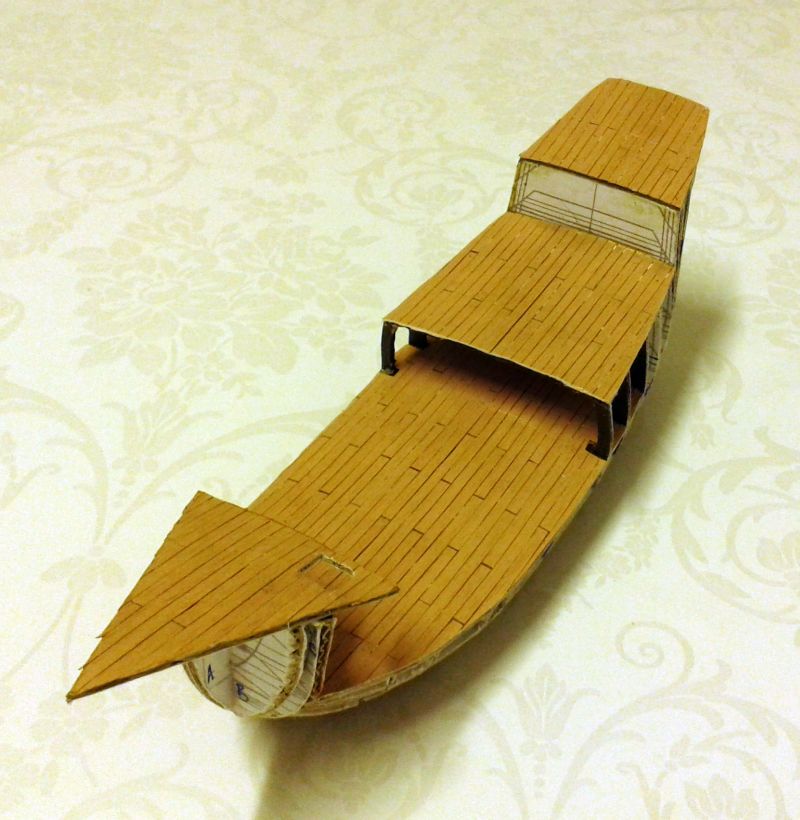
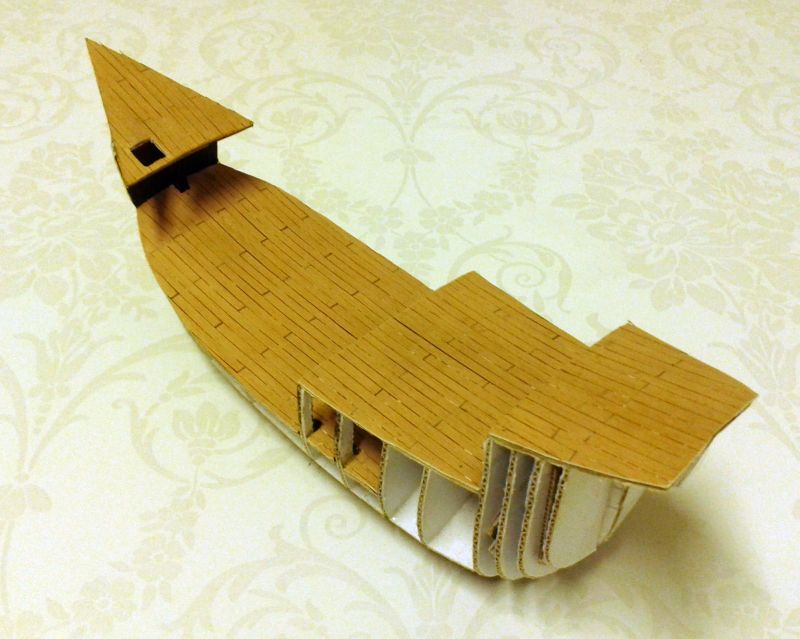
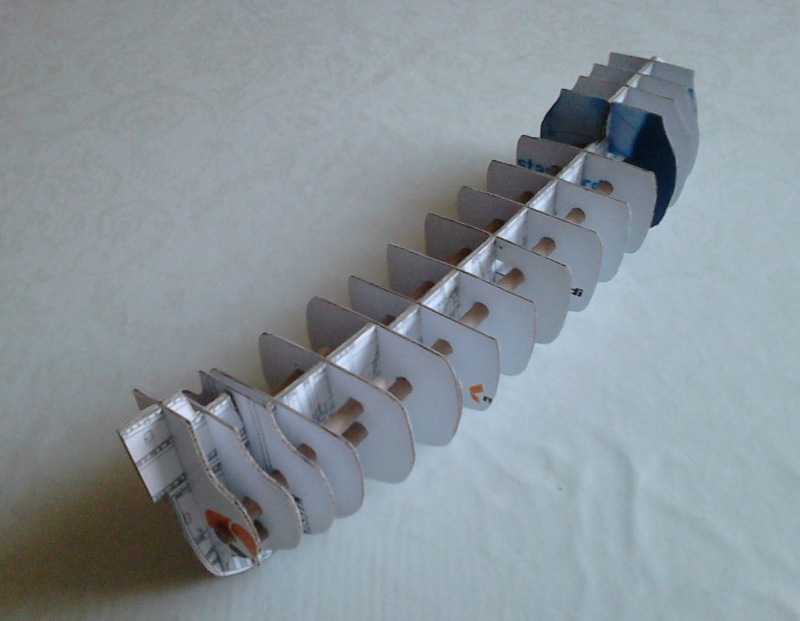
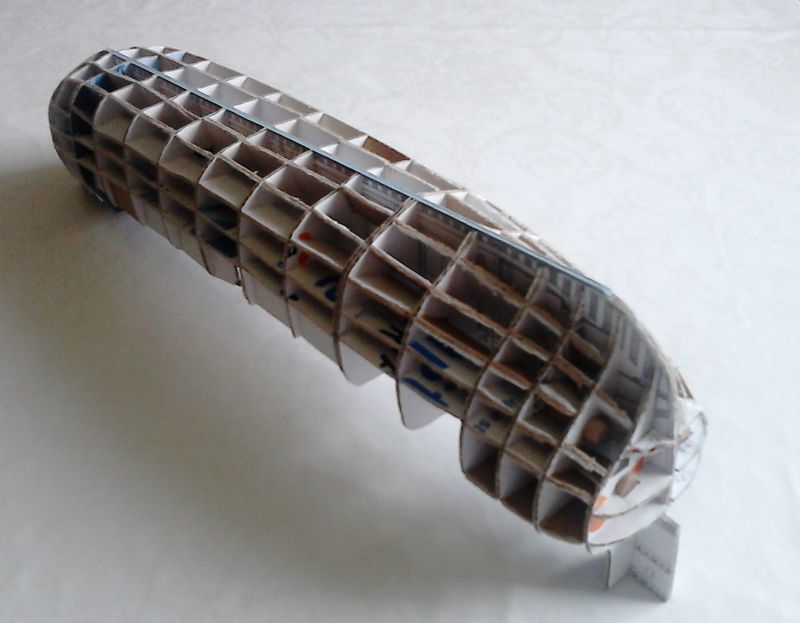
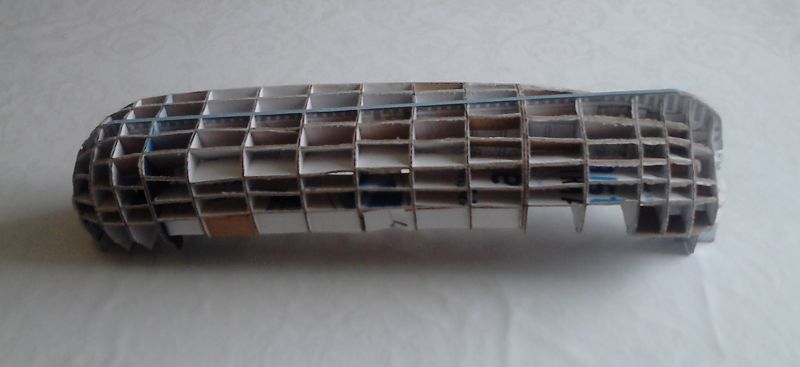
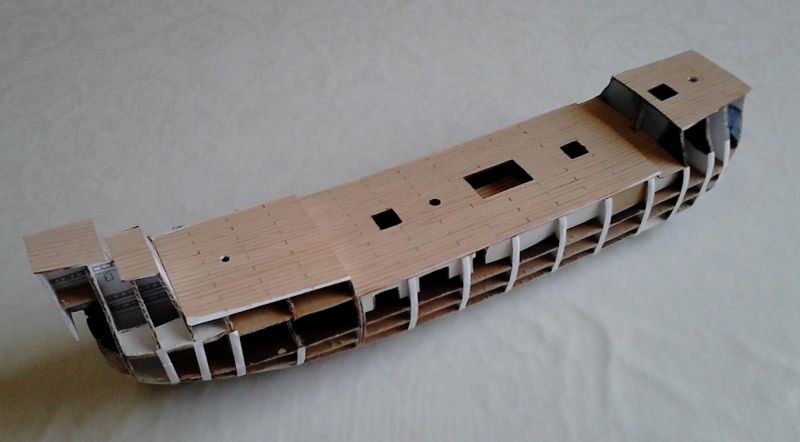
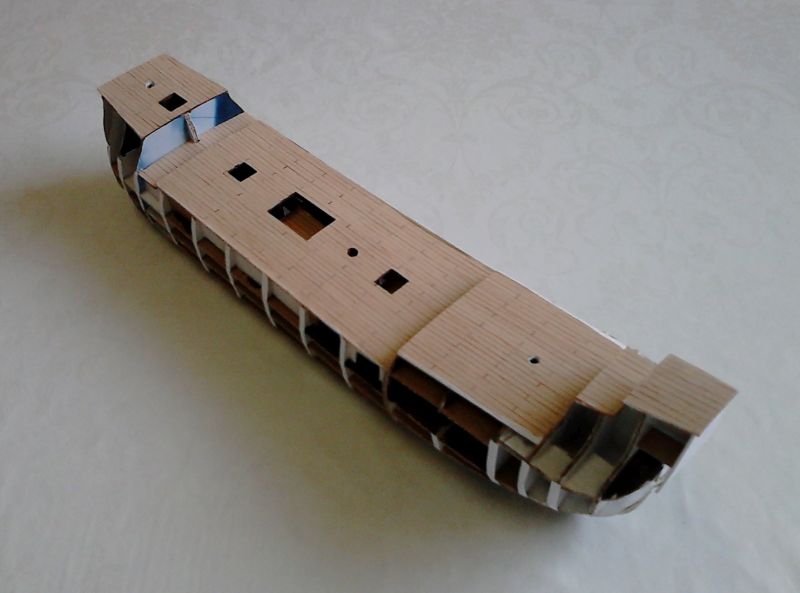
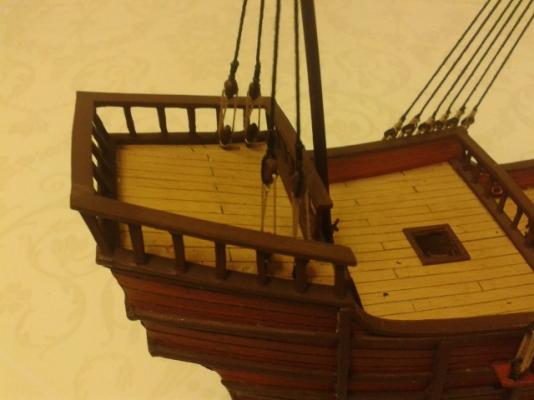
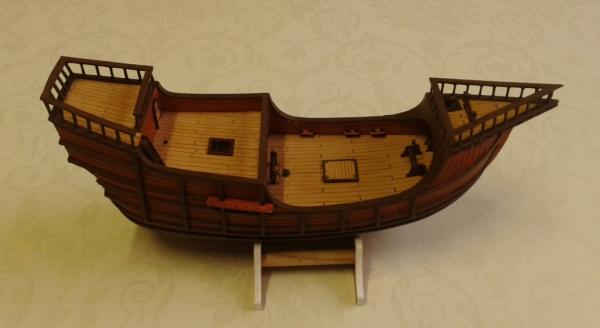
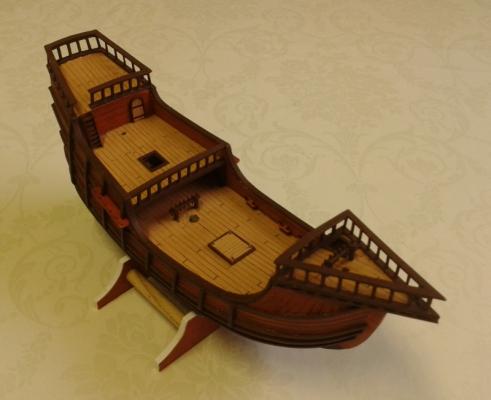
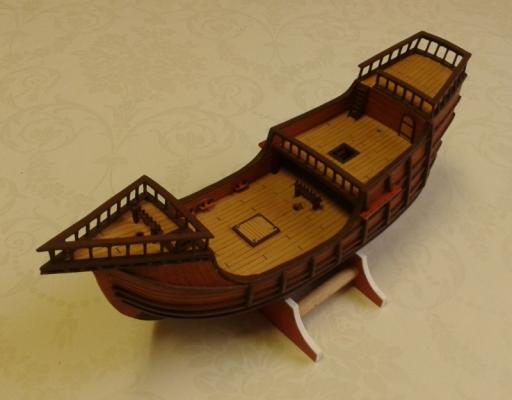
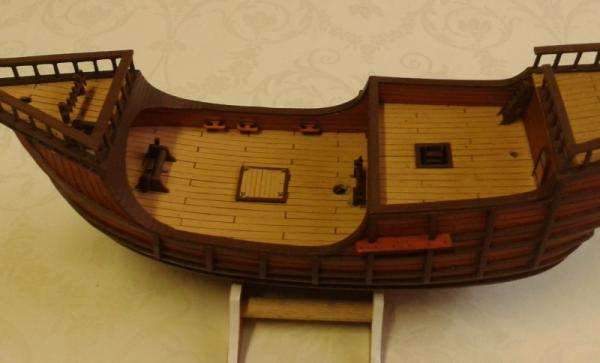
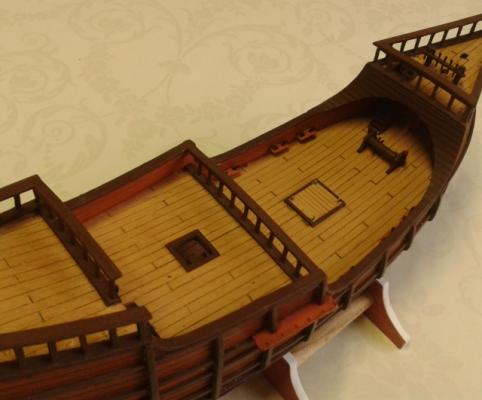
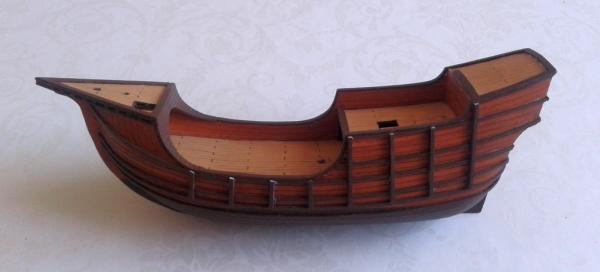
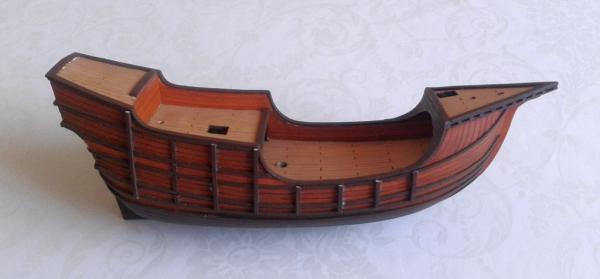
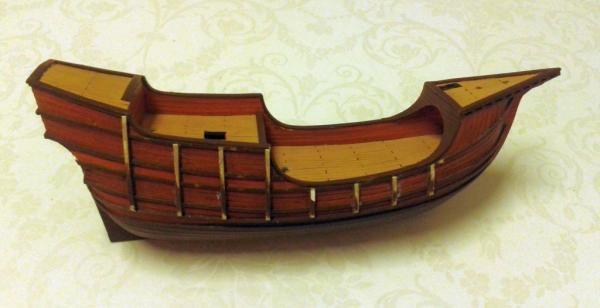
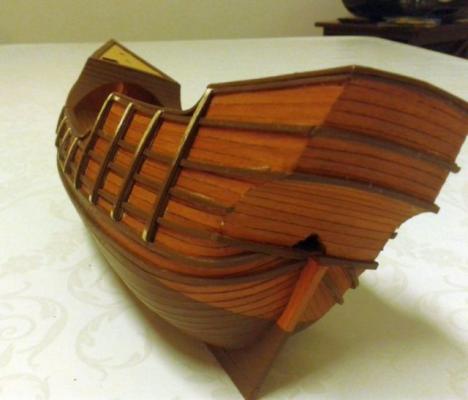
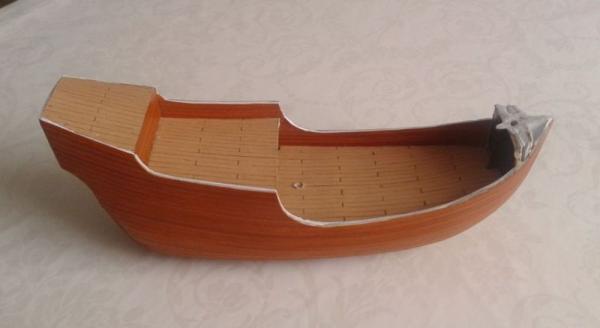
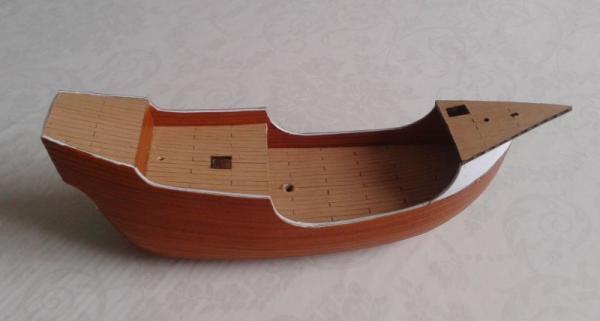
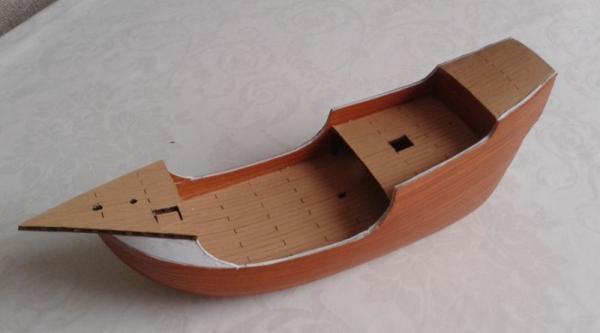
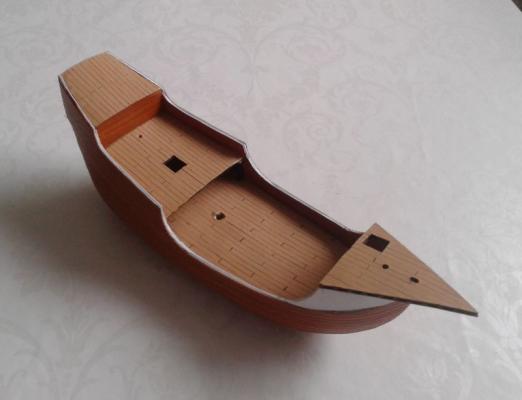
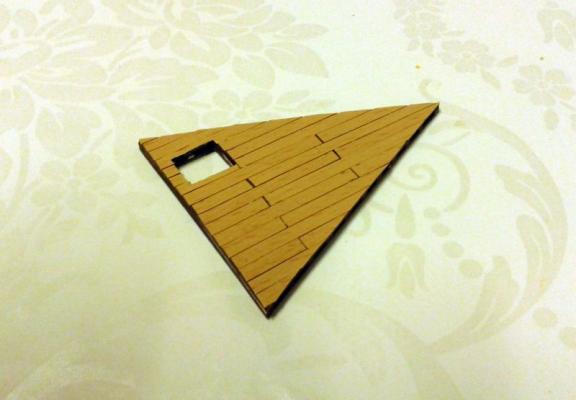
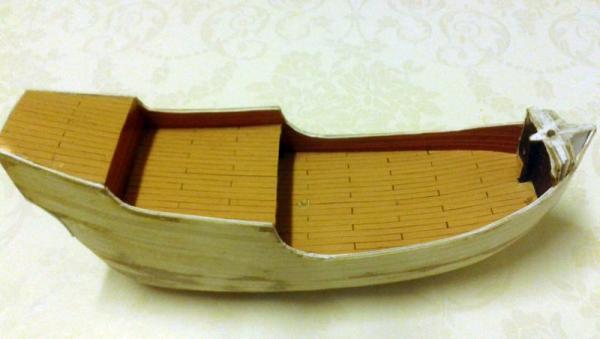
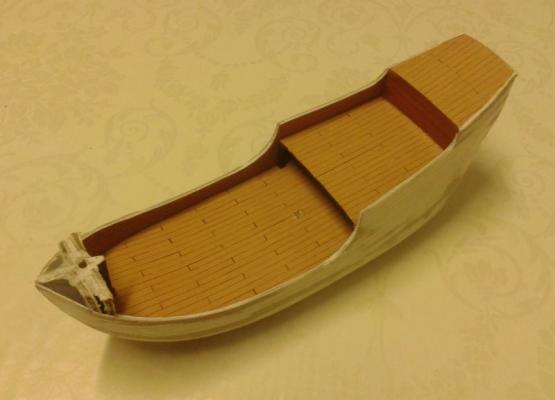
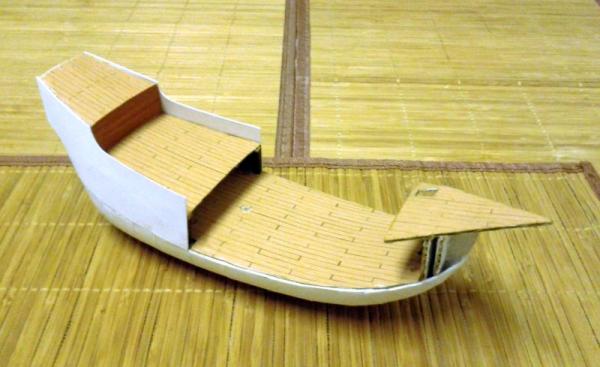
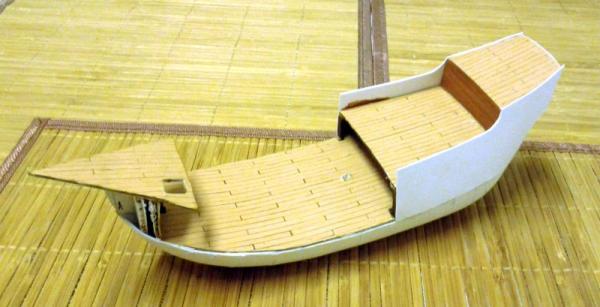
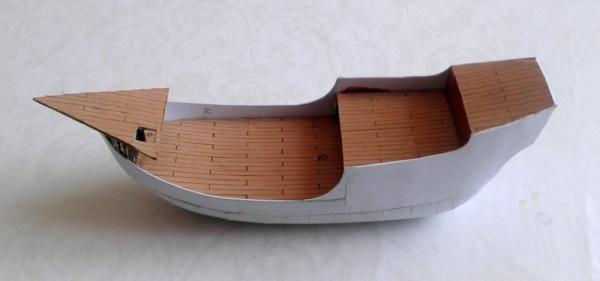
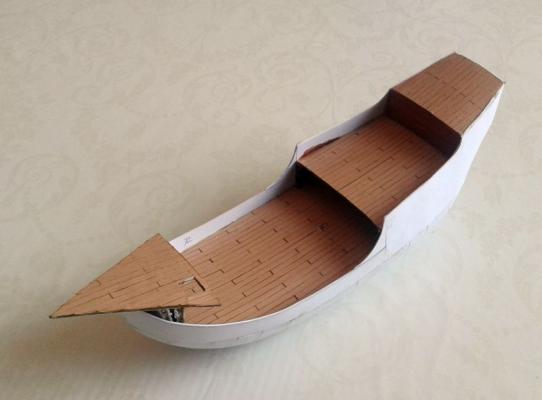
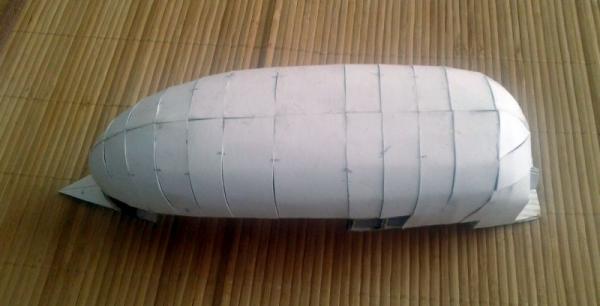
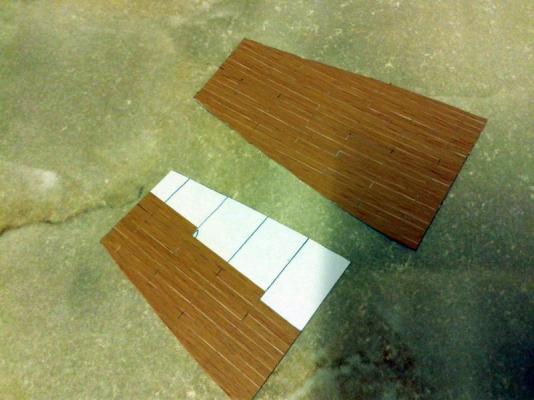
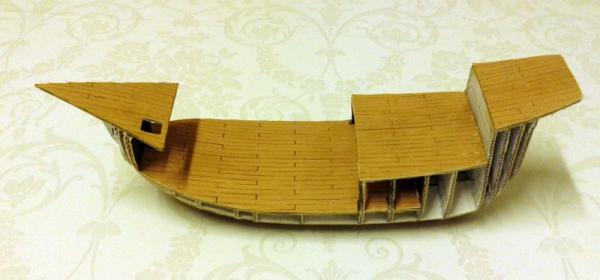
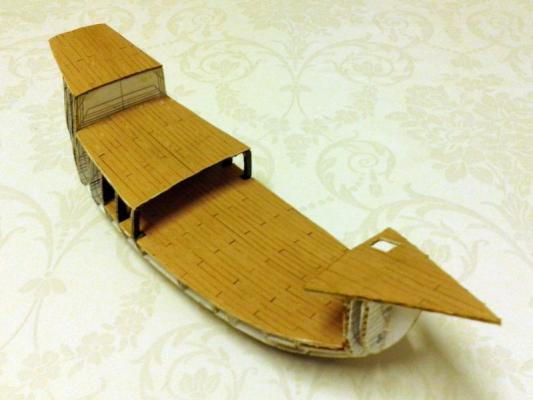
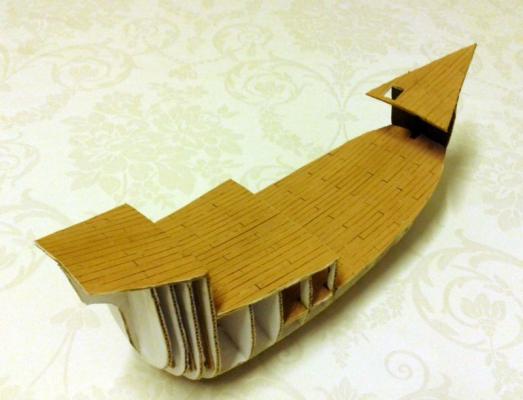
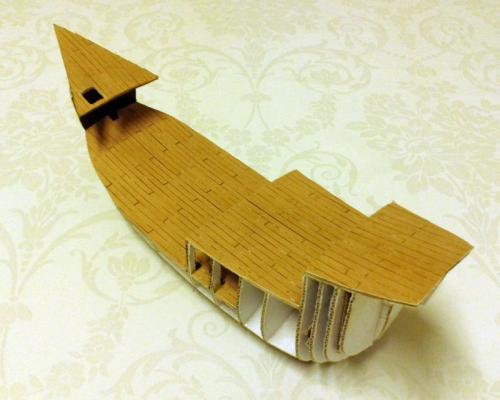
Hi friends, decks are finised and glued. I made planking separately on the drawing paper and then glued them on based decks on the ship. The frame is grinded also - I´m usin sandpaper granuality 60. The skelet looks quite ugly now, but i´ll glue planking very soon Jan


- 53 replies
-
- 9
-
-
- santa maria
- carrack
- (and 2 more)