HOLIDAY DONATION DRIVE - SUPPORT MSW - DO YOUR PART TO KEEP THIS GREAT FORUM GOING! (Only 20 donations so far - C'mon guys!)
×


greatgalleons
-
Posts
794 -
Joined
-
Last visited
Content Type
Profiles
Forums
Gallery
Events
Everything posted by greatgalleons
-
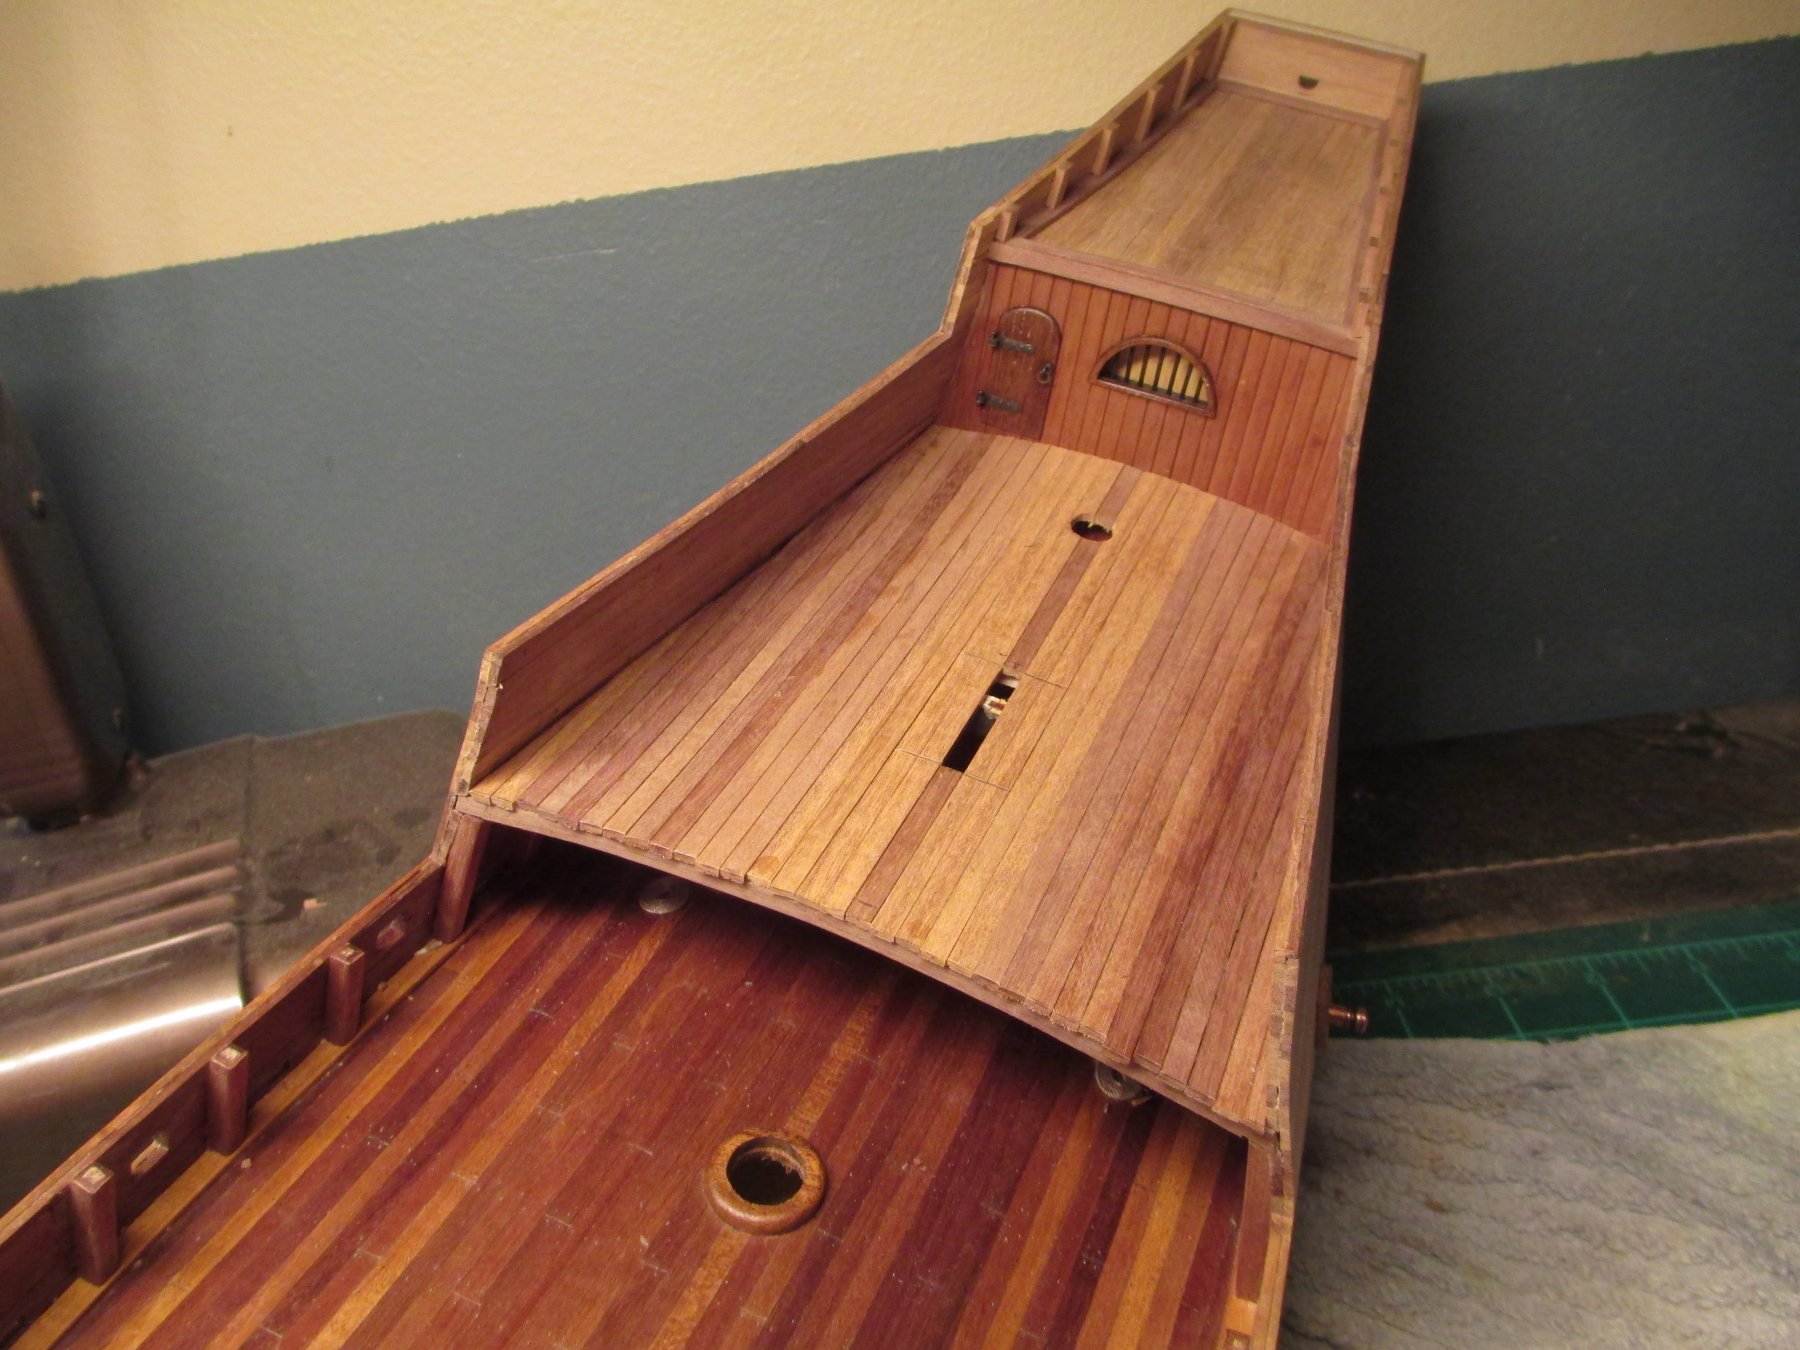
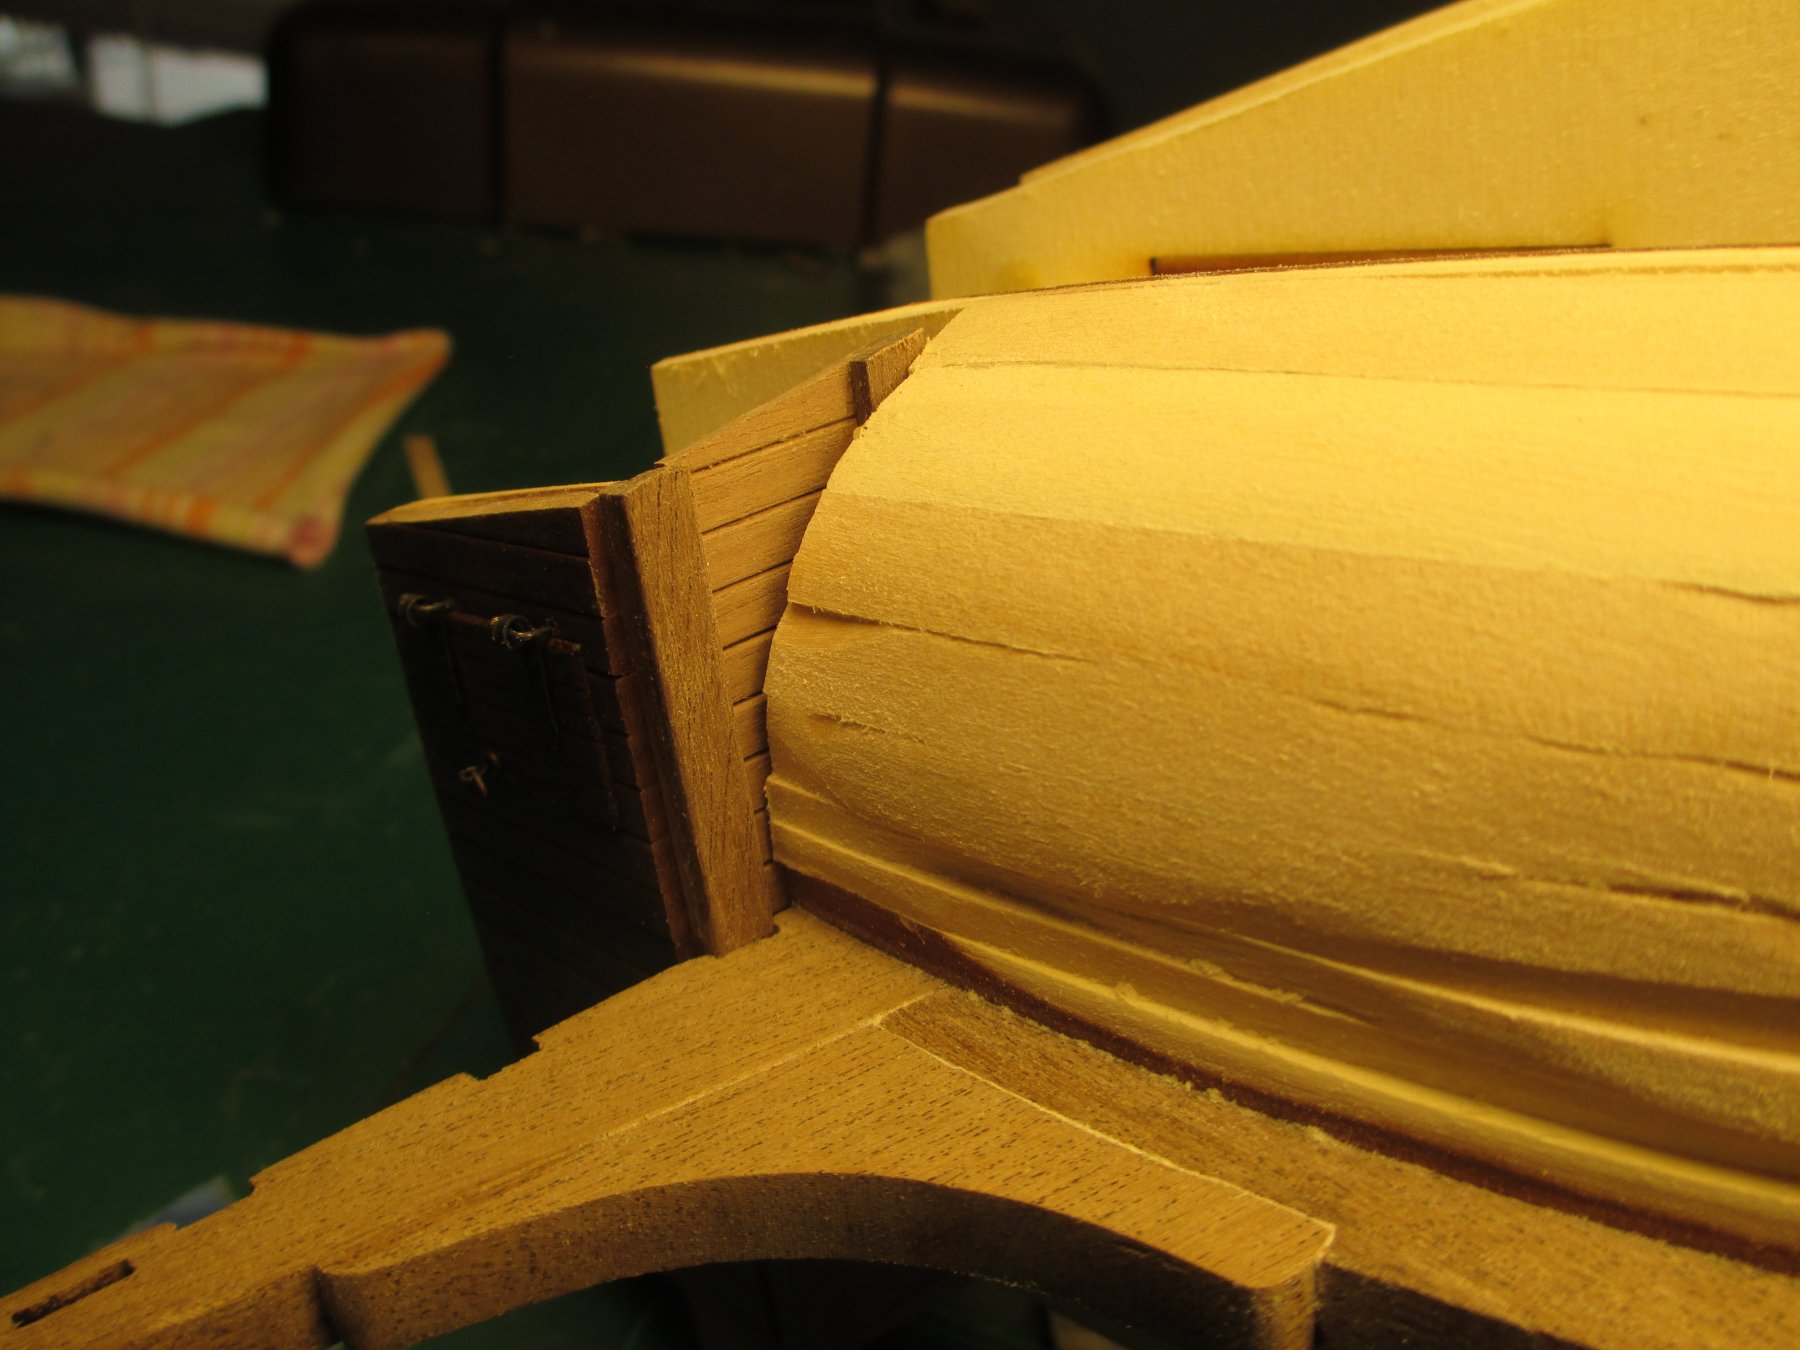
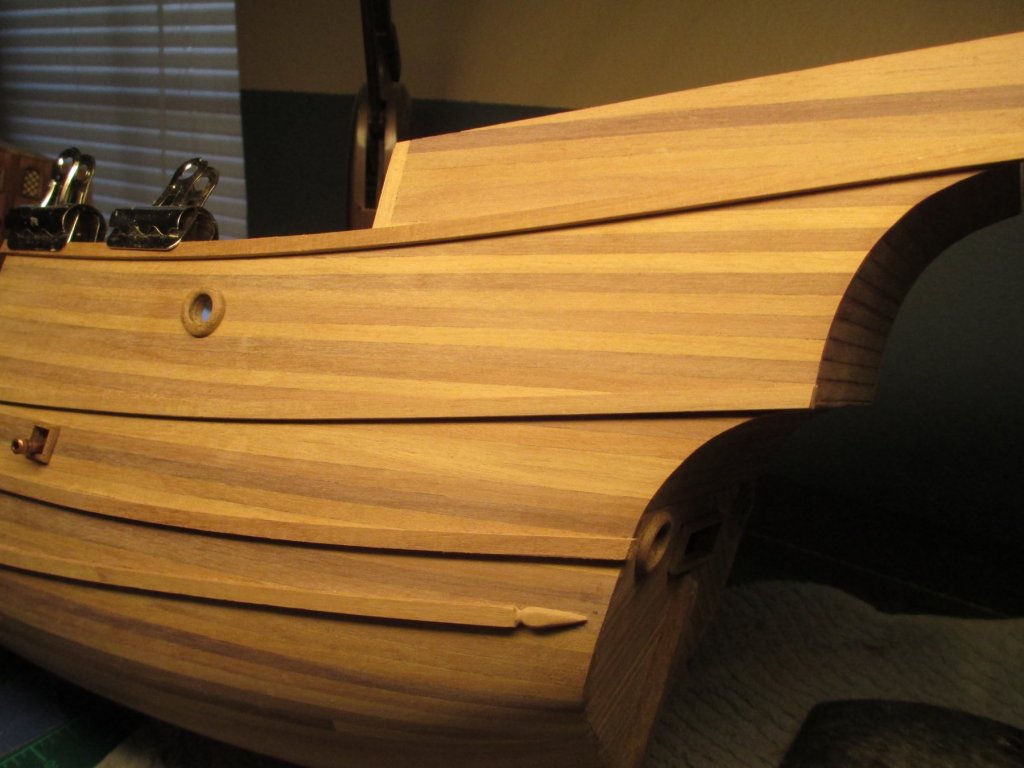
 anchor rope goes here, all the sharp edges on the strakes will be sanded smoother in the future
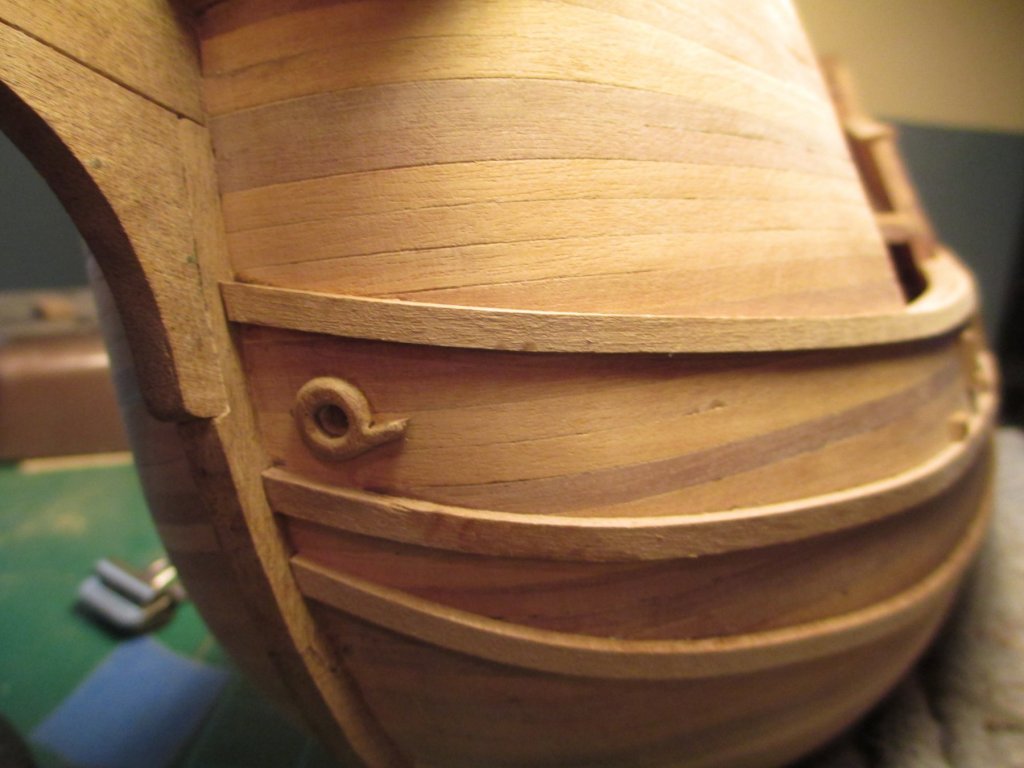
-
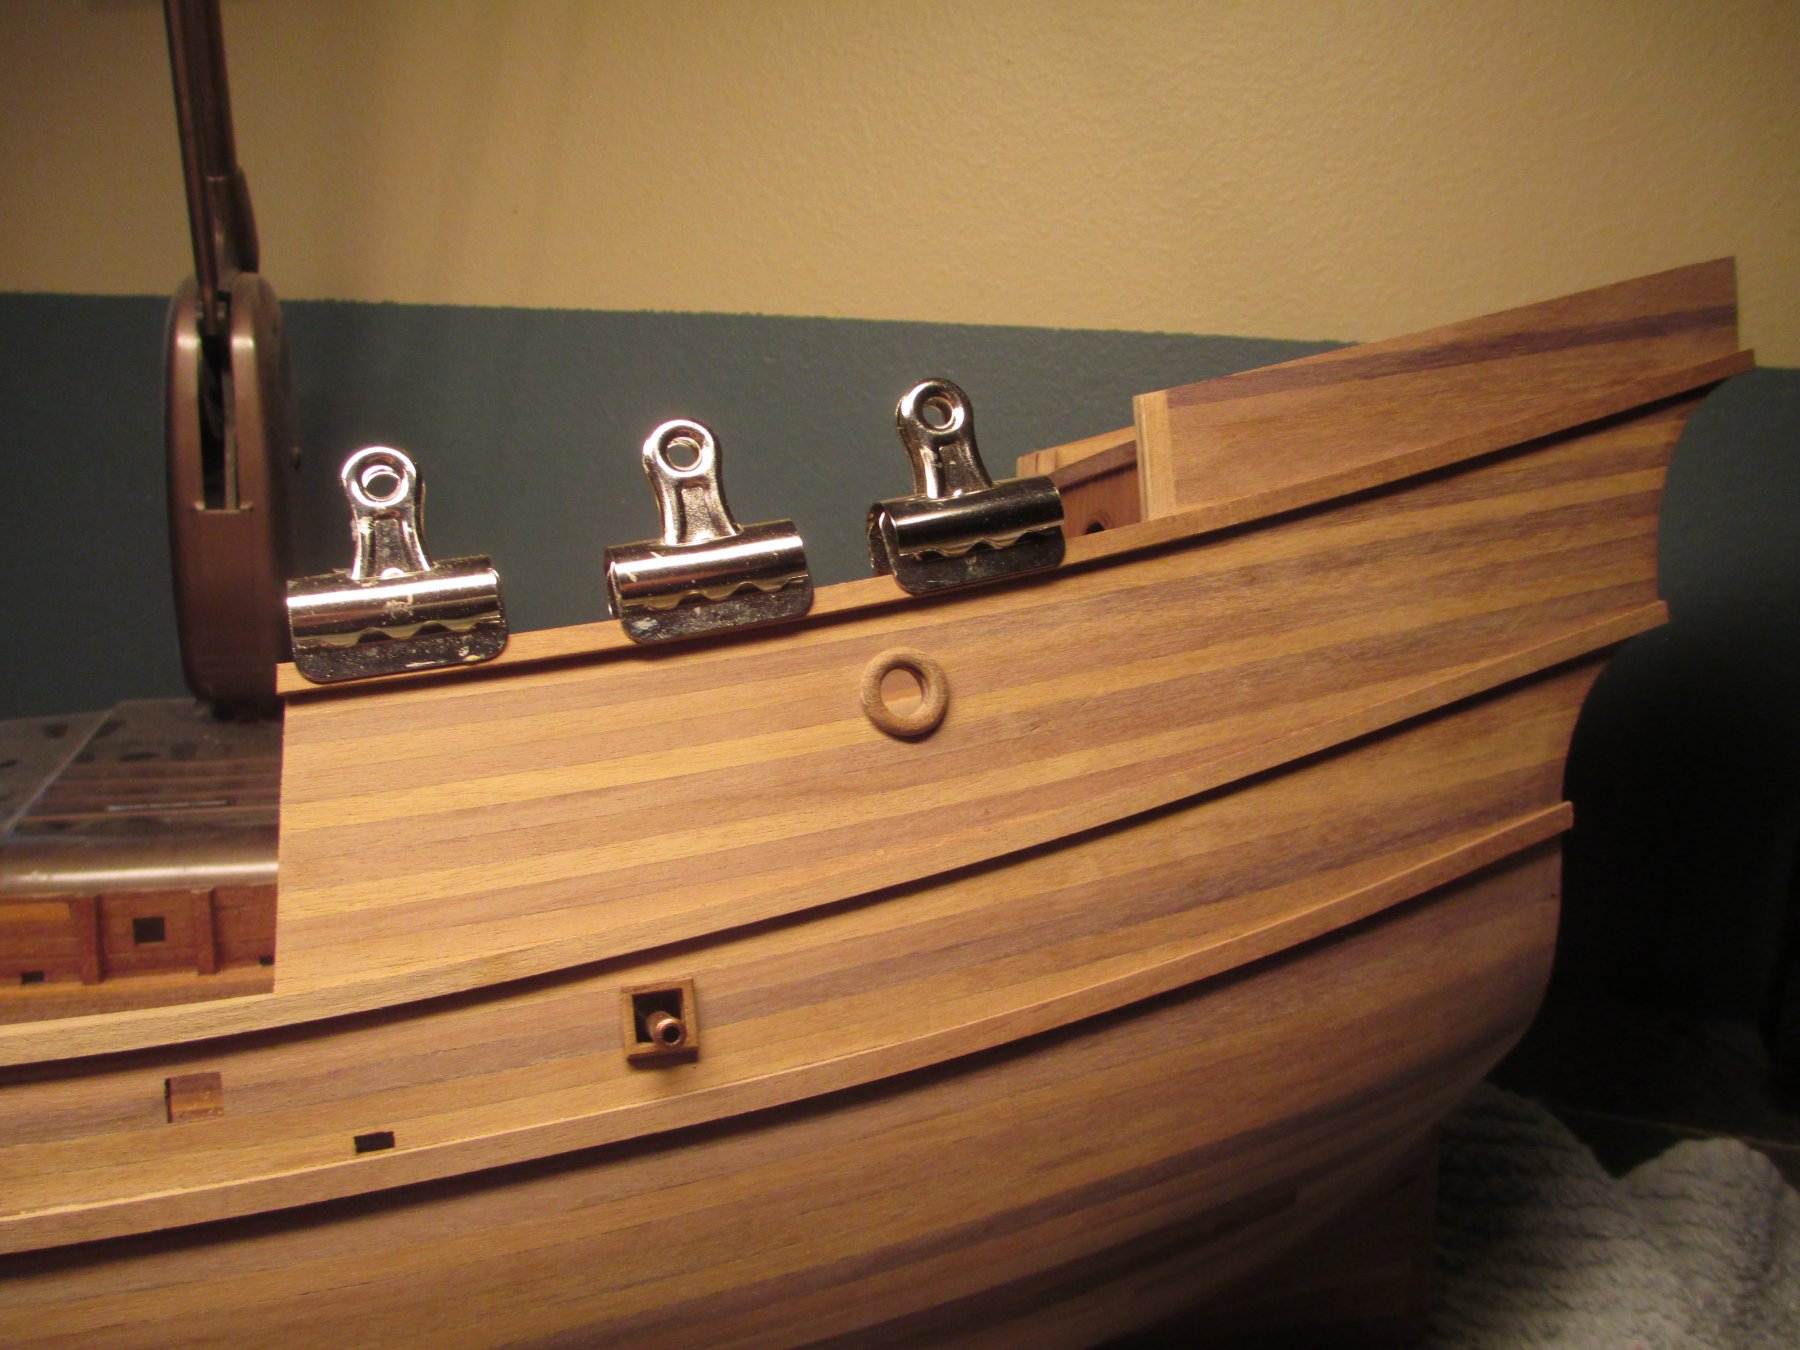
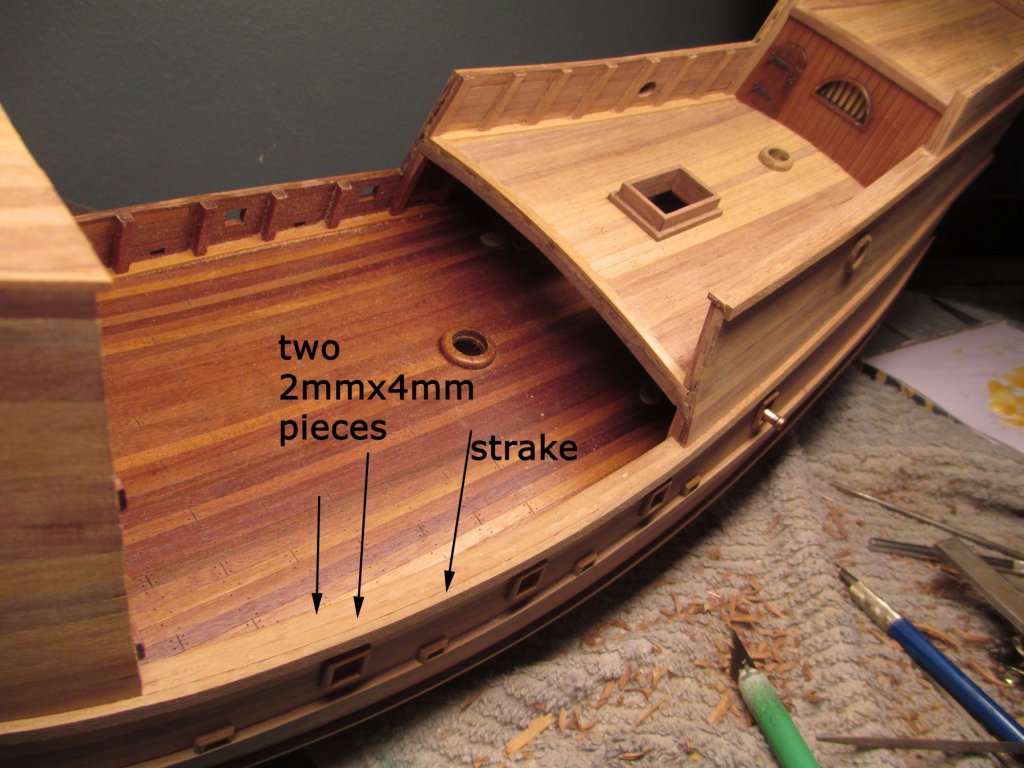
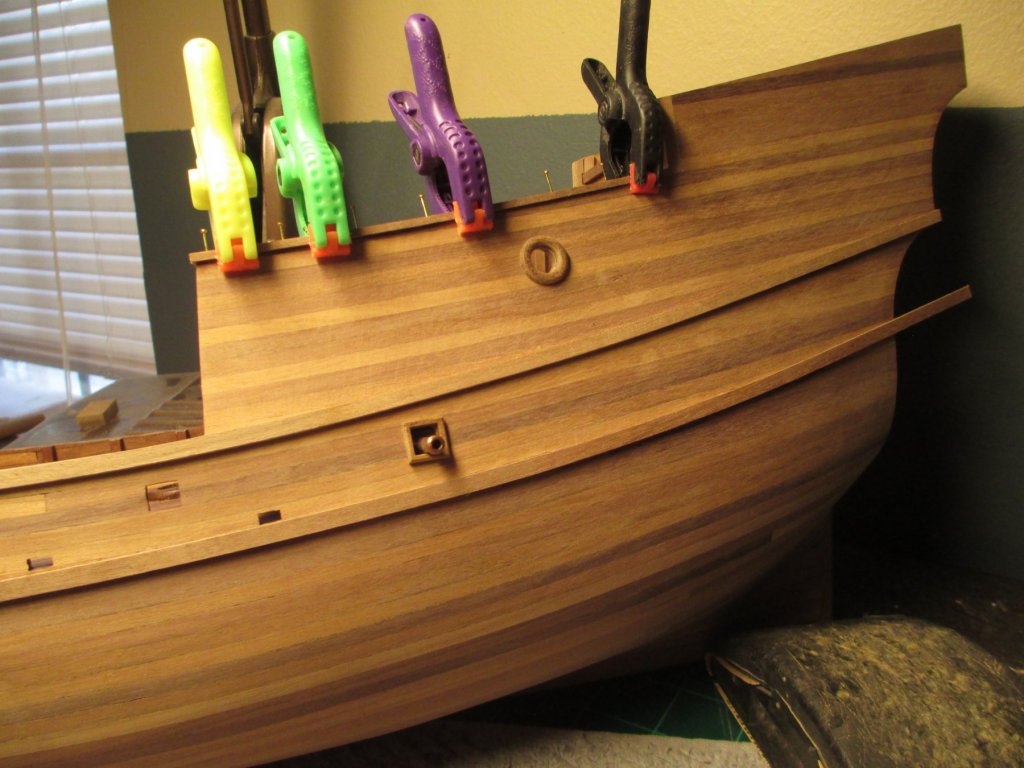
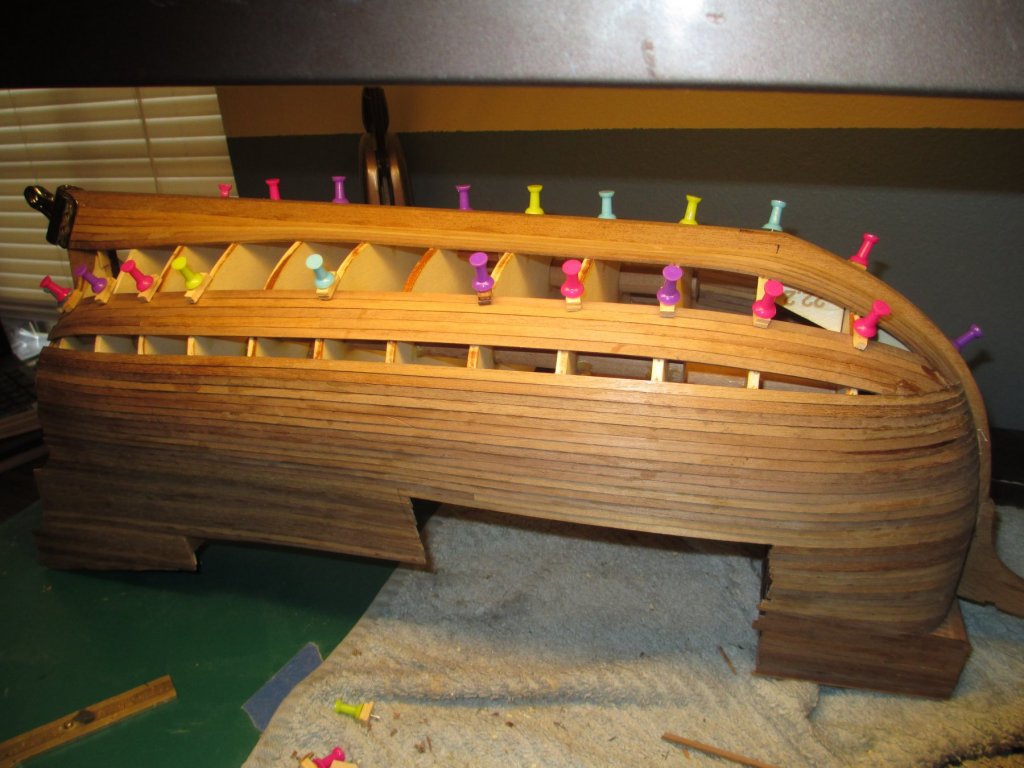
for the rails I used two 2x4 mm pieces and glued and nail in, I sanded down the overhang on the hull side so the first strake will butt up to the sanded overhang. And the same for the second deck rails. the wood was soaked in water for a few hours so it would bent easier.
-
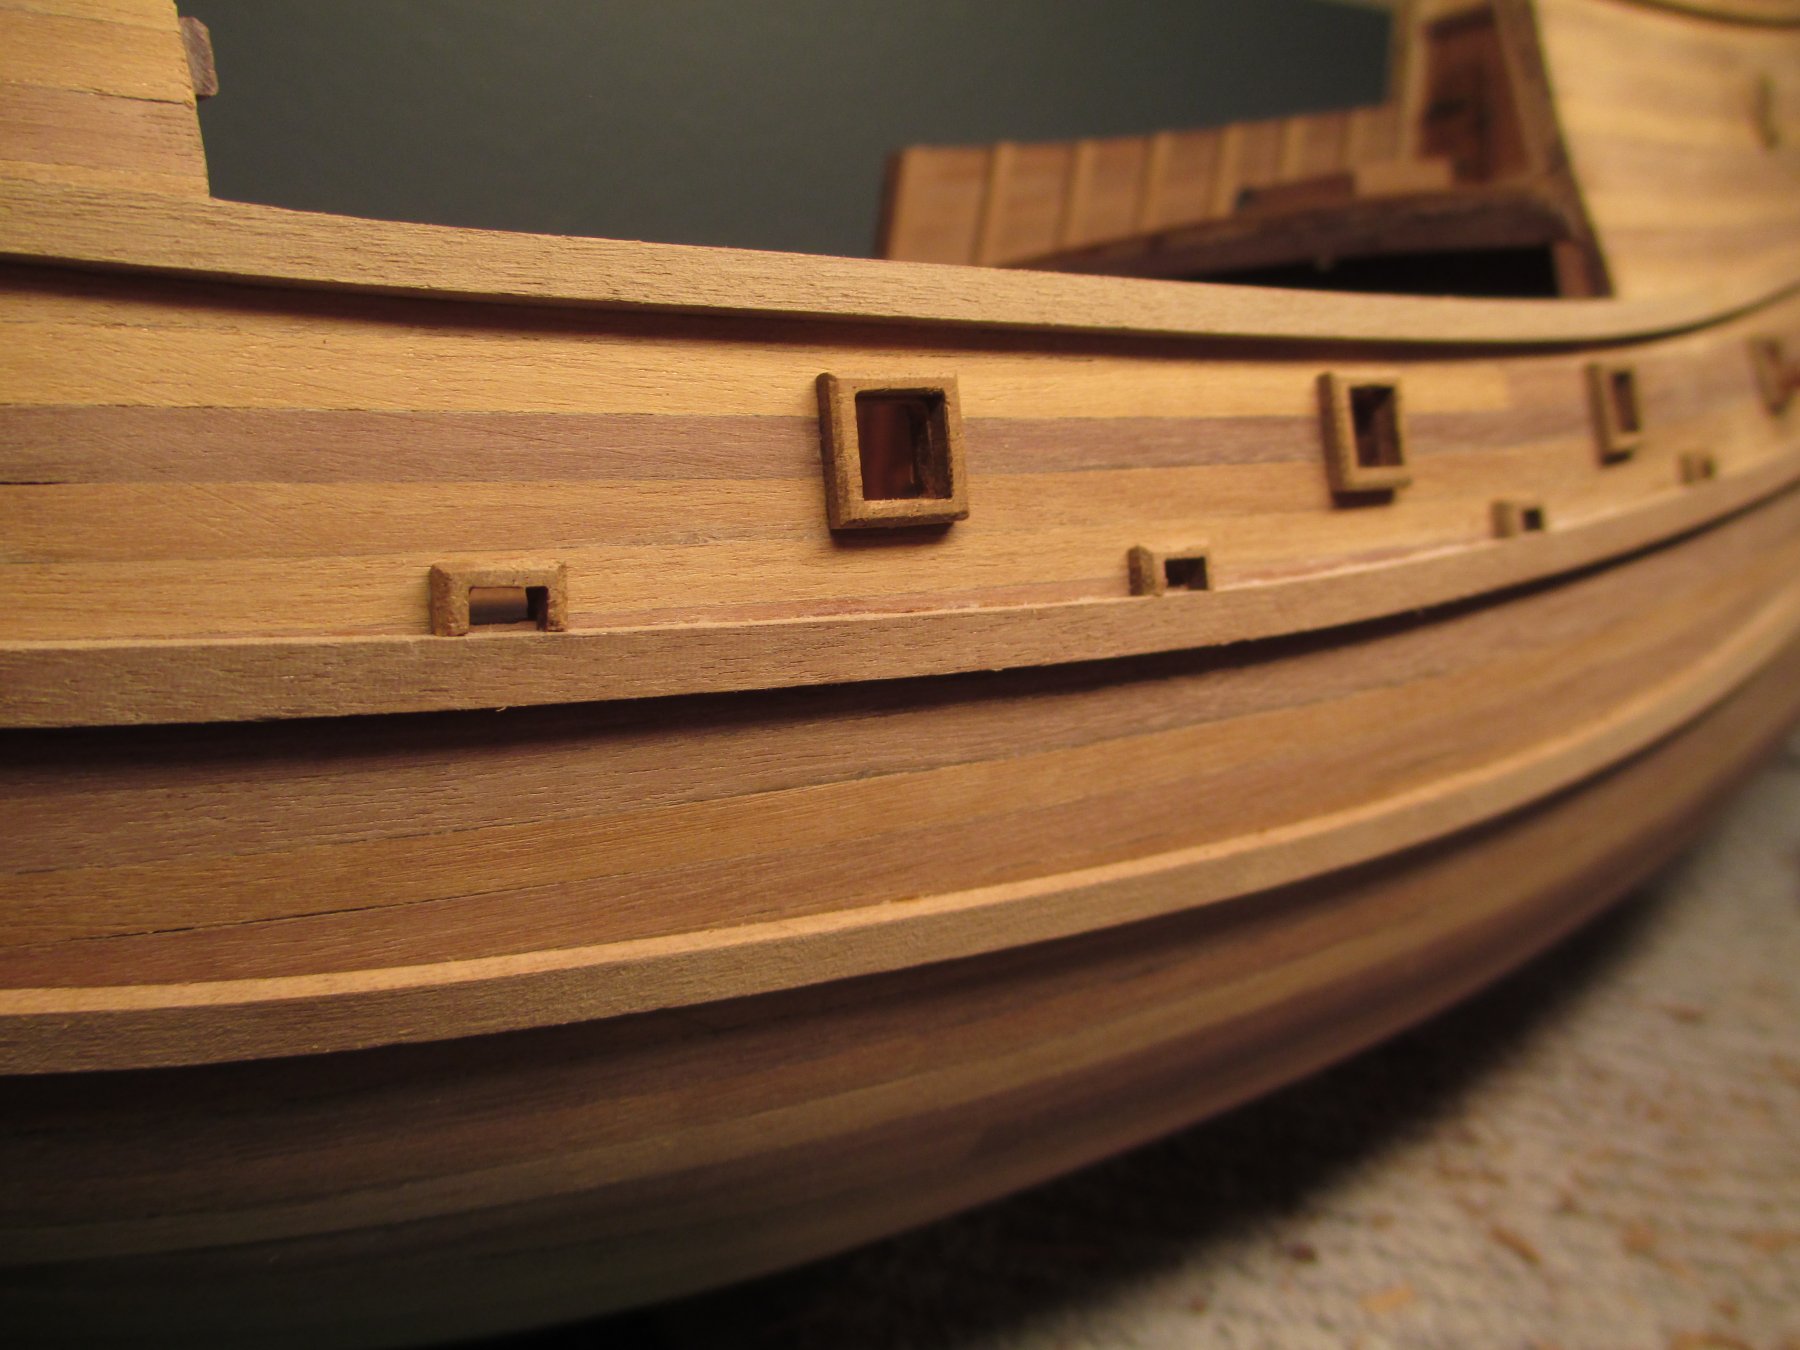
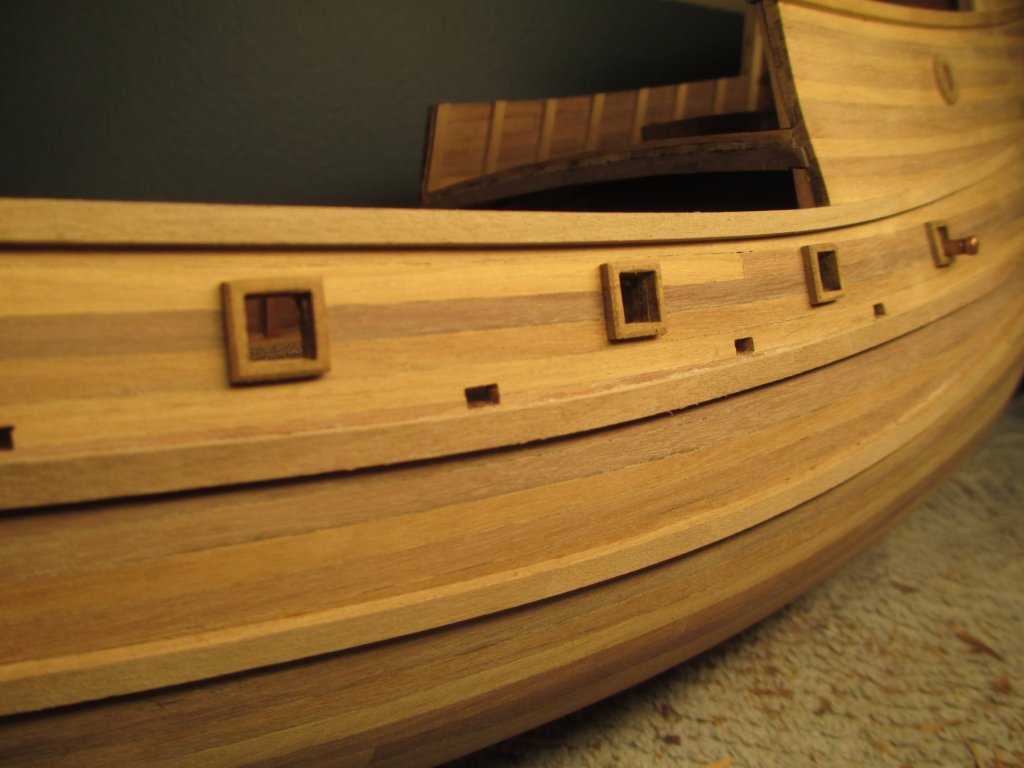
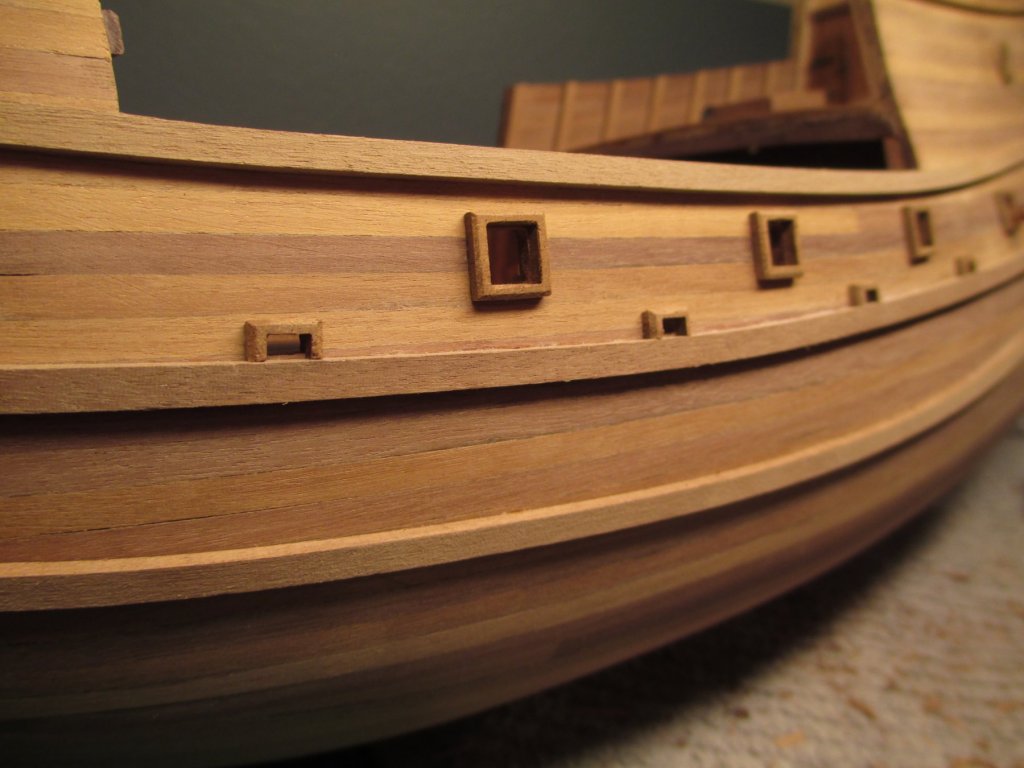
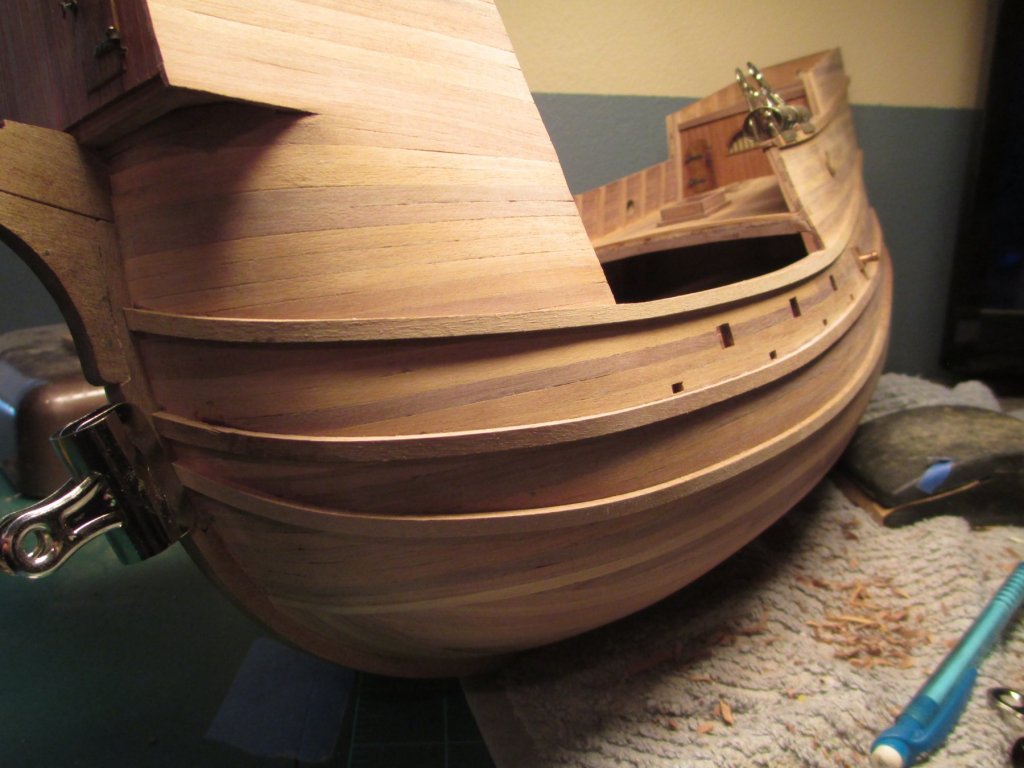
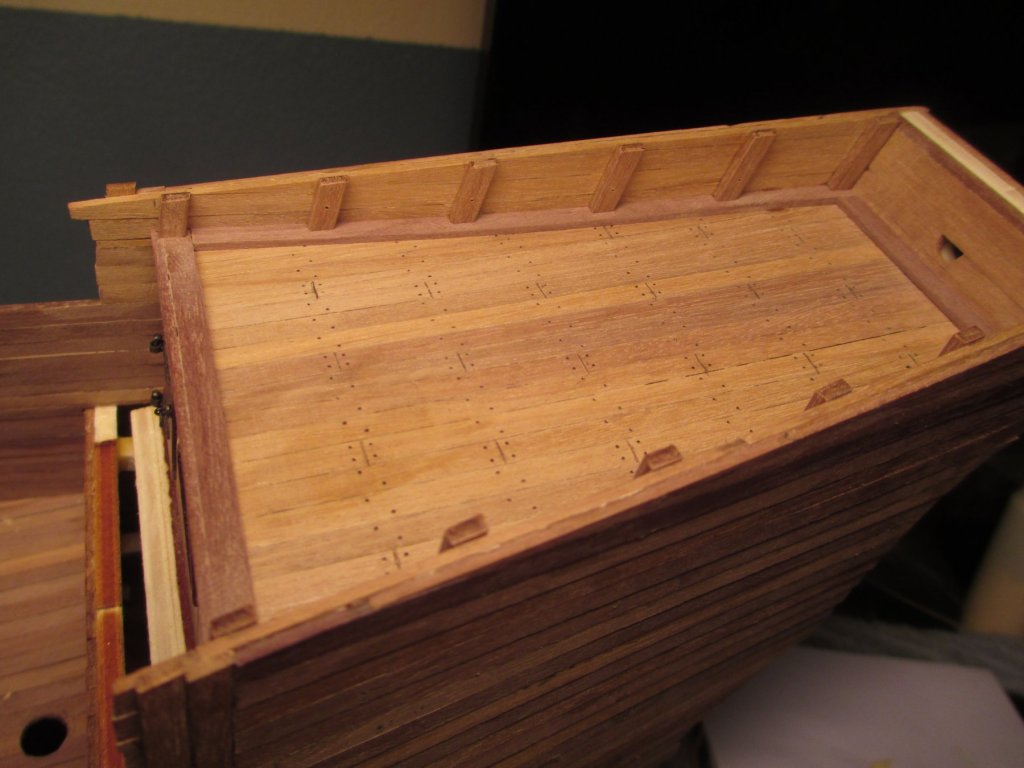
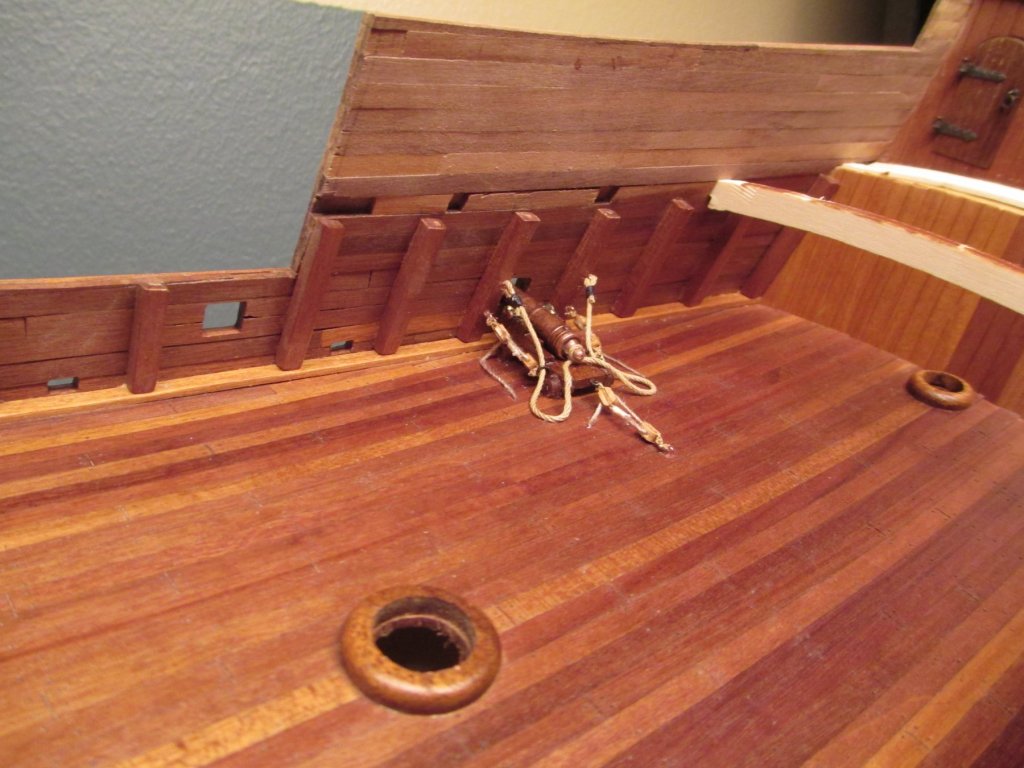
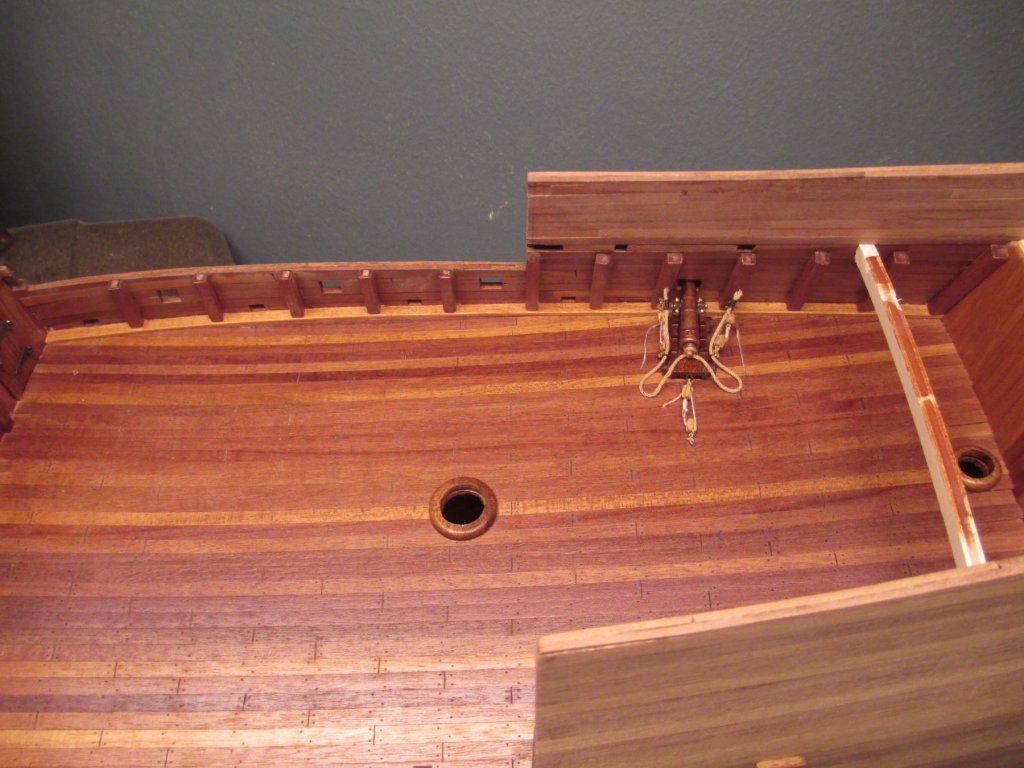
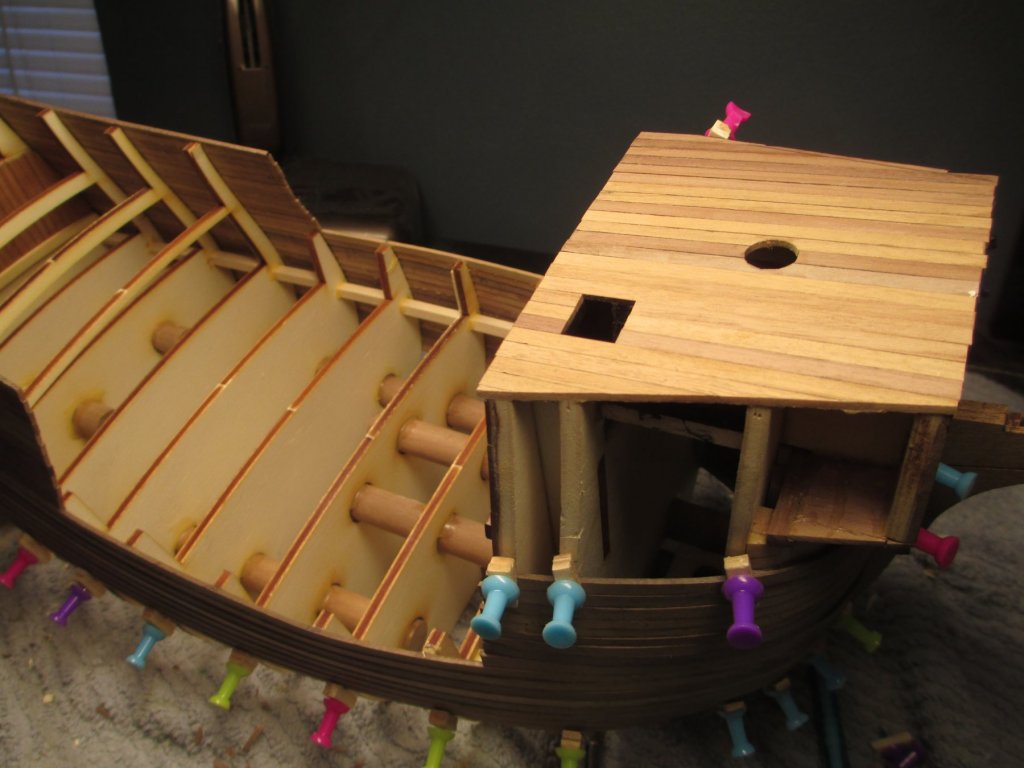
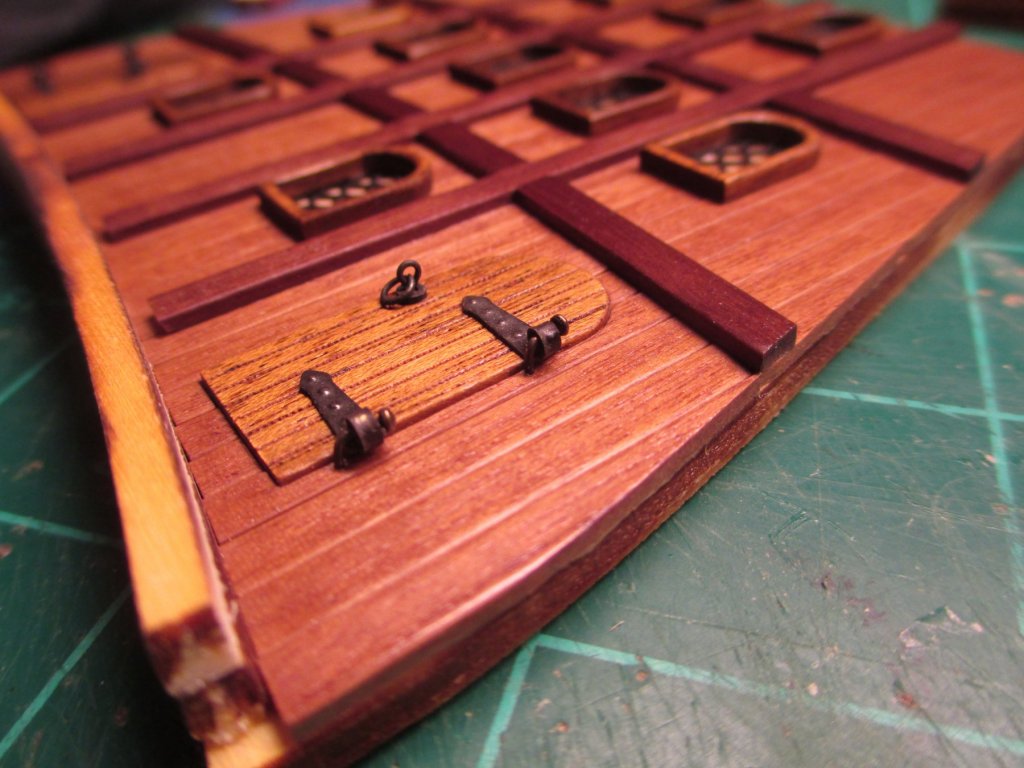
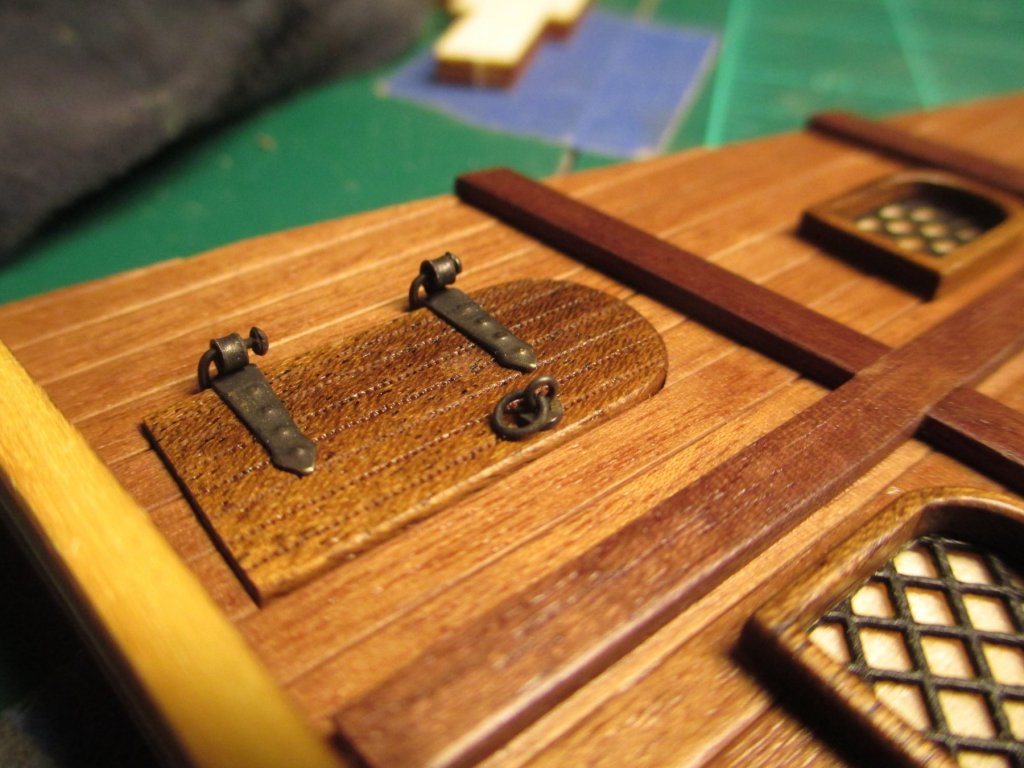
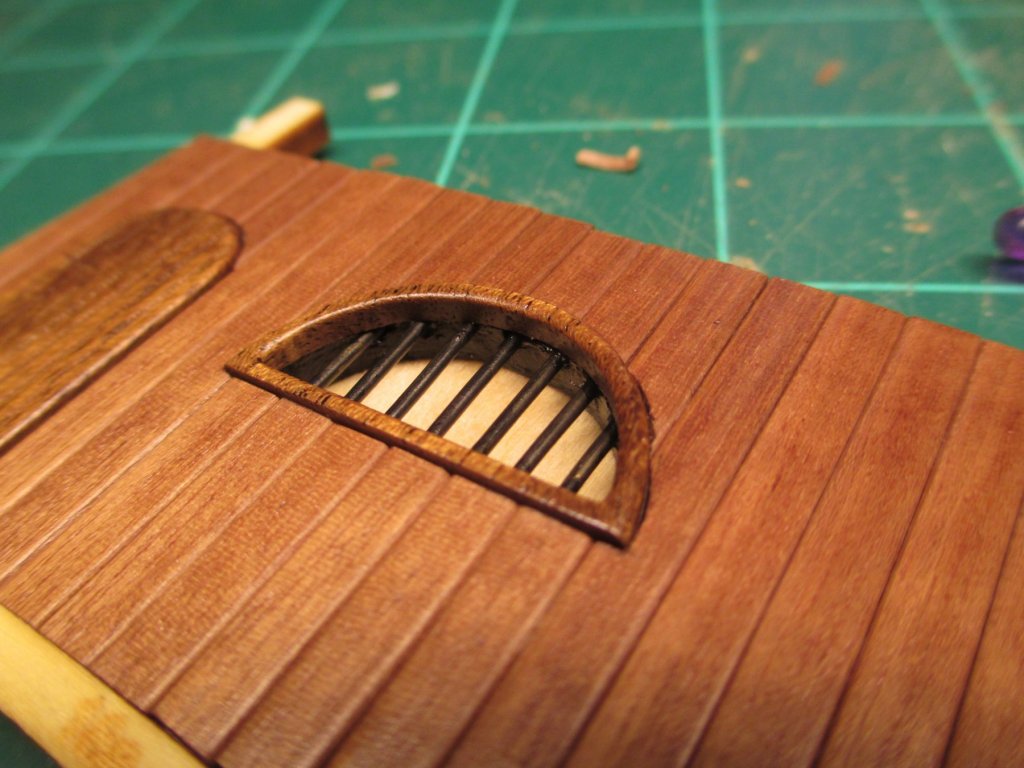
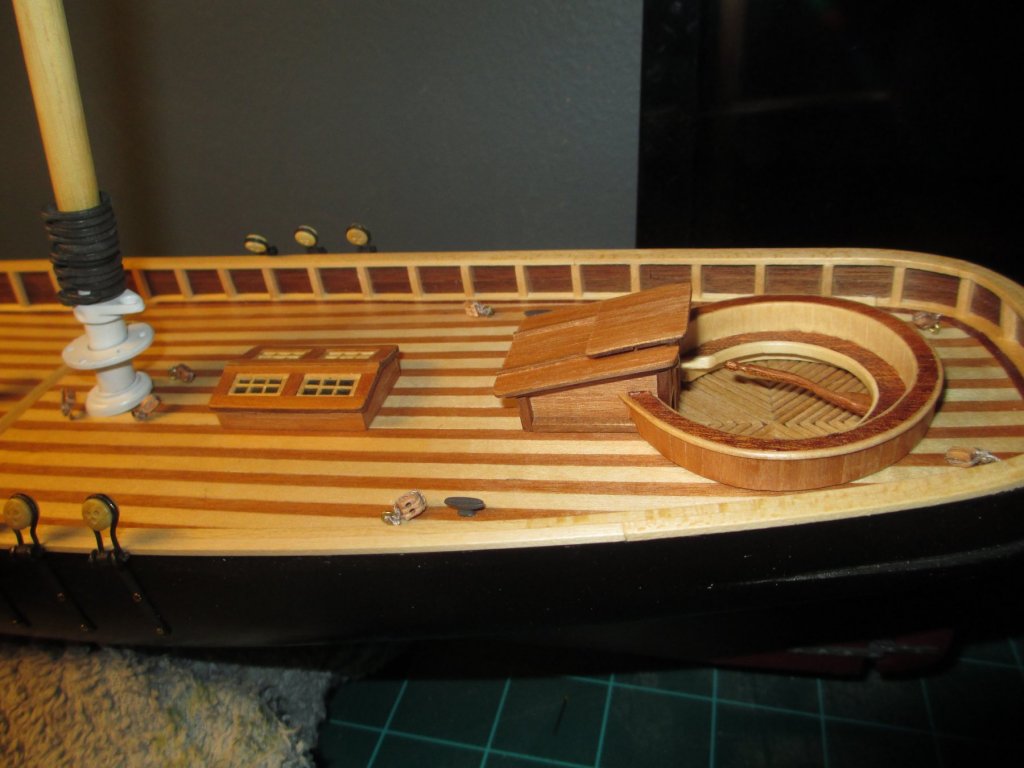
some small details to the gunports and scuppers
-
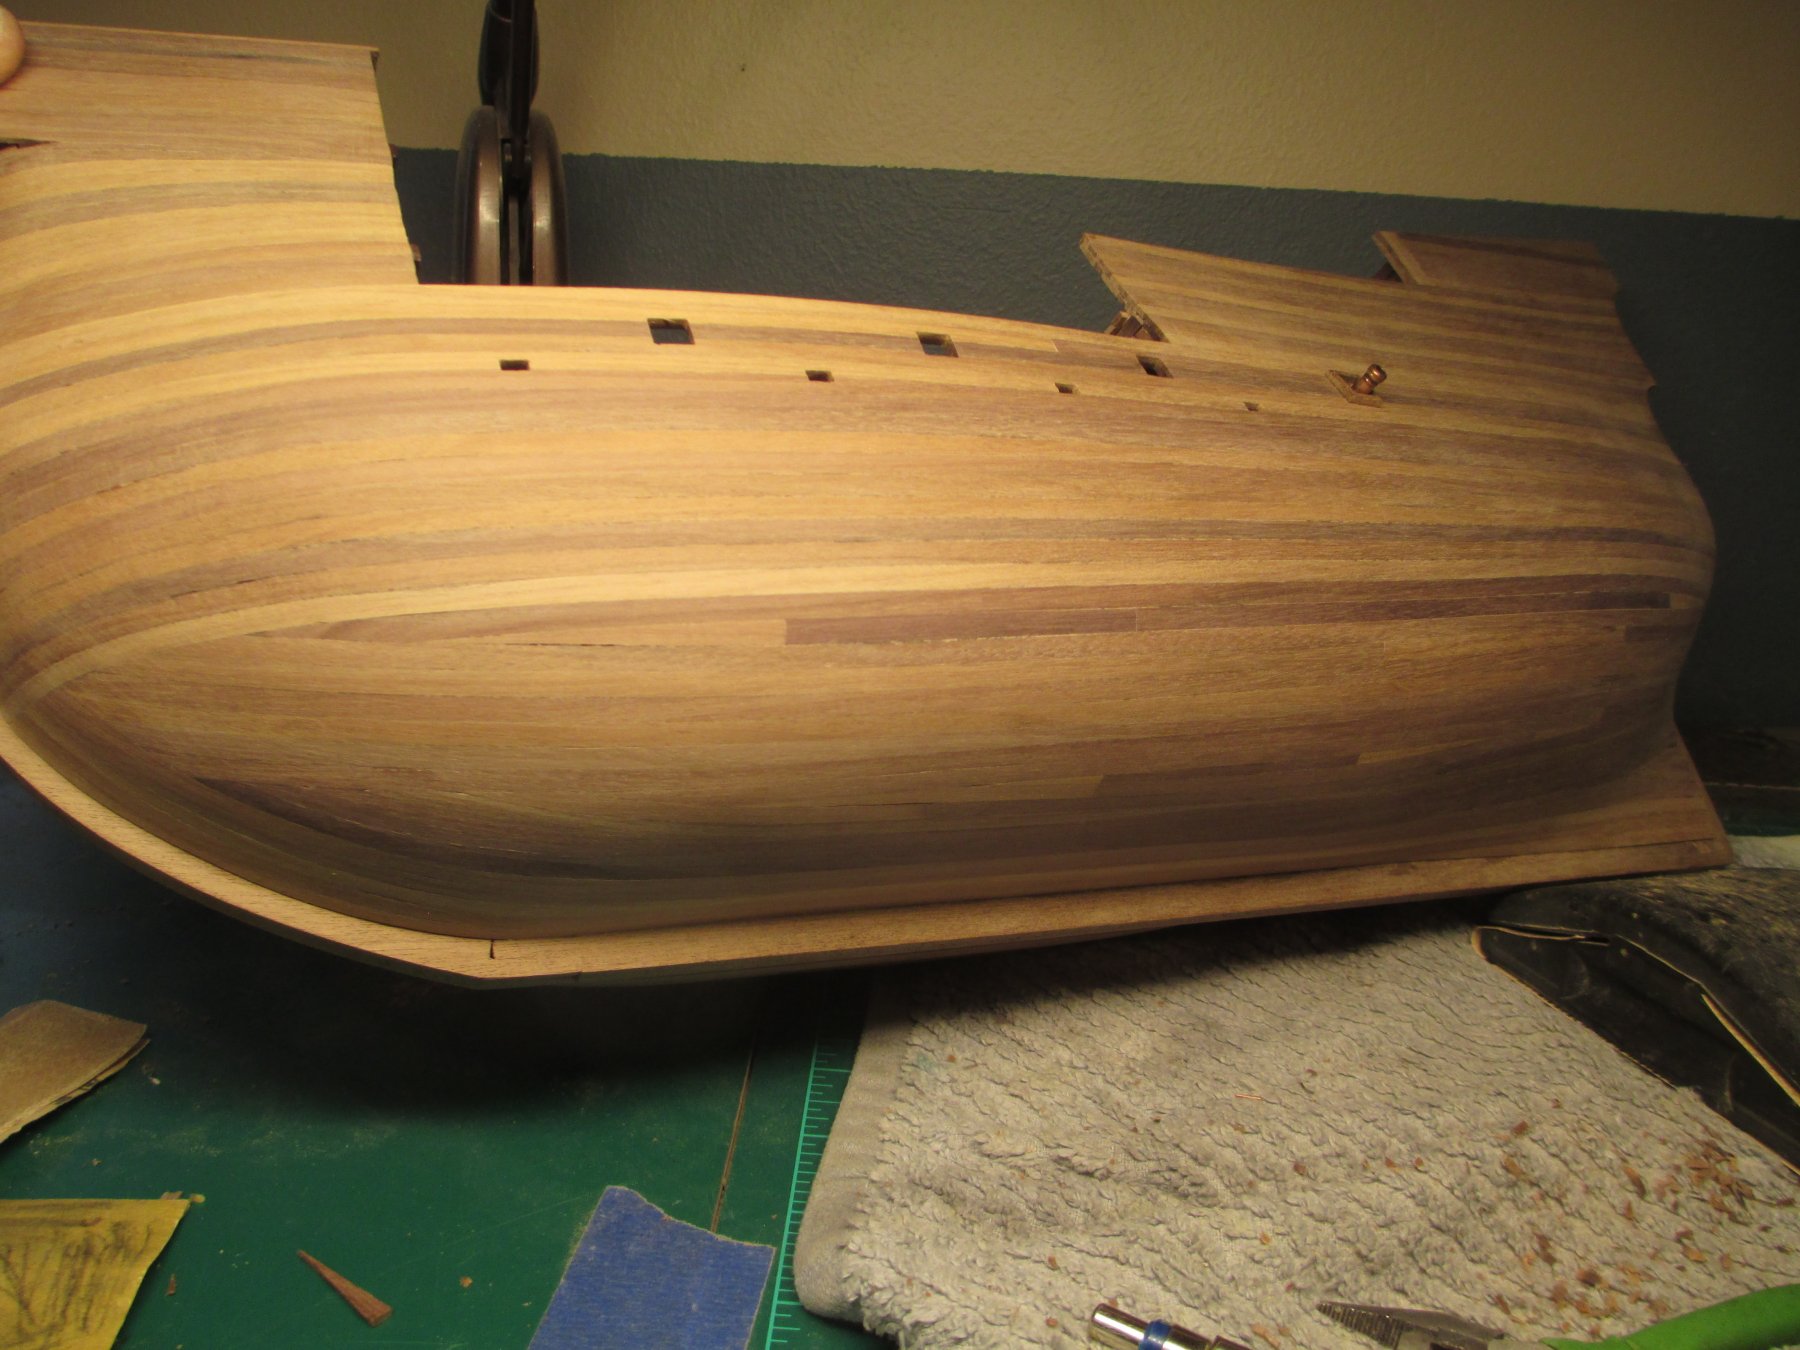
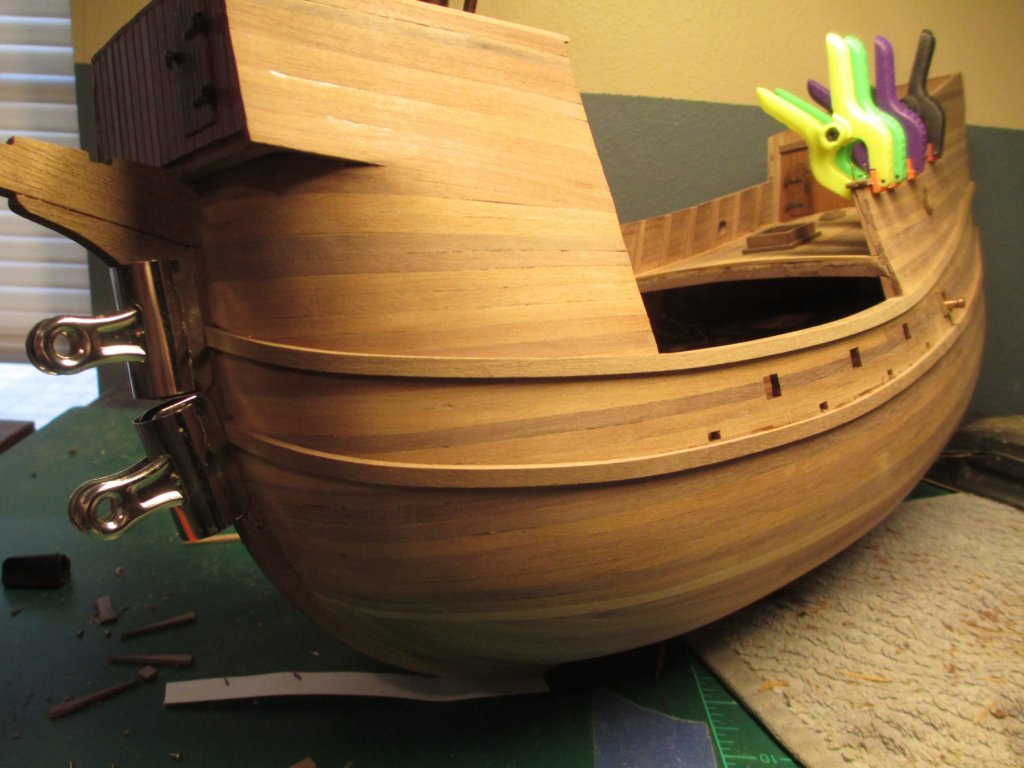
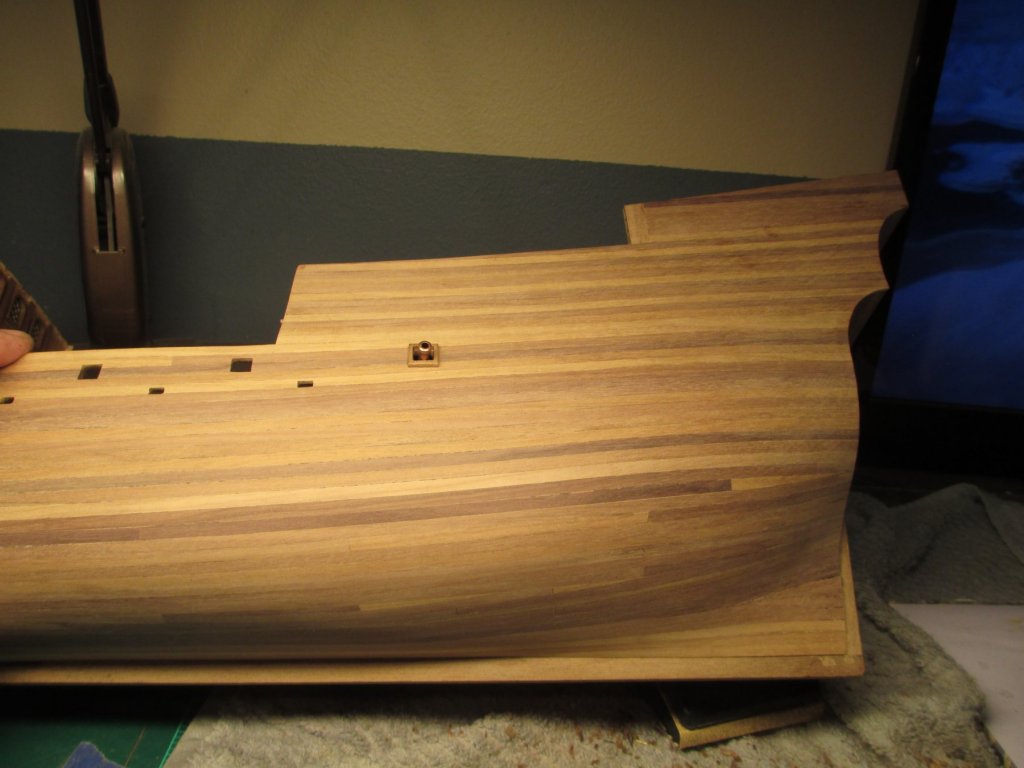
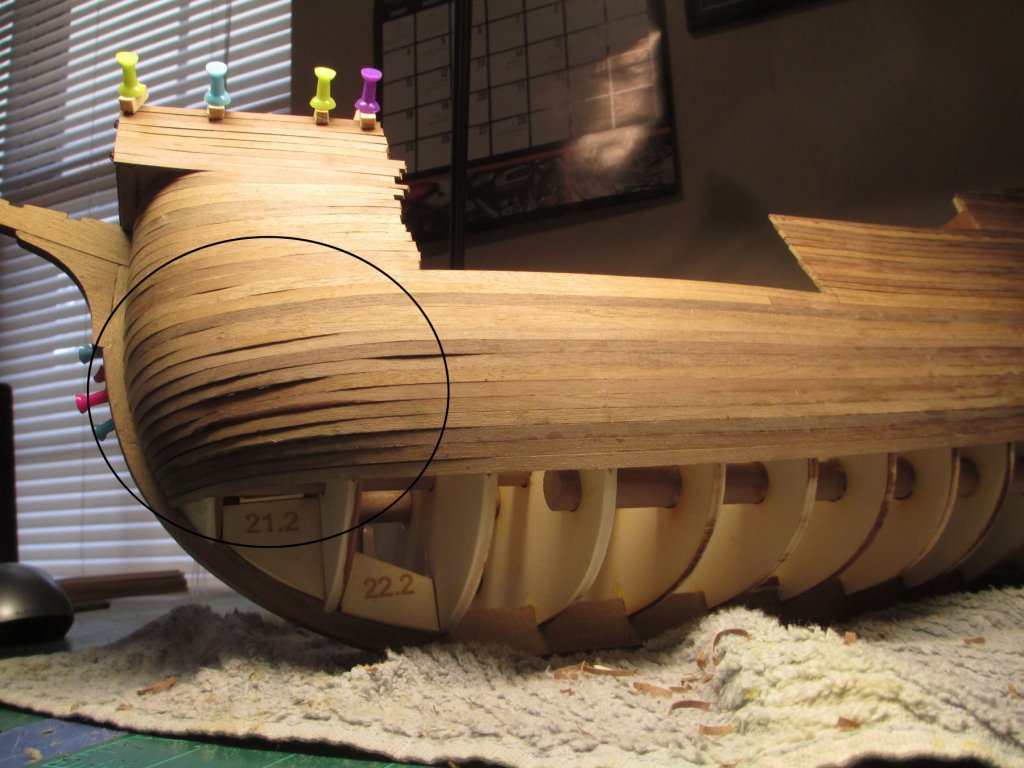
working on the hull strakes

-
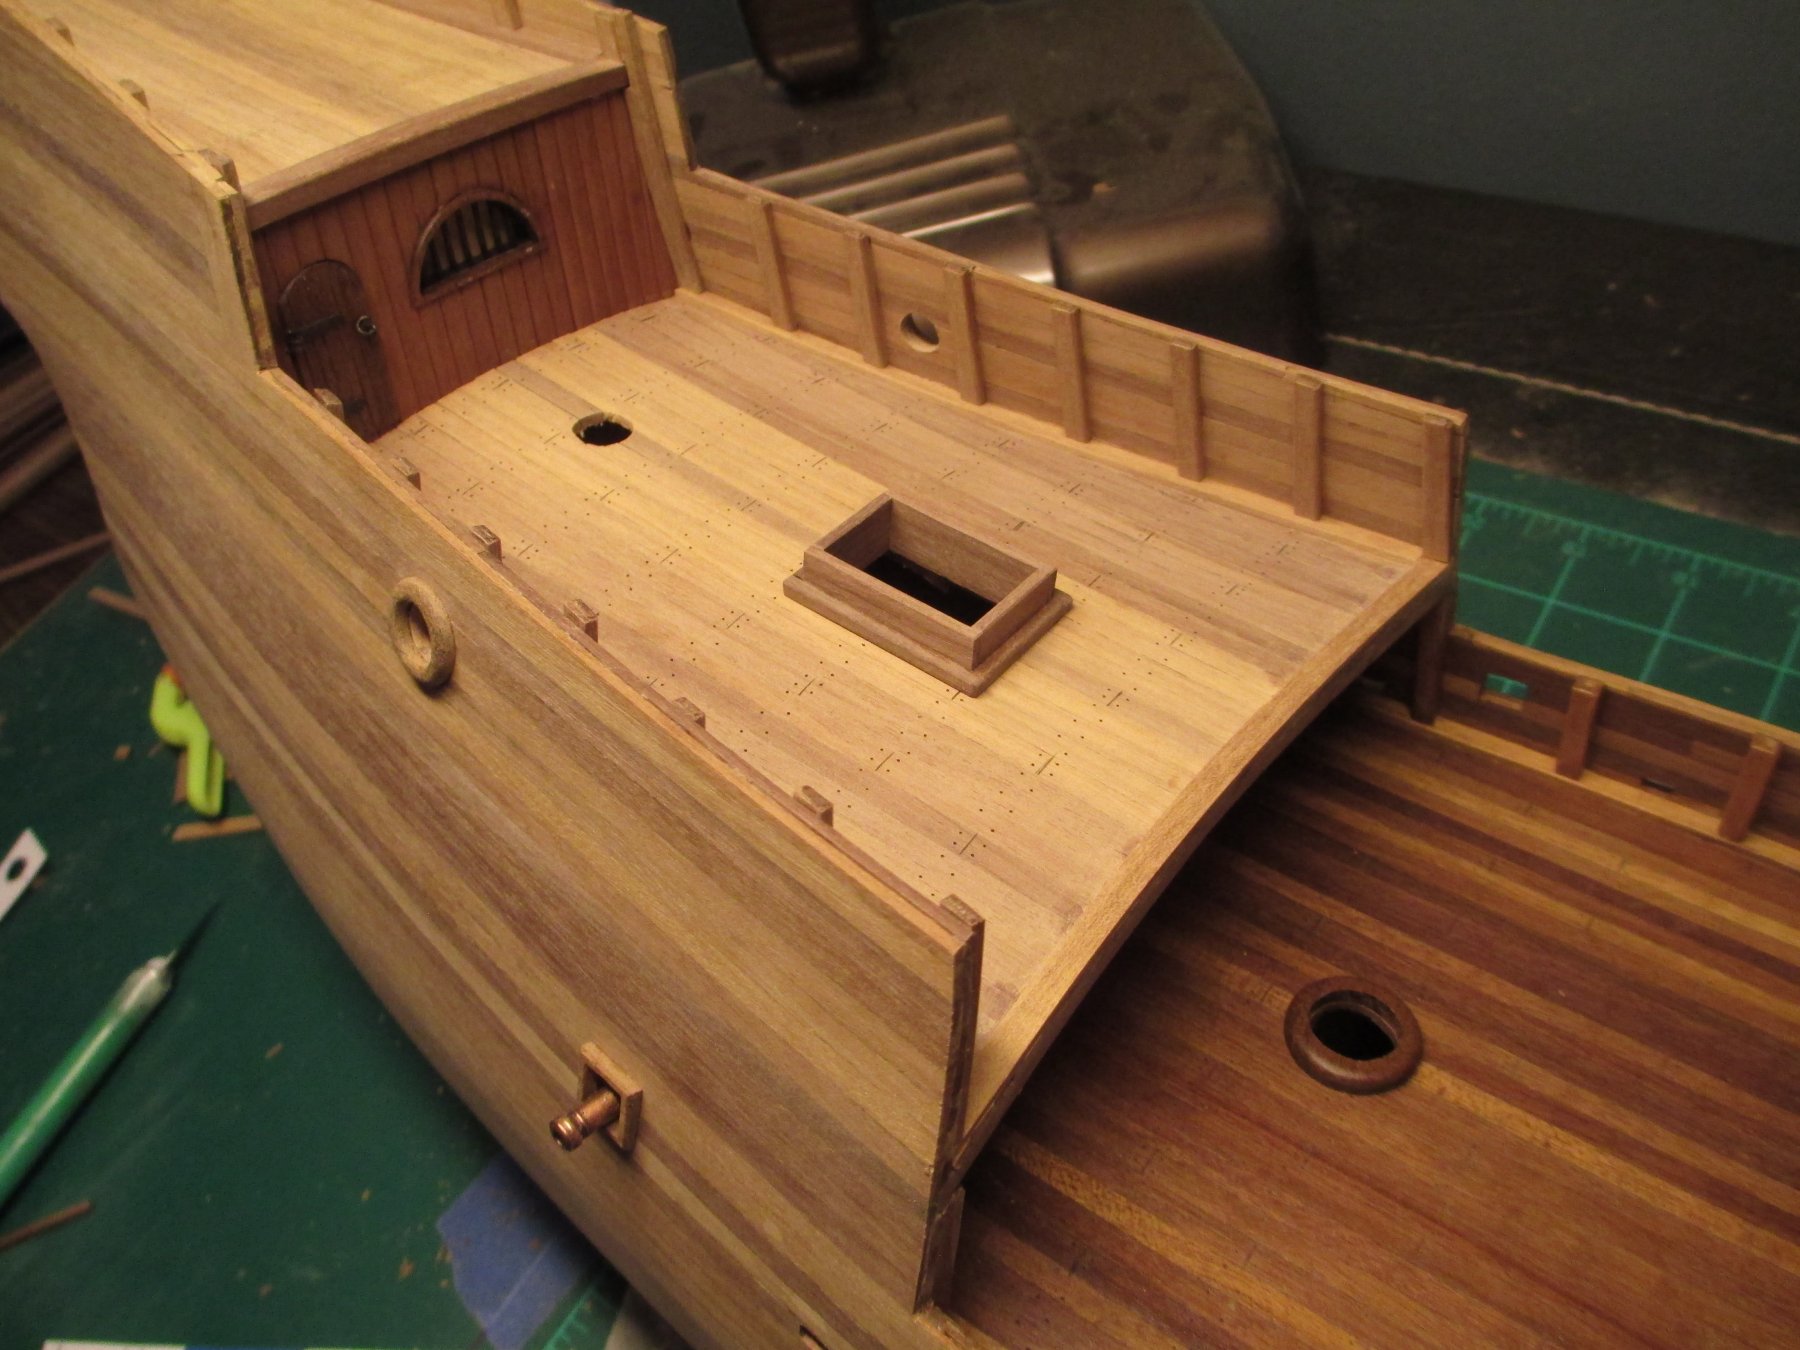
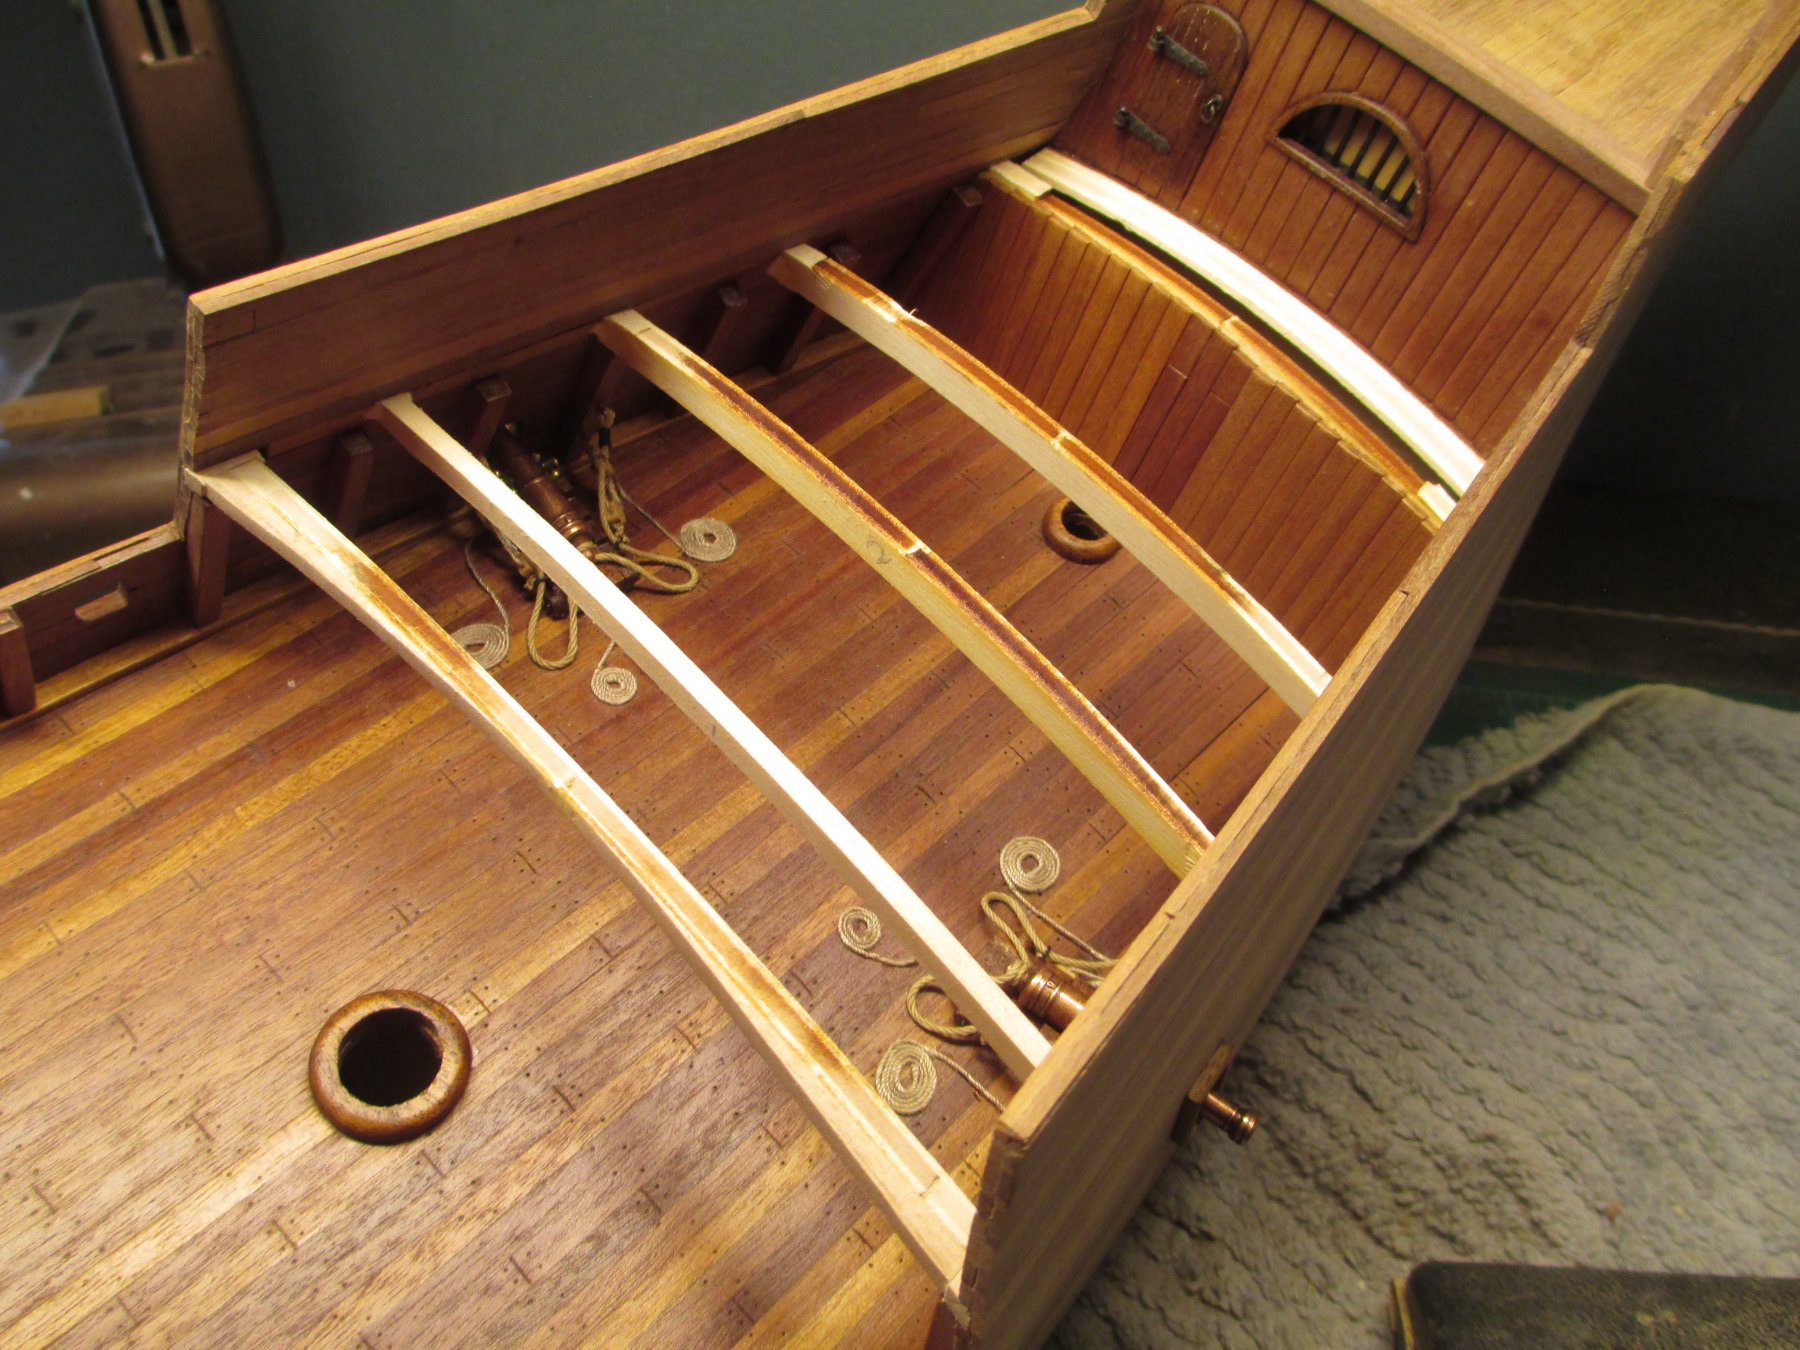
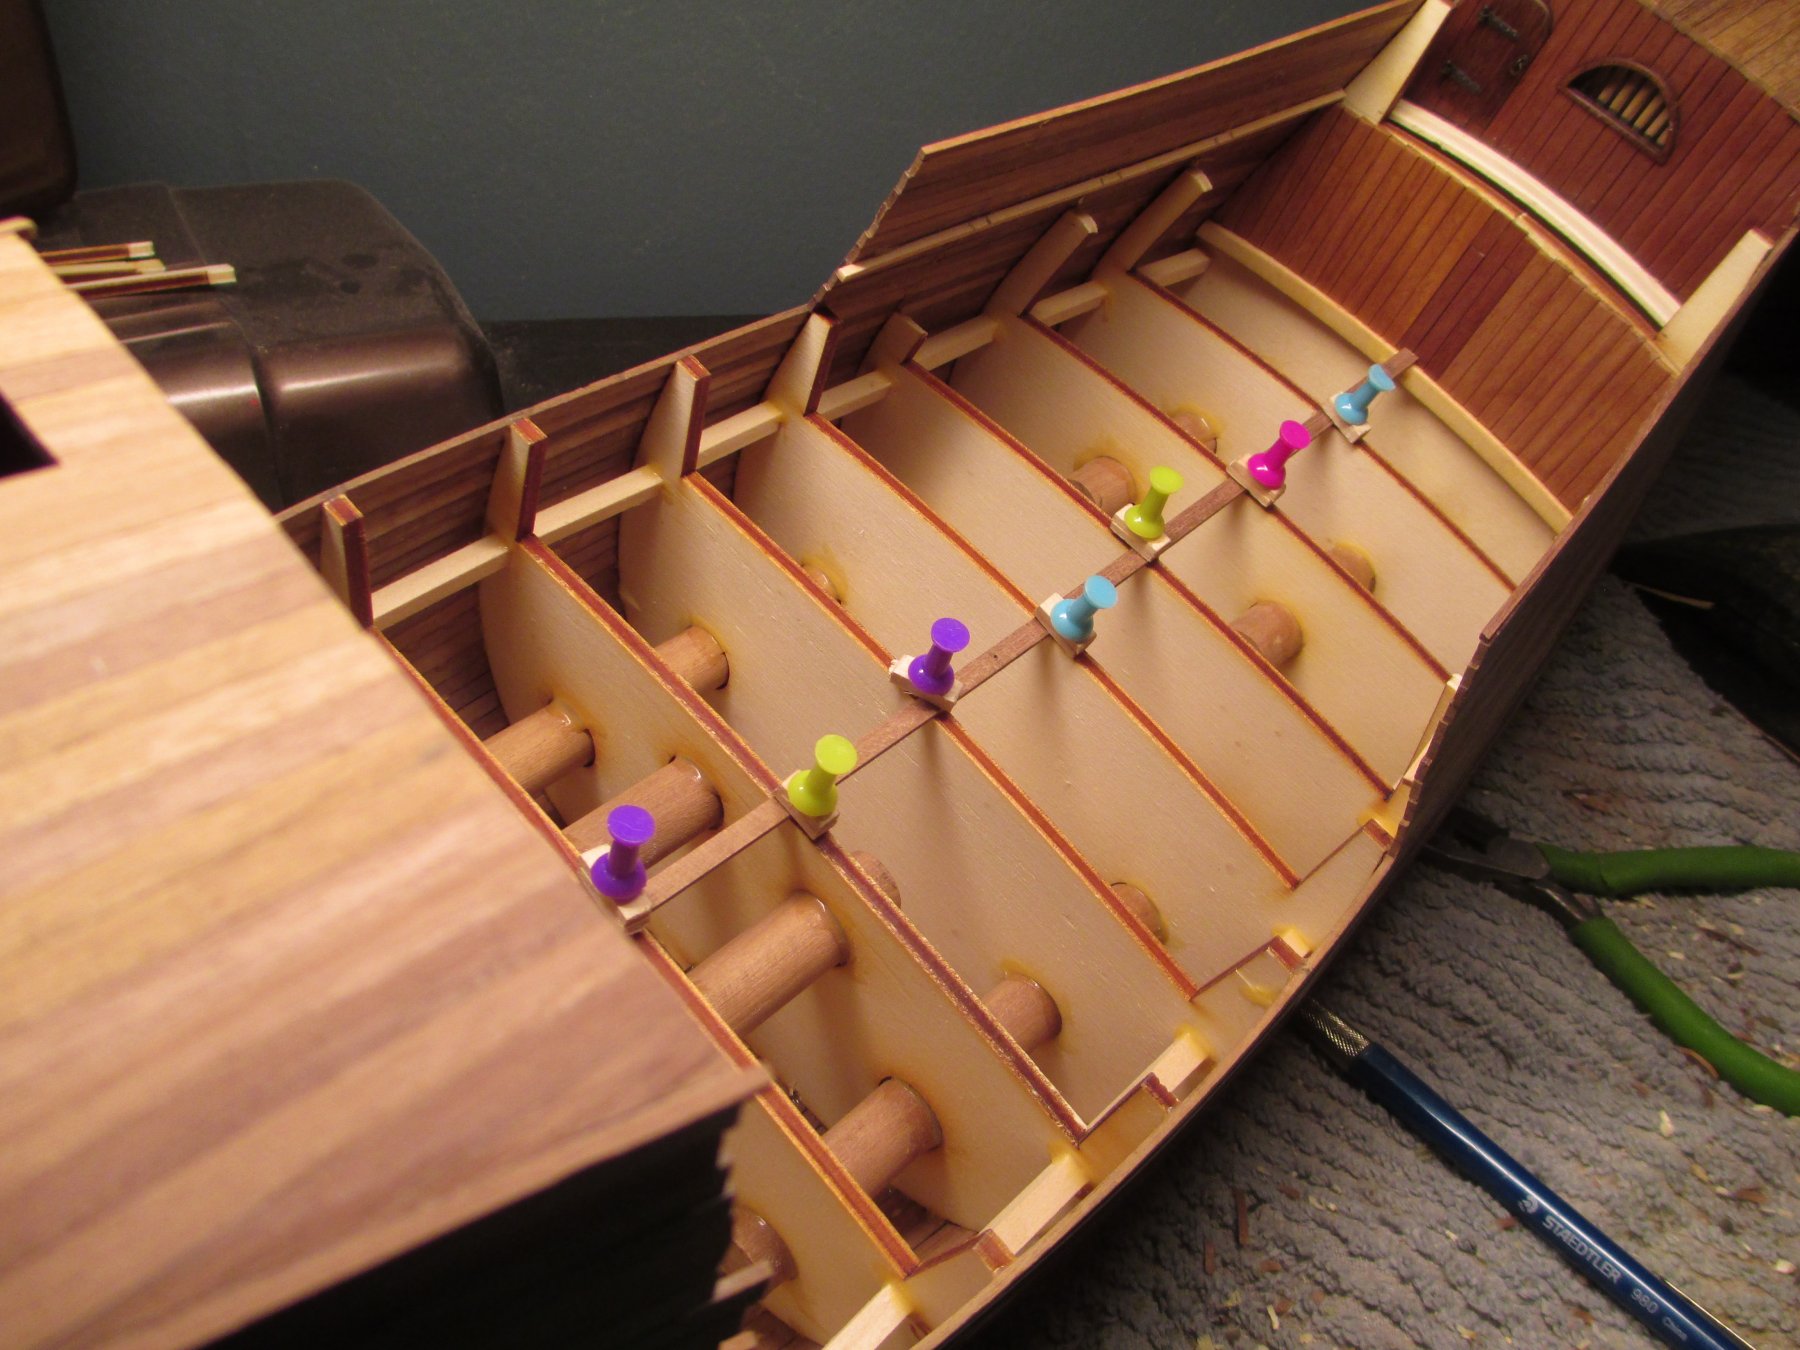
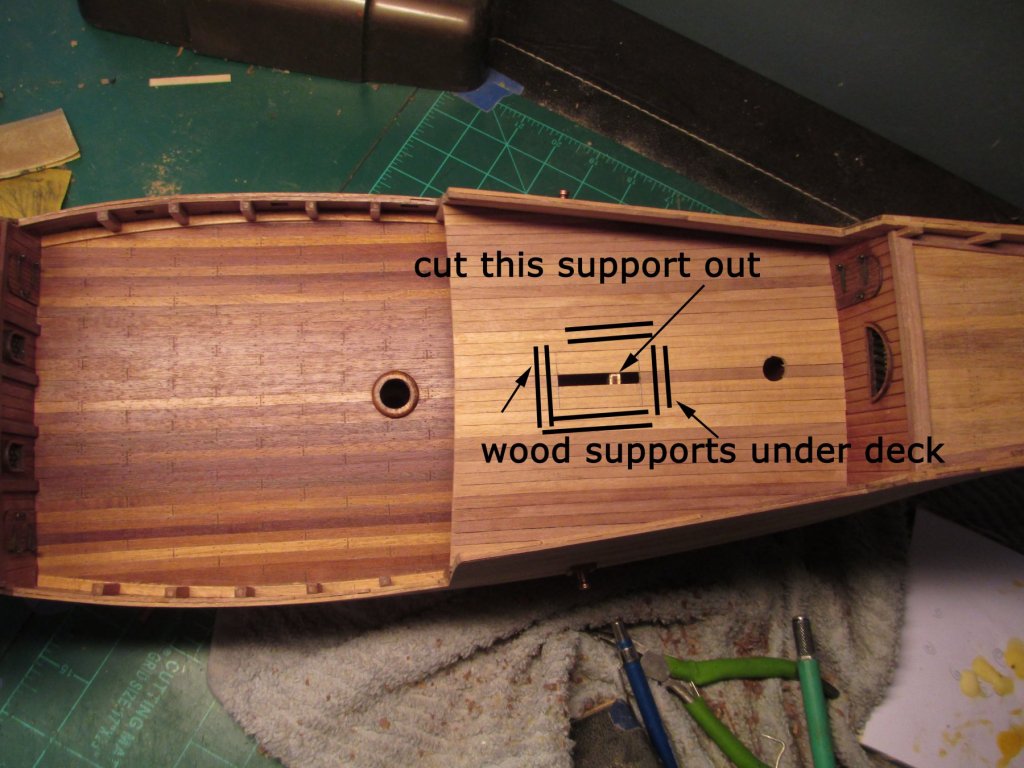
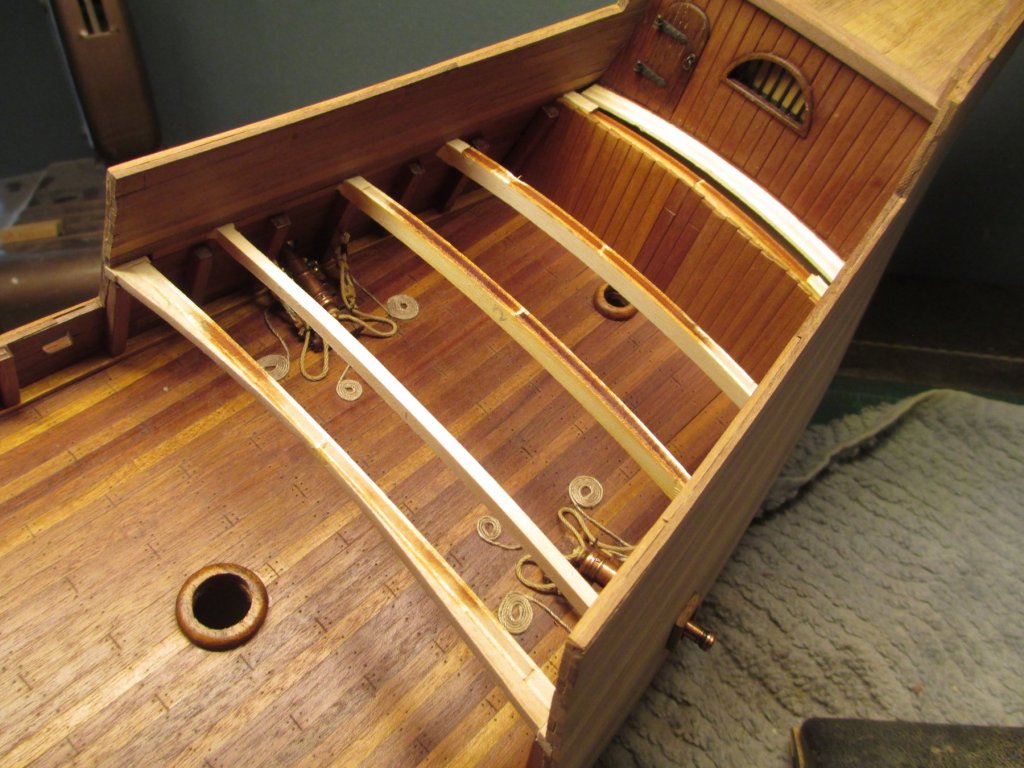
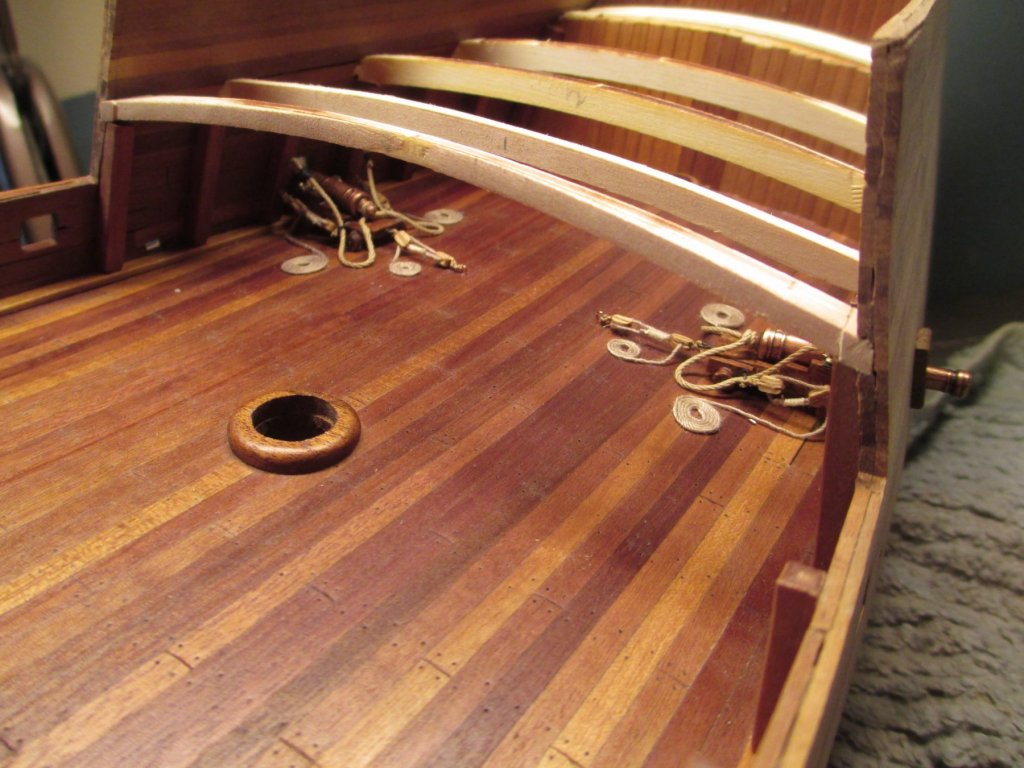
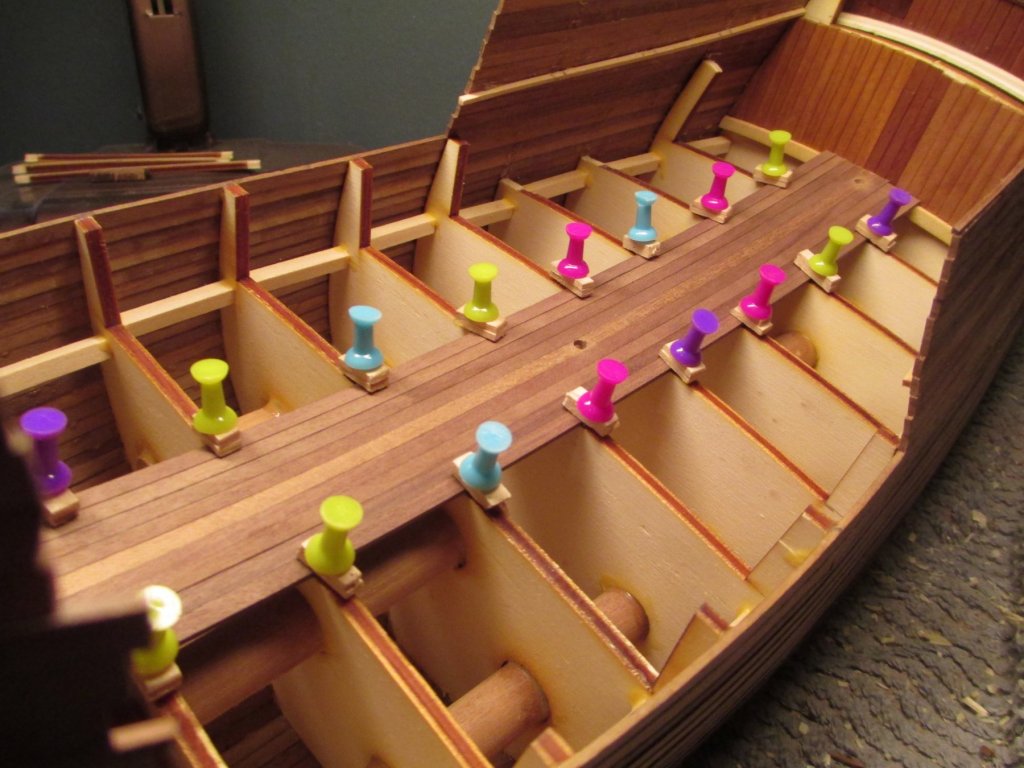
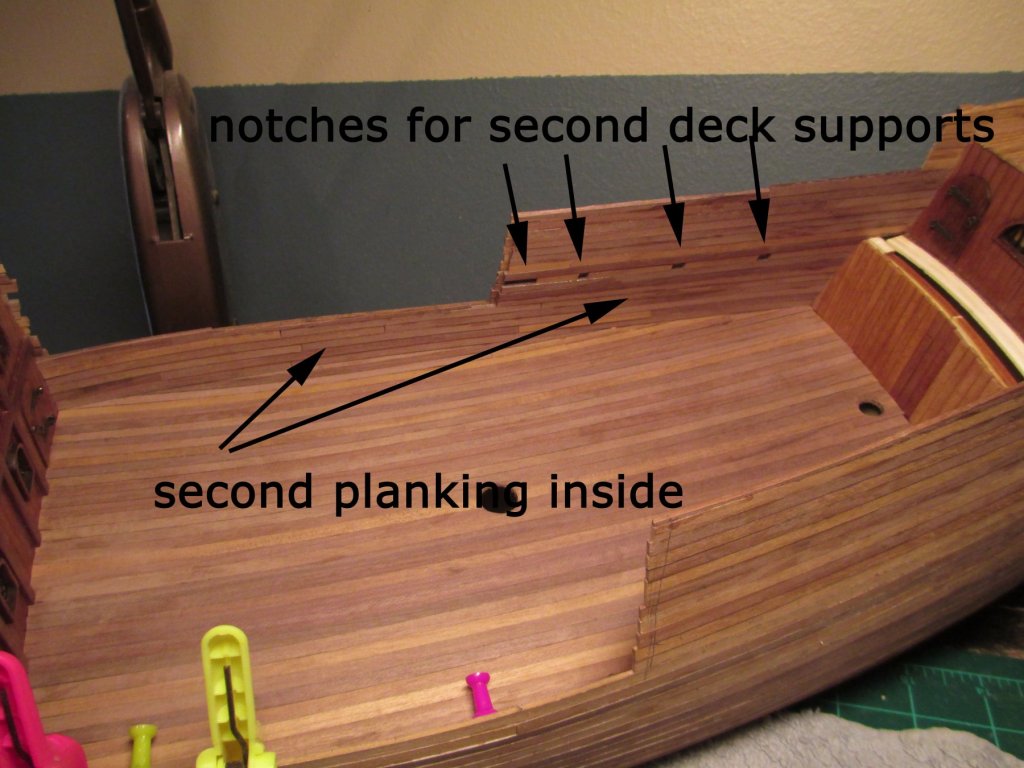
second deck ladder hatch needed one support cut out. I placed supports under the opening to secure the area


-
I forgot to mention before I placed the cannons on the main deck I sanded the hull down and made the cannon ports and scupper hole drains.


-
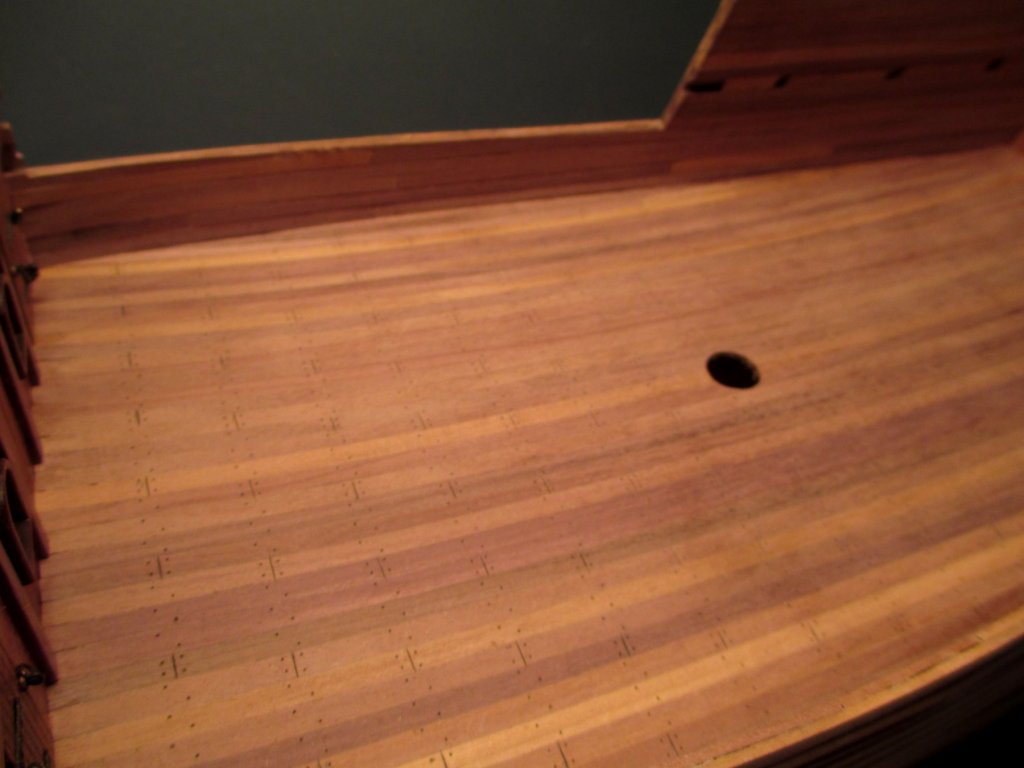
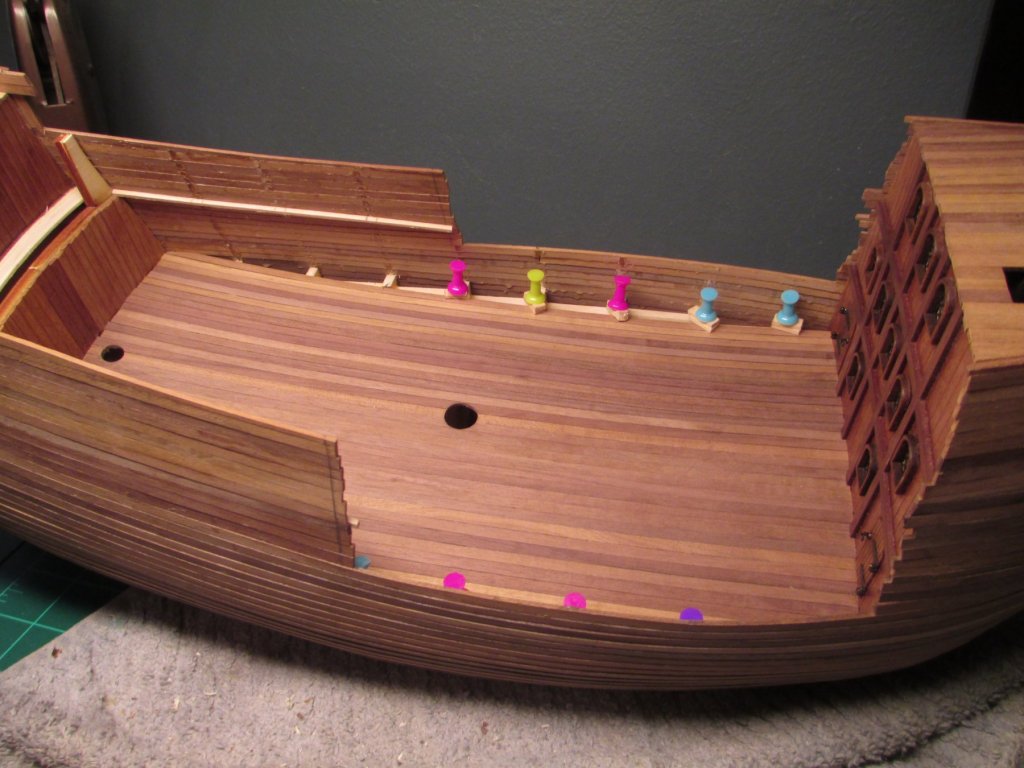
planked the third deck and started on second deck planking

-
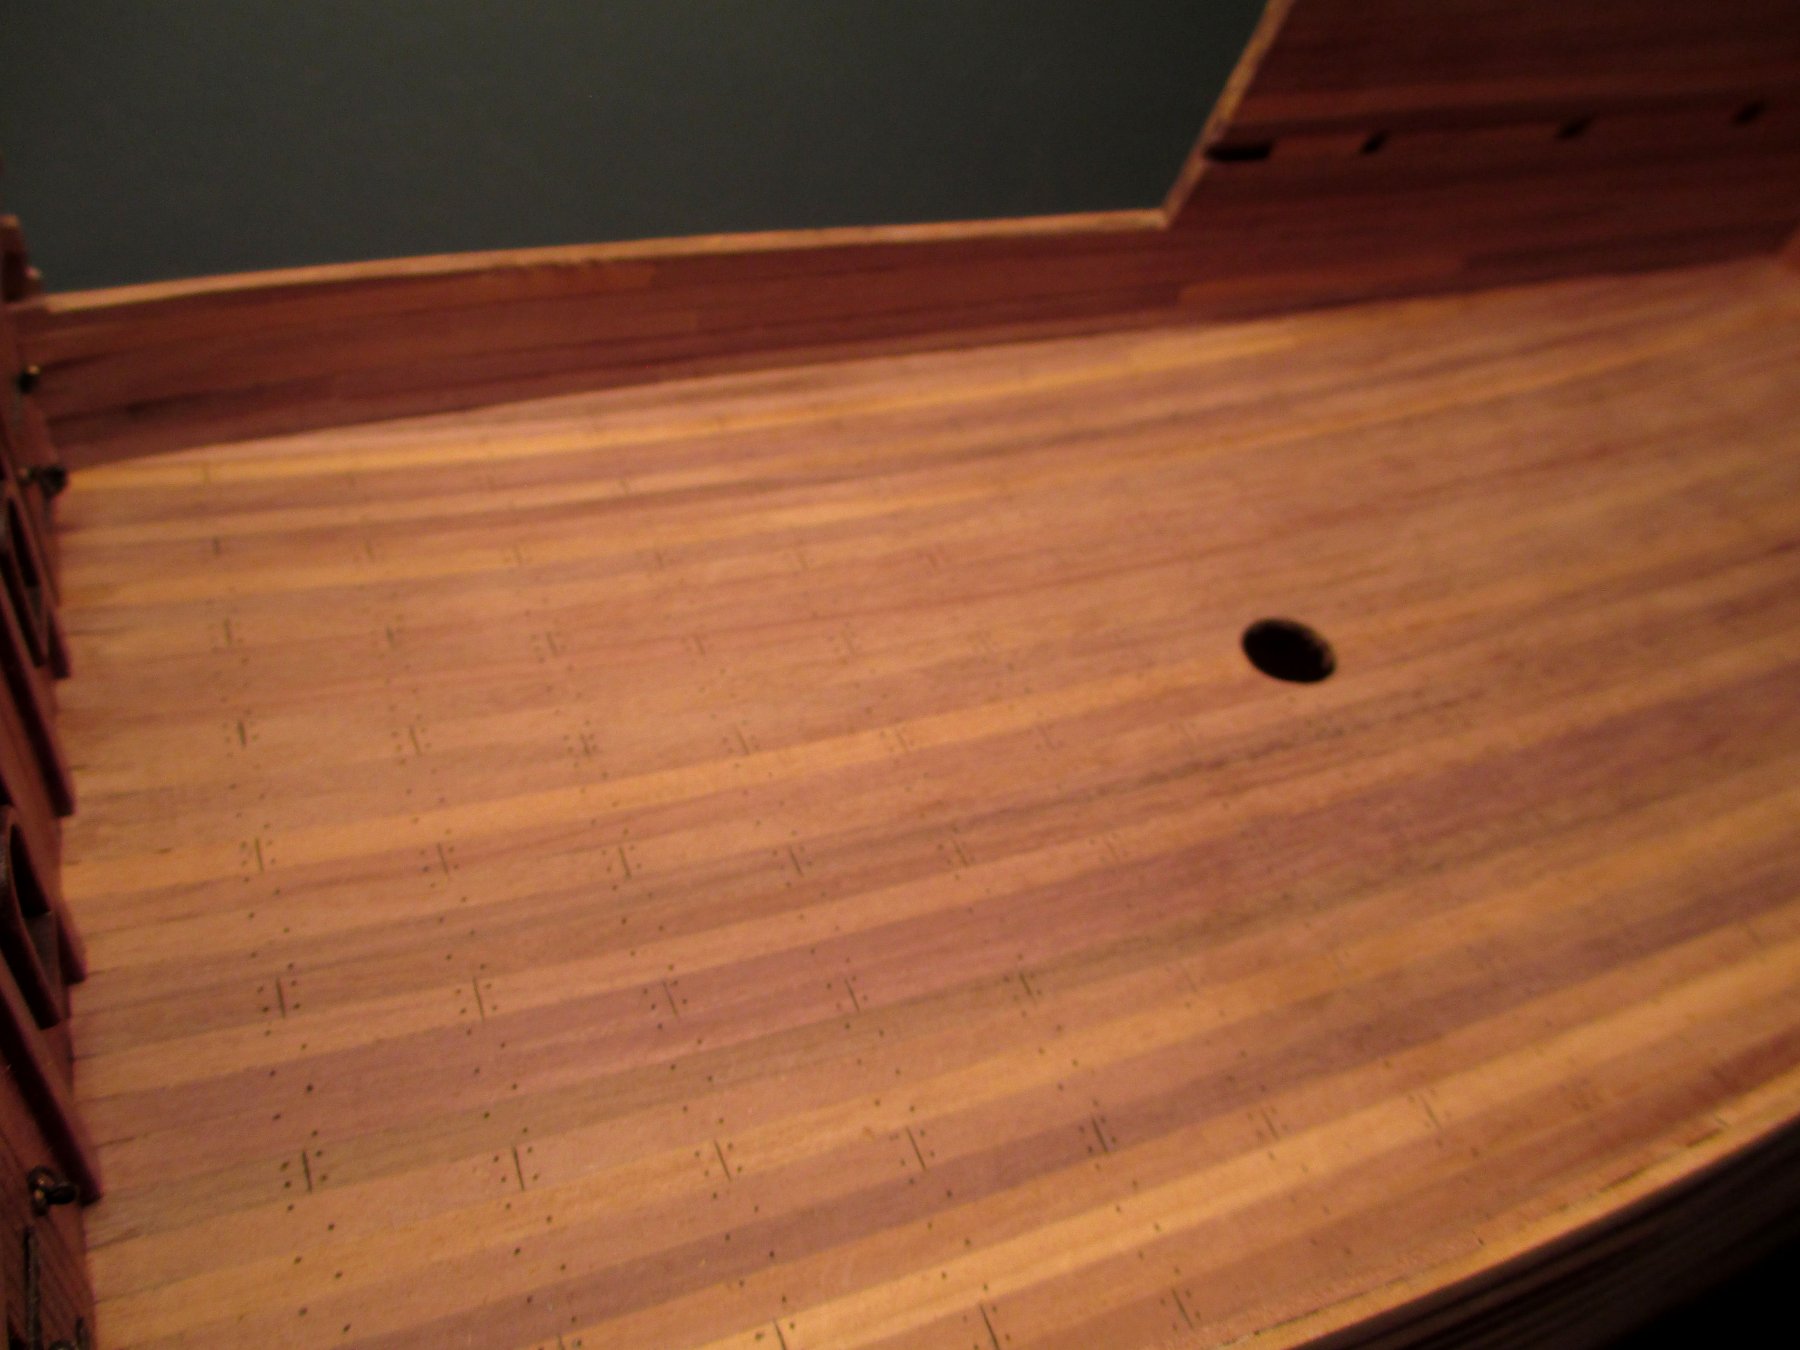
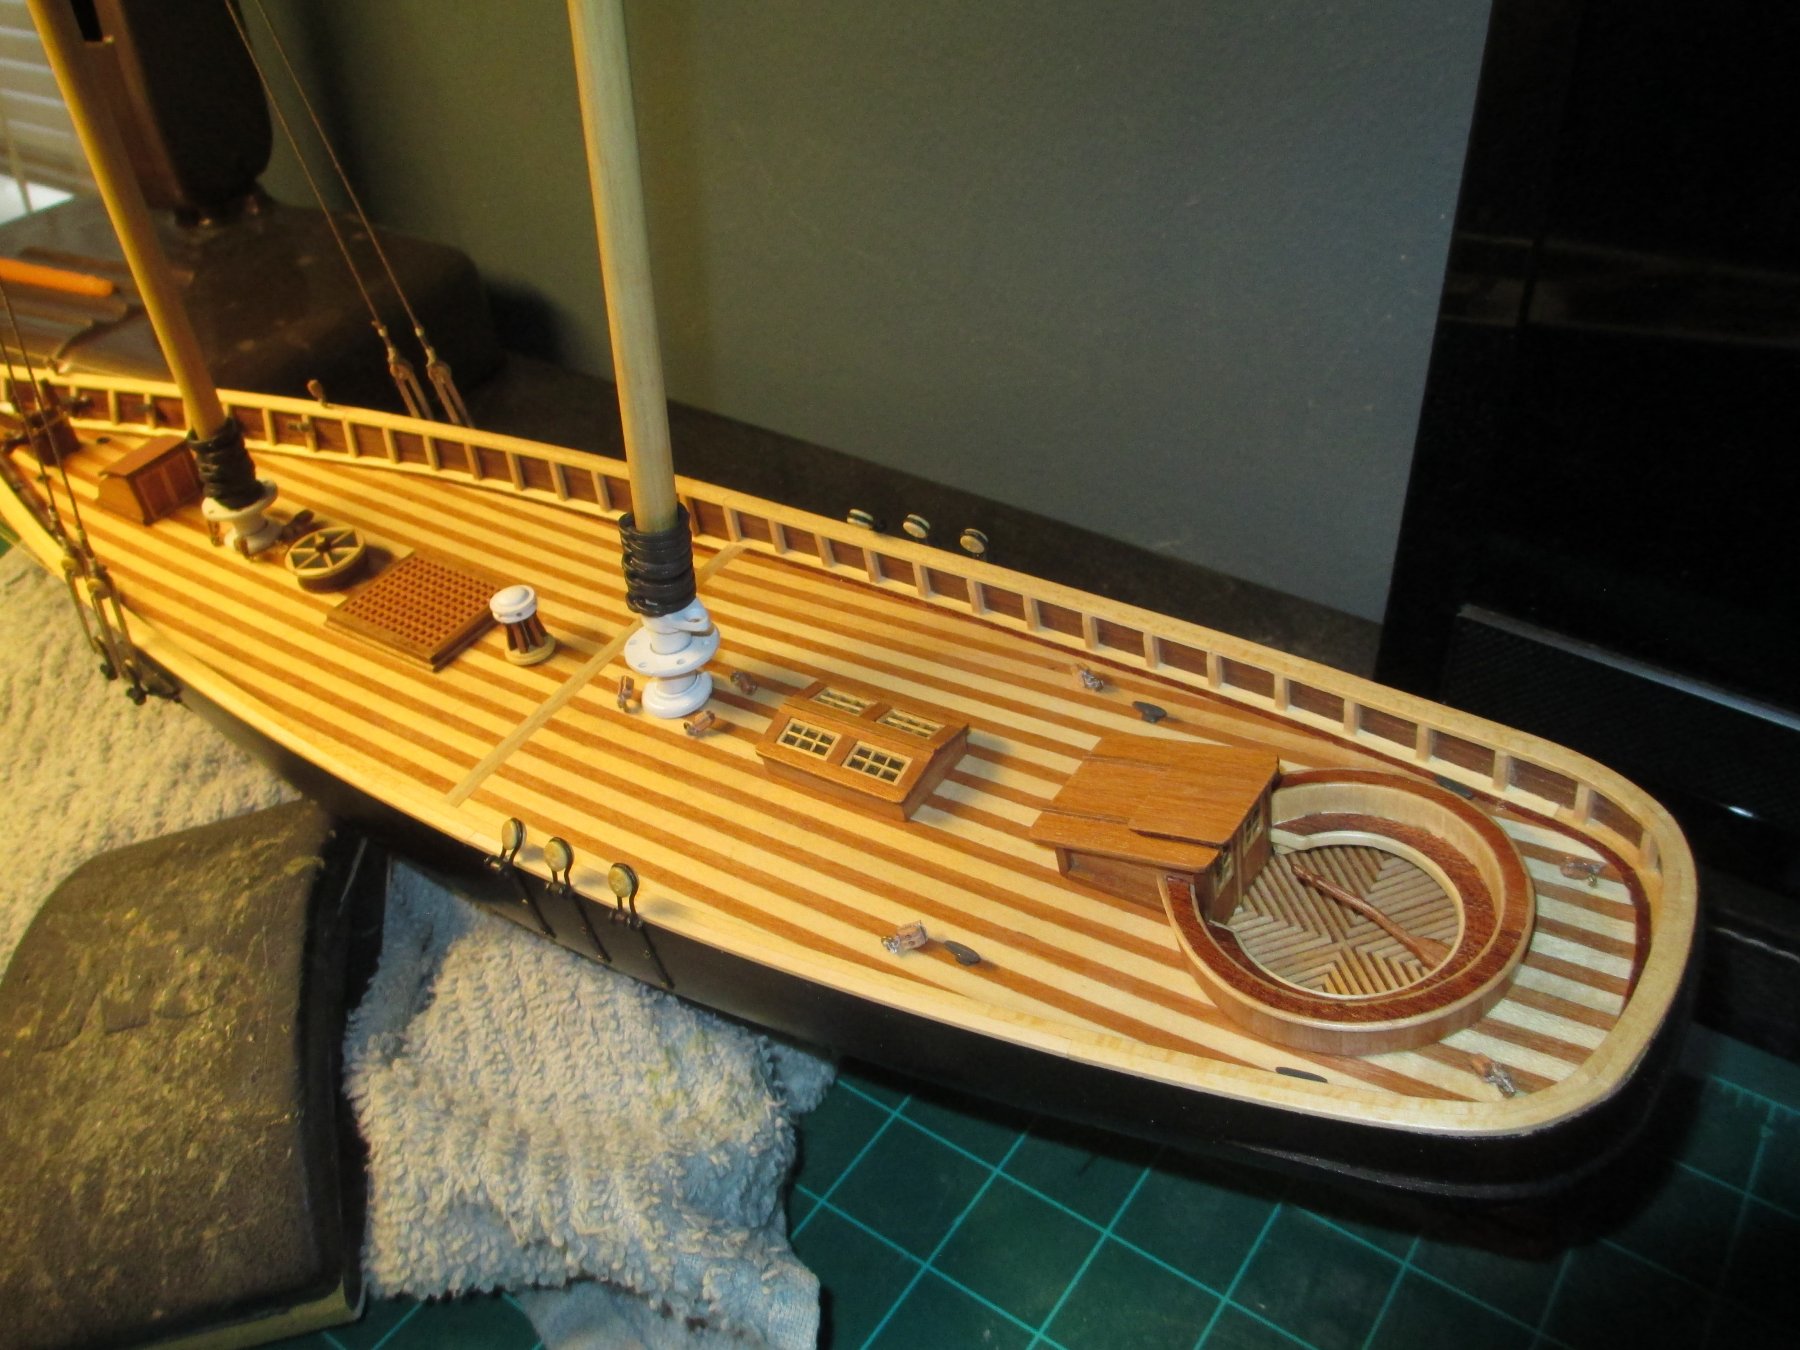
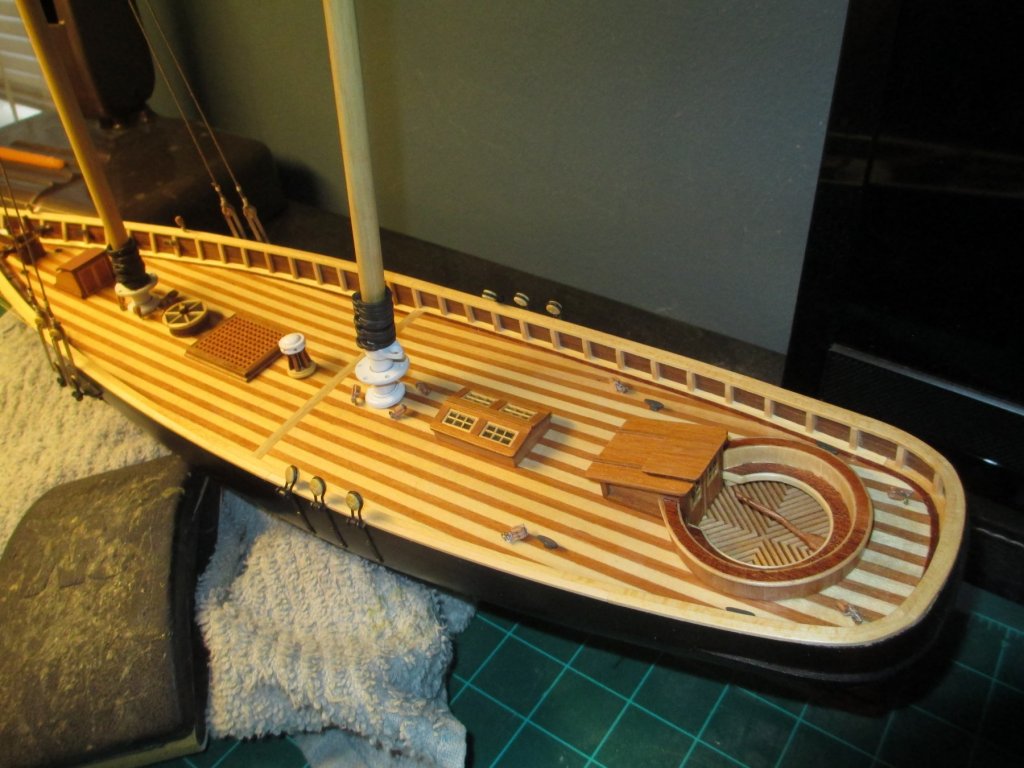
so I sanded the main deck and sides, put some small detail on the main deck planking, made sure main and mizzen mast are lined up, clear coated the deck and sides. made some cannon hatch holes for the two cannons under second deck and installed them.

-
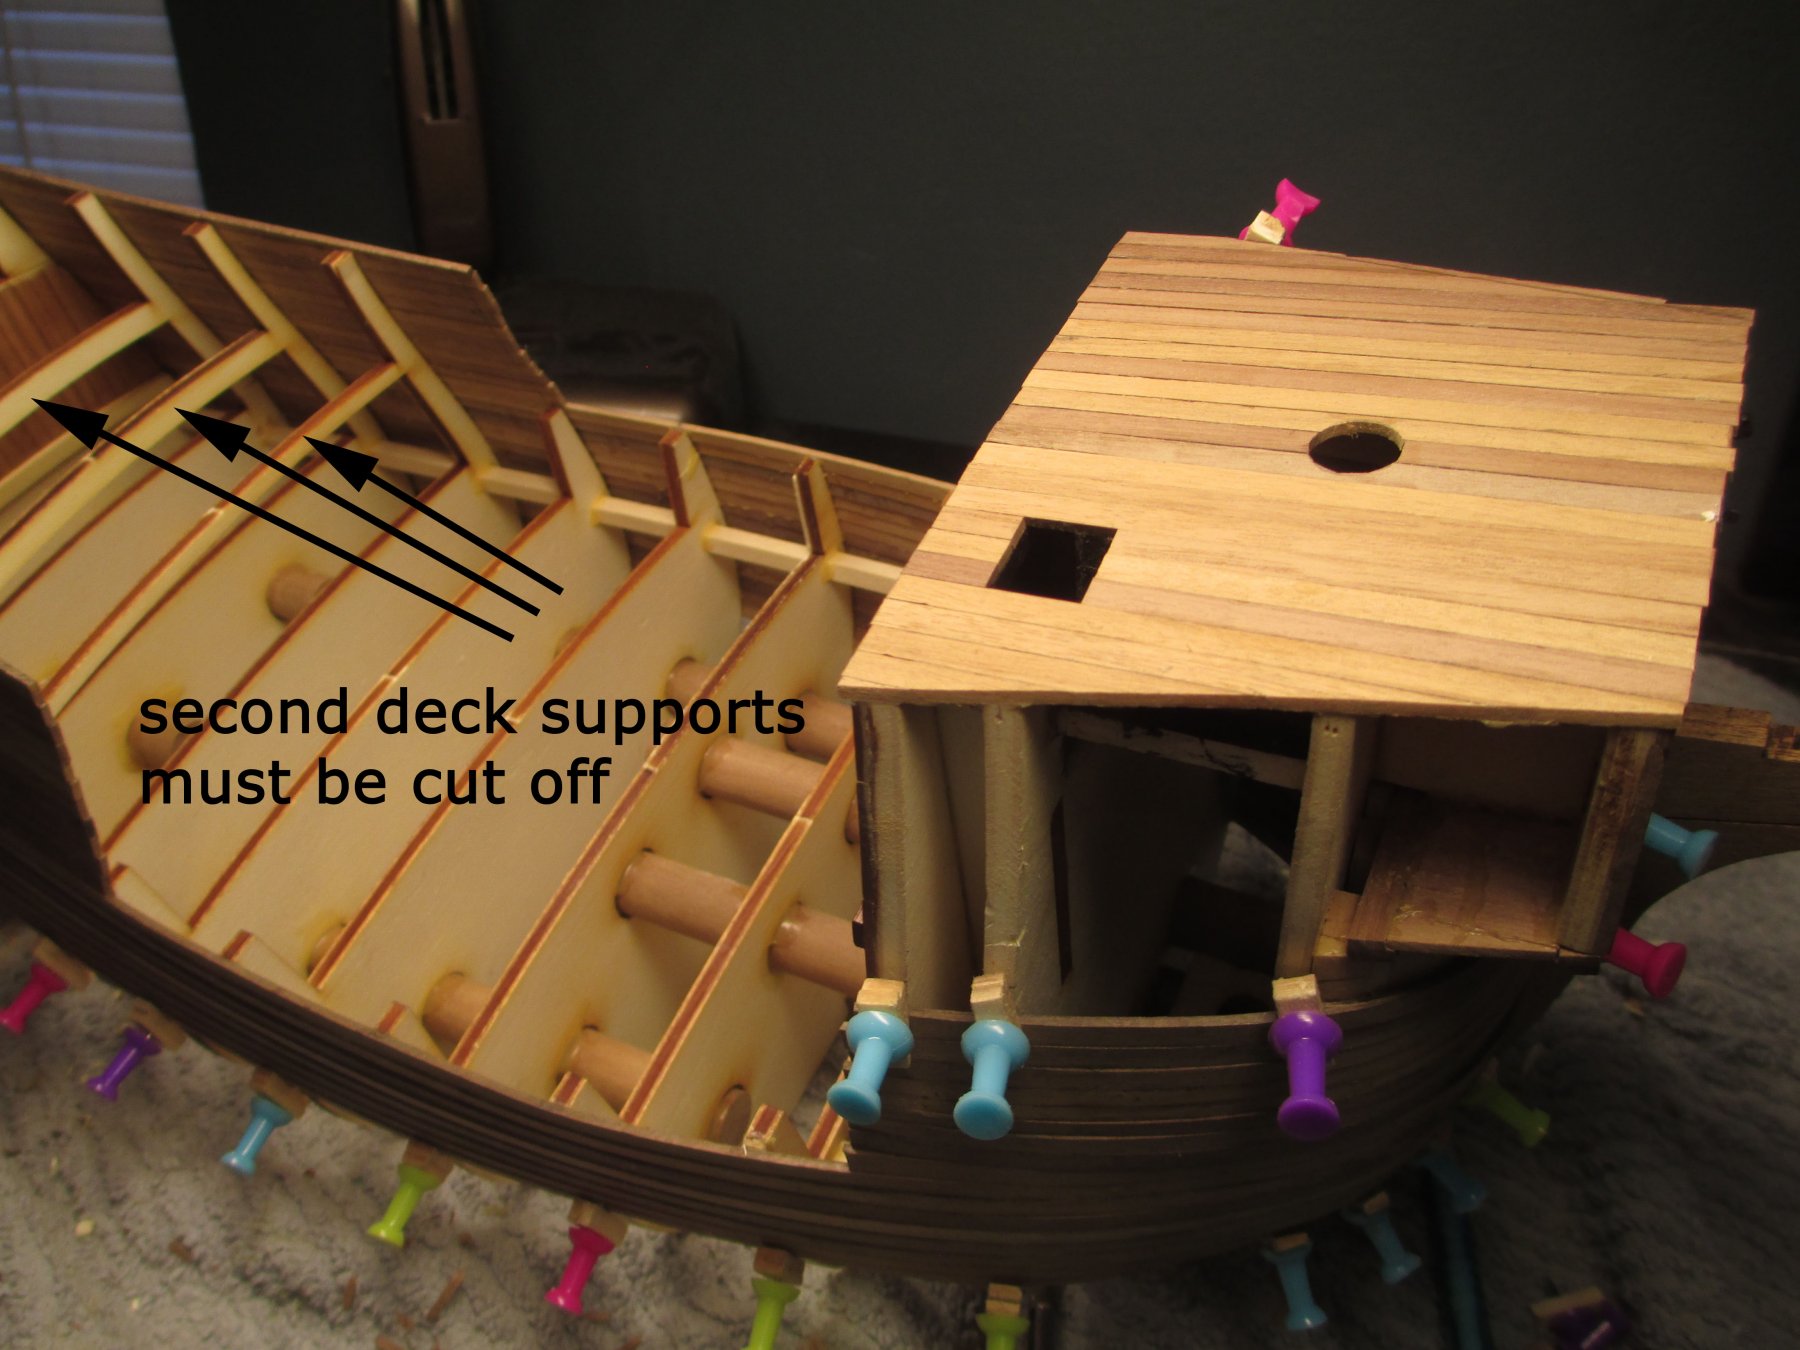
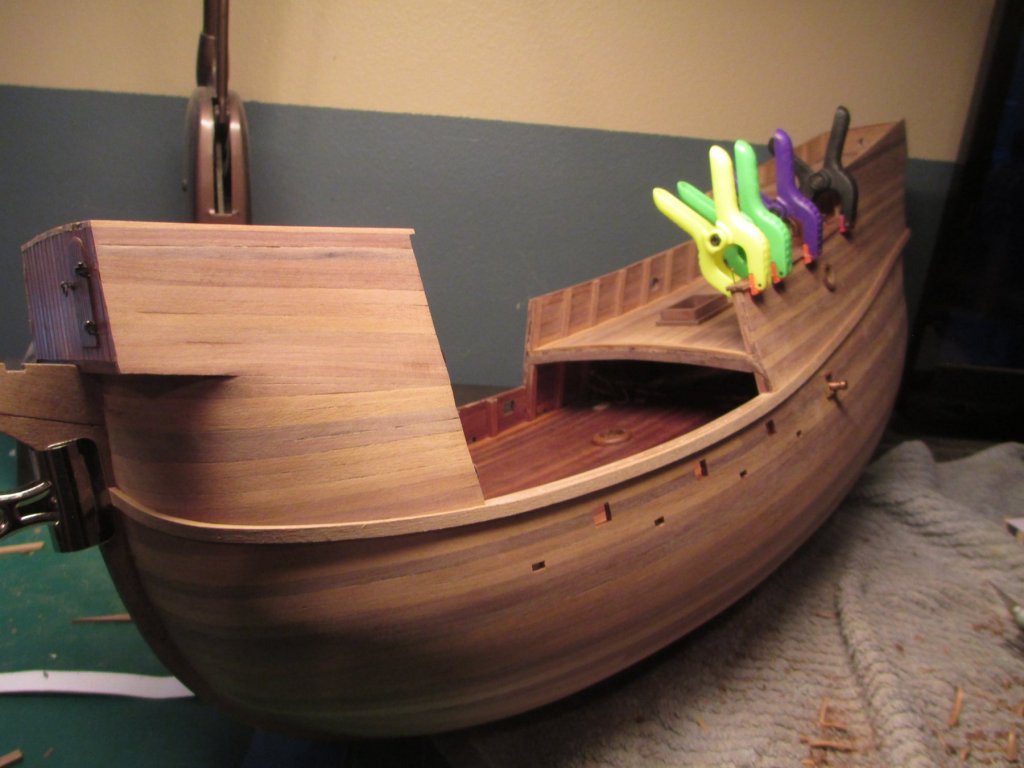
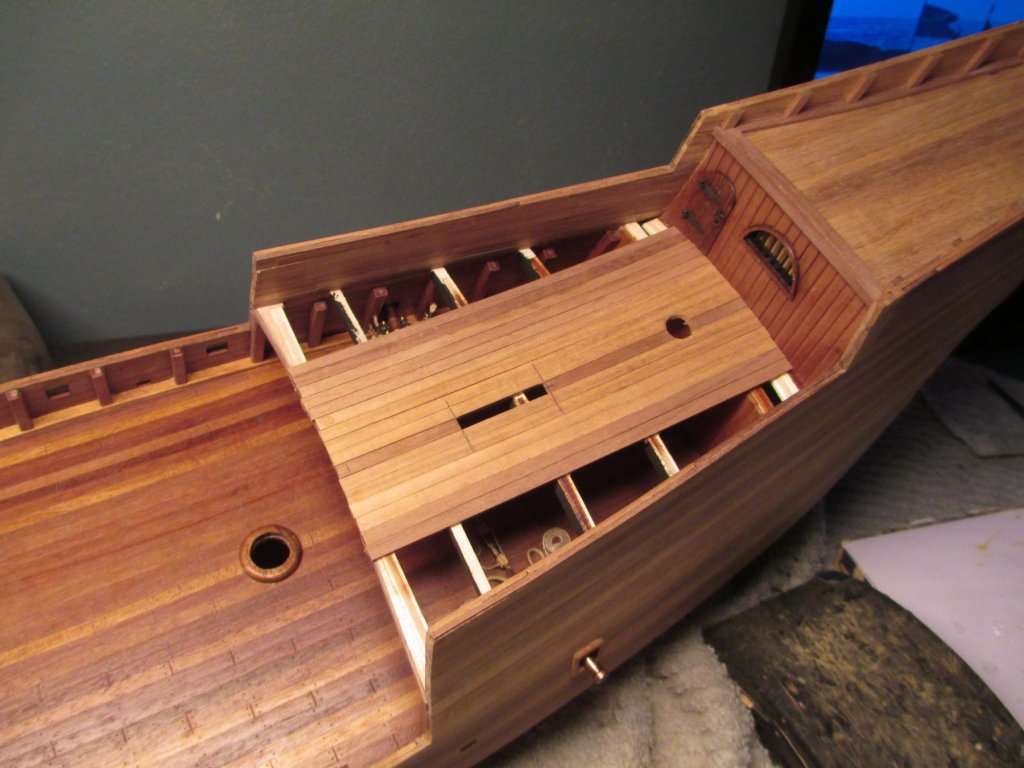
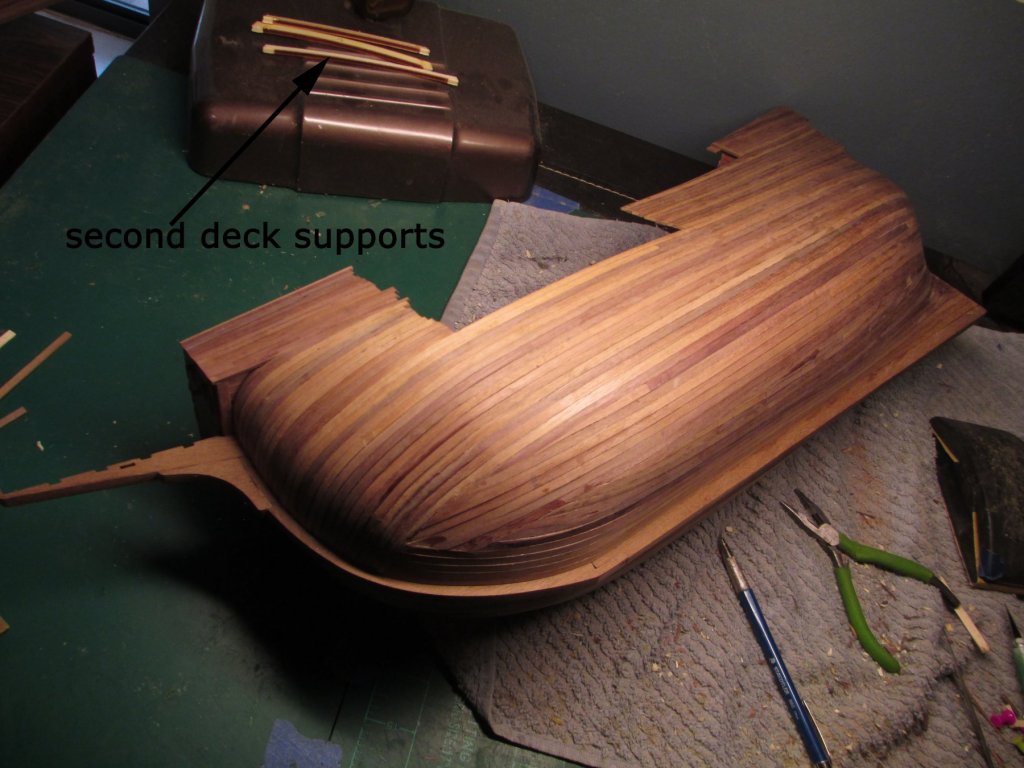
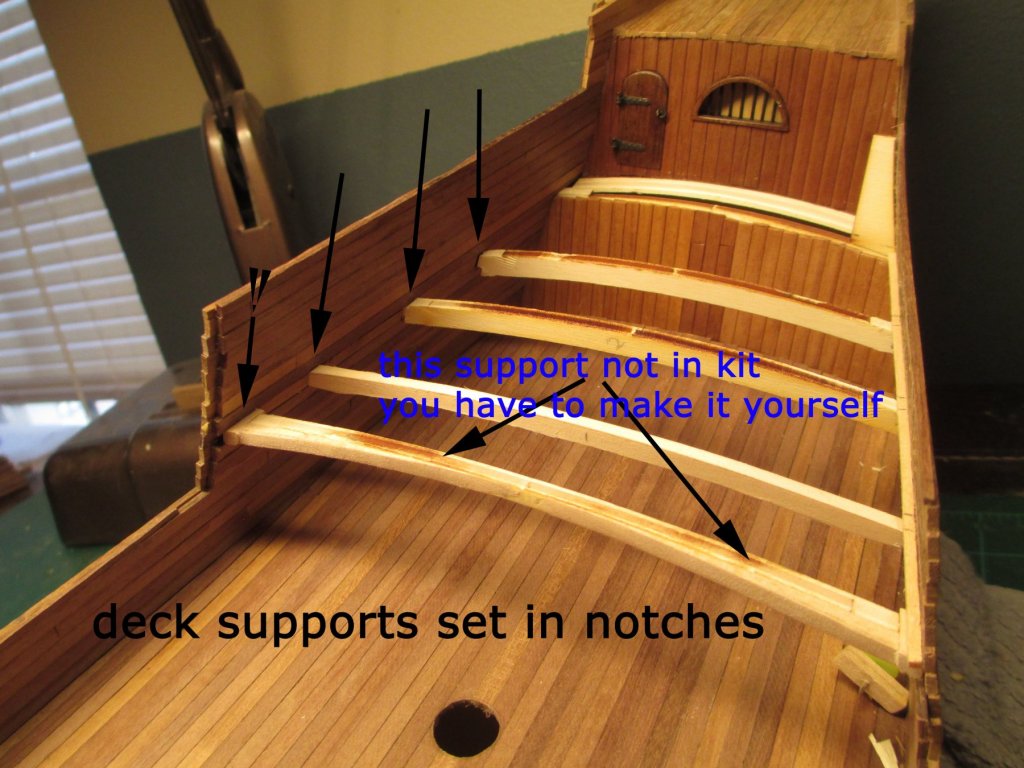
One note , the above photo shows the second deck supports , these are just for placement at this point, they are not glued in yet, I have to sand down the main deck and second planking on the sides, also there are two cannons that need placement under the second deck first before setting the second deck supports.
-
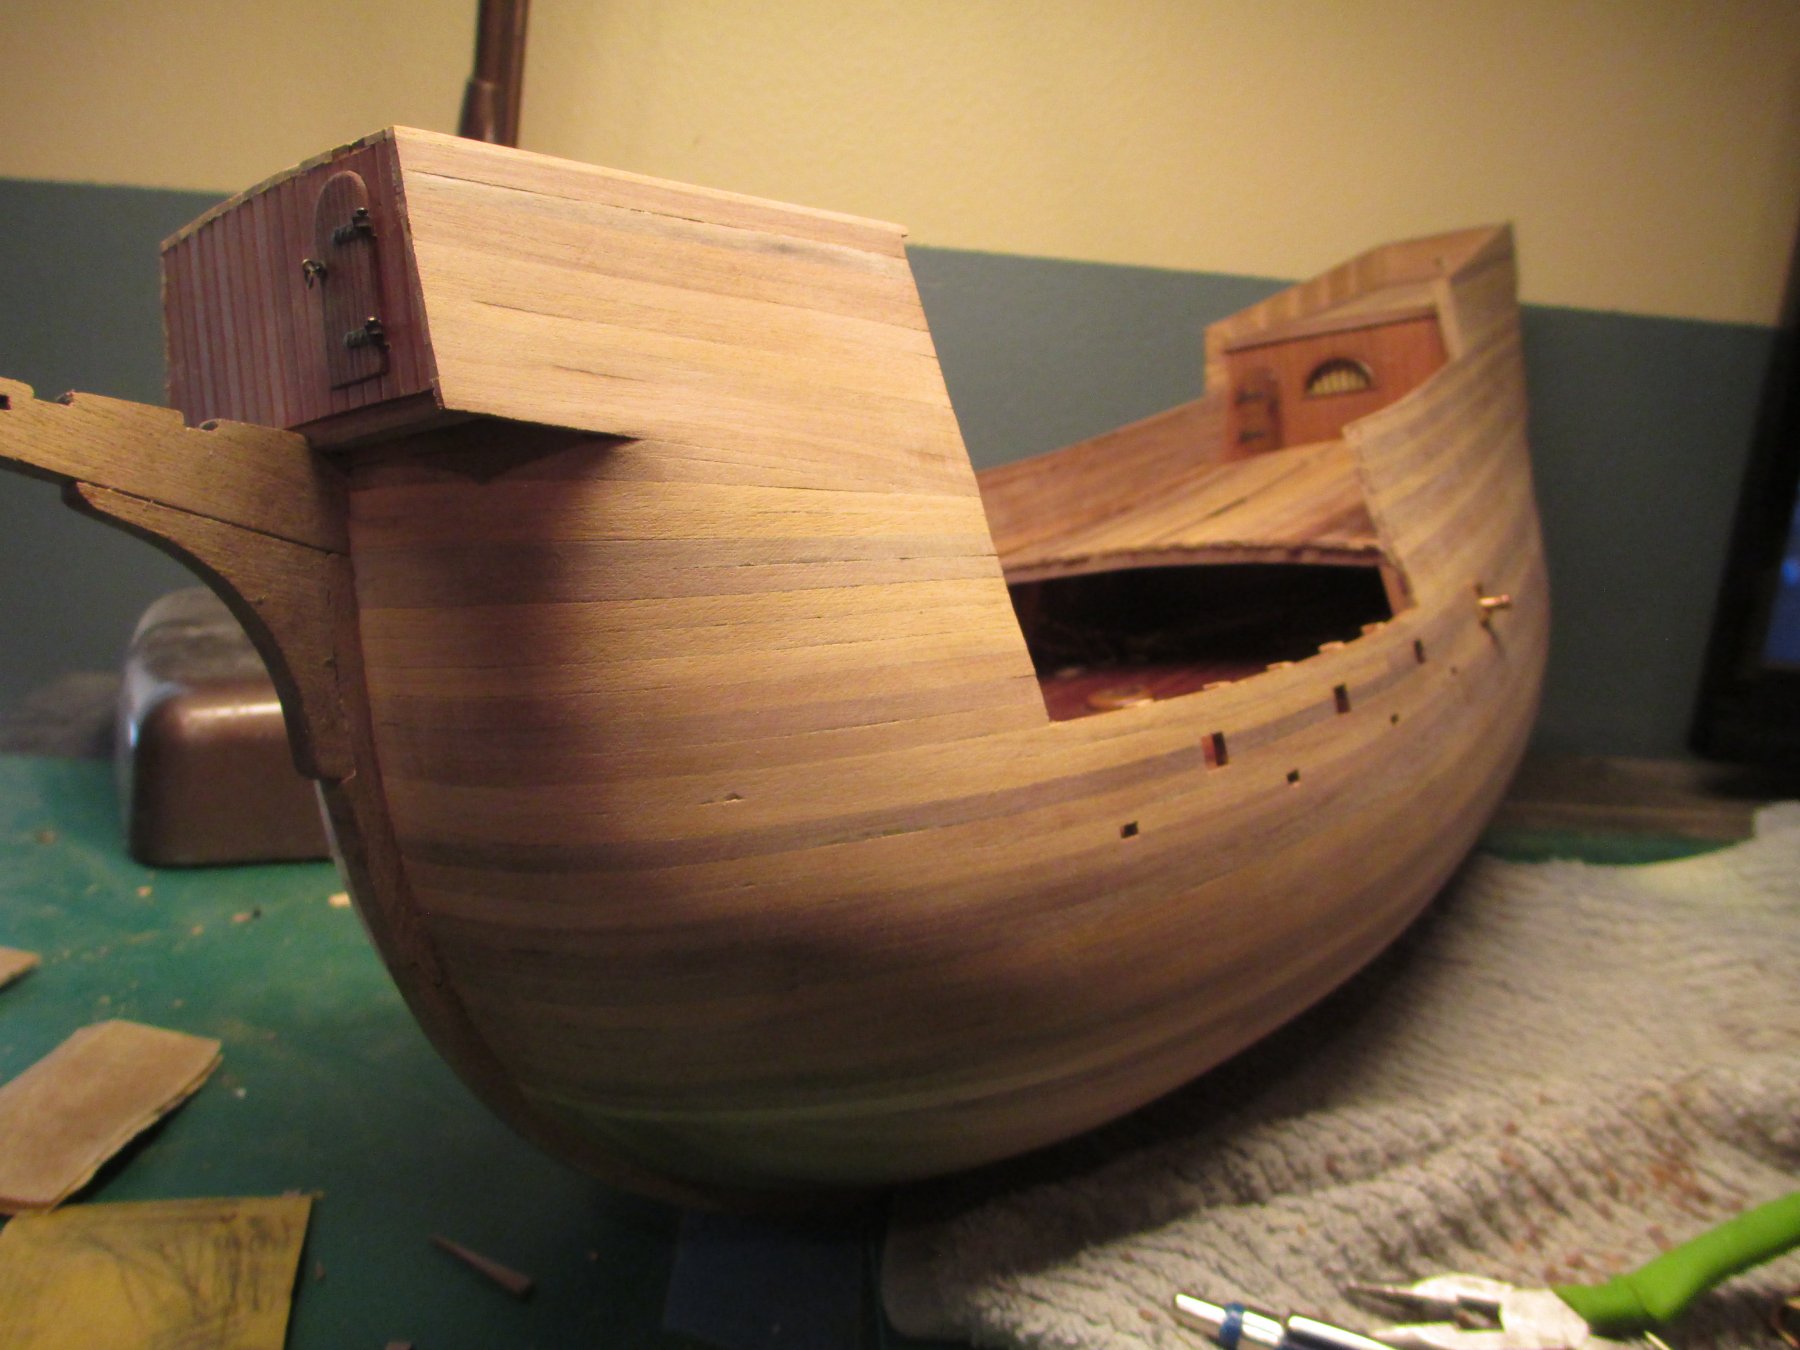
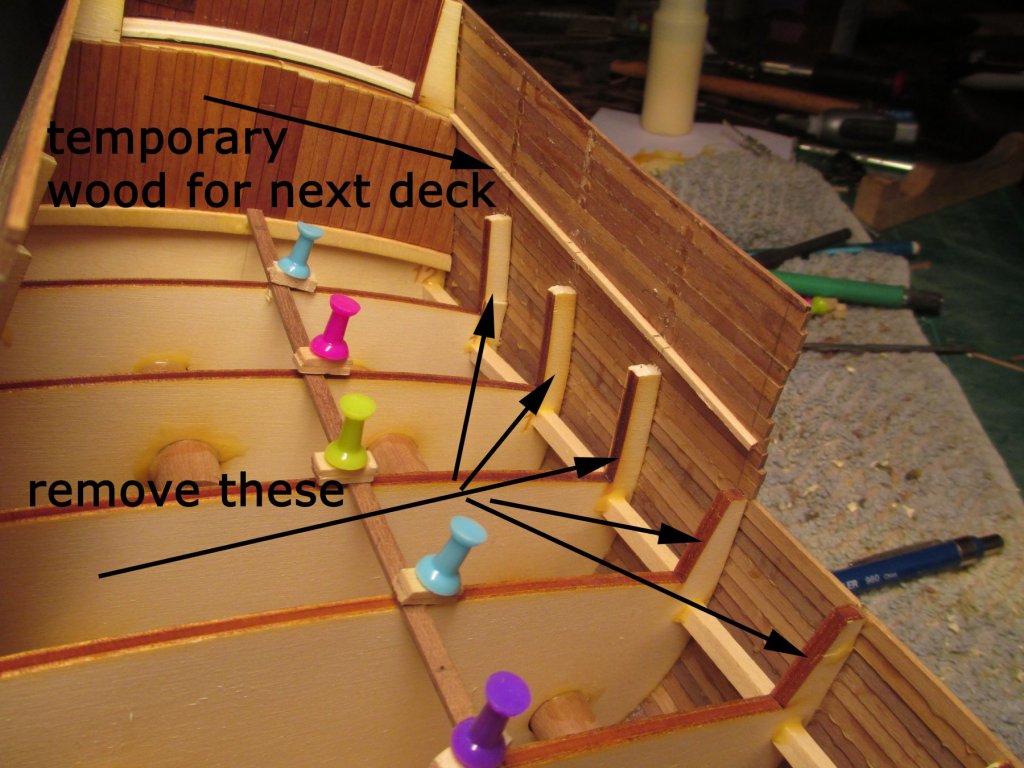
the second deck was a little tricky but I came up with a solution. the supports must be cut off in order to plank the first deck. I layed and glued a temprorary piece of wood on top of the second deck supports, and then cut them off. i'll place them back in the same spot once I'm done second planking the inner hull sided.


-
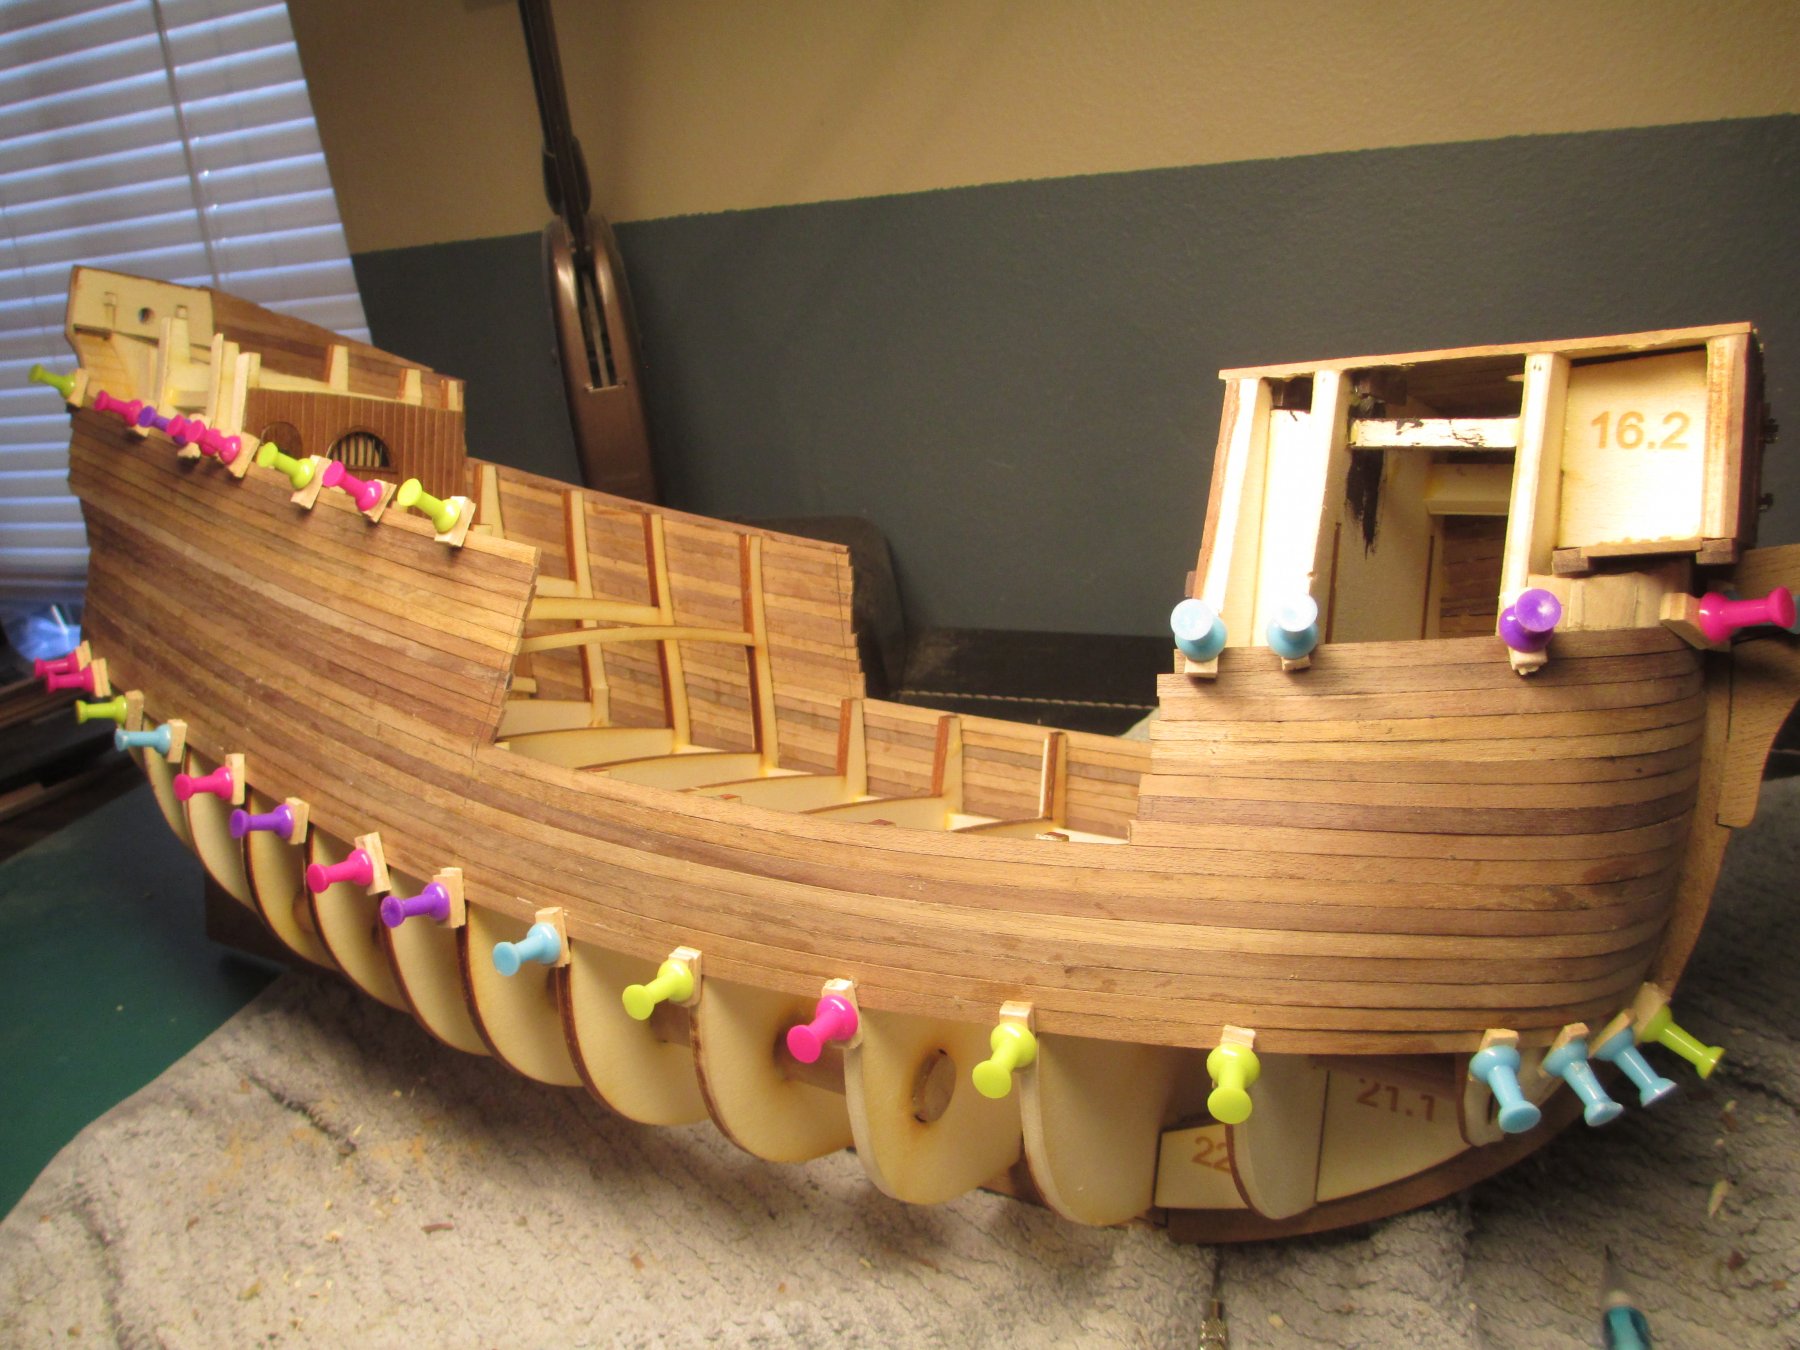
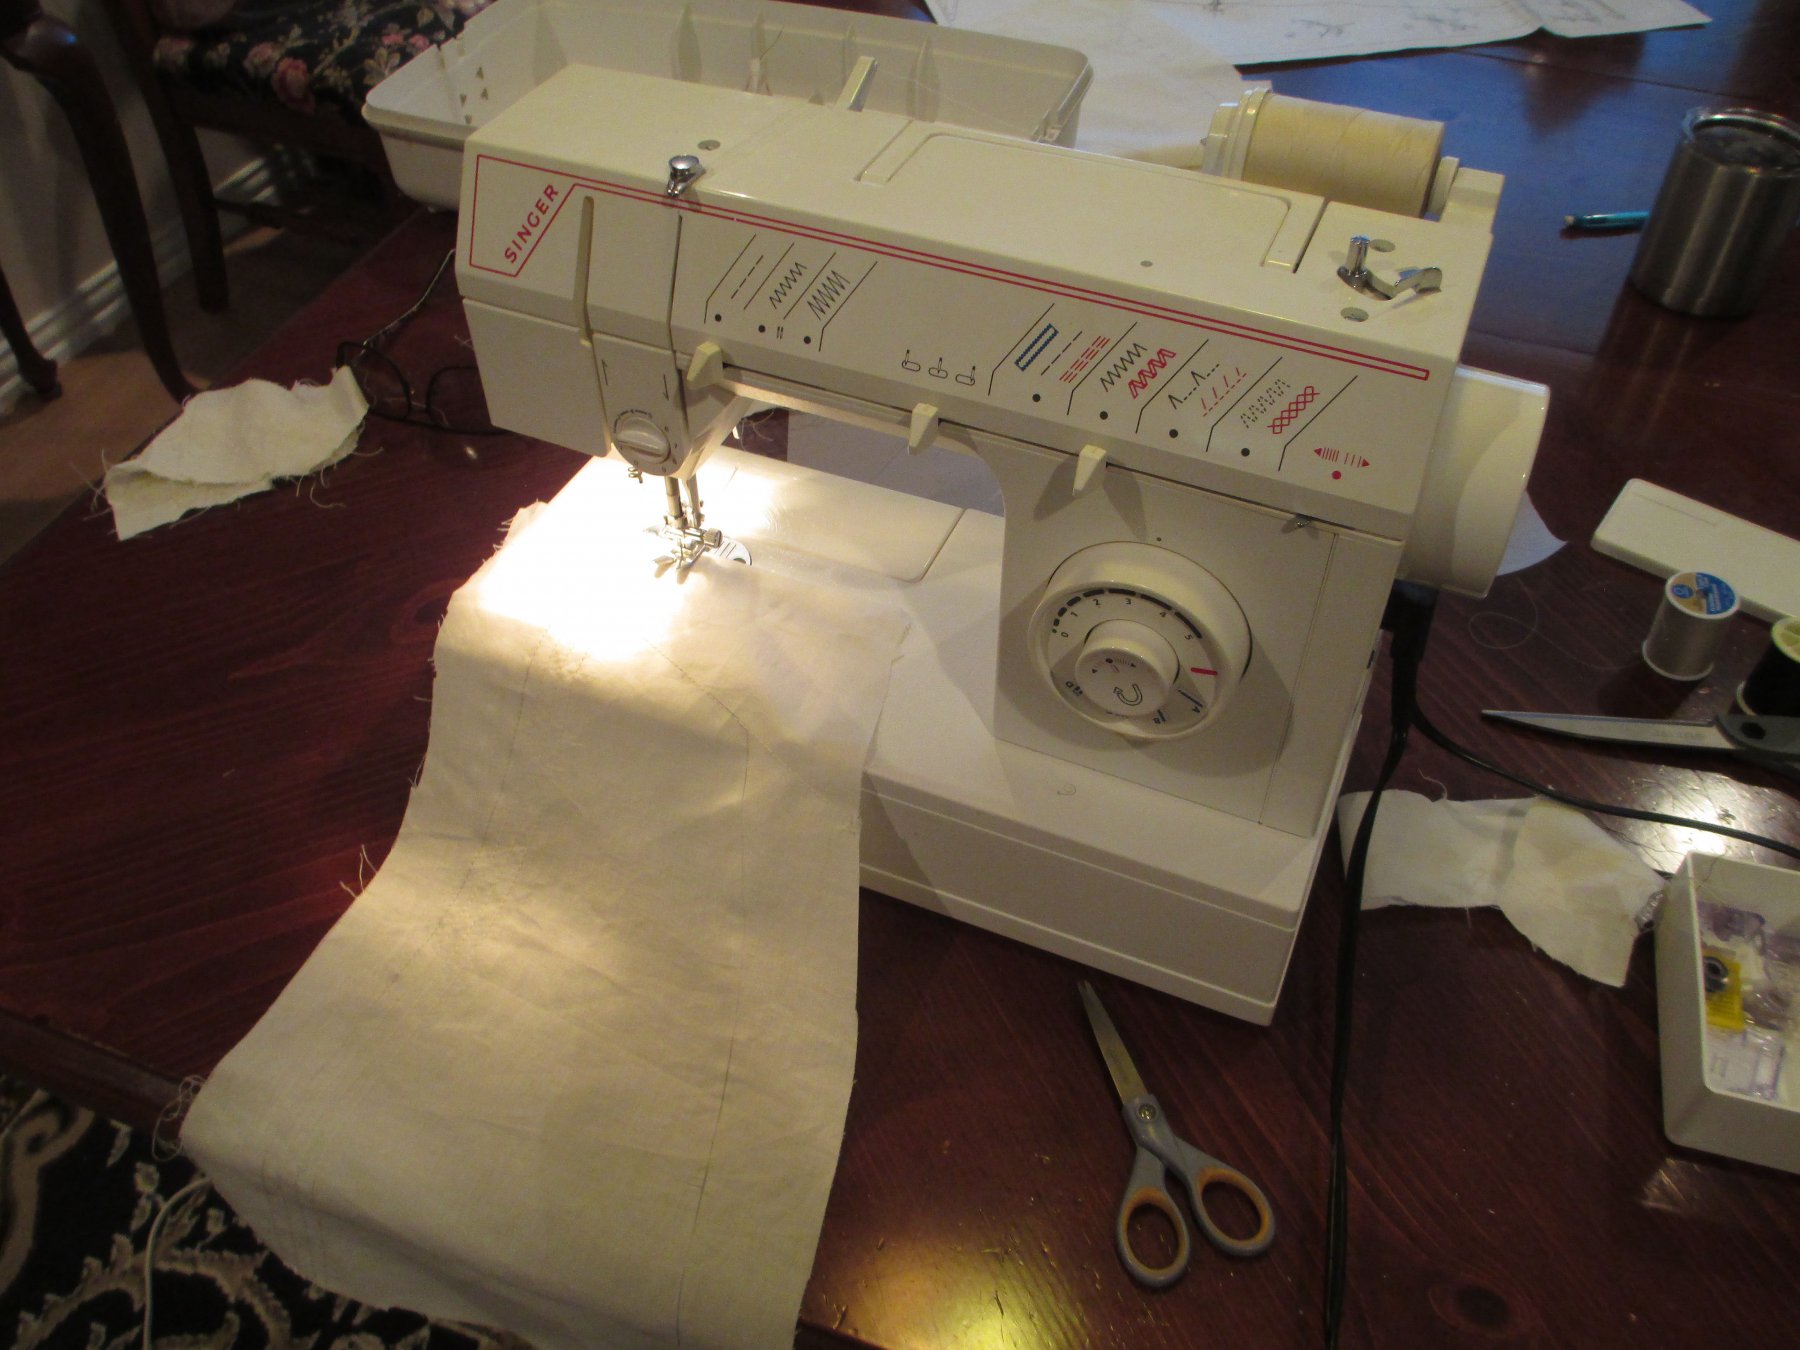
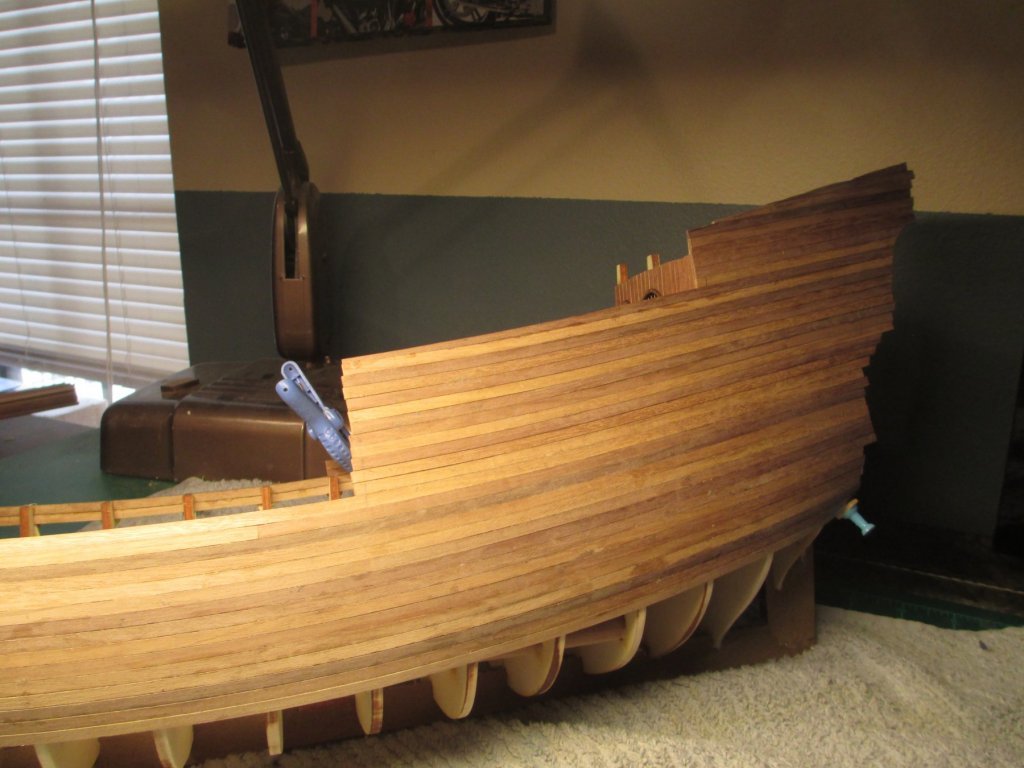
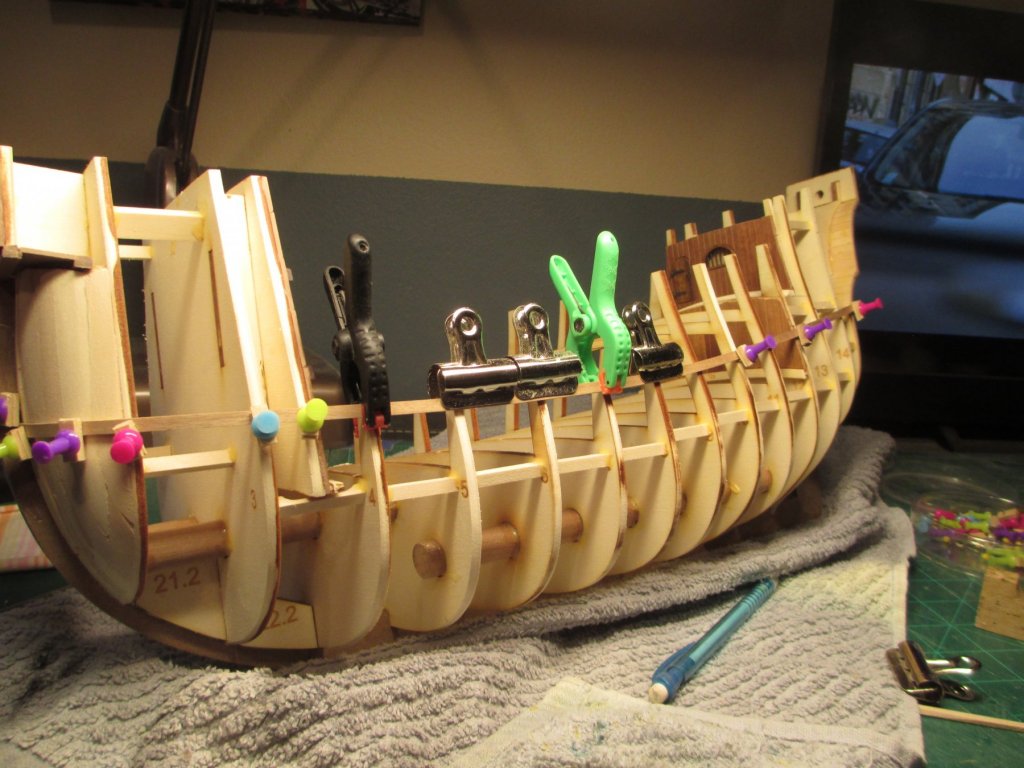
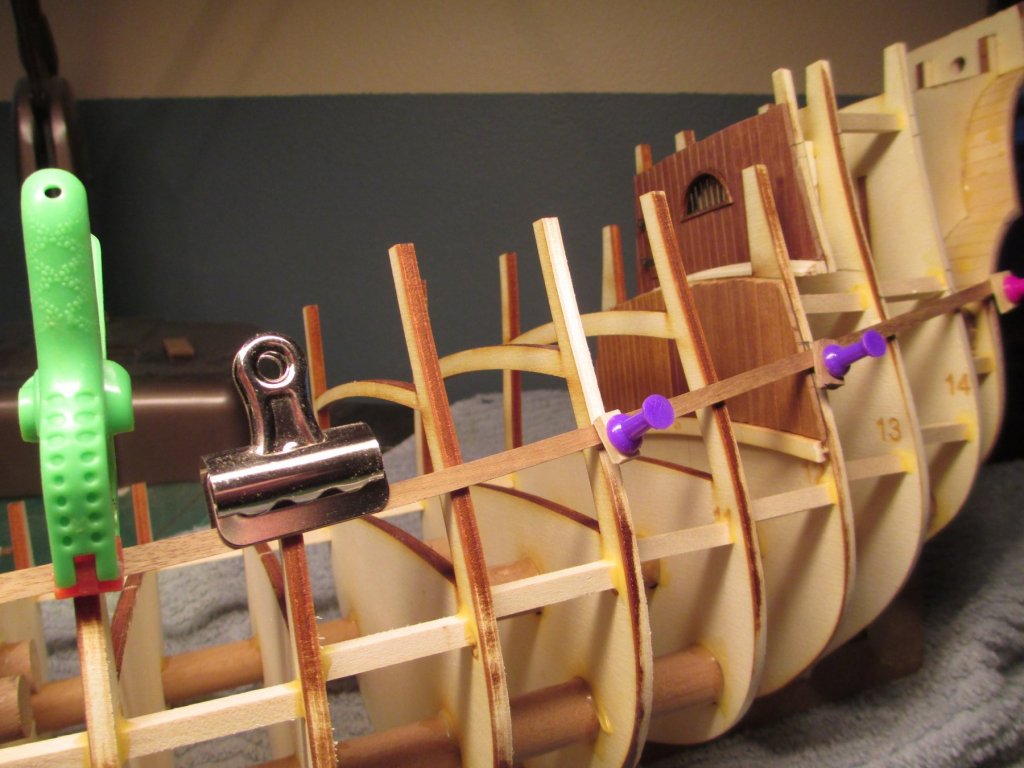
finishing the hull planking


-
with the port side half done I started on the starboard and forecastle. to complete half the planking on both sides took two weeks.


-
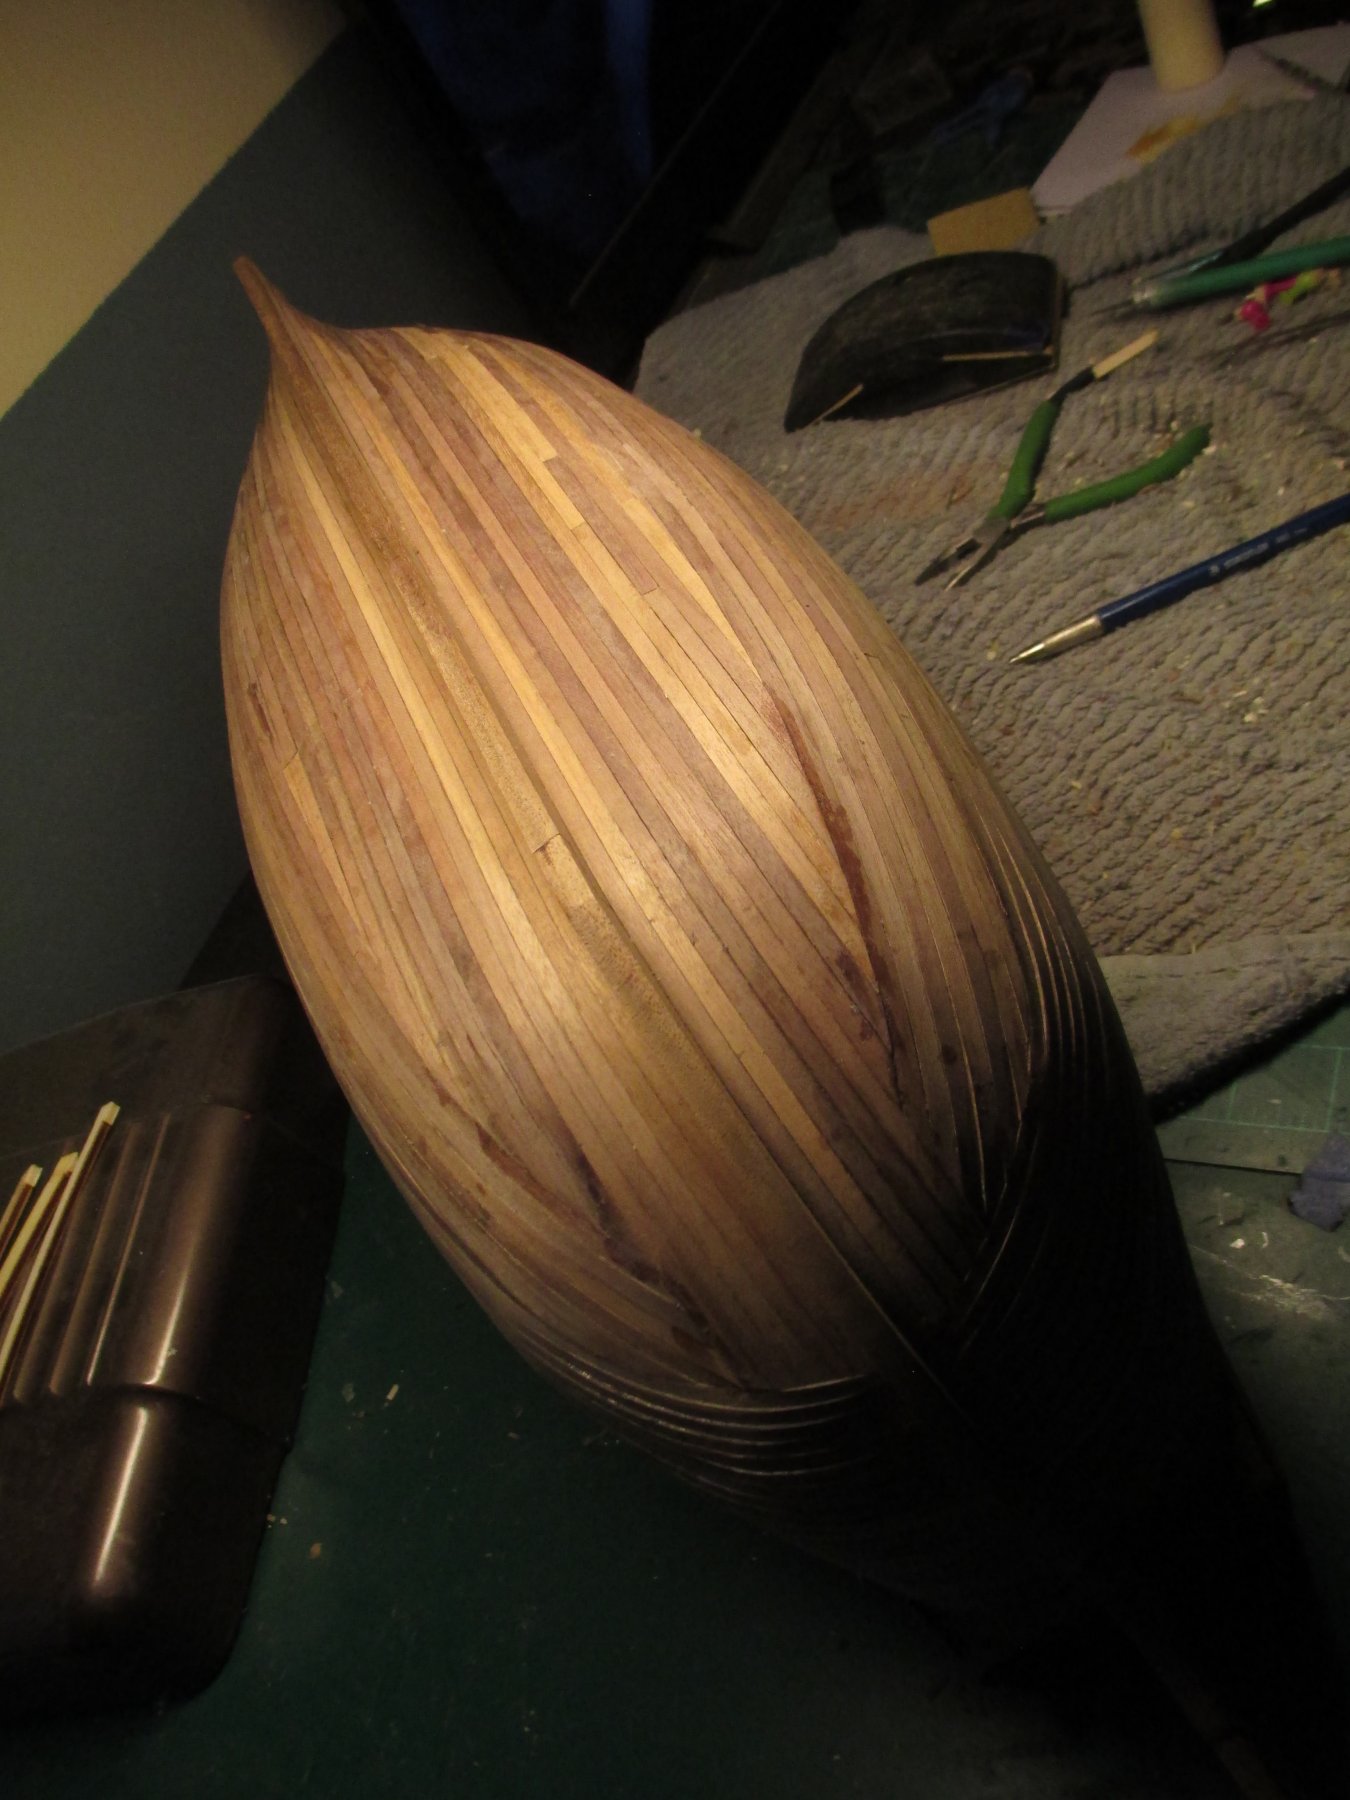
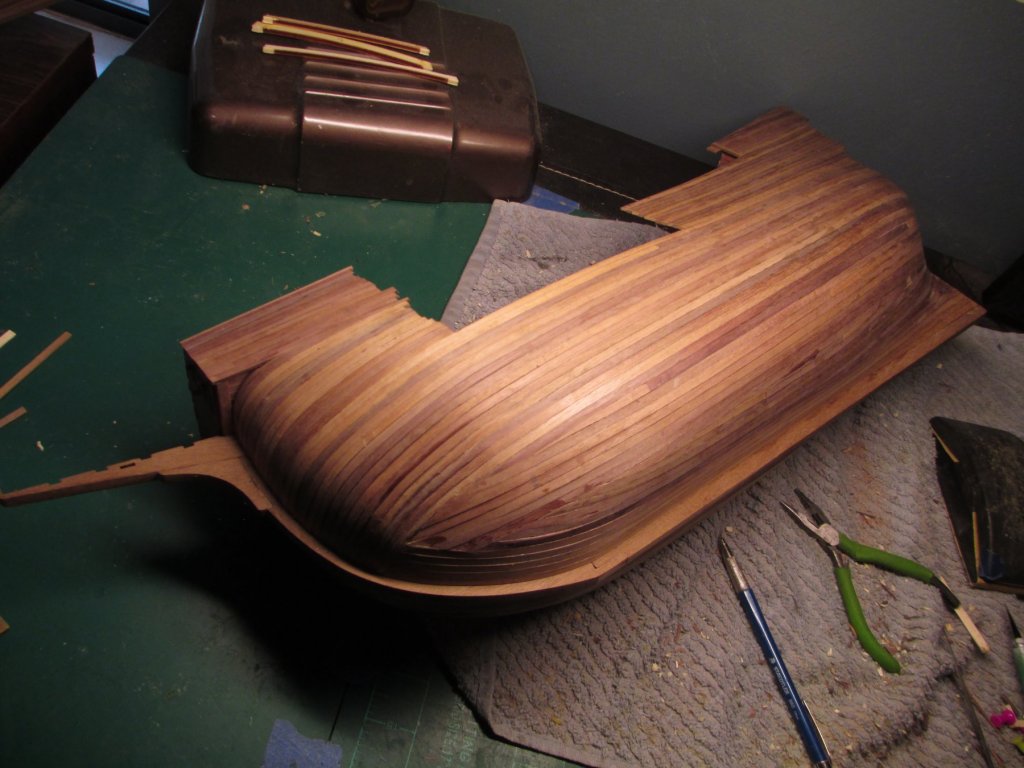
here is 3 days worth of hull planking, it is also as far as the wood would allow for natural bending around the bow. I soaked the wood planking overnight in water and used a heated plank bender to curve the wood. its a good thing this planking is 1.5mm thick, there will be enough material to sand the curved bow section smooth without compromising or sanding to down to thin.
-
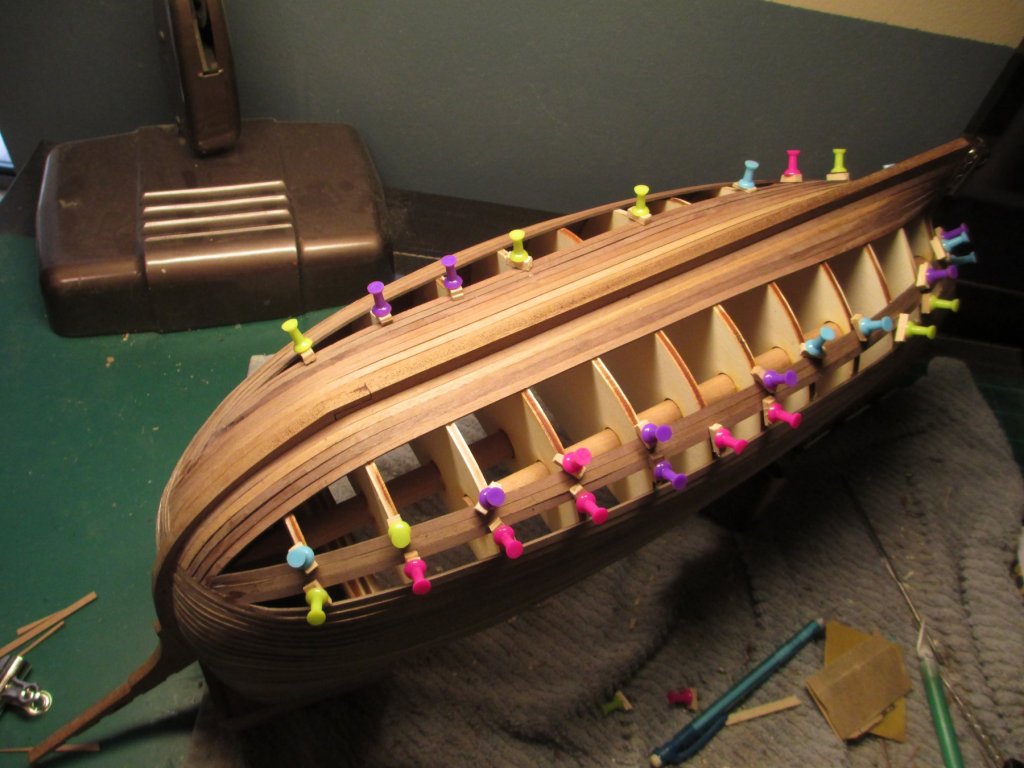
once the stern is planked with second planking and the wood bow filler is has set its time to start planking the hull. I'll be using tacks with wood spacers to set the planking, I tried to nail some of the planking but the walnut wood is too dense and hard and splits. pre drilling the holes for the wood in too much work and the tacks will work just as well.


-
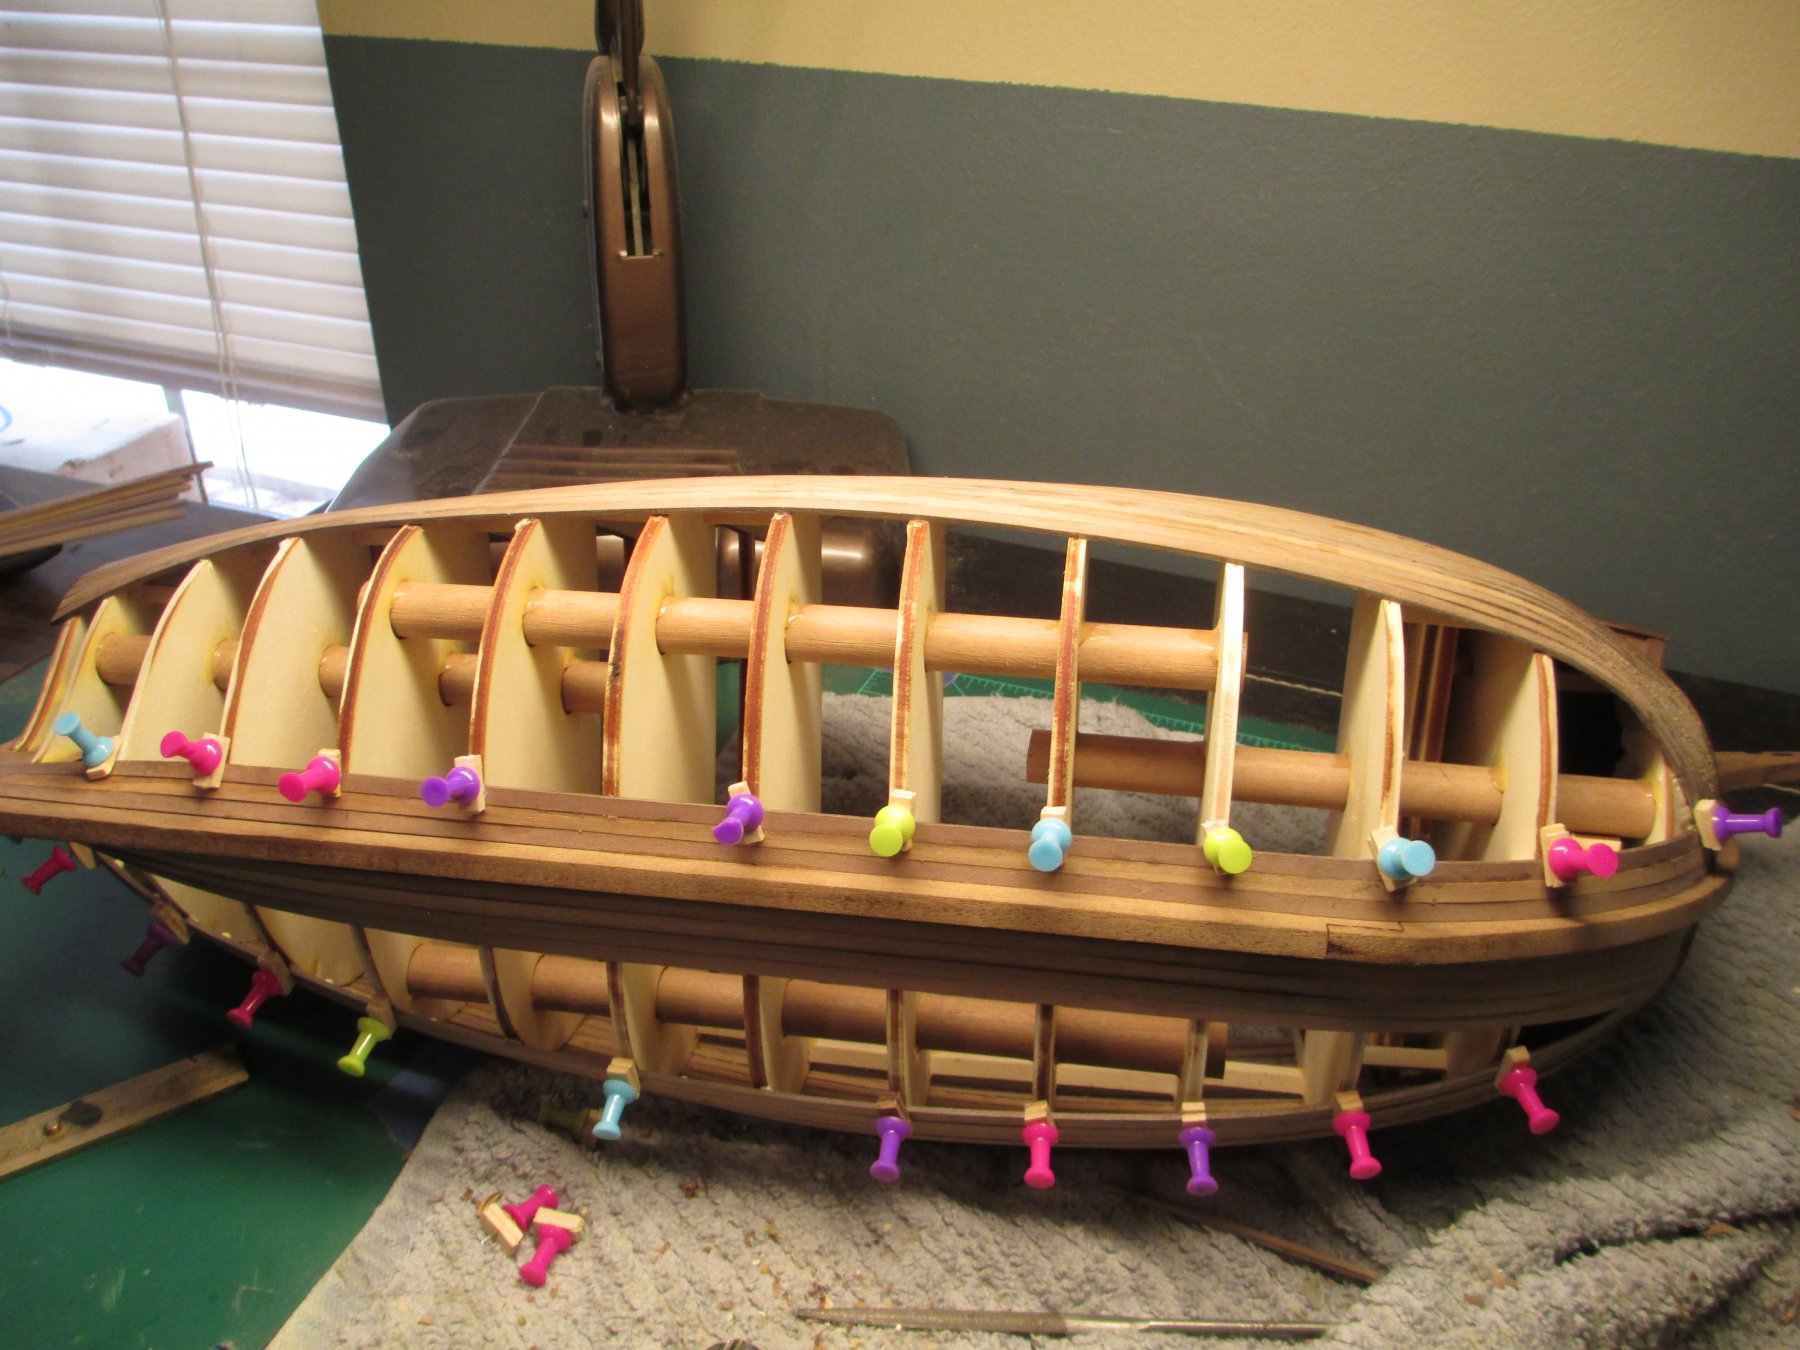
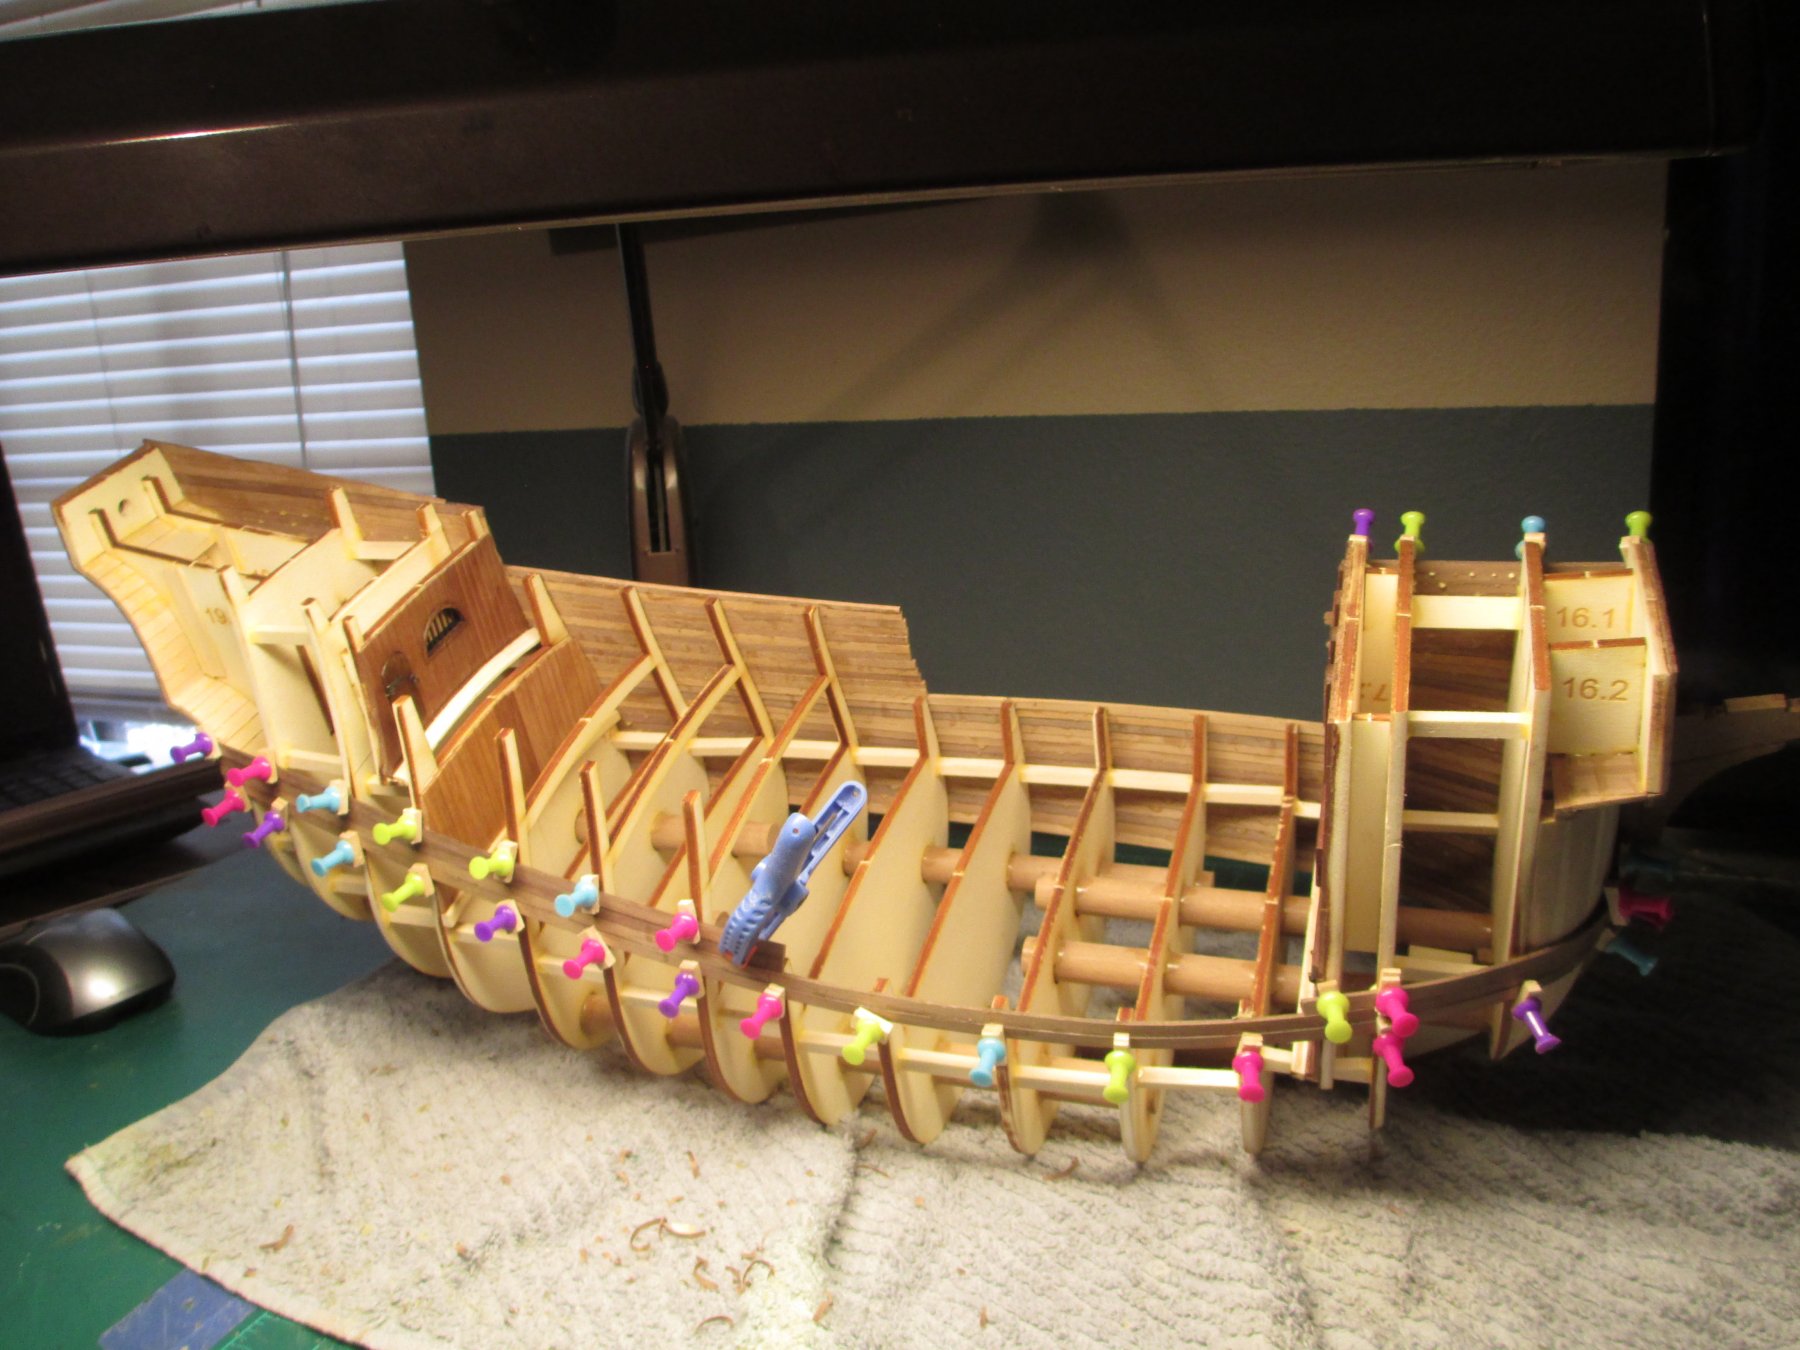
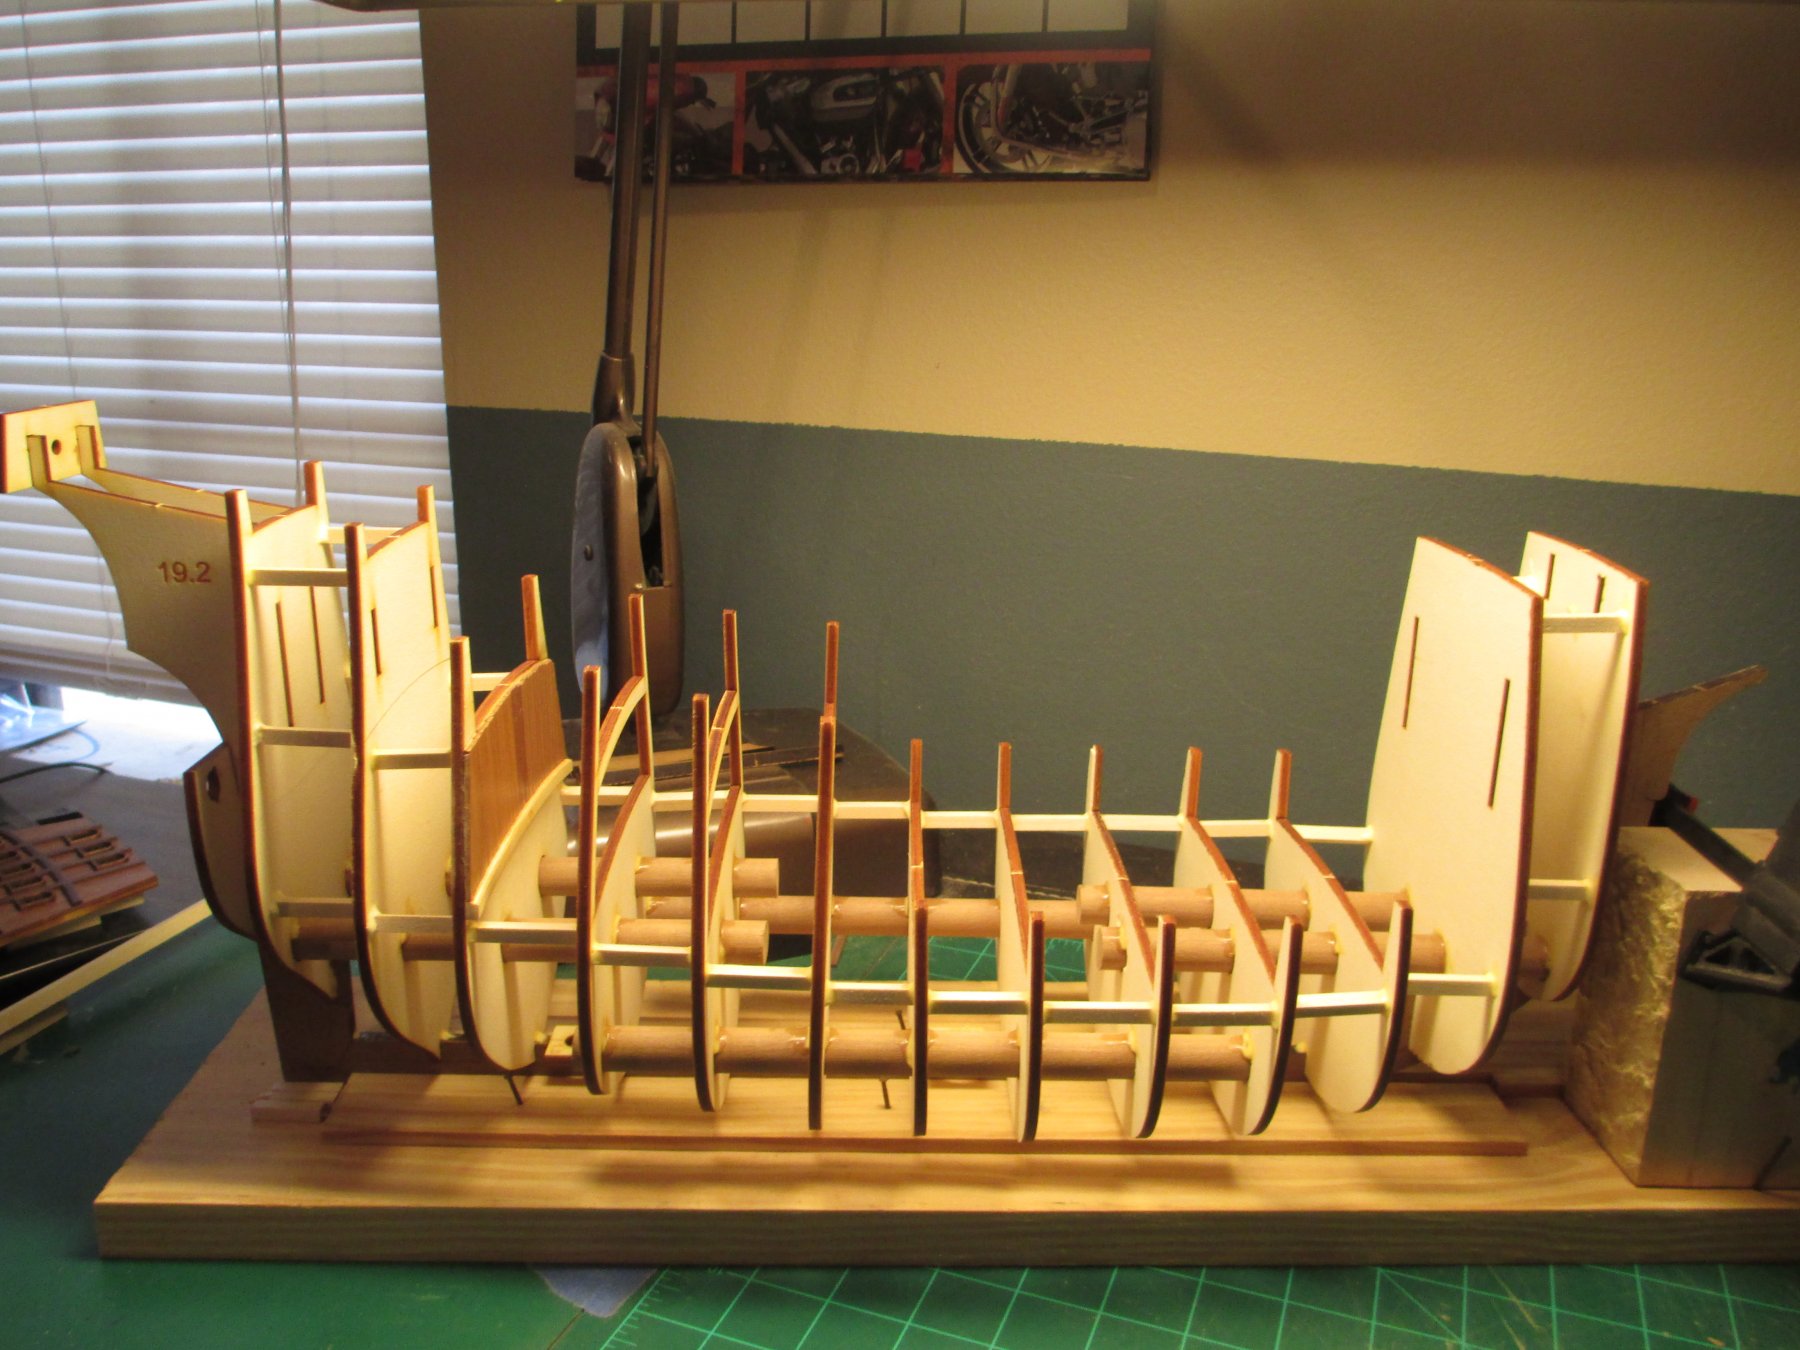
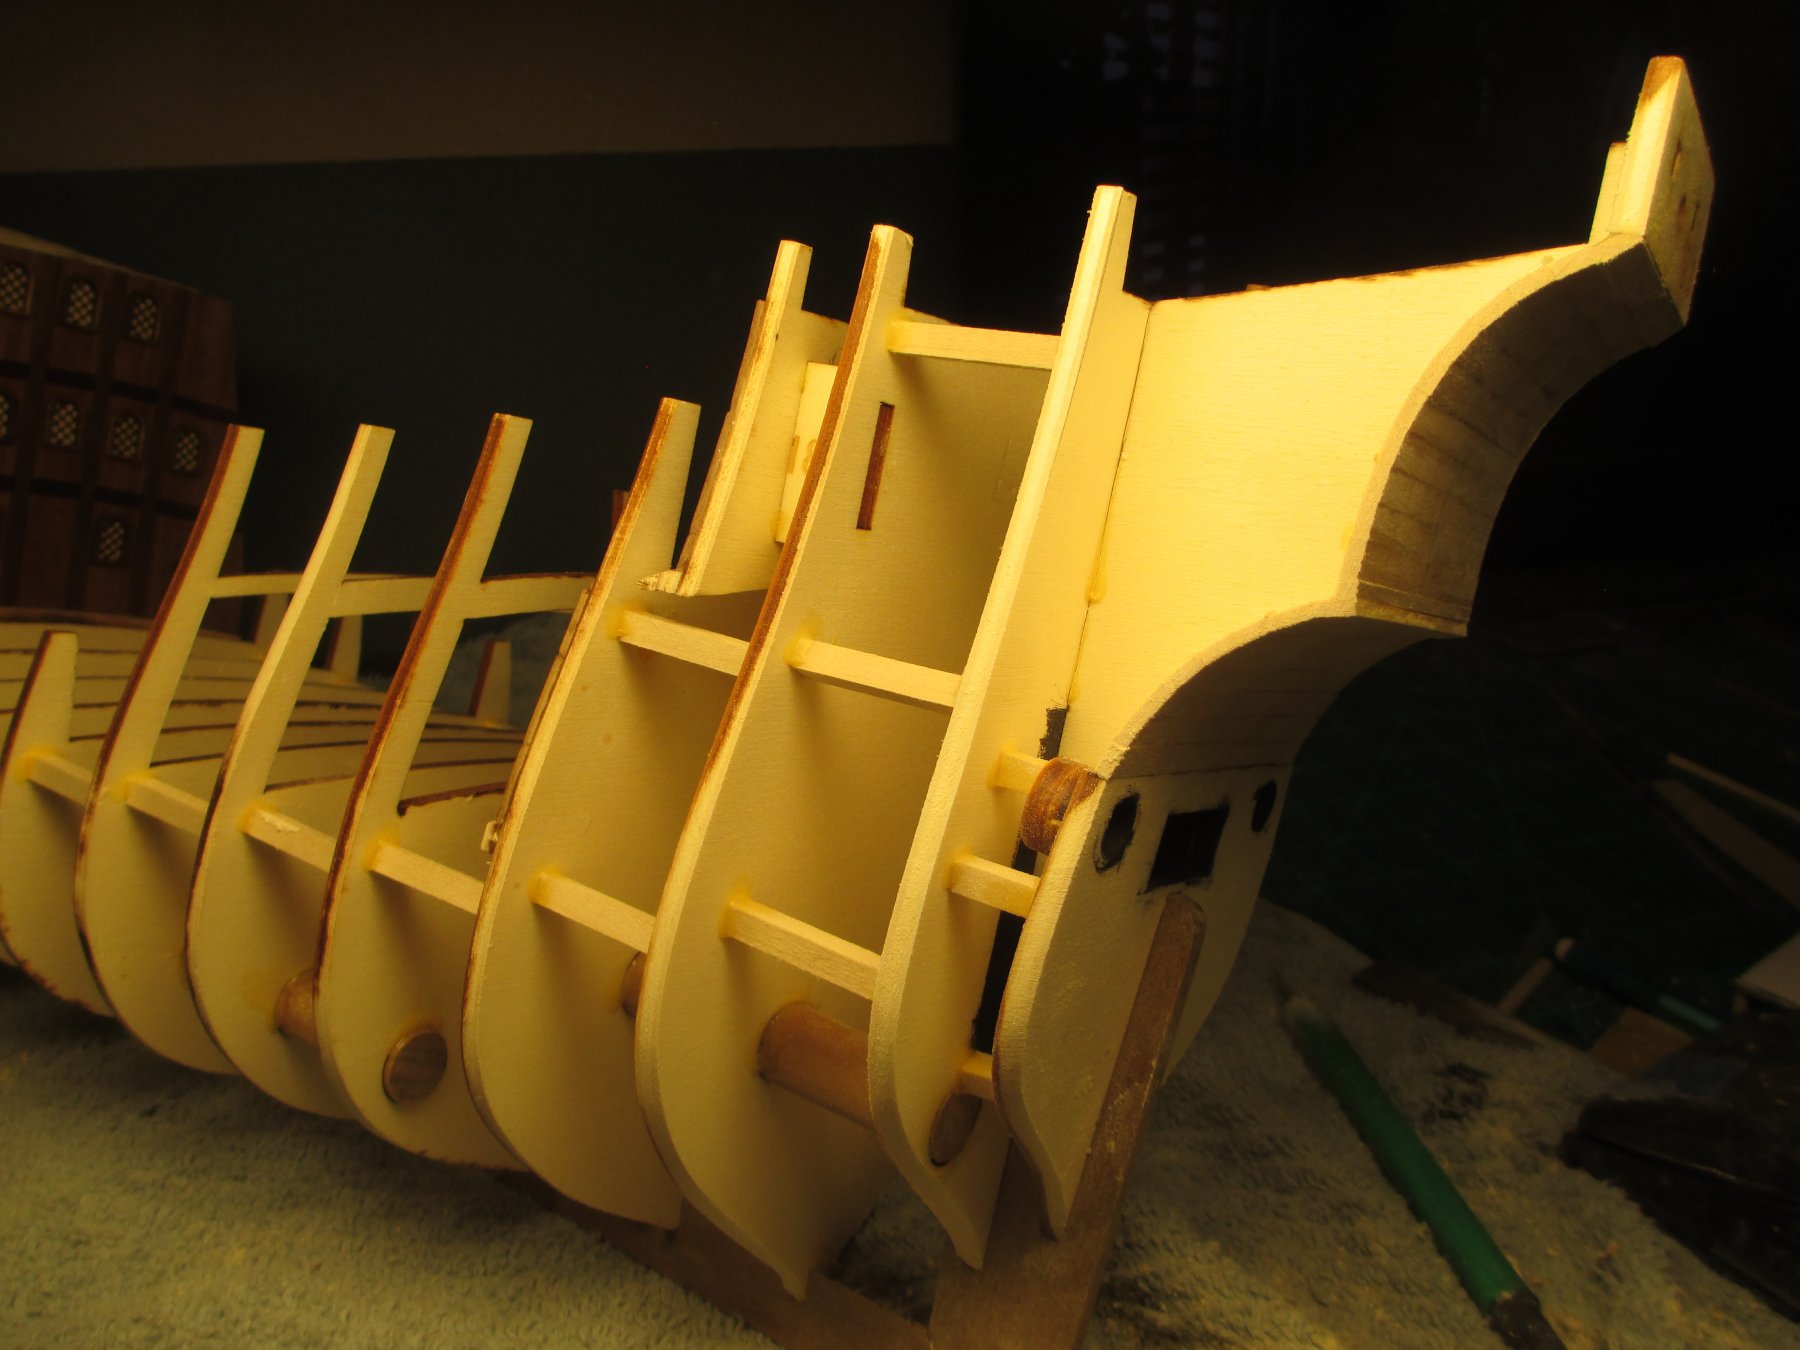
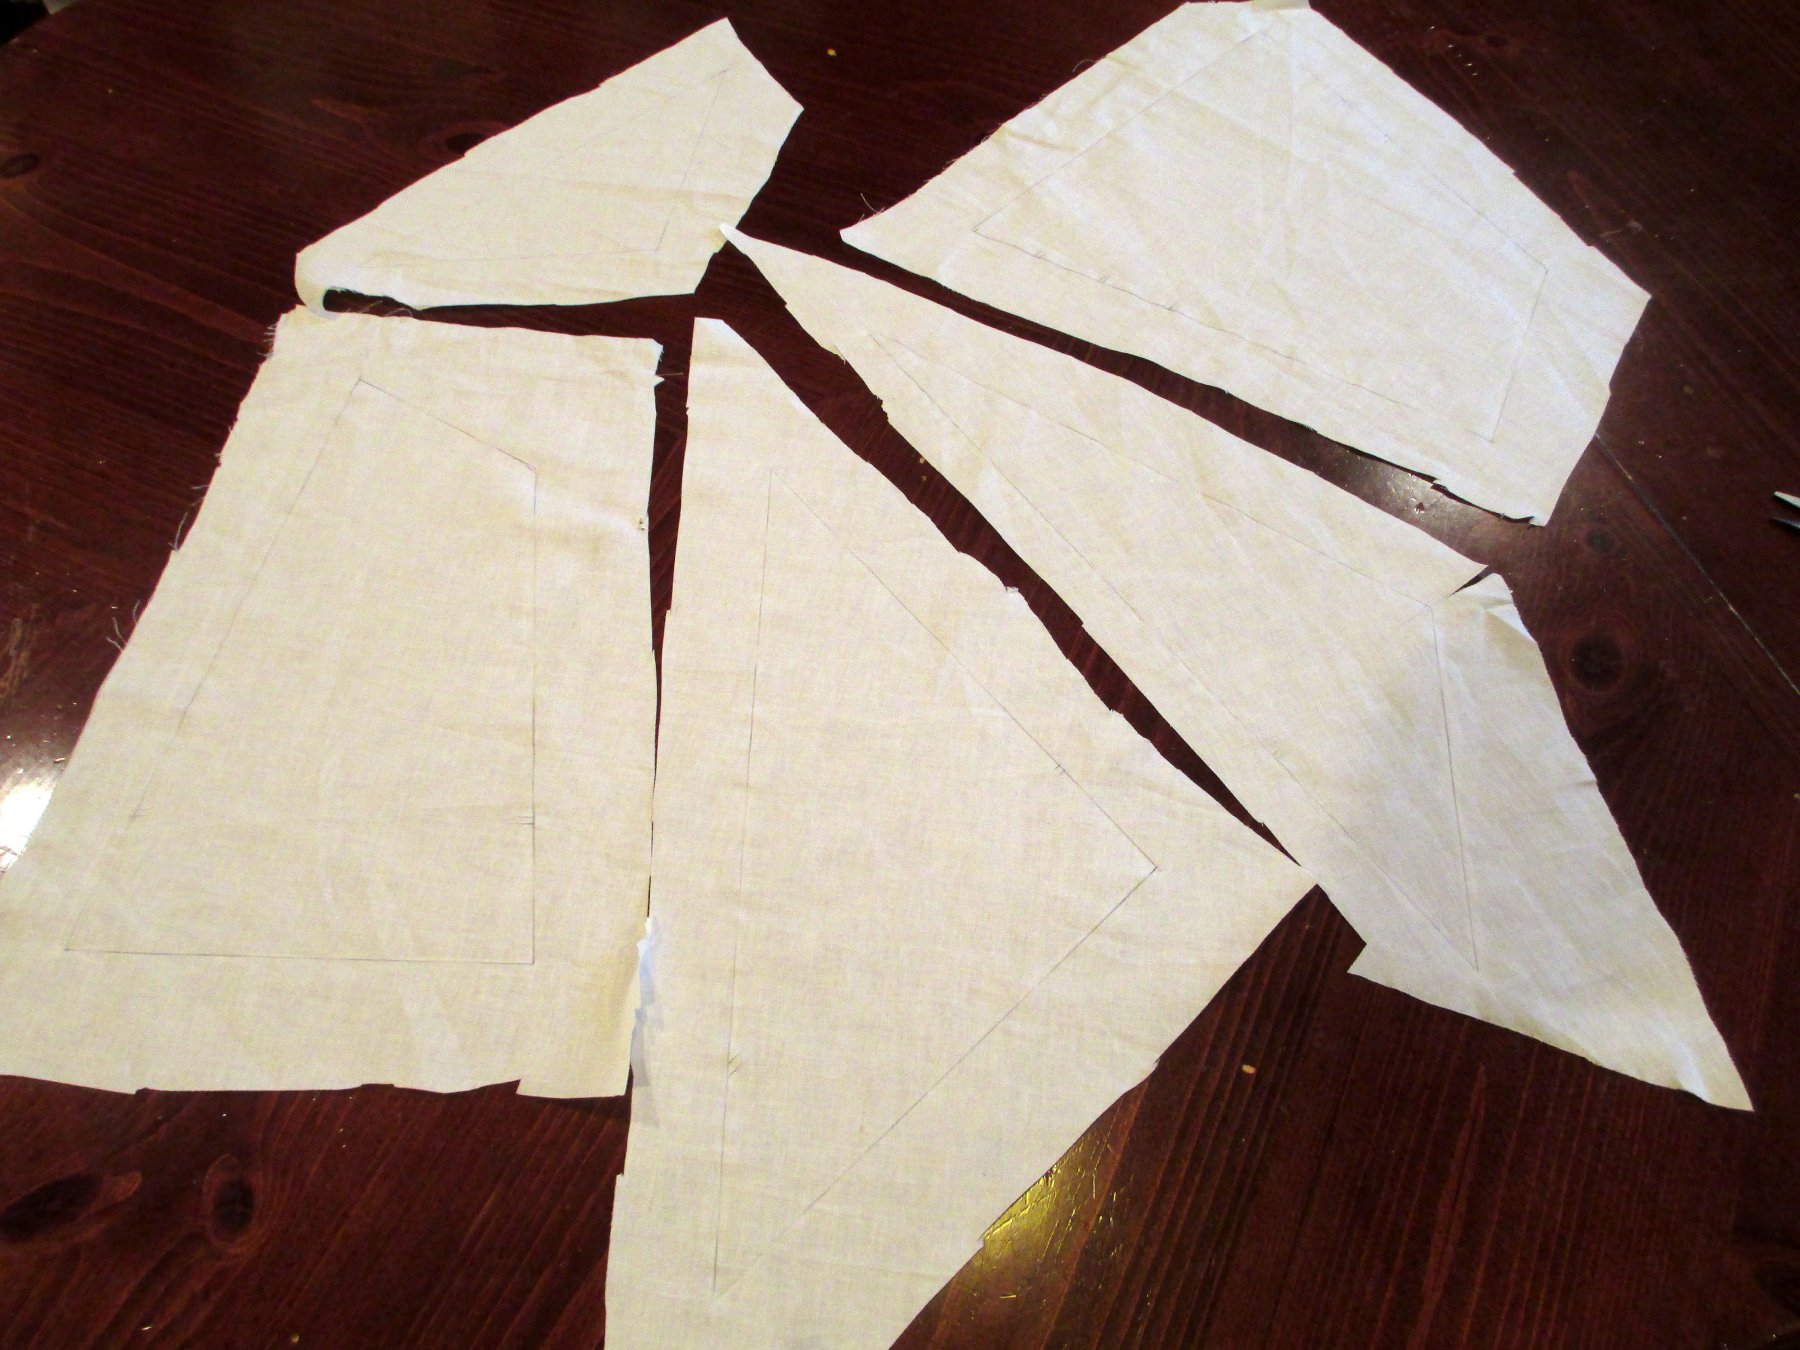
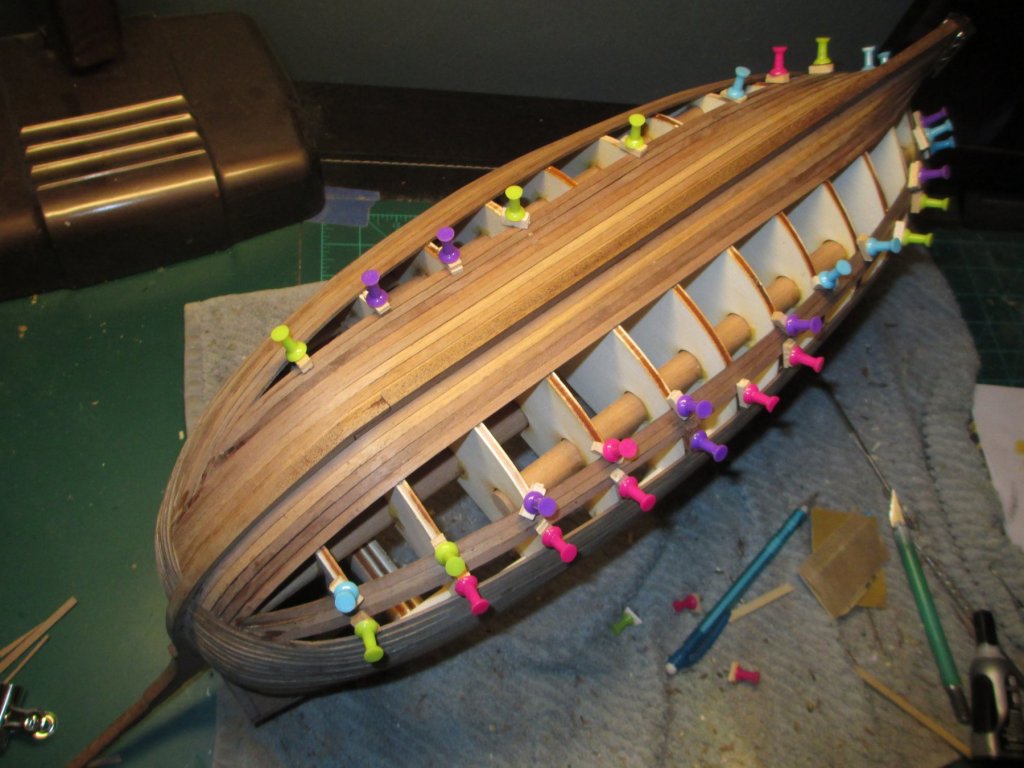
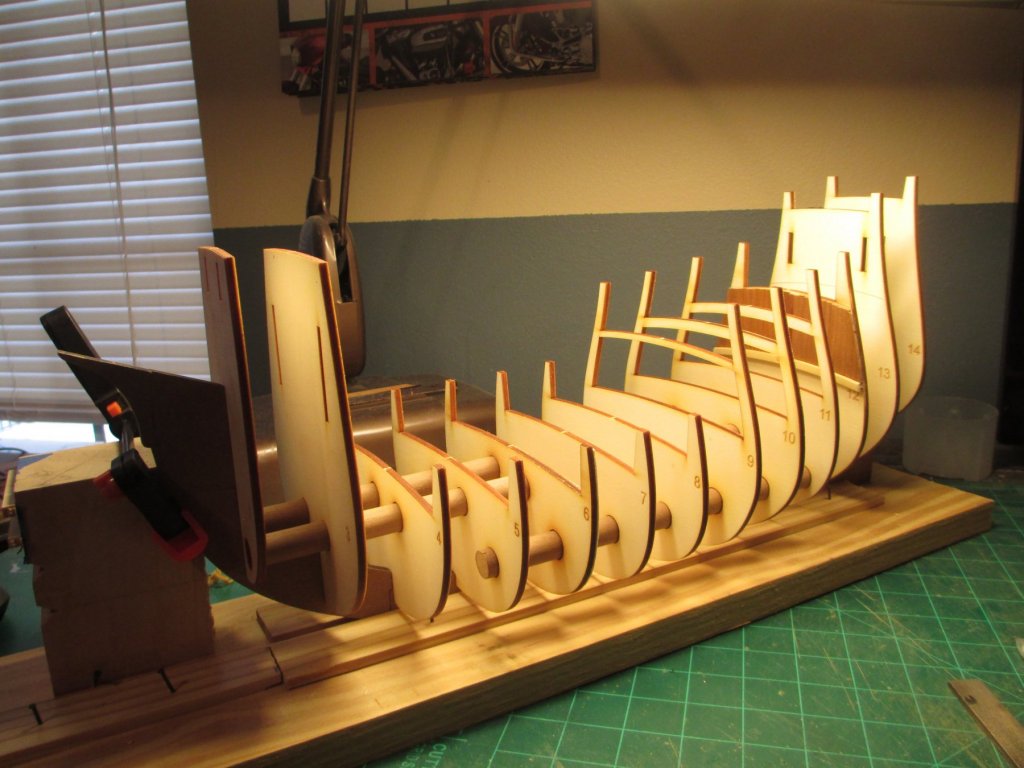
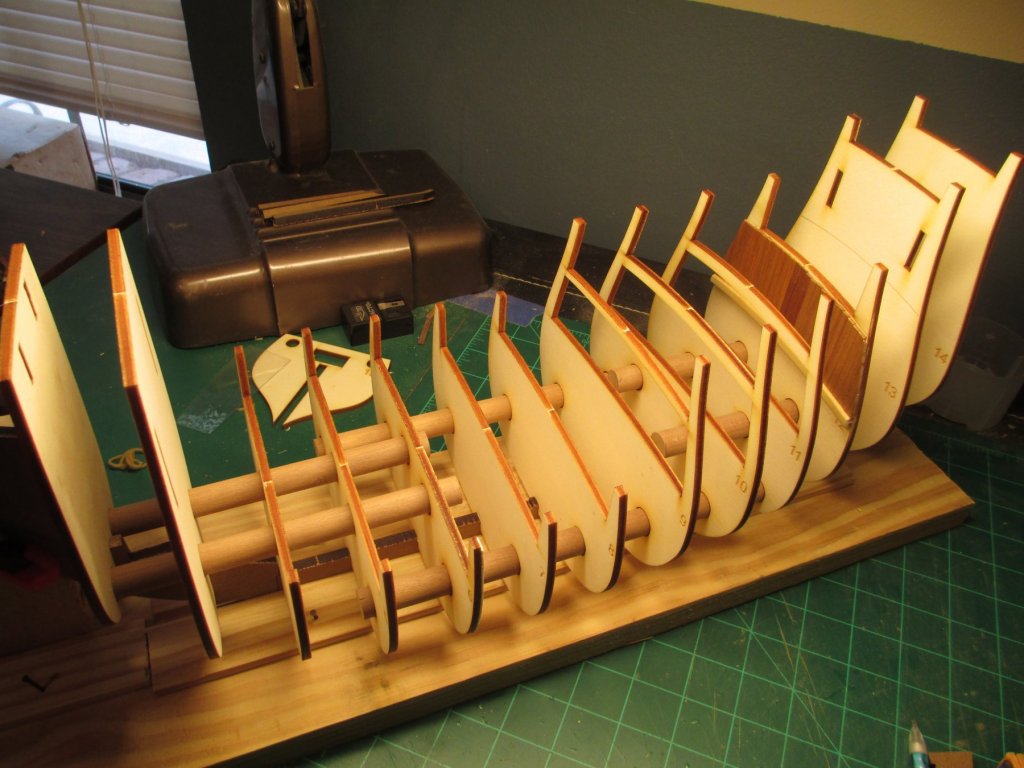
pre planking on a few frames before the hull planking begins

-
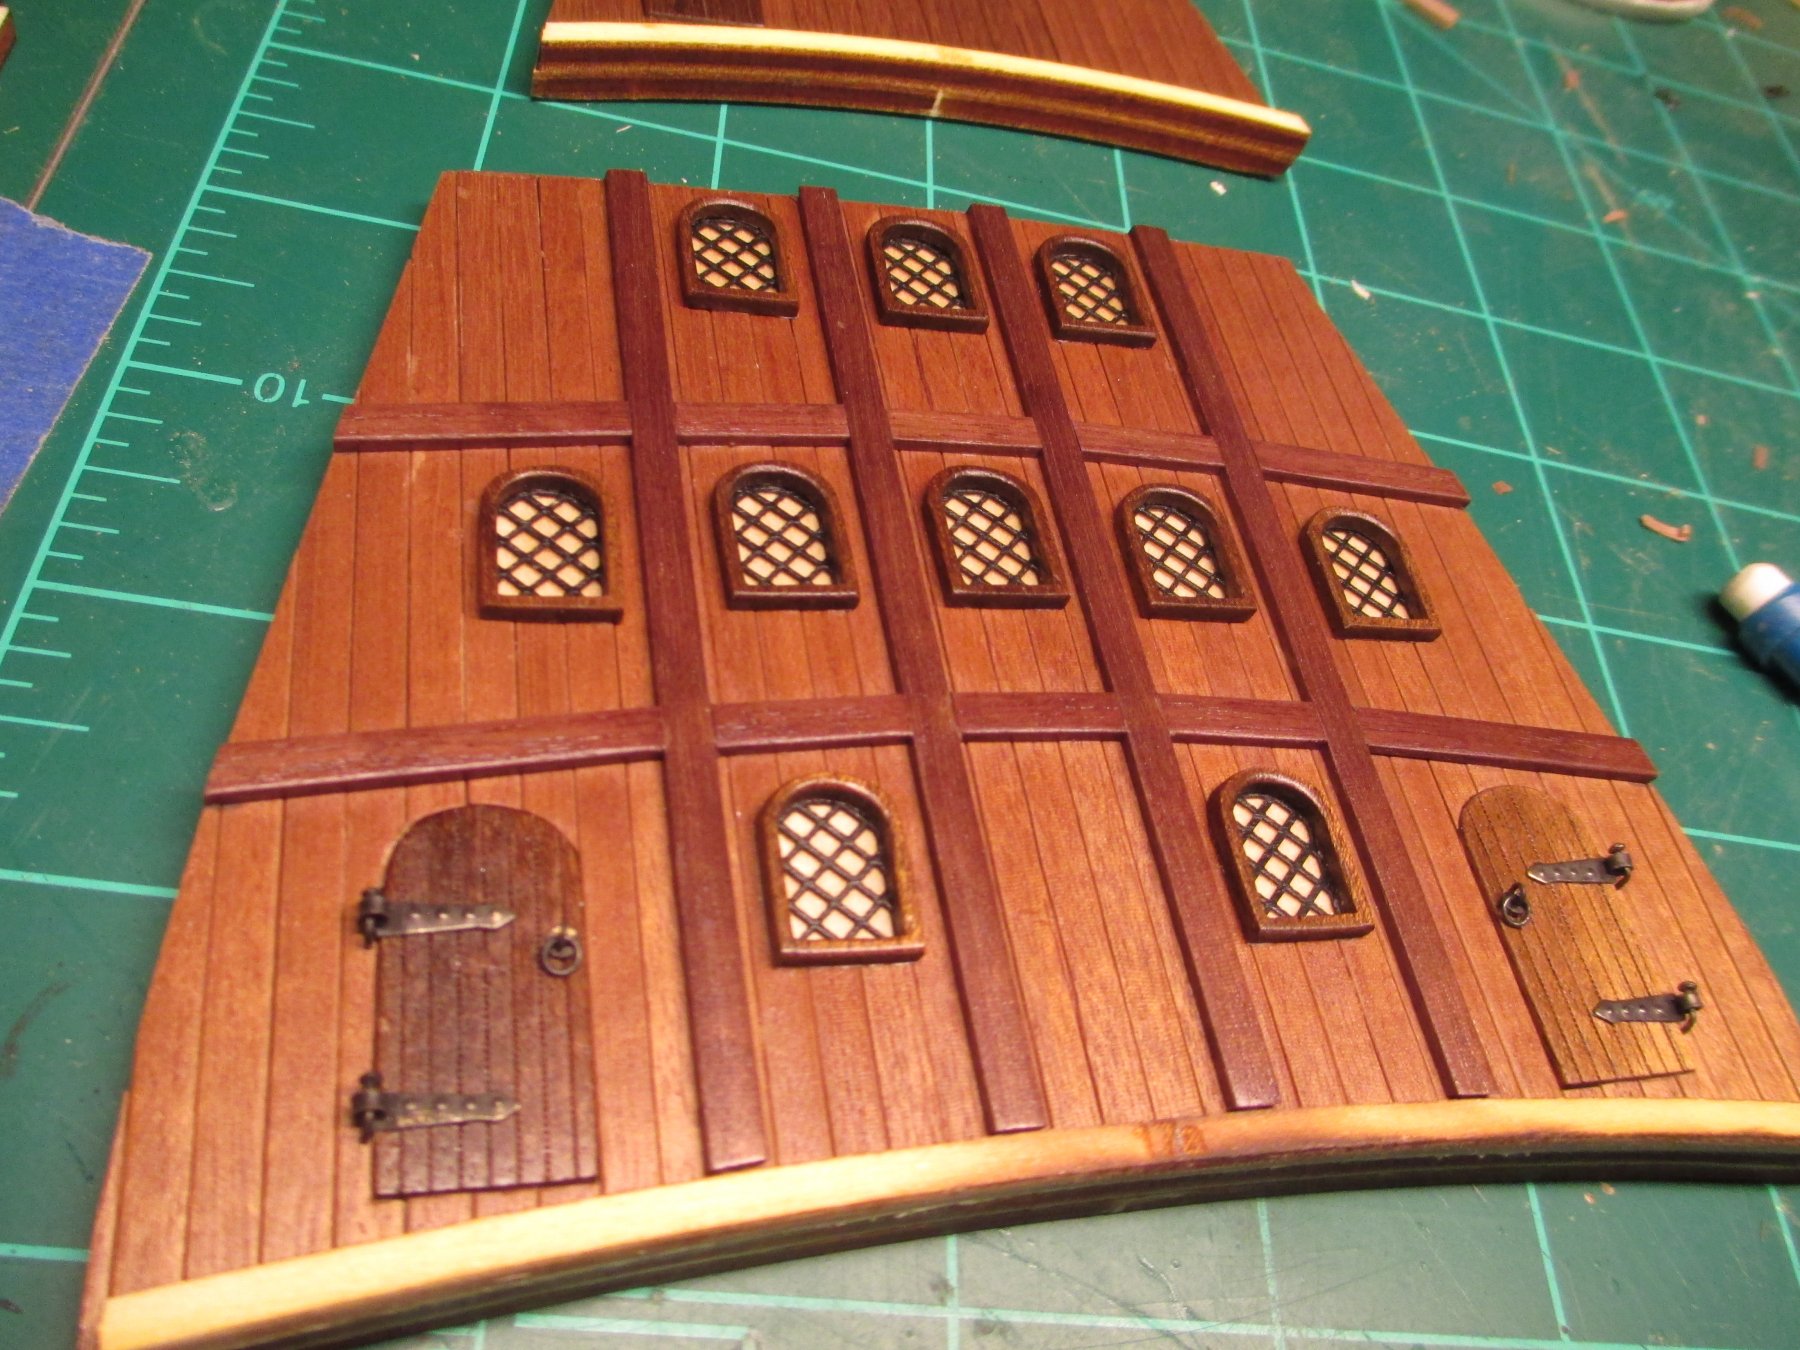
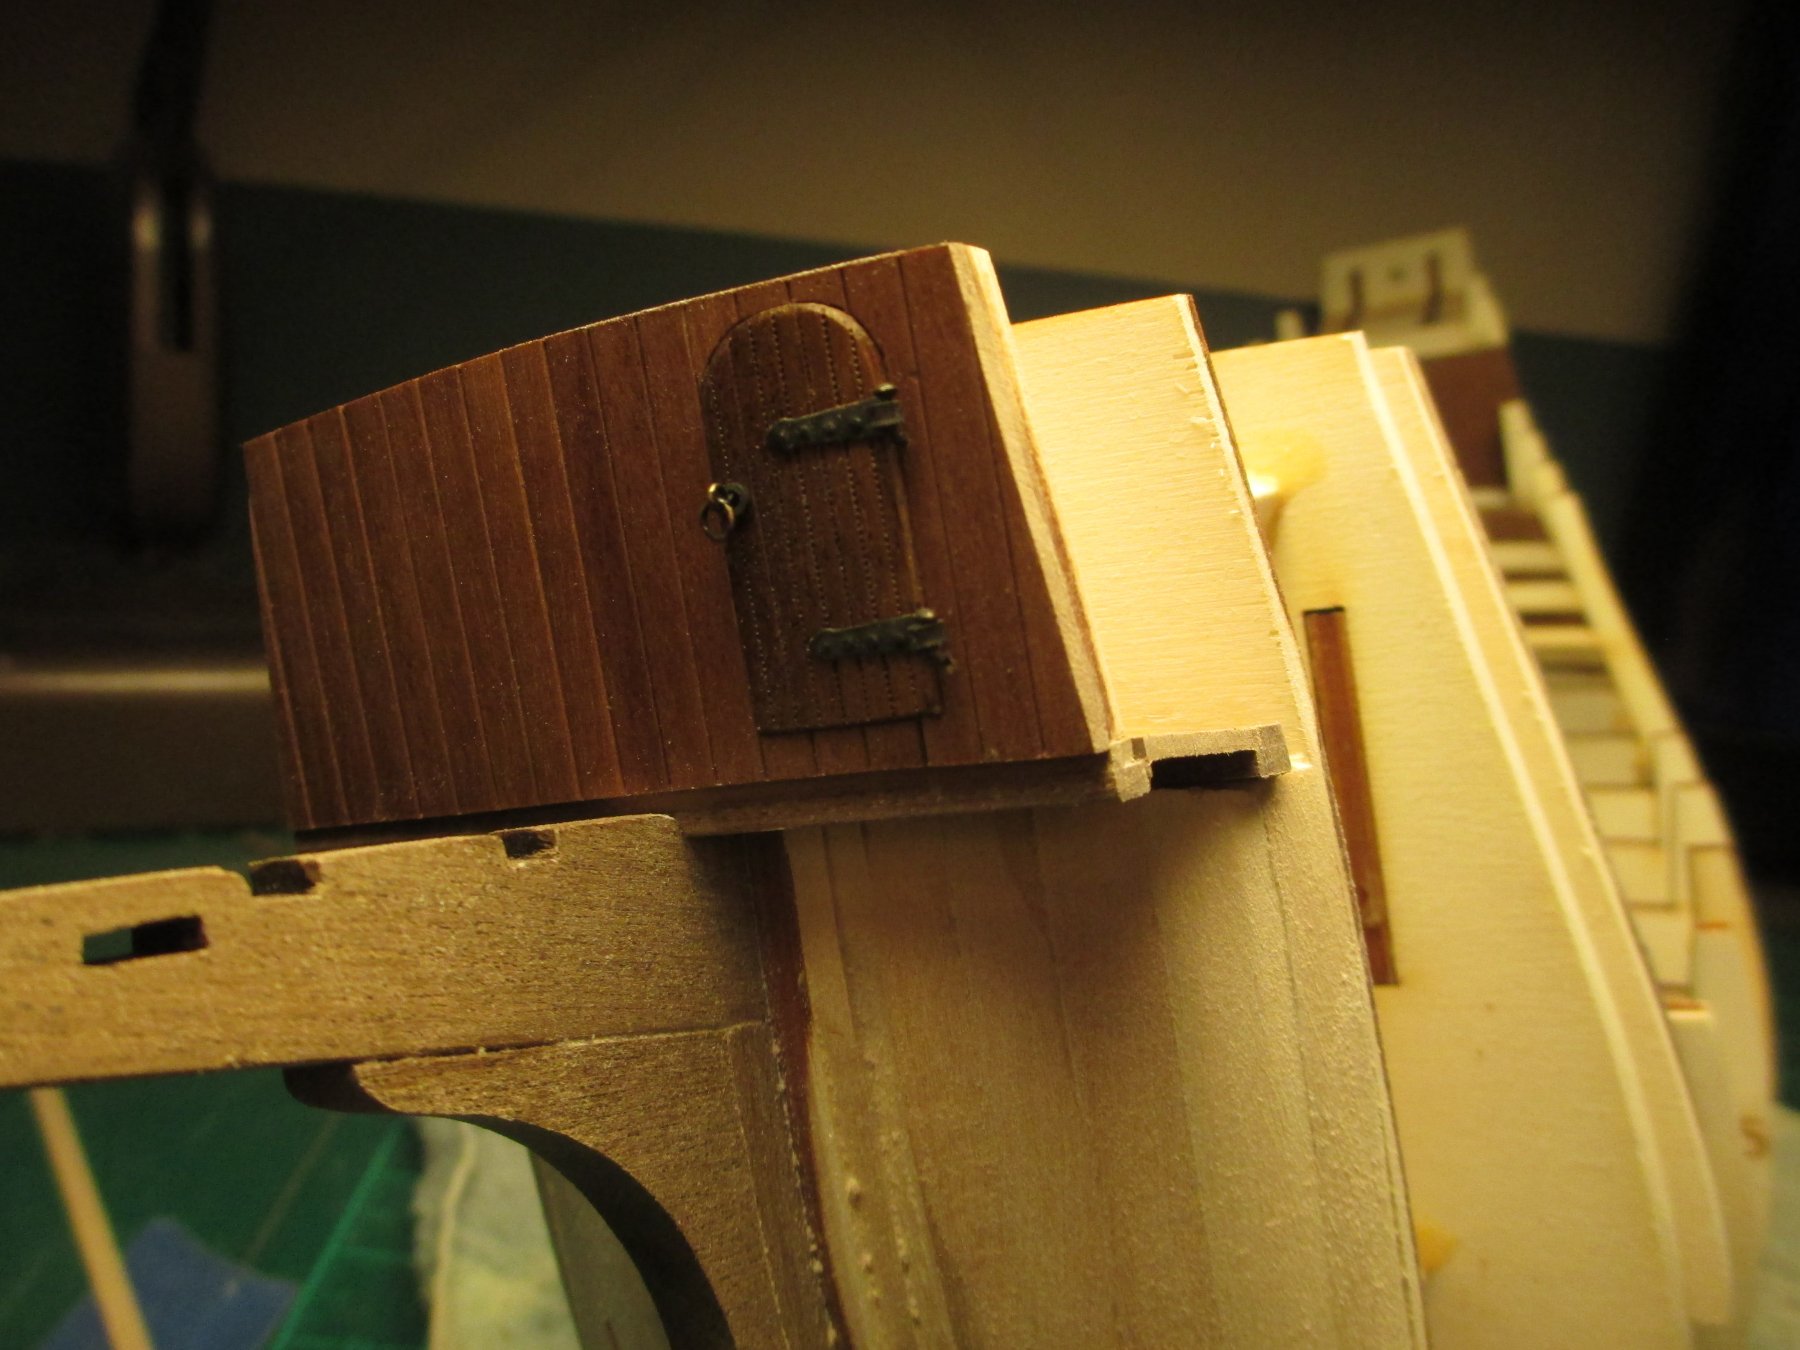
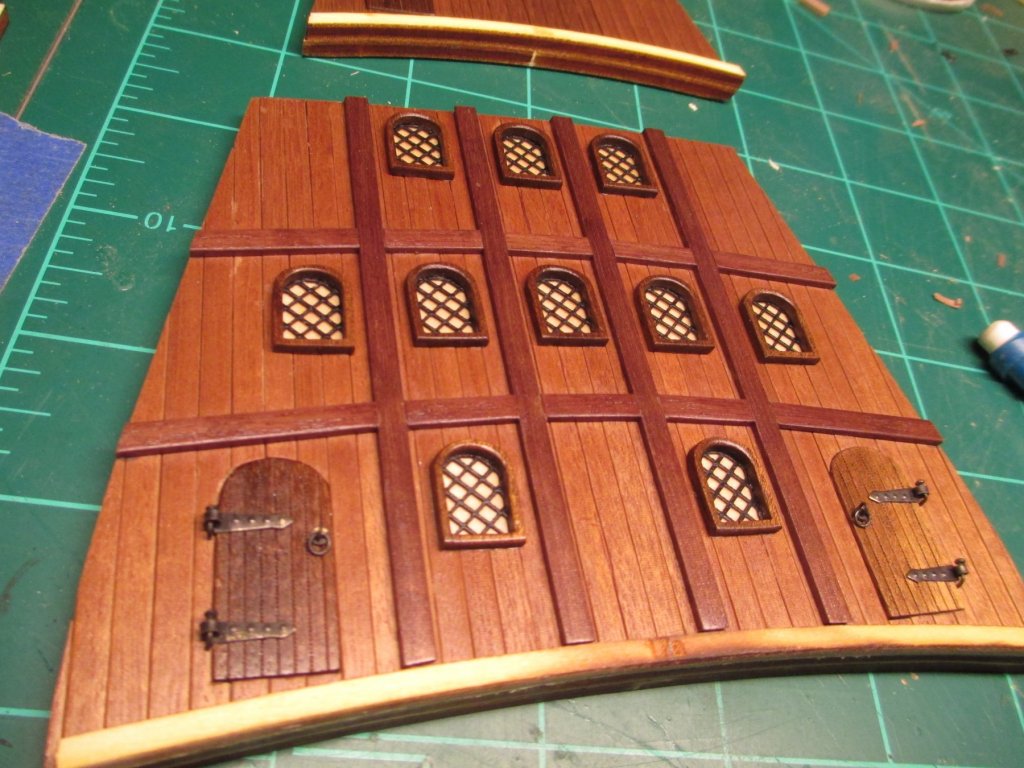
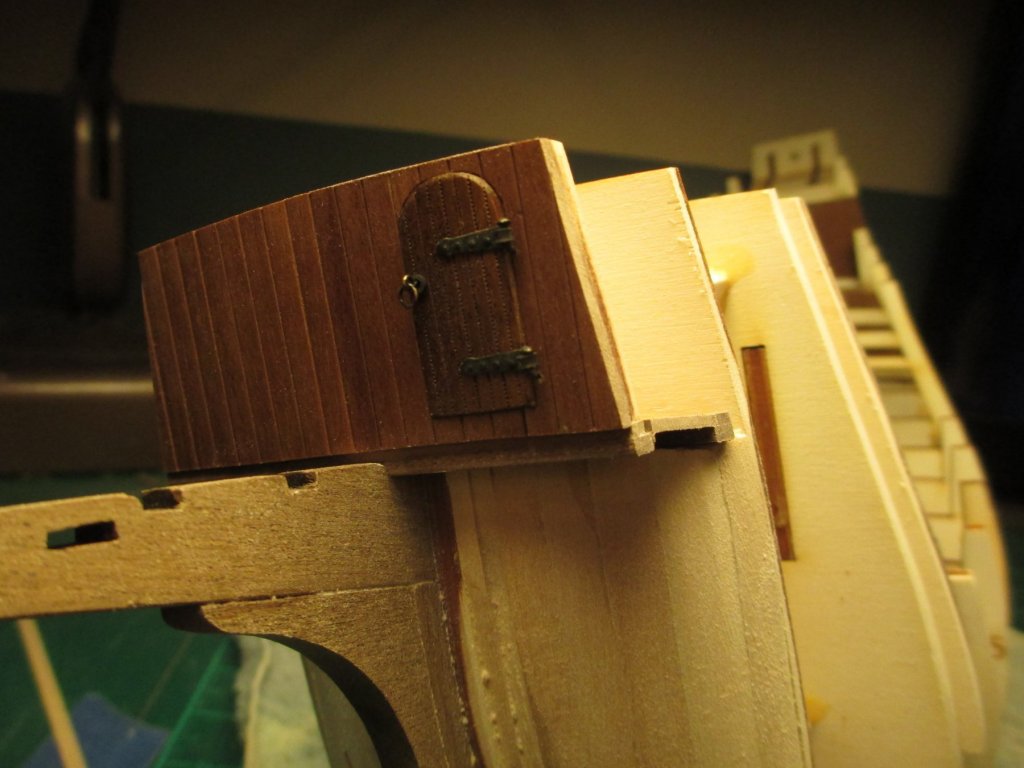
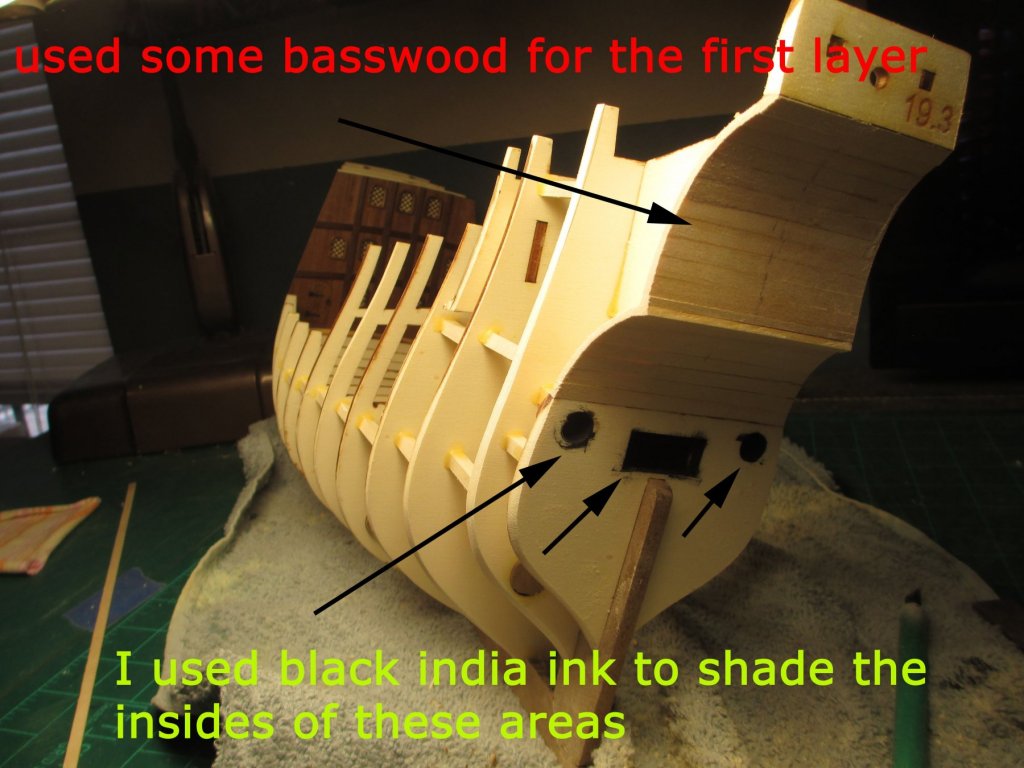
The first step is to mock up the framing pieces. I made a temporary work base to set the model on. A few of the frames need to be layered with planking ahead of time, I believe they were frames 16,17,and 18, this took some time to create and place the window and doors and hinges. I clear coated the areas with satin clear. I added some vertical struts in between the frames for stability. the stern I used basswood for shaping the primary planking. the instructions indicate to use the walnut for primary and secondary.


-
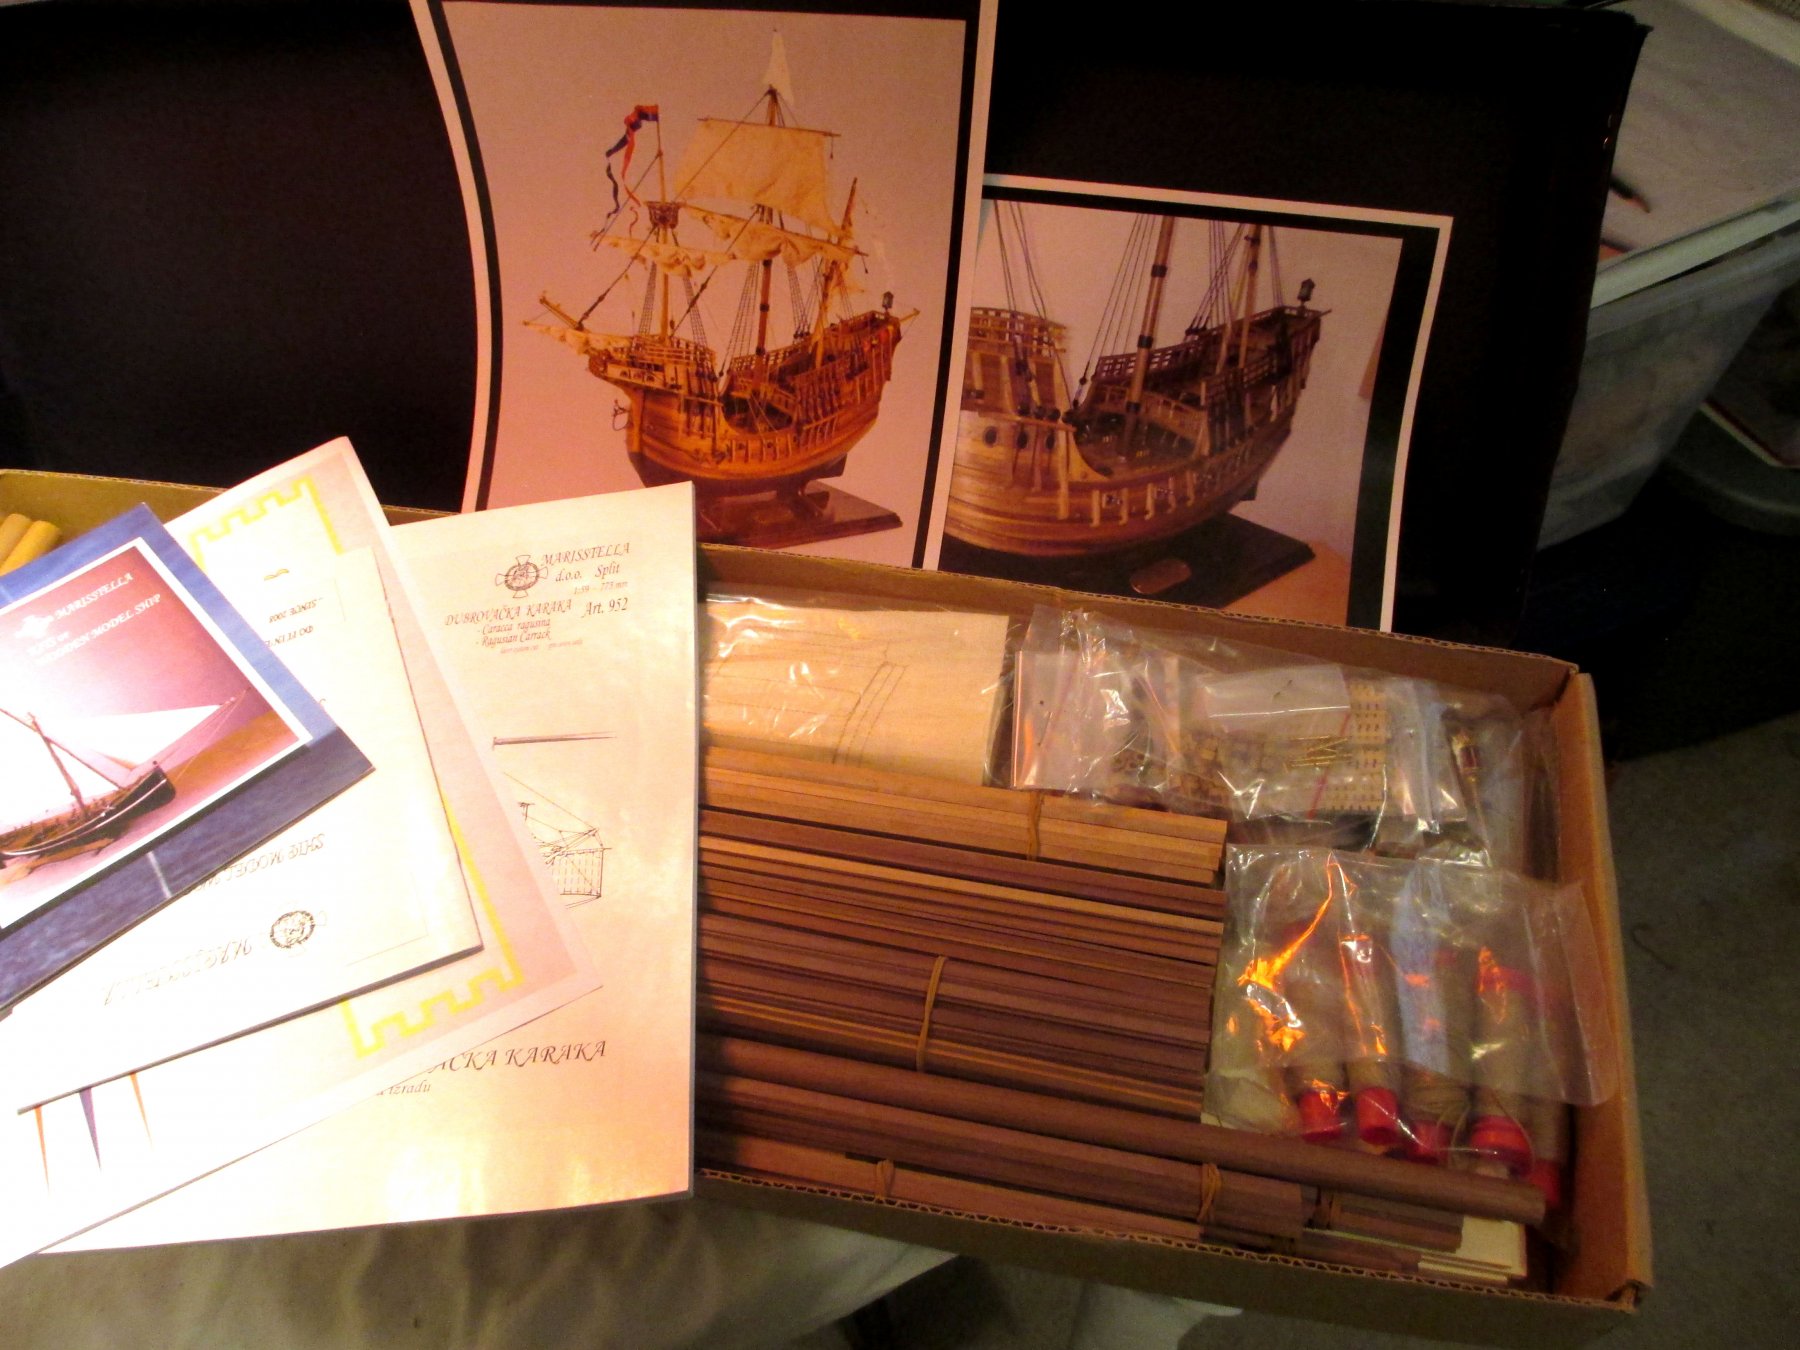
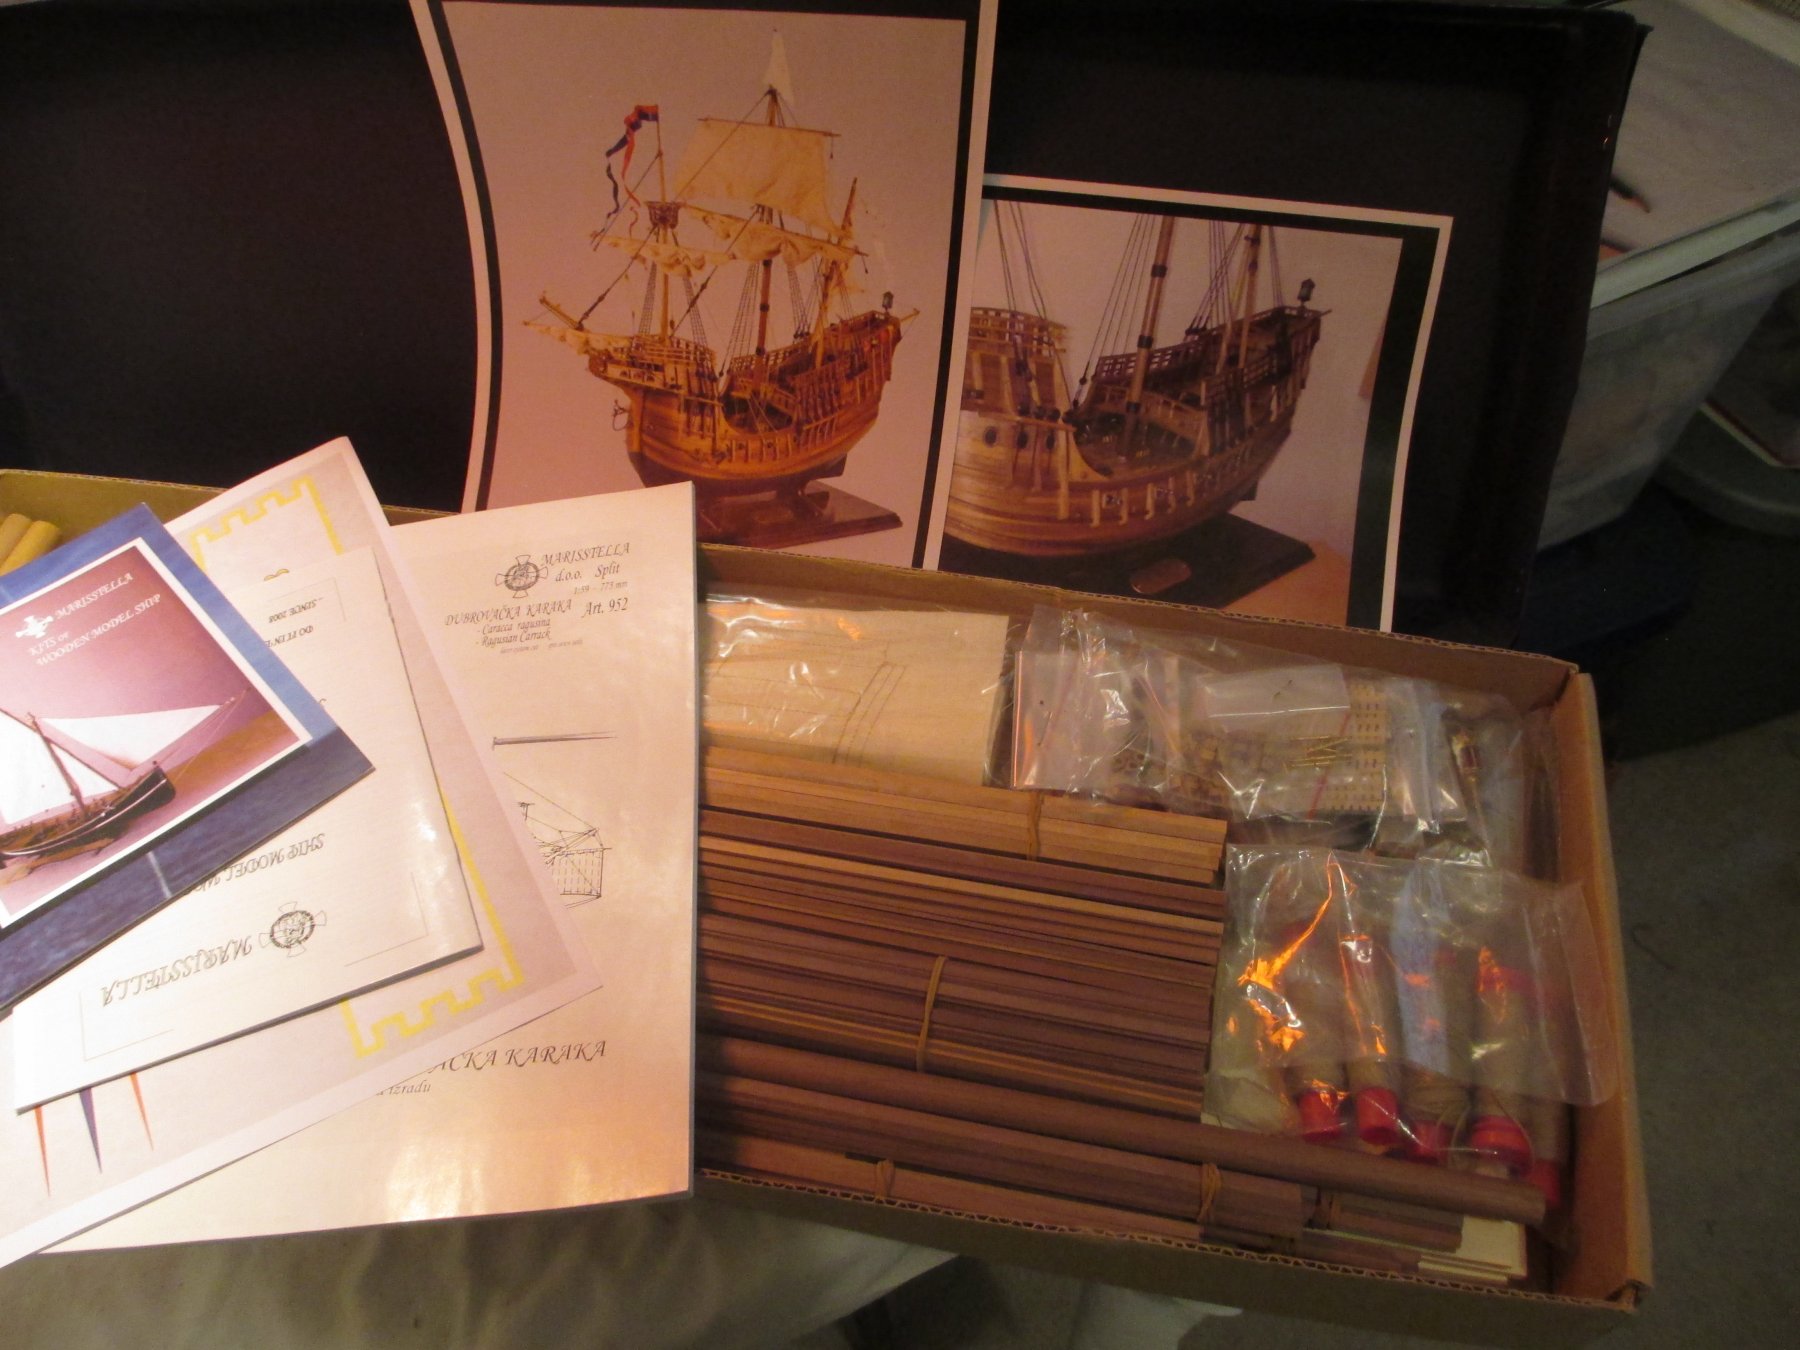
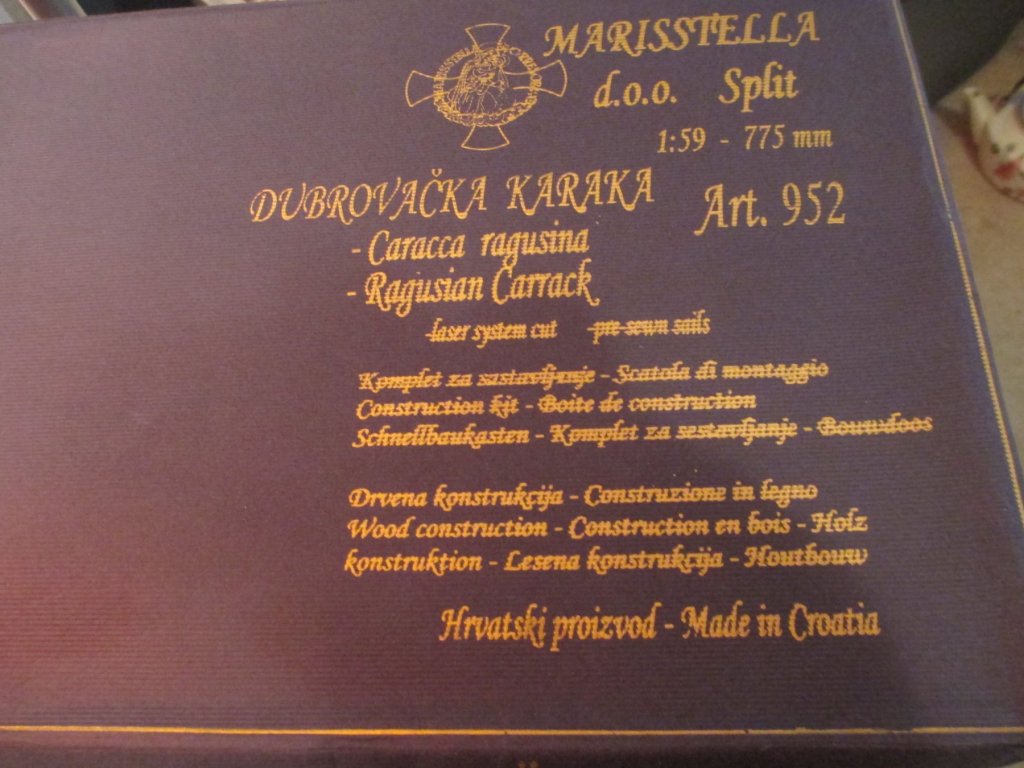
I was very interested in this particular kit by the fairly new company out of Split Croatia. The materials are made from quality walnut in various hues. The rigging is superb quality, as well as the blocks and stern lantern. All of the laser cut parts are great, very precise in the making. And the sails are stupendous. Overall I really am impressed with the components and framing quality. I do see also that this will be a bit of a challenge (which I don't mind at all) to create. The over all instructions are lacking in English but the layout plans are very informing. This is definitely an expert level kit. I'm relying mostly on the plans for the entire build and not the instructions. So I spend much of the time staring at them and anticipating what is to come. I started this kit about a month ago with all the intentions of making this kit build last as long as possible. absolutely taking my time with this build. Walnut wood is not one of my favorite woods to work with, it can be stubborn and it is definitely a dense hard wood and needs coaxing into place. so here goes another ragusian carrack build because you need more reference and other methods to research. there is more than one way to build a ship.


-
Hi there, I noticed on the finished model photos you have on page one the up close images of the planking on the hull have simulated tree nail holes from planking tacks which were used. I have started my ragusian carrack kit and have not noticed any nail tacks provided in the kit, did your kit have any provided? The hull photos also show darkened hull planking edges to simulate chinking , do you intend to incorporate this technique in your hull planking? Thanks. A.Jorden
- 190 replies
-
- 2
-

-
- ragusian
- marisstella
- (and 1 more)
-
Hi there, I no longer have the plans or parts list for the elidir kit, sorry can not help,
-
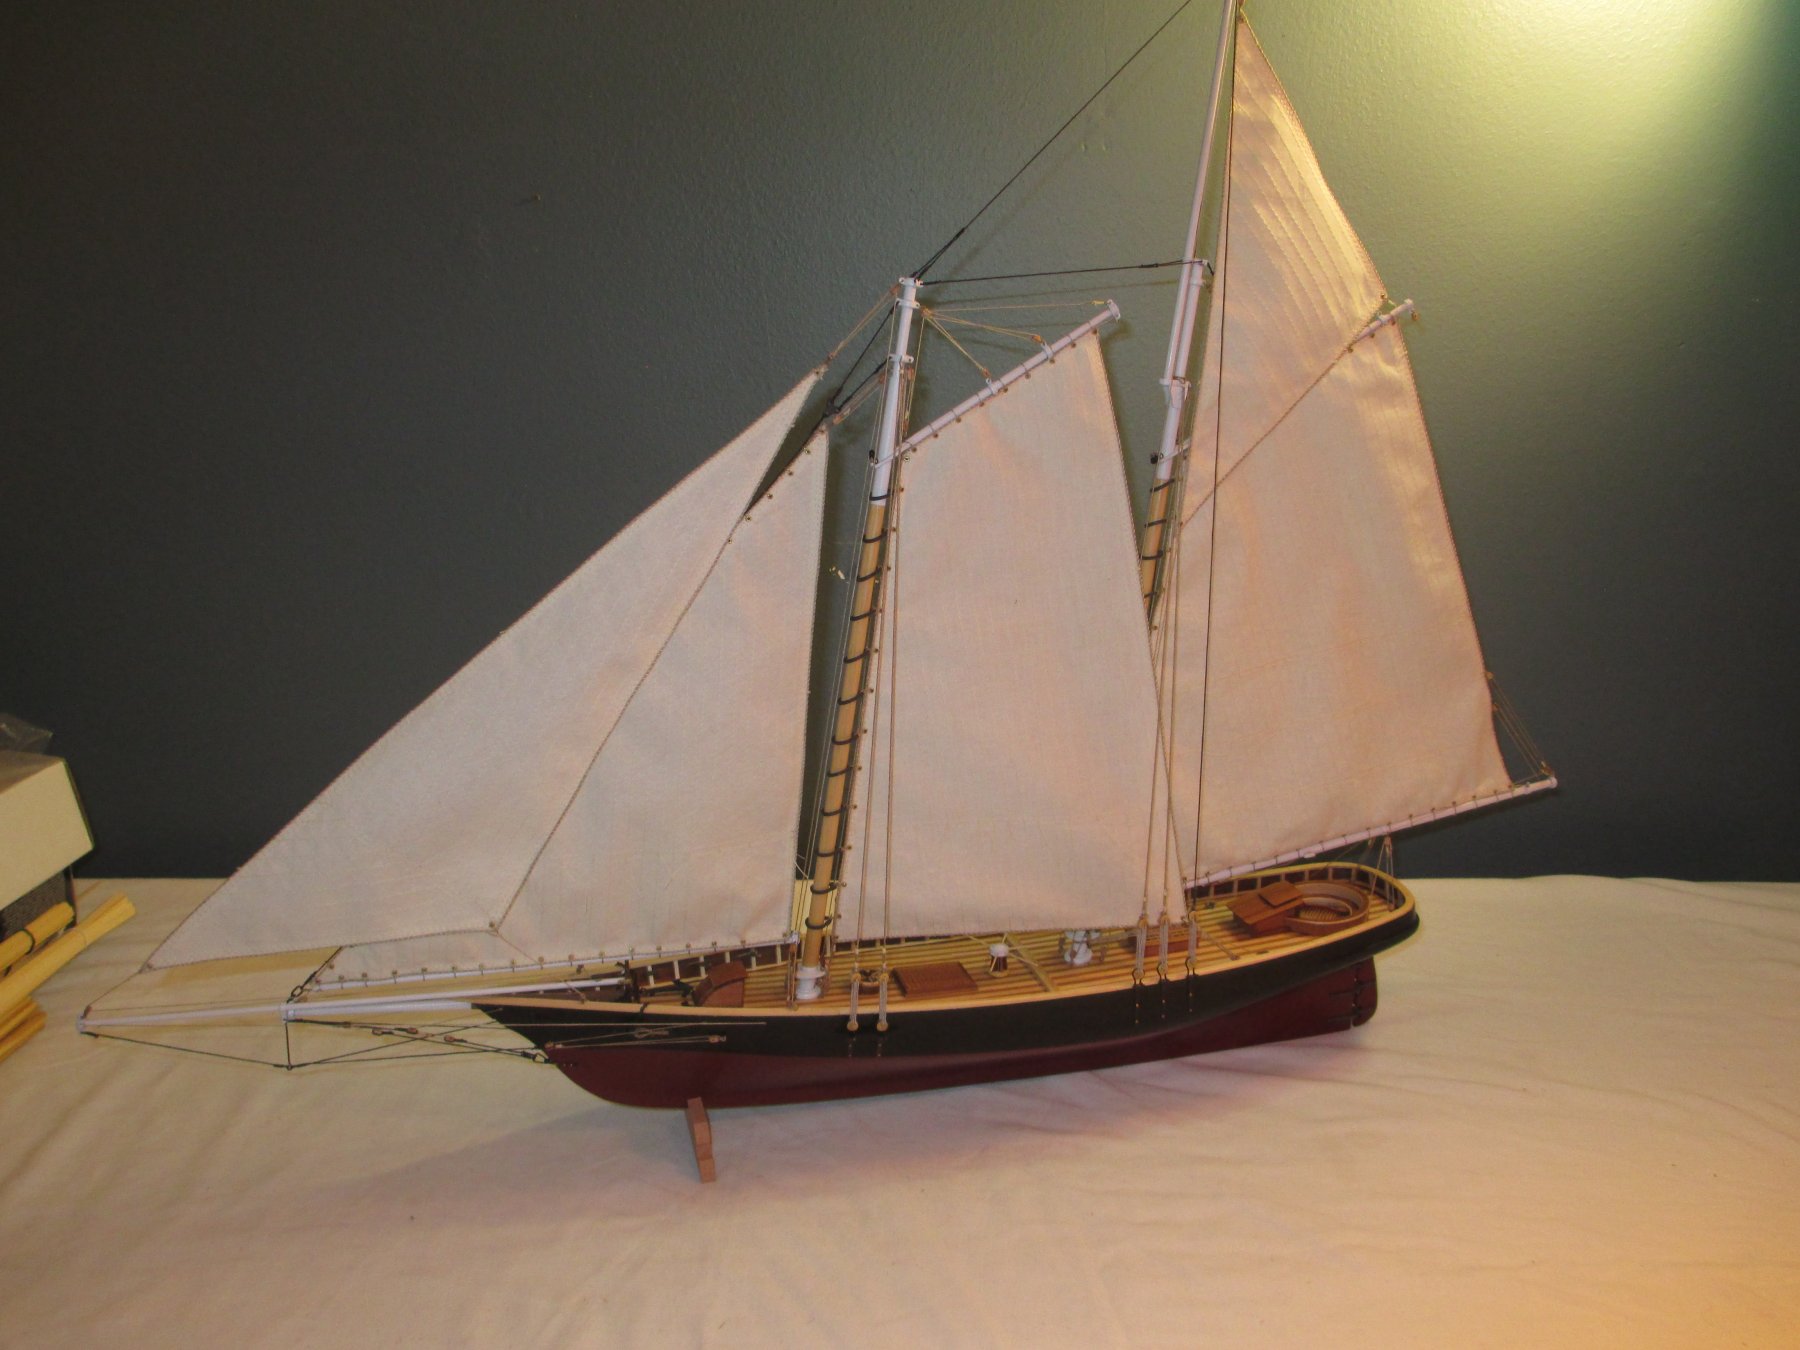
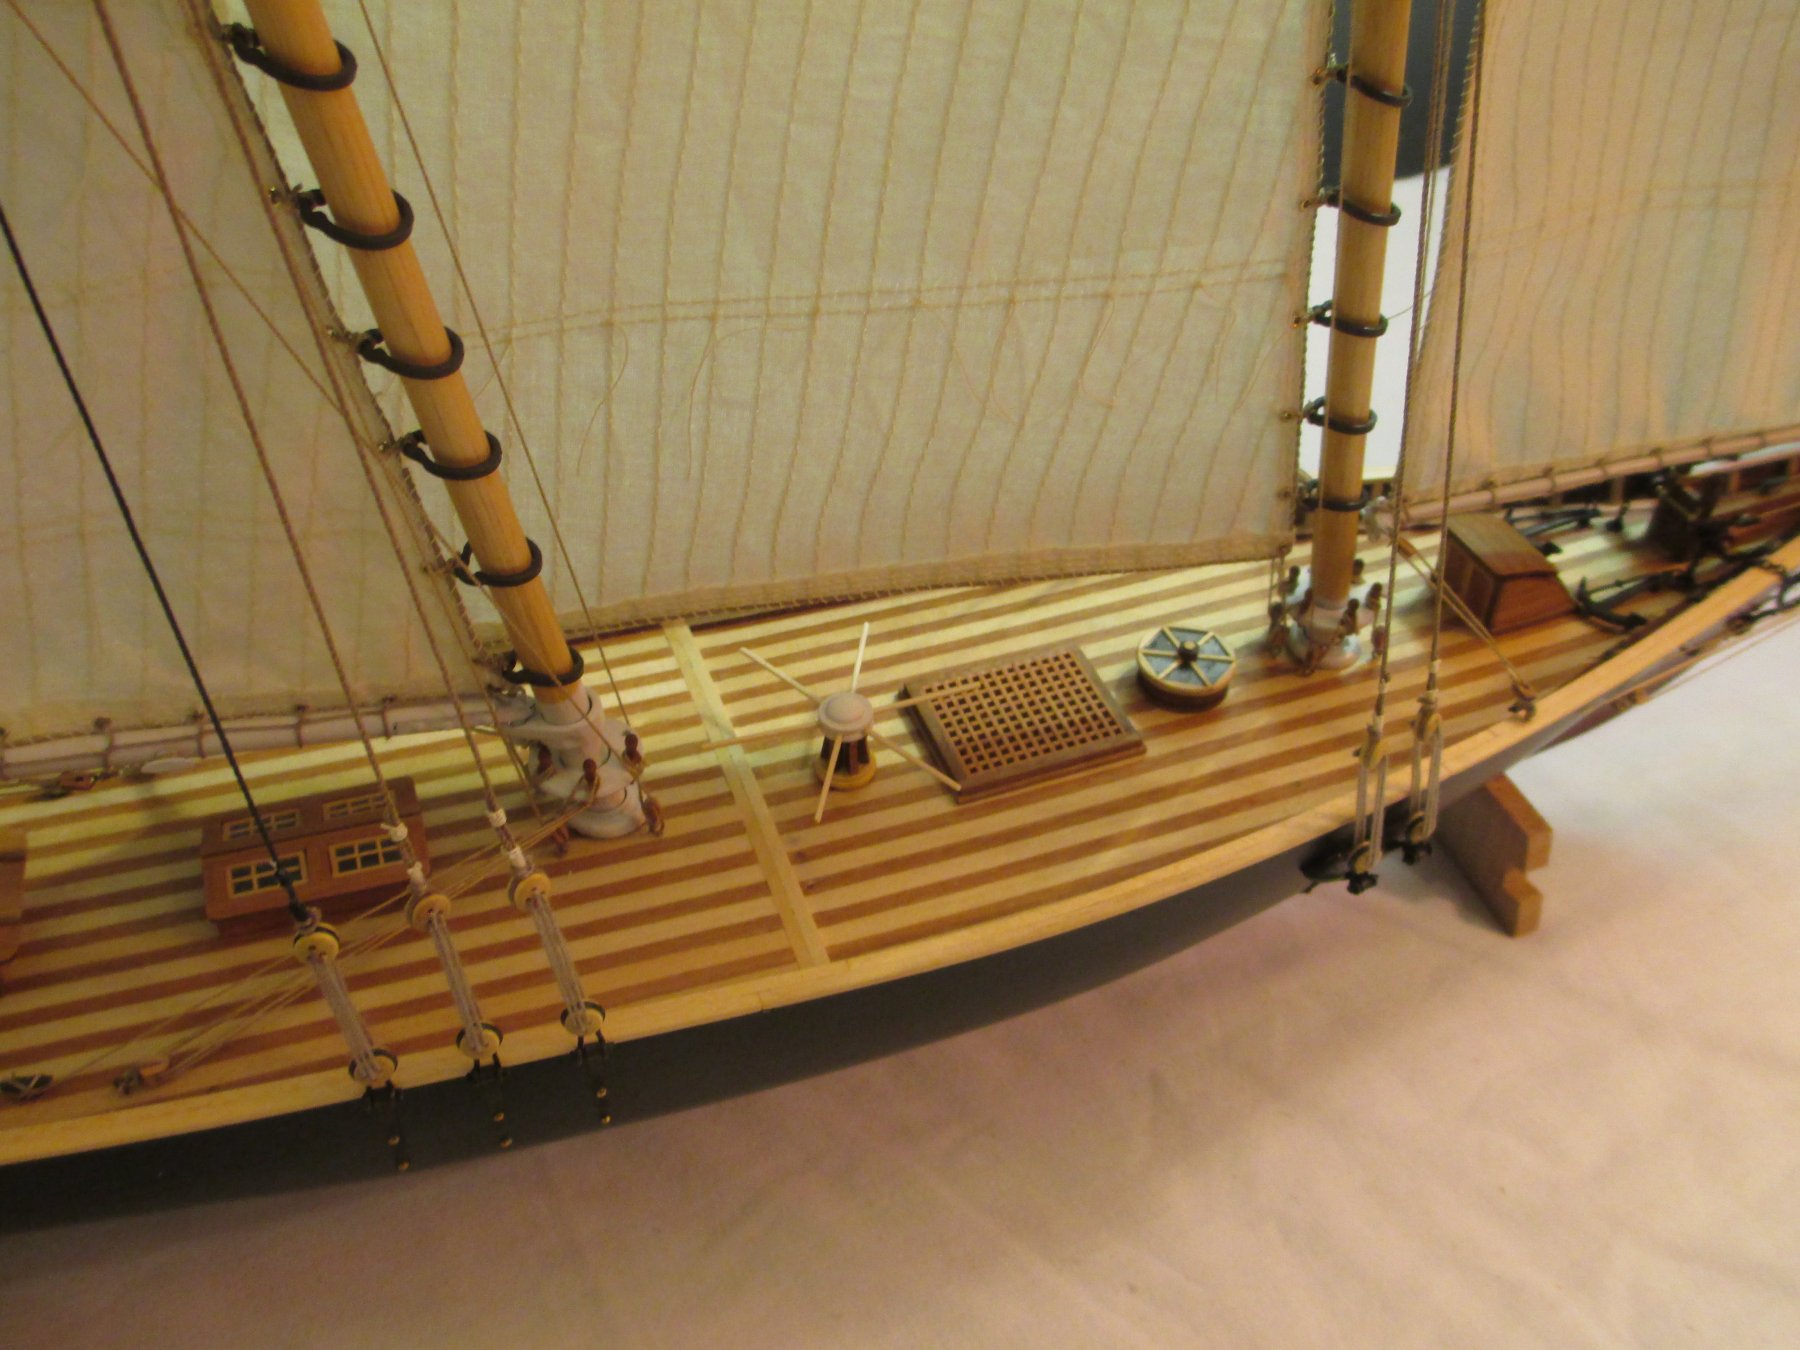
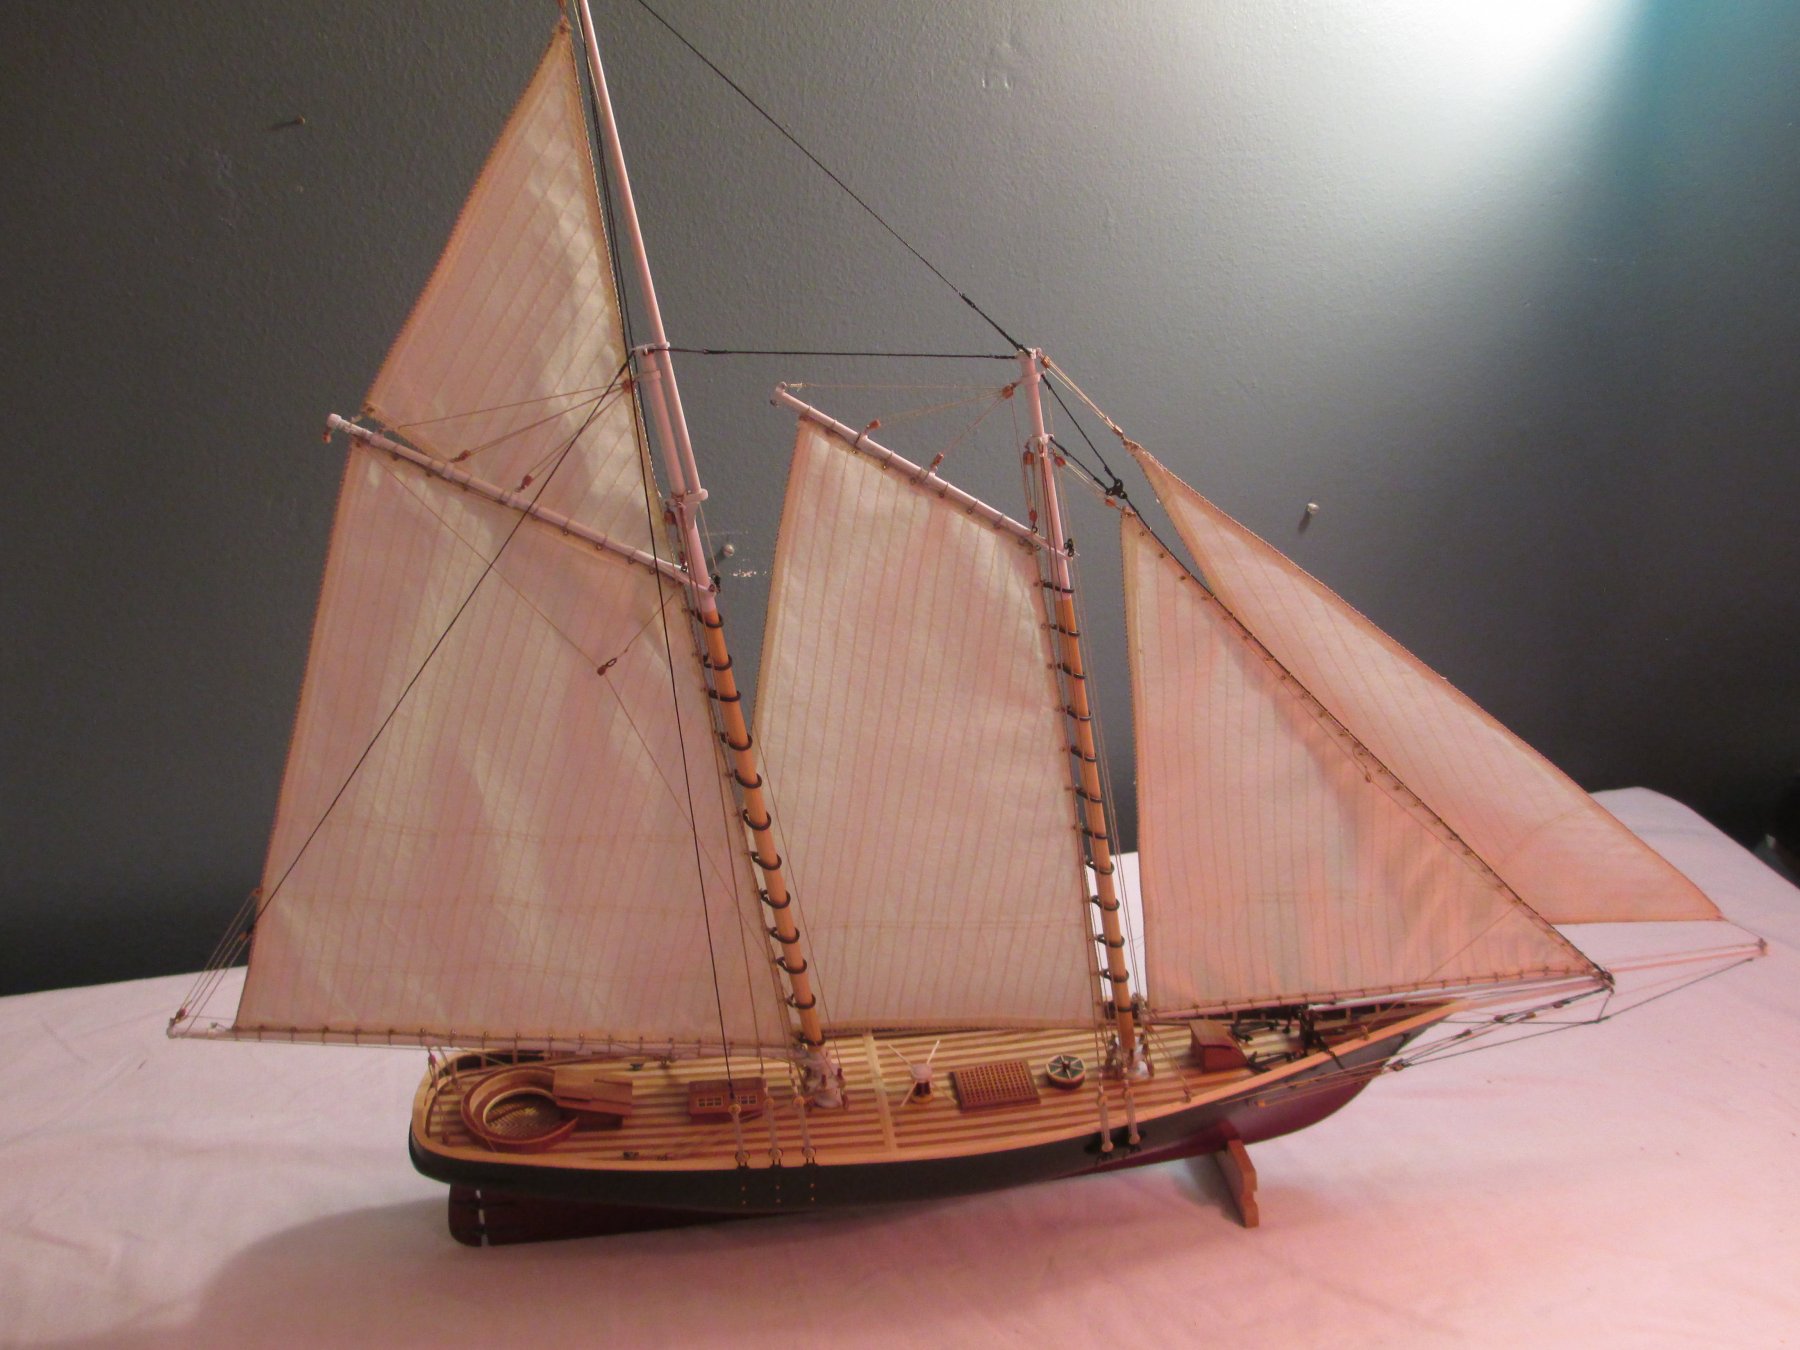
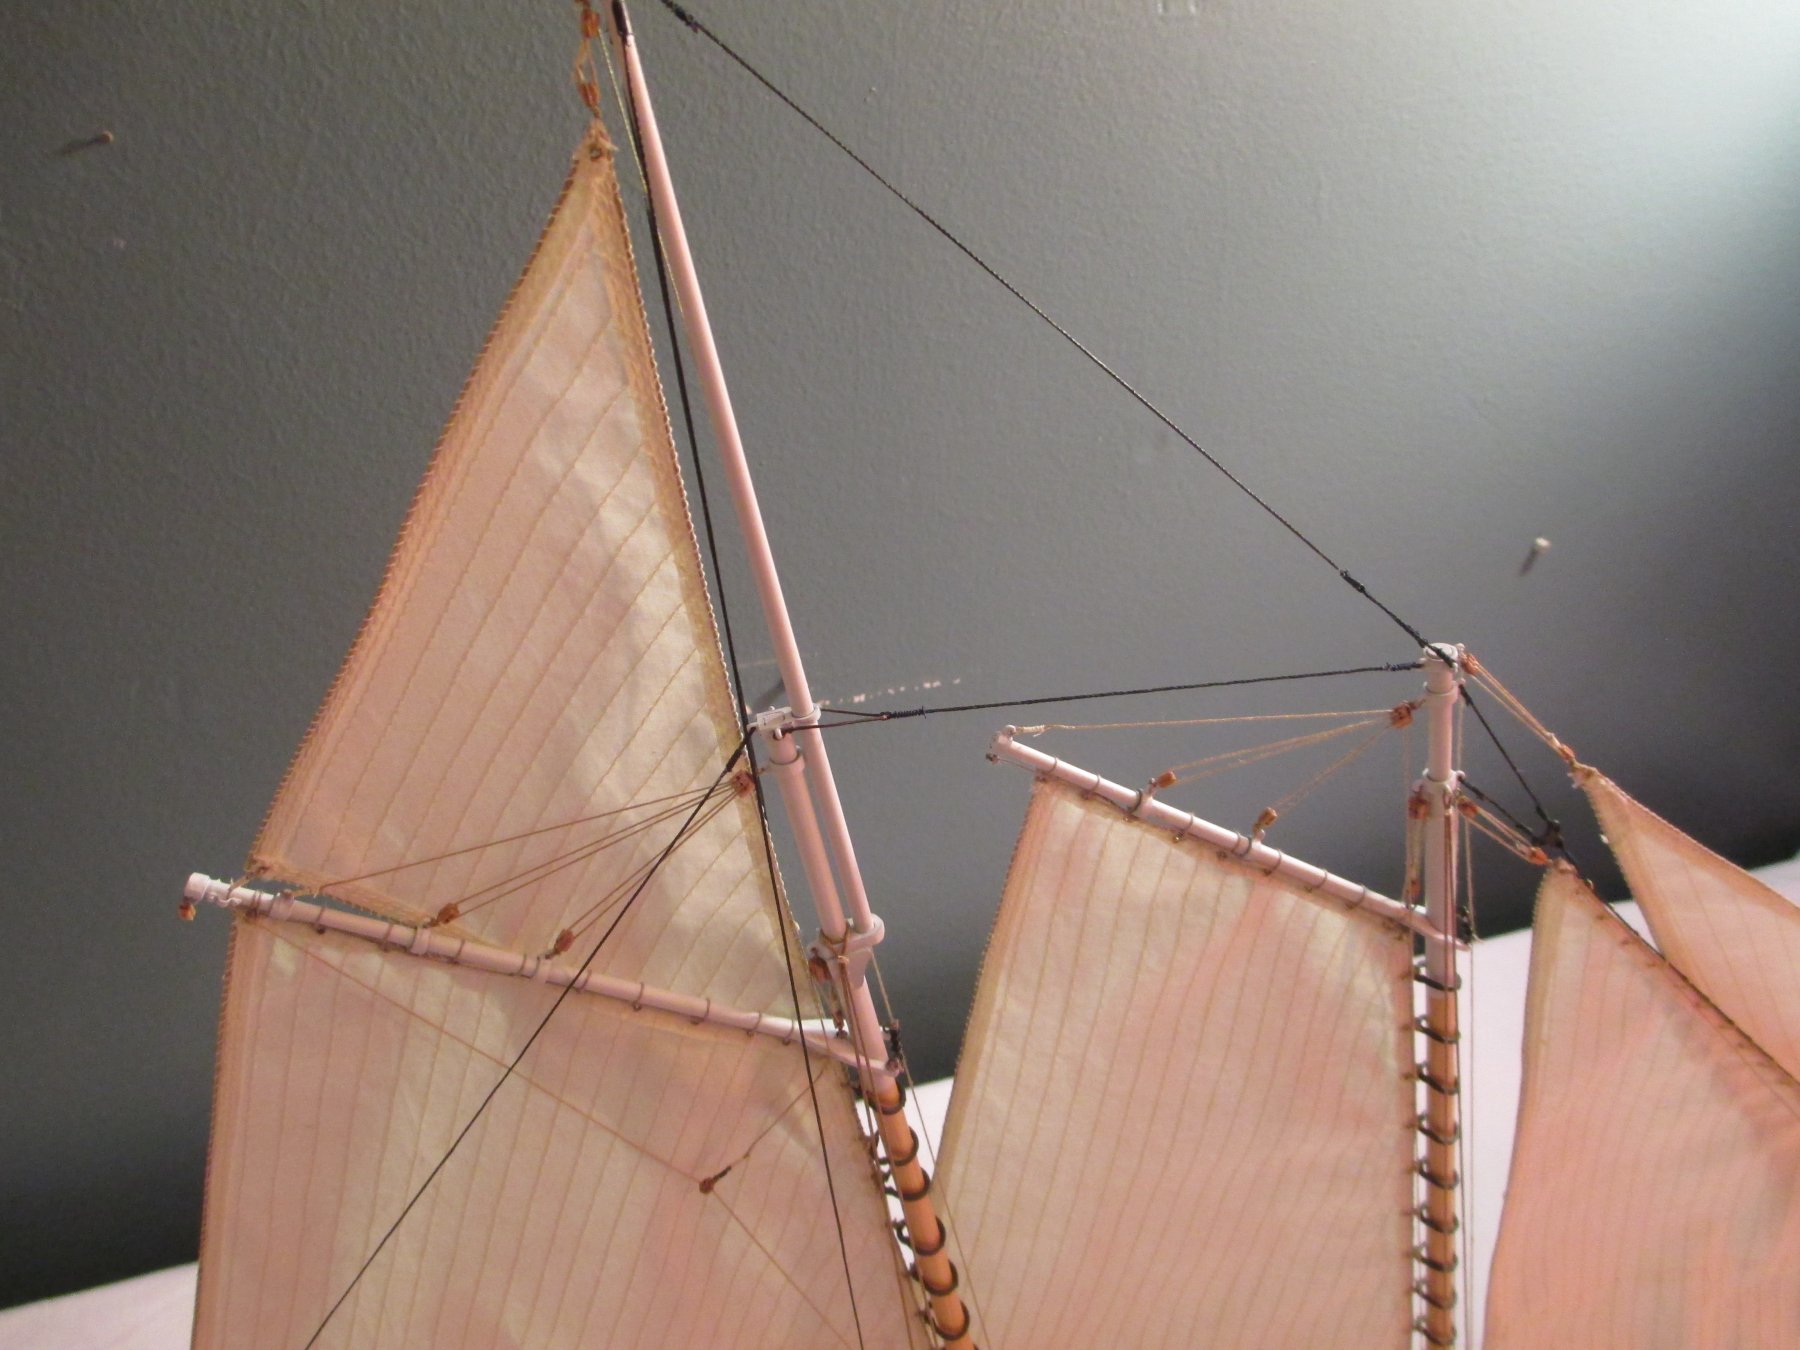
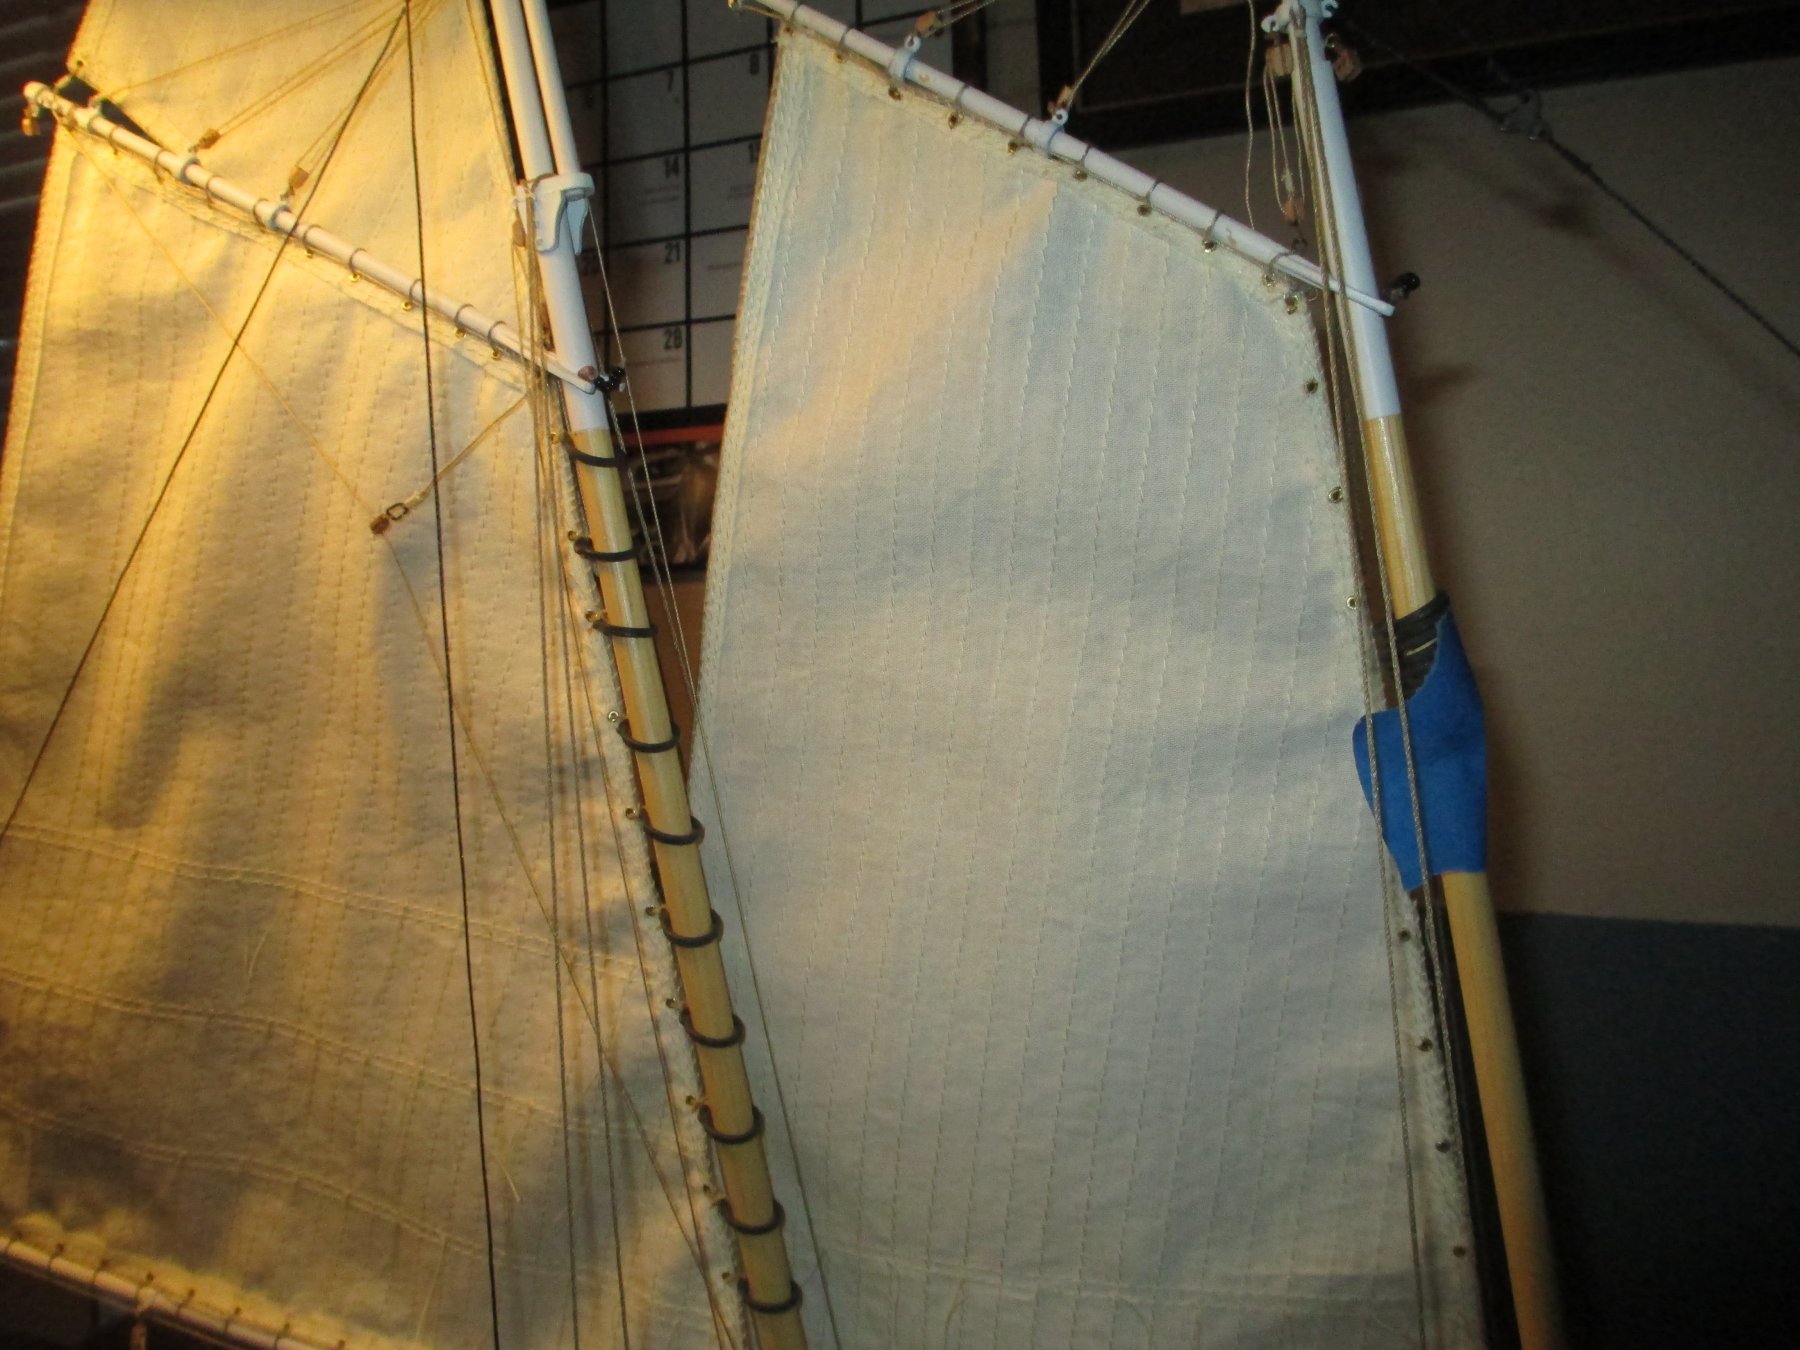
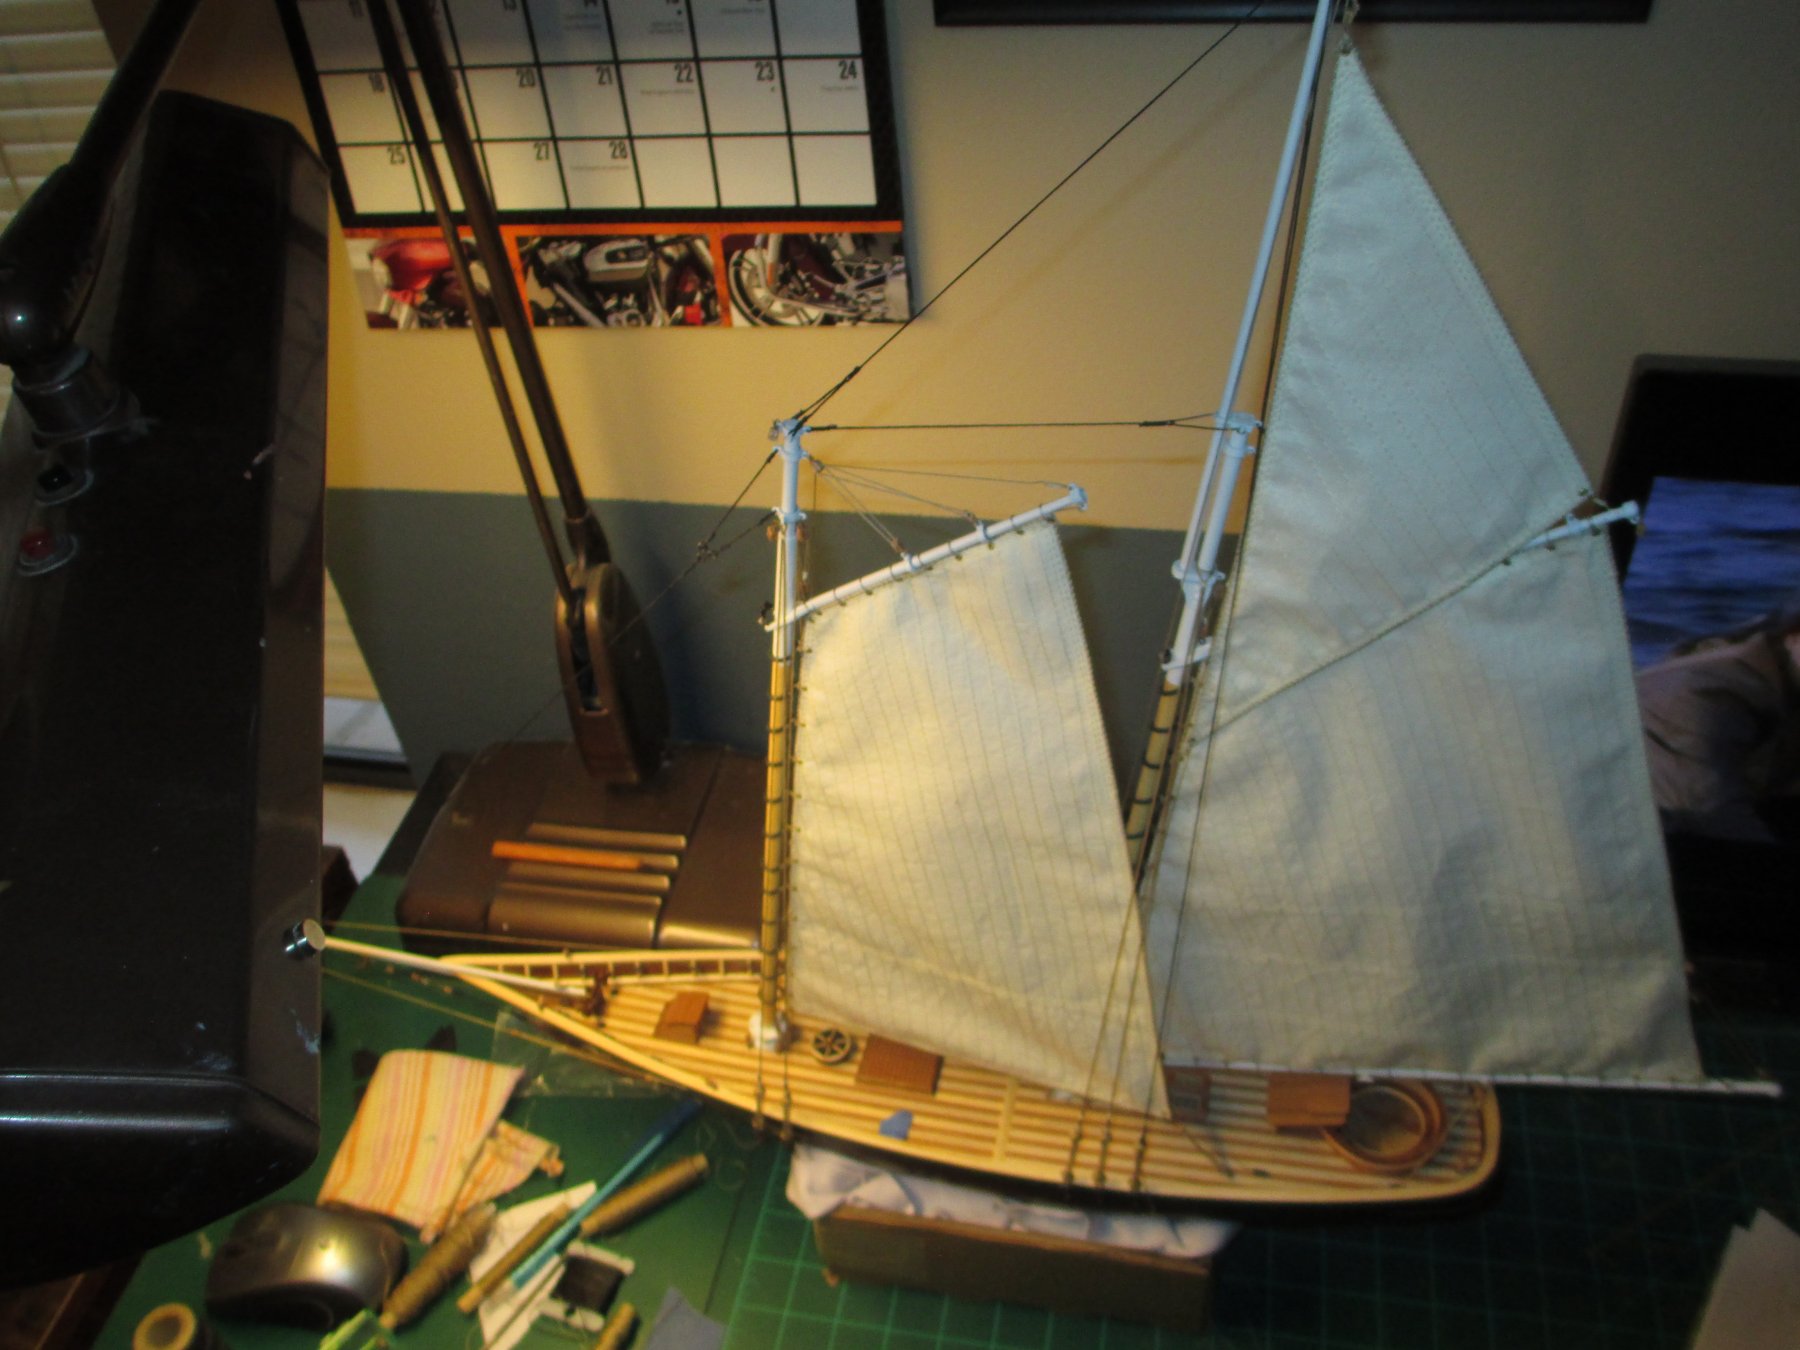
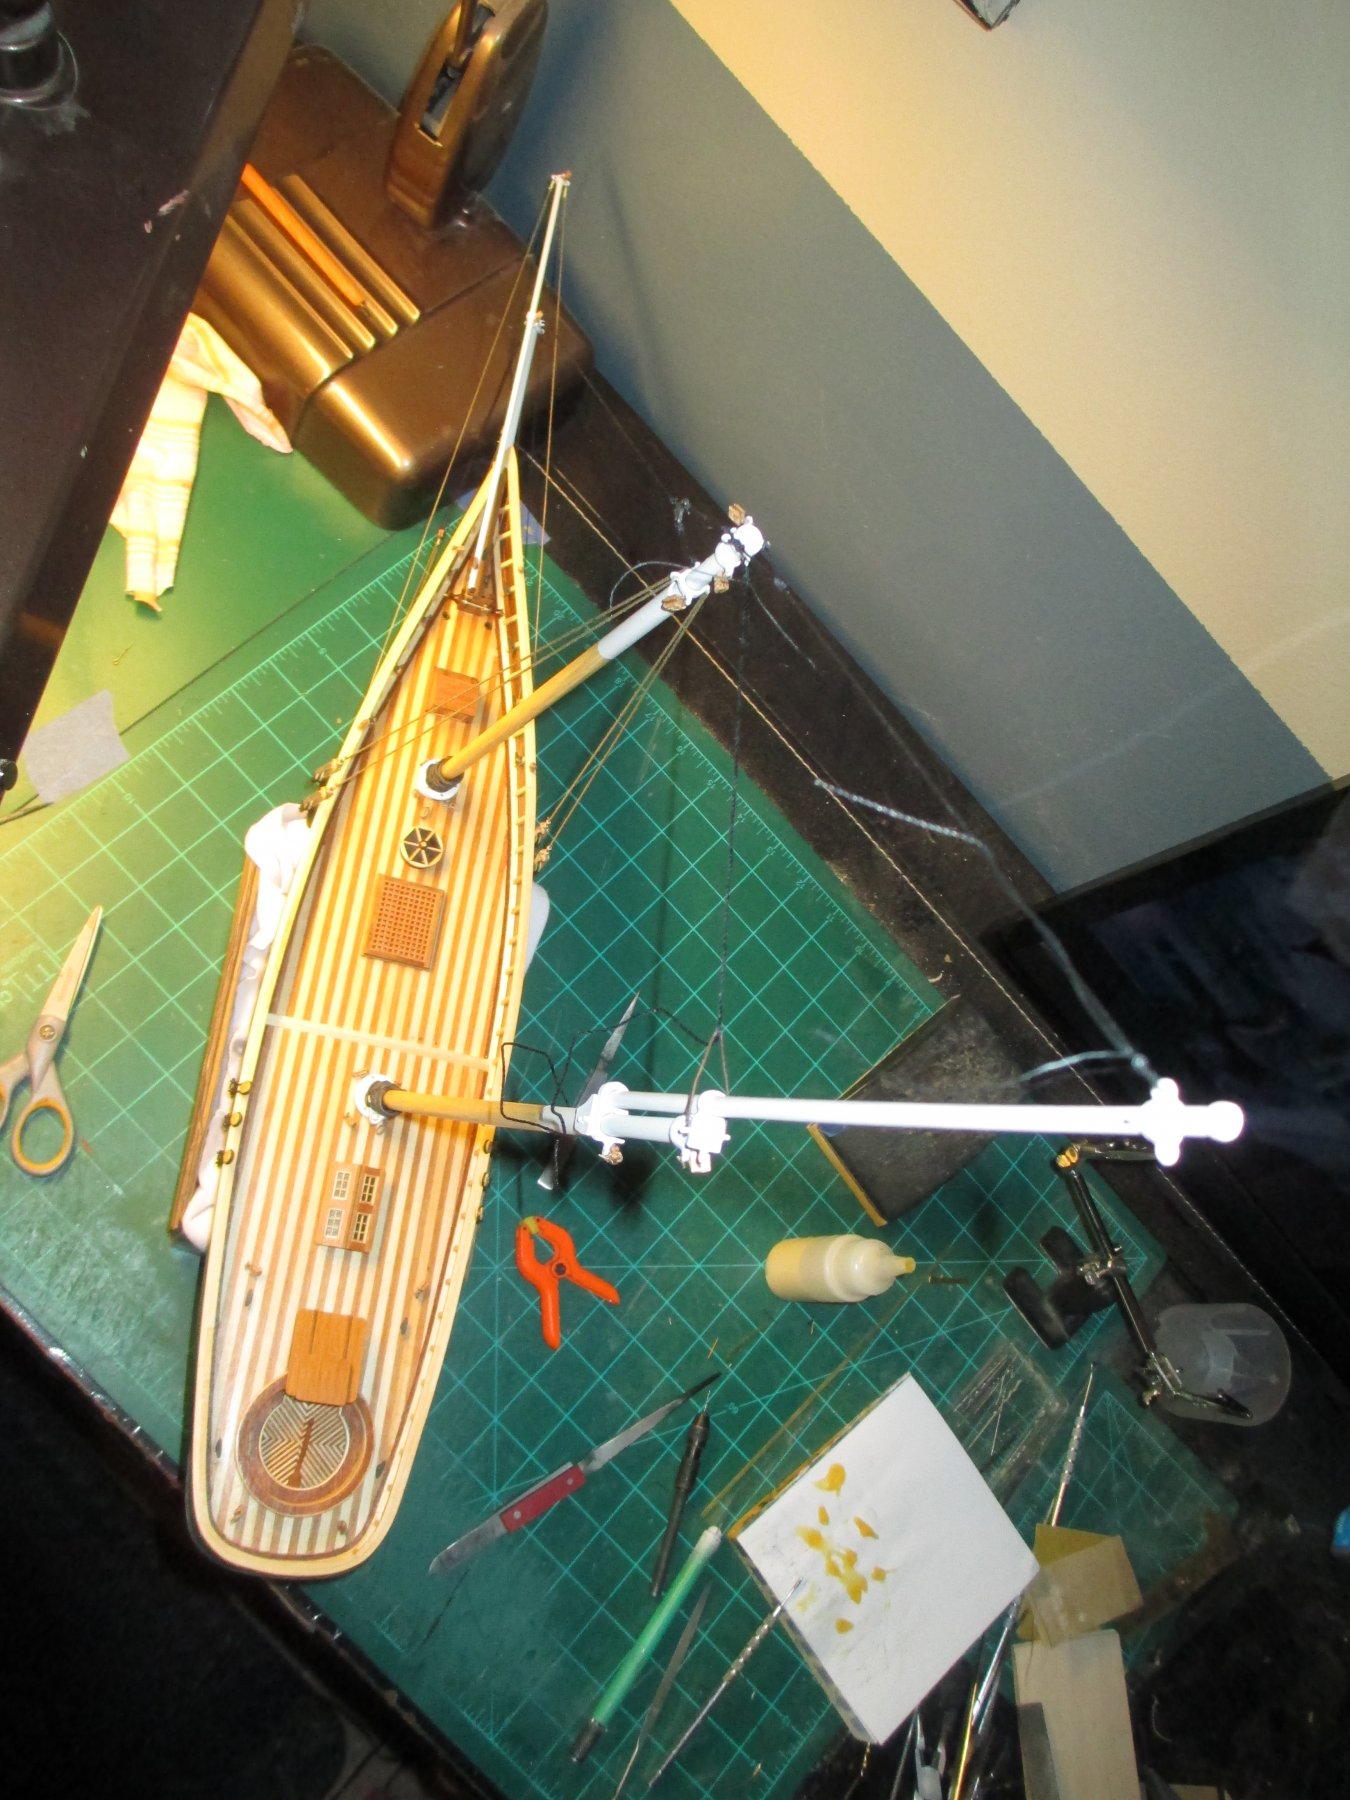
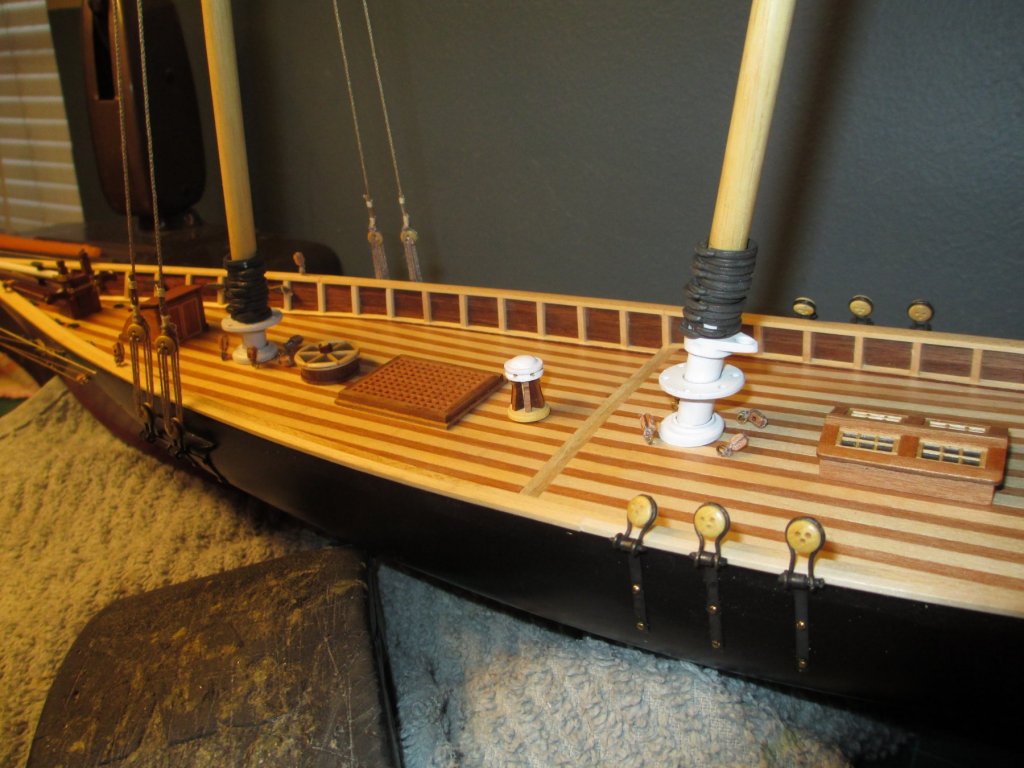
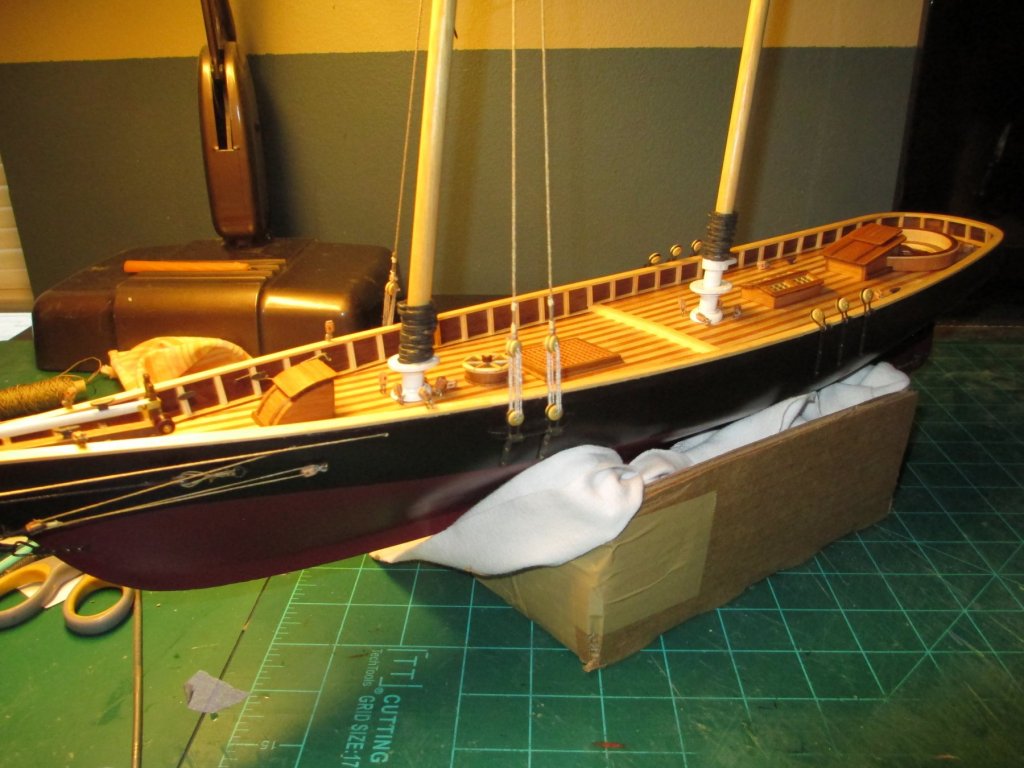
I'm working on the mast and rigging and had to make a temporary cradle for the boat, it was flopping around like an angry fish. piece of cardboard and some cloth and it did the job, nothing fancy, don't need special tools to make a masterpiece. just some ingenuity and a little talent.


-
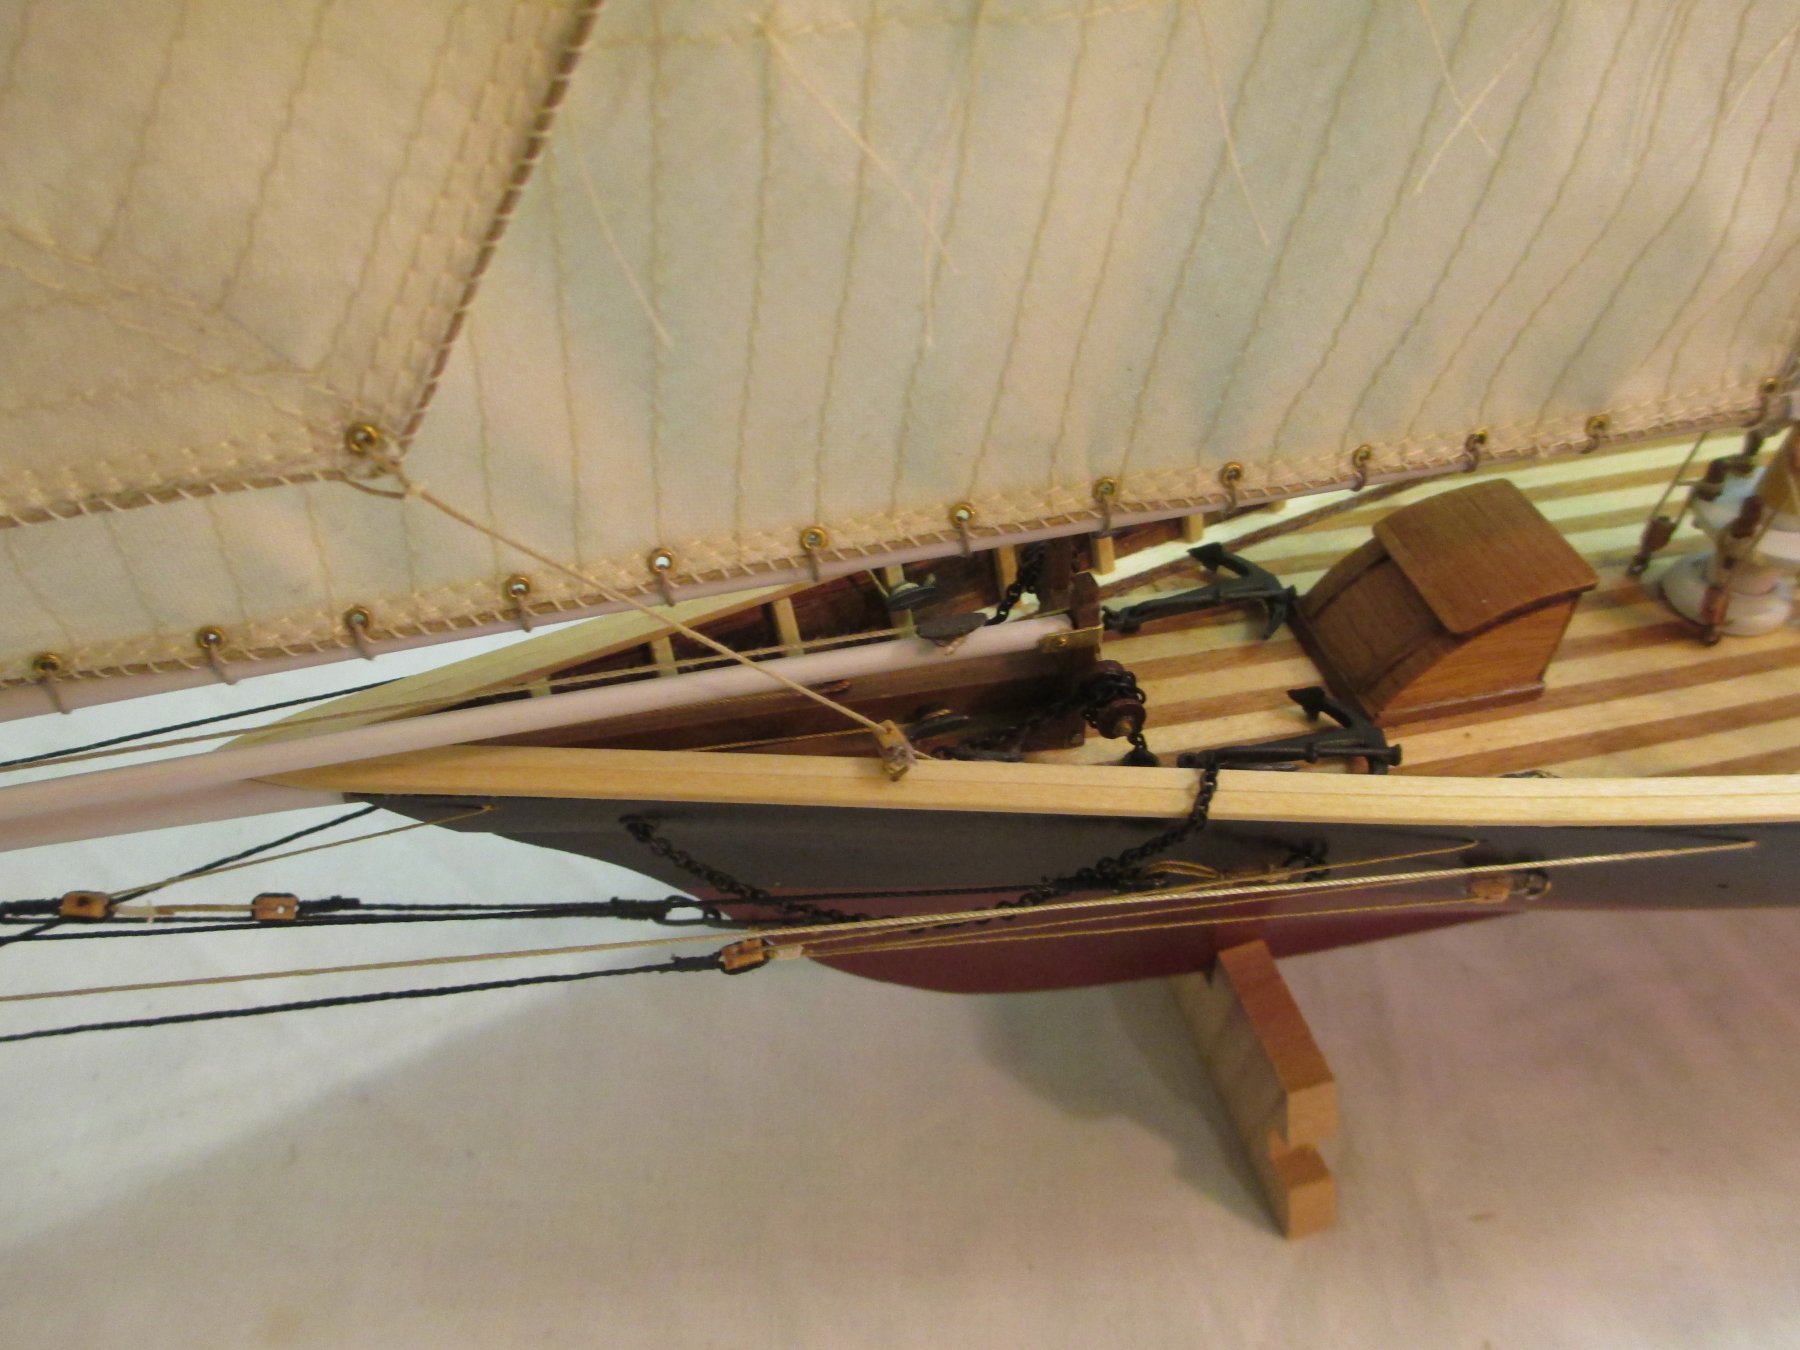
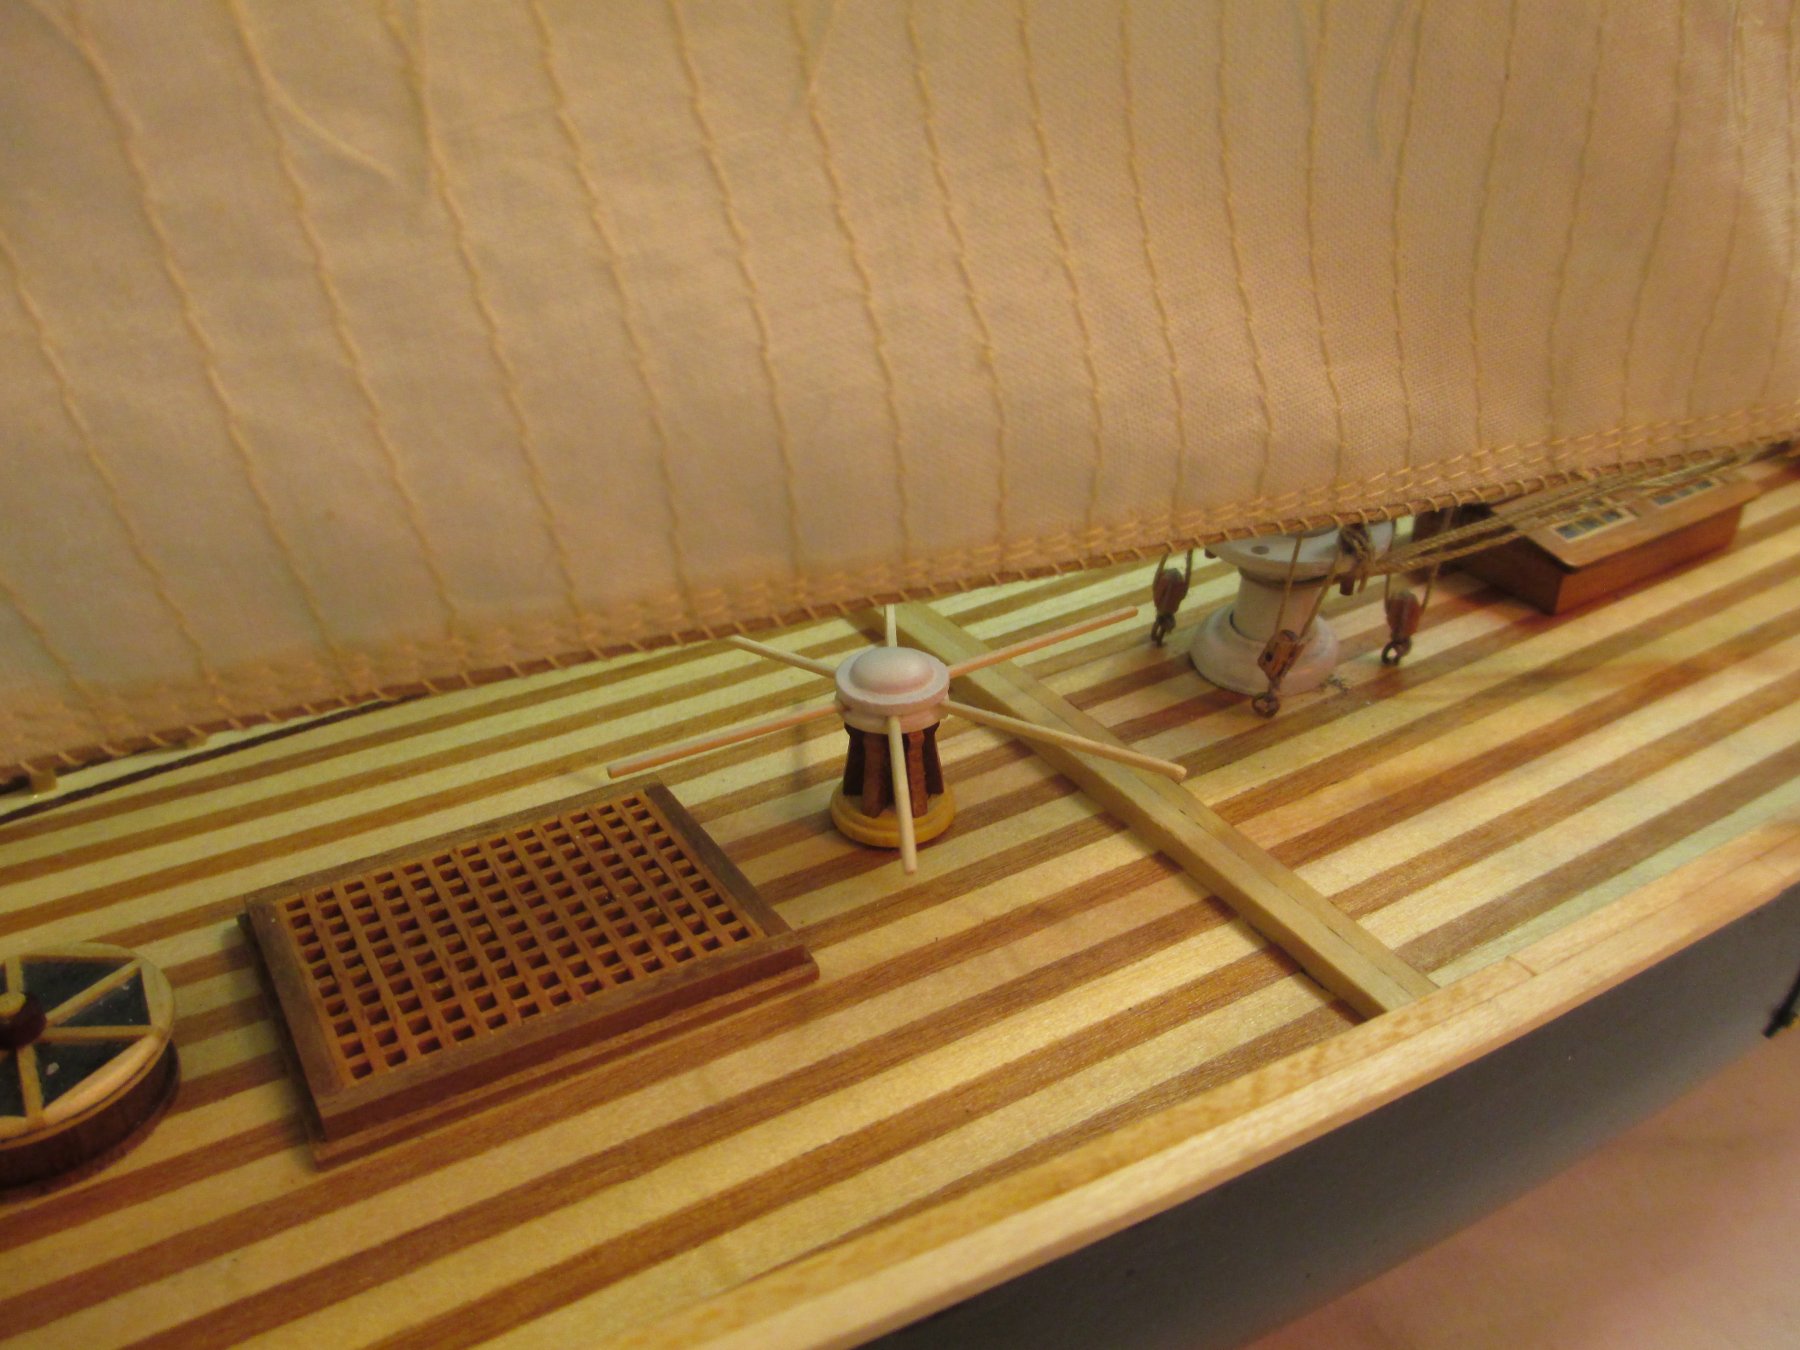
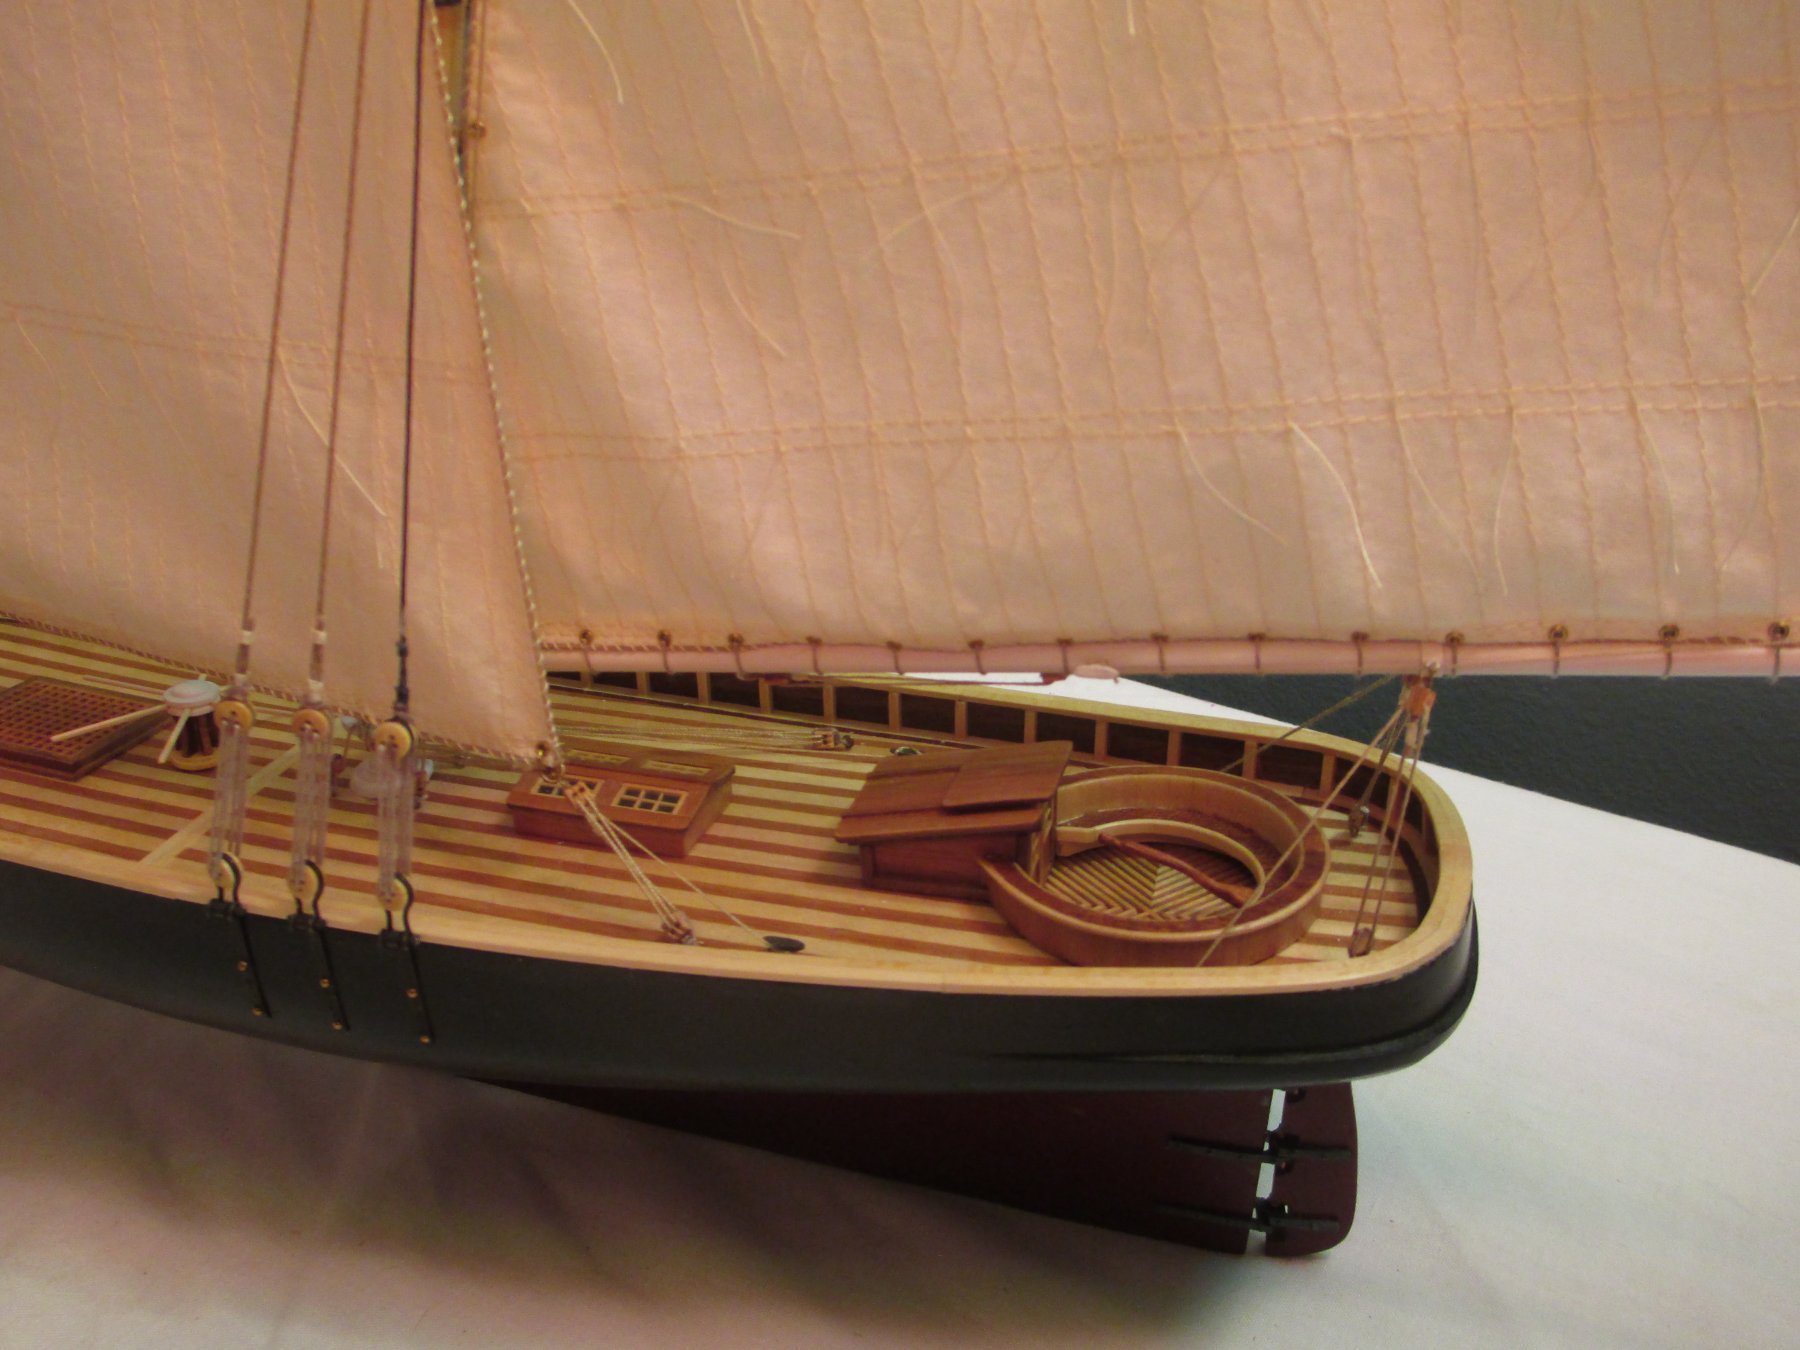
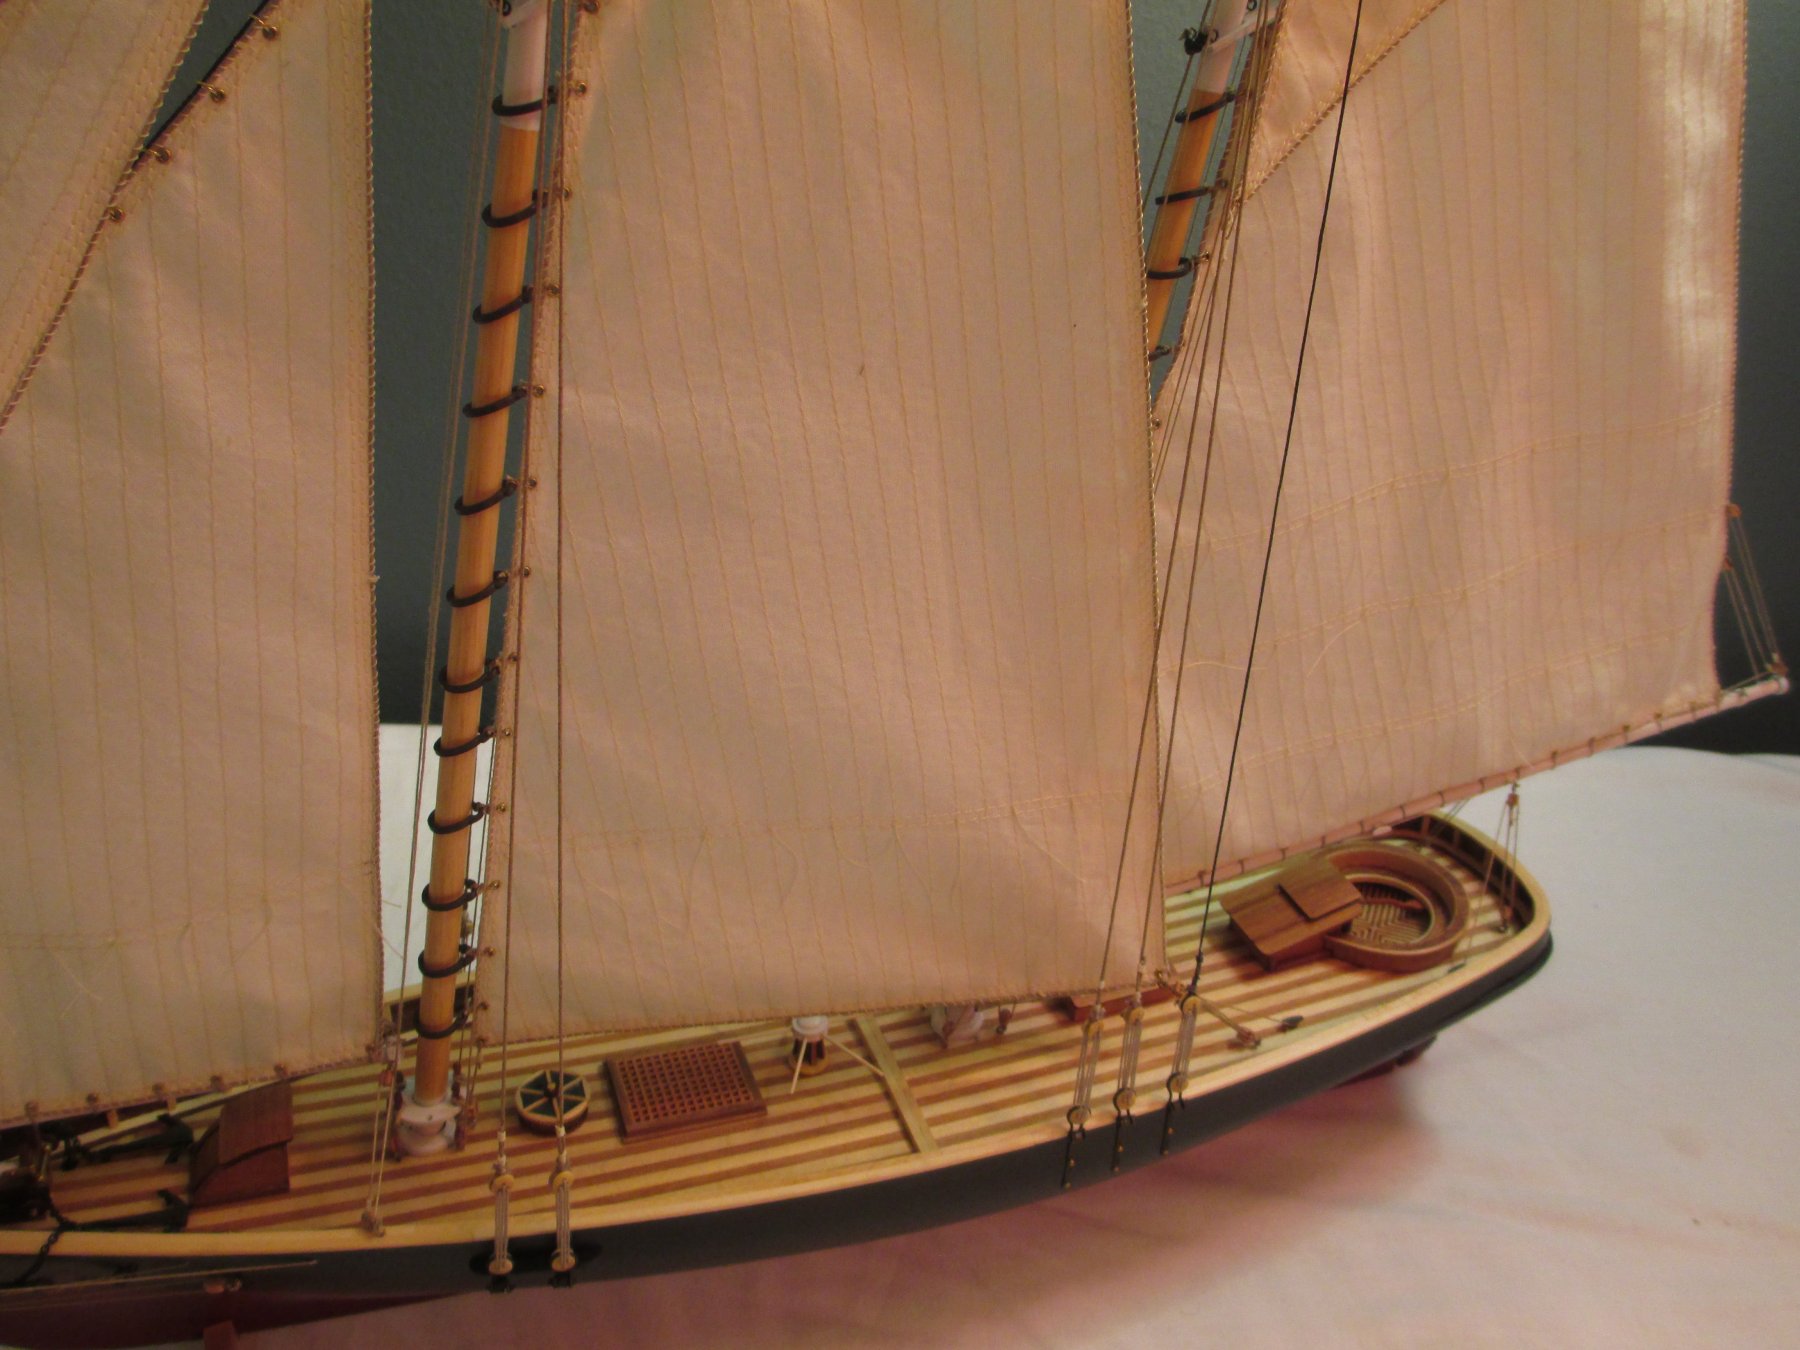
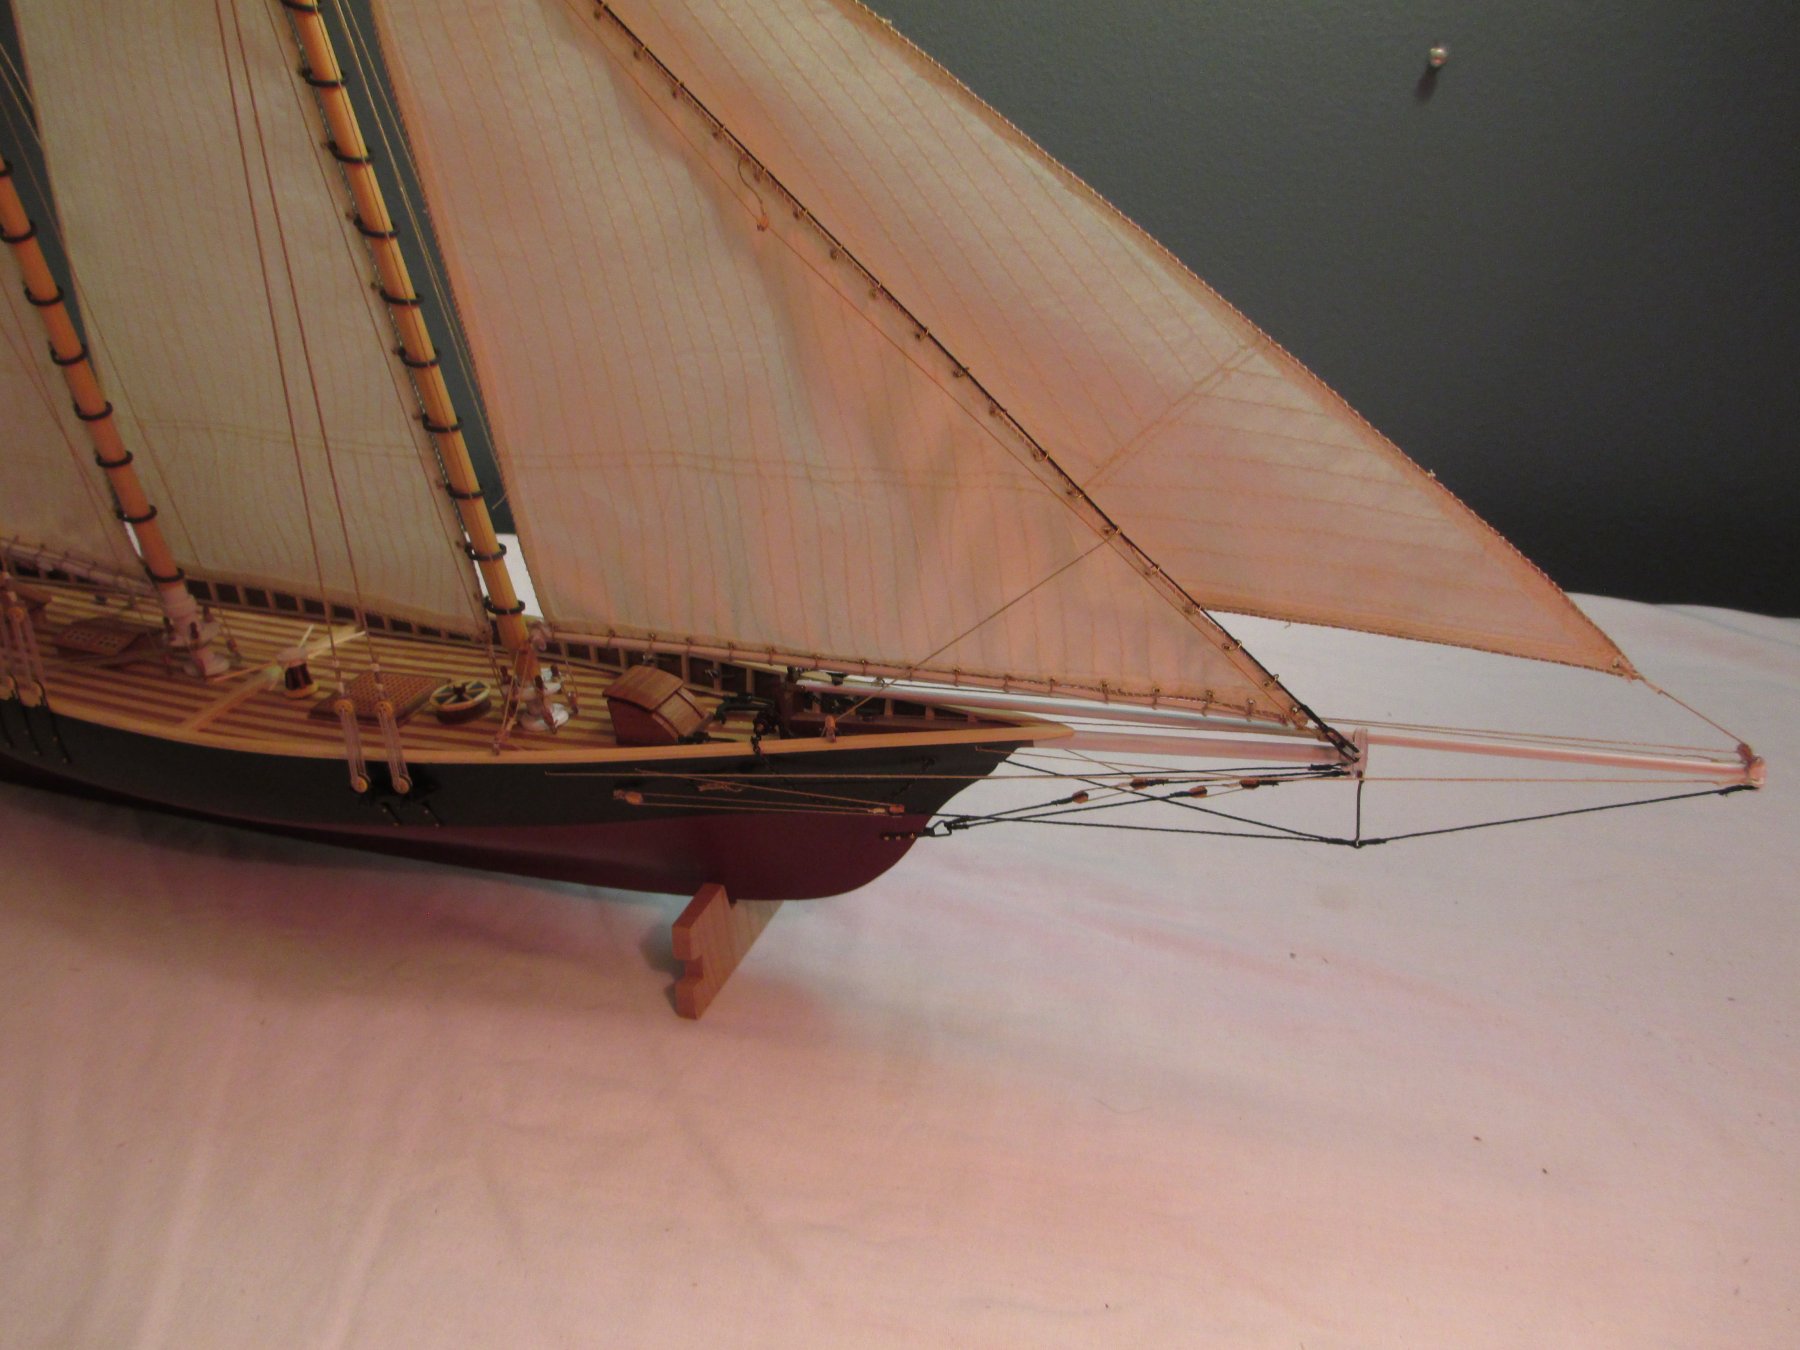
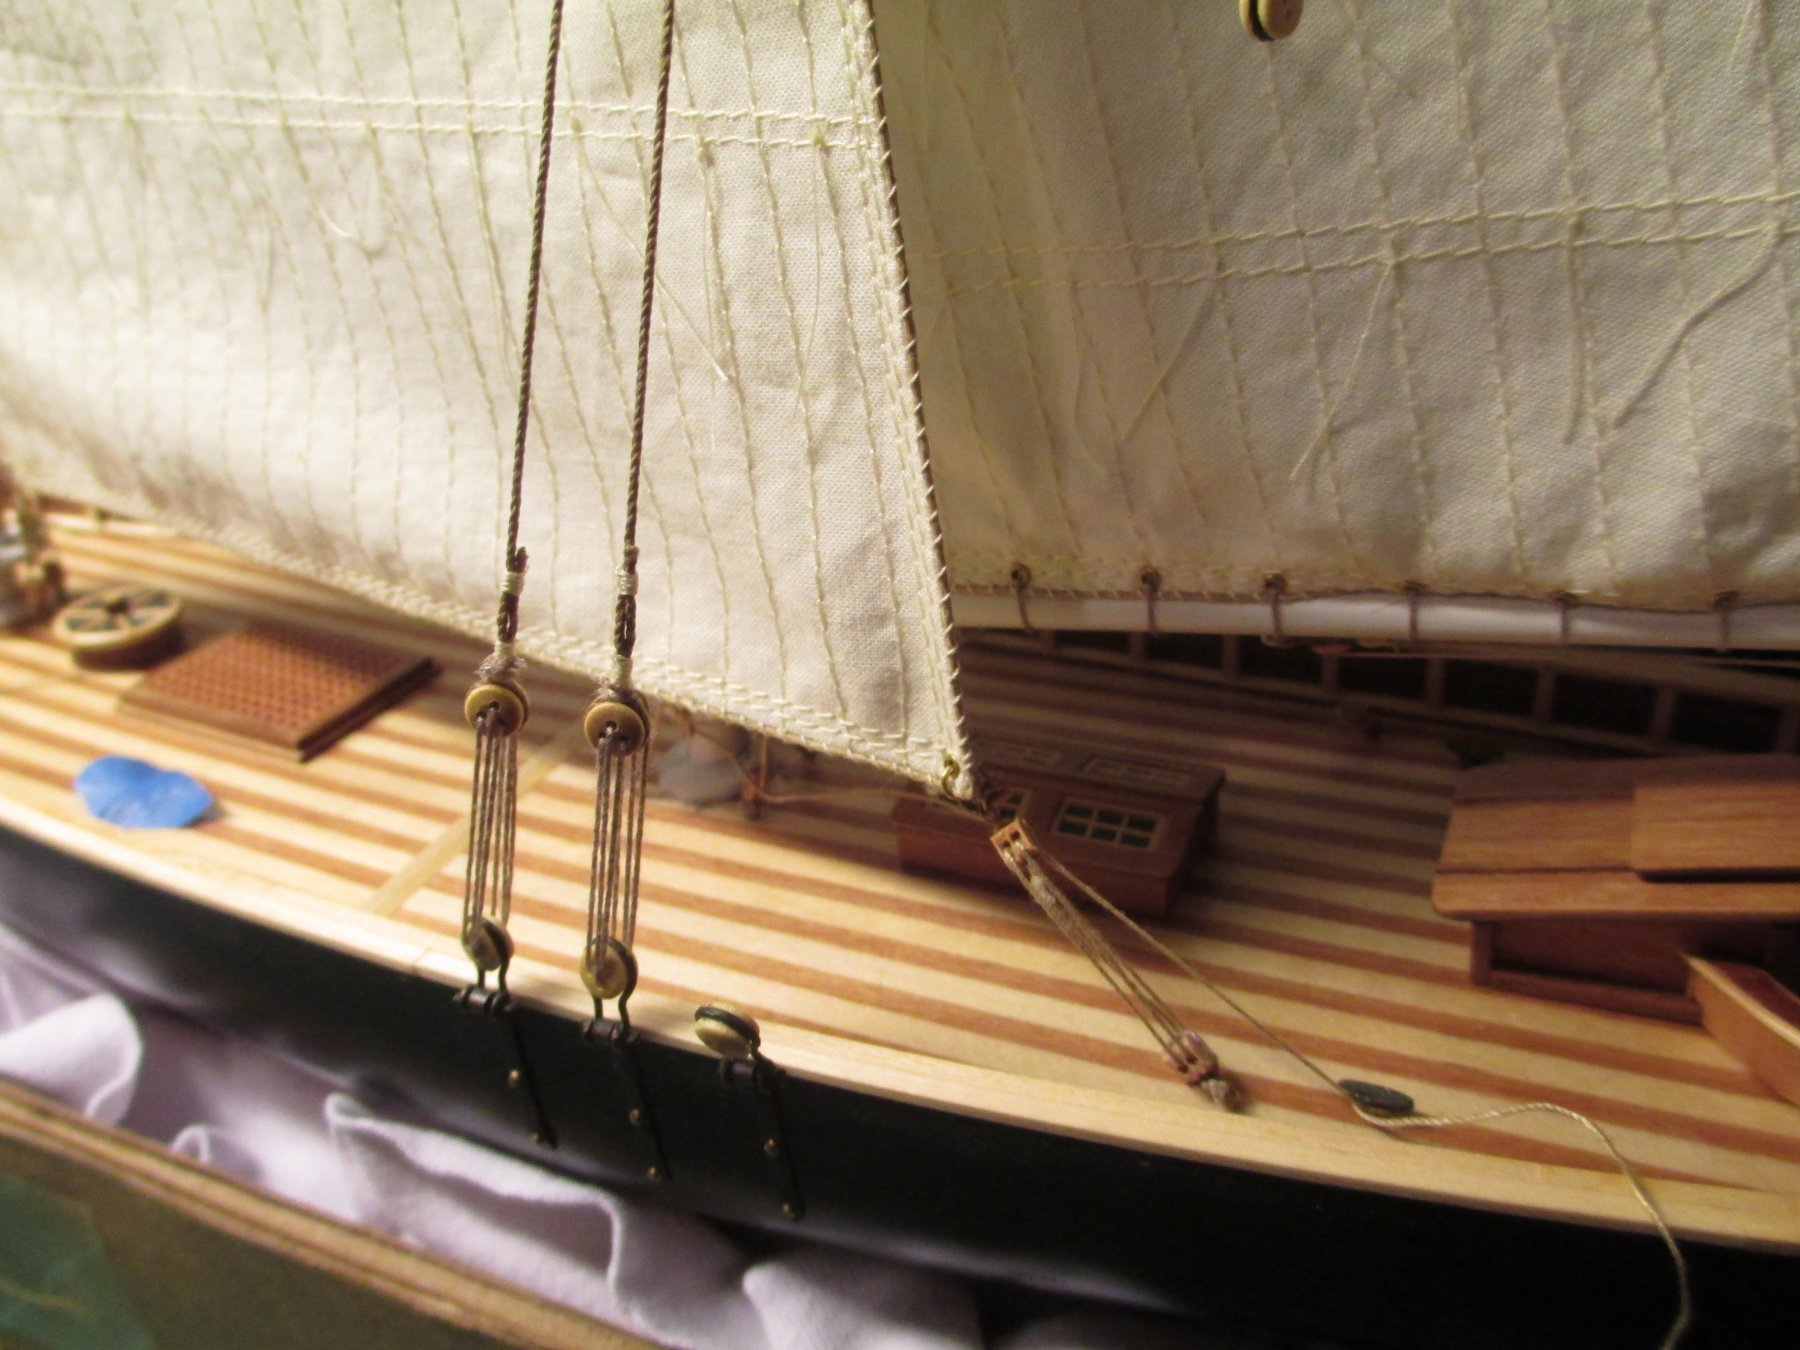
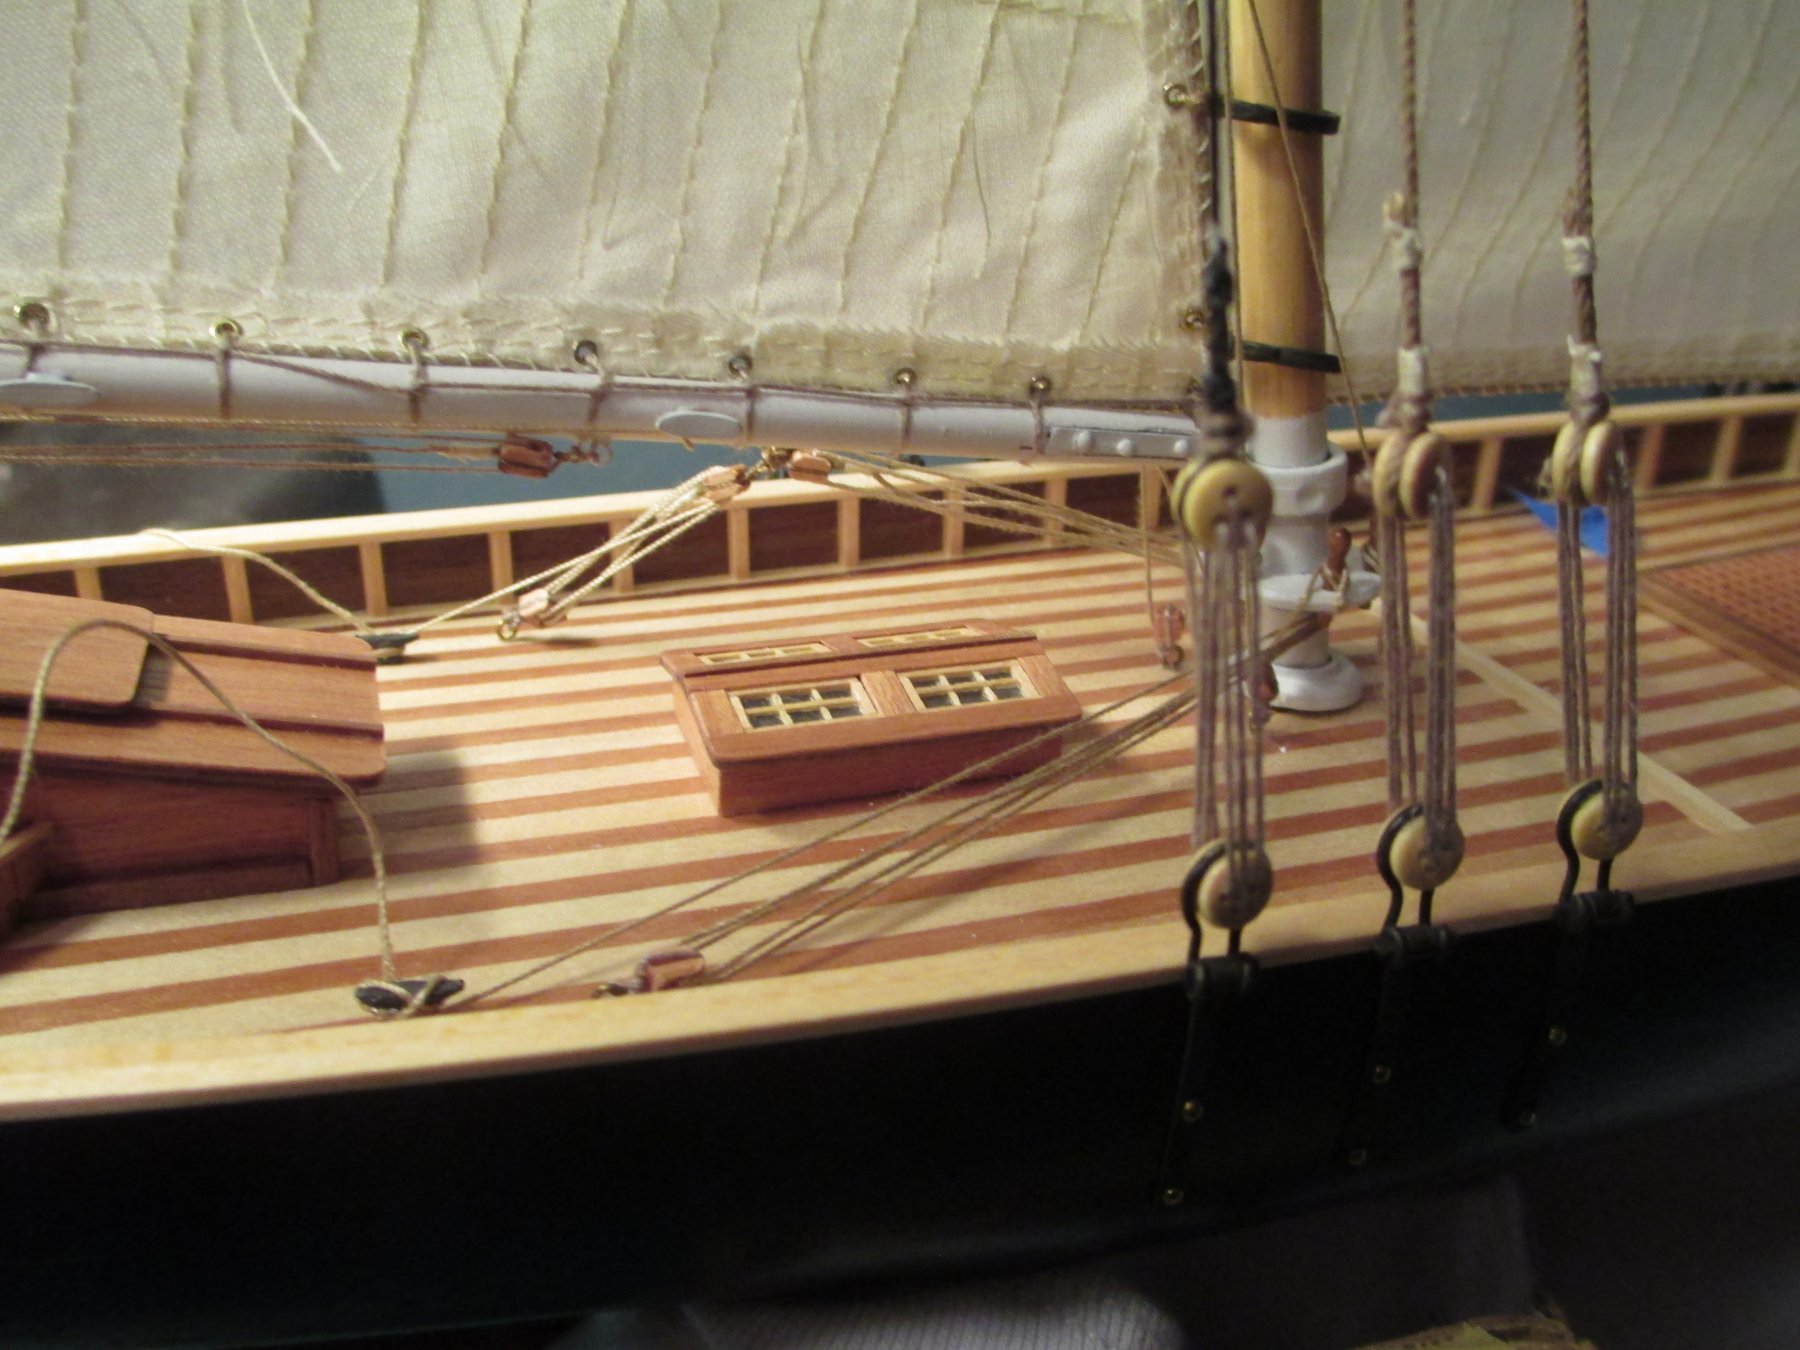
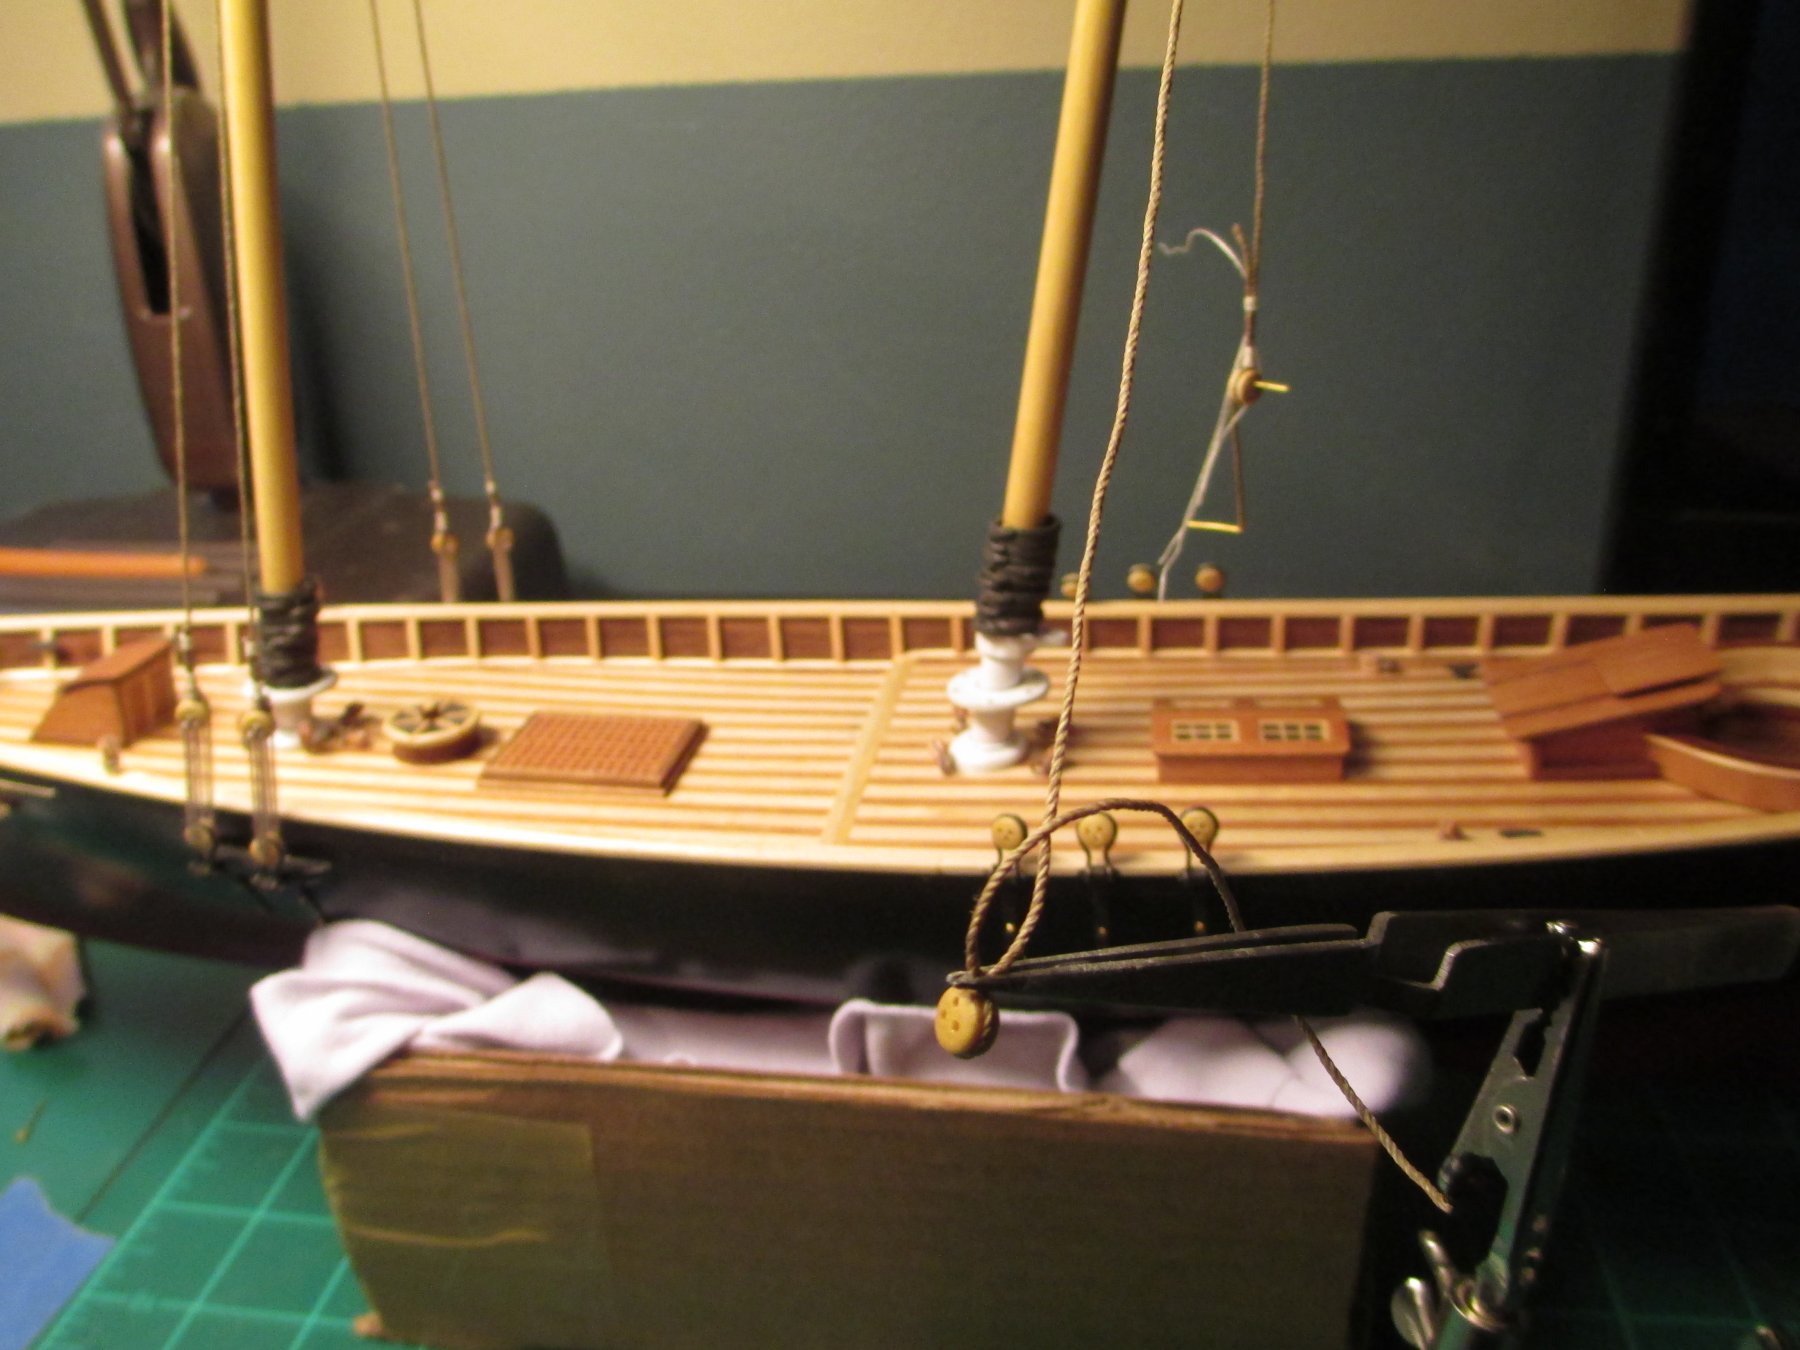
Hi there, I use india ink along the tape which marks off the water line, I brush it on as dry as possible so it does no bleed under the tape. its much cleaner than paint and does not glob up and leave raised streaks on the hull. after the satin clear coat it looks really good. I used other deadeyes because of contrast, I'm always aware of wood tones and paint colors for better contrast overall, the kit deadeyes where very dark in color. If I build this kit according to the intended instructions I end up with a dull looking boat. I also used different color rigging for better contrast. the cockpit needed some excitement to it so I just felt creative. Ive seen plenty of these builds using what is provided in the kit. I was not interested in the same looking model. who says you have to follow the rules. make the art a reflection of your own talent, break out of the box, explore a little. box kit models are meant to be bashed in my opinion in order to improve them, and also to have a better time in creating them. good luck with your build and remember attention favors originality.