CDW
-
Posts
7,755 -
Joined
-
Last visited
Content Type
Profiles
Forums
Gallery
Events
Everything posted by CDW
-

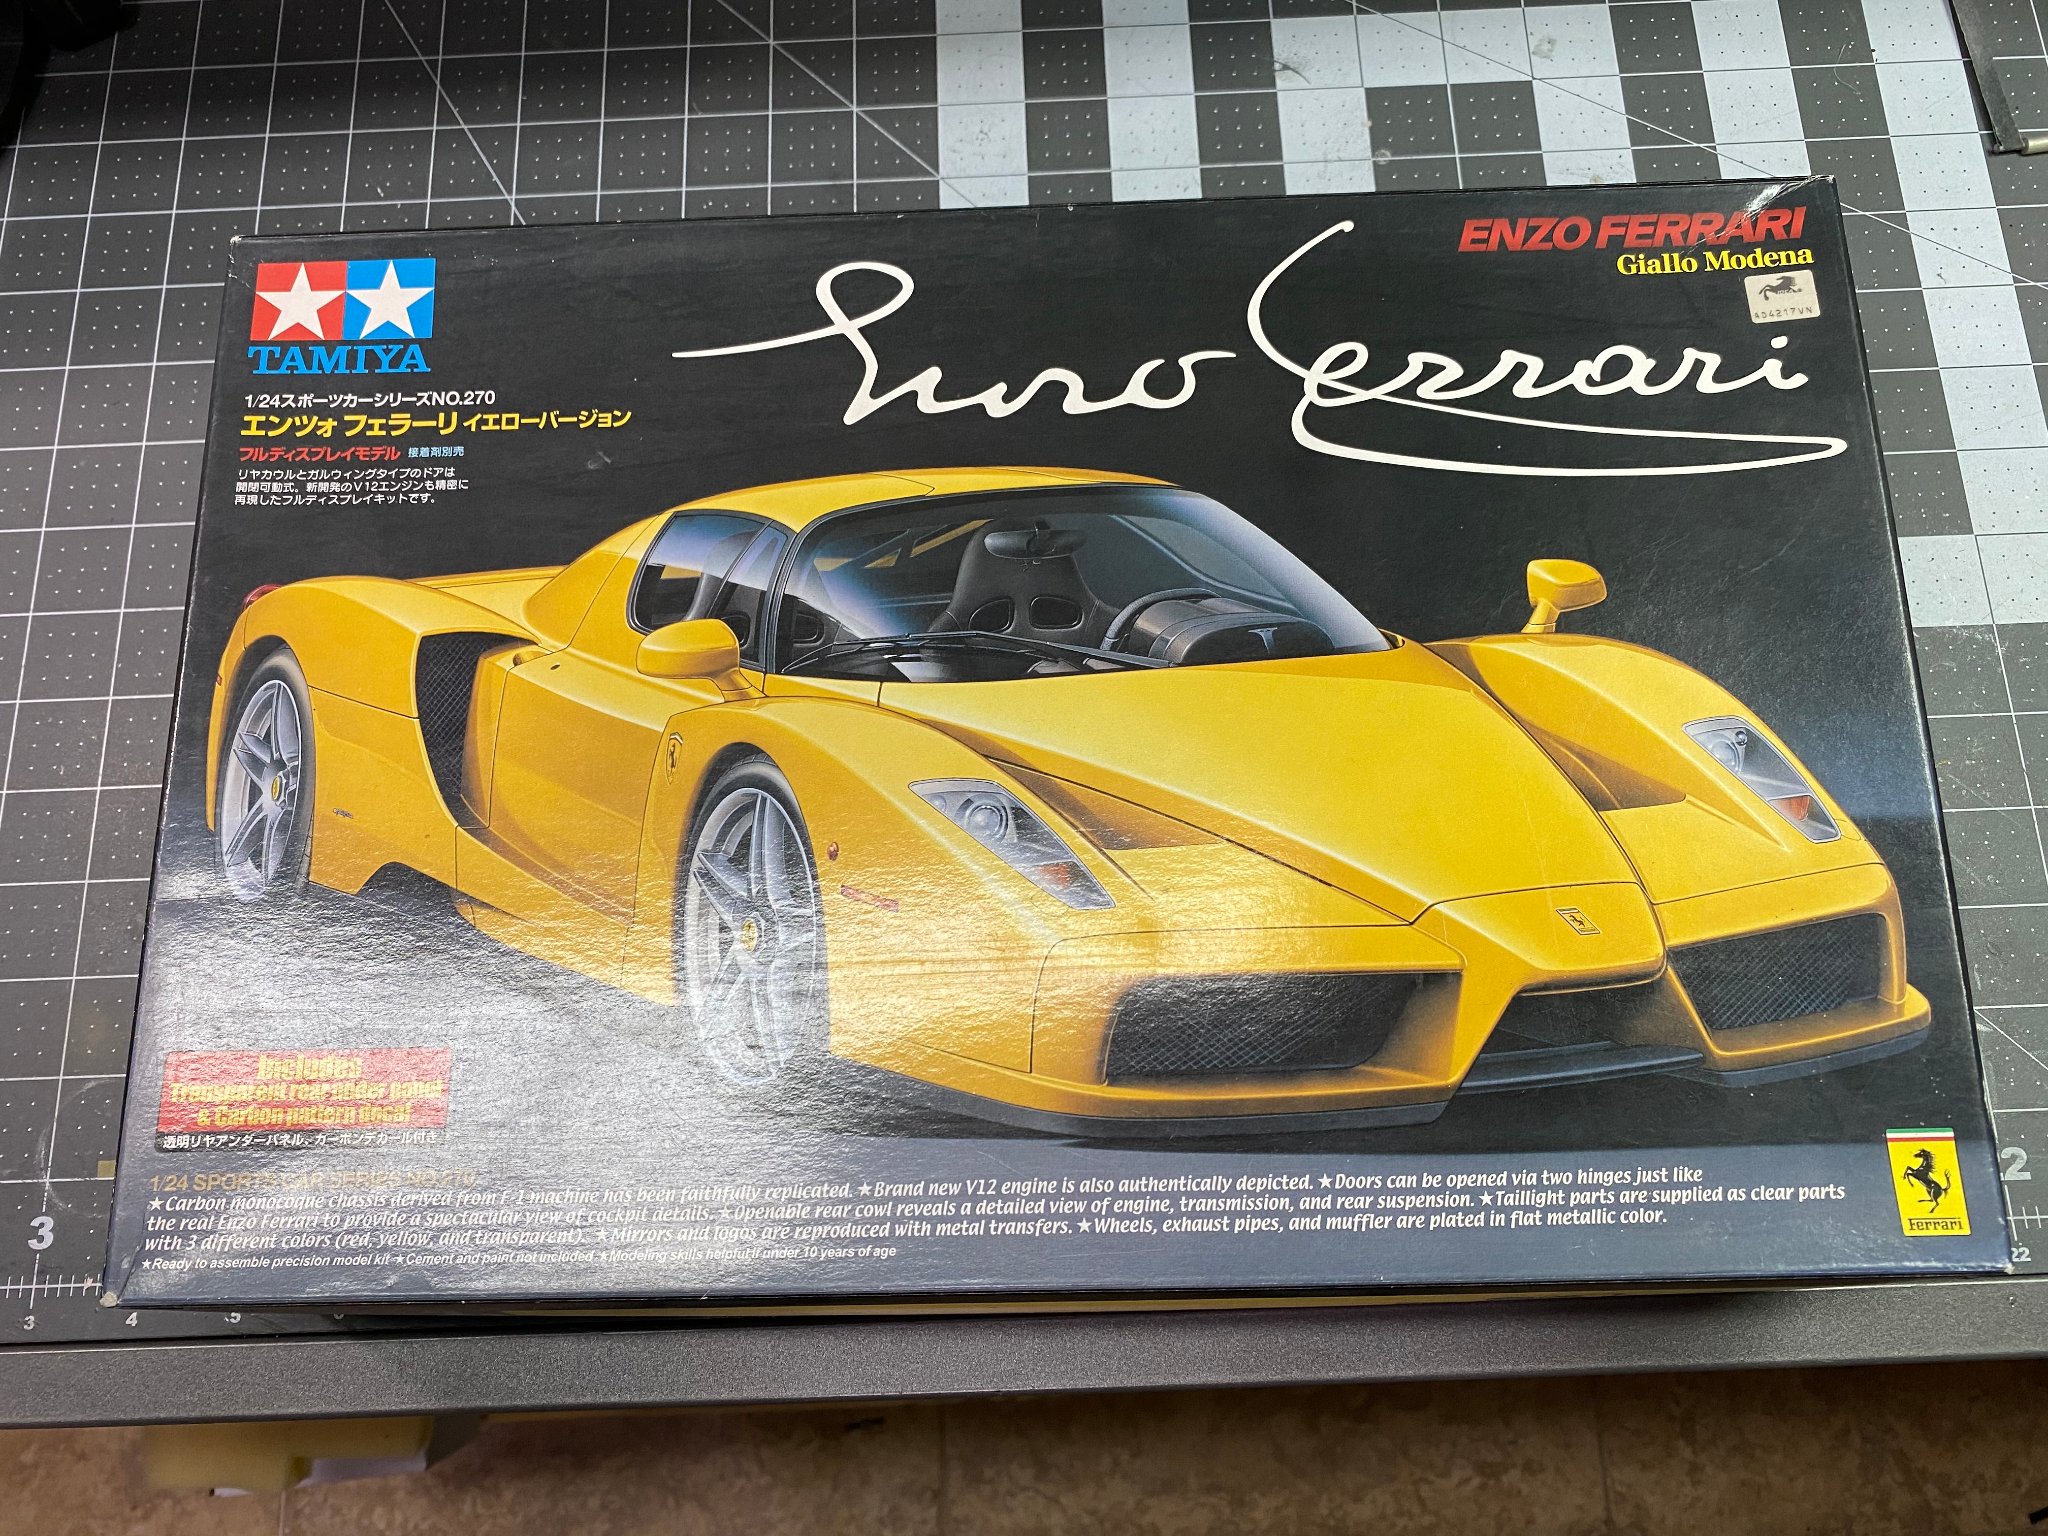
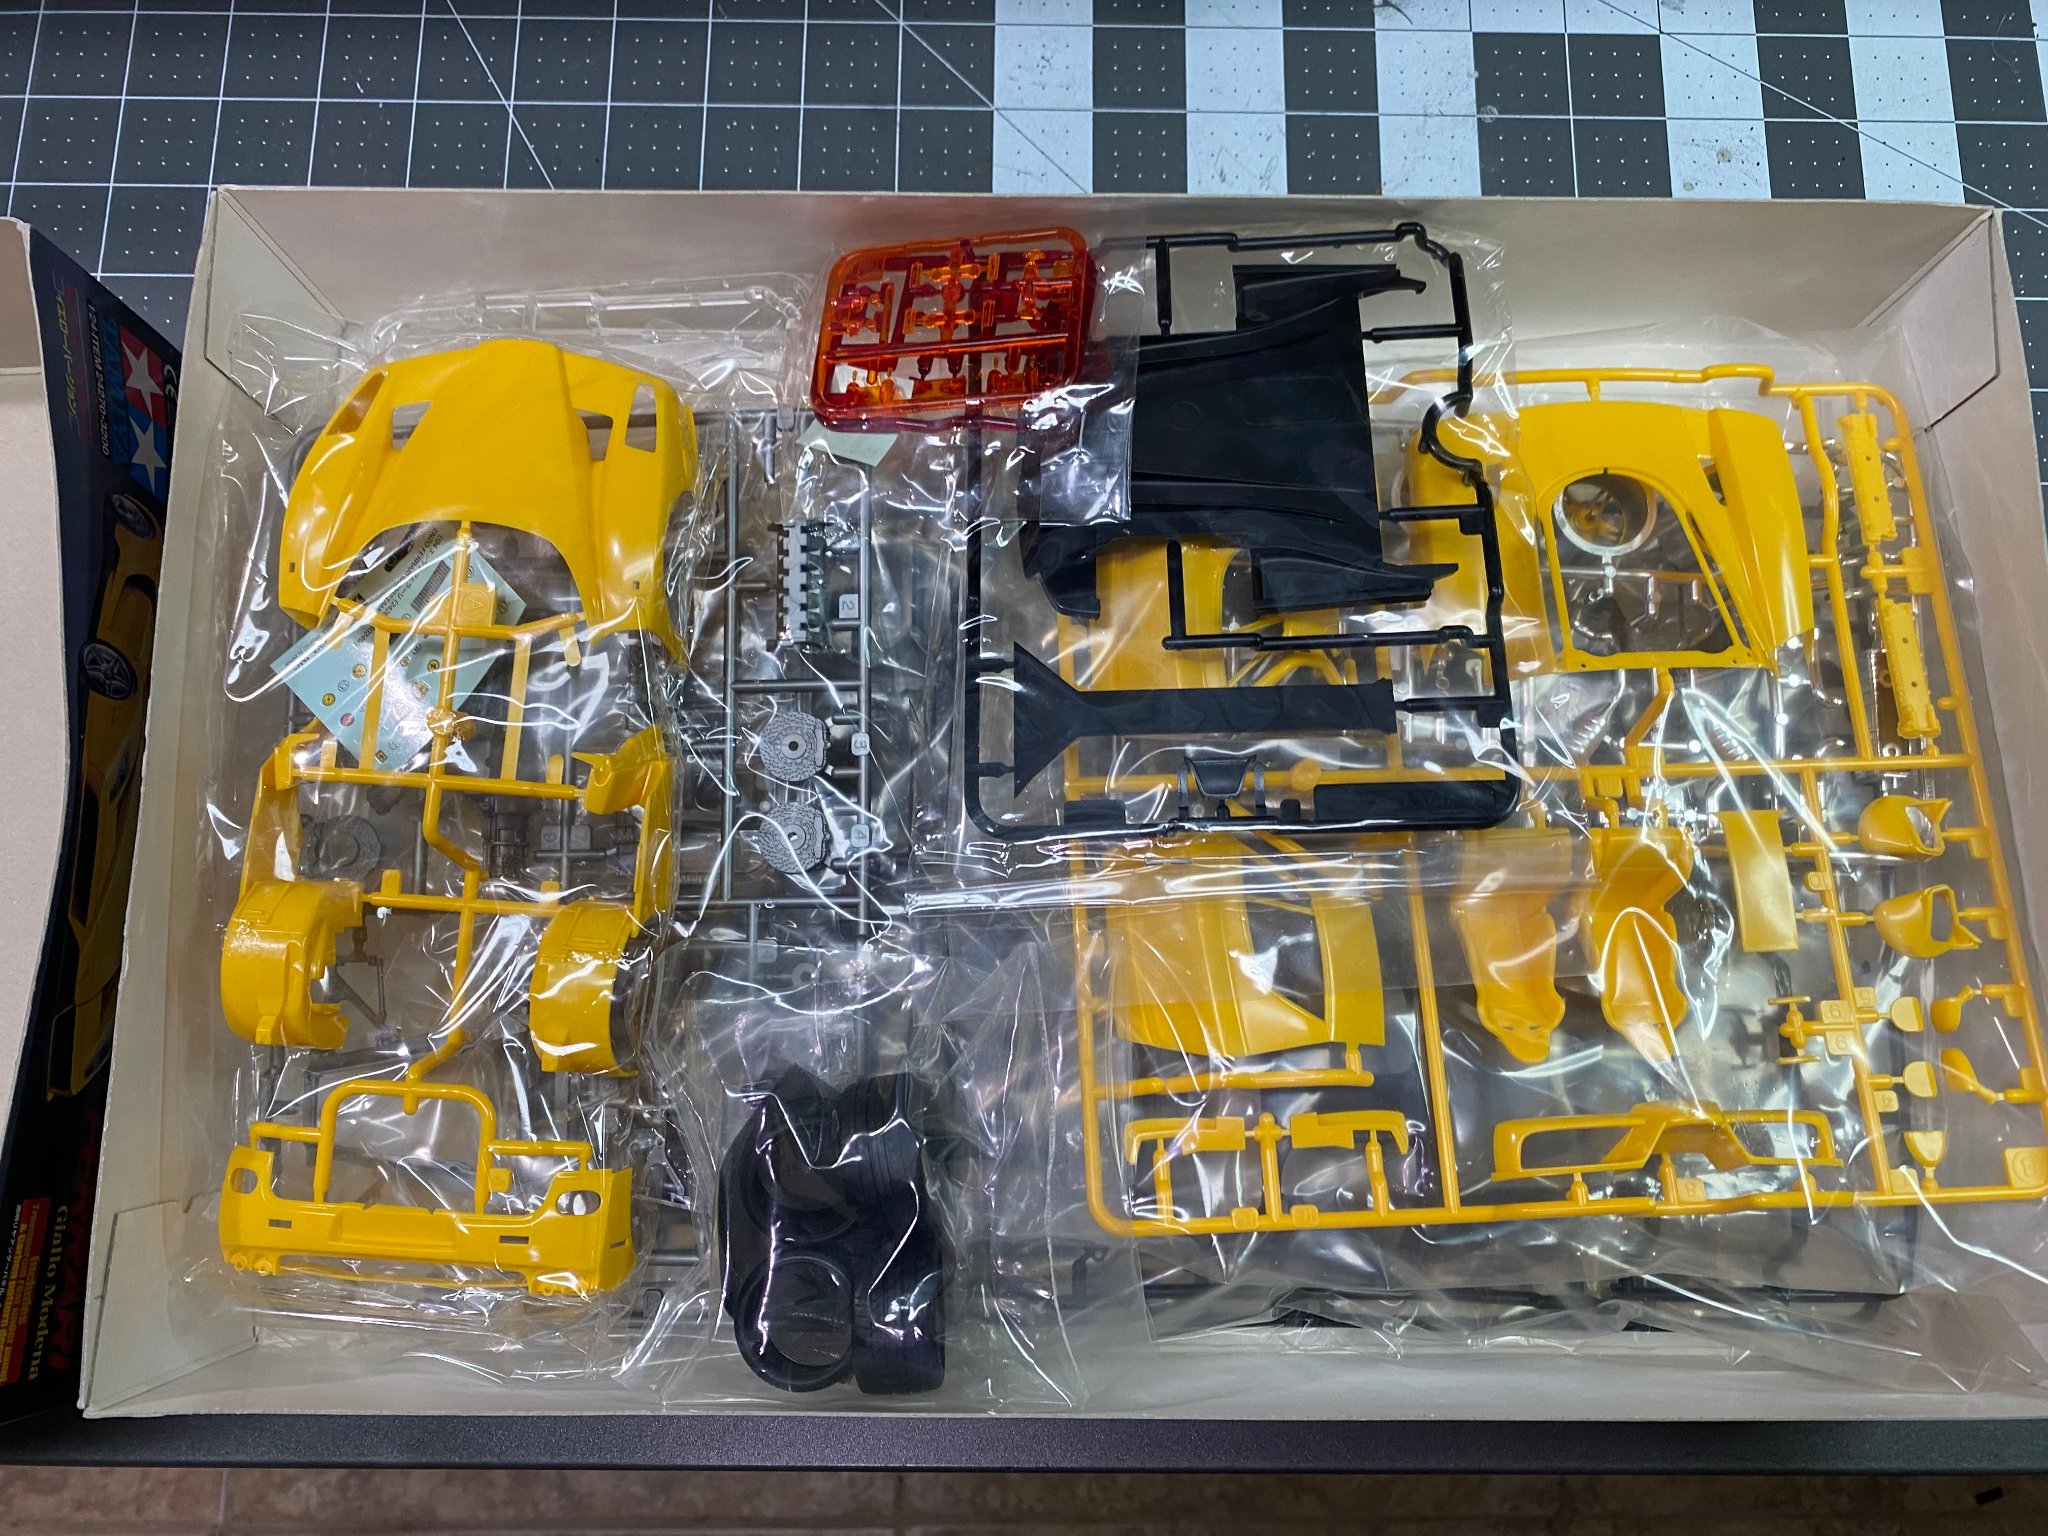
Enzo Ferrari by CDW - FINISHED - Tamiya 1:24 Scale
CDW posted a topic in Non-ship/categorised builds
Think I'll build this Tamiya Enzo Ferrari next. It's been sitting in my stash for close to 2 decades so I suppose it's time to get it done.

- 128 replies
-
- 13
-

-
Looks great Jack. Is the 14th hull plank unique to this model, or is this a typical ship building feature in general?
-
Thanks for the comments, much appreciated. Have not decided what I want to do next, but will make a decision soon.
-
Going to call this one finished. After I took the photos, realized I left off the windshield wiper, but I'll put it on later today.


- 86 replies
-
- 15
-
-
Decals are ready for a sealer. Then there remains the window glass, spoiler, headlight lens and covers, taillight lens and covers...and this one will be a wrap.

- 86 replies
-
- 14
-
-
Got sidetracked with other things today, but man, this decal task is taking WAY longer than I hoped it would take. The headlight buckets called for a chrome silver. After thinking about masking and painting with a chrome type of paint, decided masking would be more than I cared to take on. Got out the Molotow chrome pen and am very pleased with the results. Looks almost as good as chrome plated parts in my opinion. Sure have gotten a lot of use out of my set of Molotow chrome pens. They were well worth the investment I think. They have lasted more than a year.


- 86 replies
-
- 12
-
-
Thanks! yes it sure does.
-
😄 I know, right? Who would have thought it? The Italians, that's who.
-
I did some touch ups (paint) on the port side of the car that was decaled yesterday. Found that Mr Color Italian Red matched the red decals perfectly.
-
I love that channel! Watch it a lot. Have not tried using a hair dryer yet, but will give it a try on some spare scrap decals to see how it works. Thanks
-
What a great looking model, Kevin. All those details look super! Hope you are doing better soon with your health.
-
Yes, and you have to work it v..e..r..y - s..l..o..w..l..y. This is one instance where haste will make waste. Oh, and I should have mentioned...use warm water to dip the decals. Cold water gives lots of trouble when sliding the decal off the paper. Warm water does the trick, but not too hot. I have a cup warmer that I use to keep the water warmed in a small tin pan.
-
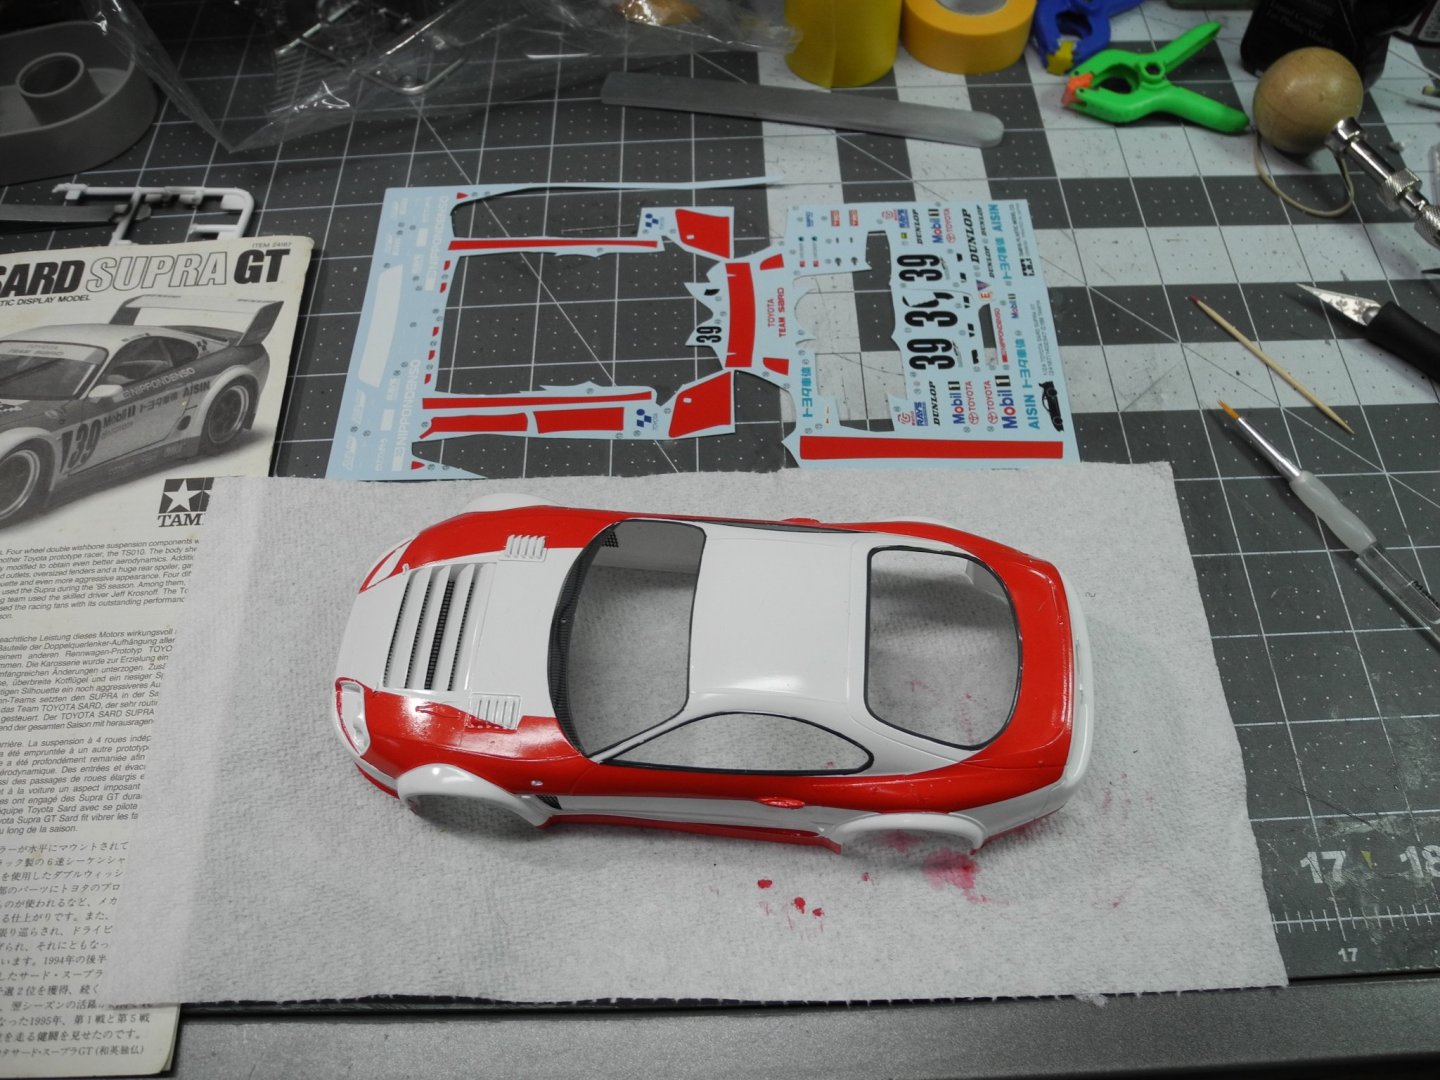
I took these photos to give you a view of the sausage making process. It sure is an ugly thing. When the decals first go down and get their first coat of microsol, they look to be in a total and unrecoverable mess. But you work it, massage it and in between several or more applications of microsol along with enough drying time to allow the solvent to do it's thing and it finally works itself out. At this time, almost all the large red decal pieces have been placed, but there remains a considerable number of other smaller decals yet to be applied.


- 86 replies
-
- 11
-
-
Decals and masking are the most tenuous parts for scale modeling in my opinion. With decals, you never know from one sheet to the next exactly what to expect until you actually start applying them. This is due to the various manufacturers, the age of the specific decal sheet, and the complexity of the surfaces to which they are applied. Additionally, you never know exactly how the decals will react to decal solvents. It's best to start with the milder ones first, then graduate to the stronger solutions if need be. In this case, I am using Microscale brand, Microsol. Solvaset is a stronger solution but can destroy some decals. These are so thin and delicate, I thought it best to stick with the milder of the two solutions. Because this kit was introduced in the mid 90's, I am guessing the decal sheet i acquired from Tamiya USA is maybe a bit old stock rather than newer manufacture. They have that "old" feel when applying them. They should not be as brittle as they are. On the home front, nature did a marvelous job of pruning the trees in my yard. The wife and I spent several hours this morning gathering and bundling small branches, raking up, bagging leaves and acorns. Then we dragged out all the Christmas ornaments and staged them for next week. Our daughters are flying down from New Hampshire next week so we will have an early Thanksgiving-Christmas celebration.
-
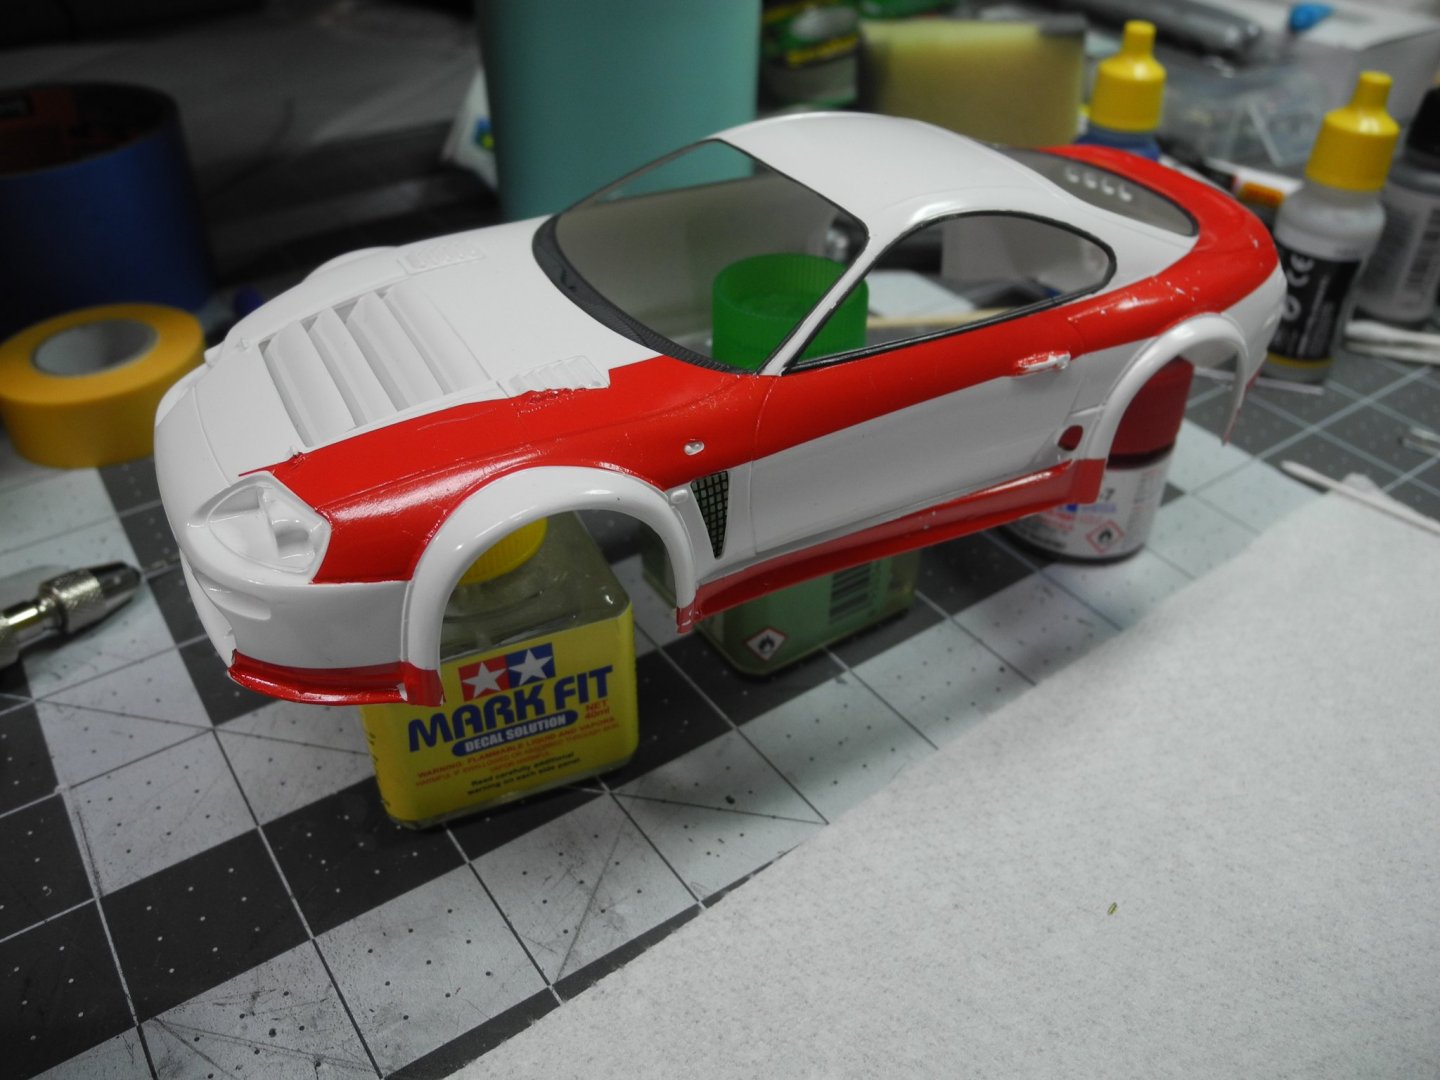
A raw preview of the decal action. The car body has so many compound curves and small raised details such as fasteners that make decal application without multiple touch ups, impossible. Even masking and painting the red instead of decals would be equally challenging because of the compound curves.

-
Judging from tonight's effort with the decals, it's going to take a couple of days to get them on, touched up, and clear coated. Tamiya decals are very thin and brittle. Takes a lot of care not to break them into lots and lots of itty bitty pieces. This makes the work go slower and more difficult but I like the end results so far. Will take some photos tomorrow. PS: we've had a lot of rain from the storm, some wind, but not too bad. My son who lives north of me is getting hit harder. His power is out but he has a backup generator wired into his circuit. If my power goes out, I'm down to candles, flashlights, and propane gas for cooking. No generator.
-
Thanks gentlemen. Decals are going on this evening, at least the start of it. We are in the midst of a hurricane right now, but it's recently degraded to tropical storm status. Should see the worst of it in my area over the next 12 hours or so. Hoping it won't be too bad.
-
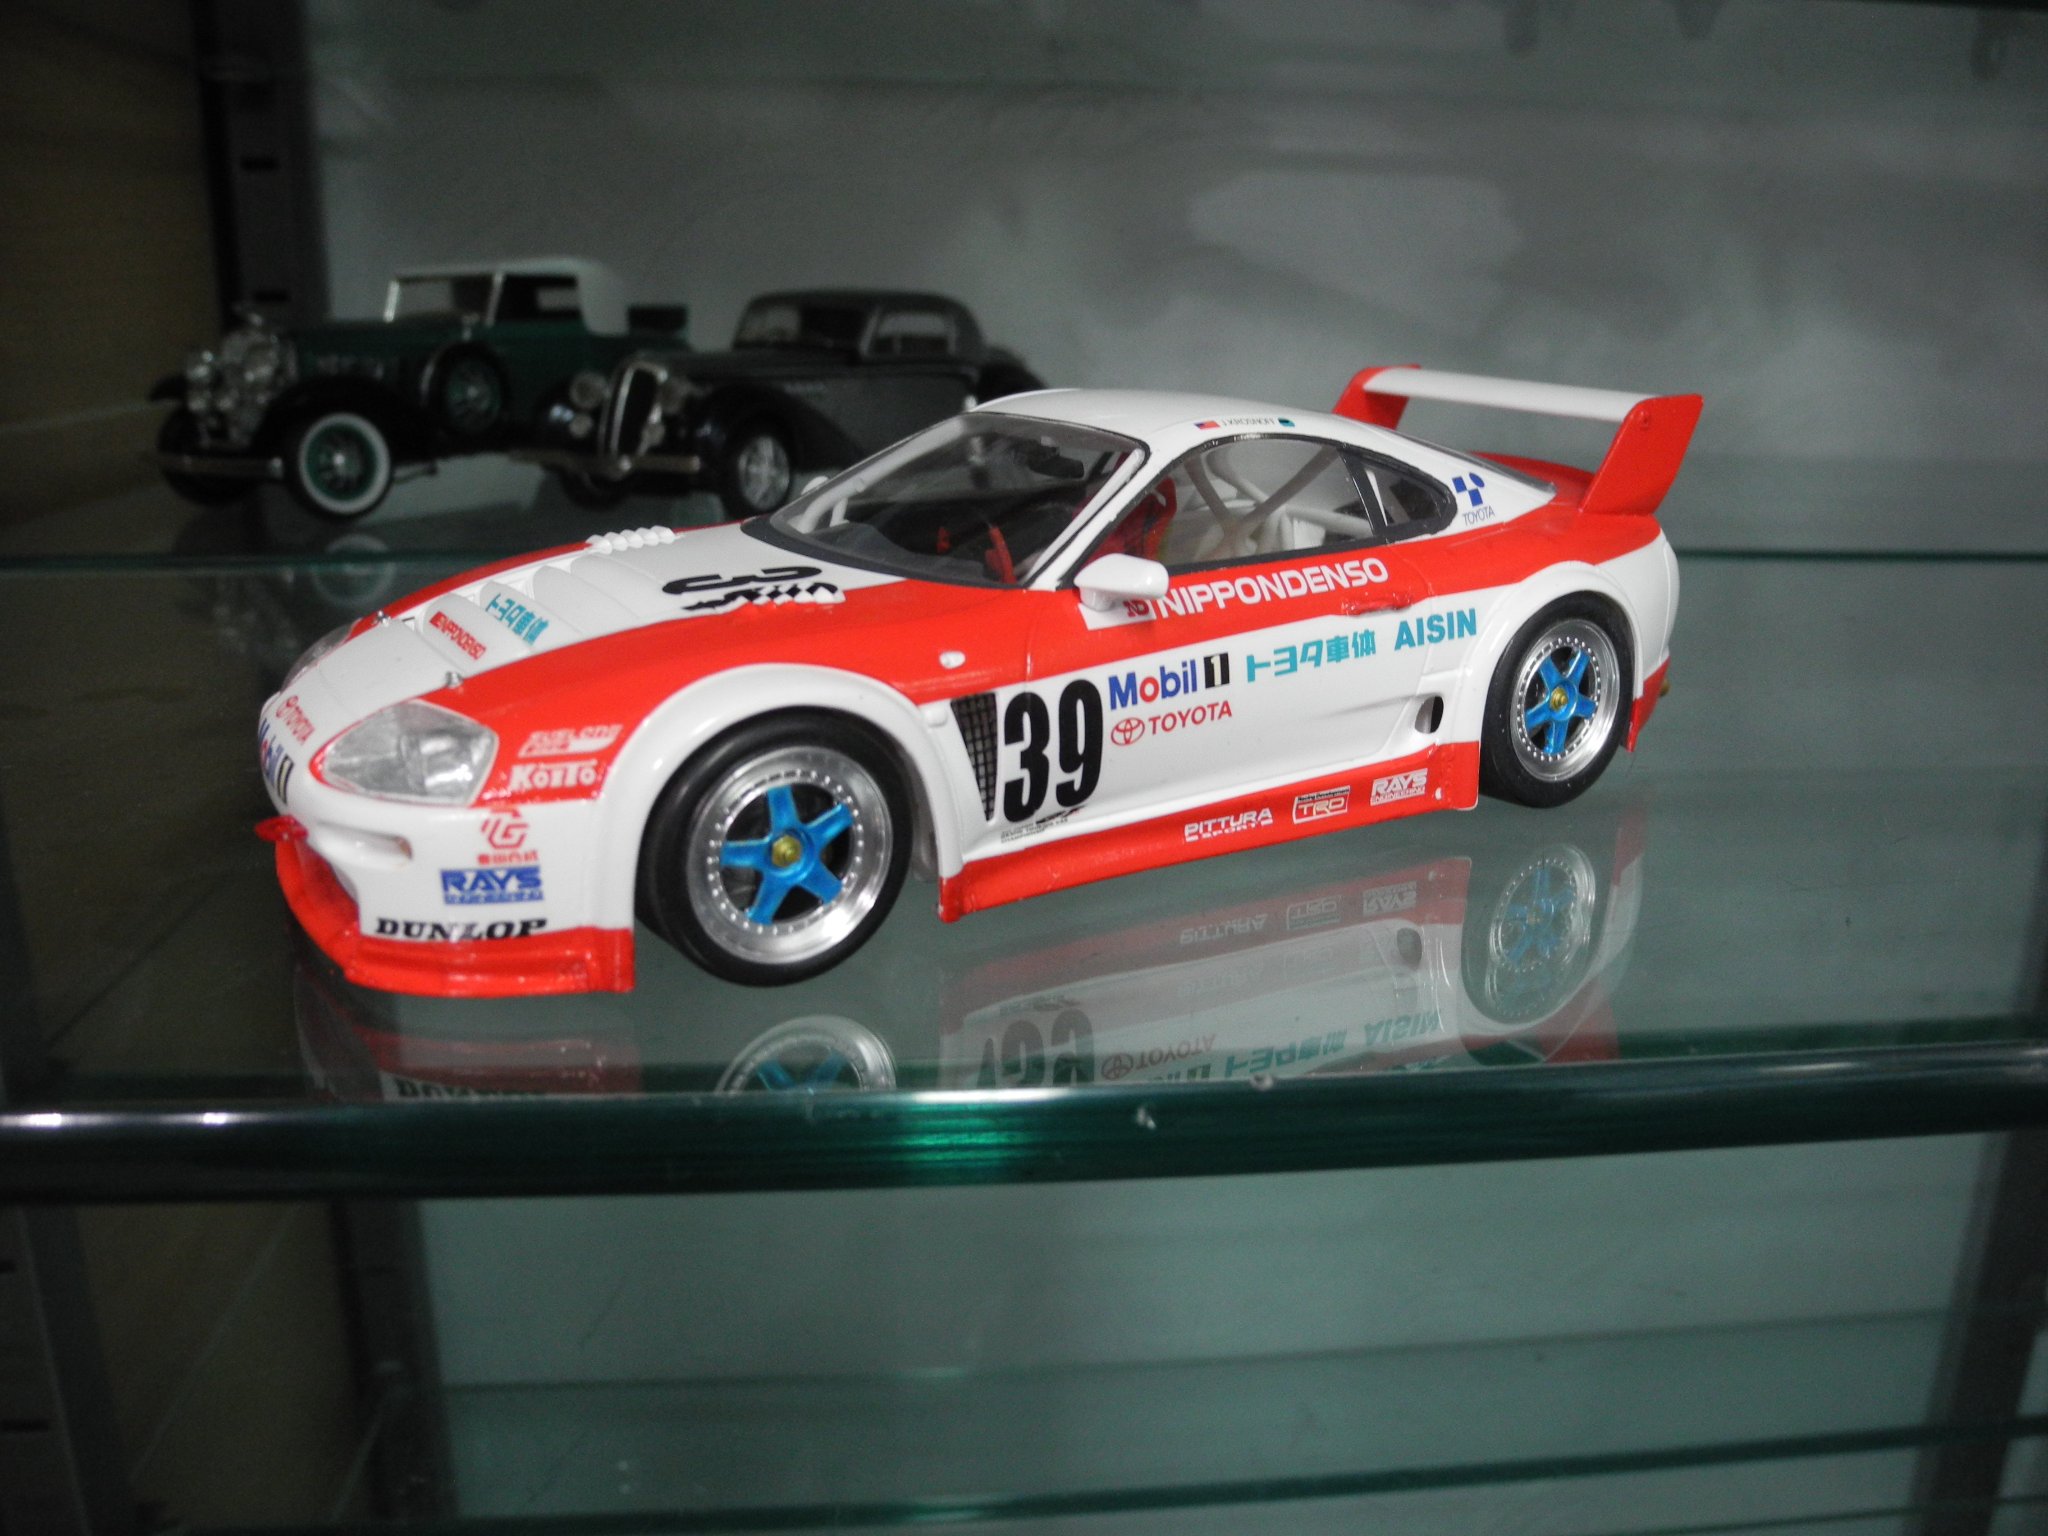
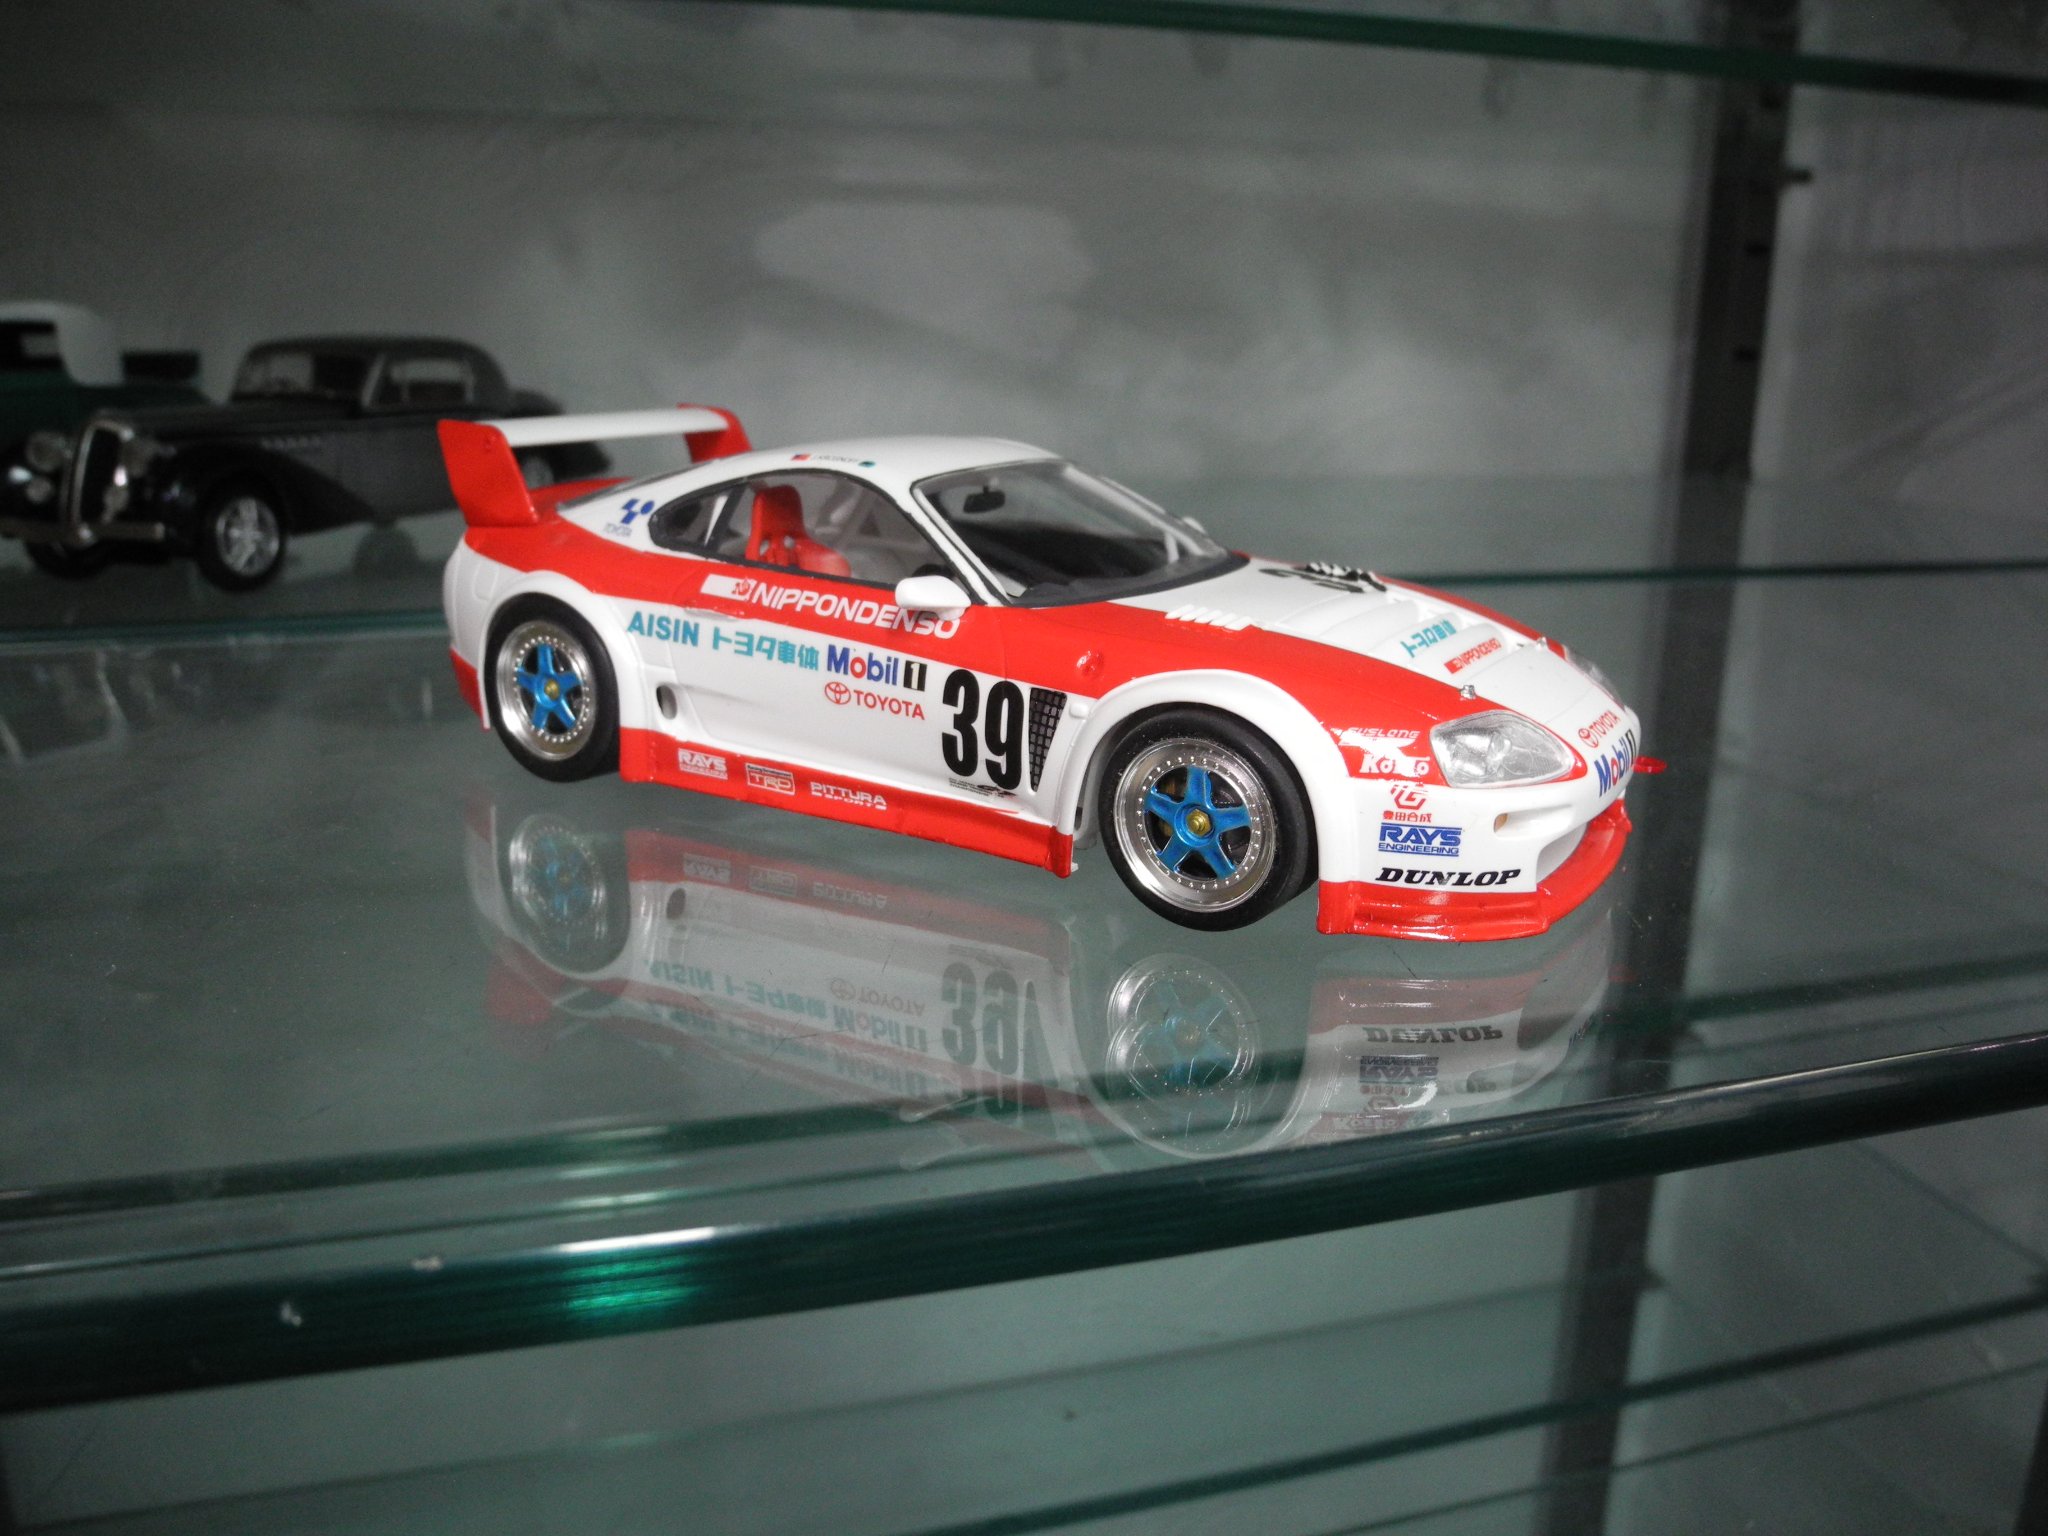
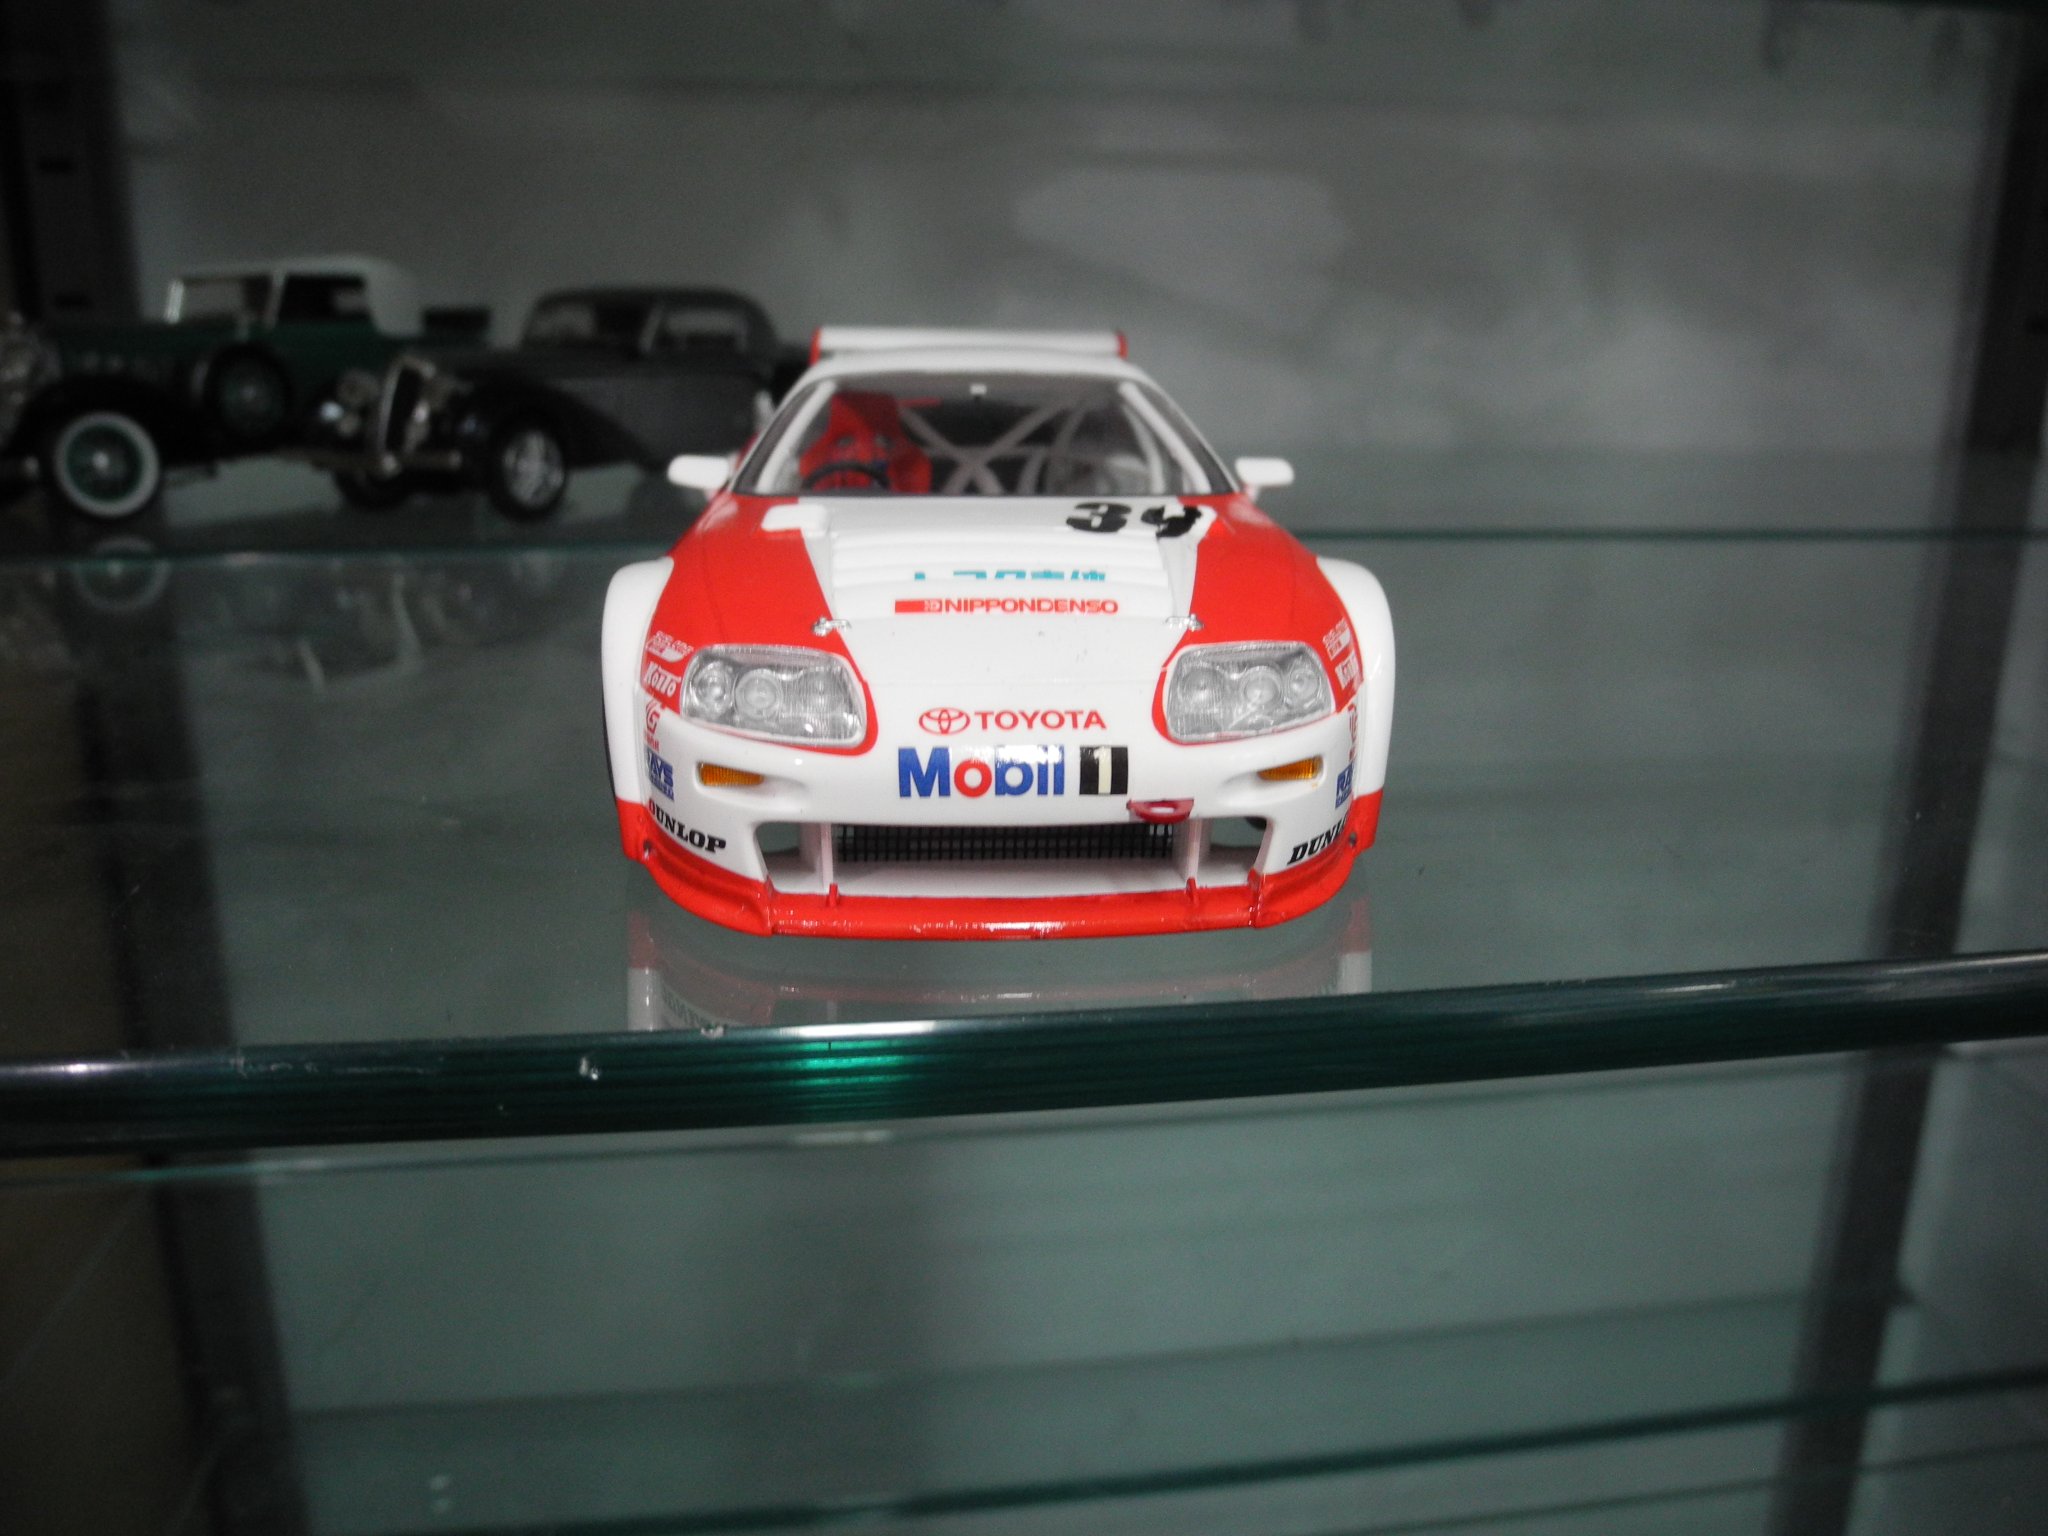
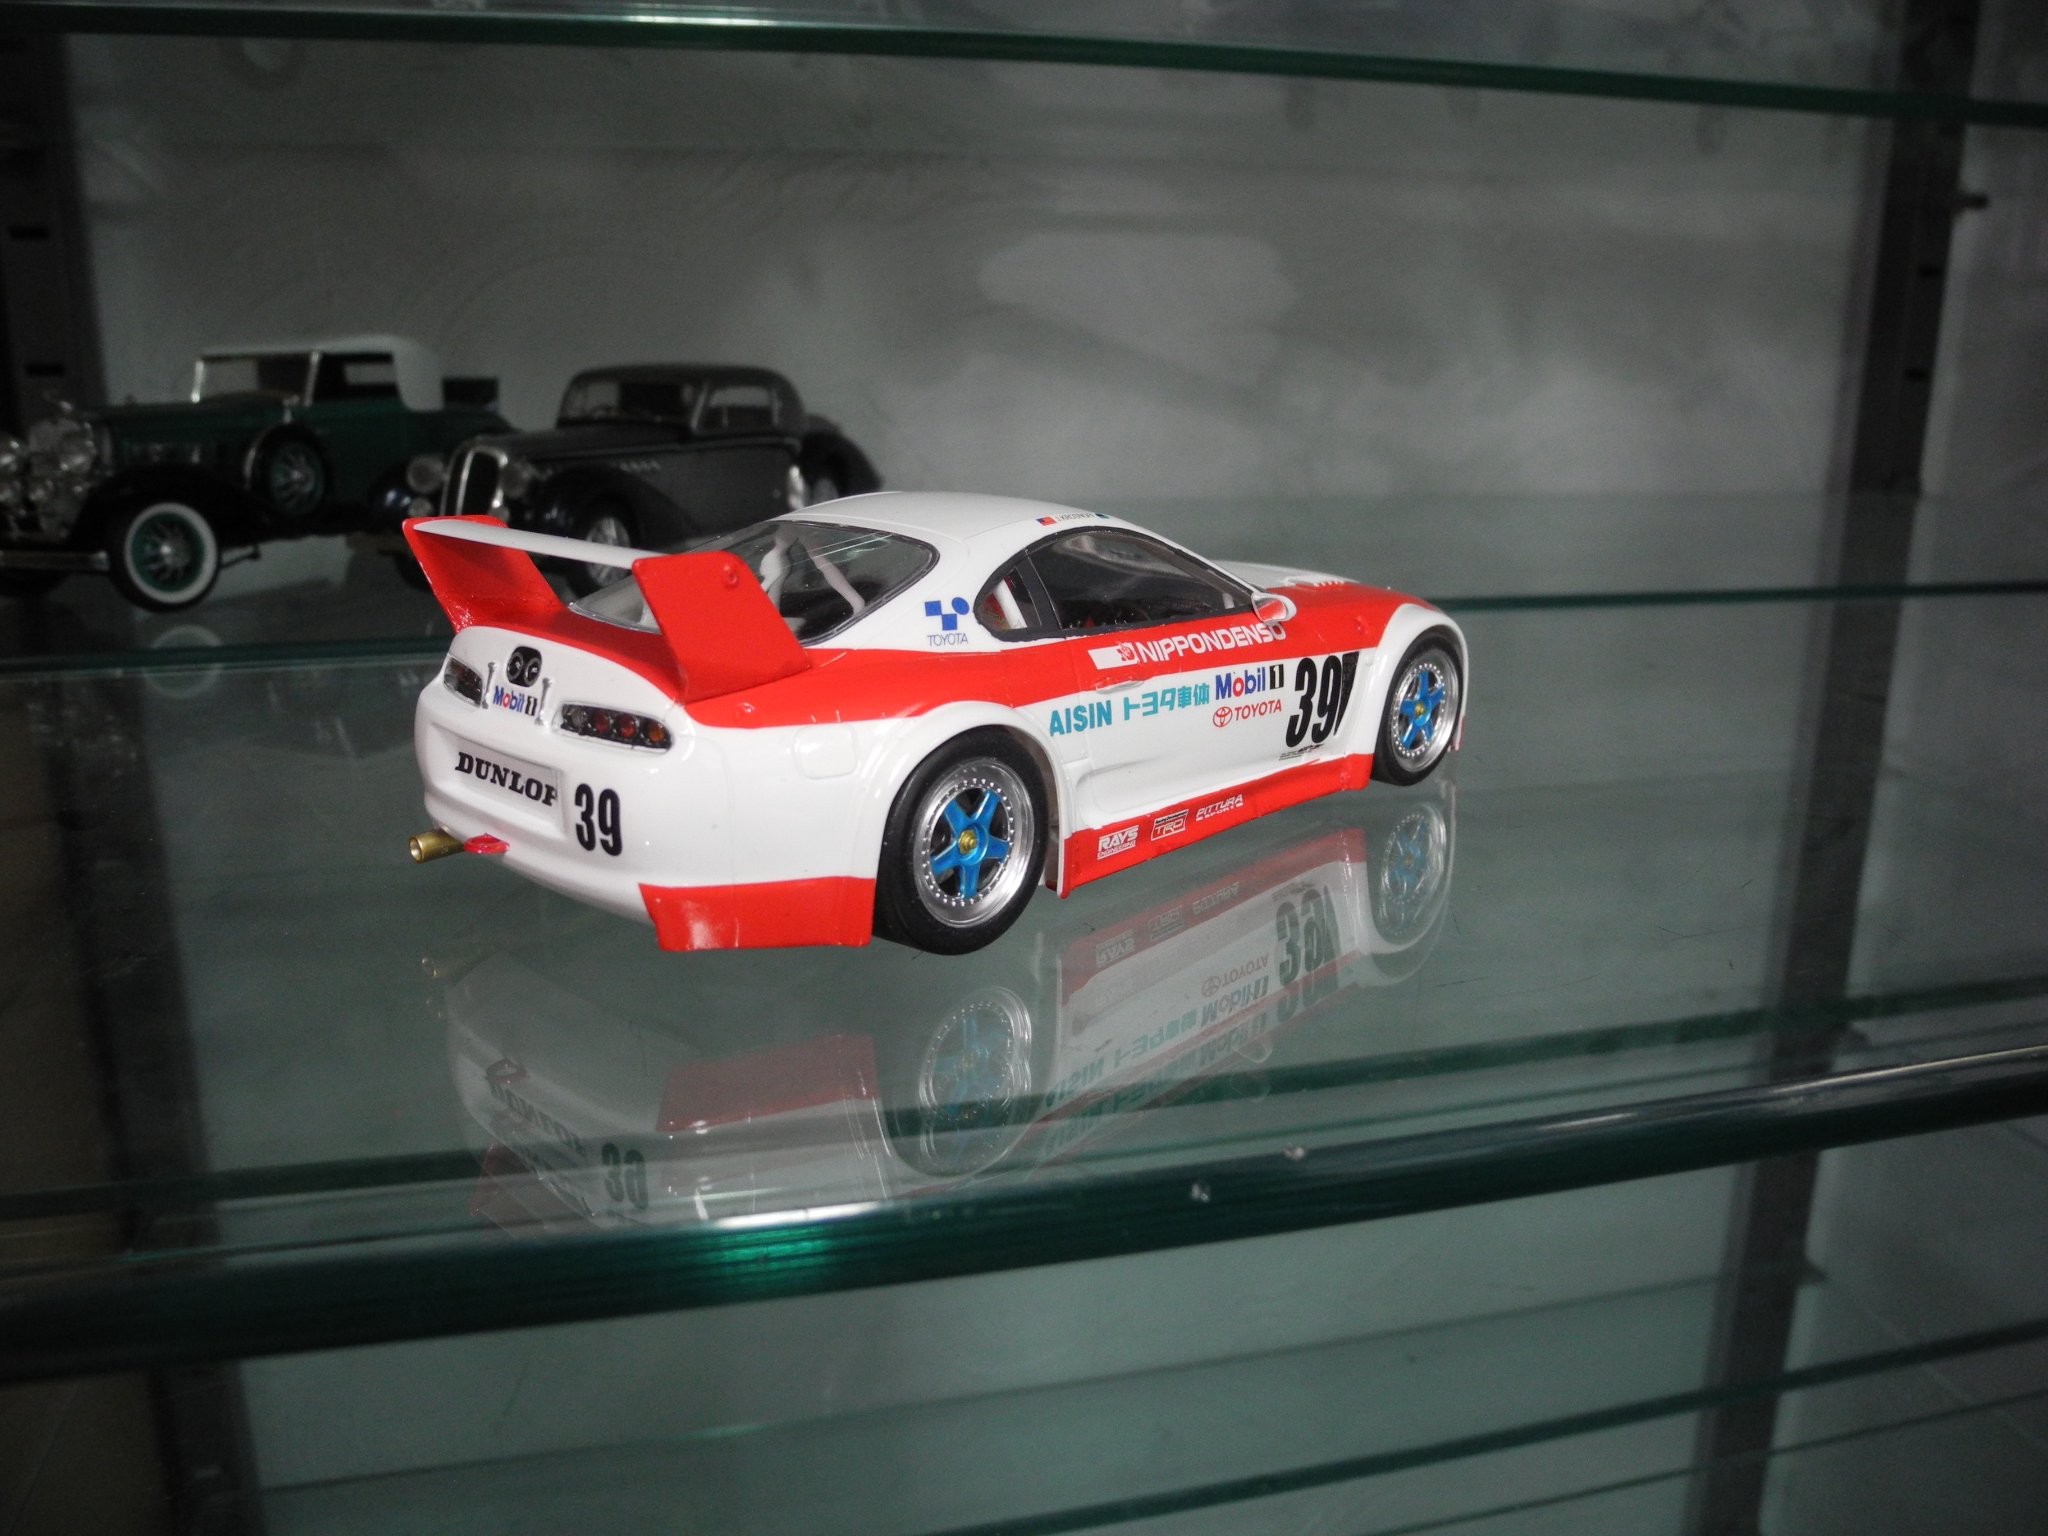
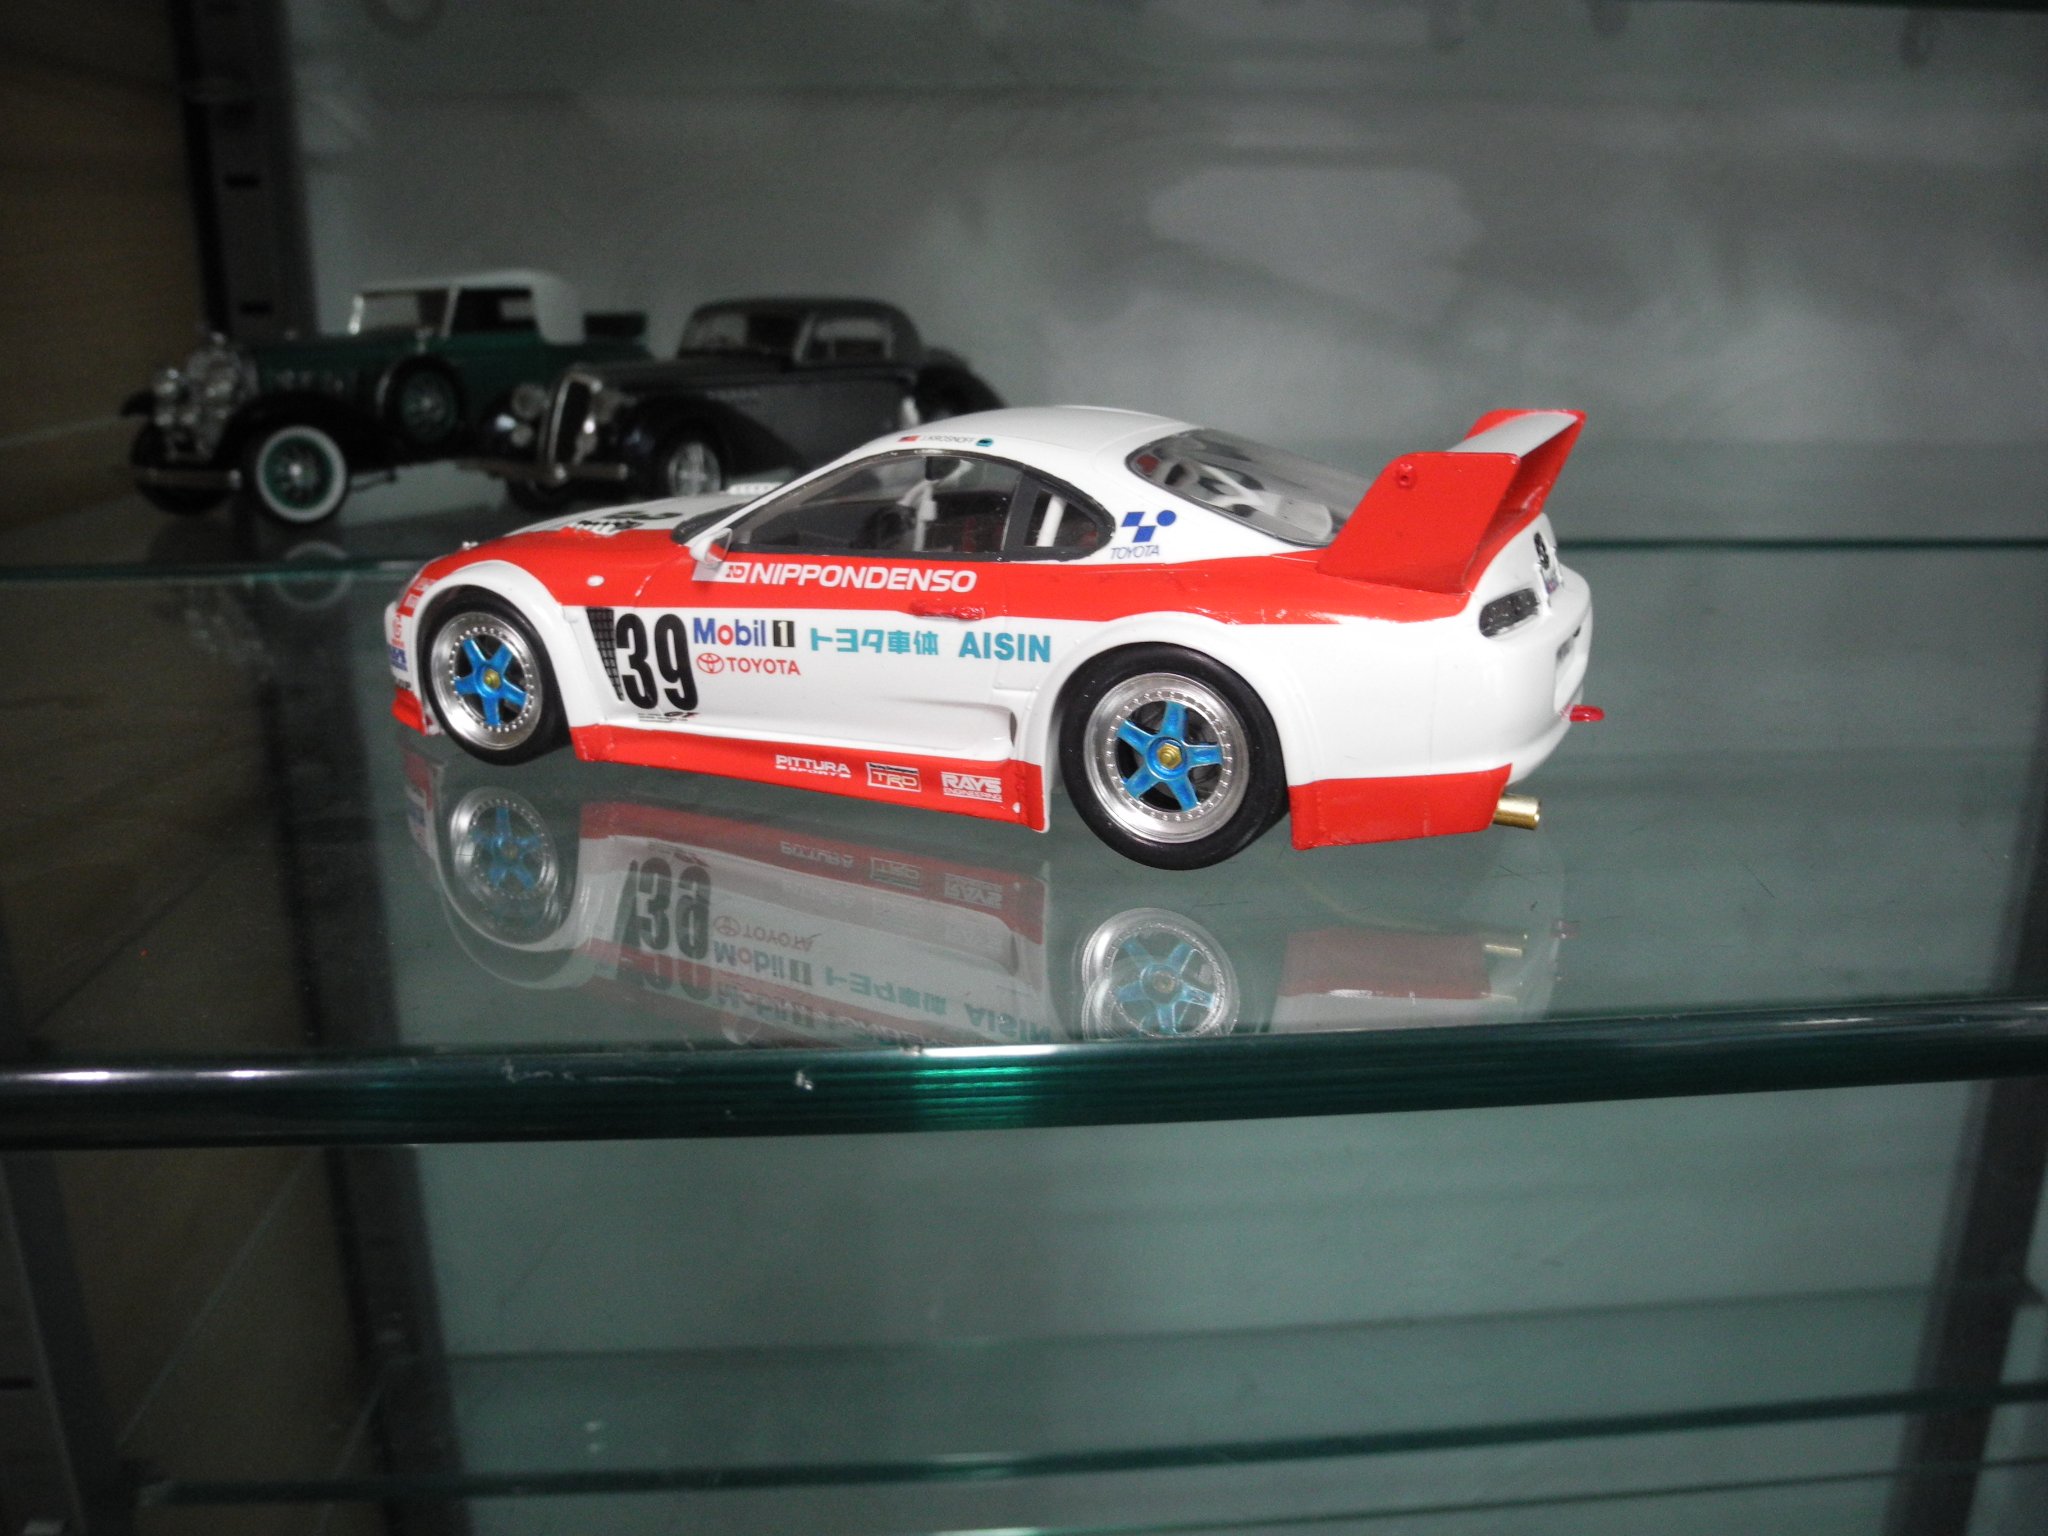
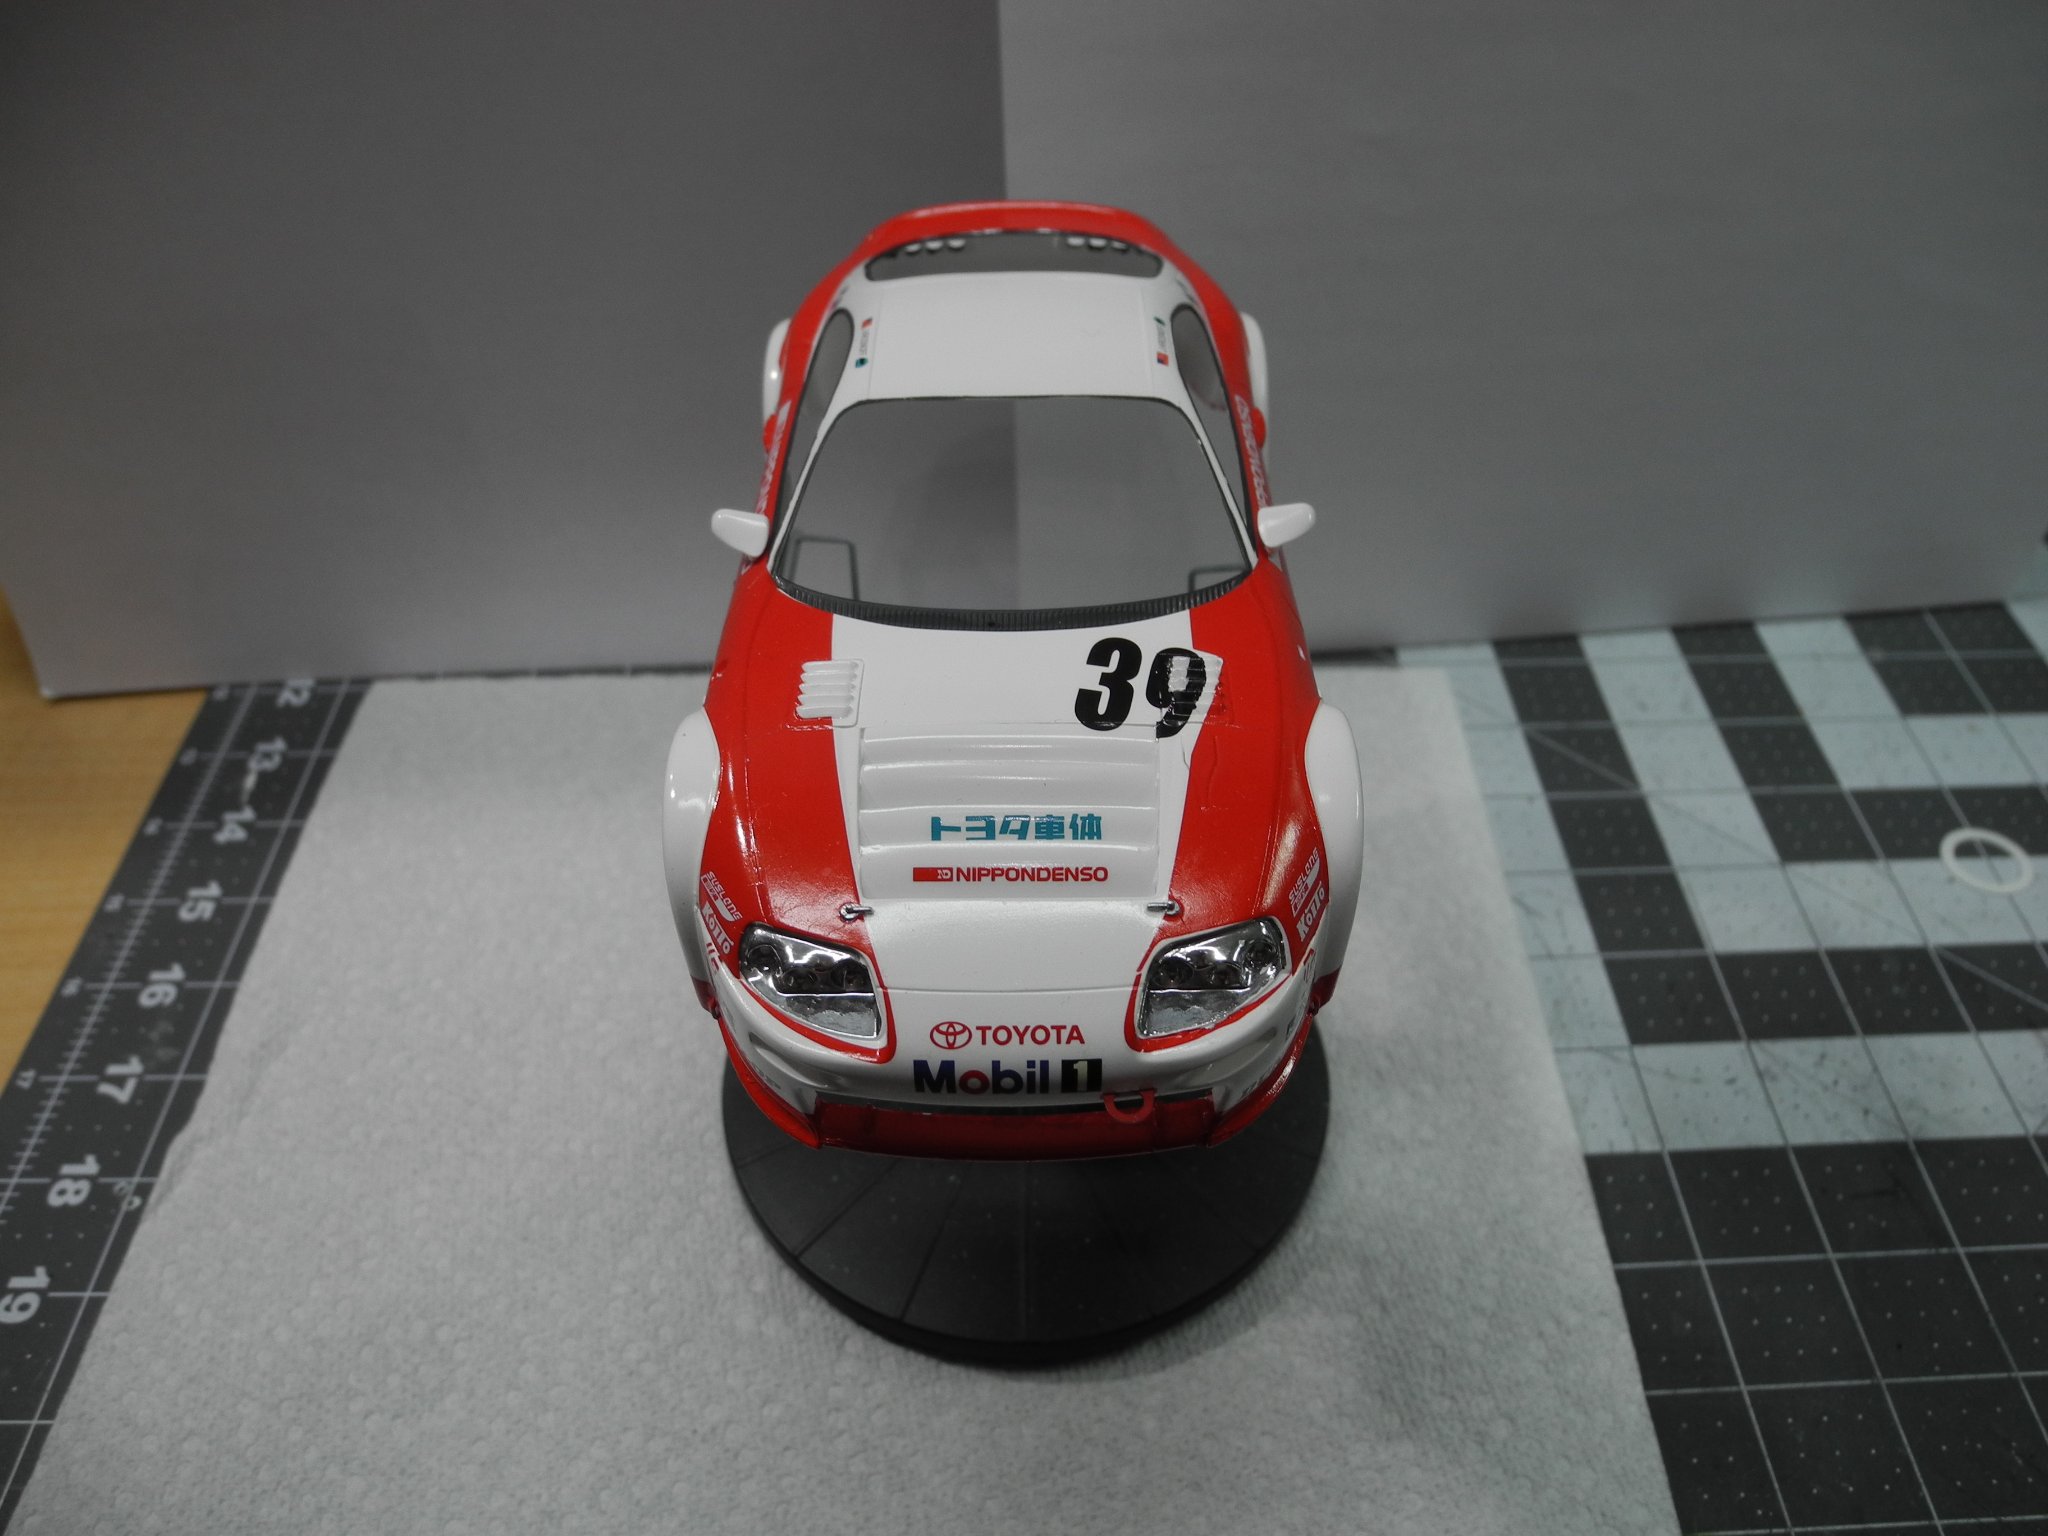
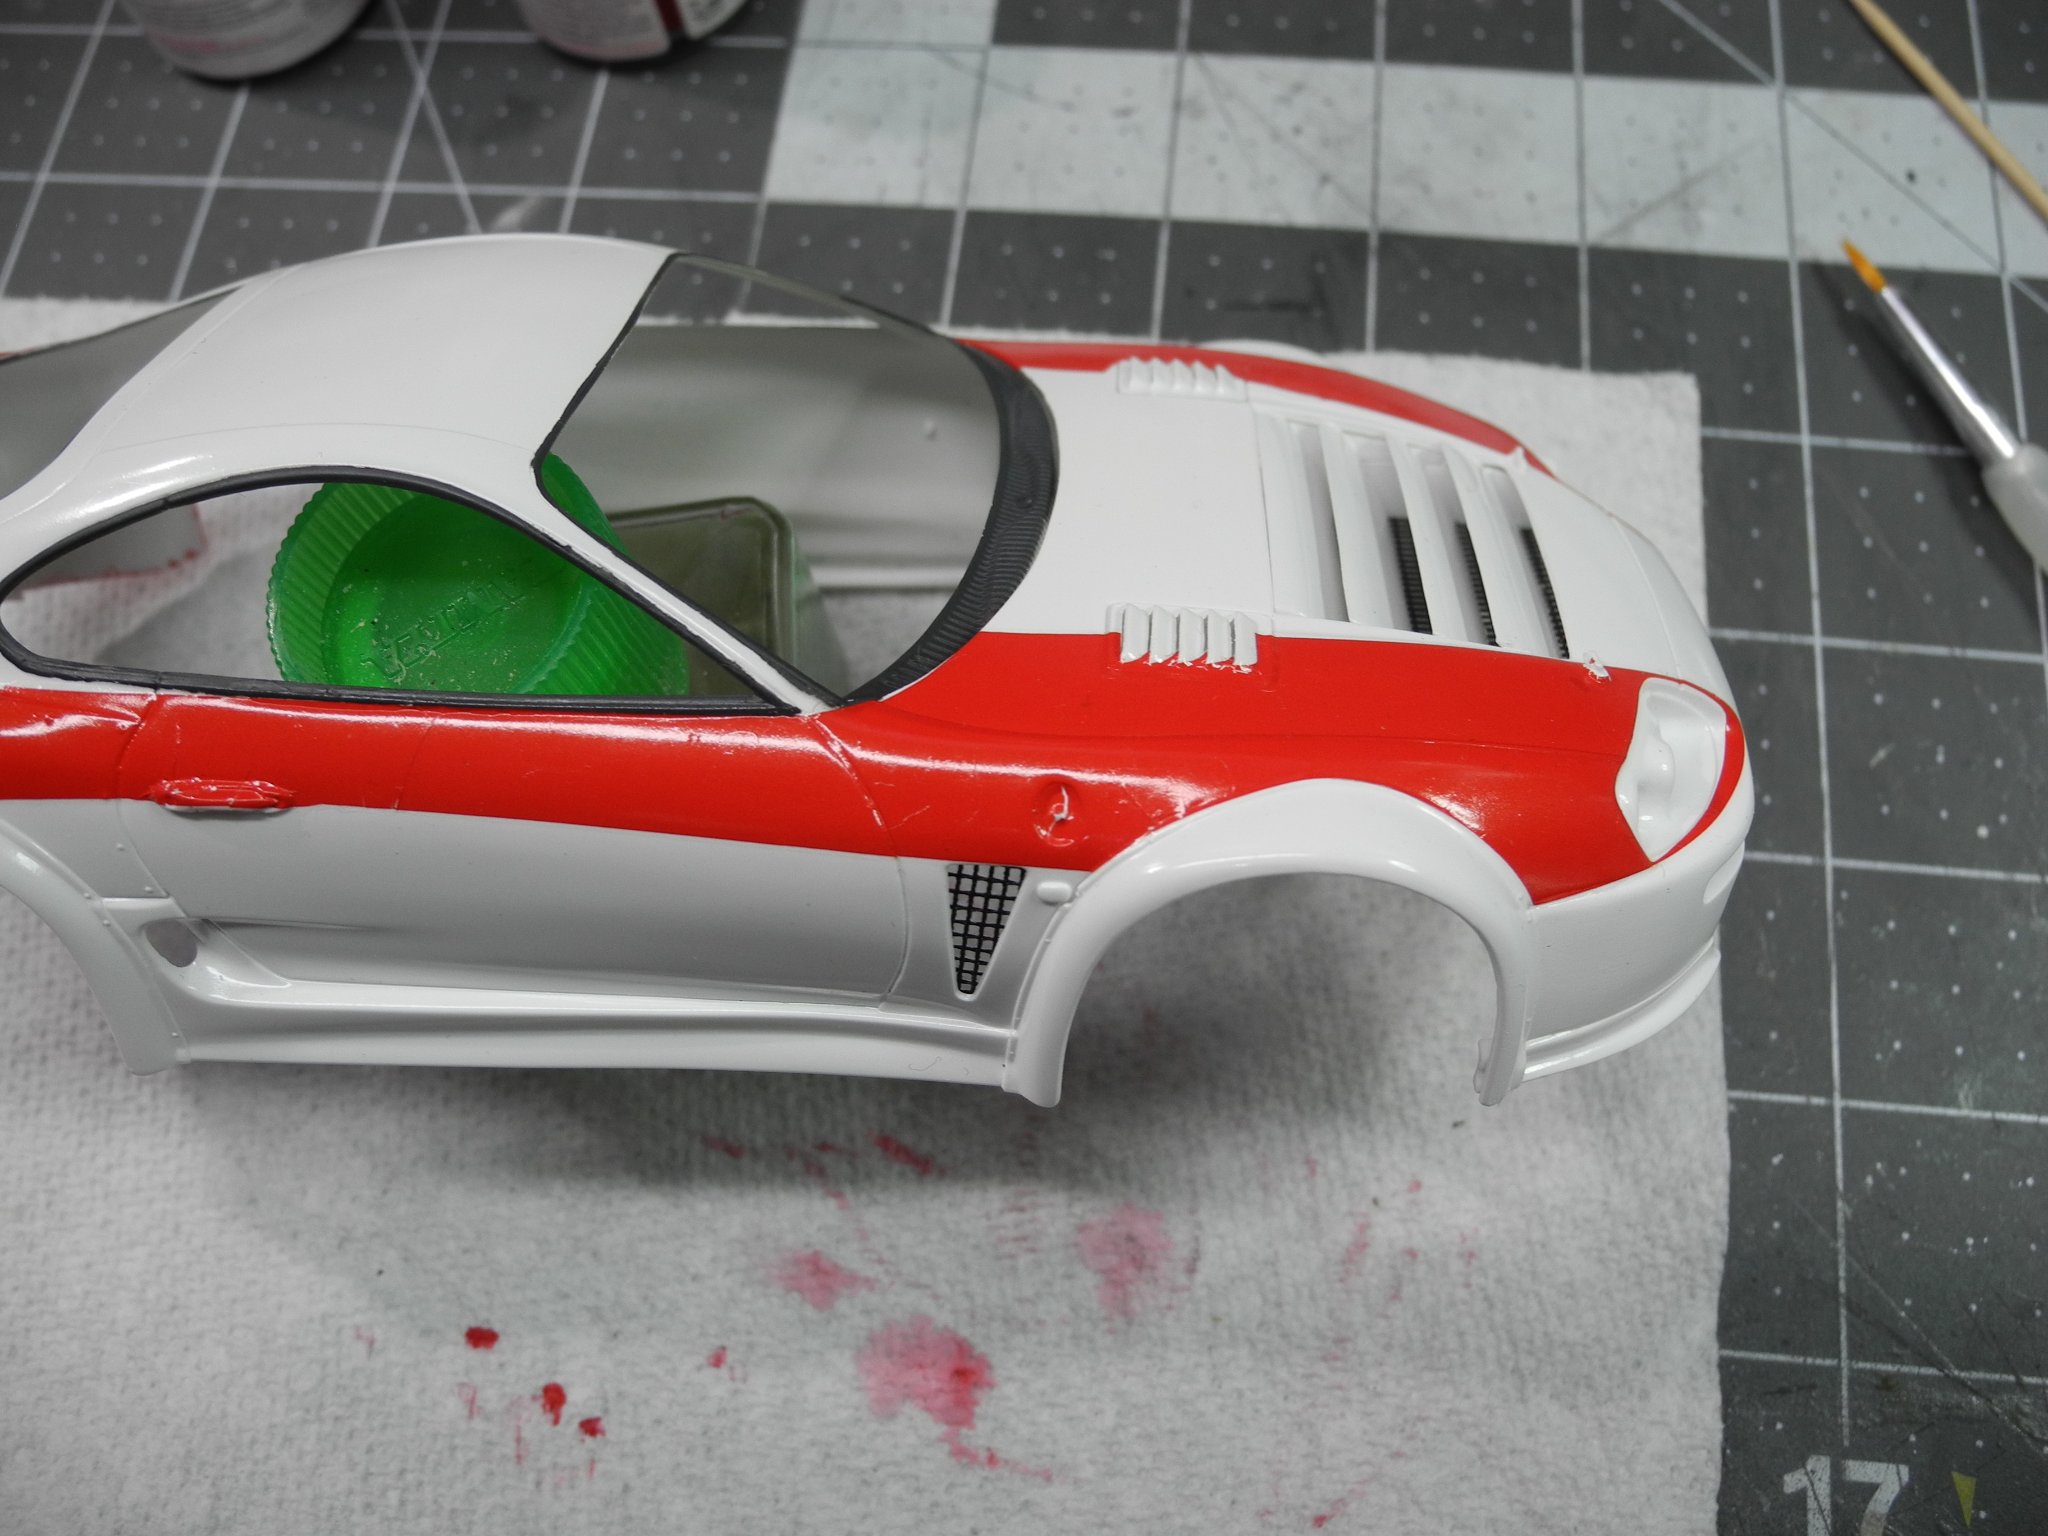
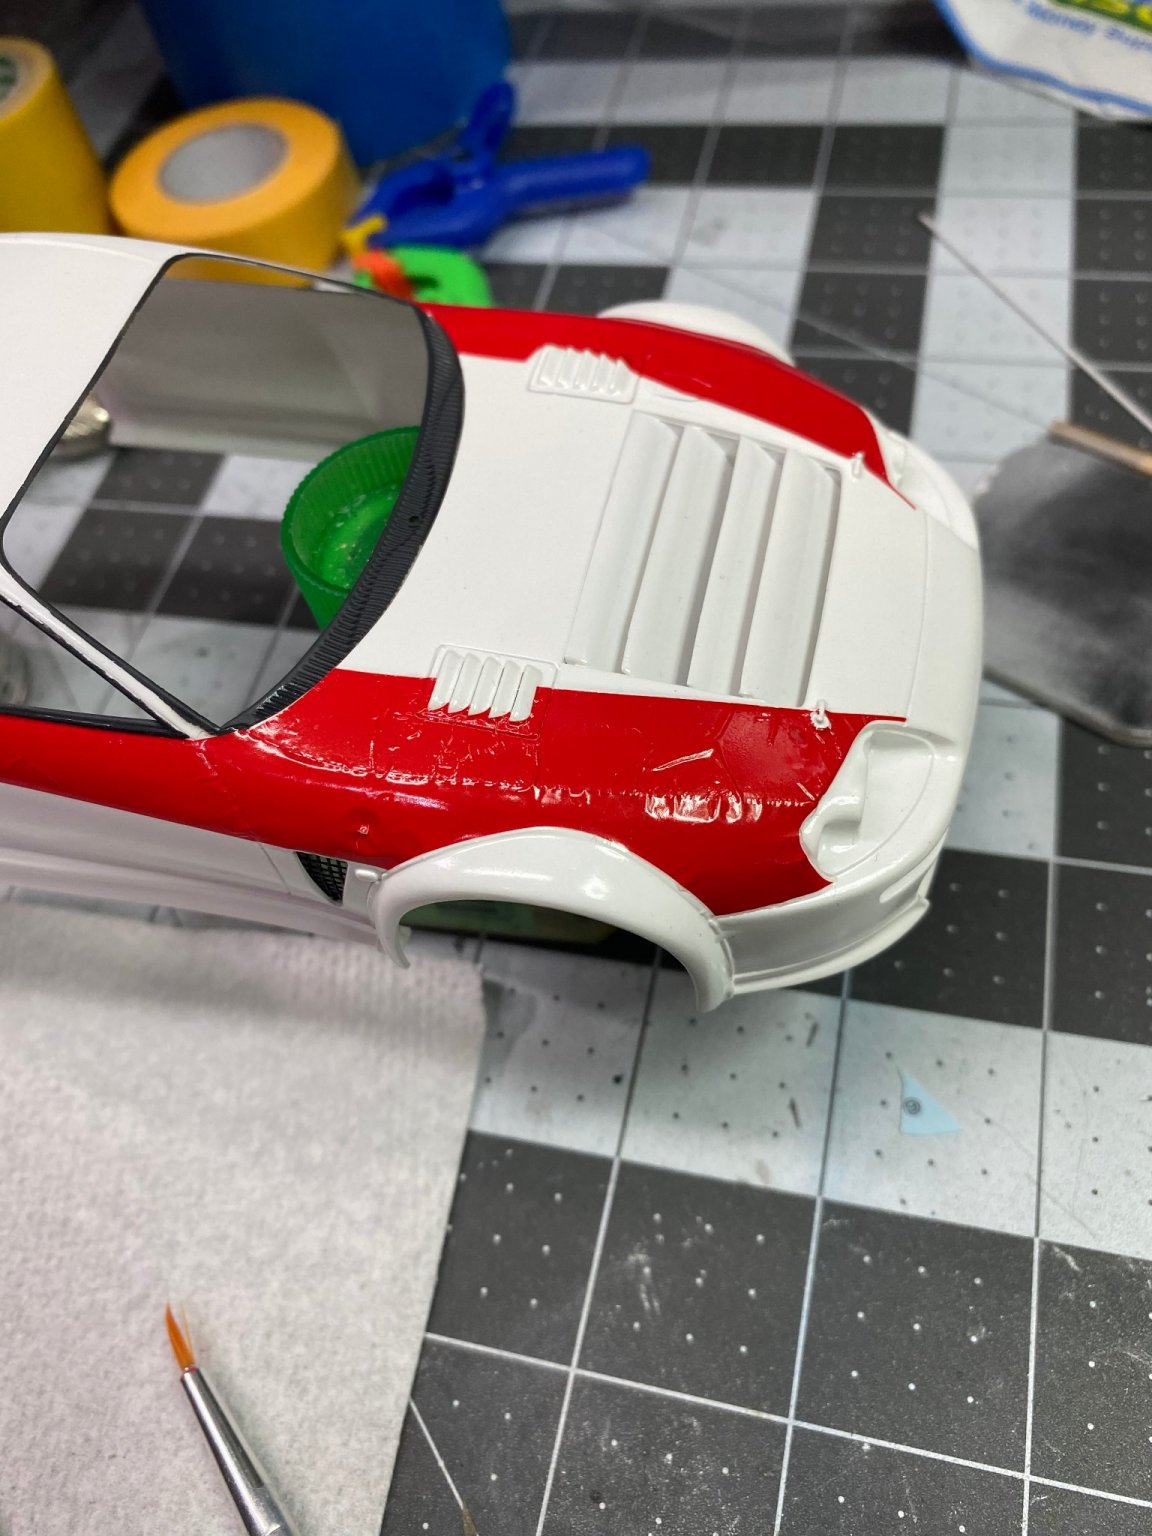
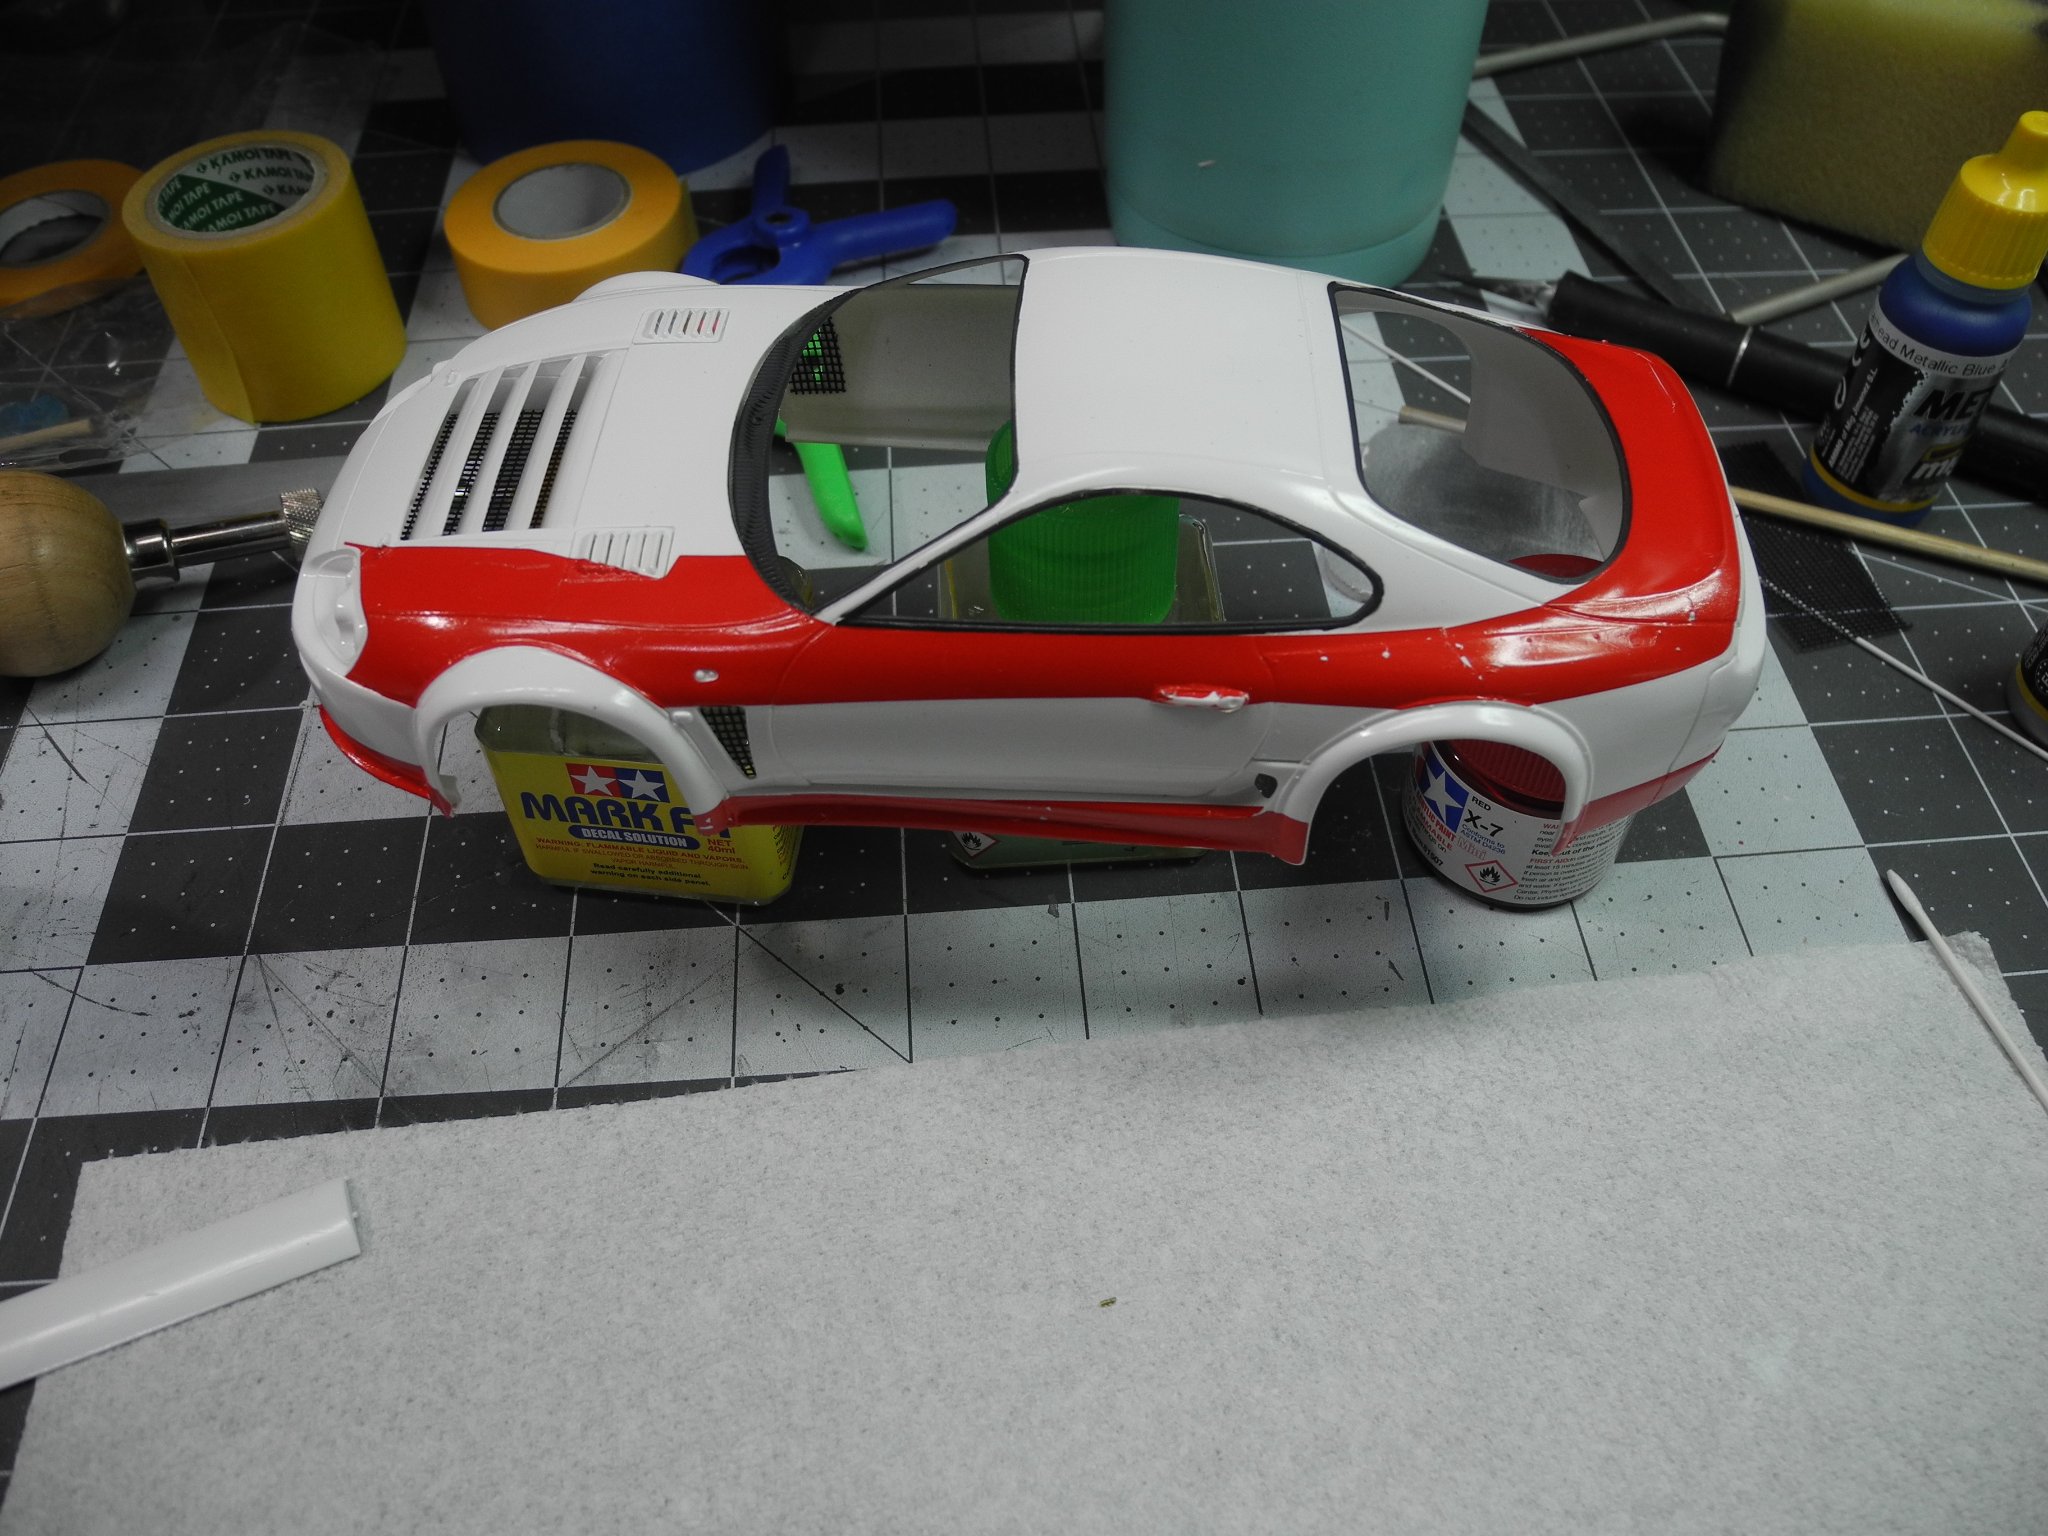
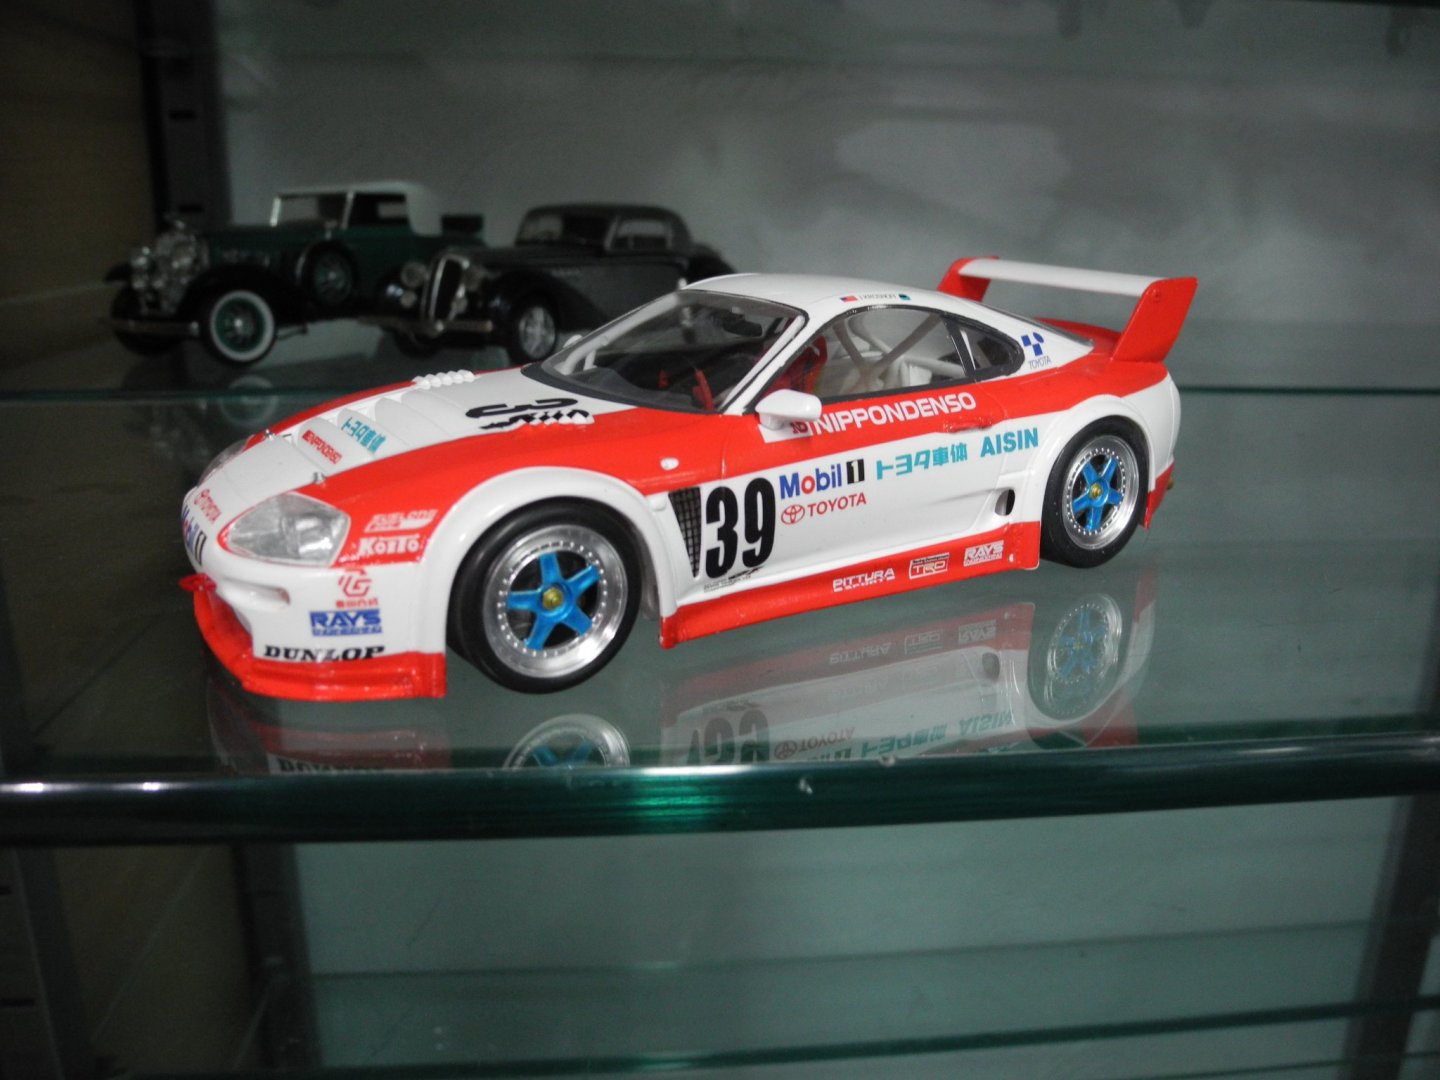
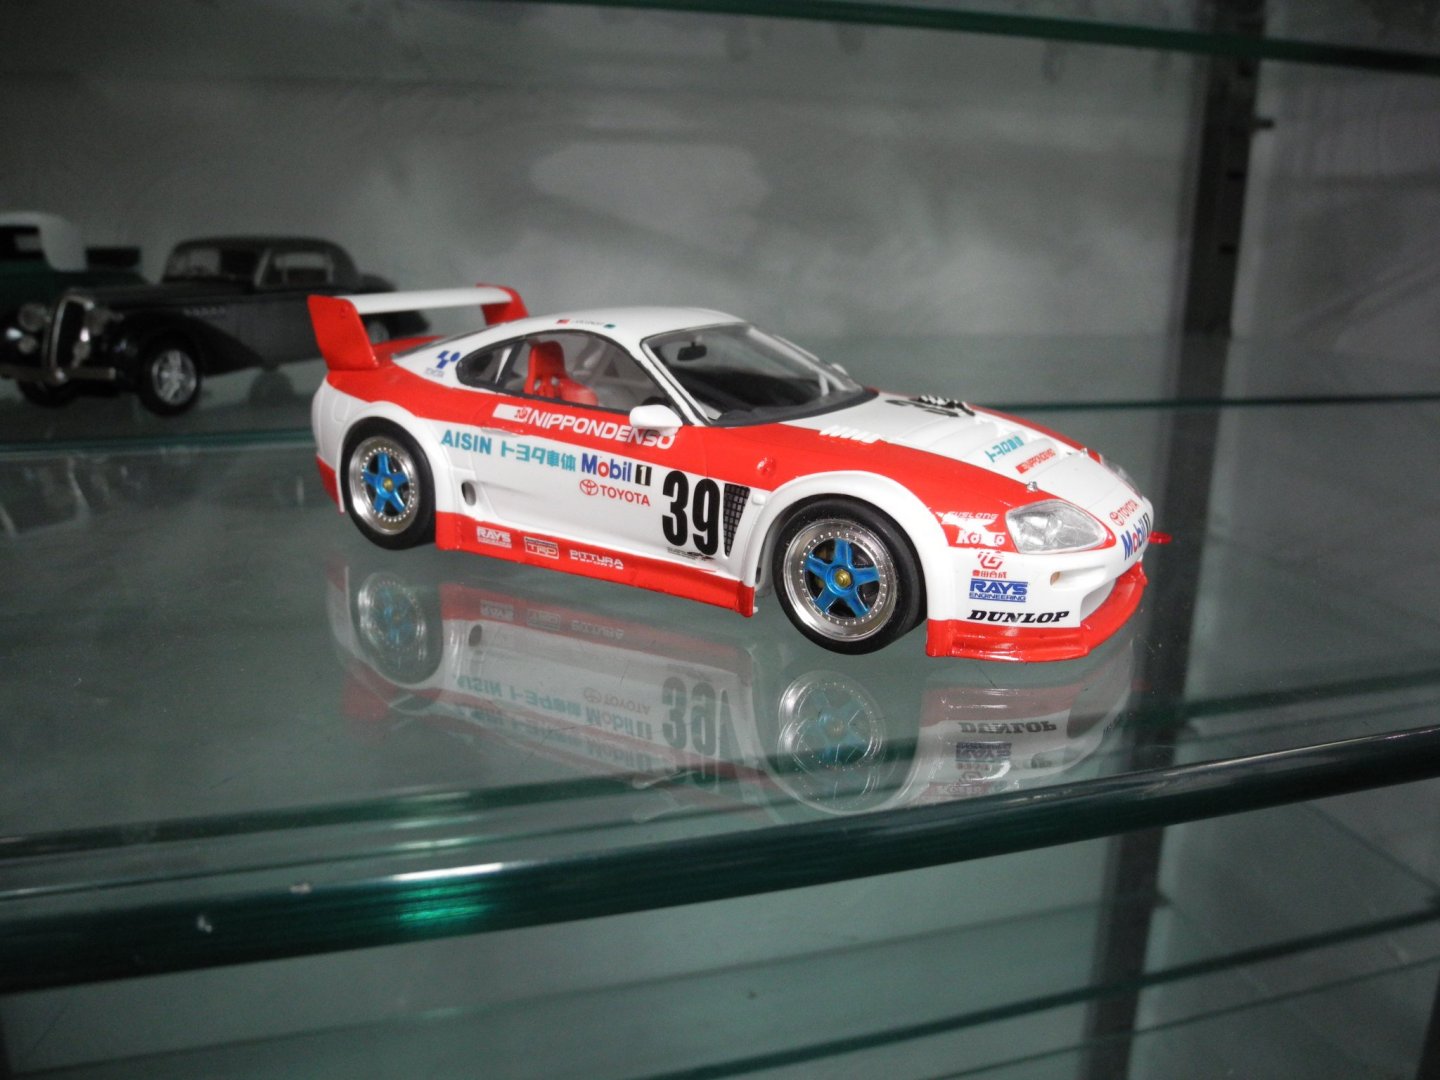
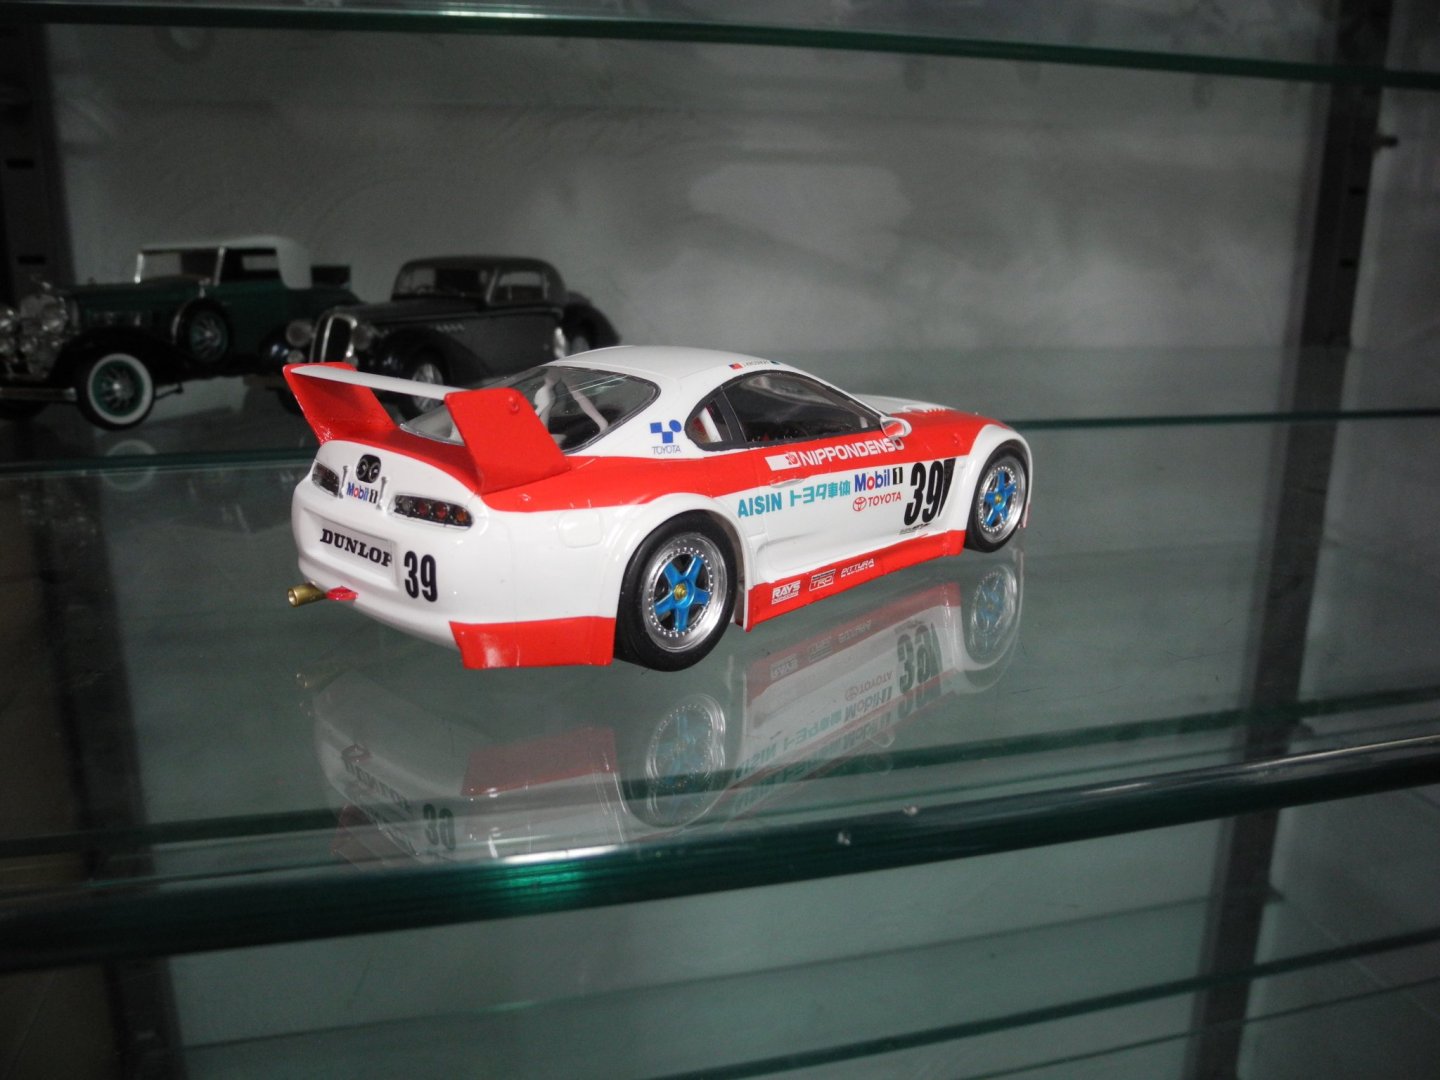
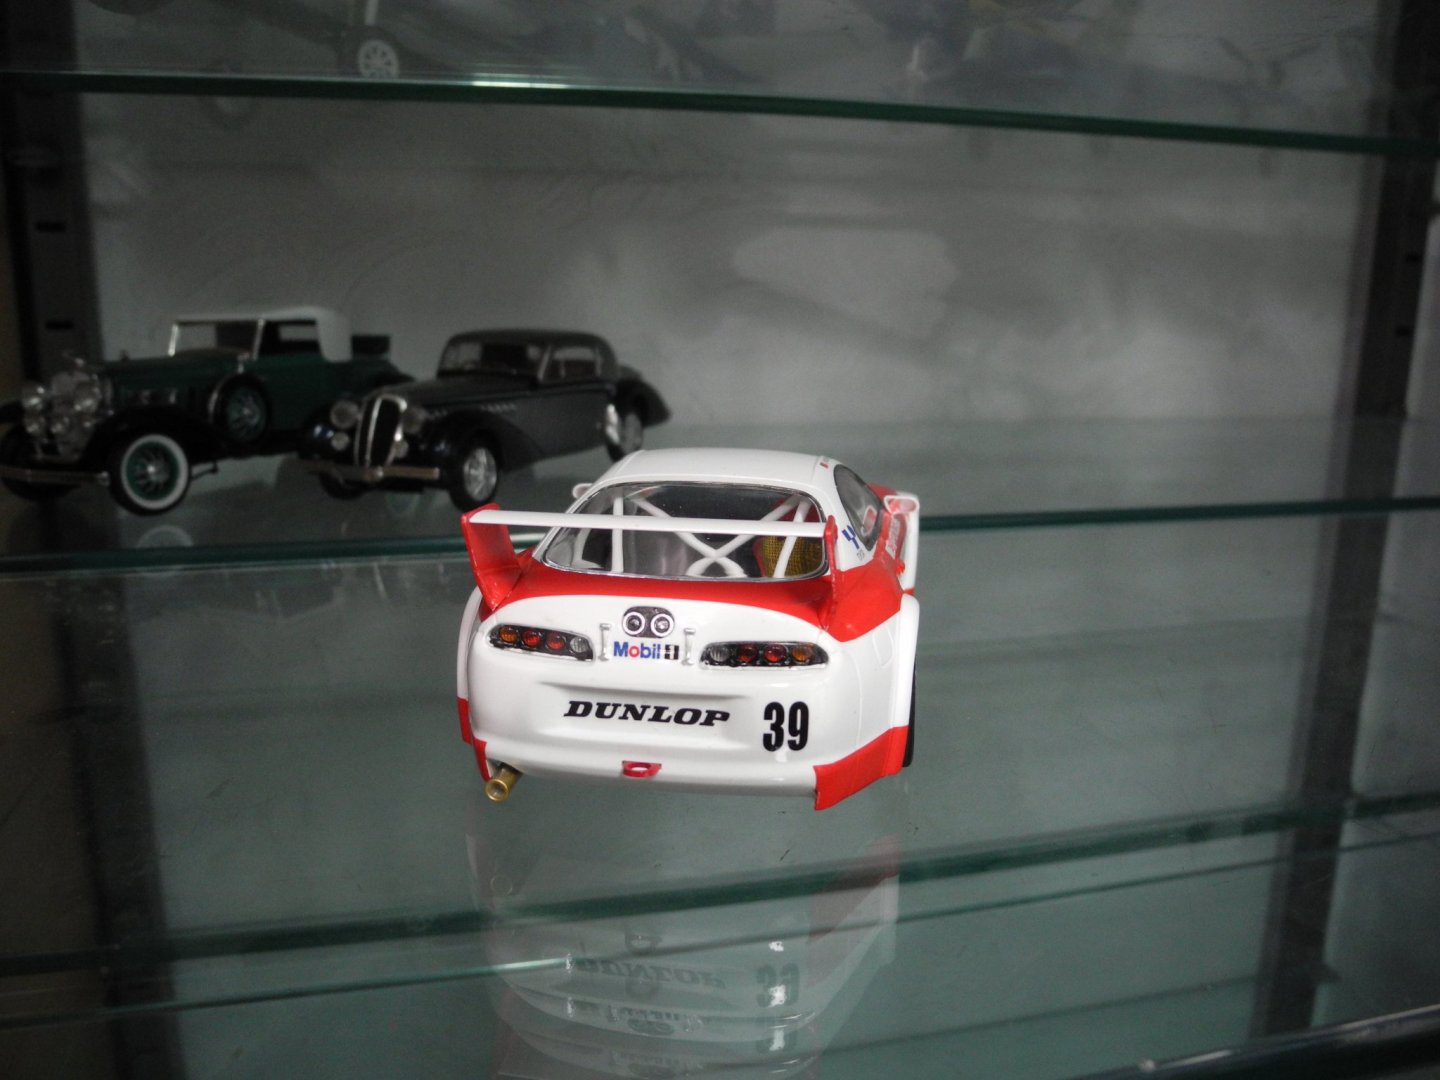
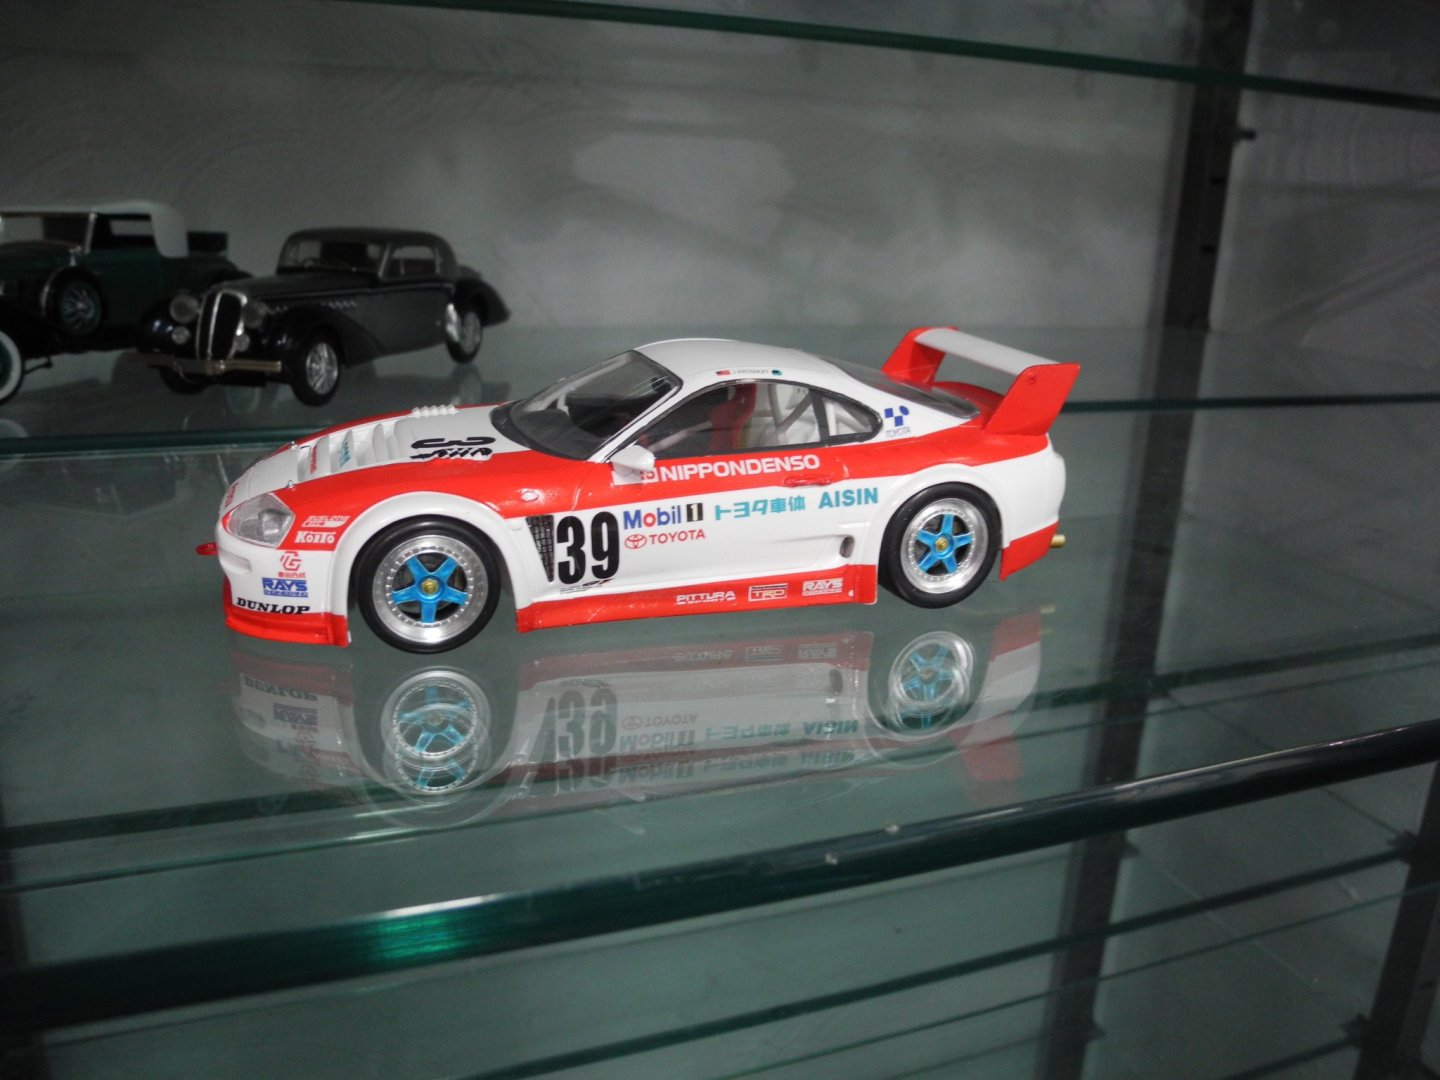
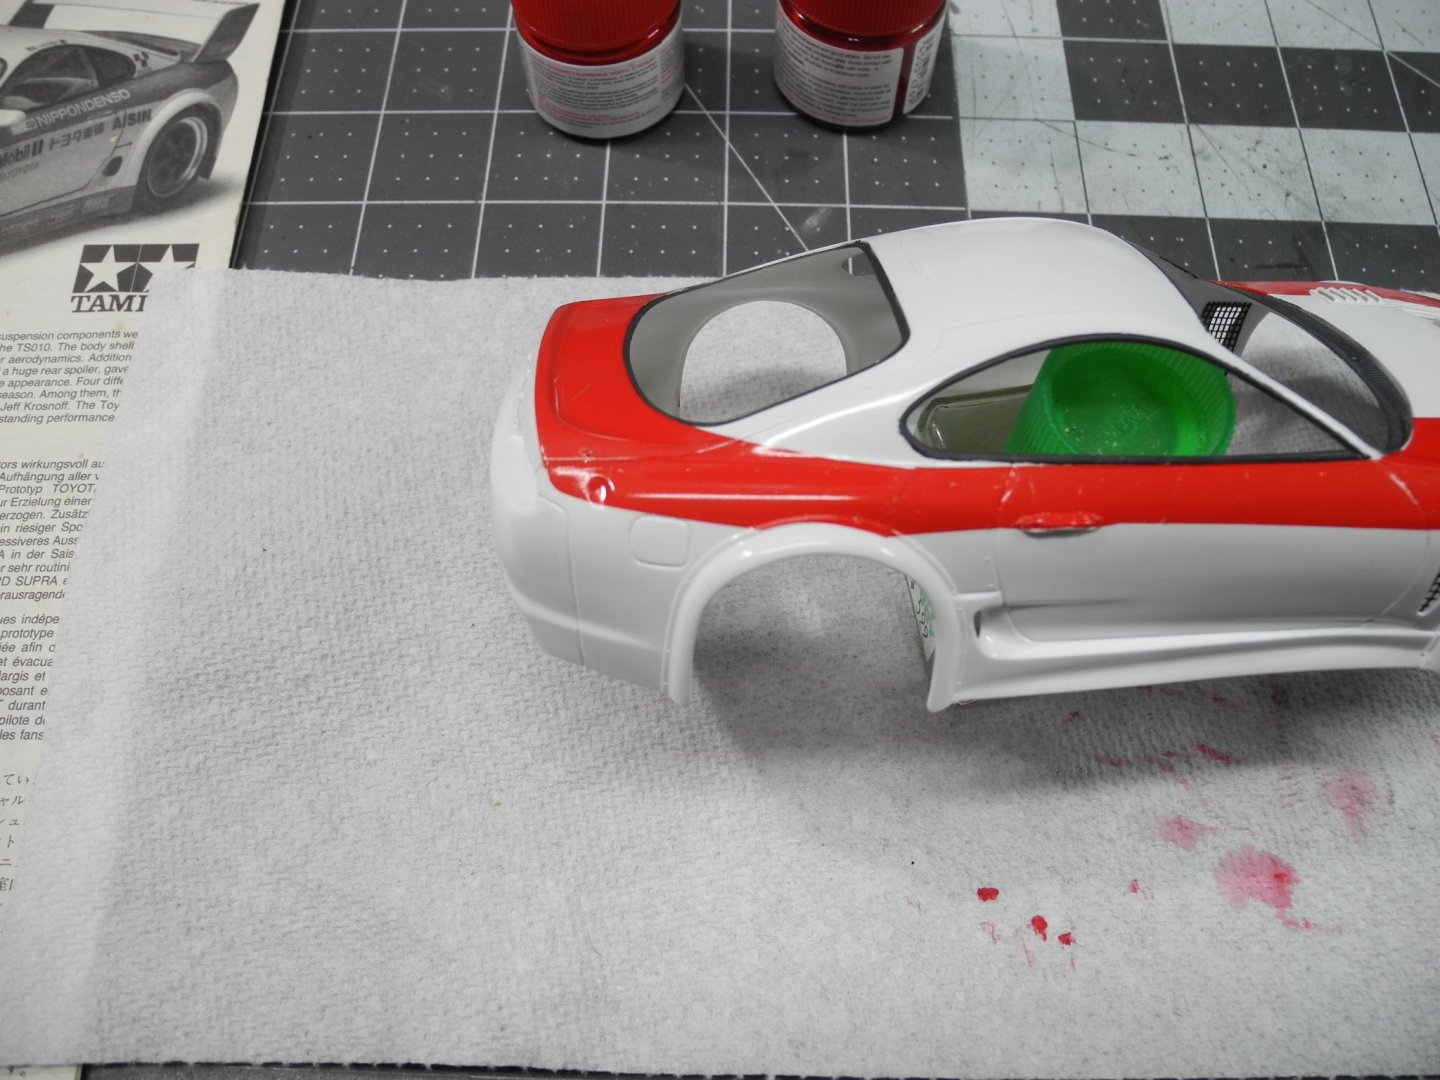
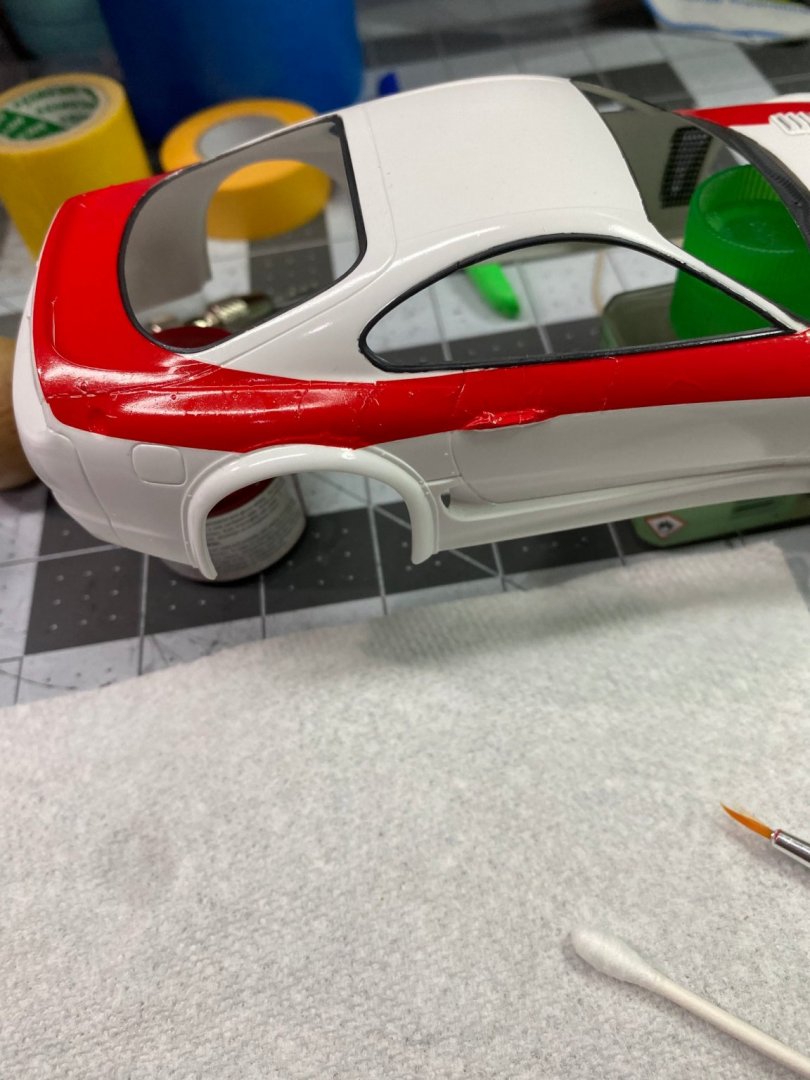
I first noticed the difference in the wheels/tires between the Castrol Supra and the Sard Supra while I watched a scale model build video of the Castrol car. It was obvious they protruded further outside the wheel wells and the model captures this difference between the two cars. Today, I masked off and painted the black trim around the windows. In these photos, I have moved the tires as far to the outside as they can go and then they touch the inside top of the wheel well arch. Oh, by the way, the black trim is actually Vallejo black gray. I rarely use pure black.


- 86 replies
-
- 10
-
-
Delahaye 135 by CDW - FINISHED - Heller - 1:24 - PLASTIC
CDW replied to CDW's topic in Non-ship/categorised builds
Thanks Denis! -
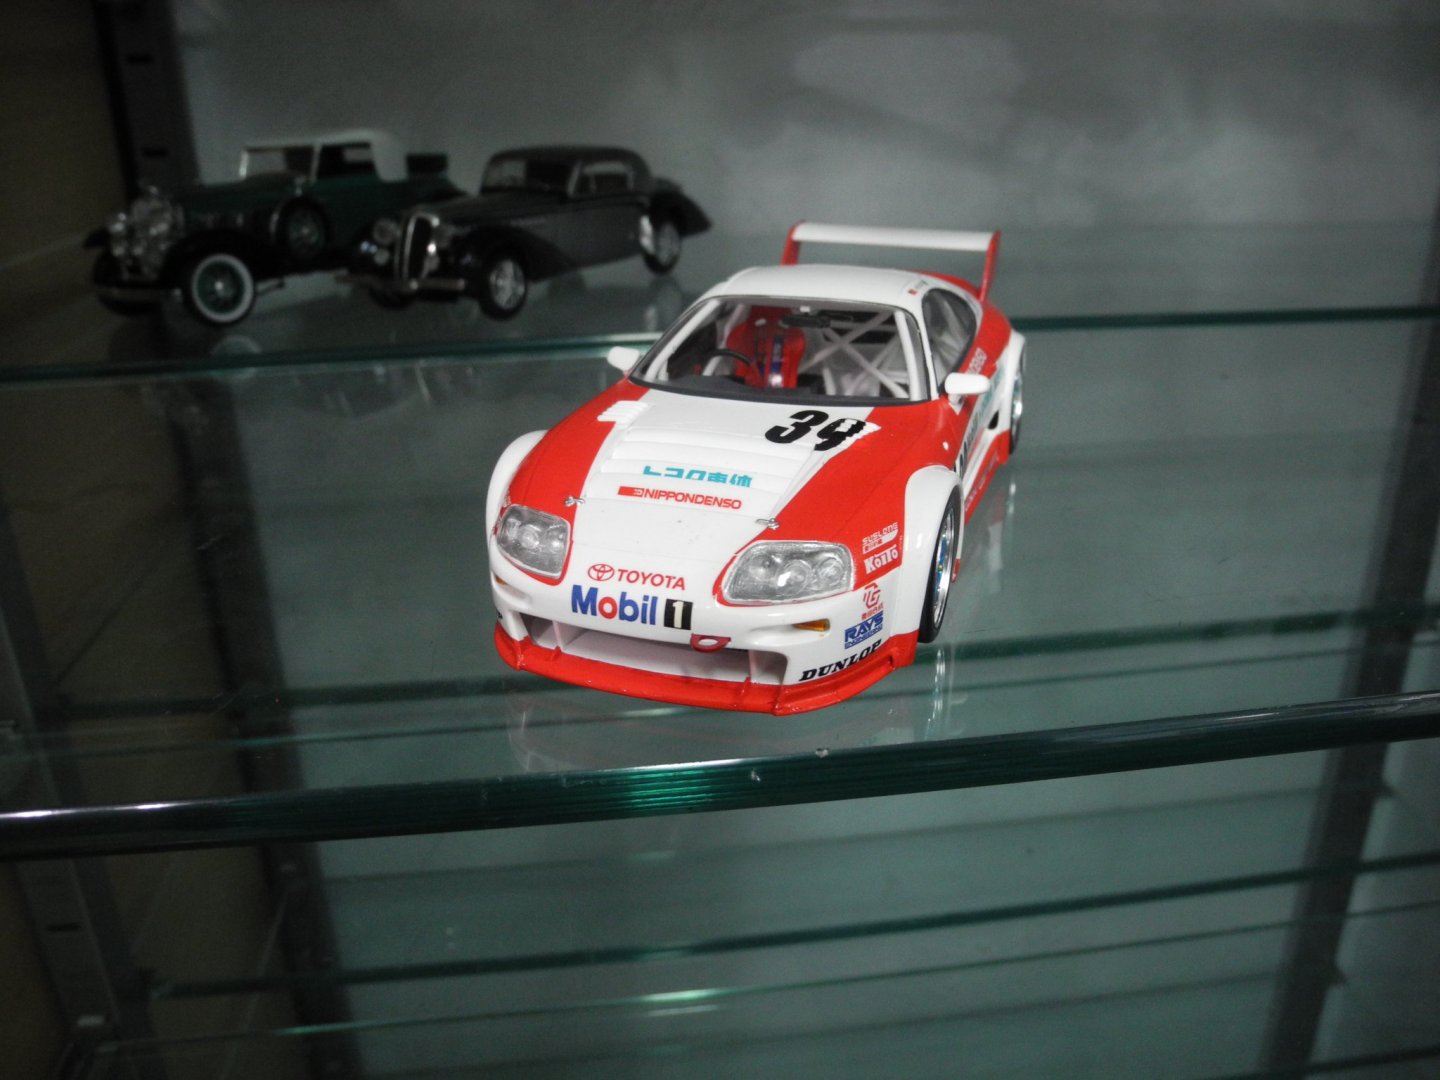
There might be just a wee bit of room to slide the tire/wheel out just a bit, but the top of the fender flare will hit the top of the tire so it cannot fit outside the well. Thanks for the photo reference and interpretation. None of the photos I found of the Sard Supra show the tires outside of the wells/flares but I clearly see it on the photo you referenced.
-
Tamiya engineers their car kits using a poly bushing where the wheel slips inside the bushing with a snug fit to hold it in place. They are all the way in, bottomed out right now. I'll have to look at some photos of the 1:1 car to try to see exactly what you are referring to. I'm not sure I understand what you're asking me.
-
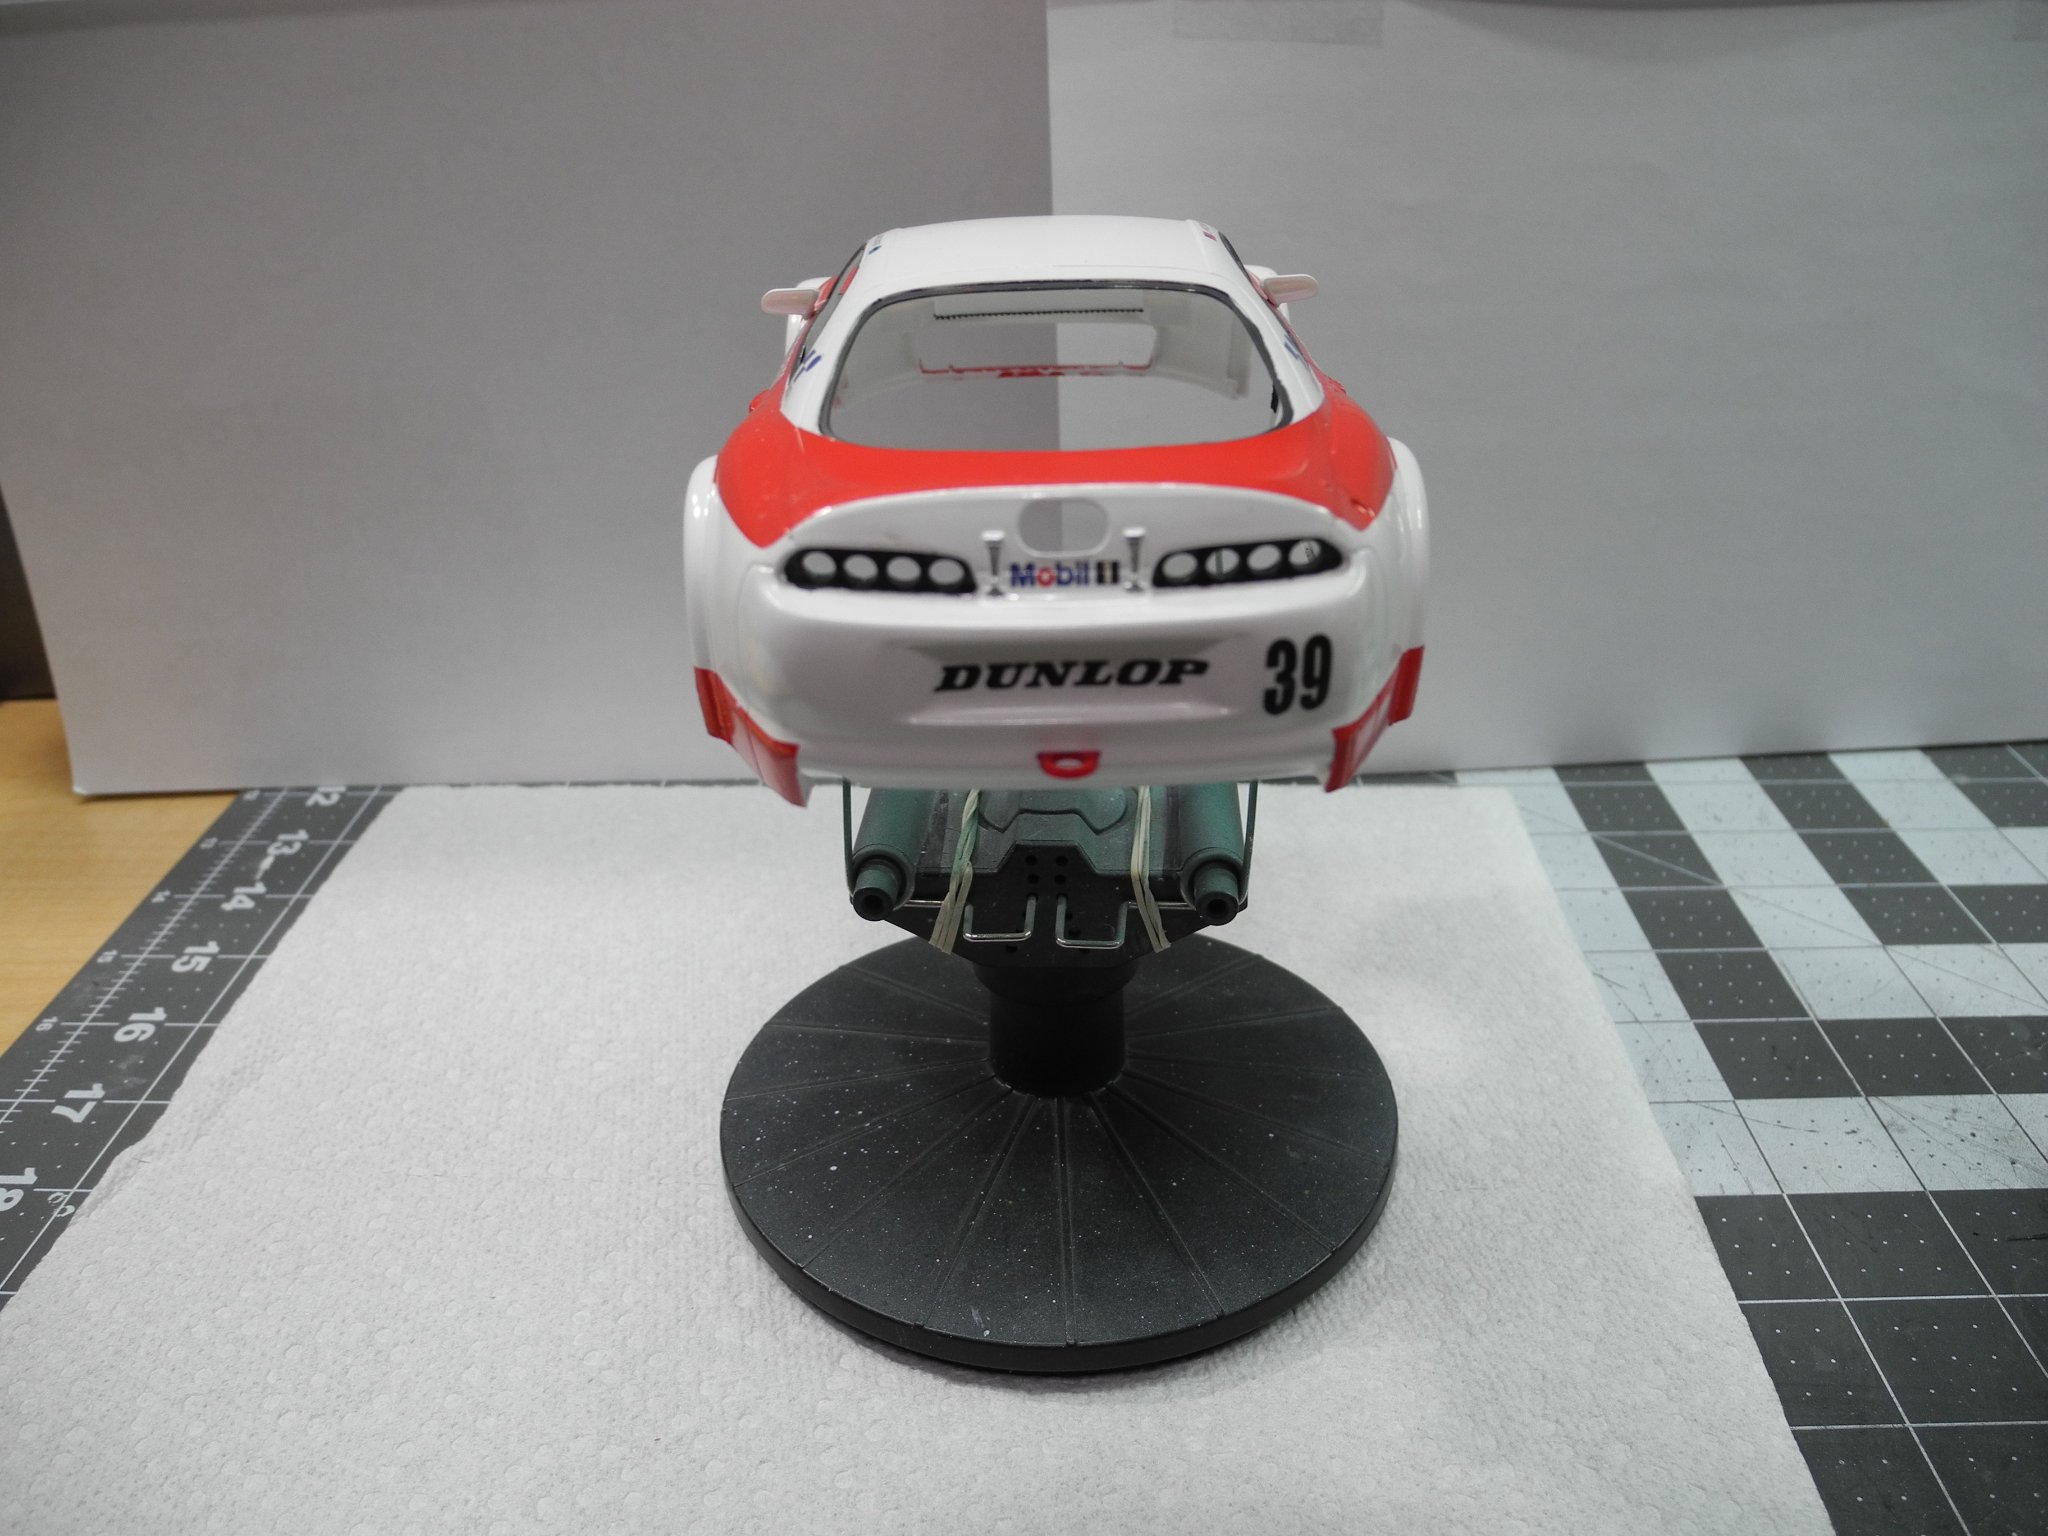
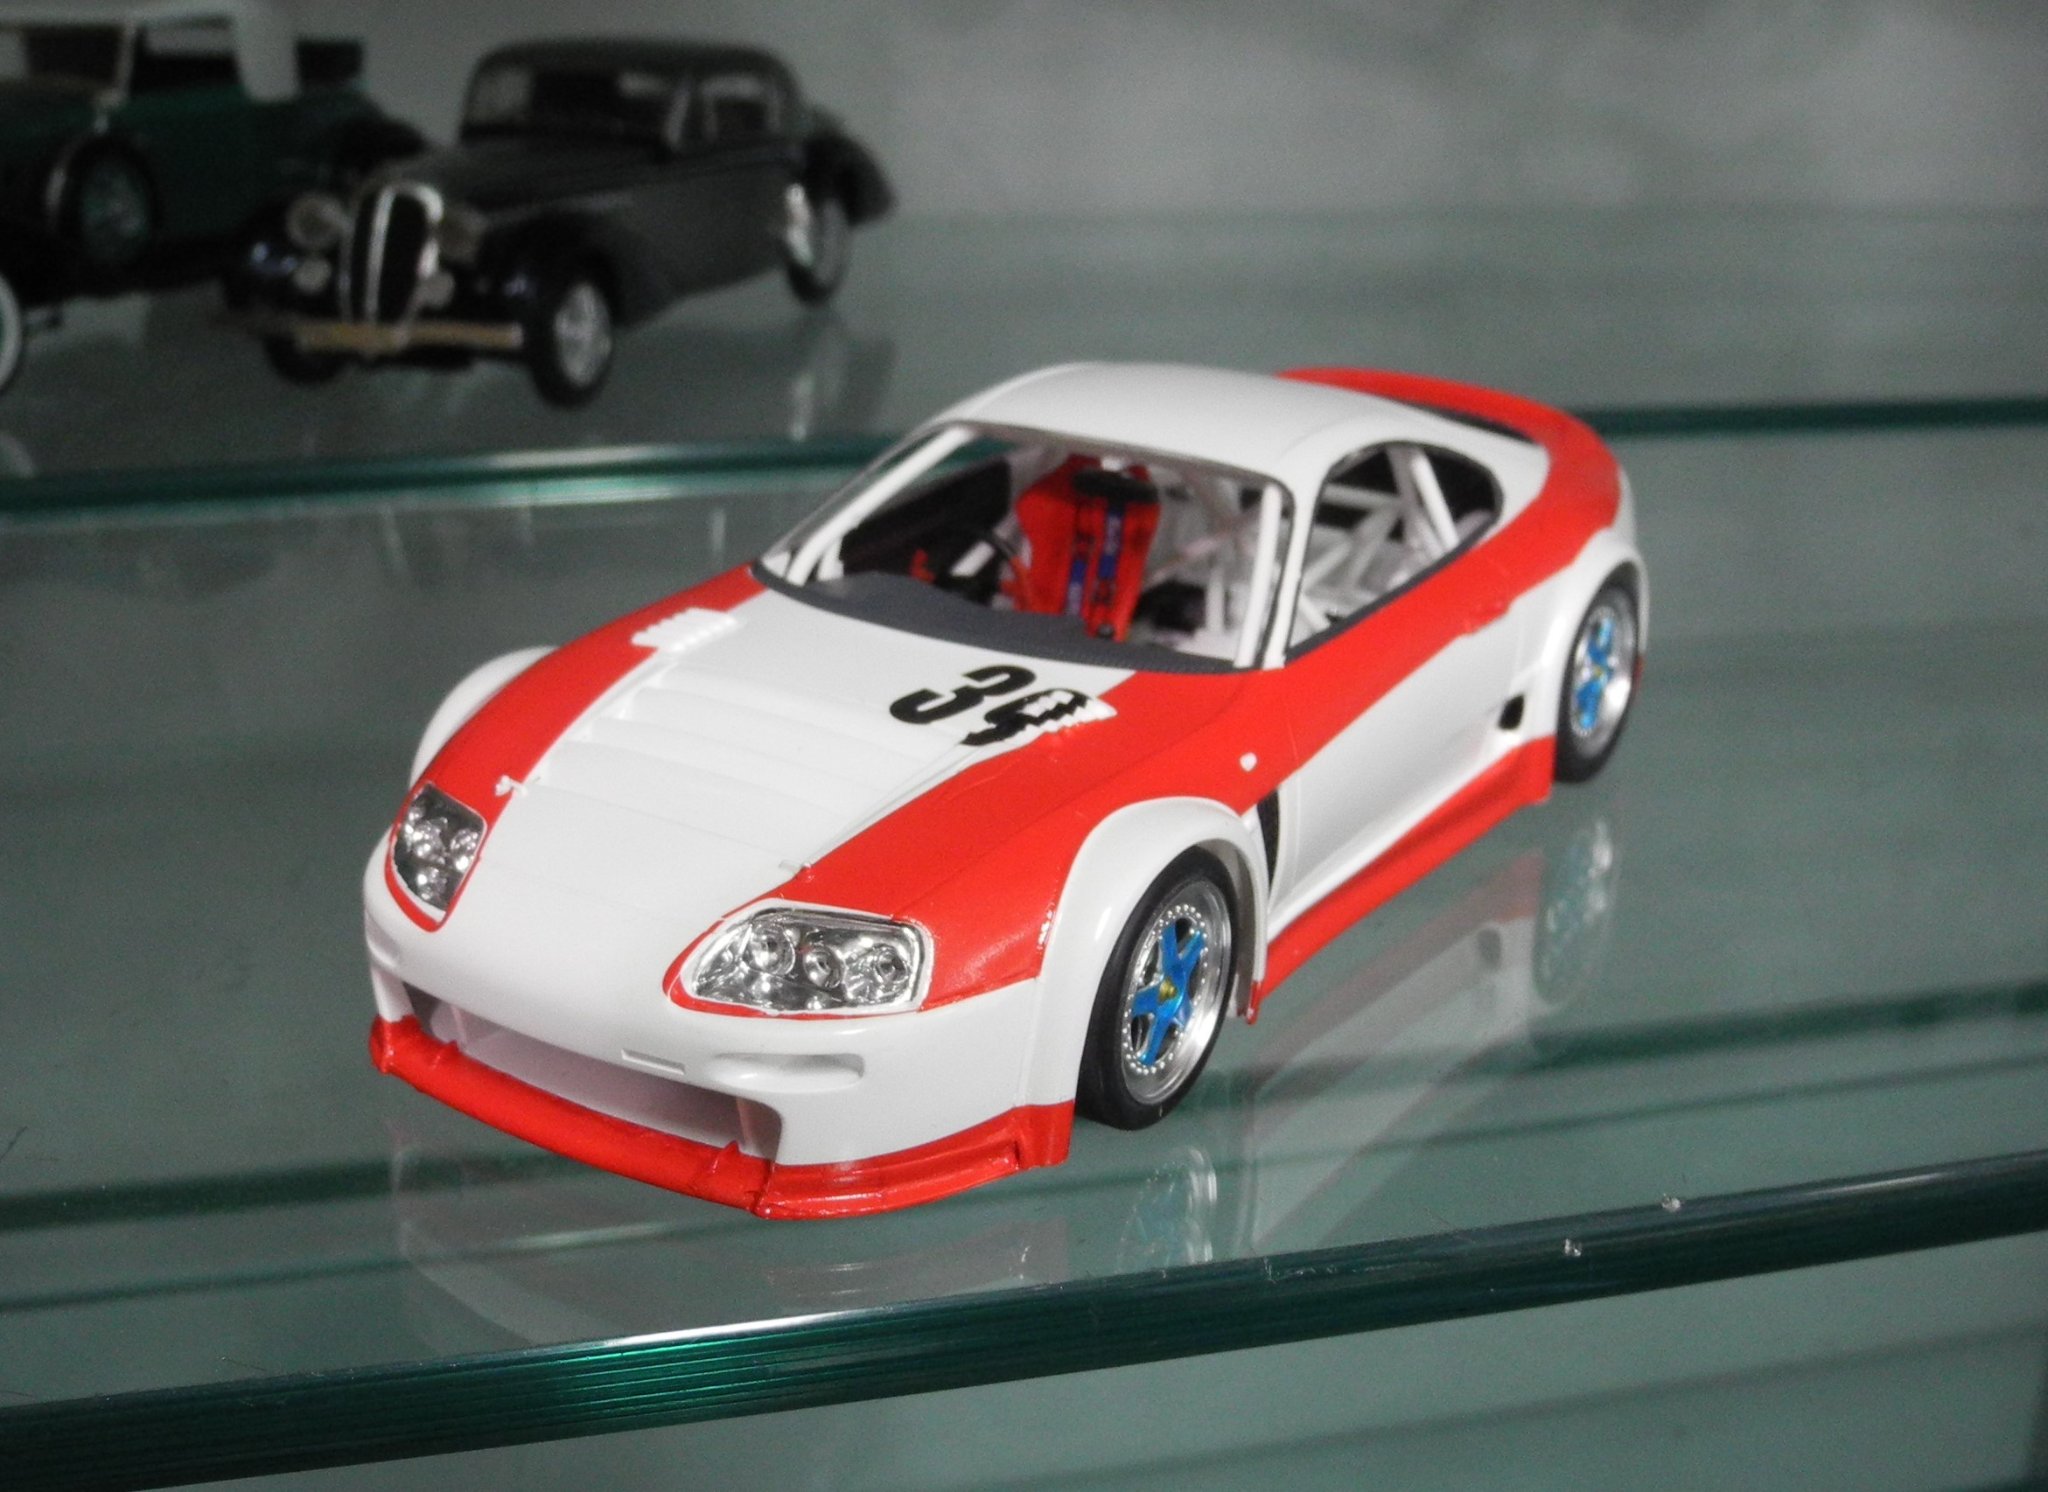
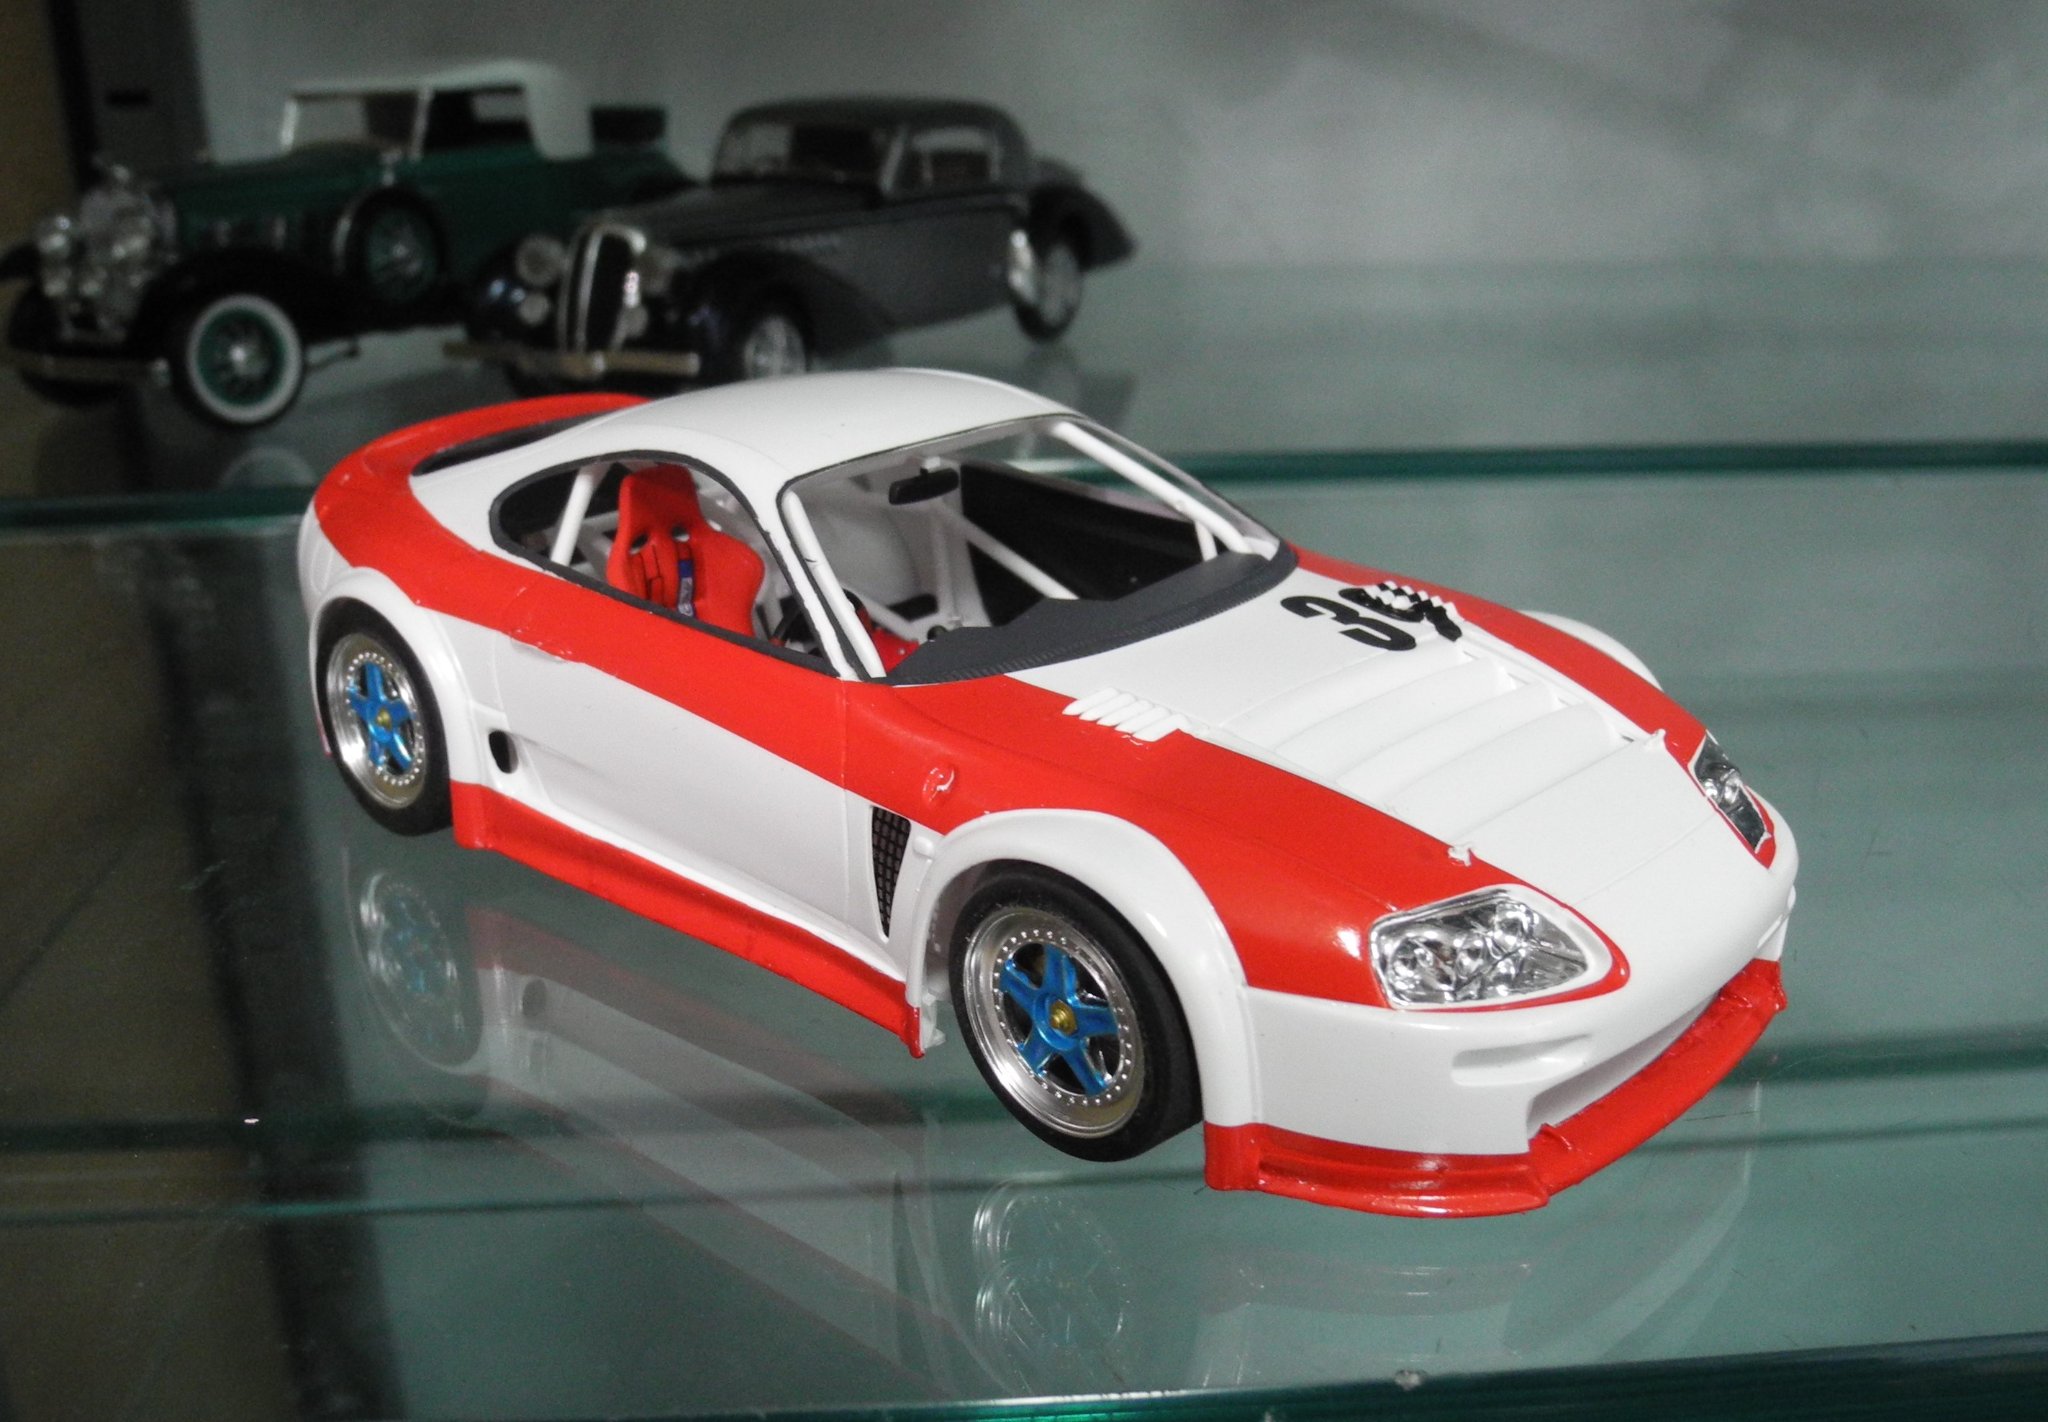
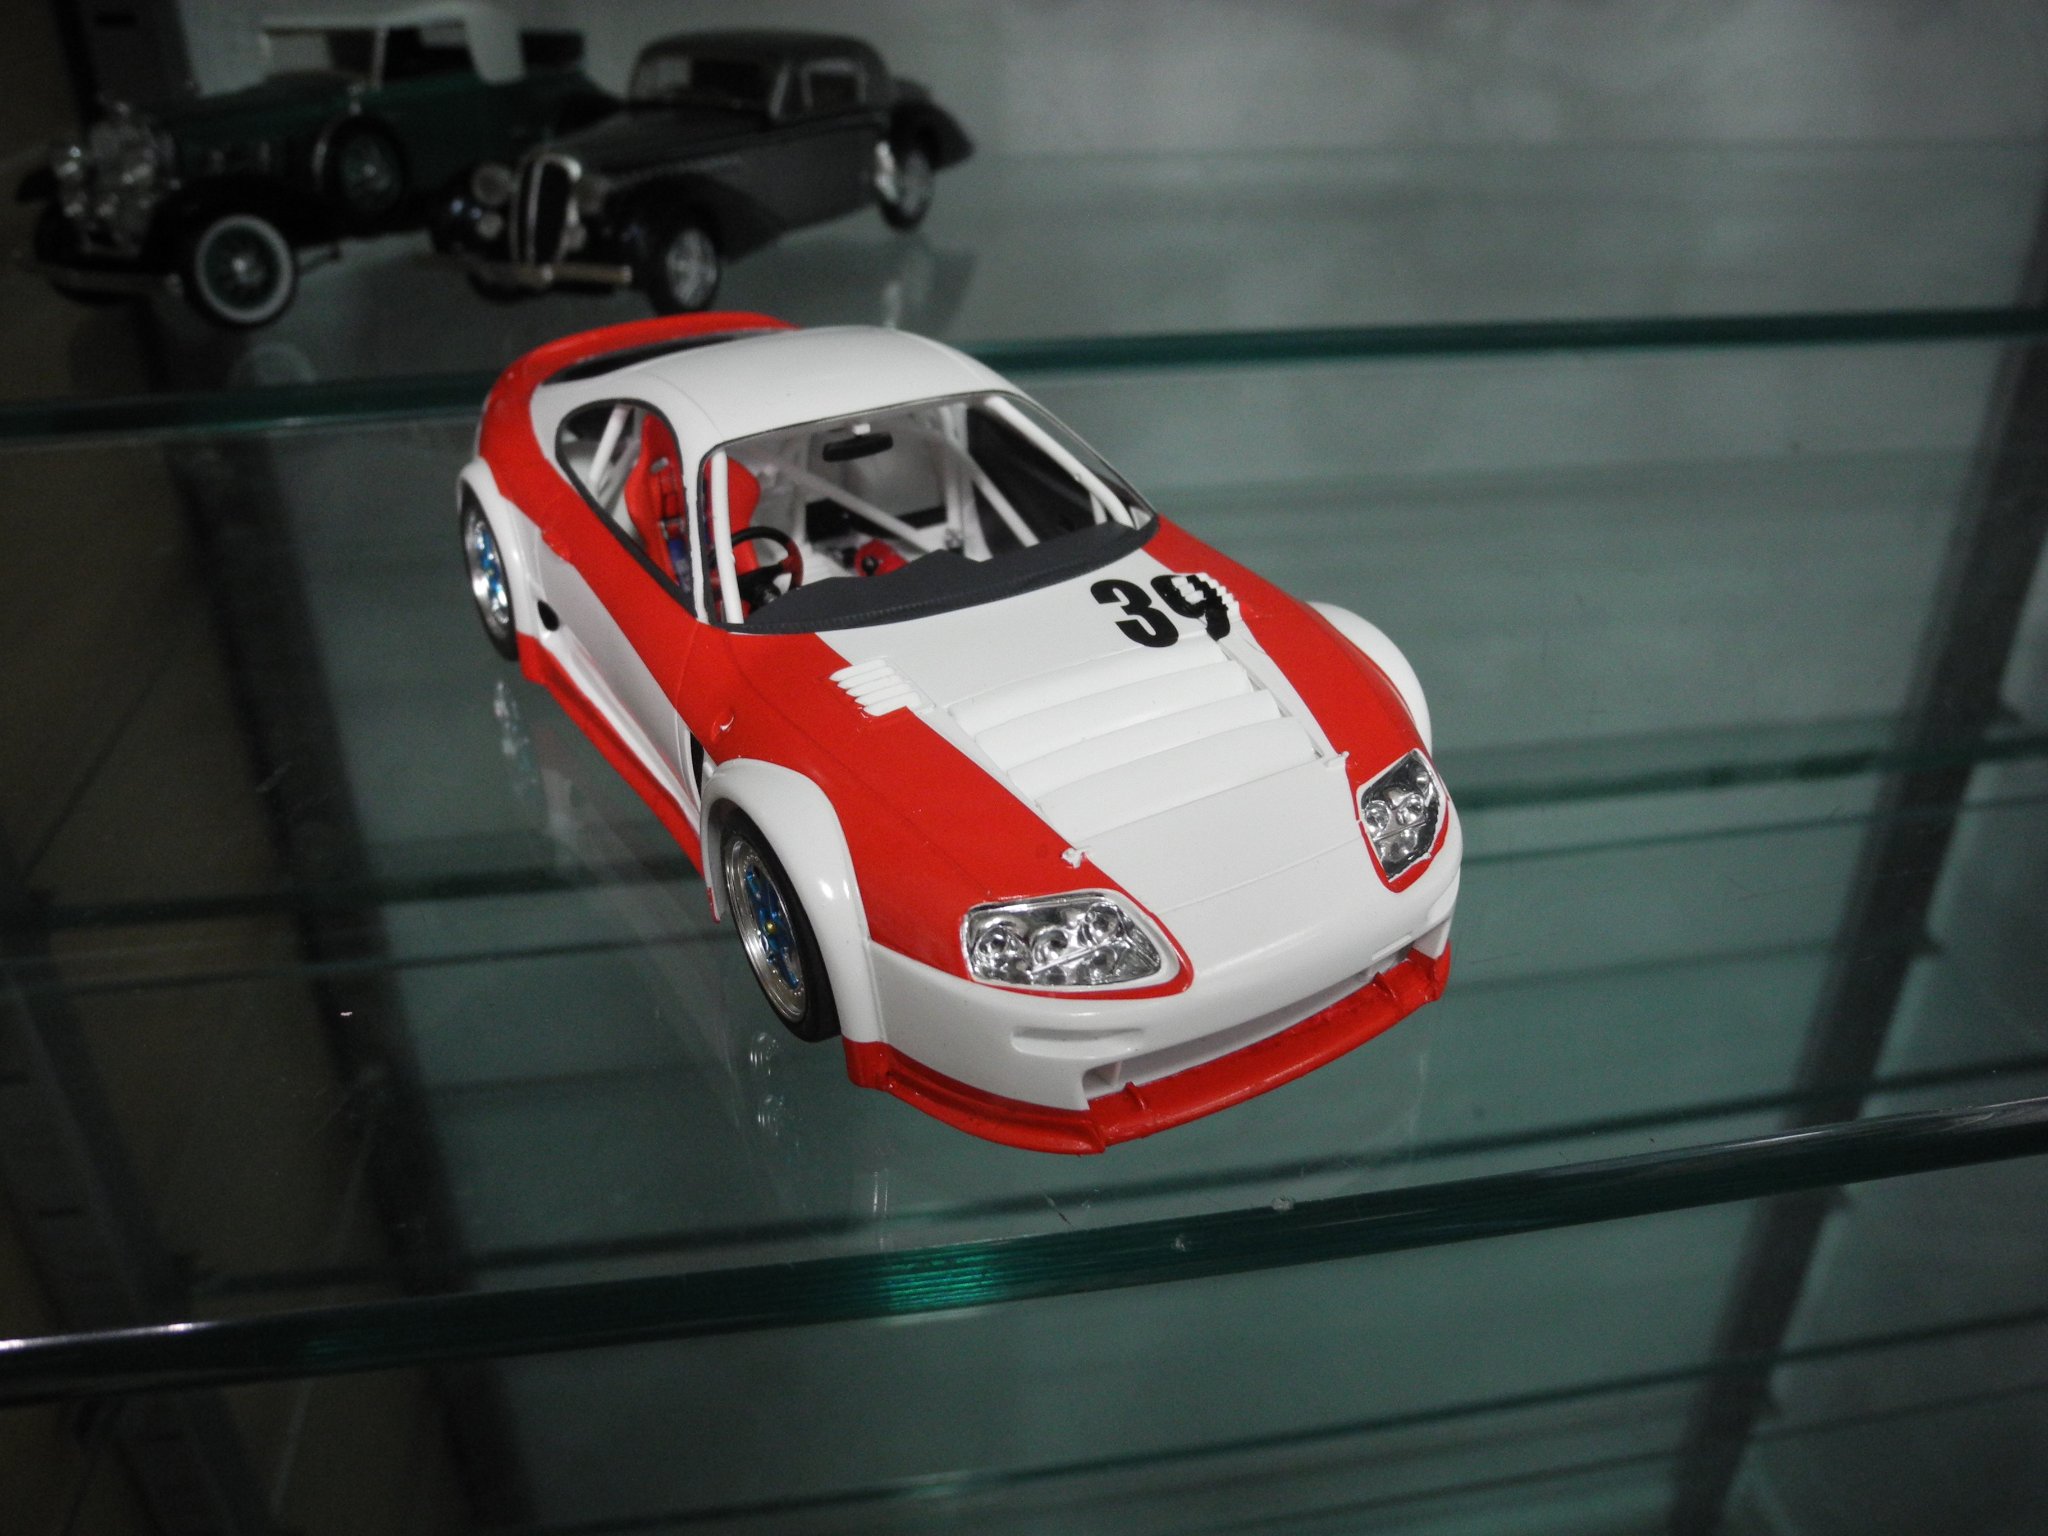
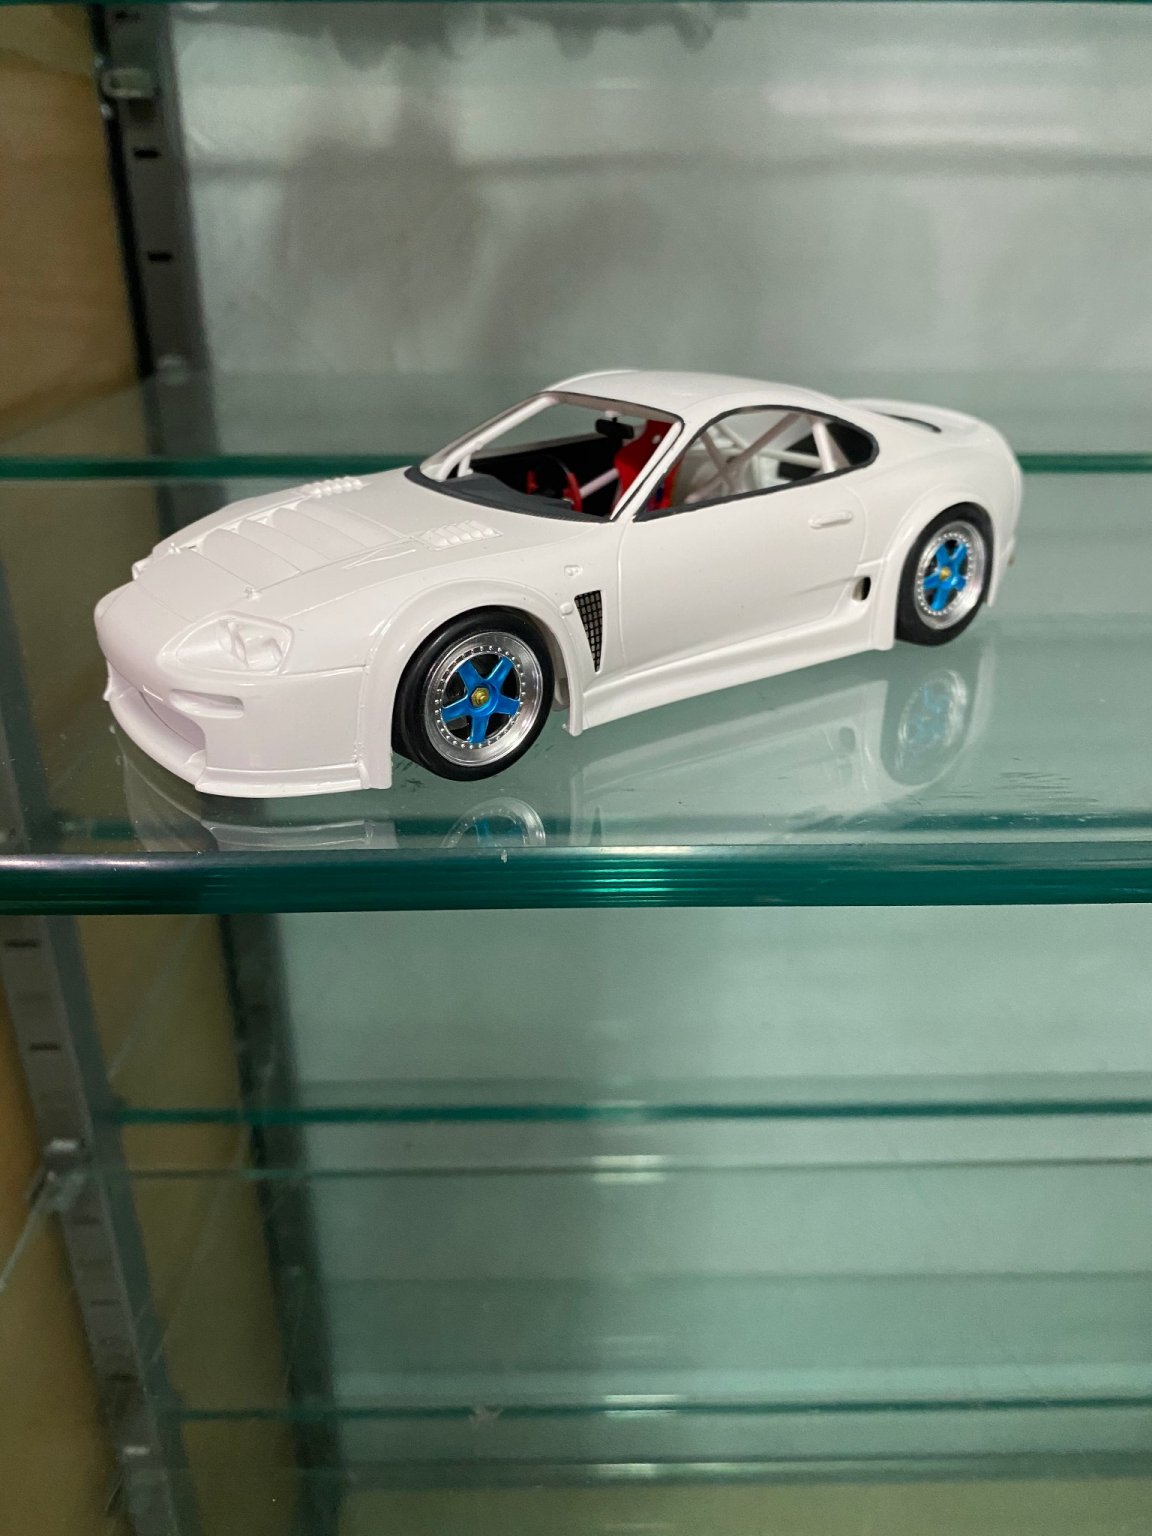
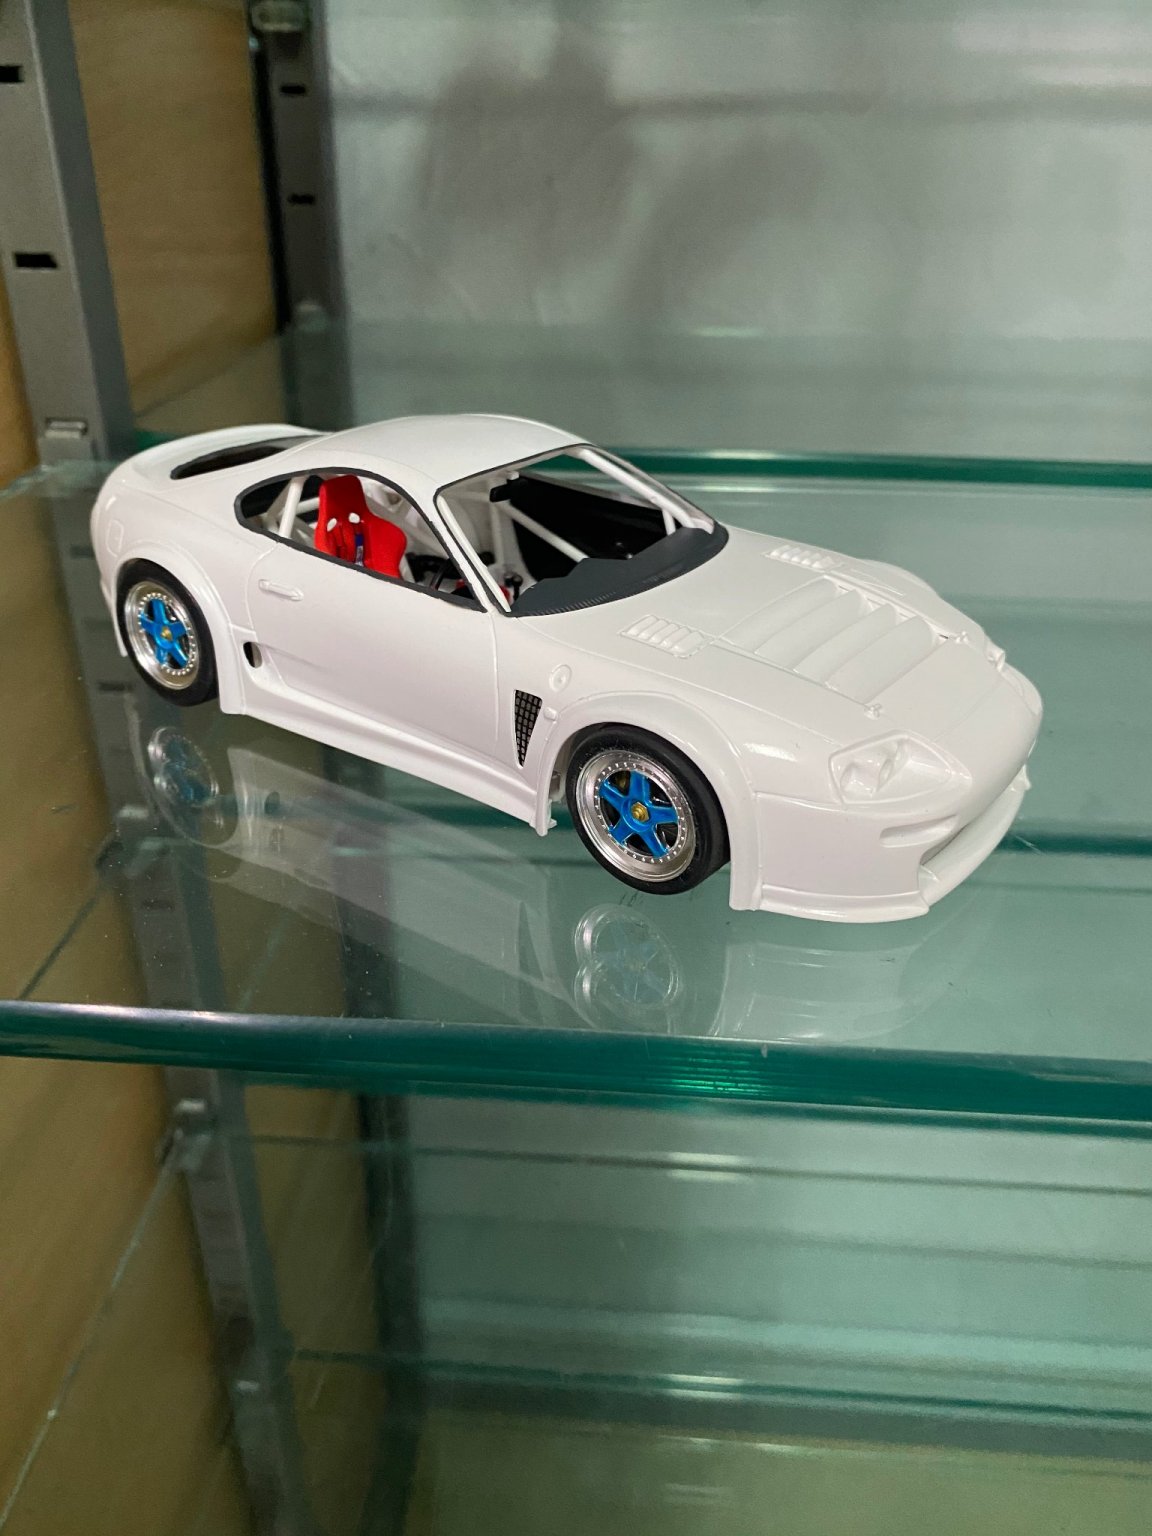
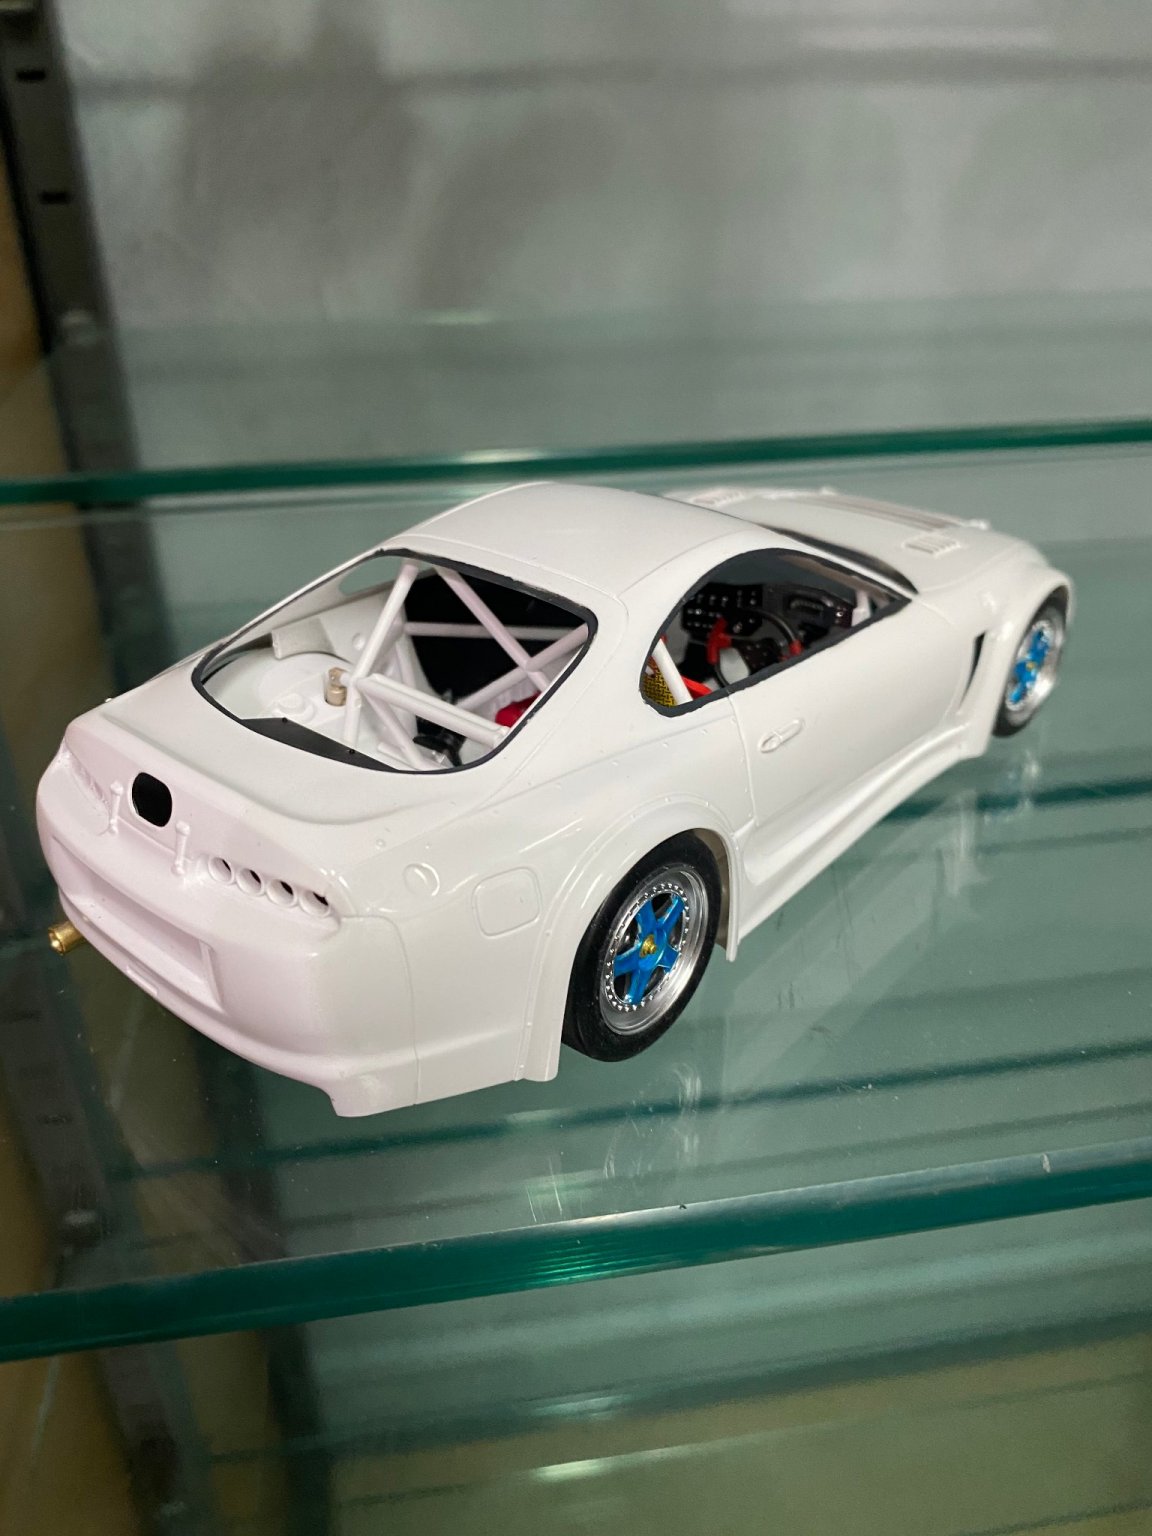
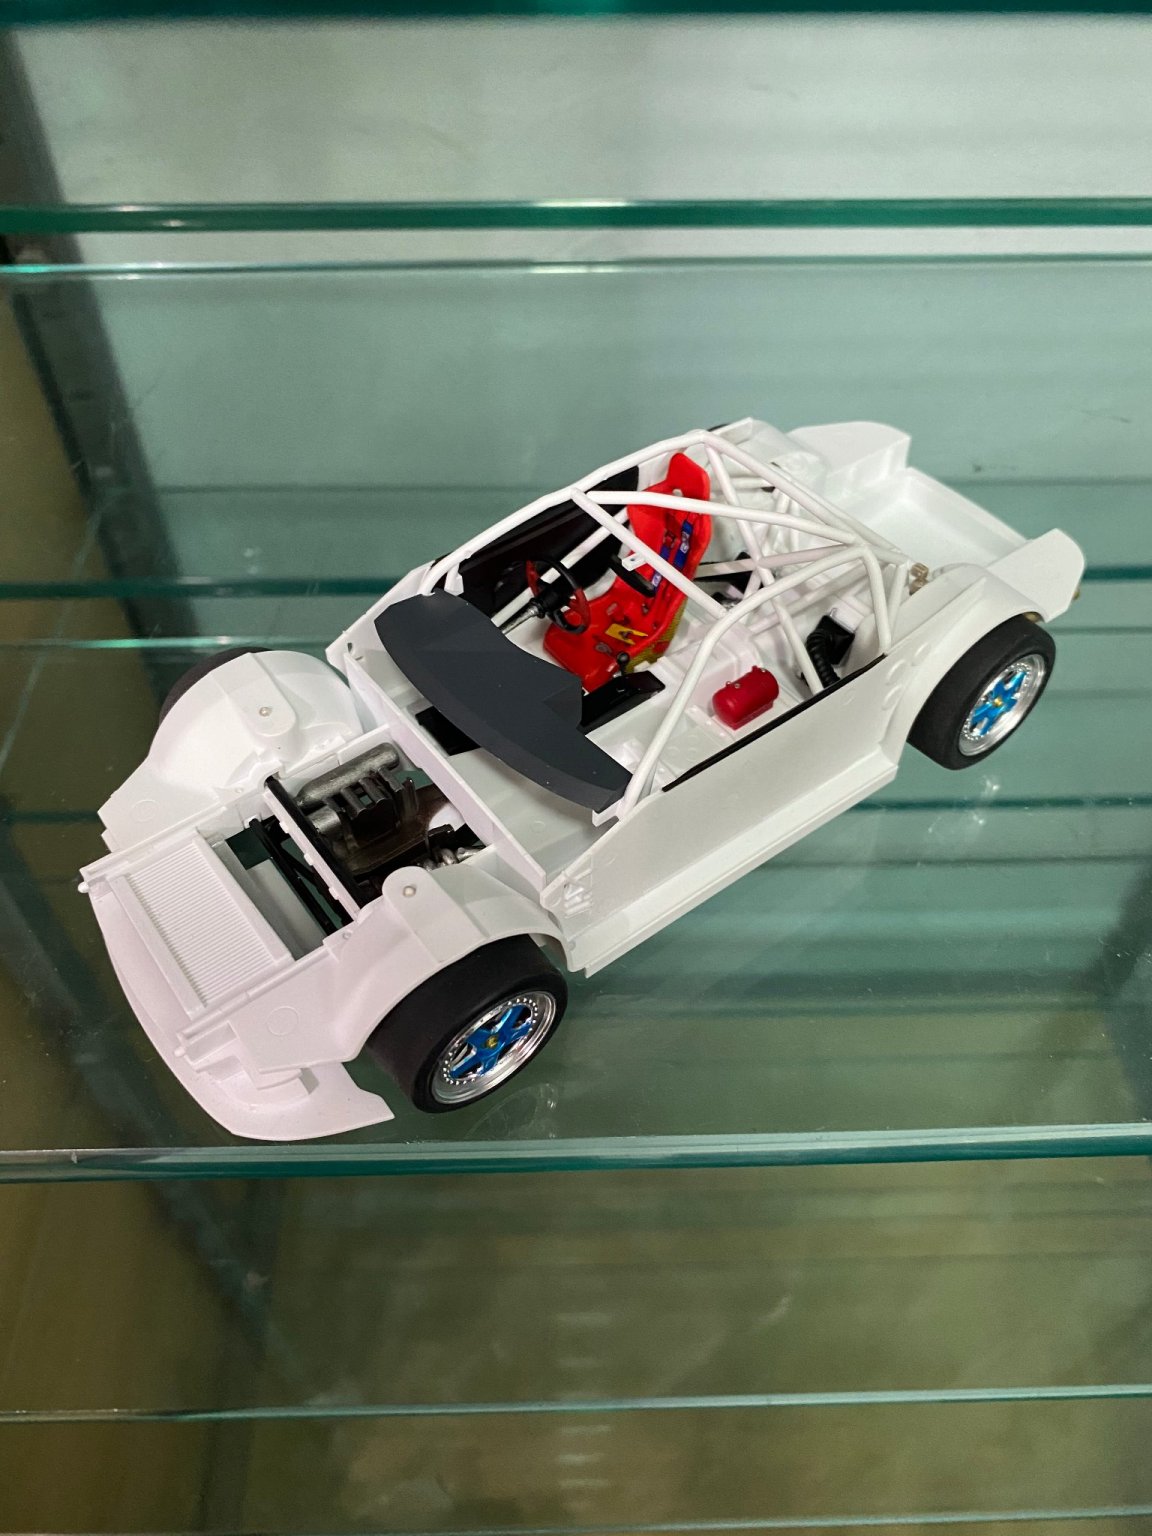
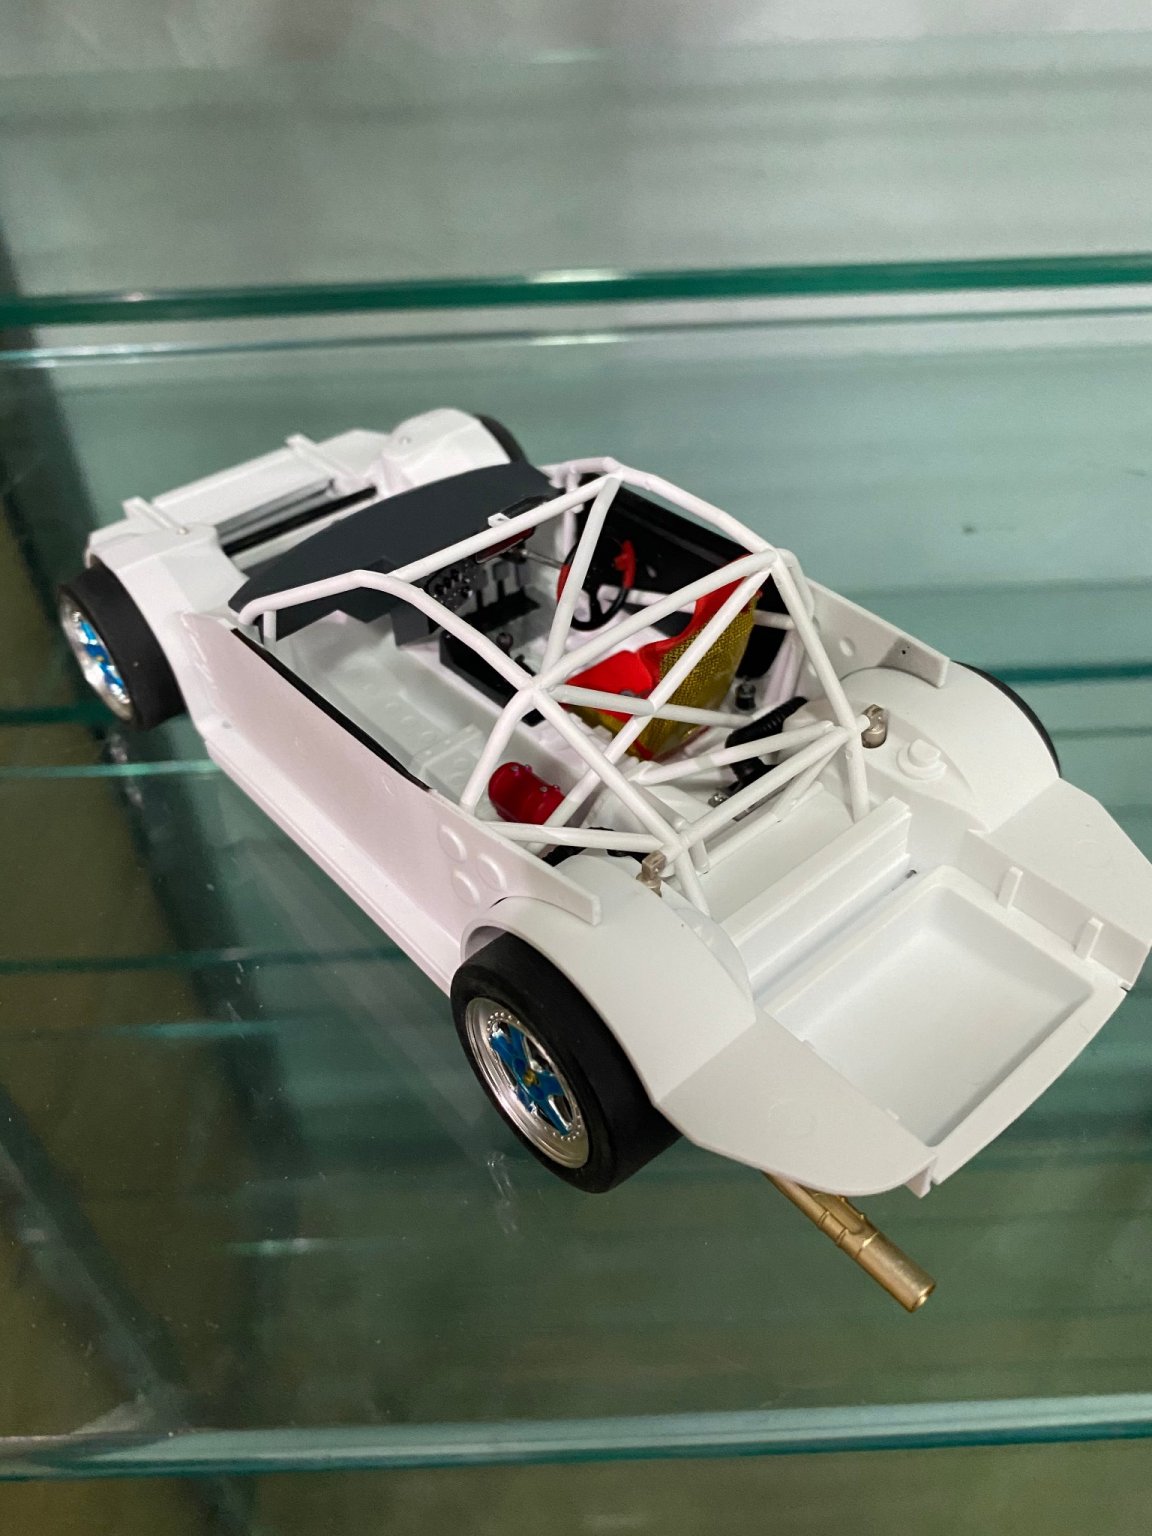
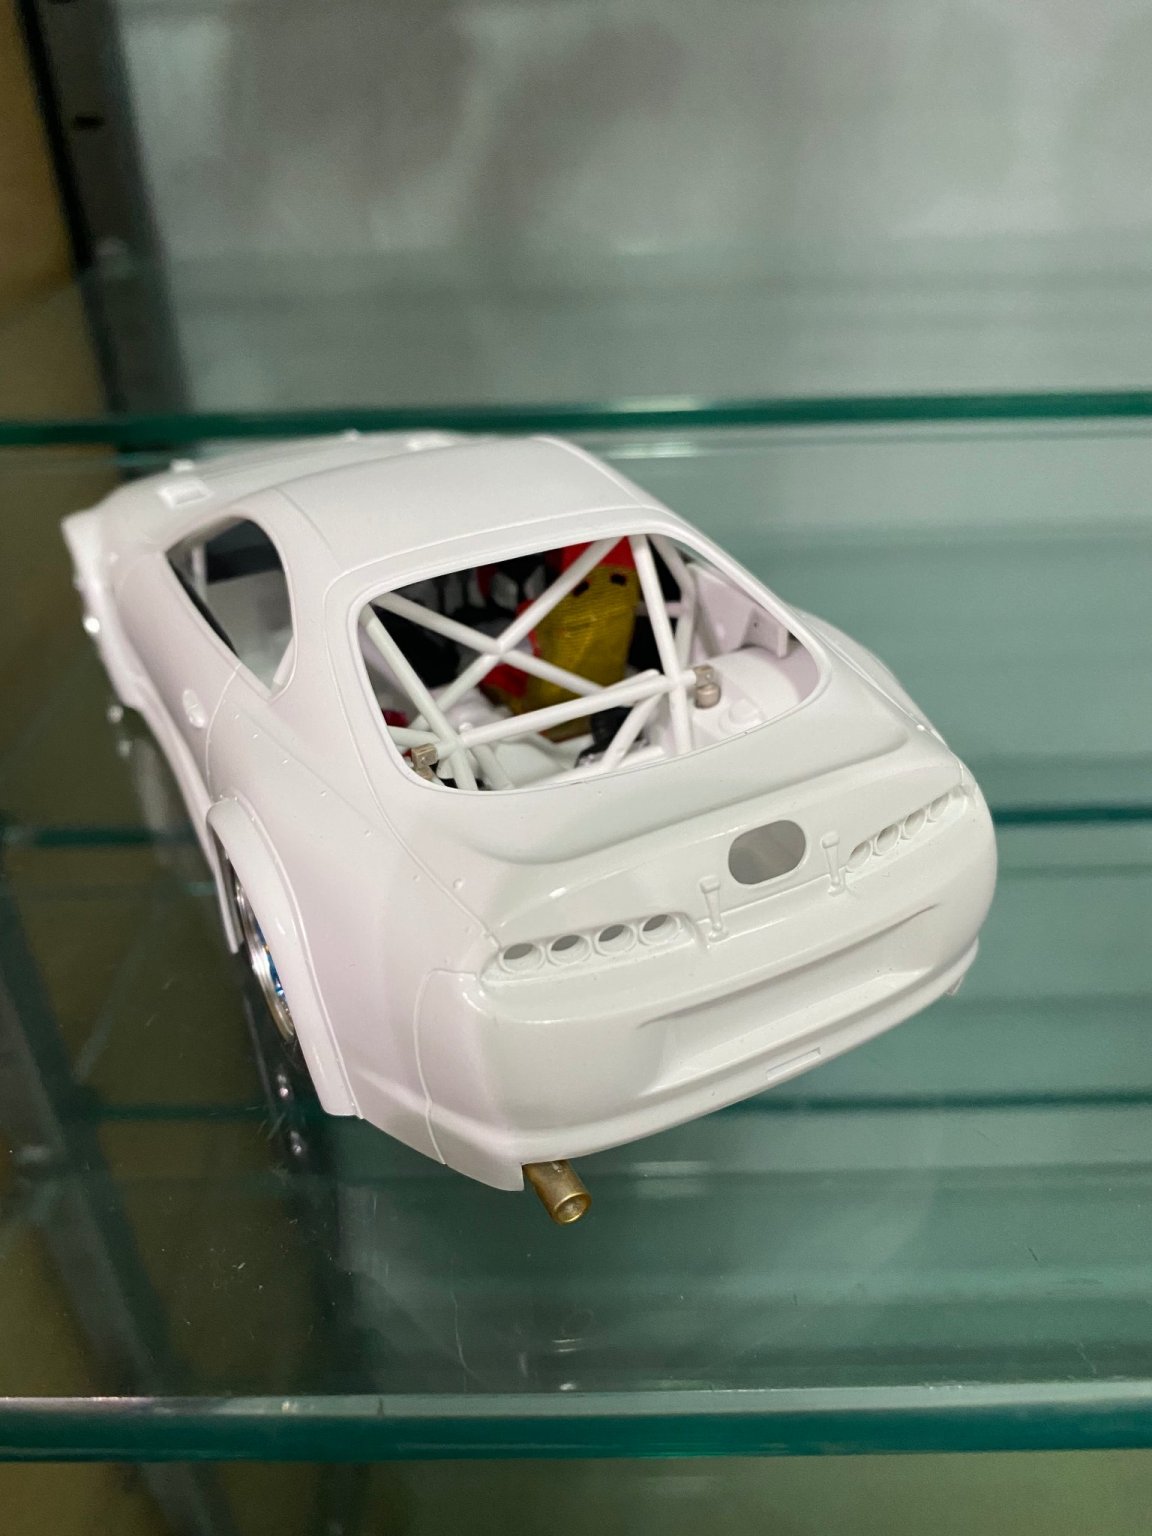
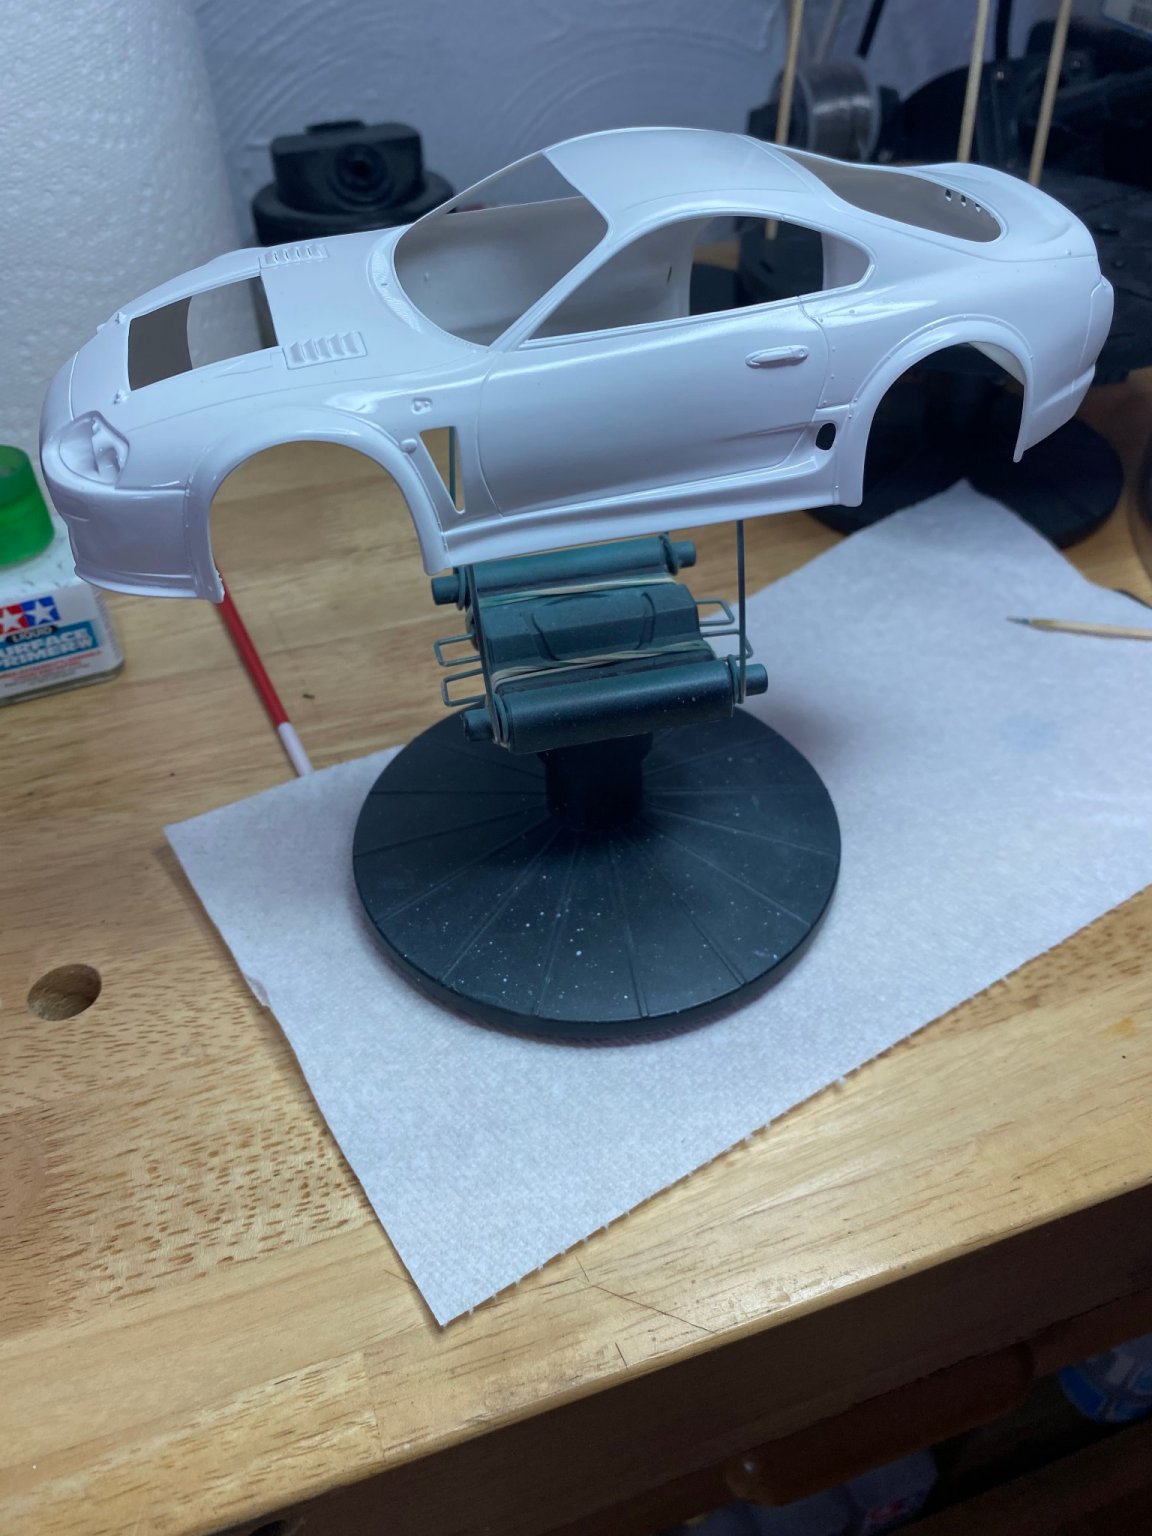
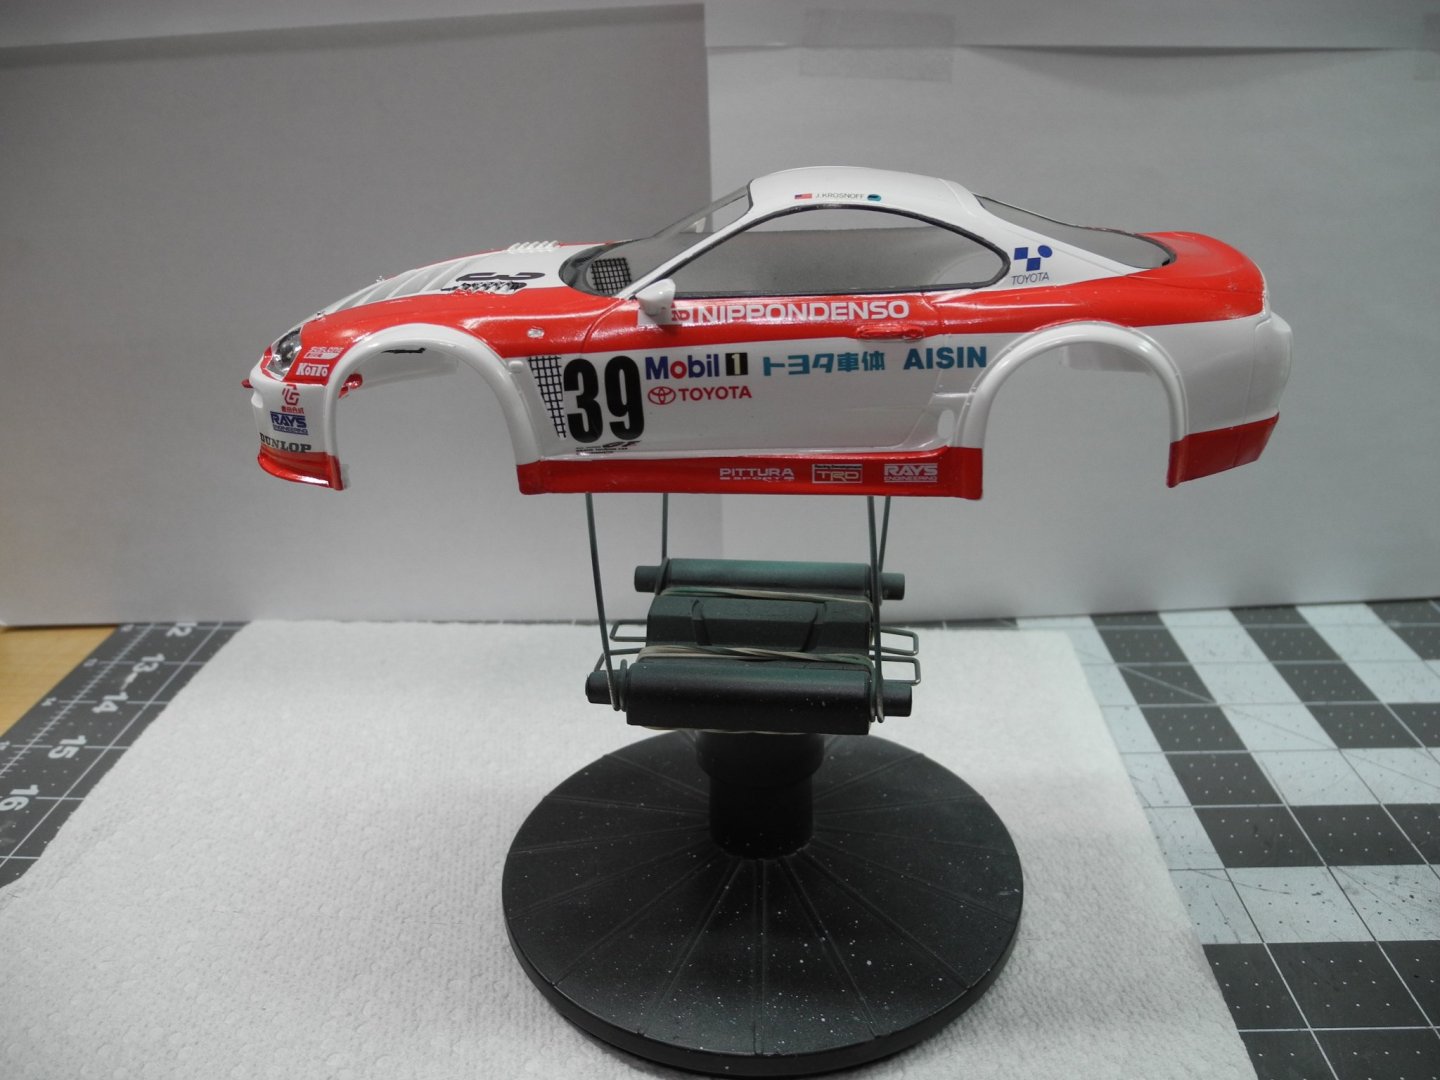
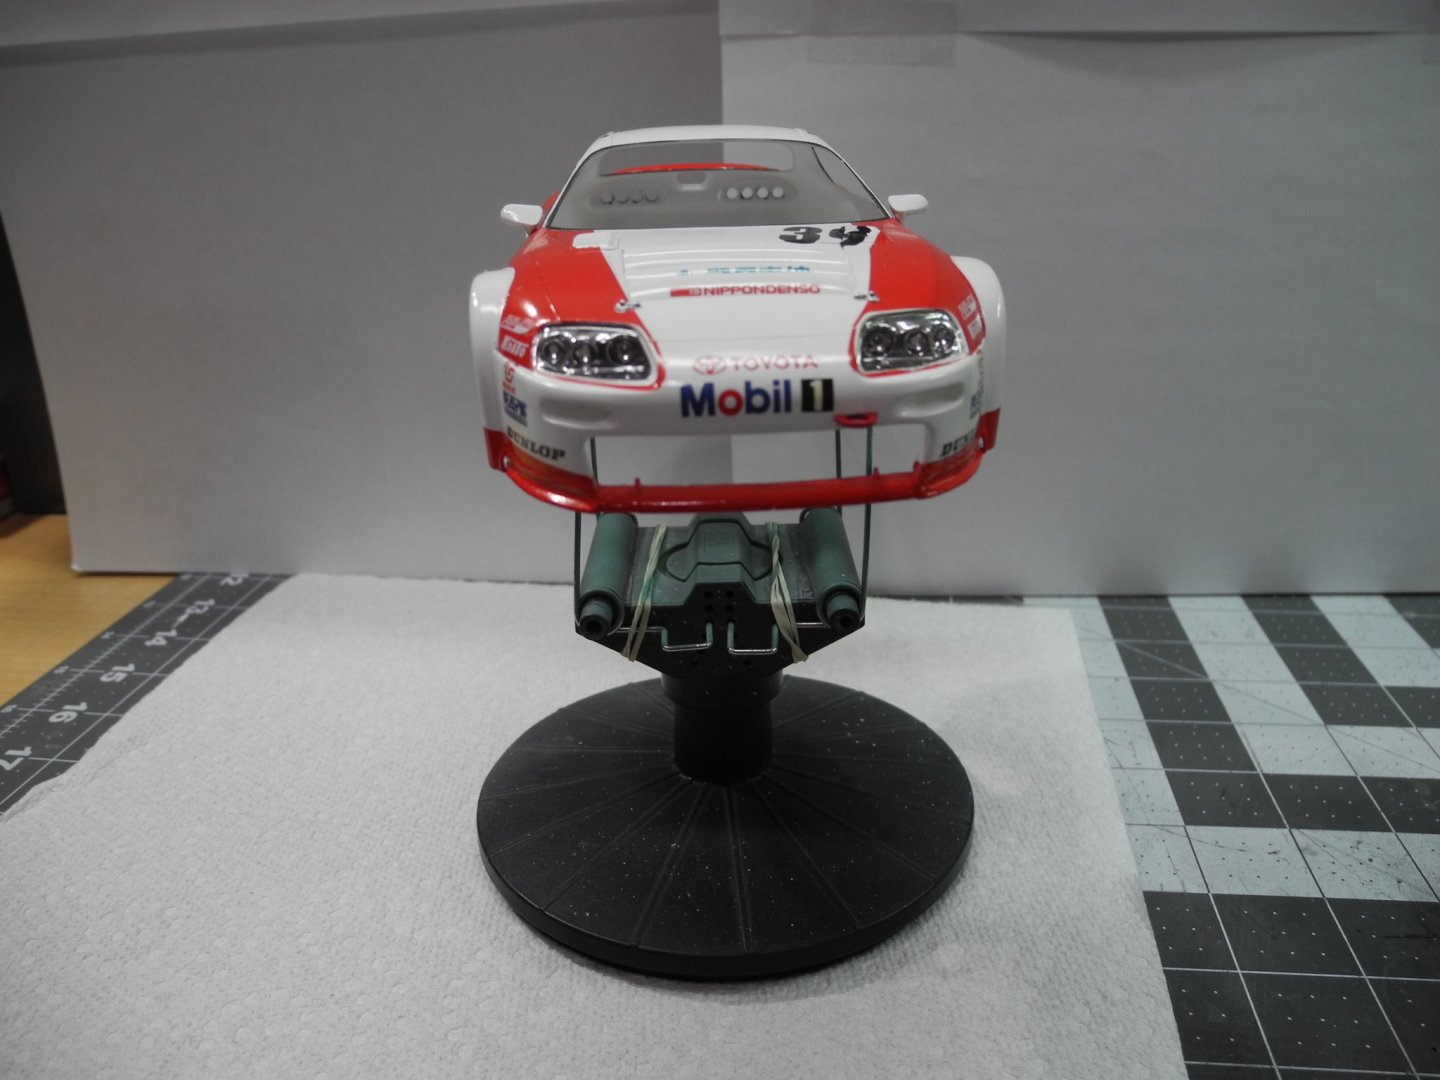
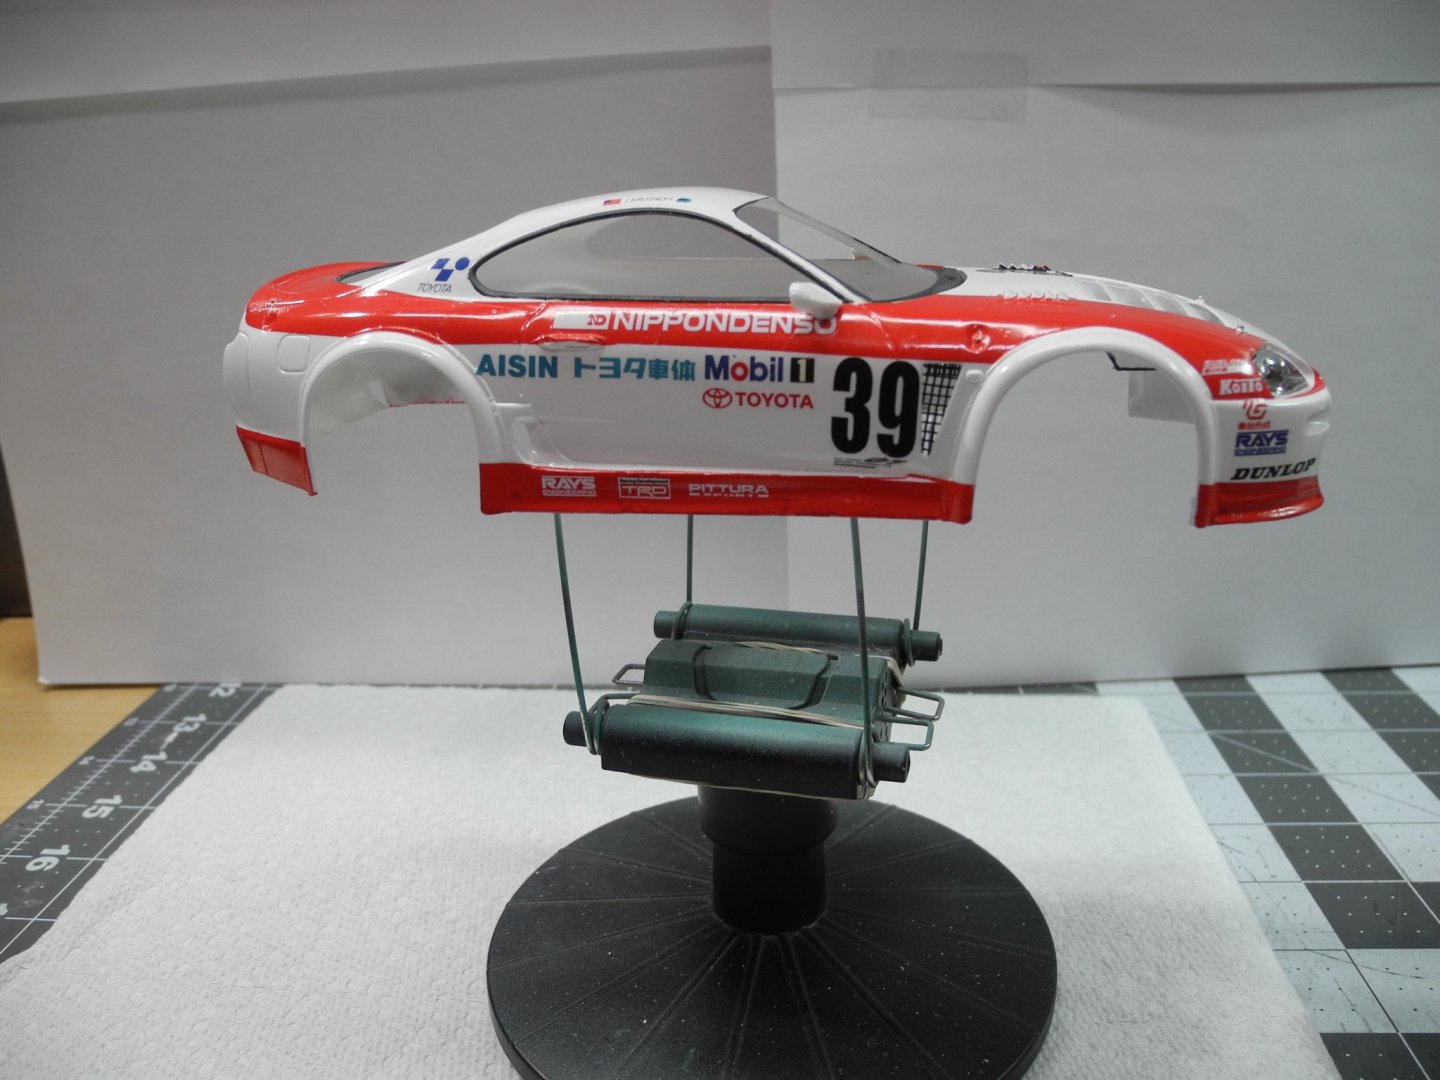
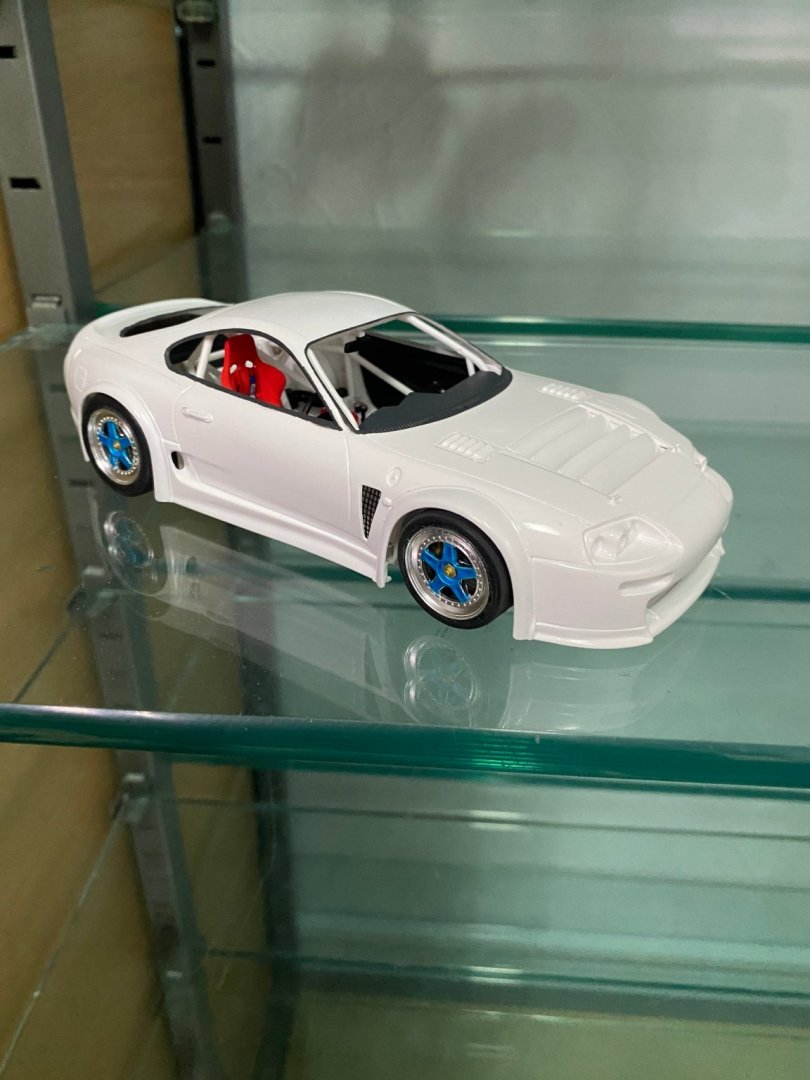
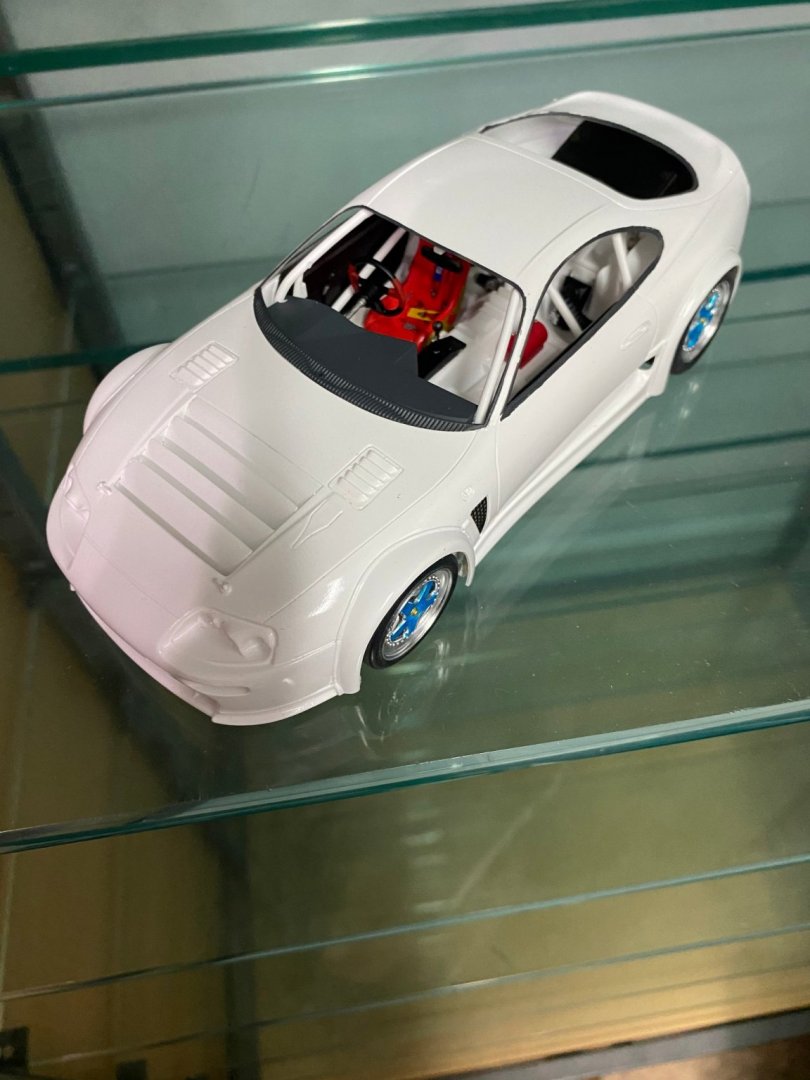
Finished up the cockpit area and roll cage, then test fitted the body to the chassis with interior. Everything on go.

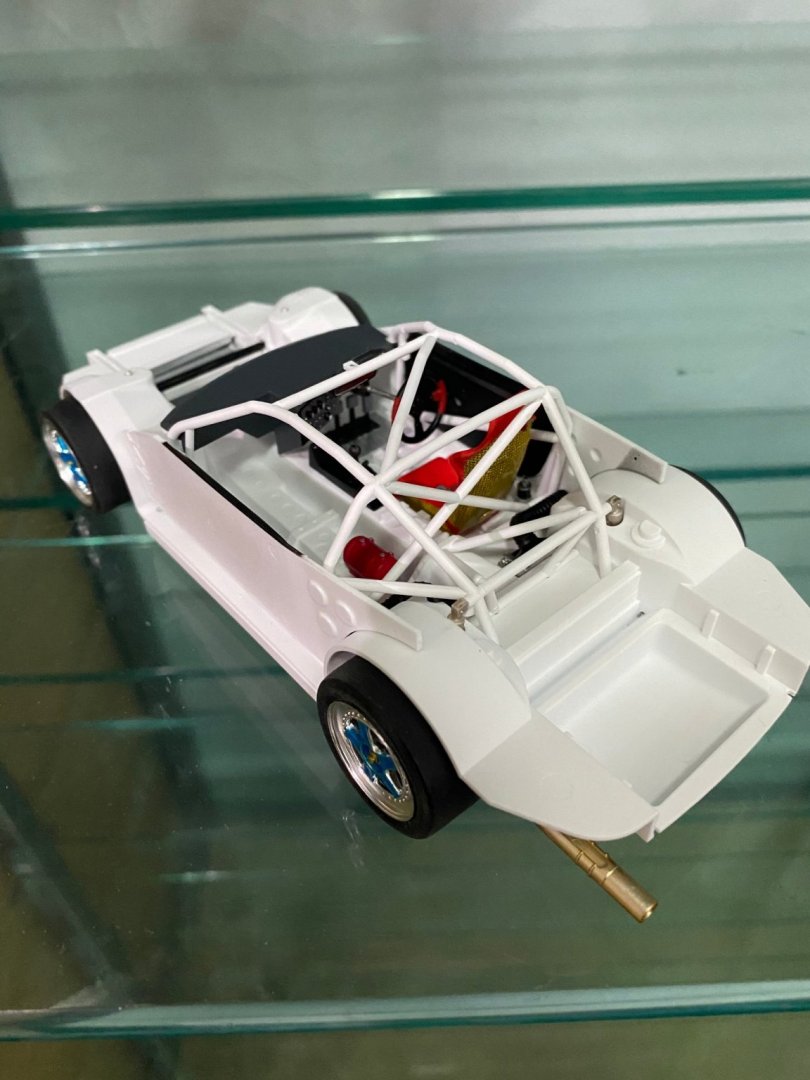
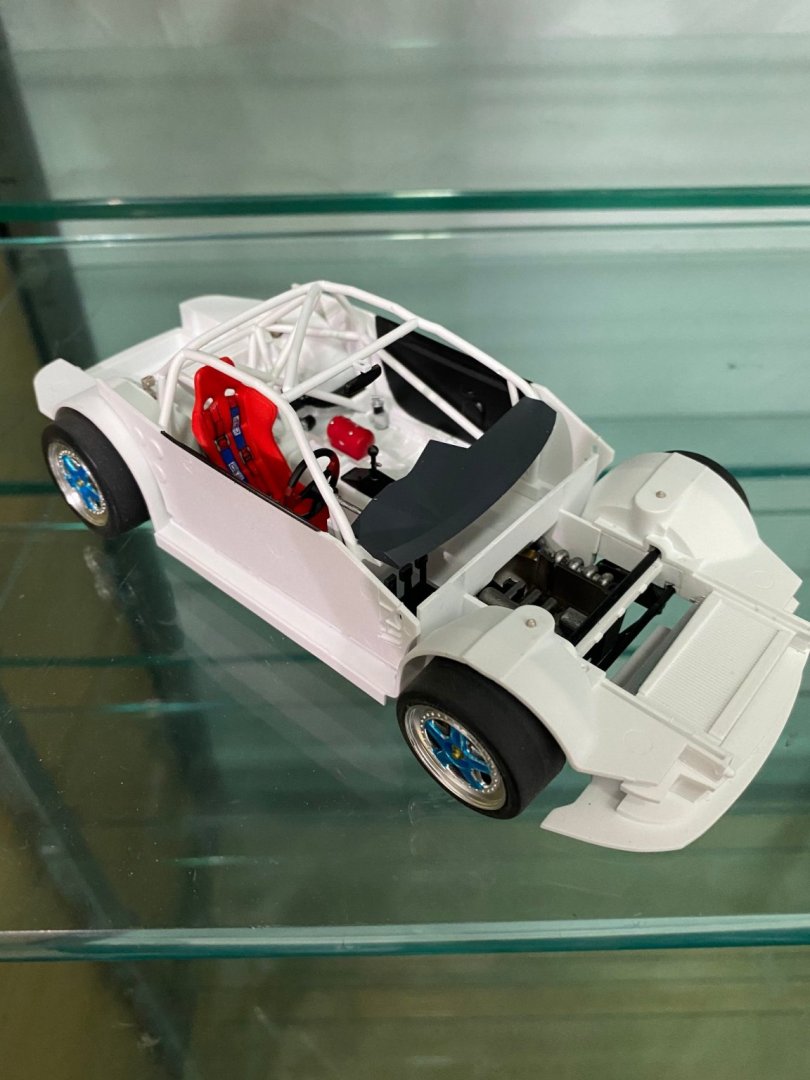
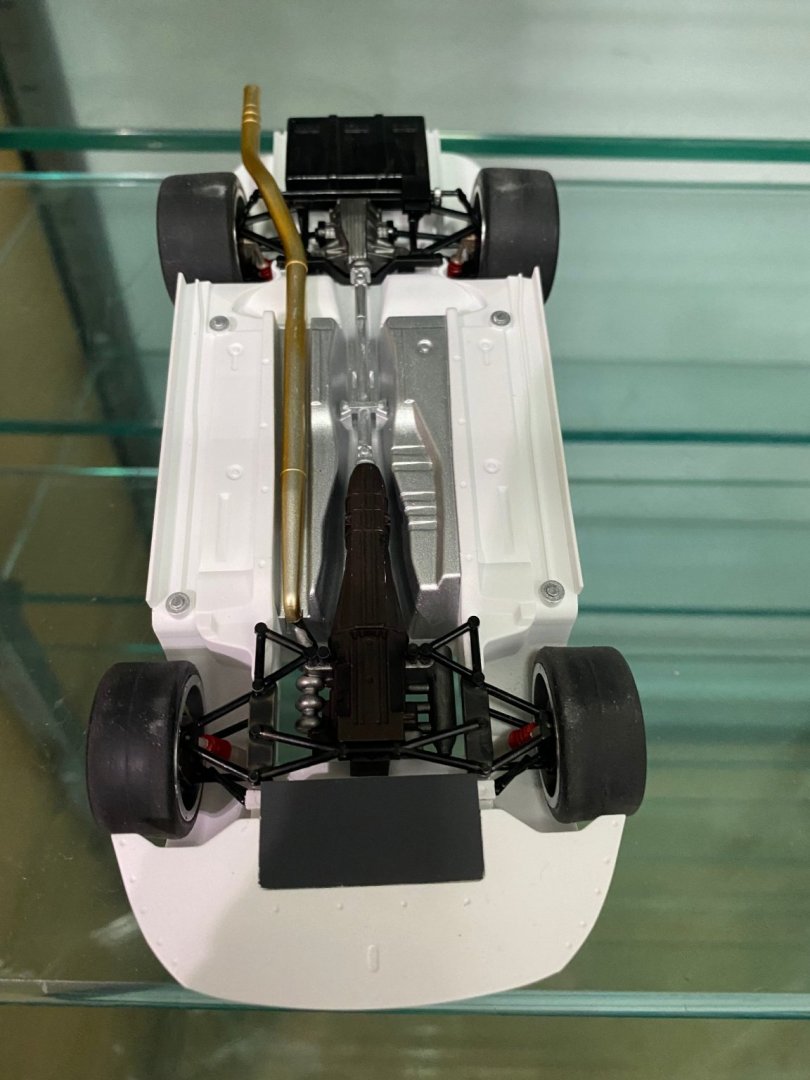

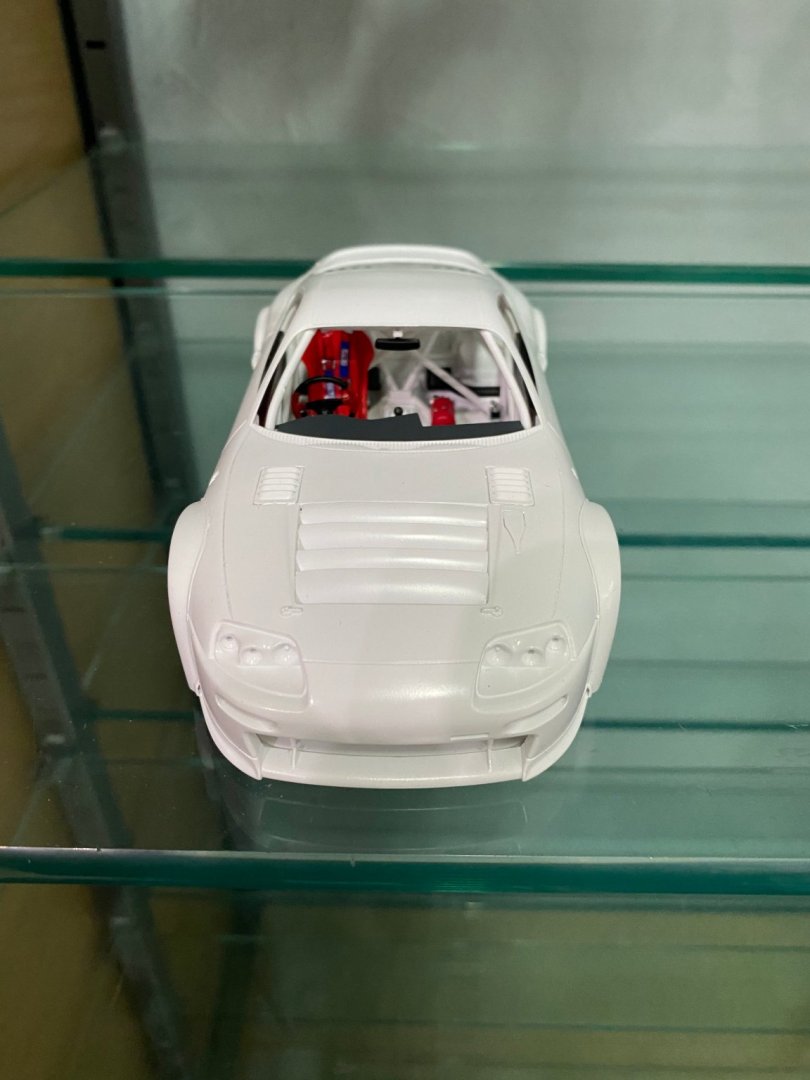
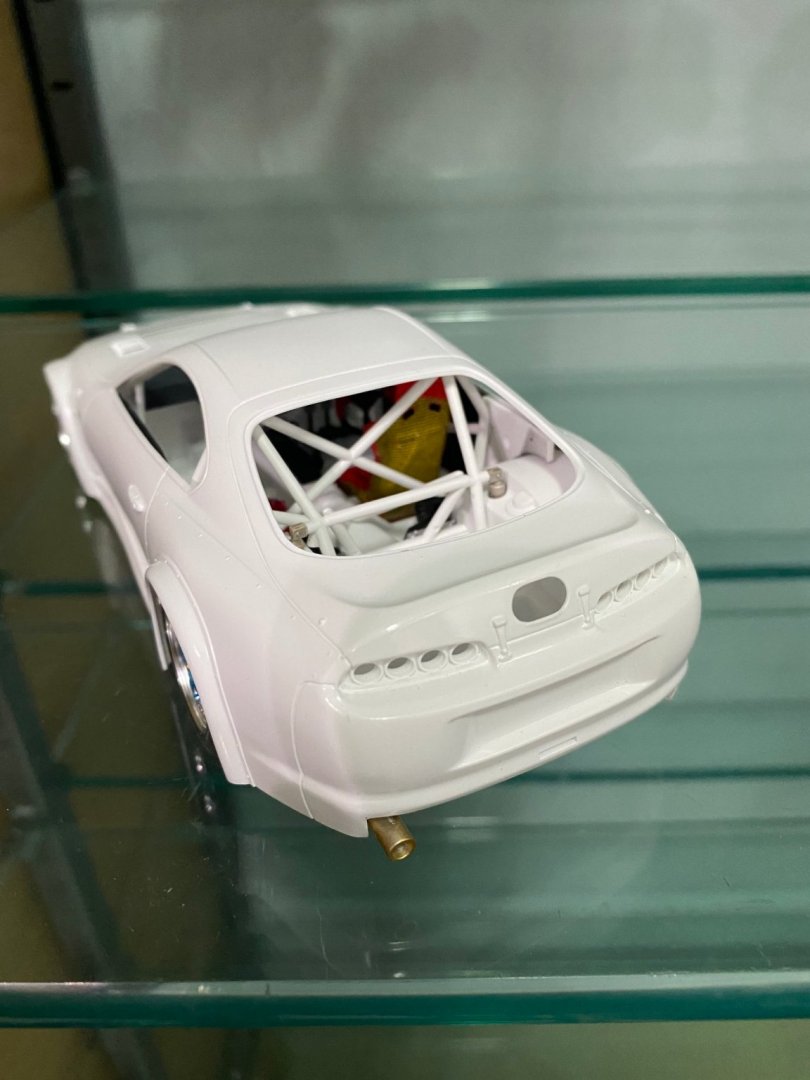
- 86 replies
-
- 13
-
-
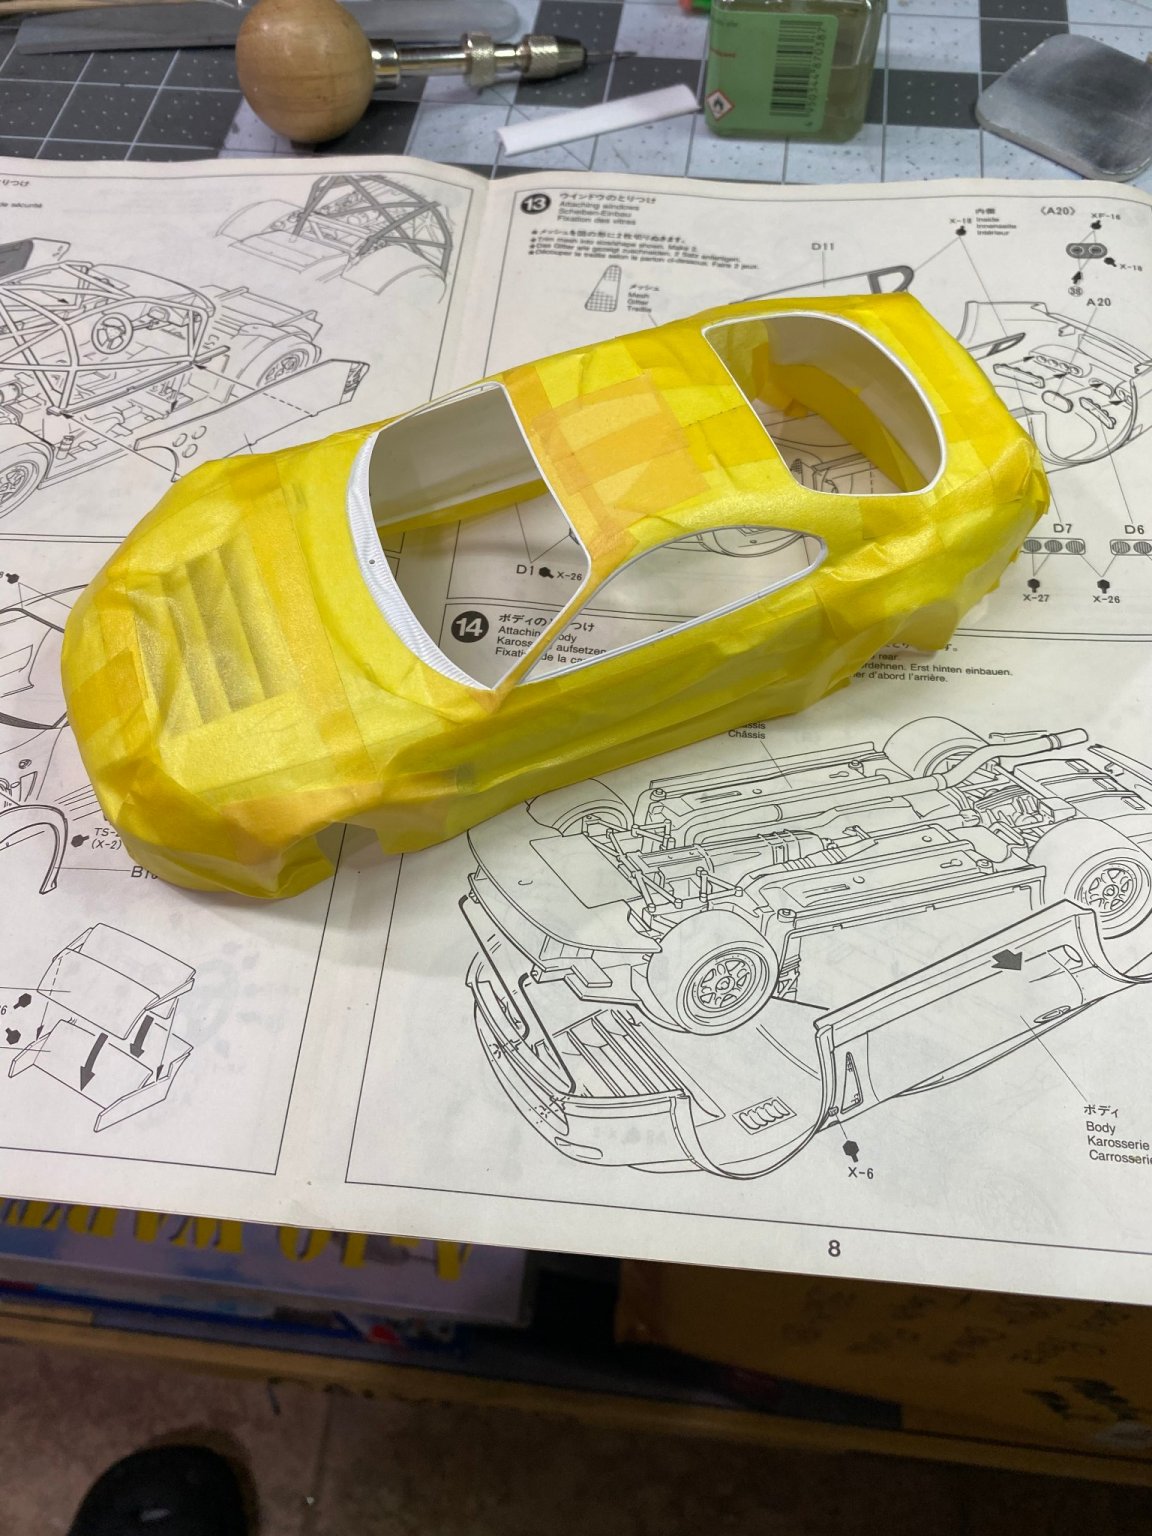
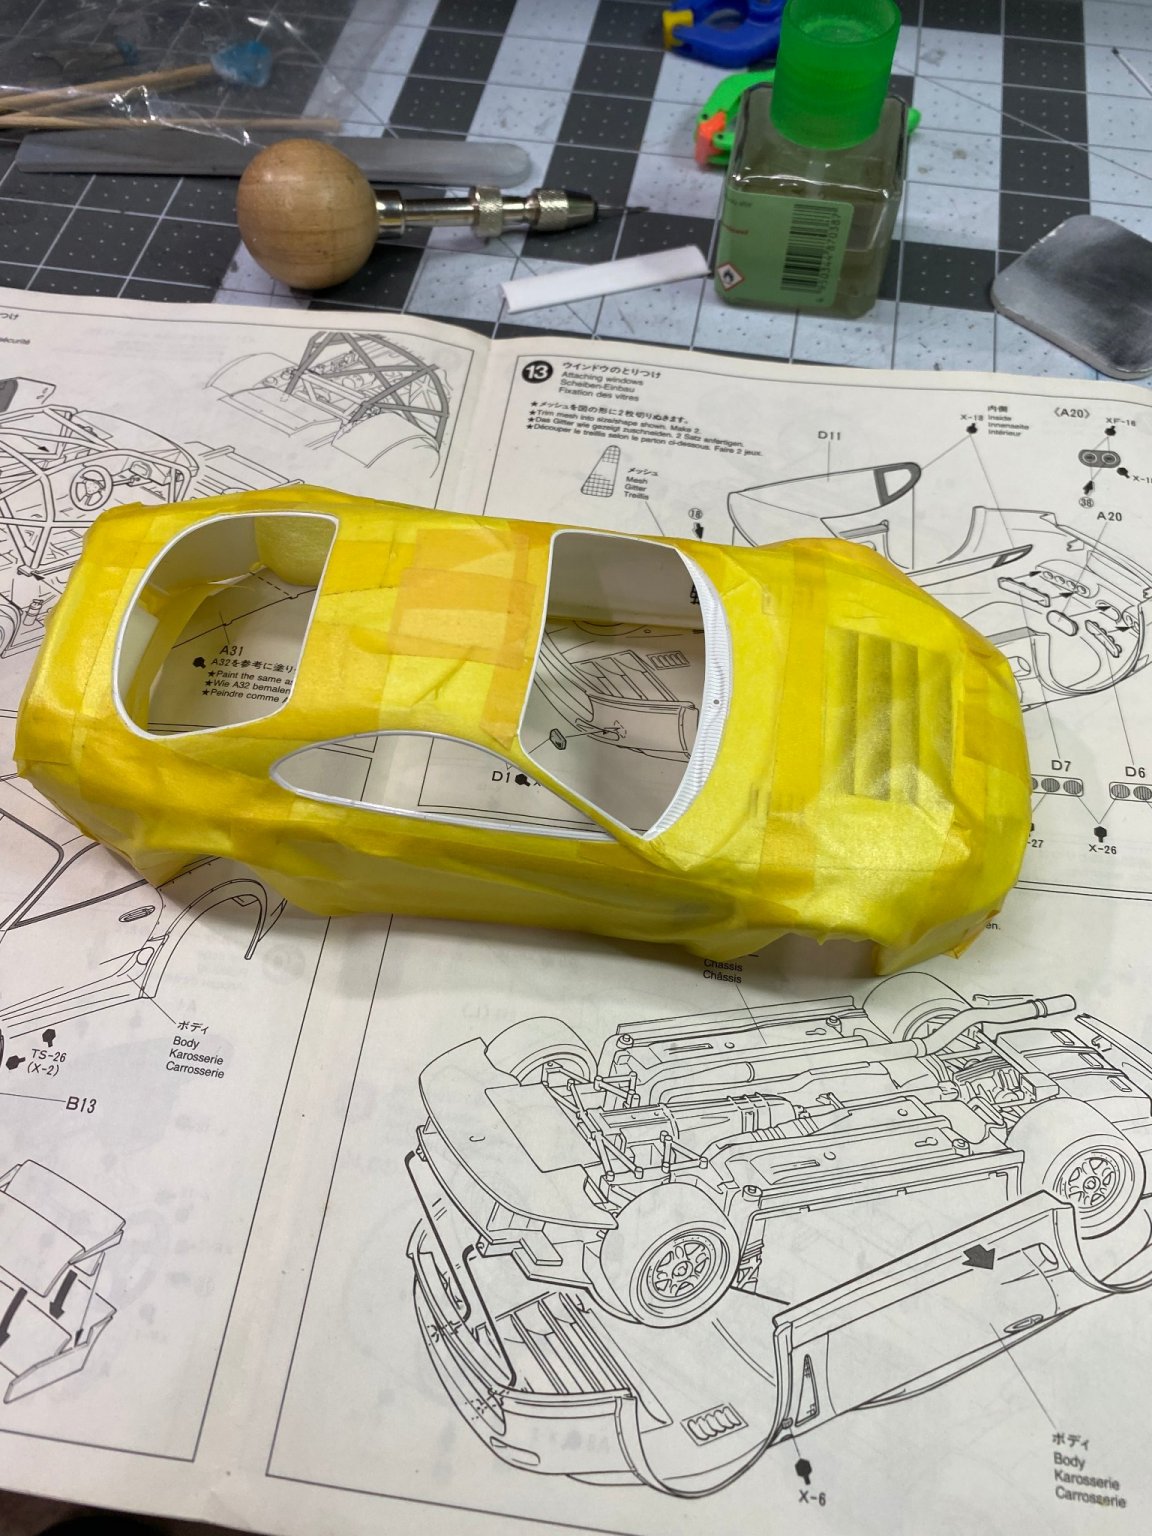
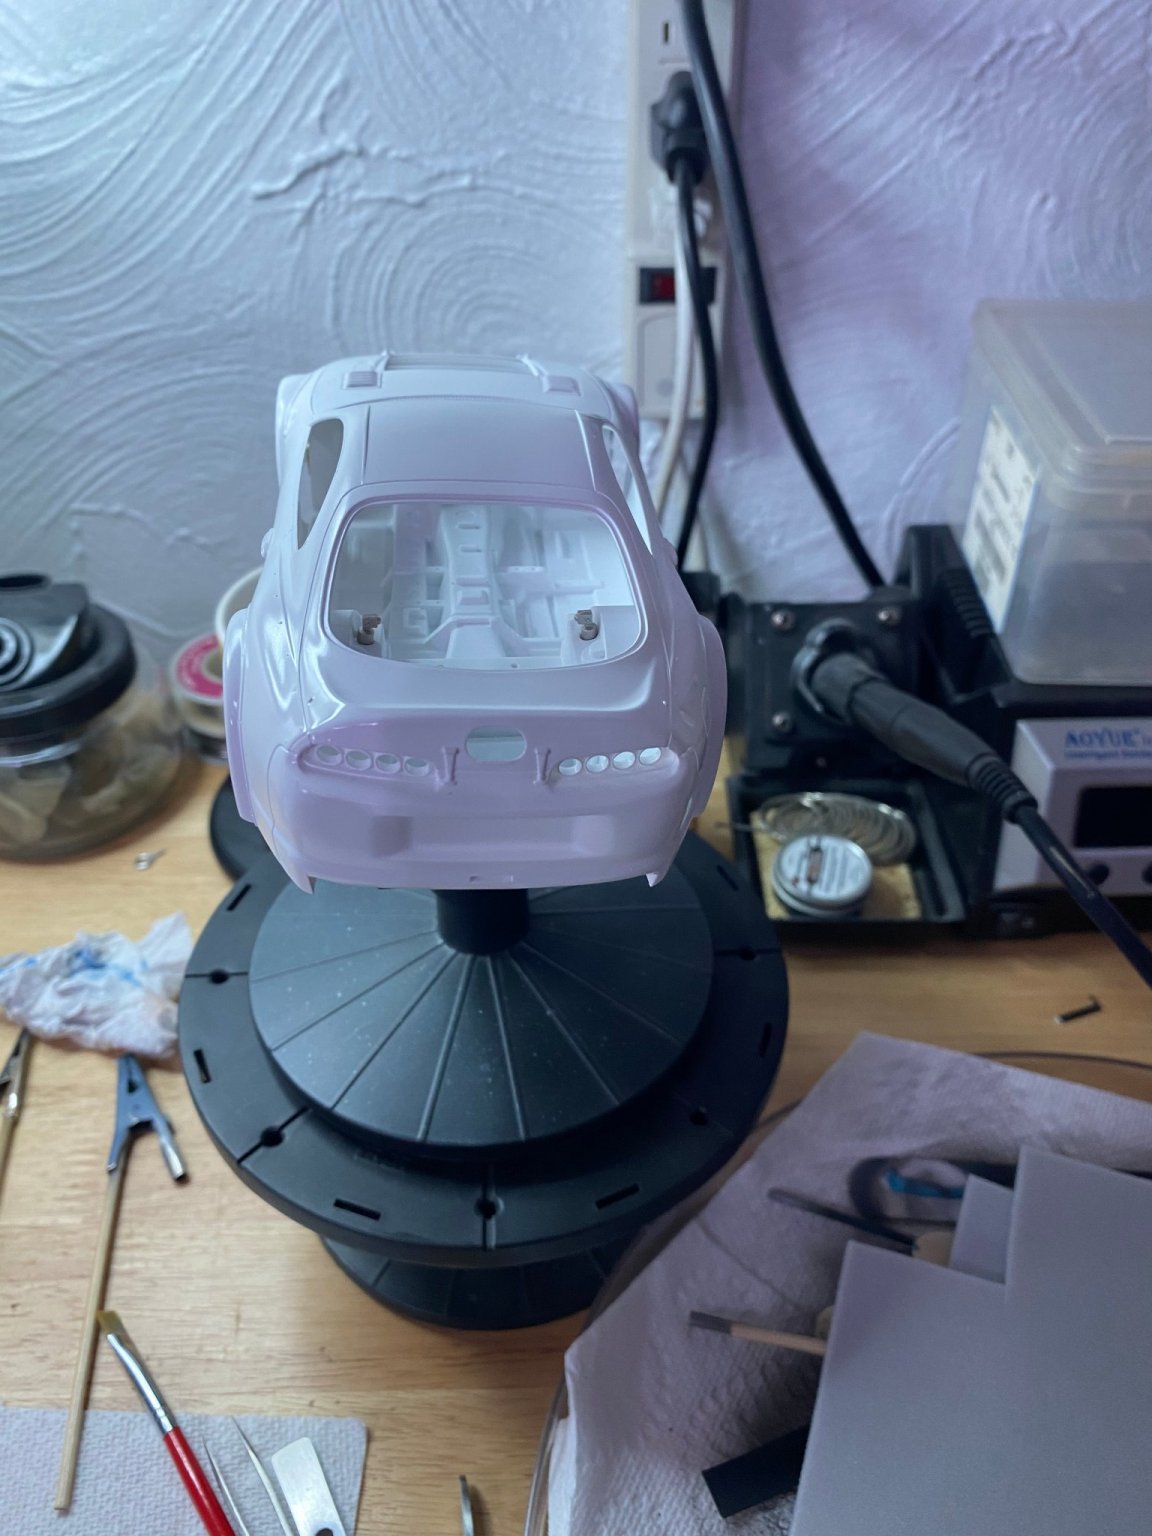
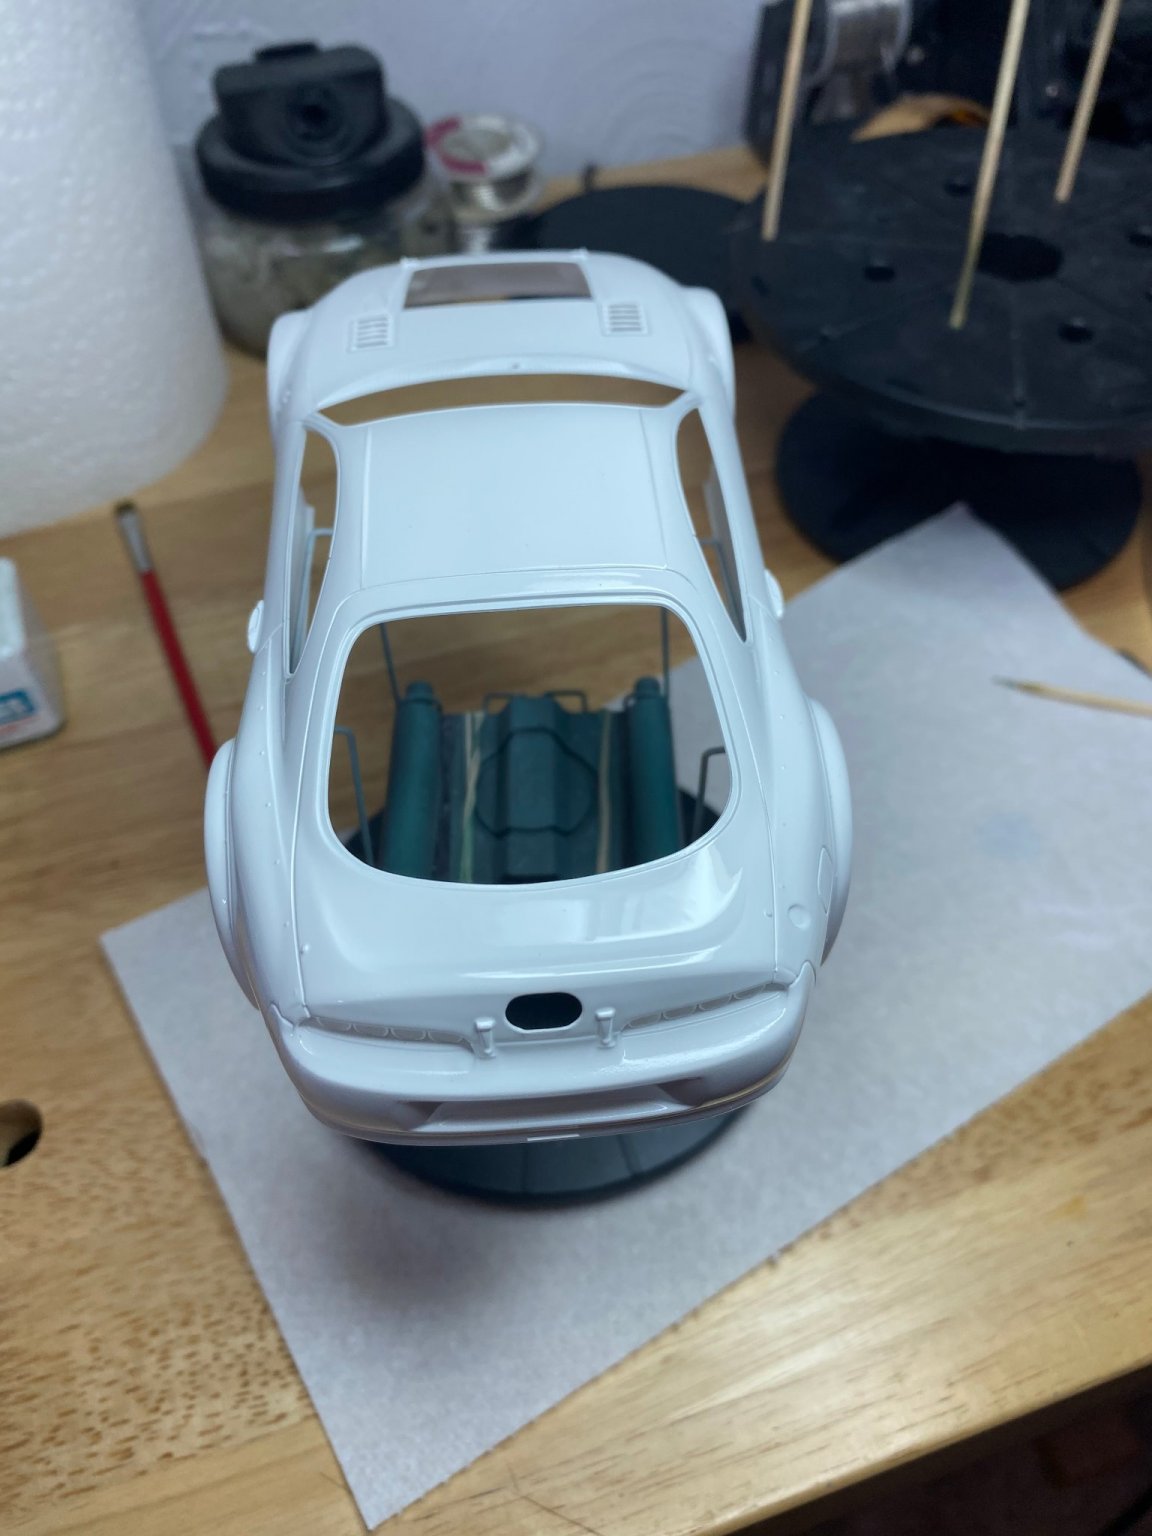
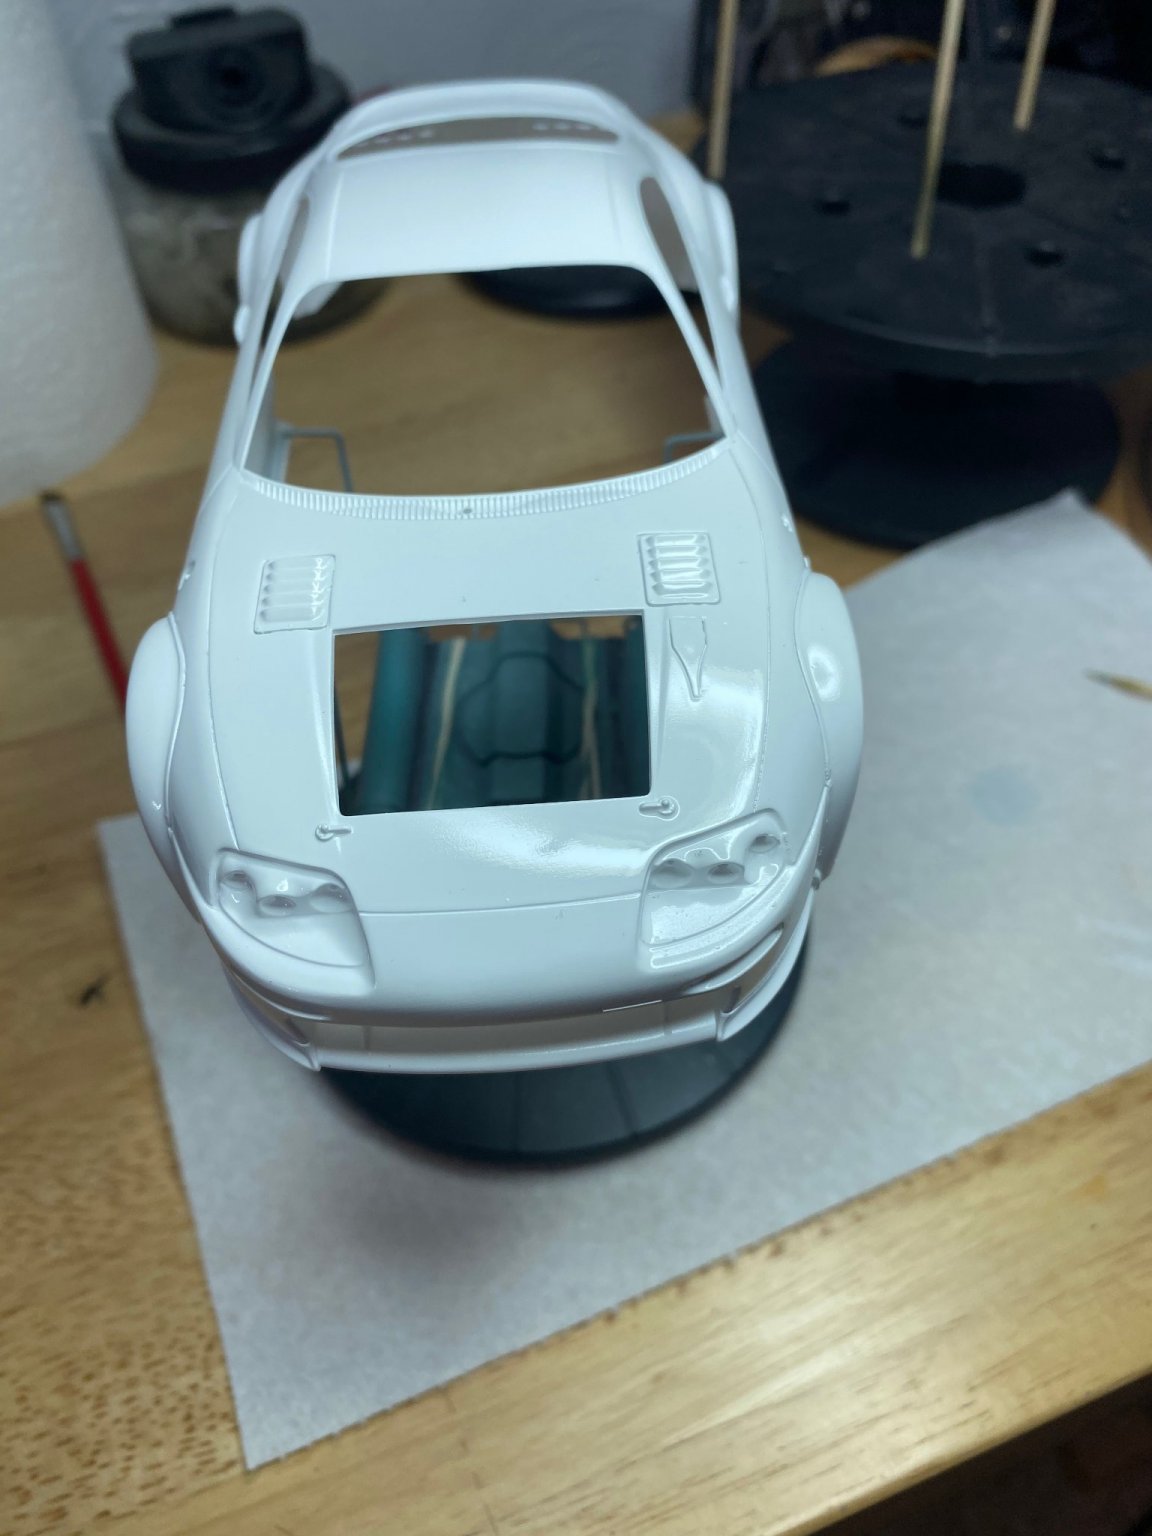
Thanks. It's the lacquer that does the trick. It lays down well with little buildup, so it doesn't hide detail. There is also the benefit of fast drying time. Even so, I am going to give it until tomorrow before I do some detail masking and painting around the windows.
-
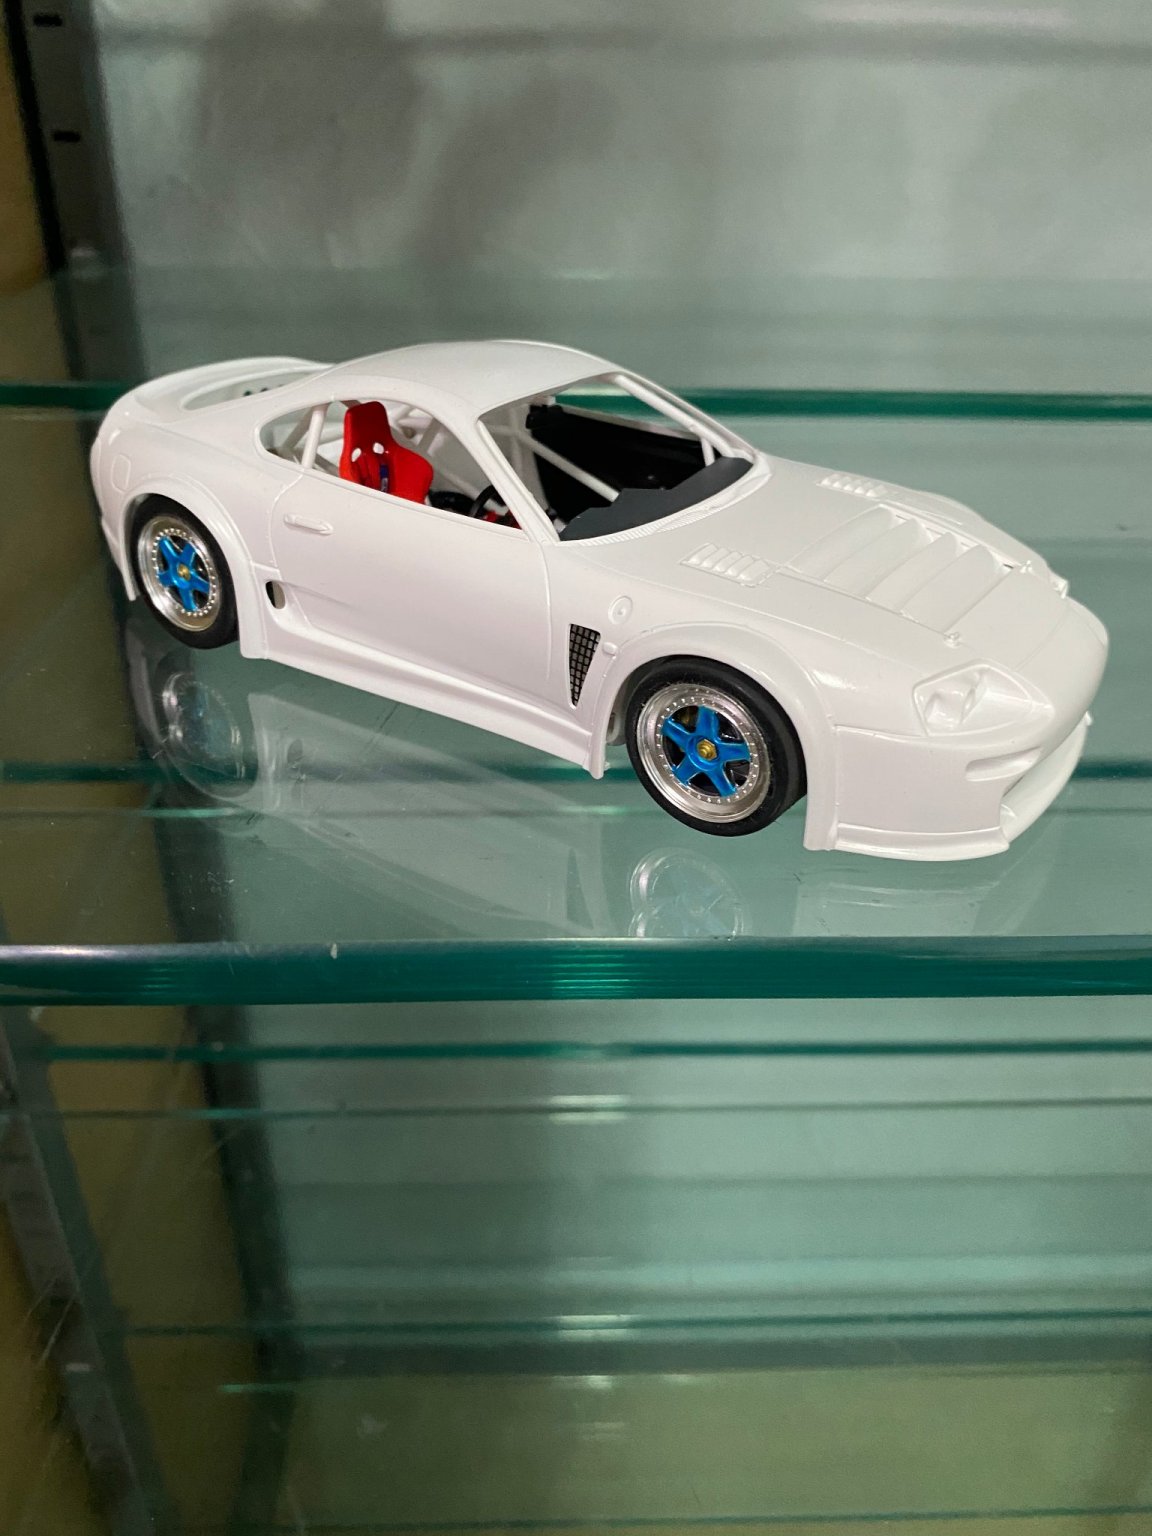
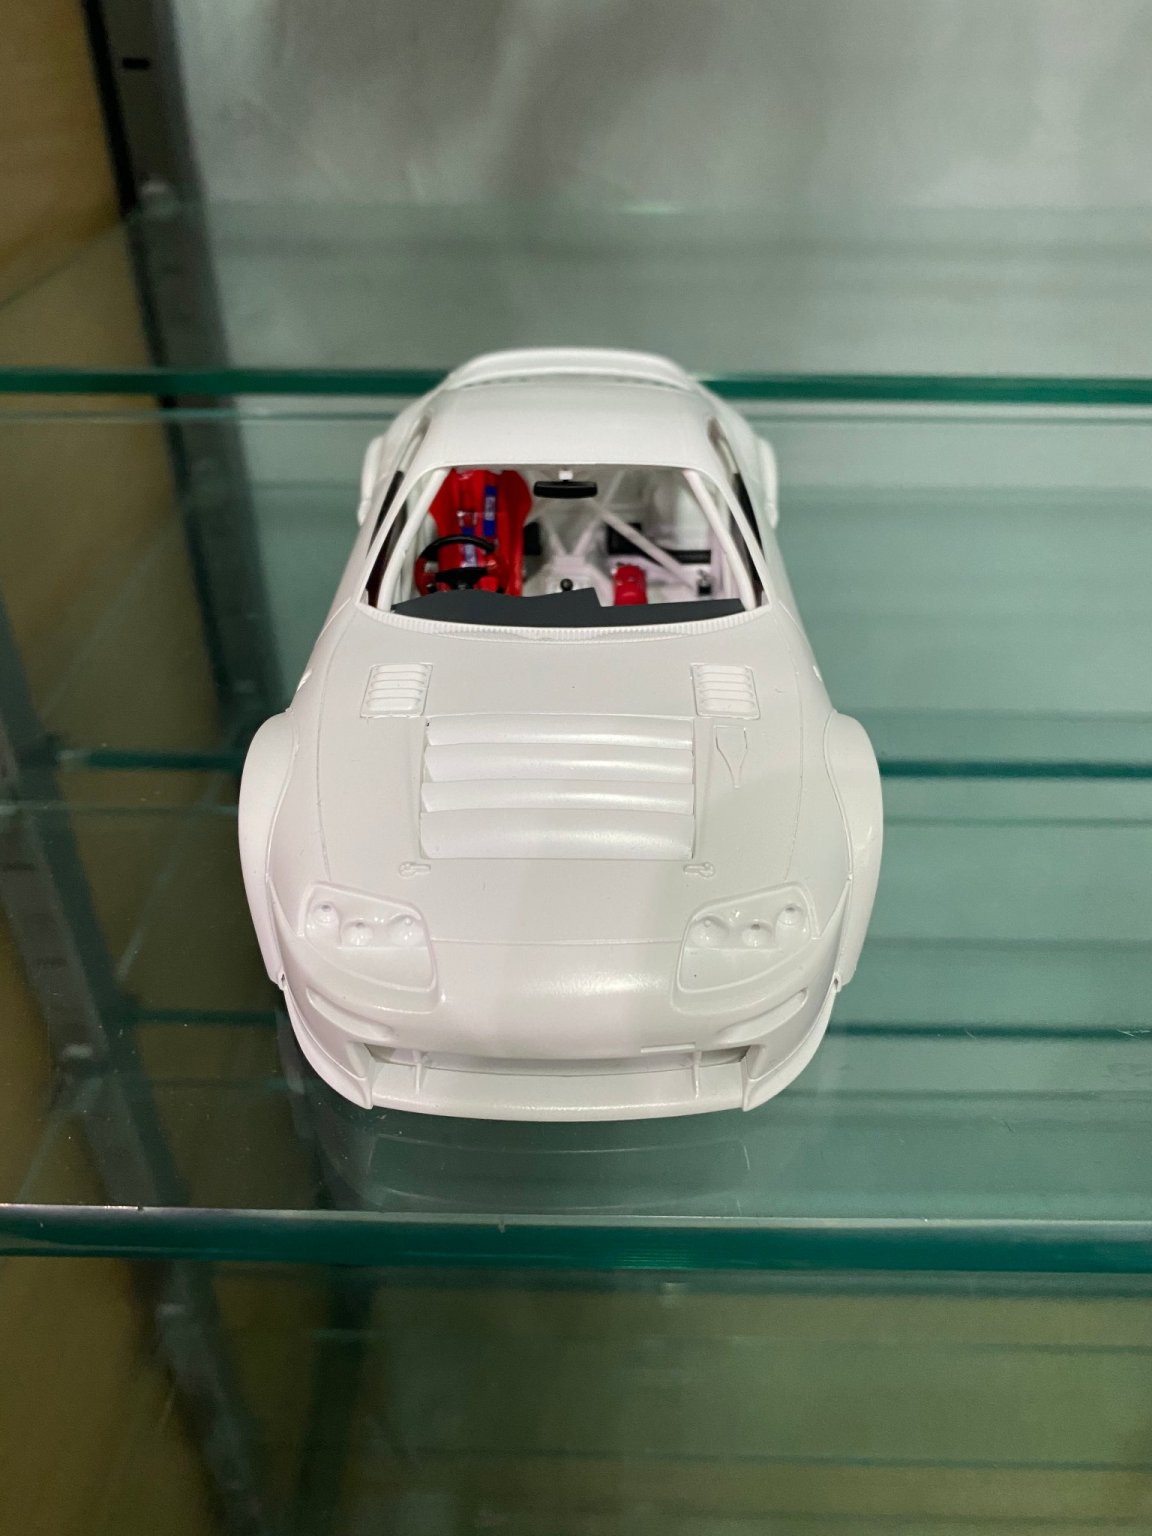
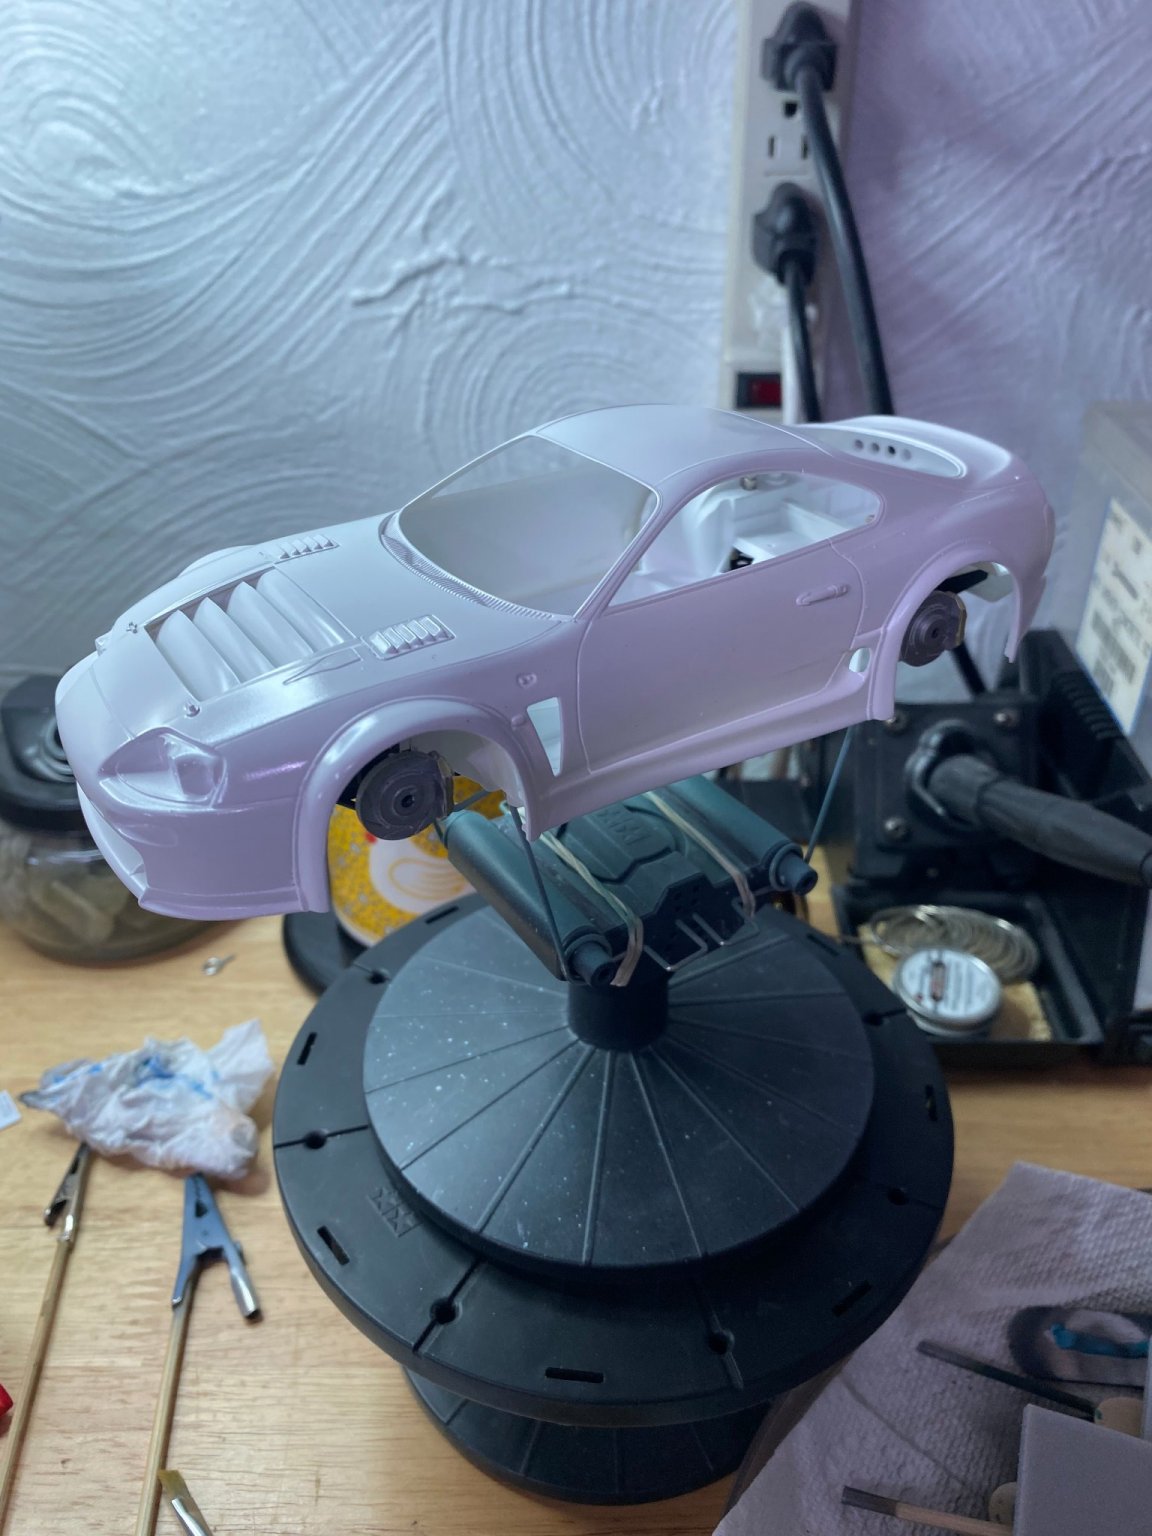
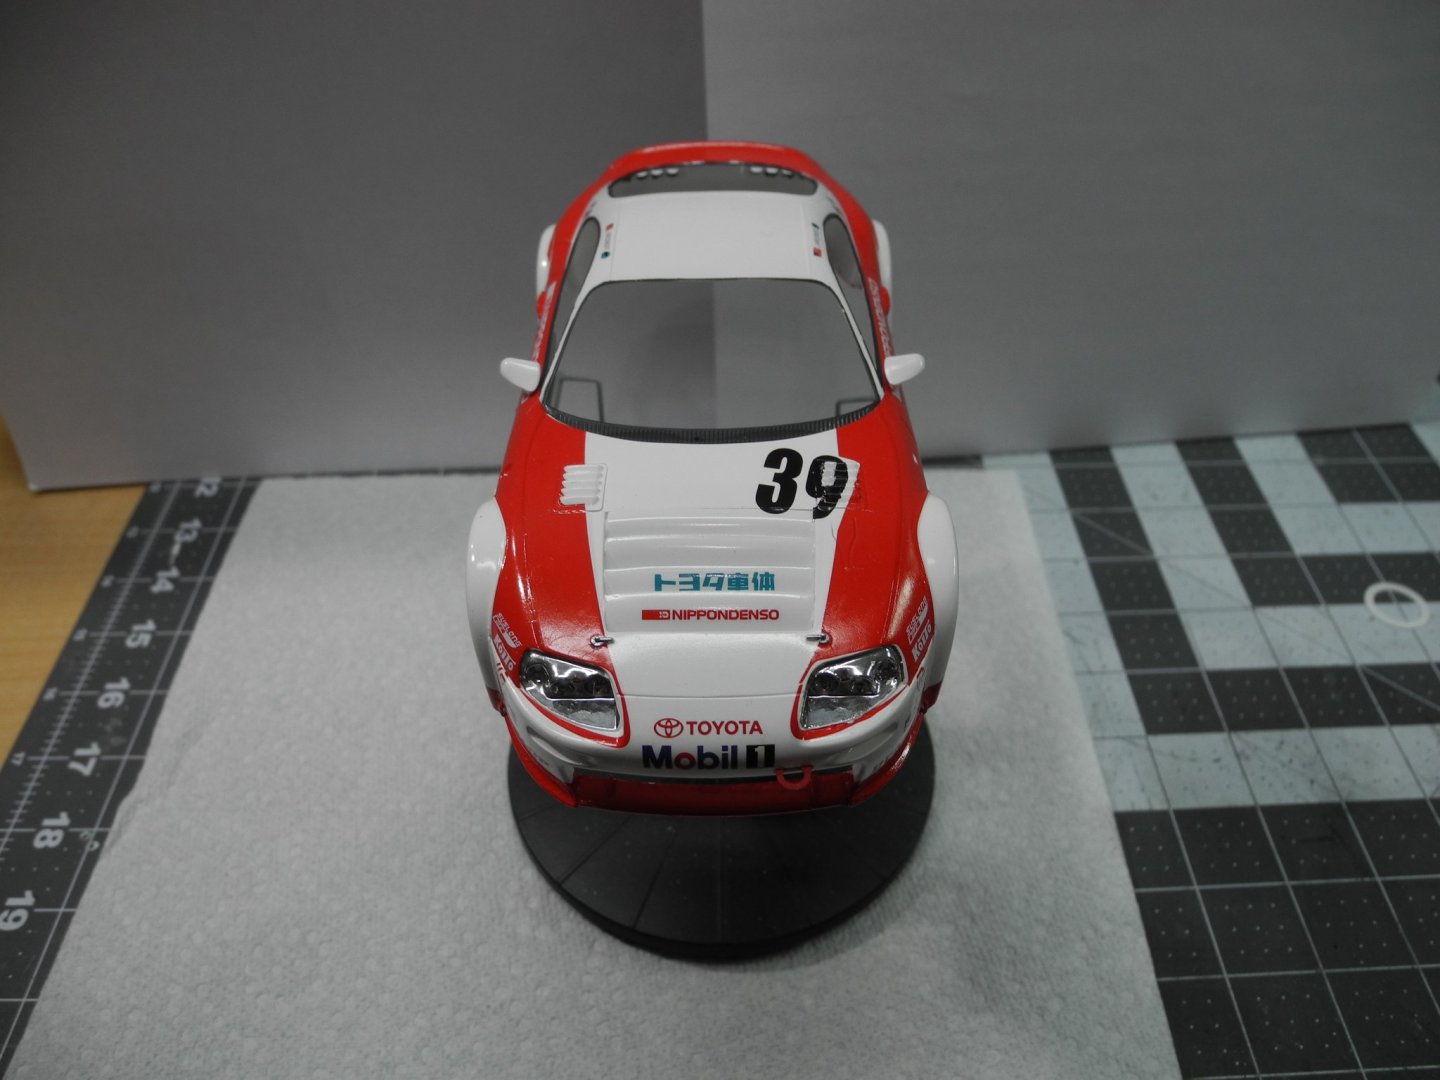
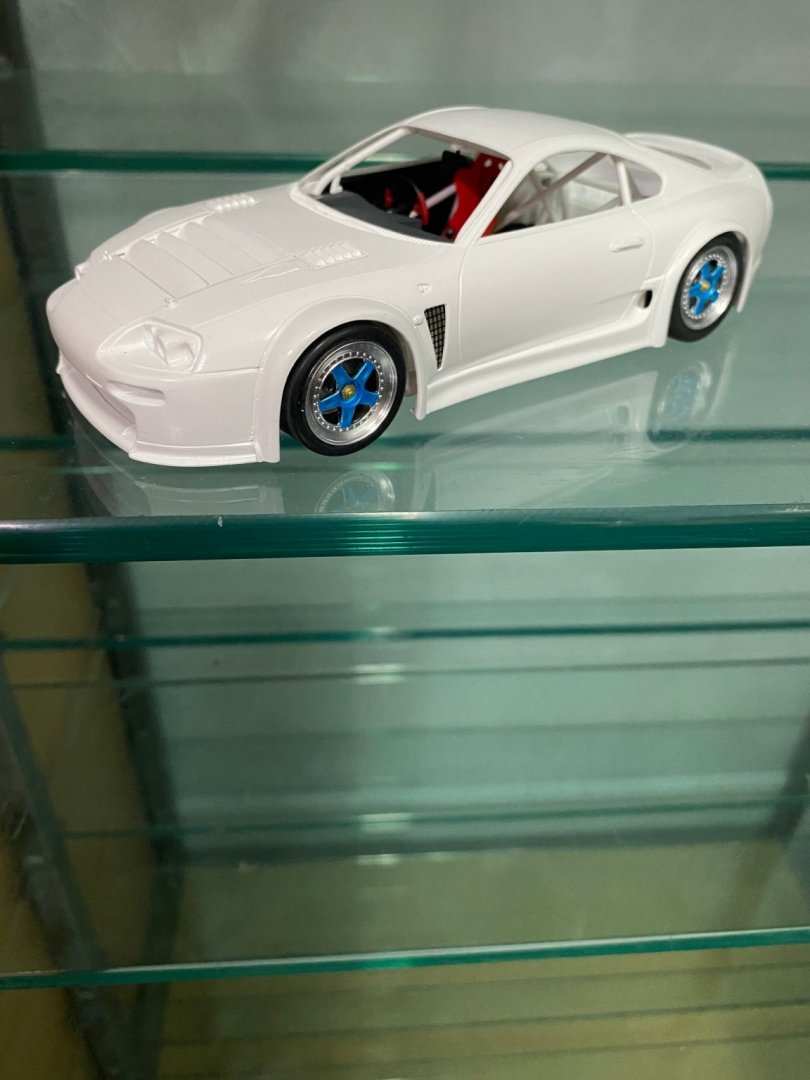
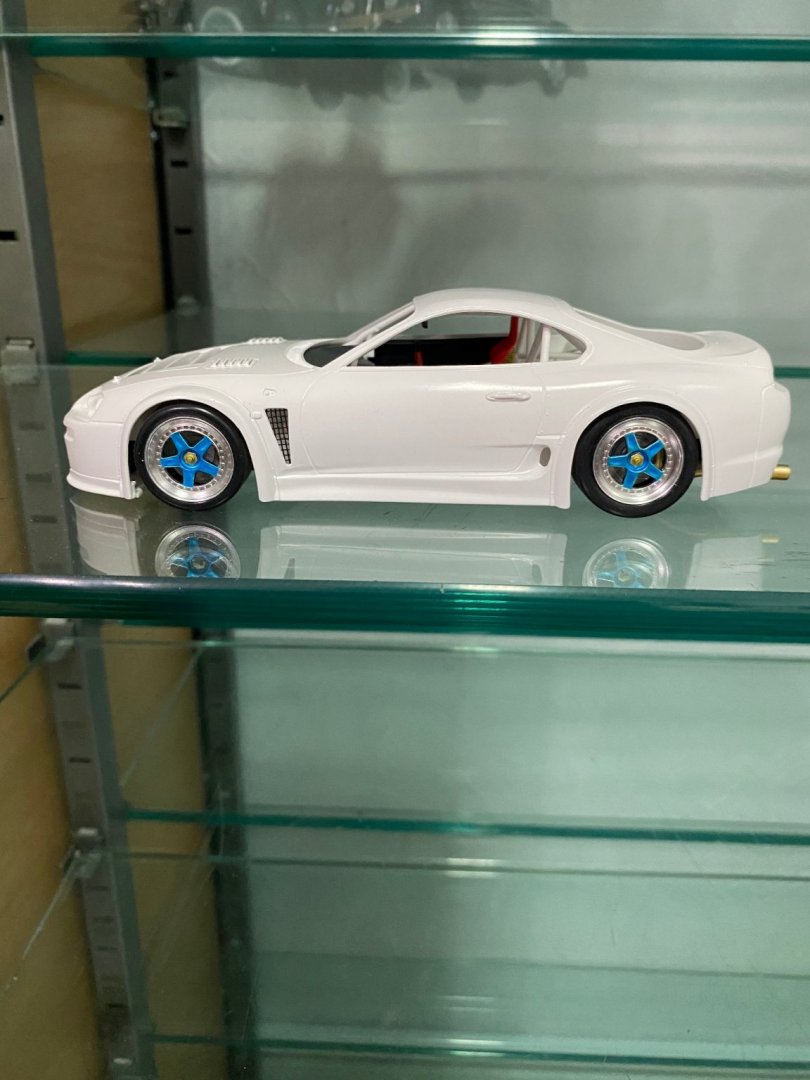
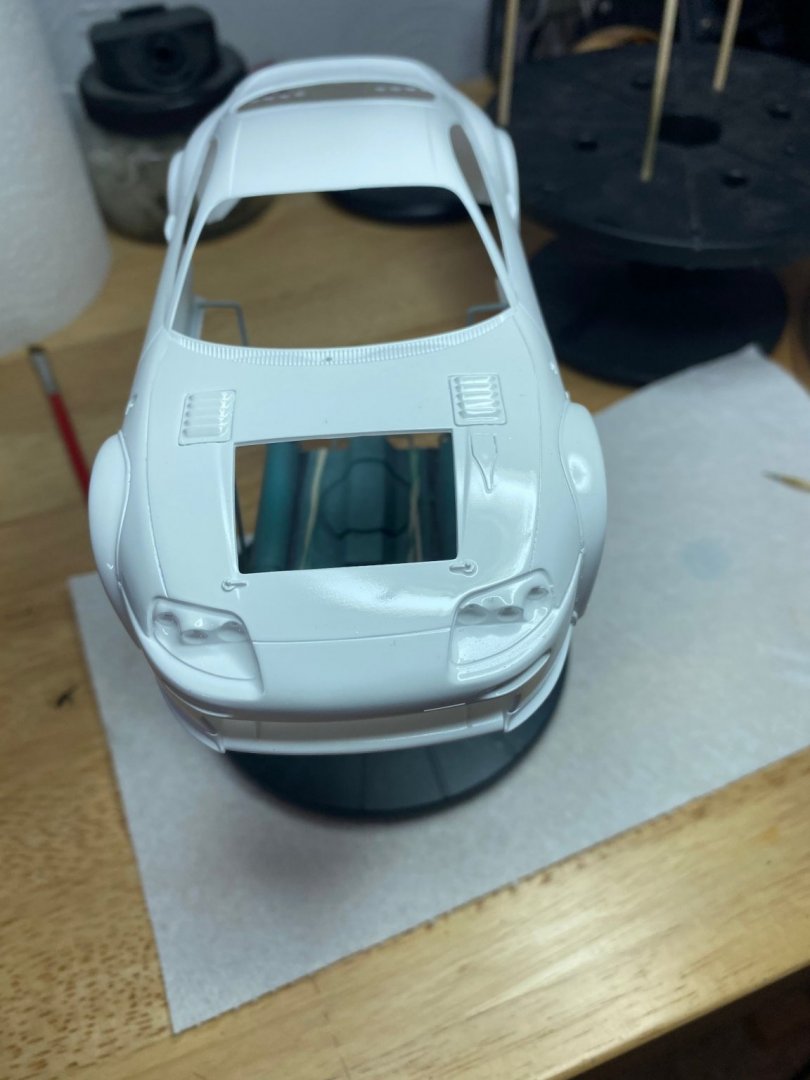
Thanks gentlemen. A dry fit before I add the interior pieces. Body needs a little more drying time before I begin masking around the cockpit windows for the black trim.


- 86 replies
-
- 12
-
-
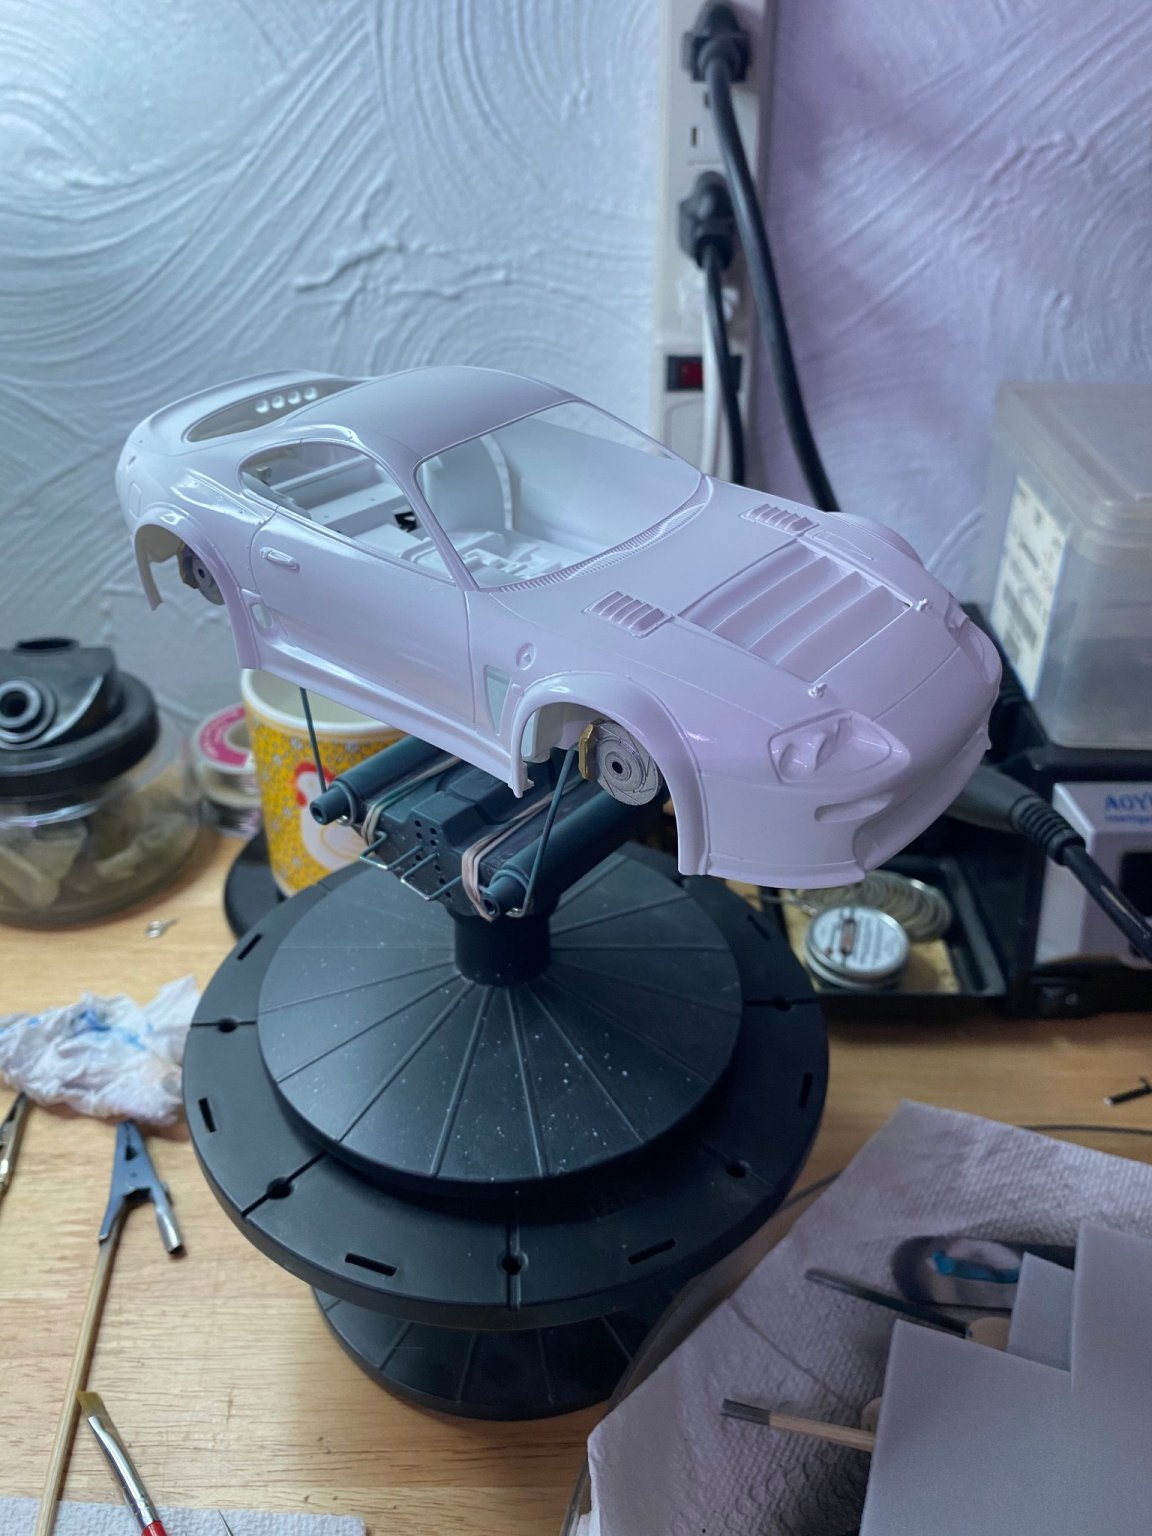
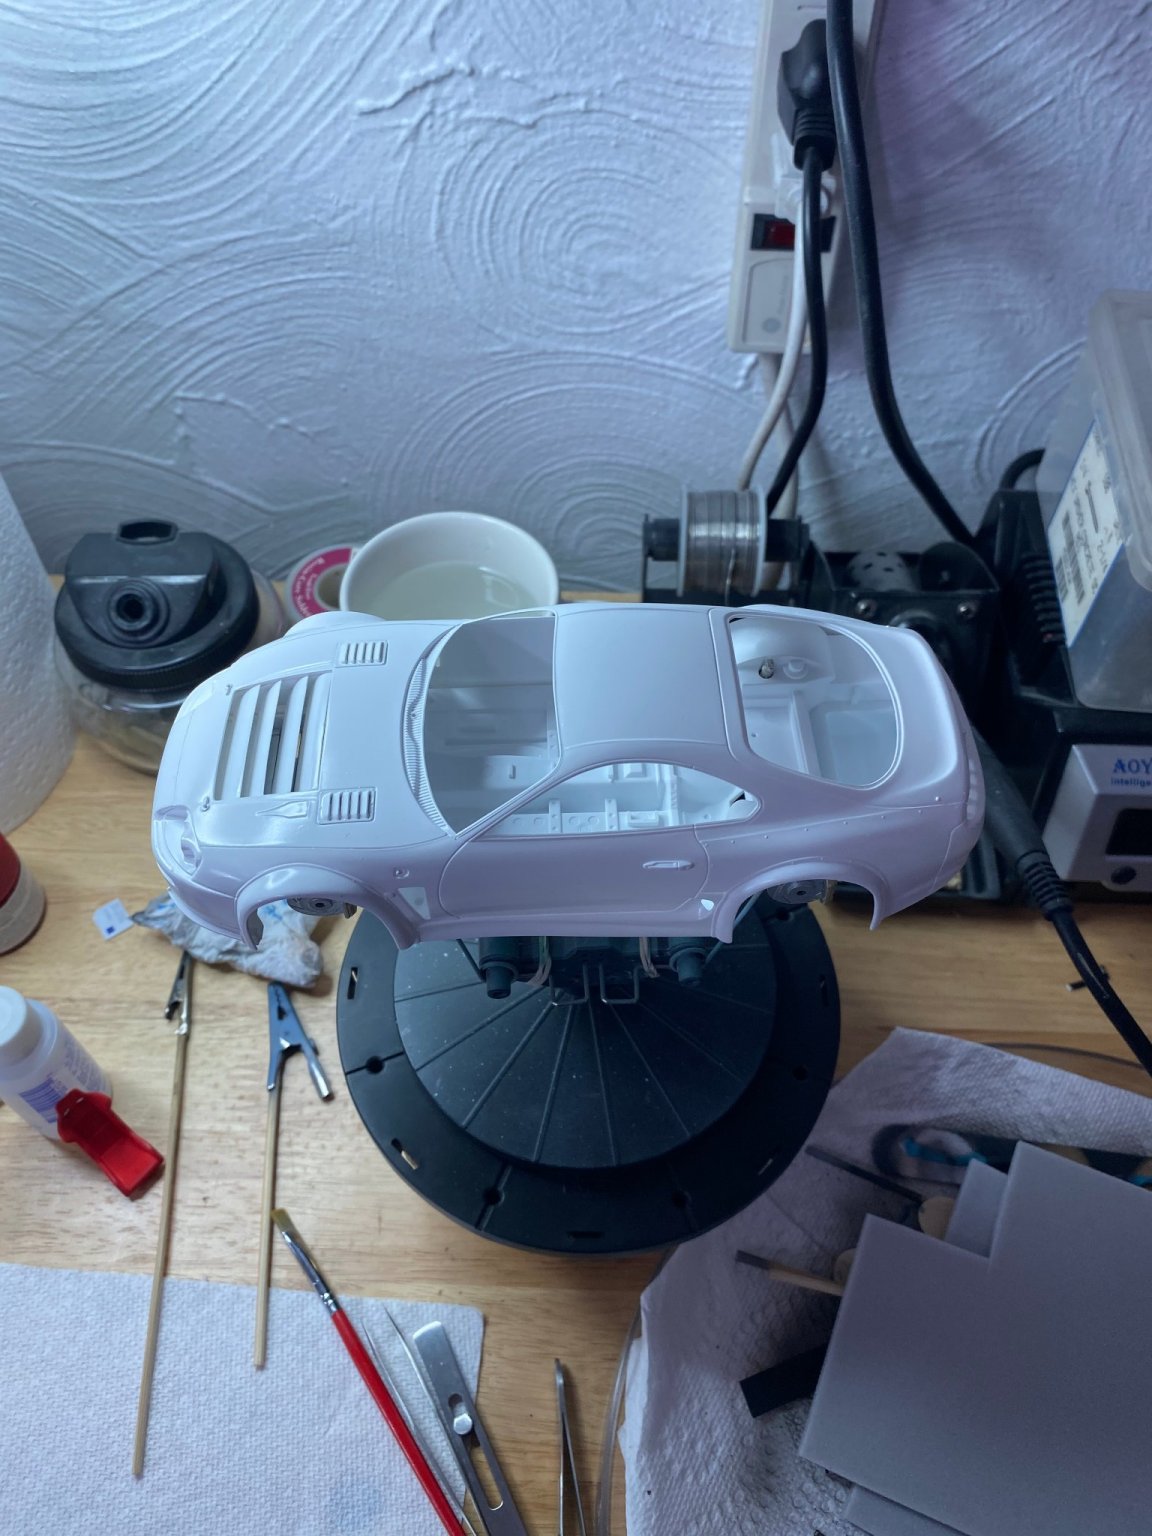
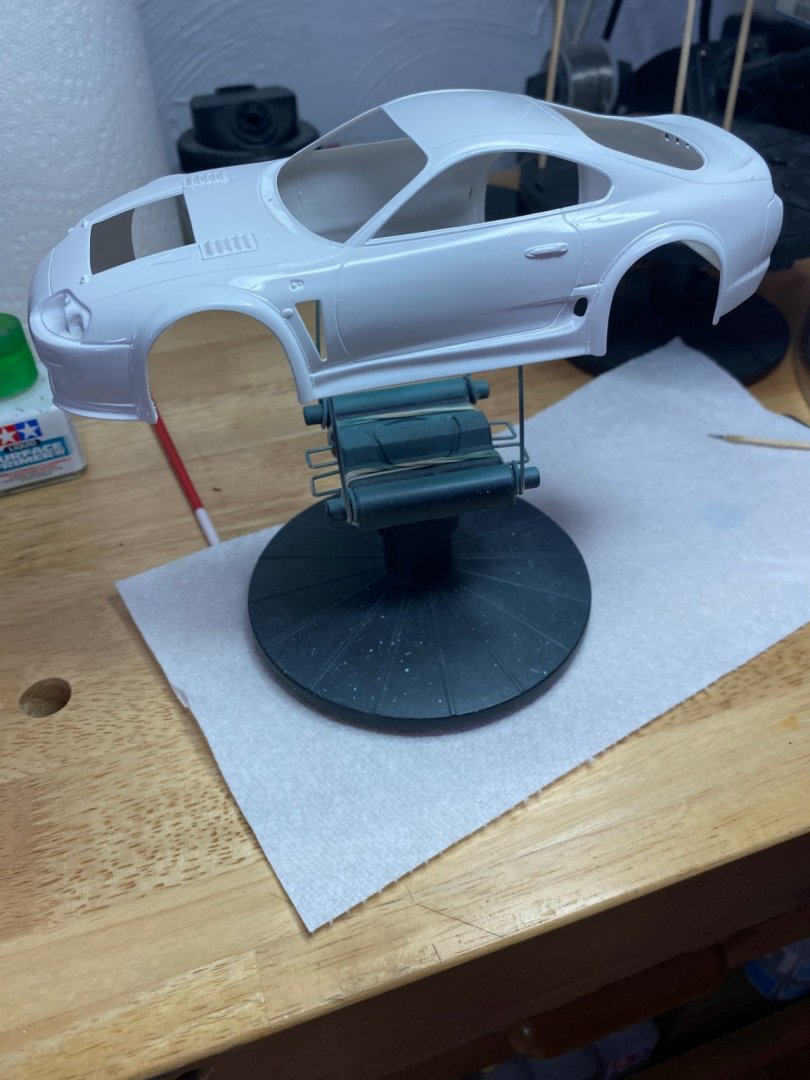
After a wet sanding with a 1000 grit sanding sponge, let the car dry, then applied a coat of gloss white Mr Color lacquer. I am satisfied with it so far. The model gets a lot of decals which will considerably change the bland white look of it.


- 86 replies
-
- 10
-