CDW
-
Posts
7,737 -
Joined
-
Last visited
Content Type
Profiles
Forums
Gallery
Events
Everything posted by CDW
-

Delahaye 135 by CDW - FINISHED - Heller - 1:24 - PLASTIC
CDW replied to CDW's topic in Non-ship/categorised builds
I think, you're right Egilman. The best approach will be to glue those lower panels to the hood along with the grill then fit it all down against the fenders and frame. I was trying to make it align so the hood could be removable, but I am more interested in the body lines remaining intact than displaying an engine. -
Delahaye 135 by CDW - FINISHED - Heller - 1:24 - PLASTIC
CDW replied to CDW's topic in Non-ship/categorised builds
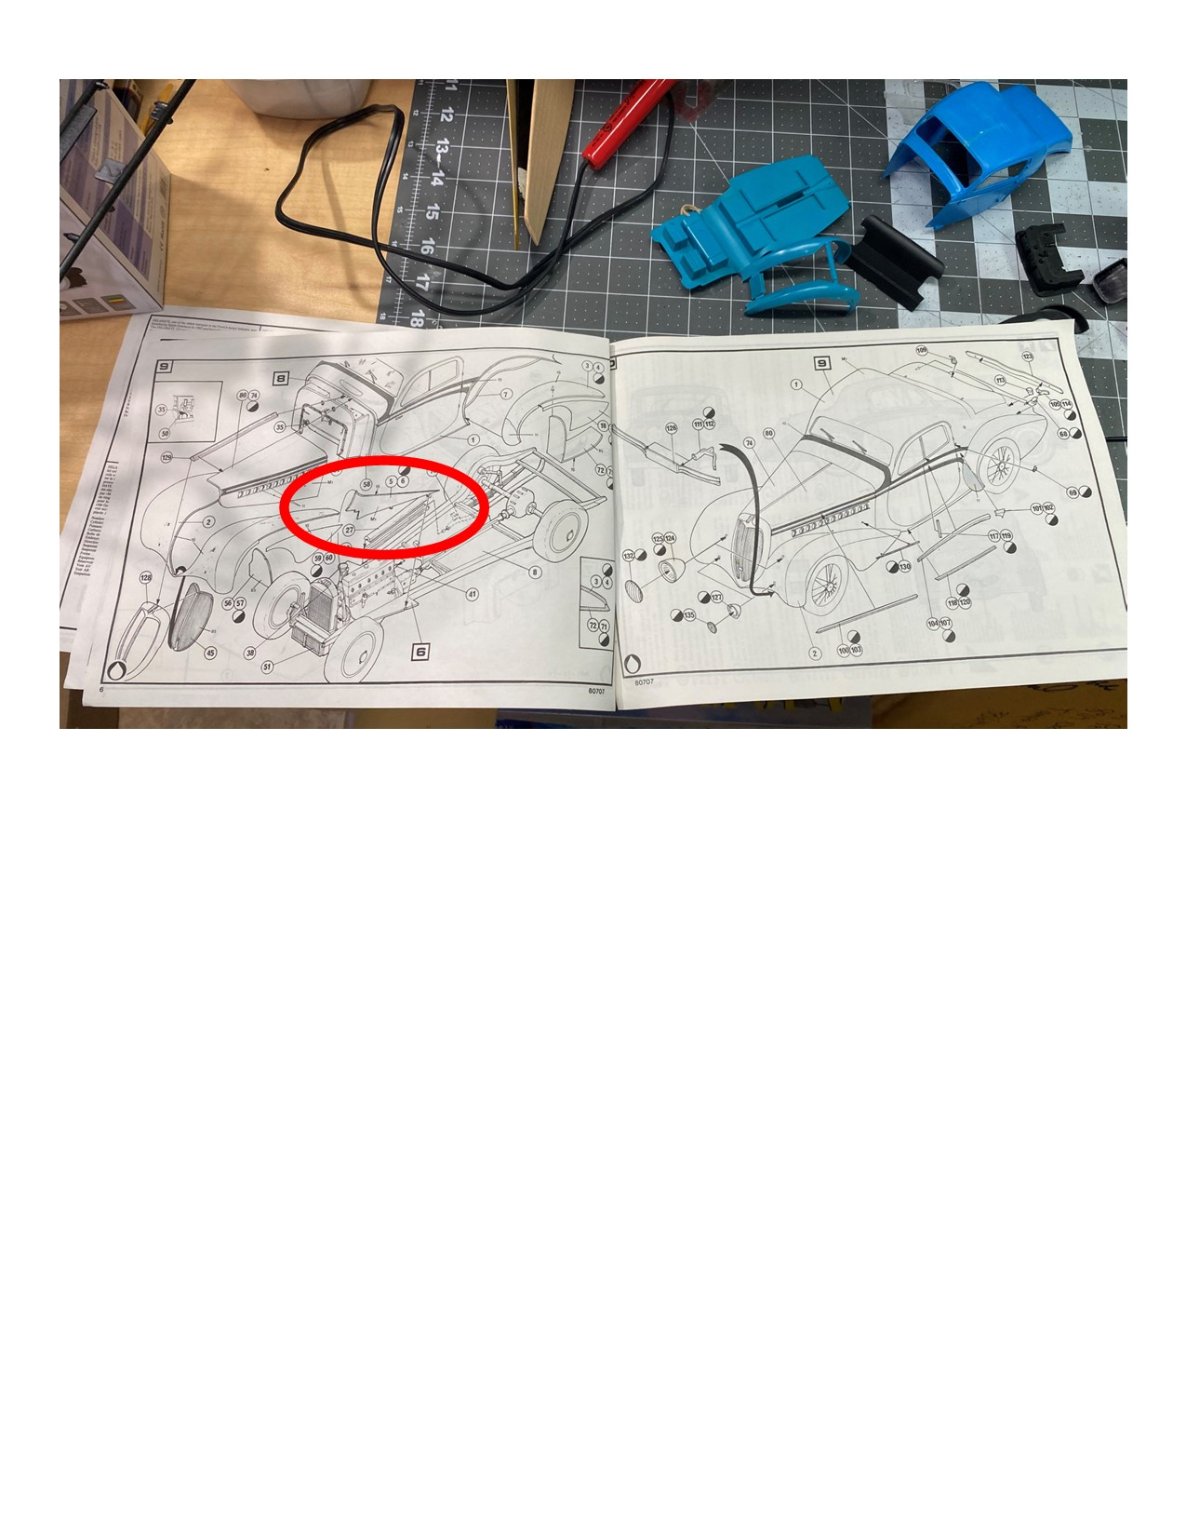
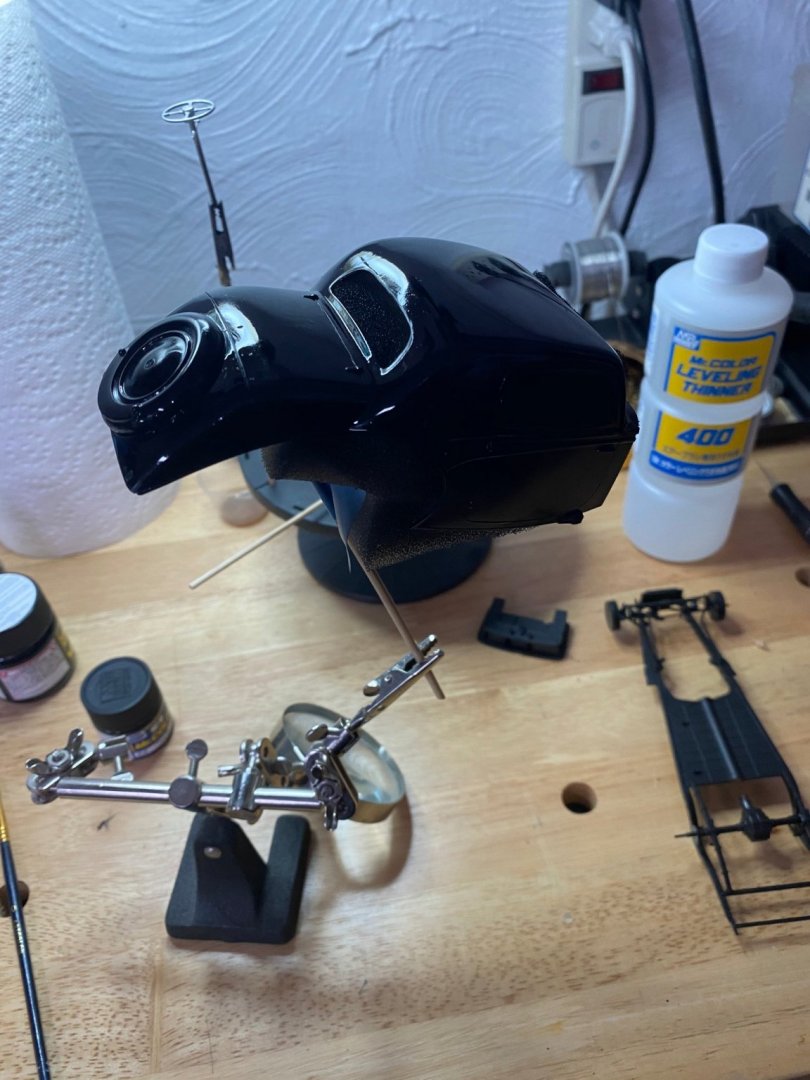
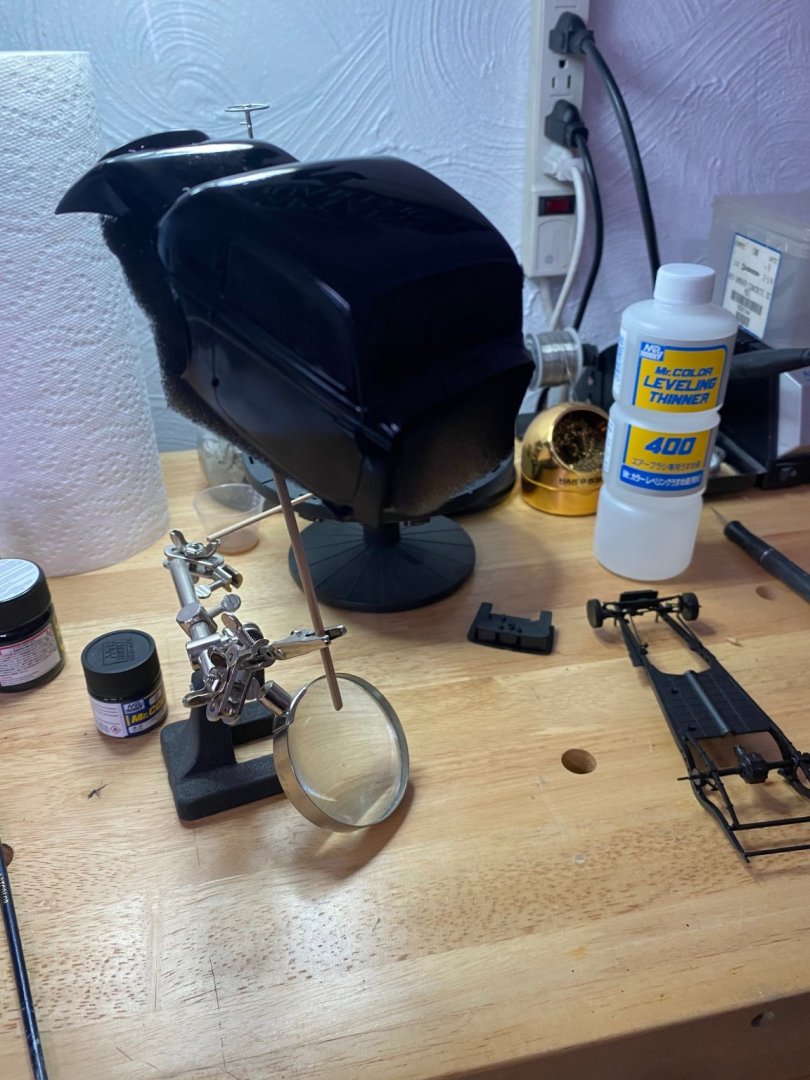
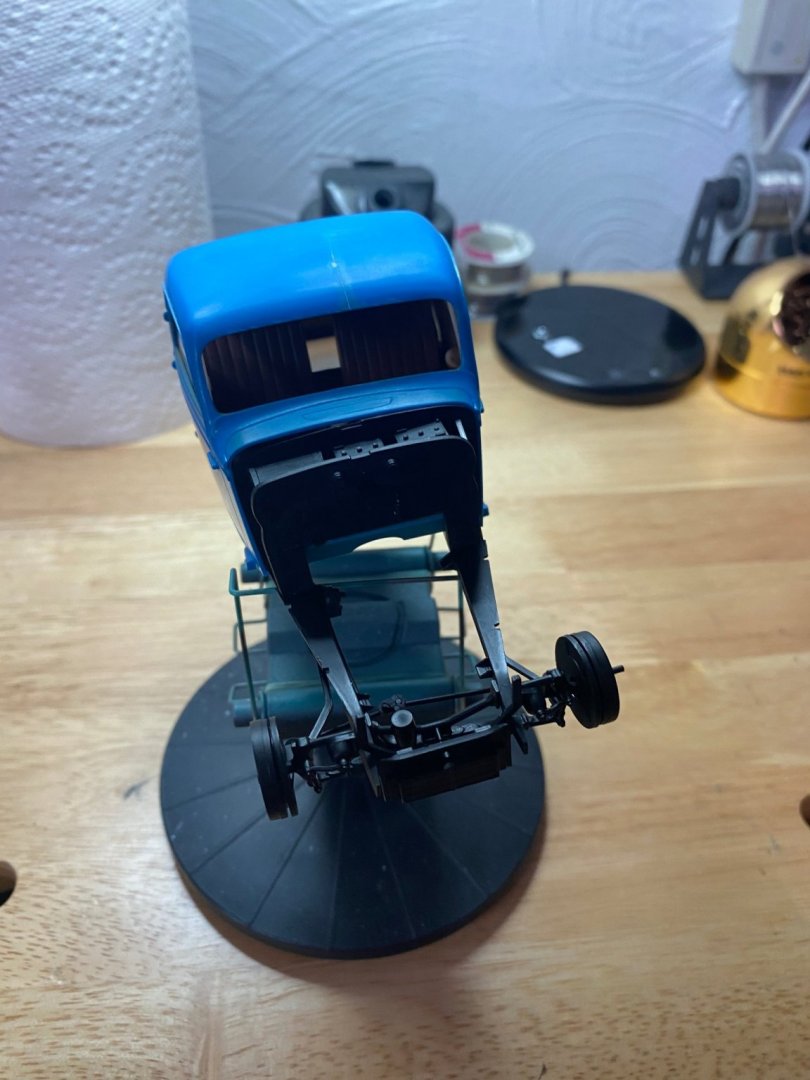
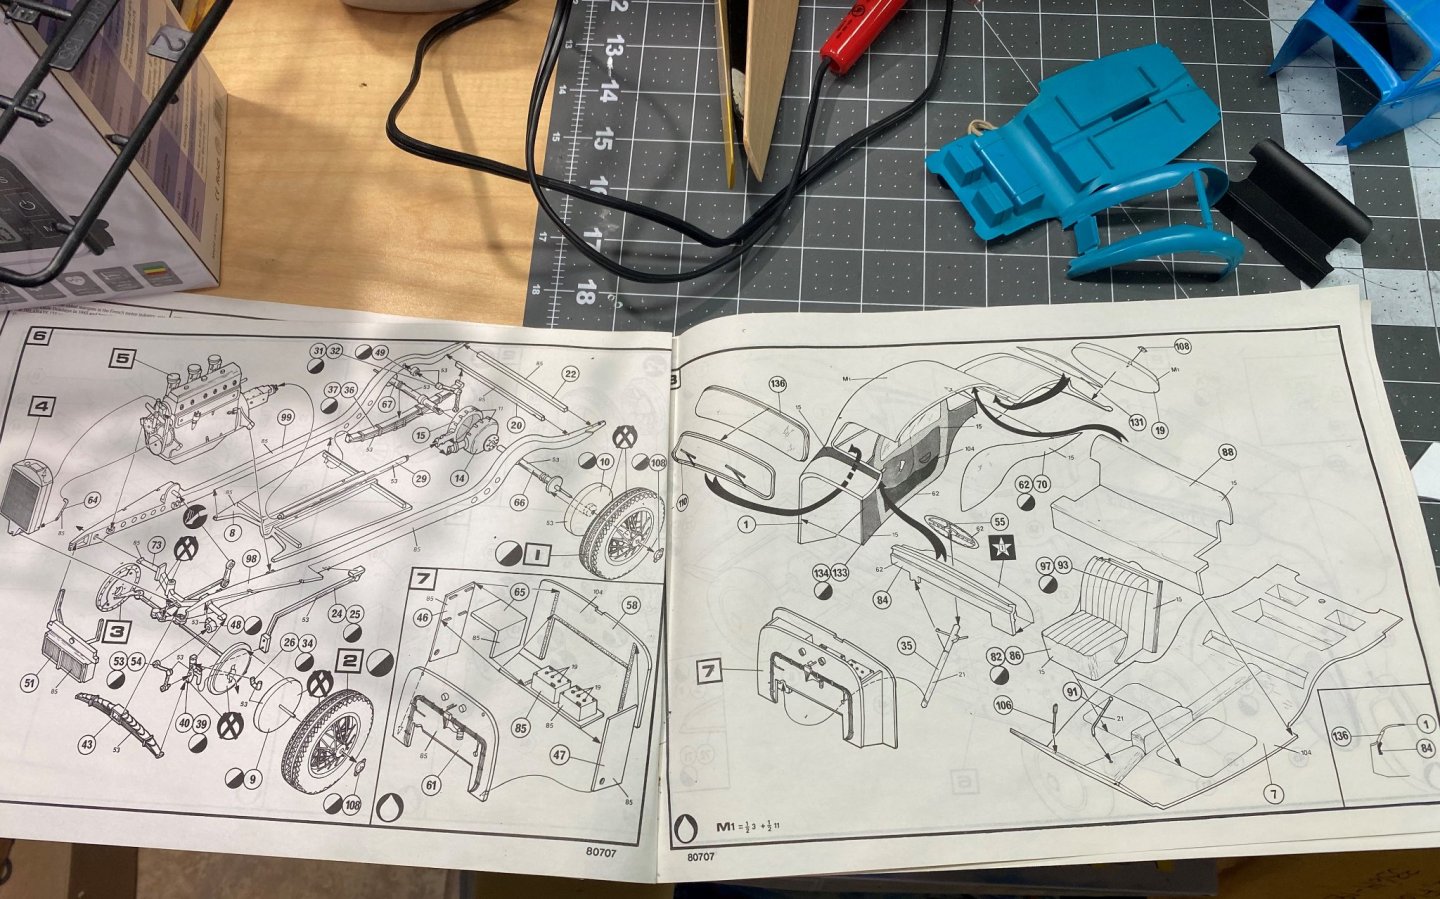
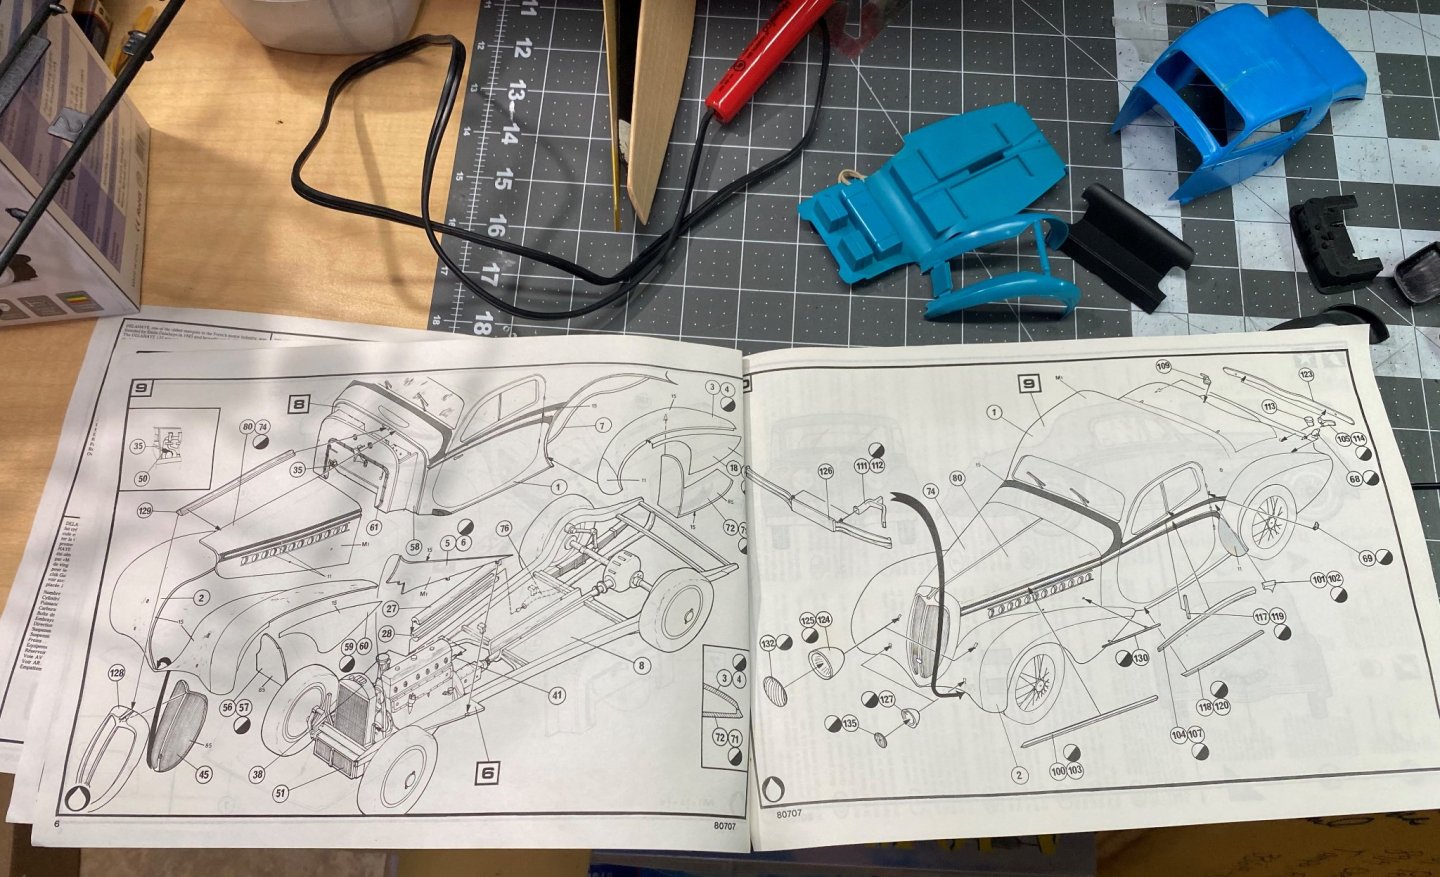
Thanks gentlemen. I'm struggling just a bit right now with a couple of pieces that go between the frame and the hood, parts numbers 5 and 6 on the instruction sheet. These parts make a fit between the hood, the grill, and the front fenders. The instructions are unclear on exactly how they fit, and they do not fit without some modifications and tweaking of the several parts to which they attach. The most critical part of it is to make sure the hood and grill fit properly once the parts are cemented in place. I've already glued and removed them for adjustments several times now. Maybe the third time will be a charm. We'll see in a bit.
-
Great looking Fokker Denis!
-
Delahaye 135 by CDW - FINISHED - Heller - 1:24 - PLASTIC
CDW replied to CDW's topic in Non-ship/categorised builds
Mockup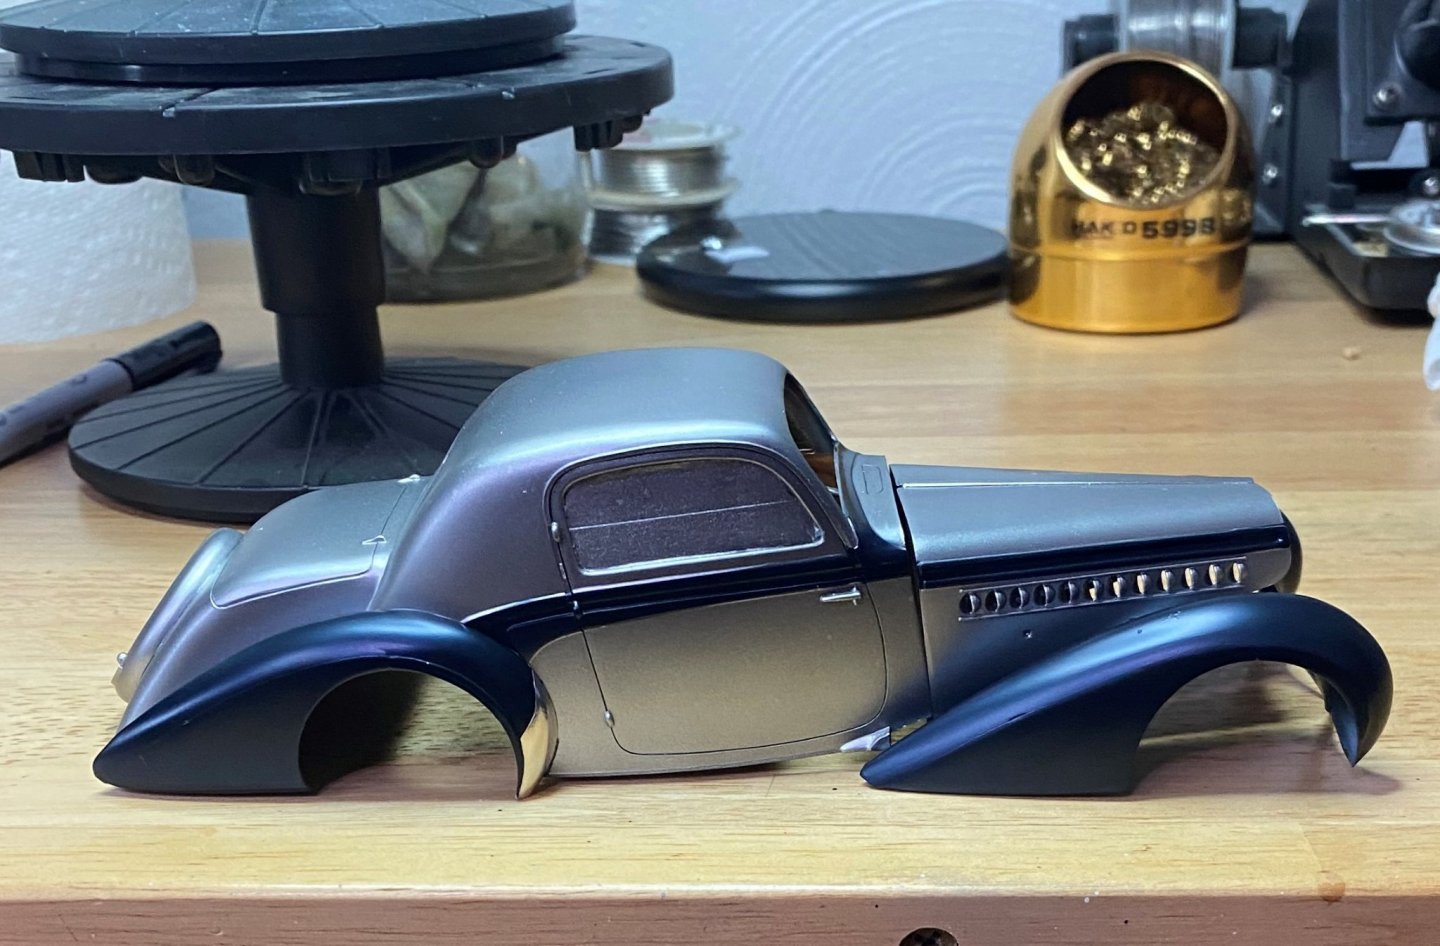
- 85 replies
-
- 10
-

-
Delahaye 135 by CDW - FINISHED - Heller - 1:24 - PLASTIC
CDW replied to CDW's topic in Non-ship/categorised builds
Fenders mounted to body

- 85 replies
-
- 12
-
-
Delahaye 135 by CDW - FINISHED - Heller - 1:24 - PLASTIC
CDW replied to CDW's topic in Non-ship/categorised builds
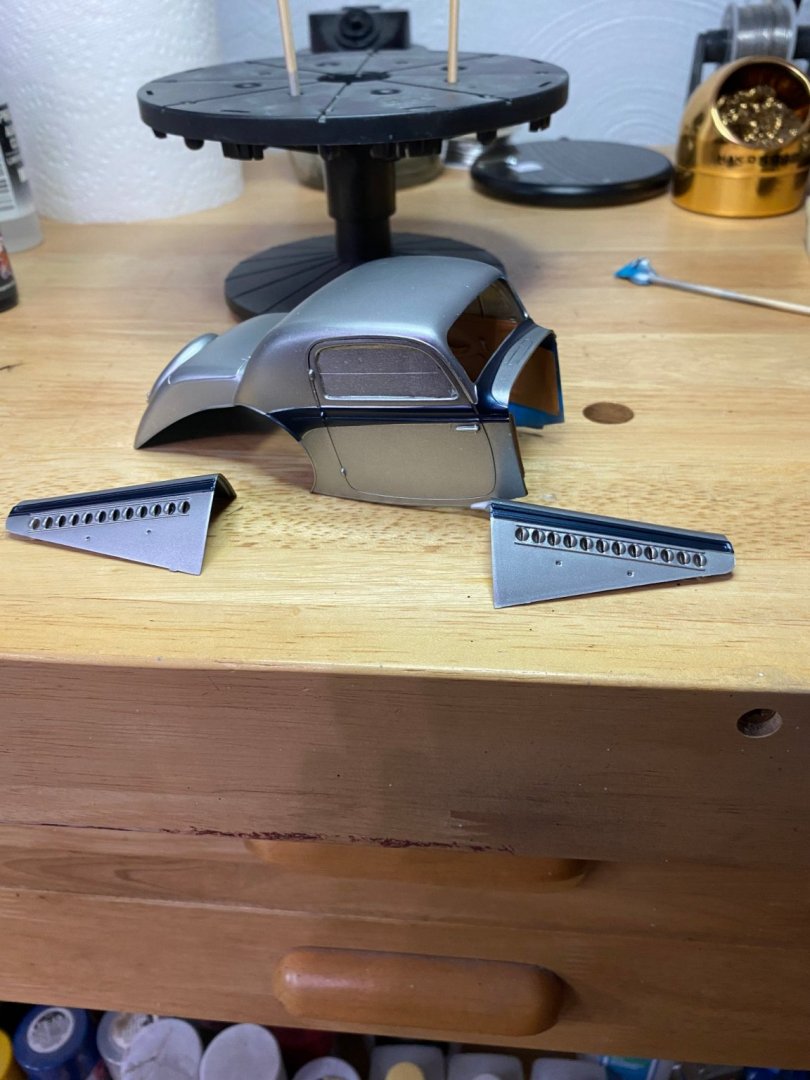
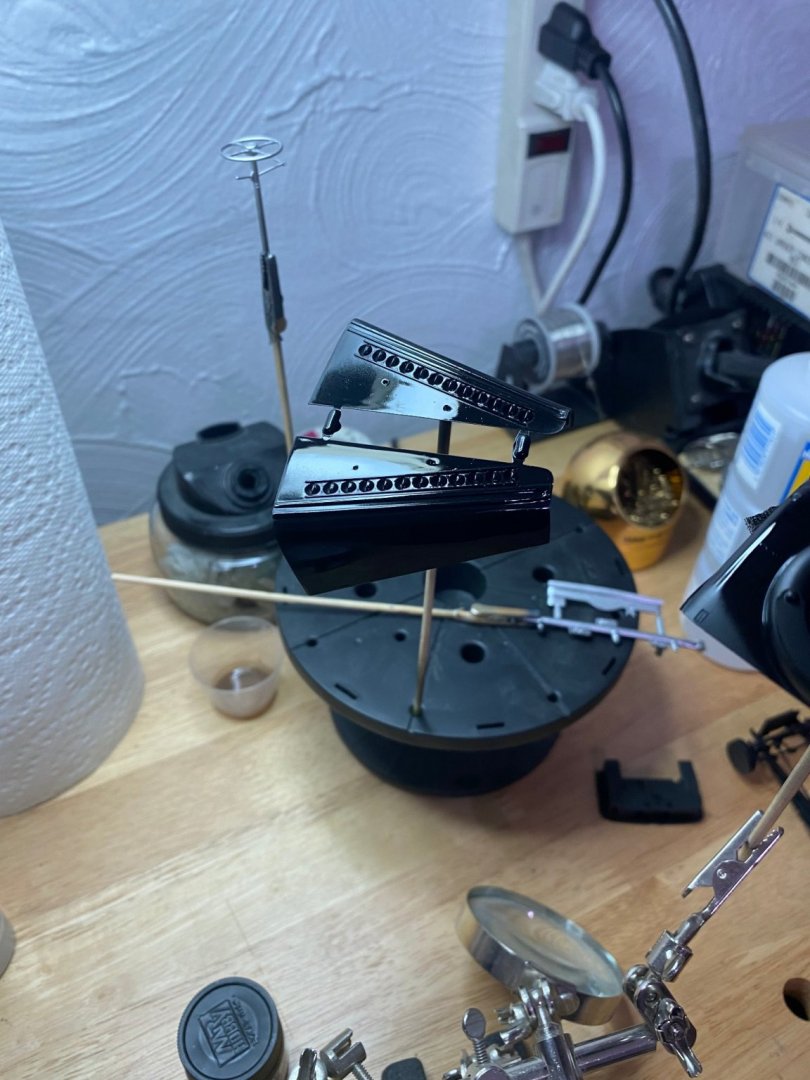
While the kit provides the chrome trim strips for the body, it omits the chrome stone guards that can be seen on the bottom of the rear fenders (see box art photo in first set of photos). To simulate the stone guards, have used bare metal foil.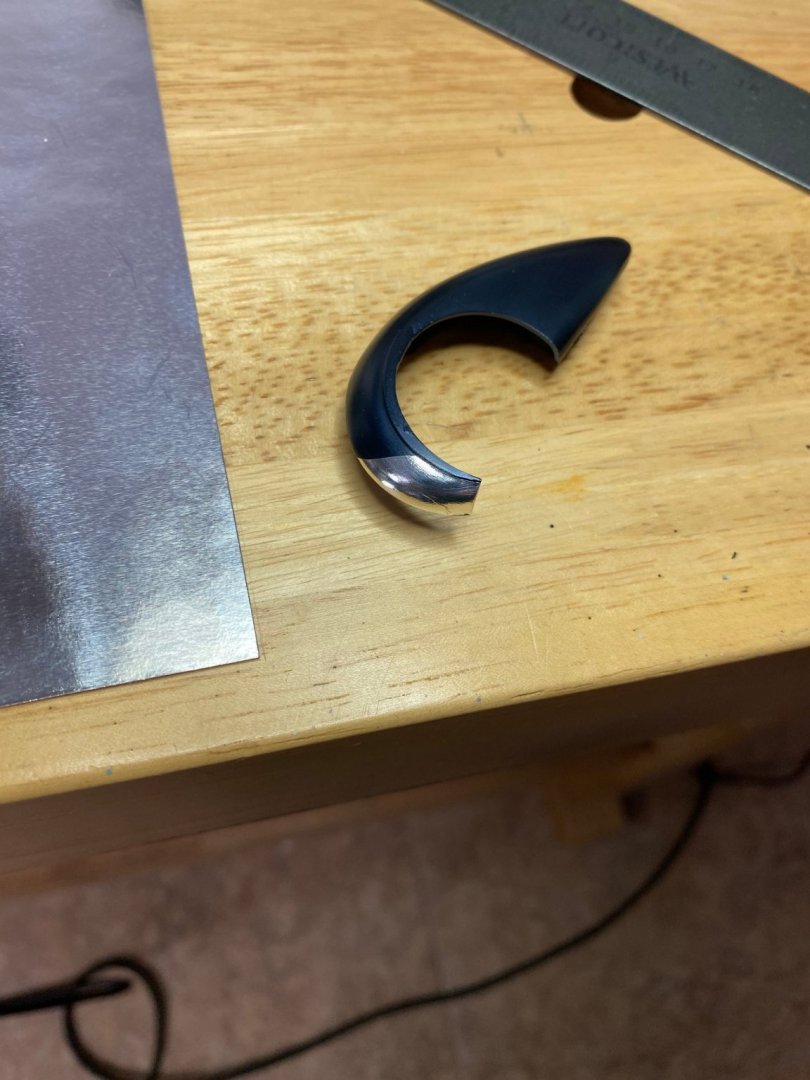
-
Delahaye 135 by CDW - FINISHED - Heller - 1:24 - PLASTIC
CDW replied to CDW's topic in Non-ship/categorised builds
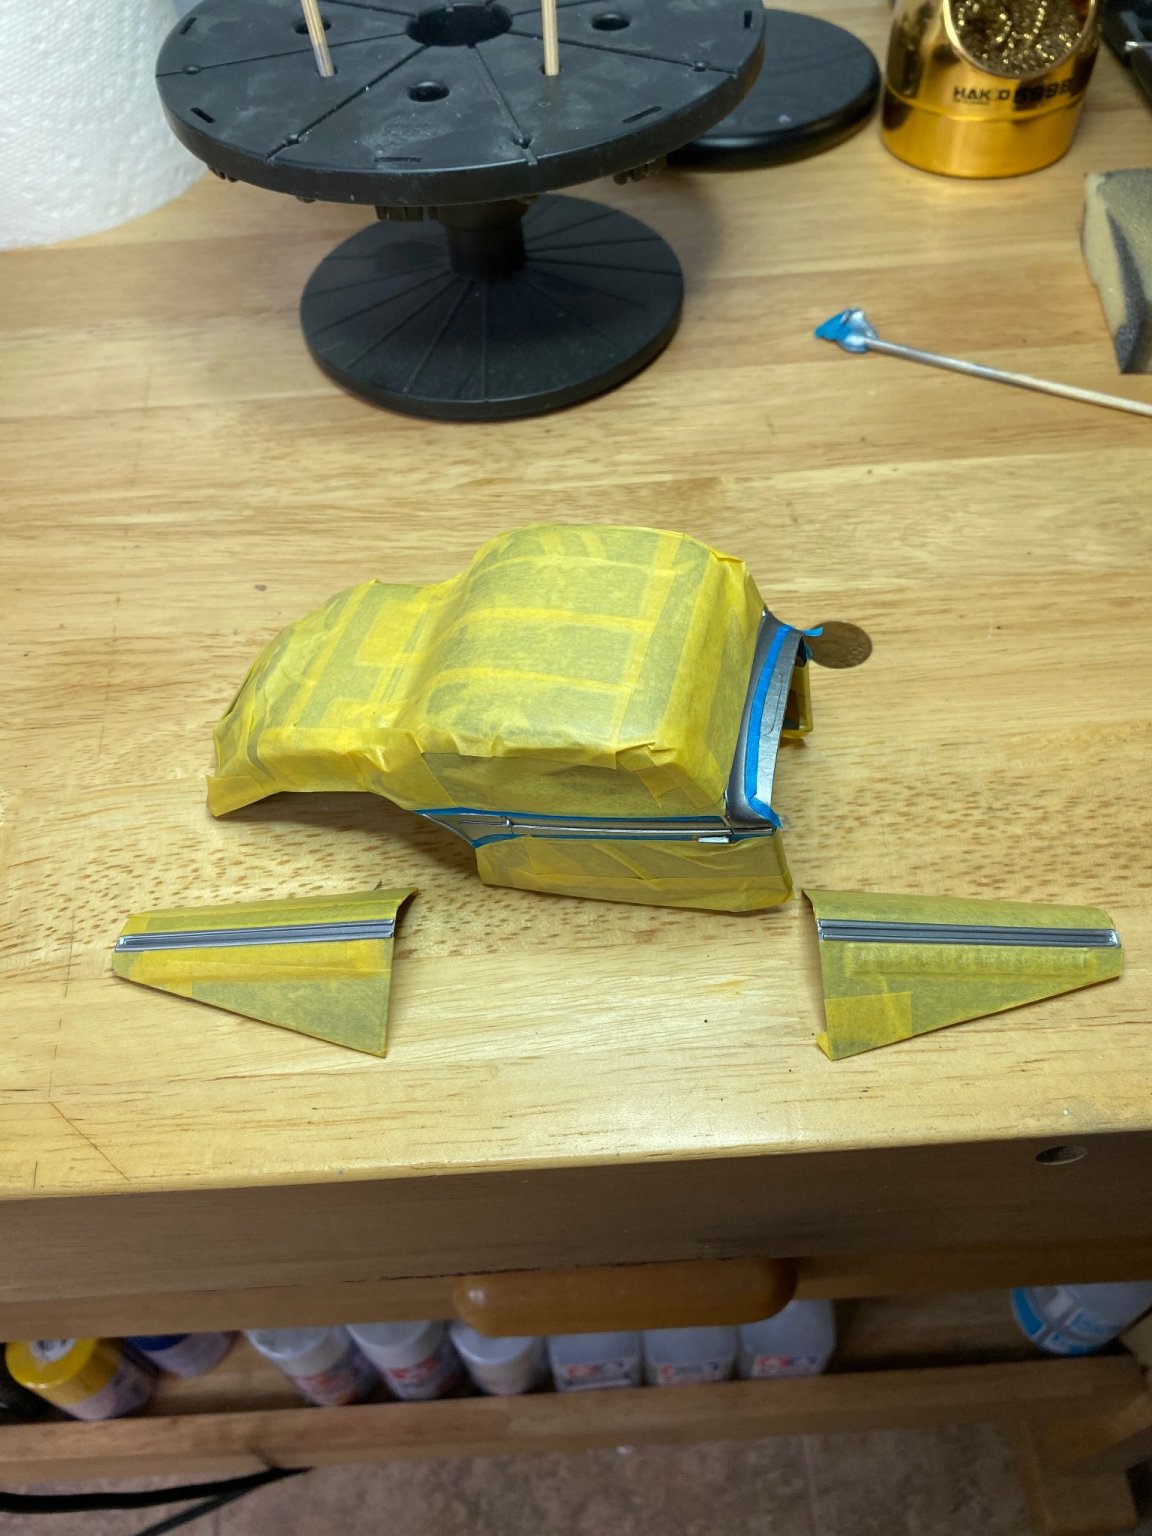
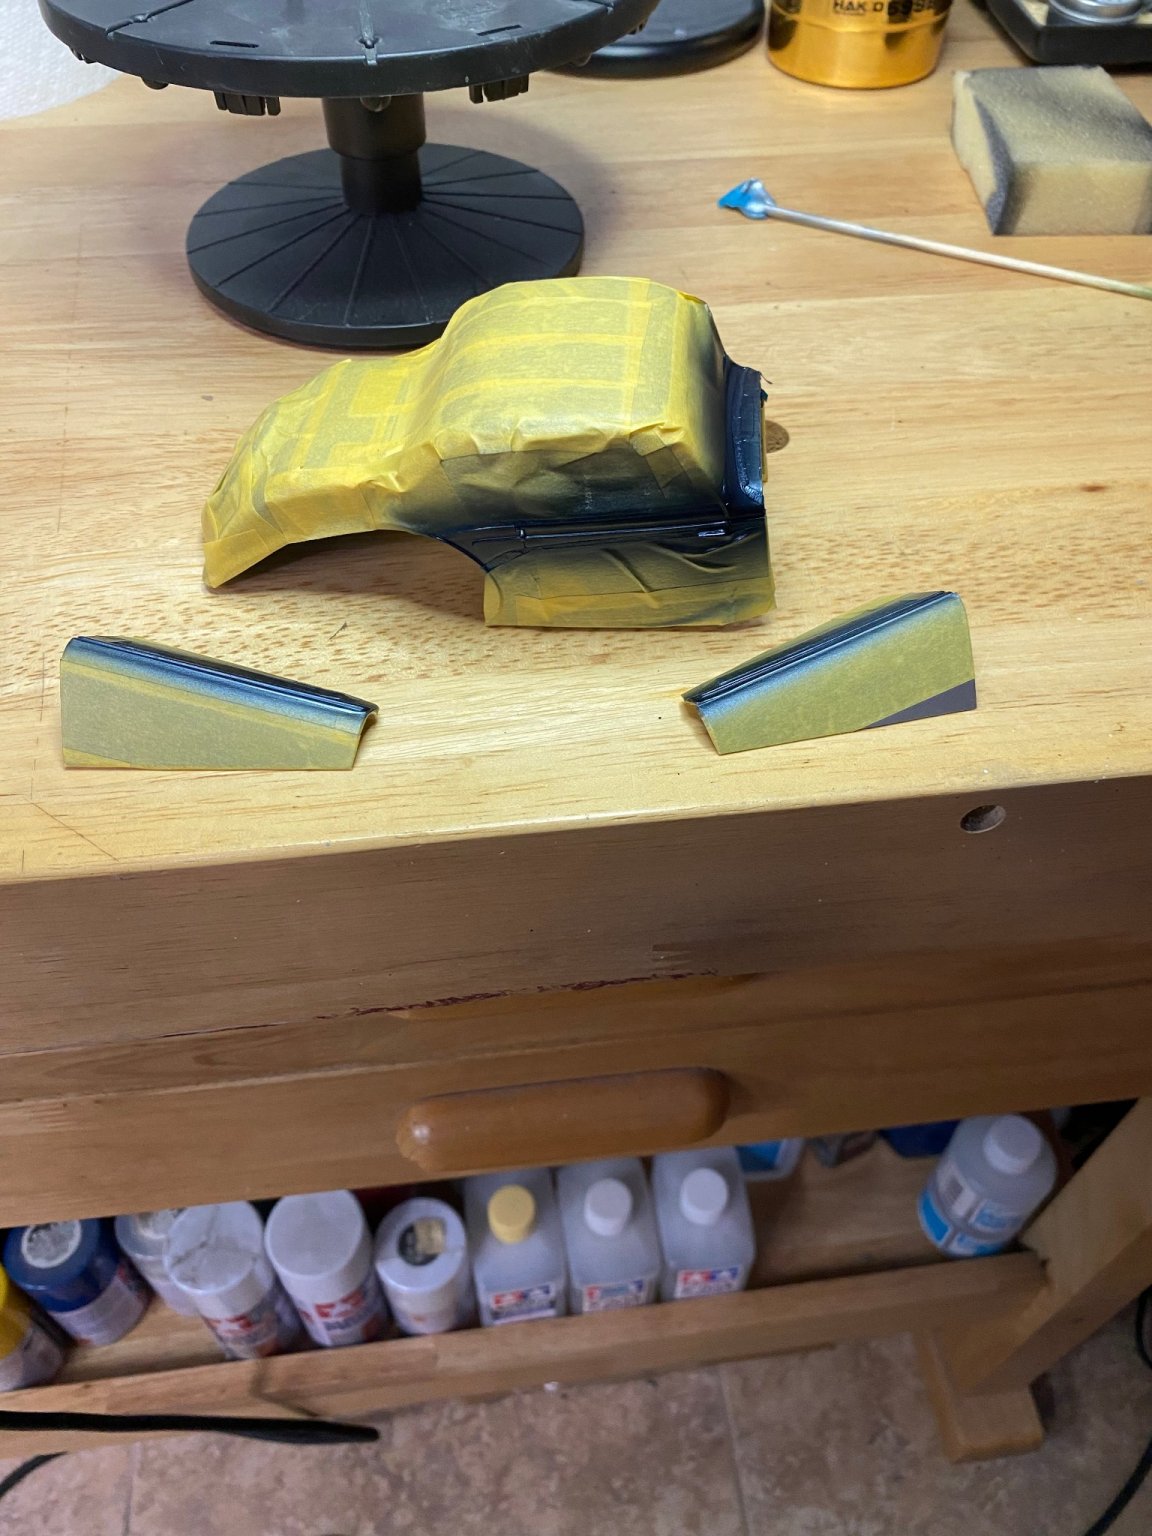
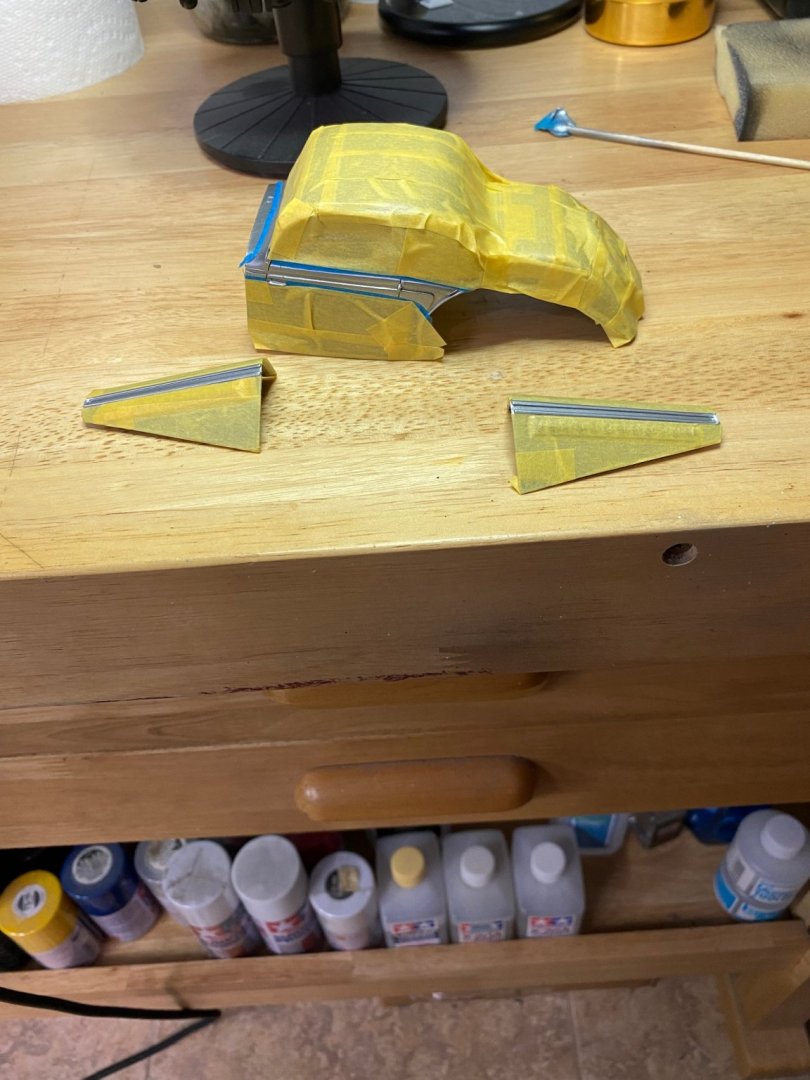
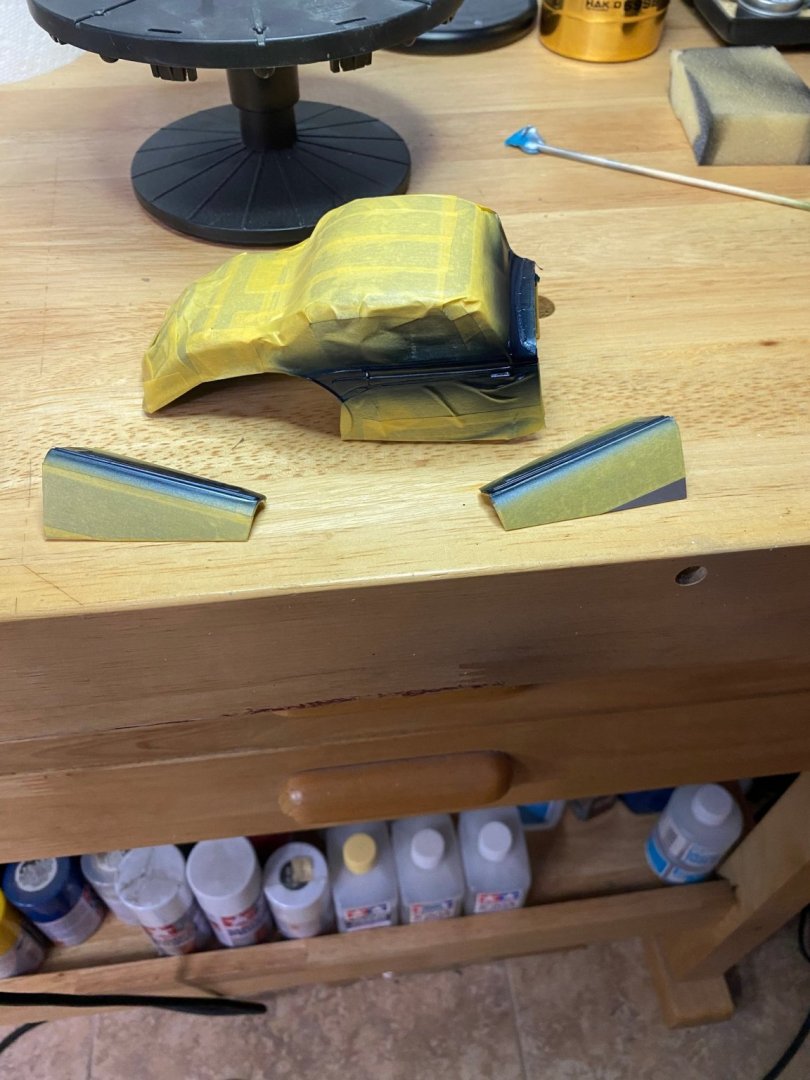
Here we go with masking for the accent paint. Some of the masking is brush-on liquid masking film. Then some painting (midnight blue) Then mask removal after pint dries

-
Delahaye 135 by CDW - FINISHED - Heller - 1:24 - PLASTIC
CDW replied to CDW's topic in Non-ship/categorised builds
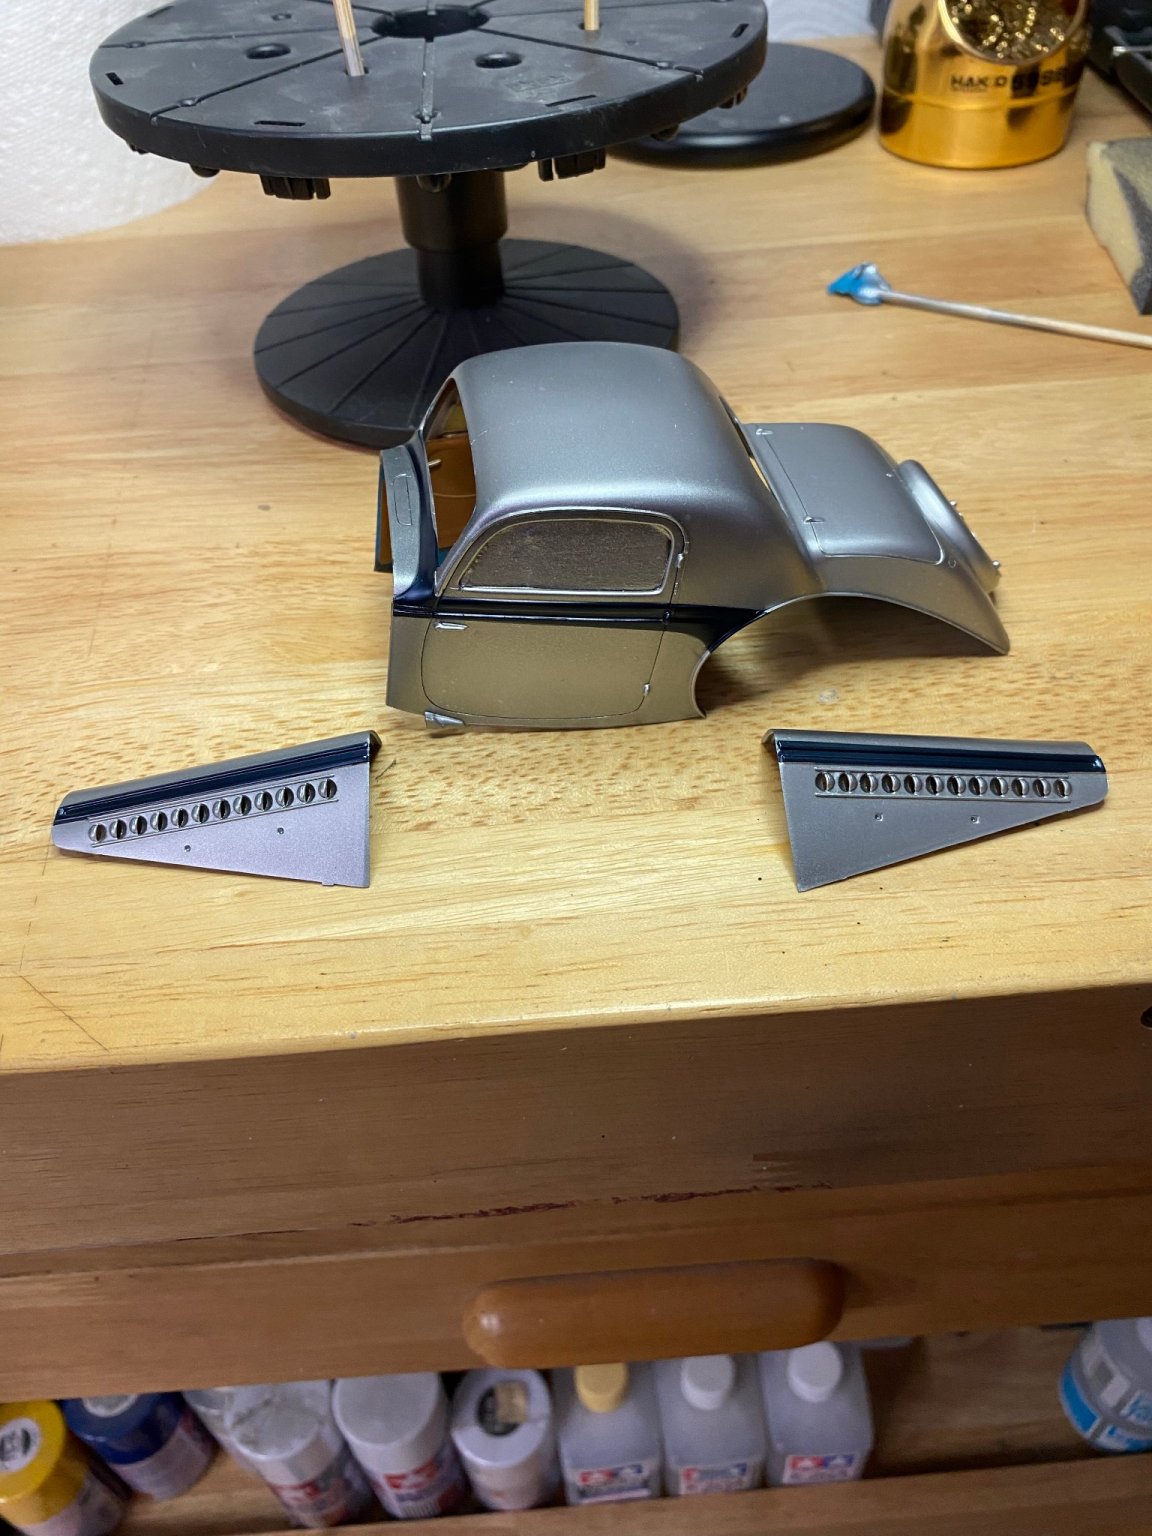
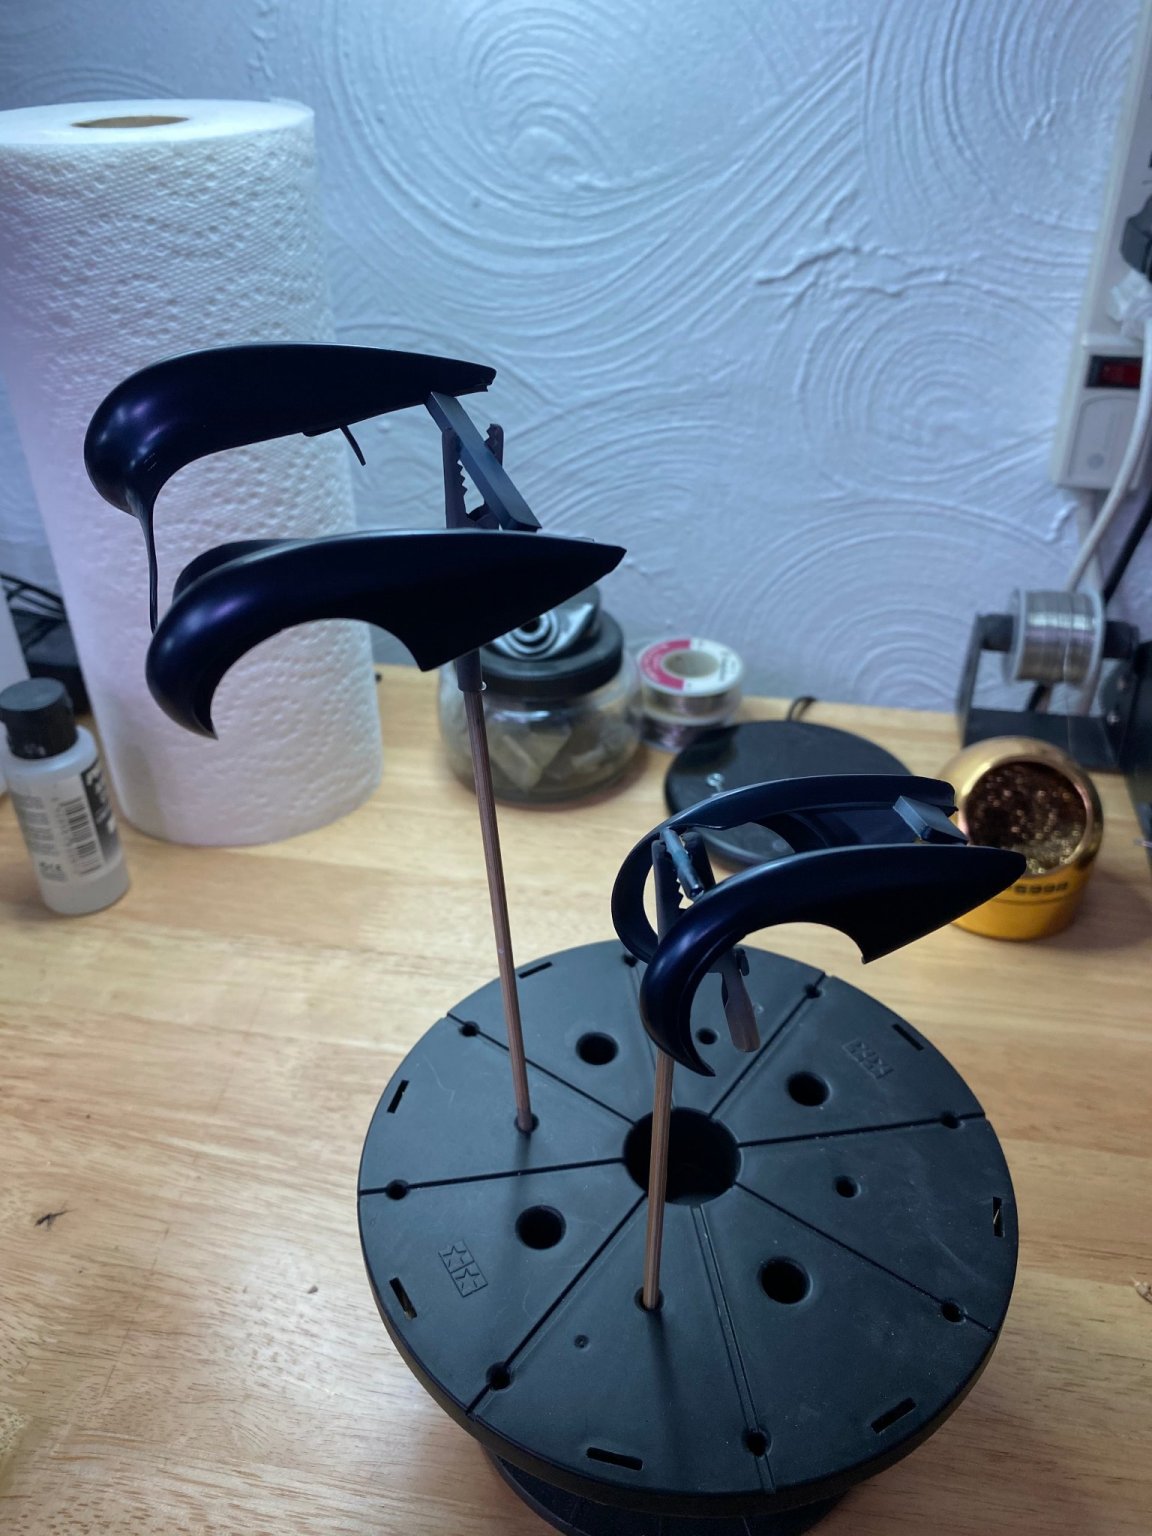
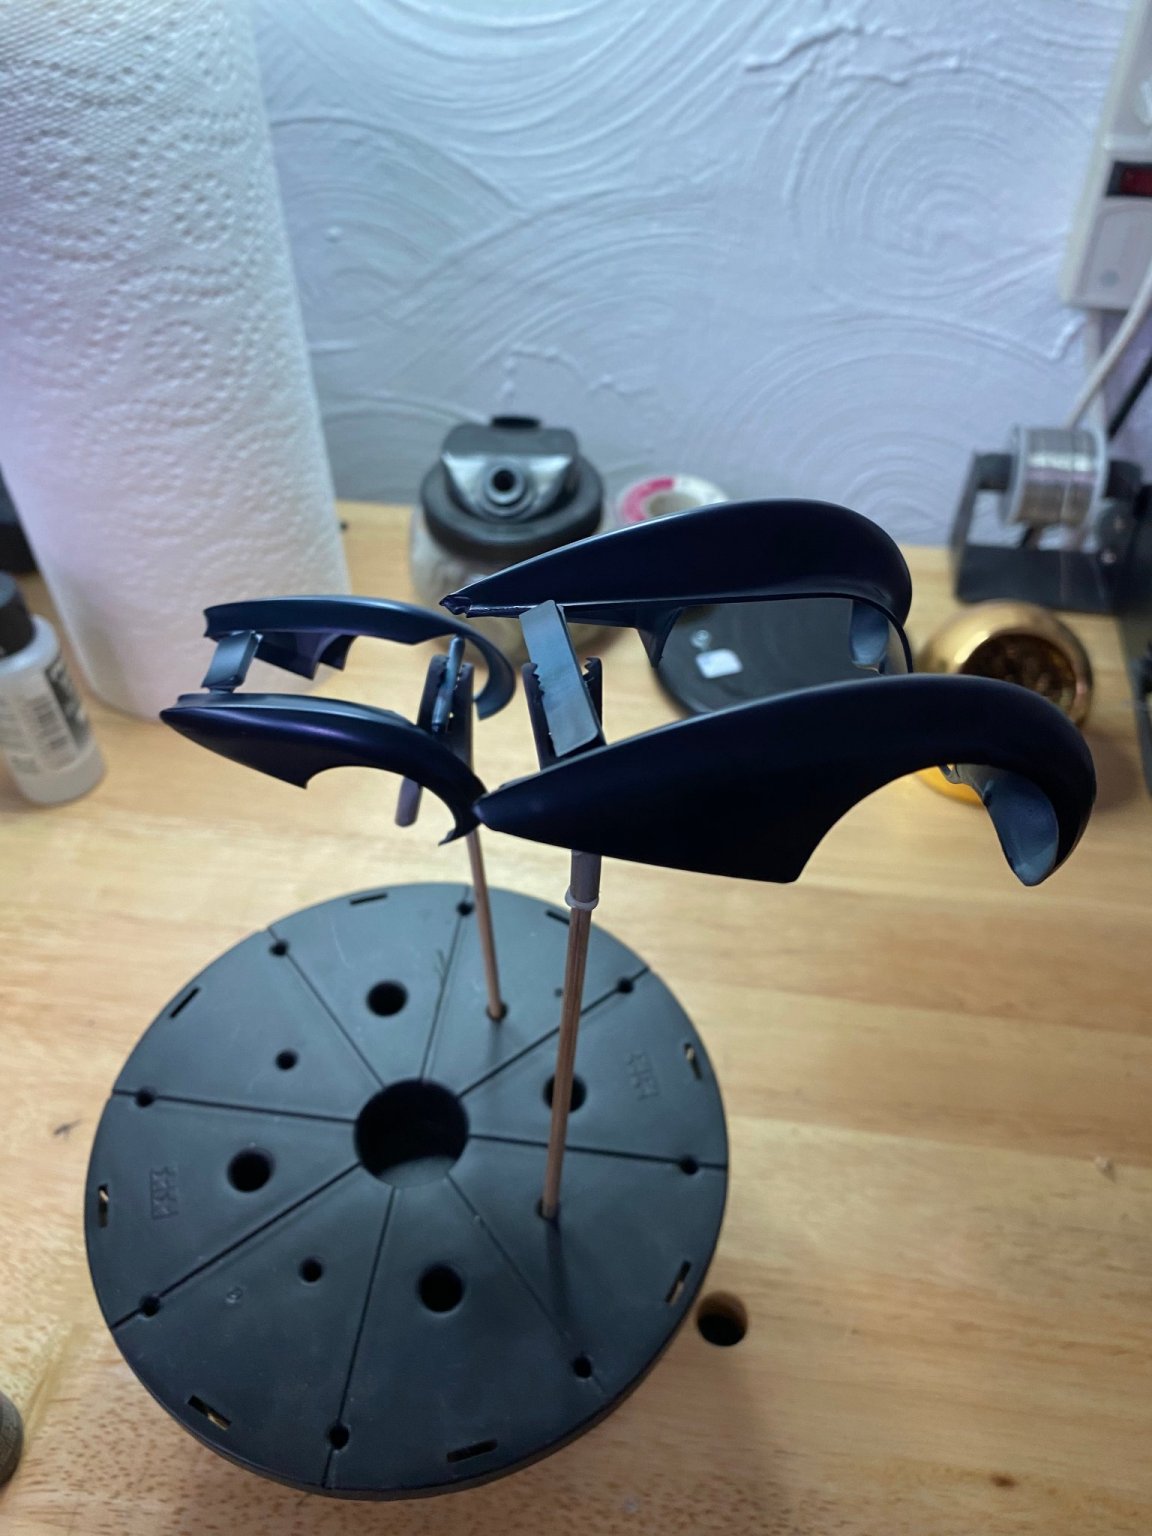
Fenders now have primer and paint. Paint color is midnight blue, another metallic color. For contrast, the final picture shows the color combination used for this model.

- 85 replies
-
- 10
-
-
Delahaye 135 by CDW - FINISHED - Heller - 1:24 - PLASTIC
CDW replied to CDW's topic in Non-ship/categorised builds
Thanks guys. You know the old saying, absence makes the heart grow fonder. Sometimes it helps to step away from a hobby for a period of time and change up a routine. I used my swimming pool more this past summer than I've ever used it before, plus got a lot of projects done around the house. -
Delahaye 135 by CDW - FINISHED - Heller - 1:24 - PLASTIC
CDW replied to CDW's topic in Non-ship/categorised builds
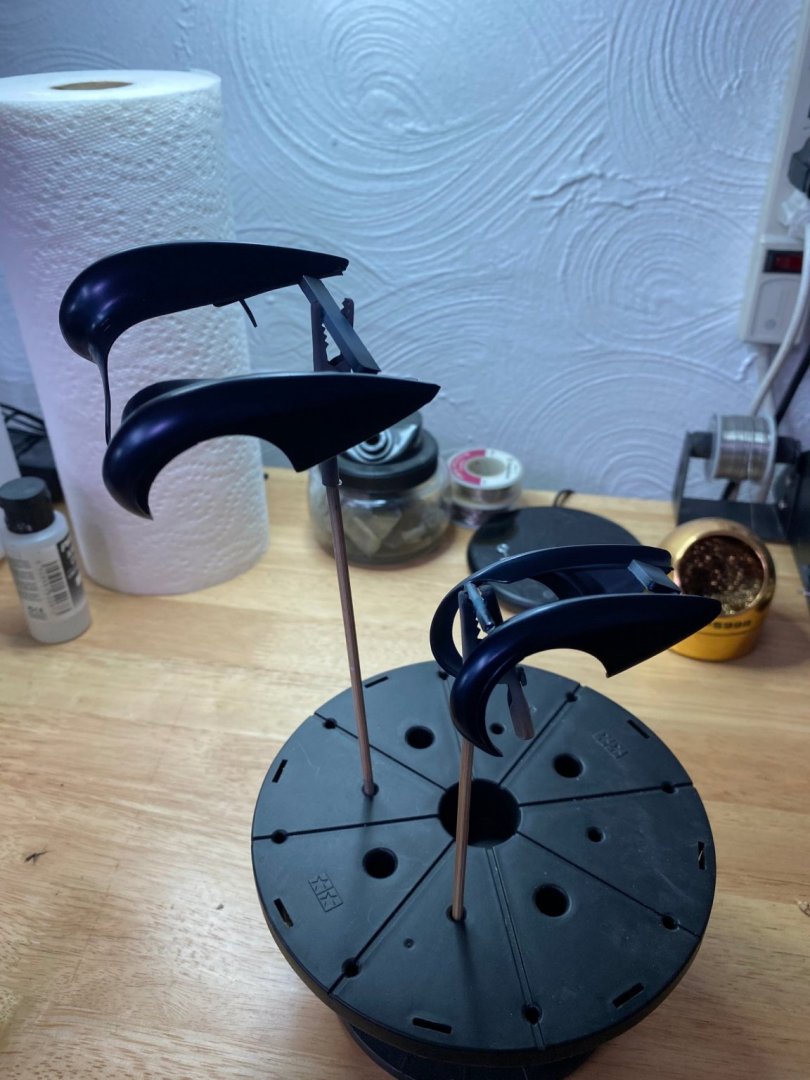
The fenders show the odd use of multi-colored plastic in construction of this kit. A good layer of primer coat will quickly solve that issue. Interior is very simple, but will mostly be unseen anyway. The finished body is what I'm after with this kit. Love the art deco lines of it.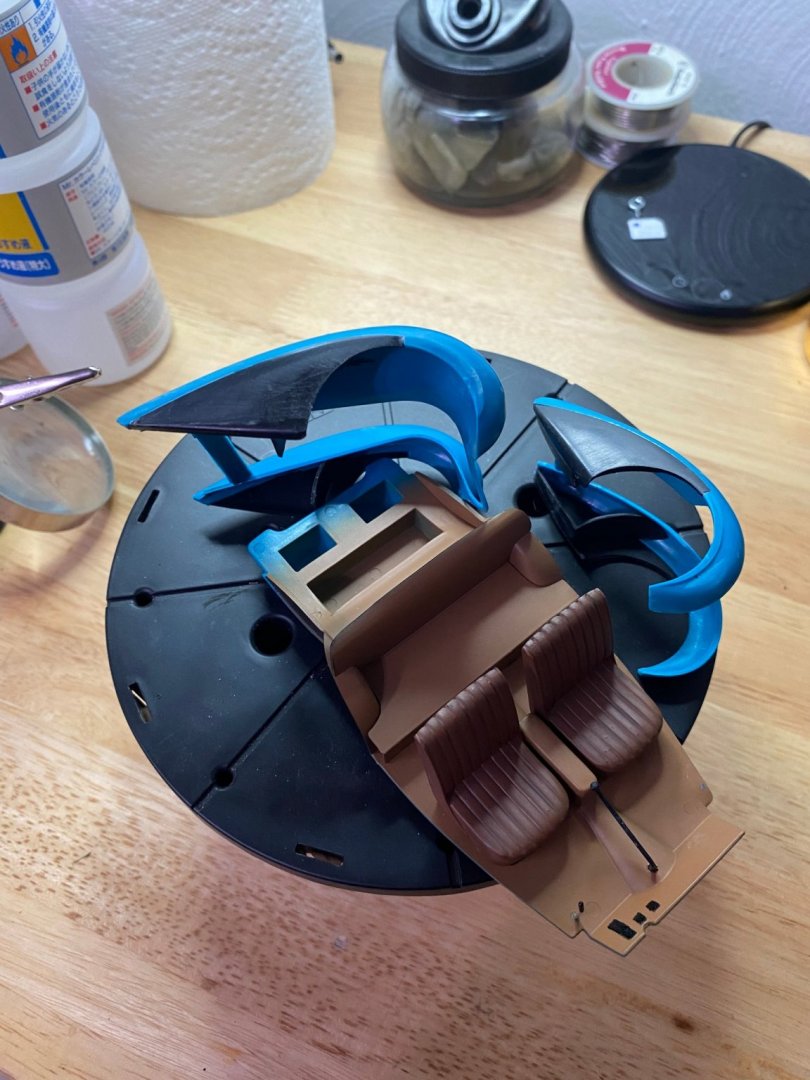
- 85 replies
-
- 12
-
-
Delahaye 135 by CDW - FINISHED - Heller - 1:24 - PLASTIC
CDW replied to CDW's topic in Non-ship/categorised builds
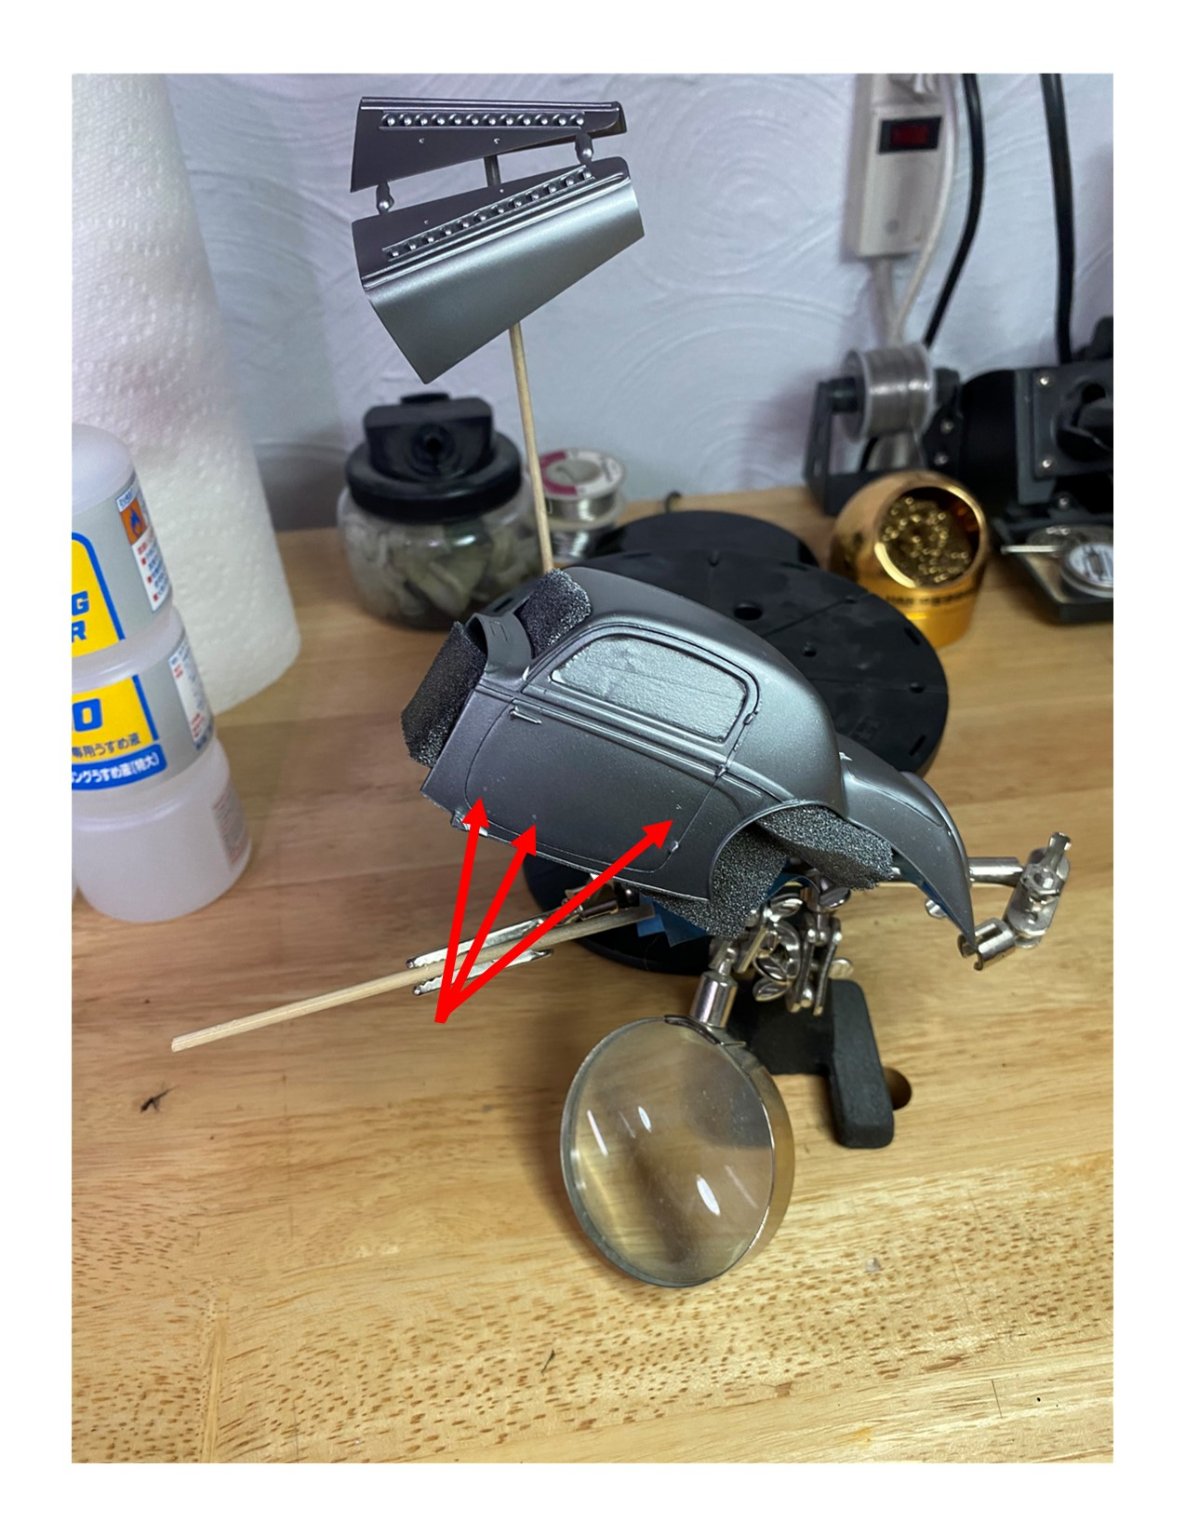
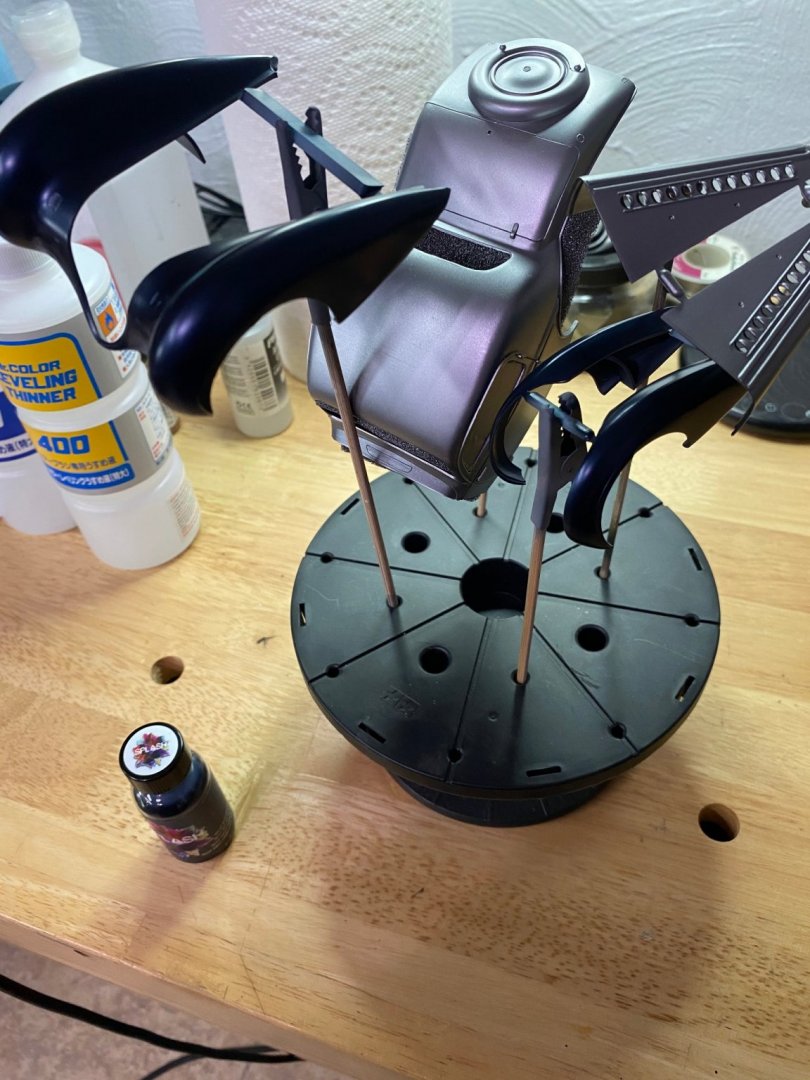
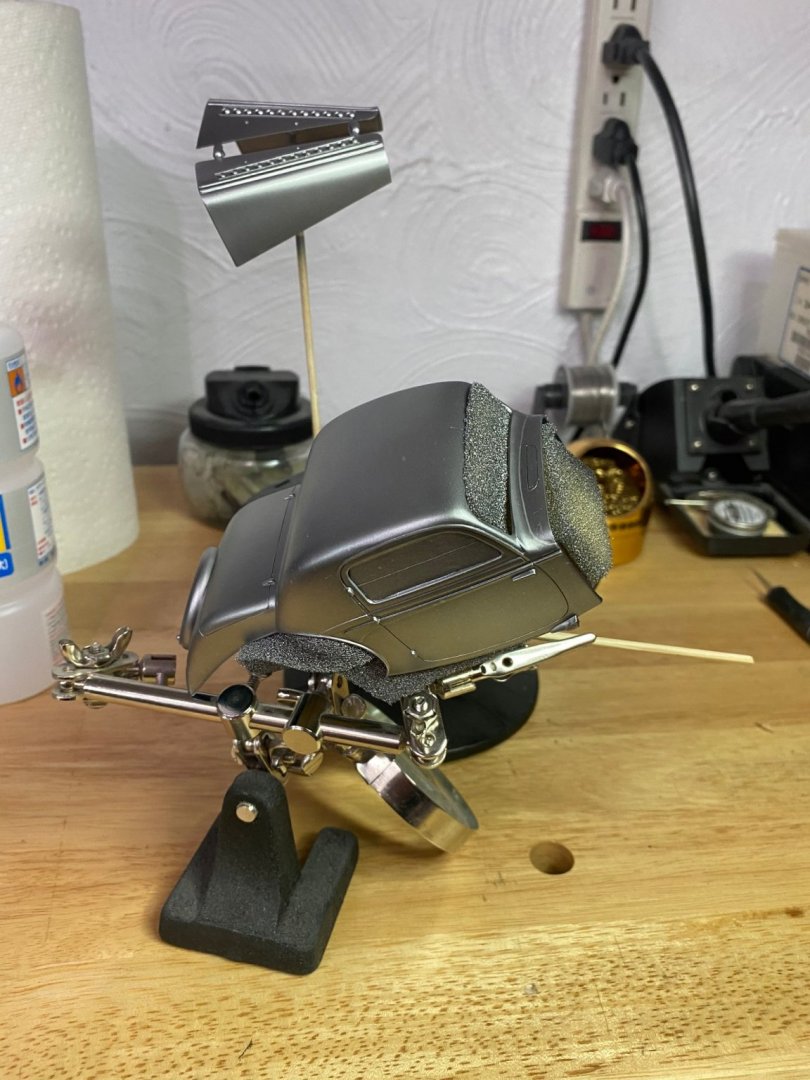
Take a look at the 2nd photo in my previous post. After I looked at the photo, I noticed something I had not noticed when I sprayed the model. There are a few small specks of something that go unnoticed until closer examination of the model. This is where I let the paint run out in my airbrush cup which caused it to spit. With metallic paints like the silver I am using here, these specks become very noticeable, particularly after a clear coat goes on top. I know better than to let my paint cup run dry like that, as it's not the first time that's happened to me. But it's worth noting to my friends who may not have experienced this phenomenon before. Always keep your airbrush paint cup filled particularly when spraying metallic paints. At this point I will give it a second coat to try and hide the specks.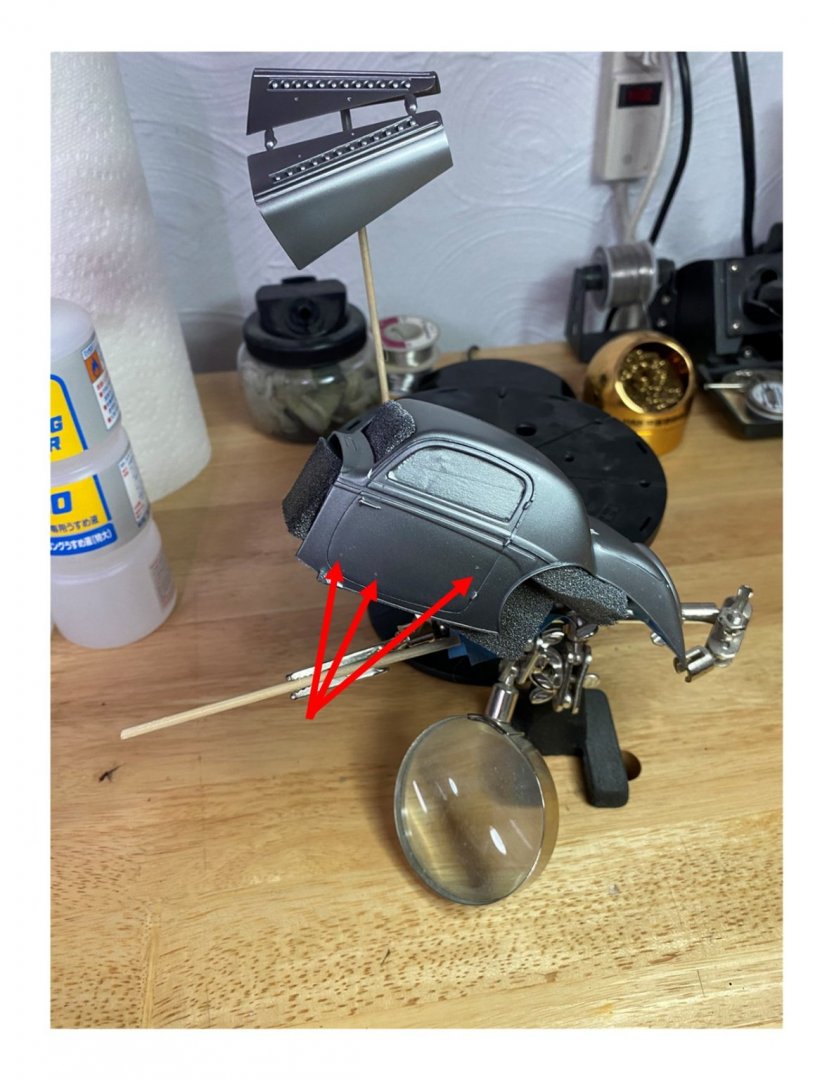
-
Delahaye 135 by CDW - FINISHED - Heller - 1:24 - PLASTIC
CDW replied to CDW's topic in Non-ship/categorised builds
It's a lacquer, Ken. -
Delahaye 135 by CDW - FINISHED - Heller - 1:24 - PLASTIC
CDW replied to CDW's topic in Non-ship/categorised builds
This top coat is Splash paint, the color is Argento Nurburgring. If I remember correctly it's a Ferarri color. Of course, a gloss clear coat goes on top of it all once everything else is finished.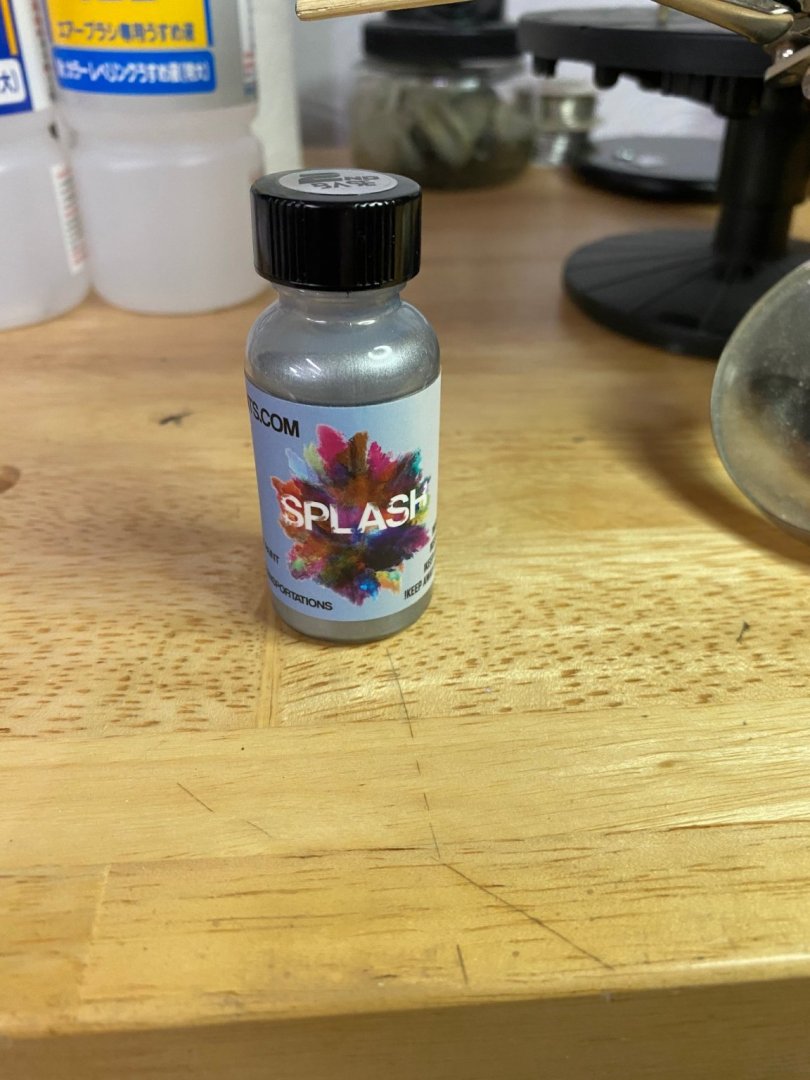
-
Delahaye 135 by CDW - FINISHED - Heller - 1:24 - PLASTIC
CDW replied to CDW's topic in Non-ship/categorised builds
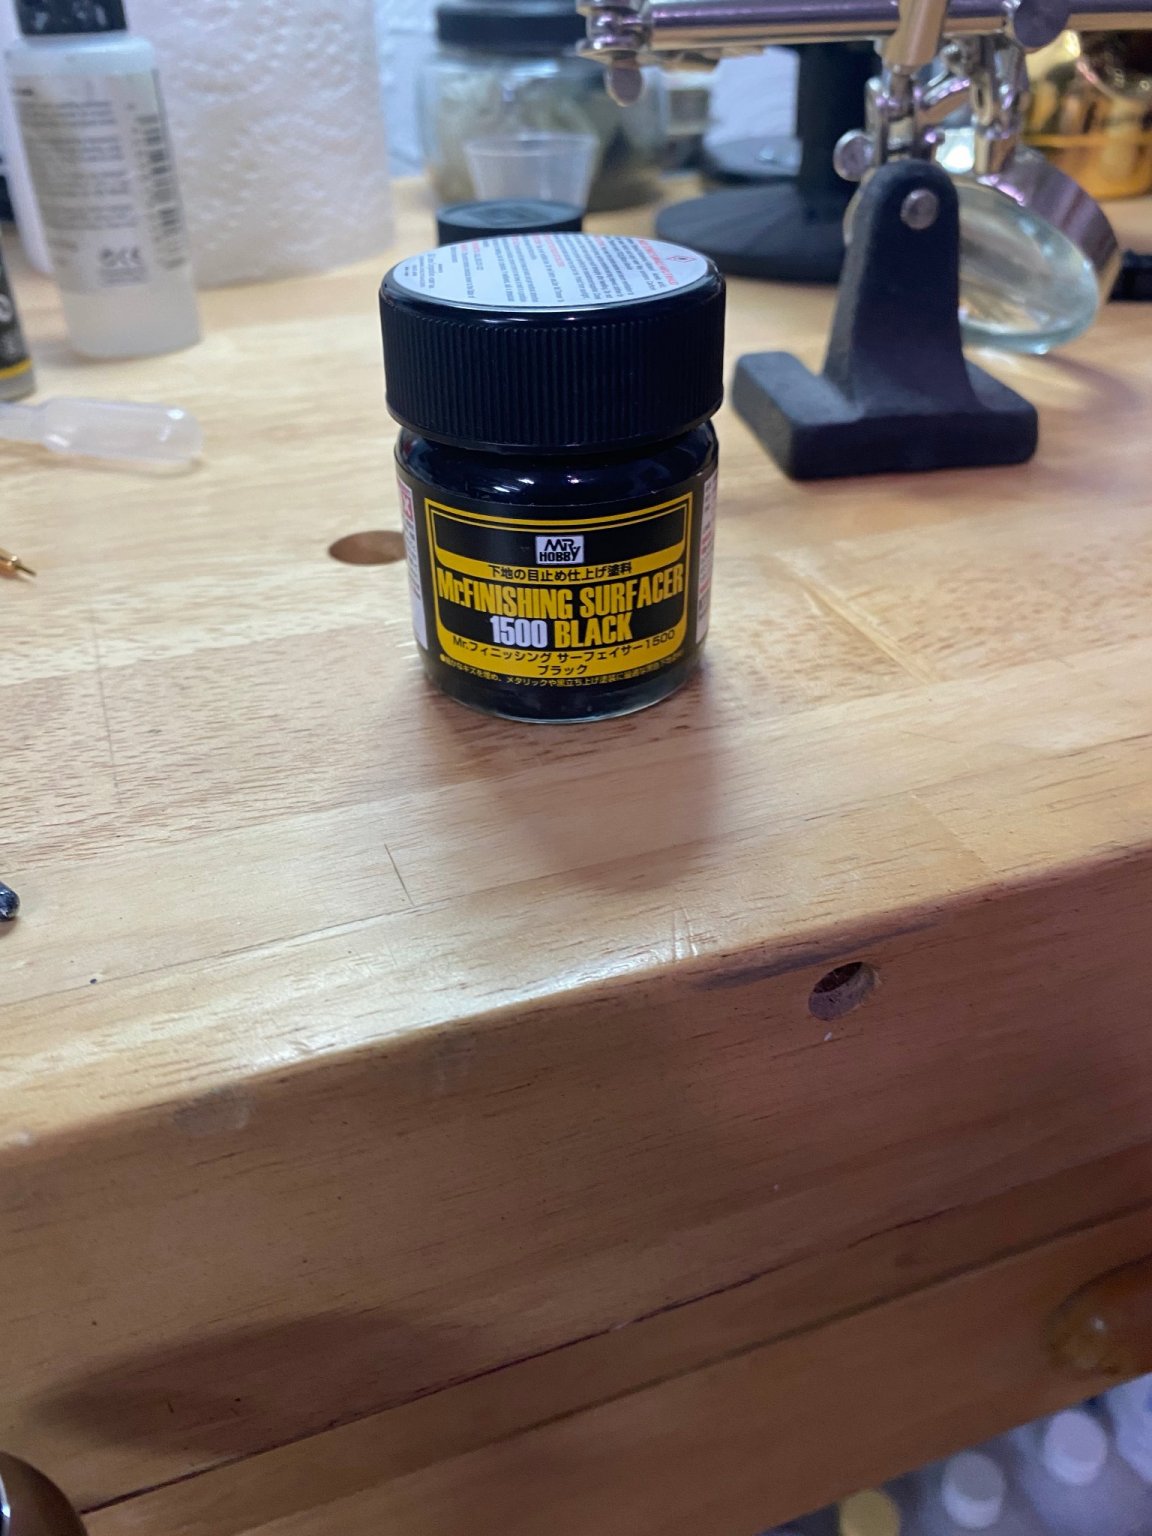
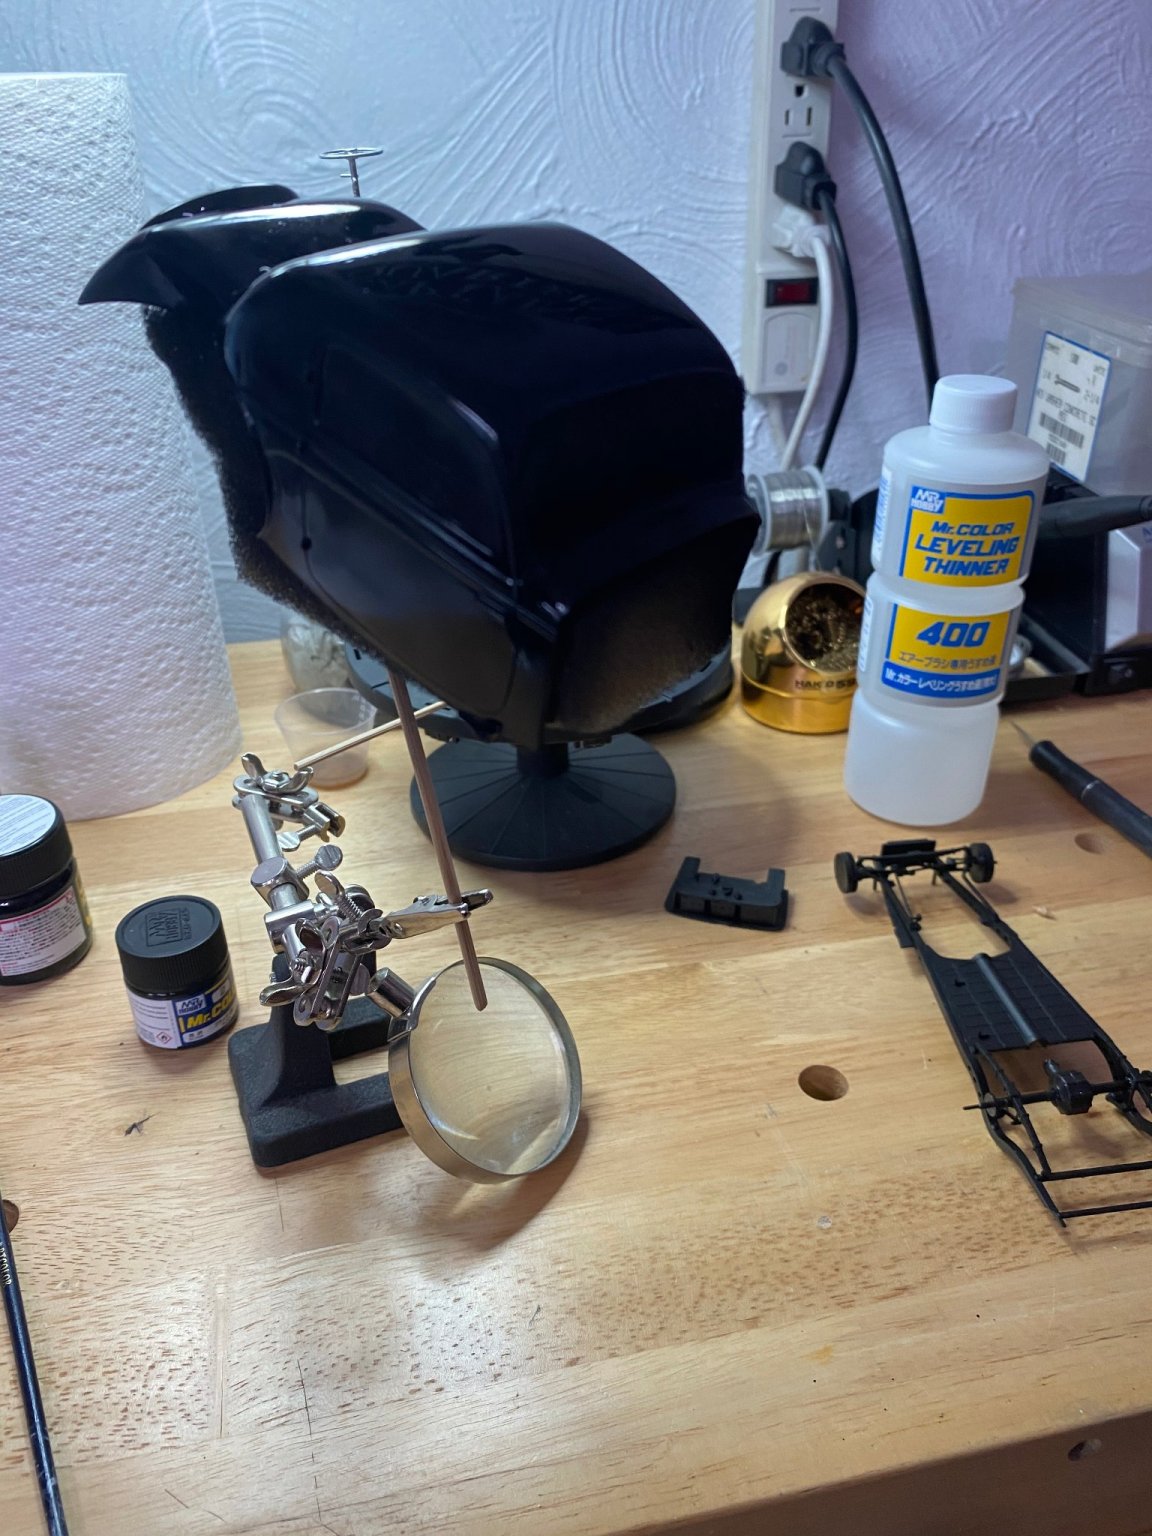
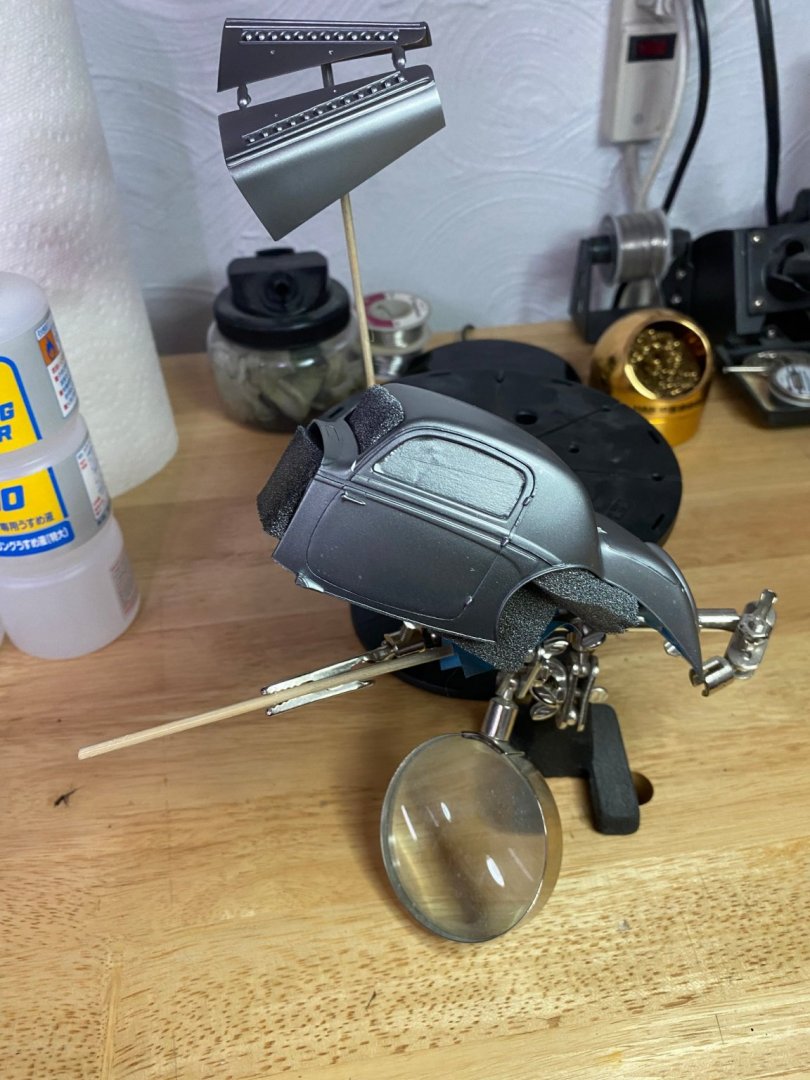
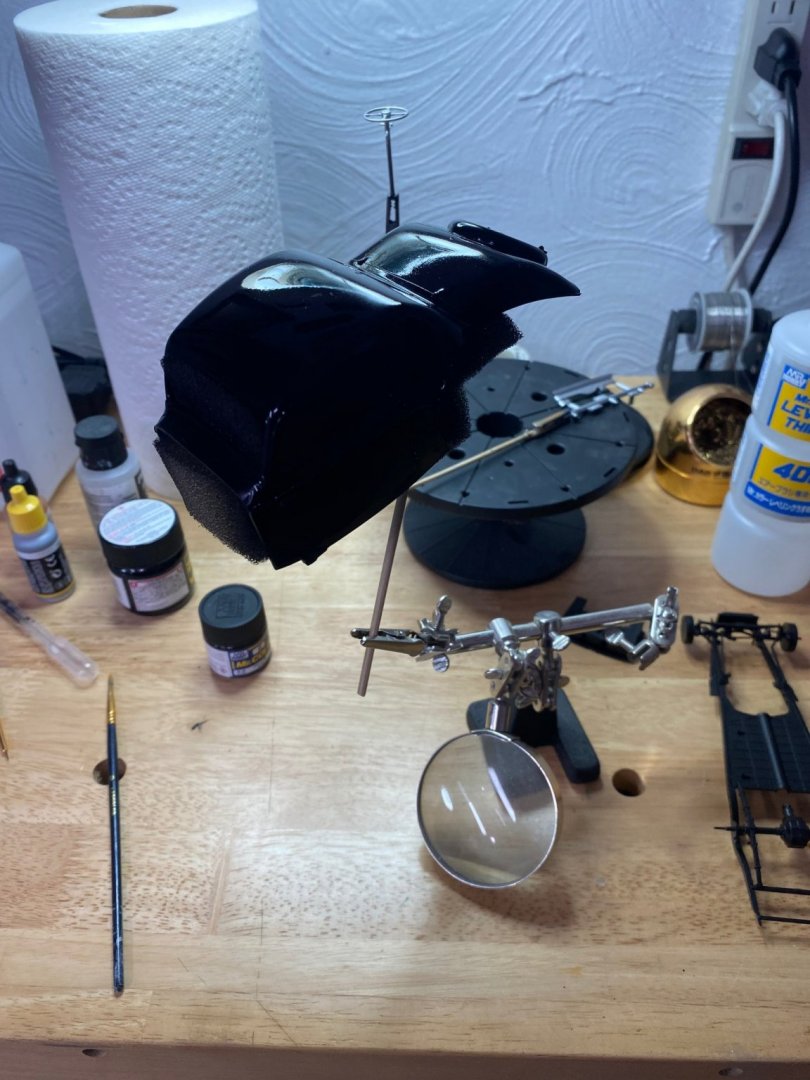
Here I am laying down Mr Surfacer 1500 black primer on the car body. The final color will be silver. For the fr and rr fenders and a stripe that runs down the length of the body, will use a light color Mr Surfacer 1500 primer with a final color of blue.
-
Delahaye 135 by CDW - FINISHED - Heller - 1:24 - PLASTIC
CDW replied to CDW's topic in Non-ship/categorised builds
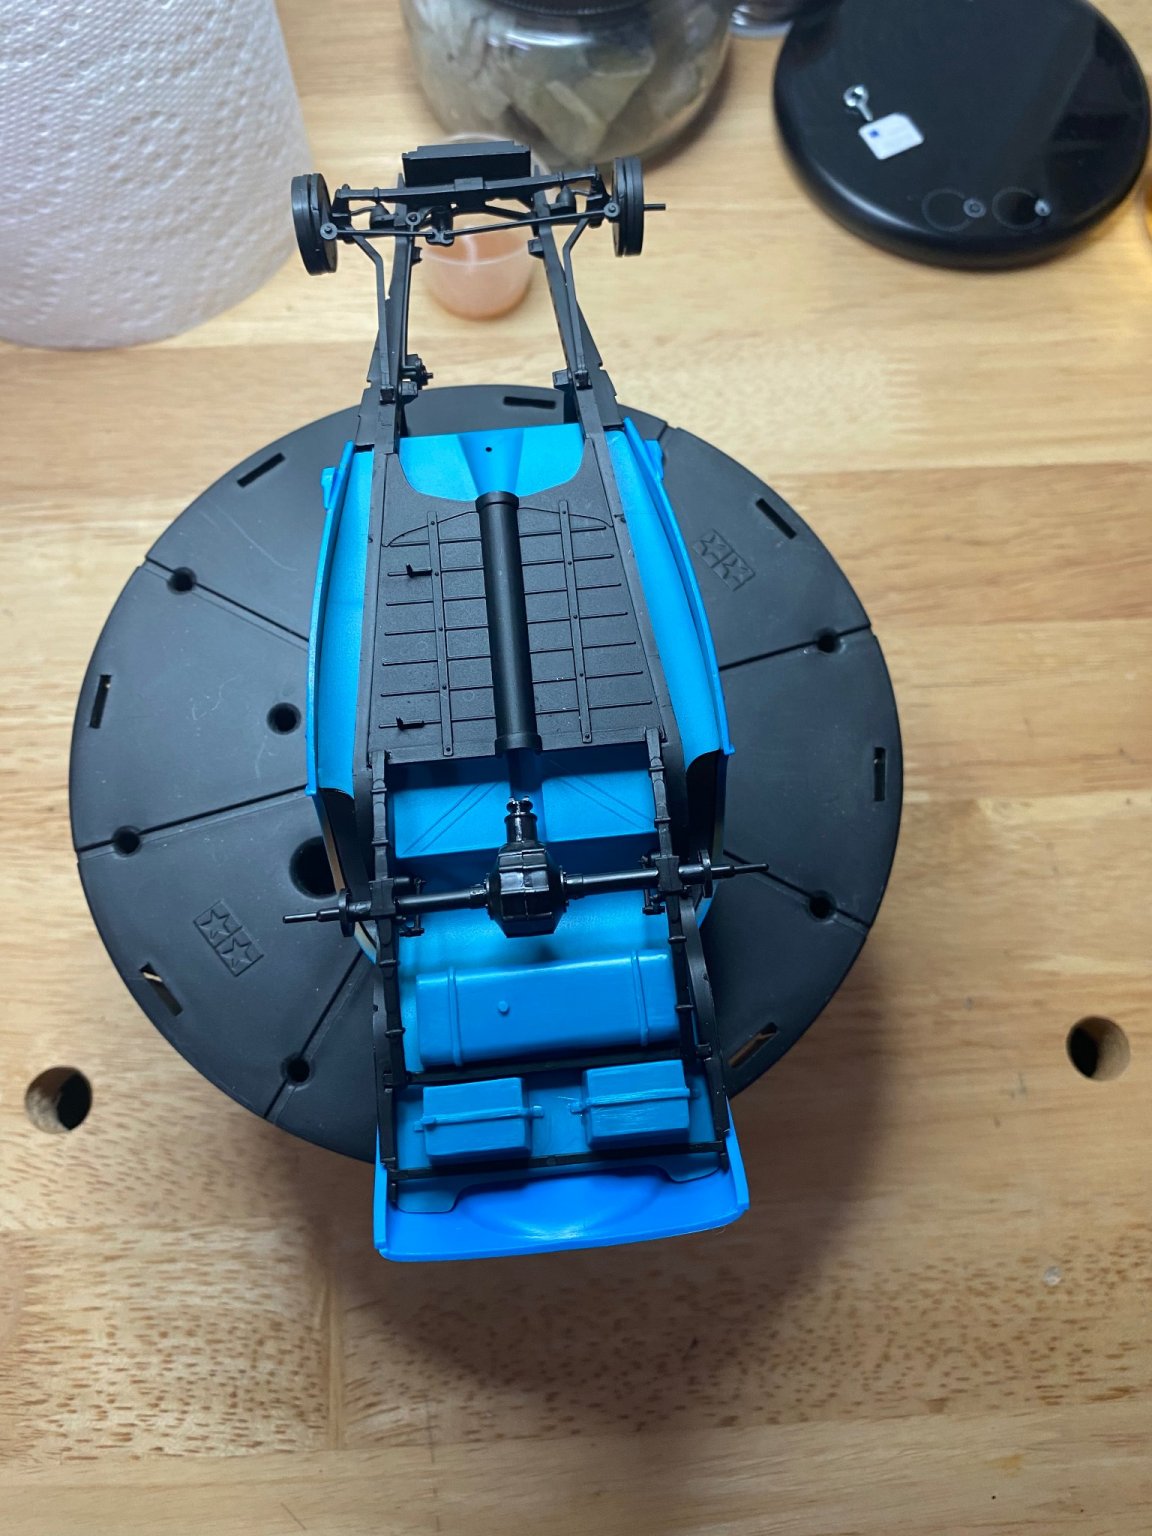
PS: I am also wondering what the two boxes located on the bottom of the chassis behind the fuel tank were used for? They look like battery boxes. -
Delahaye 135 by CDW - FINISHED - Heller - 1:24 - PLASTIC
CDW replied to CDW's topic in Non-ship/categorised builds
I was thinking the same thing about those 2 six volt batteries. There were a lot of times when I wished my old '51 Chevy (my first car) would have had 2 of those batteries instead of 1. Six volt systems were notoriously slow starters and the lights always seemed dim. If I remember correctly, a Nash Metropolitan I once owned also had 2 six volt batteries. They were located under the little rear bench seat. Seems like the Nash batteries were connected in a parallel circuit, but again, my memory may be faulty on that. -
Delahaye 135 by CDW - FINISHED - Heller - 1:24 - PLASTIC
CDW replied to CDW's topic in Non-ship/categorised builds
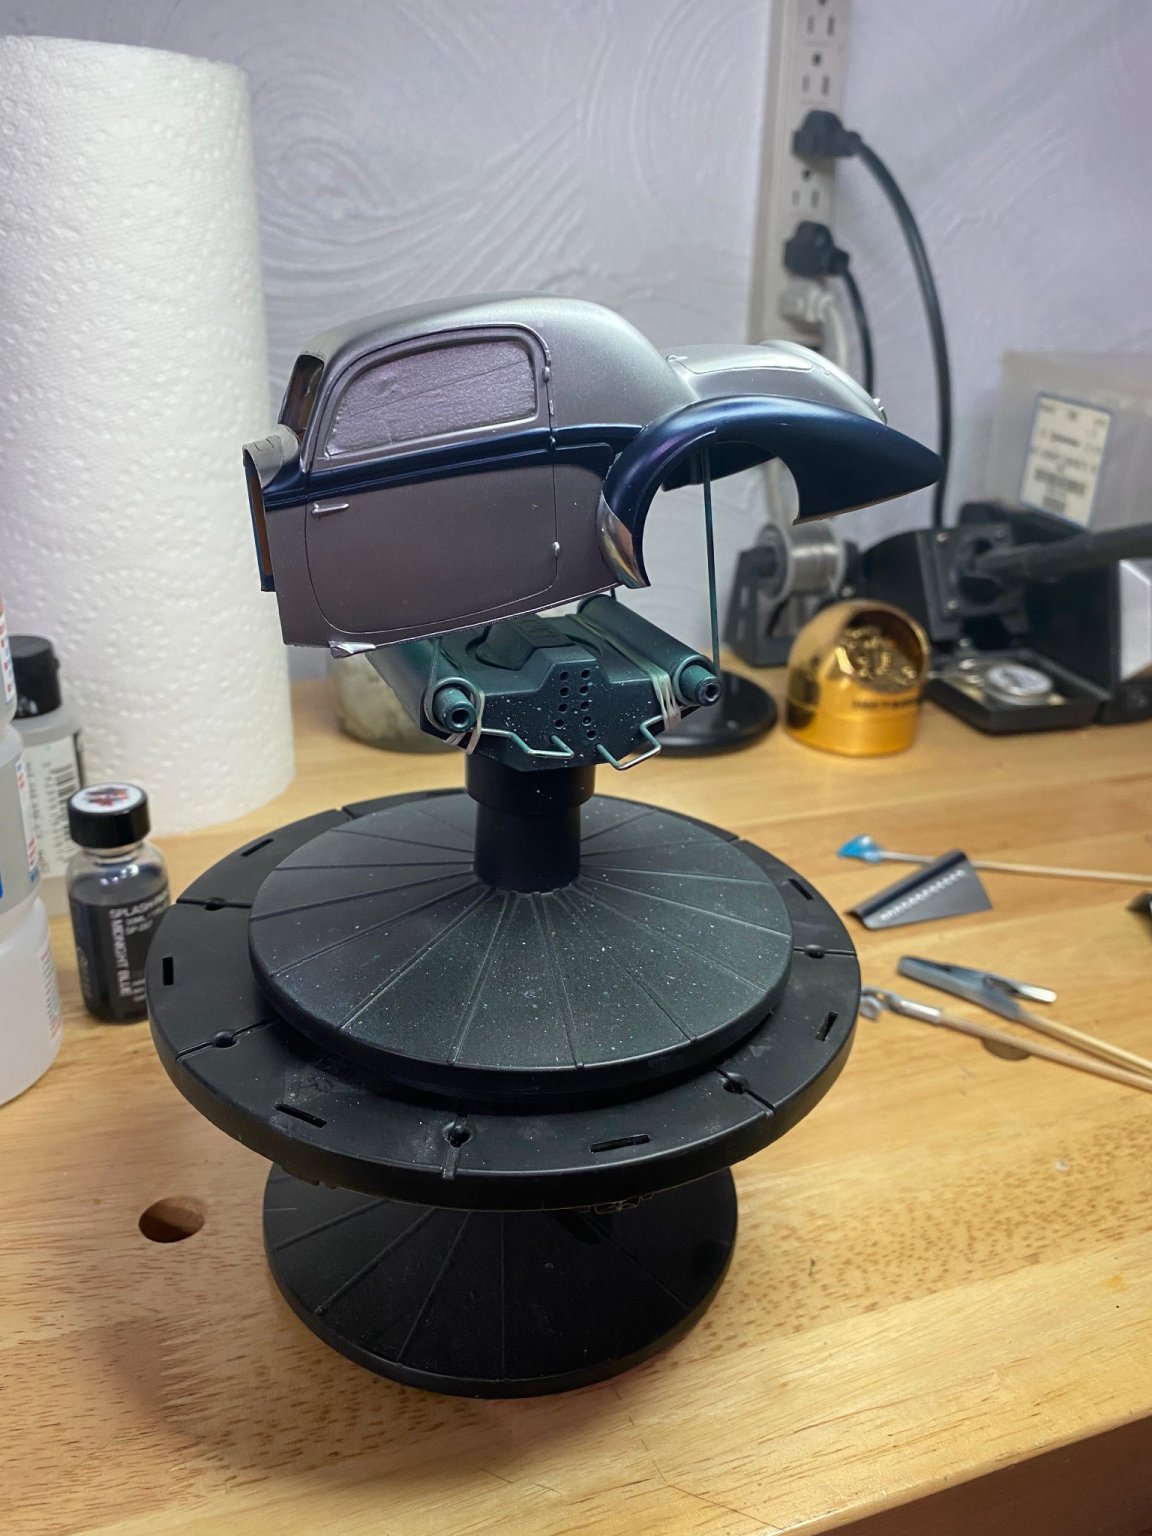
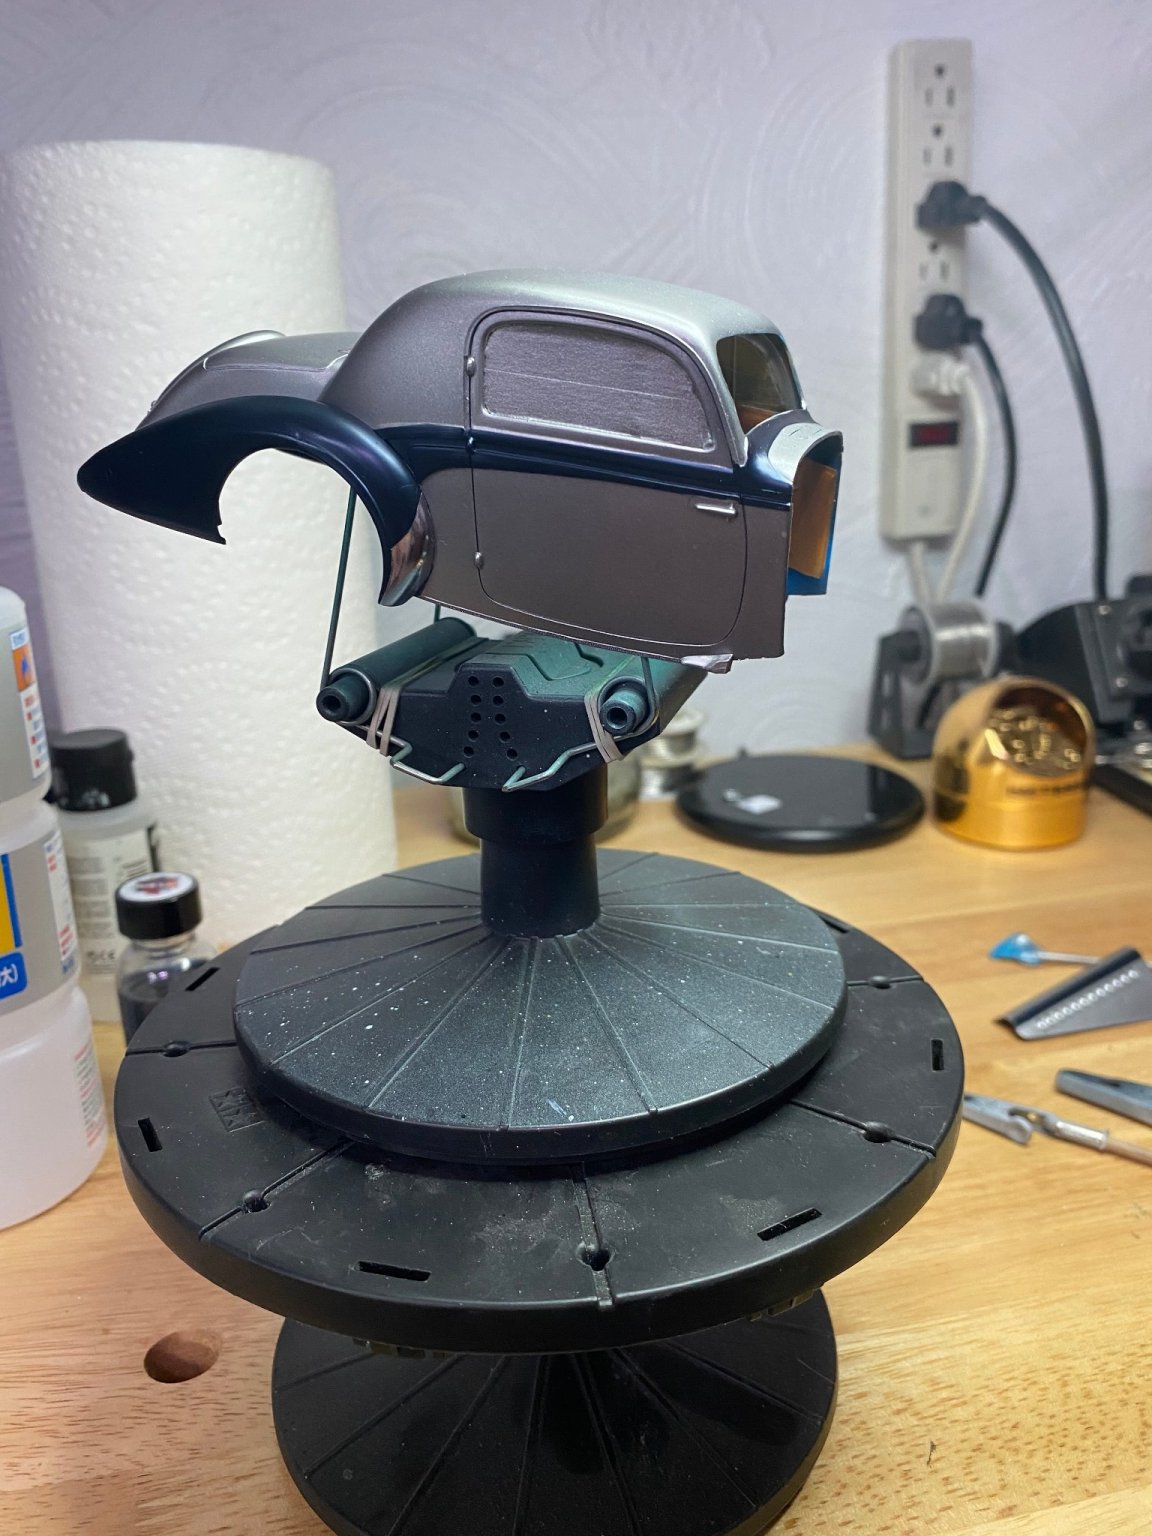
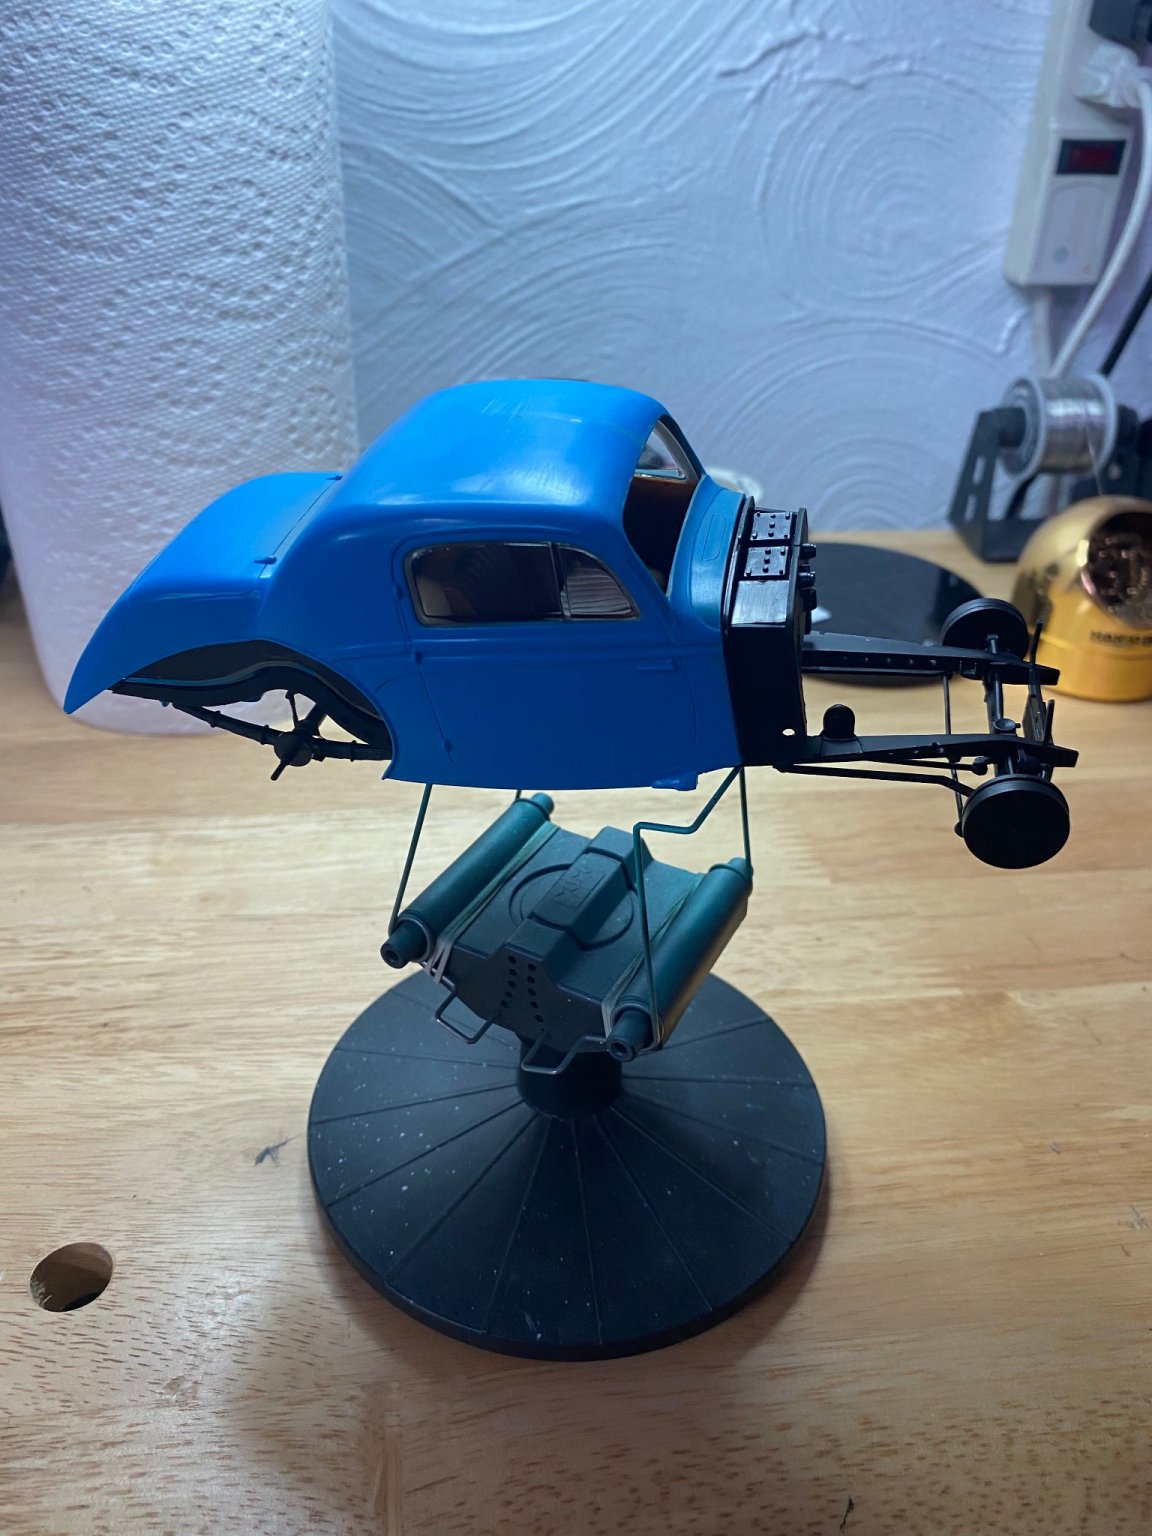
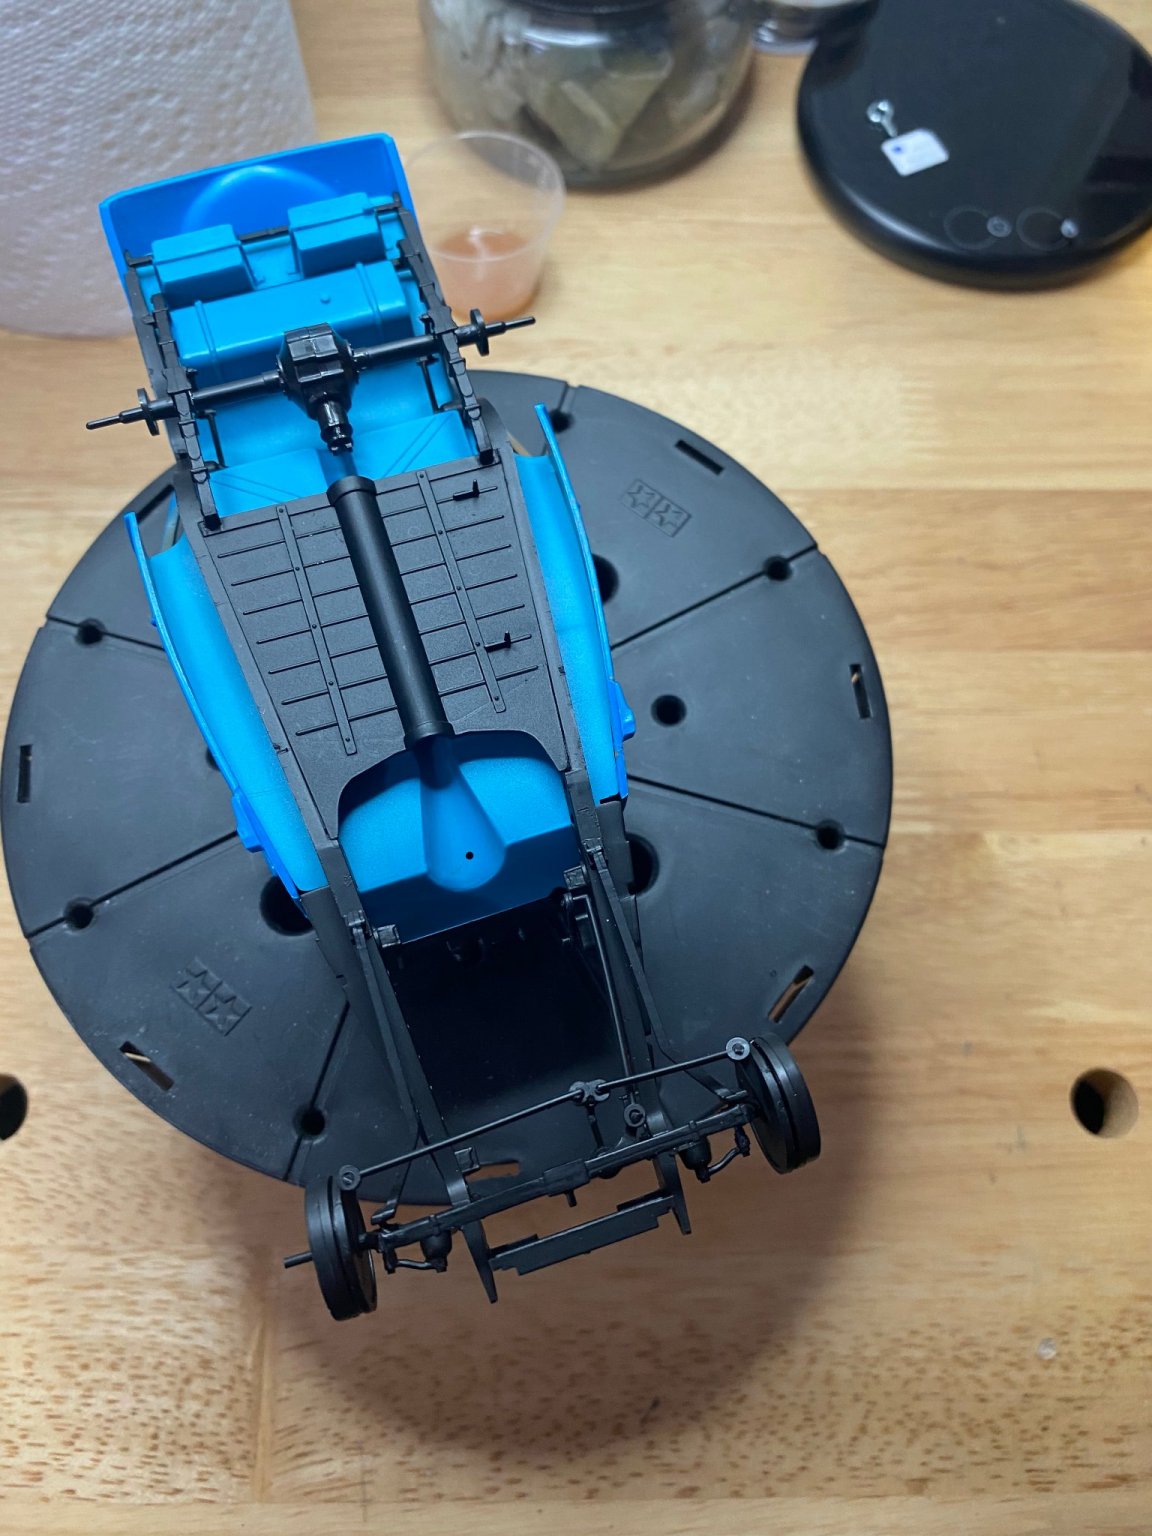
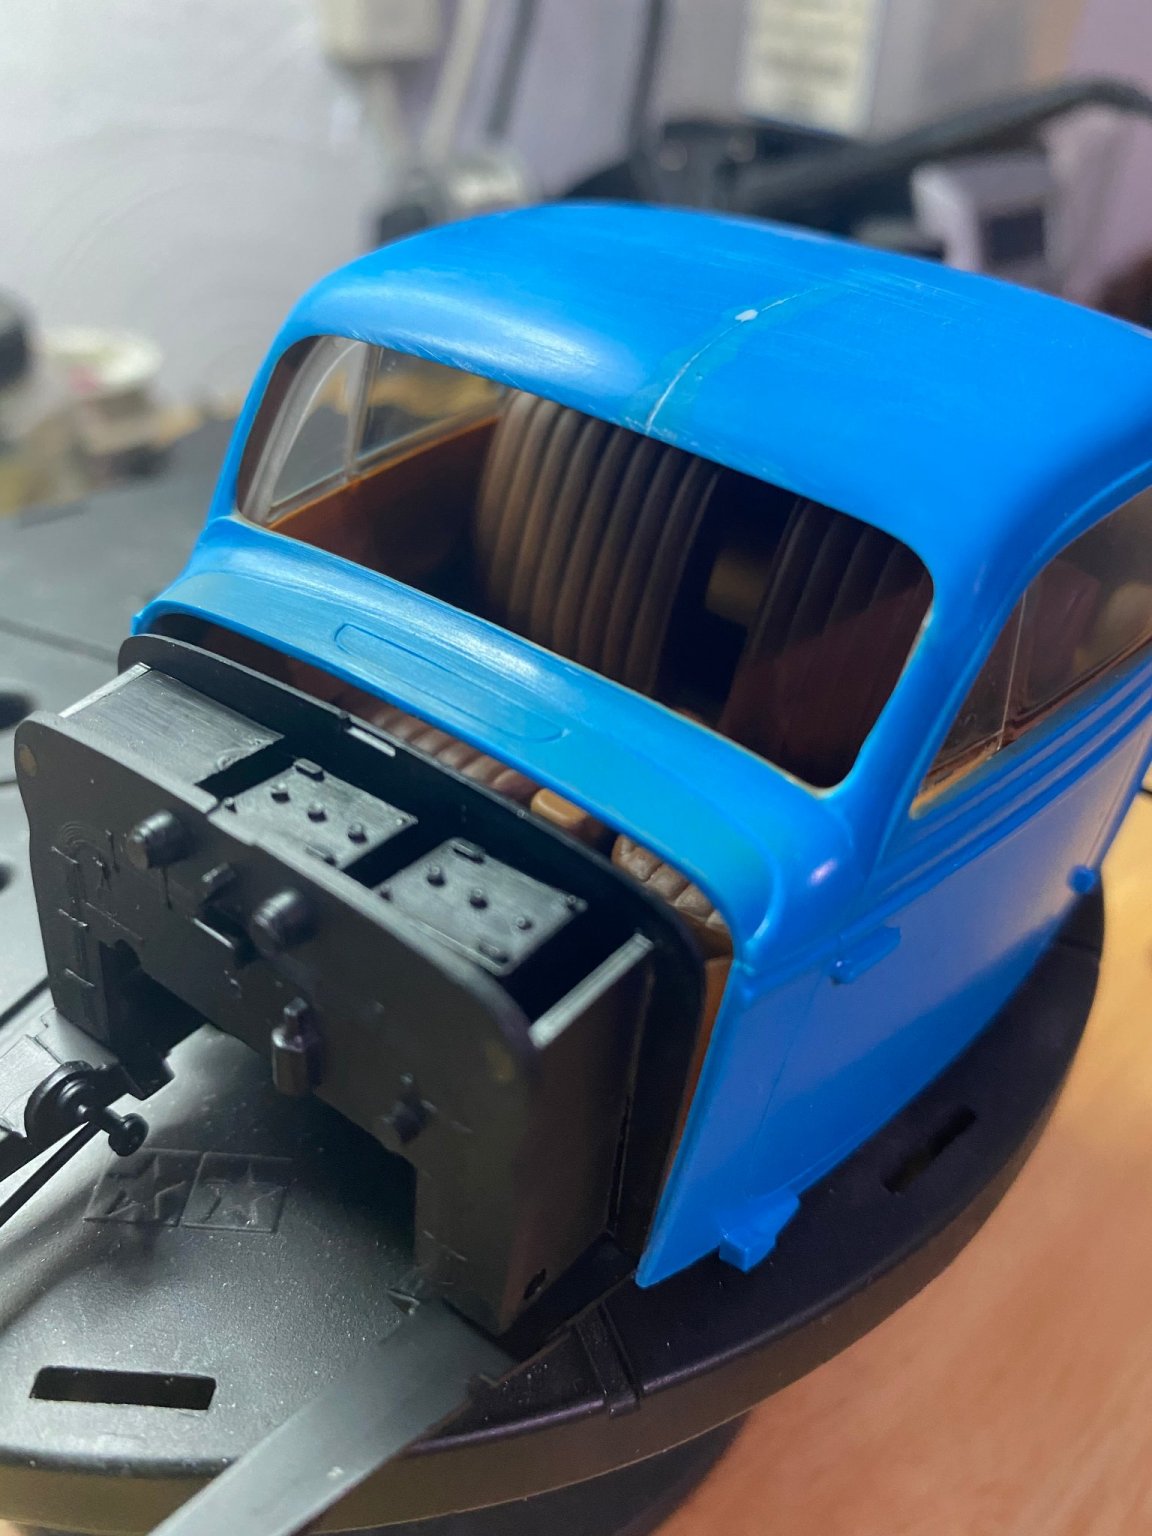
I painted the interior in a basic light brown color with the seats a darker leather brown. I glued the door panels/side windows inside the car body then test/dry fitted it all together before I do some final detail painting in the interior before gluing it all together. As you can see, the interior is not going to be highly visible at all once the model is finished. After gluing the front and rear windshields in place, will have to carefully mask the glass before priming and painting the body.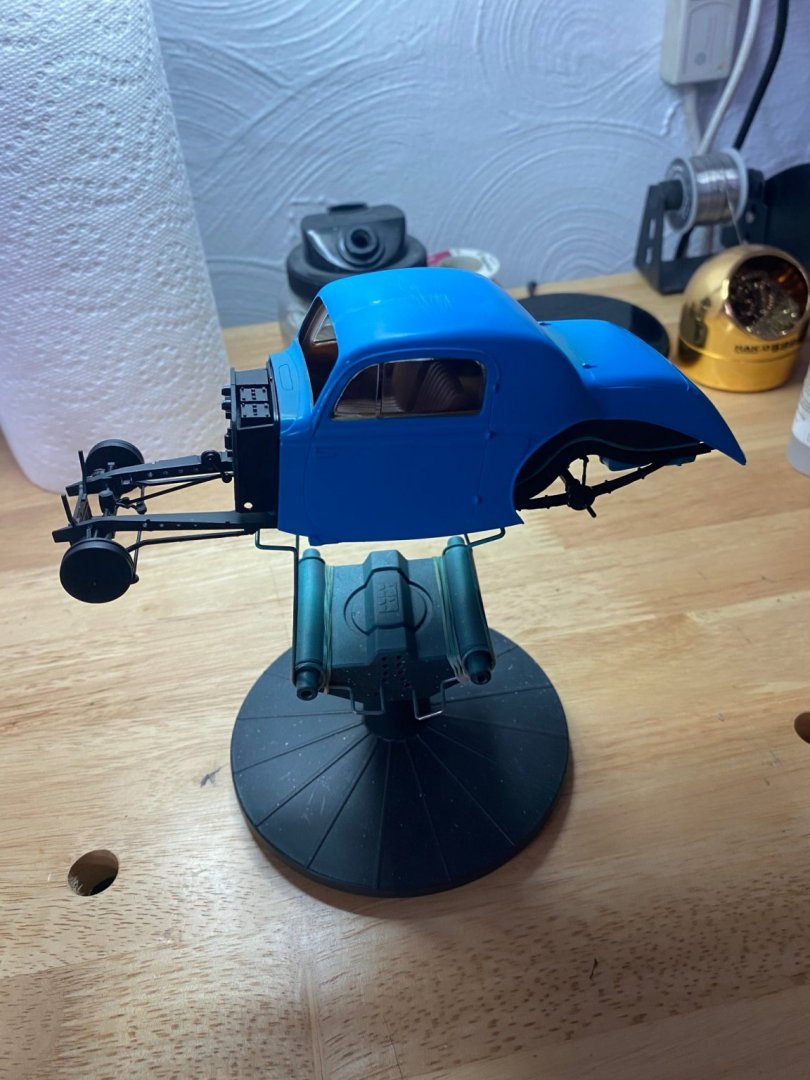


- 85 replies
-
- 11
-
-
Delahaye 135 by CDW - FINISHED - Heller - 1:24 - PLASTIC
CDW replied to CDW's topic in Non-ship/categorised builds
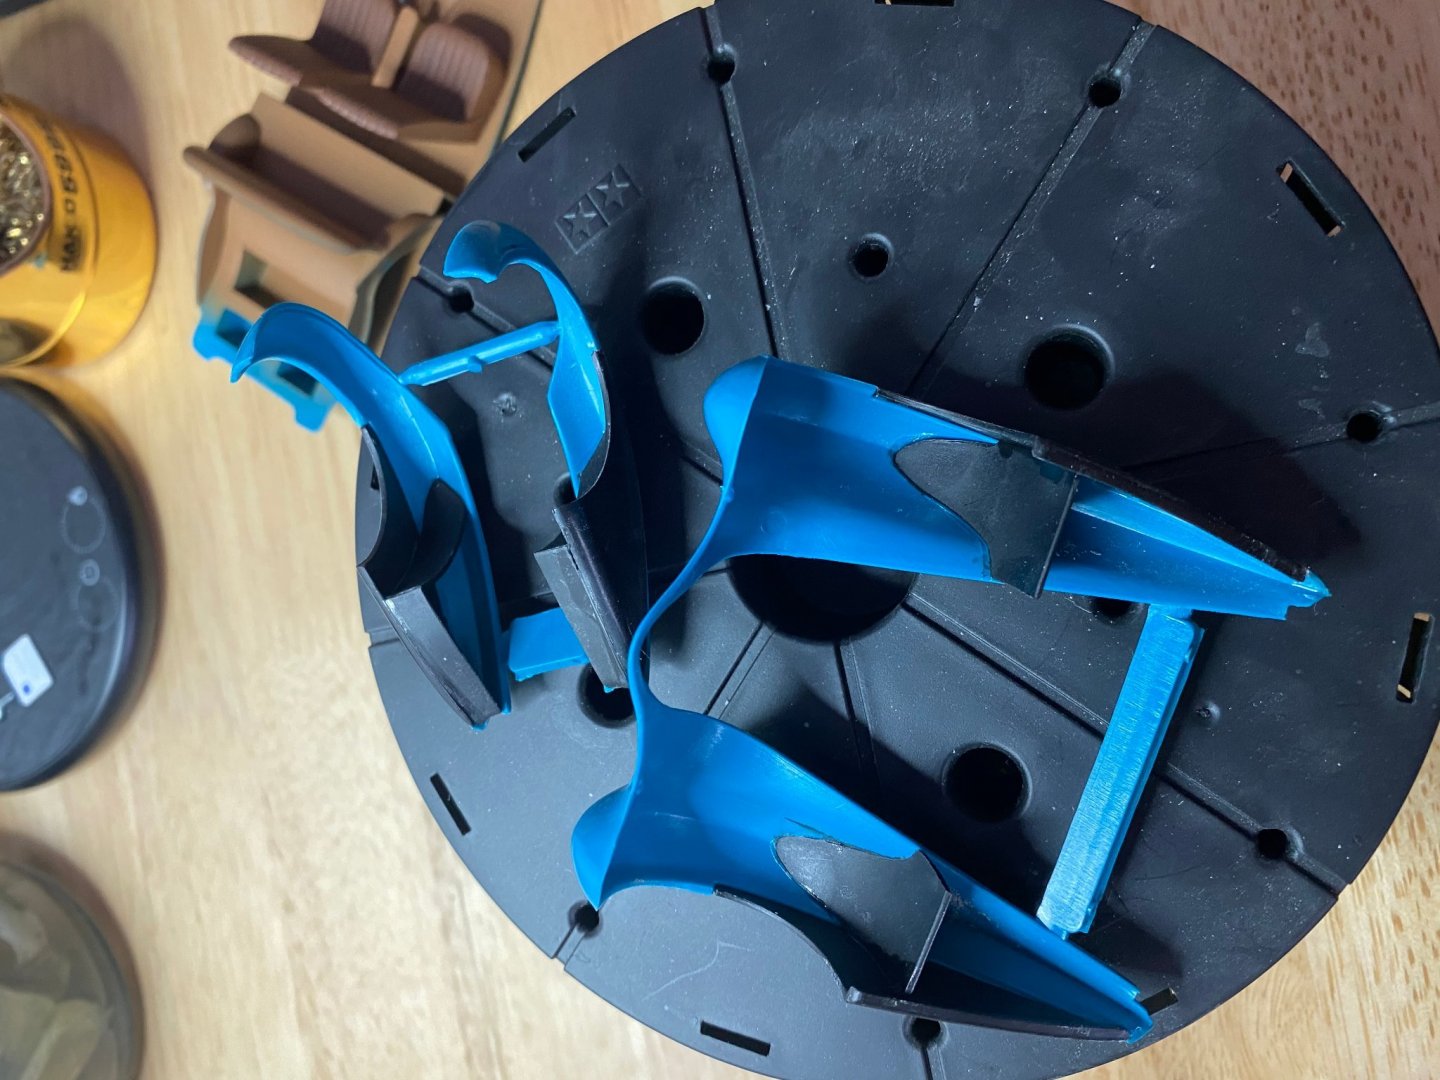
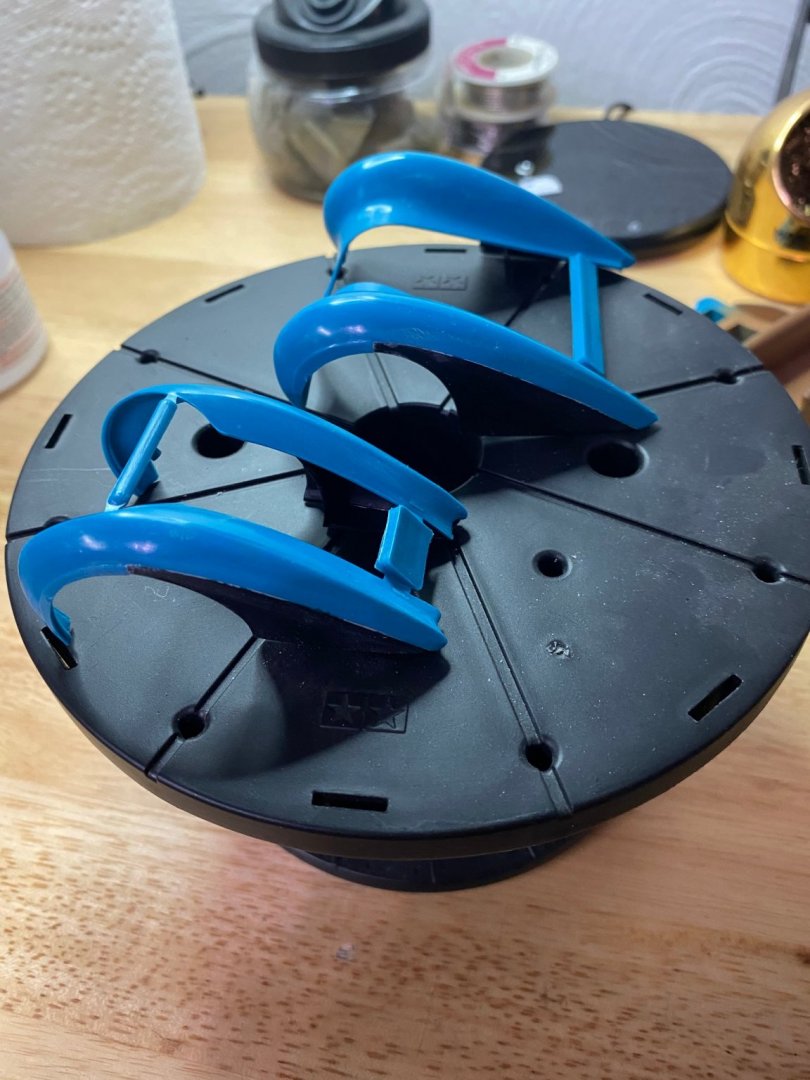
You have to feel your way in the dark with some of this kit's assembly. There are no locator pins so it's trial and error to be certain of the exact positioning of lots of parts. The interior parts along with the fender wells are particularly fiddly. It's interesting how they used the various colors of plastic to mold the kit parts. Not a whole lot of rhyme or reason to it. -
Delahaye 135 by CDW - FINISHED - Heller - 1:24 - PLASTIC
CDW replied to CDW's topic in Non-ship/categorised builds
Yes, the alignment did need a little tweak. I think I got it about as close as it's going to get. I keep looking and thinking about about the assembly and painting of the interior, the fender wells, and body of the car. This one is going to be a little tricky. The interior door panels are molded as one piece along with the side windows in clear plastic. I'm going to need to get the whole interior assembled and painted before I paint the body, and I will need to have the fenders and fender wells assembled with the body. Part of the rear fender wells are attached to the interior parts. I'll figure it out, just need to take my time and not rush through it.
- 85 replies
-
- 11
-
-
Delahaye 135 by CDW - FINISHED - Heller - 1:24 - PLASTIC
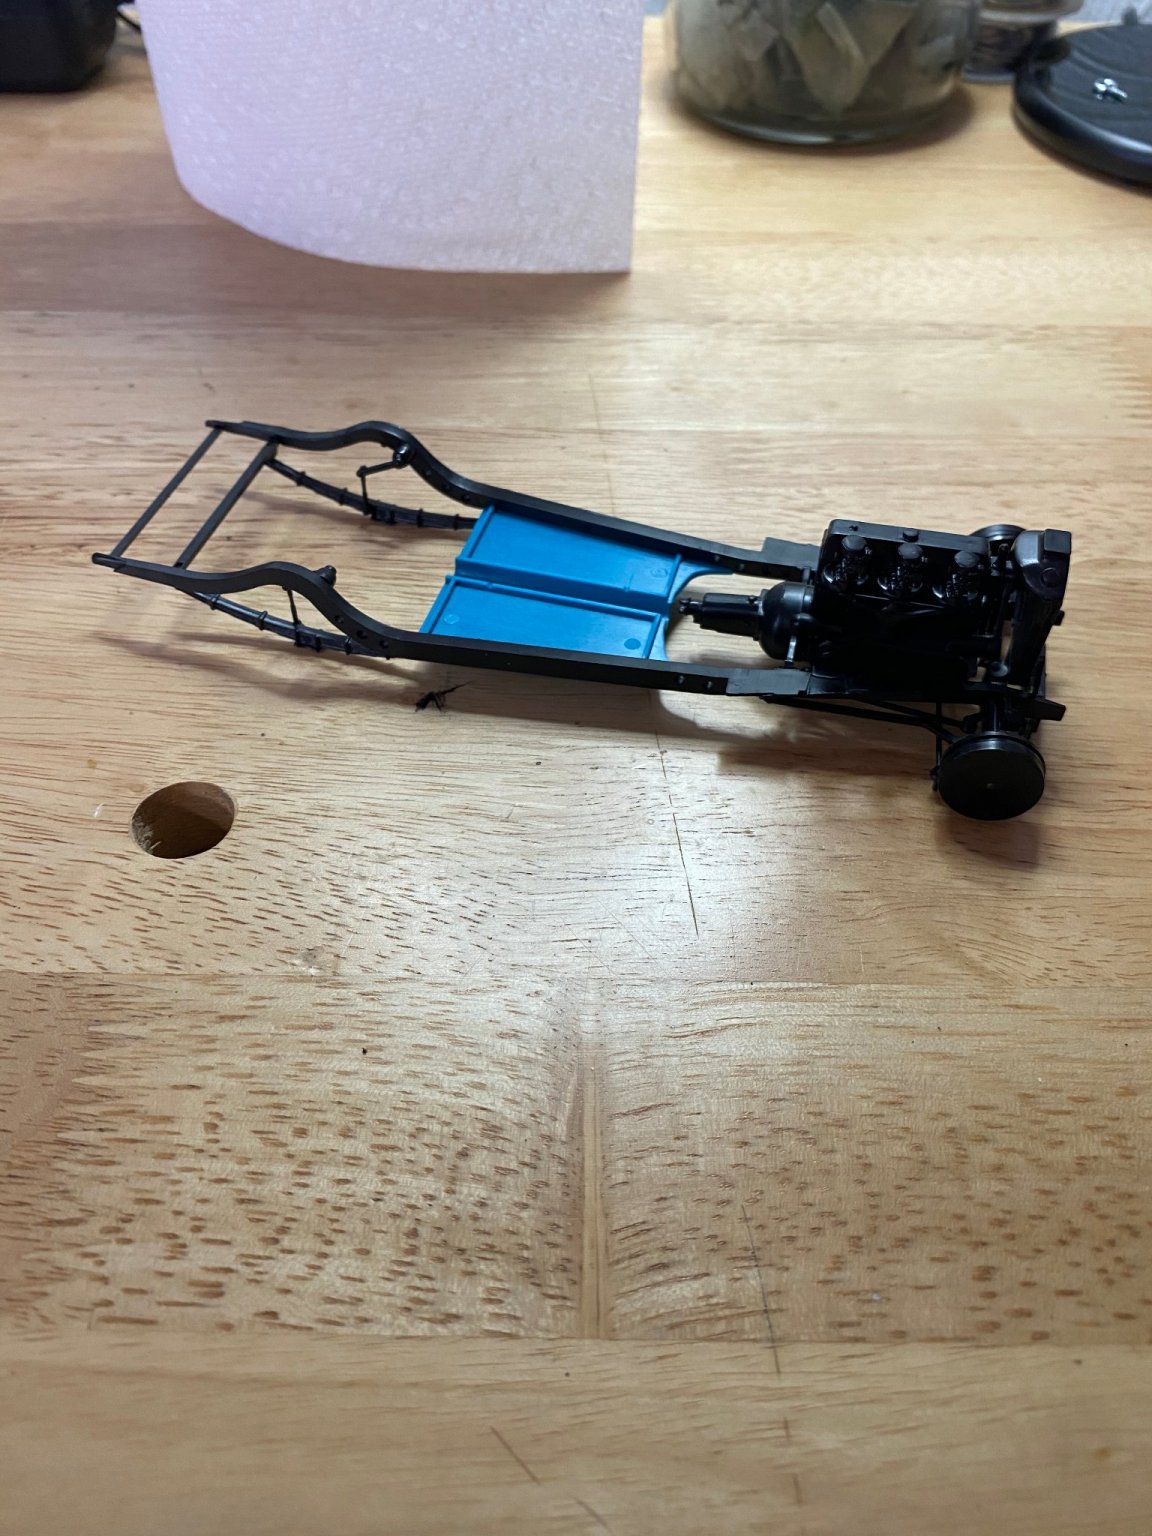
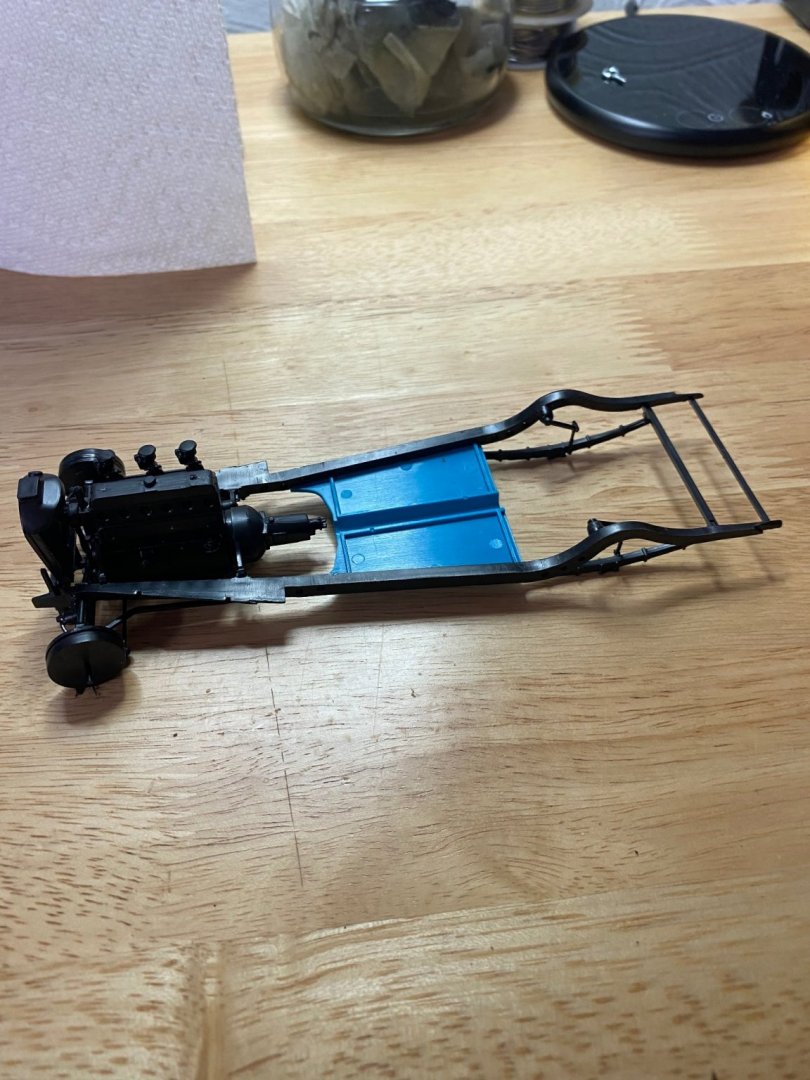
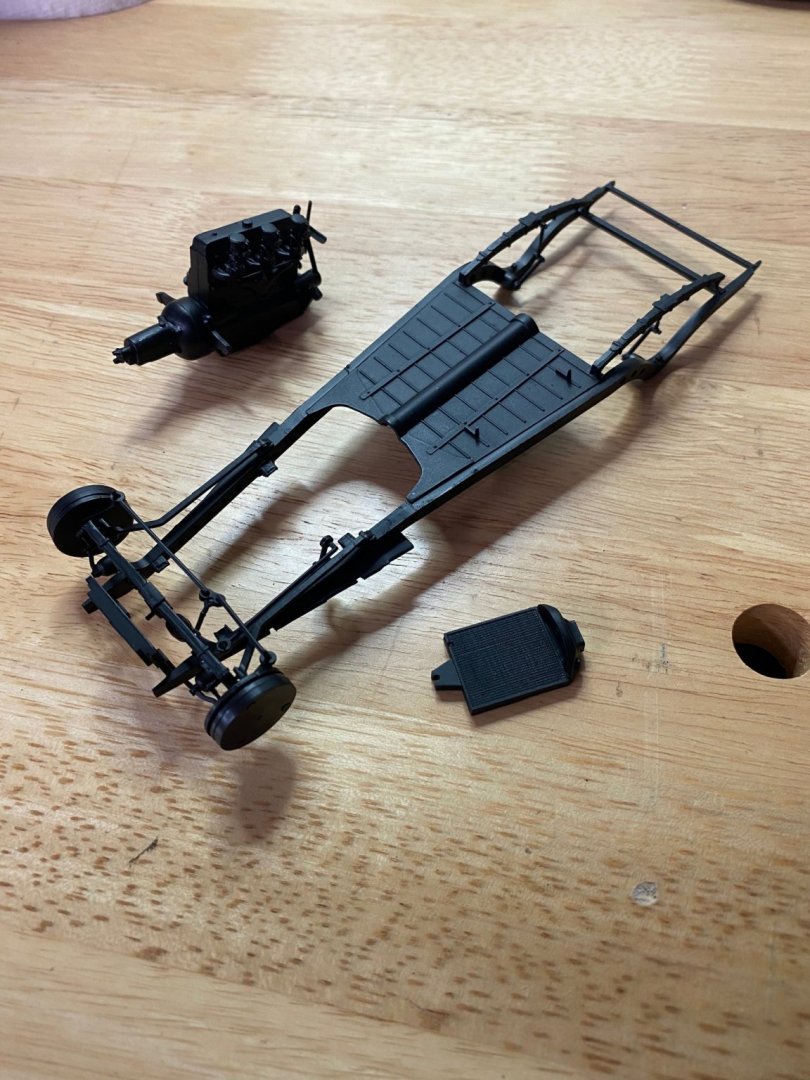
CDW replied to CDW's topic in Non-ship/categorised builds
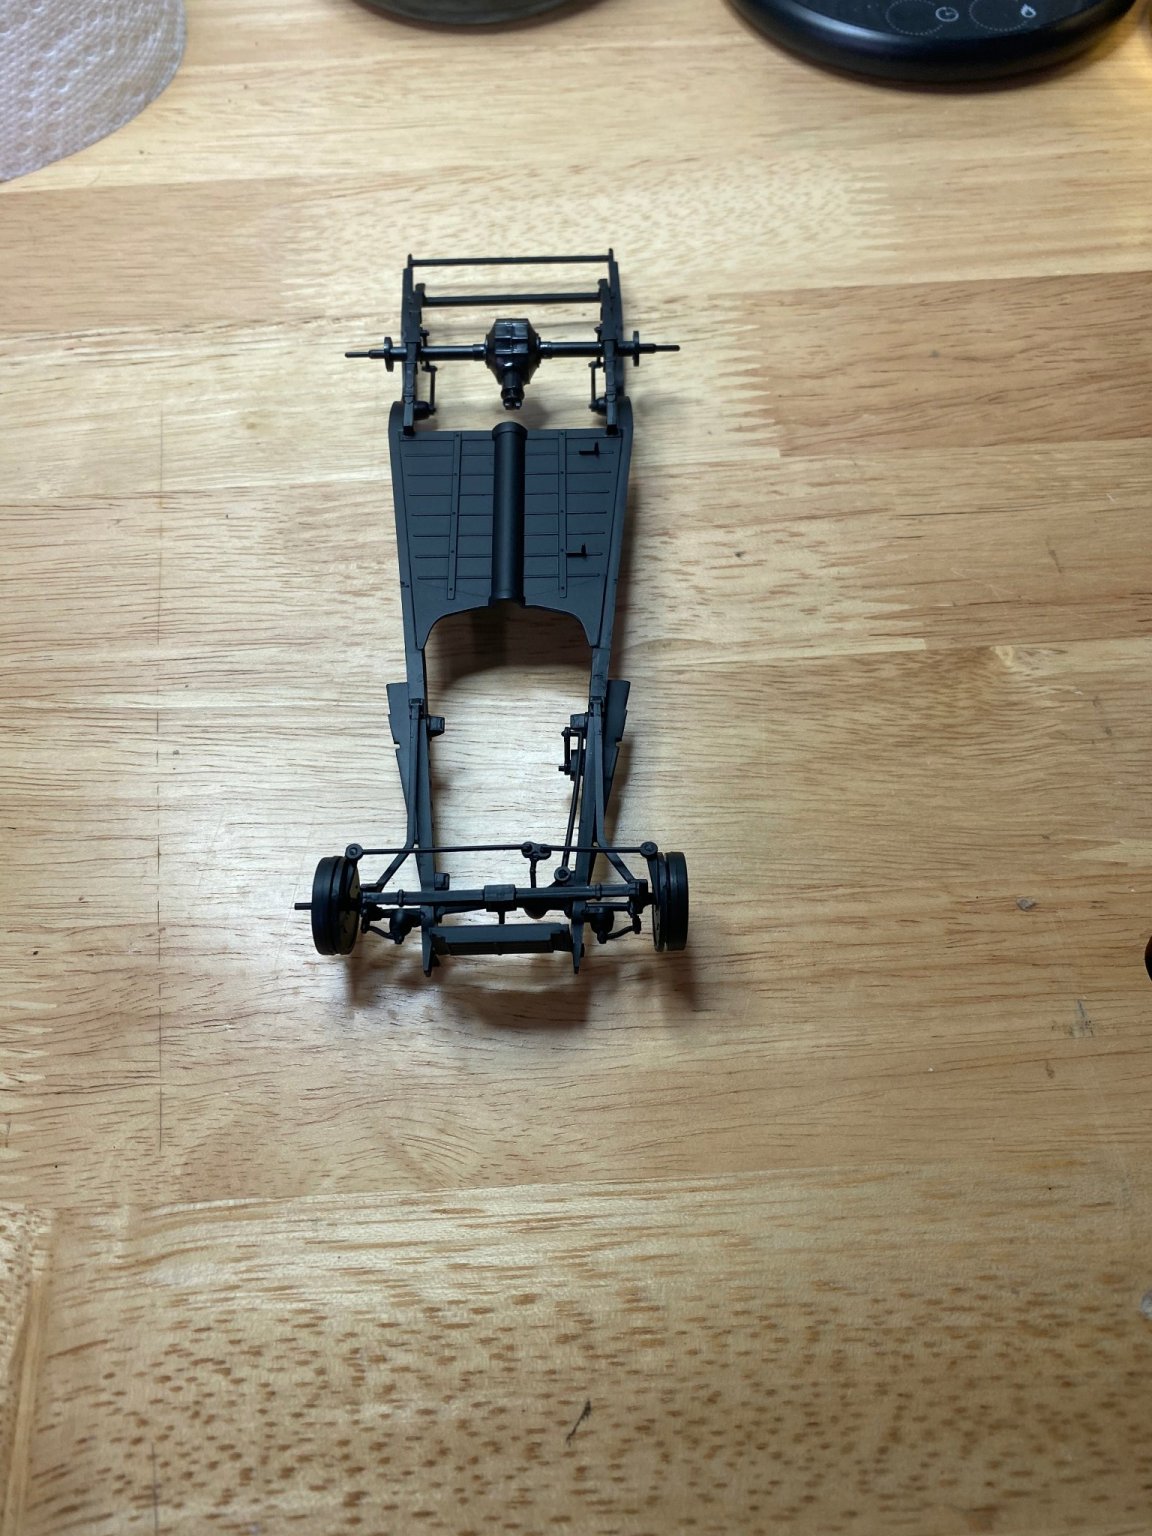
After assembling the chassis, engine, and radiator, everything got a coat of semi gloss primer before any color coats go on. The assembly was a little fiddly, but it looks authentic to me when it's all said and done.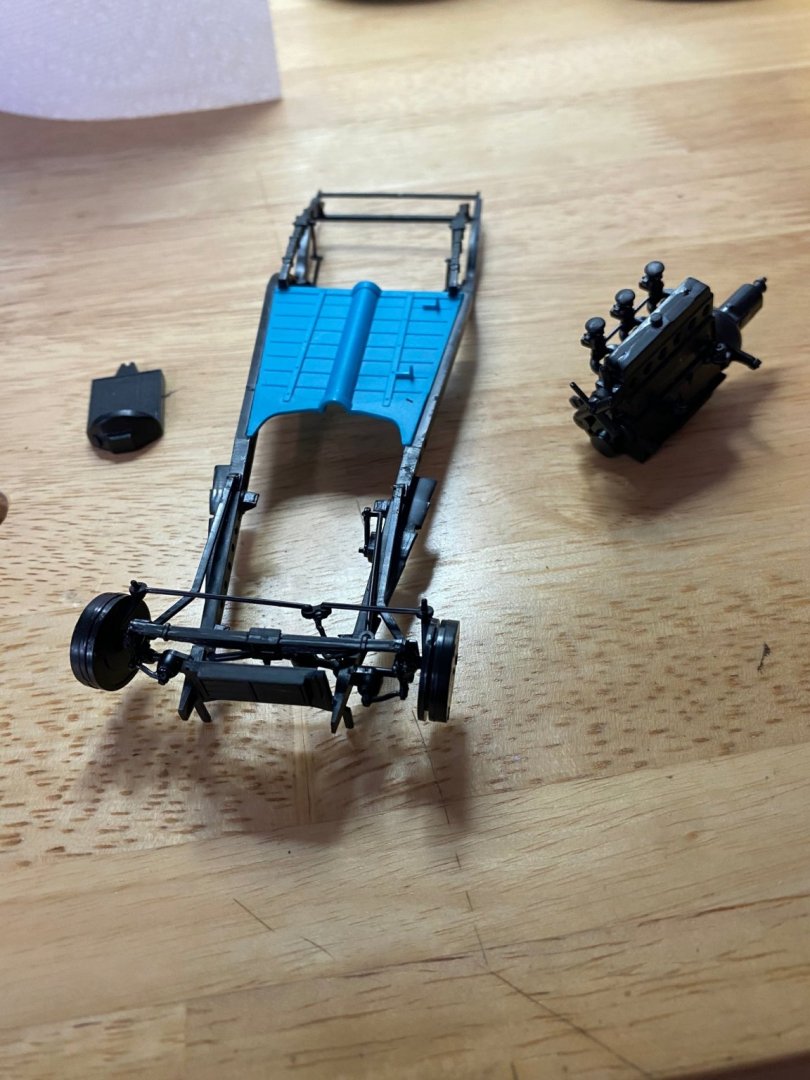


- 85 replies
-
- 12
-
-
Delahaye 135 by CDW - FINISHED - Heller - 1:24 - PLASTIC
CDW replied to CDW's topic in Non-ship/categorised builds
I'm going to slap the 1st guy who tries to look inside the window to see it right on his noggin'. 😄 -
Delahaye 135 by CDW - FINISHED - Heller - 1:24 - PLASTIC
CDW replied to CDW's topic in Non-ship/categorised builds
🤣 -
Delahaye 135 by CDW - FINISHED - Heller - 1:24 - PLASTIC
CDW replied to CDW's topic in Non-ship/categorised builds
You know the term, "tip of the iceberg"? That's what you're seeing of my model stash. I will whittle it down eventually but will never build all of these. -
Delahaye 135 by CDW - FINISHED - Heller - 1:24 - PLASTIC
CDW replied to CDW's topic in Non-ship/categorised builds
Please don't follow my example, Papa. I am a bad influence in the excess stash department. -
Delahaye 135 by CDW - FINISHED - Heller - 1:24 - PLASTIC
CDW replied to CDW's topic in Non-ship/categorised builds
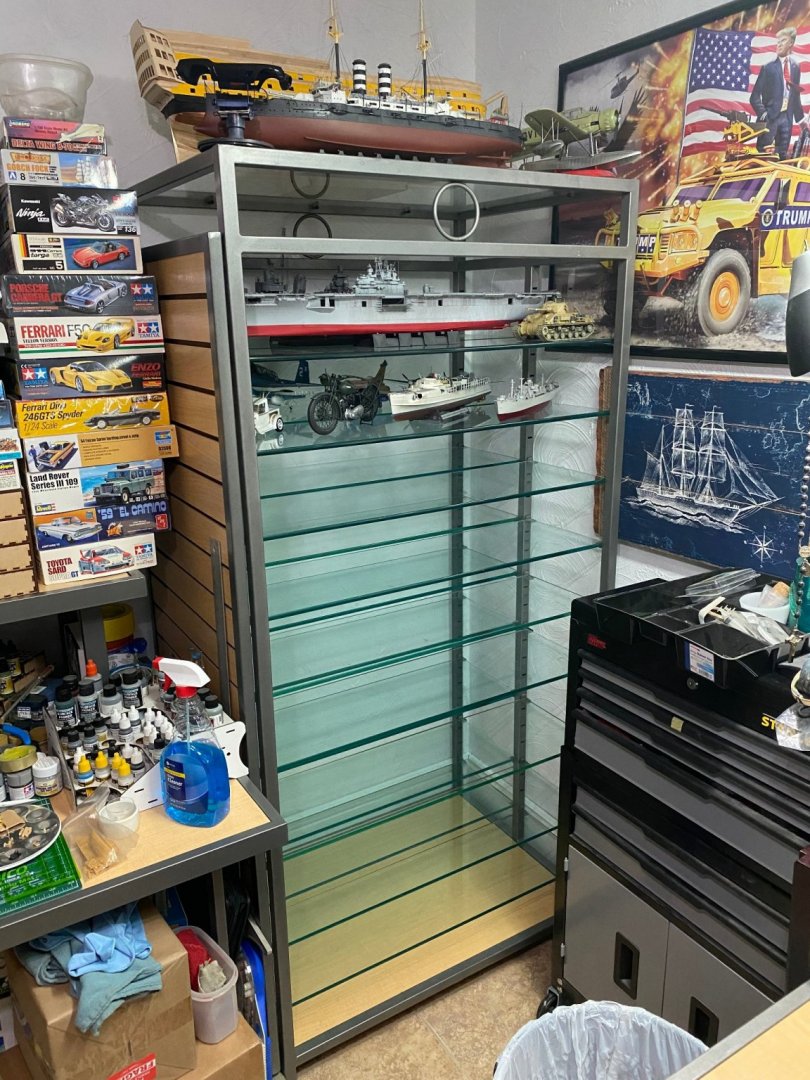
I have plenty of entertainment subject material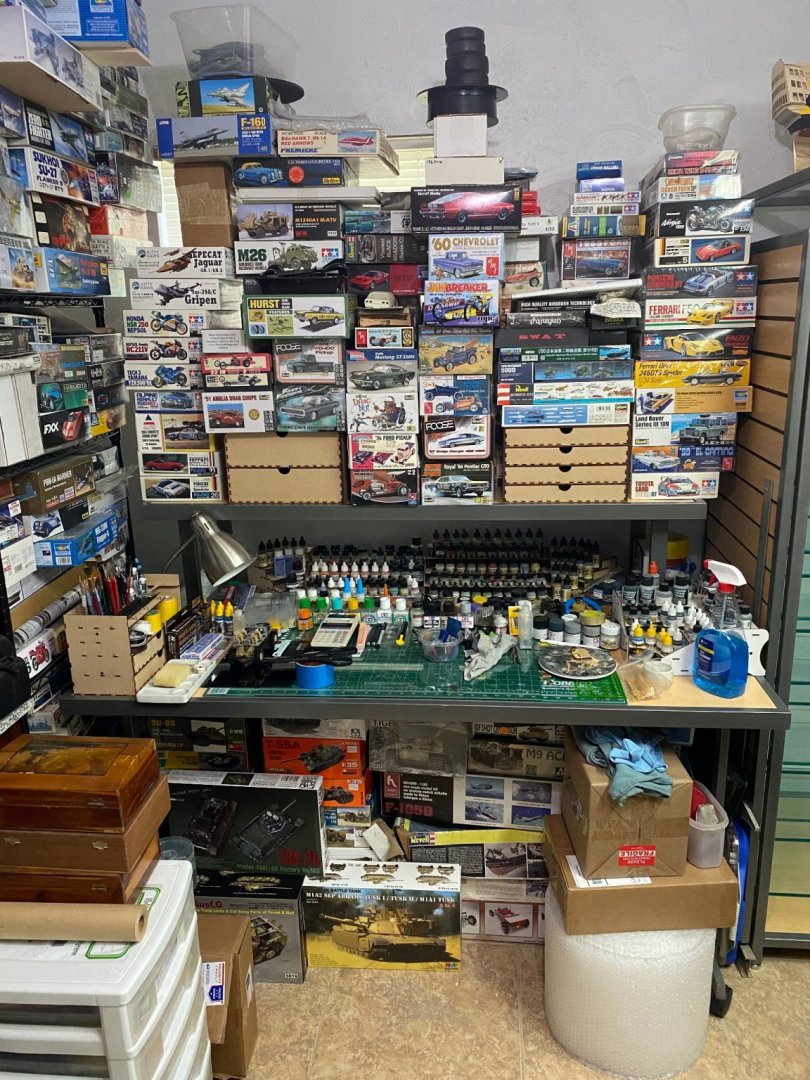
- 85 replies
-
- 14
-