CDW
-
Posts
7,737 -
Joined
-
Last visited
Content Type
Profiles
Forums
Gallery
Events
Everything posted by CDW
-

MRAP ATV by CDW - FINISHED - Rye Field - 1:35 Scale
CDW replied to CDW's topic in Non-ship/categorised builds
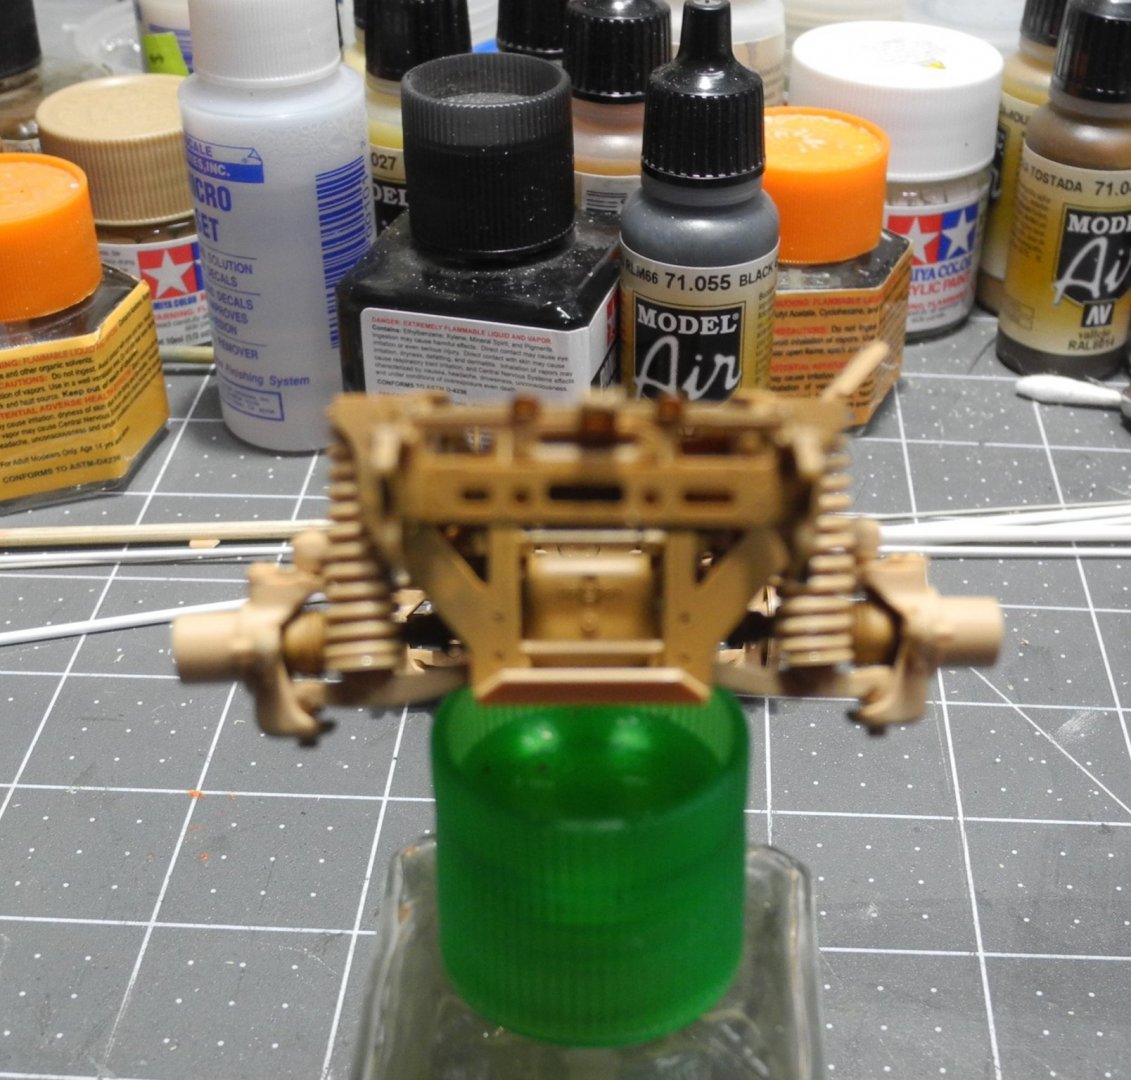
Next are sub assemblies that attach to the chassis, and the extensive detailing just goes on and on. Every step is another mini model. Every Rye Field kit I own is detailed like this. An exceptional company doing next generation work to produce extreme detail. Thank you OC To go along with the panel line wash, you'll want to acquire a bottle of Mr Color Solvent 110, and some women's makeup applicators, the ones with the little foam tips. After you apply your panel line wash, dampen the foam tip applicator with Solvent 110, and then use it to wipe away excess wash leaving only the wash in the recesses. Works like a charm. But be forewarned, this application only works over a lacquer based acrylic like Mr Color. If you try it over a water based acrylic like Vallejo, it will remove the paint. It's all in the paint, Denis. Mr Color lacquer based acrylics. The paint is just that good. -
MRAP ATV by CDW - FINISHED - Rye Field - 1:35 Scale
CDW replied to CDW's topic in Non-ship/categorised builds
This vehicle is a huge step above and beyond the HMWWV's it replaces. -
MRAP ATV by CDW - FINISHED - Rye Field - 1:35 Scale
CDW replied to CDW's topic in Non-ship/categorised builds
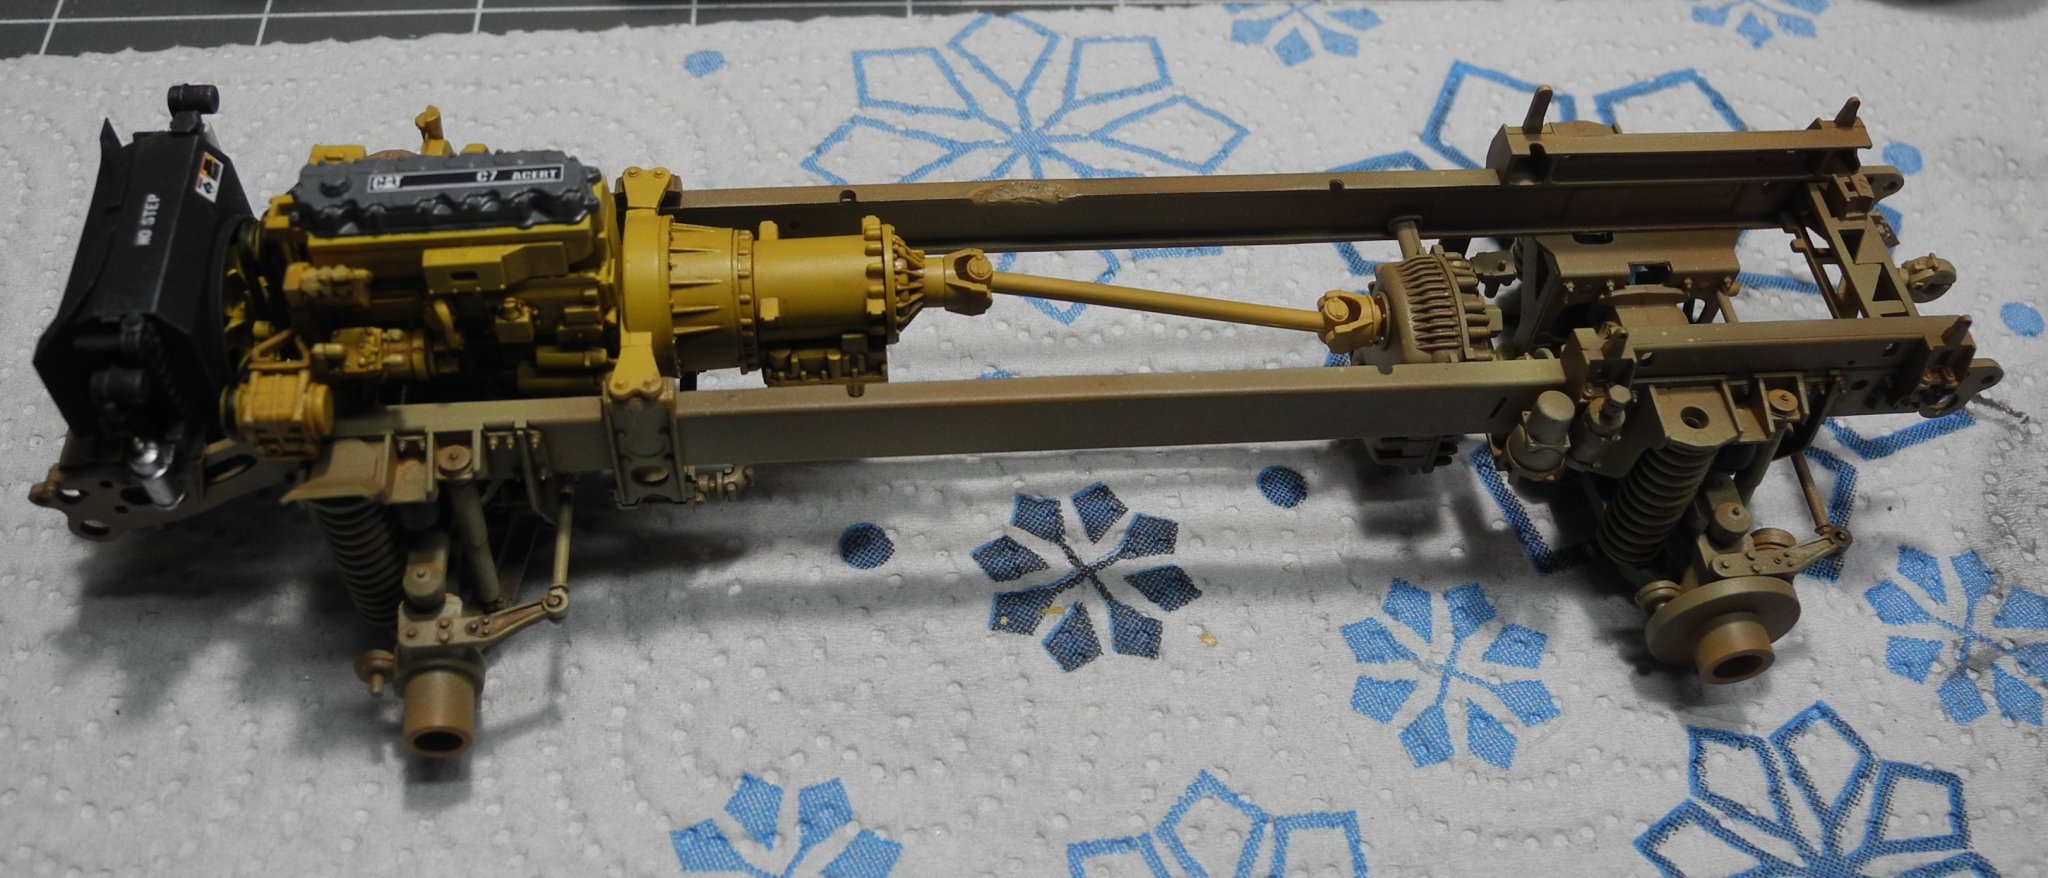
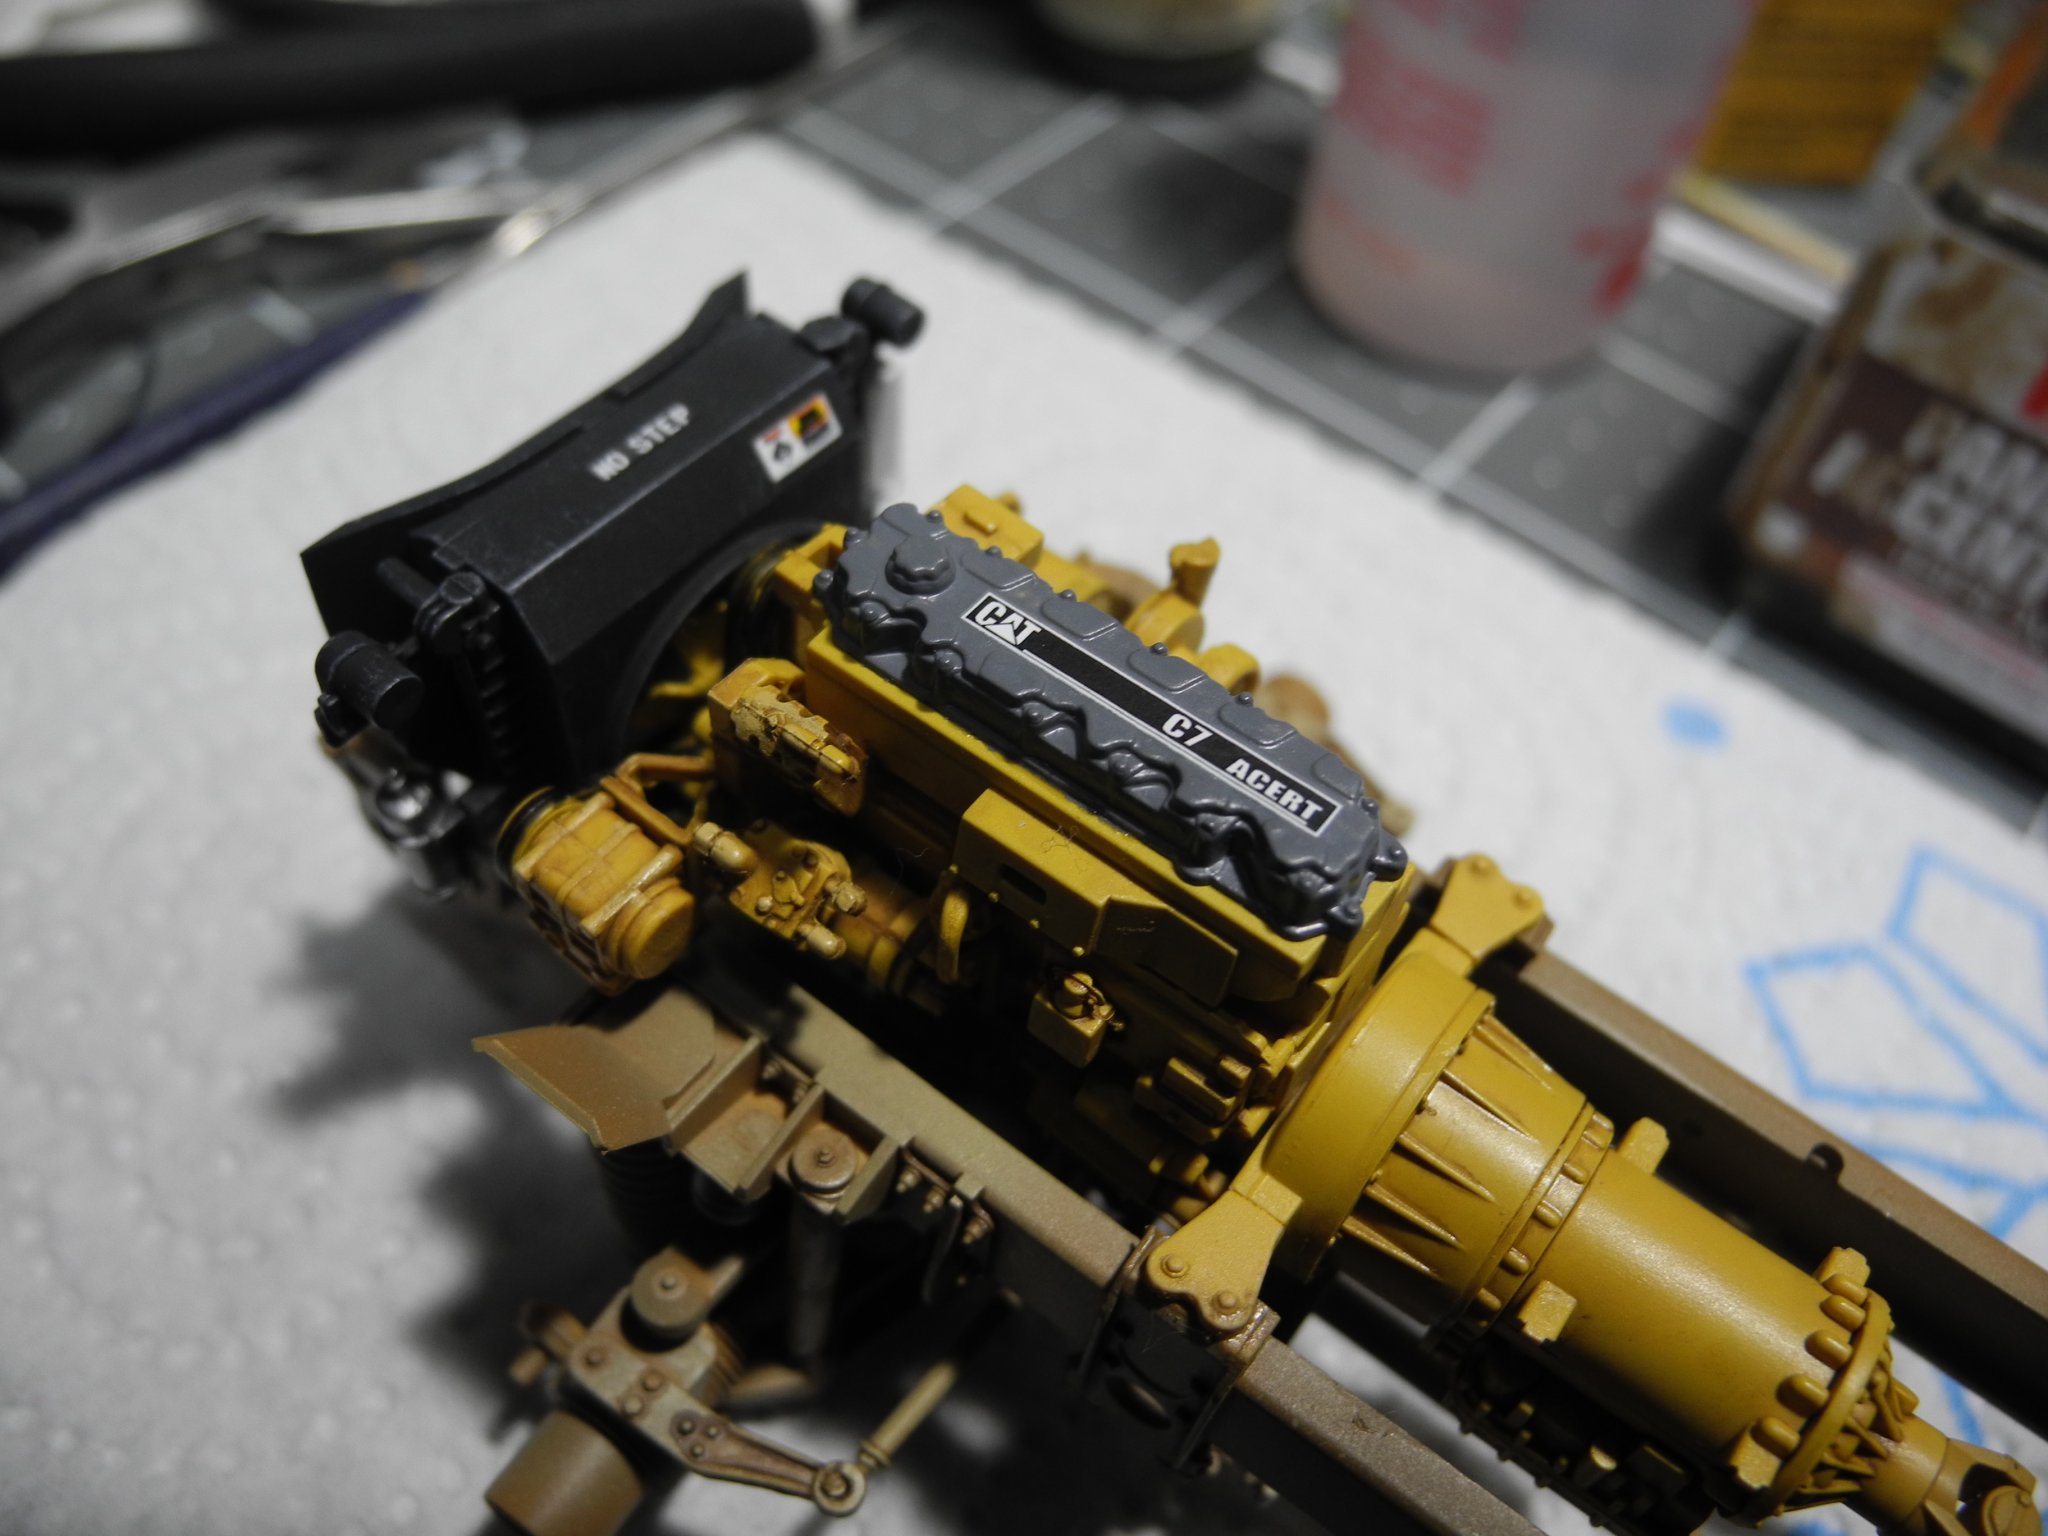
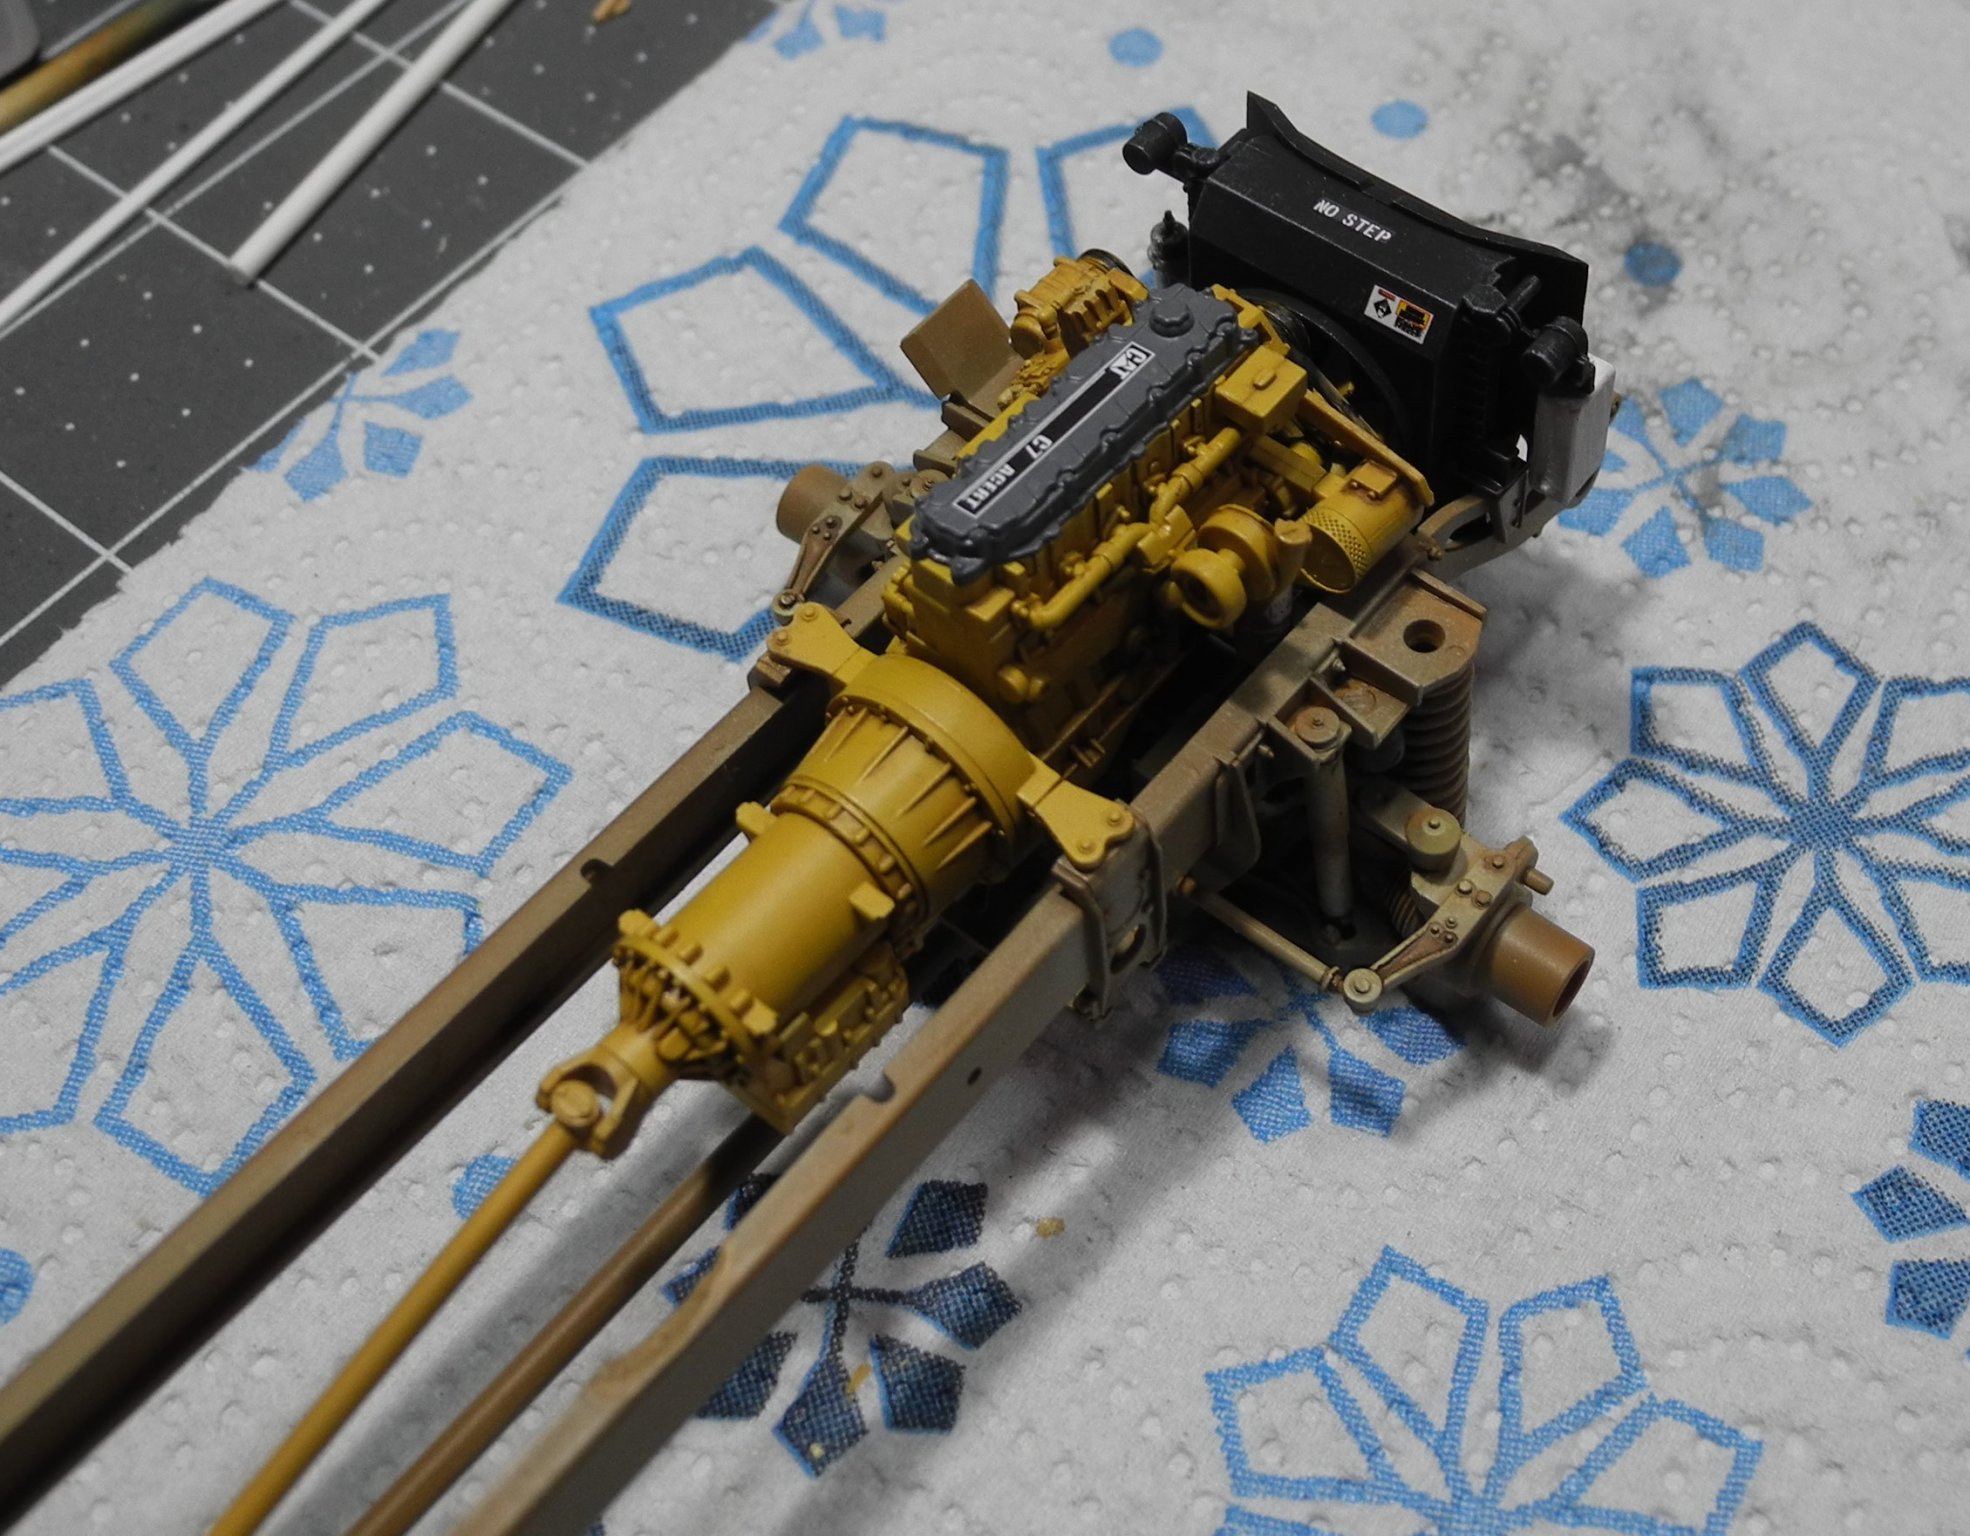
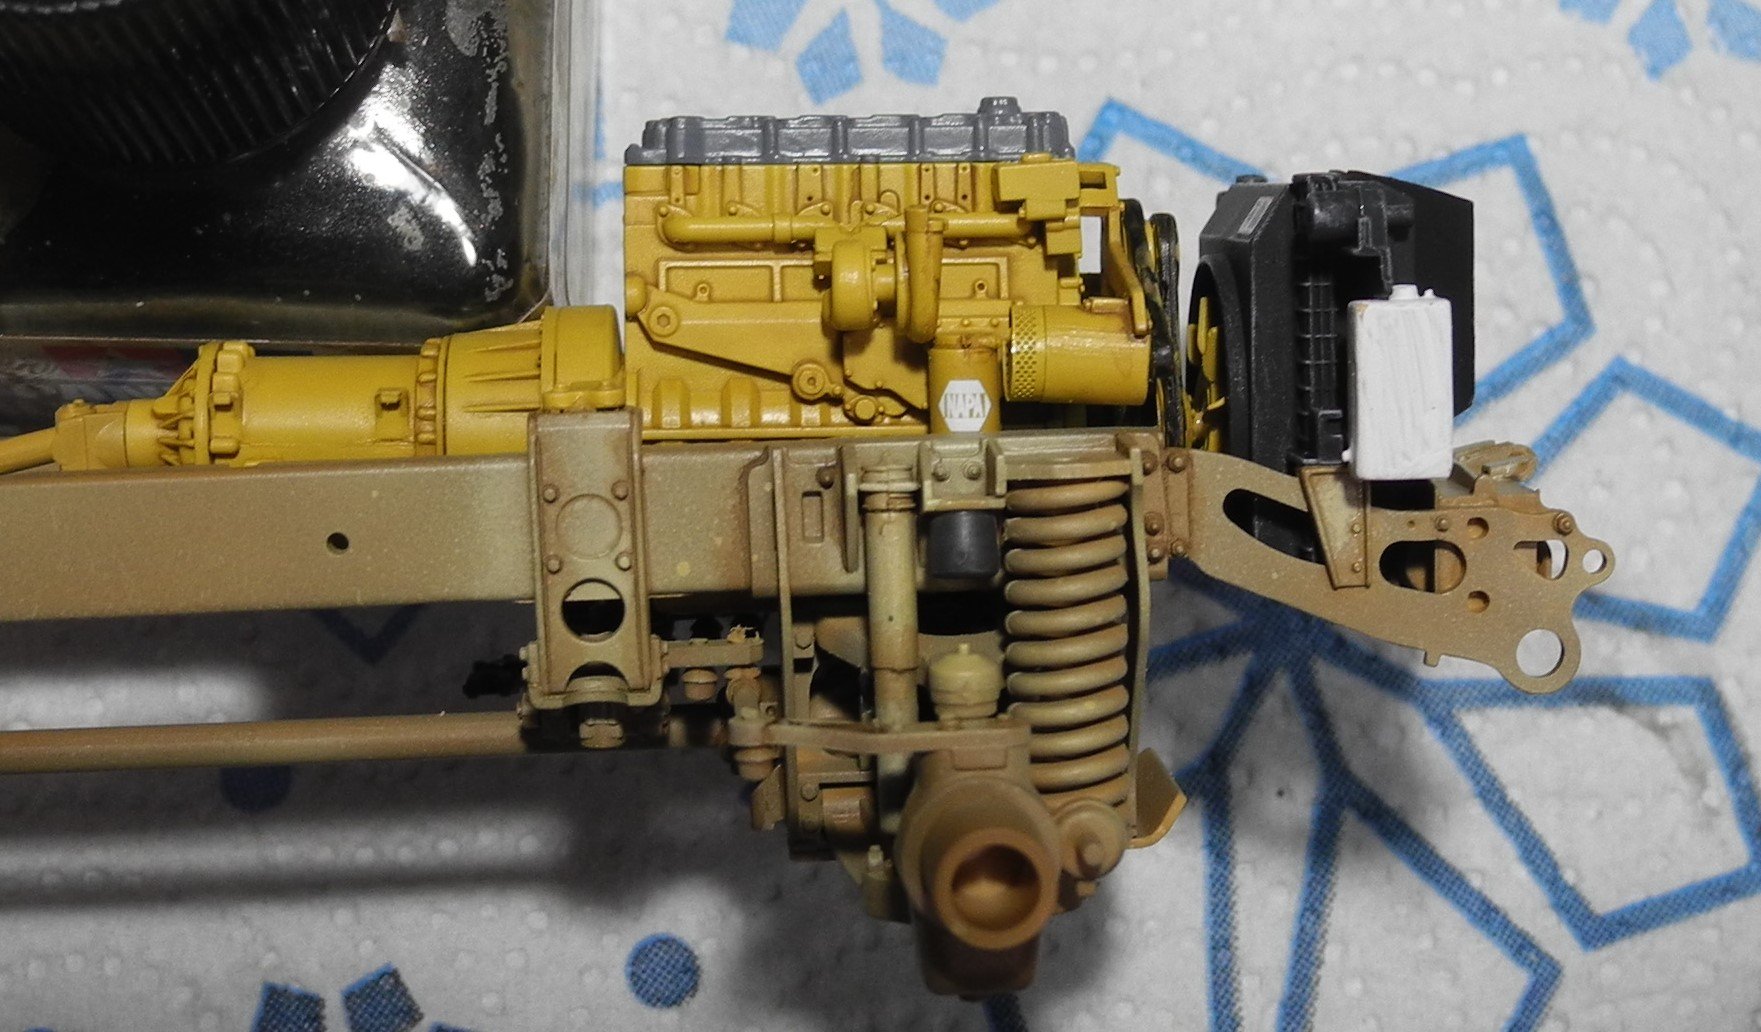
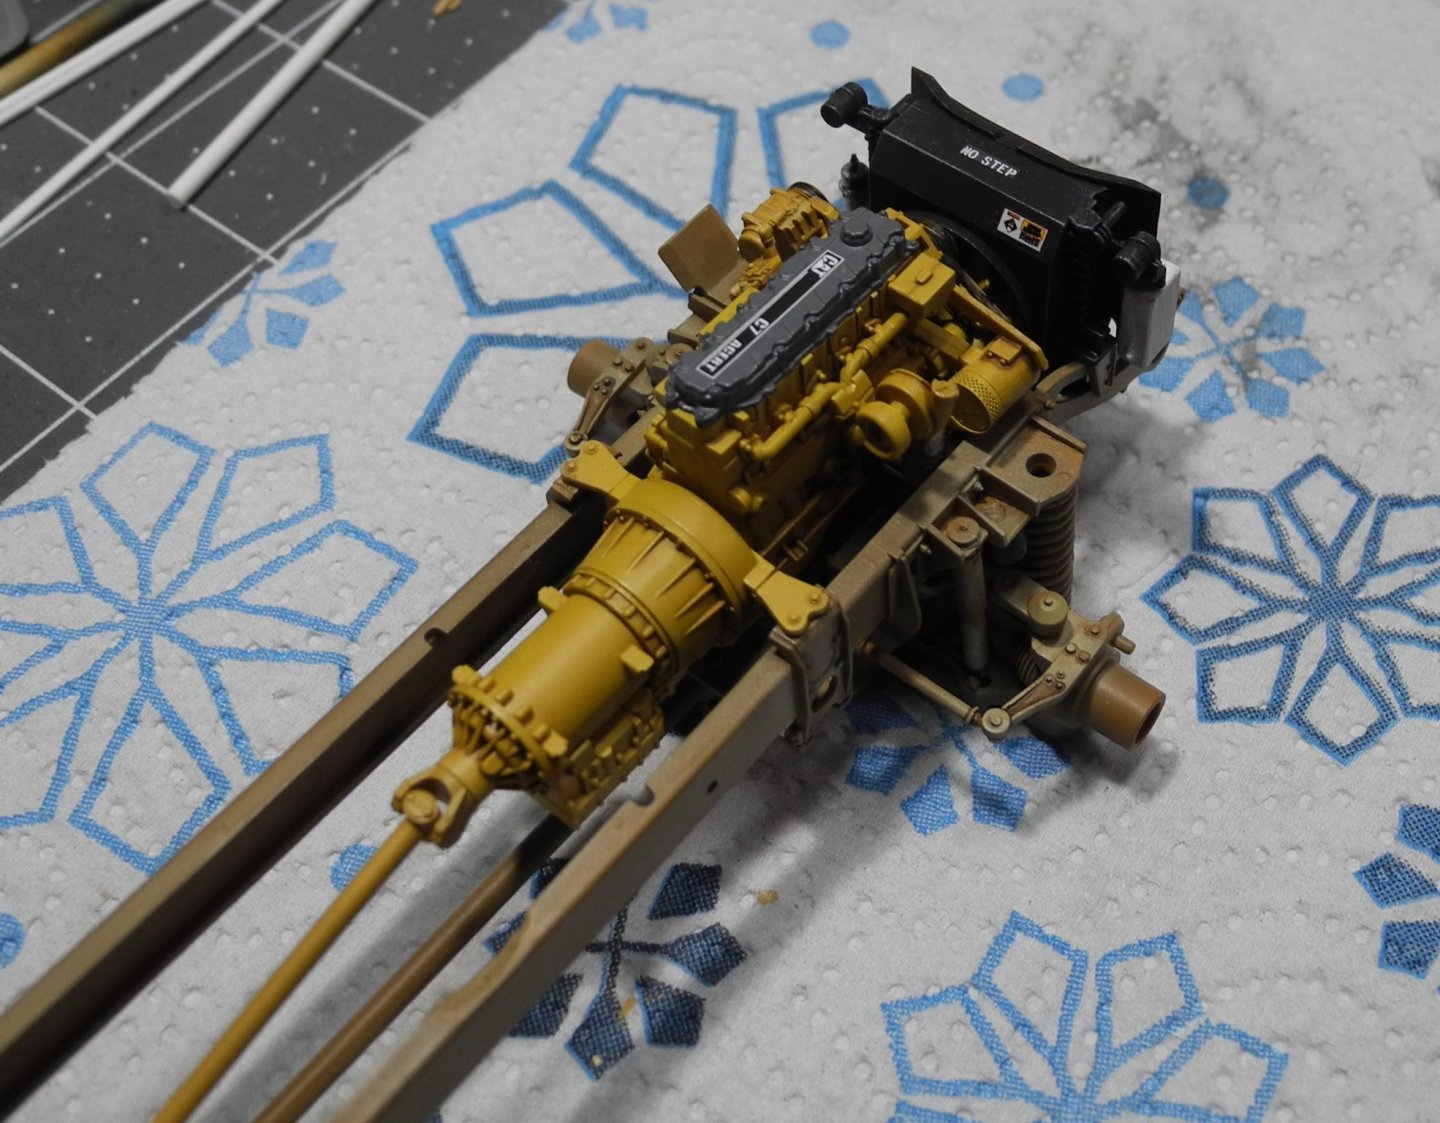
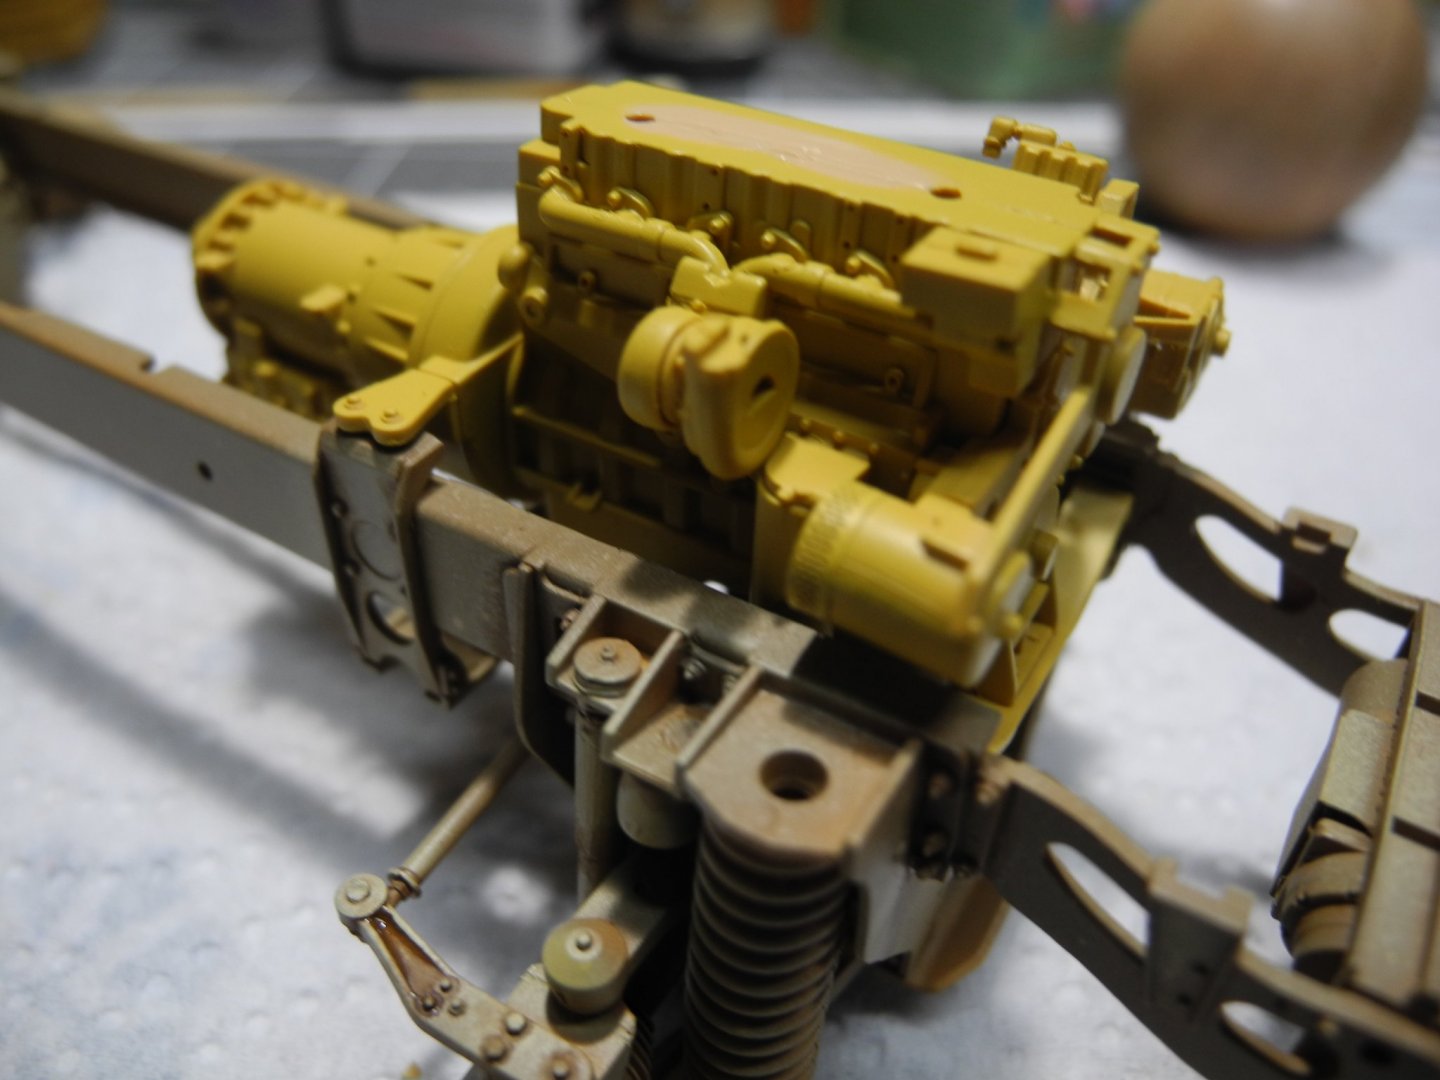
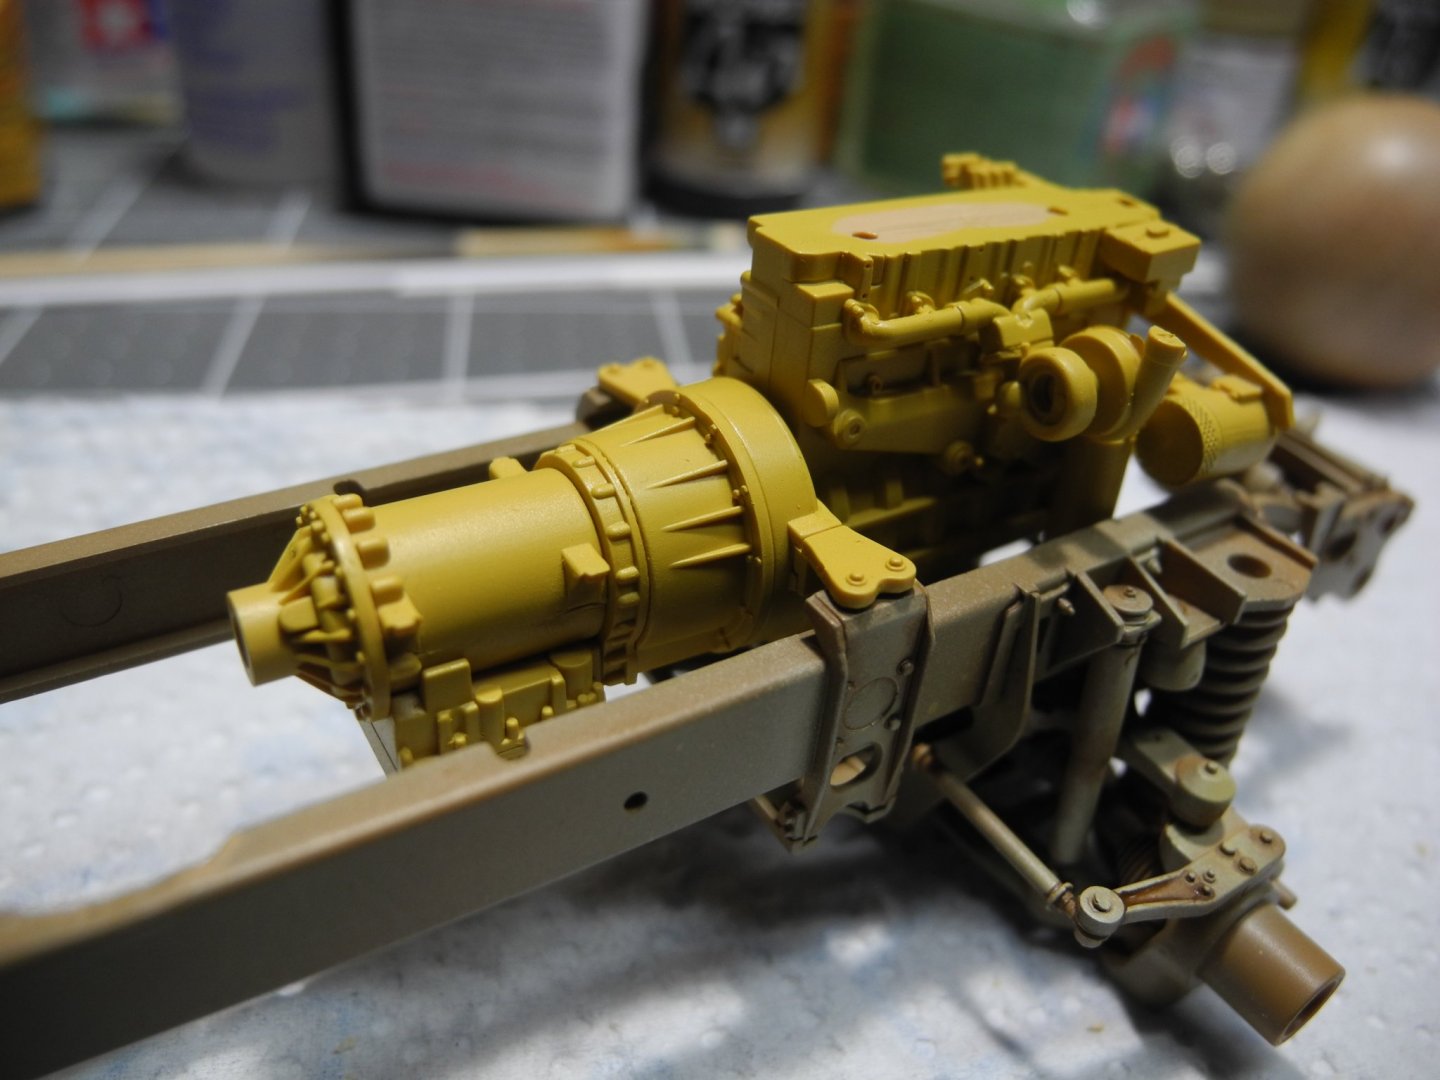
Engine, transmission, and radiator all mounted now.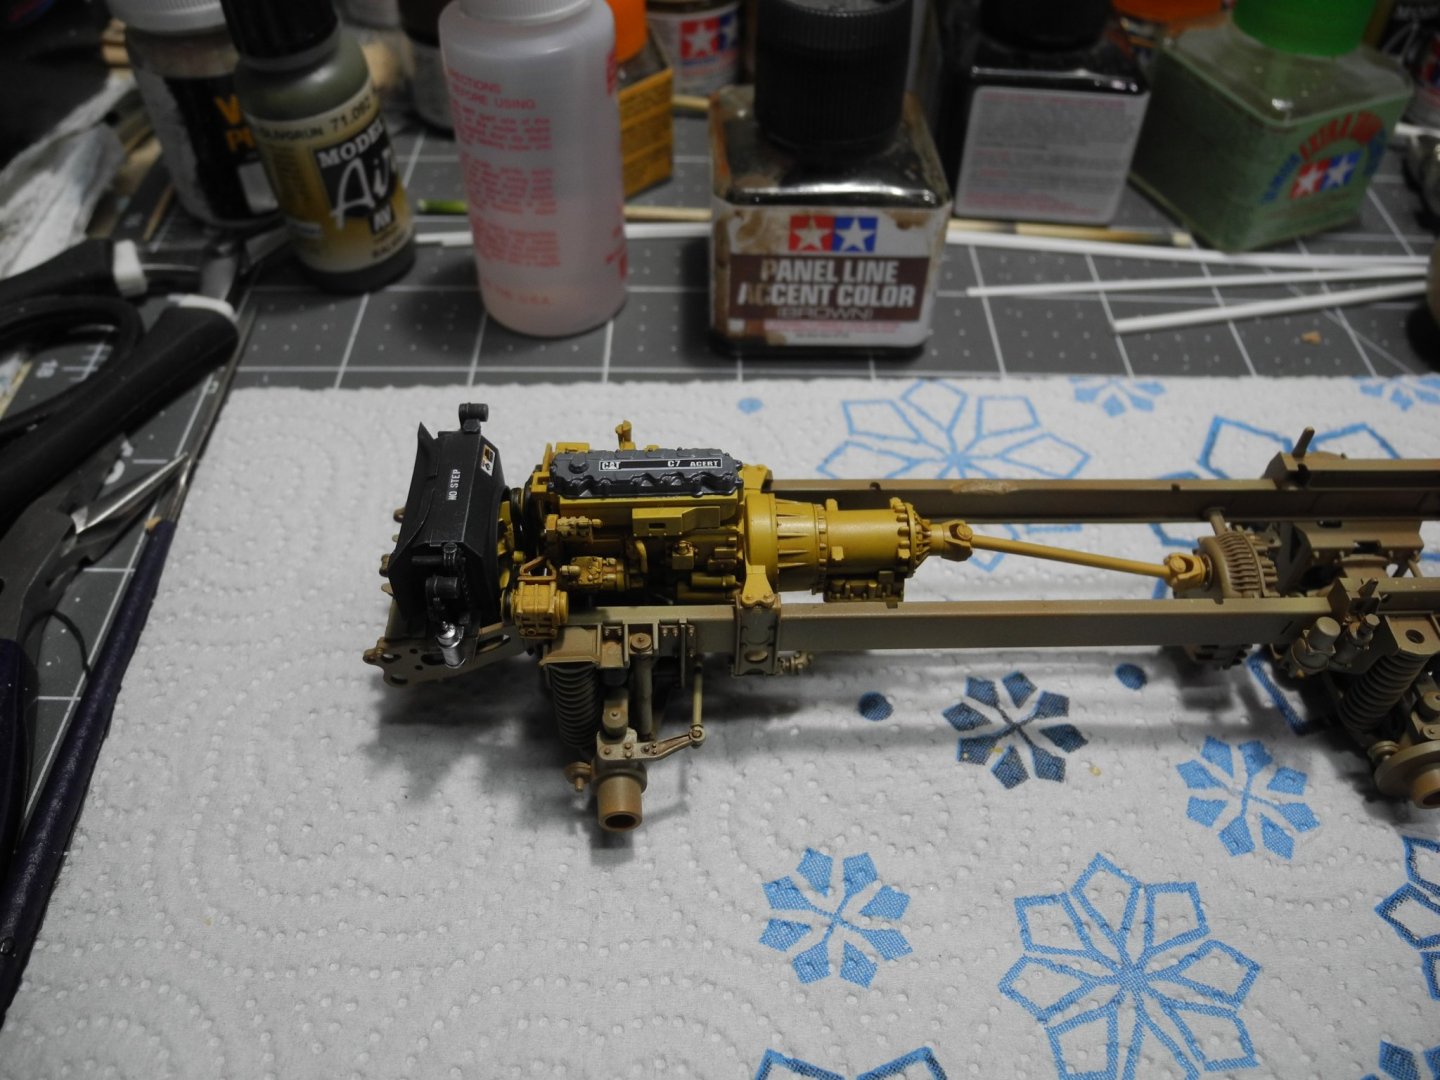


- 217 replies
-
- 17
-

-
Great subject, looking forward to your build OC.
-
MRAP ATV by CDW - FINISHED - Rye Field - 1:35 Scale
CDW replied to CDW's topic in Non-ship/categorised builds
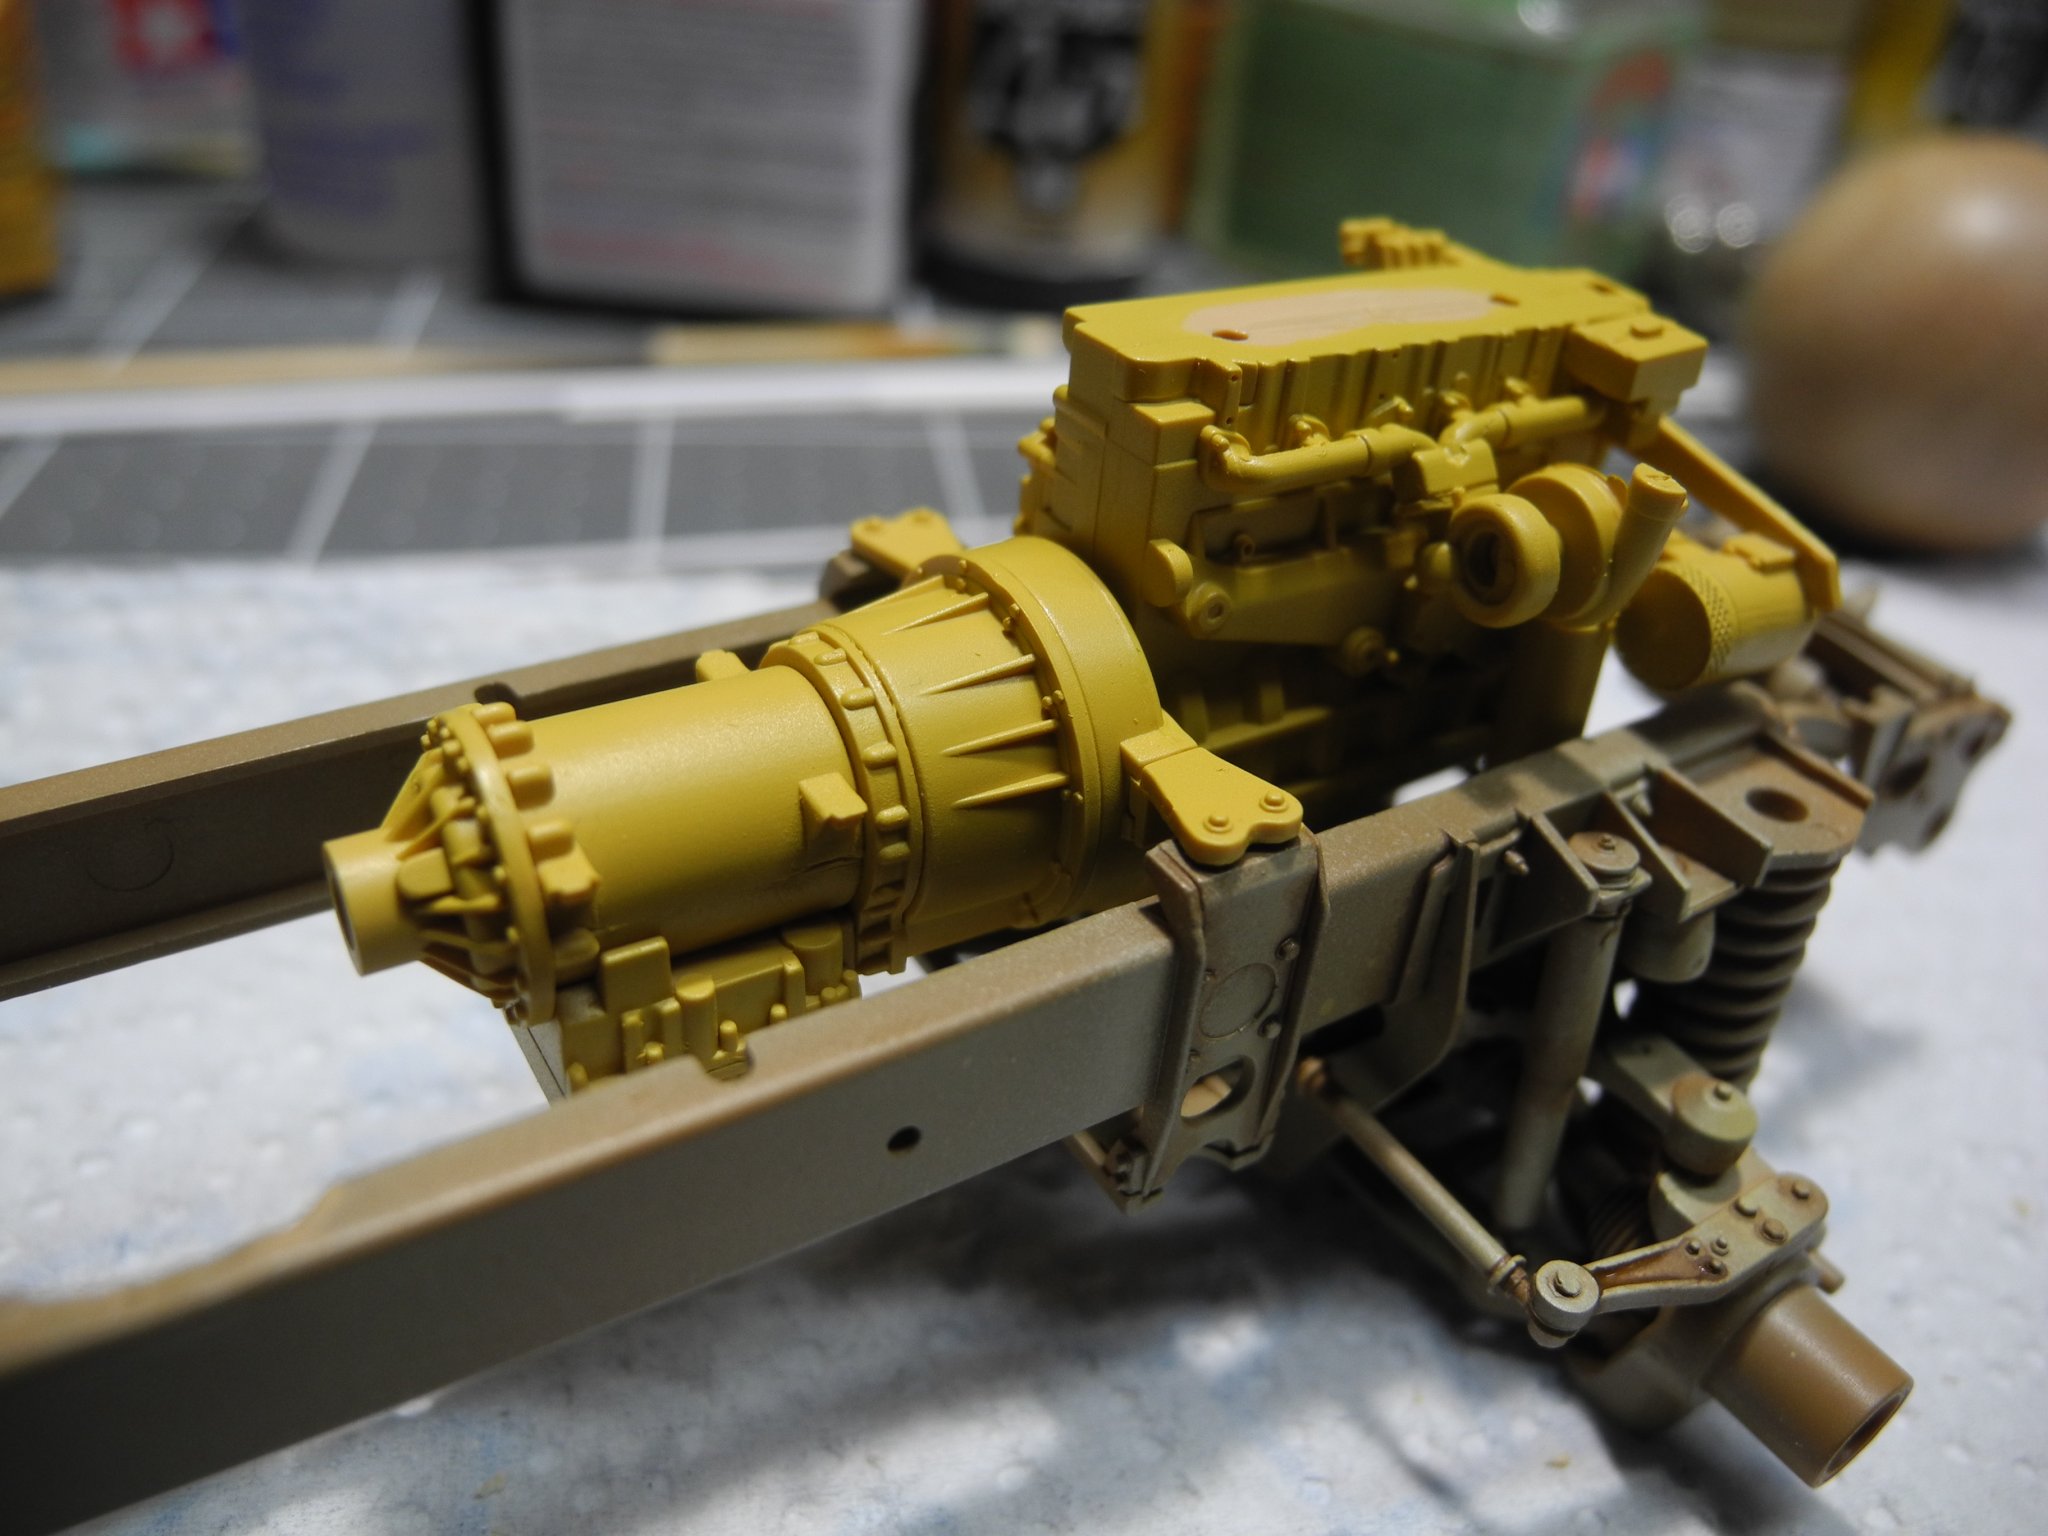
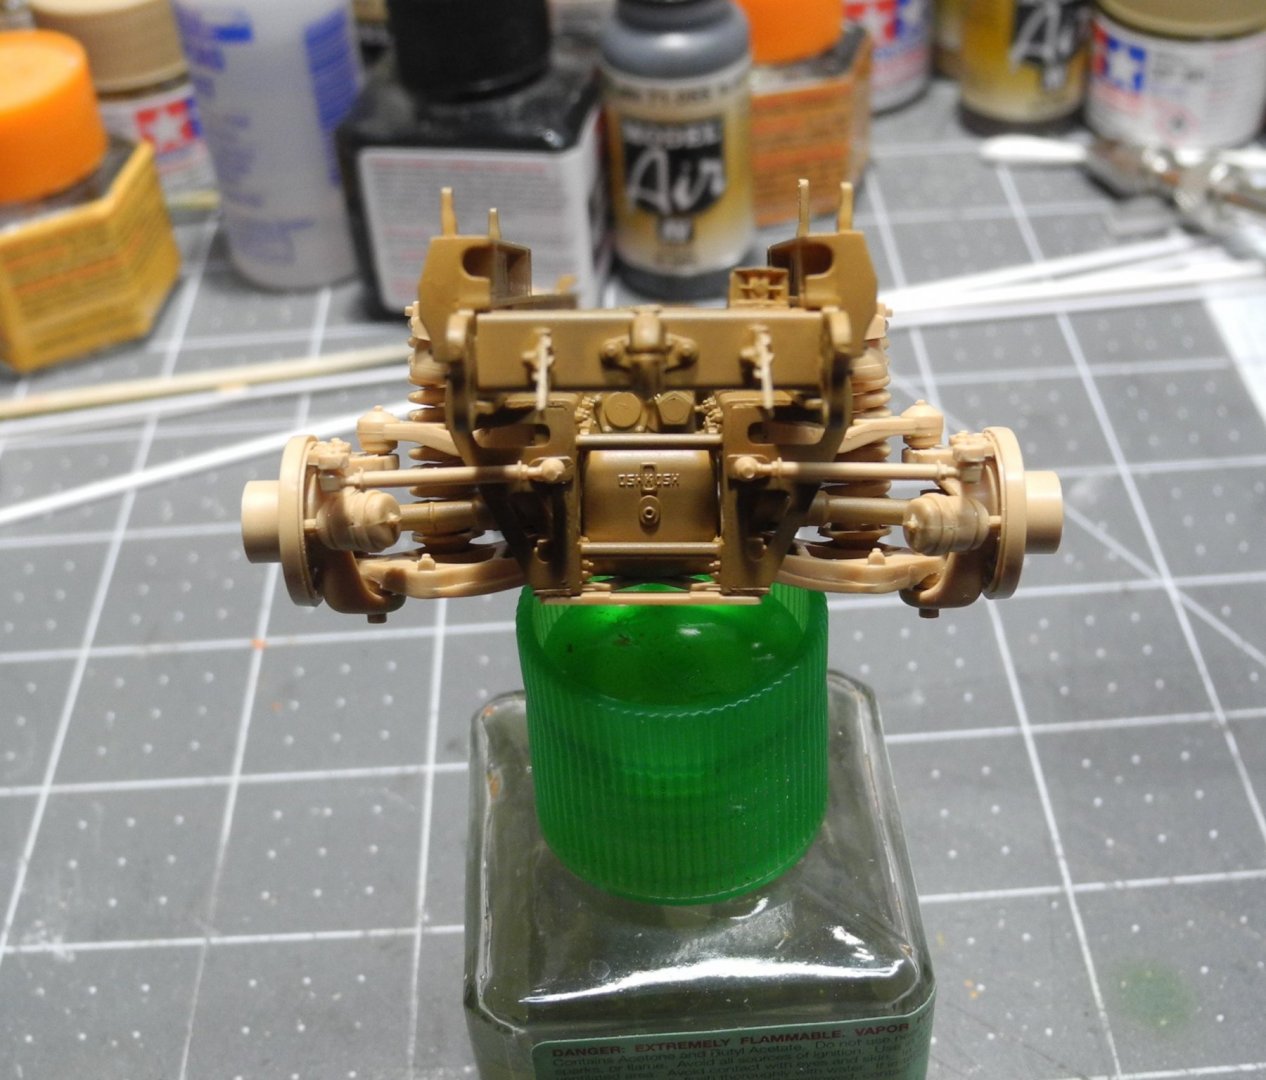
A dry fit of the Caterpillar engine/transmission to the chassis. A lot of parts involved in the engine. it surprised me, and all are not yet attached. It will be a very busy engine compartment. More to come...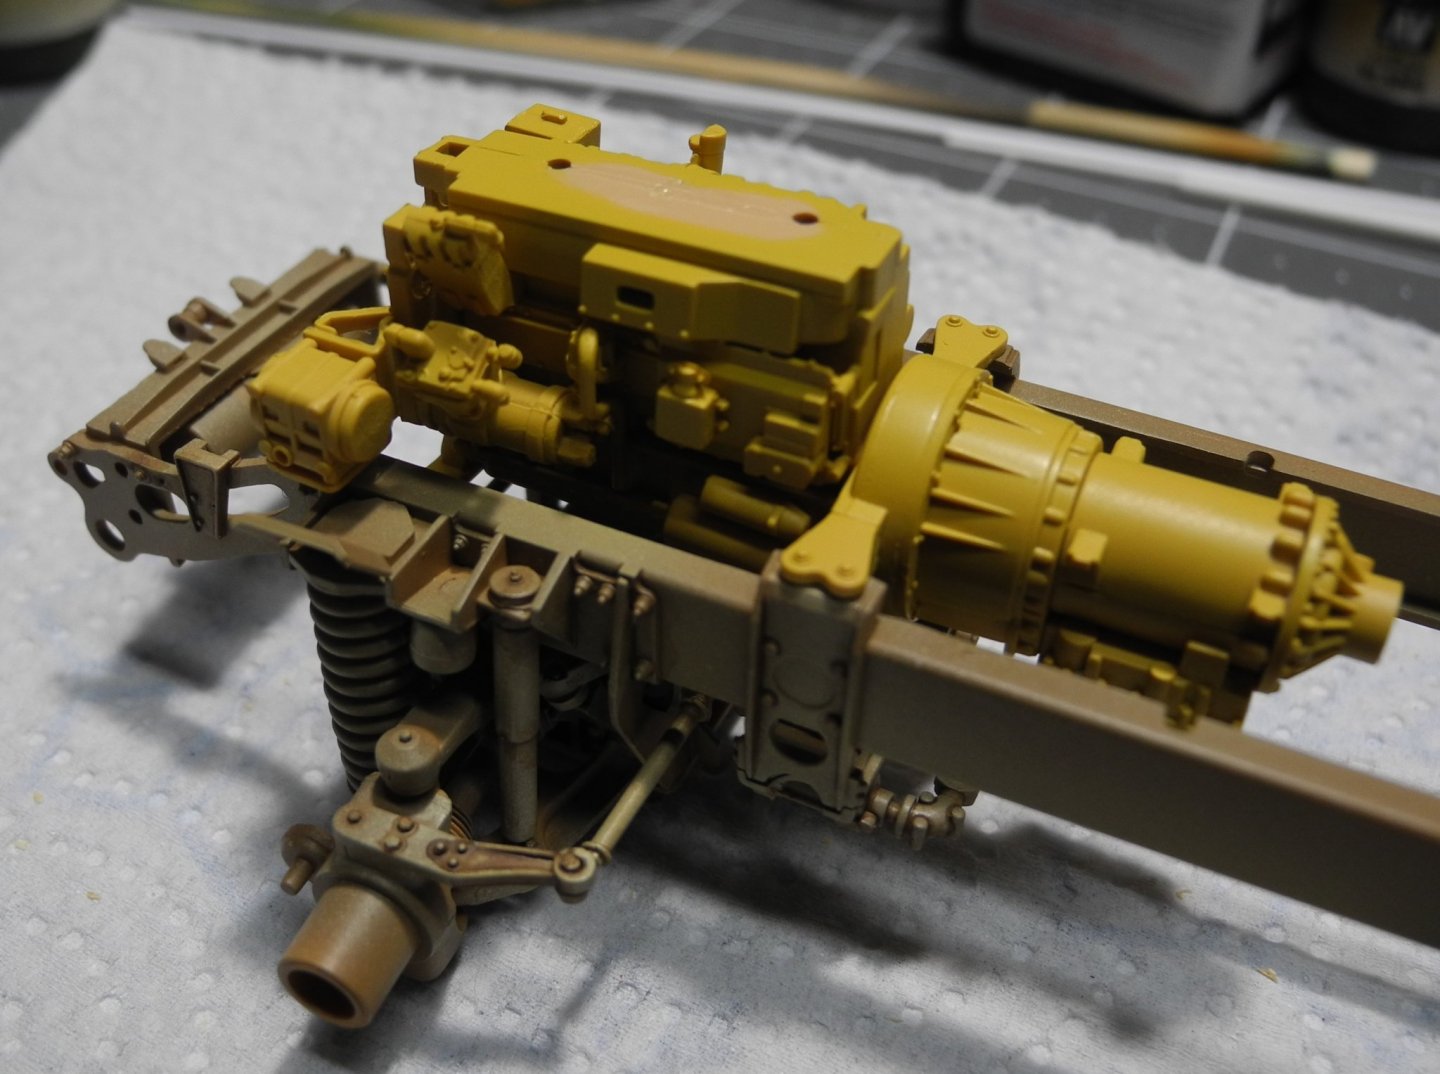

- 217 replies
-
- 14
-
-
MRAP ATV by CDW - FINISHED - Rye Field - 1:35 Scale
CDW replied to CDW's topic in Non-ship/categorised builds
We'll be staying near Manchester at our oldest daughter's home. Our youngest daughter is going to stay with her sister to finish college. Not sure how much we will be able to do while we are there, will just play it by ear. -
MRAP ATV by CDW - FINISHED - Rye Field - 1:35 Scale
CDW replied to CDW's topic in Non-ship/categorised builds
Me and my family are flying up to NH next week. -
MRAP ATV by CDW - FINISHED - Rye Field - 1:35 Scale
CDW replied to CDW's topic in Non-ship/categorised builds
Good find Ken. Thanks for posting the link. -
MRAP ATV by CDW - FINISHED - Rye Field - 1:35 Scale
CDW replied to CDW's topic in Non-ship/categorised builds
scalehobbyist.com Excellent online hobby shop that's near you in New Hampshire. They carry a full line of Mr Color paints and everything else. -
MRAP ATV by CDW - FINISHED - Rye Field - 1:35 Scale
CDW replied to CDW's topic in Non-ship/categorised builds
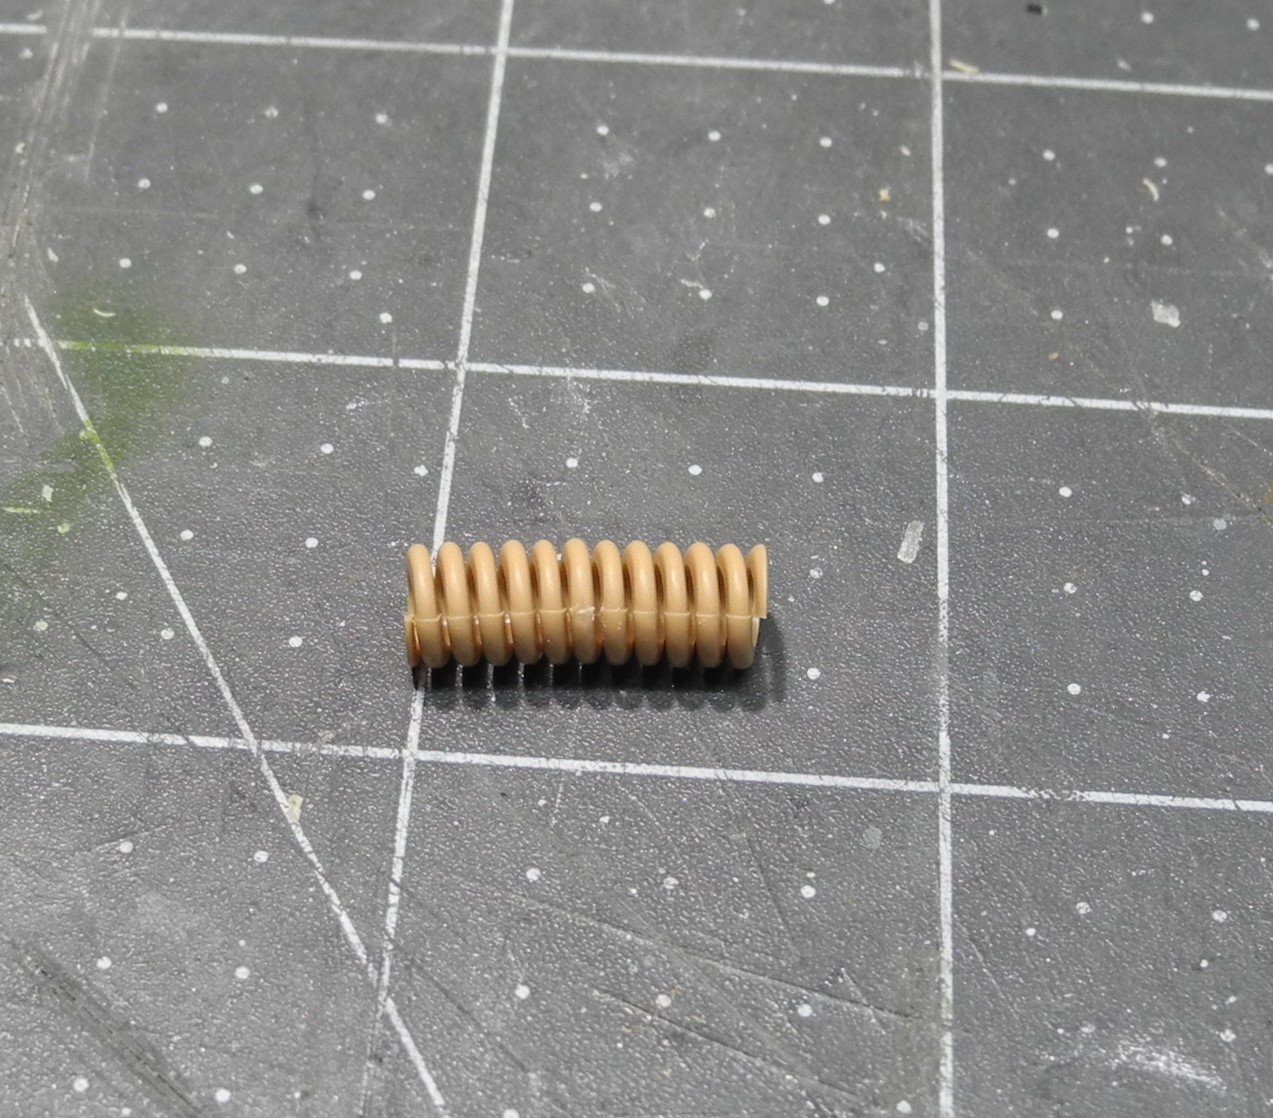
This may be, but I'm not so sure of that. Seems to me if this were true, the inside of the coil would be flat, but it's not. The spring coils are round inside and out. For sure you can see the parting line down each outside half of the coil. but the inner coils retain their perfectly round shape. That's what I can't compute. -
MRAP ATV by CDW - FINISHED - Rye Field - 1:35 Scale
CDW replied to CDW's topic in Non-ship/categorised builds
It's the first one I've seen done in plastic as well. Can't even imagine the mold it would take to do that, then to get it out of the mold makes my head spin. Yes, this has been a fun kit to build so far. Fits together very well. The paint set sells for around $12, so the price is right. Then it's lacquer based paints as well. Dries fast and hard. Very much more scratch resistant than water based acrylics but stinks a lot. -
MRAP ATV by CDW - FINISHED - Rye Field - 1:35 Scale
CDW replied to CDW's topic in Non-ship/categorised builds
Moving on...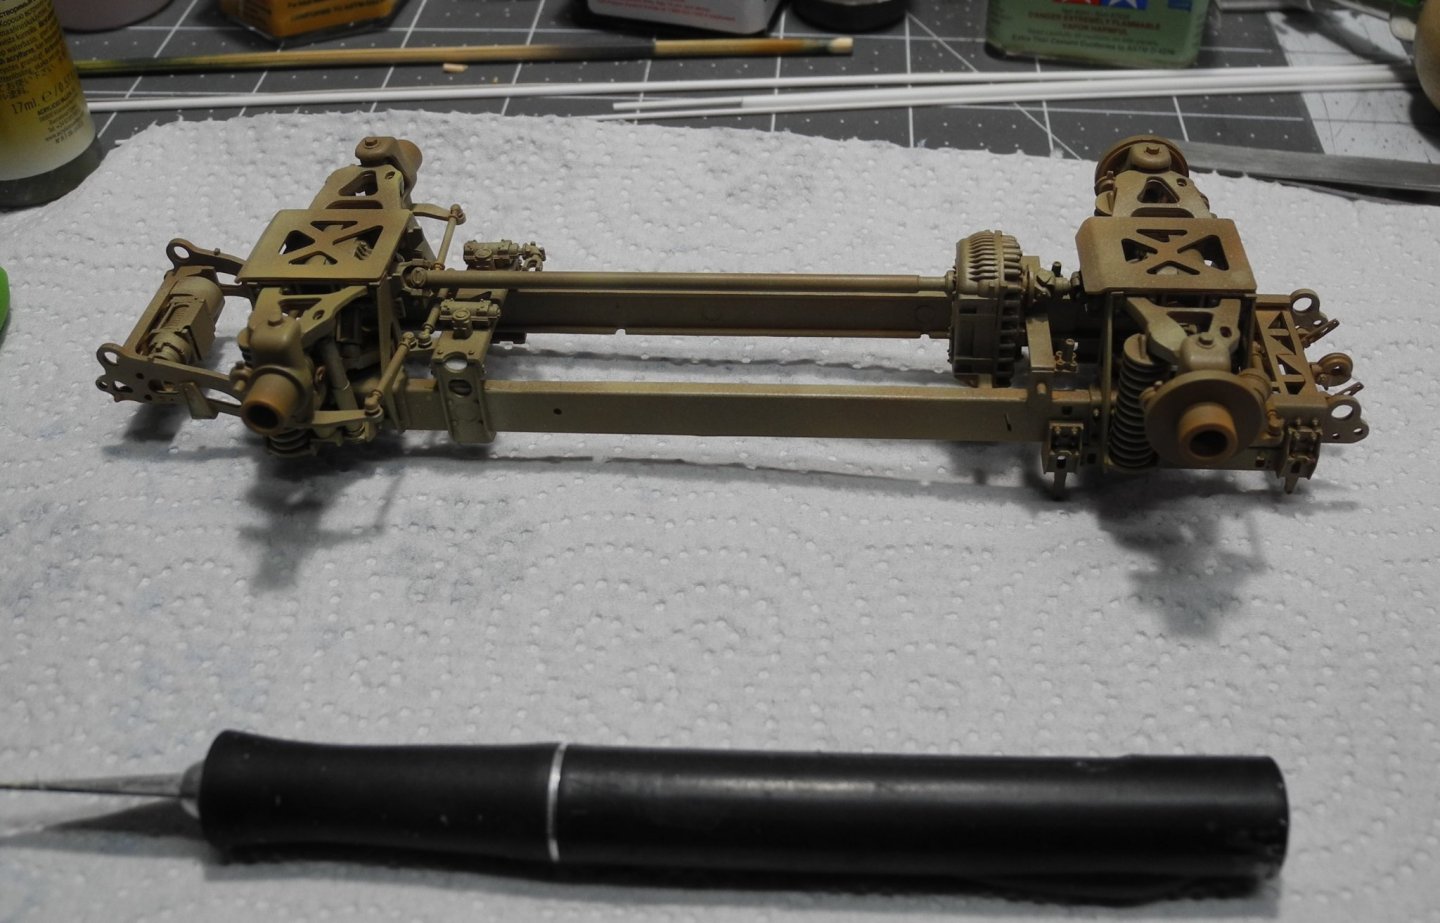

-
MRAP ATV by CDW - FINISHED - Rye Field - 1:35 Scale
CDW replied to CDW's topic in Non-ship/categorised builds
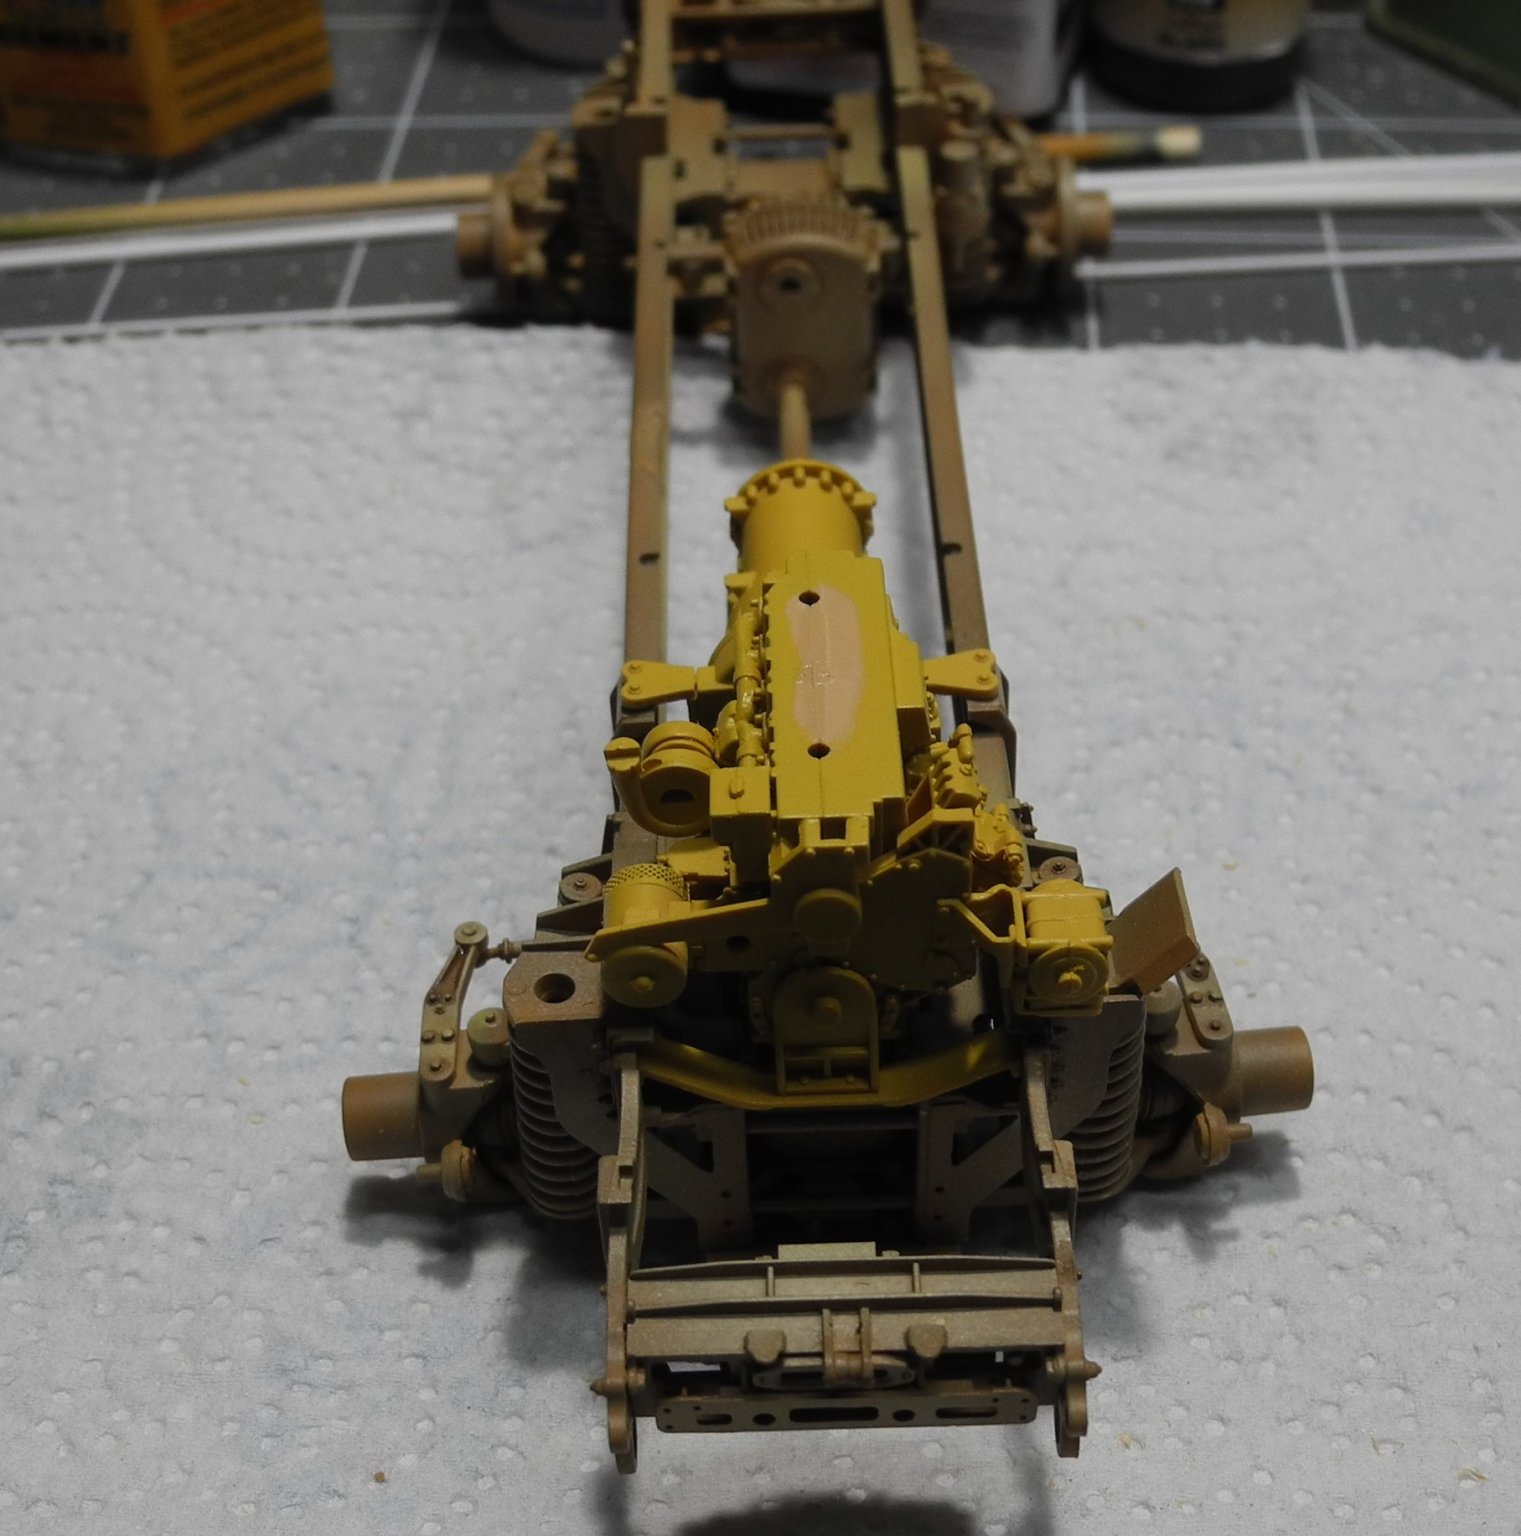
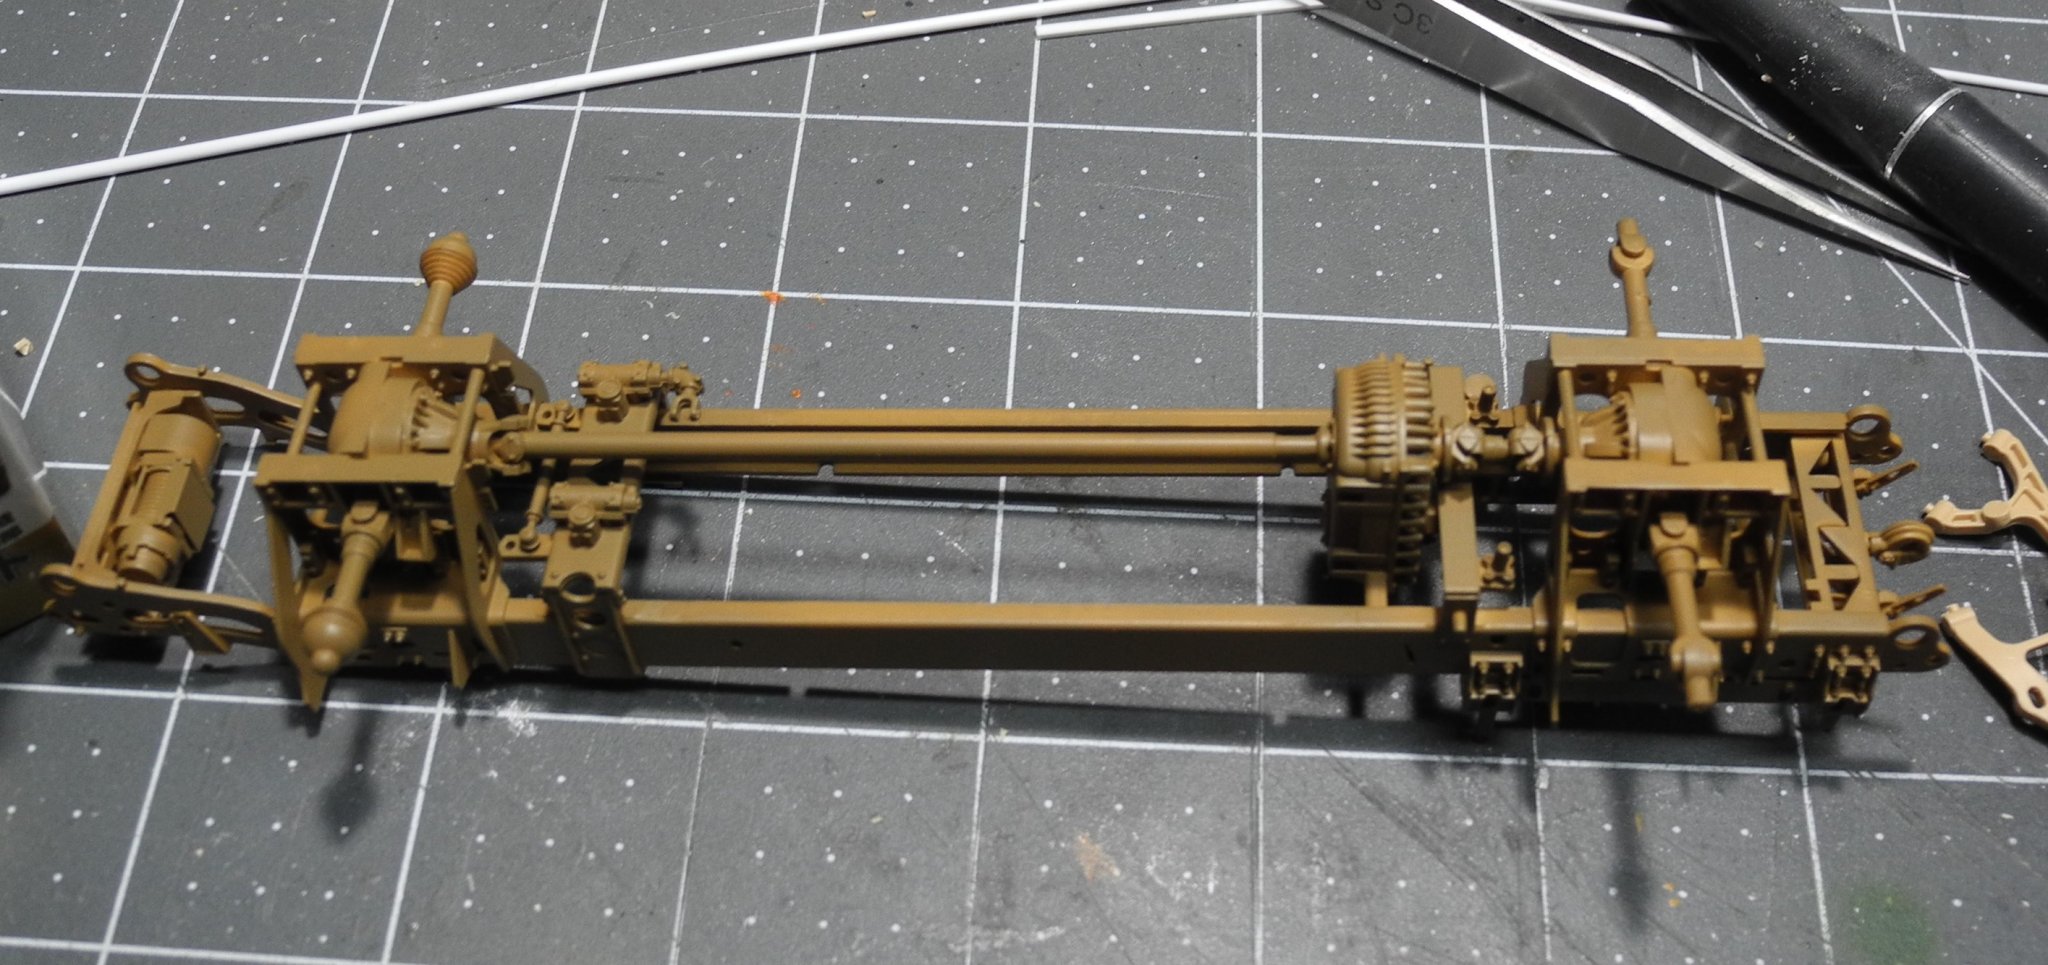
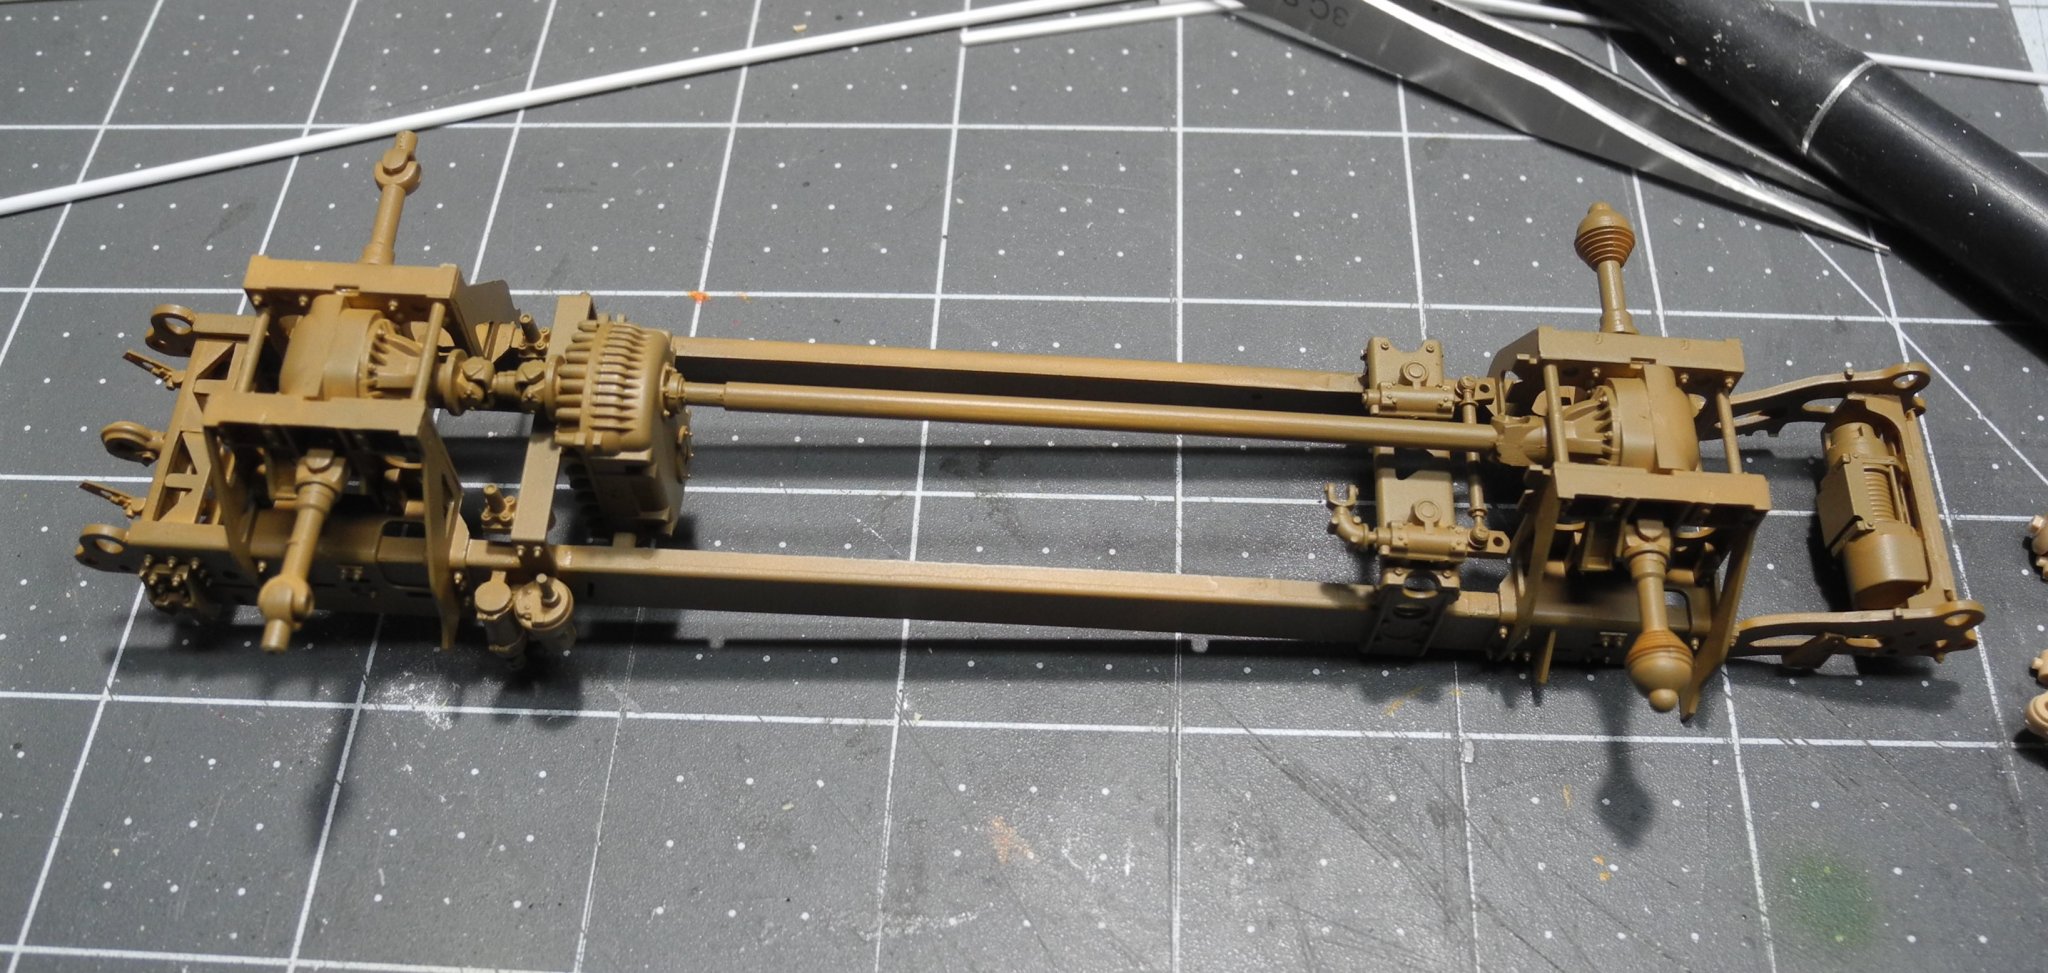
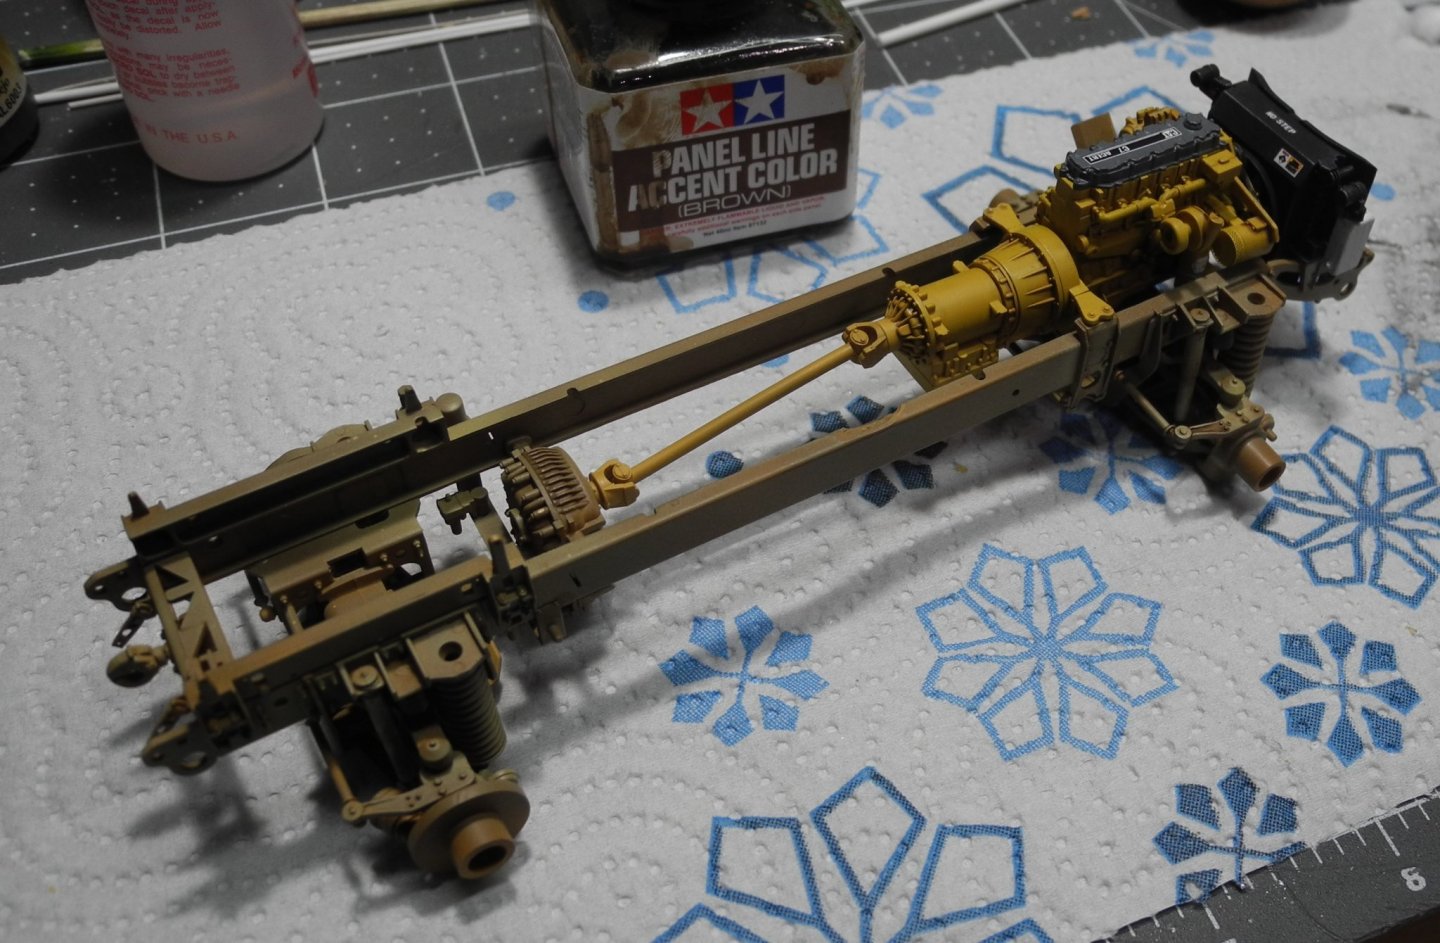
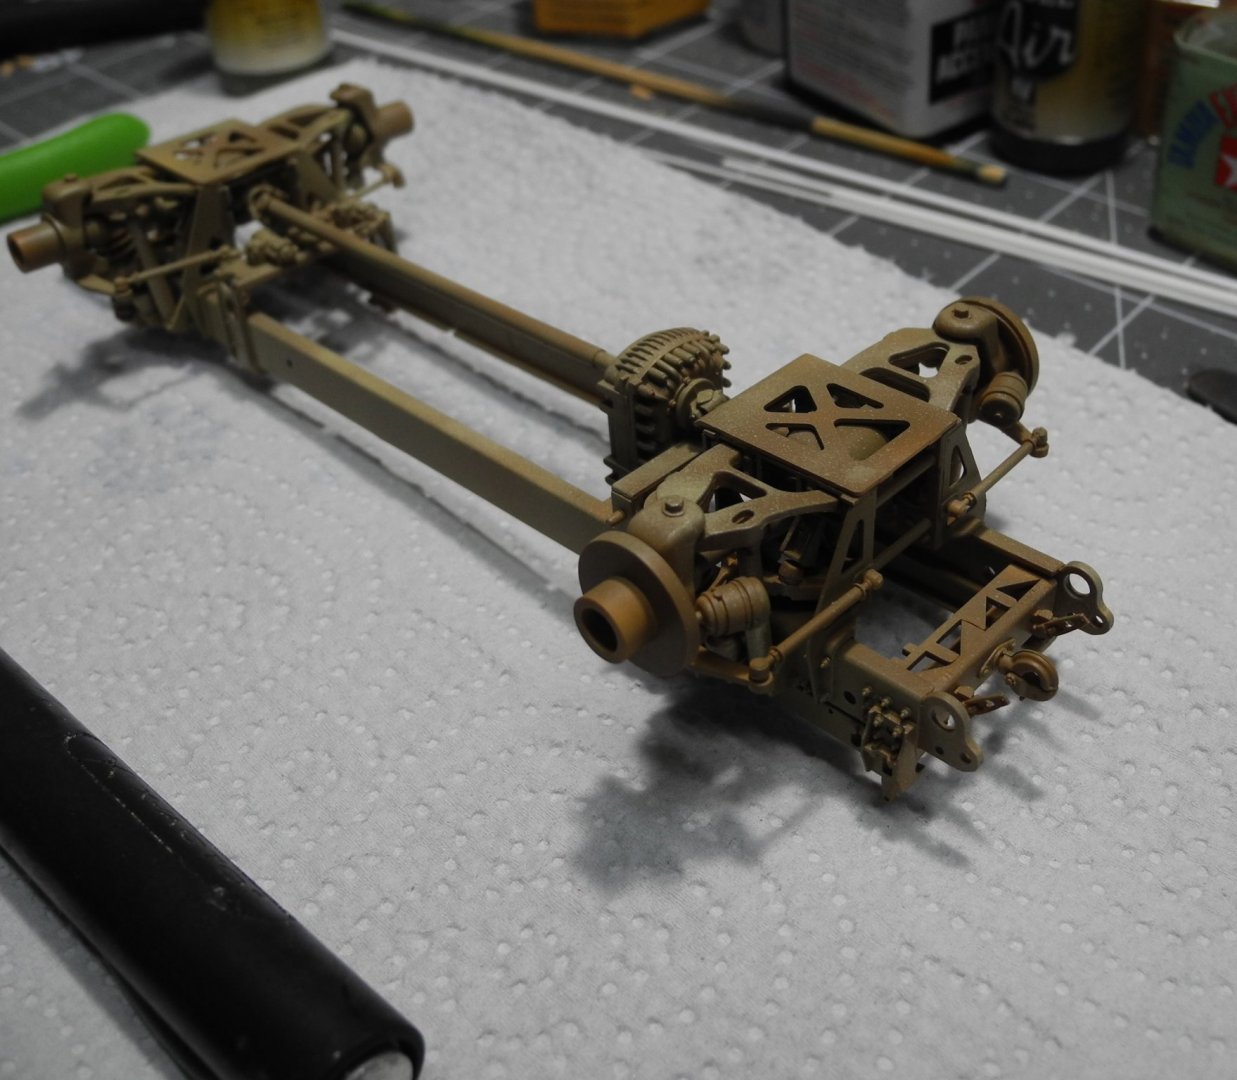
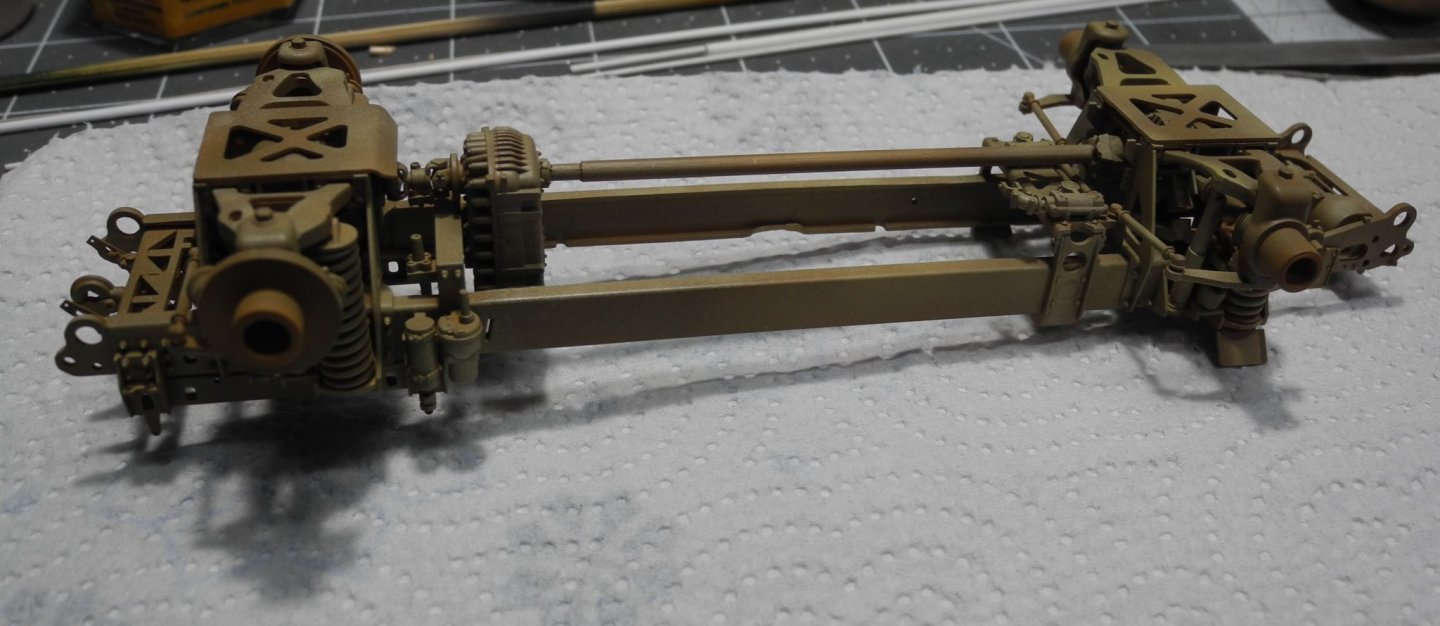
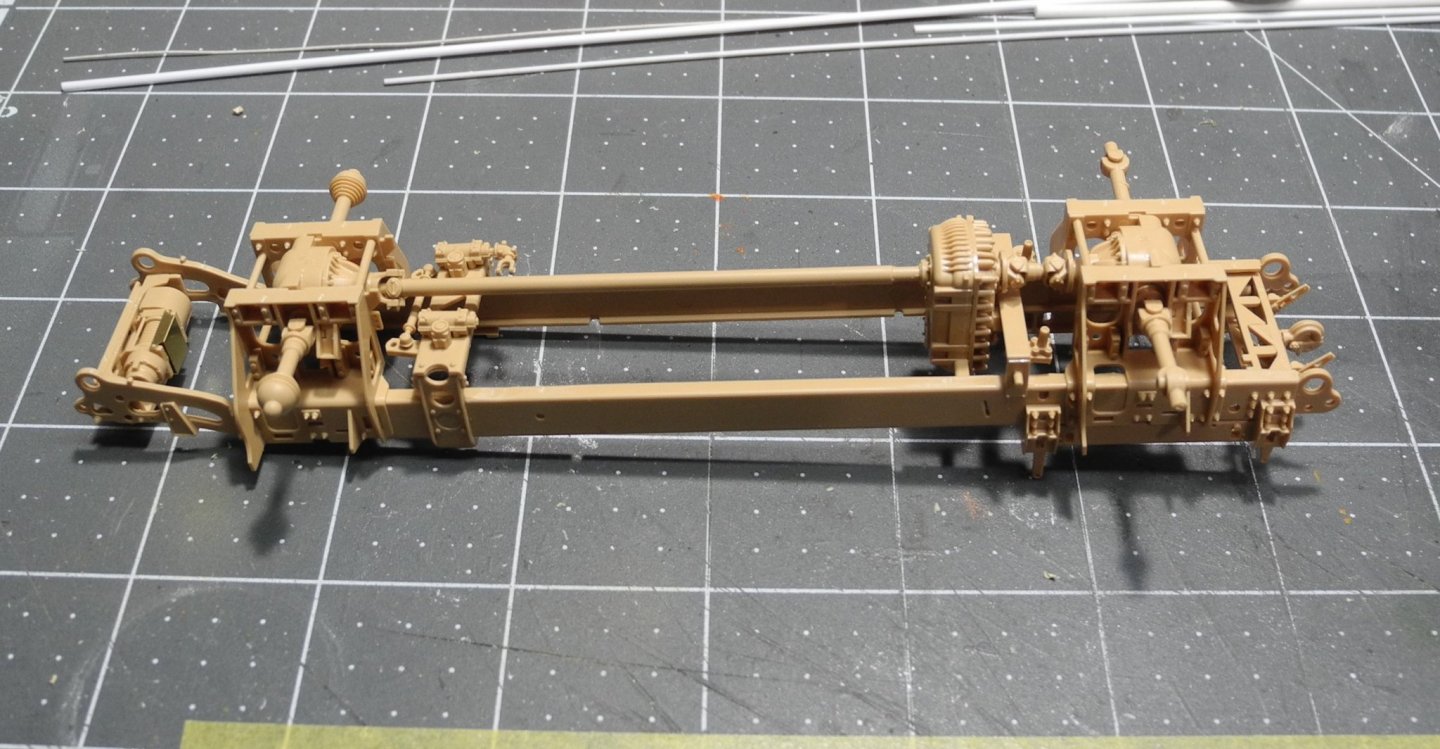
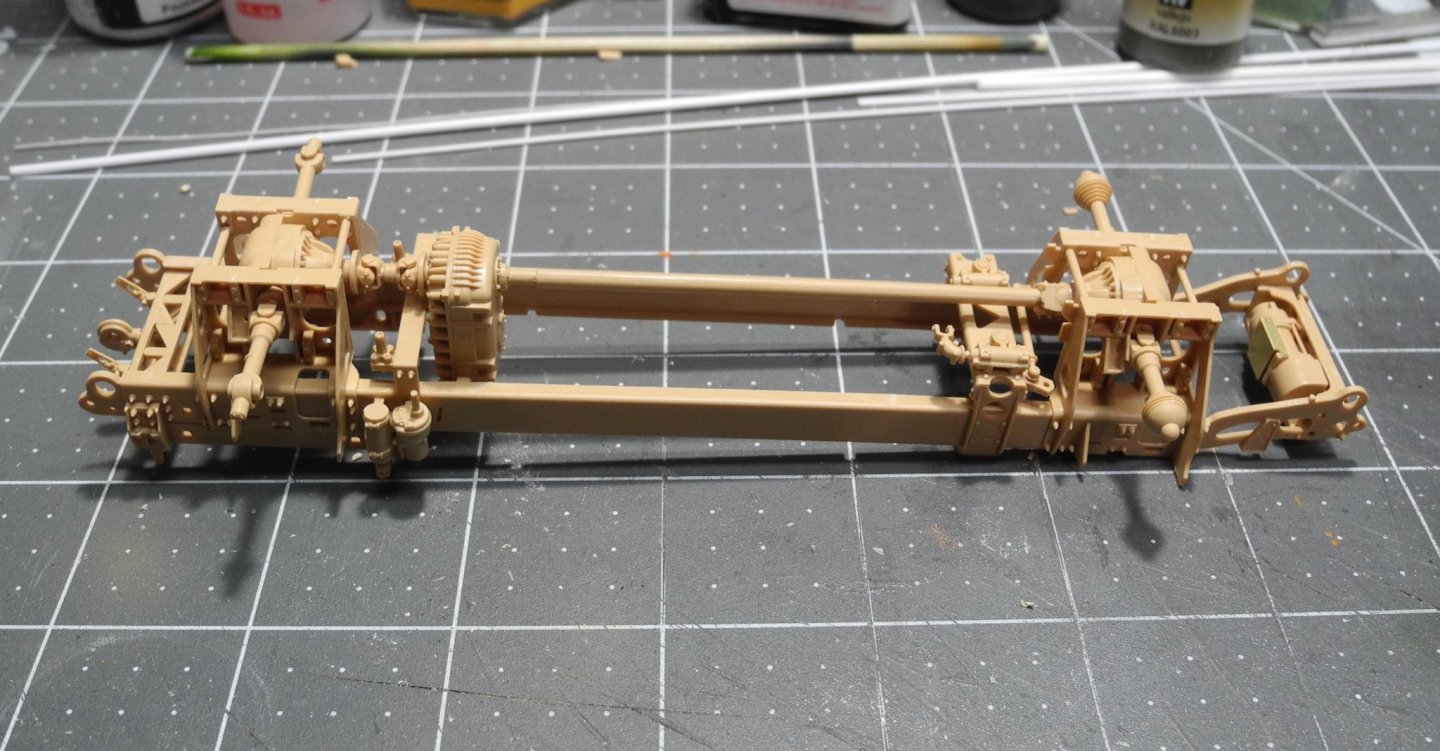
Remember when we built model cars and a detailed kit would provide a lump of plastic that resembled a coil spring? No more, this kit has the first fully formed set of coil springs I have ever seen in an injection molded styrene plastic kit. Then here are the additional suspension parts added, upper and lower control arms, hubs, tie rods, etc. Next will add some more paint to cover the newly added parts.


- 217 replies
-
- 10
-
-
MRAP ATV by CDW - FINISHED - Rye Field - 1:35 Scale
CDW replied to CDW's topic in Non-ship/categorised builds
Thanks OC -
MRAP ATV by CDW - FINISHED - Rye Field - 1:35 Scale
CDW replied to CDW's topic in Non-ship/categorised builds
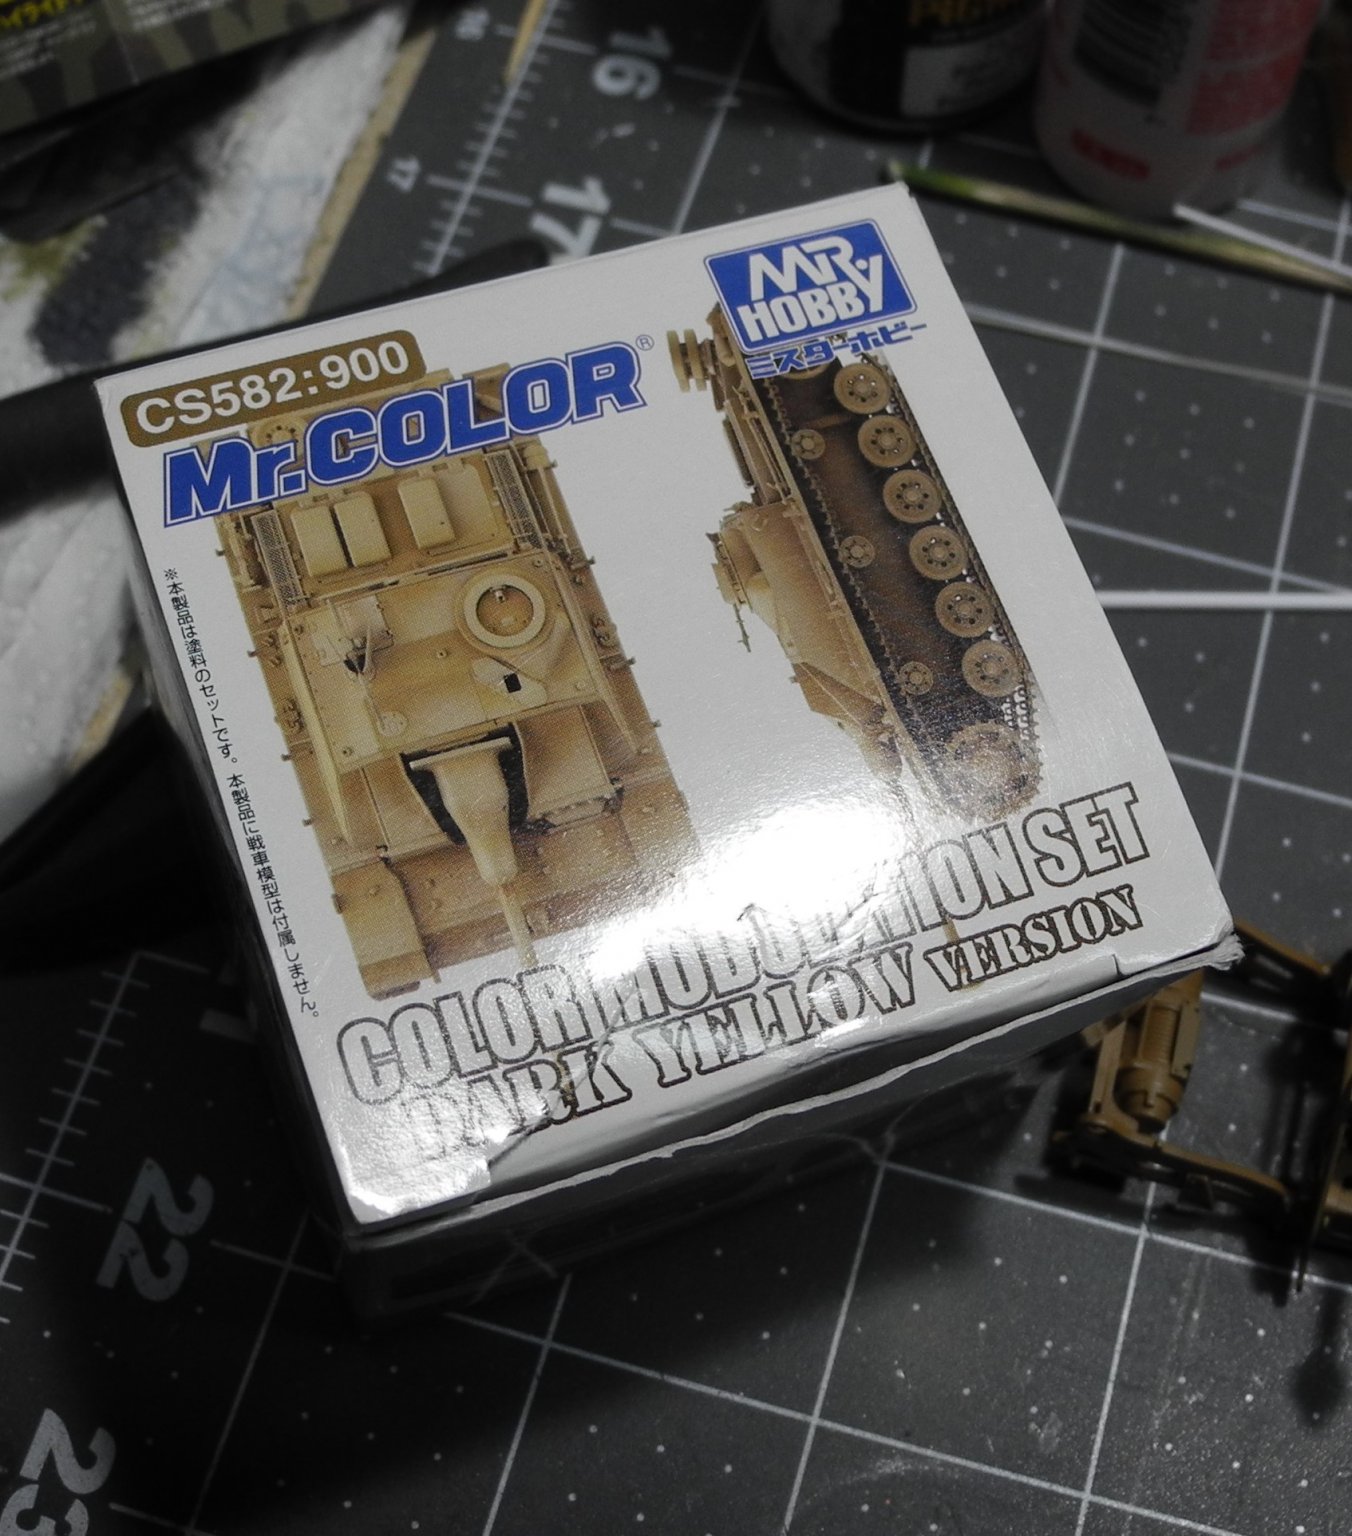
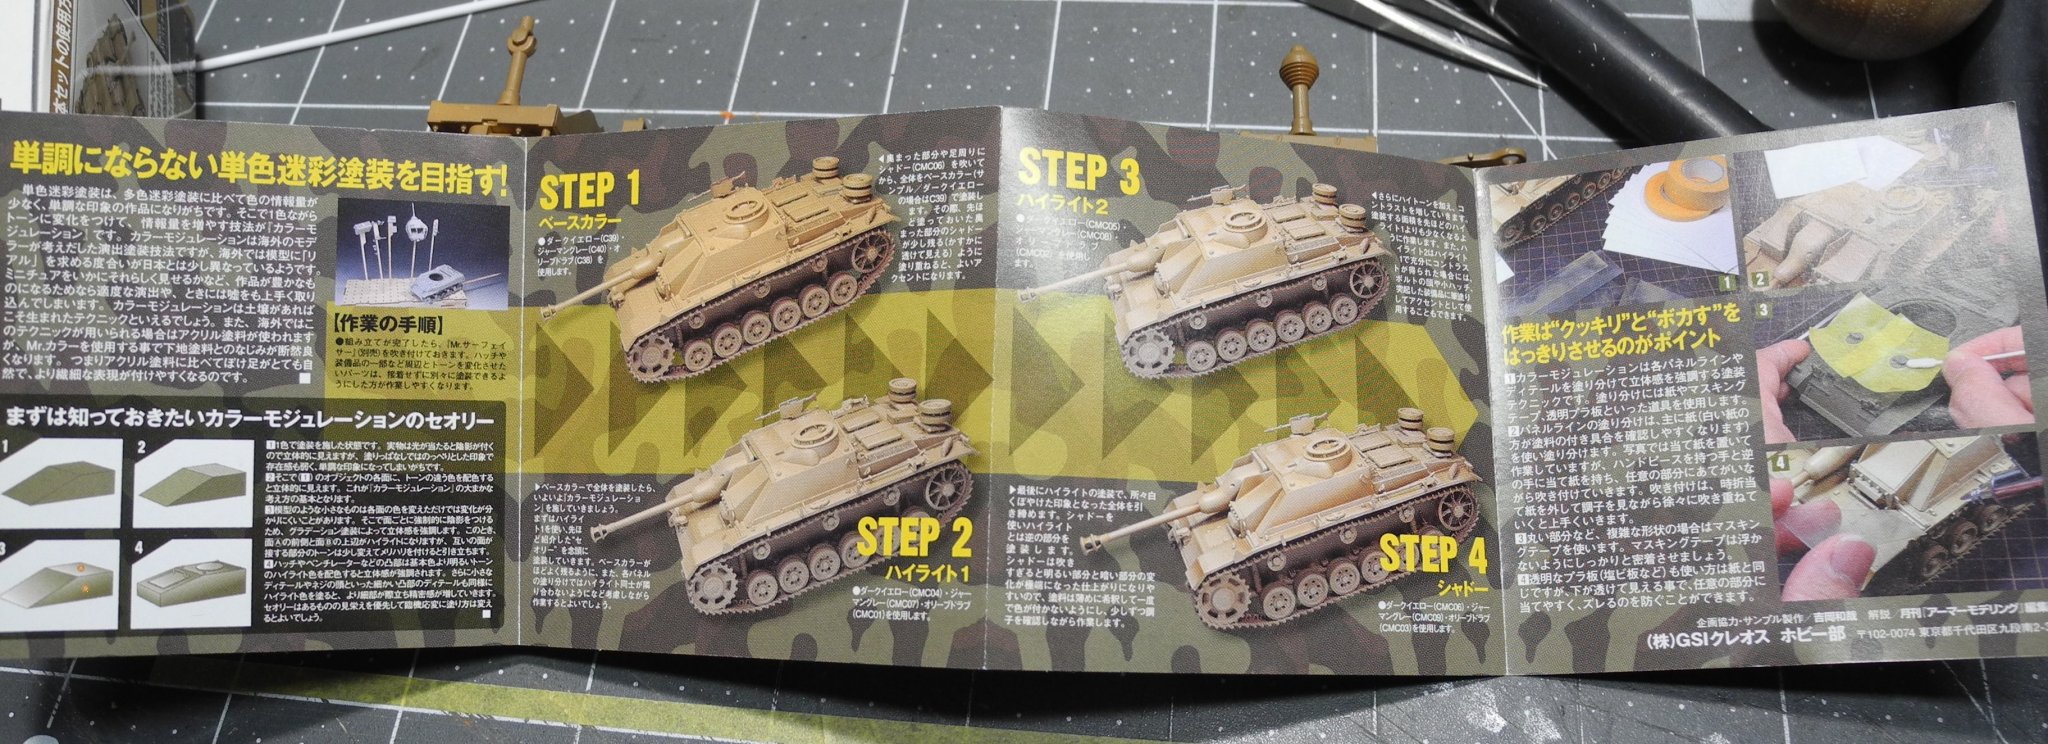
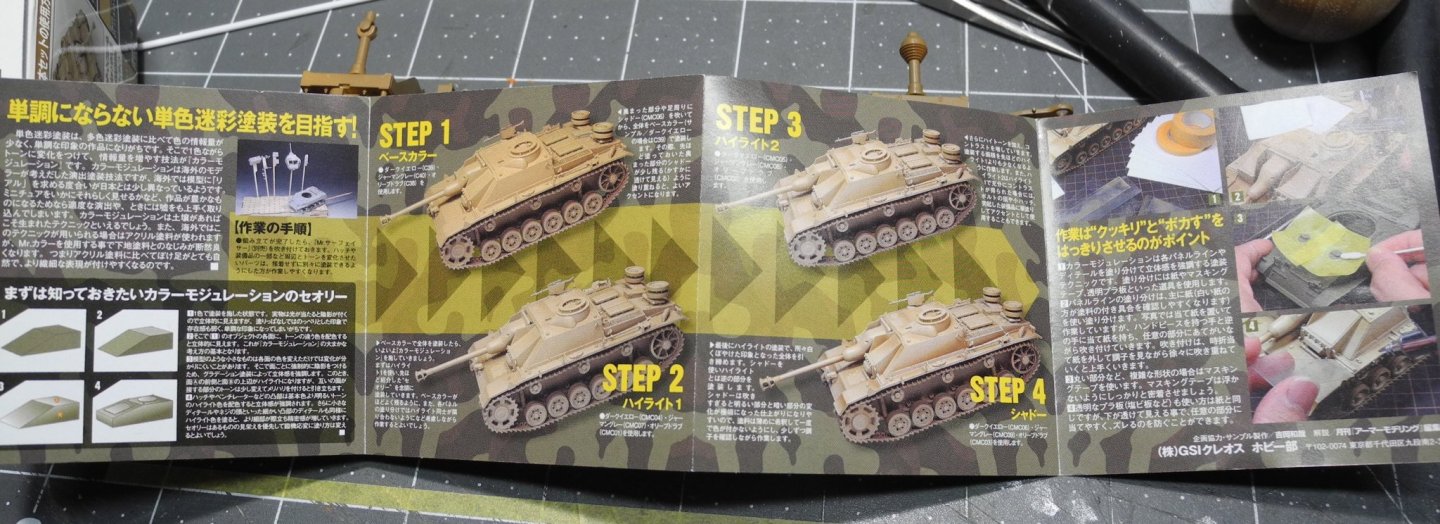
For this model, will be using the Mr Color desert yellow modulation set. This is a four color set with varying degrees of desert yellow. The idea is to start with the darkest color first, then build on that to lighten the dark shade to give the model a feeling of depth with the paint. Four-step process. Because more chassis detail gets added in subsequent steps, it's best to get the first dark coat on now before adding more parts. This will make it easier to get the entire thing painted.

- 217 replies
-
- 12
-
-
MRAP ATV by CDW - FINISHED - Rye Field - 1:35 Scale
CDW replied to CDW's topic in Non-ship/categorised builds
Sure can't fault you for that. A lot of the old hot rodder in me, too. -
MRAP ATV by CDW - FINISHED - Rye Field - 1:35 Scale
CDW replied to CDW's topic in Non-ship/categorised builds
Lou, if you go back to my first post and click on the link I provided, there are a few photos of the 1:1 machine and how it's painted all one color. Of course, there would be nothing wrong with painting it any way you see fit. In this case, I intend to paint it in one basic color and pick out details with shading and paint modulation. Just my personal preference, no right or wrong way as far as I'm concerned. It could probably look real good in different colors if one chose to do that. -
MRAP ATV by CDW - FINISHED - Rye Field - 1:35 Scale
CDW replied to CDW's topic in Non-ship/categorised builds
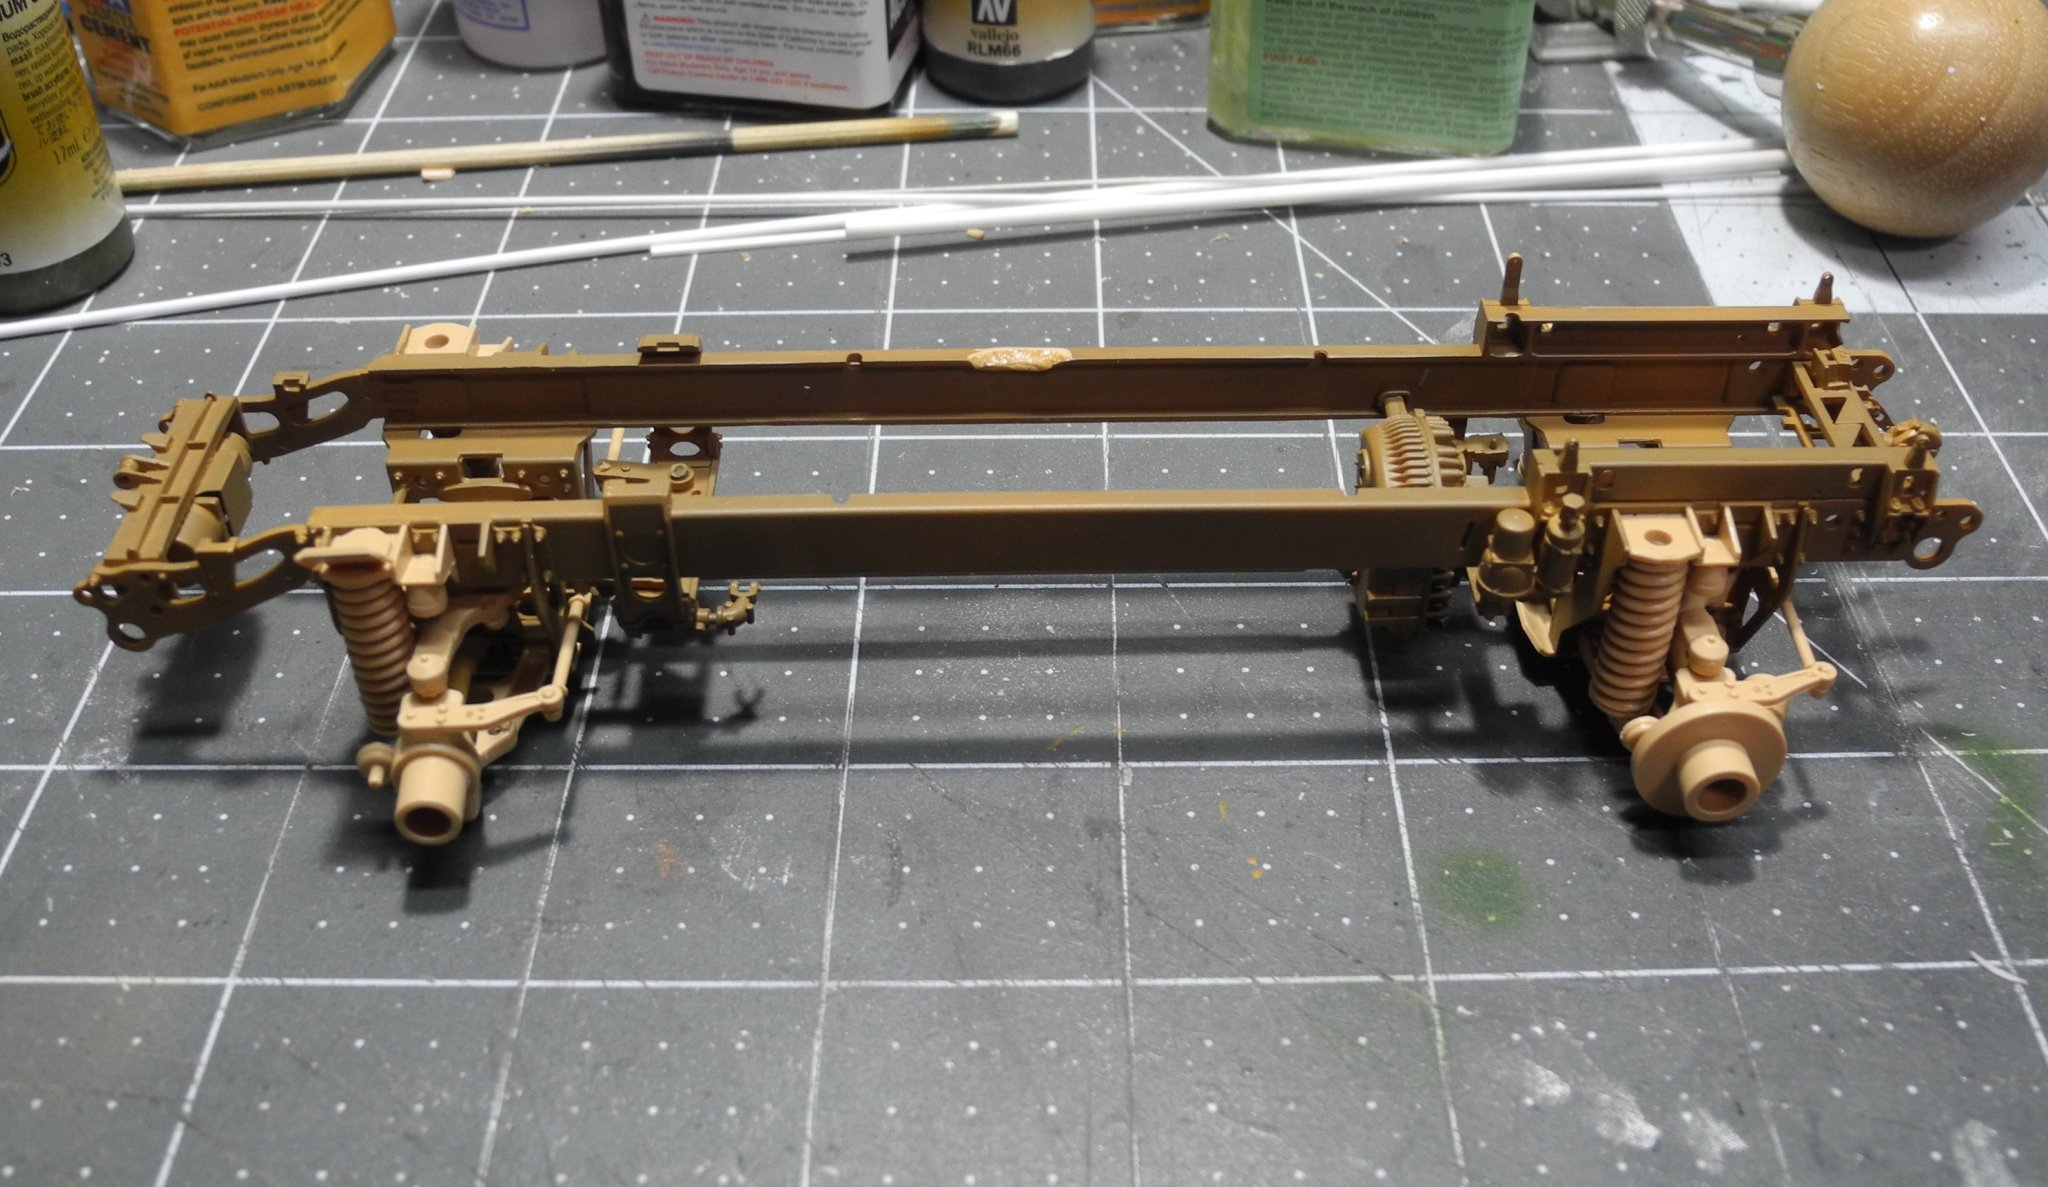
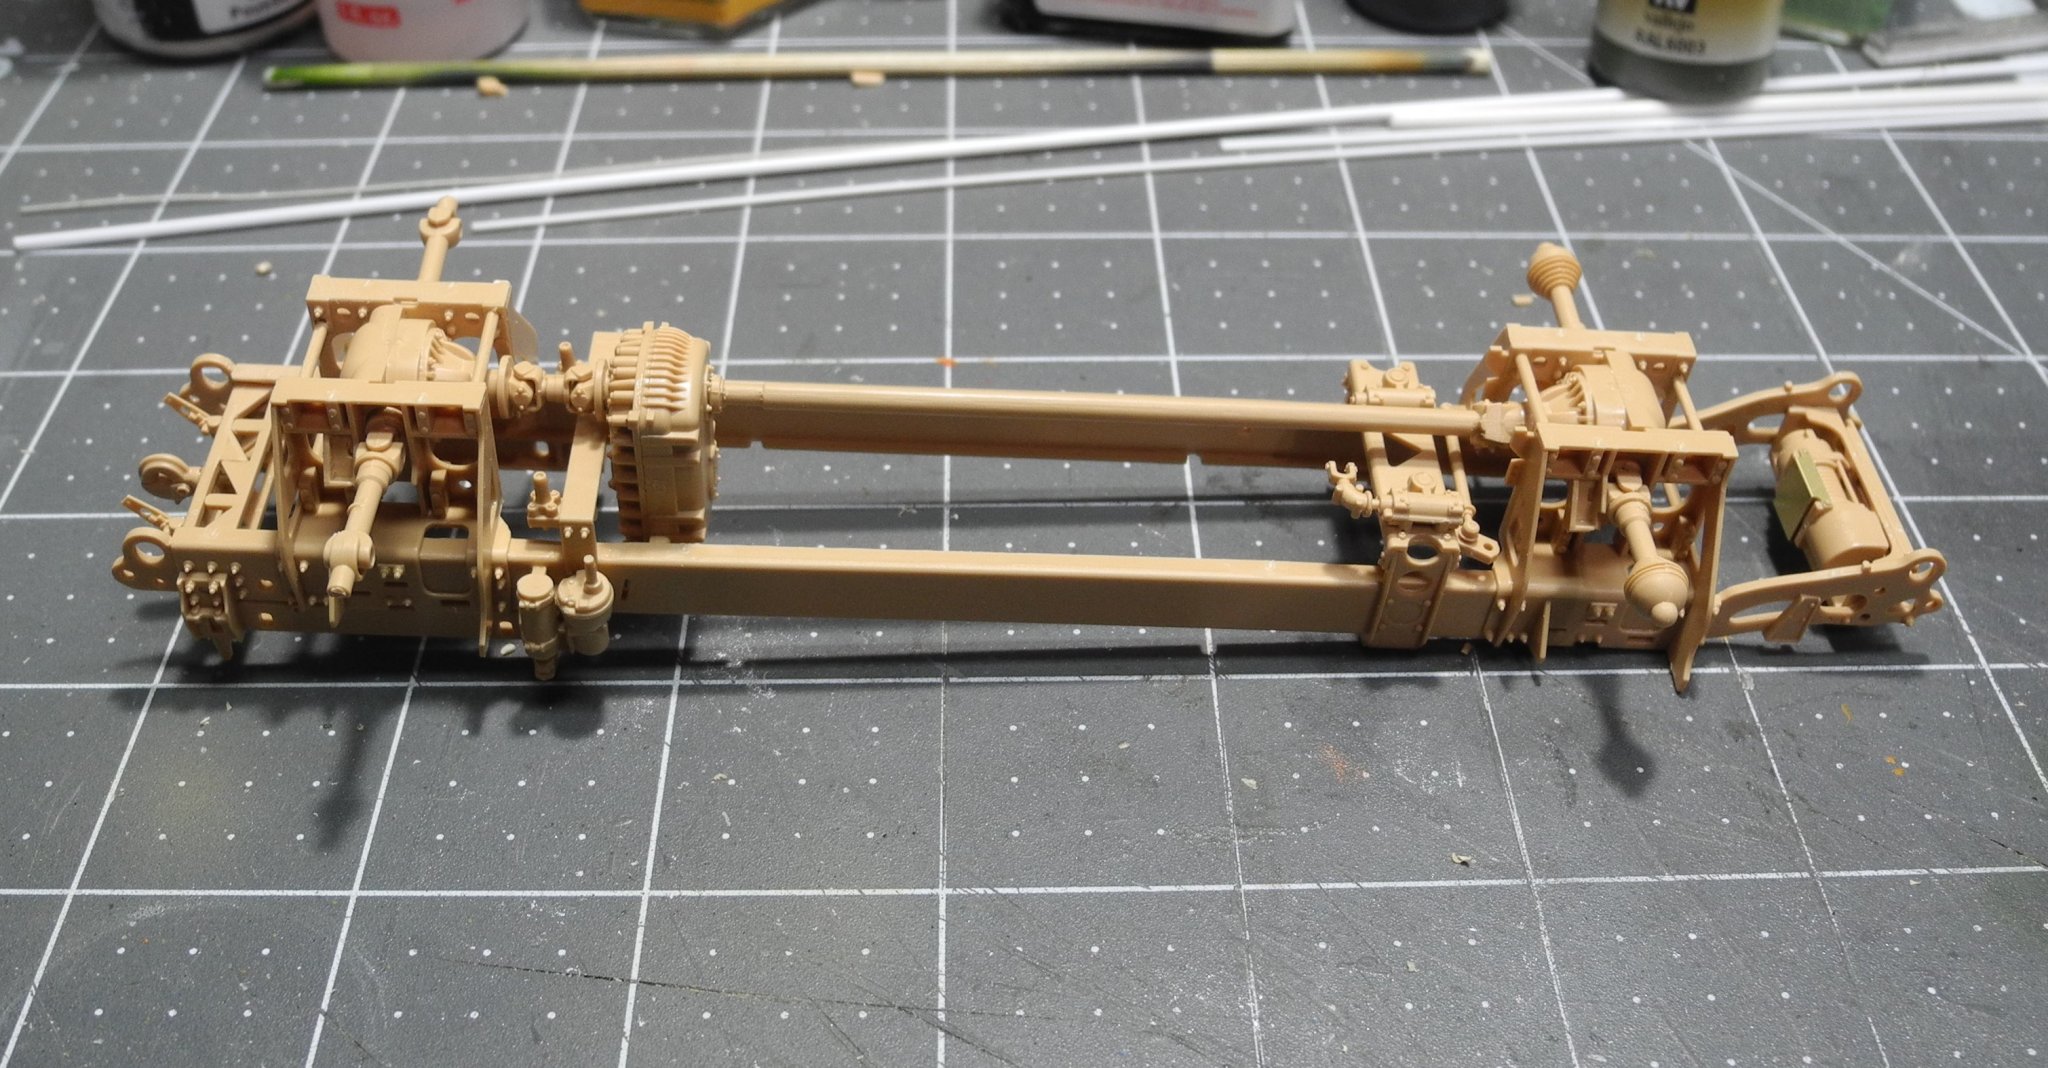
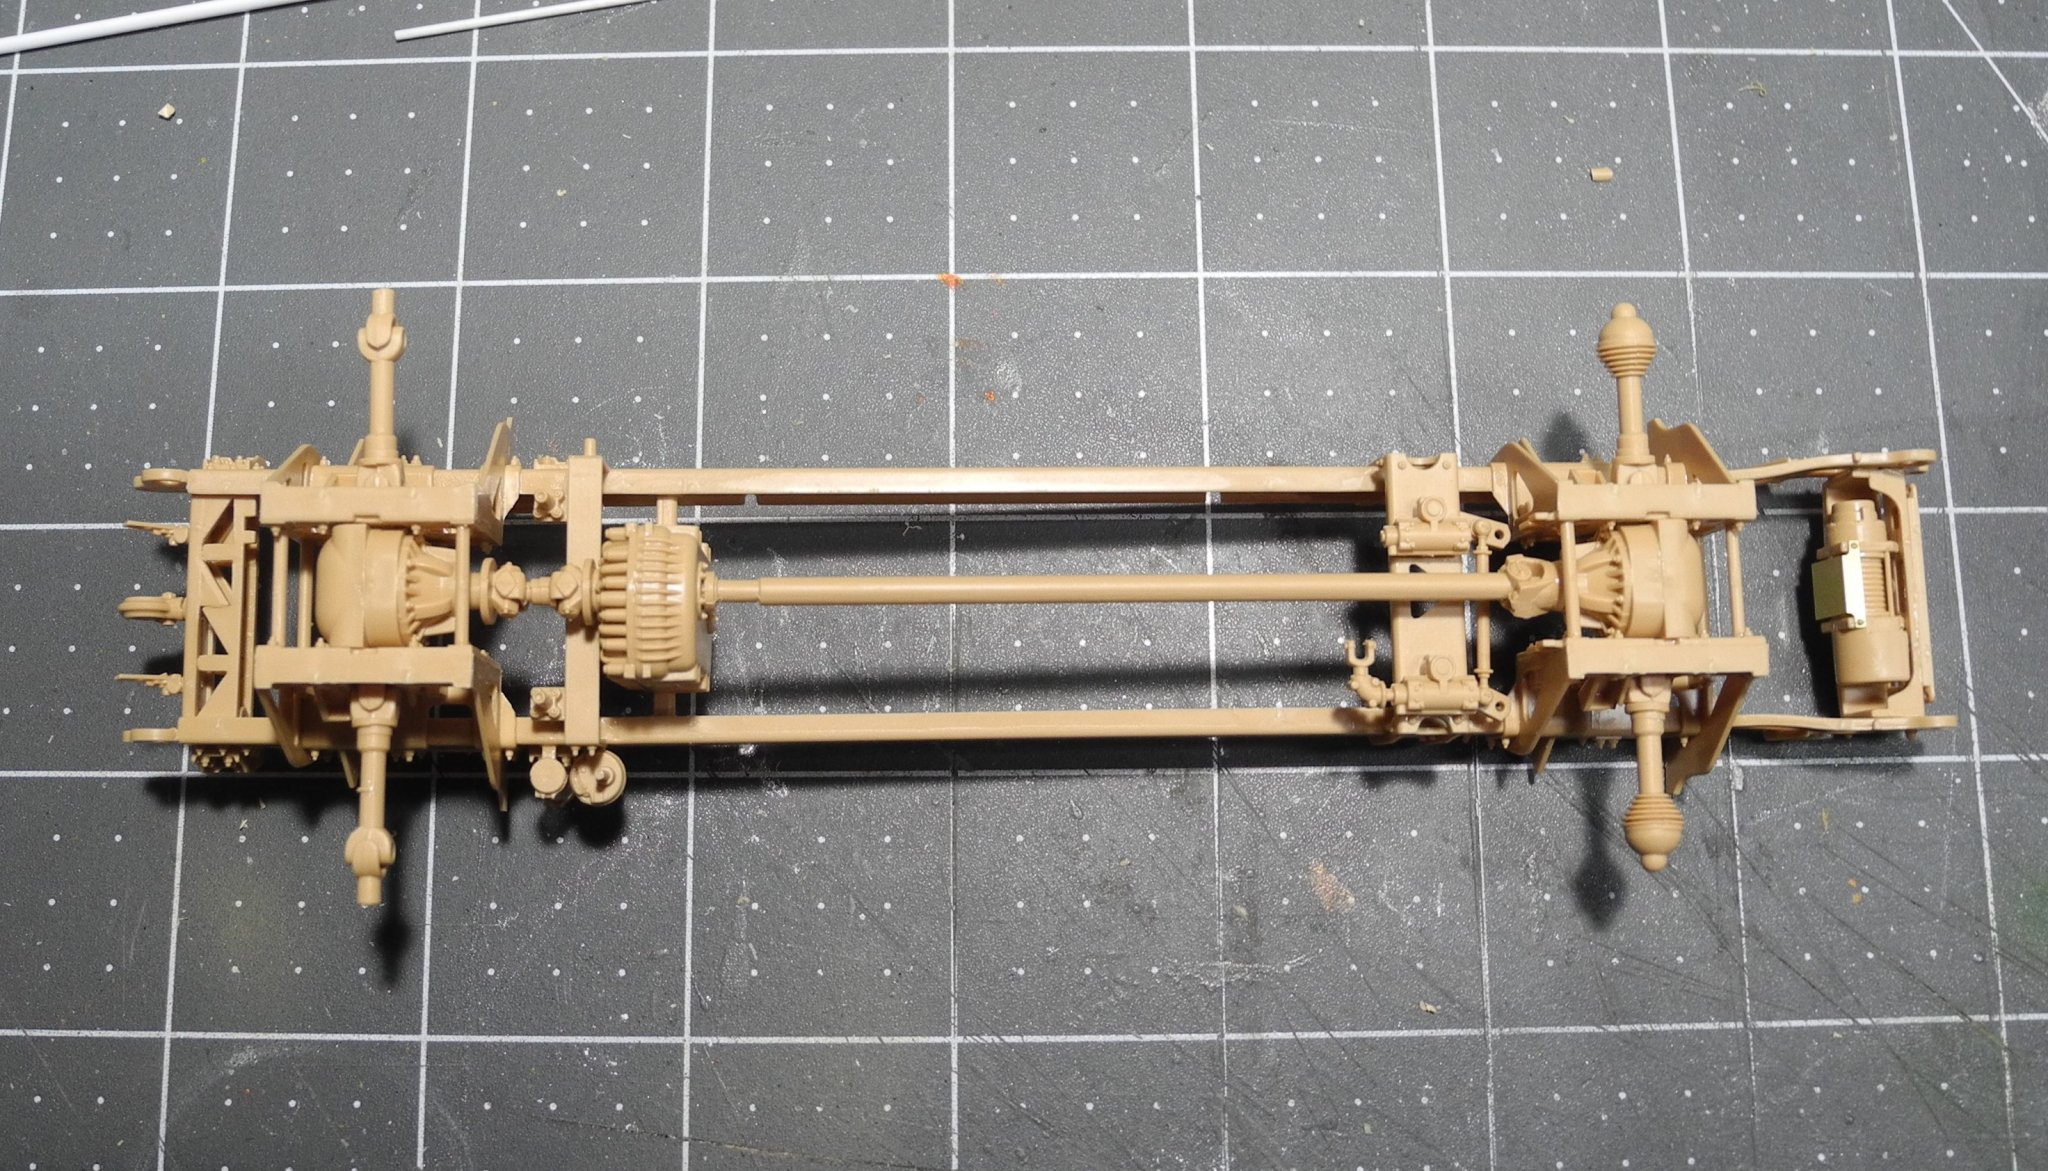
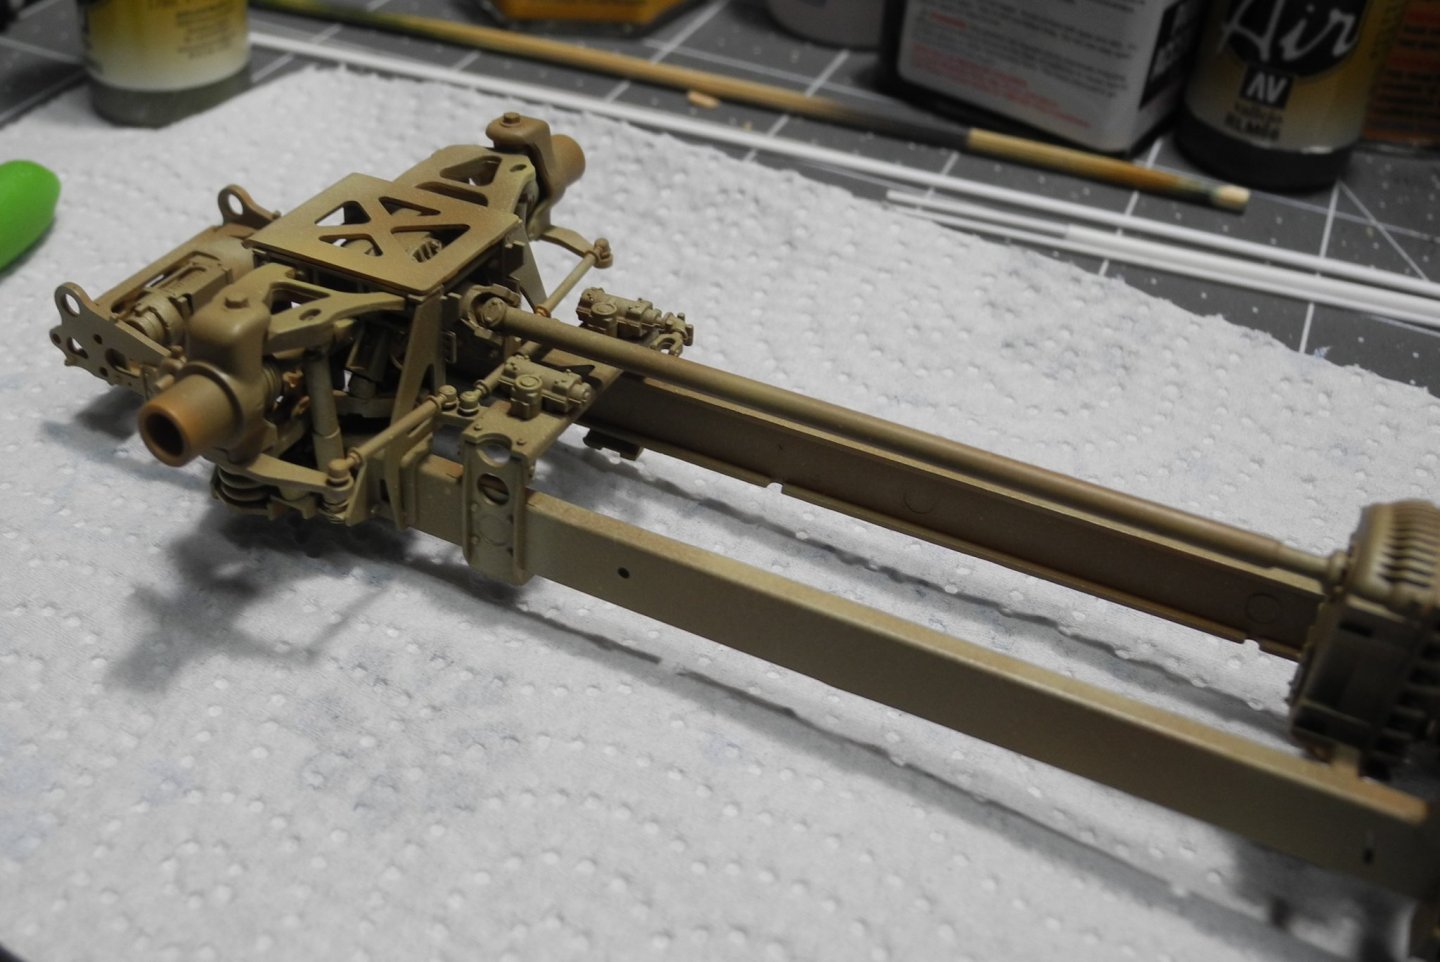
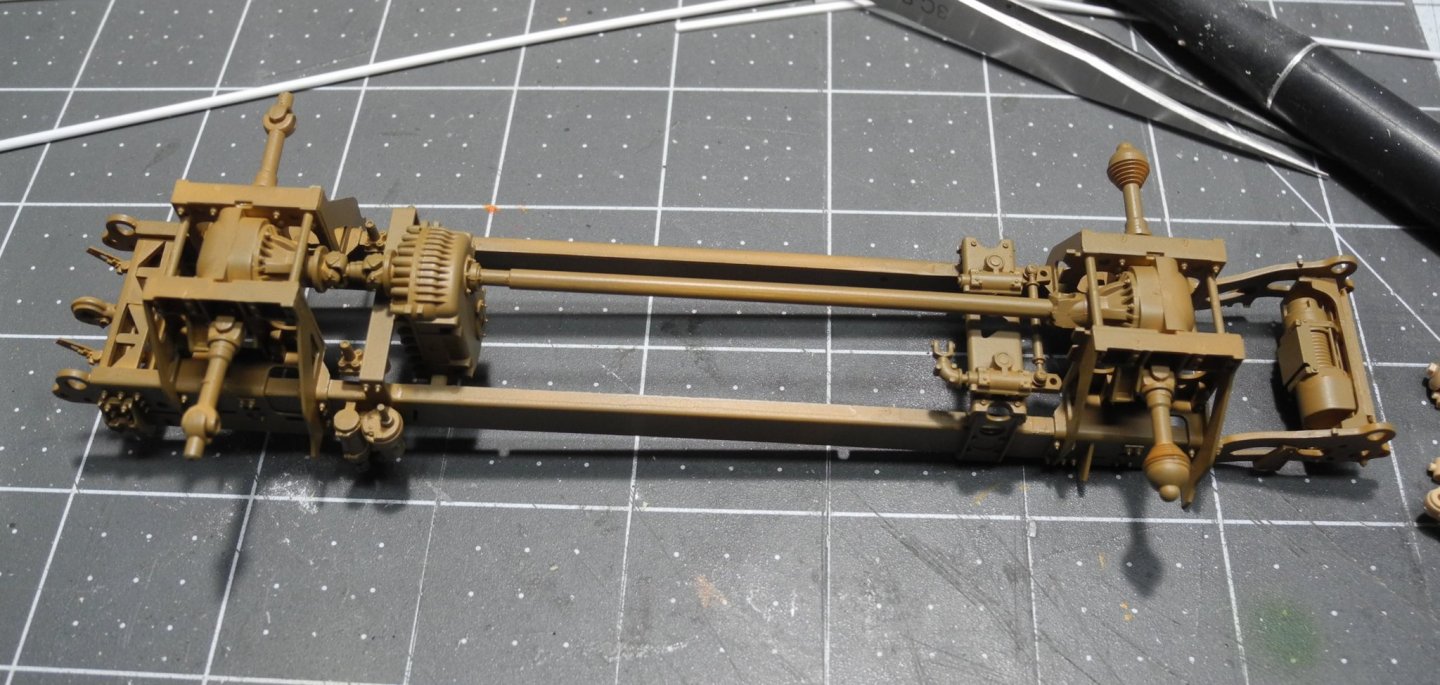
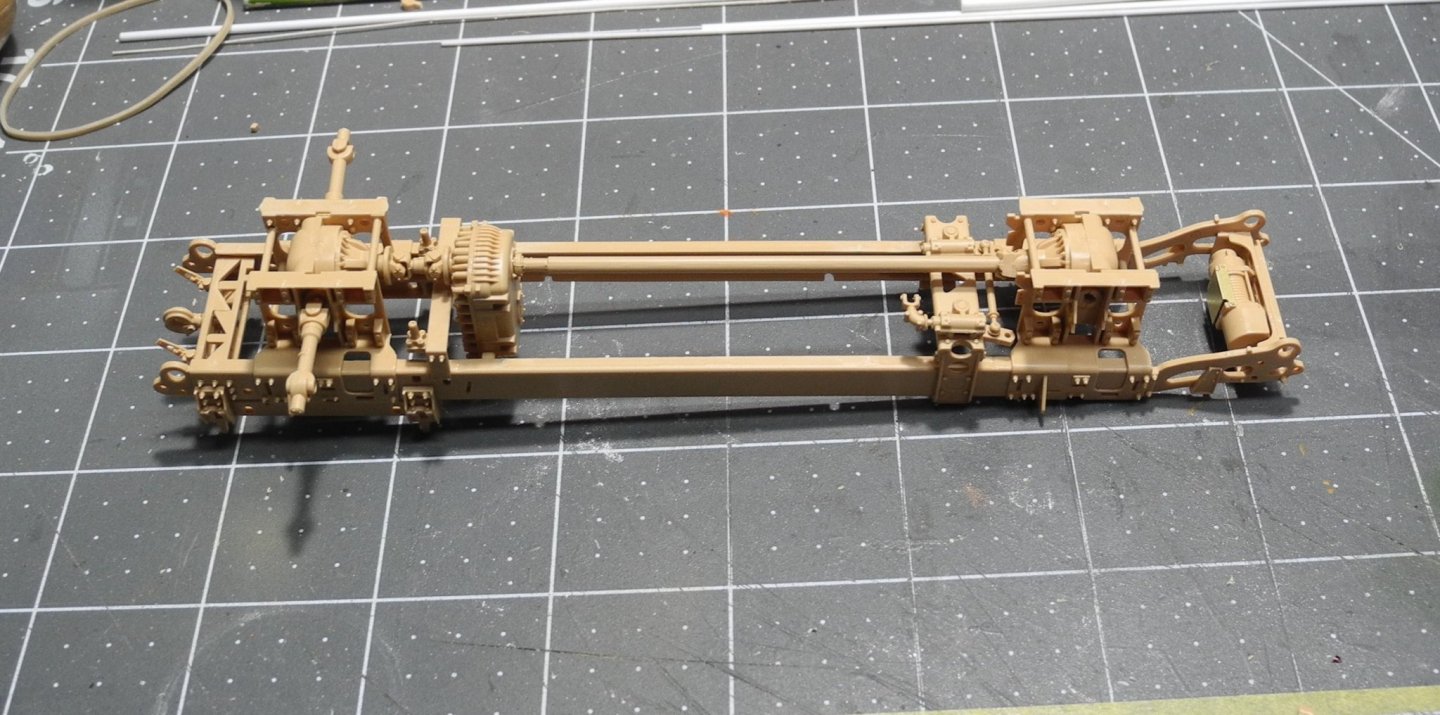
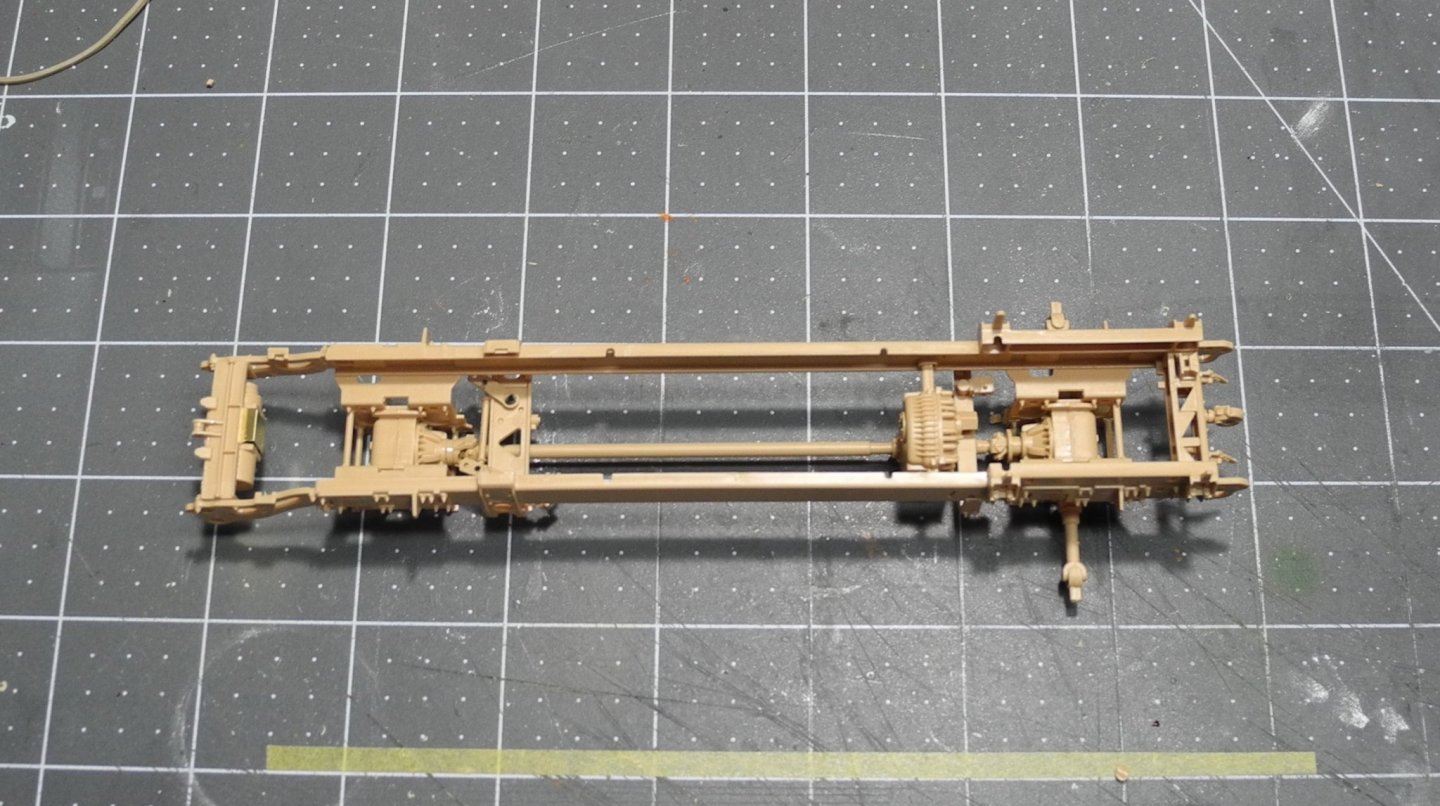
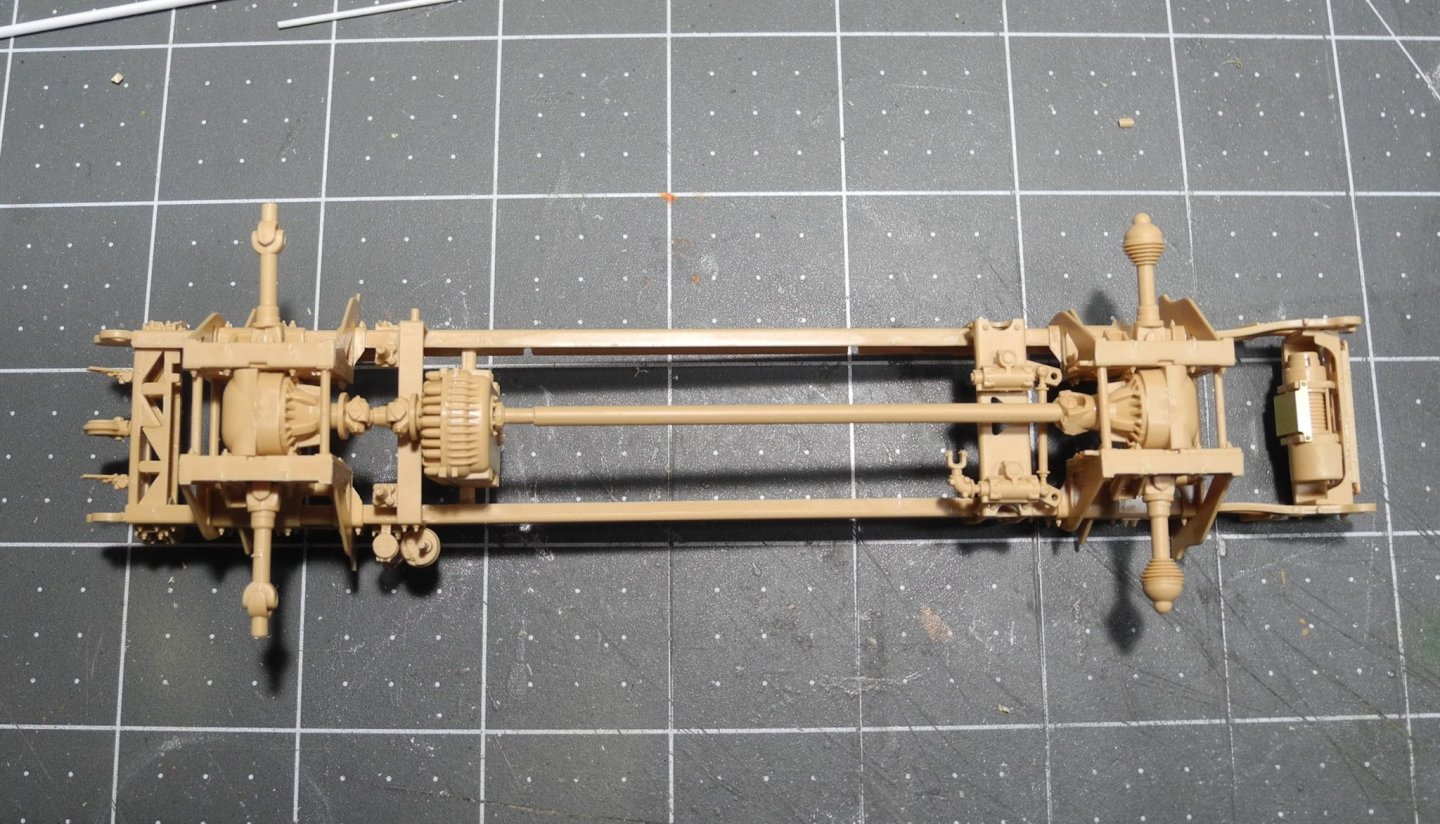
Assembly of the frame rails and sub assemblies. Addition of support gussets to the chassis and other various parts. Next up are the four independent suspension assemblies.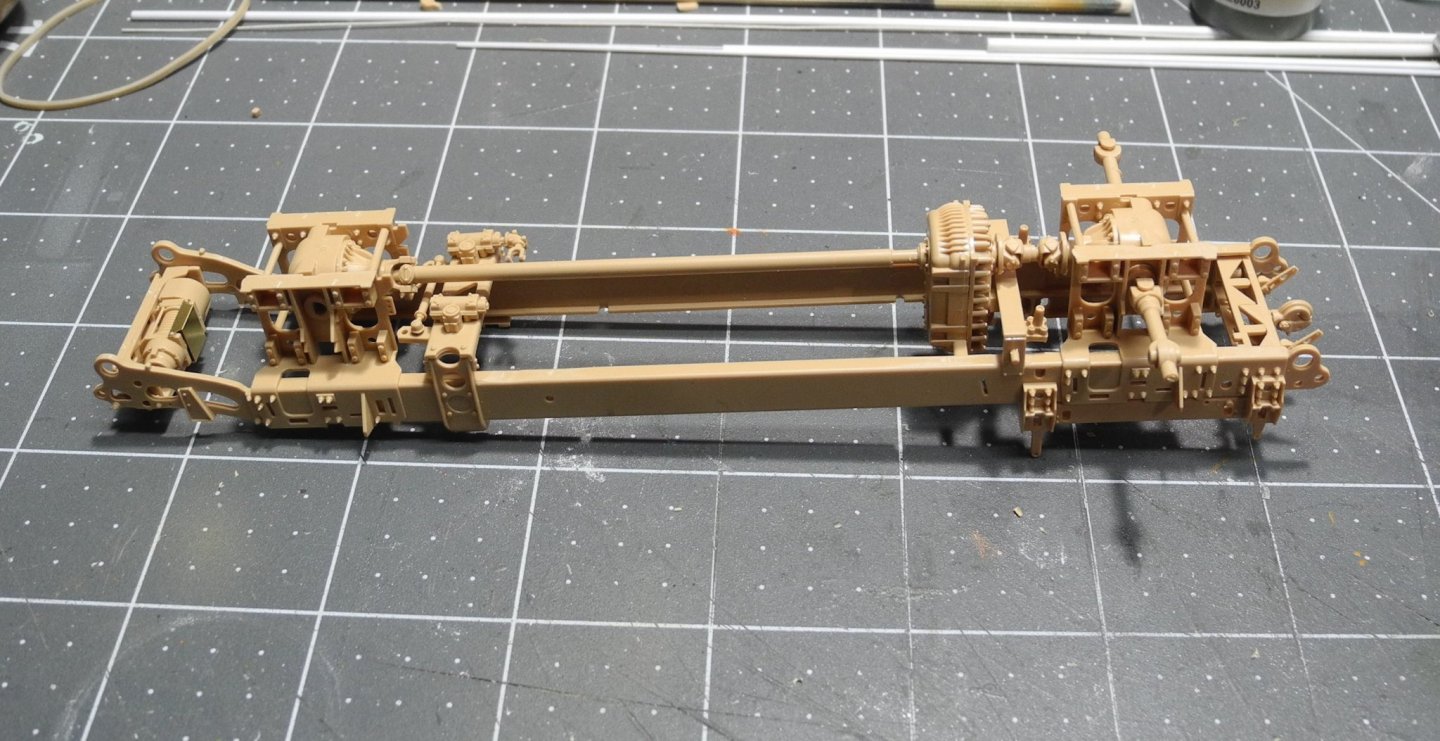
- 217 replies
-
- 11
-
-
MRAP ATV by CDW - FINISHED - Rye Field - 1:35 Scale
CDW replied to CDW's topic in Non-ship/categorised builds
I agree. In the past, I bought resin upgrades that looked nowhere near as good as this, straight out of the box. That's the point I was trying to make in another post. There are model kits out there right now that don't need anything aftermarket, they are perfectly sufficient right out of the box. -
MRAP ATV by CDW - FINISHED - Rye Field - 1:35 Scale
CDW replied to CDW's topic in Non-ship/categorised builds
Yes, this is generally what's happening with a lot of new models these days. The detail is becoming extraordinary. -
MRAP ATV by CDW - FINISHED - Rye Field - 1:35 Scale
CDW replied to CDW's topic in Non-ship/categorised builds
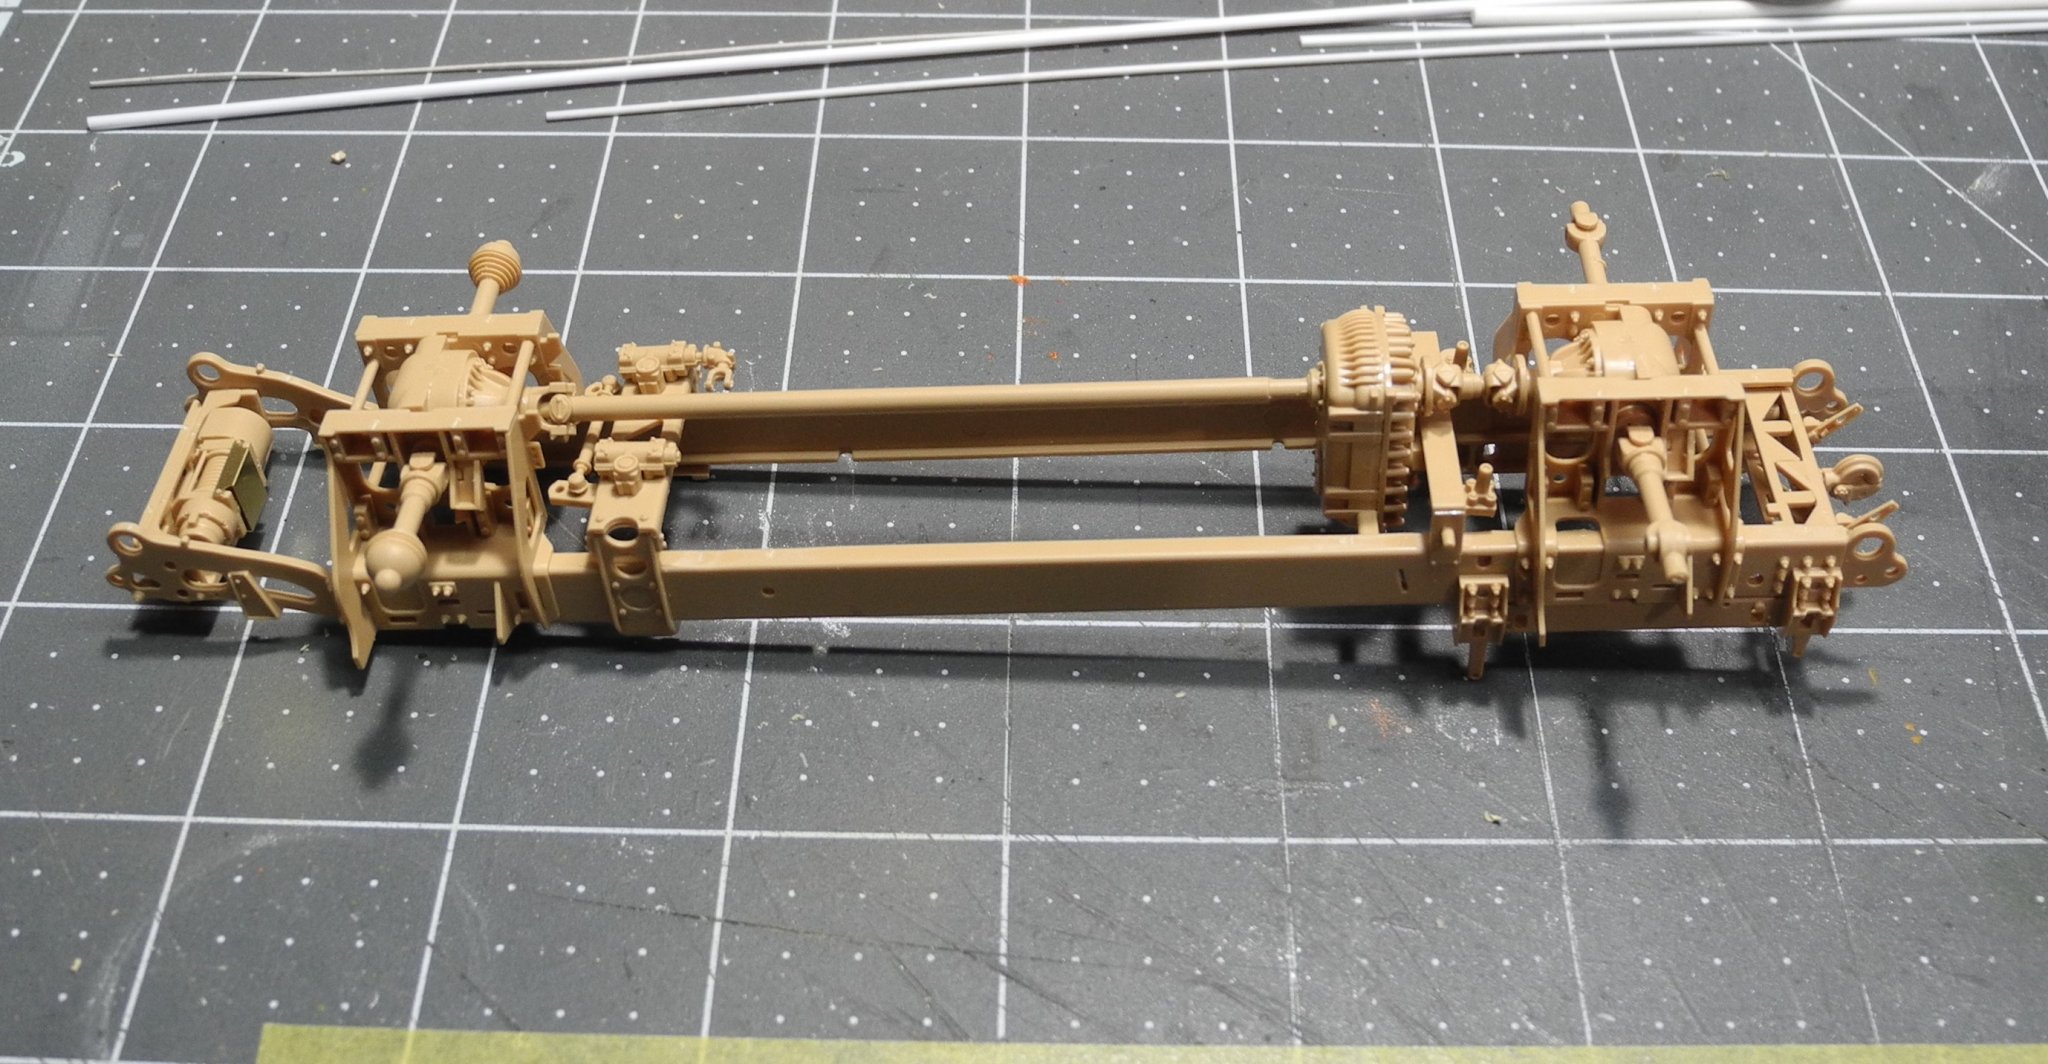
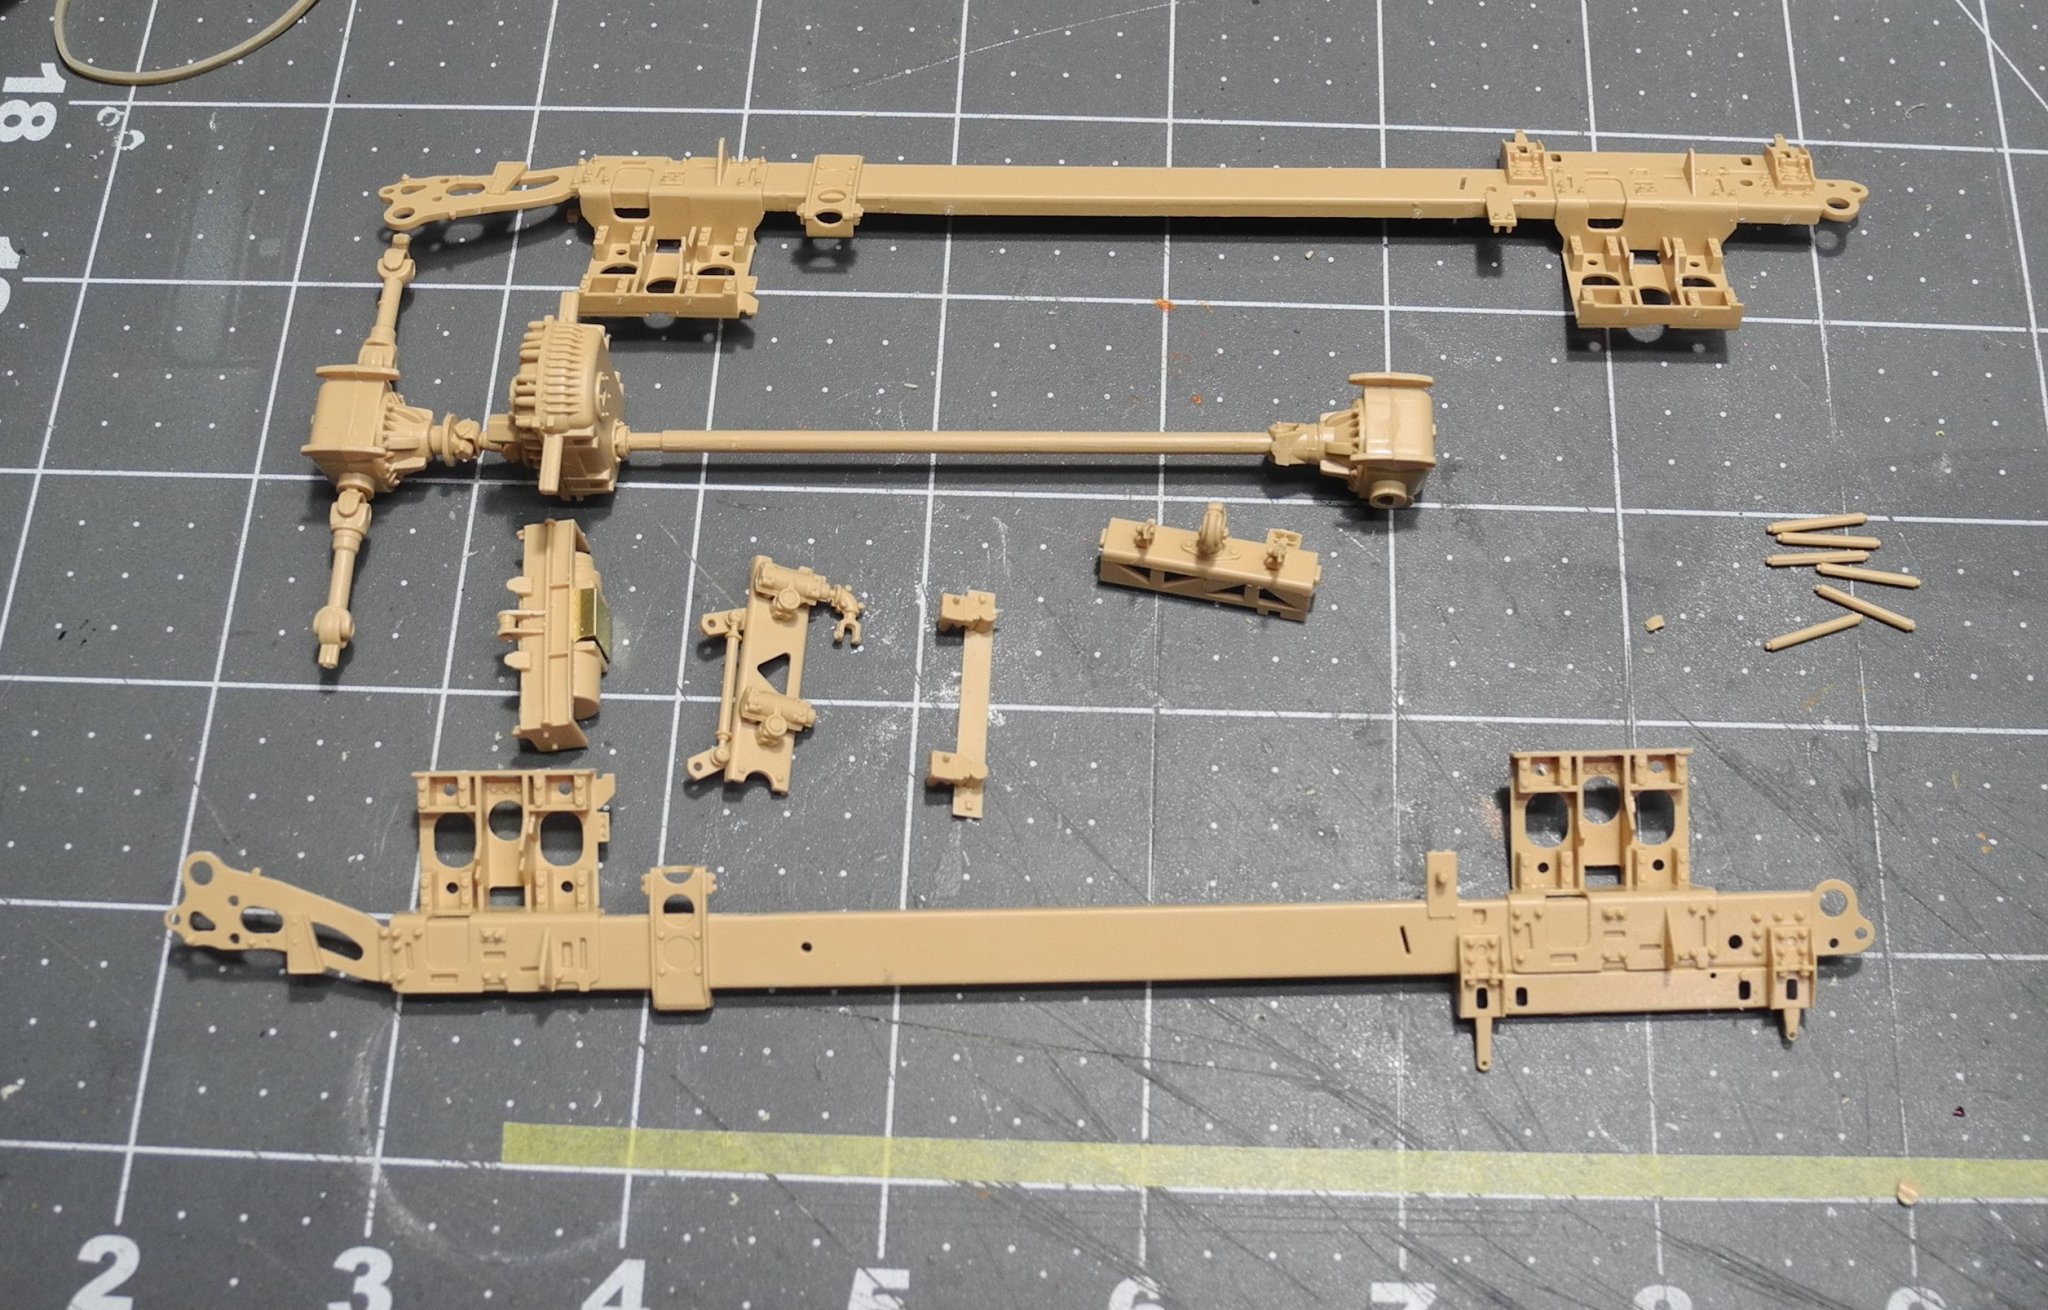
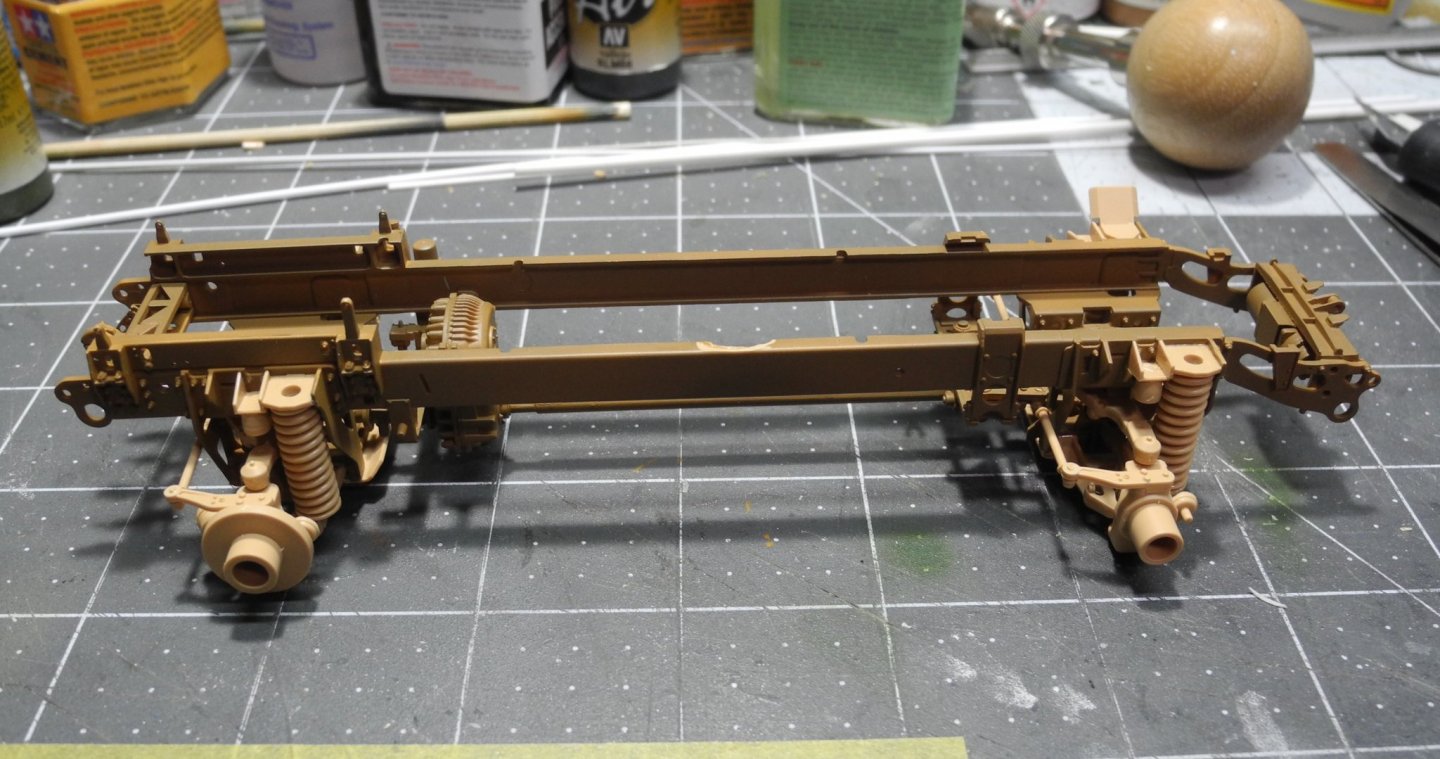
Construction begins with the chassis and drive components. These sub assemblies consist of more than 40 individual parts. The parts are small and extremely well molded. Only a small amount of cleanup is needed on parting lines, and no parts yet have had any sink marks. The steering parts appear to be movable assemblies. This vehicle has very beefy chassis rails.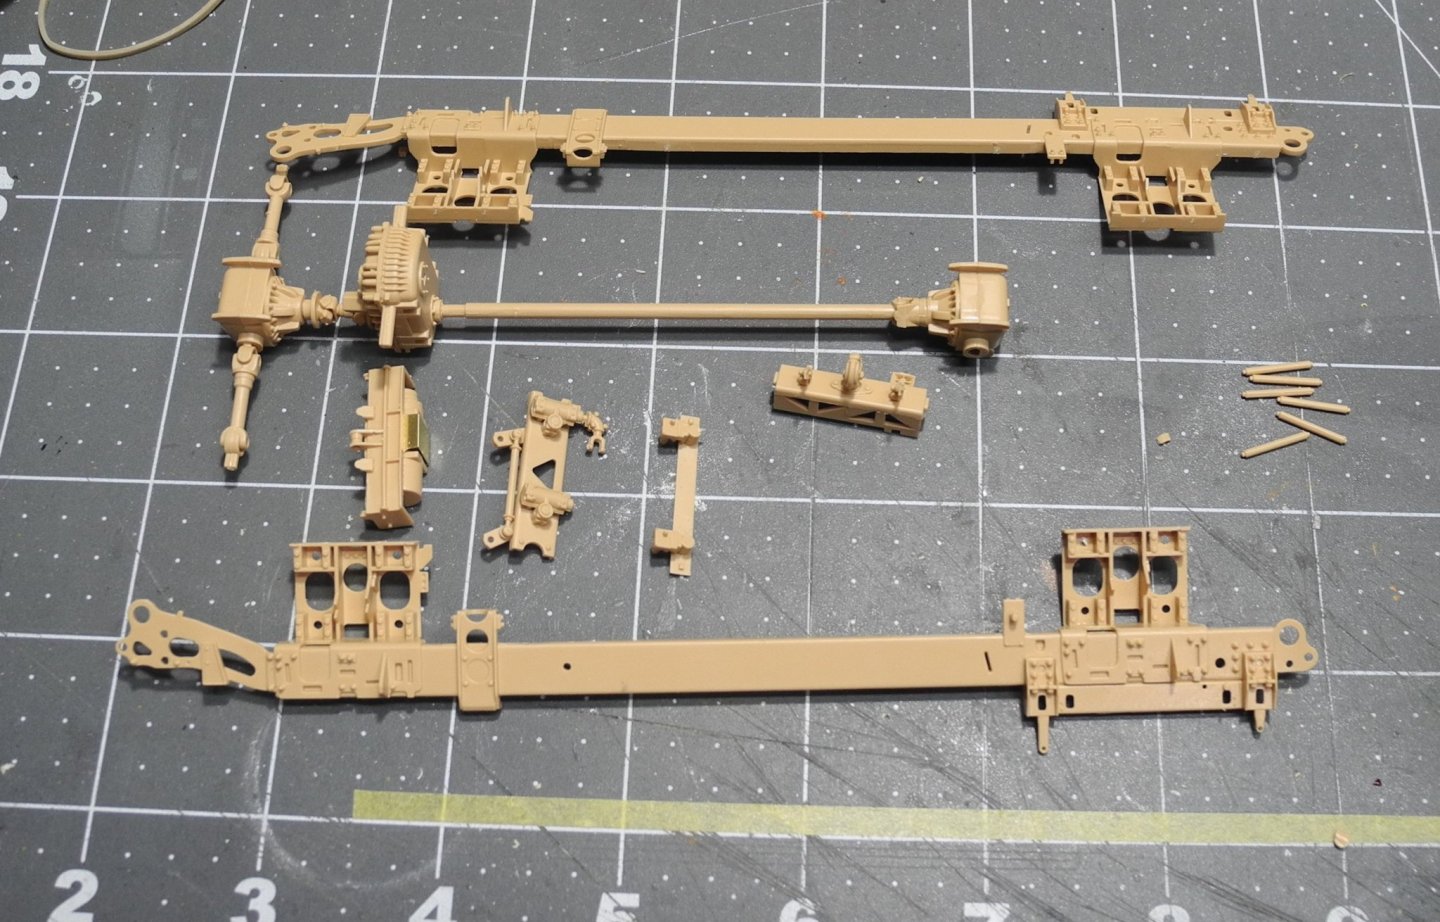
- 217 replies
-
- 12
-
-
MRAP ATV by CDW - FINISHED - Rye Field - 1:35 Scale
CDW replied to CDW's topic in Non-ship/categorised builds
Welcome aboard Mark -
MRAP ATV by CDW - FINISHED - Rye Field - 1:35 Scale
CDW replied to CDW's topic in Non-ship/categorised builds
The commander that really interests me is Kurt Knispel. Very young, this commander scored more than 160 confirmed tank kills, even upwards of 190 kills before his death in combat in 1945. One story says after his tank was blown out by a Russian T-34/85, his crew bailed out but he stayed on board, found the tank that killed his own through his periscope, then fired and killed the tank that destroyed his! He fell into disfavor after he stopped an SS guard from mistreating a Russian POW. Afterward, he was shunned by the German hierarchy and never was awarded medals or recognition he should have received. -
MRAP ATV by CDW - FINISHED - Rye Field - 1:35 Scale
CDW replied to CDW's topic in Non-ship/categorised builds
Welcome, Edward. We have two Lou's here. -
Military Wrecker - Revell - 1:32 Scale - PLASTIC
CDW replied to CDW's topic in Non-ship/categorised builds
Thanks Edward