HOLIDAY DONATION DRIVE - SUPPORT MSW - DO YOUR PART TO KEEP THIS GREAT FORUM GOING! (89 donations so far out of 49,000 members - C'mon guys!)
×

CDW
-
Posts
7,748 -
Joined
-
Last visited
Content Type
Profiles
Forums
Gallery
Events
Everything posted by CDW
-
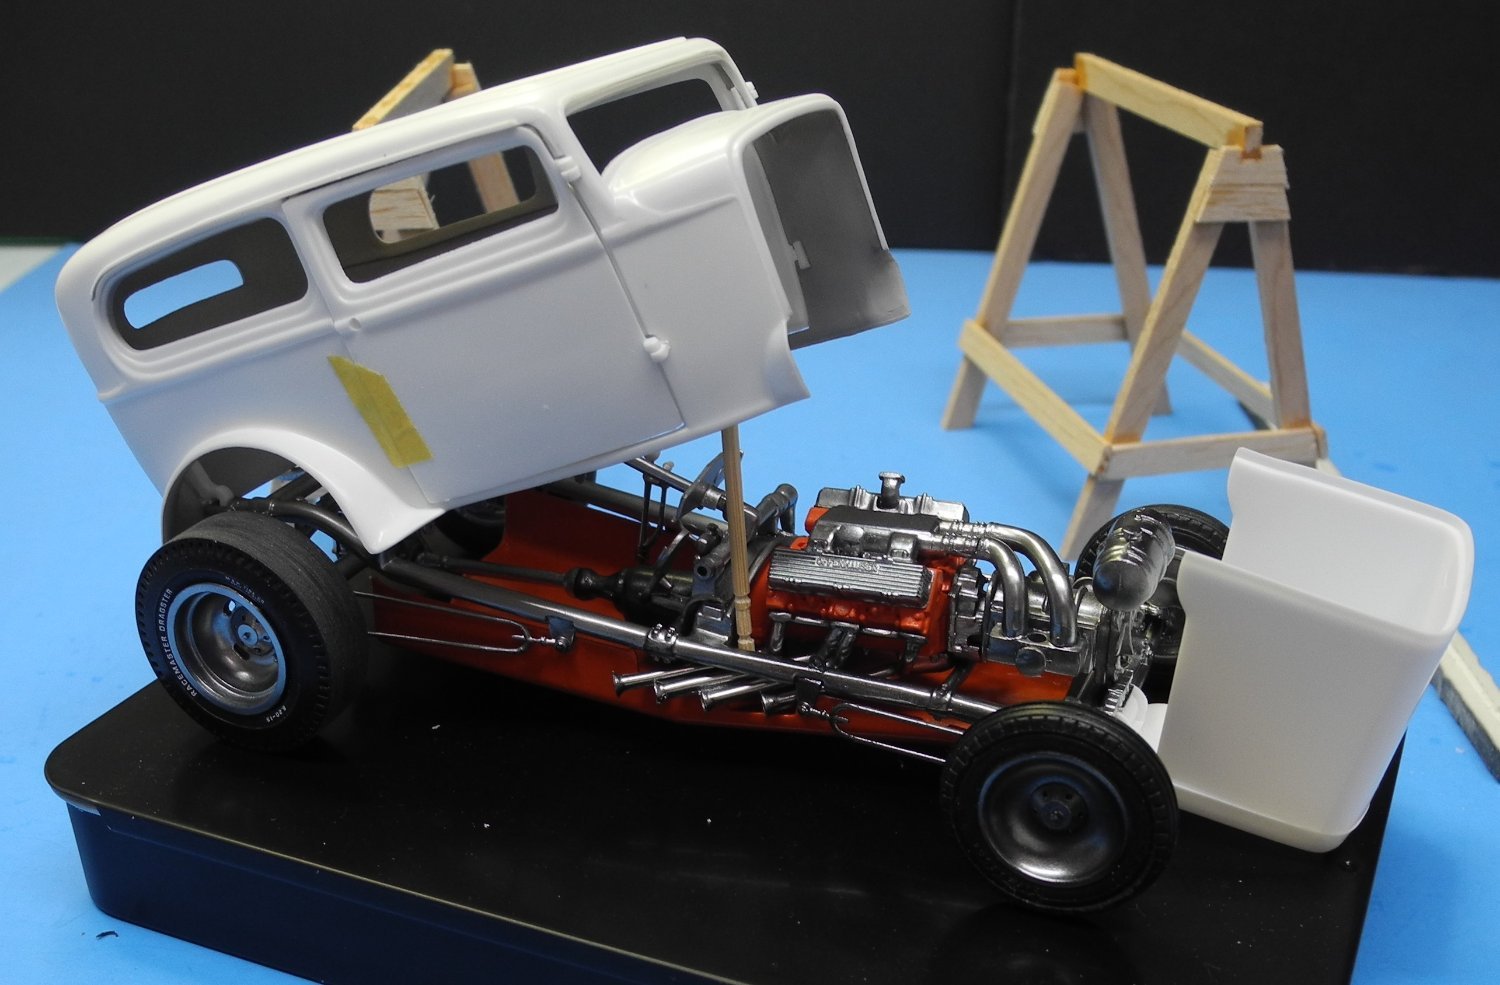
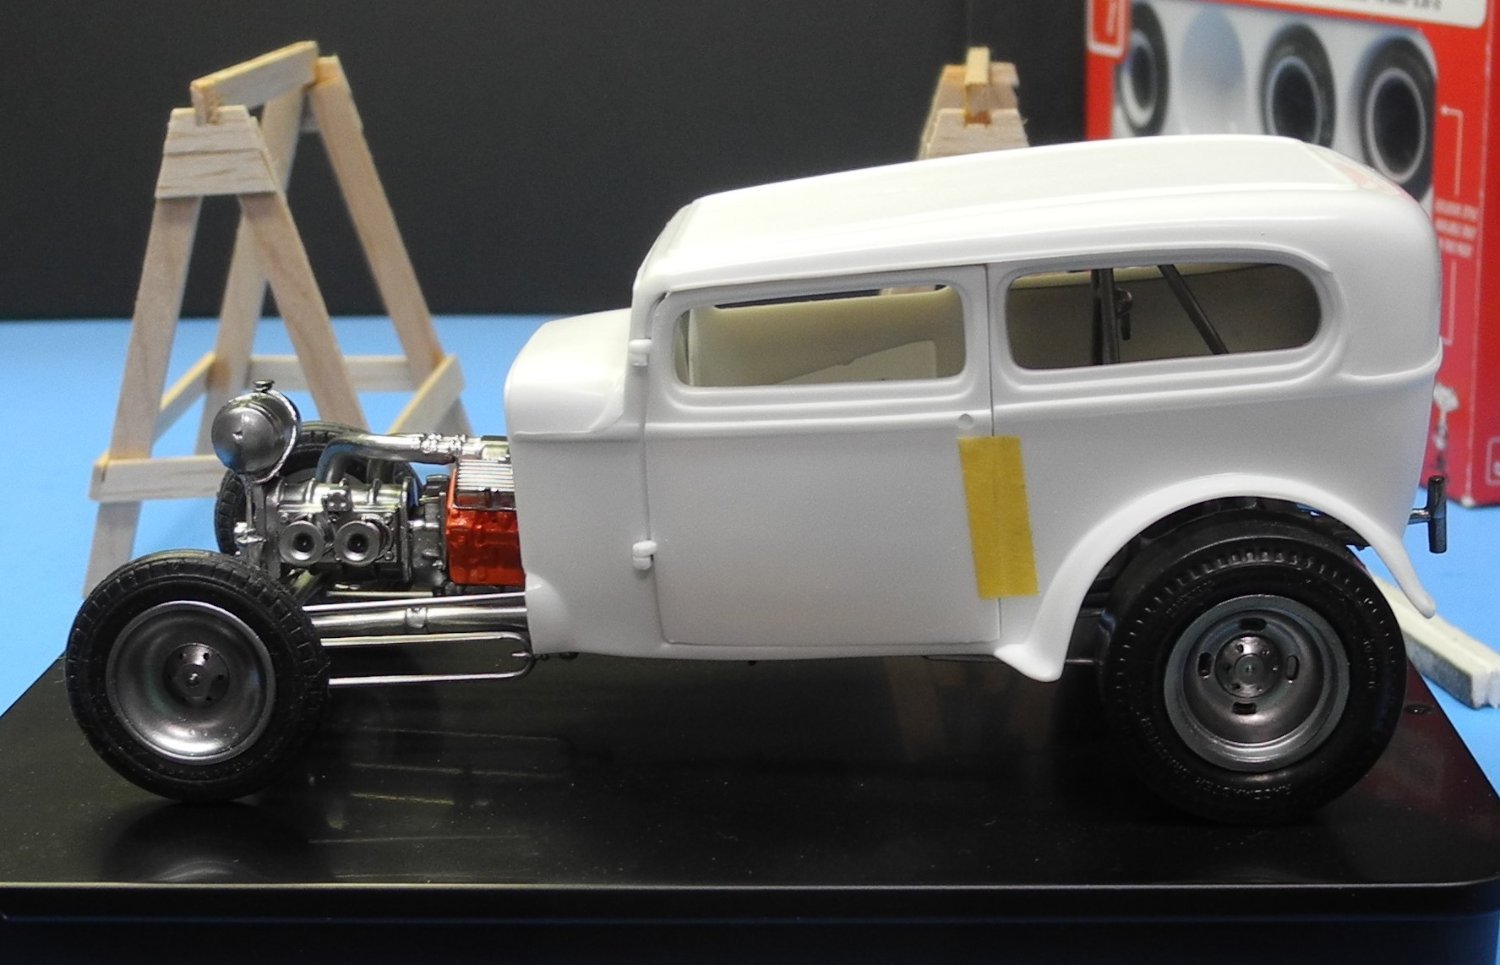
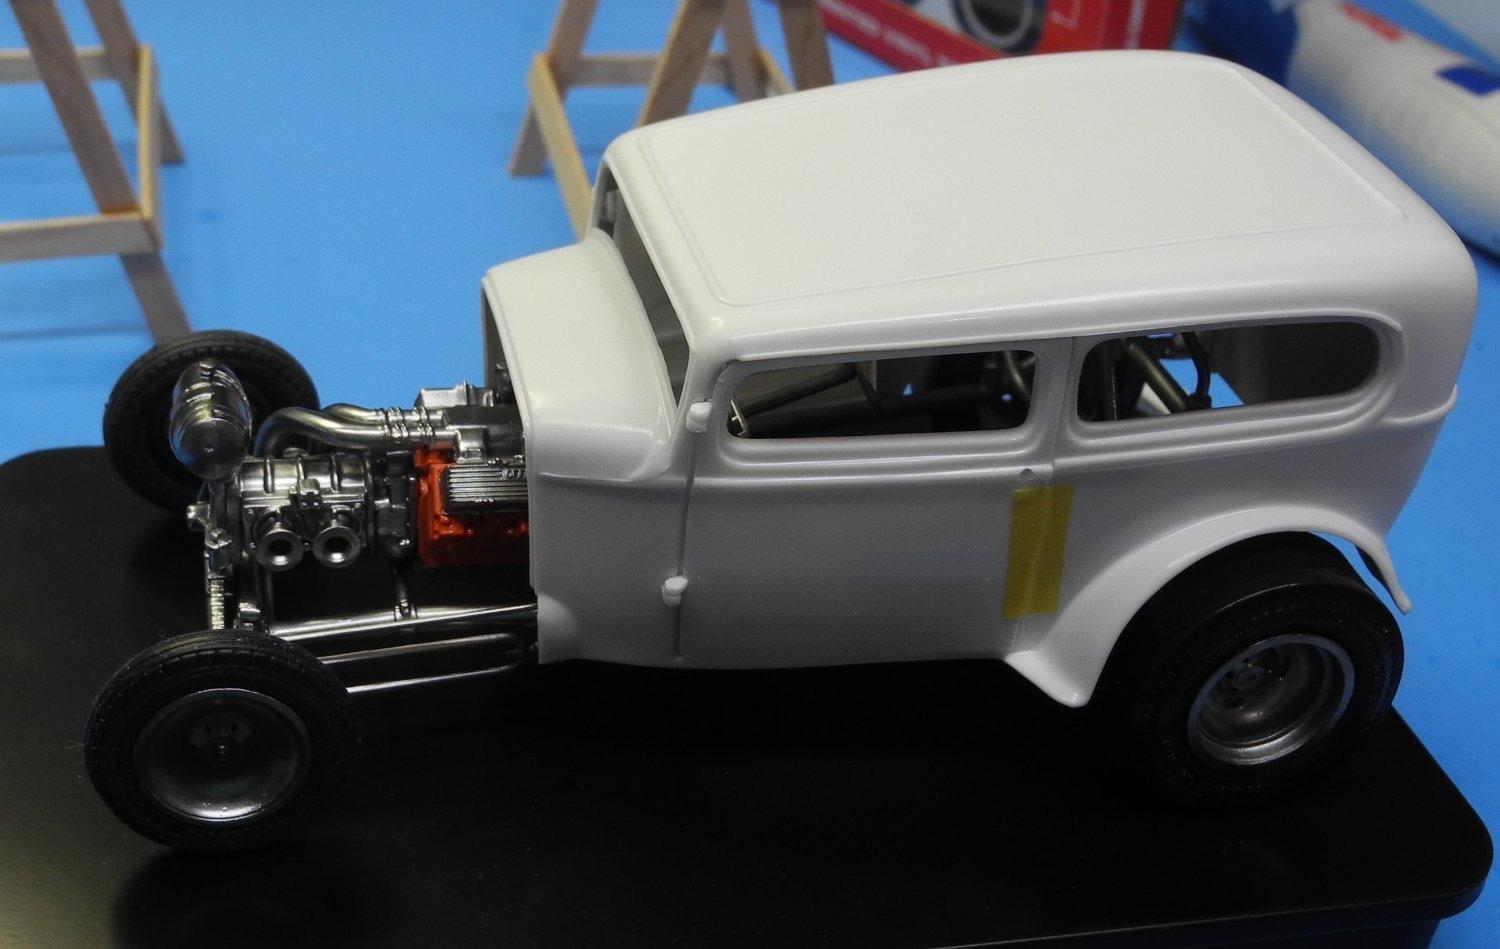
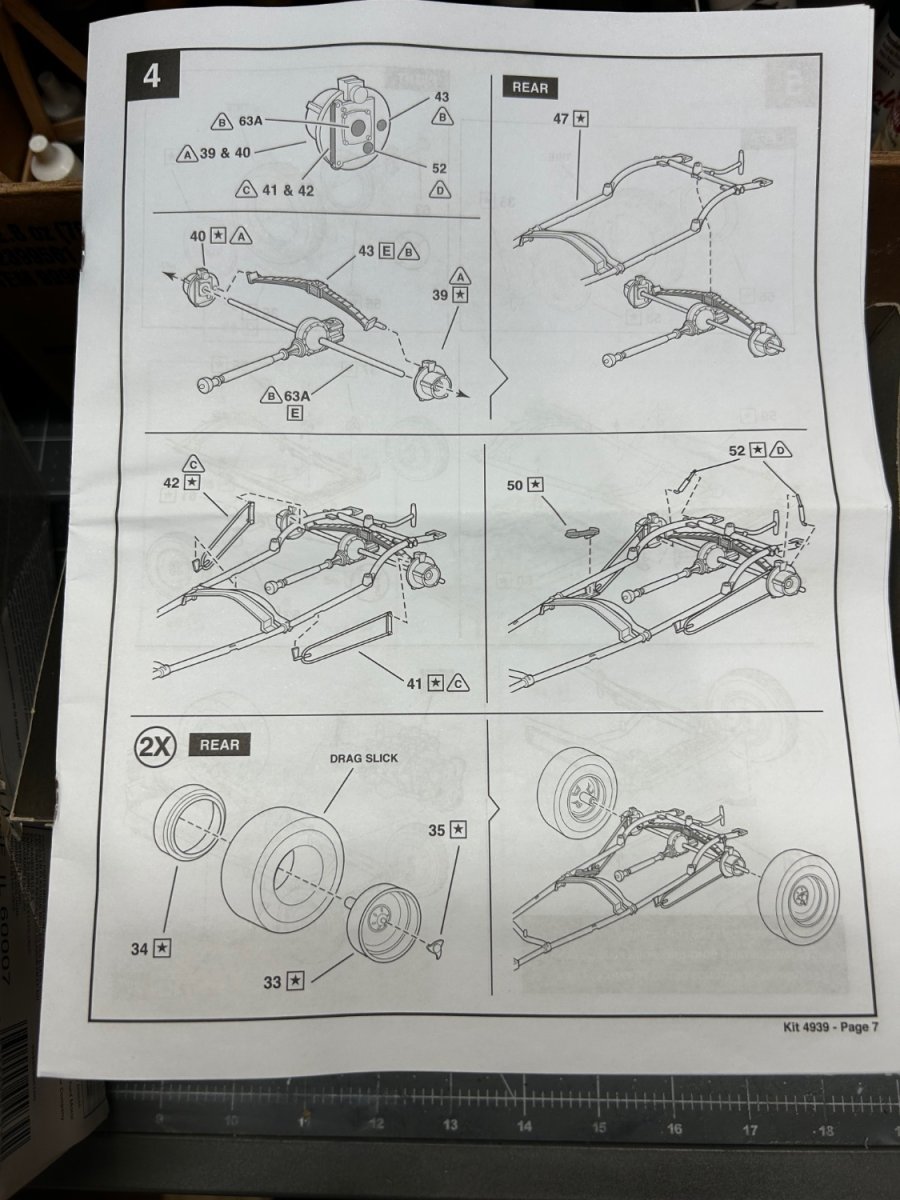
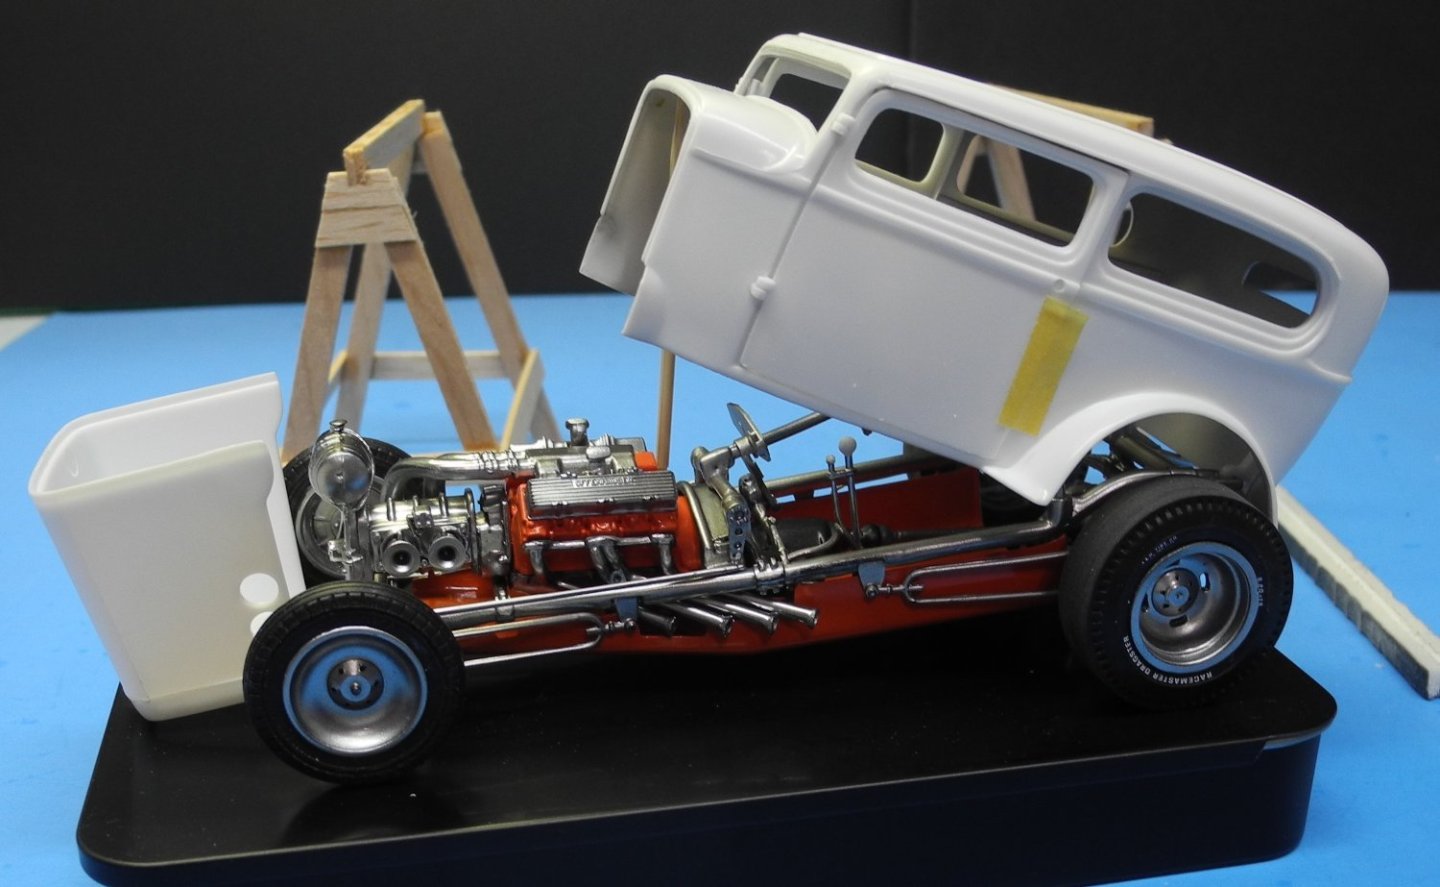
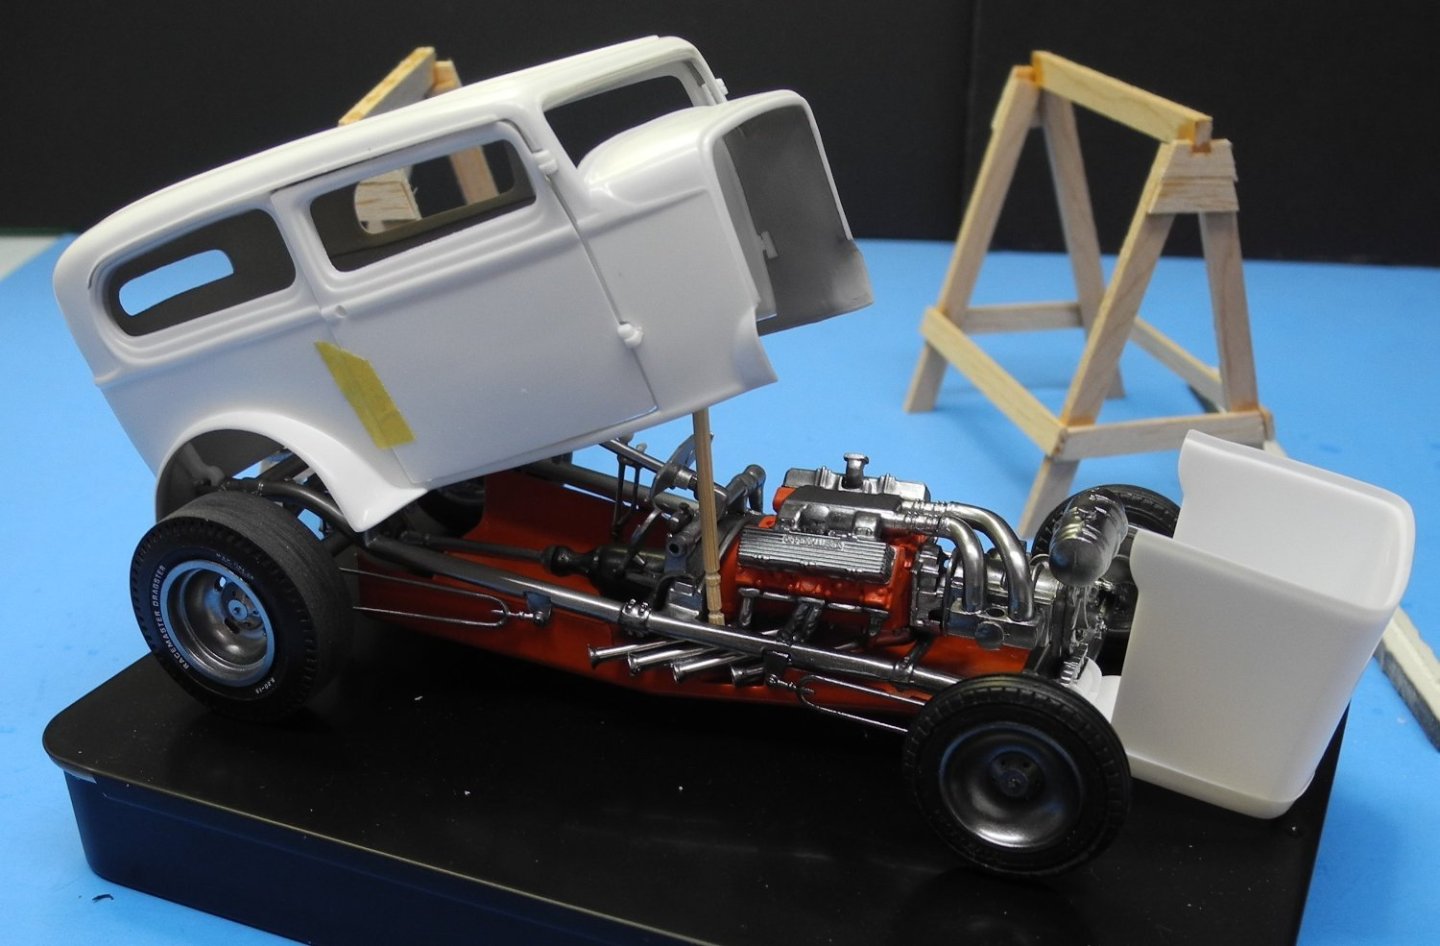
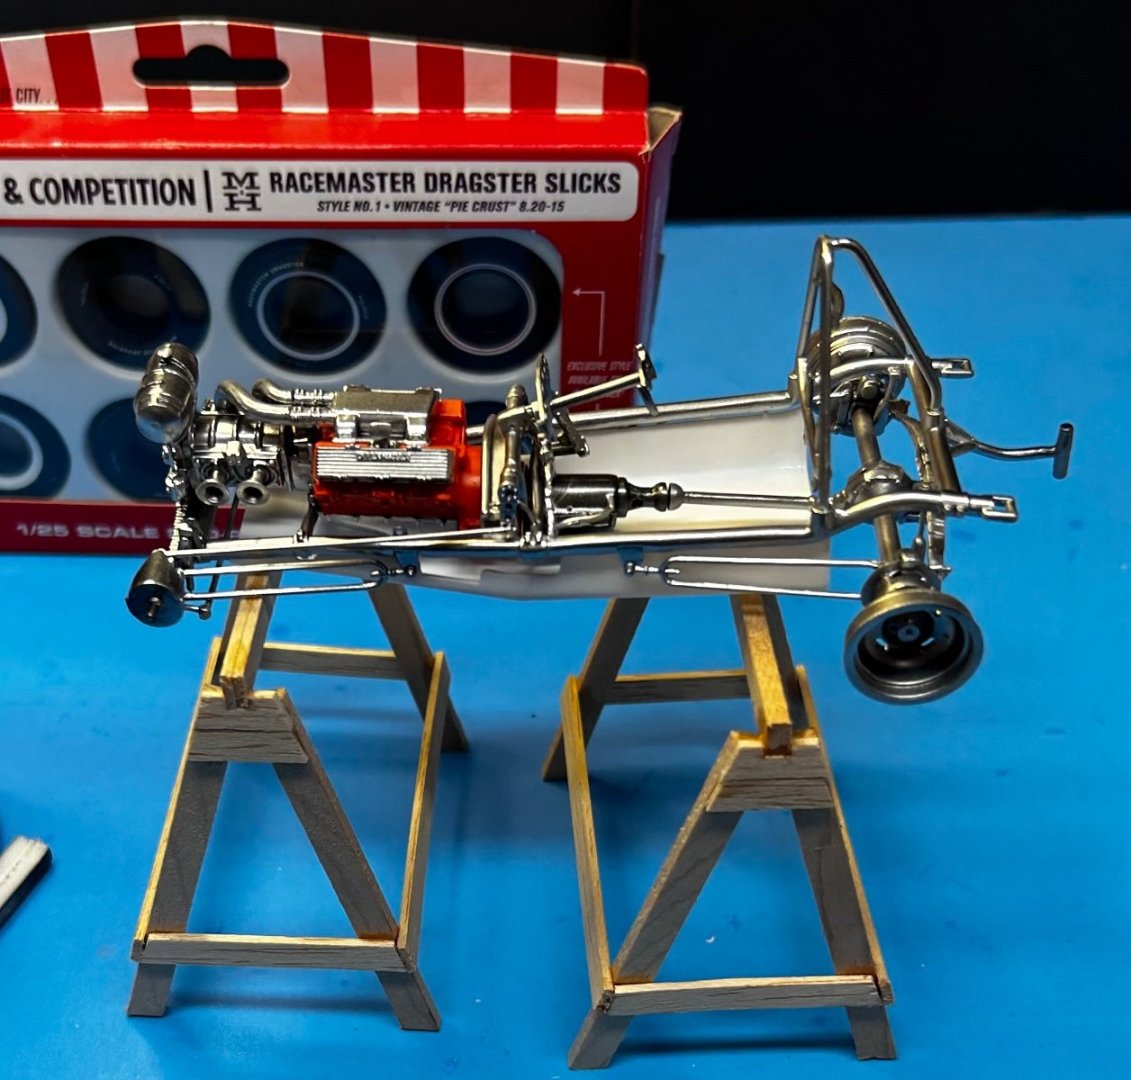
 I thought I was going to have a more difficult time getting the exhaust headers to fit, but it was easier than I imagined. There's one little issue that some minor filing and sanding can correct where the belly pan meets the chassis. The exhaust pipe on number one and number five cylinders rub against the pan causing it to pinch a bit. This is why so many dry fits are needed. Sometimes you can't tell where problems lie until you get further along in the build. If you're wondering why, I decided to go ahead and use the custom raised white letter slicks after all. I had already enlarged the inside of a tire to make the wheel fit the tire, so it didn't make sense to not do the same to the other slick and use the pair. Otherwise, they would have gone to waste. I'll just throw the stock pair of slicks in a large box I have that is slap full of tires from many, many model car kits I've built or scrapped over the years. The toothpick is used to prop up the body as this is the way the model will be displayed when it's finished. This was all that frame and engine assemblies can easily be seen. The finished model has a folding prop mechanism that holds the body in a raised position and folds down if you want to display it closed. Same for the radiator shroud and bonnet. She's a hinged folder. The mechanical body props won't go on until the model is painted and finished. They are fairly delicate and would easily break if mishandled.
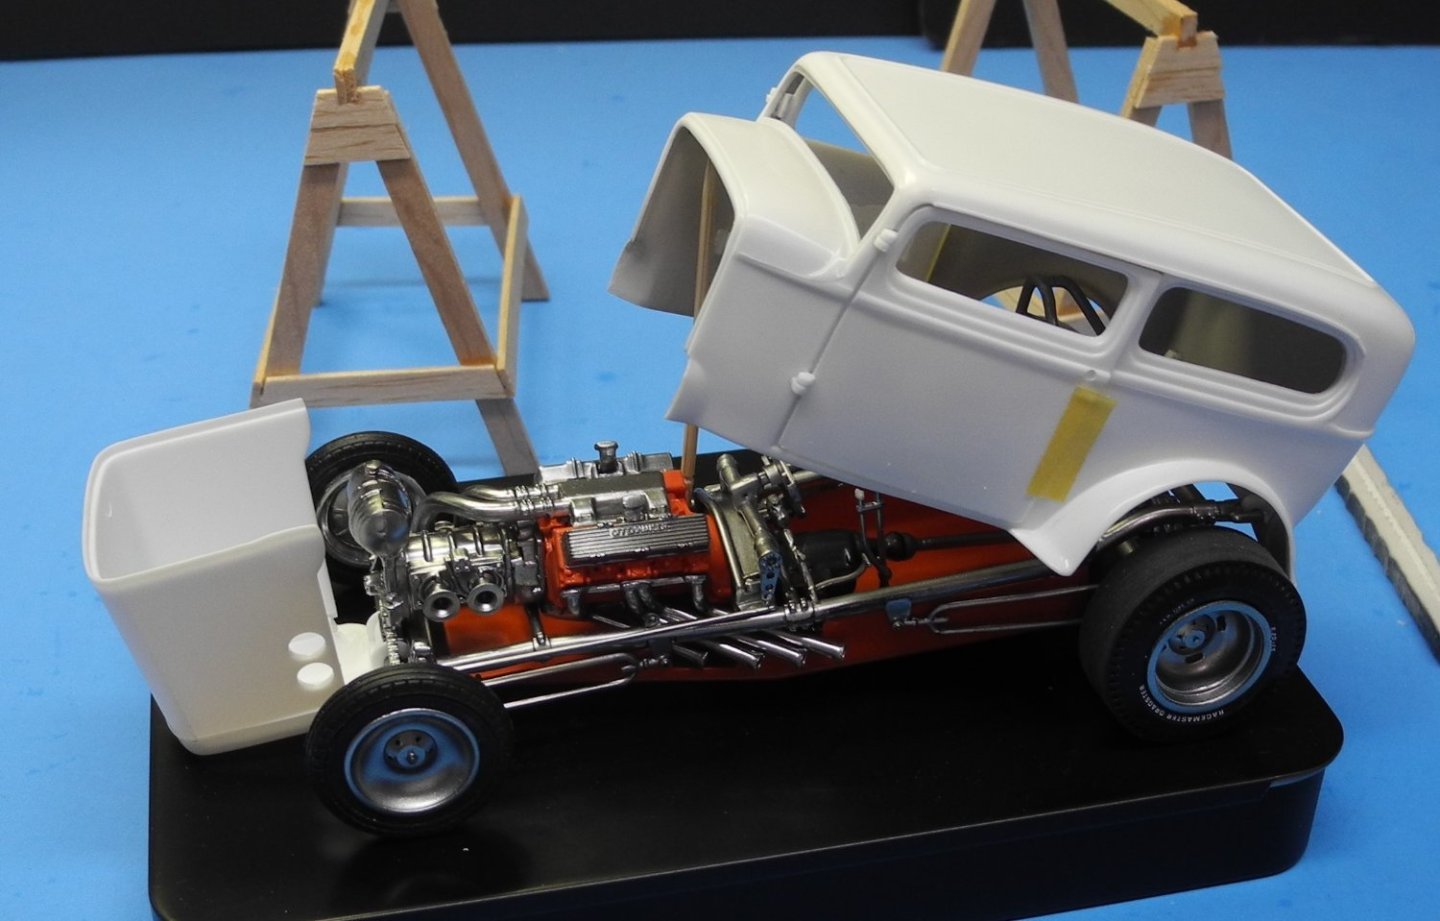

- 88 replies
-
- 12
-

-
Loarre Castle (Spain) by King Derelict - Aedes Ars 1/200
CDW replied to king derelict's topic in Non-ship/categorised builds
Beautiful, Alan. How much do you estimate this castle will weigh once it's all finished? What are the finished dimensions of it? -
Thanks Ken. I'll look him up.
-
Yes, indeed it does. It takes a lot of experimentation, trial and error to figure out the ins and outs of all this stuff. So many products, so little time. There is a guy on YouTube who goes through great pains to test and video things like this. Unfortunately, his videos are so long and tedious, I often quit watching before it's all said and done. I wish he would learn to be more concise and to the point.
-
Thanks Gary, but I still have a lot to learn about it. I should have used a clear coat before the Alclad. The gloss black was not sufficiently slick for the best possible Alclad chrome finish. I think this looks much better than kit chrome tree parts, but it can be done better than I've done here. I also must say that it's imperative to use very light coats of the Alclad chrome. It's one of those products where "less is more". I have been reading some rave reviews of the Green Stuff World airbrush chrome paint. It's an acrylic and looks very convincing when done properly. Alclad is not a forgiving paint, that's for sure. With practice, trial and error, great results can be had but I'm still working on it.
-
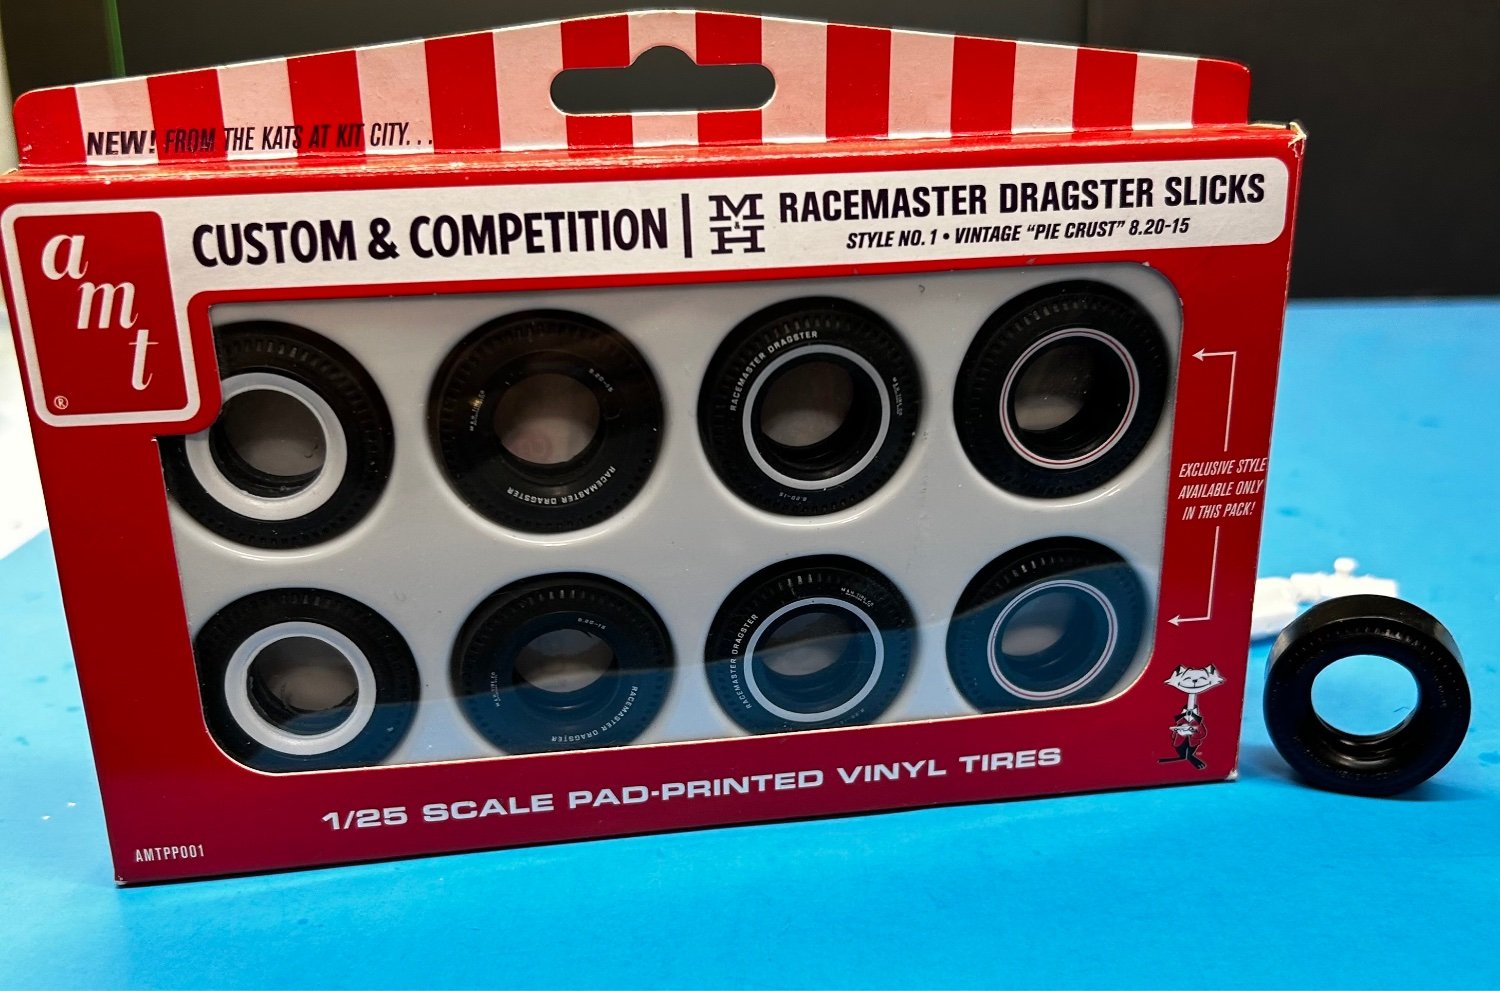
There was a hitch with the custom sidewall slicks. The tires are molded too small to fit the Orange Crate wheels. I needed to enlarge the inside of the tire to make it fit the rim. I'll be using the stock slicks, not the custom ones. Anyway, we're getting closer to the finish now.


- 88 replies
-
- 10
-
-
It was a color carried by Testors in spray cans way back then.
-
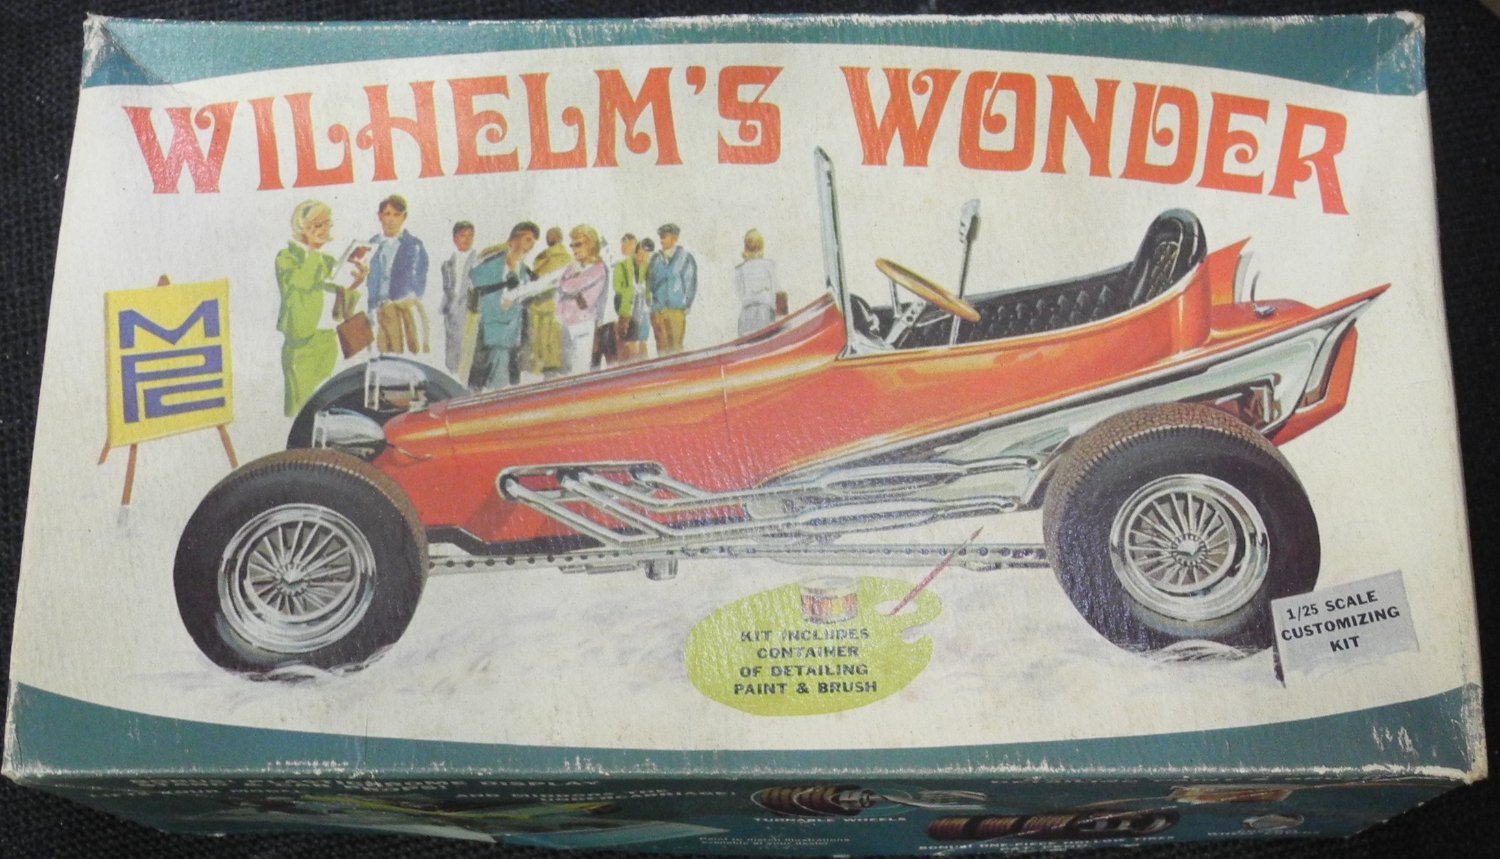
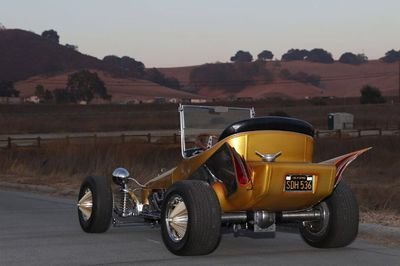
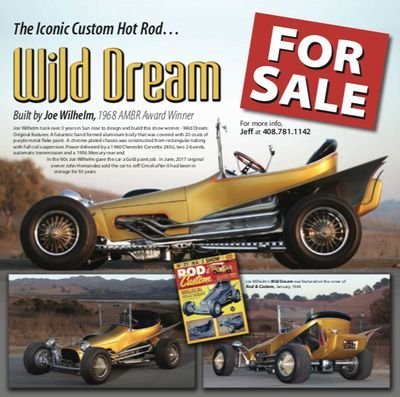
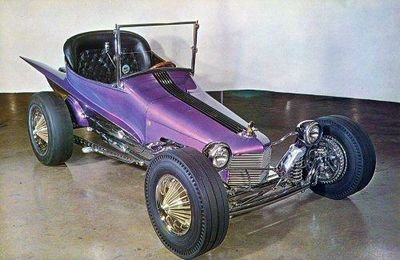
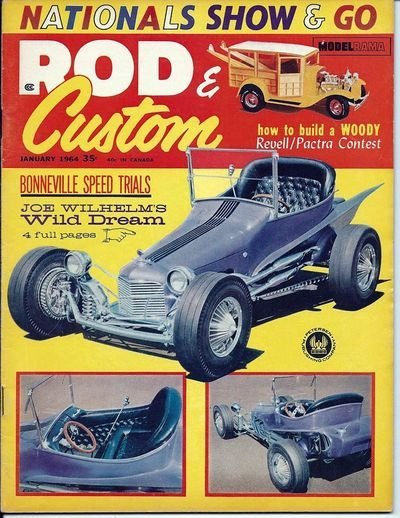
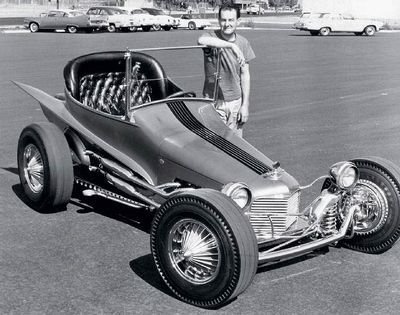
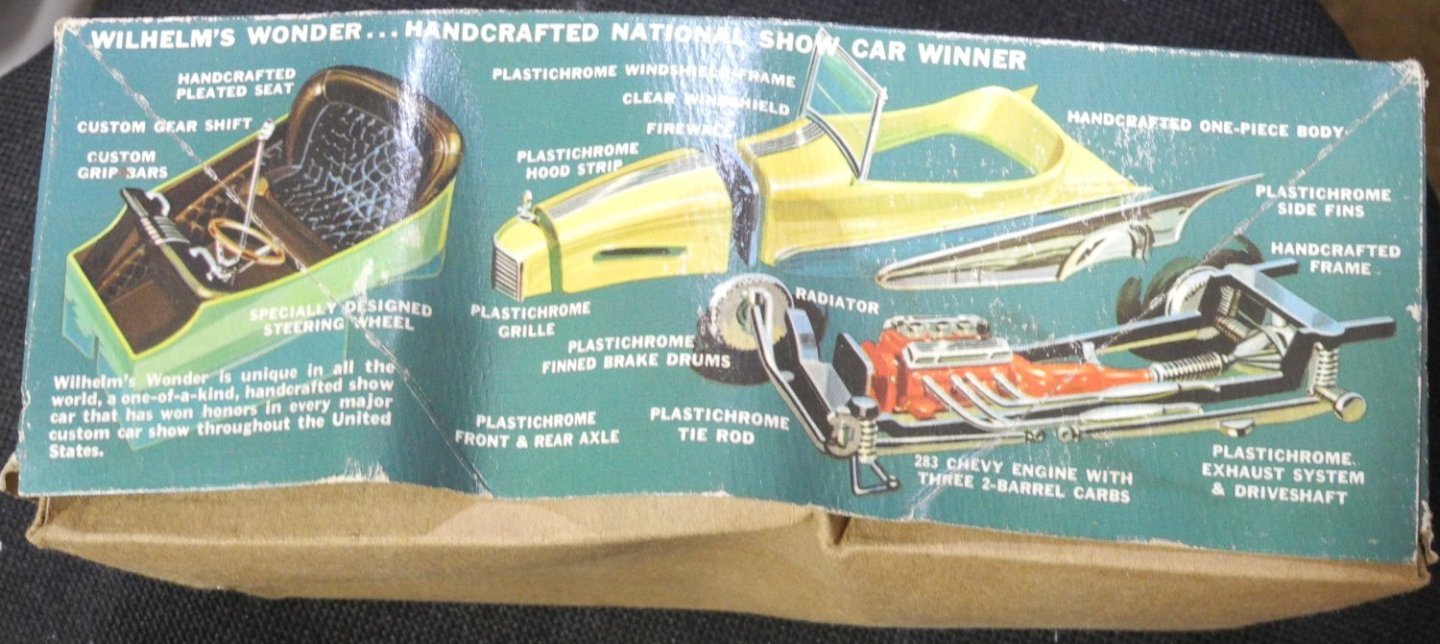
Joe Wilhelm's Wild Dream custom show rod from the mid-sixties era is my next project. This old MPC kit has been in my possession for decades and the kit box shows the wear. The good news is, the kit plastic is all there, only the tires are missing. I probably took them out and tossed them in the bin somewhere along the way. Over time, old model kit tires are notorious for 'melting down'. The first time I saw this kit was in the mid-sixties when it was released by AMT as a double-kit. The kit contained the Wild Dream and another well-known show rod from that period named Tognotti's T. Shortly after, MPC reboxed the Wild Dream and gave it the title, Wilhelm's Wonder. Same kit, same plastic, only in a different box. Here is a short description of the car I found on the net: "Wild Dream is a show rod designed and built by Joe Wilhelm at Wilhelm's Custom Shop for John Hernandez. Built over a three year period, the wild rod featured a futuristic hand formed aluminum body that was covered with 20 coats of purple metalflake paint. A chrome plated chassis was constructed from rectangular tubing. The chassis featured full coil suspension. Power was delivered by a fuel injected 1960 Chevrolet Corvette 283 cu. in. engine, a 1961 Chevrolet four speed transmission and a 1956 Mercury rear end." My build is on deck, waiting for the finish of my current Orange Crate project before starting this one. This will give me time to search down the "grape metallic" lacquer paint I want to start and finish this project.

-
I wish I could make bad models look so good as you do Chris. My one and only card model experience was with what I feel was a poor design, but it's probably more the fault of the modeler in my case than it was the kit. I dropped mine into the bin and counted it up as a learning experience. Looks to me like you're going to wind up with a fine-looking model on your shelf due to your skills to make a silk purse of a sow's ear.
-
Great looking airplane and a fine model Andy. I used to play a MMO aerial combat game and this was a favorite plane for me to play. A dive bomber but also a very stable gun platform. It was slow but maneuverable. Could take a lot of punishment but give it out as well. Not sure how closely its game performance matched reality but it was fun to play. You could drop the flaps and easily turn inside the faster fighter planes. Excellent low speed handling. With that big wing area, it’s no wonder it was so stable in flight.
-
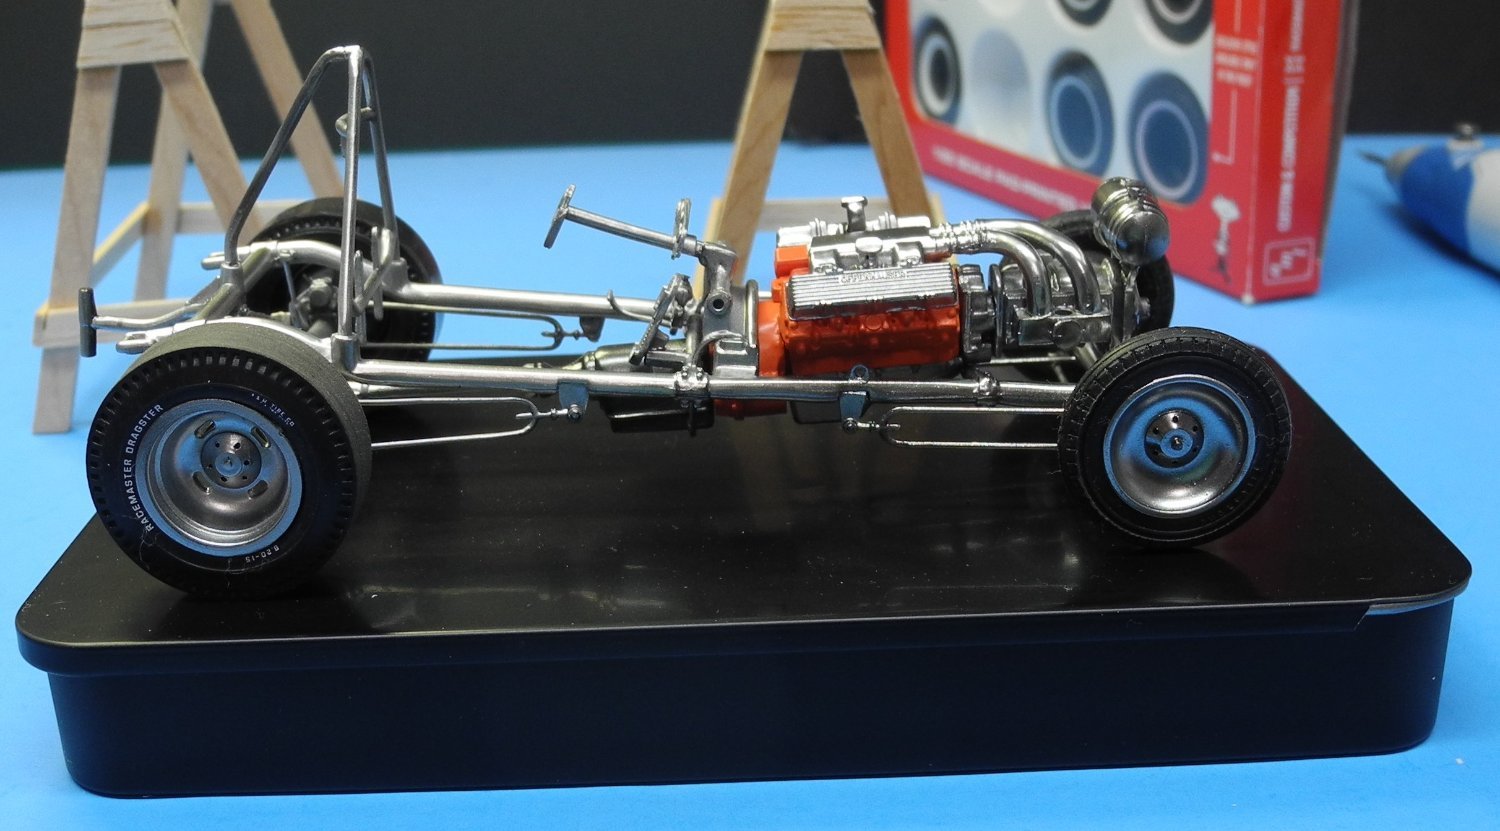
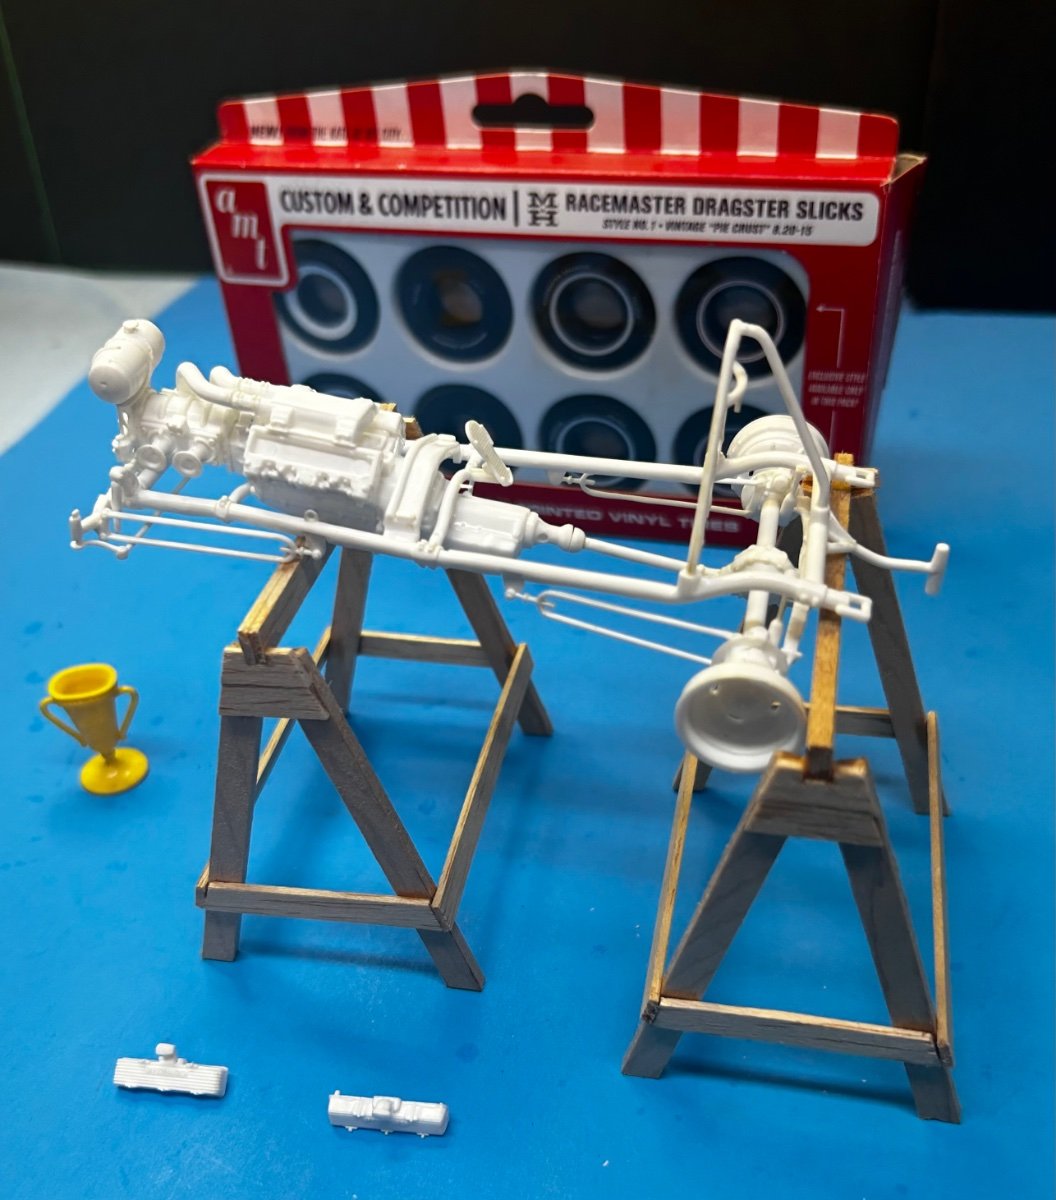
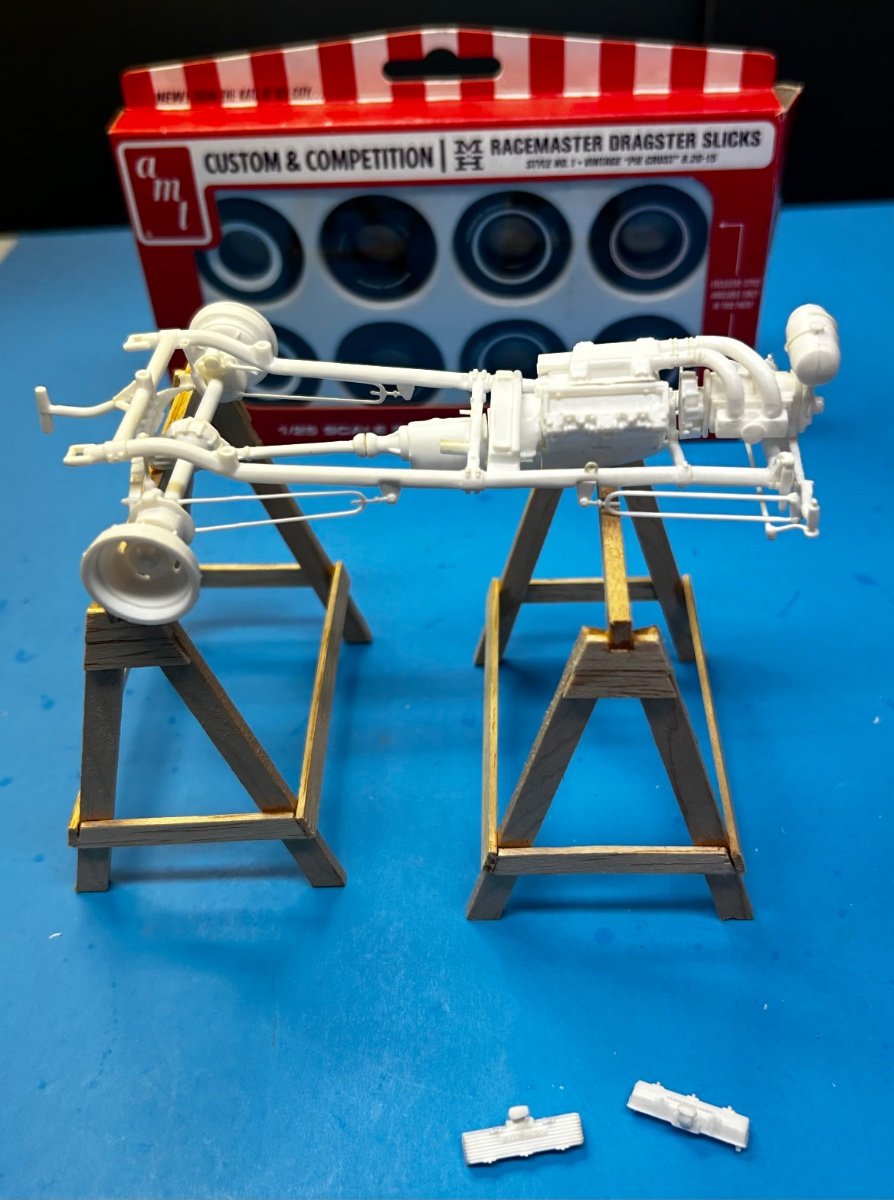
Dry fit (again, for motivation). The chassis fits right down on top of a belly pan. The pan will be orange eventually. I love those Offenhauser valve covers. WhennI was a teen, I bought an Offenhauser triple single barrel carb intake manifold for my ‘51 Chevy, and the matching Offy valve cover, too. I thought I was the cat’s pajamas with that setup back then. My dad throttled me back more than once. I guess a lot of us my age went through that stage back then.
- 88 replies
-
- 10
-
-

-
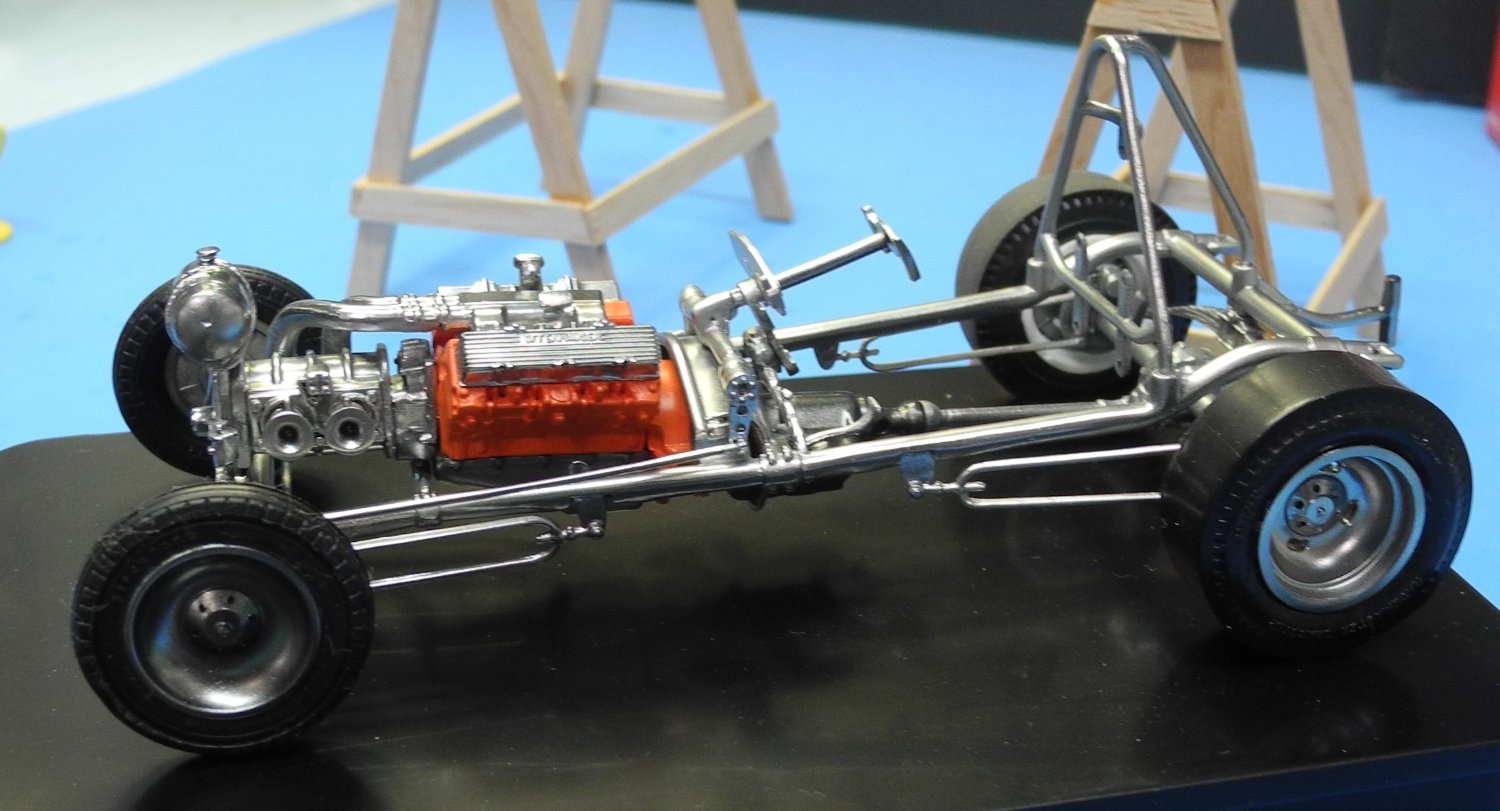
With the chassis covered in Alclad chrome, I’ll leave it sit until tomorrow and then shoot Alclad aqua gloss clear over the chrome to protect it. The other chrome parts are ready for the clear as well.

-
Here is the full article I found about the Orange Crate in internet archives: The Ultimate Dual-Purpose Hot Rod The Story of the Orange Crate By Calvin Mauldin Photography: The Rod & Custom Archives As any rodder knows, a '32 Ford of any body style never gets thrown away. Short of being run over by a freight train, a Deuce will just keep coming back in one configuration or another. Owners may change, engines may be swapped, but once this ever-popular Ford model has been hot rodded, it stays that way. Such was the case when Portland, Oregon's Bob Tindle bought a solid, albeit modified, '32 sedan in 1959, and over a period of five short years, dazzled the difficult-to-impress car-show faction as well as magazine editors. Bob's '32 came complete with such rodder's touches as a radical chopped top, a gutted interior, and rear fenders that had been bobbed and molded in for that mean and hungry look that could intimidate the competition just by standing still. Bob's younger brother, Terry, remembers what his brother purchased. "Man, that was a long time ago," he says, "but I remember the body was in excellent shape and covered in light-gray primer. It had a real hot flathead bolted in, but the guys Bob bought the car from wanted to keep that engine. Dave Bell had built a heated late-model Olds engine with six carburetors and put it in his '57 Corvette, and that engine would really run. Bob bought the Olds and had it put in the '32. We ran a Cadillac/LaSalle transmission with Second and High gears. I'll never forget sitting at the starting line, ready to go. The whole car shook, and really took off when the flag dropped." Keith Randol kept the '32 tuned to a razor's edge for drag racing so the Tindles made a good showing at the strip, but Bob wanted to get more into the car-show side of the hobby. As Terry tells the story, "The car was painted lemon-yellow. It looked nice when it was entered in the Portland Roadster Show in 1960, and it did well. Then Bob decided to create an all-out show car. Keith Randol had just started up a shop, and Bob took the '32 there for a drastic rebuild. I should mention that Keith was a machinist, and years later went to Indy with a rear-engined racecar owned by Rolla Vollstedt. This was a short time before all the teams made the big move to rear-engine cars. Keith was a real pioneer. I don't know if Bob intended to go all-out with the sedan, but he would dream up an idea and Keith would take that idea a step or two further, making the '32 very innovative and far ahead of what was being built at the time." The reconstructed show 'n' go Tudor turned out to be a quarter-mile, straight-line competition sedan riding on a Sprint Car-style chassis. The chassis itself was almost jewel-like in construction, having been fabbed from 3-inch-diameter, 0.120-inch wall seamless Shelby tubing, bent at curvaceous angles by Randol with a torch and tube bender. Adjustable suspension was added, along with a complete front axle assembly and Halibrand quick-change setup pulled from a 20-year-old Sprint Car that also gave up its Halibrand wheels. Obviously, Randol was honing his skills for future forays on circle tracks, but the blending of the two styles gave Bob's '32 an unquestionable "Wanna race?" attitude. Dick Maris rebuilt the Olds with meticulous attention to detail. Case in point: After hours of porting and polishing the heads, the combustion chambers were slicked up and given a final polish with jeweler's rouge. Enlarged to 417.63 ci, the mill was equipped with Hilborn injectors, using a front-mounted Potvin blower. A B&M Hydro trans capably handled the 600-plus horses that Marris concocted with the trademark wham/bang shifts. The chassis/engine package was treated to a liberal dose of chrome plating and polishing, which made it a shame to cover it up with the body and hood panels. Therefore, Bob gave Randol another engineering puzzle: make the all-steel body tilt for display. Keith, the wizard machinist, went through the body, adding anti-flex support members. It was a strain on the average muscleman to raise the body, but the extra grunts and groans were worth it when the eye-popping engineering was revealed. What the completed showpiece chassis needed was an equally exquisite body, and Von's Body Shop was assigned the task of getting the panels straighter than Henry ever made them. Reproduction fiberglass Ford parts maker Dee Westcott was given the job of building the top insert. When the metal was deemed worthy to paint, Von's covered the panels in Naples Orange (minus the peel), and thusly, the tart, tangy Orange Crate was officially born. The fresh Orange Crate blitzed the '61 Winternationals, handily took the America's Best Competition Car trophy at the '61 Oakland Roadster Show, and graced the Feb. '62 issue of Hot Rod magazine. This was quite an accomplishment for the Orange Crate Gang from Portland, Oregon, considering that at the time, California was considered the leader of the pack when it came to hot rods. For the 1962 show-business encore, the Orange Crate was treated to some additional, point-gathering details (as if it needed any more). It also competed once again at the Winternationals before Bob sent the wild, trophy-winning sedan on a whirlwind tour of car shows throughout the U.S. Afterward, Revell sent an engineer to Bob's high-performance automobile dealership, where the Orange Crate was diligently measured inch-by-inch for a model-car kit that would become a solid seller. In 1963, the hot rod celebrity made what was to be its final showing at the Oakland Roadster Show, once again winning the coveted America's Best Competition Car trophy. Then, the Orange Crate was retired from show business and touring to a space at Bob's hot-car emporium. The details of the story after that become vague. As Terry says, "One possible thing that led to the Orange Crate being retired was the fact that we opened a Chrysler/Plymouth store that year. That took up a lot of extra time." Being a competitive dealer also meant there was less time to keep the Orange Crate in tip-top show condition. Terry continues, "In 1964, I bought my own Chrysler/Plymouth store in McMinville, Oregon, and moved there. I sort of lost track of what Bob was doing with the Orange Crate, and by 1965, he'd sold the '32 to a couple of guys he knew who were in the used-car business. That's really the last time I saw the Orange Crate, though people still ask me about it. That's how famous that car was, and still is." Could the decision to sell have been a response to a gentle nudge from officials at Mopar? After all, here was a famous Oldsmobile-powered Ford sedan on a lot where stock Chryslers and Plymouths were being touted as the latest Michigan giant-killers. No one will ever know. Over the years, the Orange Crate could be seen occasionally, whizzing by on the custom trailer Keith Randol built for it, or on hand at a used-car auction or swap meet, each time its once-dazzling appearance a bit more tarnished. Terry states that Bob looked at the sedan a few times, but never expressed any interest in buying the Orange Crate back for old times' sake. Besides, nostalgia drag racing hadn't been born yet, and few of us were very nostalgic about anything in the early '70s. An old competition sedan was virtually useless. Shortly after, the Orange Crate disappeared. Over the last two and a half decades, rumors have abounded about the whereabouts of the Orange Crate. Paul Duchene, an enterprising writer for the Chicago Tribune, recently found the missing Crate. It's alive, if not too pristine, and living in rural Washington, owned since 1975 by drag racer Ted Gord. Gord knows what he has, as well as what needs to be done to get the old warrior back in show condition. He plans to build a shop for just that purpose and have the venerable sedan ready by the end of this year. Wouldn't it be a stupendous comeback if Gord took the Orange Crate back to the Oakland Roadster Show just one more time? Sadly, Bob Tindle wouldn't be there, as he passed away recently, but we're sure Terry could be coaxed into coming to Oakland. He might even sign a few Revell Orange Crate kits (recently re-released from Revell-Monogram) for old fans that remember the unforgettable '32 from the early '60s or for new fans taking their first look at this resurrected classic.
-
Got to give credit where it's due, Yves gave a great idea. Now I need to make a couple more sets in different scales for other model car projects. These are 2X the size they need to be for this scale. 😄
-
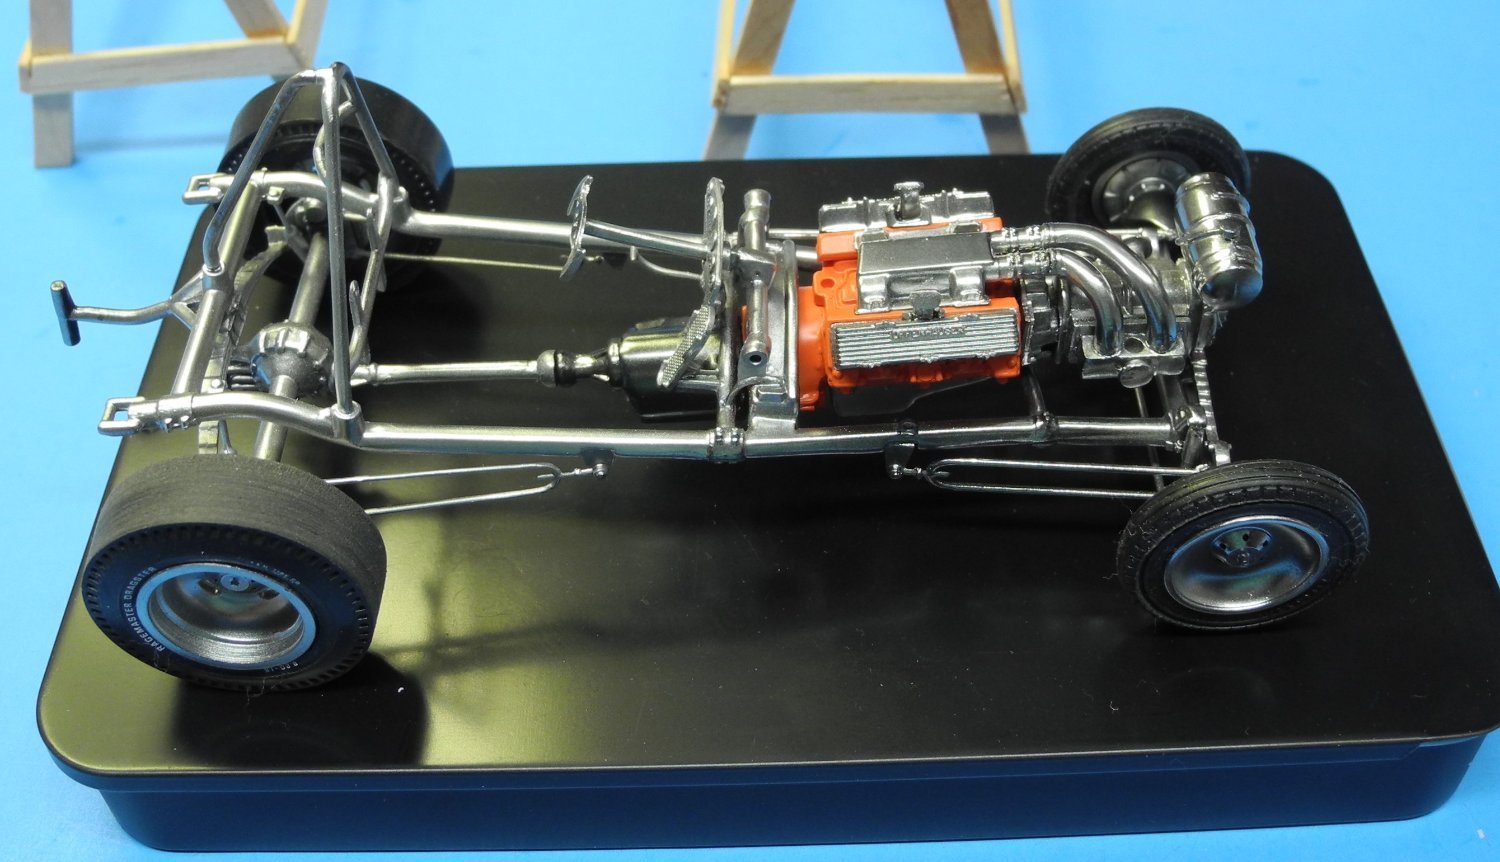
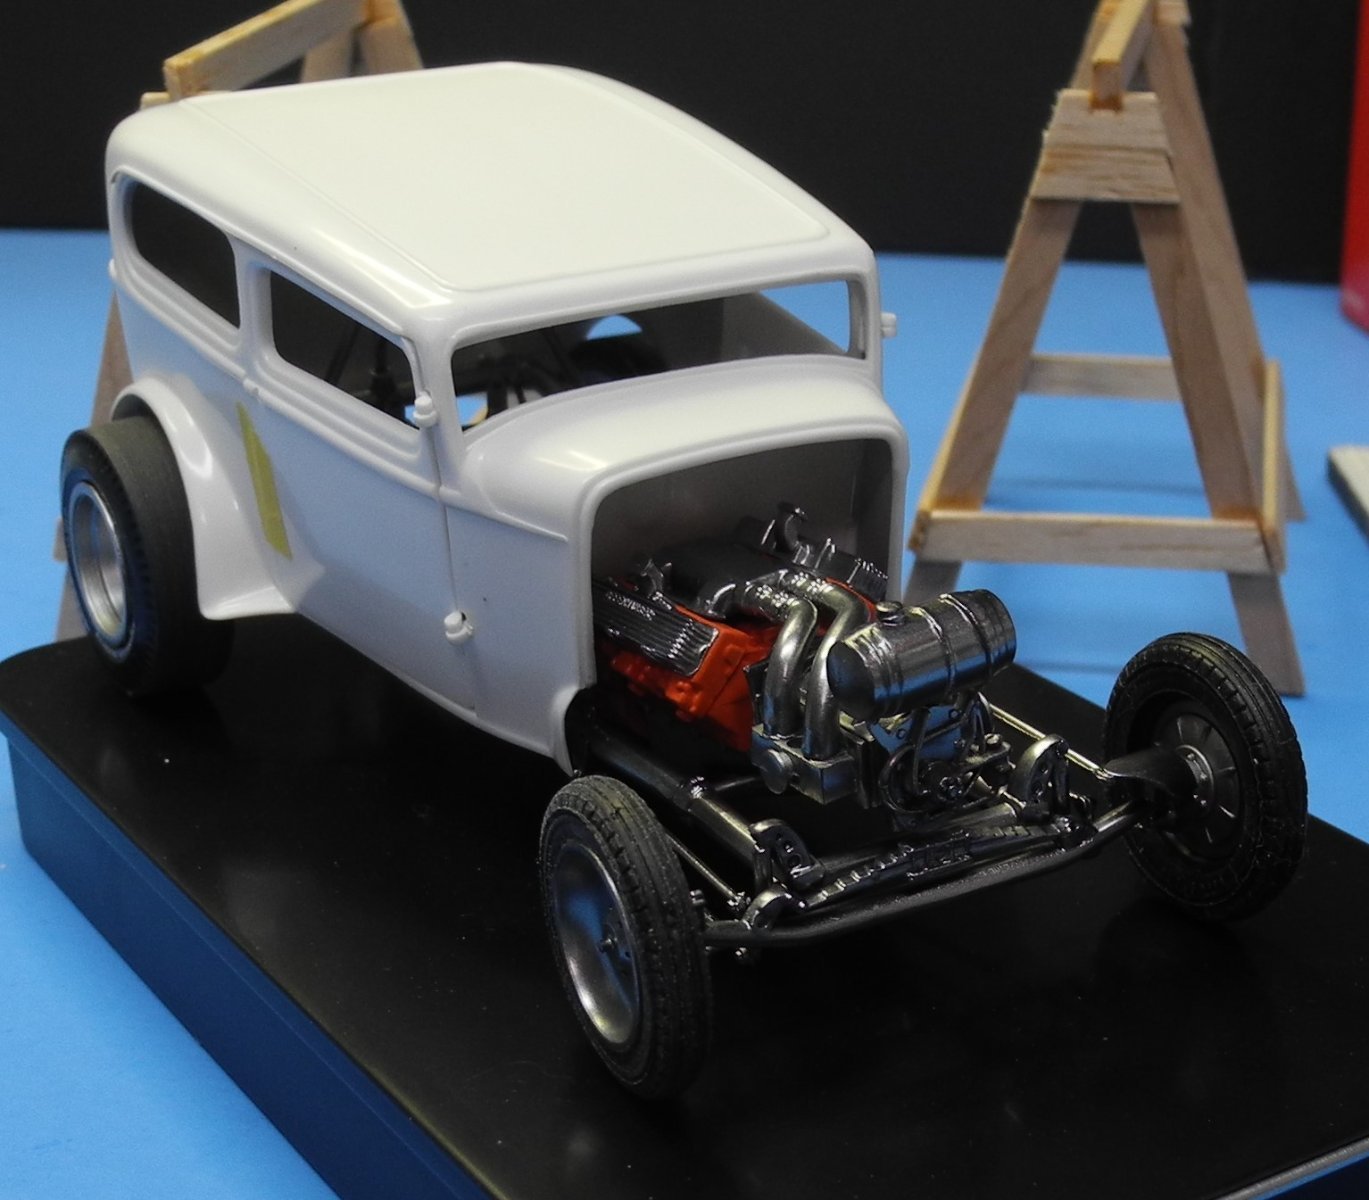
Just in case you were wondering about it, the Orange Crate engine is a tricked-out Oldsmobile built to 418 cubic inches, a front mounted Potvin blower with Hilborn fuel injection. B&M hydro transmission. The engine is said to have produced 600 horsepower. The article that I learned this information from said the engine was from a late model Oldsmobile but did not specify what particular engine or the year model of it. Suffice it to say the time period the article was written was very early 1960's. So, it can be reasonably assumed the engine was anywhere from 1959 to 1962 vintage.
-
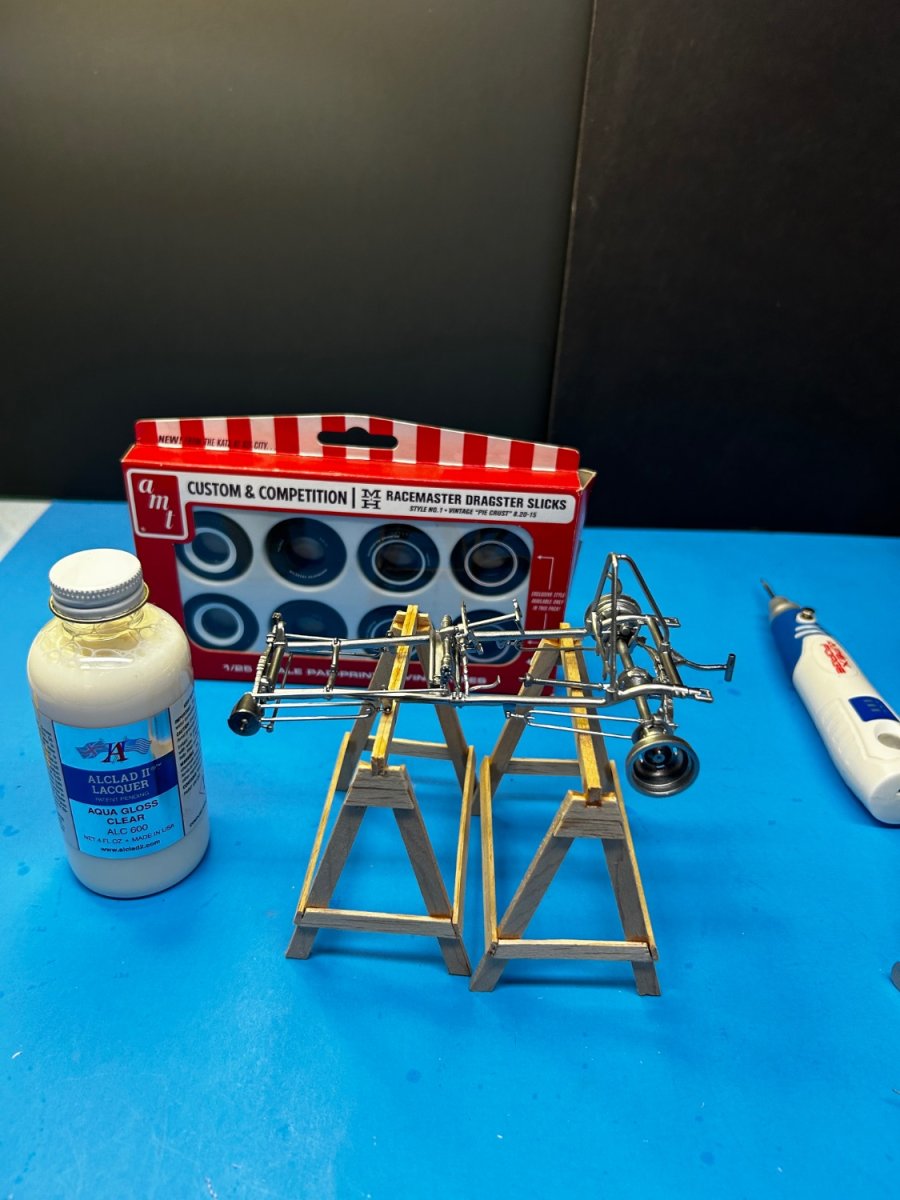
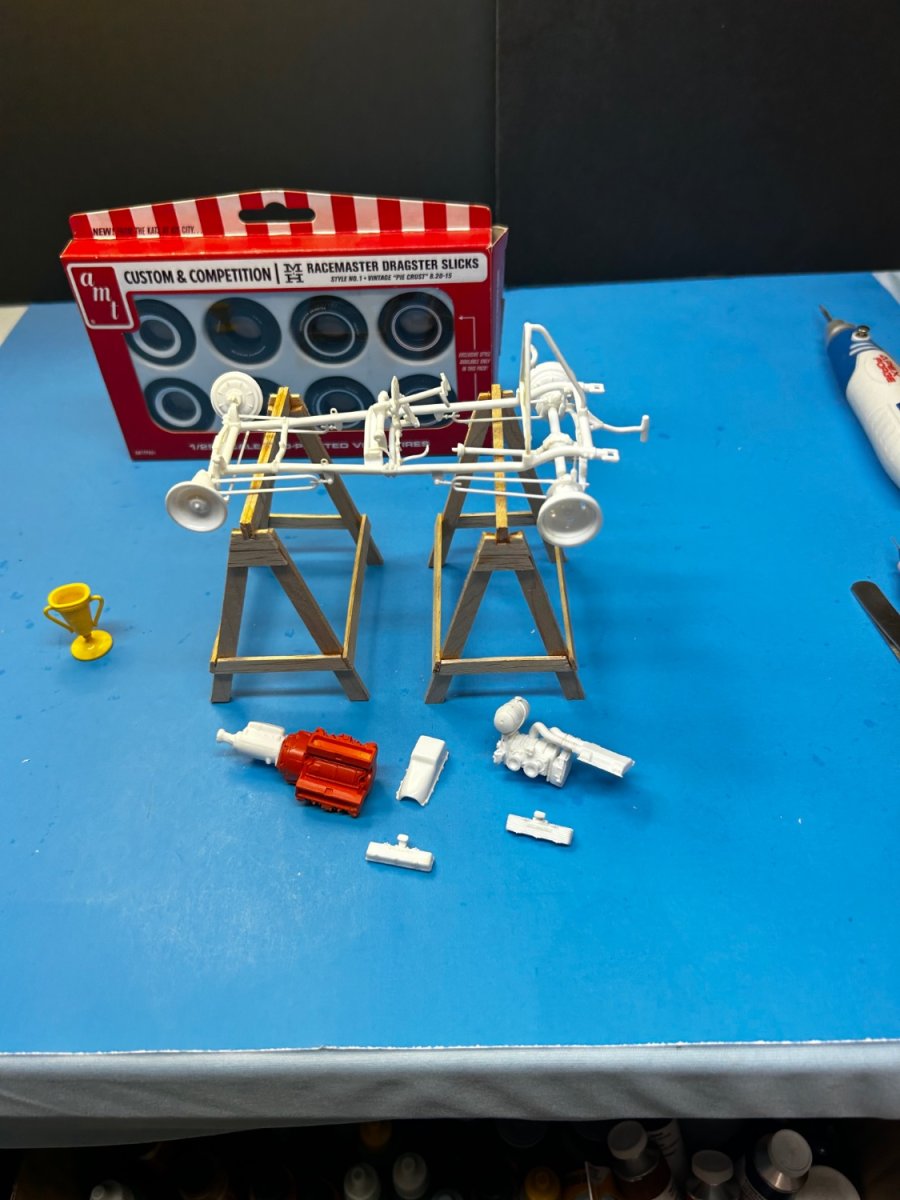
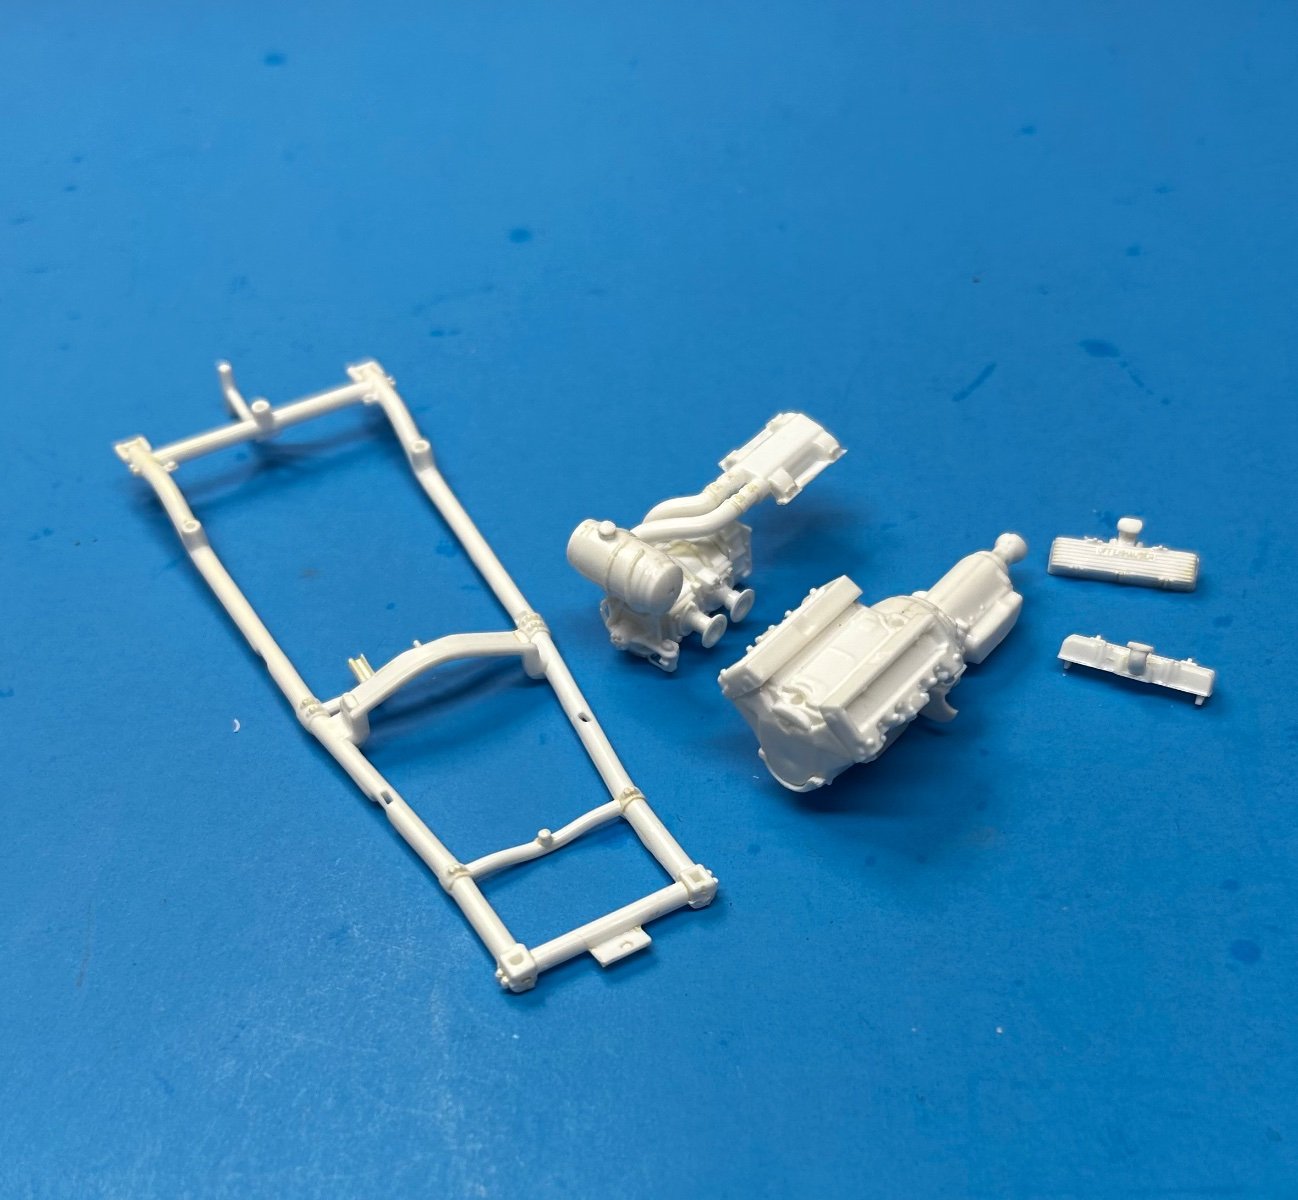
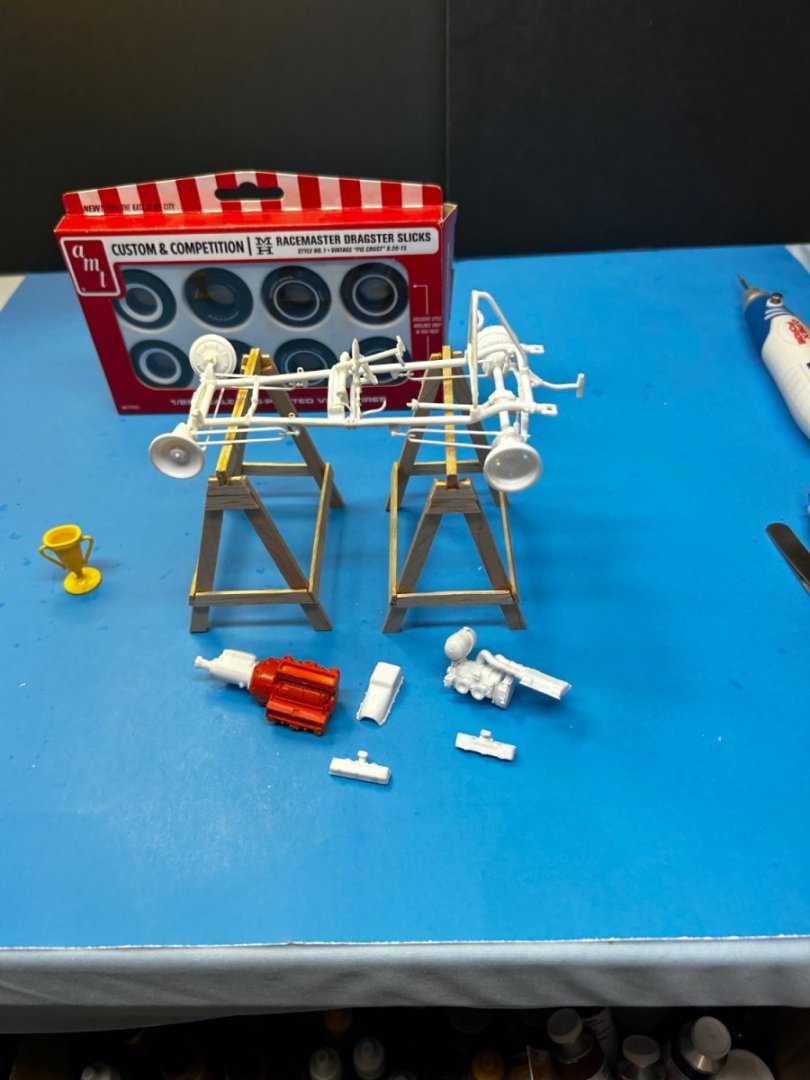
All the parts in white plastic are ready for paint. The entire chassis will be chrome. Will start with Mr Surfacer 1500, followed by gloss black, then Alclad chrome.
-
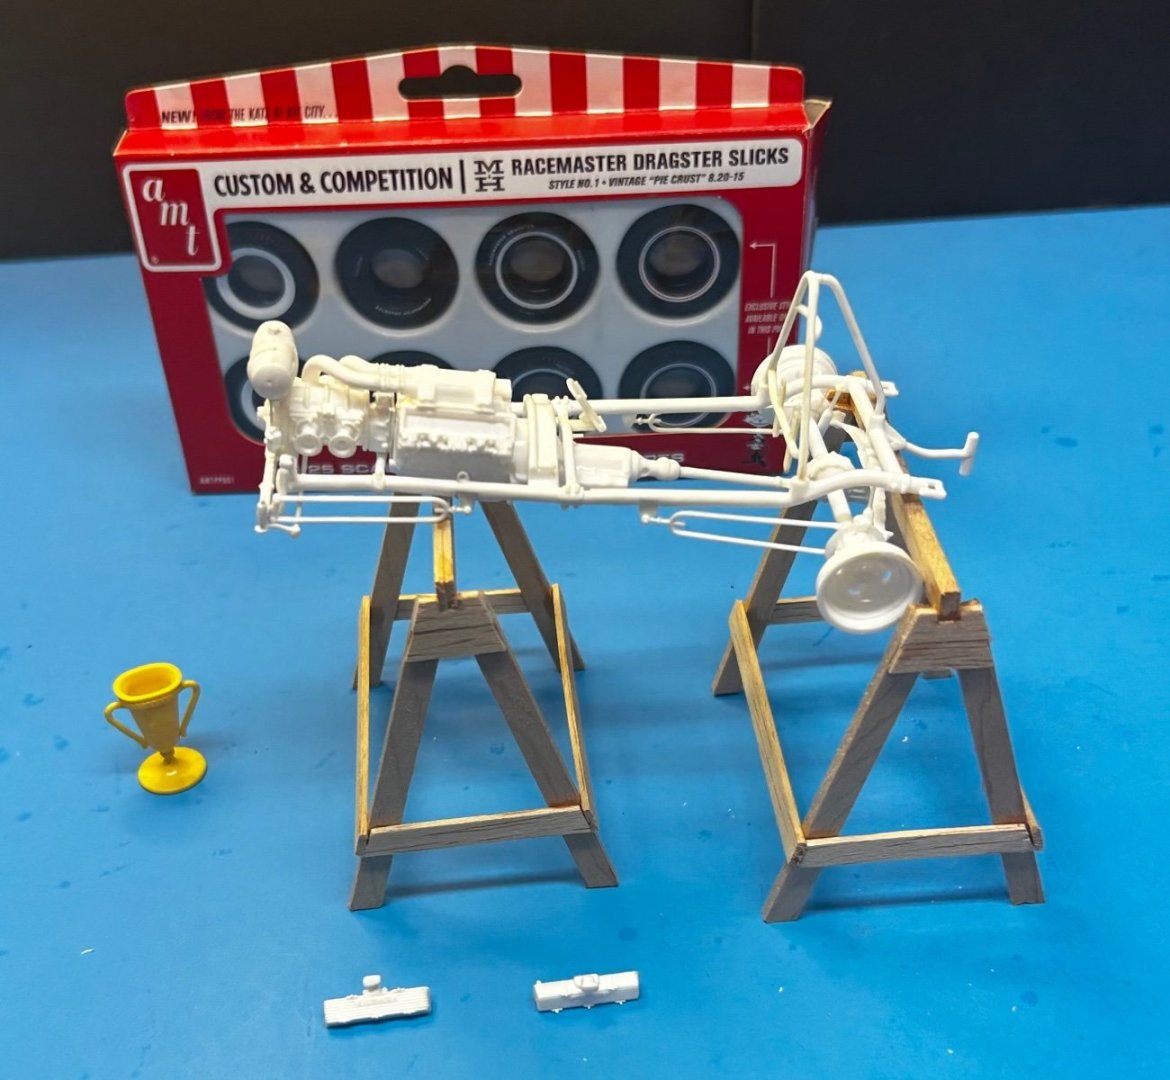
While it wasn’t from this particular kit box, trophies like the yellow one in these photos were commonly found in the 1st generation model car kit boxes of award winning show cars like the Orange Crate. This trophy comes from my spares box of car parts from decades ago.

- 88 replies
-
- 10
-
-
All the old Revell kits are detail packed and tricky to assemble. Rewarding if done slowly and carefully cleaned of flash and minor fit issues. No wonder kids had a tough time with them. More adult experienced modeler oriented.
-
Oh sure, no rush on a decision at all at this stage. The wheels can go on last.
-
Sitting on the right side of the box of drag slicks is the kit supplied drag slick. I’m tempted to use either the wide white wall slick from the box or the raised white letter slicks. What do you think? Both are probably not historically accurate but does it matter?

- 88 replies
-
- 10
-
-
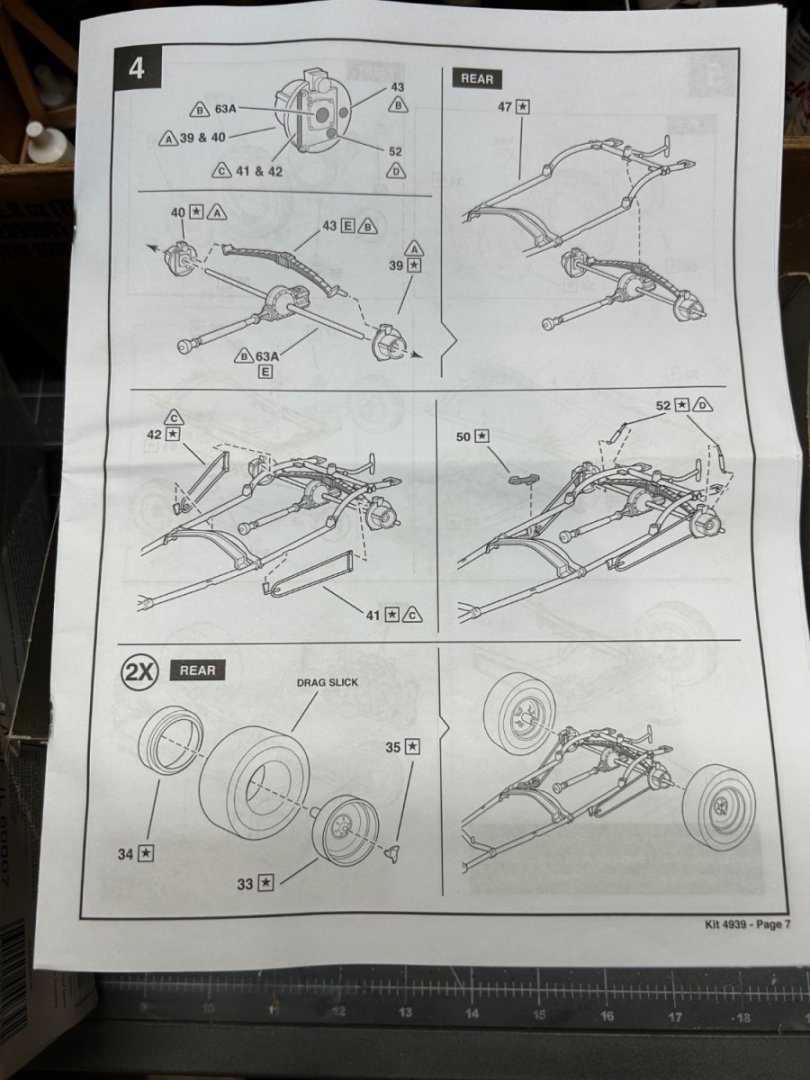
For a set of molds this old, Revell put a lot detail in their creation. One part that is very strange is the fact they molded a nicely detailed suspension and rear end, but omitted an axle housing. I’ve cut a section of styrene tubing that’s now serving as a spacer to keep the correct distance and alignment of the disk brakes while the glue sets up on the assembly. If there was a reason you never saw many of these old Revell street and drag strip rods finished, it’s because of the amount of time required to clean up the parts and then the assembly of them is very fiddly. I have no less than six hours invested in this so far, probably closer to seven.


- 88 replies
-
- 12
-
-
Loarre Castle (Spain) by King Derelict - Aedes Ars 1/200
CDW replied to king derelict's topic in Non-ship/categorised builds
Spectacular model Alan. I have never seen something like this done until now. It’s sure to be a conversation piece for guests at your home. -
I should mention, if you ever decide to build one of these old kits, particularly the older Revell kits like this one, do yourself a big favor and cut off the locating pins and tabs. Use a flat file to sand the mating surfaces level and eyeball the parts fit rather than depend on the locating pins and tabs. Thet are way out of alignment much of the time and are a hinderance rather than help.
-
Invested several hours into cleaning up these parts and assembling the engine/blower components. The chassis is straight as an arrow. Only the belly pan has a twist in it but that can be straightened out. Will assemble the entire chassis before doing any painting as the whole unit is chrome. Will be using Alclad chrome this time. The blower assembly, valve covers and oil pan are chrome as well. Guess what color for the engine? Bingo! It’s orange. 😀 There’s a whole lotta’ flash on these parts!