CDW
-
Posts
7,748 -
Joined
-
Last visited
Content Type
Profiles
Forums
Gallery
Events
Everything posted by CDW
-

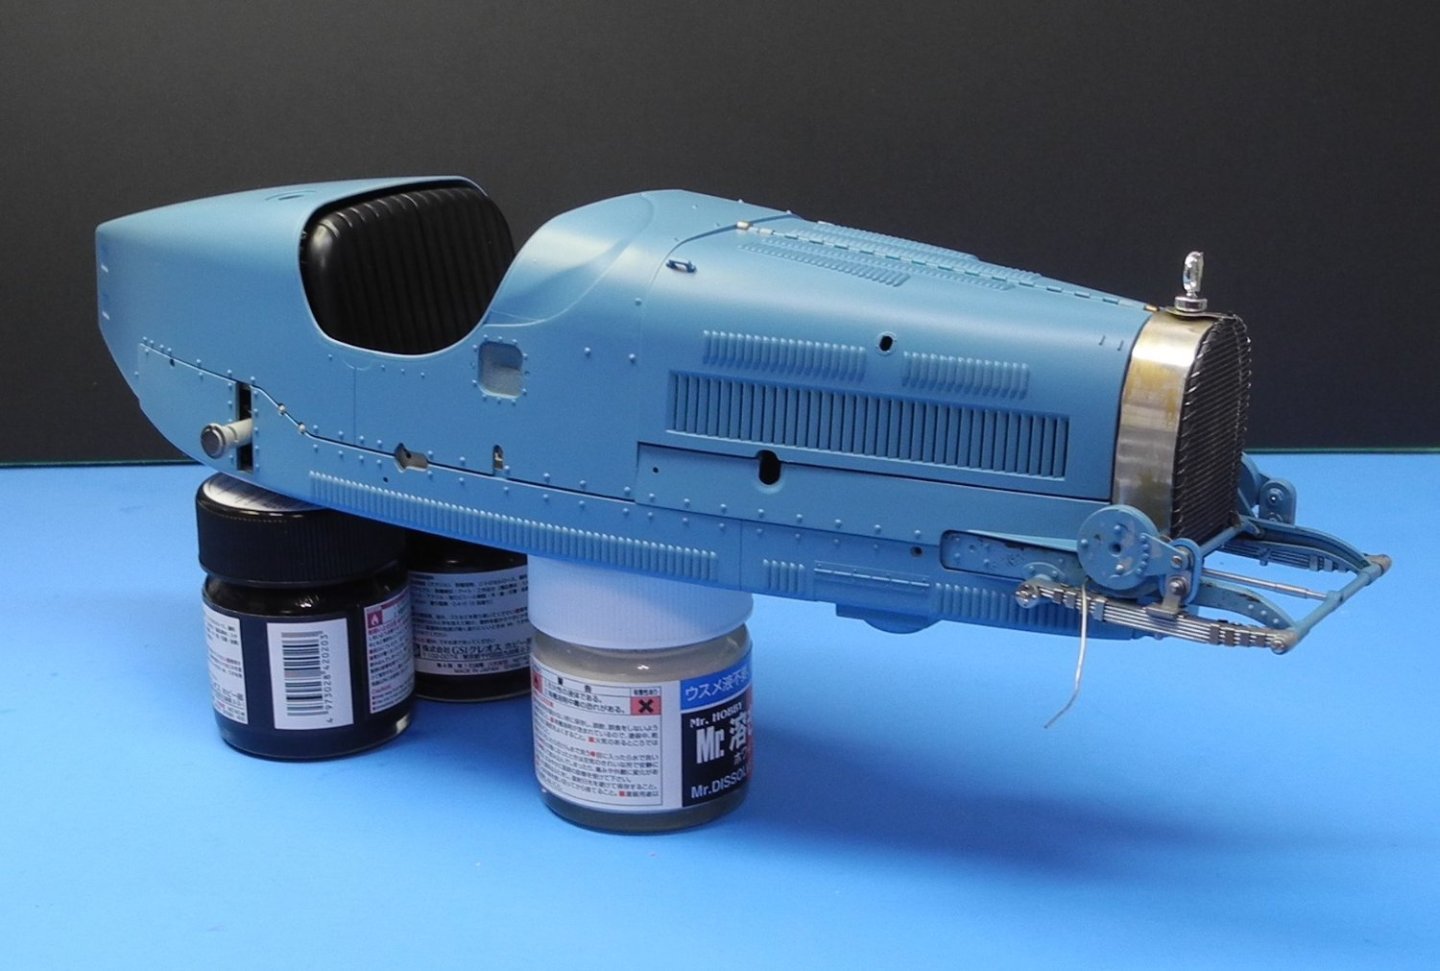
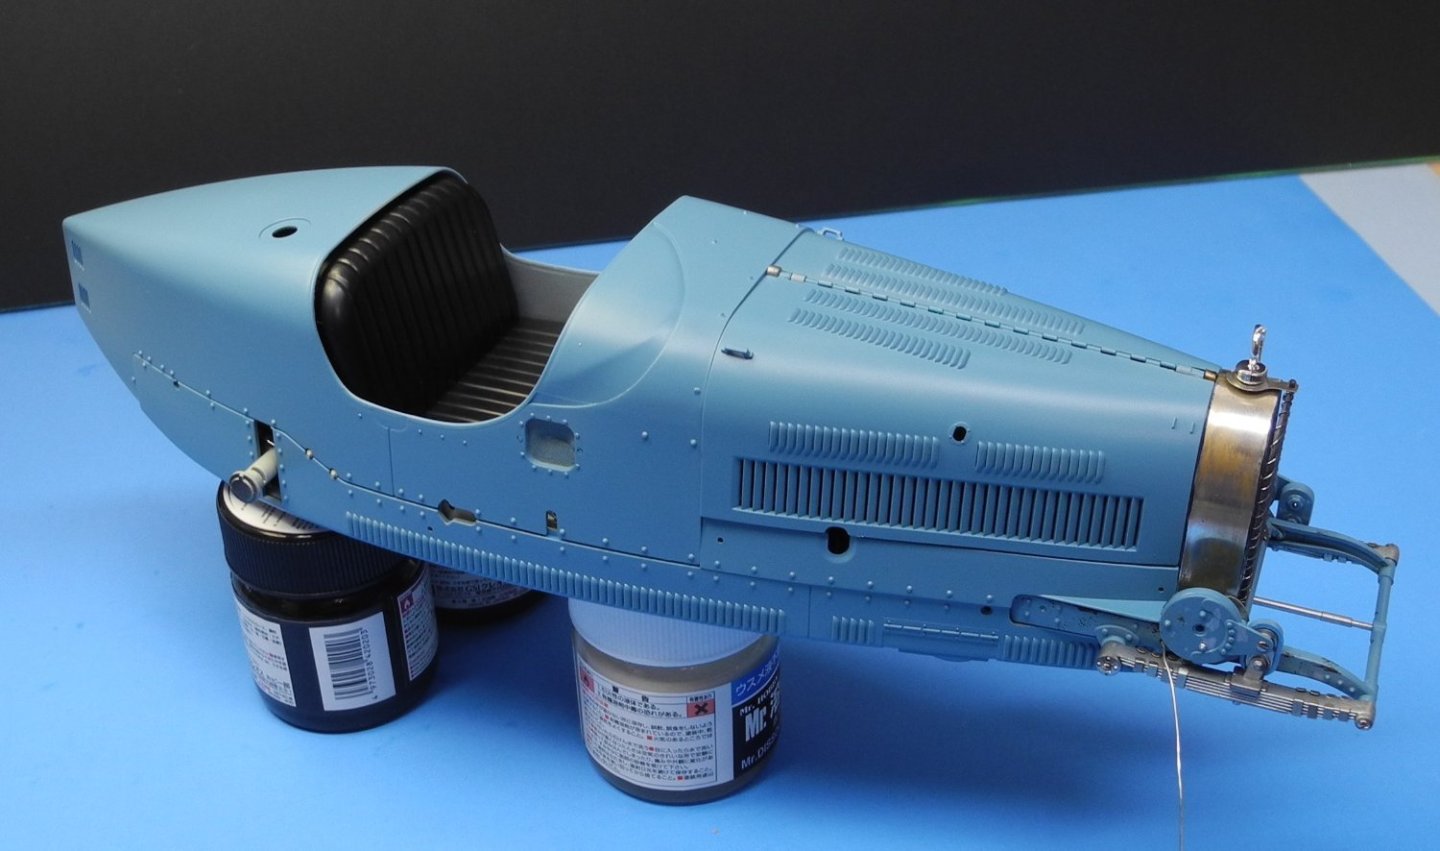
Bugatti Type 35B by CDW - FINISHED - Italeri - 1:12 Scale
CDW replied to CDW's topic in Non-ship/categorised builds
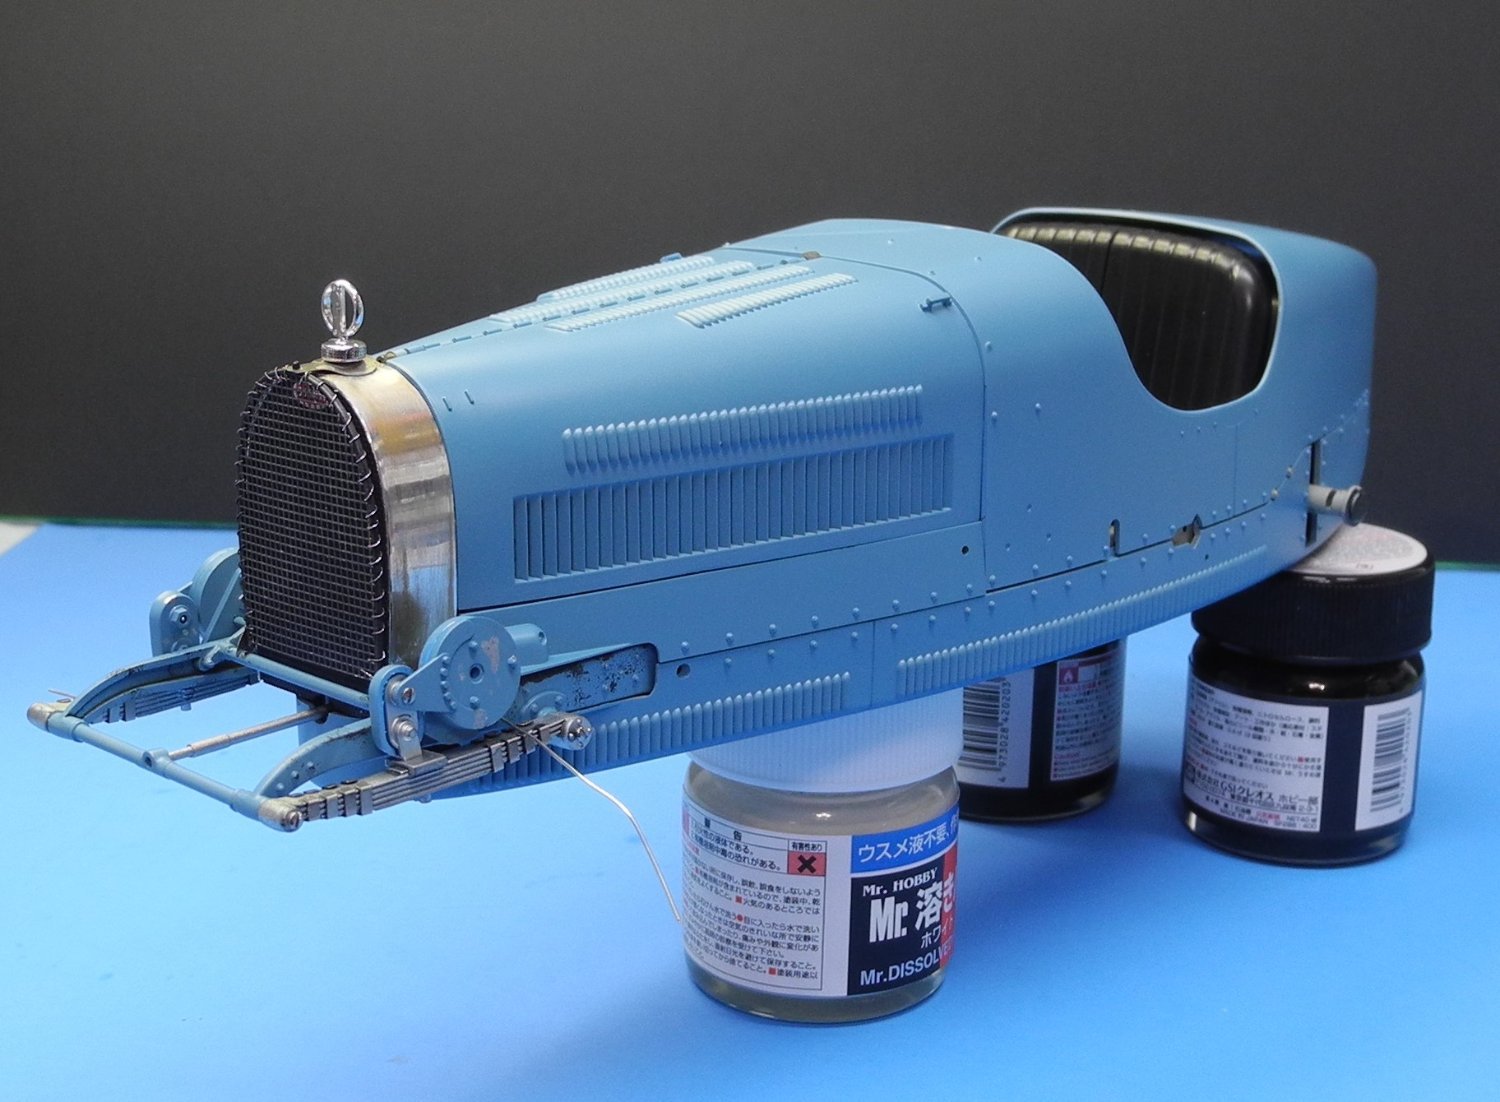
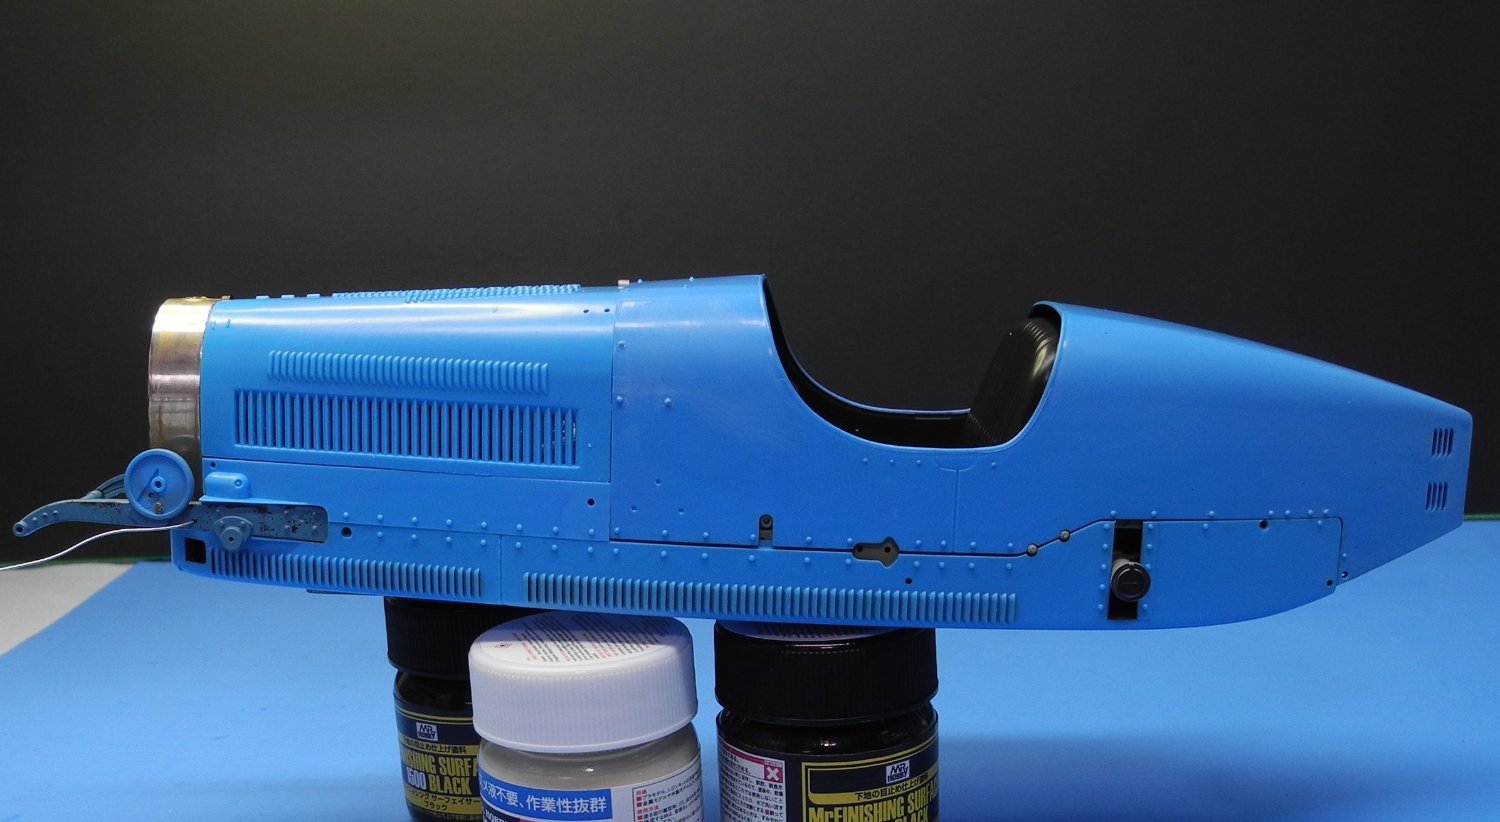
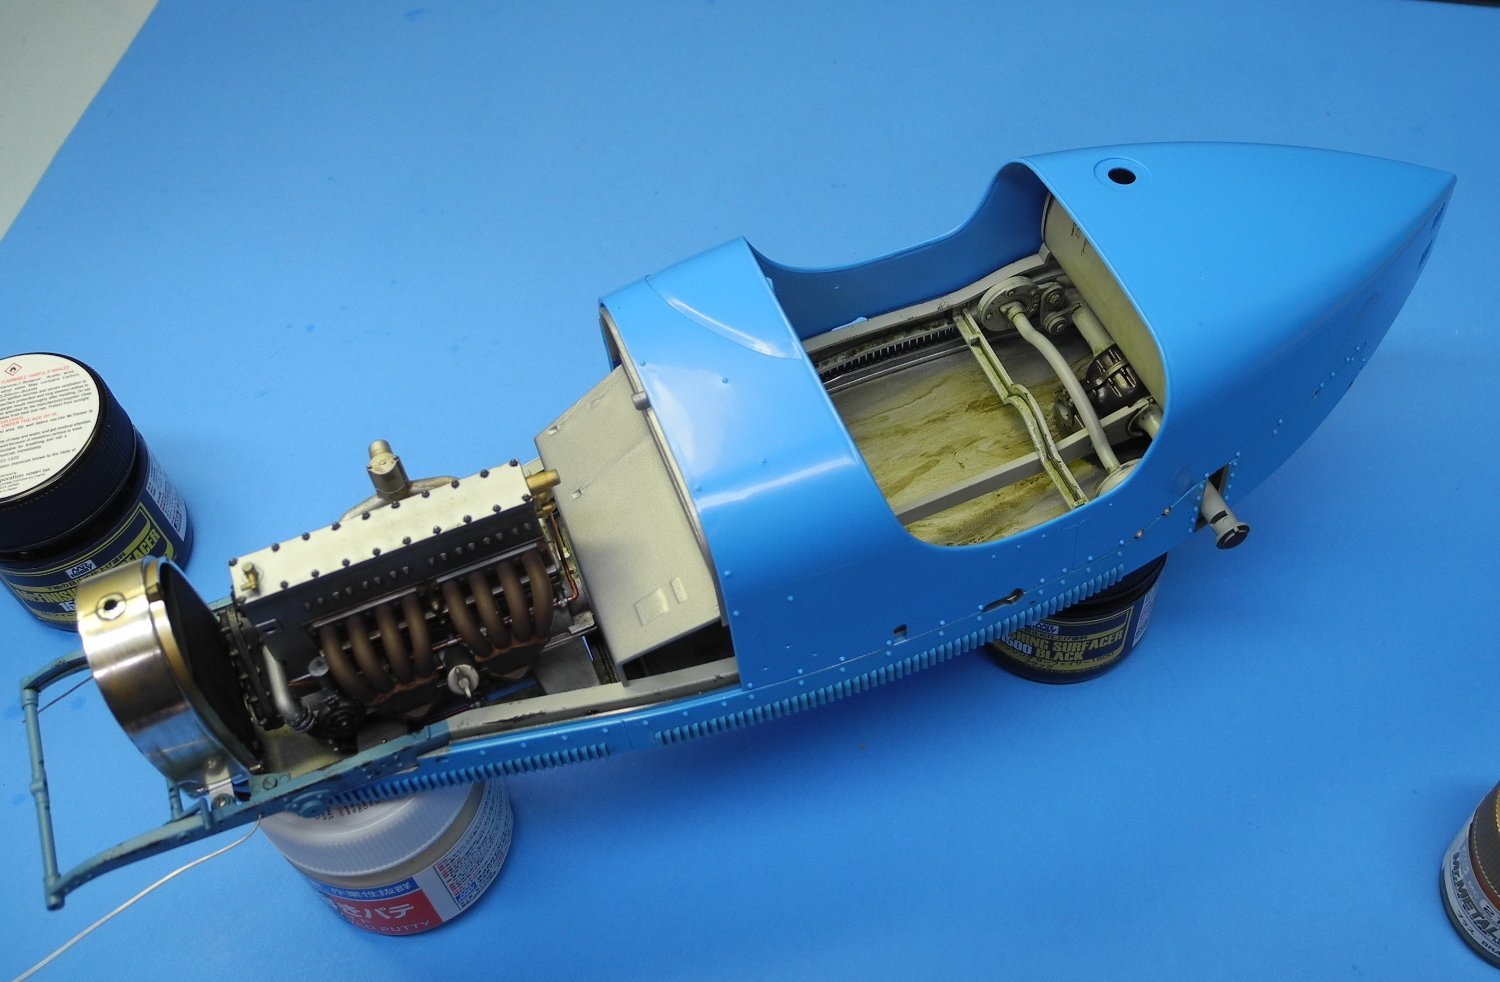
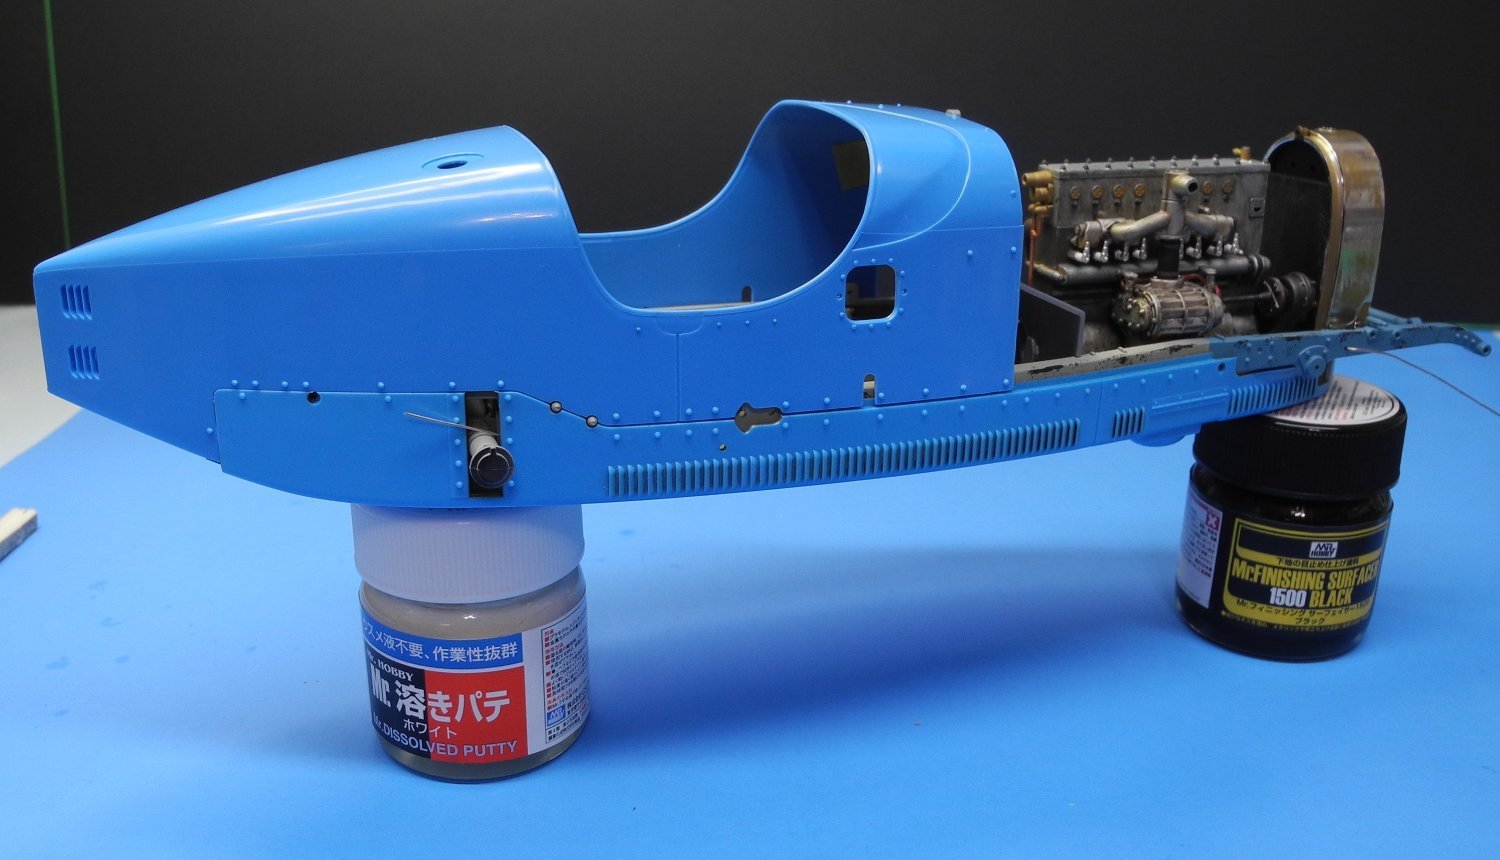
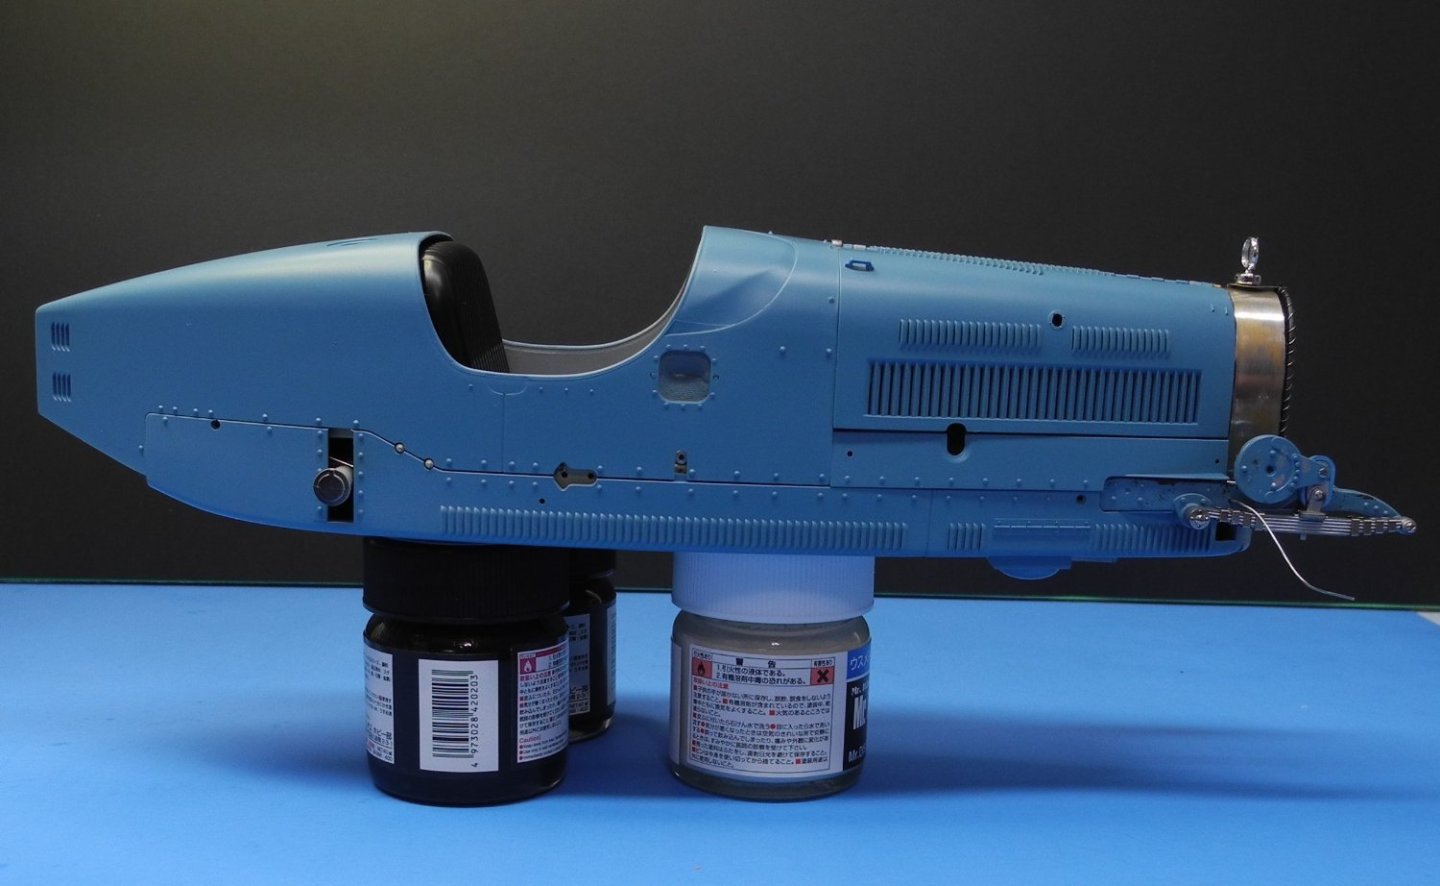
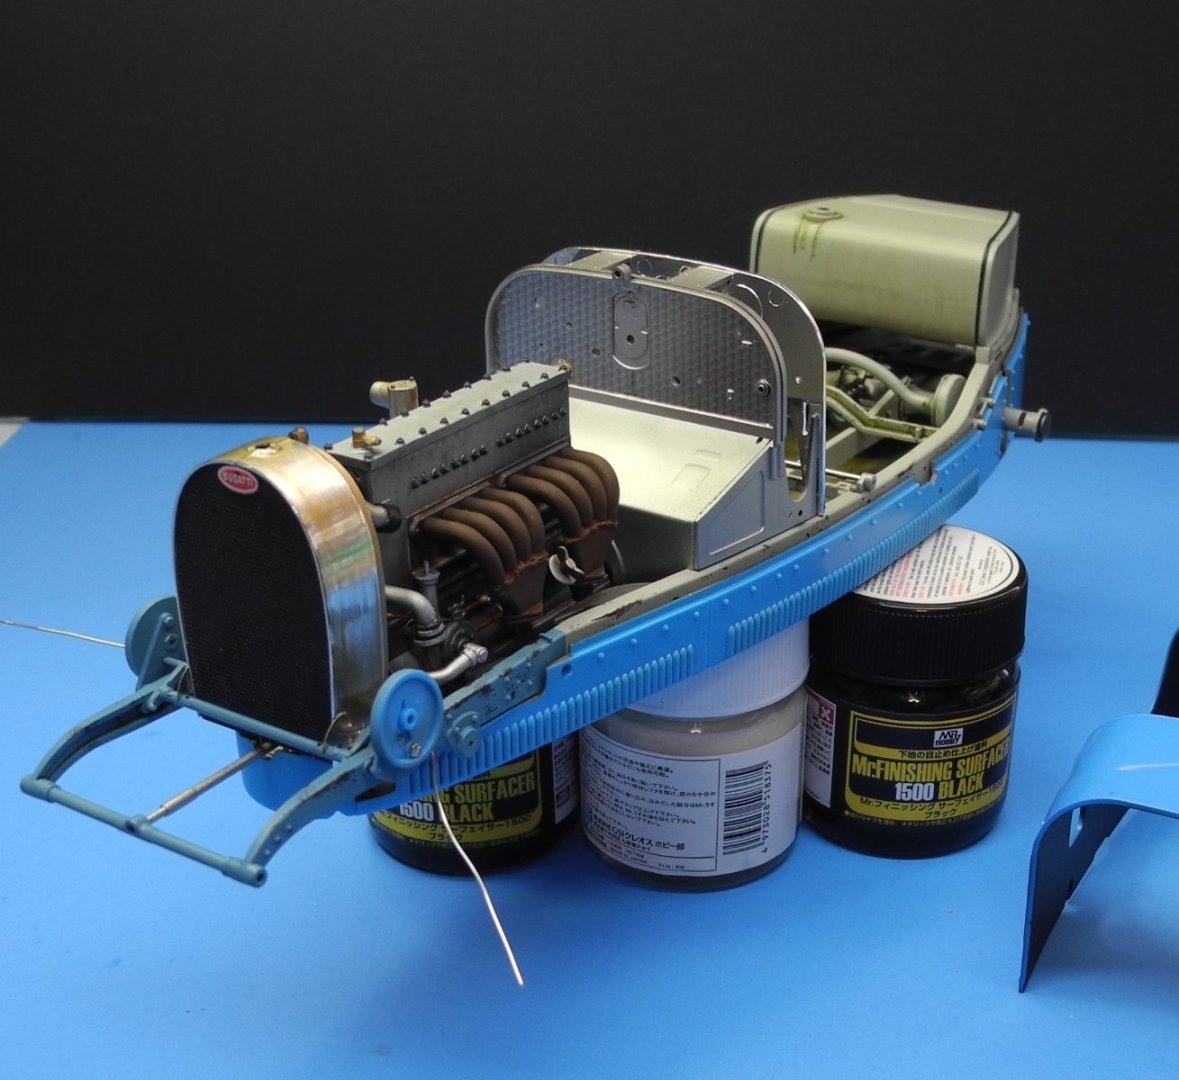
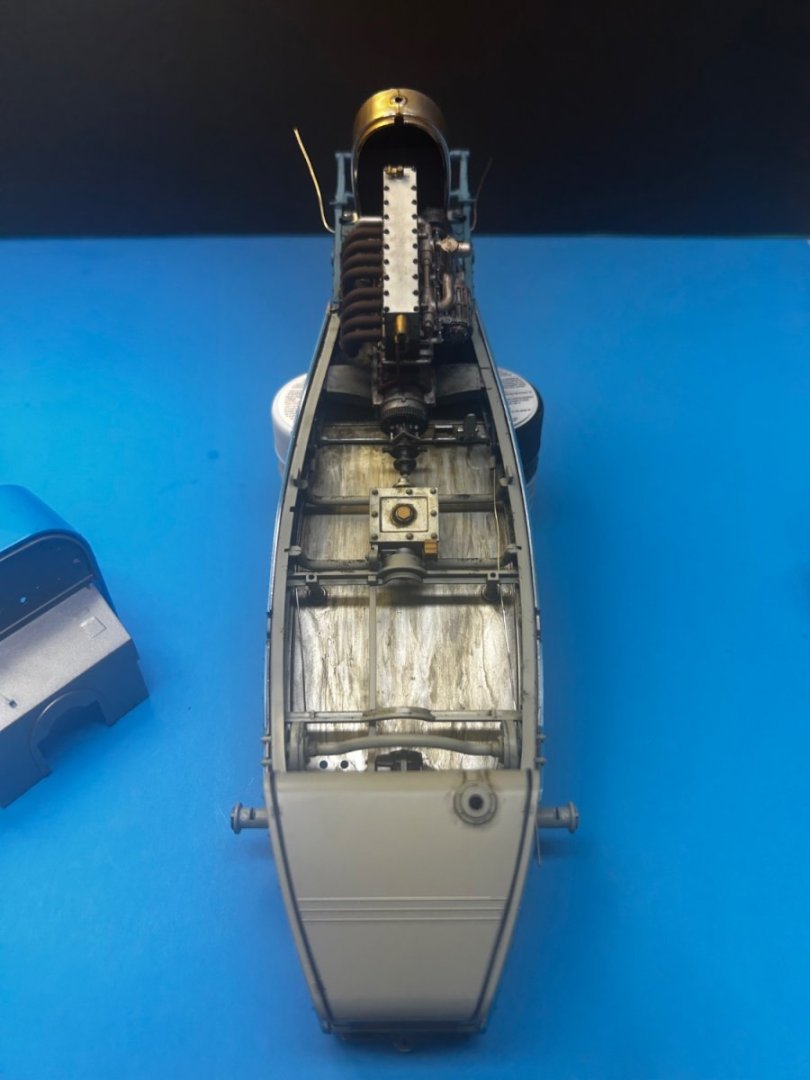
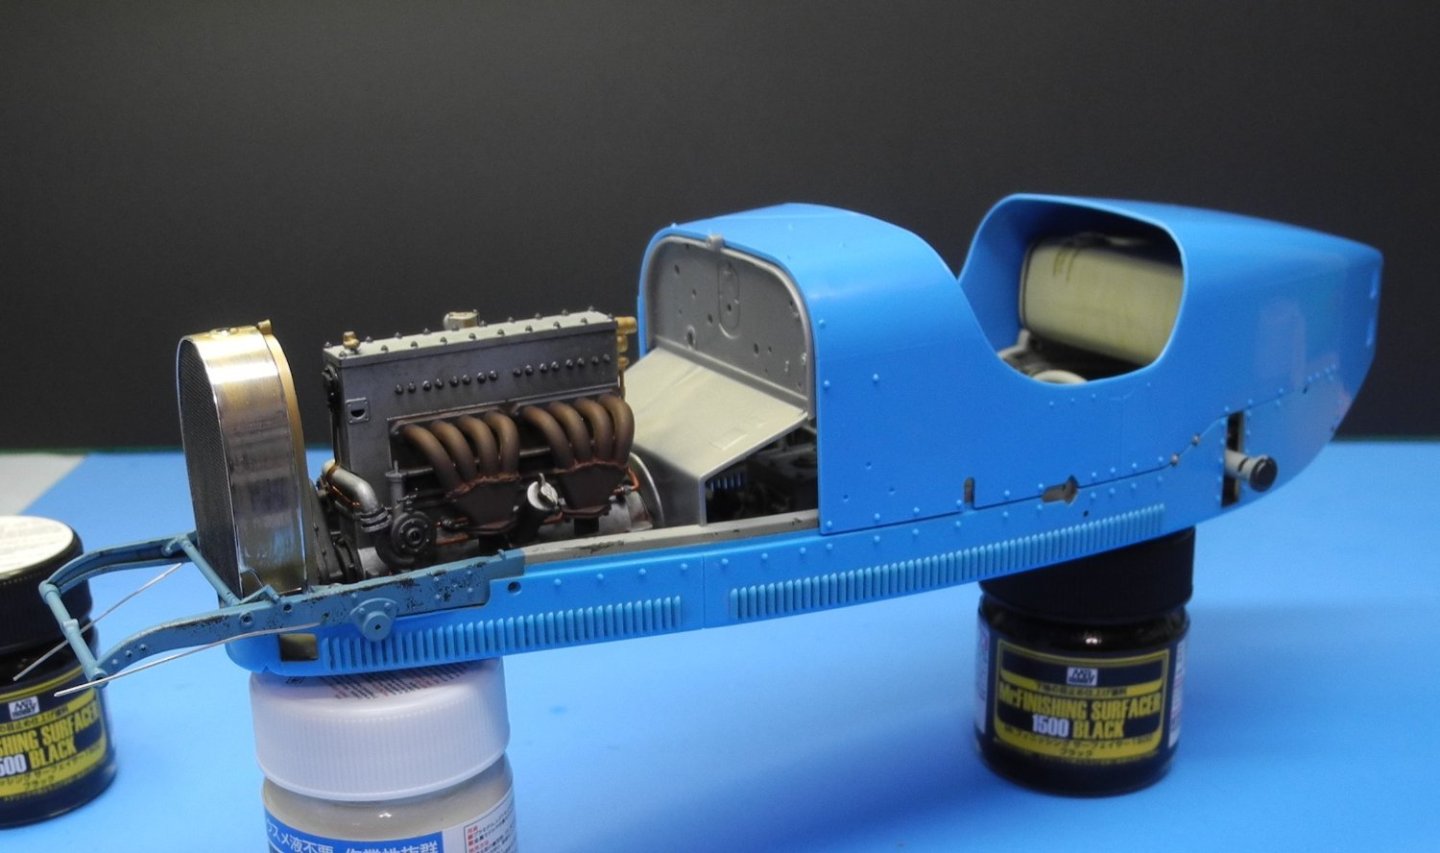
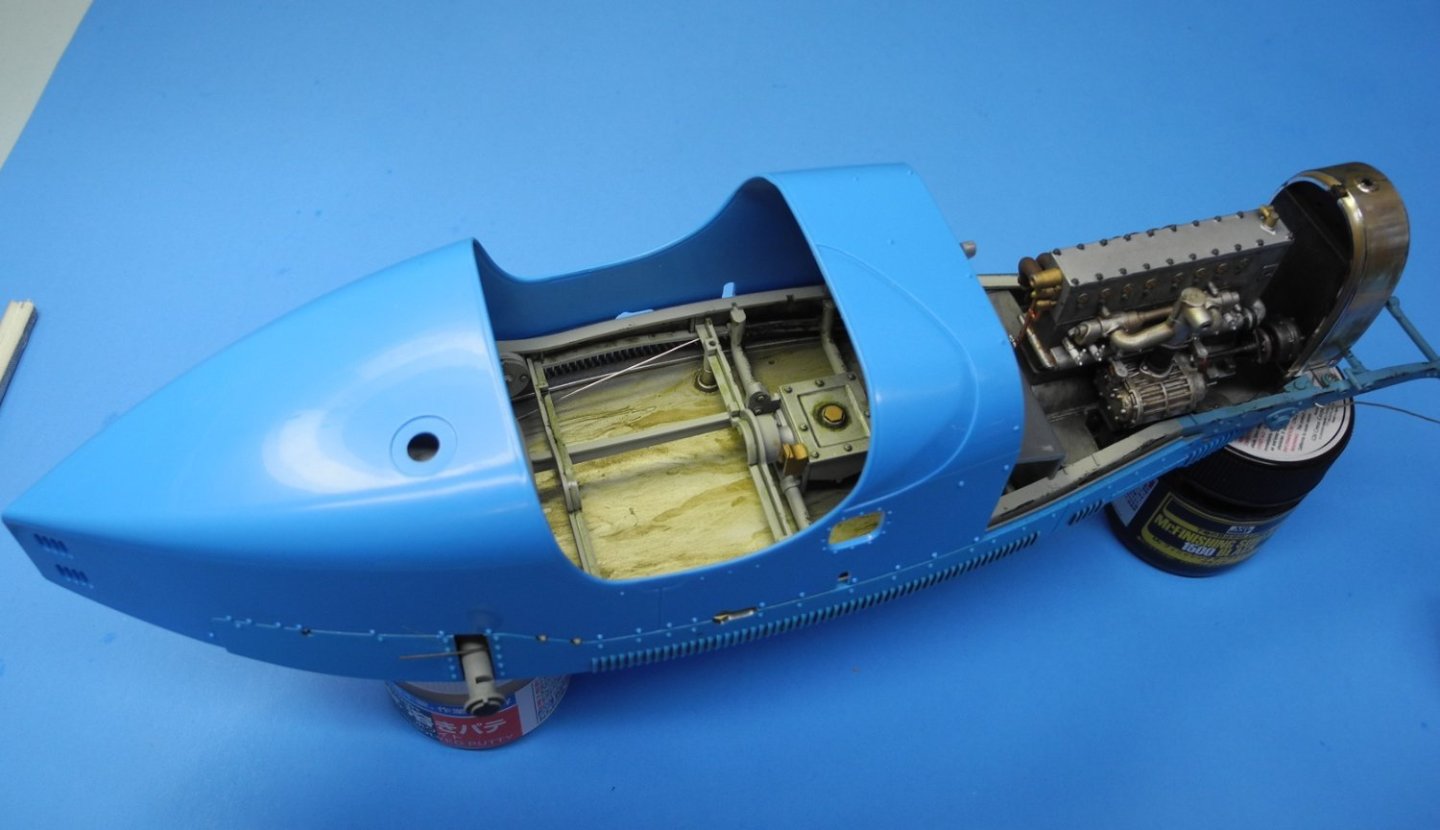
Another dry-fit photo session. This time, with the main body color, Bugatti blue, laid down. I wanted to give time for the paint to thoroughly cure out before I go to the next steps of weathering the model. There remain quite a few components and details to finish out before I move on to weathering.

- 155 replies
-
- 12
-

-

-
Bugatti Type 35B by CDW - FINISHED - Italeri - 1:12 Scale
CDW replied to CDW's topic in Non-ship/categorised builds
Thanks so much for your kind comments. Much appreciated. -
Bugatti Type 35B by CDW - FINISHED - Italeri - 1:12 Scale
CDW replied to CDW's topic in Non-ship/categorised builds
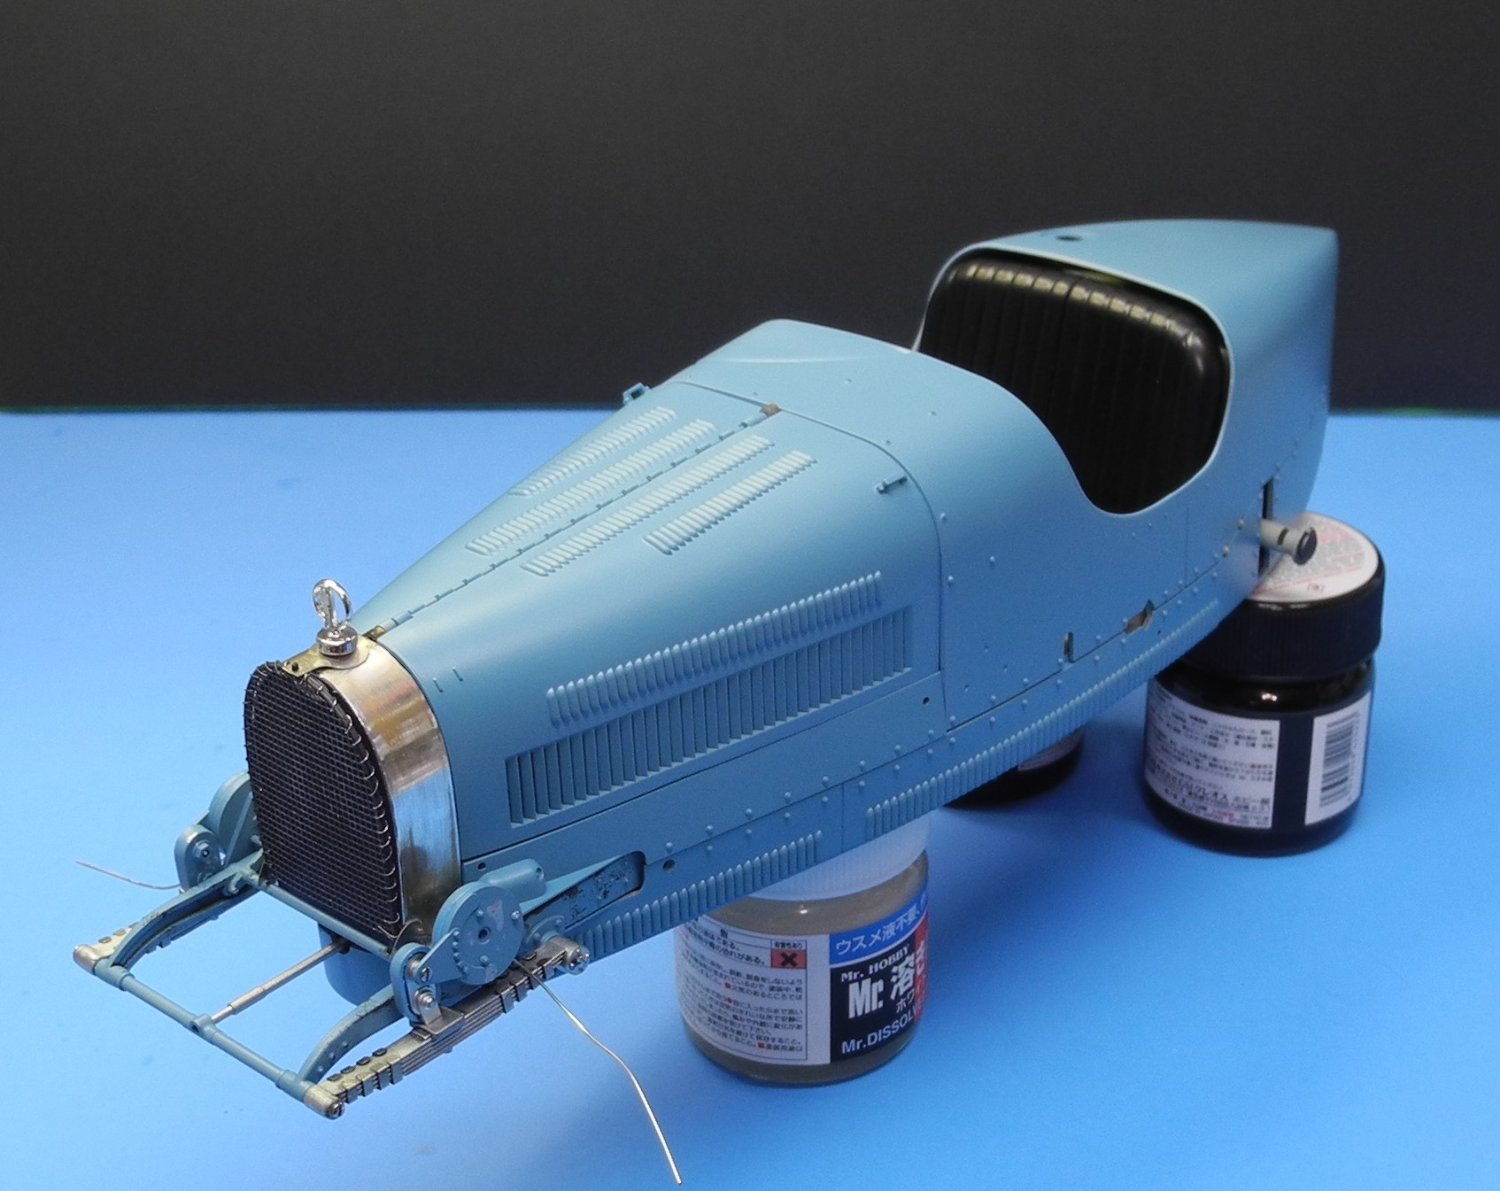
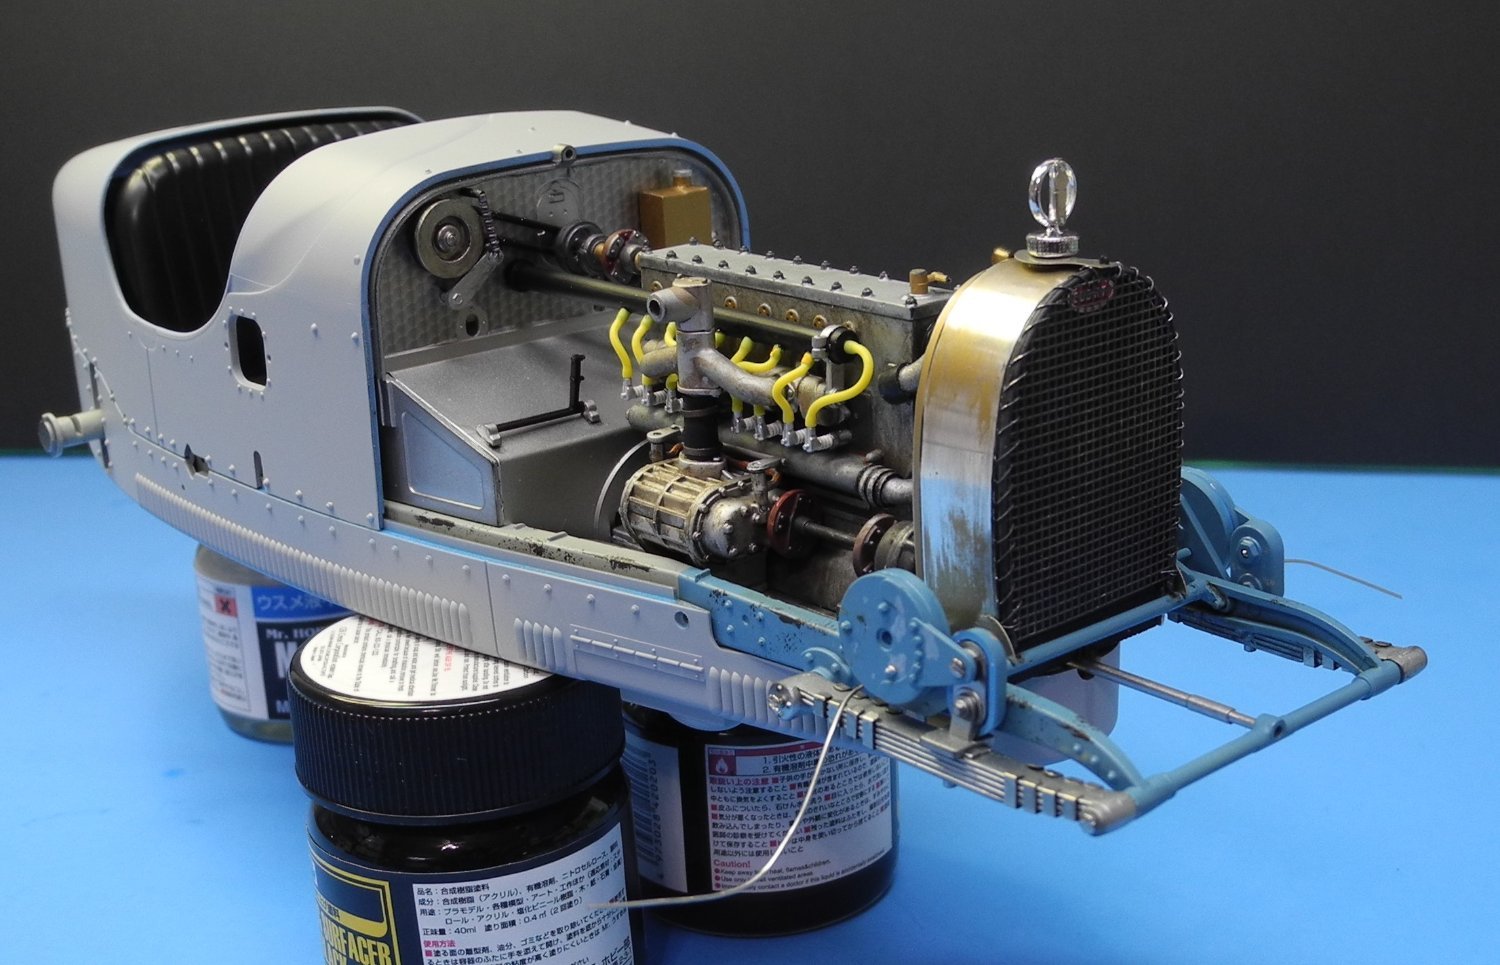
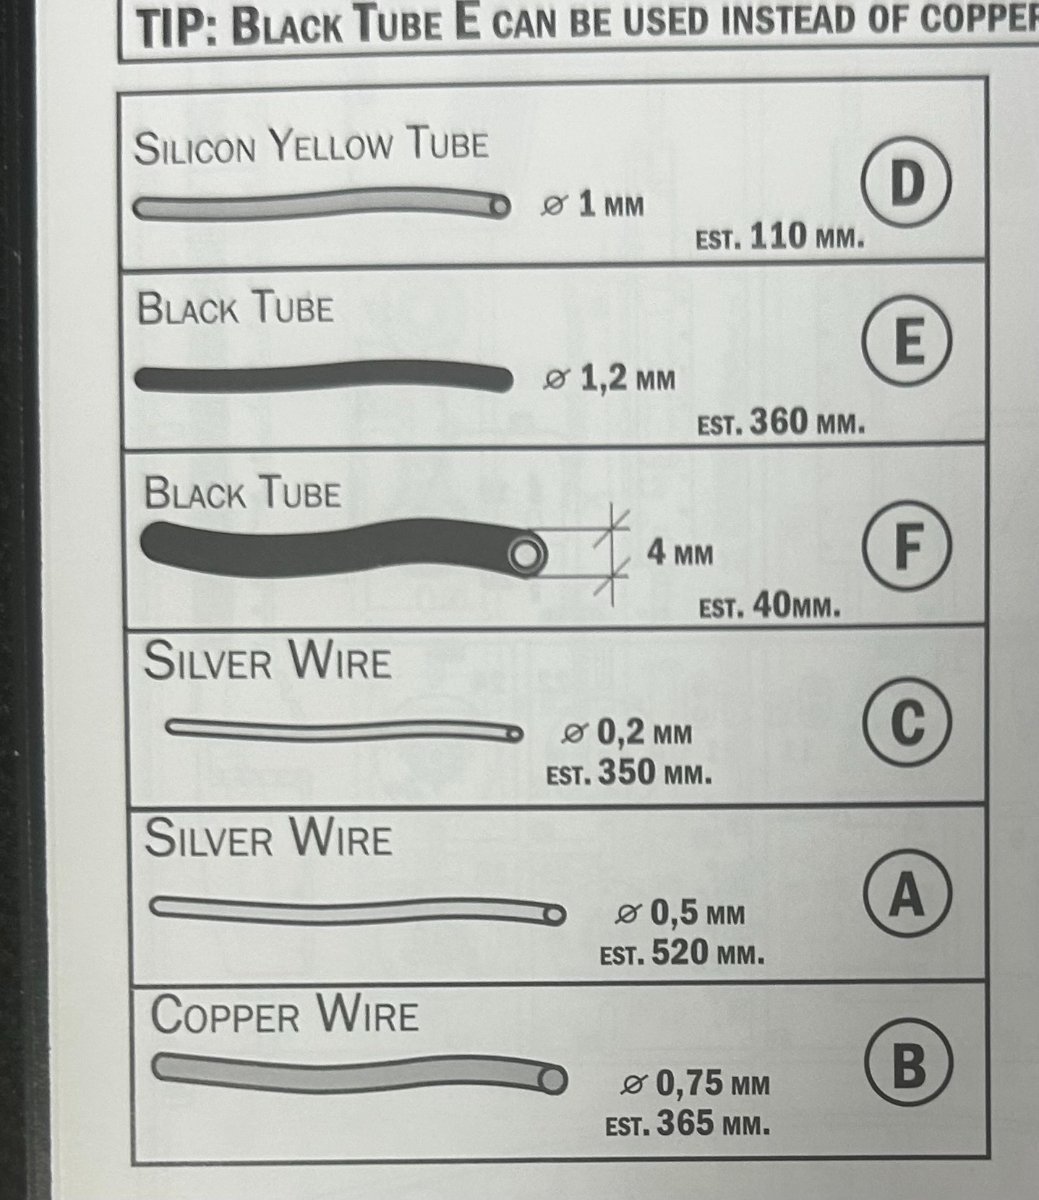
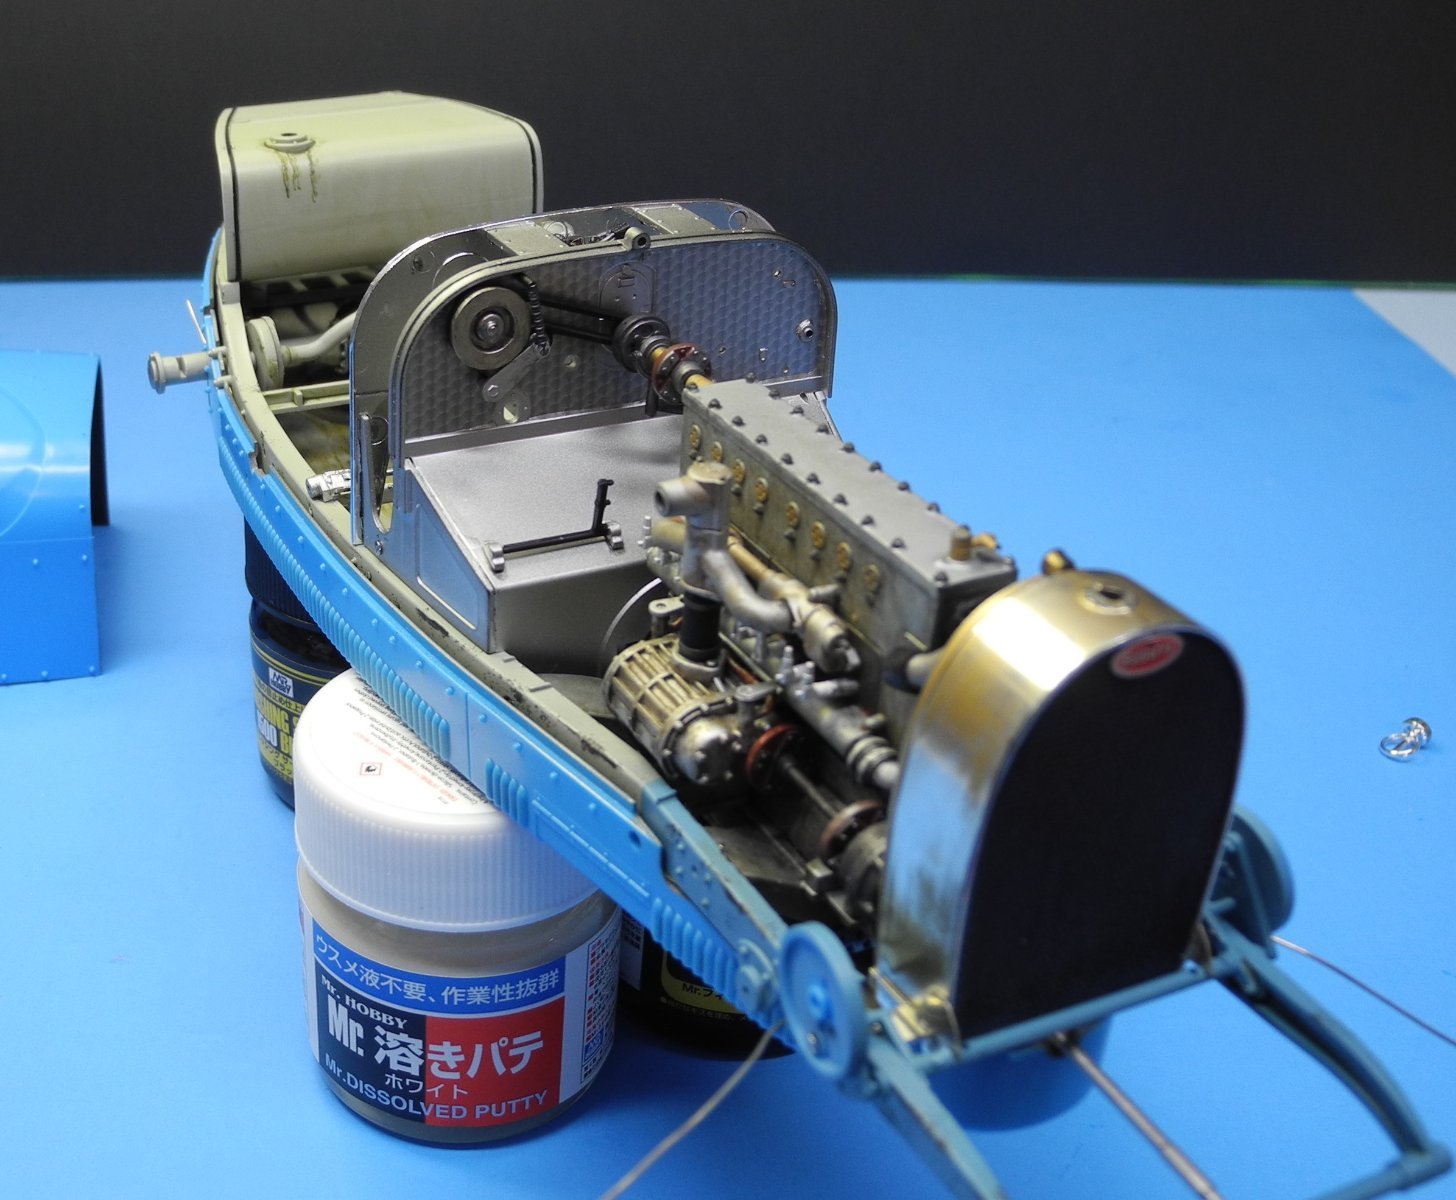
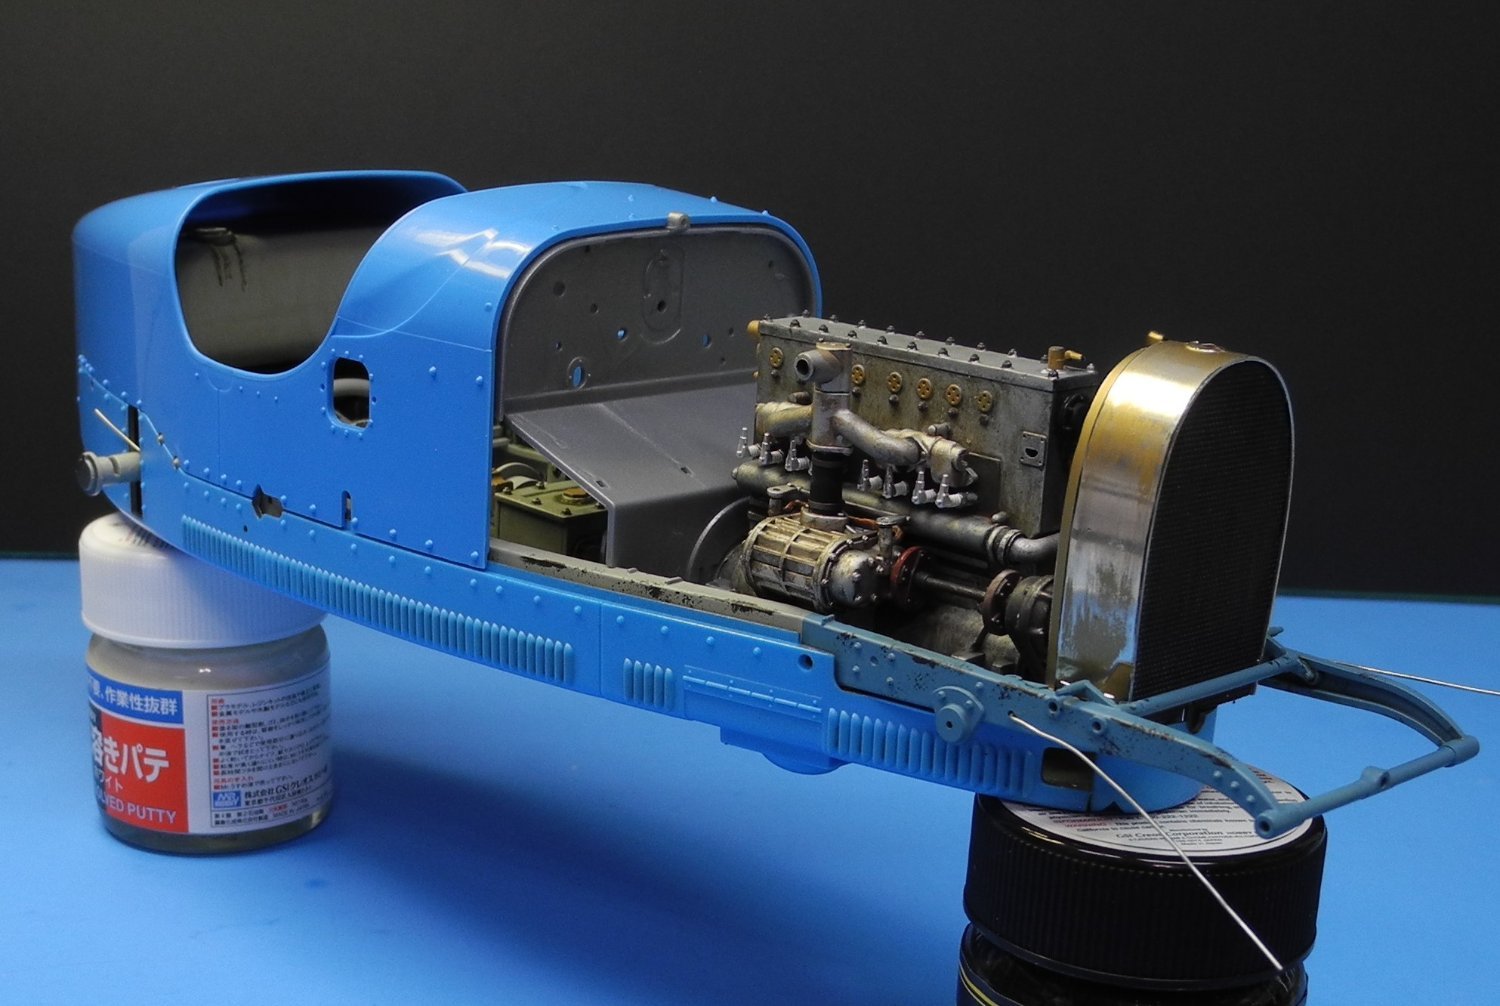
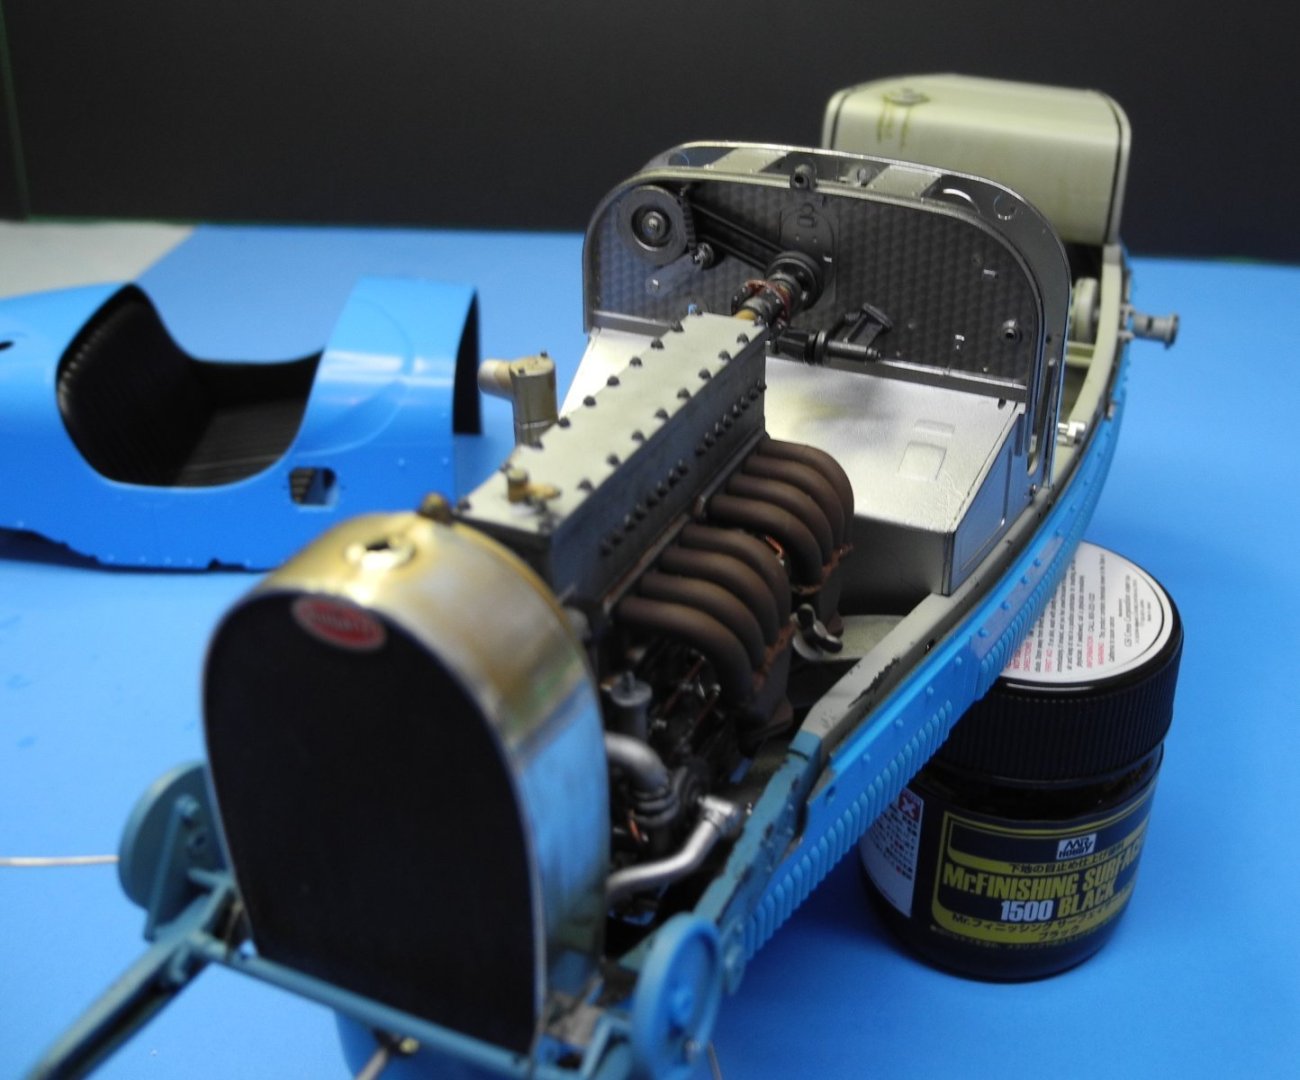
Primed the body panels, now ready for paint. Laced up the stone guard for the radiator, installed the front leaf springs and shock dampers. Added the ignition wiring and a few placards on the firewall. The brass reservoir added to the firewall. More piping goes in the engine compartment later, along with throttle linkages. Still need to deal with those .5mm silver wire brake cables after I install the front axle, brake drum, and steering linkages assemblies. It's getting there.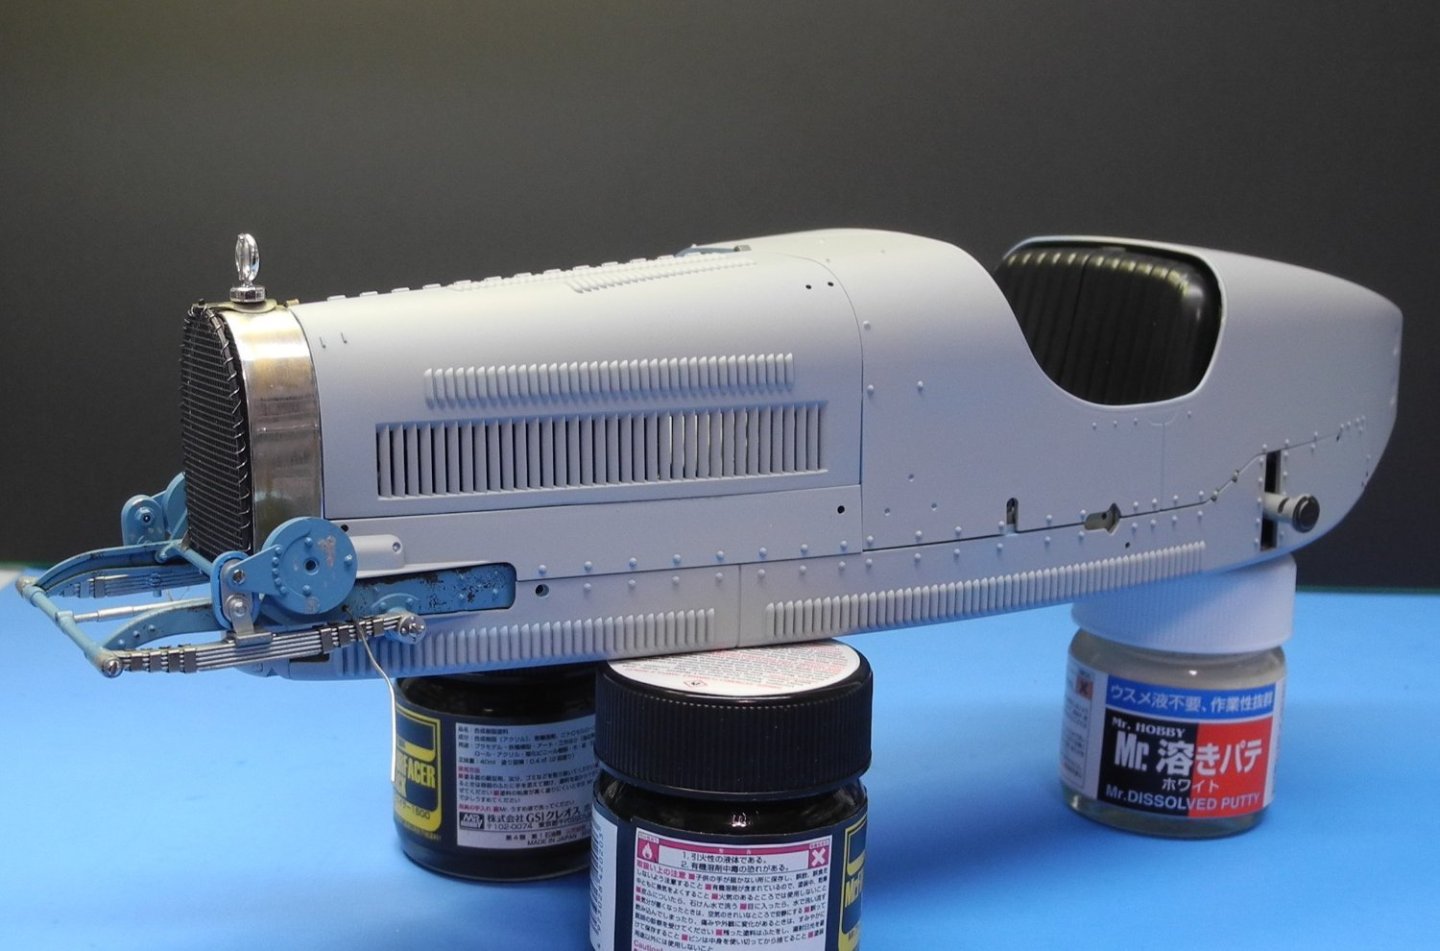

- 155 replies
-
- 13
-
-
-
Bugatti Type 35B by CDW - FINISHED - Italeri - 1:12 Scale
CDW replied to CDW's topic in Non-ship/categorised builds
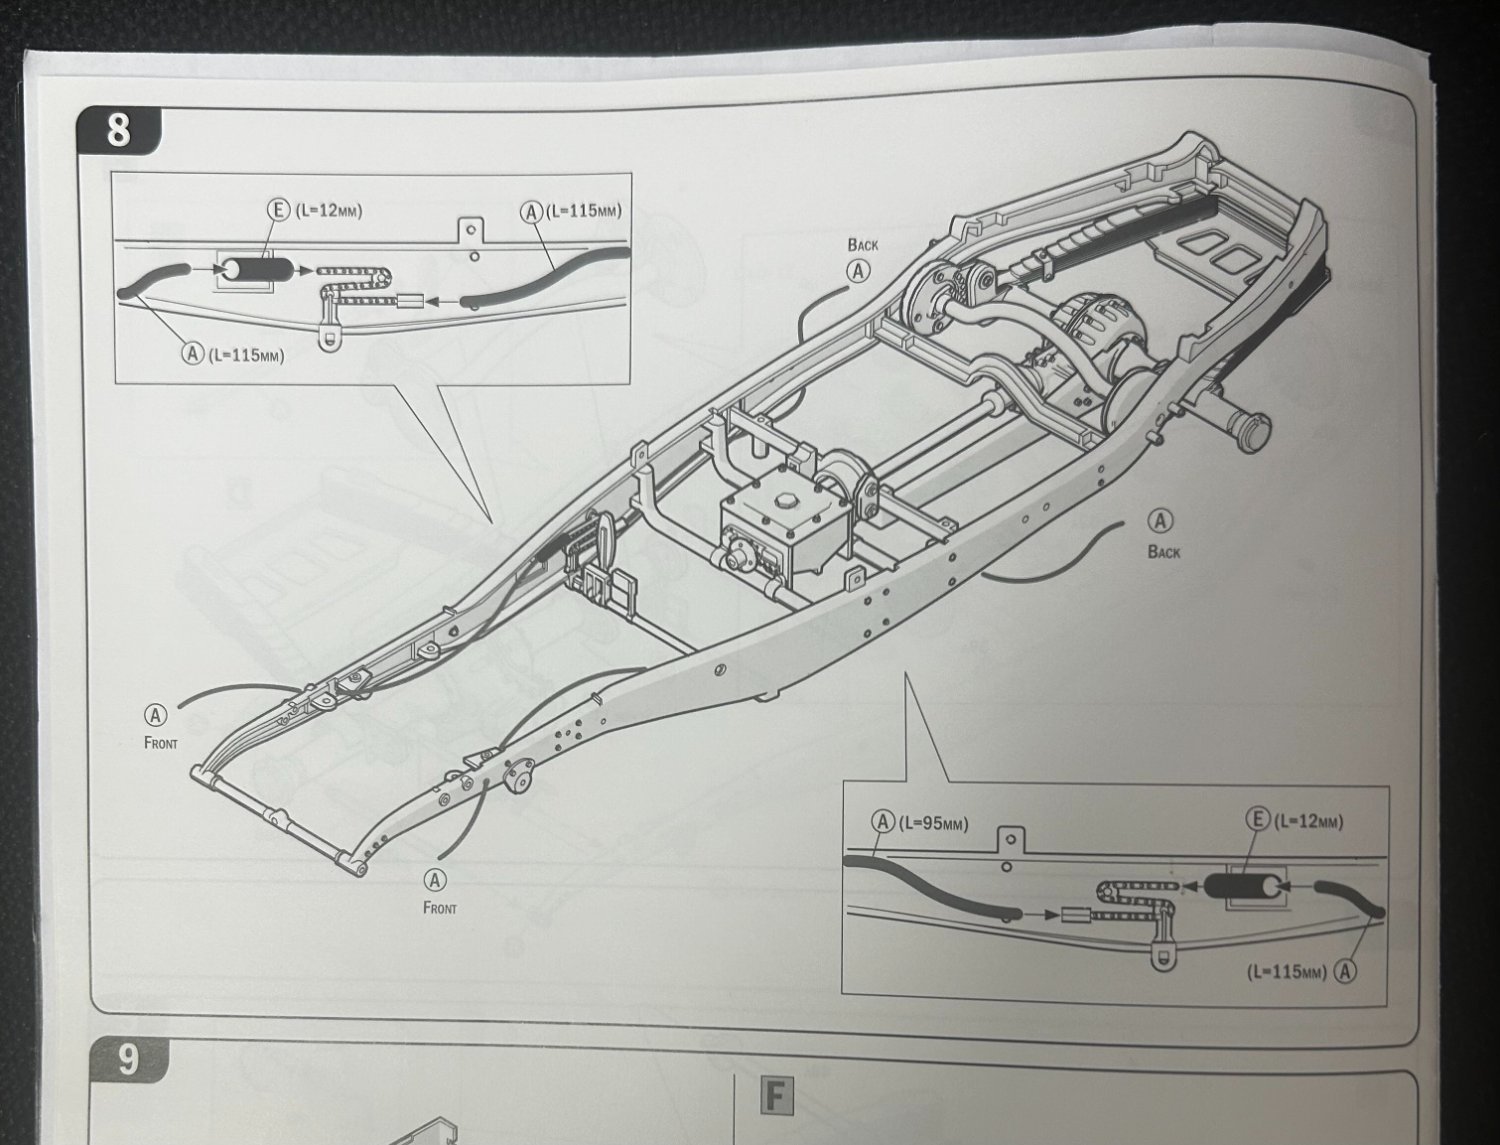
Italeri did a good job capturing the major mechanical pieces of this car, but it's a bridge too far to capture everything. I think the main purpose of the S chain is to apply tension to the brakes front and rear at the same time while also as you said, applying that all-important tension...probably spring tension involved, not captured by the plastic pieces provided in the kit. I do think it's an important feature that Italeri did not capture, failing to show in the instructions how the cables were routed around a pully before attaching at the termination point. -
Bugatti Type 35B by CDW - FINISHED - Italeri - 1:12 Scale
CDW replied to CDW's topic in Non-ship/categorised builds
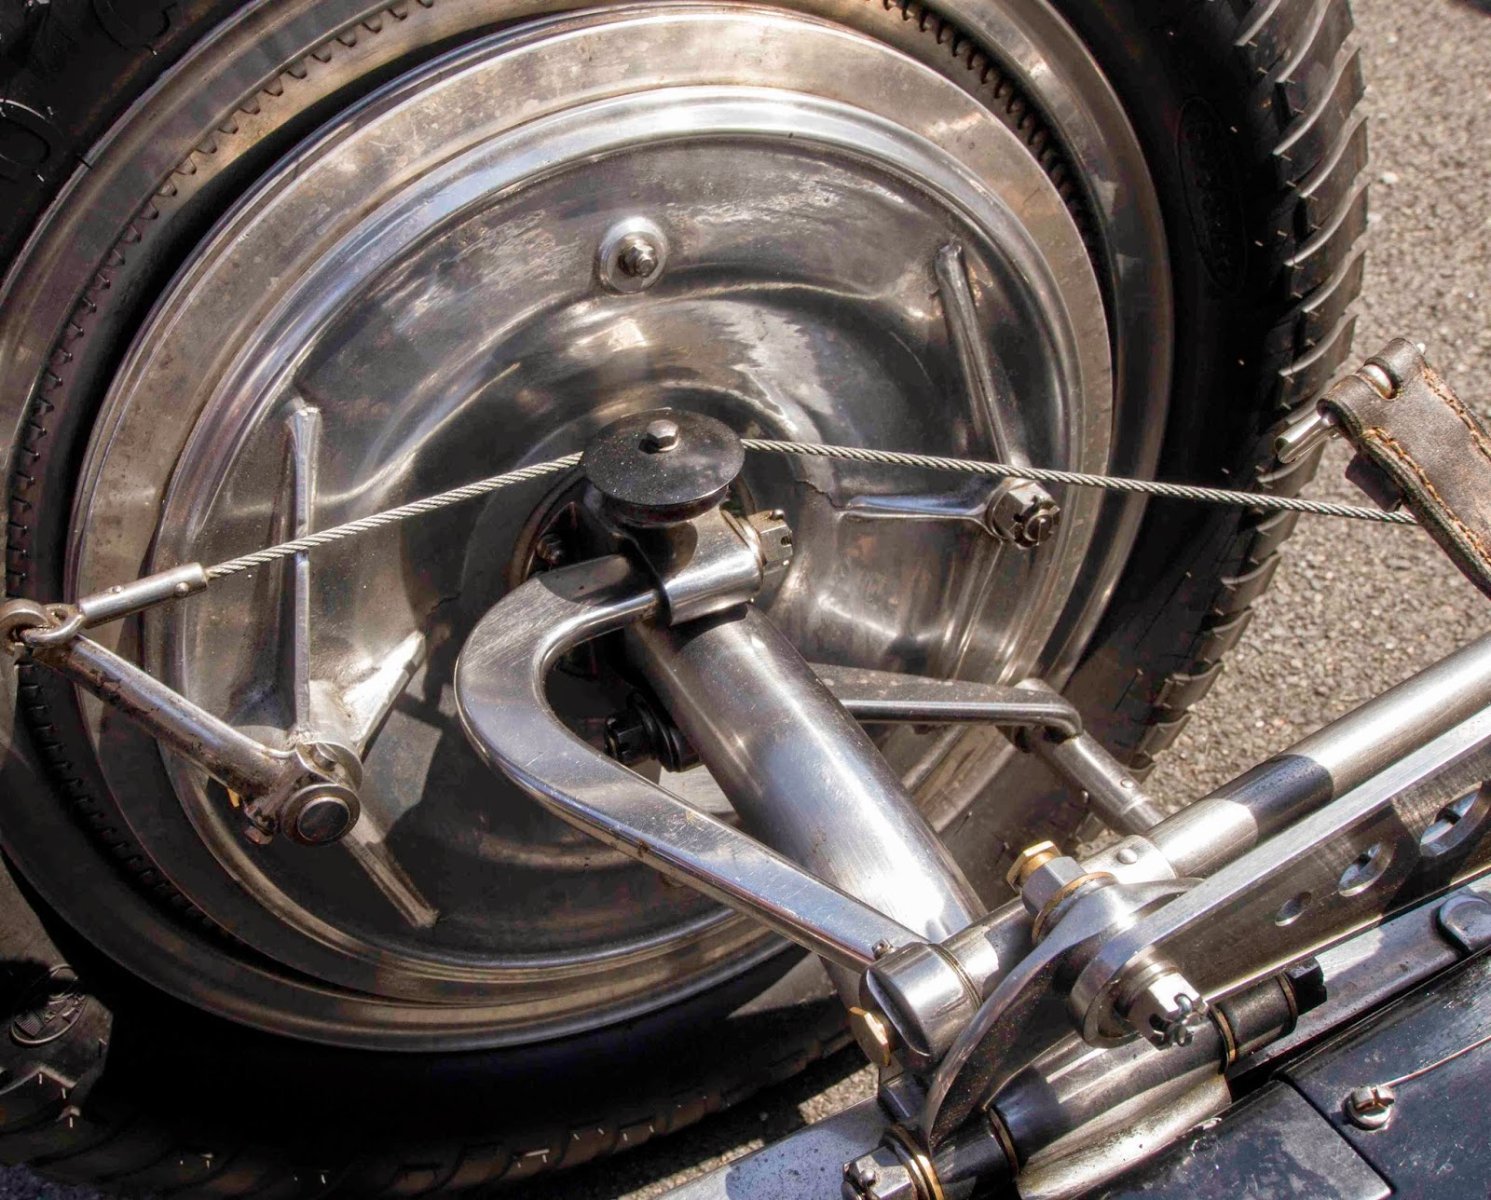
This leaves me to wonder about the tensioning of the cables. When the wheels were steered left or right, it seems like one side or the other would tighten or get slack. How was this dealt with? Hmmmmm -
Bugatti Type 35B by CDW - FINISHED - Italeri - 1:12 Scale
CDW replied to CDW's topic in Non-ship/categorised builds
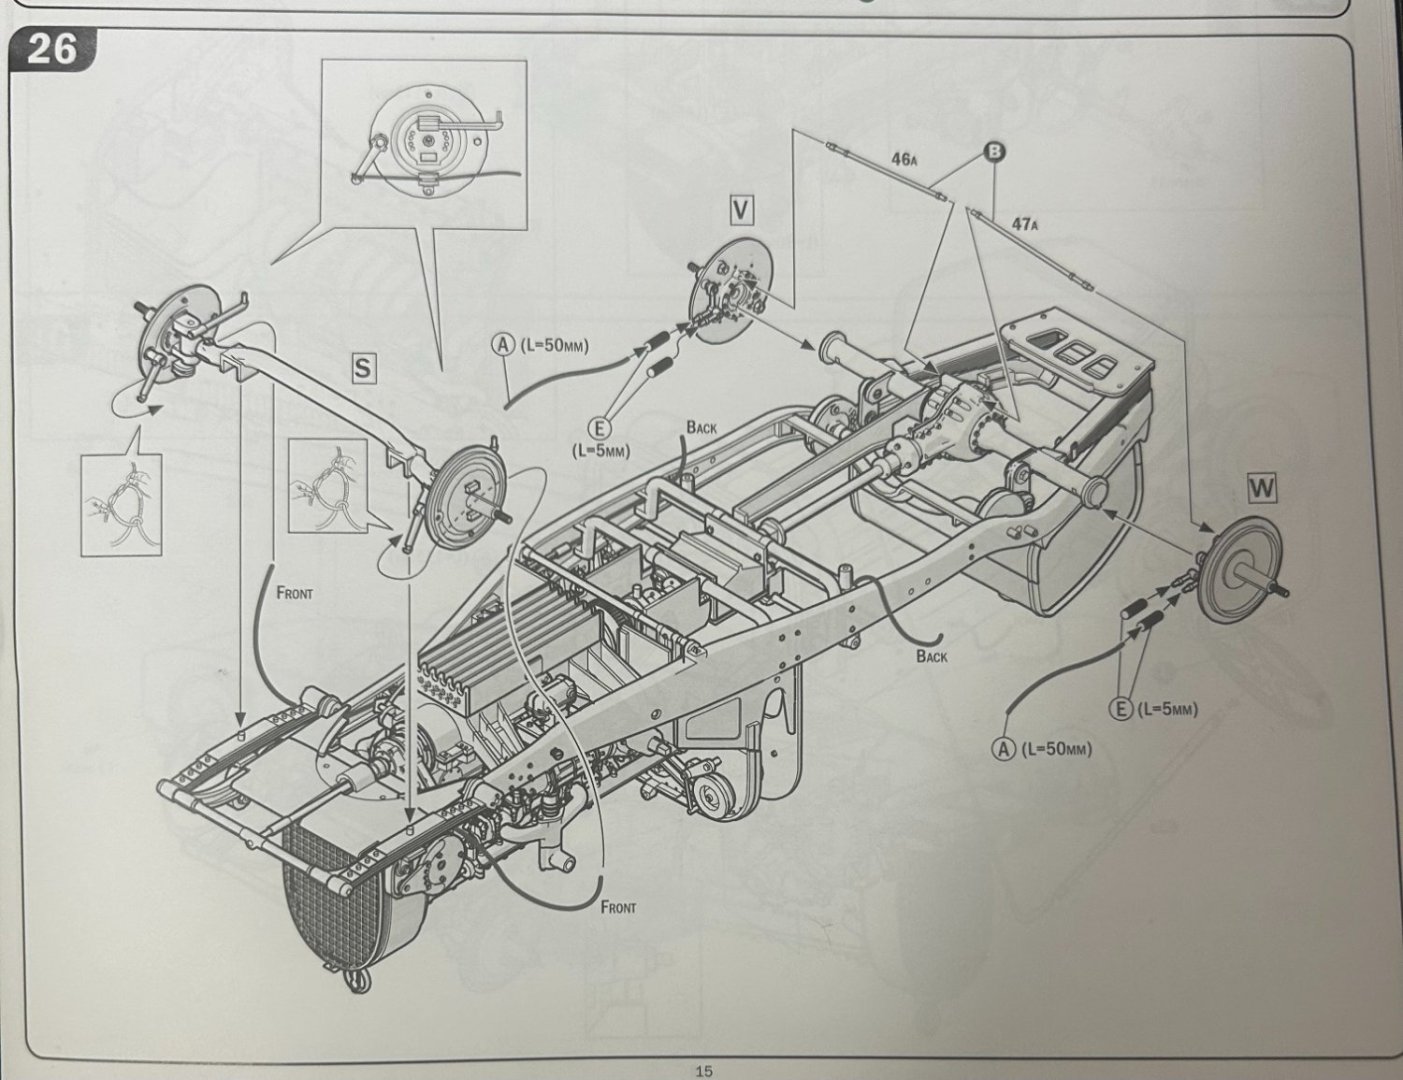
This reference photo shows in fact, how the brake cables were connected.
-
Bugatti Type 35B by CDW - FINISHED - Italeri - 1:12 Scale
CDW replied to CDW's topic in Non-ship/categorised builds
Just a heads-up for anyone who may build this kit in the future. The plans call for a .5mm wire supplied with the kit to be used as a brake cable as seen in step 8. Instead of the .5mm wire, consider using something of less diameter and more flexible. Also, find a more efficient way to terminate the brake line at the brake drums seen in step 26. Tying a square knot just doesn't cut it for me. Got to be a better way. Will find another way to do this and will show photos of how I did it later on in this thread.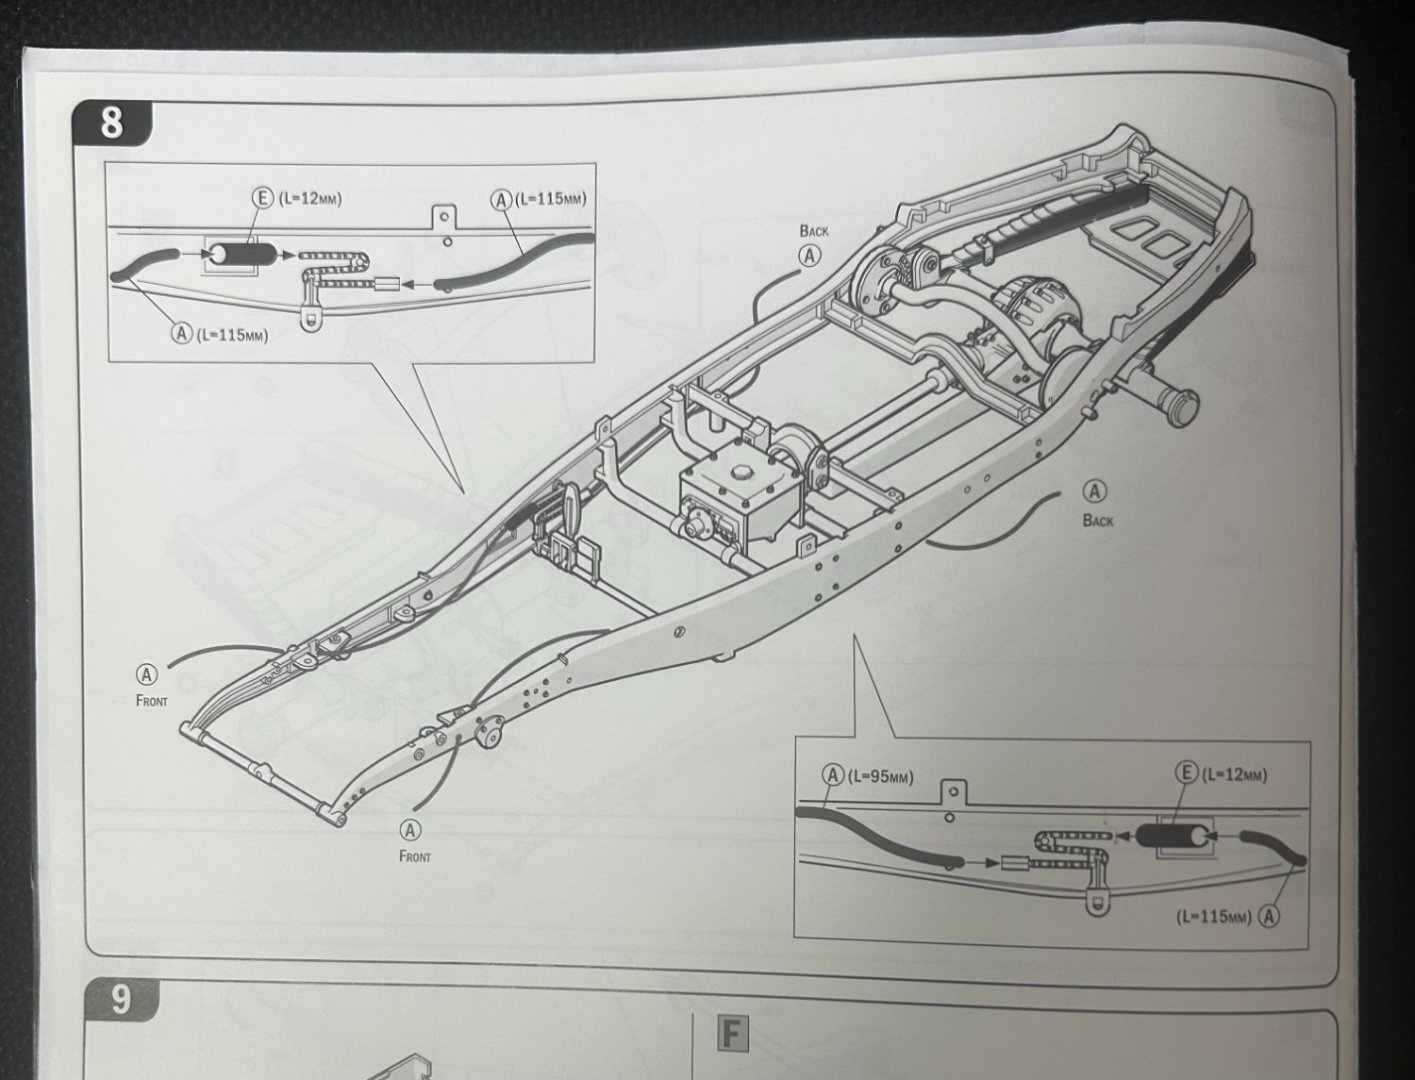

-
Bugatti Type 35B by CDW - FINISHED - Italeri - 1:12 Scale
CDW replied to CDW's topic in Non-ship/categorised builds
First dry fit of the body panels and hood. Very satisfied with the fit.
- 155 replies
-
- 12
-
-
-
Bugatti Type 35B by CDW - FINISHED - Italeri - 1:12 Scale
CDW replied to CDW's topic in Non-ship/categorised builds
Hey thanks Mike. Glad you are aboard. -
Bugatti Type 35B by CDW - FINISHED - Italeri - 1:12 Scale
CDW replied to CDW's topic in Non-ship/categorised builds
For the most part, I agree, but on this car, there are no controls on the steering column or steering wheel. It's got to be somewhere else. My '64 Harley panhead had the spark advance control on the left hand grip. 🙂 -
Bugatti Type 35B by CDW - FINISHED - Italeri - 1:12 Scale
CDW replied to CDW's topic in Non-ship/categorised builds
Thanks Yves. It's an added benefit of working in a larger scale, 1:12. -
Bugatti Type 35B by CDW - FINISHED - Italeri - 1:12 Scale
CDW replied to CDW's topic in Non-ship/categorised builds
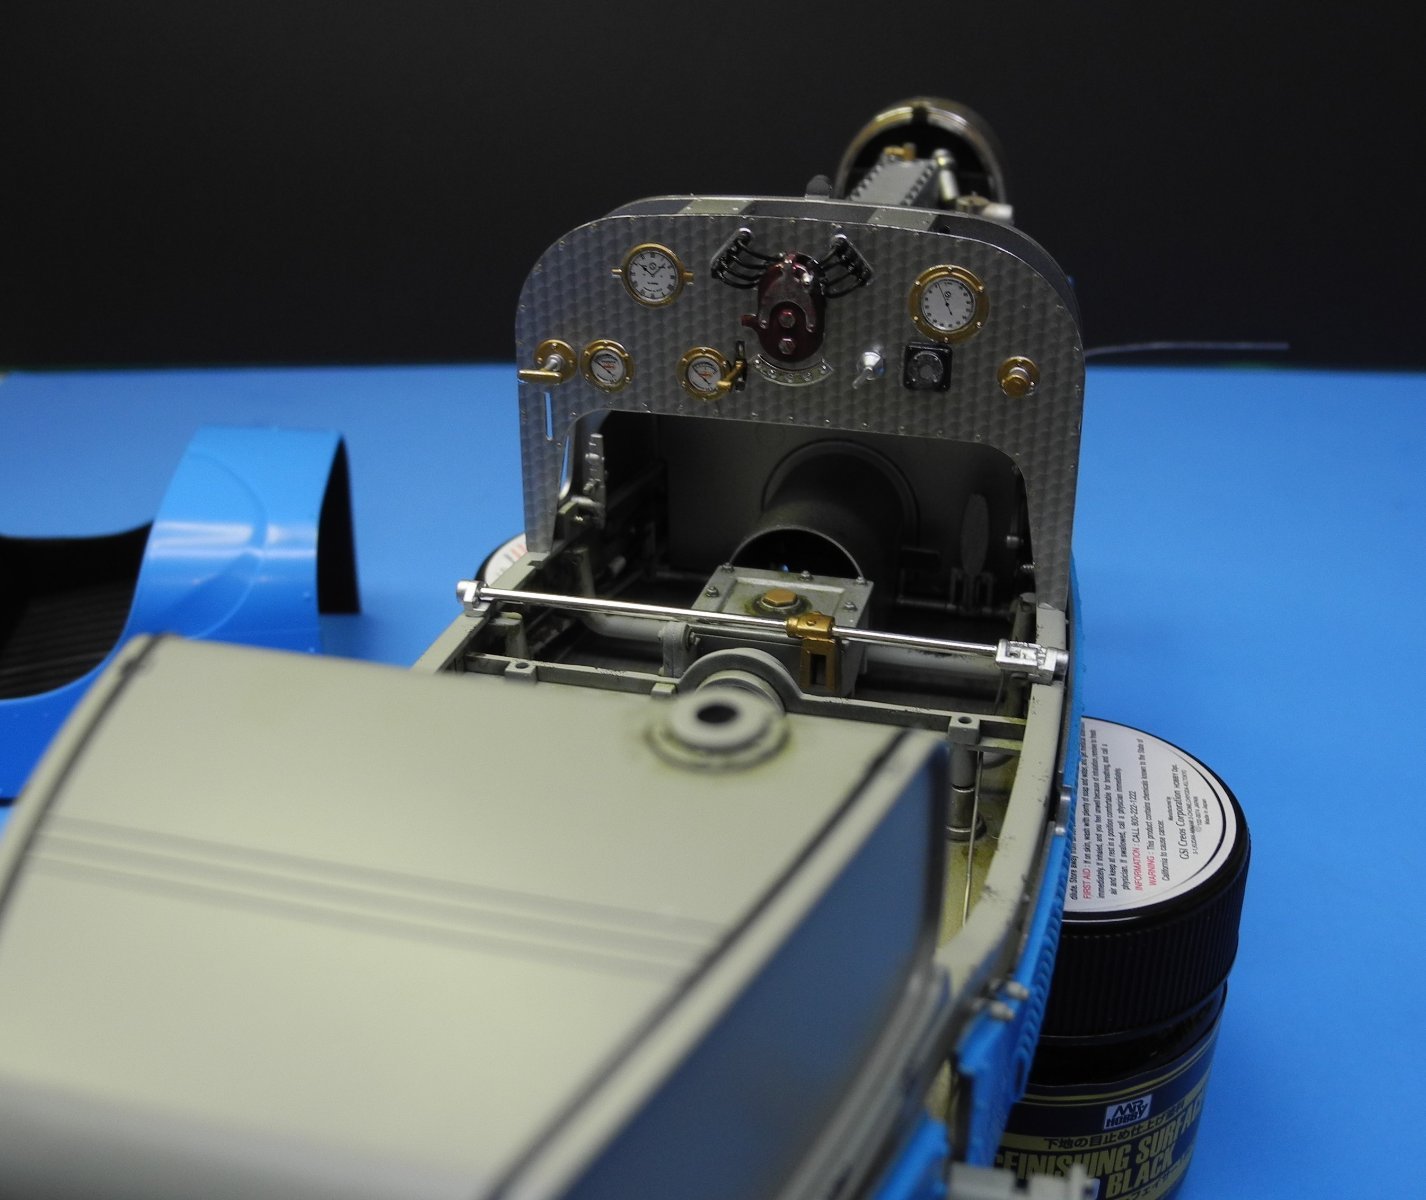
There are some cables to be added to the back side of the dash, connected to the backs of the instrument dials. I'm pretty sure the belts and pulleys seen on the firewall are a drive for the tachometer. A lot of mechanical apparatus for something as "simple" as a tach. -
Bugatti Type 35B by CDW - FINISHED - Italeri - 1:12 Scale
CDW replied to CDW's topic in Non-ship/categorised builds
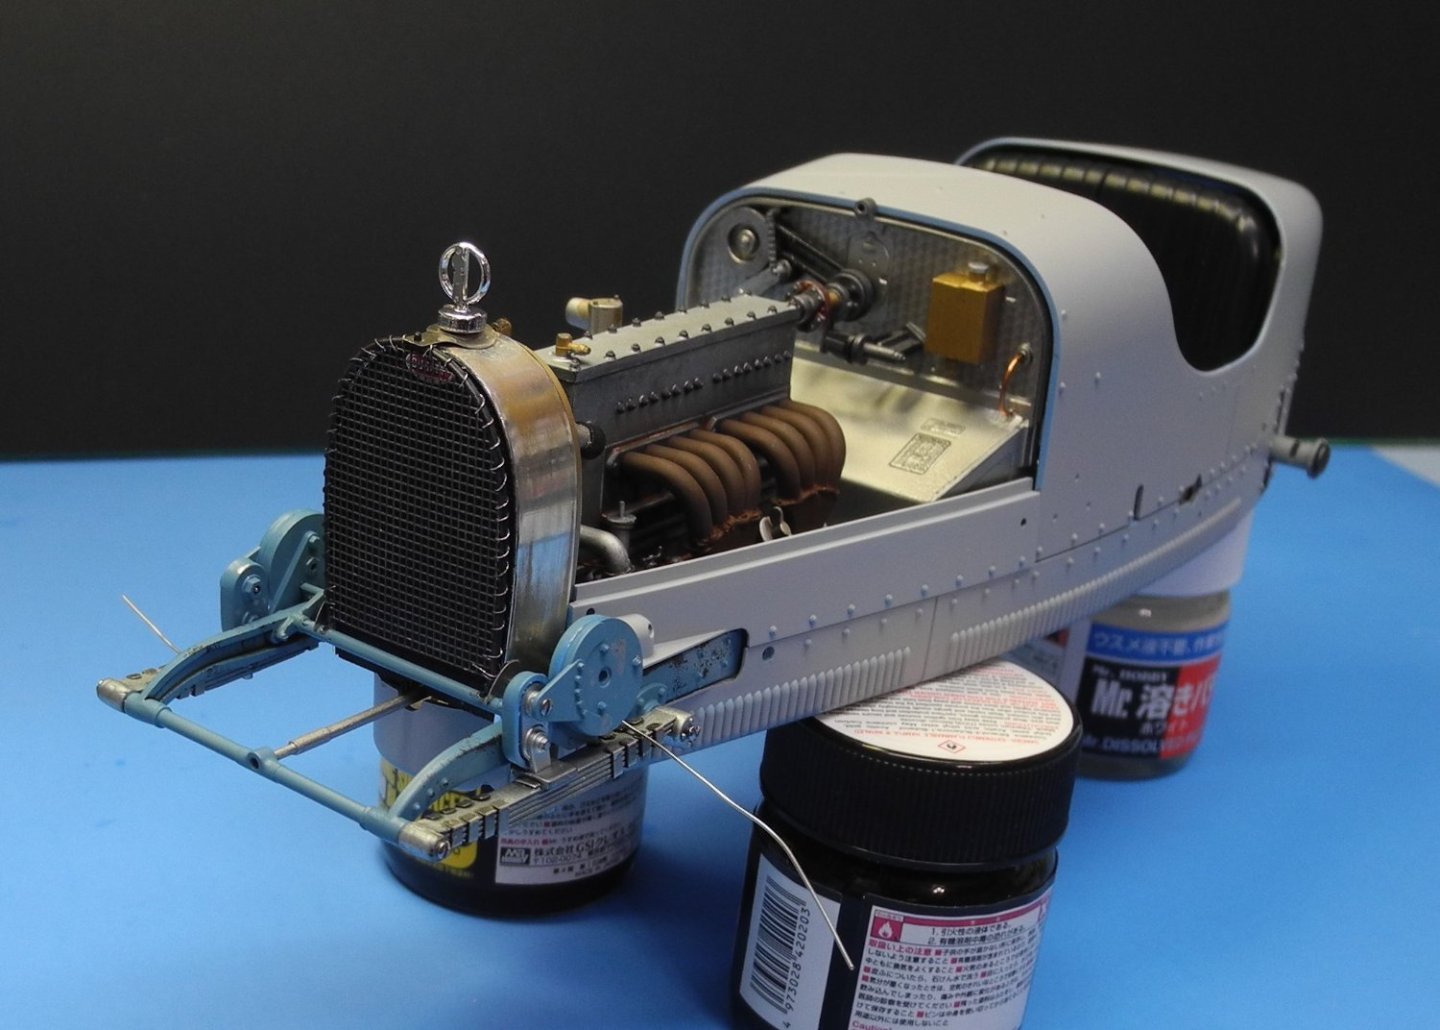
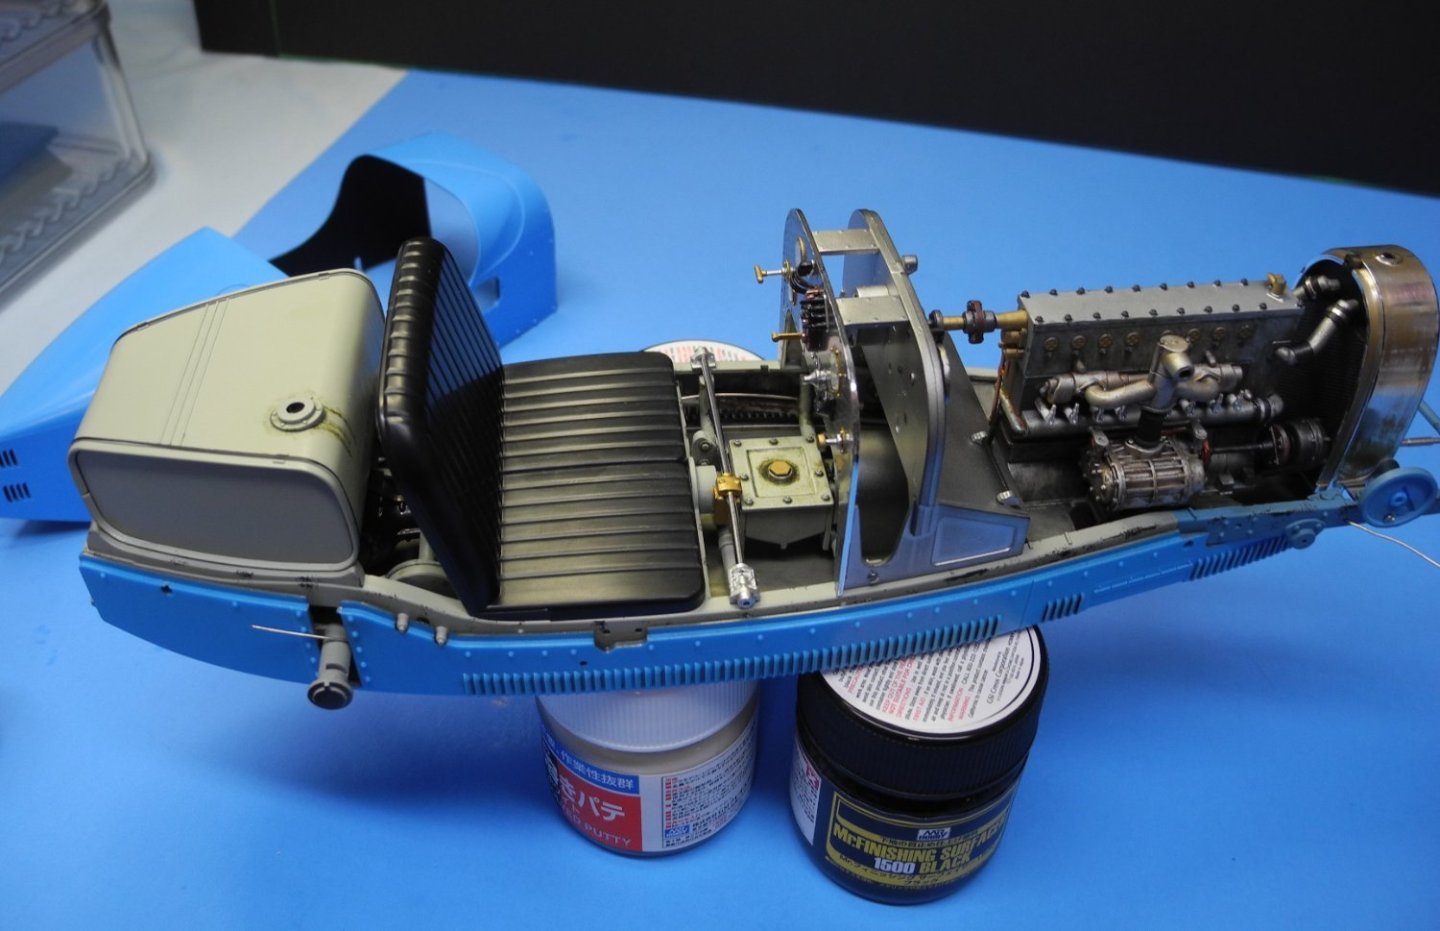
This pretty much finishes up the dashboard. Steering column and steering wheel get added later. More to do to finish the firewall. The seat needs paint and weathering, which will be a mini project to weather and age it the way I want it to be. It's interesting to me the way the ignition wiring passes through the center of the dashboard and into the face of the magneto.

- 155 replies
-
- 15
-
-
-
Bugatti Type 35B by CDW - FINISHED - Italeri - 1:12 Scale
CDW replied to CDW's topic in Non-ship/categorised builds
Thanks Rob. I've had more time than usual to spend on this kit, so that's helping move things along. Part of it is just the enjoyment of building it. We discussed earlier whether or not Italeri would do an acceptable job with the kit, and in my opinion, it's going together even better than expected. No major fit issues whatsoever and only a few minor ones. The molds are new so there is very little/no flash. Relatively few imperfections to take care of. -
Coming along great Javlin. Love to see a Classic Airframes kit built. They were very popular amongst the top modelers some decades ago and they produced kits of aircraft no one else ever did in 1:48 scale.
-
Looking forward to your build. Isn't it amazing how after so many decades this fighter still looks "modern" in a certain way? Went into service in 1958. Wow, that was a LONG time ago.
-
Bugatti Type 35B by CDW - FINISHED - Italeri - 1:12 Scale
CDW replied to CDW's topic in Non-ship/categorised builds
Thanks Alan. -
Bugatti Type 35B by CDW - FINISHED - Italeri - 1:12 Scale
CDW replied to CDW's topic in Non-ship/categorised builds
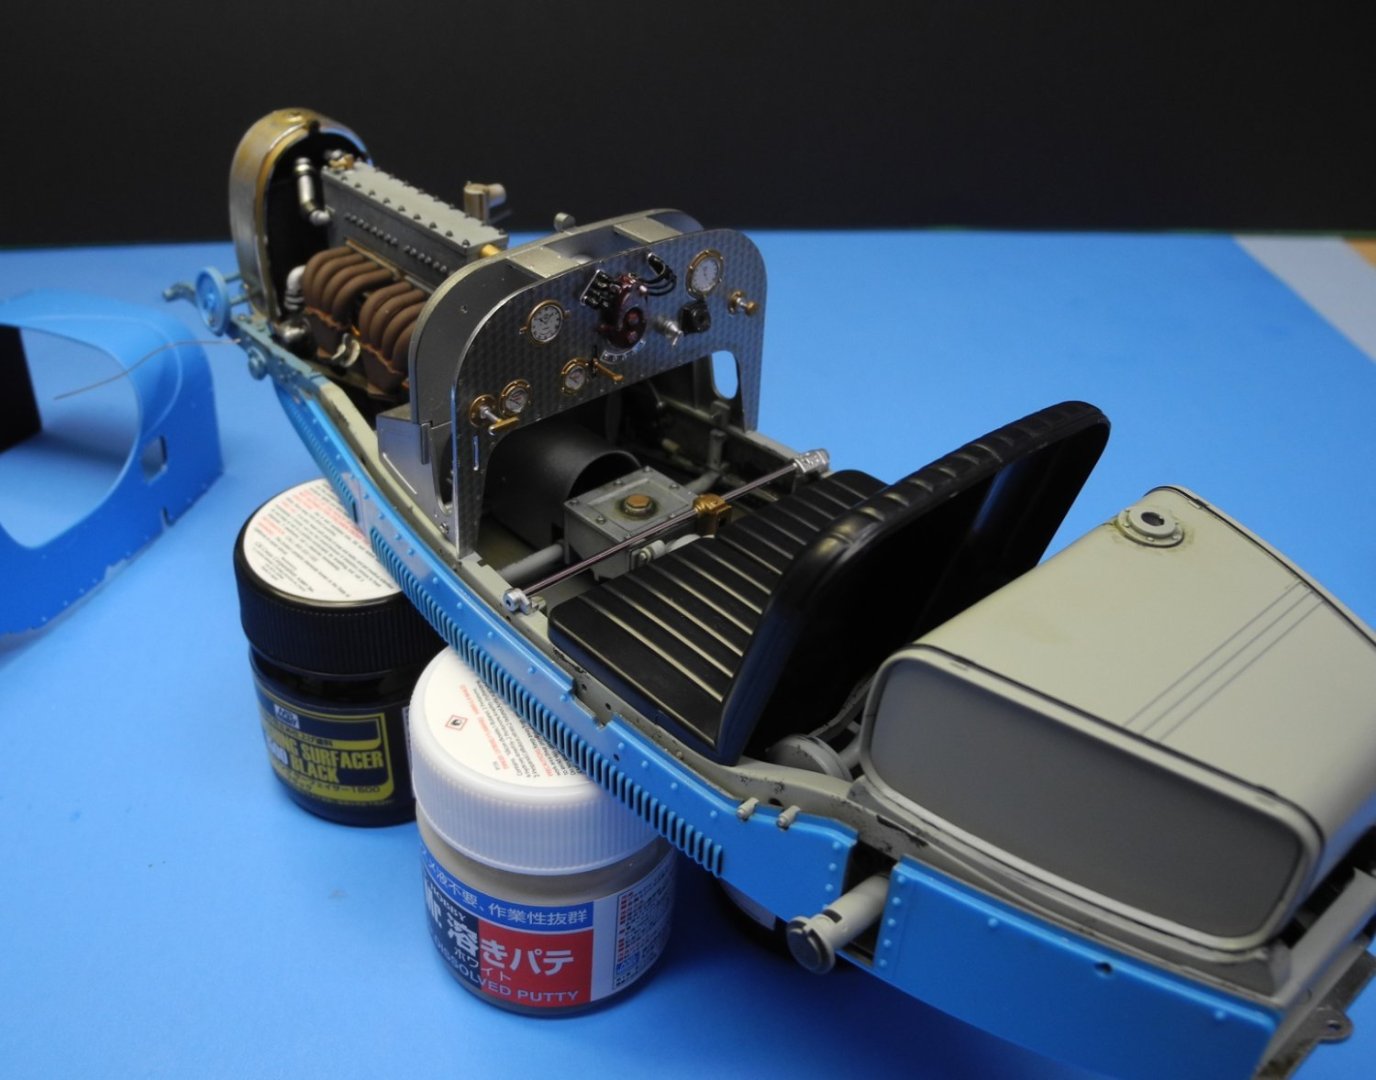
The beginning of the dashboard and firewall construction. More details to come. Construction and finishing began with black primer-surfacer, then aluminum. The hammered aluminum panels are decals supplied in the kit as are the individual instruments dials. The red-brown object in the middle of the dashboard is the magneto. I presume the driver controlled the advance and retard of the ignition timing from this location.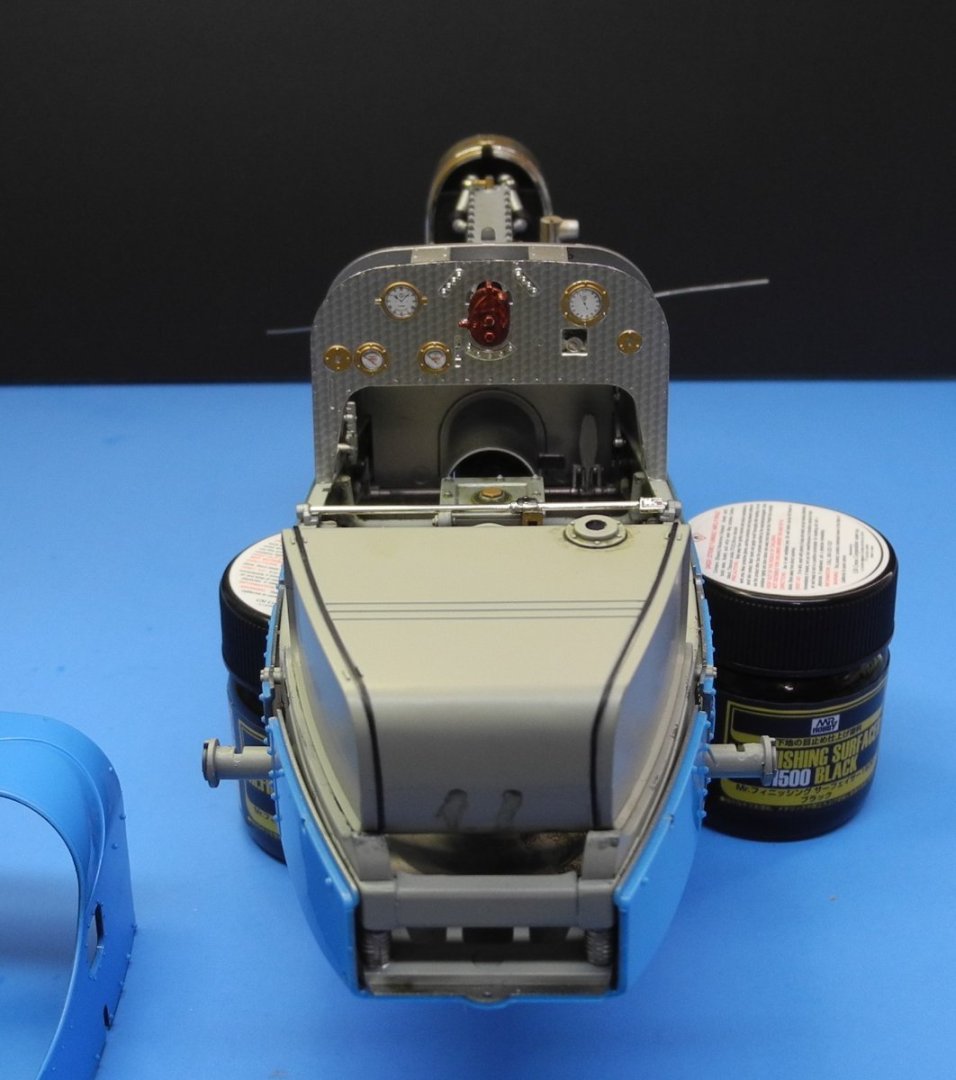
- 155 replies
-
- 17
-
-
Bugatti Type 35B by CDW - FINISHED - Italeri - 1:12 Scale
CDW replied to CDW's topic in Non-ship/categorised builds
Thanks Ken! -
Bugatti Type 35B by CDW - FINISHED - Italeri - 1:12 Scale
CDW replied to CDW's topic in Non-ship/categorised builds
Thanks OC -
Bugatti Type 35B by CDW - FINISHED - Italeri - 1:12 Scale
CDW replied to CDW's topic in Non-ship/categorised builds

- 155 replies
-
- 14
-
-
-
Bugatti Type 35B by CDW - FINISHED - Italeri - 1:12 Scale
CDW replied to CDW's topic in Non-ship/categorised builds
Thanks Rob. I’m having fun experimenting with this as well. It’s something I rarely ever attempt to do, showing age wear and grime. -
Bugatti Type 35B by CDW - FINISHED - Italeri - 1:12 Scale
CDW replied to CDW's topic in Non-ship/categorised builds
It’s where I used an oil wash over the bare metal finish to show grease and grime accumulation. -
Bugatti Type 35B by CDW - FINISHED - Italeri - 1:12 Scale
CDW replied to CDW's topic in Non-ship/categorised builds


- 155 replies
-
- 14
-
-
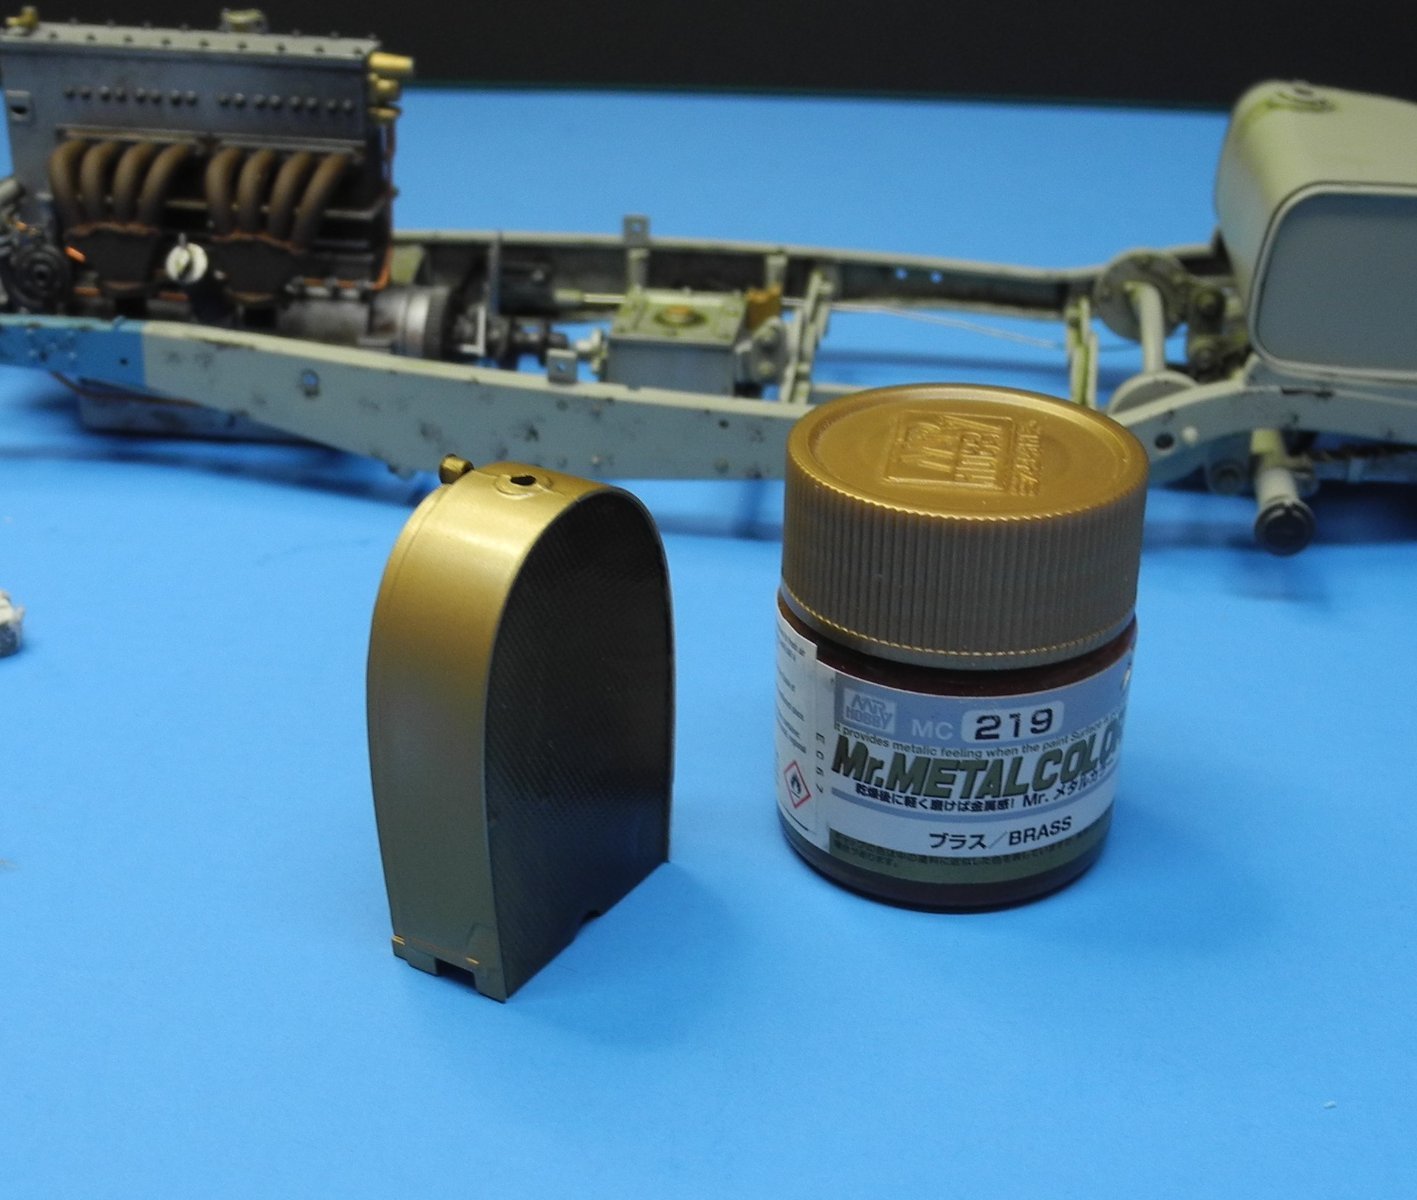
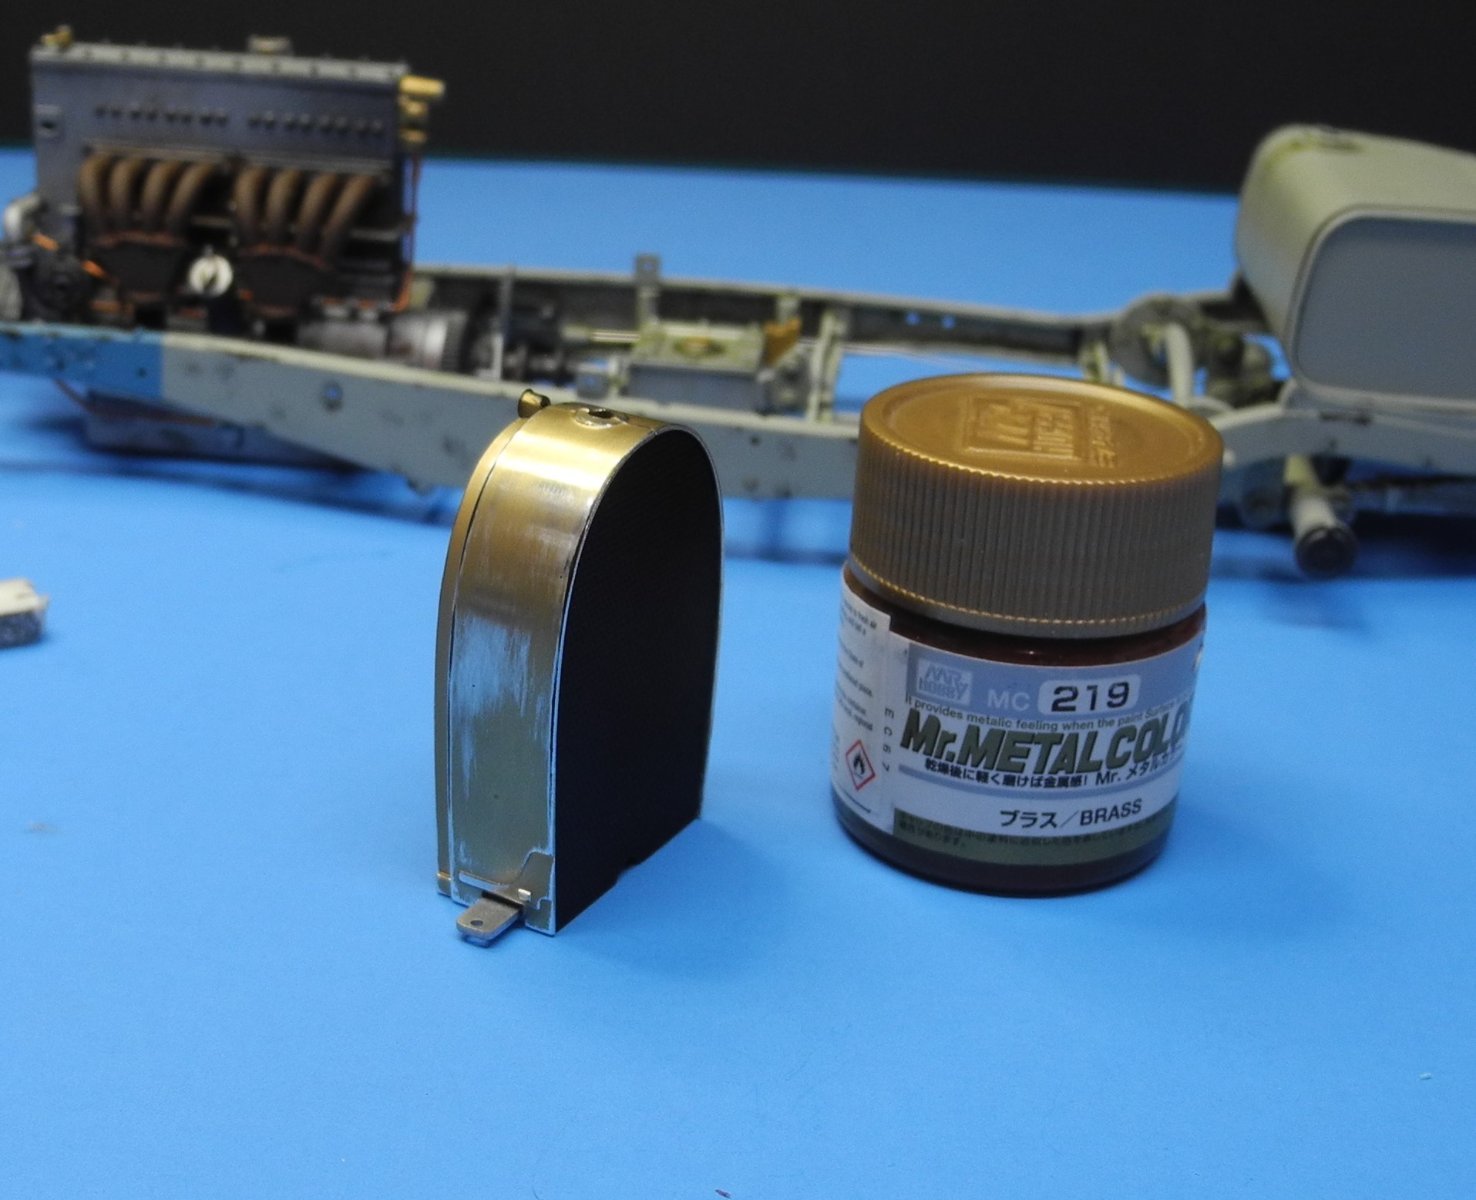
Bugatti Type 35B by CDW - FINISHED - Italeri - 1:12 Scale
CDW replied to CDW's topic in Non-ship/categorised builds
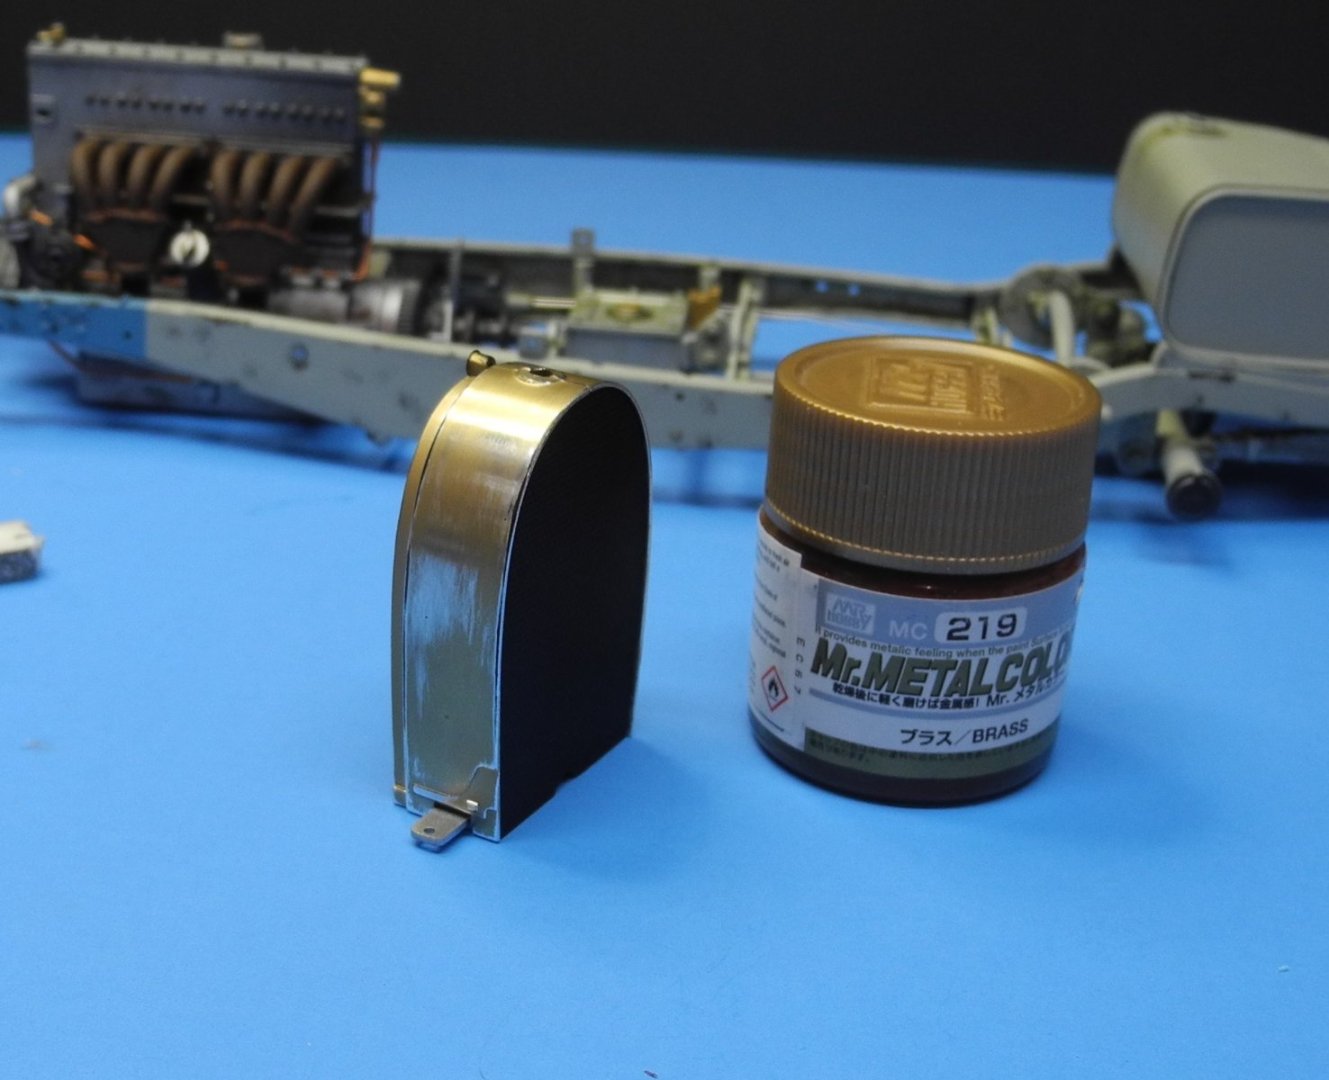
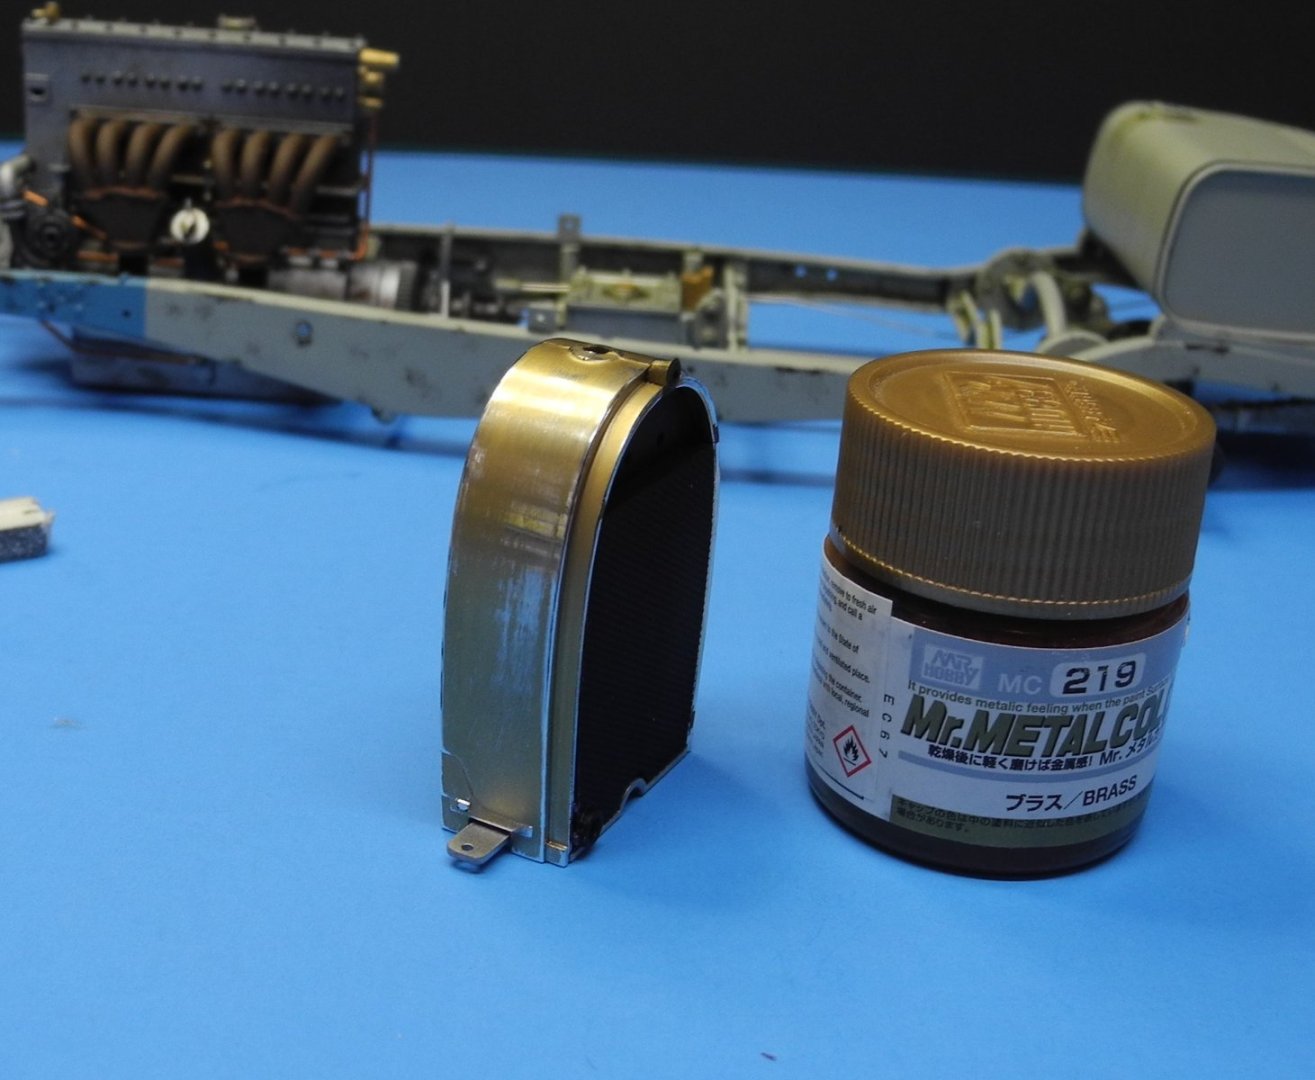
After painting the radiator core halves flat black, I masked them off with Heller Maskol then assembled the chrome radiator halves. I used a 12,000 grit polishing sponge to dull down the chrome before painting the chrome with a light coat of Mr Metal Color gold. Once dry, polished down the metalized gold so that some of the chrome shows through in an effort to make it appear to be old chrome plating that was worn away after many decades of time. That nasty seam at the top of the radiator gets covered with a photo etch piece later on.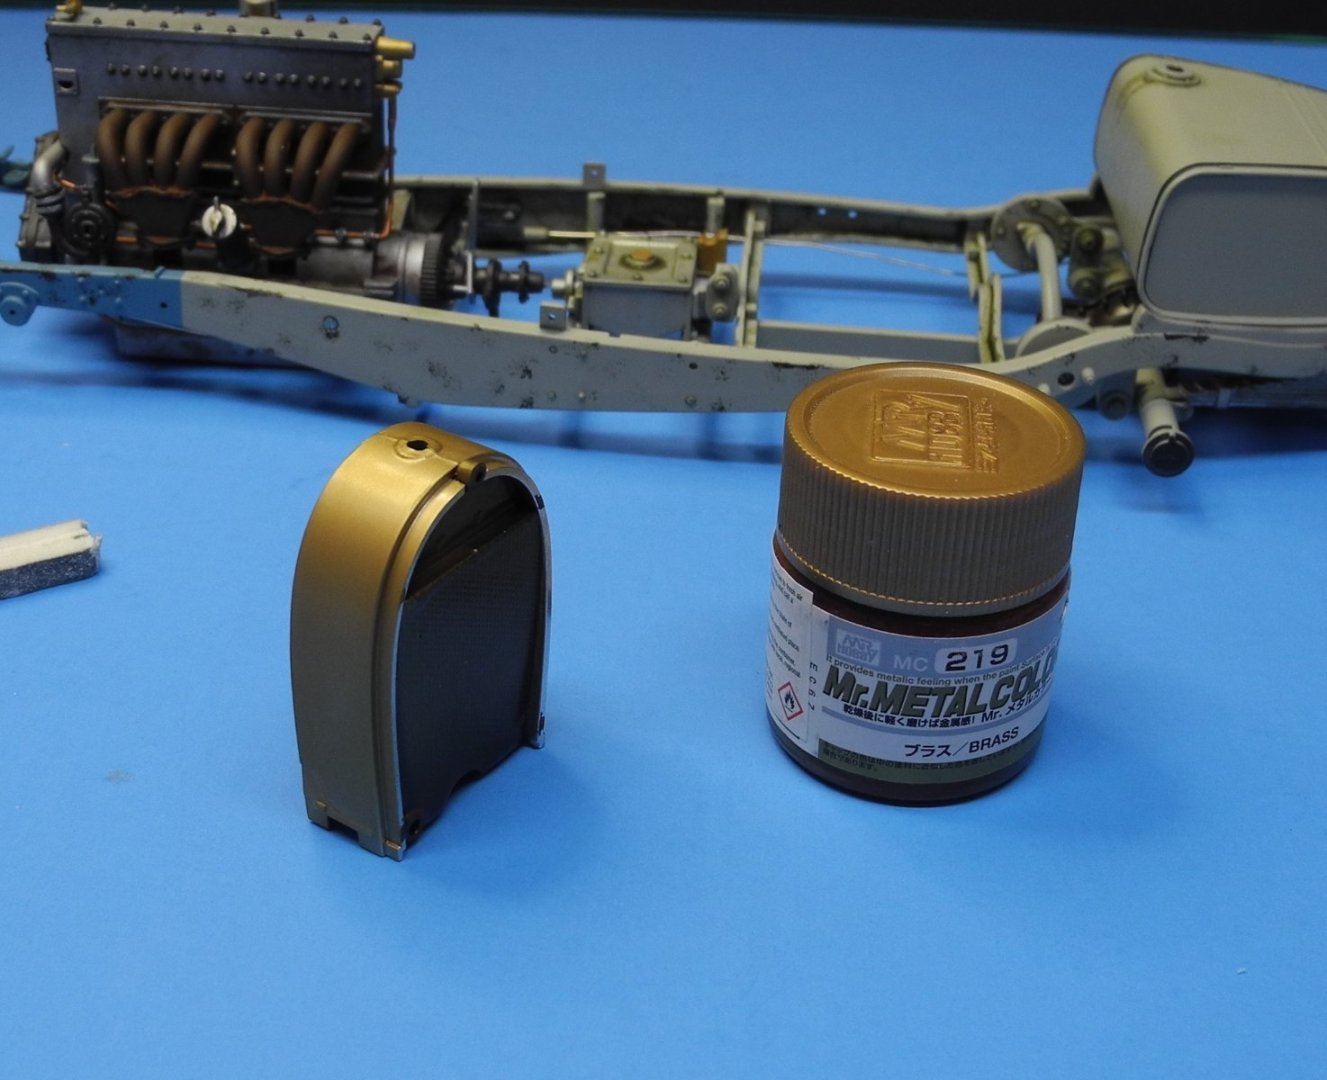

- 155 replies
-
- 12
-