CDW
-
Posts
7,755 -
Joined
-
Last visited
Content Type
Profiles
Forums
Gallery
Events
Everything posted by CDW
-
 You were spot on Jack. That is exactly what is happening. I'll need to change/revert back to the old format of jpeg and then all should work as it did in the recent past. iPhone is constantly sending out software updates. It must have changed in a recent update. Thanks for your help, much appreciated.
 -
Thanks for your suggestions. I’ll be sure to check them out.
-
If I save that file after renaming it, it will then upload. However, I don't know how to rename the file on iPhone. I am forced to send the photo file to my email, open it in my computer where i can then rename the file. Adds lots of extra steps and hassle to uploading photos. There is probably a simple way to fix this issue, but I don't know what it is.
-
Here is what I get:

-
Does anyone else use iPhone to post on MSW? All of a sudden, MSW gives an error 200 code when I try to upload photos taken on iPhone. This never happened in the past. What changed? I cannot figure it out.
-
Excellent project and will love to follow along. EG You have piqued my interest with the Bambu printer. Will definitely be looking that up. I gave my older printers away.
-
A beautiful color, the paint looks super!
-
uploading pictures
CDW replied to David56's topic in Using the MSW forum - **NO MODELING CONTENT IN THIS SUB-FORUM**
A problem that recently started: The file server chokes when trying to upload images from iPhone. I get an "unkown error" message showing a code 200. In the past, I uploaded photos many times from my iPhone without ever having issues but now something has changed and I don't know what changed. Even if I send the images to my email and download the images to my computer, the MSW file server won't upload them unless I do a "save as" and rename the files first. Any idea what settings I might change on my phone that would save the photos to a format that works without renaming and resaving every photo? I've been using iPhone to upload photos to MSW for years, so I assume it may be something that changed in a recent iPhone software update. -
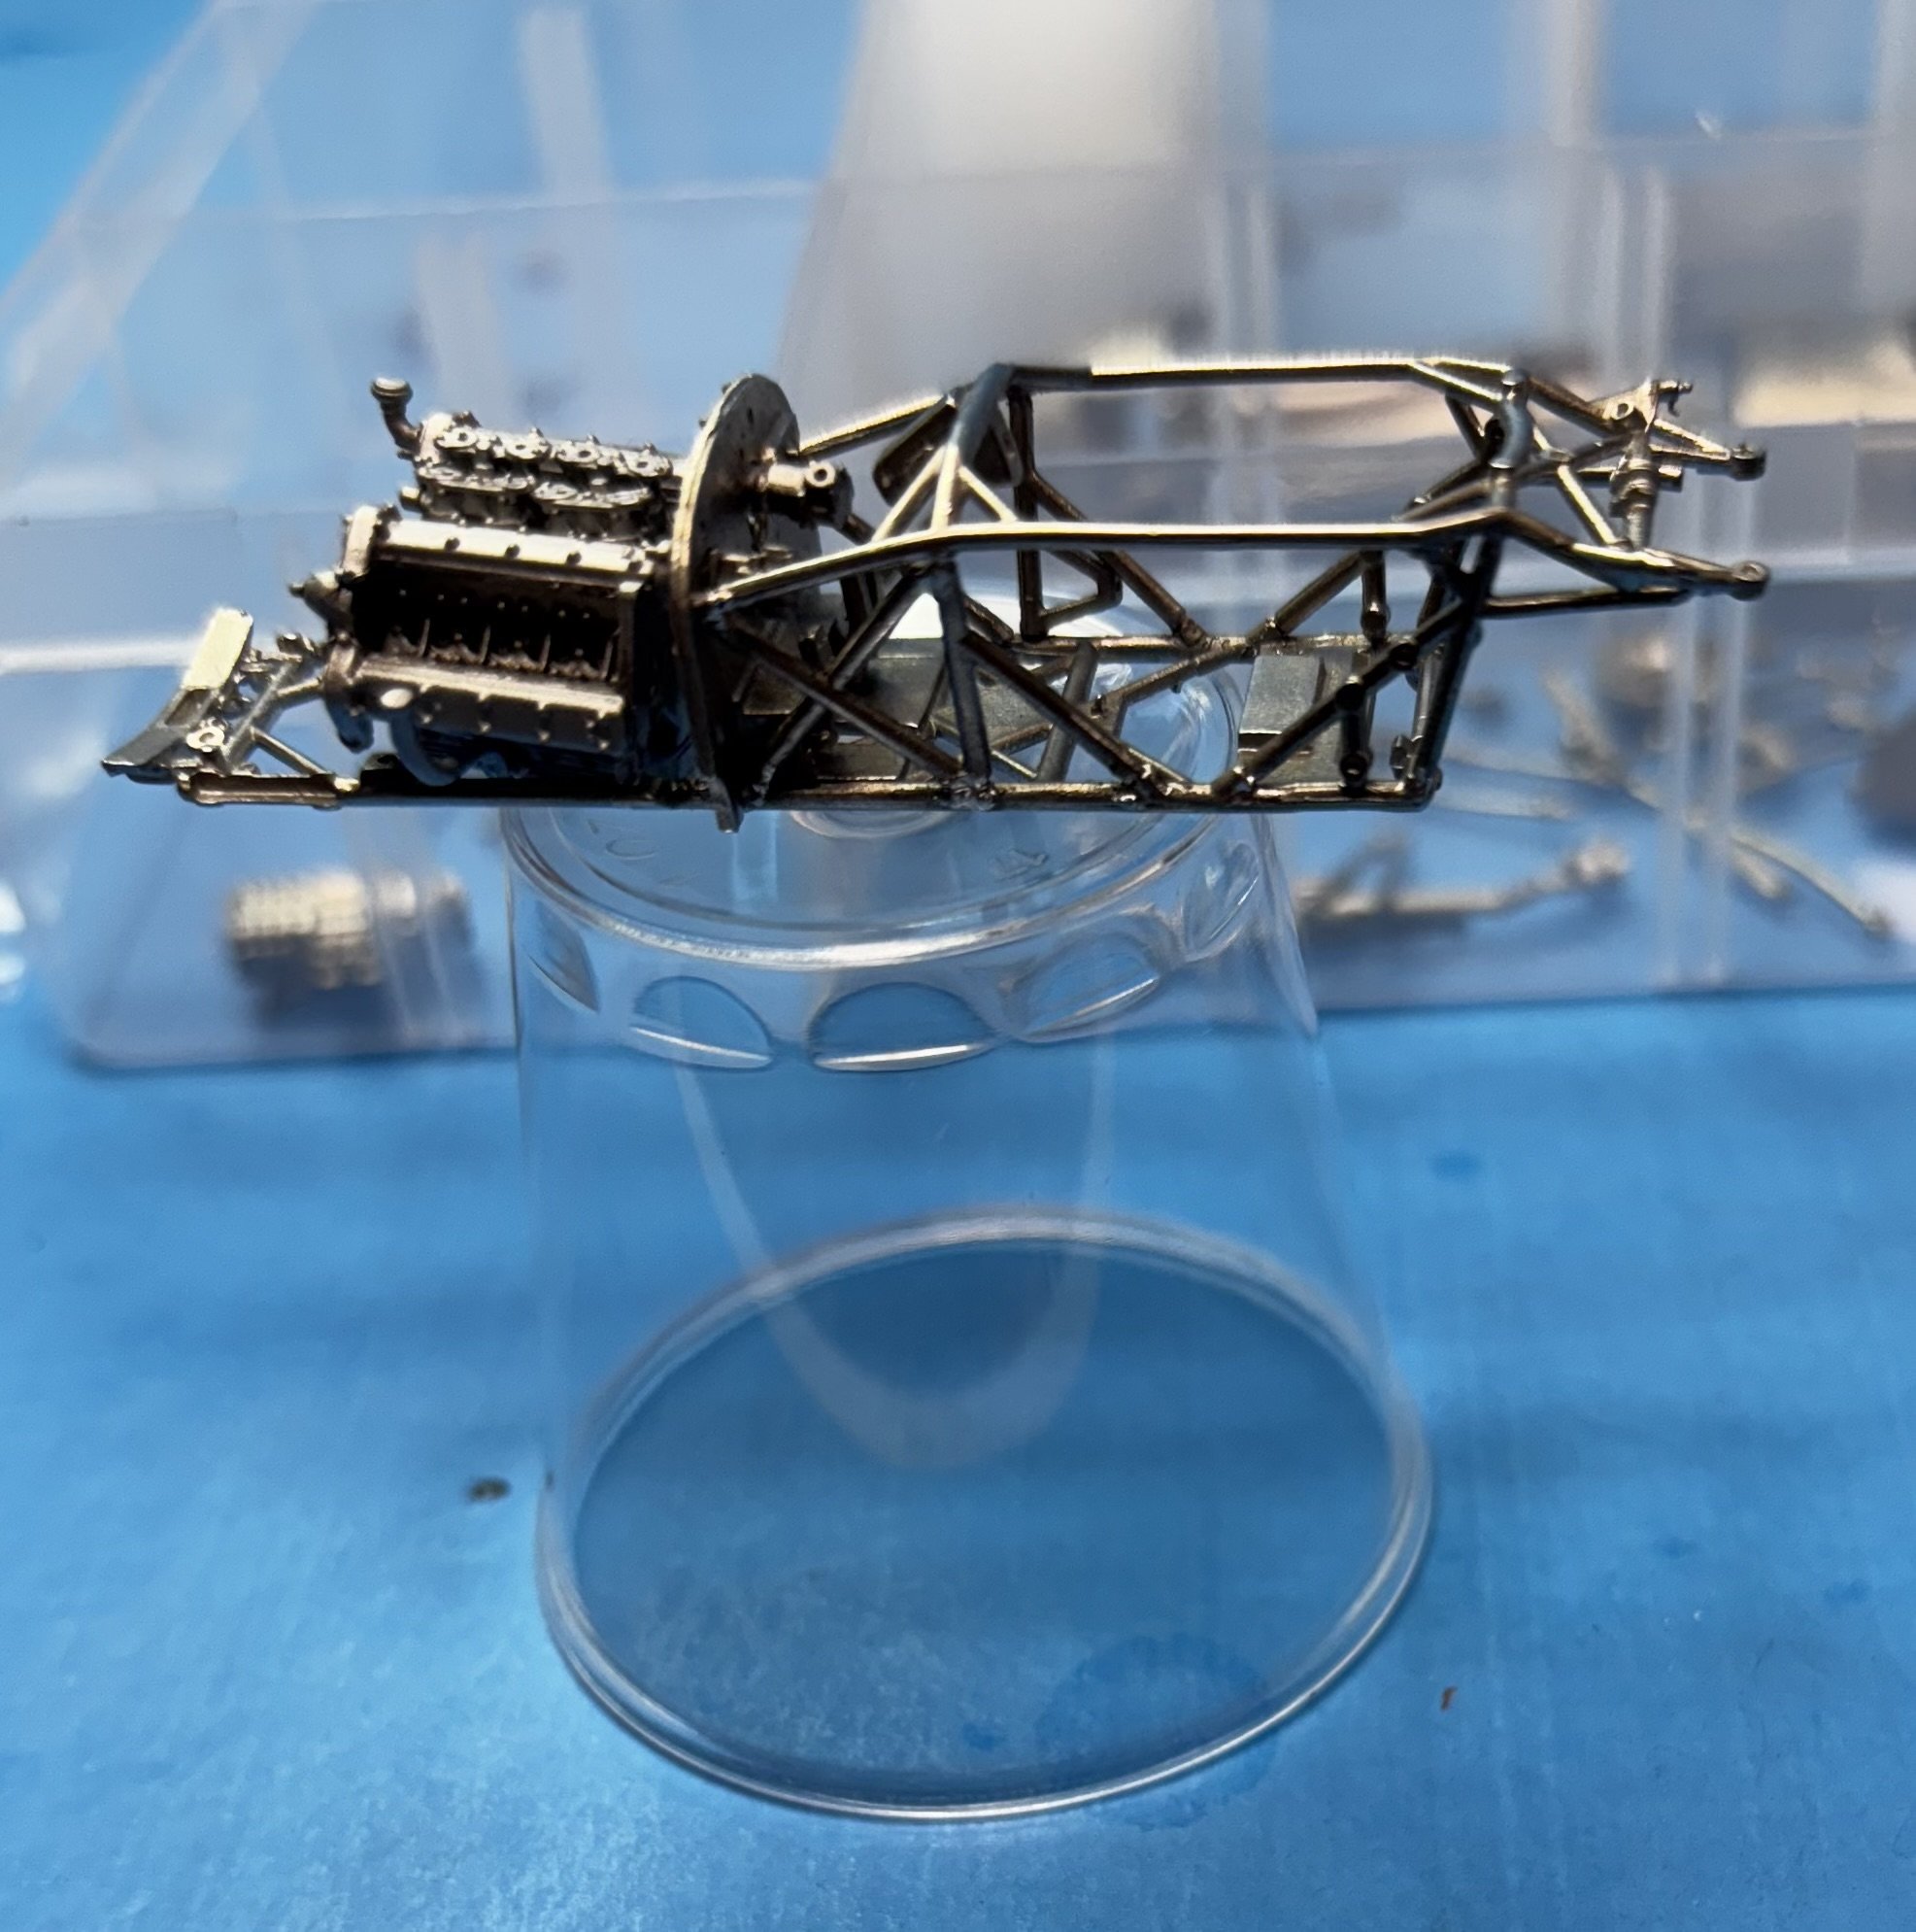
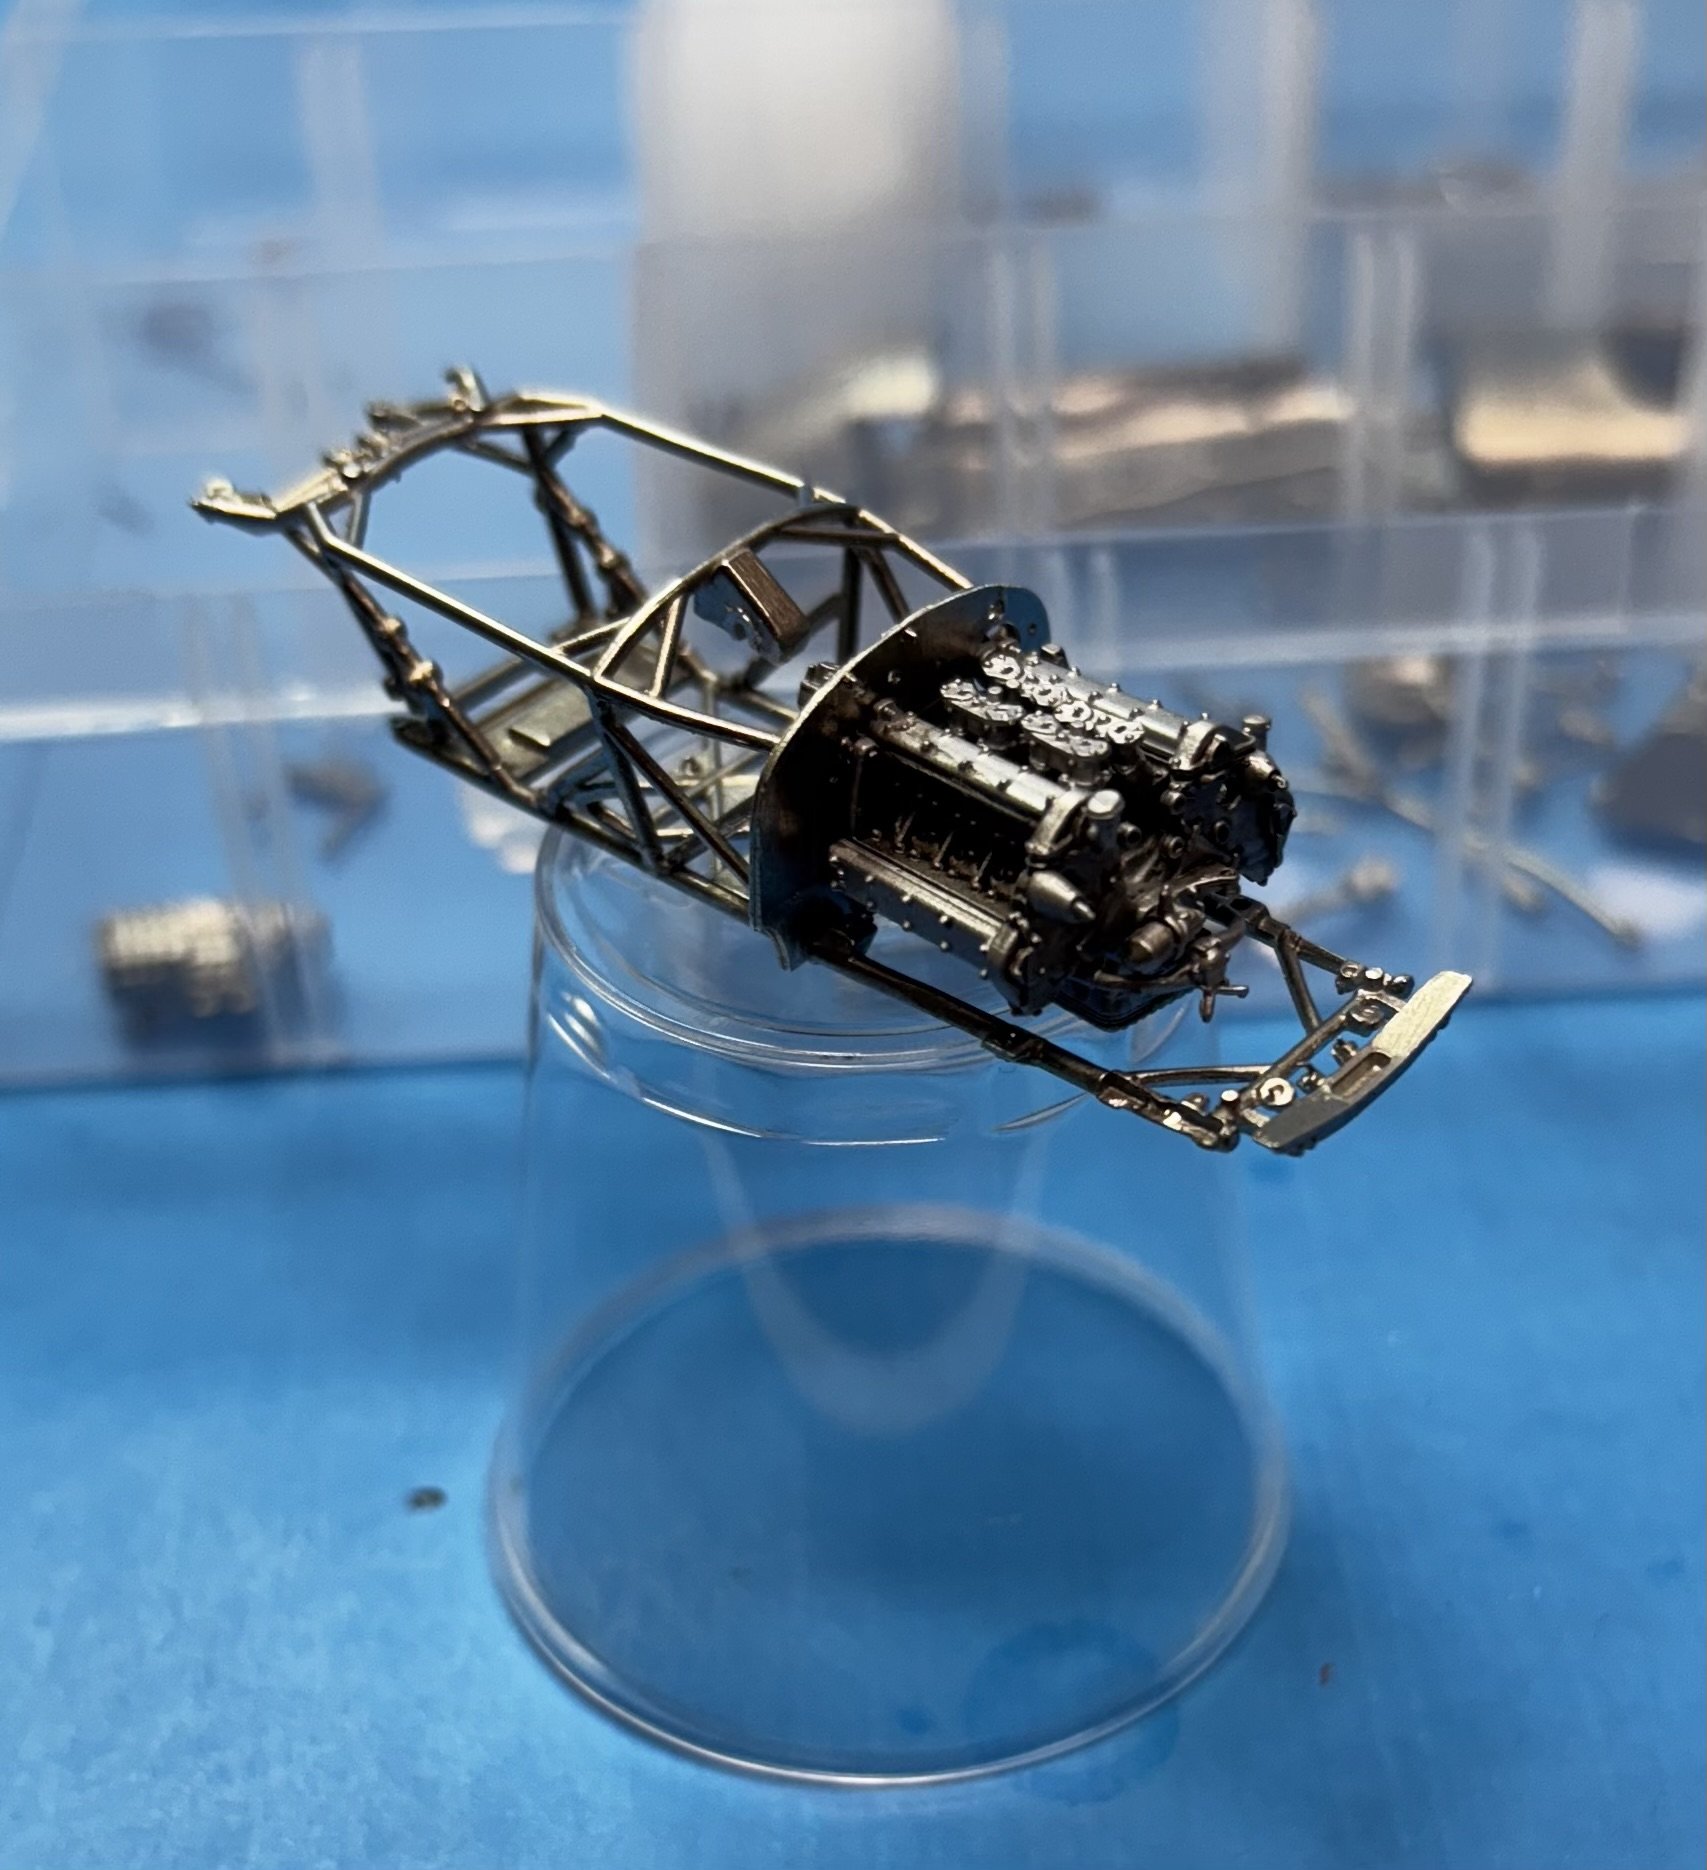
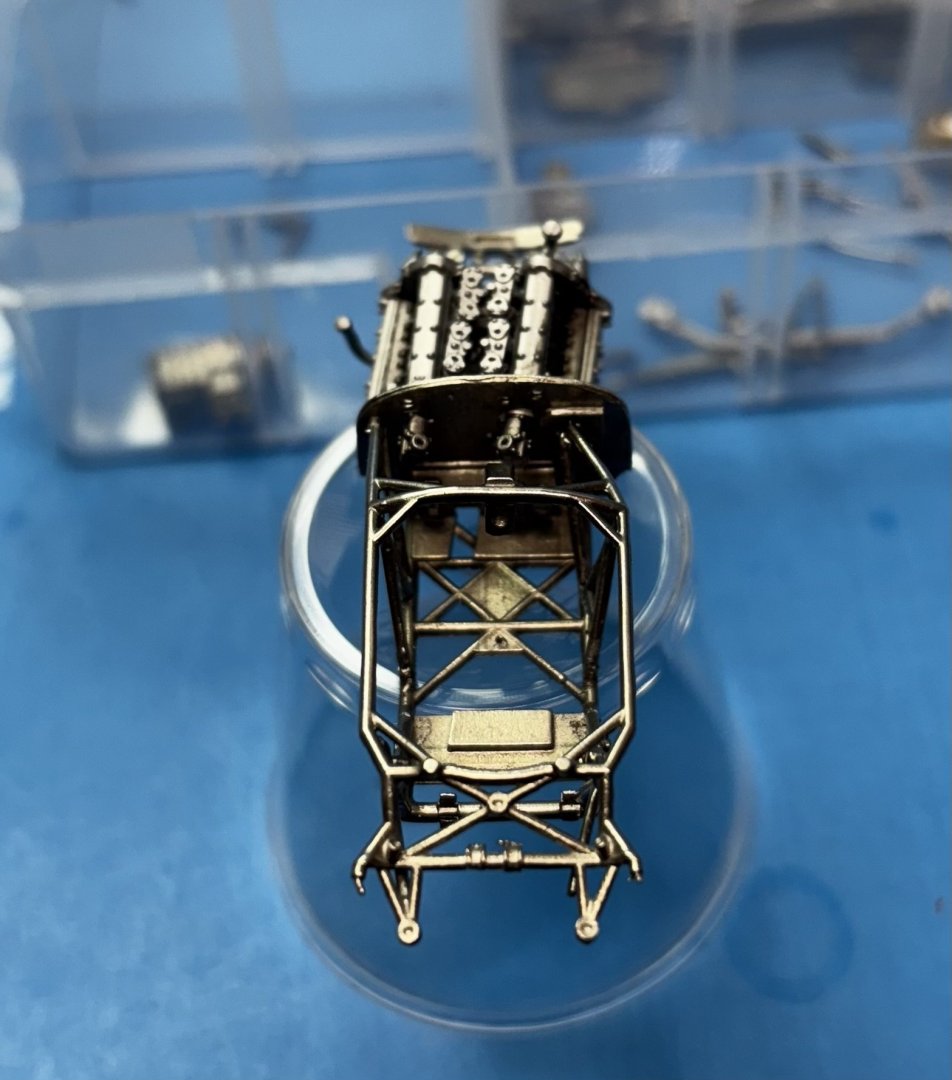
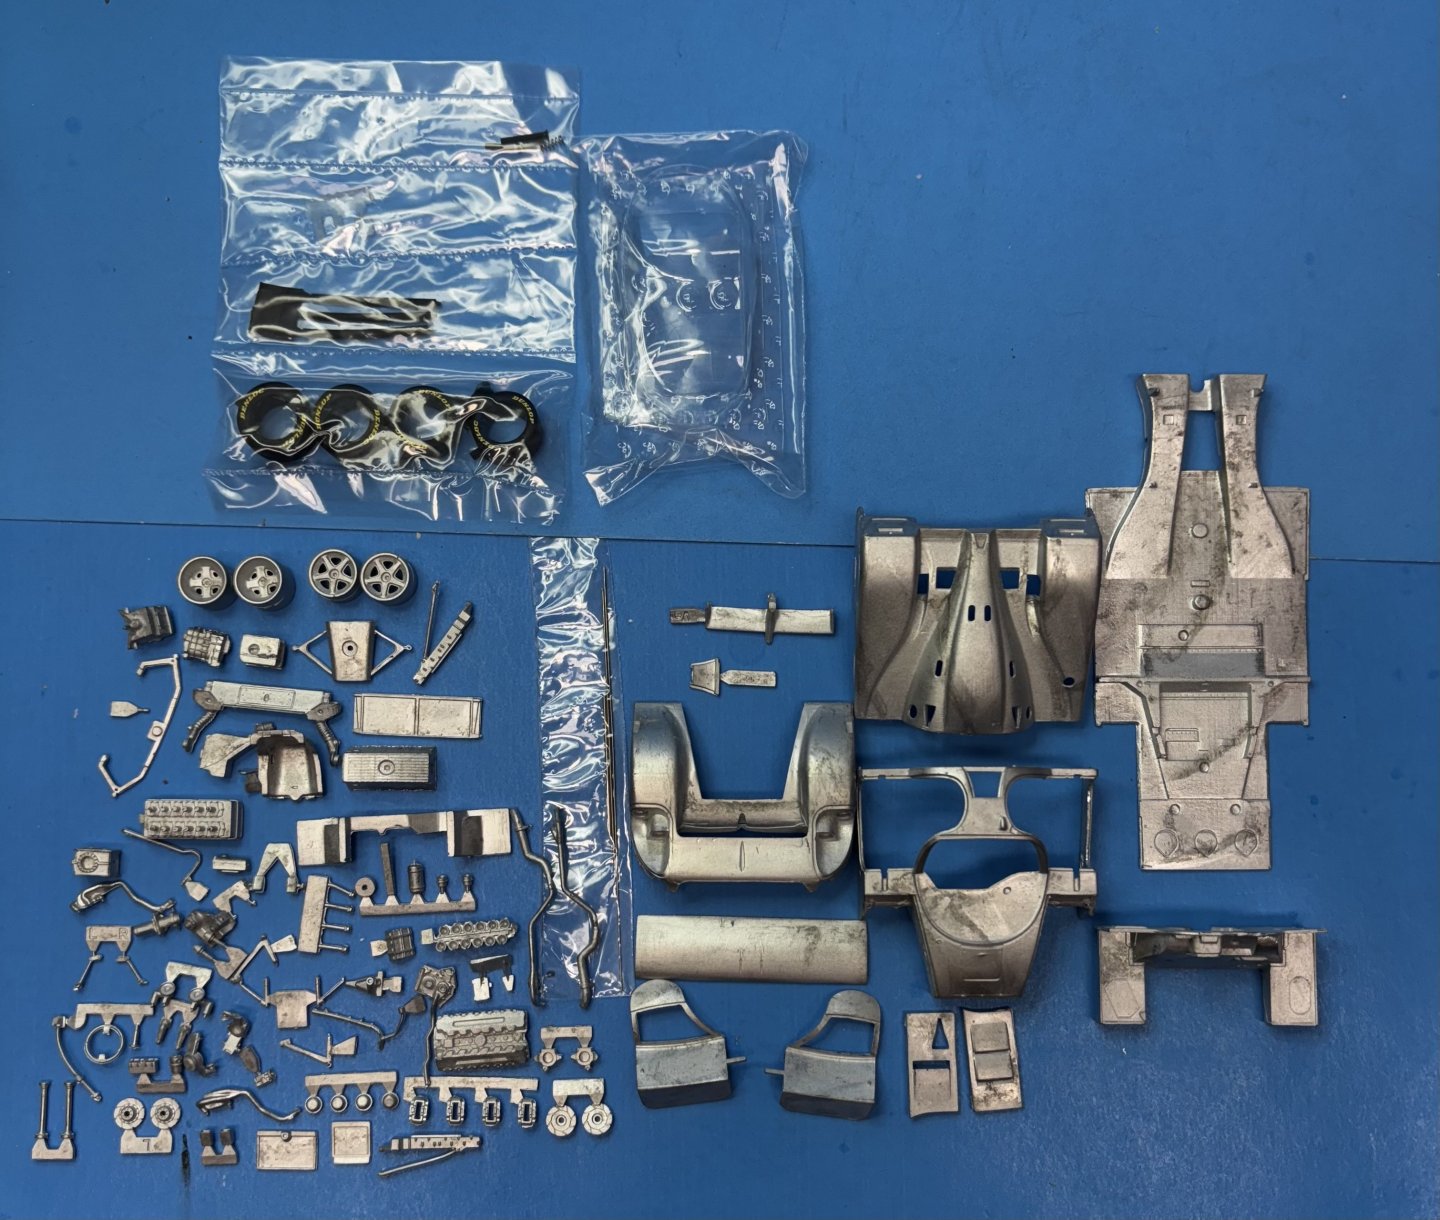
The soft white metal body parts will require a lot of prep work for a proper fit and finish. The chassis rests inside the body parts with no major issues. Soon I will need to temporarily fasten the chassis to a flat surface spaced at the proper height so the suspension components can be built in a way that keeps everything square, in alignment, and ride height is correct while all four tires/wheels touch the surface. 
- 73 replies
-
- 10
-

-

-
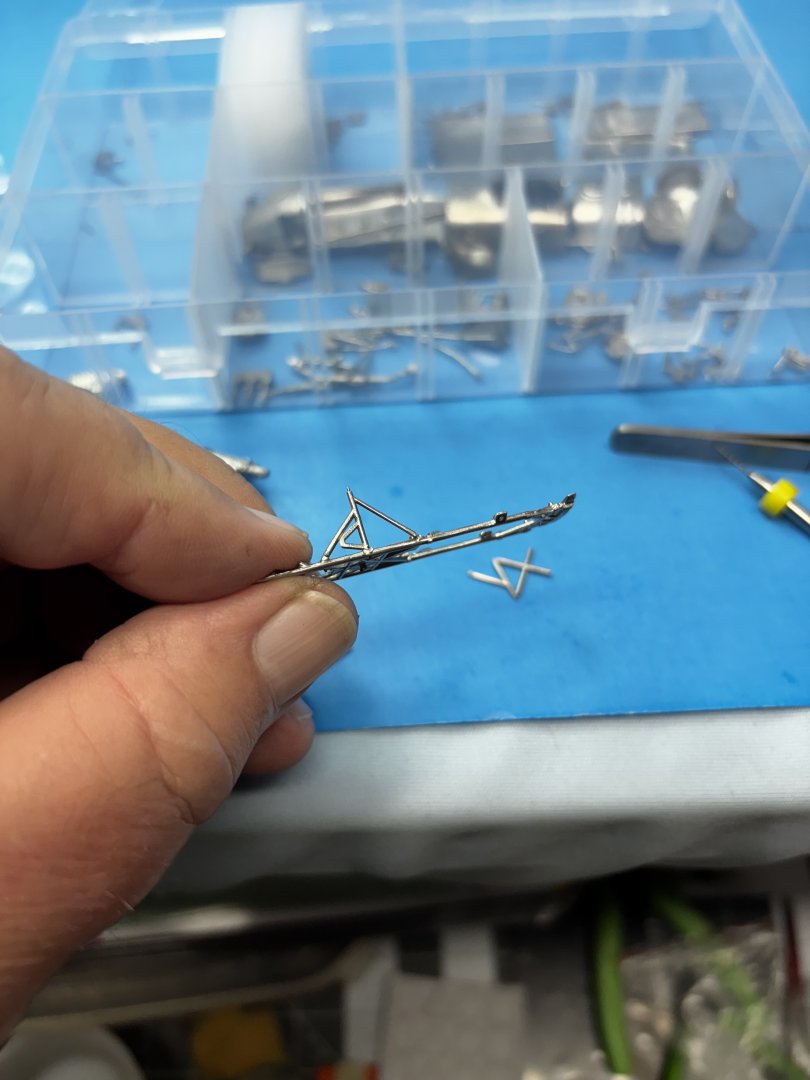
Something to keep in mind…the melting temperature of the MFH white metal is lower than 300 degrees. Something closer to 200 degrees but I cannot recall exactly. The soldering iron cannot be left in one place too long or it WILL melt the white metal. I found out the hard way but was able to repair the damage. Working with these tiny parts makes the task lots tougher to do.
-
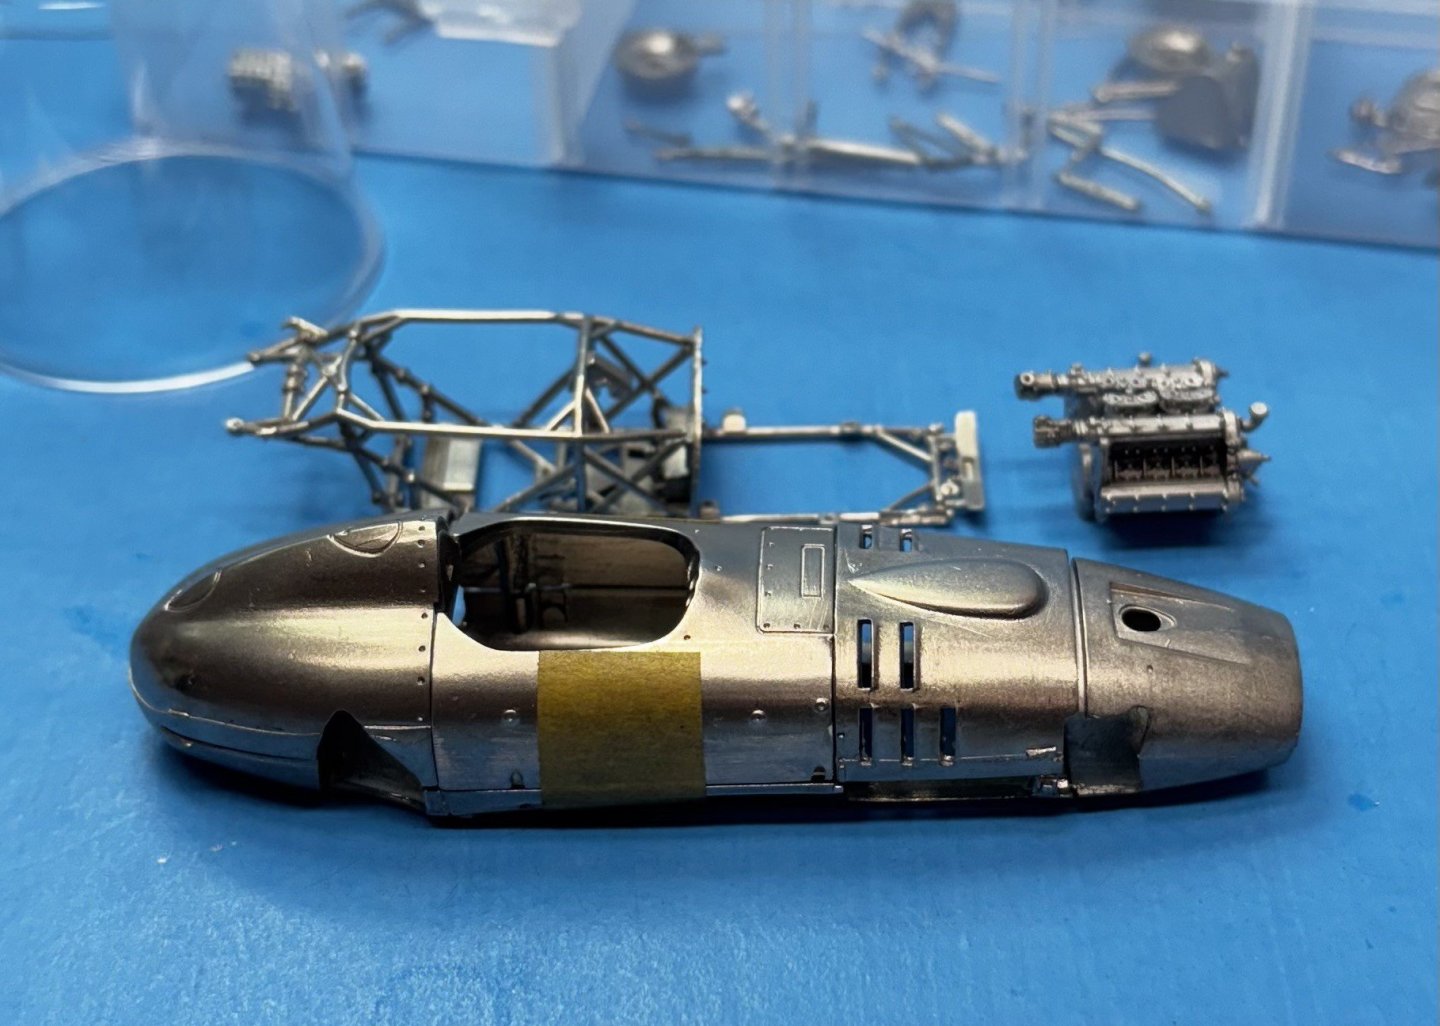
Spending a week to take care of chores around the home, just got back to work on the model. Getting the chassis parts prepped and soldered together, test fitting the engine to the chassis. It’s that crazy looking cocked angle the engine sits inside the chassis. I’ve only ever seen that design on the Lancia and the Ferrari D50’s.


- 73 replies
-
- 11
-
-
-
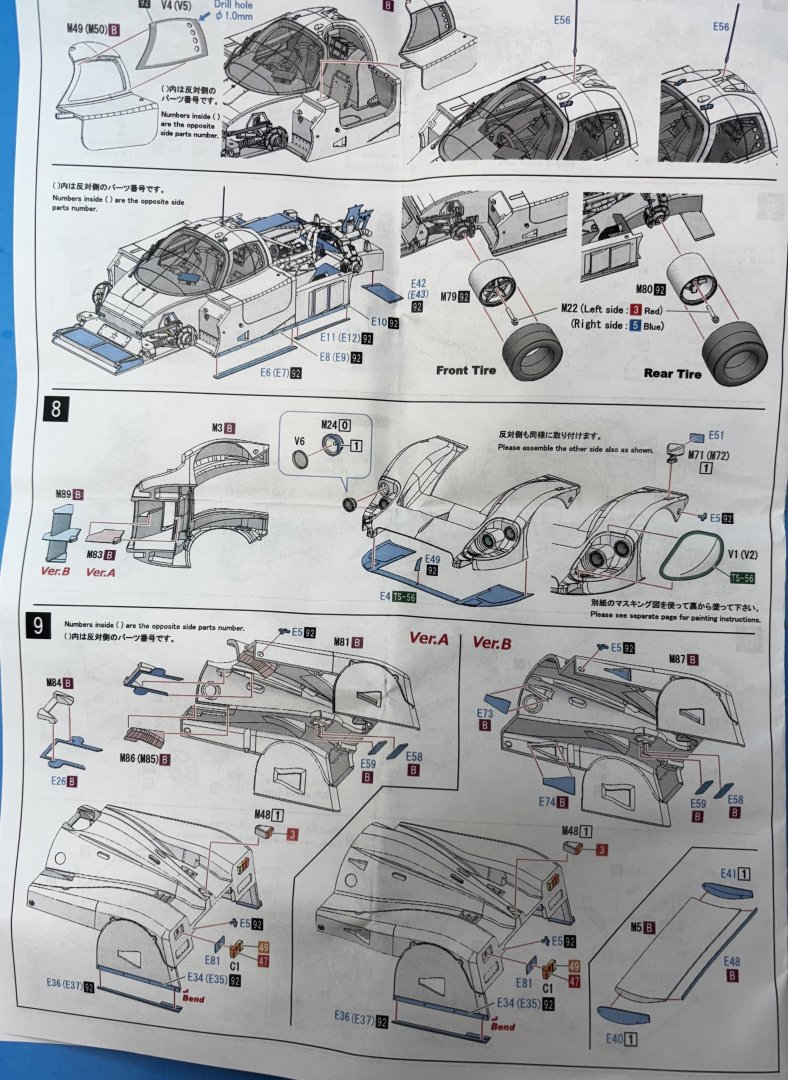
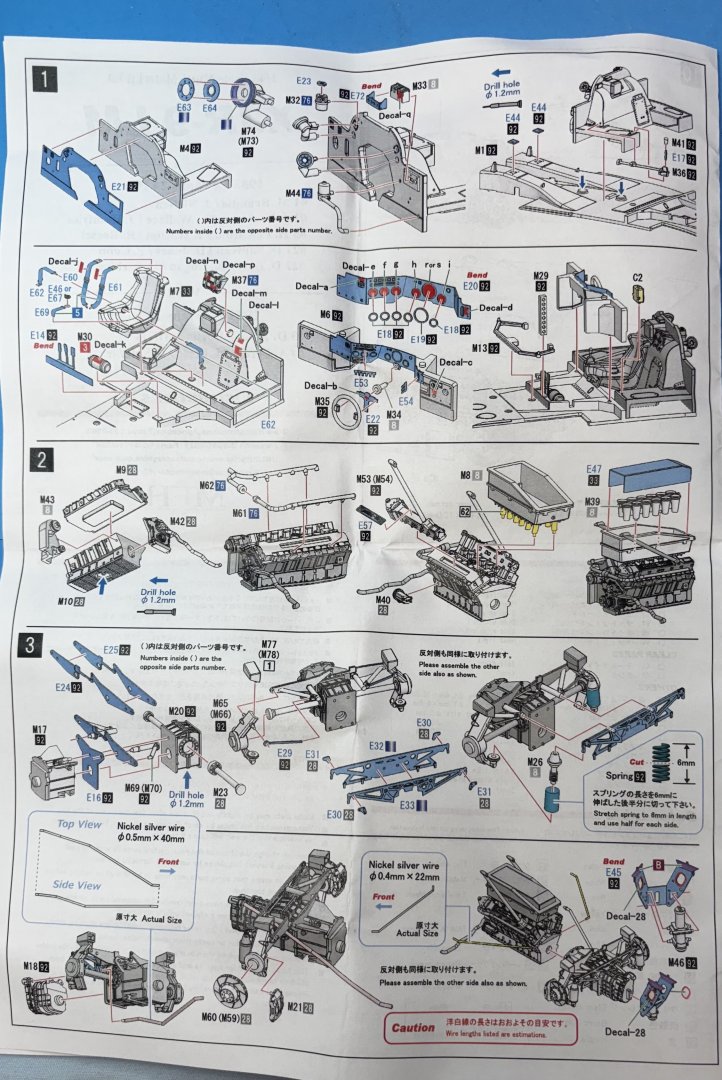
Test fit everything and drill out all attachment points as necessary. Watch a lot of MFH build videos. This modeler in particular has some very good tutorial videos that are helpful for beginners to MFH. (1124) Motorsport in Scale - YouTube
-
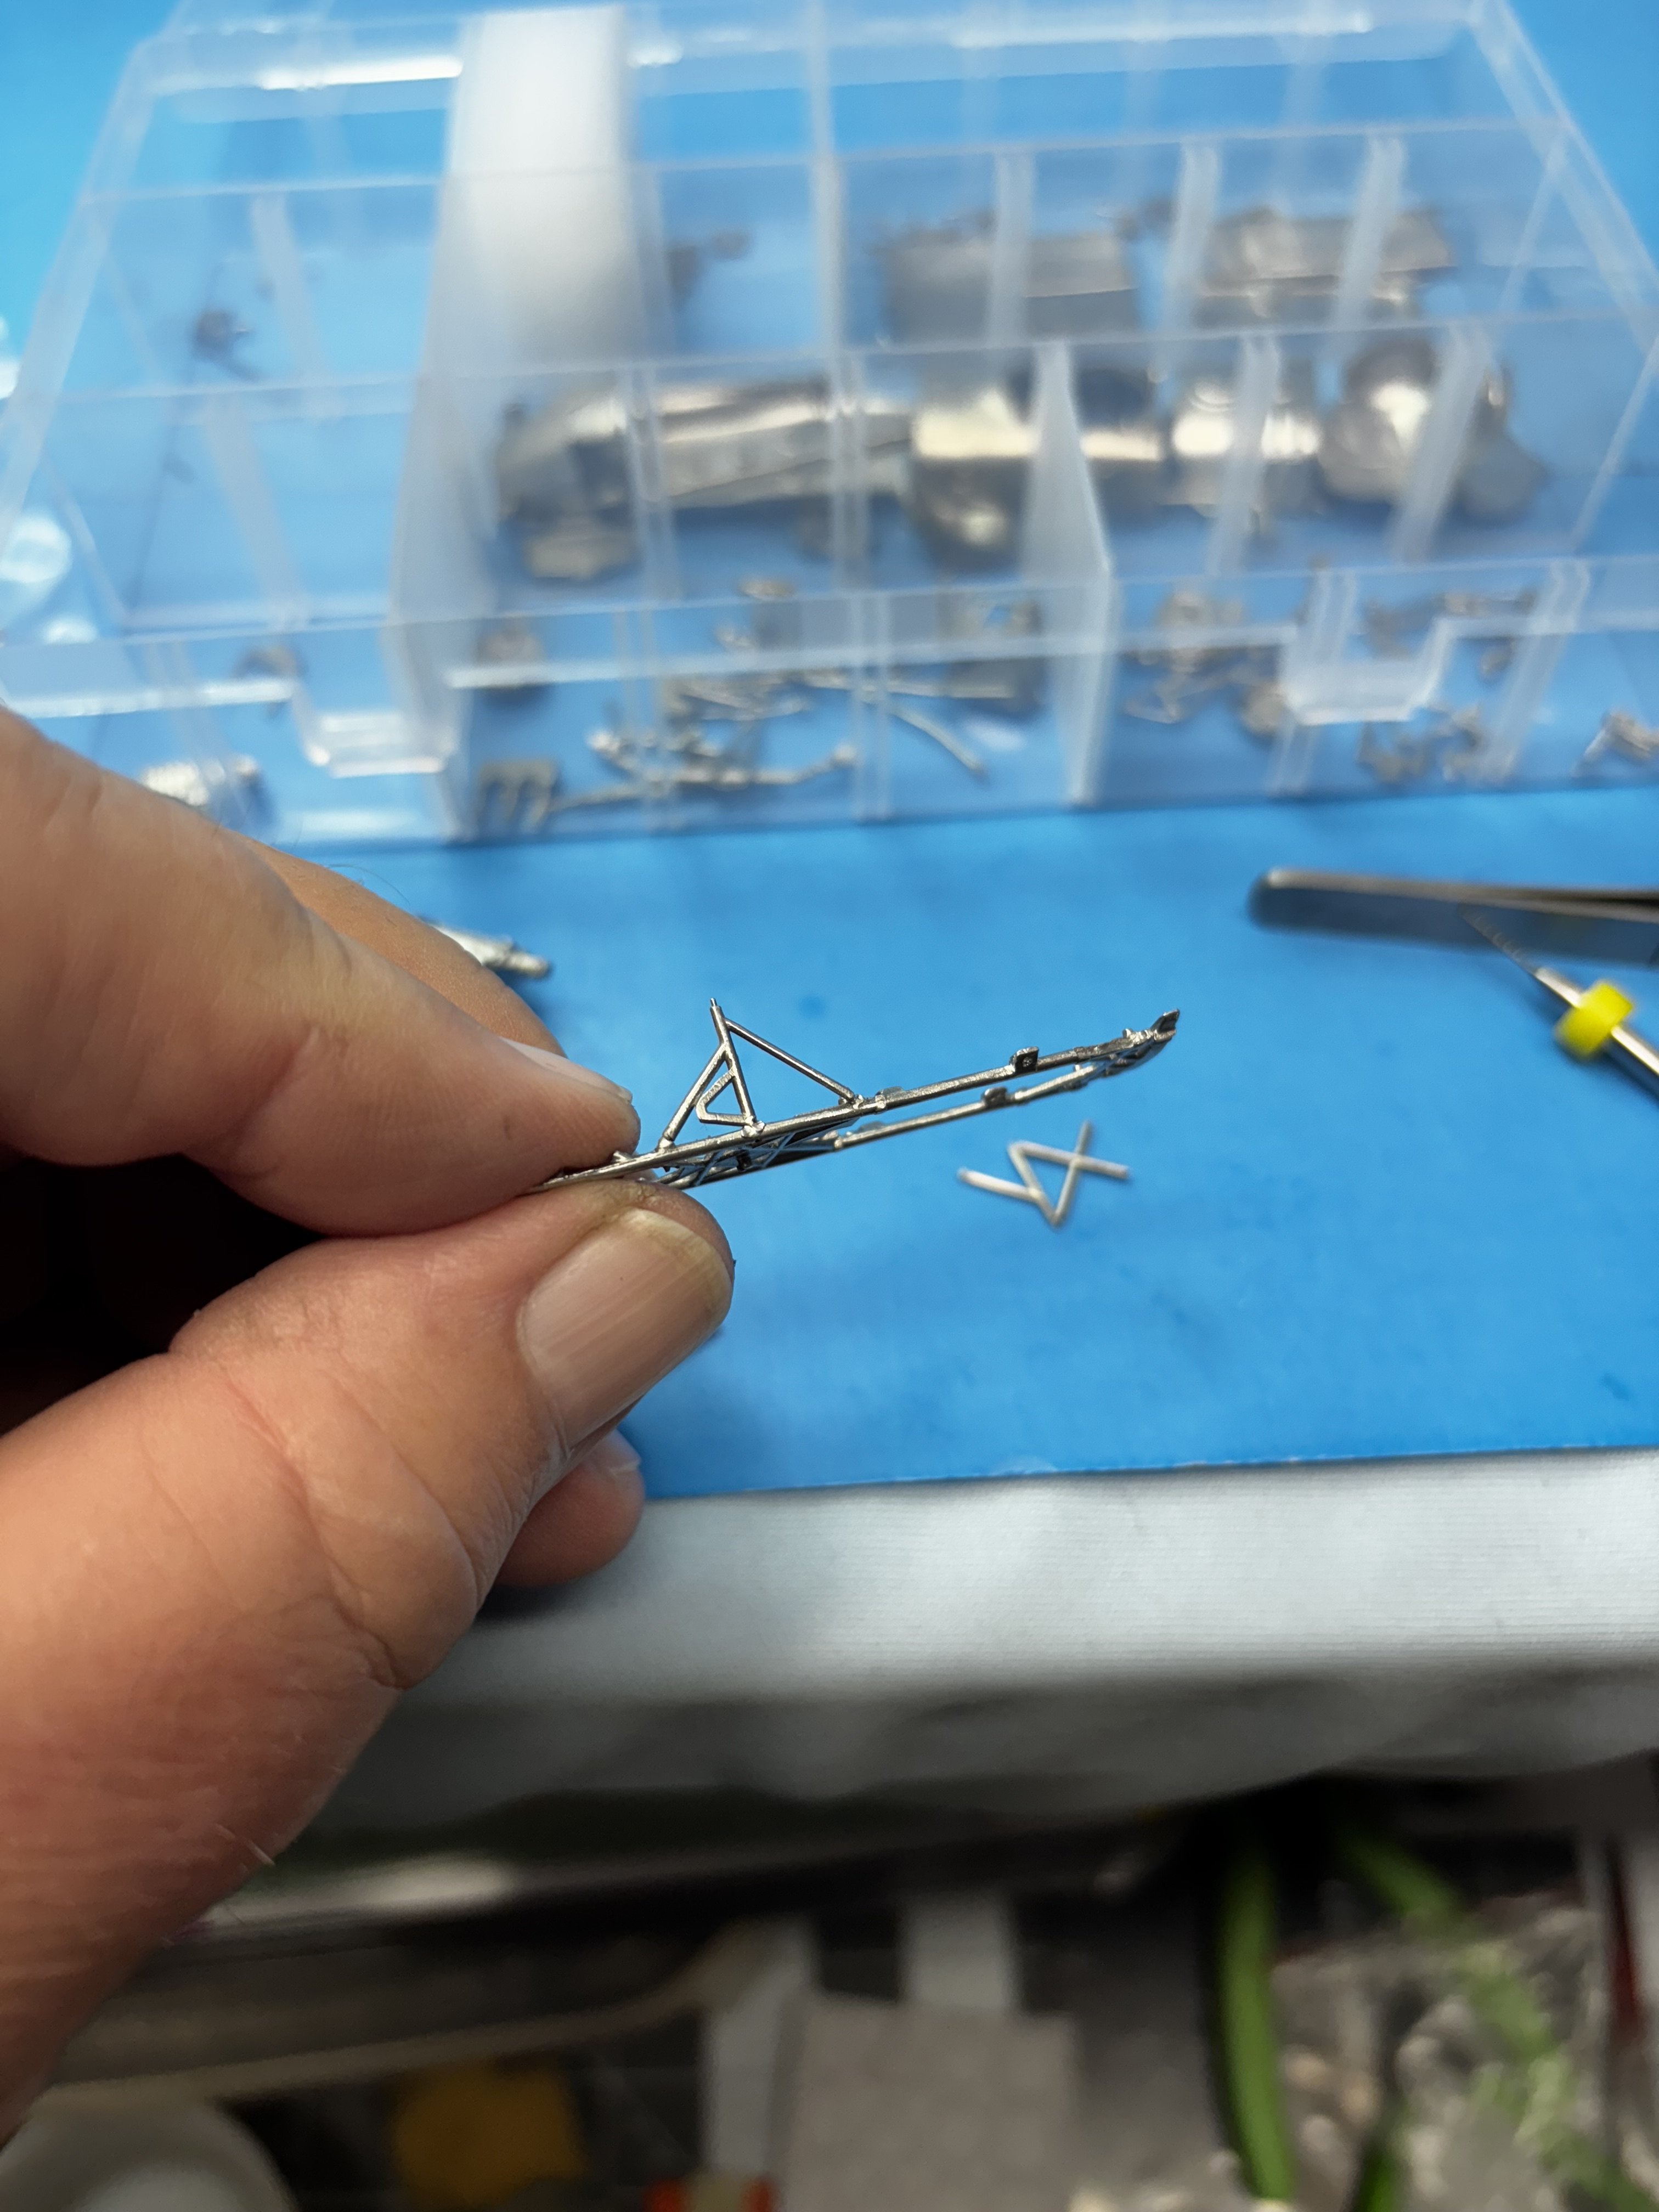
Generally I solder at 400 degrees C. I was warned that MFH white metal has a low melting temp. As such, there is a 70 degree C solder that’s specially made for white metal. What I found when testing the solder and flux on scrap pieces of MFH white metal, it would indeed melt with the iron set at 400 degrees C, however, I had trouble getting the 70 degree C solder to melt at anything less that 300 degrees on my iron. I found that as long as I don’t leave the iron in place too long, that 300 degrees setting works fine on these delicate parts. I feel certain that if the iron was left in place too long, it would likely melt the white metal. For parts this small, CA glue did not work out adequate to the task of cementing the parts together and that is why I resorted to solder. So far, so good.
-
After practicing a bit on scrap white metal, held my breath and soldered together the tiny tube chassis parts. First steps were successful.
- 73 replies
-
- 11
-
-
-
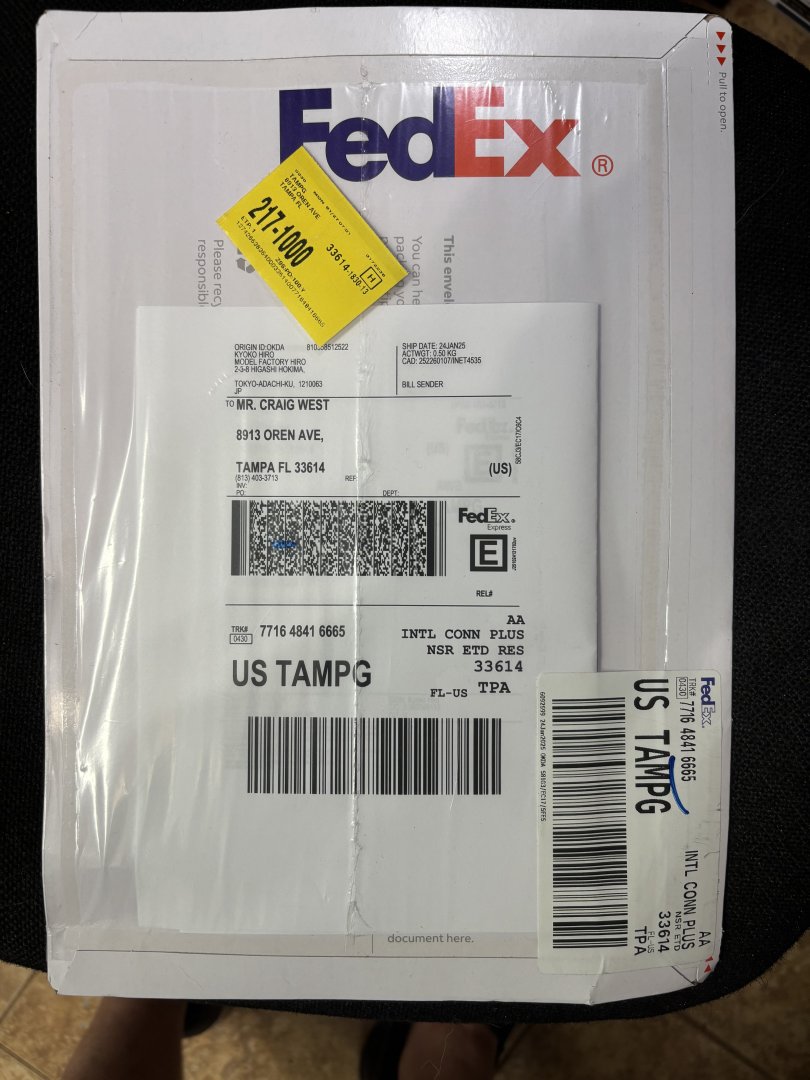
Turned out better than I expected. Parts arrived from MFH in Japan yesterday. Amazing customer service.
- 73 replies
-
- 10
-
-
Jaguar XJR-9 LeMans by CDW - Model Factory Hiro - 1:43 Scale
CDW replied to CDW's topic in Non-ship/categorised builds
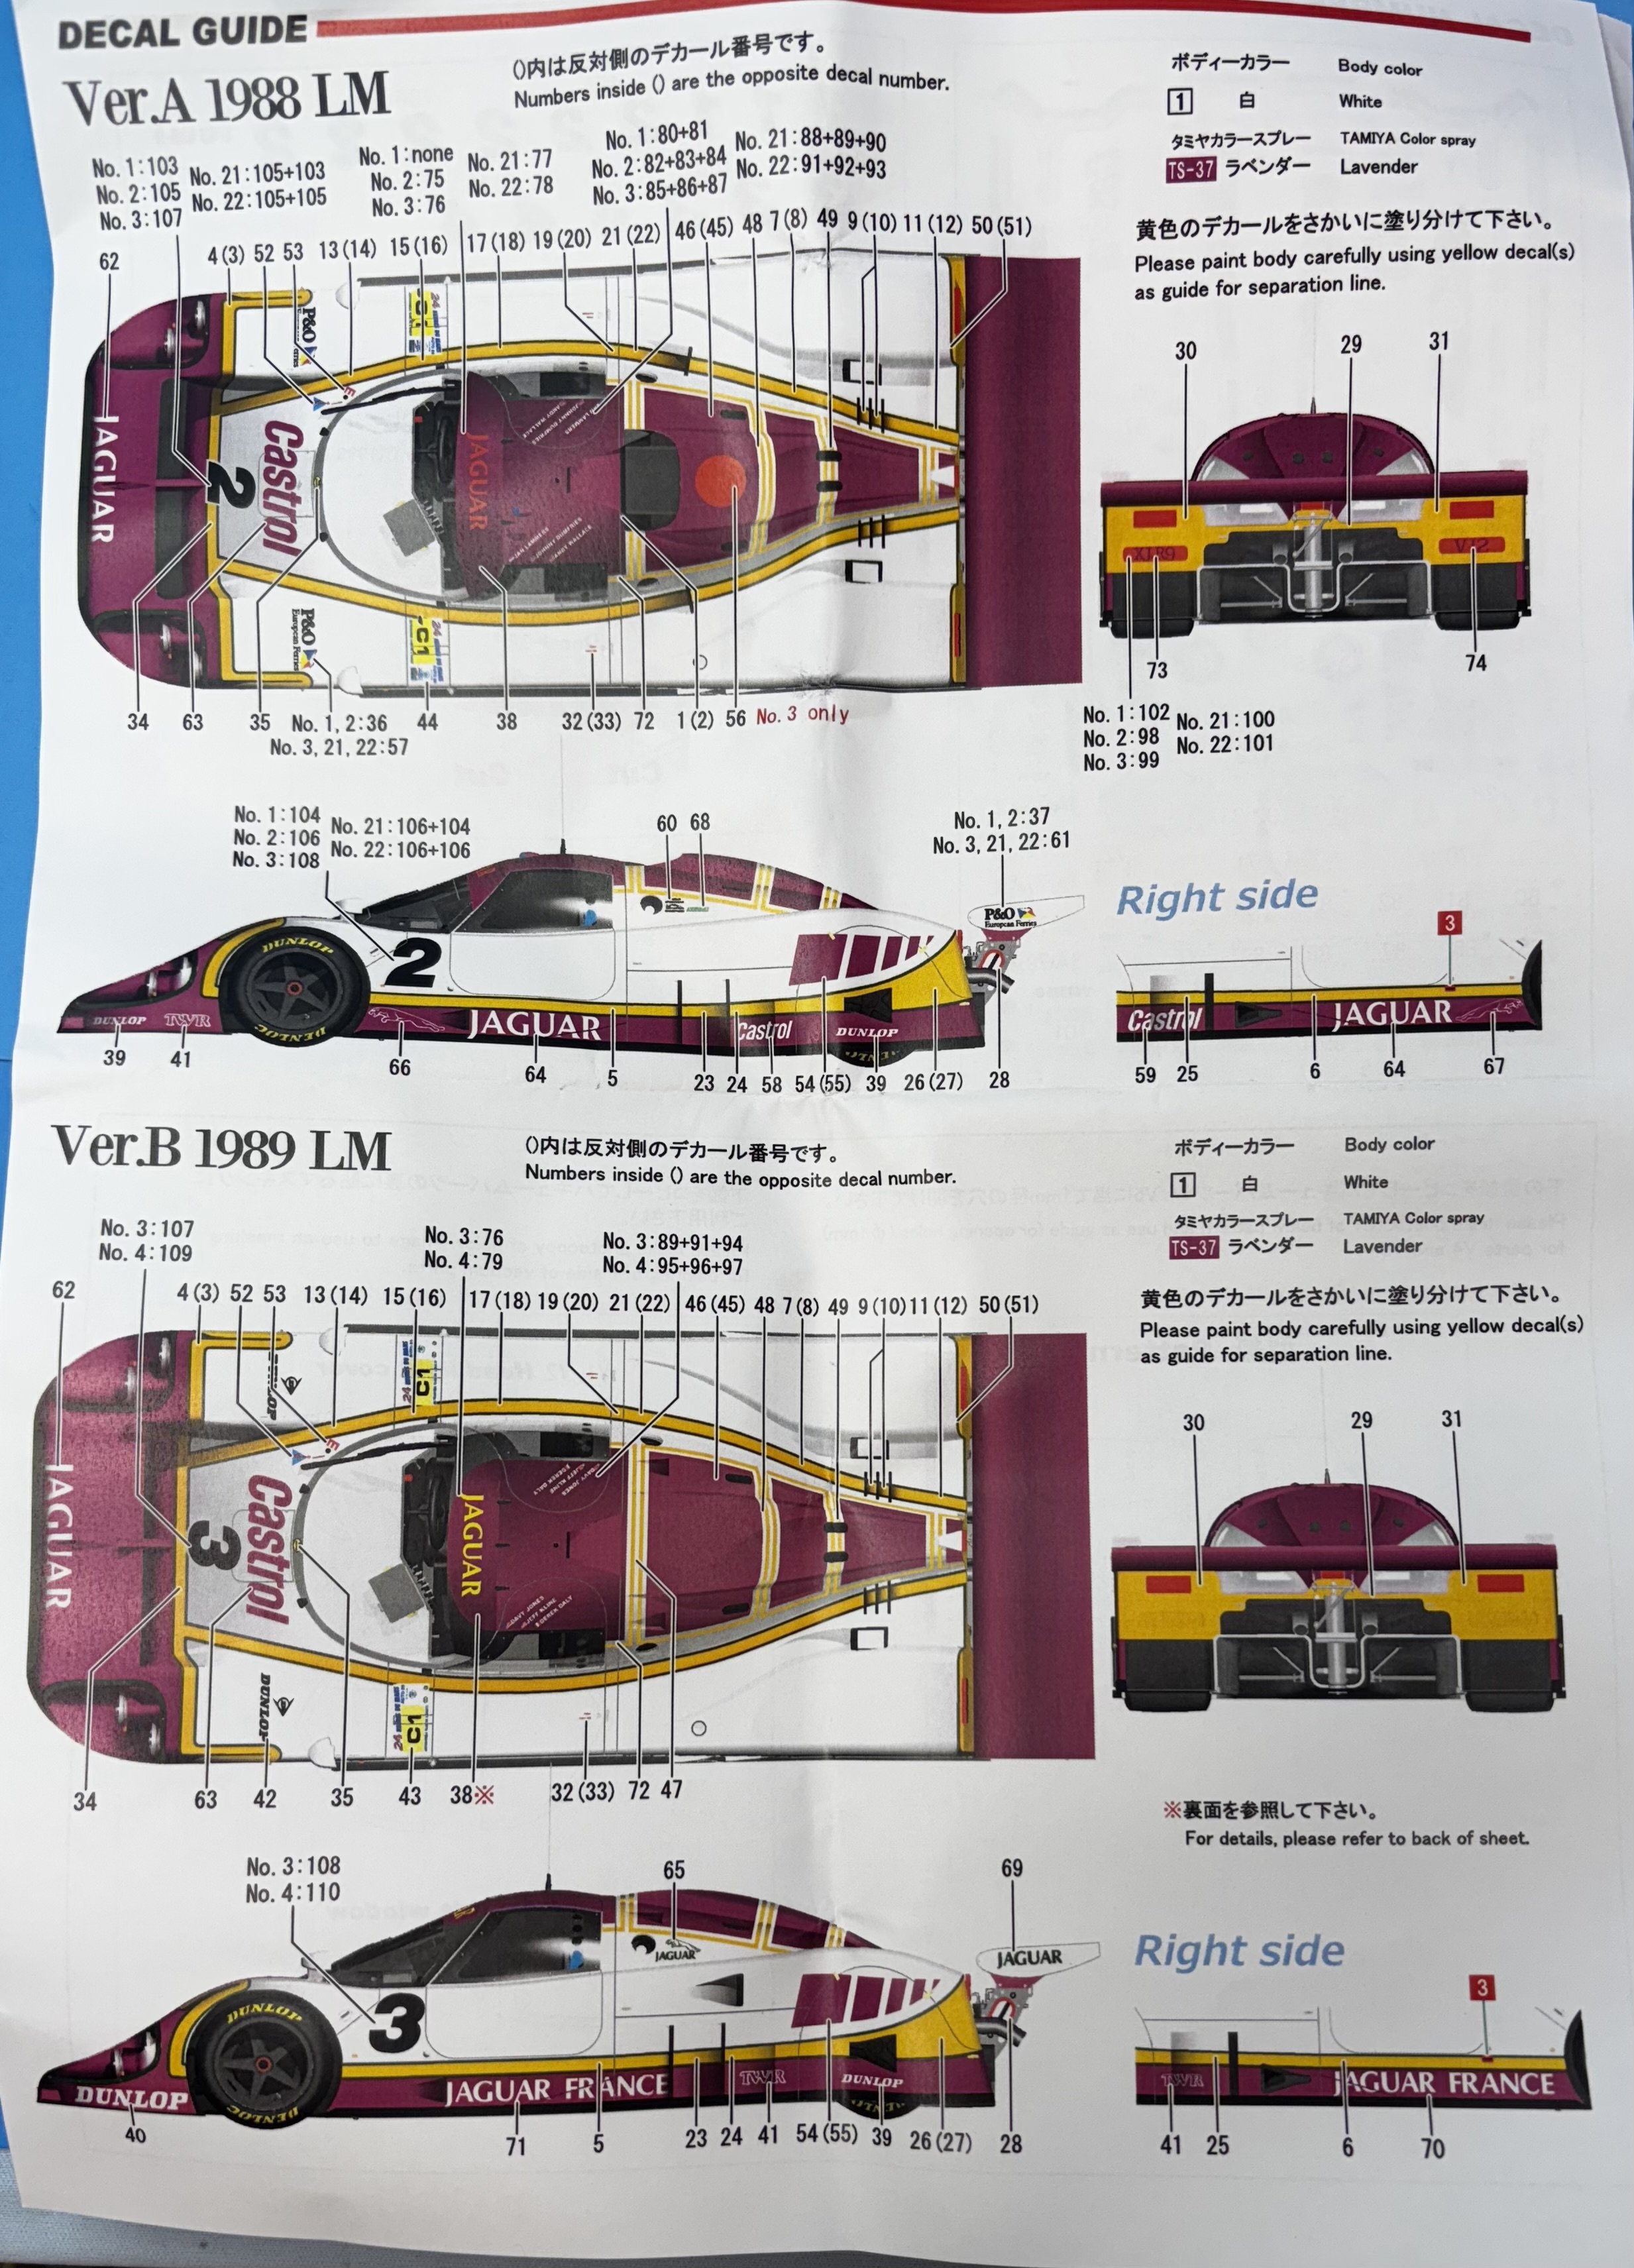
Probably but there may be other differences. For sure the decal sheet would be some different. -
Rob Is this the tape you tried? Amazon.com: Kaisiking 1mm x 50M LCD Repair Tape for Phone Screen, Adhesive Tape with 1 Tweezers for Cell Phone, iPad, Tablets, Laptops, Camera : Electronics I saw good reports on that tape from the MFH builders Facebook page.
-
Jaguar XJR-9 LeMans by CDW - Model Factory Hiro - 1:43 Scale
CDW replied to CDW's topic in Non-ship/categorised builds
From what I've read, their parts are white metal with a low melting temperature, but that's about all I know. -
Jaguar XJR-9 LeMans by CDW - Model Factory Hiro - 1:43 Scale
CDW replied to CDW's topic in Non-ship/categorised builds
I bought this kit from a shop in Germany. This was the only version of the kit in stock. Not sure when or if MFH has released other versions to include the open wheel version. Will be sure to look for the inventory pages on the MFH site. I need to explore their site more fully. -
Thanks! Will wait to see what gets offered in March and following months. The Fiat doesn't interest me.
-
Jaguar XJR-9 LeMans by CDW - Model Factory Hiro - 1:43 Scale
CDW replied to CDW's topic in Non-ship/categorised builds
I am going to try cleaning my cast metal parts on this kit with a sonic cleaner using a light detergent solution this time rather than the magnetic tumbler, just to see what kind of results I get. For resin parts, which this particular kit does not have, the sonic cleaner is the only practical alternative because the magnetic tumbler drum is not large enough to accept the large resin body parts of 1:12 MFH kits. It will be important to keep the heat function turned off when cleaning the resin so as not to warp the parts.- 9 replies
-
- 10
-
-
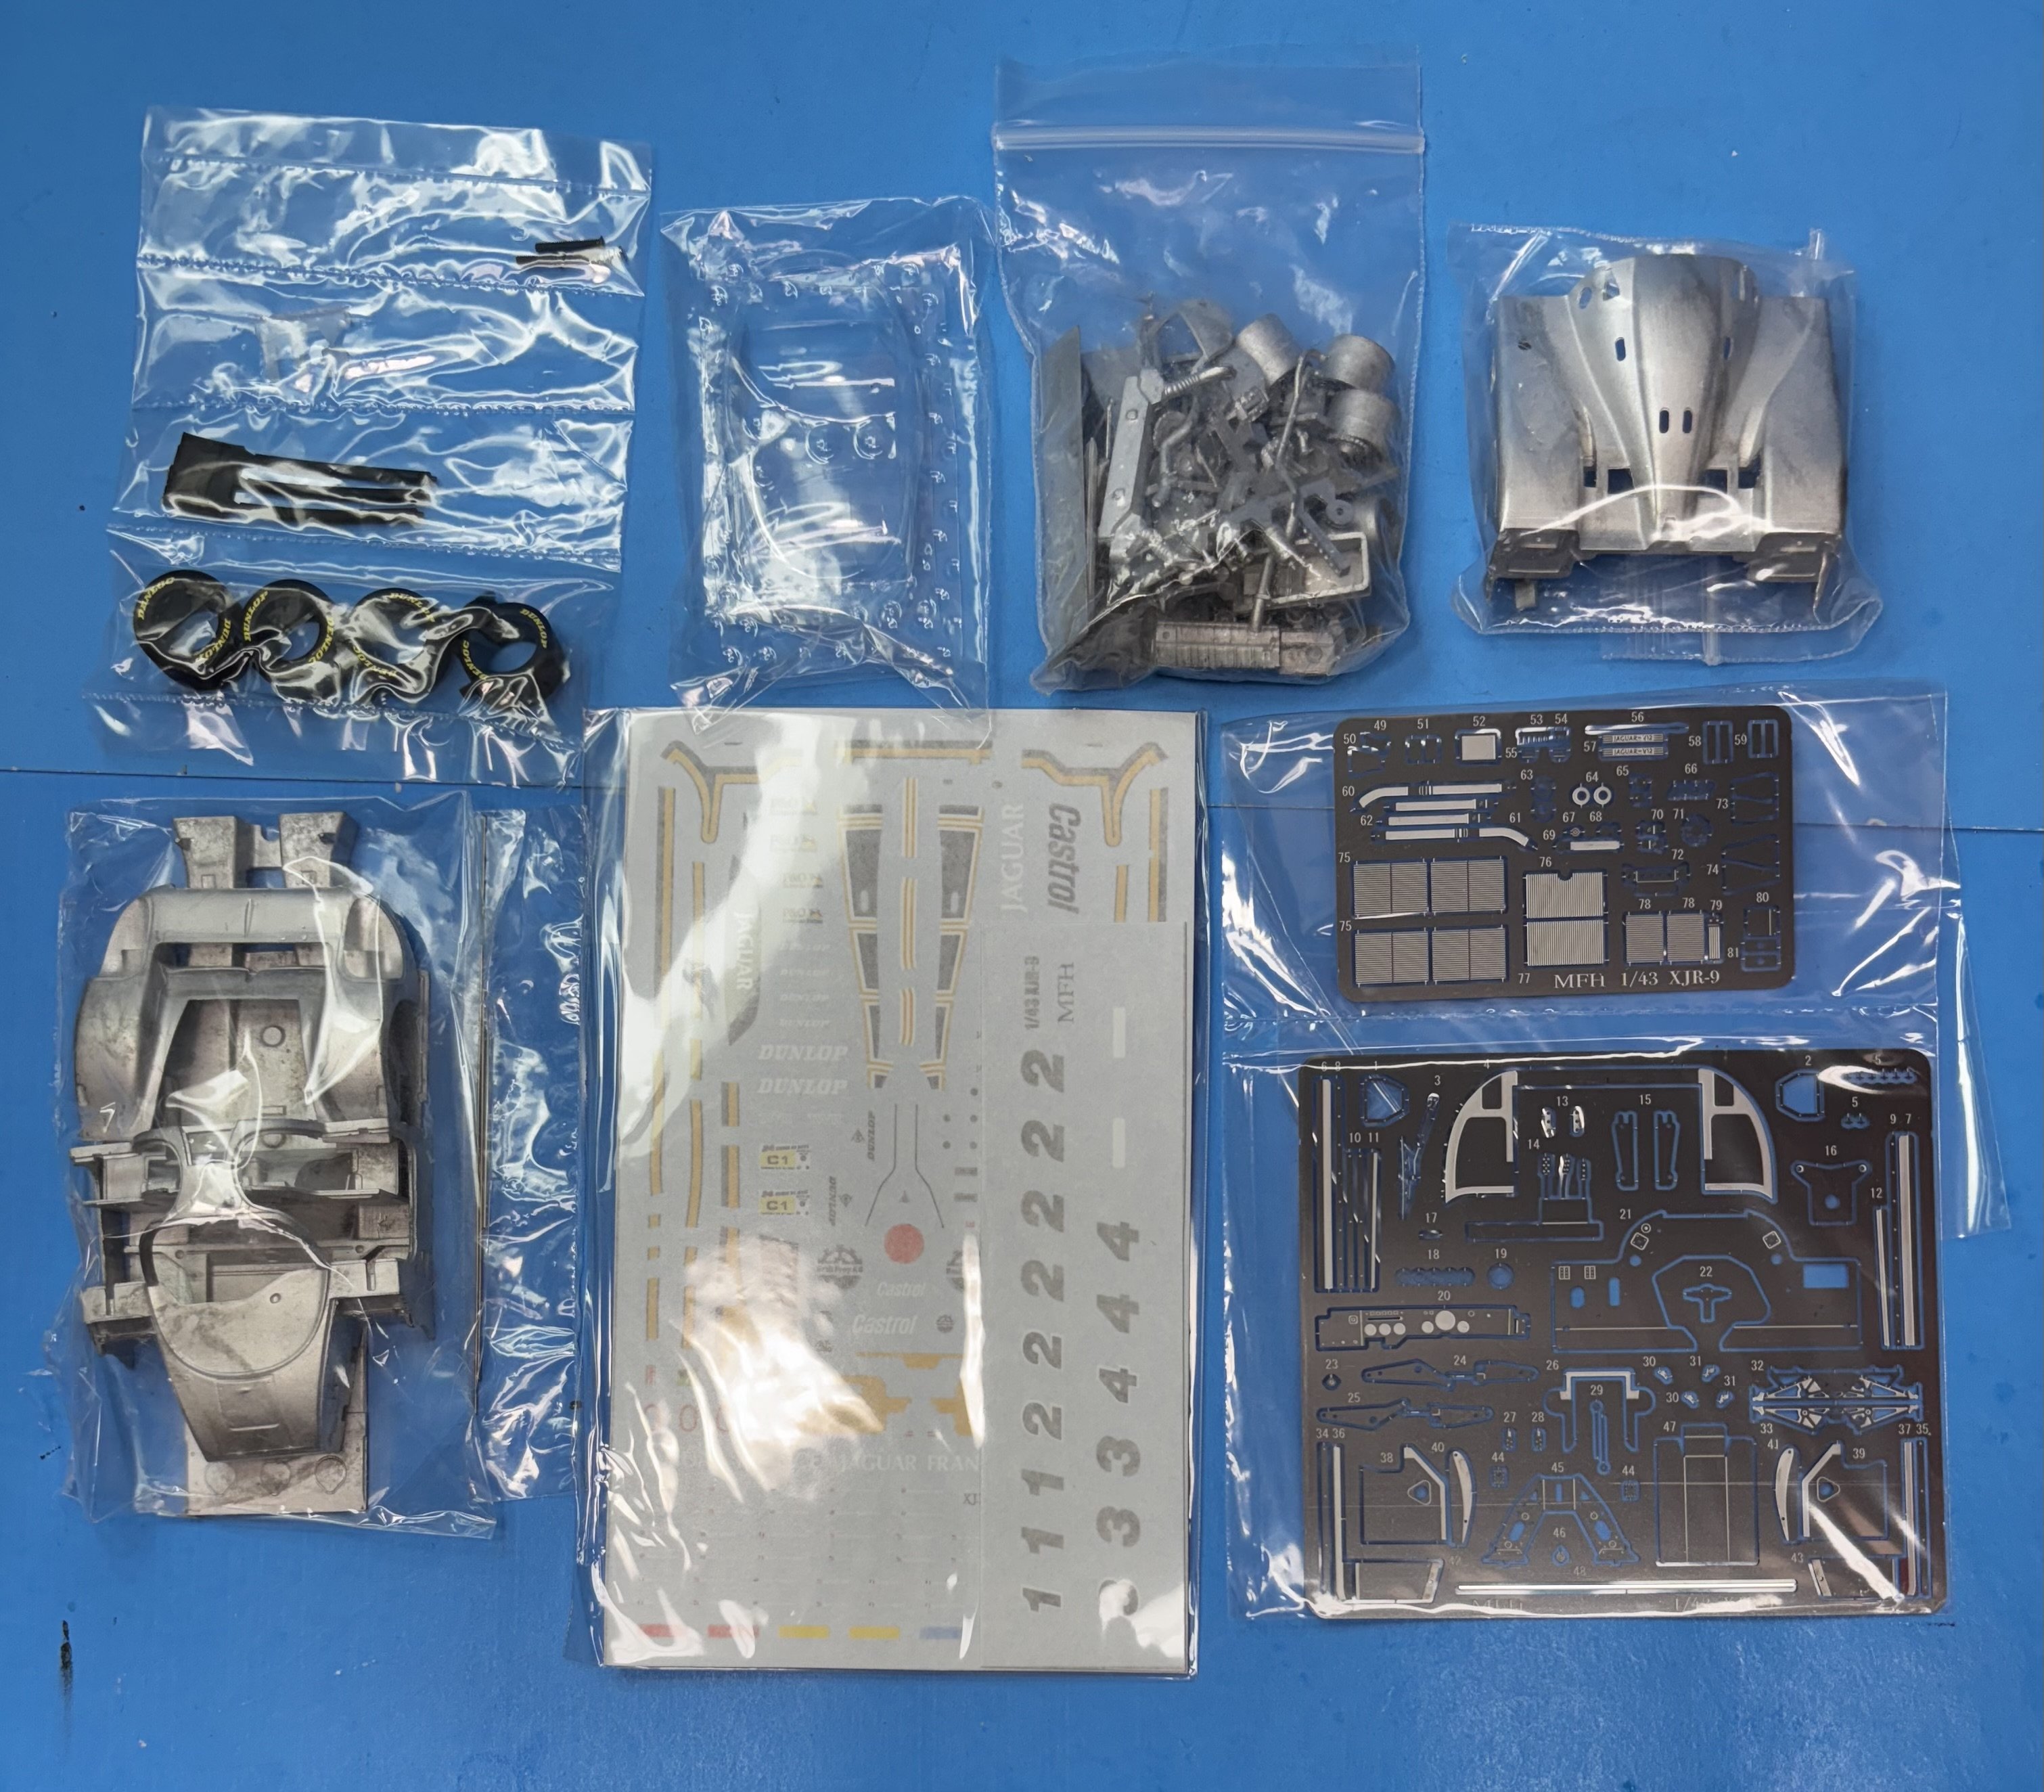
The Jaguar XJR-9 by MFH in 1:43 scale. This introduction shows what is inside the box. Next I must go through the parts cleaning and careful parts inventory stages. It’s my intention to do this with all my MFH kits primarily to insure my kits are complete with no missing parts. I am seeing a trend both from personal experience as well as commentary by others to suggest missing parts are a common problem. I would rather get all that cleaning, sorting, organizing, and inventory out of the way as soon as possible.


-
I got word back from MFH to say my missing parts are on the way. Should have them late next week. Wonderful service once again.
-
An excellent adaptation to suit the need. Well thought out and performed, Rob. MFH advertises on their website a new model offering will come out in February. Have you heard any rumors on what this new kit will be? I have not heard anything at all.
-
Very nice finish on your Porsche, Gary. I thoroughly enjoyed following along. One of my fellow high school graduates, scored the highest score possible on the SAT's. As a graduation gift, his dad gave him a brand-new Porsche Targa. While his was white, your model reminds me of his graduation gift. He later went on to get his law degree and has been a distinguished attorney in a long career here in Tampa, Florida.