Philthy
-
Posts
66 -
Joined
-
Last visited
Content Type
Profiles
Forums
Gallery
Events
Everything posted by Philthy
-
 Great link Lionfish! This is exactly what I was looking for. I am a little committed at this point with the bow filler blocks but I plan to apply this guide at the stern section. I failed to measure the actual curve profile for the bow section but should be able to wing it if I go slowly and take the material off a little at a time. Thanks a bunch!
 -
Hello fellow builders! This question may seem like a no brainer to some but I have not really seen any "how to" information on this. After the bulkheads are secure most instructions tell you to fair the edges of the bulkheads to accommodate the planks and ensuring that the planks lay nice and flat. So how do you go about doing this? I honestly just take a flat file and go to town while holding my breath in hopes of not screwing up (I actually snapped my last build in half when applying too much pressure with the file lol) I might be thinking to much into this in thinking there is an actual technique or method for this step. Thanks a bunch in advance and please have a great day!
-
If you guys have any experience or tips when it comes to shaping filler blocks I am all ears at this point. I started out by more or less gnawing at the wood but if there is an actual "method" please share the secret To keep the profile straight in my mind I have to rotate the sides I am working on or I am worried about taking to much material off one side. Tomorrow should be fun and hopefully not laced with profanity lol
-
Hello Dave, Glad I stumbled on your very impressive build log and for being your first build I think your just showing off a bit It looks like the card stock worked out great for your swivel guns (I might have to barrow your technique). In the past I have used household aluminum foil folded many times and then cut to the desired thickness. I use this trick a lot when brass is called for simply because I hate fighting with brass. I think your idea using CA glue to seal the cardboard should work out just fine especially with a coat of paint on top. More than one way to skin a cat in the world of model ship building it seems. I look forward to following your awesome work.
-
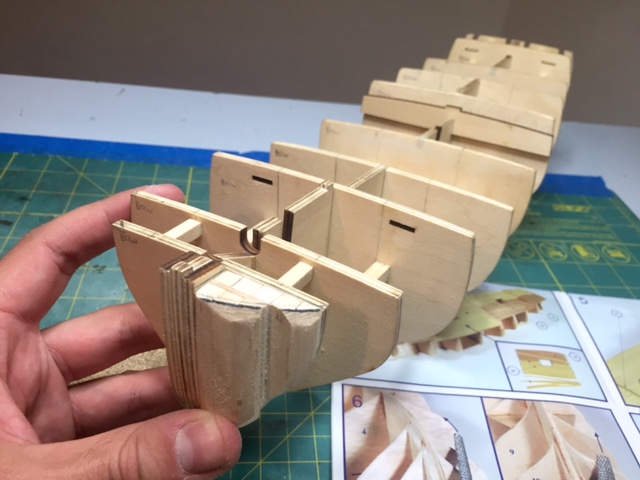
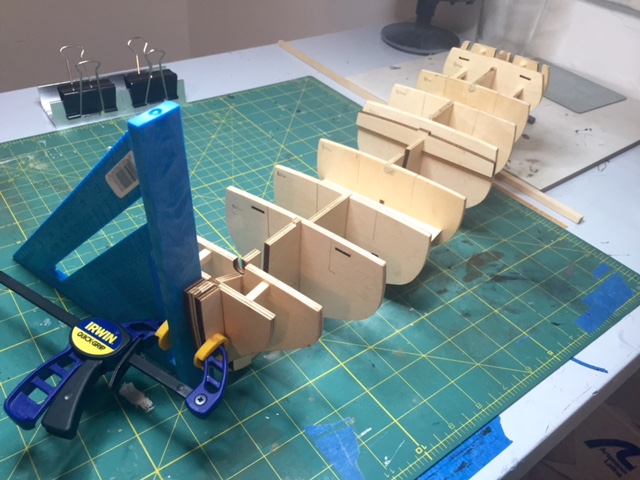
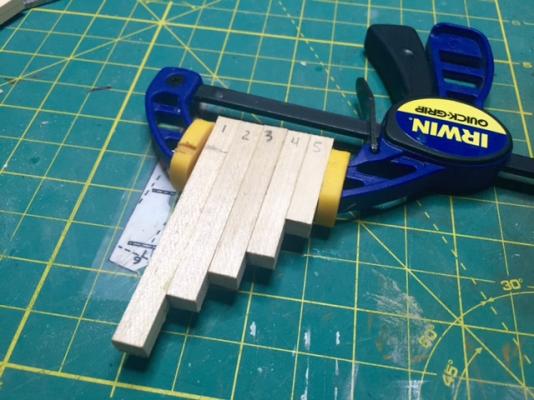
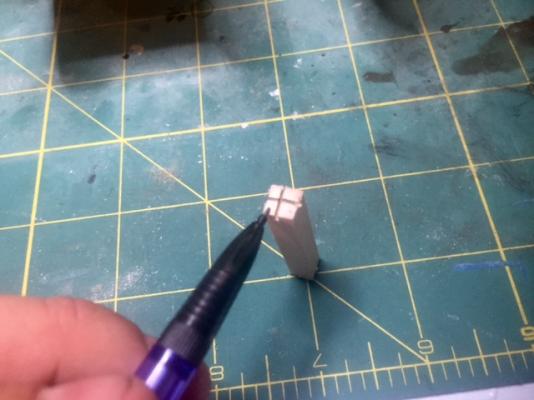
Welcome back sports fans! Today has seen some head scratching and the realization that I am not much of a wood carver artisan lol. I had a hard time finding wood blocks that would be suitable for filling in the bow and I didn't want to drive all over town in search of this item. So being a boy scout, a Marine, and mad genius I figured I would make my own wood filler blocks out of the 1/4 in strip wood all ready at hand. I started off by cutting and labeling the pieces to roughly match the bow with plenty of material to shave down later on. I then glued each of the strip wood together to roughly give me the shape needed of the filler block. I then took a pencil and traced out the profile lines from the first bulkhead, front most point on the false keel and from the top portion of the deck. Now I am slowly making progress carving the wood filler piece to match the hull profile desired. I have to say in a total of 3 wood ship models built this is the part that I dislike the most. Filing down the bulkheads and now the bow piece flat out sucks sometimes! So tomorrow I plan on making some more saw dust as I press on cutting, shaping, and sanding. For this I will be using the good ole exacto knife, 60 grit sand paper on a block, and a Dremel tool if I feeling brave enough around power tools.

-
Bracing has been completed and I am happy with the results. There is still about a 1 mm difference in some of the bulkhead distances that I was unable to fix with shims and sanding but this should be manageable during filing down the outside edges of the bulkheads in preparation of the first layer of planking. The keel was also reenforced and straightened out however, with still about a 1mm bend in a few locations. I figured I would only cause more damage if I went back and started tearing out bulkheads and braces to fix this. I might just be overly critical with these discrepancies but all should be ok moving forward. It seems pretty silly and cheap to construct the false keel out of plywood and a thin piece at that. Looks like I am going to have to run to the hobby store for some wood to use as filler blocks at the bow and stern. I should also pick up some strip wood for when it comes time to shim / fair the bulkheads to accept planking. Not bad for a weeks worth of work


-
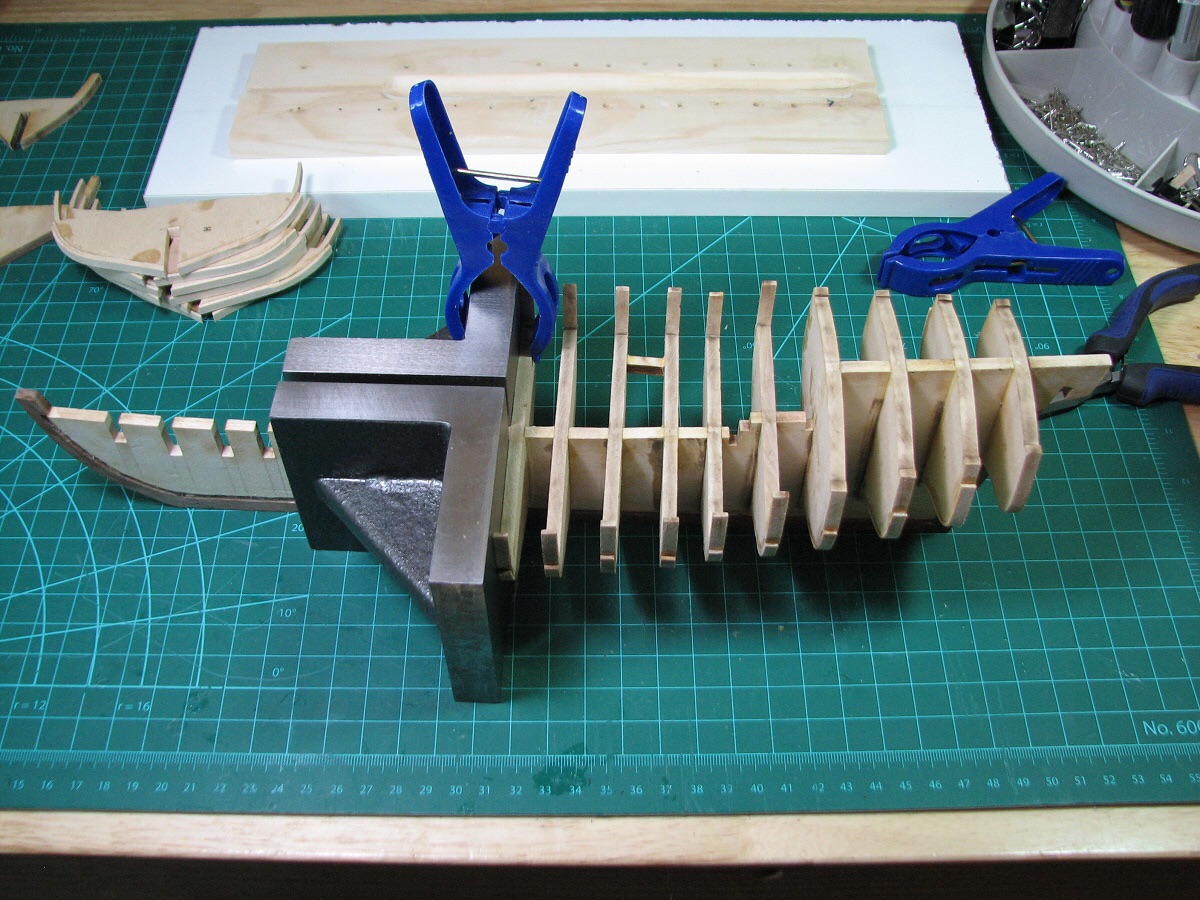
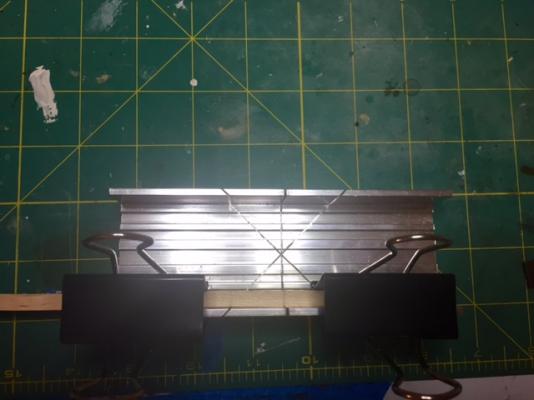
Hi Riksgewijs, I agree with you about having something to hold her steady during this step. Earlier in the log I was trying to use the fare a frame jig but sadly there is not enough material below the bulkheads for a solid hold in the jig. (I didn't want to add the keel trim pieces yet) So I had to improvise a little bit with the clamp and square. I understand this is not a perfect solution but it appears to be keeping the keel on a 90 deg angle for taking measurements and ensuring the bulkheads are evenly spaced on the port and starboard sides.

-
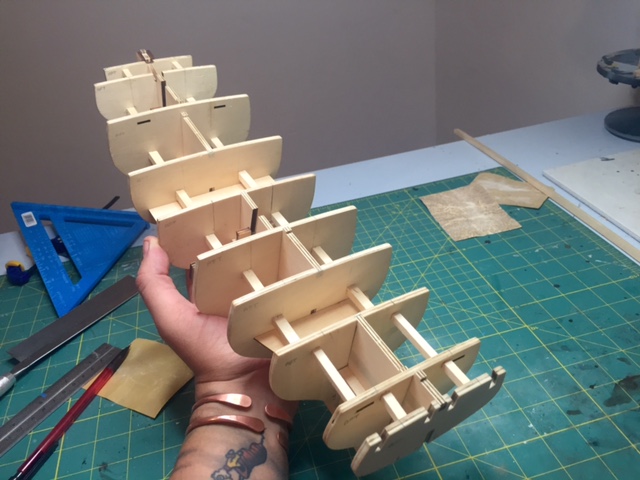
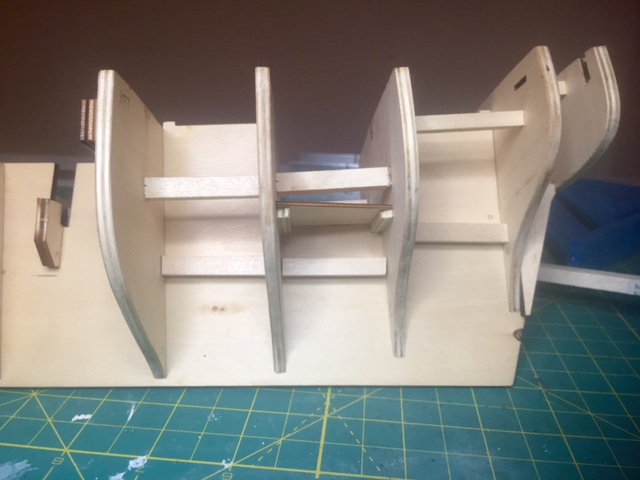
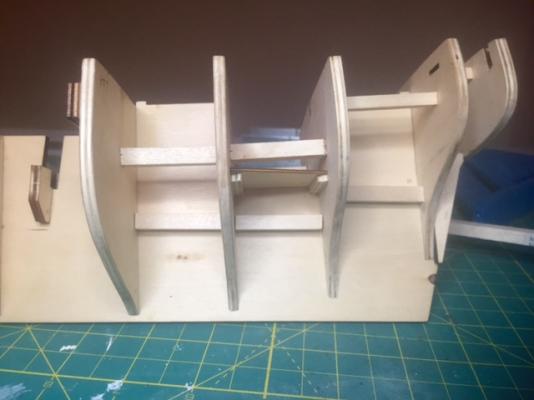
Tonight I managed to get 3 bulkheads braced up as well as adding some supports to the keel section. I can really feel the weight that is being added on but more importantly the keel and bulkheads are straight and it takes quite a bit of pressure to bend them. This should pay off when it comes time to file down the bulkheads in preparation of planking. From an initial test with some scrap planking I can see I am going to need some shims to even things out and prevent noticeable dips in the hull but that is a task for later on down the road. I should get some time this weekend and hopefully finish up the bracing step. Good vibes so far
-
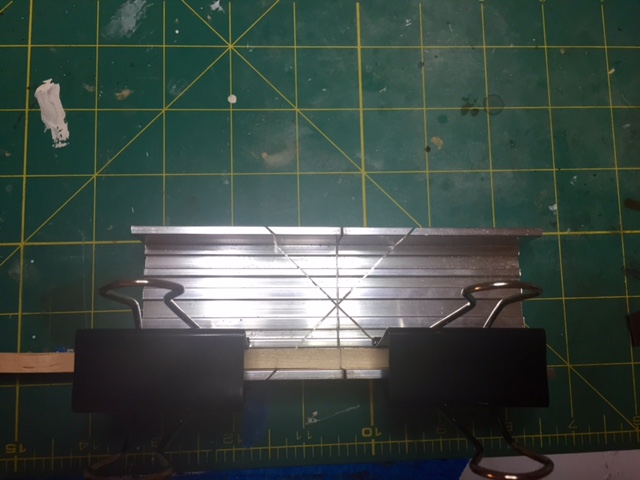
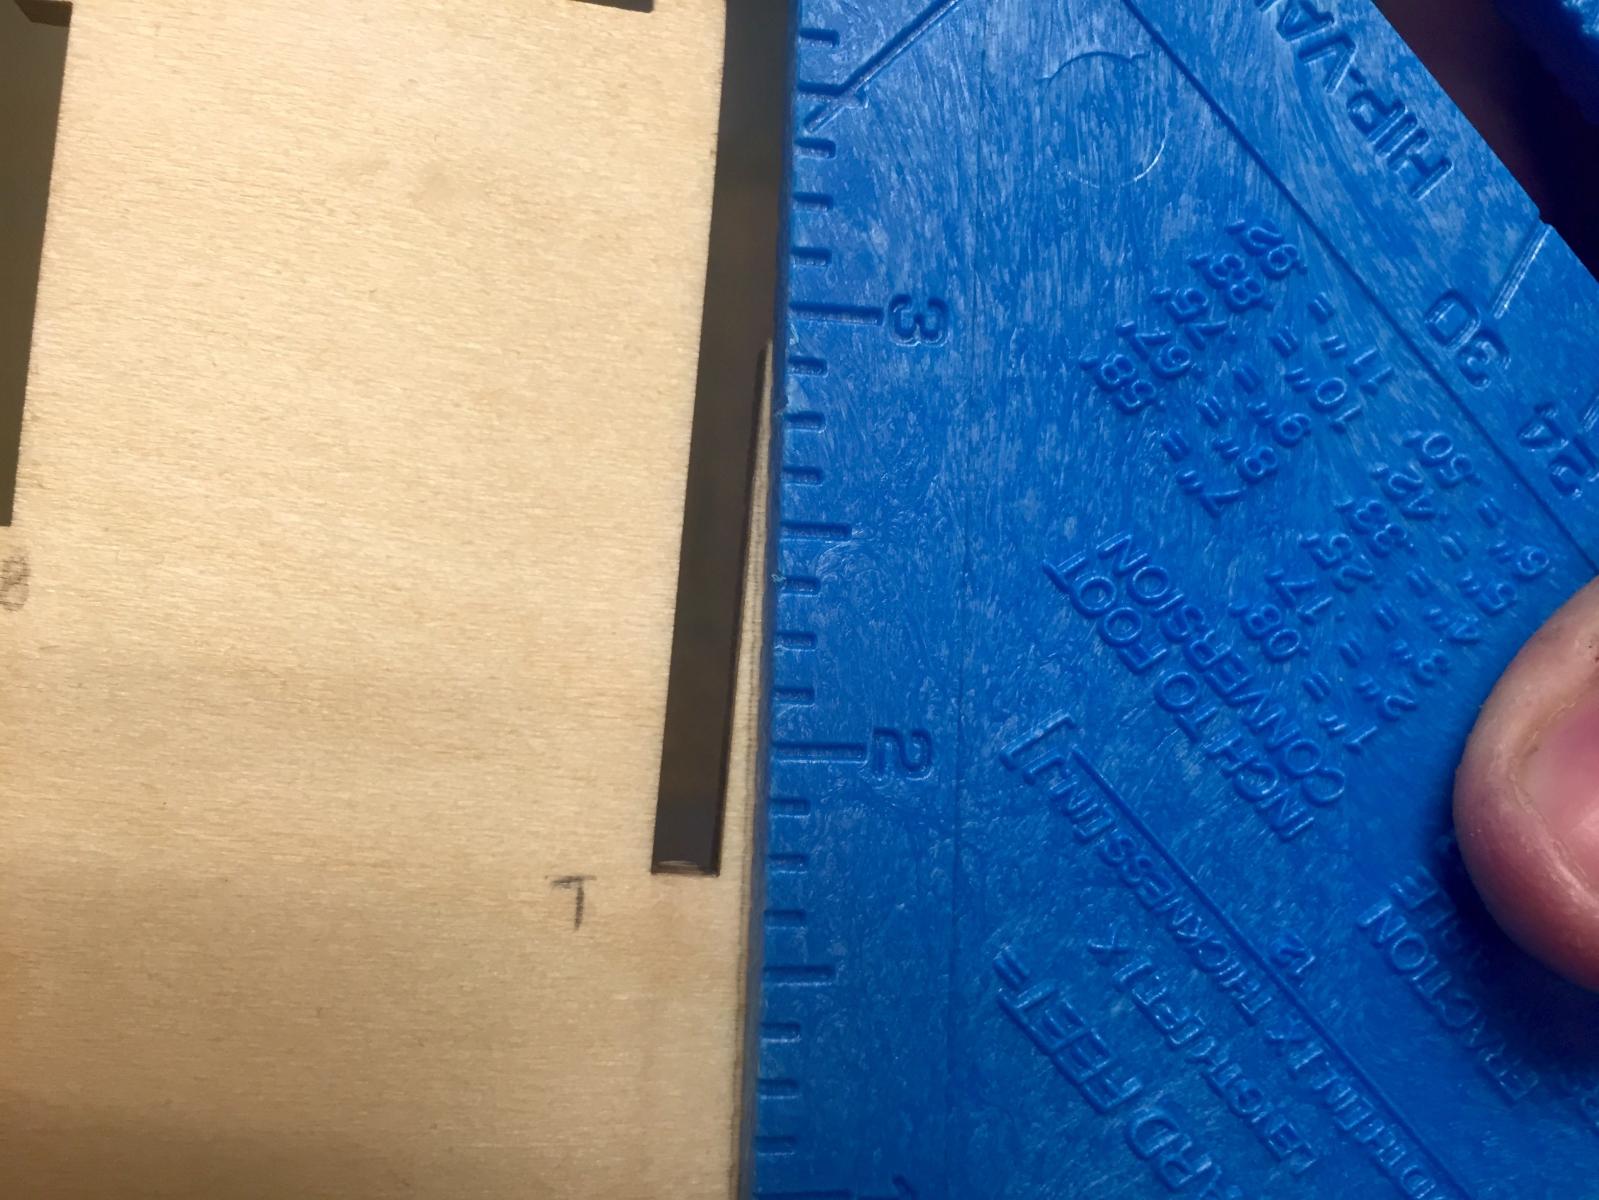
well the clean up was quick and we are back into strengthening / spacing out the bulkheads. For this I can thank my girlfriend for picking up some 1/4 stock wood from the hobby store when she was looking for material foe her viking halloween costume (score). I am measuring equal distances from both sides of the bulkheads and cutting the stock wood to secure between the two. I adopted a method of securing the bracing from Gunther's build log by cutting a cross into the ends of the cut stock wood. This should improve the amount of tight bond glue that is being use to secure the bracing. I also measured about 1 in from the keel on either side of the bulkheads as well as 1 in down to mark the location for my bracing. This might be a little over kill but hey I need to keep things organized (or at least appear so). I have been having a hell of a time making 90 deg cuts with my stock wood on other builds when using a miters box. So far the binder clips have really improved the accuracy of my cuts. A little red neck engineering seems to be the norm for my builds Im not too worried about having visible bracing in the cargo hold areas of the sub decks. I plan to black these out as they should be barely visible from topside once the decking is installed.

-
Hello forum! Well first off super pumped after the OSU vrs. Penn State game. Go Buckeyes! Now I can get back to the build but first I need to clean up the work station. I was getting a bit aggravated at the build but then had a chance to sit back and take a look. I really need to clean up the work station and focus on one thing at a time. I need to remind myself not to worry 3 steps ahead when I need to focus on the task at hand. It seems like this build log is gaining some traction as far as visitors and comments! Thanks a bunch guys. John, Thanks a bunch for your comment and heads up about the build. I sort of had my doubts as far as the accuracy of this kit but you are absolutely right. Im going to continue to approach this build as a learning experience. This is only going to make me a better shipwright in the end and hey... its still wicked fun. My plan going forward is to take this build one step at a time and improving upon the kit when and where I can while loosely following the instructions. I plan on referring to the forum for other schooner type builds and apply what I see to this kit. With that being said I have been refereeing to Gunther's build log for his amazing Armed Virginia Sloop. Granted its different type of ship and different manufacture but his build sequence and detail is a great asset for a newbie like myself. Joel- I referred to the plans and the bulkheads are indeed not on a 90 degree angle just like the actual kit itself. No worries though, since AL decided to make up and package this ship out of their own imagination p.s. John, do you happen to have a build log or completed photos of your Independence? If so please let me know as I am always on the hunt for info Well with a full glass o' wine its time to clean up / organize some and go about installing these bracings.
-
On a bit of a side note I have been doing some online research about the schooners and sloops of the Continental Navy around the 1760's / 1770's and it is some very interesting stuff. I am finding out that digging up information on my specific ship is difficult to come by. The instruction booklet said this ships claim to fame is she carried dispatches to and from France during the early stages of the American Revolutionary War and she was the first ship to receive a salute from a foreign nation. Unfortunately, I have came across conflicting information saying another ship was the first to receive this honor. At this point I am very skeptical as to the accuracy offered by the kits manufacture. Another point I find interesting is the lack of information from the Continental Navy on her such as plans, actions participated in ect. As a schooner I figured she was not meant for direct combat due to simply being out classed by larger more suitable ships. I read some information about Boston built schooners called Marbleheads that were purchased by the British prior to war for coastal patrol. These ships were said to be used for fishing and other economic based trades before being modified for naval service. I also noticed that a lot of these ships are very similar to each other in appearance for example the Hannah, Sultana, and the Independence. Maybe this is just the basic schooner profile I am seeing. Another good read was an article about Maine's Colonial Navy and the ships built for its own coastal defense. I was familiar with colonial army militias but had no clue militia based naval forces were employed. Again specific information beyond ship names has been tricky to come by. I was hoping to find ship drawings or paintings to supplement my reference material in building this kit. Also information regarding color schemes used during that time period. I noticed ships of this size are painted very similar to one another both British and American. The white / yellow hull with black trim seems very common for this style of ship. Provided instructions did not offer any information in regards to painting so it looks like I will have to figure something out
-
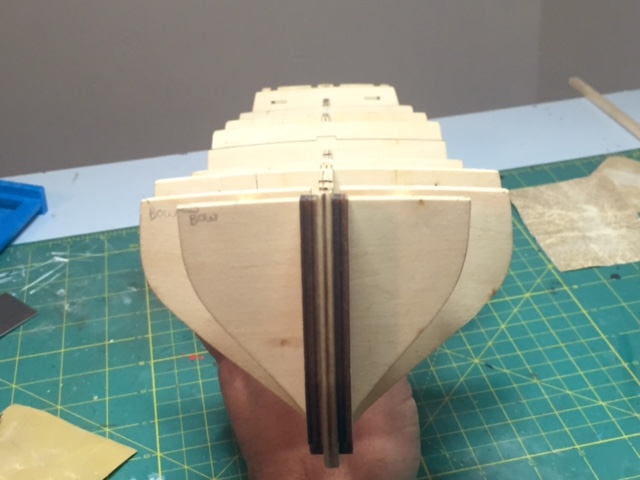
Some progress and head scratching on the Independence. The bulkheads have been secured and appear to line up ok depth wise and additional decking supports are in. Some troubles that are on the mind is since the bulkheads are not a nice 90 degrees and are not evenly spaced down the length of the keel, I am having a hard time keeping the keel nice and straight. To fix this I am using some scrap wood to make supporting braces between the bulkheads however, this is a little tricky. This sometimes creates a bend in the keel rather than fixing it. I am trying to cut the braces the exact same length but this is proving to be a case of add a little here or sand a little there. So far I have added braces to the first 2 and last 2 bulkheads on the stern and bow with only about a millimeter difference in distance between the bulkheads. To the eye it looks manageable. I understand that this is pretty important since it can mess up the shape of the hull when its time to plank as well as mess up the proper alignment of the deck. So the next task in the build is to add additional bulkhead bracing to add strength as well as ensure the keel is straight as possible. I will add some pictures later to show what I am talking about. If this doesn't make sense or if you have a better idea please let me know p.s. oh I am studying up on staggered decking and lengths. The instructions call for long single pieces of decking which I think is inaccurate after seeing other builds on the forum. So I need to figure out how to convert the scale of the model in to corresponding lengths of decking. Yay math...
-
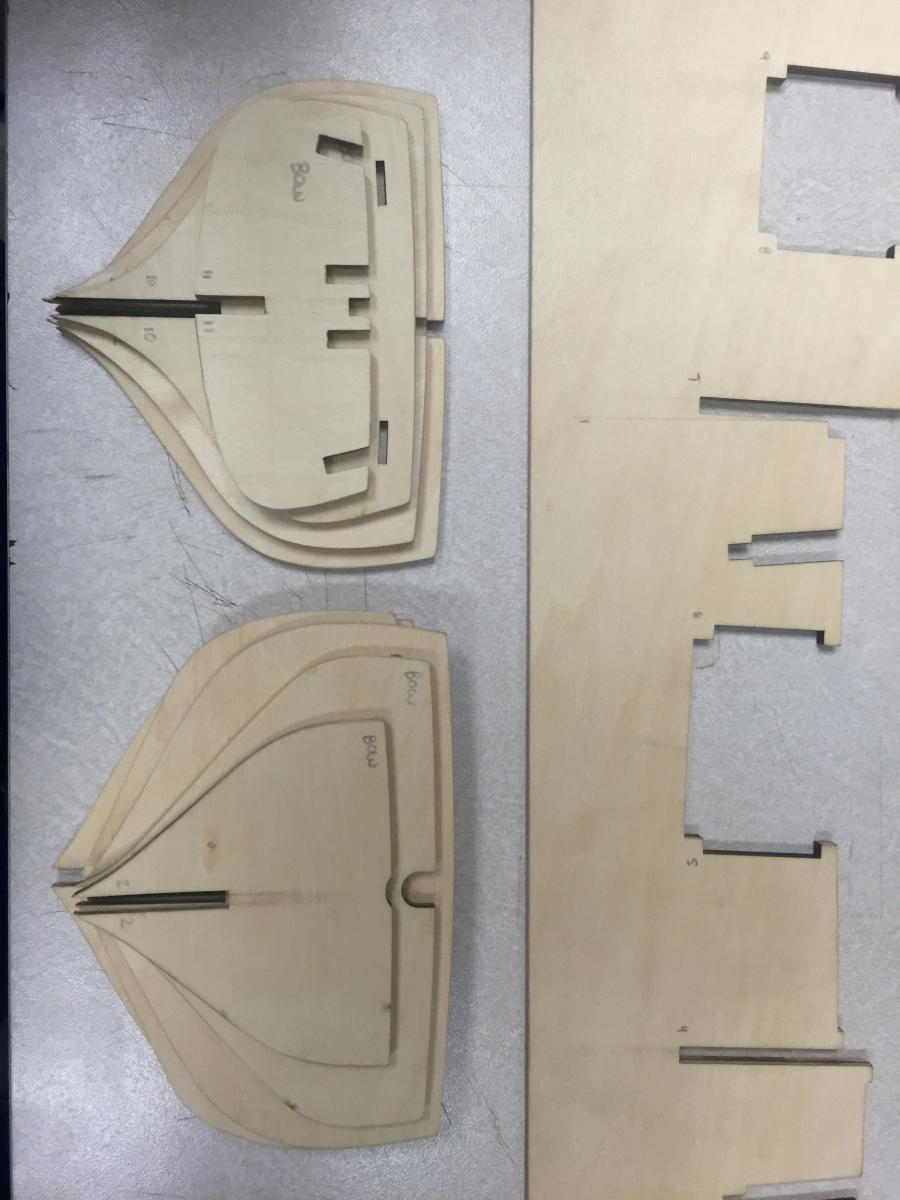
So I noticed something interesting about this kit or maybe the manufacture itself. Slots cut on the false keel for bulkhead installation are not 90 degrees as seen on other models. So ensuring that the bulkheads are properly aligned is going to be tricky. I'm not going to worry about it too much though. If for some reason the bulkheads are set crooked I can use spacer blocks to fix the alignment. As you can see I went ahead with a initial sanding of the bulkheads to remove the burnt edges. I have read in he past that glue has a hard time adhering to these burnt spots so hopefully this helps. I also labeled each bulkhead numbers and their corresponding slats to help ensure the right part goes into the right spot. "Maybe I have screwed this up before lol" I'm really considering adding filler blocks to the bow and stern sections. I have had a hard time planking these areas in the past since there is not a lot of materiel to glue to.

-
KeithW, touch the beard at your own risk. I will not be responsible for its actions once provoked lol!
-
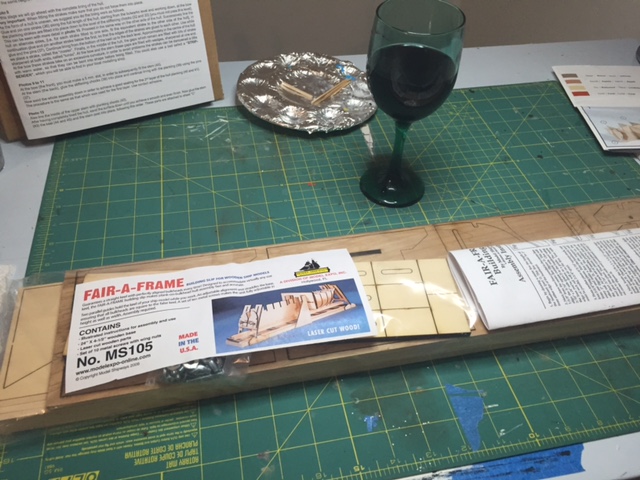
First of I hope that Gunther does not mind that I use a photo from his AVS log to illustrator this point. If there is an issue I will promptly remove it. Progress on the jig has come to a screeching stop. This kits false keel is a bit different than most kits. The bottom of the bulkheads reach almost to the base of the false keel with only a few millimeter remaining for the jig to secure to. This kit has you apply both layers of planking before adding the keel extension pieces and stem piece. Long story short this jig would work fine for most models however, I have serious doubts it will work for the Independence by AL. With that being said I plan on ordering the metal plates use for squaring up bulkheads as shown in the photo. This is a good excuse to pick up some new tools that will come in handy down the line. Model Expo is having a killer ale right now so I should be able to pick up these guys for under $15. While I wait for these blocks to ship I am going to prep my bulkheads, test fit to the keel and shape the bullhead edges in preparation on planking. I'm kinda bummed out the jig didn't work out but you live and you learn. I will just have to use the jig on a future build with a full keel from the get go.

-
Its pretty frustrating having to go to work when all you want to do is build ships Still working on the bulkhead jig. Hopefully another few hours will become available tonight and I can finish up the jig and get to actual construction of the ship. Some questions have been rattling around the brain about this build. The instructions call for installing the decking prior planking so I have been doing some thinking about treenails and "staggered" decking for a more accurate look versus individual long strips. This however is a few weeks away. I still need to install the bulkheads and should not get ahead of myself.

-
Hi there Fish. Looks like some decent progress on the decking. If you don't mind, can you explain how you constructed your treenails? I have been doing some premature research on treenail methods that I may use on my Independence build. Looks like other builders use drilled holes with wood filler or holes plugged with the tips of tooth picks. I am planning on building a test deck before I start slapping down planks to deck. I still have a few weeks before I get to this step so plenty of time for research.
-
Thanks for the kind words!
-
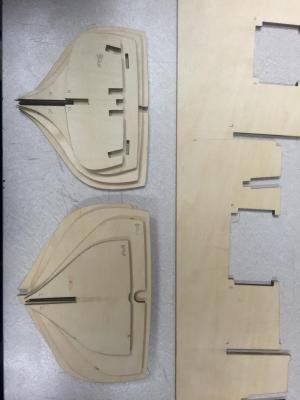
Well we are up and running sports fans. I was pretty surprised by the amount of materials that is with this kit. My two prior builds were significantly smaller than the Independence. I went ahead and numbered each of the laser cut part sheets and everything looks good. I should probably measure and organize the other material bundles (strips and dowels) as well. I treated myself to a new tool for this build. I picked up the fare a frame jig from Model Shipways. So far this tool looks like it will make life a lot easier in terms of securing the keel and installing the bulkheads however, some assembly is required. I only got a little bit of the jug construction finished before it was time for bed. Ahh watching the Walking Dead with a glass of wine and a new model build. Does it get any better than this?
-
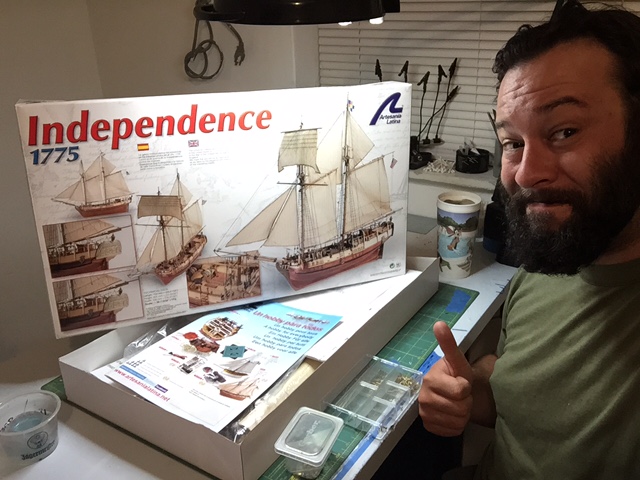
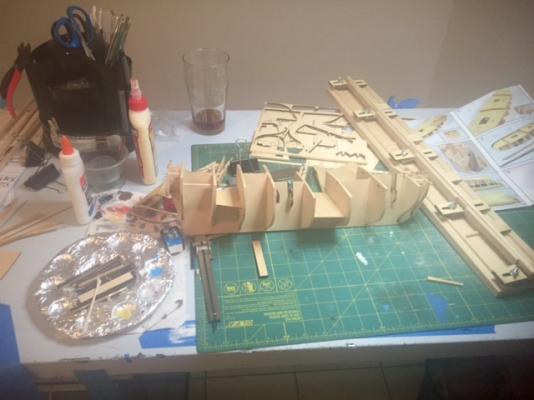
Hello and greetings! I am excited to start my second build log on this forum for the US Independence made by Artesania Latina. This is my third ship model that I have been steadily building up to in both complexity and size. I wanted to start this build log a little bit different by taking a few pictures of my work station. I remember building models on mom's kitchen table when I was a kid and constantly battling for space. Some of the tools I use have been in my possession for 15+ years and have been steadily expanded upon with a little here and a little there. Some things I'm looking forward to about this build is constructing my first gun carriages, multiple masts, and more complex rigging. This ship is literally twice a big as my last build so that should work in my favor in the constant battle between big hands and tiny pieces. Well more to come shortly. If you want, take a picture of your work station and share it on this build log oh I will be sure to add a link to my second build shortly.
-
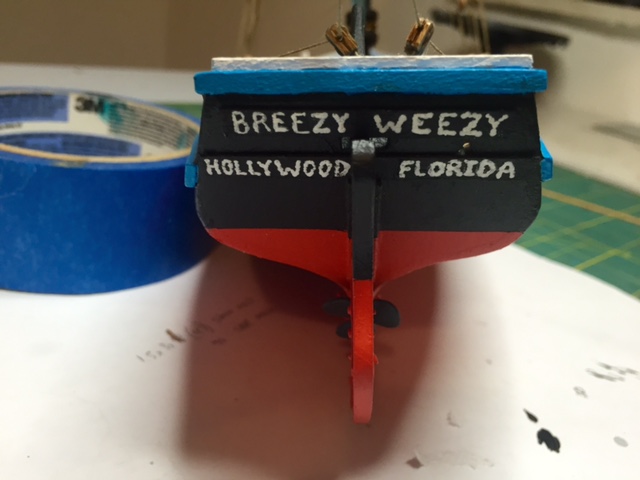
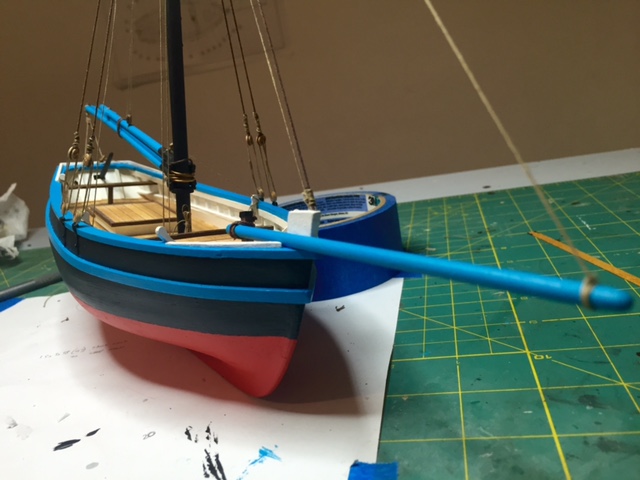
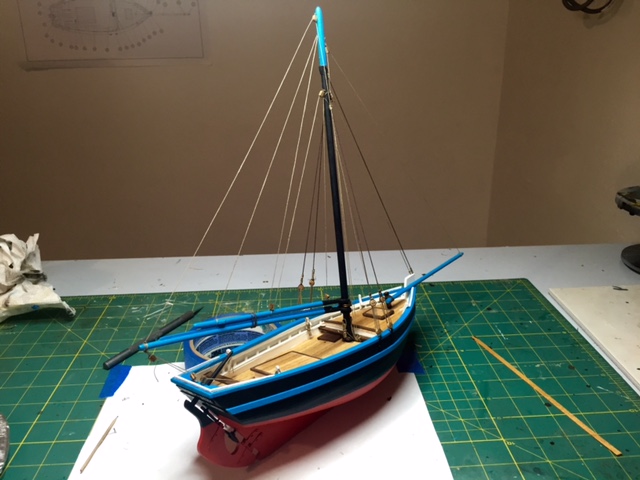
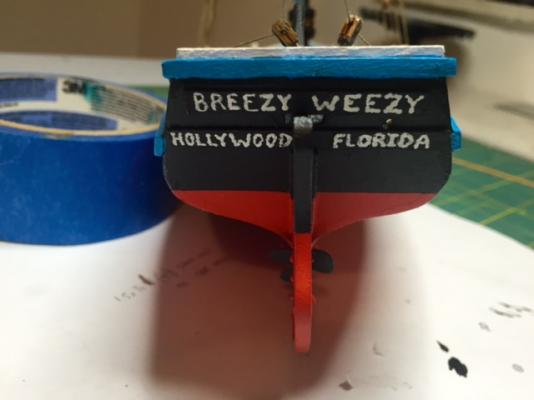
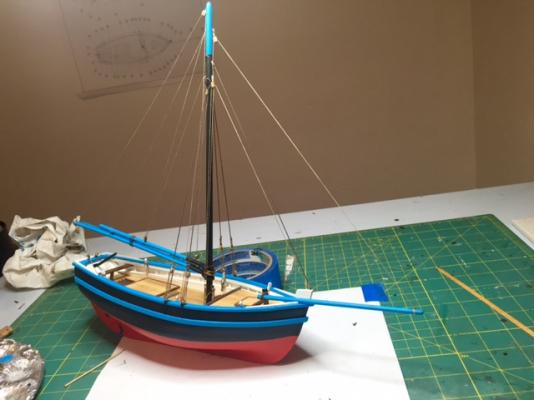
Well big big news at Philthy's Shipways! The Bon Retour has been renamed the "Breezy Weezy" in honor of my stepmom lol! All construction is complete at this time and all that is left is a little touch up here and there from when I was a little rough on the boat. I took up Gunther's tip and used a 50/50 mix of PVA (white elemers glue) and water and applied this mix to my rigging lines. This gave all the lines a more uniform color appearance after some spots were eye sores from using CA glue to secure blocks etc. I was burning the midnight oil last night when I got the idea to rename the boat and add it to the stern area. I am really glad I did and took a shot at making her a little more "Me" in both name and home port of Hollywood FL. I really do not like the pedestals and stand that is included in the kit. Its having a nice looking truck but then you lower it and put spinning rims on it. NO BUENO... So I am going to buy some stock basswood and build a mock slip way for her to rest upon. This is my second wooden ship model and I could not have been more excited to tackle my next project. During the course of this build that has spanned 2+ years I am more confident when it comes to planking a hull. I cut my teeth on decking (still need to try treenails) and the basics like painting wood with a brush versus a plastic kit with an air brush. Another key learning point during this build came from this forum in accurately rigging dead eyes and shrouds. I will be sure to take some classier photos when the slip way is complete and will add her to the completed builds section. Hope to see you all on my next build I will start later today hopefully later today.


-
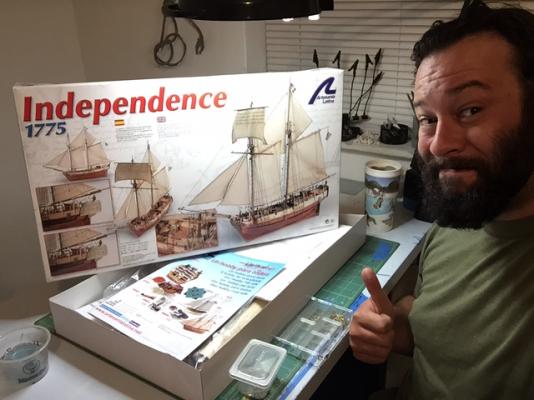
The girlfriend got me the US Independence from Artisan Latina for my birthday. Just looking at the 1:1 plans she is literally twice the size of the Bon Retour! Ugh sudden dread of all that sanding lol I also have 2 kits from Model Shipways on back order (Armed Virginia Sloop and the Fair American). They were / are having a killer sale and I couldn't pass them up since I have been drooling over them for the last year or so. Needless to say I will be busy for the next 2 years easily on these boogers. I think the US Independence will be a good next step for my third build. My first build was the Bounty's Jolly Boat that I fumbled through. The was a huge learning curve when I first started the Jolly Boat and Im still leaning into it
-
I use a badger air compressor and brush but have NOT used them yet on my wooden ship models. I used this set a few years back when I was working on 1/48th scale tanks. I can honestly say I really do not miss using the airbrush all that much. You can get good results with a standard brush and I find it was easier doing touch up and fixing my many screw ups lol. Thanks for checking out my log for the Bon Retour by the way. Im thinking only a few more hours on the rigging and she will be ready for the shelf. No worries though since I have a few kits on deck waiting to be unboxed
- 34 replies
-
- 1
-

-
- bounty
- constructo
- (and 2 more)
-
Hello Matthew, First off congrats on your first wooden ship model and starting a build log. I am pretty new to this and the forum has been fantastic in figuring out problems that pop up. I am working on a fishing boat myself and another member noticed something was amiss with one of my photos and was great in offering some accurate diagrams to assist in fixing my rigging mistake. I look forward to seeing your build progress along. There are a bunch of Bounty build logs to look at for inspiration if you haven't had a chance to look yet. Cheers! -Phil
- 34 replies
-
- 1
-
-
- bounty
- constructo
- (and 2 more)
-
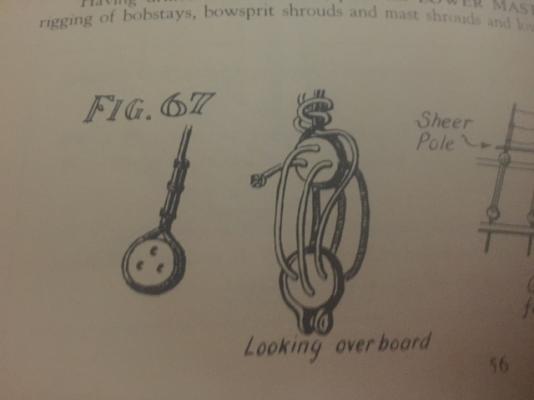
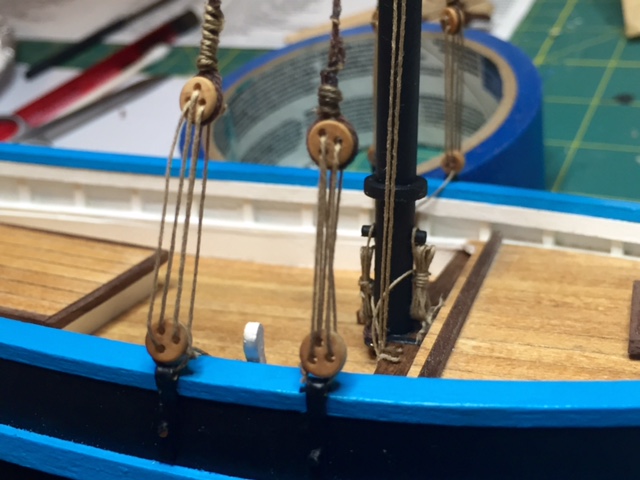
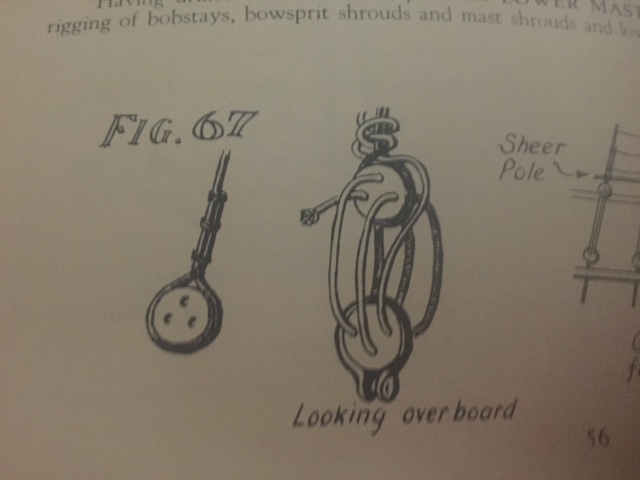
Well thanks to Gunther and my OCD I ended up fixing the dead eyes lol. Im sure this is something that will get better with more practice so I wanted to get it done right. I knew that eventually after hanging her on the shelf I would redo them out of frustration so I might as well fix it now. So with the help of a few photos from the forum, Gunther's example and a picture I found in the Jackstay book I took another crack at it. The dead eye to the right is the corrected one and I went ahead and attached the photo from the Jackstay book in case someone else runs into this problem in the future. I really don't like how the CA glue darkens the string when seizing the lines so Im going to try to minimize its use in effort to preserve the desired look of the string being used.