Philthy
-
Posts
66 -
Joined
-
Last visited
Content Type
Profiles
Forums
Gallery
Events
Everything posted by Philthy
-
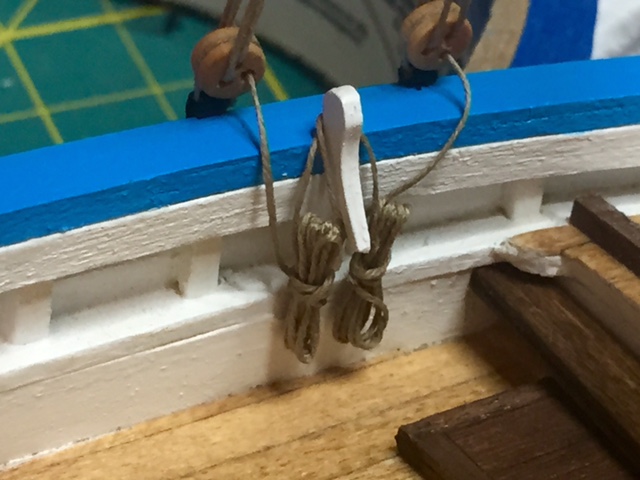
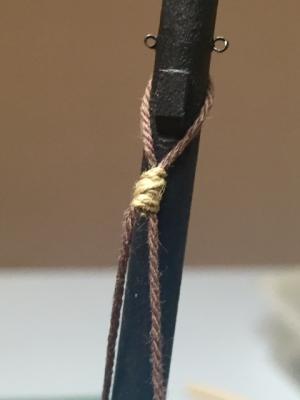
 Thanks for the heads up and awesome photo that explains it Brian! I will correct this boo boo and show you the results soon. I hope I left myself enough slack to accomplish this. Just comes down to not knowing but learning is occurring lol UPDATE: Well unfortunately I did not leave myself enough slack on the dead eye rope to fix this mistake. I tried to CA glue a fresh line and match the photo but the results were not so good. Im going to leave the rest as is and press on with the build. I could have tore down the existing rigging and started from scratch but laziness took over. Im going to chalk this one up to as a learning experience and improve upon on the next ship.
 -
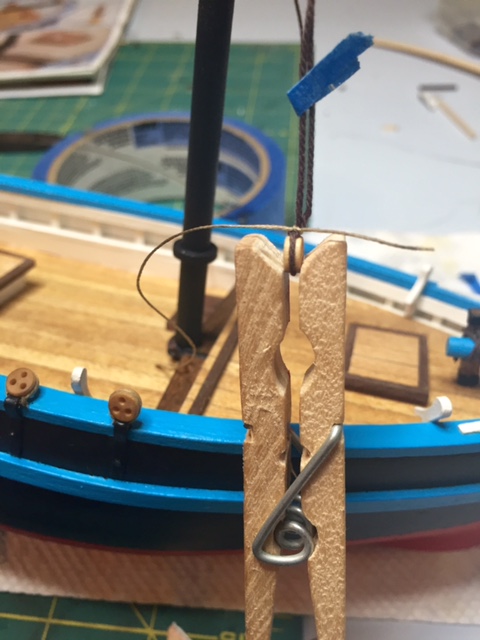
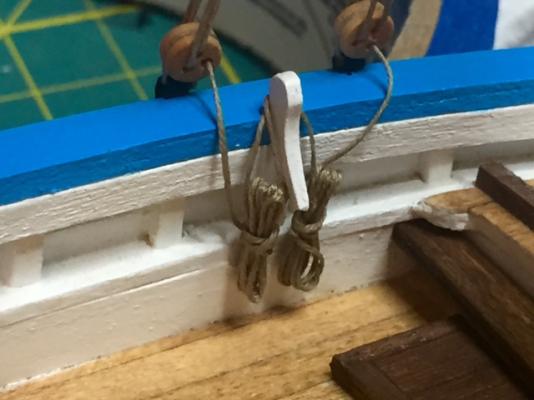
Thanks GuntherMT for the link! I actually looked at your build log for the AVS and took screen shoots of the jig you used for wrapping up loose lines. I have incorporated this into this current build. I wanted to secure all the loose lines from the mast before moving on to the other rigging. I feel this will help me keep everything in order along the way as well as helping in preventing damage along the way due to my clumsy Mongo hands. The Bon Retour has a relatively basic rigging set up as far as amount and complexity in comparison to other larger ships. Like I mentioned during the course of this build log, I have had the mindset that this build is a warm up pre-course in preparation for bigger and better things in terms of skill level. Using a jig seems like a must in wrapping up these lines and adding a sense of realism. This tip will certainly be used on future builds .
-
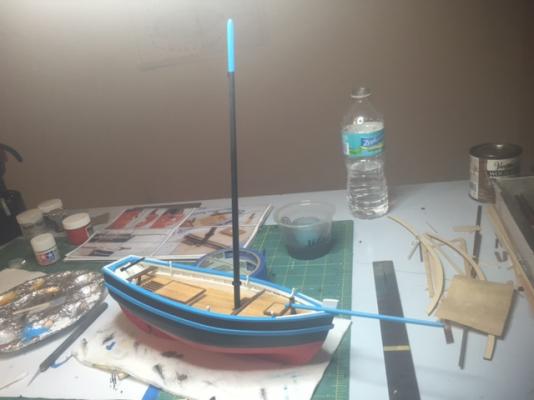
Well rigging is in full swing now. Today I got the main mast rigged up to my liking and quickly realized I need more practice / studying when it comes to rigging dead eyes and securing lines. One of my problems is I gauge my build to other expert ship builders who simply produce master pieces. Again I have to remind myself that this is only my second attempt at wooden ship building and things will improve over time and with practice. So with that being said I am going to check out the forum and study up on how to secure these lines. I am thinking about displaying the boat without sails. I know this isn't the most "accurate" way of displaying the ship but I think it looks better. Tomorrows plan is to build the "boom rigging" things (not sure on the terminology) and rigging my first blocks. Only a few more hours and she should be ready for the display shelf.

-
Thanks for the tip about using cardboard instead of brass. I will have to take a look at that build log you mentioned. Updates on the build should be posted soon.
-
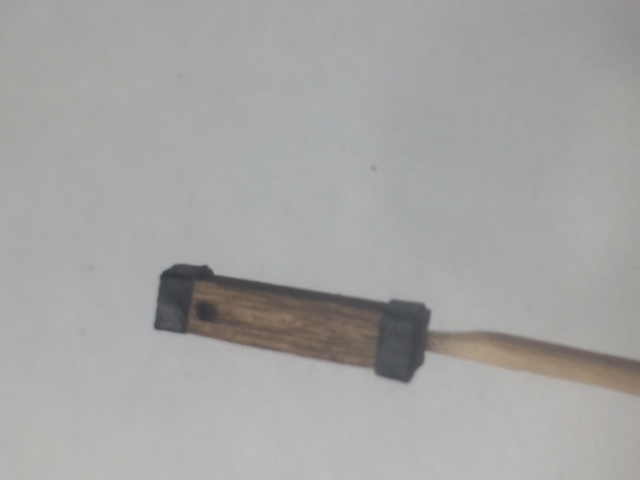
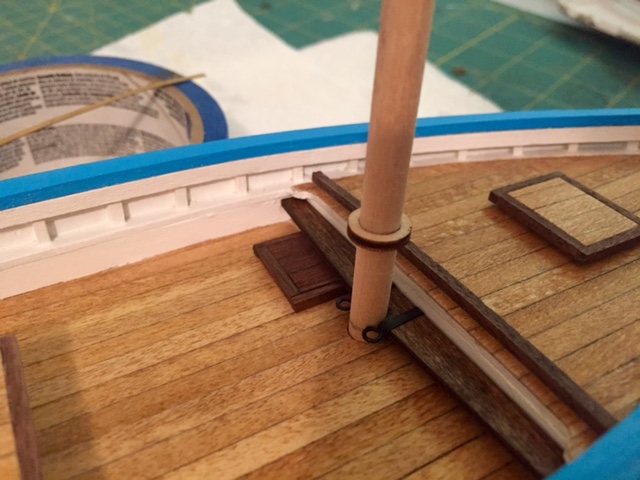
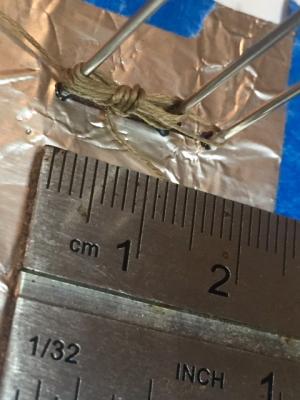
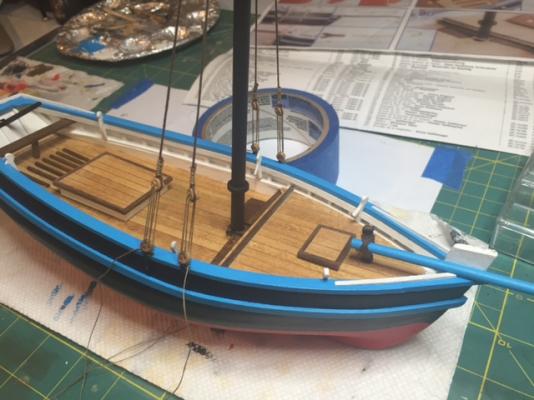
I wanted to show a wide shot of the current state of the build. The mast isn't secured yet since there are some additional items I still need to add such as eye bolts (not sure if thats the right name or not). I wasn't happy at how "clunky" the eye bolts appeared that are provided by the kit. They simply looked too big for the scale of the ship so I made some smaller ones. I got the idea from the forum and made them by twisting small diameter wire around the thickness of a paper clip. This significantly reduced their size and I feel blends better with the boat as a whole. I hope they turn out well when it comes time to work on the rigging. I also attached a photo of the timber used to secure the bow sprit. The instructions didn't provide much info how to construct this item, let alone how it mounts to the bow sprit. I used some aluminum foil painted black to mimic metal bands at the top and bottom. I have no historical or photo reference for this addition but I wanted to add some detail to her.

-
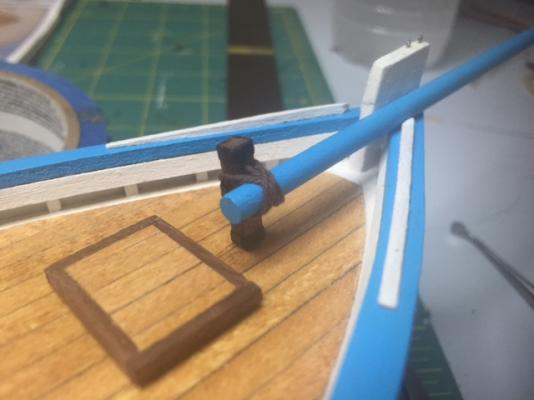
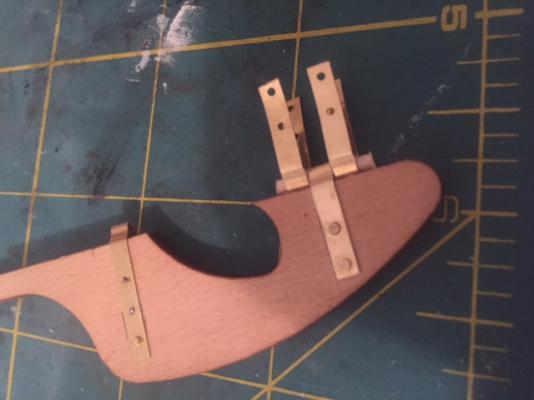
I have been slacking on updating the build log as often as I would like. When I get some free time it usually gets spent on the boat versus writing about her. It really feels like I am in the home stretch now. The rudder went on only so-so in my opinion. I really do not like working with brass very much since I have a hard time painting and working with the material. I guess its just one of those things I have to get better at with future builds. I sometimes cheat with brass work by substituting it for household aluminum foil. I fold the foil 4 or 5 times to the desired thickness then cut to size with and exact blade. Its just as difficult to paint but much much easier to work with. On to the bow sprit. This was pretty straight forward construction wise. The timber that is lashed to the bow sprit was being a little booger wanting to stay in place since I keep bumping into the bow sprit. If it breaks off again (given my luck its a certainty) I am going to drill a hole in the timber and deck then use a wooden dowel to help keep it in place and add some strength. OOOOH and the mast update. Sadly the power drill at work was not available so I had to taper the top of the mast by hand. No worries though since this worked out just fine, if not a little more time consuming.
-
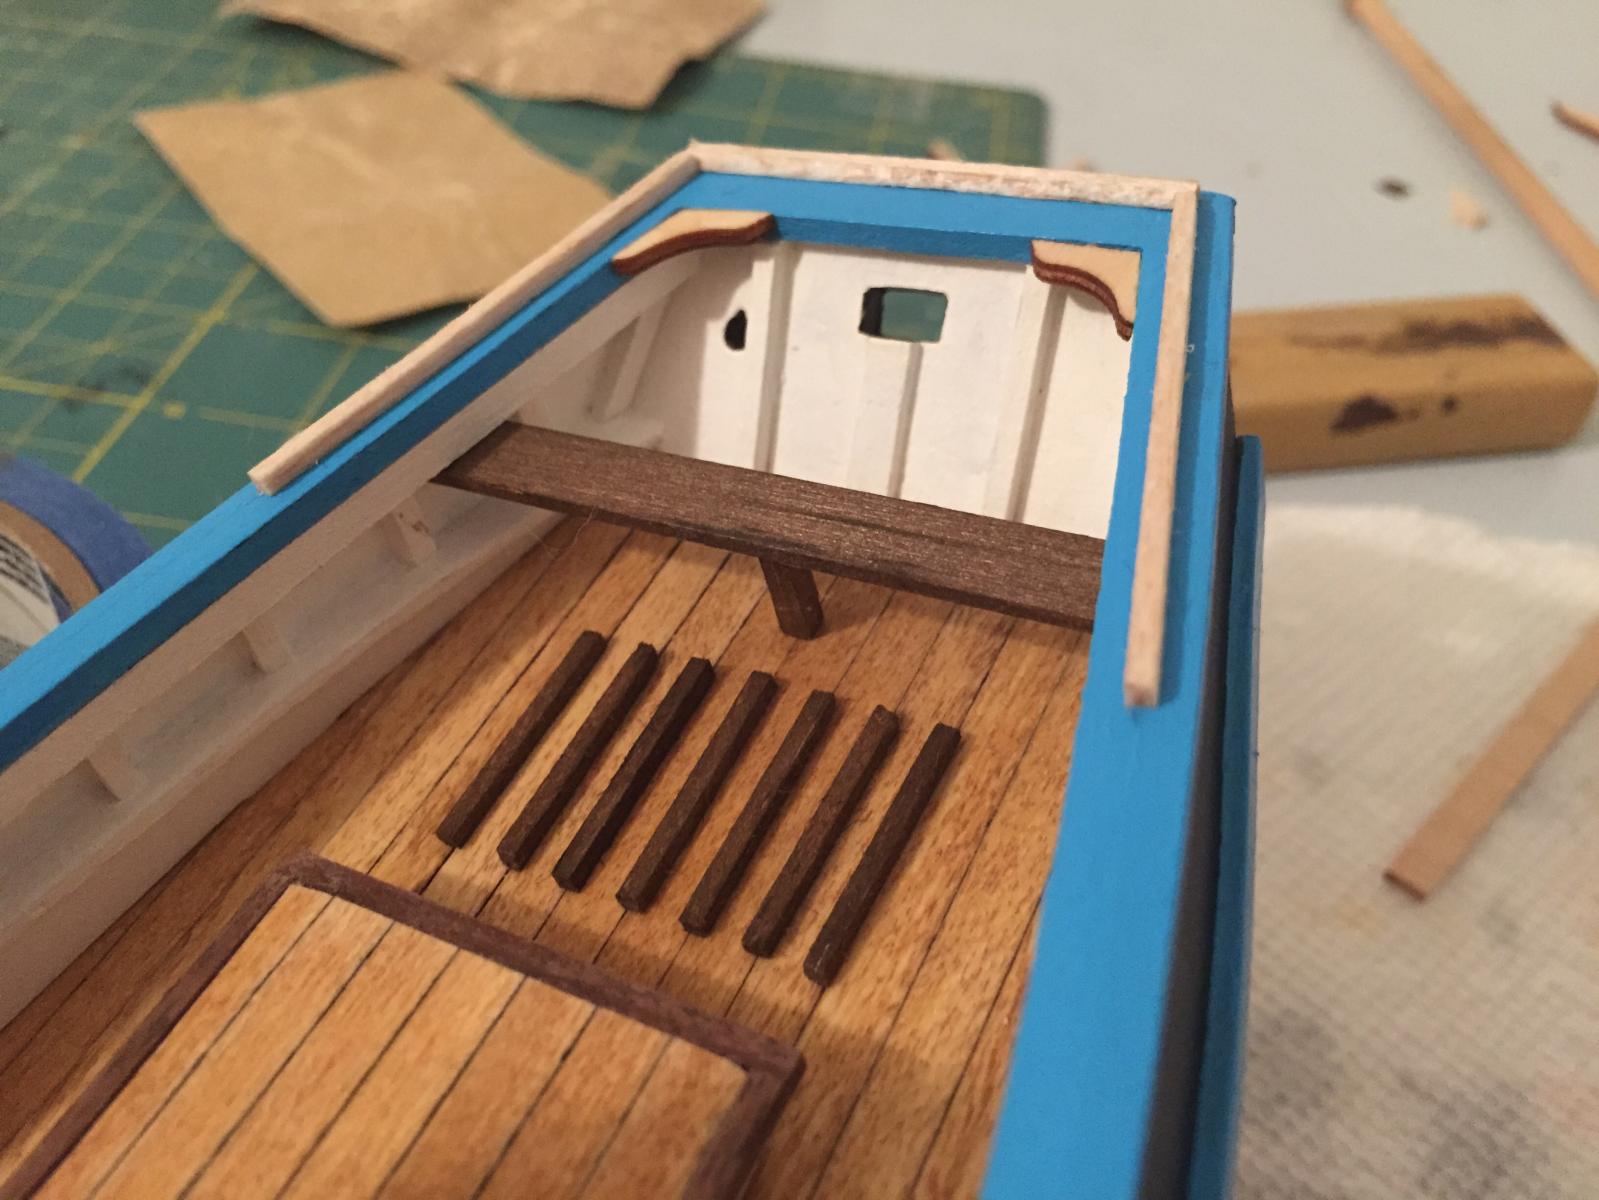
I was going to attach the rudder but I got distracted (easy for me to do). I was sitting back looking at the boat and was thinking about the logical next steps to take. I then realized I have some deckfeatures I forgot about. Since I will be man handling the boat some for this I wanted to hold off on the rudder as long as possible. As you can tell by he photos I need to get some sort of cradle or mount for her. The aft trim pieces were made from some 1.5 X 1.5 stock balsa I picked up. The wood in the kit seemed a bit "chunky" in comparison to the rest of the boat. The corner pieces for the top rail had to be tweaked a little bit to fit properly. I'm wanting to use some filler to fix the gaps that are pretty prominent. {mast question & amswer} Thanks a bunch for you tip about using a power drill to spin the mast for tapering the thickness at the top. I'm going to give this a shot on my lunch break later on today

-
Holly friggin rigging! So glad I found and added this build log. I have been drooling at the chance of cutting my teeth on my own AVS. I also really like how the sections are labeled and separated. I hope this log stays up for while to use it as a supplement when I start construction. Very impressive build. (we're not worthy, we're not worthy) lol.
- 831 replies
-
- 6
-

-
- Armed Virginia Sloop
- Model Shipways
- (and 1 more)
-
Thanks for the heads up Brian! I mean I have been working with model paints for 20 years and had to ask myself a few times "what the hell am I doing wrong with this paint" lol. In person I think the paint looks fine but like you said it makes you work for it. If you don't mind, Im going to follow your Armed Virginia Sloop build. I am waiting for her on backorder an plan to build her soon. I can use all the help I can get lol! Cheers! Phil
-
After you took the time to view and compliment my build, I wanted to return the favor and suddenly realized the timeline for this epic Bluenose journey! I thought I had it rough trying to remember what I did on a build I started 3 years ago let alone 2 decades! I am happy and surprised she was able to survive in such good shape. I have sadly sacrificed or buried in a trunk a number of old kits that didn't survive my many moves. I can't help to get a feeling of similarities with our two build logs albeit the detail in yours is leaps and bounds above mine We are both novices working with kits that are a little on the questionable side however, stubbornness and creativity take over to improve the look of the ship. Here is something you might want to try out in future builds that worked well for my Bon Retour decking. After staining the decks prior to glueing them down I used a felt tip permeant marker to ink ONE edge of the plank to mimic caulking between the planks. By inking only one side the effect is subtle enough to notice without overpowering the rest of the model. I have seen this effect used with pencil for a more subtle look. Now don't quote me for its accuracy but I feel it looks pretty good. After reading about your tree nail experiment I am thinking about trying the same effect on my humble fishing boat. Im at the part now of worrying about trying something out and really screwing up! . I look forward to seeing your progress Also on youtube there is a video build log some guy made for the model shipways kit. It might help out in seeing how he tackles the few problems he faced with his bluenose build. Cheers! Phil
- 127 replies
-
- 1
-
-
- Bluenose
- Billing Boats
- (and 1 more)
-
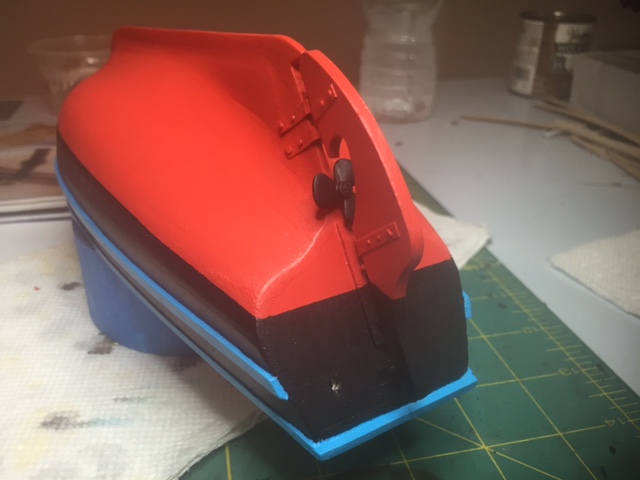
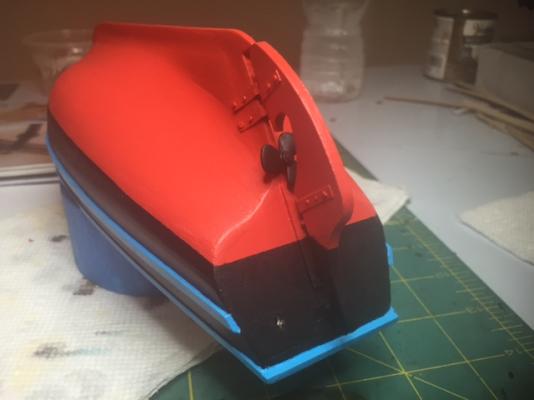
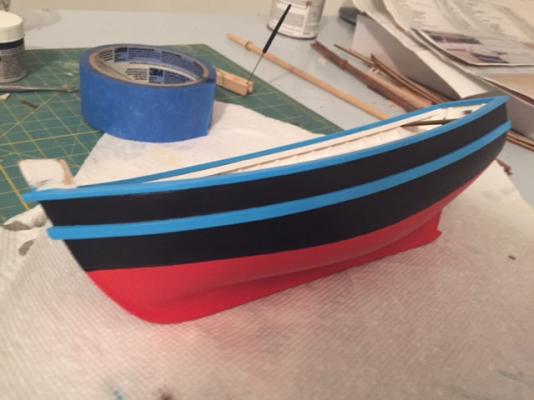
Hello All! It has been about a week since my last log update and it has been a busy time. I am very happy I decided to create a build log for this ship and plan to do so for future builds since it provides a visible transition from lifeless wood to a project to be proud of. This week has been focused primarily on painting. I have a decent airbrush / compressor set up but decided not to use it for this build. Part of it due to being too lazy to hook everything up since moving and second I figured some old salt more than likely slapped paint on his fishing boat so why can't I. This makes me wonder, how many do you use an airbrush for painting your models? I haven't came across any build logs that goes into painting very much. I used model expo paints for the primer, black, and red portions and velejo for the blue. For some reason it seemed like I was having a hard time getting the paint to stick despite having a primer coat. Granted the paint is over 2 years old and has been in storage the whole time... Past experience with plastic ships has taught me to paint the red for the hull first, then the darker colors since the darker paints cover up easier than the lighter colors. Sadly the painters tape I used did only a OK job at masking off areas. I had to go back at do some touch up on the water line do to not getting a nice crisp edge from my blue tape. I will not be using this tape for future builds so lesson learned. So that is what I have been doing this week. Paint a section and wait for it to dry, then paint another part and subsequent touch up. I am very happy how she is shaping up but I am going nuts trying to overlook little mistakes along the way. I have to remind myself that the average joe doesn't have the eye for spotting subtle mistakes like us attention to detail crazed model builders do lol Up next: Nail on the ruddy rudder, then shape and paint the mast. I have to taper the top of the mast down to about 1/2 its original diameter. Any tips how to do this? I figured it will come down to gipping a piece of sandpaper and twisting away.

-
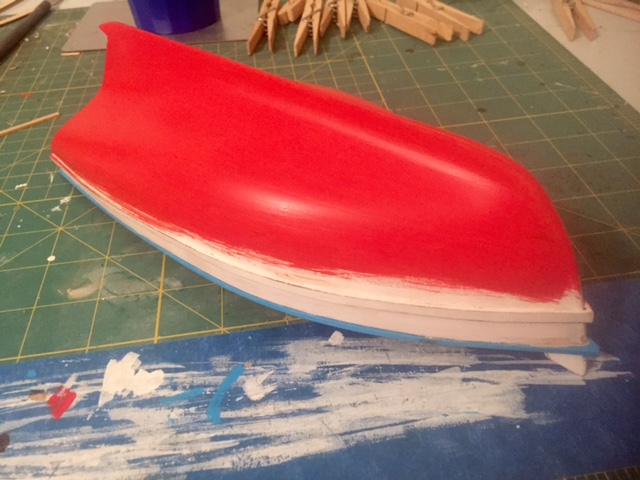
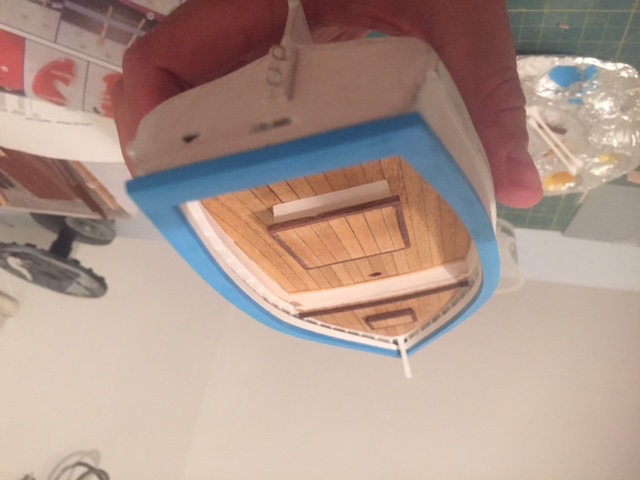
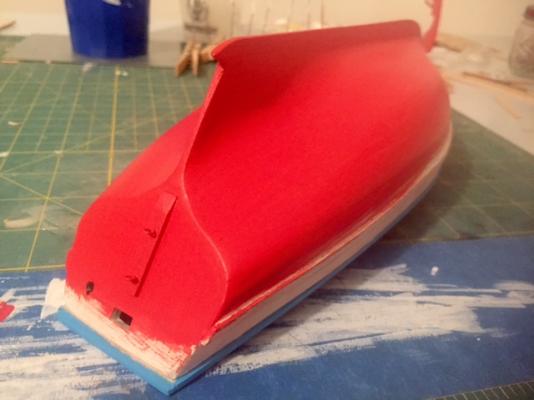
Here are some updates. I scratch made the top rails since the kit ones did not fit properly (probably my fault). I simply used some stock balsa strips and bent them to match the curve. A little filler in between the strips and a some sanding and she's looking good in my opinion. After that I move on to working on the hull some. So far i have 2 coats of red on and it looks like the sanding on the planks have paid off. Im not sure why the two photos are upside down. Too late for me to care.


-
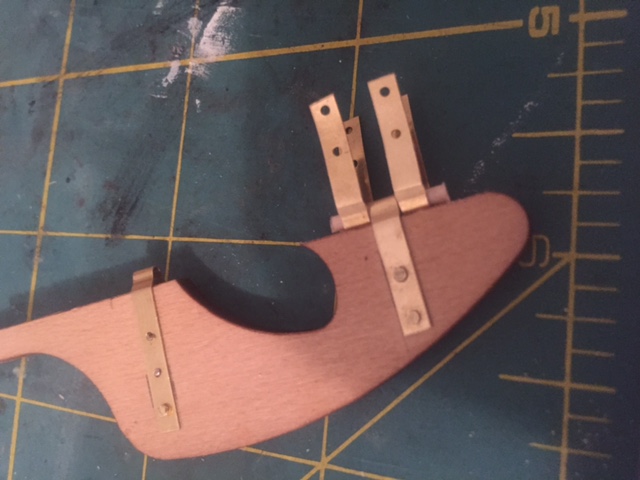
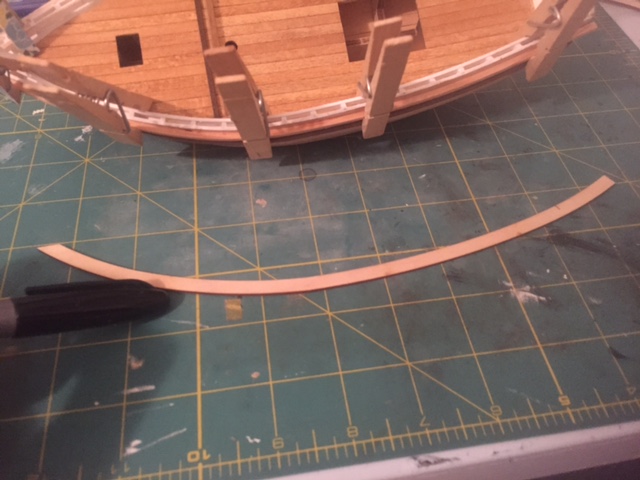
Some progress today after a visit to a hobby shop in town. Its not much for model ships however, they do stock wood for scratch building pieces. This turned out great for me! The top rails provided with the kit simply would not work and still look to my liking. This may be a mistake with the kit or how my framing and planking affected the ending shape of the hull. To fix this problem I am going to take a total of (4) 2x2 basswood strips and bend them to the shaped needed. For this my unique technique involves soaking the strips in hot water for 5 minutes then bending them to the shape of the top rail with the help of some clothes pins. In order to ensure the strips are completely submerged when soaking I put them in an old wine bottle filled up with hot water and then cork the top. I also got the rudder mounting hardware installed. The nails provided are too long and push out the nail secured from the other side. No one to sweat the small stuff I secured the nail from one side then snipped off the protruding excess. A few taps on the cut side of the nail and it mushrooms down for a snug fit. After I get the (4) top rails bent to shape its time to prime / paint the hull and top rails. Not too much further now!

-
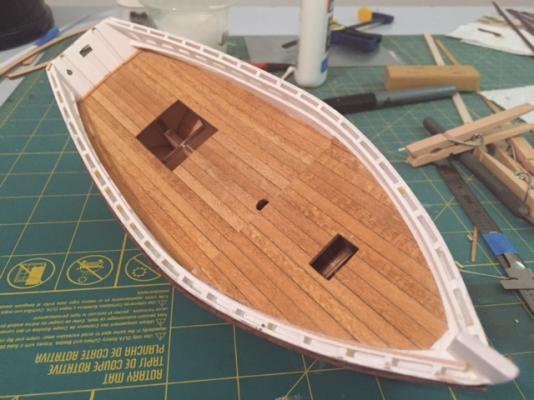
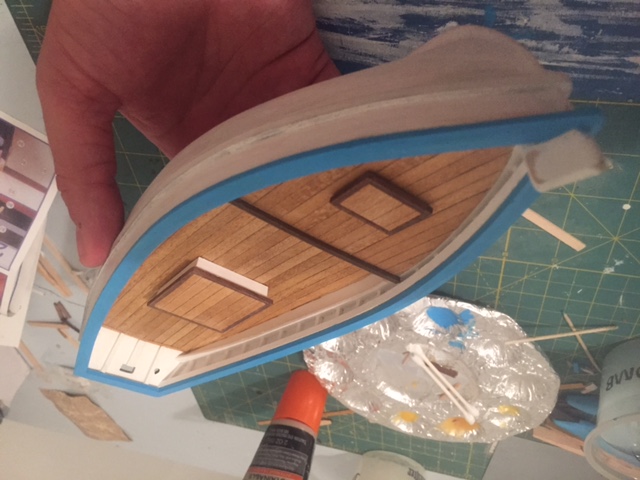
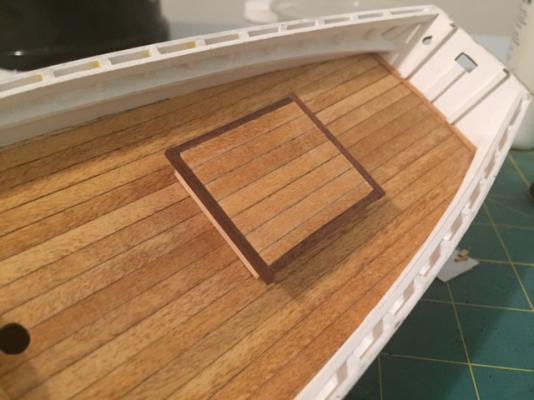
I started working on some of the deck features such as the cargo hold covers last night. I have decided to improvise a little and change the construction of the covers to fit my liking. I think the lighter decking color looks better than the darker walnut wood provided by the kit. A total of 3 covers are called for and should be pretty simple to knock out. I have some basswood stock that I cut to size for the hatchway covers then glued the planking, then added the walnut trim pieces to the edges. I still need to do some sanding to true up the trim pieces however, I am happy with how they turned out.

-
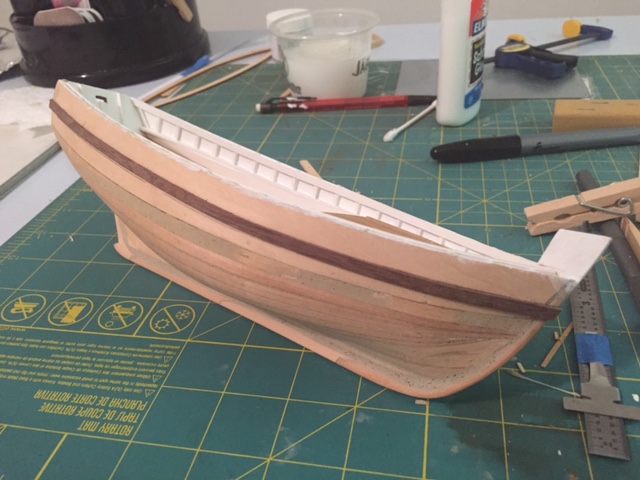
Hello Fellow Builders, This build log is for the Bon Retour by Artesania Latina (AL). This kit is designated as an entry level / beginner kit and is reasonably priced at around $60. I have had the kit for about 2 years now while working on her a little here and there. Now that I am finally settled in after moving I can make some decent progress. Im motivated to finish the Bon Retour since I have two new kits waiting for me! For my birthday the girl friend got me the U.S. Independence from AL and I treated myself with the Armed Virginia Sloop from Model Shipways. I would gauge my experience a humble beginner being new to building wooden ships. I have read dozens of build logs since picking up wooden ship building and these logs have proved very informational as well as inspiring. My aim is to share and contribute my builds and explain the steps from the view point of a beginner in hopes of helping out fellow builders who are just starting out. This is my second wooden ship model and my confidence level has considerably increased from my first build the Jolly Boat by AL. As you can see I had to use a bit of wood putty to even out the hull after planking, Since this is a singe plank hull and I plan on painting her, I figured why fuss about how pretty she looks now just as long as her hull is even and smooth. A number of modifications and repairs were needed on the hull from when i first started 2 years ago. Like a dummy i was filing down the bulkheads with the keel in a vice. Well too much pressure and I snapped the keel at the stern section. This required some profanity and some modifications to reattach the stern section. I feel it looks fine now, however she does not match up with the plans exactly now. She's a little longer and narrower than intended by the original kit. Im going to end this post now, however please leave your comments or advice as far as what you see. I see this build a being an opportunity to cut my teeth on a basic kit while preparing for more detailed builds in the future. Cheers! Phil Current Build: Bon Retour (AL) On Deck: U.S. Independence (AL) Armed Virginia Sloop (Modle Shipways) Completed: Jolly Boat (AL)