-
Posts
209 -
Joined
-
Last visited
About genericDave

- Birthday 12/18/1973
Contact Methods
-
Website URL
http://www.suburbanshipmodeler.com
Profile Information
-
Gender
Male
-
Location
Austin, TX
Recent Profile Visitors
-
 yvesvidal reacted to a post in a topic:
Fair American by genericDave - Model Shipways - Scale 1:48
-
 yvesvidal reacted to a post in a topic:
Fair American by genericDave - Model Shipways - Scale 1:48
-
 yvesvidal reacted to a post in a topic:
Fair American by genericDave - Model Shipways - Scale 1:48
-
 yvesvidal reacted to a post in a topic:
Fair American by genericDave - Model Shipways - Scale 1:48
-
 yvesvidal reacted to a post in a topic:
Fair American by genericDave - Model Shipways - Scale 1:48
-
 yvesvidal reacted to a post in a topic:
Fair American by genericDave - Model Shipways - Scale 1:48
-
 yvesvidal reacted to a post in a topic:
Fair American by genericDave - Model Shipways - Scale 1:48
-
 yvesvidal reacted to a post in a topic:
Fair American by genericDave - Model Shipways - Scale 1:48
-
 Chuck reacted to a post in a topic:
Fair American by genericDave - Model Shipways - Scale 1:48
-
 TerryPat reacted to a post in a topic:
Bluenose by genericDave - FINISHED - Model Shipways - 1:64 Scale
-
@Gregory, I didn't really consider the laser for this since I've only played with the laser function a little bit, just running the setup tests to be sure it worked. I'm much more comfortable with milling, so I decided to start there. @Matt D, the machine is a Snapmaker 2.0 A350. It is a hobby machine - nowhere near what people use for production environments. But for my uses (ship modeling, playing around), it has been working great so far. And having one machine that I can swap between 3D printing, laser, and CNC was great. I could never justify separate dedicated machines for each function.
-
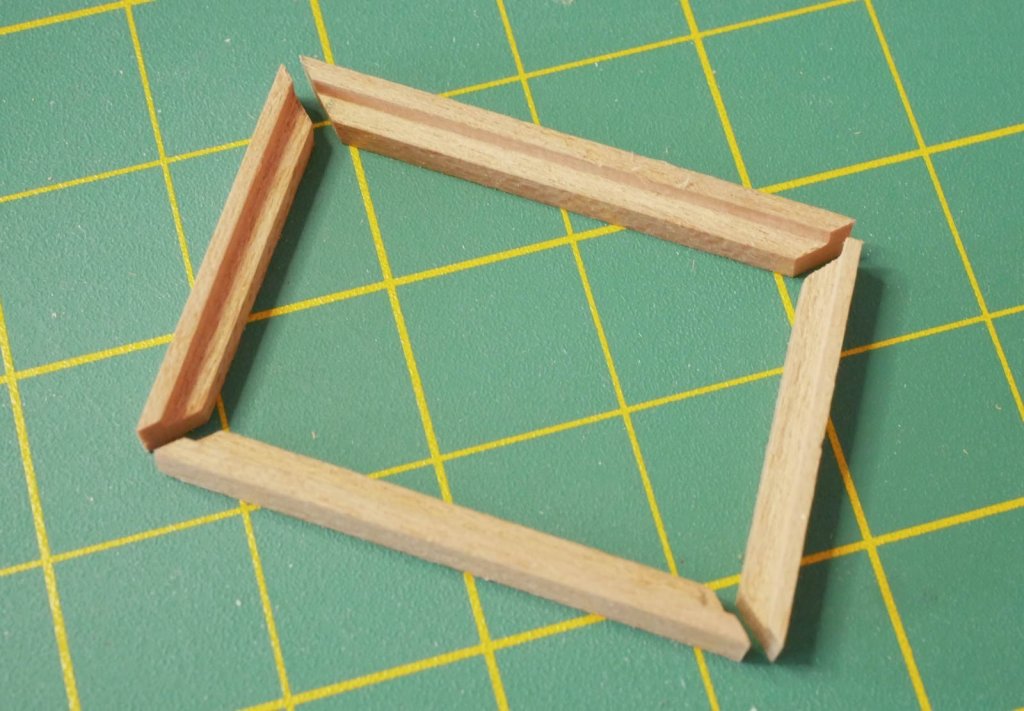
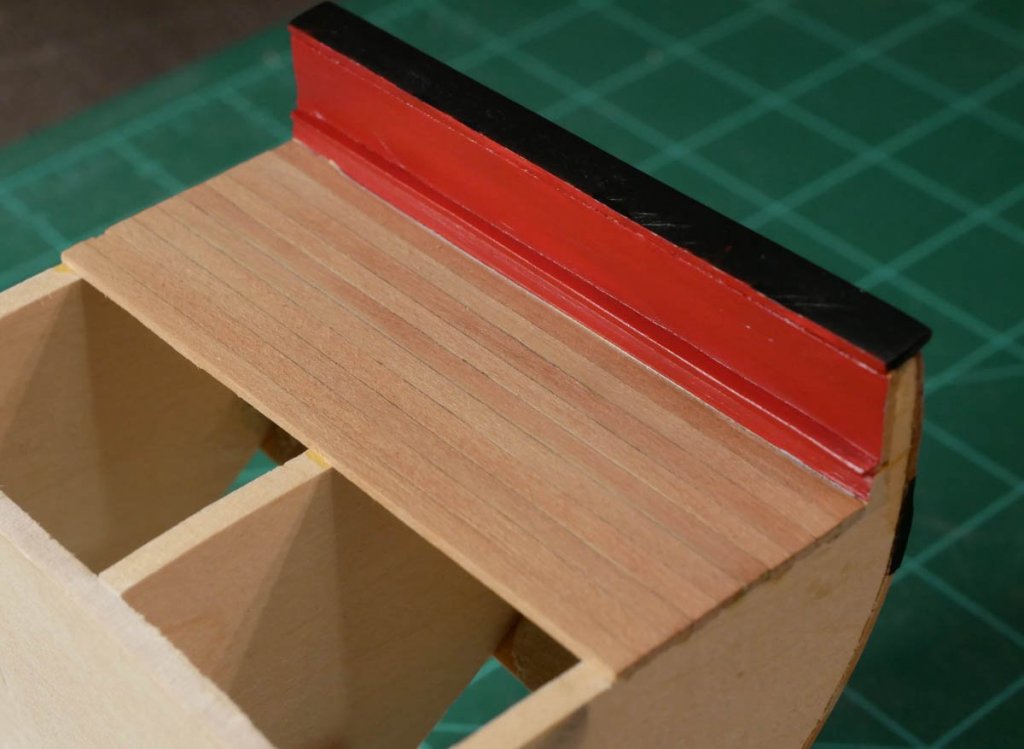
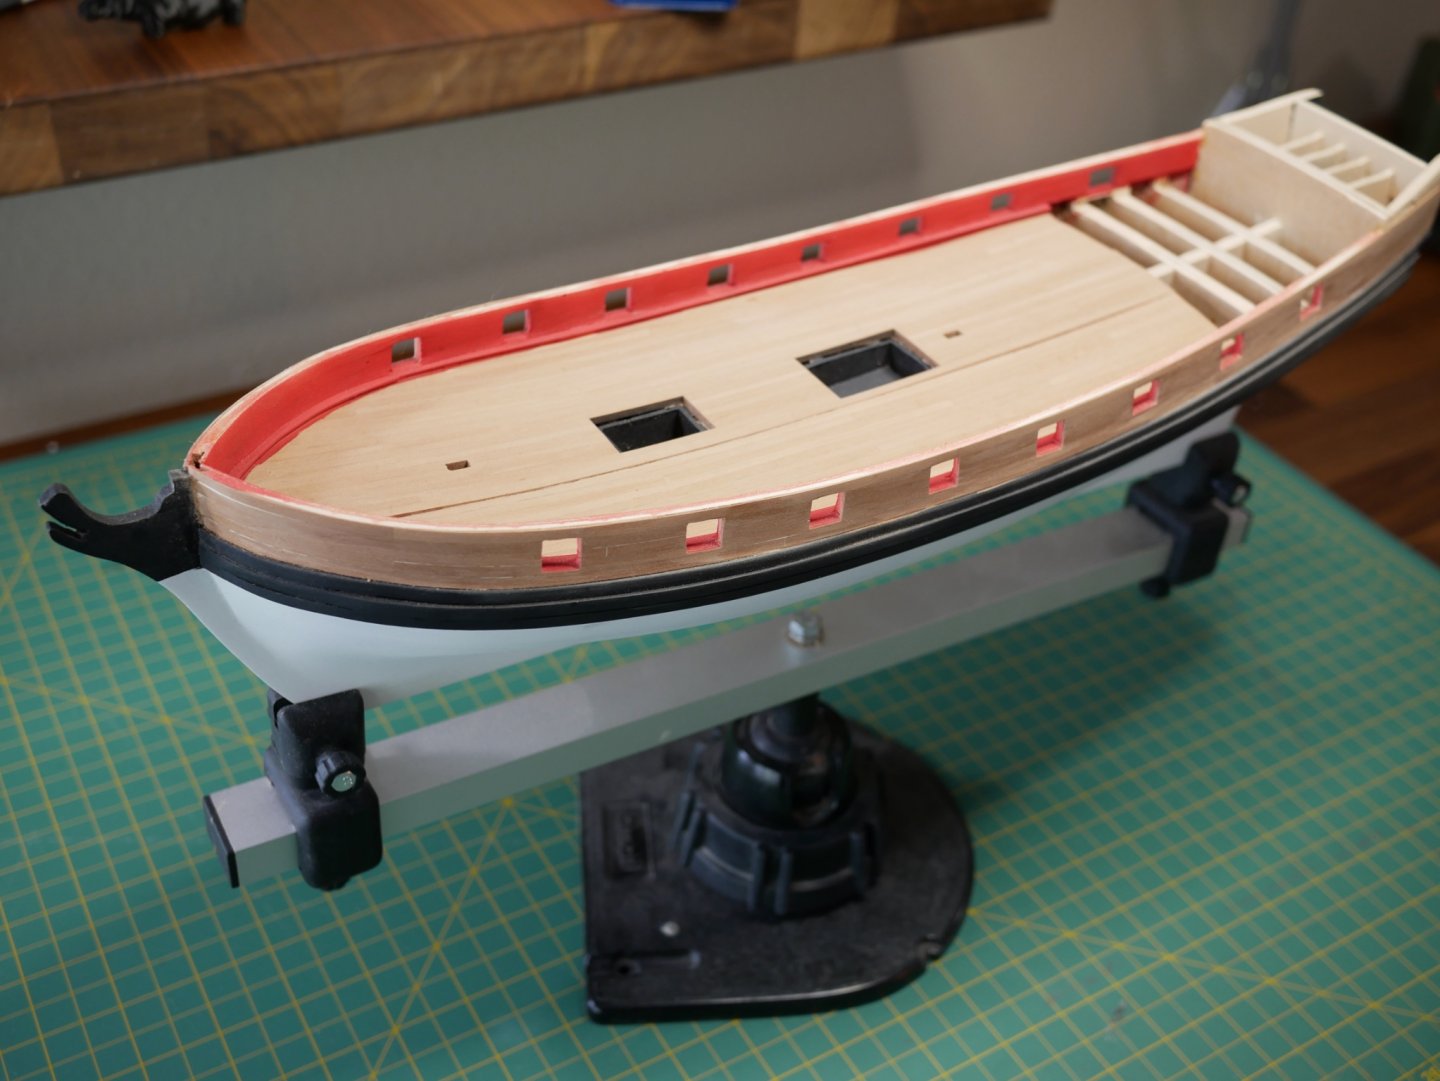
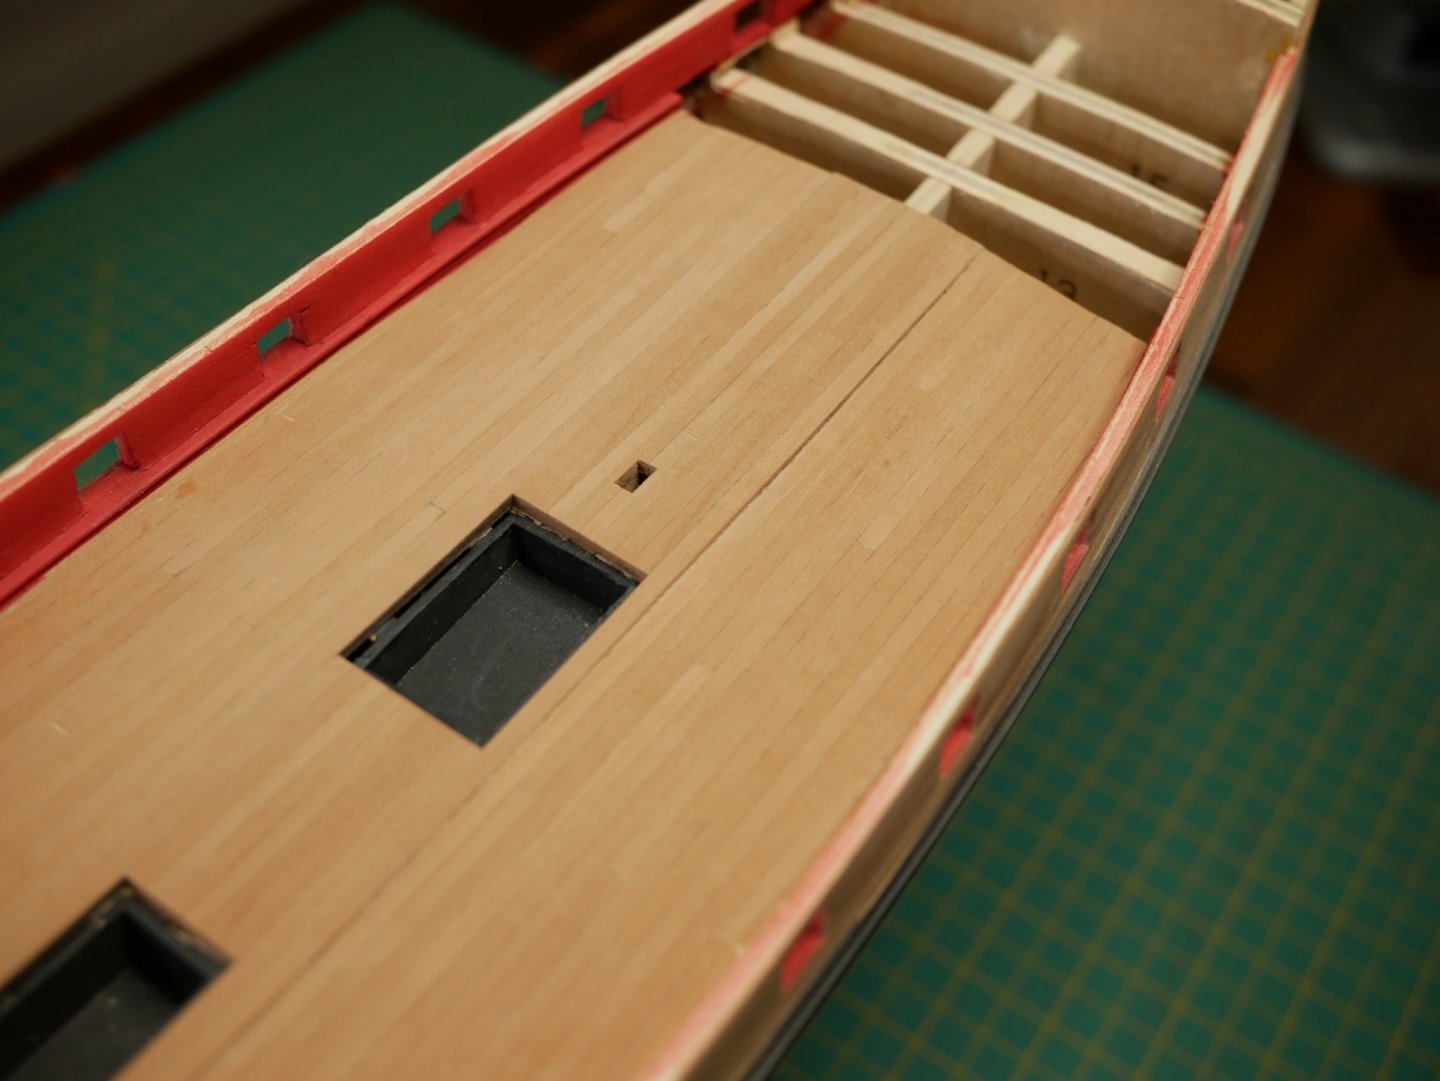
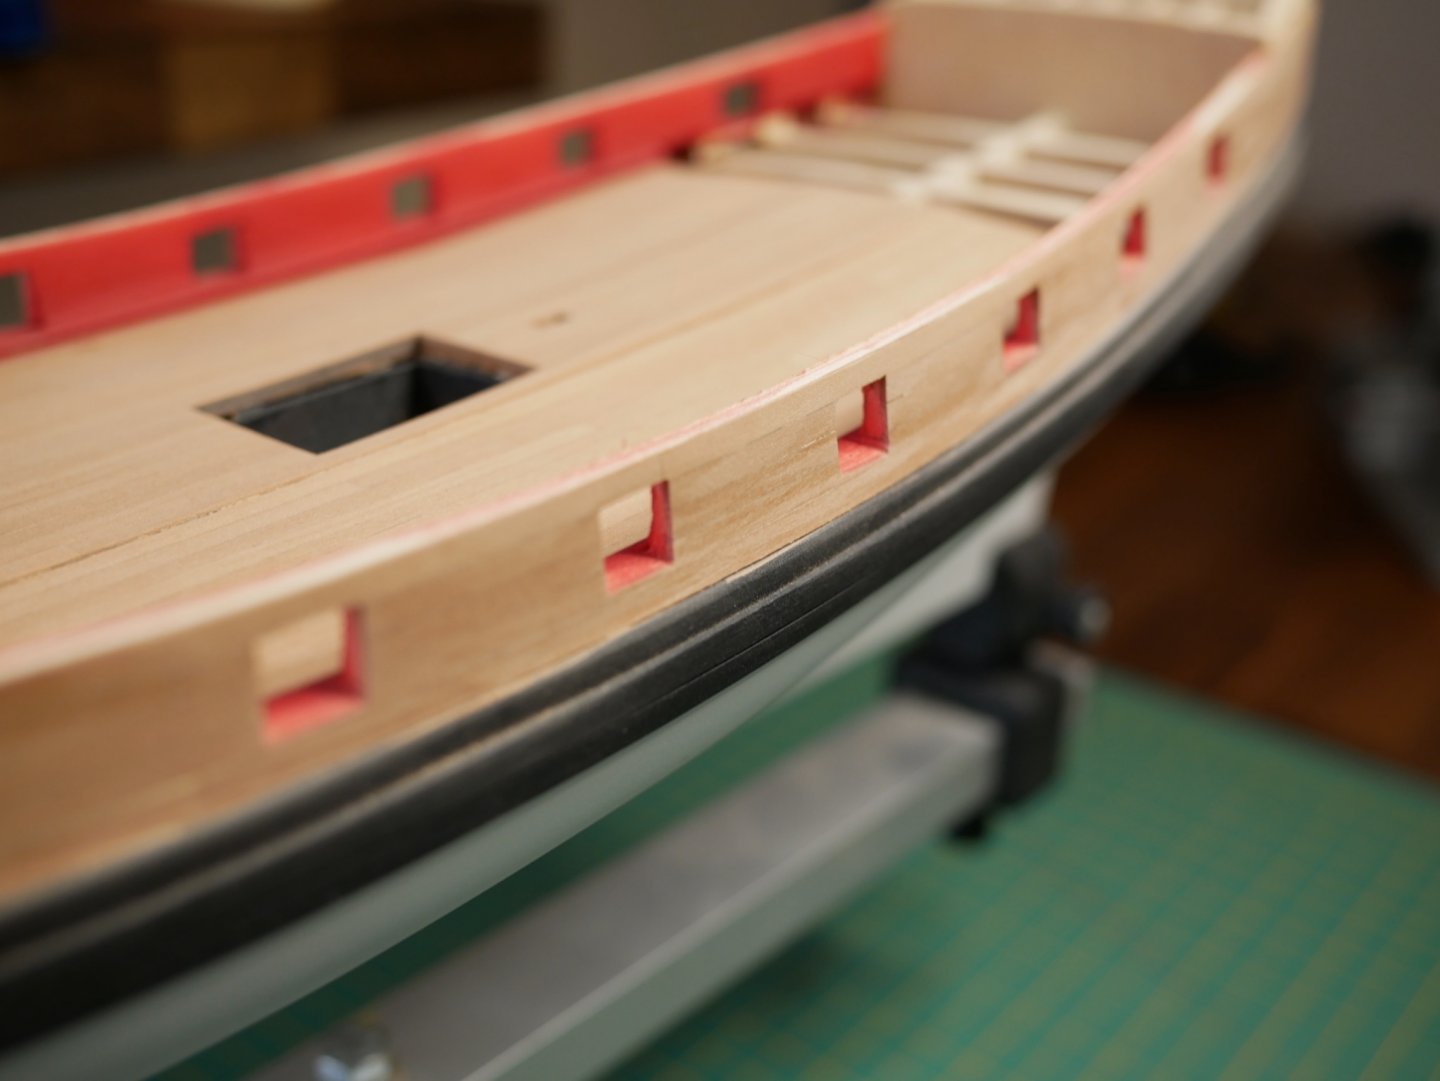
Been a while! About 10 days after my last update in June 2019, our son was born. That brought my build to a stop as I adjusted to being a first time dad. Just when that settled down, COVID hit, and once that calmed down I was crazy busy with work. But finally I’ve been able to get a little modeling done. Since my last post, I’ve gotten the deck planked back to the quarter deck. I’ve also planked the bulwarks and painted in the inboard sides. My plan was to leave the outboard bulwarks natural (planked in swiss pear), but I’ve got a few spots that required filler. I’ll need to sort that out so the filler isn’t visible or I’ll end up painting the outboard side as well. I’ll figure that out later. Right before the build came to a halt, I had been working on the stern. The kit’s white metal window frames weren’t usable. I tried making my own, but wasn’t getting results I was happy with. So I decided to go a completely different route. In December 2019, I pre-ordered a new CNC mill / laser cutter / 3D printer. It finally arrived in December 2020, and I was finally able to start playing with the CNC function over the last few weeks. I decided I would try using the CNC mill to make the stern and window frames. I drew up a model in Fusion 360, generated the tooling paths, and gave it a try. For the material, I planked a basswood sheet in swiss pear. The planked material was then cut using the CNC mill. Totally overkill, but I wanted to try and do something ‘real’ with the new machine. The piece fits perfectly, and the position and size of the windows is better than I could have done by hand. Obviously needs sanding / cleanup, and I'll need to square off the corners. Now we'll see if I can keep working on the model a little, or if it will be a couple years before my next update.
-

Model Shipways Fair American vs Syren US Brig
genericDave replied to WalrusGuy's topic in Wood ship model kits
Gregory, I wish I knew We've got a 5 month old baby that is eating up all of my free time. I've got the gun carriages made, and I know how I'm going to mill the window frames for the transom (just haven't actually sat down and done the work). I'm currently stalled on getting the bulwarks planked, and have been for months. I'm not using the kit's material, so I need to cut strips for the planking. Can't run the Byrnes saw when the kiddo is home, so I haven't been able to make the strips for planking. But after seeing Toni Levine's presentation at this year's NRG conference in New Bedford, I'm considering using her approach for the planks (which is also what she covers in the NRG's Half Hull Planking Project). This was one of many things I picked up at this year's conference. I've always cut strips, then bent and trimmed them to try and get something close to an accurate shape. The planking project's approach doesn't require cutting a bunch of strips, and instead creates accurate planks from sheet stock with a knife blade. That's quiet and can be done while the baby is sleeping -

Model Shipways Fair American vs Syren US Brig
genericDave replied to WalrusGuy's topic in Wood ship model kits
I'm currently procrastinating on my Model Shipways Fair American build. After finishing my last build, I strongly considered the Syren but went with the Fair American just to be 'different'. I've built a few Model Shipways kits, and I hate to say it, but their Fair American kit isn't quite up to par with their other kits. I think it is just the age of the kit and the revisions that have been made over the years. The plans are mix-matched and less 'clean' than other kits, and the instructions are kind of limited. I've run into numerous issues with the castings and some issues with the plans just being 'off.' I had to mill my own parts for gun carriages (the kit parts weren't usable and didn't match the plans), had to rework the size of the gun ports (plans were a little off), and currently I'm scratch building all the window frames for the transom because the provided castings are horribly malformed. Overall, I think the Fair American is great if you want to "make it up as you go", scratch building some parts, etc. It is a great subject that gives you a lot of room to be creative (being a model-of-a-model, you can add your own interpretation), but the kit itself needs some work. If you're looking for a complete, ready-to-go kit with great plans and instructions, I'd recommend the Syren. Even though it is a more advanced build, I think it would be easier overall since you won't have to solve the problems with the Fair American kit and there are a LOT more resources here on MSW to refer to for the Syren. -
@abelson, for the prototype cannon I used some thin brass strip for the straps. I'm not super happy with how they turned out...it was difficult to shape them well when they're that small. I'm not sure if I'll still use brass strips when I actually build out all the cannons. @Sea Hoss, thanks! I've actually redesigned the cannons since that post. After showing them to my local modeling group, the consensus was that they were missing a step on the sides. After some work, I ended up making them about 0.5mm taller and adding an additional step on the sides. Work over the last 5-6 months has been slow, but there has been some progress. After reworking the cannons, I got the gun ports framed. I've also ripped apart the stern, and I'm rebuilding the transom from scratch off the model similar to what others have done. This is partly because I've snapped the kit's laser cut transom parts a few times will working on the hull, and partly because the metal castings for the window frames were pretty poor in my kit, so I want to just toss the whole assembly and build it from scratch. The other next big step is to plank the bulwarks. I'm cutting my own strips to replace the kit's material, and I'm hoping to get all the strips cut in the next week before our baby is born. My wife is fine with me working on the build while we've got a sleeping baby, but would prefer I not run the Byrnes saw with a sleeping newborn down the hall
-
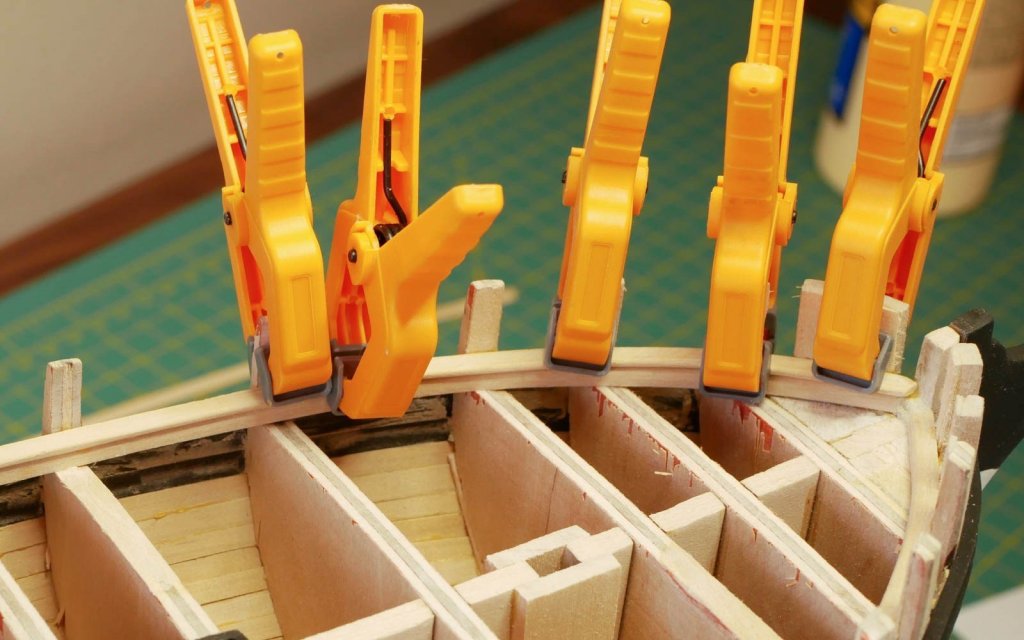
Thanks Jim and Jim! After planking the deck pad along the center of the main deck, I woke up today and decided I wasn’t happy with it. A few planks were uneven, and I realized the hatch coamings weren’t straight. So, I’ve ripped off the deck planking and coamings and I’m starting over on the deck. Better to fix it now than decide after finishing the deck planking!
-
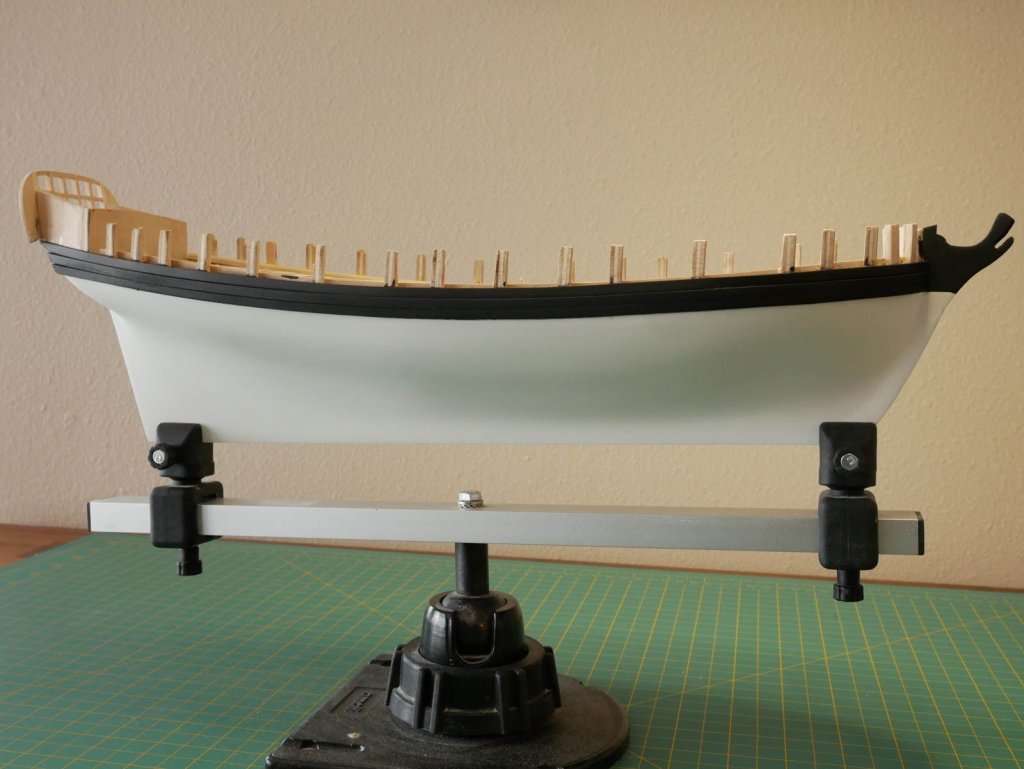
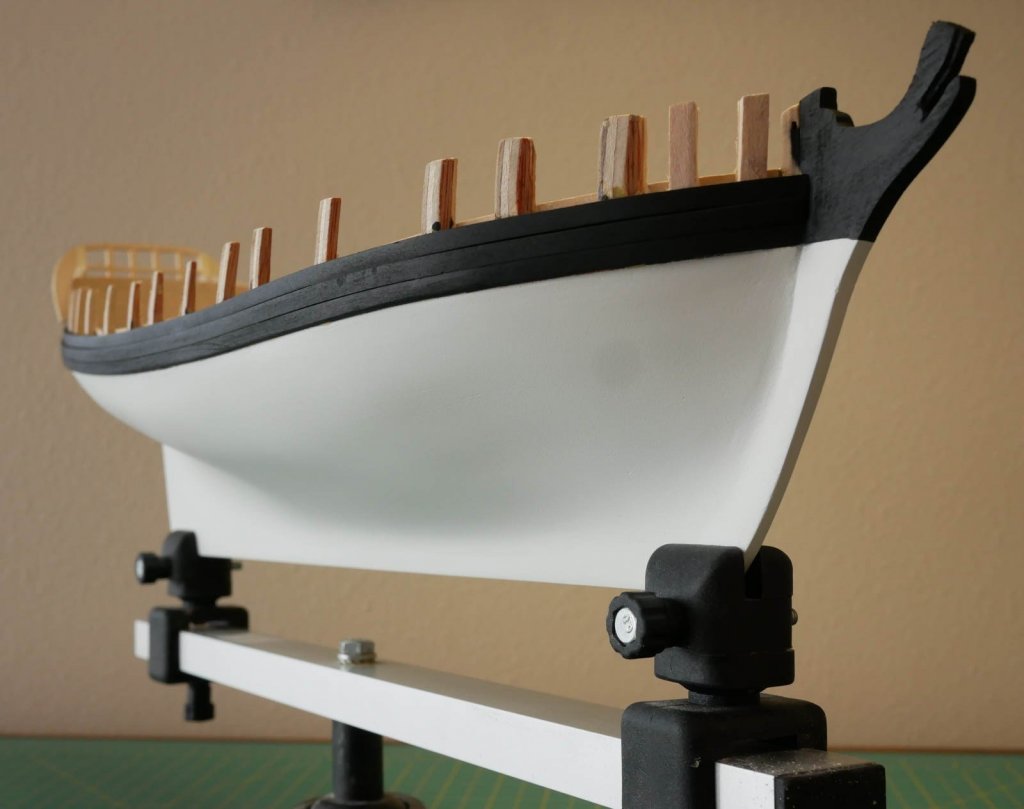
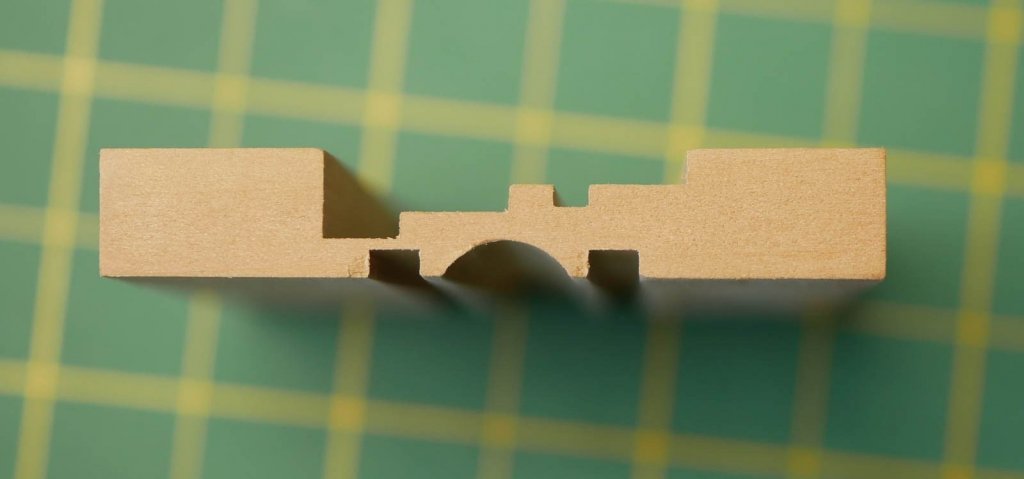
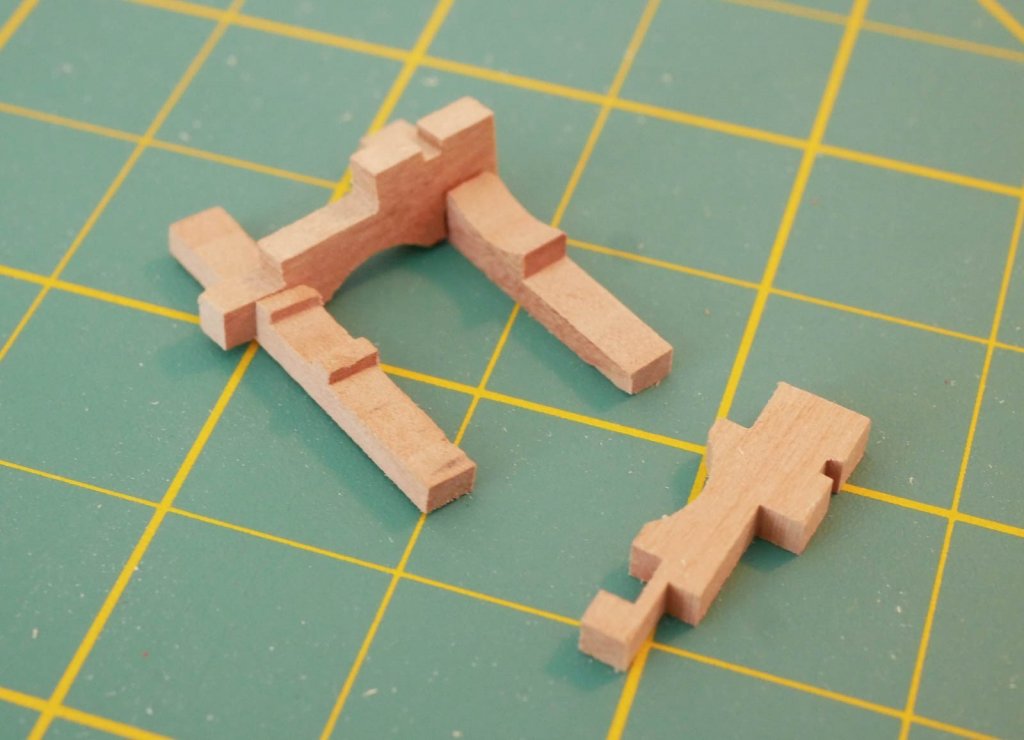
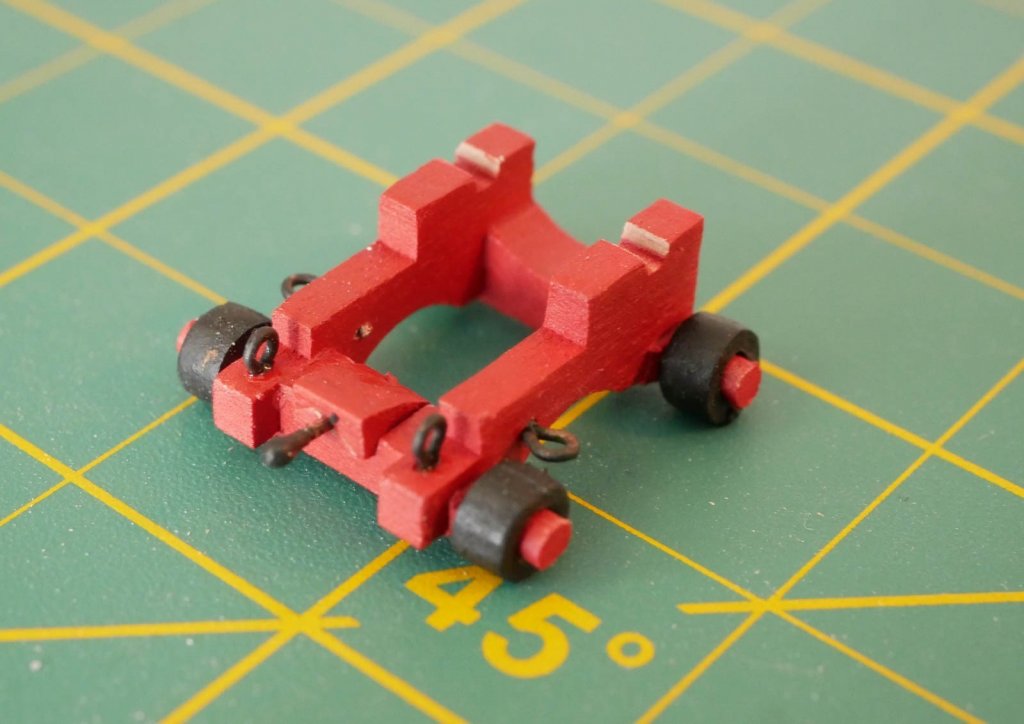
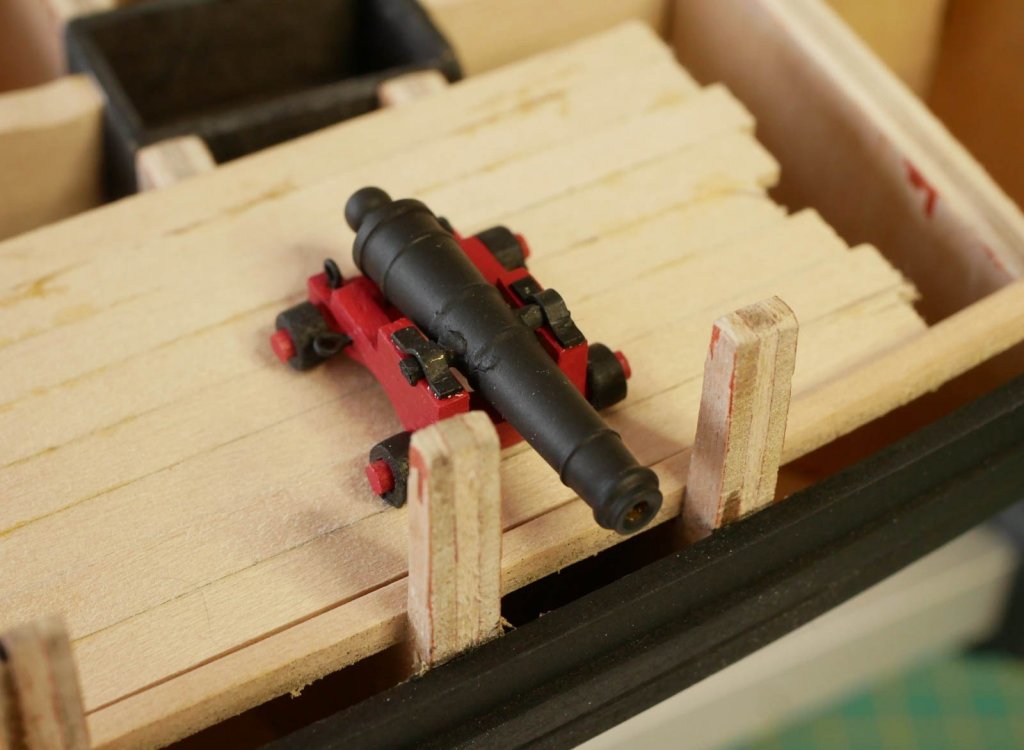
While there's been little time to really dive in and work on the ship over the last couple of months, I was able to get some work done. After several passes of sanding, filling, and repeating, I finally got the hull painted. I decided to go with just white below the wales as this seems to match what was done on the Rogers model. (As opposed to using a different shade below the waterline.). I would have liked to use a slightly antiqued white, but wasn't able to find paint I liked, so I went with a basic flat white. My paint mixing skills are non-existent. After I get the rest of the planking done (the decks, stern, and bulwarks), I'll do another coat or two of paint followed by a clear coat. With the hull painted, I shifted my attention to the deck. Given the various issues with gun port sizing that other modelers have run into, I'm planning to plank the main deck before framing the gun ports. This will allow me to place a gun on the deck to better size/position the ports. I started by installing the covering board, which went pretty quickly. The hatch coamings were next. For these, I milled the pieces to create the 'lip', then cut them to size. Also, over the last 3 months, I've been periodically playing around with building a gun carriage. I wanted to have one assembled to help with framing the gun ports, and working on that was a nice side project when I didn't feel like sanding or painting the hull. I discovered right away that the laser cut carriages provided with the kit are pretty bad. They are the wrong size (they don't match the plans), and would turn out too big. Being laser cut, they would need a good deal of sanding to remove the laser char, and I have zero faith that I can sand such small pieces accurately. Finally, the 'trucks' formed by the laser cut base are incredibly fragile (I broke 2 just removing the piece from the laser cut board) and they don't seem well suited to being rounded off to form axels. So, I decided to make my own carriages from scratch. I did a bunch of reading, looked at a lot of other carriages, and came up with a simplified design. It isn't perfectly historically accurate, but I think it comes close enough to look more-or-less correct on the model. I followed the process shown here: The pieces were milled from Swiss pear. All told, I went through about 8-10 variations of size and shape until I finally ended up with pieces that were the right size. This was the most precise/complicated thing I've done on my mill to date, and it was actually a lot of fun. I milled the sides, the front trucks, and the rear trucks separately. For each one, I made them using 4" wide pieces of wood, then 'sliced' them to the right thickness. This let me create a lot of identical pieces at once. The front truck was given a curve to allow the cannon barrel to move, and the rear truck was given a small notch to aid in placing the quoin. The width of the trucks was precisely matched to the slots in the bottom of the sides. After the pieces were glued together, the 'axels' were filed to make them round. I'm using the wheels from the kit since I couldn't find any better, so I matched the diameter of the axels to those wheels. The entire thing was painted, and the various eyebolts were installed. My prototype isn't pretty, but this one is just for gun port placement. The actual carriages I'll use on the model have all their pieces cut, but won't be assembled until I'm ready to install them. At that point I'll spend more time with getting the finish just right. I dropped a barrel in my test carriage and set it on some fake decking. Compared to the plans, this one is much more accurately sized. Now that I've got the cannons figured out and set aside, I'm going to start planning out how to plank the deck. I had wanted to plank the deck after doing the bulwarks, but I'm not confident I can correctly position the gun ports unless I can set my test cannon at each position. This means that I'll have to carefully mask off the deck when I'm working on the bulwarks to avoid marking it up or getting paint on it.
-
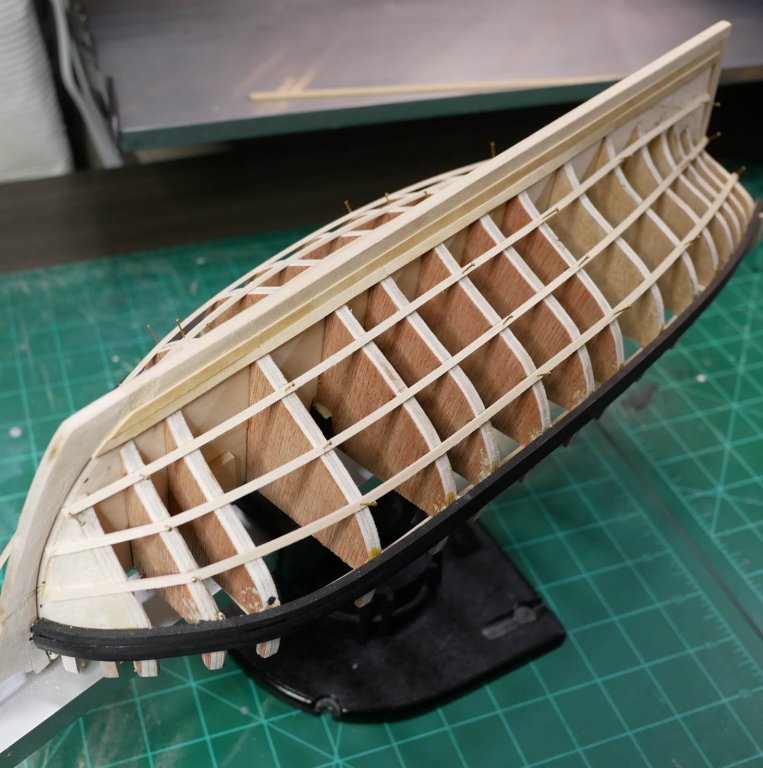
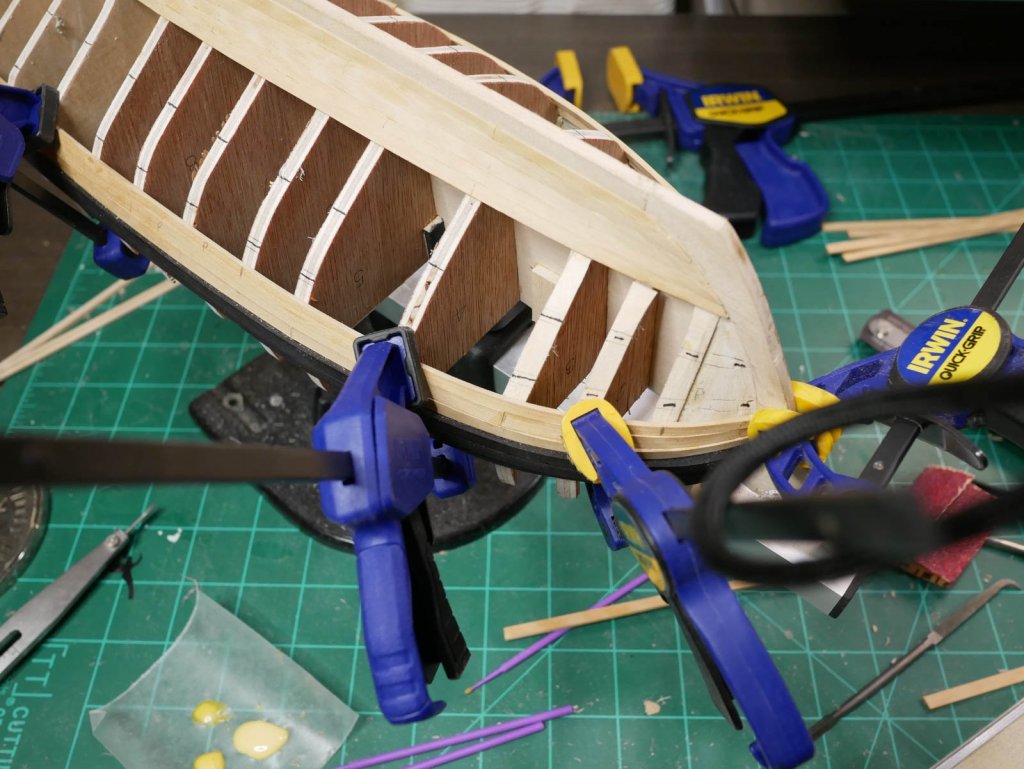
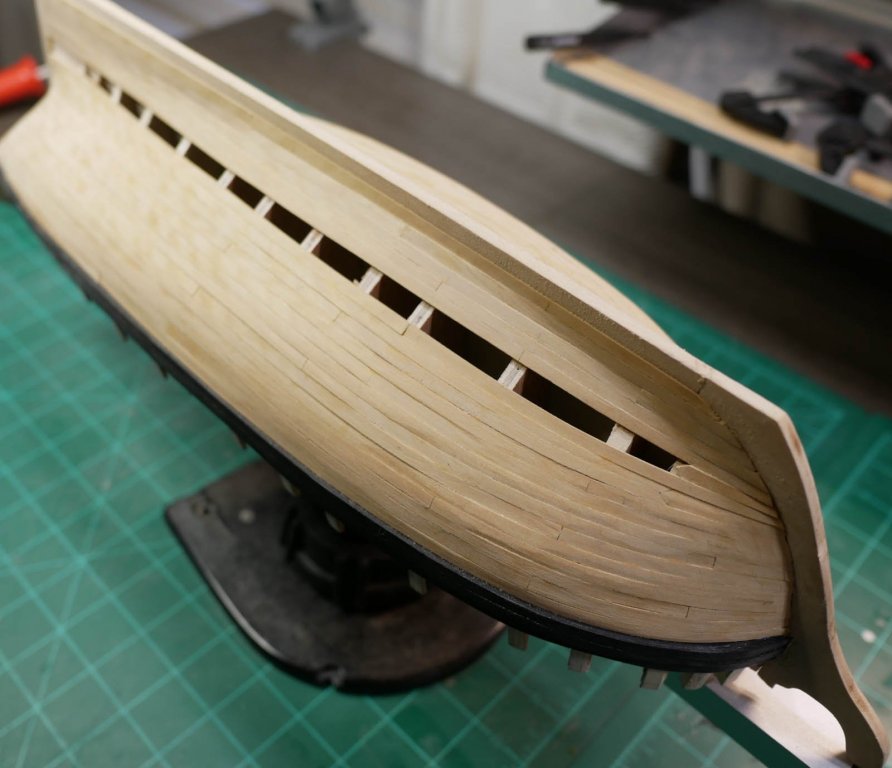
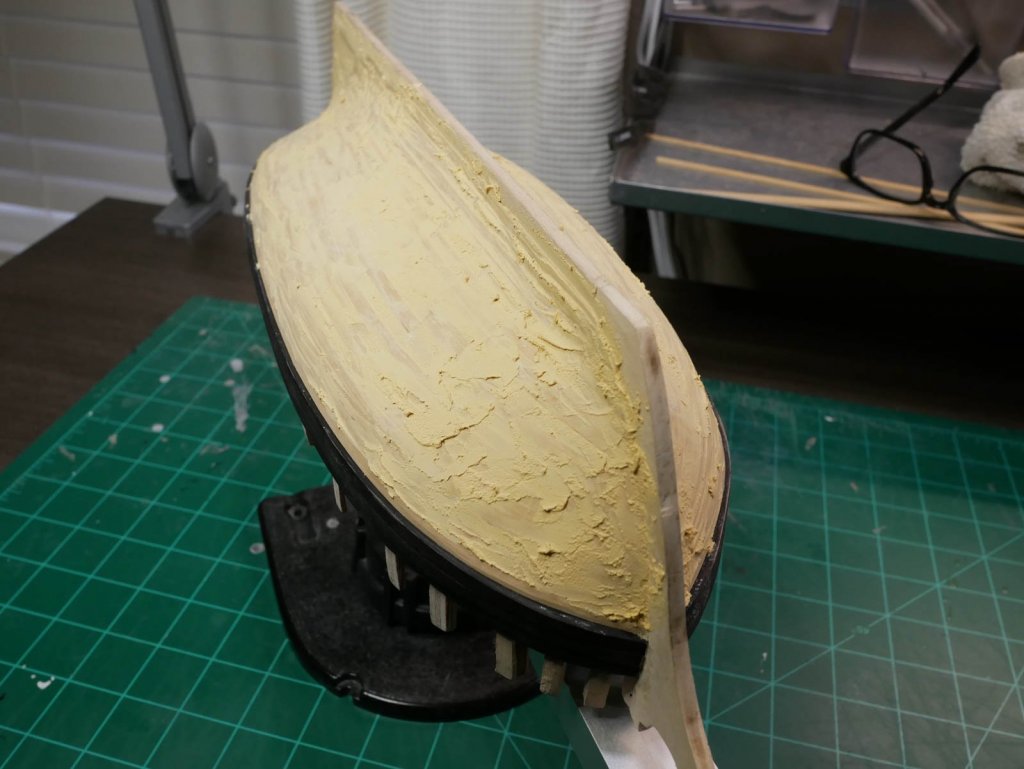
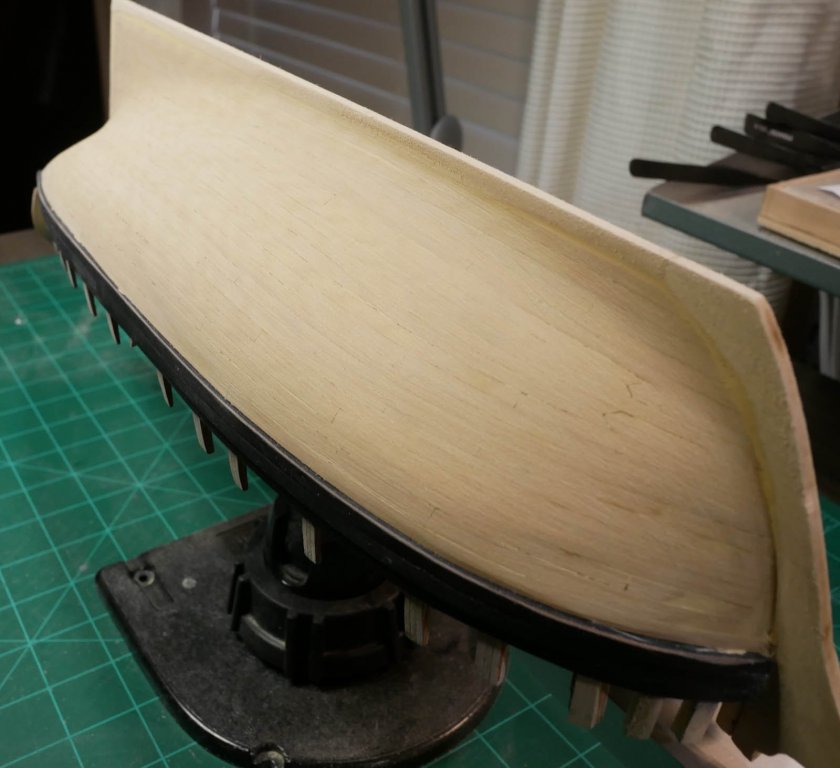
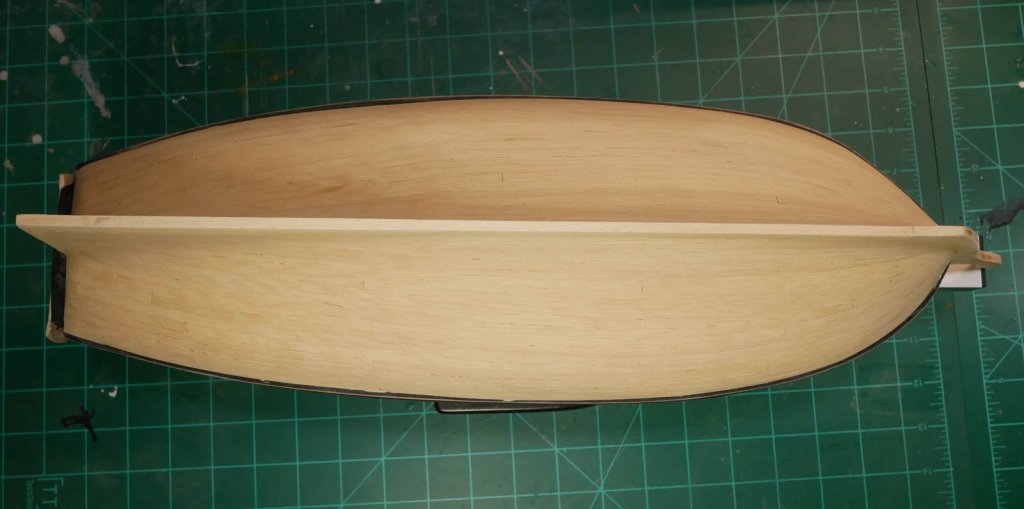
I procrastinated on planking for several months. When I was initially looking at other Fair American builds, I really liked how the planking turned out on @KenW's build and thought his model looked great with the planking left natural. I know that my planking skills won't allow me to leave the hull unpainted, but I wanted to get as close as possible. So, I found myself fearful to start planking. My previous build, the Bluenose, had very simple lines and didn't require any sharp bends, tapering of planks, drop planks or stealers. I knew I'd encounter all that here, and just couldn't bring myself to pull the trigger and start the planking. While attending the NRG conference in October, I got a lot of encouragement and advice. I returned from that trip highly motivated, and jumped right into planking. I realized that the worst case was that I ended up needing to use wood filler and paint the hull, which is actually correct for this model anyway. I started by dividing the lower hull into 4 bands. I did this by laying tape onto the edge of ever bulkhead and trimming it to fit the keel and wales. After the tape was removed, I used proportional dividers to divide it into fourths, then put the tape back on the bulkheads and transferred the markings to the bulkheads. I used some thin wood strips pinned into the bulkheads to create the bands. (At least until those strips got in the way and I removed them and relied on markings on the bulkheads.) I started with the garboard strake, which I mistakenly didn't make wide enough. Oh well...a small detail that a casual observer won't notice. I planked that band, then moved to the band next to wales, then worked my way towards the center. The planks were cut from 3/16" boxwood sheets, so each plank was 3/16" wide. Several months ago my puppy ate the planking material supplied with the kit, so when I replaced it I went with boxwood. It is overkill if I paint the hull, but I felt that boxwood would hold the edge better than basswood when I needed to taper or bevel planks. I'm not a skill level yet where I worry too much about being perfectly historically accurate, so I kind of faked the length of individual planks. I find working with shorter planks easier than trying to fit one long plank, but I didn't want to mess with trying to add blocks to support plank joints that didn't land on a bulkhead. So I went with planks of varying lengths that were close to scale length, but adjusted to the nearest bulkhead. I did *try* to follow the rules for where planks should end so I didn't end up with joints too close to each other. I found that dealing the sharp curve at the stern was difficult. My planking there ended up being a mess. At that point, I realized I would have to paint the hull since I'd need to use some filler, which removed some of the pressure to get everything perfect Almost all the planks were tapered. I didn't end up using any steelers, but I probably should have used one on each side. I did use a couple drop planks at the bow on each side. That was probably because of errors determining the plank widths for each band. Once I started on the final band, I realized the planks at the bow would be way too thin. Once planking was finished, it was very rough. Fortunately since I had cut my own planks, I made them a little thicker than necessary to give me some extra material for sanding everything down. Like I did with my Bluenose, I started the 'cleanup' by applying VERY generous amount of wood filler...basically covering the entire hull. After that cured, I spent several days sanding it all back off so that the only filler left was between planks or on things that were very uneven. I spent the next week slowly sanding those problem spots until most of the remaining filler was gone. In the end, the hull is pretty even. A non-modeler (like my wife), might say even say it looks good. There are still a few spots where the filler is visible, but those spots are smooth to the touch so I don't want to sand much further. I still need to sand a little more around the rabbet, but I'm holding off on that until I'm almost done filling/sanding/etc. I don't want to risk over-sanding that and damaging the keel. At this point, the process for the lower hull should be similar to my Bluenose. Since I'm going to paint, the goal is to get the hull smooth. I'll do another pass with wood filler to get any remaining gaps between planks (MUCH less than the first round...just hitting the problem spots), then I'll sand that down, followed by a series of sanding passes with 200 and 400 grit paper. After that, I'll primer the hull and sand again. At that point, there will likely be a few flaws that are visible and I'll tackle each of those individually. Hopefully after that I can do a light first coat of paint on the hull. I'm going to hold off on the final coat until I get further along in the build.
-
CPDDET started following genericDave
-
Just booked my trip for the conference! Excited about the line up and the chance to meet everyone in person!
- 19 replies
-
- nrg
- conference
-
(and 2 more)
Tagged with:
-
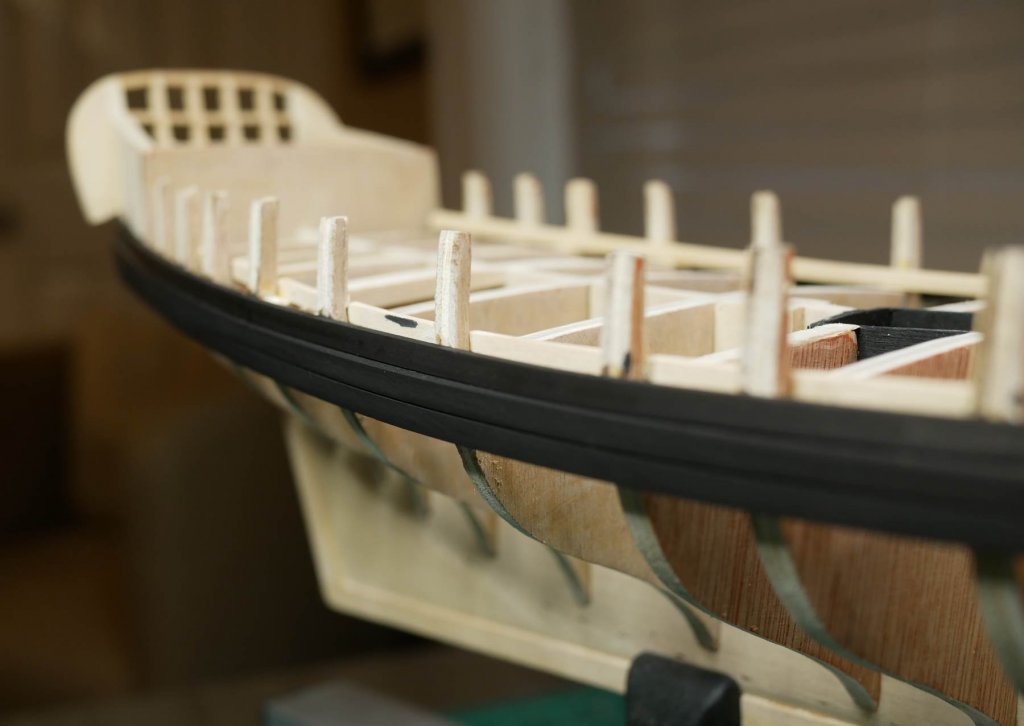
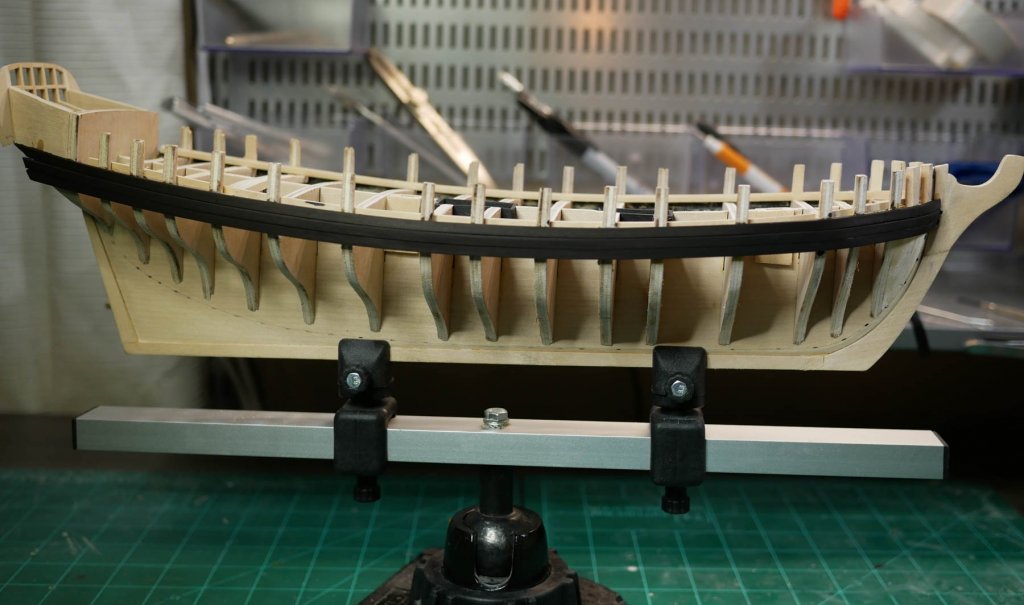
It has been a while, and I've only had a chance to tackle a few things. None of it took very long, but my schedule has had me going a few weeks at a time without touching the ship. The waterway was installed. This was the first piece that I made from boxwood instead of the kit's basswood. I cut the strips from some boards and sanded them to create the angle shown in the plans. I didn't bother running them all way to the last bulkhead since that area will be covered with the cabin. I also tackled the black strake and the wales. These were also cut from boards instead of using the kit's basswood. For these, I went with Swiss pear, because I had seen a mention in a thread somewhere that Swiss pear looks really good when you use black leather dye on it instead of paint. My tests looked great, so I decided to proceed with pear for the strake and wales. I found the Swiss pear difficult to bend, even with water and heat. The bow requires a very tight curve and it took several tries to get the pear to bend that way. Since these are black, I probably should have used boxwood instead. Oh well. It worked out, just took more work than it should have. I plan to tackle the lower hull planking next. It will likely be a long process since I'll be cutting the planks from boxwood myself. I'm going to try to do a 'correct' job with the planking, so I'm planning to do a bunch of reading before I start.
-
 genericDave reacted to a post in a topic:
New to ship modelling? But what do you build first?
-
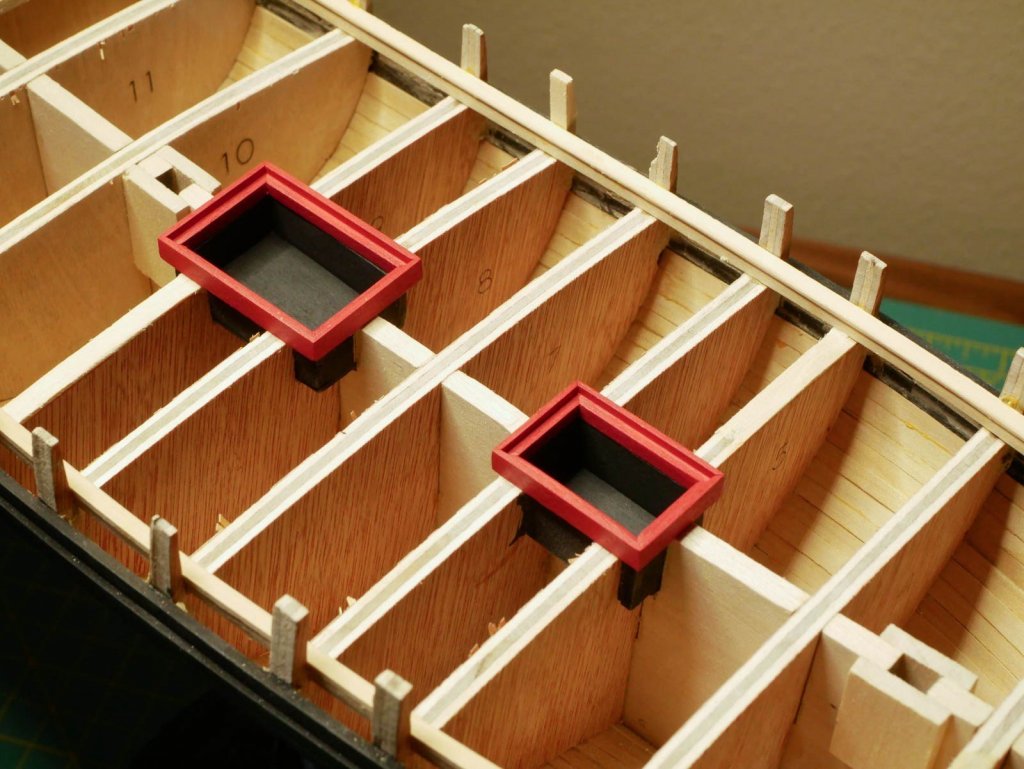
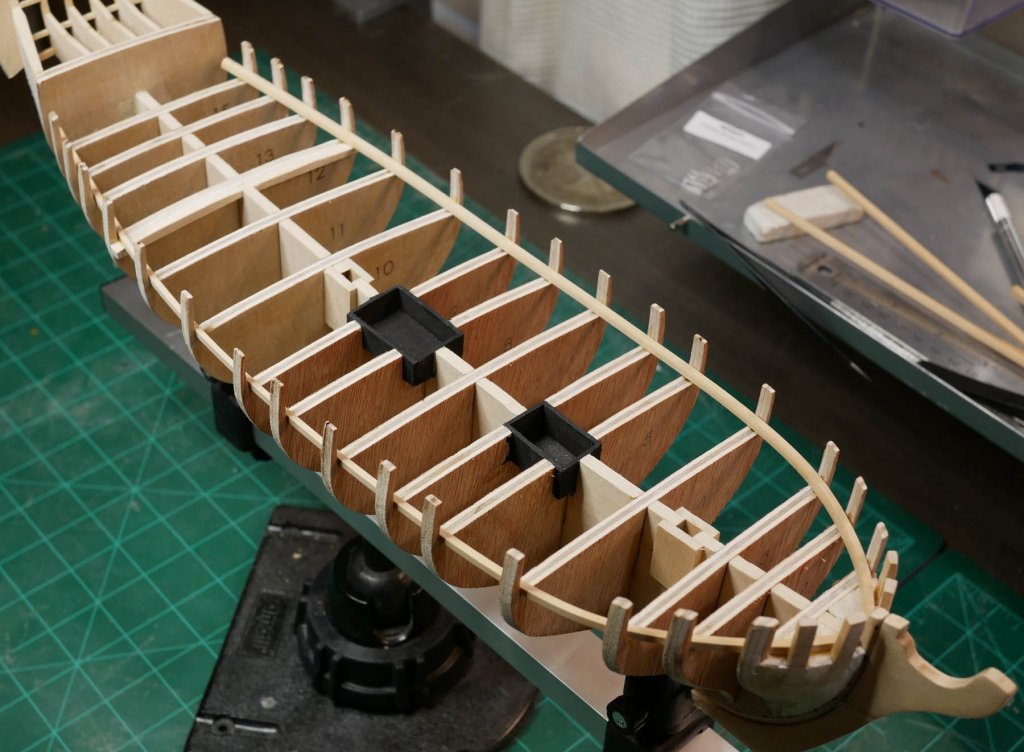
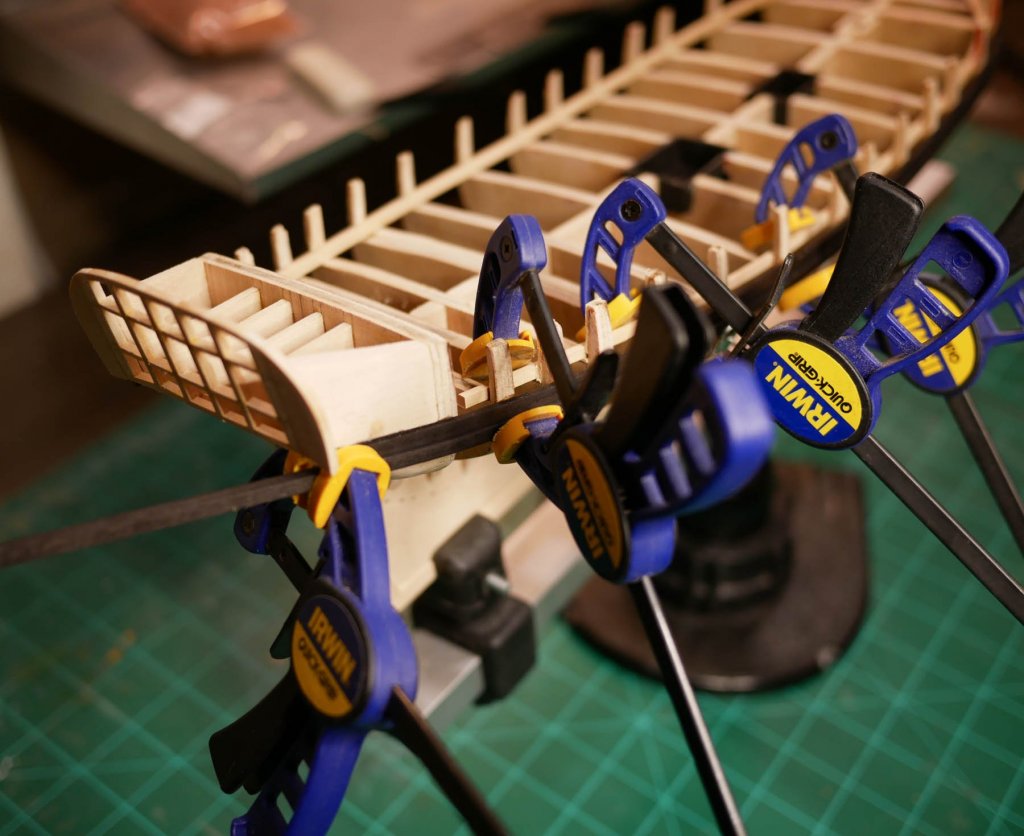
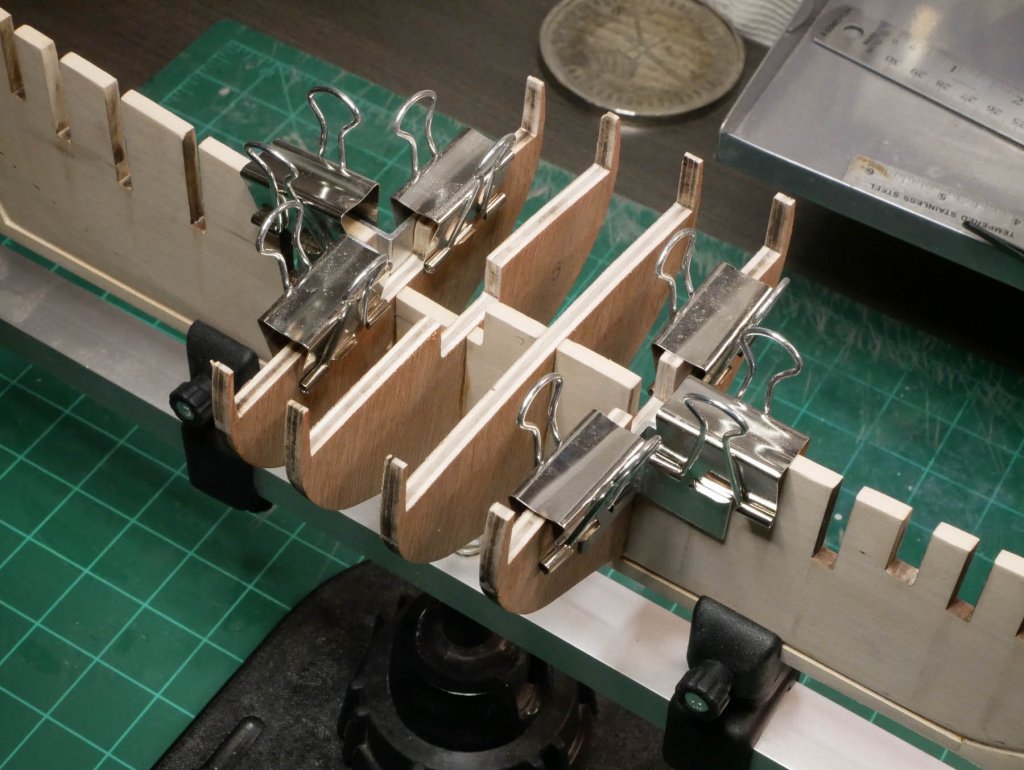
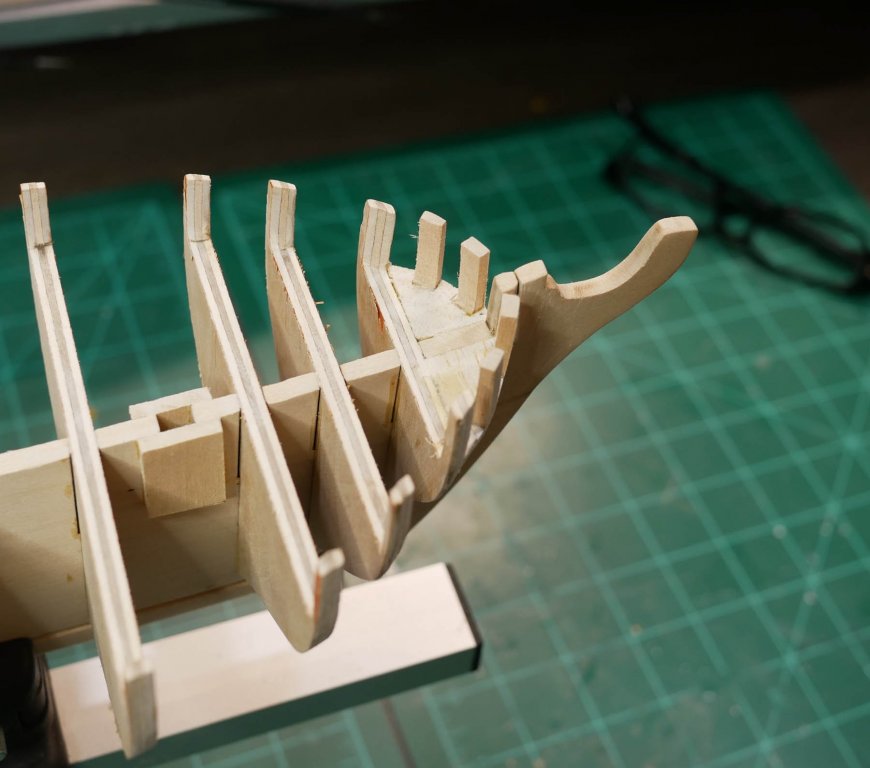
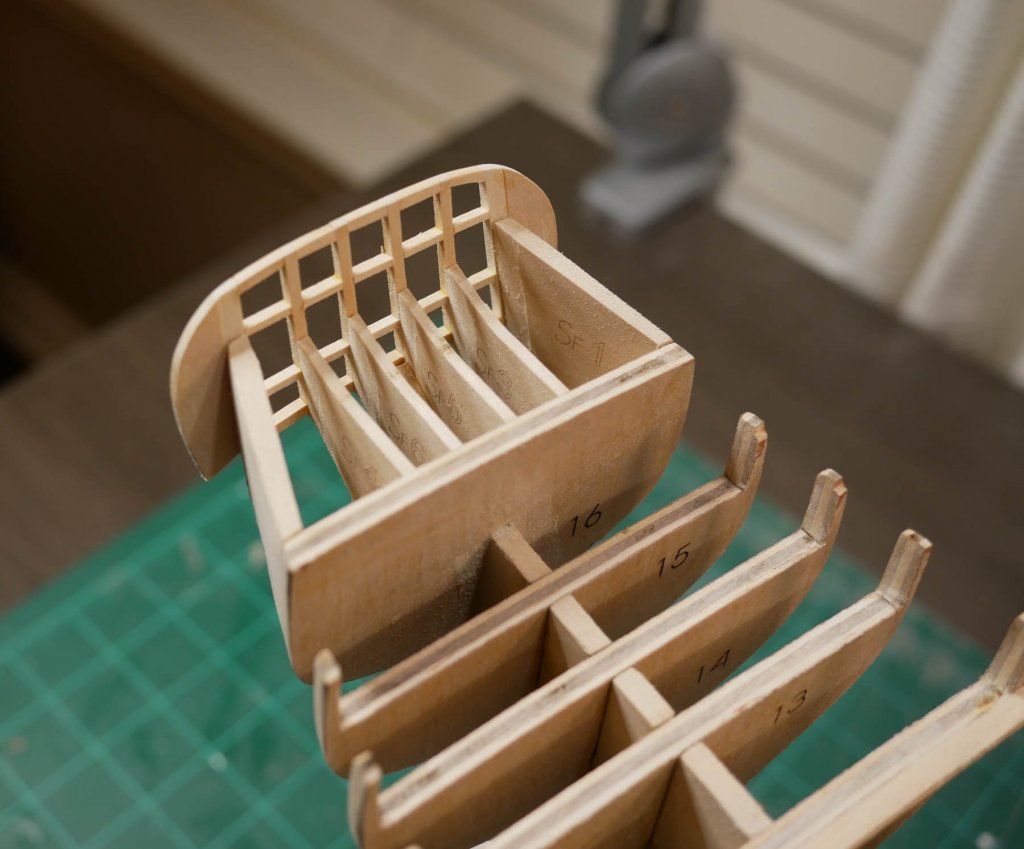
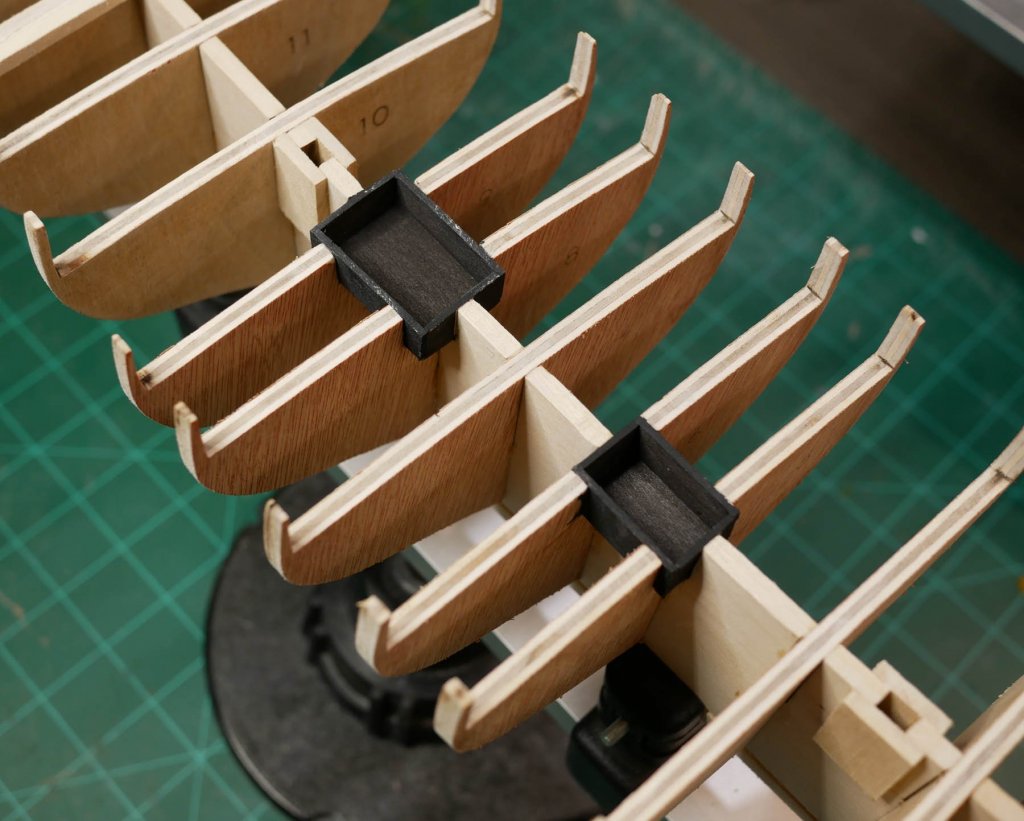
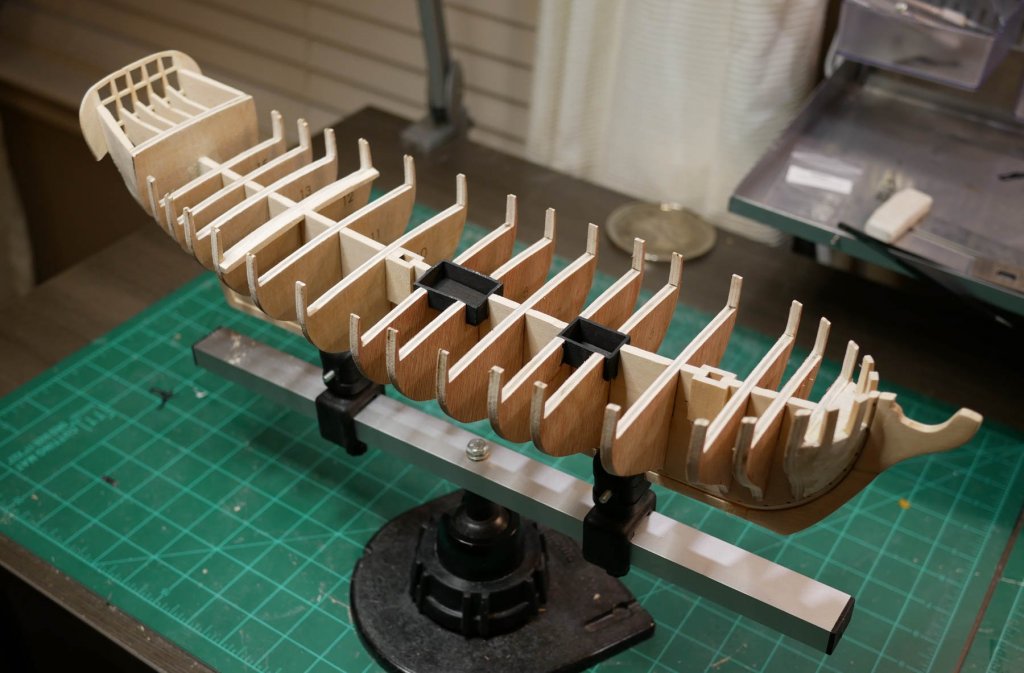
After spending a couple weeks figuring out what to do with wood and getting the materials ordered, I finally got a chance to dive back into the actual build. The kit's instructions and plans suggest fairing the hull by beveling the bulkheads before installing them, rather than sanding the edges after they are glued in. I considered trying this, but ultimately went with the traditional method of gluing in all the bulkheads and sanding the edges down afterwards. I was worried that beveling in advance might result in some bad angles. The bulkheads were glued in, working from the center out. Next I did a round of fairing the hull. I plan to do a final hull fairing round right before planking (after I get all the filler blocks and framing installed), so this first pass was just to rough in the general shape. I did a horrible job at fairing the hull on my Bluenose, so I spent a lot more time on it for this build. I built out the mast slots and moved on to the bow filler blocks. These were roughly cut using a hand saw and Dremel, then glued in and shaped by hand with a sanding block. I approximated the timber heads and knight heads and got those installed. I'll clean up the shape of those during my next round of hull fairing. At the stern, I got the wing transom installed and made the stern filler blocks using a similar method to what I did for the bow. Then the stern frames were added along with all the various plank supports. I'm not sure yet how I'm going to handle the window frames. I might use the kit's cast metal pieces, or I might try to make the frames myself...I'll figure that out later. For now, I added some framing around where the windows will go so I can keep my options open. Around this time I noticed that my stern wasn't straight. The last bulkhead (and the wing transom, filler blocks, and all the framing), was tilted a little bit. I'm not sure if this was caused by a bad job of installing the last bulkhead, or if it was a result of all the other work on the stern. Regardless of the cause, it was off by enough that it was going to be a problem. So, I cut the stern assembly off the ship. I removed the sternpost, then used a thin saw blade to cut through the keel, following the shape of the filler blocks and the last bulkhead, taking the entire stern assembly off as one piece. I did some cleanup on the cut edges, then glued the assembly back on with the correct alignment. A couple years ago this kind of mistake would have caused me to abort the build, but now I realize it's all just wood, and it can easily be cut/glued/remade. After a couple hours of work, I had everything reinstalled and the problem was fixed. I'm a little concerned about the strength of the joints, but once the planking is on I think everything will be firmly held in place. Next I added a beam just before bulkhead #12 to support the deck planking where it will run up to the front of the house. I also decided to go ahead and build out some fake interiors for the hatches. The plans indicate that the hatches are kind of see-through, so the center keel and bulkheads have some open space below each of the two hatches, and the kit recommends painting these space black so it looks good through the hatch grating. I decided to use some thin sheet material and build some boxes to enclose those spaces. Rather than painting them, I actually dyed them black before installing them using some leather dye. While researching what woods to use, I ran across some posts here that mentioned that black leather dye on swiss pear looks great for anything that needs to be black. I tried it out on some scrap pear and was really impressed. Since I still had the dye out on the workbench, I decided to use that for the hatch interiors rather than black paint. These probably won't be noticeable once the deck and hatches are in place, but I had a little extra time and wasn't ready to move on to bigger things I think my next step will be to install the waterway. I'm going to run the waterway the entire length of the ship, even though it will be hidden by the quarter deck after bulkhead 12. That seems to be the recommended approach since it will strengthen the hull a bit. Before I glue it in, I'll do a final fairing of the inboard edges. The waterway is going to be the first piece that I'm making from boxwood (from some tests, I think I can more accurately reproduce the taper on the waterway using boxwood). I received my shipment of boxwood from Syren last week, and I've got my new slitting blade from Byrnes, so I just need to stop procrastinating and cut some strips!
-
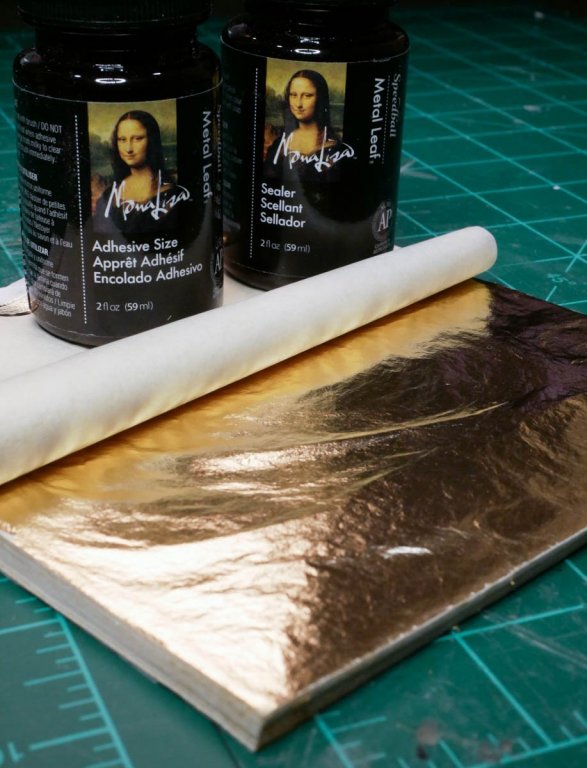
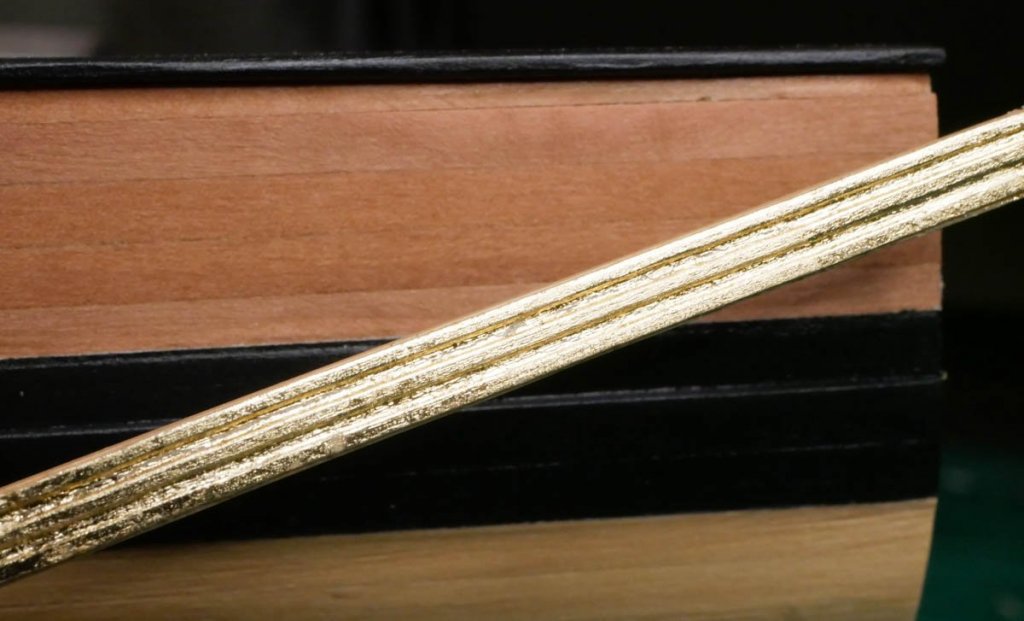
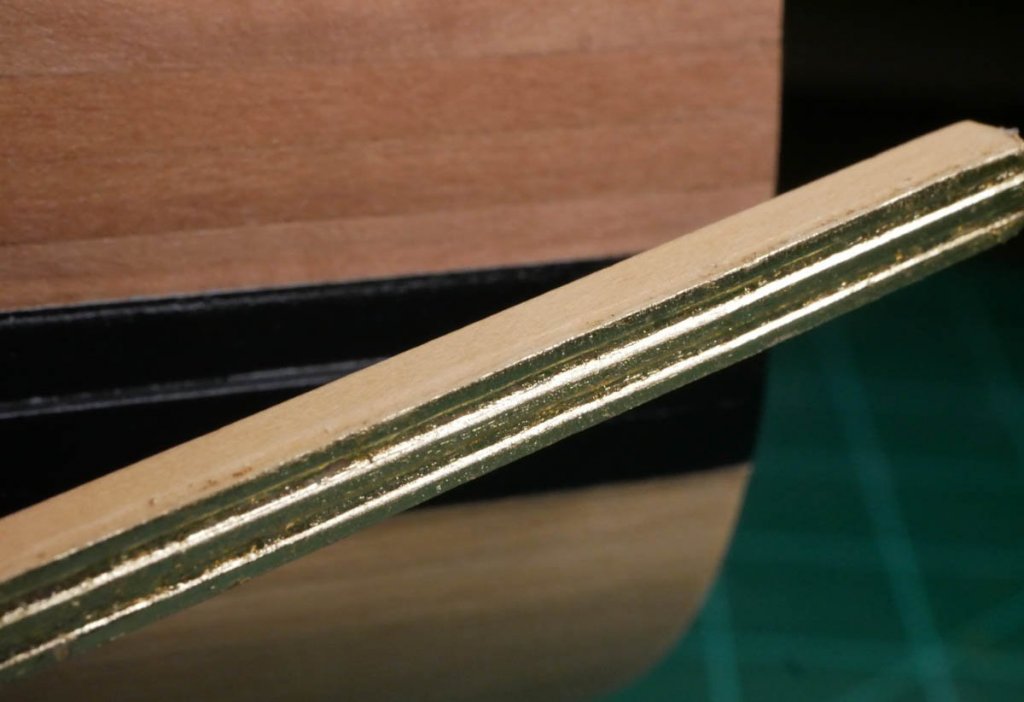
I decided to try gilting some wood as a way to procrastinate on fairing the bulkheads. The Fair American plans indicate that several parts should be finished in 'gilt'. I've seen some models where these parts were just painted with a golden color. I've had mixed success with metallic paint in the past, so I decided to try some actual gilting. I thought I'd test this out now while I'm waiting on wood to come in. I picked up some sheets of gold colored leaf and some 'size' adhesive and sealer (about $20 total). The gold leaf sheets I'm using aren't actually gold - just gold colored. You can get actual gold leaf for a little more $$, but I don't think it really matters for a model ship. The process is pretty simple. Seal your wood (the size needs a non-porous surface). Brush on the 'size' (adhesive), and let it sit for 15-30 minutes. Lay a sheet of gold leaf over the piece, and press it on. Let it sit for a bit. Brush off any loose gold leaf and cover everything with the sealer. The results were pretty good. Not perfect, but pretty good. Definitely better than I think I could do with gold paint. The test piece was just some scrap boxwood that I milled to have a little relief. The test piece was about 5/32" wide. I can probably get better results after a little practice. For now, I think my plan is to use this technique for all the parts that call for gold. Some macro shots of the results:
-
Thanks @Jim Rogers! They looked they were back up, but I wanted to make sure before I placed an order. Just ordered the Swiss pear from them and the boxwood from Chuck. i also ordered a slitting blade from Byrnes to get a little better quality once I start cutting planks. Now I just need to get those bulkheads faired before the wood comes in!
-
@Tigersteve, @Jim Rogers, thanks! I'm pretty happy with how it turned out! @petervisser, thanks! The wood I'm working with now was bought from Wood Project Source back in January. I ordered one each of several types so I'd have some samples to work with. They don't appear to be taking orders right now, so I'll have to get the wood for the build from somewhere else. Right now I'm planning on ordering the boxwood from Syren. For the swiss pear, Crown lists is on their site, but I'm not sure if they are back up and running yet. I also know of a couple fine wood dealers here in town, so I might check there for the pear as well.
-
 genericDave reacted to a post in a topic:
Fair American by genericDave - Model Shipways - Scale 1:48
-
 genericDave reacted to a post in a topic:
Fair American by genericDave - Model Shipways - Scale 1:48
-
 genericDave reacted to a post in a topic:
Fair American by genericDave - Model Shipways - Scale 1:48
-
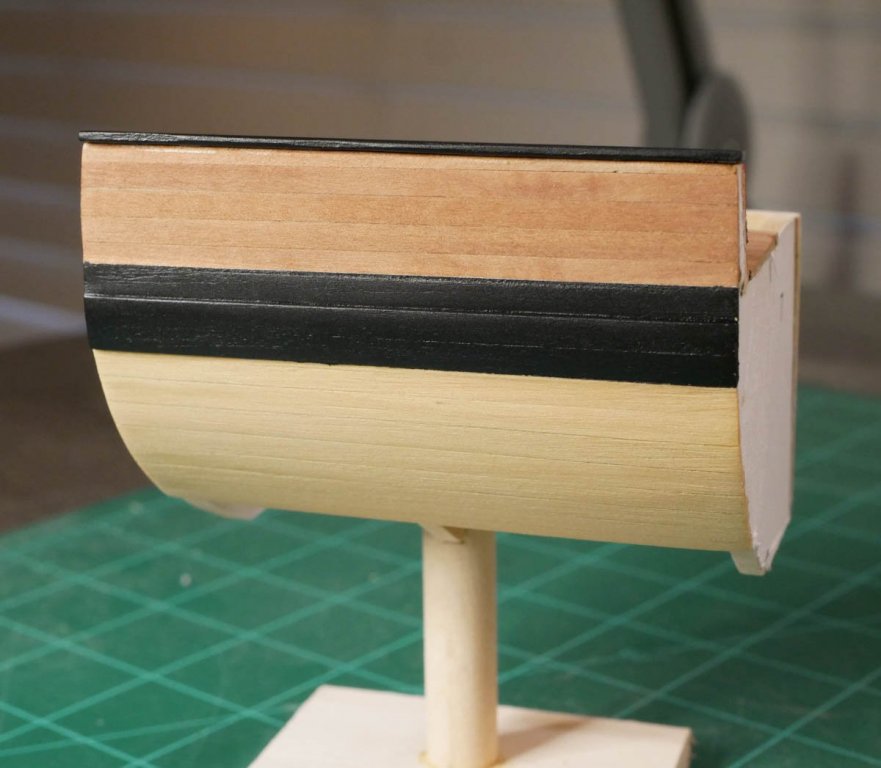
So, since my puppy ate my planking, I thought I'd look into replacing some of the kit wood with better materials. Since it can take a month or two to get a wood order delivered, I thought I better figure this out before moving on. I read through a bunch of threads and articles in the database, and chose a few woods to start with. Earlier this year I ordered some samples of several woods, so I used those and built up a little test model. My focus here was on a couple things: Can I actually cut usable planks from boards with my table saw? Will the higher quality woods produce better results? Can I create a color scheme that I'm happy with? My test build was done in about 4 hours (including cutting all the planks), so it isn't necessarily the best planking job I started by taking scans of the plans and making some templates of bulkheads 7-9 (which are fairly straight and don't require bending planks). I cut those out on my scroll saw. I made all the planks and assembled and painted everything. I'm pretty happy with how it turned out, and I think this is what I'm going to with. The lower hull planking is boxwood, to give the lower hull a lighter look that's seen on most Fair American builds. The wood was left natural aside from some wipe-on poly. My hope is to leave the lower hull unpainted on the actual build. The wales and 'black strake' are swiss pear. Even though I painted it here, I've read that many people have had great results replicating an ebony look by dying swiss pear with leather dye, which is why I'm working with swiss pear for these. My order of leather dye won't be here for a week, so just painted these parts for the test. For the test, I primed them with a lacquer based primer and airbrushed them black. The outboard bulwarks are swiss pear. I don't really care for the yellow painted look the plans call for, and I've seen a few builds that used a different shade of wood for the bulwarks to give them some distinction from the rest of the hull. I left it natural, with a final coat of poly. The cap rail was made from boxwood, primered and airbrushed. The inboard bulwarks, cover board, and waterway are boxwood. Since these are going to be painted red, the actual material doesn't matter that much as long as it has good sanding/finishing quality. I just used some 'Insignia Red' paint left over from my Bluenose build for the test. I'm planning to find a red that is a little more muted for the actual build. The deck is also made from swiss pear. I like that the shade of the wood here matches the outboard bulwarks...I don't want too many different colors/textures. This was my first experience actually working with anything other than basswood. I'm really shocked at how much of a difference the wood makes. I told my wife that all my ship builds just got a lot more expensive The boxwood and swiss pear feel more solid. They cut easily, but have crisper lines. I find it way easier to sand and finish the wood while keeping straight clean lines. I'm going to stare at this over the weekend, and if I still like it on Monday, I'm ordering a bunch of wood!
About us
Modelshipworld - Advancing Ship Modeling through Research
SSL Secured
Your security is important for us so this Website is SSL-Secured
NRG Mailing Address
Nautical Research Guild
237 South Lincoln Street
Westmont IL, 60559-1917
Model Ship World ® and the MSW logo are Registered Trademarks, and belong to the Nautical Research Guild (United States Patent and Trademark Office: No. 6,929,264 & No. 6,929,274, registered Dec. 20, 2022)
Helpful Links
About the NRG
If you enjoy building ship models that are historically accurate as well as beautiful, then The Nautical Research Guild (NRG) is just right for you.
The Guild is a non-profit educational organization whose mission is to “Advance Ship Modeling Through Research”. We provide support to our members in their efforts to raise the quality of their model ships.
The Nautical Research Guild has published our world-renowned quarterly magazine, The Nautical Research Journal, since 1955. The pages of the Journal are full of articles by accomplished ship modelers who show you how they create those exquisite details on their models, and by maritime historians who show you the correct details to build. The Journal is available in both print and digital editions. Go to the NRG web site (www.thenrg.org) to download a complimentary digital copy of the Journal. The NRG also publishes plan sets, books and compilations of back issues of the Journal and the former Ships in Scale and Model Ship Builder magazines.



.thumb.jpeg.21ec7dcb4a677d20ec17ece6b0b61451.jpeg)
.thumb.jpeg.9766b9200653b2d88a2c533043611c93.jpeg)
.thumb.jpeg.ca49de619de51afde7aef32ec4f50c79.jpeg)
.thumb.jpeg.ed6852f0f8fb0e3b0d7ed3fe9096e24e.jpeg)
