


mikiek
-
Posts
2,276 -
Joined
-
Last visited
Content Type
Profiles
Forums
Gallery
Events
Posts posted by mikiek
-
-
Michael,
They do have inhauls. Depending on the navy and even the captain, they might or might not be rigged until actually needed to run in a gun. They were usually not rigged until the call for "action" except for maybe an inspection. They would be something else to trip over.
What about rough seas (lakes)? If a gun were left untethered, how much pitch would it take before it started rolling?
-
-
-
-
-
-
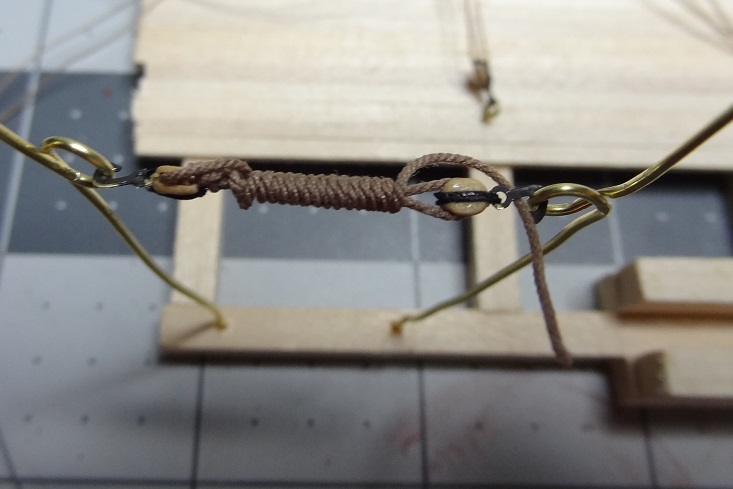
After the tackle blocks are reaved but before they are hooked to the eyebolts, the plan is to pull the line so the blocks are at the appropriate distance from each other. I stuck 2 pieces of thick wire into my mock-up station about as far apart as the tackle blocks will be. I put a small loop in each wire so that I can hook a tackle between them and the wire stretches them taught. Then it's just a matter of applying some glue to the line(s) in between the blocks and then wrapping the excess line around the glue. After the glue dries I just hooked the finished tackle to the gun & bulwark.
That's how I did the samples. It really didn't take more than a minute. The key is getting proper spacing of the blocks before frapping, but that should be the same measurement on each gun. The 2 tackles for running out the gun should be the same measurement. Same for the 2 tackles for lateral adjustment.
-
You are correct ca.shipwright. The best way to determine the length of the breech line (at last for a carronade sled) is to retract the sled all the way inboard. The line should be tight at that point. Then if you wish to display the guns run out, the breech line should have some slack in it.
-
Regarding the extra rope that will occur with the gun tackles, I will be frapping that between the blocks - I just learned that term. I found a thread here on MSW describing a "zip frapping" technique. I may try this or just wrap the line by hand.
What I thought was interesting in the zip method was using wire loops to wrap the line around and then pulling the line to be frapped thru the zip frap using the loops.
-
I have begun re-work on carronade rigging tackles using the 1/8" single and double blocks. Besides being what the plans call for, they just look better and are slightly easier to work with. Will most likely still use .012 line. I'm re-drilling the holes in the blocks and stropping 3mm hooks. Got a long way to go. I hope when general rigging starts, I can use all the 3/32" blocks that have hooks stropped to them.
Having the second project going on is sort of a mixed blessing. A diversion is nice but I'm find it too easy to put away the carronade tackle and work on the other build. Not enough self-discipline.
-
That is a lot of work - as I am finding out. 2 questions:
1. How far out are the barrel/sled?
2. Are you still planning on placing coils around the gun?
Oh yes, well done sir! As you mentioned earlier, the doubles are what's called for and they just plain look better than singles.
-
So as you see deciphering it is almost impossible so it's not you

That makes me feel a little better.
While out of town I was able to visit the gentleman that inspired me to try ship building. My Dad and he are in the same senior facility and he has several of his builds on display there. A lot of his builds were AL kits and he described the same problem - Italian on the plans. He said he even went as far as translating the notes. I could see the benefit of that. No telling what the notes could be saying. Of course nothing helps when plans don't match instructions.
Thankfully I have you guys to keep me pointed in the right direction!
-
Welcome back Elijah. As one option, I am taking back my original suggestion - copper/paint one side, stain the other. I'm afraid that the edge of the copper might show when looking at the stained side. What you might consider is do the coppering all around and then dark stain the remainder. No paint.
I do not have a suggestion as to an exact stain color but will offer this. The same stain will look different on different wood. In fact the same stain will look different on the same wood cut differently, i.e. strips vs. veneer. I'm not suggesting this for you but Minwax Golden Oak seems to be a favorite for decks. I tried it on some boxwood that I used for my decking, it looked dreadful.
So while you will get plenty of suggestions, all with the best of intentions, You really have to try it on exactly what you will be using it on. Don't even trust the color charts you see next to the cans at the store! It WILL look different for your application.
-
-
You've lost me
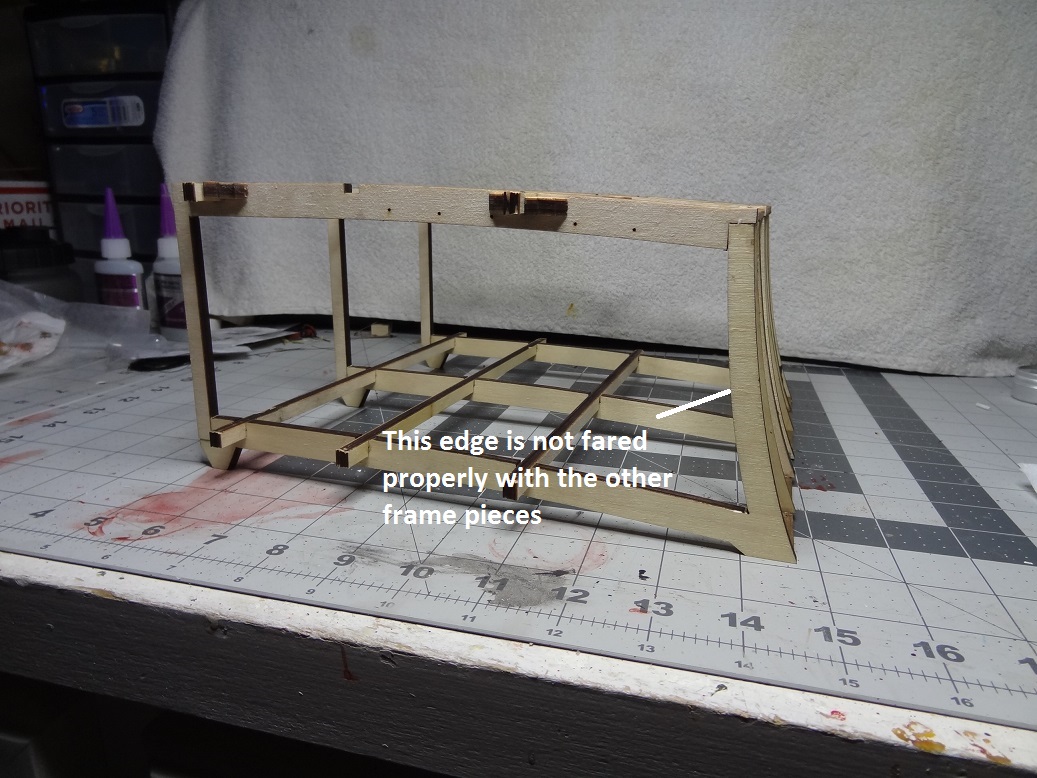
Bob - it's the edge pointed out in this pic - although you only see the outer piece in this angle. The convex side of the other hull frame pieces do not align. It will take some sanding (faring) to fix this.
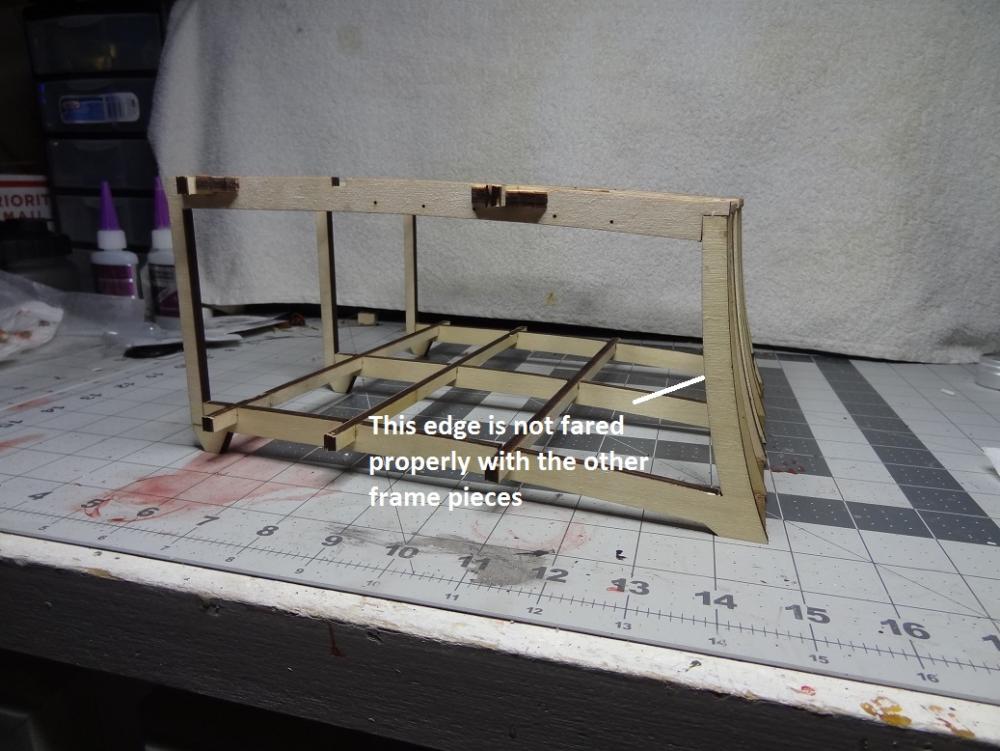
When I took a plank strip and held it in place (what would be the lowest inner hull plank) it did not touch all the hull frame pieces. Sorry, I am out of town right now or I would take a pic of the hull plank against the frame.
-
FOR FUTURE BUILDERS - before gluing the 3 frames together. Cut out the additional hull frame pieces (there are 4 of them) and hold them together with the other 3. The wide flat sides against each other and the exterior hull side aligned. Then check what will be the inner hull side. Is this side aligned and flush? If not sand them now. It will be much more difficult to sand once all these pieces are assembled.
-
Another ding against the wood parts. When the original frame is assembled you have 3 hull "frame" pieces. Then you add a total of 4 more. So you end up with (R to L) original, added, added, original, added, added, original. Before gluing the additional pieces I tacked 2 hull planks across the 3 original frames so that when I slid the other in they would be aligned with the hull planks.
This worked out OK except that the additional pieces are not quite as wide as the original 3. So if I hold a plank up against the frame on the inside, the plank contacts the 3 pieces but not the additional 4. Hope that made sense. I guess I will be sanding down the 3 to fit the other 4.
-
I know this is from way back Mike (I've been way behind on build logs lately), but I would not let the rope dictate the size of the block, rather go with what looks right, and drill out the blocks as needed.
If you look at my rigged cannon, every single block in that had to be drilled to allow the rope to fit. For that matter, every single block in my rigging was also drilled out. By the nature of how these little scale blocks are created, the provided holes are simply not large enough if you wish to keep the blocks in scale, and use rope larger than 'very small'. I don't know for sure, but my guess is that this is intentional to keep the blocks stronger and allow people to enlarge them if needed without making the unused parts of the blocks look goofy with overly large holes.
Funny you should bring this up Brian. Darrell just pointed out in his Niagara log that the plans call for 1/8" blocks. Based on some suggestions, I was going to use 3/32". Never really cared for them but didn't want to get out of scale either. You have no idea how many times I looked at the carronade detail and didn't notice that 1/8" was explicitly called for. When I built the mock up gun station I tried 3/32, 1/8 and 5/32 blocks. Personally I thought 1/8 looked the best. Shoulda gone with my gut.
As I have only made about 20 of the 3/32" block/hook assemblies so far, I will be switching to 1/8 single and 1/8 double for the gun tackle.
-
OK Bob - didn't know that about the limewood. In my Niagara build I have switched out all basswood for boxwood from Crown. Those strips are a joy to work with. I'll give it a go with the kit strips and see how they end up. If the frame that they sit on wasn't curved I would build the deck separately and glue it down when I finished.
One question for you guys that I could not discern from the plans. Should the deck butt up against the inner hull planks or should the hull planks sit on top of the deck planks? Does it matter?
-
Way back I was trying 3/32, 1/8 and 5/32 blocks. 5/32 was obviously too big. Personally I like 1/8 the best, but got some opinions that 3/32 should be used. I don't have that much invested in the 3/32 rig so I will likely switch to 1/8. I made a quick tackle last nite with 1/8 single and double with .012 line. I like it.
Agree on the double block at the bulwark. The Syren version looks really good so I will move to that as well
-
-
-
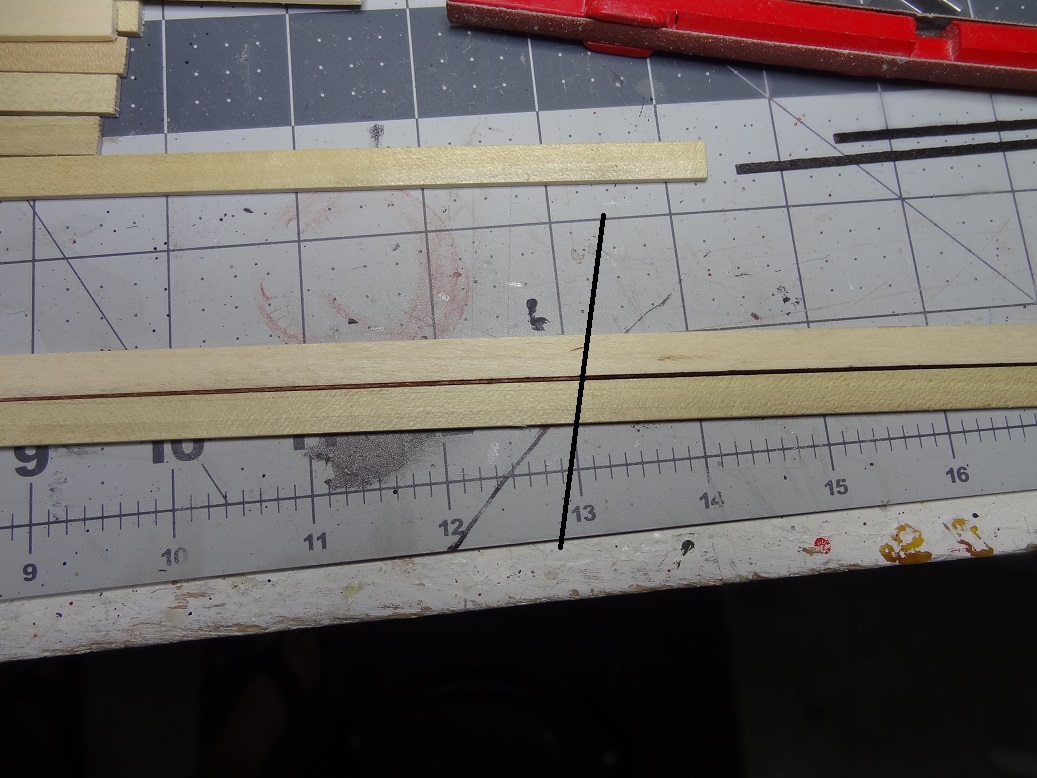
Tried a few things this evening, mostly dealing with the kit caulking strips. My gripe with them out of the box is I feel they are a bit too lite in color. I tried darkening a strip with a black Marks-a-Lot. I like the result but would be nervous applying stain to the deck planks. Would be afraid the black might leech into the limewood, which seems to be almost as porous as basswood. This pick shows the natural strip color and the strip blackened. I prefer the black but that's purely a personal preference.

Not sure if my answer is any safer, but I darkened a strip with some dark stain and tried that and found it acceptable. Here's a shot of the natural strips and some stained.
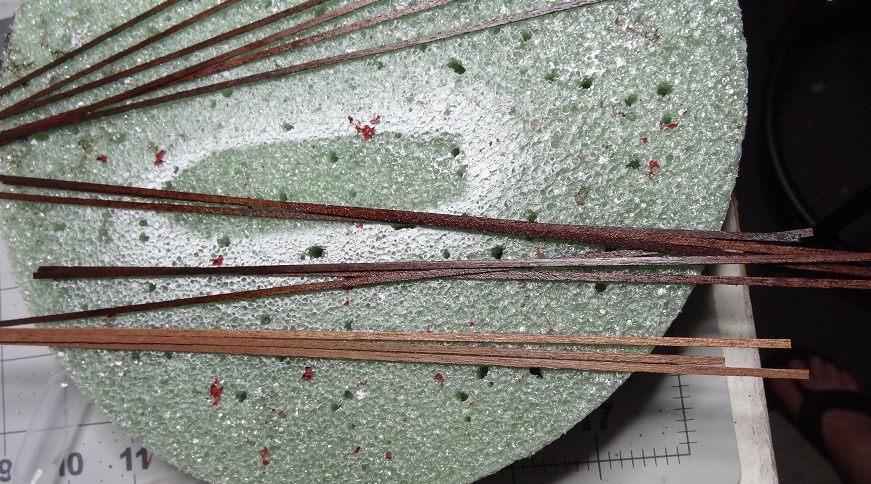
So I glued the stained strips to the edge of the deck planks and will let that dry before cutting the butt notches and installing.
I am afraid I may have to recant my claim about the wood being nicely cut. Many of the deck plank edges are not square and several are warped.
-
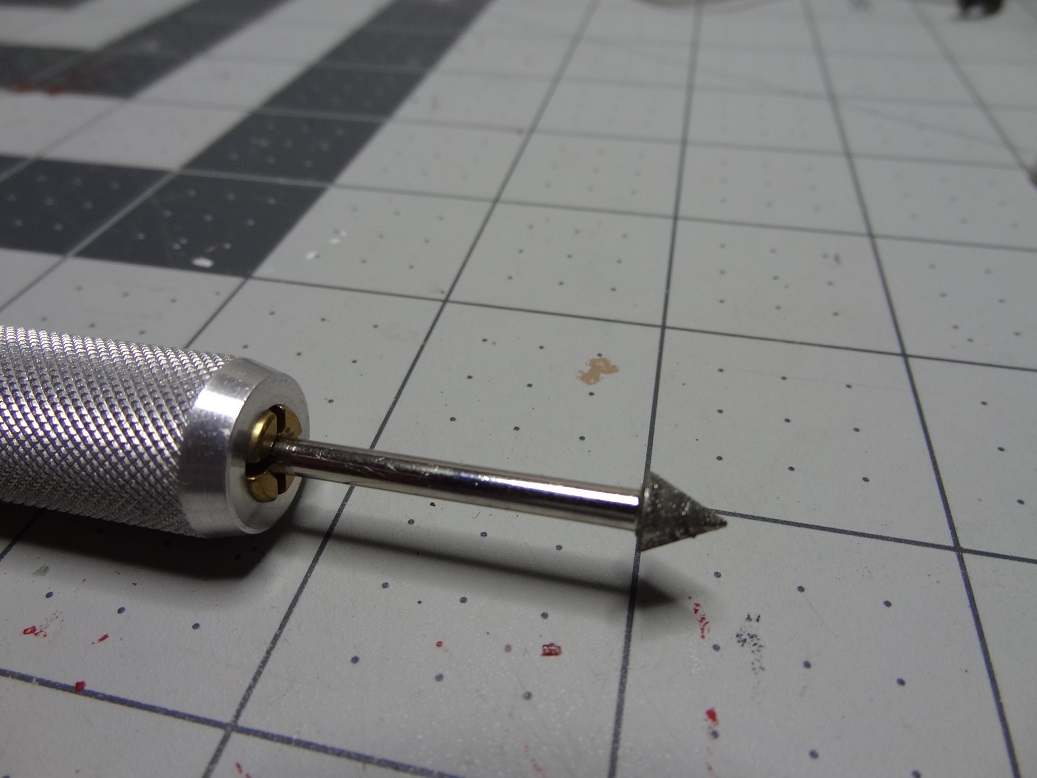
I probably would try to chamfer the edges with a bit or other grinding thingy turned backwards in my pinvise.
Maybe like this?
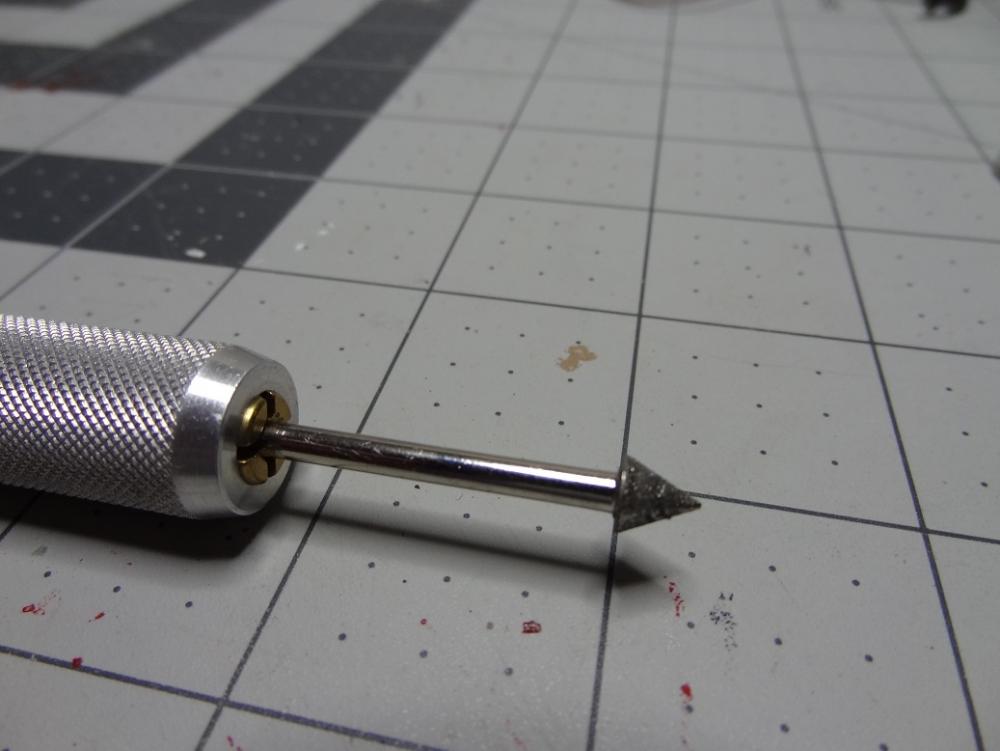
I took a stab at making some rings or chafe guards with some wire. Wrapped it around the 7/64" bit, hard soldered the end, stretched it just a tad to make an oval and then filed for a while. Ended up with these.
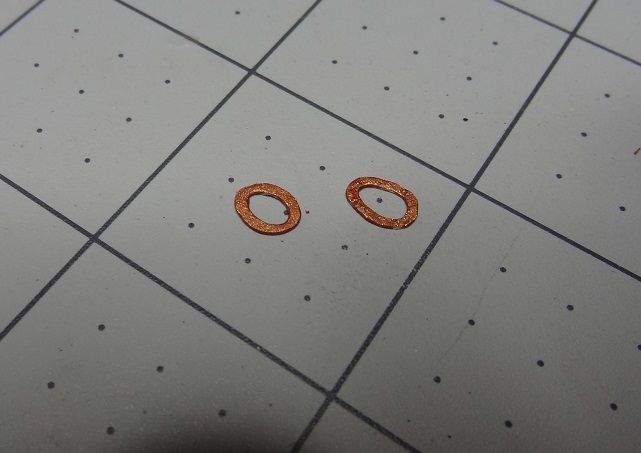
Will probably change color, just wanted to see what copper colored paint looked like. But then I had the realization, if I blacken or paint them Dark Iron (my go to cast iron color) it will just about blend in with the hull.


Section Deck Between Gunbays by mikiek - FINISHED - Panart - 1:23
in - Kit build logs for subjects built from 1751 - 1800
Posted
I have been bouncing back and forth between this build and Niagara. This one is helping to keep my sanity while I debate with myself over part sizes for Niagara.
The gun deck planking is under way. I went with the kit supplied caulk strips stained dark (Minwax Provincial). Assembly is pretty easy once I got the routine down. It does however, seem to be just a few steps above building a ship in a bottle. I couldn't even begin to say how many times I have bumped the frames while working inside them.
While the caulk strips look OK the gaps they fill seem to collect a lot of dust when I began sanding. Even with a paint brush I could not get it all out. I suspect I will need a damp rag or something similar. The strips just don't completely fill the gap between plank edges. If I had it to do over I would probably take a different approach. Another thought would be to run the plank edges thru my table saw to square them up and smooth them off.
Given the limited space inside the frame I think I am going to hold off on planking the hull and main deck for as long as I can. I think quite a bit of the assembly can be done before the planking, although it will be out of order from the instructions.
I'm also thinking it will be wise to go ahead and stain and finish the deck now while nothing is in the way.
I'm to the point where I need to build and install the grating before I can complete the gun deck planking. Here's a few pix