Turatopgun
-
Posts
55 -
Joined
-
Last visited
Content Type
Profiles
Forums
Gallery
Events
Everything posted by Turatopgun
-
Elijah You are really moving ahead. I just love the fact that you, as a young man, really stick to the task before you and don't let any challenges bother you. If you keep this attitude through life you will achieve anything you put your mind to. Your Papa must be proud of you. You are also getting a lot of followers of your build who have many years of ship building experience, and the fact that they are watching with interest and offering assistance shows how much they appreciate your enjoyment of the hobby. Phill
- 701 replies
-
- 2
-

-
- phantom
- model shipways
- (and 1 more)
-
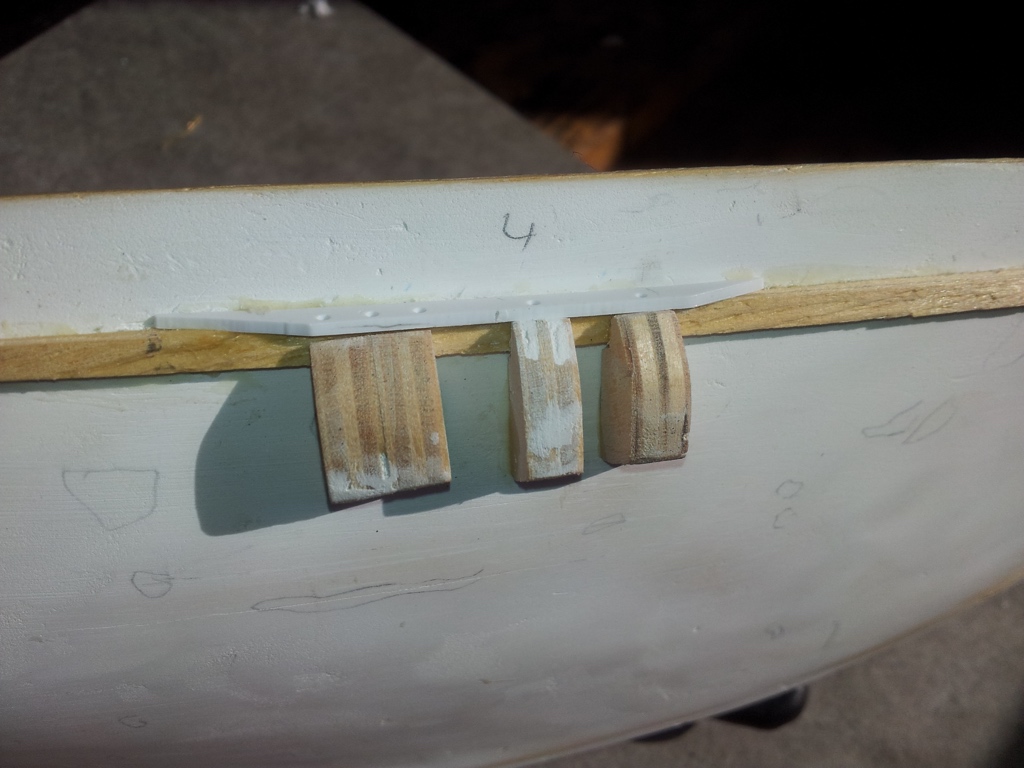
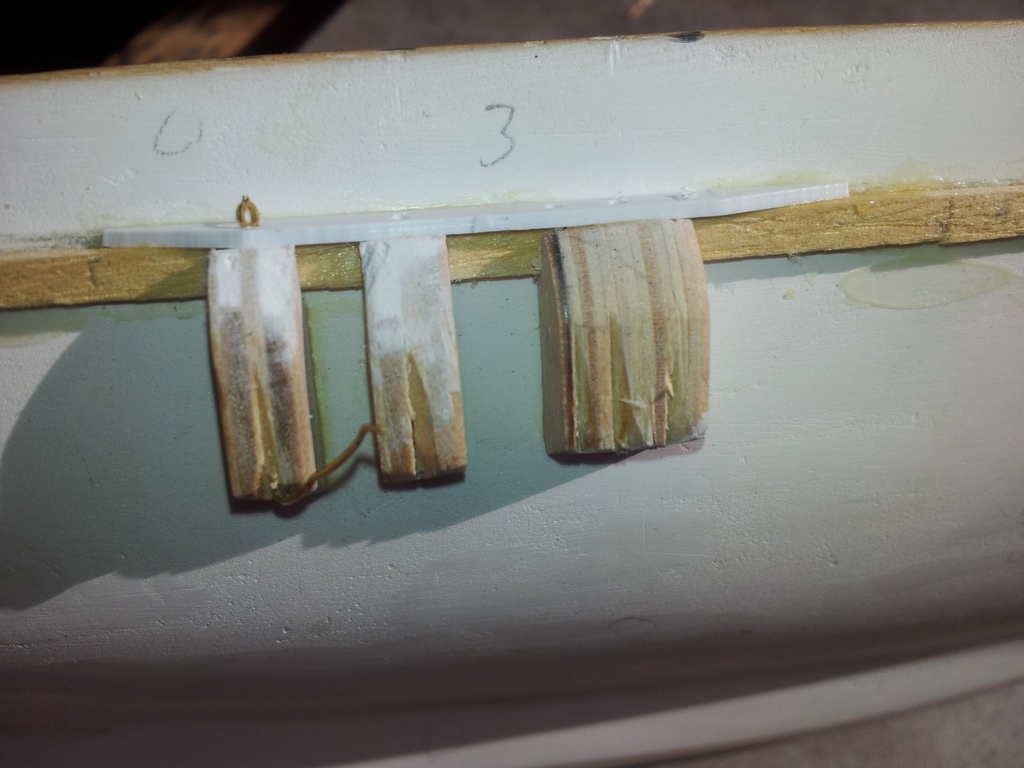
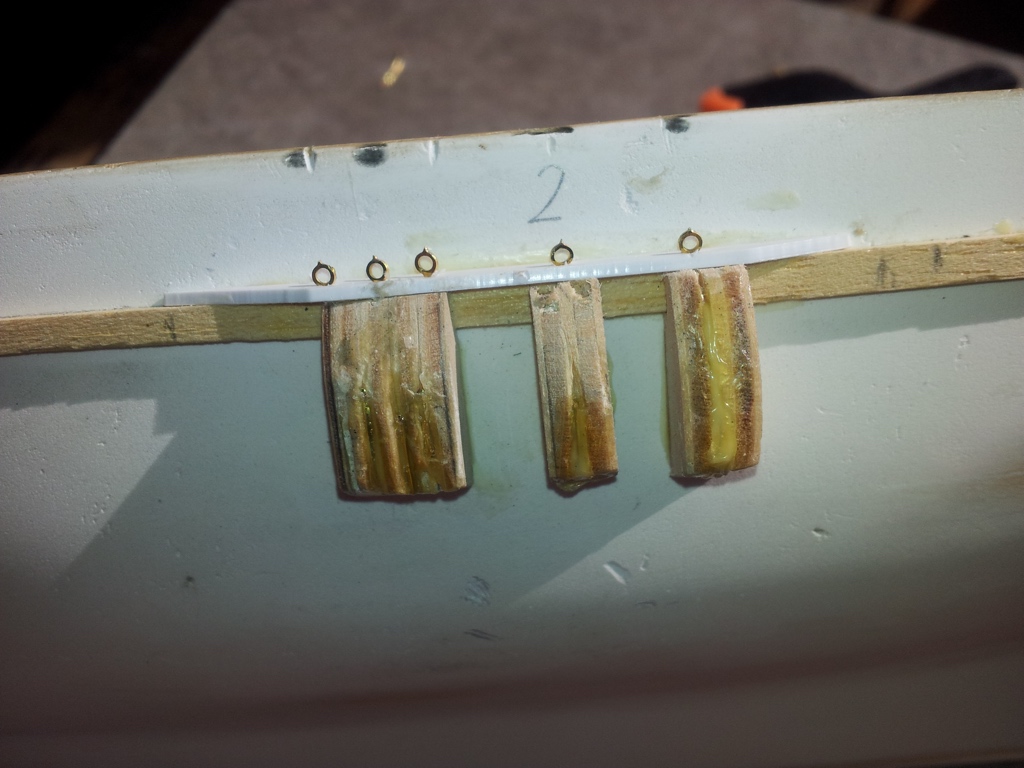
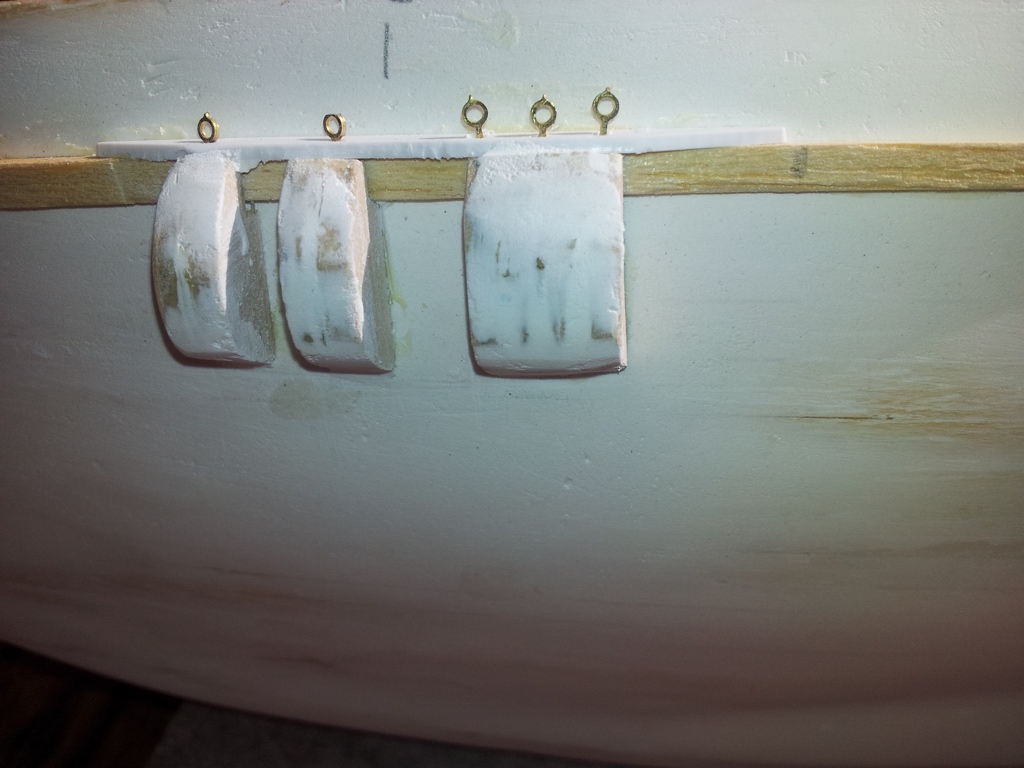
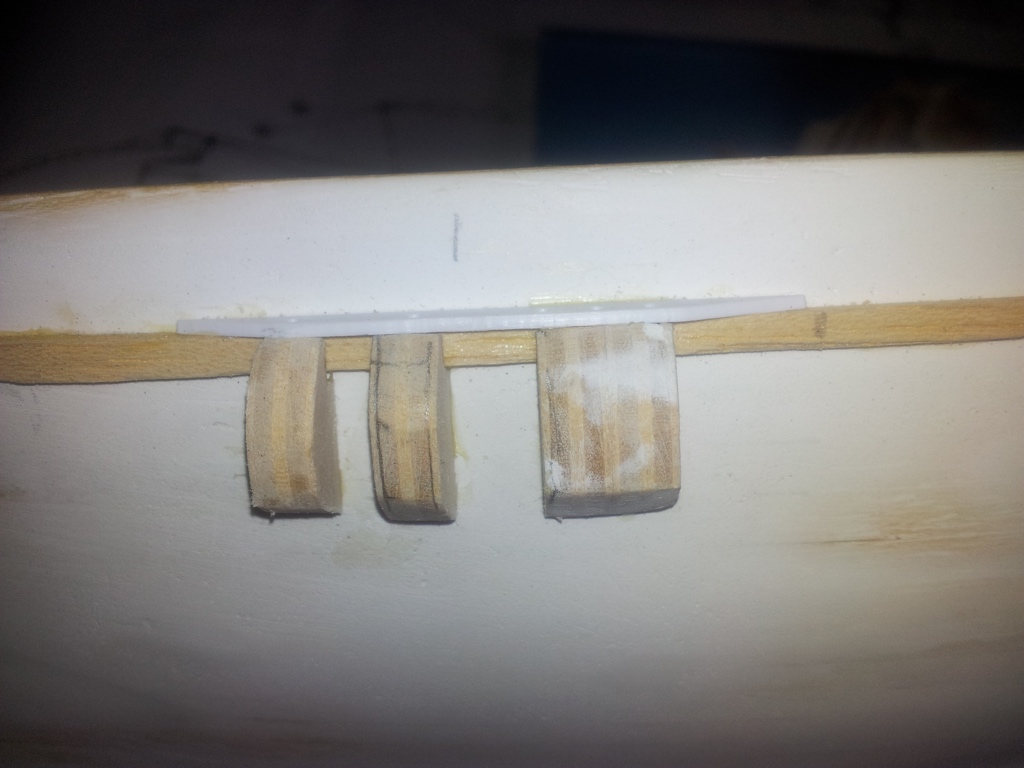
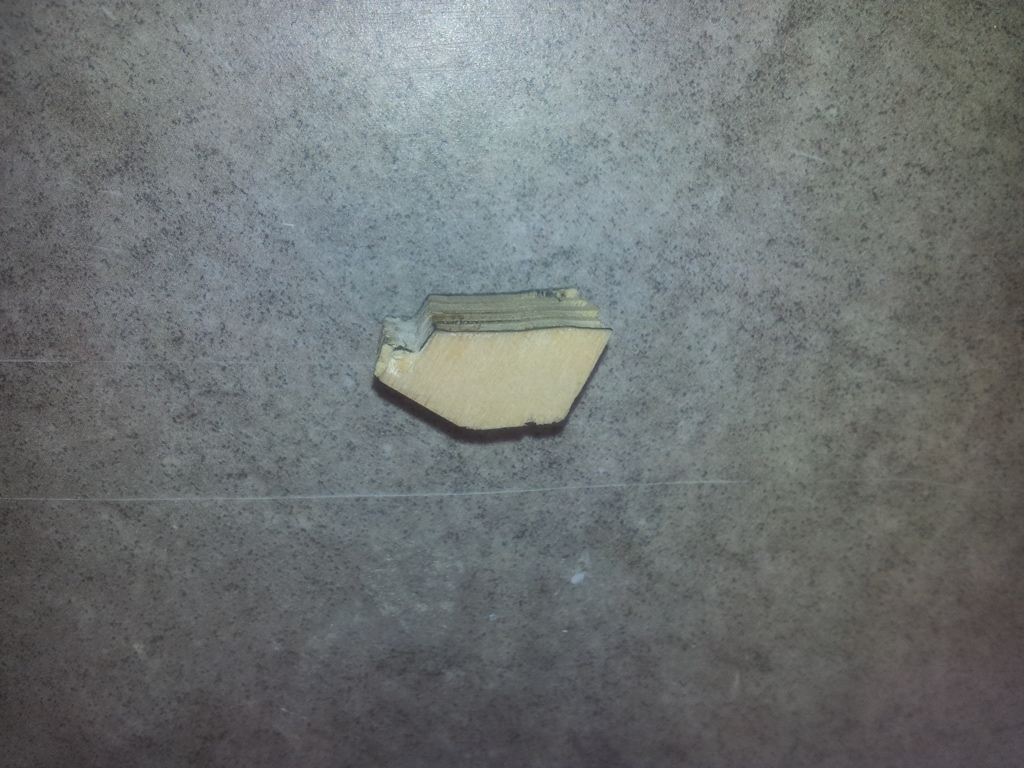
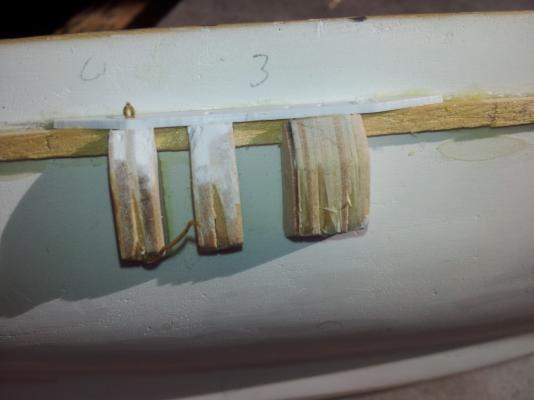
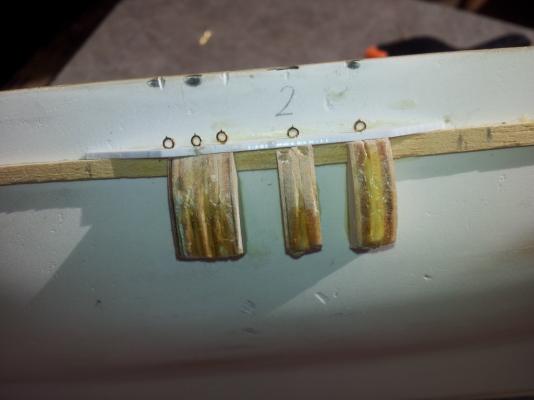
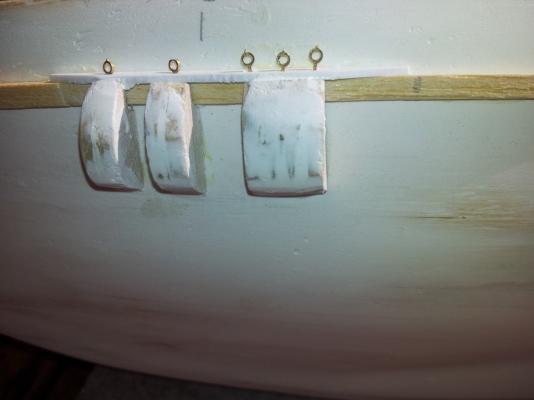
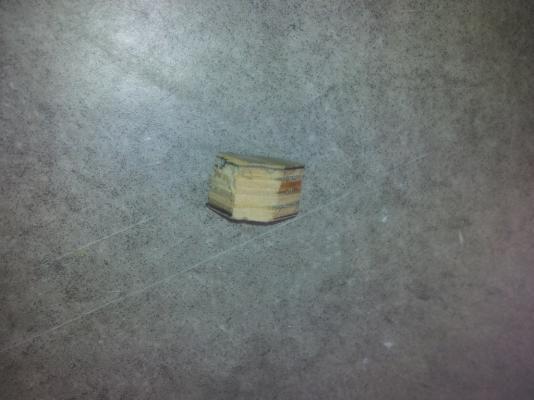
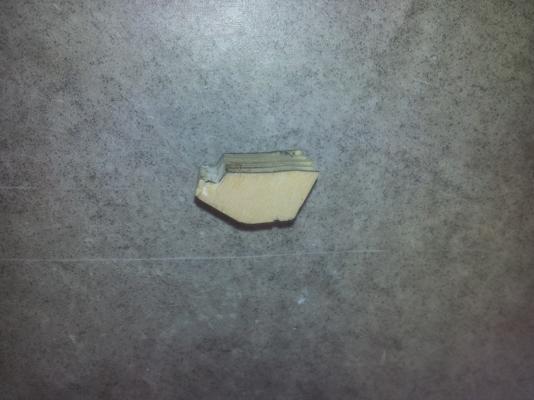
Hi again. The pictures today show the stages of attaching the deadeyes through the chain plates that I came up with. The first picture shows the chain plates. The second shot shows the deadeyes sitting in the hole I drilled through the chain plate. To keep the deadeyes in pace I pushed them through the holes and then bent them back into a slot I had cut into the plate to sit the deadeyes. The third photo shows the deadeyes sitting in the slots and glued in place. When dried I then filled the slots and sanded them back as shown in the final photo. Once all the deadeye are in place I will tidy them up ready for painting. That is after I have finished with the portholes and propellor shafts etc. This job never ends!! I believe that having fitted the deadeyes in this manner will enable me to tension the ratlines and shrouds correctly. Let me know what you think. Phill

-
Thanks Nigel, I do hope it works. Phill
-
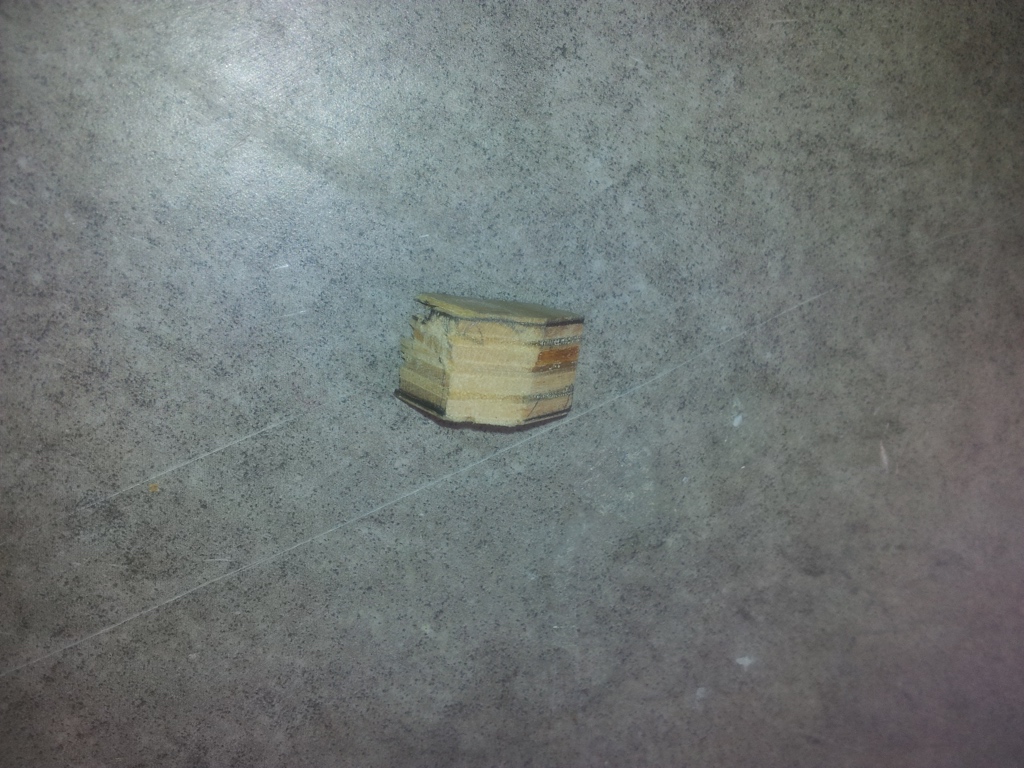
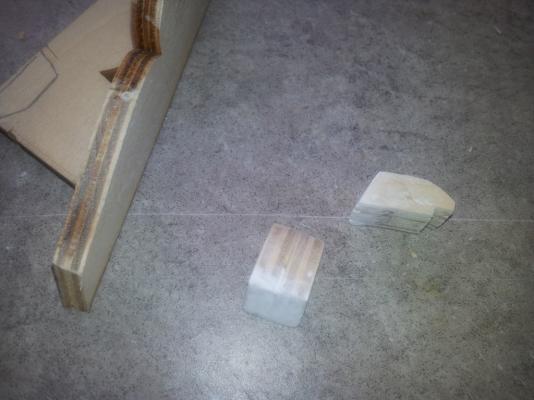
Hi Lory It looks like your plans are not only half chewed but also older than mine. However, I don't imagine that would make much difference. I live in a small seaside town and we are a few hours from any large city here, but I will check out around the place and see if I can get a copy made. If is is possible I will let you know. I have spent quite a bit of time making the chain plates for the Sir Winston using spare wood from the kit as shown in the top photo. Each rubbing strake has five ropes coming from it, three together and two singles. I ended up glueing two pieces of ply together for the large chain plates and carving them out to fit the strakes and each other then I carved out the two single chain plates. I filled where required and then glued them to the rubbing strake and the side of the boat. The intention is to bore holes into the plates and glue the deadeyes into the holes to hold the shrouds (I think that is correct). This should allow full tensioning of the rigging. It was a bit of a pain in the A making the plates as it was a carving, sanding and eye job but shouldn't look to bad when finished. Phill


-
Hi Elijah, Have been away for a few days and just got back to your build. You are doing great and the b oat is starting to take shape. Well done. Phill
- 701 replies
-
- 2
-
-
- phantom
- model shipways
- (and 1 more)
-
Thanks Elijah my fellow tyro. Phill
-
Thanks Nigel, I am not sure I would call the work beautiful as I have been looking at many of the quality builds that are contained in this site. I am pleased as it is a first attempt. Hopefully the chainplates will look better when finished. It is rather difficult to standardise them as I only have basic equipment, ie. a very sharp scalpel and sandpaper. Fortunately, I was able to use the waste plywood from the kit and cut the basic shapes then glue four pieces together to make the chainplate. Time consuming but satisfying. Phill
-
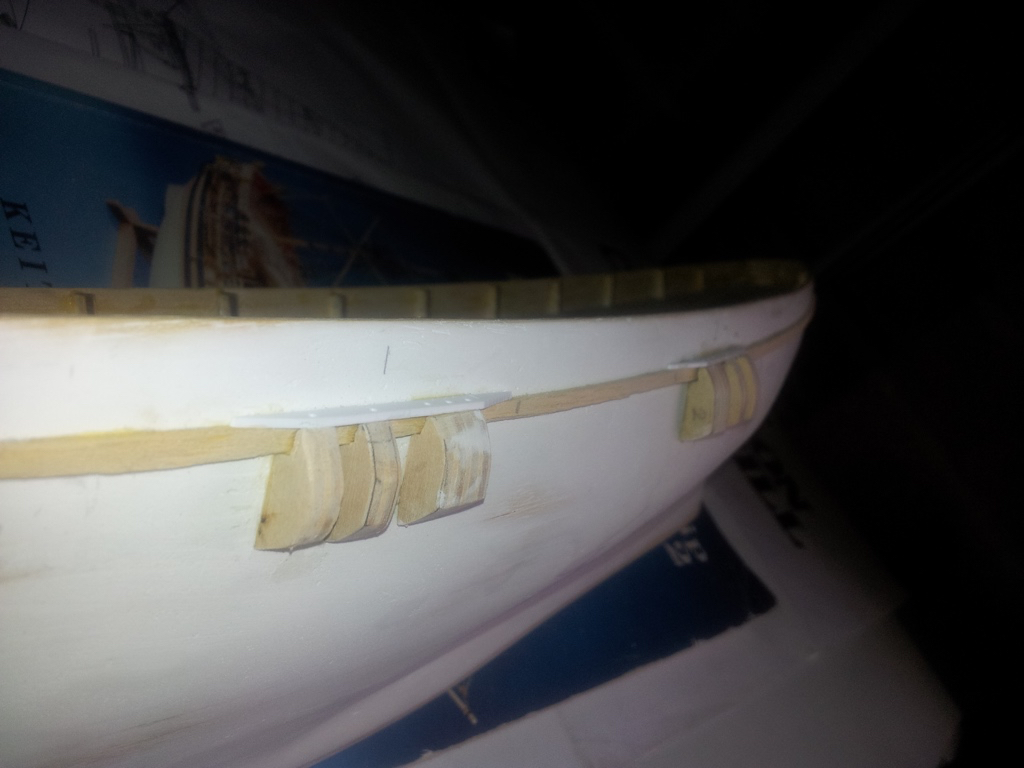
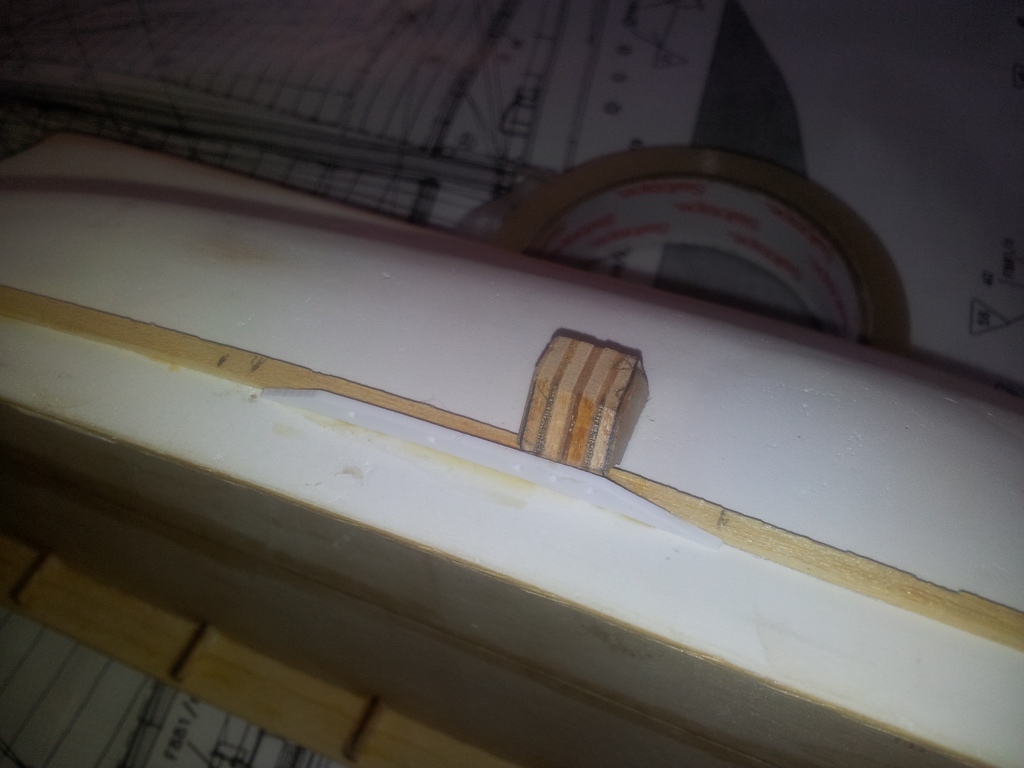
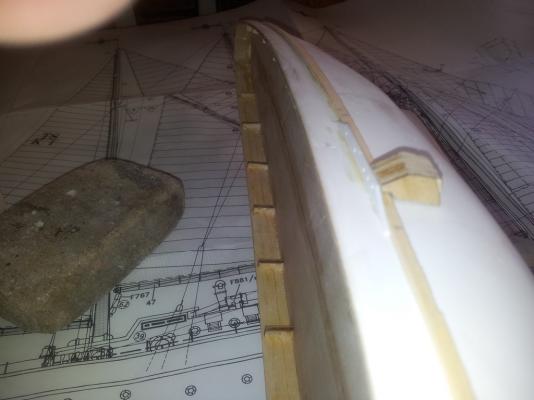
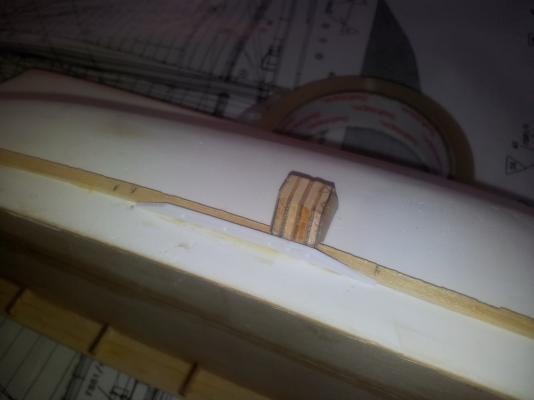
Here we are again just a little further on. I finished the stern and bow on the boat and whilst waiting for the filler to dry I decided to work on the cabin. It is nearly complete and looks quite good. These pictures show one of the pieces I am making to attach to the the channels. The kit neither shows nor has the pieces that sit under the channels on the original vessel. You need to have these pieces , which act in the same manner as chainplates, as they will hold the deadeyes so the shrouds (or is it ratlines) can be tensioned fully. The kit shows the deadeyes being connected directly to the hull via a pin with no chainplate or anything similar. I have seen videos that show the vessel as having the chainplate fixtures. These show how I intend to fix the "chainplates" to the hull under the channels. My intention is to bore holes, using the holes in the channel down through the "chainplates" and the fix the rod holding the deadeyes in them. I have to make four pieces for three deadeyes and eight pieces for the remaining single deadeyes. Hope it works!! Phill

-
Thanks Grant, That is what I will do. It really is little by little when building and I can't imagine what it will be like to undertake a big build like the Endeavour. Maybe I will see!! Phill
-
Grant, Elijah Thanks guys. Grant, I managed to bend the stern piece but broke the bow piece. Will have to fix it and bend it and pray.....a lot. Am also working on the cabin area.. very little info on this but am getting ahead slowly. I think I am going to have to paint the cabin as it would be very difficult to stick all the parts on the cabin and then paint around them. I know that gluing to paint isn't to good but will work out a process. Keep you thinking. WIll put up another picture when I get the bow piece put on. Phill
-
Hi Elijah. You are moving ahead now, well done. One thing, the timber looks from the photographs like chipboard with a pine veneer. Is it, or is it a solid piece of Pine. Normal timber shouldn't be as crumbly as your pieces appear to be. I am probably wrong but just an observation. If it is a solid piece of timber you may have to find some closer grained wood which will hold together better when cutting the finer curves of the templates. Phill
- 701 replies
-
- 2
-
-
- phantom
- model shipways
- (and 1 more)
-
Thanks Grant, now I have to workout how to fix the transom as there is no instruction. I have to bend the wood to fit so I will do a few trials on some spare timber of the same type. This will be interesting. Phill
-
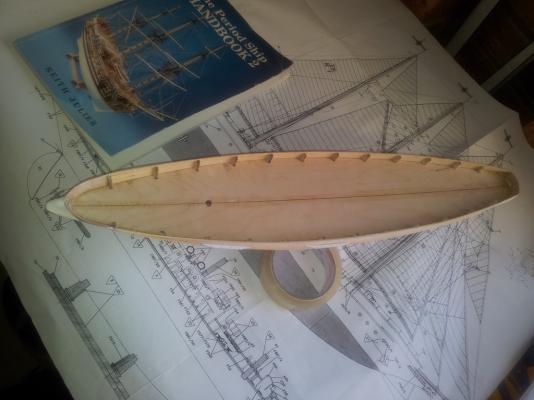
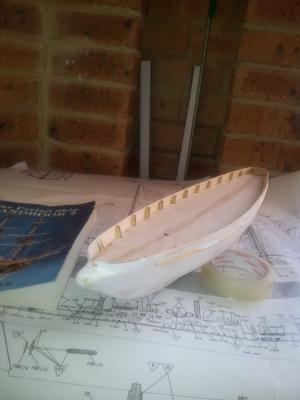
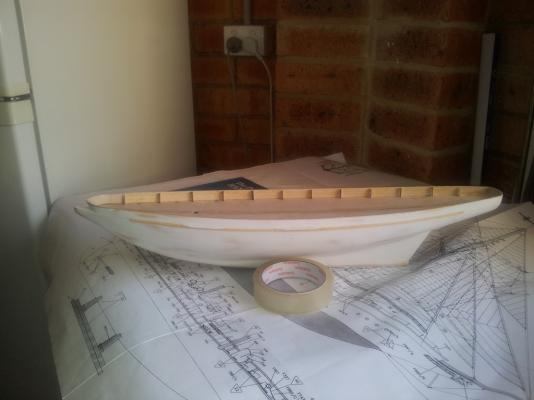
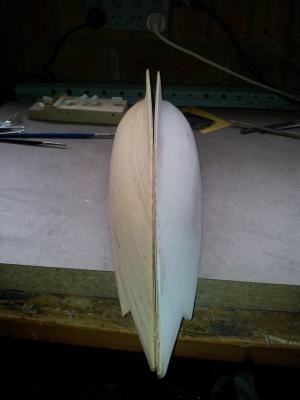
Well I finally glued the two halves together. They came together reasonably well but it highlights a problem with the type of build, that is, building one half at a time. The end result was, whilst I ensured that the deck came together well, the hull had a very slight bow in it. However, as I was using filler as my base for painting I was able to fill any gaps in the hull easily and after about four hours of sanding and refilling and further sanding I now have a hull that is in good shape for painting when I get to it. I also had to make a couple of ad hoc repairs to a couple of small pieces that I broke, but they came up OK.I also managed to break one of the planks that come around the stern of the boat so I will have to think about fixing that down the way. It is one of the problems with this build that requires the top three planks to overhang the stern and they are open to damage and sure enough fumble fingers damaged a piece. Ah well I am sure this won't be the last mistake I make. My next move is to attach the stern pieces and to do this I think I have to bend the planks slightly around a stern piece that I am yet to find, The instructions in the book are sadly lacking consisting of five paragraphs and the plans. I also have a book by Keith Julier called "The Period Ship Handbook 2" in which he discusses, briefly the building of 10 ships, Yachts and a canoe. It offers some hints but even then there still is a dearth of info. One of the things he suggests at this stage is to build the stand as one can place the model on it to work, unfortunately he does not advise how he builds it and neither does the Billings build information. There is no way that the pieces in the kit will hold the boat as the upright stands are too small and I note that Mr Julier shows an additional block of wood above the kit stands for his build. Unfortunately the kit does not have this extra timber so I shall have to decide what to use and how large it should be as well as how to ensure it is strong enough for the ship. StillI I am happy where I am and once the stern and bow is completed I shall fill, sand and be ready to add strakes, portholes and propellors etc And then start to paint. Phill PS. The shape of the hull at the bow in the third photo is not as enlarged as it appears in the photo...sort of like Scnozzle Duarante's Schnoz. It is better in actuality and due I think to a foreshortening effect of the photo position.....at least I hope that it is. Also the unlike the first photo the hull is actually quiet straight. l
-
Grant, I have been right through your build Grant and all I can say is.... "I am not worthy". Brilliant and beautiful, a true work of art. Phill
- 456 replies
-
- 5
-
-
- finished
- bomb ketch
- (and 2 more)
-
Thanks Grant, and thanks for the info re hobby shops in Canberra. Got the paints you recommended. We shall see how they go. Phill
-
Elijah. Remember, everything in life has a learning curve and this hobby is no exception. Keep your eyes on the goal and keep at it and you can only learn from every step you have to take backwards. You're doing great mate. Phill
- 701 replies
-
- 3
-
-
- phantom
- model shipways
- (and 1 more)
-
Gerald, Your phantom is beautiful and I particularly like the weathering as it shows a working craft as it should be shown, a little tired but still able to carry out the tasks it was built for. Phill
-
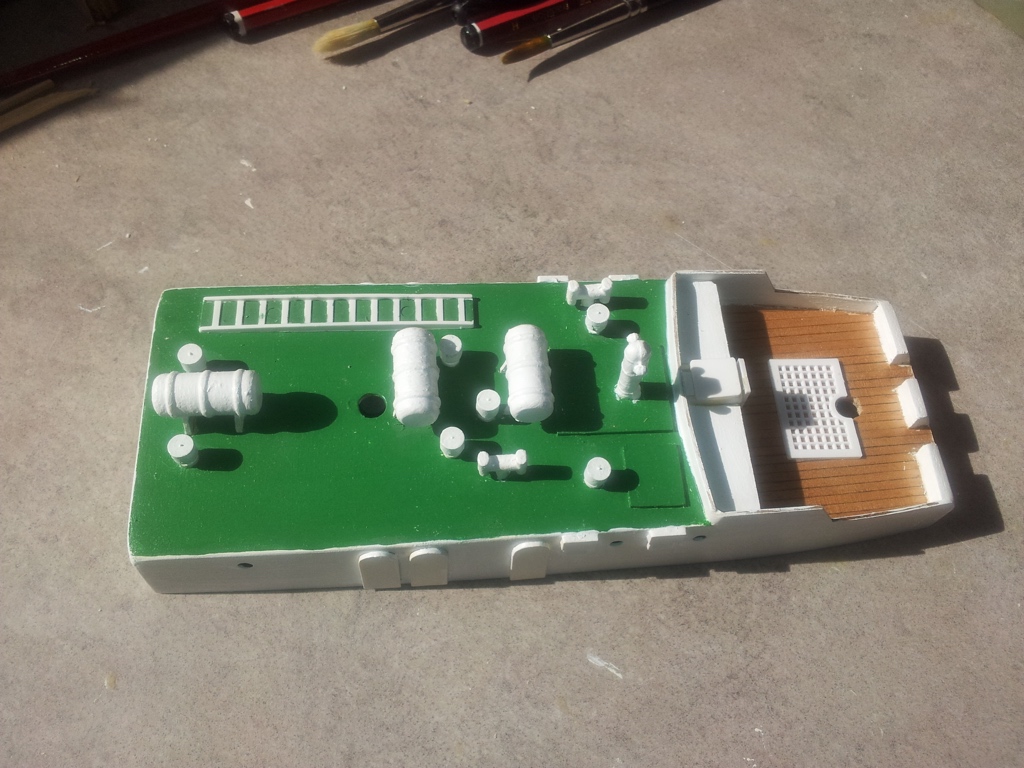
Back again. Completed the planking on the second half of the hull and sanded it back. The hulls look good and with no obvious differences in their shapes. The next task is to fill and finalise the shape including the stern. Then I will join the to halves, hopefully without problems. Then porthole placement, rubbing strakes and propellors etc. Then undercoat and topcoat. Not too much. Just a lot of patience, still it is preparing me for the big ships. Phill
-
Thanks guys. David, I will try your idea out. Just got back from Canberra with paints, now I have to find a divider on line. Thanks again, Phill
-
Nigel, That's good advice and thank you for it. have to leave it for a couple of days, unfortunately, but will be back soonest with paint and dividers to undetake the various measurements. cheers, Phill
-
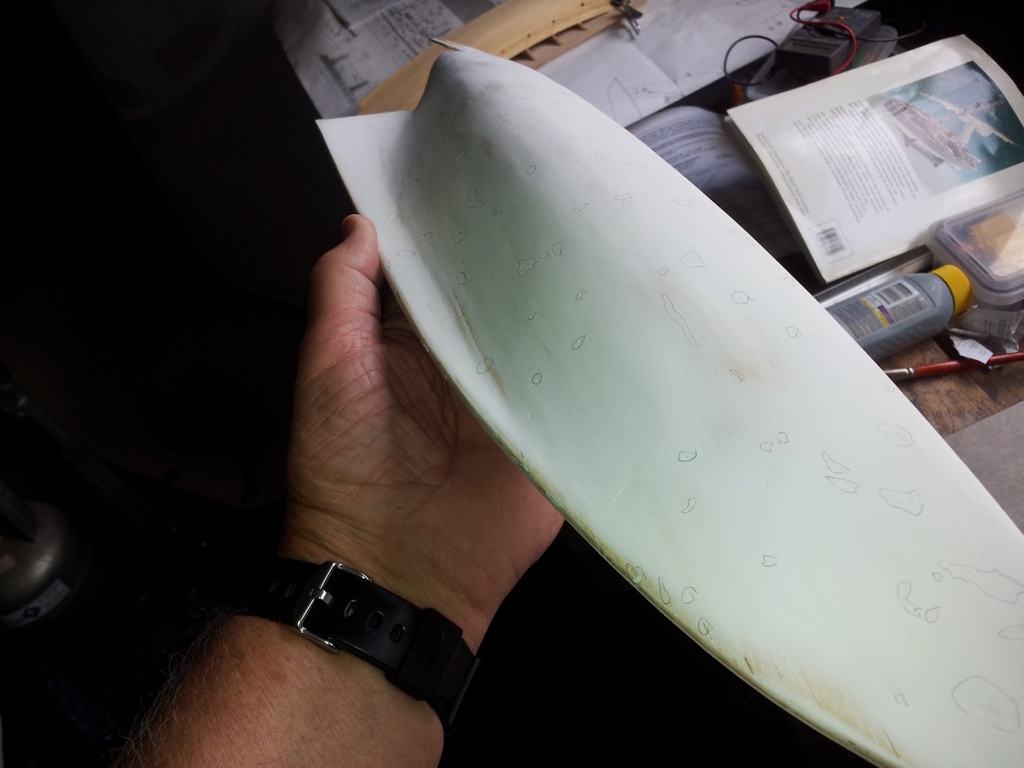
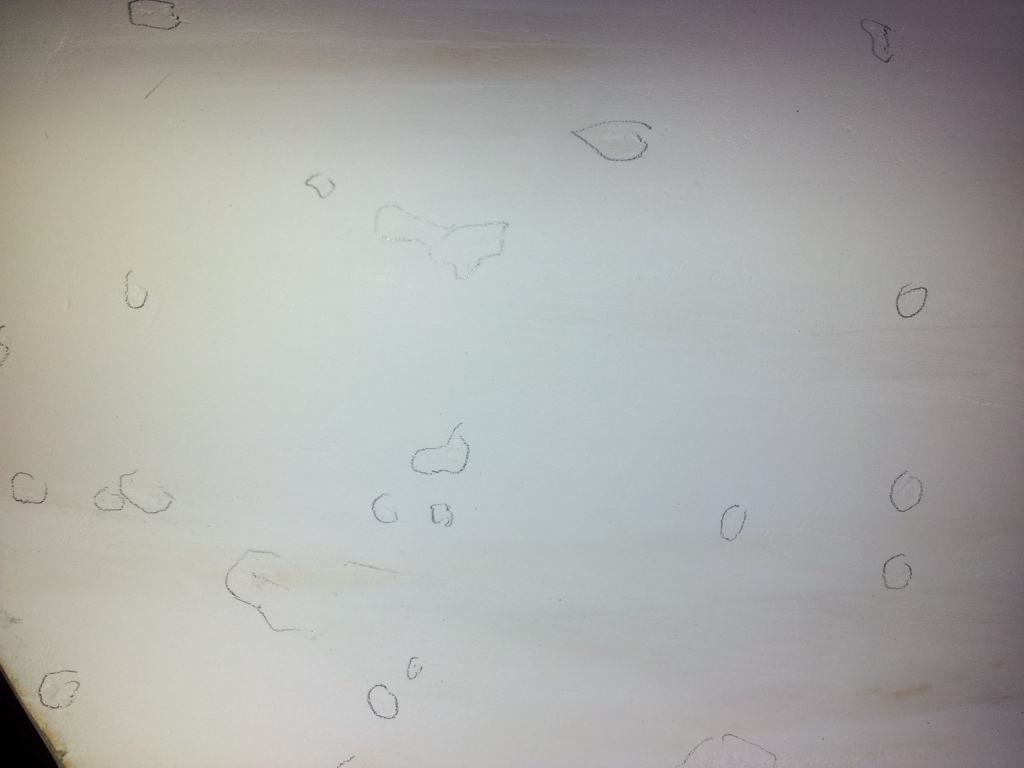
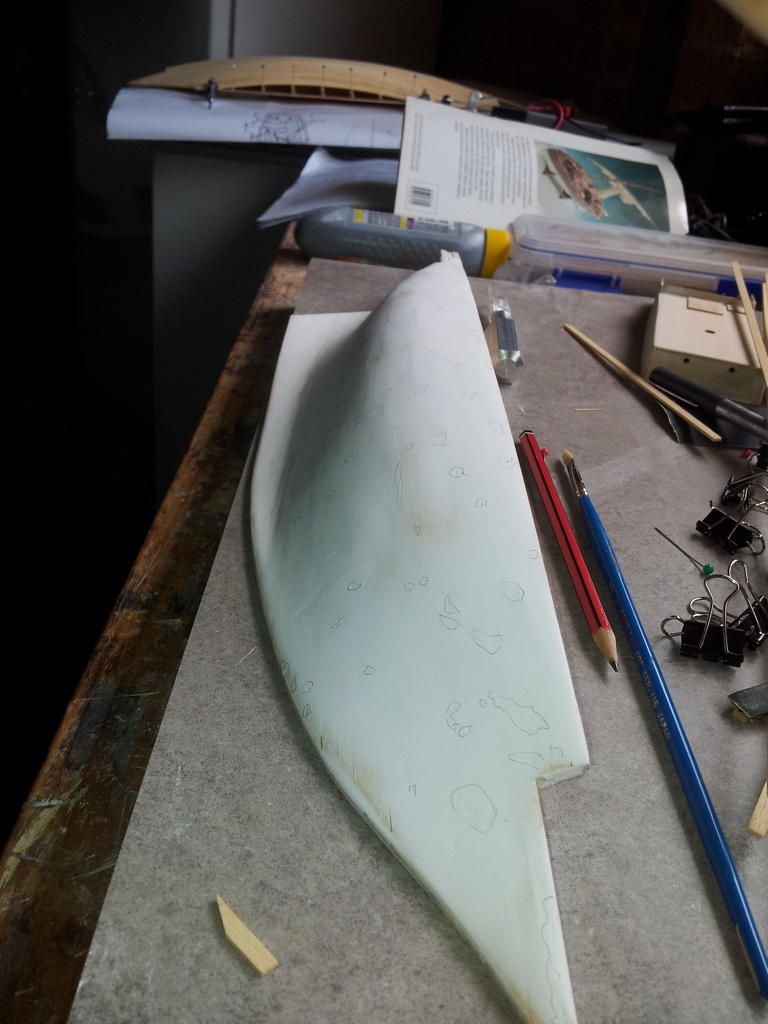
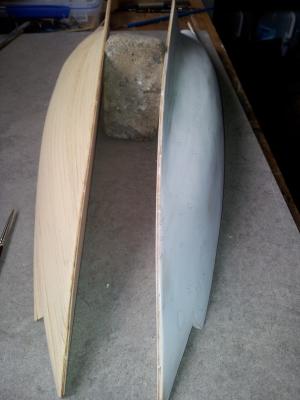
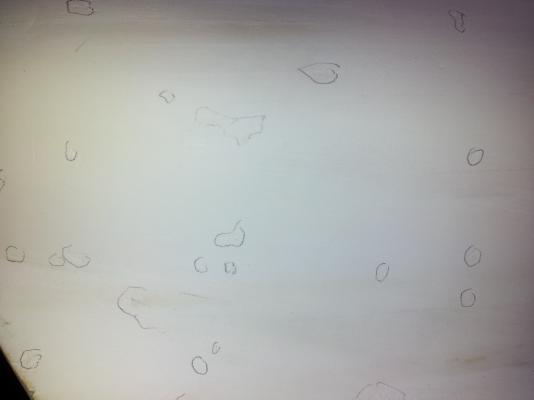
Hi Elijah The 'water droplets' you see are actually pencil marks highlighting minor imperfections in the sanded filler. They will be filled and sanded out when I compete the hulls and connect them. Thanks for your thoughts though. Phill
-
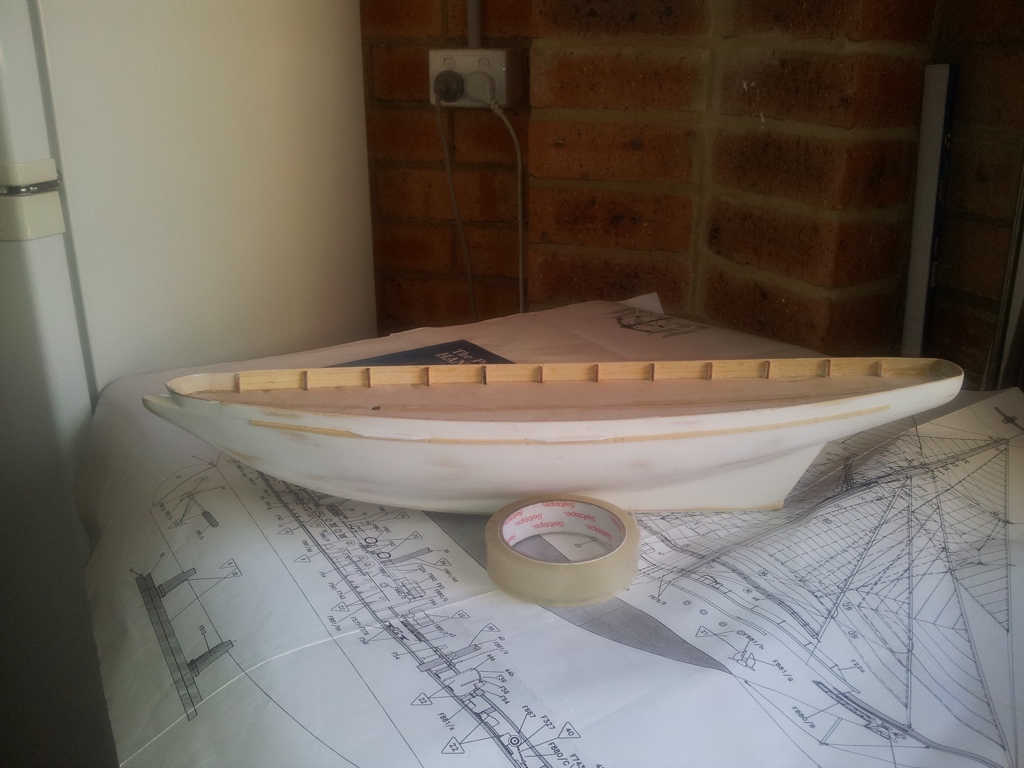
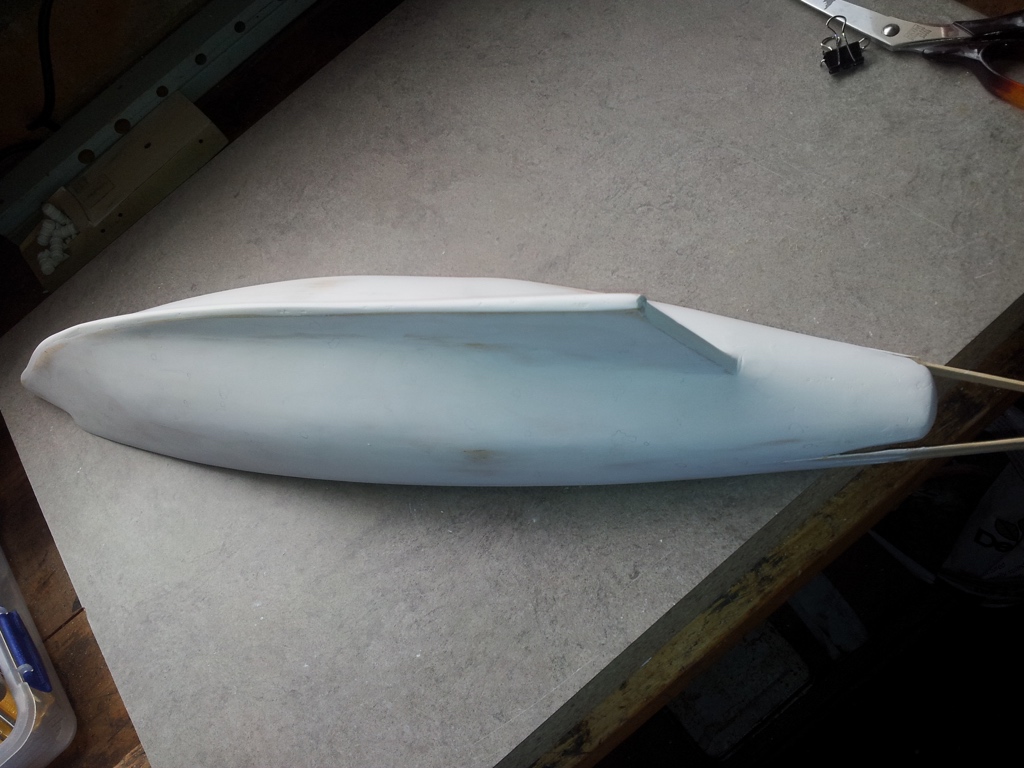
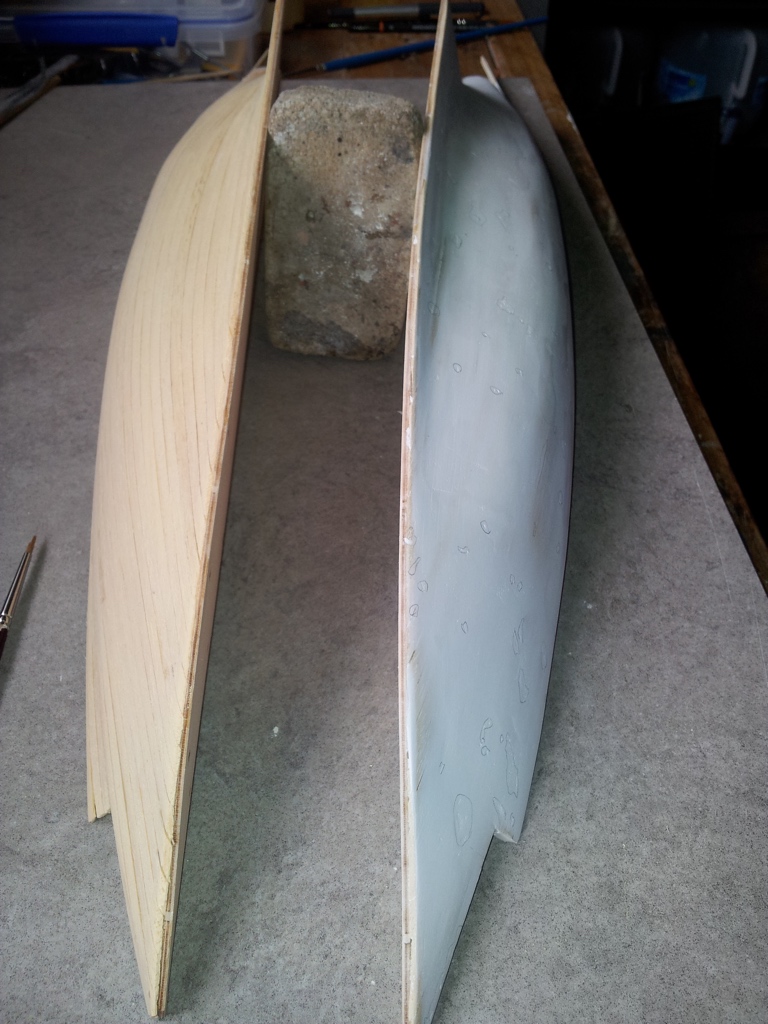
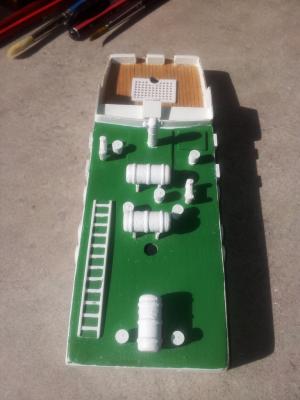
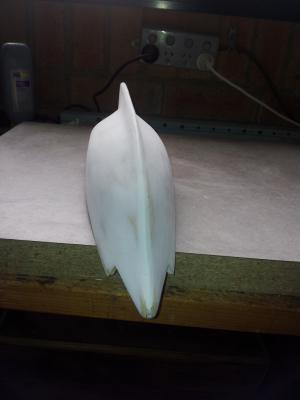
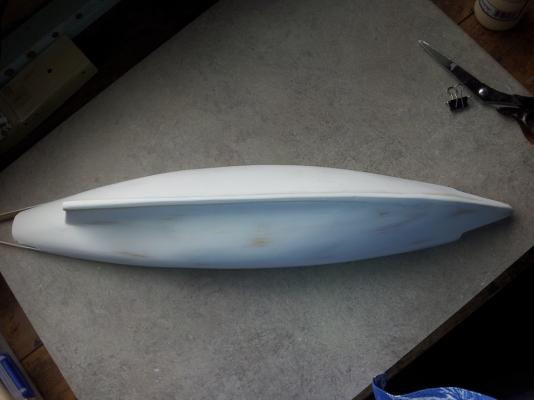
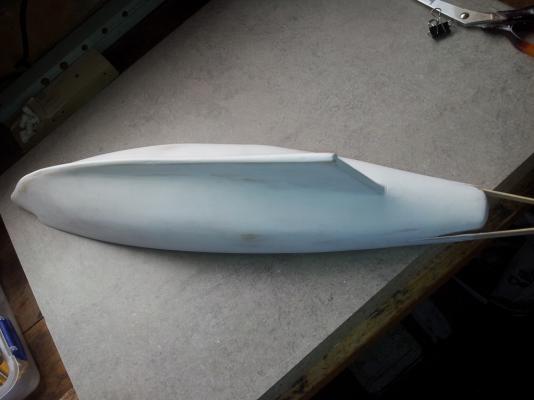
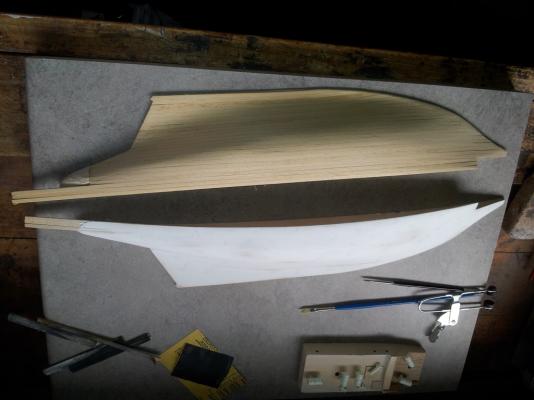
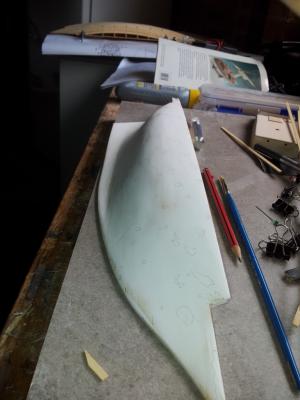
Here are the photos I promised of the single hull filled and sanded to date. I don't believe the shape is to bad. You will note, if you expand the photos, that I have marked ,in pencil, the tiny imperfections in the sanded filler. Once I have filled and sanded the other hull and joined them together I will finish the planking around the stern and bow of the ship and finally fill and sand back the imperfections. Another few hours of choking on white dust... Then it is on to the portholes, rubbing strakes etc. A slow but enjoyable task. One question re the portholes. Should I cut a hole into the hull or just glue them on to it. I will have to see how they look I imagine. Phill

-
Grant,Nigel. Grant, that is what I thought may have been an issue but you have confirmed and I am soooooo glad I asked. Thanks mate. Nigel, it is my intent to fit the halves and finish the sanding, but I was unsure how to handle the portholes. I had thought to add them and the rubbing strakes after I had undercoated, but between yours and Grants comments I have changed my approach and will not only sort out the portholes and strakes but also the propellor shaft etc prior to painting. In addition to the work above I have decided to add some additional pieces under the rubbing strakes which will ensure that the shrouds can be fully tensioned. These are not shown on the Billings plans but they are actually built into the original Sir Winston Churchill. See the video above about 4 minutes in. This is really interesting building. I thought about building ships years ago but did nothing. Now I regret that and hope I can get to build something like the Victory or similar ship. What a great hobby. Phill
-
Hi Grant. How many builds do you have going at once? This boat is going to look good and is a classic boat, absolutely beautiful. Phill
- 339 replies
-
- 4
-
-
- dumas
- Chris-Craft
- (and 3 more)