HOLIDAY DONATION DRIVE - SUPPORT MSW - DO YOUR PART TO KEEP THIS GREAT FORUM GOING! (Only 53 donations so far out of 49,000 members - C'mon guys!)
×


Eric W
-
Posts
133 -
Joined
-
Last visited
Content Type
Profiles
Forums
Gallery
Events
Everything posted by Eric W
-
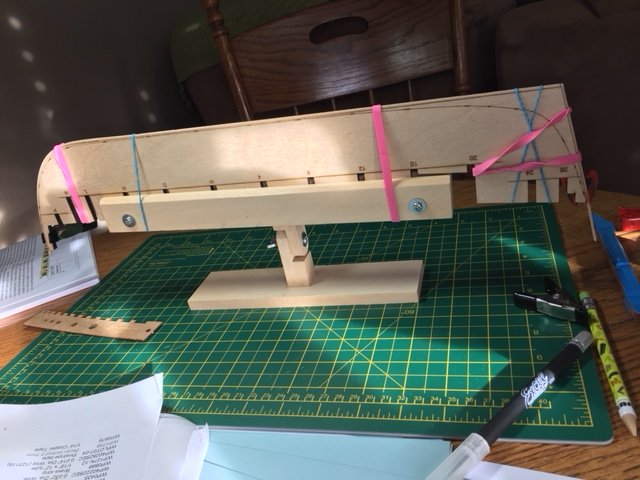
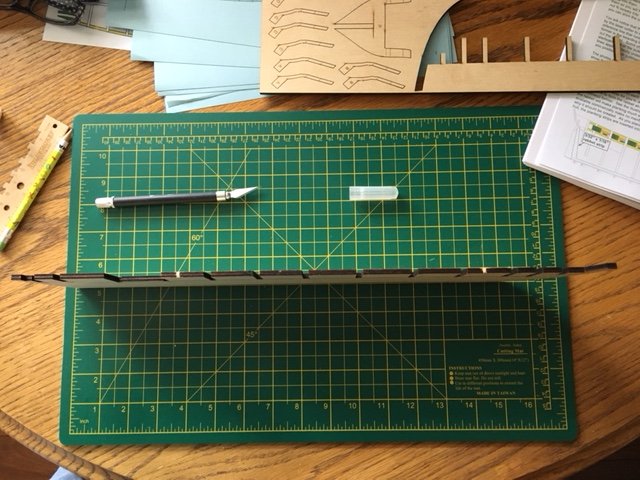
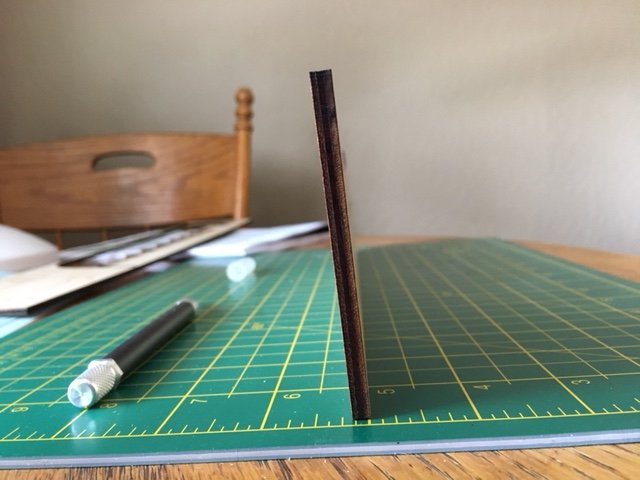
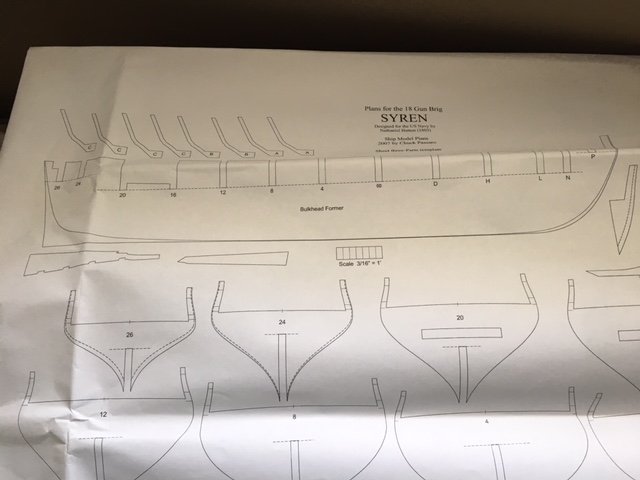
Formed and glued the rabbet to the BF. Now to research this whole "shaping the rabbet".
-
So far I am impressed with the parts. The bulkhead former is very straight.

-
Joining a distinguished club on MSW. Jumping into my first plank on bulkhead after two solid hull builds.
-
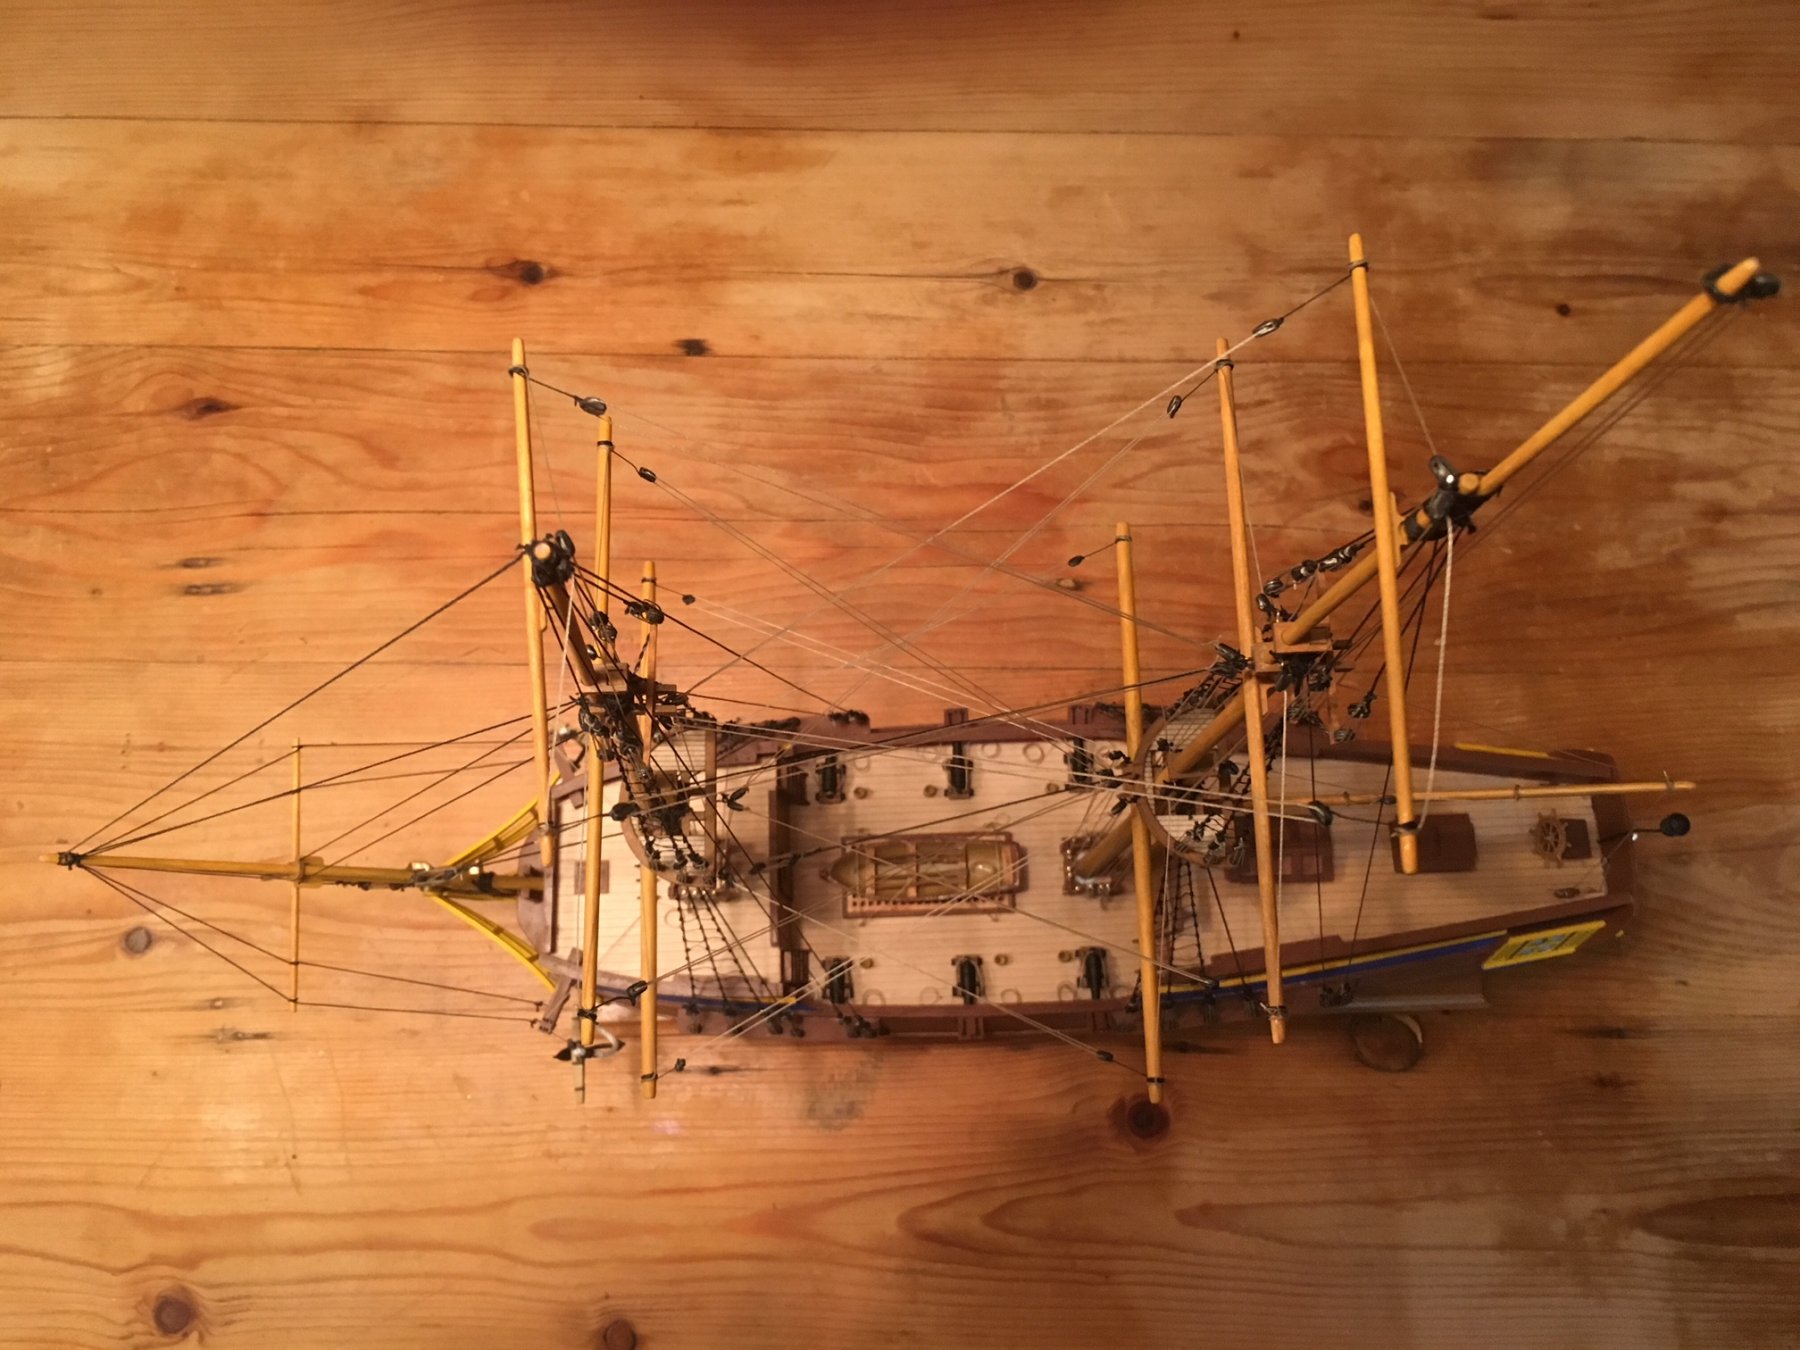
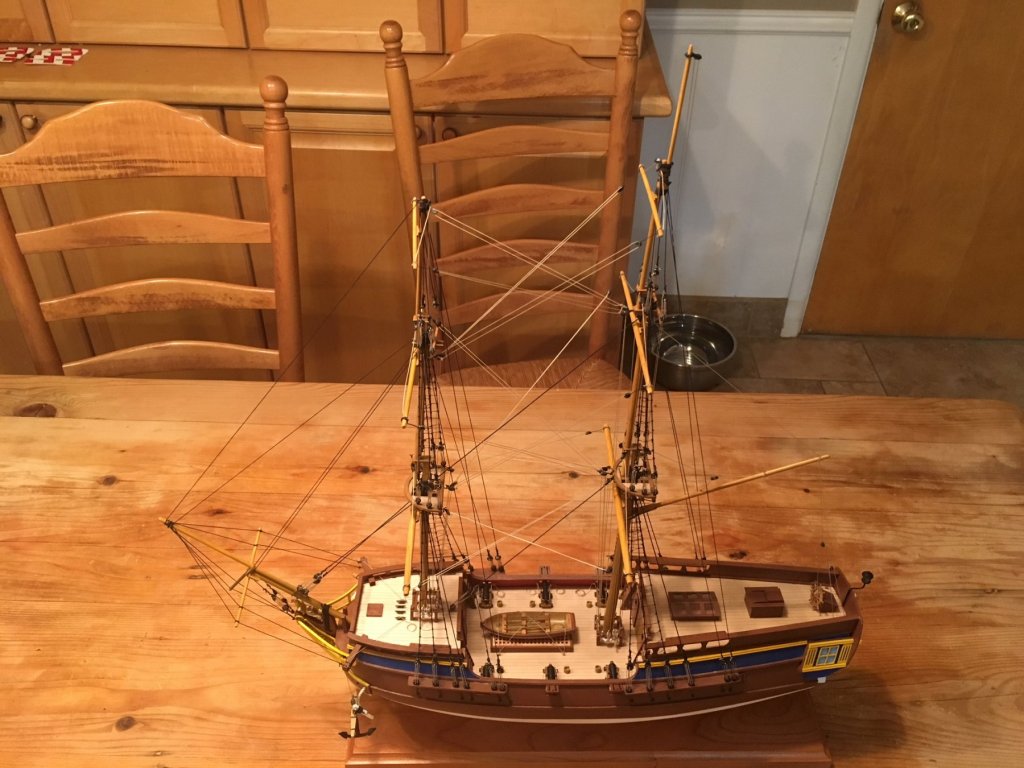
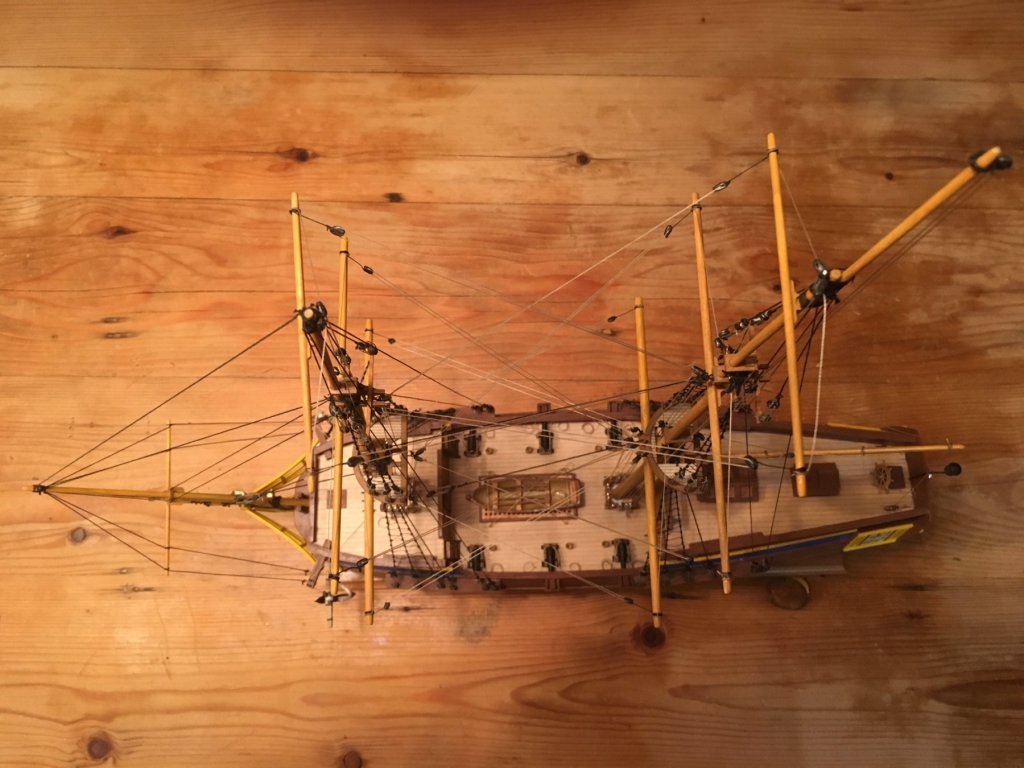
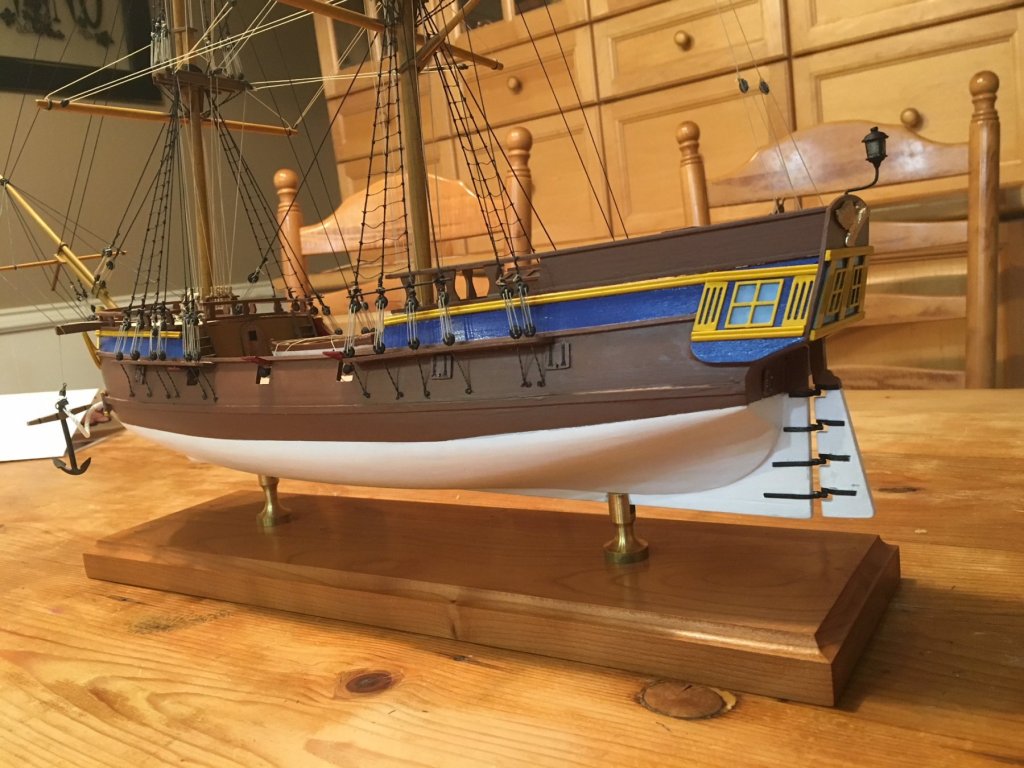
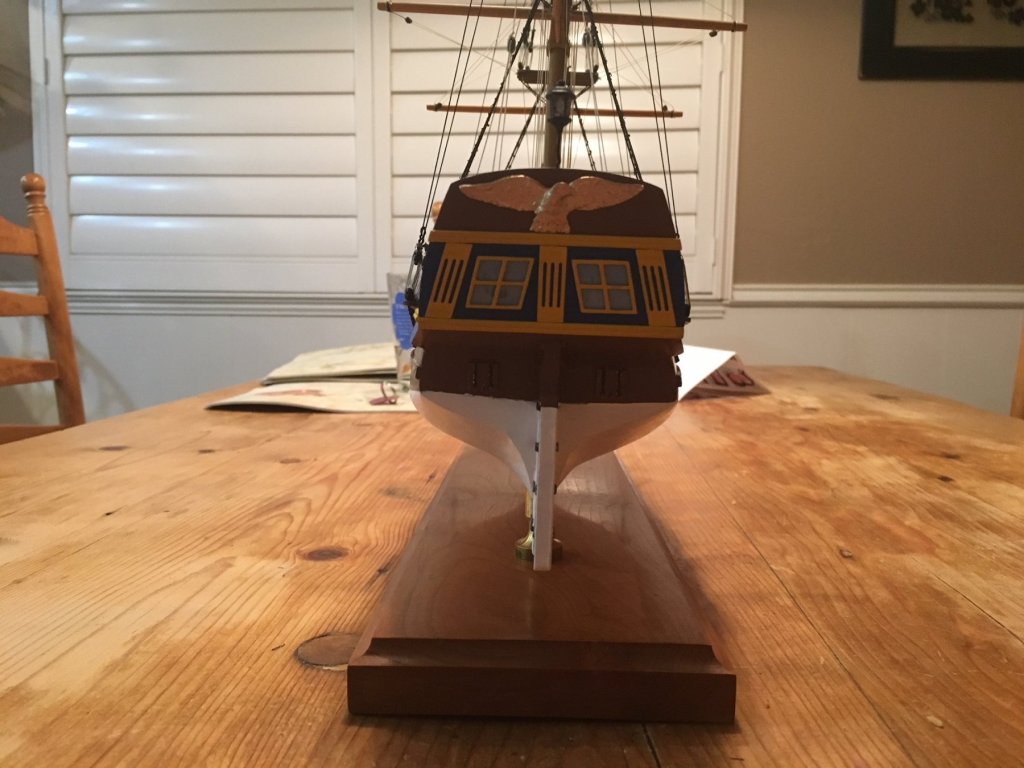
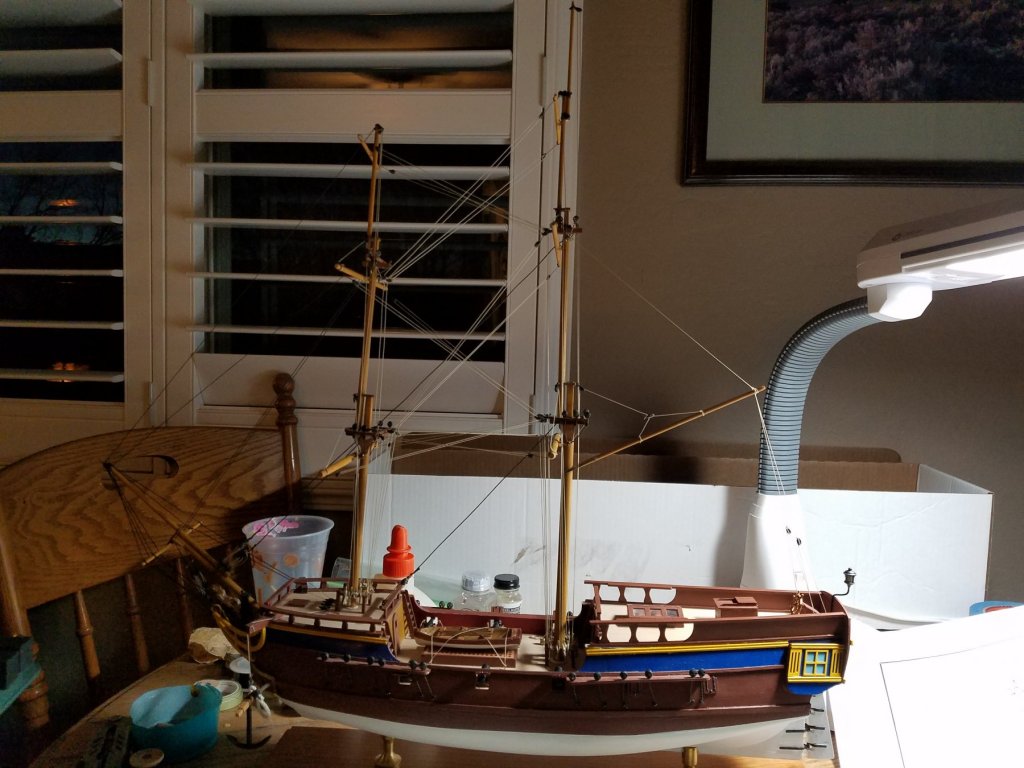
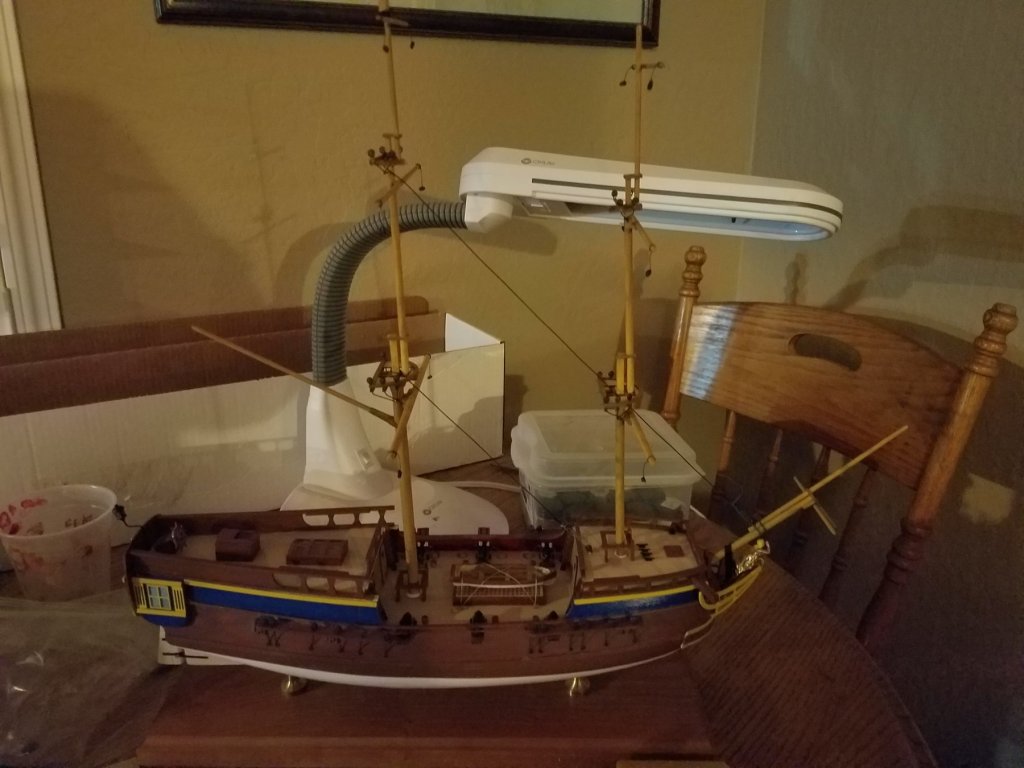
Nearly 14 months of work and a lot of learning along the way. The Pirate Brig was a good introductory model for learning the basics of a square rigged ship. Several mistakes were made and she is far from flawless, but I really enjoyed the build.


-
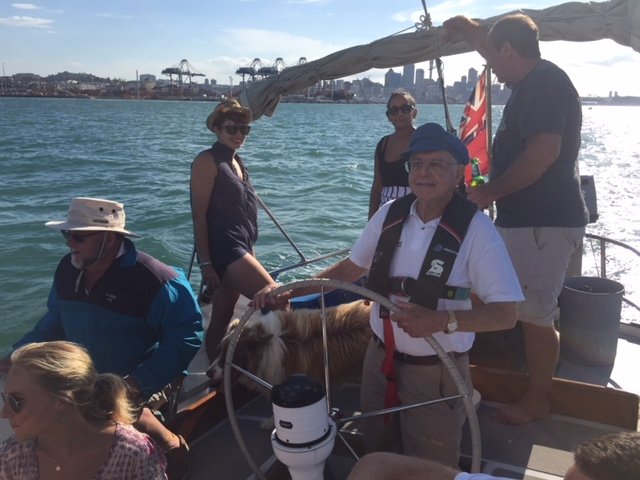
Thought I'd post a shot of my dad at the helm of Ta' Aroa in Auckland Harbor. She is a.60' sloop built in 1957 based on America's Cup plans. My dad's hobby is live steaming, and his buddy is the skipper. Nice to have friends with boats!
-
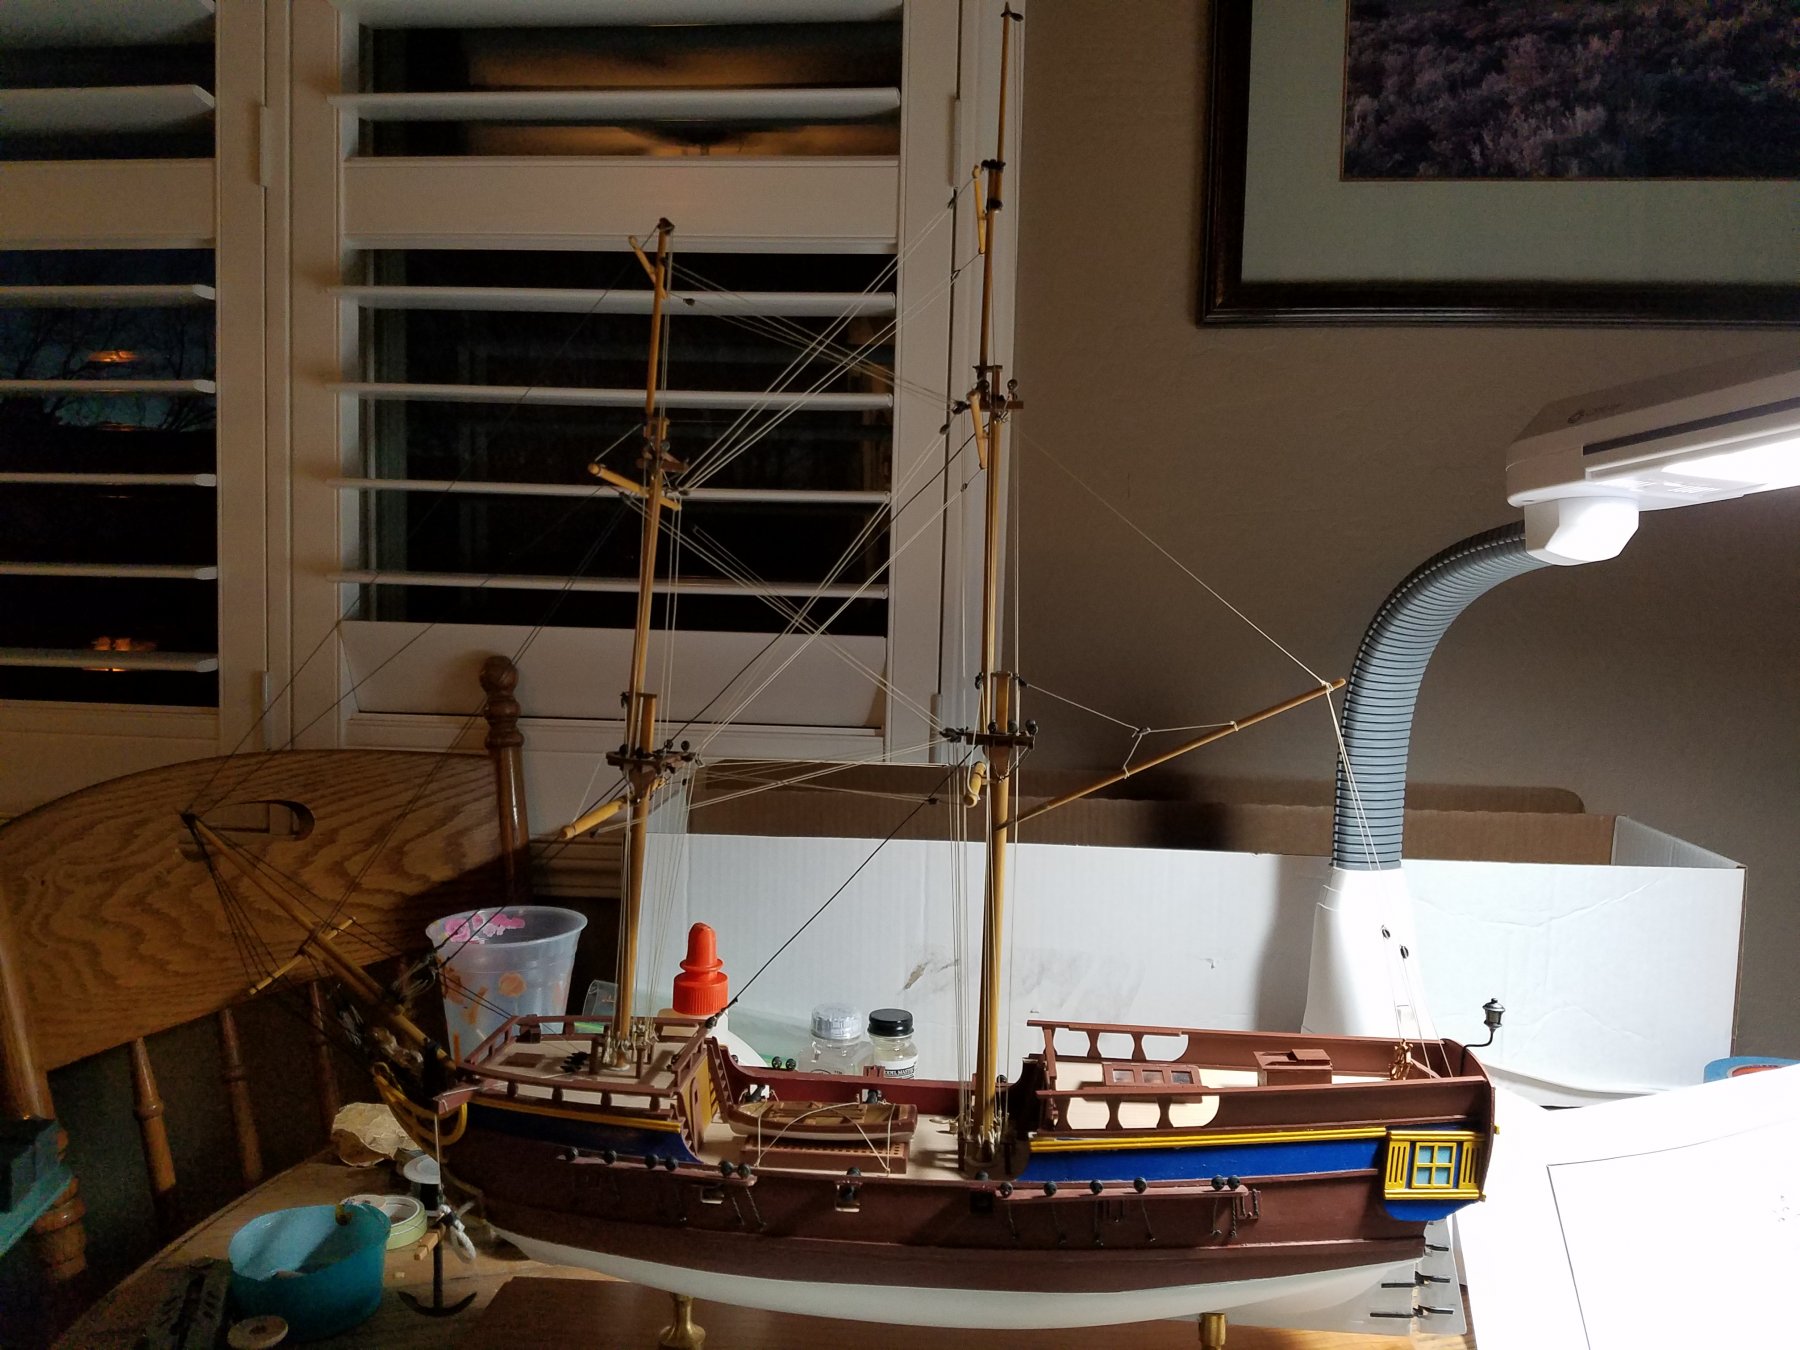
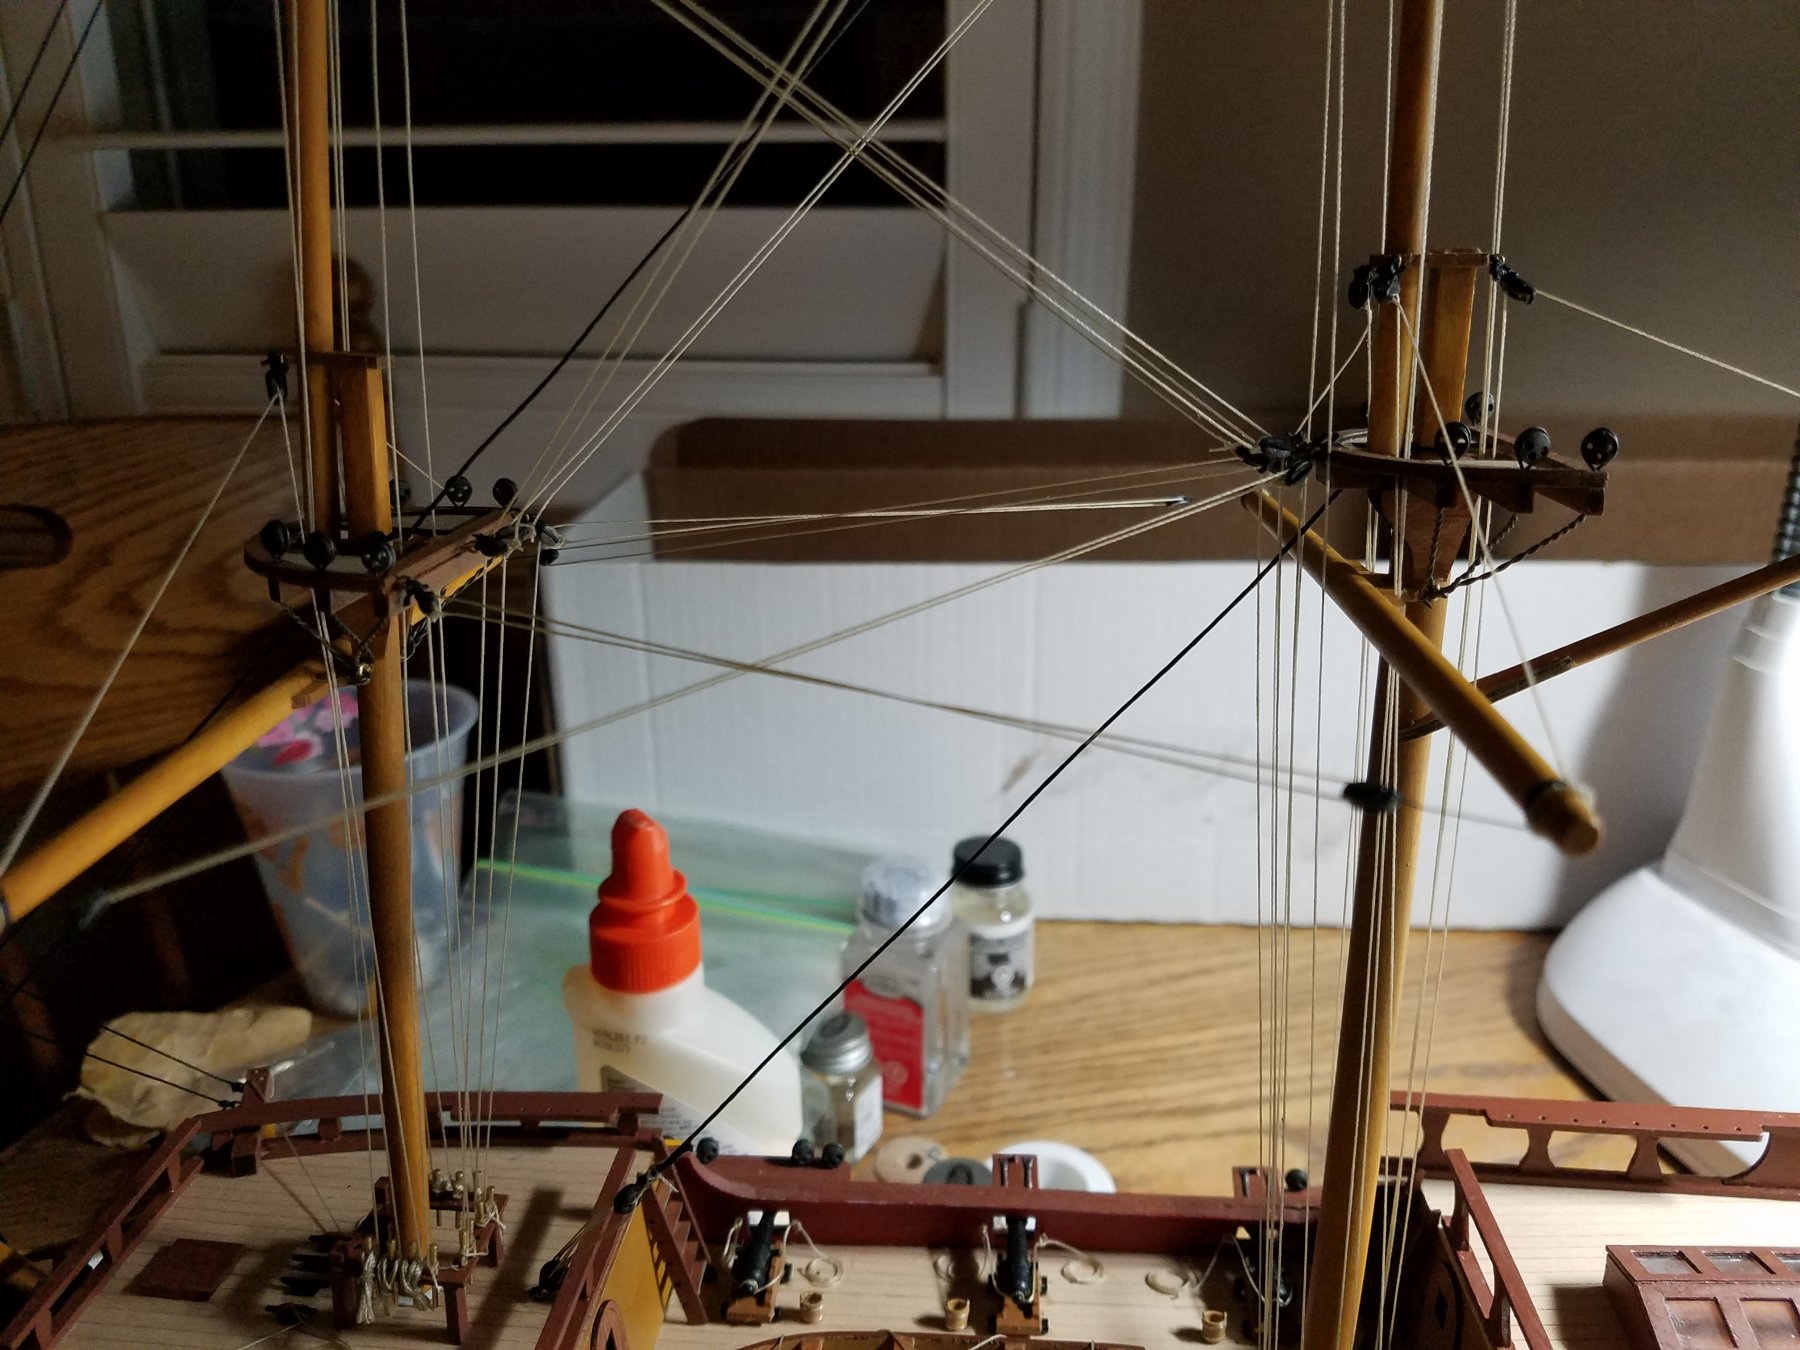
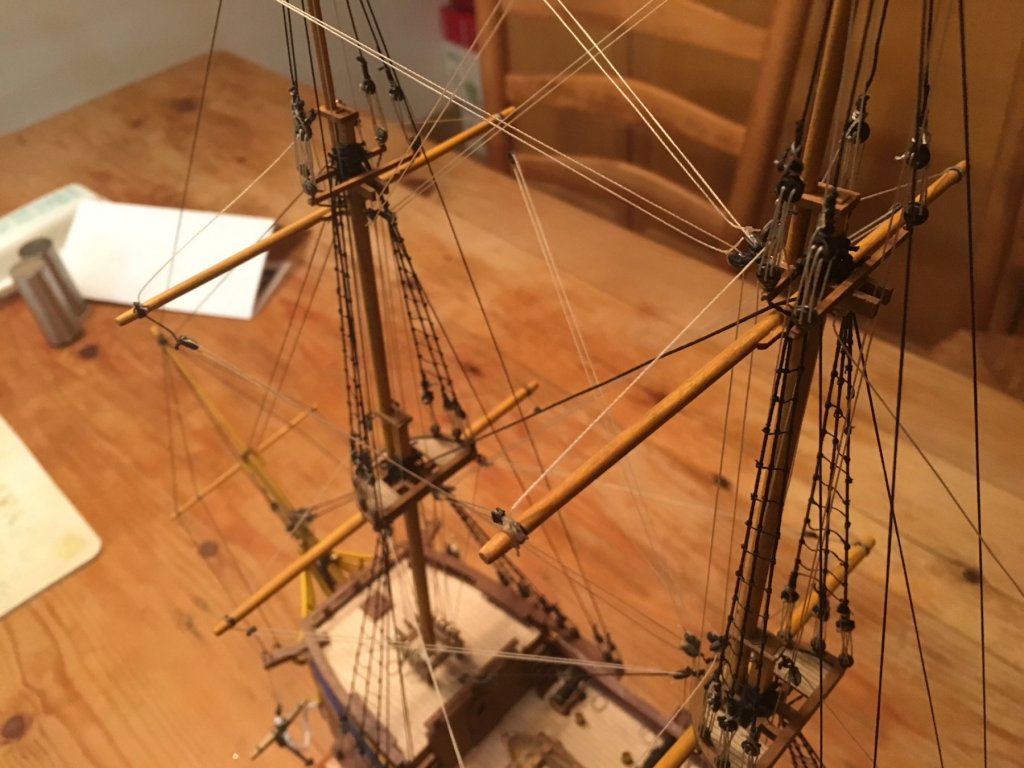
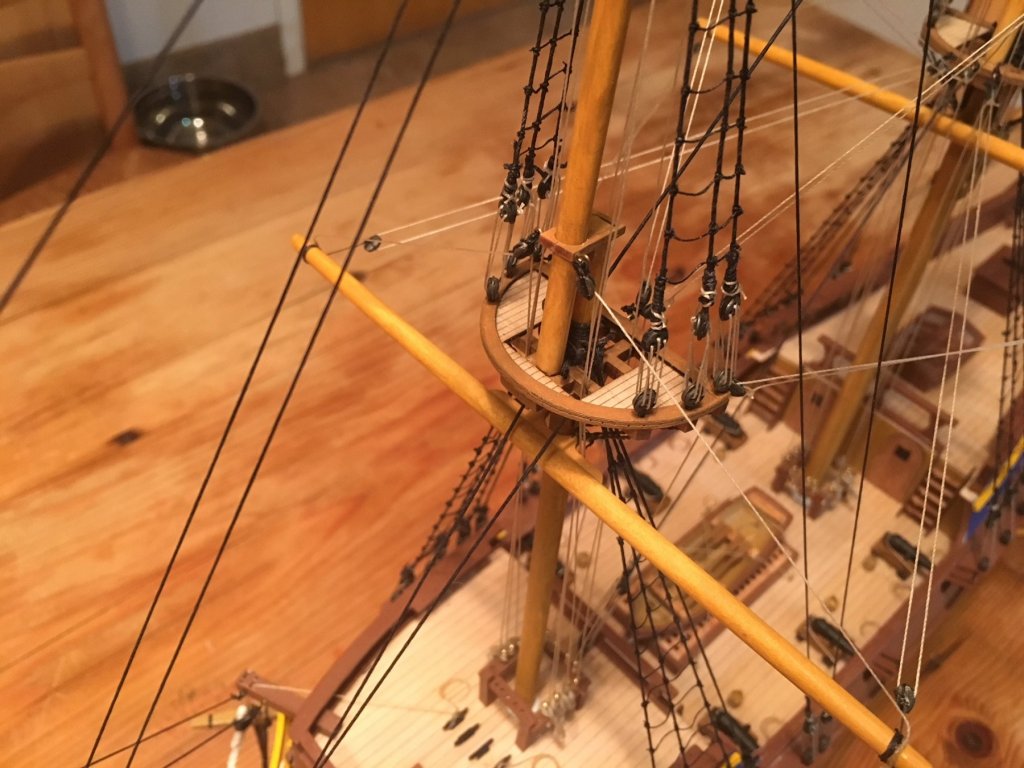
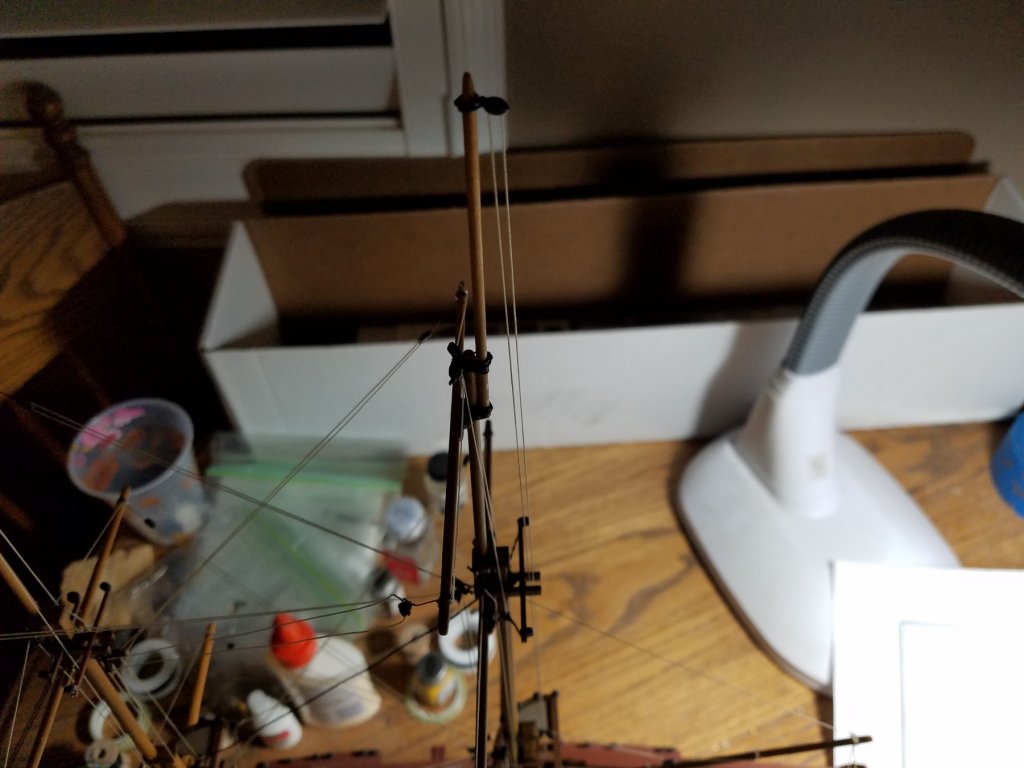
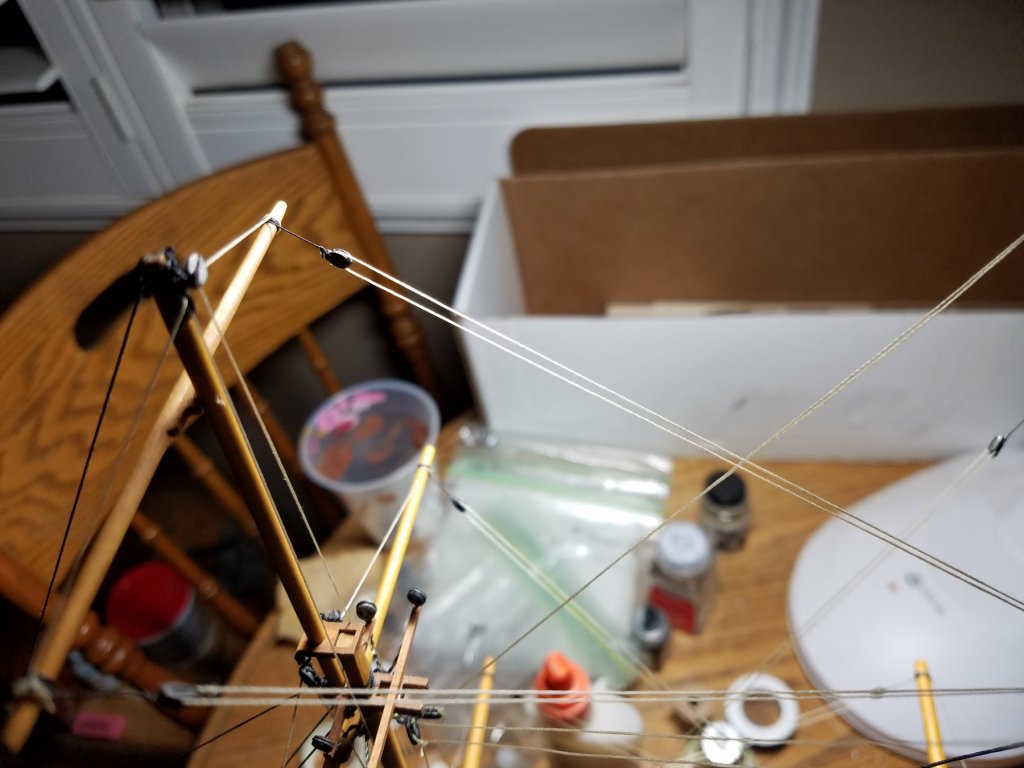
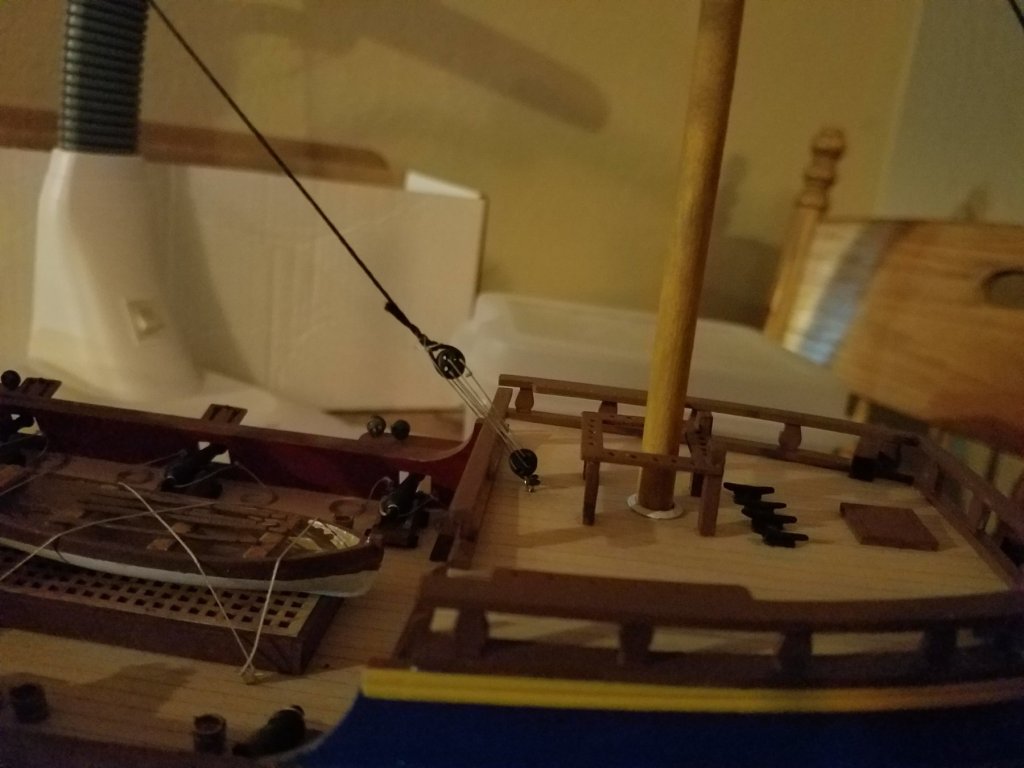
Started the ratlines. I built a 1/4" jig based on a tip from Bluejacket's newsletter. Original plan is to clamp the jig to the shrouds, but I found that a bit cumbersome, so I have been just measuring by hand.

-
Scasey88, Small world. Are you a native of the area? I am over in Hidden Valley and went to McQueen HS.
-
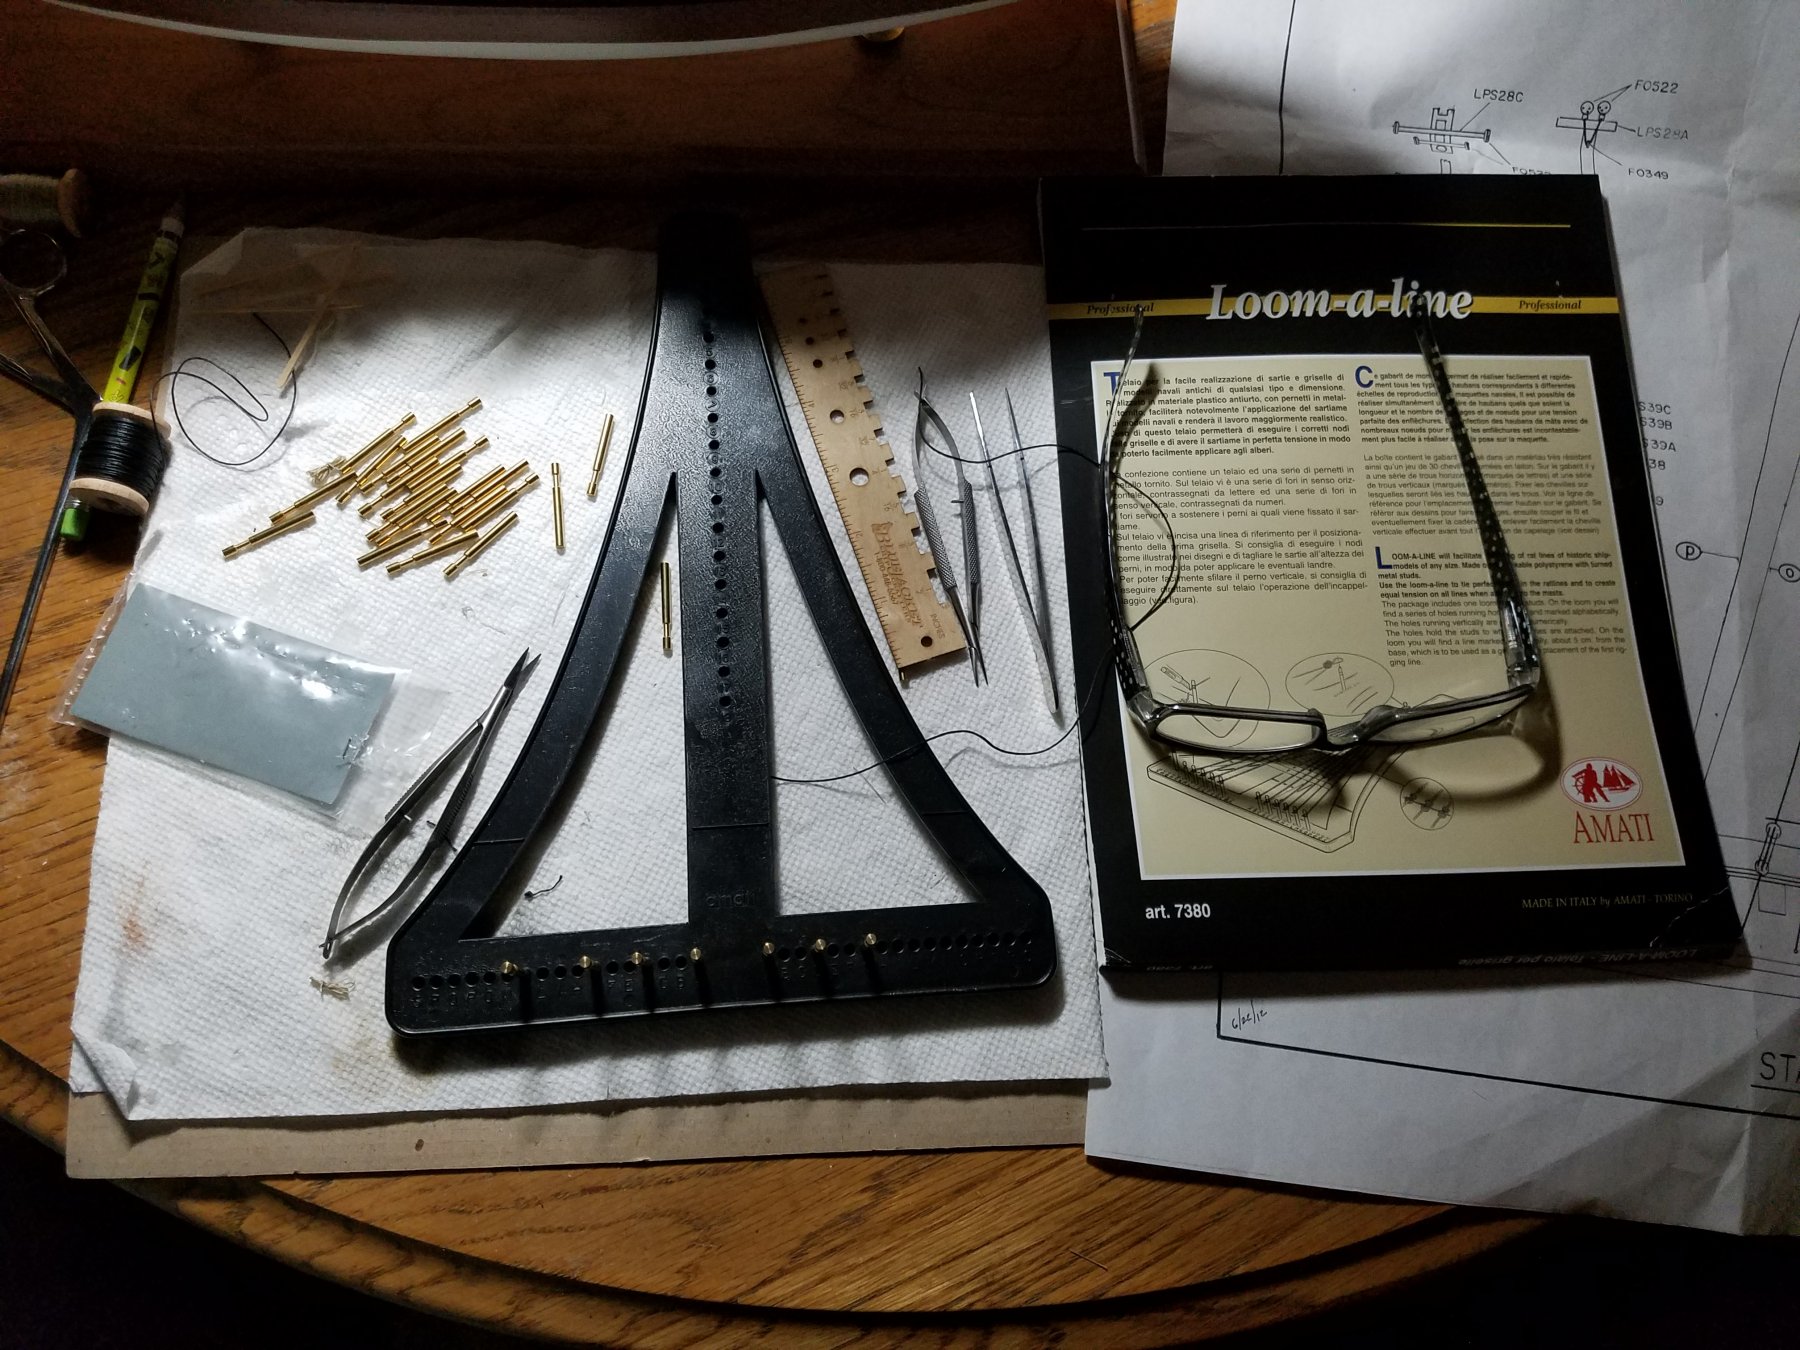
I think I just wasted my first twenty bucks on building tools with the Amati loom a line. Anyone use this yet? The pegs don't fit very well and I think I am better off rigging the lines, then tying off the ratlines. I am afraid that I won't have the flexibility to fine tune things if I have it all tied off on the loom vs. On the model.

-
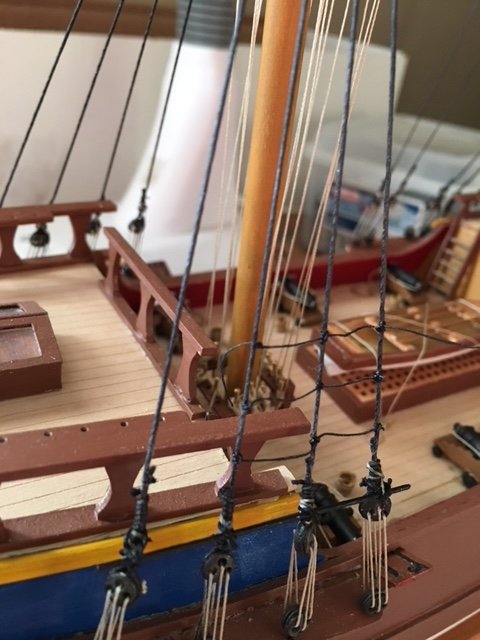
Running rigging is complete. The plans were a bit of a mess, as the lines did not correspond to the belaying pin diagram. I sent Nic a note on this with photos and he had "pen and ink" changes back in 24 hrs. I was also gratified to read Al was updating Pirate Brig plans in the next newsletter. So, no worries. It is a simplified rigging plan with no clews or sheets for the sails. Otherwise, the plans were pretty straightforward. You need to be comfortable working off plans though. The rigging instructions in the manual are a single page that refer you to the plans. Only area where I struggles a bit was placement of lines coming down to the belaying pins. Plans are a bit rudimentary on this.


-
Chuck,
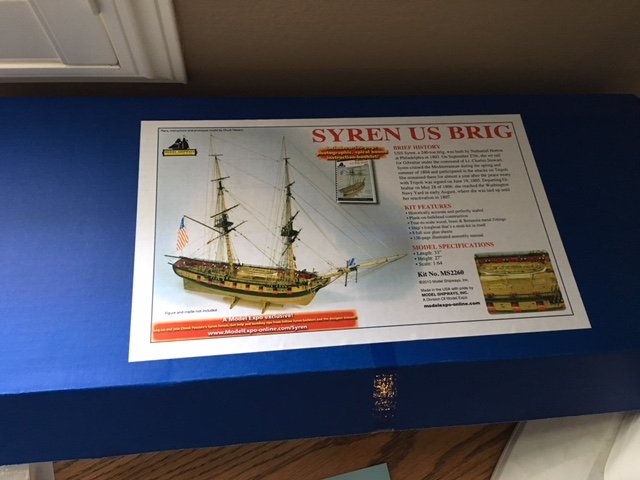
Russ and company talked me into MSW's "Syren" for my first POB build. I am looking forward to it. My prior building experience is Bluejacket's Revenue Cutter, and I am just finishing up their Pirate Brig. Two questions: First, can you recommend some planking tools, such as clamps and battens? I do have a vice for the keel already. Second I noticed MSW also has a kit of the USS Essex, but I have not seen anything on it in the build logs. Do you have any knowledge/experience with this kit? I read "Odyssey of the Essex" by Frank Donovan a while back and was considering it for a future build. Appreciate any input and advice on these topics.
Eric Wishart
-
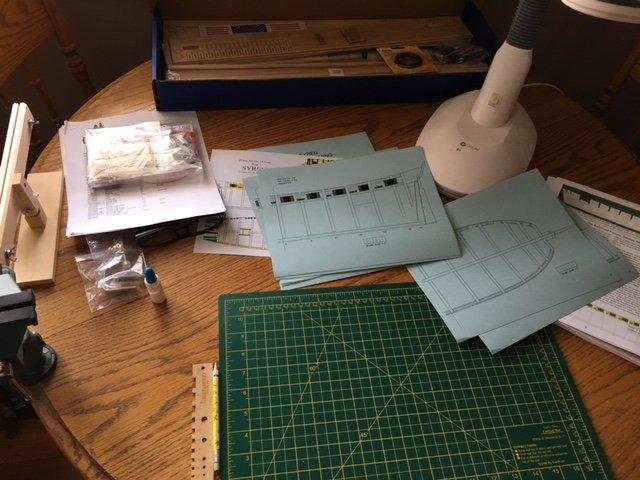
Gentlemen, I just put my order in for the "Syren" kit from Model Shipways. I really appreciate all your input and I am glad I started this thread. This is exactly what makes MSW such a great forum. She is on backorder which is fine as I have just started rigging the Pirate Brig, so I have time. Those of you who cut your teeth on Syren and your positive comments as well as the very detailed instruction manual are what swayed me.
-
Wow gents, thanks for all the terrific feedback. Okay, sounds like if I go the Caldercraft route, cutting one's teeth on Pickle might be a good start to get used to that company. She is a great looking little schooner. And, Russ - I'll steer by Syren again. I have seen a lot of positive comments on the instructions. Thanks for your input!
-
Gents, I appreciate your advice, and I am thinking back to when I first thought about getting into wooden ship models and the most important factor is interest in your build. I have really been giving Caldercraft's Cruizer class brig sloop a look. Anyone with experience on this model?
-
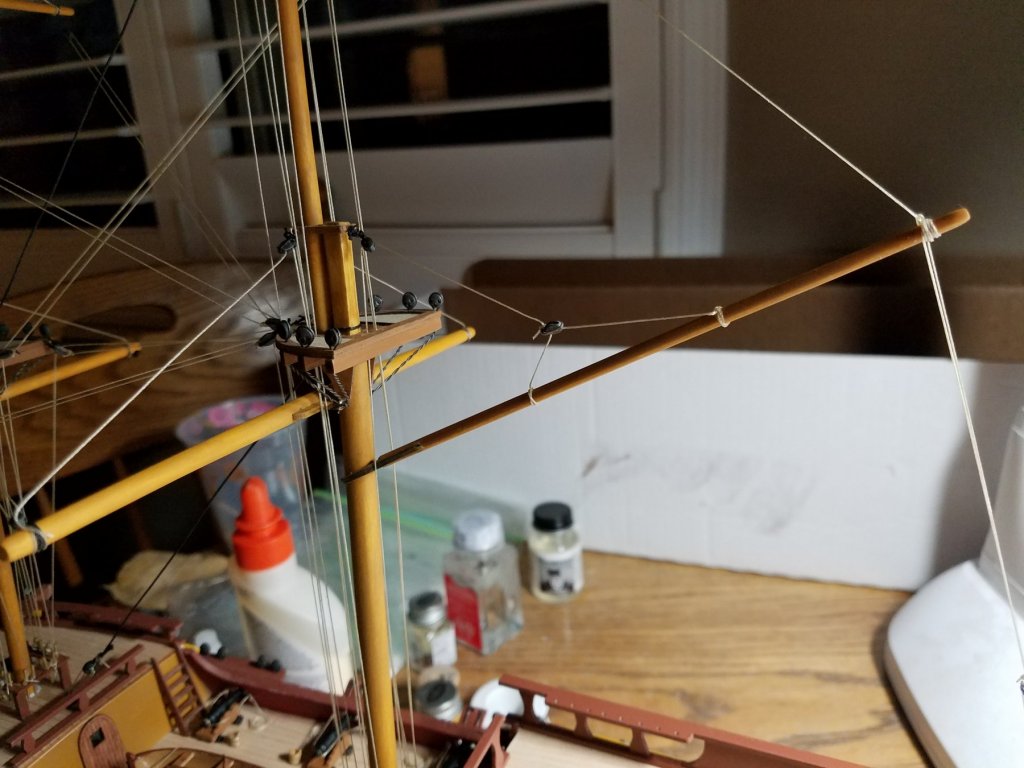
Derek, you are my conscience. I think the halliards are too thin. I went a couple millimeters thicker and I think it made a big difference.

-
Thanks Derek. I'll drive on with my stock on hand for this build, but was there a certain stock number you went with or just rigging in general from Chuck?
-
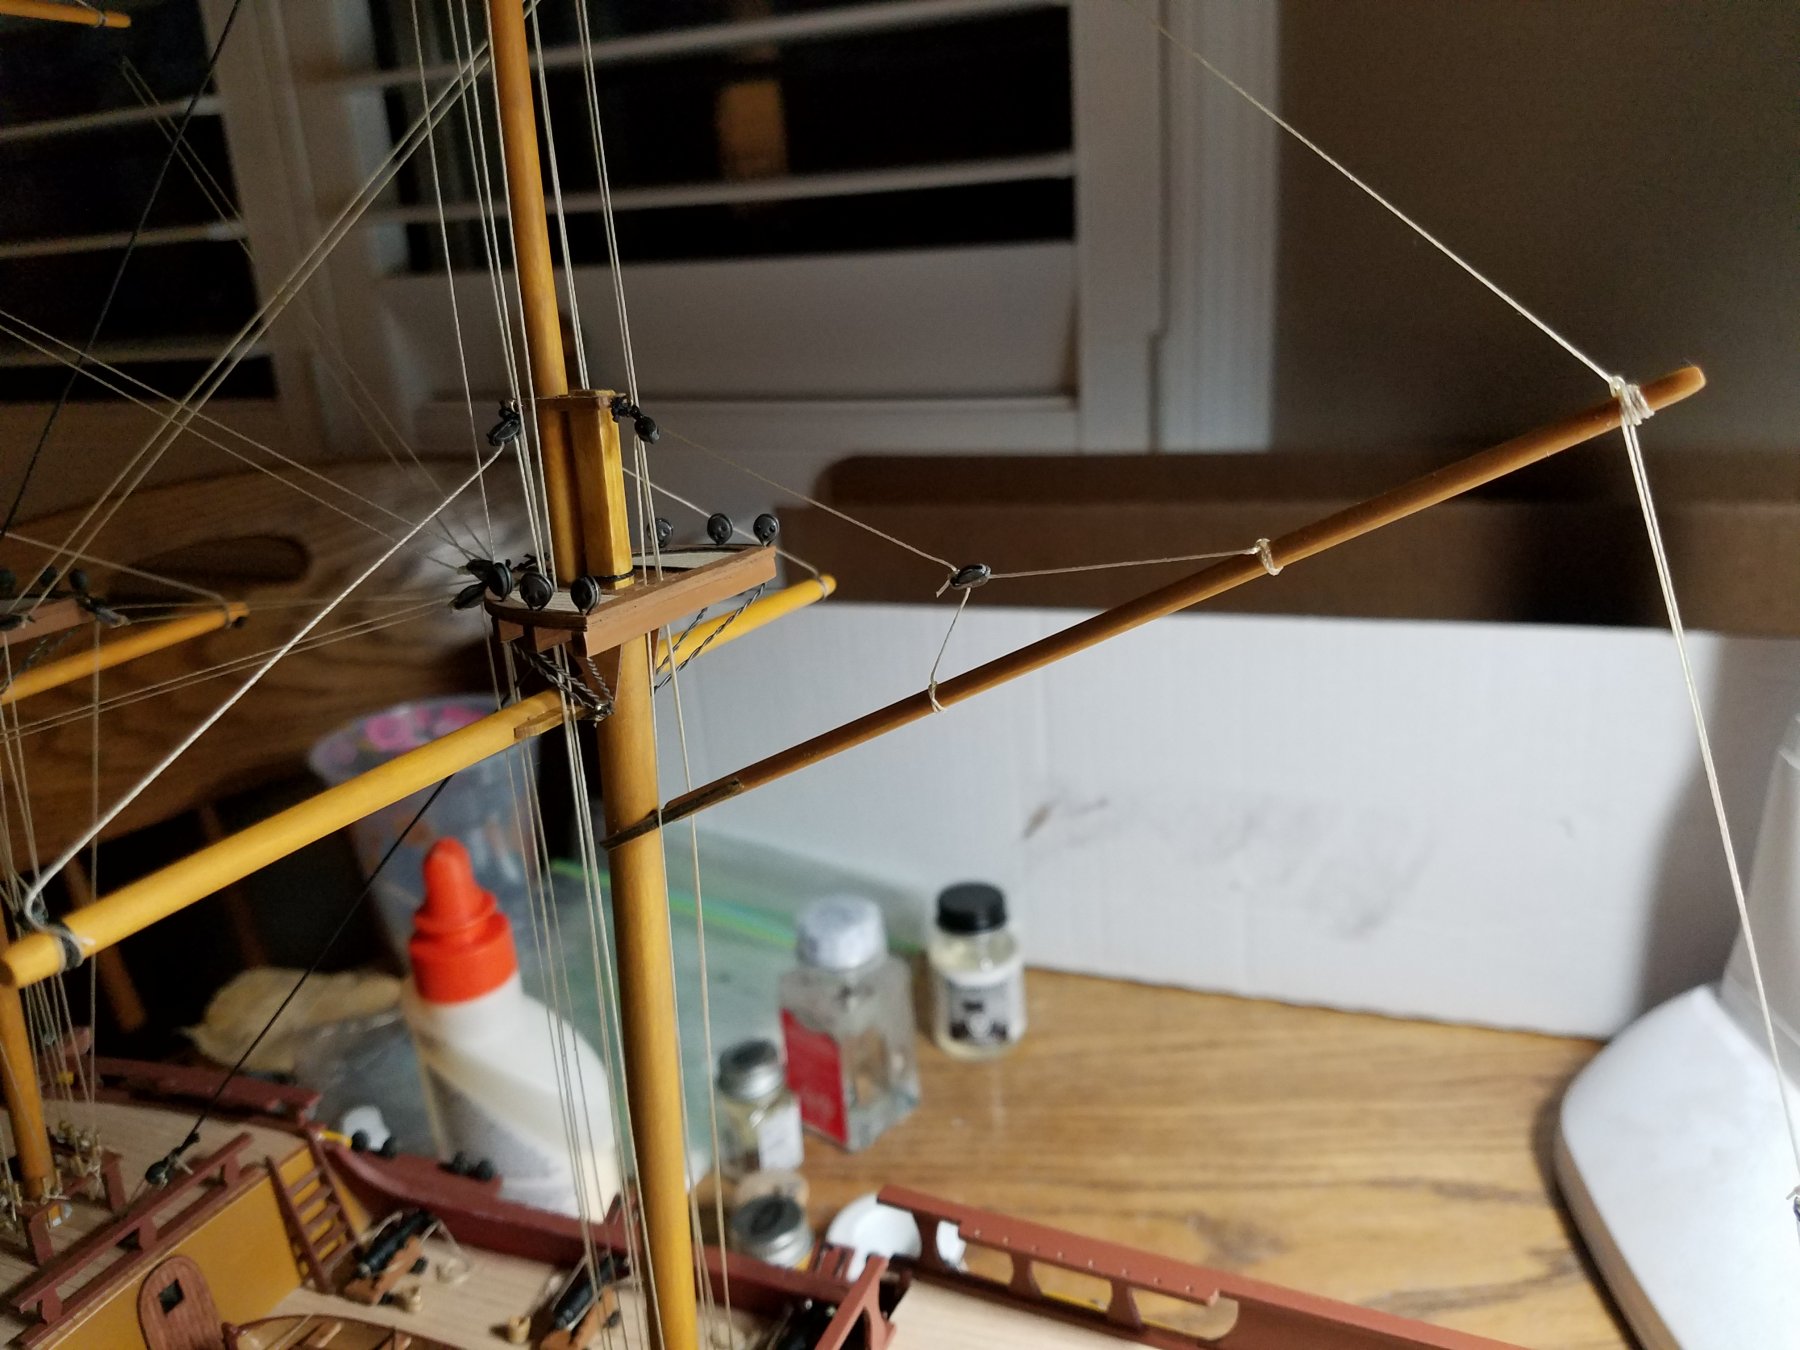
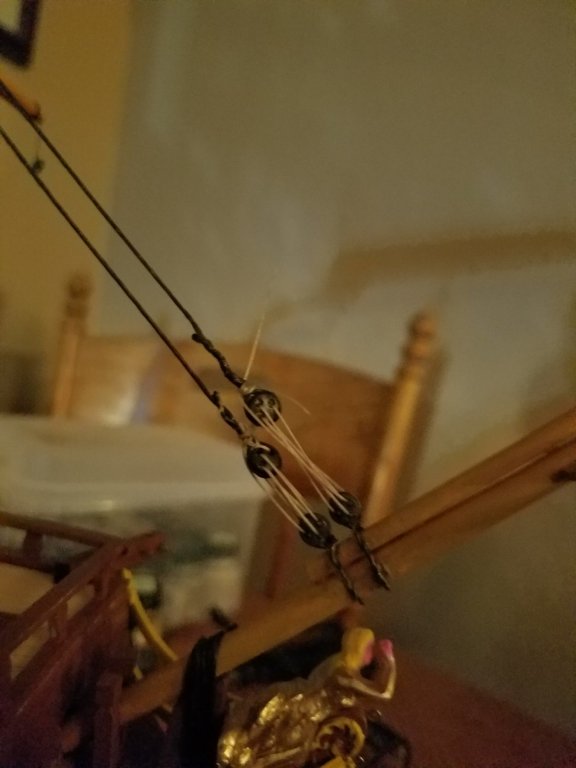
Just got the masts set, and I am starting the rigging. Asking for an opinion on the halliards. Do you think the line is too narrow? The kit comes with a slightly thicker black line, but I have noticed most deadeye halliards are white or tan, so I am improvising.


-
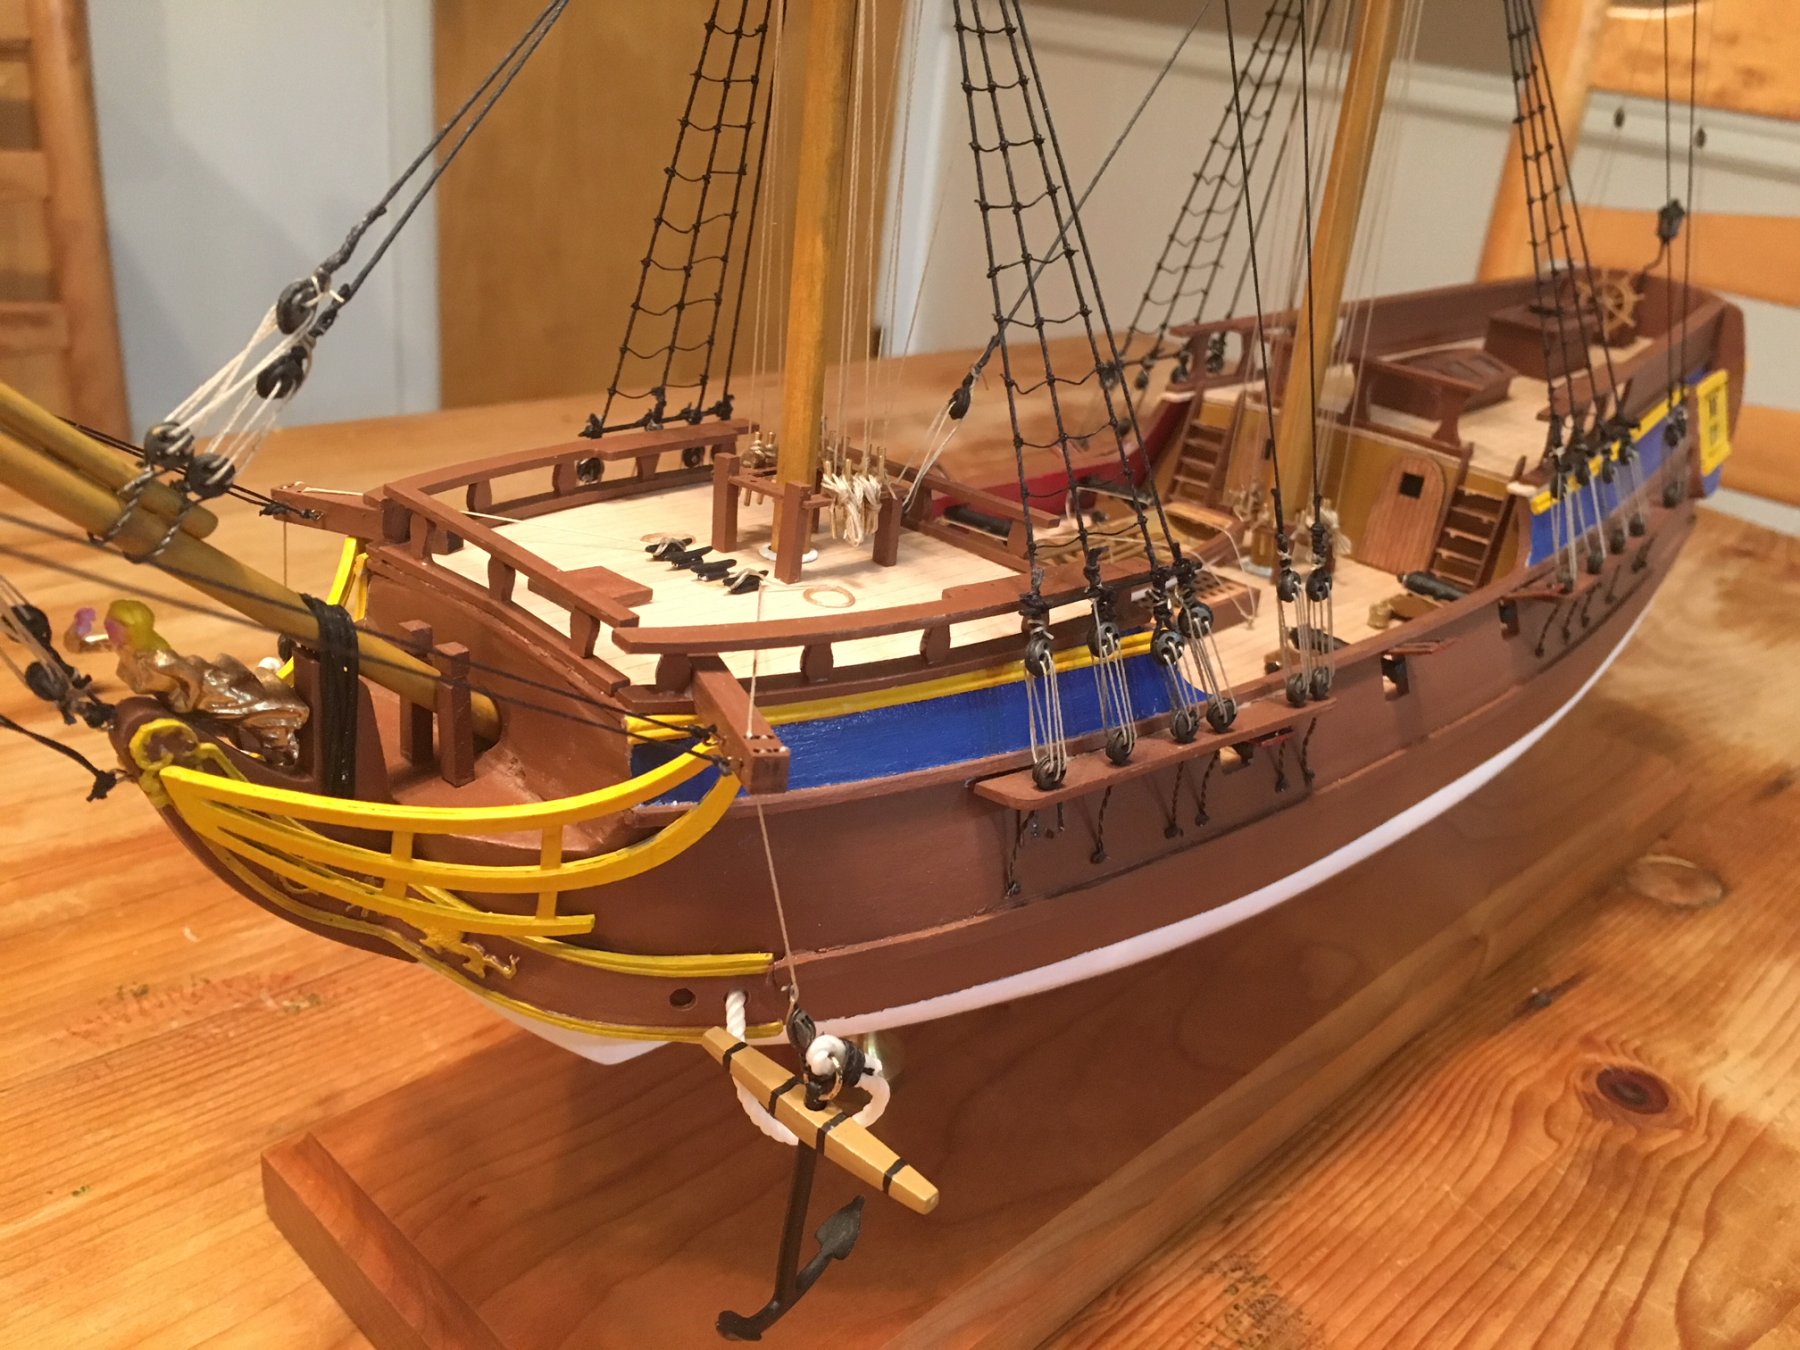
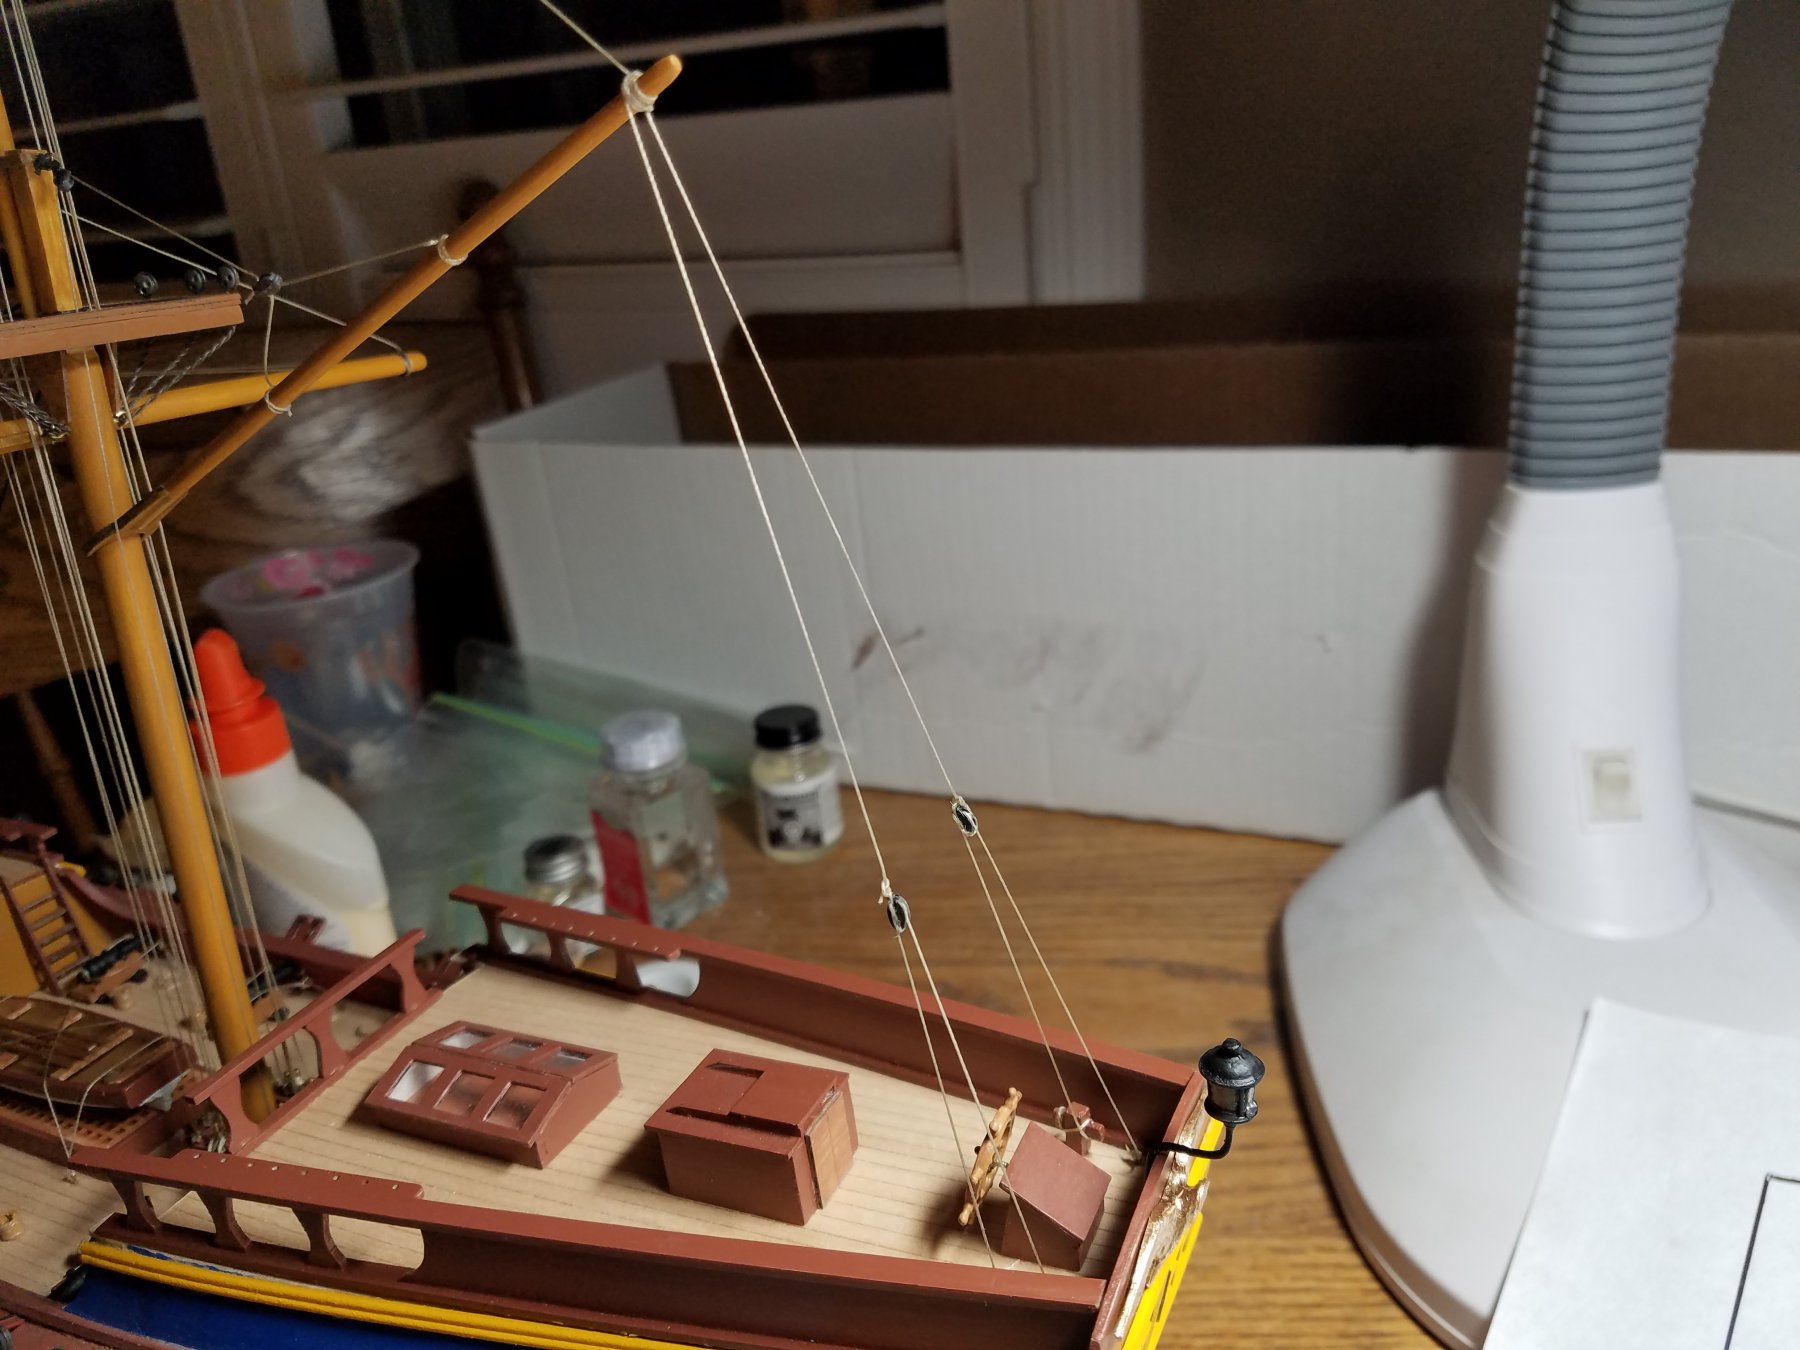
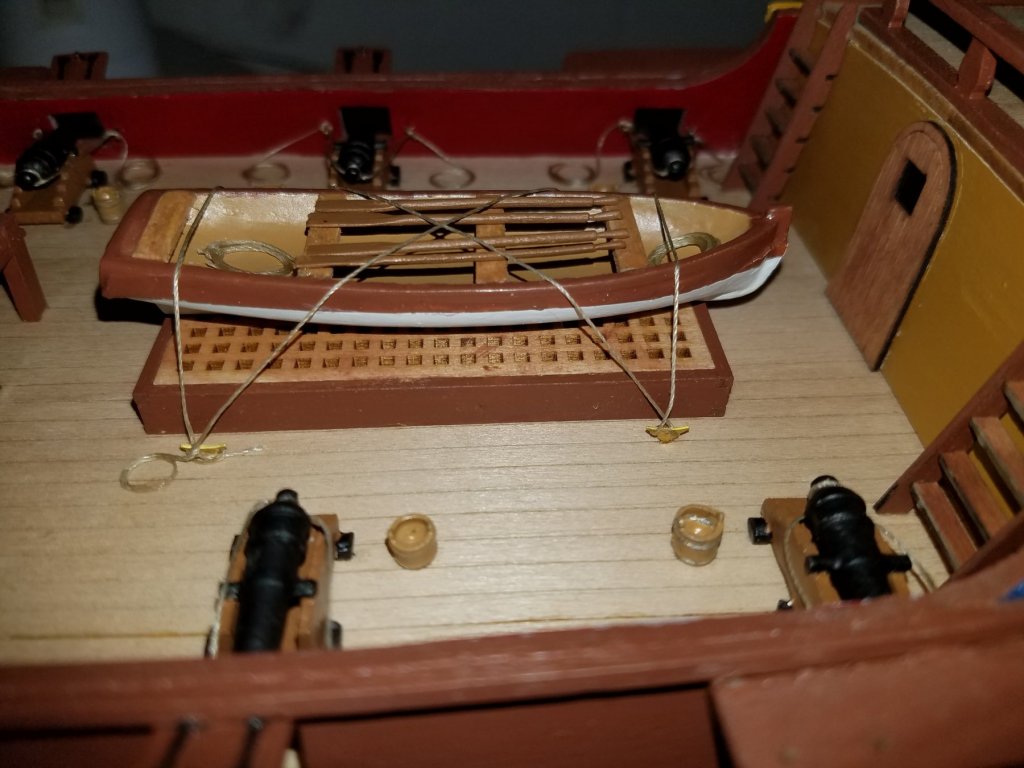
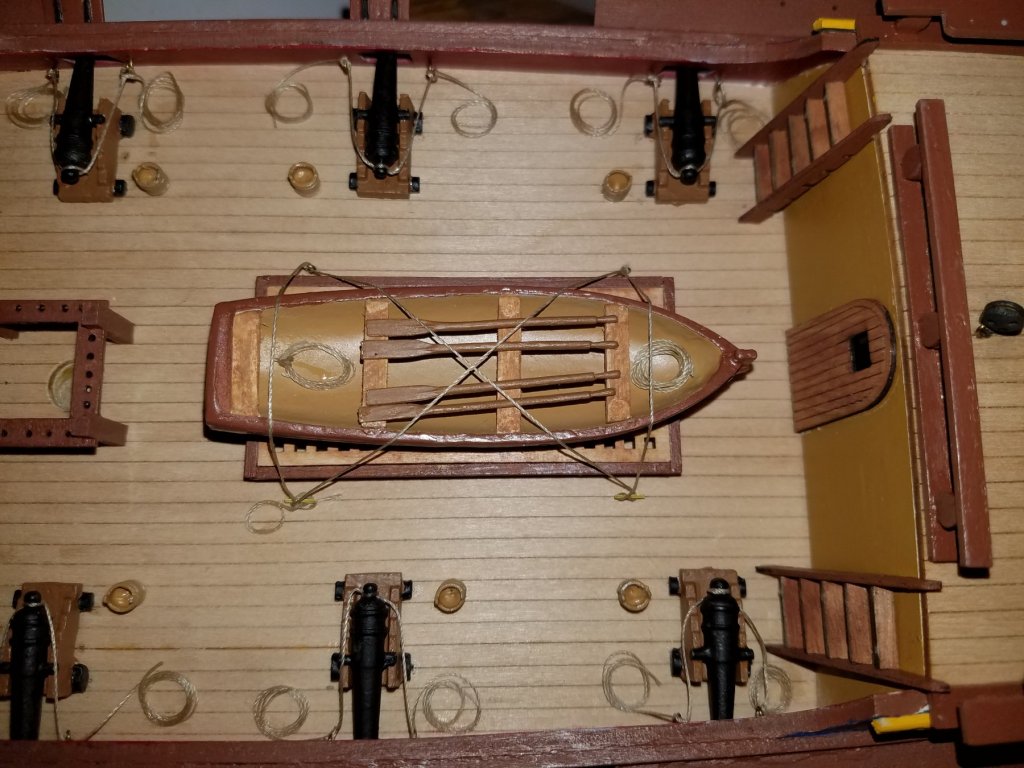
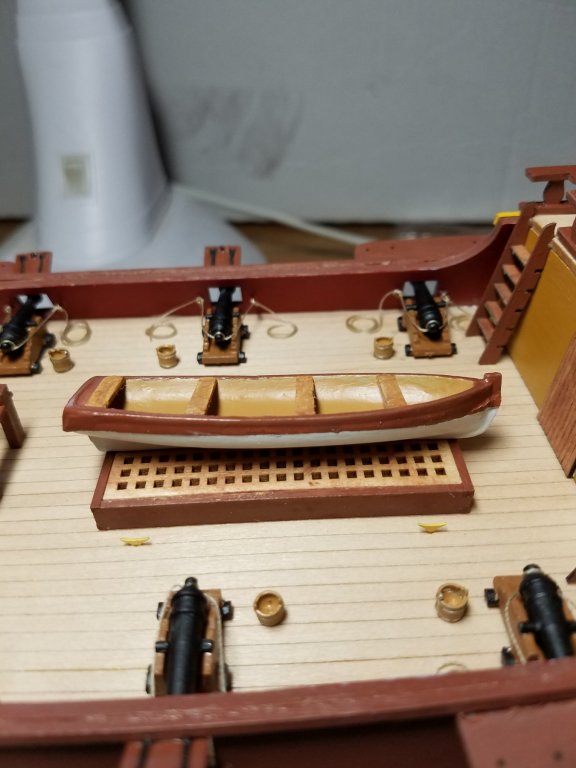
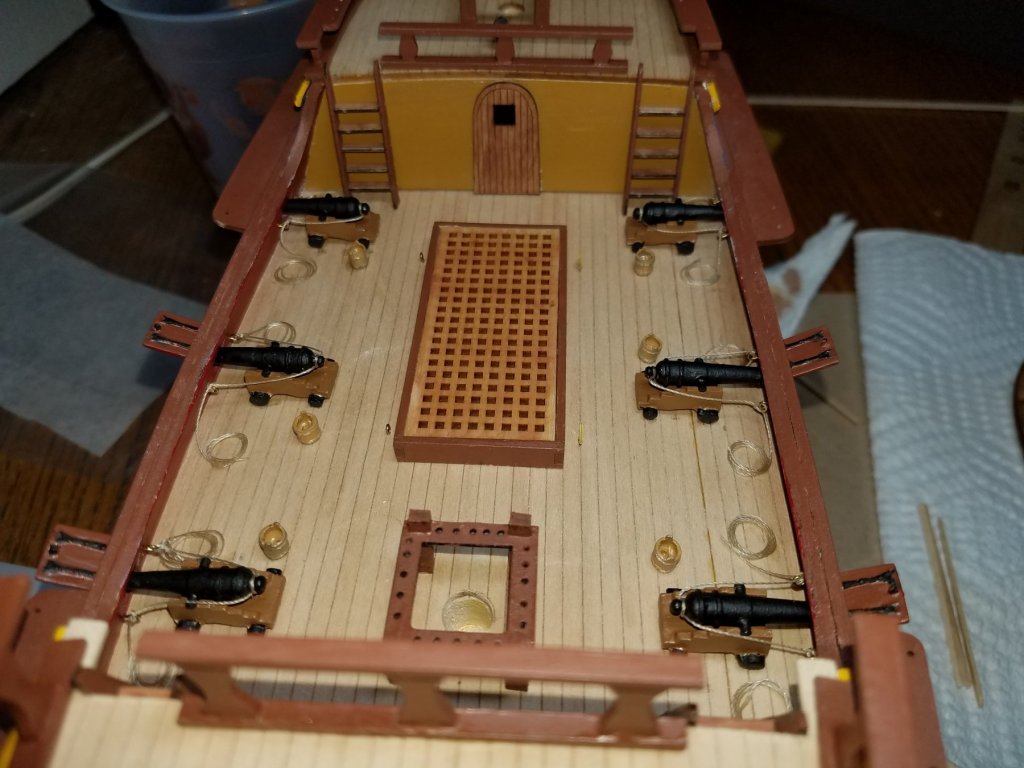
Here is the long boat lashed to the grating. Oars are cast Britannia metal. I ordered them from Bluejacket's accessory page, along with the slow match tubs shown with the cannons.
-
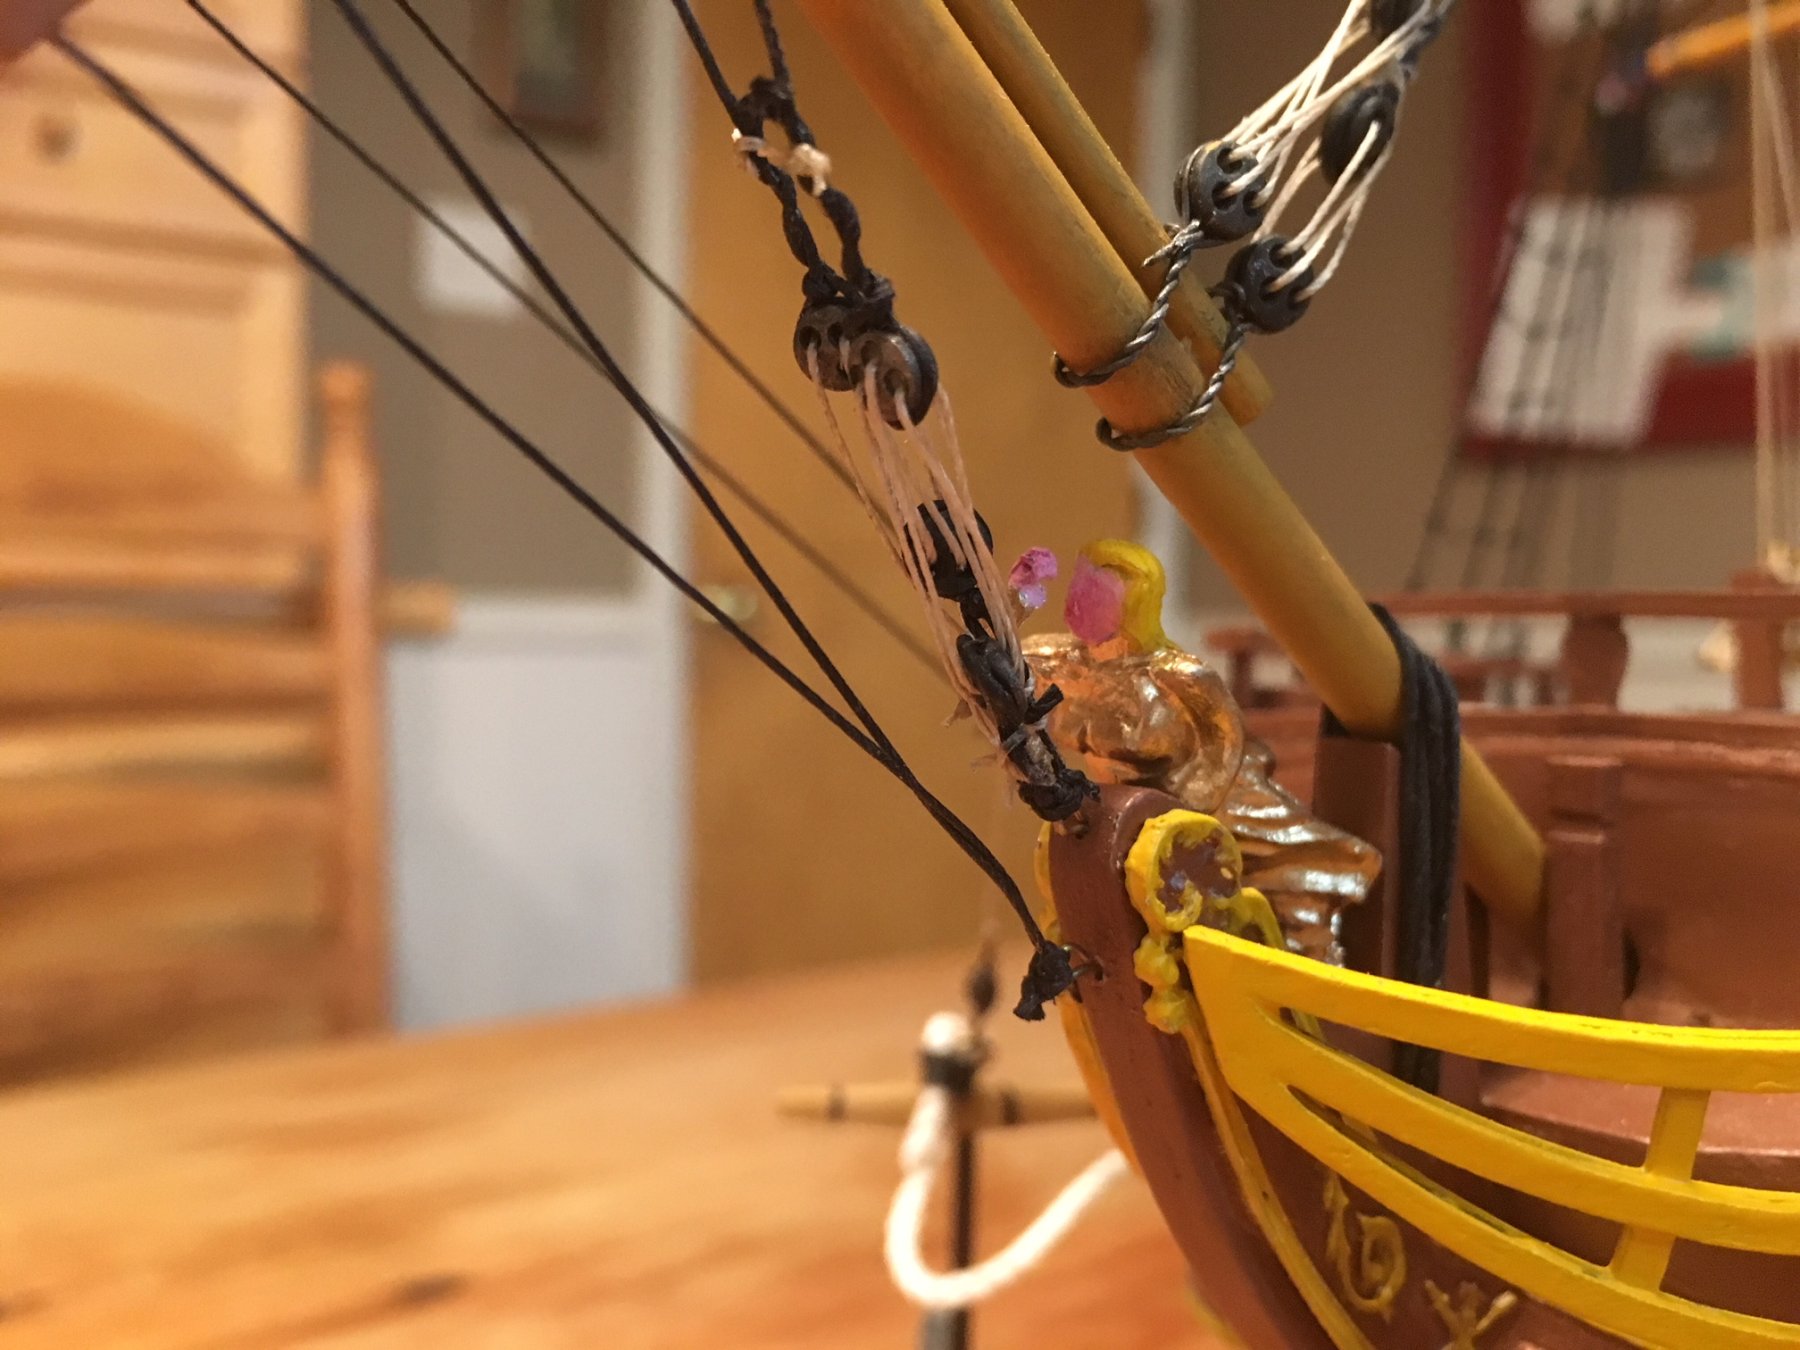
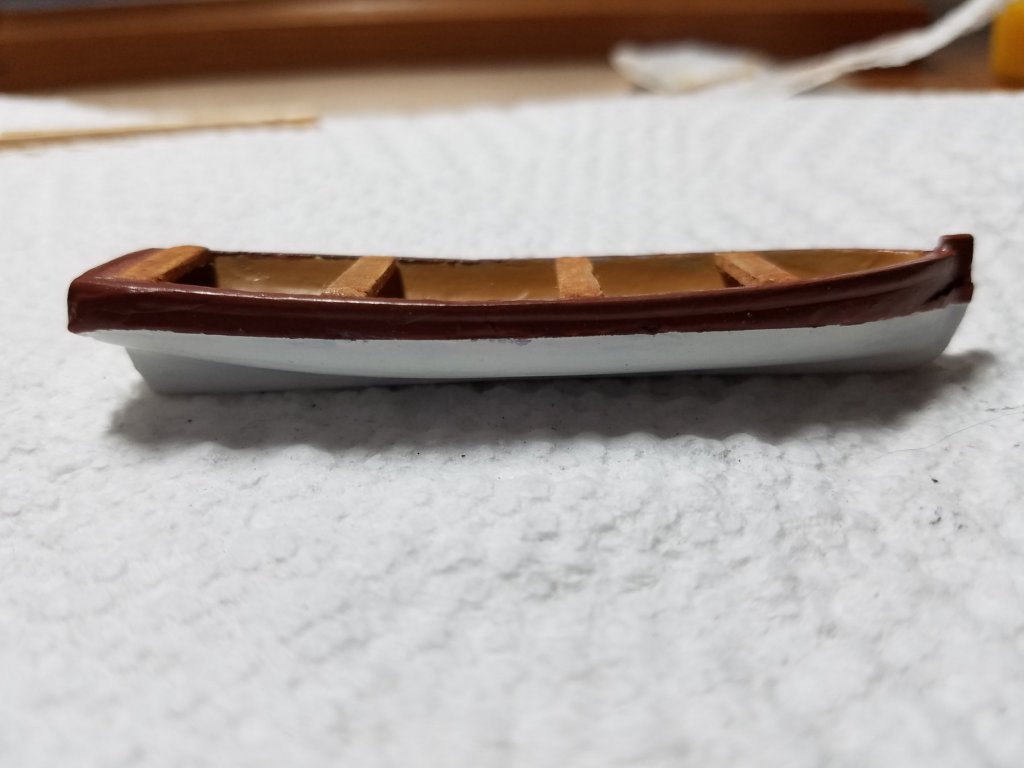
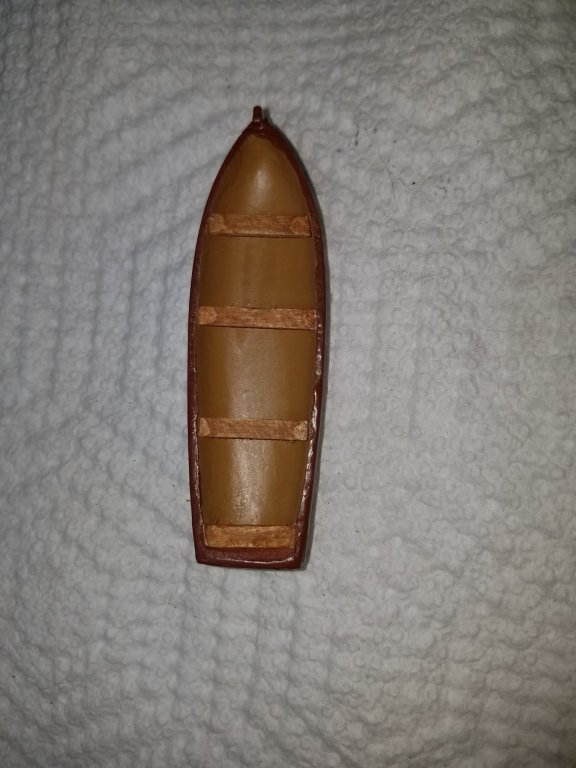
The kit come with a cast Britannia metal long boat. It is designed to be painted and secured upside down over the main hatch grating. This a perfectly reasonable option, but I got to thinking how "iconic" the long boat is on a pirate ship. Pirates going ashore to bury treasure, Long John Silver sneaking away in Treasure Island; heck even the boat in the Pirates of the Caribbean ride at Disneyland is loosely based on a long boat. So, I used some left over balsa wood from the wales and fabricated some benches. A bit crude, but I think with some oars and a little line coiled about. It'll do the trick.
-
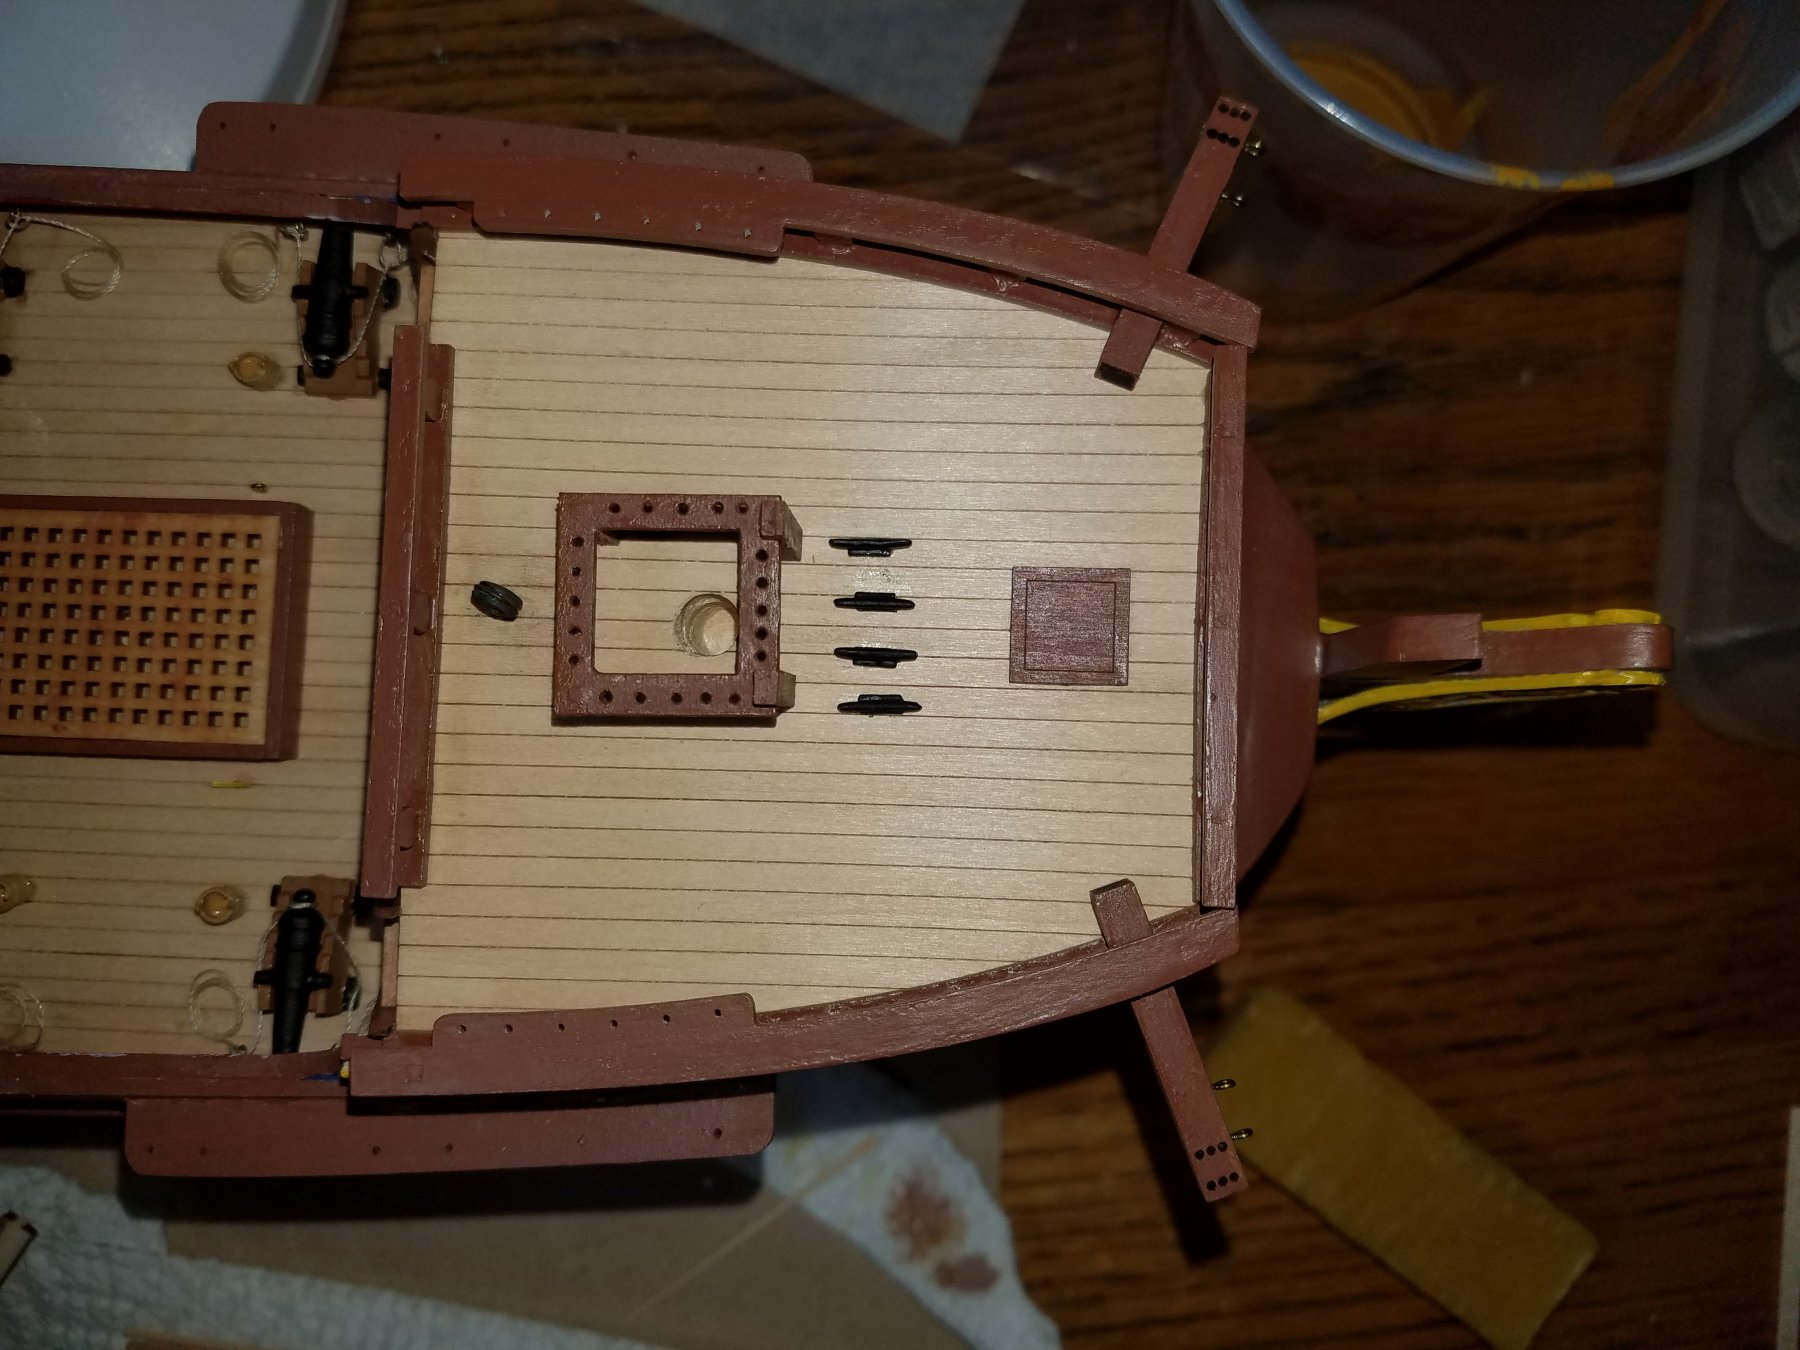
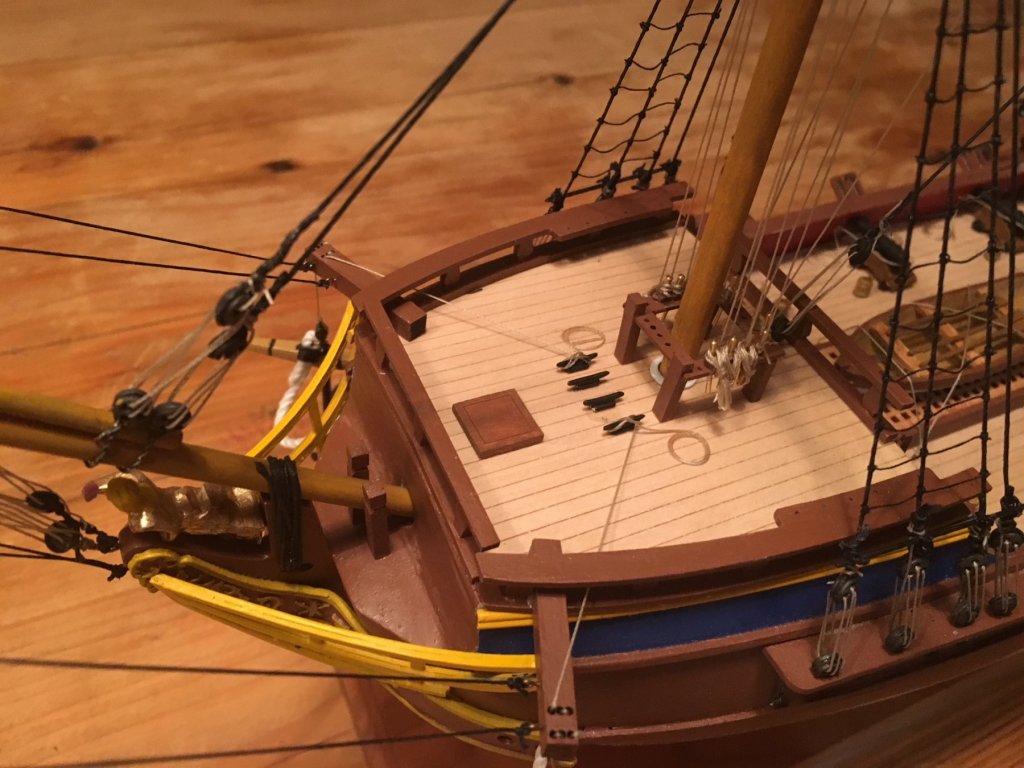
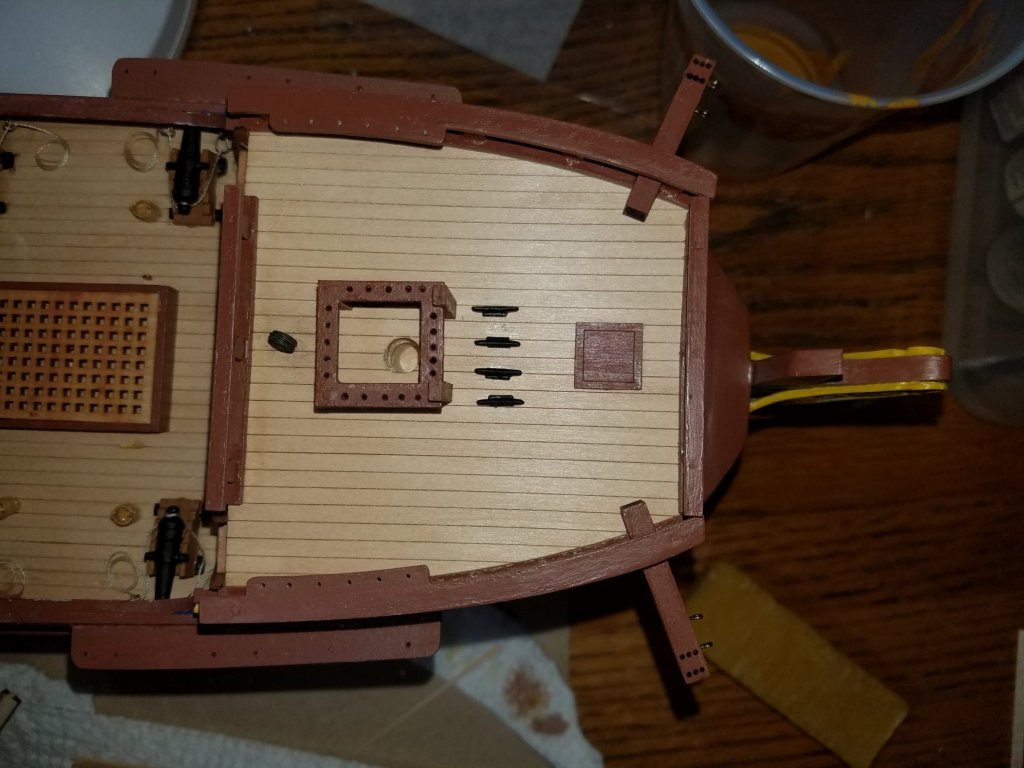
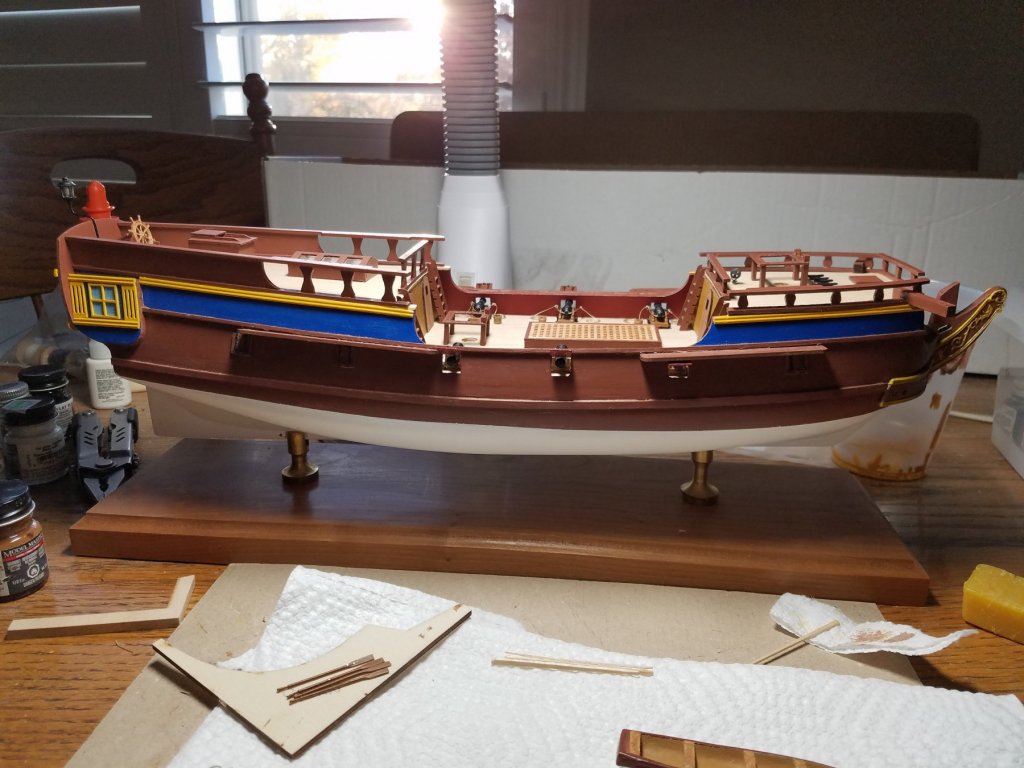
Here are some photos of the railings.. These were finished a while ago and dry fitted.

-
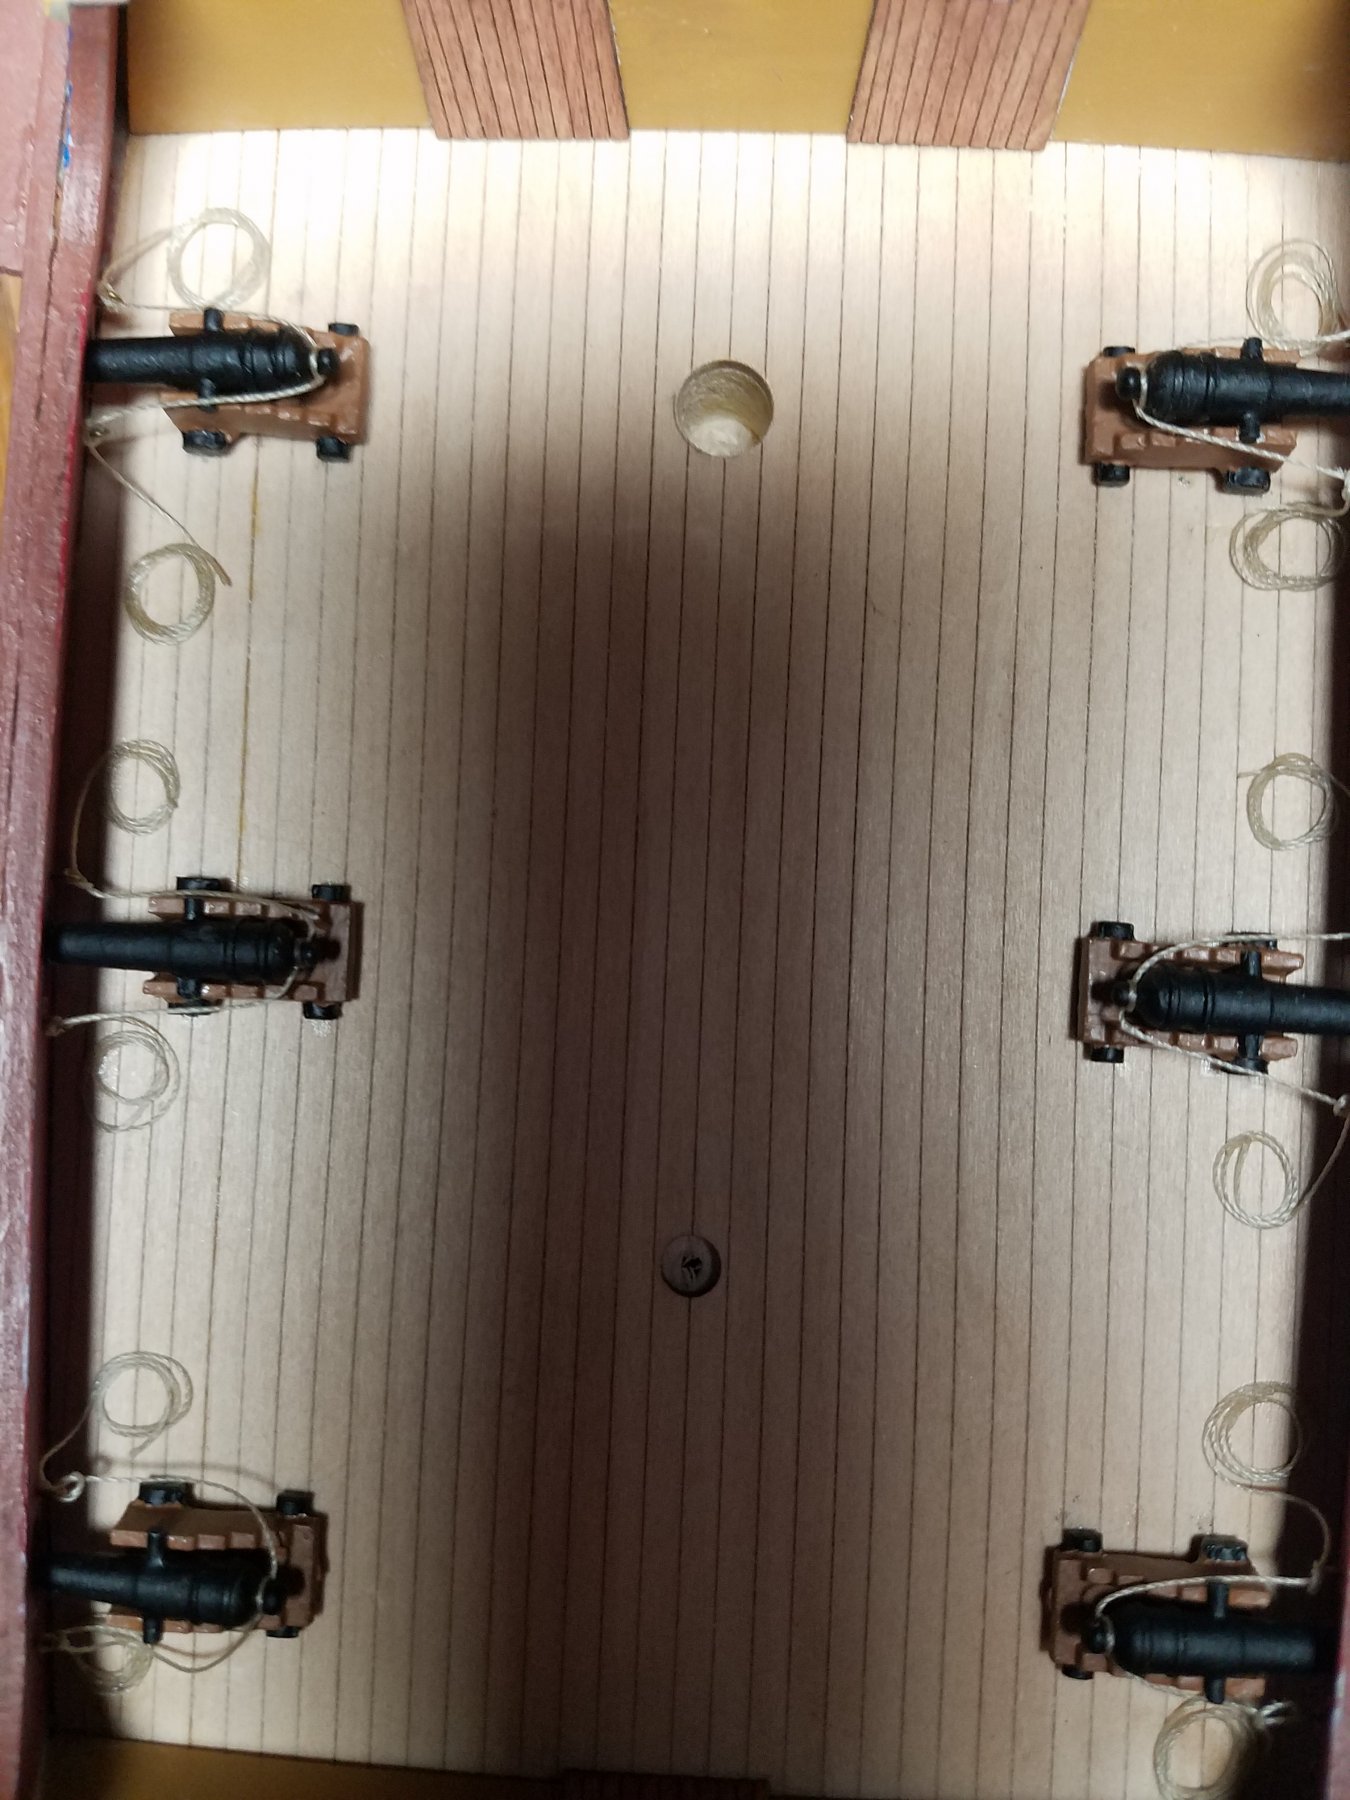
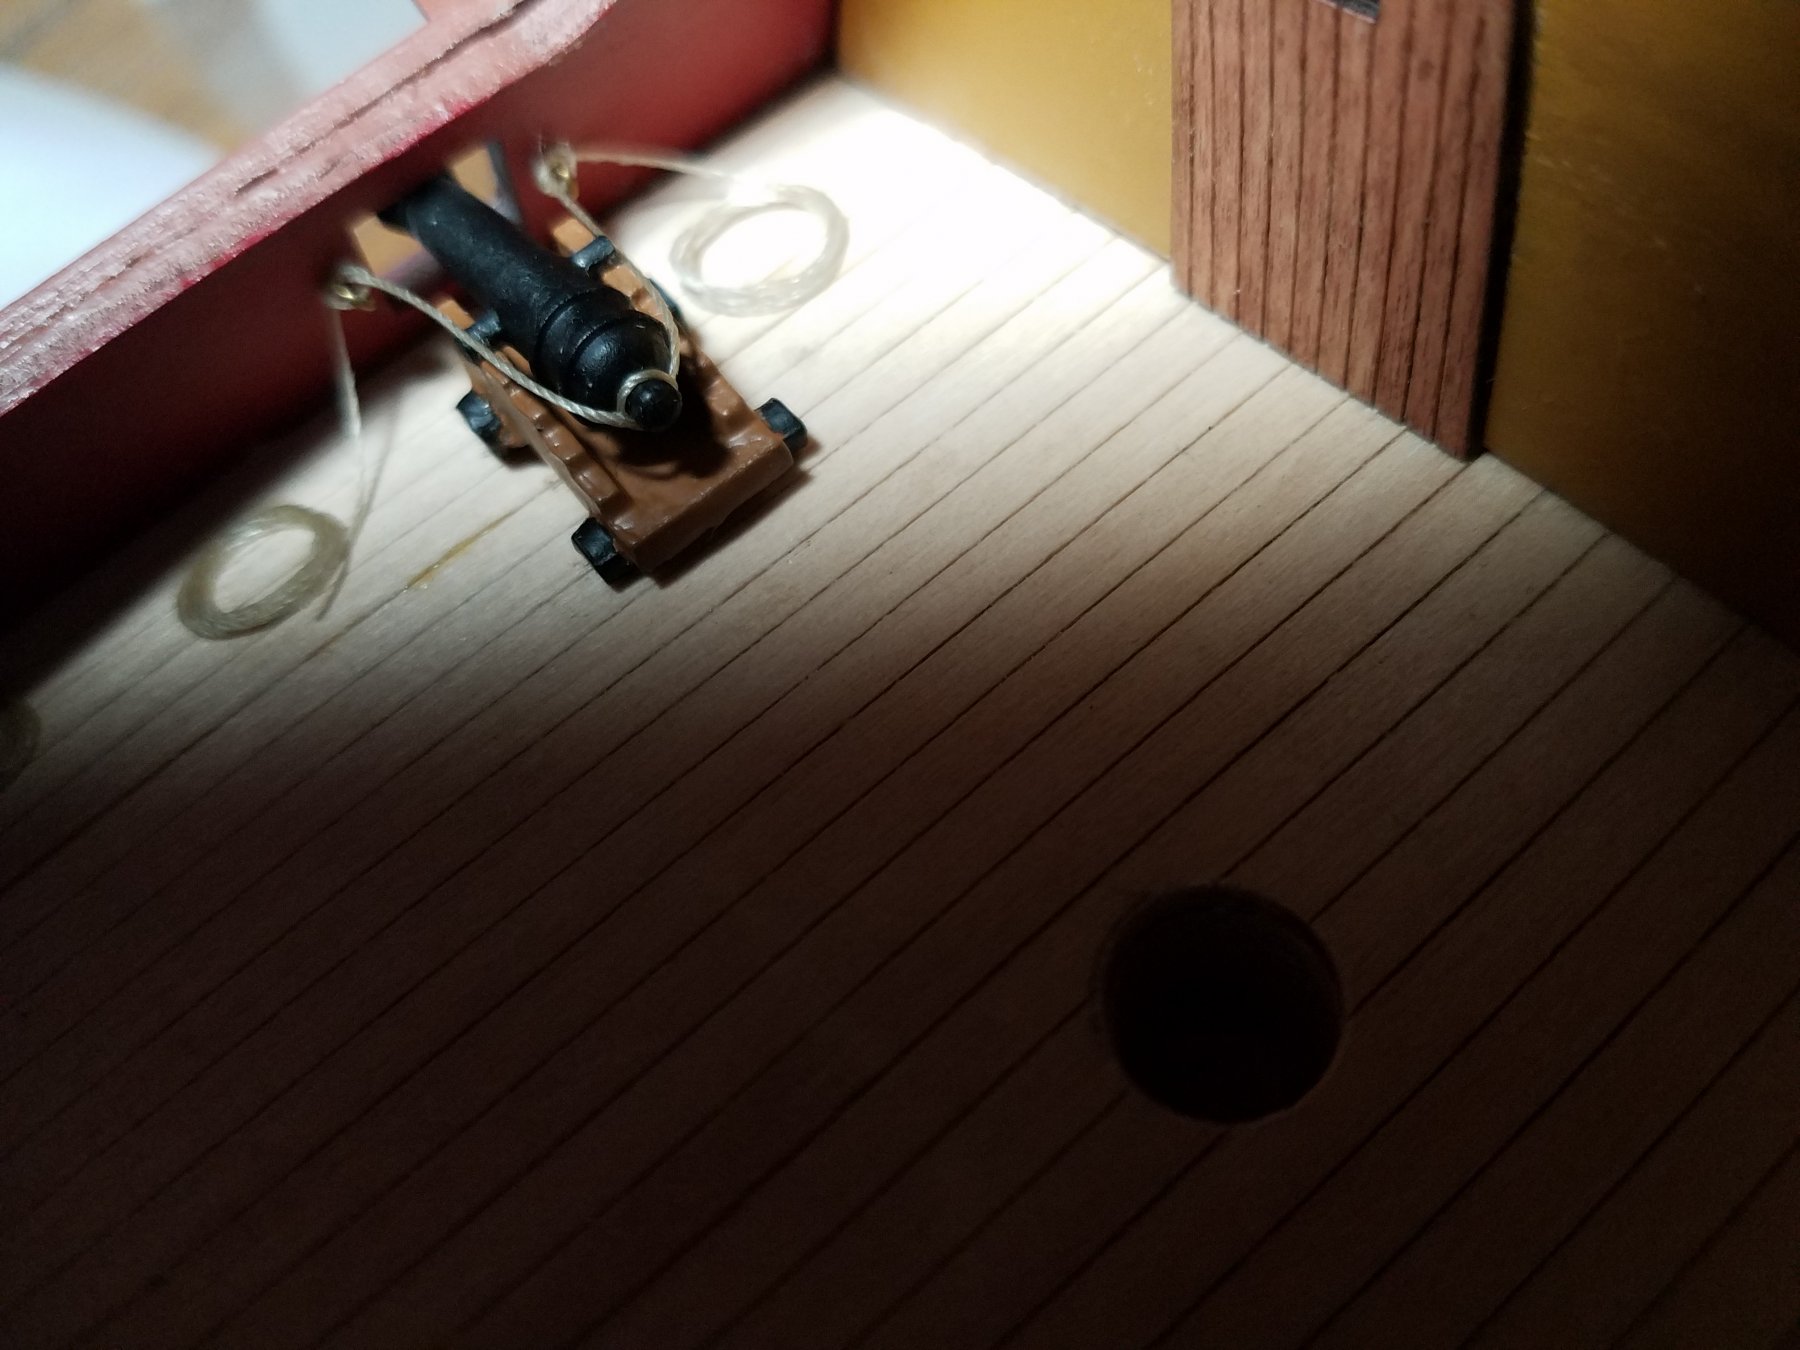
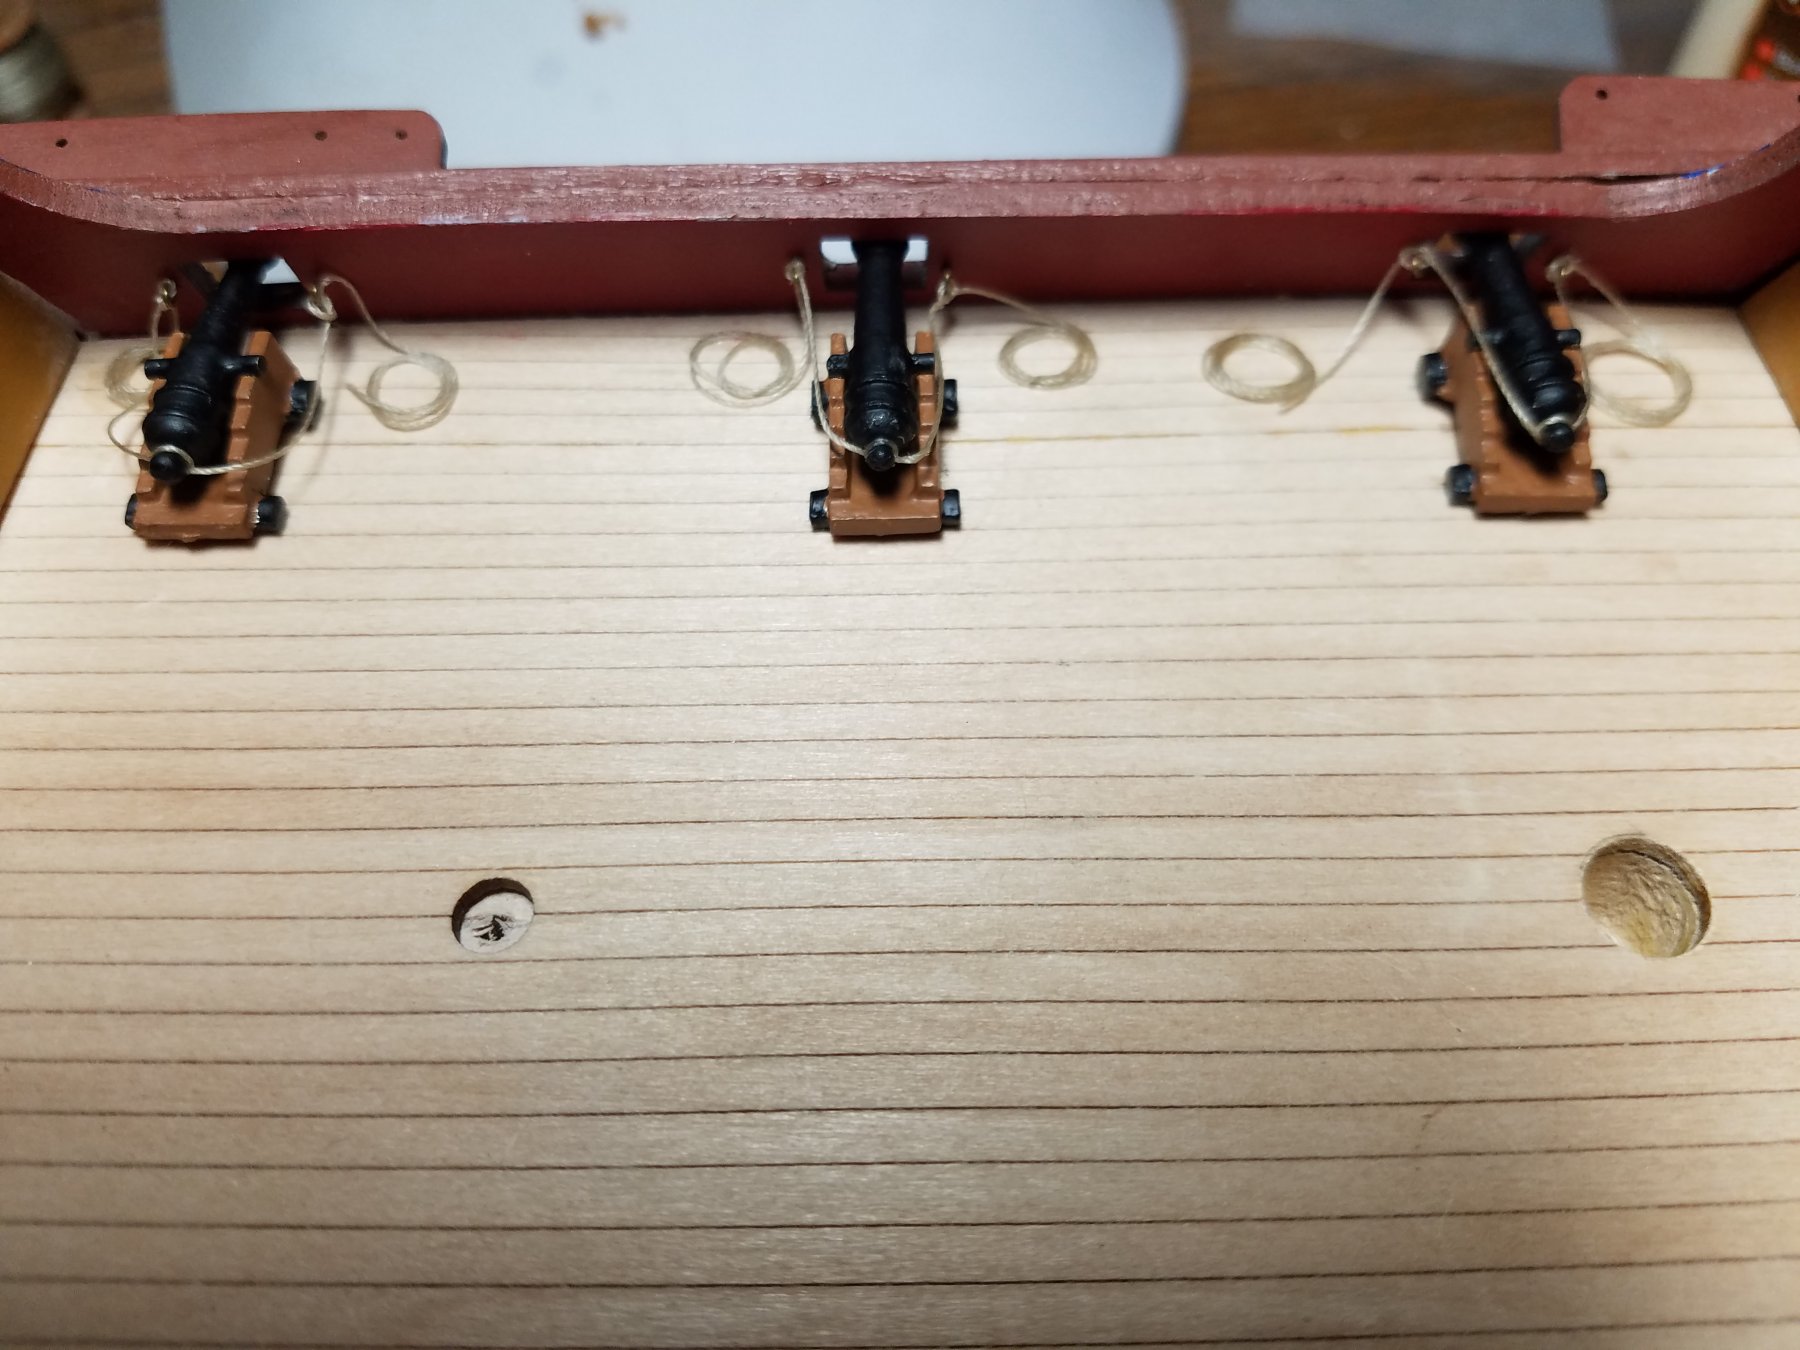
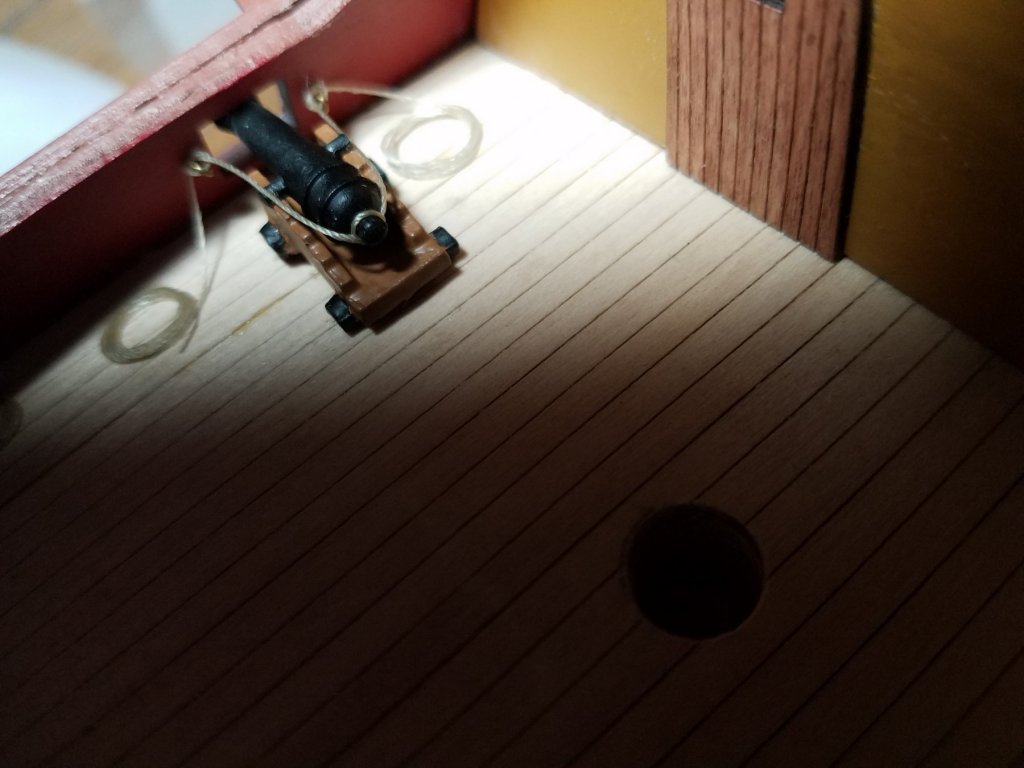
I finished the battery of cannons in the waist this weekend. The Britannia metal guns and carriages did not need too much filing. The rig is fairly simple and there were no tackle for the carriage themselves. You could add a small block to each side of the carriage, if inclined, but you would have to order them separately. I went with the rigging plan provided with the exception of adding some coils on the end of each line. Rookie note: measure line lengths prior to building. I finally came up with 10" as a good length on the starboard battery. Note the different lengths on the larboard side.
-
I finished the battery of cannons in the waist this weekend. The Britannia metal guns and carriages did not need too much filing. The rig is fairly simple and there were no tackle for the carriage themselves. You could add a small block to each side of the carriage, if inclined, but you would have to order them separately. I went with the rigging plan provided with the exception of adding some coils on the end of each line. Rookie note: measure line lengths prior to building. I finally came up with 10" as a good length on the starboard battery. Note the different lengths on the larboard side.


-
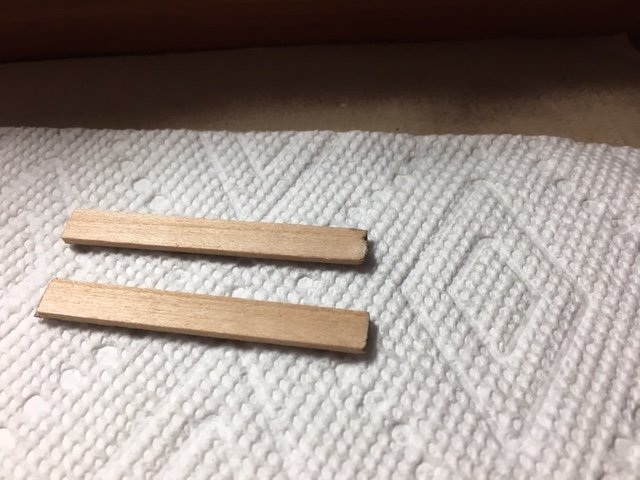
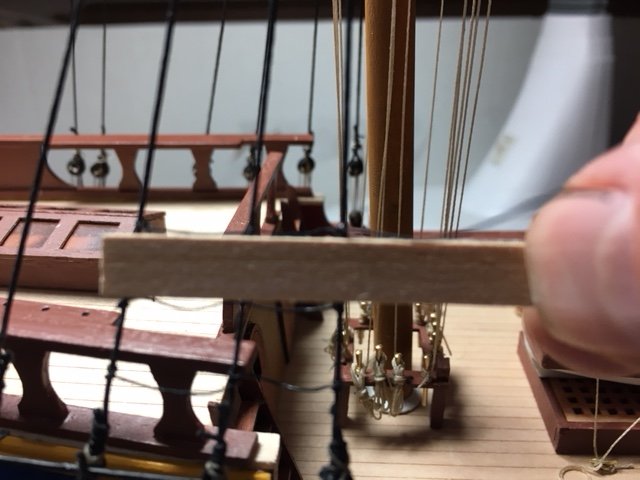
Working on the spars. I sanded the yards by hand to the plan specifications. I think the main yards might need to be reworked with a bit more tapering on the ends. They are the indicated width on the plans though. I mixed a stain similar to the masts, then tried to present a bit of a weathered effect. I figured a merchant brig would not have the budget for regular painting like a warship, but would still be serviceable.
-
Alibi- I also noticed with Model Shipways website, when you look at the kit accessories you see the typical mounting hardware, paints, etc. I also noticed they have the plans sold separately. I am assuming the plan sheets in the kit are sufficient and these separate ans are for scratch builds?
-
Thanks gents. I like the look of Syren, but shied away initially as the kit is rated as "advanced". I was leaning a bit towards "Fair American" Since it was rated "Intermediate".
-
Thanks Rick. Part of the appeal of the Pirate Brig was the fact I did not have to follow a historic example. It allows for a lot of creativity. I have been thinking about giving a plank on bulkhead kit a try.