Sexyauthor
-
Posts
101 -
Joined
-
Last visited
1 Follower

Recent Profile Visitors
1,420 profile views


-
Hi, I recently came into possession of a wooden kit with the ST. Helena Ship from Constructo, the kit is complete but the construction plan is completely missing. I saw that you built this beautiful boat and I wanted to ask you to help me with the construction plans of the ST. Helena ship. If you can send me a copy of these plans please let me know, I really appreciate your help. Thank you! -
 Organ tech reacted to a post in a topic:
Harriet Lane by Sexyauthor - Model Shipways - Scale: 3:32
Organ tech reacted to a post in a topic:
Harriet Lane by Sexyauthor - Model Shipways - Scale: 3:32
-
Organ tech reacted to a post in a topic:
Harriet Lane by Sexyauthor - Model Shipways - Scale: 3:32
-
Organ tech reacted to a post in a topic:
Harriet Lane by Sexyauthor - Model Shipways - Scale: 3:32
-
Organ tech reacted to a post in a topic:
Harriet Lane by Sexyauthor - Model Shipways - Scale: 3:32
-
Duanelaker reacted to a post in a topic:
Harriet Lane by Sexyauthor - Model Shipways - Scale: 3:32
-
Duanelaker reacted to a post in a topic:
Harriet Lane by Sexyauthor - Model Shipways - Scale: 3:32
-
Duanelaker reacted to a post in a topic:
Harriet Lane by Sexyauthor - Model Shipways - Scale: 3:32
-
Duanelaker reacted to a post in a topic:
Harriet Lane by Sexyauthor - Model Shipways - Scale: 3:32
-
Duanelaker reacted to a post in a topic:
Harriet Lane by Sexyauthor - Model Shipways - Scale: 3:32
-
Good afternoon,
My name is Benoit and I'm from Belgium.
I normally make plastic kits but was always looking up my dad in the time when he made wooden ships.
I recently bought the "Adventure pirate ship" from Amati. I bought it because on the box they wrote "easy to build" but looking at the plans inside it will be a challenge ;). I have also contacted Amati because there a piece of the plans missing. I don't have the part were you can see the whole deck and were you can see the place and how big the parts 24 and 26 are.
I will certenly put some pictures here on the forum to show how it gets.
Do you have a technique to taper the masts?
Grtings
Benoit
-
GrandpaPhil reacted to a post in a topic:
Harriet Lane by Sexyauthor - Model Shipways - Scale: 3:32
-
 Hi Steve! Yes, the solid hull of the St Helena required a good bit of sanding but no carving. However, this isn't always the case. My current build, the Harriet Lane, is also a solid hull but it required a LOT of carving as well as sanding to get the correct profile. The deck was a scored piece of wood (ribbed) that simply glued onto the top of the hull. I added the horizontal score marks to make it look a bit more plank-like, but I don't see any reason you couldn't just plank the deck instead of using the ribbed piece of wood supplied. In fact, depending on your patience and dexterity, you could slice up that piece of wood and use the resulting thin strips as the planking material 😜 The sails were made from a single piece of supplied cloth and were hand-sewn to mimic the panels... i hope this has helped. And good luck with your build. Have fun! - Brian
 -
I'm glad I could help! I would be interested in seeing your progress as well. Although it's been a bit, if you have questions that my build doesn't address, feel free to ask - I may remember something!
-
Sexyauthor reacted to a post in a topic:
Adventure Pirate Ship by SexyAuthor- FINISHED - Amati - scale 1:60
-
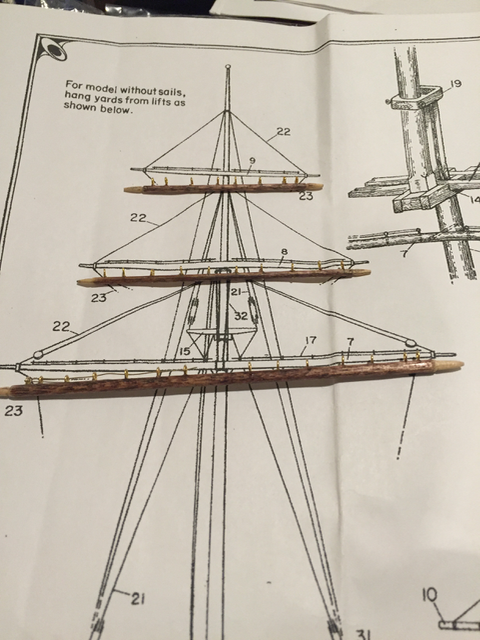
yards.... shoulders have been created on the ends, but they need to be re-stained...
-
Sexyauthor reacted to a post in a topic:
Harriet Lane by Sexyauthor - Model Shipways - Scale: 3:32
-
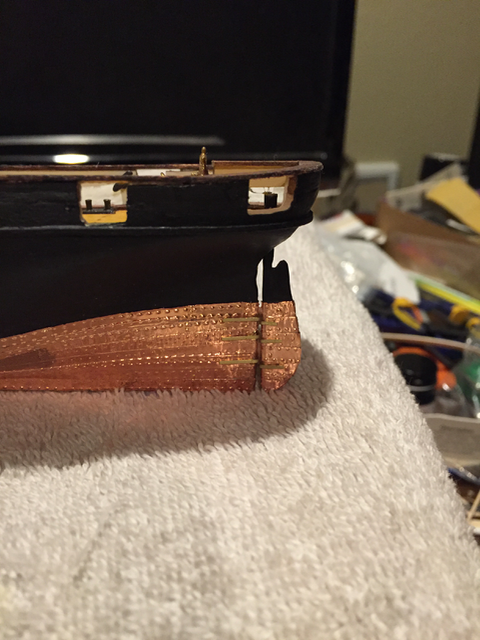
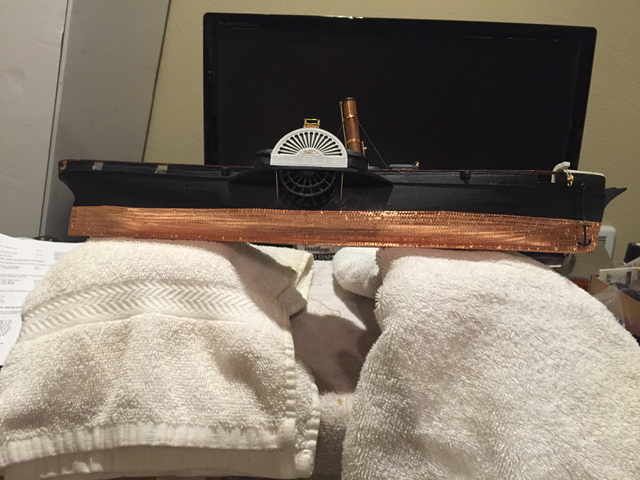
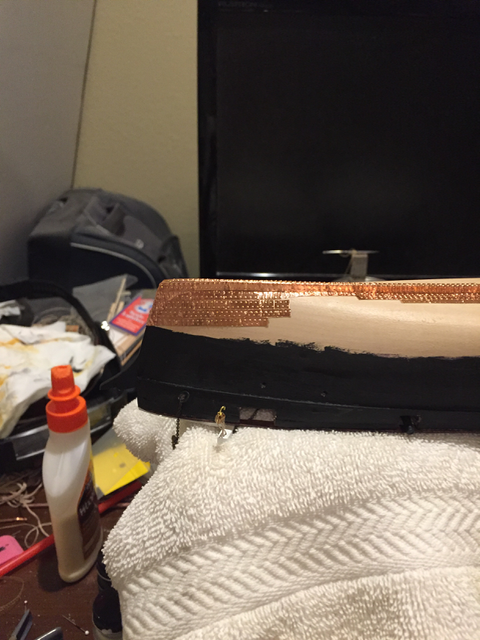
Mark, The kit supplied a roll of 1/4" self-adhesive copper. I cut 4" to 5" lengths, cut it in half length-wise (giving me two 1/8" strips). I then used a pounce wheel to add the bolt marks along both edges and then a smaller pounce wheel to add the marks to separate the plates. So, I didn't go the route of individual plates... I think it looks pretty good, and they are already beginning to take on a patina, so I don't think they'll be that shiny for long. I may polish them up and then apply a coat of varnish when I'm all done. I'm playing it by ear for now... Thanks!
-
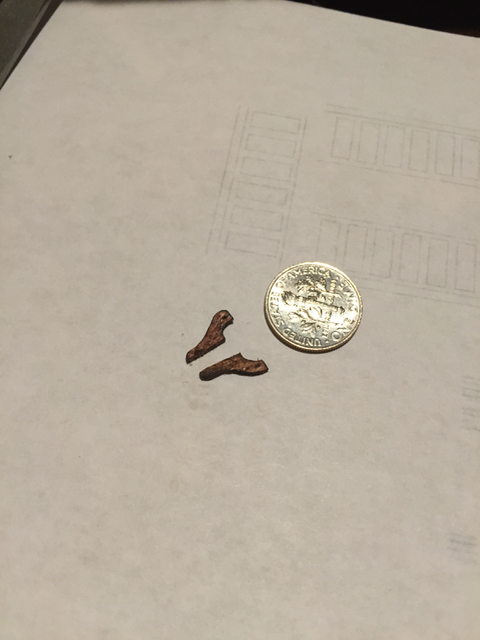
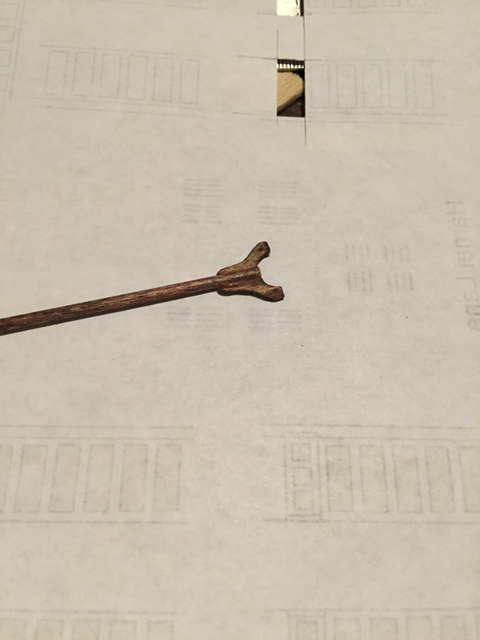
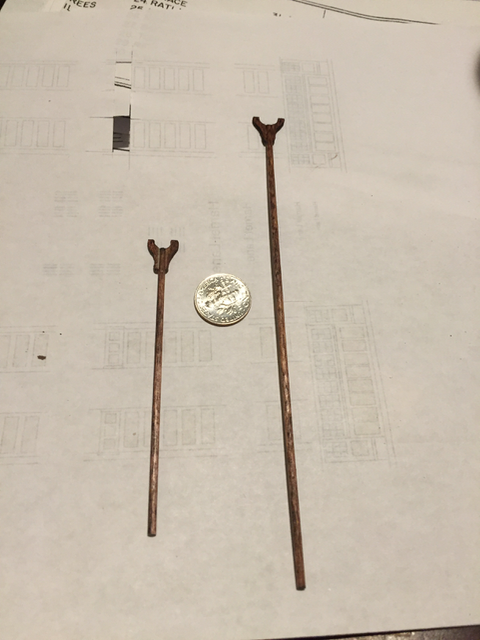
Carved jaws for boom (another set for the gaff not pictured). Holes for parrel drilled also (whew!) - Now where am I going to find parrel beads to go on the rope (ha ha)? Jaws attached to boom: Boom and gaff: Boom resting on main mast (parrel still needs to be added):
-
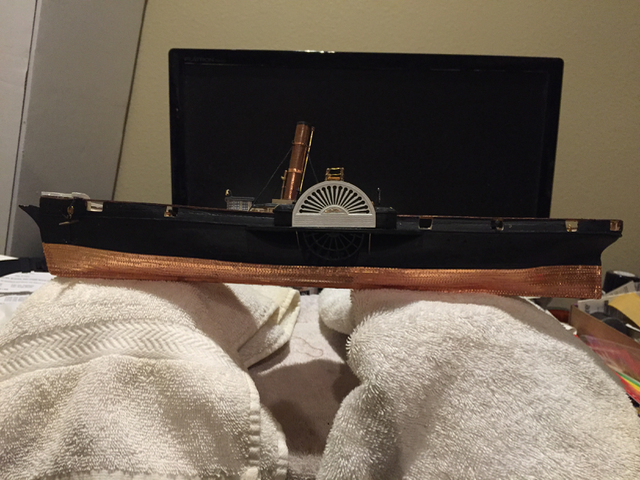
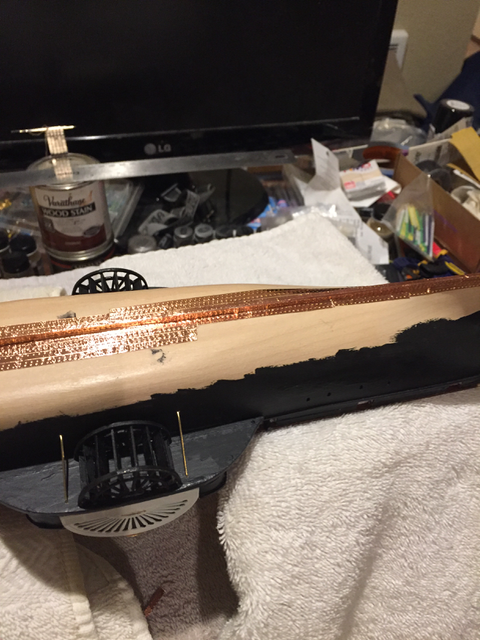
Port side coppering complete: Rudder with gudgeons and pintles:
-
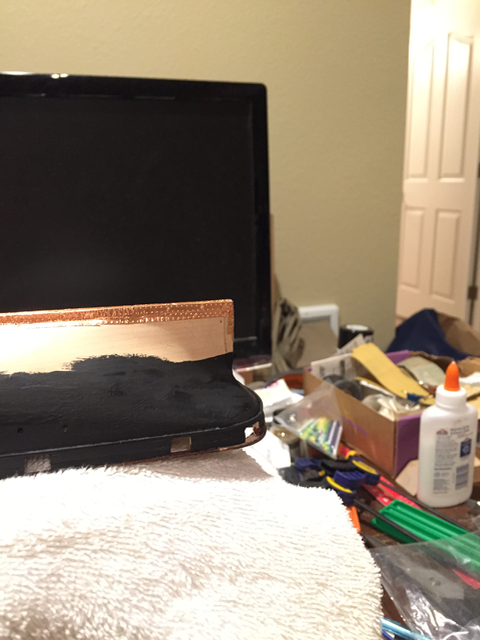
Starboard side coppering complete...

-
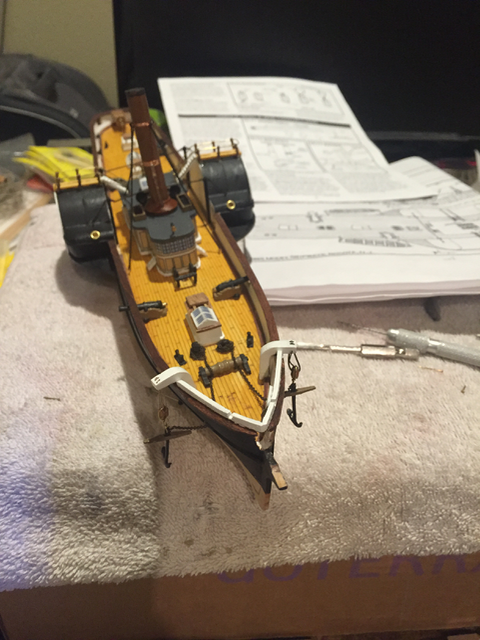
I probably should have done the coppering a while back (certainly before adding the funnel). Since I didn't, I had to make up this ridiculous rig... However, it let me proceed and here are the beginnings.... I've poured over the instructions, both old and new, and I couldn't find any statement along the lines of "at this point, you may want to copper the hull....". Live and learn....
-
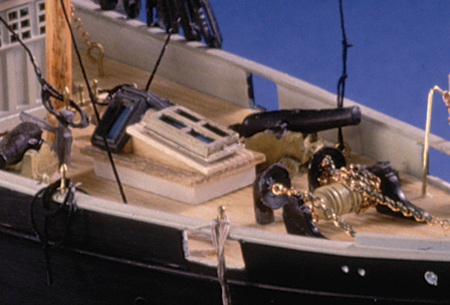
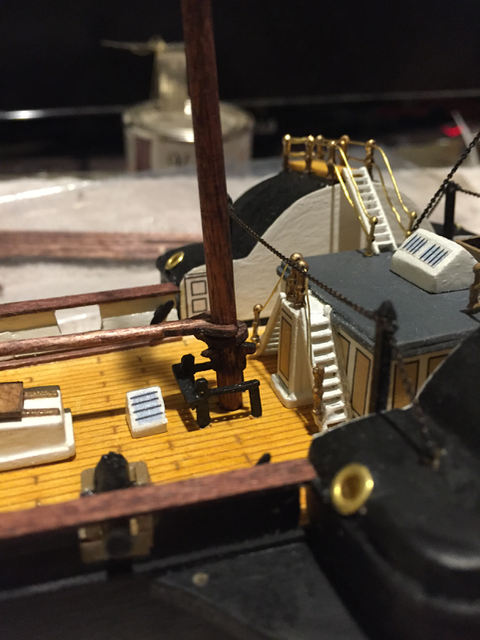
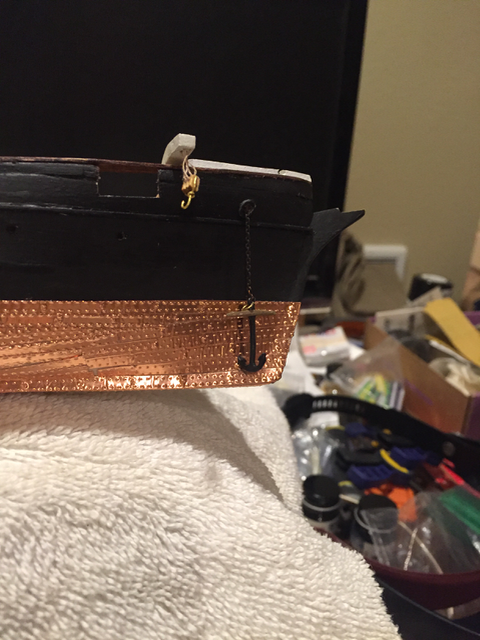
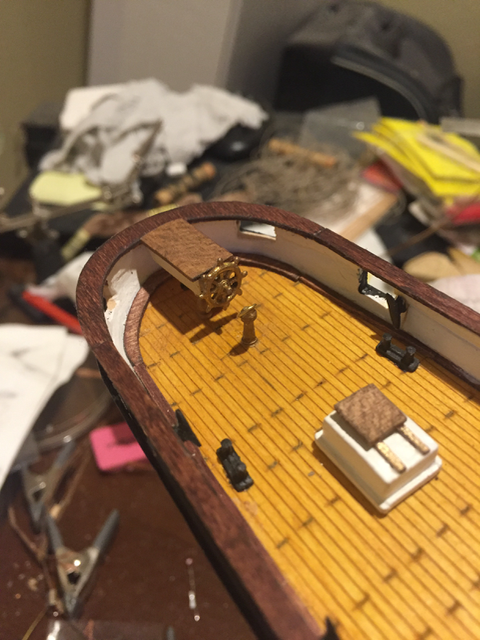
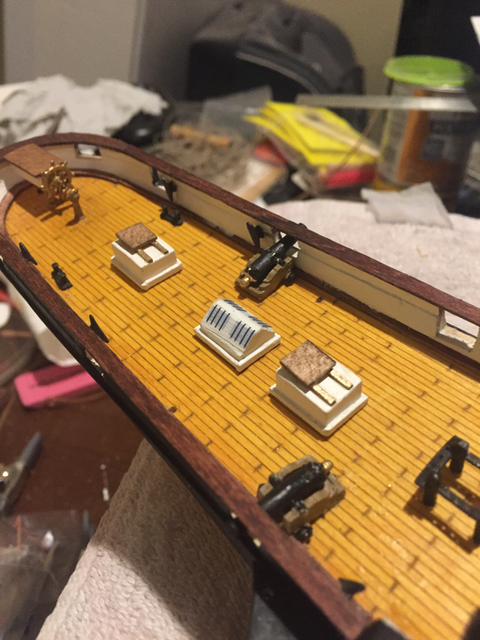
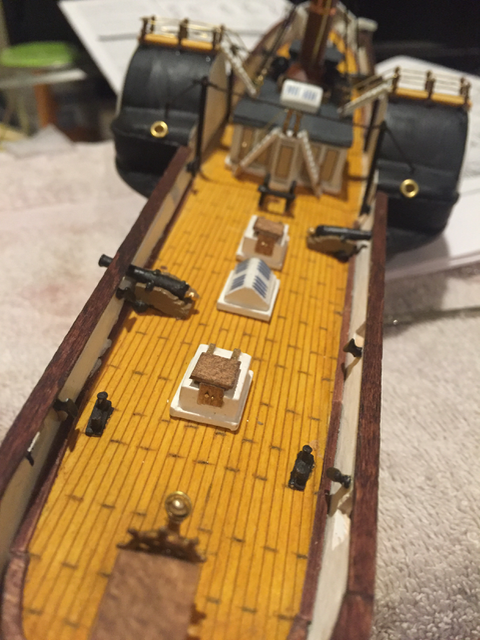
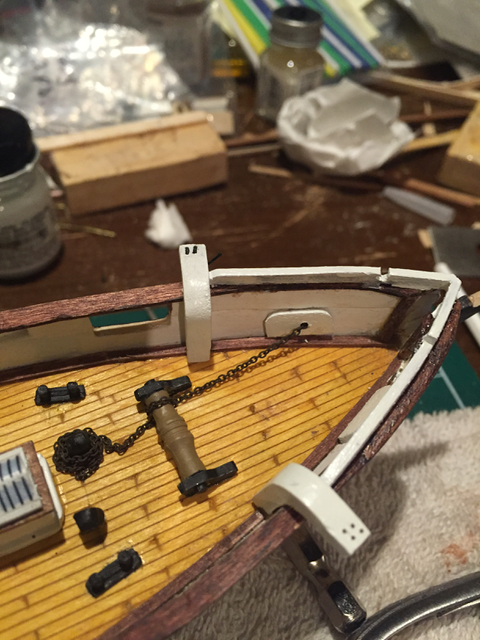
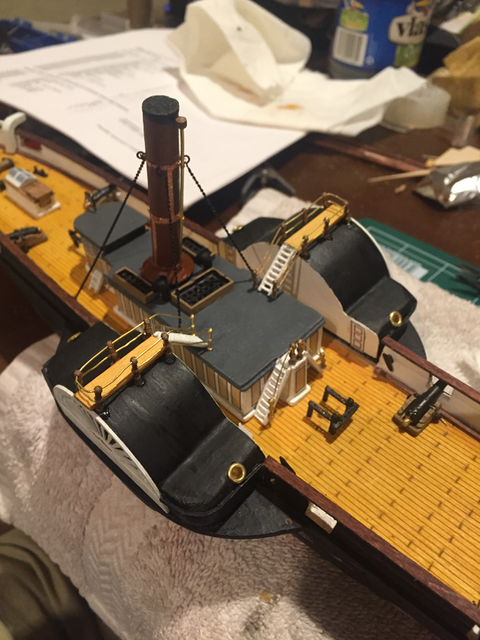
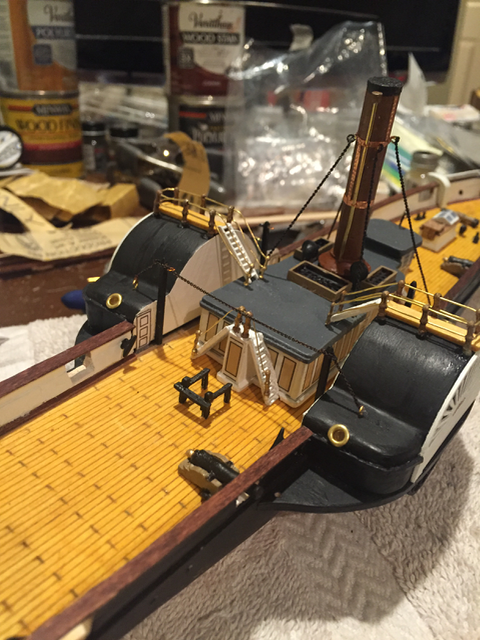
All the deck furniture is now in place. Both anchors rigged.... (phew!)
-
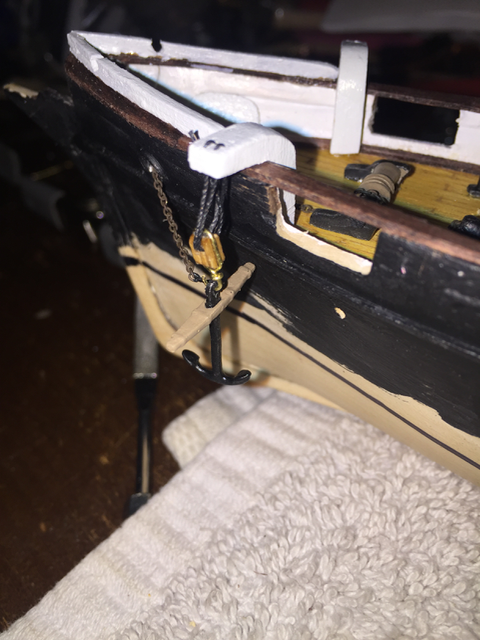
First anchor with cathead, block, rigging and chain. Top view of deck with chain running through hawse pipe, around windlass and to the spurling pipe. Excess chain wrapped around pipe until I figure out final resting place of anchor. Once that is done, excess chain will be cut and the end glued to center of the front of the spurling pipe.
-
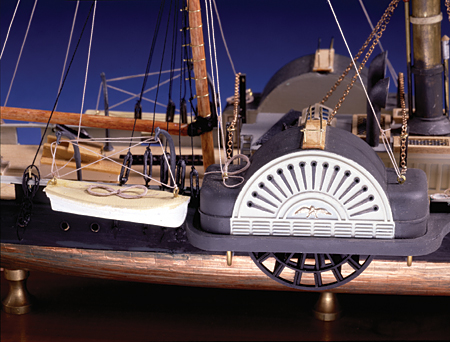
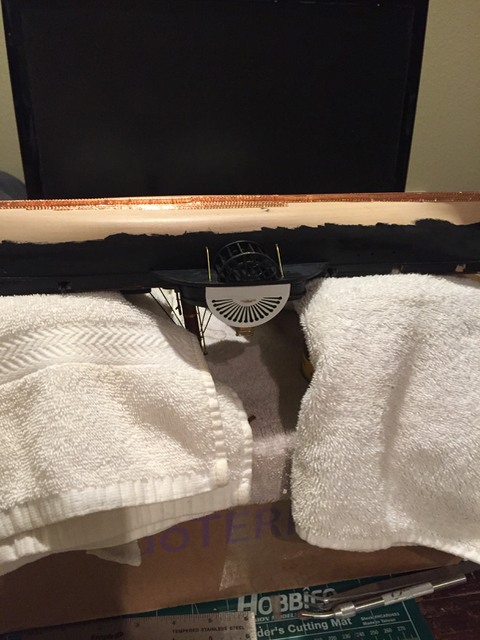
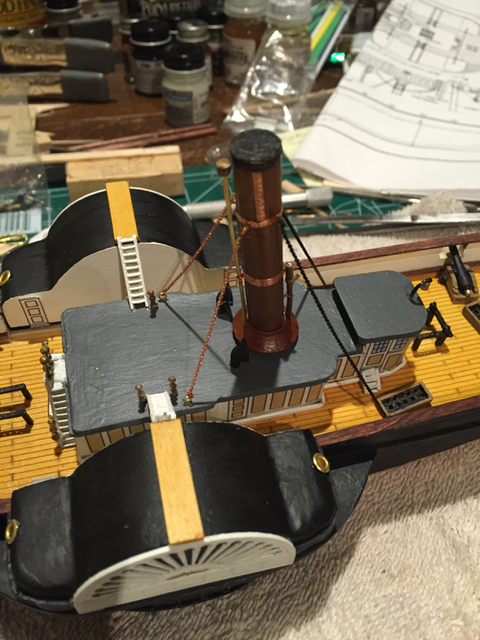
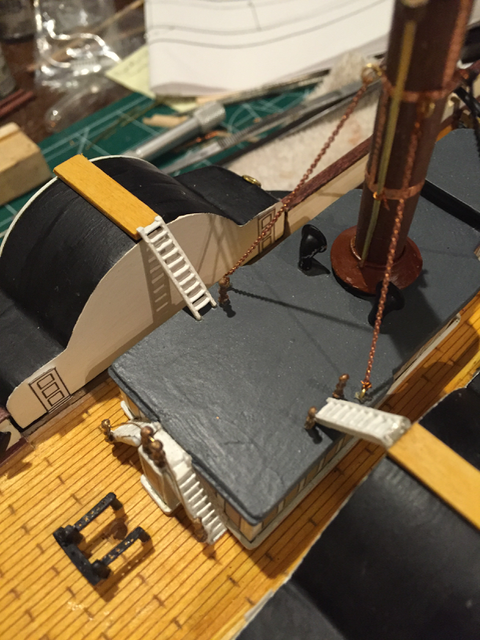
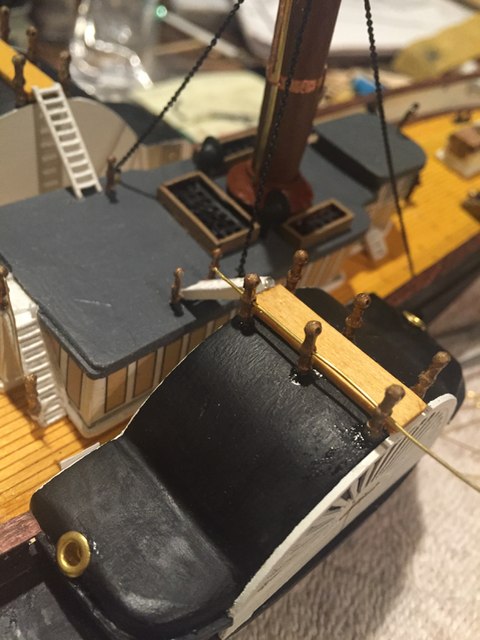
Guy chains added to back of funnel (still need to be painted black). Bridge platform with stanchions and the start of a railing... .... Bridge platforms complete with ladders and railings... Kingposts for paddlebox support (one set with chains)....
-
Ron, thanks for the input on the guy chains. I agree that the plans indicate that the aft guy chains attach at the top of the deckhouse. My confusion stems from all the images I've looked at - a fair number of them show the chains attached to the deck (all 4, not just the front two). But this seems like it would have been problematic for anyone walking the deck between the paddle boxes and the deckhouse. So, I'm going with the top of the deckhouse as you (and the plans) suggest. Thank you!
-
Sexyauthor reacted to a post in a topic:
Harriet Lane by Sexyauthor - Model Shipways - Scale: 3:32
-
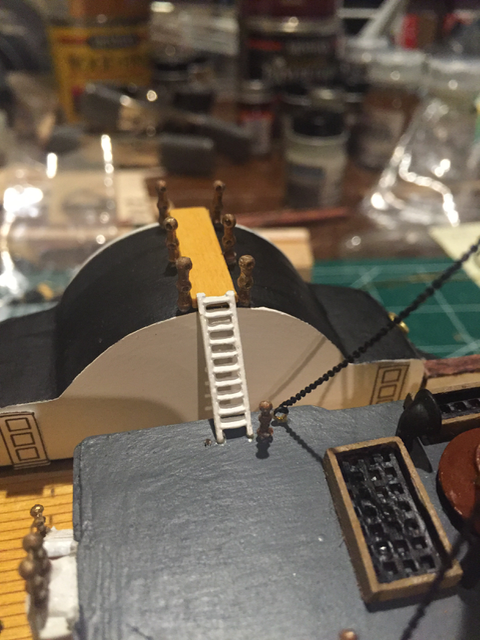
Roger, I wondered about that. I looked at several images (both here and elsewhere on the 'net) and the vents atop the deckhouse seem larger (i.e. have a longer "stem" if you will, that places the "bowl" much higher) than the small cowl vents. Here's an example I found which bolstered my renditiion: And this one - look how tall the vents are behind the funnel... I am leaning toward moving those vents from behind the windlass to the deckhouse as you suggest, but with what do I replace them? How do the pipes that lead to the chain locker look? [Edit] - OK - I guess those things behind the windlass are called spurling pipes and I found images of modern day pipes. Looks like I have more carving to do :-)