


Erik H
-
Posts
24 -
Joined
-
Last visited
Content Type
Profiles
Forums
Gallery
Events
Posts posted by Erik H
-
-
-
5 hours ago, rghensley said:
Not trying to hi-jack your thread, just wanted you too see the difference in the frame of your kit compared to this version from same mfg., but w/diff mfg dates. Every part required attention with knife and sanding block to get assembled. Two of the lateral parts required a little ironing w/steam to flatten. I have around 20 hours in this and not a single part is glued yet!
They must have changed a lot

-
20 hours ago, Chippa said:
Wow, yours look way better then mine. If mine looked like that I would use them too.
They must have changed that over the years. These are wood parts.
I think you can buy them on their website https://www.mantuamodel.co.uk/ (currently down, new site under development)
Another link http://www.cornwallmodelboats.co.uk/acatalog/mantua-laser-etch.html
-
20 hours ago, rghensley said:
Well, retired and time to play! As I mentioned this is a older version of your kit.
I spent the day just cleaning and cutting slots to get the frame too this shape. A ton of work yet to do before glue is applied. This is old school building, and since I am old it fits! Fired off a order to Shapways for all the items they offer in 1/78 scale. Paid more for those parts than I did the kit (used). Looking forward to more of your thread.
Rick
Hahaha nice

And, same here, all the extra bits did cost more then the kit itself lol, but so far well worth it.
Erik
-
On 12-11-2017 at 7:37 PM, ca.shipwright said:
HI Erik,
On another note, I noticed that you have the quarter deck installed. Are you not going to detail the upper gun deck? It will be almost impossible to set the guns, hatches, etc., on the upper gun deck with the quarter deck installed.
Enjoy you build- it is a biggie.
Regards
Yeah .. followed the instructions and now I'm left with a challenge there
I'll think off something to get the guns in there
") once I get the planking done. Working on both sides now.
once I get the planking done. Working on both sides now.
Erik
-
On 12-11-2017 at 3:28 PM, Chippa said:
Hi Erik,
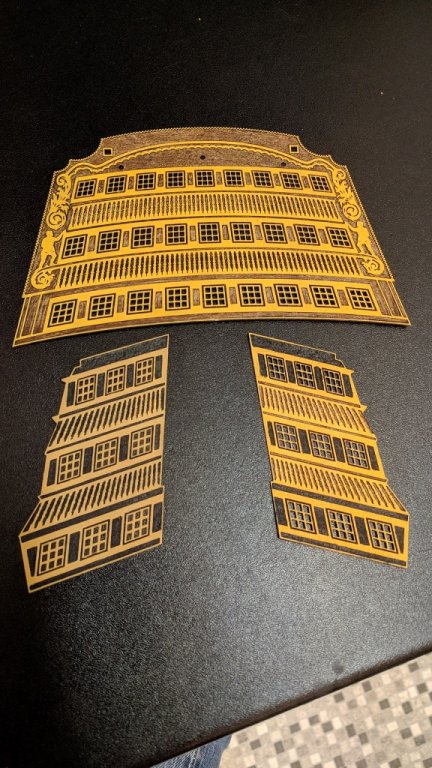
I think I have the same kit that you do. Mine stalled a long long time ago. I did not like the stern metal etching plates that were supplied with the kit. Mine are really in very poor condition. The etchings were not etched properly, and not only that they are really kind of ugly. I sort of stalled on the kit, with the idea of replacing the whole stern with my own version made from wood and fancy toothpicks.
How are your stern metal etching plates? Are you going to be able to use them?
I think these are the ones you're talking about
They're not too bad and I think they will work for me. Been a pain cleaning them and I recently started painting them, bottom left is done.
Maybe, just maybe, I'll order a few extra bits and pieces to add to it https://www.shapeways.com/product/Z3AEMH3UQ/1-78-hms-victory-stern-gallery-decoration?optionId=9864351
-
On 4-11-2017 at 7:23 PM, Bill Morrison said:
I do have one question. It appears that you are putting in a series of wales, but I can't see any in photos of the real ship in Plymouth. I like them very much. Do you have any information that I might be missing?
Thanks!
Bill
They're much bigger in the kit then on the real ship. This being my first complete hull I decided to stick with the kit
Erik
-
-
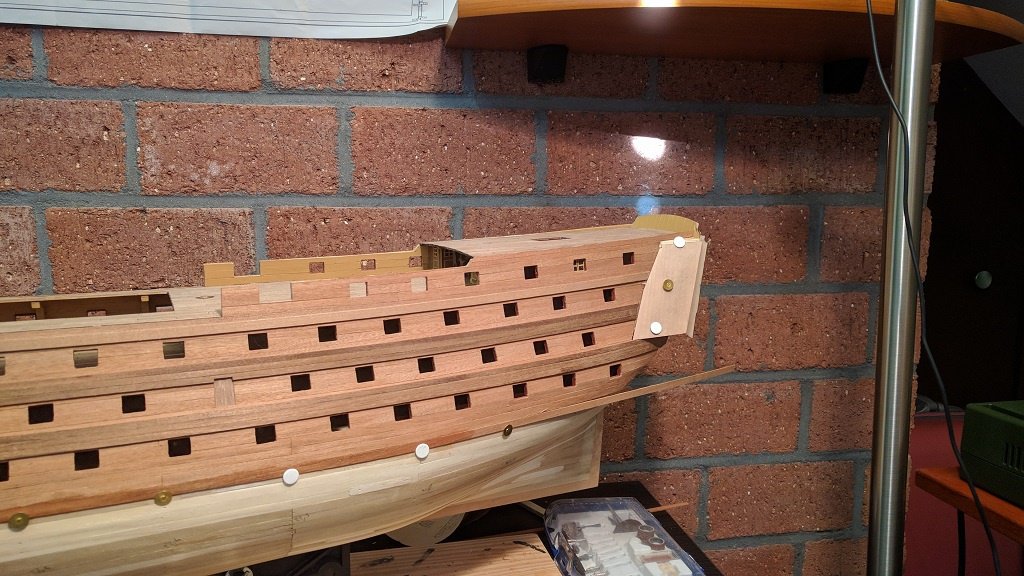
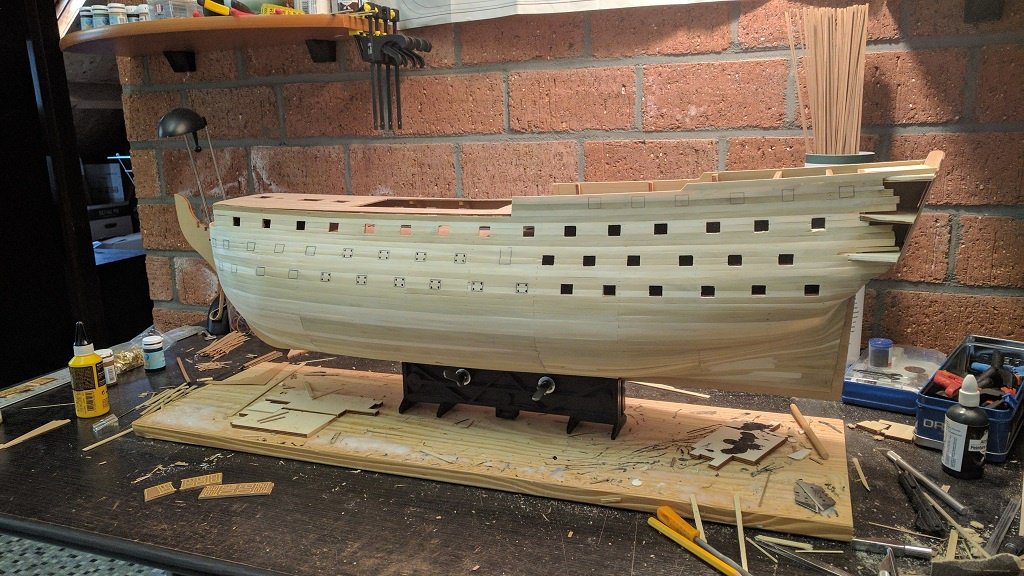
Finally another update
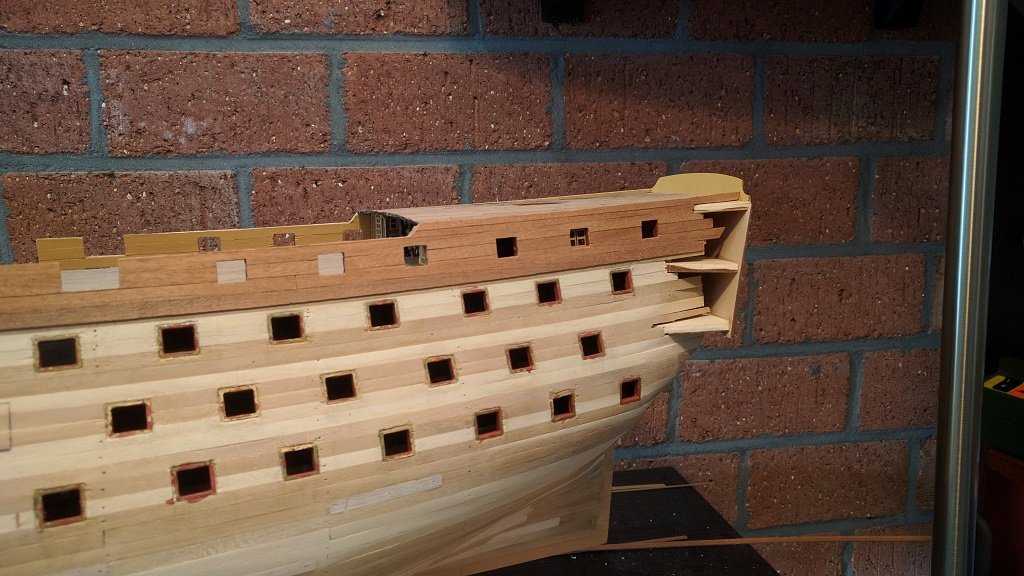
Had to correct an error. The tapering towards the bow was not going well, the planks were going up too steep (you can see that clearly in the last posted image)
I'm happy with the new line I found. The next few planks are going on very smoothly now. Also started some preparations on the galleries.
Erik
- zappto and popeye the sailor
-
 2
2
-
thx all
Been very busy and have not had much time to work on the victory. Hope to have an update soon(ish)
")
-
20 hours ago, 6ohiocav said:
Great progress. What wood are you using for the second layer of planking? Whales? Is it kit supplied?
Thx
And I have no idea, it's all kit supplied. I'll see if I can find the parts list, it might mention the type of wood.
Partlist found .. type of wood is not mentioned. The darker ones could be walnut.
Erik
-
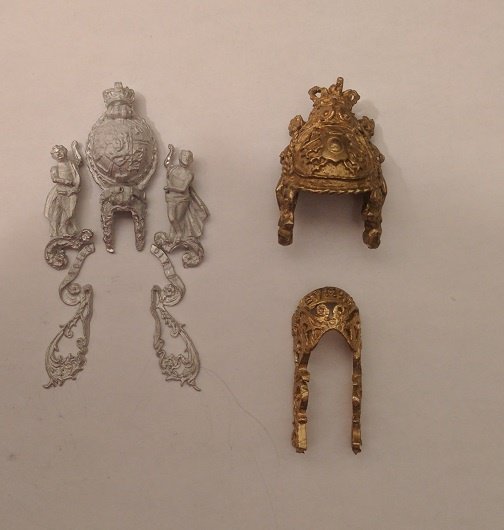
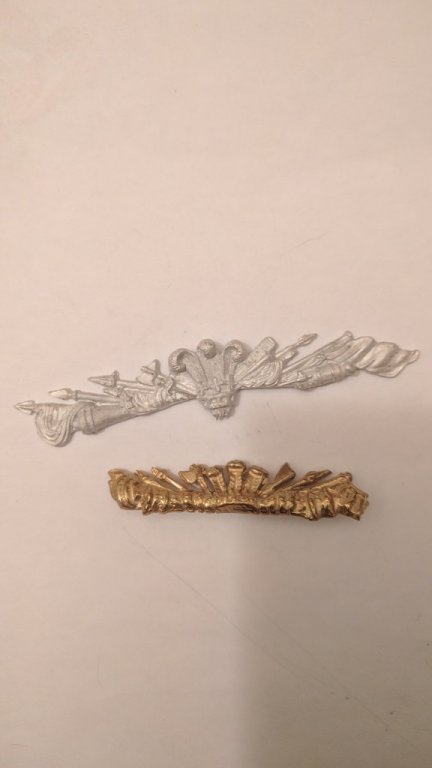
Hey Rick,
I got the figurehead and the trophy of arms and also the lanterns from cornwallmodelboats in the uk.
http://www.cornwallmodelboats.co.uk/acatalog/caldercraft-figureheads.html
http://www.cornwallmodelboats.co.uk/acatalog/caldercraft_decorations.html
http://www.cornwallmodelboats.co.uk/acatalog/caldercraft_lanterns.html
The monograms I got from https://www.syrenshipmodelcompany.com/
And I received some more replacement parts yesterday from https://www.shapeways.com/shops/victoryparts?s=0§ion=Scale+1%3A78 (The rigols)
Think I spend more on the extra bits then I did on the model so far (got the model for a little over 100 euro)
Start your build also

Erik
-
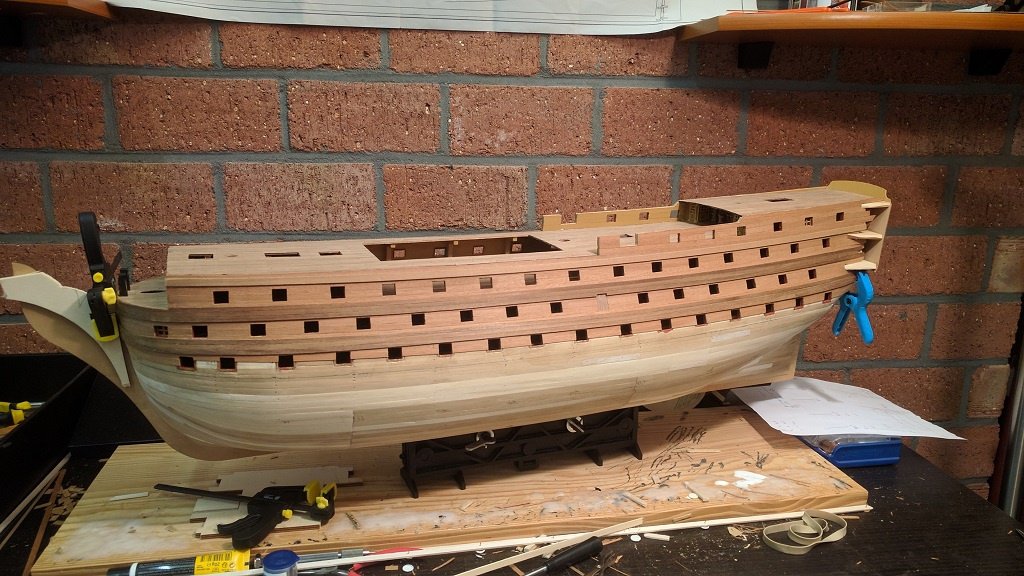
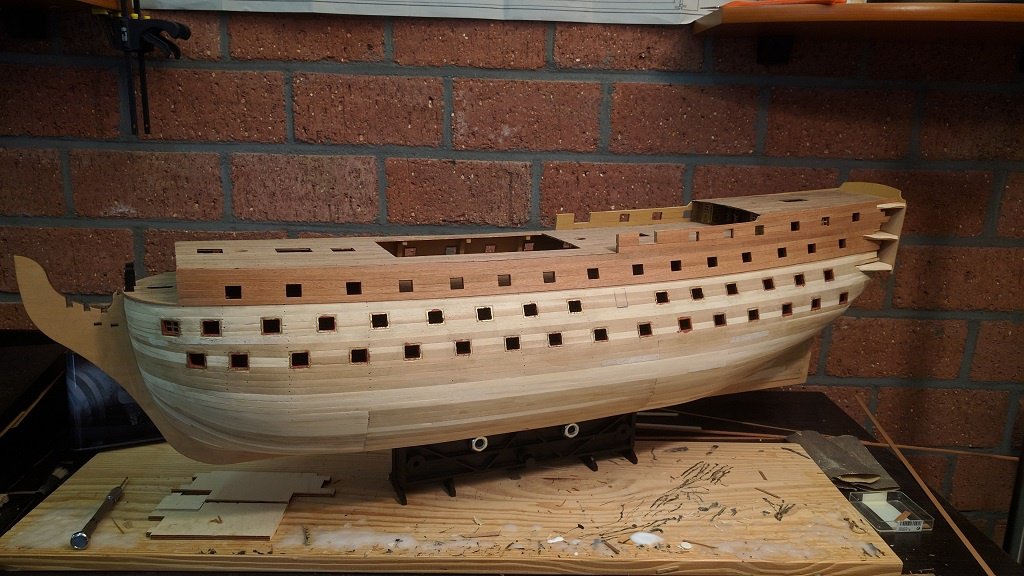
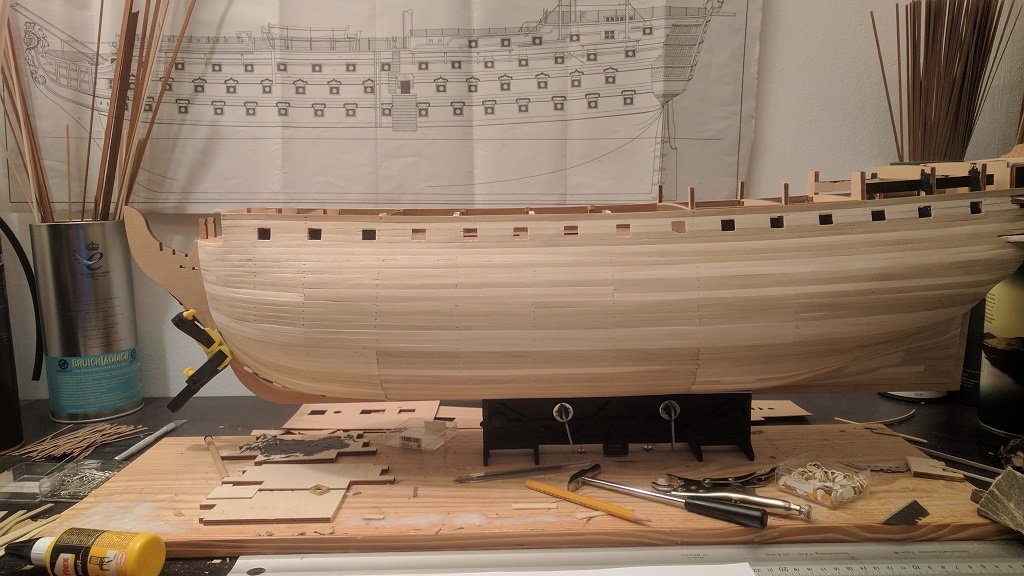
small update, second planking is going slow
- popeye the sailor, AntonyUK, zappto and 2 others
-
5
-
Hey John,
Hahaha, must be the old kit then. Still got rudimentary plans and the booklet is very poorly translated indeed. But luckely there's tons of information to be found on the internet now.
I hope to visit the ship myself someday
Erik
-
1 hour ago, AntonyUK said:
Hi Erik.
Welcome to MSW.
Where are you from Erik ?
Nice progress on the Victory.
Nice move putting the brass gunports between the planking layers.
Also a nice touch is putting the monograms on the cannons. They look like Chucks.
Will follow along on this one.
Regards Antony.
Hey Antony,
Thx!
I'm from the Netherlands, I'll update my profile
Erik
-
11 hours ago, JohnReid said:
Hi ! is this the old Sergal kit ? Cheers ! John.
Hi John,
Tbh I don't know. Didn't know there was a new and an old kit
-
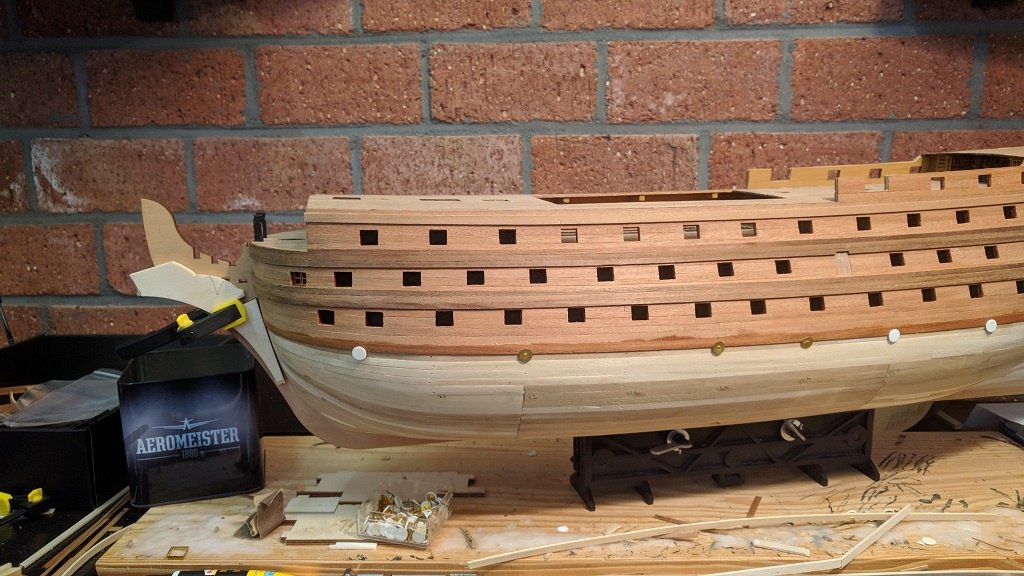
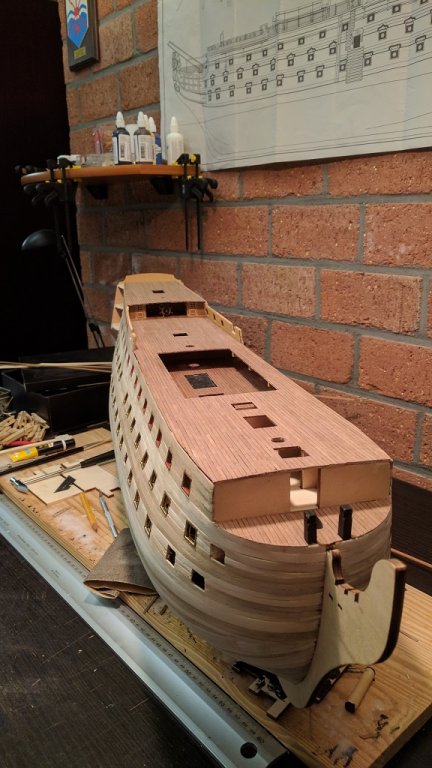
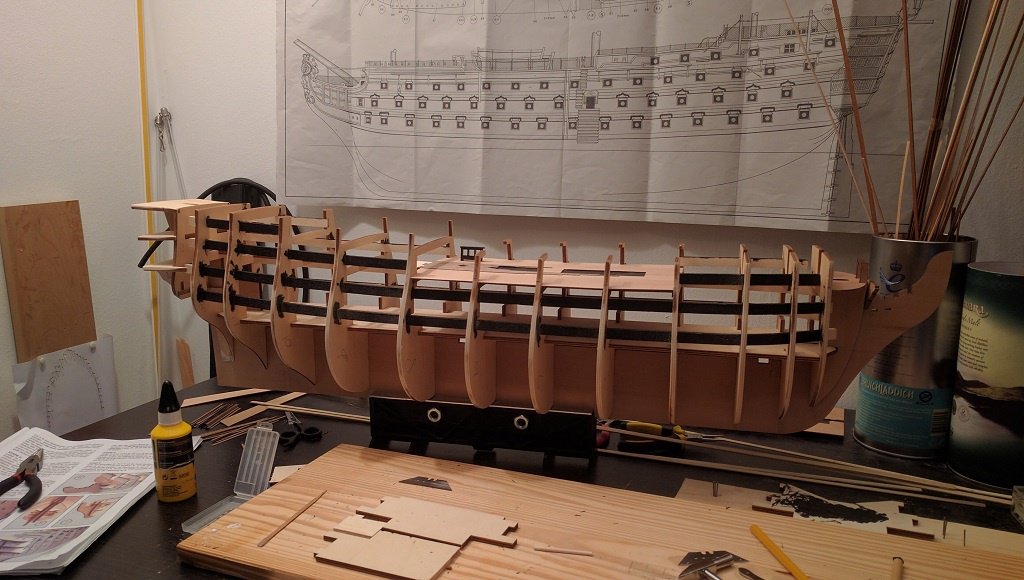
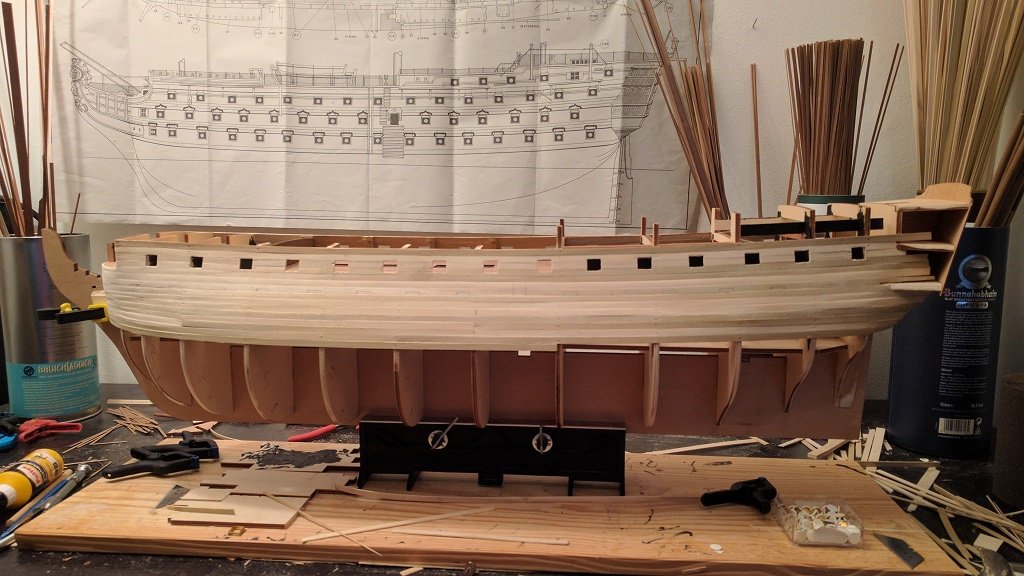
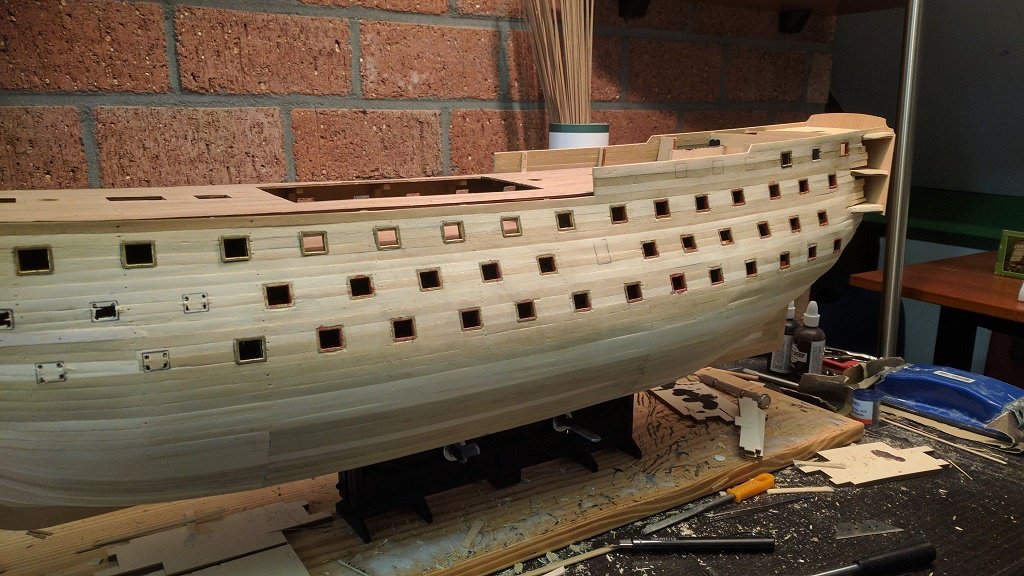
All decks done, gunports done. time to start the second planking
And we're all up to date at this point. Will post an update soon
Erik
- Papa, popeye the sailor, jay and 4 others
-
7
-
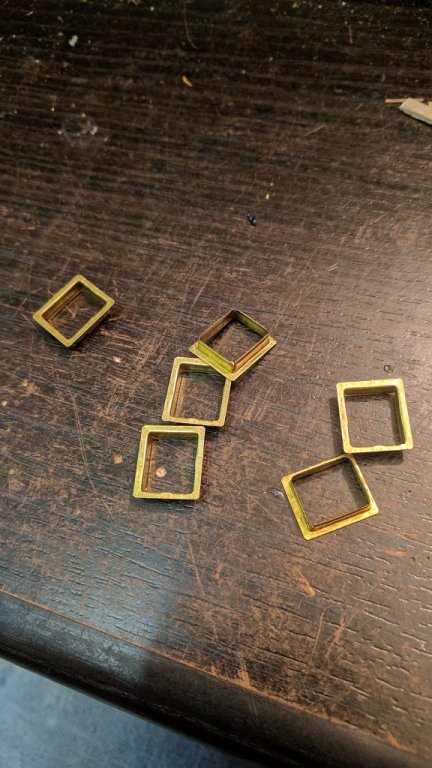
Found some monograms to put on the guns online
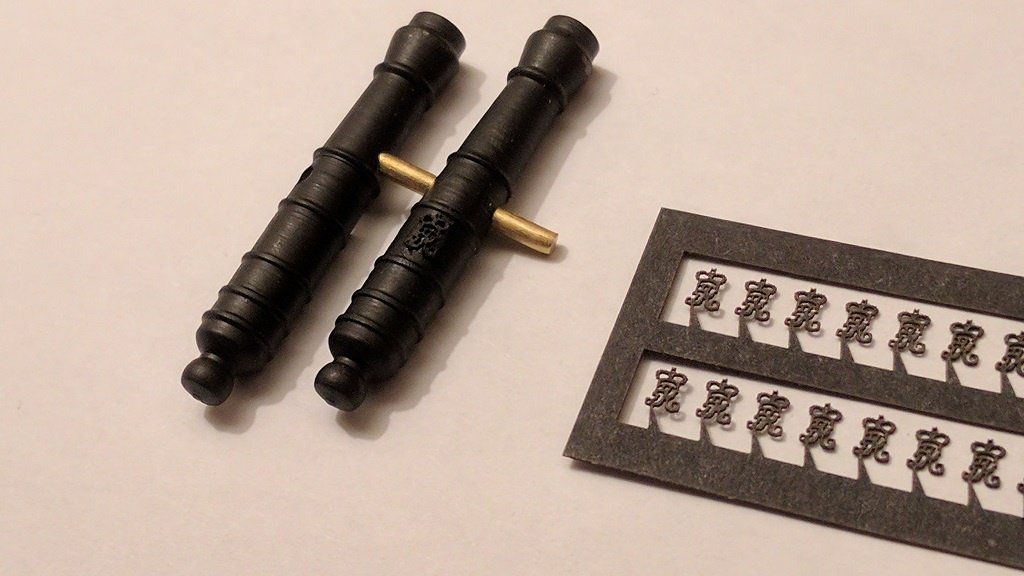
and with the extra monograms I decided to upgrade the buckets
Few more items I just had to replace, on the right the ones that came with the kit. Too big and a bad finish.
this new one is too big, but it's so much nicer then the original one, I'll be using it anyway
")
- Ryland Craze, BenD, jay and 2 others
-
5
-
-
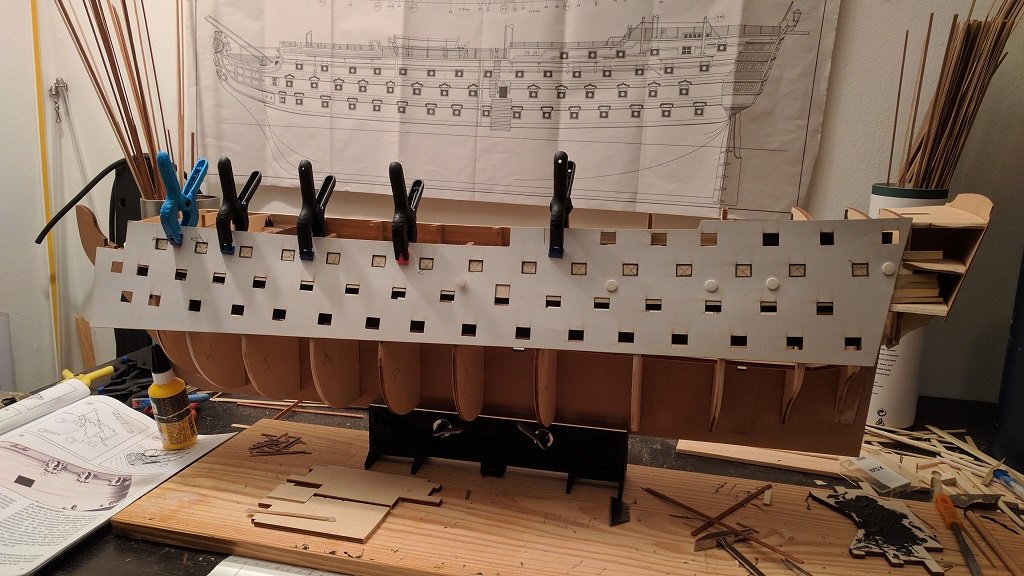
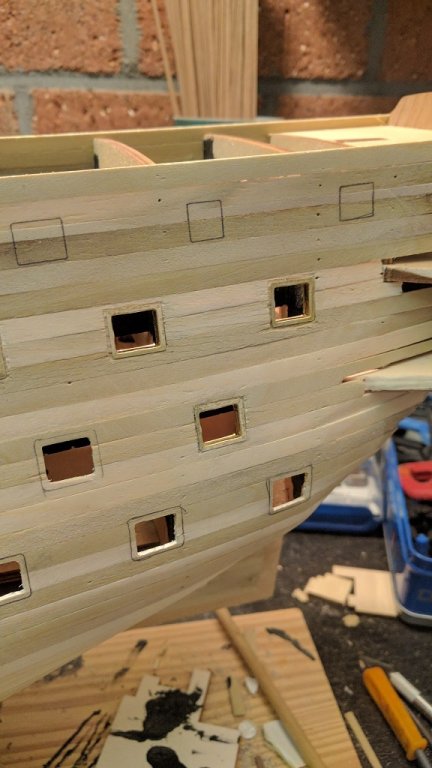
Deviating from the plans. The gunports should be opened after finishing the second planking according to the plans. I decided to do it my way
The kit comes with lots of metal frames to put into the gunports, but they leave me with a metal window on top of the wood. My plan is/was to insert these frames in the first planking (cut away a tiny amount of extra wood so they sit flush in the first planking) and then do the second planking.
- jay, zappto, popeye the sailor and 2 others
-
5
-
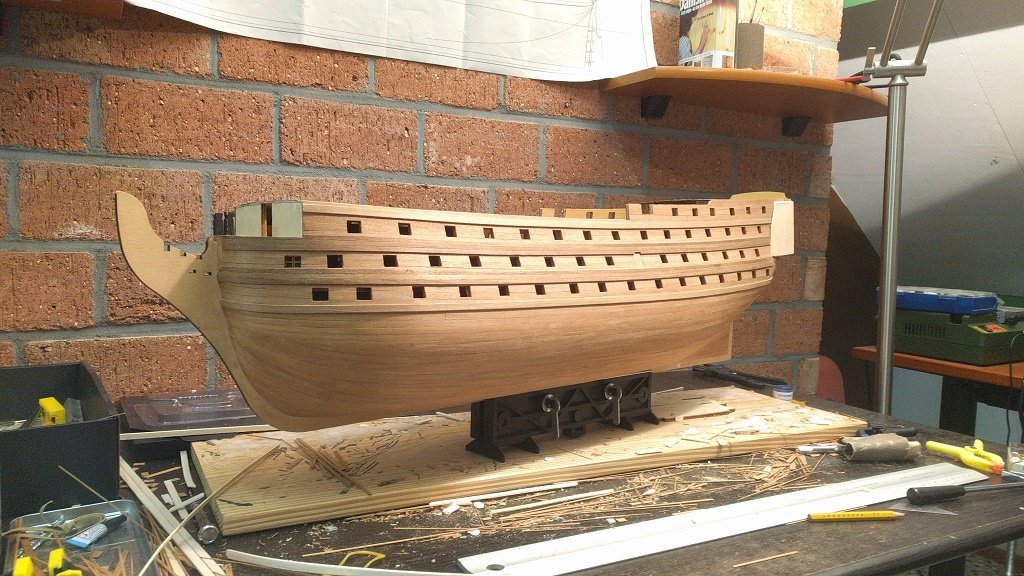
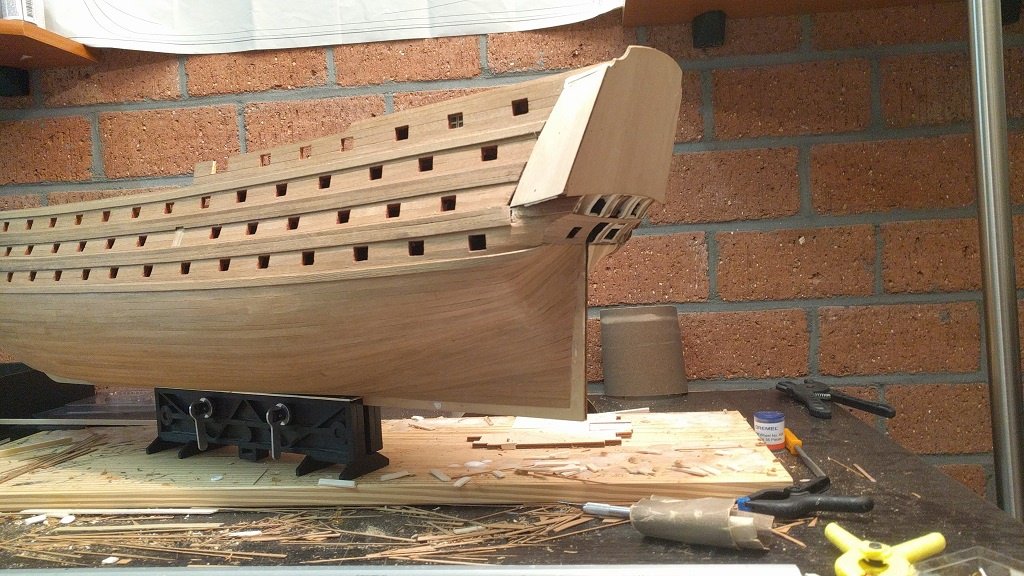
Started on the first deck and the first planking
The deck treated with Danish Oil:

- jay, FrankWouts, Robin Lous and 5 others
-
8
-
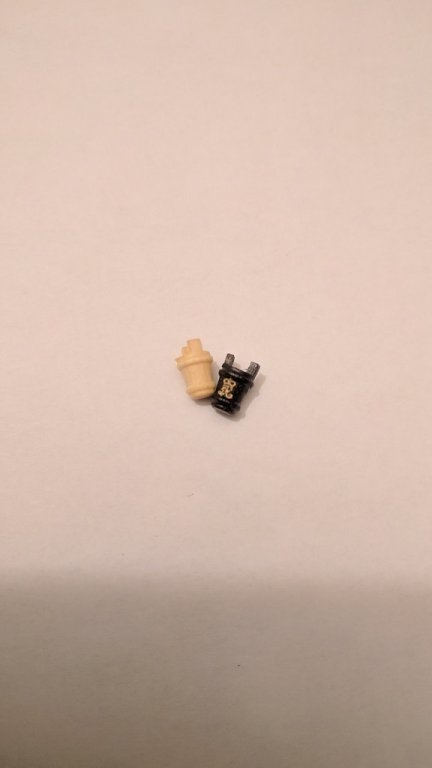
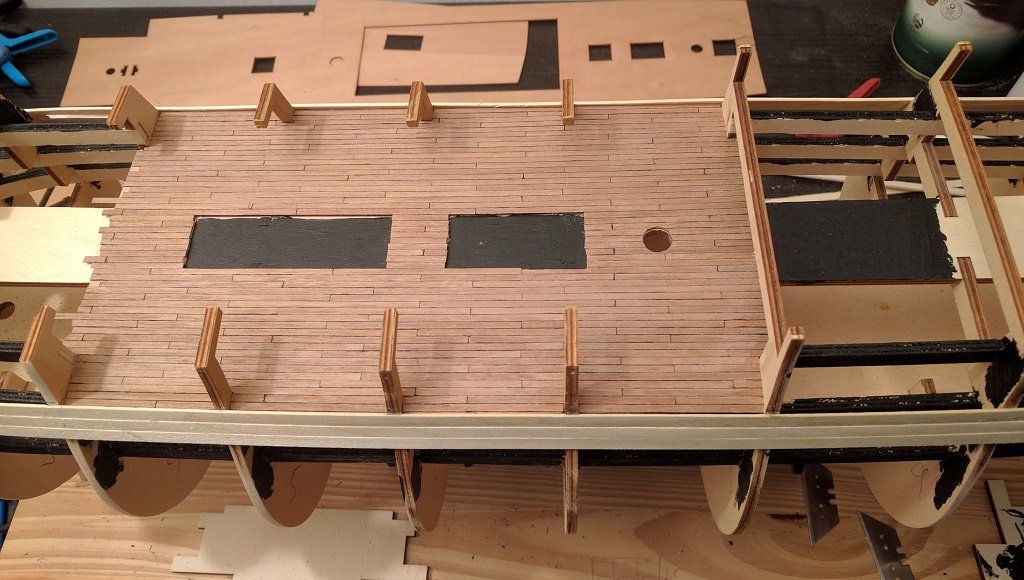
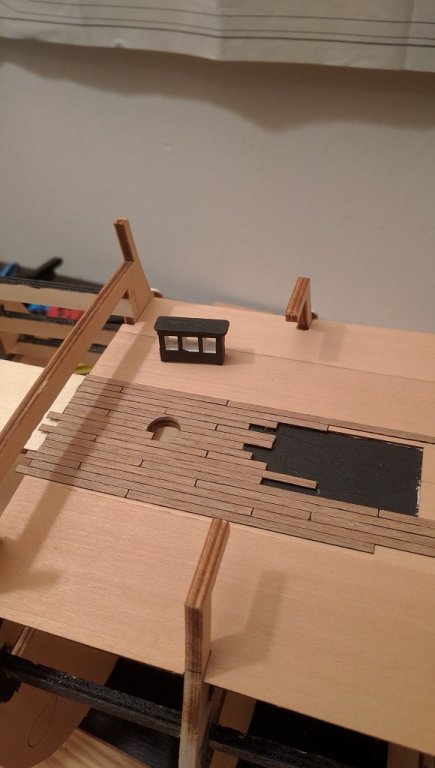
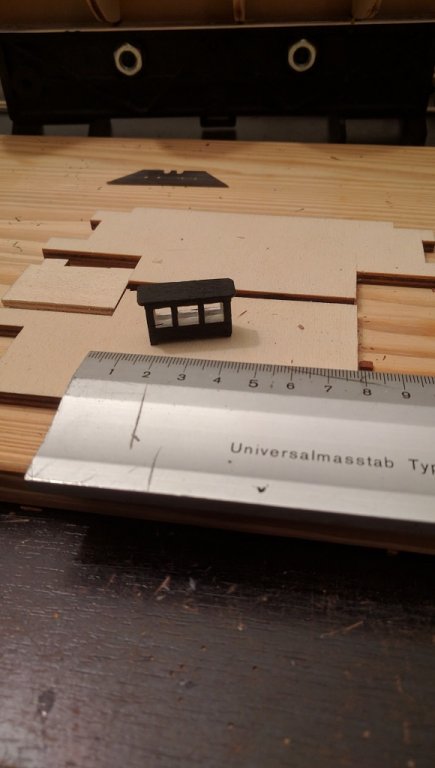
I didnt like the compass housing so I made my own from some left over wood. The kit just has a solid block of wood. Not very nice
Ordered some paint and got some replacement lanters. (kit lantern on the right, I found them to be ugly)
- FrankWouts, zappto, Ryland Craze and 5 others
-
8
-
Thought I'd share my build with you all. It'll be a lot of pictures at first since I'm already building
Little about myself, I'm Erik, 47 years old and I'm from the Netherlands. Done a partial Rattlesnake build years ago and I've done the Constitution cross section, both from Mamoli.
Managed to get this kit second hand. The first owner gave up
and it was so cheap I just had to have a go at it.
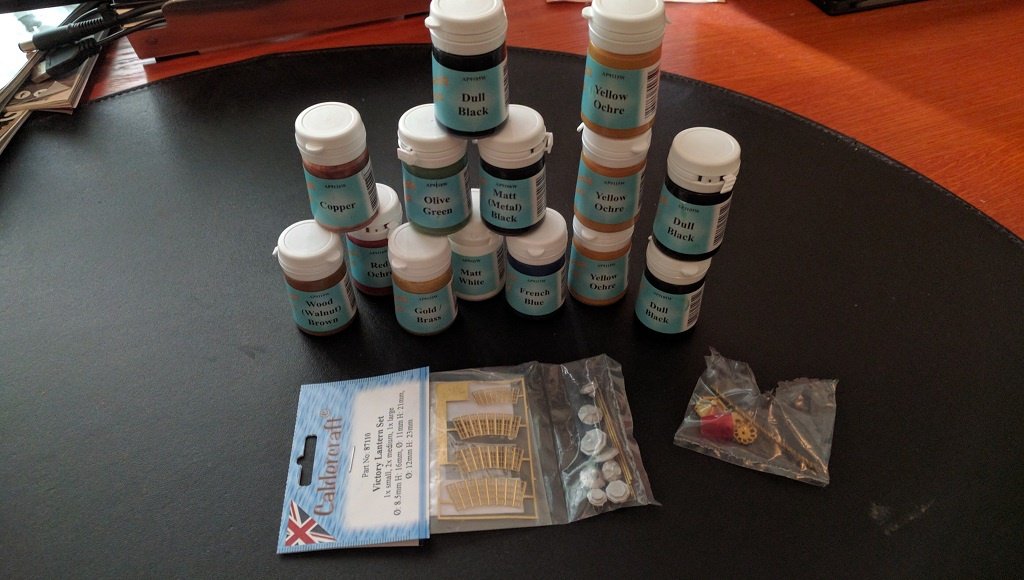
This is what I got:
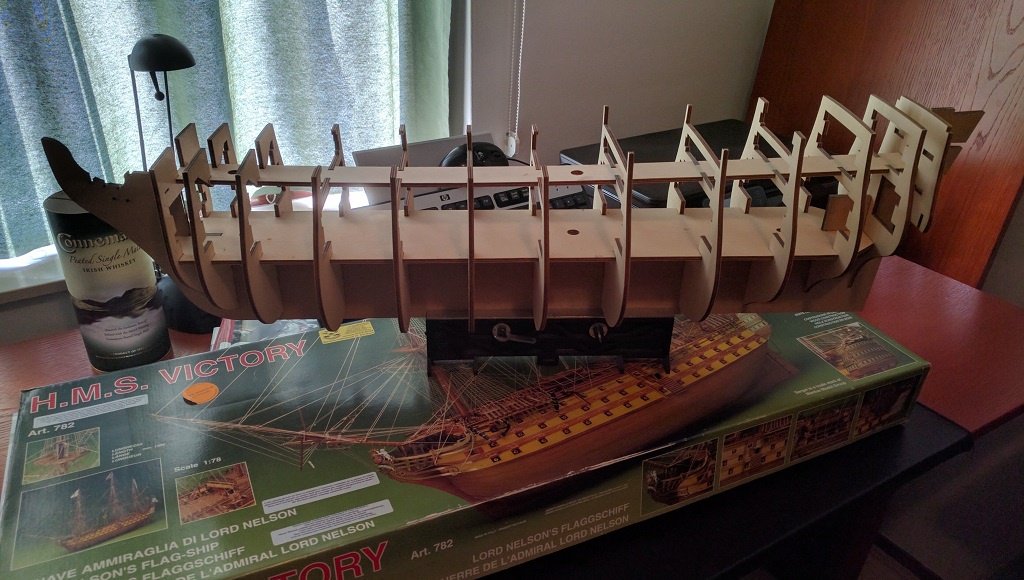
It'll be a kit build with some minor adjustments and replacements
HMS Victory by Erik H - Sergal - Scale 1:78
in - Kit build logs for subjects built from 1751 - 1800
Posted
Haha, yes, the instructions are terrible. So glad we got the internet now, that's more valuable then the bloody manual