mtbediz
-
Posts
1,344 -
Joined
-
Last visited


-
 mtbediz reacted to a post in a topic:
USS Constitution by Unegawahya - Model Shipways - scale 1:76
mtbediz reacted to a post in a topic:
USS Constitution by Unegawahya - Model Shipways - scale 1:76
-
mtbediz reacted to a post in a topic:
USS Constitution by Der Alte Rentner - Model Shipways - 1/76
-
mtbediz reacted to a post in a topic:
USS Constitution by Der Alte Rentner - Model Shipways - 1/76
-
mtbediz reacted to a post in a topic:
USS Constitution by GGibson - Model Shipways - 1:76.8
-
mtbediz reacted to a post in a topic:
USS Constitution by GGibson - Model Shipways - 1:76.8
-
mtbediz reacted to a post in a topic:
USS Constitution by GGibson - Model Shipways - 1:76.8
-
mtbediz reacted to a post in a topic:
USS Constitution by GGibson - Model Shipways - 1:76.8
-
mtbediz reacted to a post in a topic:
HMS Portland 1770 by scrubbyj427 - 1:48 - 4th rate 50-gun ship
-
Unegawahya reacted to a post in a topic:
USS Constitution by mtbediz - 1:76
-
 Unegawahya reacted to a post in a topic:
USS Constitution by mtbediz - 1:76
Unegawahya reacted to a post in a topic:
USS Constitution by mtbediz - 1:76
-
woodartist reacted to a post in a topic:
USS Constitution by mtbediz - 1:76
-
g8rfan reacted to a post in a topic:
USS Constitution by mtbediz - 1:76
-
Stevenleehills reacted to a post in a topic:
USS Constitution by mtbediz - 1:76
-
albert reacted to a post in a topic:
USS Constitution by mtbediz - 1:76
-
mtbediz reacted to a post in a topic:
USS Constitution by mtbediz - 1:76
-
PaddyO reacted to a post in a topic:
USS Constitution by mtbediz - 1:76
-
Der Alte Rentner reacted to a post in a topic:
USS Constitution by mtbediz - 1:76
-

USS Constitution by mtbediz - 1:76
mtbediz replied to mtbediz's topic in - Build logs for subjects built 1751 - 1800
Thank you Jon! I couldn't sleep last night thinking about how to prevent these from breaking, but I finally found a solution. I would be grateful if you could provide the source link. -
 GGibson reacted to a post in a topic:
USS Constitution by mtbediz - 1:76
GGibson reacted to a post in a topic:
USS Constitution by mtbediz - 1:76
-
USS Constitution by mtbediz - 1:76
mtbediz replied to mtbediz's topic in - Build logs for subjects built 1751 - 1800
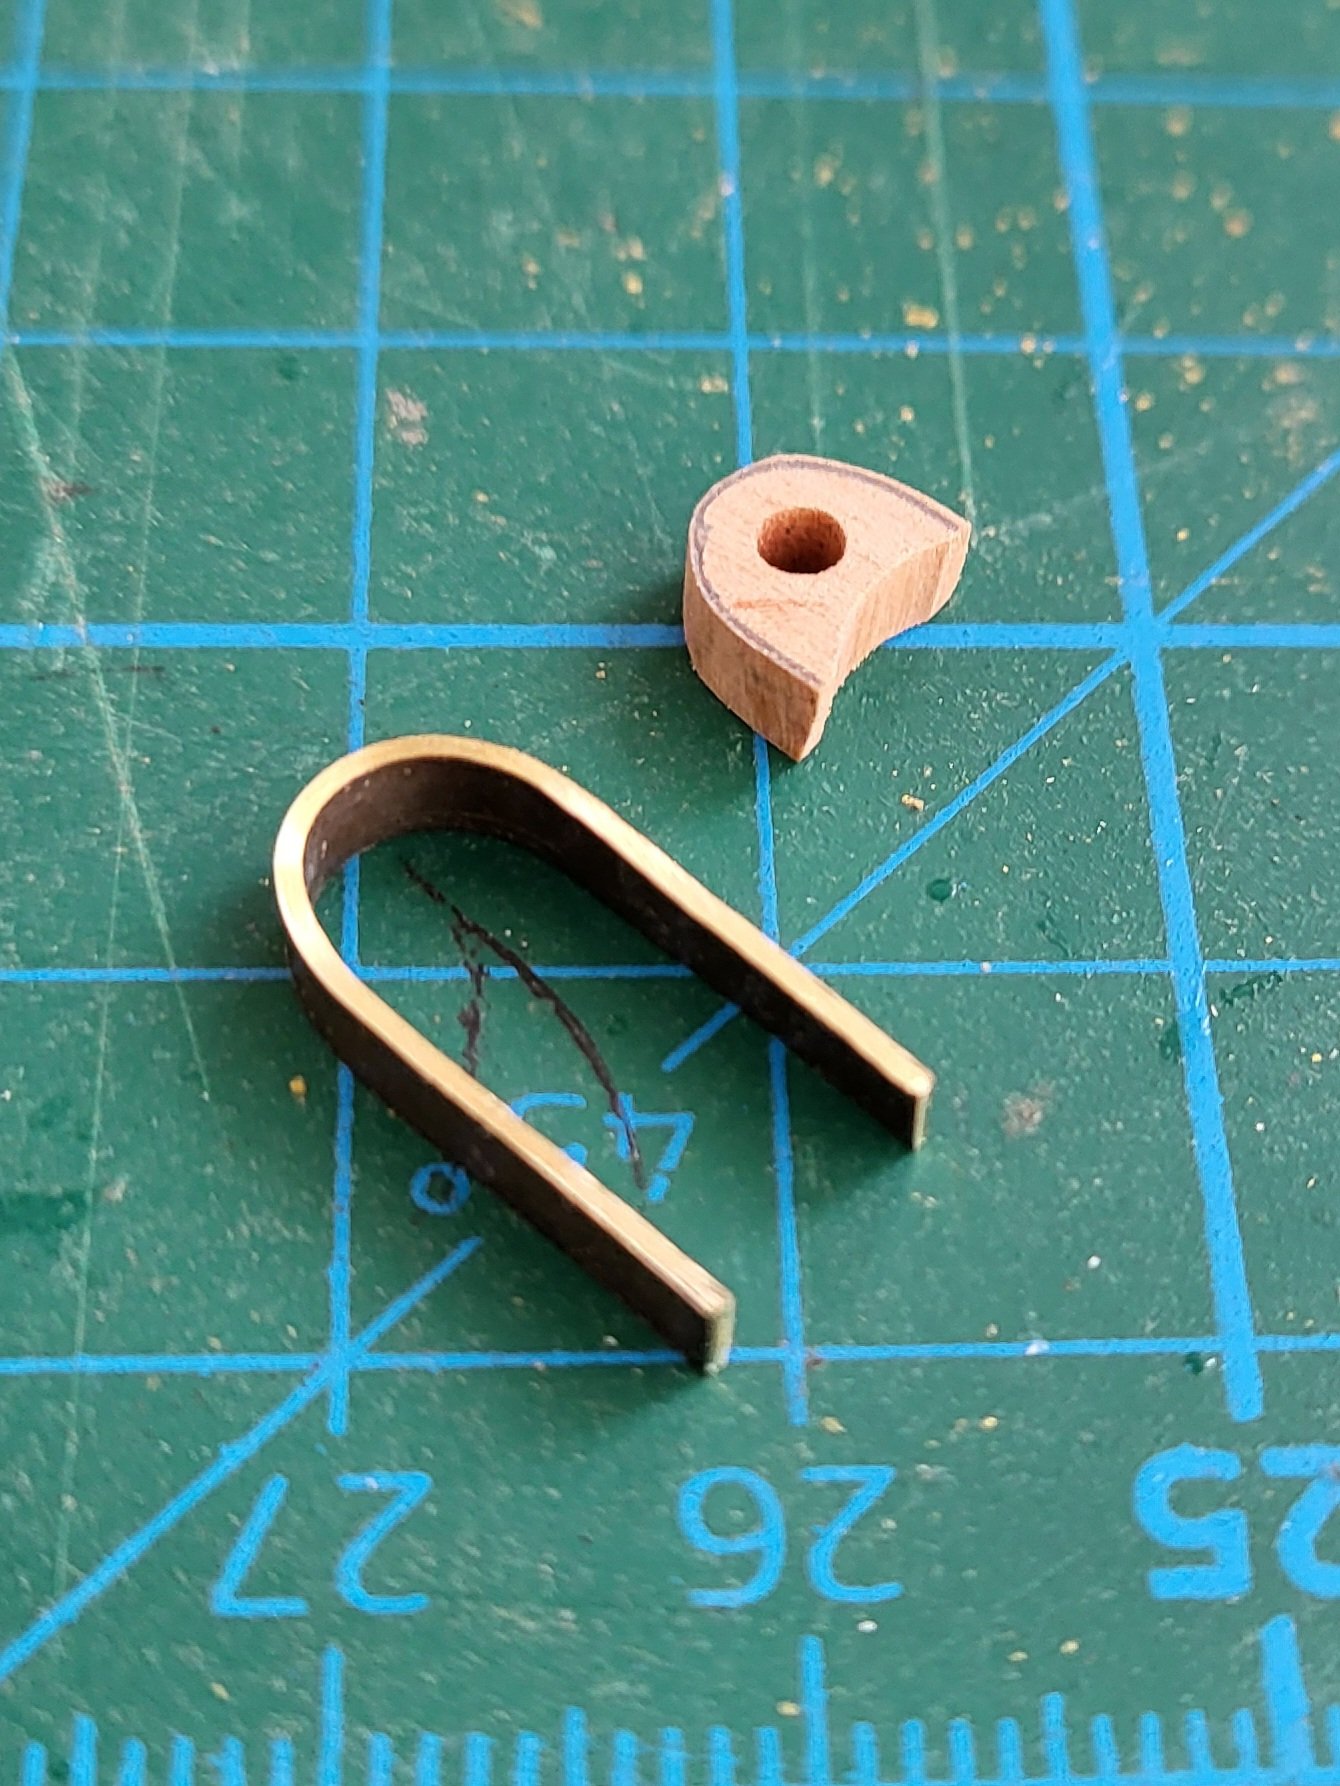
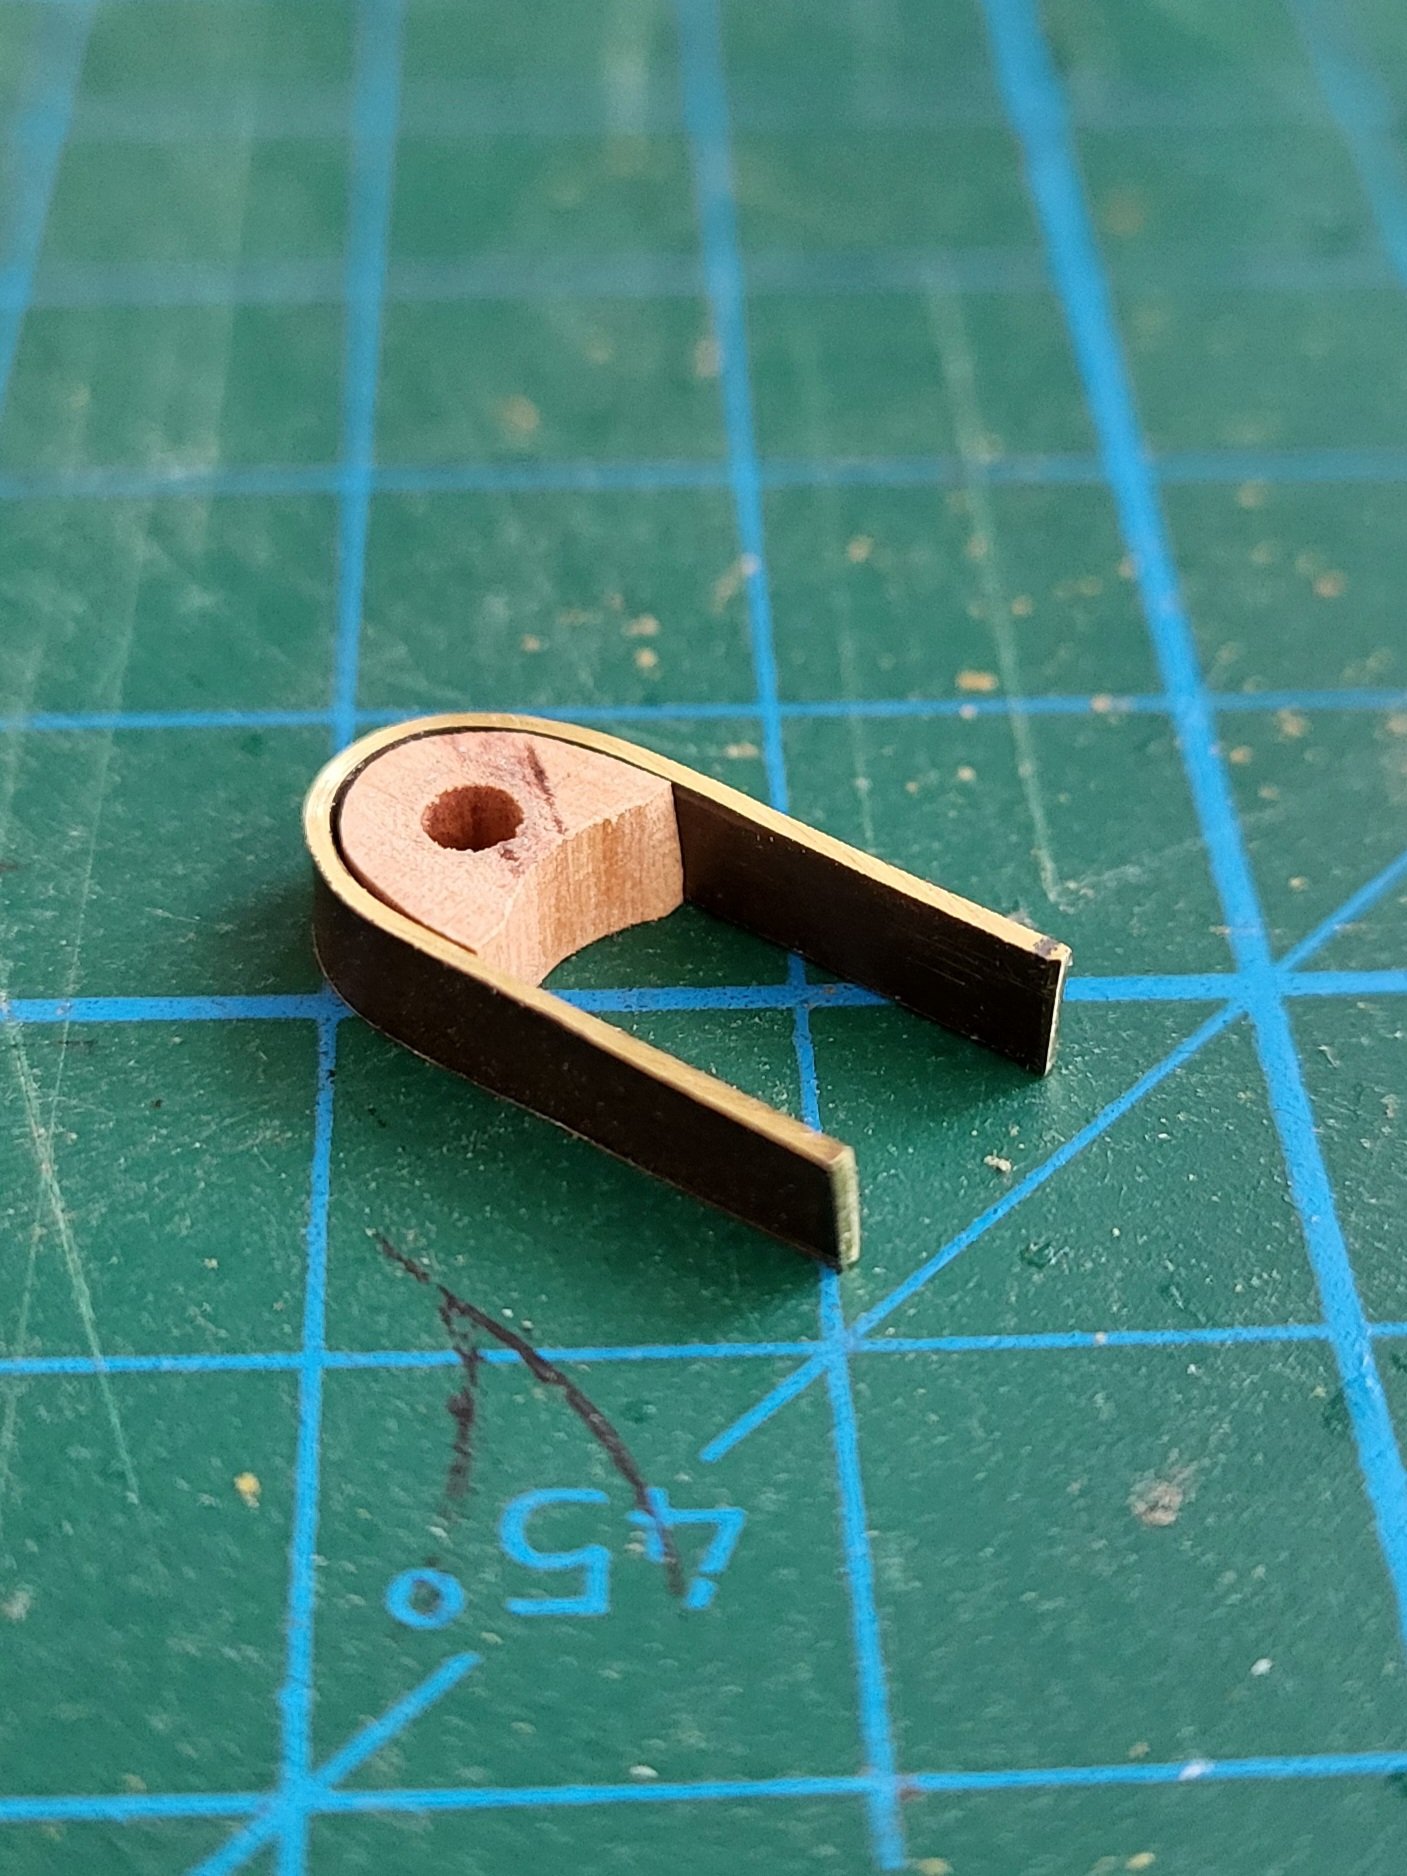
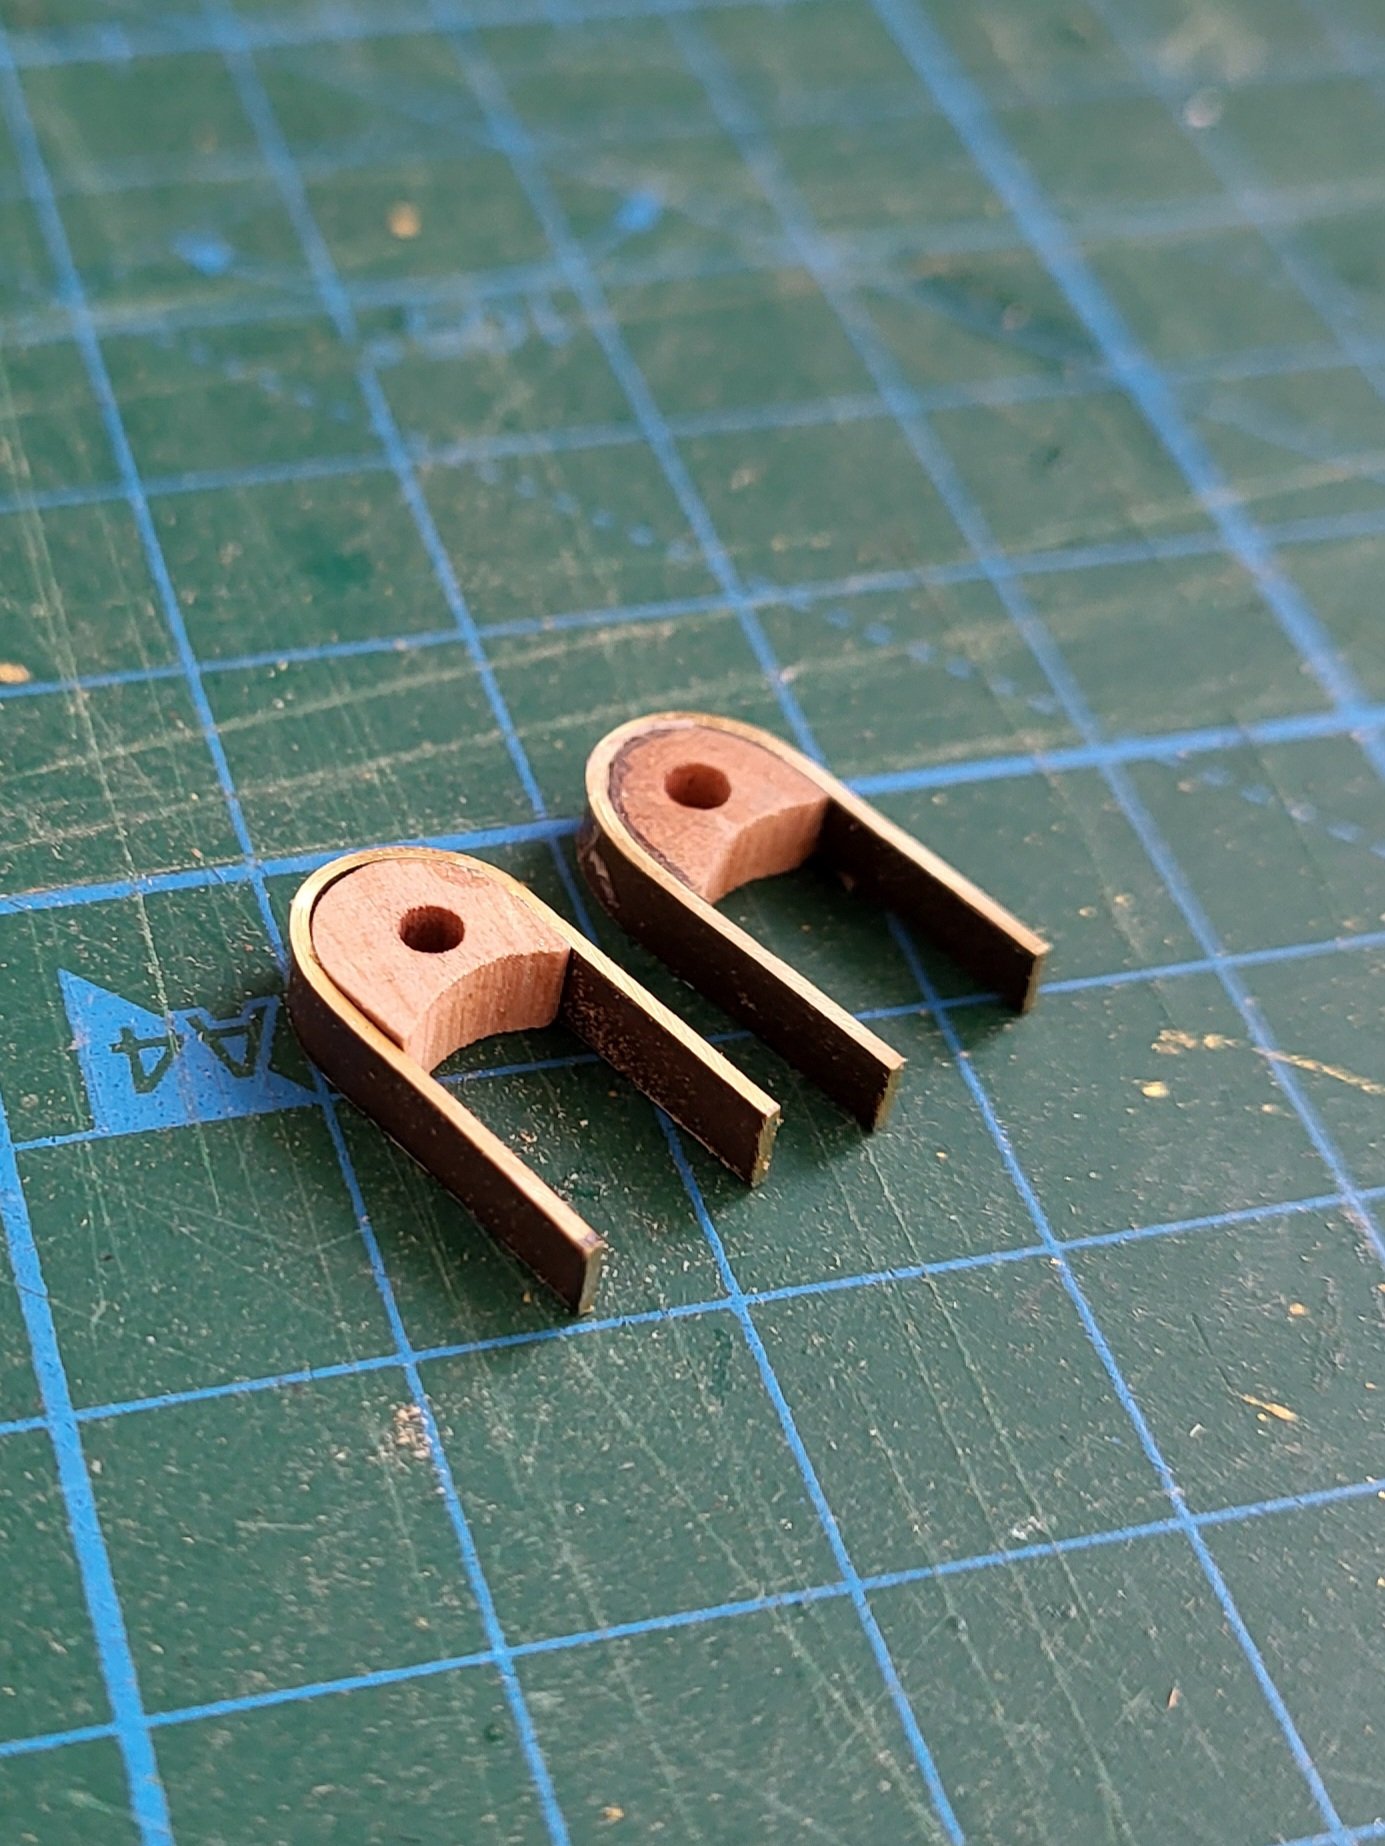
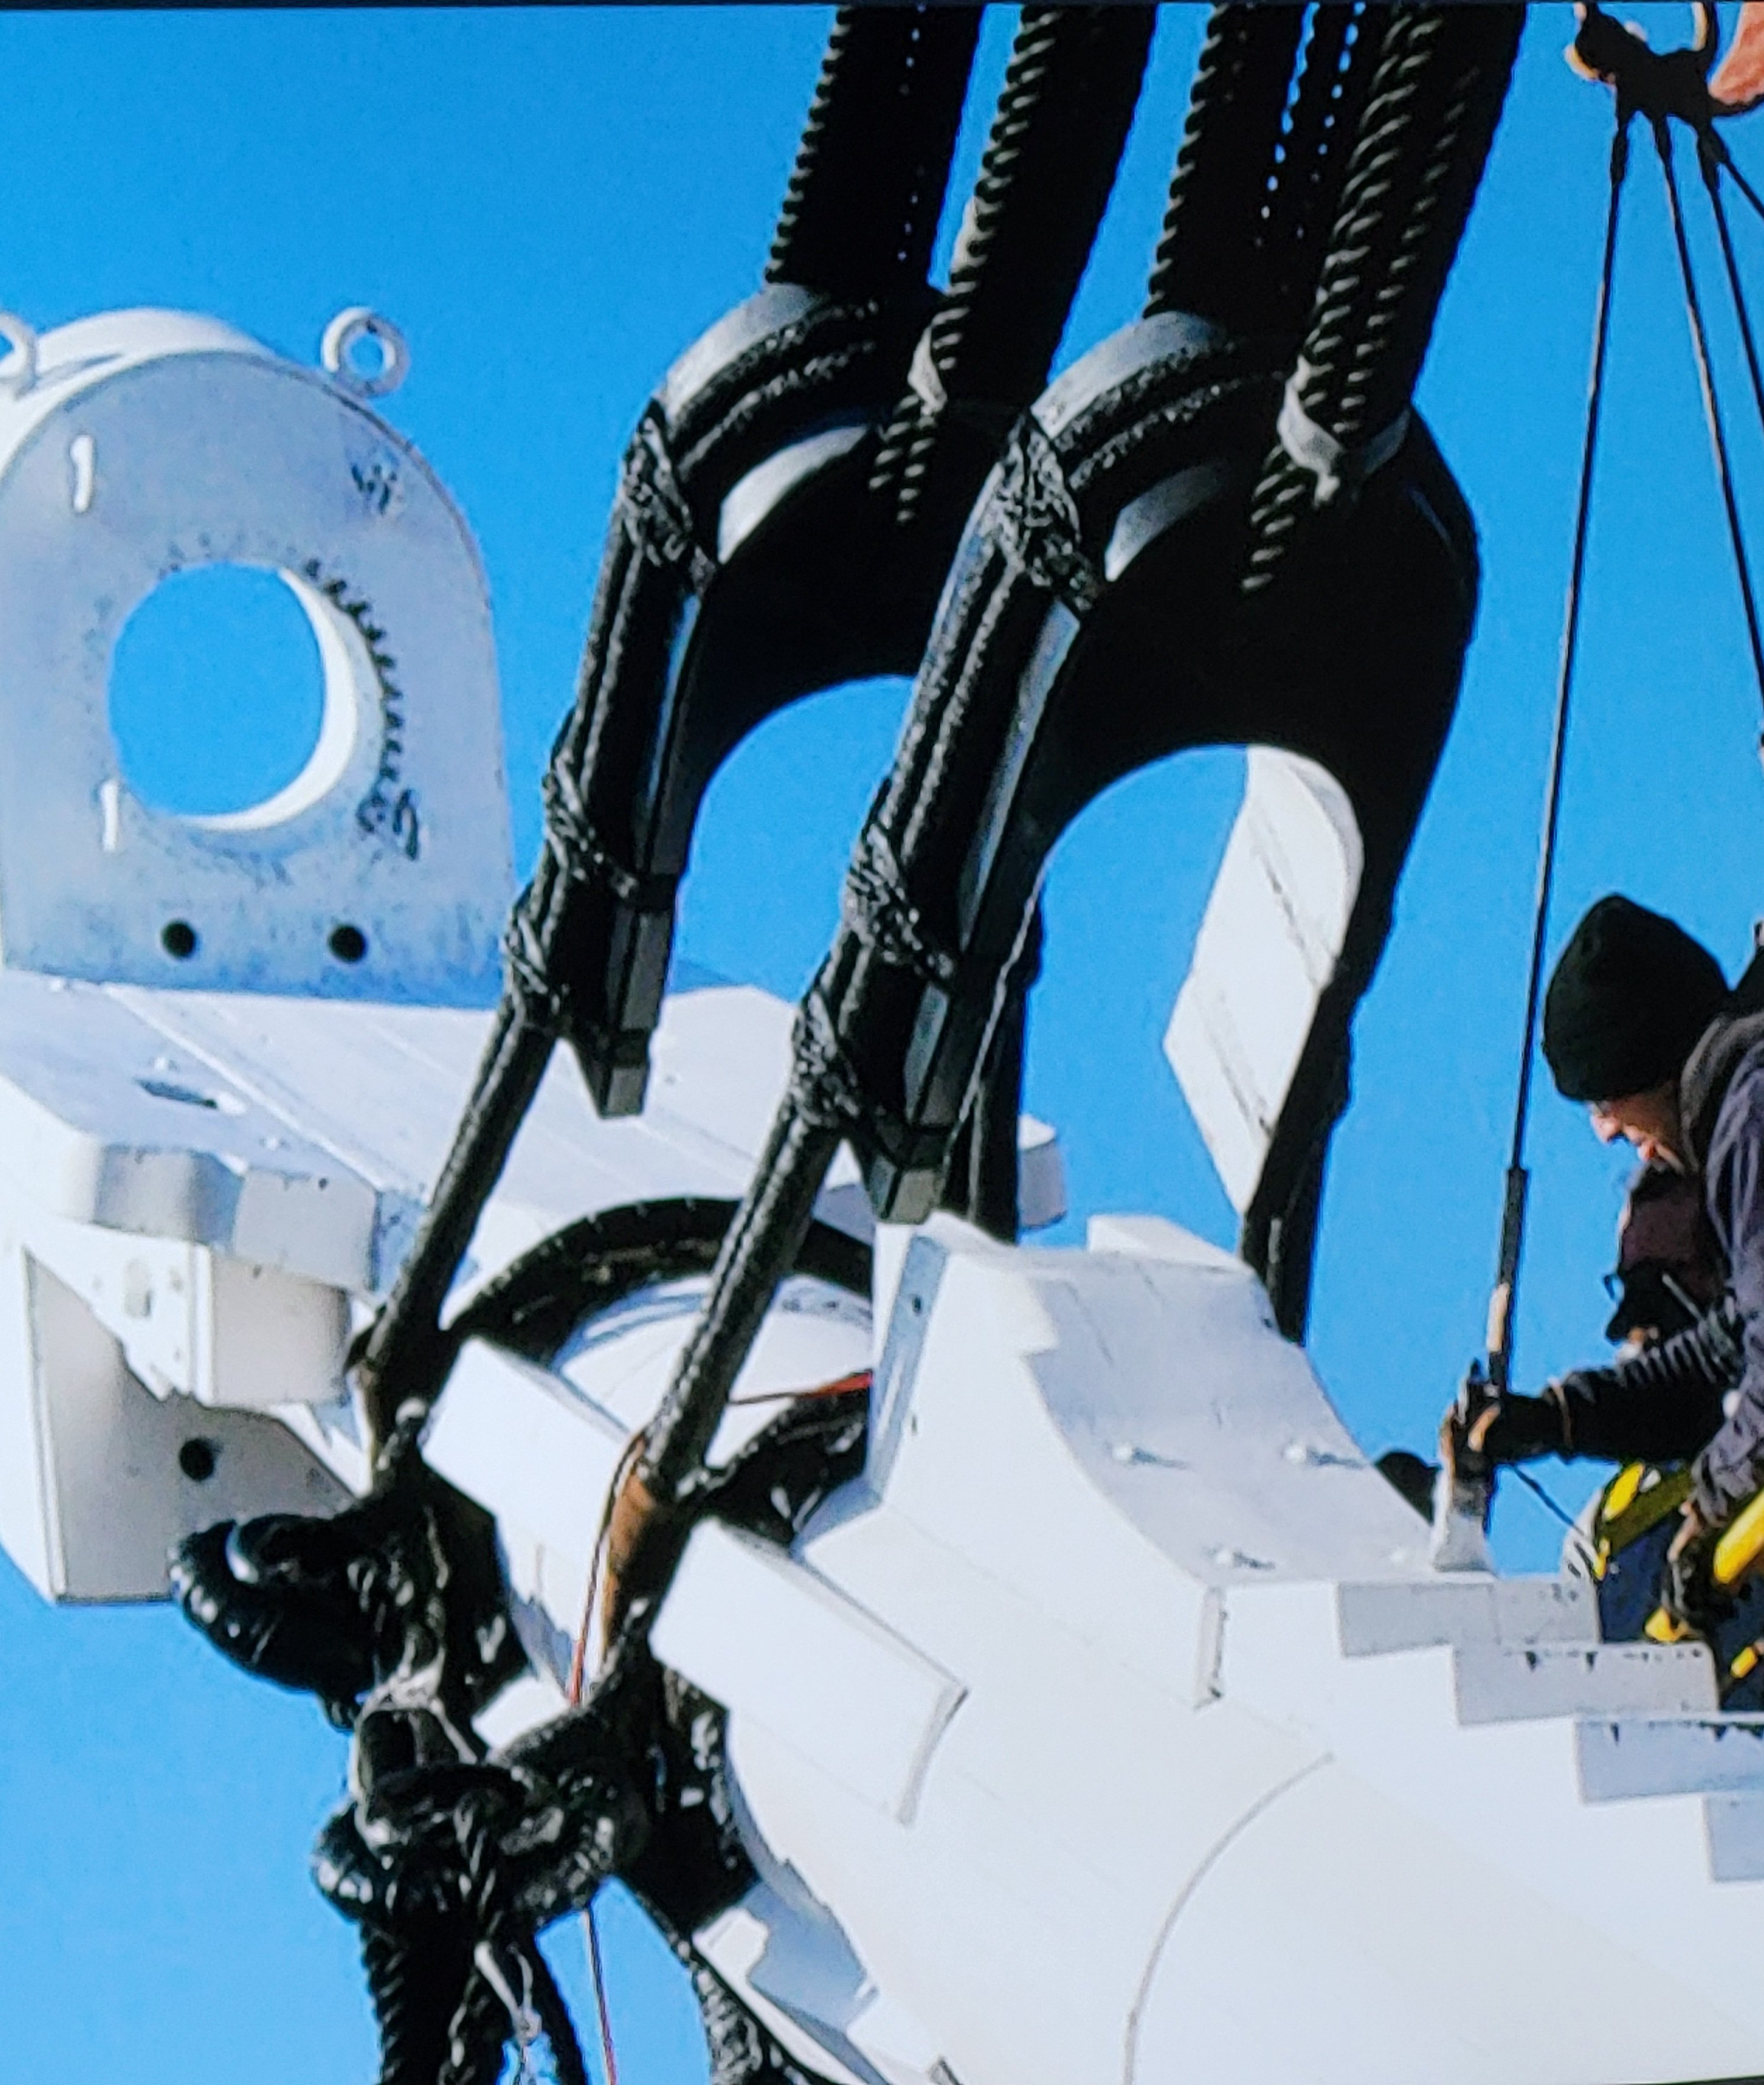
Thank you, Greg! The brass sheet I used is 0.7 mm thick and 3 mm wide. I wrapped the brass strip around a round rod with a 6 mm diameter. As you know, I’m modeling the ship as it appears after the 2015 restoration, and for reference I usually rely on the interior visual tour available on Google Maps. Since the open hearts are shown in white there, I’ll be painting mine white as well. -
mgatrost reacted to a post in a topic:
USS Constitution by mtbediz - 1:76
-
USS Constitution by mtbediz - 1:76
mtbediz replied to mtbediz's topic in - Build logs for subjects built 1751 - 1800
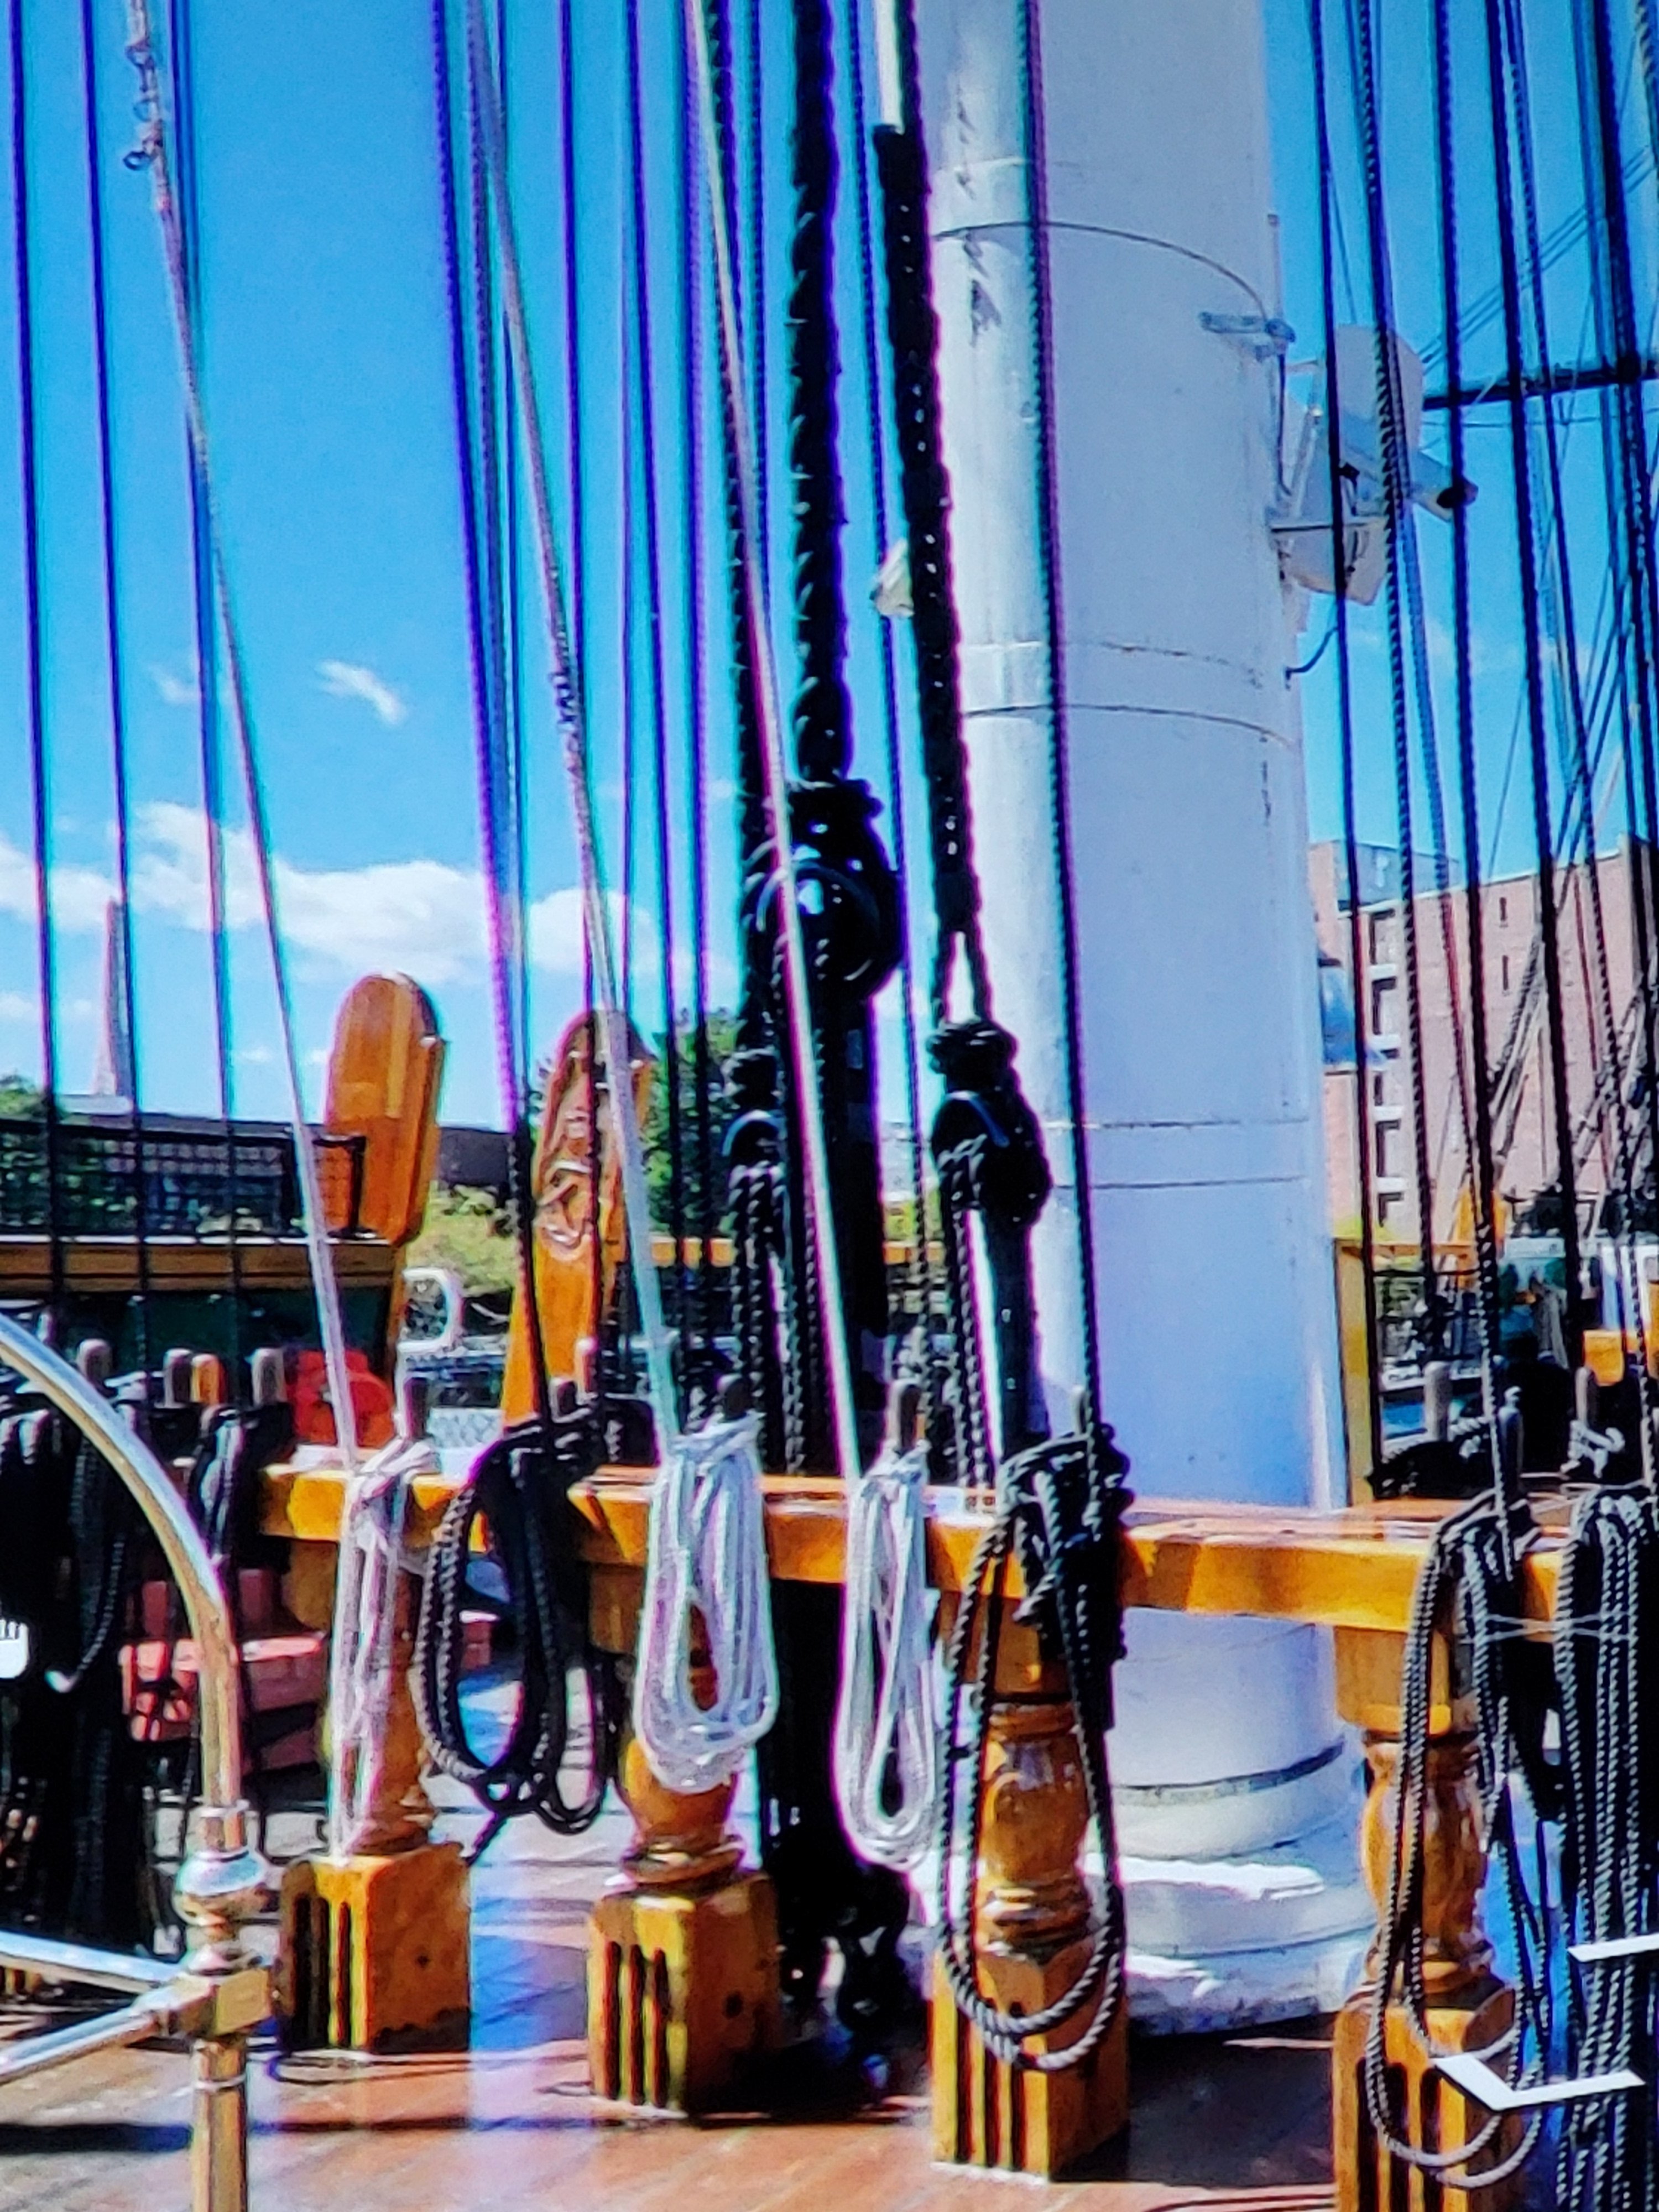
I’m currently working on the open hearts that connect the fore stays to the bowsprit, using photos of the actual ship as reference. At first, I tried making them entirely out of wood, but the side extensions were so thin that they kept breaking during construction. So I abandoned that approach and came up with a hybrid solution, which turned out really well. This hybrid structure combines brass sheet and wood. Once the open hearts are painted white, the mix of materials is practically invisible—unless you look very closely with a magnifying glass.


-
Nice work on the chafing fish, Peter! Just a heads-up—the space between the main mast and the fife rail looks pretty tight in the photo. You’ll need room there for three stays coming off the mizzen mast, which get tied down to the deck with bullseyes. On my build, that gap was really small too, and I had a tough time securing the mizzen stays. Hopefully you haven’t glued the fife rails yet. Also, before you set the masts in place, it’s a good idea to get the eyebolts around them installed first.


-
Perfect work Peter. She is going to be a very beautiful ship.
-
That was a good decision, Greg, you now have a much more comfortable workspace on the gun deck.
-
That was a good decision, Greg, you now have a much more comfortable workspace on the gun deck.
-
USS Constitution by mtbediz - 1:76
mtbediz replied to mtbediz's topic in - Build logs for subjects built 1751 - 1800
Yes friends, after buying and starting to use the milling machine, I began to enjoy this hobby so much more. Yes, it’s a bit of an expensive investment, but it’s worth every penny. Also, once you own this machine, don’t forget that you won’t be spending tons of money on kits or accessories anymore. In the long run, your money will stay in your pocket. -
USS Constitution by mtbediz - 1:76
mtbediz replied to mtbediz's topic in - Build logs for subjects built 1751 - 1800
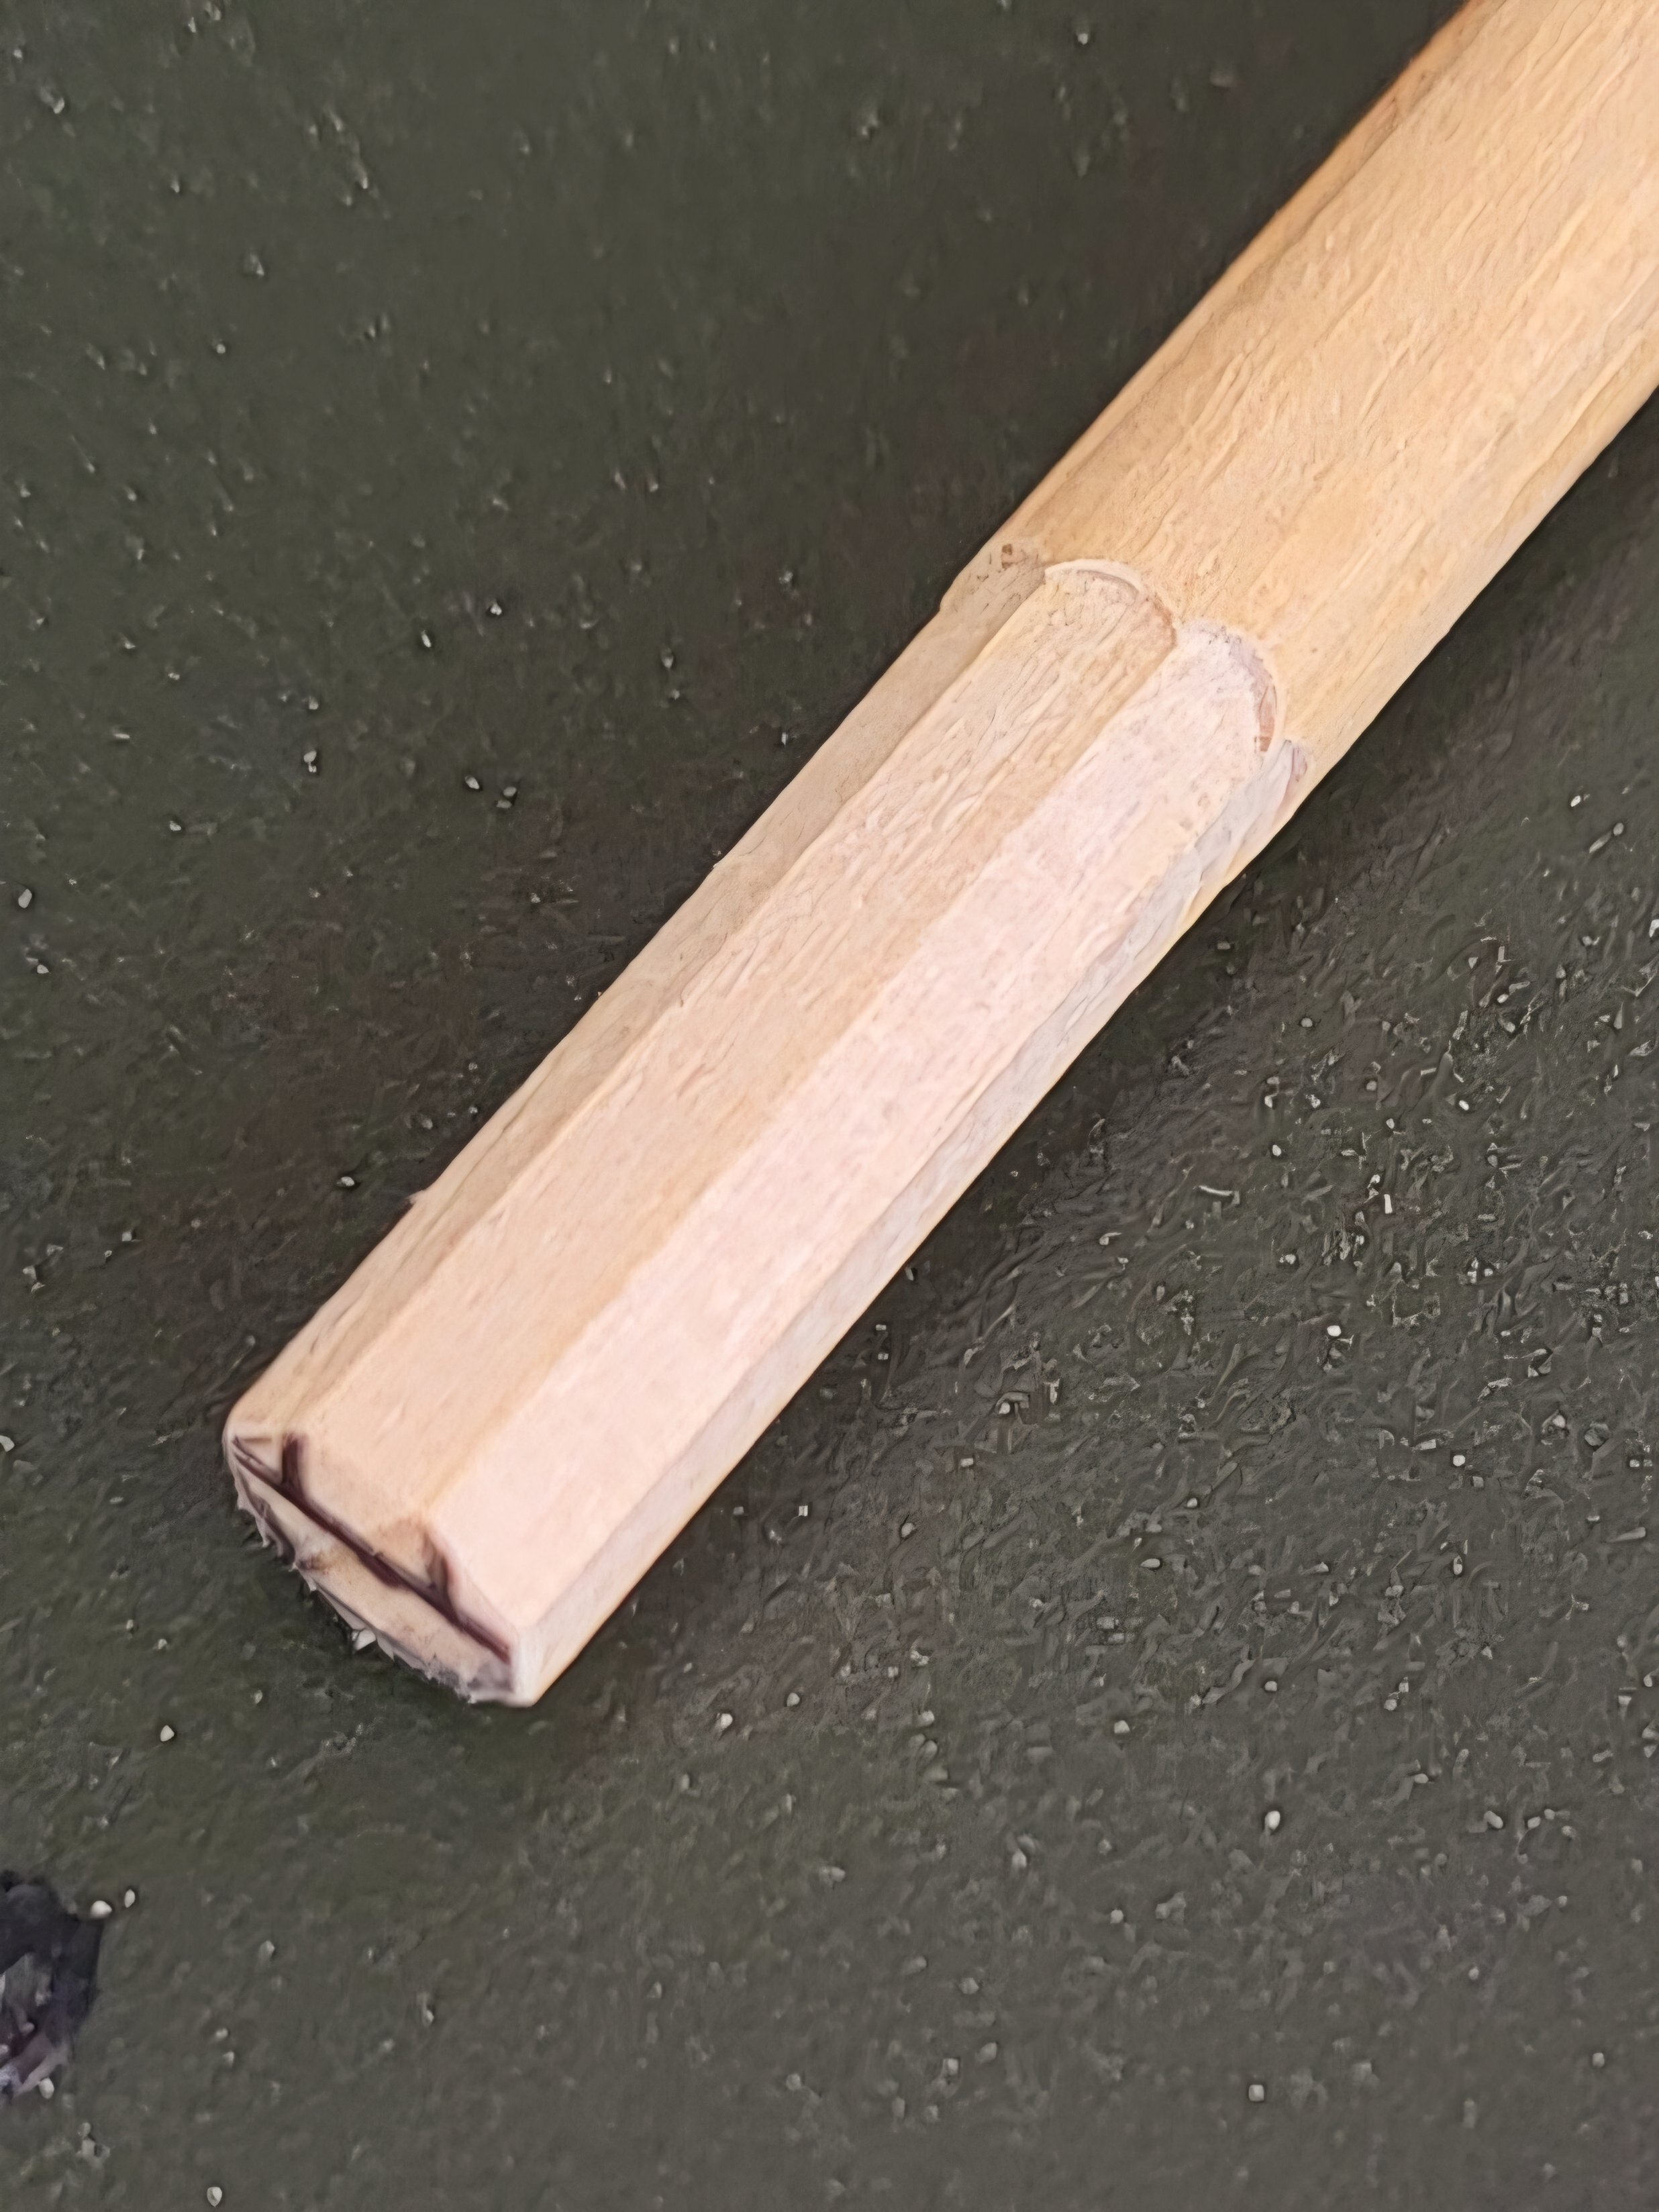
Jon, Peter, Greg, thank you so much for your kind words. Greg, all of the detail pieces are made from pear wood. I have never used boxwood, as it is both expensive and difficult to source locally. Pear wood offers similar working properties to boxwood while being a more economical and accessible alternative. Bowsprit itself is made from hornbeam wood. -
USS Constitution by mtbediz - 1:76
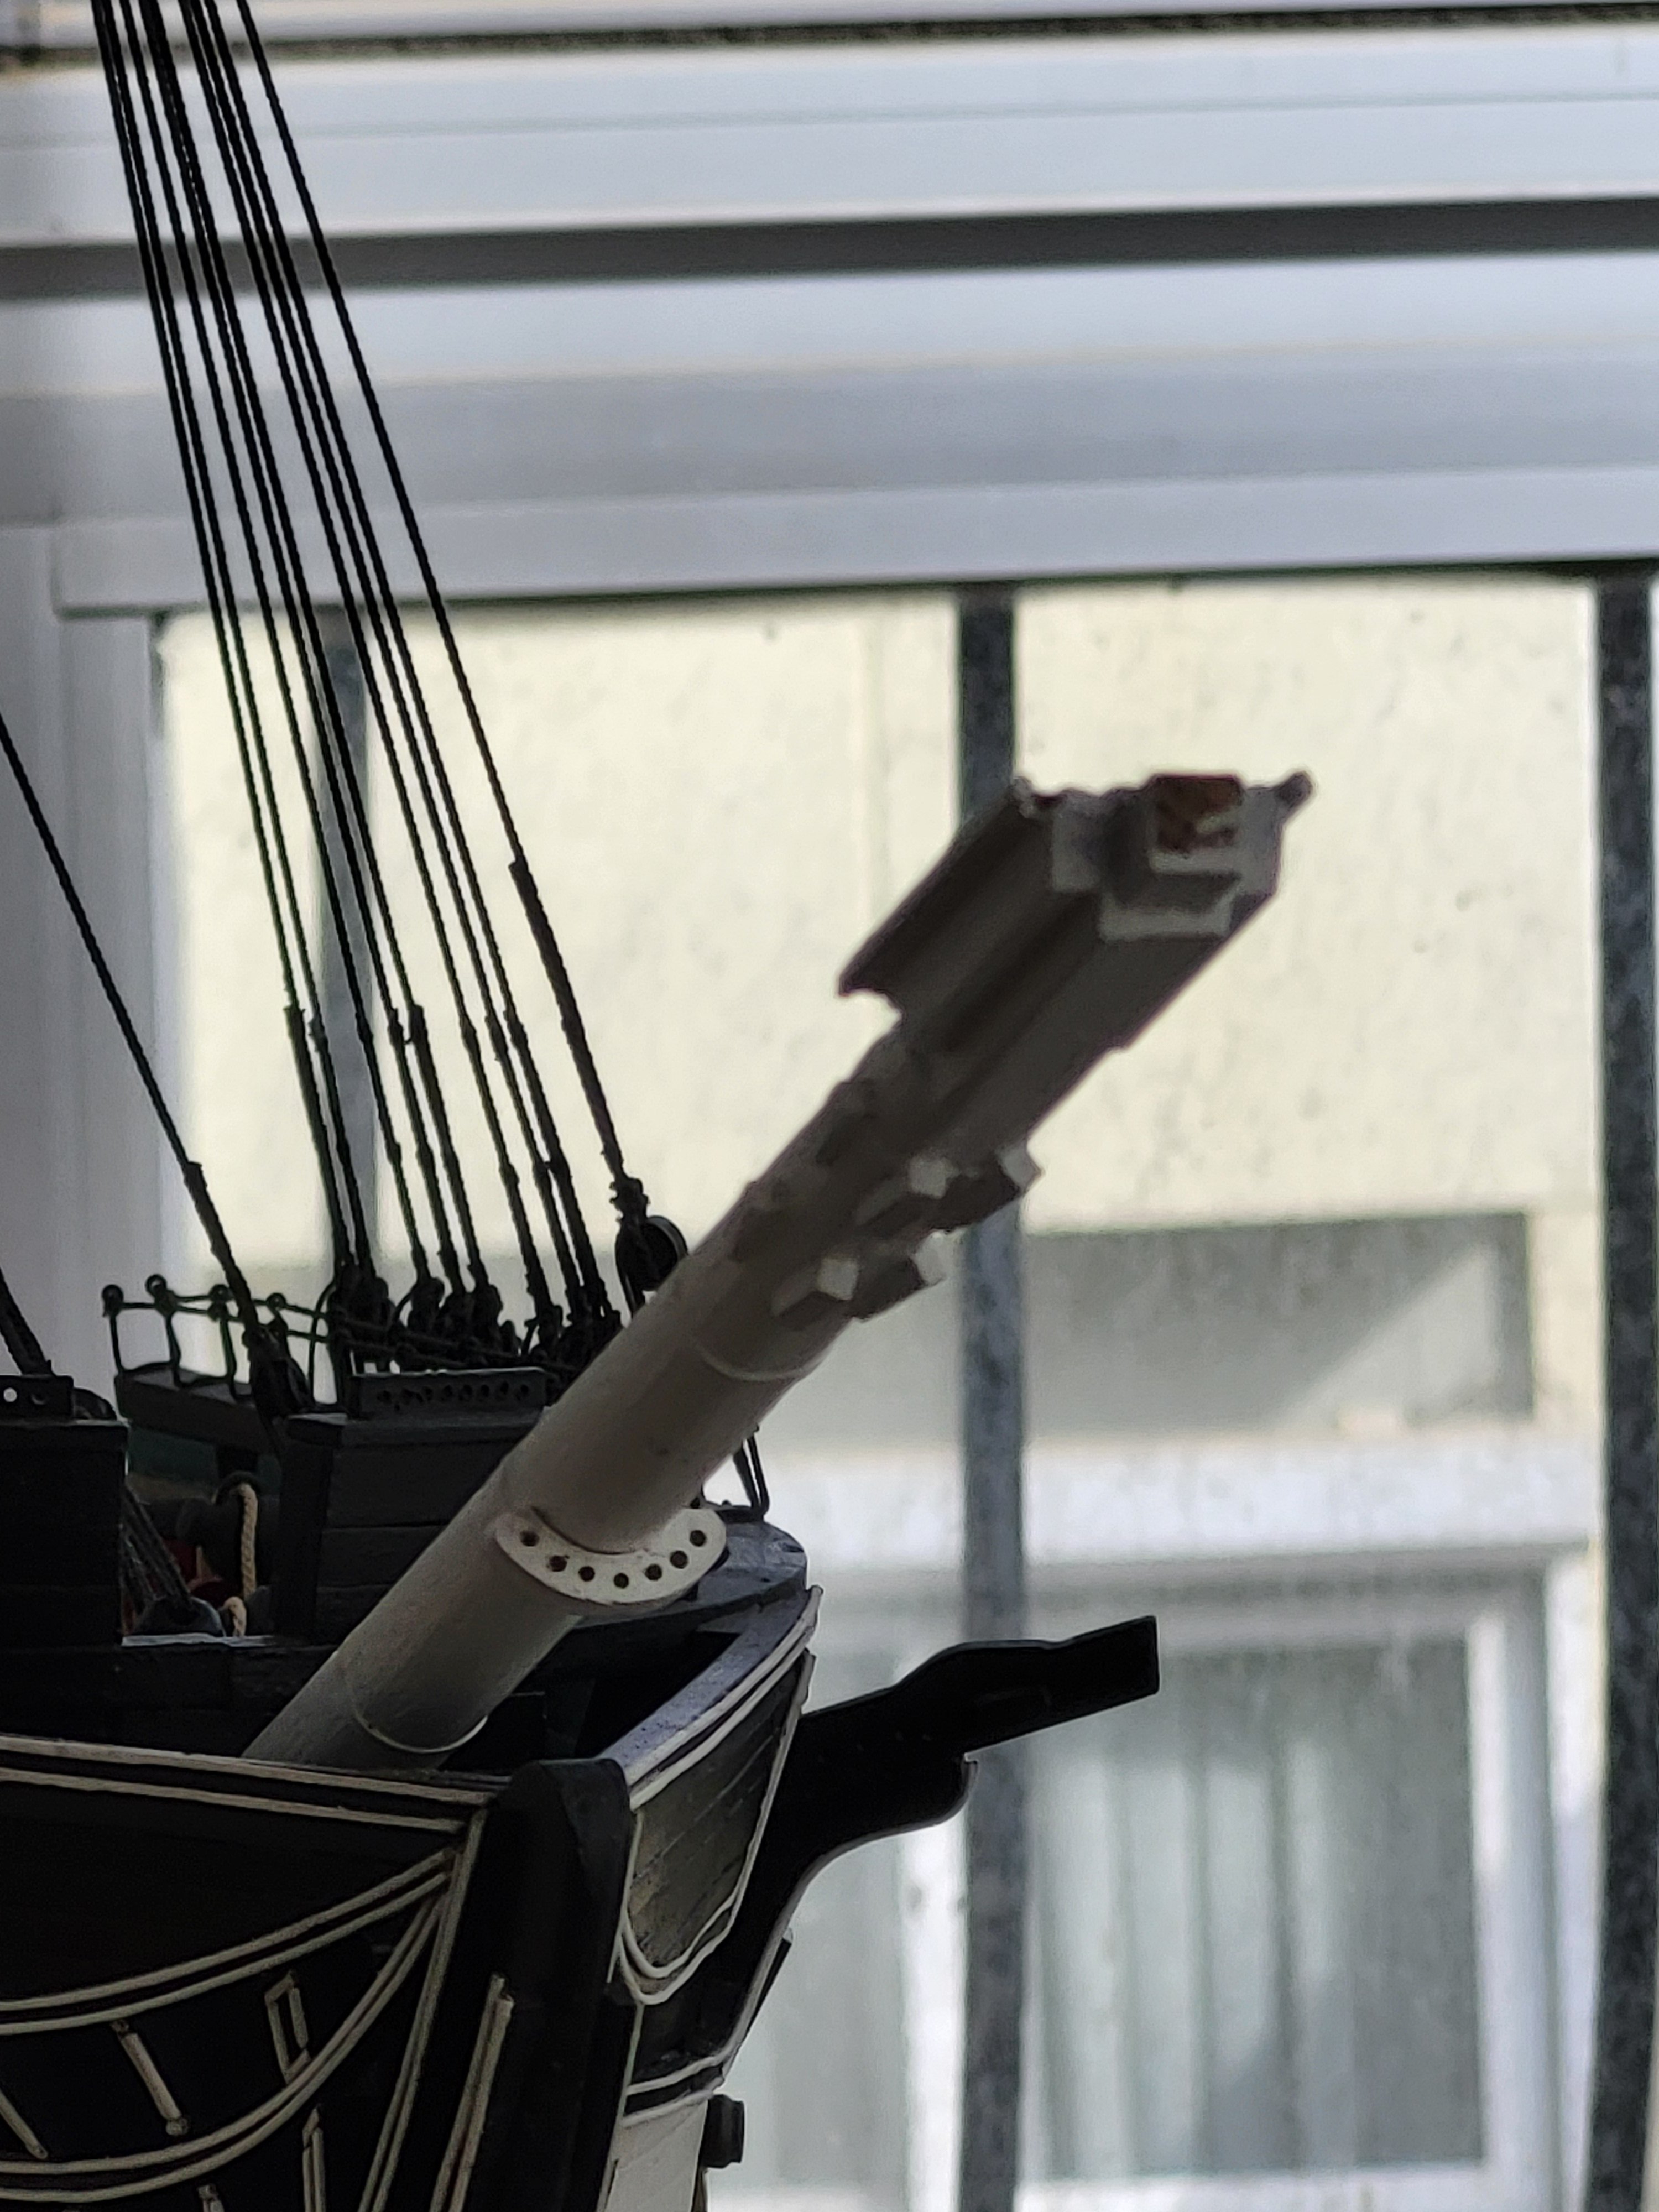
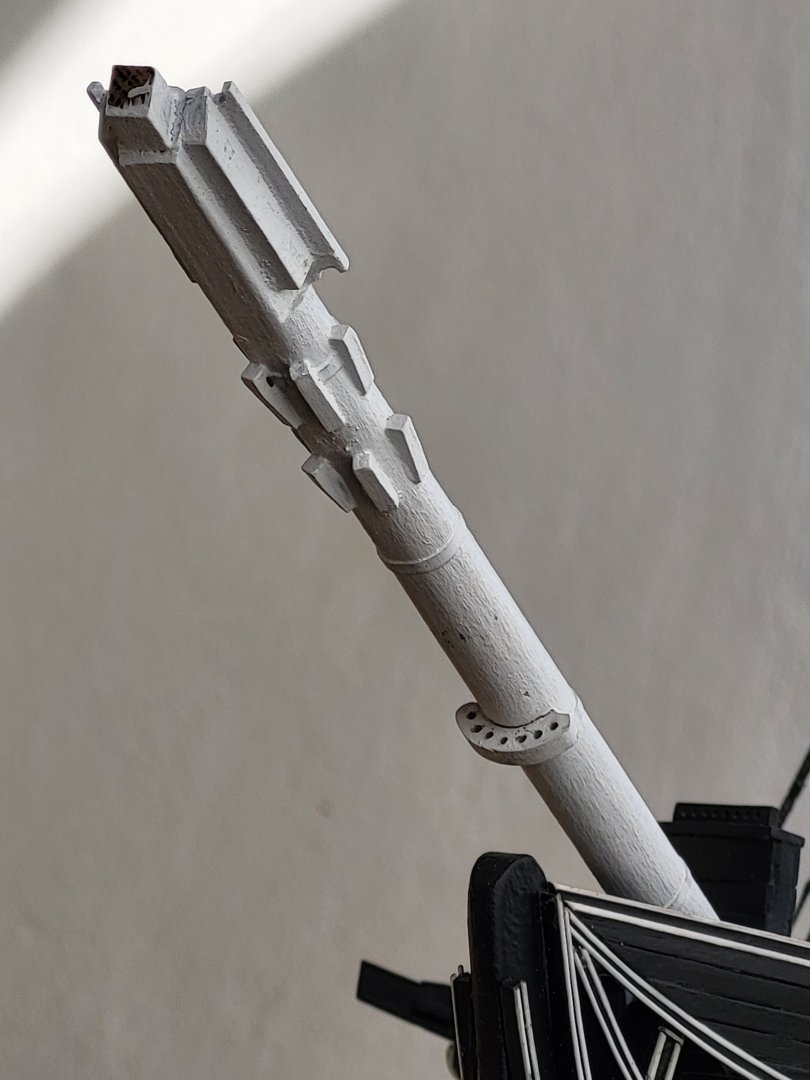
mtbediz replied to mtbediz's topic in - Build logs for subjects built 1751 - 1800
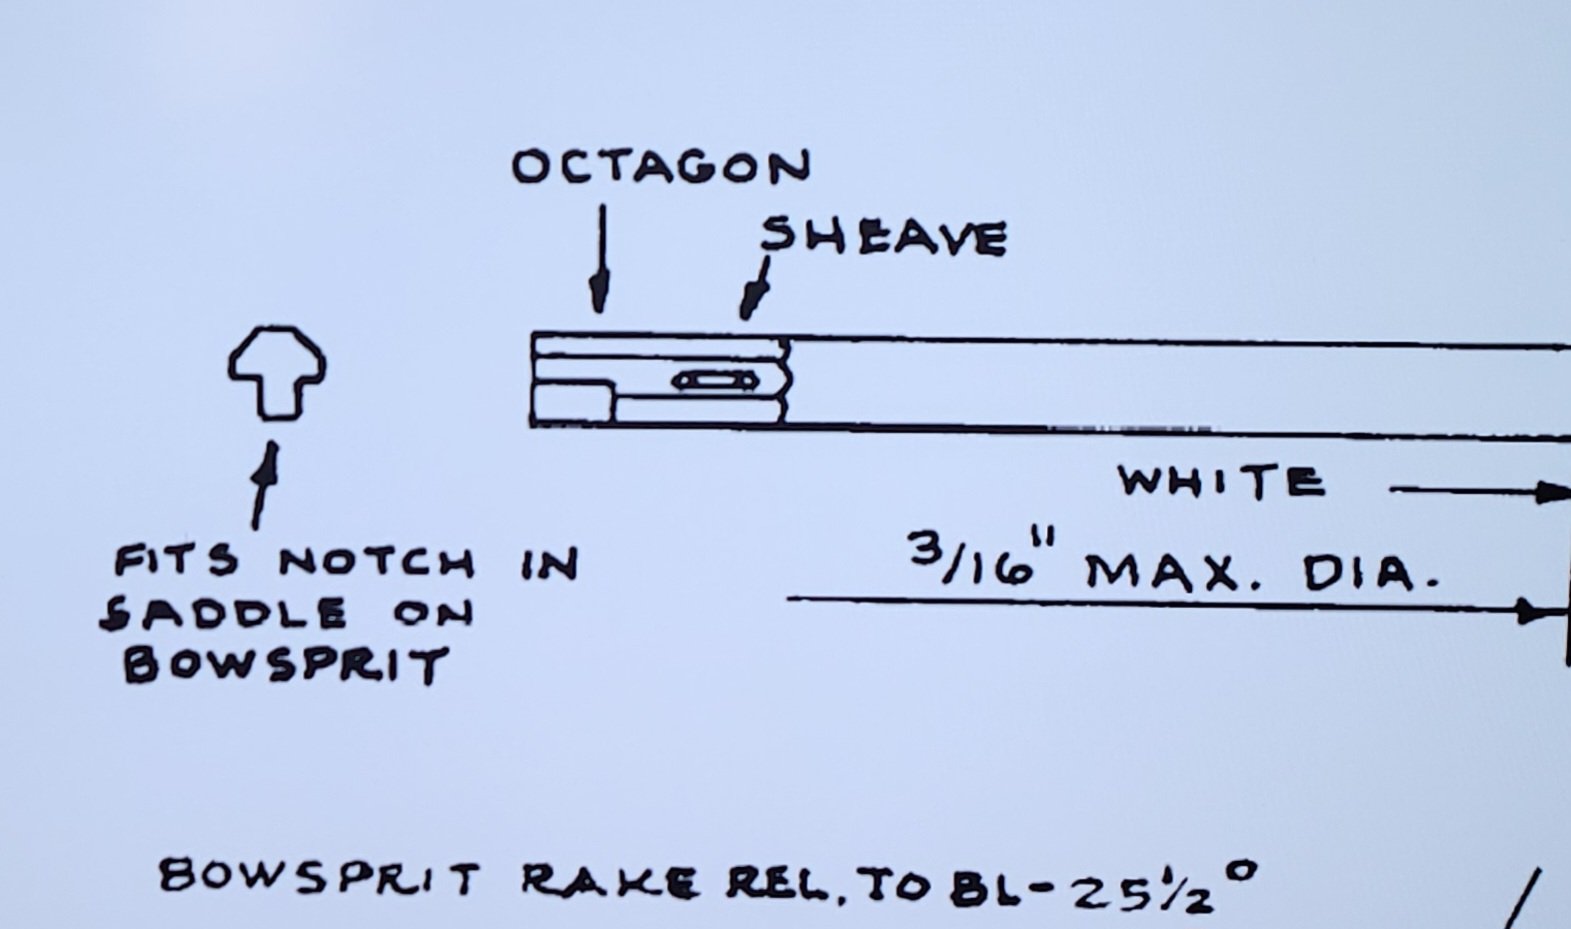
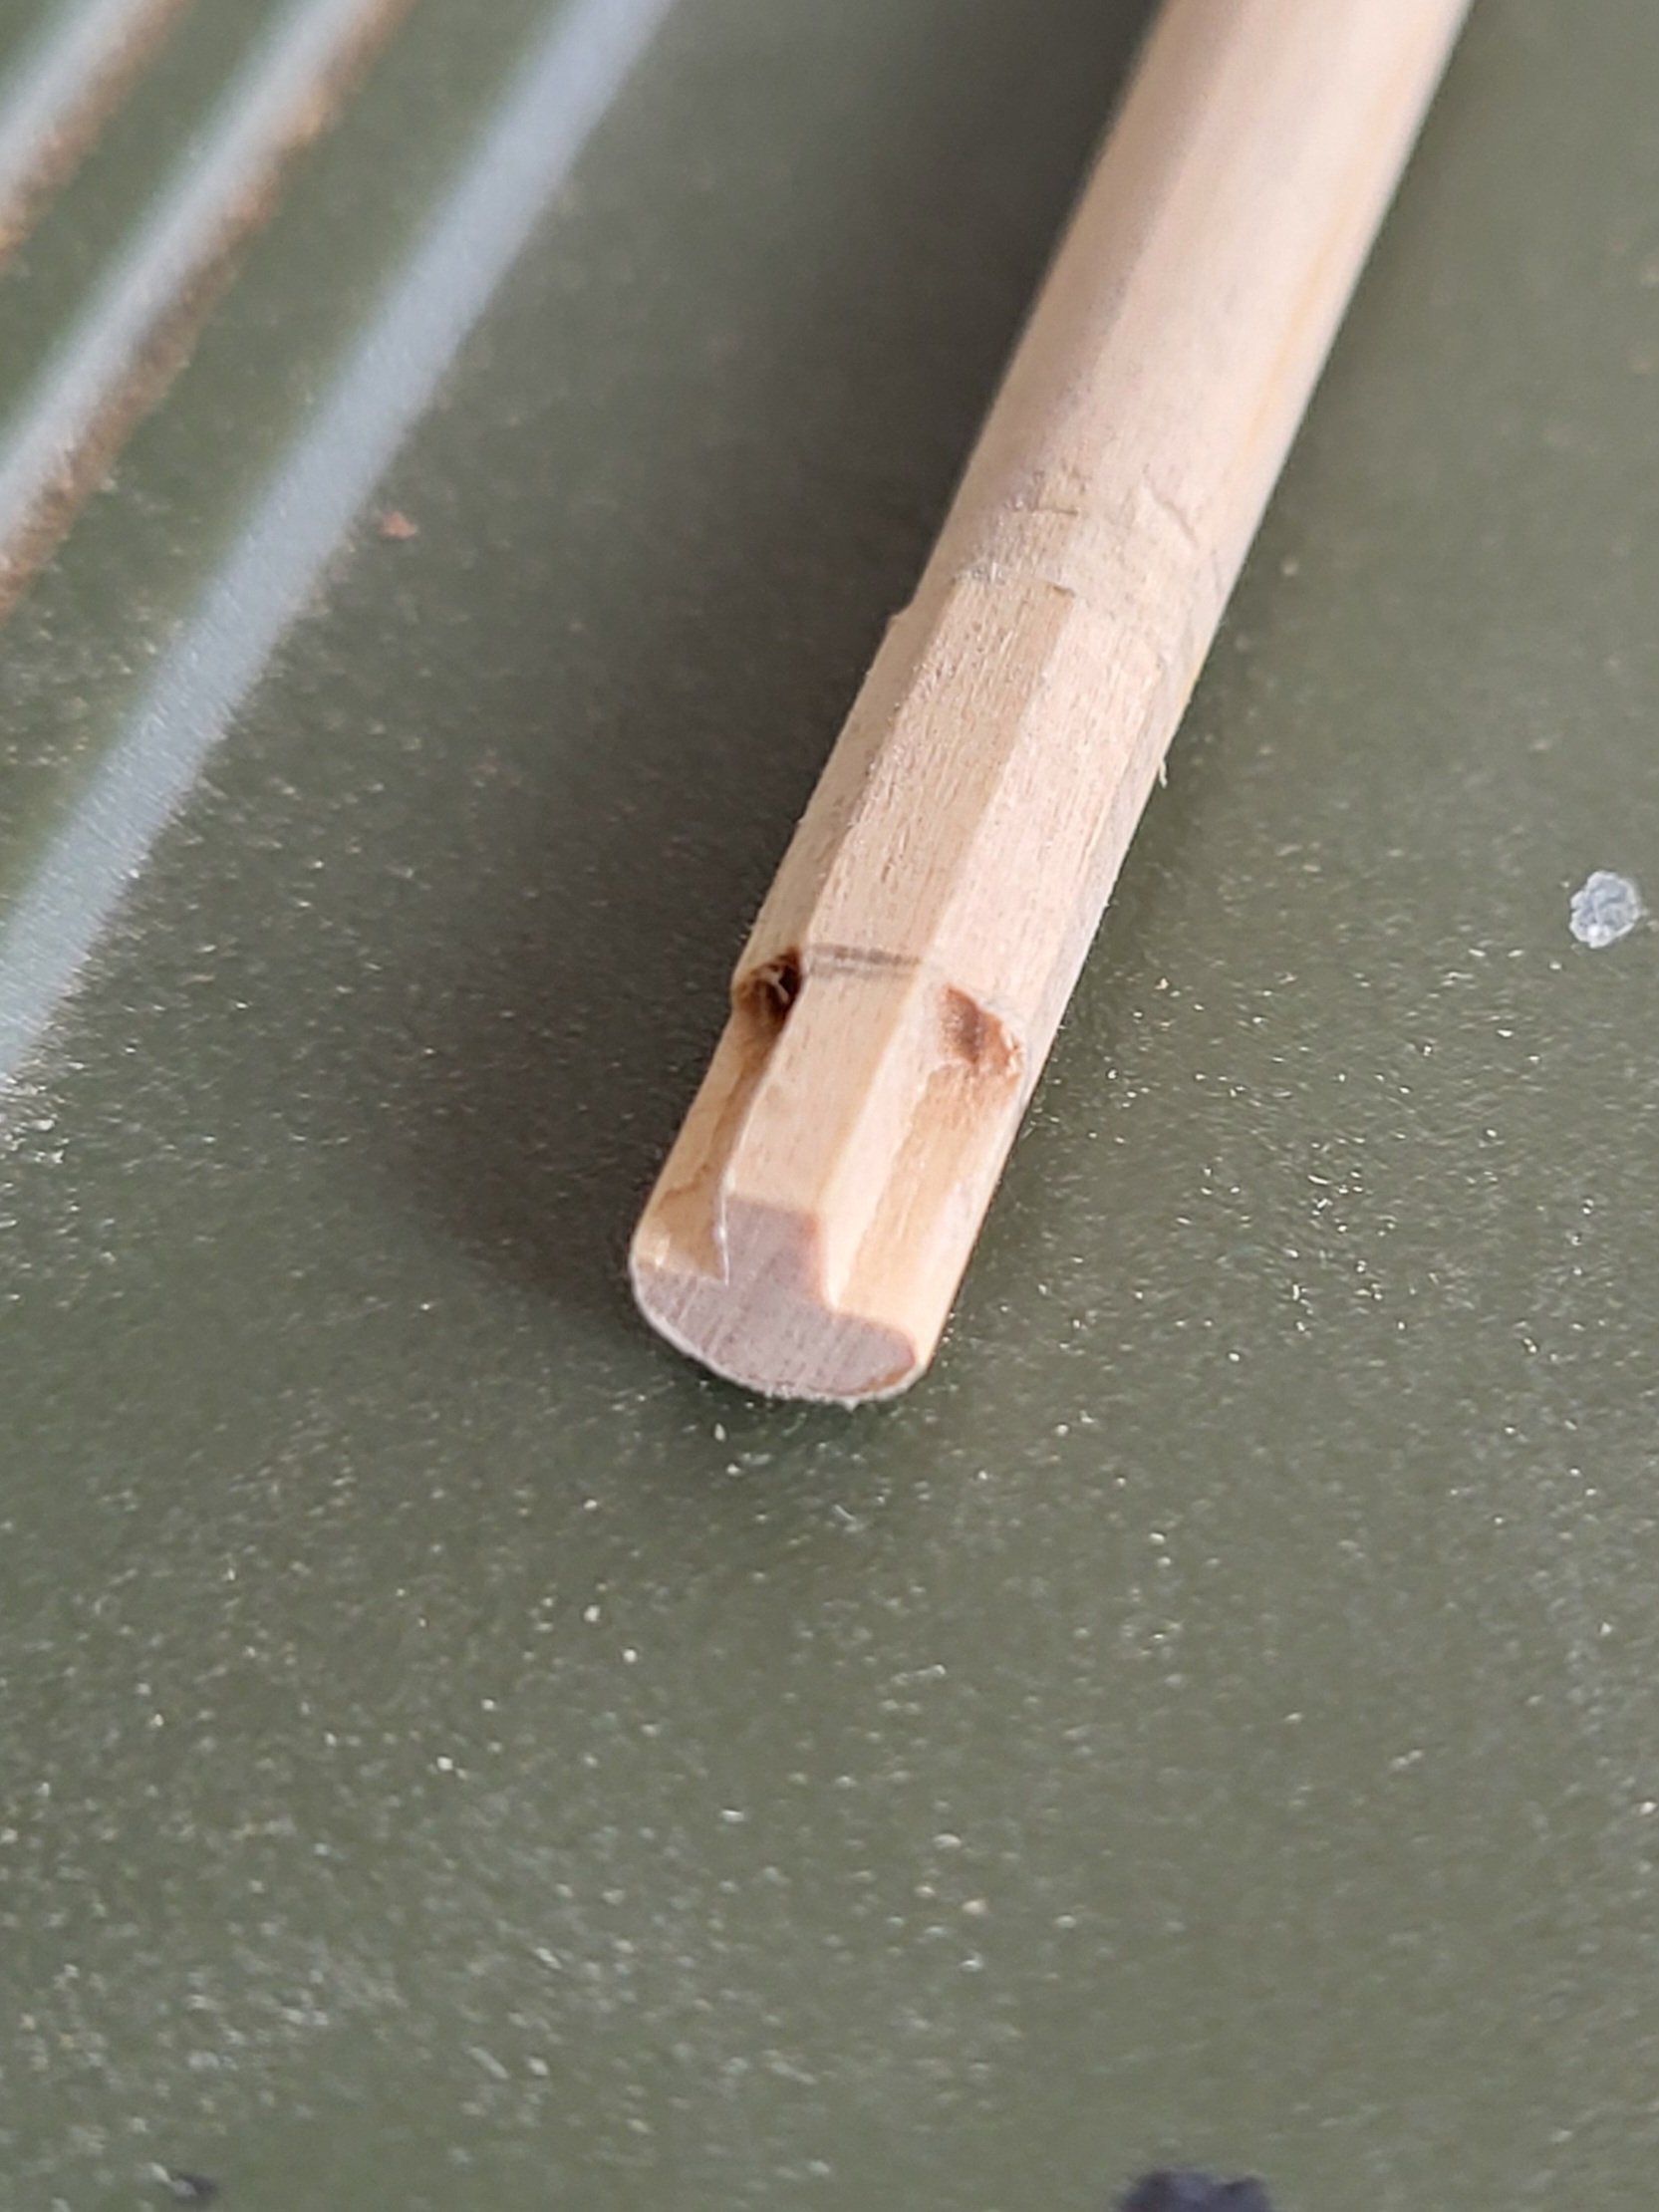
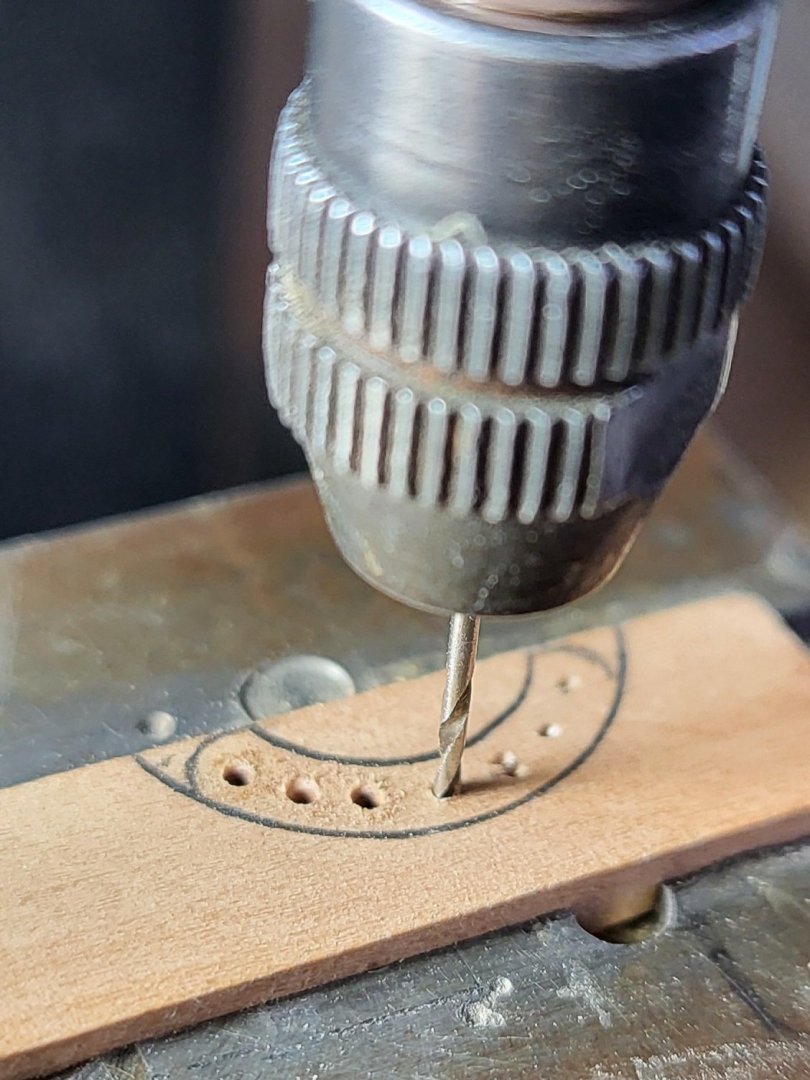
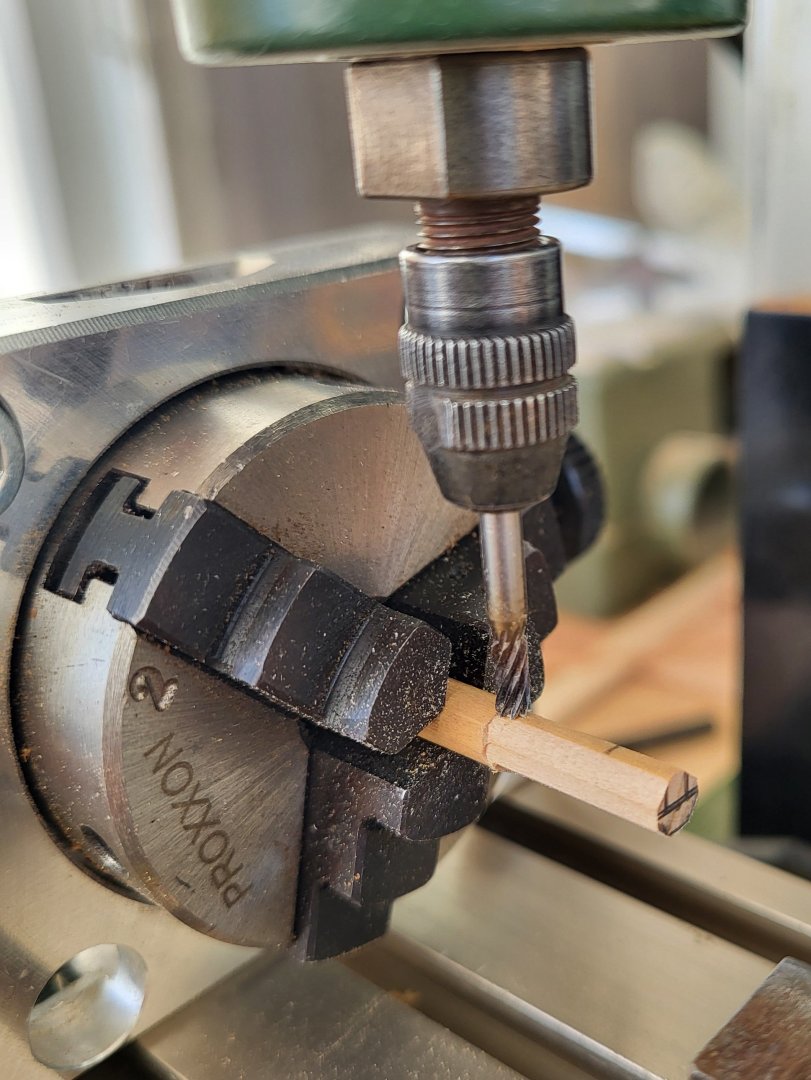
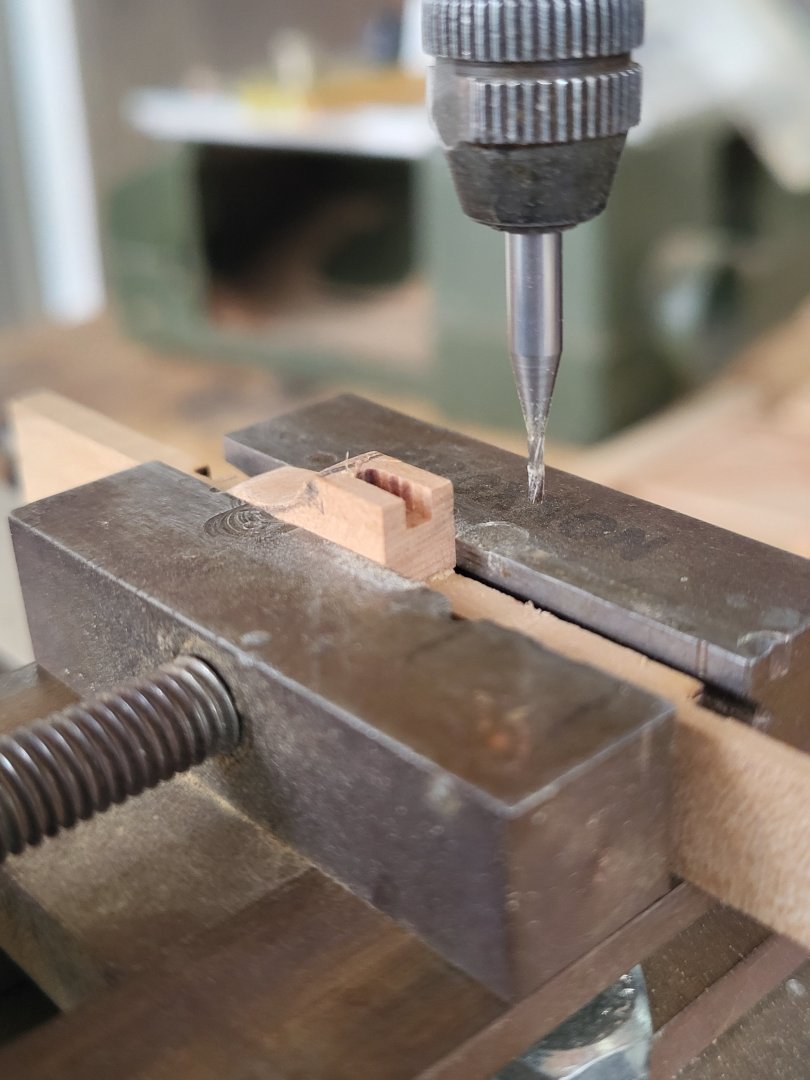
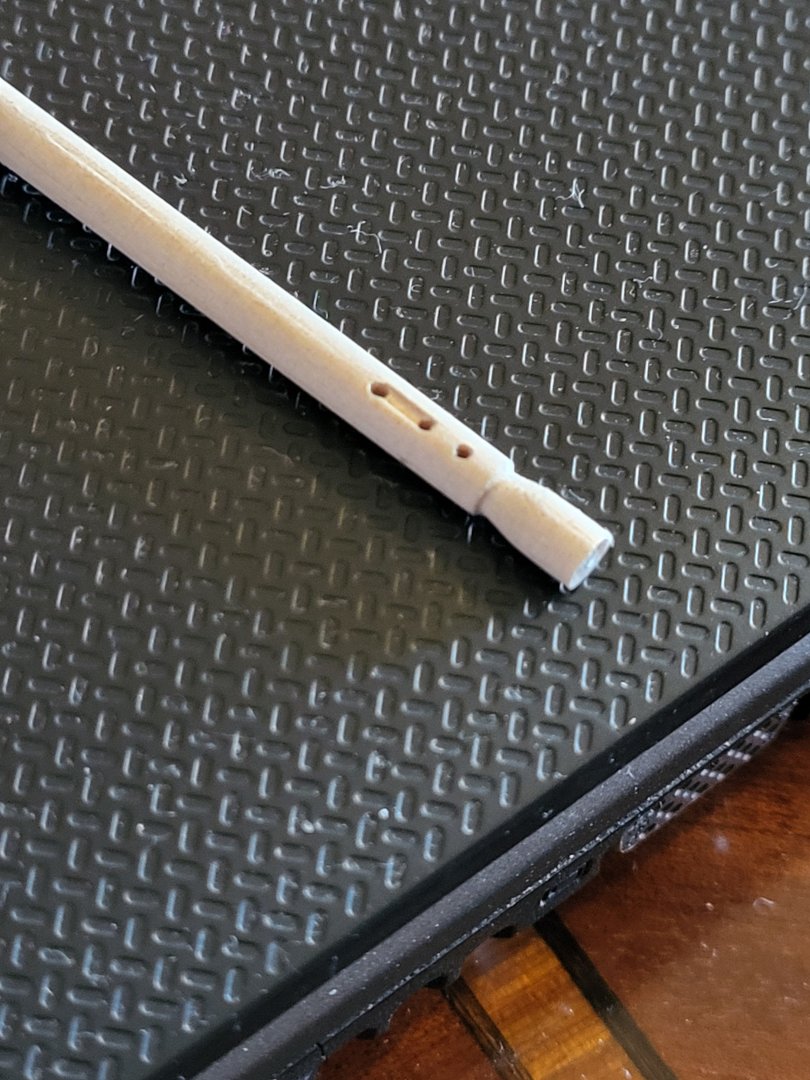
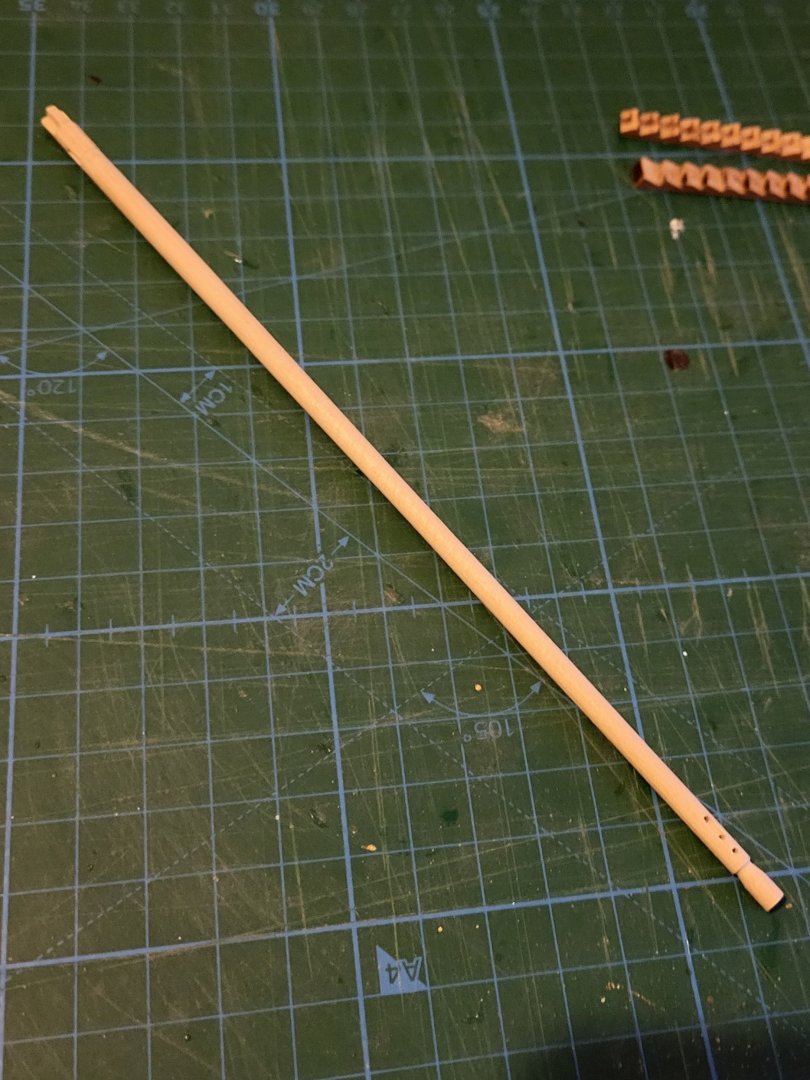
My work on the bowsprit and jib boom continues. On the bowsprit, I cut notches where the iron bands and the gammoning rope will sit. For the gammoning, I decided to use rope instead of chain. Afterwards, I completed the fabrication and installation of the iron bands, chocks, and fairlead on the bowsprit, and finally painted it white. I also finished the jib boom. First, I tapered a 5 mm round strip according to the plan’s dimensions. Using my milling machine, I shaped the aft section into an octagon, while the forward section was turned on the lathe as per the plan. At both ends, I applied my usual method to represent the sheaves. Additionally, I milled the underside of the aft octagonal section to match the plan, so that the jib boom can be secured onto the saddle on the bowsprit. Finally, I fabricated the jib boom saddle itself.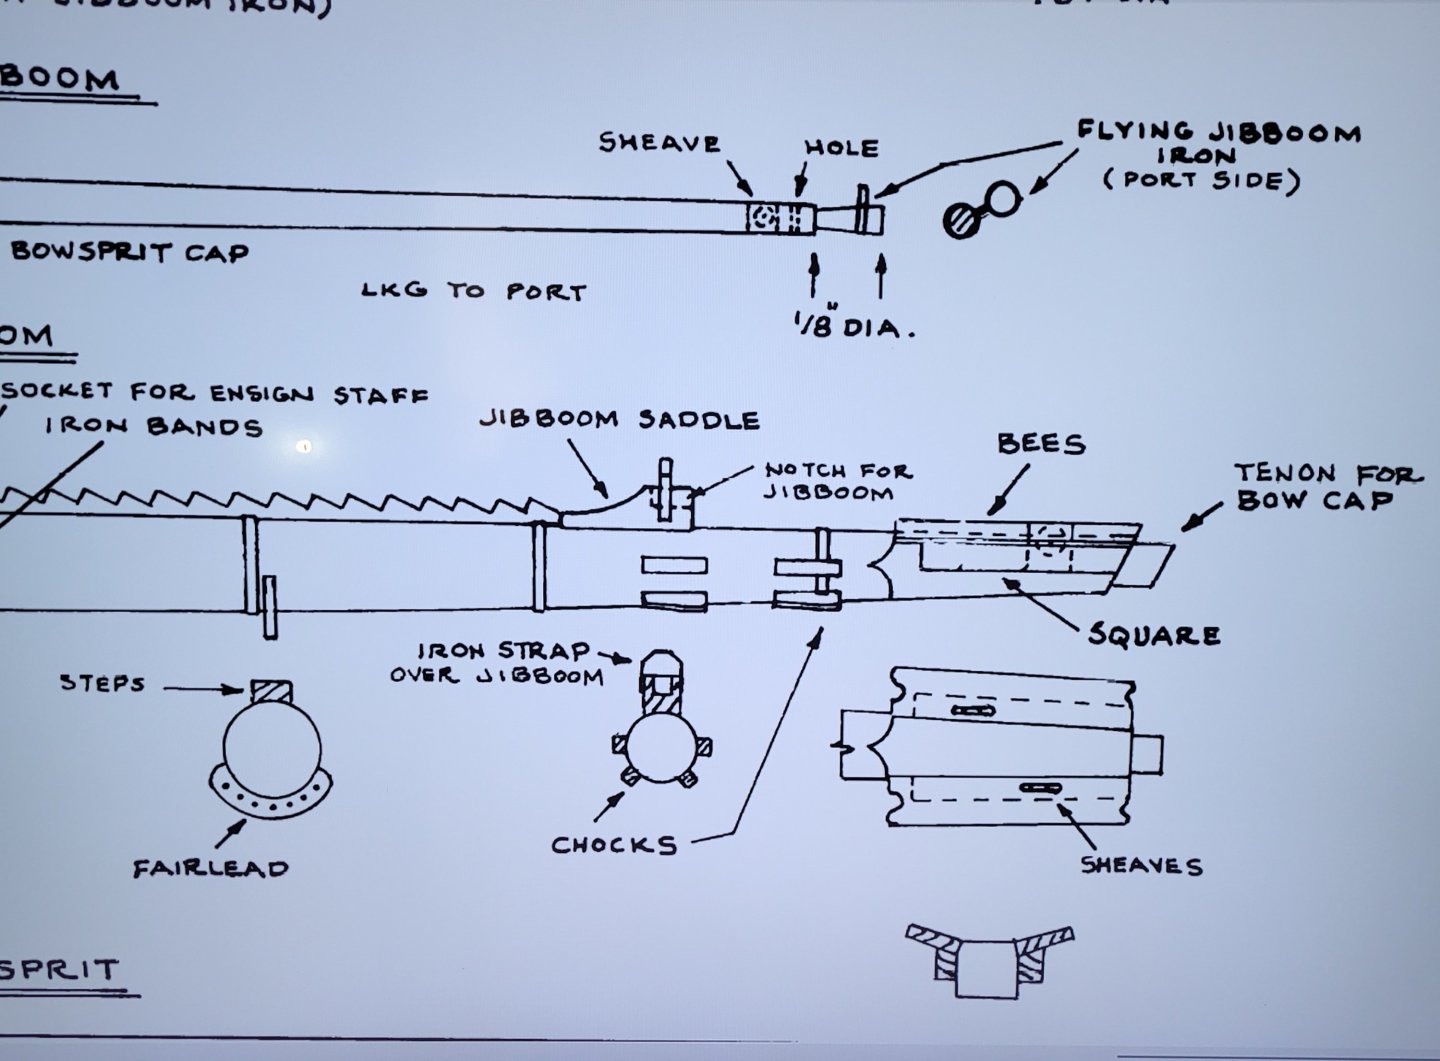


-
Excellent job, congratulations!
-
USS Constitution by mtbediz - 1:76
mtbediz replied to mtbediz's topic in - Build logs for subjects built 1751 - 1800
Actually, the angle of the chamfer isn't that important, as the bottom part won't be visible anyway. It's enough that there are no gaps between the strips on the visible surface. -
USS Constitution by mtbediz - 1:76
mtbediz replied to mtbediz's topic in - Build logs for subjects built 1751 - 1800
Hi Peter, unfortunately I couldn’t automate the chamfering process. To be honest, I didn’t spend much time thinking about it. As you can see in the photos, I did it entirely by eye and by hands. In the second photo, I'm using only one hand because I have the camera in my other hand. Normally, I use both hands, meaning I'm holding both clamps with both hands.

-
USS Constitution by mtbediz - 1:76
mtbediz replied to mtbediz's topic in - Build logs for subjects built 1751 - 1800
*I have a Proxxon mill, Jon. I can move the cutter vertically with an accuracy of 1/20 mm. *I flattened the top surface of the bowsprit (which is easier). *Thanks for reminding me of gammoning!
-
USS Constitution by mtbediz - 1:76
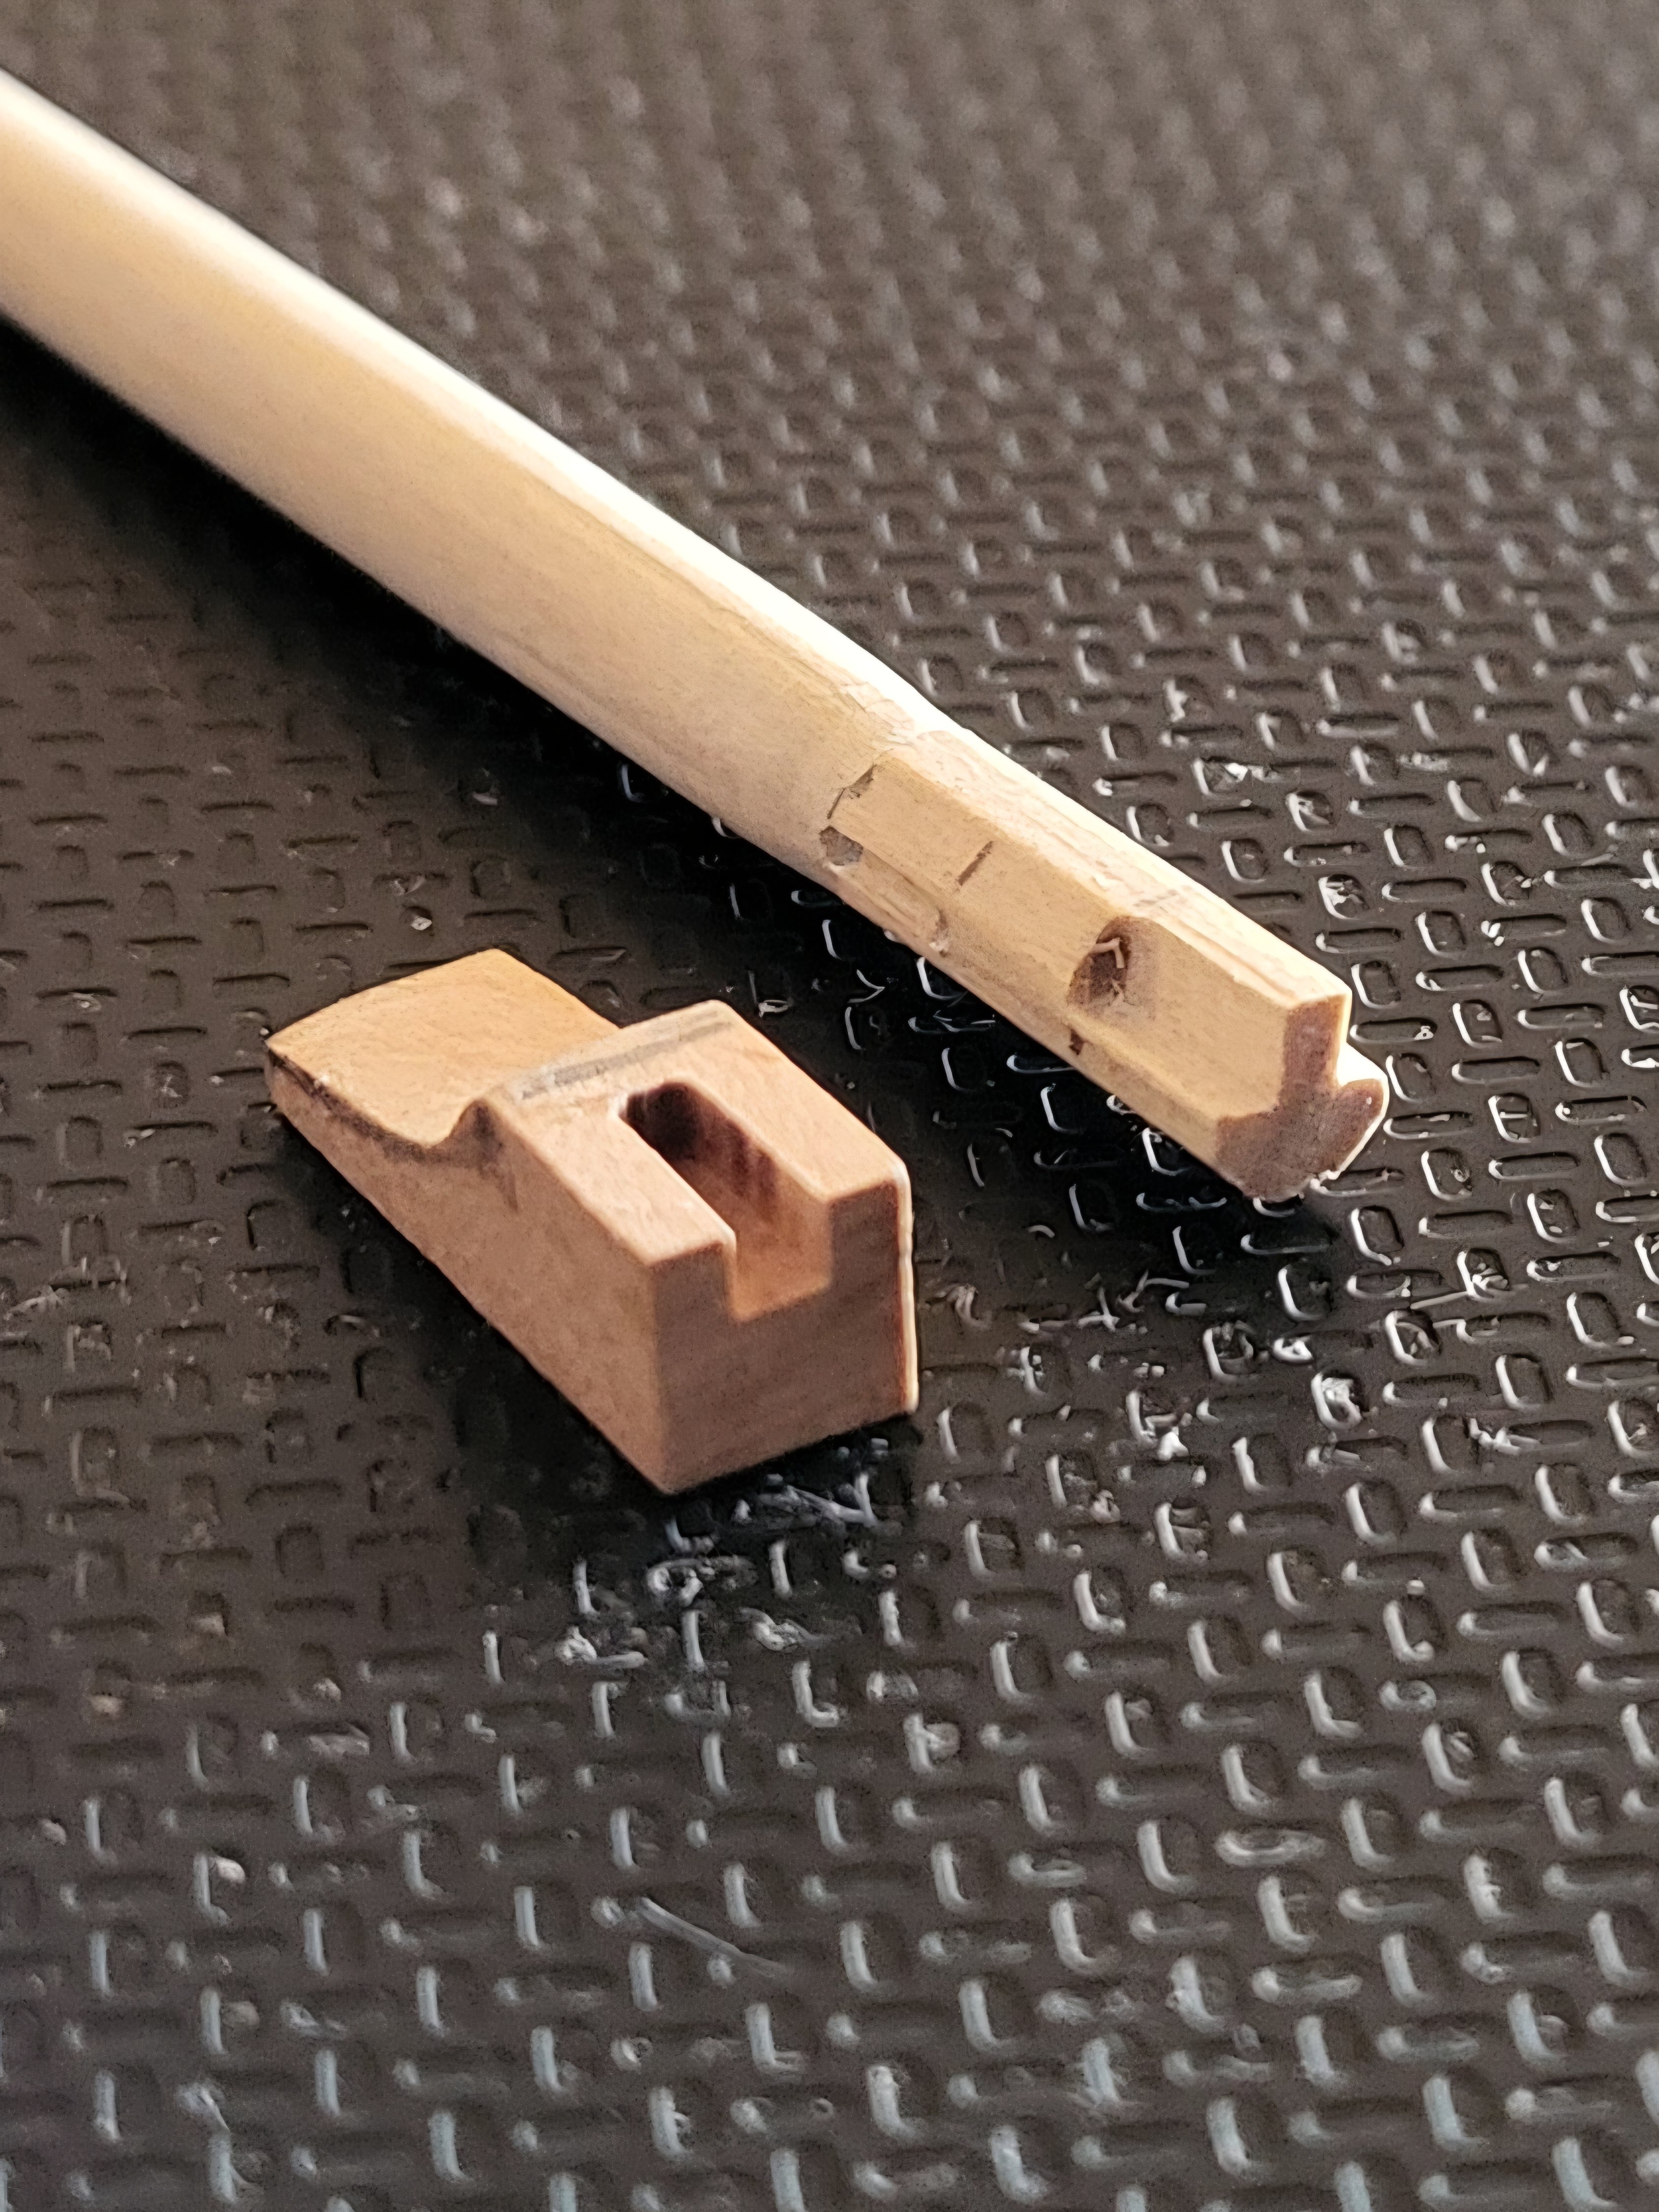
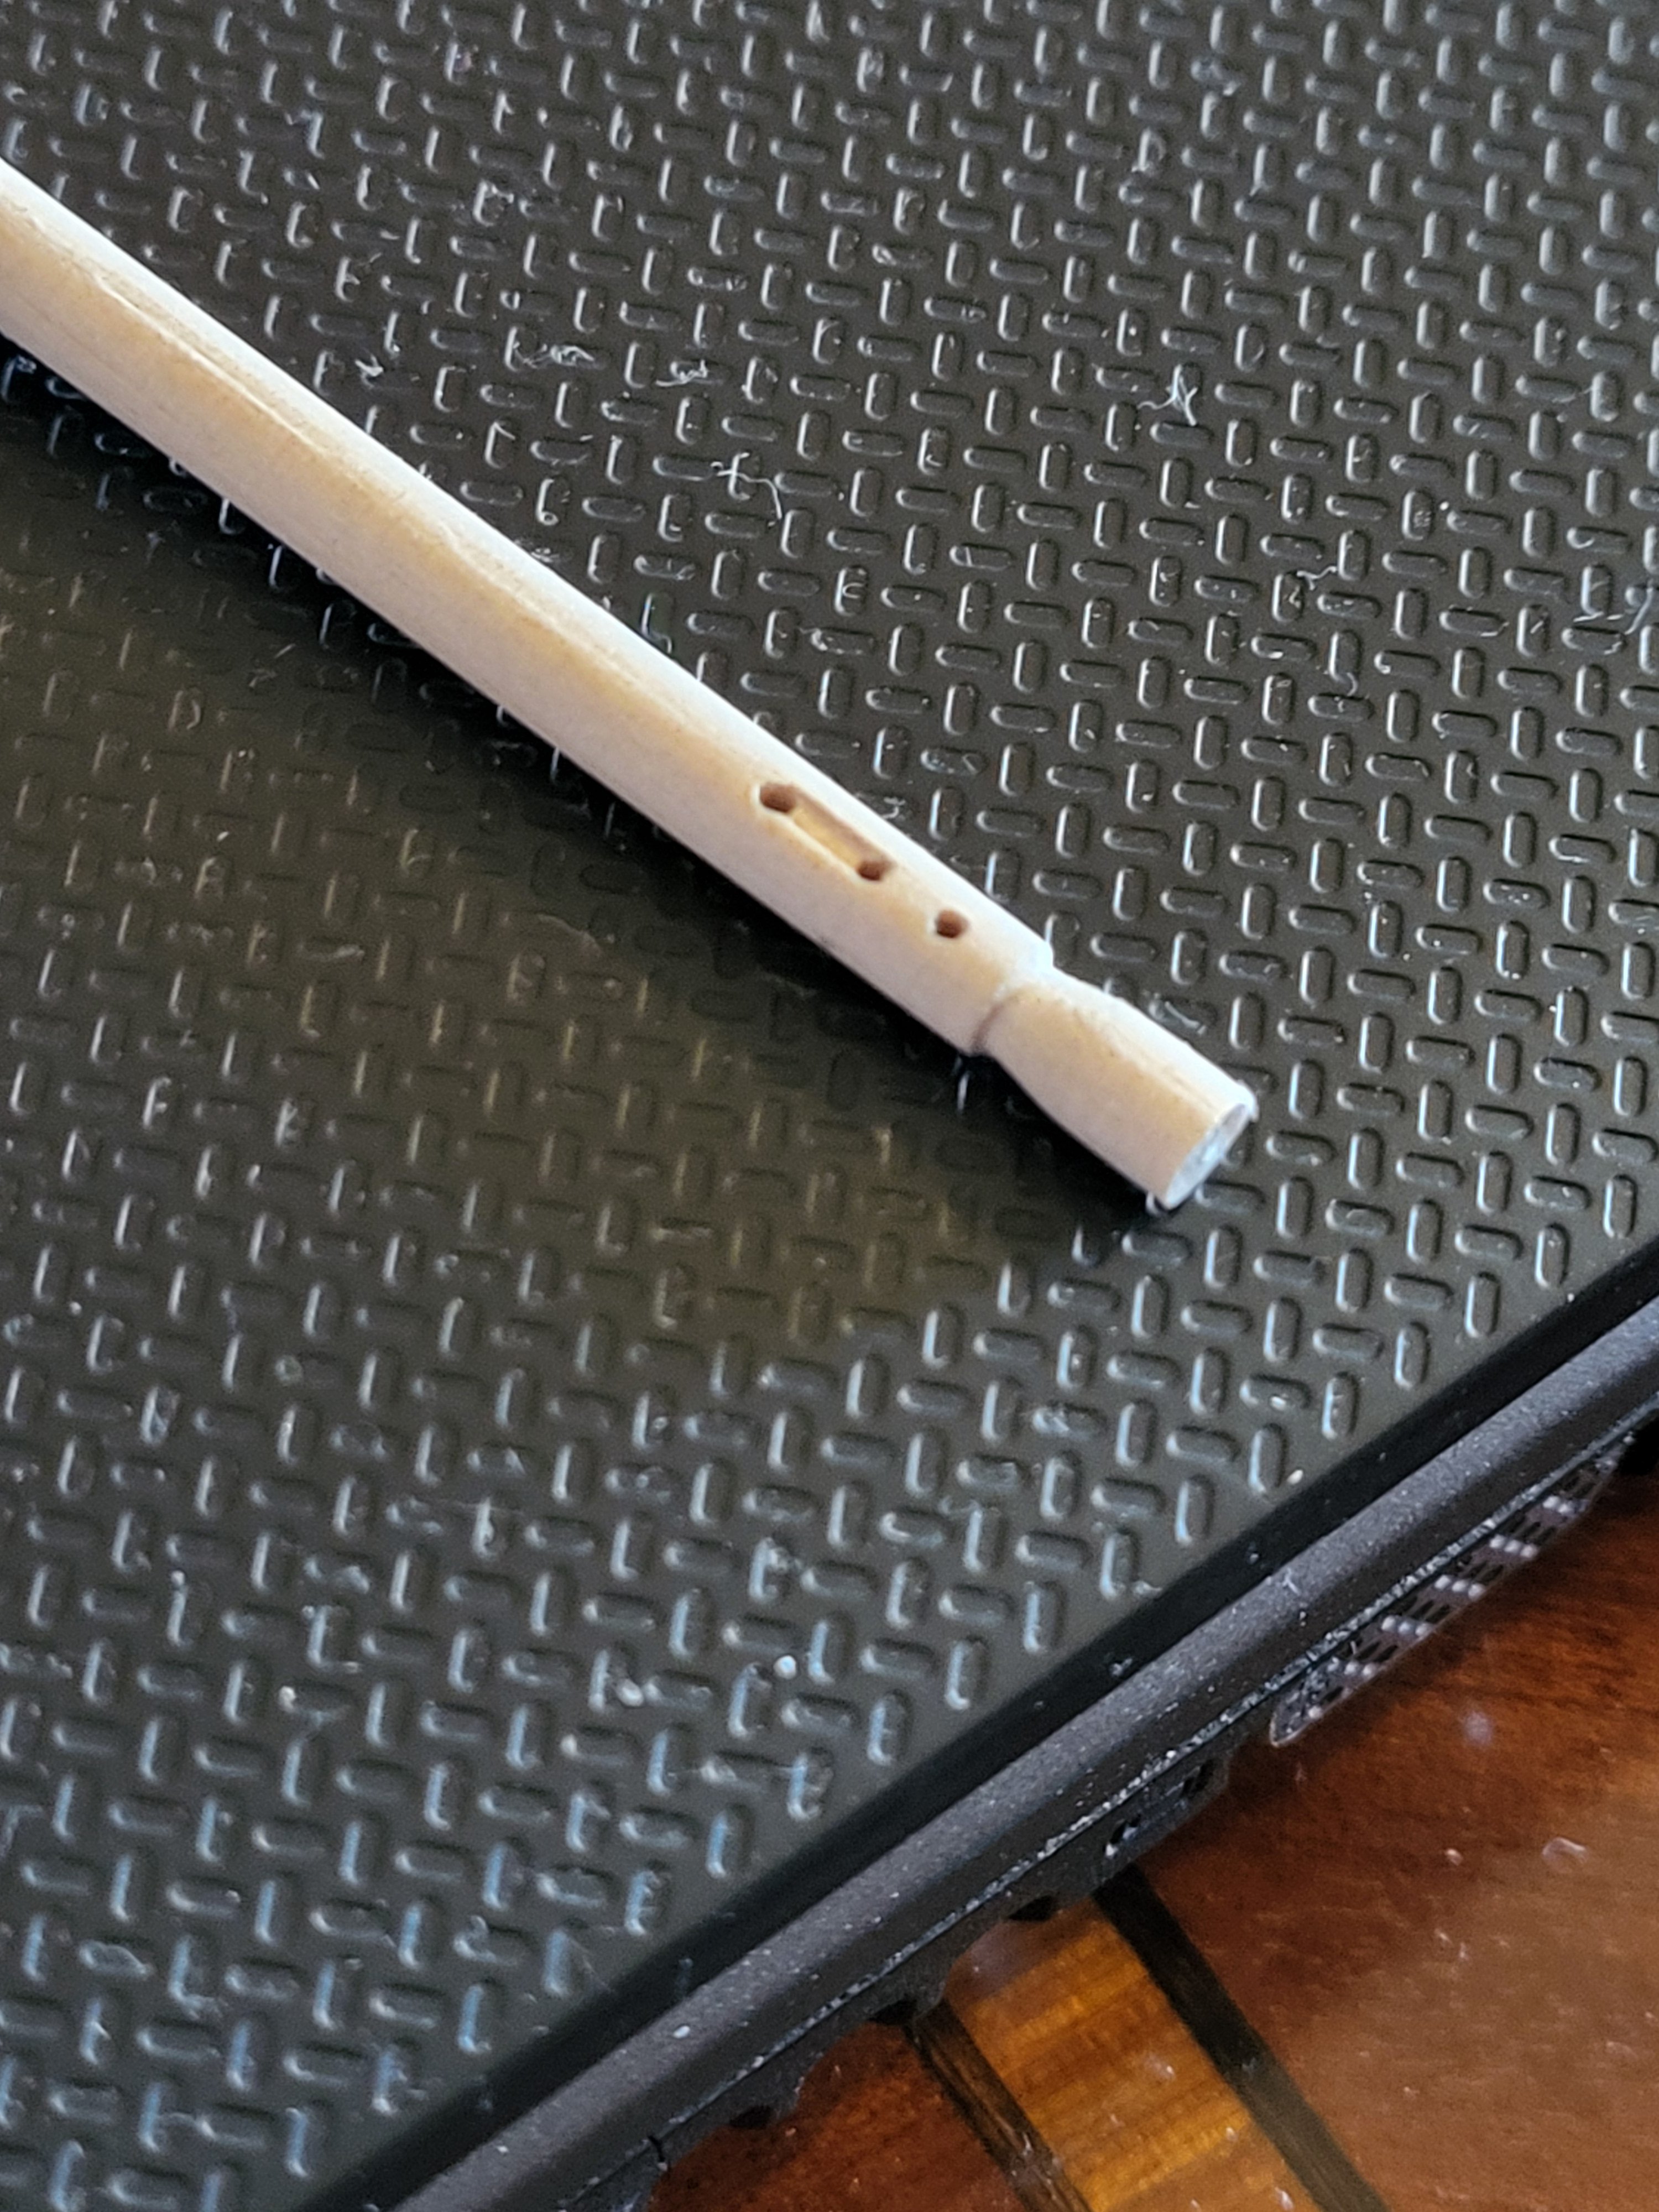
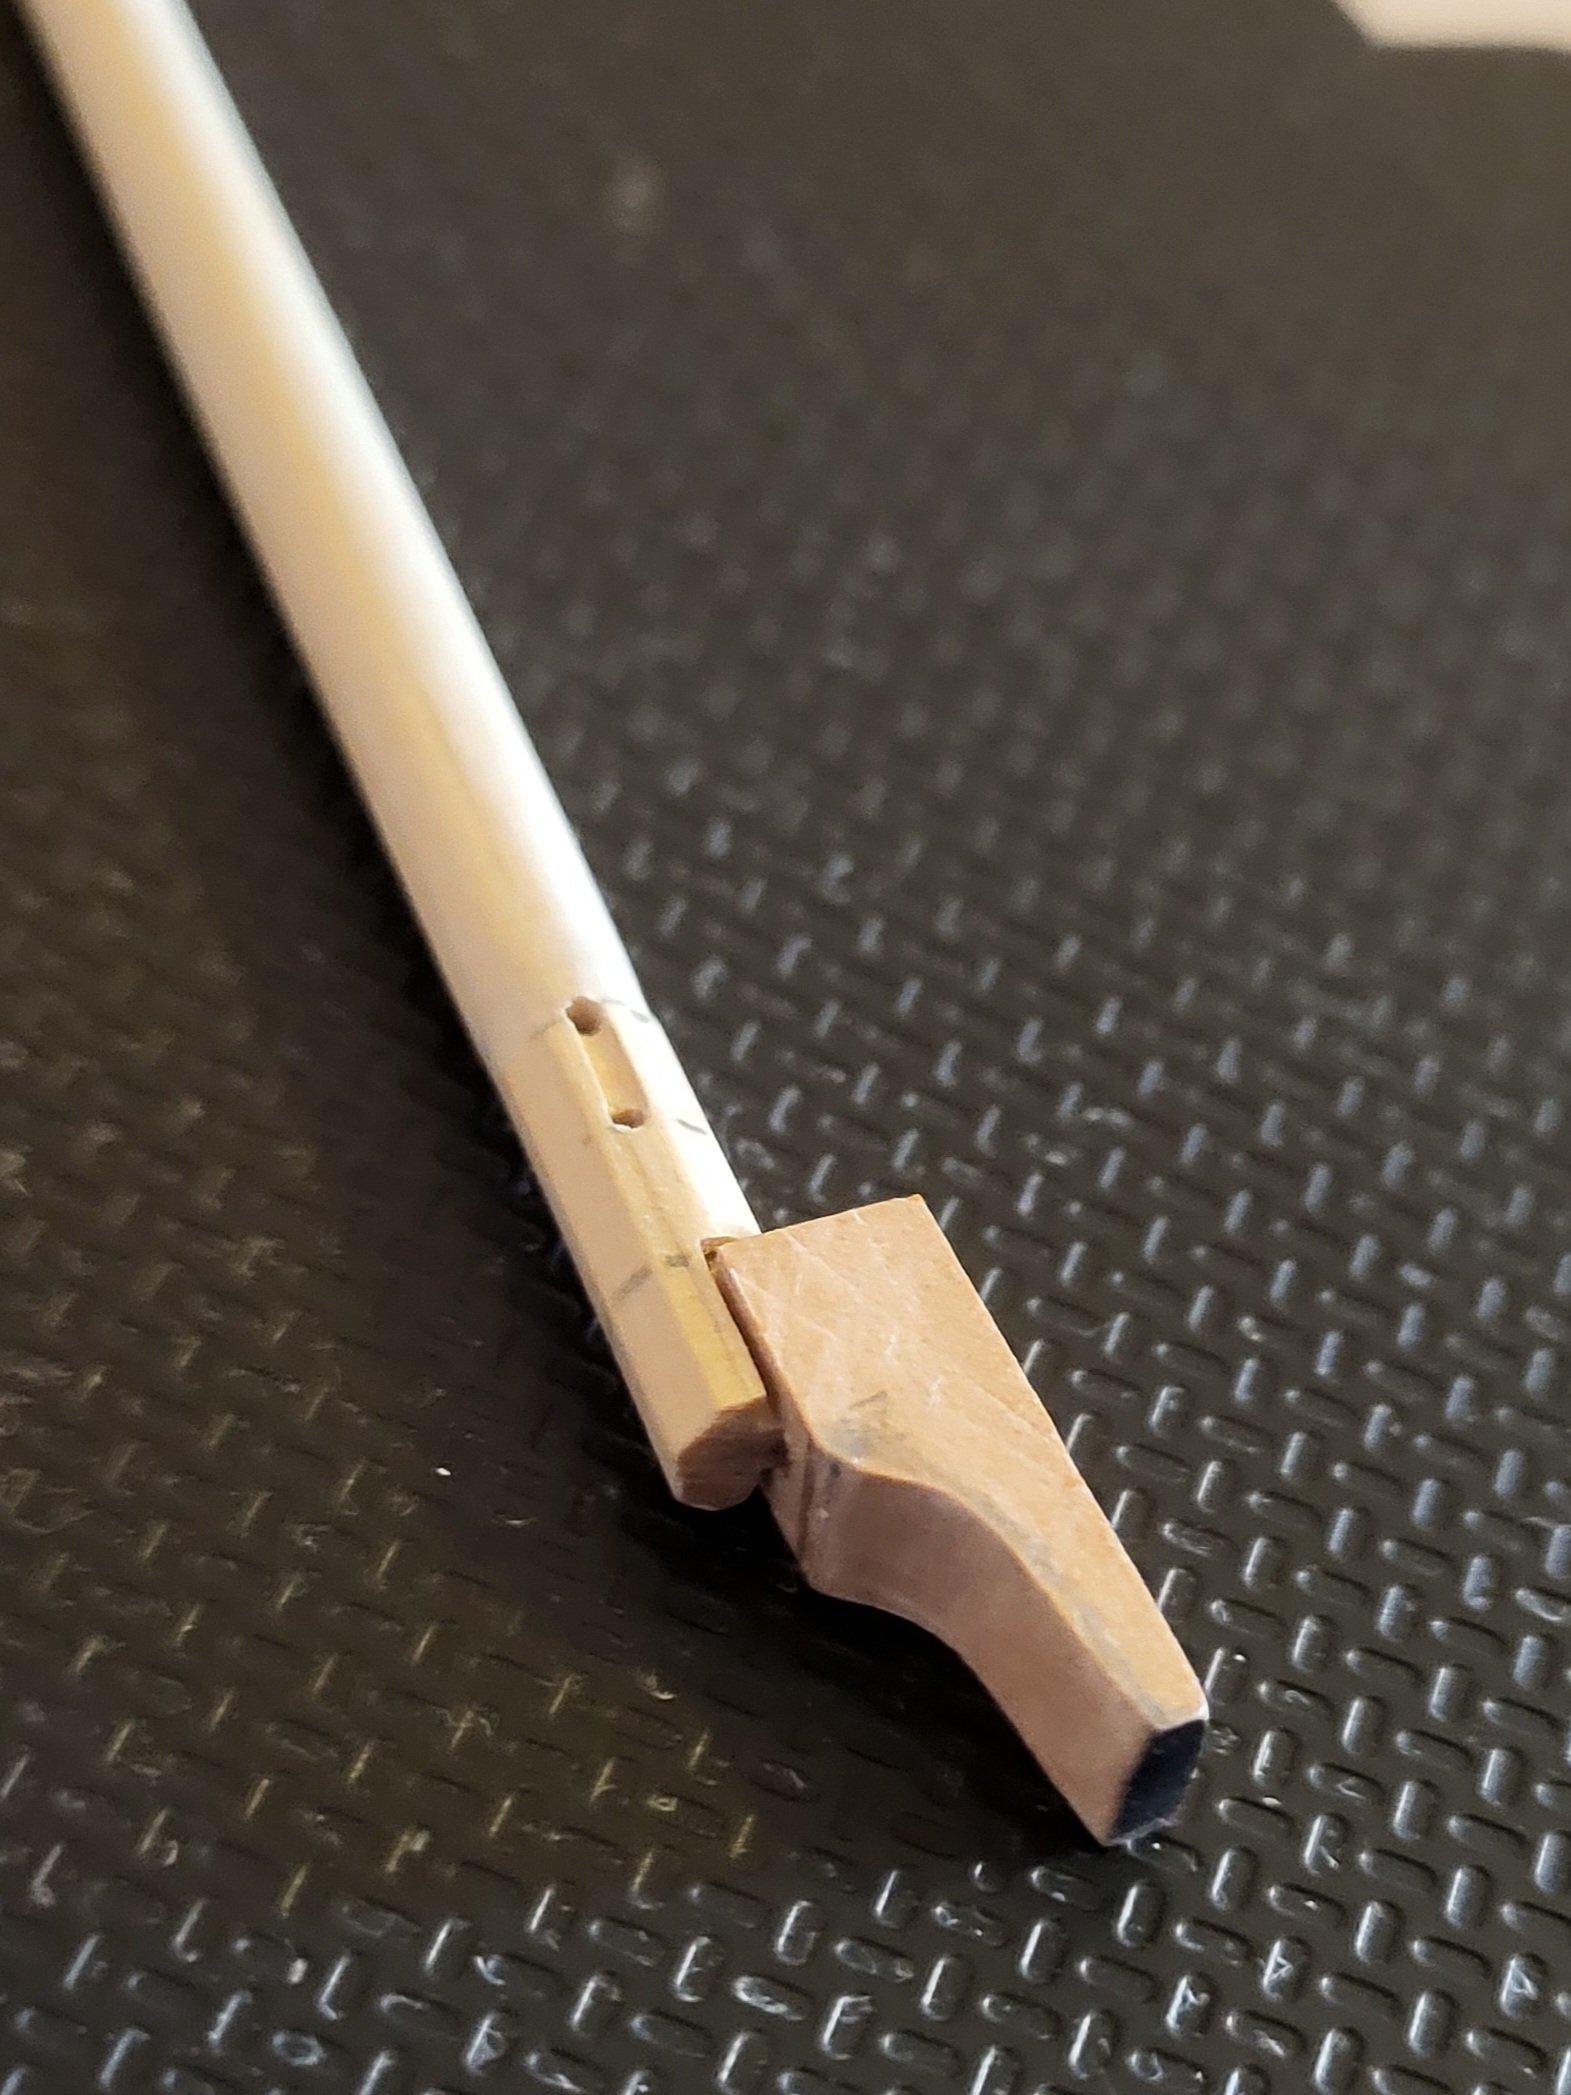
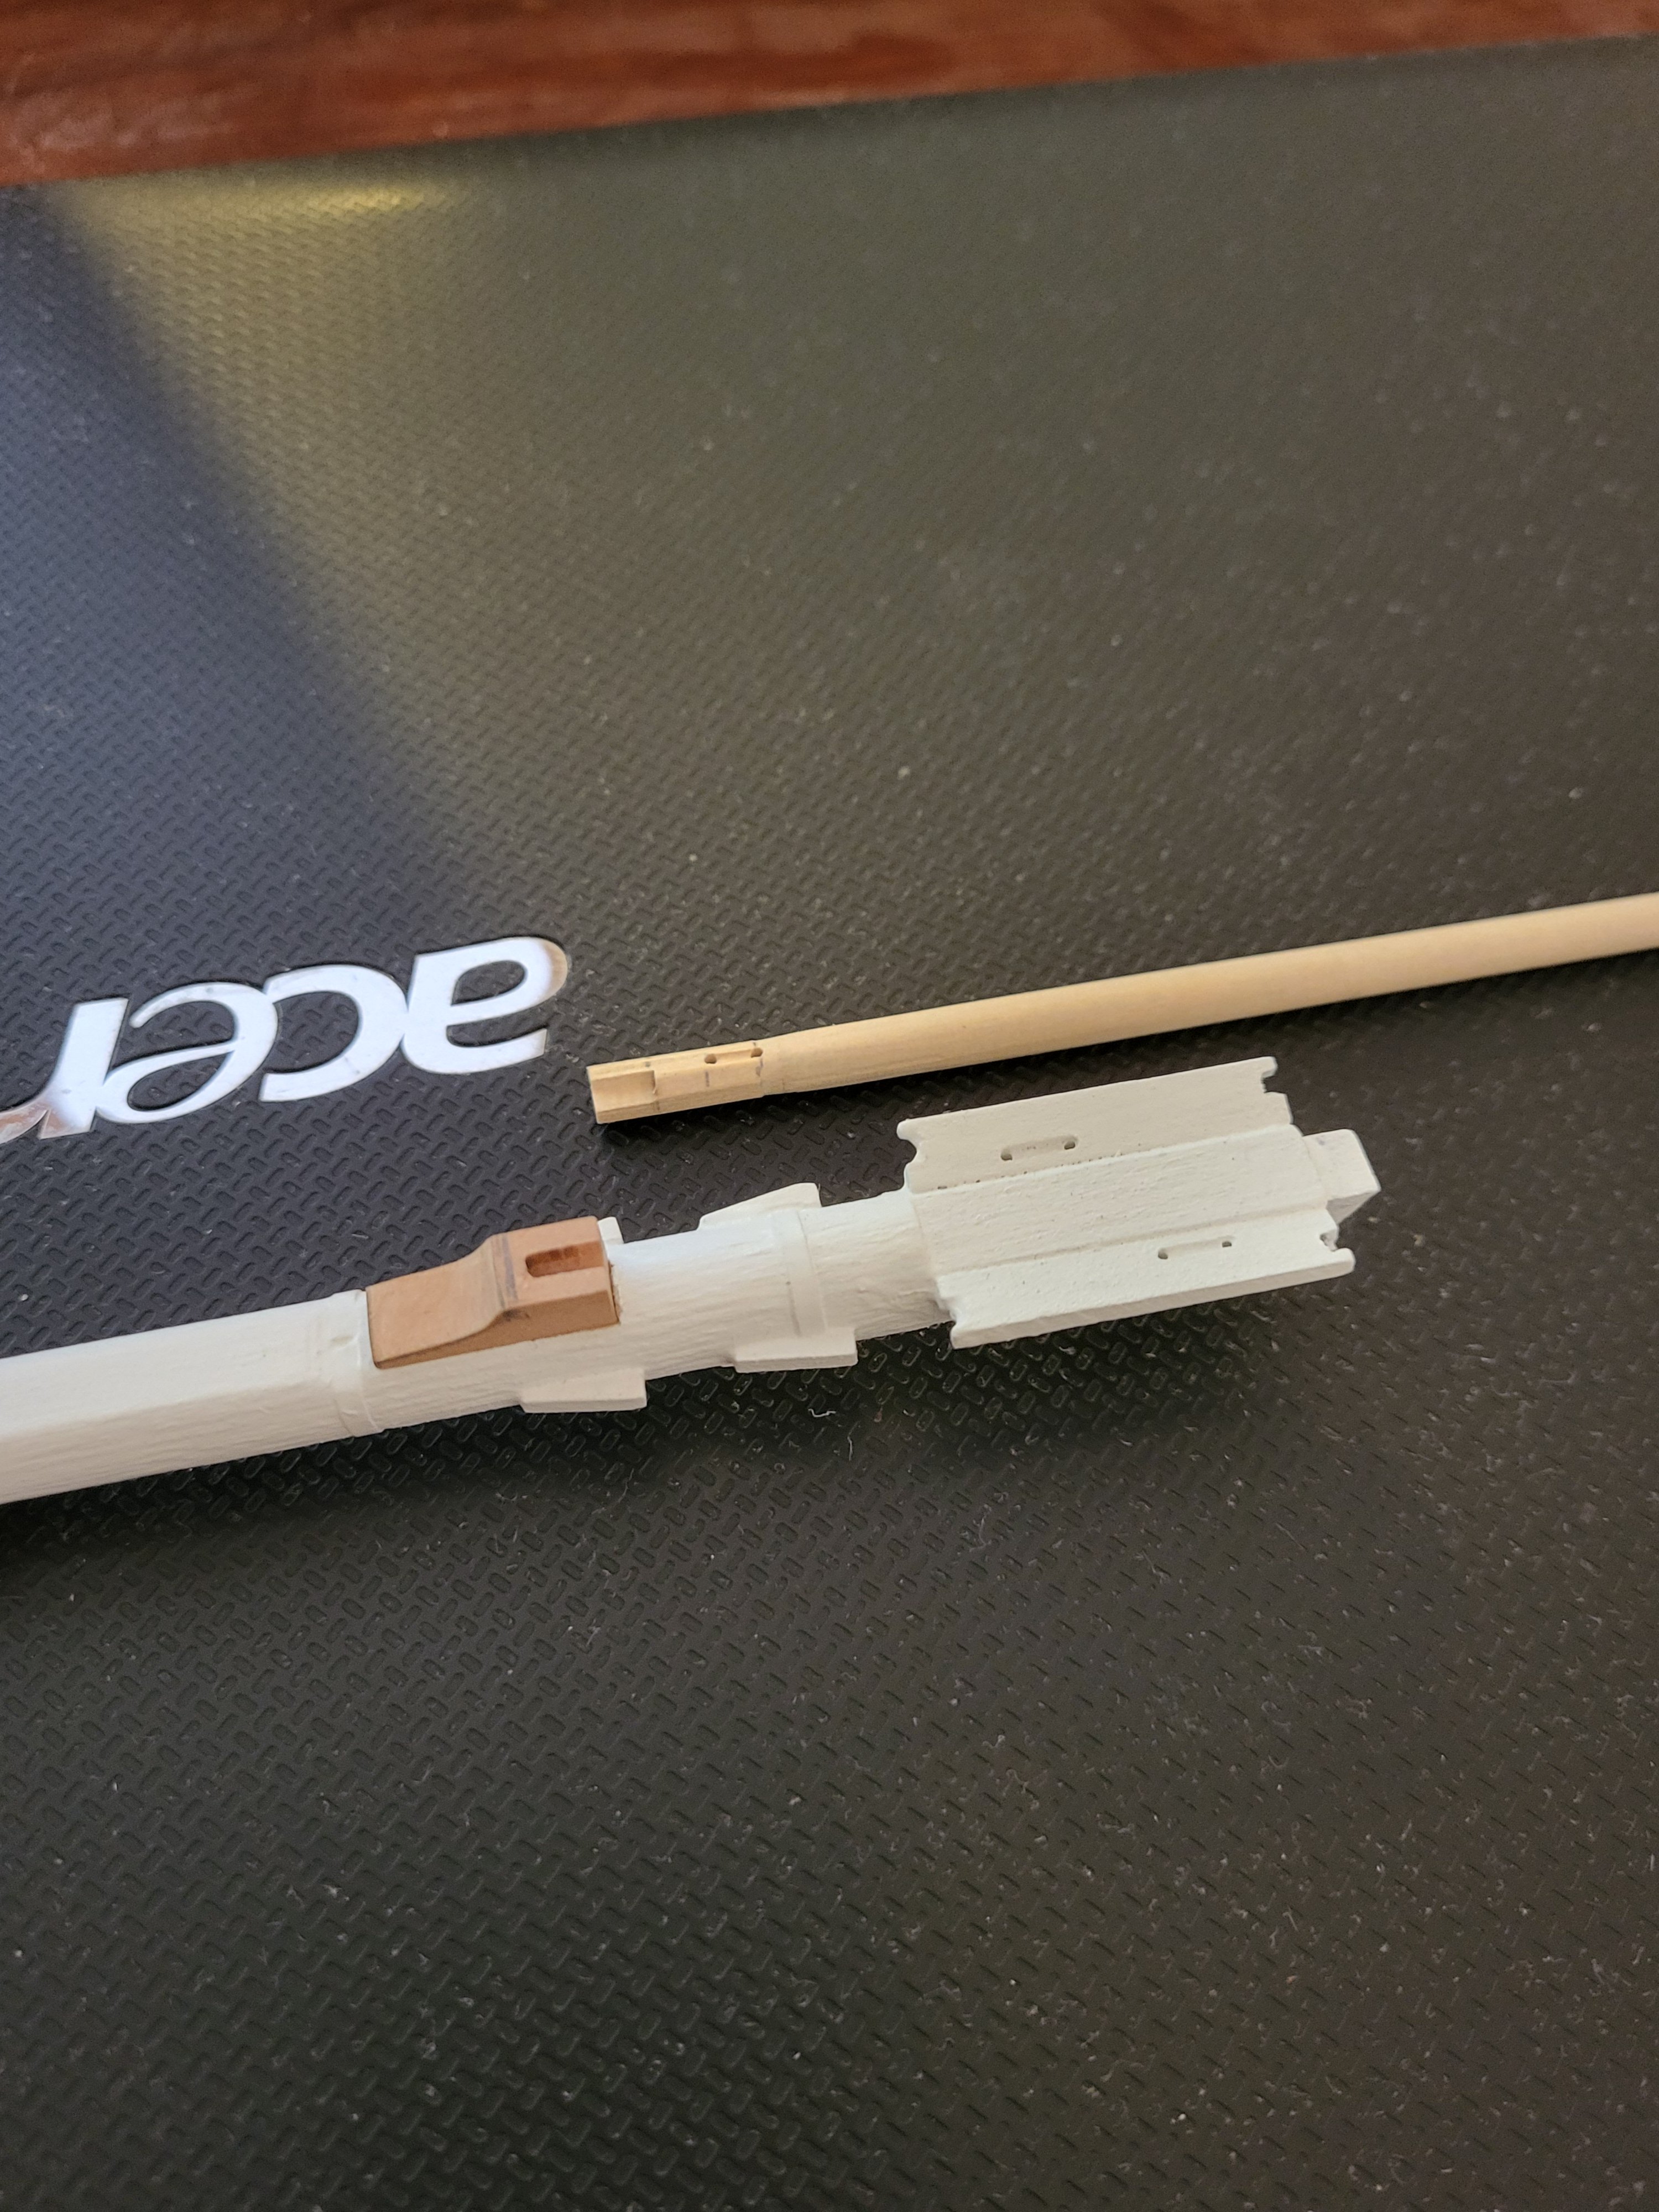
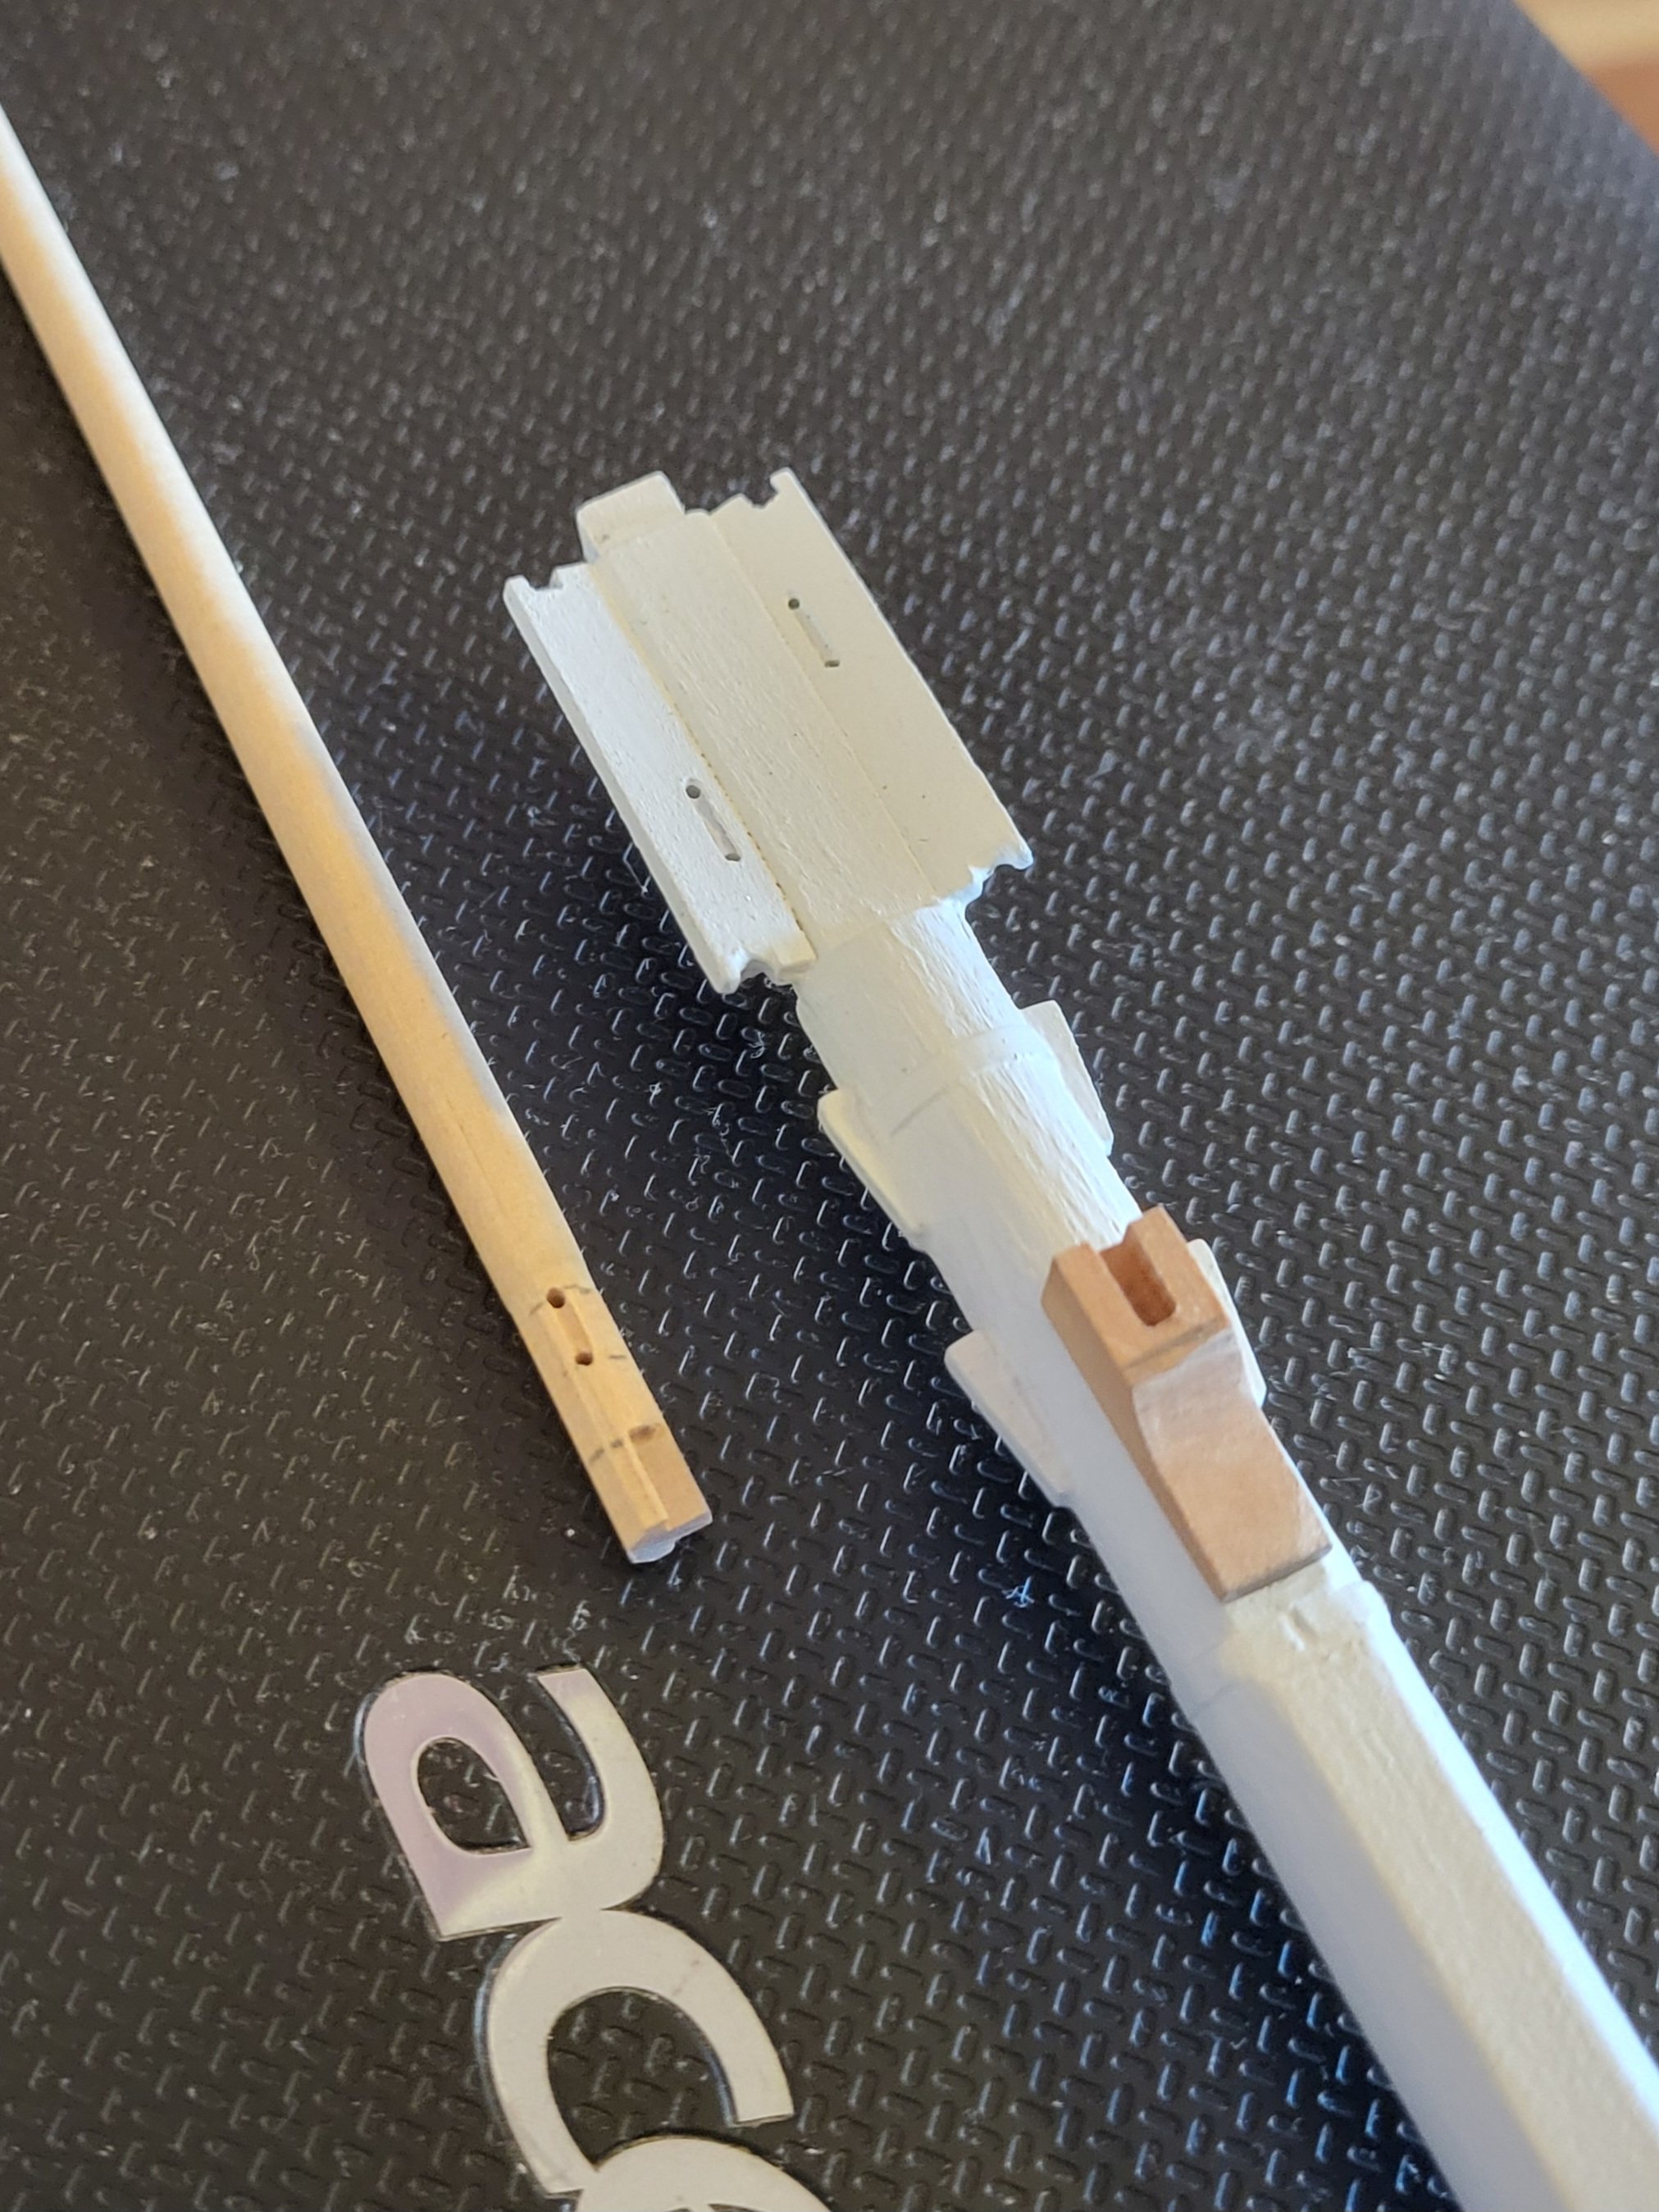
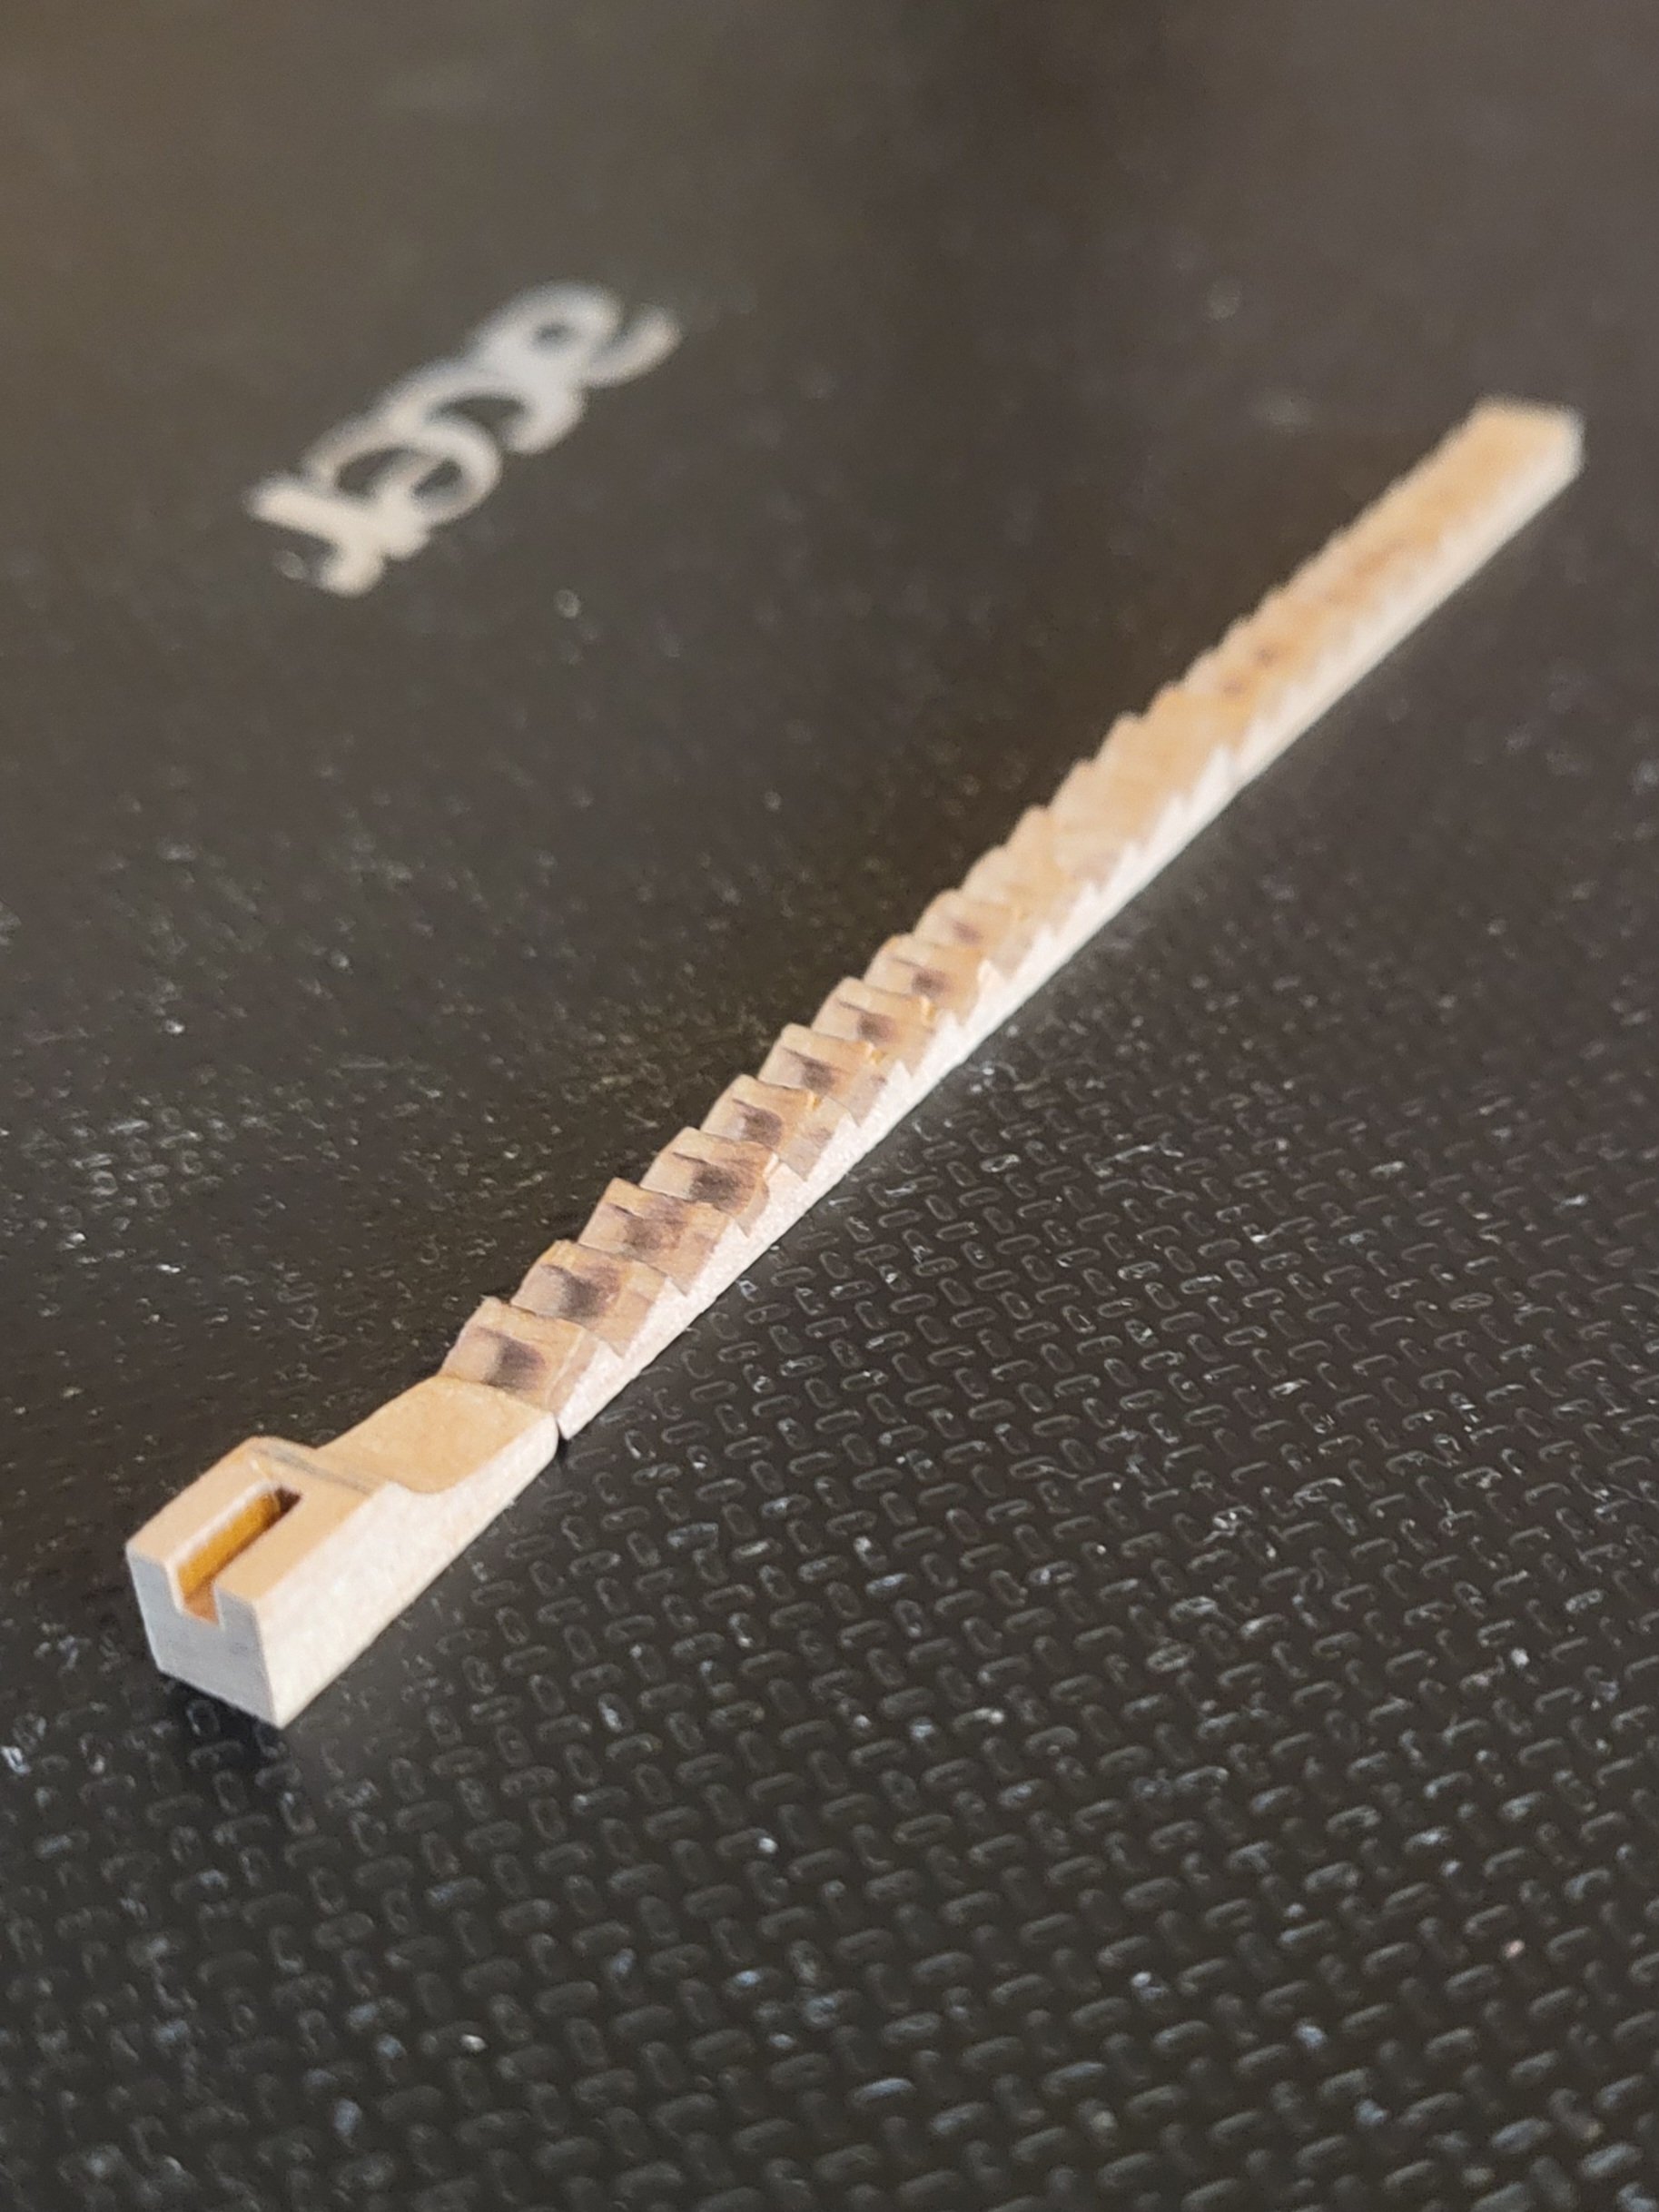
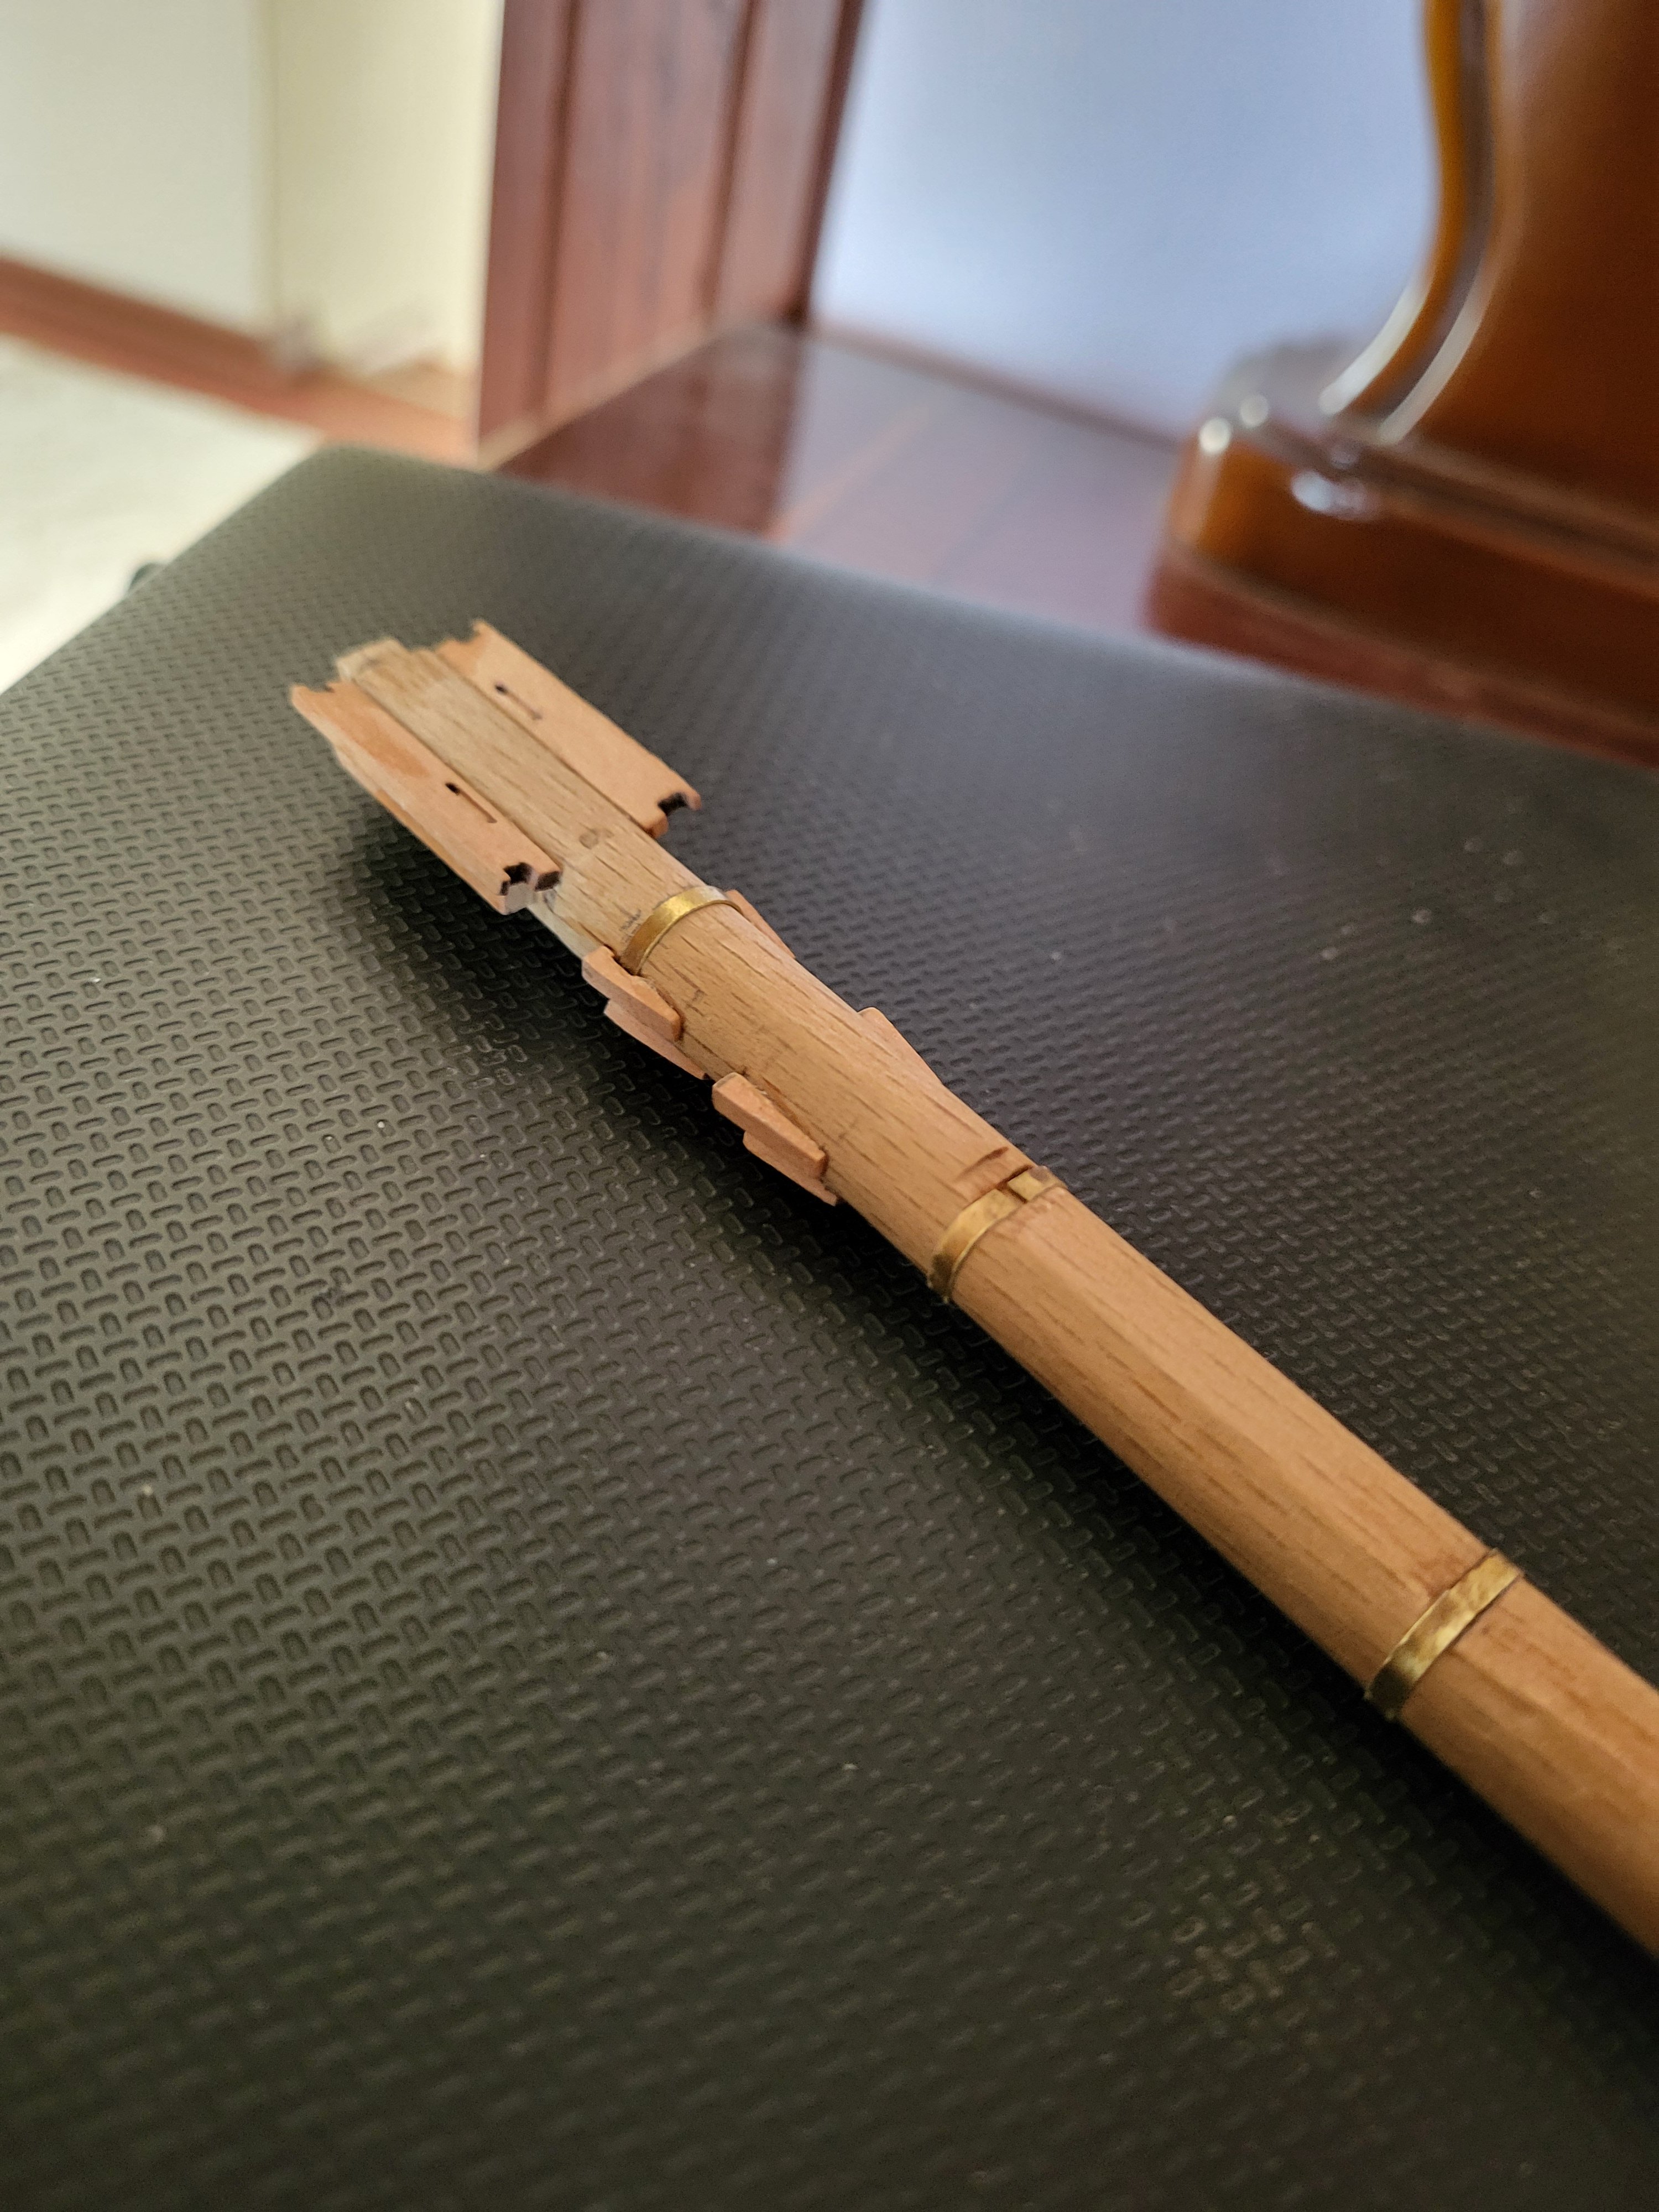
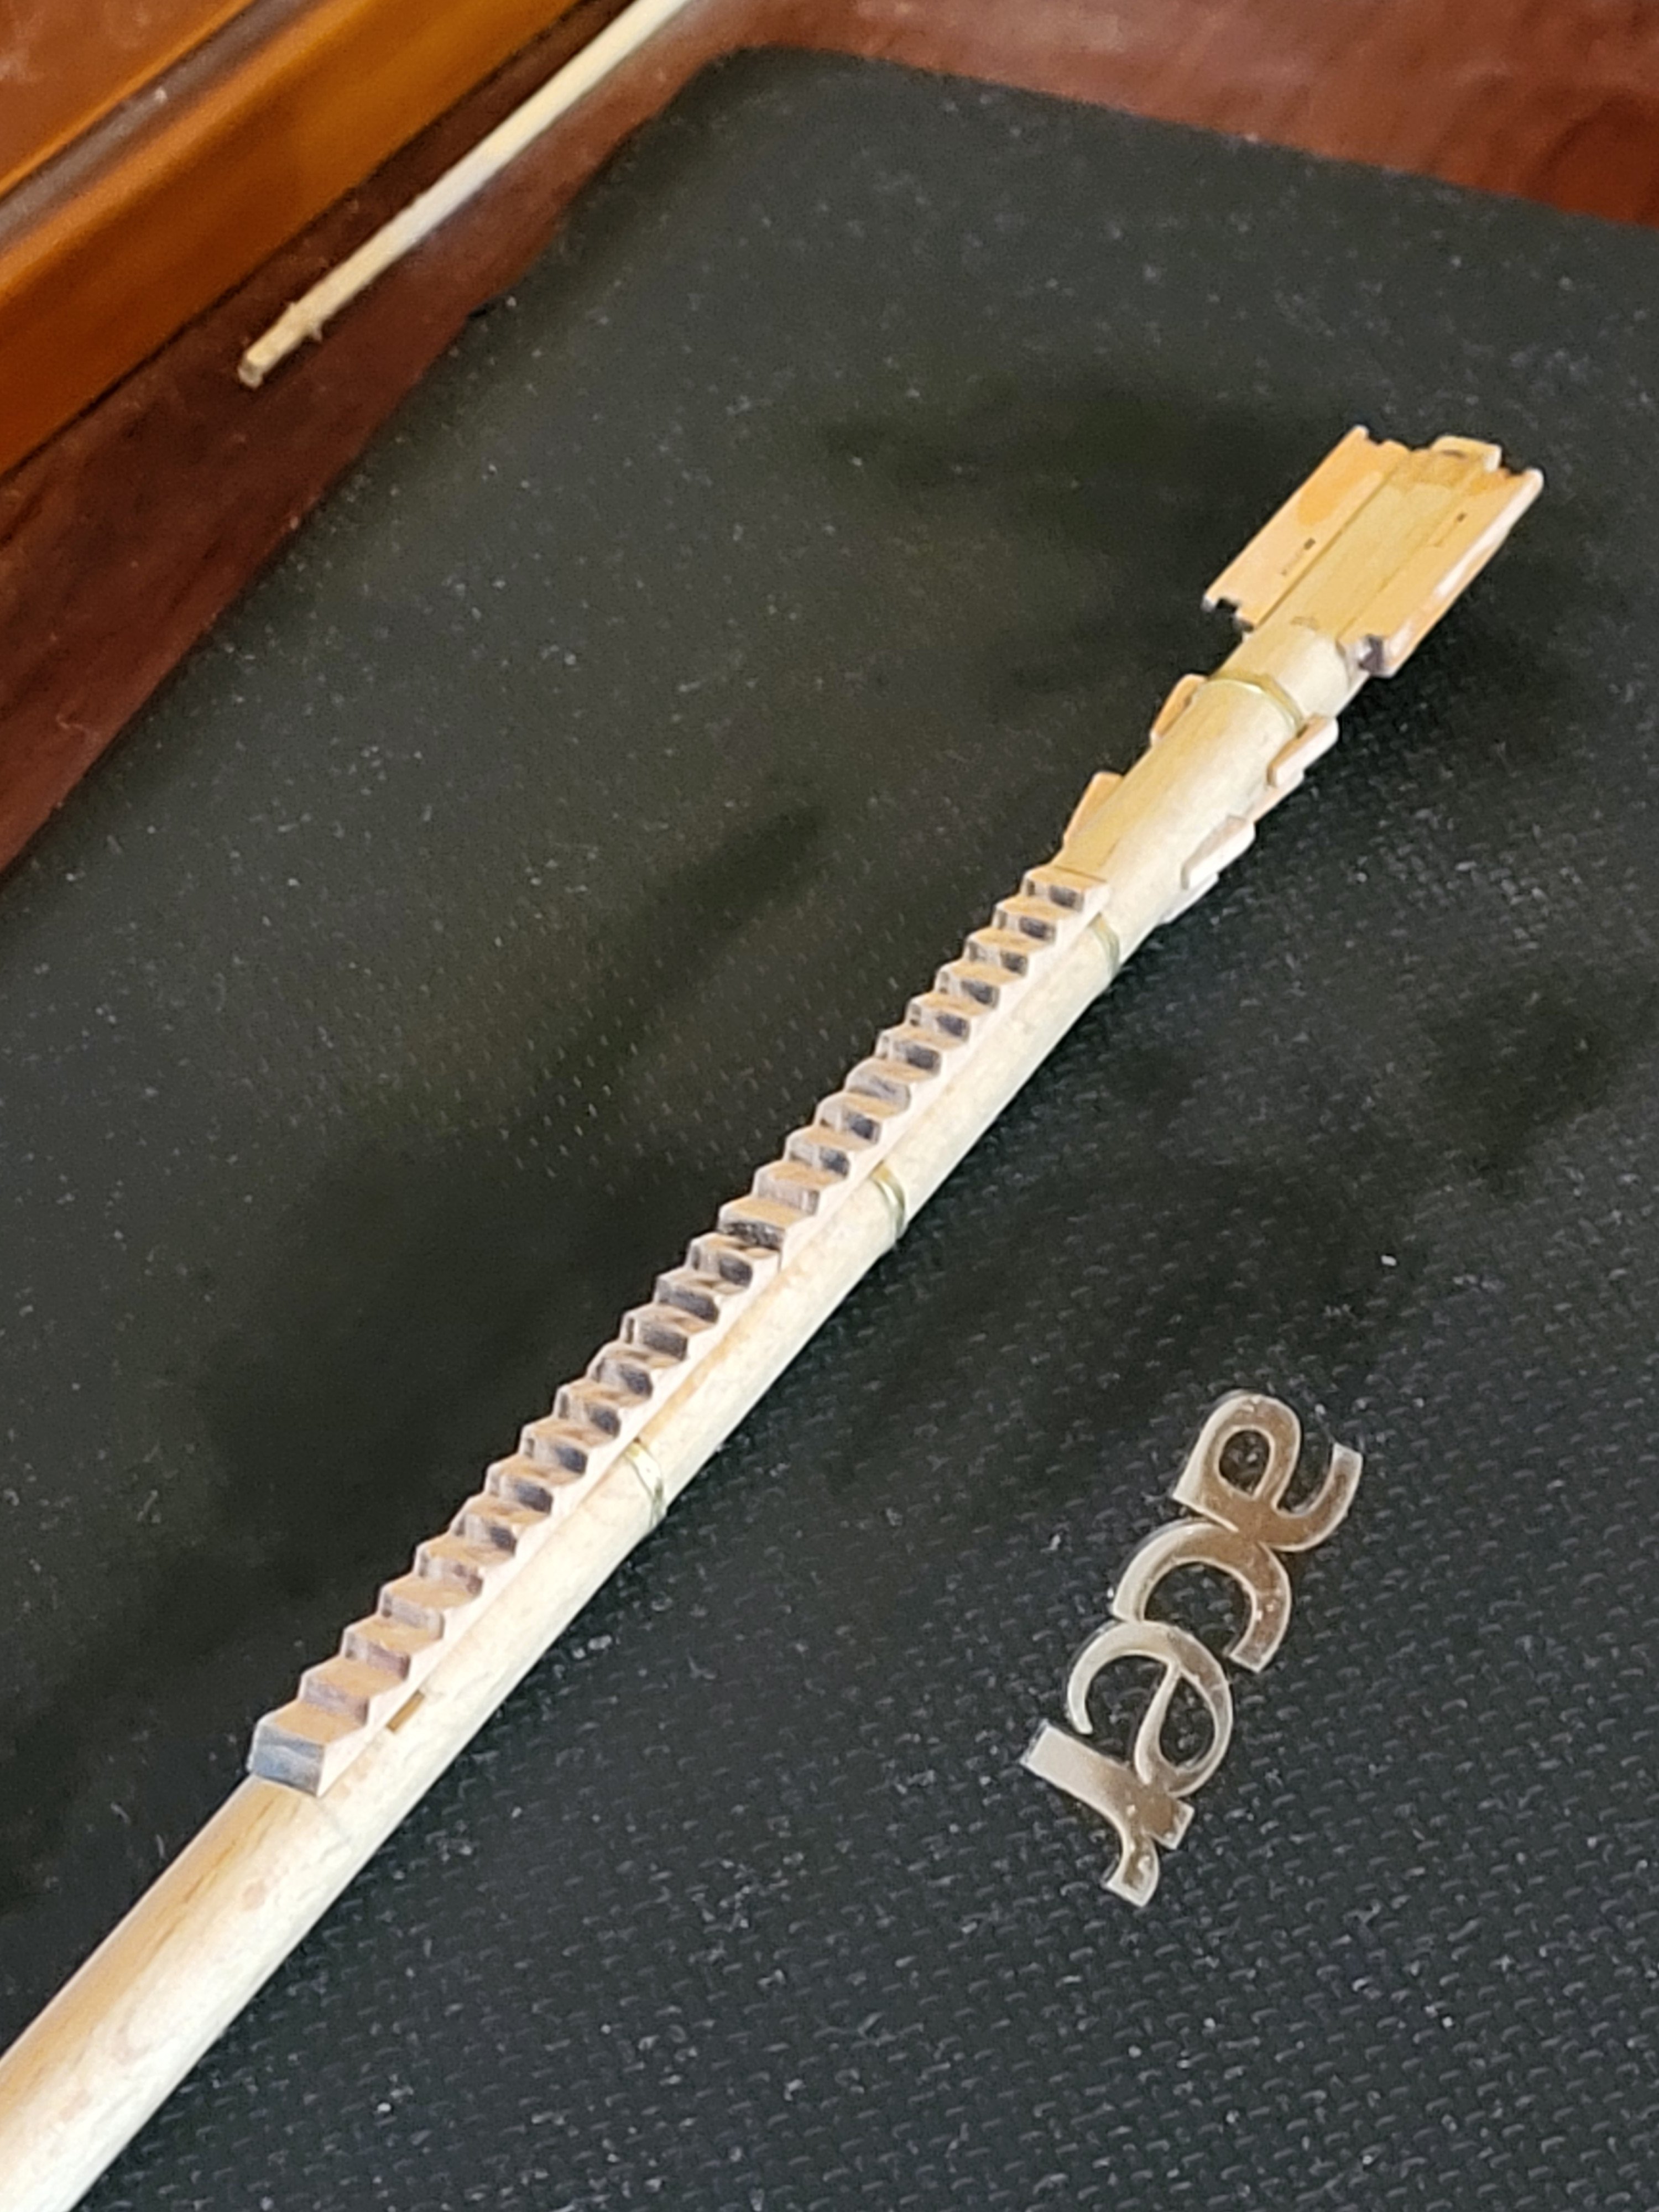
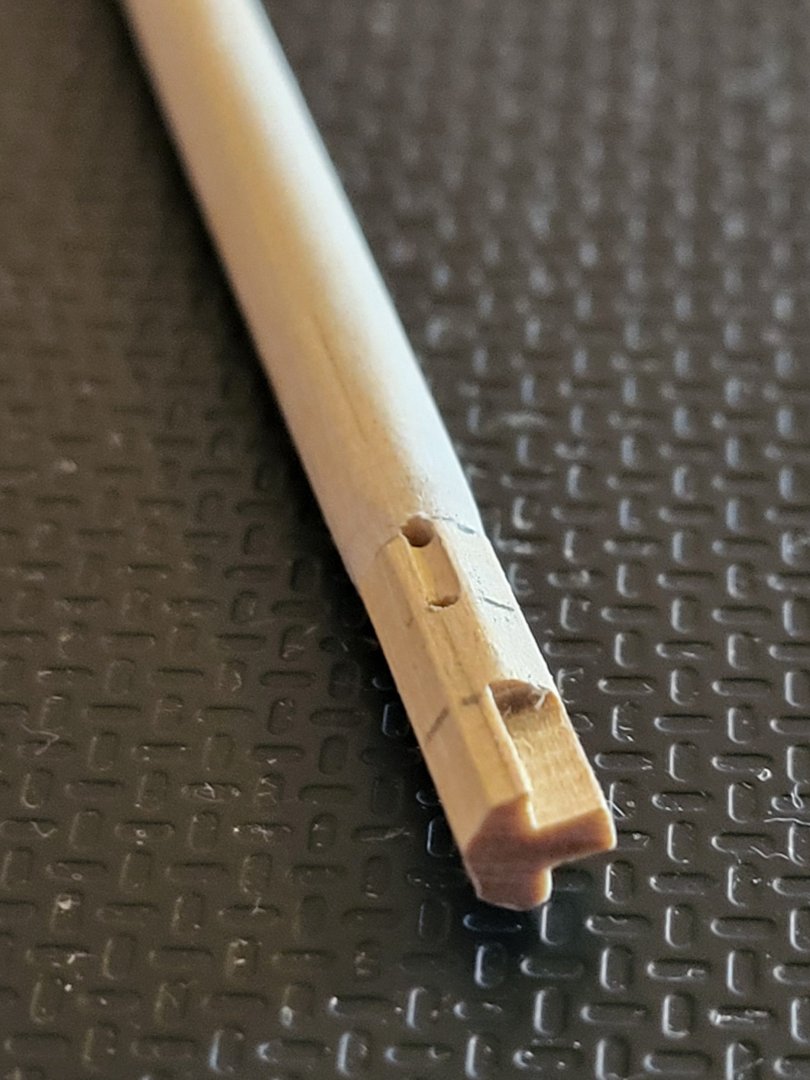
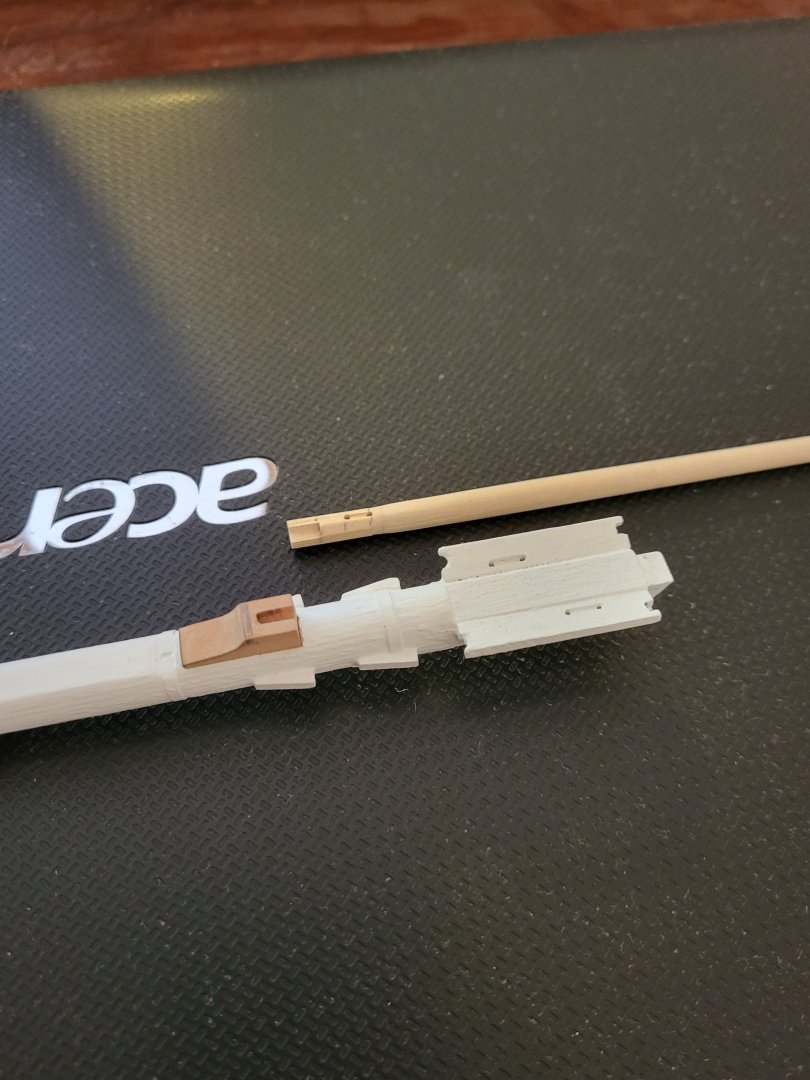
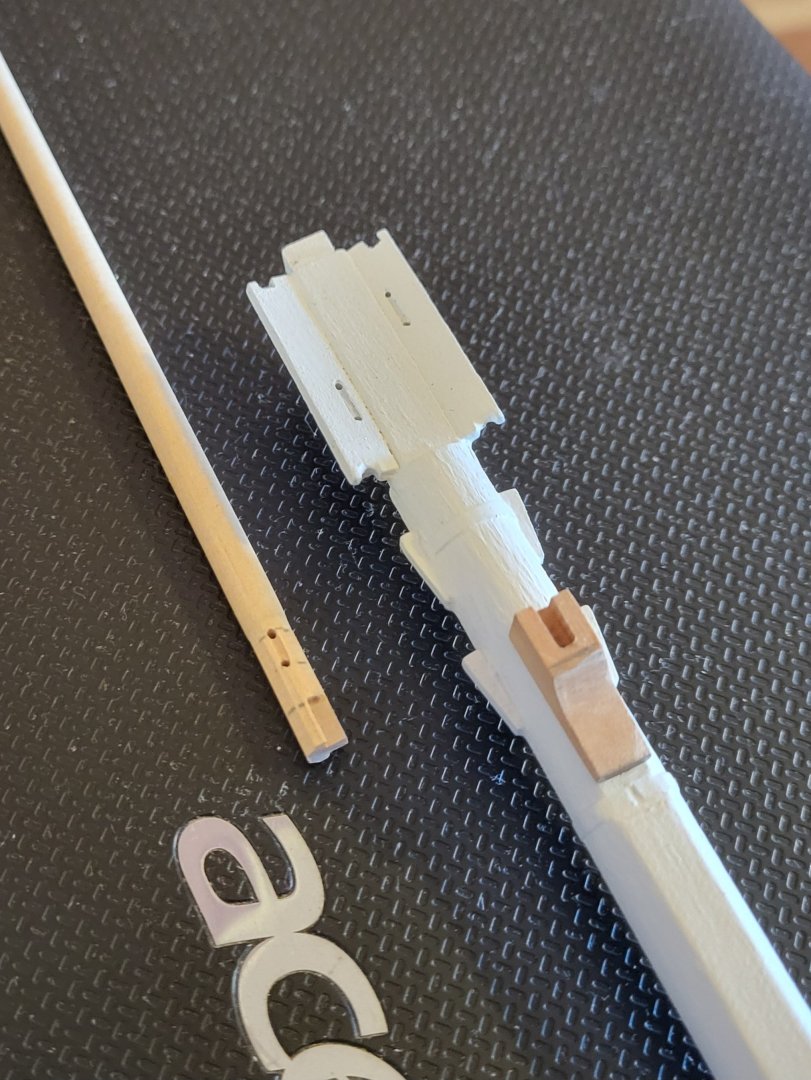
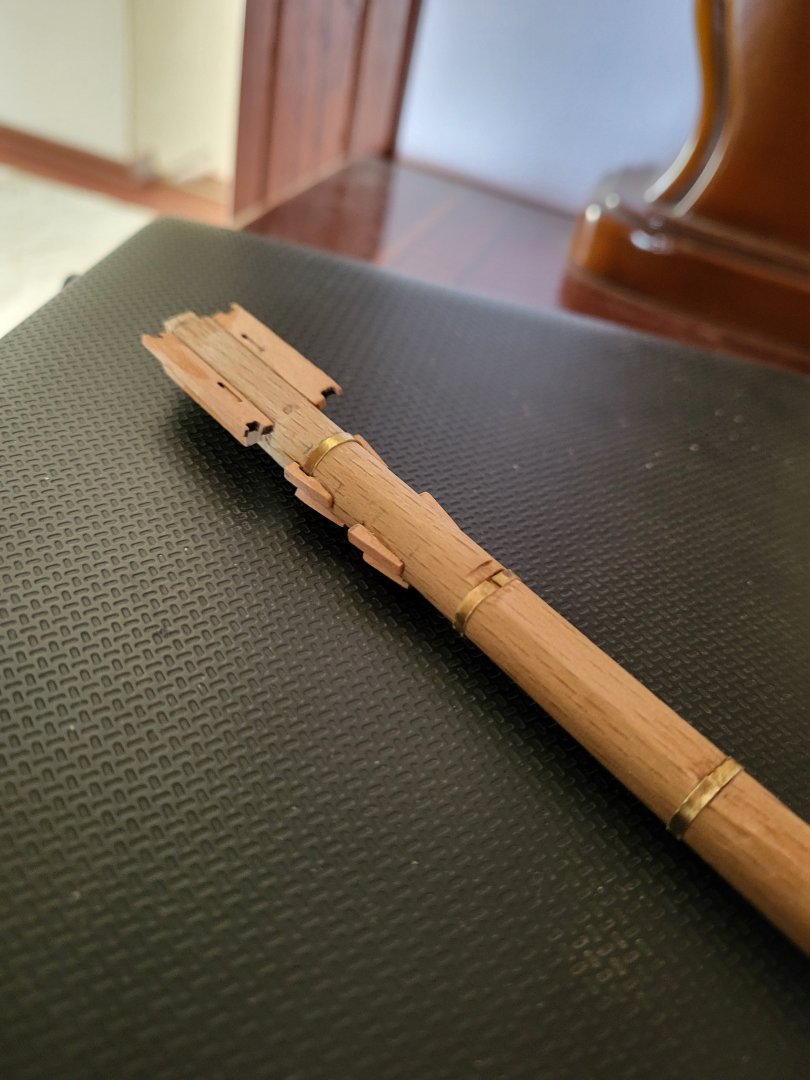
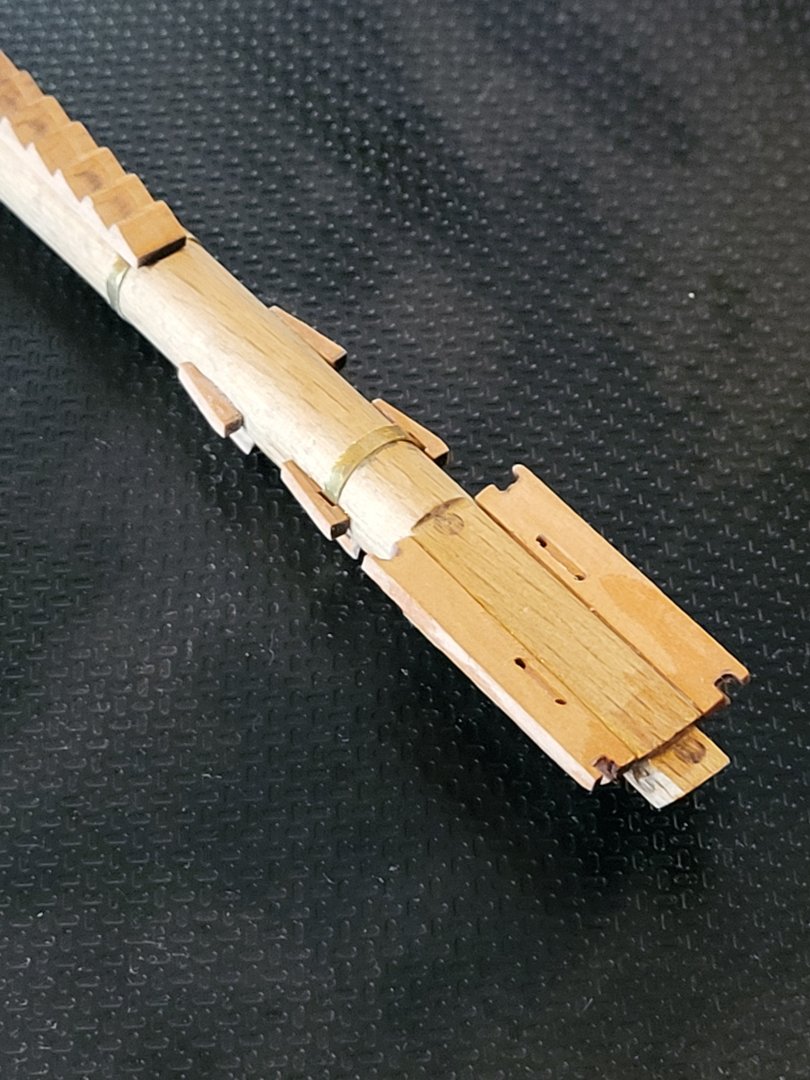
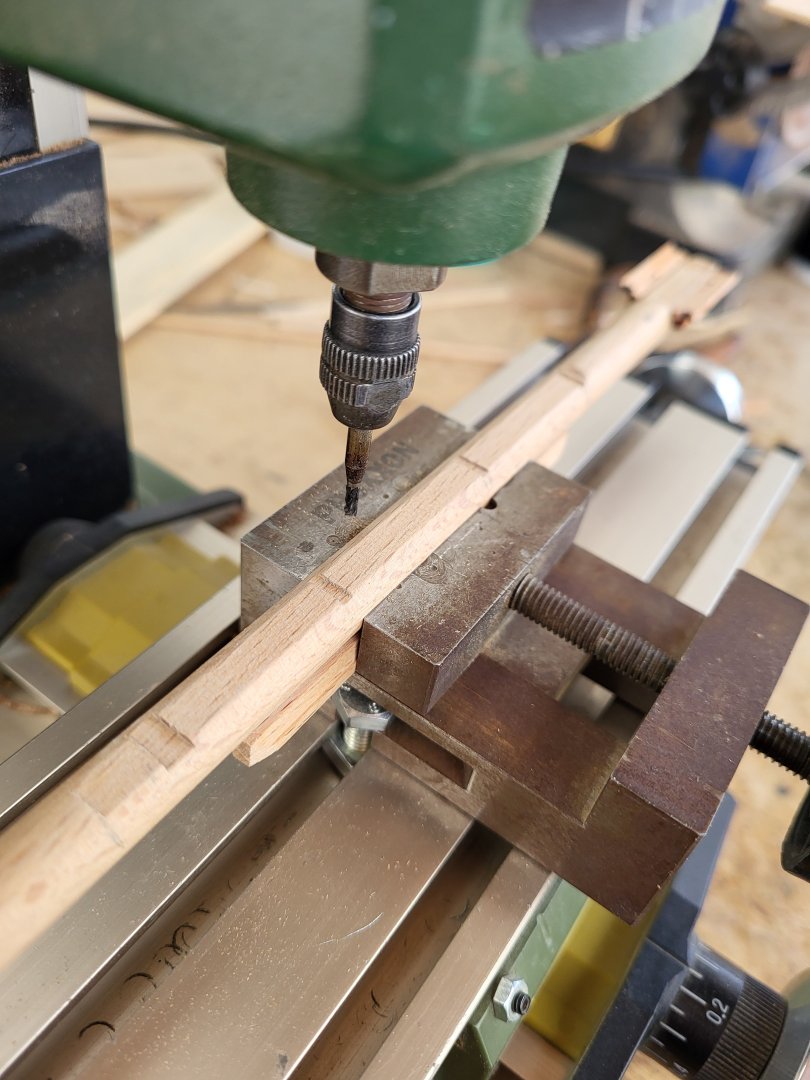
mtbediz replied to mtbediz's topic in - Build logs for subjects built 1751 - 1800
I am currently working on the details of the bowsprit. I first prepared the bees and their supporting pieces to scale and glued them in place. I then drilled the holes representing the sheaves and cut the corresponding channels. After that, I milled the stair on top of the bowsprit. I made the stair in two separate pieces because the stock had to be clamped in the vise at an angle of approximately 26 degrees. This meant the piece could only be held over a very small area, which caused excessive vibration as the milling cutter moved farther away from the clamping point. At this scale, the stair steps are 2 mm in height and 4 mm in width, which corresponds to an angle of 26 degrees. Meanwhile, I milled a flat surface to create the area where the stair will sit on the bowsprit. The stair parts have not yet been glued to the bowsprit.