Tecko
-
Posts
312 -
Joined
-
Last visited
Content Type
Profiles
Forums
Gallery
Events
Everything posted by Tecko
-

HMS Beagle by Tecko - OcCre - 1:60
Tecko replied to Tecko's topic in - Kit build logs for subjects built from 1801 - 1850
I was able to get a free PDF download of the ATOS book... https://vdoc.pub/documents/anatomy-of-the-ship-hms-beagle-survey-ship-extraordinary-243g3u4qjal0 -
HMS Beagle by Tecko - OcCre - 1:60
Tecko replied to Tecko's topic in - Kit build logs for subjects built from 1801 - 1850
Thank you, @GrandpaPhil, for your 'likes'. -
HMS Beagle by Tecko - OcCre - 1:60
Tecko replied to Tecko's topic in - Kit build logs for subjects built from 1801 - 1850
Thank you for the scaled drawing, a great reference for me to learn from. -
HMS Beagle by Tecko - OcCre - 1:60
Tecko replied to Tecko's topic in - Kit build logs for subjects built from 1801 - 1850
Thank you for the feedback. Well, as I go over the hill, my human intelligence is blunting. And more so, in this case, as I am so used to being 6'2". AI discrepancies become clearer by asking different questions on the same subject, which I did, and you concurred. And by posing my disappointments and questioning the kit scale, I got clarification from the wise people of this forum. I thank you all for putting me on the right track and mindset. -
HMS Beagle by Tecko - OcCre - 1:60
Tecko replied to Tecko's topic in - Kit build logs for subjects built from 1801 - 1850
An example of AI contradictions... After being on the HMS Beagle for nearly five years, it is no wonder Charles Darwin developed a stoop. 😉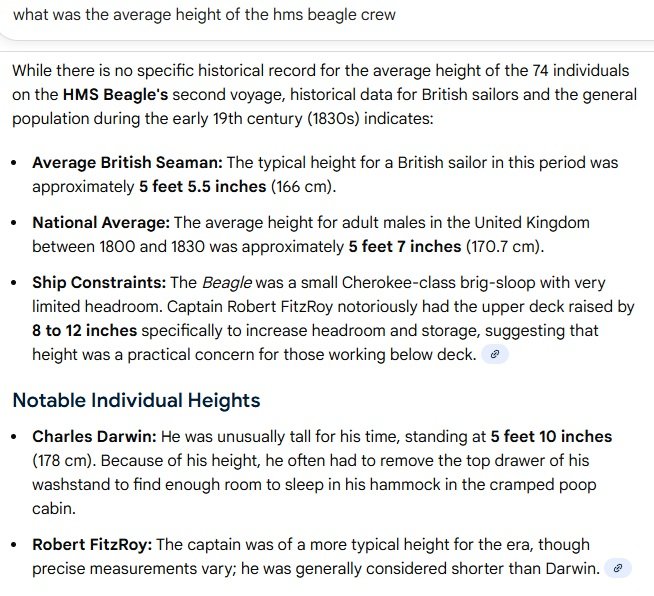
-
HMS Beagle by Tecko - OcCre - 1:60
Tecko replied to Tecko's topic in - Kit build logs for subjects built from 1801 - 1850
Thank you for your feedback. -
HMS Beagle by Tecko - OcCre - 1:60
Tecko replied to Tecko's topic in - Kit build logs for subjects built from 1801 - 1850
I am disappointed with the OcOre's HMS Beagle kit regarding the degree of accuracy. The kit's scale is 1:60, but parts of the ship are too small for humans of that scale. For instance, the four doors in the aft section are 22 x 13mm. That is, 1320mm (4' 4") high and 780mm (2' 6.7") wide. The cabin interior height is 23.5mm i.e., 1410mm (4' 7.5"). If the 1:60 scale is true, the ship must have been for dwarves. It does not say much for Darwin's theory of evolution, regarding humans.
-
HMS Beagle by Tecko - OcCre - 1:60
Tecko replied to Tecko's topic in - Kit build logs for subjects built from 1801 - 1850
Here is another sci-fi movie. . . https://www.youtube.com/watch?v=YI2KIQbewkY&list=PL2gsu7VGzgdbQ9kmI3nyEcLGE20BtQDgV&index=92
-
HMS Beagle by Tecko - OcCre - 1:60
Tecko replied to Tecko's topic in - Kit build logs for subjects built from 1801 - 1850
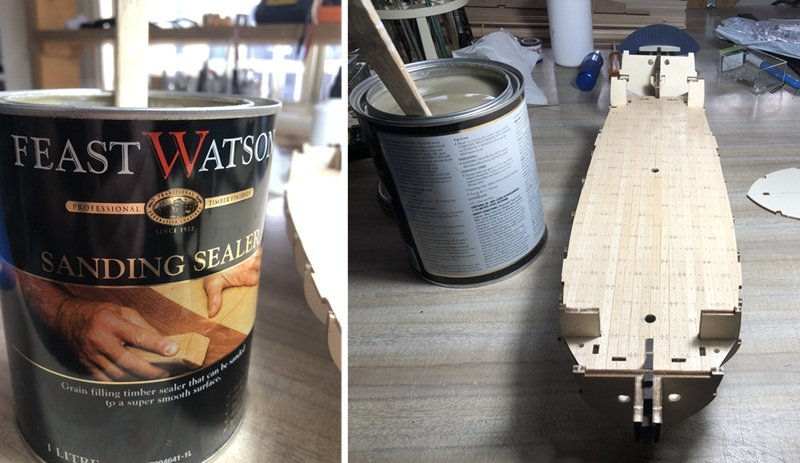
I got a couple of postal deliveries. Two books arrived, and I am happy to have received them. Yesterday, I bought a tin of satin clear varnish and a tin of sanding sealer (pore filler lacquer) from the local hardware store. As recommended by the kit instructions, I gave the deck a coat of sealer.
-
HMS Beagle by Tecko - OcCre - 1:60
Tecko replied to Tecko's topic in - Kit build logs for subjects built from 1801 - 1850
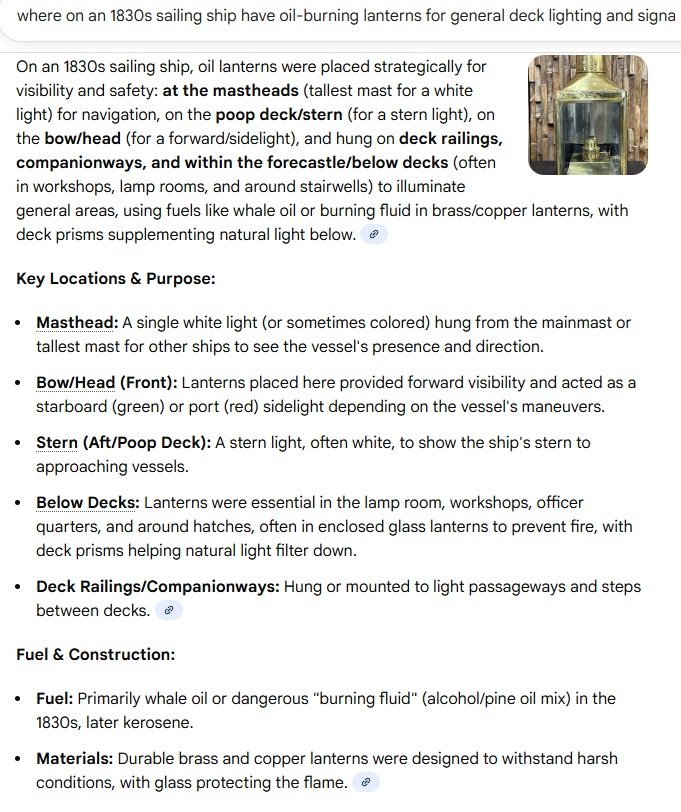
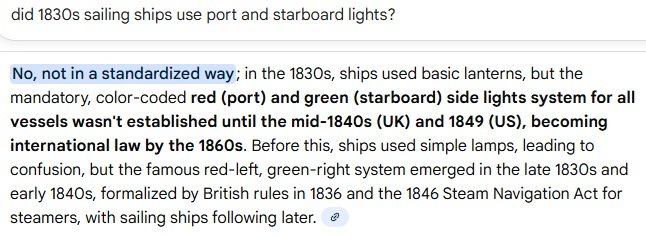
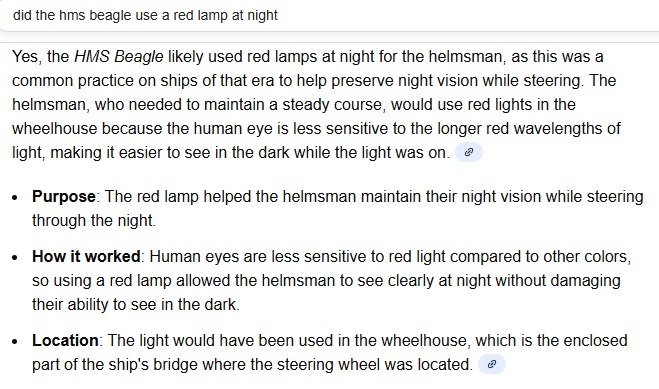
I was hoping to get a start on planking, but there is still a matter of wiring that runs within the hull area. I need to do the wiring first. The wiring is for lighting. There are several lights I wish to explore. There are the skylighting areas and the night lights. HMS Beagle did not install any port-starboard (red-green) nav lights. However, it did use lanterns during the night. I will be installing some lanterns in this build. The wiring needs to be fine/thin to conceal it where possible. Yesterday I ordered the wires, and that will take a while to arrive. I am also still waiting for a book to arrive, HMS Beagle, which has been delayed from the USA. After my recent adventure into constructing the captain's skylight, I realised how little I know about ship design and what to look for. I hope this book will provide me with a better understanding of the construction of the HMS Beagle. I know there is a better book on this subject, but it's too expensive to justify the cost of what I can do with this kit. About the lighting. AI tells me the following...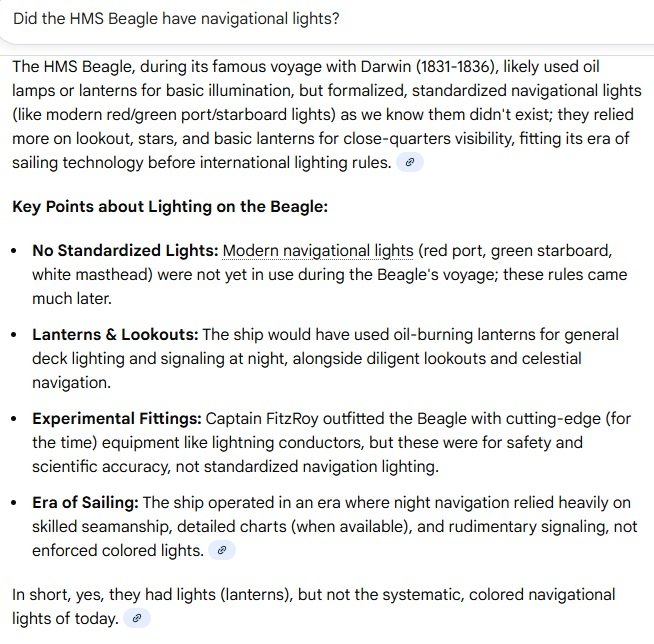
-
HMS Beagle by Tecko - OcCre - 1:60
Tecko replied to Tecko's topic in - Kit build logs for subjects built from 1801 - 1850
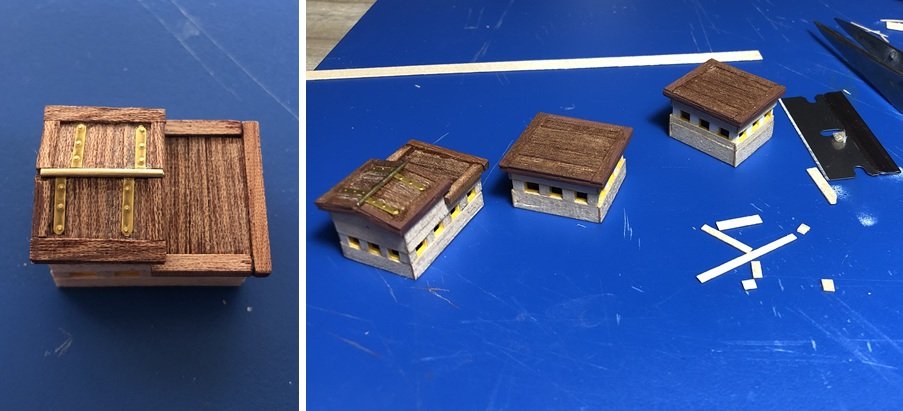
While sleeping last night, I had a dream about those skylight doors. There is still something wrong with them... First of all, according to the build kit, the doors are too small, resembling cabinet doors. Besides, what are the slanted hatch lids for? This morning, I had a closer look at some HMS Beagle plans and discovered that there is a ladder-way from the Captain's cabin to the upper deck. Aha! So, these doors should be taller. . . I extended the doors and panel to indicate this.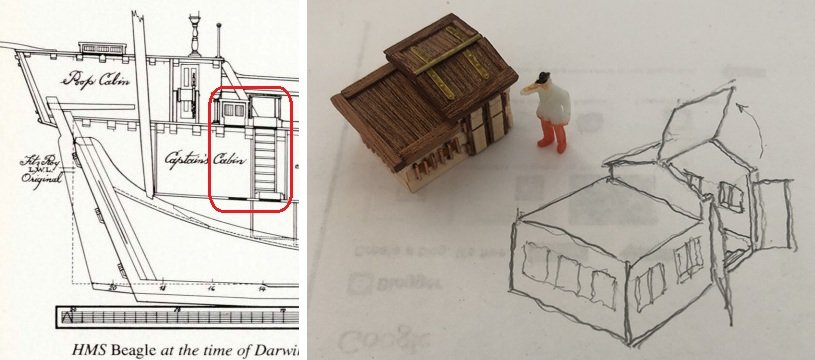
-
HMS Beagle by Tecko - OcCre - 1:60
Tecko replied to Tecko's topic in - Kit build logs for subjects built from 1801 - 1850
Thank you, Geoff, for the compliment. -
HMS Beagle by Tecko - OcCre - 1:60
Tecko replied to Tecko's topic in - Kit build logs for subjects built from 1801 - 1850
Well. This is enough for me. Back to the boat.
-
HMS Beagle by Tecko - OcCre - 1:60
Tecko replied to Tecko's topic in - Kit build logs for subjects built from 1801 - 1850
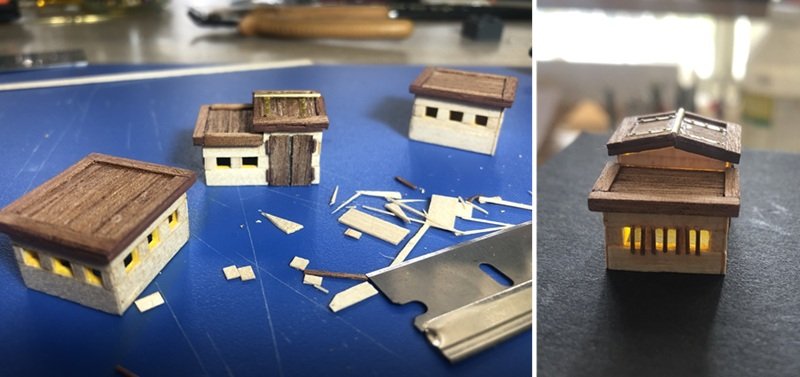
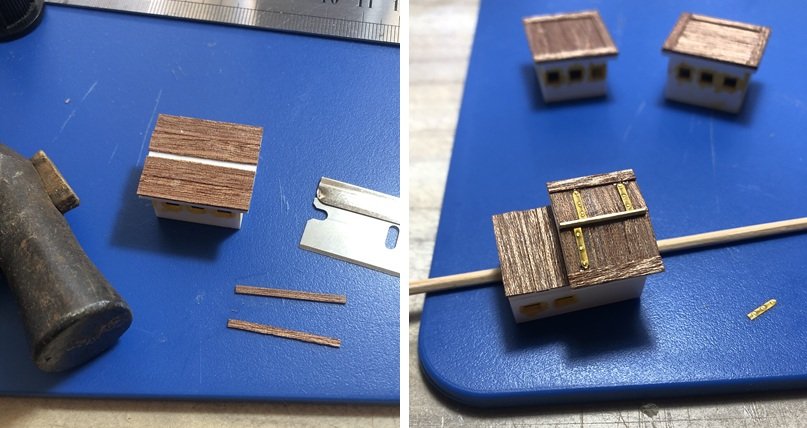
Even though I completed the wooden panelling, it is still not finished. I've run into a few problems (as expected with model building). The white 1mm polystyrene sheet is quite light-transparent. I will have to dim the light source even more. The interior needs to be repainted white to see if that lessens the effect. I am after a warm light effect. I am not happy with the doors. I might add panels of the lighter timber. I experimented with a section of the captain's skylight that is not seen when placed on the deck. I included protective bars across the windows. I will try to do a better job of it with the rest of the windows. You can see the interior light penetrating the upper panel.
-
HMS Beagle by Tecko - OcCre - 1:60
Tecko replied to Tecko's topic in - Kit build logs for subjects built from 1801 - 1850
Sorry for the delay in completing the skylights. I have been too tired to do so. My mates have been getting me back into cycling. The trouble is that I am 20 kgs overweight, and losing it seems to be an impossible task without burning off my fat reserves. The guys I ride with are 70+ y.o., and the better riders average 30 kph. It has taken me a few months of riding to be able to stay with the faster guys. Last week I rode 5 out of seven days, my best performance since returning to the sport. I rode about 270 kms. I am now losing weight, but it will still take a long time to lose the excess. I am feeling better today and looking forward to completing the skylights. -
HMS Beagle by Tecko - OcCre - 1:60
Tecko replied to Tecko's topic in - Kit build logs for subjects built from 1801 - 1850
Today's update...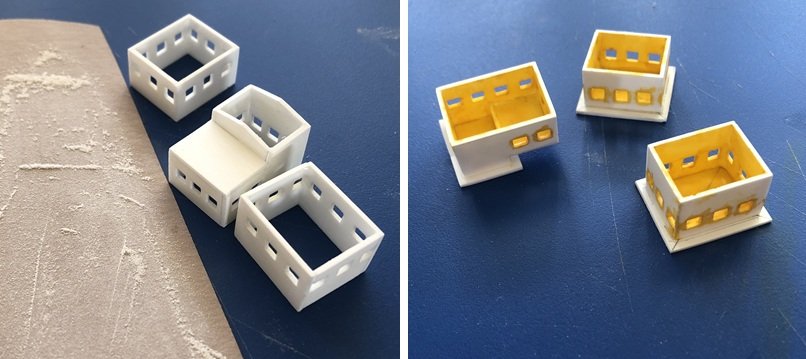
-
HMS Beagle by Tecko - OcCre - 1:60
Tecko replied to Tecko's topic in - Kit build logs for subjects built from 1801 - 1850
I am tired, and so is the Beagle who is dreaming about a promised kennel. Good night, my friends.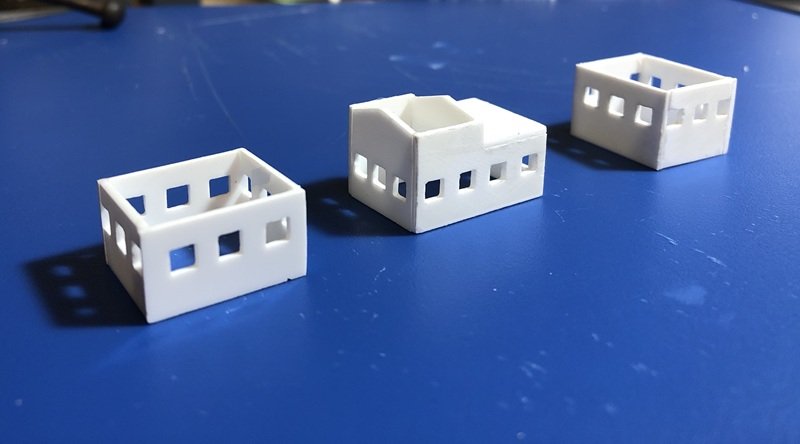

-
HMS Beagle by Tecko - OcCre - 1:60
Tecko replied to Tecko's topic in - Kit build logs for subjects built from 1801 - 1850
Too tired to assemble the captain's and gunroom skylights. Maybe tomorrow.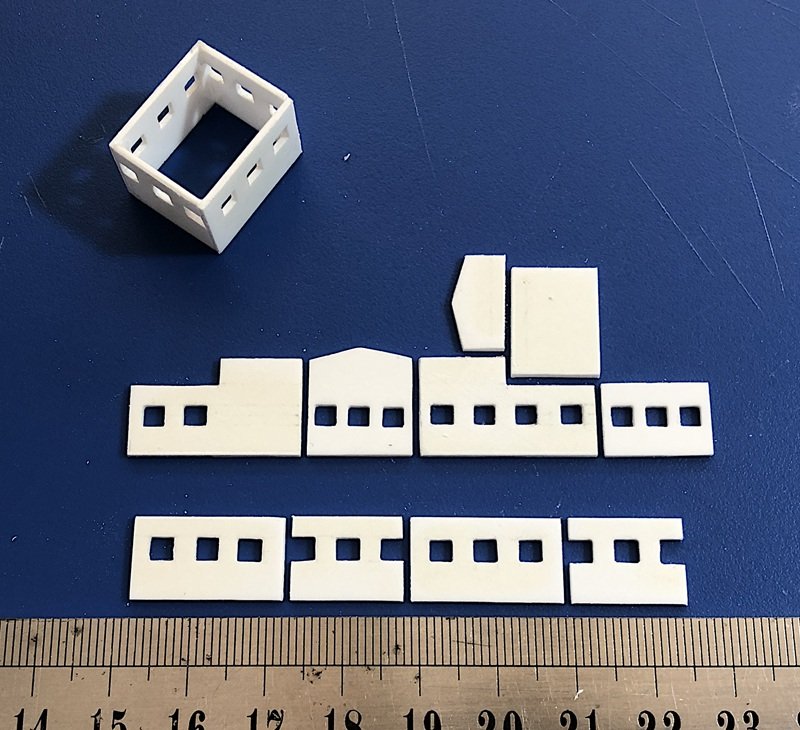
-
HMS Beagle by Tecko - OcCre - 1:60
Tecko replied to Tecko's topic in - Kit build logs for subjects built from 1801 - 1850
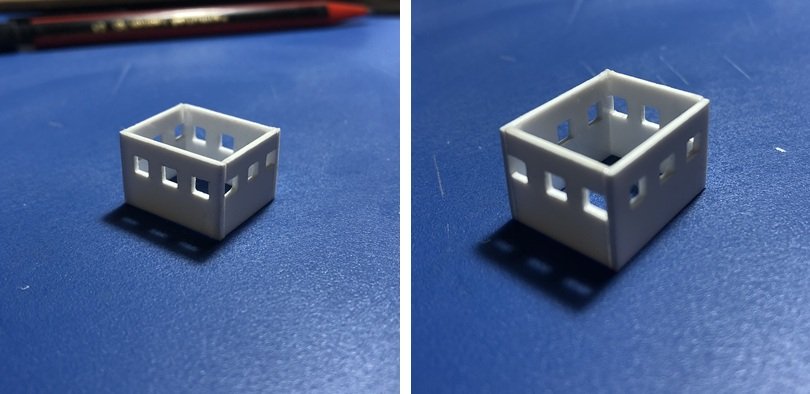
I decided to use a 1mm polystyrene sheet for the skylight surrounds. Here, I am testing the Poop Cabin skylight. So far, I think it looks promising.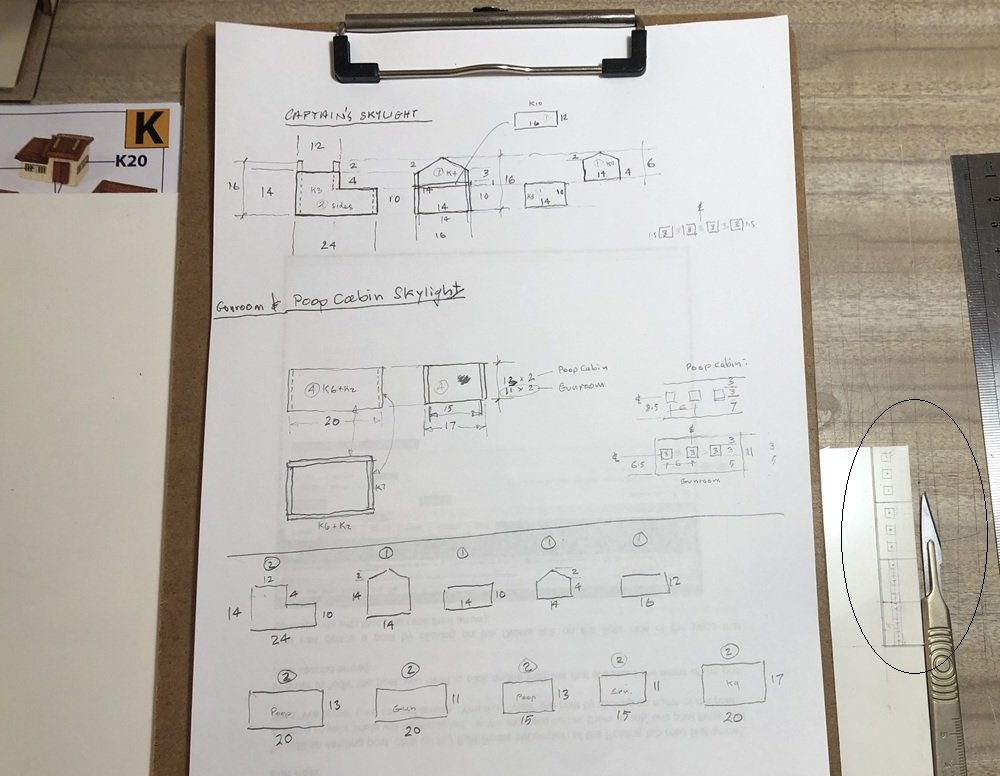
-
HMS Beagle by Tecko - OcCre - 1:60
Tecko replied to Tecko's topic in - Kit build logs for subjects built from 1801 - 1850
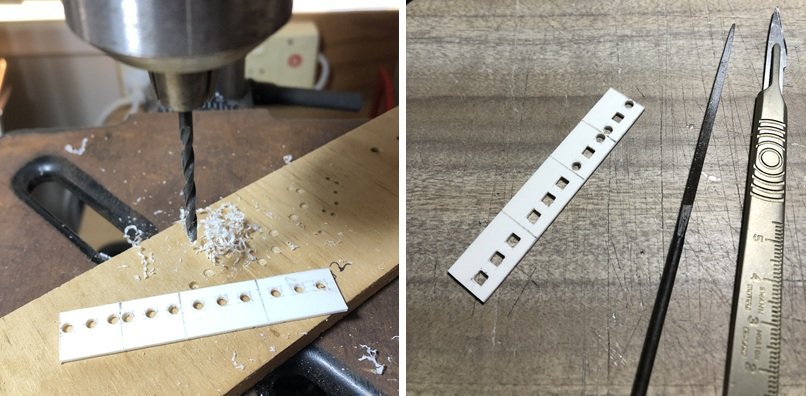
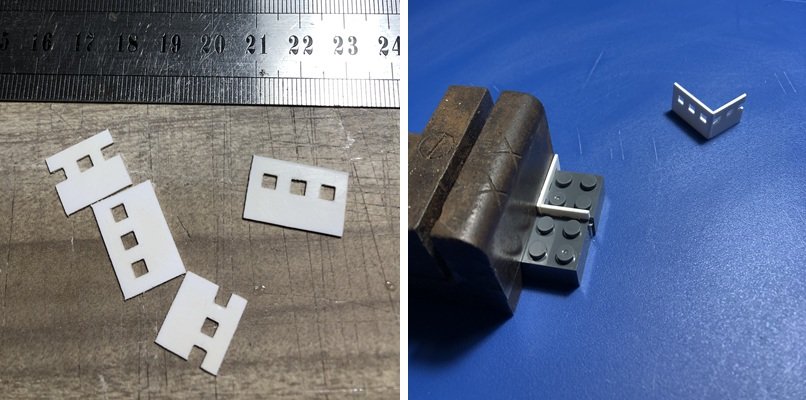
Before I do any planking, I need to work out a few details about the interior wiring for lighting and how to alter or replace some of the kit pieces. I want to have interior night lighting visible through the skylights, but there is a problem...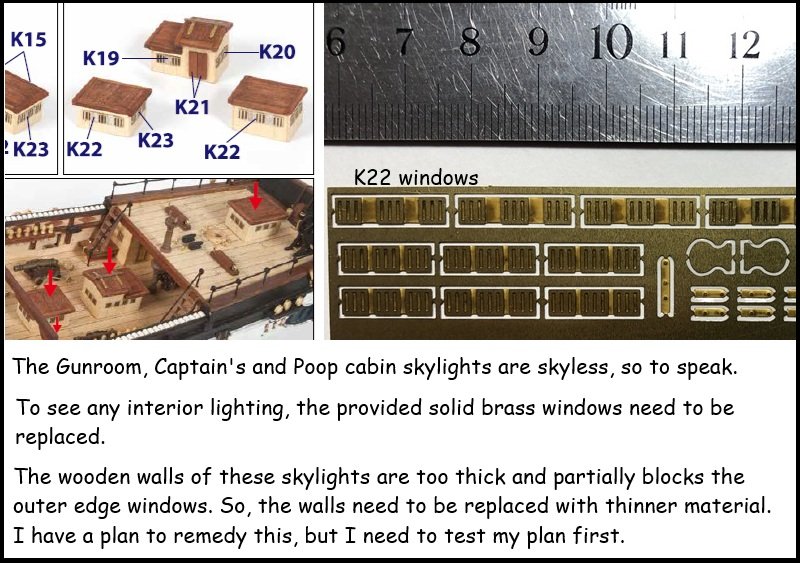
-
HMS Beagle by Tecko - OcCre - 1:60
Tecko replied to Tecko's topic in - Kit build logs for subjects built from 1801 - 1850
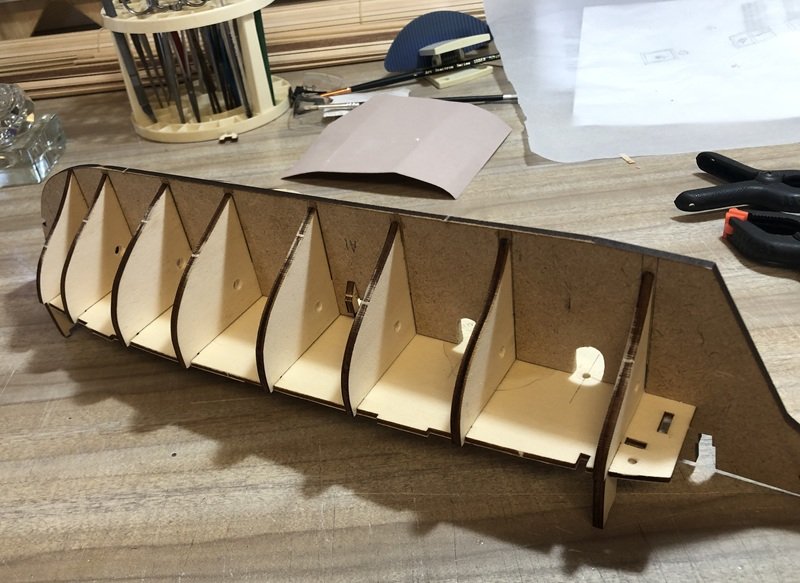
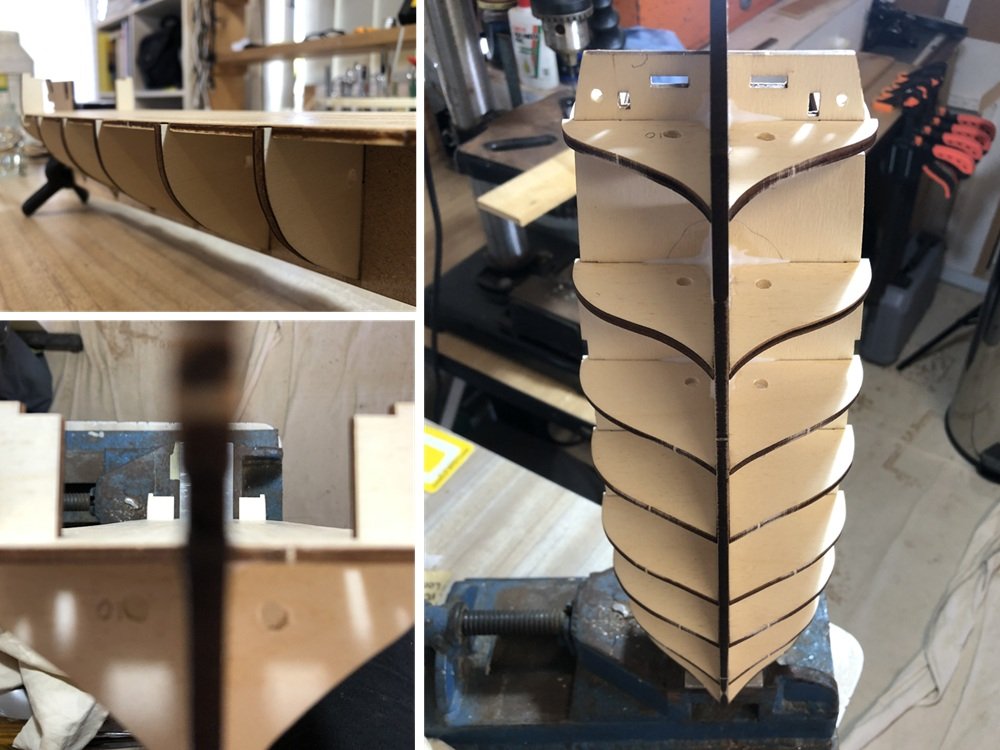
Added the fore and aft sections and some meat for better shaping of the same.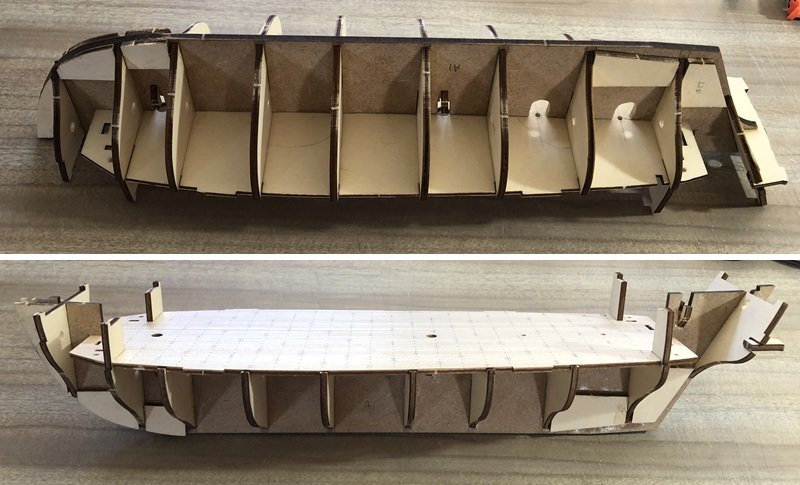
-
HMS Beagle by Tecko - OcCre - 1:60
Tecko replied to Tecko's topic in - Kit build logs for subjects built from 1801 - 1850
Thanks, vvjames, for the great suggestion. Hmm. -
HMS Beagle by Tecko - OcCre - 1:60
Tecko replied to Tecko's topic in - Kit build logs for subjects built from 1801 - 1850
A strange thing is happening to me. As I progress into the building of the HMS Beagle, I am growing fond of the boat as a whole. My idea of a boat in water, as part of a drastic diorama, has become less appealing. Dioramas tend to steal the limelight, in this case, the boat. I also want to see how I do in planking the whole hull, and not just to the waterline. I am sorry if my change of plan has disappointed you. So, I am still going to exercise some liberties with the build, such as lighting. __________________________________________________________________________________ I saw an odd approach to adding a diorama to a standalone model. Logically, it does not make sense, but for some reason, it looks okay. What do you think?
-
HMS Beagle by Tecko - OcCre - 1:60
Tecko replied to Tecko's topic in - Kit build logs for subjects built from 1801 - 1850
Thank you, Nirvana, for your response. You'd better drink that glass and bottle before it goes sour. 😆 -
HMS Beagle by Tecko - OcCre - 1:60
Tecko replied to Tecko's topic in - Kit build logs for subjects built from 1801 - 1850
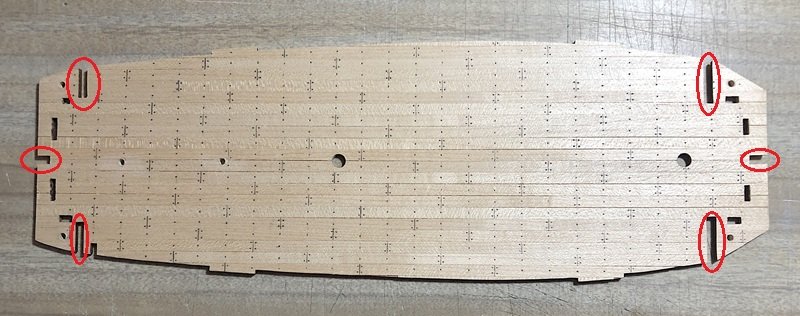
Well, I was surprised to learn that I did not make an "Oops!" in post #20, in fact, I made a bigger oops by not realizing at the time that I needed to cut out another five slots. Time to assemble bulkheads and deck... But I made another 'Oops!' The LED lights for the two hatches are directly over the spine. I had to cut access slots for when I need to mount them. After spot gluing everything snuggly together, I am now doing PVA runs, starting from inside corners going out...