

.JPG.1db74a3c50dee7c3f86fbf4fdabbb0e2.JPG)
Ondras71
-
Posts
440 -
Joined
-
Last visited
Content Type
Profiles
Forums
Gallery
Events
Everything posted by Ondras71
-
.thumb.JPG.4d3261ccae06041fa7cc2933fb43d577.JPG)
Roter Löwe 1597 by Ondras71
Ondras71 replied to Ondras71's topic in - Build logs for subjects built 1501 - 1750
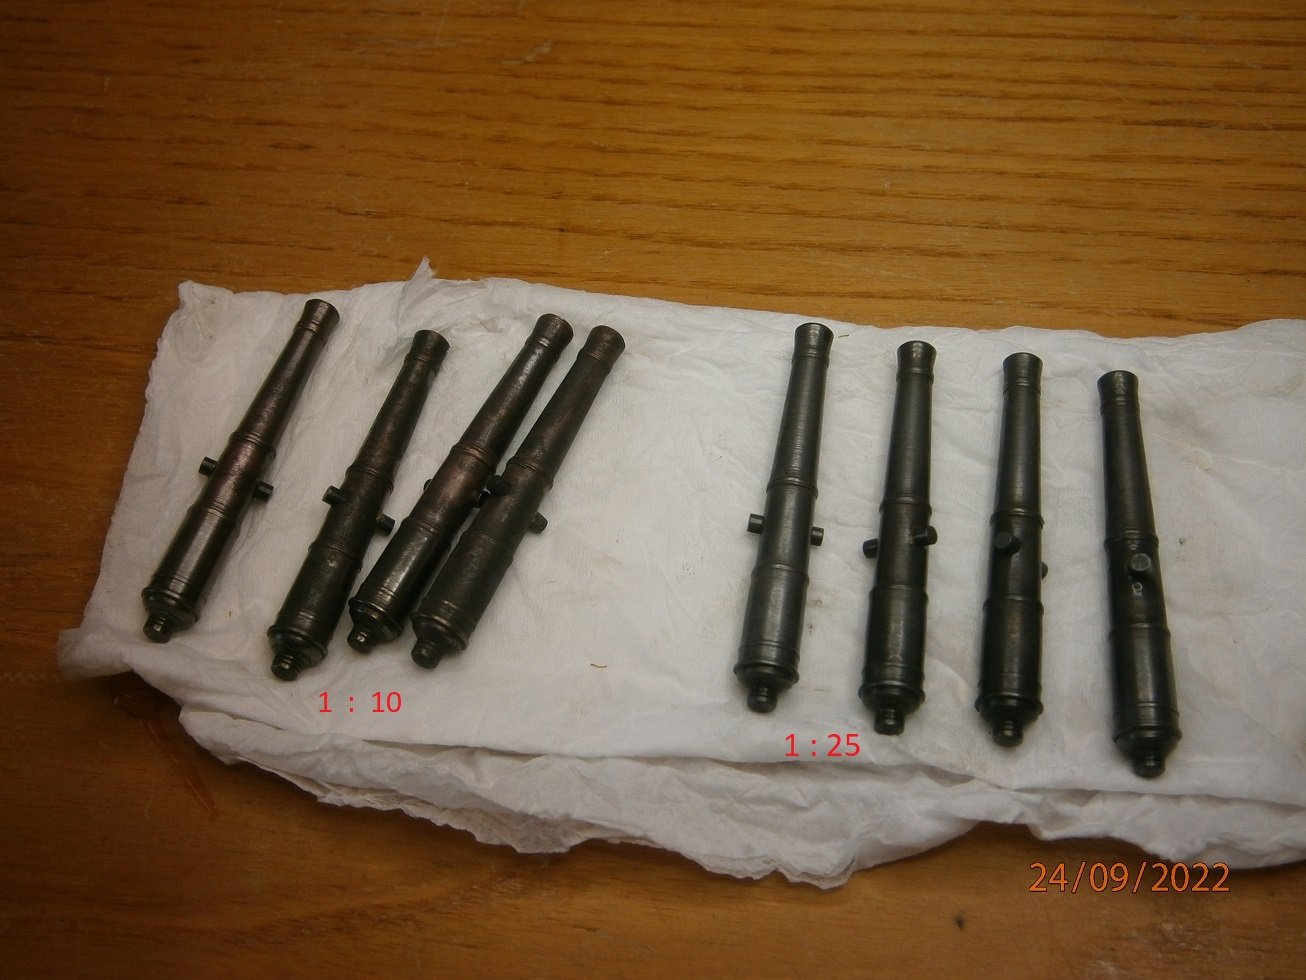
Finally placed the main guns below deck. Blackening is alchemy, take your time, 1:25 an ideal solution that does not stain..😵 Tangled end of rudder belay rope.. Mounted guns on deck.. Current status...JPG.3433f5605303d75542825dd332b69469.JPG)
.JPG.37bc00f2714f0e8d7d9d4b5f48c120a2.JPG)
.JPG.558317acdb275f683489f5f2f3fe9ae5.JPG)
.thumb.JPG.c3c6c4e6d80814abc670b61cd36170cb.JPG)
.JPG.27dfad125a6fb0da594a85c8474d80a6.JPG)
.JPG.64dedf1f3fbe85800798952c4620c3b2.JPG)

-
Roter Löwe 1597 by Ondras71
Ondras71 replied to Ondras71's topic in - Build logs for subjects built 1501 - 1750
Thanks for the likes.. The model is placed on a baroque stand... Cannon goals set up. Created an imitation of cable entanglement.. The first cannon goals in place.. And arranged more...JPG.a8e38b8d7b879d41367feff7c610bef4.JPG)
.JPG.e5a73931c6b066b09eea74e440bb6918.JPG)
.JPG.7ddf69c3d77d221950135f6d5c195c12.JPG)
.JPG.bee28c5d3c56ae2ee5ed84e41a47c895.JPG)
.thumb.jpg.666dfa05d01e2eebd0b4a8864753dbfd.jpg)
.JPG.593423c67a63ae0798fb7bc636920e15.JPG)
.JPG.55e60bedf4ab061bb05570477ed690b1.JPG)
.JPG.7d9bf4566b2ff22c56c2585620c5e666.JPG)
-
Roter Löwe 1597 by Ondras71
Ondras71 replied to Ondras71's topic in - Build logs for subjects built 1501 - 1750
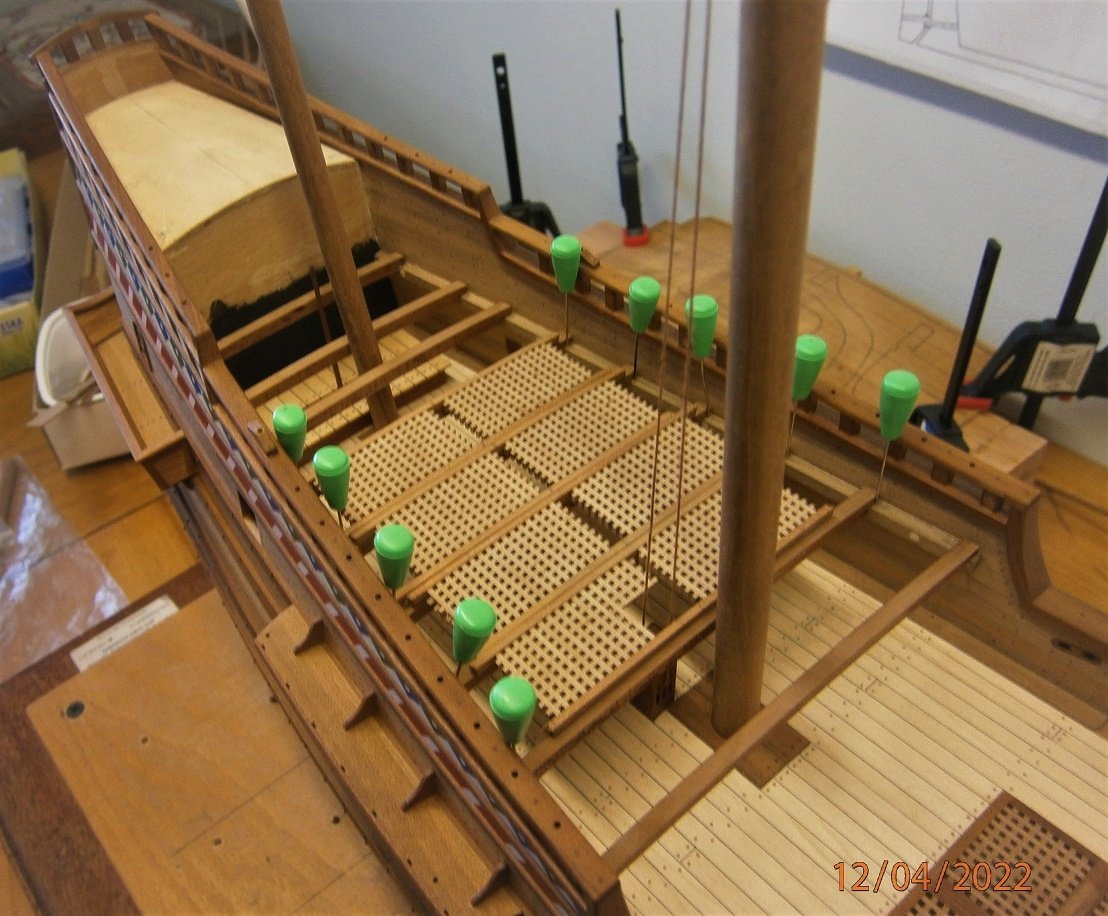
Back deck wall done.. After waxing, placed on the gun deck, secured with pegs in two wheels.. Restraint ropes created.. ..and guns placed on deck.. Add hoists and place cannons below deck..👌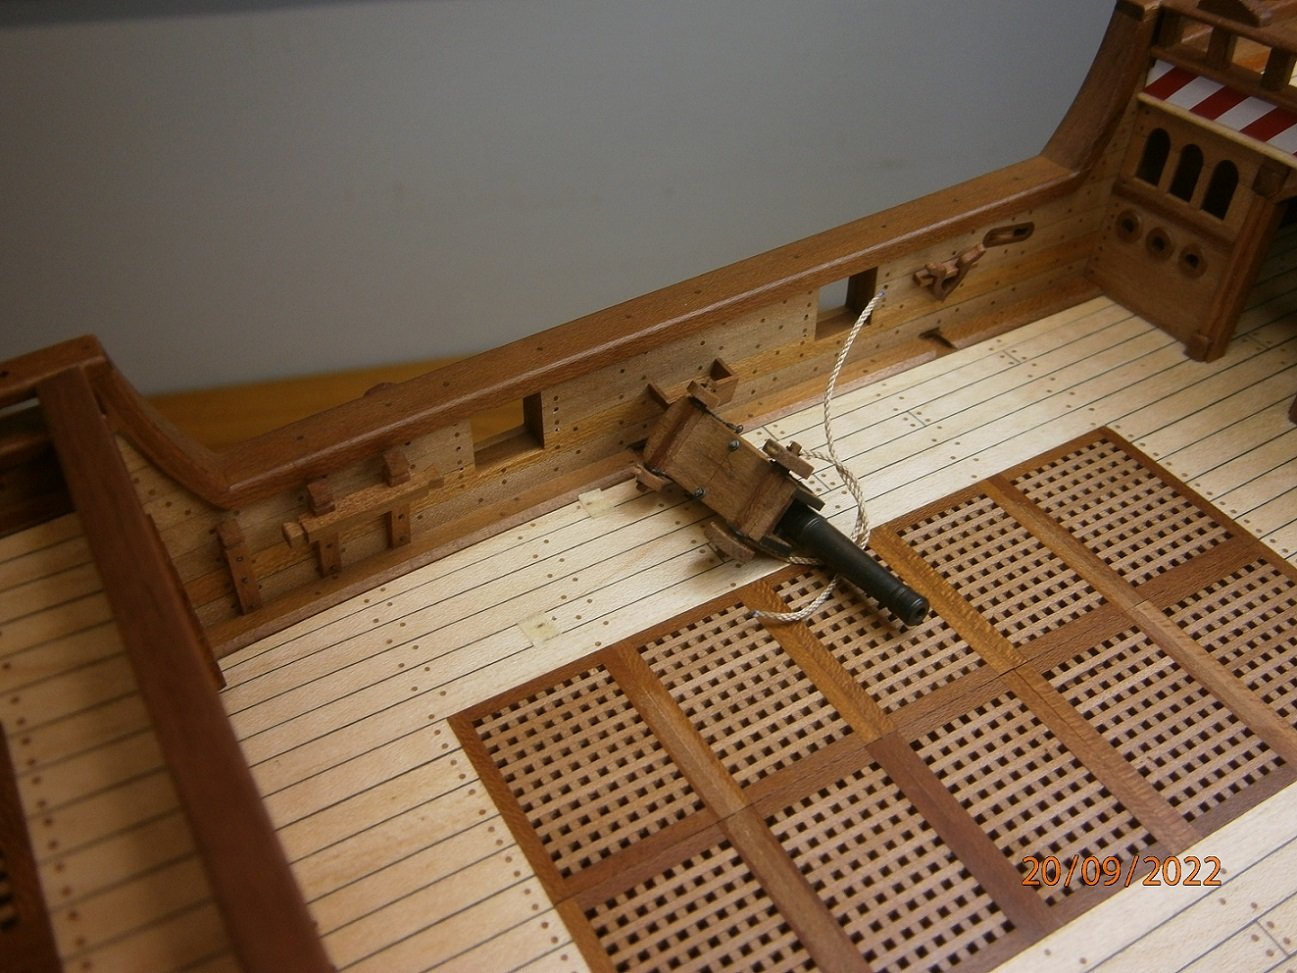
.JPG.f05fd979dc50ca102f082e495fb10a15.JPG)
.JPG.8ca81151919b75de7ae3682fd4544042.JPG)
.thumb.JPG.a7794b8ad50d63f0652f89ccd37ef6a5.JPG)

.thumb.JPG.80f9b0650ce1ae9f4d0a0faea7dc8add.JPG)
.JPG.eb78642eb8c049668298f15bf8971347.JPG)
-
Roter Löwe 1597 by Ondras71
Ondras71 replied to Ondras71's topic in - Build logs for subjects built 1501 - 1750
Thank you shipmodel. Bad translation. This is just below deck. O..JPG.80c816a88306bb375c105ee8566325de.JPG)
.JPG.4a66e6737bbebd2f4c5f1f390c8ea9d7.JPG)

-
Roter Löwe 1597 by Ondras71
Ondras71 replied to Ondras71's topic in - Build logs for subjects built 1501 - 1750
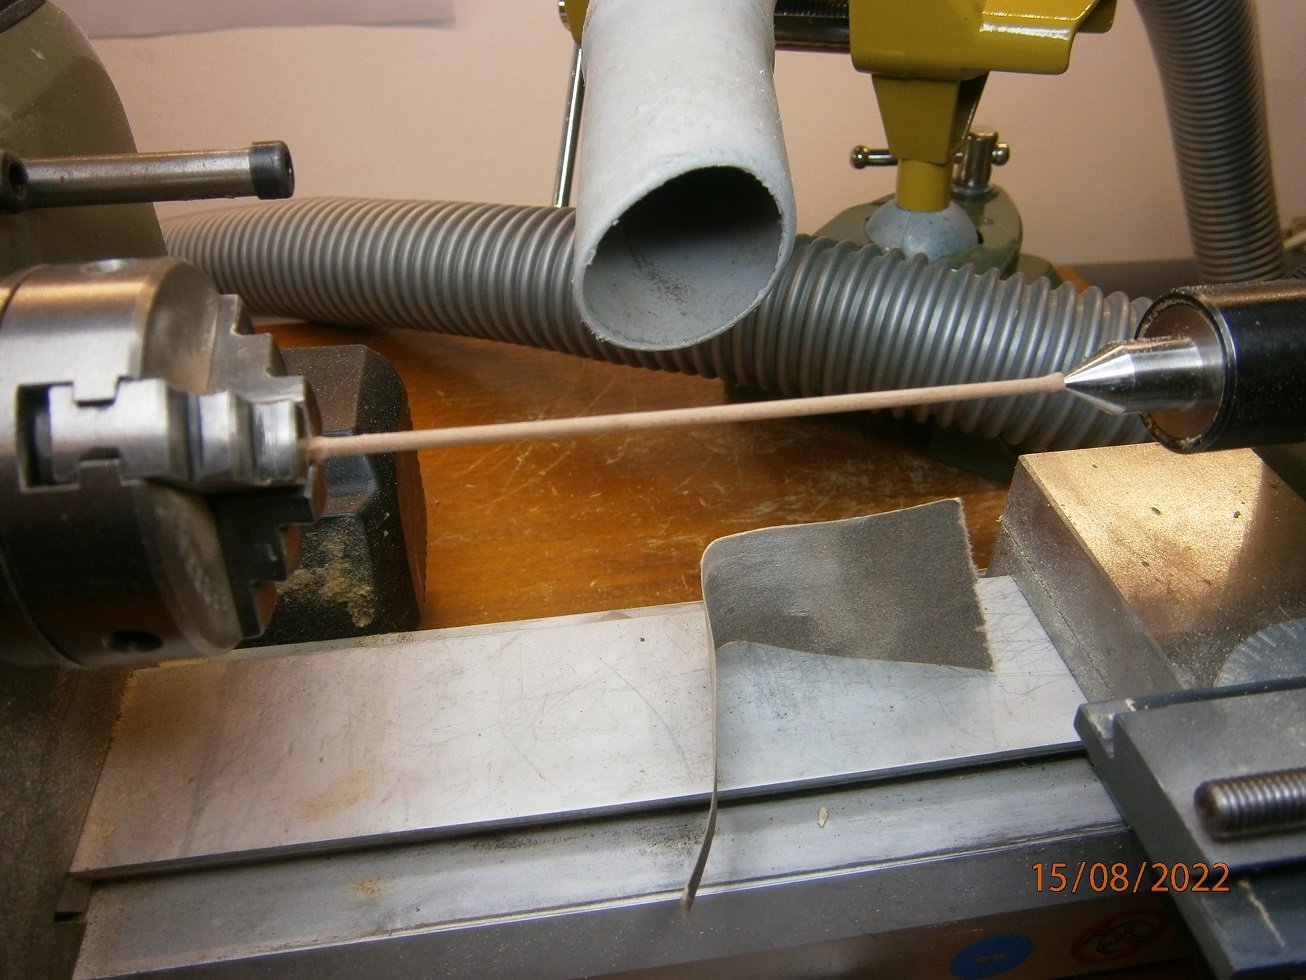
Thank you very much Gary! I created the wheelhouse.. I started making ropes from thin Sajou threads. On the old ropewalk with a low-quality ride, the rope made mistakes for me. So I modified the entire ropewalk.. And now it's about something else!! The hoists of the main mast have been completed with new ropes, they will now go below deck.. Now I can close the wall of the rear superstructure..
.JPG.7975874aaf50a0ee4c7b43147d36ccbb.JPG)
.JPG.842eb49e7f91a34cd5fdf093e9c5a167.JPG)
.JPG.ee90e80fc73e661eeee9220e755be5a6.JPG)
.JPG.ac6c931cde8656800a6e3672e882fb66.JPG)
.thumb.JPG.e48d702613265a37673a089d6bc930b0.JPG)
.thumb.JPG.c41d90773a98a4fc3b7e8d0684acefb7.JPG)
.JPG.fe77f923b23dc499cb4b3fa66891c03e.JPG)
.JPG.bfe781383f138d7ba2f4f8e107fa5e40.JPG)
.JPG.fbed81e0b88c5352e0dc1c2e7ae1dc88.JPG)
-
Roter Löwe 1597 by Ondras71
Ondras71 replied to Ondras71's topic in - Build logs for subjects built 1501 - 1750
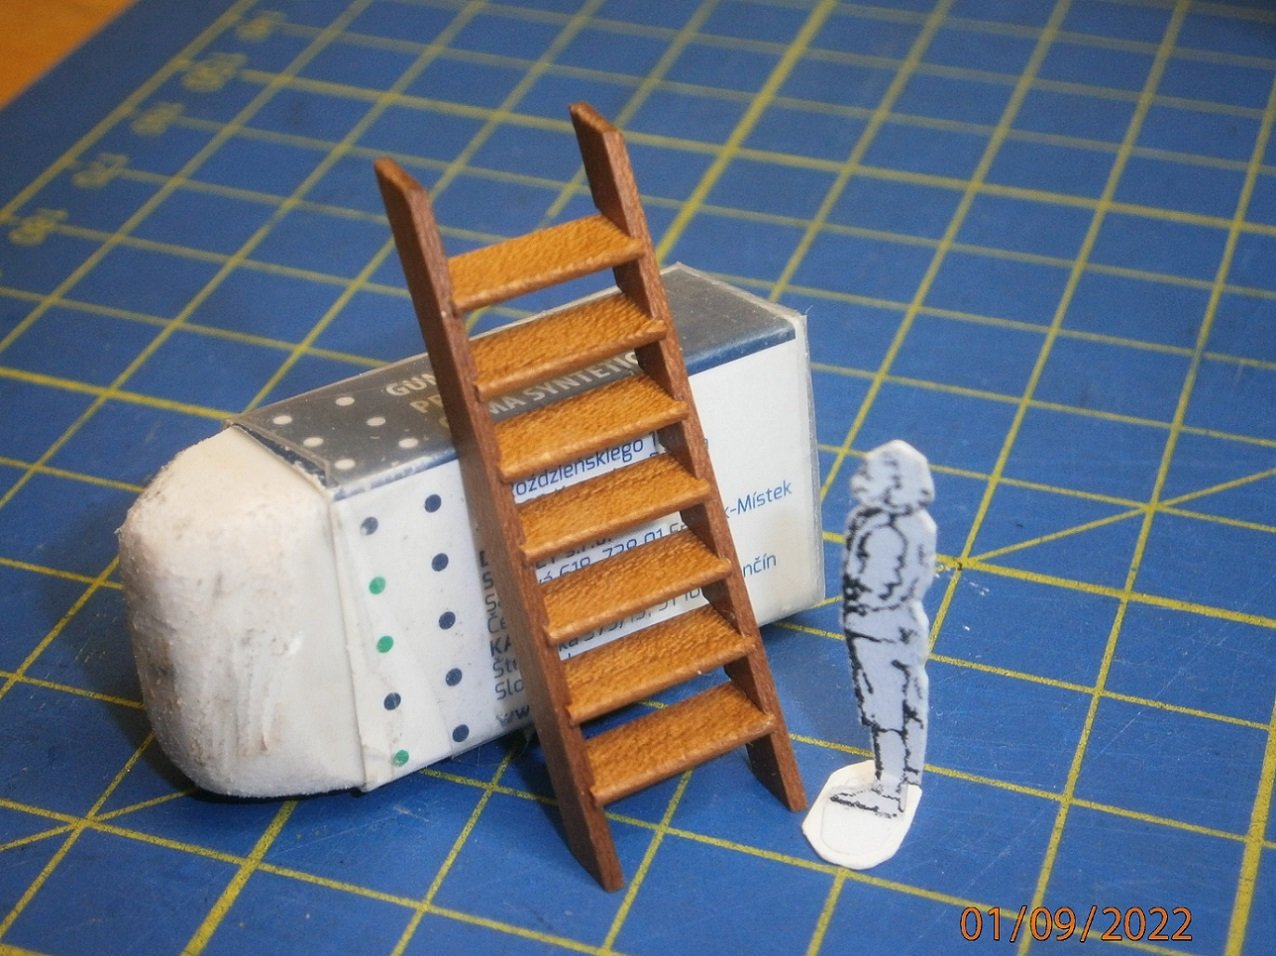
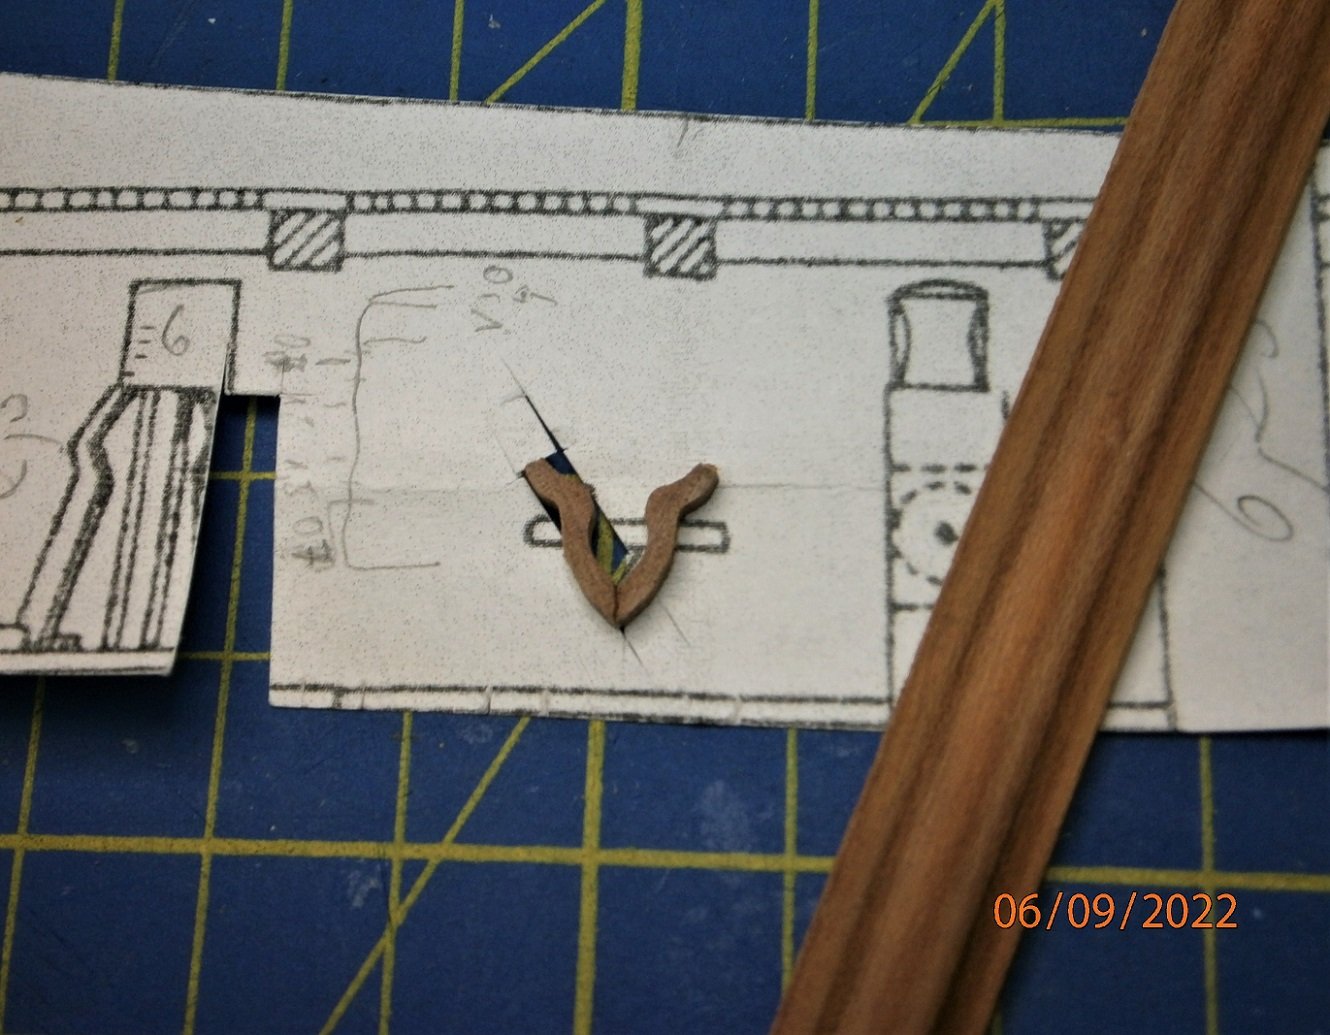
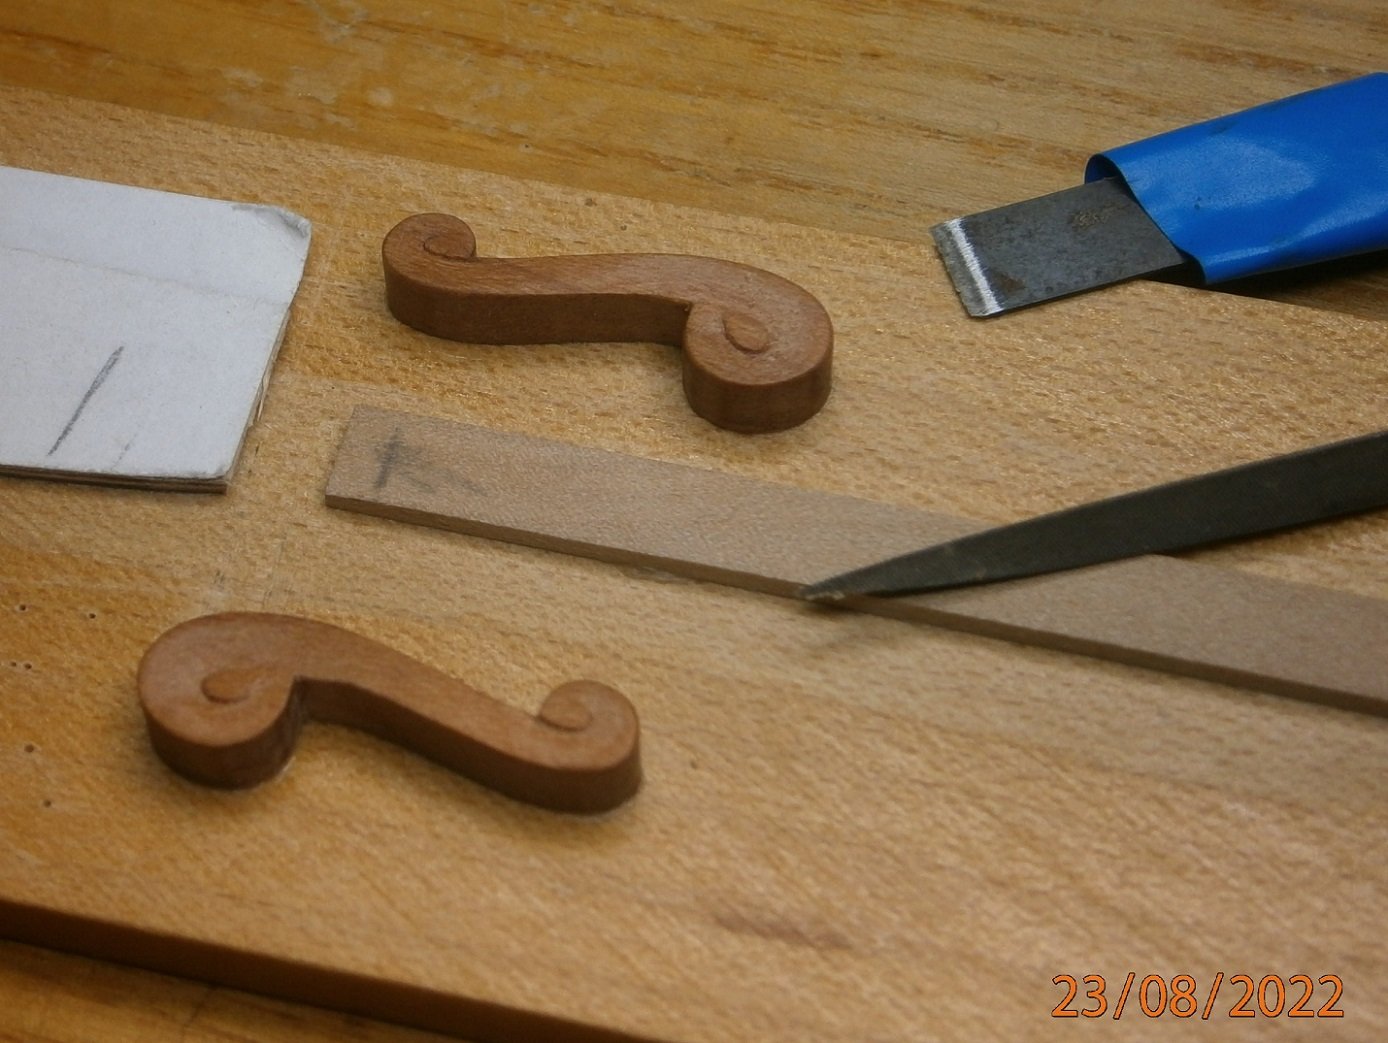
Made stairs.. Ramshead pulleys made for Halyard Knightheat posts.. Next work aft deck wall.. And a supply of Small staghorn harnesses...JPG.544f688230301a38f6a447b580fcd8a0.JPG)
.JPG.cc4ae980e1eb271c6050870604b28167.JPG)
.JPG.8979e17dcf2445e87ff421f1146d8d33.JPG)
.JPG.8467eaffee881fde52eba98385ec0804.JPG)
.thumb.JPG.4024efab7743258545d67f01f57def0a.JPG)

.JPG.ea2d1428230ee4be37bc244913e6050a.JPG)
.JPG.9a79505464c7b1140e133ffe05d7ec4e.JPG)
-
Hello Dave. I'll be happy to watch, I like Carolina. Your start looks very honest..!!
-
Roter Löwe 1597 by Ondras71
Ondras71 replied to Ondras71's topic in - Build logs for subjects built 1501 - 1750
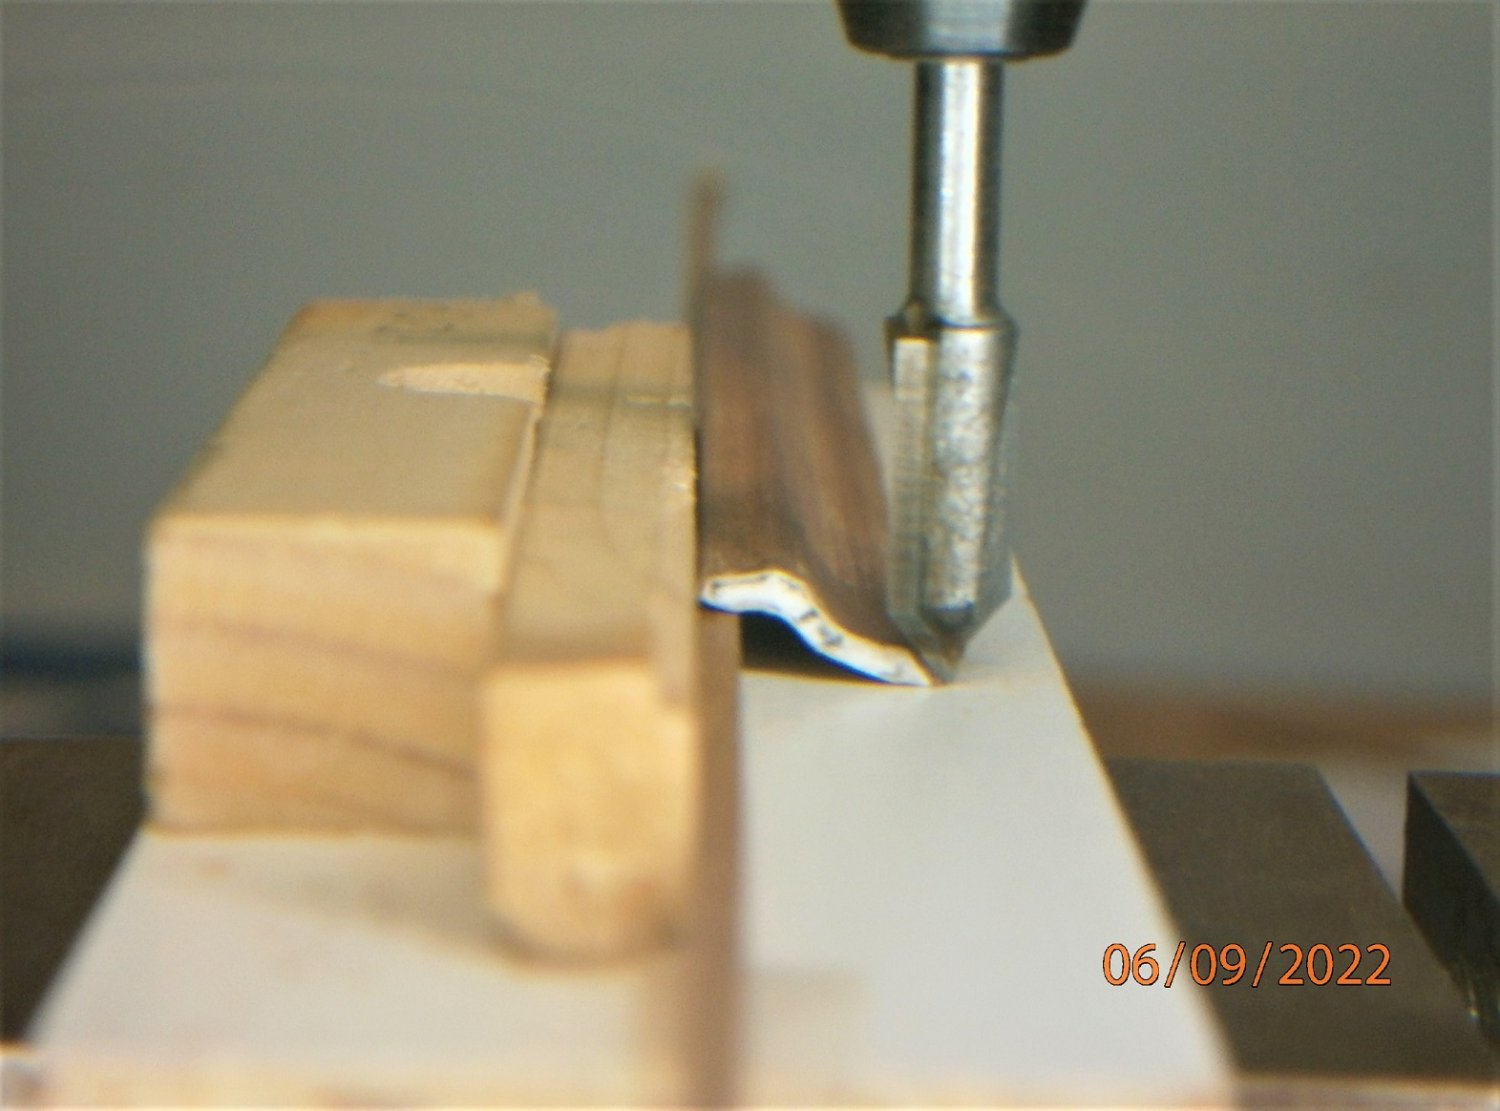
Decorative S attached to the stern.. Work on the inner railing, the supporting centers of the posts made of steel pins.. Waxed.. Capstan already placed under the deck, using a previously created jig.. Railing done..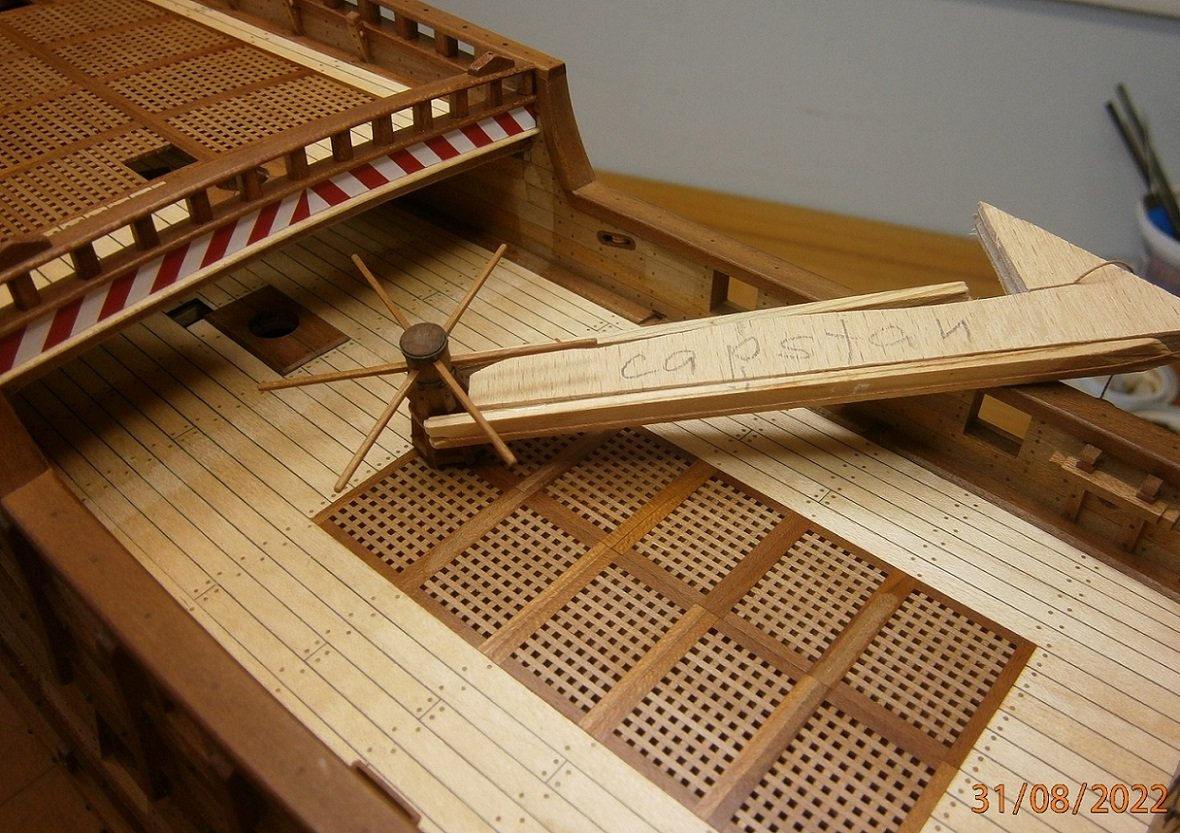
.JPG.744cdfe9b19c3c7c92664e9e96cb7bde.JPG)
.JPG.1e8fbc6d1810bdbe00632e76b4e06ae6.JPG)
.thumb.JPG.375062372d24edd66318197469fcffce.JPG)
.JPG.7d9bbe93d349546b1b55e472d019644d.JPG)
.thumb.JPG.0ab79ead9270e8b39a1e20e57e268d4c.JPG)
.thumb.JPG.5f85f99a630b4085c18f1203f242ab3c.JPG)
.JPG.7184966eee865910ec9166ba205731ae.JPG)
-
Roter Löwe 1597 by Ondras71
Ondras71 replied to Ondras71's topic in - Build logs for subjects built 1501 - 1750
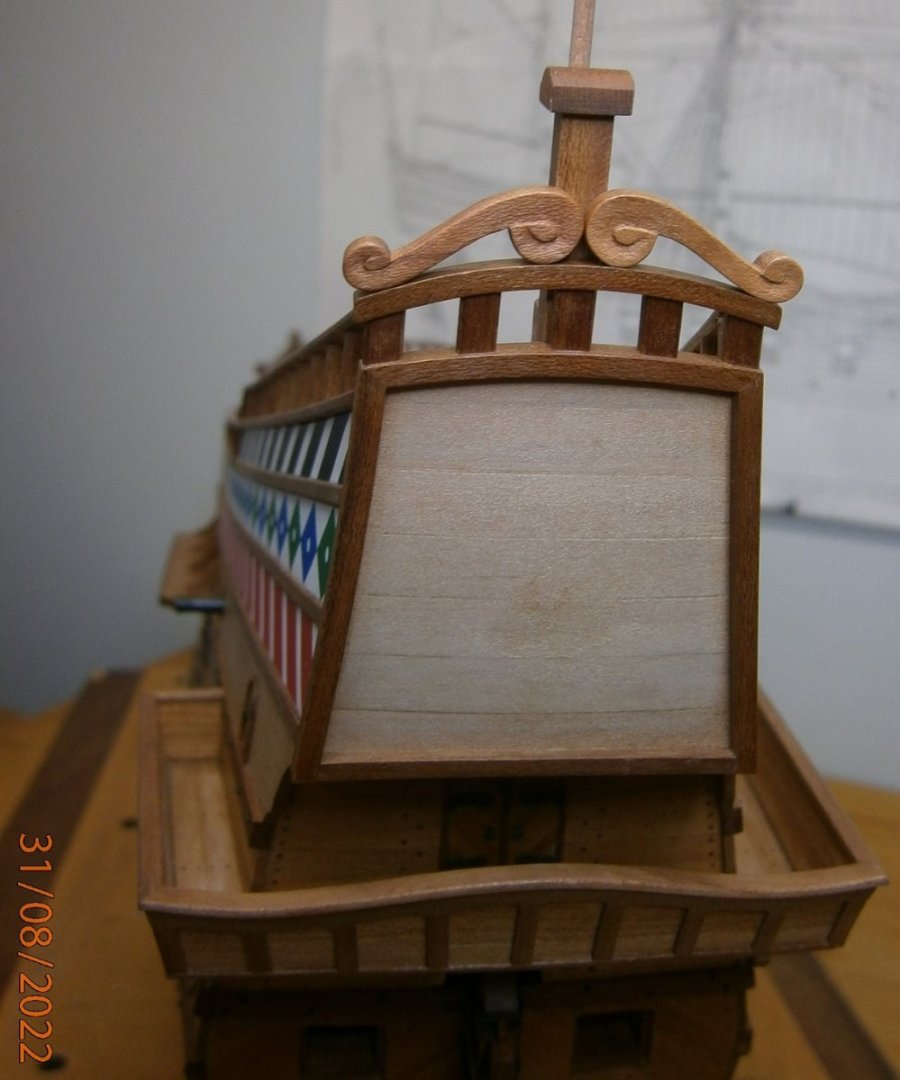
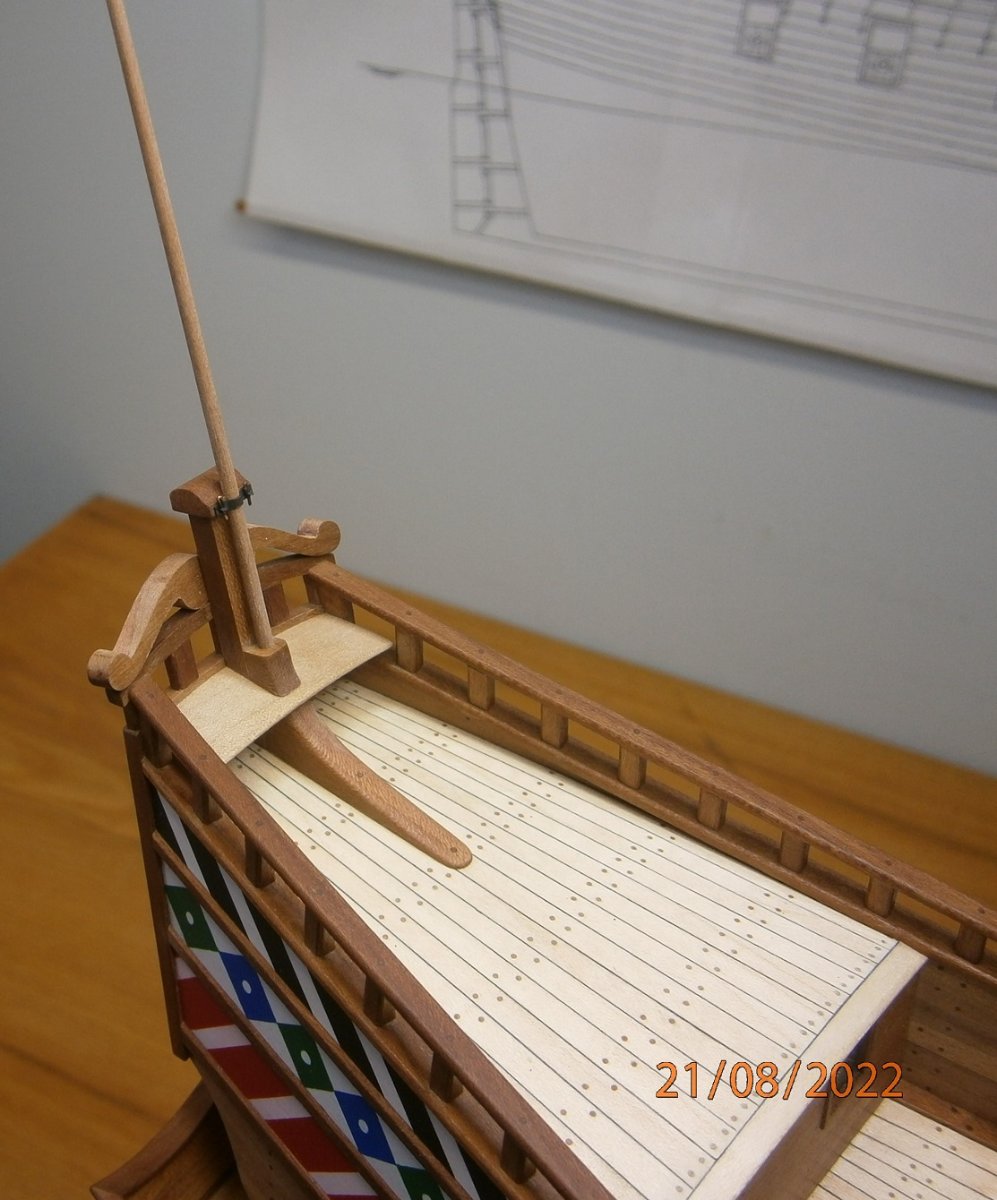
Flagpole turned, flagpole halter placed on ship. I reached maximum torso height.. I roughly created decorative ornaments for the top of the stern.. And then came the inner railing. Columns of the lower part.. Secured with three pins for strength..
.thumb.JPG.1328321eb1b0d983efb582936e5c5f9d.JPG)
.thumb.JPG.2c716a0df12e063ce60100e4daf22cc8.JPG)
.thumb.JPG.f6586fc7567ef16ee426daa838e53d3b.JPG)
.JPG.884fd91e3166c59d9746fa83f46254fd.JPG)
.thumb.JPG.f68e90c988ec82eee268907f03b24e99.JPG)
.thumb.JPG.f7cd82df38a7cabfe1f23e83a0489412.JPG)
-
Roter Löwe 1597 by Ondras71
Ondras71 replied to Ondras71's topic in - Build logs for subjects built 1501 - 1750
Completed poop deck.. Created a bench above the mirror.. Also the flagpole and the inner railing...JPG.384e54696b23a19a5c8fba2c8a19bfb8.JPG)
.JPG.d402fc07b541b9b0150ae3c1601dba5c.JPG)
.thumb.JPG.19890e3d9174b7941316d869e10f6071.JPG)
.JPG.8cc60df0177154d8d47c4816b3b815b3.JPG)
.thumb.JPG.a8261c7c666b158f92accafc253cdda1.JPG)
.thumb.JPG.b156505ab564f2f6e21abb6ecfcbf8d5.JPG)
.JPG.f7632e72f343df4c2962be402547b854.JPG)
-
Greetings to all Doris fans. The good news is that Doris is slowly returning to Czech forums. 💐I believe that you will soon welcome her here as well..♥️ https://www.modelforum.cz/viewtopic.php?f=177&t=110763&start=1605
- 1,035 replies
-
- 20
-

-

-
- royal katherine
- ship of the line
- (and 1 more)
-
Roter Löwe 1597 by Ondras71
Ondras71 replied to Ondras71's topic in - Build logs for subjects built 1501 - 1750
Thank you so much Rick, I appreciate your words! The last part to be painted, the inside railing of the foredeck.. The wall of the back castle.. Added rear side bar for Belaying pins.. I cover the last plywood part, the roof of the rear castle..
.JPG.1878679d3a40a8d5e3cb6f728ae08510.JPG)
.thumb.JPG.efff081d247eff790019859612a33079.JPG)
.JPG.978bd9dafbbb87173400c6e9d71d57dd.JPG)
.JPG.3a4d990944681e0c10a9590113a3c492.JPG)
.JPG.ea31cd55cc047ceaa98c956ef4742a4a.JPG)
-
Roter Löwe 1597 by Ondras71
Ondras71 replied to Ondras71's topic in - Build logs for subjects built 1501 - 1750
Thank you very much for the like! I provided the rear deck with all the pins.. Added Kevel blocks to the rear deck.. And the final spray, the inner railing.. Cleaned the holes in the gretings and waxed the rear deck...JPG.54d0bcac3c36047851a2f81240d71284.JPG)
.JPG.c0979dff483cecebb8877541ff96087c.JPG)
.JPG.fd091b374e9cc84dcef3efd7152e87a8.JPG)
.thumb.JPG.625f0a57dfaa864745be1fe24e1f0c11.JPG)
.thumb.JPG.801e40e448261cb6bcd070f5ec6325a0.JPG)
.JPG.7819902466162066e38543a783747d7a.JPG)

-
Soleil Royal by yancovitch
Ondras71 replied to yancovitch's topic in - Kit build logs for subjects built from 1501 - 1750
I was very happy to find your next build here. I will be happy to watch. Thank you for continuing.. -
Roter Löwe 1597 by Ondras71
Ondras71 replied to Ondras71's topic in - Build logs for subjects built 1501 - 1750
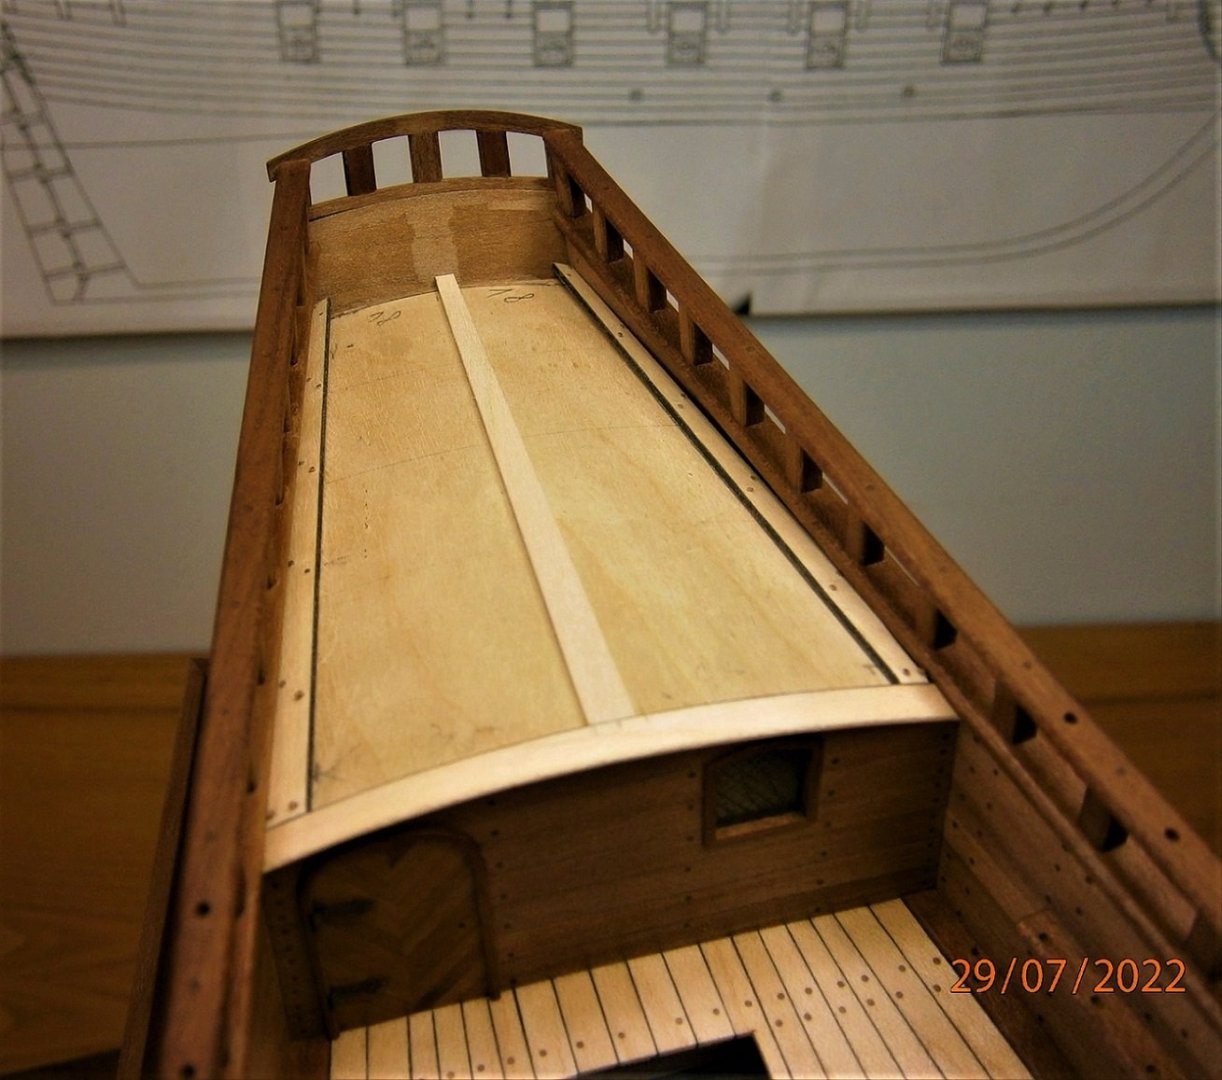
Thank you very much Patrick!! I lined the back deck with lapped boards.. Deck with gratings ground.. Deck sanded.. View below the rear deck...JPG.d7c21d00e942791424ab9b2cbec2f45f.JPG)
.JPG.9fa773bd8d78b6ac6003ded3789b01e7.JPG)
.JPG.3131a57e6edadd52ece156d92cb957bf.JPG)
.JPG.eb6ad7f4c8d2157b1b8832b78bc7963d.JPG)
-
Roter Löwe 1597 by Ondras71
Ondras71 replied to Ondras71's topic in - Build logs for subjects built 1501 - 1750
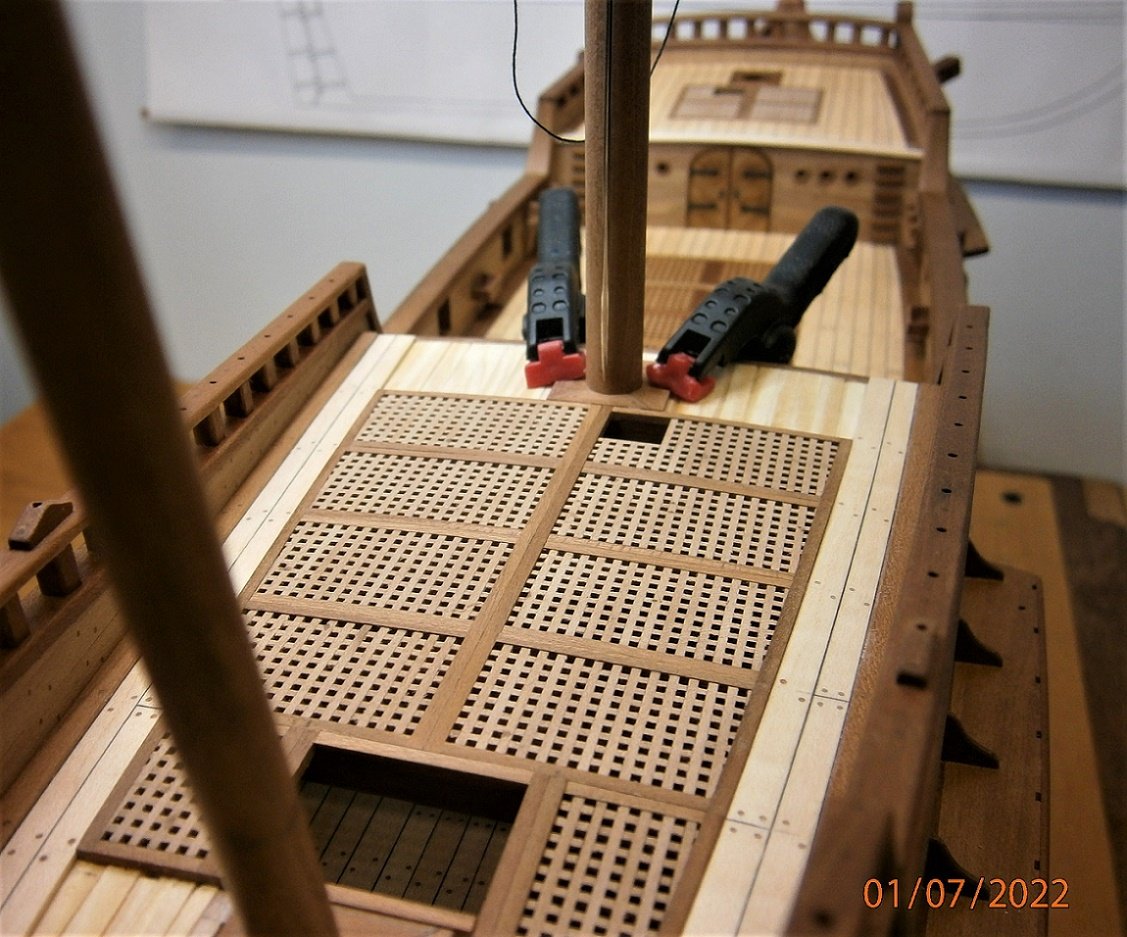
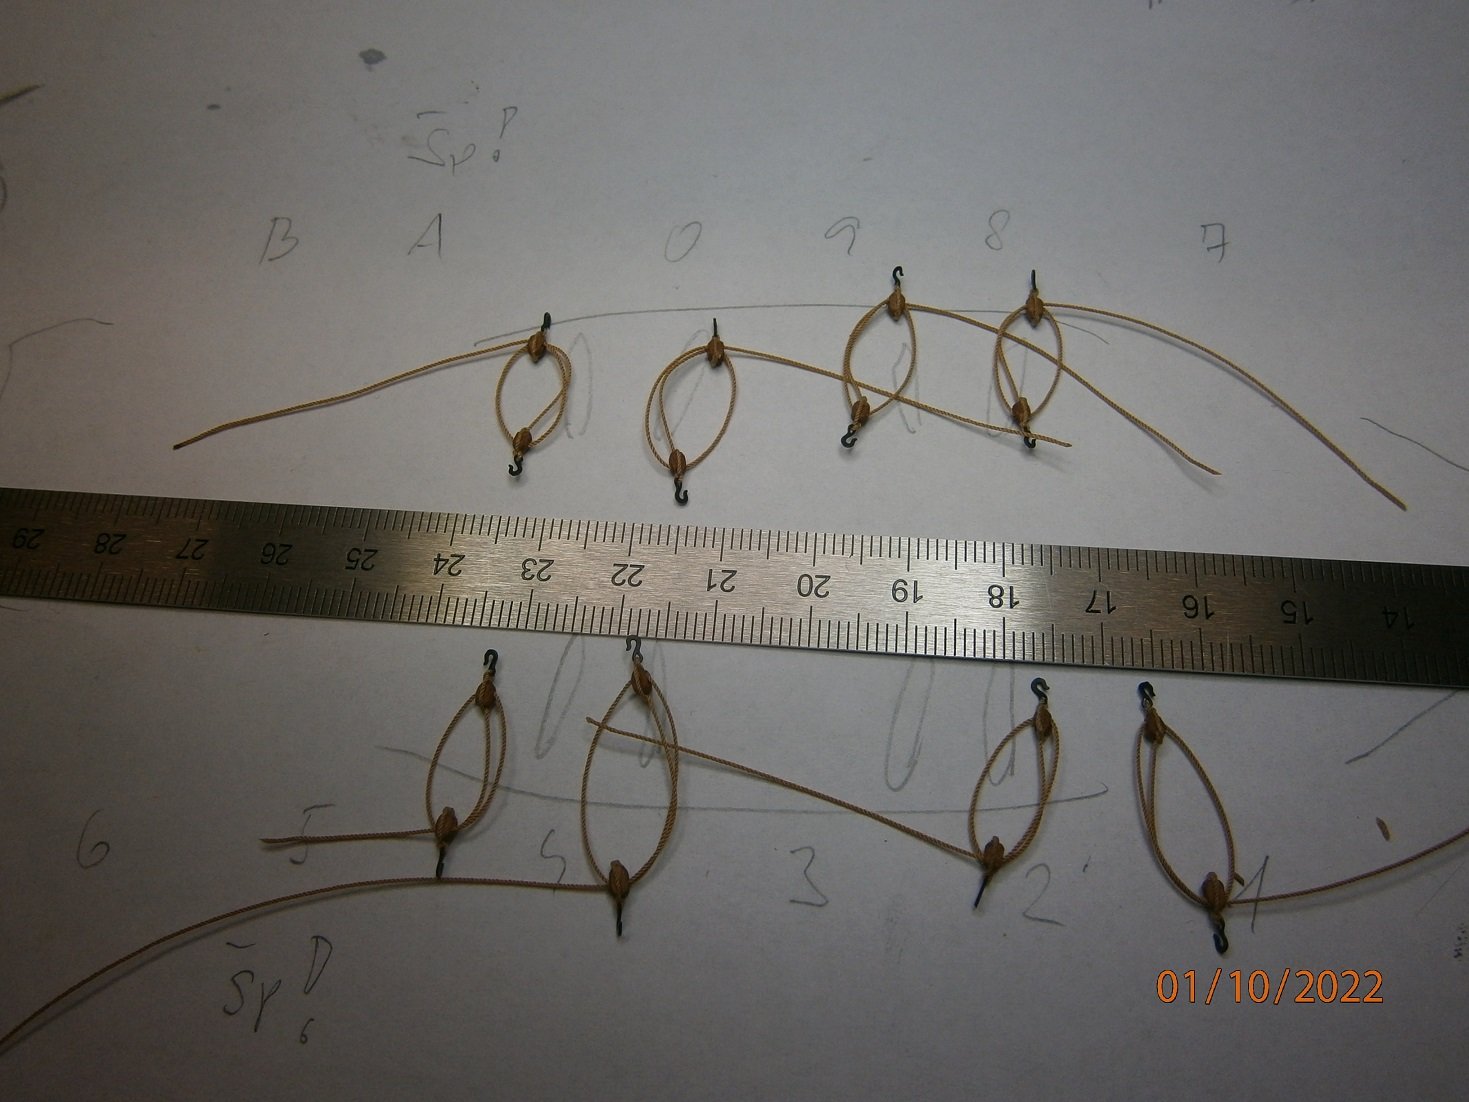
Thank you for the like! I made blocks for cannon hoists. Training kept under deck.. Hoists .. Cannons arranged and placed in the transport position..👍 Glued grating, these I have to grind with the deck, to this created a "box" that prevents contamination of works.. The base of the aft deck..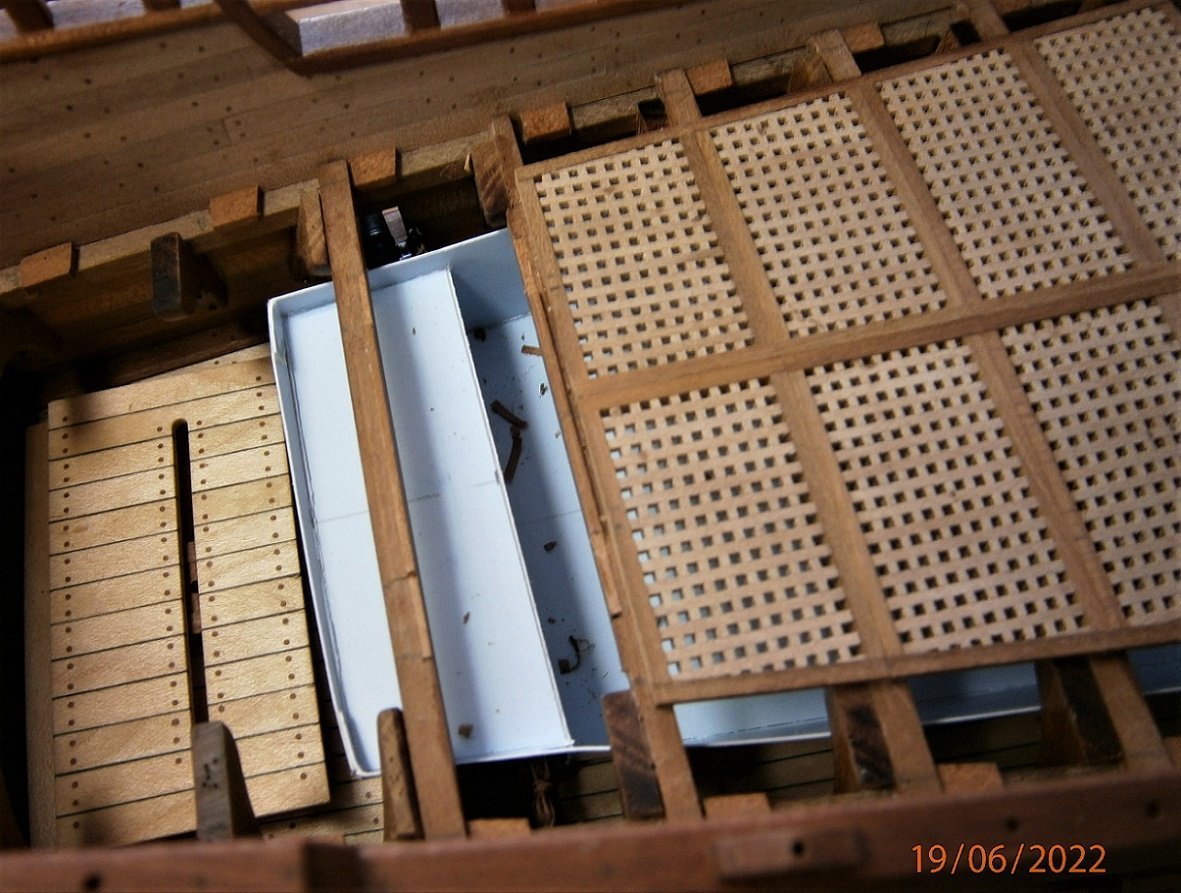
.JPG.9072a6afc53caf817a153c99a8e8b451.JPG)
.JPG.8c1458dde1b74082b3470568fa62698c.JPG)
.JPG.9ed3e8e6fa34b1a443a060d0d088b9be.JPG)
.JPG.26cad9a9152eb0c8461547a01ef33ed3.JPG)
.JPG.c859889e41e5bdee3c5dfa277be195fc.JPG)
.JPG.1803ace41da7edd79eb53f986082f79e.JPG)
.JPG.099f0fe9e3a1a64d08781089f8487026.JPG)
-
Roter Löwe 1597 by Ondras71
Ondras71 replied to Ondras71's topic in - Build logs for subjects built 1501 - 1750
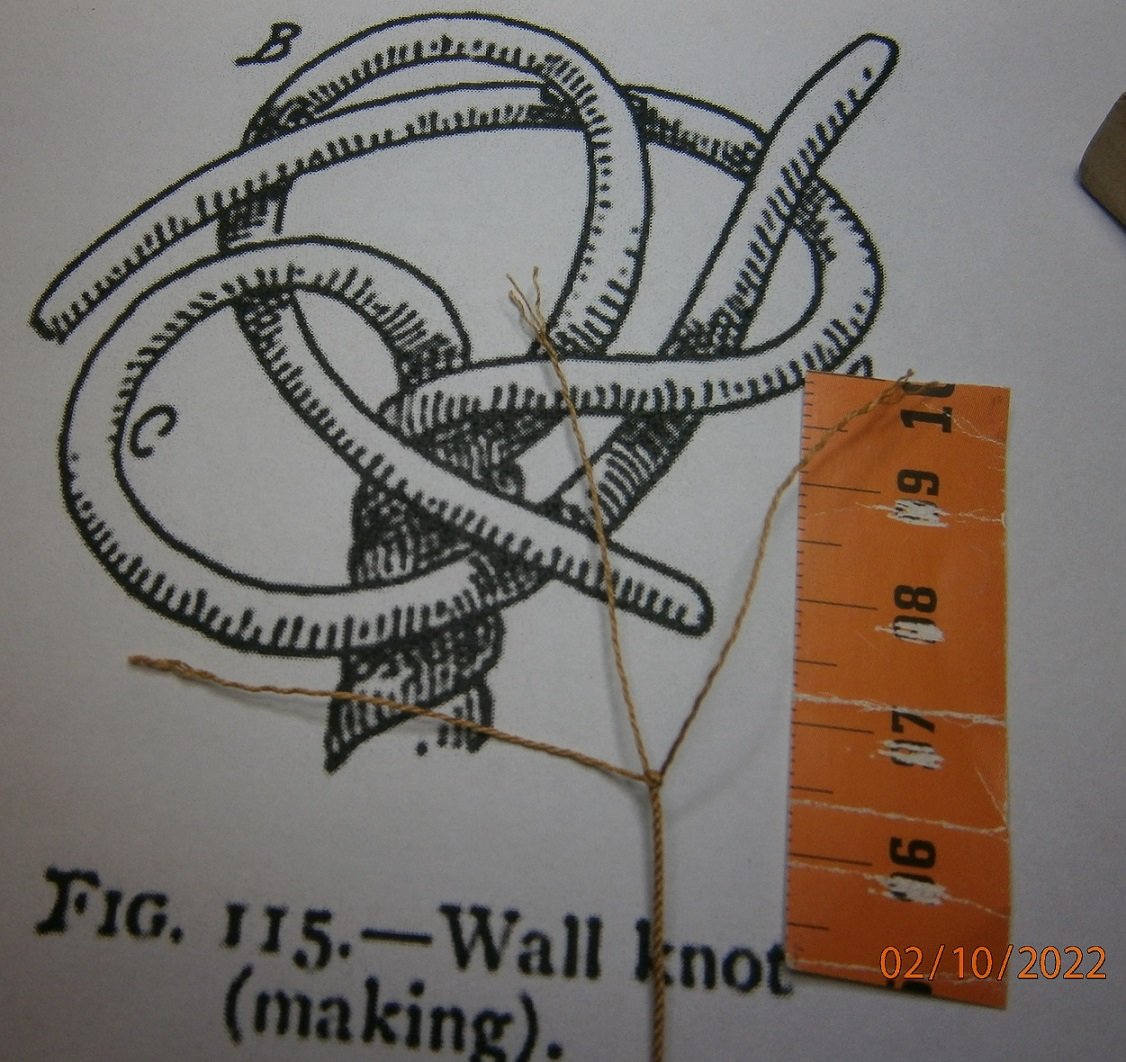
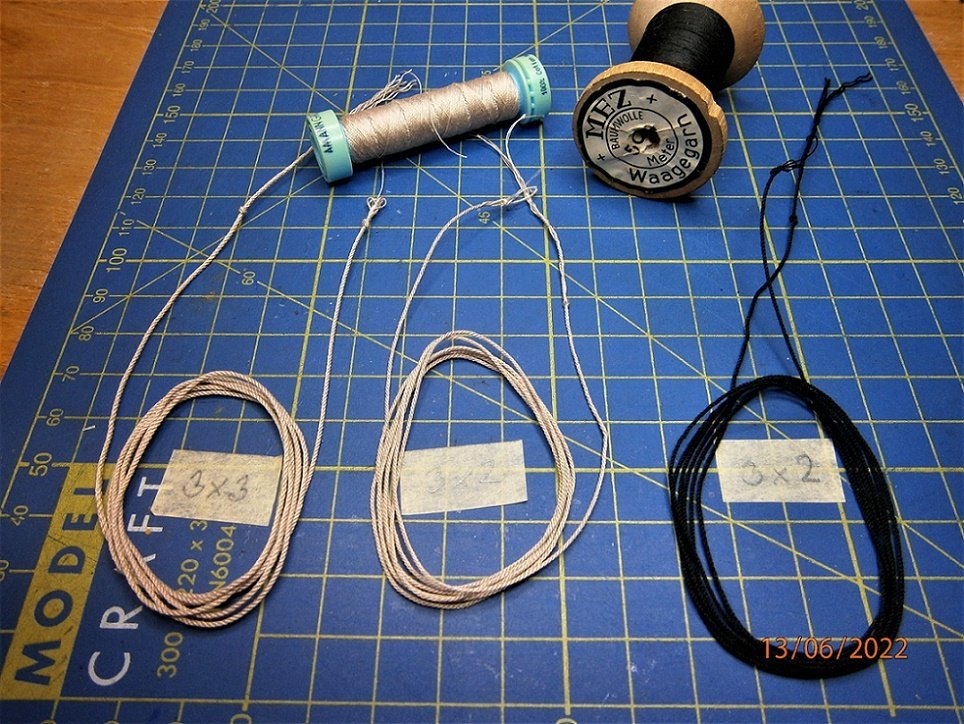
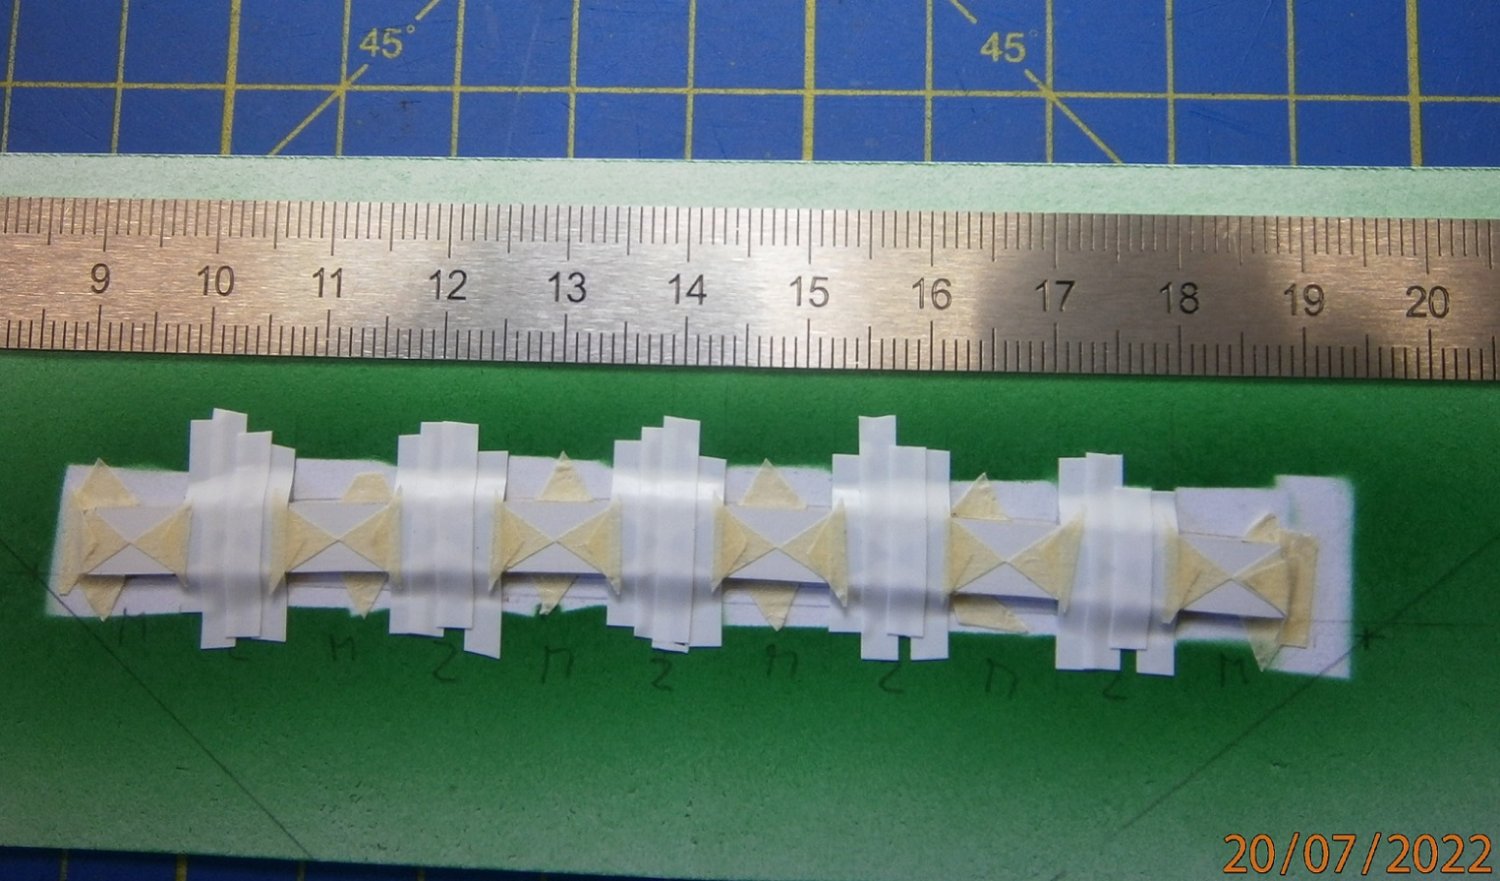
I'm learning to work with a ropewalk. It's really about testing. Catch weight weights and skill.. The first ropes and anchor cable Gutermann ..💥 First I have to create ropes for the cannons, which will already be placed under the aft deck. I study in detail and only now do I understand that the "rope" is braided only once from 3x32 threads .. Then the anchor "cable" is braided from three prepared ropes.. After the first twisted ropes, I confirmed that the Dutch ships had, against the English, all the ropes turned to transport, even stays. This is confirmed in publications by Ab Hoving, such as "The Ships of Abel Tasman" and on replicas of Batavia and Duyfken..😱 So I used the table of the Czech modeler marsalva, to whom I would like to thank very much for the information, because the system dropped my trial and I don't have to invent the invented ones, For a 3x1 rope, which is braided from three clockwise threads, the threads must first be turned to the left, elongated by 3.6 percent and then pre-spun to the left to form a clockwise thread. During this, I ran the threads several times between my fingers and the resulting cable, which is more hairy, went through the flame of the candle and the resulting cable P 3x1 with a thickness of 0.37 mm is great !!💯.JPG.ab4ef61e394270790dece8ccb0590f7b.JPG)
.JPG.59c02d3f1f7e01f6d1621ac4470bb431.JPG)
.JPG.1969f863d4f7acf320e31c77ffdb6b24.JPG)
.JPG.b9a7e188886711e71882f9560994d705.JPG)
-
Roter Löwe 1597 by Ondras71
Ondras71 replied to Ondras71's topic in - Build logs for subjects built 1501 - 1750
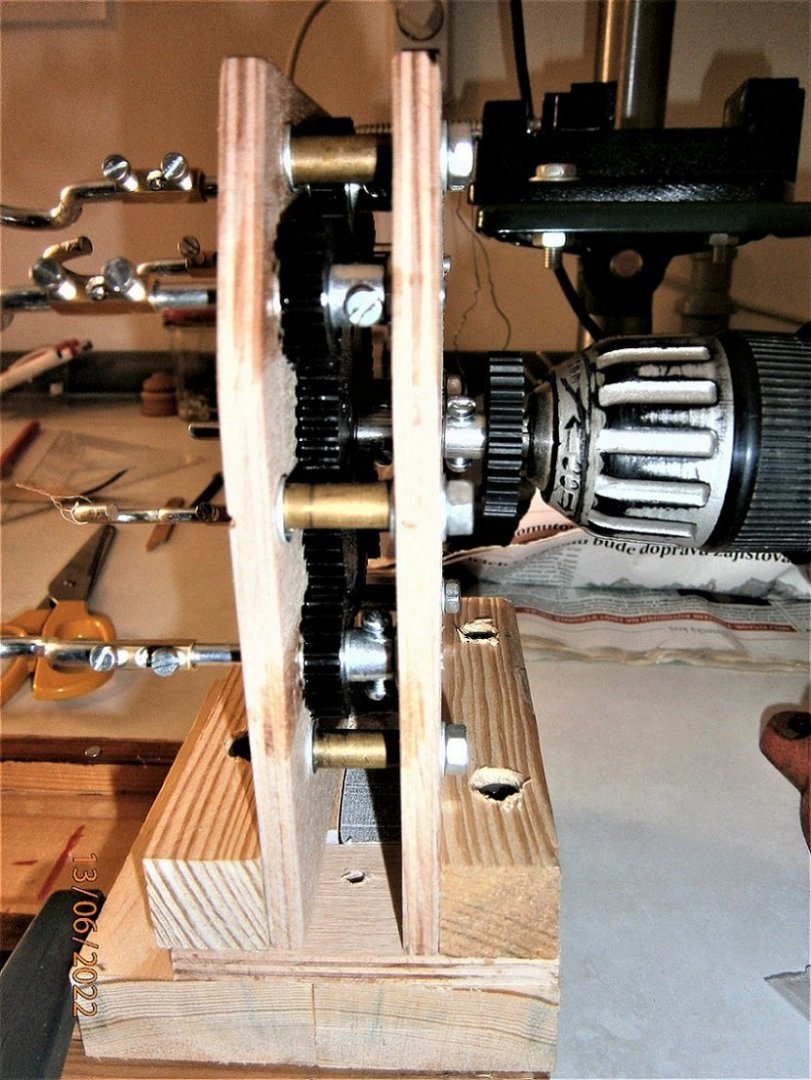
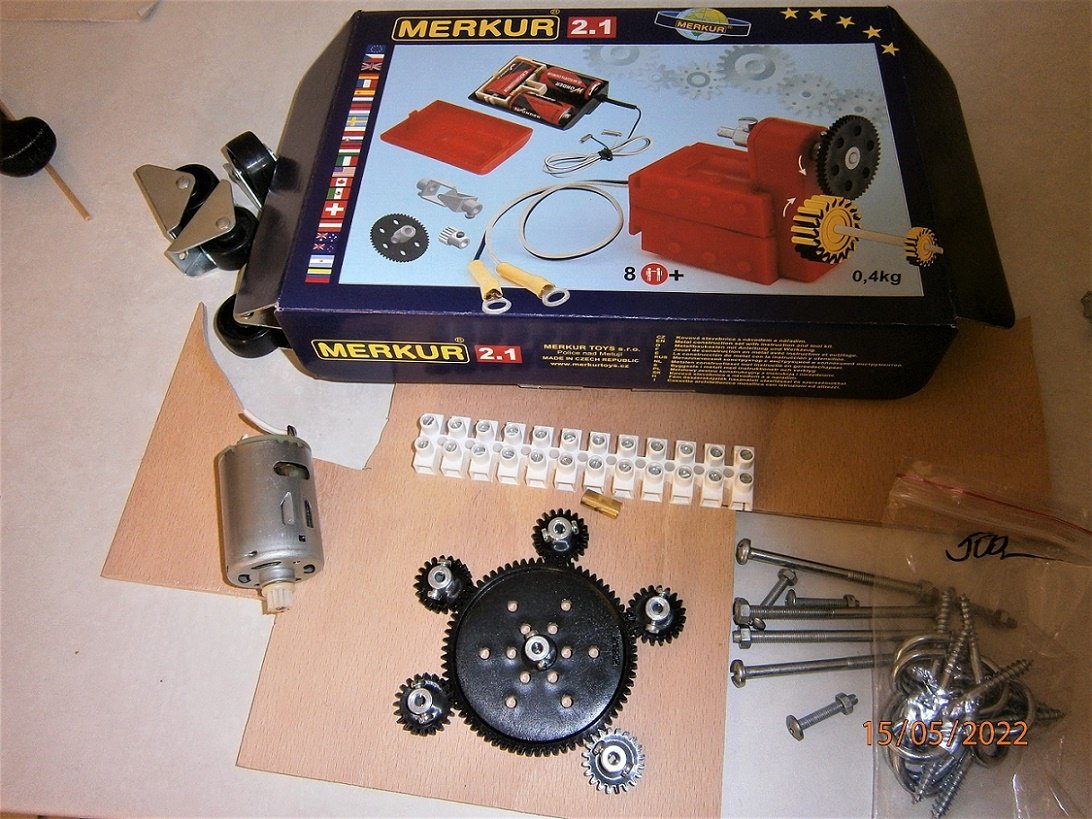
After a week's sick leave, I finally completed my ropewalk. I only bought the Czech "Merkur" set with wheels and a motor, the others are various remains, the other side is still driven by a cordless drill .. It works ..🛠️ After a short training "IT" really creates ropes !! So far, I'm training on the remnants of threads ..💥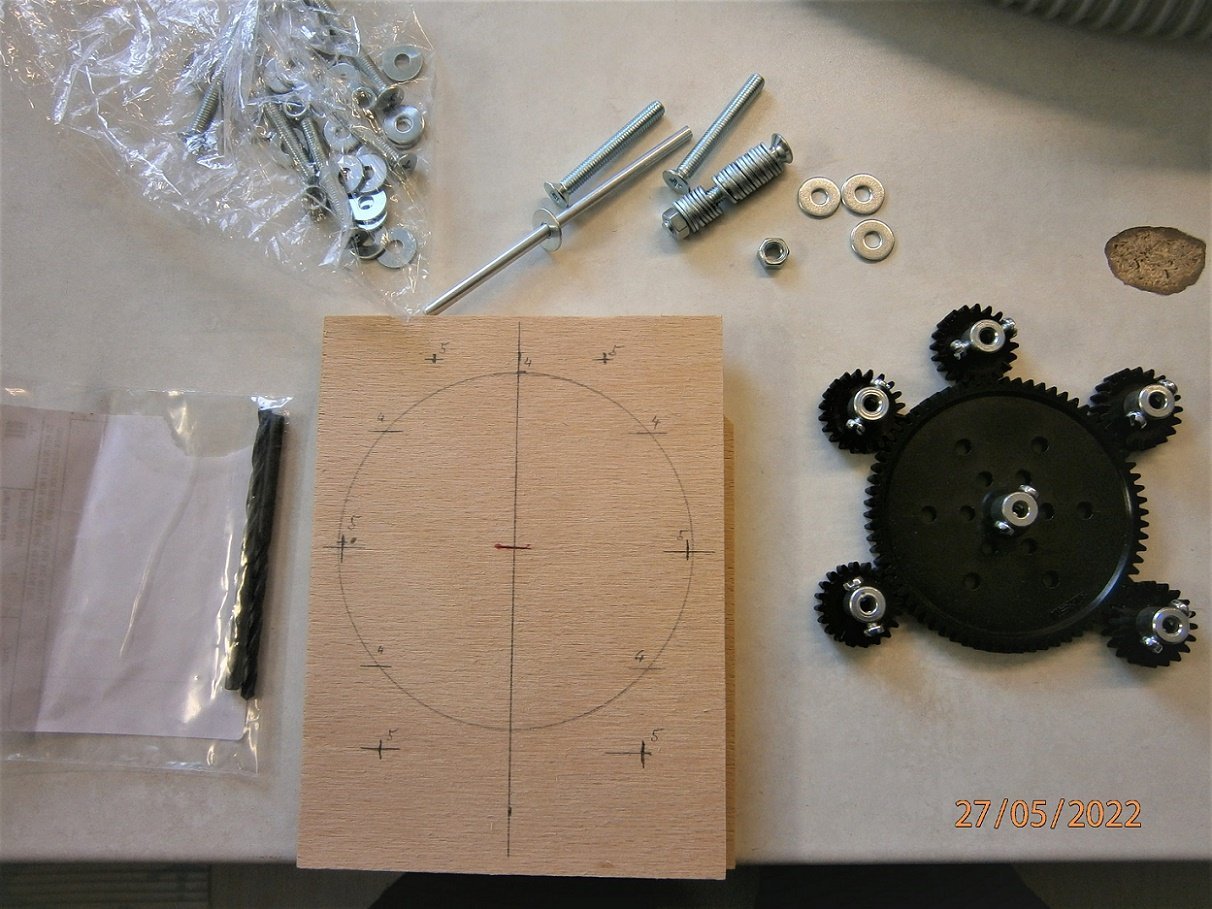
.JPG.c398c683958bd4283c974c9d6304064c.JPG)
.JPG.ada9613121533c3c23d10025e4eb16aa.JPG)
.JPG.72ead560d610e1d6a01615e2398bc2b2.JPG)
.JPG.fee23a0471735b5987768944c98d676c.JPG)
-
Roter Löwe 1597 by Ondras71
Ondras71 replied to Ondras71's topic in - Build logs for subjects built 1501 - 1750
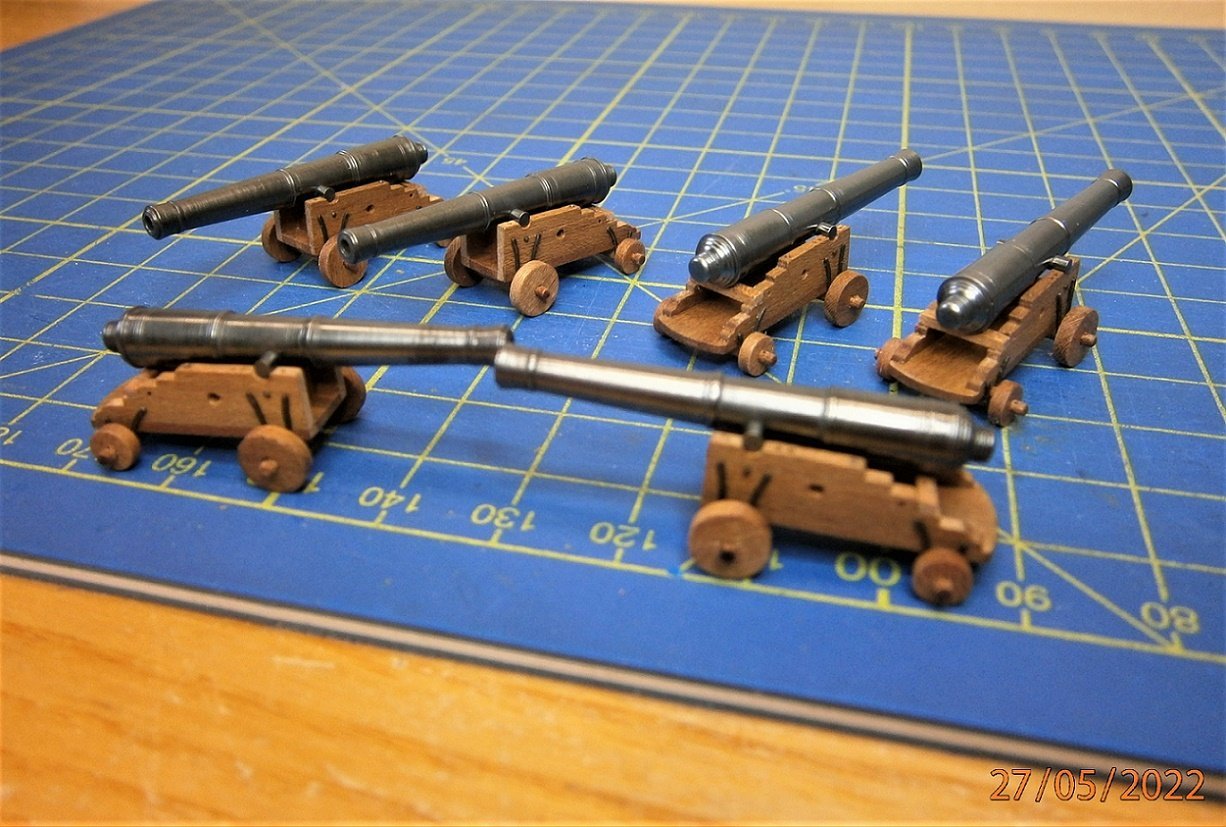
Thank you very much for the nice words. I try to reach the maximum, it's slow. Ondras Fittings finished, next time I'd rather create etched parts, this is hard work.. To be on the safe side, I provided the bottoms of the wheels with pin holes for a firm placement on the deck.. Cannons on the main deck done..👍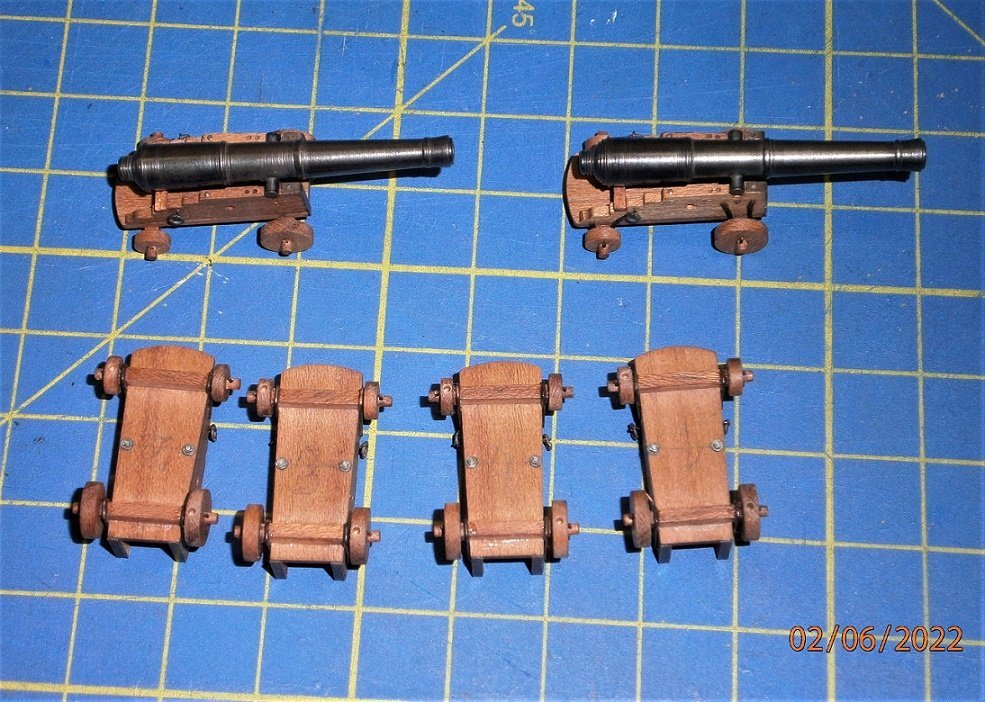
.JPG.8f4bc212370af7fd07a7a067cad60a81.JPG)
.JPG.482296ea224d48b2f1fe93294bd06e82.JPG)
.thumb.JPG.63418374e3f973dd27942d2f095b6ce8.JPG)
.JPG.e73955363c83dee9b3c51e14158a6a20.JPG)
.JPG.85153d7b6793ffb649bebee08a0e85b5.JPG)
.JPG.16b3e78c43c5a84bdfd9bf2a0e4cc006.JPG)
.JPG.90f52298a6c9d8974eec51eae48a95d7.JPG)
.JPG.7df7e160eb9201c855b121e3dc3515d5.JPG)
-
Roter Löwe 1597 by Ondras71
Ondras71 replied to Ondras71's topic in - Build logs for subjects built 1501 - 1750
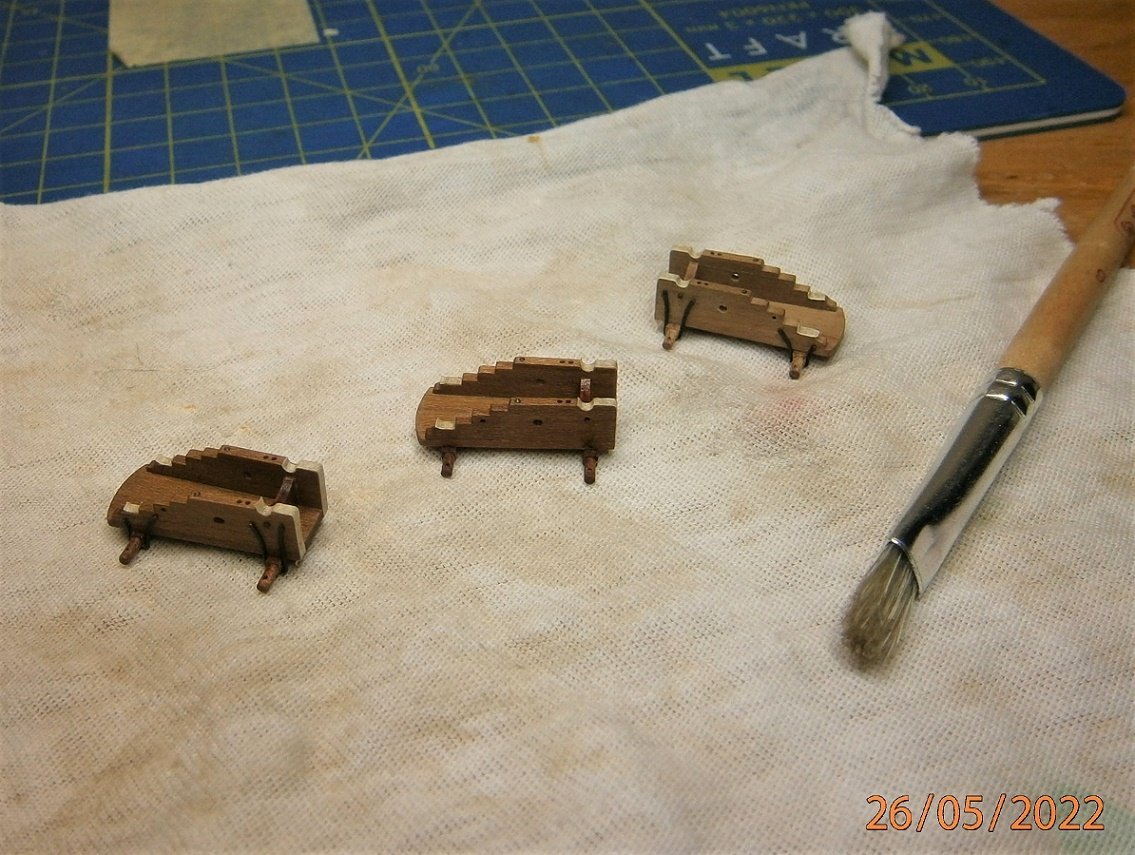
Cannon trucks folded, complete with side fittings, waxed.. Test of cannons on the upper deck...JPG.8dba760531ff2503a1c53f213a36fdb4.JPG)
.JPG.0ff3d93fd443b6f2ecdcafdc1b42bf6b.JPG)
.JPG.4cb48d720b0654ca3998bbb6b308e228.JPG)
.JPG.4b33fff1a07d5deb967ca26d104ec6dc.JPG)
.JPG.e82cbdcd451036473ca694eb5b345341.JPG)
.JPG.461d441d792be31851baff13dc00a749.JPG)
-
Roter Löwe 1597 by Ondras71
Ondras71 replied to Ondras71's topic in - Build logs for subjects built 1501 - 1750
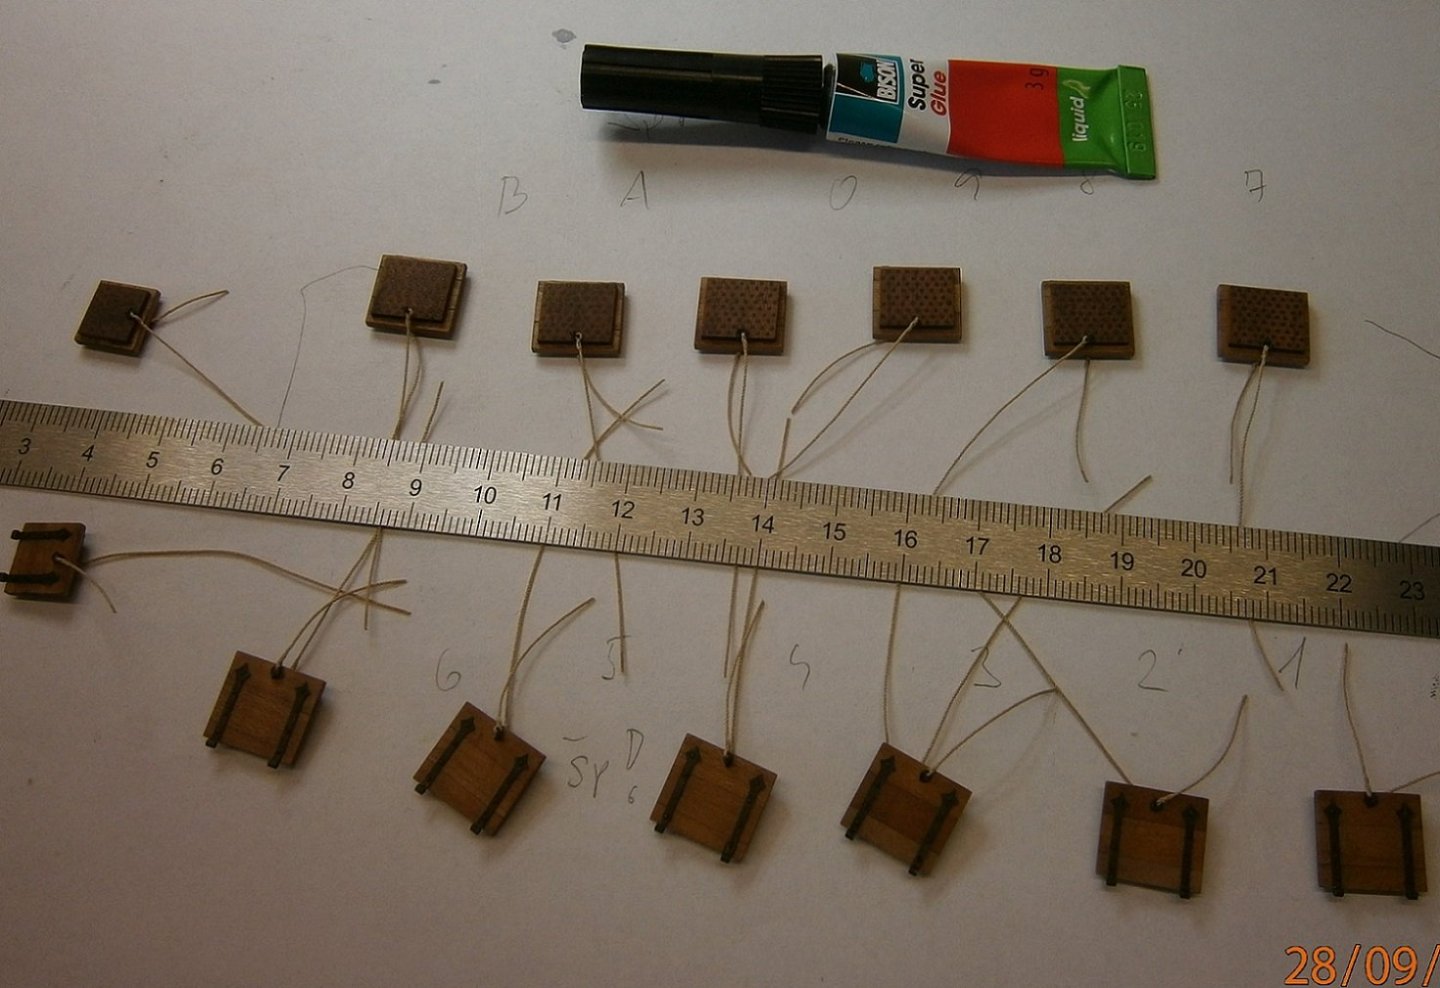
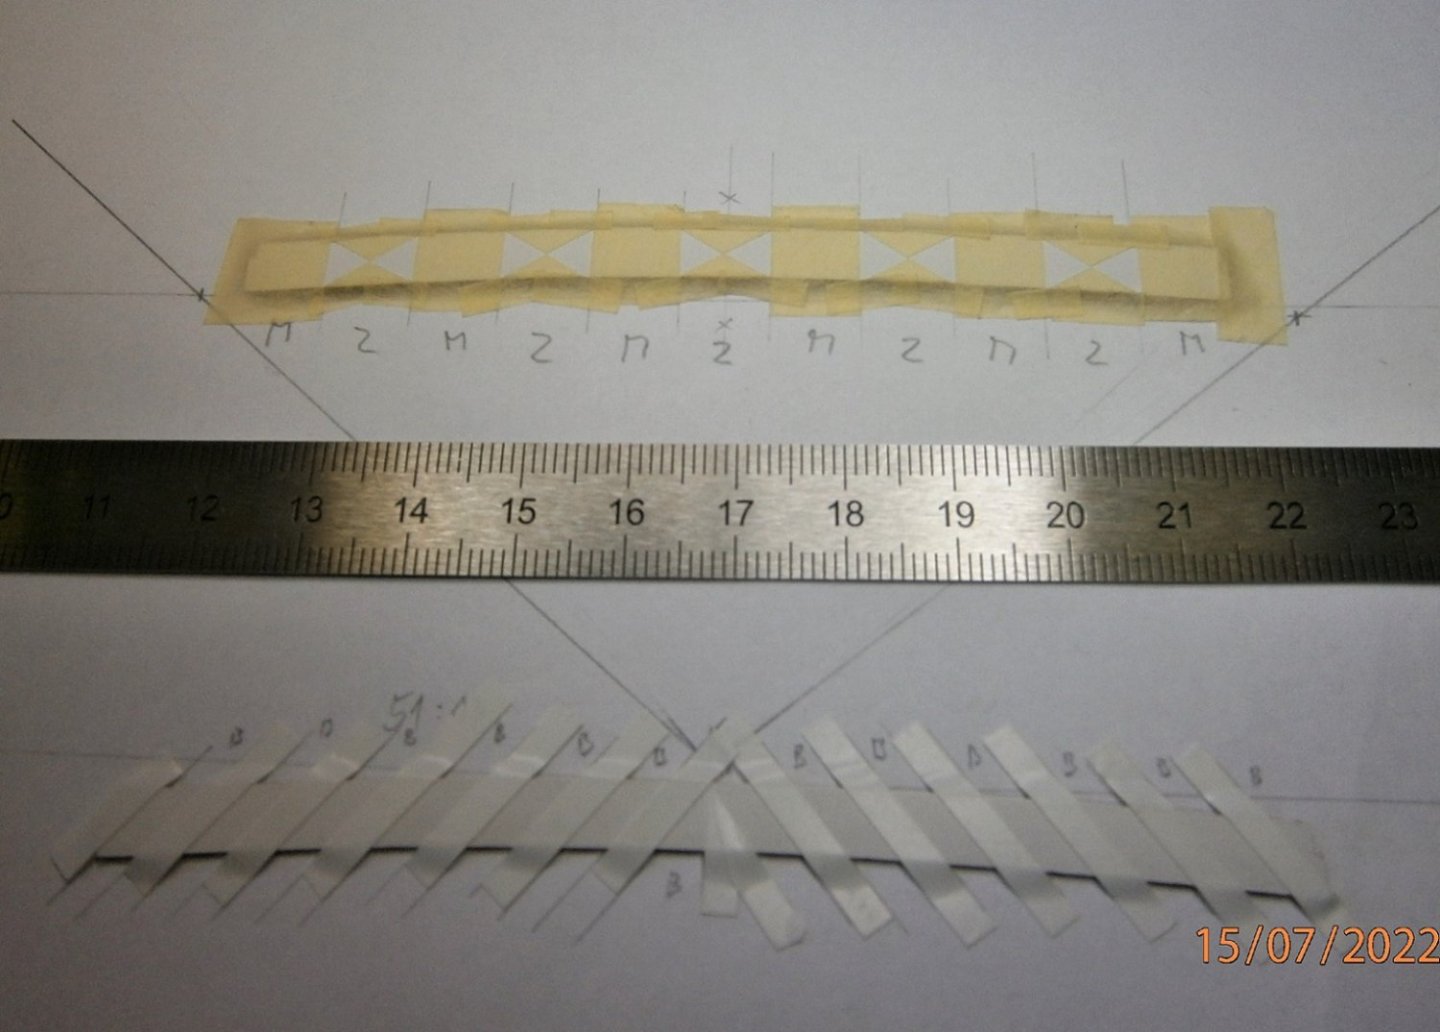
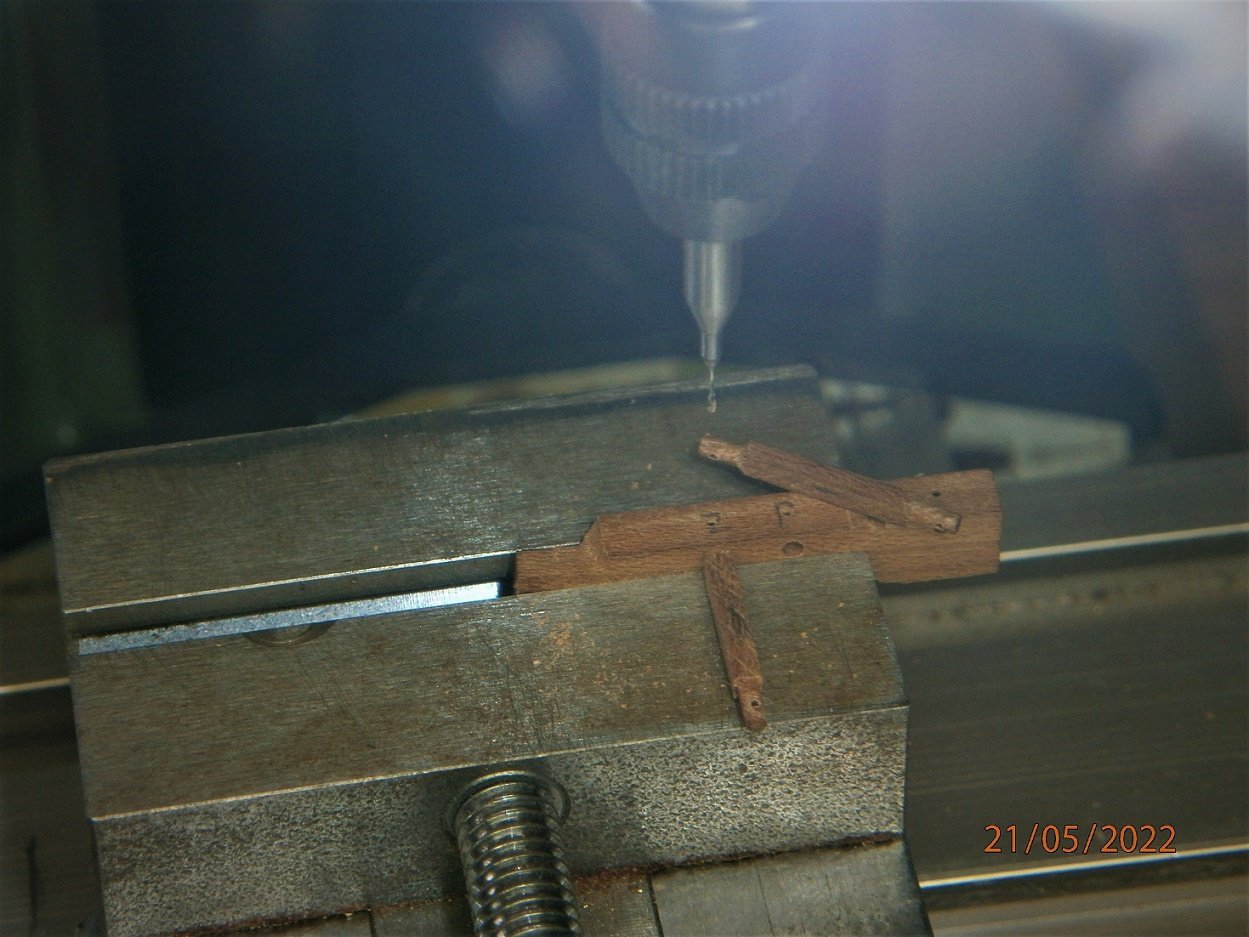
I measured Dutch artillery trucks.. Production of artillery trucks.. Artillery trucks folded .. Ready material for ropewalk...JPG.e9538172563680b4011e5bcad173fdef.JPG)
.JPG.421ad87d39fef3a4709c5a31b88caa13.JPG)
.JPG.b560ed140575d36240c204db1a814bd2.JPG)

.JPG.05eb49047d6aa1ce73c673afbc0d3e27.JPG)
.JPG.2652be7d01bed5d757b100ce605b37a7.JPG)
.JPG.c1b593fb414d300766b11da235513807.JPG)
.thumb.JPG.933aeee837941140474656d7c413403e.JPG)
.JPG.3f793ad9eabc5a925cf6a702a95c6b2a.JPG)
-
Roter Löwe 1597 by Ondras71
Ondras71 replied to Ondras71's topic in - Build logs for subjects built 1501 - 1750
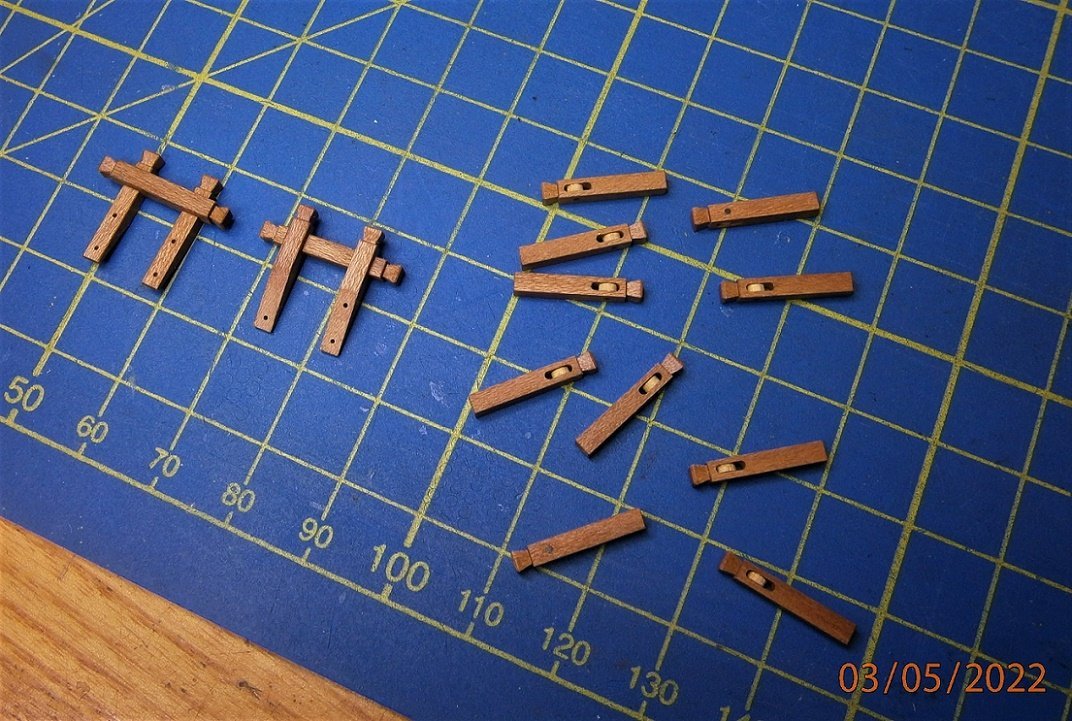
Thank you for the like..👍 I finished the cannon barrels on the upper deck. They have been ready for 2.5 years...😱 I placed Large staghorn and Level blocks on the main deck...JPG.b84c45197730e05168df97de0f473e36.JPG)
.JPG.40cc739f01221b98a179d380cbddc4c0.JPG)
.JPG.800012e3b1d20ef187a0a96583bf1c22.JPG)
.JPG.34e775d522863231d072f0d138a0fb77.JPG)
.JPG.522de019b815b4dfb4cca00bf63d7bdd.JPG)
.JPG.91e652c9800481617a39a33c998432a9.JPG)
.JPG.af285e9ebd12517698ab62d7602fbb39.JPG)
.JPG.5e6b51a27a69da3c2983c8dfdb0aa5df.JPG)
-
Roter Löwe 1597 by Ondras71
Ondras71 replied to Ondras71's topic in - Build logs for subjects built 1501 - 1750
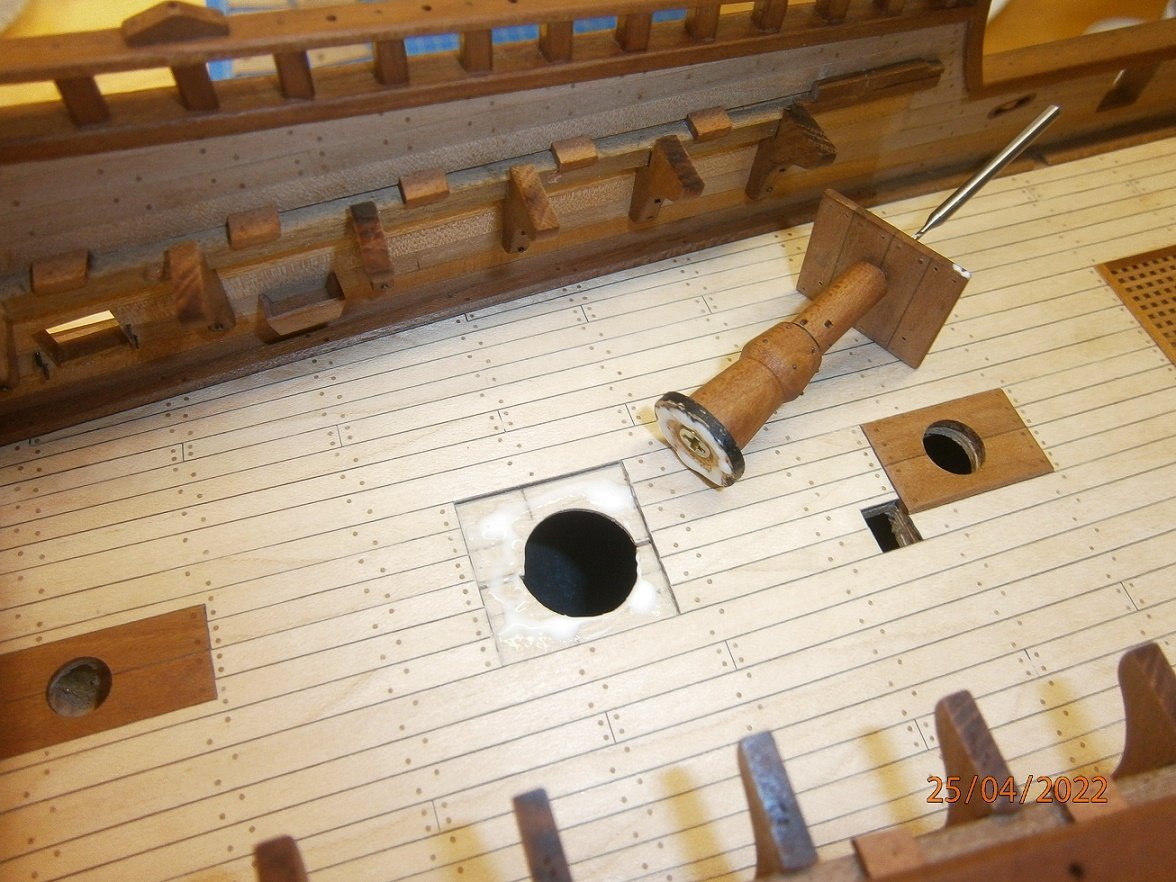
Thanks for the like!👍 The lower capstan is glued.. I finished the upper capstan and added a rope pulley to the Halyard knighthead post against the plan Main top rope.. Before gluing the deck beams, I adjusted the visible places at the holes on them, the grating do not have a scale force.. I also create Large staghorn and Kevel blocks, these are completed according to Zehaen's plan.. Rear grating shaped ..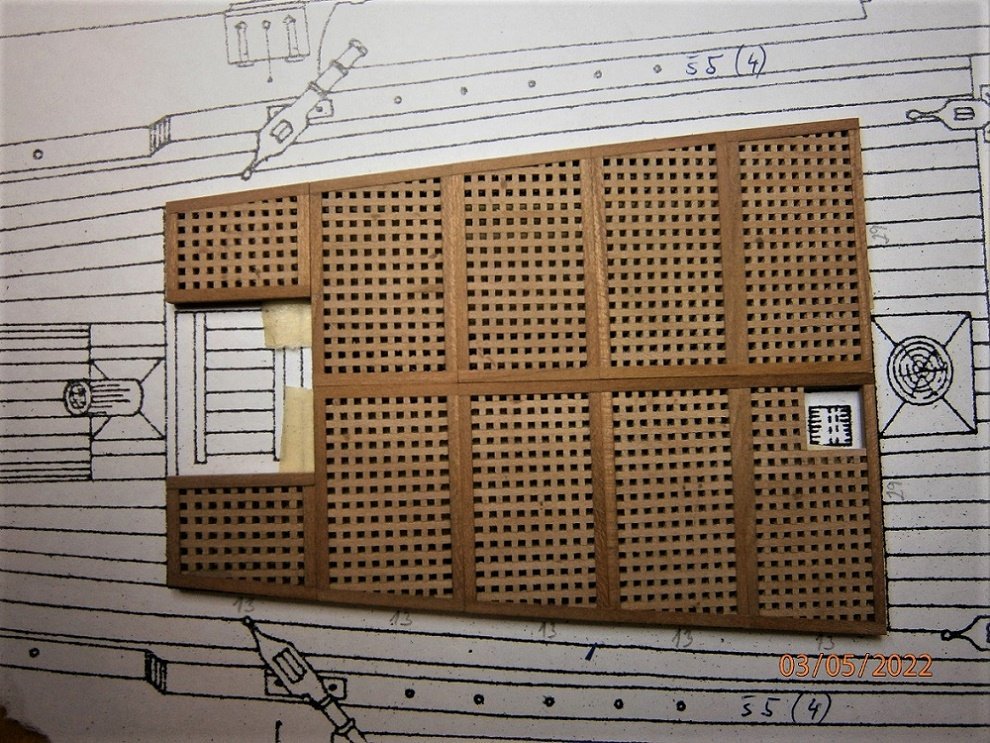
.JPG.7c07ffbc769fa2036206796220cc4e01.JPG)
.JPG.36f1b764e3b1b794ff056d67dff6d8f6.JPG)
.JPG.9eeea7c275e4d1d0c91dc489f683aec3.JPG)
.JPG.f79ac8c607980385577386163b2f733f.JPG)
.JPG.ce84736cb83fc81dec68505c0a38310f.JPG)
-
Roter Löwe 1597 by Ondras71
Ondras71 replied to Ondras71's topic in - Build logs for subjects built 1501 - 1750
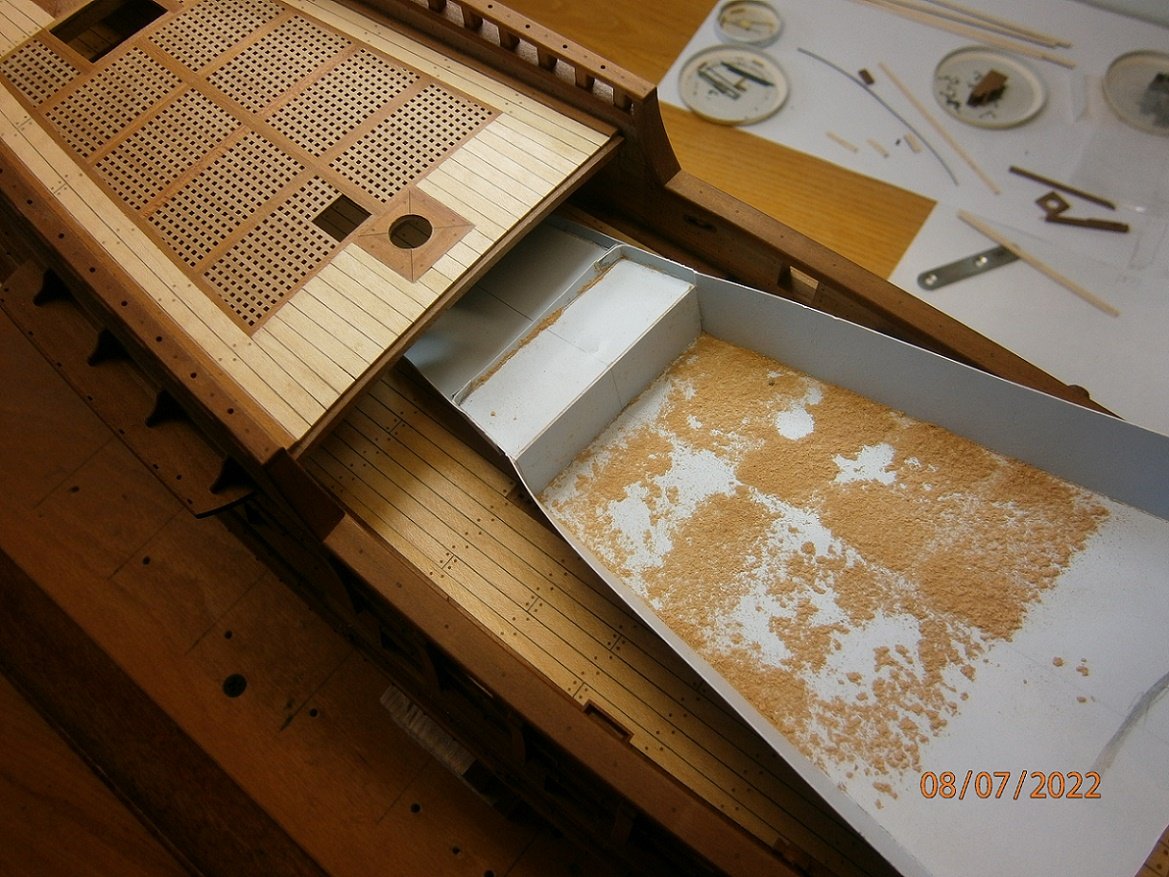
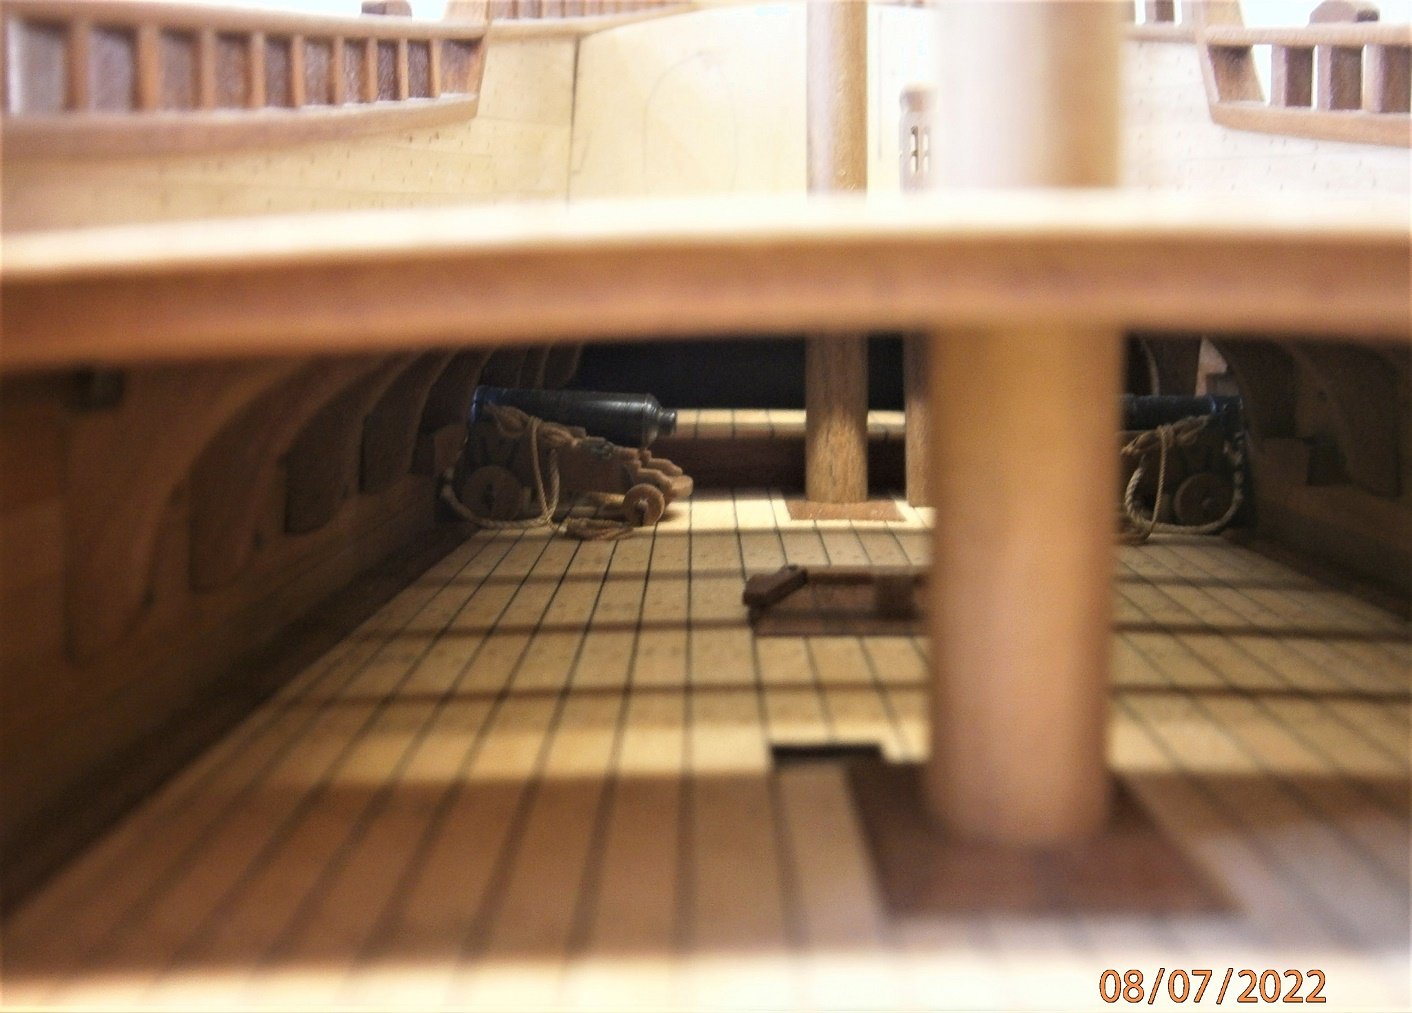
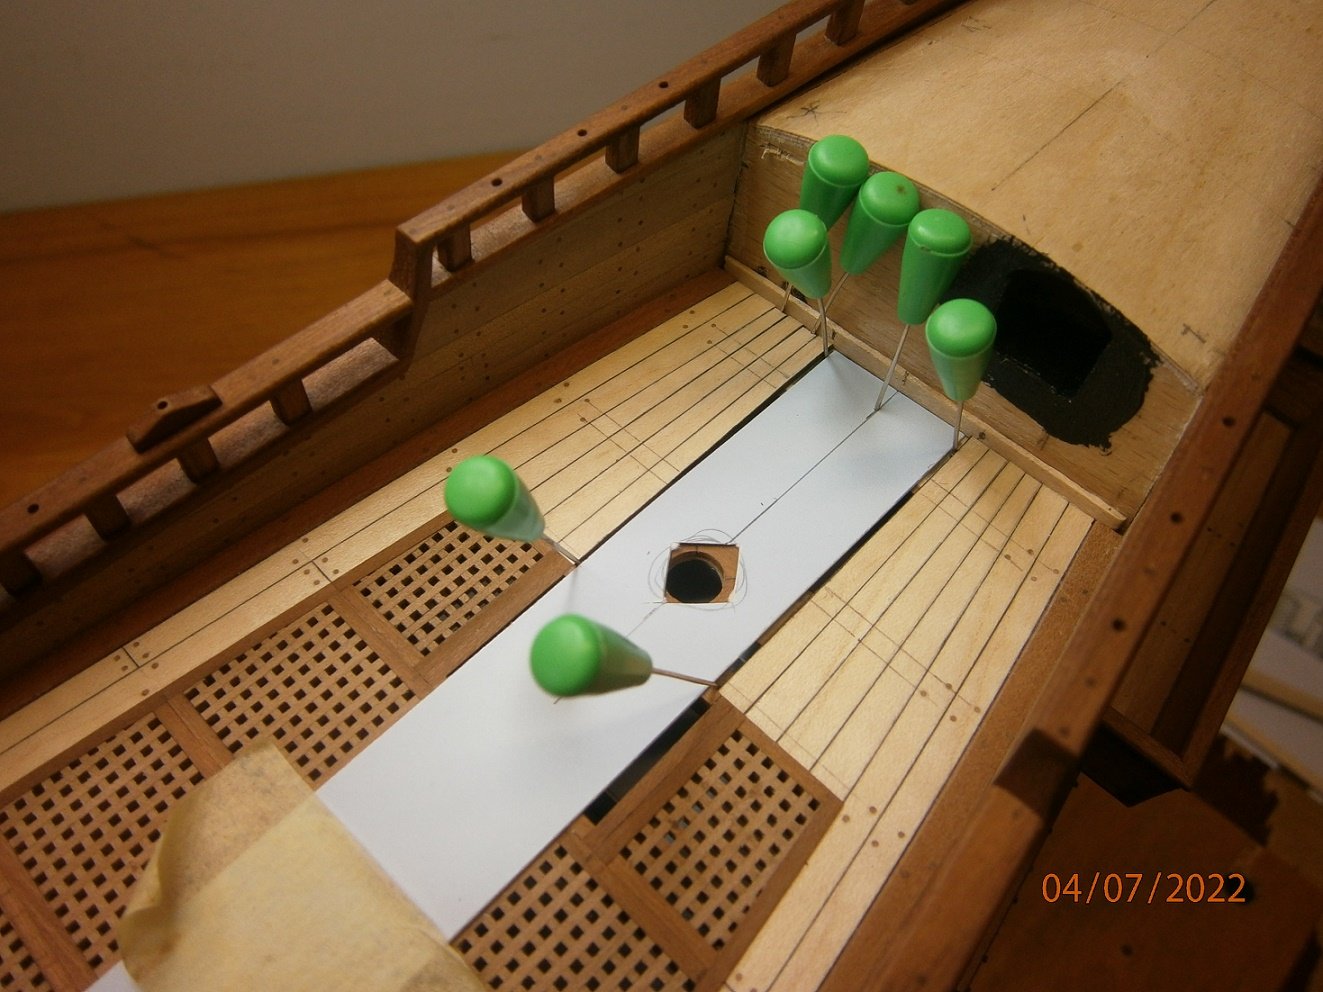
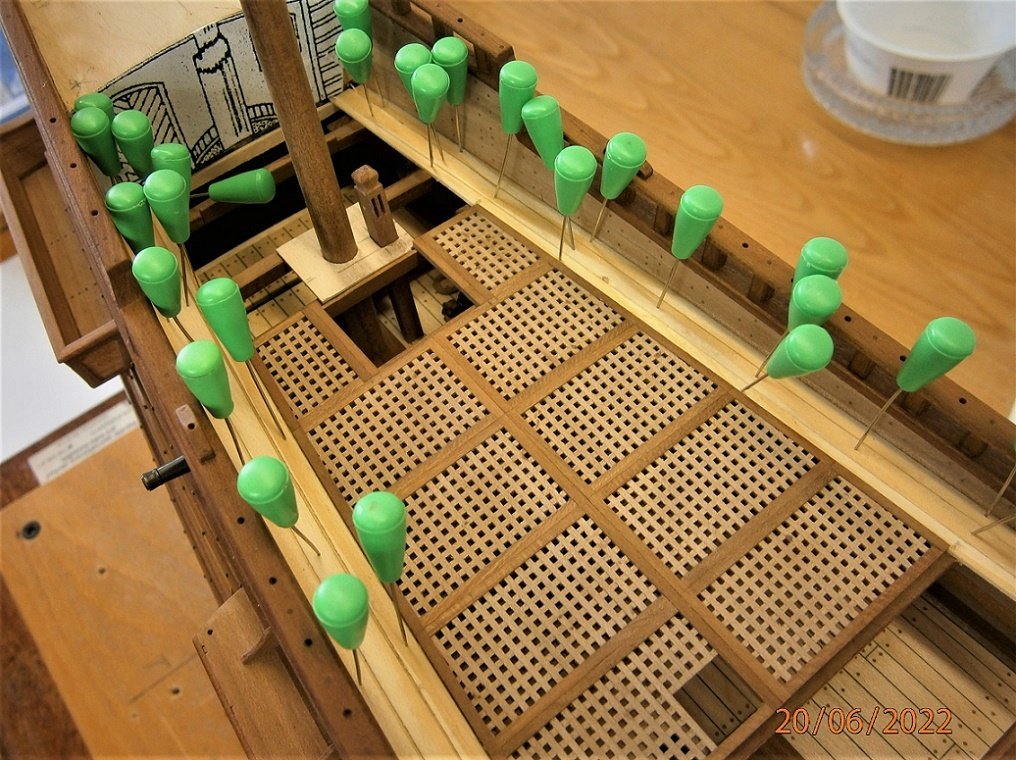
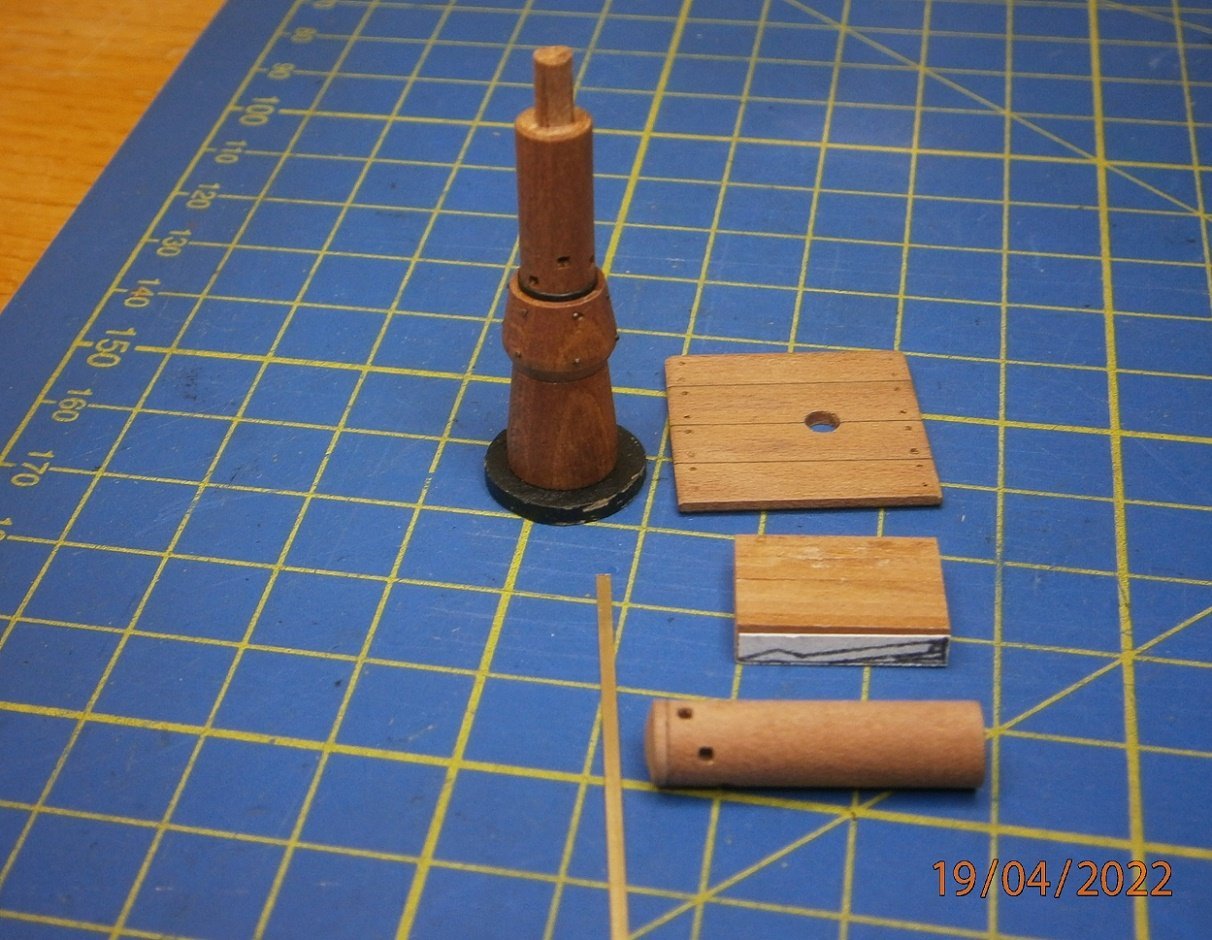
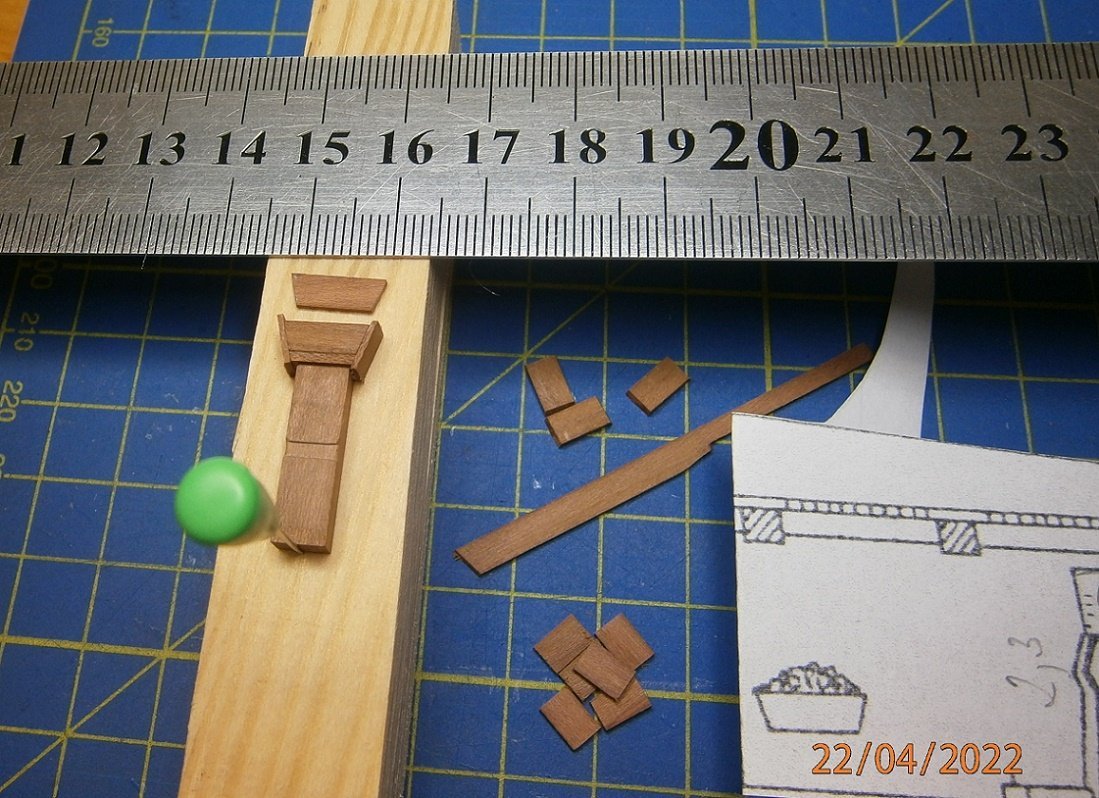
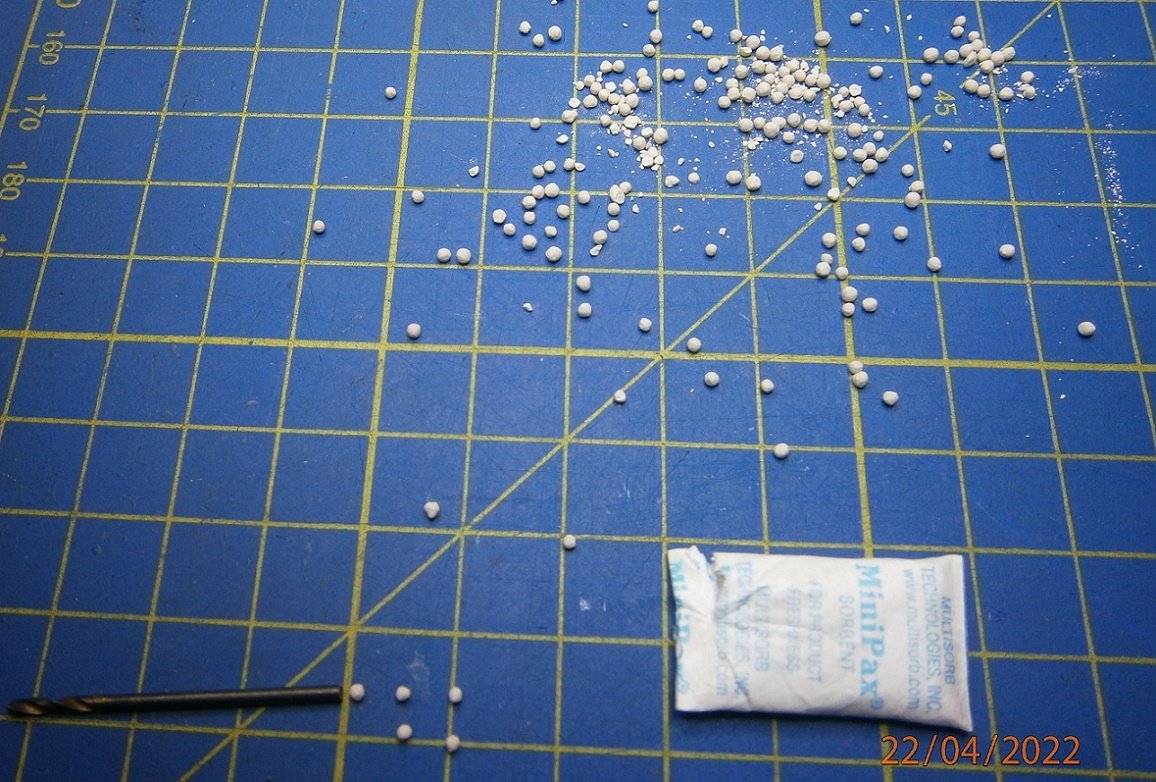
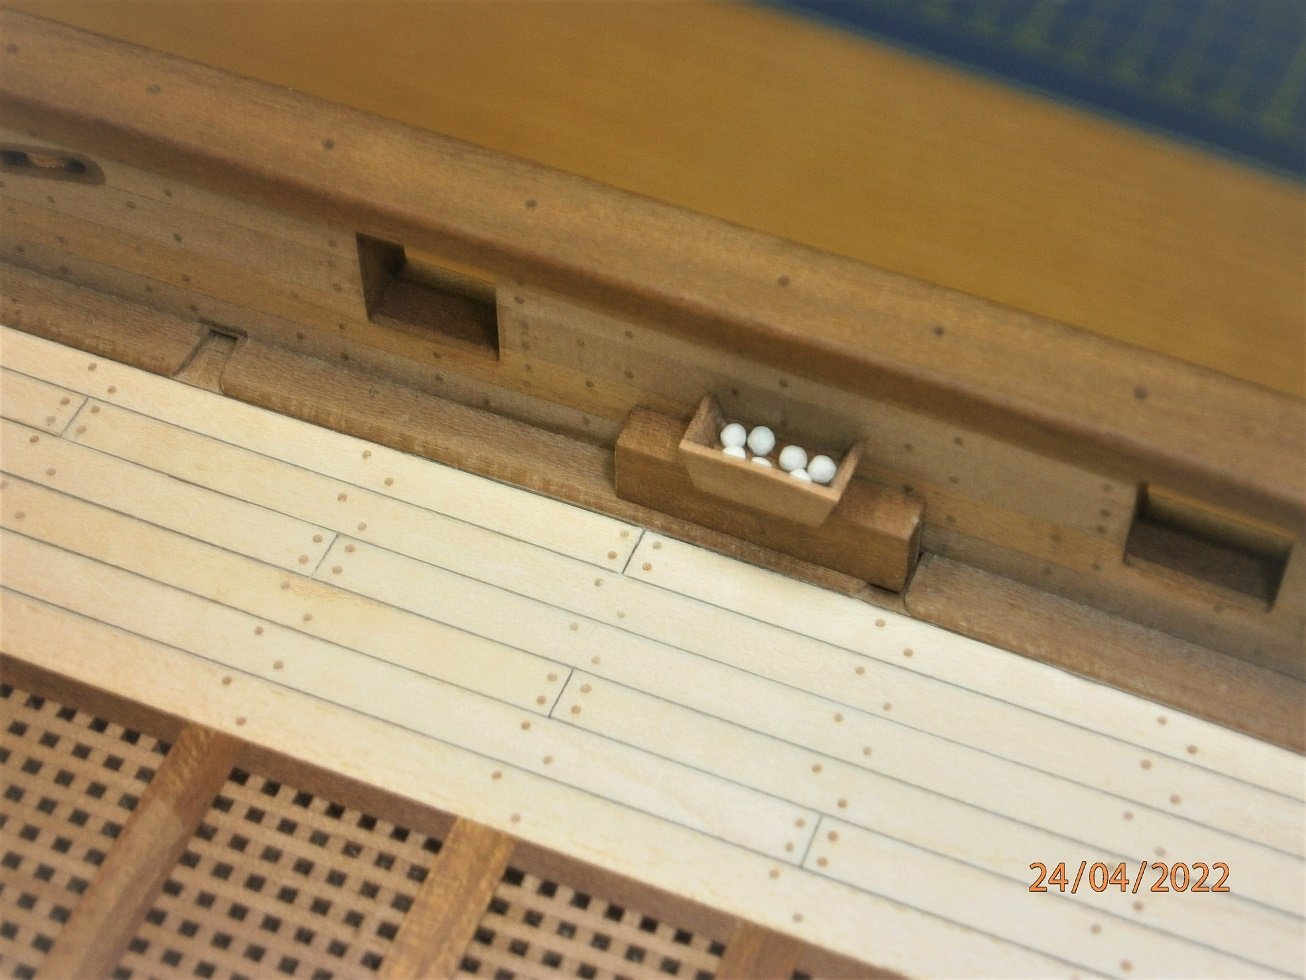
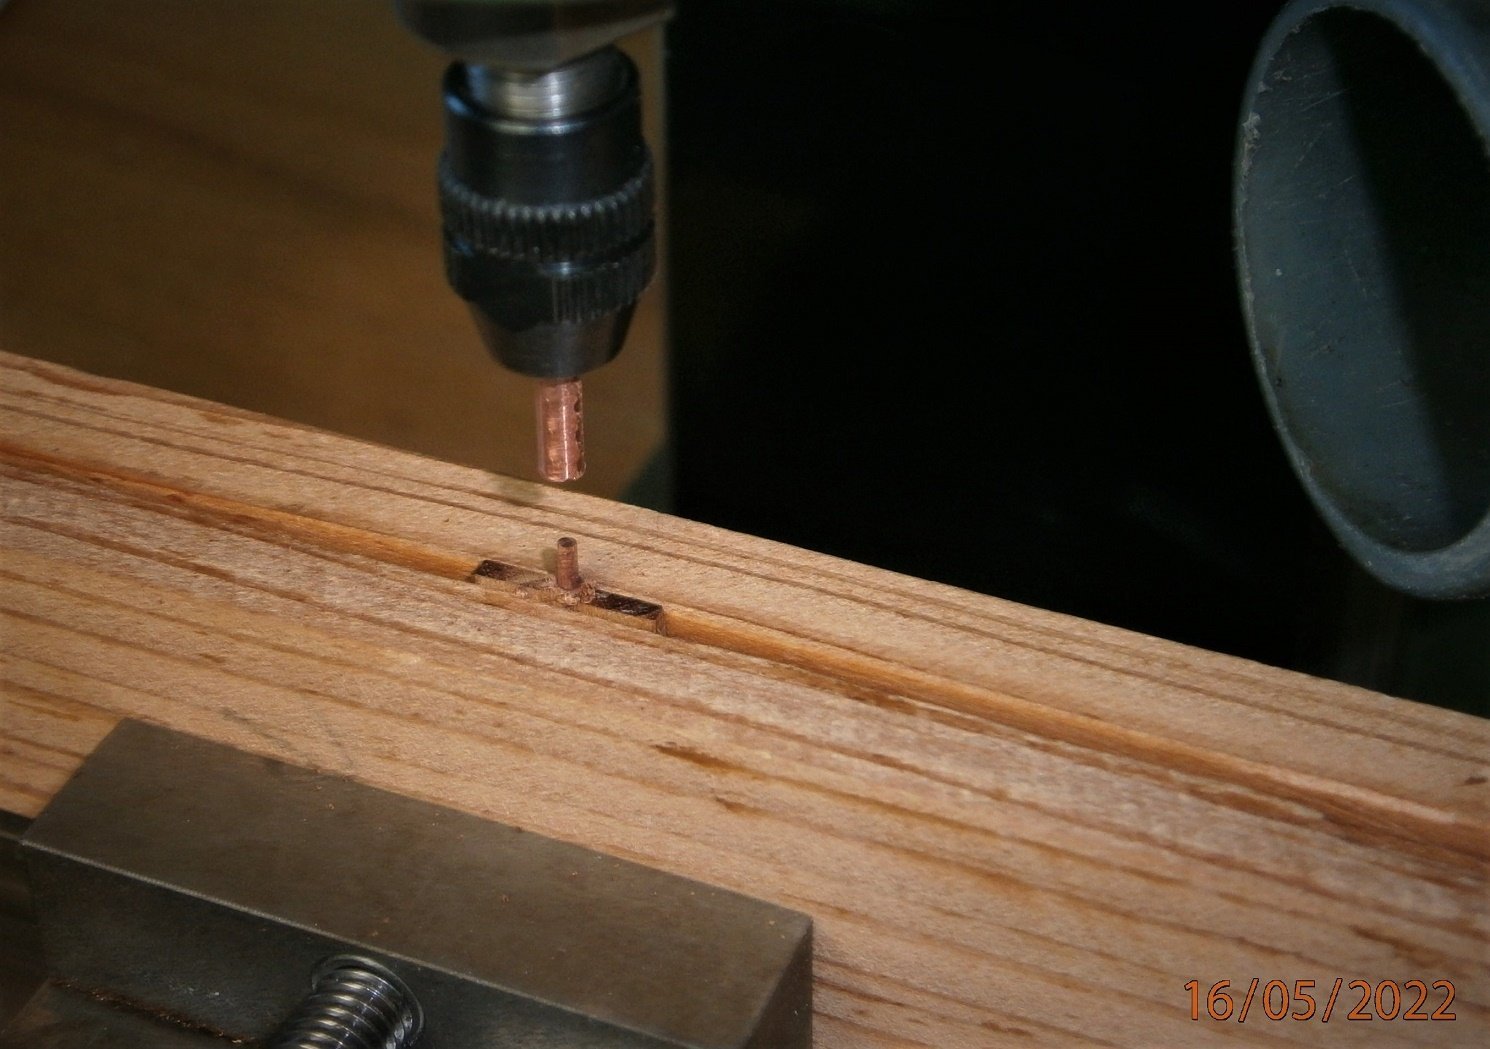
From the beginning, I thought he would hardly see under the aft deck. Despite the wide grating, there will be a lot to see there. That's why I decided to supplement the knee padding. I didn't like the first attempt with colored dots .. It forced me to drill and place metal.. I add underdecks, cannonball boxes.. The Dutch double deck also has them on the open deck.. I also think about stone balls of the right caliber.. And Capstan production. Simplified under deck..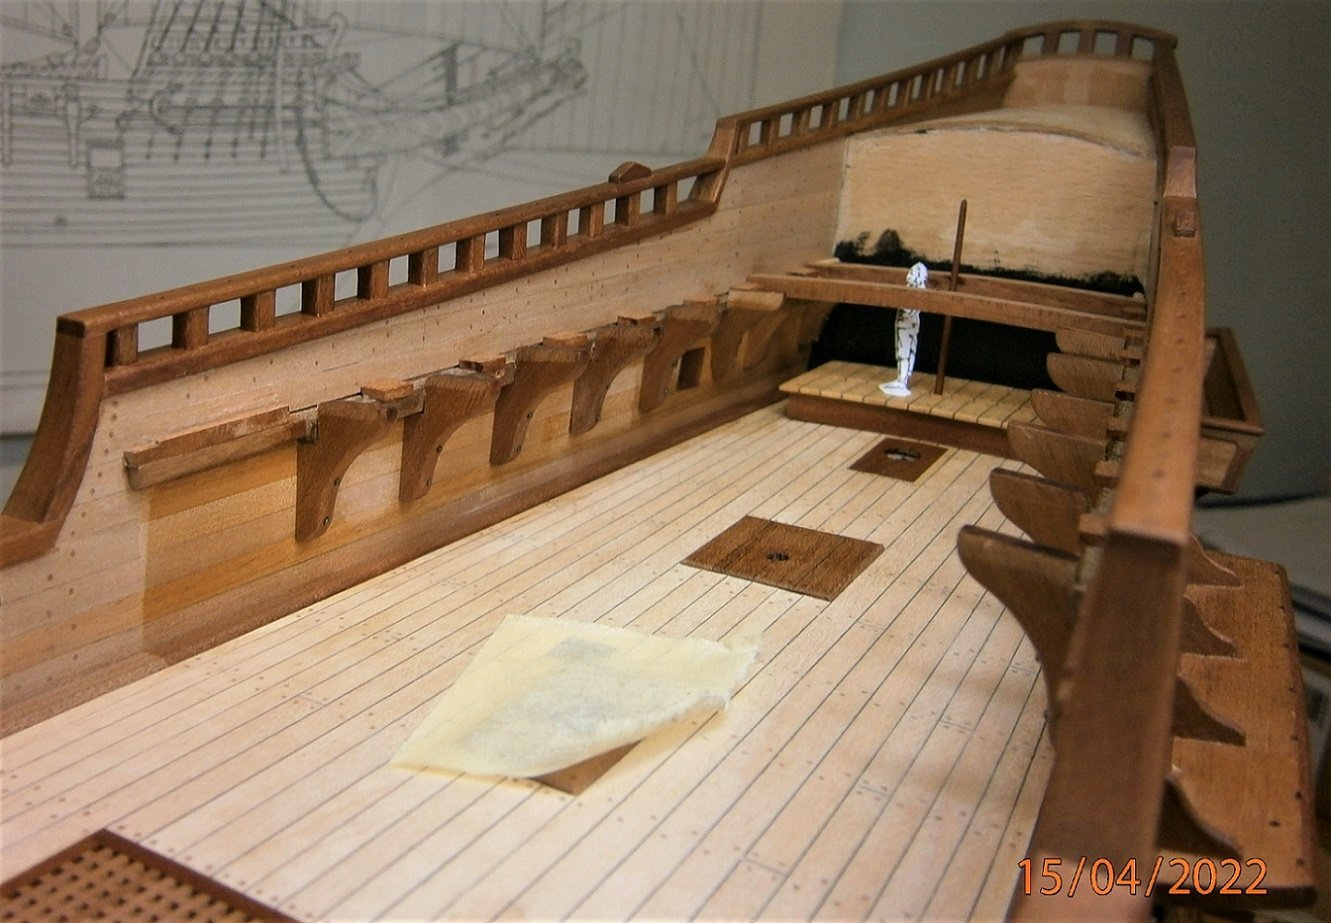

.JPG.65af4d36e4a737dba3c1e20c6bb28839.JPG)
-
Roter Löwe 1597 by Ondras71
Ondras71 replied to Ondras71's topic in - Build logs for subjects built 1501 - 1750
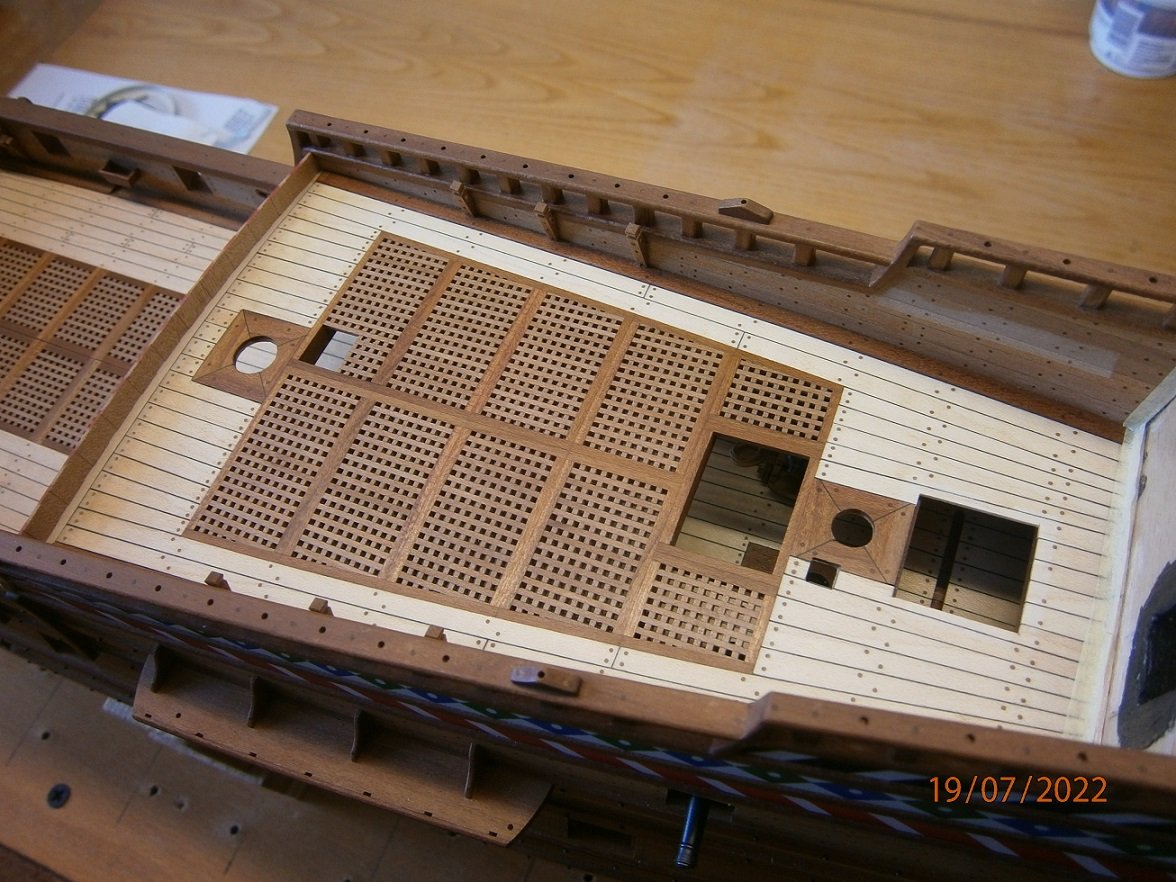
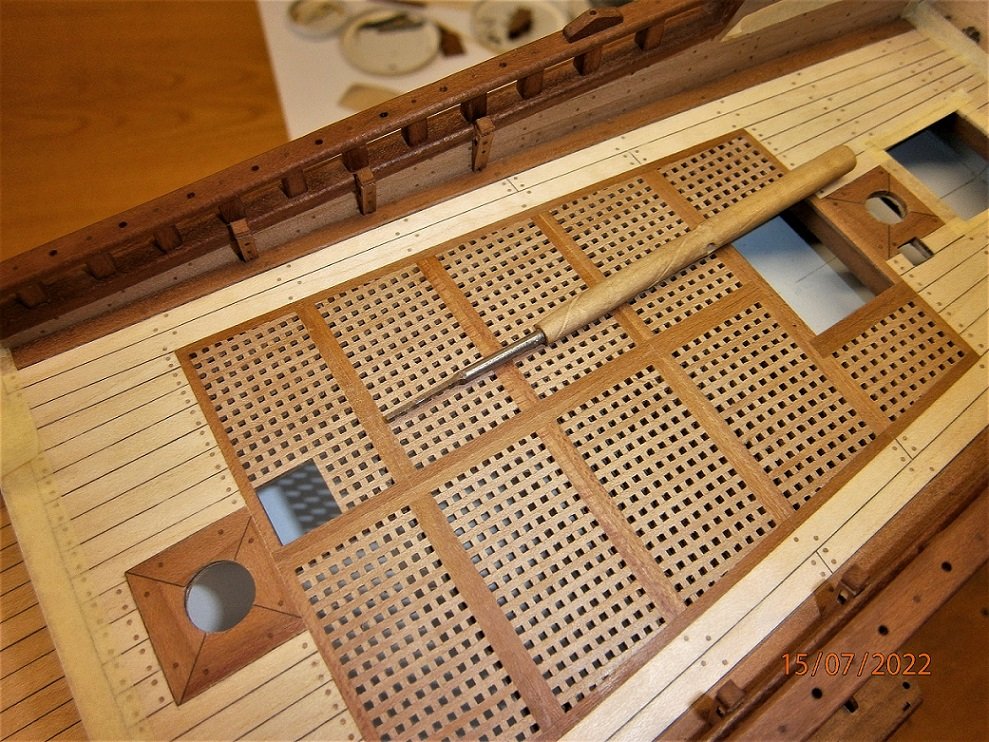
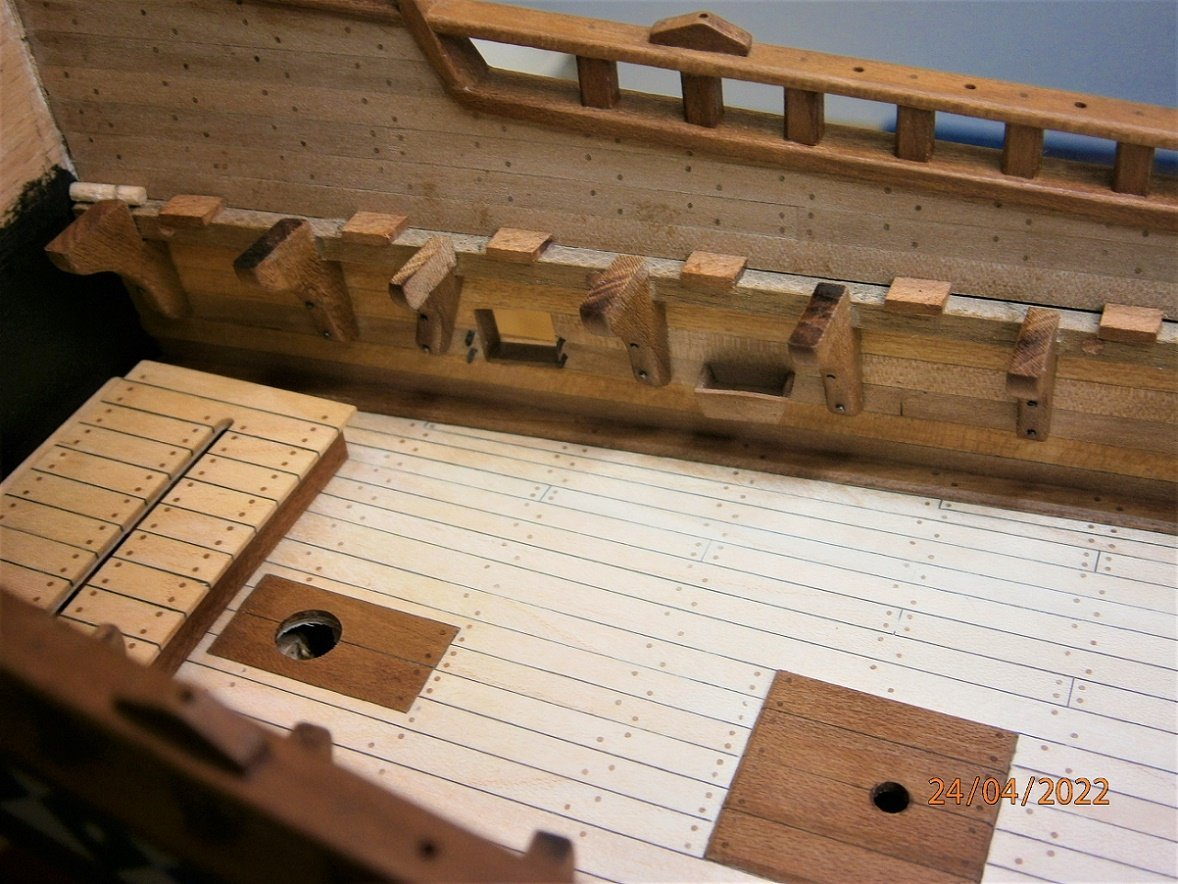
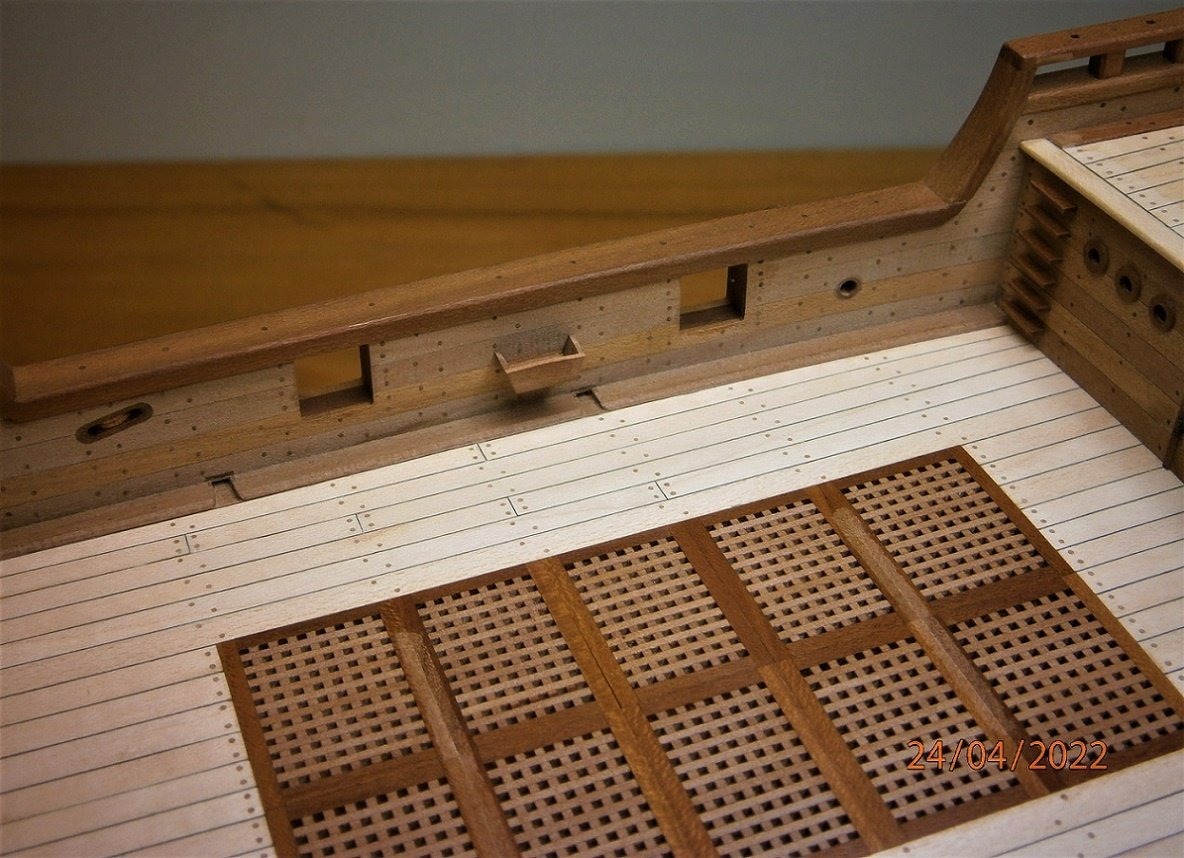
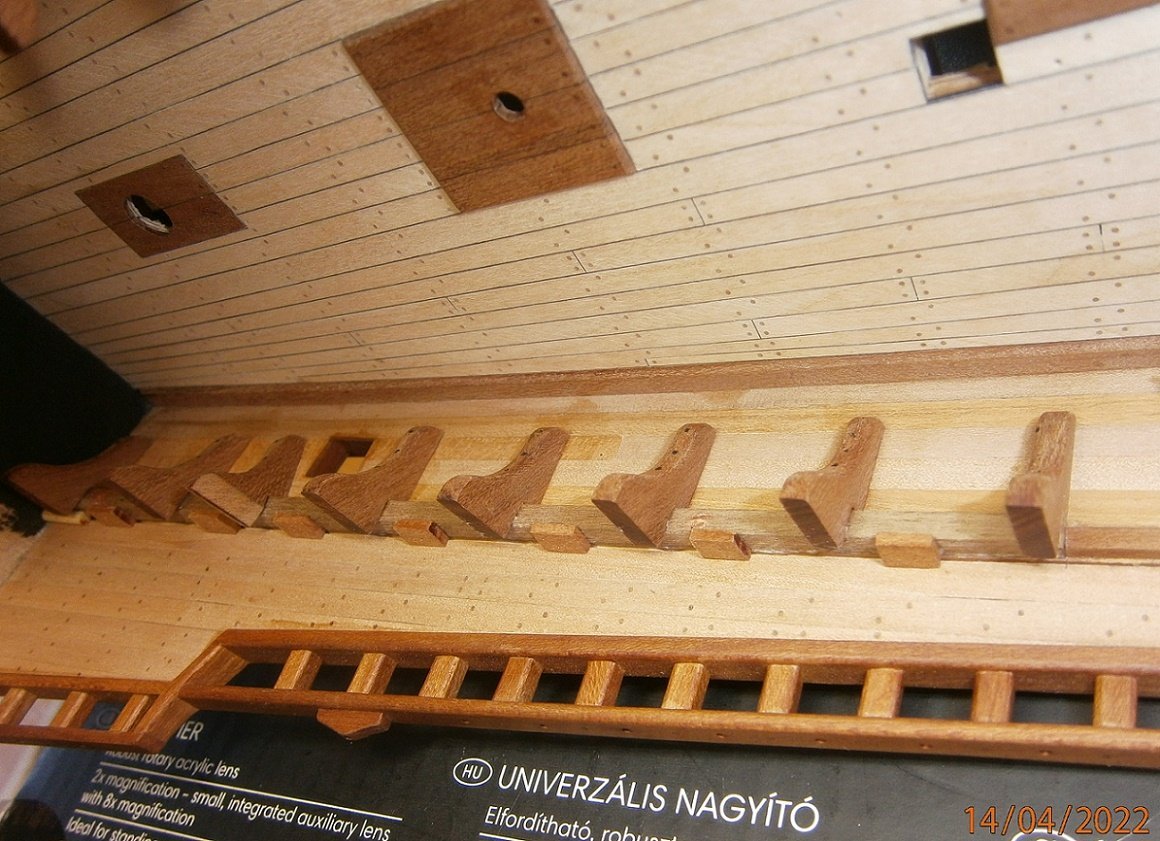
Drilled holes for hinge hooks. The blankets of the shooting ranges are kept, I will place them at the end of the construction.. And I used the week of incapacity for work to progress in the construction..😱 Previously prepared gratings for the aft deck were shaped.. And according to them, deck beams are created.. And added previously prepared knees.. And now I have to fill the lower deck and close the deck..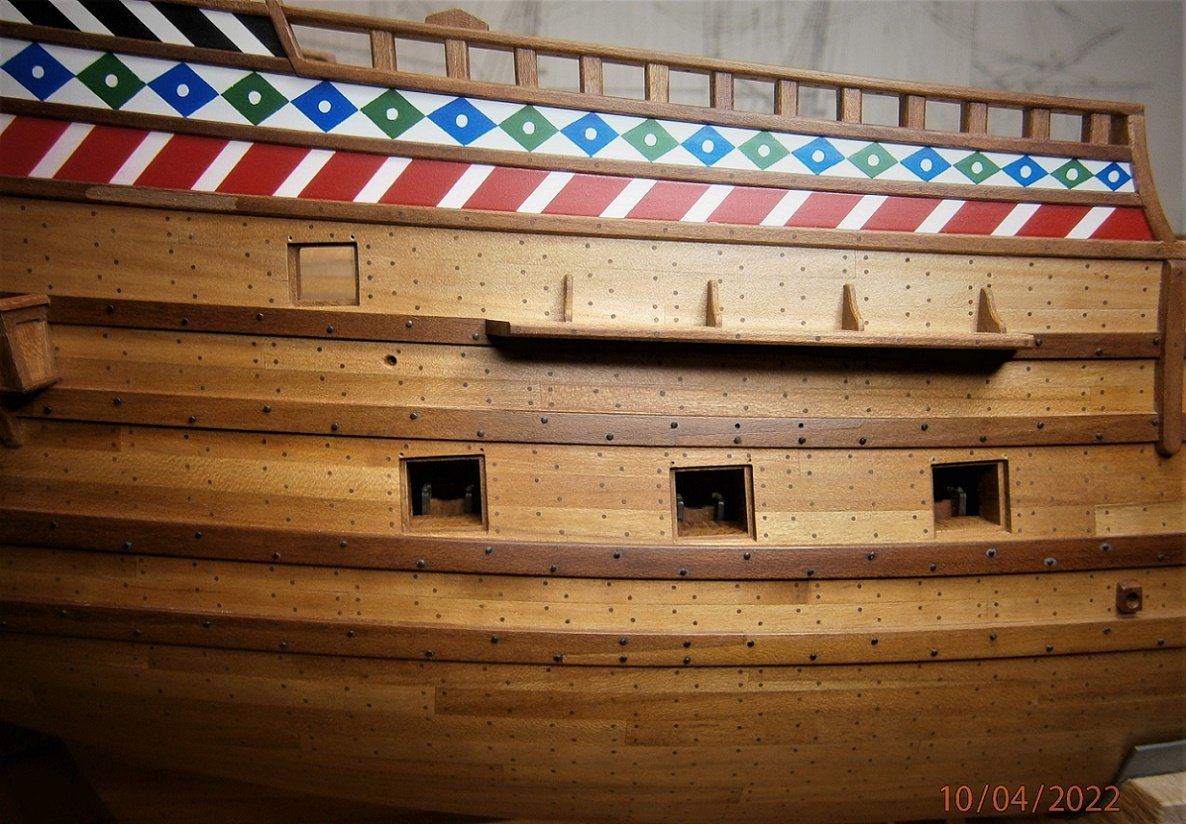
.JPG.35875f0f7c42deae71590f67da2d71ed.JPG)
.JPG.68d74e3657747c95ab6532b96da3d8db.JPG)
.JPG.ad8921f72677b3401984b2a83d8c5ce4.JPG)
.thumb.JPG.0cdad7fc678ec396bdecea664fbbfc43.JPG)
.JPG.a1f14d4d2c78fafabcd631010a2b1a16.JPG)
.JPG.a9ec190a9502645a16bd8f7948c253da.JPG)
.JPG.909e3f536cf6e4233885d3a6e273858b.JPG)
.JPG.be7520dfb0c75f41971689a8e1bf4abd.JPG)

.jpg.96ca040c218ed86d35a1f6393a341beb.jpg)

.JPG.56d2c329d5de7e01edef1ea81d0da8e8.JPG)
.JPG.3339a689802659c976c25e7ad8535a4d.JPG)
.JPG.bf5706734a260d1633821665d898587d.JPG)
.JPG.d1651fc05eb7a4b5cc38155c8d9c1b23.JPG)
.JPG.8ed913fcef13d5deebba354396f782ca.JPG)

.JPG.65038f00e082f8d329fc3dbd54b9ab1b.JPG)
.JPG.4cbccb01a242eeefd359535a46b2fc9d.JPG)
.JPG.ad0f307e29b53352ed1061d2f9a00c91.JPG)
.JPG.1b5a4d949958f90a9319d4fea1d83b3b.JPG)
.JPG.a3092ce58163af874e9e90a41c76a30c.JPG)
.JPG.13418bacd2c8fbb4901298528050e858.JPG)
.JPG.1b9d9235a2919cee716b567121dd89a7.JPG)
.JPG.56f9f1f5c534d7ed3dcbc227f5fe82c7.JPG)
.JPG.3d78a947118970ce7d01099d430e608a.JPG)
.JPG.acaacdb287b2f8de2c9ab5982226a4d2.JPG)
.JPG.44f28c30273ad26e2d08ddad1b48461c.JPG)

.JPG.58252eb3e2ba4652d862b43cc7a4bf11.JPG)
.JPG.0ff49956200d627dc91937bdb9be9d9c.JPG)
.JPG.a0354b21d74e8cba26b79f822a3173bc.JPG)


.JPG.a3d88f3e2a902d2b004b0134a43cb512.JPG)
.JPG.616455d1d6a1fcac61bad2b8b6d3db0d.JPG)
.JPG.9ab2bc18e4cac71720a463120a6bec98.JPG)