

.JPG.1db74a3c50dee7c3f86fbf4fdabbb0e2.JPG)
Ondras71
-
Posts
440 -
Joined
-
Last visited
Content Type
Profiles
Forums
Gallery
Events
Everything posted by Ondras71
-
.thumb.JPG.4d3261ccae06041fa7cc2933fb43d577.JPG)
Ship in trouble by Ab Hoving - FINISHED
Ondras71 replied to Ab Hoving's topic in - Build logs for subjects built 1501 - 1750
Hello Ab. I am very glad that you are now healthy and creating again! I'm thinking of putting your picture on my wall...🏆 Ondras -
Roter Löwe 1597 by Ondras71
Ondras71 replied to Ondras71's topic in - Build logs for subjects built 1501 - 1750
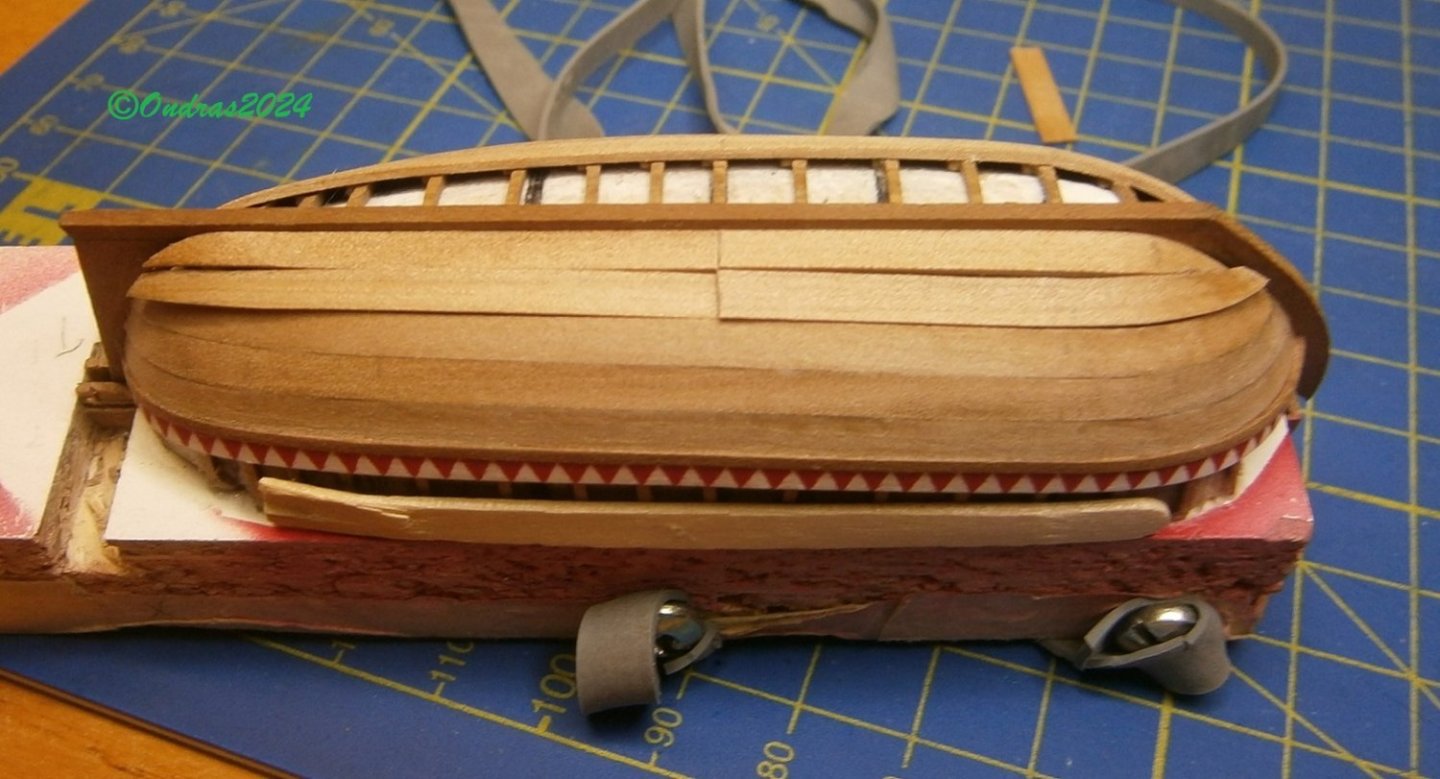
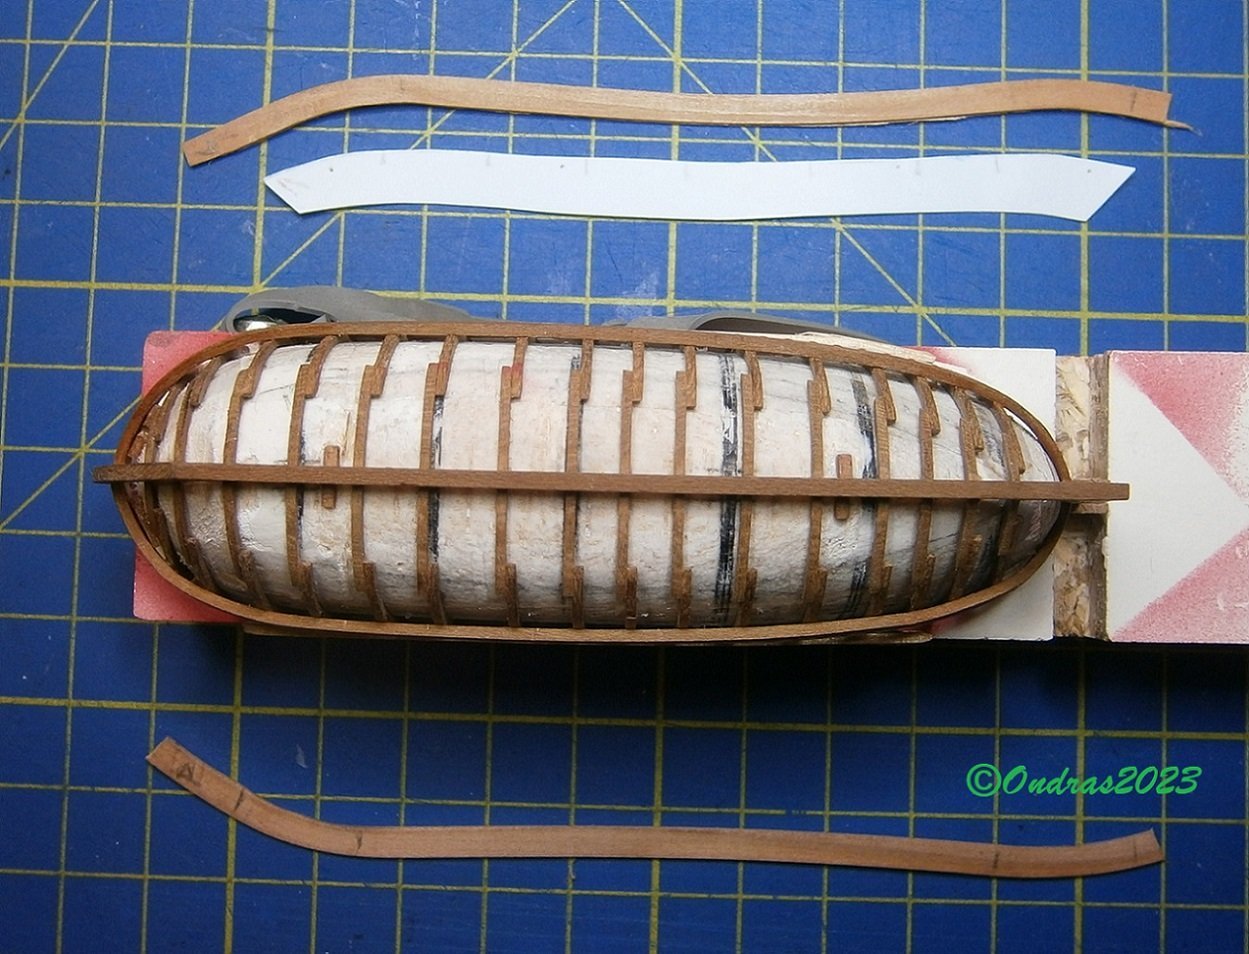
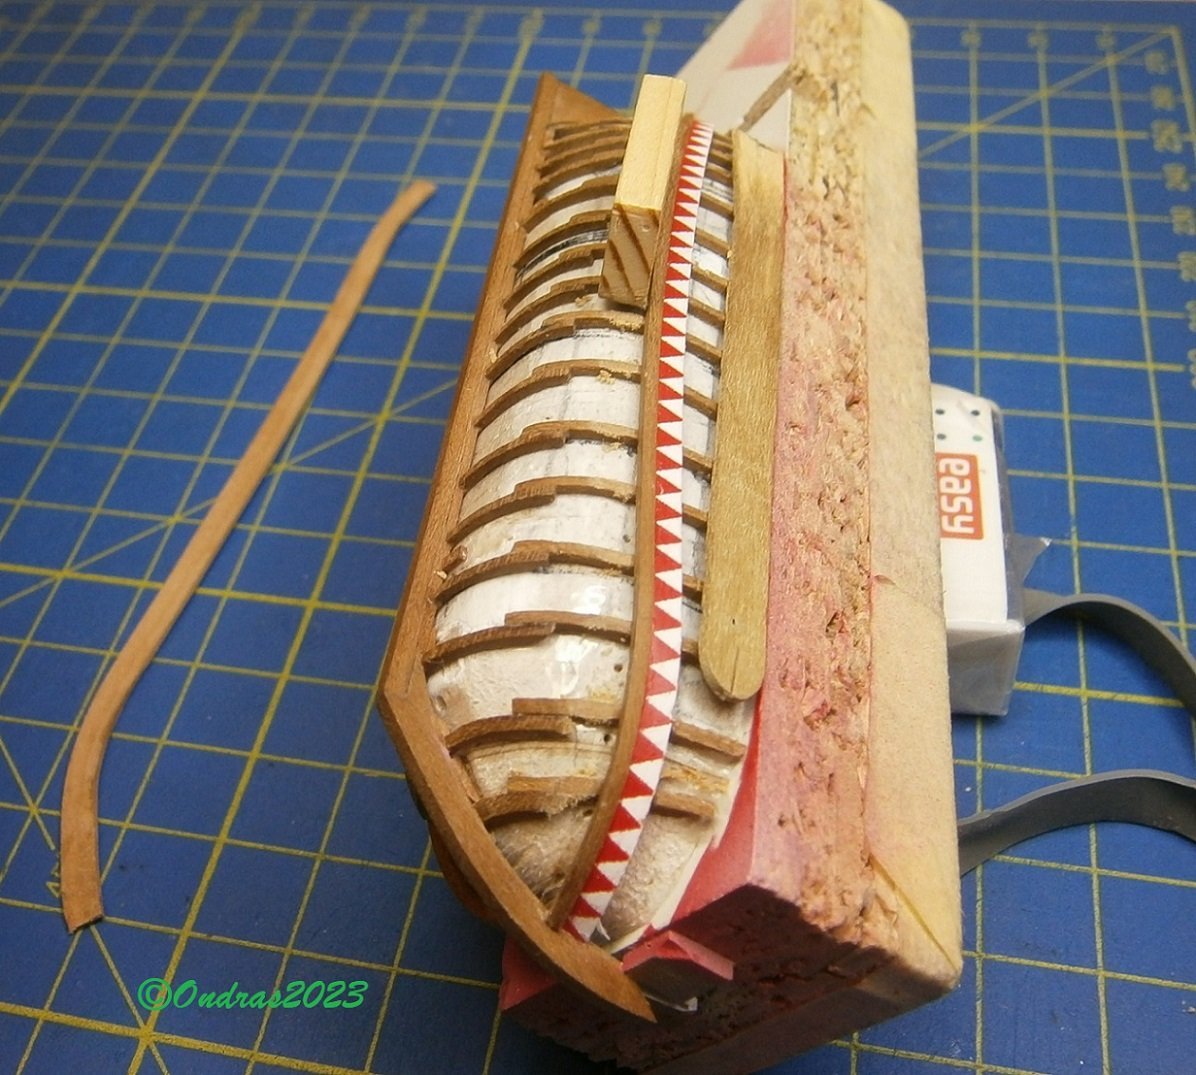
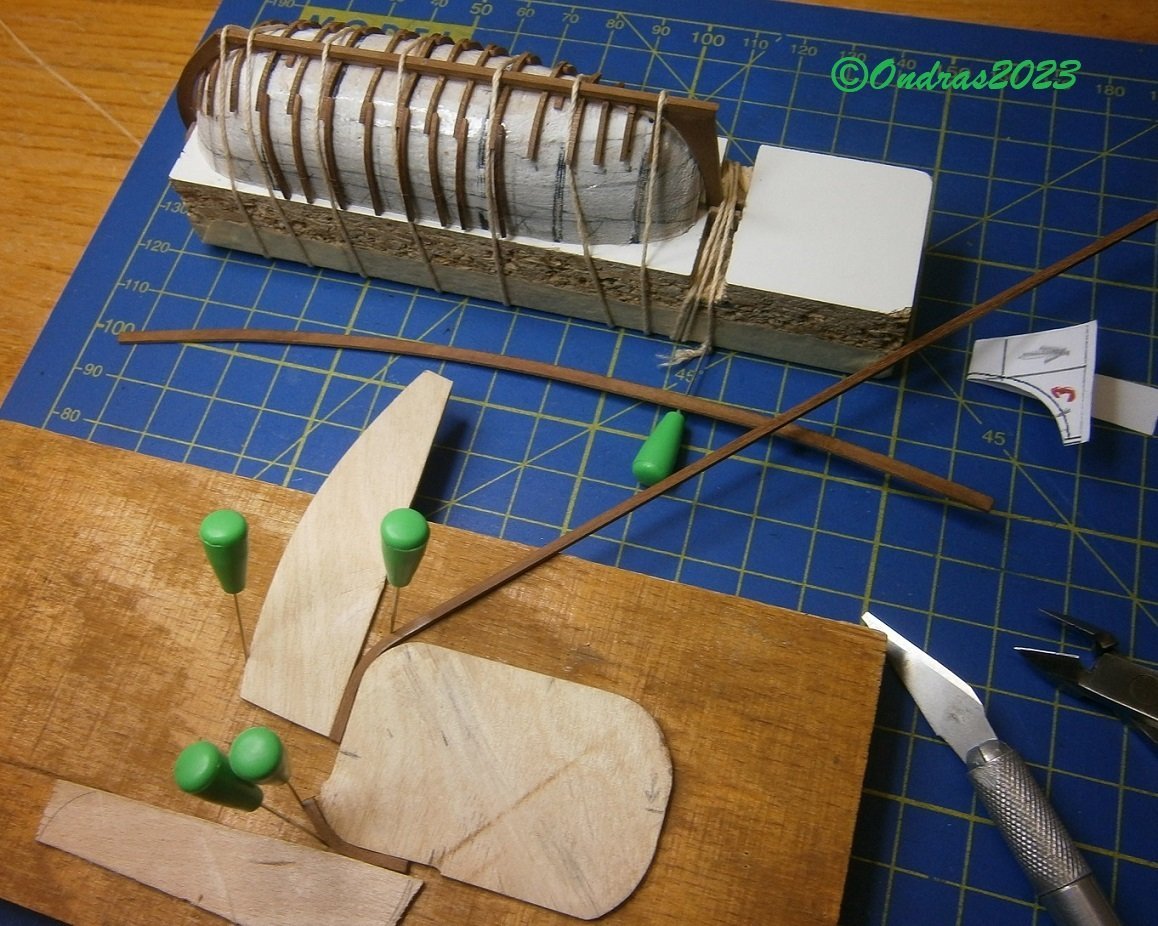
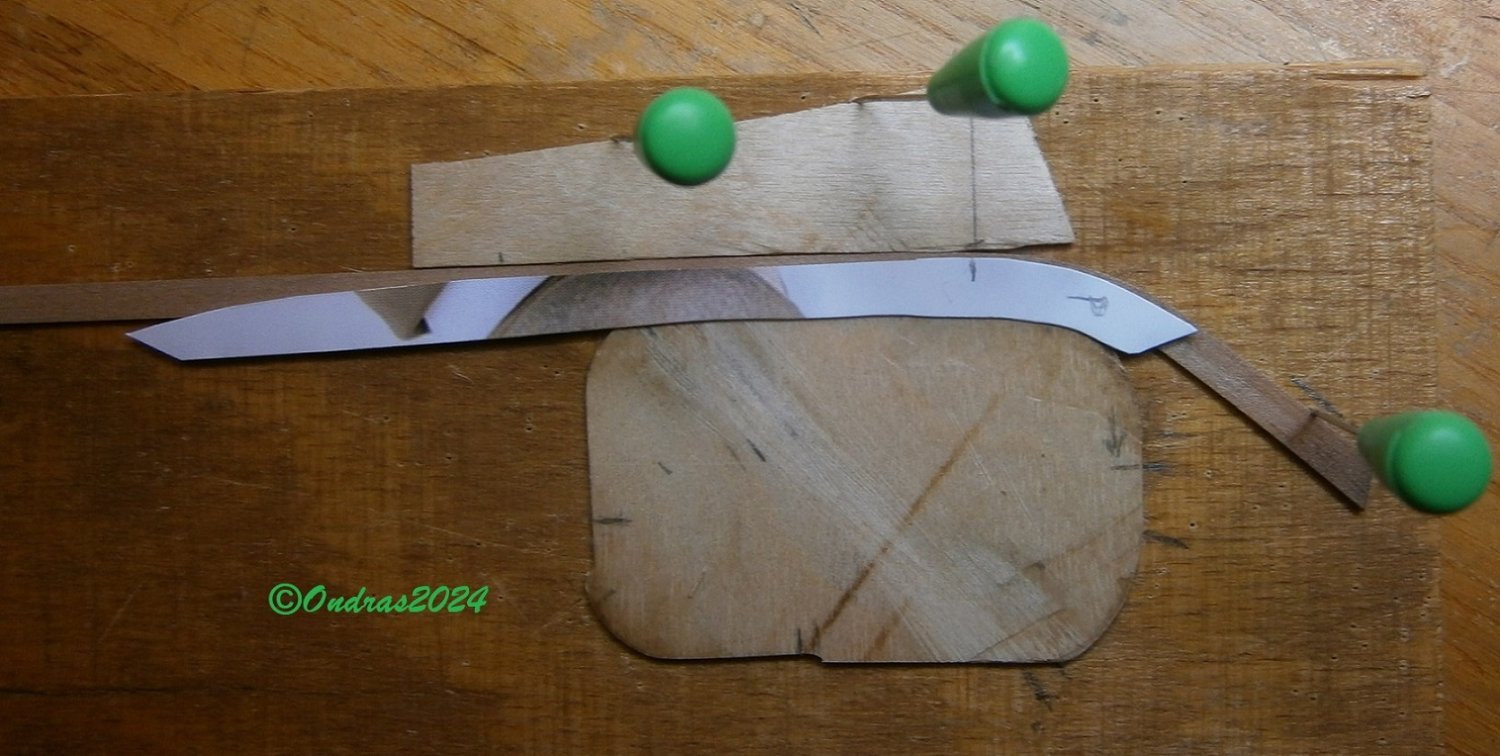
I continue on the work boat. Bending workshop.. According to the paper templates, I create more rows of boards, the edges highlighted with graphite.. The third row already has an extreme side bend. After a good soaking, the 0.8x3.5 mm strips can be bent well, just persistence. Step one - side bend.. Step 2 - after drying, bend into the shape of the torso, then fit.. I will save material against carving from wood plates..👍 The last part, closing the bottom. Too small, the bottom will not be visible, I helped myself by assembling the moldings from two parts. Otherwise, it would not be possible to do it well..🔥.JPG.ead91e0b54246e708f5fd70844958e69.JPG)

.JPG.db57bd0f9f74d85ff527ffd98456ca7f.JPG)
.thumb.JPG.1b724c58c2c5879fd966cb19af478c88.JPG)
.thumb.JPG.bf1dc9e670fb5db86f090b78748ded23.JPG)
-
Roter Löwe 1597 by Ondras71
Ondras71 replied to Ondras71's topic in - Build logs for subjects built 1501 - 1750
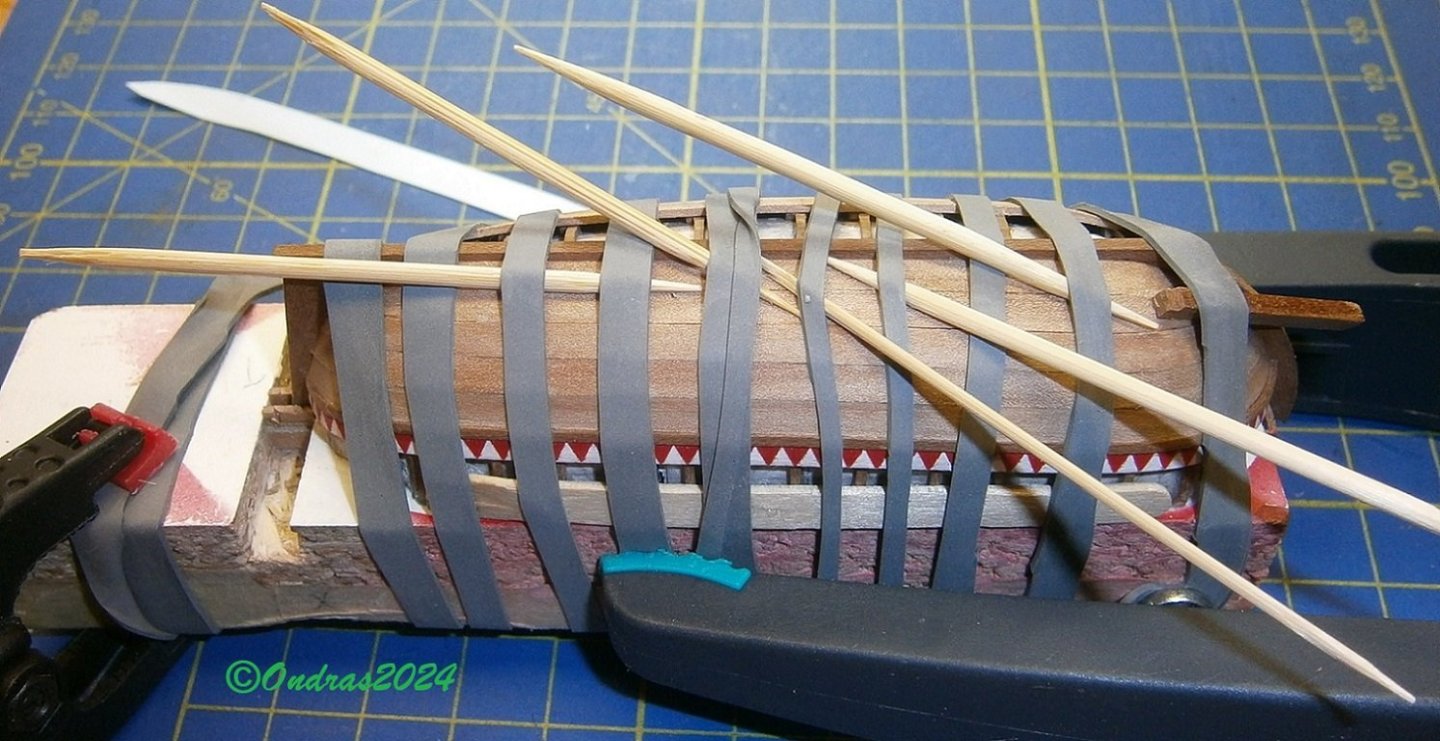
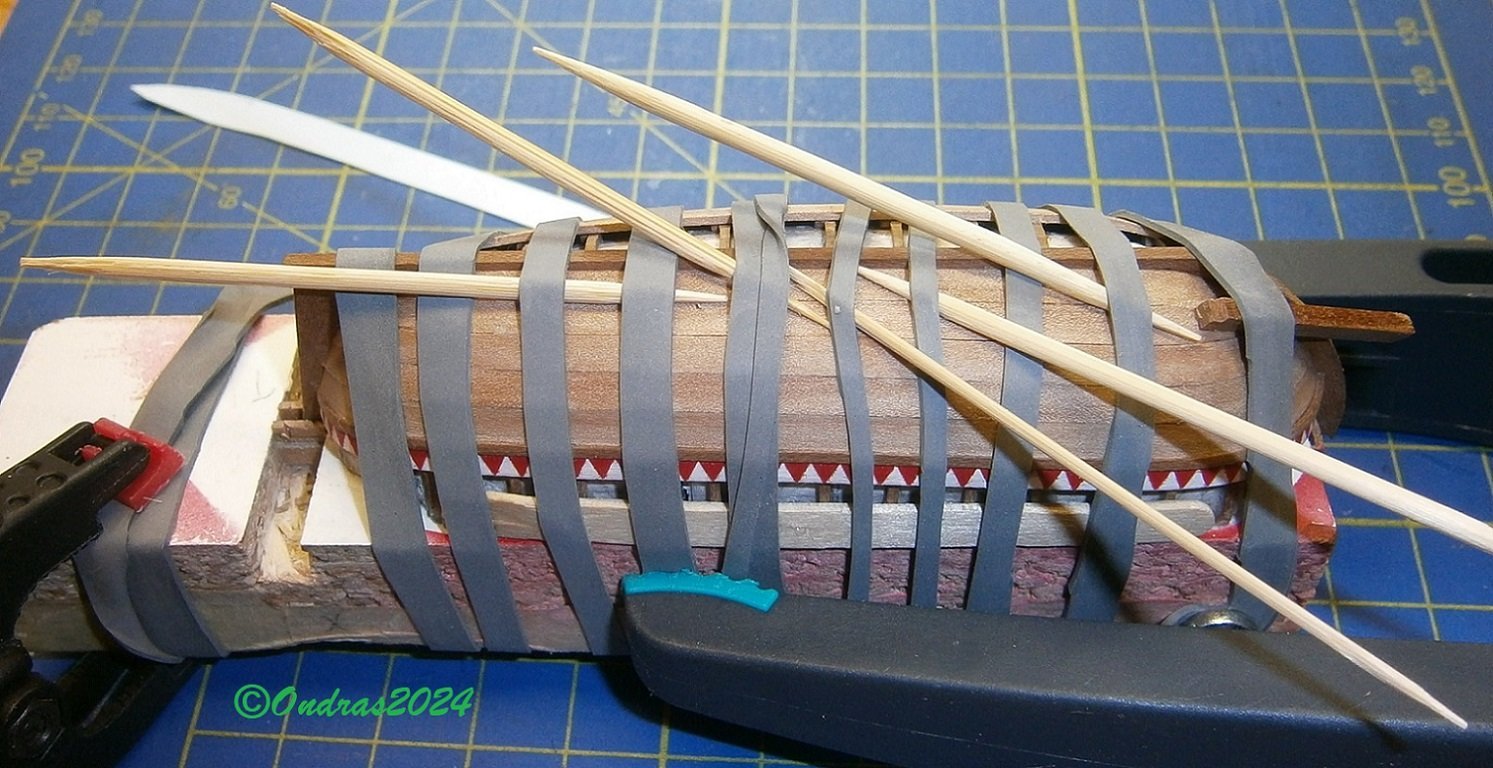
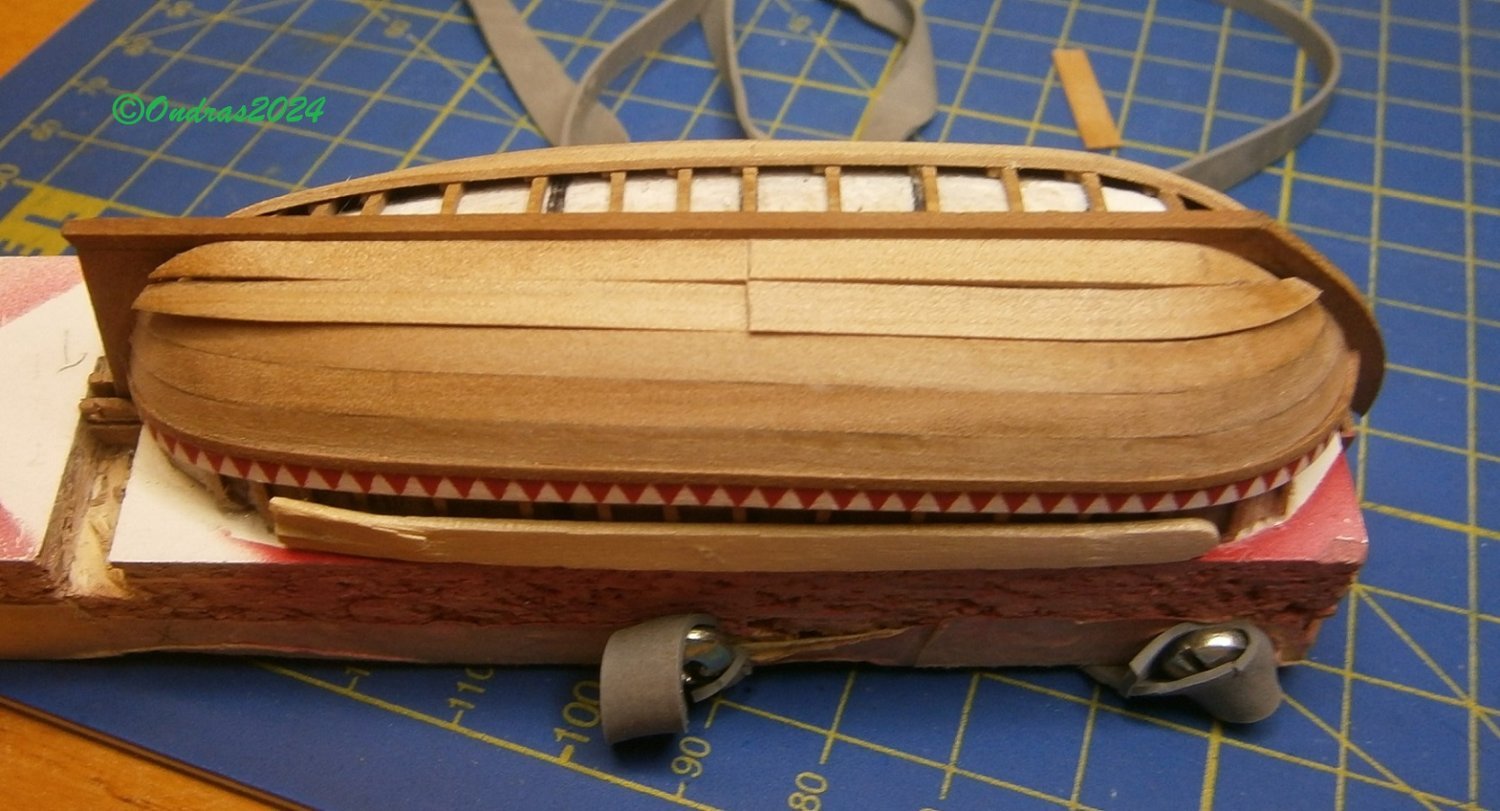
I continue with the paneling boards, paper templates again.. Surfaces created on the ribs.. Gluing with long-term glue D3, fitting takes a long time.. First board..🔥 I wish modelers all over the world a lot of peace and time to build models in the new year 2024. Ondras.thumb.JPG.8a11d4210d12ac2e4b92ad5b0b36d13a.JPG)
.thumb.JPG.db69a2443895b87f0f375774aa0c039c.JPG)
.thumb.JPG.67608dbaa34b5bb456d9358e2954ea7b.JPG)
.thumb.JPG.07352b5c3cfdedc1be7c5285aa523893.JPG)
.thumb.JPG.3b5a7fd755fd532d0c1edcc054764713.JPG)
-
Roter Löwe 1597 by Ondras71
Ondras71 replied to Ondras71's topic in - Build logs for subjects built 1501 - 1750
Thank you very much everyone for the likes.. Spraying done, maybe the last one on the ship...🎨 Glued pre-prepared wales from strips 1x1 mm.. The result is satisfaction..🔥💥.JPG.6e0a4491fb23c1a7480e57398ff9dfed.JPG)
.JPG.e1b59f6e9e5c44fe501a232a9f2893df.JPG)
.thumb.JPG.c13adf151ee03bcc890019f67aa30906.JPG)
.thumb.JPG.ffb28210ccbfd53a5cedfe3155e328c7.JPG)
.thumb.jpg.e49ce5c412bfdd14fd59edd758b5172a.jpg)
.thumb.JPG.bb2b728bb6ea0b5a85e7dbf9f396bc3a.JPG)
-
Roter Löwe 1597 by Ondras71
Ondras71 replied to Ondras71's topic in - Build logs for subjects built 1501 - 1750
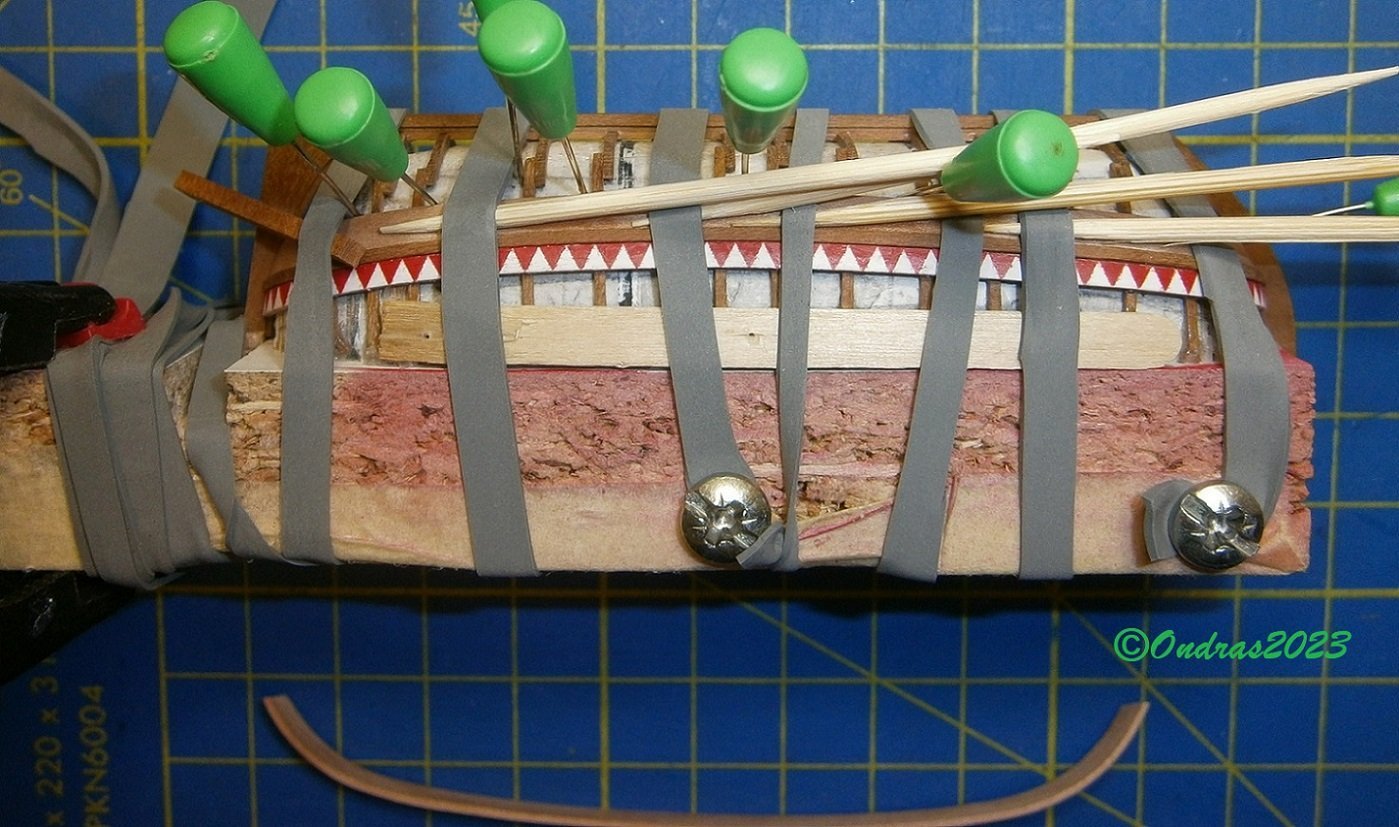
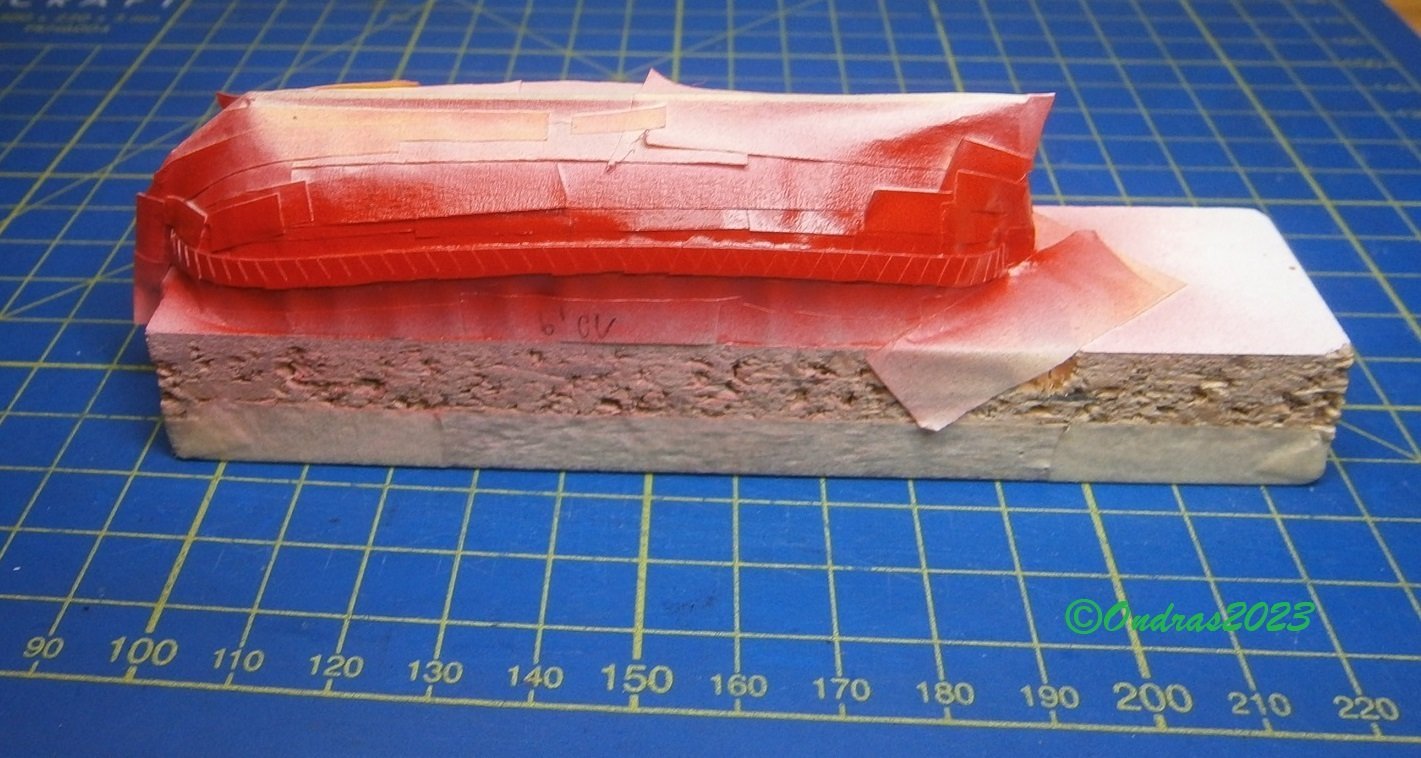
I continue on the work boat. According to the plan, the boat has colorful decorations. I didn't want to do this on the boat, but the color strip will match the whole boat.. So spray paint white and then red triangles. The board is 2.2 mm.. Red... And the resulting decorations.. I'm repainting and now just clean wood...🔥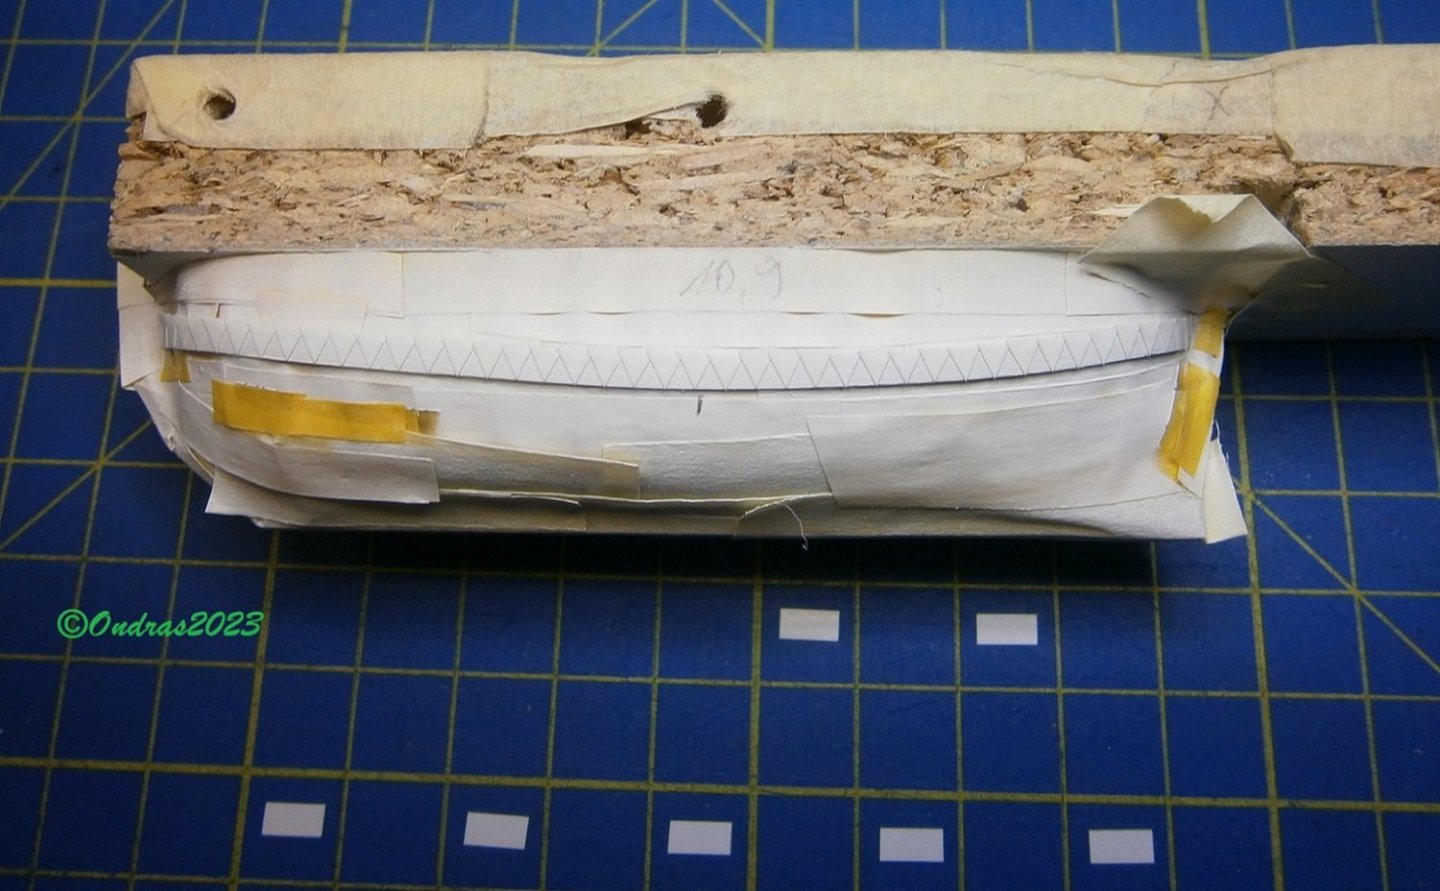
.thumb.JPG.18f2522269d87002e8490c200545d440.JPG)
.JPG.7534944863a4e30b09a3de175f73c99e.JPG)
.JPG.d21cd6c253e2272c526c57b5ff14e4f6.JPG)

-
Roter Löwe 1597 by Ondras71
Ondras71 replied to Ondras71's topic in - Build logs for subjects built 1501 - 1750
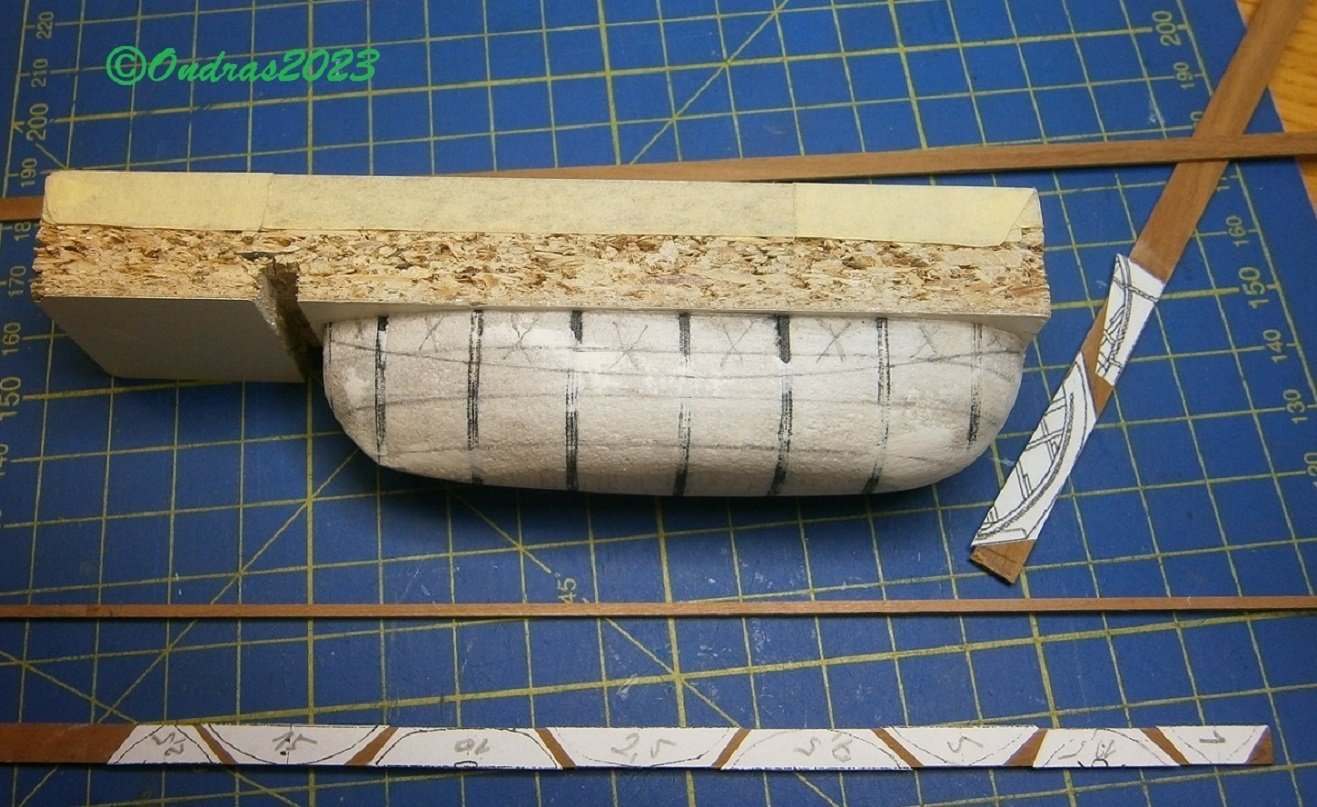
Thank you very much everyone for the likes.🙂 The most challenging part of a Dutch boat with a round bow and stern. Top board. Made stops to get the shape and cut the boards... ..bending into shape according to a paper template.. First boards glued..🔥 Bow.. Stern.. Finding? Very fragile...JPG.8392382502db50d38f3731b443d0d51f.JPG)
.JPG.497af2d05f2512171612e3ac4ce19978.JPG)
.JPG.7511b6a1a999a28cdc956bf22ec3ba12.JPG)
.JPG.f730f5e351bc28b89b7fa133fdddeab6.JPG)
.thumb.JPG.5c07be341745c4cb12030f514ad02931.JPG)
.JPG.7c25307cd23745866441006acc31f6ee.JPG)
.JPG.6c56cae58d16049fbf70cbe1bb849a10.JPG)
.JPG.fdcbdf3b3d2fb44350c7d4edad5bd71f.JPG)
-
Roter Löwe 1597 by Ondras71
Ondras71 replied to Ondras71's topic in - Build logs for subjects built 1501 - 1750
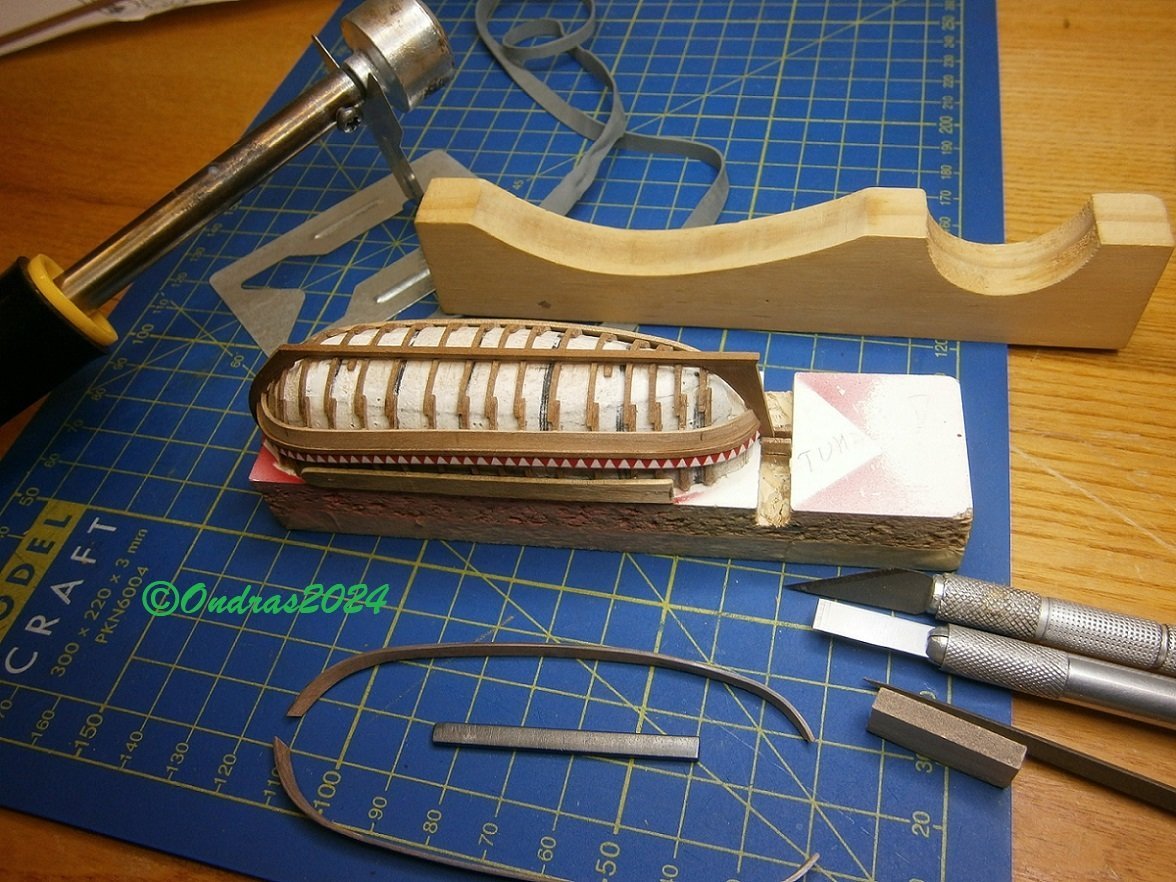
Thank you very much everyone for the likes.. I finally finished the folded ribs of the boat.. Future rib height.. Sanded, I can lay boards..🔥.JPG.db902a972434474764cf96c547670587.JPG)
.JPG.26010b9949af3b5973a0848ce79bea61.JPG)
.thumb.JPG.e40cc67dde6cb97dd90fcd9a849a1f78.JPG)
.JPG.f3872ee26111b253bebae6ec5c2ee4a6.JPG)
.JPG.6f9bb2a78c41b83223bac0d0b3e4d3cc.JPG)
-
Greetings Tomek. Beautiful work, I envy paper art. 🏆 You convinced me again that the Dutch ships were the most beautiful..
- 26 replies
-
- 1
-

-
- Seahorse
- De Zeven Provincien
- (and 2 more)
-
Roter Löwe 1597 by Ondras71
Ondras71 replied to Ondras71's topic in - Build logs for subjects built 1501 - 1750
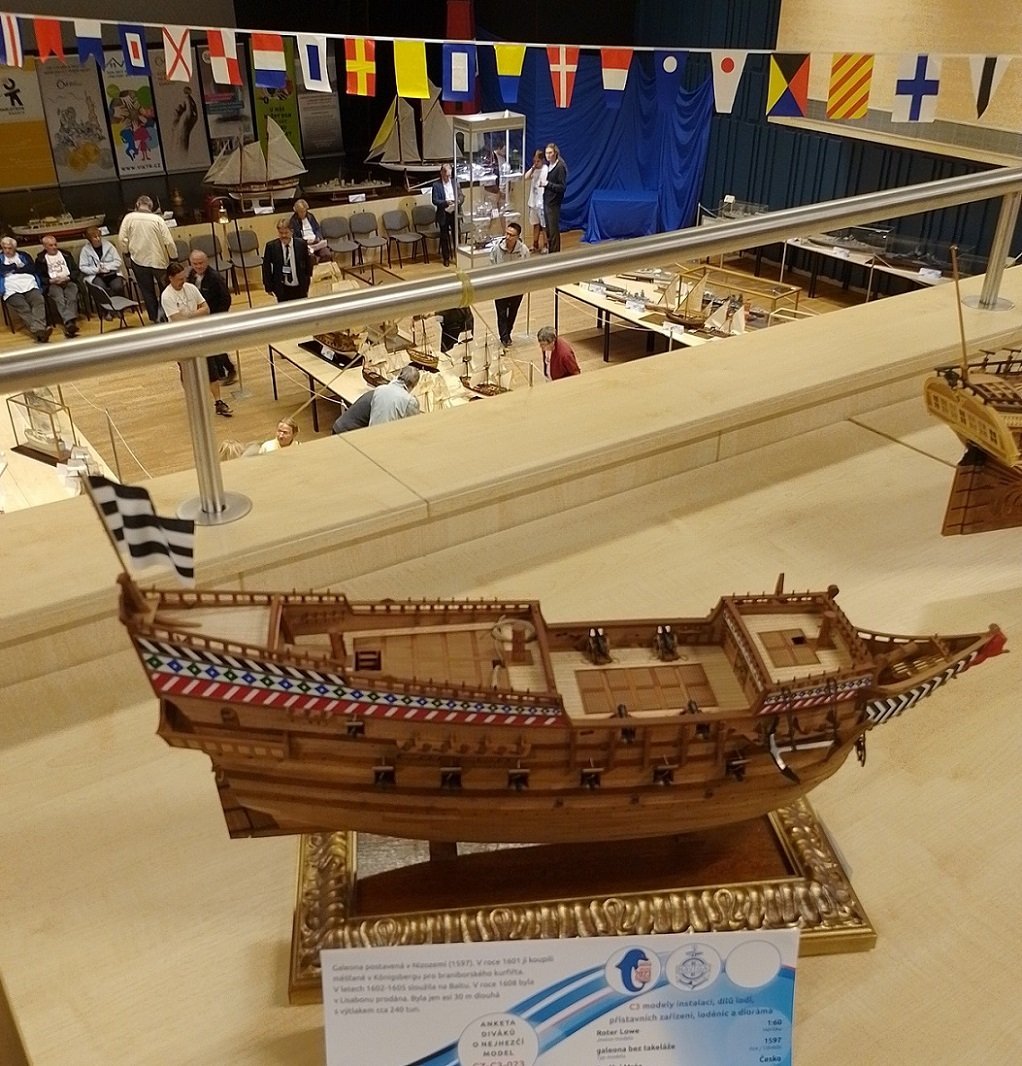
So the WCHS 2023 pre-competition and competition time is over, the boat has returned from its trip.. ...now to start building again and finish the rigging!🔥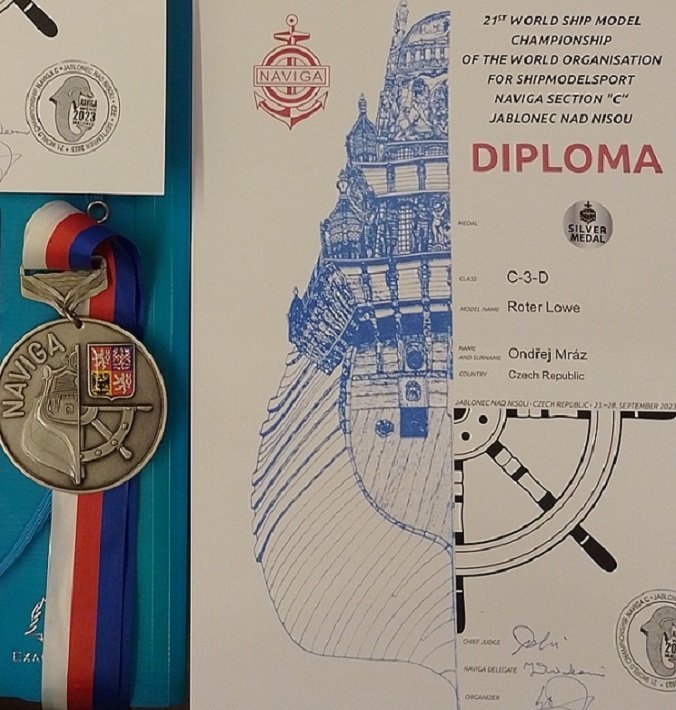
-
Roter Löwe 1597 by Ondras71
Ondras71 replied to Ondras71's topic in - Build logs for subjects built 1501 - 1750
You have great eyes Johnny. Of course, the plan in our "eastern" sector was for the Soviet ship Tovarišč.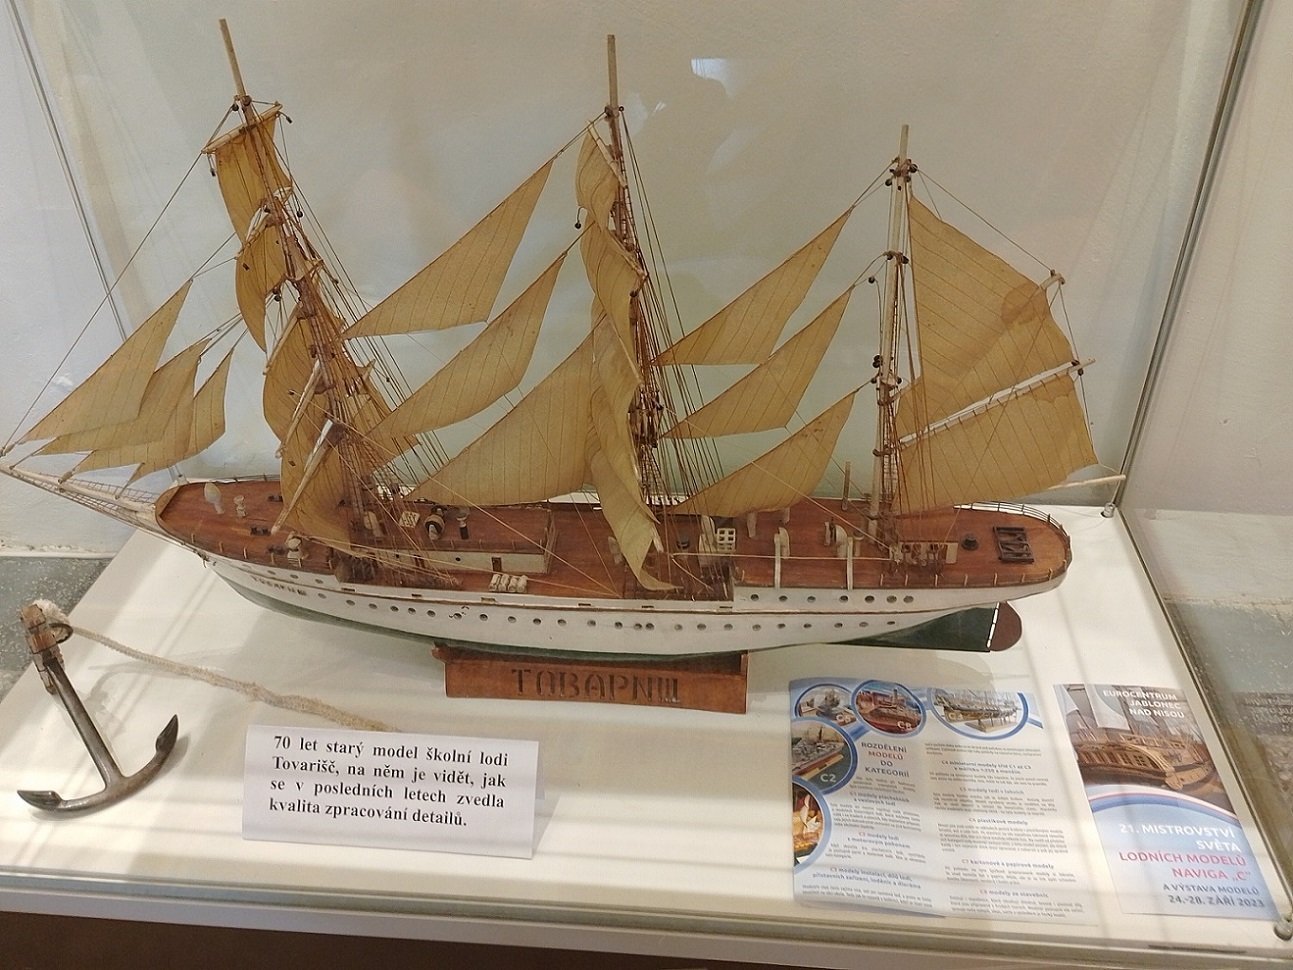
-
Roter Löwe 1597 by Ondras71
Ondras71 replied to Ondras71's topic in - Build logs for subjects built 1501 - 1750
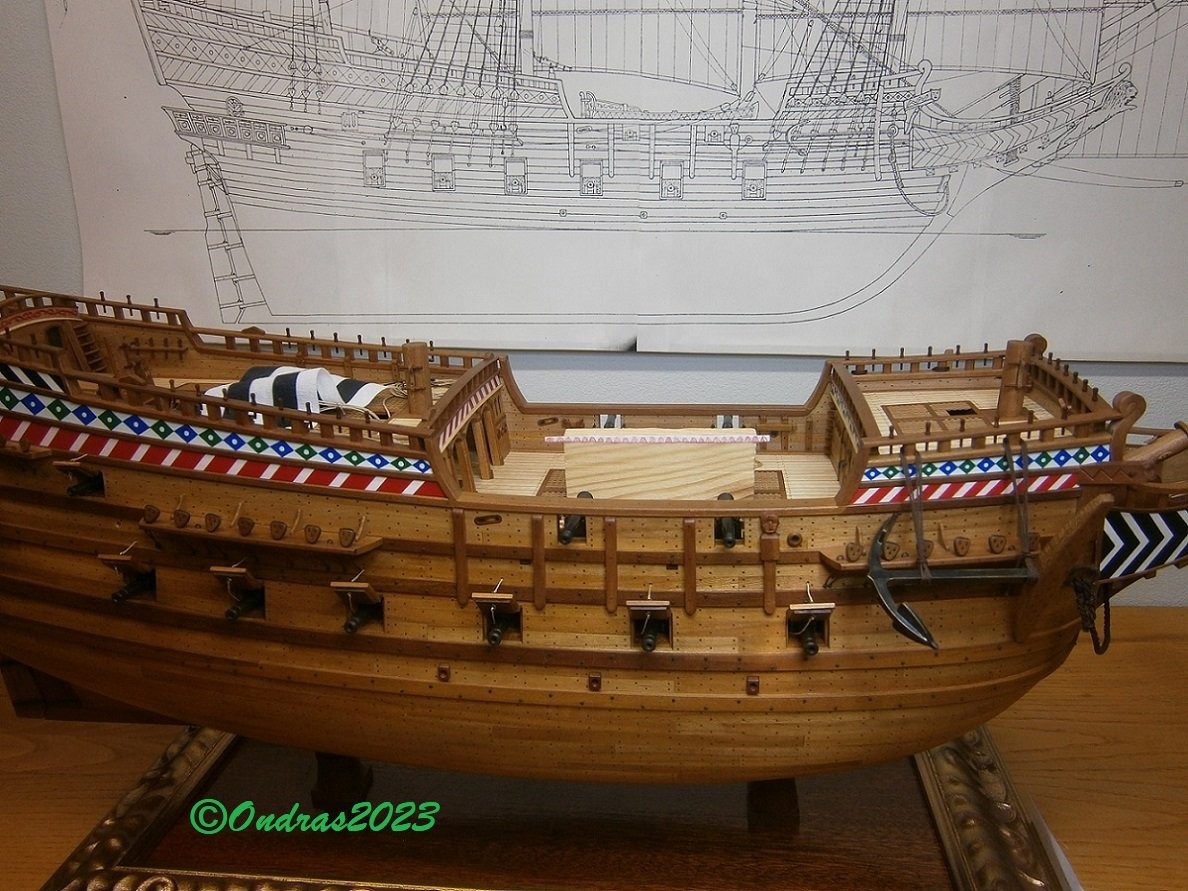
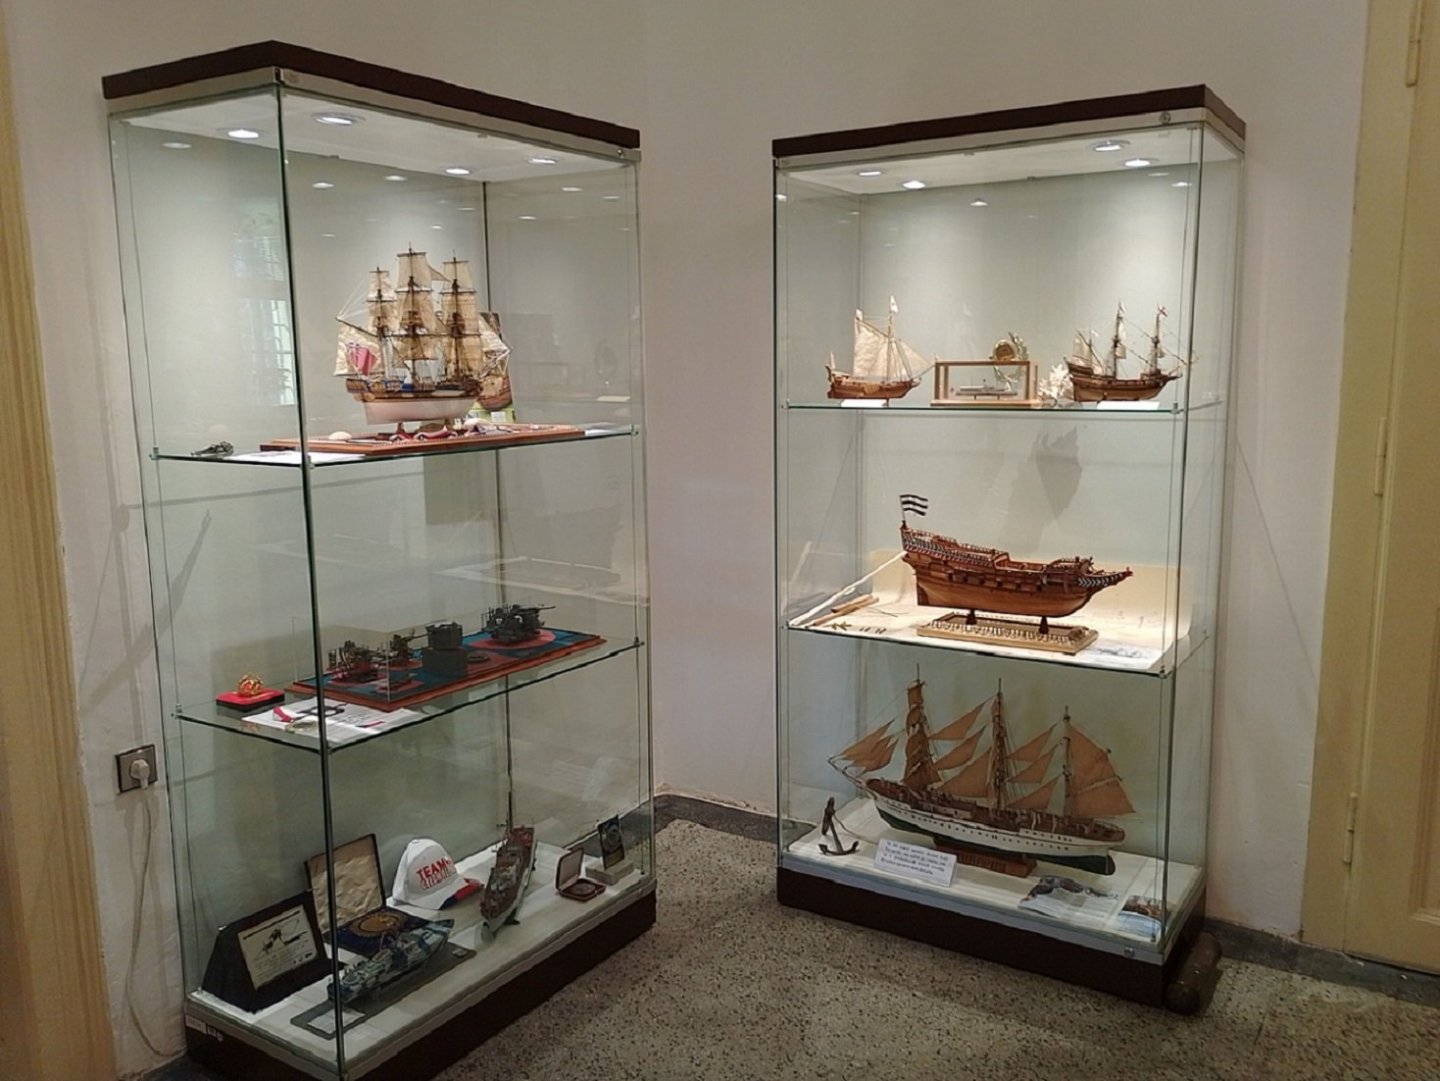
Binding points laid on the bowsprit stump. The ship is temporarily located in the museum in Rumburk as part of promotional events for the 2023 World Model Boat Championship in the Czech Republic. https://wchs-c-2023.eu/cz.thumb.JPG.528bc487a410a2ee4493bfb106c5097d.JPG)
.JPG.1d7da27a459ec2ebd4c2db050d22f049.JPG)
.JPG.1622f4aca8ae0ff7b71d62fbf6a00371.JPG)
.JPG.d065bd3591b51cee0dd537594c8a964e.JPG)
-
Roter Löwe 1597 by Ondras71
Ondras71 replied to Ondras71's topic in - Build logs for subjects built 1501 - 1750
Thanks scrubbyj, thanks for the like. I hung the finished anchors on the boat. The bow has been properly strengthened.. I will also place the binding points on the bowsprit stump...thumb.JPG.207671186aa0a582fae82e36446d33c0.JPG)
.thumb.JPG.863d887cb95899dae0a7a129e8a3974d.JPG)
.thumb.JPG.bcc3f89db07bfbfe2fafd680b03925e2.JPG)
.thumb.JPG.2f478af709320a4543c6a53dc2ea0ad7.JPG)
.thumb.JPG.a41839da82cb37e58e2ae8330aa64aeb.JPG)
-
Roter Löwe 1597 by Ondras71
Ondras71 replied to Ondras71's topic in - Build logs for subjects built 1501 - 1750
Thank you very much Gary. Thanks for the like. Anchors blackened and wooden partitions made..🔥 Result..

.JPG.d5e07994f2545d7438bd703baec241c9.JPG)
.JPG.32a46fed67233d58b10bc25f223754f9.JPG)
.thumb.JPG.eee1ecc53aca60e98597e1bffa3126c7.JPG)
.JPG.dca057ec8d03be9b63f2f869b8b09374.JPG)
.JPG.17bcfa7a24c0274ab990e78a1535ea8e.JPG)
-
Roter Löwe 1597 by Ondras71
Ondras71 replied to Ondras71's topic in - Build logs for subjects built 1501 - 1750
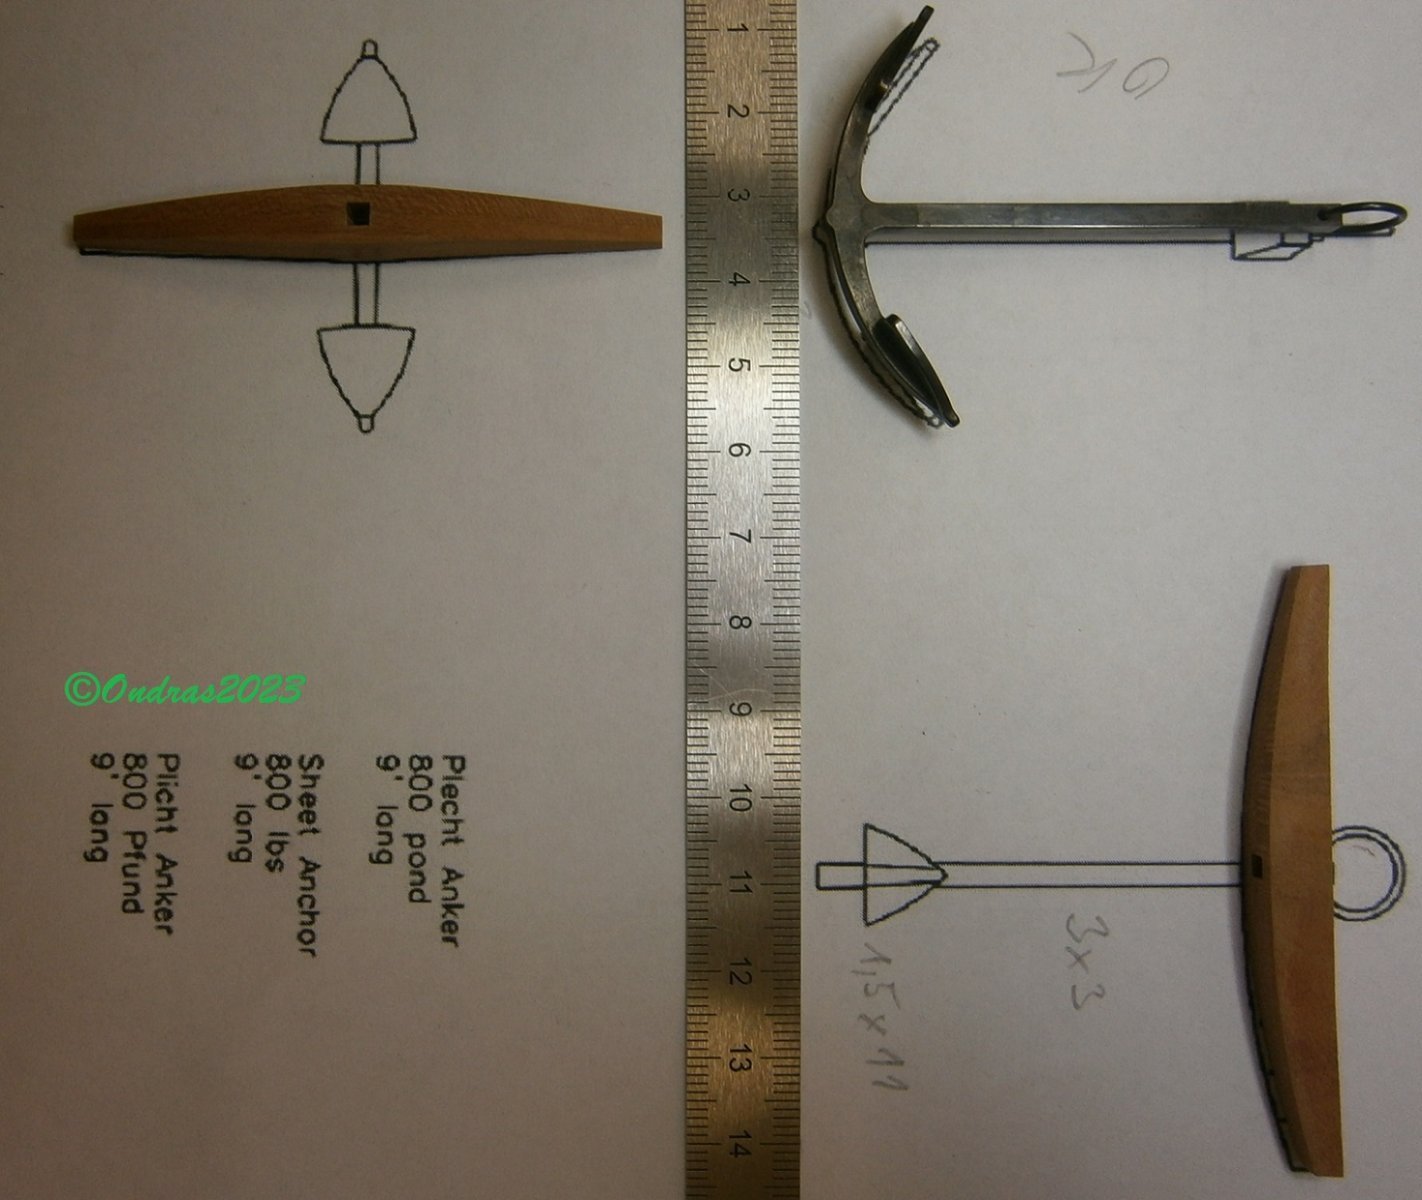
Thank you very much Patrick and Rock! Thanks for the like. I weakened the vanes to 1.3mm according to the Zeehaen ship anchor plan, now better..🔥 Polished with 00 steel wool and ready for blackening..🔥.JPG.2daa702fa875cf629a3f4b36b22ecb34.JPG)
.JPG.de10023d9c5ccc0a74d785029920f81b.JPG)
.JPG.ebb1c451efb732c635db2eba9f9d746e.JPG)
-
Roter Löwe 1597 by Ondras71
Ondras71 replied to Ondras71's topic in - Build logs for subjects built 1501 - 1750
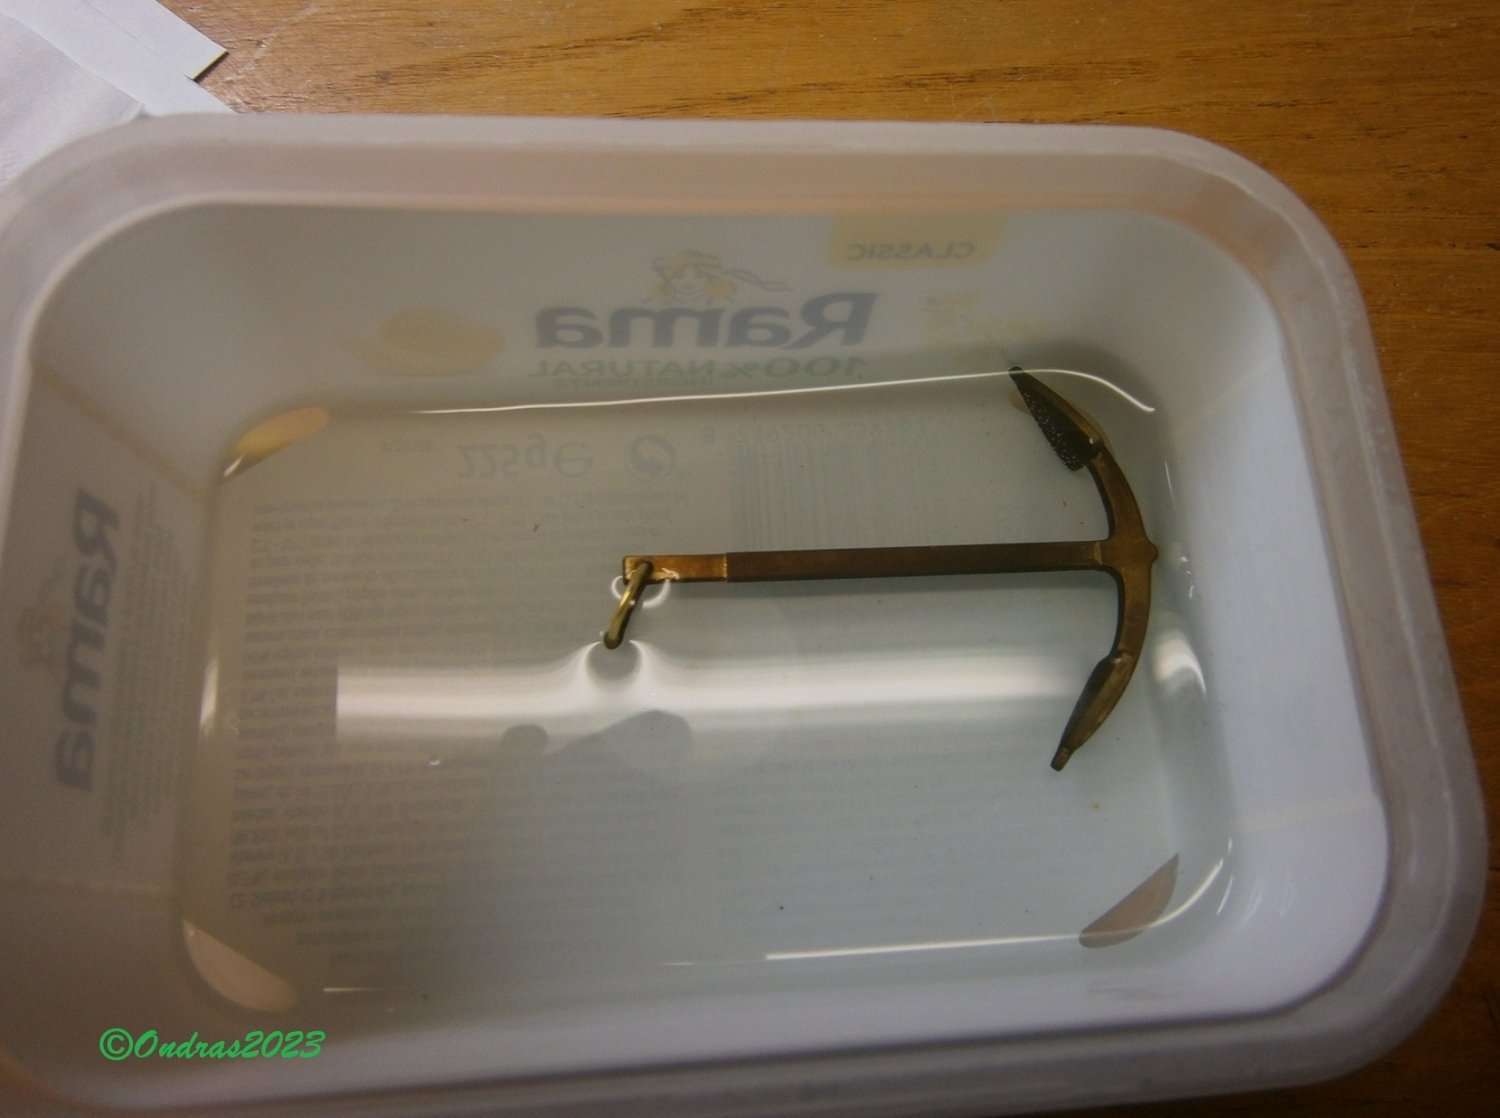
Thank you very much friends! Boat put away for a while, making anchors, another challenge...🔥 Here, however, a larger burner than the one in the photo is used for heating...thumb.JPG.0dbbc12dfeaff59095b499fdaddd8ed7.JPG)
.JPG.3f58243b40abecec9ea23dc1c2c99f90.JPG)
.JPG.1da5d33b53b997592cc4e89b34d7409c.JPG)
.thumb.JPG.dc7bc70314e3f271396cb9449be9b4e4.JPG)
.JPG.8ea5b22ad2e792a0776df4583a7bc249.JPG)
.JPG.bf6ef9eaf3b7cb417c81d2b7ca8aea66.JPG)
.JPG.e9f4bca8465c17d4b44bd61a65f6c536.JPG)
.JPG.1c70f5234a13382a63f9209cf5ad6012.JPG)
.JPG.05c613639589c64cce77795220aff964.JPG)
-
Roter Löwe 1597 by Ondras71
Ondras71 replied to Ondras71's topic in - Build logs for subjects built 1501 - 1750
Thank you so much Hubacs and Steven.. I got over the "lean" period a bit and started working on the boat. The lower parts of the ribs are gradually ground, the horror, each part a different angle.. The ribs are gradually placed on the keel.. It's a bit like making another model...thumb.JPG.2d00cdb0df49d7cfe985e57bb6ba0780.JPG)
.JPG.3b470d2e522df40dd6a7d459be8adeb6.JPG)
.JPG.5de5769dd338ded3dadf50c490308ada.JPG)
.JPG.e00c2b64474097844f44dc7d4197f132.JPG)
.thumb.JPG.0ea905f992bfb59a22ee9790036c9794.JPG)
.JPG.7f27b15d414b427e7b3e78e7d786cf5c.JPG)
.JPG.cf2b31d4e4d167d32e91f22c318bca22.JPG)
-
Roter Löwe 1597 by Ondras71
Ondras71 replied to Ondras71's topic in - Build logs for subjects built 1501 - 1750
After a very long time I finished the hoof for the workboat. I'm building this one according to the Zeehaen plan.. Prepared keel, stern post, stem and ribs..
.JPG.a1bbfaf2b6500cd32b213581fb590b81.JPG)
.JPG.909fc6deca3f371b37530ba26faa588d.JPG)
.JPG.ebd21b054751581c0d5f3b9919c0106e.JPG)
.JPG.c0e020a2eba5ac8c067a5768c036bb56.JPG)
-
Roter Löwe 1597 by Ondras71
Ondras71 replied to Ondras71's topic in - Build logs for subjects built 1501 - 1750
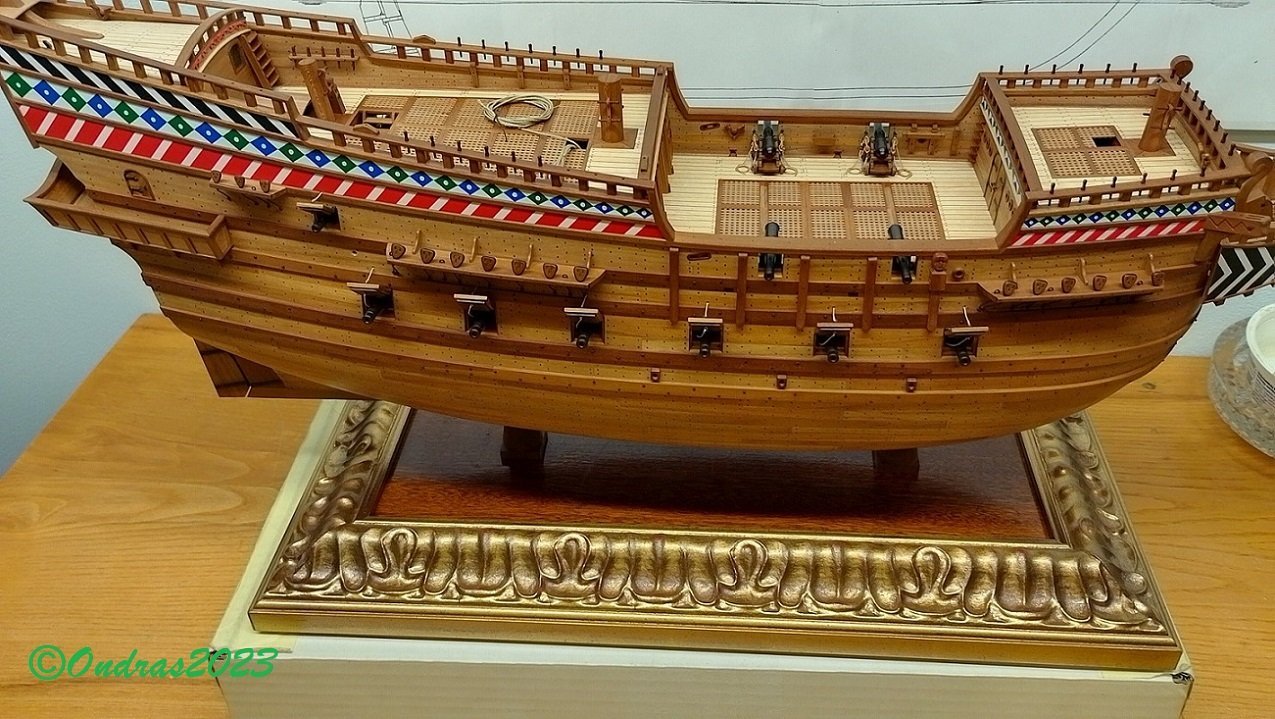
Thank you Baker for the kind words before the contest. Thanks for the Like. This time in the competition, the points were enough for the silver medal. When I compare my boat with La Renomee by the Czech modeler Pavel Brablc, I have to agree.👌 Hats off to his extensive hand embellishment and detailing. Well 22 years of work.. I have to say that the visitors liked the ship..😃 Here is a link to photos from the contest. https://www.olesnica24.com/galeria/1405,mistrzostwa-polski-i-mistrzostwa-czech-wystawowych-modeli-redukcyjnych-statkow-i-okretow-klas-c-w-olesnicy.jpg.332392721842e6eea77abe3c5c7deac3.jpg)
.thumb.jpg.8437128668dac2c1c9eea3652122b987.jpg)
.jpg.bb309c89aa962e59d2263f1b695aeff7.jpg)
-
Roter Löwe 1597 by Ondras71
Ondras71 replied to Ondras71's topic in - Build logs for subjects built 1501 - 1750
Thank you very much Hubacs Historian, thank you for the like.. I studied the patina of a strong shining gold color, I darkened the stand so that it was not prettier than the ship.. The model is ready for the competition in Poland...JPG.2f2c9cc9b810d4dd2048709a356750f8.JPG)
.thumb.JPG.902a4a6e824cd0f842bed7d20e04ba4d.JPG)
.thumb.JPG.27cf1df84308d1f138b3837ae270ac0a.JPG)
.thumb.JPG.54d65a2e06dac95c849ef3b9a2756b65.JPG)
.JPG.7fb43bb87da4c8007f17259186540aea.JPG)
.JPG.b5609cbff6f1c5c8b7966083ef6c6b7c.JPG)
-
I tip my hat! Beautiful work. Like alive!!
-
Roter Löwe 1597 by Ondras71
Ondras71 replied to Ondras71's topic in - Build logs for subjects built 1501 - 1750
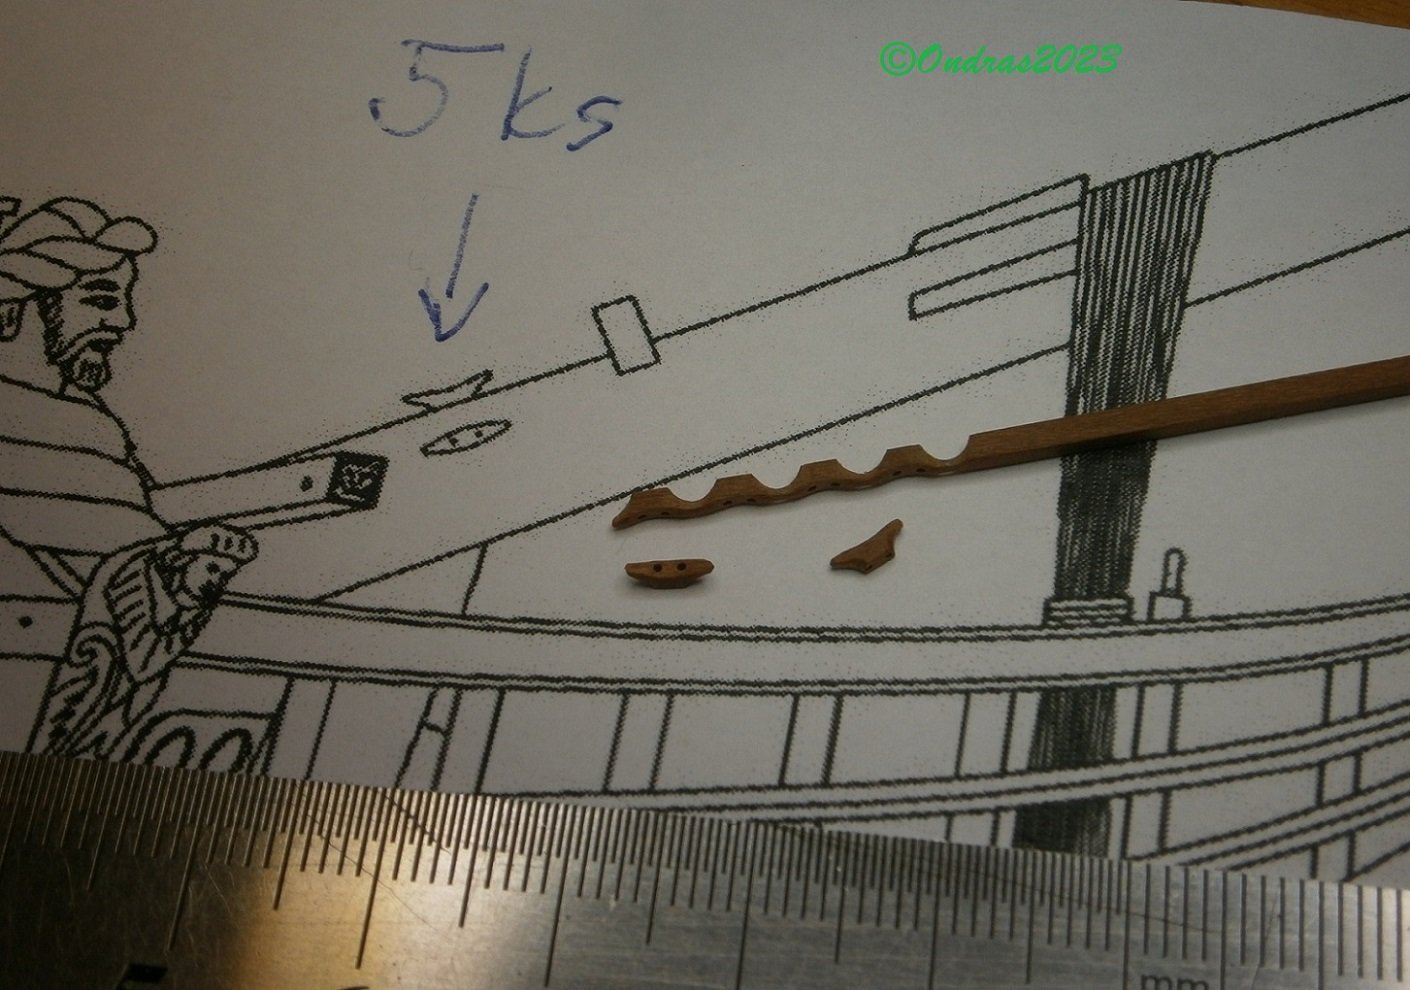
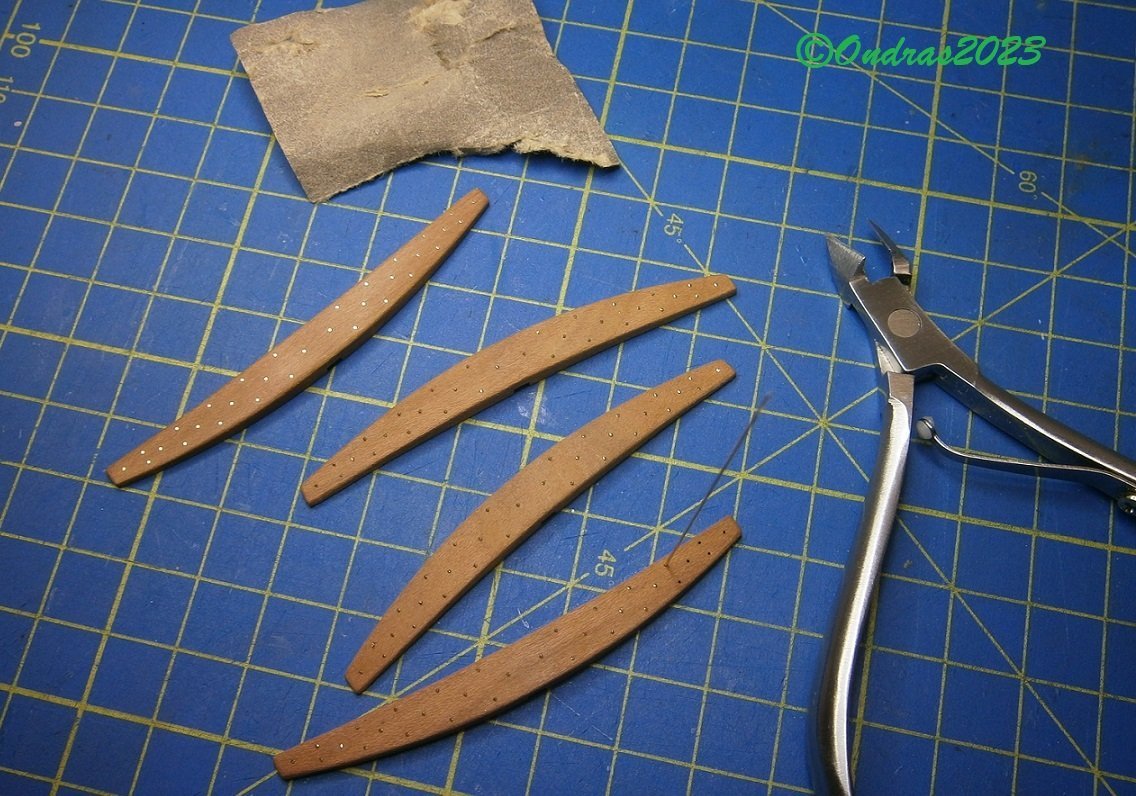
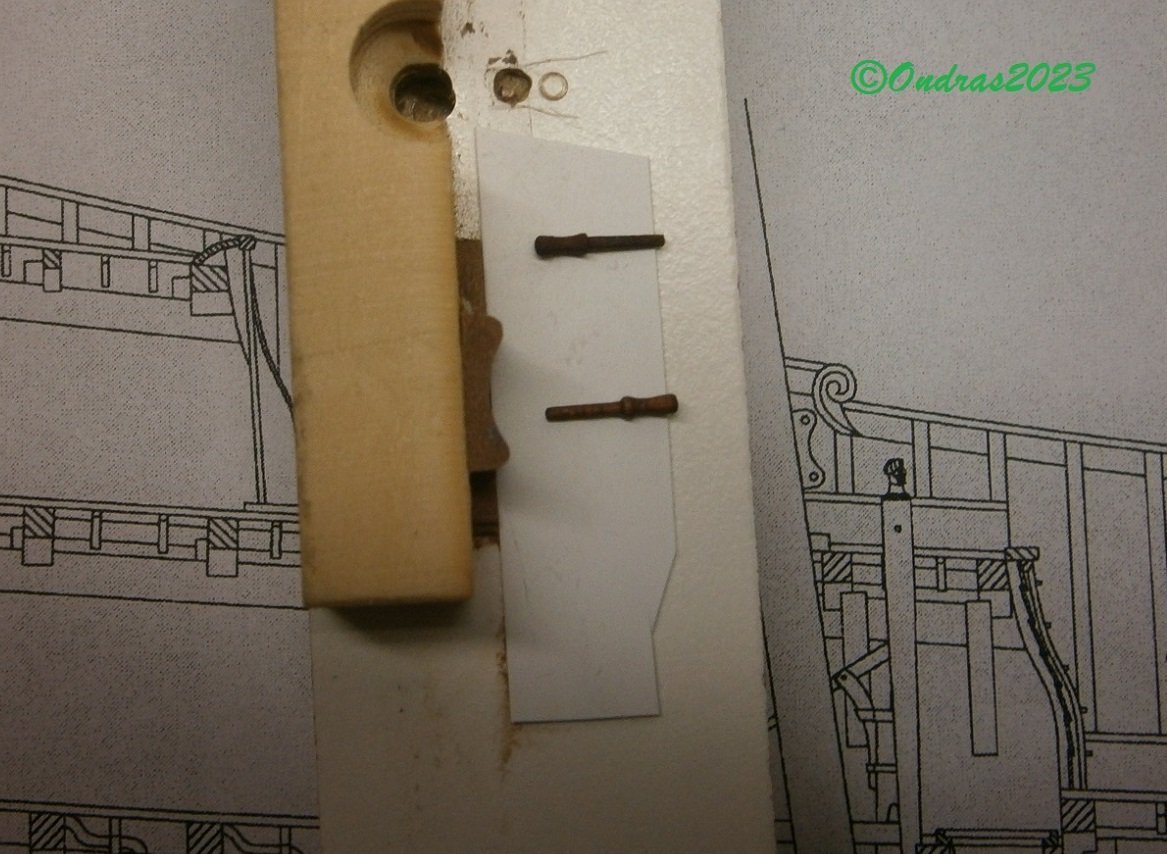
Thank you for the like.. "Mast rails" are created on the stumps of the masts..👌 All attachment points including Pins done..🔥💥.JPG.12aa3eaab723db9960724f51db430b1d.JPG)
.JPG.564010cdef3033563702992a24bc97ea.JPG)
.JPG.cb6a81b7d390a0106b6968d7ea1a7933.JPG)
.JPG.84217e770fcf67422370e151fda97143.JPG)
.JPG.adb2ca4294507053bd0e79f075a4dbee.JPG)
.JPG.05ce047857aa9cb3a4c69df8d3a7a8f3.JPG)
.JPG.26b6527d358bd1269e62fd75df7fcb5d.JPG)
.JPG.65b5a166c8482ffa3f089034055ae044.JPG)
.thumb.JPG.8ff24d27237bdc016a27d70c40de57f6.JPG)
-
Nice to see you back in full Paryzek work. Great job!! Ondras
-
Roter Löwe 1597 by Ondras71
Ondras71 replied to Ondras71's topic in - Build logs for subjects built 1501 - 1750
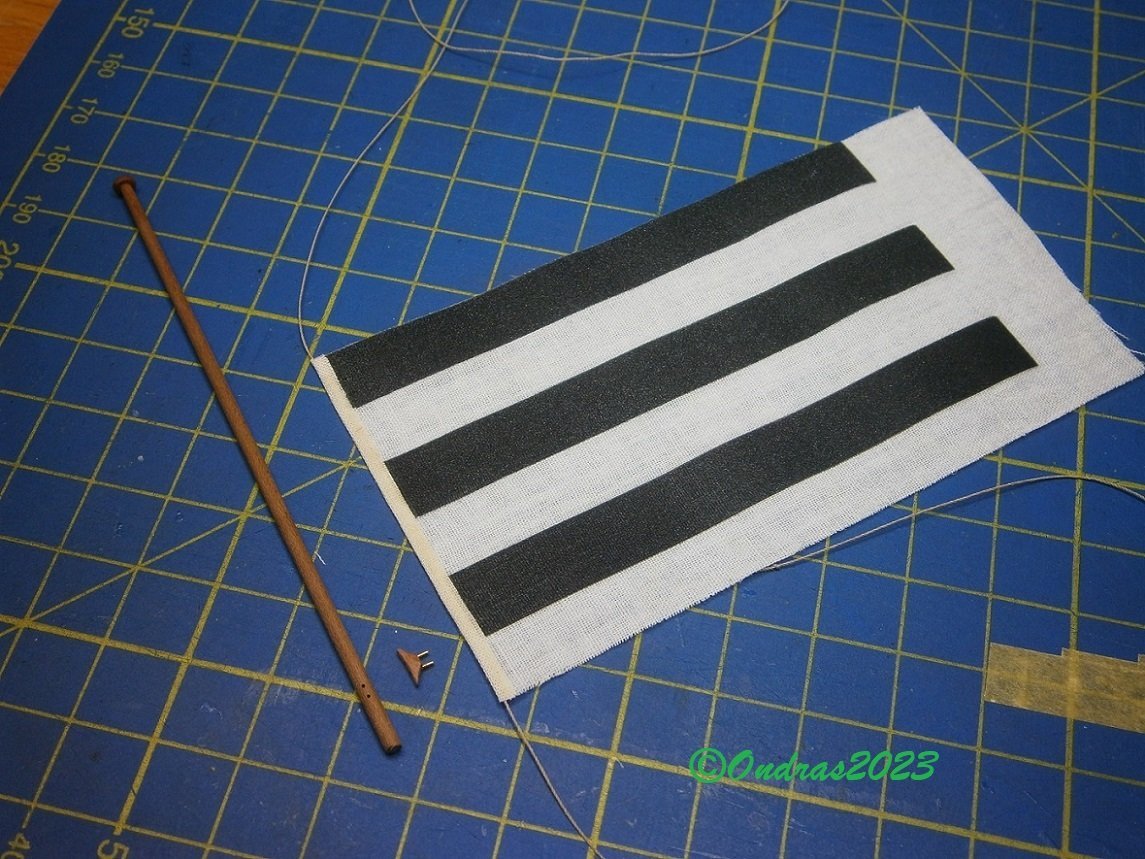
Thank you very much Todd, thank you for the like.. Continuation of the big flag on the stern...thumb.JPG.4ac4abcb1466e9f868d90cfe3d55241d.JPG)
.thumb.JPG.558f317a9a4c403c3c2863682bad3e47.JPG)
.thumb.JPG.8328cc12e3e804db69ebe3e33637fdf9.JPG)
.thumb.JPG.454855e524a765b58d1332c6cc236185.JPG)
.thumb.JPG.587a9dc1924eab904b4442c556513fb3.JPG)
-
I tip my hat. Especially for the beautiful work without machinery!
-
Roter Löwe 1597 by Ondras71
Ondras71 replied to Ondras71's topic in - Build logs for subjects built 1501 - 1750
Thanks for the like.. The emblem is ready.. ..and placed on the mirror.. Next job - a big flag on the stern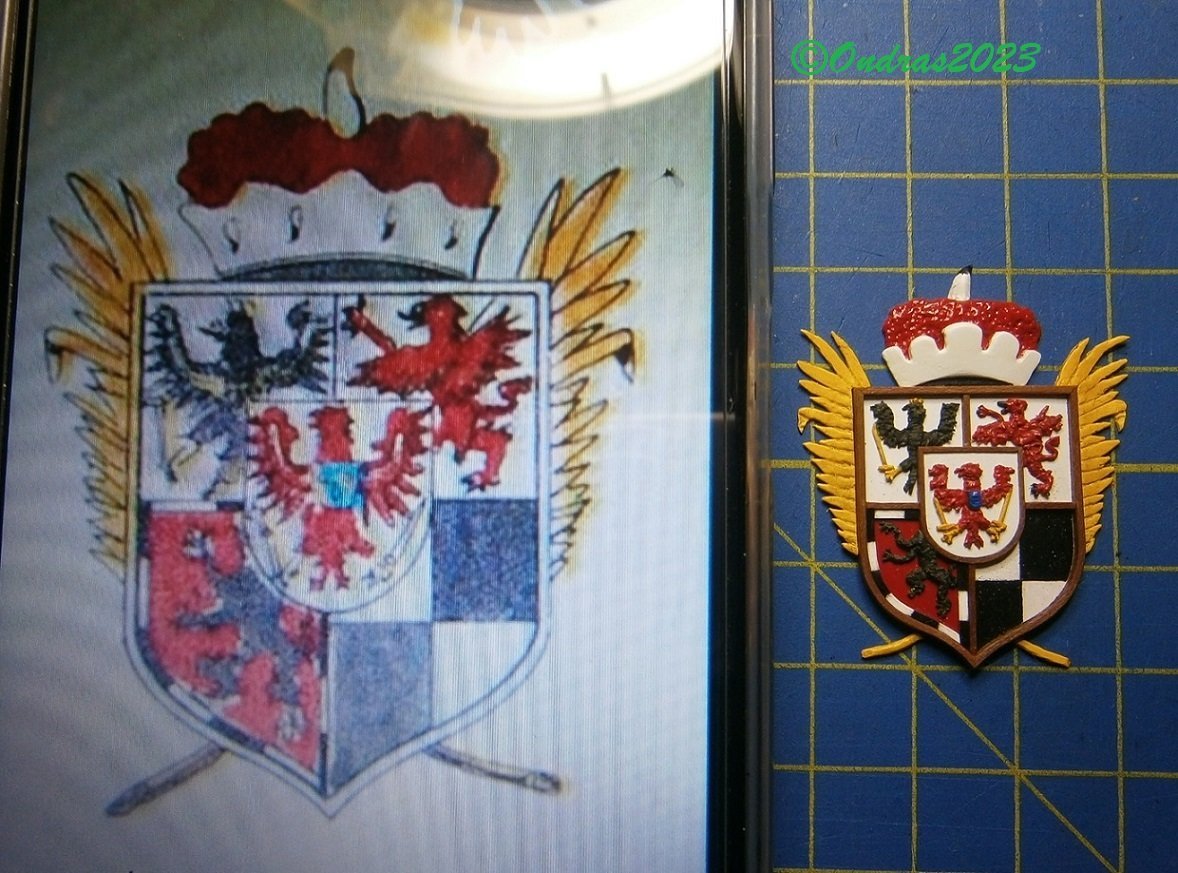
.thumb.JPG.c4e511d02c3b3fa5740e9874393770e9.JPG)
.thumb.JPG.cb443099454017c9b2ab2554b8f89c46.JPG)
.thumb.JPG.bd7e4cf5cff8943f772b72de6fea1a75.JPG)
.JPG.eb2a11e4cedd396079159c4a569c69cf.JPG)
.JPG.3c9a63f05198f2b58a0fccf87d0dcbea.JPG)

.JPG.523965c0c60ea699a6449871900e6aa0.JPG)
.JPG.fe7ccfd8a3a3f3567841878a0a9ed6d9.JPG)
.JPG.ce0026ead763f53ffaf6f49da167699b.JPG)
.JPG.94fa1305978f4c3b128e7adb71f4465d.JPG)
.JPG.732cee8eb6da872695a4800a876b53e6.JPG)
.JPG.7cdbde10c7375605bfbf30be59d0c1c1.JPG)
.JPG.74ade3d34545212cc619ab6e19e03c93.JPG)
.jpg.af3ffcdd924a4a399d928fade167e43c.jpg)
.JPG.aed937d427e3bdaab3f50ede16a30bd0.JPG)

.JPG.2f4f816464de7dd8228acfe387ed8d08.JPG)
.JPG.4ea3f3f733b25f075edd6b175a112e1b.JPG)
.JPG.47a310bfff2ae66add021eb0c89f872a.JPG)

.JPG.69591e60e33bb009ac6bf55bfb0786b0.JPG)

.JPG.d52397c1c6c88cc7fb0ece8872e80d1f.JPG)
.JPG.912c2951f77a0f33b95f7410dd3601b5.JPG)
.JPG.a055a2a27a401a658fdf7c374401589e.JPG)
.JPG.3458e30c796850a0bdc7b0bf0f37f8a3.JPG)
.JPG.754554268592986ec42f4d3cdd138a2b.JPG)
.JPG.d9f67ce133510a04d7fc8a7d6931b434.JPG)
.JPG.7550ec361bbcf674a81111a2829661fb.JPG)
.JPG.f3e84819df6bb735fc9a264e9d537698.JPG)
.JPG.2c053b548ac0ea91d38a3b95633b1ba3.JPG)
.JPG.31163bfbeb92e0a8b187d259ec114b29.JPG)
.jpg.6356274036f5a8cfd06f130c86847931.jpg)
.JPG.fadad9958c9e55e274e3afa85f6dc877.JPG)
.JPG.d5bdc40962ccc5d52ad445b0ec84a399.JPG)
.JPG.7d7c318697cc9f054825f7b5c24306ba.JPG)
.JPG.82863e6f95425823219bc54111612279.JPG)
.JPG.0e9d3c9ab5cd80d9b3ff793c61c30d1c.JPG)
.JPG.89714d3c334a9b3995c2b074bbec1bb6.JPG)
.JPG.10806694d9eb81e476a2fb4521499508.JPG)
.JPG.07d644104d59201bcda4a6f46fe86eb1.JPG)
.JPG.66eaeffc55abd7ad8a0828ae558d31b1.JPG)
.JPG.07c65ea869ab66ef0825cfa8569c92f4.JPG)
.JPG.7107c886e4e1a2e2494dd63ca5056b67.JPG)
.JPG.facfad841c692d9a410af36a60da487f.JPG)