rwiederrich
-
Posts
5,520 -
Joined
-
Last visited
Content Type
Profiles
Forums
Gallery
Events
Everything posted by rwiederrich
-
Thanks Druxey. Time to clean up the shop and get prepared for the next phase. Finalizing the mast locations, setting temp masts so I can properly set angles when building the chainplates and channels. Things are gonna slow down......a bit. Rob
-
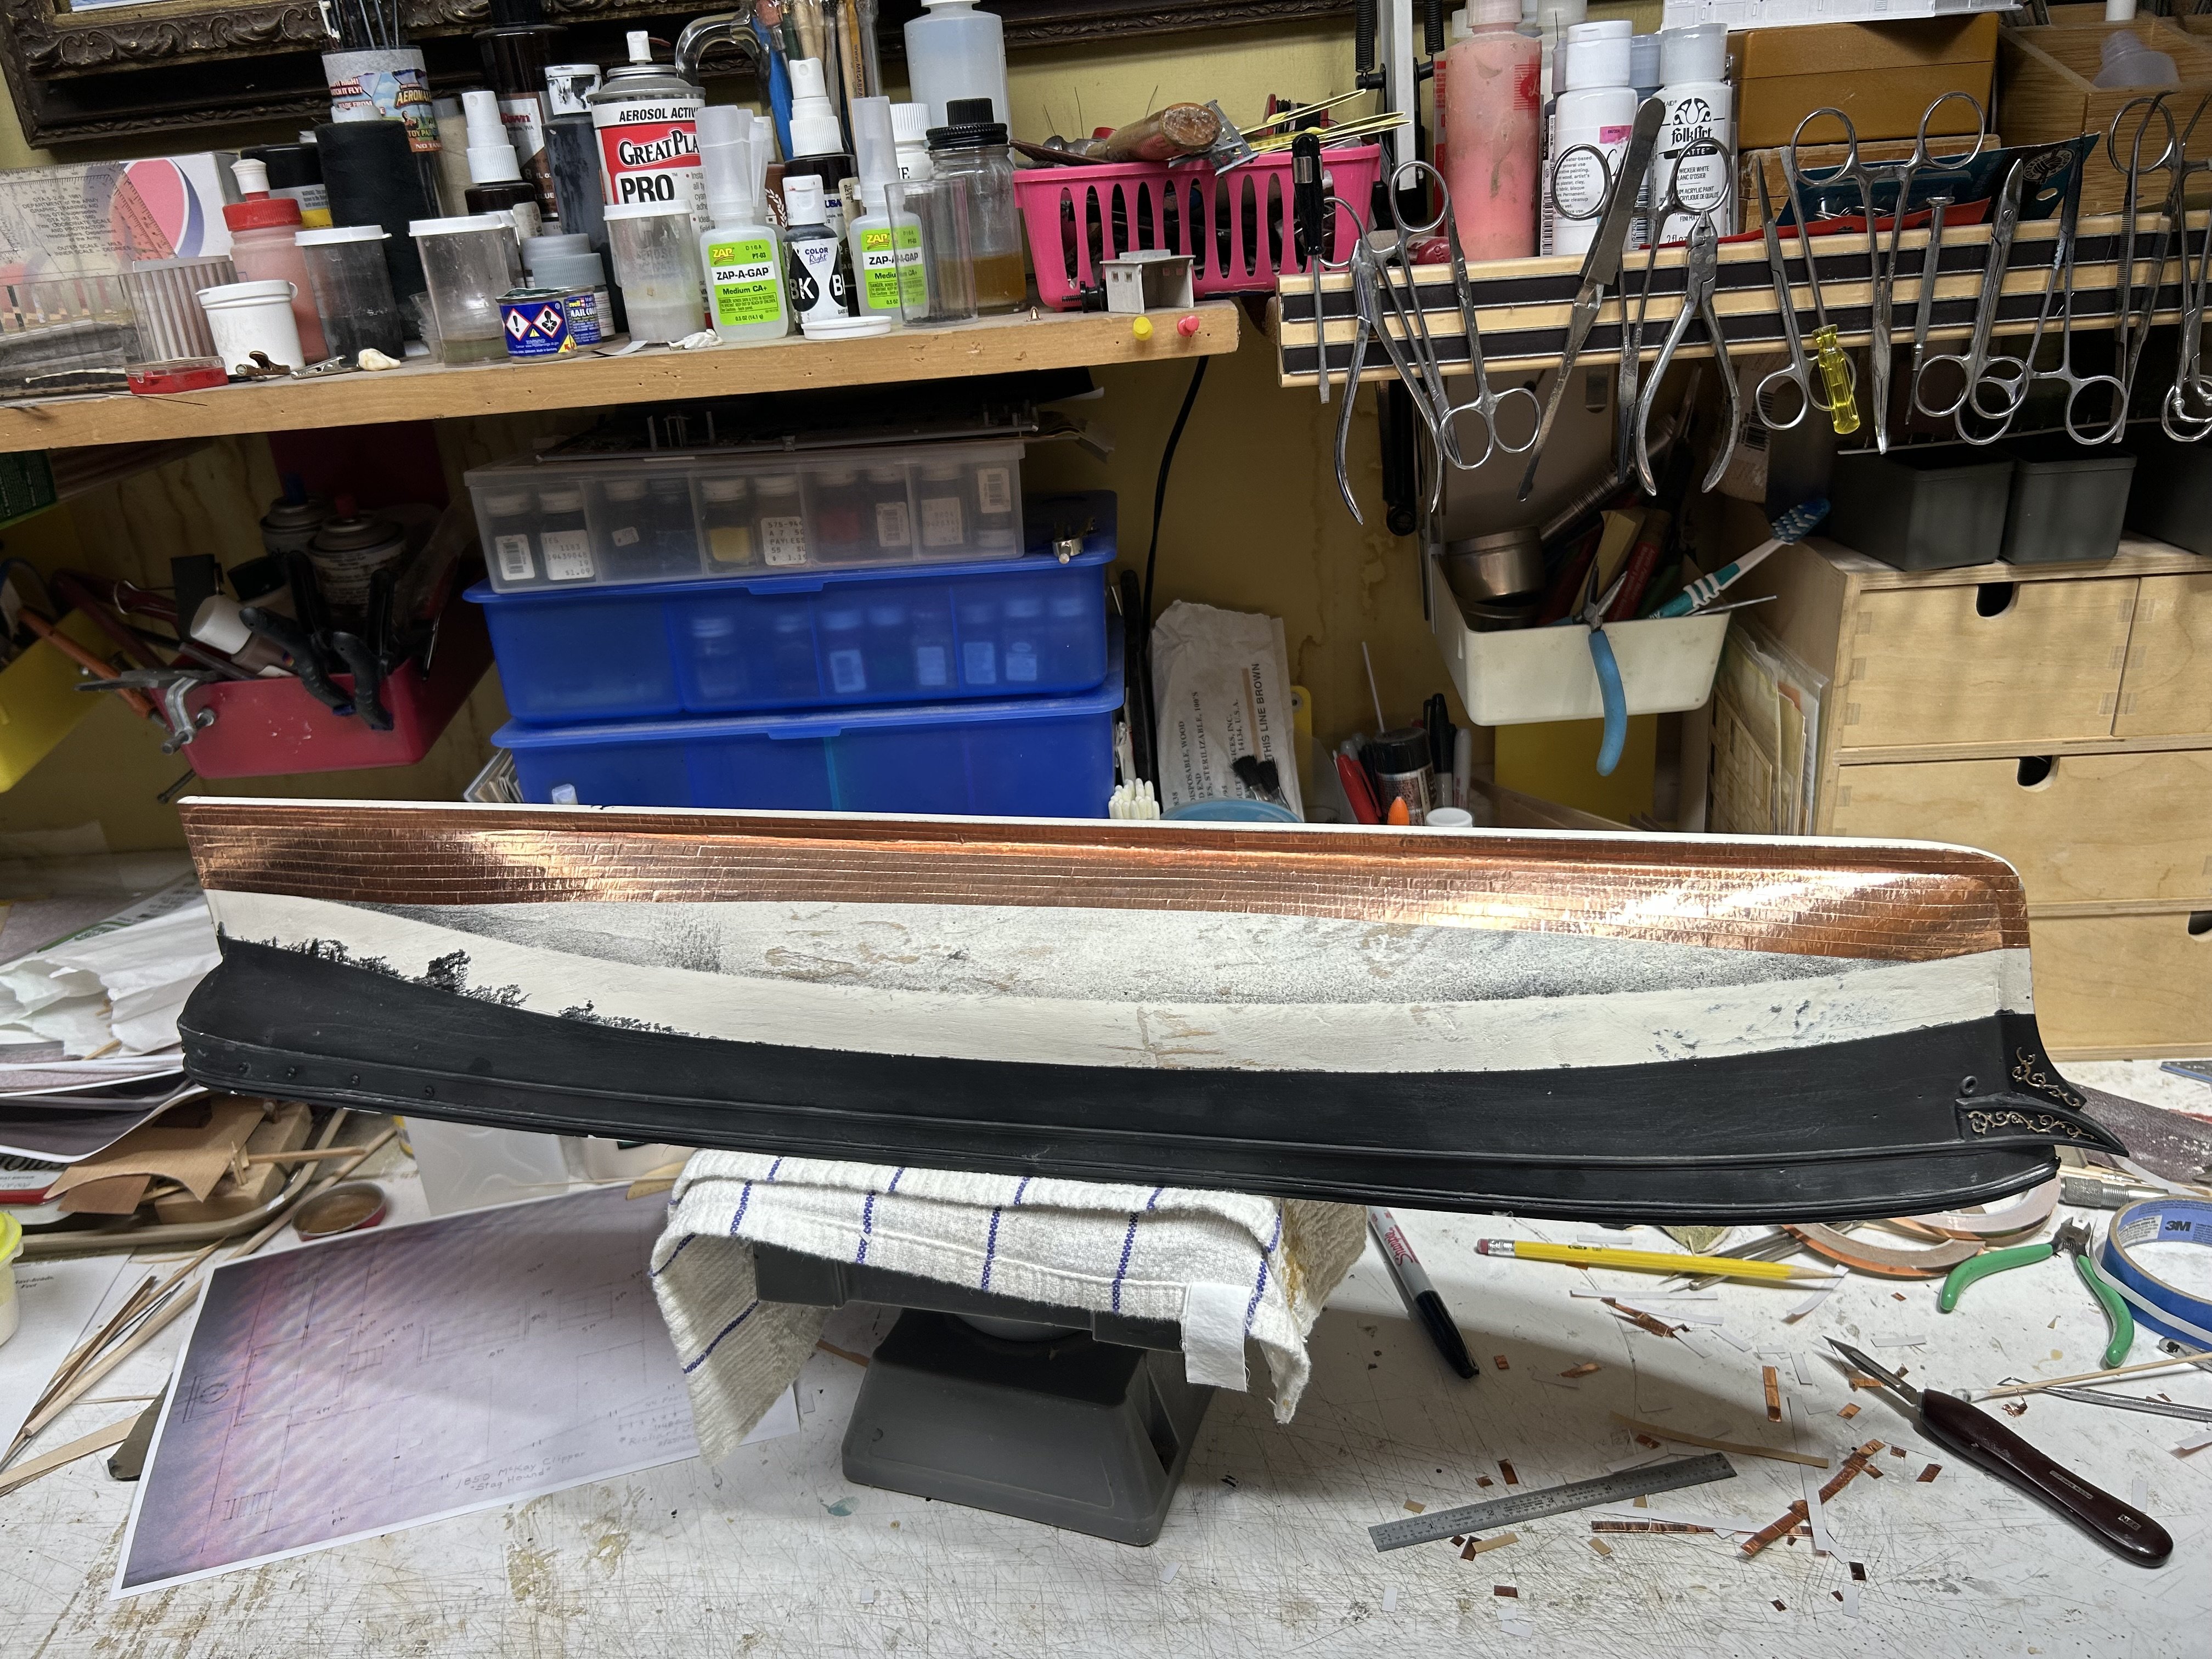
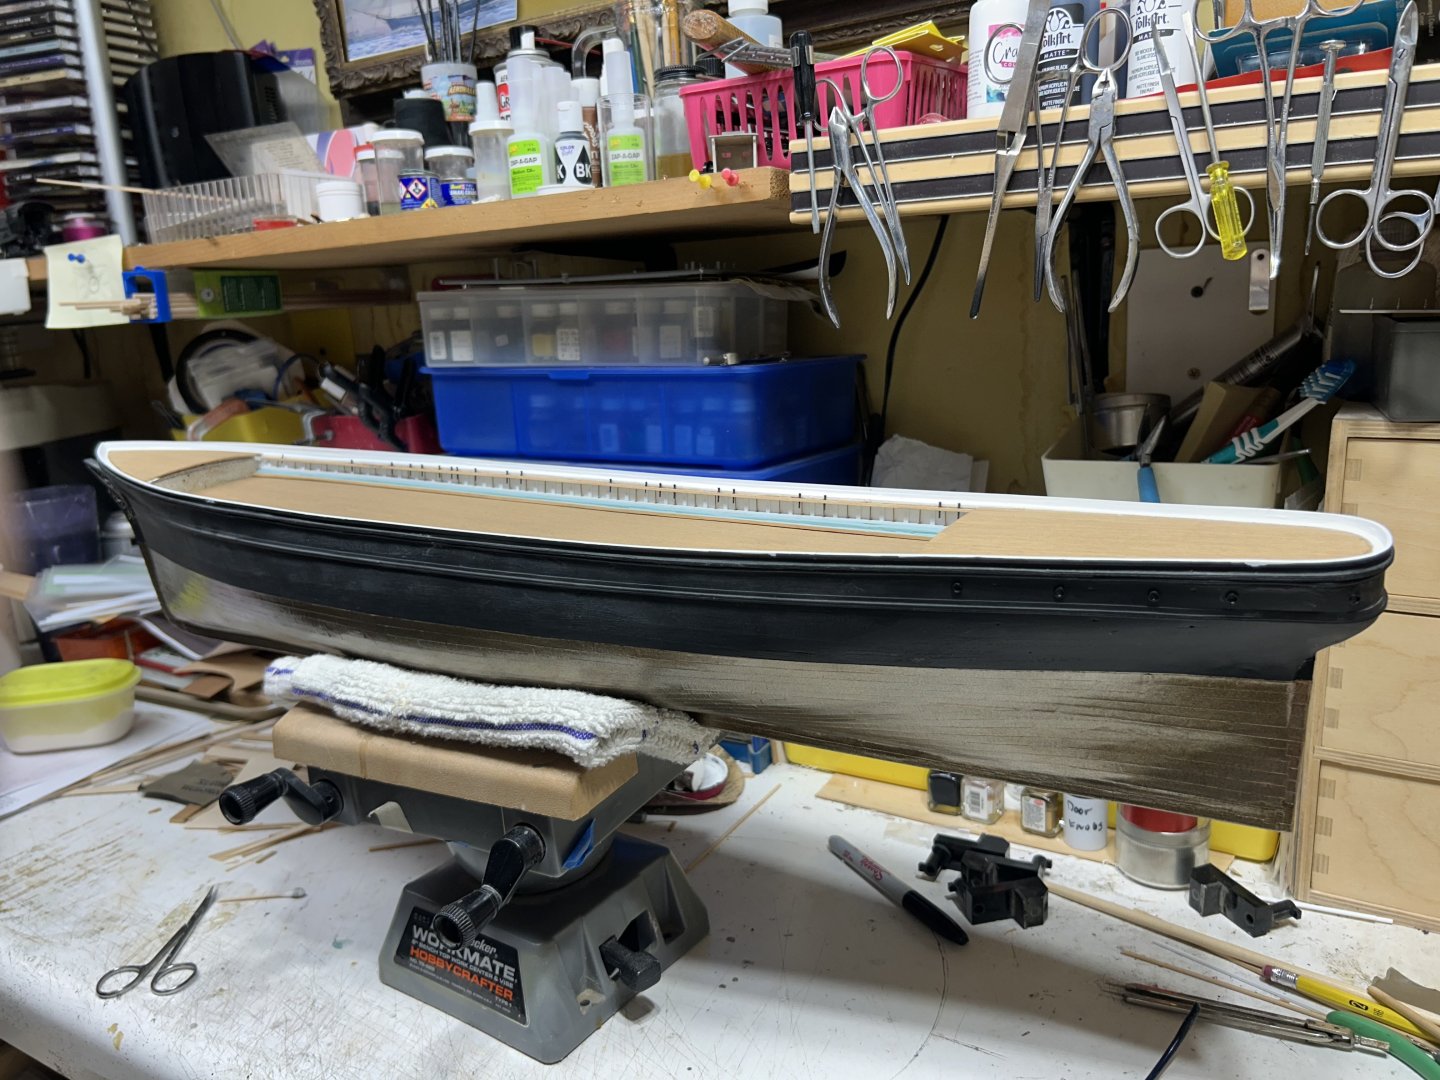
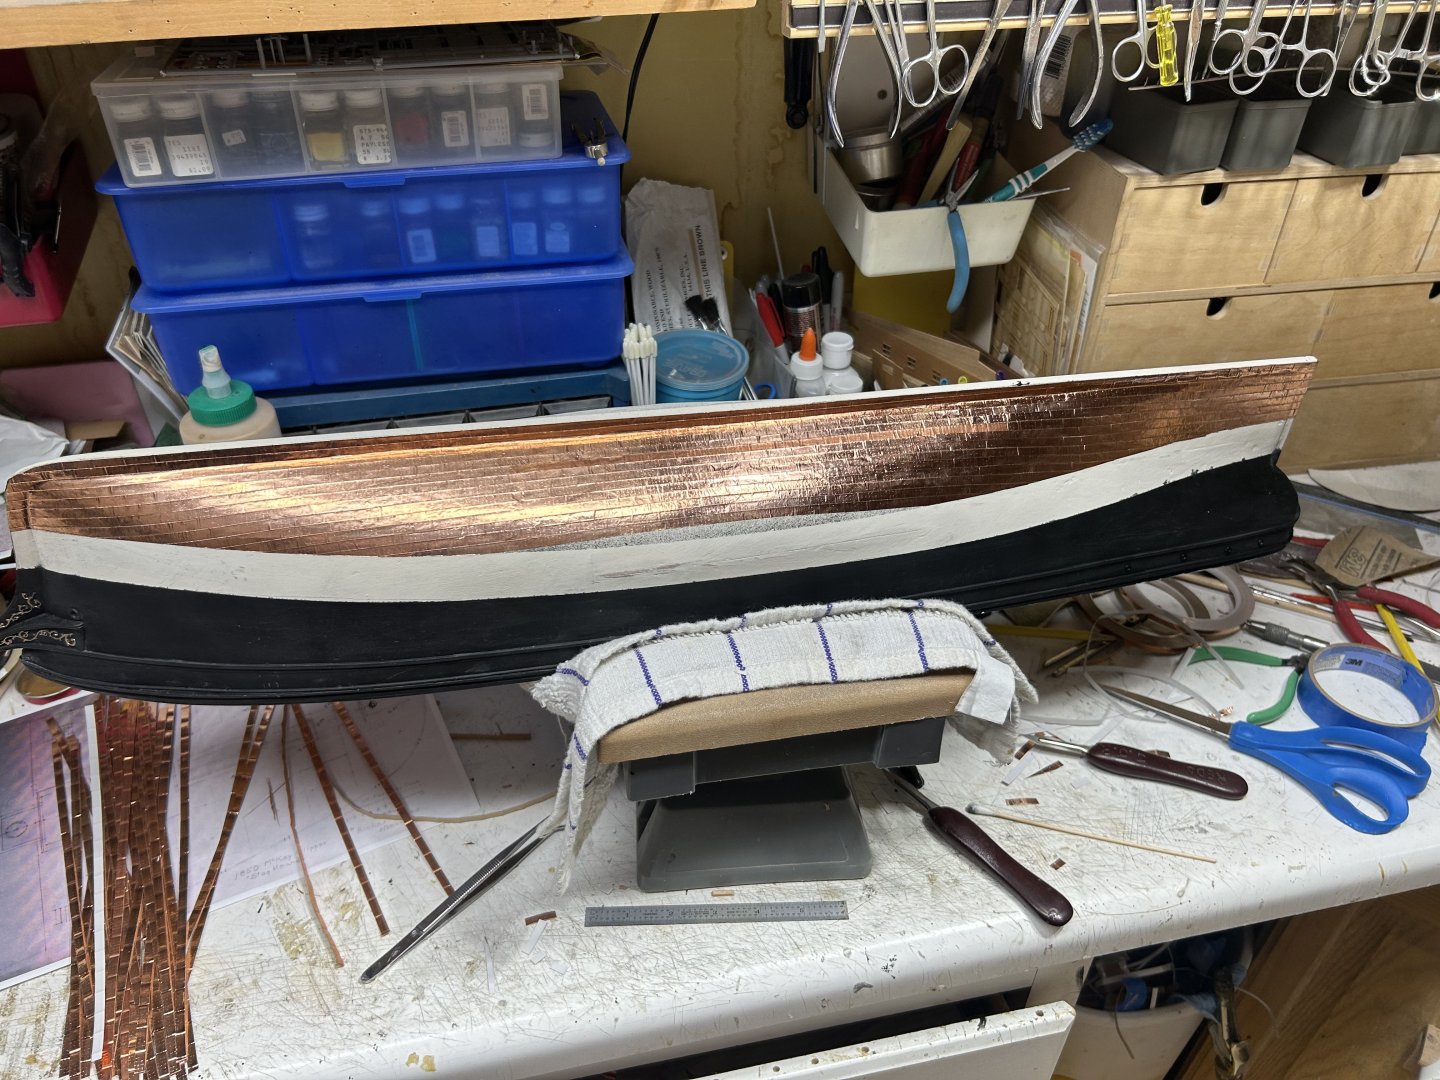
Masked and painted. Rob

-
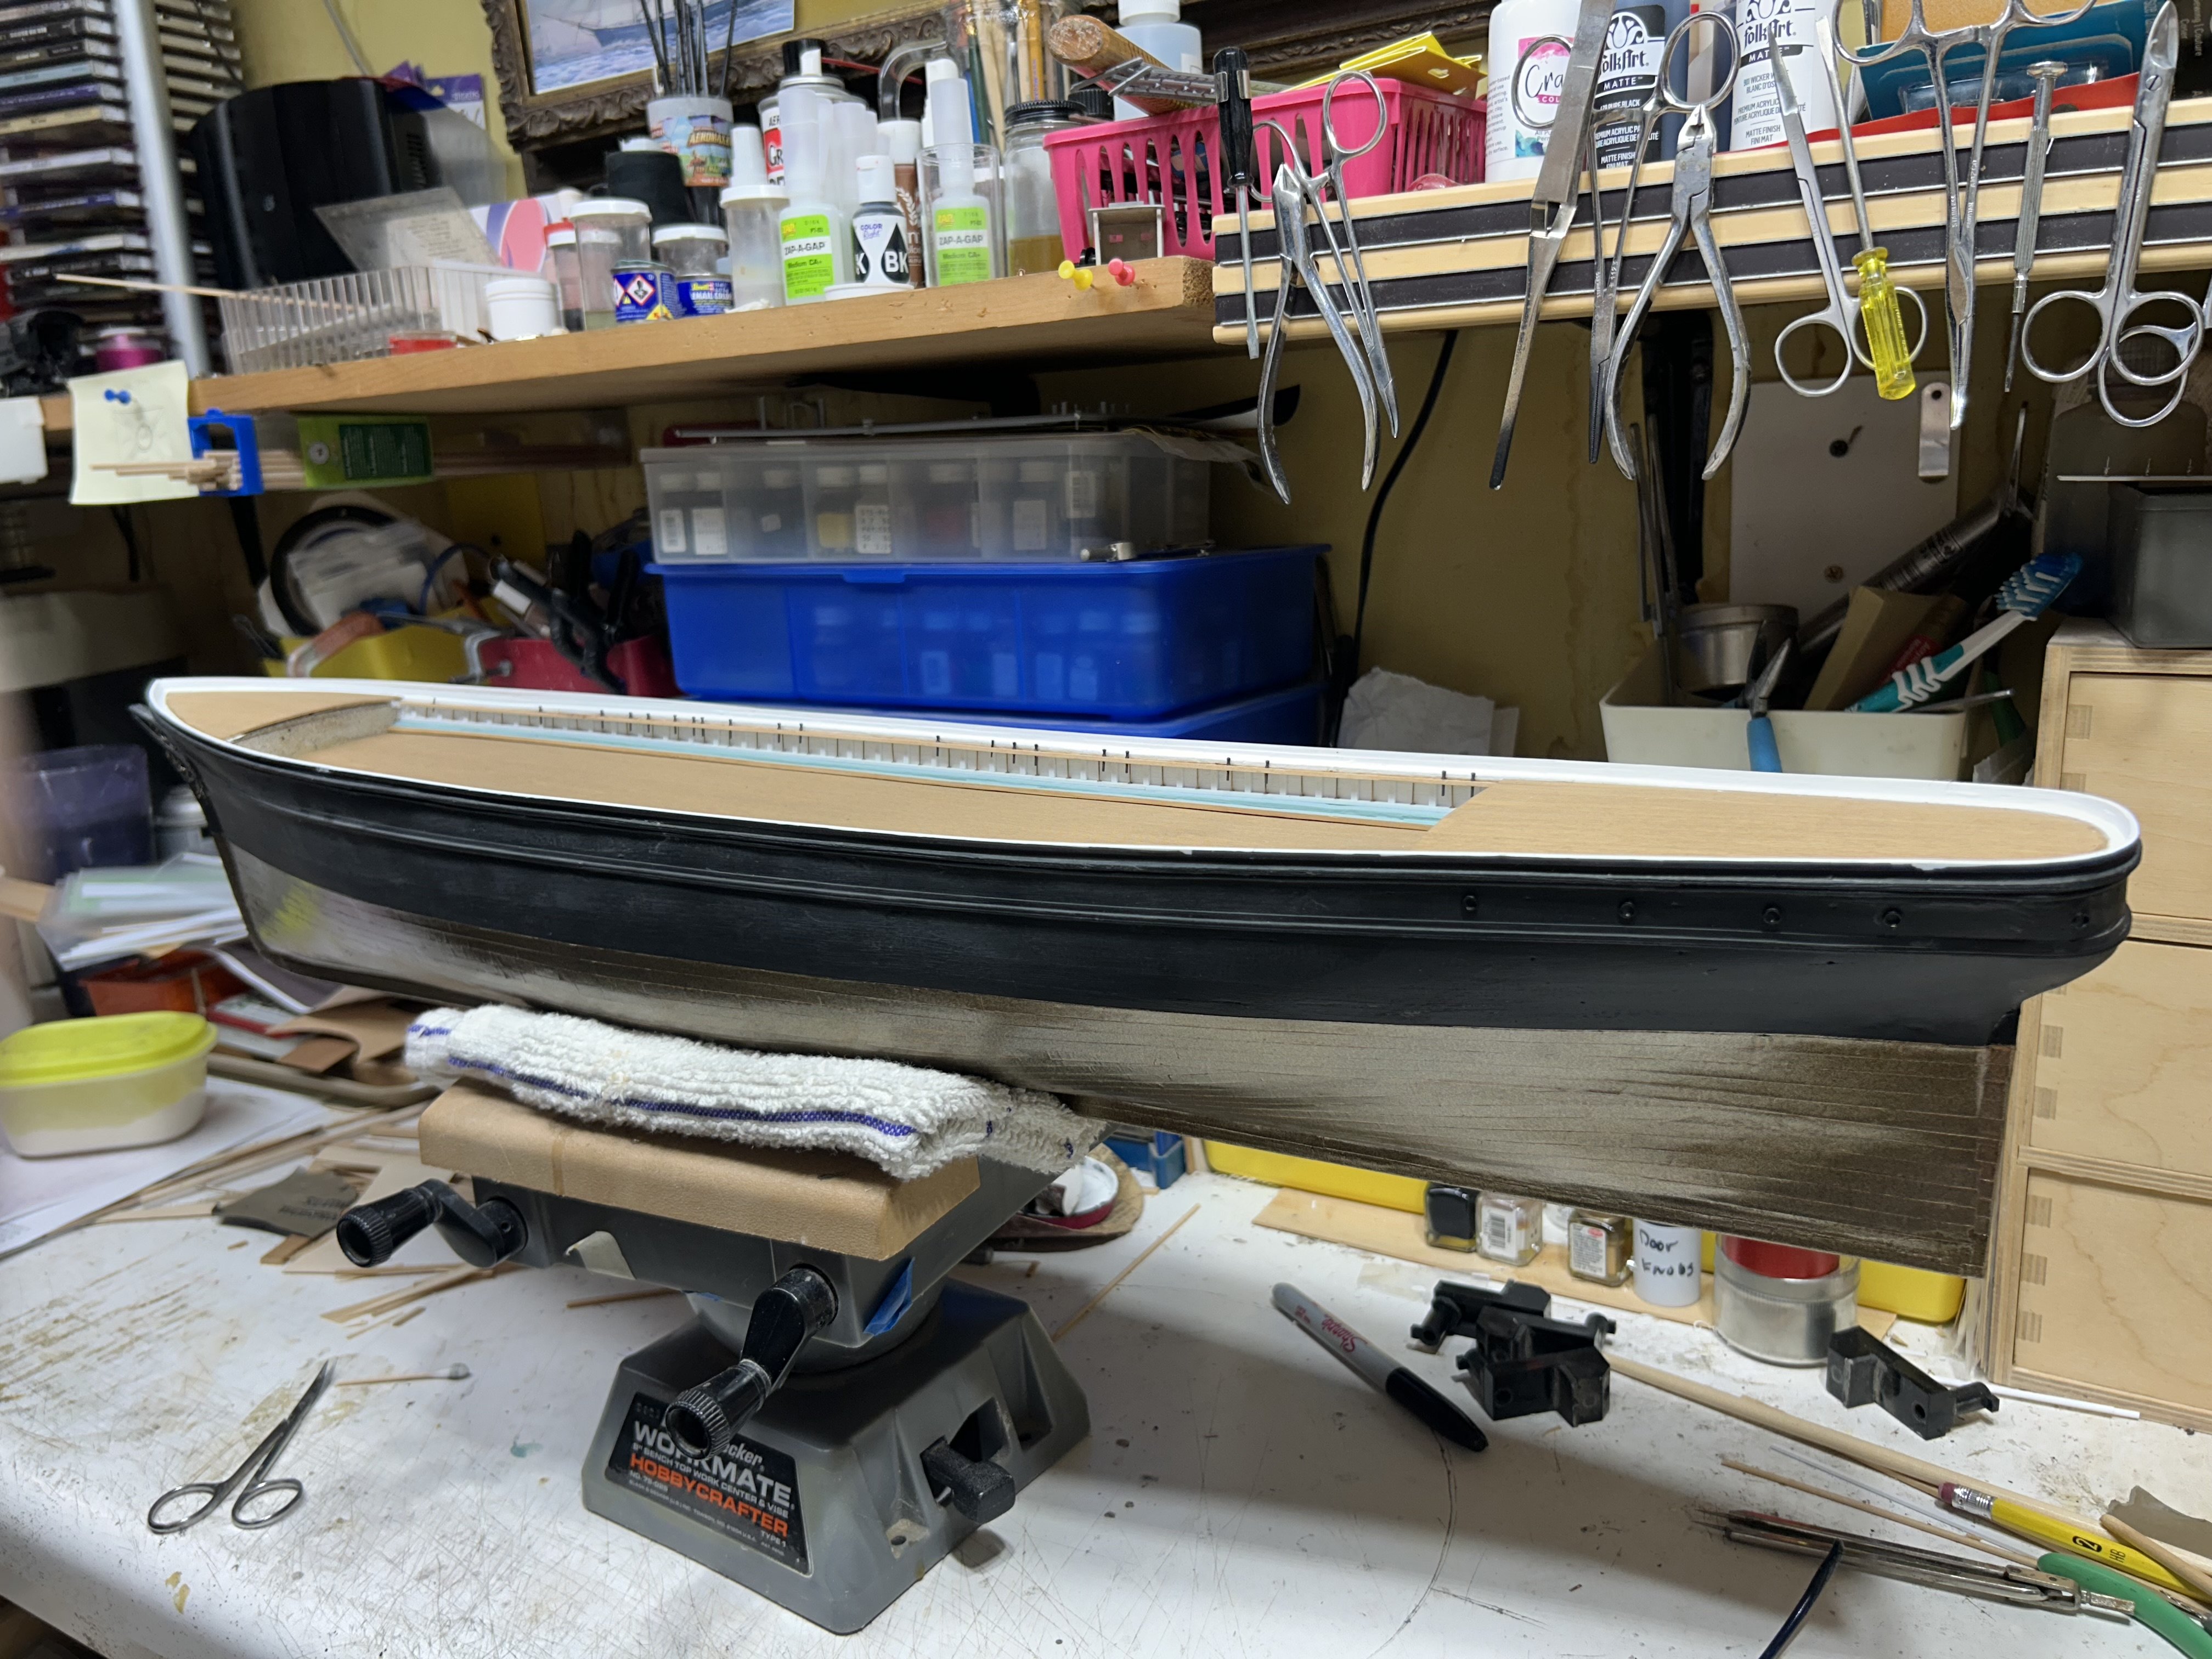
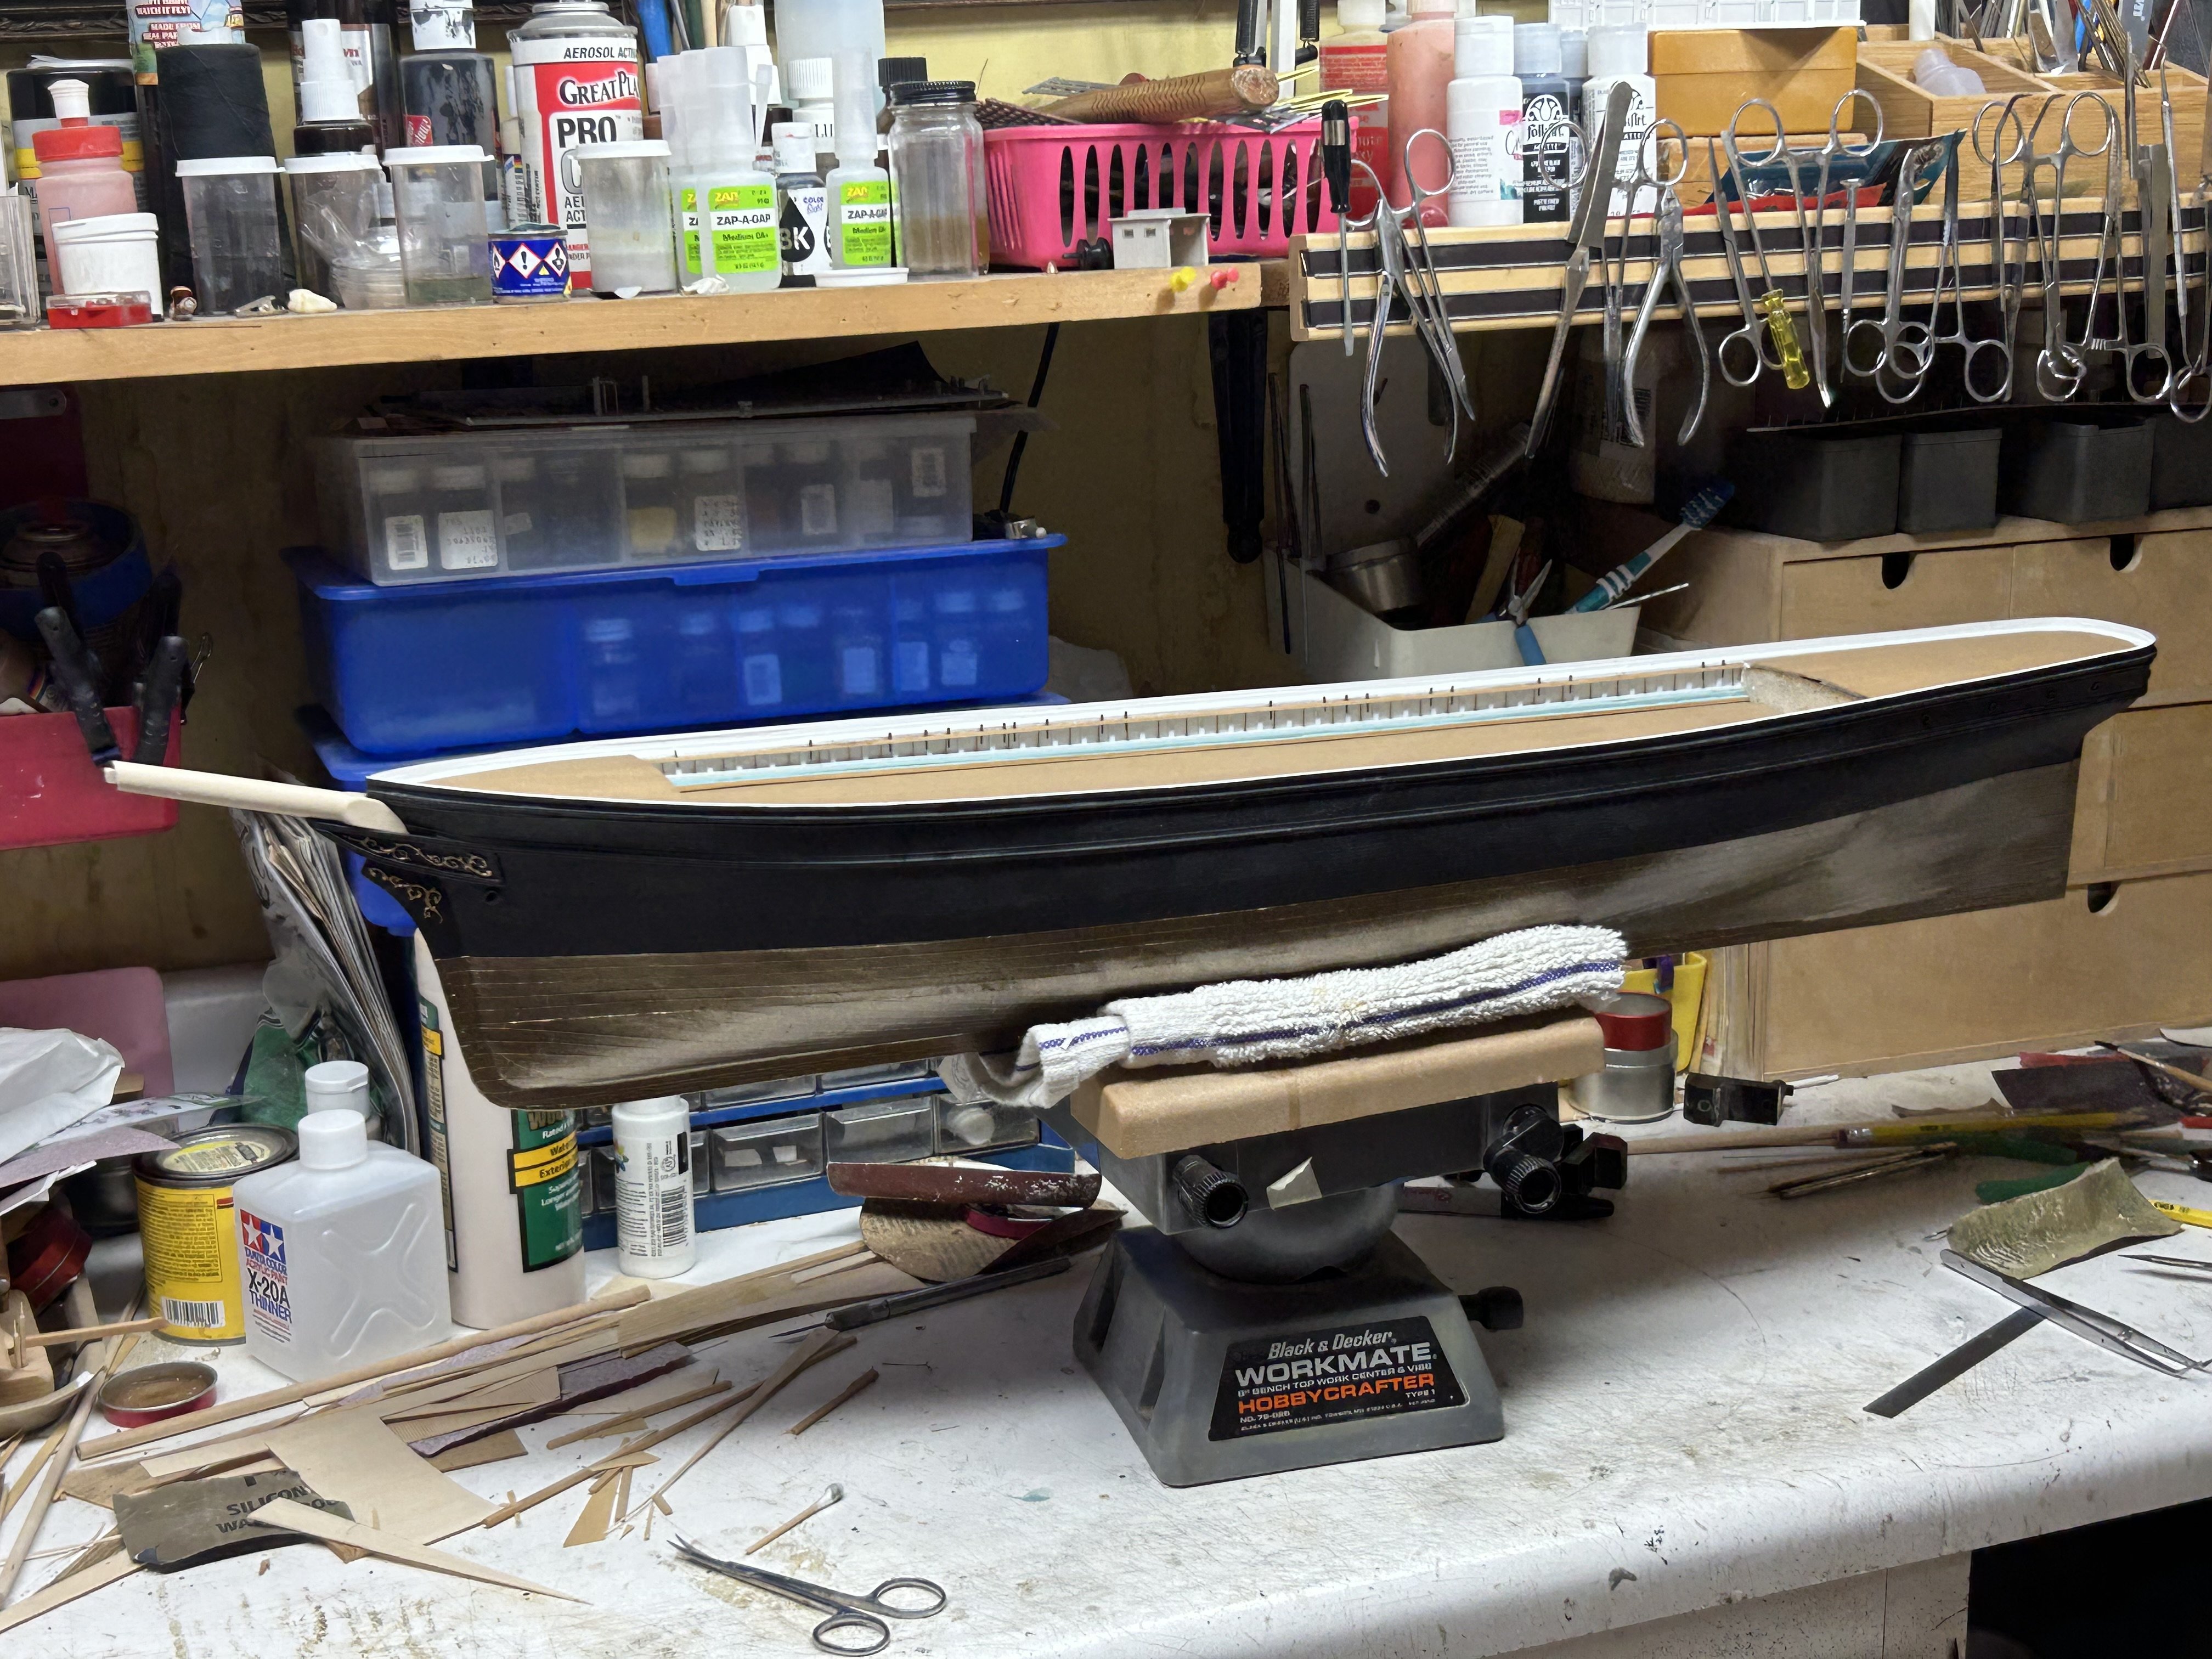
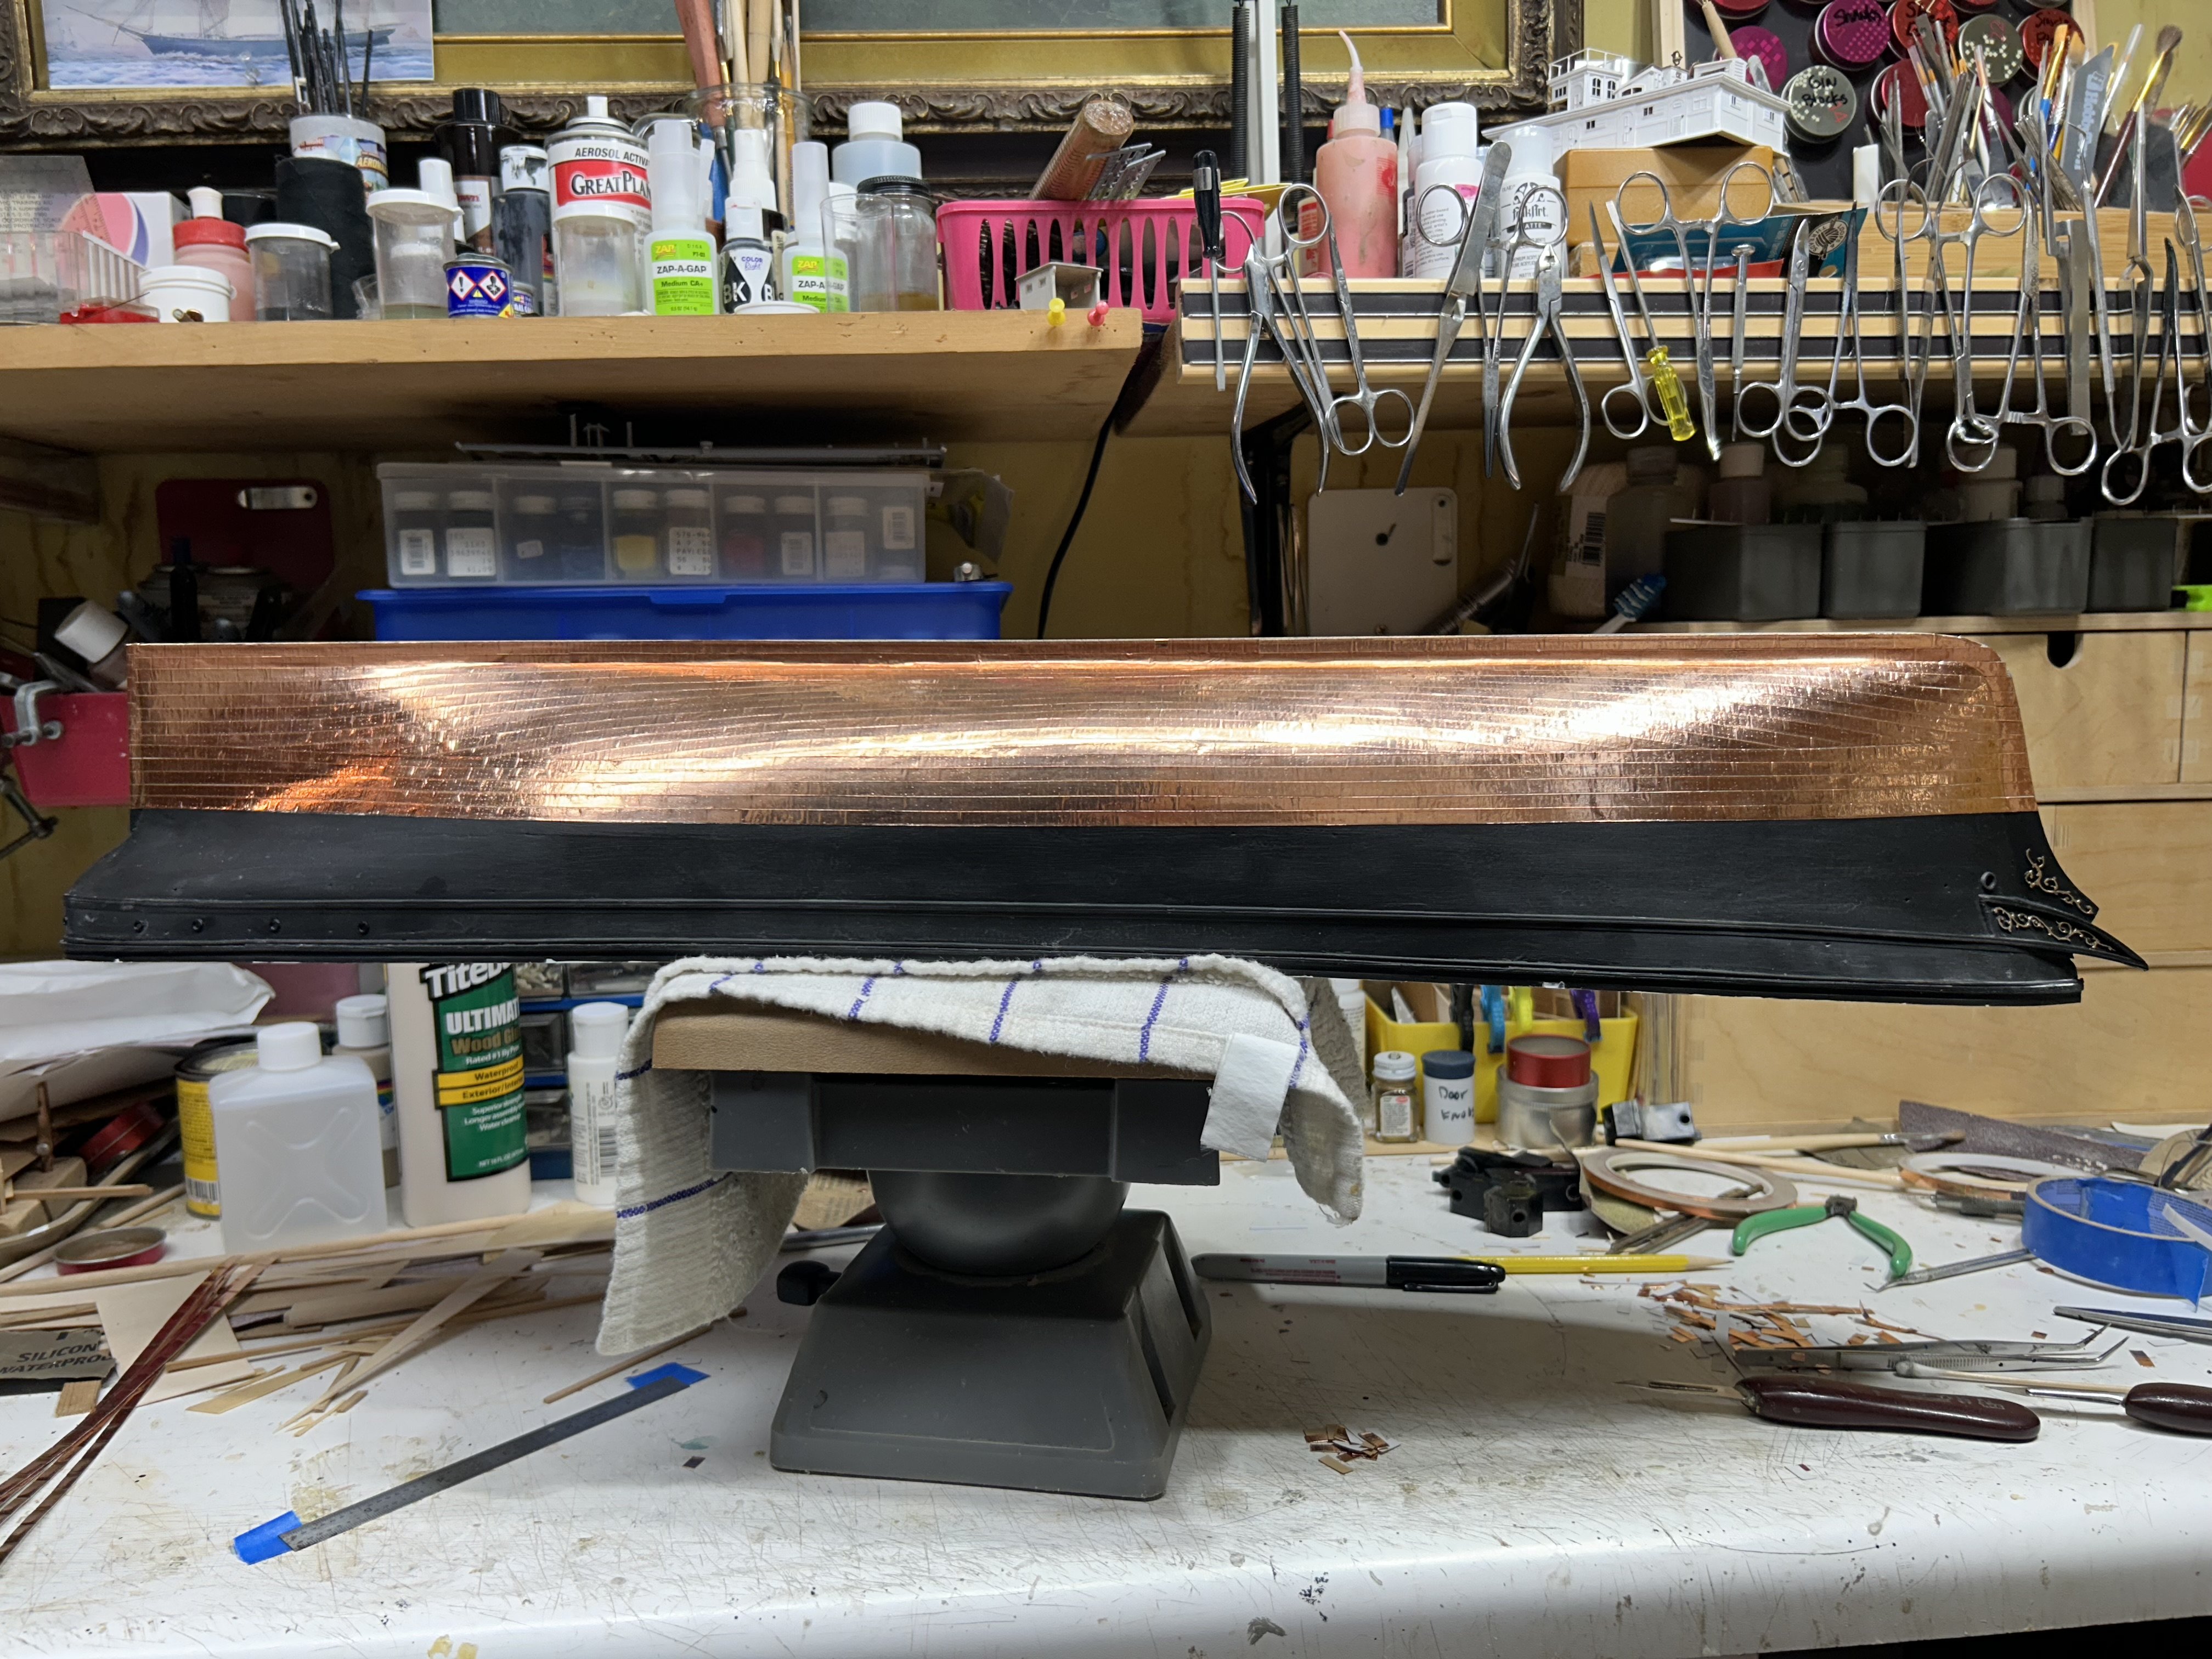
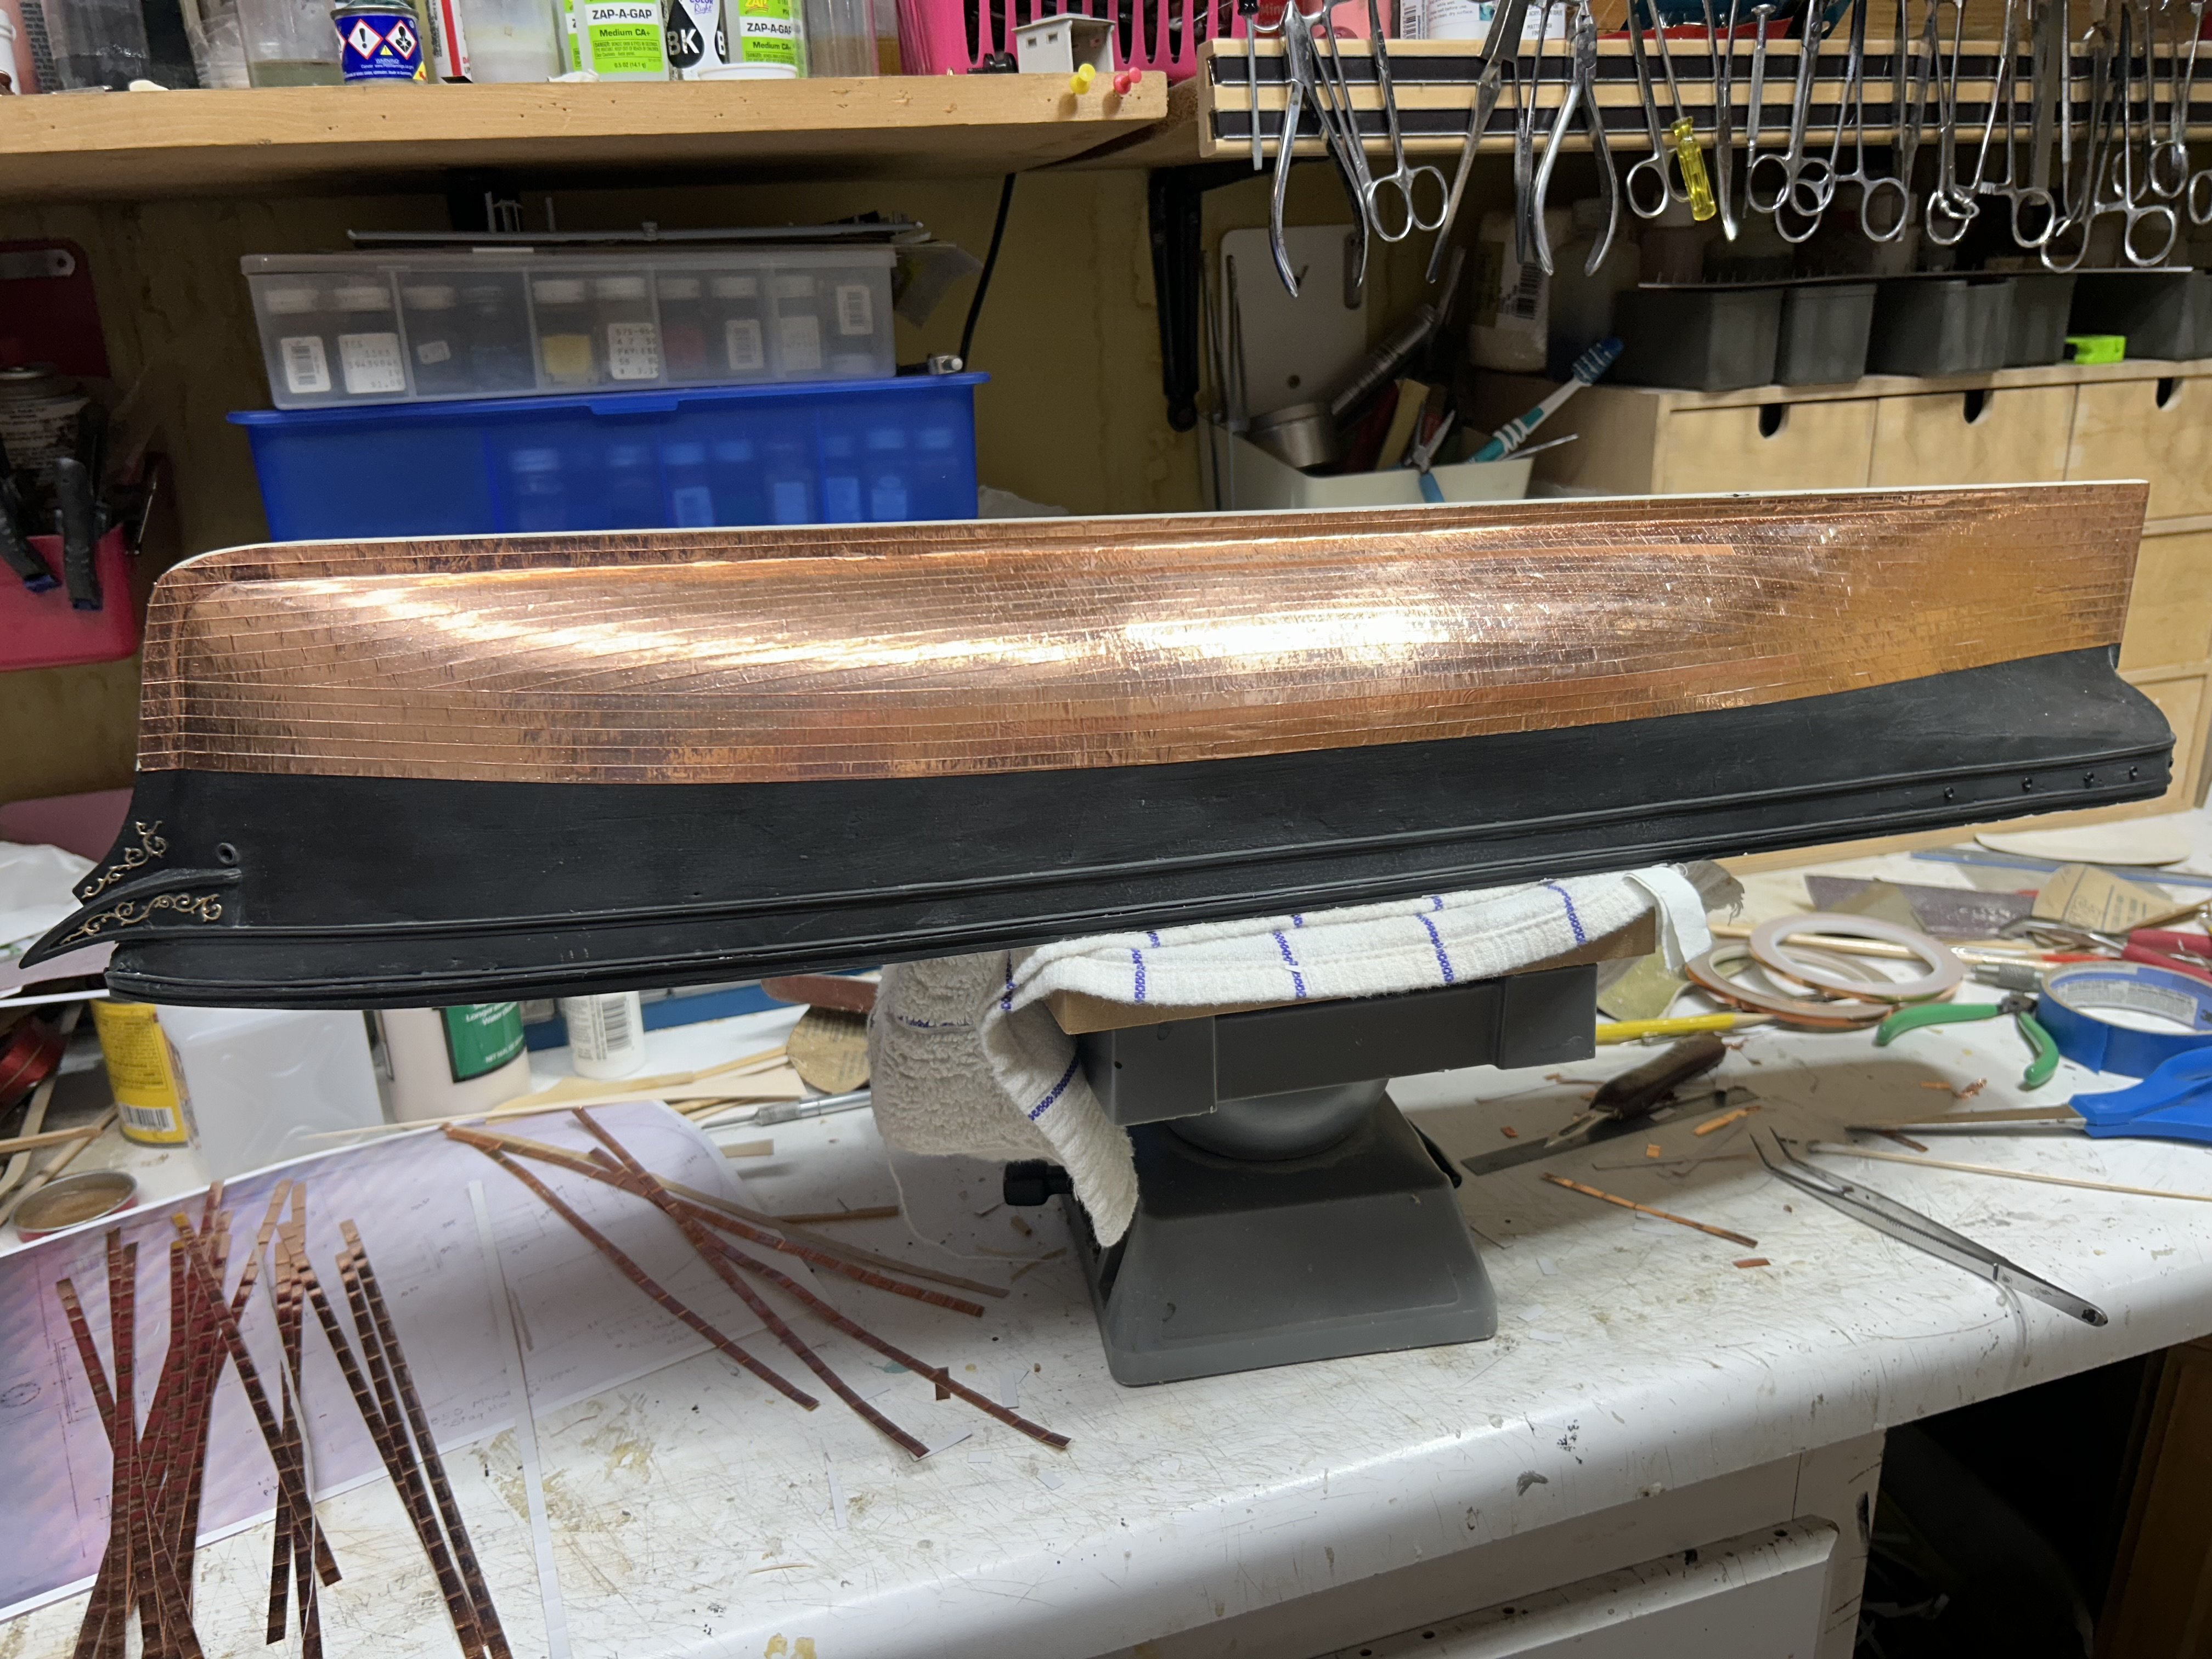
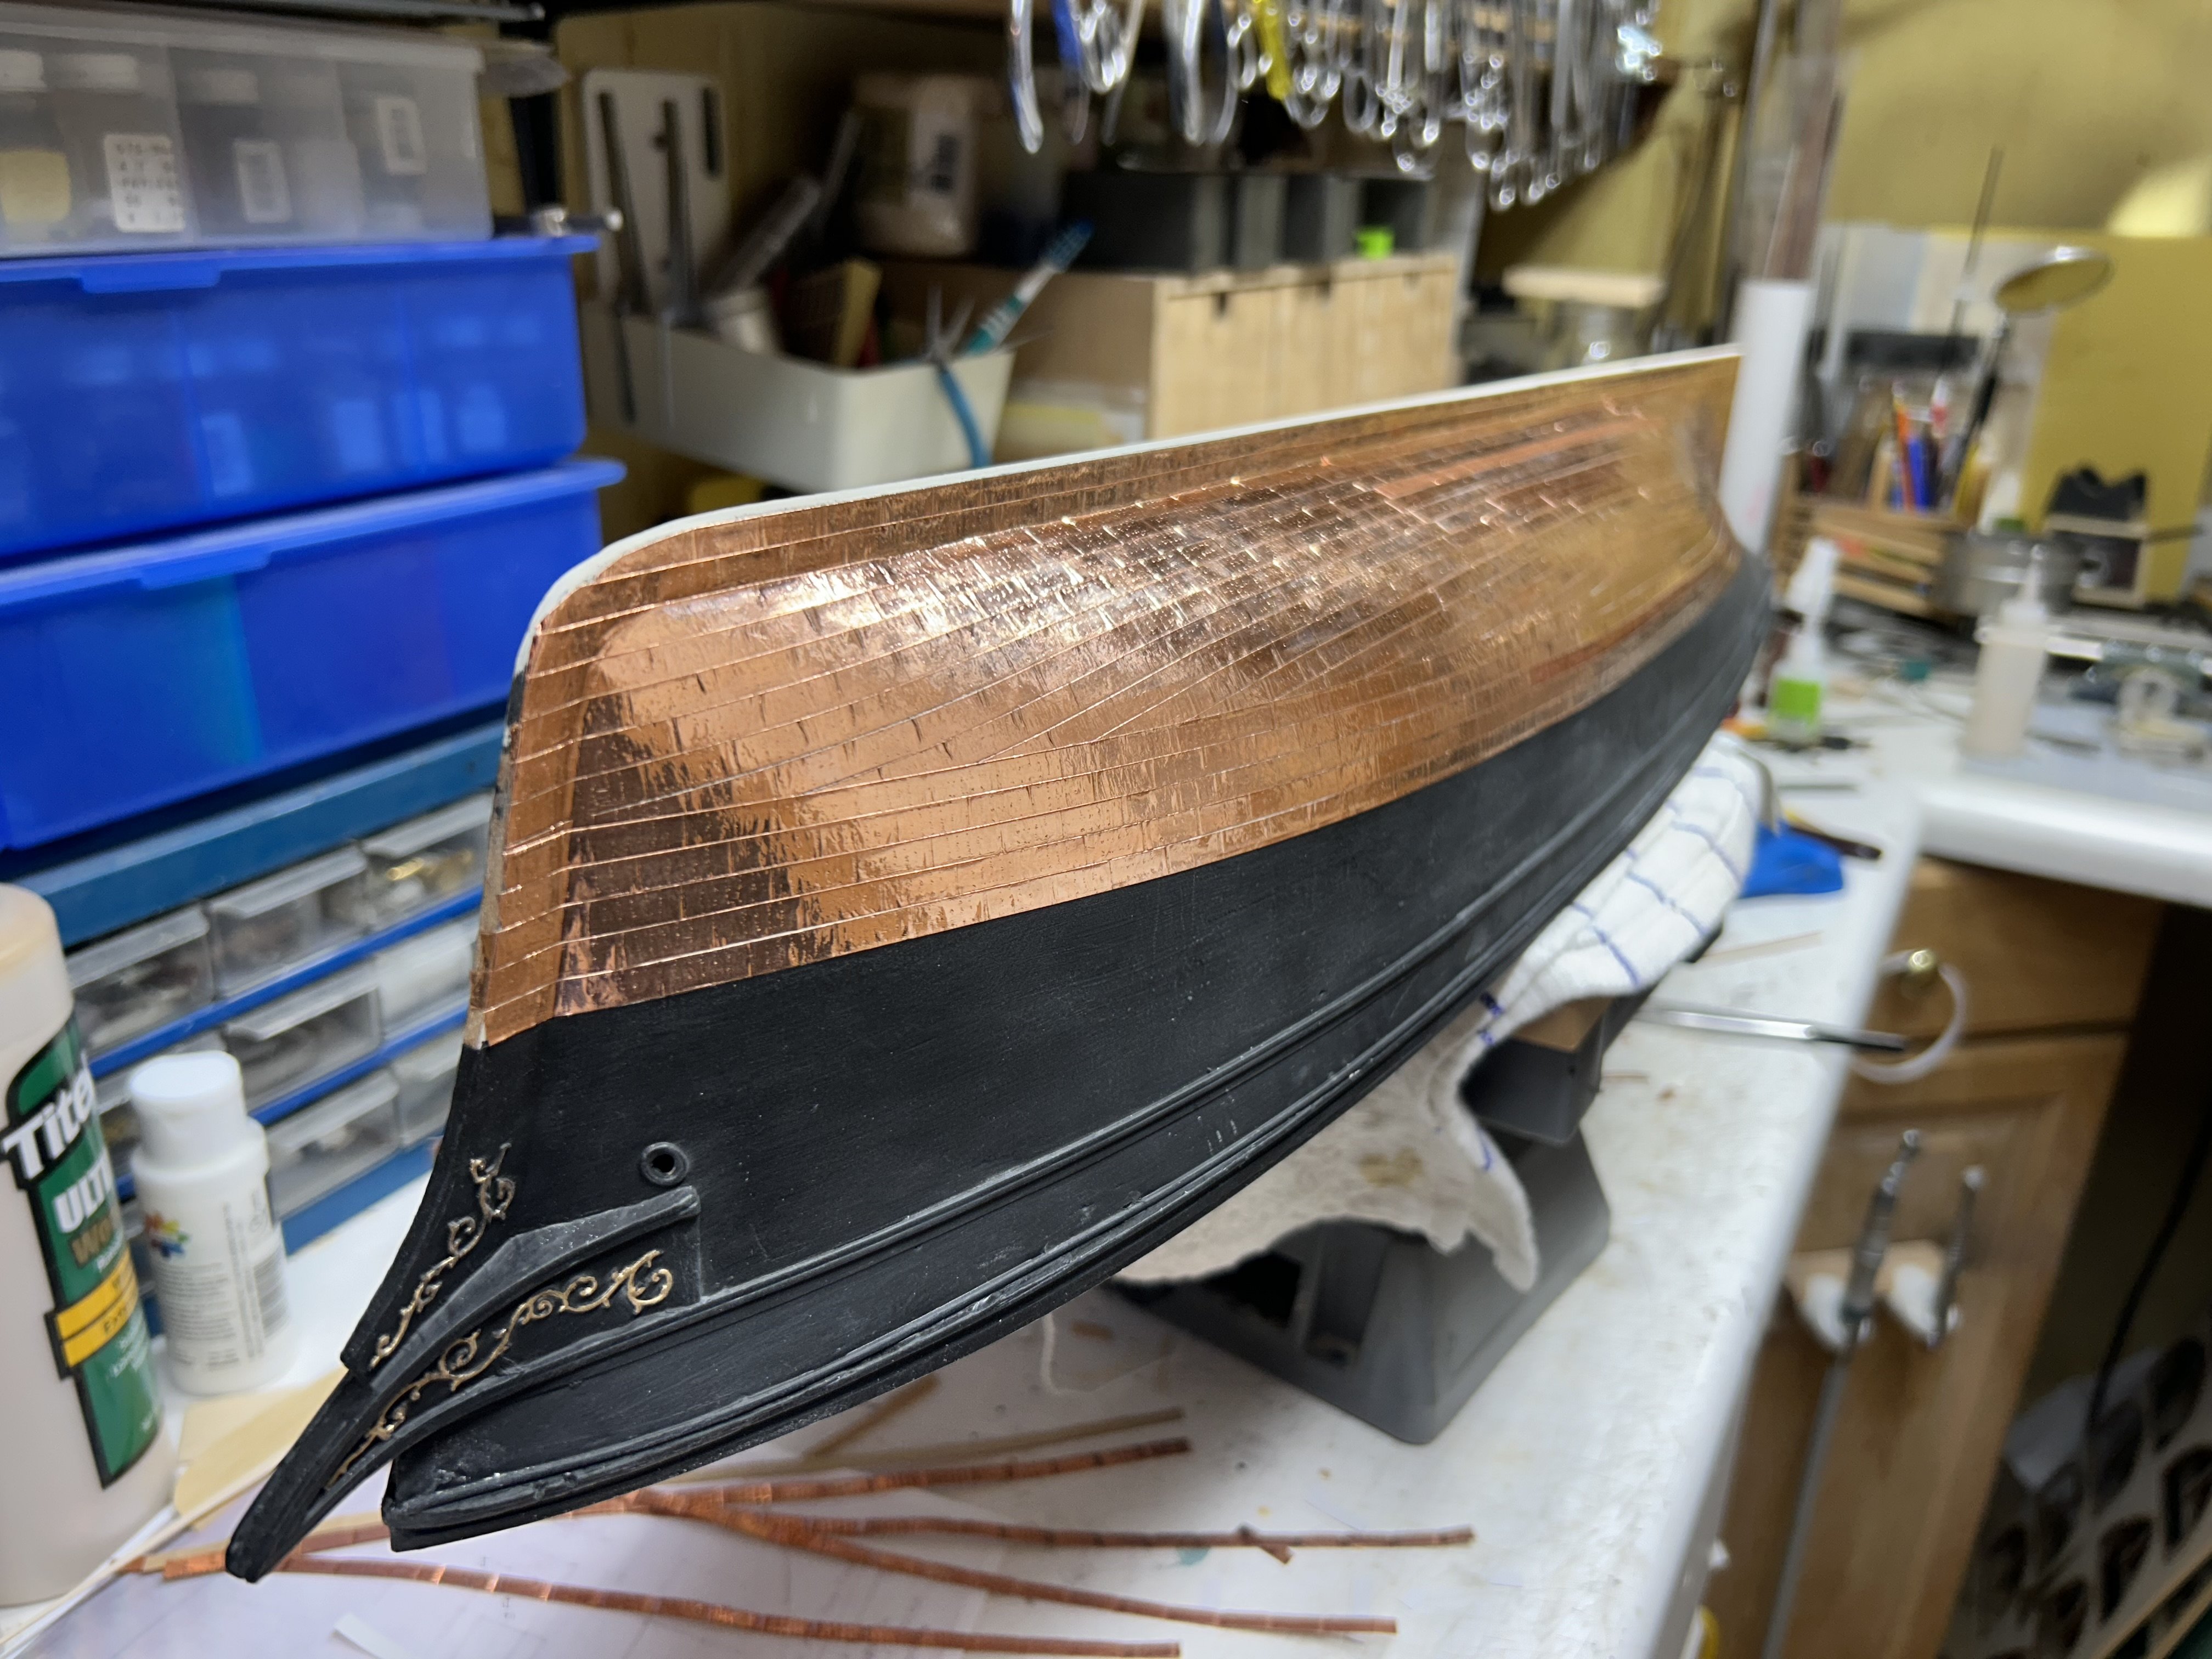
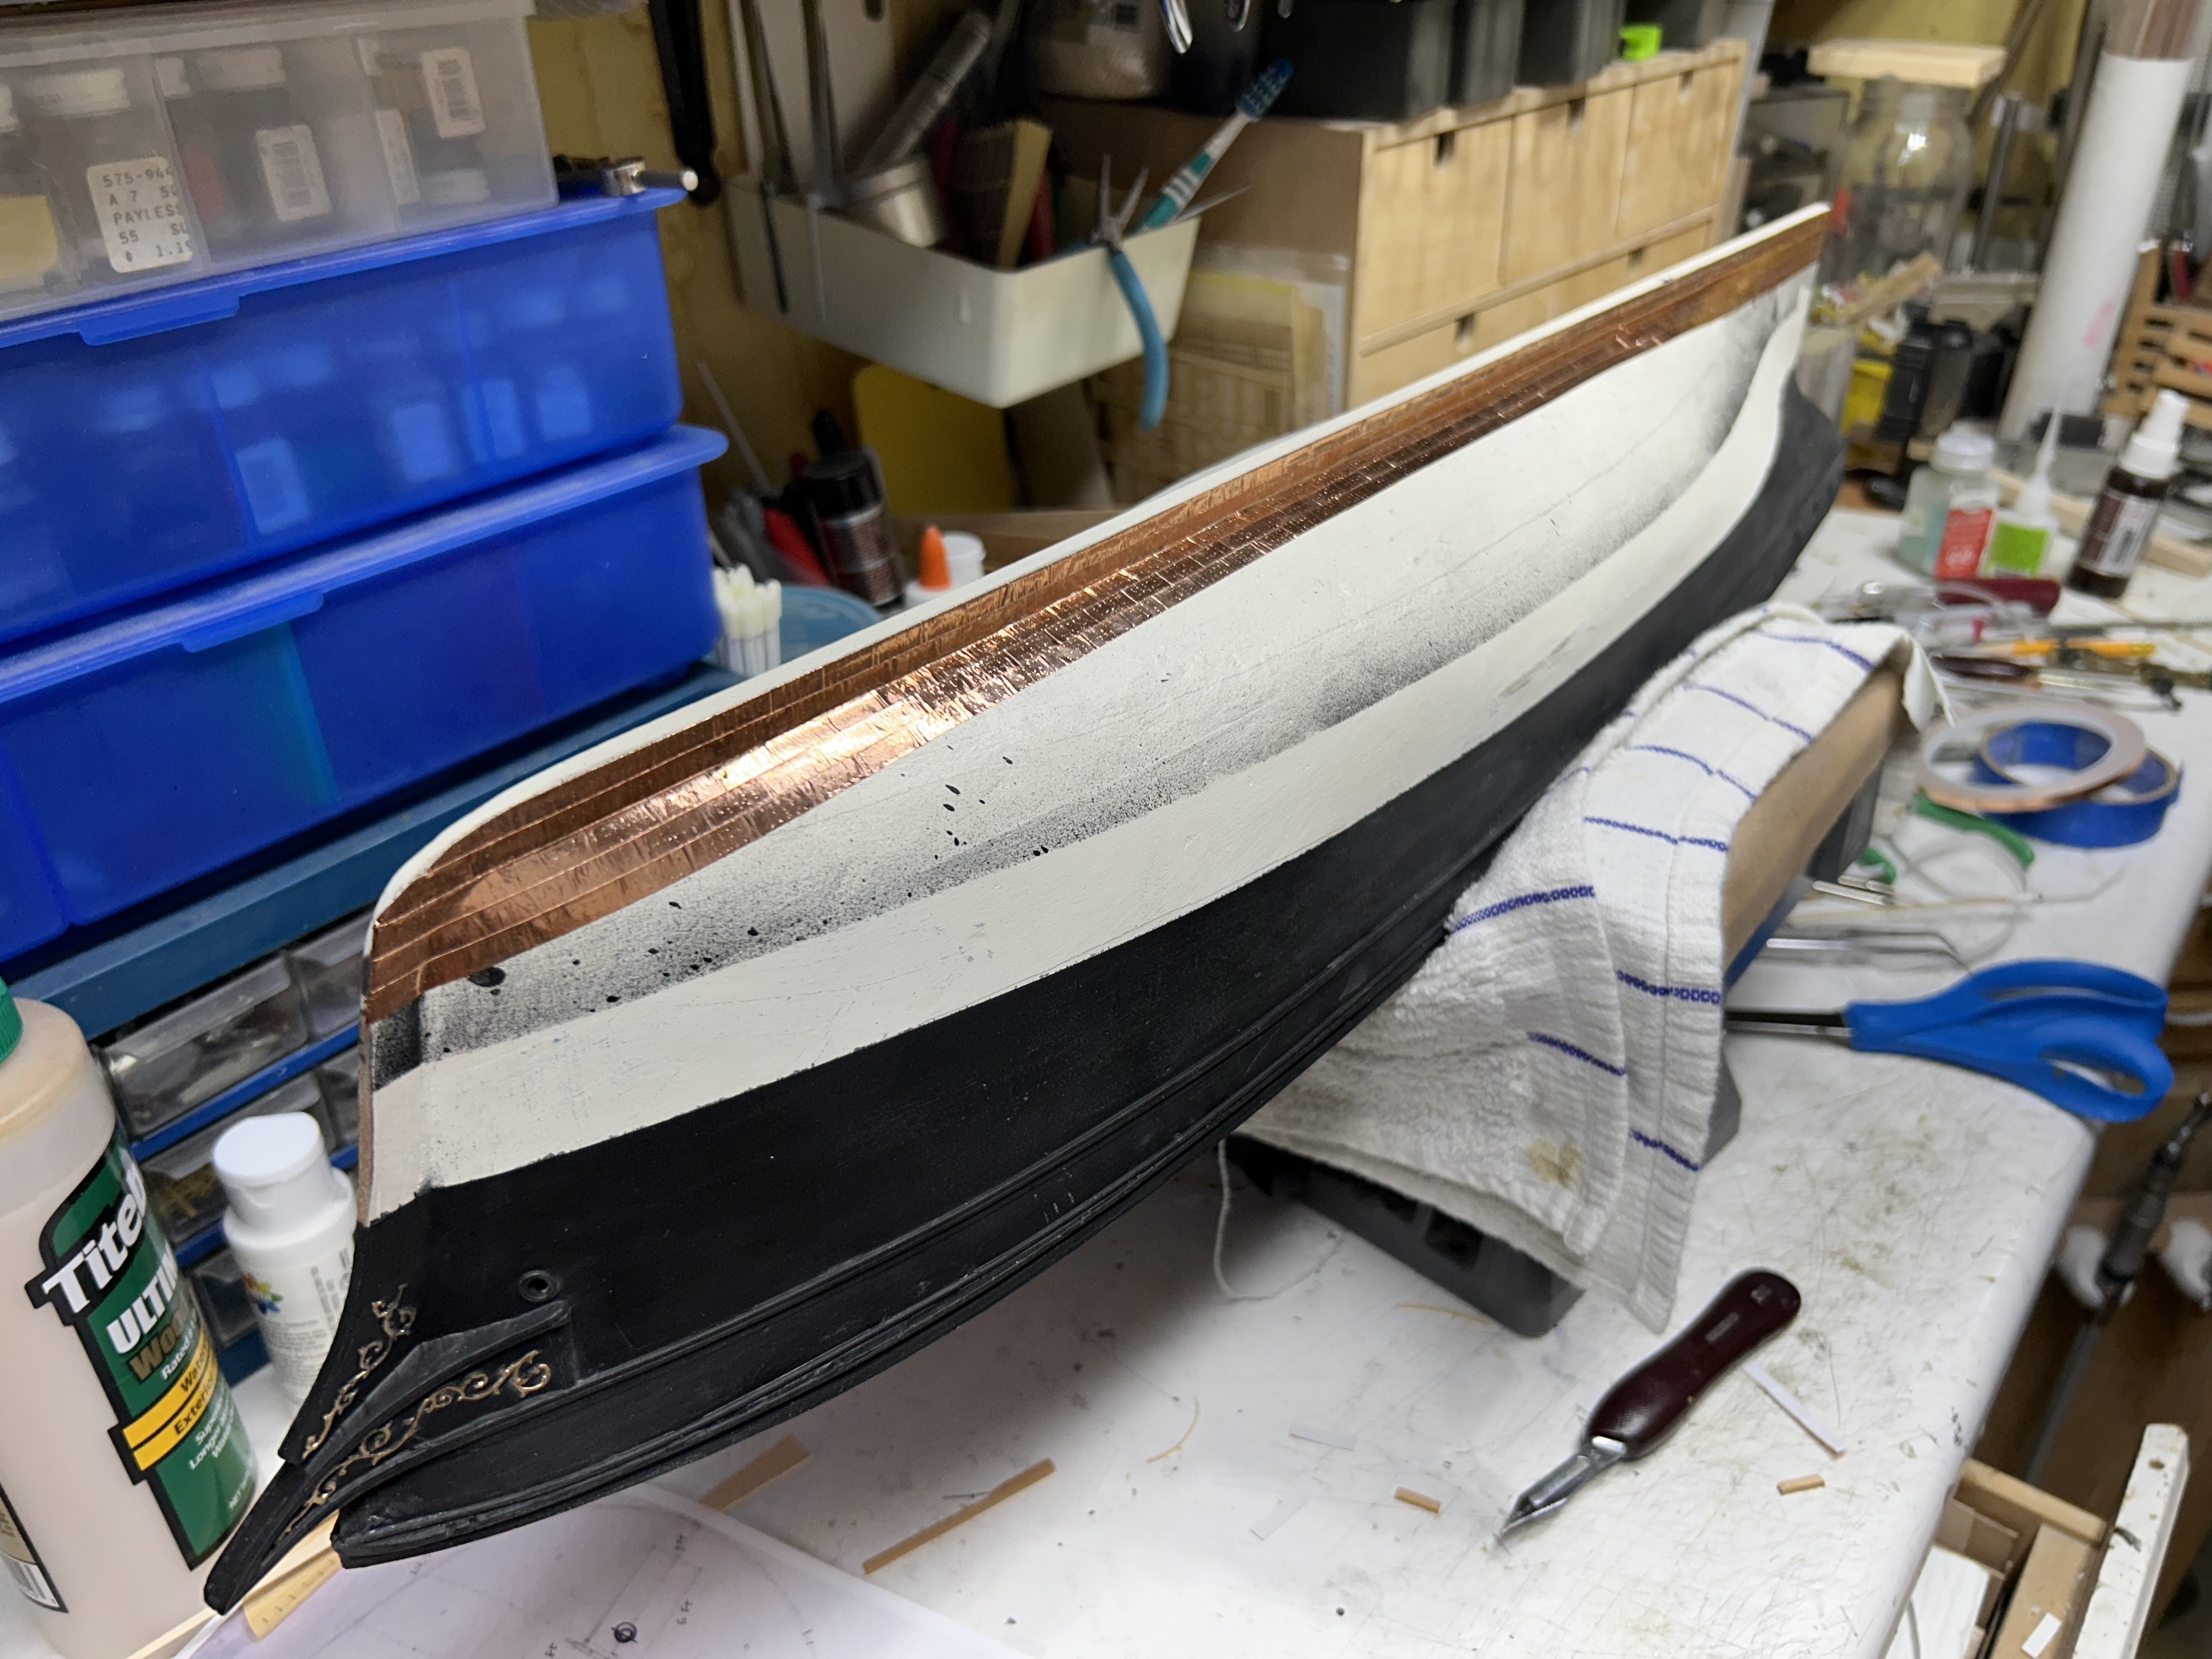
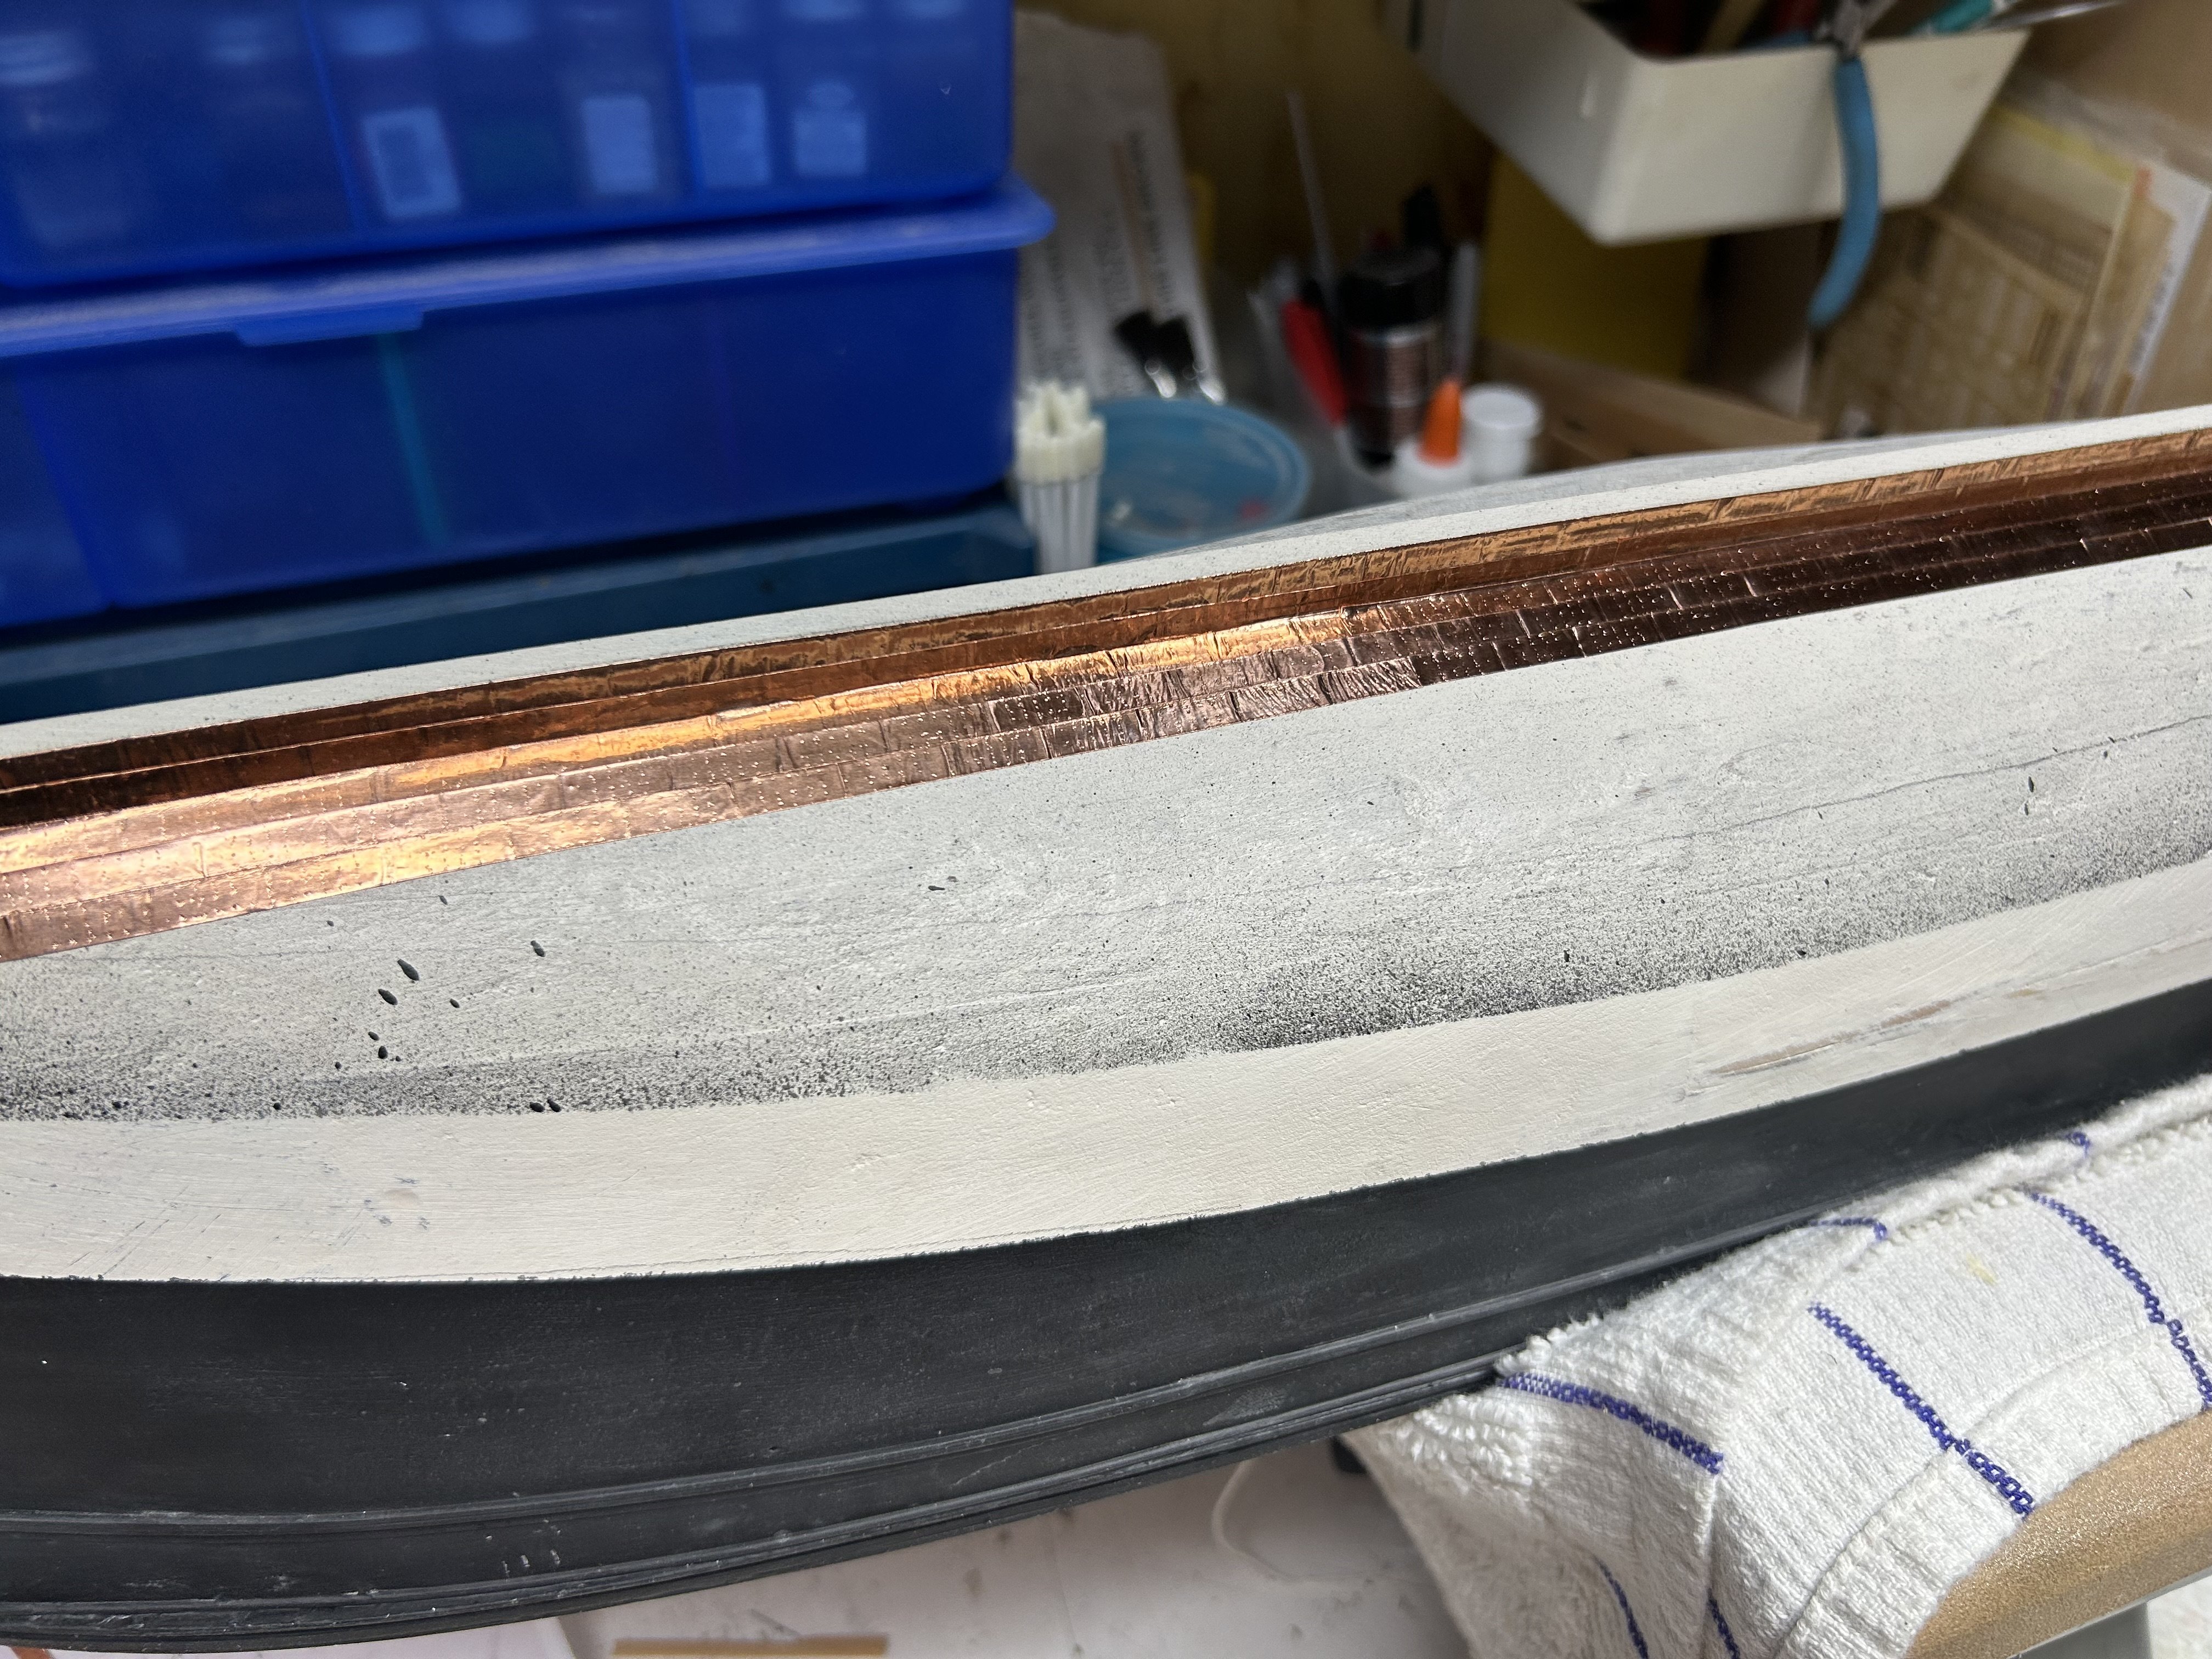
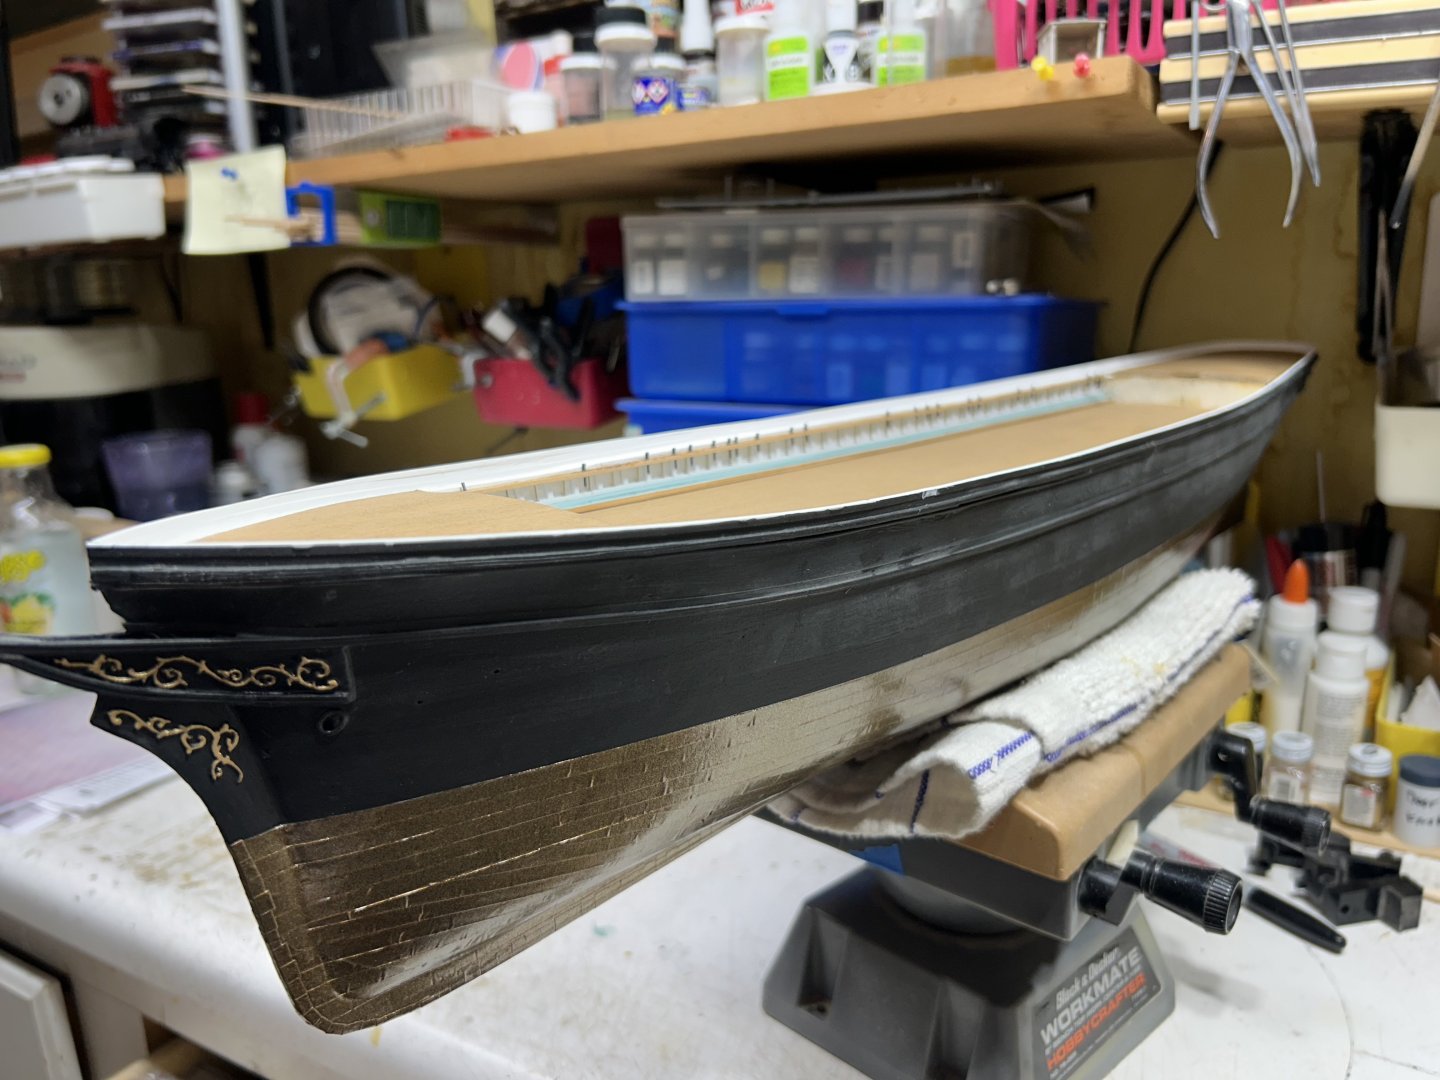
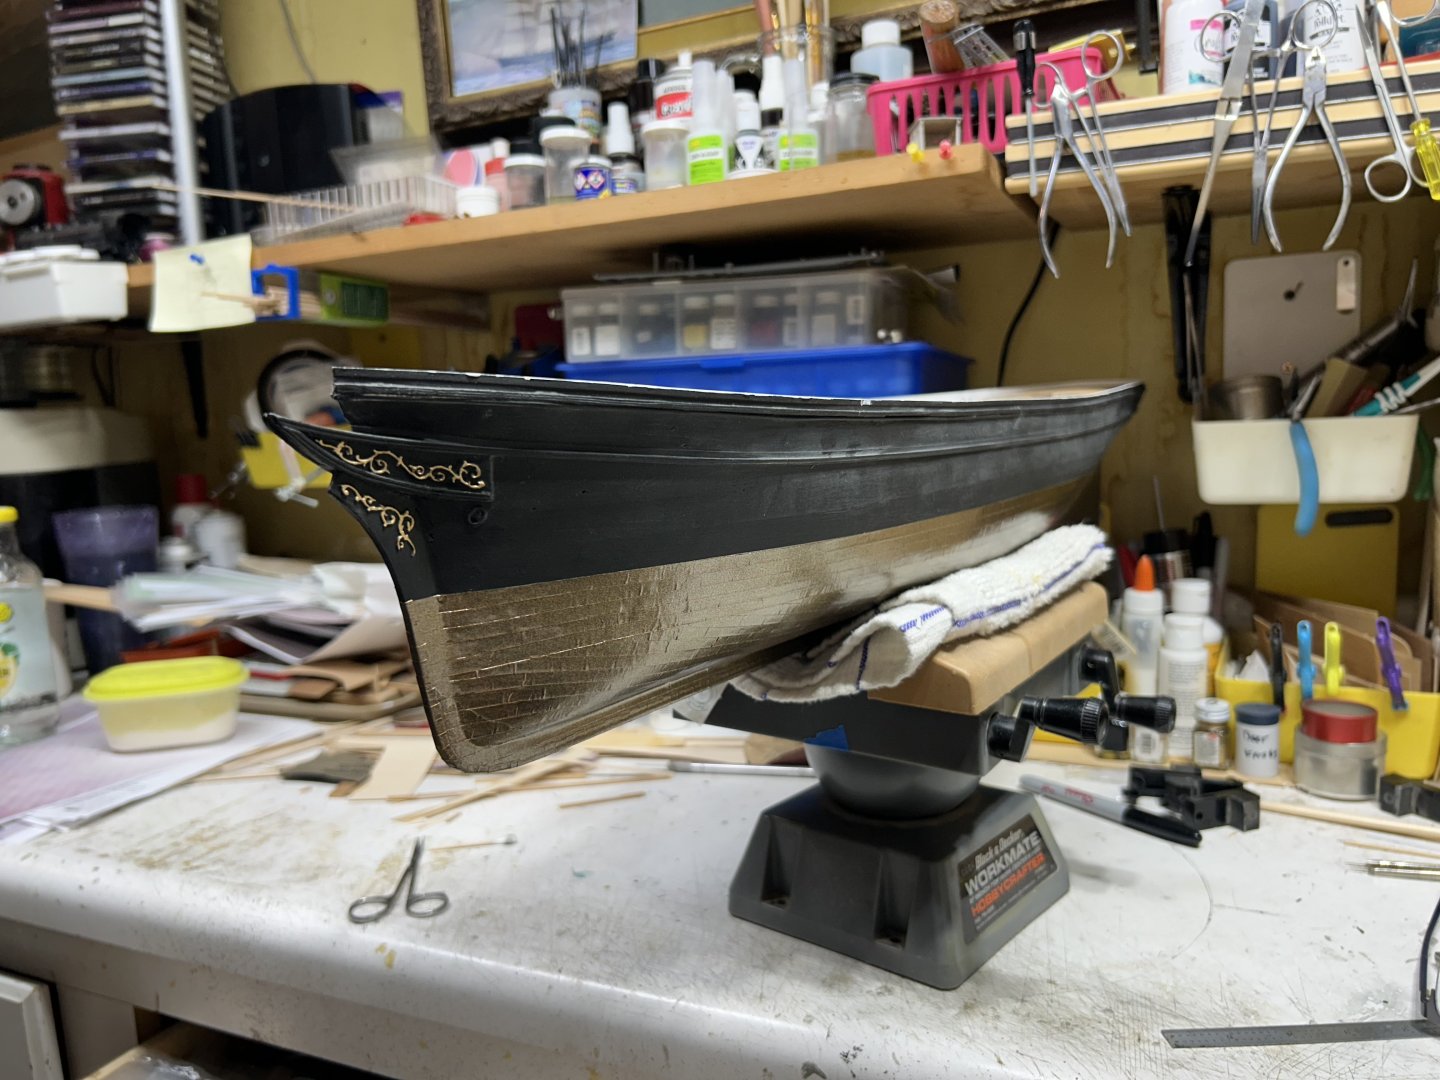
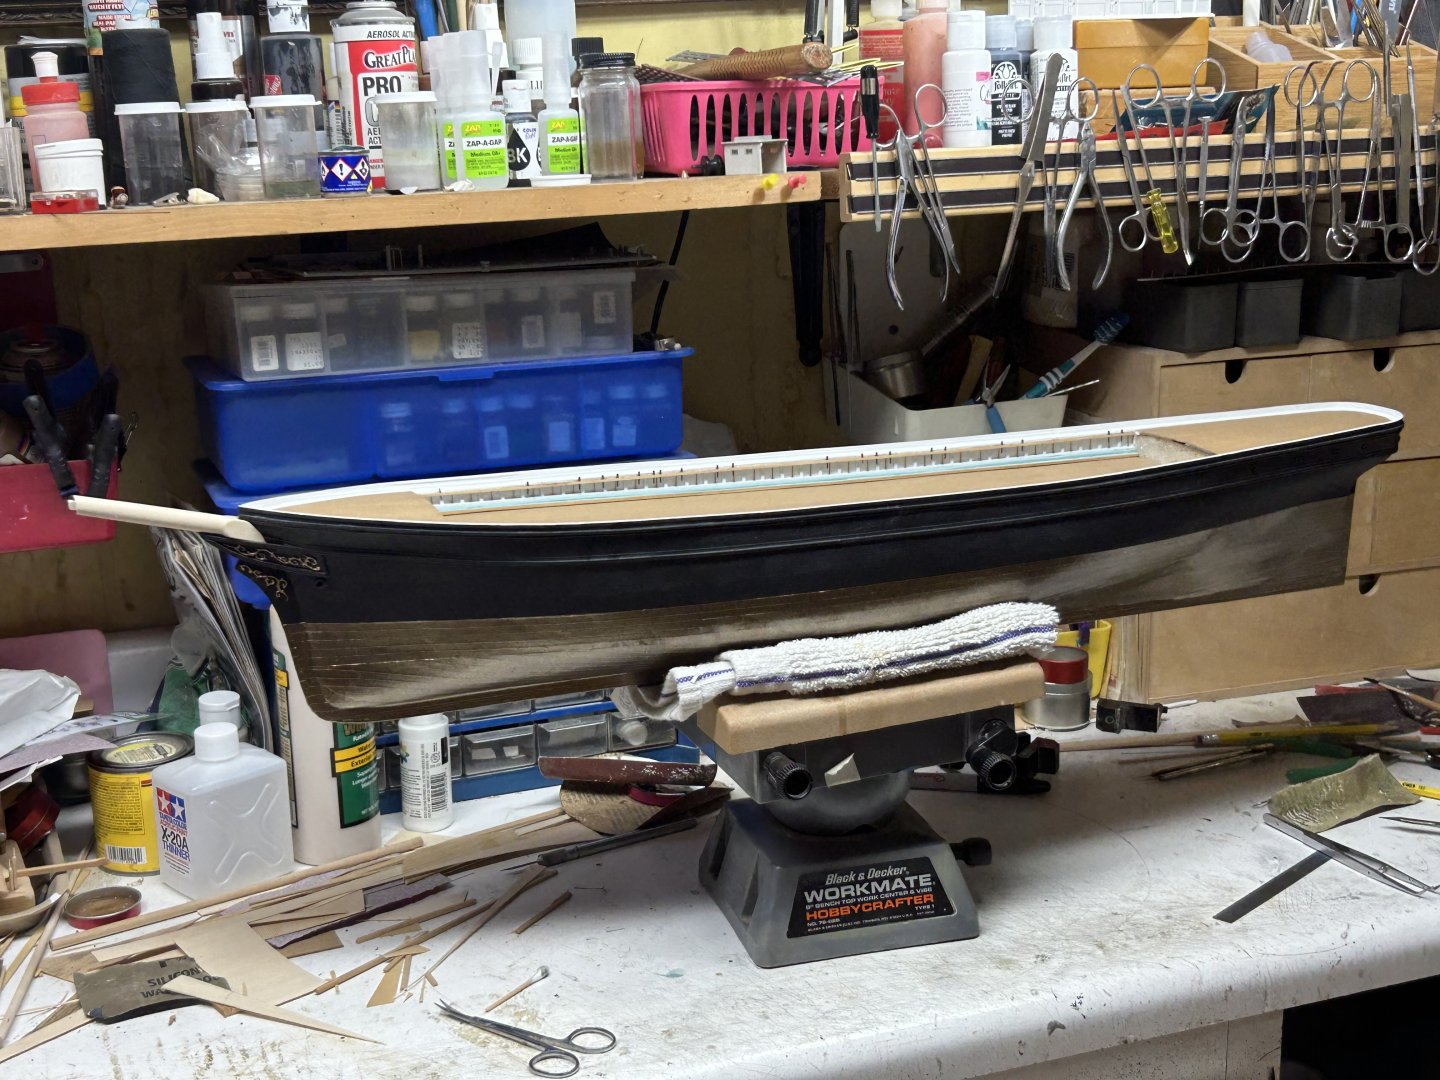
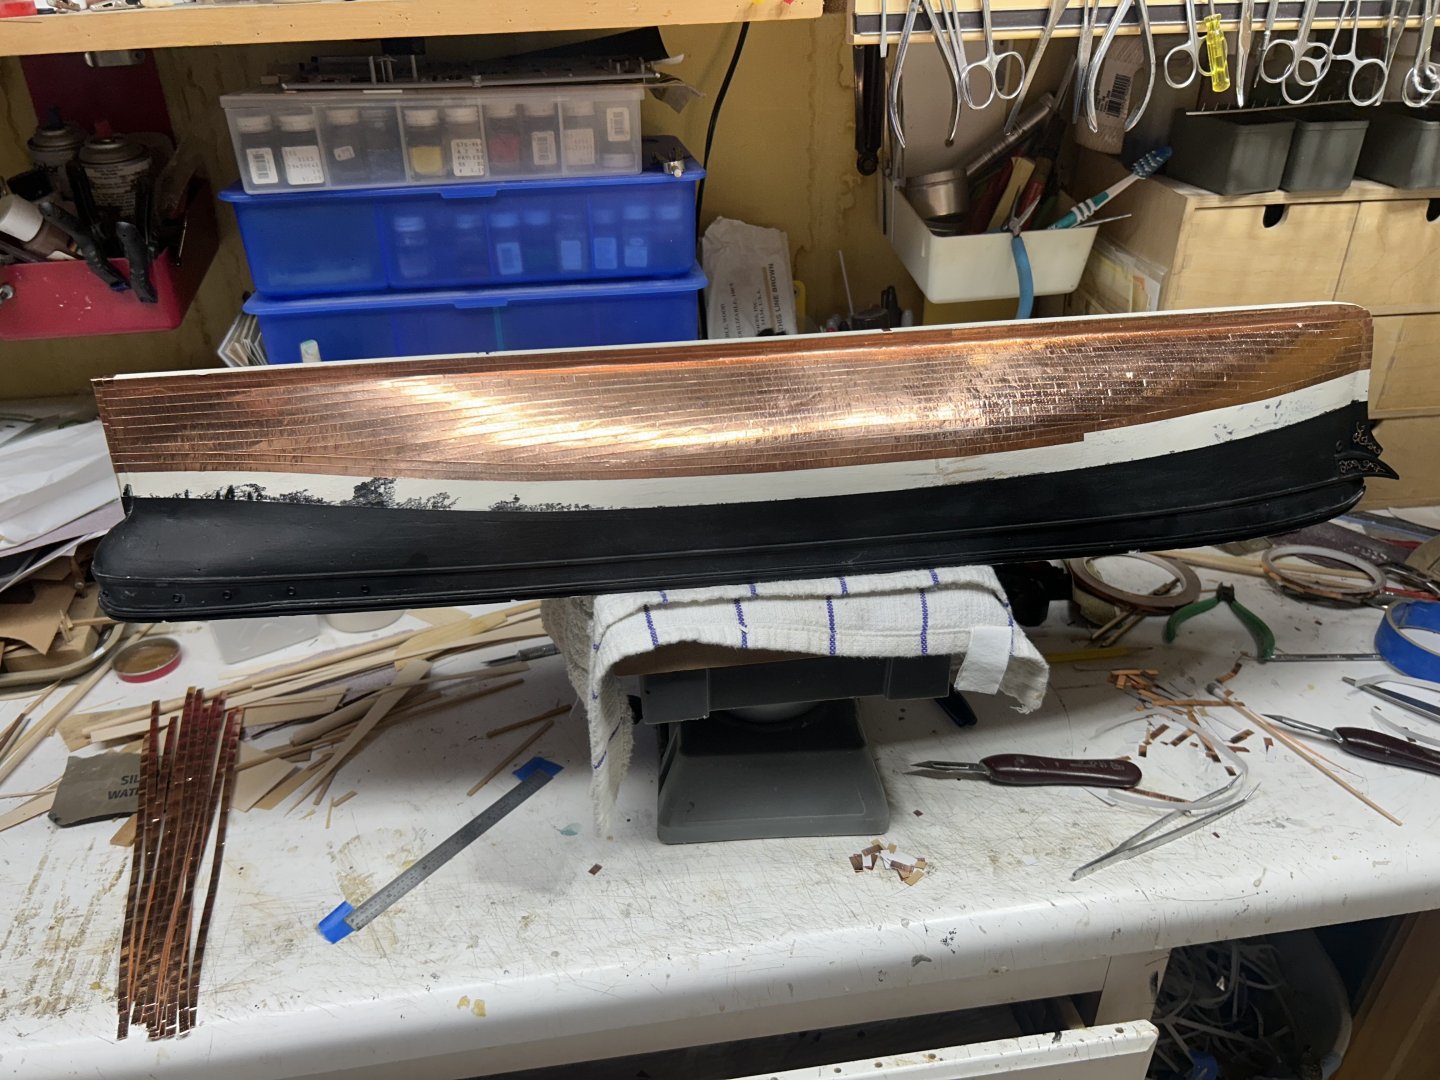
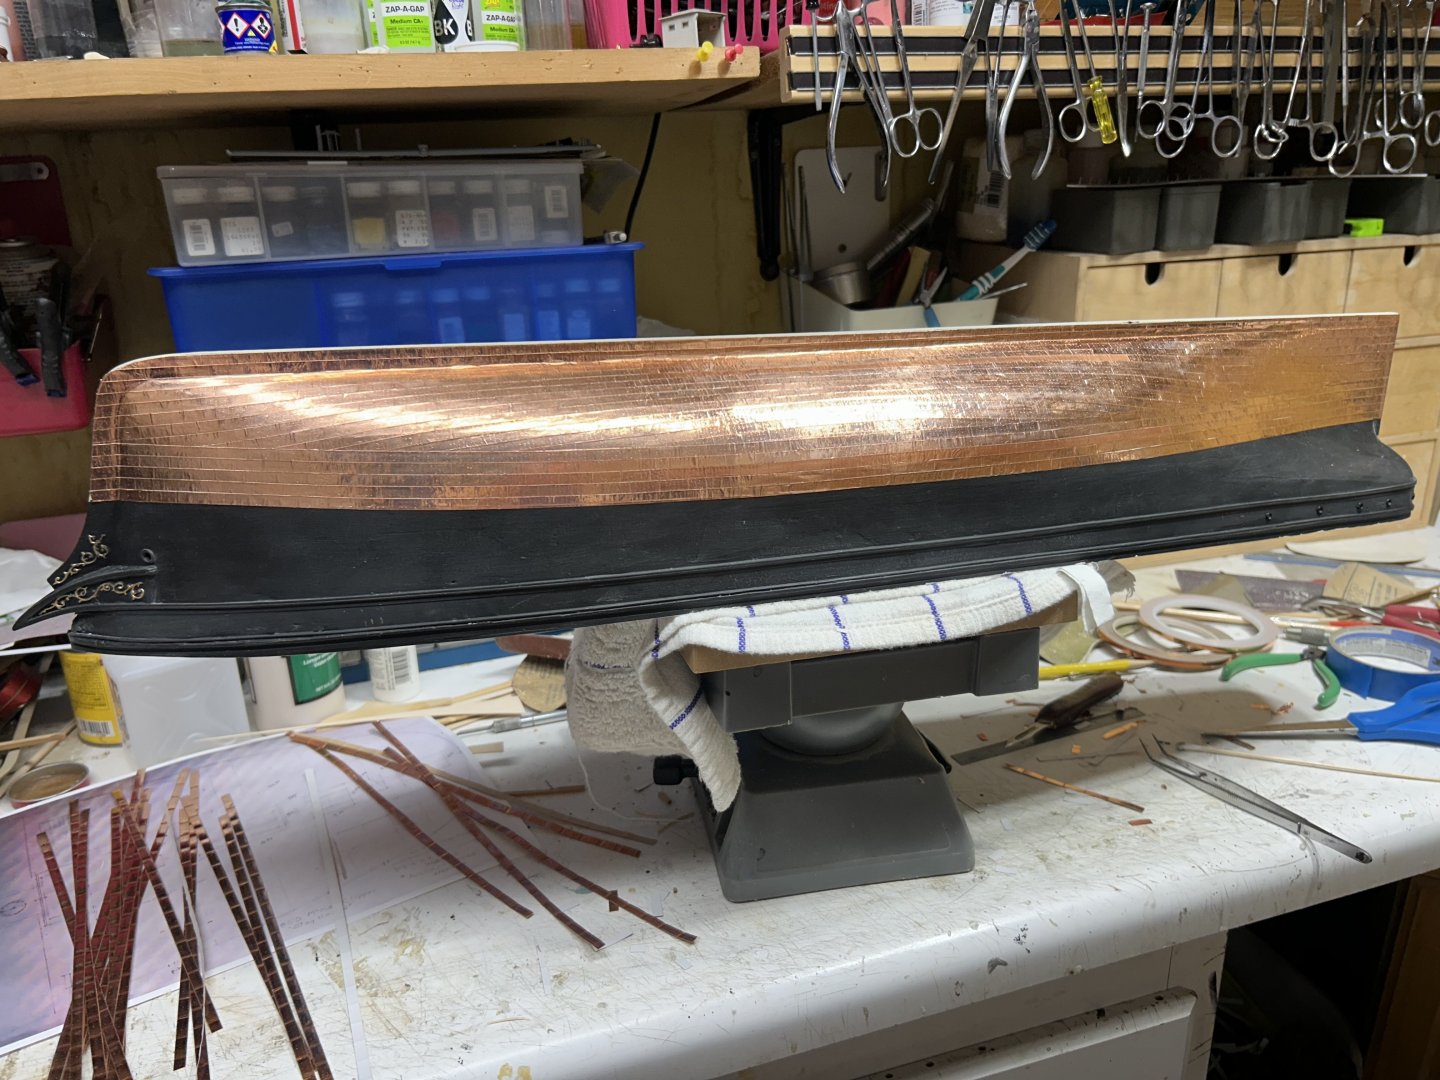
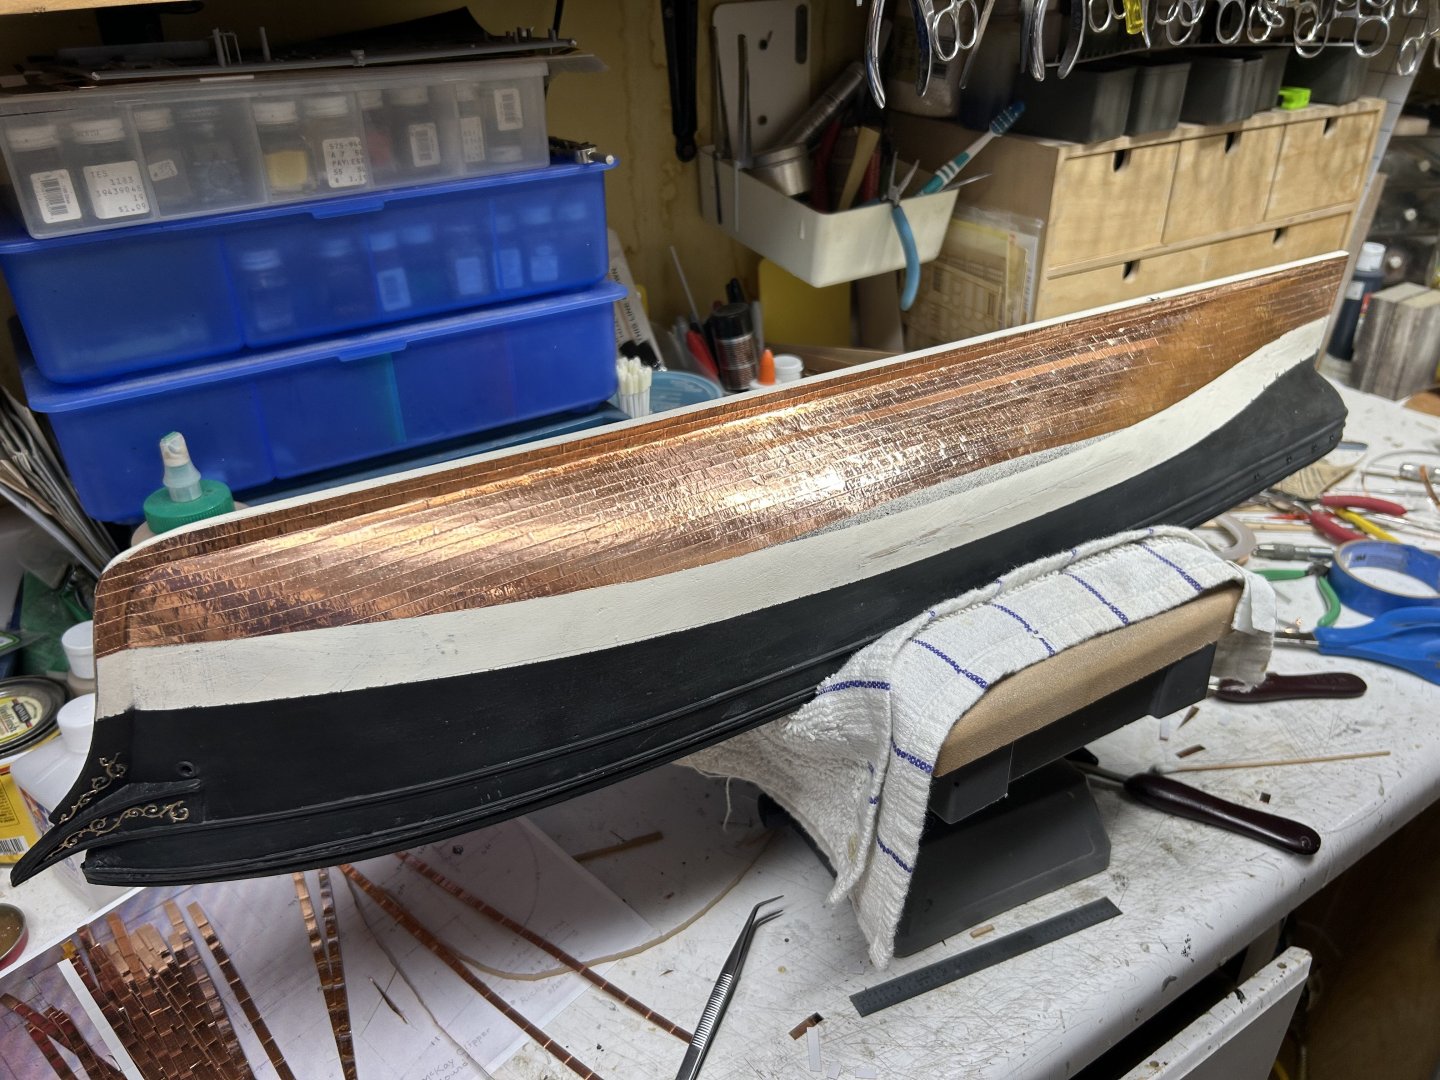
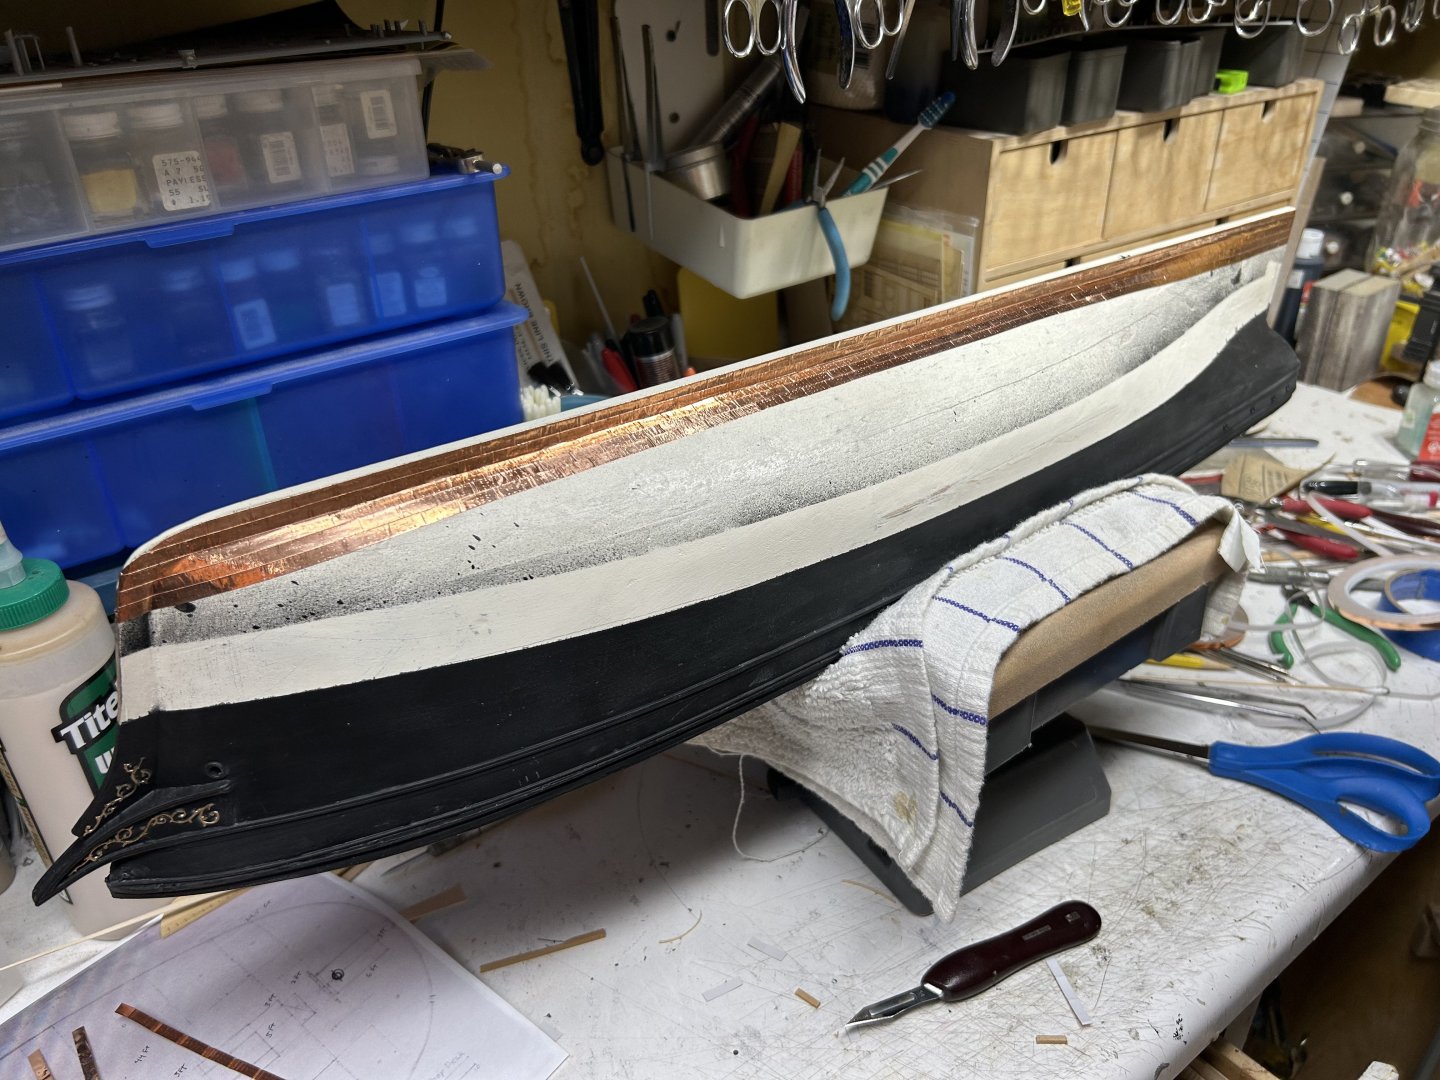
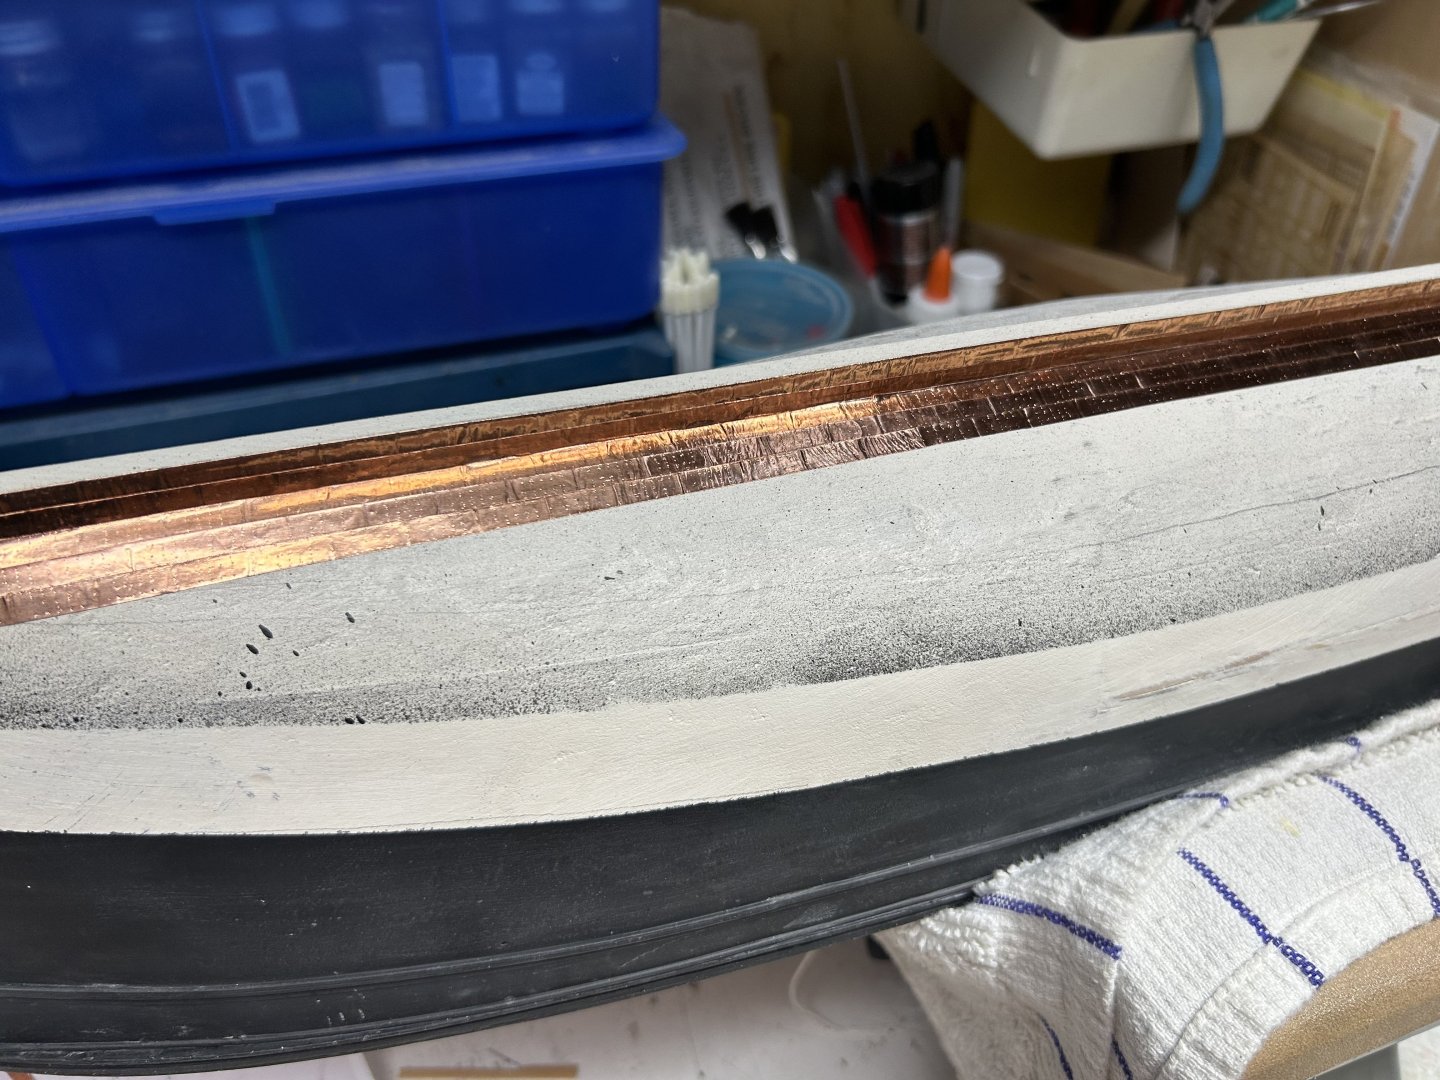
Finished up the coppering. Rob
-
Thanks Rich. I’m hoping to finish coppering……then masking and painting today. We’ll see. It is Father’s Day. Happy Father’s Day everyone! Rob
-
When you add to the McKay half model the missing stem/cut water , and the main bulwark , she does look pretty good. 5ft higher forward then aft, and drawing 10ft aft then forward……. She takes on the description as outlined by McLean. Rob
-
She’s looking smart. When the keel is done…….paint. Rob
-
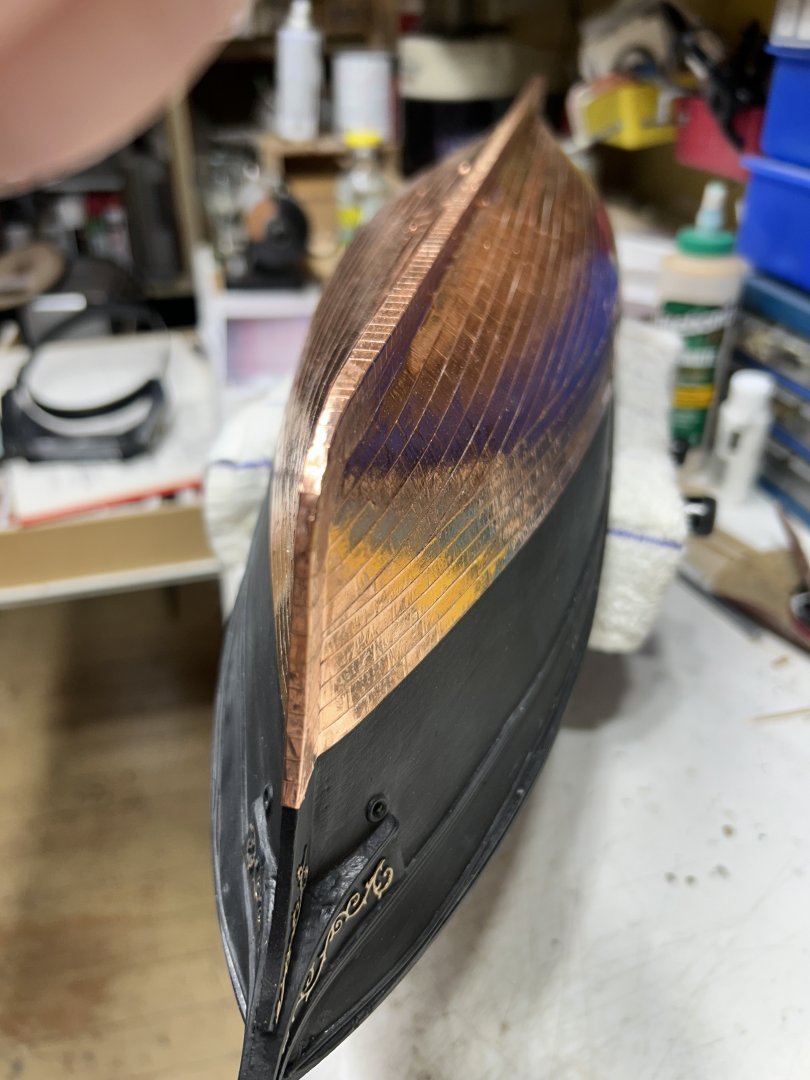
A little keel foot coppering. Rob

-
Prepping the single plates for the keel foot. Rob

-
Finished the port side. Now to finish off the keel foot. Rob


-
Took a break to be with family and grandkids. Be back at it a bit later. Rob
-
Working at finishing up the starboard side. Rob

-
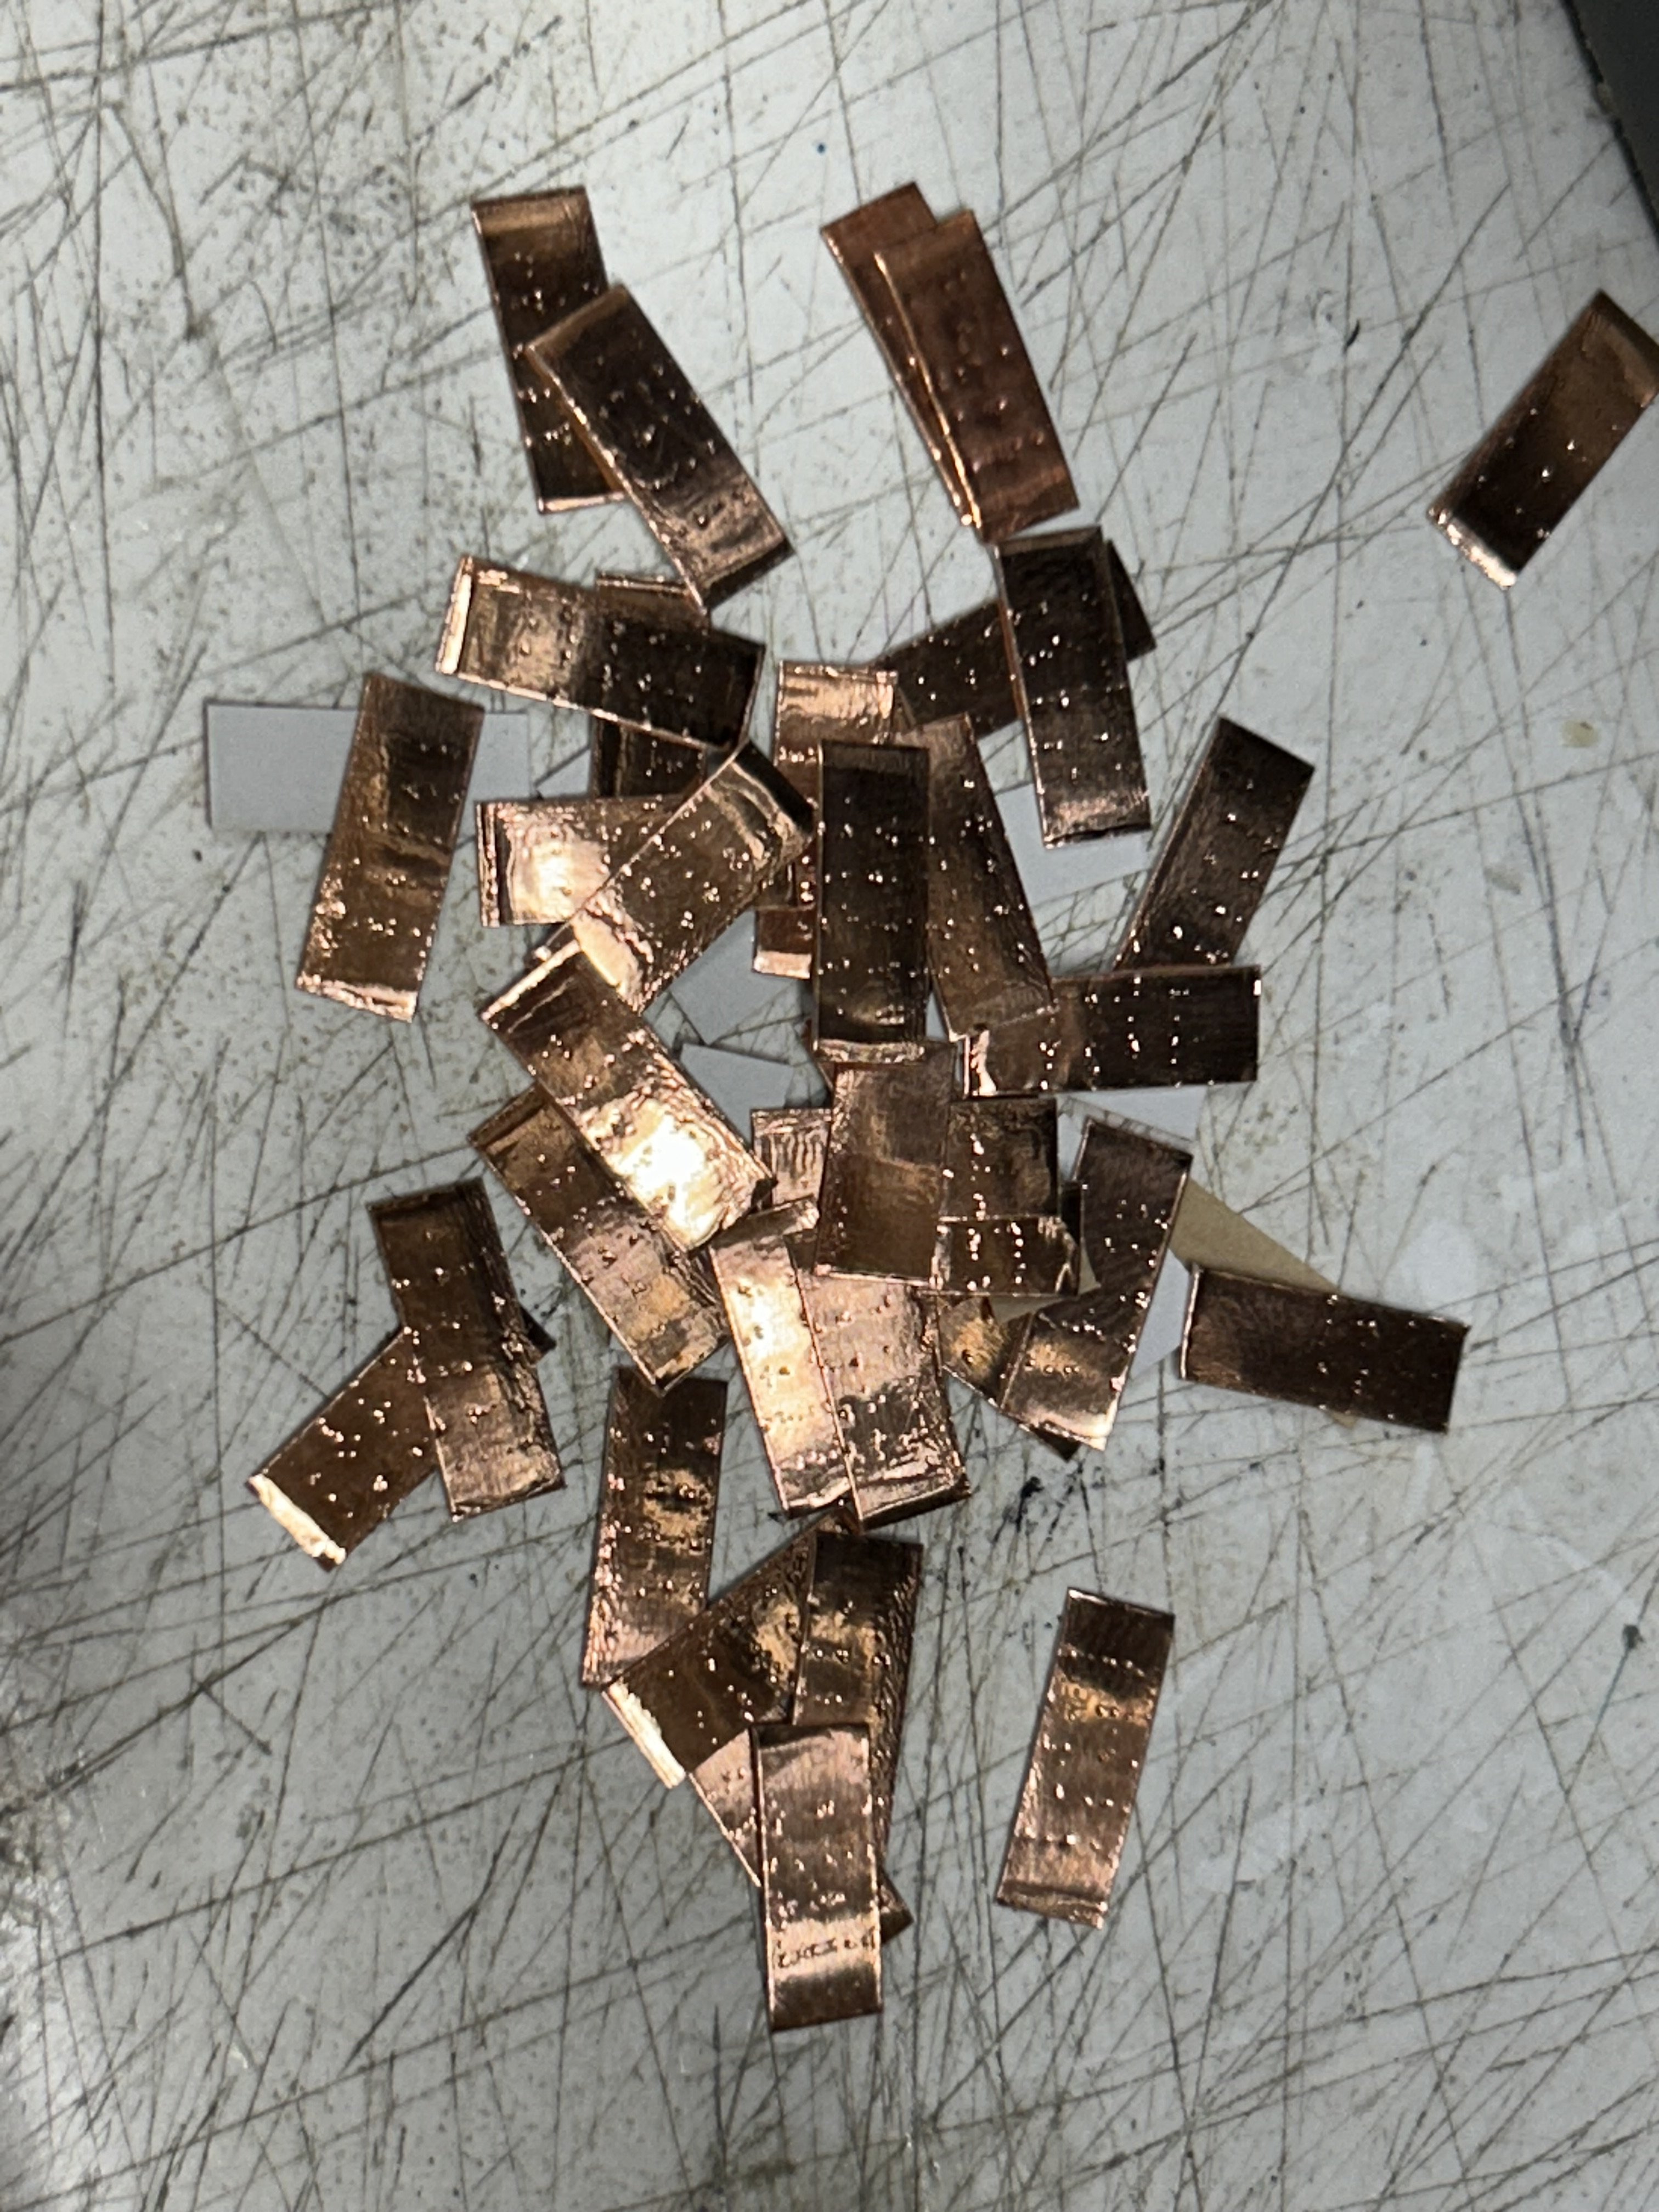
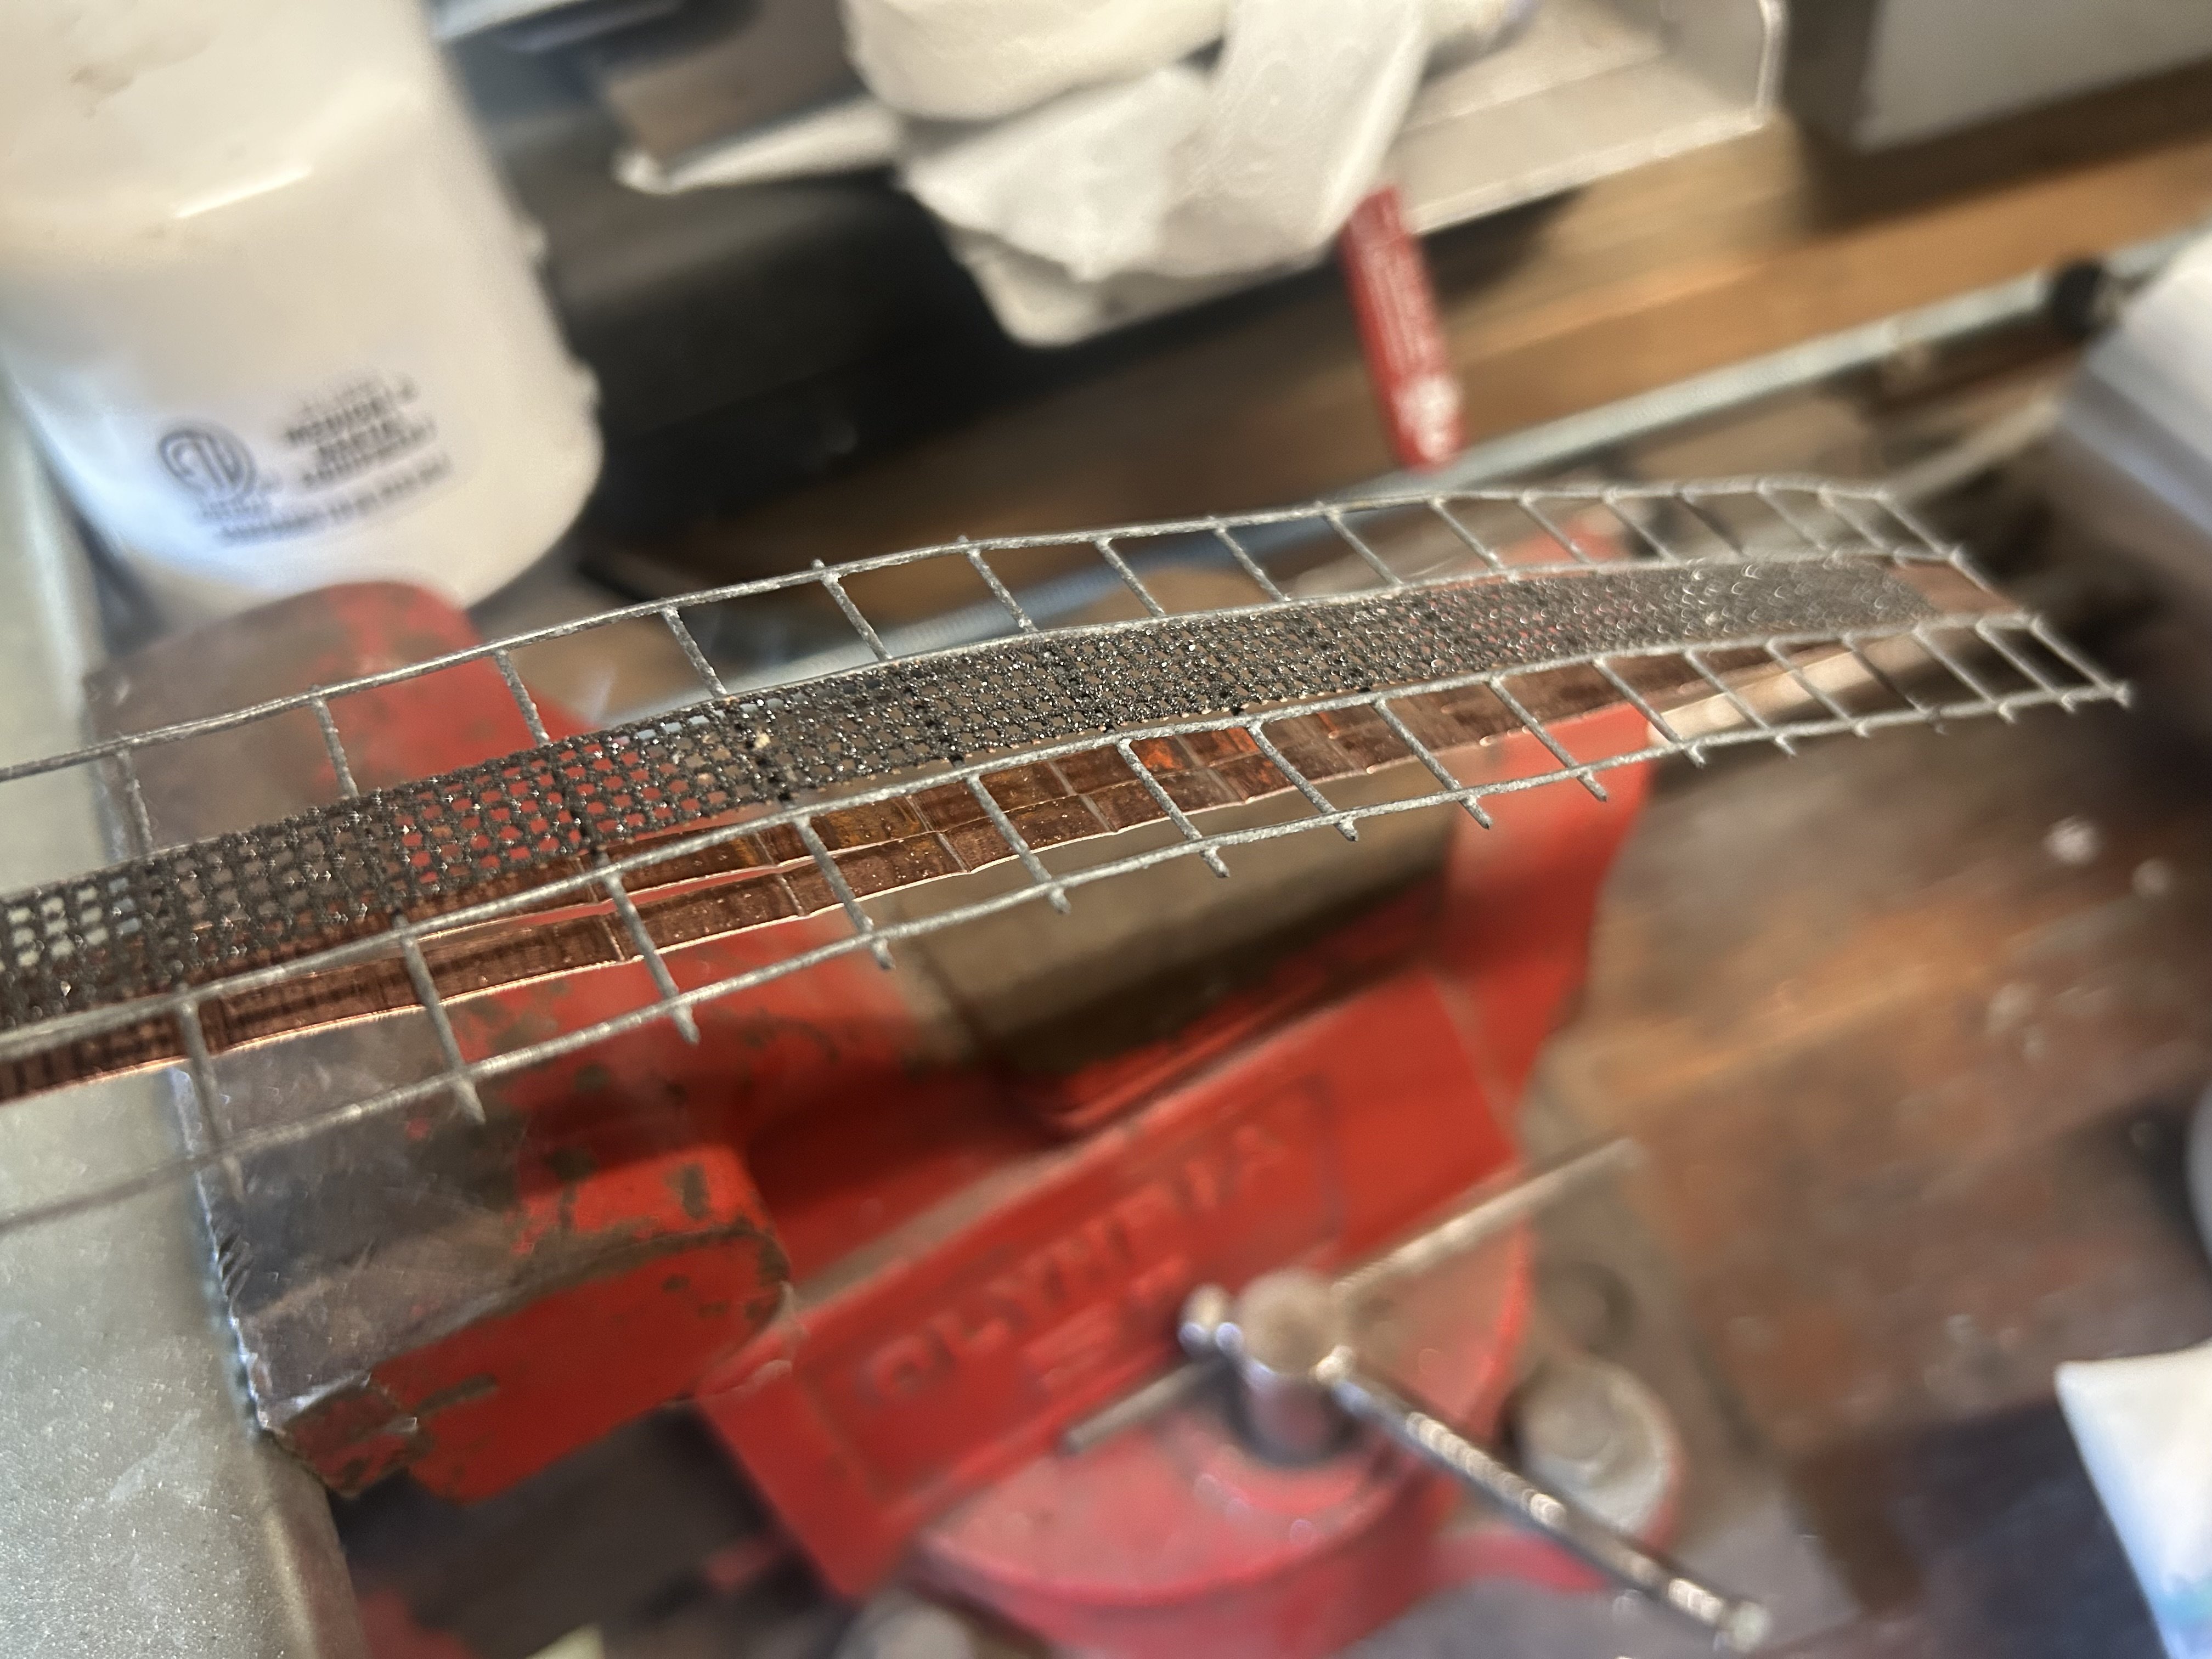
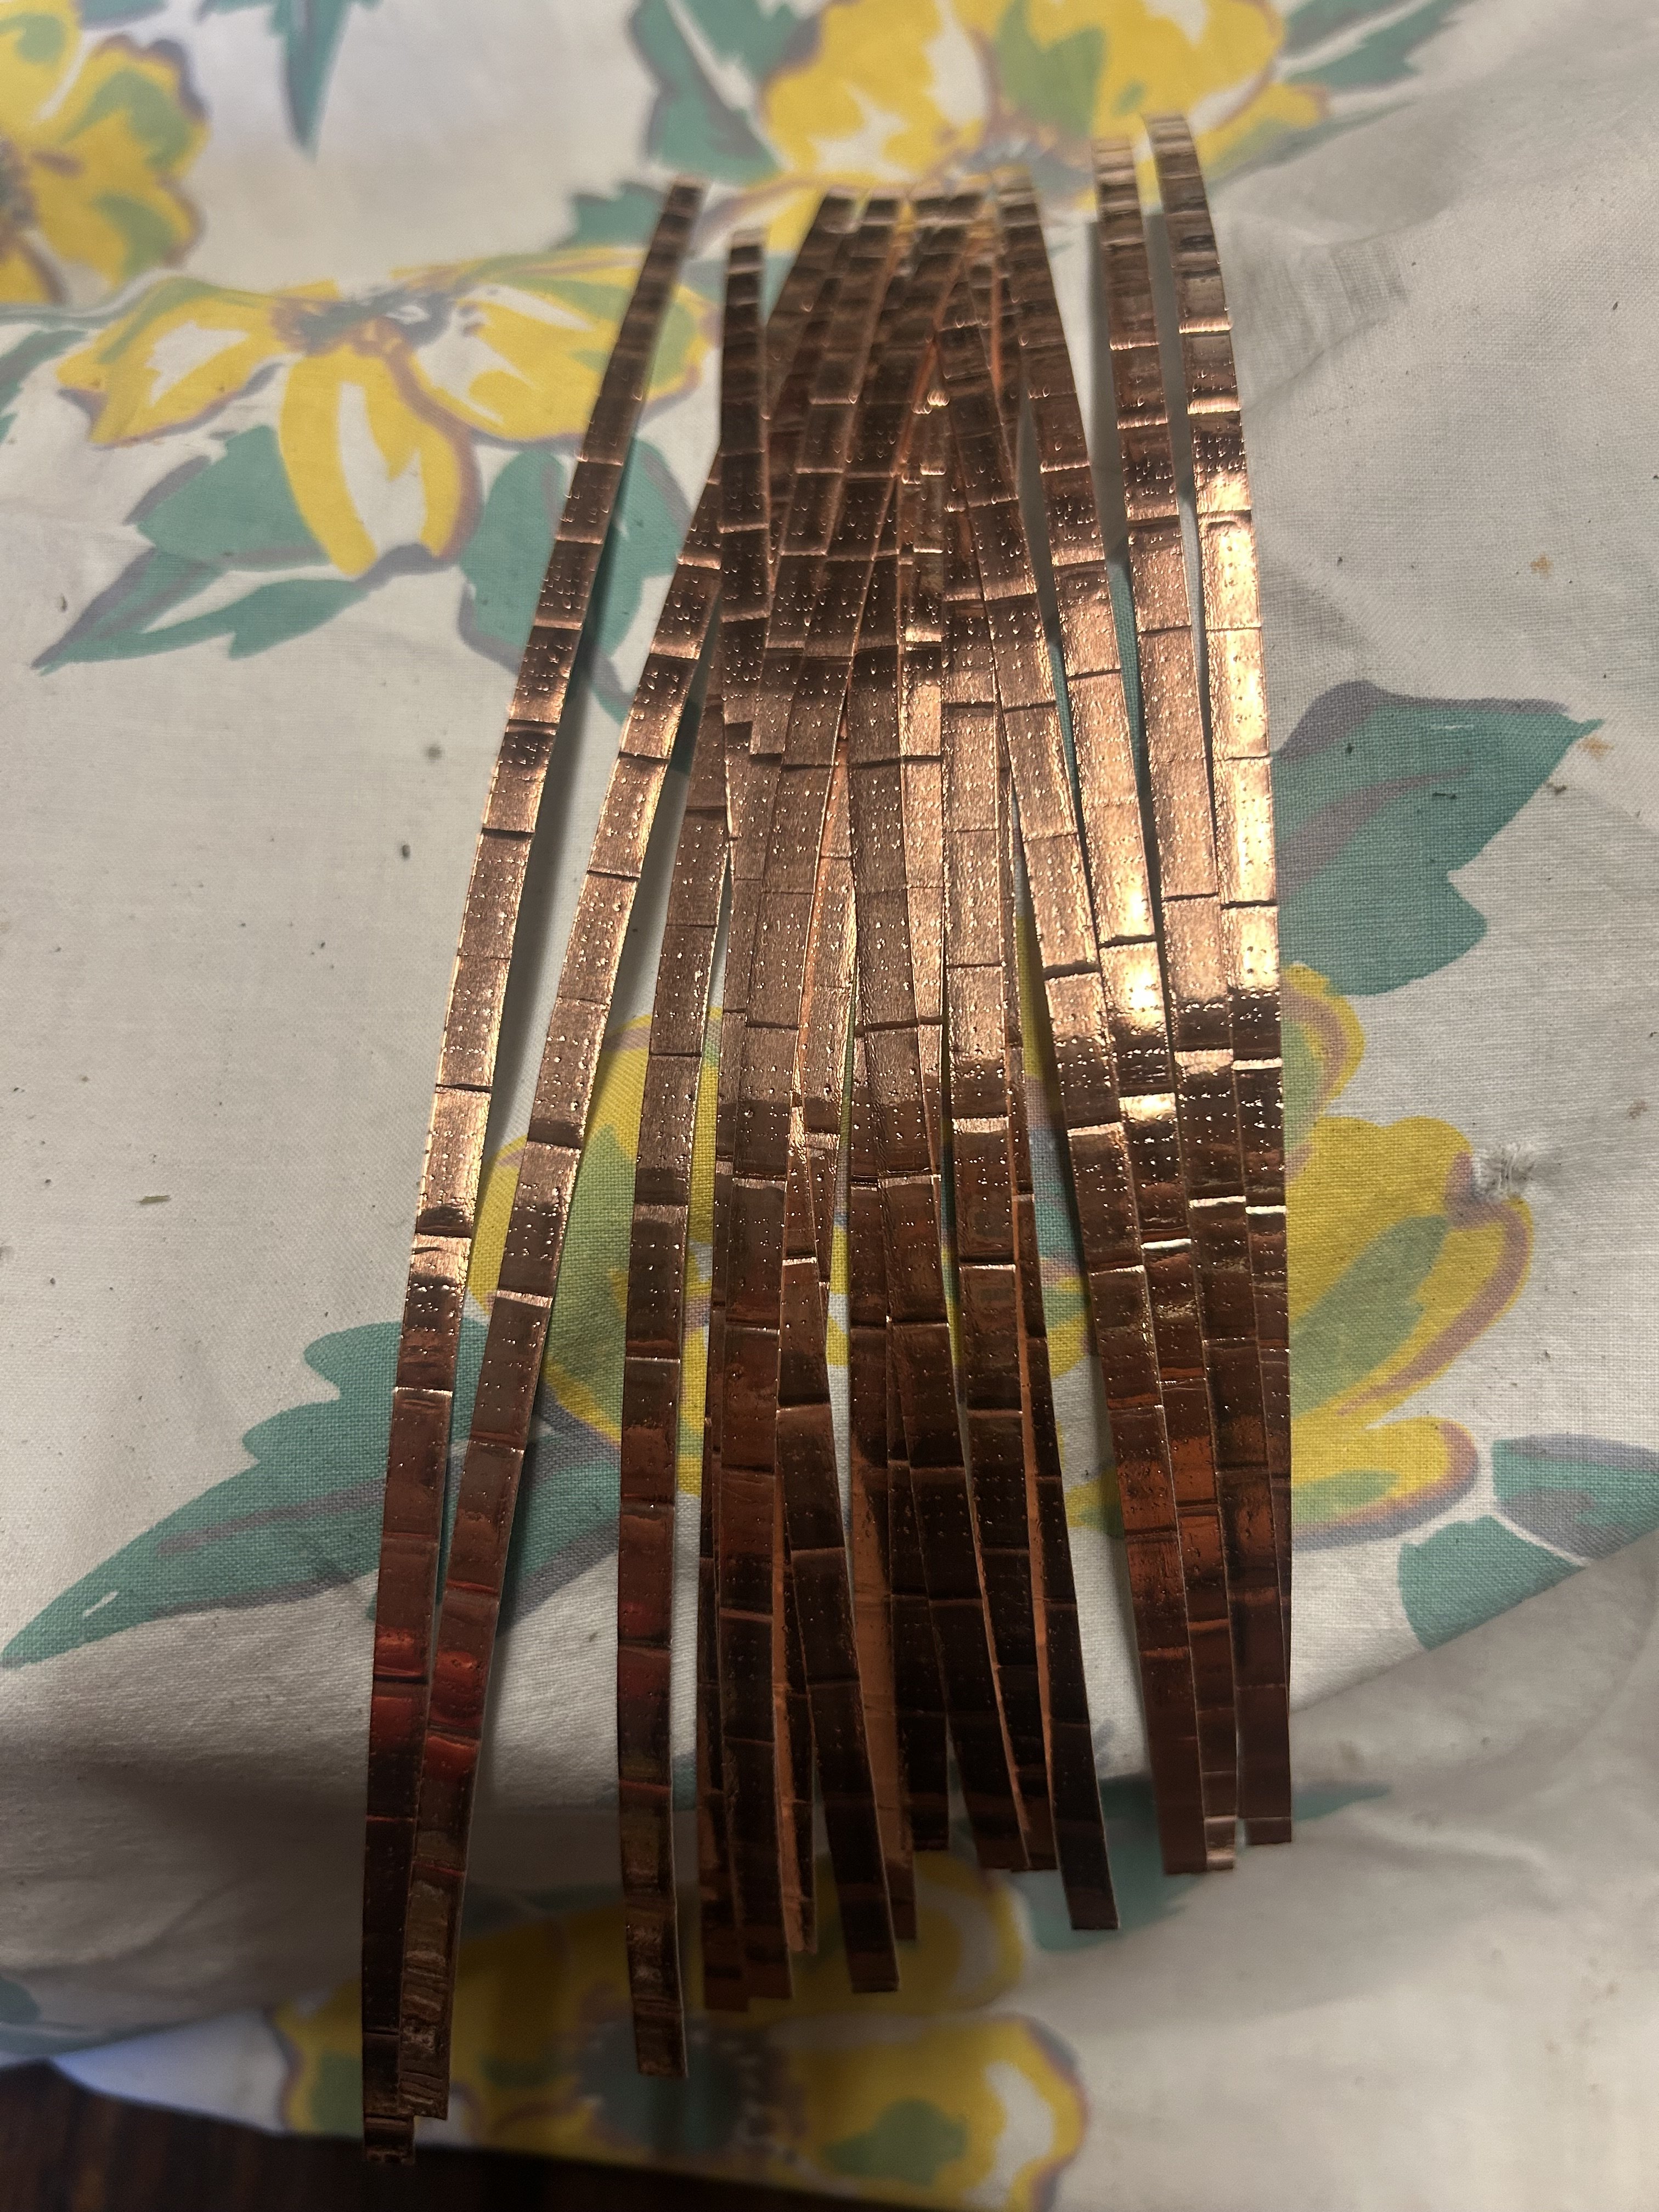
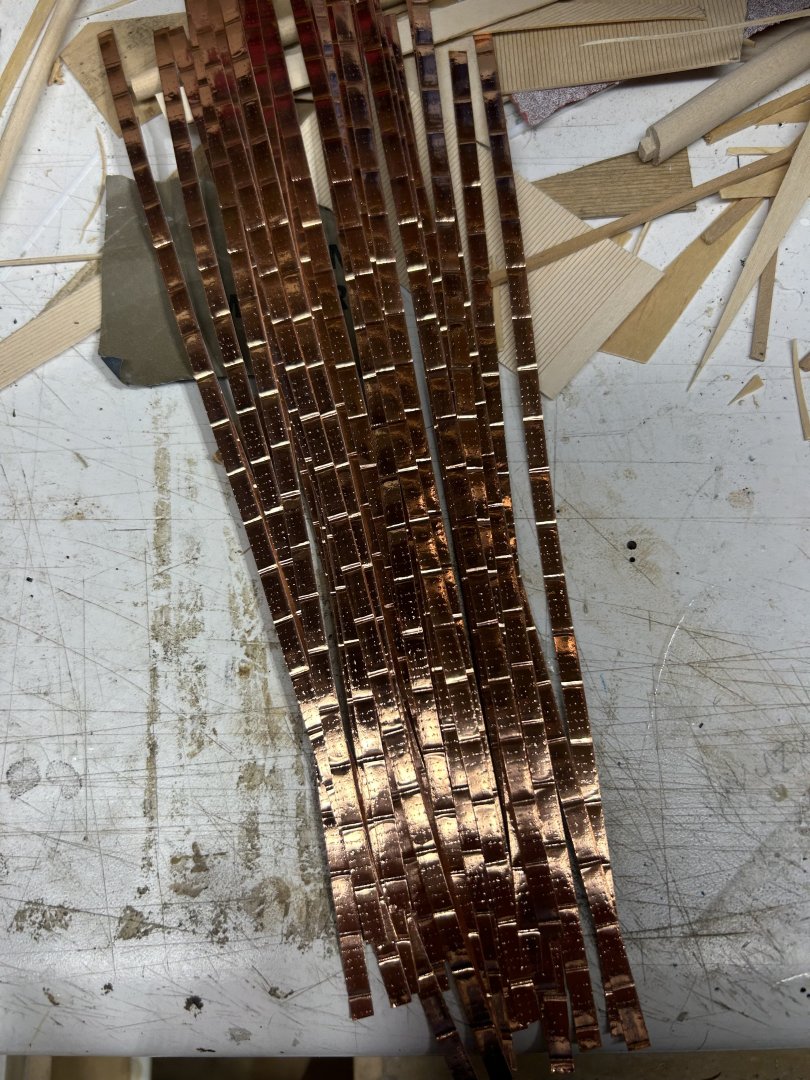
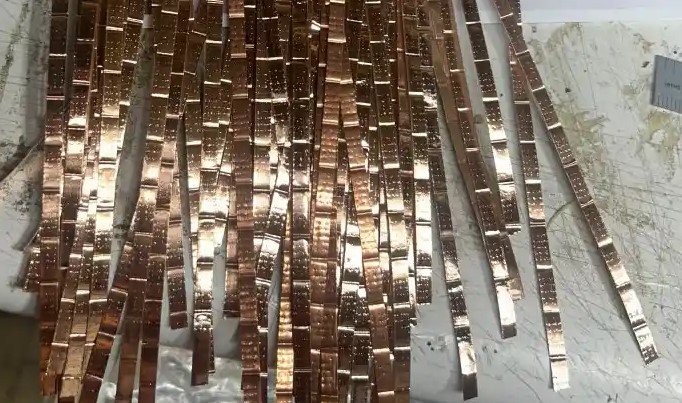
Made the remainder embossed strips tomorrow Rob
-
Fantastic work! Super attention to detail and craftsmanship. Rob
- 101 replies
-
- 1
-

-
- Cutty Sark
- Sergal
- (and 1 more)
-
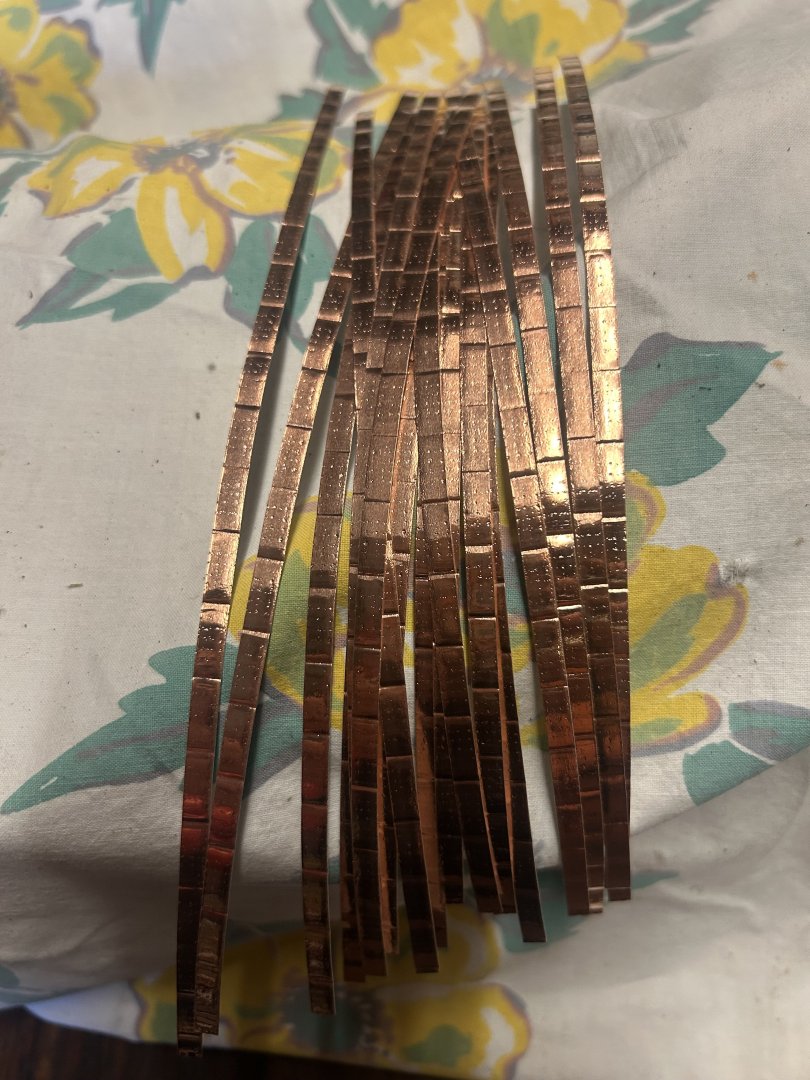
I gather it will require around 31 more embossed strips to complete the job. Not forgetting to add the single plates needed to cover the keel foot. As is my habit, I want to create a unique mounting for Staghound. Like all my McKay clippers....she will be mounted with something that ties into her name. My first thought is to use deer antlers as the pedistals and then mount them to the base (whatever I decide) Rob.
-
I’ll make more embossed strips tomorrow and then finish the coppering. Projecting forward, it will have taken me roughly 8 hours to make …..and install the copper strips on the clipper Staghound. I think that is my best time ever. I’ll paint and seal them shortly there after. Rob
-
Started the port side …..a then ran out of embossed strips. I’ll do them tomorrow. Rob

-
Finished up the Starboard side. Rob

-
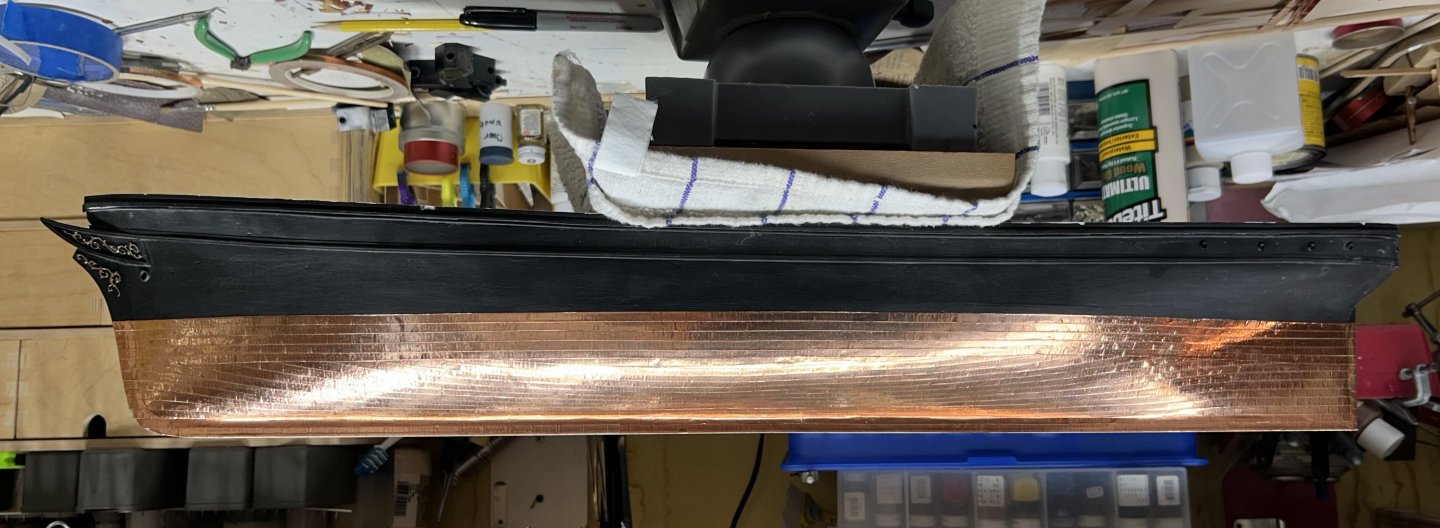
Copper plates are actually not necessary. You can use paper like you suggested....then paint them....again, as you describe. As is my own practice, I always paint over my shiny copper plates with Metalic paint...that ultimately resembles weathered muntz metal. Rob
-
Nearly finished the first half of the starboard side. The next run will go to the waterline. Rob
-
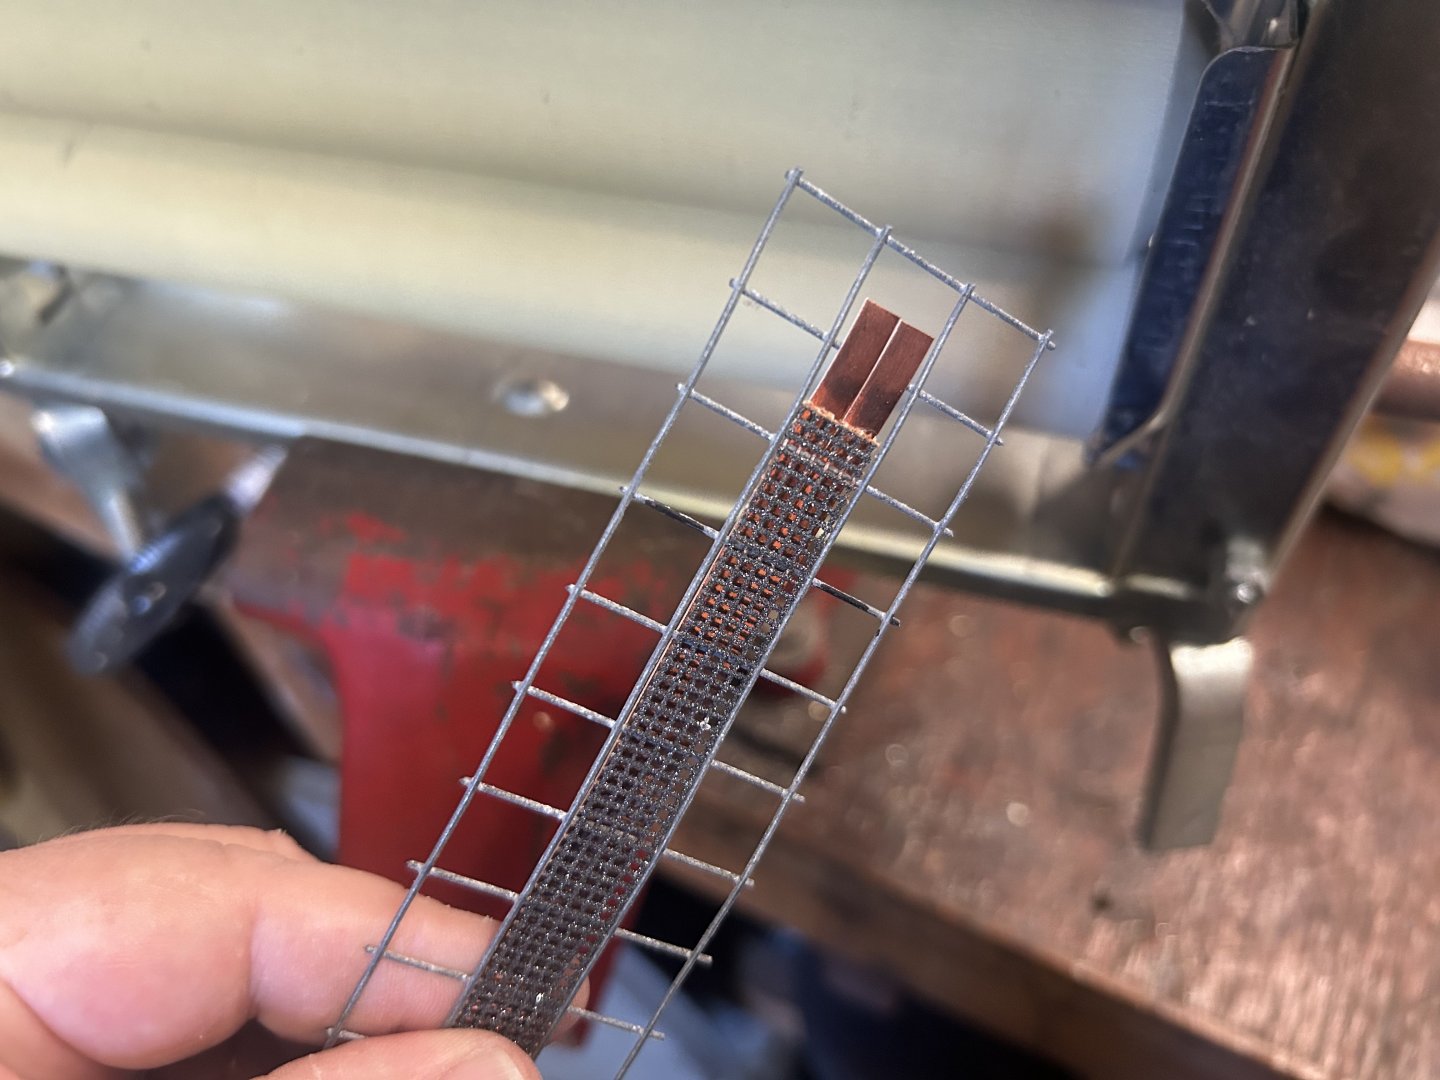
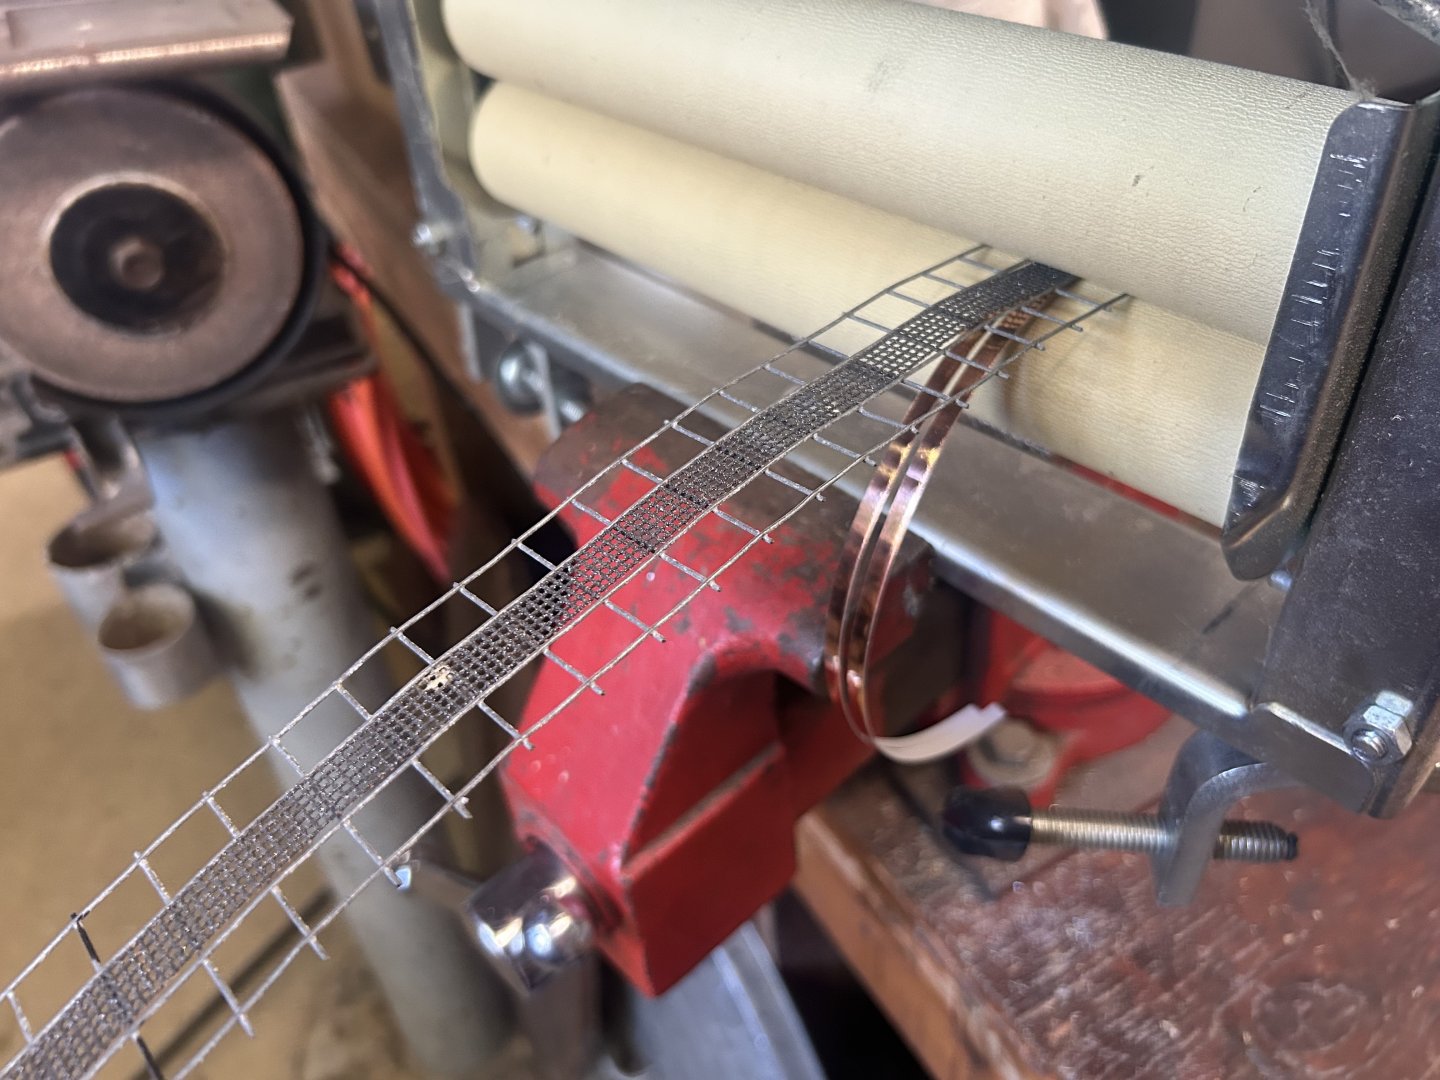
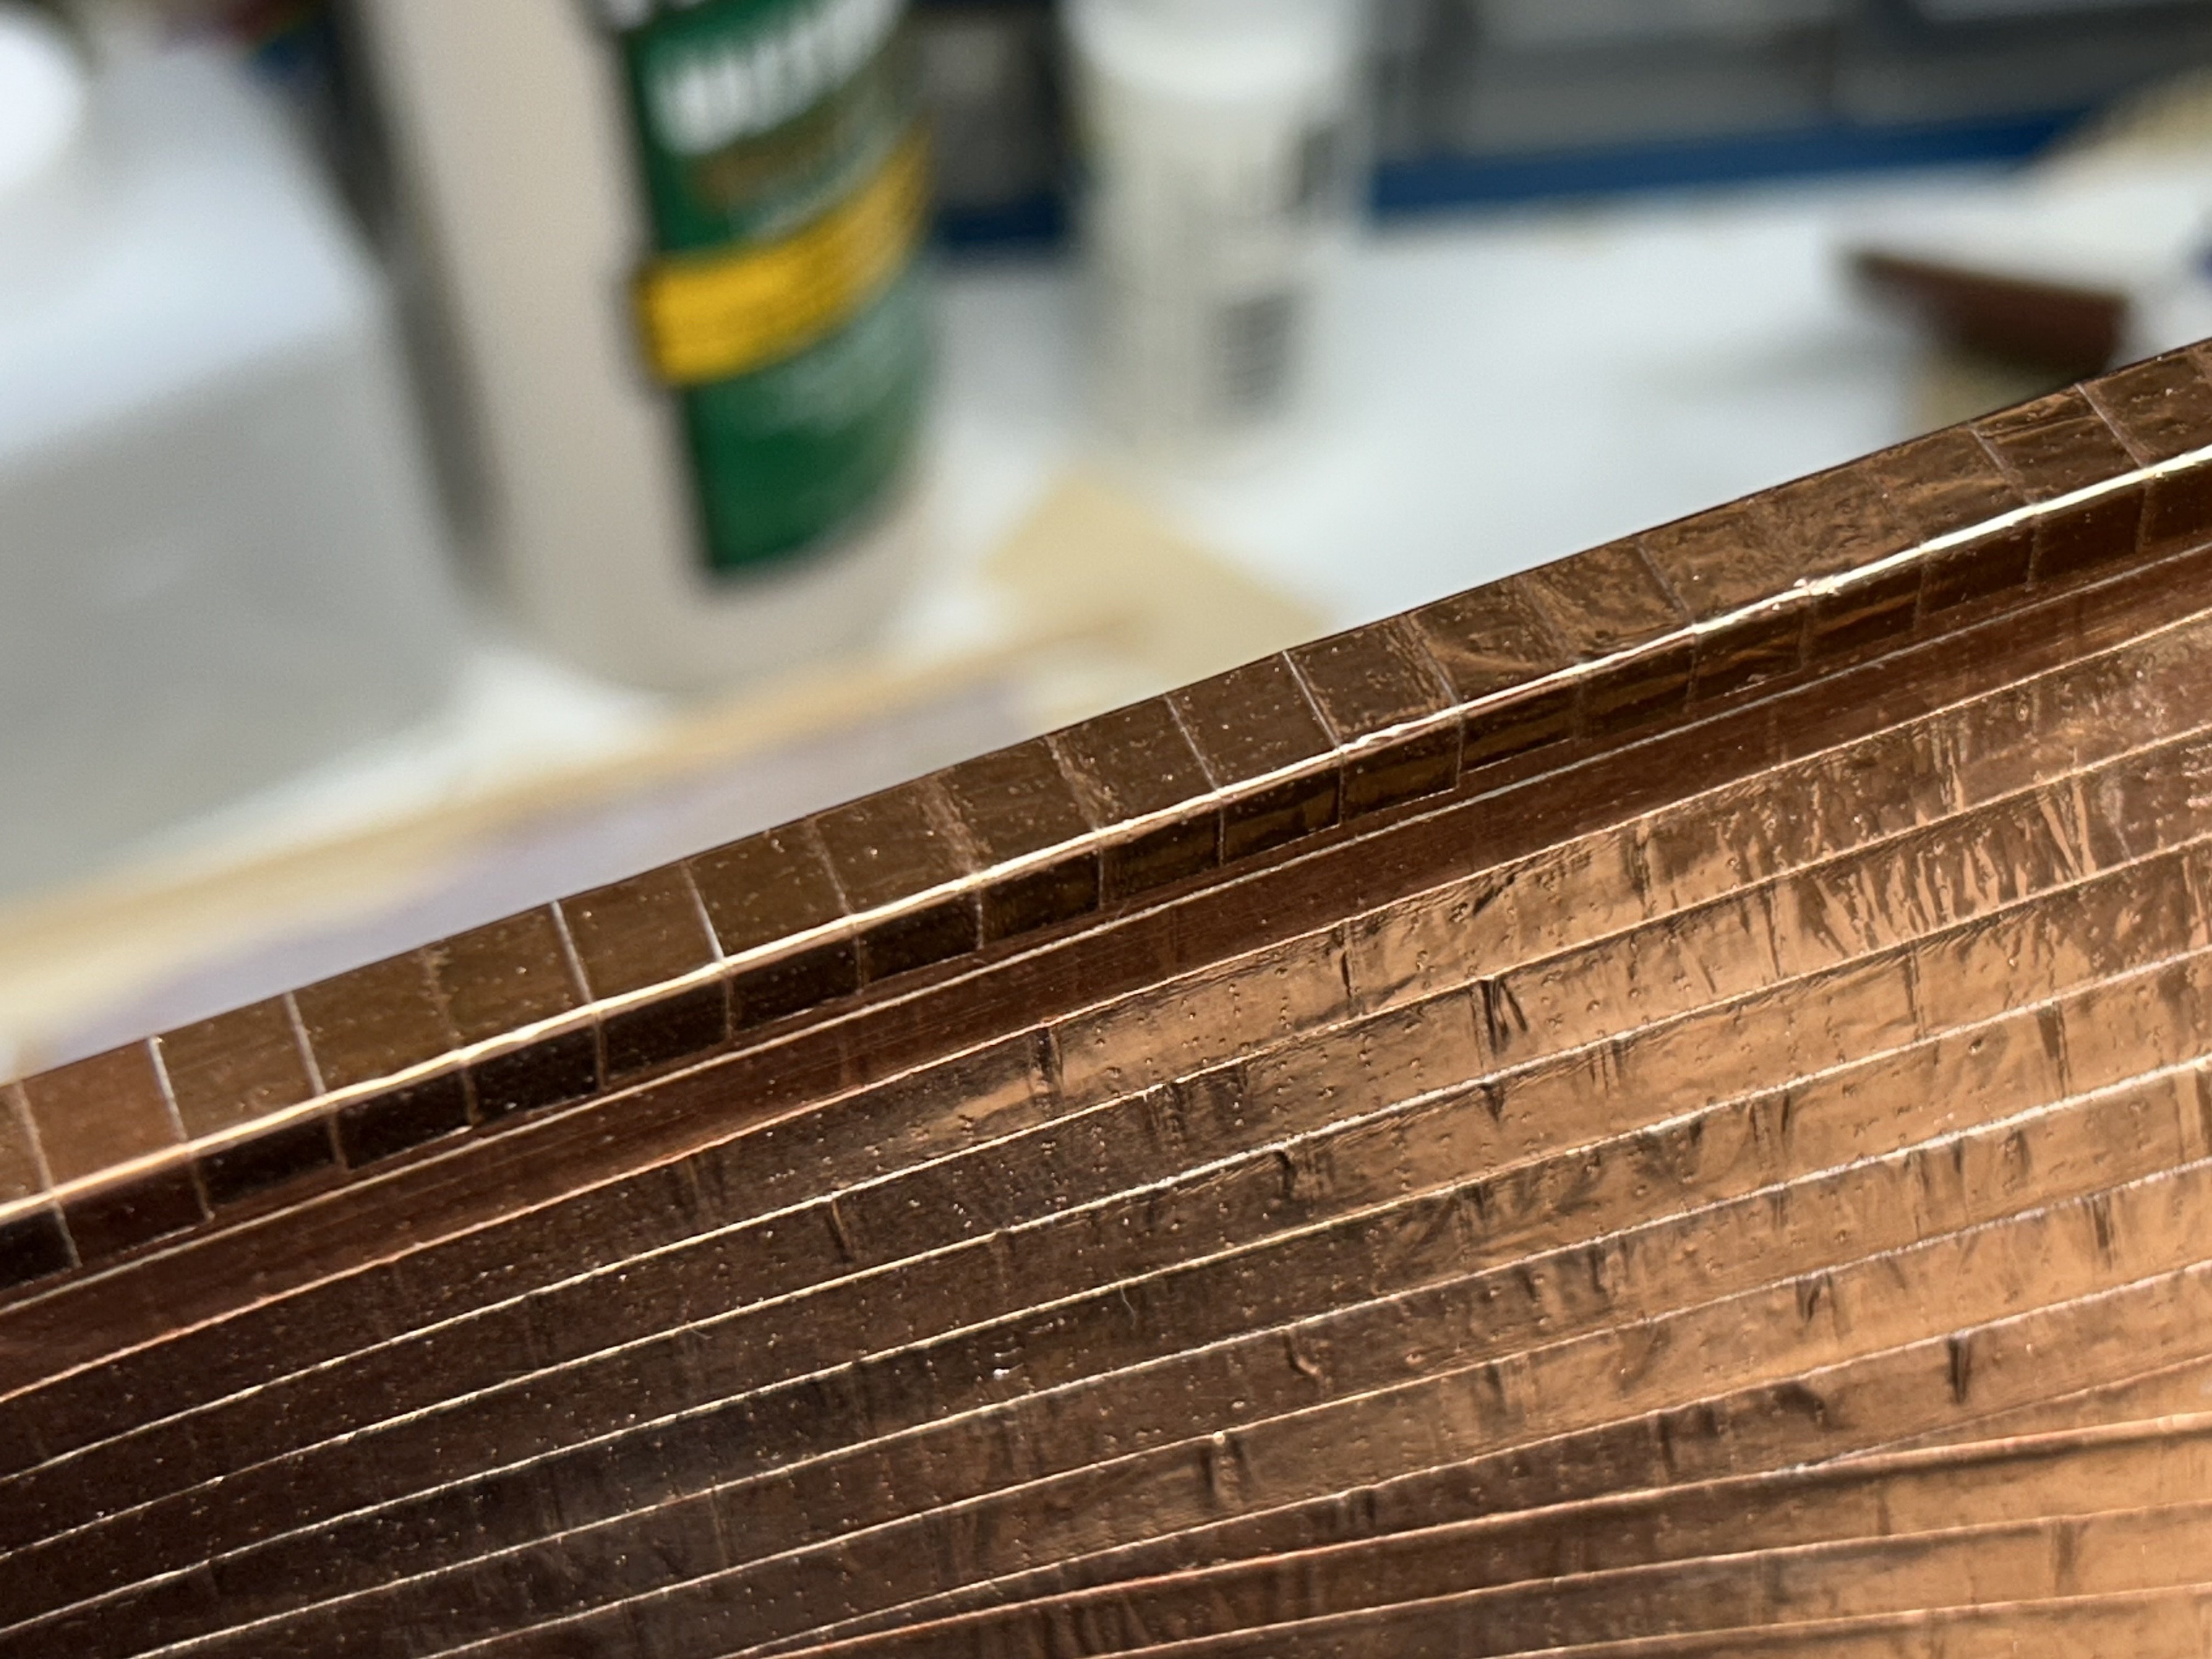
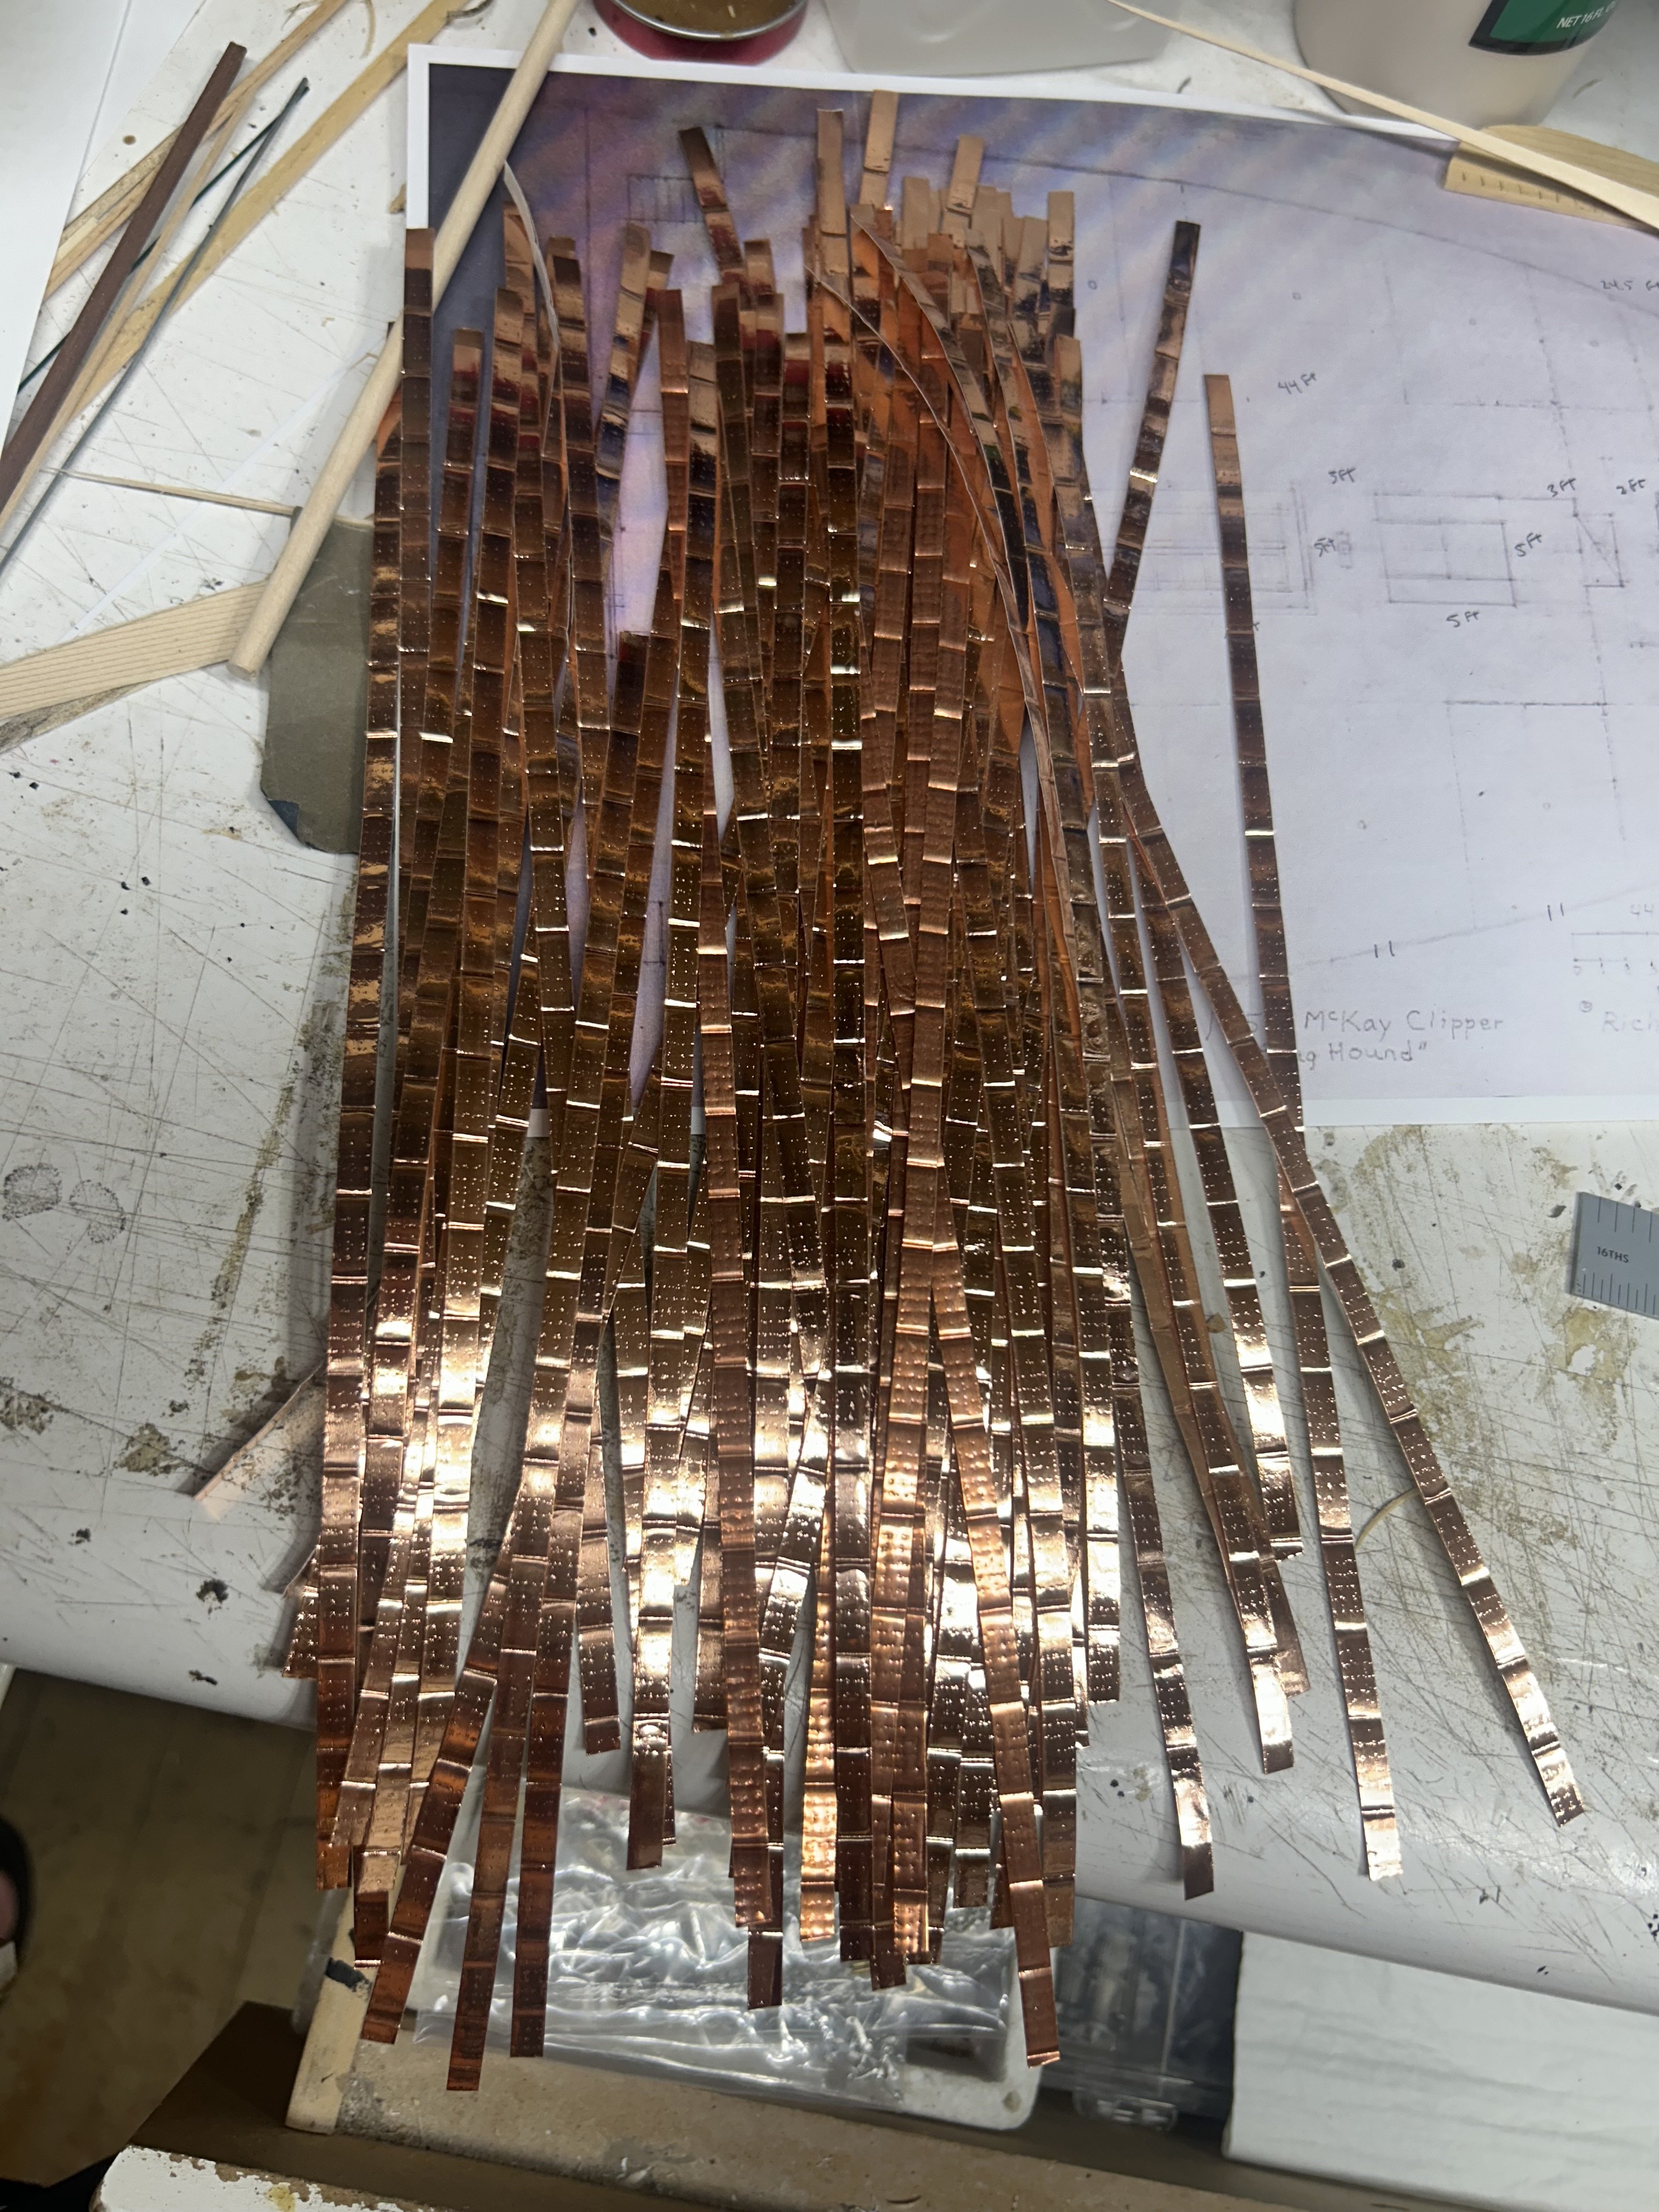
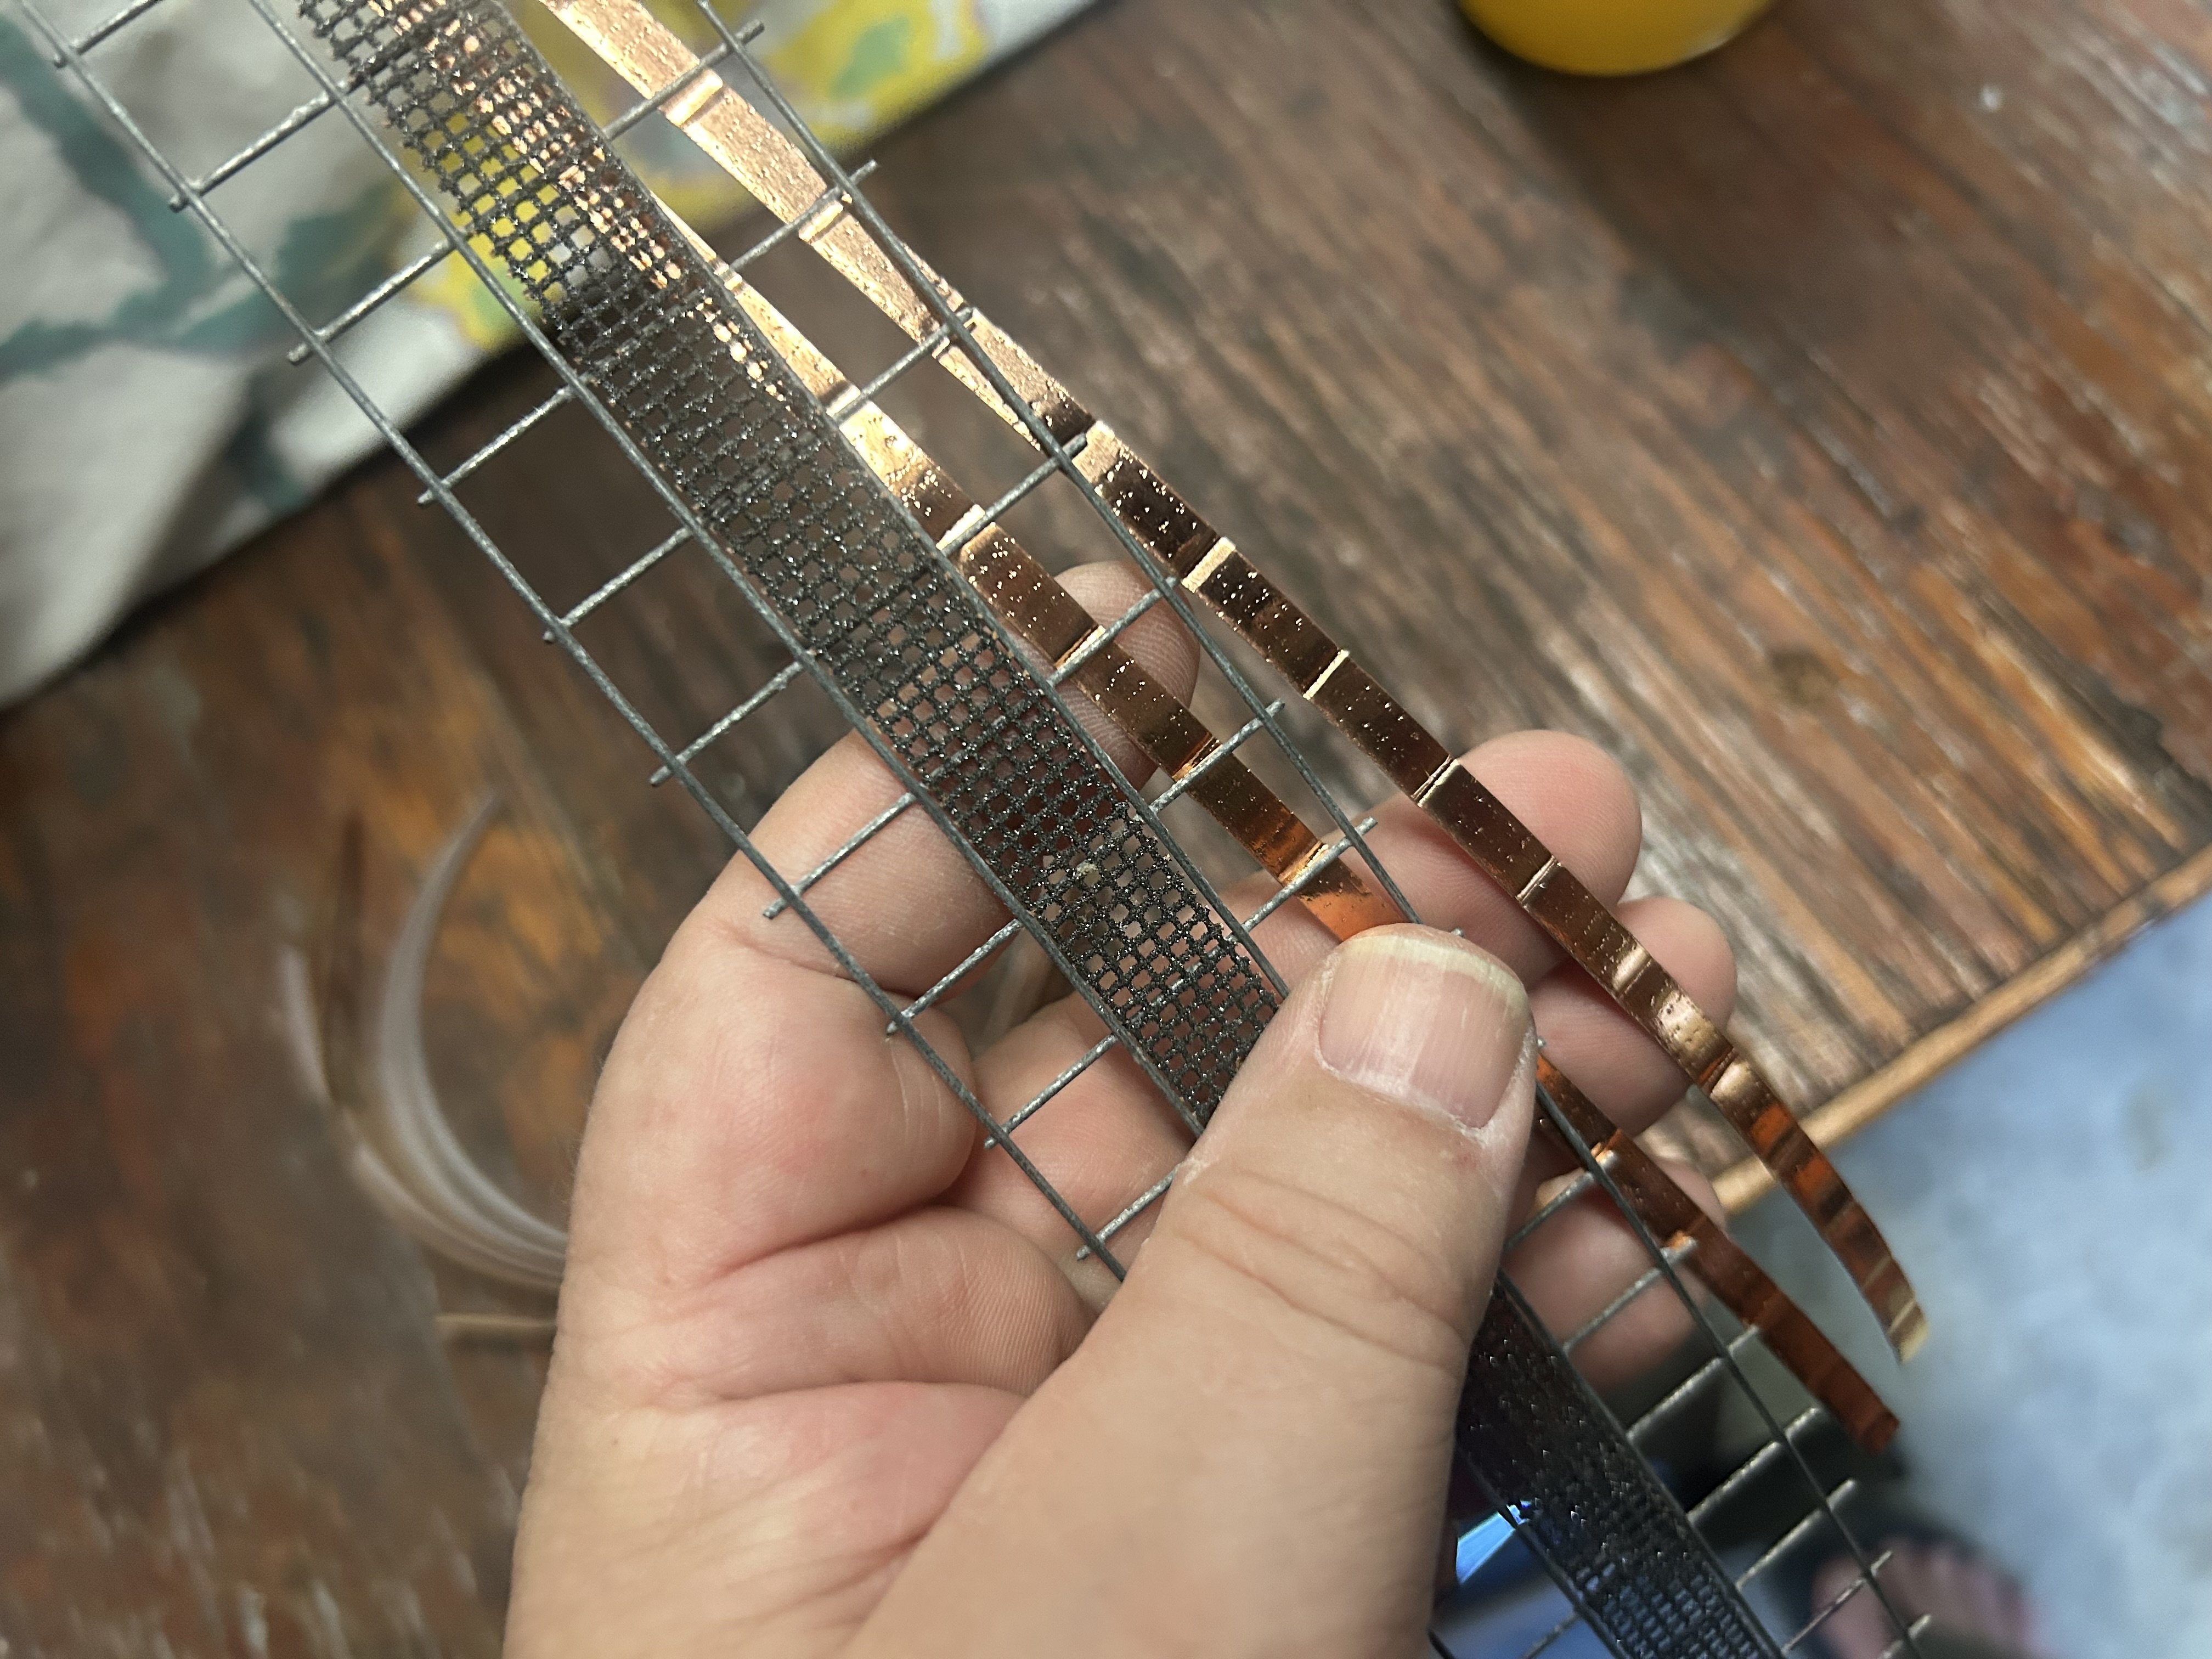
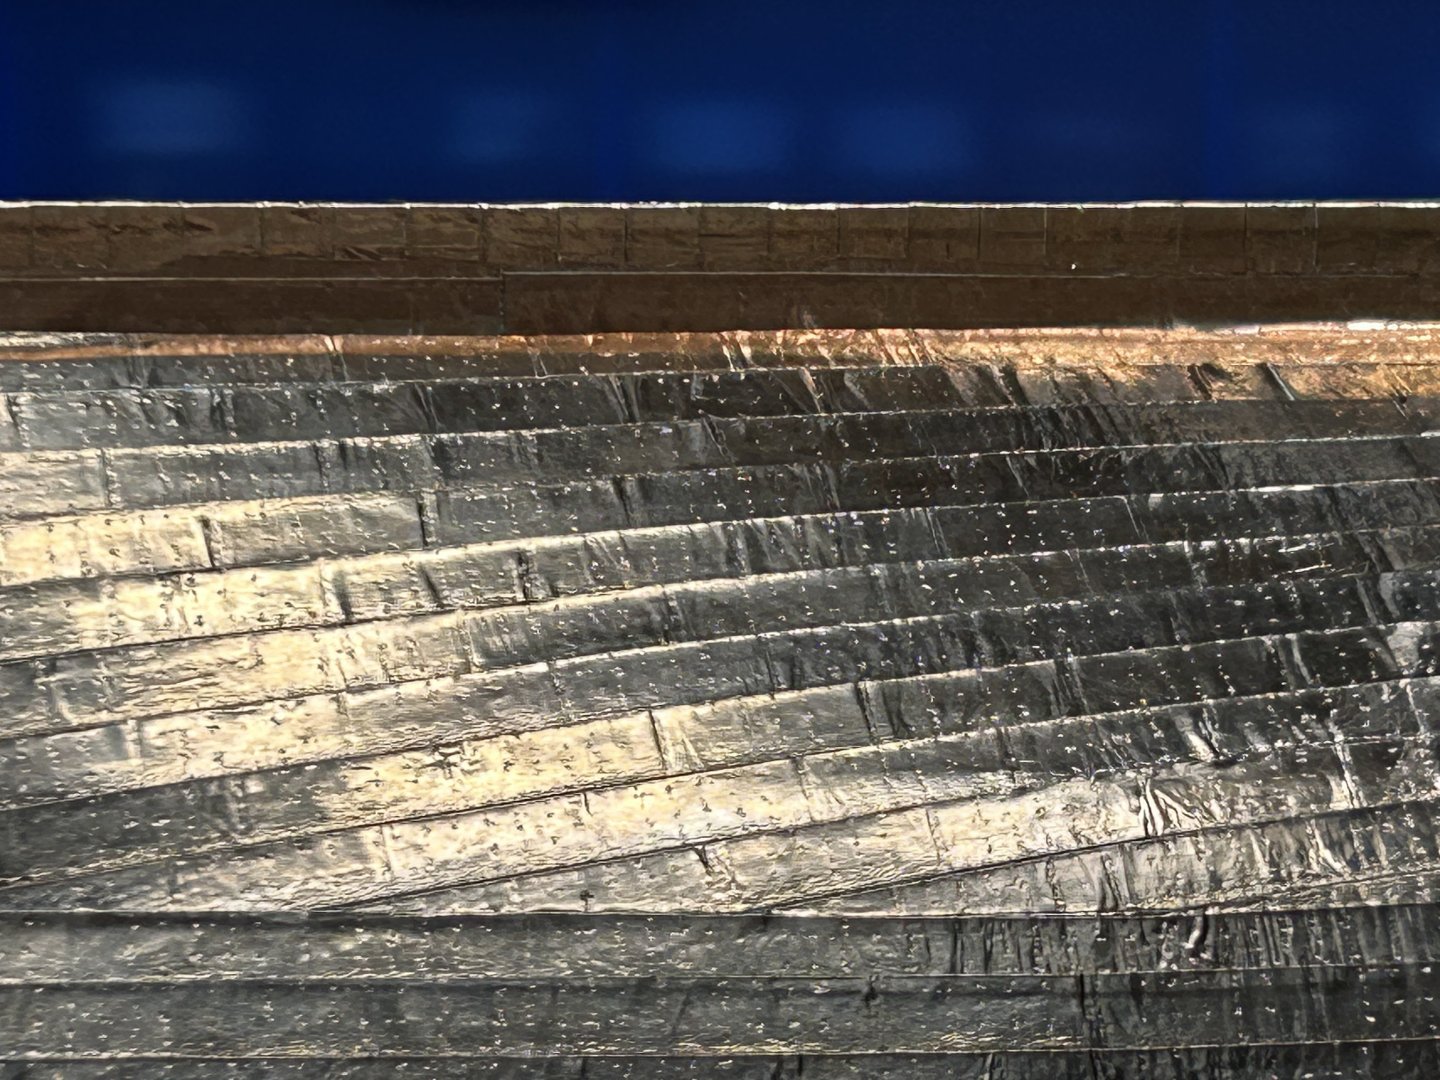
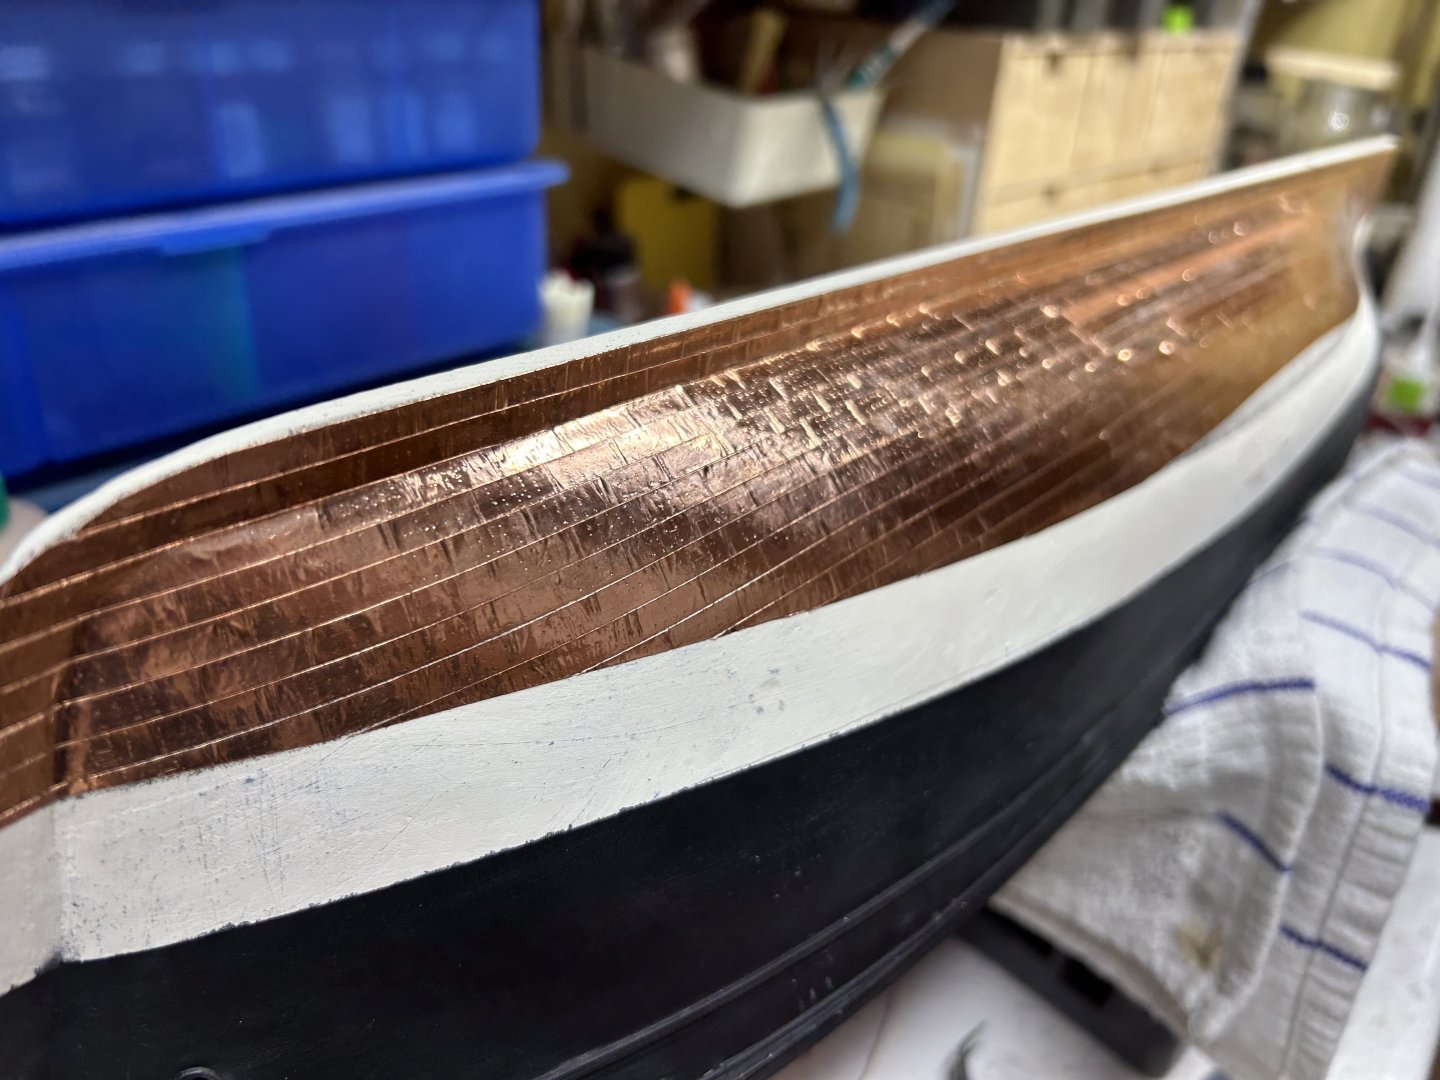
I lose a bit of detail when I remove the copper from its backing...but enough is present to represent the plates. They emboss well and the addition of the drywall sand screen to add the nail imprints was a game changer.
-
Jared....In no way, was I referencing your coppering job. Overall, your model is wonderful and skillfully done. Rob
-
What I've found out and have sought the advice of oh so many other model builders, is that at this scale...it is more important to project the *Hint* of individual plates. Too often the over exaggerated nail prints or over lapping plates...leaves the model looking more like it needs repair and replacement then actually adding to the ships detail. Plus...it just goes way faster. Thanks everyone for the fine comments and kudos. It really has taken me years of thought, and experimentation to develop and finally perform this technique. Rob
-
Thanks Jared. I’ve used this system on three models now……and as is my way…..I can’t stand anything as tedious as laying 2000 individual plates. Plus it shouldn’t take me too long before Im spraying on the metallic sealer over the shiny copper. Rob
-
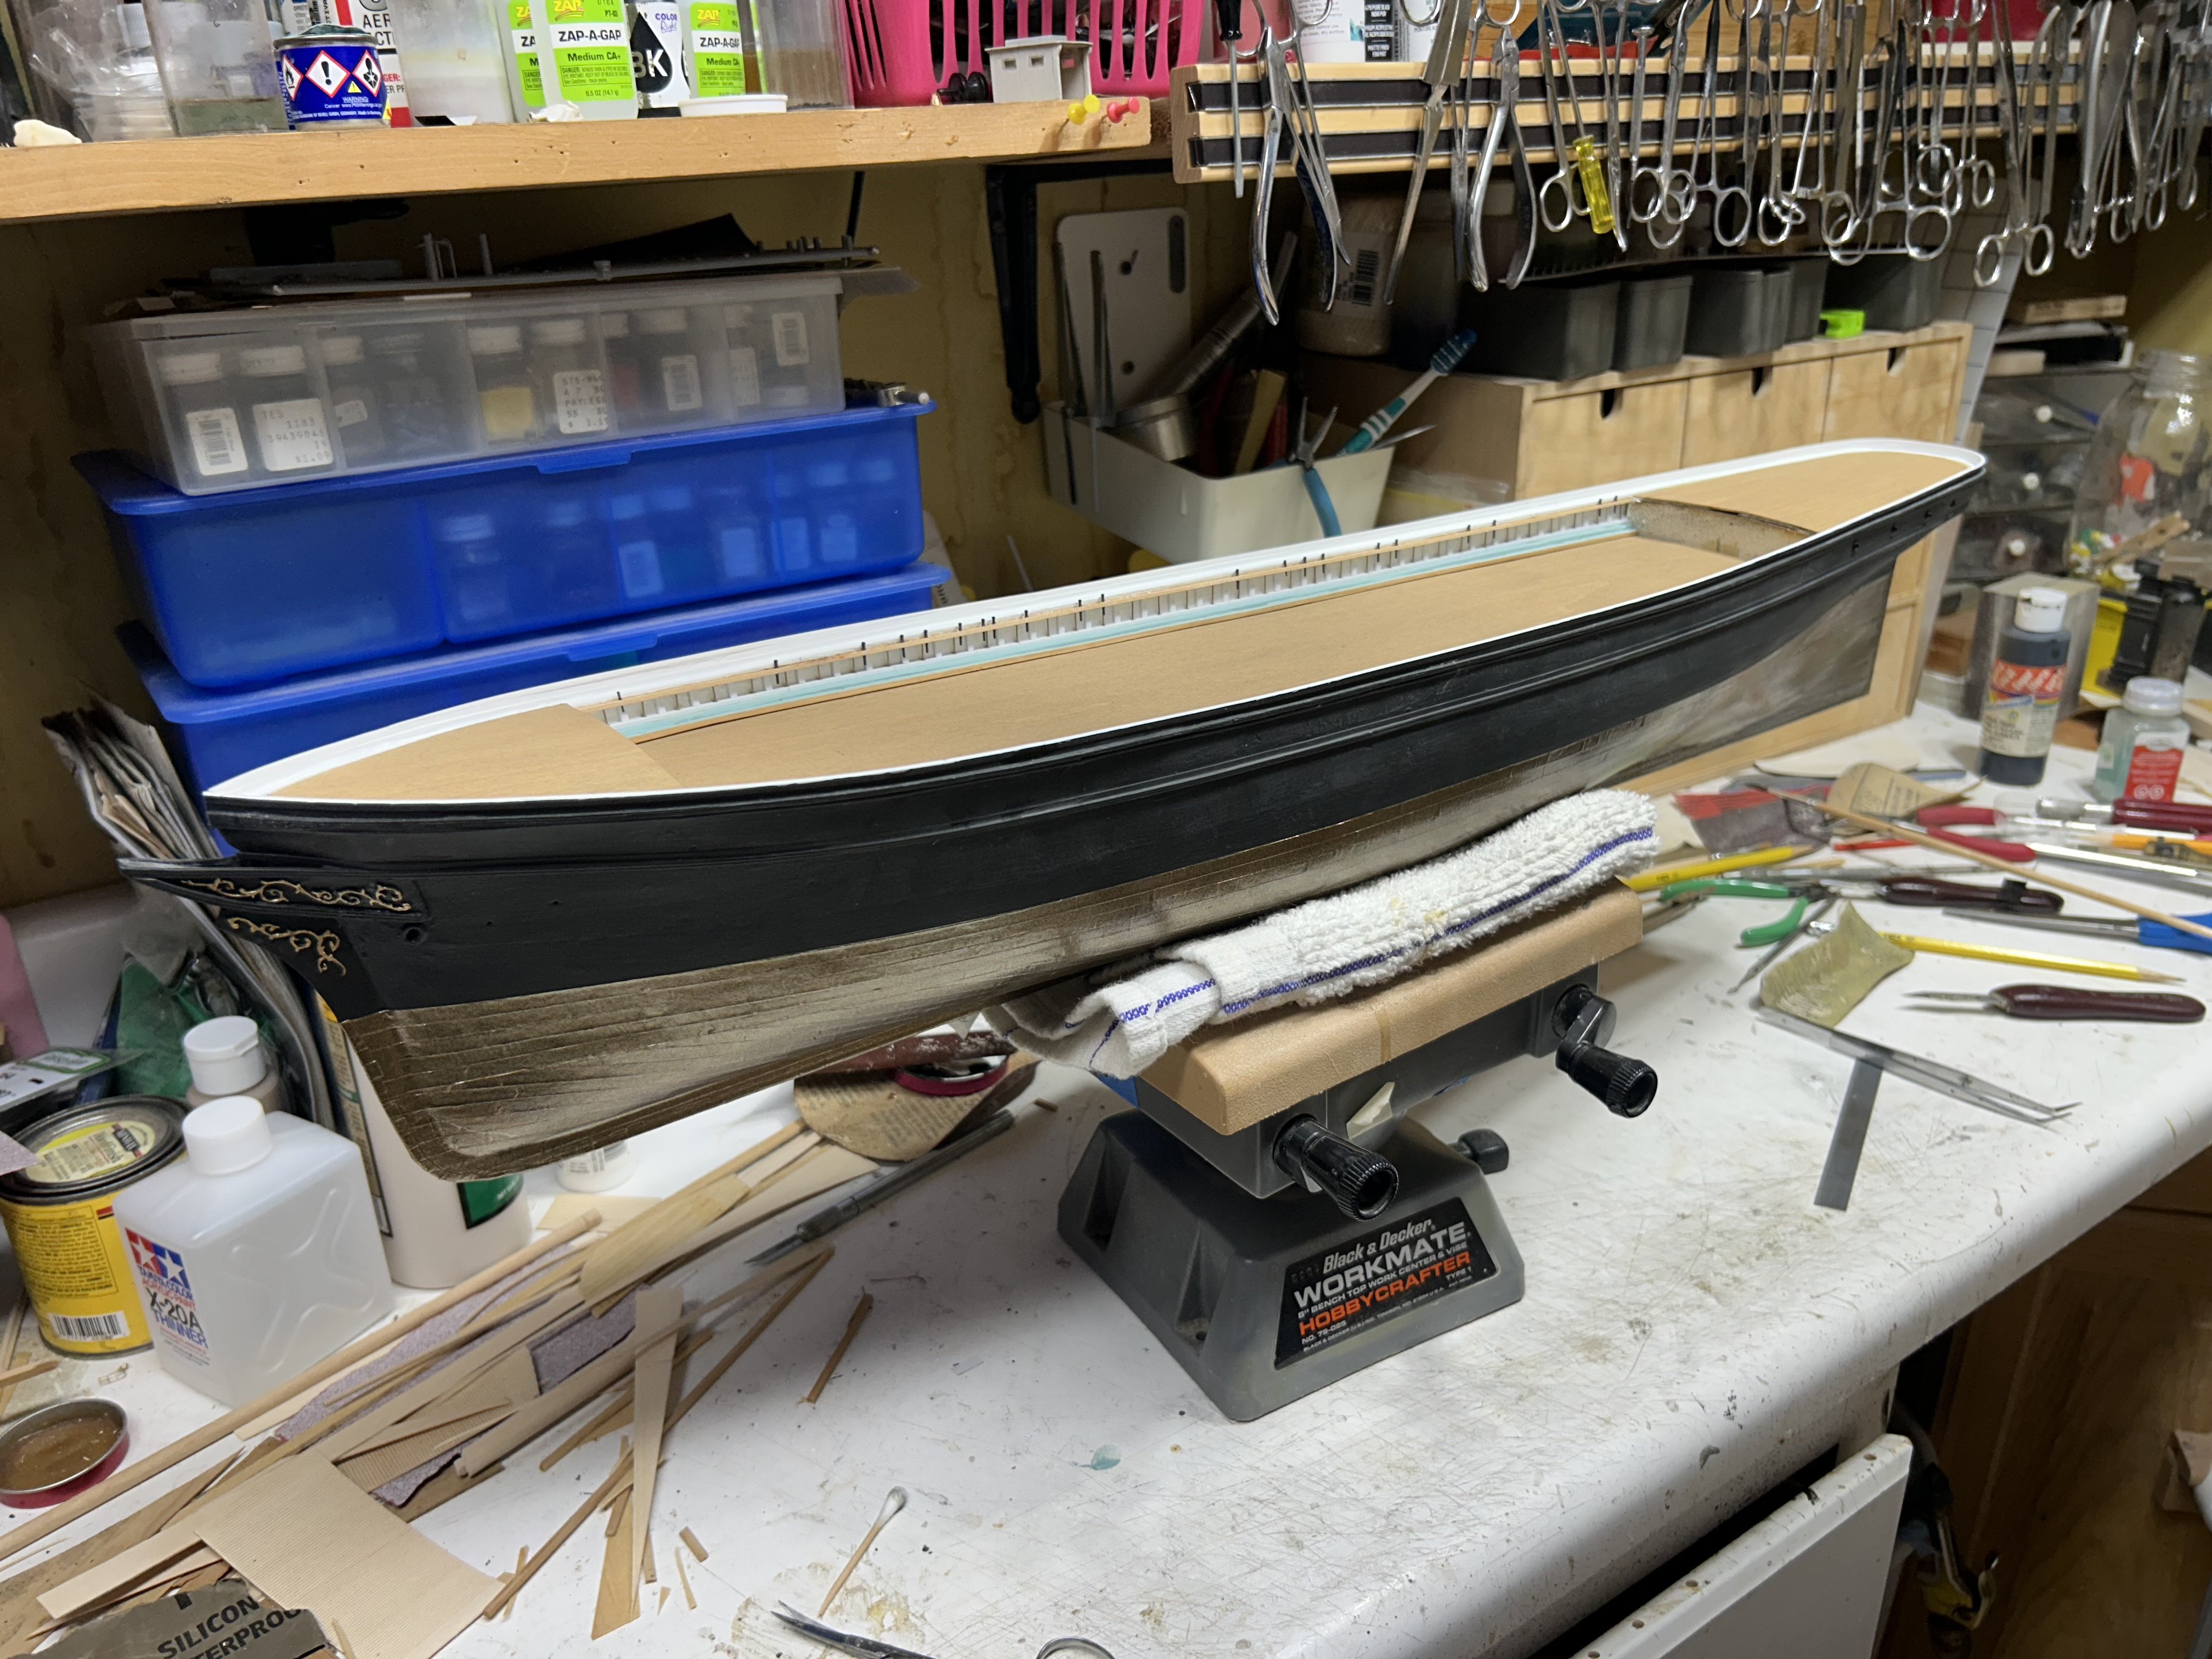
Starting the process of coppering the hull. Rob


-
Began cutting and imprinting the myriad of copper strips for the hull. using my clothes roller. Here is part of the process. Rob