Check out our new MSW Sponsor Innocraftsman
×


rwiederrich
-
Posts
5,504 -
Joined
-
Last visited
Content Type
Profiles
Forums
Gallery
Events
Everything posted by rwiederrich
-
This is my favorite build log for sure....... Rob
- 3,618 replies
-
- 3
-

-
- young america
- clipper
- (and 1 more)
-
Fun part(well there are many fun parts), but this fun part(building the great cabin and accommodations) must be real fun. A little artistic license availeth itself. I suspect the roof of the poop deck will be be the window into the gallery. Great job Ed....real artistic workmanship. Rob
- 3,618 replies
-
- 3
-
-
- young america
- clipper
- (and 1 more)
-
Thanks Keel.....I had to display it somehow. Might as well make a story out of it. Rob
-
Thanks everyone for your likes........ Rob
-
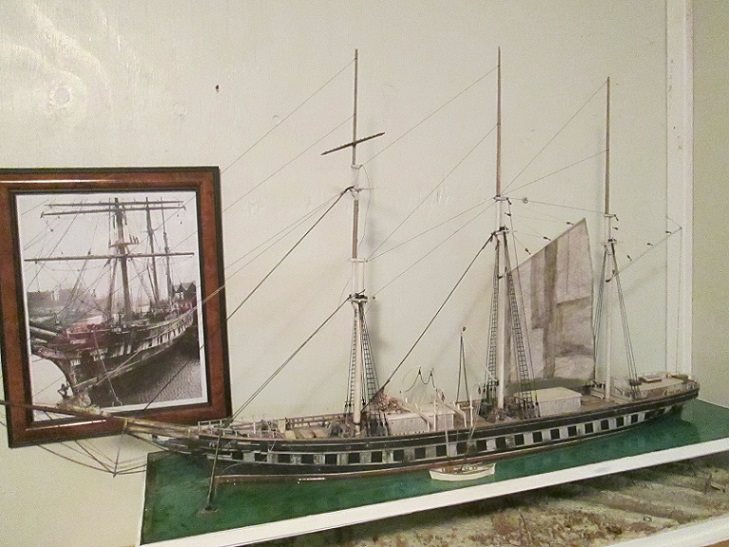
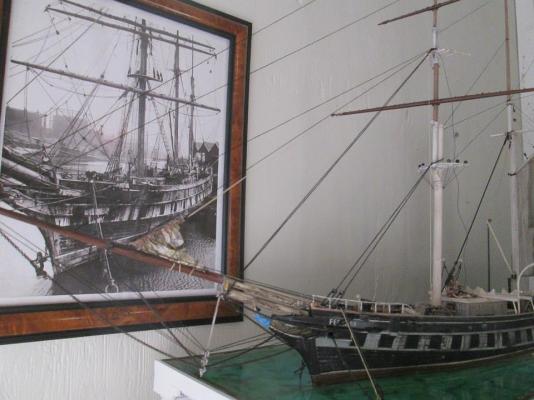
One image from the waterline for effect....I'm currently finishing the mizzen...then I need to add standing rigging to the yards. I'll probably add the royal sail first. I'm sorry..I didn't start this Log any sooner, but I had some downloading problems and a new job to deal with....which as you are probably aware is a lot to handle.......for some any way. I hope this far has been an encouragement for some. I feel, a dioramic story is more powerful a theme to convey emotion and involvement then a static display. That is just me......I want to entice an emotional connection......to bring the viewer.....if for a moment...closer to the adventure of what is ships and ship building...and to appreciate the powerful significance of maritime history. Thanks for viewing. Rob


- 31 replies
-
- 15
-
-
- ferreira
- cutty sark
- (and 2 more)
-
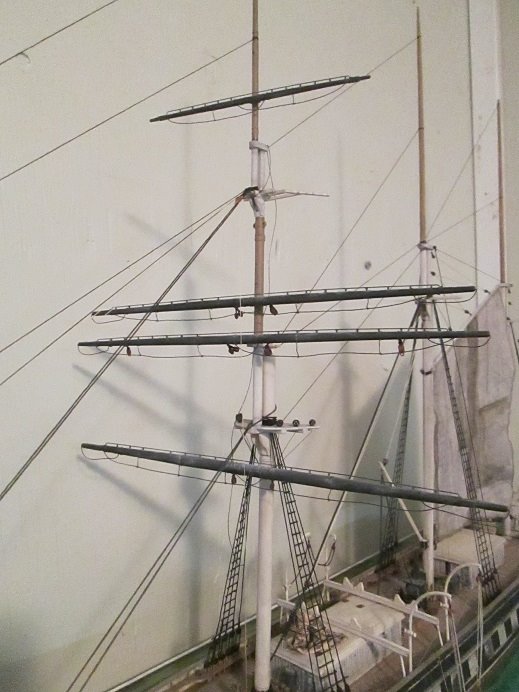
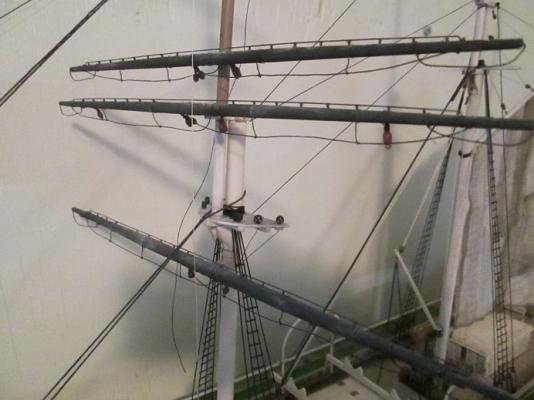
I have so much more to do to complete this build.......but first......I want to show some images of the yards I built for the fore mast...again weathering takes precedence (fun for me). I'm glad I only had to make these four.
- 31 replies
-
- 6
-
-
- ferreira
- cutty sark
- (and 2 more)
-
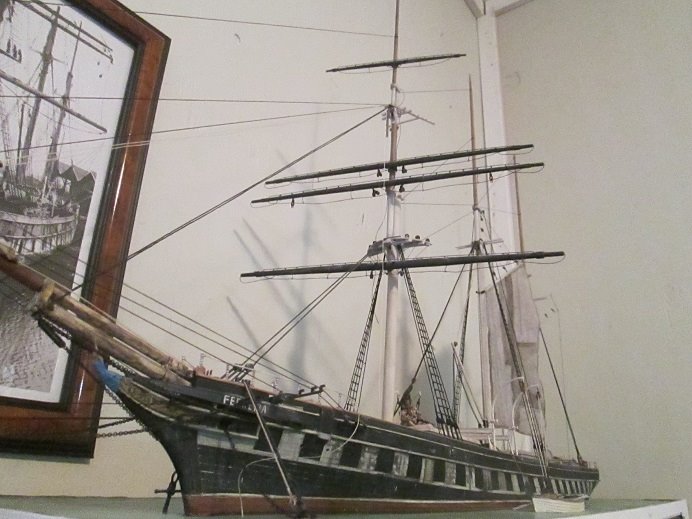
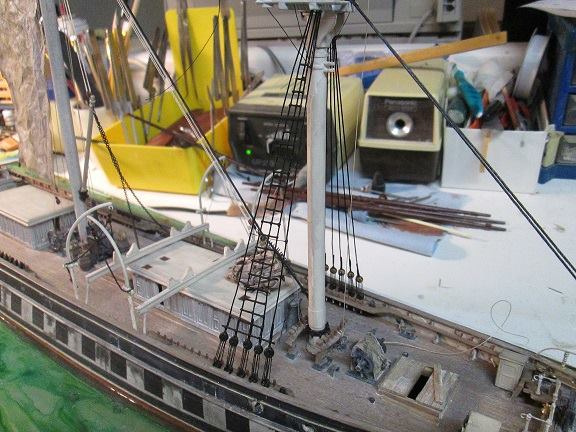
Lets begin rigging. Unlike the CS, the Ferreira was rigged not unlike a schooner...were wooden slats replaced ratlines on the shrouds. Working along....I finished one side at a time.


- 31 replies
-
- 5
-
-
- ferreira
- cutty sark
- (and 2 more)
-
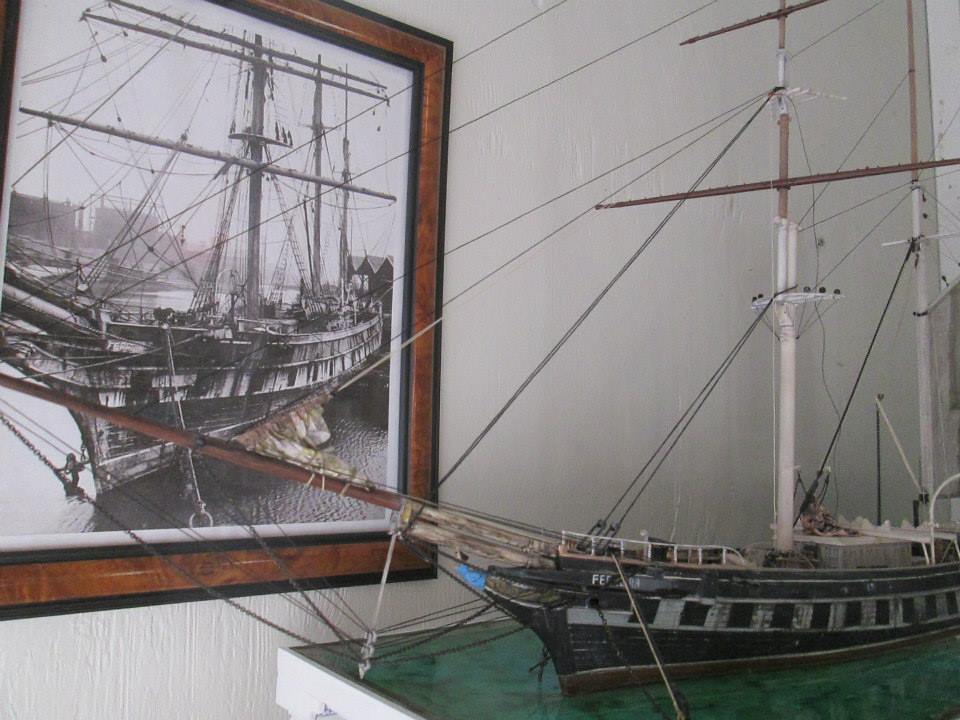
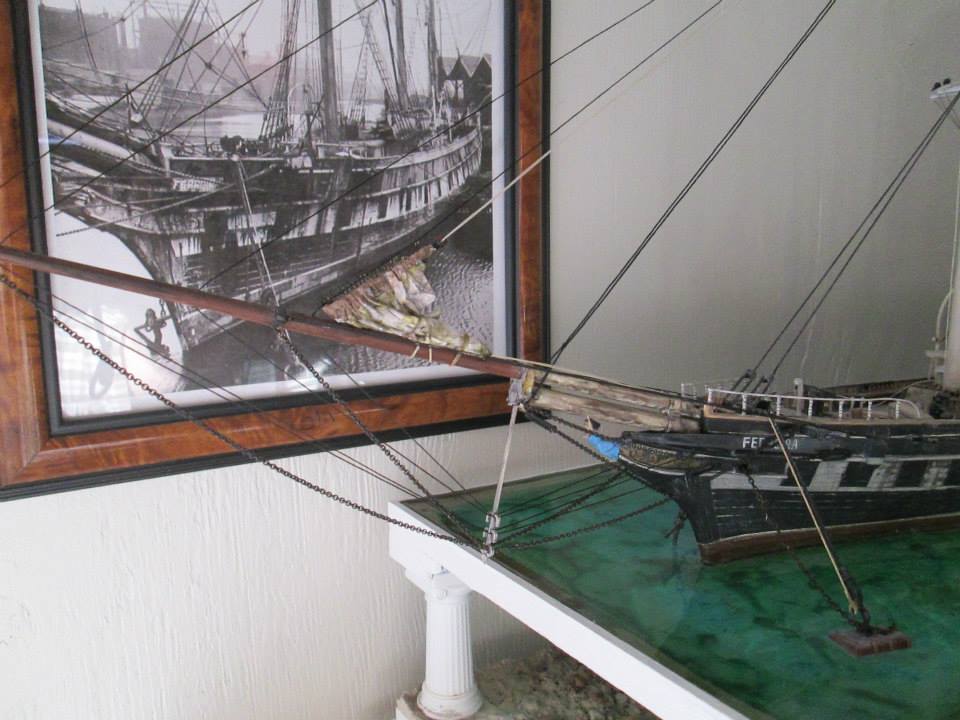
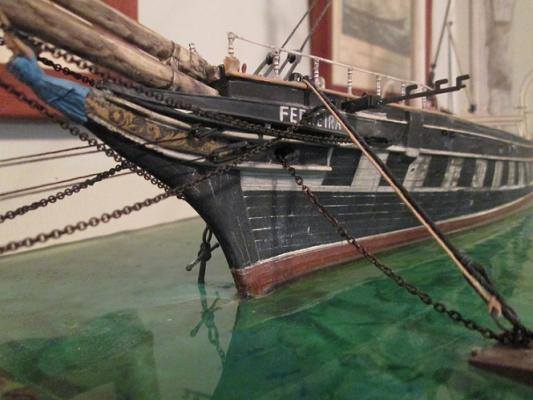
The figurehead was painted ..unlike the stark white figurehead of the Cutty Sark. She was draped in a pale blue gown and was painted to look like a Portuguese princess.......probably representing a Ferreira family Matriarch. Again, using ample artistic license, I moored the Ferreira and partially slung her starboard anchor midwater.

- 31 replies
-
- 9
-
-
- ferreira
- cutty sark
- (and 2 more)
-
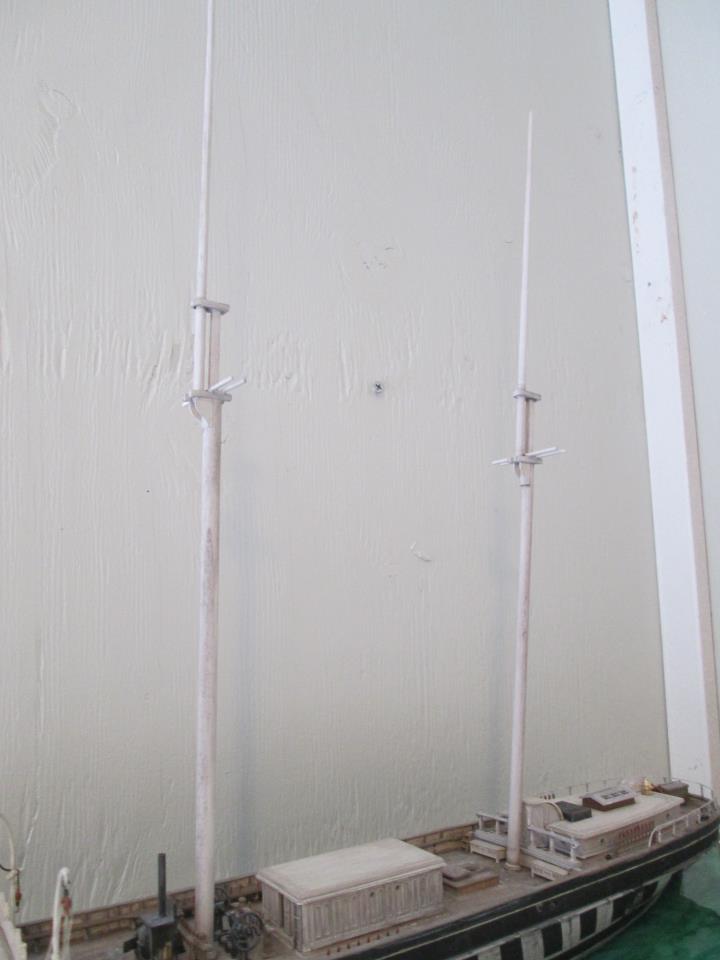
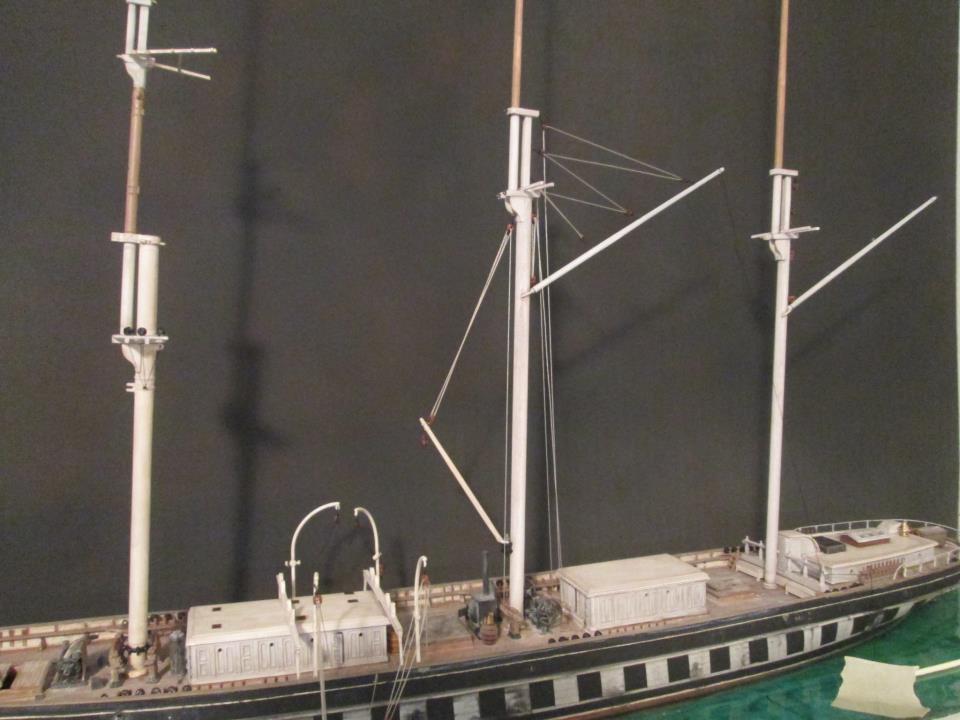
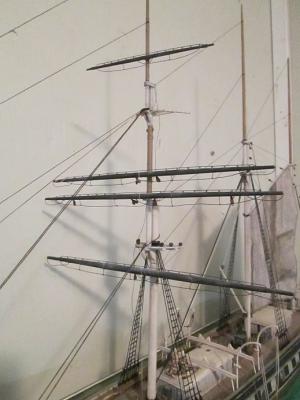
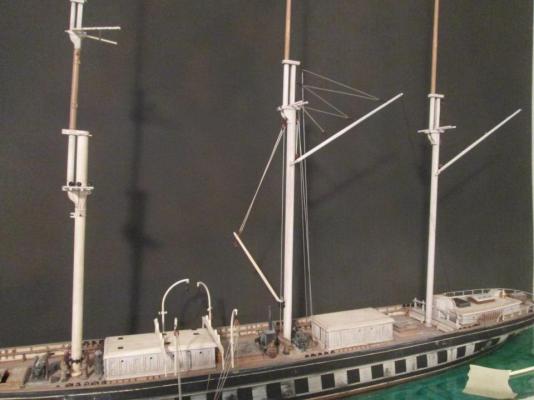
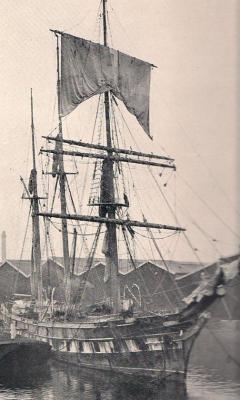
Now we need some masts......being that I had to build these from scratch....I copied the fore mast from a previous CS model I completed and fashioned the main and mizzen from wood stock and material on hand. the fore mast was the original iron and the later wood replacements. I decided to partially sail rig the Ferreira with jibs loosely furled and the fore mast royal hung to dry....while the main sail is also hung to dry loosely. All sails are in severe disrepair and discolored by man made and natural stains. Here are the masts and the cargo boom mounted on the main mast.
- 31 replies
-
- 4
-
-
- ferreira
- cutty sark
- (and 2 more)
-
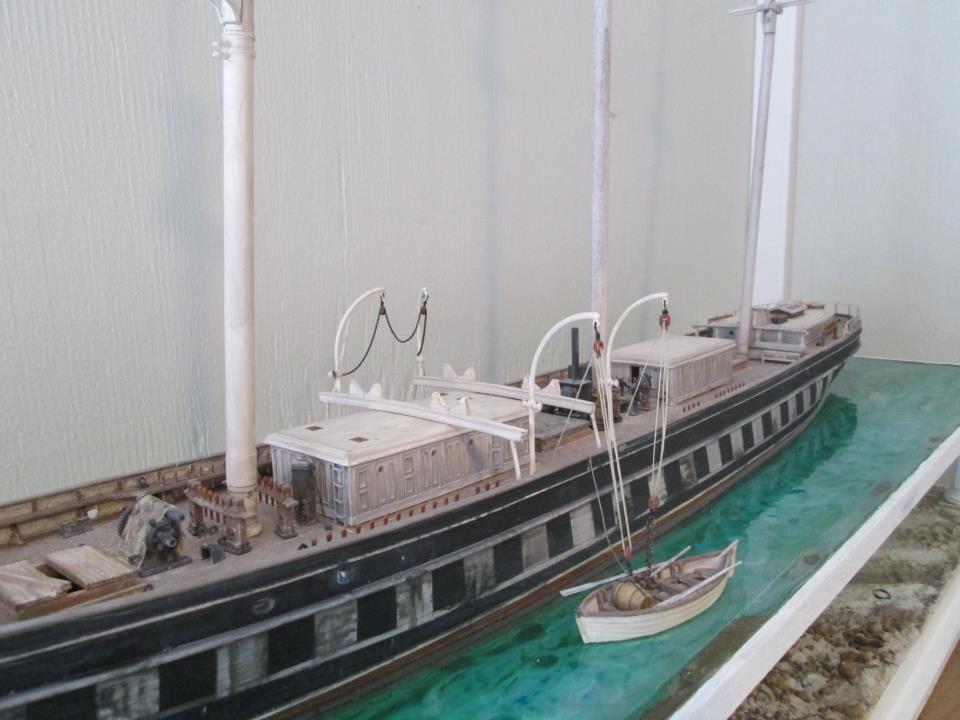
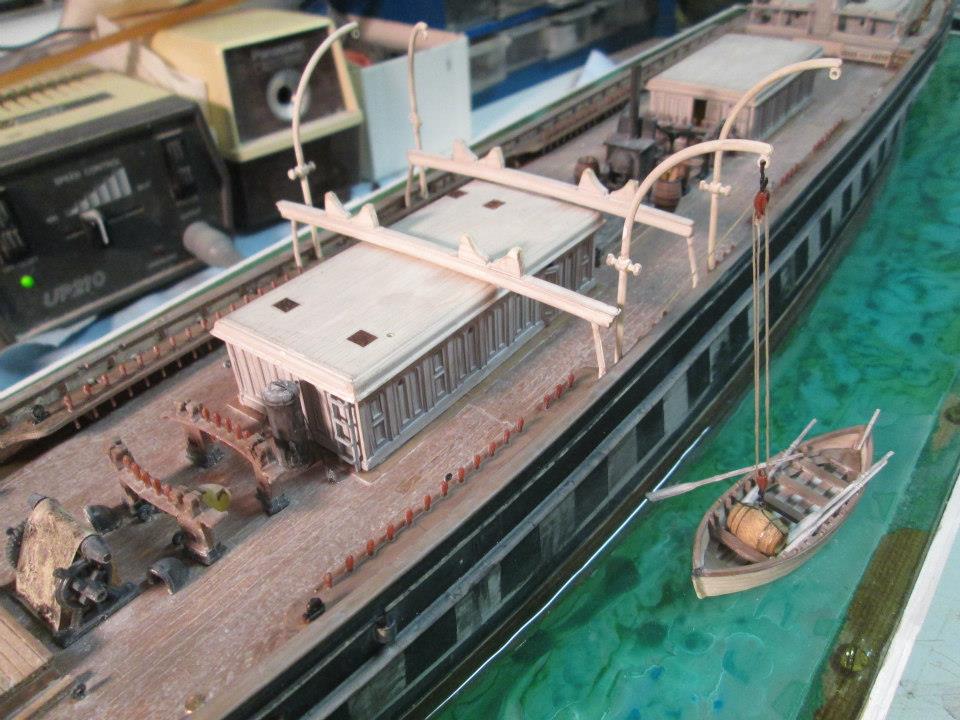
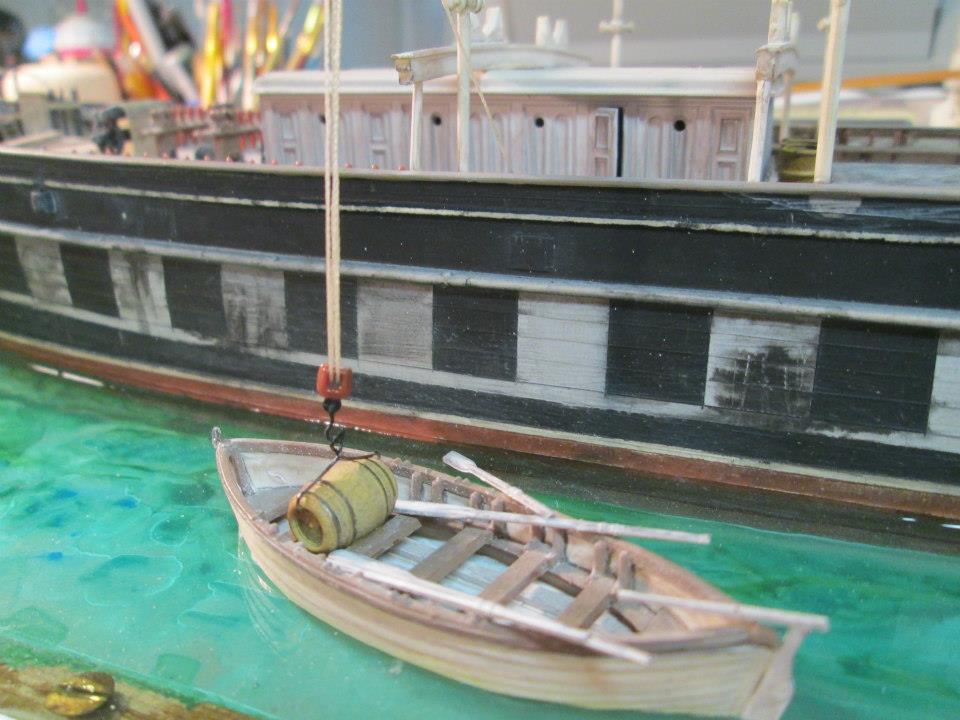
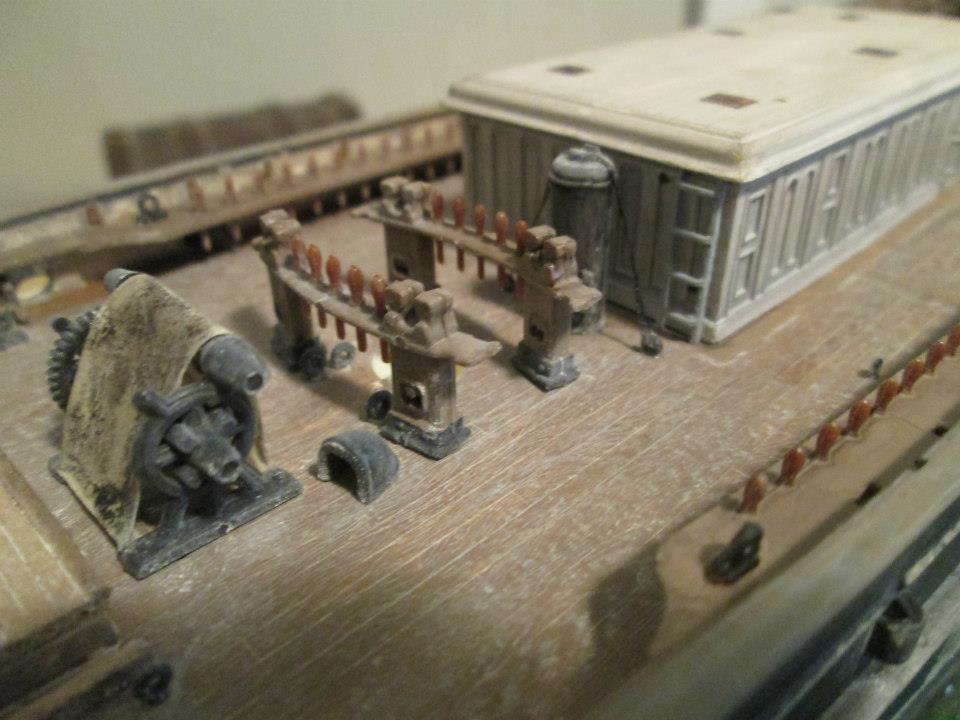
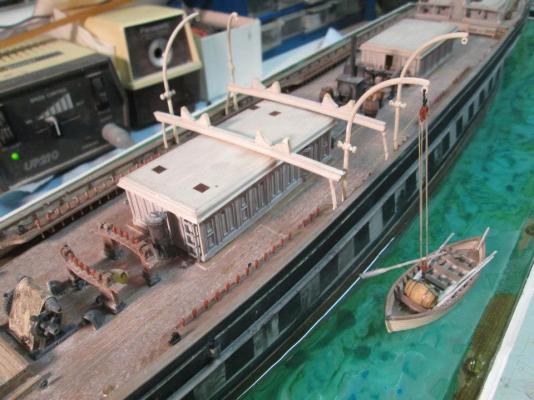
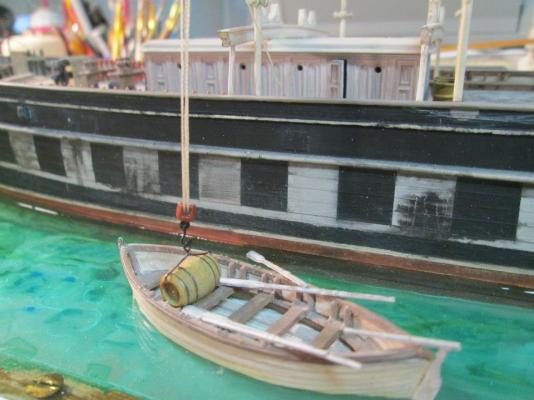
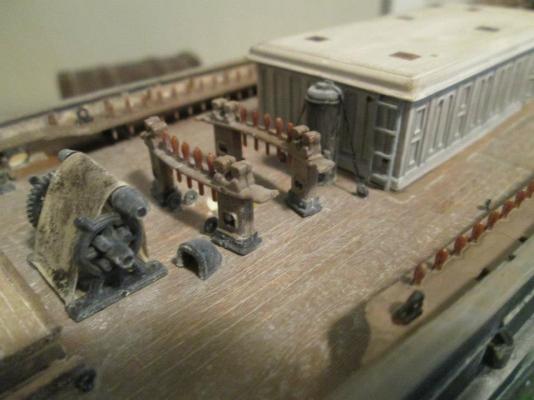
Back to the build. Railing differed from the 2 ships....CS had a double run rail while the Ferriera for some reason did not...I suspect damage during her near capsizing may have been the culprit. The forcatle needed degrading as well as the deck needed to be strewn with nautical paraphernalia. Being a local cargo carrier she had a winch installed on her schooner main mast to aid in cargo laying...this would have been accomplished by the mains main yard. Looking for activity to add..I opted to build a water line dingy to come along the side to aid on cargo uploading......this added detail contributed to the over all demise the ships state.


- 31 replies
-
- 7
-
-
- ferreira
- cutty sark
- (and 2 more)
-
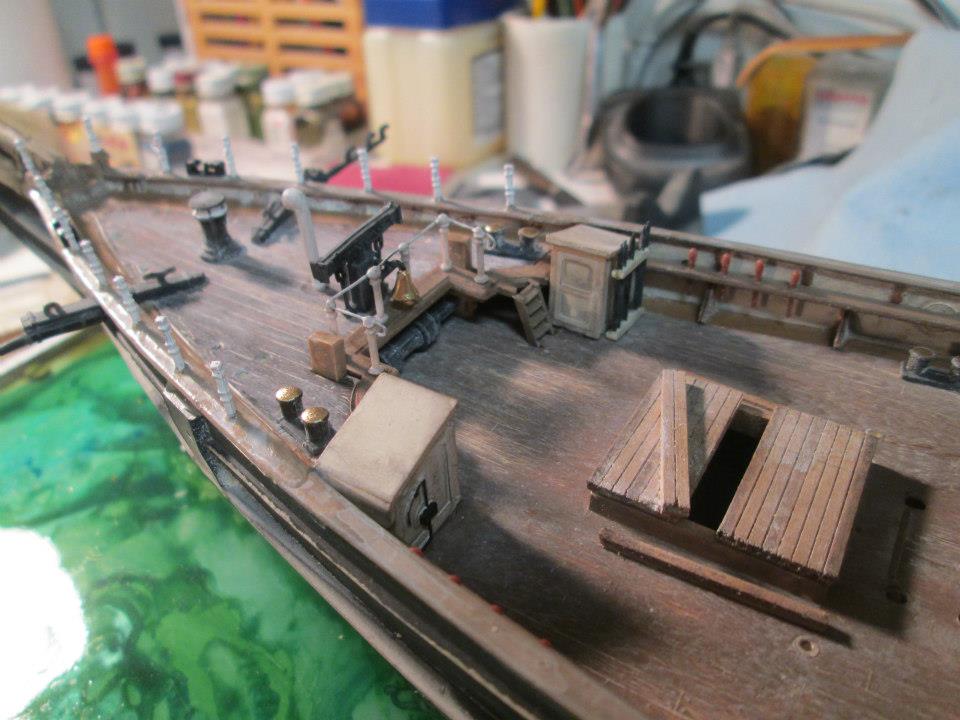
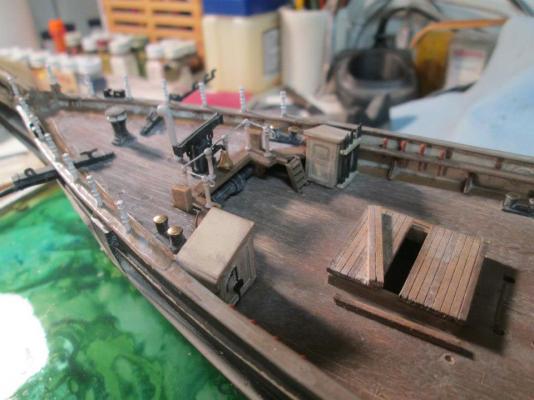
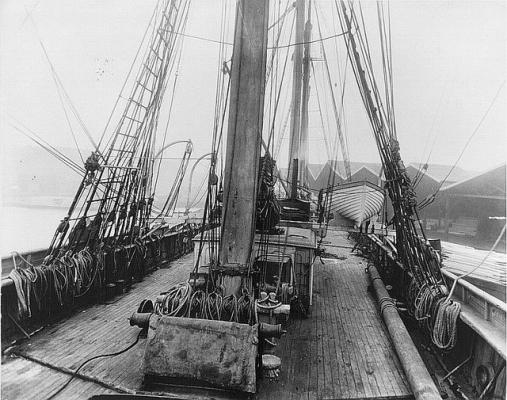
Severe weathering was necessary to convey the drastic disrepair the Ferreira(Cutty Sark) had found herself in. Artistic license was the theme of the day and I availed myself of it. Here is another photo of the Ferreira from the forecastle looking aft. What a great subject to model.
- 31 replies
-
- 4
-
-
- ferreira
- cutty sark
- (and 2 more)
-
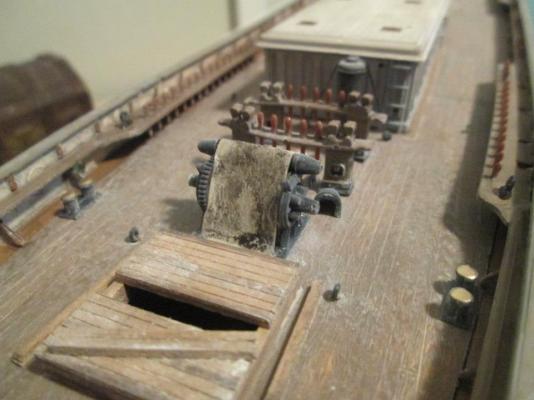
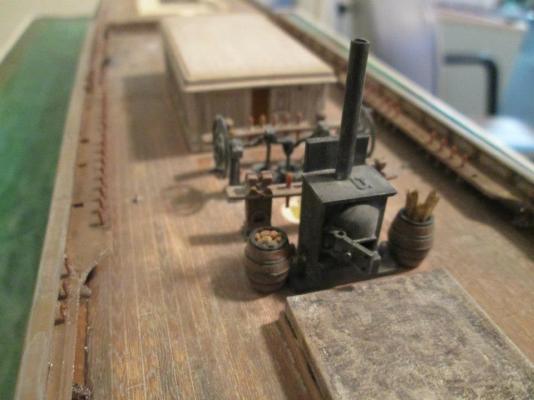
One thing I found in the building of the Ferreira, is that it was in this rig and ownership that she developed some of the current CS deck fittings and furniture. the forward deck winch was inactive during this period and the aft cabin entry was added during this period. I added new roof tops to both cabins and added additional furniture such as a wood stove/boiler and several iron water casks not in the original design. Here are some images of the deck houses, furniture and the like.
- 31 replies
-
- 7
-
-
- ferreira
- cutty sark
- (and 2 more)
-
Now onto the ship itself. The deck of this model was so badly damaged..I had to fabricate a duplicate from wood and castings...I made. One thing to make mention of. The Ferreira was heavily modified from the original CS we are familiar with...so I will make note of as many mods as I can as I proceed. One thing I practice is usage of multi applications and media in my builds. I am NOT a purist in any sense of the word, so I use resins, waxes, plastics of all kinds...metal, paper and wood to build my vessels. Decks.
- 31 replies
-
- 6
-
-
- ferreira
- cutty sark
- (and 2 more)
-
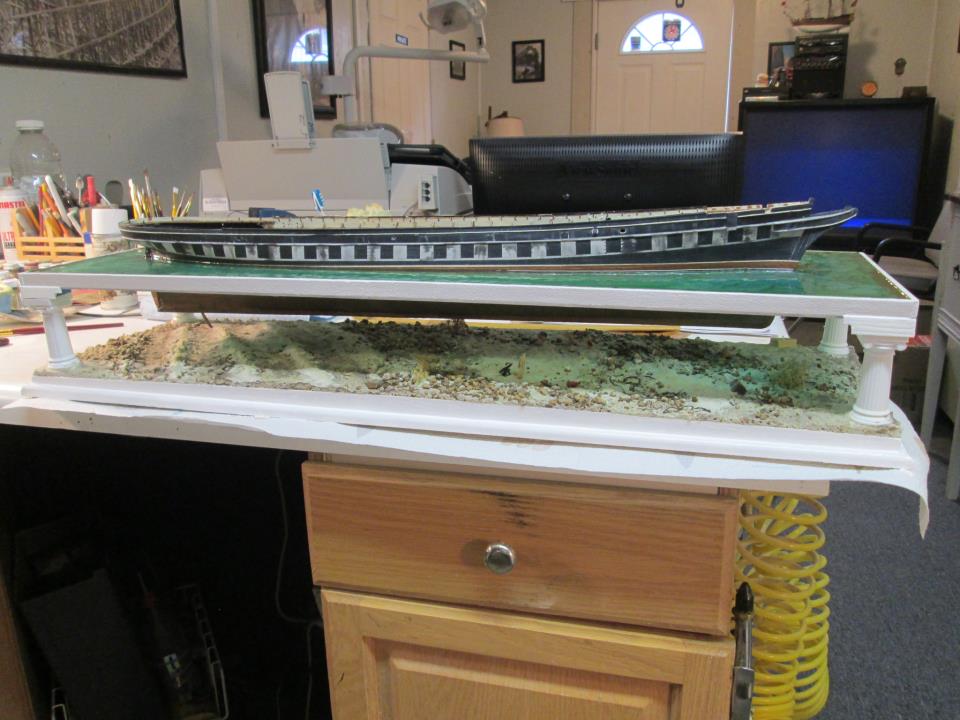
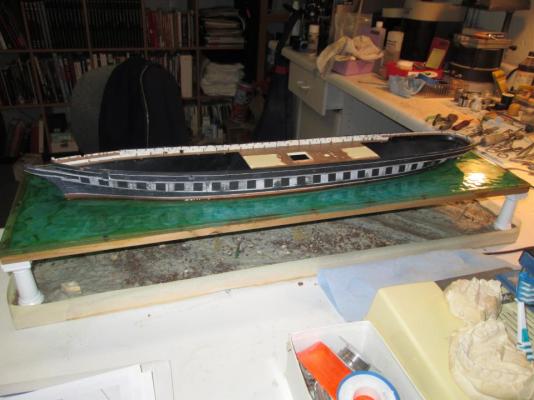
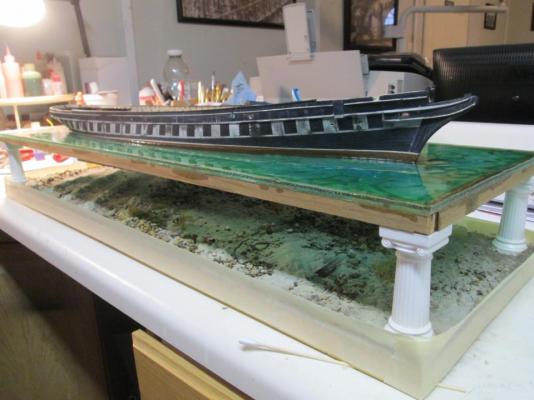
Now for some trim around the border and some paint to finish off the display part of the waters edge. Further detailing around the base and the hull still needs to be accomplished.

- 31 replies
-
- 5
-
-
- ferreira
- cutty sark
- (and 2 more)
-
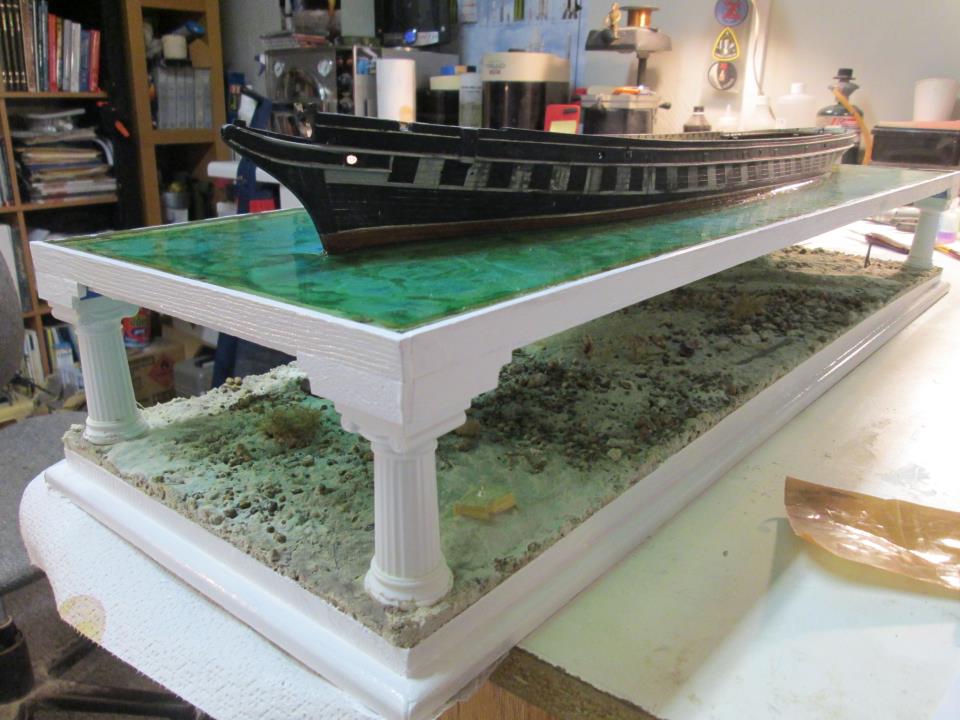
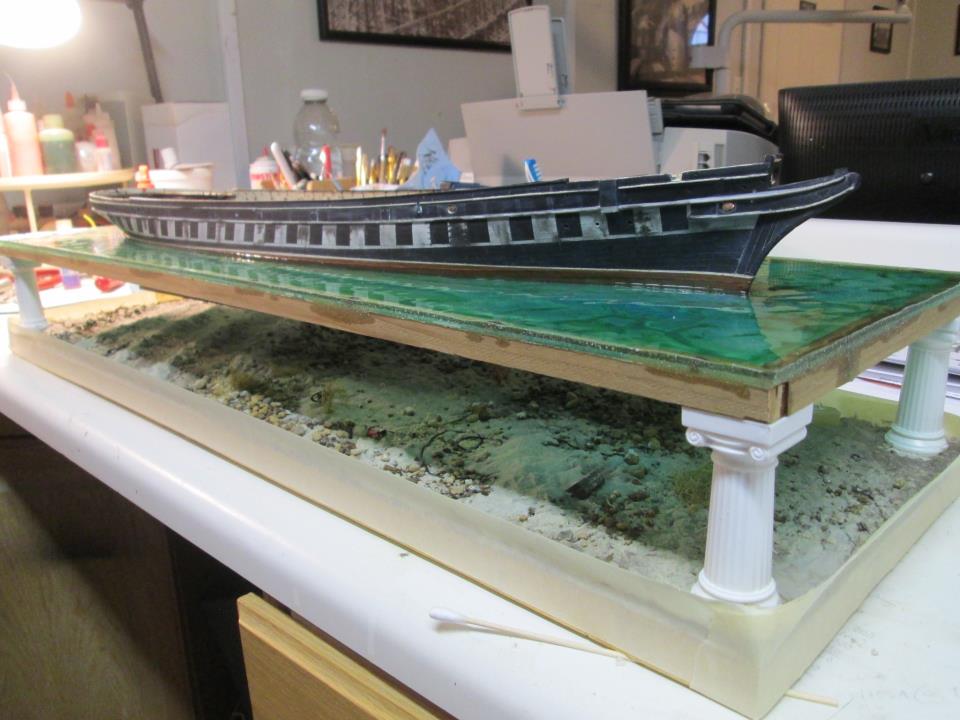
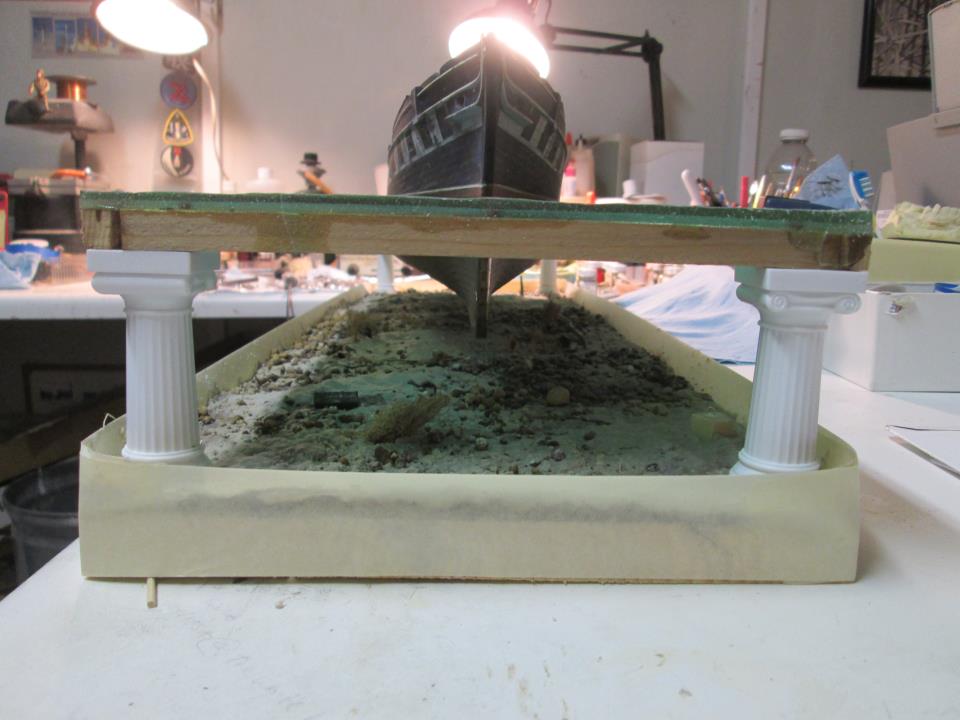
Now as you might imagine.......the water has to look like mercy, oily, algi, back water. I did 2 details at the same time...the water and the floor of the harbor. The water was resin that I lapped for the unevenness.......died the resin and then painted beneath with water colors. I was seeking a 3 D effect. Next was the floor of the harbor....which as you would imagine...was strewn with nautical debris and water current deformations in the sand. Plus minimal flora.


- 31 replies
-
- 5
-
-
- ferreira
- cutty sark
- (and 2 more)
-
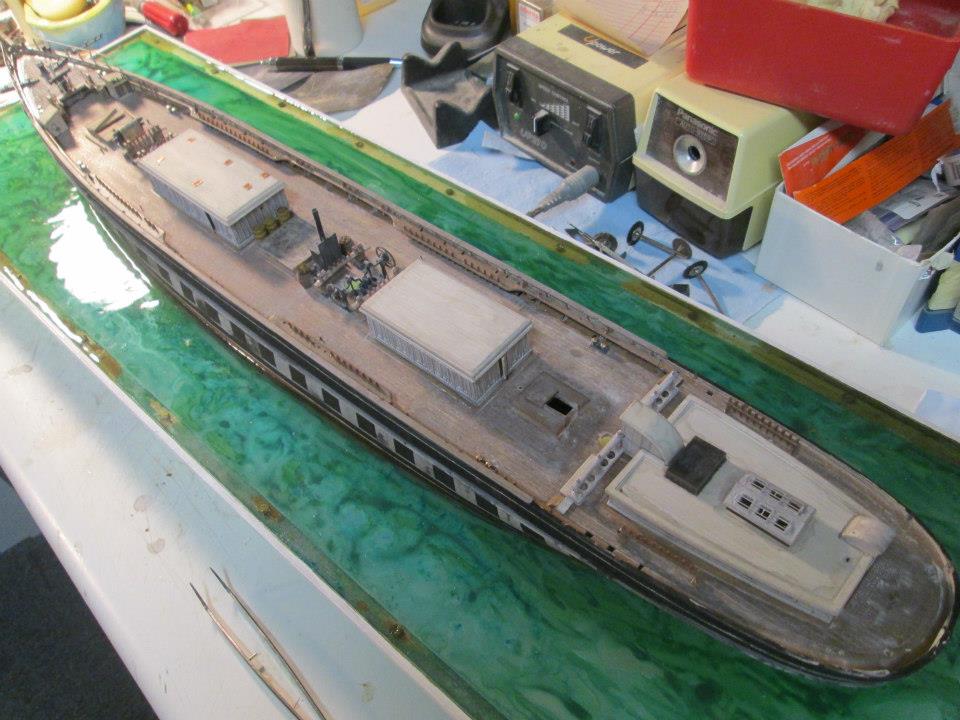
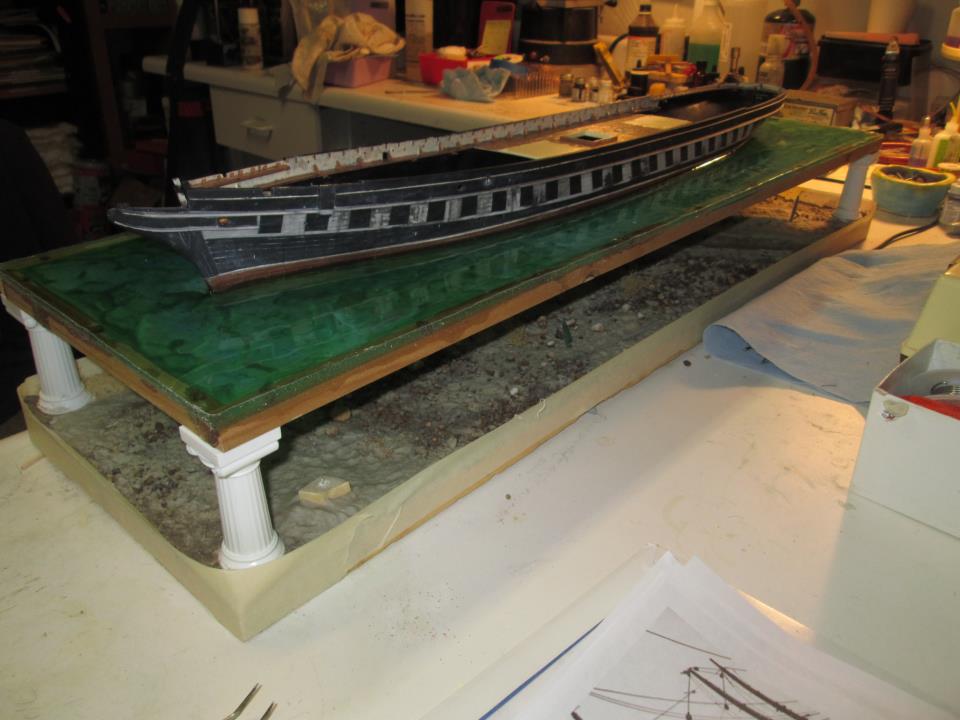
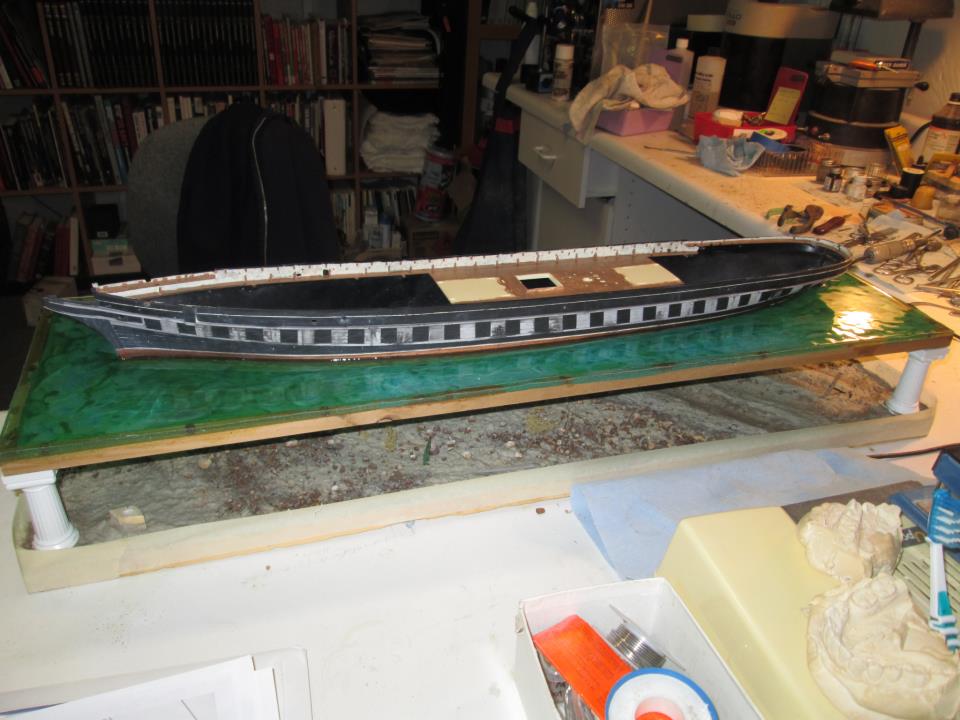
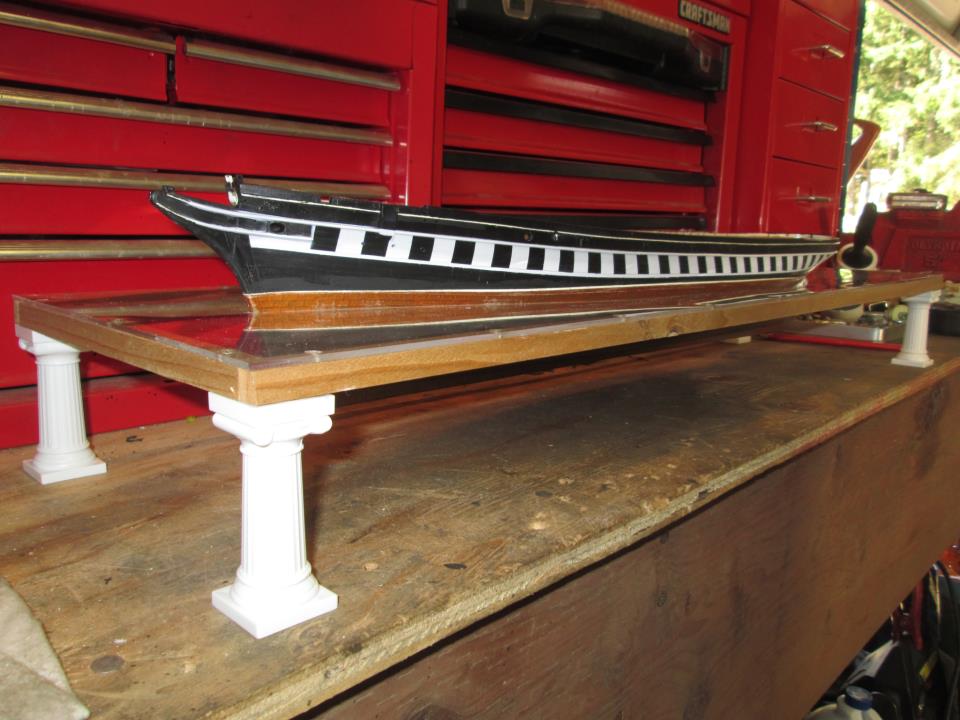
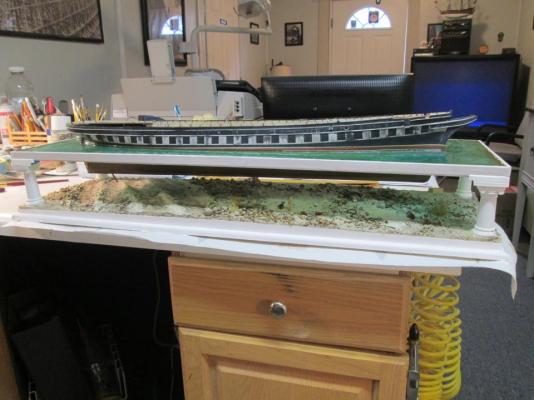
Now to the harbor. The ship(un-weathered) sitting in the plexi water before the resin is poured.

- 31 replies
-
- 4
-
-
- ferreira
- cutty sark
- (and 2 more)
-
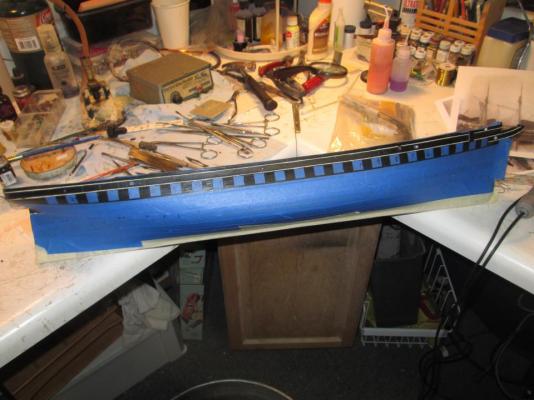
Next while I gathered my whits about me I had to design the water base and devise a display that would accommodate the effect I was seeking. So I used 1/8" plexi glass as the base for the resin water. I had to measure and cut the hull opening.......plus, I had to build the frame to support the edging and corner supports. First I had to finish the painting..here is the final...un weathered paint scheme and weathered.
- 31 replies
-
- 4
-
-
- ferreira
- cutty sark
- (and 2 more)
-
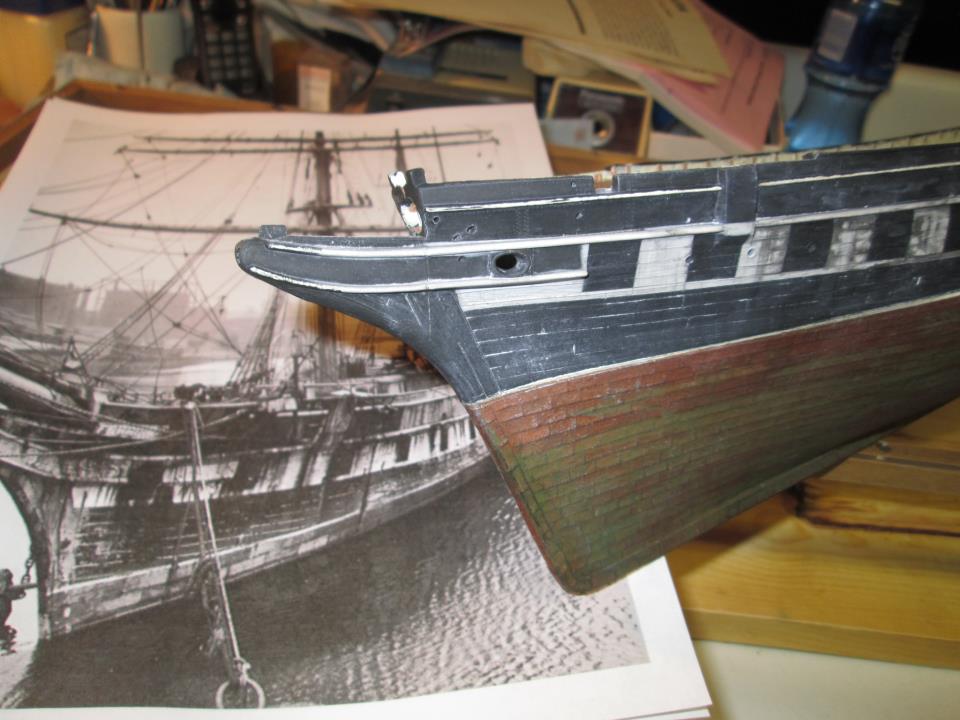
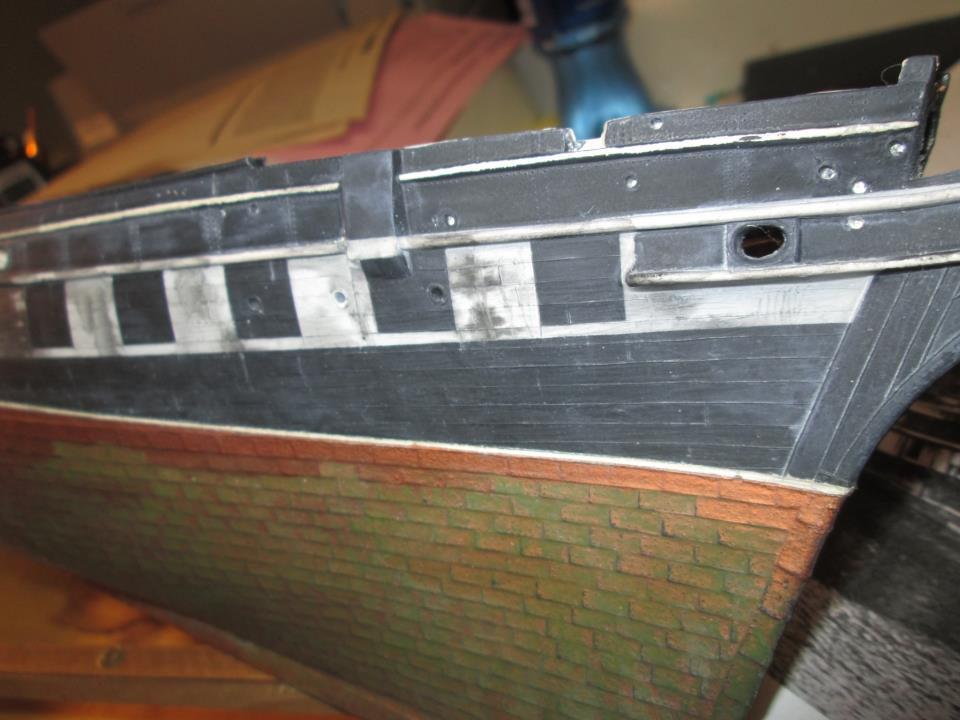
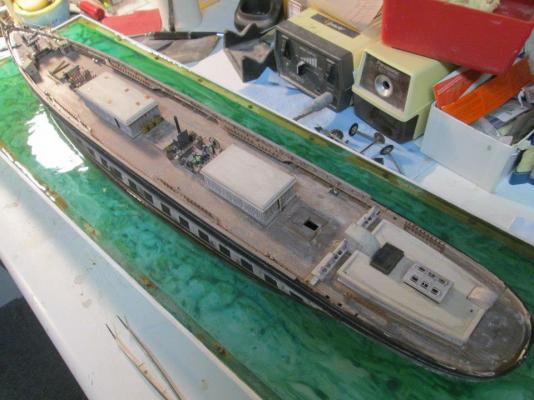
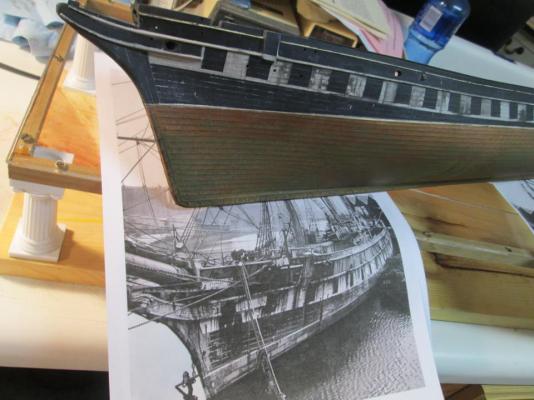
Now I had to mask and paint her hull to mimic the false gun port array.
- 31 replies
-
- 4
-
-
- ferreira
- cutty sark
- (and 2 more)
-
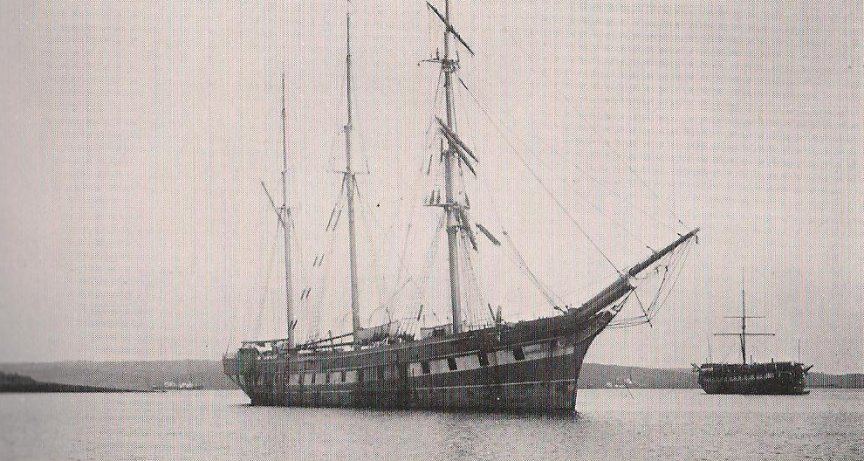
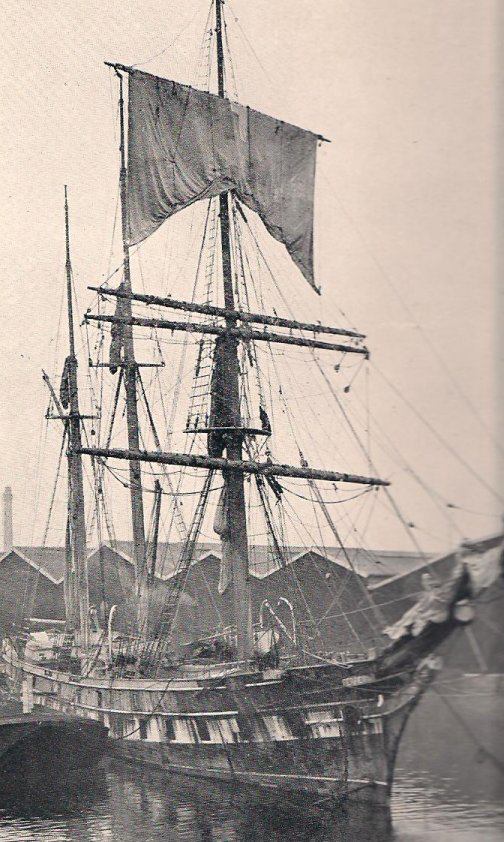
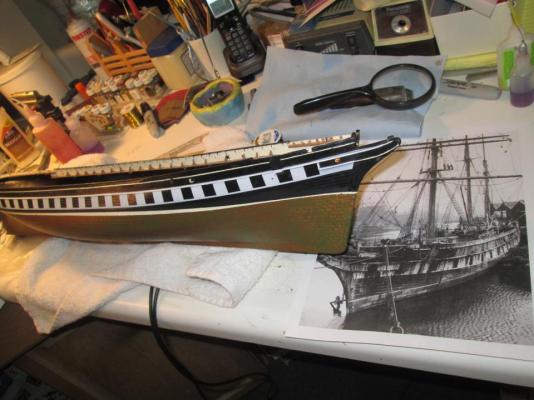
As is my custom...I wanted to kit bash, scratch build a model that does not exist...and use a model that does to achieve this. Not just build, but bring alive a piece of history many people, not to mention modelers, are not even aware of. Not just a conversion.....but a piece of life, a moment in history...to bring the viewer into a scene...not just present a wonderfully built model, but to depict an event, that sparks and interest and hopefully a fascination. Many modelers of the famous British clipper Cutty Sark are lost to the depraved history of this magnificent clipper. Here is her story..the stuff of my depiction. Once the ship had lost its usefulness as a profit maker for her owners she was sold to the Portuguese shipping family Ferreira , her name sake. She fell into hard times and disrepair and was dis masted in a freak accident that nearly claimed her life. Rerigged as a barkentine..she employed herself in local trade routes. Here is where I begin. I depict here in some back water shallow harbor.. I first had to paint her hull to depict the typical gun port sceme that as typical of the period.
- 31 replies
-
- 4
-
-
- ferreira
- cutty sark
- (and 2 more)
-
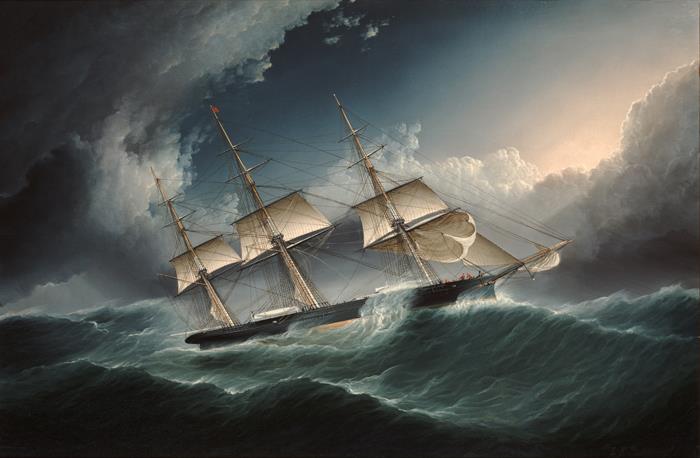
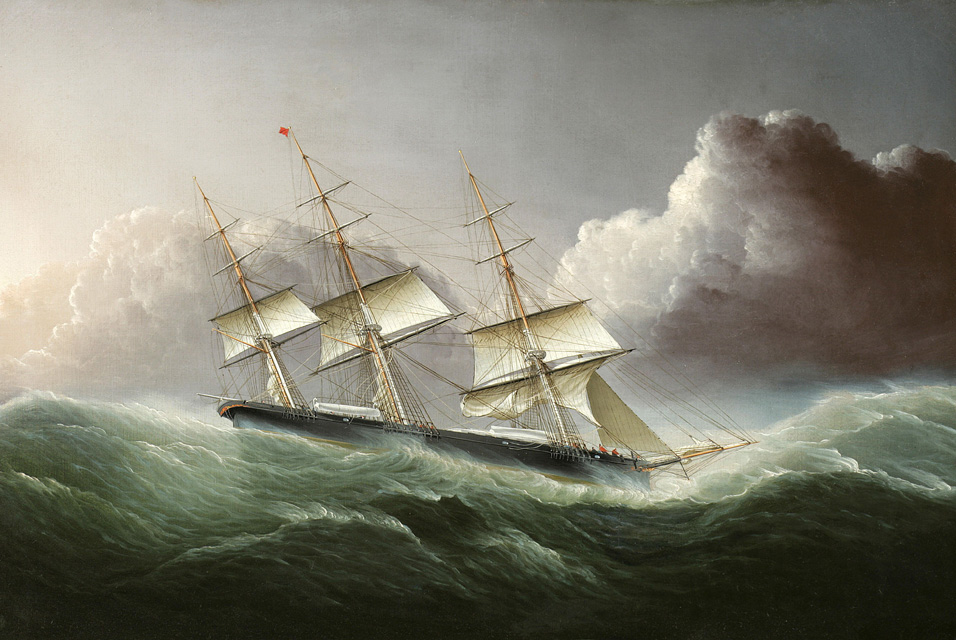
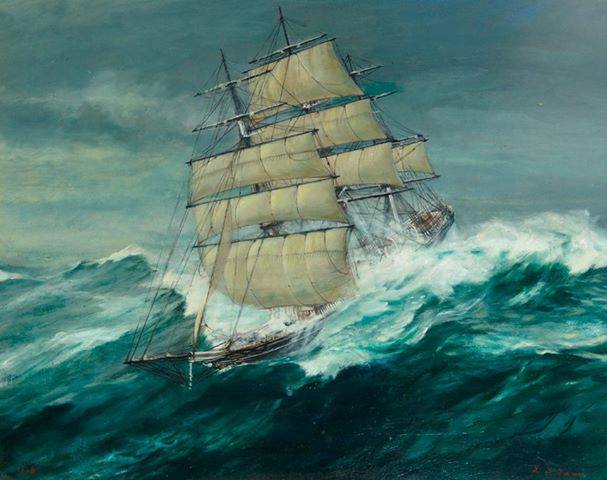
Again...I will rig my McKay in similar fashion as the two latter images...short sail for high winds and sea. Thanks for commenting.
-
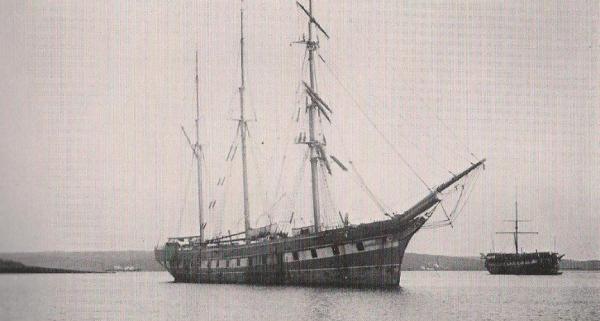
Yes indeed Patrick........and I wanted to attempt to recreate the feeling of such a sea being traveled by a clipper. Many model their models on calm seas.....with light breezes and stunning sails set....the majestic image of a grand clipper. I on the other hand, wanted to depict the (other) side of the coin...the one novels are written about......the adventures of the (High) seas under clipper sail....and such a journey around the bottom of the world up past the horn of South America. A real test of a captain, crew and the magnificently built slipper ship. My view any way. Check out these big see going clippers.......just beautiful


-
This painting of the Cutty Sark...kinda represents the feeling I am attempting to achieve. A ship in very big water. Cs is descending into a trough as my Donald McKay is climbing out.