Check out our new MSW Sponsor Innocraftsman
×


rwiederrich
-
Posts
5,504 -
Joined
-
Last visited
Content Type
Profiles
Forums
Gallery
Events
Everything posted by rwiederrich
-
One note on the mods...I had to remove lots of rail detail along the hull to accommodate the new wood bulwork extensions..plus the McKay has a different stern so I also had to remove material there as well to make room for the wood additions. Today I will do more work and take some pics of the corrections. Rob
-
Super job Ed...super job. Rob
-
Another angle

-
Another angle....I only oiled the deck.....once the gunwall is finished off and painted I will sand and weather the decks

-
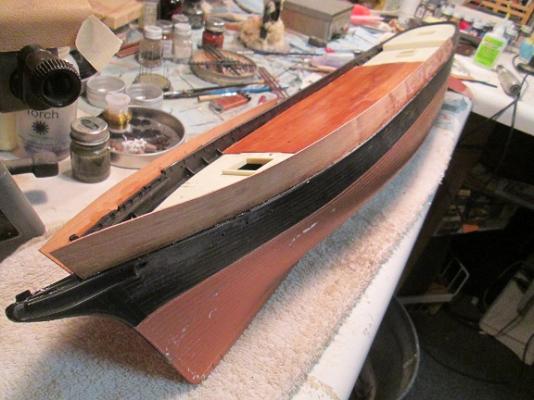
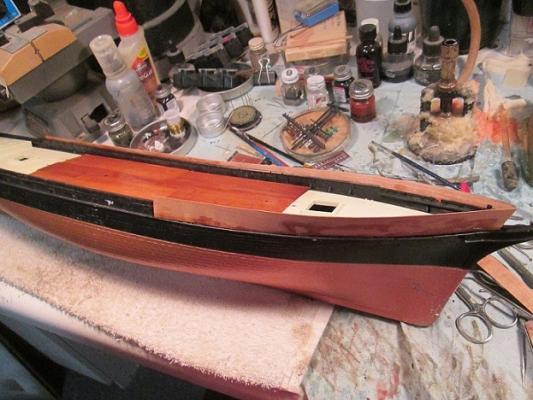
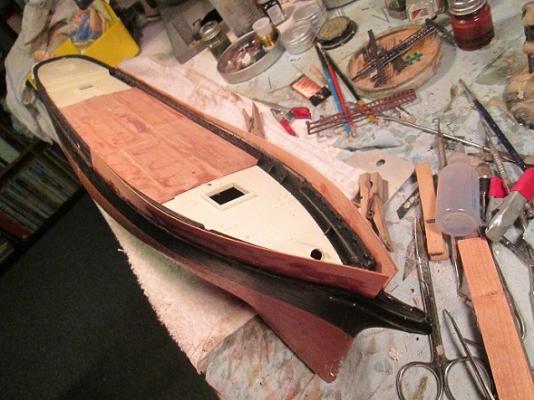
Today I began the mods to the CS hull. I had to remove the monkey rail and remove the cheeks and relocate the Howes hole and be prepping for its new location. I then decked the main deck between the poop and forecastle. Next was laying in the new bullworks.....which is quite taller then the CS. Loads still to do....I'll finish up the starboard side and then steam the stern to bend it around the rounded stern. So we begin the Donald McKay build. Rob
-
Looks like steam drills and drivers are being employed.....were those utilized during the 1850's? Great image by the way. Rob
-
Now that I am nearly finished with the water(always details can be added)......I am getting ready to alter the forecastle and lengthen the bull works. Once the water is finished it motivates me to get the ship going and correct. I added the apple wood base..but still need to sand and stain it. Rob
-
Amazing build...thanks. Rob
-
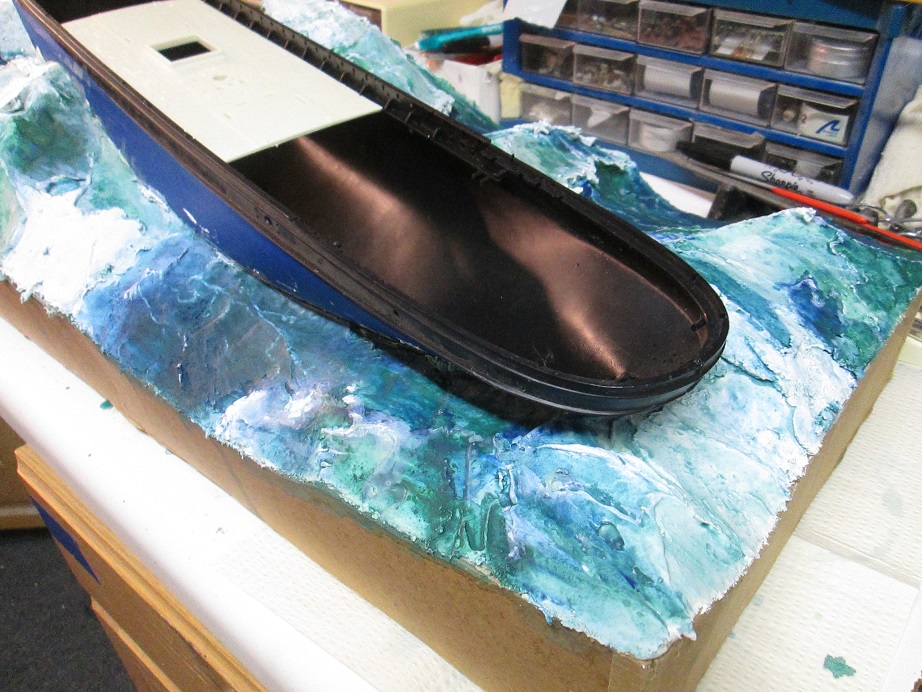
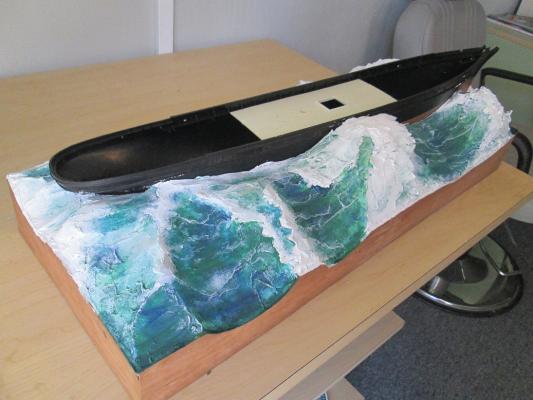
Well..everything worked out as expected(Kinda)....before I set the hull and plastered it in...I applied some expandable foam beneath it, knowing that when it expands it will push the hull up and release it from the plaster. Bingo..this morning it was just that way....RELEASED and no broken plaster or cracks. Now with a bit of clean up I can remove and slip the hull in and out as I build it...and once finished I can then glue it permanently in place. This makes work on the hull much easier. Sweet.
-
And stern

-
Finished painting the port side....I still have lots of detailing but this is the Port bow
-
I wanted a base that sat nicely on a regular shelf...with no extra ordinary dimensions. But spoke volumes. Thanks.
-
Sweet.
-
Thanks Captain Grant. I build a bit different then the average pedestal on a plaque look. I like to display my models doing what they were known for doing. It is one thing to look at a model on a stand...but when it is placed within a media it was either known to be at or in...makes the viewer a bit more connected...and brings in some history along with the model itself...it almost draws the viewer in..when otherwise they may have been otherwise uninterested. Inspiring an interest in ships is as much fun as building them. Again...thanks. Rob
-
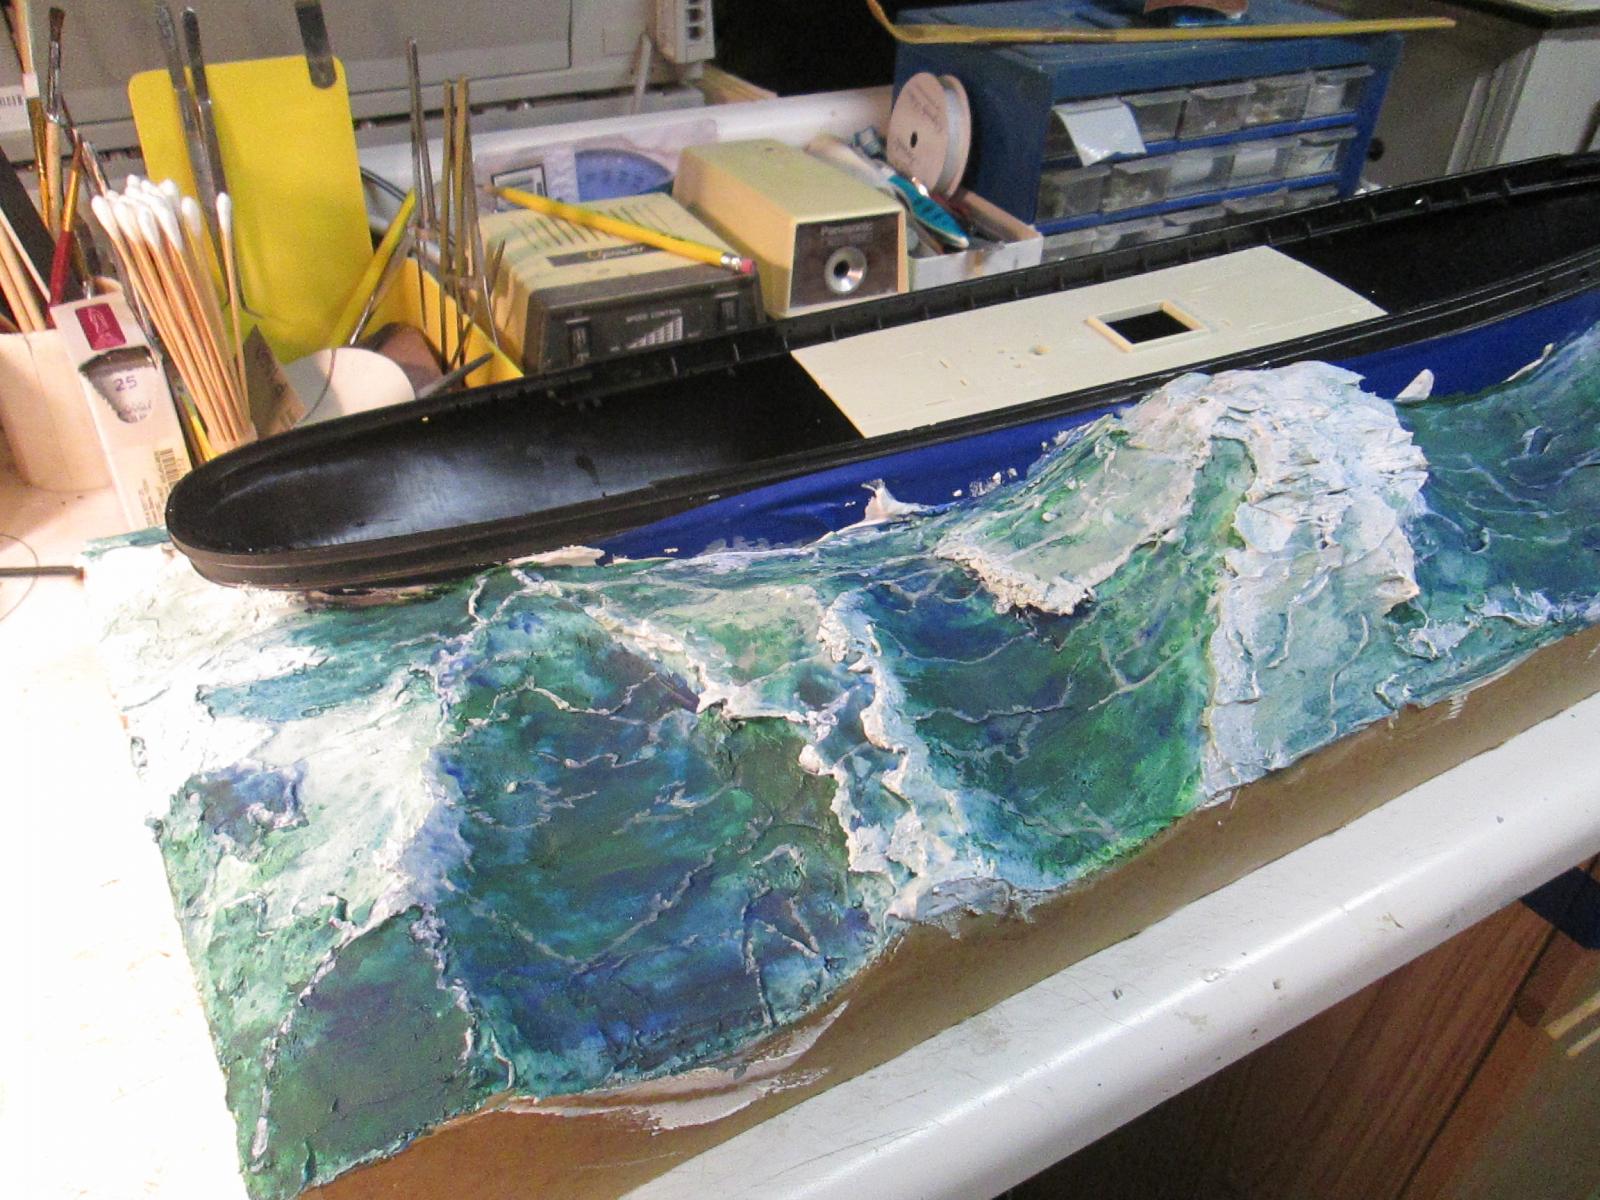
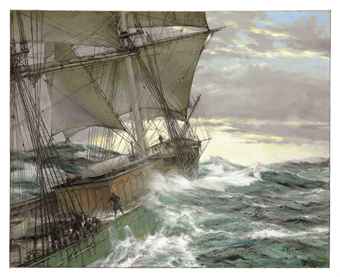
Yes.....the models design calls for a *BIG* ocean...not a typical light breeze diorama...but a *Hang on mates..we're in for a woopin* kinda representation diorama. This was inspired by reading logs of clipper captains who described some of the worst waves and weather they ever had to sail in...... Montogue Dawson painted this magnificent painting of the Thermopylae in extreme weather.
-
And one of the other side...still in raw plaster. Once painted the borders will be trimmed off and painted black.

-
And a bit of a closeup. Once finished a clear coat will be added.

-
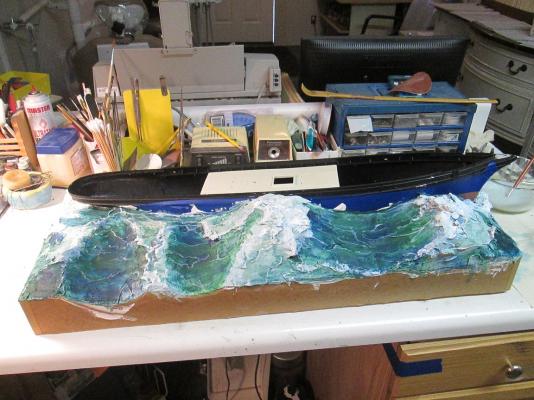
Here is a midships view.....

-
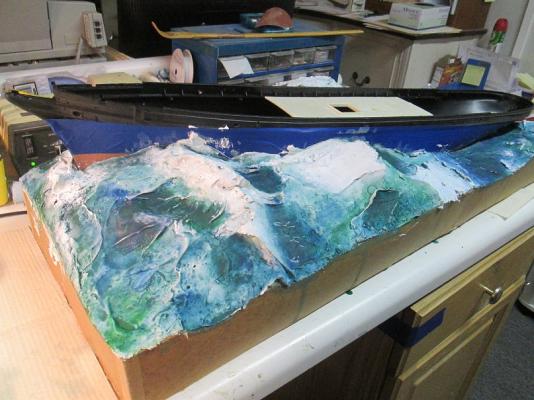
Yes I have Michael..thanks for the great link. I spent time plastering and painting the water....I only have half done..because it is very crucial that the color is right...well as closely as one can interpret it. Painting begins top down...and foam is added in color stages. Here are some first images of the near finished one side. Here is an overall view.
-
Thanks everyone. The first hurdle to tackle is creating the realistic water she will be sitting in. I will carve that today..and hopefully have the top coat of thin plaster trawled in place. I chose to use a medium I am well acquainted with...plus it paints well with watercolor.....so I can achieve great depth of realism. Wave crests and foam will be added with acrylics...then it will all be covered in clear coat. The foam core will greatly reduce the weight. I will then remove the hull and finalize its detail..prior to reinstalling and finishing up the water/hull interface. I Too am looking forward to this build. I'm sure the sequence of production may vary or be altered..but I think the final results will be fun. Rob(Pics will follow as production continues)
-
That is right Augie. They are my favorite form...and I will continue to build them and display them actively. After my Cutty Sark build: I began my American clipper project...starting with the Glory of the Seas...The Ferreira(AKA CS)...Donald McKay(Currently)....and I have in the planning stages the Great Republic and the Dreadnaught. These pages will be filled with Clipper builds in the future....... Rob
-
I love the clipper form...and yes the rigging and sails are magnificent I love building clippers set in realistic fashion.....not just quietly displayed on their pedistalled .bases. This build will present the McKay in open green water under shortened sail......pressing against a high sea. Fun Rob
-
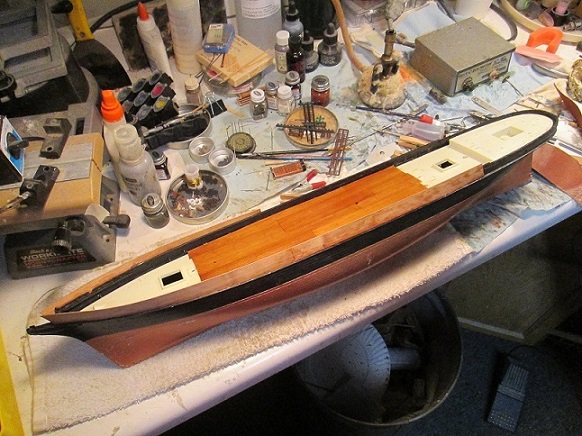
Among my many builds I have been planning a diorama build of the magnificent medium clipper, Donald McKay..the final ship of the quartet of Boston Built ships ordered by James Baines for his Black Ball line. She was a wonderful combination of beauty and strength. She was designed to be a heavy cargo and passenger carrier...unlike most extreme clippers that only had space for broken stowage..the McKay was slightly concaved below, she was also decidedly convex above and thus her great capacity. Her figurehead was a representation of a Highlander, painted in the his Tartan array of the ancient McKay clan. She employed the recently devised Howes double topsails..a improvement over the the common rig of the day. The lower topsail yard was trussed to the topmast cap and instead of slings, was supported from below by a crane upon the head of the topmast. the lower topsail was set entirely by the sheets. The upper topsail set upon the mast above the cap and had it;s foot laced to the jackstay upon the yard below. The ship could be reduced to close-reefed topsails at any time by lowering the upper topsails which would then lay calmly before the topsails...and if required, could be reefed without the use of reef tackle. A modern application that require far less men then the old system. It was an inovation that worked at sea extremely well. Unlike most clippers of the period, her masts were not raked, but straight up...this prevented the sails from chafing during calms and reduced the backstay stress. She was 2594 tons and was considered the second largest ship to sail next to the Great Republic. Her best days sailing is recorded as 421 miles in a 24 hour period and she regularly sped along at 18 knots. I chose her because of her unique deck layout and that she was designed a passenger carrier by James Baines rather then for speed......and that she was proudly named of her builder...and that she was the last of a famous quartet..during the height of American production. She will be set in an open ocean scene during a Cape Horn crossing. Today I took a modified 1/96 Revell Cutty Sark hull and set it into its initial foam base. Once the foam is set, I will remove the hull and begin modeling the water. Rob
-
Yes.....I did put that idea into the planning stages.....since then I chose to tackle the Donald McKay first. I am tackling the logistics of such a modified build...... It will require 3 Cutty Sark hulls and ample hull modifications. The McKay will(Like my ferreira build) be an open water diorama ...where the hull below the waterline will be unseen...there for no mods will be needed. Rob(thanks for asking)
-
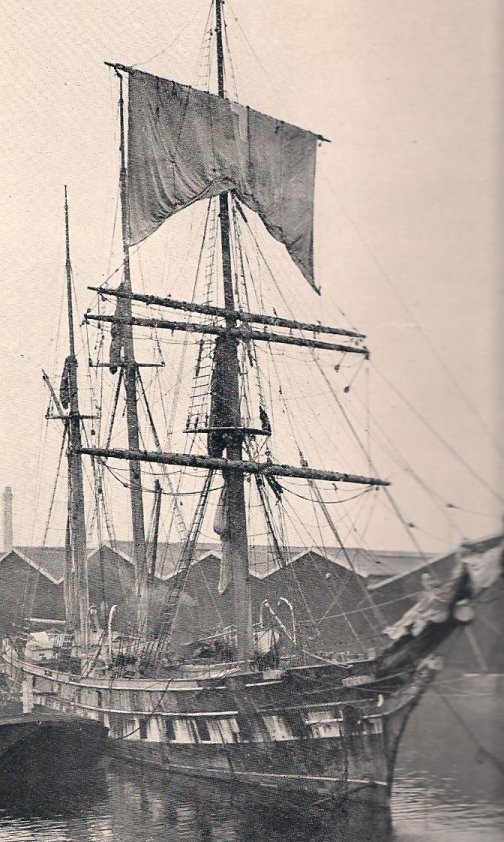
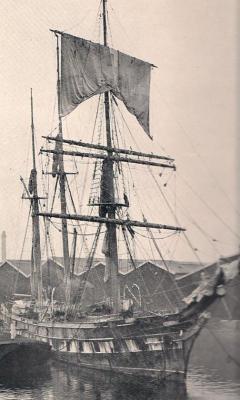
I had inadvertently left my last posting without finishing my thoughts and what I was posting next.....I got abruptly called away to the Hospital and unfortunately gave the impression I was Bumping this thread. Sorry for that oversight. I was looking for this image I wanted to post of the Ferreira in a particularly posed stance..that I wanted to model......besides modeling her in her unkept state. This image shows her top-gallant set and drying...this is the posture I will model.
- 44 replies
-
- 2
-

-
- cutty sark
- revell
- (and 1 more)