Check out our new MSW Sponsor Innocraftsman
×


rwiederrich
-
Posts
5,504 -
Joined
-
Last visited
Content Type
Profiles
Forums
Gallery
Events
Everything posted by rwiederrich
-
One of my dreams have come true today. I was able to go to the pyre site of the Glory of the Seas.....and at an extreme low tide..did indeed find the remains of my favorite clipper ship. I then excavated several portions of the iron pins used to fashion the timbers together(No timber survived). These iron pins were roughly 1.5" and some over 3ft long. I procured several portions..one crusted nearly fully and the rounded form head was barely visible. Being nearly 100 years old....they are brittle and after preservation I will mount them along with my model of the vessel. 8 years ago there was more to be found...she is nearly completely vanished from view and from memory. I saved my piece of the *Glory* and can't be any more excited. I have an actual piece of the Glory of the Seas and it will rest proudly and preserved with the model of her namesake. Rob(How many people can say that?)
-
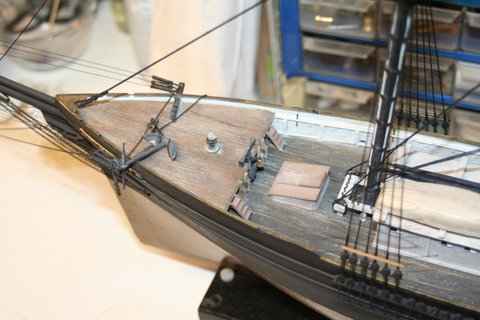
I wish I had gotten a better image. I hand laid the individual planks...stained and then they required ample sanding to bring them to a smooth finish. Some accounts suggests that the Western Shore sported a single tree bowsprit/jib-boom unlike many clippers that had a bowsprit, cap and separate jib-boom. Others suggest a bit less typical with the bowsprit of square dimensions and a jib-boom of typical round configuration. I will continue my research, until I am confident of this. Rob
-
Got to working on some ratlines on the Glory and I rigged the mainmast yards. Still lots of ratlines to finish..but coming along.


-
And a bit closer so you can see the individually laid planks. I hope to begin on more.but the Glory needs finishing work too.
-
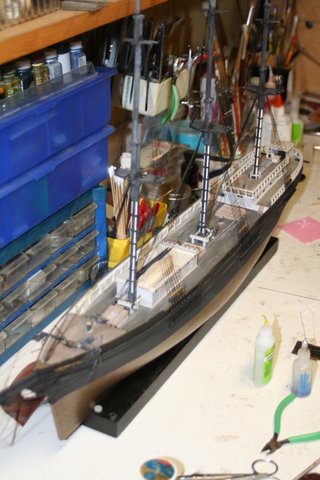
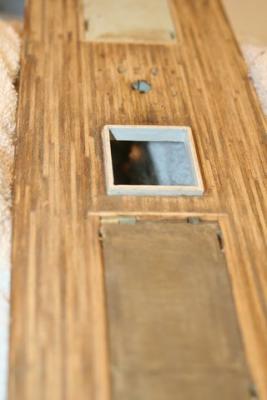
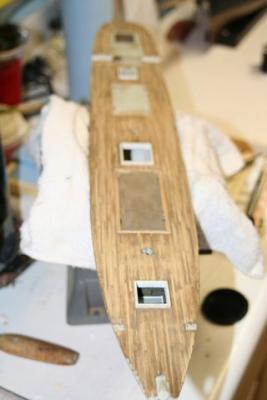
Spent some time laying the wooden deck for the Western Shore.
-
I have anew computer that has no photo software loaded on it so I'm working to remedy that . Hopefully soon. Rob
-
Cutty Sark by NenadM
rwiederrich replied to NenadM's topic in - Build logs for subjects built 1851 - 1900
I am so sorry about your mother......I pray she recovers fully...as well as your sweet wife. According to your most recent images of the Cutty and the chain you are fabricating...good job! One thing I am not clear on is that, are you going to model your version with the forward hatch covered with that stairwell cowling as well as that cowling just aft of the windless forward? These items are not of the original design and were added for cadet and public usage. Are you omitting them or adding them..not sure I read that anywhere? Rob- 4,152 replies
-
- 5
-

-
- cutty sark
- tehnodidakta
- (and 1 more)
-
That is outstanding news....and I have not forgotten your excellent offer. Just let me know the shipping and associated costs and I'll pop off the address. Again...thanks so much for your kindness and generosity. Rob
-
Great tribute Ed. I too have been moved by Mr. Crothers writings and collections of clipper ship data. His collective research is in my view, priceless. And you have translated his work into a living representation. No better tribute. Rob
- 3,618 replies
-
- 7
-
-
- young america
- clipper
- (and 1 more)
-
Sometimes I don't know if I'm coming or going. I kinda feel like Ole Donald McKay myself with the anxious anxiety of a new build fogging my view...long before I have finished the ship I'm currently working on. After working on the clipper Donald McKay for a time...and finalizing a home move...I finally spent some quality time rigging and fitting out the Glory of the Seas foremast yards. To include lift rigging, jackstays, Flemish horses, stirrups and footropes. Before I affix them to the mast...I must return to finishing the port side foot ropes. I spent much of last night rigging them on the shrouds. I intend to fashion the Jacobs ladders as well during this stage. It appears I have created for myself a nightmare(If such can be considered to be so). I'm on the brink of finishing ....totally...the Barkentine Ferreira ...(aka Cutty Sark). few odds and ends. I'm a third way through the mast construction on the Clipper Donald McKay. I'm slinging along on the mainmast yards and backstays of the clipper Glory of the Seas. And... I'm laying the deck for the new construction on the clipper Western Shore. I forgot to take images...so I'll try that soon. Rob
-
Thanks......I will probably be building several copies of the Western Shore...one by way of using a heavily modified hull of an existing CS hull and then later after I am given permission from the owner of the plans...a plank on bulkhead version. As some may know from previous builds of mine..I like to use inexpensive 1/96 polystyrene hulls and then modify them as much as possible to the correct dimensions. Saves time. This will be tricky.....however, since only carpenter drawings are all that remain of her hull. Her deck fixtures and fittings are not unlike that of the McKay, Glory of the Seas, and her forecastle is not unlike that of the Flying fish. Asa Simpsen simply went aboard vessels at anchor and took measurements and ideas, from what I gather. Rob
-
Yes...I considered a larger scale...but I do need to stay within some limits. I still have to build the Sea Witch....and the Great Republic...... 6 clippers. Rob
-
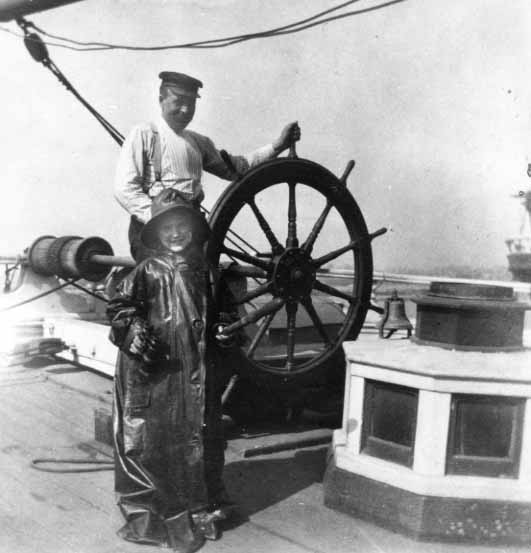
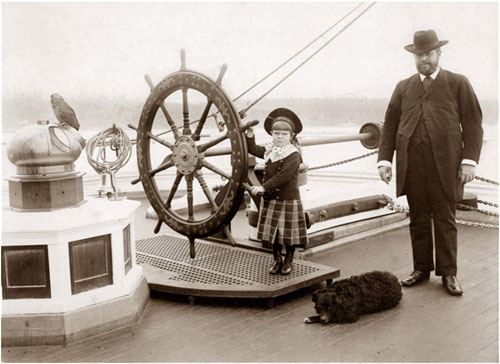
Further study reveals that the Western Shore had a simple(whaler) tiller style steering gear...unlike the mechanical designs of clippers a decade earlier and since. Here are some examples of the wheel and tiller rigging the Western Shore emulated. Asa Simpson wanted his ships as modern as possible..but sturdy and sometimes the simpler the design the better. He never insured his vessels since he owned and operated them for his own particulars.....and when they wrecked that was it. Rob

-
Yes, and I just ordered 5 books this last week....... Rob
-
Thanks for responding.....I'm looking forward to your technique when you come to making the lower masts. By the way.....most outstanding Log....I will be getting the book too when it is finally in print
- 3,618 replies
-
- 1
-
-
- young america
- clipper
- (and 1 more)
-
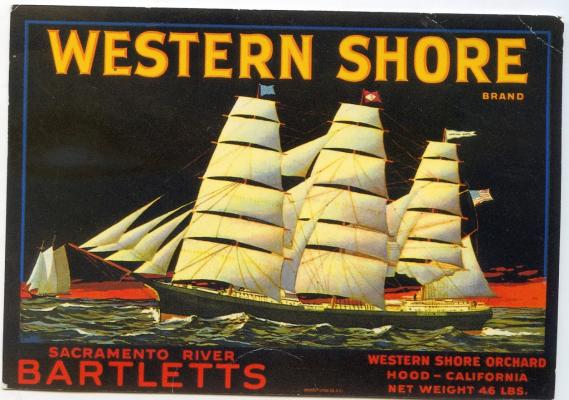
Some art work of the Western Shore.
-
It's funny, but as I go through my notes on the Western Shore...a Particular incident comes to mind and was possibly a good reason why Asa Simpson built the Shore. In a newspaper interview Asa gives a detailed account of ‘why’ he built the ‘shore’ and it all centered around an east coast Captain leaning over the handrail of his ‘clipper’ ship (could have been a Mckay or Webb ship?) shouting to one of Asa’s captains in command of one of their Barkentines, “nice yacht”!That friendly insult along with what must have been constant chiding at their many dinner parties, inspired Asa to ‘prove’ his west coast yards could indeed built a true clipper ship (there’s a whole bunch more to the east coast skepticism, a whole bunch of which centers around using Oregon Cedars and Fir, rather then east coast hardwoods to build premium ships). Great American know-how and a streak of competitiveness.... Great story. The discovery of this vessel and its record breaking runs...will forever change the history books according to clipper design and history. Rob
-
Ed..not sure you mentioned this earlier, but did the YA have single stick masts or composite masts? From her images it appears they were not composite...but I could be wrong. Rob
- 3,618 replies
-
- 1
-
-
- young america
- clipper
- (and 1 more)
-
Sorry Steve...just got done talking to Priske and after his cross country move he will tackle his book and hopefully the plans will become available. Interesting note concerning the Western Shore...Concerning her overall look, as model shipwrights (Well anyone for that matter) need to keep in mind this ship was an aberration, being built on ways and by shipwrights who only built Schooners and Barkentines. The Simpson’s down in San Francisco designed the ship after ‘looking’ over all the clippers at anchor in the bay, and then ‘commanded’ the fellows at coos bay to built it (it was really out of their league). The ship was so large compared to all previous (and subsequent) builds, that she ‘stuck’ to the ways on launching (and needed a tug boat to yank her off the ways). She was then towed down to San Francisco without masts as the builders in coos bay were not qualified to rig a square rigger (they had never built one). Things like the ship steering gear was designed from an 1850’s whaling ship block and tackle used at the time, whereas in the 1870’s ‘all’ ships used ‘gear’ steering, and the like. One side note...her deck plan was not unlike that of Donald McKay's Glory of the Seas.....so building her will be even more so of an enjoyment. I think I will reverse engineer my first build from Steve Priske's own builds. I hope you too begin your build of her soon and maybe we can share techniques and ideas. What *connection* do you have? More then family? Rob
-
That is correct Patrick. I would like to make her a bit larger...but space has become a premium..since I already display 3 large clipper models...not to mention the plethora of smaller scale ships. I still have the Great Republic to make in the future as well....so things are tight. Rob
-
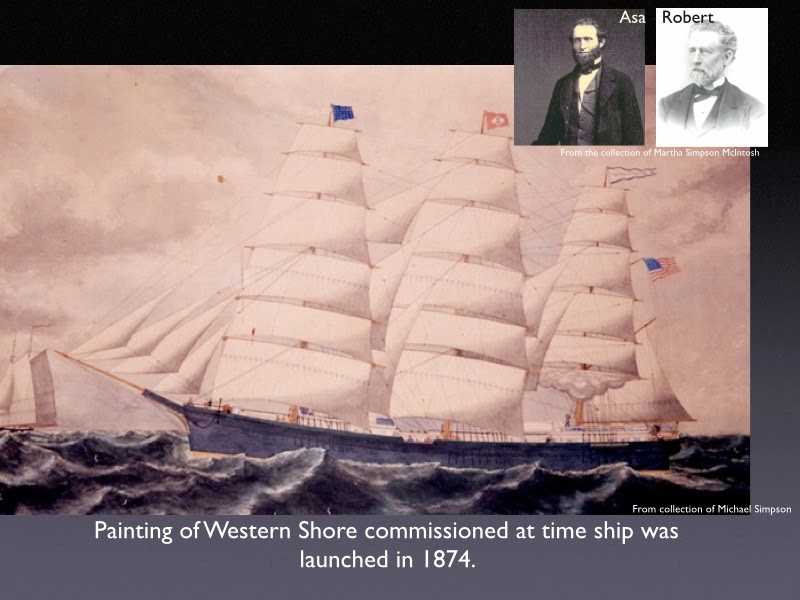
Among many other things..I plan on building the clipper ship Western Shore. She has a most wonderful and exciting...not to mention short history. She was the only clipper to have been built on the West coast of the US...in Coos Bay Oregon over 20 years after the last clipper was built on the East coast. She set world speed records and holds the fastest time from Portland Oregon to Liverpool England to this day of 97 days. She was involved in a high stakes bet race between the clippers, *Three Brothers, and the *British King*. they all left SanFransisco the same day and both the Three Brothers and the British King consumed over 150 days passage, while the Western Shore passed them both and moored at the Liverpool docks in 104 days. Built for Asa Simpson in Coos Bay/North Bend Yards by John Kruse...the Western Shore will be a grand addition to my Donald McKay collection. One note....the WS was sporting 6 yards per mast and the main mast yards were the same size as the fore and both main and for masts were the same height. This calculation was probably the reason she was known as the fastest clipper ever built...beating clippers easily that were 20 years her junior. A couple photos(Paintings)..were as there are no actual photographs of the ship. Steve Priske in his soon to be published book will provide the hull and line drawings. Scale will be decided at a later date...but I will probably stay close to 1/96...for special reasons.

-
Ed...I agree with your segmentation......from Crothers description...Lady Liberty kinda straddles the demarcation line between the stem and siding(tough place to separate a woman). As you did..it looks easier to place her entirety against the hull side then against the stem....Same with the eagle. Never the less...your magicsculpt work is outstanding. Being a wax worker..I did a similar work using wax carved in place to make my carvings..then lightly covered with an epoxy glaze to seal. That way I can easily follow the hull contours. Very impressive work Ed...... Impressive. Makes the model snap alive. Rob
- 3,618 replies
-
- 2
-
-
- young america
- clipper
- (and 1 more)
-
Cutty Sark by NenadM
rwiederrich replied to NenadM's topic in - Build logs for subjects built 1851 - 1900
- 4,152 replies
-
- 3
-
-
- cutty sark
- tehnodidakta
- (and 1 more)
-
No wonder the efforts were extreme to prevent hogging on these extreme clippers. There is so little for and aft material to be buoyant in the water. The ends were suspended by the amidships. Fantastic Job for sure. I'm finally getting to rigging the yards for my *Glory of the Seas*.....following your build has been nothing short of an exhilarating motivation. Rob
- 3,618 replies
-
- 1
-
-
- young america
- clipper
- (and 1 more)