


rwiederrich
-
Posts
5,497 -
Joined
-
Last visited
Content Type
Profiles
Forums
Gallery
Events
Posts posted by rwiederrich
-
-
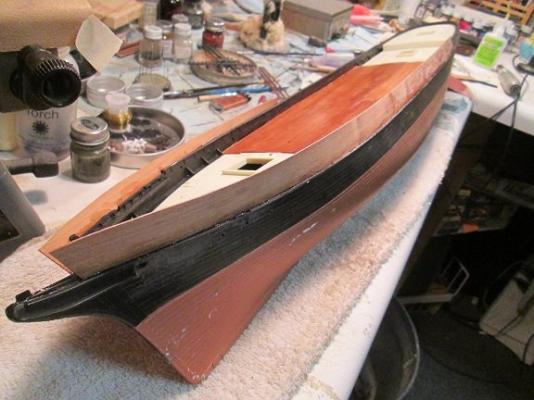
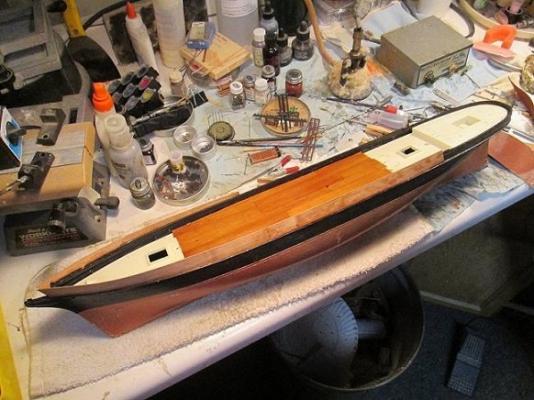
Well, as is my custom, I began my build of my new clipper Donald McKay from using a 1/96 scale Revell Cutty Sark hull as a start point..then I began to build up the bulwarks and modify the hull accordingly.
Here I began the build up using maple strips I cut to the proper dimensions.
This, as all my models finds its beginning as a plastic hull that I heavily modify..then build up in wood for the desired effect and design.
Here is a first images of the transformation.
I strained the deck to see the individual planks.
Rob
- clamdigger, hexnut, douglaspbrown and 2 others
-
 5
5
-
I just finished reading a book about coming to California via clipper in *49*.......Amazing...just amazing. To be a passenger on a clipper was nearly as stressful as a crew member...and at times more so. Poor food.....continual dampness.....uncontrolable passengers/crew......disease.....Riiiight.
Clippers like the Games Baines...that was built expressly for passenger travel..was far more luxurious travel then most others for sure.
Rob
-
That's right.....Ed..thanks for the response.
Rob
-
As I've said before Ed....FANTASTIC! WORKMANSHIP.
I don't recall.....was the YA cargo or was she also a passenger carrier...as were some of the MCKay creations?
Rob
-
Outstanding work.......impressive.
Rob
-
Where on earth did you get these plated/riveted panels?
Rob
Build log part 12
Bulwarks on the high deck mounted and also plated
Bow area plating
for plating keel and bottom Areas the ship is removed from the stand
and placed back on it again afterwards
Build log part 13 to follow....
Nils
-
Thanks...I'll keep that in mind when I go looking again.....I need several ladders right now...so.....I'm searching.
Thanks.....again.
-
I've drilled and set all the brass belay pins...but have come across an issue. I'm trying to locate brass step ladders..but I can't for the life of me figure out how they measure them...when they say 7mm or 14mm by.....is that the step rise distance or the width of the stair...or something entirely different?
I can't figure out how ladder sellers determine the size and scale...let alone how to interpret their nomenclature.
Can anyone help?
Rob
-
Fantastic progress Ed......very nice workmanship.
Rob
-
Magnificent work.........
-
You're doing a great job.....
-
-
-
Maybe in the middle of the night(In total darkness) and in 30 degree freezing weather with no dry warm gloves..trying to furl a frozen sail while on slick foot ropes 100ft from the deck on an extremely pitching yard......doesn't sound all that *awesome* to me. Sailing in warm tropical seas sounds better.....
Rob(The painting is awesome though)
-
Great job woodrat.....great job.
-
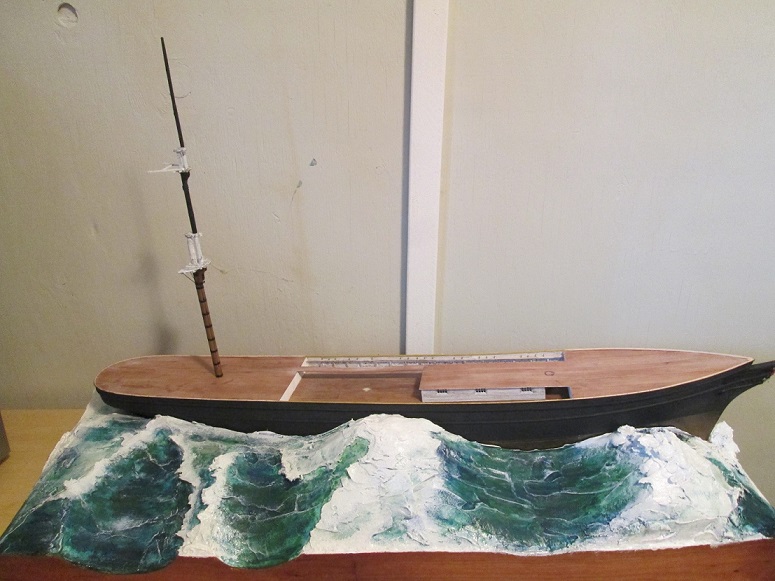
Captain...thank you very much...Montague Dawson is one of my favorite ship painters. He captures the essence perfectly.
I wanted to attempt to do the same in a 3D diorama. I think I came close......anyway.
Again...thanks for the ample likes and fine comments
Merry Christmas.
Rob
-
That's right Grant. Over riding the desire to go the least path of resistance.....means I had to invent and build a table saw explicitly for the job of cutting in the mast grooves.....and go through the extreme lengths of making the numerous *wedges* to support the rings in the grooved area. Similar to the masts on the Glory of the Seas....cept I milled those...and it was very arduous. This method worked out faster and a bit easier(Once I built the table saw).
Plus these masts are varnished wood...NOT painted as in the other masts I built. Can't cover up that multitude of sins with paint......

Merry Christmas to you and yours as well.
Rob
-
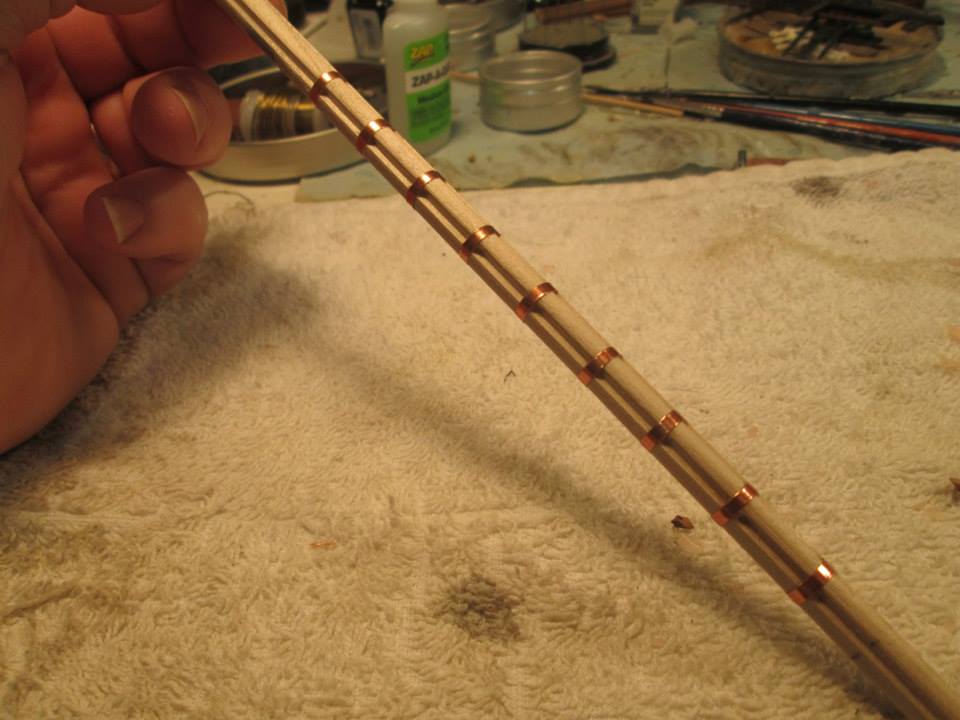
So for one lower mast...I had to:
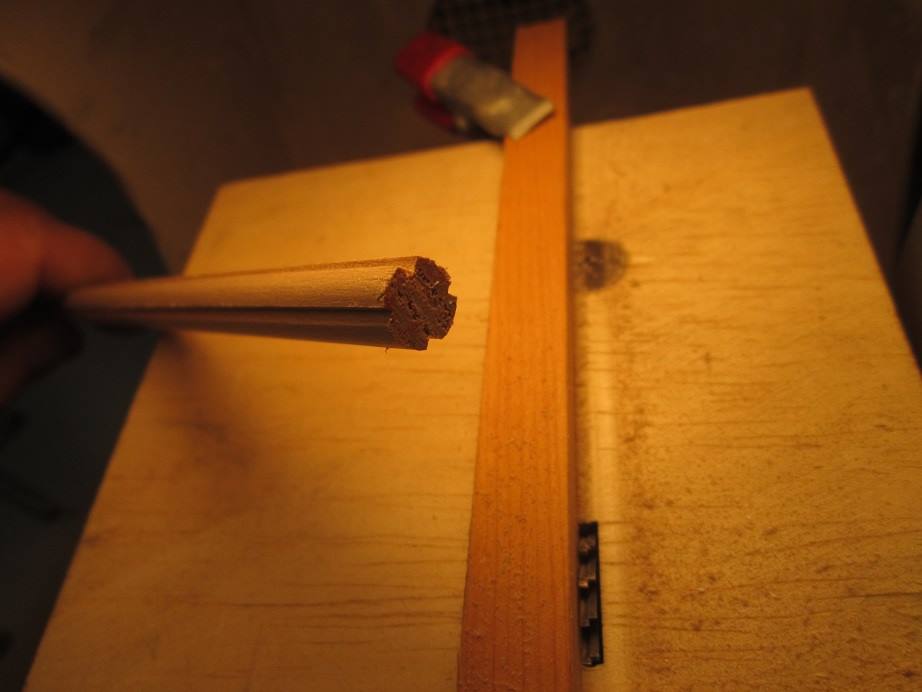
Cut 4 lengthwise grooves to represent the outer 4 beams.
Build and apply the 36 ring wedges under each ring and in each groove.
Cut and apply copper banding and glue secure.
Paint banding black.
Add chain lift.
Stain/varnish/weather.
Build, apply cheek supports and tops and paint white/weather.
Lots of work...then required for simple dowel or straight stick masts.
But the effect is much more attractive and accurate.
Rob
-
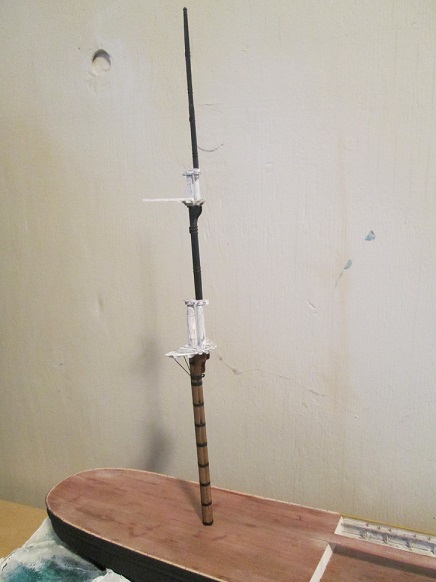
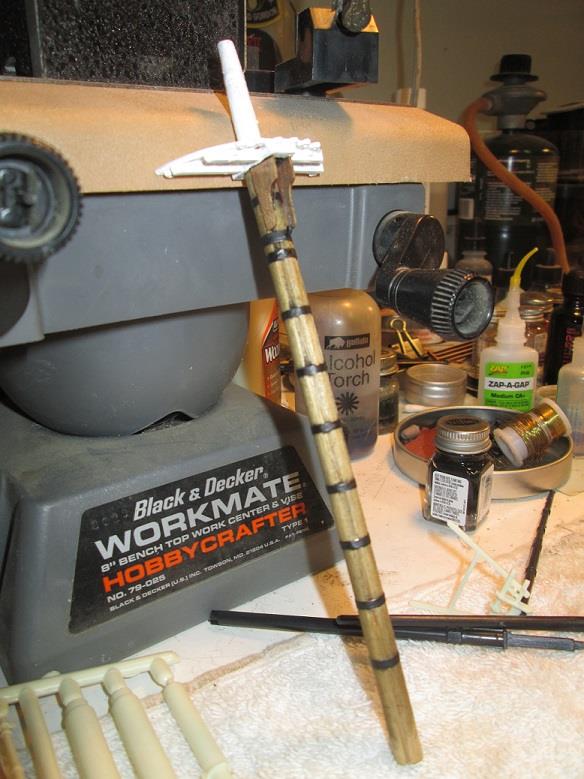
Worked on the mizzen mast and I finished the lower built up mast with weathering and paint/varnish.

-
Today I added the band wedging to fill in the slot created by made masts and the copper bands.
I'll sand and stain them and varnish.
- gjdale, EricWilliamMarshall, hexnut and 1 other
-
4
-
Today I worked on the lower masts. The mast for the Glory of the Seas were made on the mill and were quite laborious....I didn't want to go that route this time...So I tried gluing the 5 pieces to together adding the blocking of the straps.....I turned on the lathe. Not so good....the extreme edges kept getting knocked off and ruining the mast as I began to apply the cutting tool....I then opted to sand on the lathe instead....same result.
So I opted to build a table saw for the job....Using some ingenuity, I adapted the table saw to one end of a dental Baldor bench lathe. This meant I needed to mill the housing and attachment bracket.....get some good blades...make the keepers and secure stock and table.
Walla! done. It works beautifully and made the cuts in the masts exactly as needed.
So first is an image of the defunct lathe attempt mast. Strapping had not been done...just the tuned mast.
It's the dark brown one.
Rob

-
Coming along nicely Nenad.......you have made some very good progress......I bet you have leaned lots too as you have made the changes you have.
I see you added the plankshear........
I steam out in the shop...not to get into my wife's space.....
Great progress.
Rob
-
It's tough staying out of the shipyard......isn't it. I steal away 20 minutes here and there myself.
Merry Christmas. And many sneak aways.........
Rob
-
Stalkers are good.....
Especially if they love clippers too.......
Rob


Donald McKay by rwiederrich - clipper
in - Build logs for subjects built 1851 - 1900
Posted
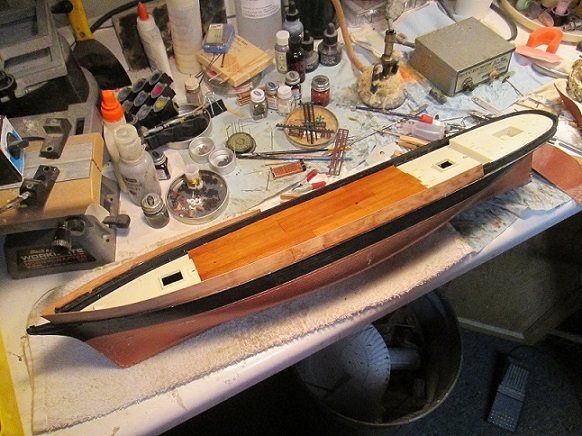
Next I had to continue to build up the poop deck and the forecastle.