HOLIDAY DONATION DRIVE - SUPPORT MSW - DO YOUR PART TO KEEP THIS GREAT FORUM GOING! (Only 36 donations so far out of 49,000 members - C'mon guys!)
×


rwiederrich
-
Posts
5,518 -
Joined
-
Last visited
Content Type
Profiles
Forums
Gallery
Events
Everything posted by rwiederrich
-
I hope to see them soon if possible. Rob
-
Photo stacking is just like the process used when stacking Astro images of galaxies and nebulae. Hundreds if not thousands of of images stacked, along with blacks and opaques to render the complete image. Cool. Never imagined you could do that with models correcting for depth of field. Rob
-
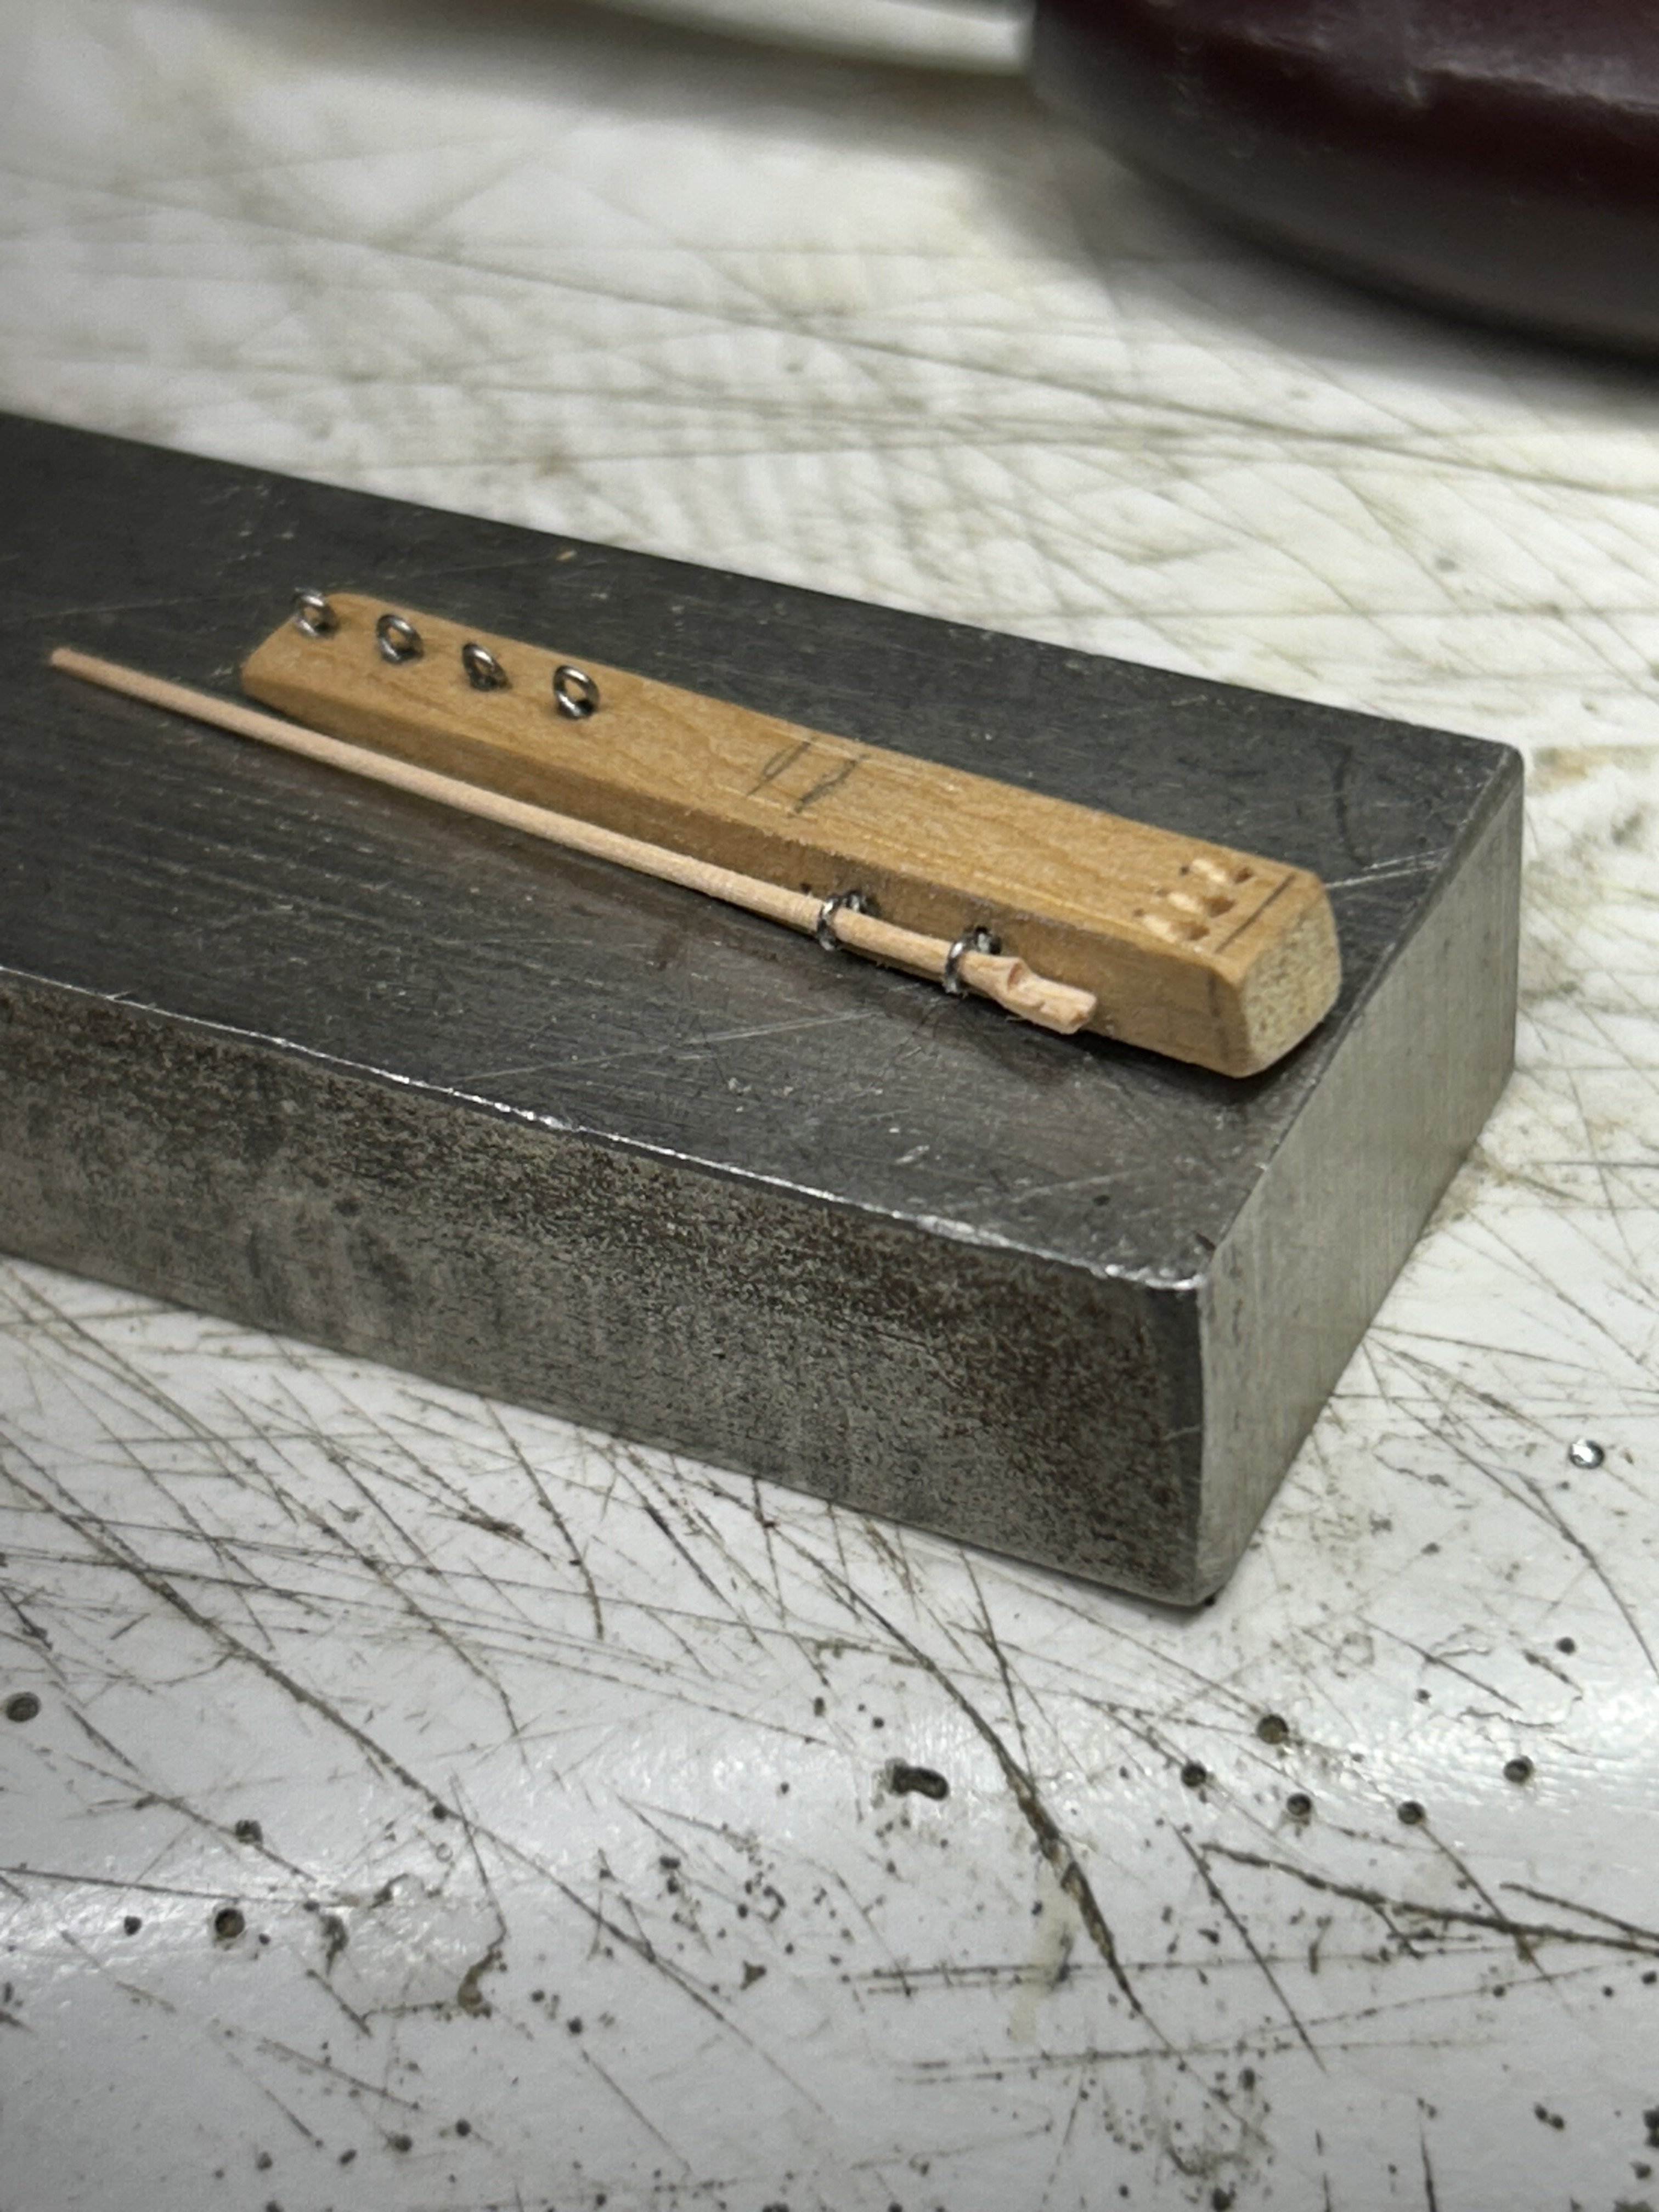
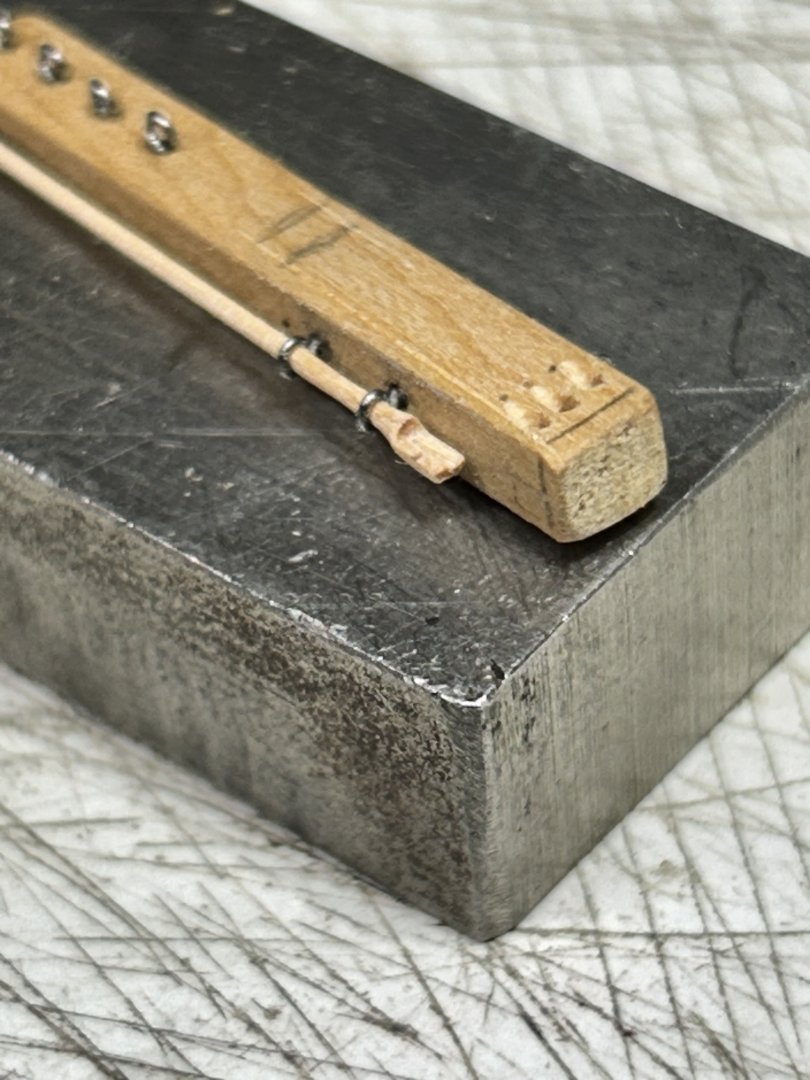
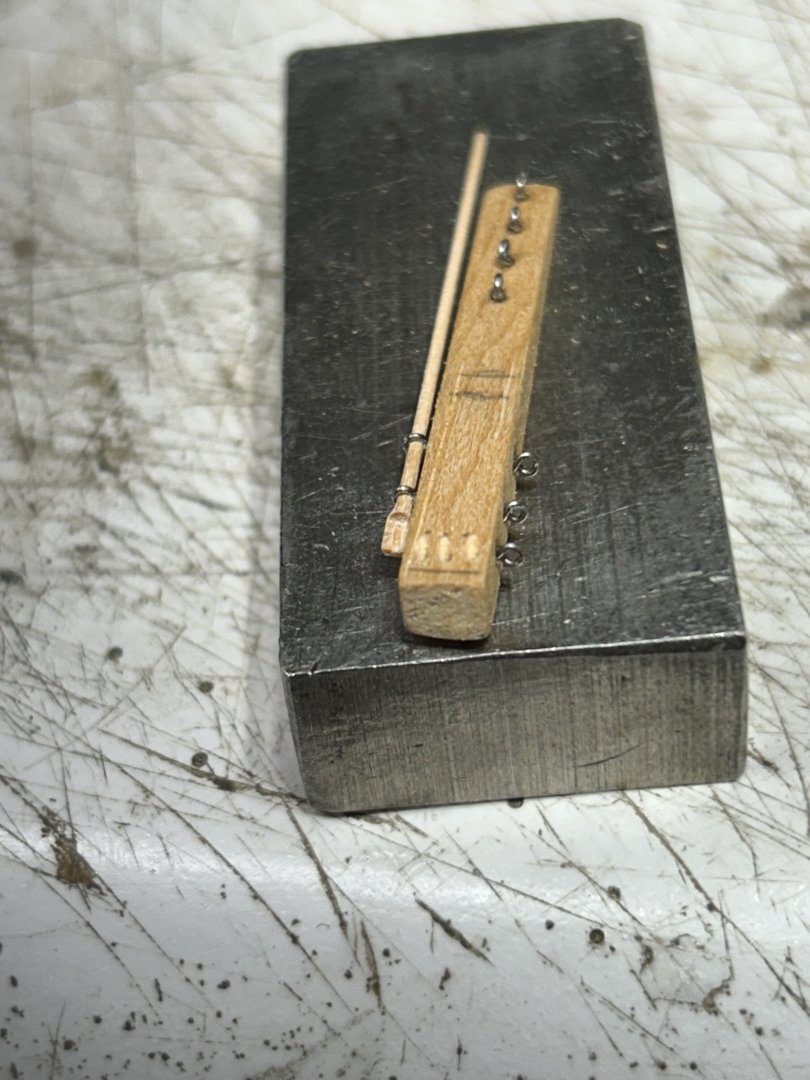
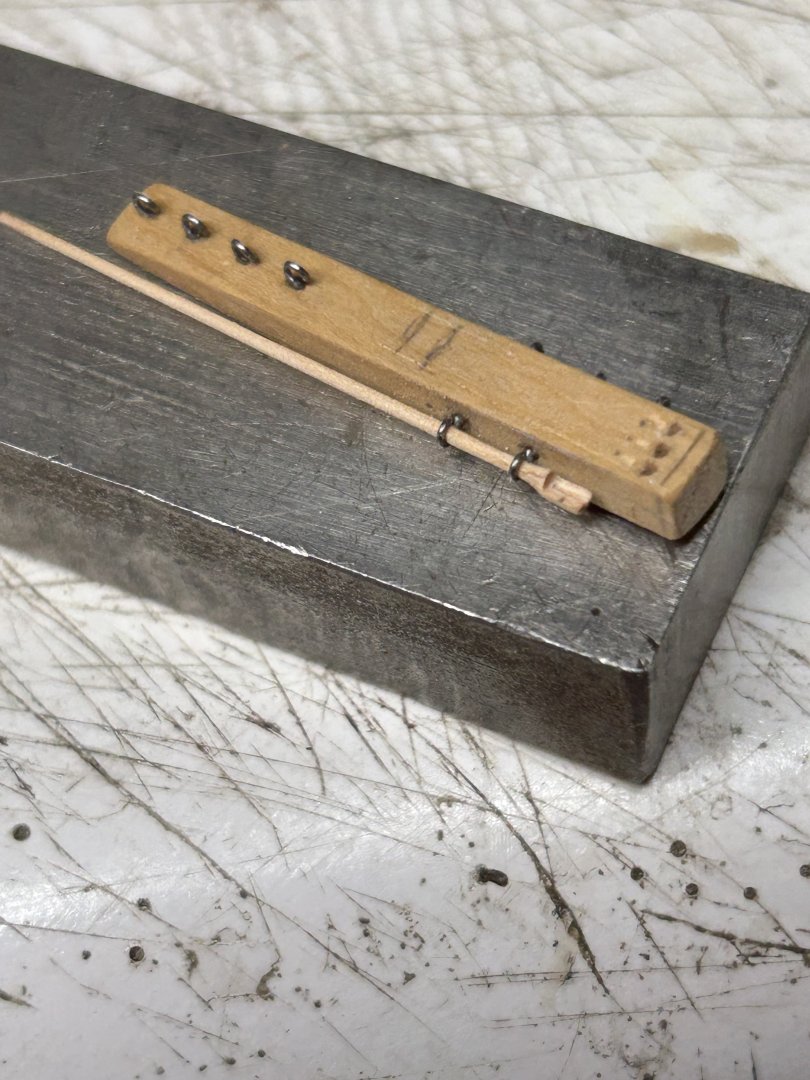
Worked a bit on the cat head structures. Haven’t decided what release mechanism I want to use. Here, I’m working out the twist and release design. I haven’t added the release pin yet……just the long bar with the cupped head that holds the release pin and retaining chain. The other design uses a rope and release clip that holds the release pin from falling away releasing the retaining chain. Rob

-
Where to begin Rick.... You've done a magnificent job on her initial rigging of her lower shrouds. As usual, your work is impeccable , clean and crisp. You have been busy. you've not accomplished all this in a short time....you've been up to stuff. Quietly working away...and then...BAMN! You weren't slowing down (as we had imagined)...you were secretly accumulating your results....so you could shock the daylights out of us and thus initiate hyperventilation. I have no way of catching up(If that was ever a thing). I'm surely impressed. Flying Fish is looking beautiful. Rob
- 345 replies
-
- 1
-

-
- Flying Fish
- Model Shipways
- (and 1 more)
-
Great job S.H. Johnny. That hull looks smooth and well contoured. Where have you been hiding this? It's fantastic! Rob
- 100 replies
-
- 1
-

-
- Cutty Sark
- Sergal
- (and 1 more)
-
Got a link to that build log? Rob
-
Yes do that Jared. I will be taking those images of Staghound before she ever ends up in a case . Unfortunately, I neither had the time nor pre-thought to have done that for Glory of the Seas and the Great Republic. 😪. Can't wait to see those images of your wonderful build. I understand *stacking* image for astrophotography to capture luminosity of vary dim objects...but what do you mean by *stacking*? Rob
-
Great job Jared. Many rope coils makes the belayed lines legitimate……adding realism to your fine model. The “Harties” and “Bully Boys” add authenticity to a working ship. Rob
- 431 replies
-
- 1
-
-
- Flying Fish
- Model Shipways
- (and 2 more)
-
It escapes me others have not concluded the same thing. “Just glue it together and stick it on the mantle”. Really? Rob
-
Thanks Rich. I thought they would add some continuity to the practicalities we uncovered. Rob
-
I'm humbled. I feel, I'm more of a hack...then one as skilled as yourself. But I do appreciate, your fine compliments and comments. At 1/96 scale...details are more challenging....and I like details. It has always been my habit to add as much detail as the scale can handle....without looking over done. A little can go a long way, and suggestive detailing can be more advantageous at this scale. Implying that something is there is, IMV better than actually having to make the item at scale, accurately. Generally, I have always held, that I am a lazy modeler.....so if I can pull off a task with the least amount of effort.....I'm going that way. In like manner....I'm inspired by your attention to clean sharp details as well. When I get to the rigging, I like to let the horses out. I love rigging detail. Rob
- 100 replies
-
- 1
-
-
- Cutty Sark
- Sergal
- (and 1 more)
-
Well...the change came by way of a hurricane, (and her being loaded incorrectly), that nearly capsized her and demasted her mizzen and main. They could not afford to rerig her as a full rigged ship....so they turned her into a barkentine. Rob
-
Thanks. Not only did it have to be cleanly executed ...it had to be mirrored. Both fore and aft. I'm humbled. Rob
-
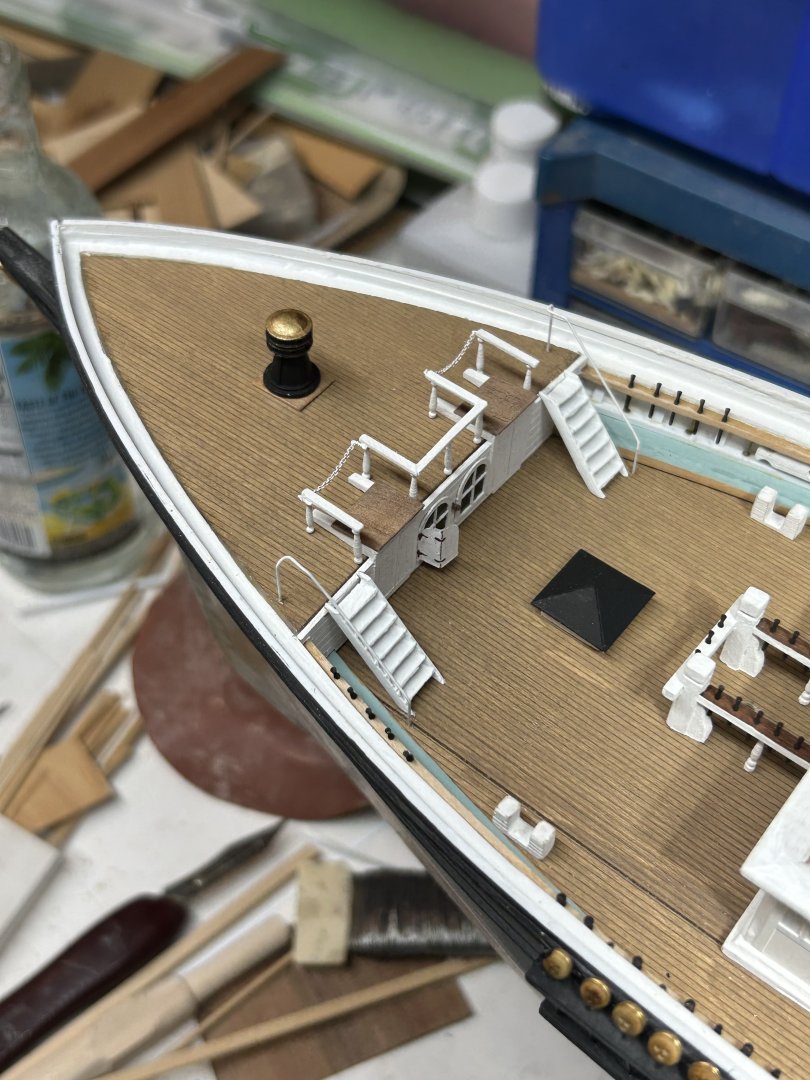
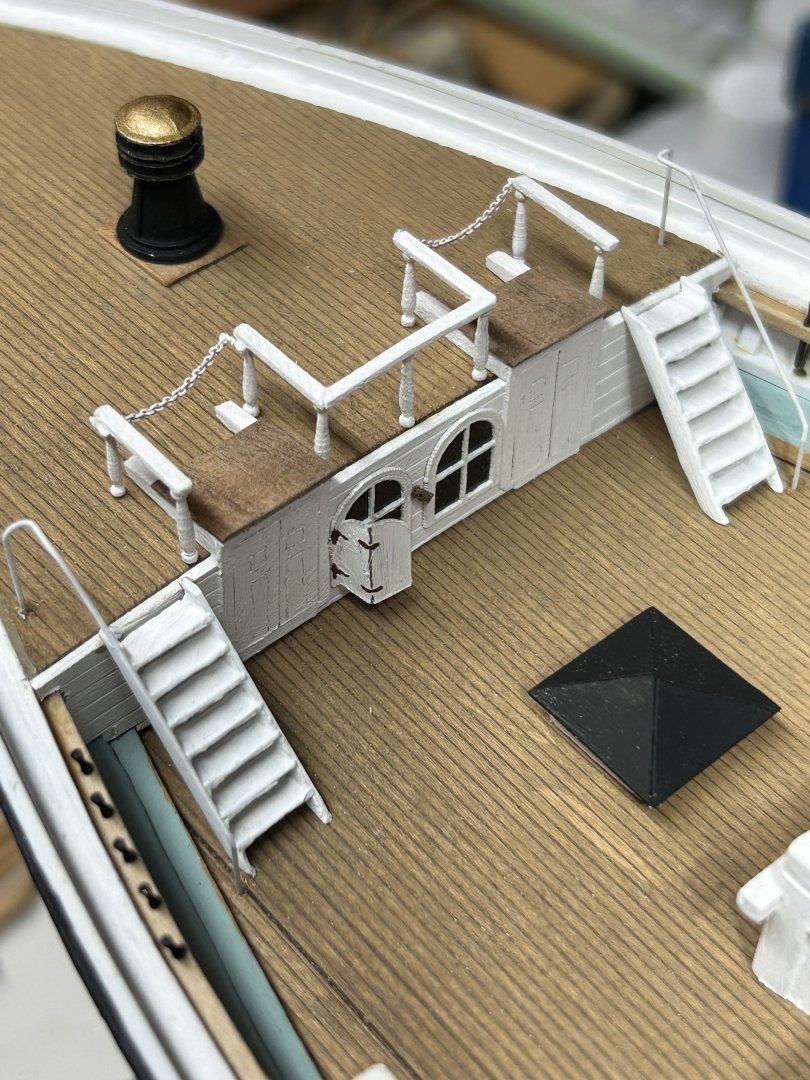
Thanks Rich. Those little boogers were quite challenging to fix in place....without damaging the existing spindly wooden railing. The splash rail will go atop the catheads in the near future. I will add the iron fairleads shortly after. Noticing the Cheppelle drawing a bit closer. I noticed he set the forecastle deck at nearly the monkey rail height. NOT at the main rail height as McLean describes. Probably trying to reconcile the limited height under the deck for real men to do work. More evidence, the inner forecastle decking was 3ft below....providing that *AMPLE, well lit work space....we see described in McLean's first hand description. Rob
-
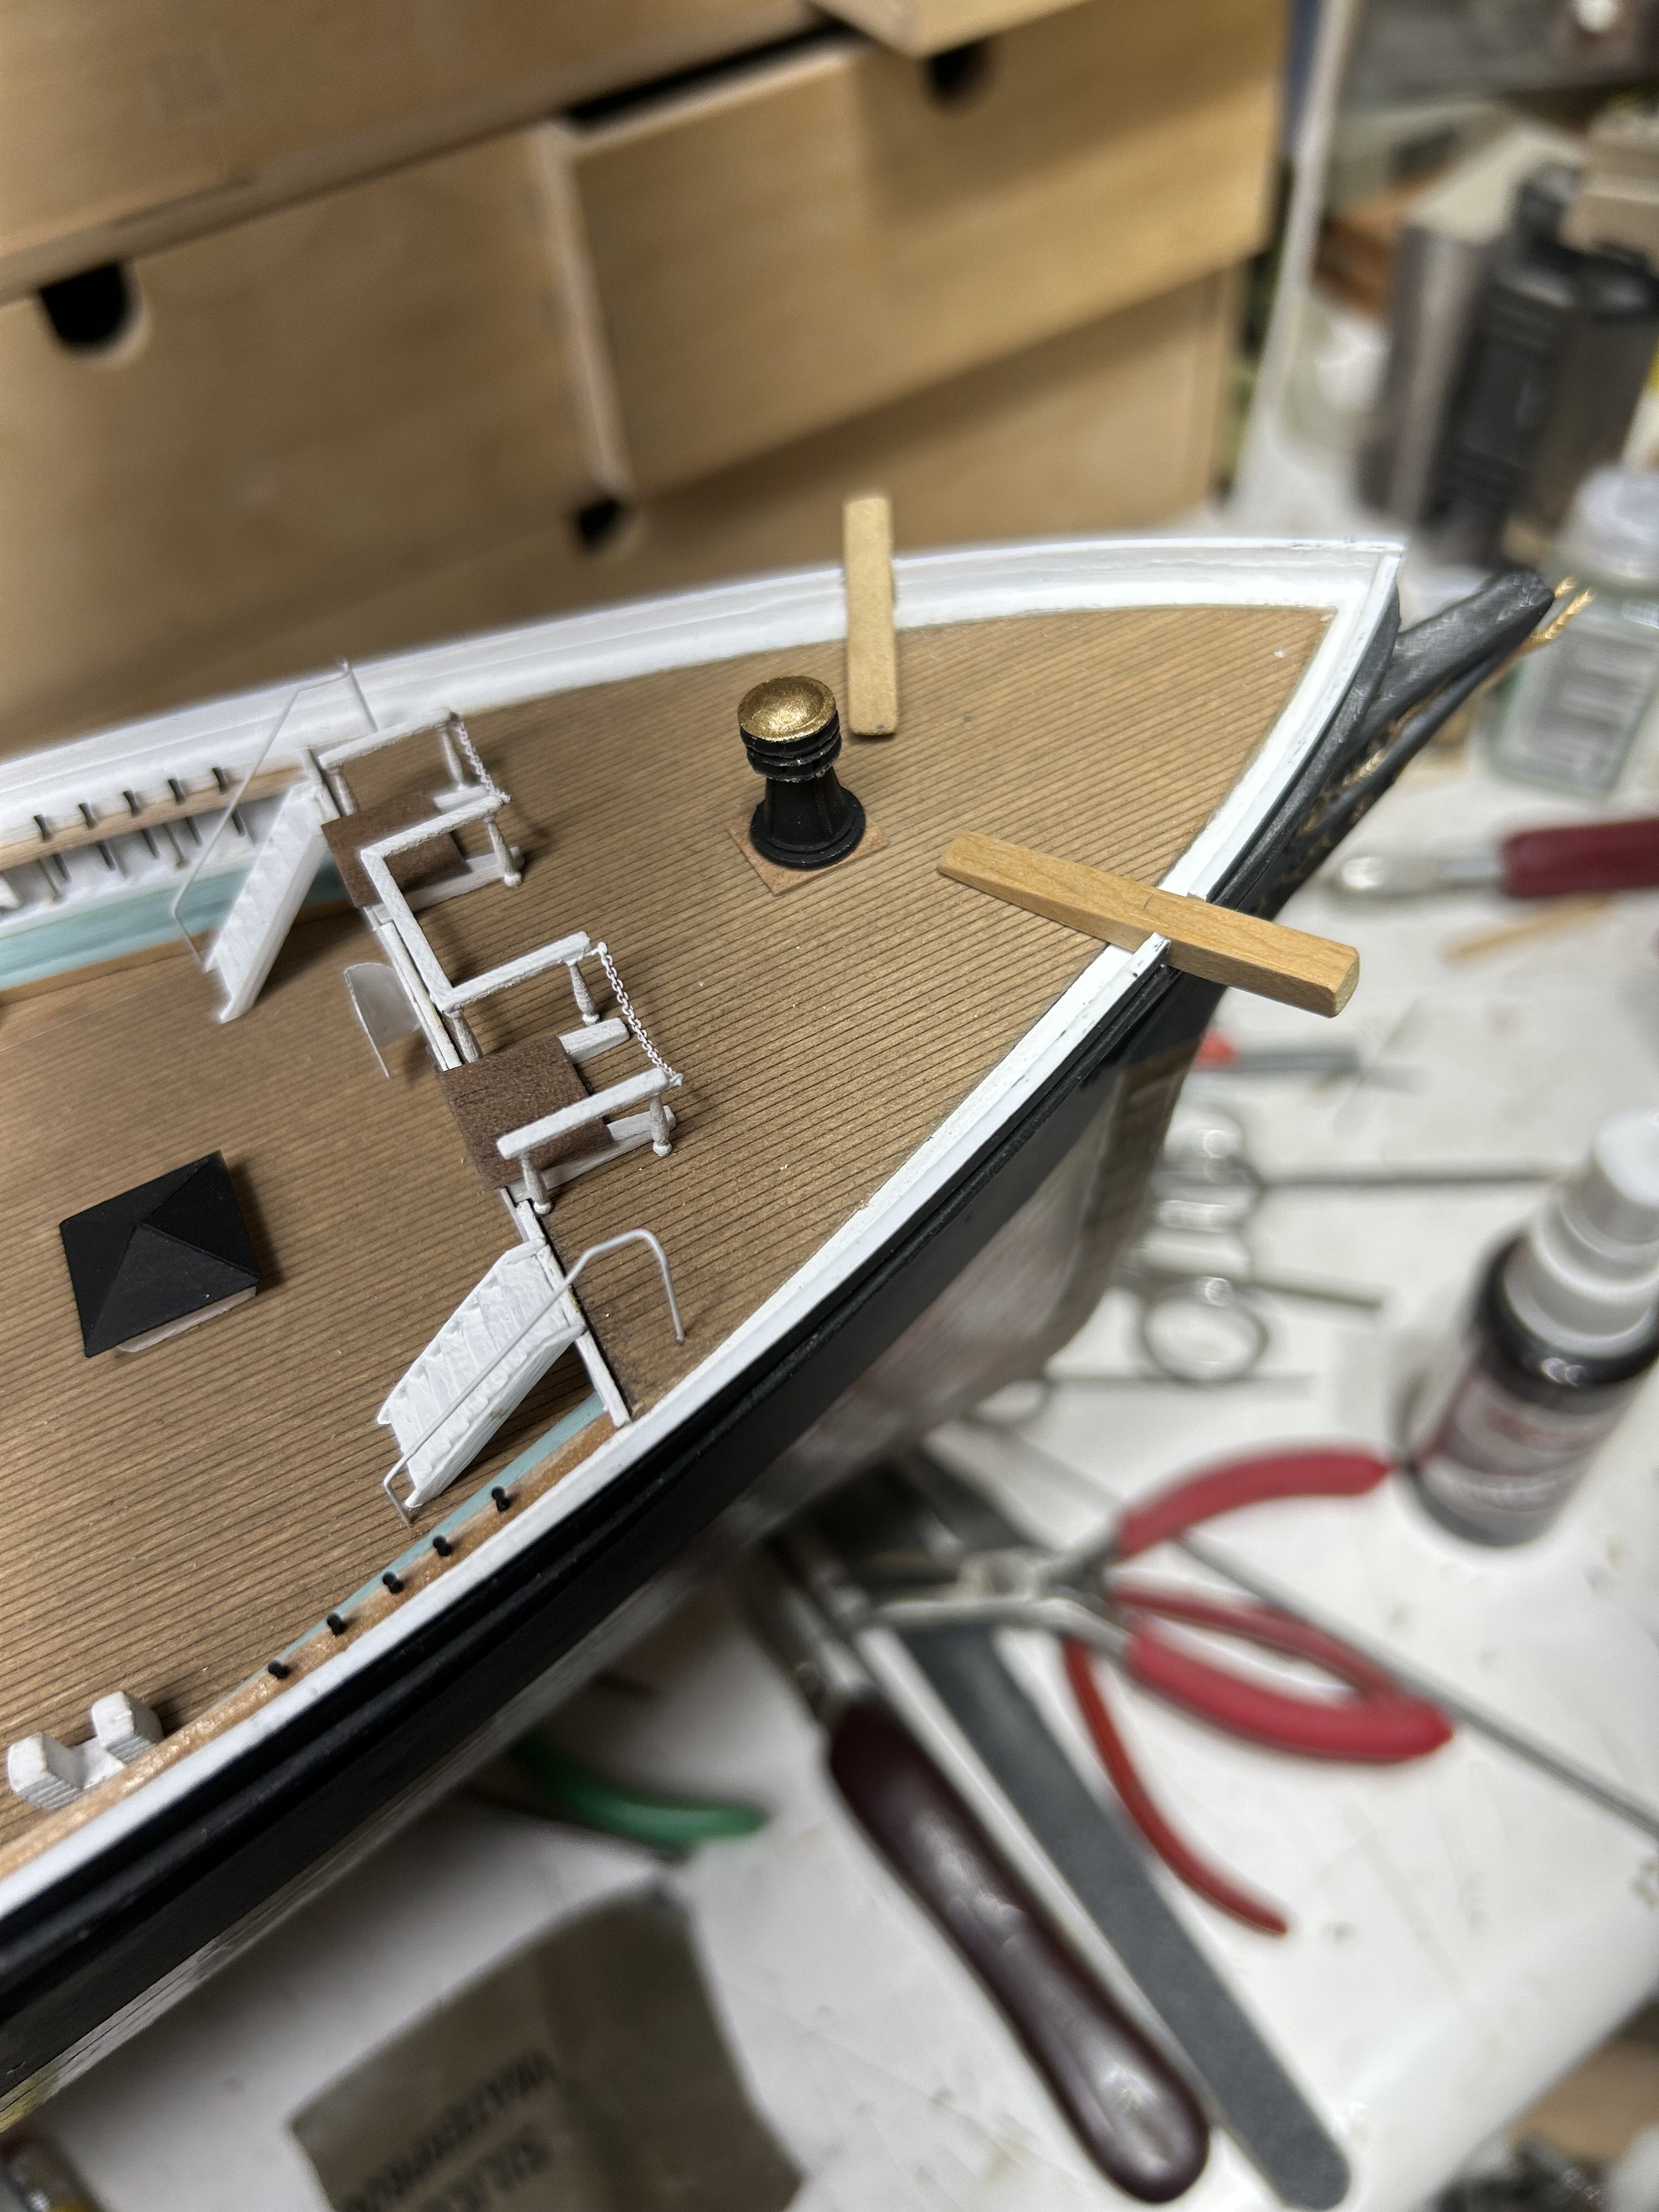
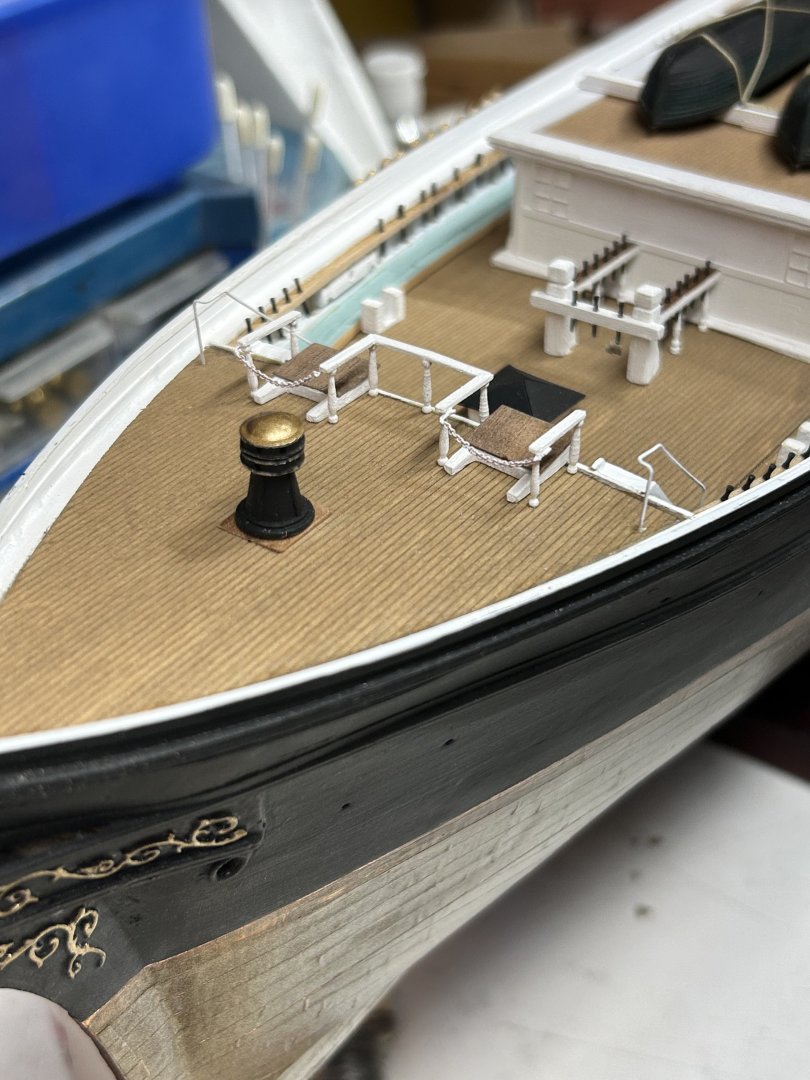
Cutting in the cat heads. Rob

-
Great job Rich. Love the drawing. Super Rob
-
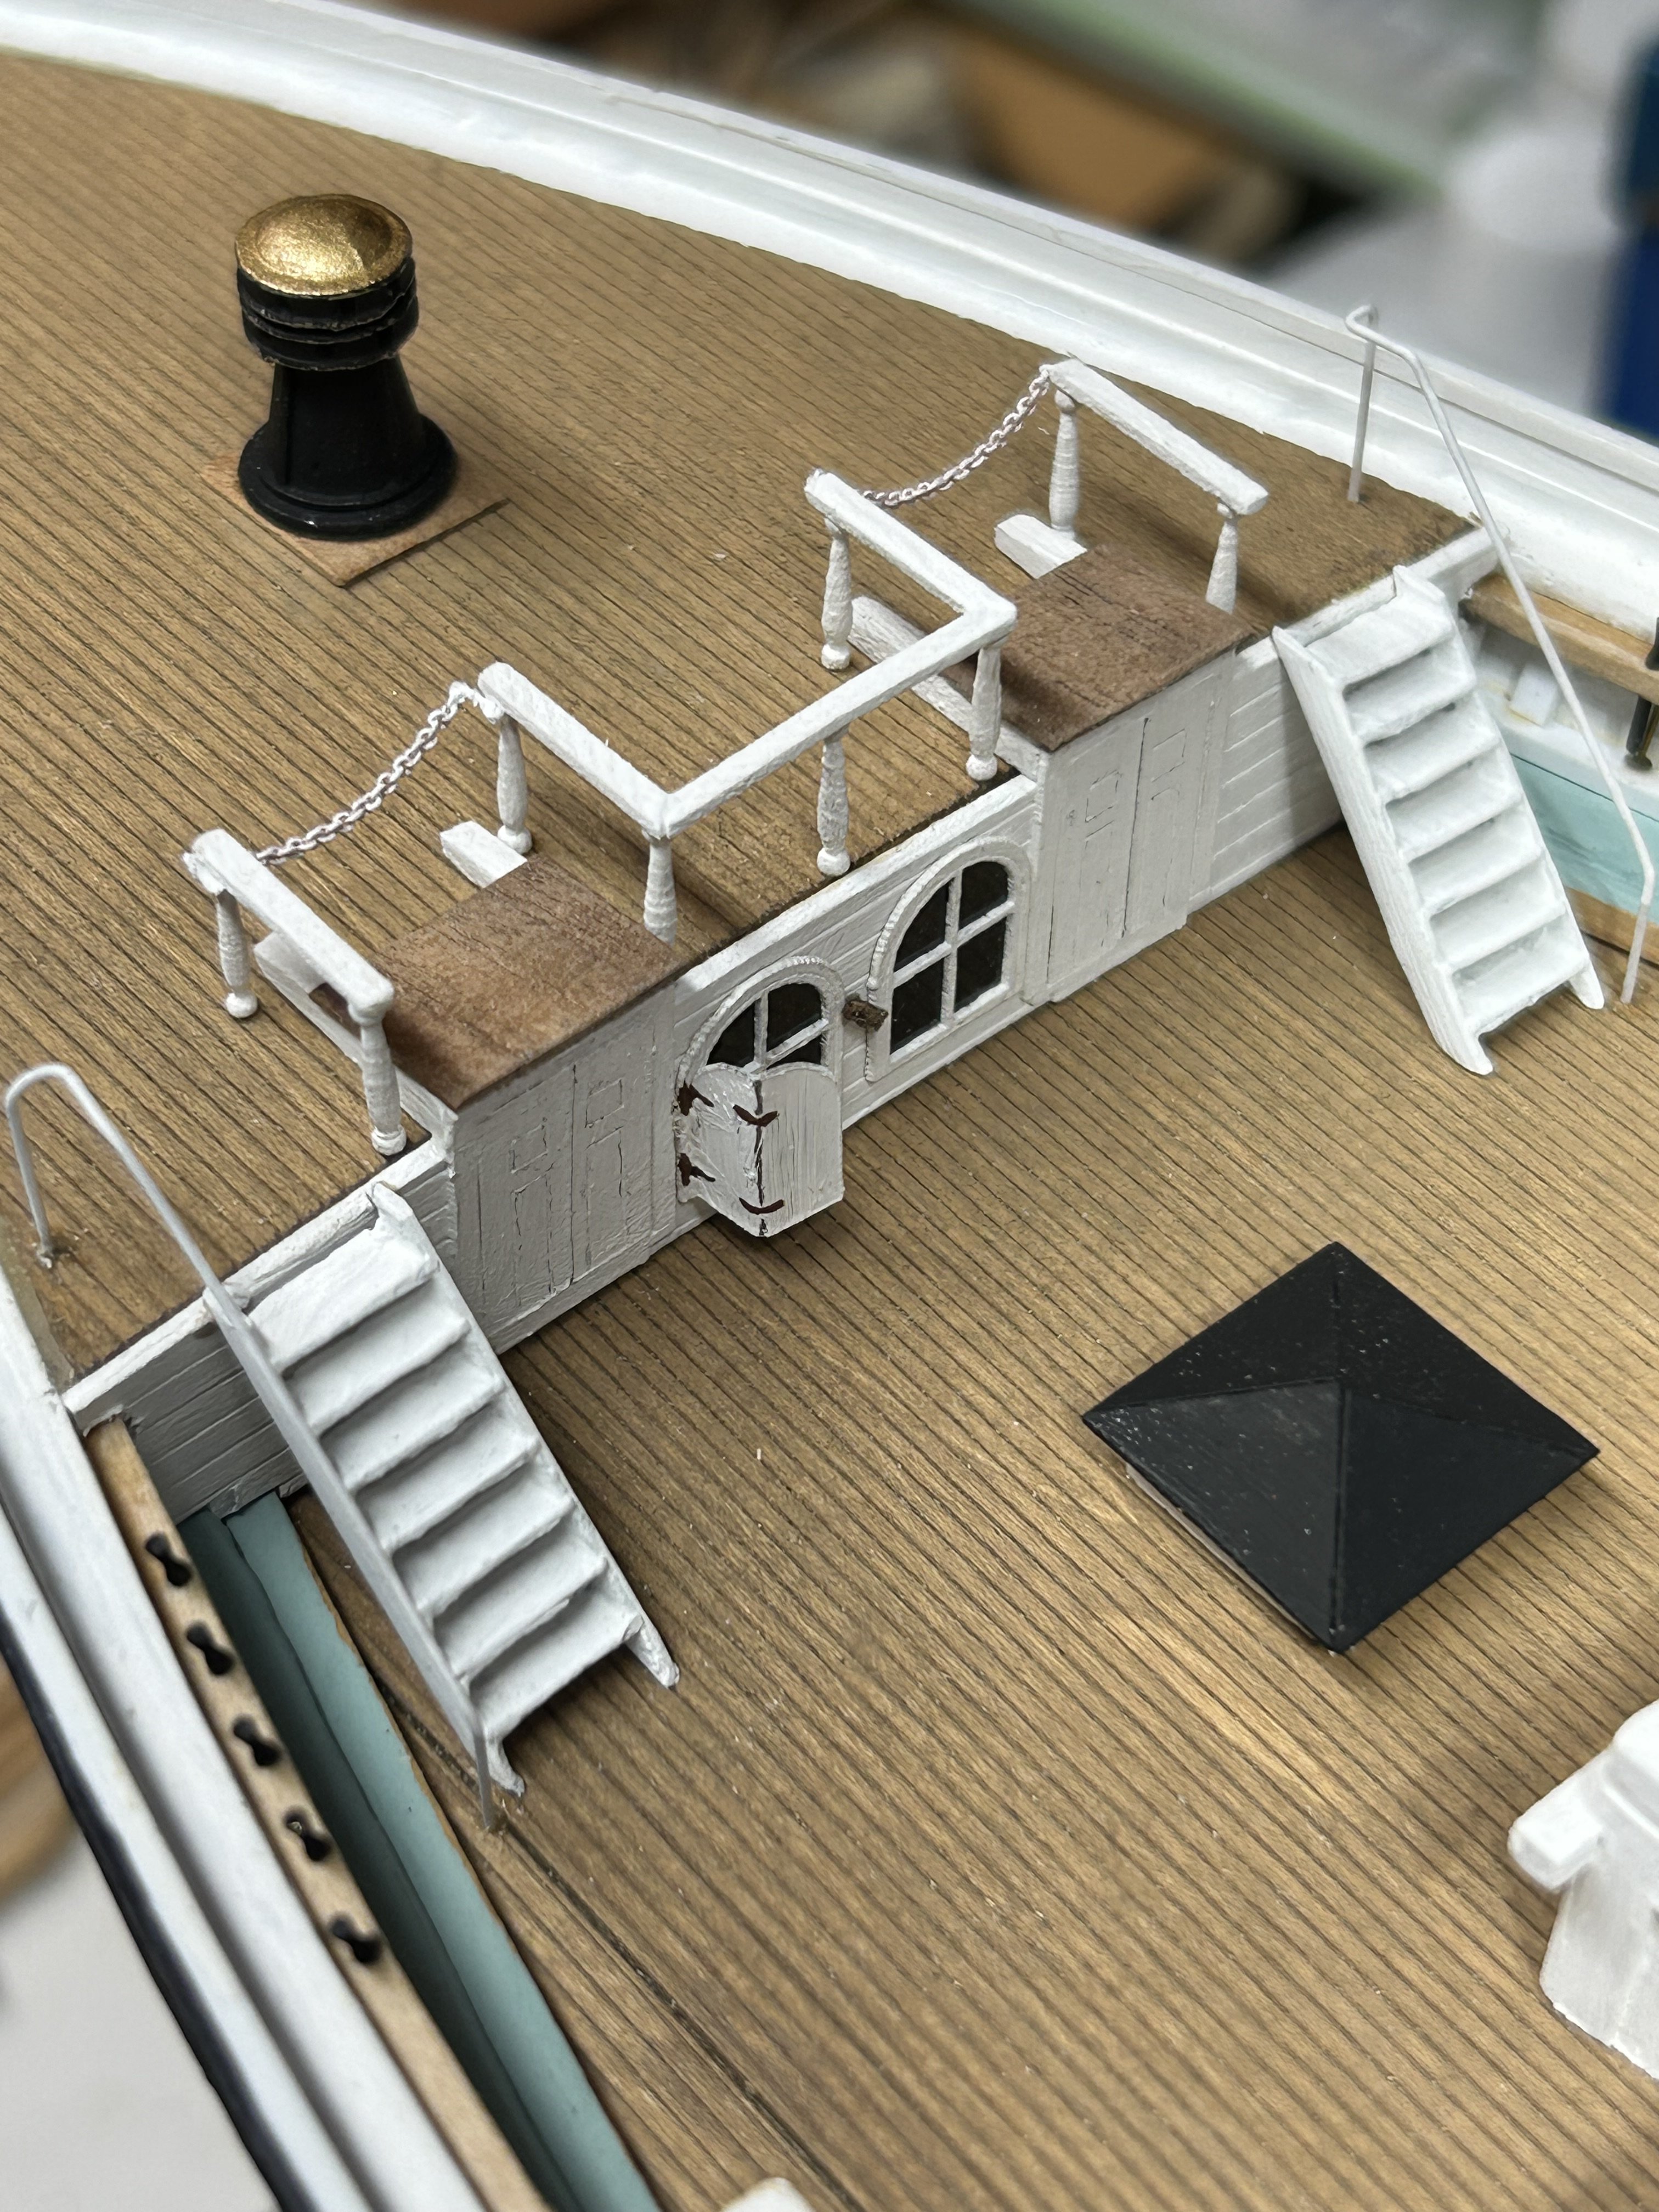
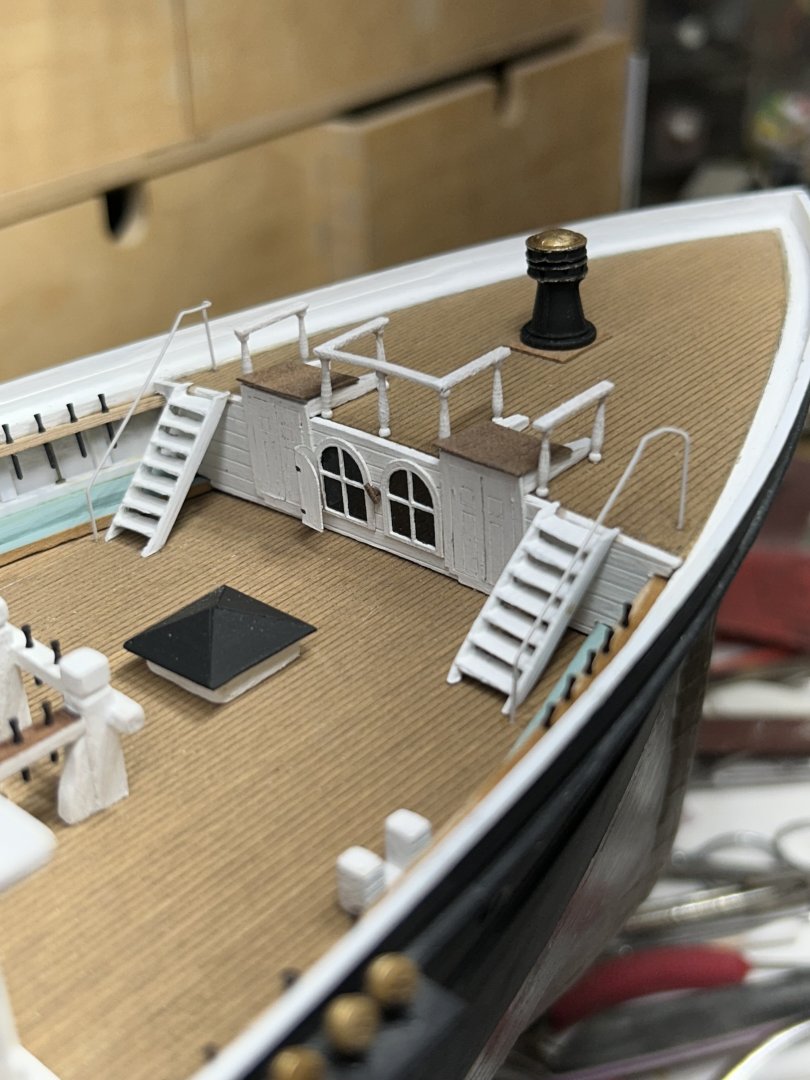
Thanks Rick. Finished up the safety chain around the forecastle companionway roofs. Rob
-
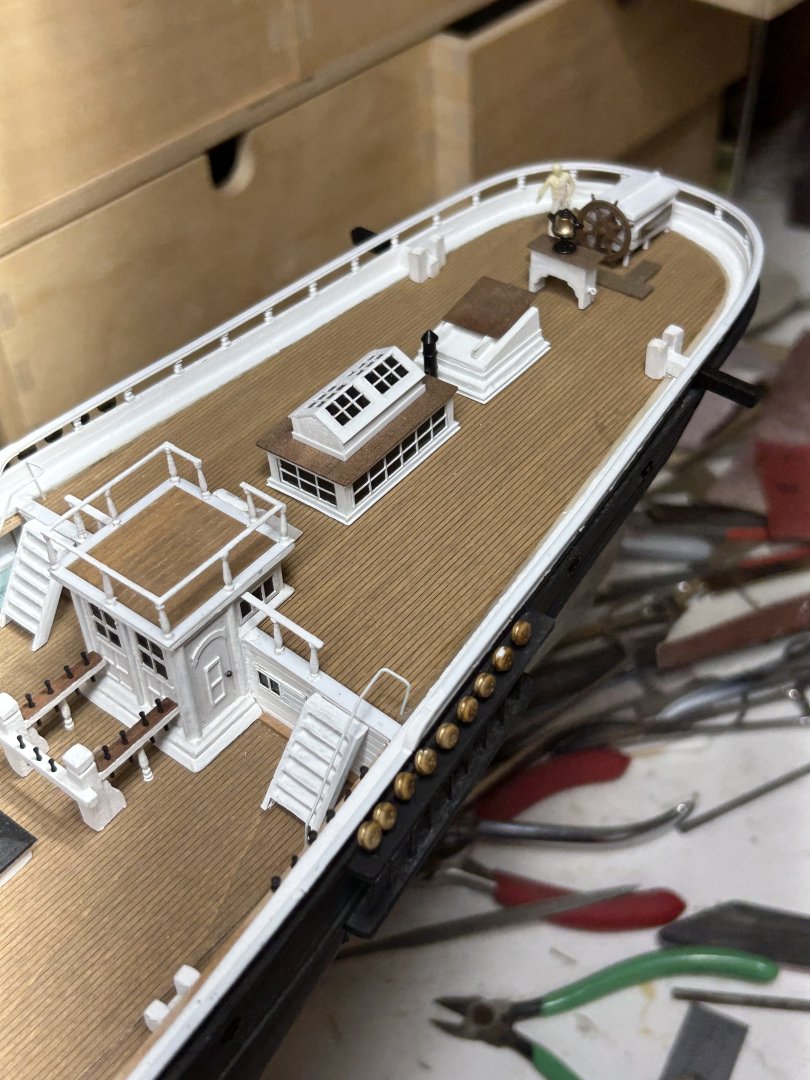
Thanks Rick. Finished up the bumpkins and their bits. Blocks and hardware will come later. Rob


-
Thanks Pat. Yes...the finer details always catch the eye. the chain ropes...will really bring it all together. Still have the catheads(all their detail) and the splash rail. not to mention the bits and the jib fife rail. Rob
-
Chain barrier still need to be added in front of each companion way roof. Rob
-
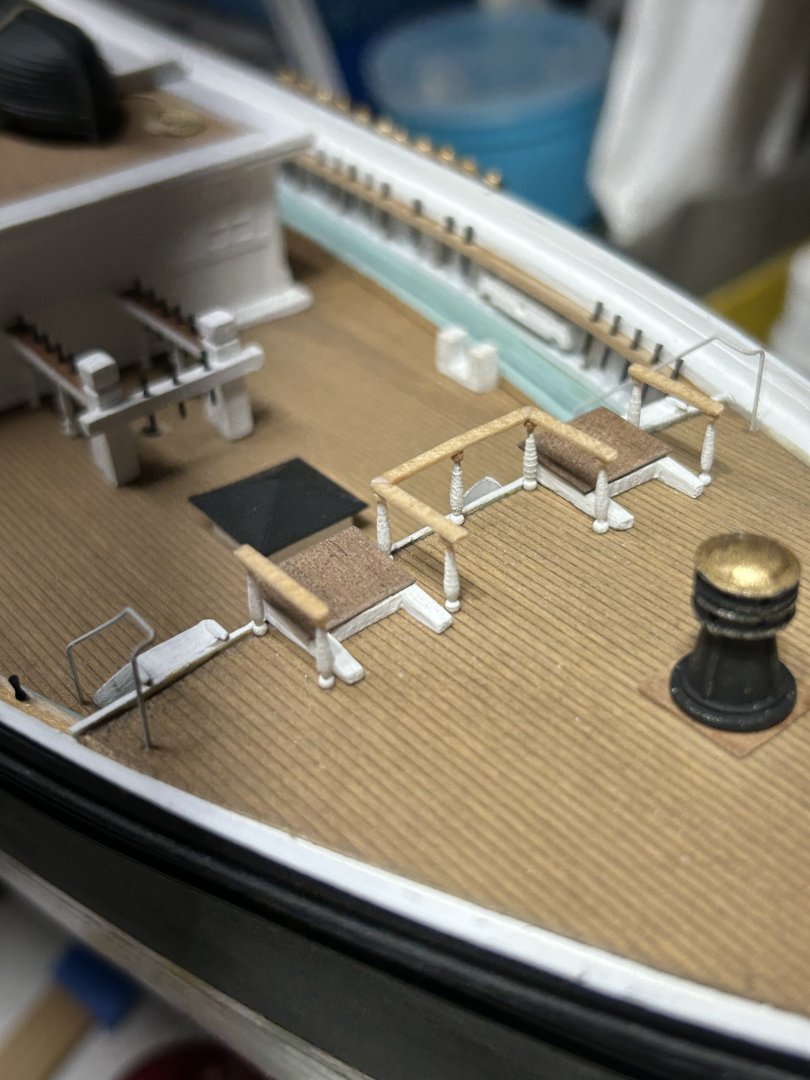
Worked on the forecastle railing a bit. Lots to do. Rob

-
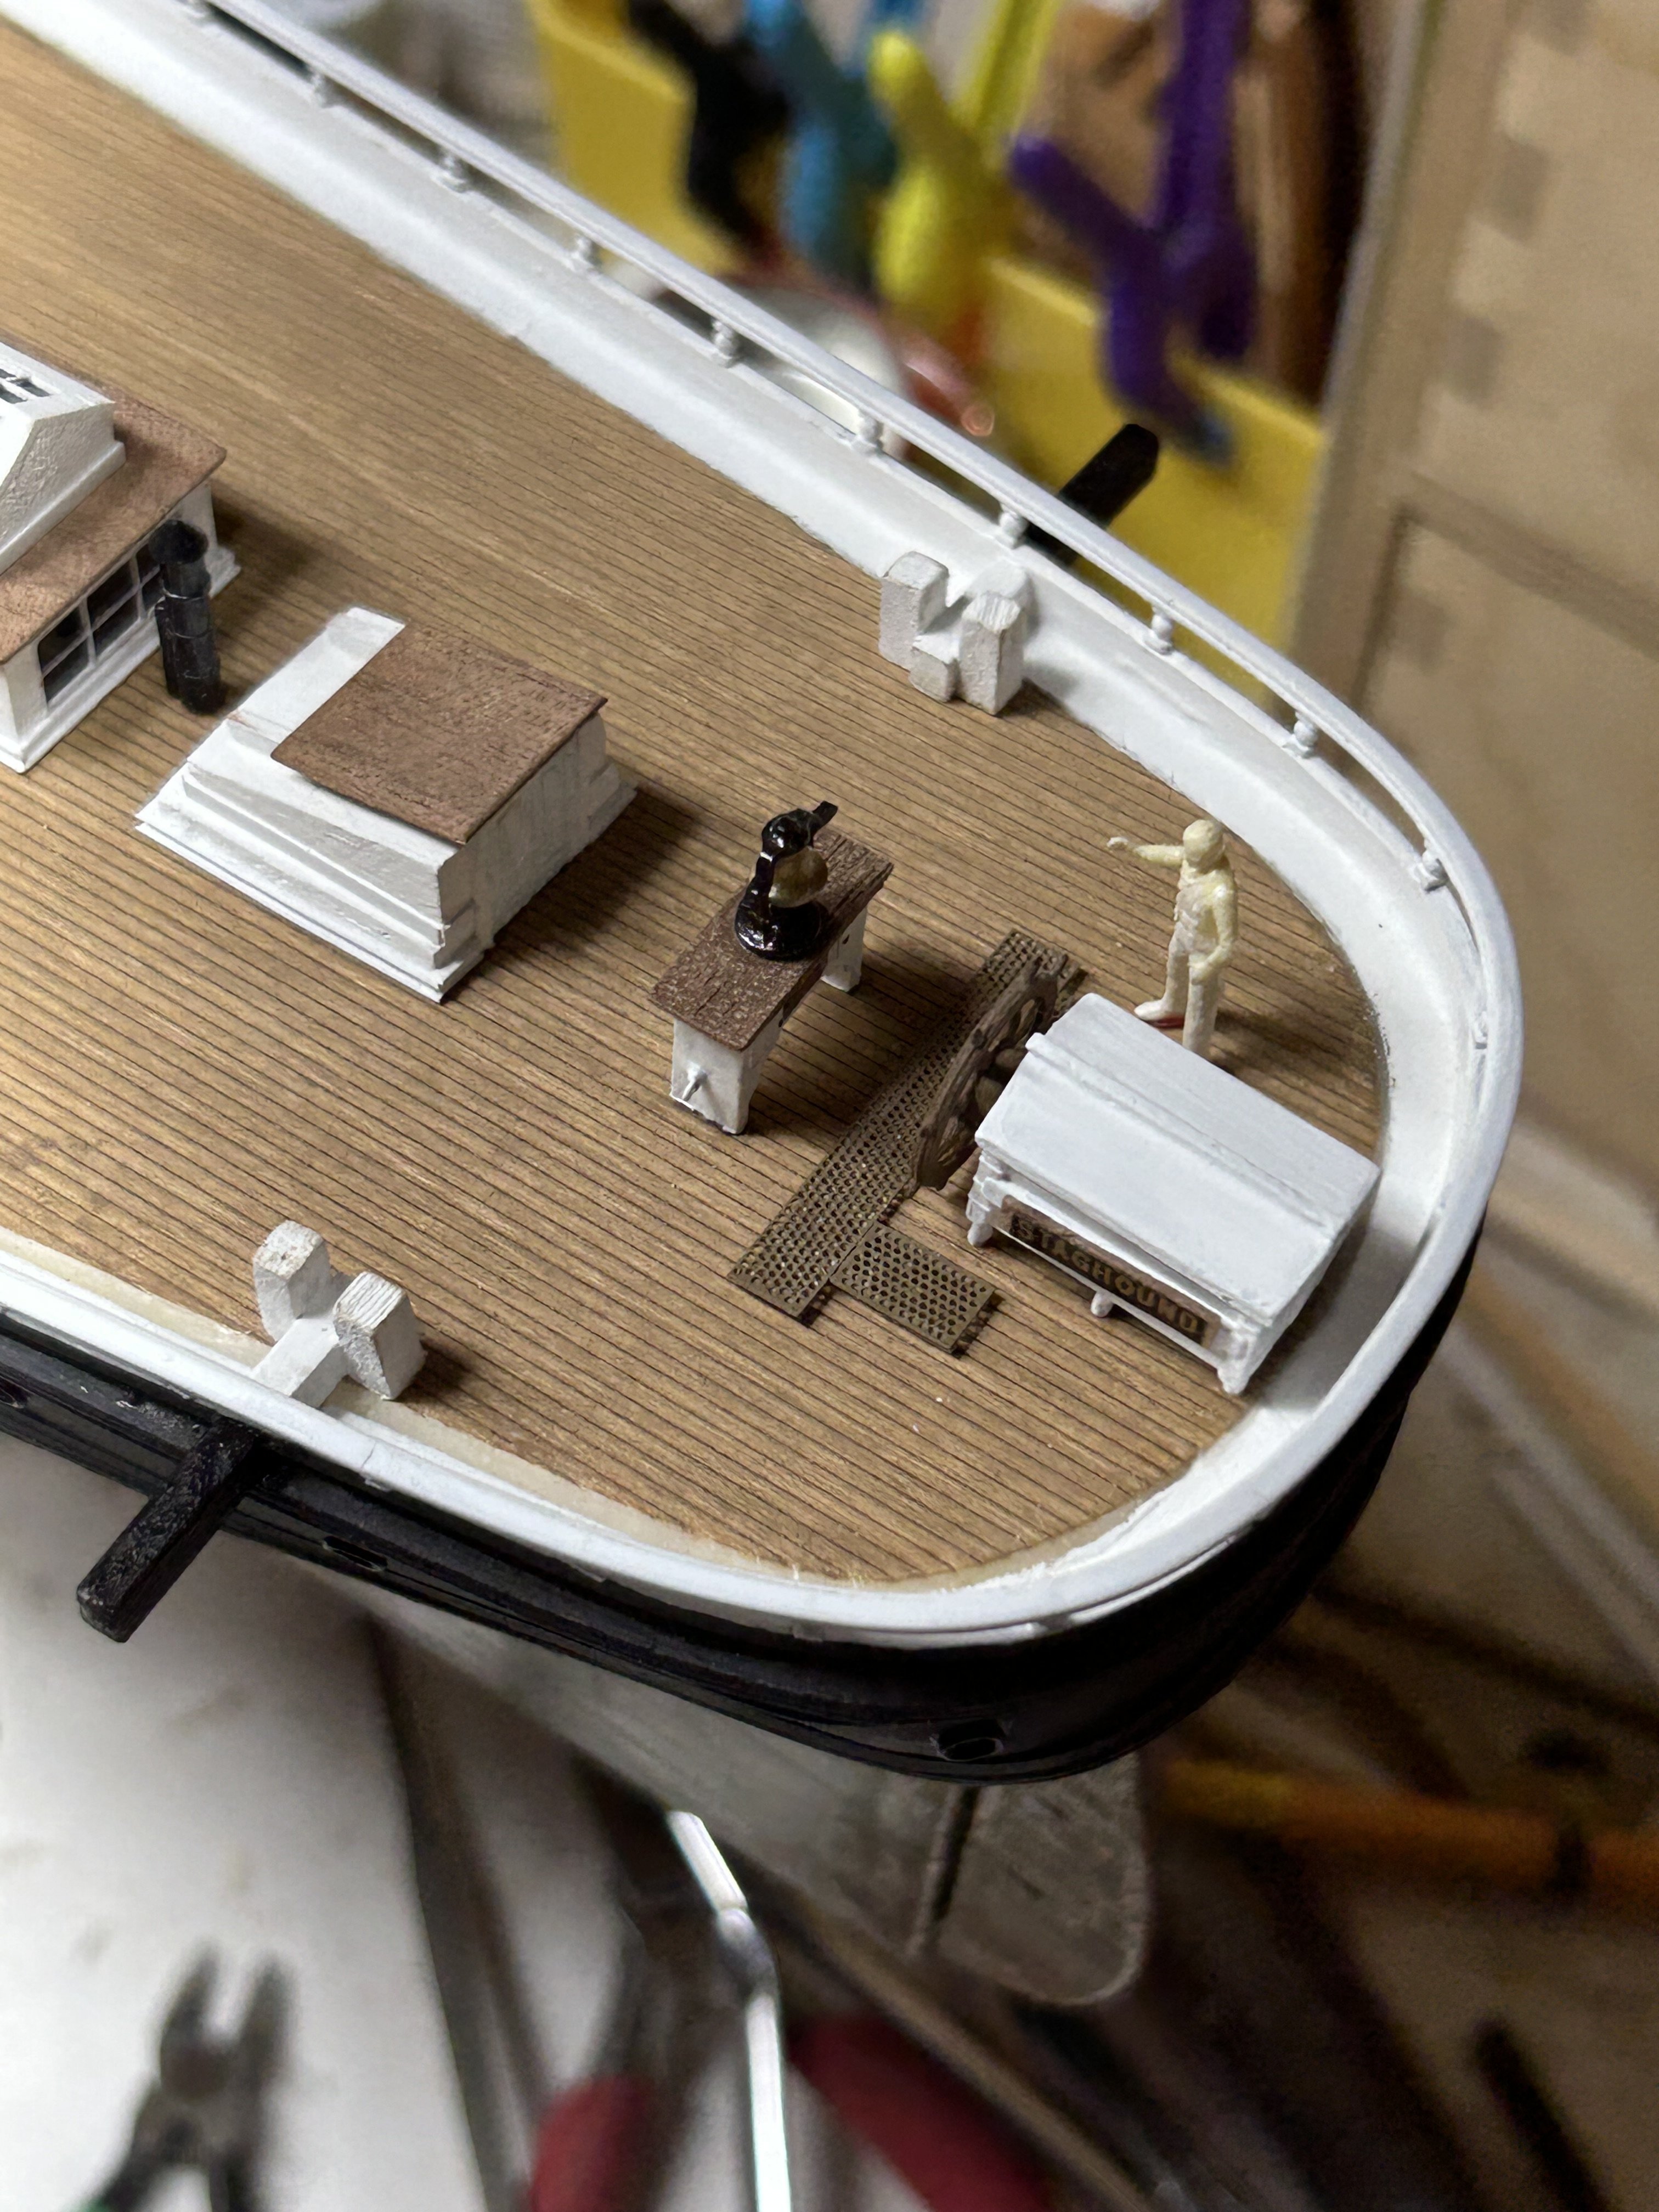
Break out the brasso. Rob
-
I’m sure the brass was tarnished when she was owned by the Portuguese. They let her go pretty badly. Maintenance wasn’t their gig. Rob
-
Thanks Rick. Now to the bumpkins and their bits and poop step iron rails. Then finally, onto the forecastle details. Which will be an entire job in of itself. Rob