rwiederrich
-
Posts
5,520 -
Joined
-
Last visited
Content Type
Profiles
Forums
Gallery
Events
Everything posted by rwiederrich
-
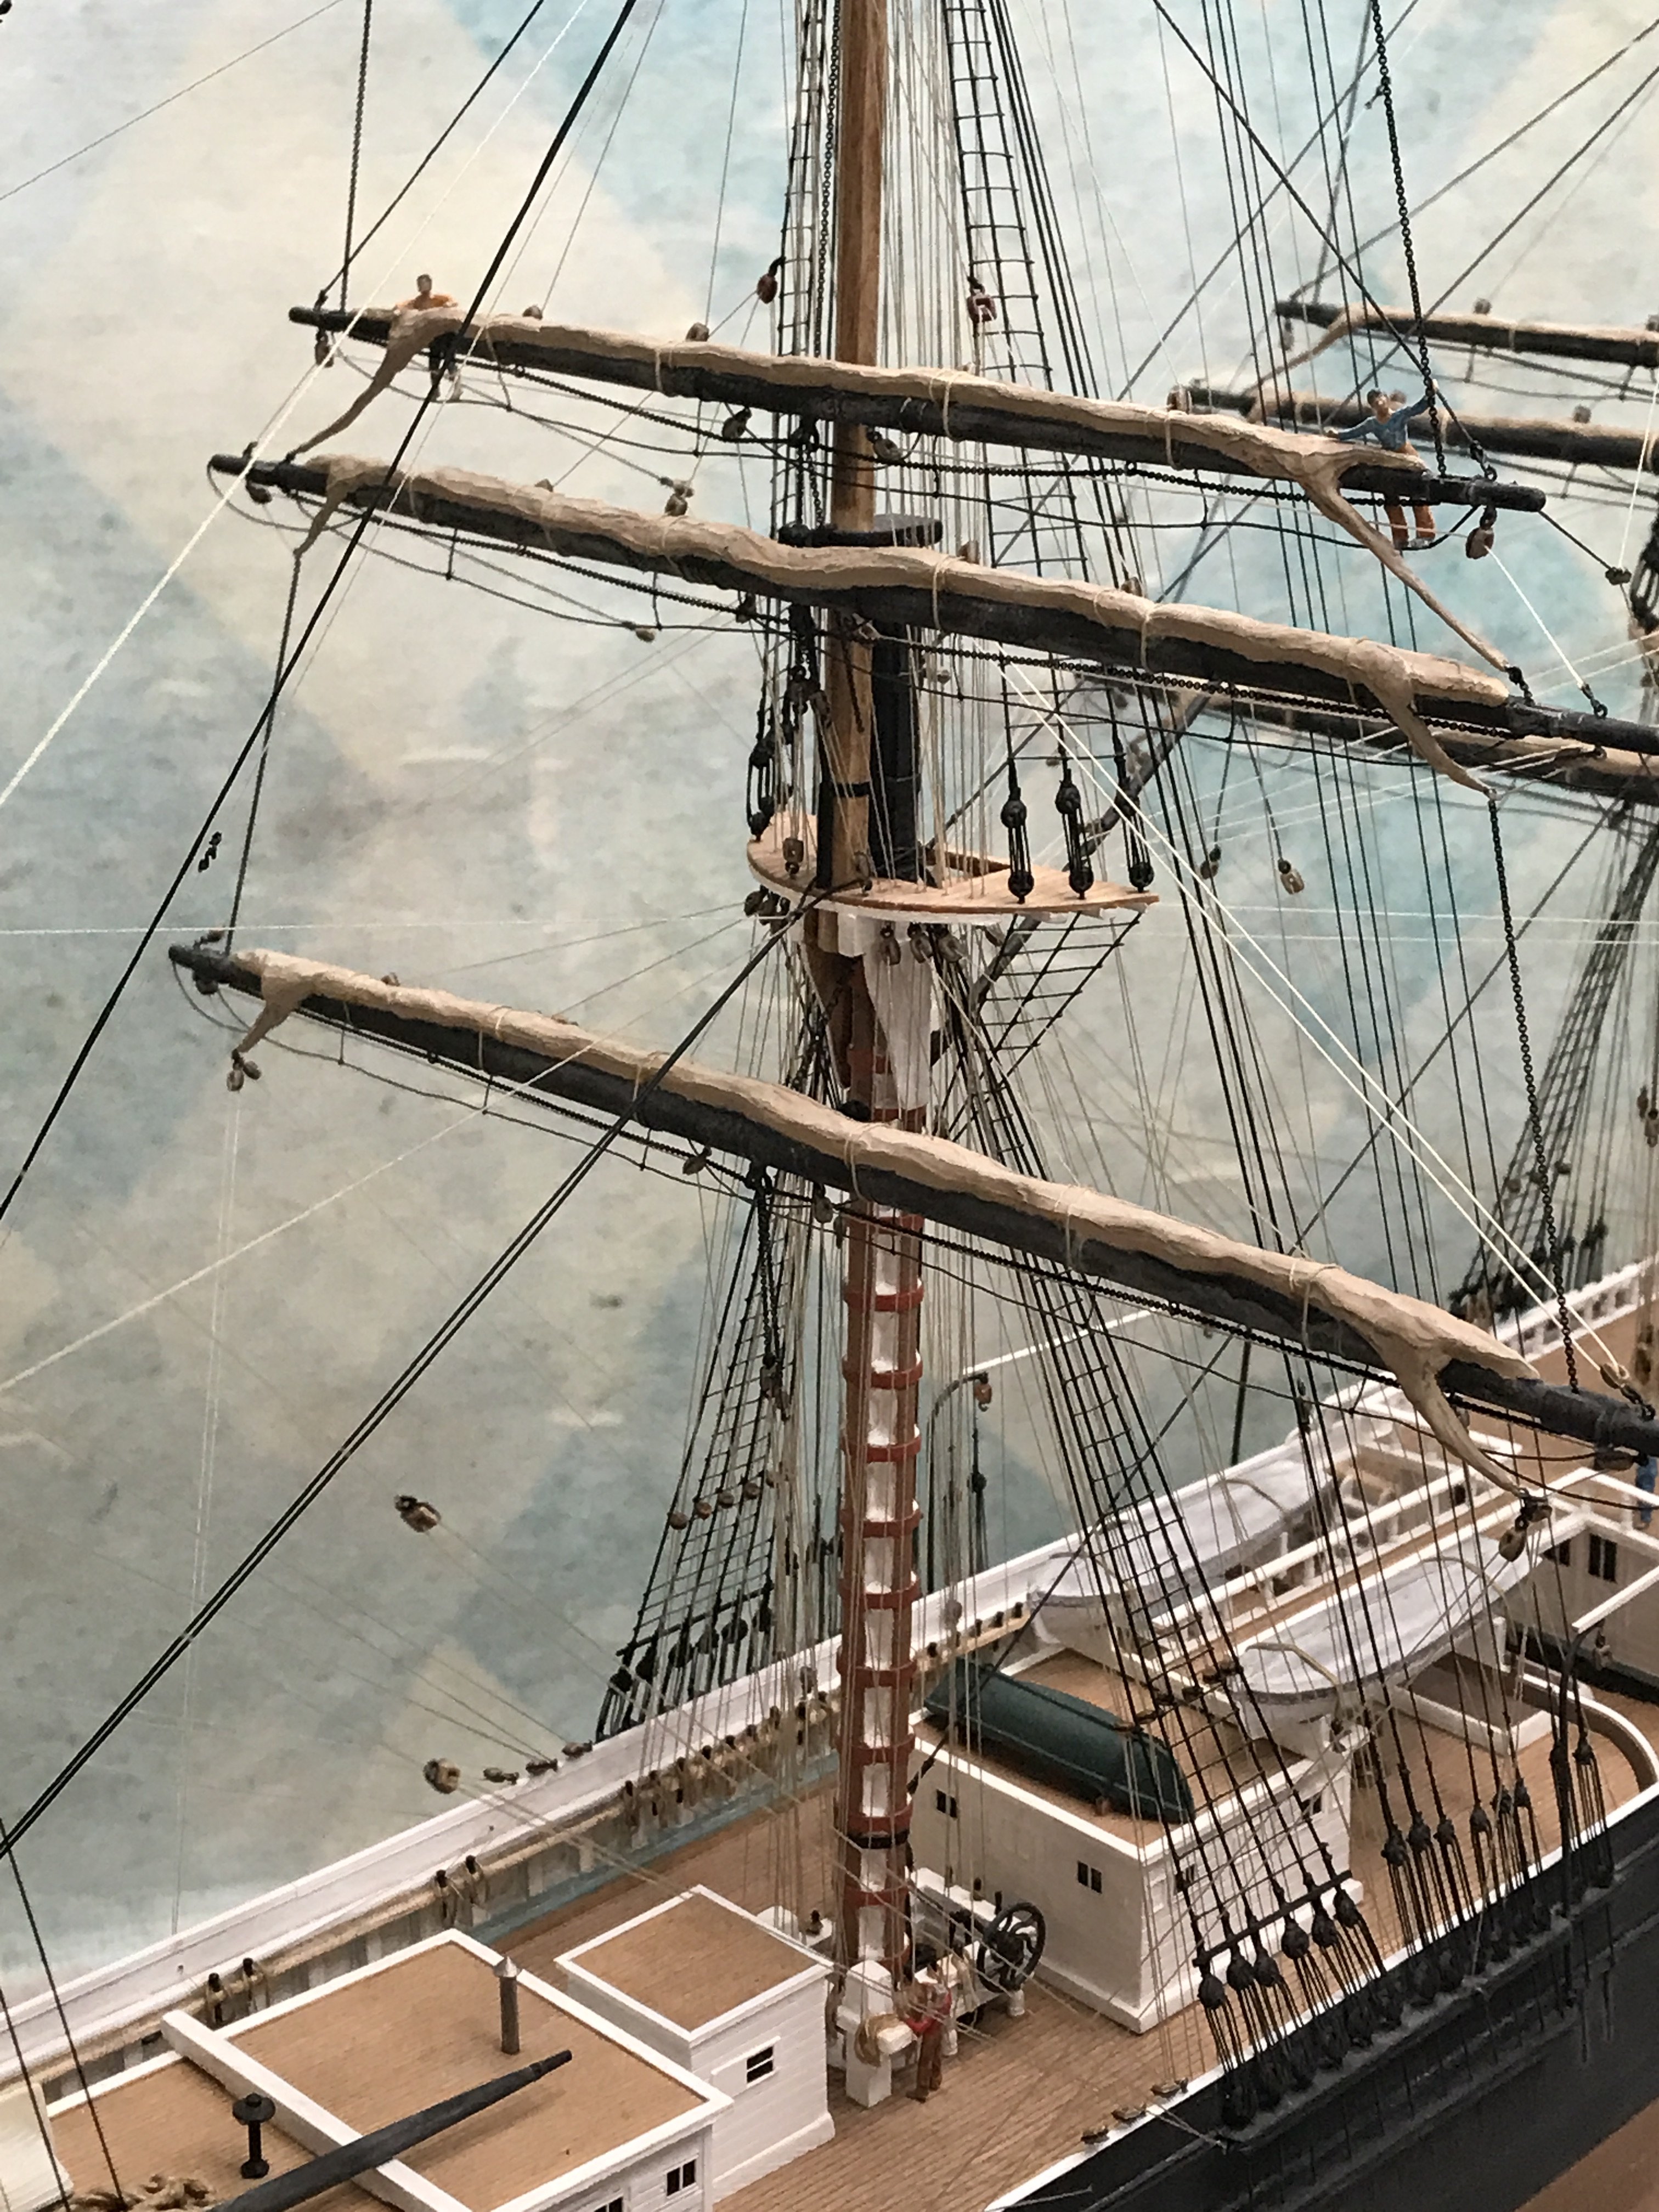
Rick. I wanted to tell you, that I think your representation of this model is fantastic. You've represented yourself as a very good model maker and detailer. However, I have issues with this tye and lift design the manufacturer has chosen to represent on this model. It is clearly a plethora of engineering and design application....with a yard truss coupled with a gin block on the yard head...leading to two more bilateral gin blocks craned beneath the topgallant cross trees. But looking at the overall lift characteristics and actual lift extension...when fully raised the topsail yard will just barely pass the mid point on the top mast. The yard can never reach its full lift...due to the impedance of the exaggerated lengths of the entire lifting design. You'll just plain run out of lift room due to, too many components of the lift system. I noticed this same situation on other builders versions of this kit as well. If the yard gin block was fixed directly to the yard, and the upper double gin blocks were fixed with less crane strapping. Maybe it might be possible to lift that yard as far up against the futtock shroud band, as it should be. This is only an observation of the kit...NOT your exemplary fabrication of it. Sorry for any perceived malicious remarks. I just always evaluate rigging designs that model manufacturers use and improve them for my own models if I can....to follow more traditionally functioning designs....of real sailing vessels. Rob
-
Riiight. I forgot. They are very nice...revisiting them again. You went all out on those sheet blocks. Mine are a bit simpler in design Rob
-
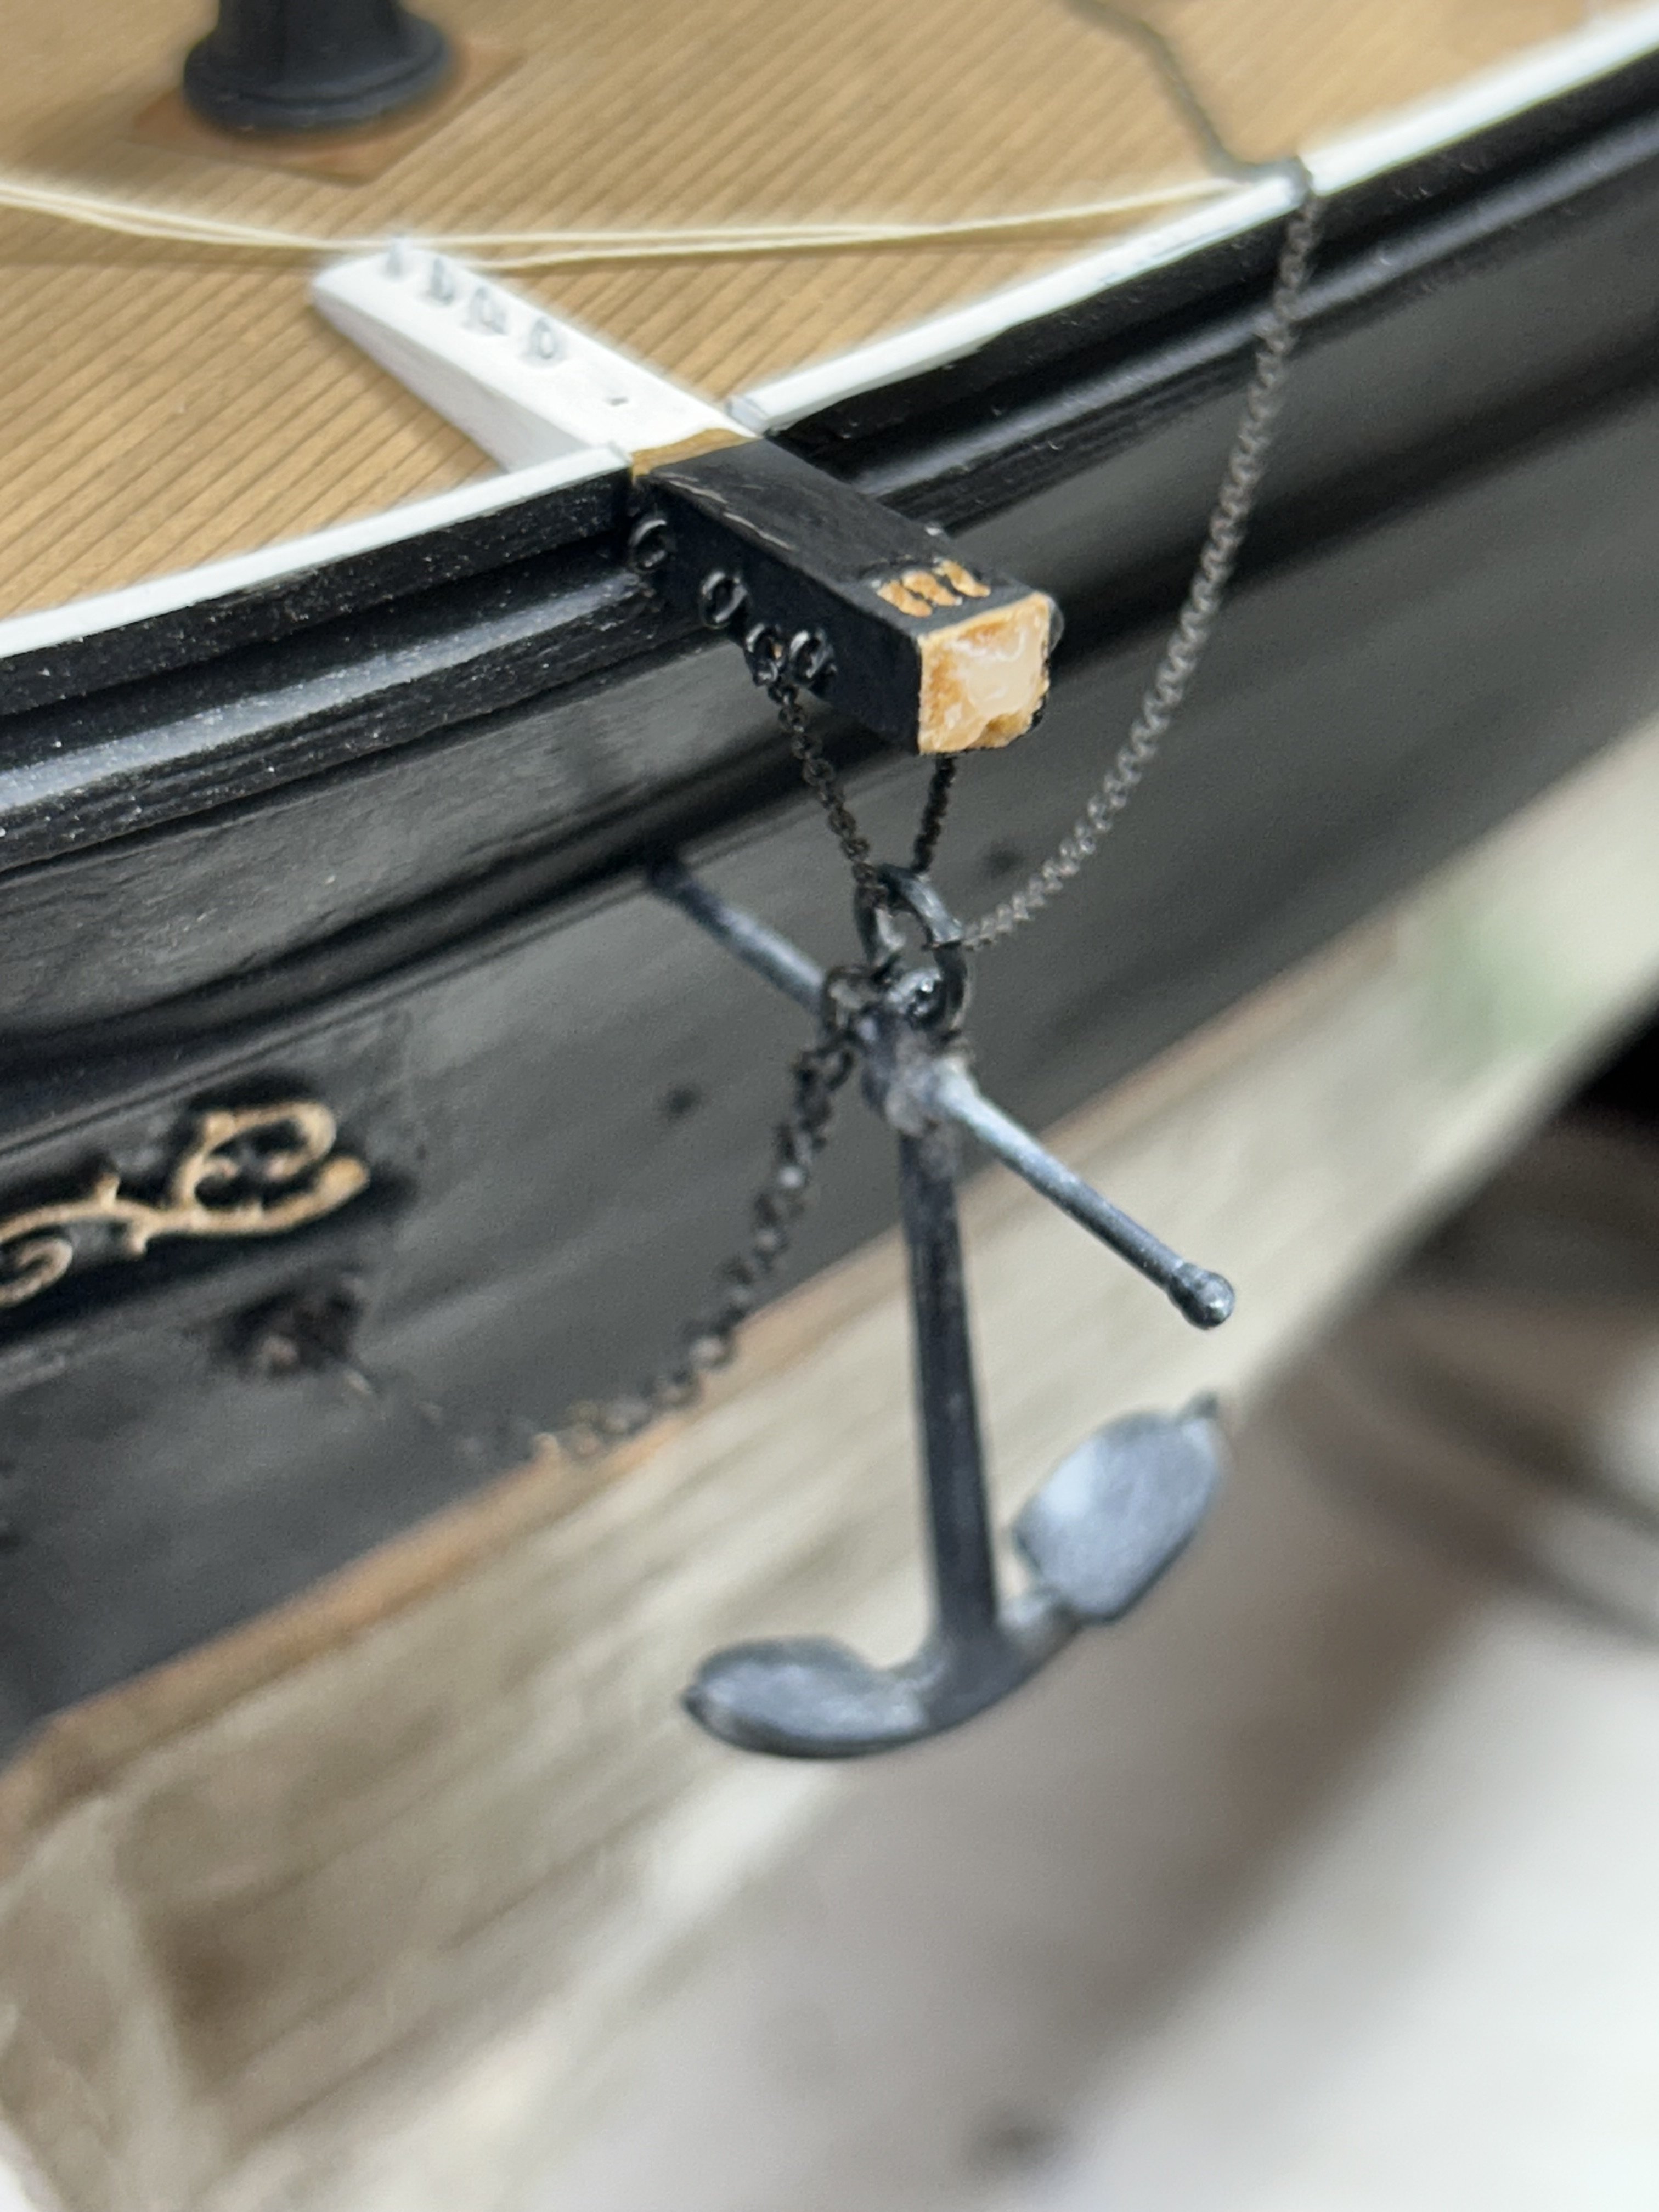
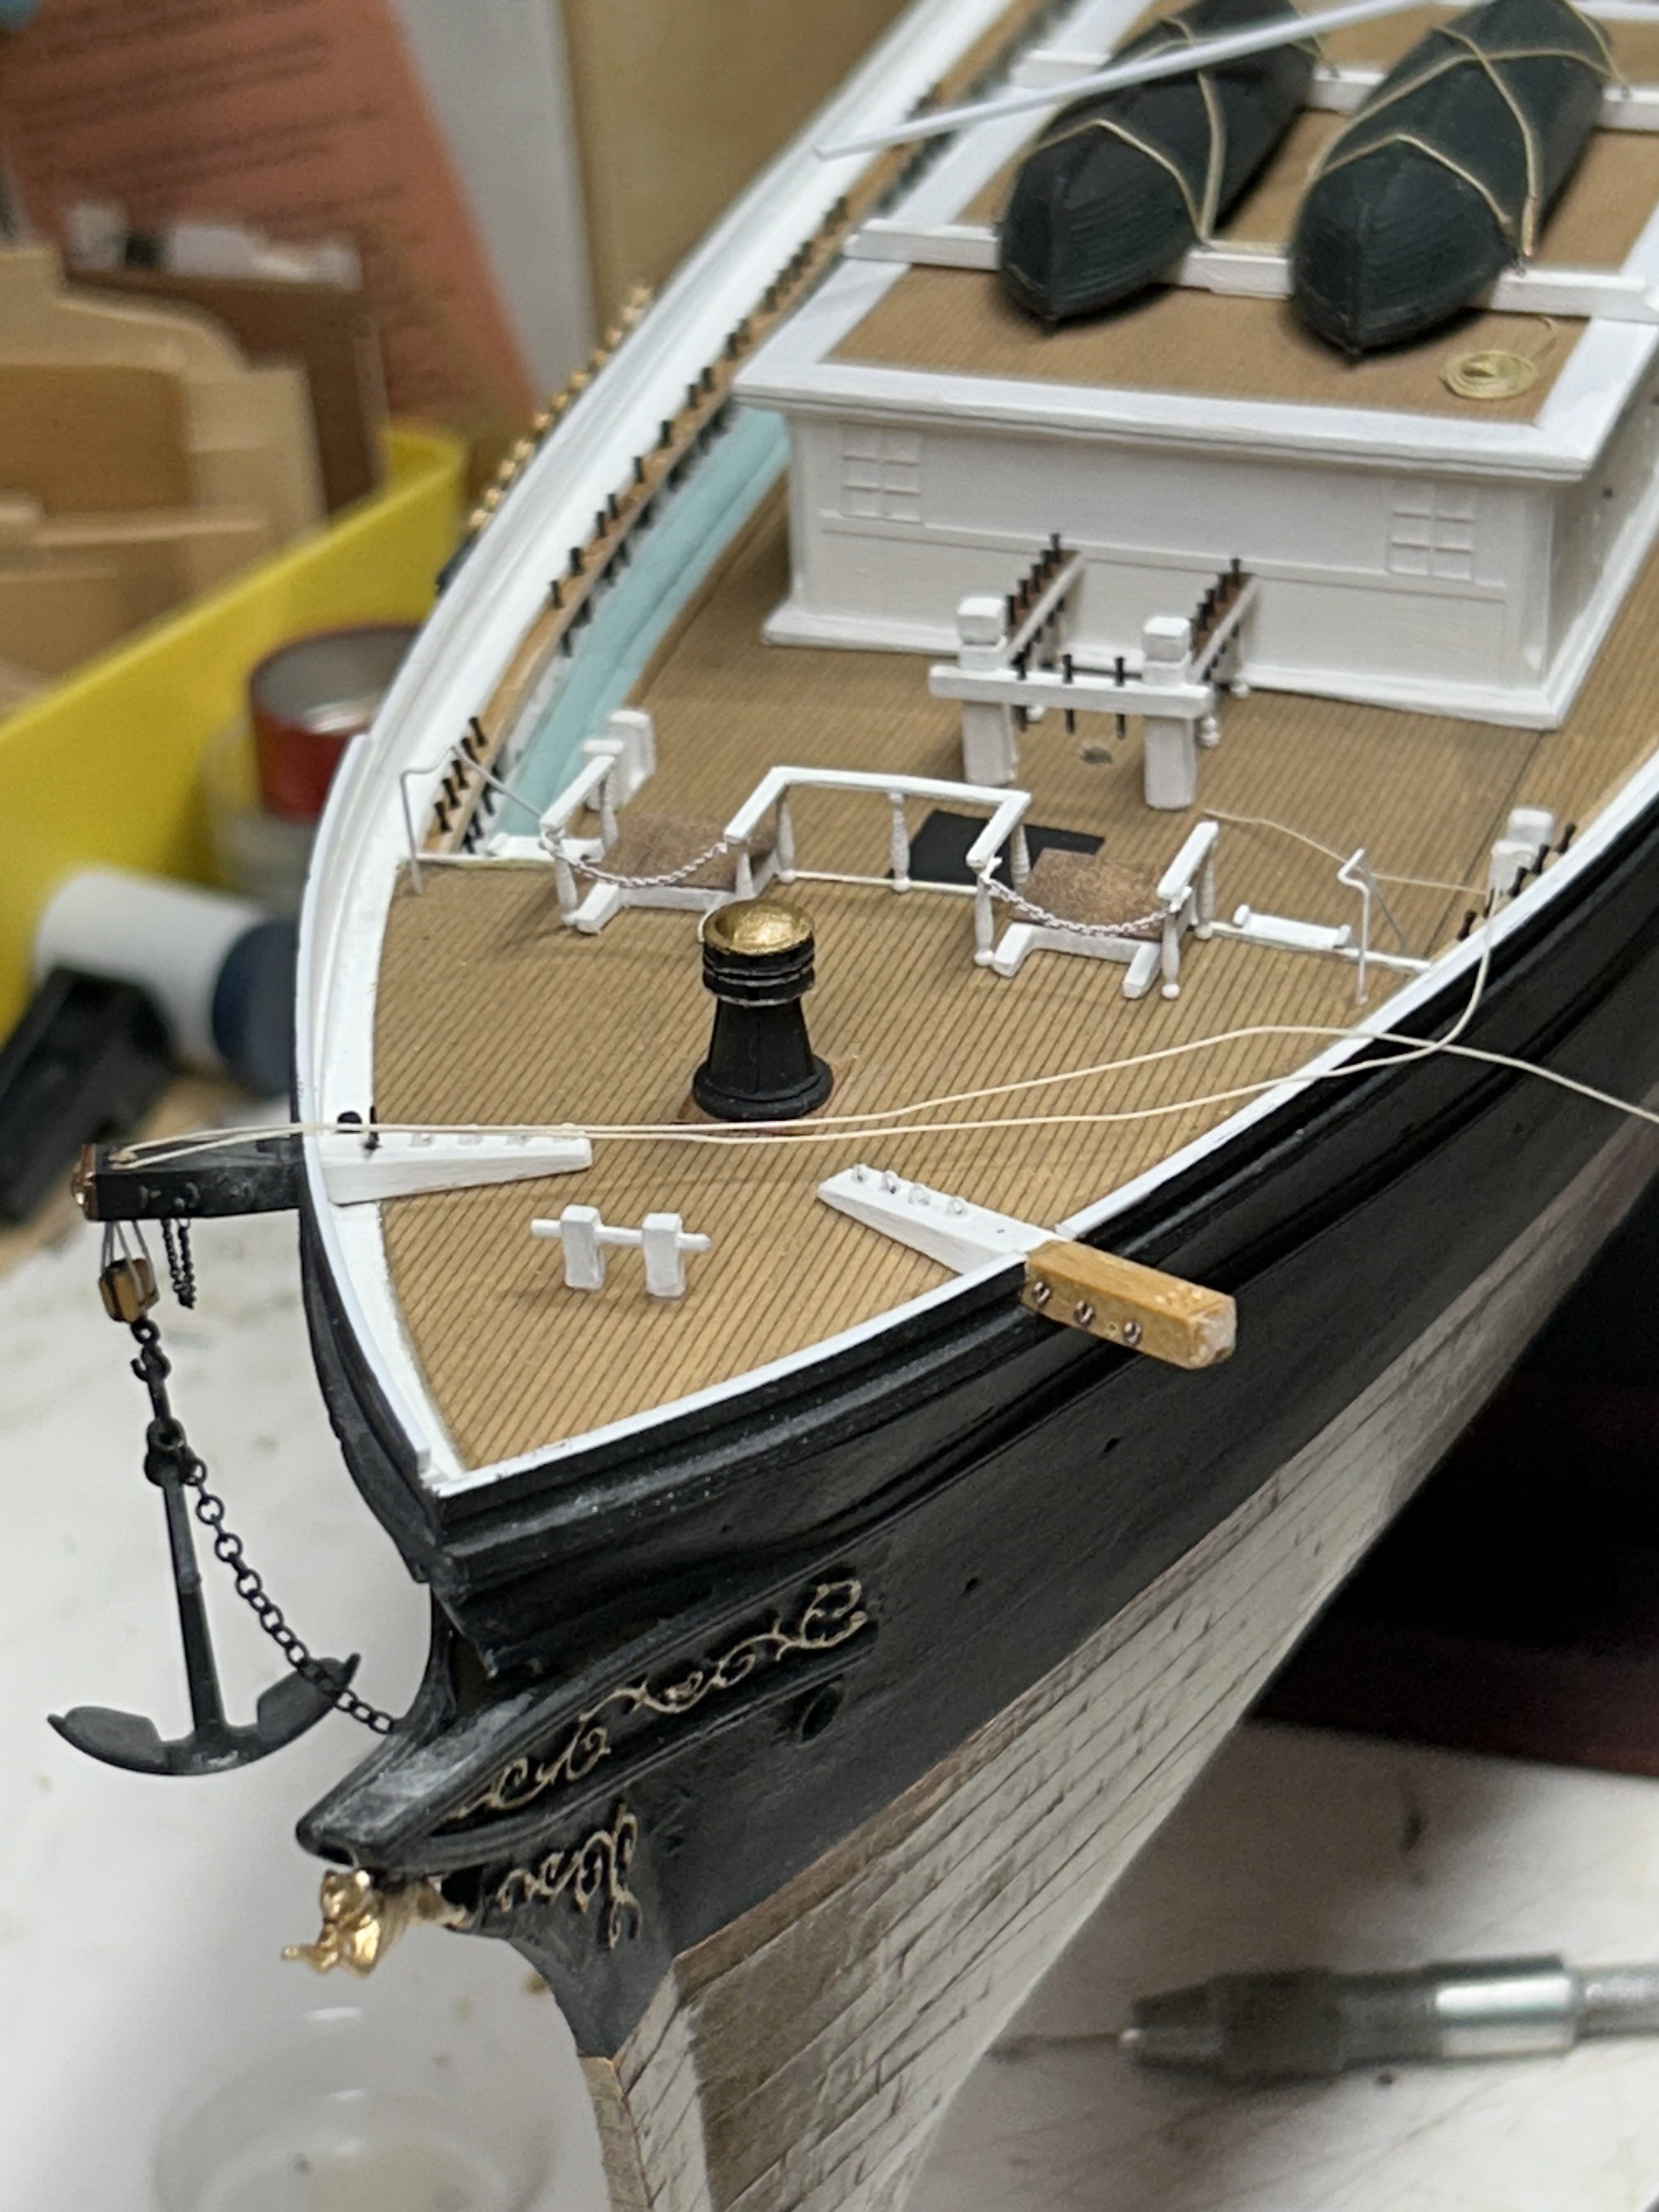
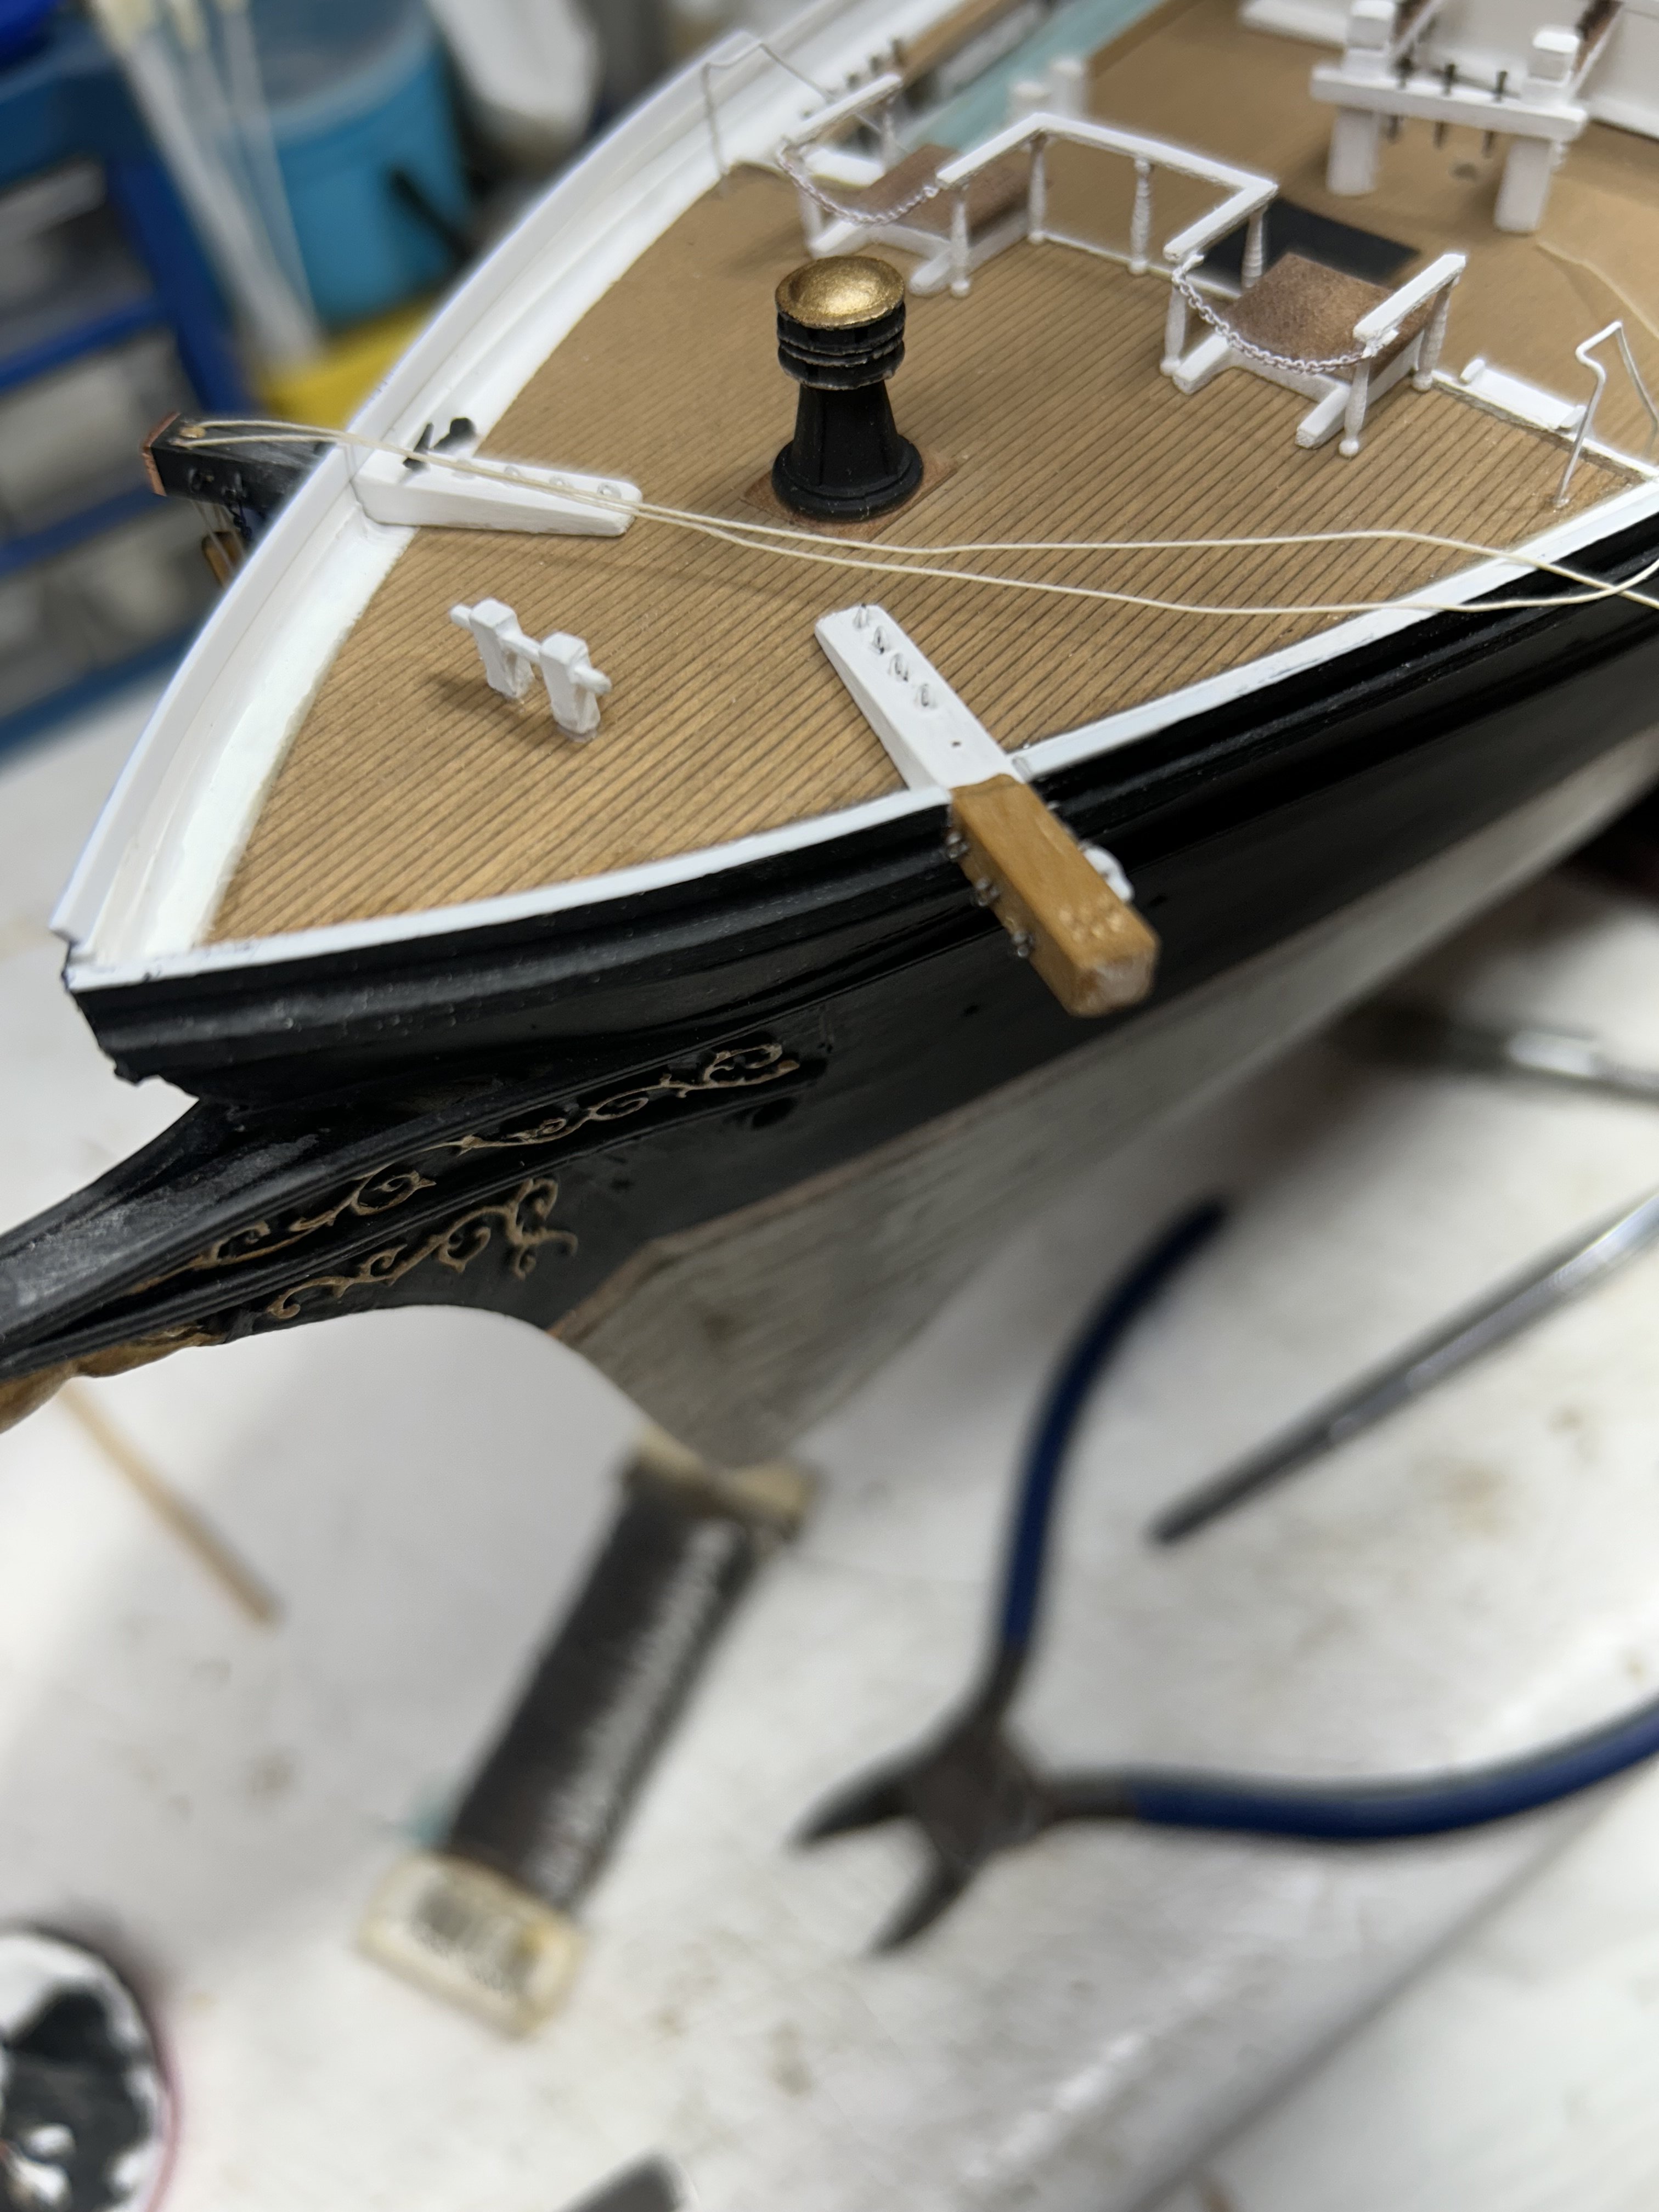
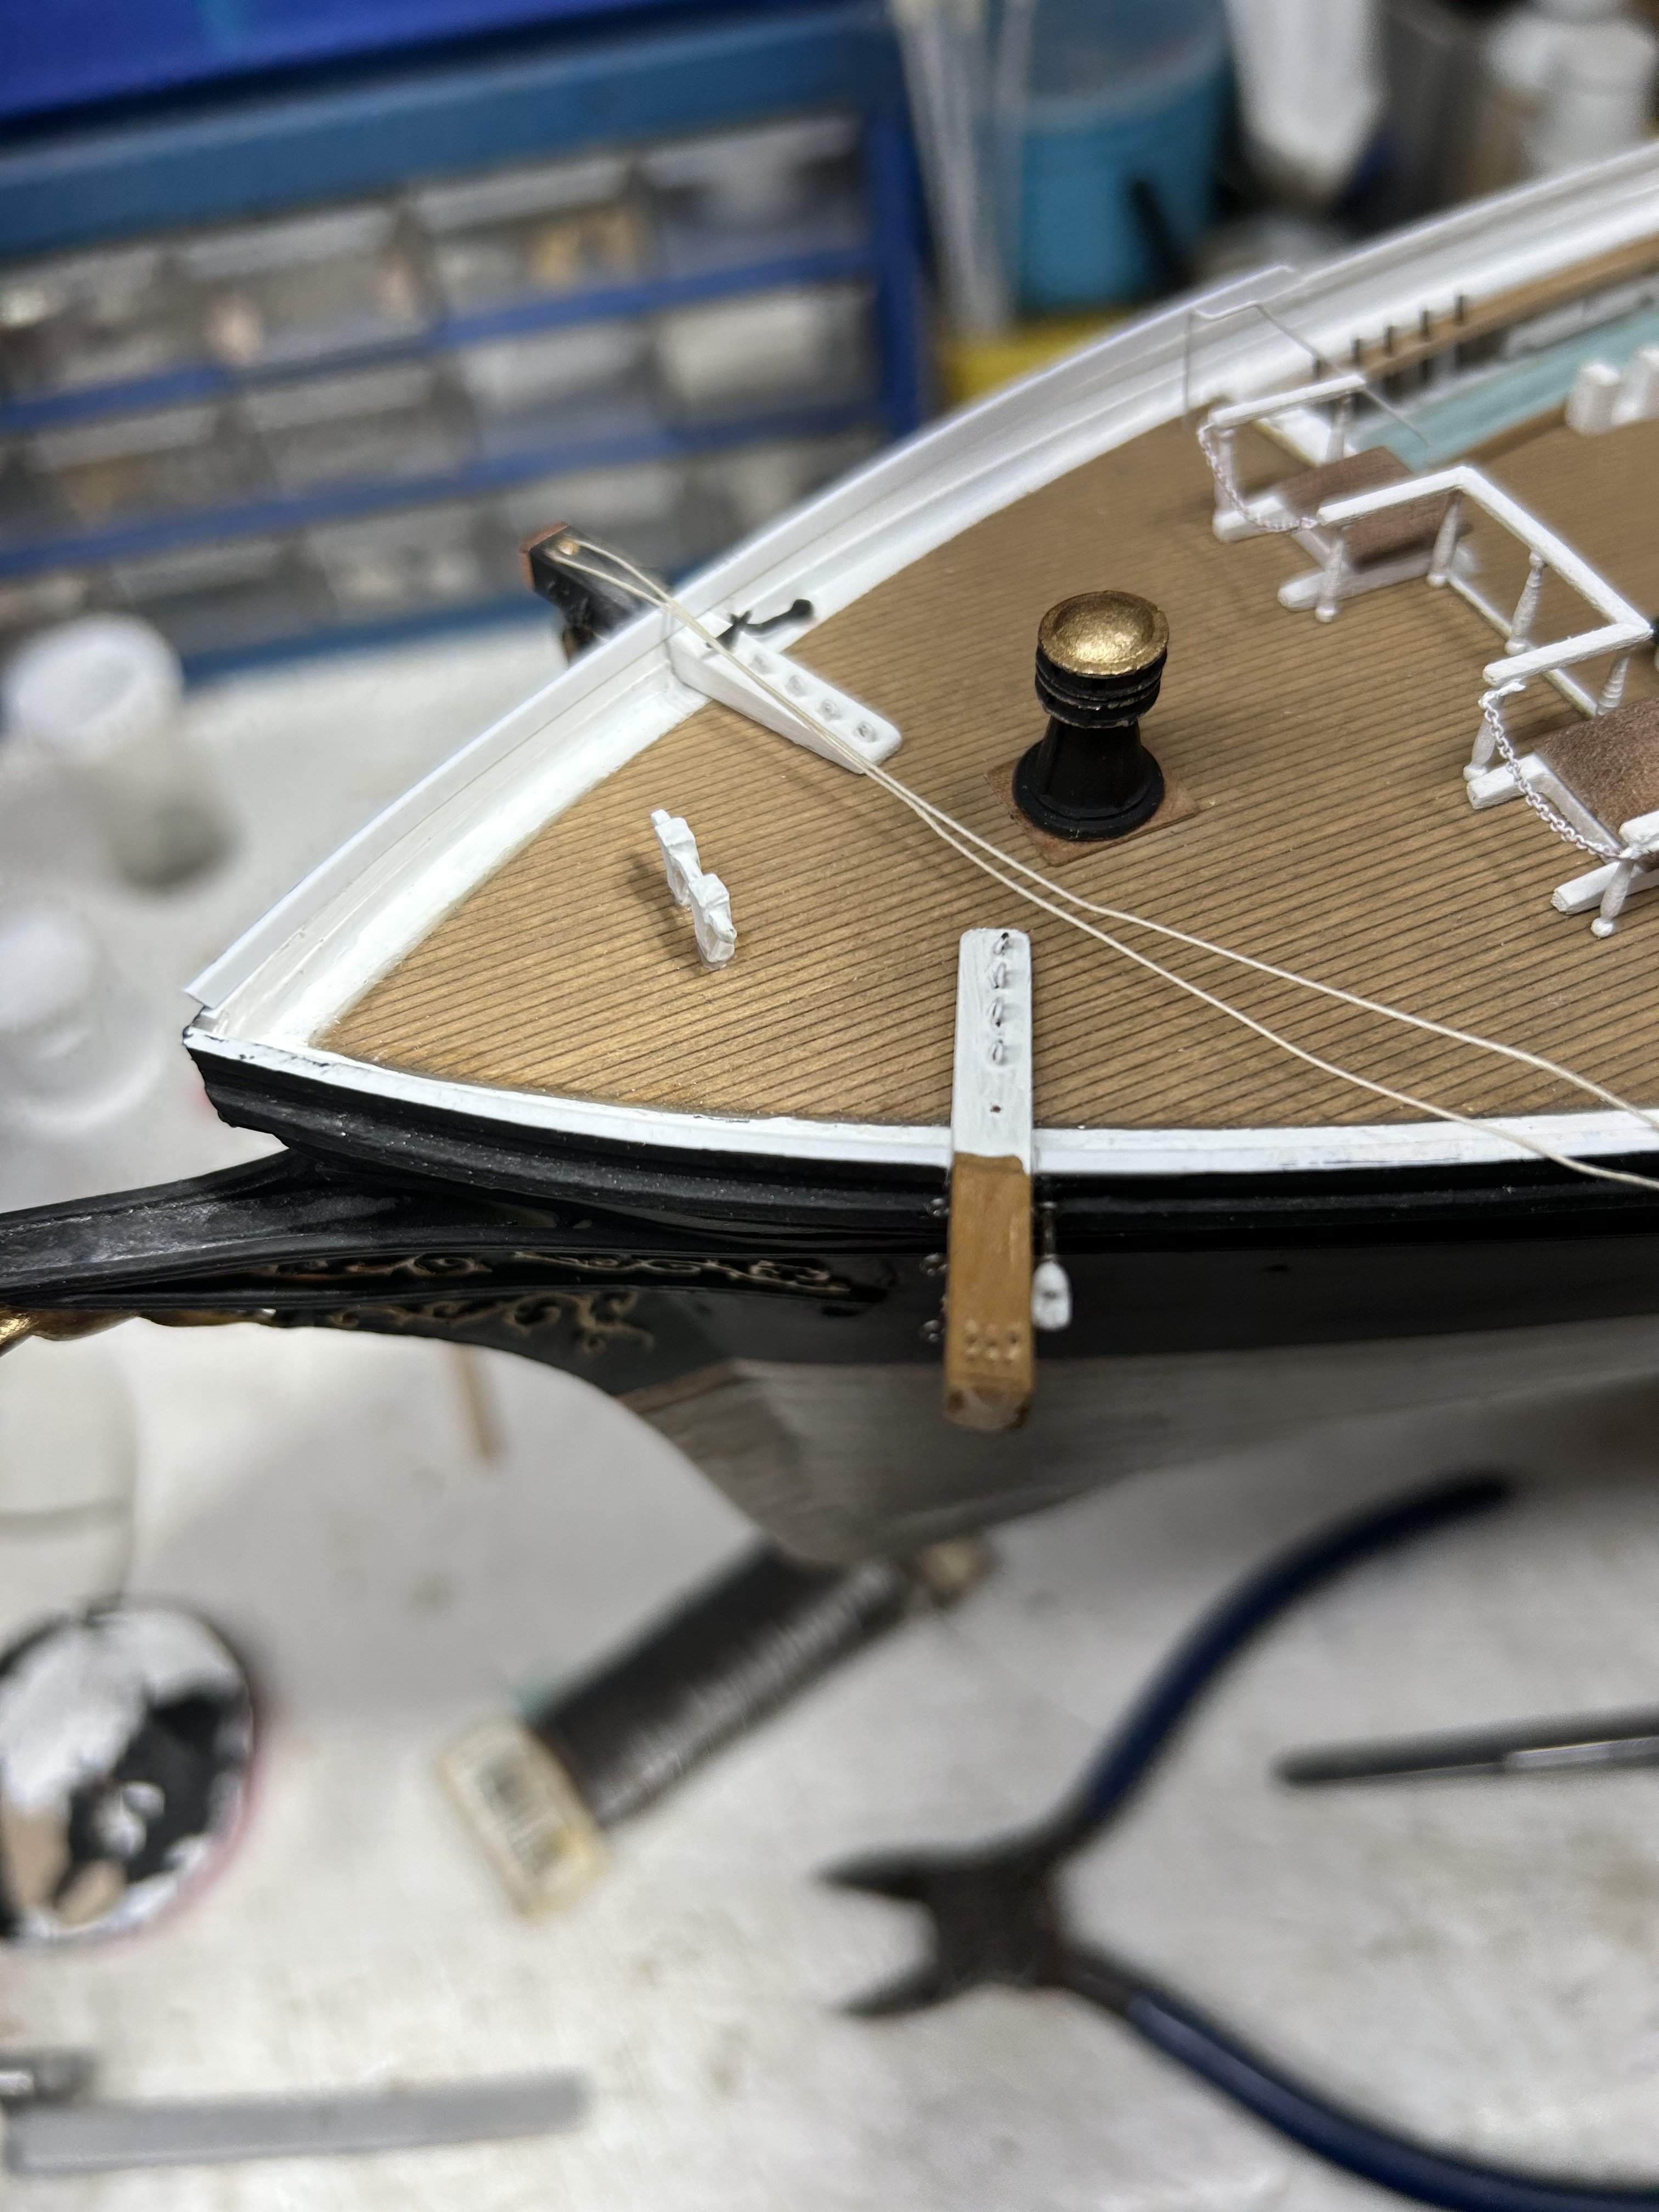
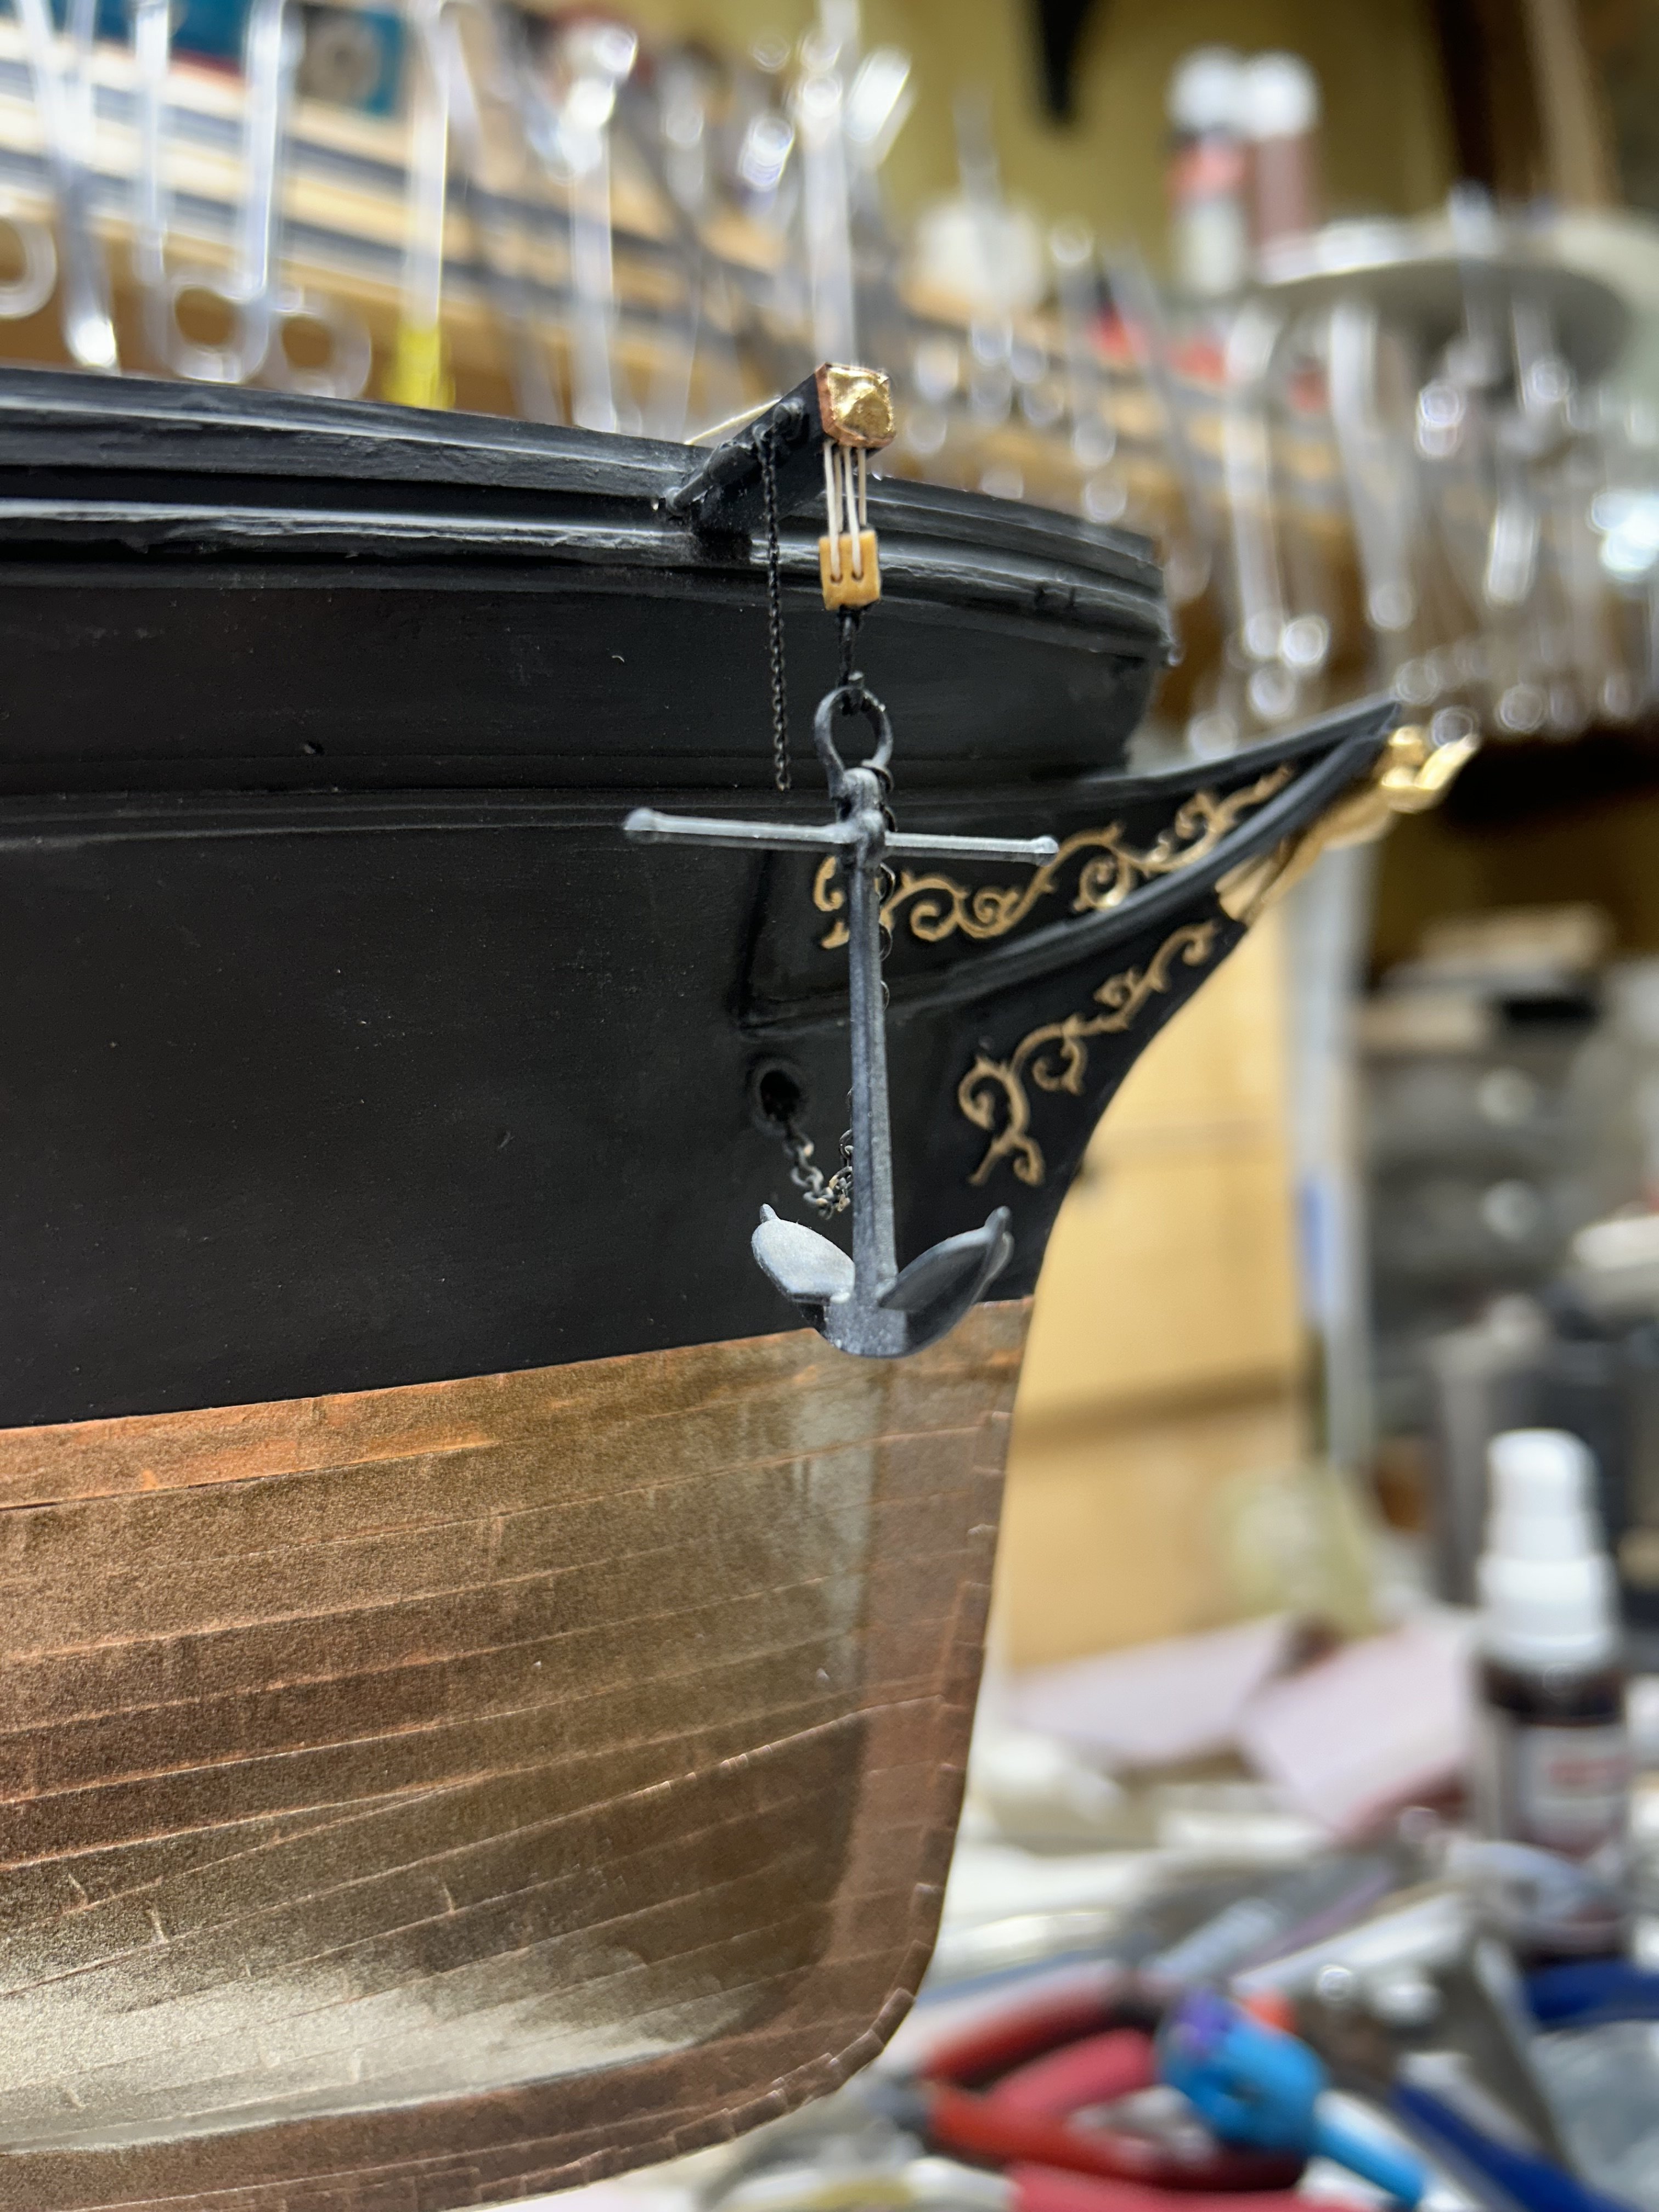
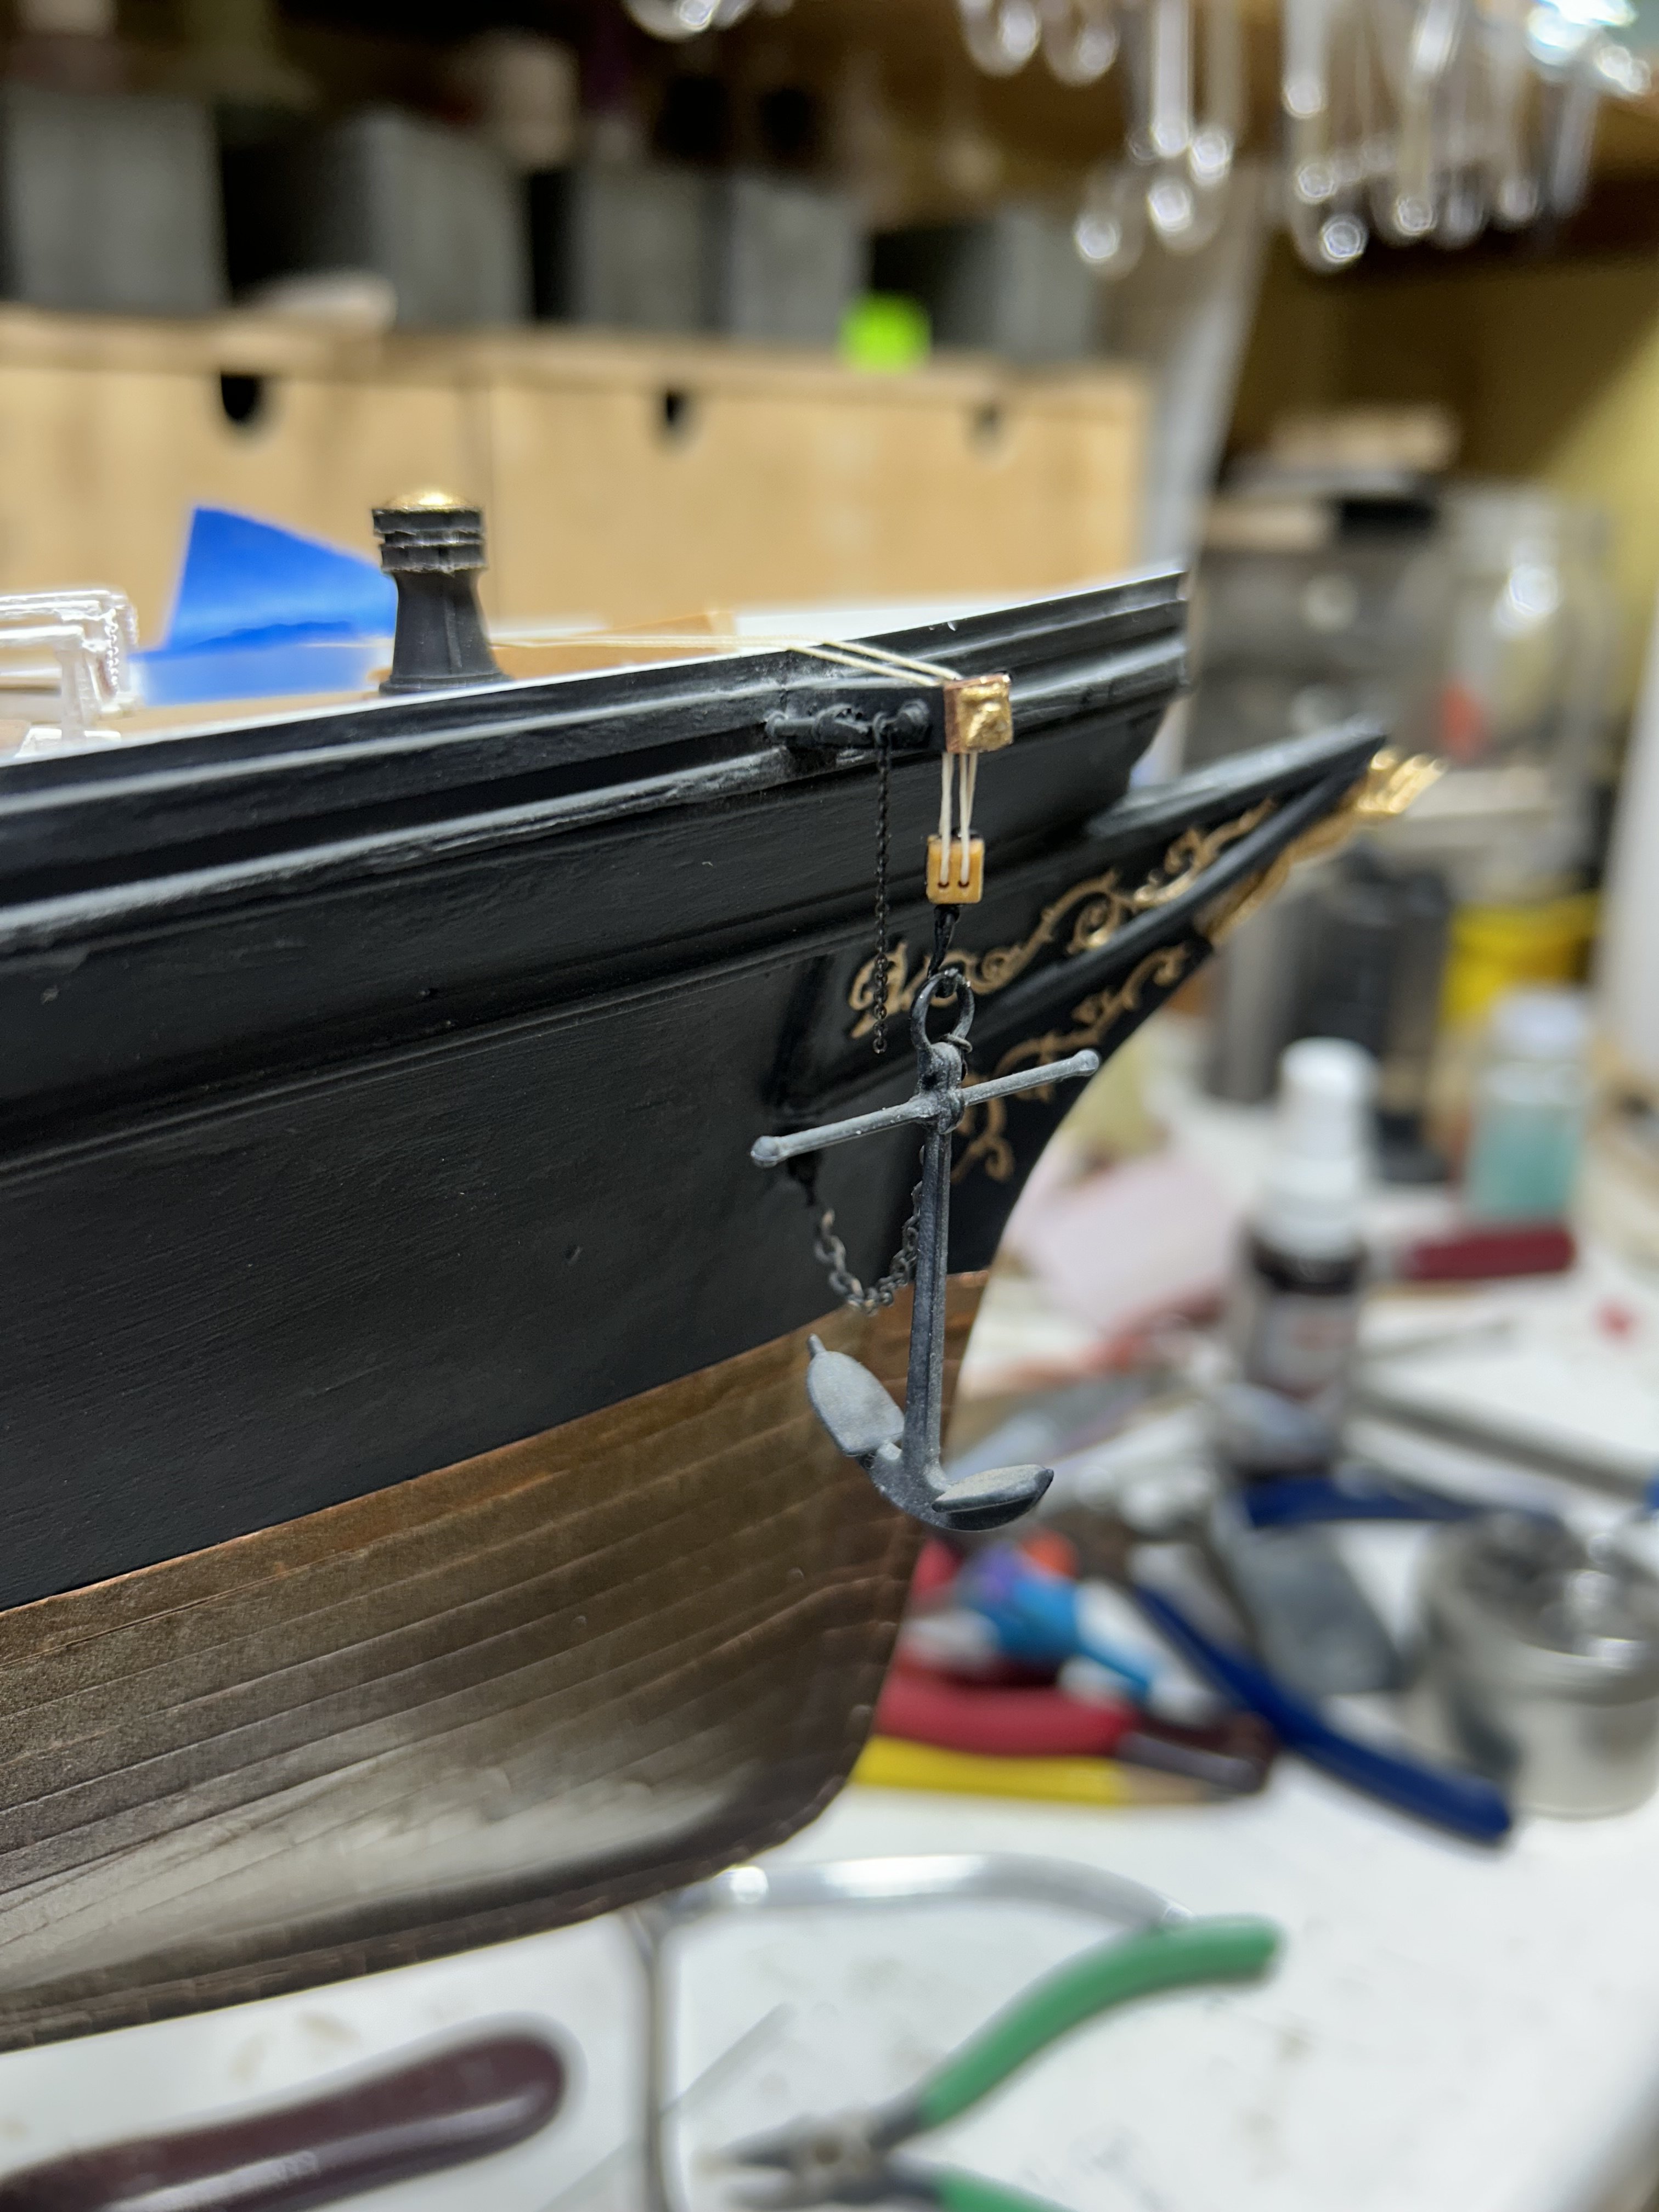
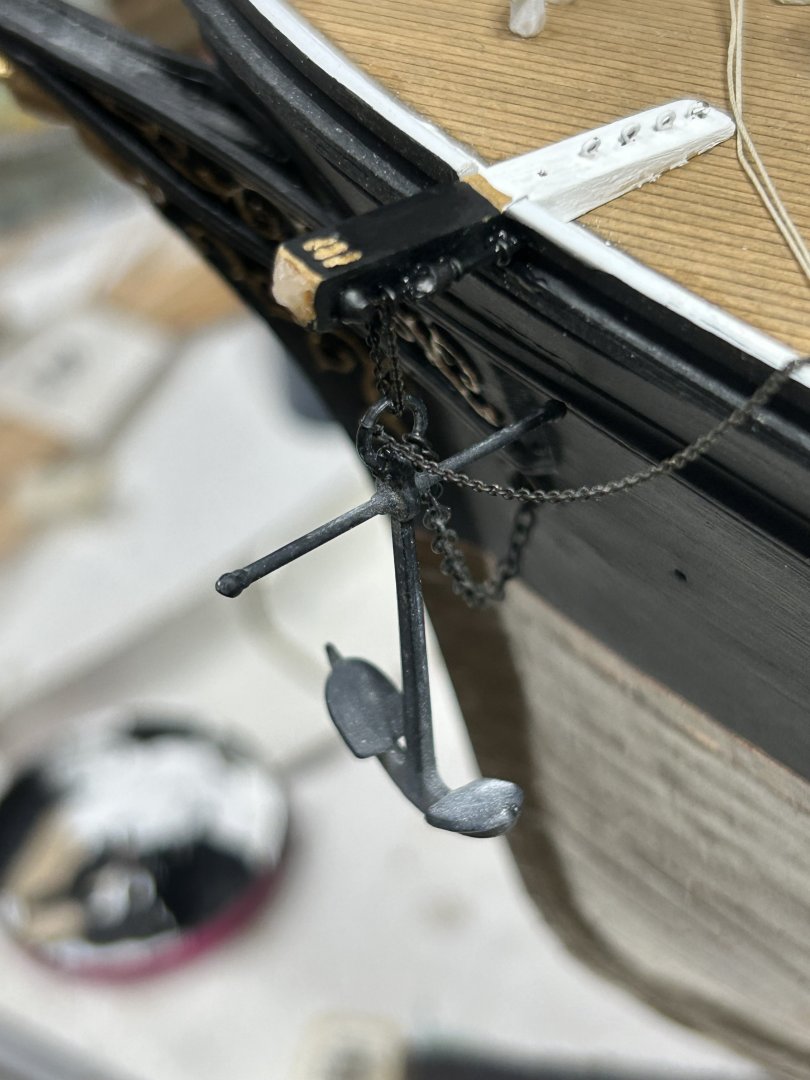
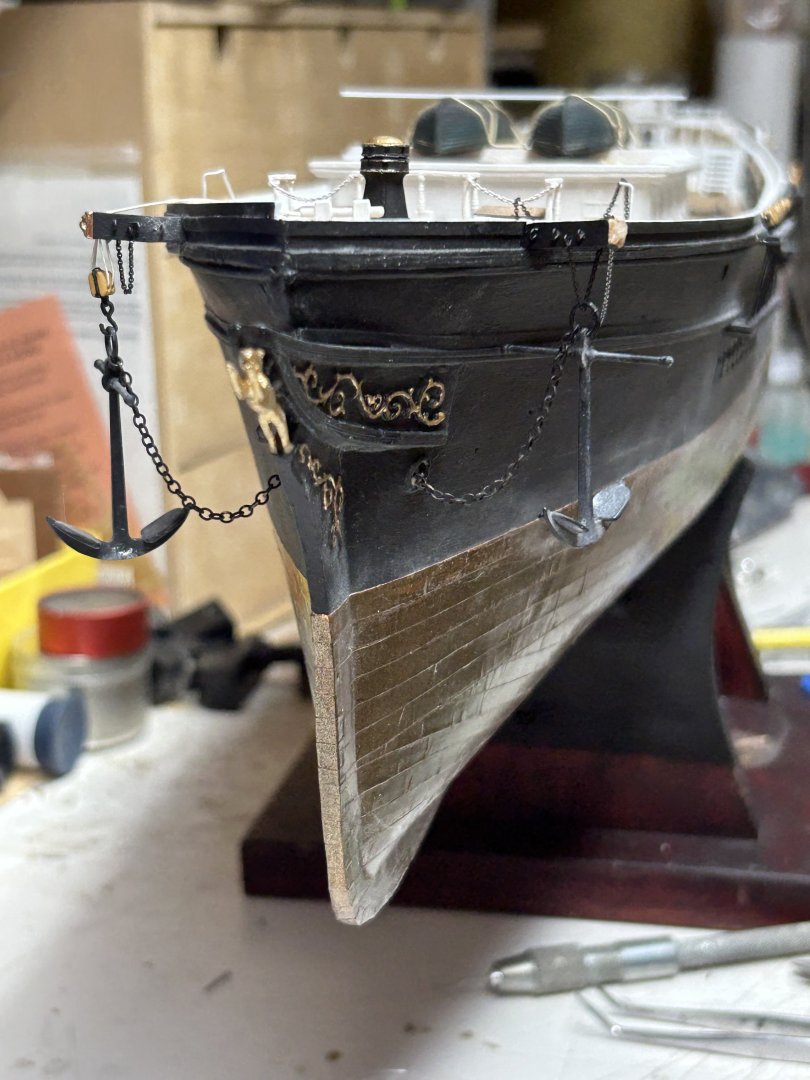
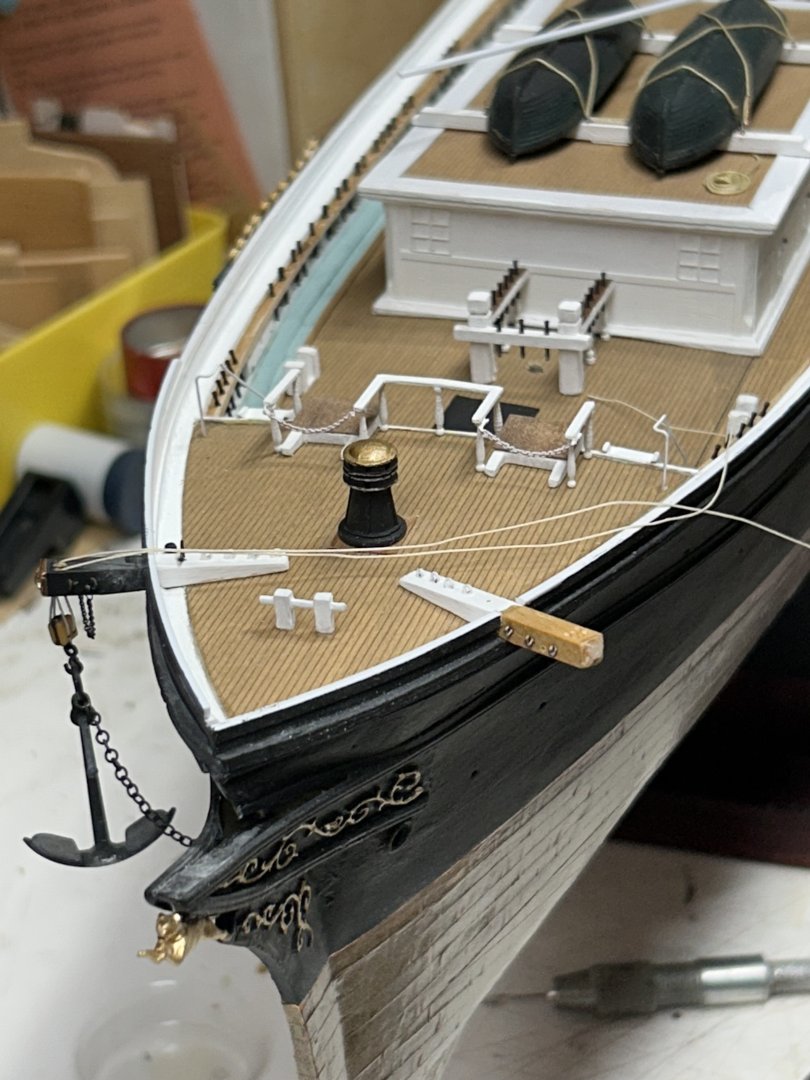
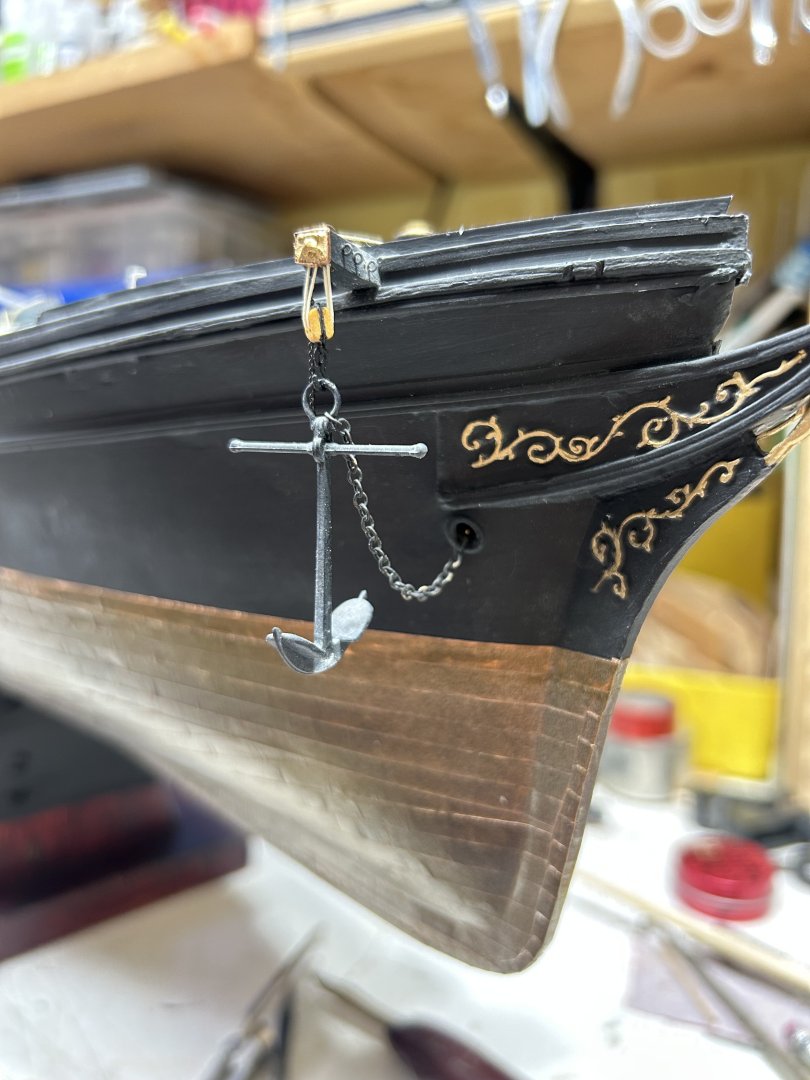
The port anchor will be supported on the splash rail , I think. It’s not finished. Rob
-
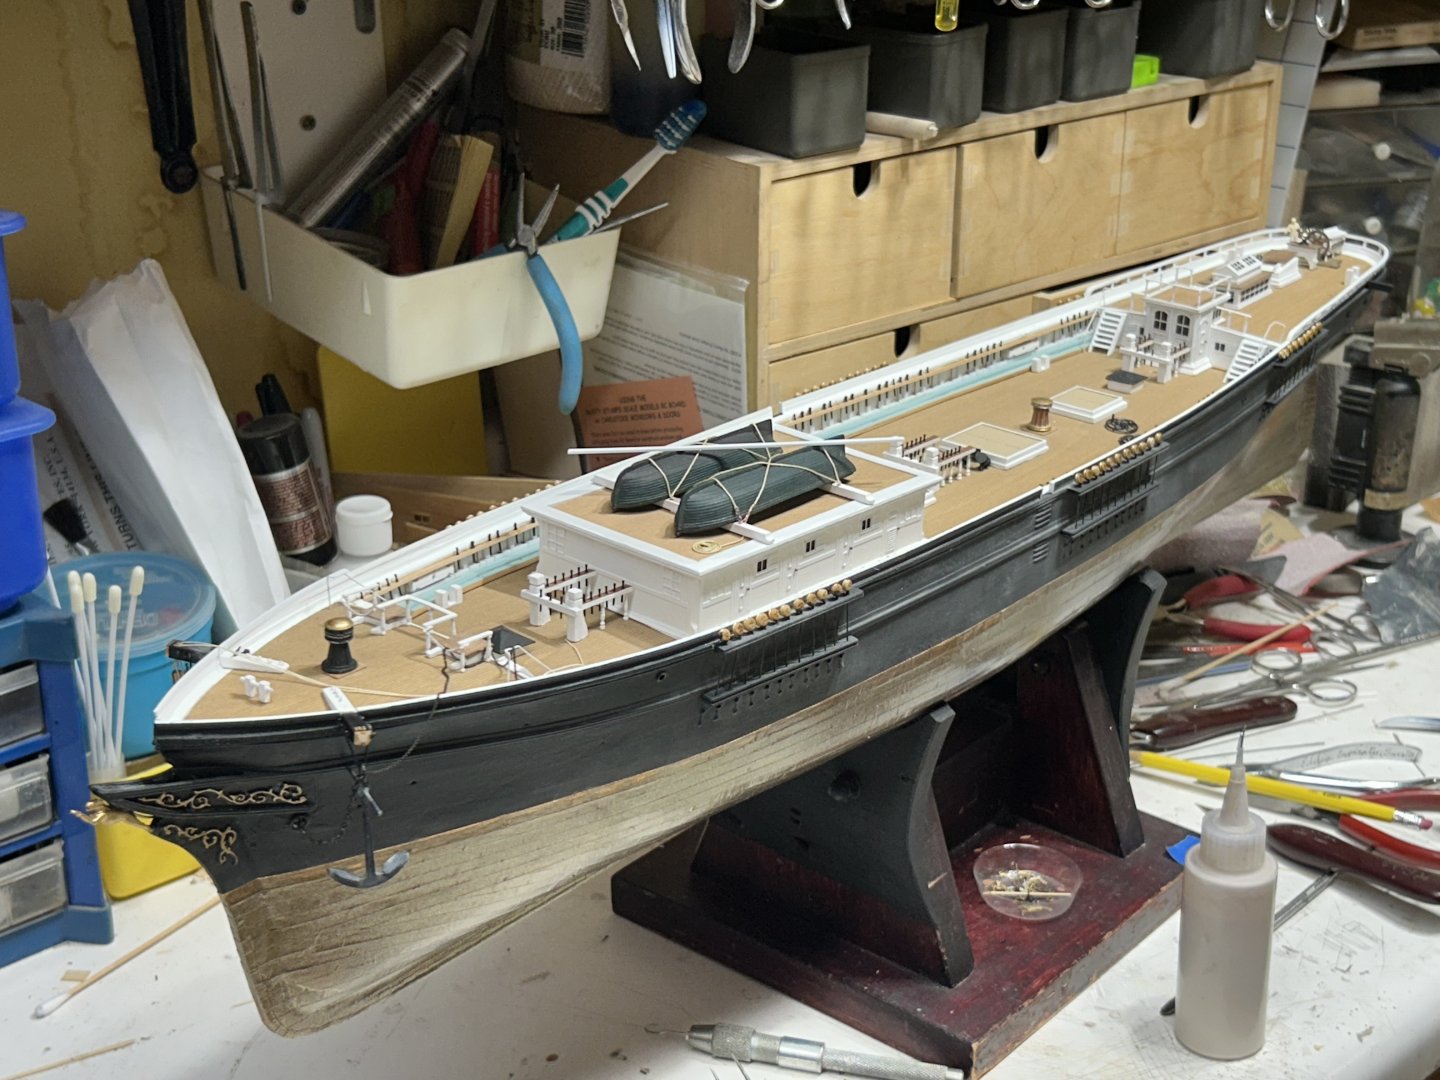
More images. Rob


-
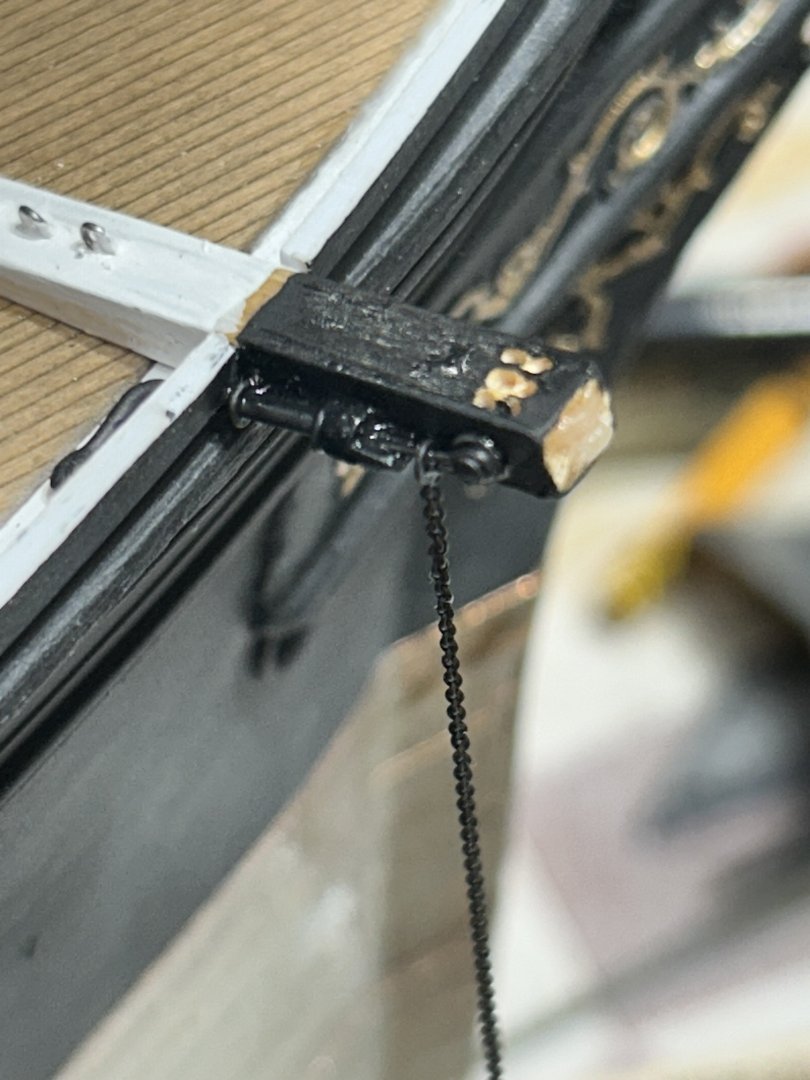
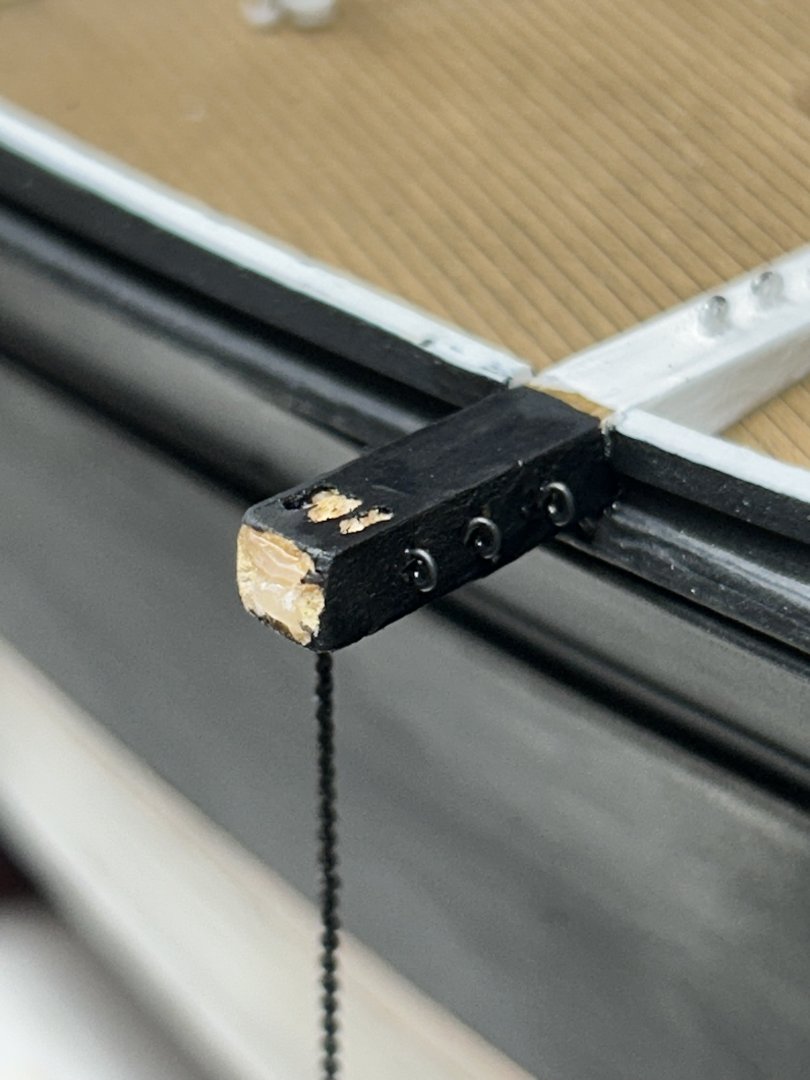
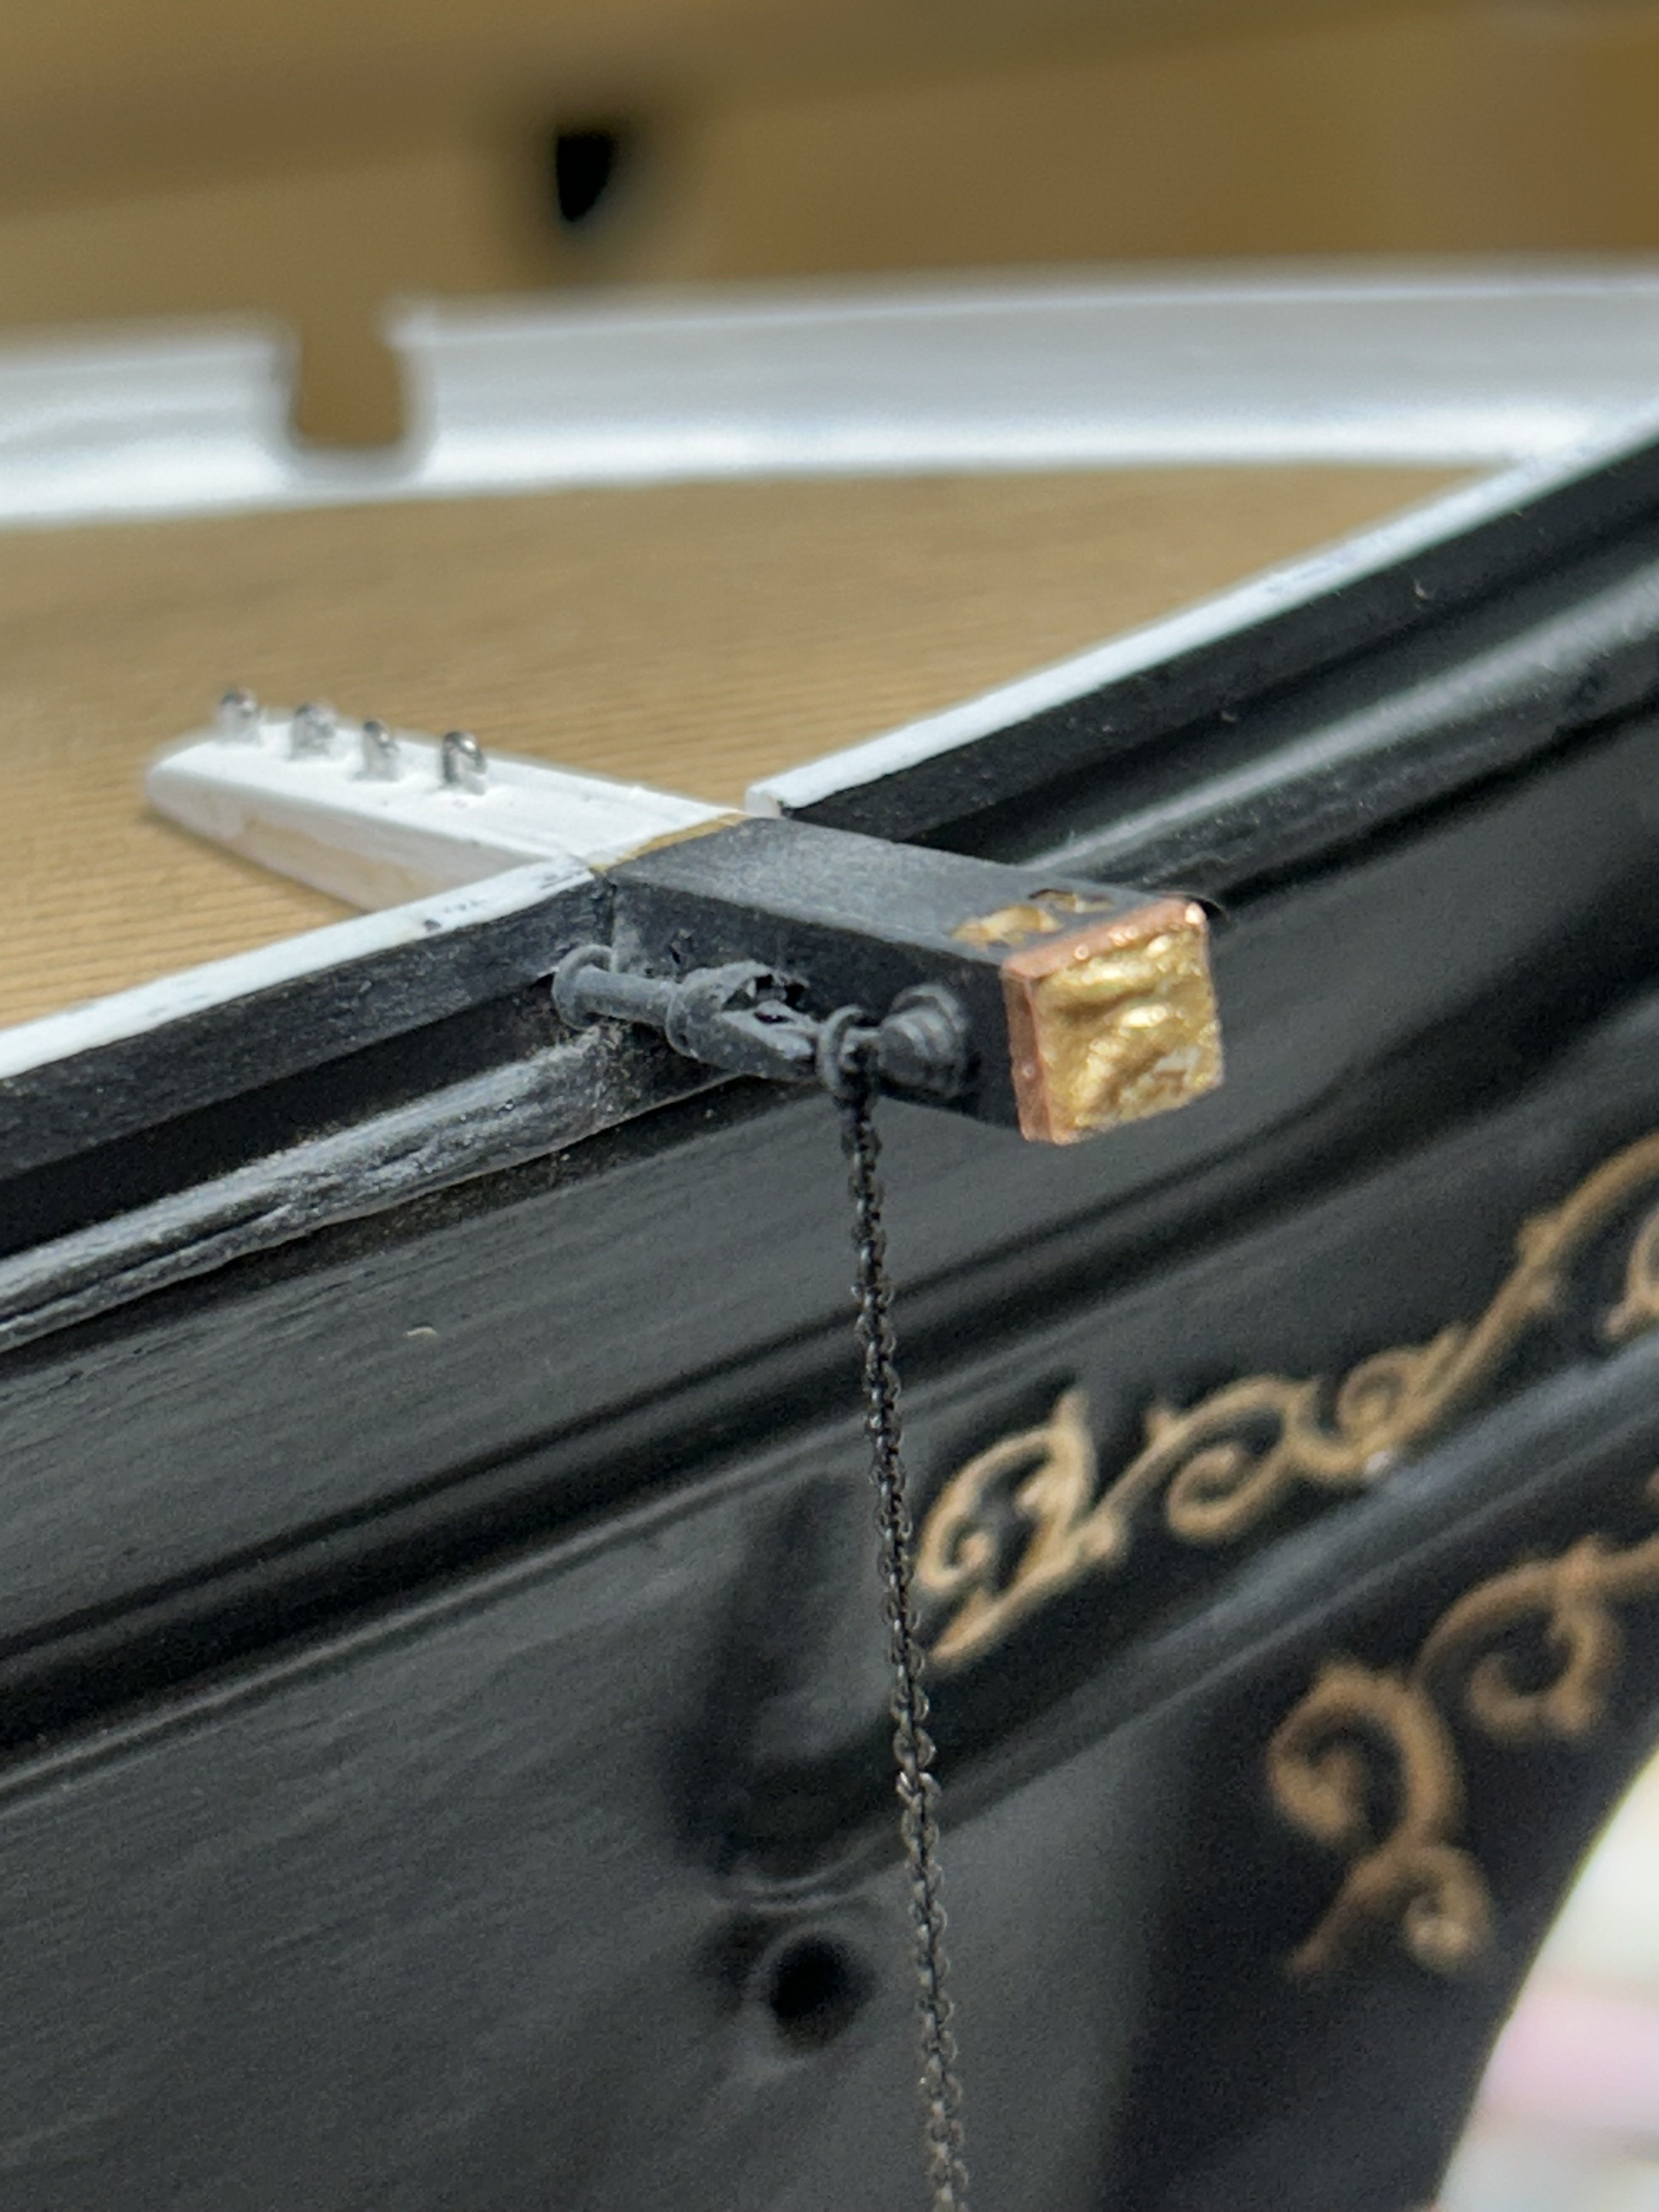
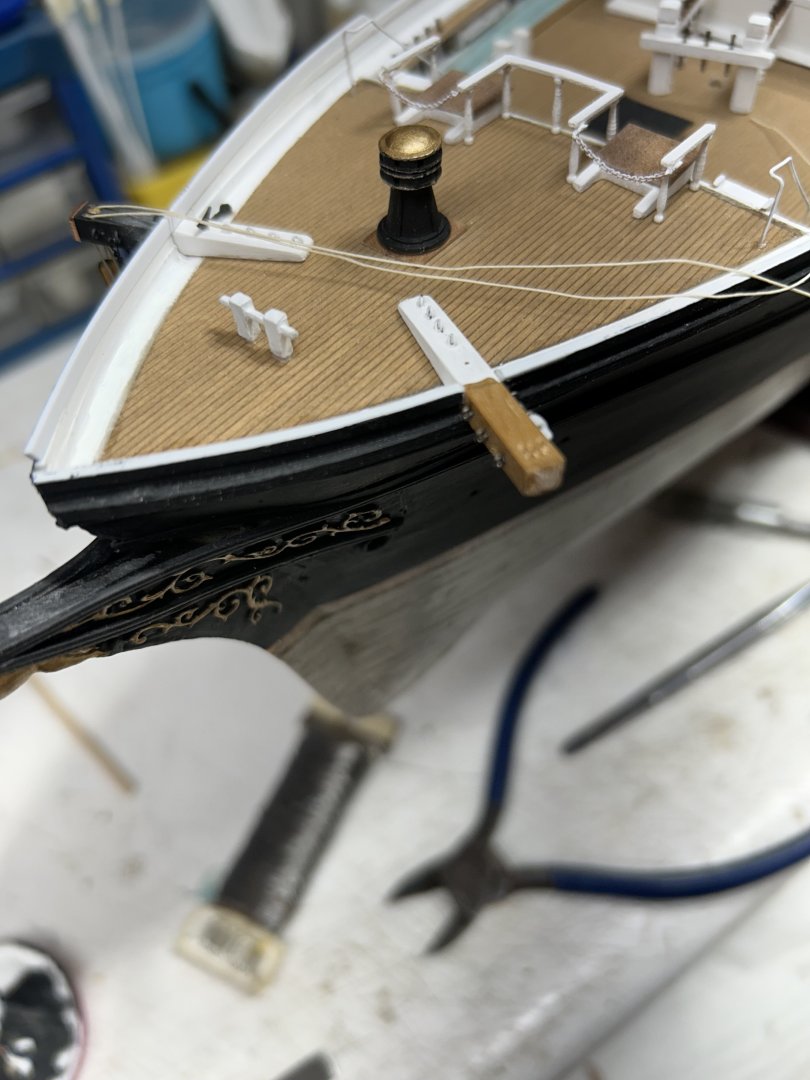
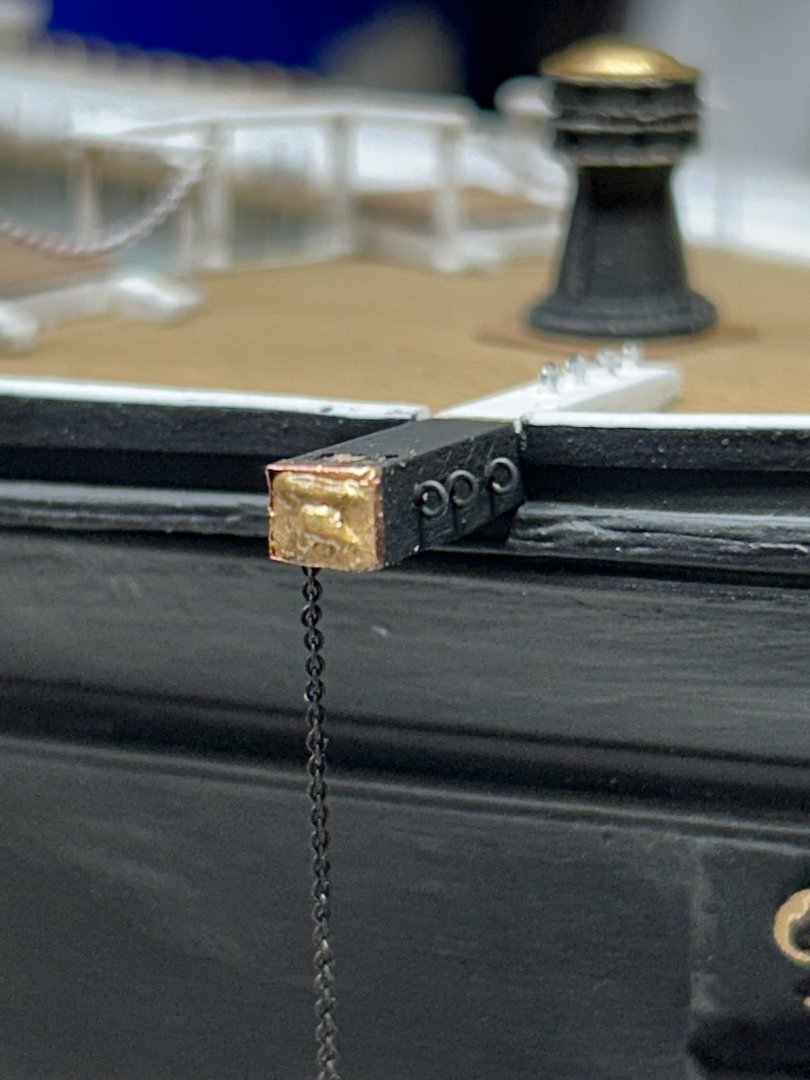
I worked on the port cathead a bit today. Rob


-
Thank you. I’m curious, where is your data that Buttersworth is one of the most forged artists? And that his paintings cannot be trusted? Rob
-
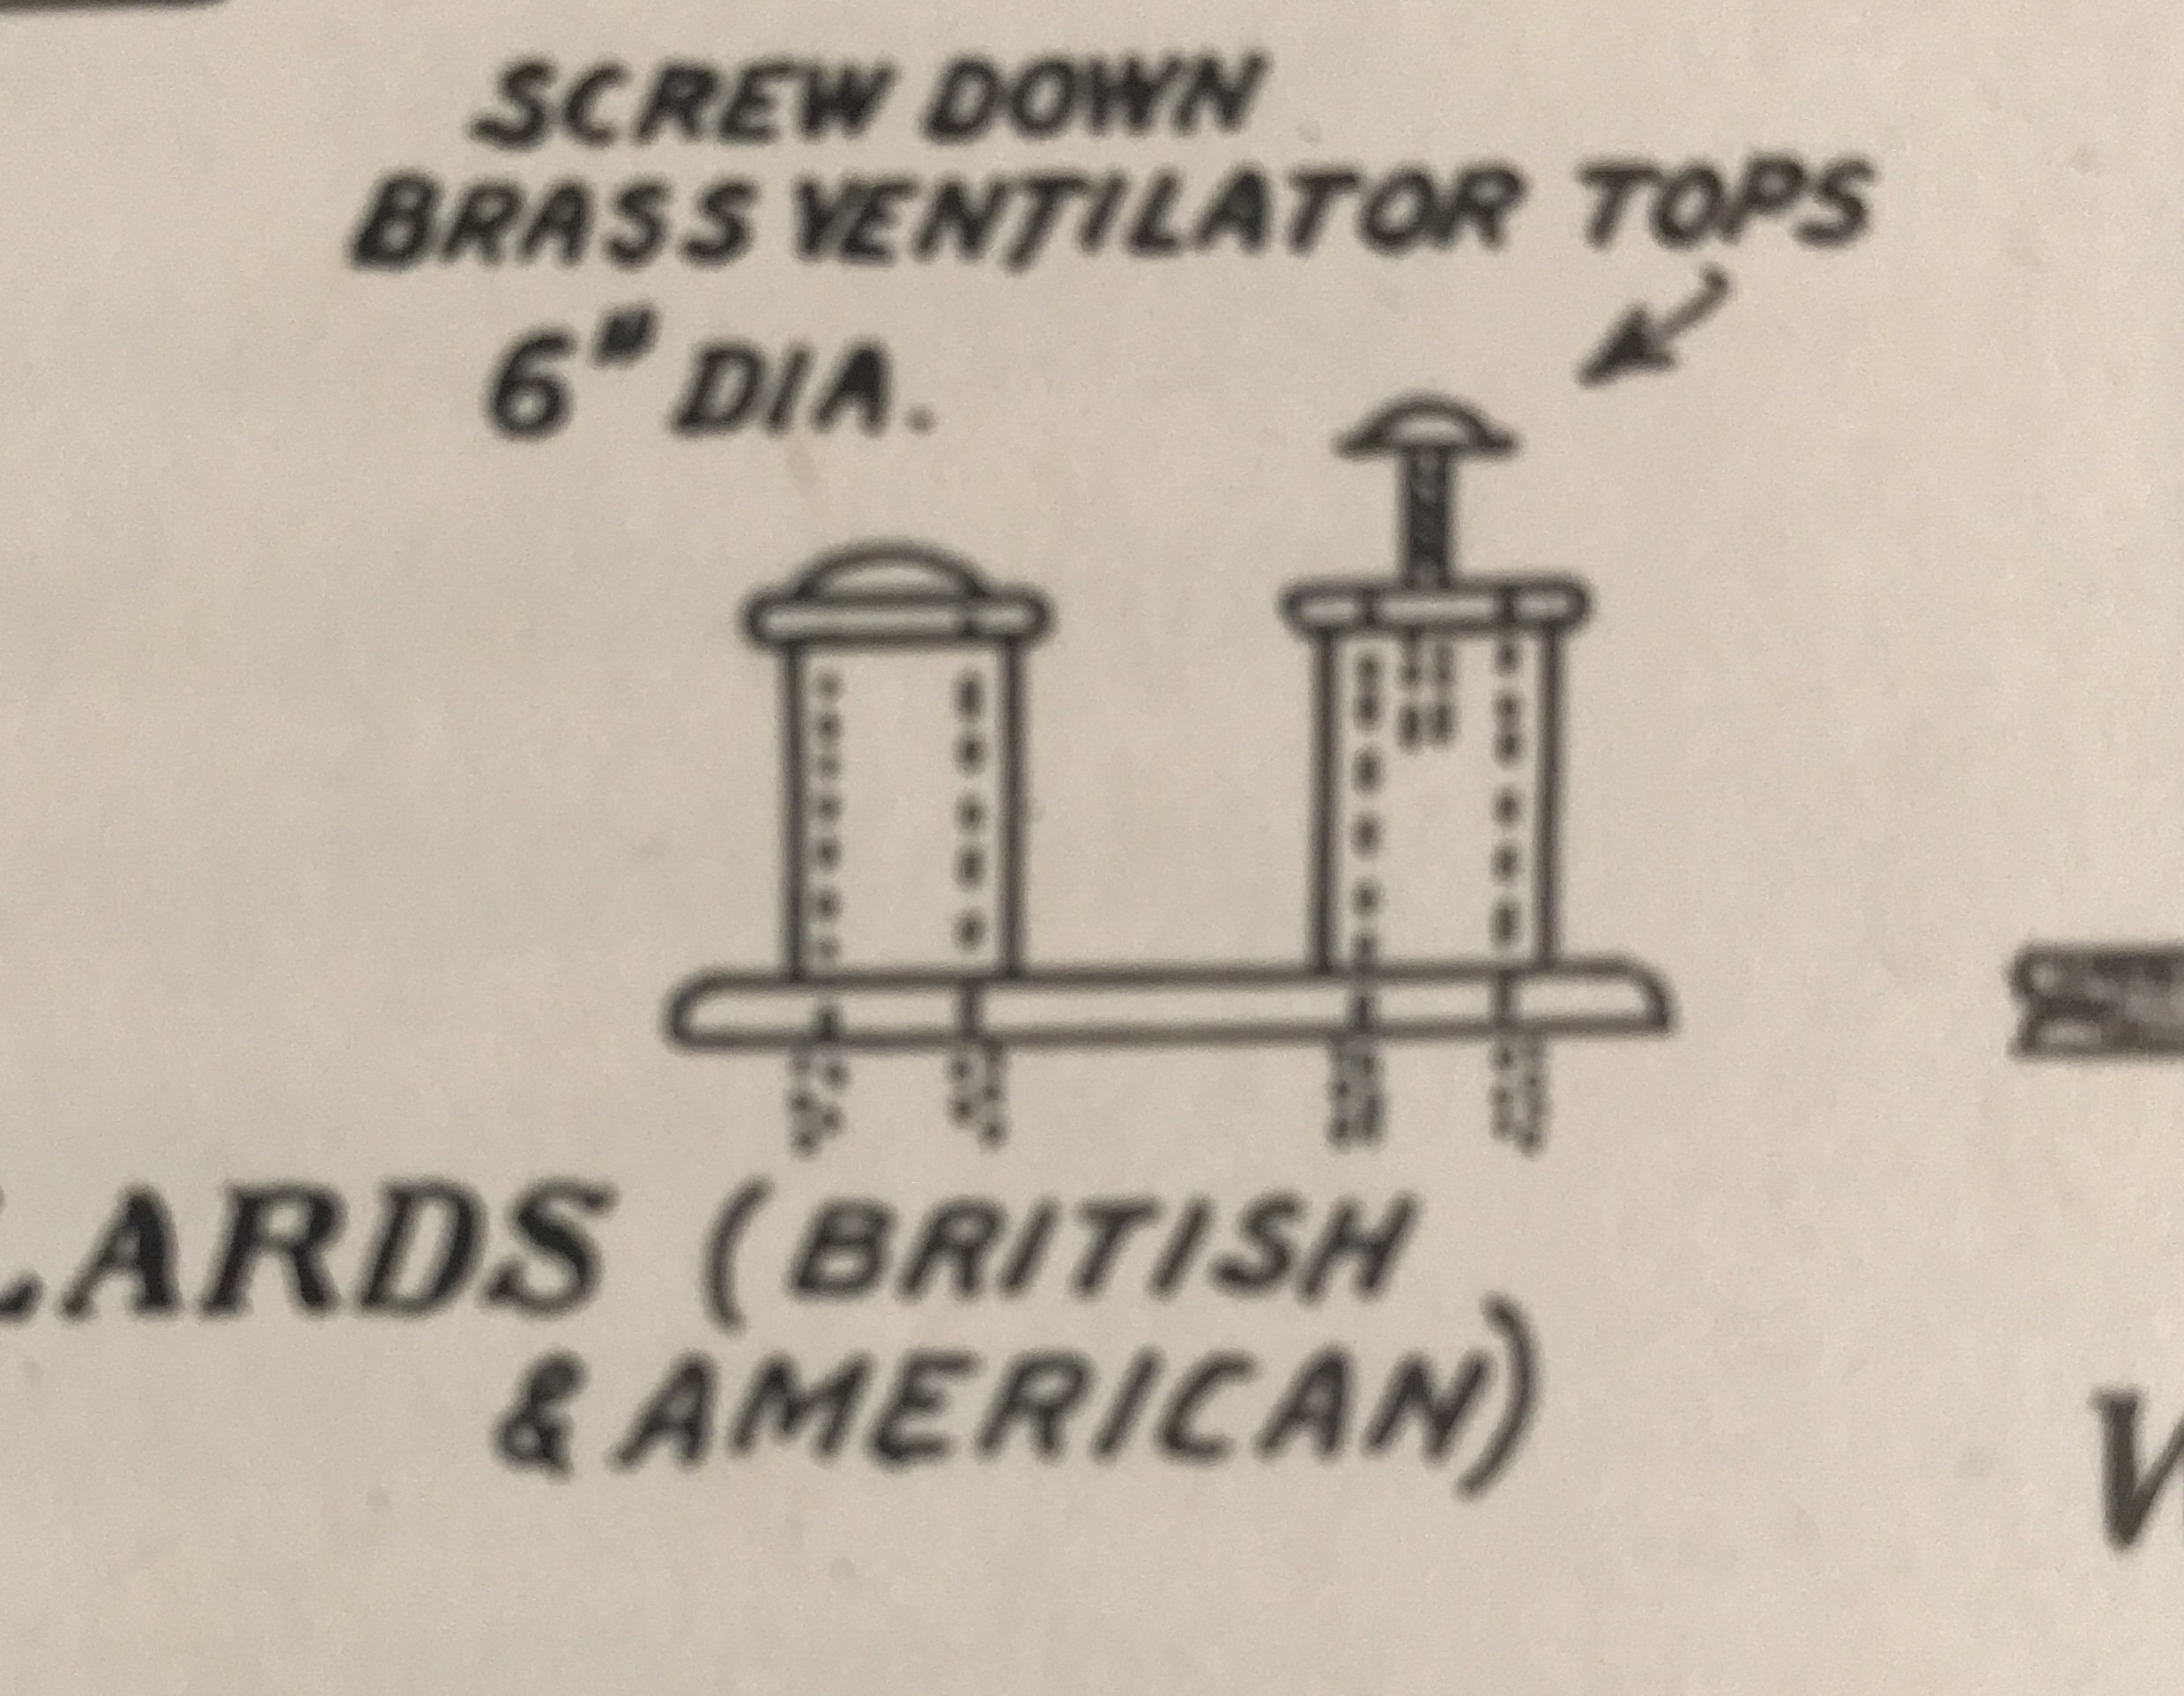
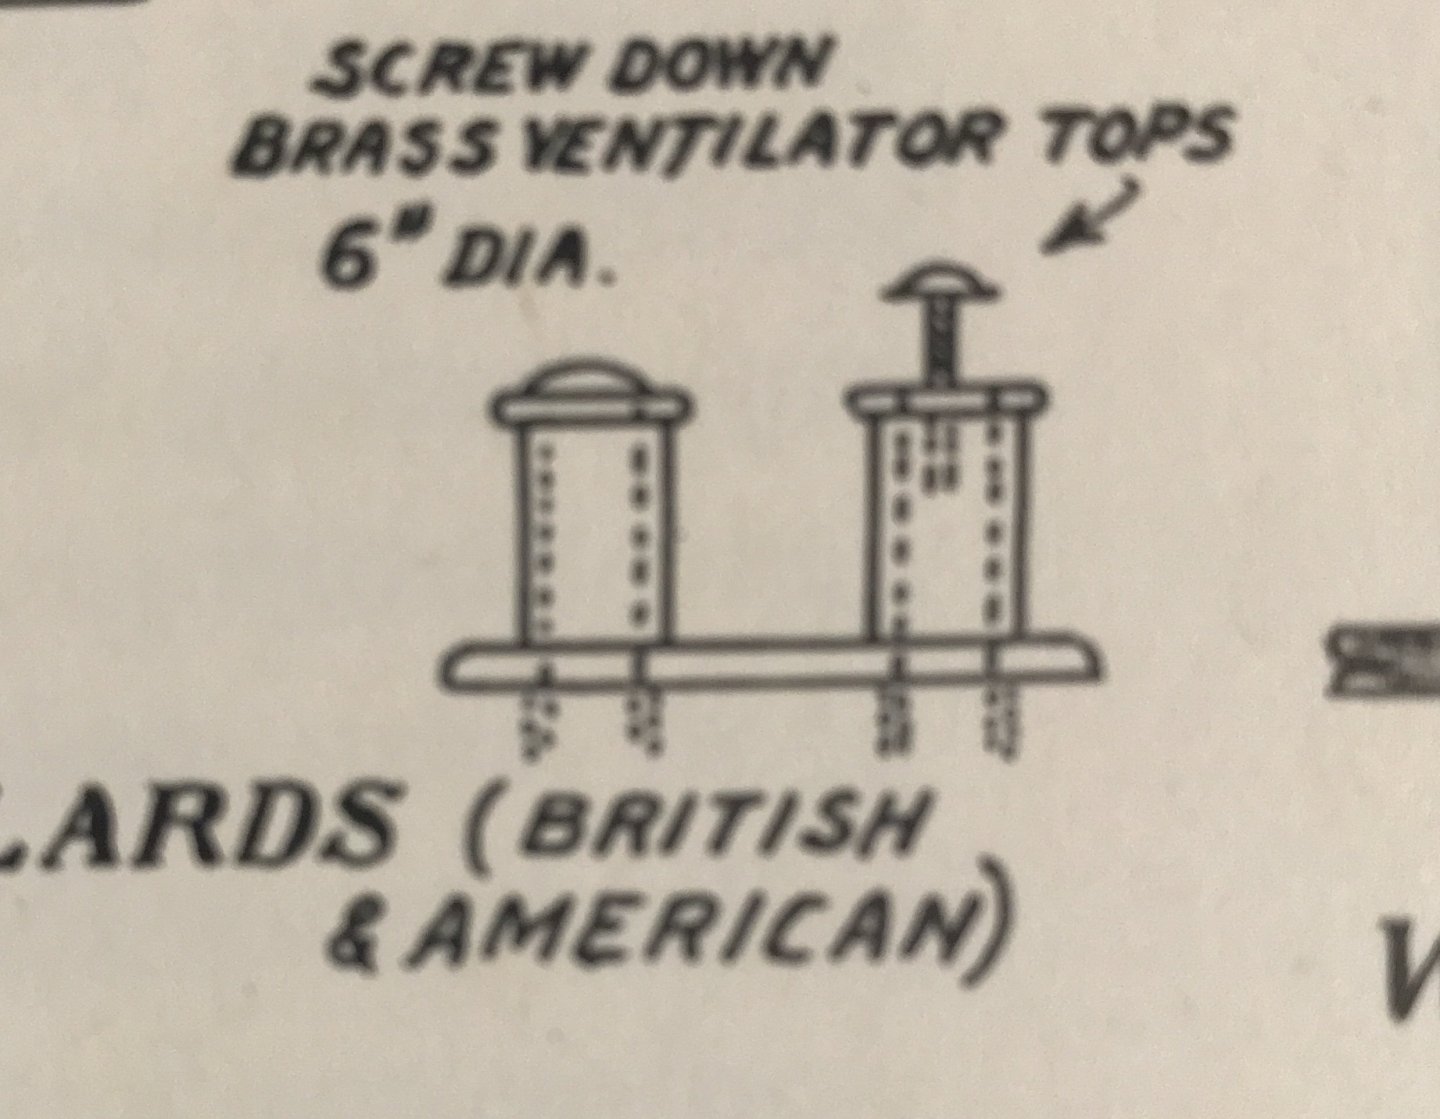
Rich , I’m suggesting this type of ventilated bitt. Rob
-
Rich , it says the foretopsail sheet bitts are all white oak. NOT the ventilated bitts. These are all metal bitts with unscrewable centers with caps. NOT the large wooden bitts, found at the foot of the masts, and by the bulwarks for mooring. Two different kinds of bitts.
-
Really, apart from those Buttersworth paintings, all we have to go on is what was typical of clippers of the time. McLean clearly describes her deck features in general, but the finer details are left up to the modelers creativity. And, as you put it, up to their, *powers of observation*. Knowing, from the gate,.......that McKay was given the most extreme levity of design and fashion. We can conclude the most discrete furnishings were employed. I still have to determine, where the iron (vented) bitts are to be placed. 2 On the forecastle and 2 aft on the poop deck? Rob
-
Worked on the anchor for the cathead. I decided against the wood stock, based upon Buttersworth’s painting, plus the fact McKay had an open checkbook to buy the best and most up to date hardware for Staghound. Rob


-
I agree…… great job Johnny. Rob
-
Everything is just stunning...absolutely stunning.... I just might consider taking up another hobby.......... Rob (Maybe whale or bird watching)
-
Hey Rick. Just wondering.....what is your process for making Gin and Sheet blocks? I have not seen it. Rob
-
Thanks Rich. Yes it's true.....most onlookers are truly unaware of the actual functionality of many aspects and components of a large sea going clipper ship. Or how many builders of these wonderful ships, actually are interested, or have the desire to fully compliment their models with accurate and complete components? EDT comes to mind, of one who is an extreme accuracy modeler. But he also built his model in a scale able to accommodate such precise detailing. Us modelers down here in the smaller scales, have to modify, simulate or just completely illuminate some details....because the fabrication to do so...is just too microscopic for even the most discriminating critic. If a magnifying glass is required to properly inspect your models details.....then, you've become a magician. Rob (Just doing the best that I can)
-
Thanks Pat. I really wanted them to be fully functionally correct. Each aspect of the model is a small project in of itself. Rob
-
Thank Rick. It needed to look warn as naturally expected. Rob
-
Footropes, Flemish Horses and Stirrups
rwiederrich replied to hof00's topic in Masting, rigging and sails
I’ve always reminded builders to keep their stirrups/foot ropes very short. I made sure they were on my Glory of the Seas. The men working the sails are able to do so. Rob
-
Good move. Looks convincing. Fine work in such a small scale. Rob
- 165 replies
-
- 1
-

-
- Red Jacket
- Marine Model Company
- (and 2 more)
-
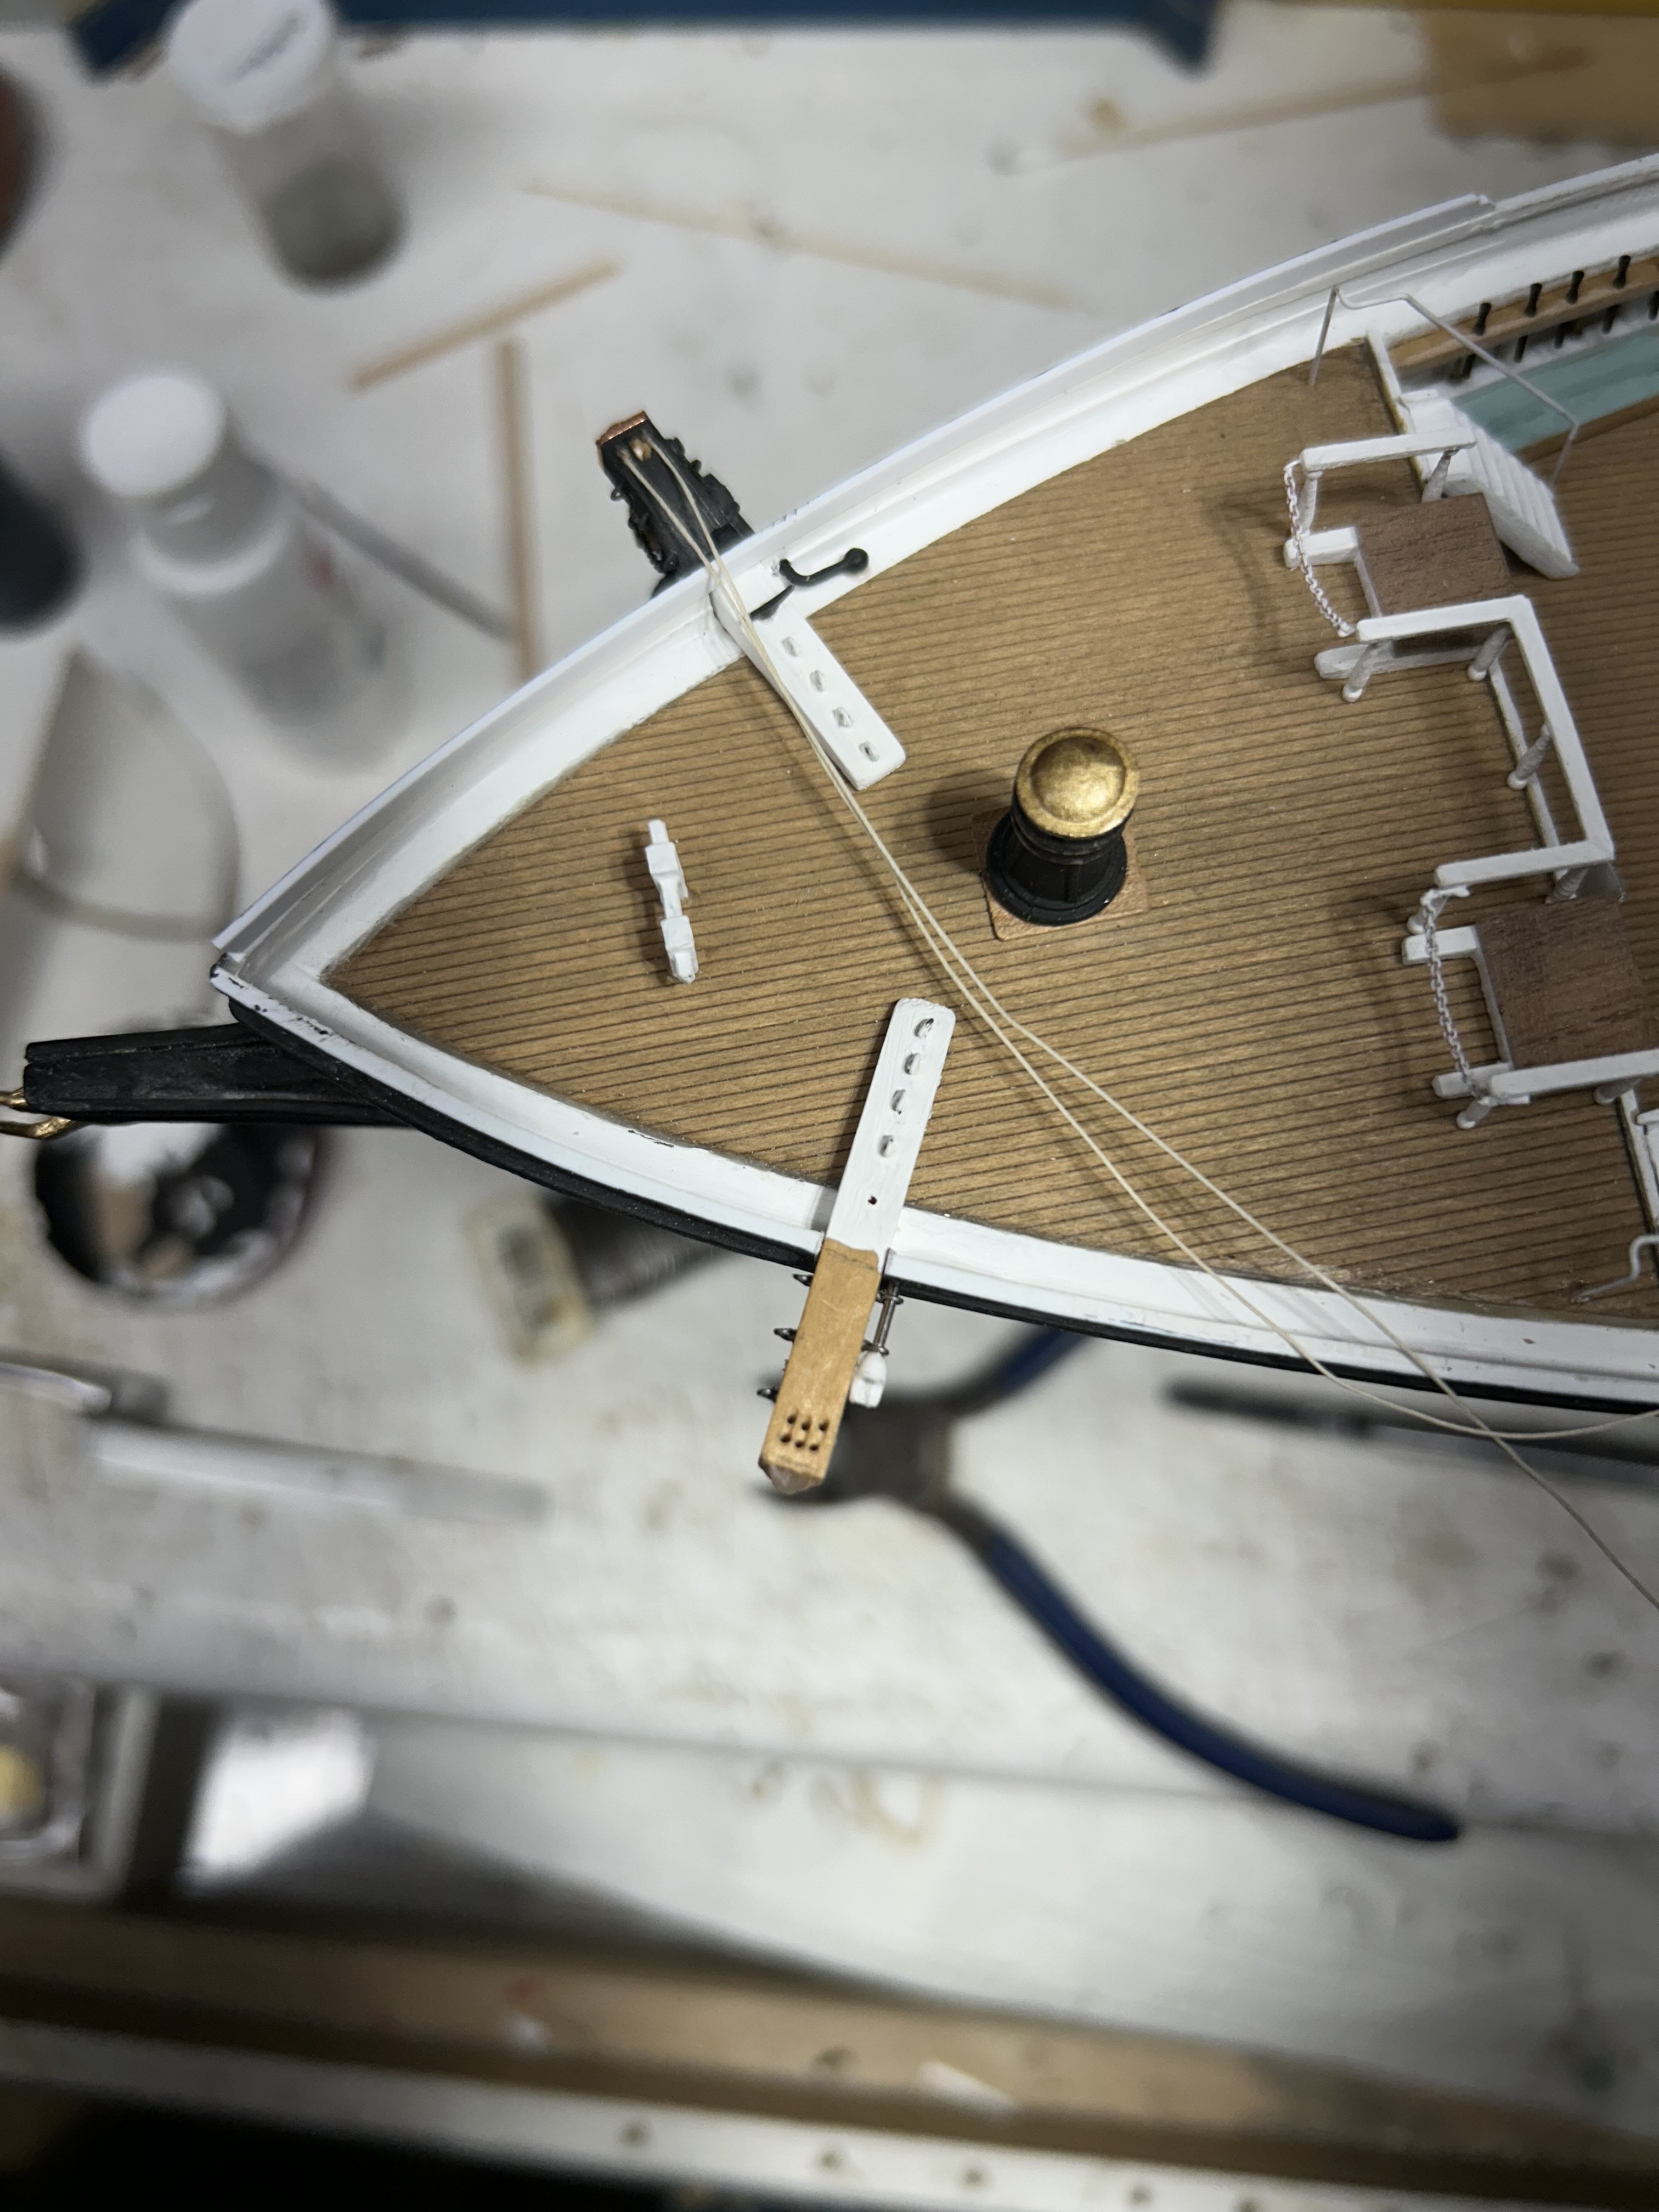
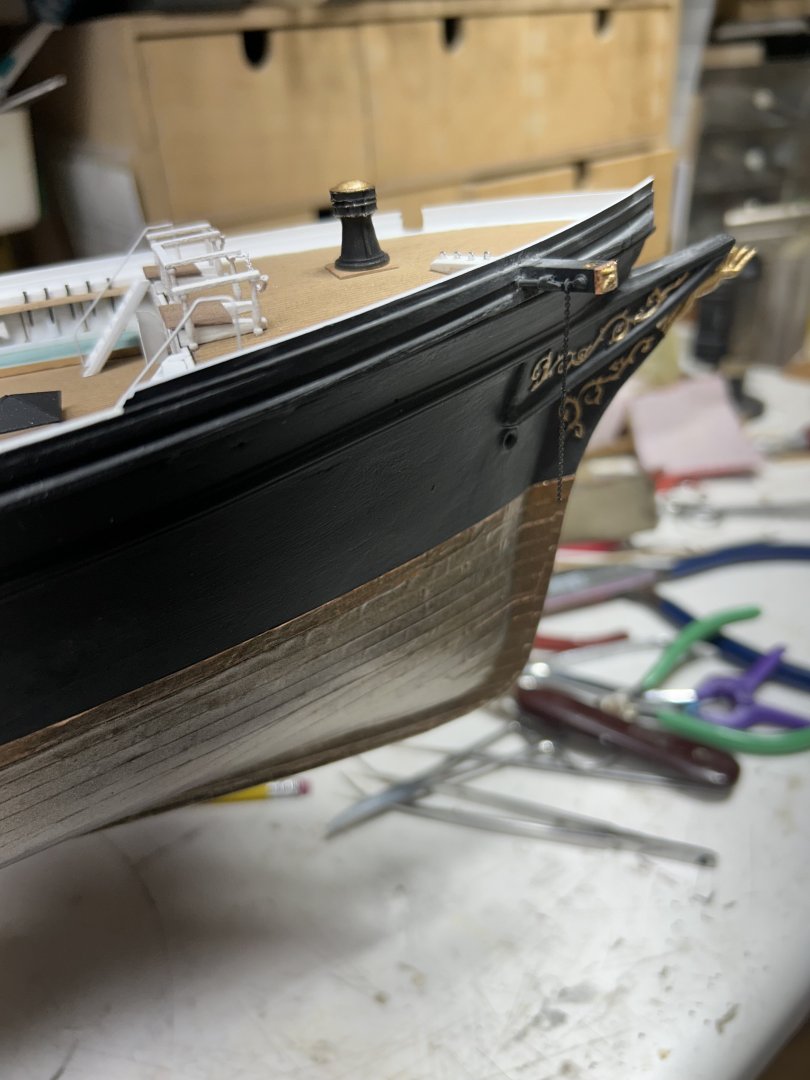
Spent some time finishing up the starboard cathead and splash rail. Rob


-
Bill, I watched both videos. It was truly amazing what these men accomplished, with what they had. ...... Freezing rain, dangerous pitching heights, cruel *Bully boys*, scurvy, sleep depravation, and the cruel list goes on. All we can do now, is, enjoy a romanticized version....of *Wooden ships and Iron men*. Rob
-
THAT book is surely in MY collection. Rob
-
I appreciate your support and fine compliments. I hope you stick with me till the end...it'll been a hoot. I'll talk to Mike and see what he wants to do.... It might be possible I can arrange for him to sign a copy for you...possibly in exchange. Rob
-
Rick, I wondered how you did your release. I went back and forth....from the latch, like device on the Flying fish to EDT's Young America twist release. I went with the latter. It had to drill an exact hole through the Rail, aligning exactly with the release bar. It was a booger to install and then paint. Rob
-
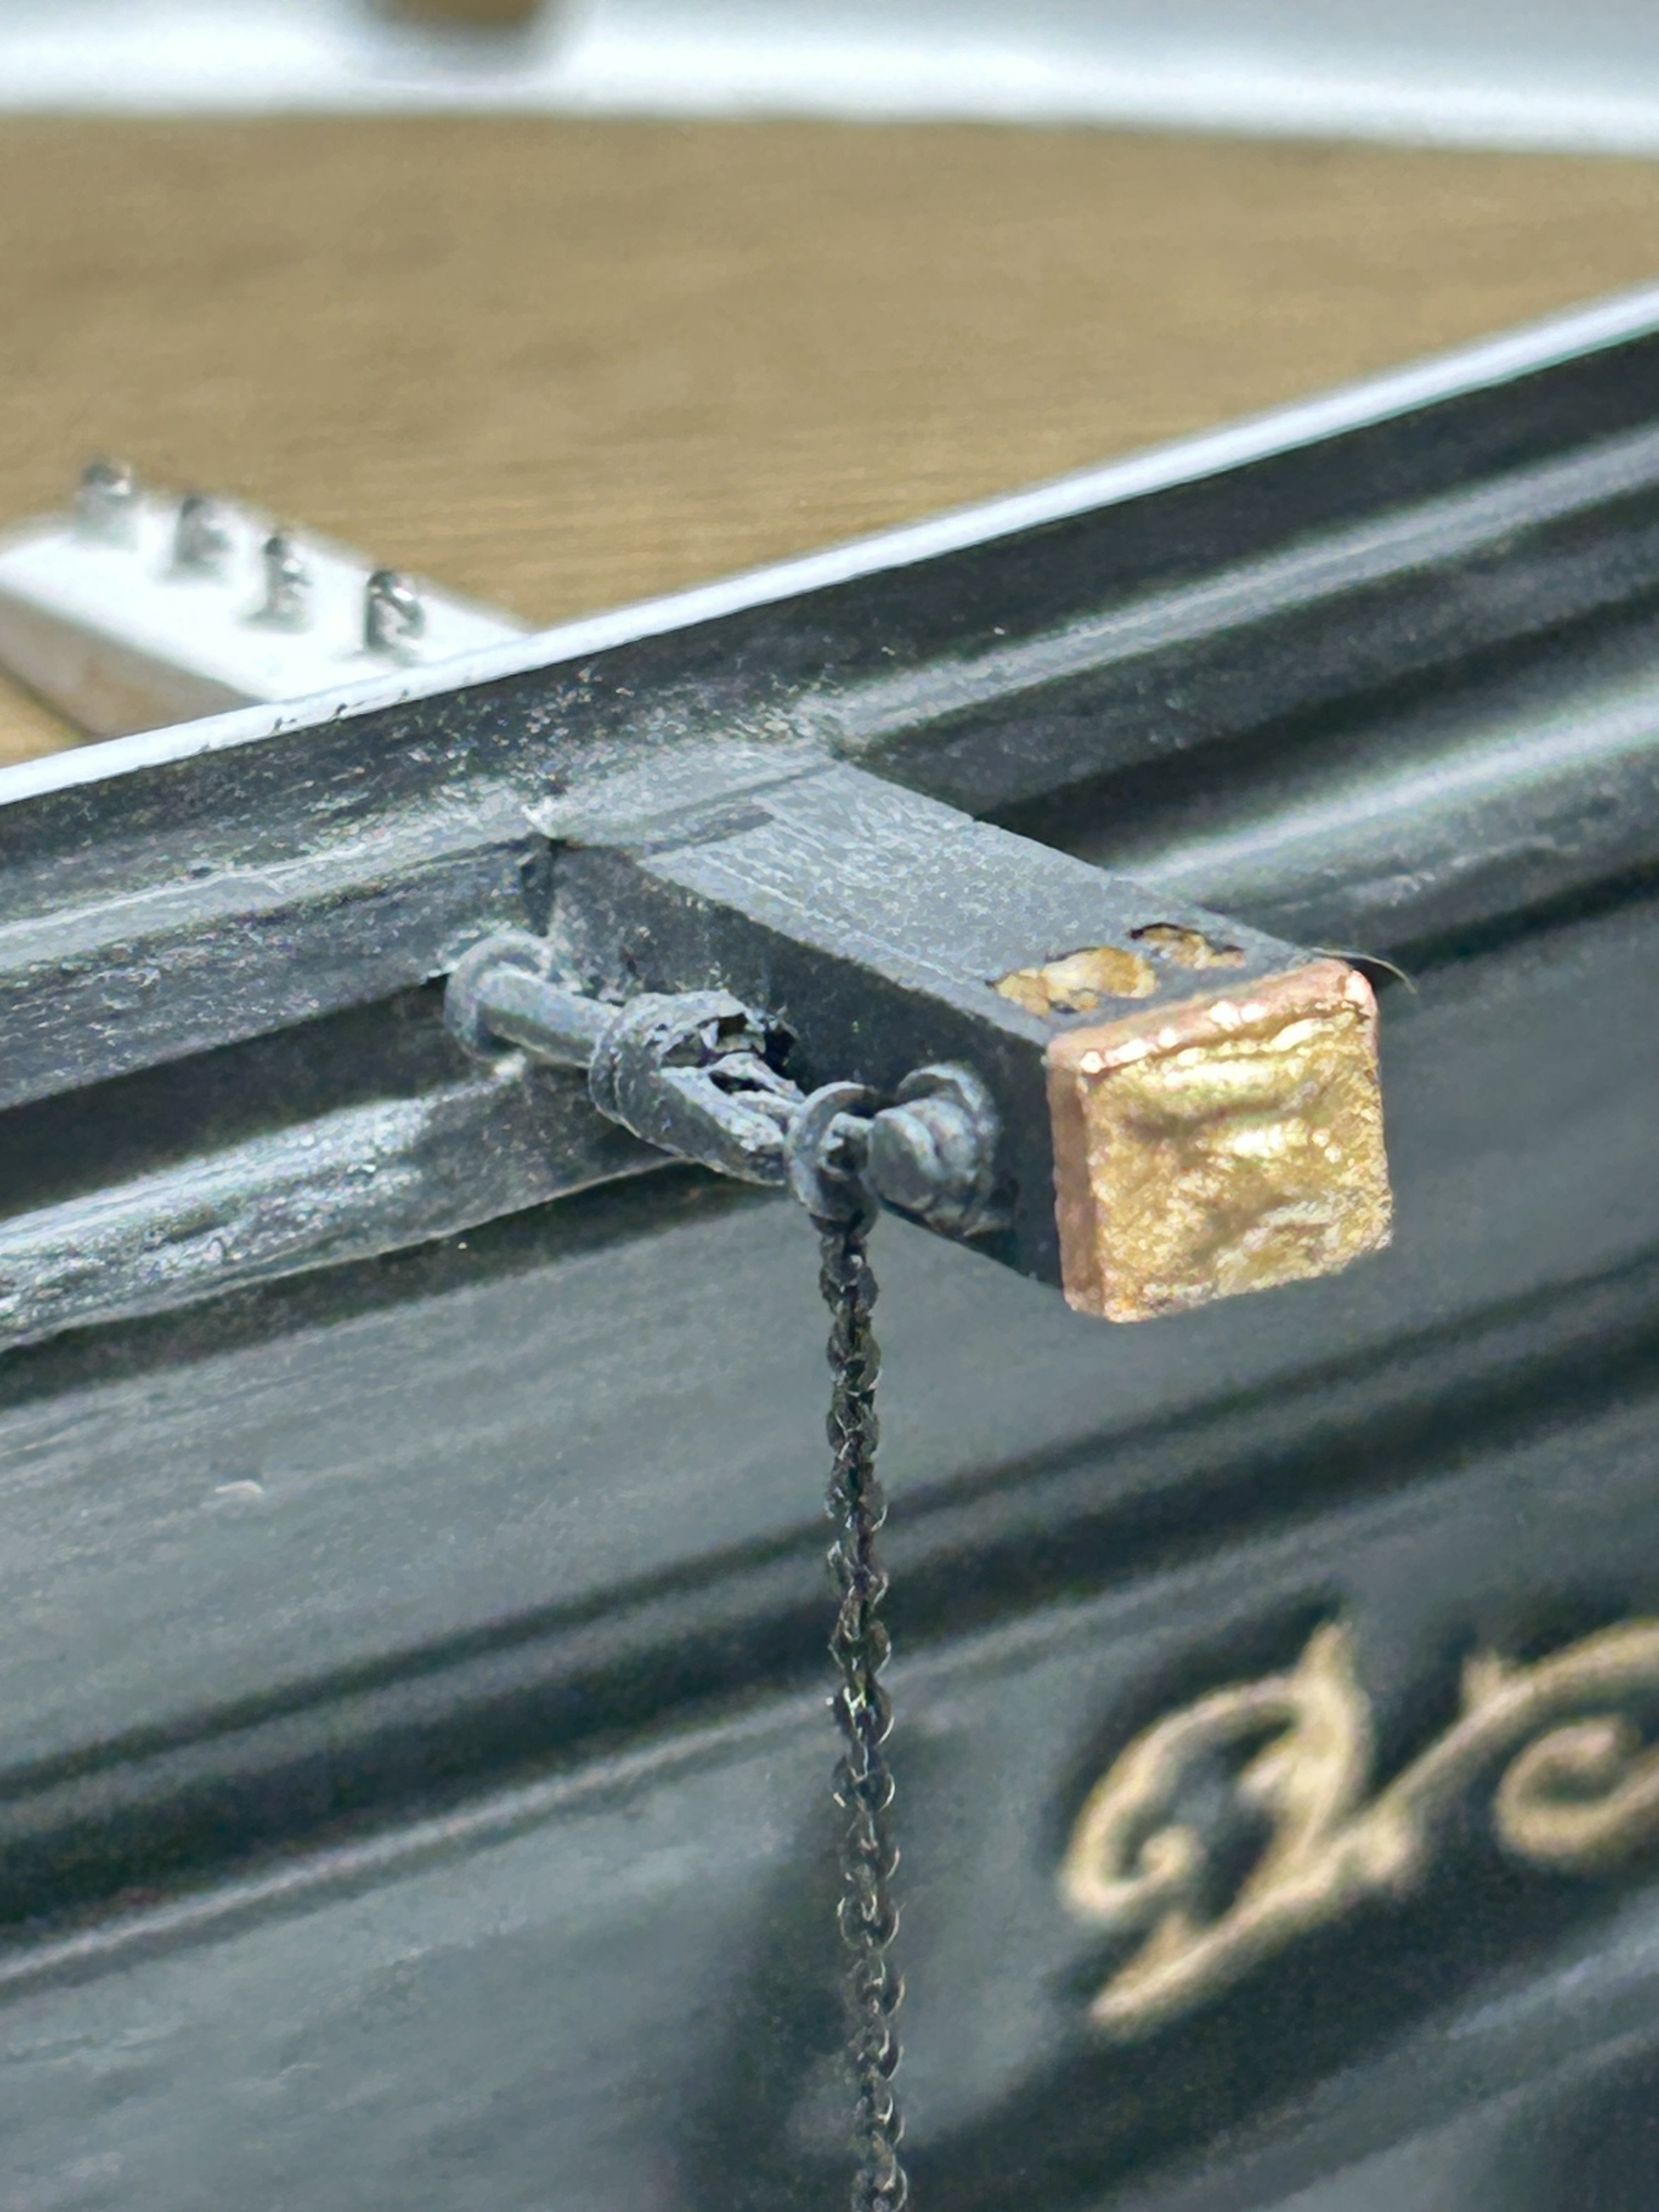
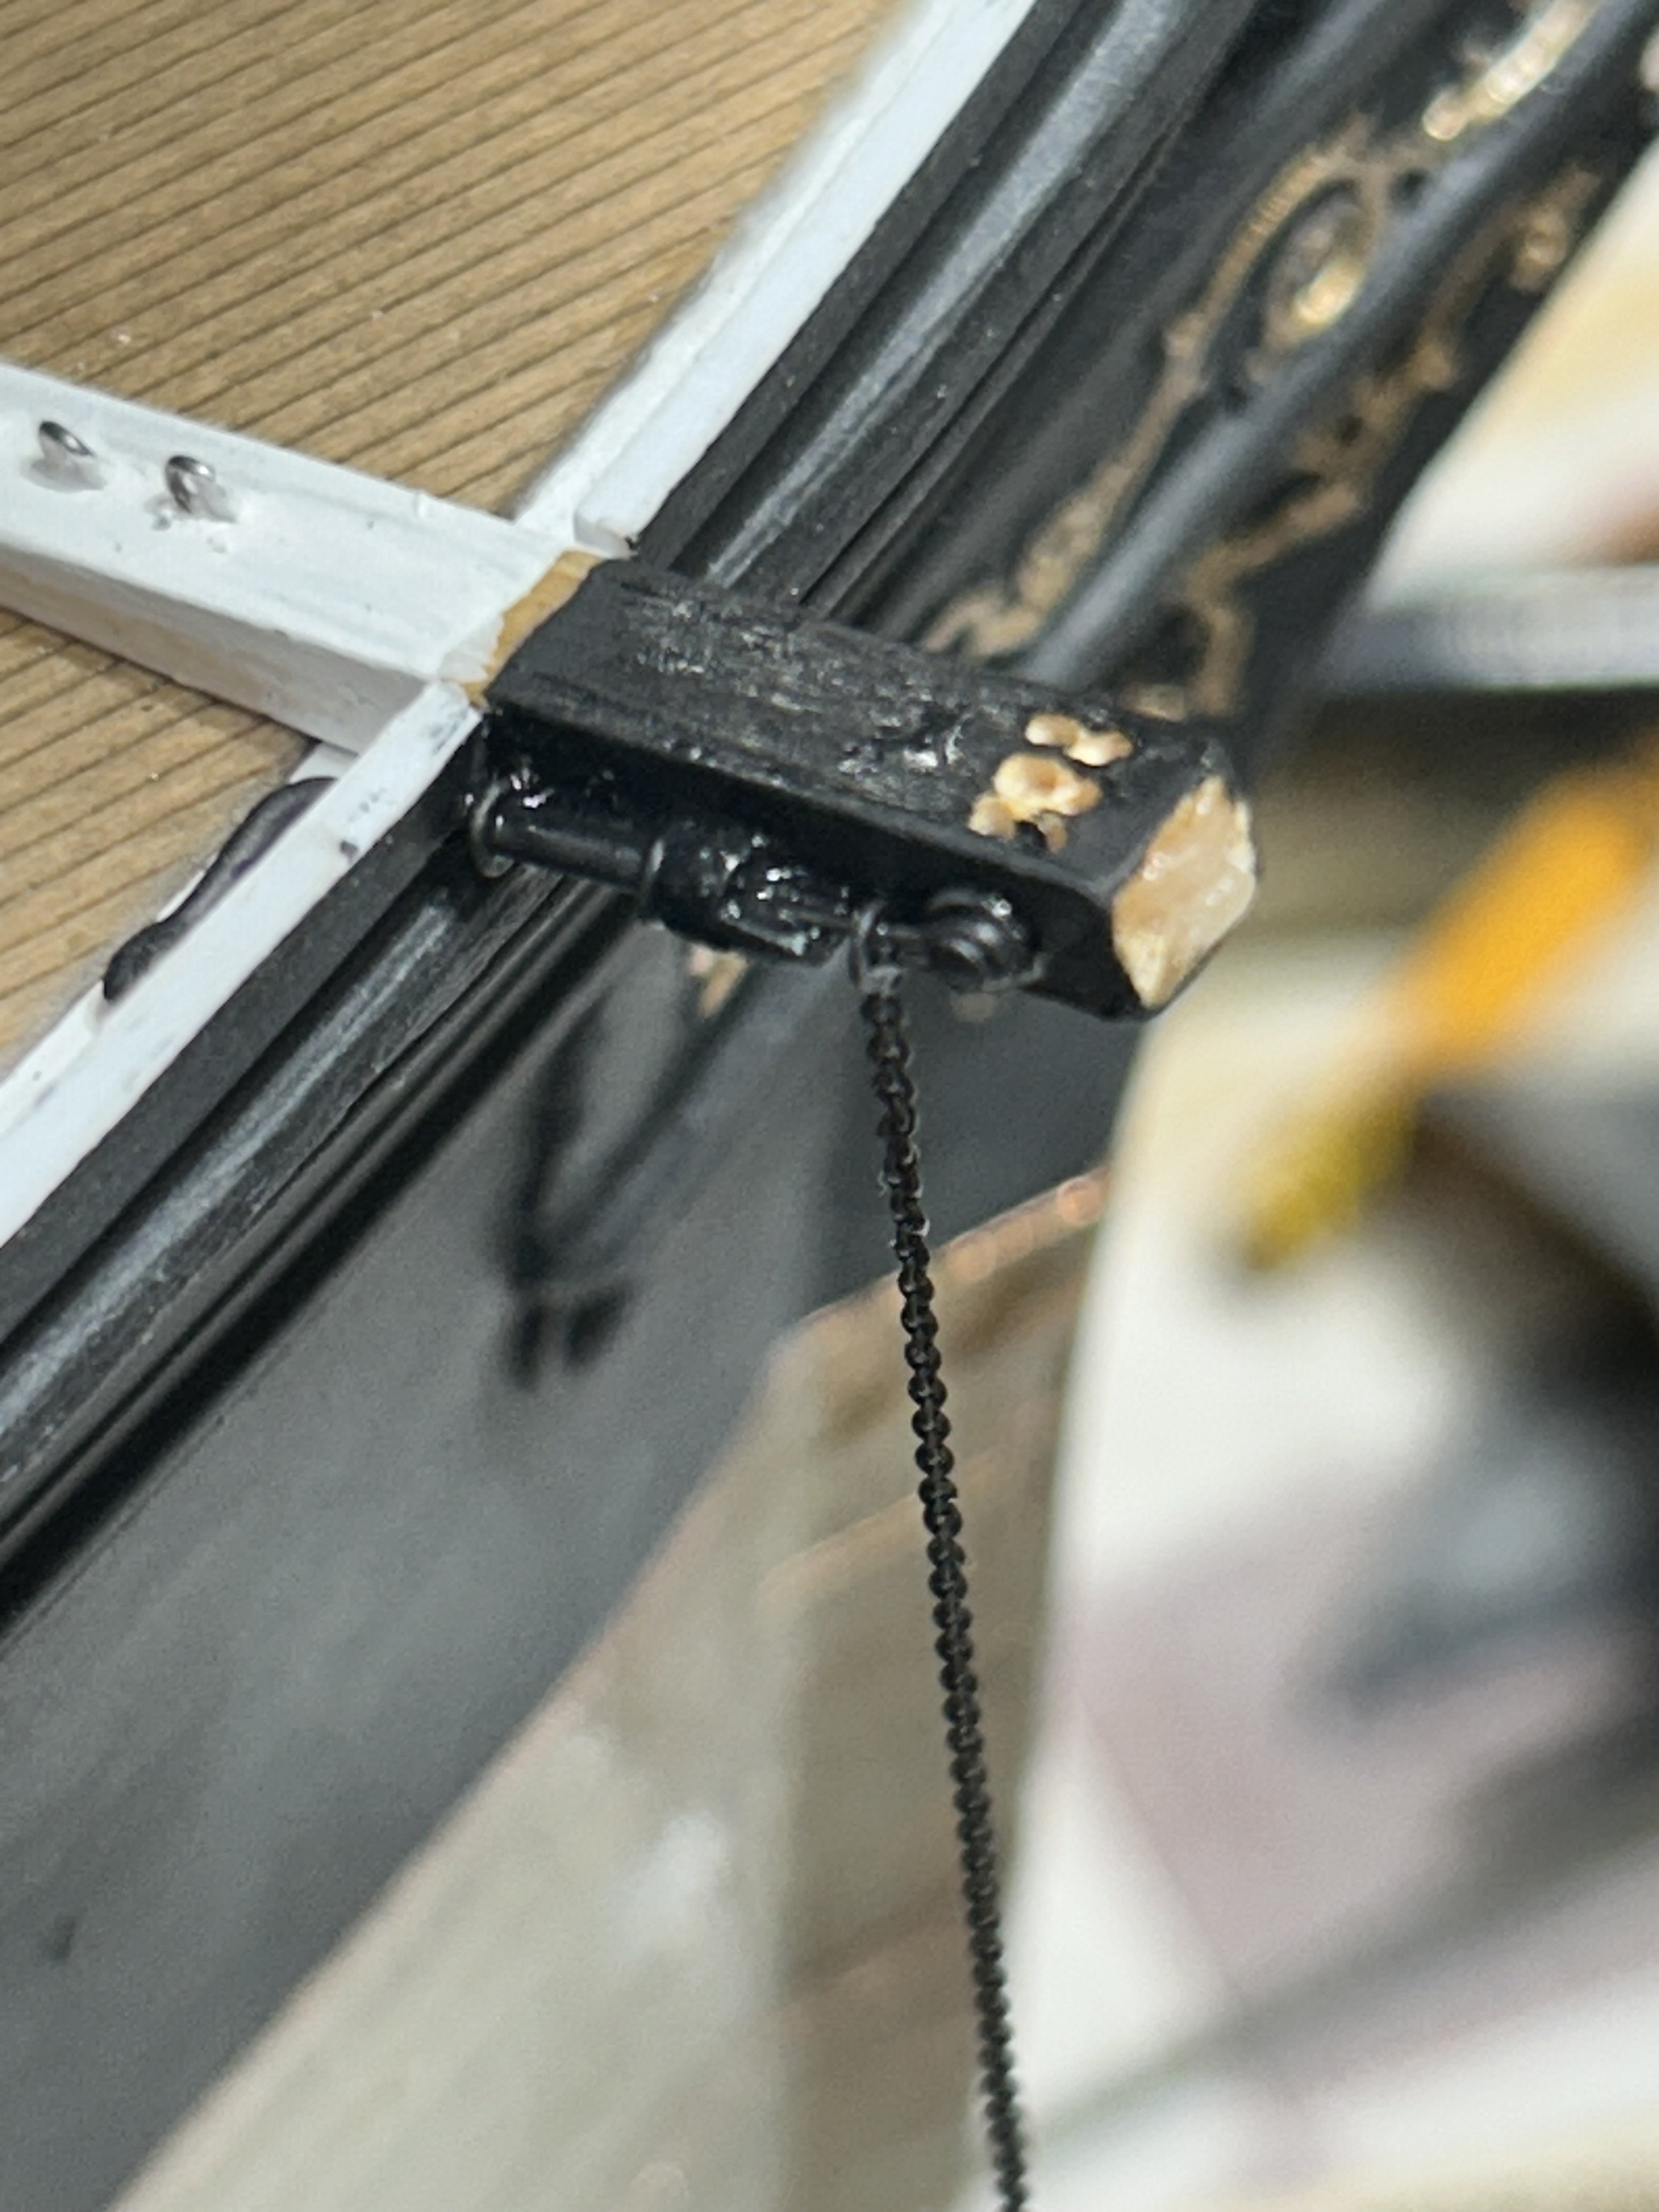
Remember..that cathead is no longer then 9/16" and the release mechanism is very tiny. I will finish off the gilded cat face on the end next. I won't be adding the anchors until I have finished installing the splash rail Rob
-
First coat of paint. I’ll add the painted cat facings a bit later. Rob