lb0190
-
Posts
686 -
Joined
-
Last visited
Content Type
Profiles
Forums
Gallery
Events
Everything posted by lb0190
-
 Hi Popeye, Thanks for the concern and well wishes. Unfortunately Mom and Dad are getting to that point in life where all you can do is try to keep them safe and comfortable. Hopefully the shipyard will open up this spring. I’m already thinking about my next build. The Confederacy is at the top of my list, maybe from the Lumberyard if I can work up the courage. Take care my friend. Larry
 -
Hi Sjors, its good to hear from you! I hope you and Anja are doing well. Our world is bit up side down right now but hopefully by spring it will get better.
-
Hi John &Everone Else, This is the first time I ck’ed into MSW for months. I just have too many irons in the fire! I’m sorry to hear about your Admiral, I hope she has a fast recovery! In regard to you question, I used no.90 brass hex head machine screws. I found them in a local hobby store. The turn handles are 0.010 nylon cord I found at Hobby Lobby. I cut a long piece, dipped the end in CA glue, held it vertical so the glue formed a knob, then cut it to length and glued into the jack screw head. I may be repeating myself....lol I do not recall how much detail I gave on my build log. Our new house is under roof and electrical should finish this week. HVAC ducting, exterior doors and shingles are next. The builder says April is the scheduled finish date but February looks more realistic. I’m currently in Ohio (5th time this year) helping out my parents. My father (87) fell and busted his elbow and cracked his pelvis one month after knee replacement. He’s having a rough time this year, seven days so far in the hospital, this time. Mom cannot be left alone for long so I’m trying to be useful in helping her while Dad is out of commission. My Niagara sits patiently waiting for a new shipyard. Our temp rental home is small and stacked with furniture and unopened boxes, way to small to work on my ship. Take care everyone, eventually I’ll get back to building and posting results... Regards, Larry
-
We're staying in Florida, moving @25 miles west to get closer to our son who is very ill. We'll get a bigger home (downsized too much) which we miss, along with an acre lot for more privacy. The best part is I can move the shipyard into the house, I've grown to like heat and AC in my old age... Packing started today, gawd I hate moving...
-
Thanks for the replys. My attachment plan is to simply glue the cordage to the inside leg wall of the stanchion, being very careful to use a minimum amount of glue. I preferred drilling through holes in the legs but backed away from that method after many failed attempts. Yesterday, we signed papers to sell our home. We have to close and be out June 21. It's going to be interesting over the next 6-12 months...
-
I have three samples of stanchion rope I would like your opinion on. My next step is to mount rope to the stanchions I recently installed. Plans are to run two rows across the stanchions with a wood top-rail. I currently have three samples of cordage I can use and I would like your opinion which one looks best or if you think I should keep looking for something better. I'll glue the cordage to the inside of the stanchions and may decide to leave the canvas bedroll cover off. The photos do not show the exact installed position, the rope is simply close to the intended location for this decision making process. I have some material that may work out for the canvas, but I'm thinking it may look better to me without the canvas. Plus less risk of damaging the rope or stanchions when pushing the canvas in place – decisions, decisions... First Photo x797 shows Beadalon Supplemax monofilament illusion cord at 0.010” dia., Second Photo x800 shows Econo Soft Flex stainless steel nylon coated midnight black beading wire at 0.014” dia., Third Photo x802 shows Syren Co. (Chuck) black rigging rope at 0.008” dia. Thanks for the help!!!

-
Good morning Sjors, This ship does not have netting. The kit shows two horizontal ropes from stanchion to stanchion and a wood toprail, using a canvas tarp to cover the bedrolls. I believe the actual ship had three horizontal rows of rope, but I think I'll stick with two spending on how it looks. I may also forgo the canvas tarp, again depending on how it looks. I have three different type ropes to try for horizontal runs. Take care....
-
Hi Popeye, nice build you have going. I think I'll pull up a seat. Many if not all of the builds I was following have been completed since I took some MSW time off (I still need to check them out). As usual, I see excellent craftsmanship and artistic excellence!
- 452 replies
-
- 6
-

-
- thermopylae
- sergal
- (and 1 more)
-
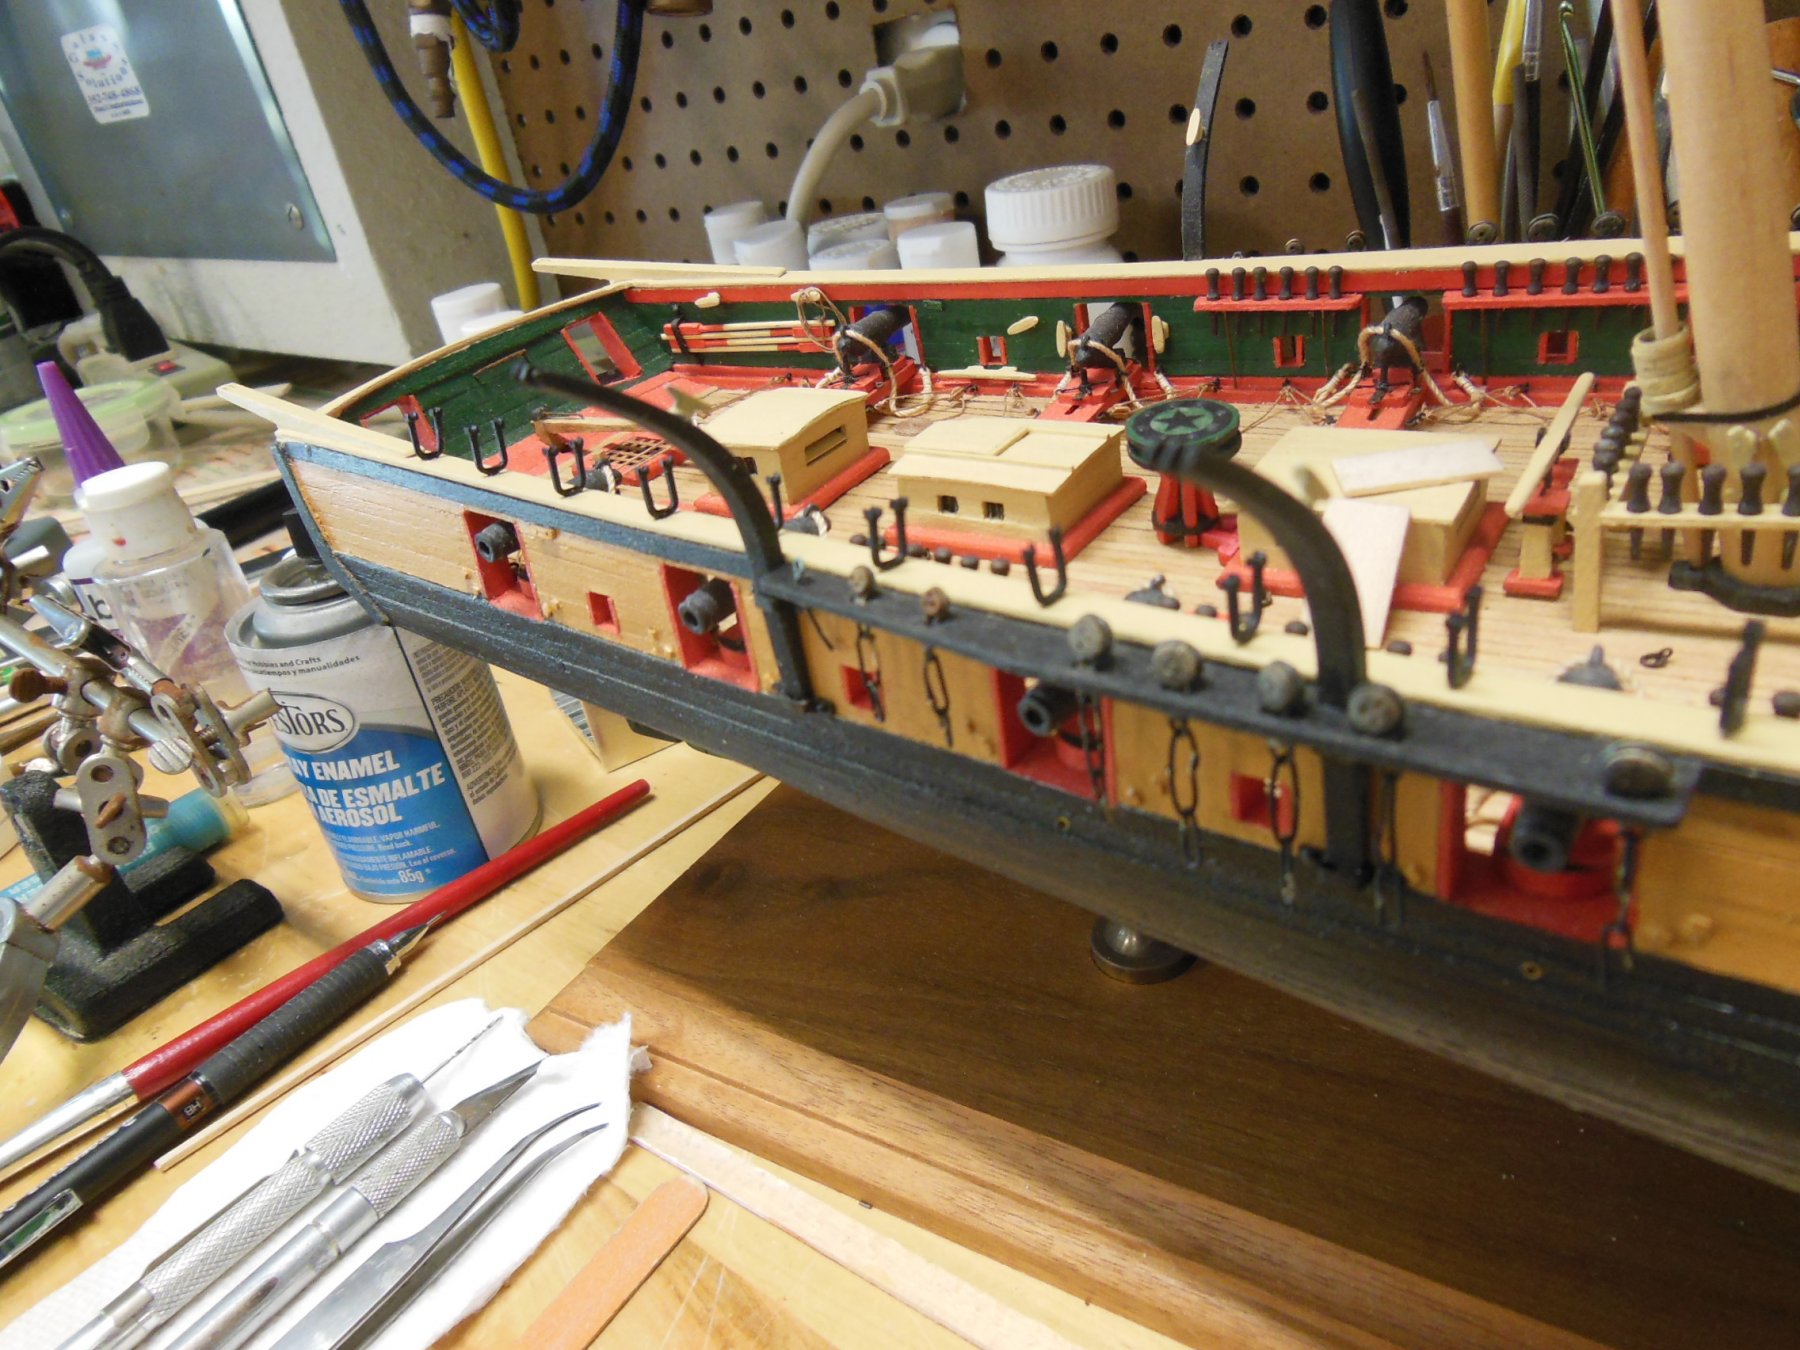
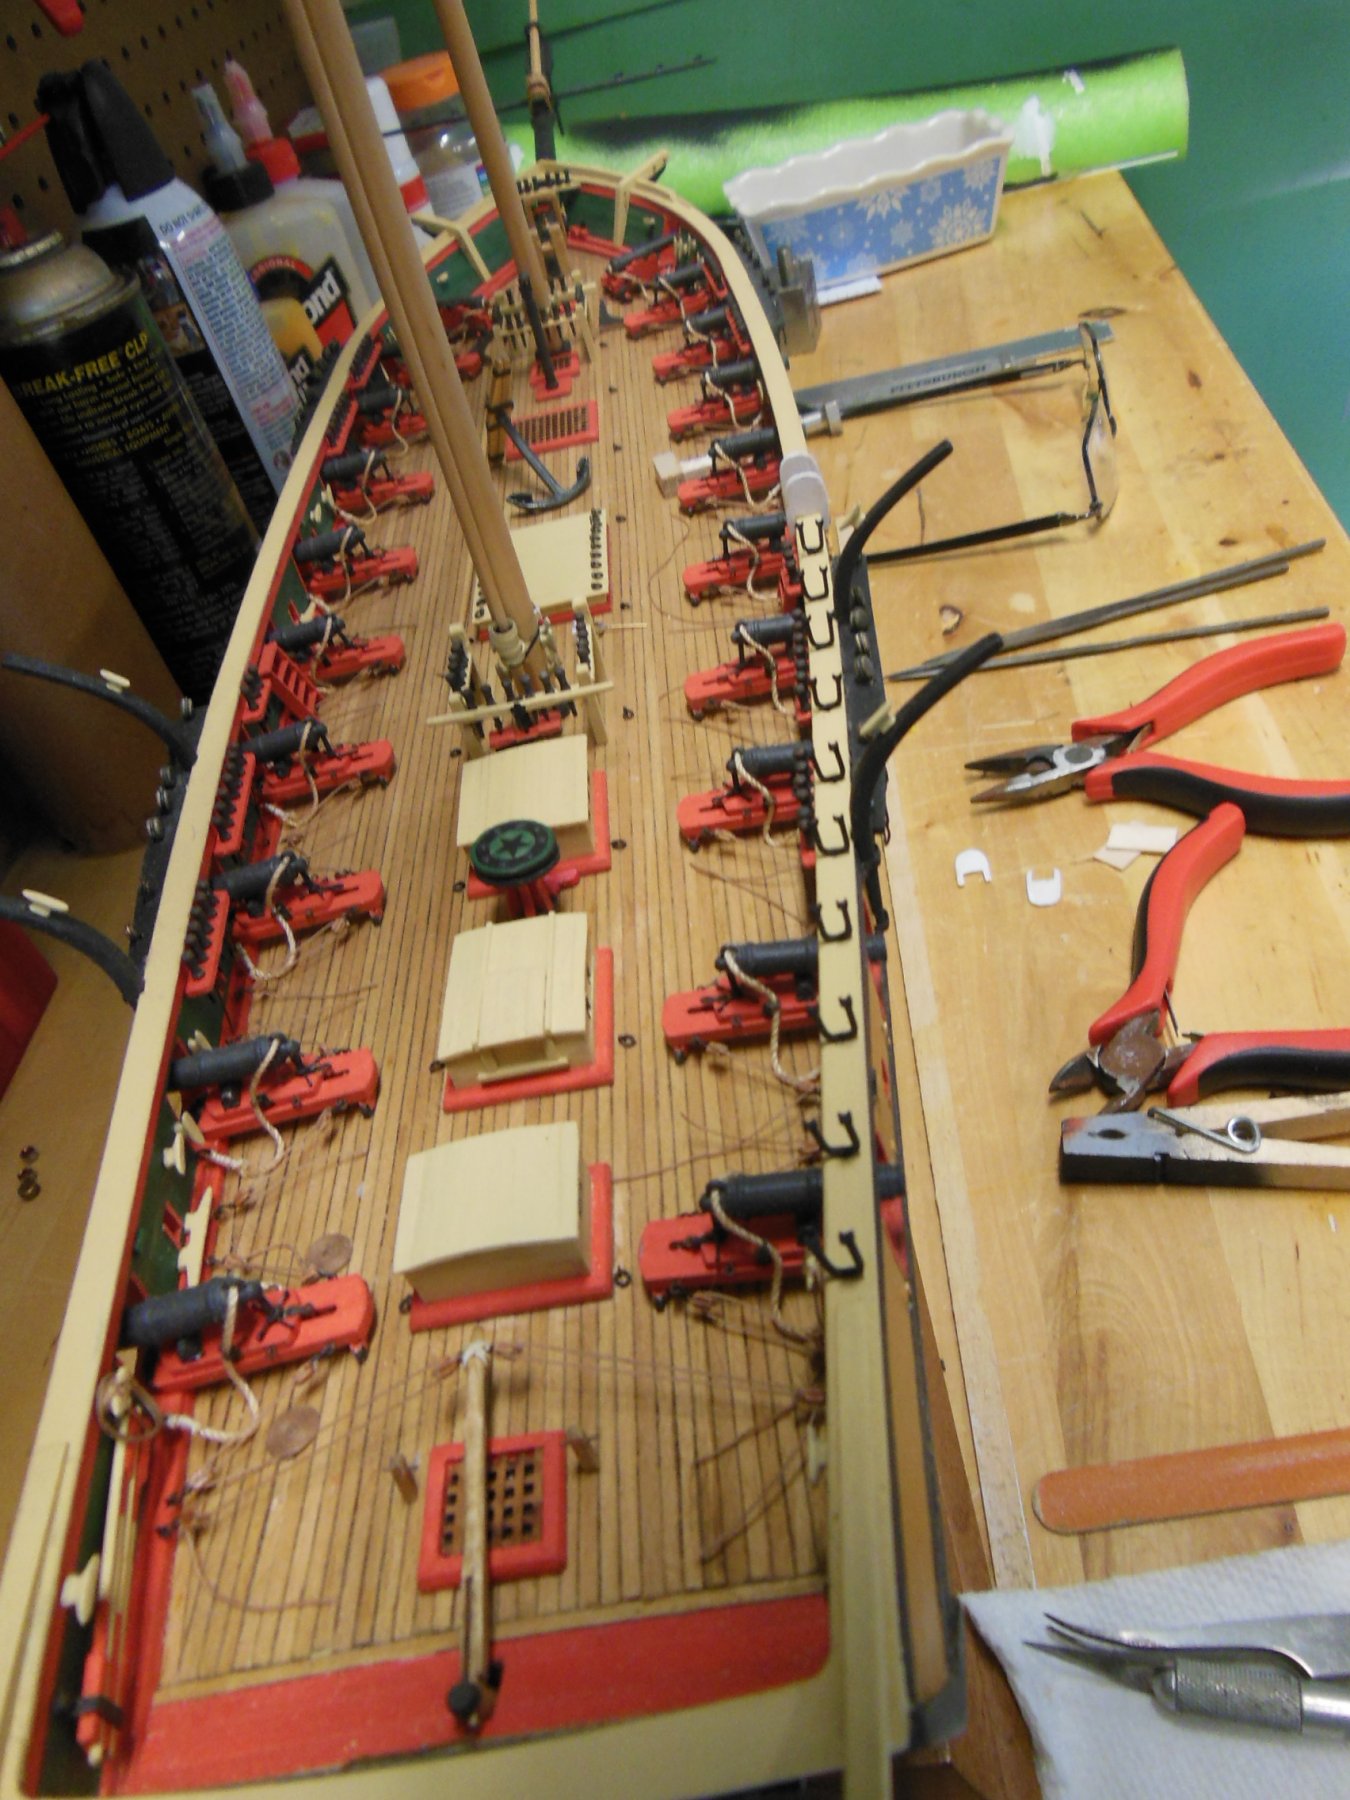
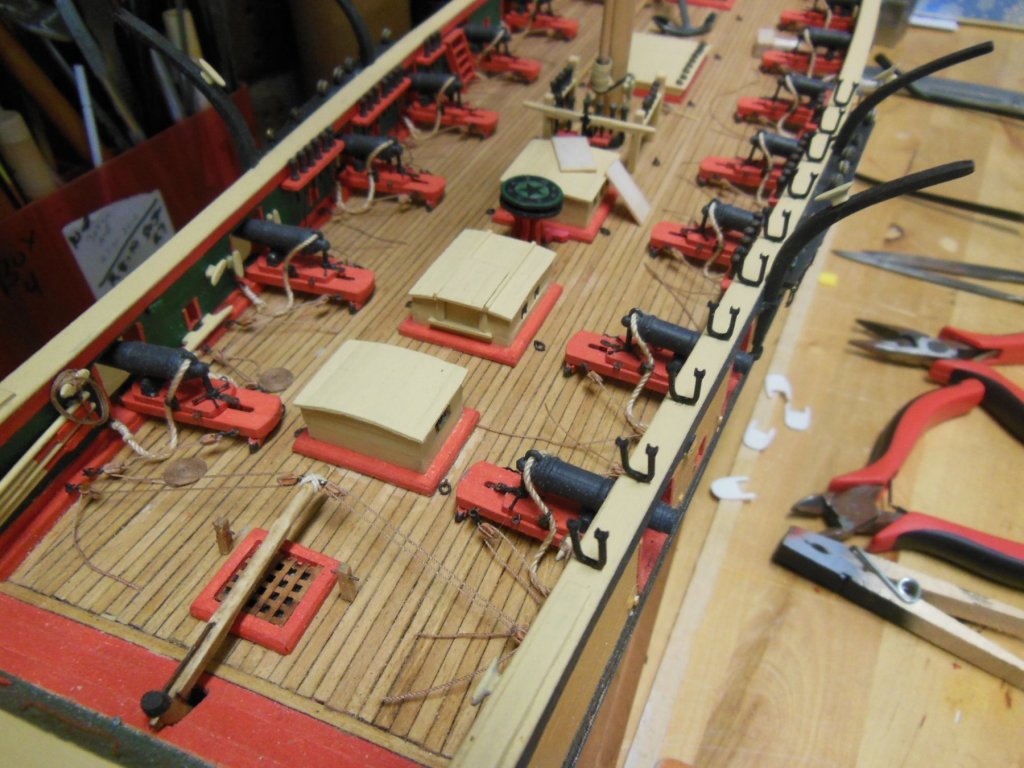
Thanks Popeye, I think I'll install the ropes and wood railing next to make sure I can complete this area before moving to the other side. I have so much to catch up on, things I started but did not finish. Coil ropes, deadeyes rotated and glued in position, the second anchor and a few other items. Since I have to reach over the stanchions to place the carronade coiled ropes, I may do this next..., but we will see. Common sense does not always apply with me...
-
I managed to finish making and mounting the aft starboard hammock stanchions after a couple of aww hecks. First, I broke two of the mount pins by simply handling them too rough, I managed to. solder them back on without melting the plastic stirrups by clamping the stanchion in a wet cloth which provided enough heat sink – lucky break for me. The next mistake was measuring the distance between each stanchion. The plans call for eleven pieces. I carefully measured and started mounting them using a wood spacer but did not account for the thickness of the stanchion resulting in mounting only ten. What a rookie mistake...lol. I think it will look fine with ten. I also made the four wood stanchions that mount by the two ladders. One photo shows them with primer, mounted loose for a photo. Sorry to post and run but we have a house showings today and we need to vacate the home for most of the day.

-
Thanks Steve, glad you stopped by to look. I now have eleven metal stanchions painted and ready for installation. I'm currently working on the wood stanchions that mount by the steps.
-
Hi Edwin, Thank you for the kind words and thoughts. I agree with you on the downfalls of aging. Family and health is precious and becomes more so once you realize how fragile they become in later years of life. I hope you and yours are doing well and enjoying life as much as possible. It's good to be back posting on MSW and I hope I can provide more timely updates this year. Take care....
-
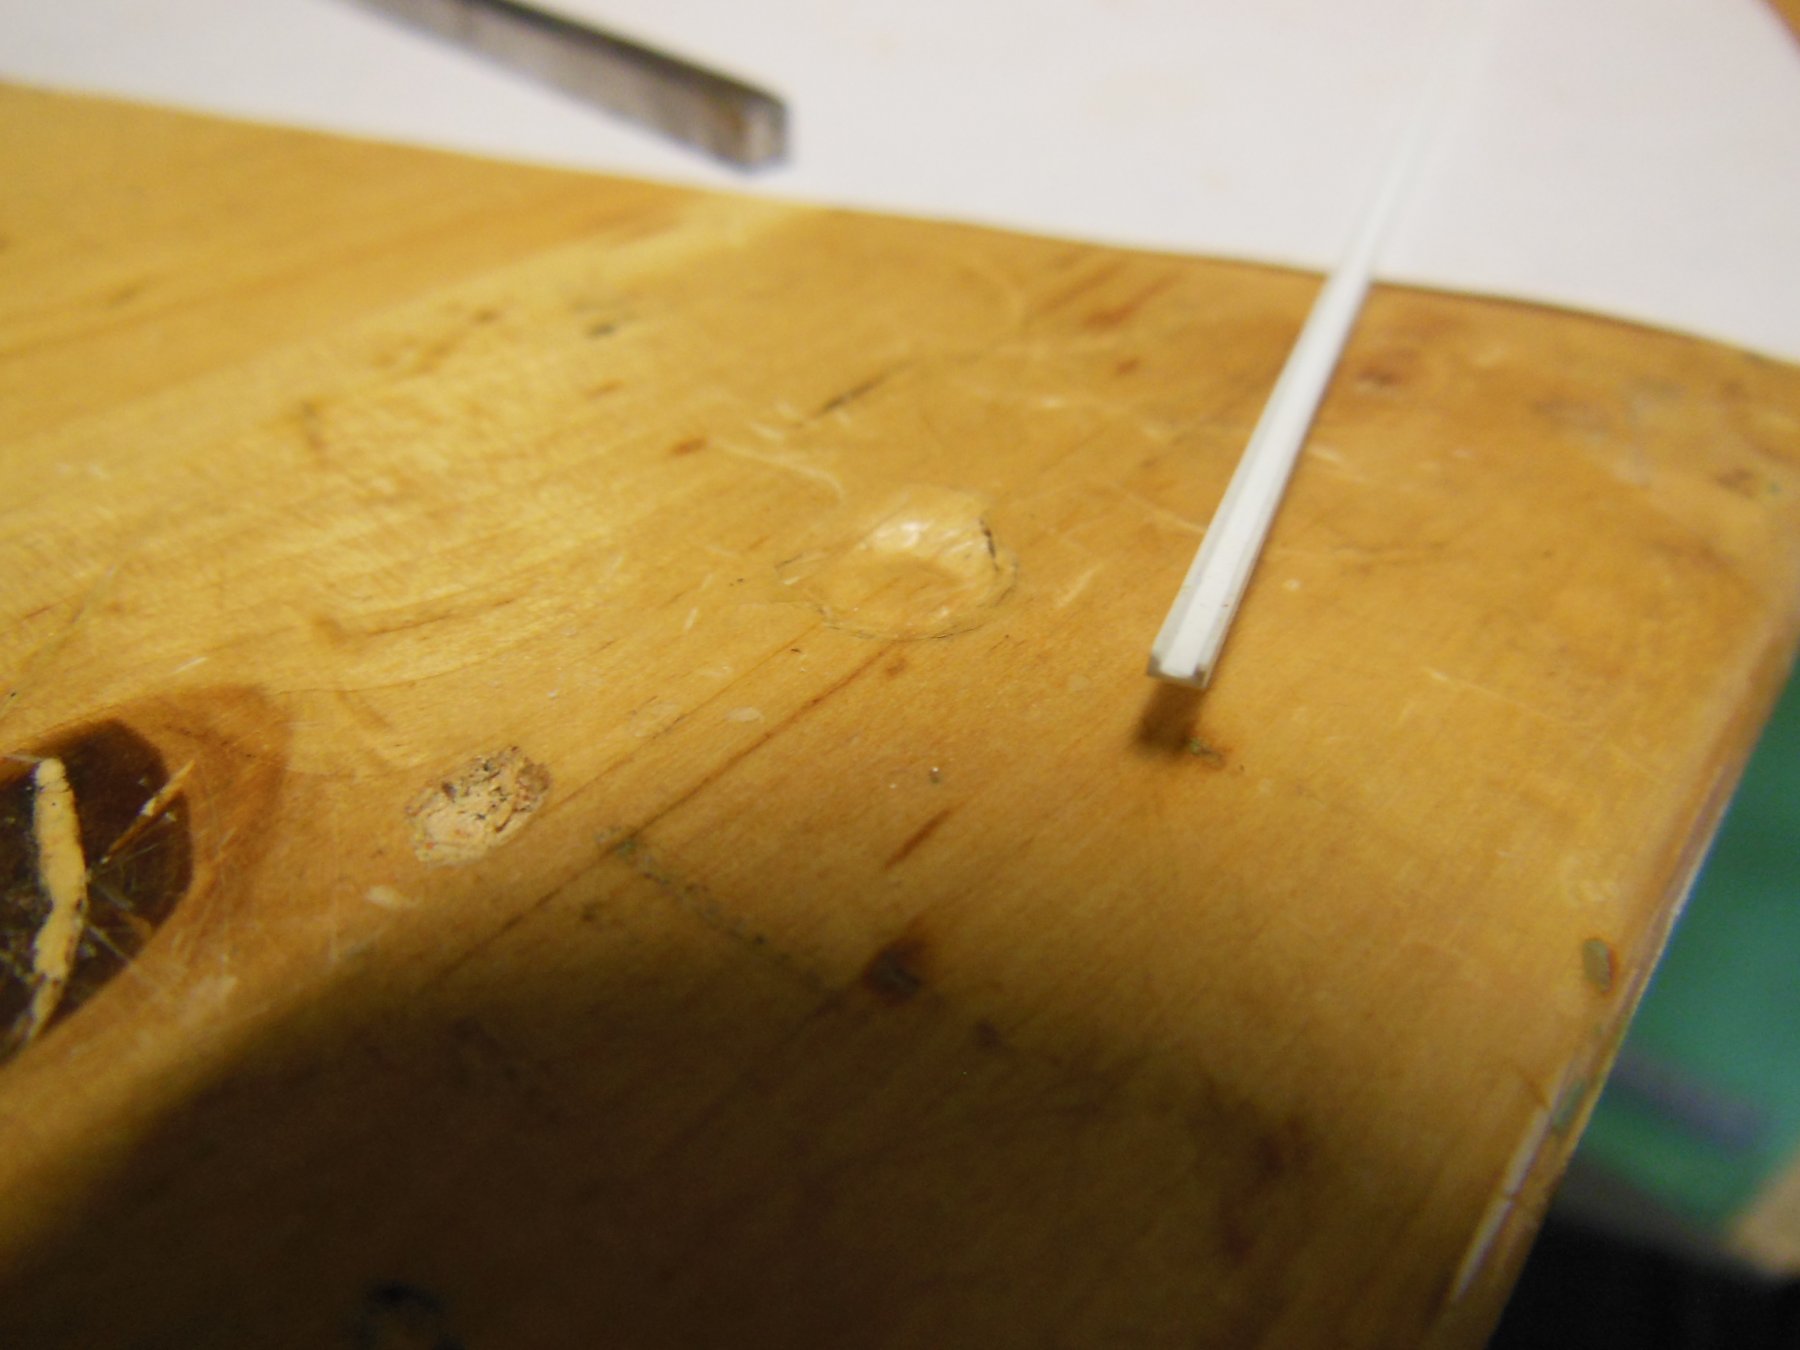
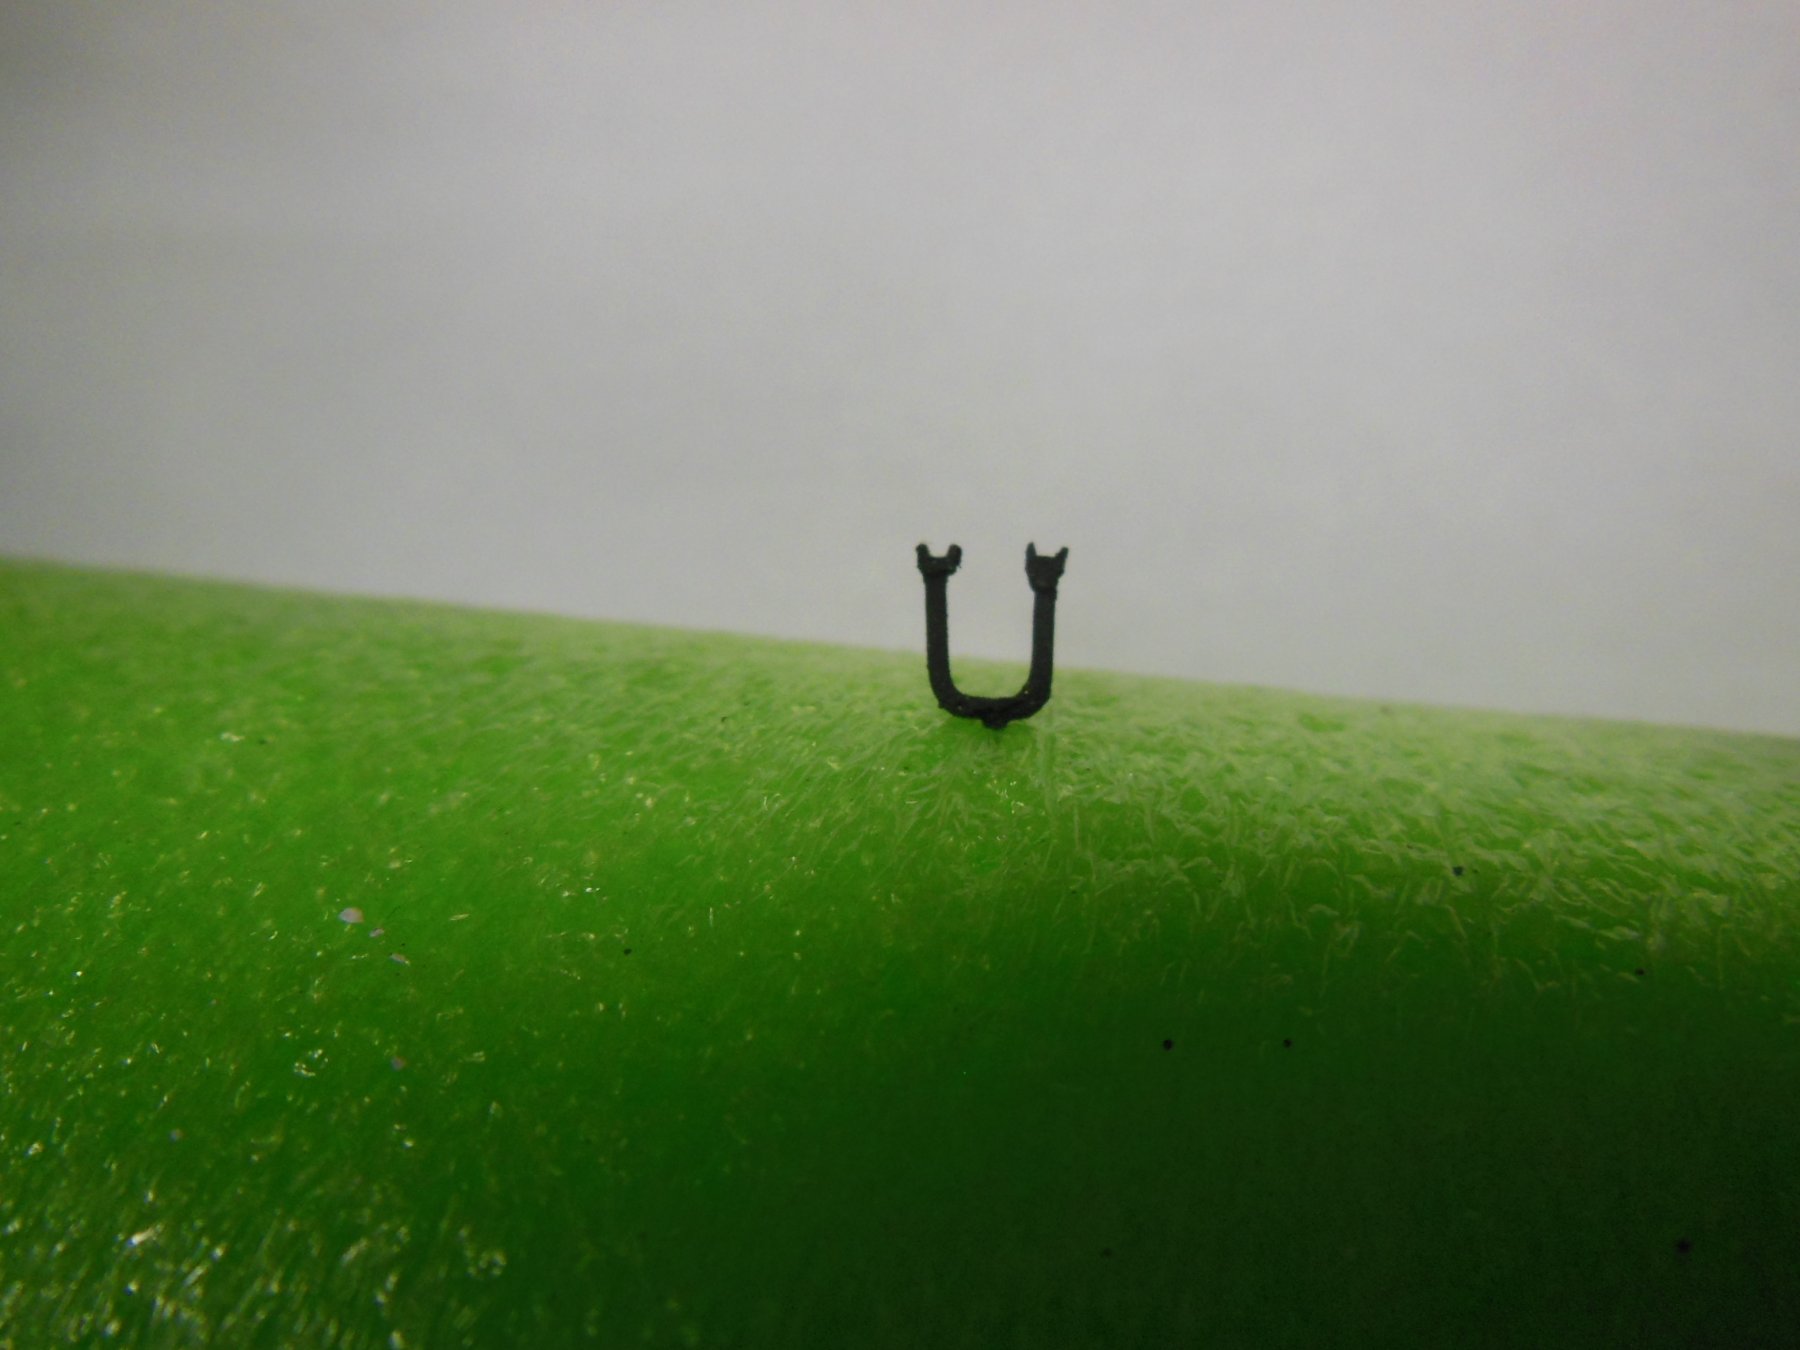
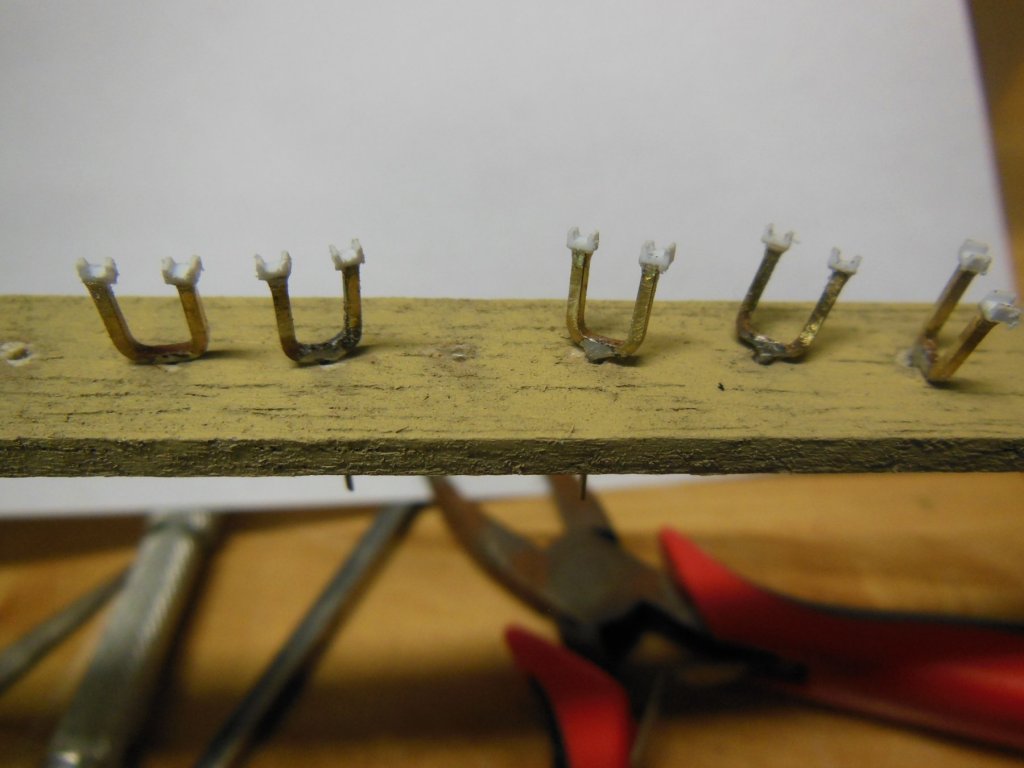
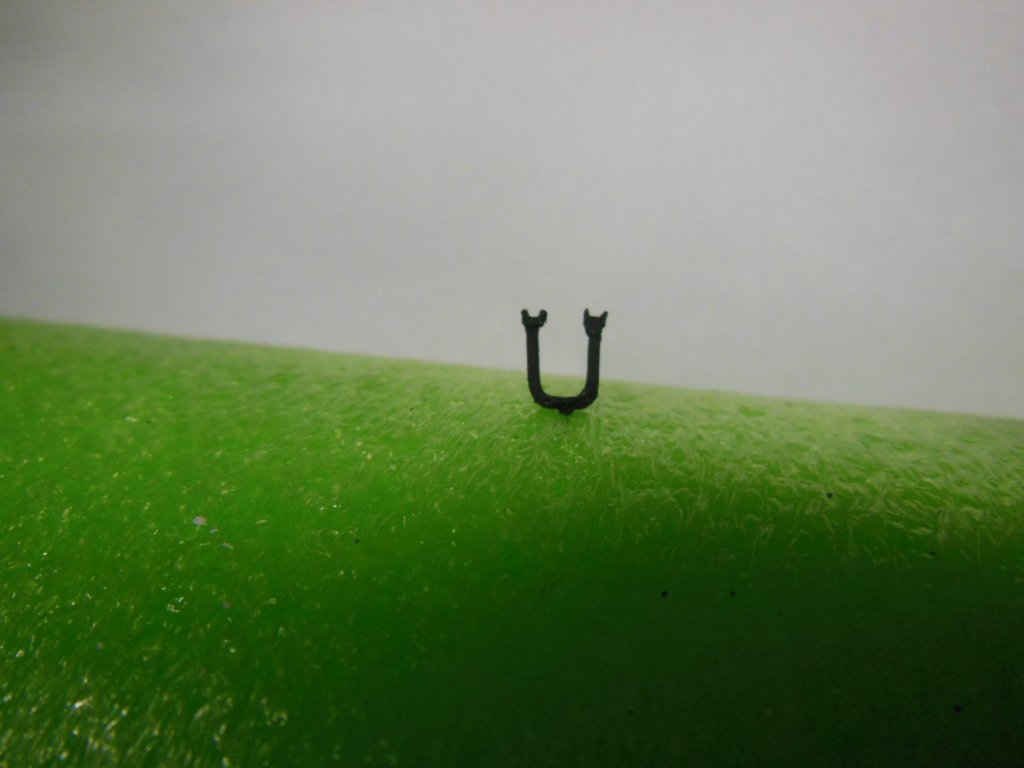
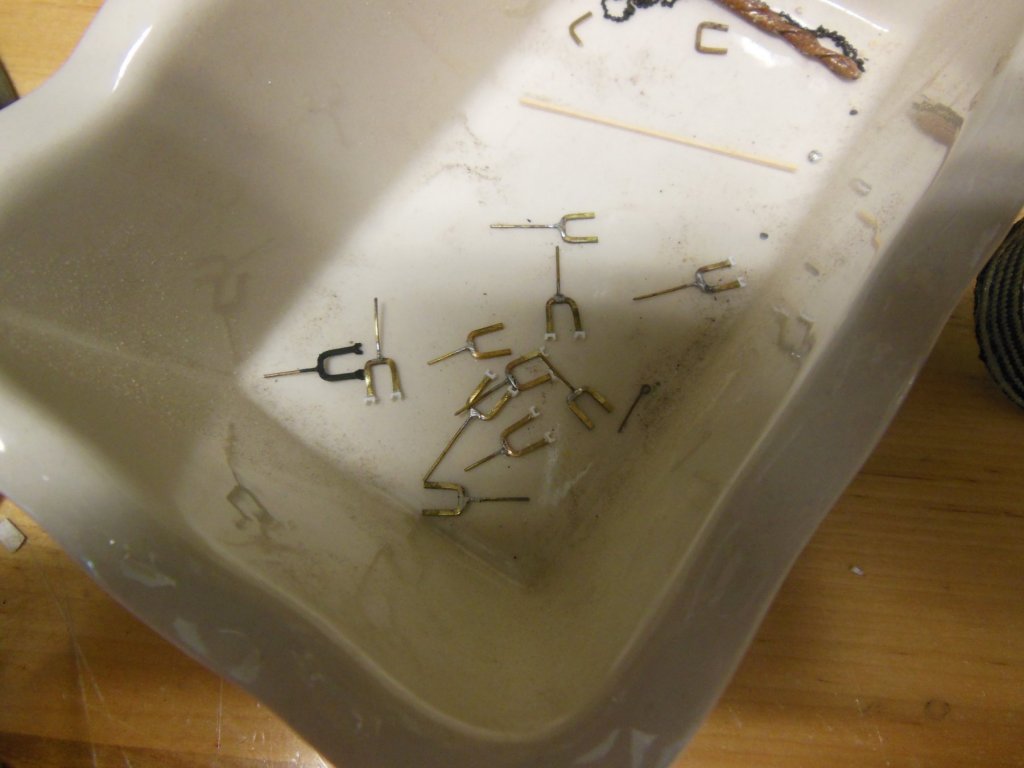
After all of the above I could not successfully drill another hole without breaking drill bits! I went thru 8 bits, breaking them off each time and losing a stanchion each time. I varied the drill bit speed, tried to drill much slow in respect the bit pressure, talked to two machinist friends until I finally gave up. Plan "B" is to glue the rope on the inside of the stanchion. At this scale is should look ok providing I use small enough thread. Next is to add the stirrups on the top of each leg. I found some StripStyrene plastic channel thats 0.060 wide with 0.037 channel walls. I think this will give me the look I want if I can glue it on and sand the channel down to the width of the brass bar. below are some photos on where I'm at with this process. The macro shots show dust, fuzzies etc, which I hope will clean up. I painted one unit but did not clean it very well before painting and looks pretty bad but I'll clean it up later - I think this looks like this may work out. I used enamel paint for this step, thinking since I'm gluing rope to it, it may be less likely to peal off.


-
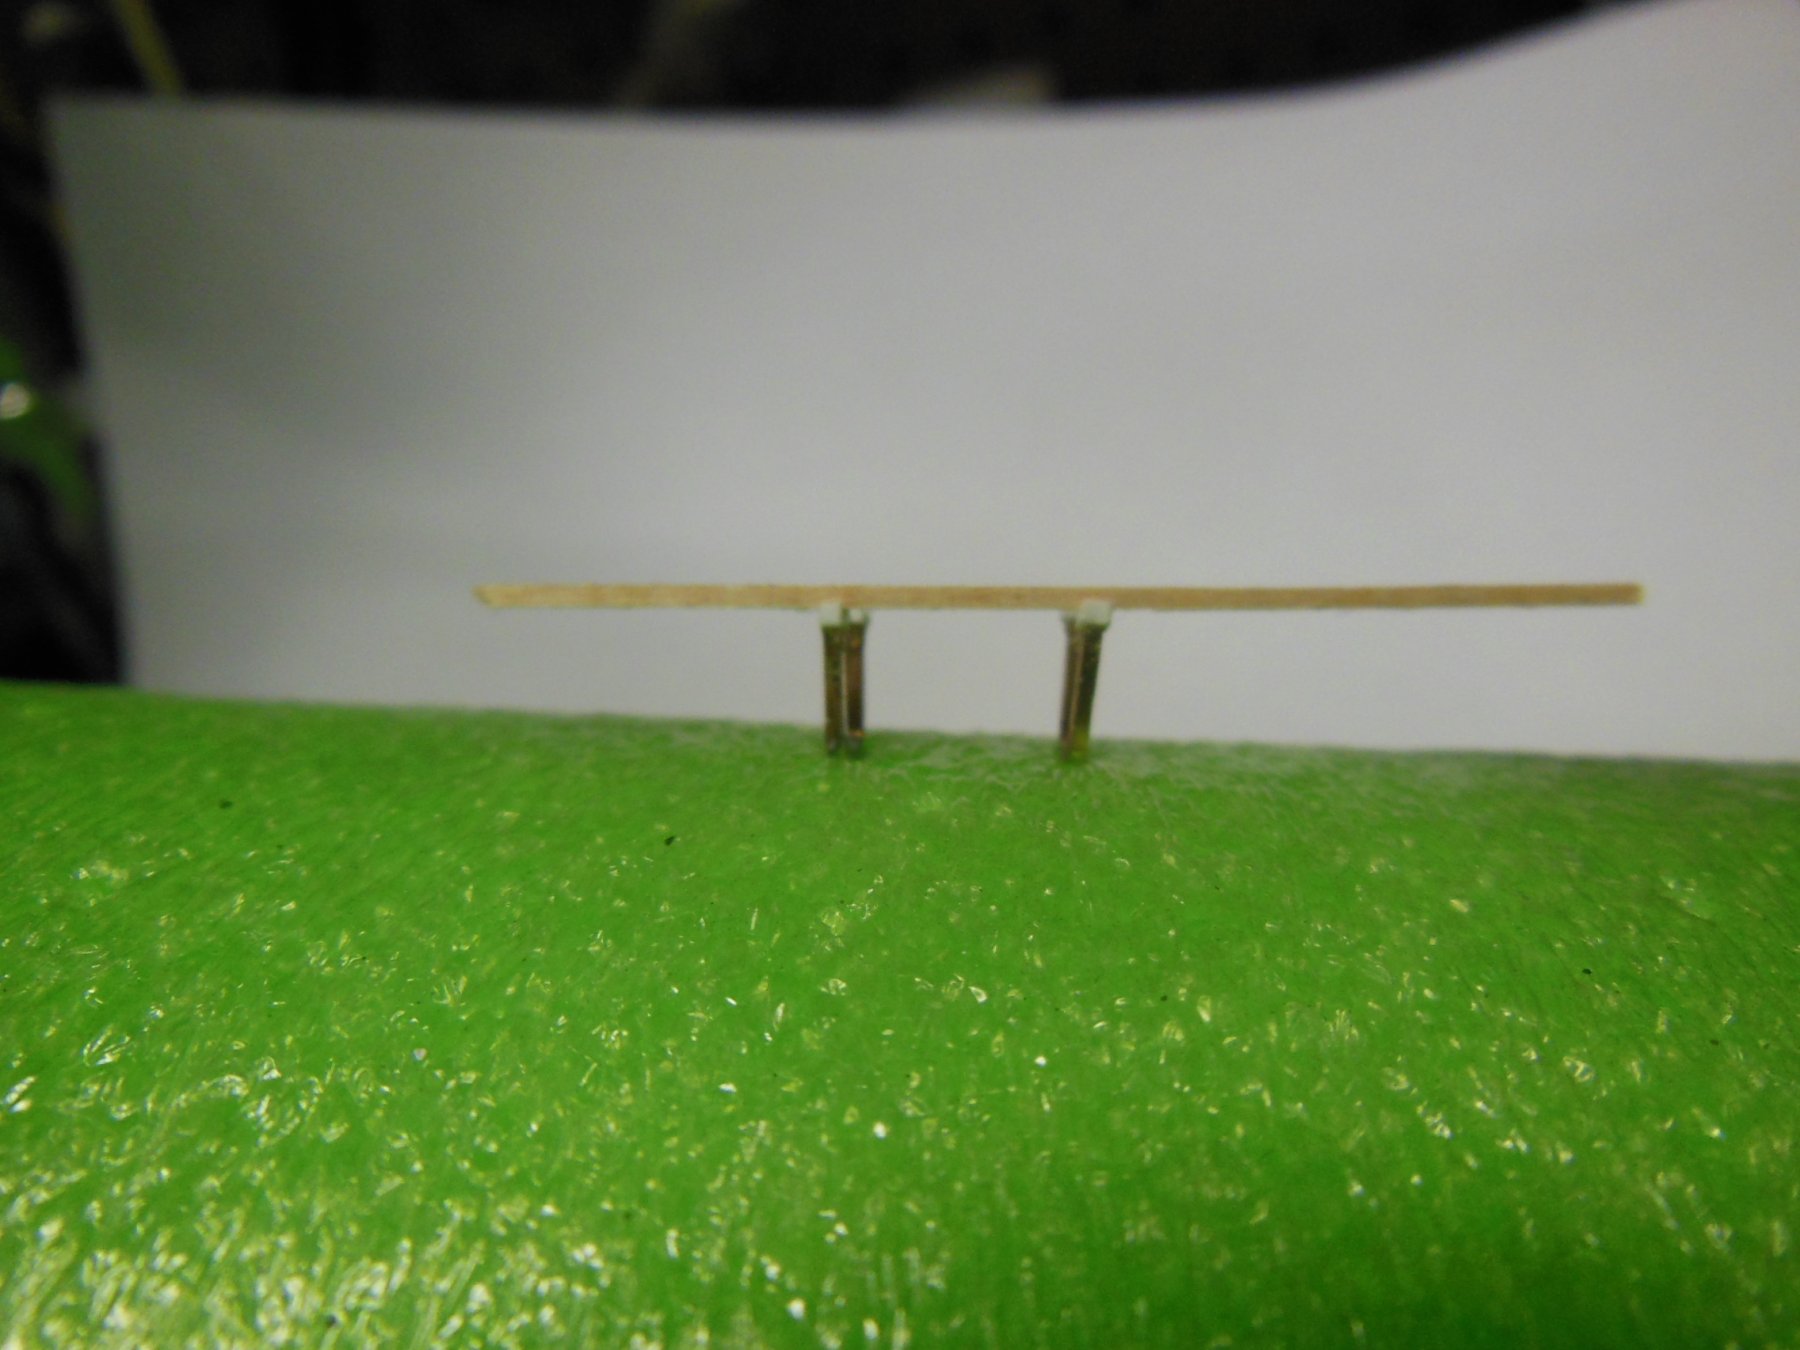
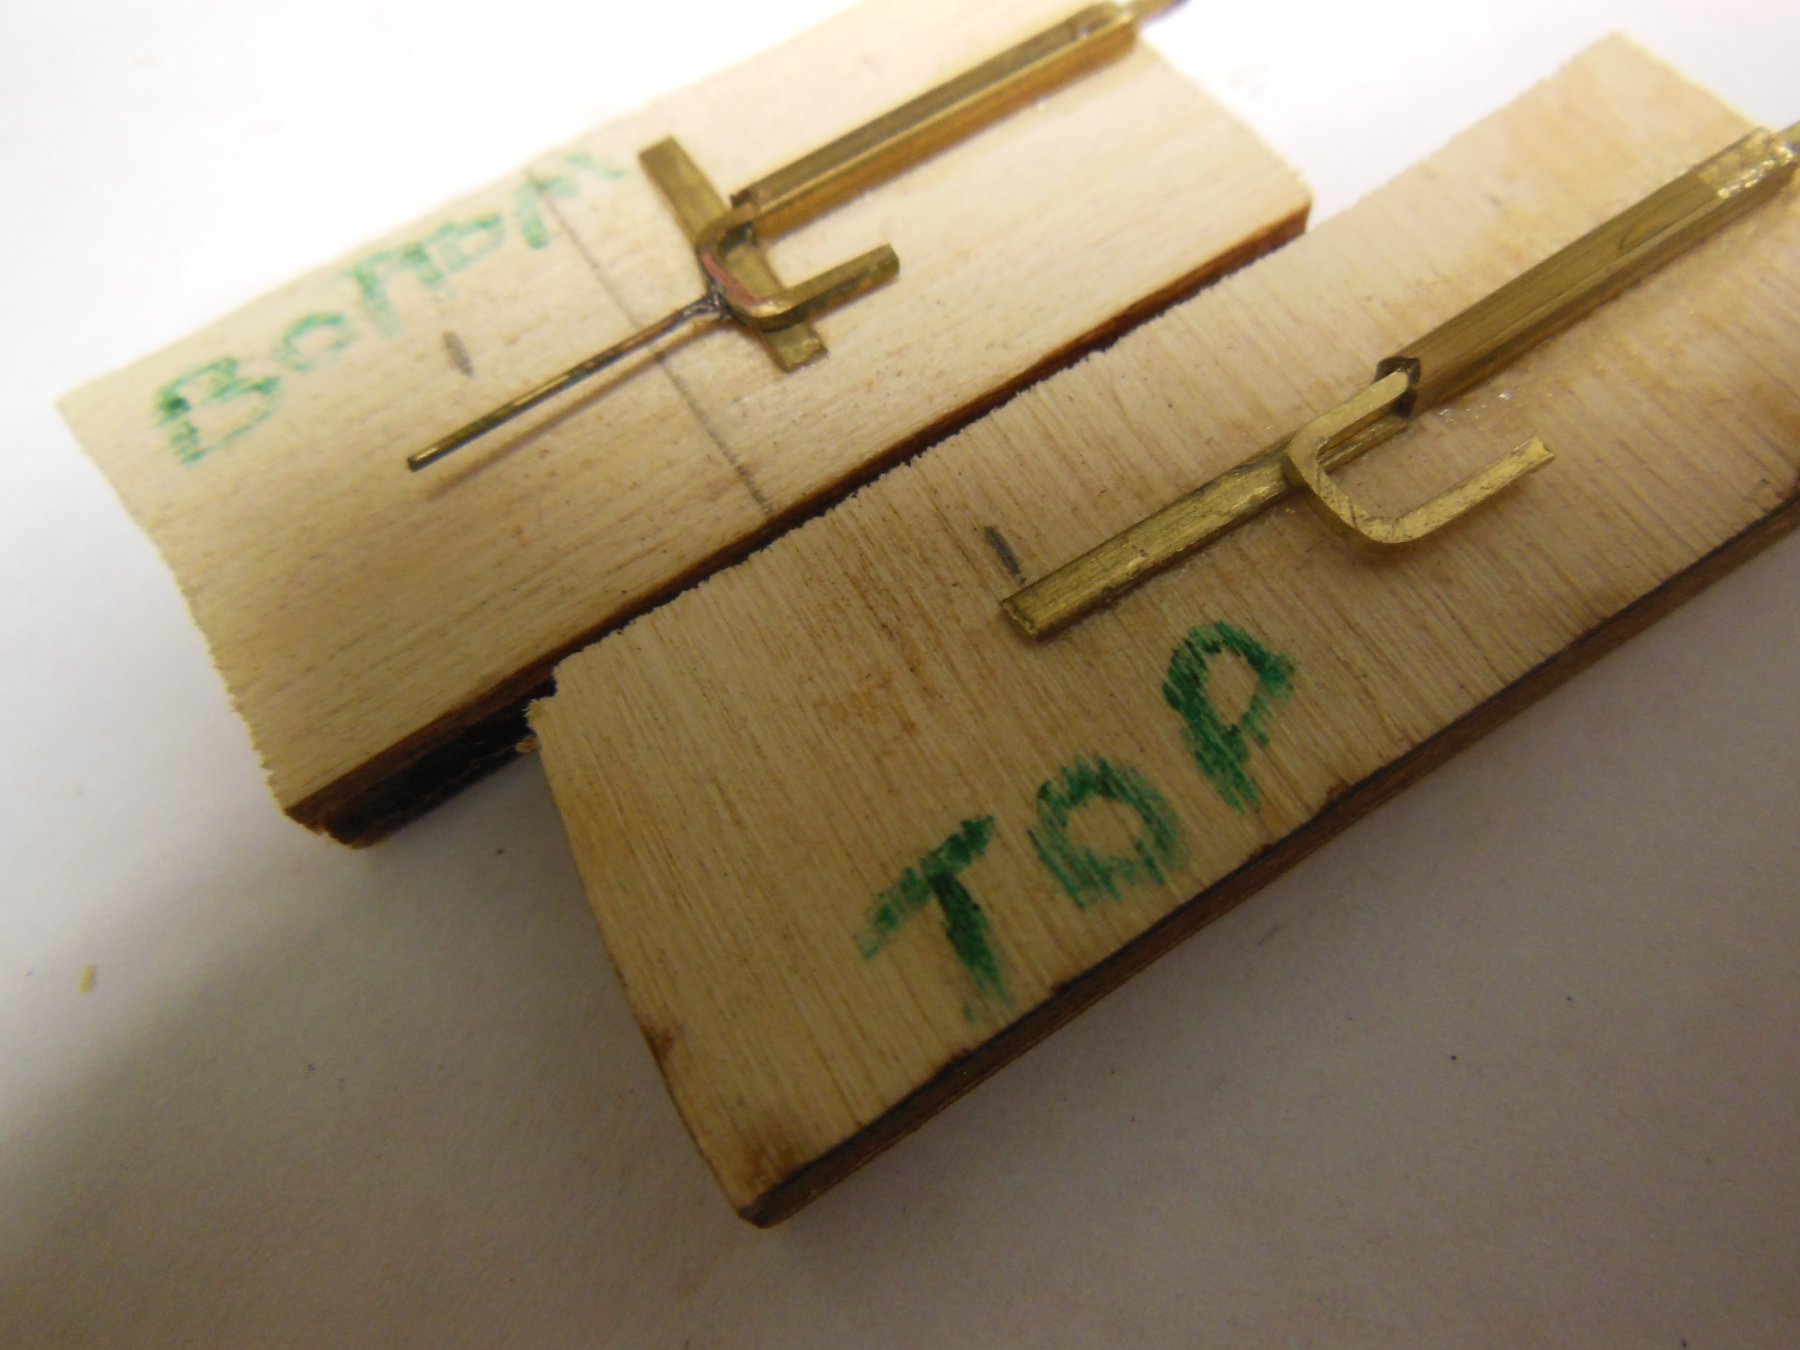
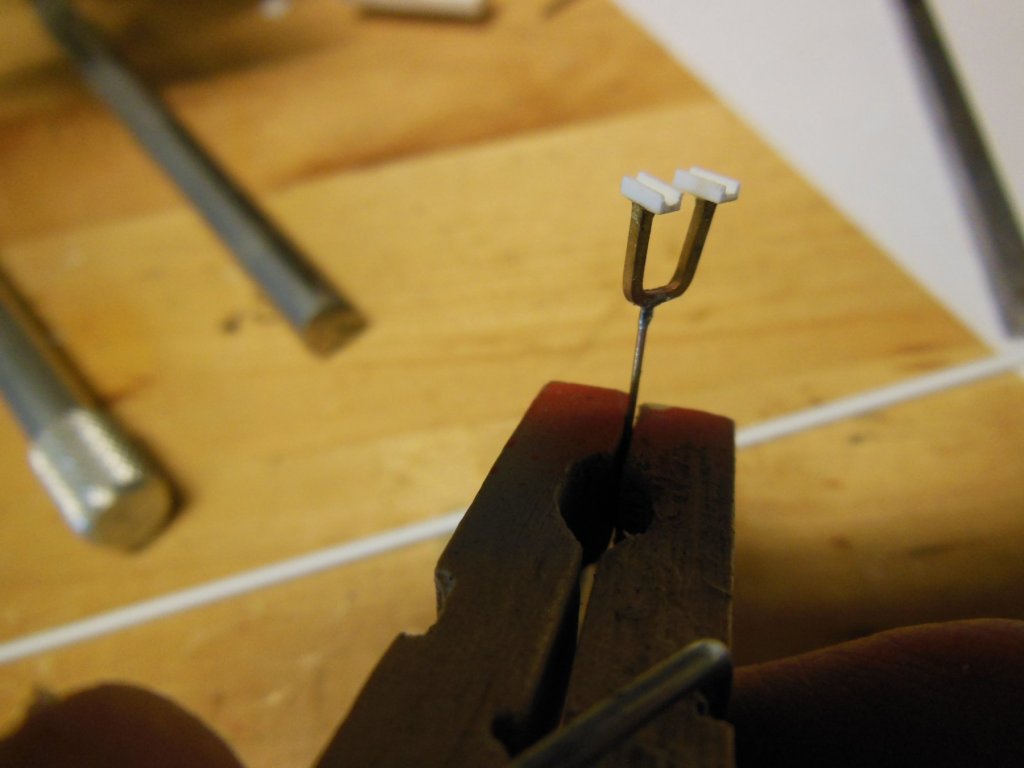
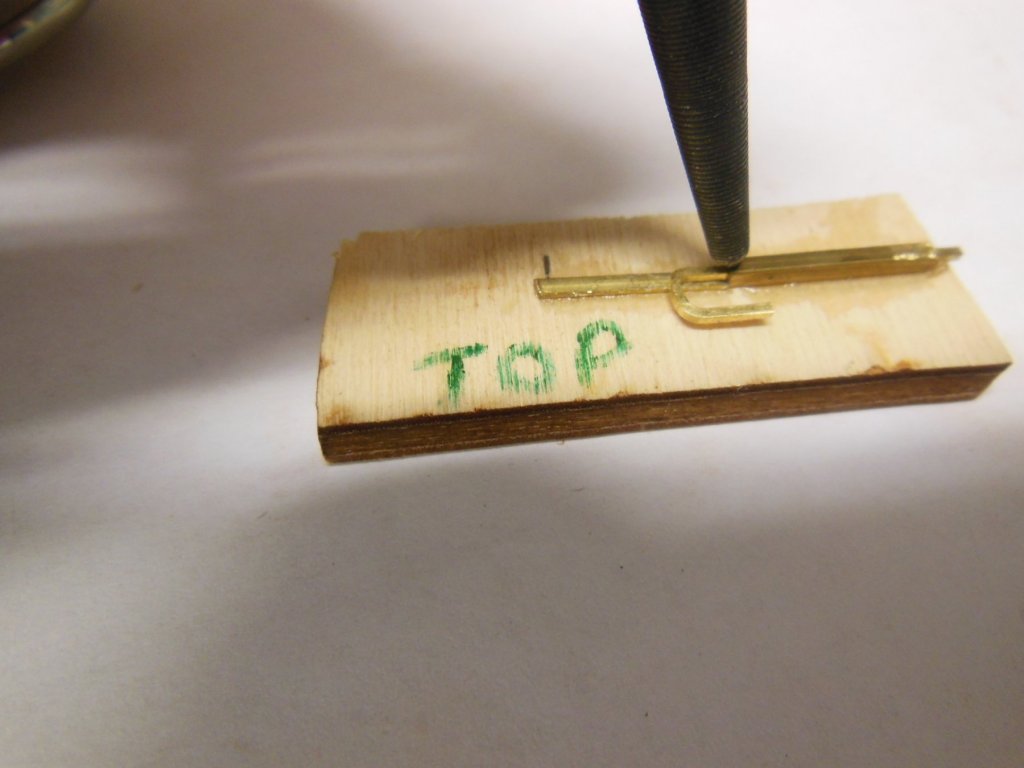
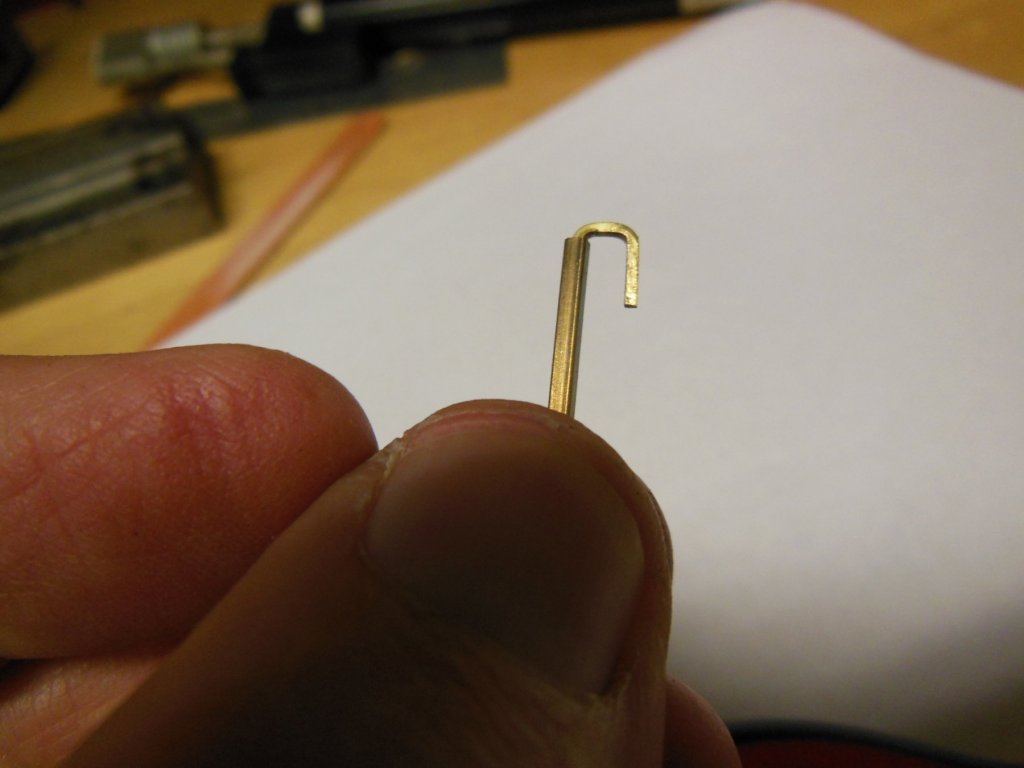
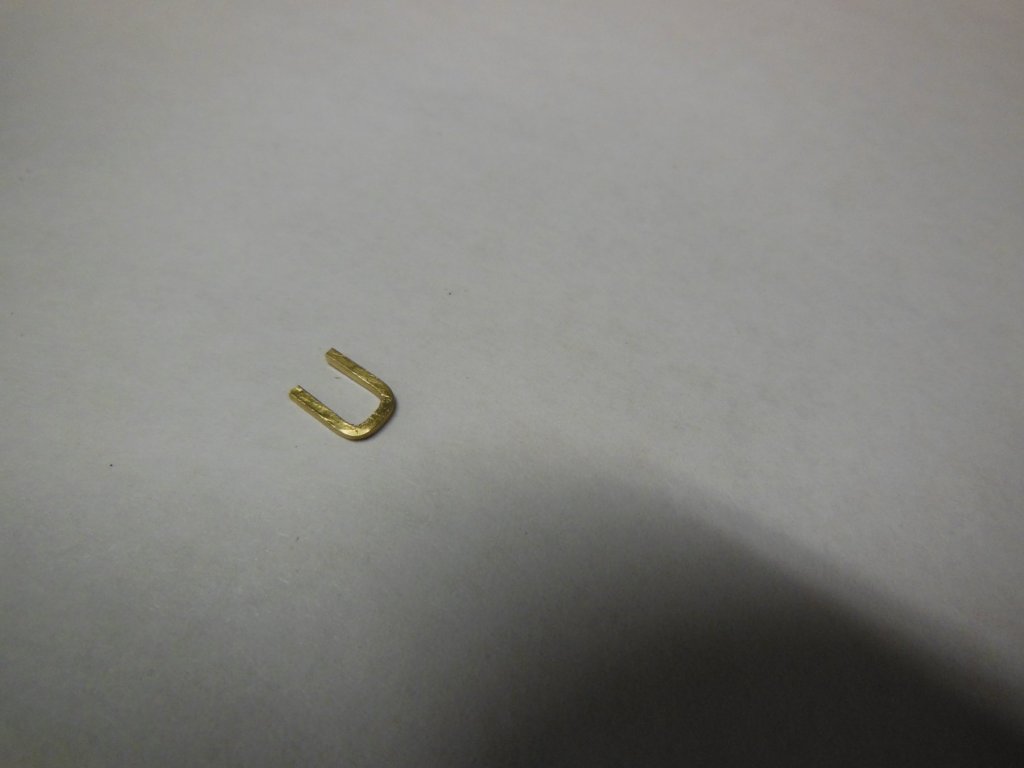
Now that I have the shape I need, squared and trimmed, I need to center punch each leg at a high and low spot to run the rope through. Two more jigs are needed, one for each spot. As you can see in the photos, the depth of immersion is fixed and the V notch aligns where the center punch is located. One photo shows a stanchion with an anchor tail solder in place. I'll use this method to help secure the stanchion to the top rail. I soldered them free hand which was not pretty or very straight, but I'll clip them off short, use a bigger than necessary hole that will fill up with CA glue, so I hope its a non issue. The next post will be a; CRAP, that does not work out as planned!!!

-
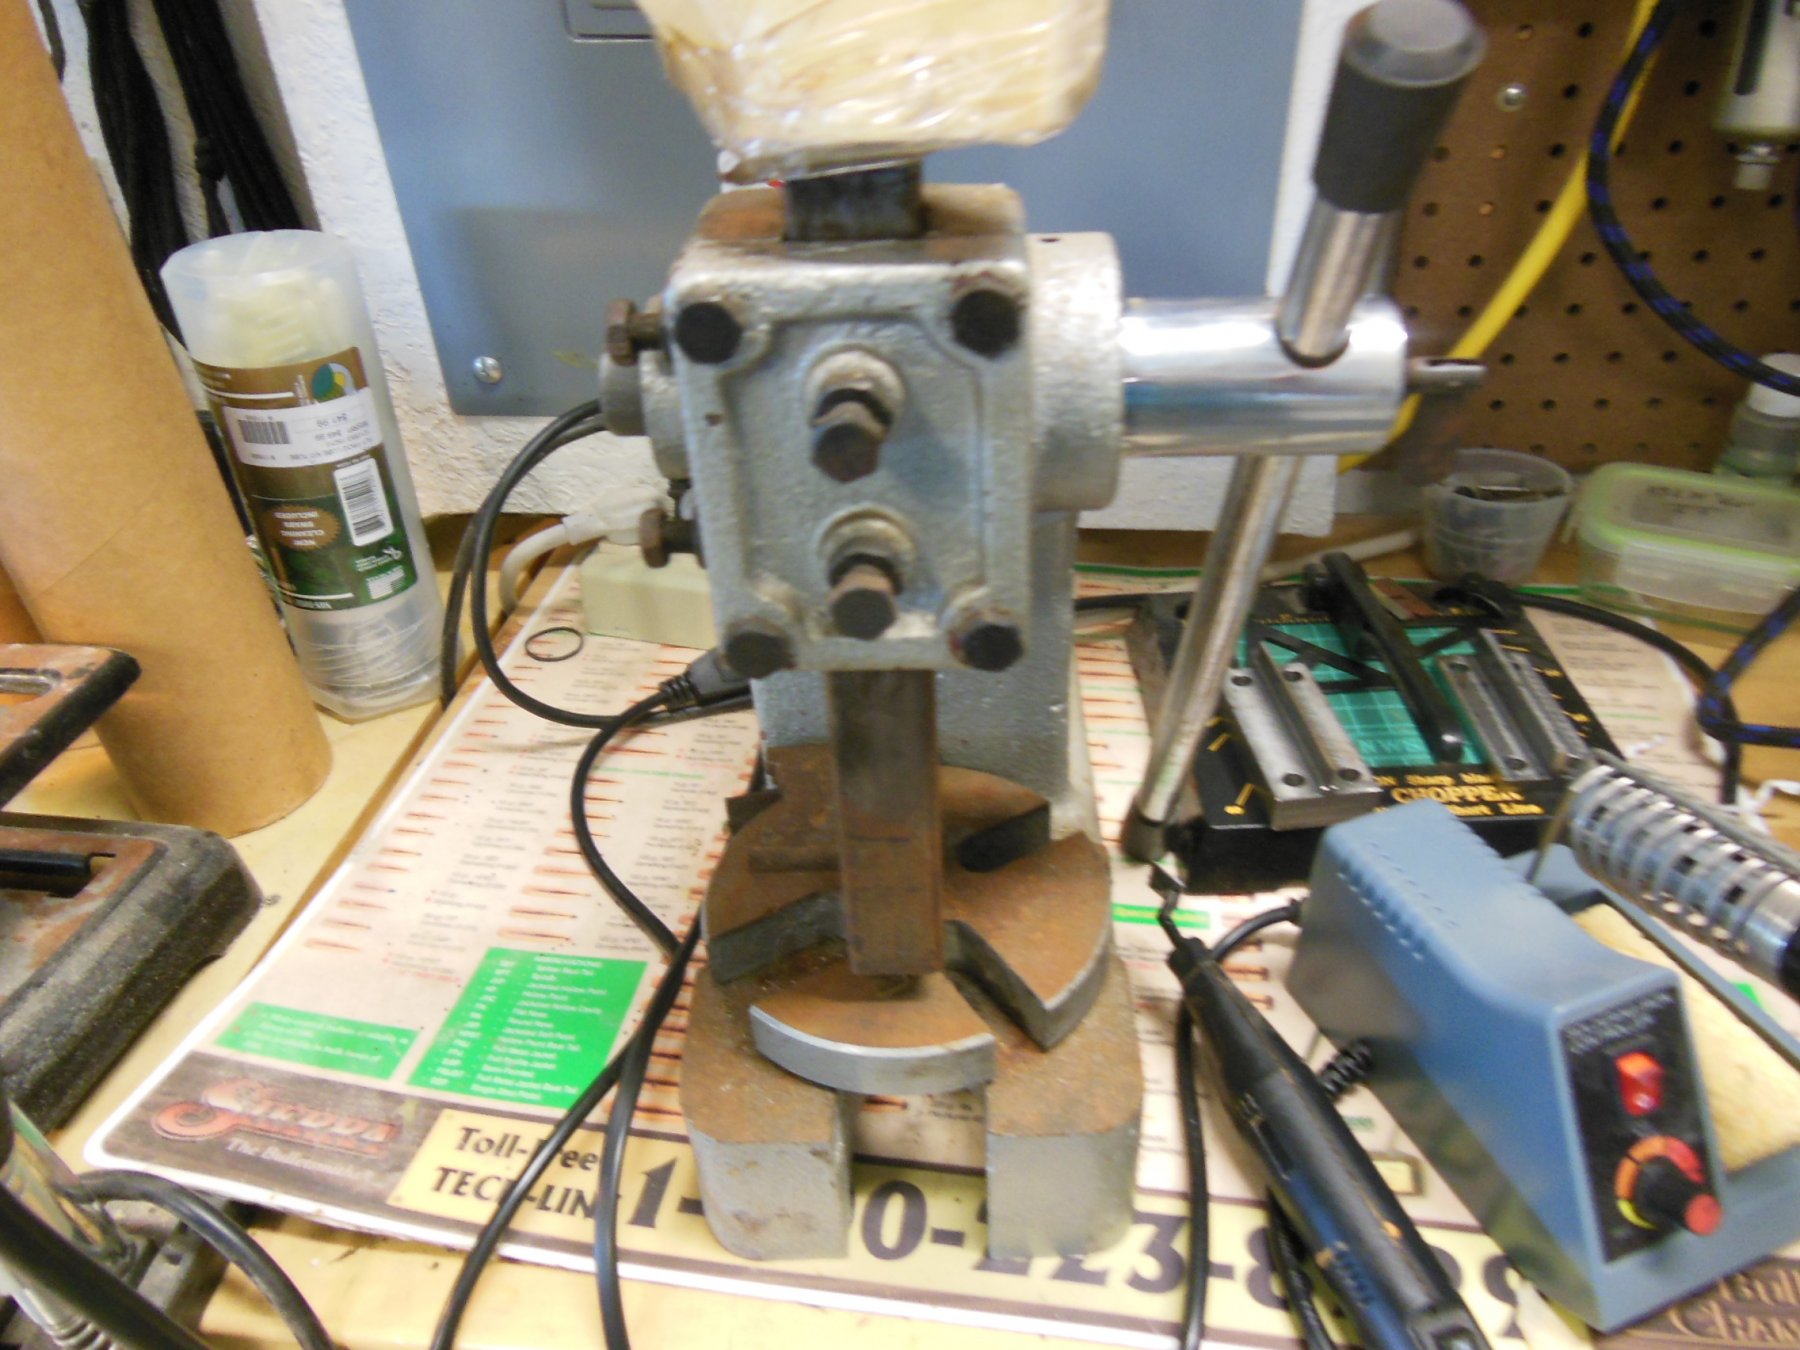
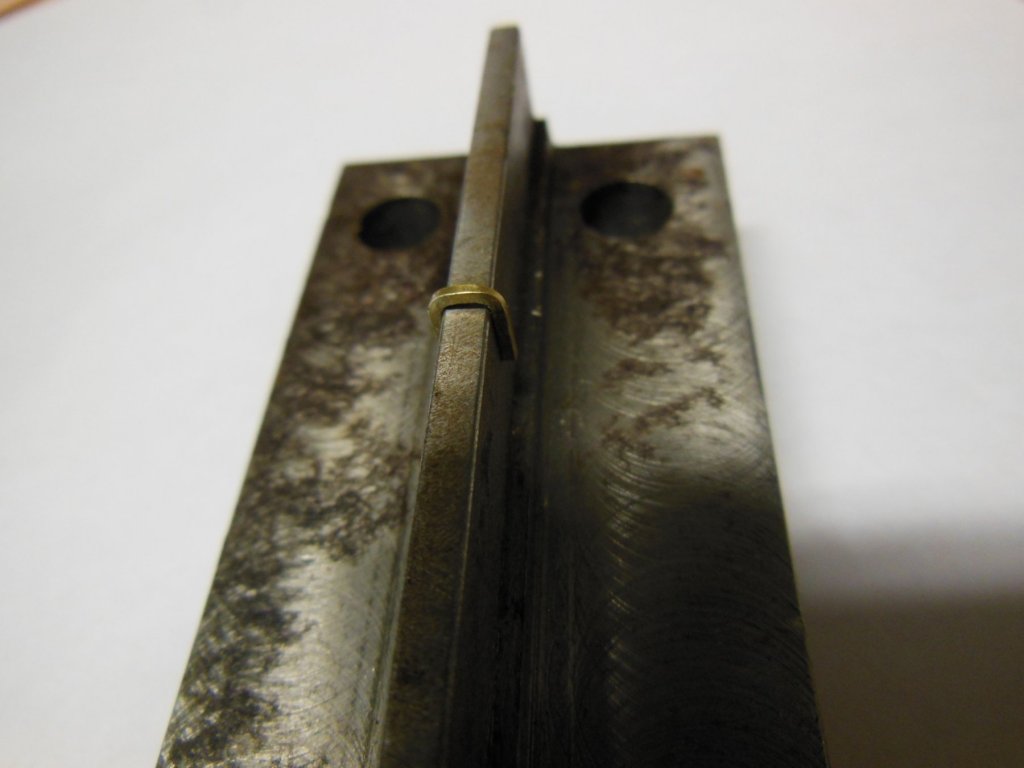
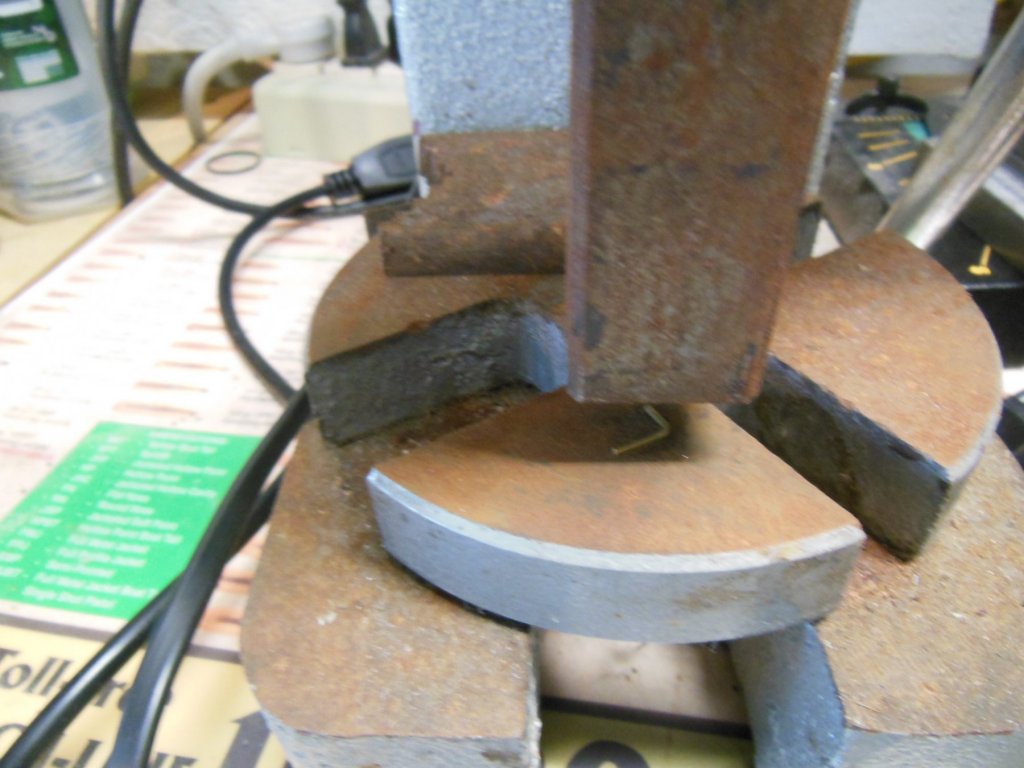
Now here is where it got interesting to me. I could not bend the legs to get a ninety degree corner. I was ok with a radius but wanted to improve it a bit. My neighbor used to be a machinist for the airlines. Showing him what I'm doing and the issue I'm trying to resolve he said he may have something he made 20 years ago that may help. It was a metal jig used to form a part that had three sizes to choose from. Here is his jig with one mandrel that worked for me. I place a stanchion on the edge, assemble the two jig pieces and hit it a few times with a brass hammer and it took some of the radius out of the legs! Something made for a custom purpose, 20 years ago.... lol After this step, back the the arbor press again the square it back up.

-
After all of that, the legs are still not exactly the same length, so I made another jig to grind them the same length... Did I mention earlier, I tend to over complicate things...?
-
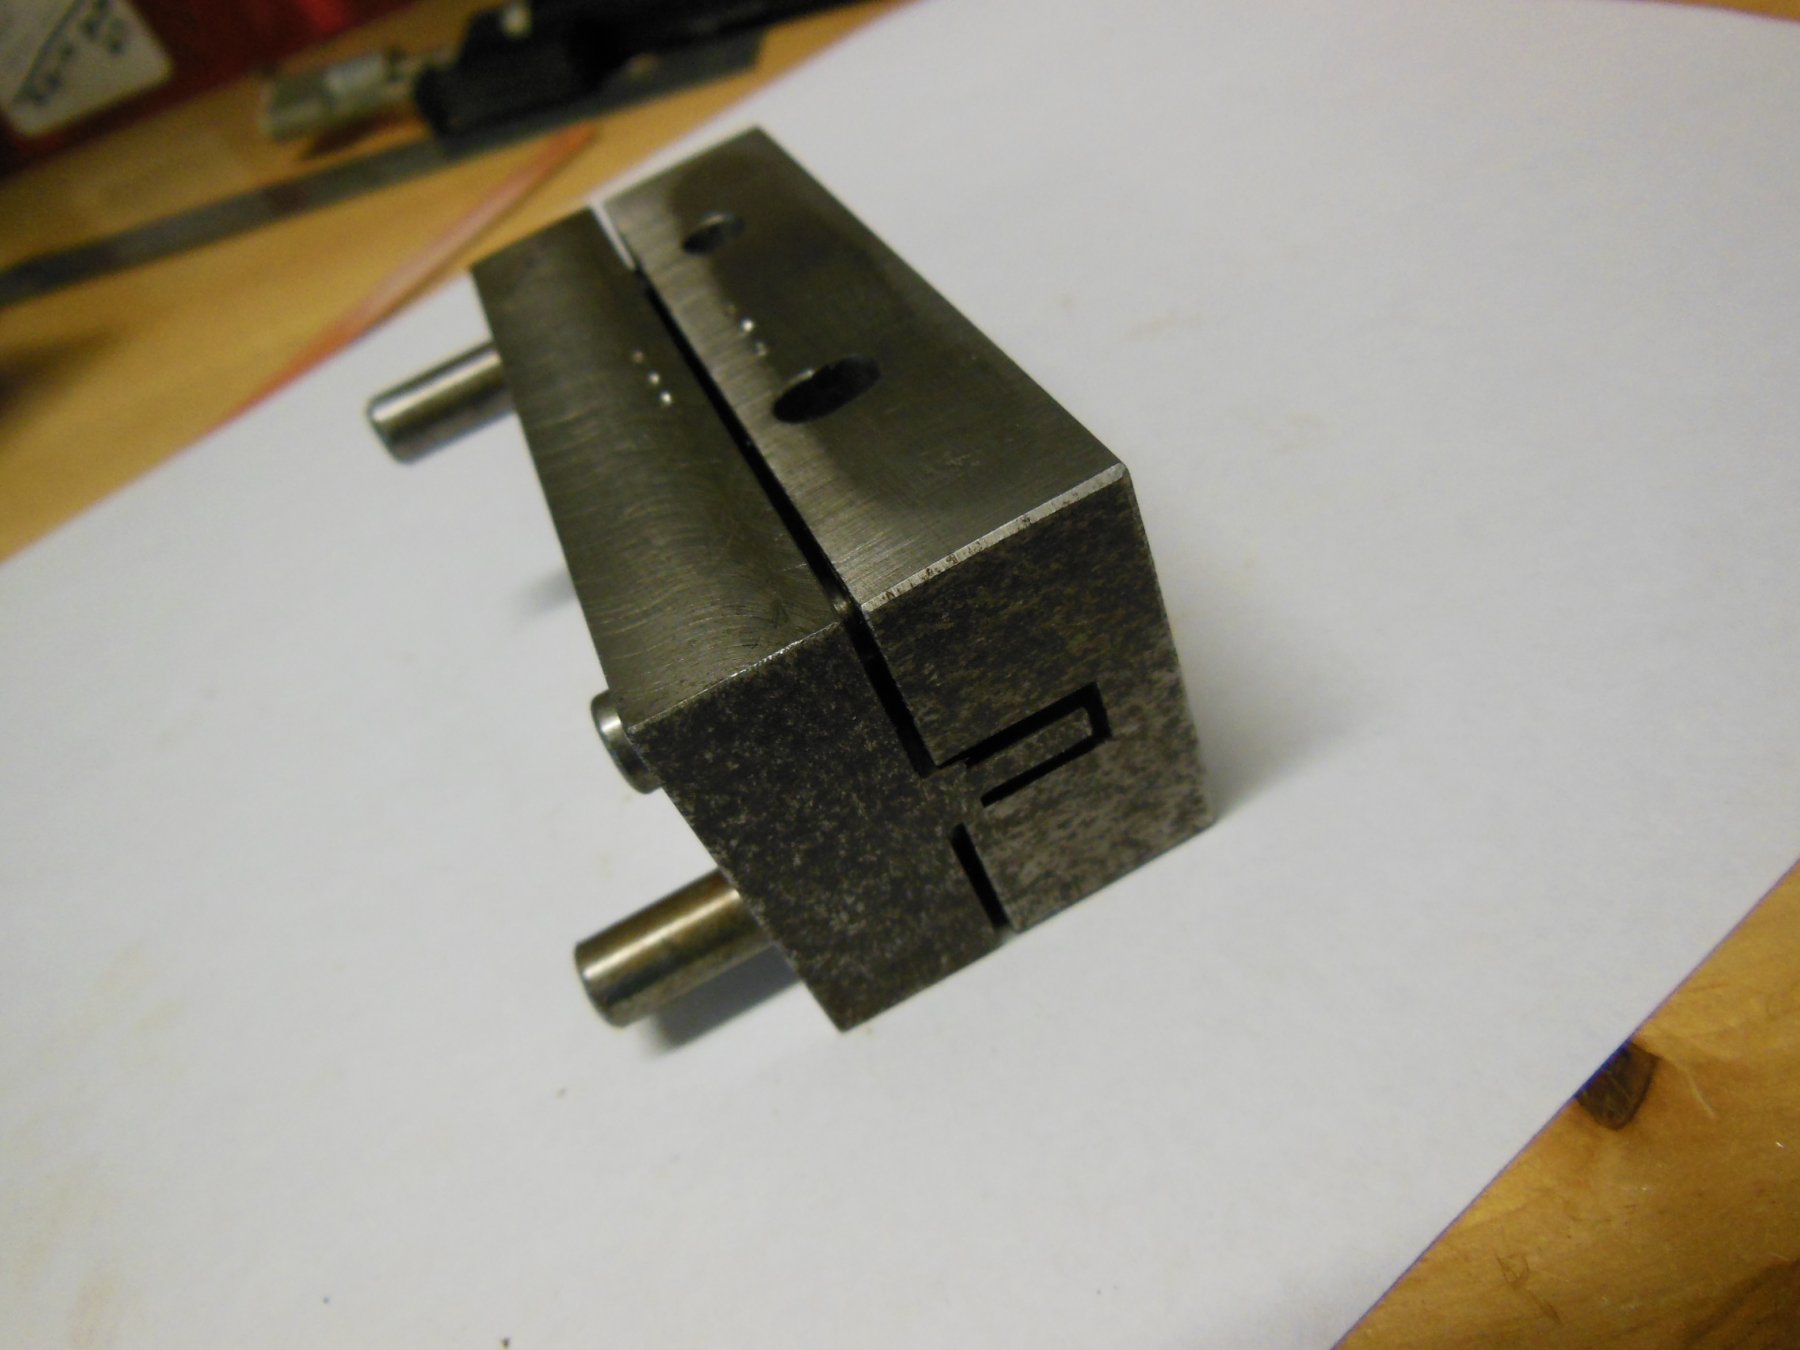
Now I have equal length pieces and need a consistent way to center punch holes. I ended up with two more jigs. One each for the top and bottom hole for each leg. I again used square tubing to set the distance the bar stock can slide in. I V notched the leading edge of the square tube to rest the center punch in, helpfully also centering the punch on the 0.031 wide bar stock. I made another metal jig used to bend the two legs. Like the previous jigs, it also was made to only allow the metal to go in a set distance. Bending the bar stock would twist the material a bit, but once I had the end shape, I used an old arbor press to flatten it back out making it square again. Sorry - the pictures are out of sequence but it's easy to figure out.


-
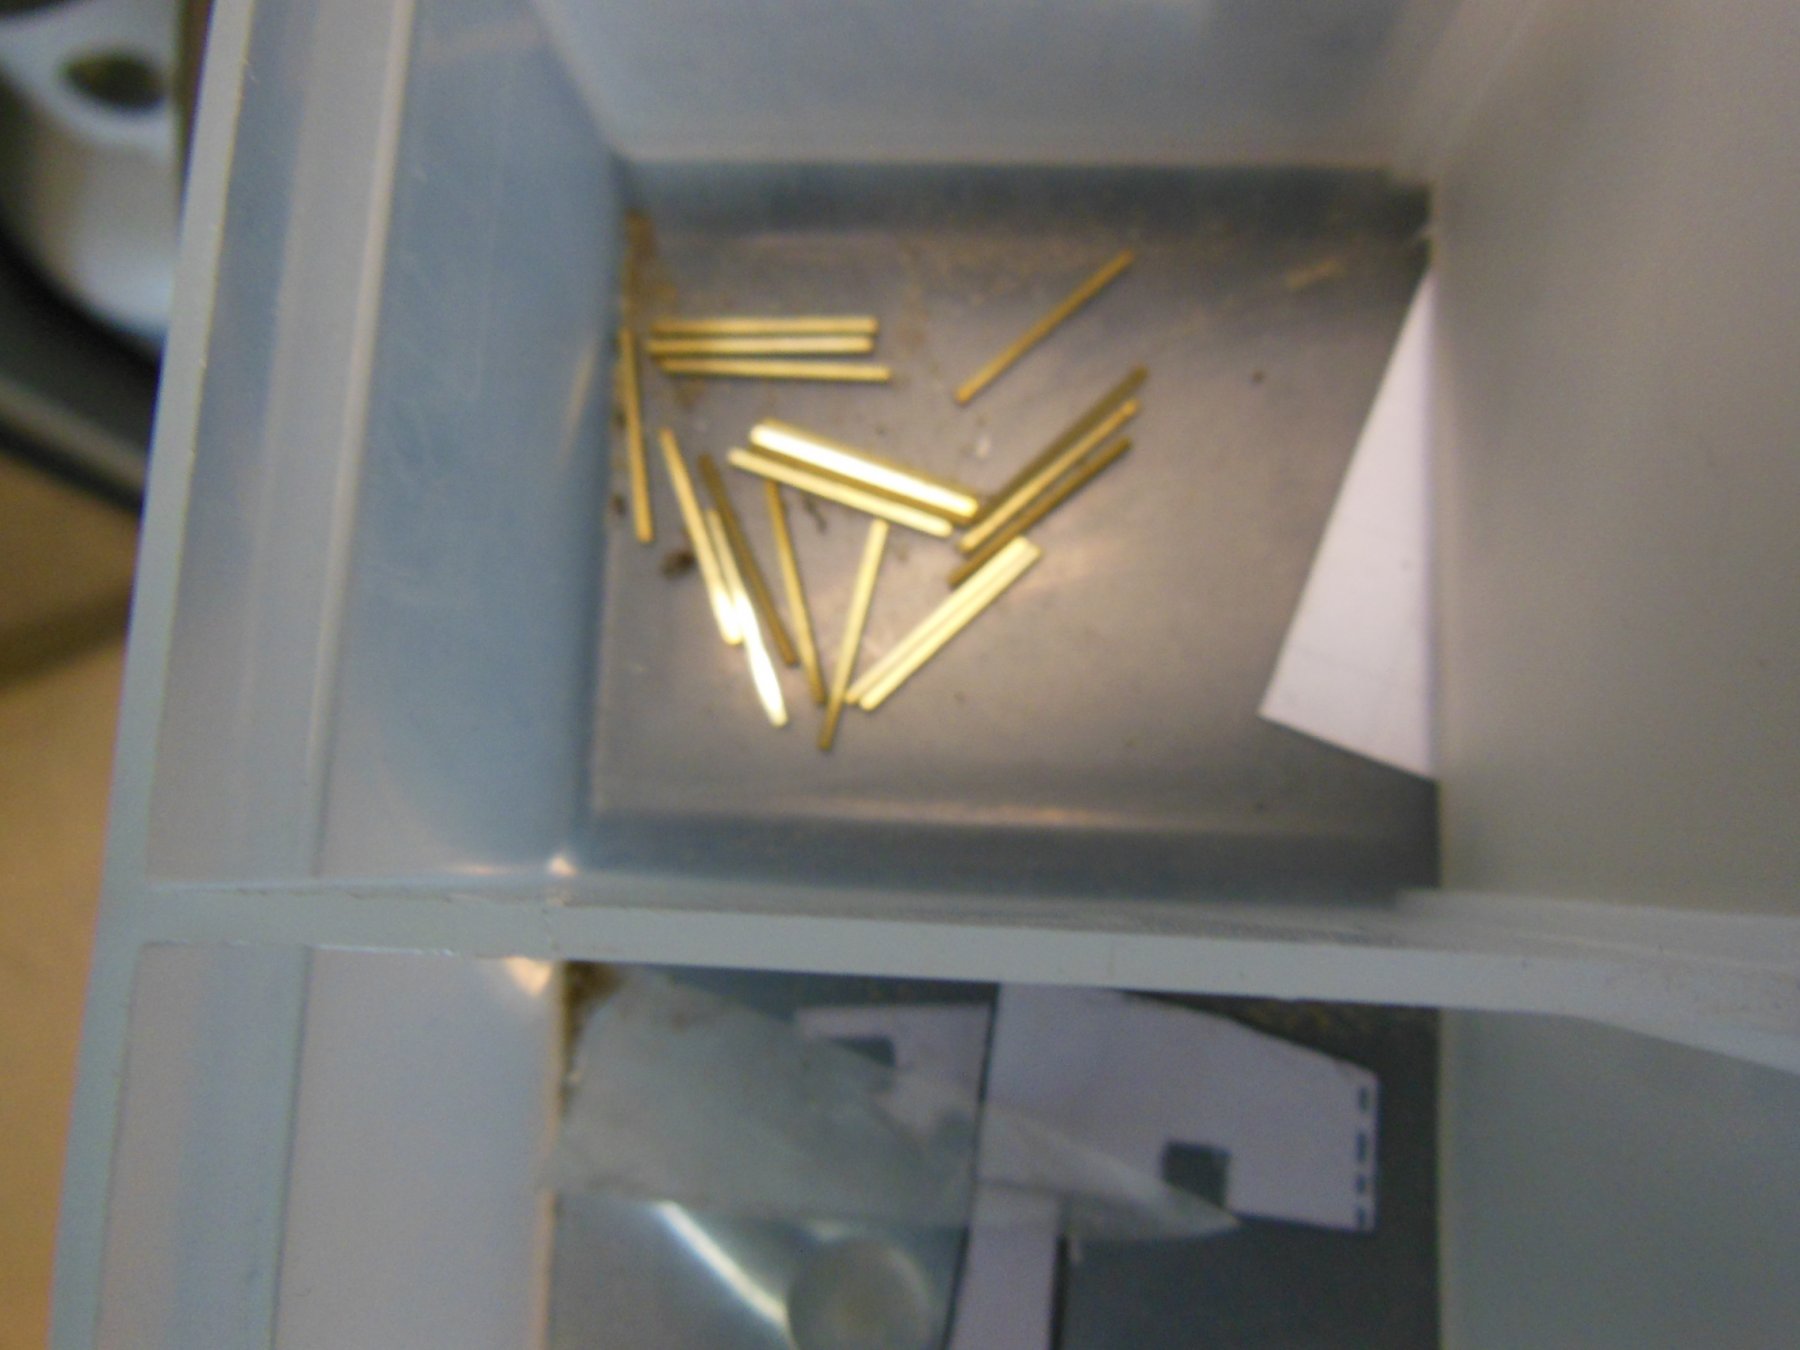
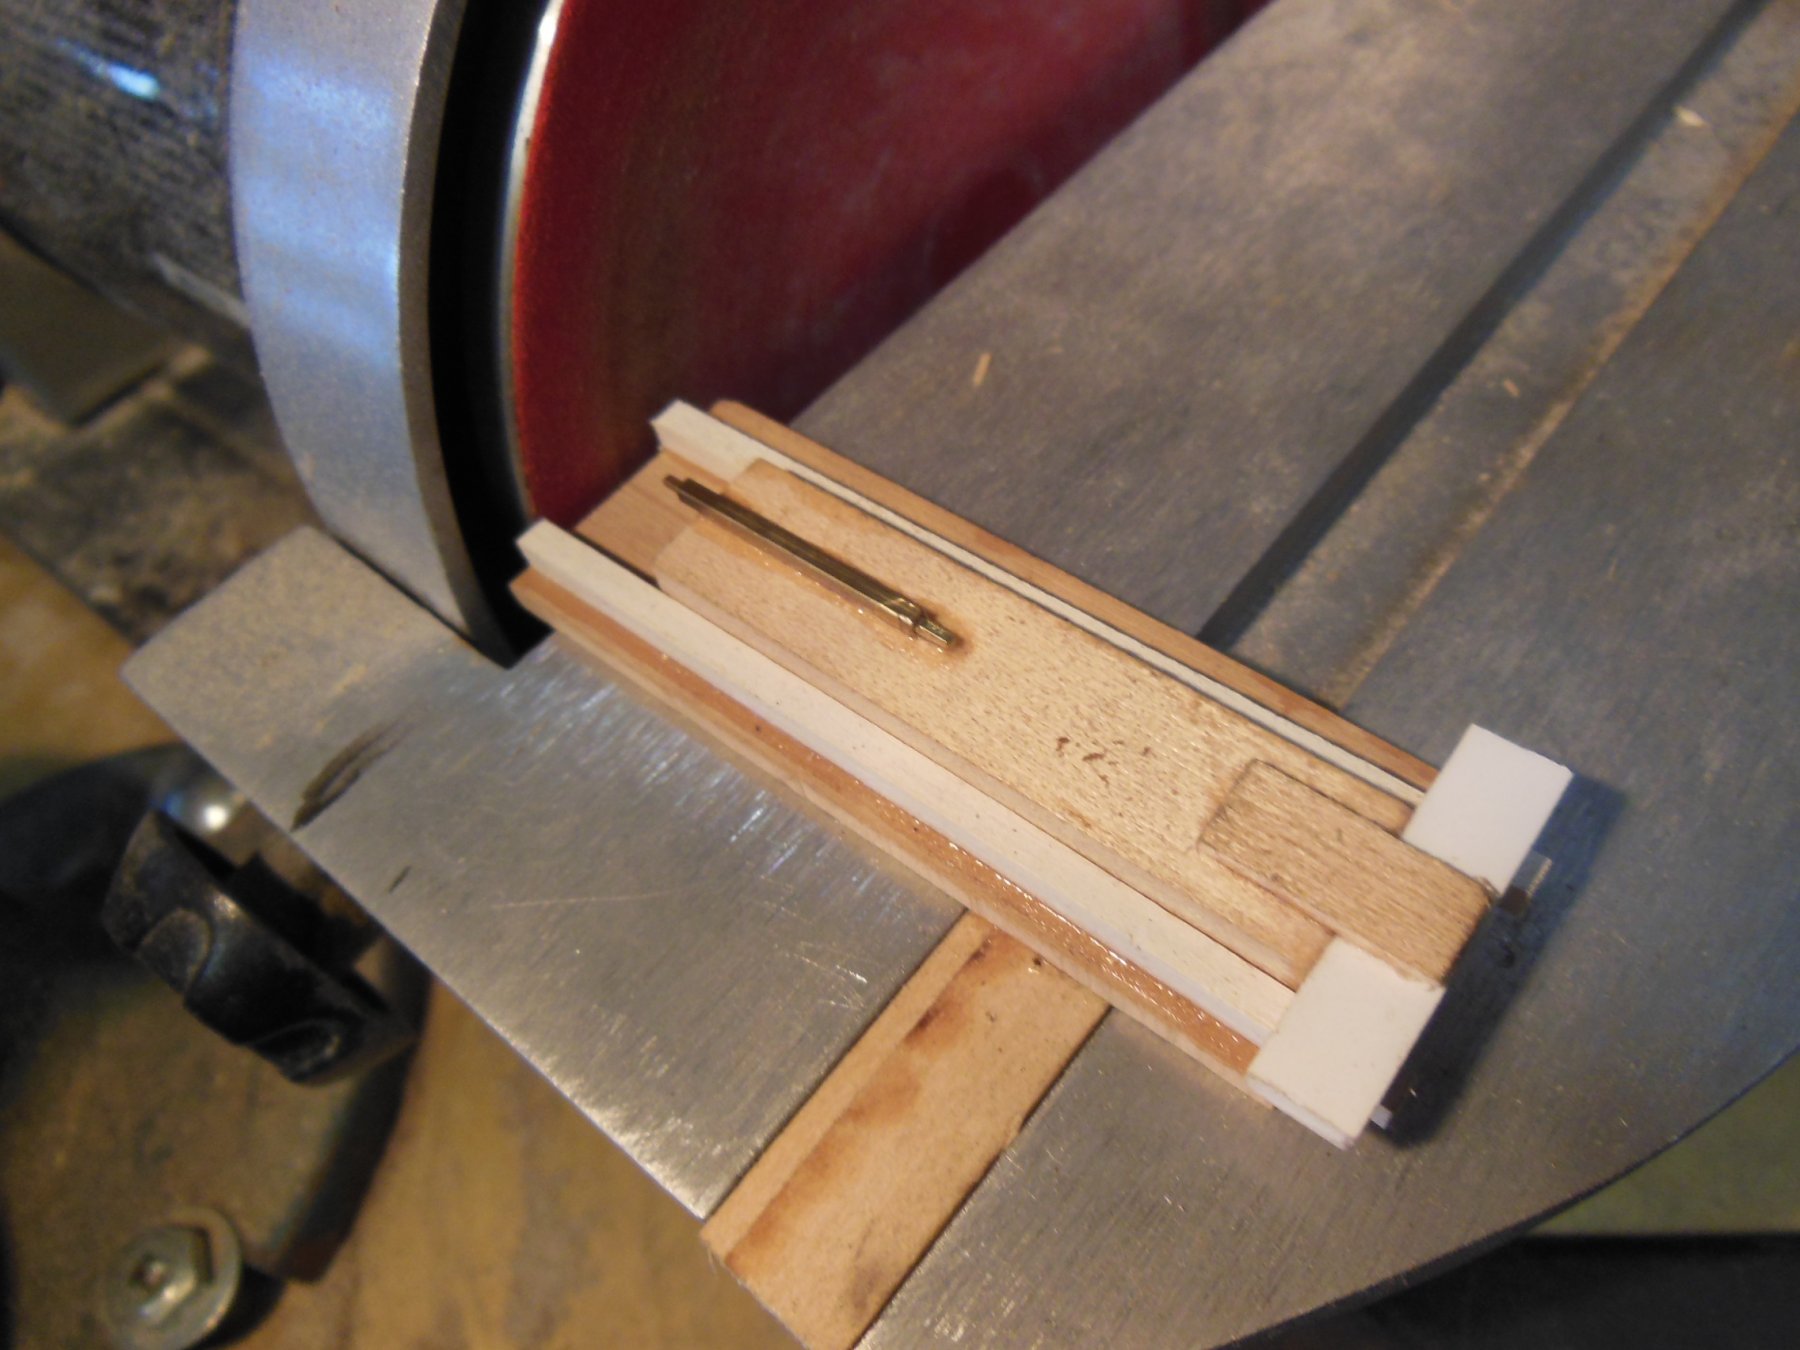
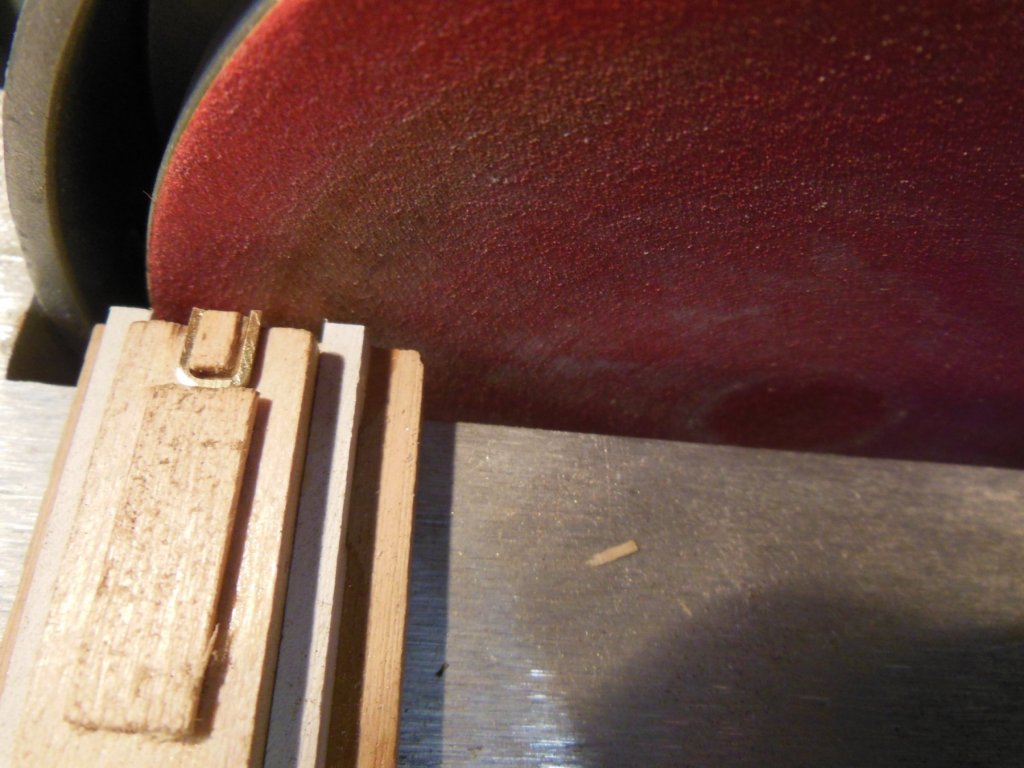
Here are the jigs used to cut and grind the bar stock to consistent lengths. This is a two piece jig. Jig no. 1 sits on the grinder table fixed in place with jig no. 2 laying between the white guide strips on jig 1. I slide a piece of bar stock into jig 2 and cut it long with a hand side cutter, you can see the excess sticking out in the photo. When I place jig 2 on jig one, I carefully slide it to grind off the excess material. I simply eyeball the amount I grind off taking care not to grind the brass square tube. The square tube has a piece inserted and glued in place from the back to set the overall length I end up with, hopefully getting 44 consistent lengths of stock.

-
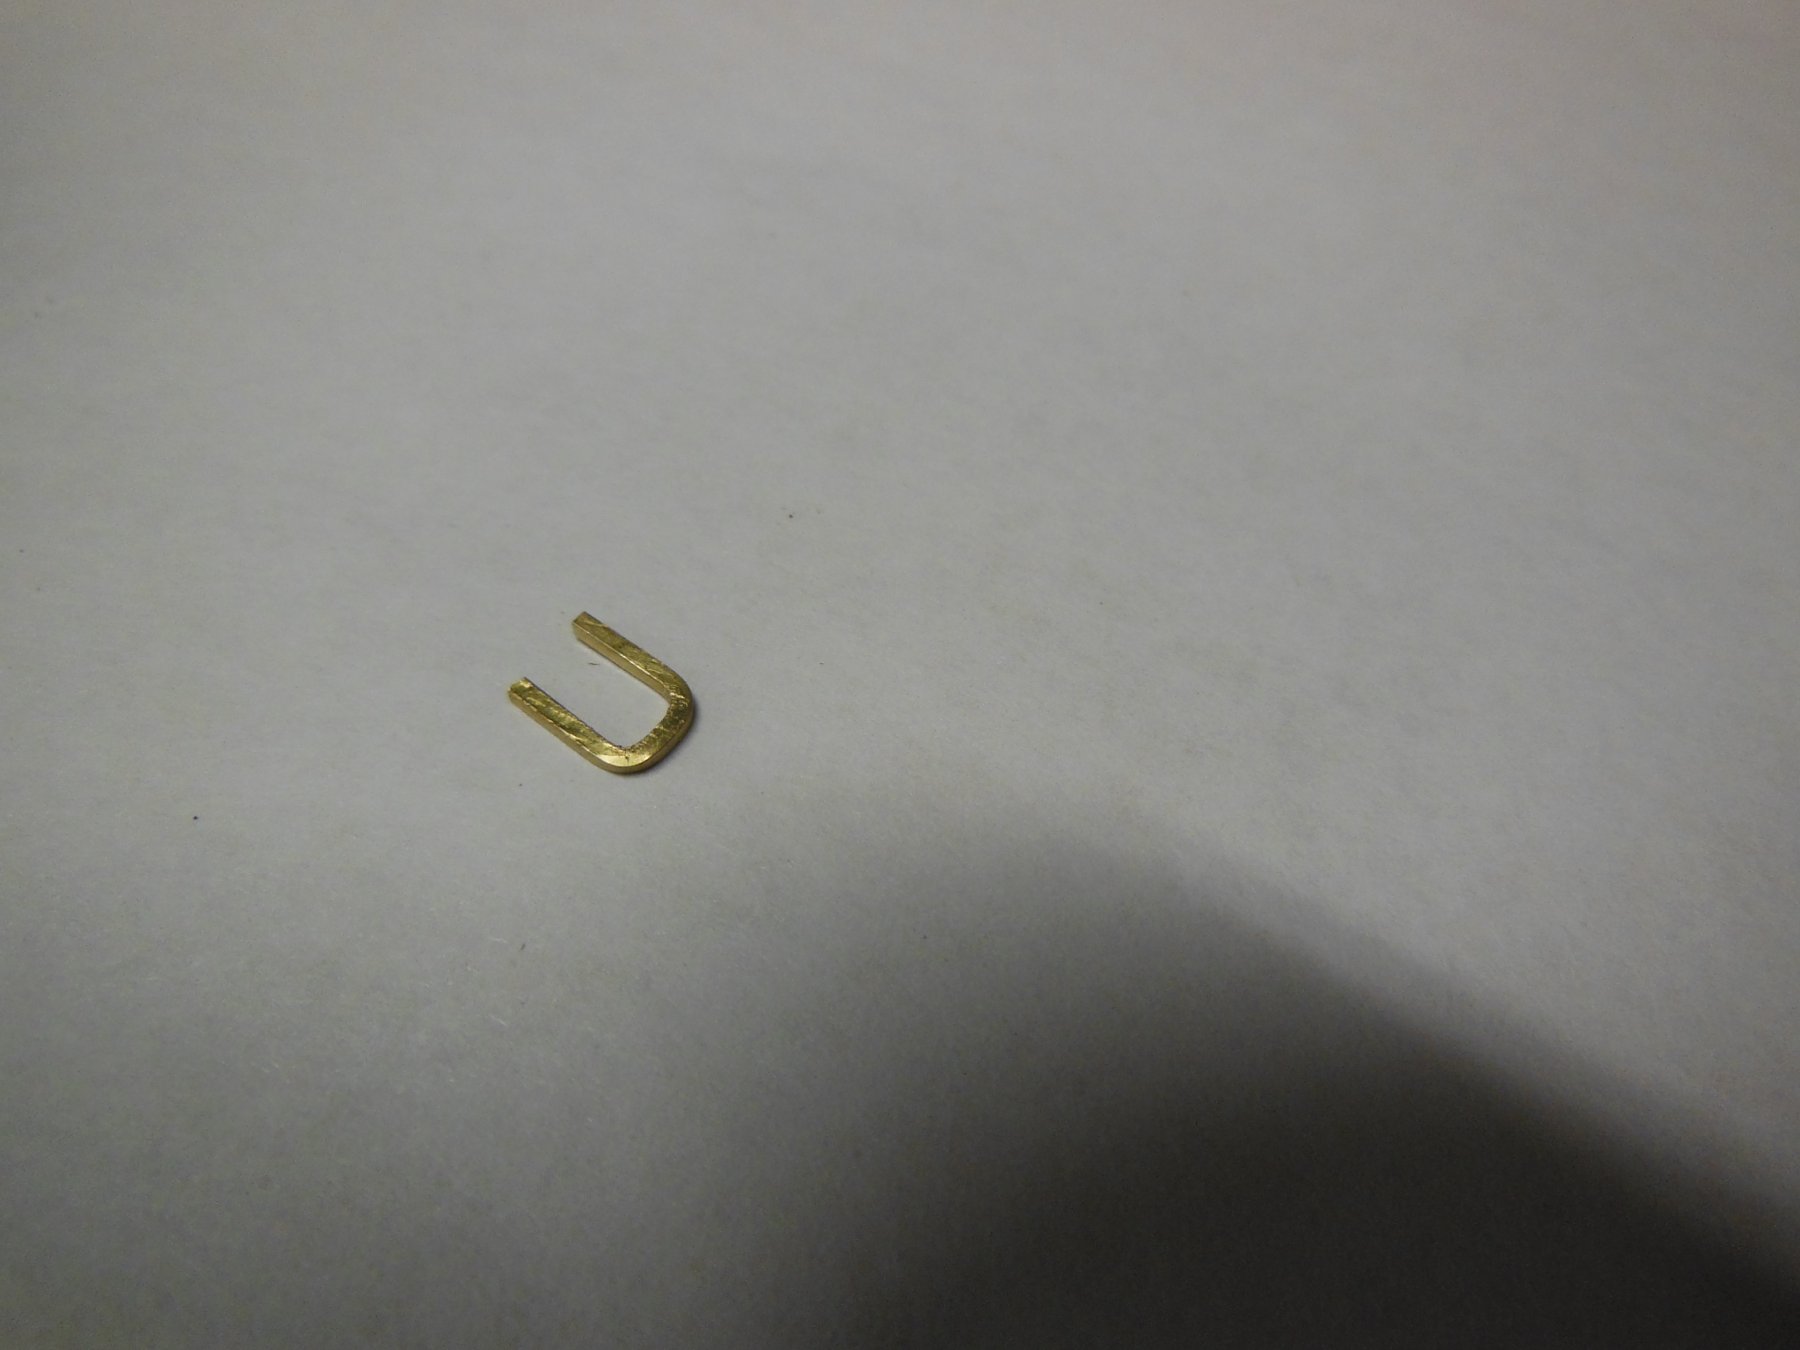
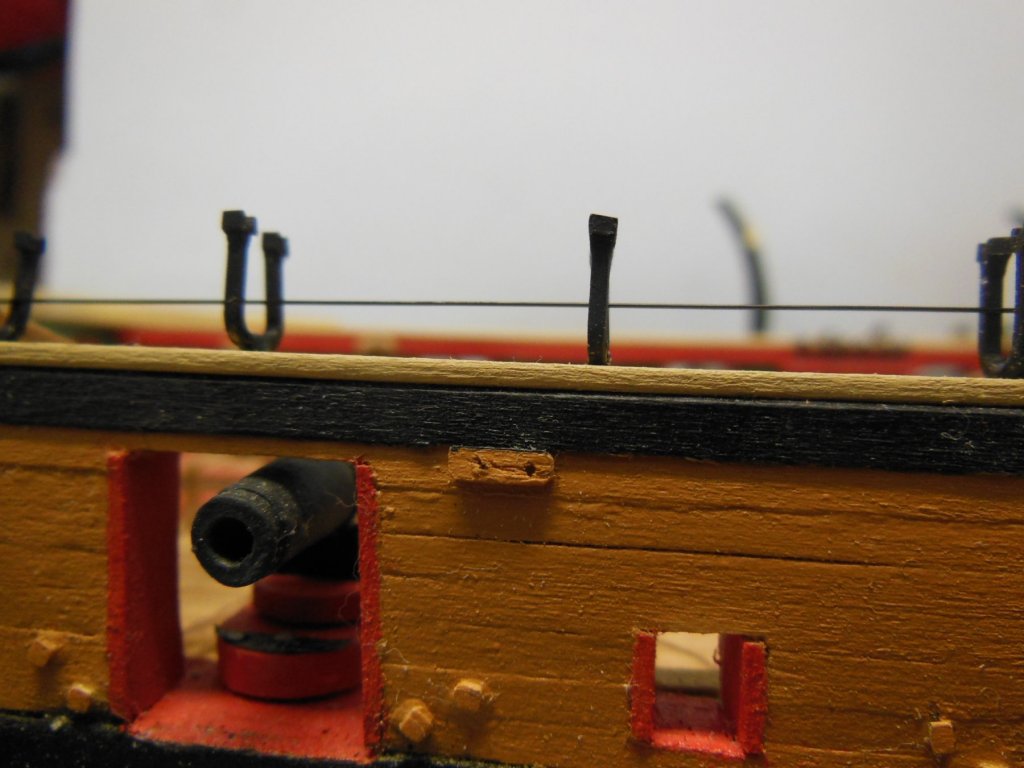
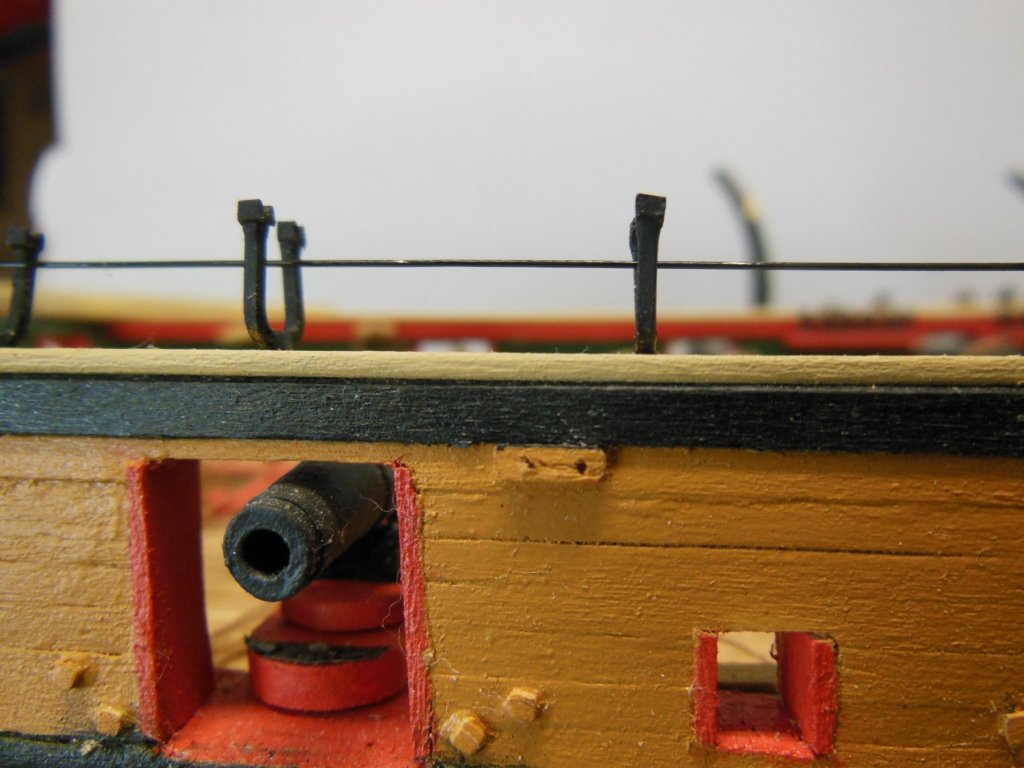
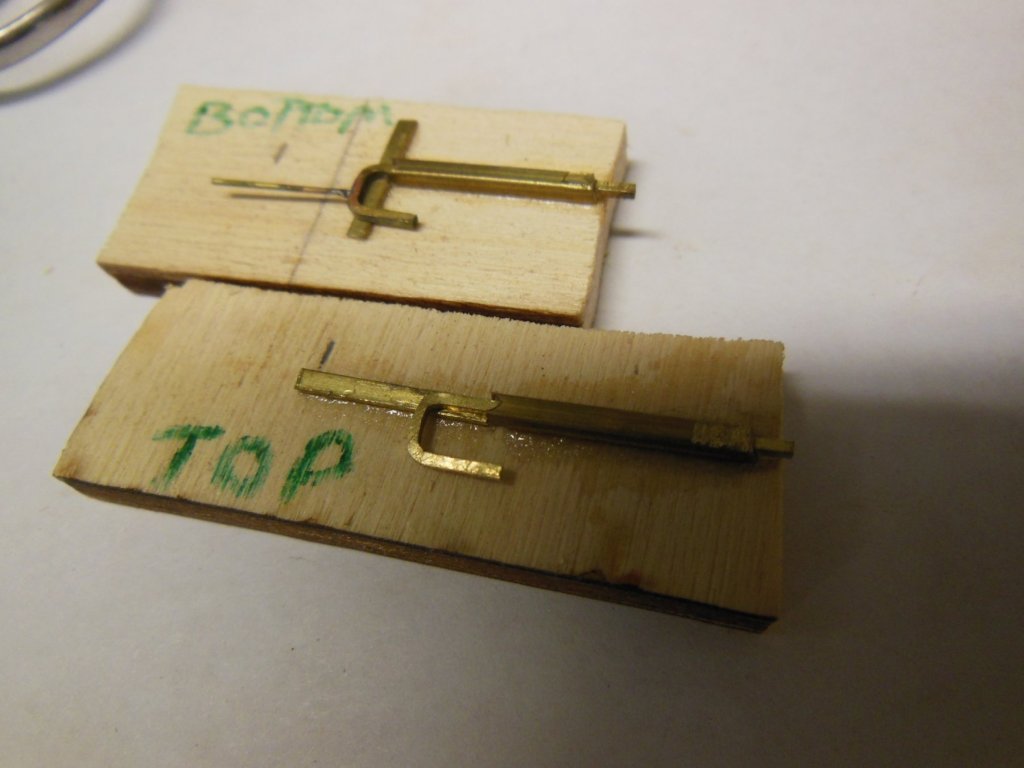
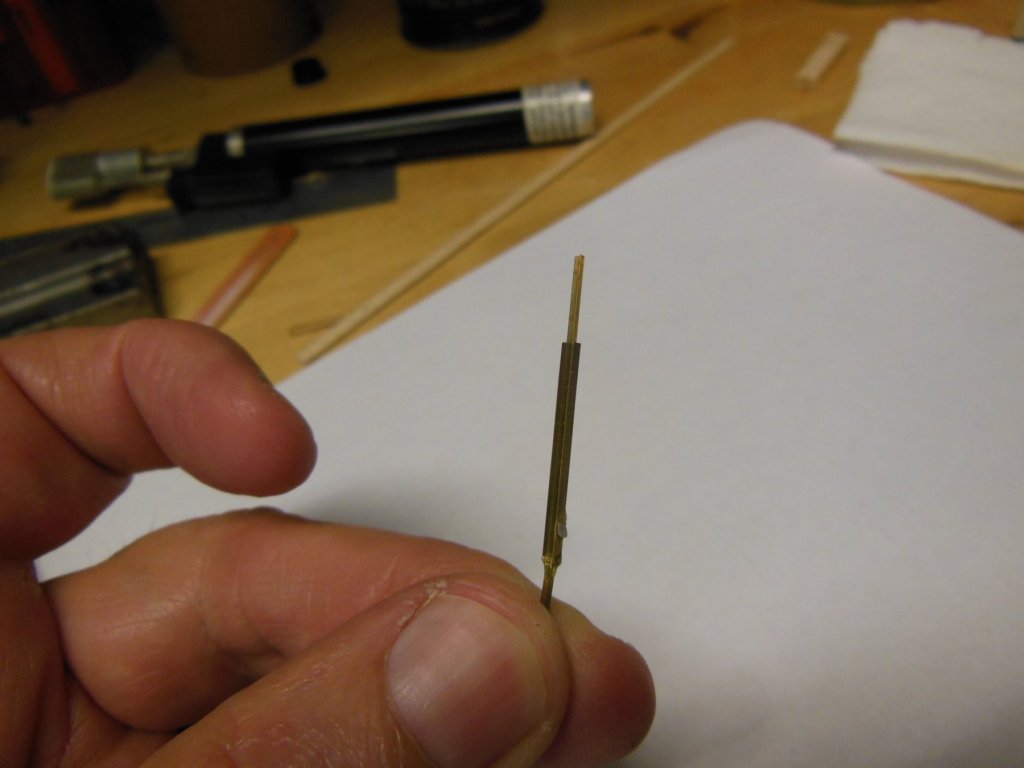
I figured out the straight overall length of square bar needed to be taking into account the bends, but bending the material to get a consistent shape and size was not working out well using the usual hand tools. The width varied too much to suite me, the corners were more rounded than I liked and the the leg heights were not consistent enough, but other than that it looked good...lol. I quickly realized I needed a more controlled way to bend the square bars and also needed to figure out when to drill the holes for the rope before or after I bend. The plans call for three rows of rope which means I need to drill over 250 holes. Since the square bar is 0.031 wide, I need a pretty small hole, so I found a 0.014 dia drill bit which leaves me with a side wall thickness of 0.008 – not a problem I thought ( I must have been crazy to think that). Just to get an idea of how well the square bar would drill, I quickly found out the brass was so smooth the drill bit would dance around and not take a bite without a center punch indentation, which presented the next problem – centering the center punch on the square stock where there will only be 0.008 wall thickness left. Anyway, that's a problem down the road, I need to drill a hole to see how easy it drills. Another issue that came up was the bar stock would not clamp up tight enough in my drill press vise without tilting as I applied pressure to the drill bit. The vise has very smooth jaws and only one screw to tighten, so another method was needed to hold the bar stock in place. I center punched the bar stock (yes its off center) and glued the bar stock to a jig for stability and started drilling, but after breaking one drill bit I managed to drill the hole very slowly. It was difficult to do. I could not feel any resistance to the downward pressure I applied without first breaking the drill bit. I tried to watch how fast it cut chips in order to control how much pressure to apply but I still managed to break a drill bit even after adjusting spindle speed. If I break off the drill bit, it leaves the broken bit on the bar stock which I could not remove which basically scraps that piece, hmmm I thought with my luck I'll get three holes drill then break off the drill bit...lol. Oh well, I'll deal with that if it happens. Now I need to figure out how to center punch @250 places, in the same spot so the rope line is nice and straight – I found out it's much easier said done. My first decision was two rows of rope would look OK reducing the number of holes to ~176 – progress made!! I decided several jigs were needed to get consistent shapes, consistent center punch locations. Gluing the pieces to a wood jig for drilling provided a stable platform, using MEK to remove them later. Here is the wood jig to hold the bar stock in place.

-
Well, here is the saga on stanchion building... The hammock stanchions have been driving me crazy for more months than I care to admit. The kit provides flat brass strips to make them from but I could not get a look I was satisfied with. Looking at photos of the Niagara on Lake Erie that John provided, they looked like they were made from square stock, with three holes in each leg for the rope and with a horse shoe shaped saddle on the top of each leg to hold the wood runner. All I need to do is figure out how to replicate @ 44 pieces. I did a little research and found out that K&S Precision Metals sells brass square bar, with the smallest being 1/32 square which scales to 2” which sounds close. The local hobby store ordered it for me and from there it became difficult. I'll admit I'm known to overly complicate some projects and this quickly became a great example. I decided the width of the stanchions needed to be ~0.200 wid, based on the drawings and the width of my toprail. The drawings also indicated a height of ~0.25 which sounds a little short when scaled up, but adding the horse shoes the the top of the legs added a little height and visually mocked up to look right, so now I have my overall dimensions and shape.
-
Good morning everyone. THANK YOU for the warm welcome back. Family issues are still very busy but I'll post when I can and eventually catch up on all of the fine ship building going on on MSW.
-
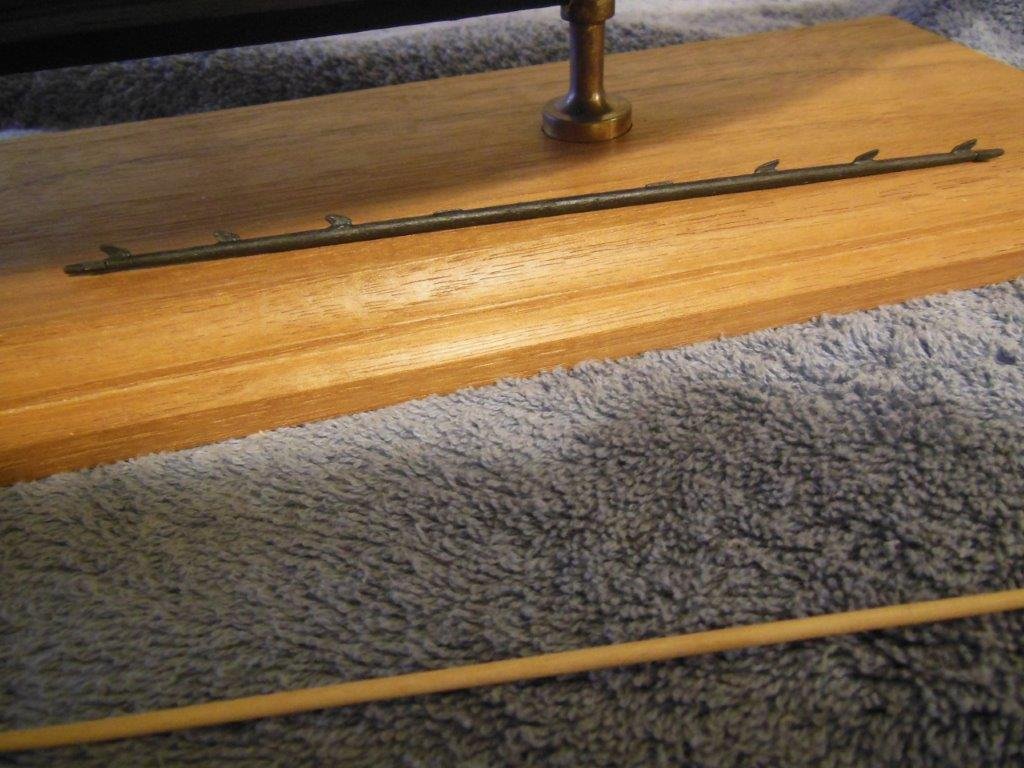
Serv-O-Matic purchased from Chuck. It's a nice tool,well worth the money.

-
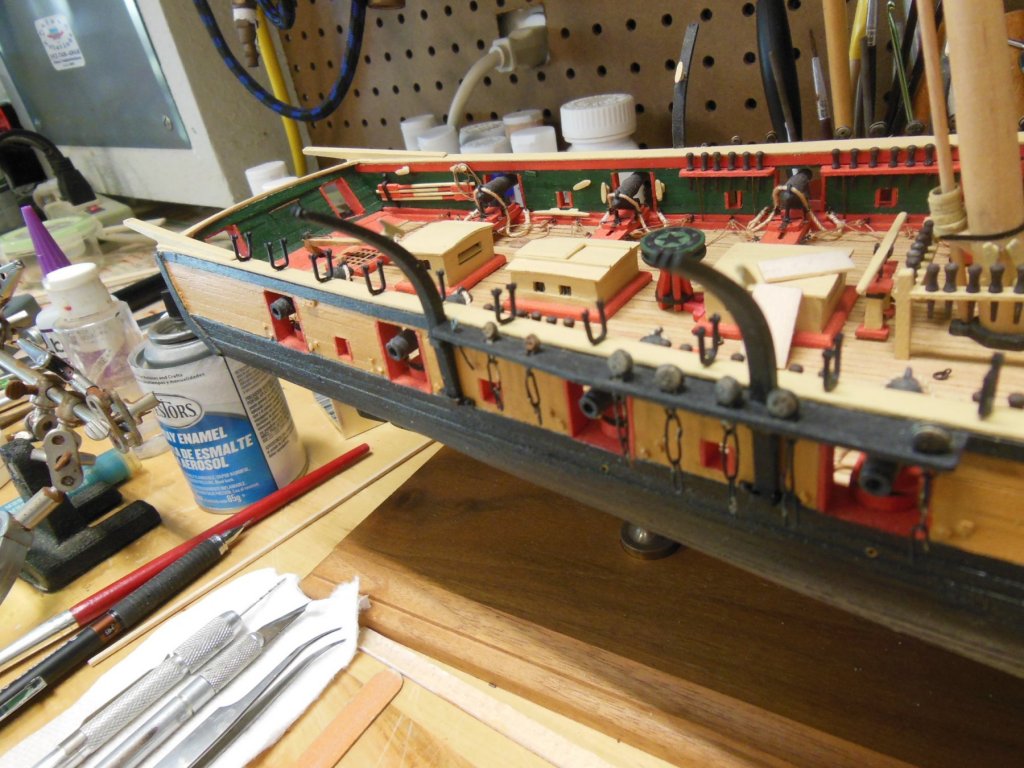
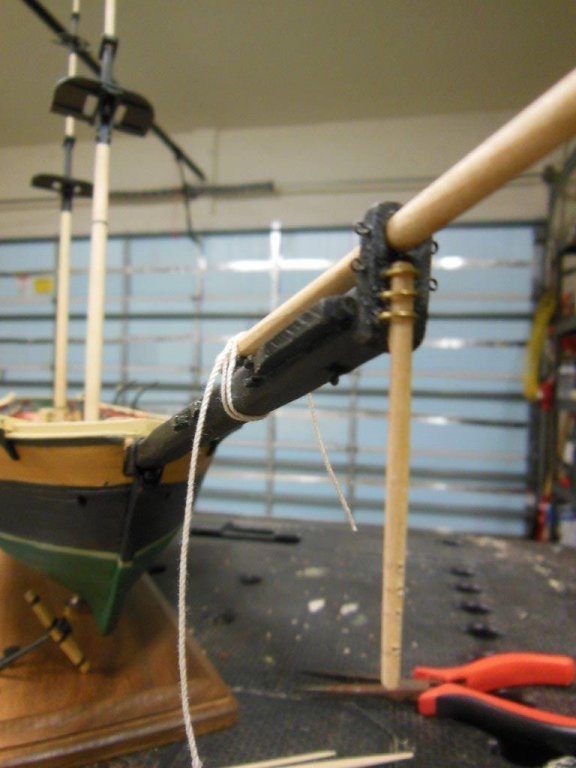
Dolphin Striker Completed and Mounted Jib Boom completed and mounted Preventer Stays dry mounted on bowbrite Flying Jib Boom Completed. I'll hold off as long as possible before mounting. I can just imagine breaking this off several times...

-
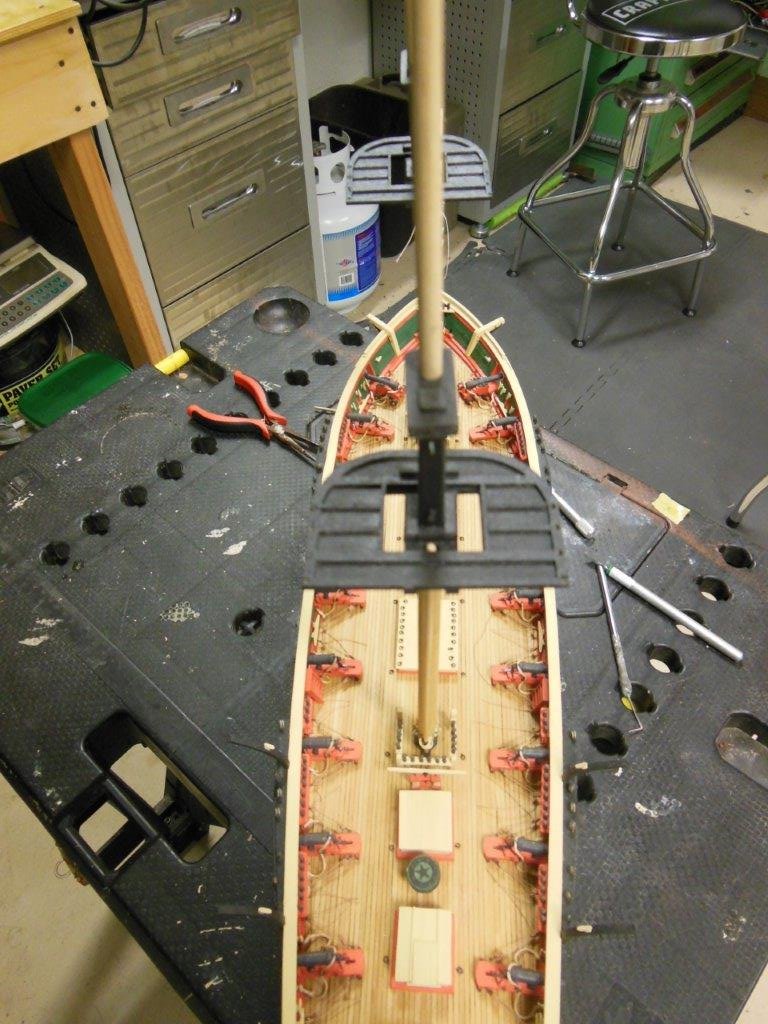
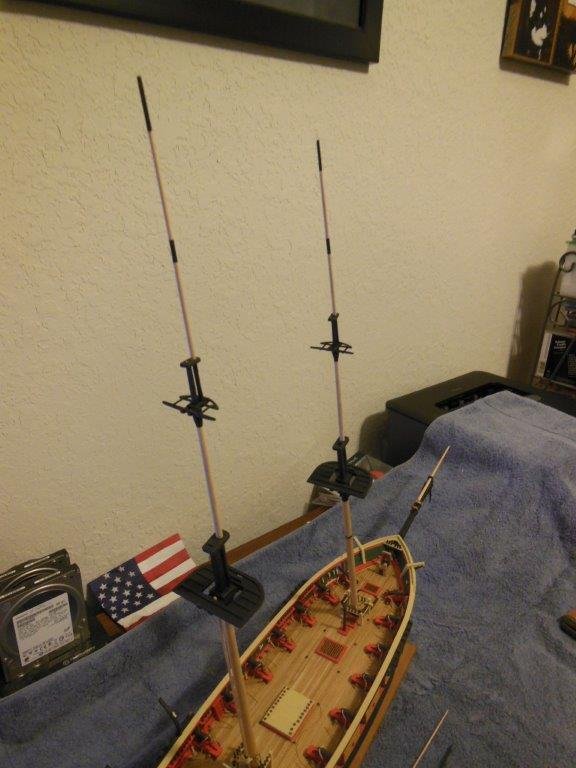
The masts are assembled dry and sitting loose on the deck. I'll have to figure out the sequence for final assembly as I work on the shrouds and ratlines (it's getting close!)

-
Its hard to believe it's been over 18 months since I last posted an update on my build. I wish I had 18 months worth of work completed but it was not a complete shutdown on the shipyard. Below is a list of work completed. I'll add some detail as needed with the pictures. Main and Fwd masts completed Dolphin Striker Completed and Mounted Spritsail completed but not mounted Jib Boom completed and mounted Flying Jib Boom Completed (I'll Preventer Stays dry mounted on bowbrite Dual pawl for capstan – Still needs painted (Thank You John for the photos showing this item) Serv-O-Matic purchased from Chuck (assembled and sealed with poly) Many, many hours working on hammoch stanchions (its a long story and far from complete)