HOLIDAY DONATION DRIVE - SUPPORT MSW - DO YOUR PART TO KEEP THIS GREAT FORUM GOING! (Only 20 donations so far - C'mon guys!)
×


lb0190
-
Posts
686 -
Joined
-
Last visited
Content Type
Profiles
Forums
Gallery
Events
Everything posted by lb0190
-
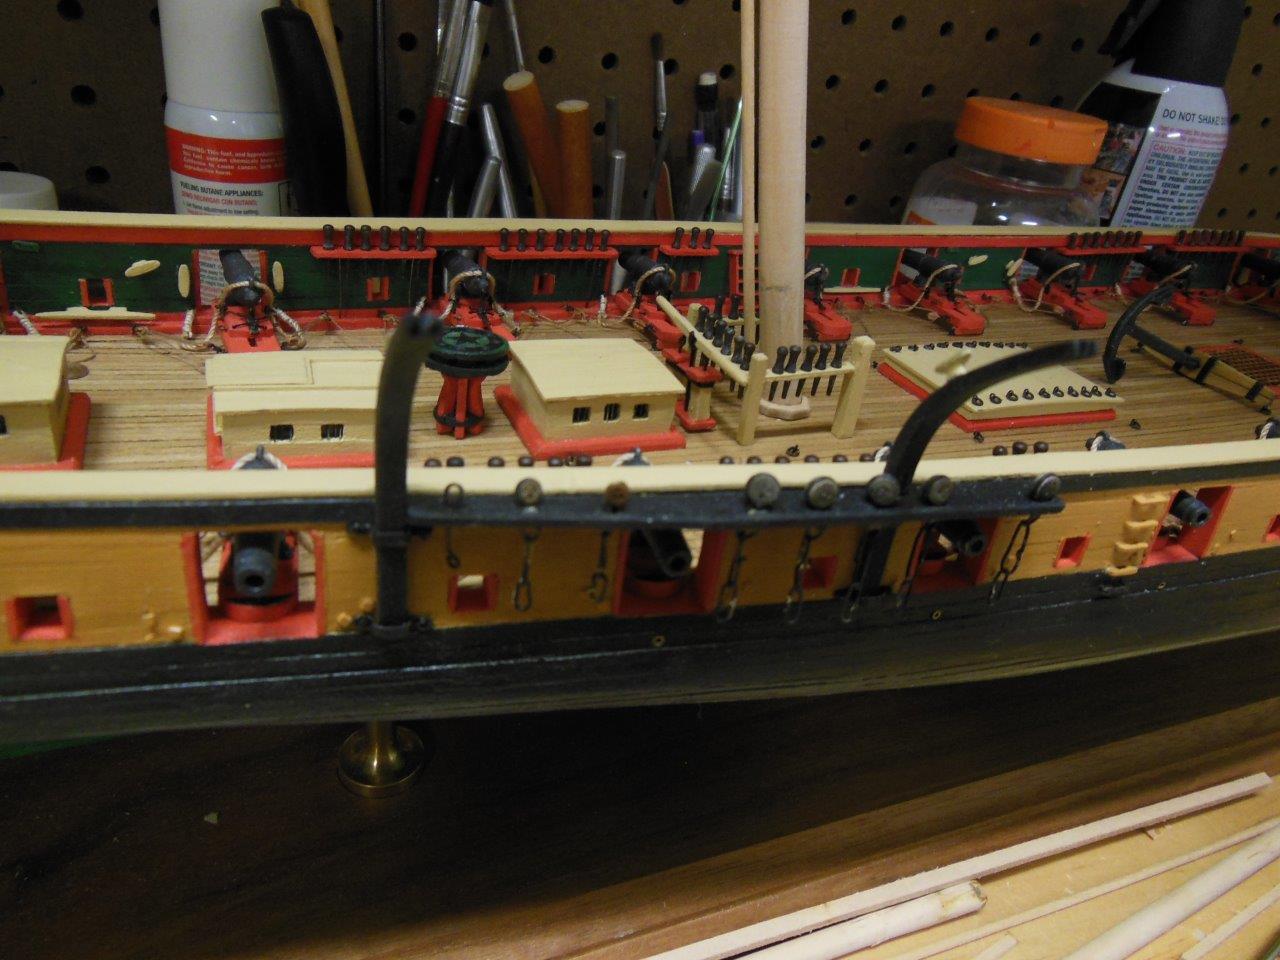
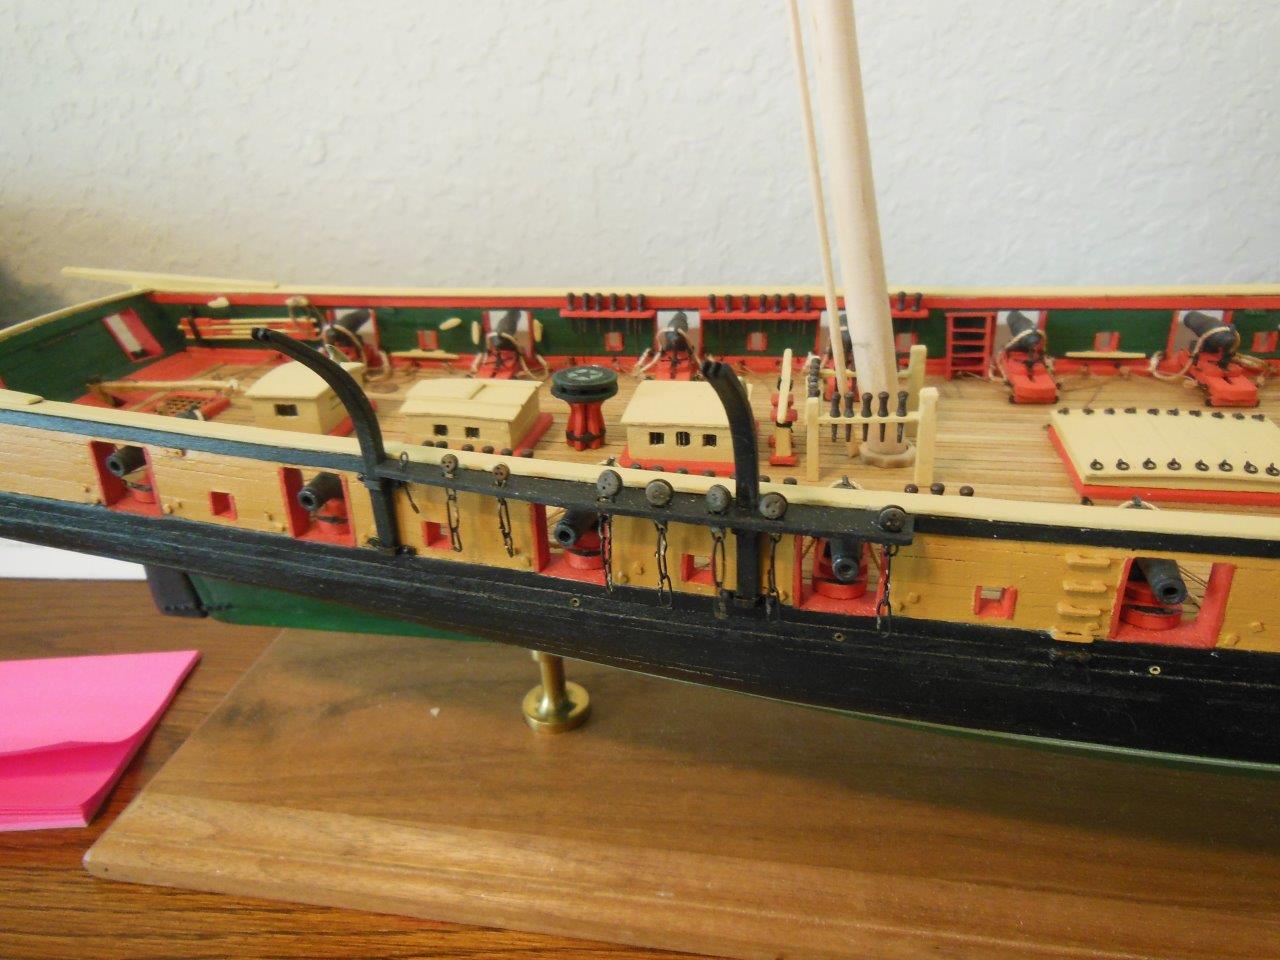
 Hi Popeyes, thanks for looking in. I'm currently in Ohio helping my parents out. I hope to be back in Florida next week but the way things have been going, who knows... I've been working on the hammock brackets that mount to the main rail. I did not care for the material provided in the kit, so I bought some 1/32 square brass to work with and it's been trial and error trying to get results that I'm happy with - mostly error....lol I finally found a way to make them the same shape and size and figured I'll make the first batch of 11, mount them to see how they work. I'll post some pictures and the details once I have them mounted on the top rail.
 -
Hi John, Good to hear from you. I have complete faith your Niagara will outstanding. I'm still having trouble finding time to work in the shipyard and even less time to spend on MSW but this will change eventually. Tomorrow we head down to a Fort Lauderdale so the surgeon can do an eight week look at the Admiral's knee replacement. She's off the cane but still going to PT - overall it went very well. We'll head to Ohio in a couple days to visit parents and see how mom is doing with her heart valve replacement. And to top it off, we have our home up for sale... moving at our age was not planned, but living the HOA life did not turn out as well as we envisioned. Back to ship building... I have progress to report. I just need to write it up Hi Joel, Thank you for looking at my build log. As you probably read above, I have some catching up to do and yes, it will show some warts! I've really struggled with a few parts and I plan on showing what worked and what kicked my butt.
-
I use a medium CA glue from the local hobby shop. I'm away from home and cannot give the brand right now. I do not get an immediate bond (unless it's my fingers... lol). I have to hold it a few seconds, maybe up to five. Adhesion is seldom a problem, especially with wood. I prefer PVA for most wood joints. It gives me more working time and I find it easier to ungluen if I make error.
-
Hi Anja and Sjors, Yes, it's been a while. I tried resuming the ship building life a few months ago but too many thing got In the way. My mother (85) had a heart valve replacement and I'm staying with them to help with transportation and home chores. Dad is 87 and does not drive plus he has his own health issues that need addressed. The shipyard is a mess right now but it will not take much time to get it operational again. I hope you and and yours are safe and healthy and that you both are making a lot of saw dust in the shop. I hope to ck out this new site in a day or so and maybe have enough time to see what everyone has been working on and maybe make a post or two while visiting my parents.
-
Here are a few steps I've tried over the past few years. I've used both CA and PVA on the same joint, sometimes in alternating locations if there is room. If room is limited, I use CA at the end points and PVA the remaining area. I used this especially if there was a bend in the wood and it's difficult to clamp in place. The CA bonds right away and holds the piece as the PVA cures. I don't know how this will hold up over time, but so far I've not had any issues with it. If mating joints are not 100% clean i.e. where paint was removed or I simply want an extra tight adhesion, I use the point of my xacto knife to make a number of penetrations along the glue line where the glue can soak in.
-
Hi everyone! WOW a brand new site. I hope everyone is doing well. I have some updates for my Niagara but life has been too busy to post. The Admiral is recovering from knee replacement surgery and I'm currently in Ohio helping my parents with their health issues, add to that my own health problems along with planning a move and somehow trying to get a little ship building accomplished. I hope to get back home (Florida) next week but time will tell. I apologize for my lack of communication but I could not even find time to follow the amazing builds on here. I did start a word file on my update that I can hopefully finish and then simply cut and paste but we'll see how soon I can do that once I'm home (fourth trip to Ohio in less than a year and another one planned in April). Now all I need to do is figure out how to post updates with pictures....lol
-
Hello everyone, It's been a while since I posted or worked on my Niagara. Health issues with myself, family responsibilities and family health issues just overwhelmed me to the point I had to back away from MSW and the shipyard for a while. I realized just recently we lost a good friend and I feel bad I cannot express my condolences in a timely manner. Like many of you, even though I never met Augie, I considered him to be a friend. If possible, I hope to get back to the shipyard in a week or two but we will see. My Admirals brother just suffered a heart attack and she flew to Ohio this afternoon to see him in the hospital and get a better accessment of his health. It's too soon to know the severity. Take care Larry
-
Ken, Impressive build!! Thanks for providing such a great build log.
- 440 replies
-
- 3
-

-
- niagara
- model shipways
- (and 1 more)
-
Thanks John. Your pictures are a big help. I'm on a bit of a hiatus right now. Maybe you can pre-select sections of work that's more conducive to travel, ie launches, deck furniture, etc.. I've thought about the same dilemma for our trips, "what can I take with me to work on during idle time?" My biggest hurtle is the risk of taking sharp items, glue, pointy needle files etc in luggage for aircraft or on cruise ships and then risk damage to what I'm working on. In the long run its probably best if I leave it all at home since most travel is a few weeks or less at a time.
-
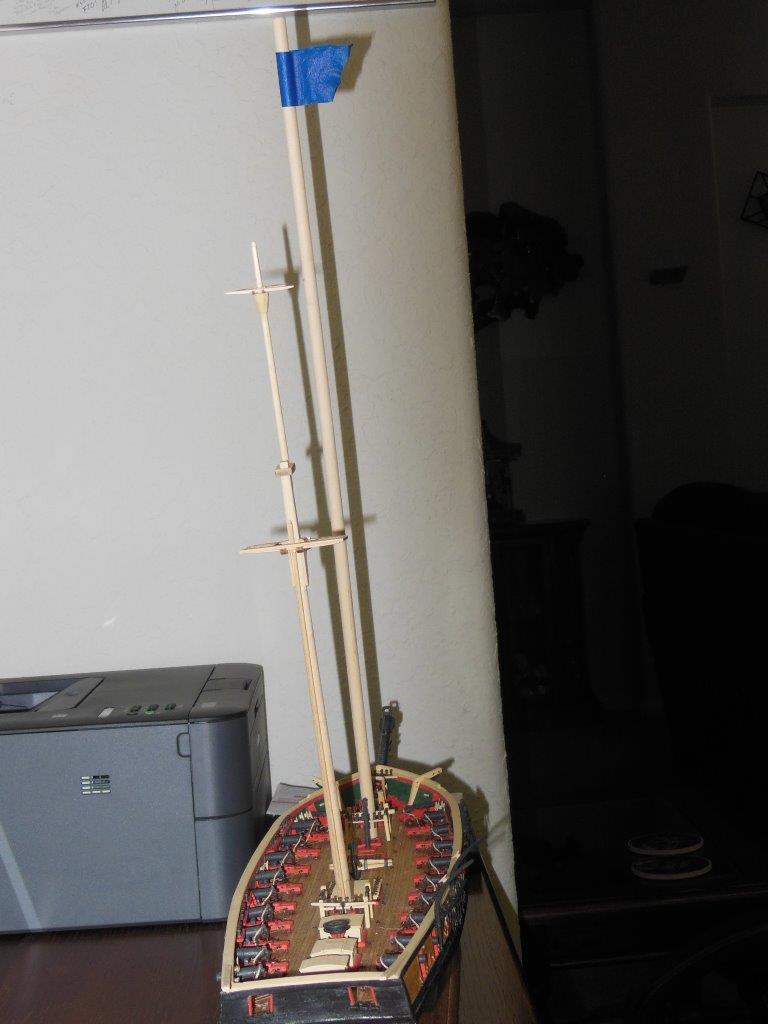
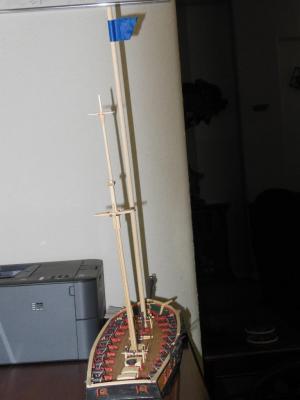
Hi Adam, Thanks for looking in, the compliments and for the suggestion. I shimmed the foot as much as I can and believe the epoxy fix will resolve the issue. The biggest challenge will be finding a way to hold the mast in position while the epoxy dries which takes at least 30 minutes. The shipyard has been idle for a while but as soon as the weather cools off a bit I'll resume the build. This weekend we're off to Charleston SC to see the Hunley submarine and Patroits Point.
-
Bob, I glad to see your back ship building again. The planking looks very good!
-
Grant, she looks great and I would not have noticed if you did not bring it up. Your photography is also excellent. I like to blur my photos a bit to help hide my errors. :)
- 456 replies
-
- 5
-
-
- finished
- bomb ketch
- (and 2 more)
-
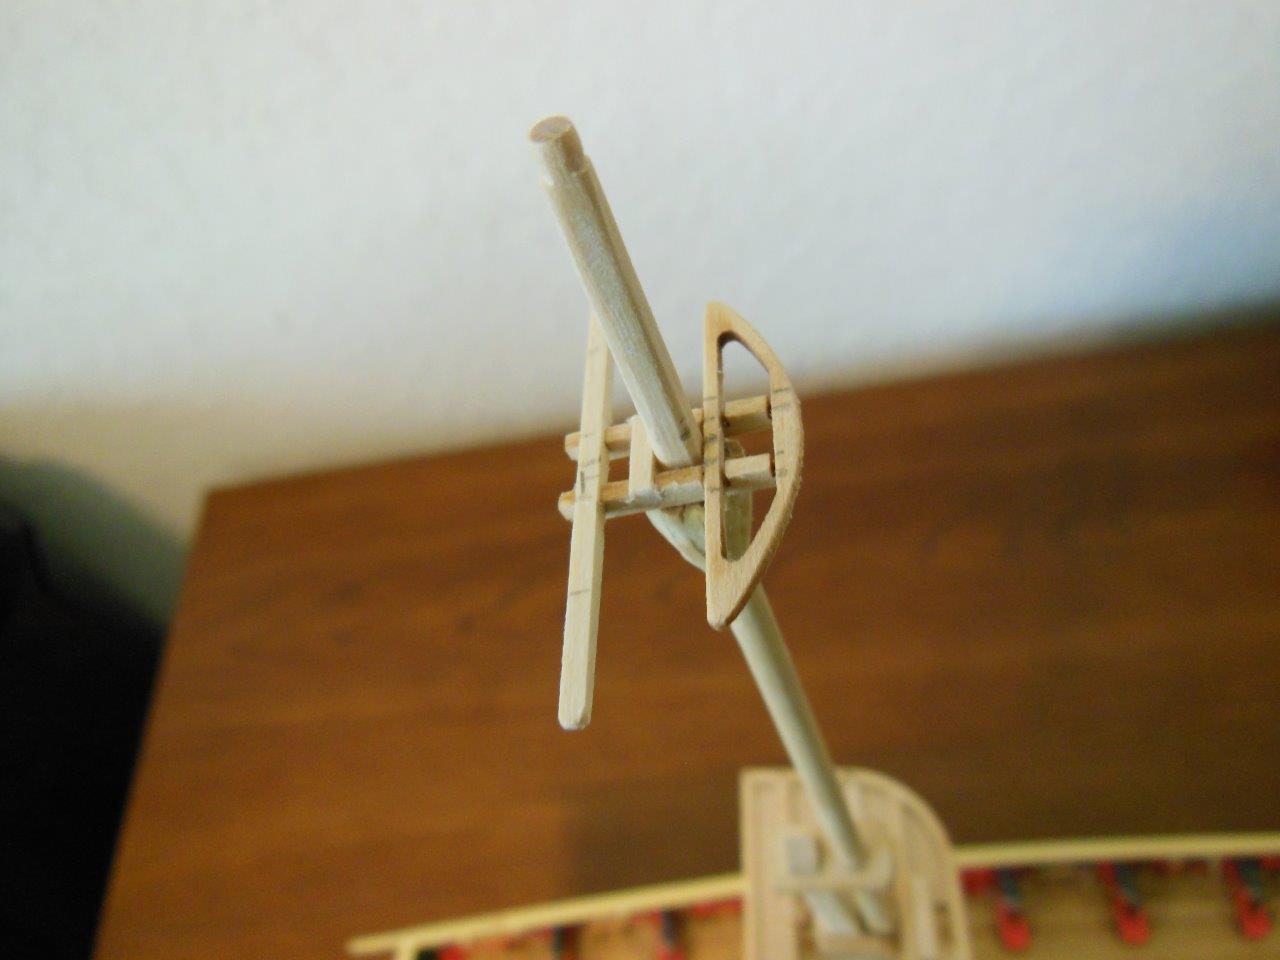
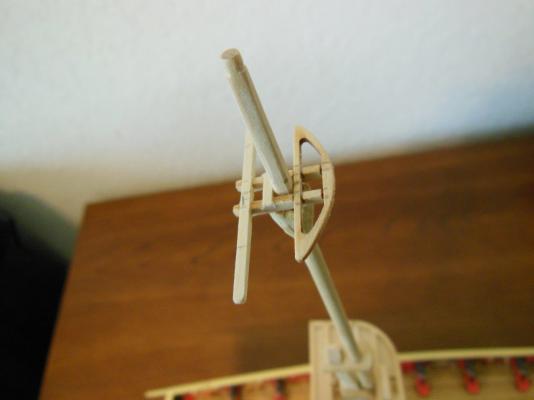
Thanks Popeye! I still have to trim off some excess material here and there, sand a bit more, paint/seal, plus glue it all together. The mast foot(???) is smaller than it should be, so it fits loose in the deck. Since the mount hold is blind, my plan is to find a method to hold the mast in position, partially fill the hole with epoxy, stick it in and let it set up - I only get one shot! I suspect the final assembly sequence is very important in regard to rigging, so I need to plan it out in advance.
-
Hi George, Thanks for looking in and for the compliments. I certainly agree with you on visiting family. Sometimes life just gets in the way and time seems to go by faster every day. I'm lucky to still have both of my parents, both are in their mid 80's.
-
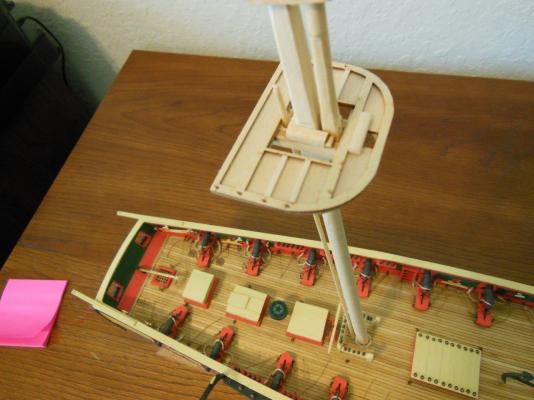
I've been pecking away at the build as time permits. I'm jumping around a bit but it keeps my interest up and avoids the repetitive work that gets old for me pretty quick. I'll post whats been accomplished by each photo below. Note that many items are dry fit and once I'm confident of the location and no need to move for access, I'll glue them in place. Pins were used for the majority of parts to reinforce their attachment. Forgive me if I mess up the nomenclature of the various parts. It's still mostly a foreign language to me. Next on the list is to make the main topgallent/royal mast. Next week I'm off to Ohio again. My mother bought a new desktop and her needs help loading Windows 10 and moving all of her files over from the old desktop (which will no longer boot up - darn), so the shipyard will be closed for a few days. It will be good to spend a few days with mom and dad. I made and installed the aft starboard channel, along with the quarter boat davits, deadeyes that need rotated/glued/darkened, as well as the chainplates. I'll attach the chainplates to the hull as soon as I can align them with the angle of the shrouds. The main mast wedges are ready for painting, but I still need to make and attach the spanker step (?) The shroud sheer bars will be installed once I'm sure work is done in that area so I do not knock them off. The main mast, main topsail, main topmast/octagon swell/crosstrees and main top are made and dry fitted. I have some final sanding to do. I need to measure the swell to verify the diameter is not too large. The fore mast is simply the dowel used to make the mast, sitting loose.
-
Hi Patrick, I'm starting to take a serious look at how to construct the masts on my Niagara and once again find myself referencing your beautiful build. If I had to pay you a nickel each time I looked, you could afford to live next to Bill Gates.
- 299 replies
-
- 1
-
-
- niagara
- model shipways
- (and 1 more)
-
Grant, I'm sorry to hear the sad news. I believe loss of a pet is more difficult than one can express. I hope you have a lot of pictures and great memories.
- 456 replies
-
- 6
-
-
- finished
- bomb ketch
- (and 2 more)
-
I used paper which works well and just recently tried black shrink tube cut to the needed width. The shrink tube looks pretty good but cutting it a consistant width was a challenge. It's on my Niagara build if you want to see how it looks.
-
Hi Sjors, thanks for stopping by. Progress is slow but so long as it's moving in the fwd direction I'm happy! I'll post a few more pictures soon, to show what I'm working on now. Edit: it never fails. As soon as I made a new post I see typos that need fixed...
-
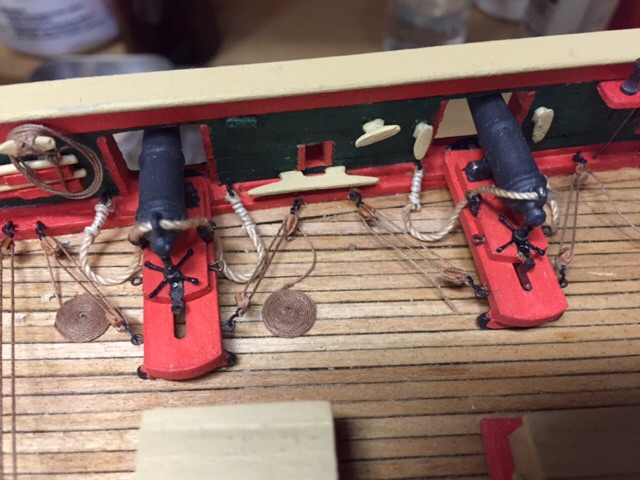
You can never have too many shotgun shells ...
-
Thanks Augie, now all I need to complete them is cannonballs. I'm thinking of using shot from a shotgun shell if I can find the right size. Thank you everyone for the likes.
-
Thanks George. Your right they were not part of the kit. I can hear the dark side calling... I'll add a few more non kit items.
-
Here is a quick shot of the jack- screw on two carronade.

-
Glad to have you back Augie and she continues to impress...
- 2,191 replies
-
- 2
-
-
- confederacy
- Model Shipways
- (and 1 more)