HOLIDAY DONATION DRIVE - SUPPORT MSW - DO YOUR PART TO KEEP THIS GREAT FORUM GOING! (Only 20 donations so far - C'mon guys!)
×


lb0190
-
Posts
686 -
Joined
-
Last visited
Content Type
Profiles
Forums
Gallery
Events
Everything posted by lb0190
-
 Thanks Augie & John. Let's see... 74 x 8 blocks = OMG!!
 -
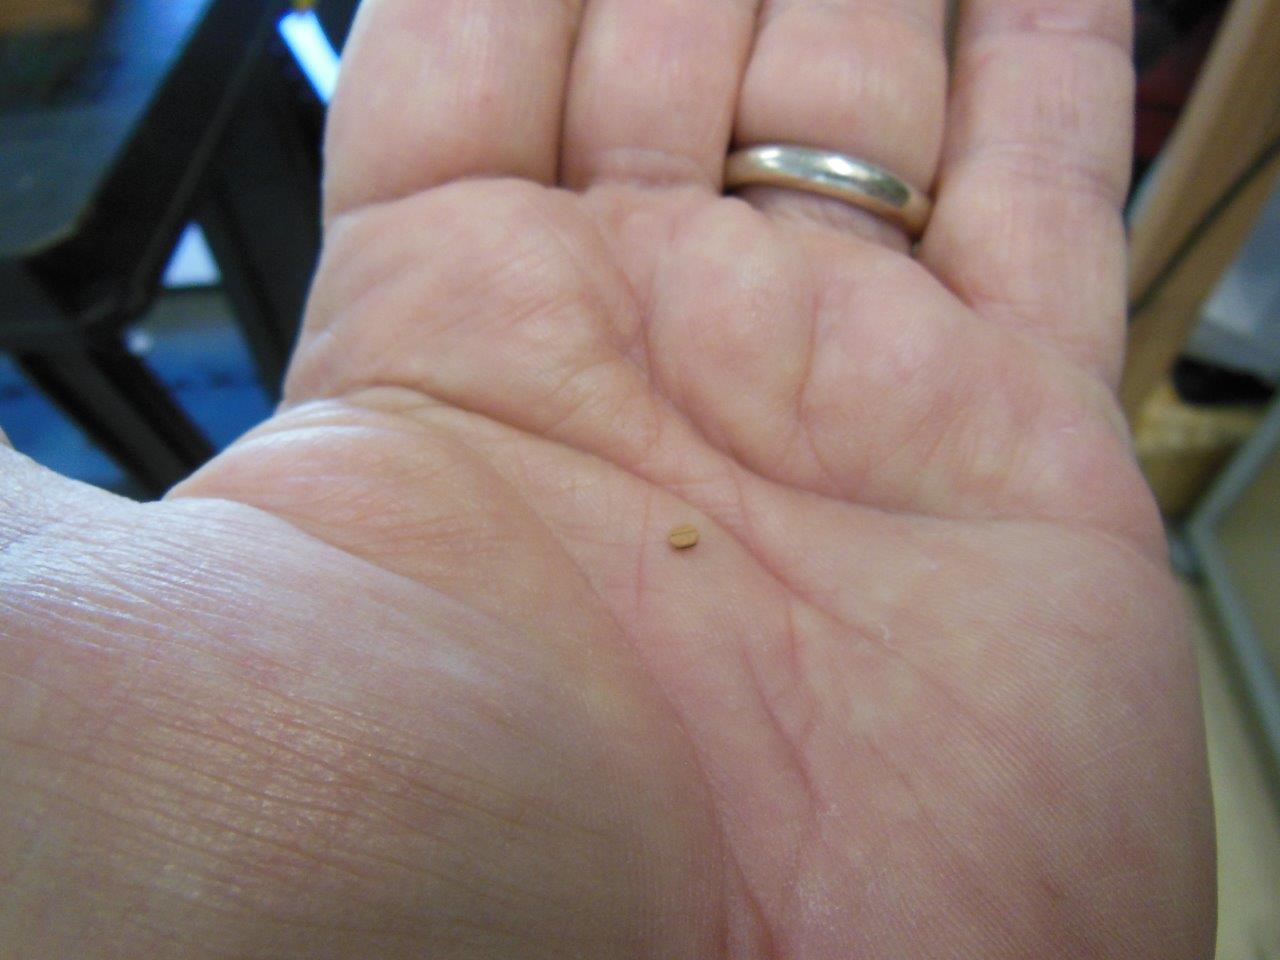
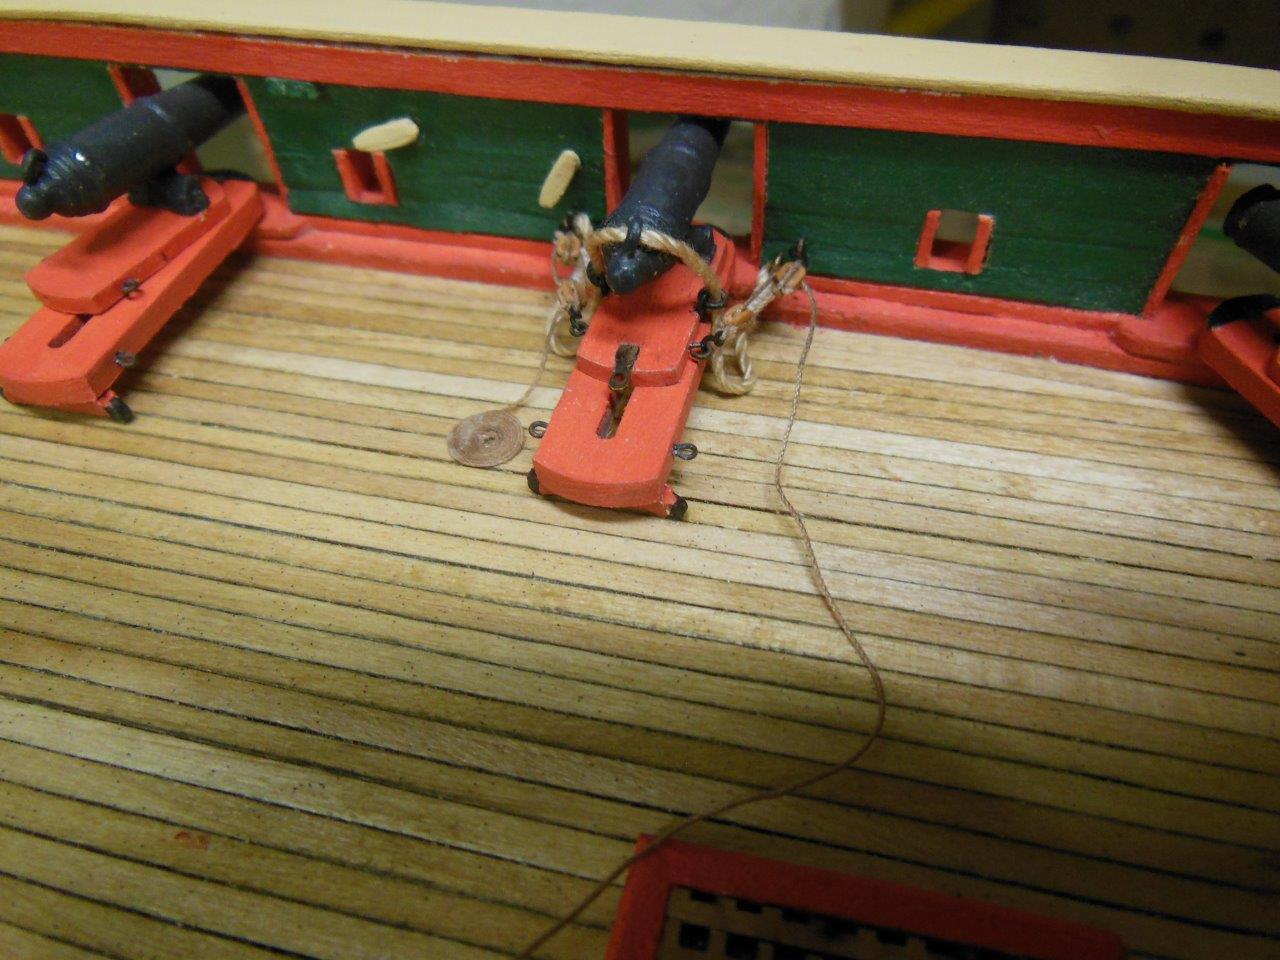
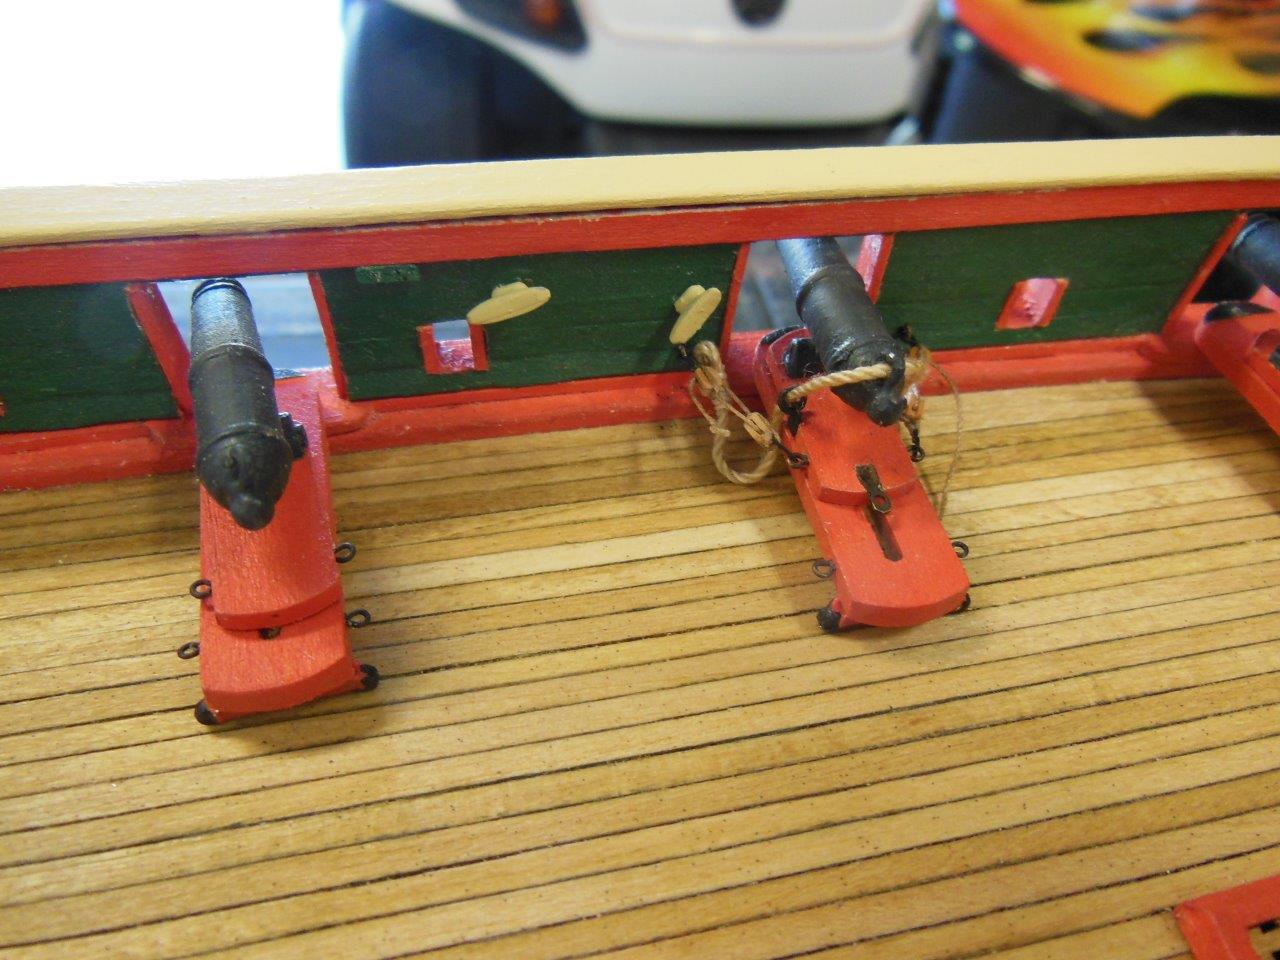
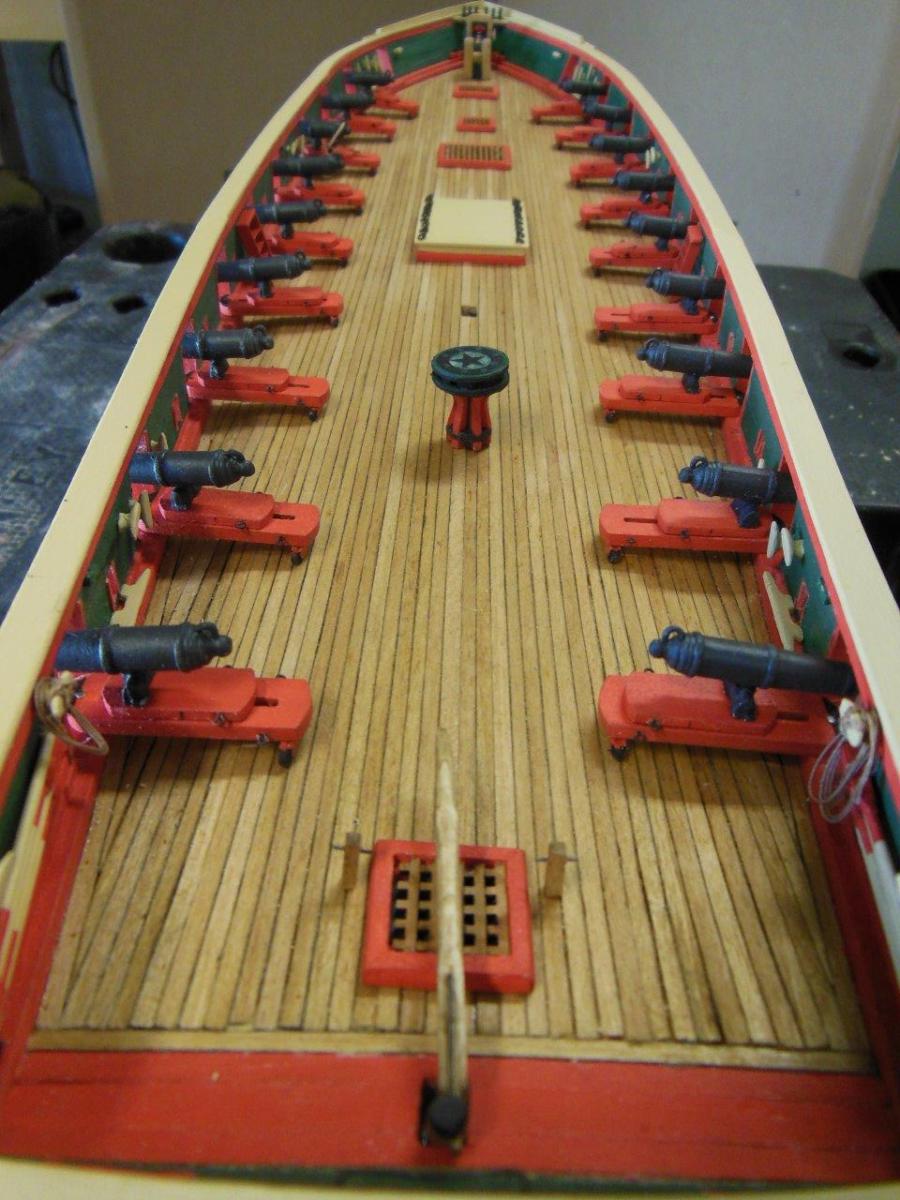
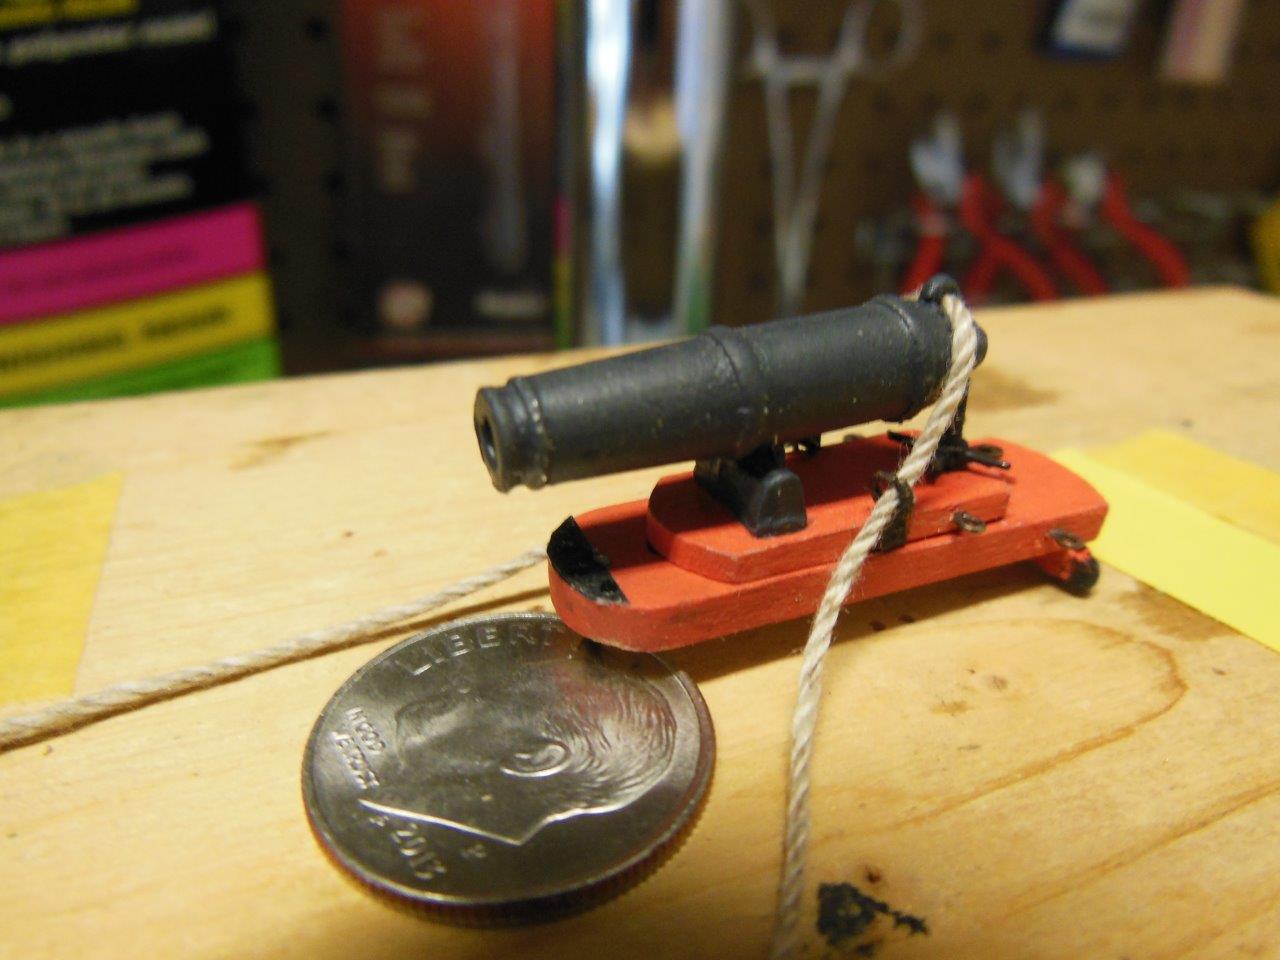
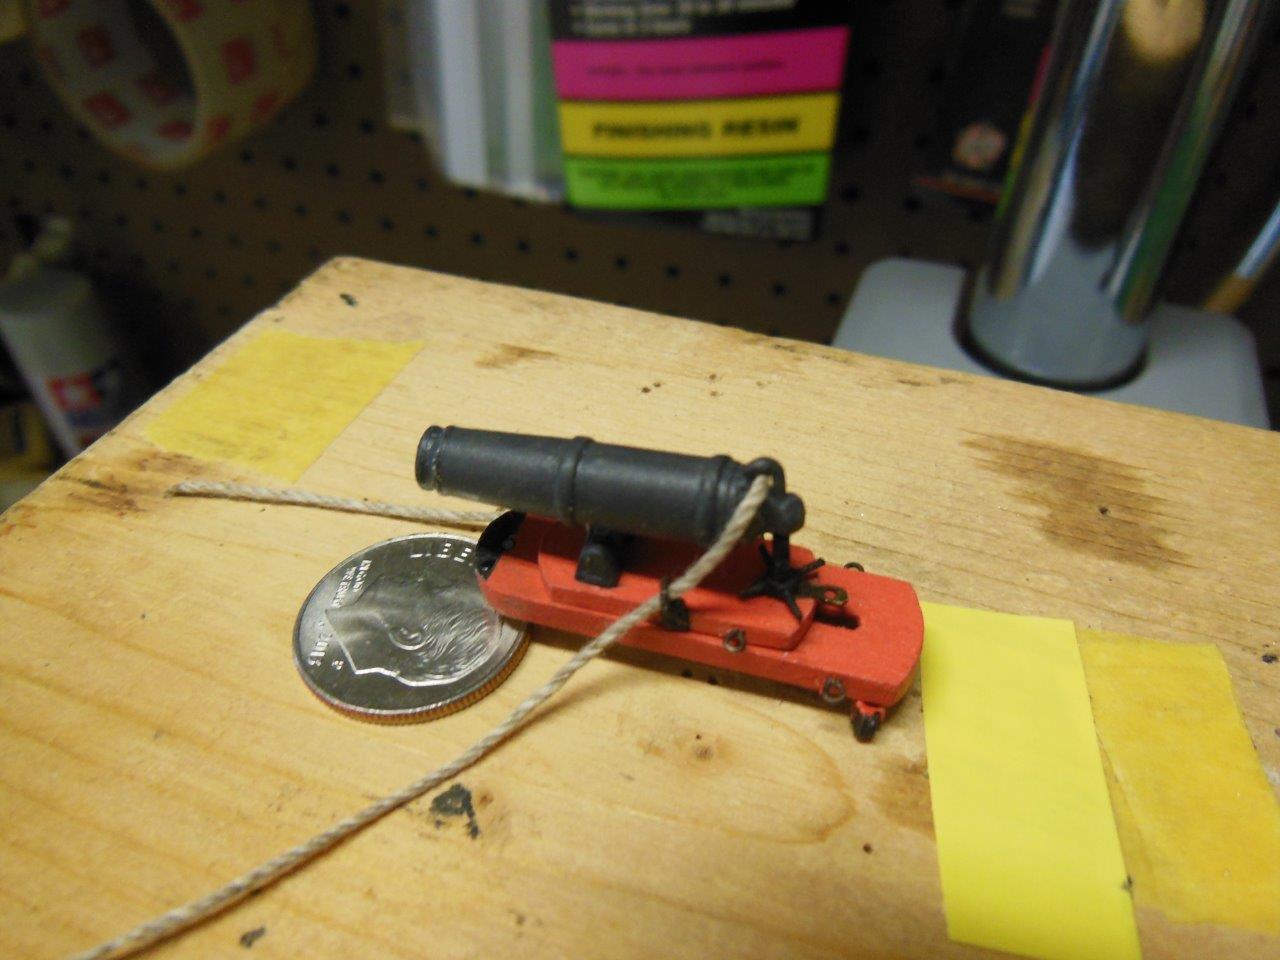
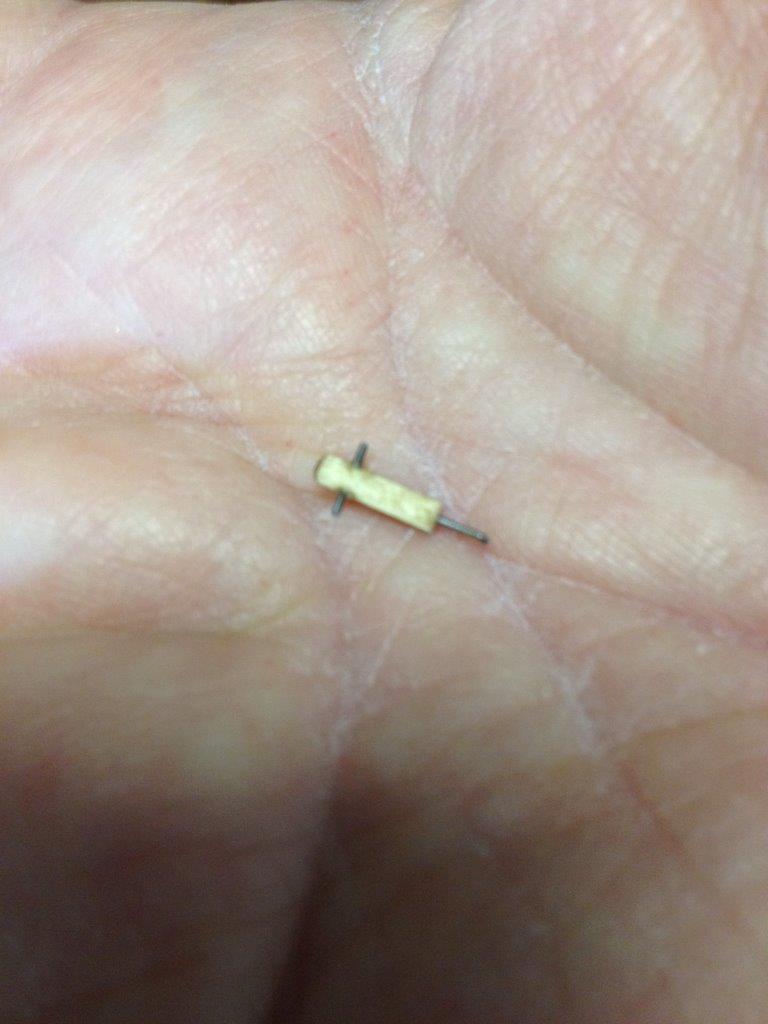
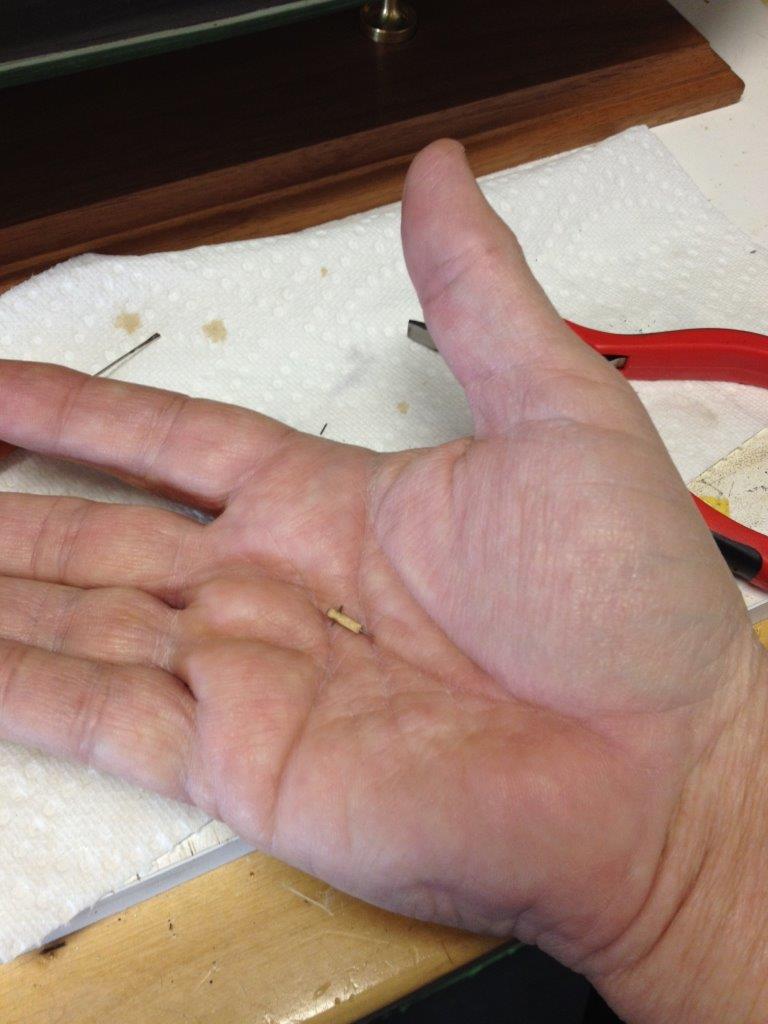
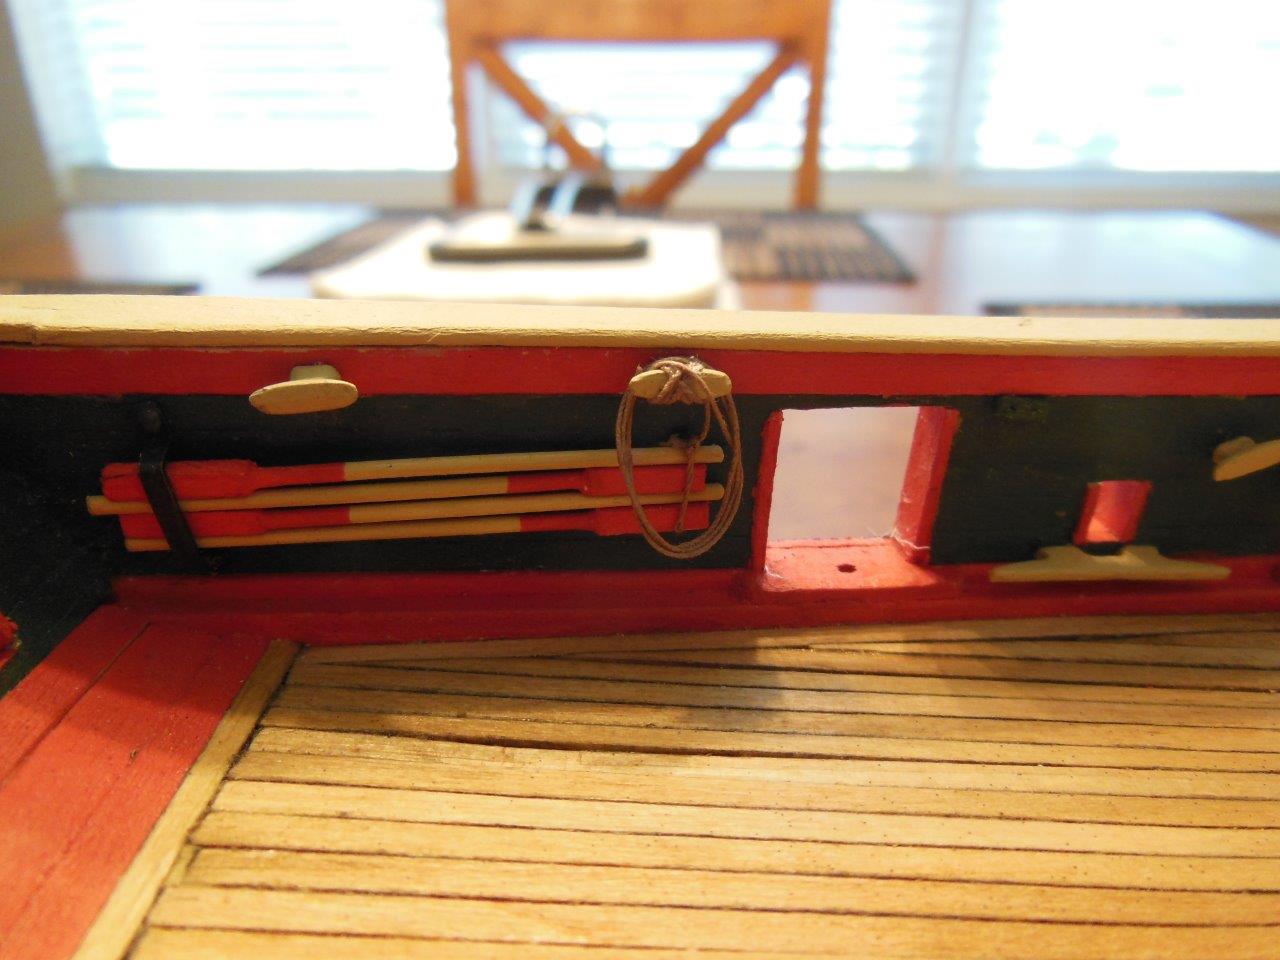
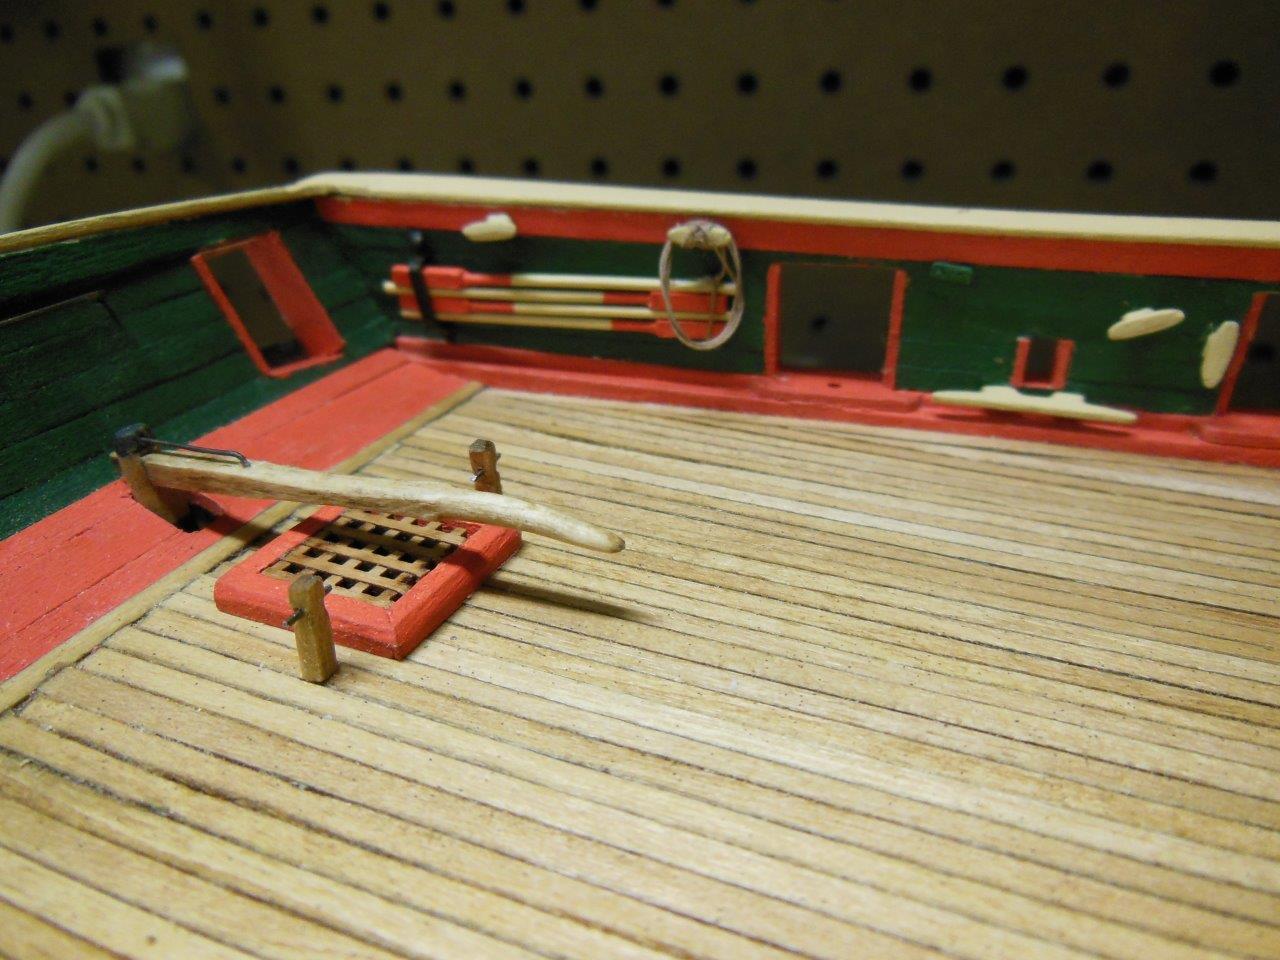
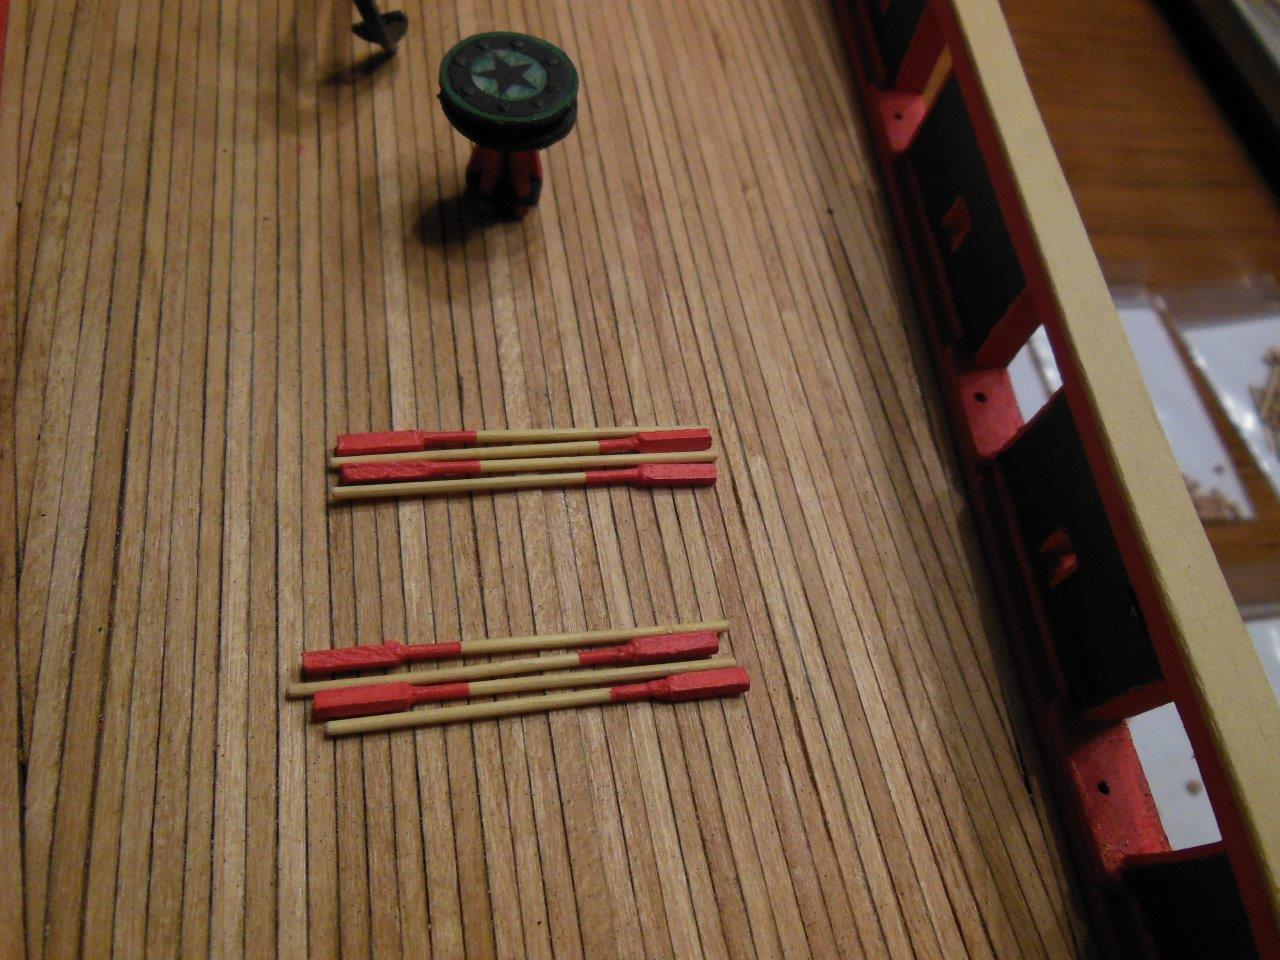
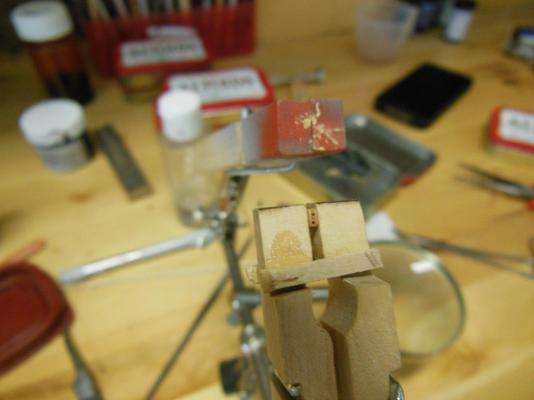
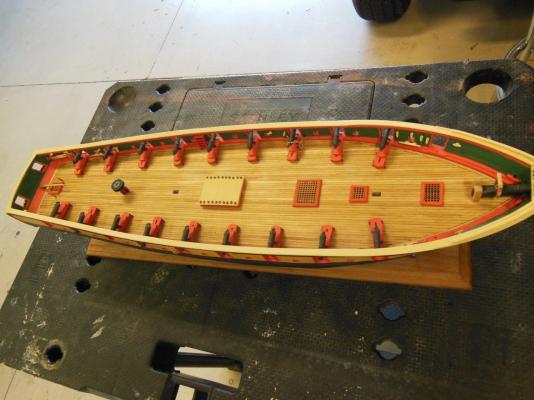
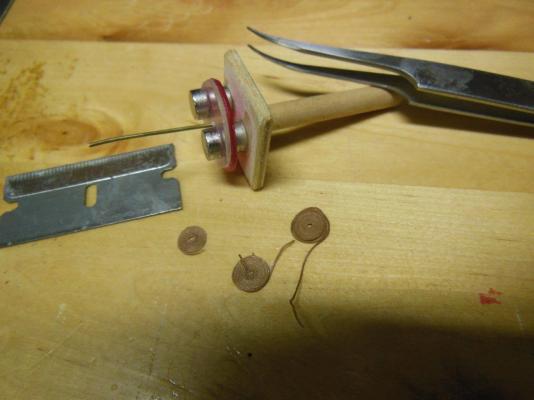
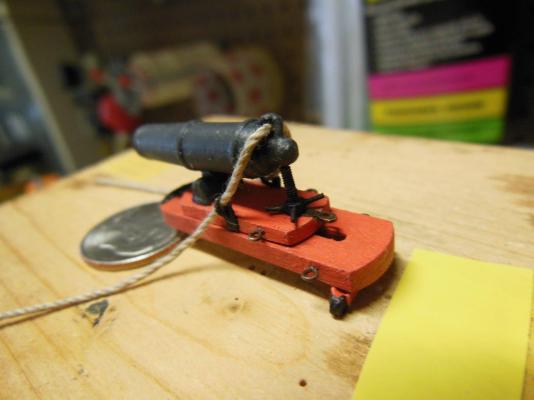
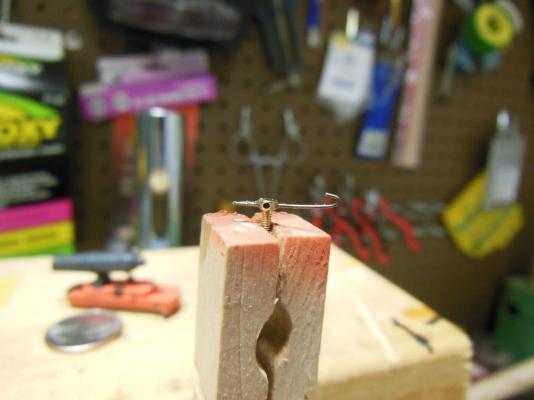
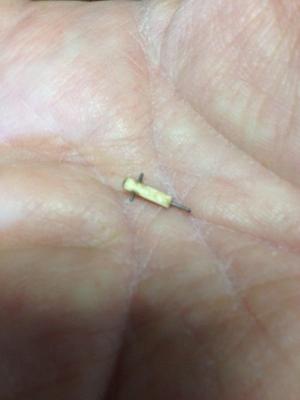
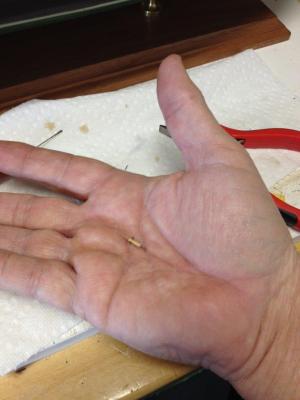
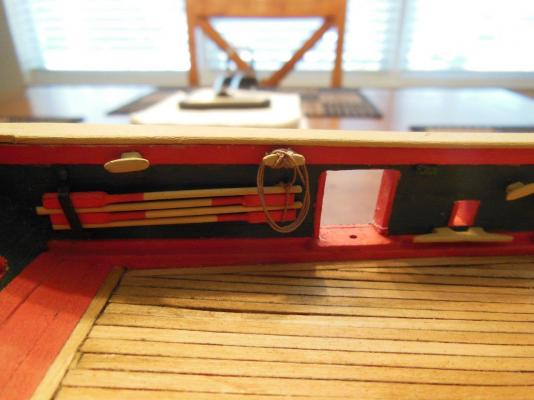
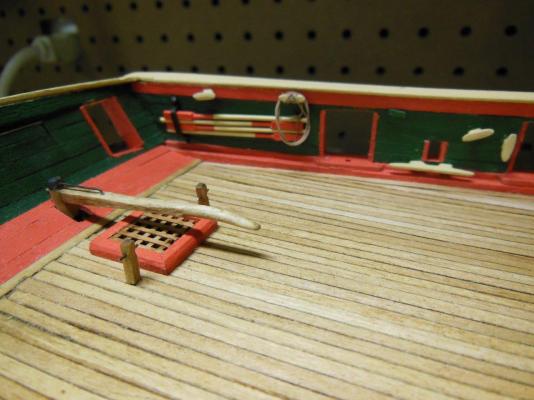
Here is a small update. Time to work on the Niagara or to even read MSW, has been very scarce. I started working on the carronades again. I've painted the guns and sleds, made all of the metal work with the exception of the jackscrews (a project in itself), installed the mount pins on the lower sled but still need to install the line plates on 17 of the 18 guns. I've also worked on figuring out how to rig the very tiny 3/32” blocks from Syren Model Ship Co.. I modified a clothespin to hold the blocks while I install the 0.008 line and hopefully not cause them to flip out and disappear - if I ever find where that stuff goes I should have enough material to build an entire ship . I'm debating between have one set of blocks per gun vs two. I'll add a second set with coils to the one in the picture to see how it looks and then decide, but your input is always of value to me. I've also made a rope coil tool and made a few rope coils, to which I need to improve on size and consistency. Pictures are: the modified clothespin hoding a block my hand holding a block for size reference several shots of one carronade rigged with the breech line and one set of blocks with a rope coil. The aft block assembly is onstalled backwards on one photo and corrected on another without the rope coil in place. I could not help from setting the carronades loose on the ship for a few photos. She now has some teeth! Rope coil tool and a few coiled ropes


-
Chuck, thank you for the videos! It really helps to better understand what we may have read numerous times. I hope next months session on seizing & splicing is also taped. Regards, Larry
- 1,051 replies
-
- 2
-

-
- cheerful
- Syren Ship Model Company
- (and 1 more)
-
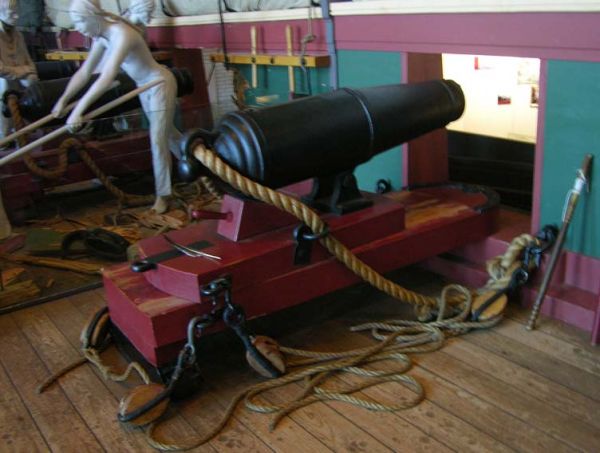
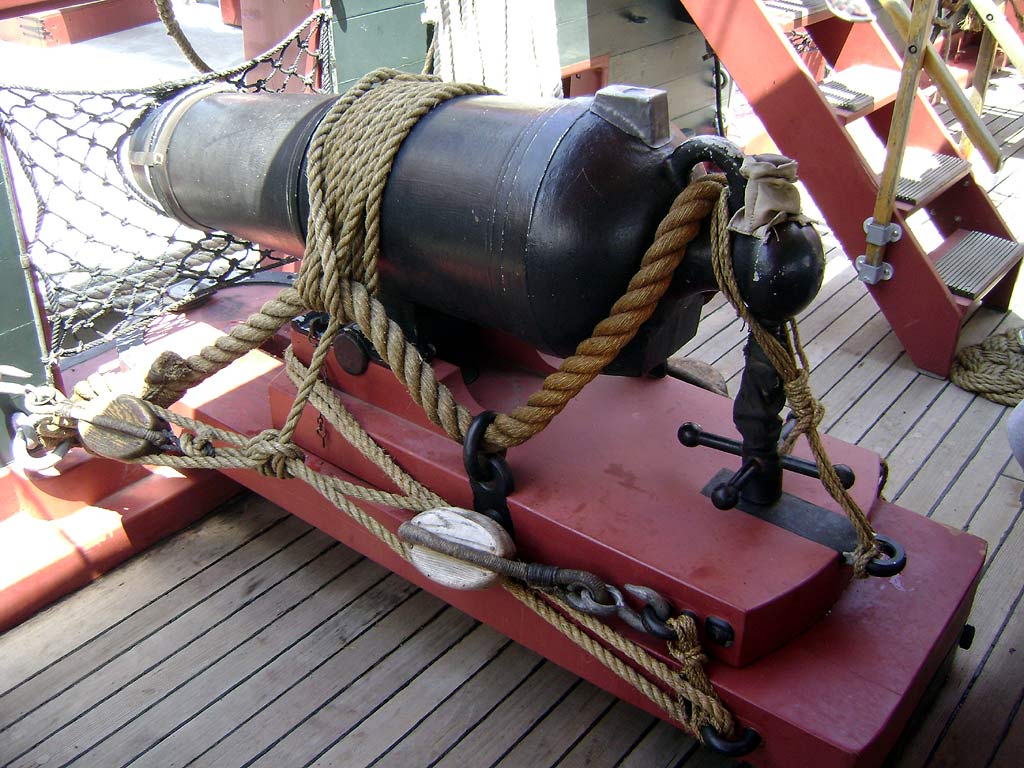
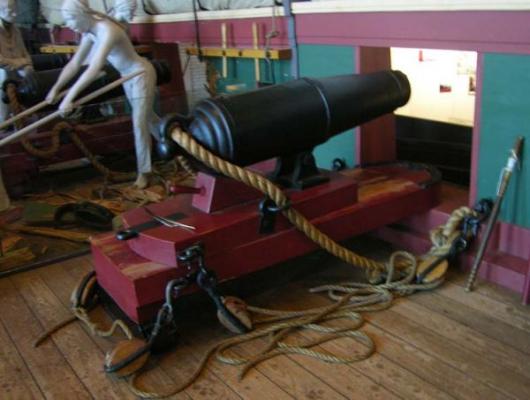
Hi Steve, Thanks for stopping by and for the compliments. The cannon color is called Cannon Black, from Model Expo. It is not as dark as most black paints I have used and looks like cast iron to me. I really like how it looks on the guns. I'm a long ways from being an expert, but I believe the second photo shows the guns in a stowed (non-use) configuration, using additional ropes to secure the guns in place. The small ring just behind the jack screw is called the "in-haul plate" and would be attached to a rope and block to pull the upper slide aft. I suspect there are circumstances when the gun has been pulled forward and needs to be moved aft without firing. At this time I do not plan on attaching a rope/block to this plate due to the congestion on the deck. Some Niagara builders include this rigging in their build and others do not. From the photo, the small rope attached to in-haul plate and jack-screw does not appear to serve a purpose but I cannot help but think it does. I suspect the angle of the photo prevents us from seeing the reason for it being there. After a second look, it may prevent the jack-screw from turning by blocking the handle but that is simply a WAG (wild axx guess) on my part.
-
Hi George, I agree the Captain (well maybe the Admiral) has the final say and I was leaning heavy in favor of the jack-screw, but I always appreciate hearing from others. I would have used a smaller diameter screw if I could have found one, but the no.90 will work fine. Thanks for looking in and for your comments,
-
Thanks everyone for your input and compliments, it looks like the jack-screw is the choice. I'll finish this gun up with the rigging then start drilling out more brass machine screws.
-
Sjors, She looks awesome and HUGE! I want to build a bigger scale model after I finish the Niagara, which may be complete sometime this century
- 1,616 replies
-
- 3
-
-
- caldercraft
- agamemnon
- (and 1 more)
-
Augie, She is something to be proud of! A very impressive build.
- 2,191 replies
-
- 2
-
-
- confederacy
- Model Shipways
- (and 1 more)
-
The past few weeks have been spent work matching up the starboard side with the port side in regard to cleats, capstan bars, plus making the ladders for each side. When I started making the ladders, I though I'll knock them out today, but the model ship building fairy set me straight. It's never as easy or quick as I think it should be. The first ladder issue was the tread thickness - 0.015" which I did not have and figured I could no make consistent enough for ten steps. I ended up using styrene which turned out OK once I figured out how to set the correct angle for the steps (pictures later). I've also been working the the carronades - actually just one. Once I have one built that I like I'll start the production line for the remaining seventeen. This is where I need your help. I've seen pictures of what I assume to be Niagara carronades. Some have the quoin to adjust barrel elevation and others have a jack-screw. Ignoring what may be historically correct, I kinda liked the looks jack-screw method and thought I would try to replicate that. I almost destroyed one carronade by attempting to drill a hole in the breech end of the cannon for a small screw, so I dropped that idea. I though just having the jack-screw mounted so it interfaced with the breech may look OK. Below are pictures of my reference material (THANKS MSW builders!) and a preliminary attempt of making the jack-screw, with the jack-screw sitting loose in place. I still need to dress up the ends of the jack-screw handles by making round knobs with CA glue and the normal touching up of paint, but it's close enough to gather a few opinions. I used a #90 brass hex head machine screw for this project. After drilling two thru holes 90 degrees apart, I turned the hex head round using a hand drill and emery board. I CA glued the handles in place and painted the assembly black. I did not make a quoin to compare the two since it's pretty easy to imagine. Questions: does the jack-screw look out of scale and too rough and which do you think would look best - quoin or jackscrew?


-
She looks good John. I really like the overhead view, it gives you a completely different perspective.
- 2,250 replies
-
- 2
-
-
- model shipways
- Charles W Morgan
- (and 1 more)
-
Count me in for a set of the bulkheads. HM Cutter Cheerful will be my no. 3 build, just as soon as I finish the Niagara. Chuck, she is looking majestic!
- 1,051 replies
-
- 2
-
-
- cheerful
- Syren Ship Model Company
- (and 1 more)
-
Hi Brian, I think Alexey's machine is awesome and it's back on my list for consideration. Budget is a big driver for me in making decisions and I'll waffle on it numerous times before deciding which direction I'll go. I'm also considering building one. Since I'm at least a month or more away from needing one, it gives me a lot of time to change my mind many times... Thanks for the input and sharing of experience. Hi Jerry, your serving machine looks very good. I looked in my local hobby store for gears as well as a craft store - no luck yet in finding the needed sizes. I have not given up on this option but not sure at the moment which direction I'll go. This will probably be a last minute decision... . Your ship looks impressive and as you can see the pictures posted fine.
-
Thanks Dale. I did not give that any consideration.
-
Hi John, I'm convinced Alexey's machine is the better of the two. For my needs (and budget) I suspect the lower cost machine will meet my needs. In regard to greasing the rods, I agree it may become an issue over time. Maybe a very little dry silicone lube placed on the exact spot needed by using finger tip with clean cloth may help and not become an issue to deal with at a later time. Then again, a little use may work out the kinks.
-
So far I've only used a small amount of rope to hold up the capstan bars. What I bought was less than 20% of what was supplied from the OEM when looking at it by cost, so I'm sure this will be used up. My intent is to buy in batches so cost can be spread out and in case the kit provided more than needed, not over-buy any specific part.
-
Hi Augie, the brandy would be the tie breaker for me. . Out of curiosity we bought a legal bottle of moonshine - Wooohoooo it had a kick and a burn. Thanks Tom. It's been a fun and challenging build. You can always buy the kit when on sale and defy the urge to open her up until your current build is complete.
-
Thanks Augie. It's coming together slowly, but at a pace I'm comfortable with. I'm currently researching serving machines (I have little desire to make my own rope - at least for right now) and considering the two below: My first choice - http://www.shipahoymodels.com/equipmentforsale.htm Looks very nice but bigger hit on my ship building budget - http://www.shipworkshop.com/
-
Brian, what item are you inquiring about?
-
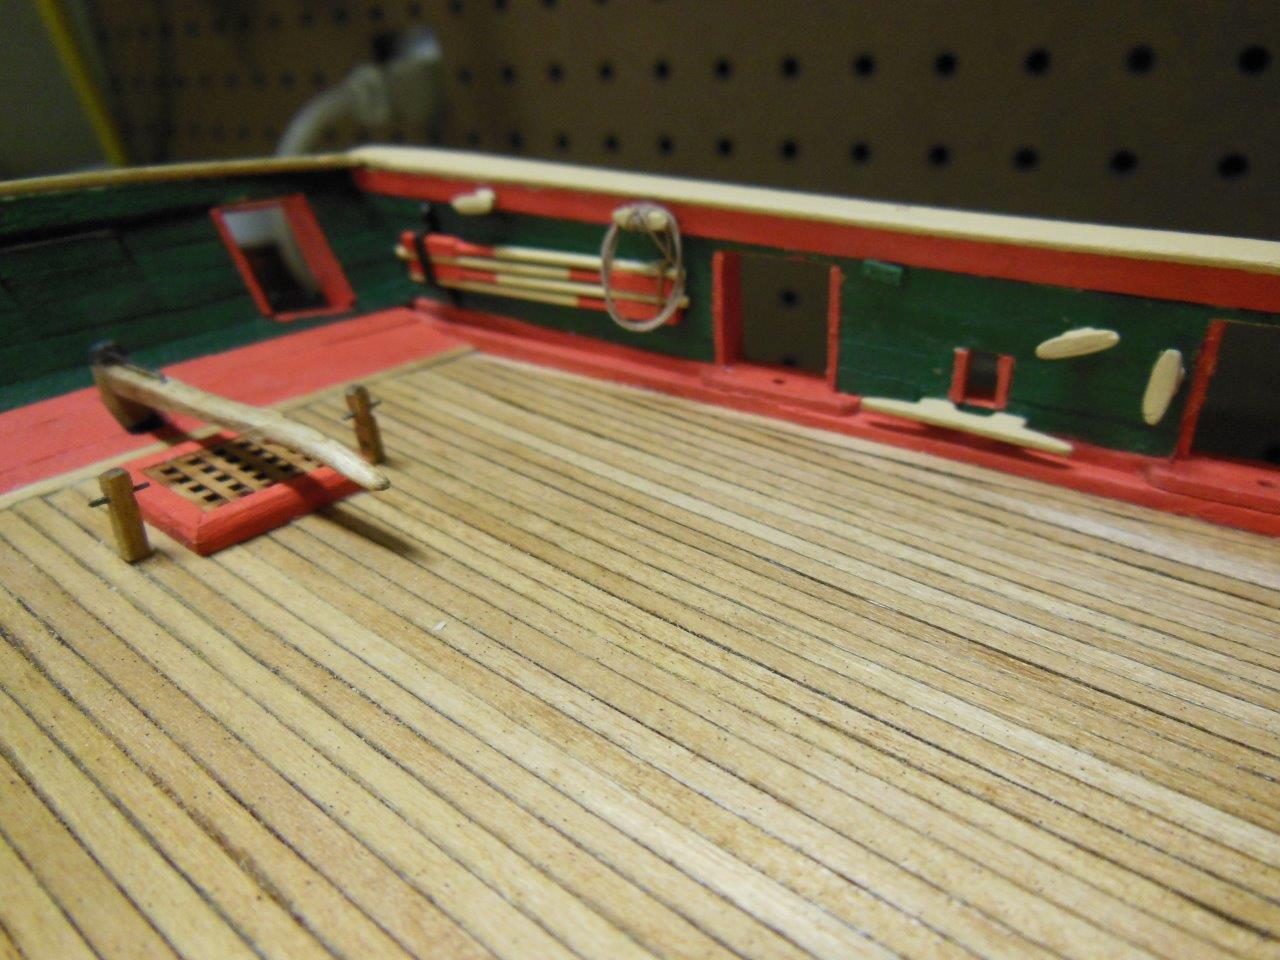
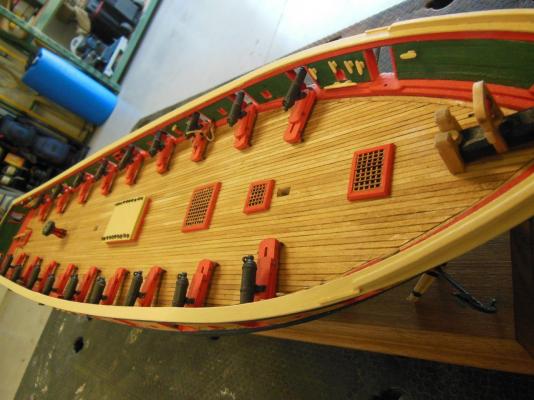
I made a little progress over the weekend. First, I repainted the cleats using Model Expo bluff color. The Tamiya Bluff was different enough in color it did not look right with the existing colors on the build. I loved how it sprayed and was already the right viscosity for an air-brush. I also mounted the small cleats on the port side along with the mooring cleats. I made the mount bracket for the capstan bars and mounted the bars along with the aft bitts which are next to the aft grate. The bitts look crooked in the photo but upon seeing this I went back to the garage and verified they are straight. The bits are very small and were difficult to make to get them close enough to suit me. The basswood sure does fuzz up! I pinned them to the deck for a stronger bond. I forgot to take a photo down the length of the hull, but I'll get that view the next time. Of course I only been working on the port side other than the starboard bitt, but I'll move over to the other side soon. Edit: I set the tiller angle too low, one more item for the to-do list.

-
I enjoy following your build. It's turning out great! I have not gotten to this point in my build yet, but your comments on flaking paint concern me for when I get there. Do you think pulling the brass through some sandpaper so the paint has a better bite will help and maybe use primer first? Sounds like a lot of work but....
-
Hi Augie, I have a friend who is building a Hahn style version of the Confederacy. He is currently researching a number of specifications, one of which is stern lanterns. He has not seen any models showing stern lanterns and has difficulty believing they were not on the ship. Has this item come to your attention and if so, do you plan on adding them to your build.
- 2,191 replies
-
- 2
-
-
- confederacy
- Model Shipways
- (and 1 more)
-
Here is the item list from my order, but be aware I'm changing sizes and it's just the initial list of items I wanted to try. I suggest you bump the Model Expo parts list against what you want to buy from Syren. ==== Items ==== .008 (.20mm) LIGHT Brown Rigging Line - 20' per package - Linen/Cotton Blend SKU 008LBR Weight 0.00lbs Quantity: 2 Price (each): $4.50 .025 (.63mm) LIGHT Brown Rigging Line - 20' per package - Linen/Cotton Blend SKU 025LBR Weight 0.00lbs Quantity: 1 Price (each): $4.50 .008 (.20mm) Black Rigging Line - 20' per package - Linen/Cotton Blend SKU 008B Weight 0.00lbs Quantity: 1 Price (each): $4.50 3mm Black hooks for rigging your ship model SKU RH-3 Weight 0.00lbs Quantity: 1 Price (each): $9.00 .025 (.63mm) Black Rigging Line - 20' per package - Linen/Cotton Blend SKU 025B Weight 0.00lbs Quantity: 1 Price (each): $4.50 KIT - 3 mm Boxwood Deadeyes - KIT- 28 per pack - Assemble them yourself SKU 3BDK Weight 0.00lbs Quantity: 1 Price (each): $5.50 3/32" (2.5 mm) Single Sheave SWISS PEAR Rigging Blocks - (50 per pack) SKU RB3-32S-P Weight 0.00lbs Quantity: 2 Price (each): $12.50 1/8" (3 mm) Single Sheave SWISS PEAR Rigging Blocks - (50 per pack) SKU RB1-8S-P Weight 0.00lbs Quantity: 2 Price (each): $12.50
-
Happy "B" day Patrick!
-
Awesome pictures and info Augie. As far as I'm concerned, the more the better....
- 2,191 replies
-
- 2
-
-
- confederacy
- Model Shipways
- (and 1 more)
-
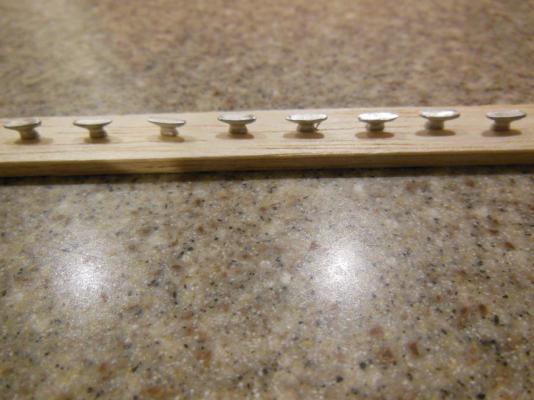
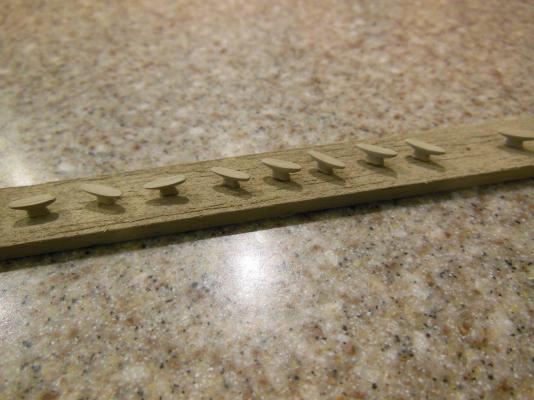
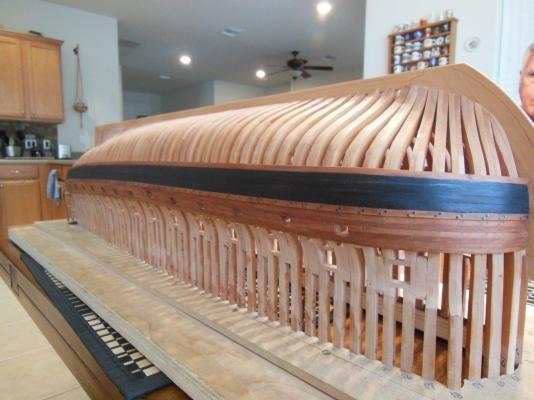
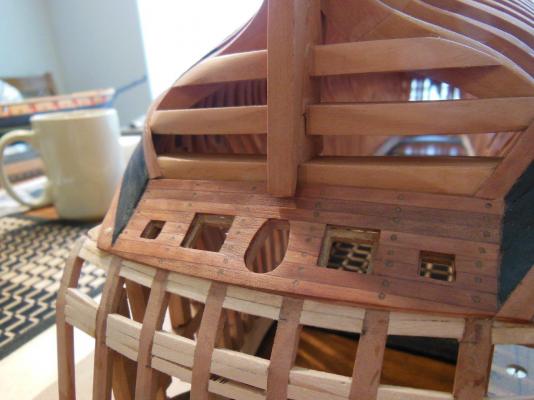
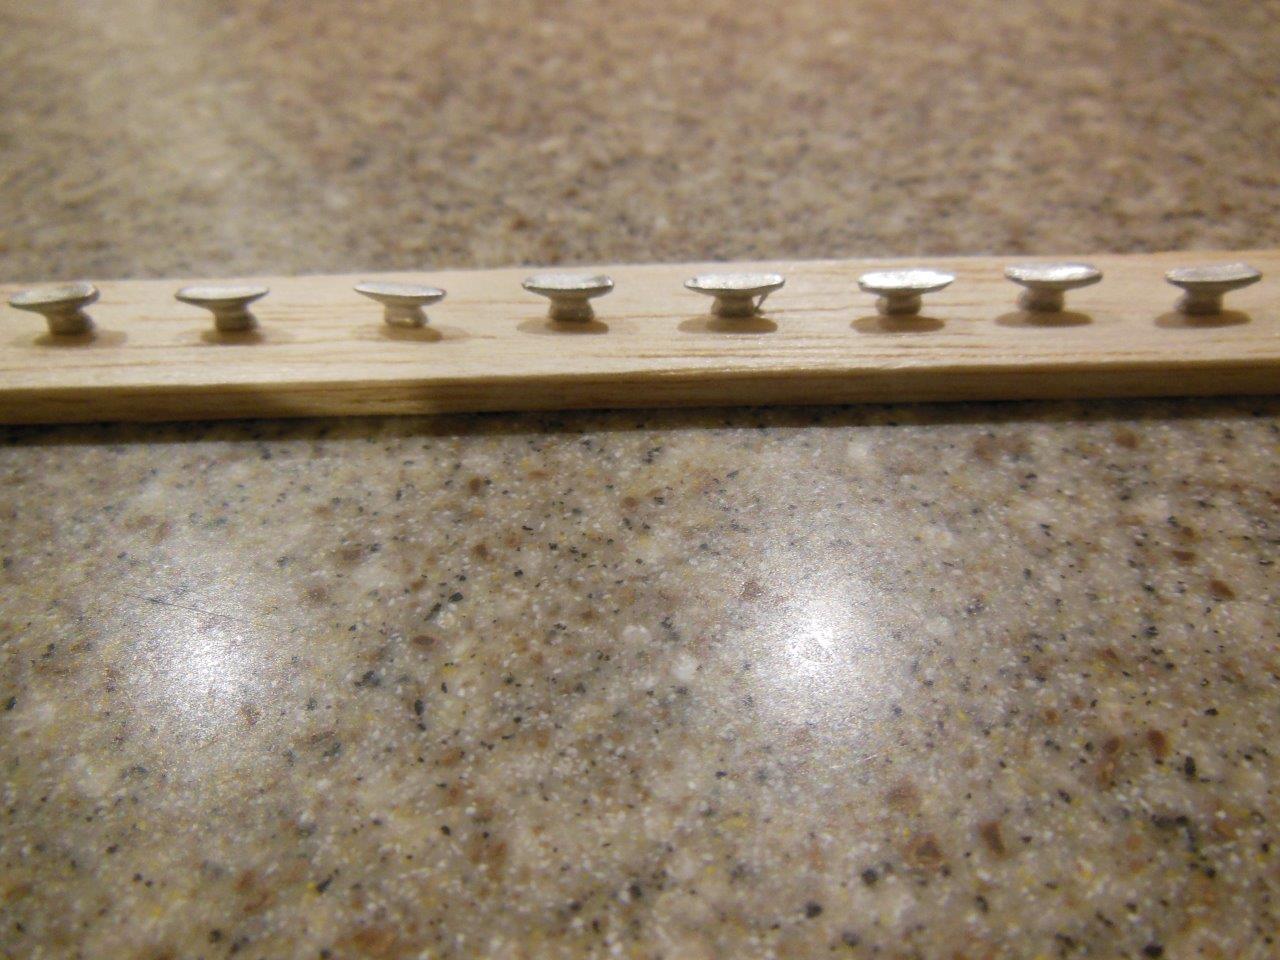
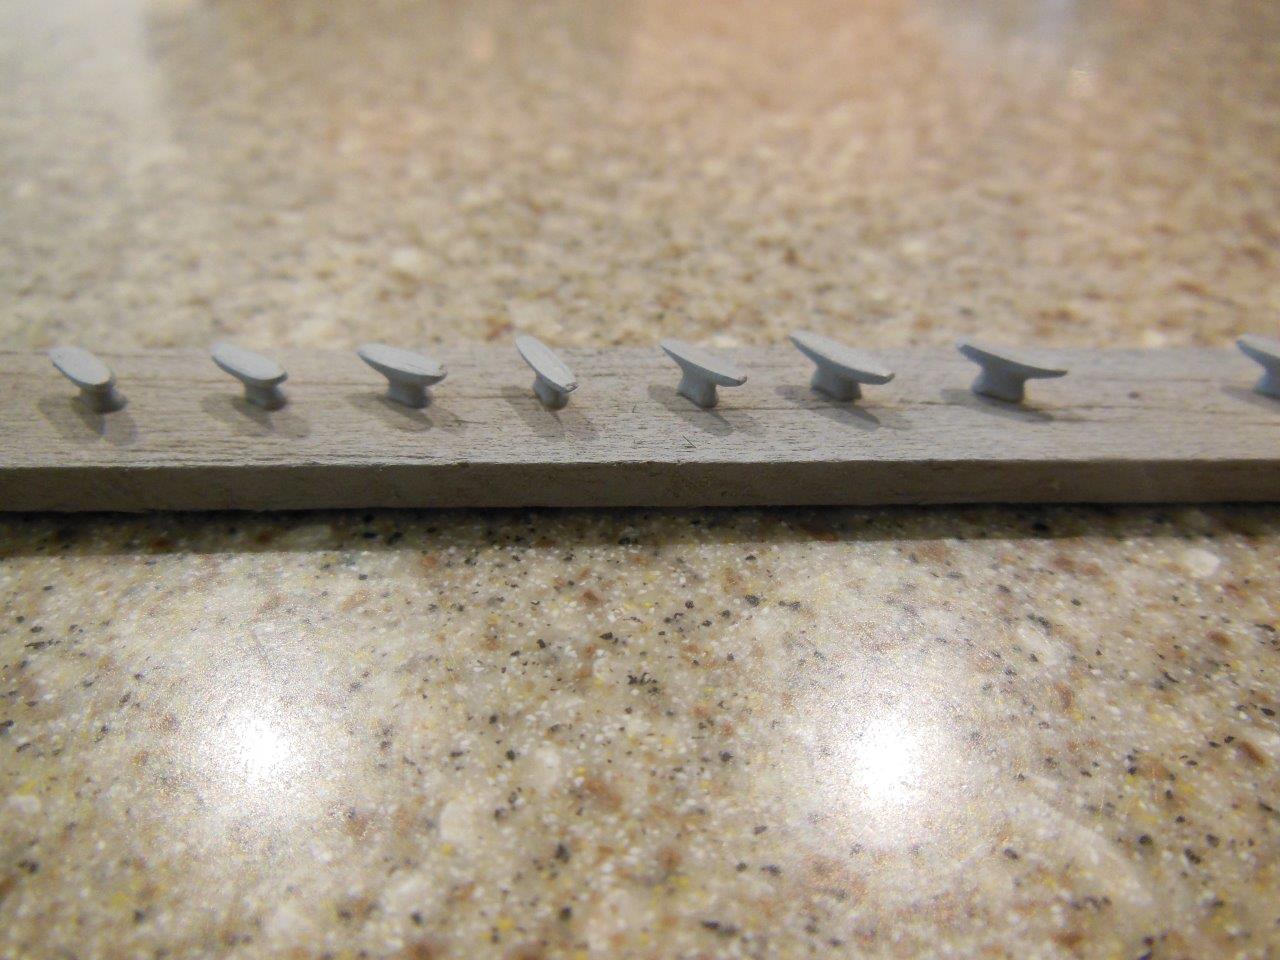
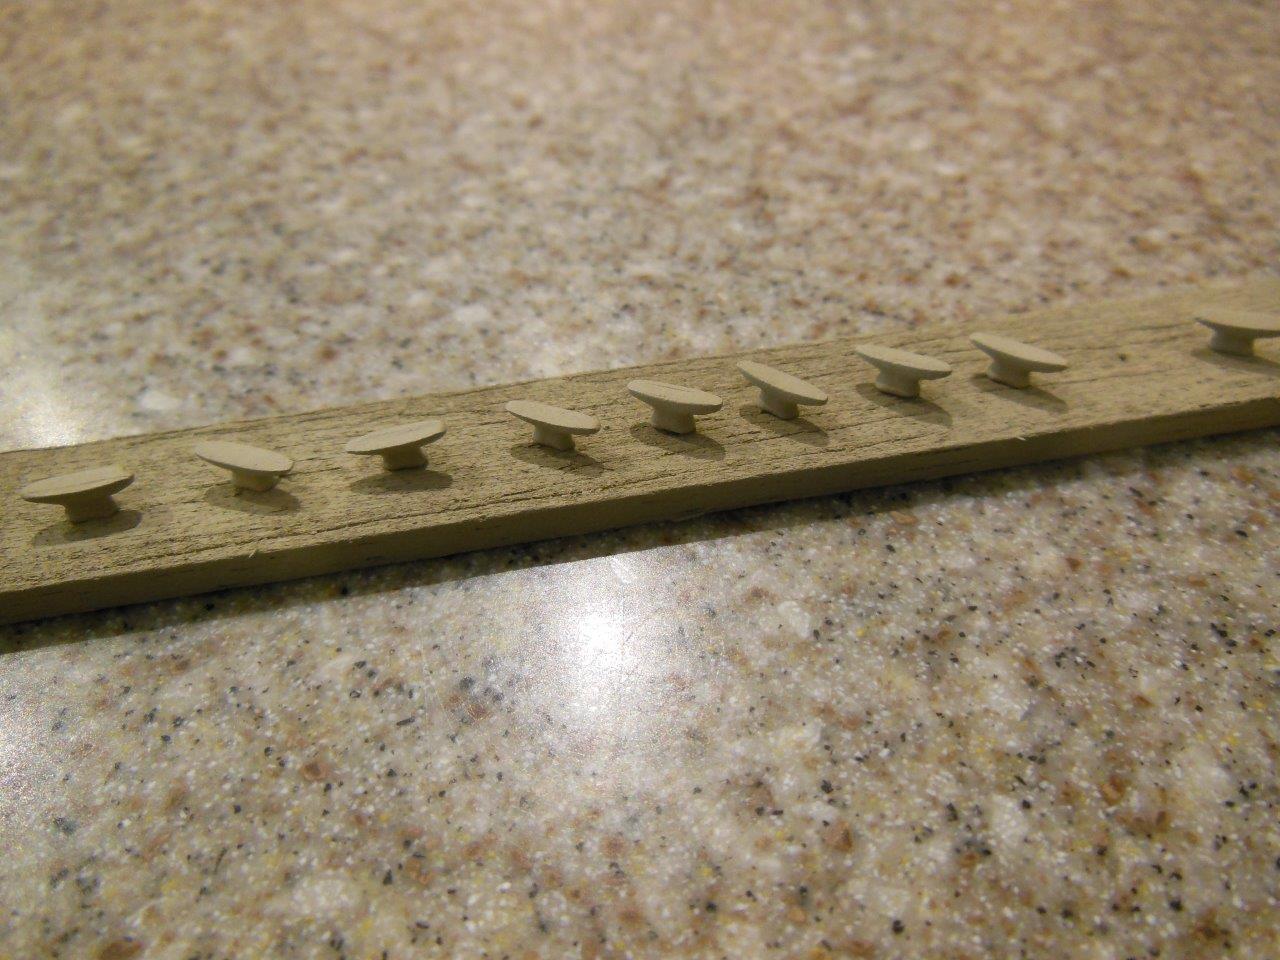
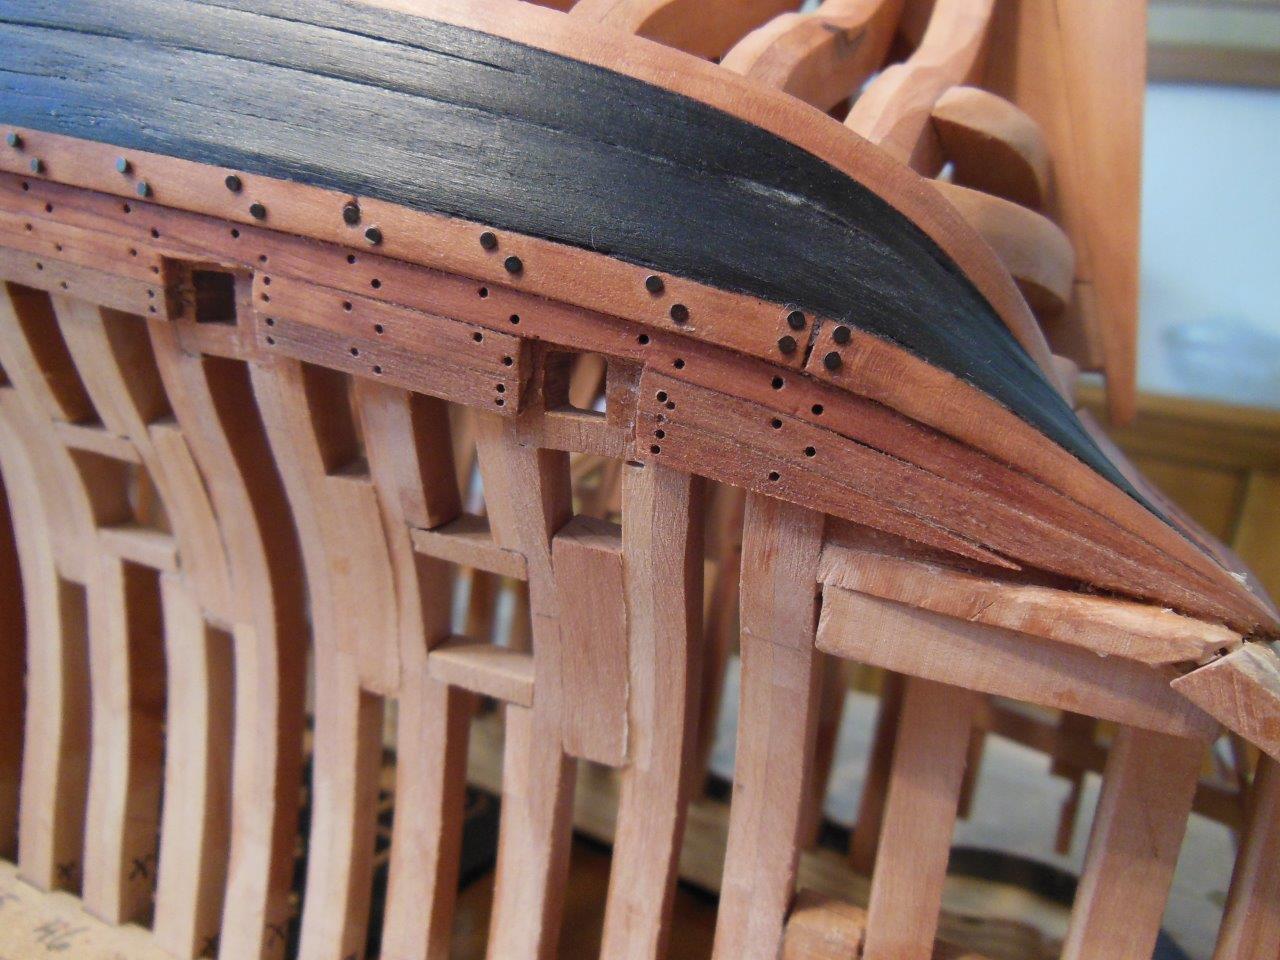
Here is a very small update. I'm lucky to have a family owned hobby store within 6 miles of my home, so I took Sjor's suggestion and picked up a spray can of Tamiya primer. The store has it in white and gray. I have two other primers I do not care for especially for small metal parts so I thought I would try Tamiya. Tamiya sprayed on very nice with a thin even coat which I'm happy with. I then sprayed on a coat of Tamiya buff which is a slightly different shade than the Model Expo paint, but I'll see how it looks next to the other colors before deciding if I keep it for the cleats. I also made the eight capstan bars which will be mounted near the stern, four on each side. I tried turning down some round bamboo stock but it was more trouble than it was worth. I could not get the diameter consistent enough to satisfy me using a drill as a turning tool. I ended up using styrene rods at 0.046" diameter attached to 1/16" sq basswood. I realize the color is not to spec but it simply looked better to me. I had a visitor today, a friend who is what I consider to be an expert at building model ships - especially when compared to my building skills. He brought his latest project with him, which when complete will be a fully rigged Confederacy, that is starting as a Hahn build but bashed to reflect specifications he is researching. The build currently has pear, ebony, cherry and I think boxwood. I attached a few pictures... As usual I cannot figure out how to post the photos in a specific order....