HOLIDAY DONATION DRIVE - SUPPORT MSW - DO YOUR PART TO KEEP THIS GREAT FORUM GOING! (89 donations so far out of 49,000 members - C'mon guys!)
×


lb0190
-
Posts
686 -
Joined
-
Last visited
Content Type
Profiles
Forums
Gallery
Events
Everything posted by lb0190
-
 Thanks Popeye! I now have all 18 jack-screws made, with five installed. The prototype I installed a few months ago was removed and reworked. After looking at it for a while, I did not like the four handles. The new handles are smaller diameter (0.014 vs 0.020) and slightly longer. I'll post some pictures soon.
 -
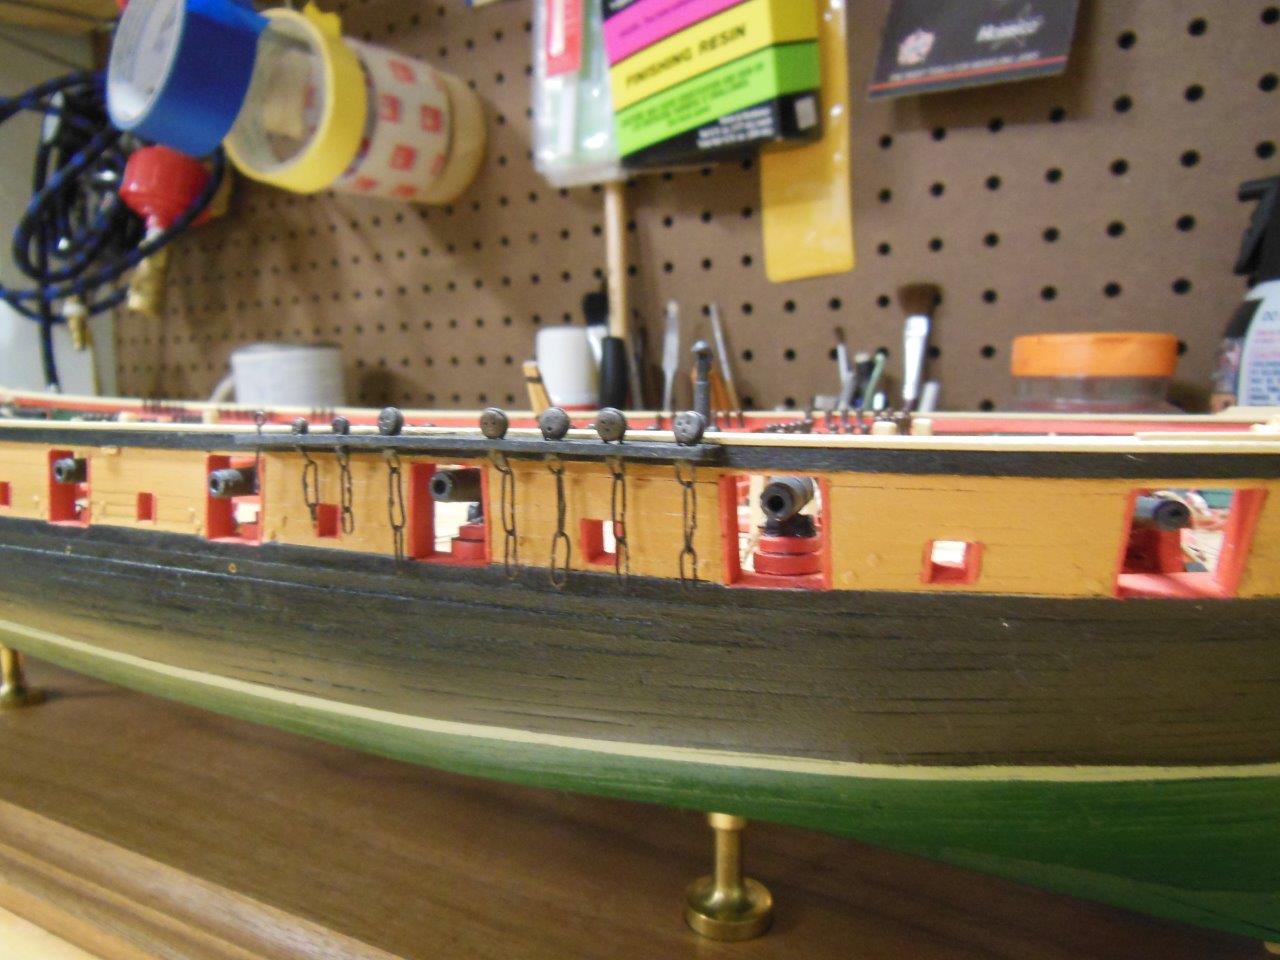
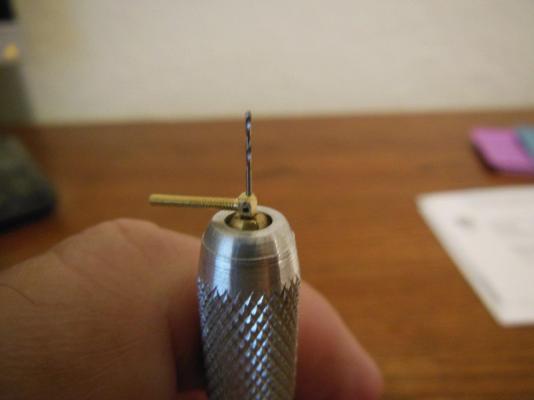
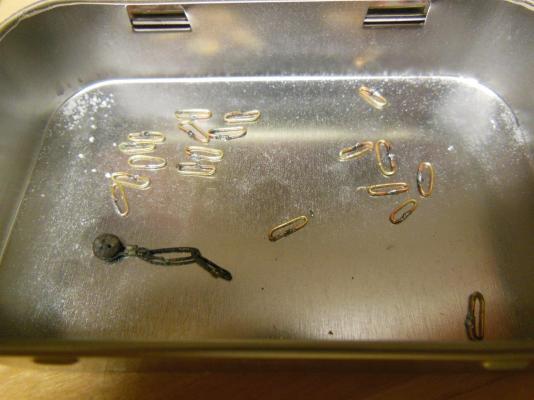
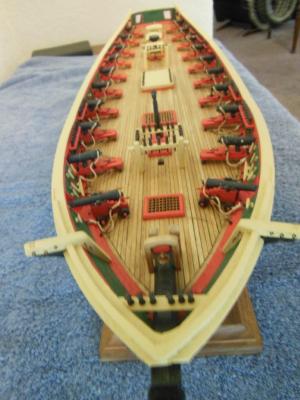
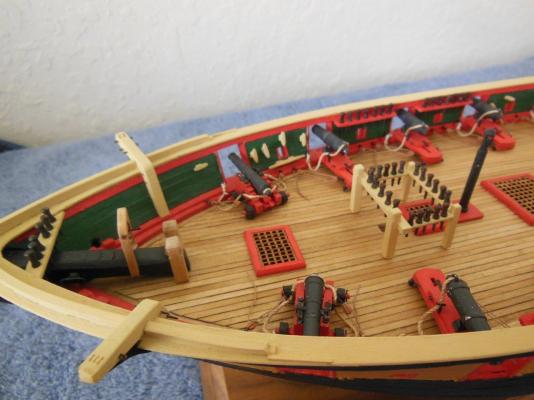
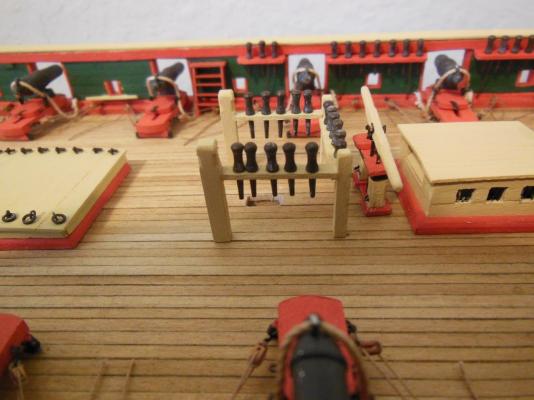
It's too hot to do much work in the garage so a quick minor update sounds like a good thing to do. I finished one channel with chain-plates, on the fwd starboard side. I'll use three steel pins and CA plus PVA glue to mount it in place. The photo shows it with the three pins holding it in place dry. The center pin hole is slightly too high on the hull which shows up in the photo. I'll make the center hole a bit bigger to correct the bow and secure the pins in place with med CA along with PVA for the wood to wood contact. I was going to start on the aft channel, but after giving it some additional thought I decided I need to finish some deck work so I do not knock off the boat davits and sheer bars that get mounted with the aft channel. I've been procrastinating on making the remaining carronade jack-screws (17) and rope coils. The jack-screws are simply a pain to make and I need to order more rope for the rope coils, but I need to finish these tasks before I paint myself into a corner. Below is a photo of a no. 90 brass hex head with a 0.017 drill bit. I drill the bolt head through in two locations 90 deg apart. Once the four holes are in place, I turn the bolt head to make it round, then add wire to simulate handles. The wire ends are dipped in CA glue to look like knobs on the end of the wire. I'll blacken the assy and then mount it on the carronade. I use my drill press to drill the holes and chase the holes with my hand drill. Four down fourteen to go. Here you can see the center of the channel is slightly high. Someone needs to stow that anchor before a big wave rolls it into someone and kills them.


-
I'm enjoying your build Popeye. I've never seen a plastic model with such detail and build quality.
-
Thanks George but I may already be a quart low... . .
-
Thanks Popeye... lol. The jury is still out on replacing them. We'll see if it eats a hole in my head waffling on the decision. After all, what's one more hole...
-
Hi Grant, I'm late to the party but I hope there's room for one more chair. You have an excellent build log and a beautiful build!
- 456 replies
-
- 2
-

-
- finished
- bomb ketch
- (and 2 more)
-
That's a good point Brian. I do plan on hanging rope coils. As you suggest, I'll take the "wait and see" approach. Thanks for looking in and for your suggestion.
-
You can think of it as leaving your DNA print on each build... Sometimes I walk into the house from the shipyard and the Admiral says, OMG where are you cut. Oh course I usually completely unaware.
-
Hi Frankie, yes I realized the pins are way out of scale but they are all I had and my making them would look even worse. I have not glued them in place yet due to the size issue and may eventually look into buying some that are closer to scale. I have a grocery list of items to address or accept at some point. Thanks for pointing it out and for visiting my build.
-
Hi Popeye, thanks for looking in. I wish I found this hobby years ago, but then again without MSW and the help from others such as yourself I probably would not had much luck at finishing one. Yes that chopper is really nice, did you see the "Caution Sharp Blade" written on the body? In case you were wondering if it's true, I confirmed its accurate.... I mistakenly left the handle up and that was all it took. Pain is such a good teacher nothening serious in regard to the cut but it was a quick lesson to leave the handle down! It seems inevitable that anytime I get anything new that has a sharp edge, it's not really mine until I cut myself.
-
Good morning Mark. Thanks. I seen that you pulled some planks. It's tough to go backwards but I'm sure you'll be happier with the redo. That's something I struggle with, deciding what is good enough.
-
That's a good idea John. The problem for me is, as I build the good side keeps changing. Kidding aside, I'm looking fwd to working on the masts and rigging.
-
Happy B day Mark. Your build looks awesome and is making me lean toward the dark side for my next build...
-
Thanks George. They are so small, it's difficult to work with, but I suspect they will look fine, once installed. I'll hold off pinning them in place until I work on the shrouds so they line up correctly.
-
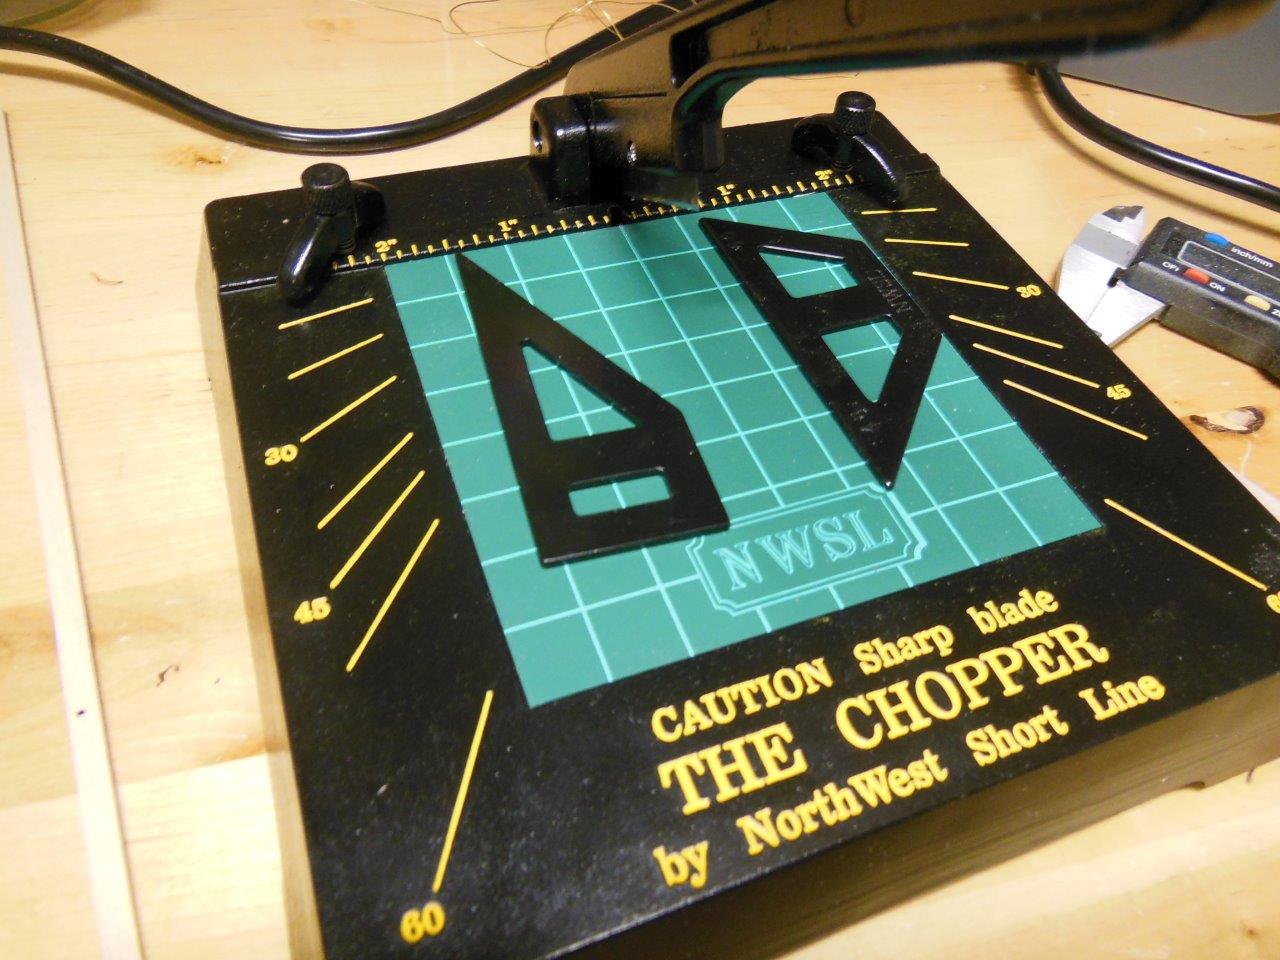
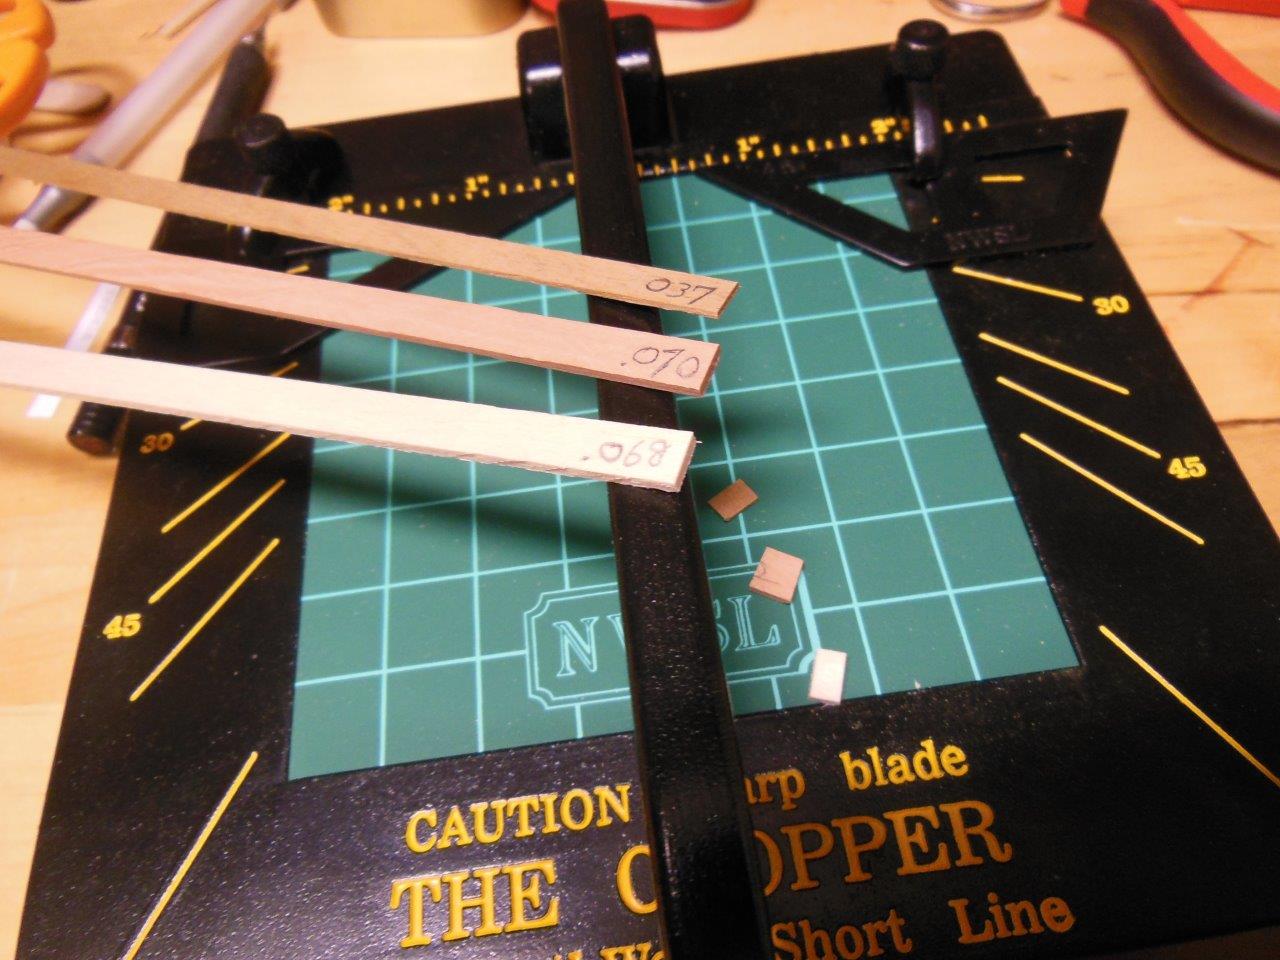
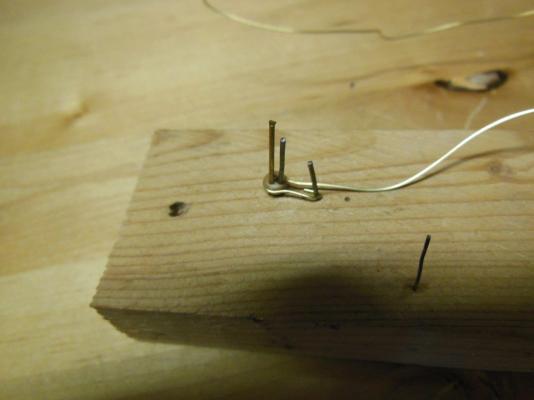
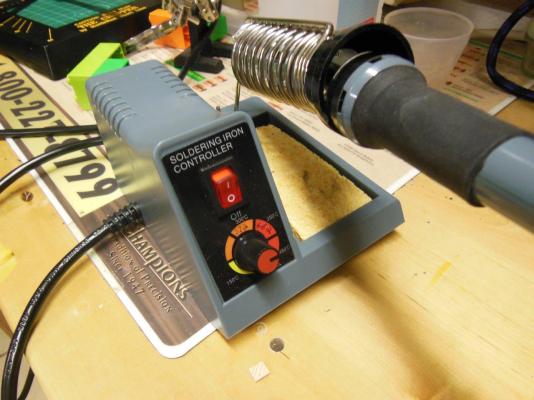
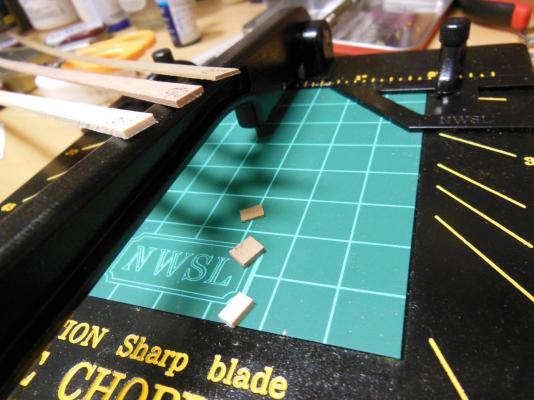
As time permits, I've been working on the channel chainplates. This is a first for me and to say it's a challenge is an understatement. I tried several different methods and settled on one using pins in a board to help shape the wire. I'm trying to keep the OAL within the drawing spec but I'll know how well I did once they are hanging on the ship. I also recently purchased a wood chopper from NorthWest Short Line and after market soldering station at a Hamfest. Both work great and after using the chopper a few times, wished I found it day one when I started with this hobby. Jig for deadeye, similar type wire jig used for links. Some of the links soldered. My soldering skills have deteriorated, no signs that I used to install and solder strain gages... One assembly together with first effort at blacking - needs more work! Once assembled, I'll rotate the deadeye to it's proper point and use CA to prevent it from rotating. Single edge razor blade held in by a single screw. Extra screws were provided. From the top, walnut, pear and basswood. All with very clean cuts.


-
Popeye, if your doing a little kit bashing here is an idea... I suspect you may have seen this but in case not
-
Hi Ken, I've been quietly following your build. In case your interested in using the hooks mentioned by Brian, here is how I used them on my Niagara: http://modelshipworld.com/index.php/topic/313-niagara-by-larry-model-shipways-wood-pob-164th-lb0190/page-35 As Brian mentioned, I also think they match the scale well. Take care,
- 440 replies
-
- 1
-
-
- niagara
- model shipways
- (and 1 more)
-
Micro-Mark MicroLux LaserKnife 2525 – A Review
lb0190 replied to mtaylor's topic in Modeling tools and Workshop Equipment
I hope to buy a table saw and thickness sander after I finish my current build. Hmmmm, Micromark or Byrnes? Maybe the above post will help me decide. -
Thank you Augie.
-
Thank you John and George! I'm getting closer to going vertical!
-
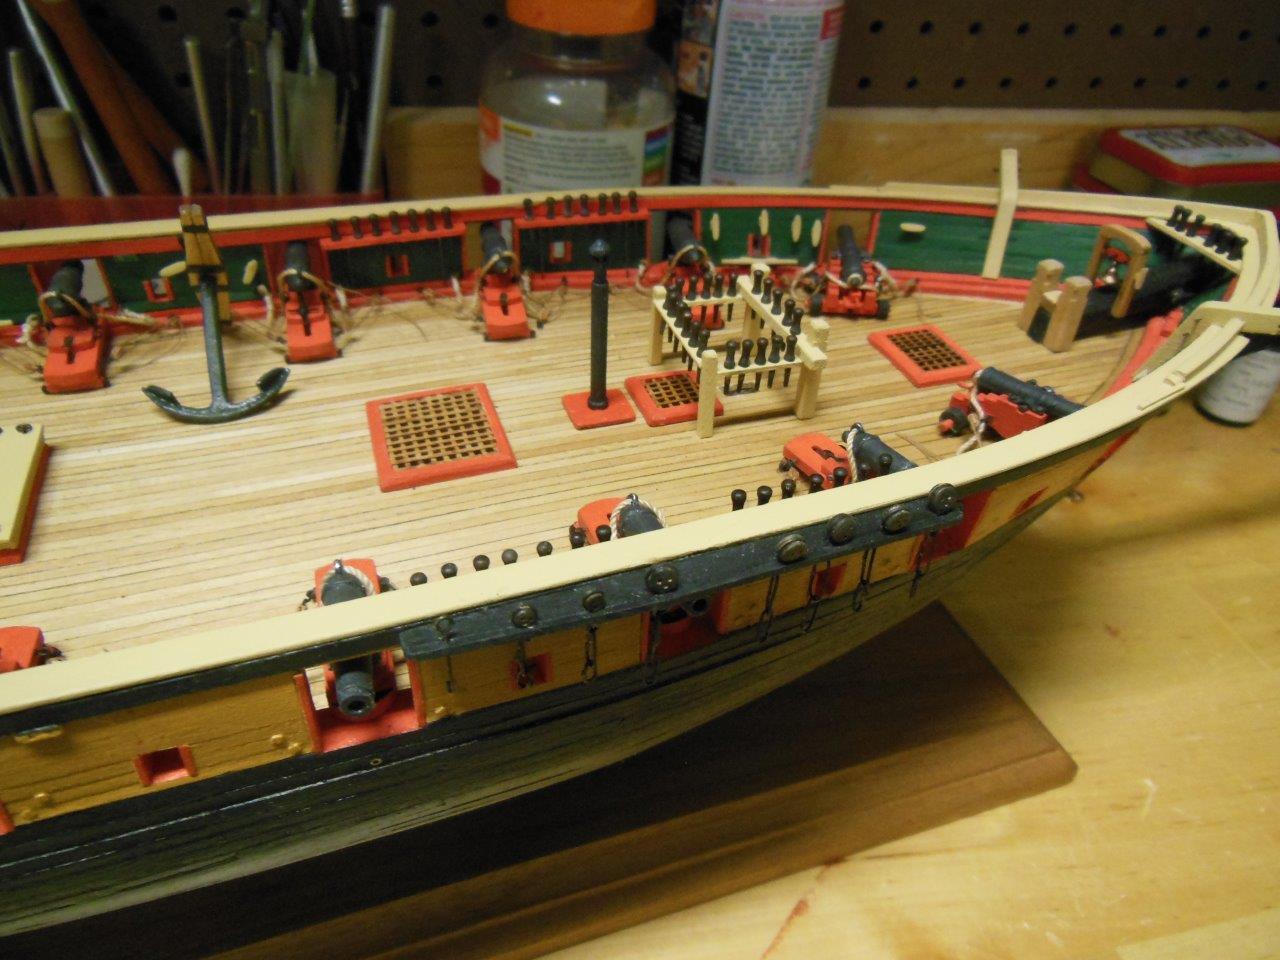
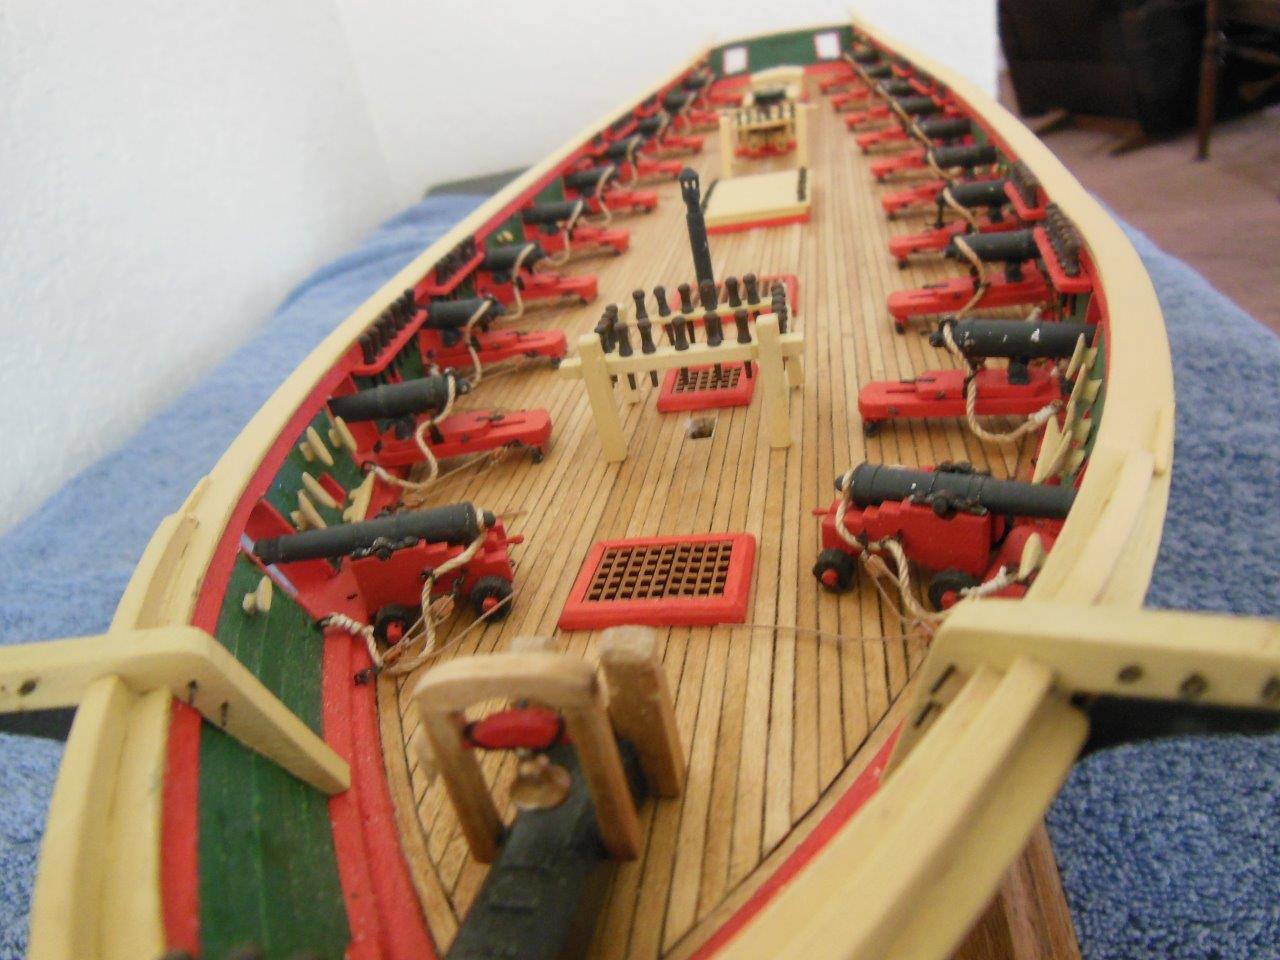
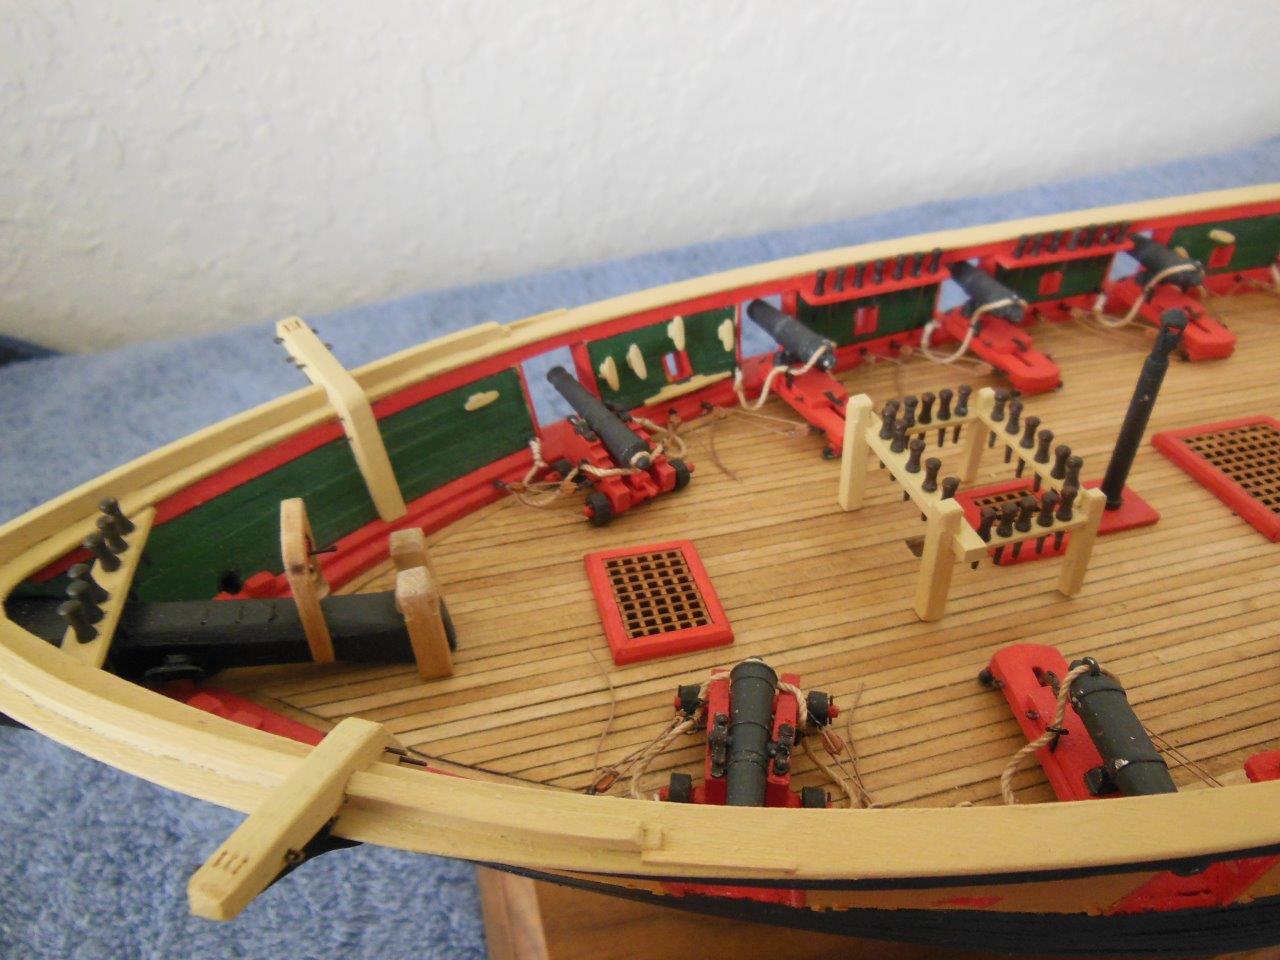
I managed to get some work accomplished over the past few weeks. The catheads are installed except for the tension rod. I need to pull to fwd facing eyebolts and reinstall. I did not notice how crooked they are until after I took the photos. They were evenly installed but i noticed the spacing was not quite right so I pulled them and reinstalled them crooked on the other plane! The aft boat davits were also installed, as well as the fore and aft fife rails. I still need to install the cleat on the aft fife as well as the bitt knees. The fife rails and bilge pump are pinned but will not be glued in place until I'm sure they are in the correct position or do not need any rework. Next on the list are the channels and chainplates.... Again, sorry about the dust and paint nicks but after all it is a construction site...

-
Bob, we'll be here waiting on you. Have a safe move.
-
Popcorn and another interesting build by Popeye. I think I'll pull up a seat and watch, plus munch on some of Sjors popcorn.