HOLIDAY DONATION DRIVE - SUPPORT MSW - DO YOUR PART TO KEEP THIS GREAT FORUM GOING! (Only 20 donations so far - C'mon guys!)
×


lb0190
-
Posts
686 -
Joined
-
Last visited
Content Type
Profiles
Forums
Gallery
Events
Everything posted by lb0190
-
 Your welcome Brian. Don't forget to use Chuck's picture for reference, on how he rigged them.
 -
Thanks Augie. Too much CA was my concern, but I'll try to control the amount using the no. 11 Blade tip. I'll use a kit block to test out the process. I'm absolutely happy I spent the money to buy Chuck's blocks and hooks! The size is much closer to scale and they look so much better than the kit supplied parts.
-
Hi John, Augie & George, Thanks for looking in. I agree John, it's a good thing most kits have extra parts. Thanks for letting me know Augie, I was not sure if it was a good idea or not. George, harbor freight has floor pads the link together that may help keep parts from falling into the carpet: http://www.harborfreight.com/4-piece-anti-fatigue-foam-mat-set-94635.html
-
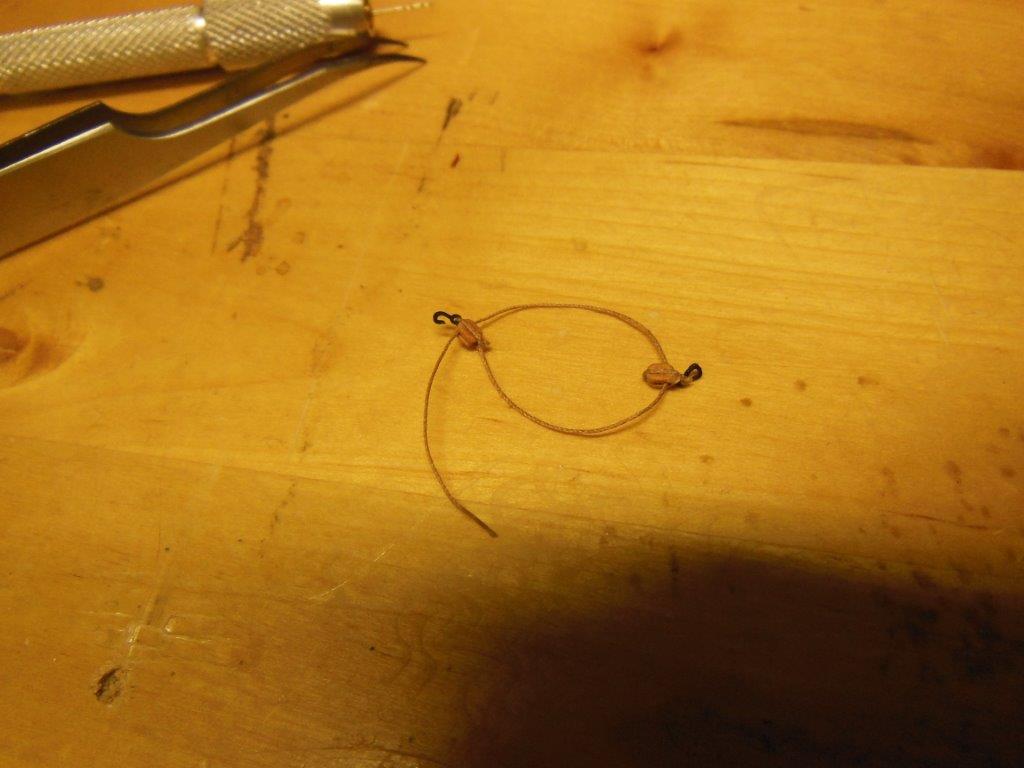
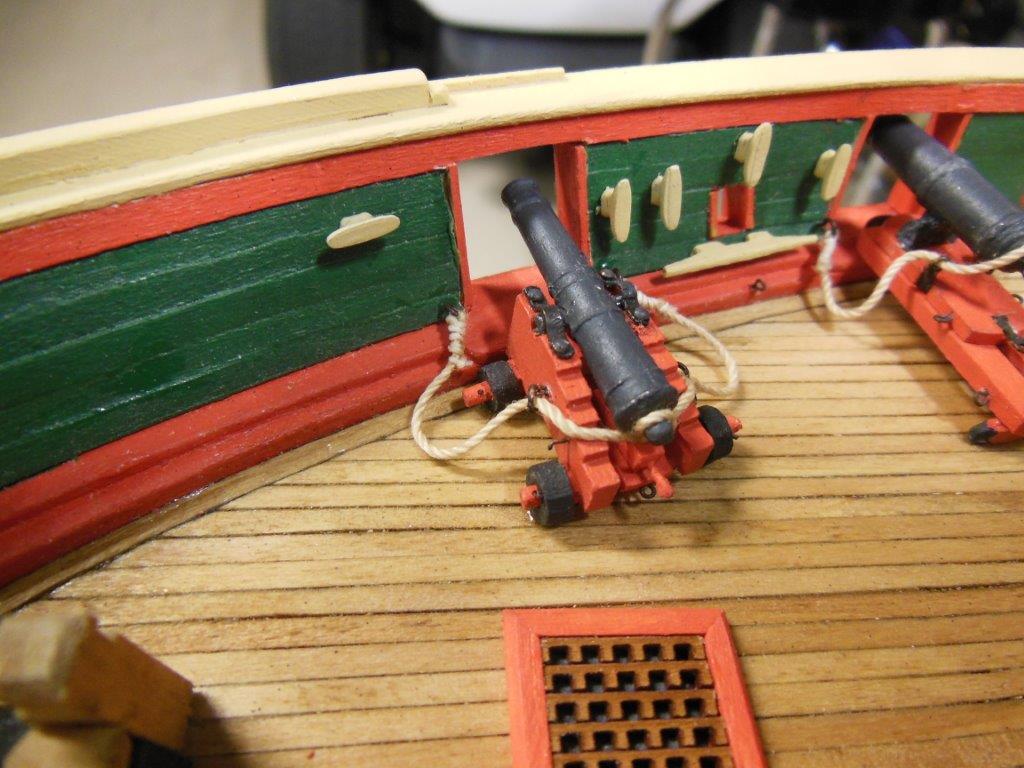
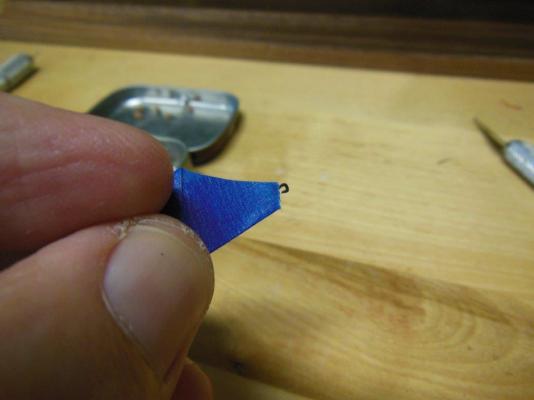
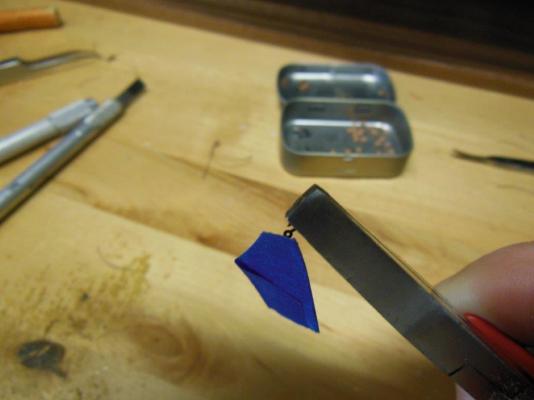
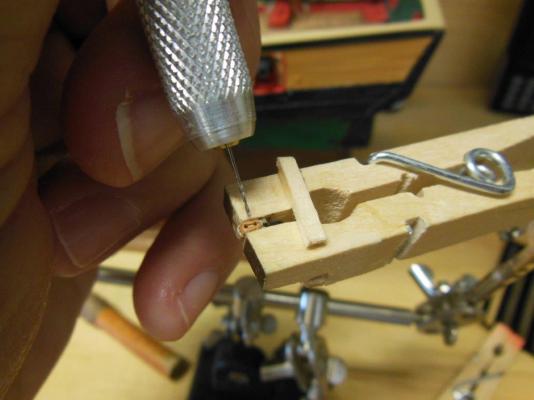
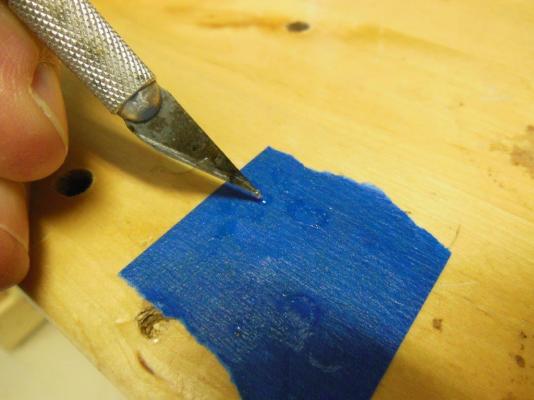
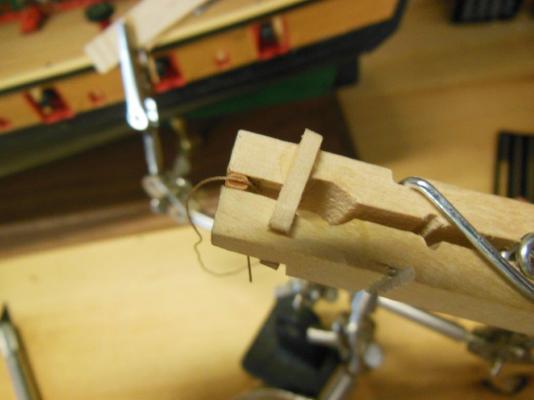
I just installed the block and tackle on my third carronade and thought maybe I should share how I rig the tiny 3/32” blocks, 3mm hooks and 0.008” dia. lines. My results are not exactly what I would like to get, with my knots being the biggest issue but it does not look too bad. Sharing the process may be beneficial to others and also hopefully provide feedback on how to improve my results. The sequence below is not what I used. That detail varies depending on a lot of variables, including personal choice. First, how small is it really??? The parts are small enough I could not hold them by hand and even getting them in a tool could be challenging with some slipping out and going to the unknown location we all have in our build areas. I tried using tweezers to handle the hooks but smooth jaw duck bill pliers worked best for me after I figured out how to get them into the pliers. A small piece of tape folded over exposing a small are of the sticky side works well for picking up the hook so I can transfer it to the pliers. Transfer to pliers completed. Once in the pliers, I chased the hole and then inserted the rope. The first 1/4” or so of the rope had to be soaked in CA glue first to stiffen it up so it could be shoved through the hole of the block as well as the hook. I also clipped off the glued end to an angle so there was an actual point which also helped a lot. Chasing the block hole. I used a clothes pin for holding the blocks for some of the work. I glued two pieces of wood to the clothes pin so it opened and closed evenly. This reduced the number of tiny blocks being flipped to who knows where (Sjors have any of my missing blocks showed up at your place? They certainly are not anywhere here to be found. ) I stick a piece of tape on my work bench so I can place a drop of CA glue to pick from with a needle on a stick or exacto knife blade point. From this point it was just a matter of stringing the rope to the configuration needed. I always applied a very small amount of CA glue to each knot using the pointed end of a no. 11 exacto blade. The blade allowed very good control for the amount of glue as well as placement. I would clean the build up glue on the tip by simply scraping it off or burning it off from time to time. I also applied CA glue to the tiny grove on the side of the block to hold the rope in place. Rope coils to be added later. I may end up placing a small amount of CA glue into the block where the pull rope exits, so the block?tackle stays tight.


-
Congratulations Dale. She looks awesome. Give me two more years and I'll catch up with you.... I noticed the pictures of the 747 and shuttle. I was aboard one of the two NASA 747's at Dryden during the 90's. I seen quite a few shuttle landings at Edwards on the lakebed as well as the runway.
- 468 replies
-
- 1
-

-
- niagara
- model shipways
- (and 1 more)
-
Sjors, I'm anxious to see the build. Will you post it somewhere?
- 1,616 replies
-
- 3
-
-
- caldercraft
- agamemnon
- (and 1 more)
-
Hi Sjors, Thanks for looking in. I cannot imagine building a ship like yours with so many guns! BTY, your build is impressive! I hope to have cannon no. 2 mounted tomorrow and then it's time to work on the block & tackle. I have a small issue I need to resolve. The garboard ladders will be in the way of the aft block & tackle for a carronade. I'm not sure what they did in real life and was thinking about simply passing the hook between two steps. I'll have to see how that looks but all of the other options I thought of sound less attractive. Any suggestions anyone?
-
Thanks Popeye. I appreciate your following along and for the encouragement. Cannon no.2 is over half complete. It sure goes faster the second time around!
-
Thank you George. I'm glad to be on the downhill side of this phase of the build. It was one of those "it hurt so good" timeframes....
-
Thanks Augie. I would have never guessed they would have added up to that many.
-
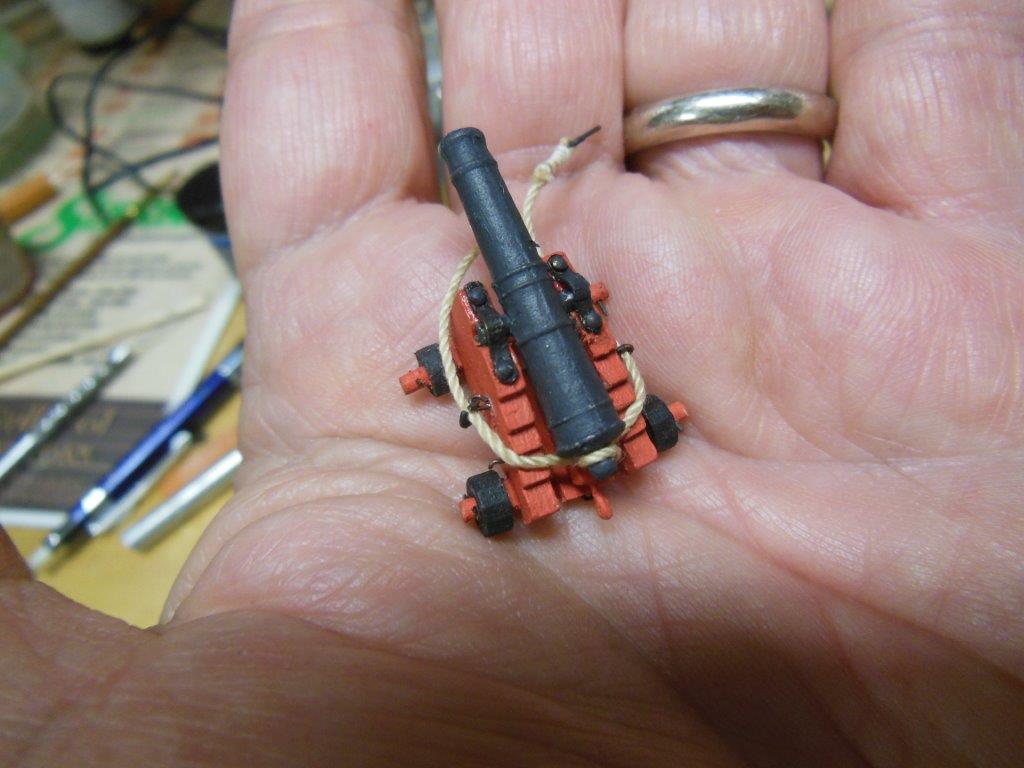
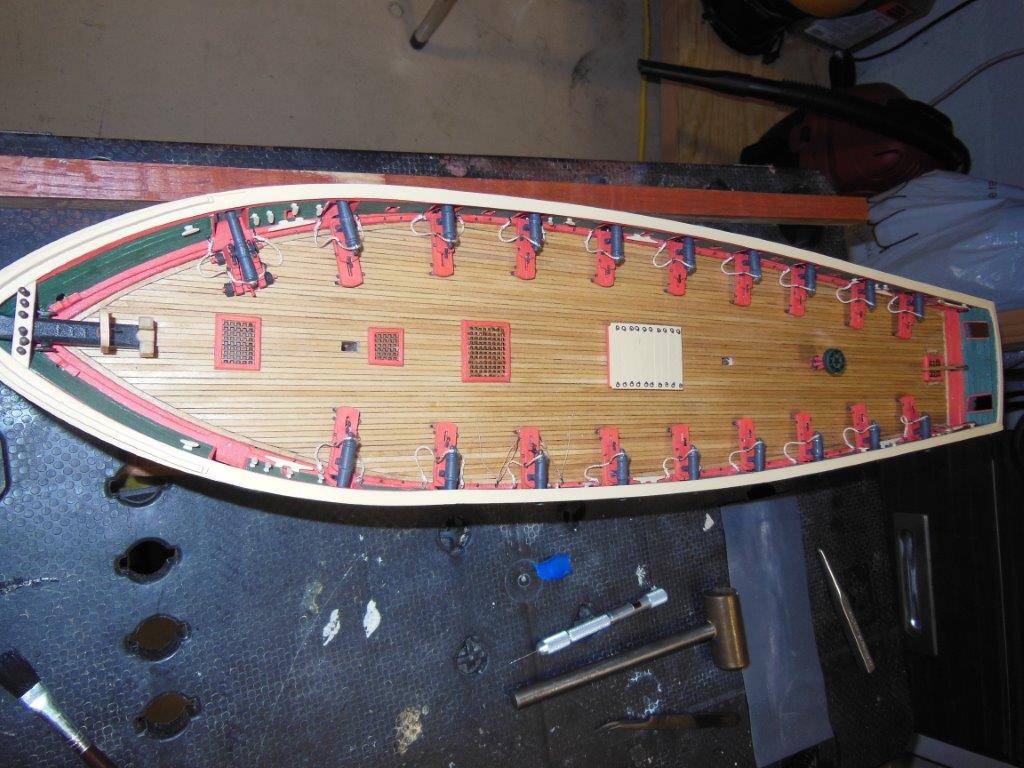
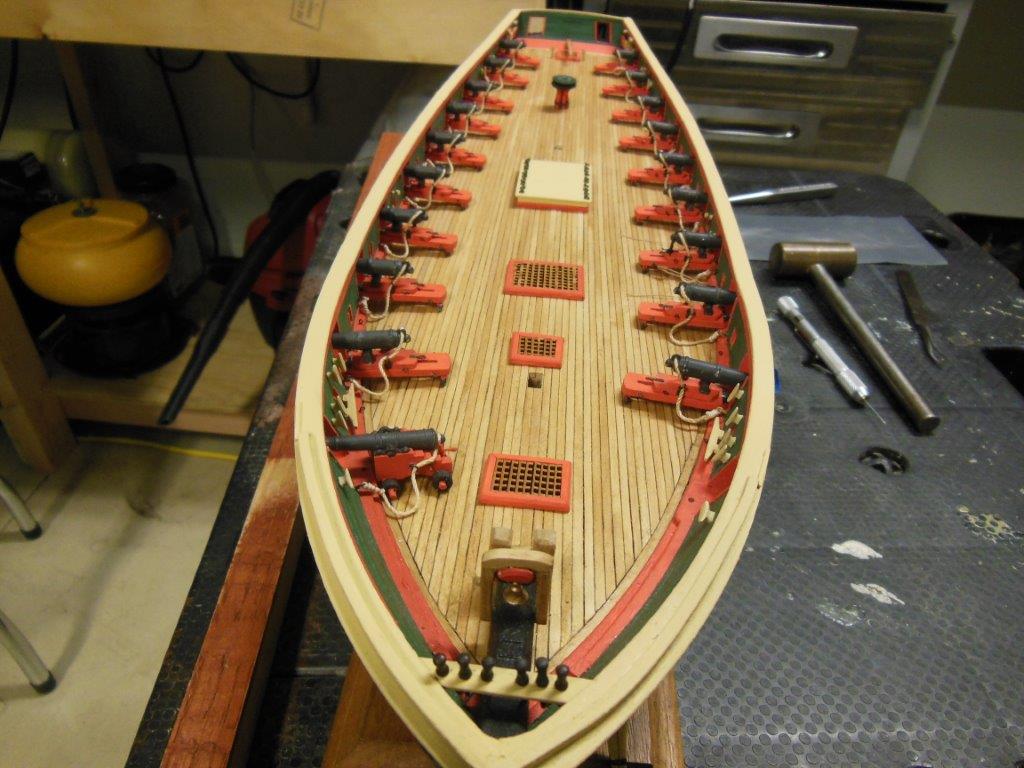
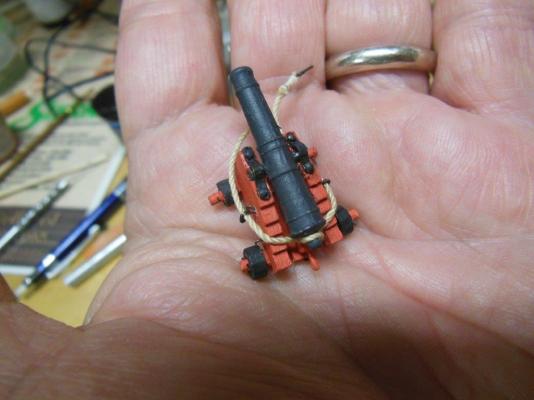
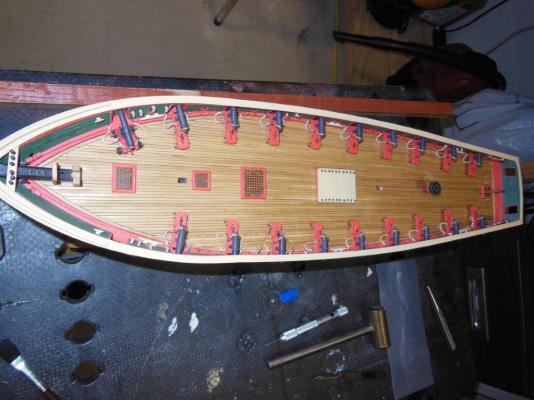
I have a short update. All carronades are mounted with the breech ropes. I still need to add the block and tackle to all but one. I also need to add the jack-screw to all but one. I mounted one cannon with breech rope, still needing to add the block and tackle. The cannon was a project in itself. Out of curiosity I listed every piece and came up with 53 parts if I counted correctly. 2 Cheeks 1 Gun 1 Quoin Body 1 Quoin Handle 2 Gun Trunnion Bands 4 Trunnion Band Pins 2 Breech Line rings on Cheek 2 Breech Line Eyebolts on Cheek 2 Breech Line Eyebolts to Mount to Waterway 1 Breech Rope 2 Breech Rope Seizing Lines 2 Gun Tackle Eyebolts 1 Train Eyebolt 4 Wheels 4 Wheel Pins 2 Axle Bodies 4 Axle Rods 1 Bed 1 Bed Rod Support 2 Ropes for Block-Tackle 4 Rigging Blocks 4 Rigging Hooks 2 Rigging Block Eyebolts to Mount to Waterway 2 Rope Coils 53


-
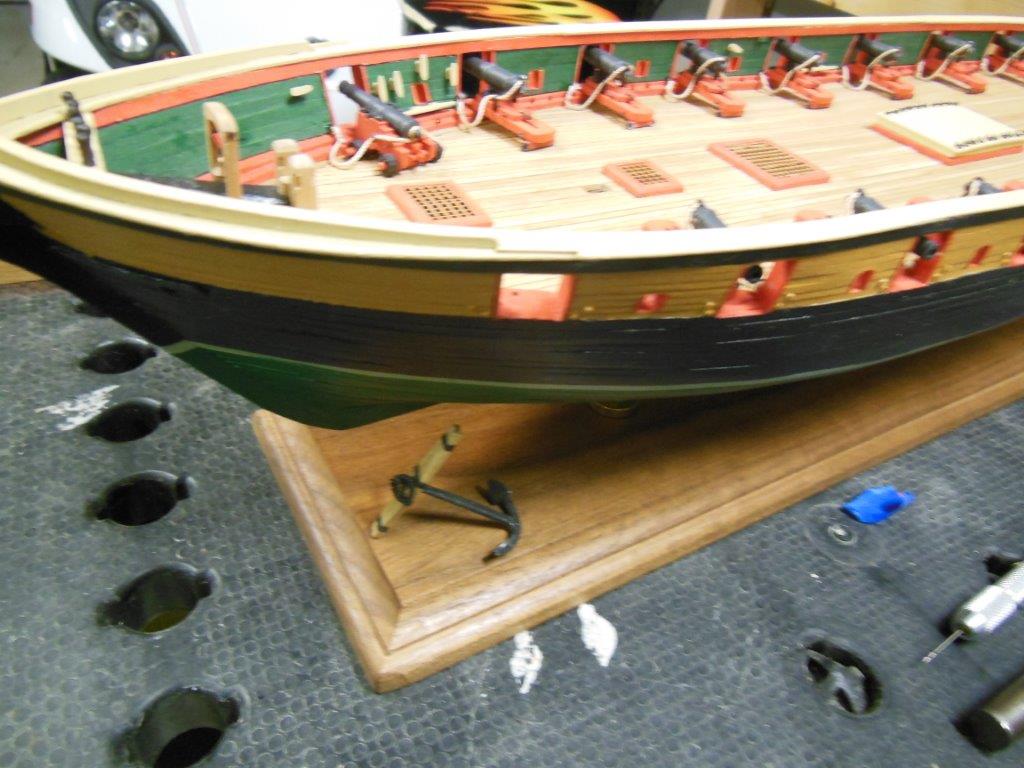
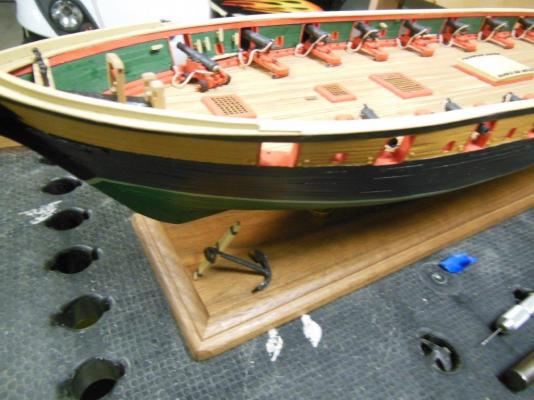
Thanks Brian. Today I mounted the last carronade on the deck, all with recoil ropes. I'm working on the two cannons right now with the next step being assemble and mount the block and tackle for all of the guns. The last step will be to make and mount seventeen more jack-screws. Slow and steady......
-
Hey Mark, I was wondering how you were doing and hoped you did not give up. Taking a step back does help when it gets frustrating, believe me I know...lol. In regards to being slow, I share that trait with you. I'm two plus years on my Niagara. So long as your enjoying the build, the pace is right. I struggled with the stanchions until I used wire strippers to cut the insulation. I suspect my method was faster but yours looks more precise. Keep the pictures coming..., I'm enjoying seeing your build. Edit: I think your panels look many times better than the decals.
-
Hi Mark, I'm impressed!! She looks well built with excellent lines as well as colors.
-
I may have to do that Bob, I just have to decide between the cross section and the Cheerful.
-
Thanks Popeye. I ran out of the larger eyebolts for the recoil rope, but more are on order. They are easy to make but not much fun. There are plenty of other parts to work on while I wait.
-
Hi Bob, I just found your build and throughly enjoyed every post. I'm thinking about my next build as I work on my Niagara and want to venture to the dark side if I can convince myself I'm not take too big of a step. Your cross-section is inspiring and is now on my next build short list. Congratulations on completing a beautiful cross-section.
-
Thank you Sjors and Tim. I just finished attaching all of the train tackle eyebolts/hardware and 50% of the rings for the recoil rope. I'll add the rigging rope/blocks next and save the jacks-screws for last. It's a slow process for me but so long as I'm making more steps fwd than backwards I'm happy with the pace.
-
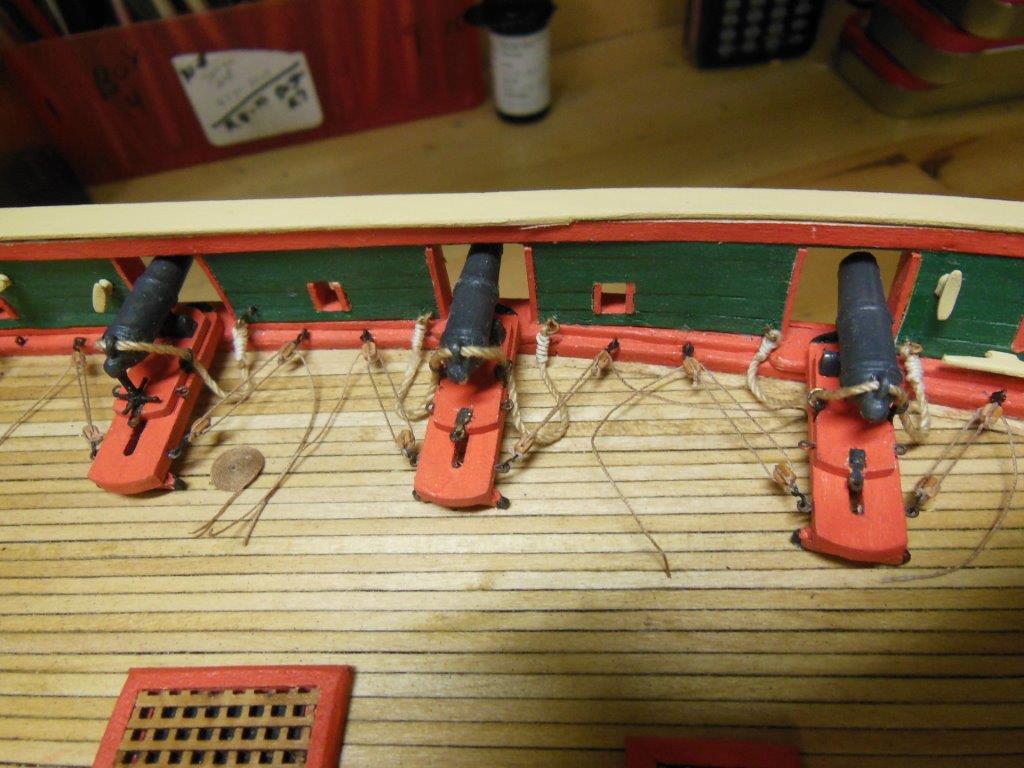
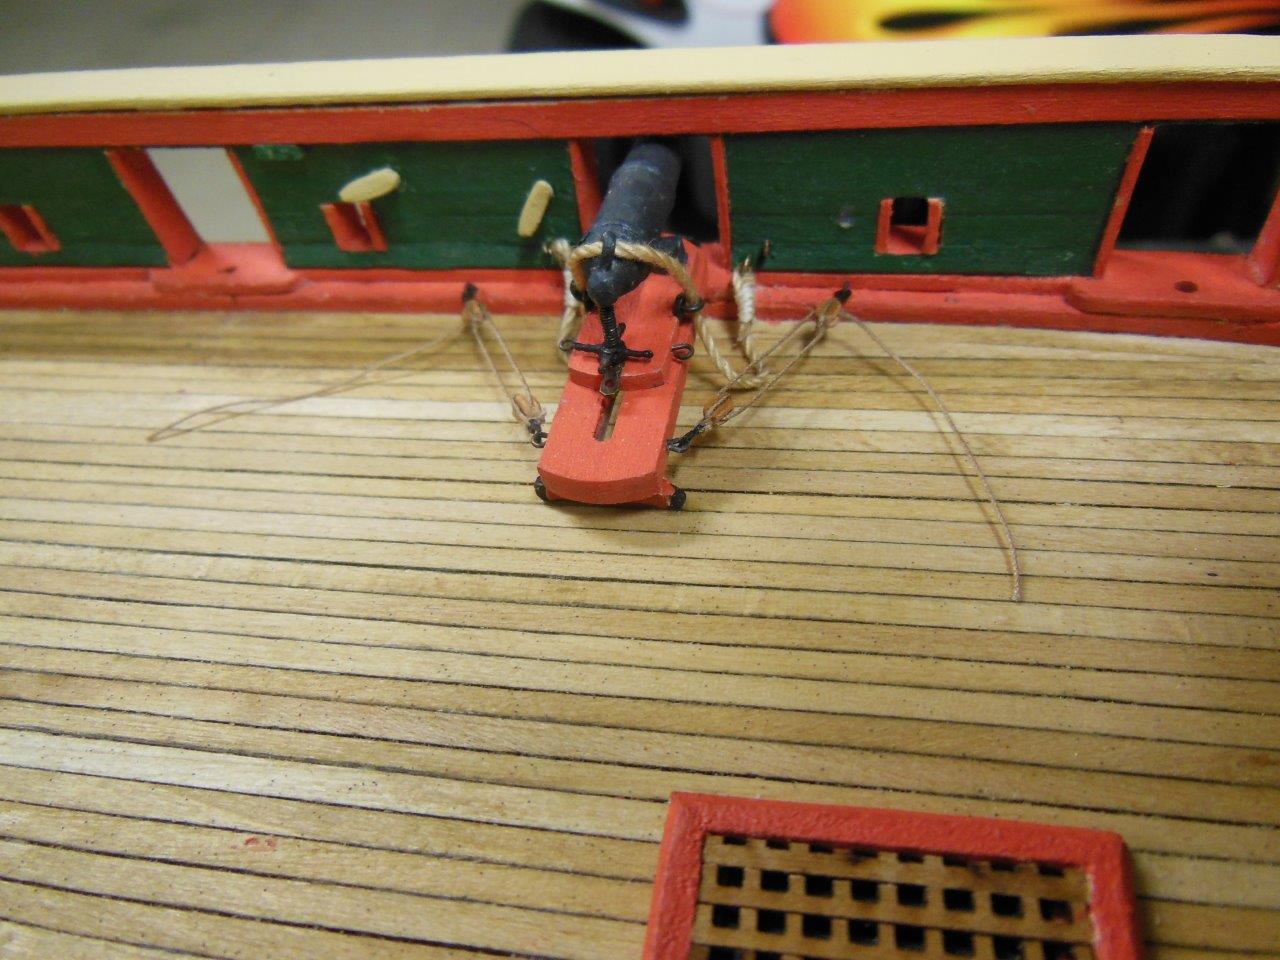
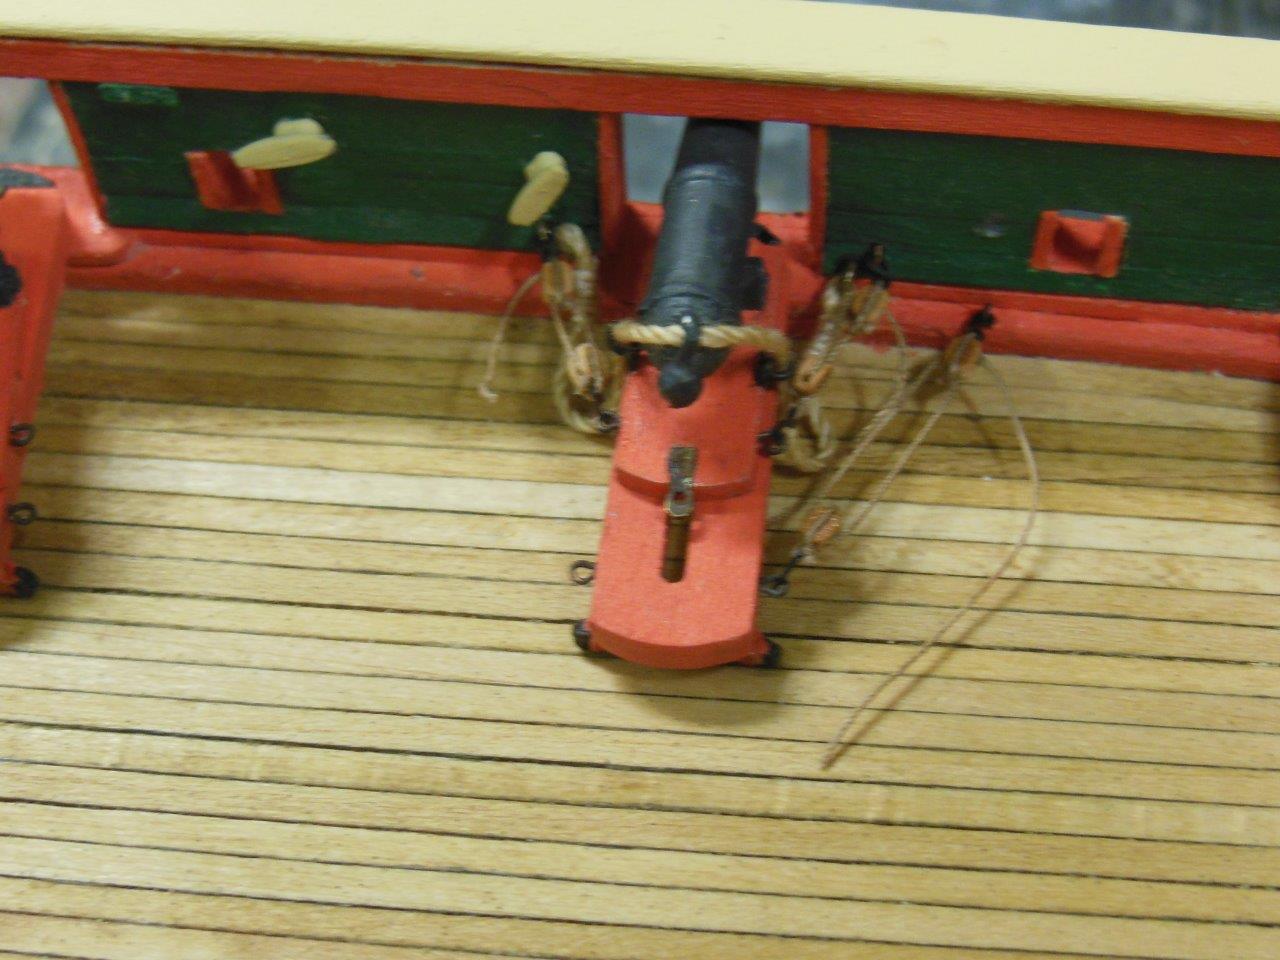
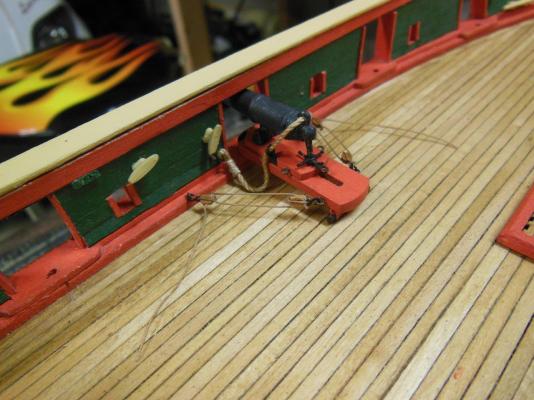
Thanks for looking in... I've been changing the number of blocks trying to decide what I like best and the picture below is what I think I'll use for all of the carronades. One set of blocks for the lower aft train tackle eyebolts. I'll add the rope coils once all of the guns are glued in place.

-
Hi Sjors IK hoop u en Anja goed doen! I thought the above would be better than smoke signals ( I hope it translated correctly), but in case there is a translation issue.....

-
Thanks for the info. My condolences to his family and friends.
-
Sorry Popeye - I heard back from Chuck and he confirmed my suspicion. Huberts site is off limits as he has a subscription to it. All we can do is provide a link if one exists. If I find the link I'll post it.
-
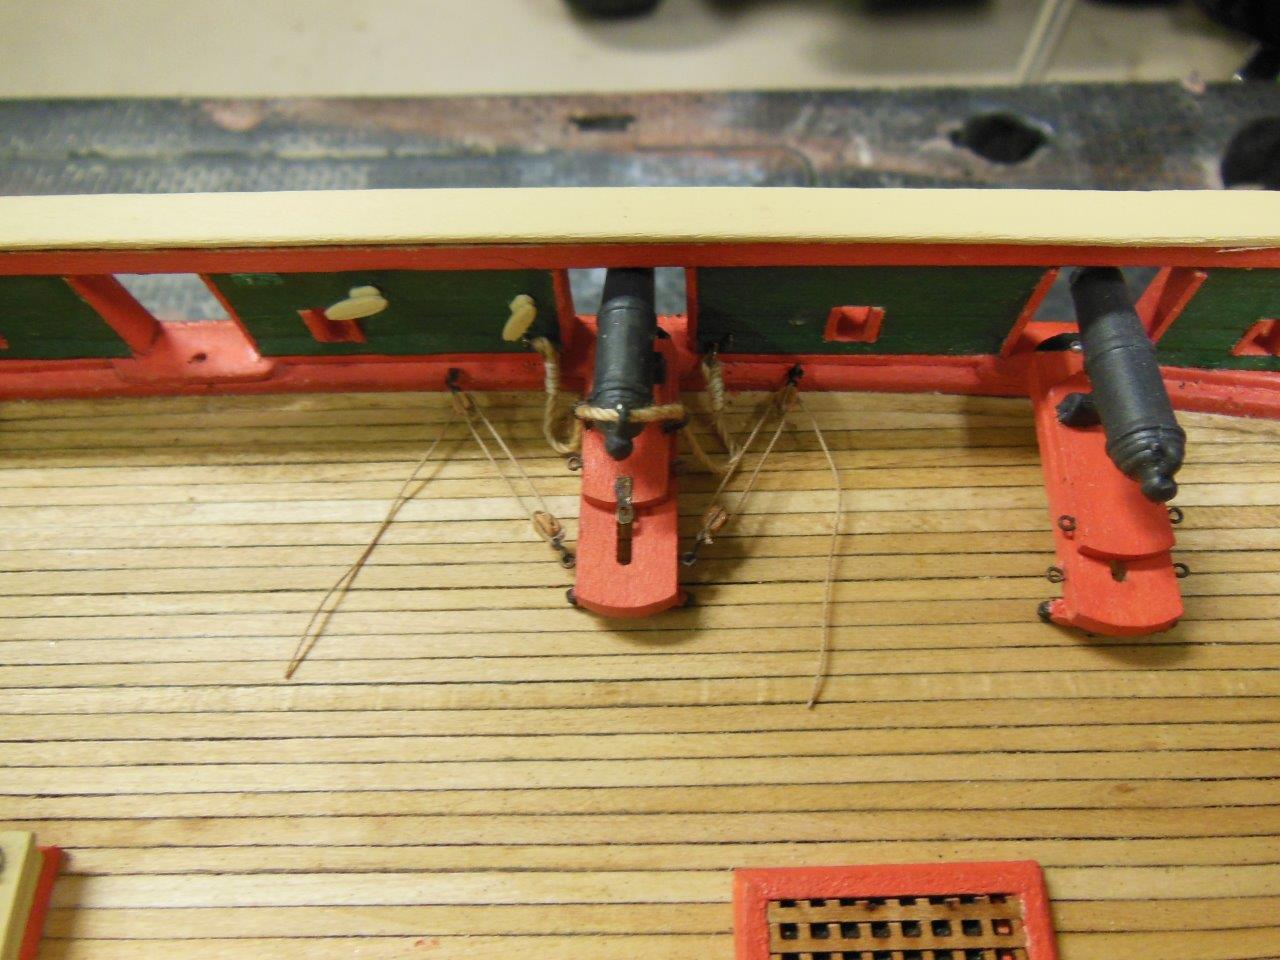
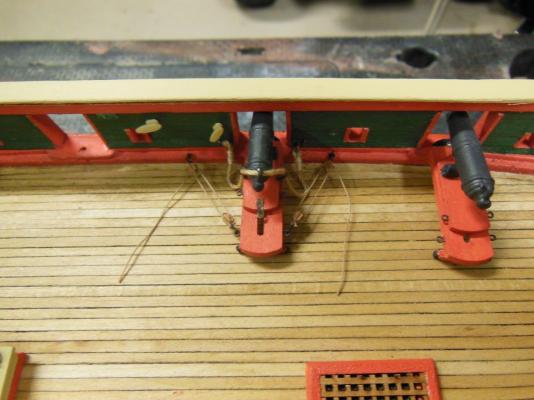
I added a lower slide set of blocks on the fwd (right side) side of the gun - looks congested and does not compliment the model in my opinion I removed both upper sets of slide blocks and installed only lower slide blocks. I think I stick with this configuration, with rope coils for the rest of the build.

-
Hi Popeye, Thanks! A few years ago, I found a web page that showed how to build the rope coil jig and provided a video you could save, demonstrating how to use the tool. I cannot find the url for either. I was getting ready to provide the static page and avi video when I noticed at the bottom of the static page: Copyright © Hubert Sicard which I suspect means I cannot post it on MSW (???) even though I was under the impression the information was being openly shared. I'll ck with Chuck to see if my interpretation is correct. I do not recall where or how I found it and that it read as if it was meant for other modelers to replicate and use. Once I hear back from Chuck I'll get back with you on the subject. It's a preety neat tool that makes rope coils pretty quick and easy once you get the process consistent.
-
John, I cannot imagine painting them and keeping the holes open. I did buy some Min Wax black stain to see how that looks, but have yet to give it a try. Thanks George, she's coming along slow, but I'm OK with the pace.