HOLIDAY DONATION DRIVE - SUPPORT MSW - DO YOUR PART TO KEEP THIS GREAT FORUM GOING! (89 donations so far out of 49,000 members - C'mon guys!)
×

Sumner
-
Posts
33 -
Joined
-
Last visited
Content Type
Profiles
Forums
Gallery
Events
Everything posted by Sumner
-
 Nice colors! Keep up the good work -- definitely the right call to redo the work you're not satisfied with.
 -
Always nice to follow another Sherbourne build -- looking really good!
- 18 replies
-
- 1
-

-
- sherbourne
- caldercraft
- (and 1 more)
-
The windlass looks great. Nice job! Sumner
-
Thanks for sharing the details of how you painted your hull, Daniel. I was thinking about trying a larger brush with multiple coats of thinned paint, but will give things a shot with a smaller brush. Glad to hear the Cruiser builds are still progressing. They are great little ships and will certainly build into a nice pair of models once you have the time to pay them more attention and your research is completed. The museum in Madrid sounds fascinating. A three-decker built in 1:24 would be massive -- that must've been a real sight to behold! Sumner
-
Daniel, next time around I will definitely try a different wood, like pear, with a closer grain and the ability to hold an edge better. Your idea for a diorama sounds great, can't wait to see you pull that together. Are you still working on your Cruiser builds? Also, how did you paint your Sherbourne? Did you paint the white using a brush and thinned paint or an airbrush? It looks great! Gregor, great to hear from you! I just saw the picture of your diving boat on Lake Lucerne. That's a pretty wild boat you've got there! Jay, I'm with you on not following the instructions for these models. Most of the fun and enjoyment I get comes from thinking about what I'd like to do and then trying to actually make it. The Caldercraft kits are a great base for kit bashing, I think. Sumner
-
Dubz, ZyXux, Jay: Thanks very much. I'm pleased with how the clinker planking turned out, although things get tricky as the run of planks approach the wales. I've done the final starboard planks twice now, having re-done them after finding myself unsatisfied with how they came out. The current result is okay, but I wish it was better. I'm currently trying to decide if I can still do a better job and, if so, what exactly I would do over. I would really like to maintain the nice run of planks from this part of the build, as much as possible. Kester: Thanks! The views can certainly be stunning, especially as the sun goes down on a clear day. Really spectacular. Living on the 63/F of one building and working on the 69/F of another, I spend a good portion of my daily commute in elevators (3 of them, to be exact)! Sumner
- 57 replies
-
- 1
-
-
- caldercraft
- cutter
- (and 4 more)
-
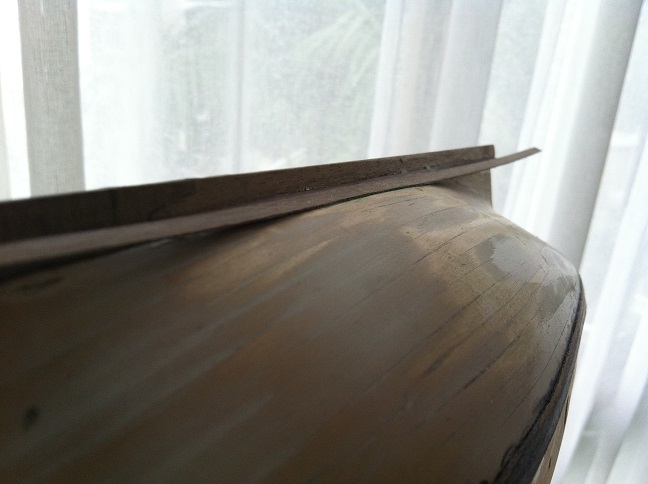
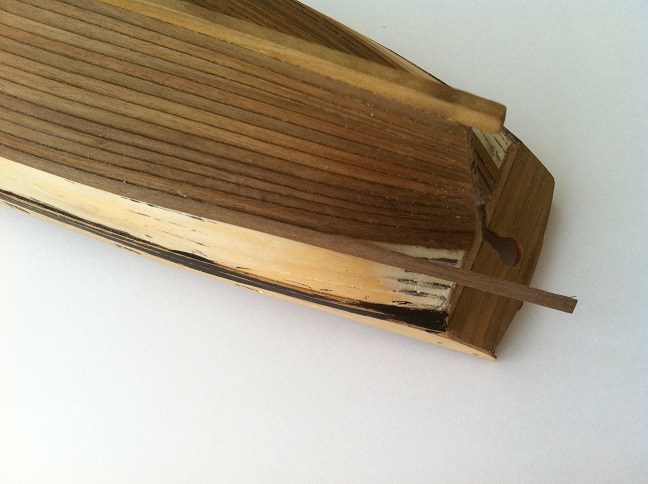
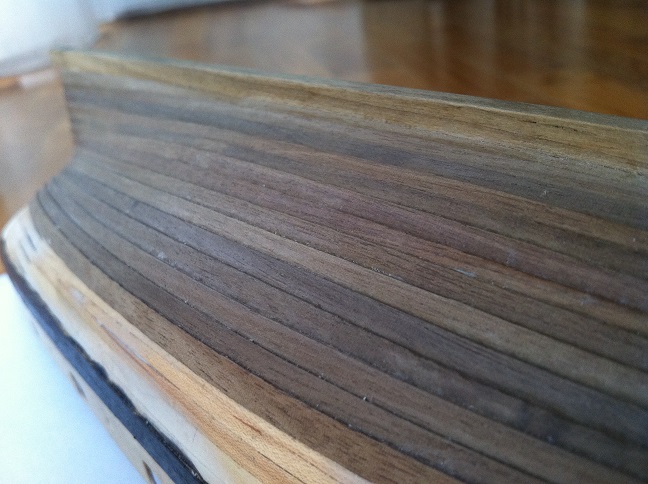
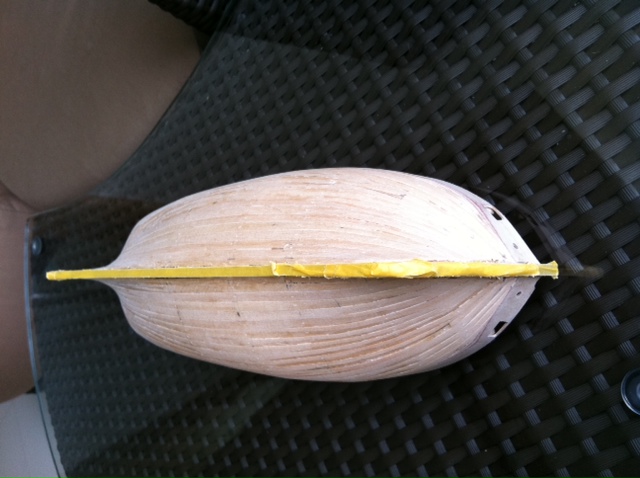
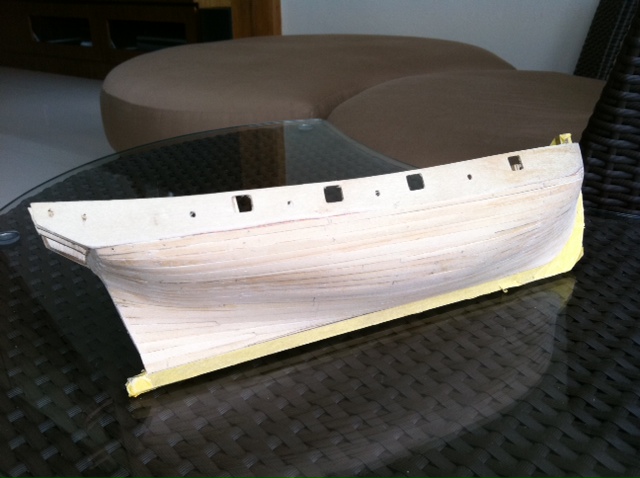
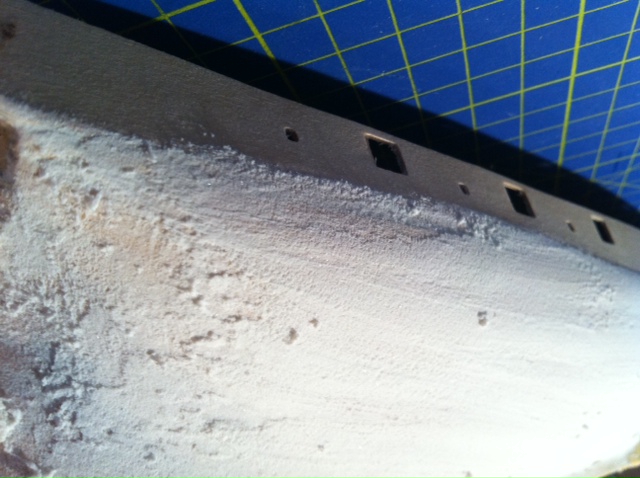
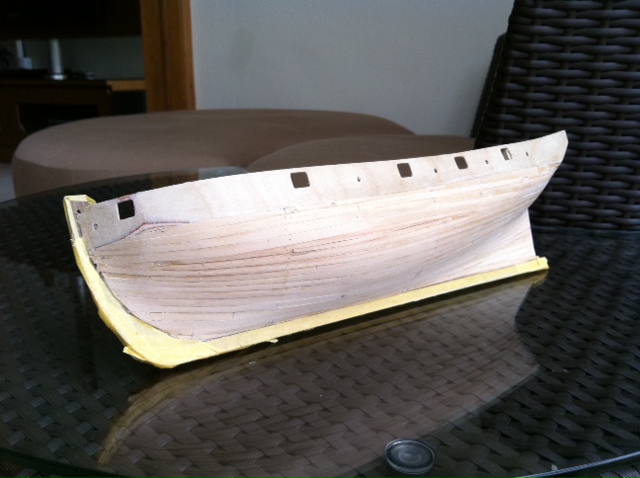
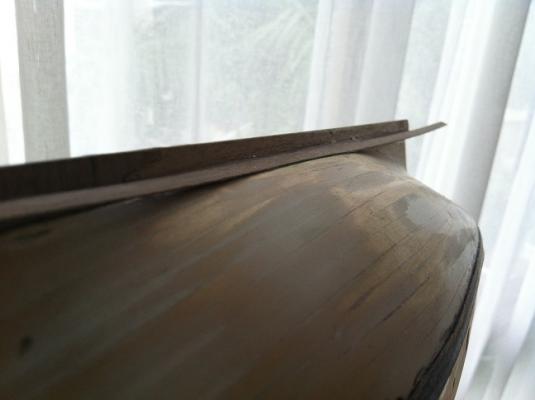
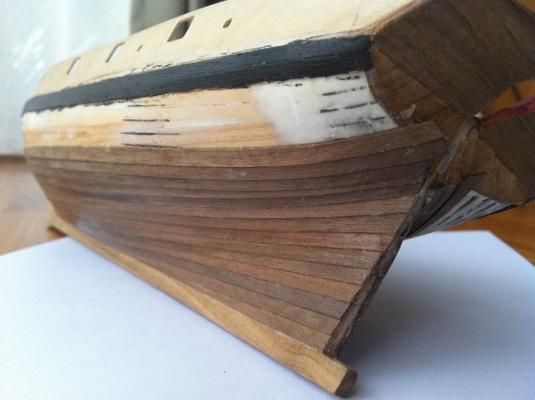
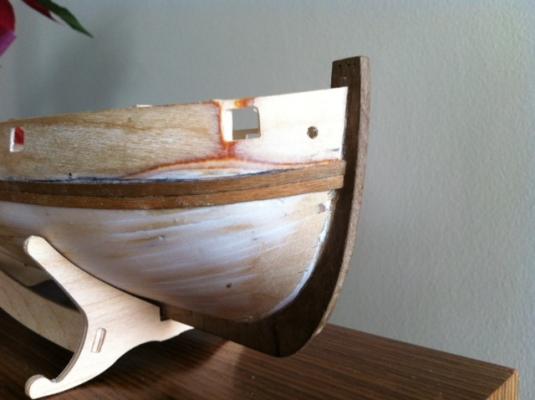
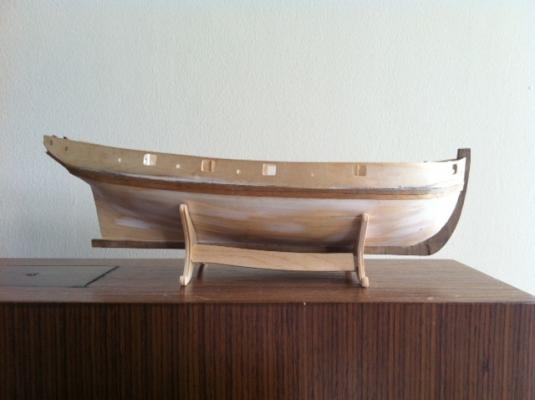
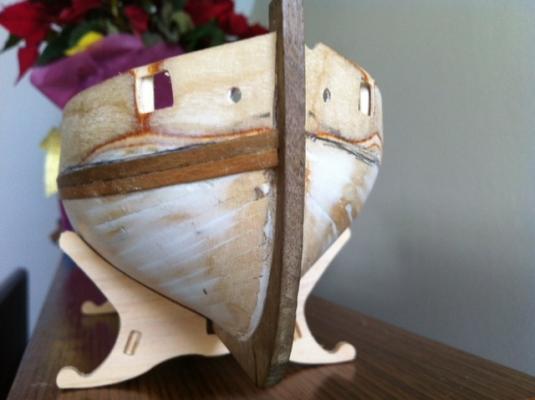
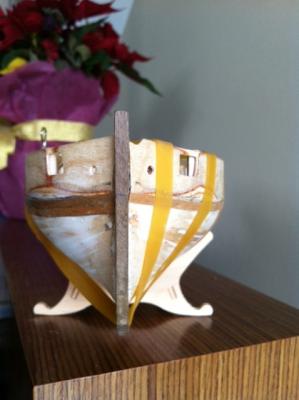
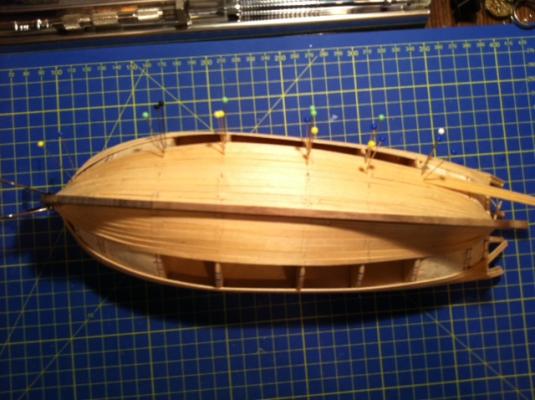
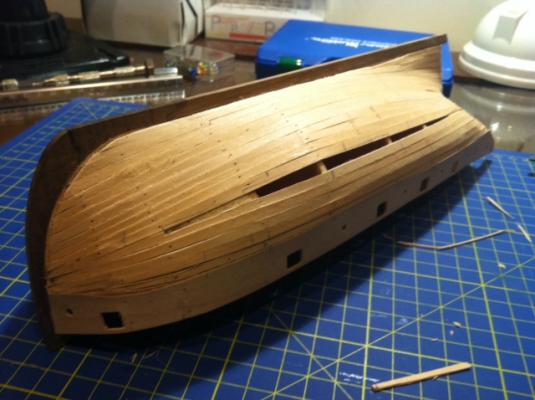
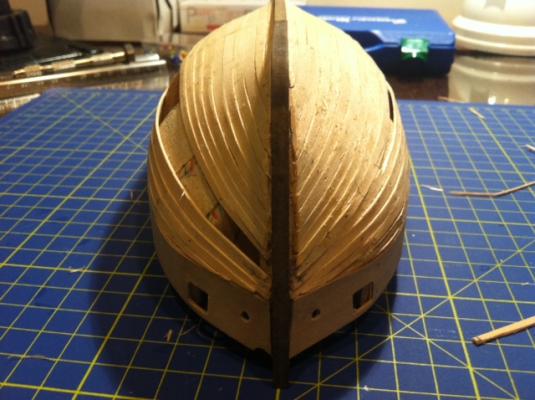
Clinker planking has to start from the garboard plank. As described above, I used 4mm x 0.5mm walnut strips. The plan was to have a 1mm overlap on each plank, with the top edge of each plank sanded to accommodate the one above it.. Things got off to a pretty smooth start. It's key to make sure the garboard plank does not rise too high, as that effect gets magnified as the planks rise along the bow. You want to keep the run of the planks as flat as possible. One step that I neglected in the first part of my build was to carve the rabbet. At the time, I didn't feel very confident that I could do this well and it seemed optional. As you can see in the picture below, the result is that the planks aren't entirely flush. This will require some sanding and the use of PVA/sawdust filler to fix. If I was to do the build again, I would absolutely carve a rabbet as I think it makes such a difference in the final results. These next three pictures show how I installed the planks. The first thing I did was to use a 3mm plank to mark where the top of the next plank should lie, thereby giving me a 1mm overlap. After that, I would place the plank and put the first drops of glue amidship, followed by gluing the fore and aft sections of the plank. This worked pretty well, although the positioning of the planks became significantly more complex as I moved up the hull. And this is where my build more or less came to a halt in mid-2012 with our move to Hong Kong. Over time, the walnut faded in color. As with the stern counter, I probably should have taken steps to protect the wood with varnish of some sort but the model nonetheless survived in relatively good shape. Sumner


- 57 replies
-
- 7
-
-
- caldercraft
- cutter
- (and 4 more)
-
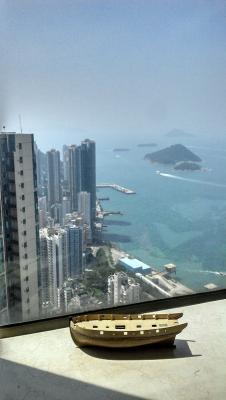
Interesting thoughts and perspective on the lids, Jay. I guess the advantage of having lids would be to offer a bit more weather protection, especially since the gunports went all the way to the cap rail. One of the aspects that I like about these plans is that they give us a hint of what the Sherbourne looked like, but still leave plenty of room for interpretation. Hong Kong is a pretty unique place. If it weren't for work, we wouldn't be here ... and we wouldn't be living quite so high up. There are days when it rains that we're literally living in the clouds and can't see the ground below. Pretty wild. Here's a picture that I took this afternoon to give you a sense of what it's like here in MSW's highest shipyard (if it weren't so hazy today, you'd be able to see Lantau island off in the distance): Sumner
- 57 replies
-
- 5
-
-
- caldercraft
- cutter
- (and 4 more)
-
Hi Daniel, great to hear from you! I've been enjoying your Port Jackson schooner build and love the careful, precise work that you do. Thanks for recommending the 4mm planks. We had the same discussion on MSW 1.0 before I started the second planking and I followed your advice. This is definitely a good size to use, although I found the 4mm x 0.5mm walnut planks sometimes difficult to shape because they tend to splinter so easily. I wonder if a more closed-grain wood, such as pear, might produce better results? The discussion about the gunport lids is very interesting. I look forward to seeing how you will handle them. I've often wondered about how these would work in practice, and interested to see your interpretation. I plan to open my gunports to the rail but plan leave the gunport lids off my build -- but you may yet inspire me to give them a shot, too! Kester, Tony, Jay, Gregor: Thanks for stopping by and the insights and words of encouragement. It's great that we have such an active community of Sherbourne builders here on MSW. I finished the clinker section of the second planking last night, and another 2-3 posts should bring me up to the current state of my build. Will post some pictures of the second planking later today. One of the biggest challenges I've faced during this build has been space. Here in Hong Kong, we live in a small apartment on the 63/F (yes, you read that correctly ... the 63/F) and I don't have a dedicated workshop. Most of my work gets done on the dining table after the kids sleep. I'm able to get a couple of hours of work done and then must pack everything away until the next opportunity presents itself. One of these days I hope to have a proper shipyard! Sumner
- 57 replies
-
- 2
-
-
- caldercraft
- cutter
- (and 4 more)
-
Thanks for the likes and for checking in, guys! Paddy, glad you're enjoying this build log. The Sherbourne is a great little kit and has been a lot of fun to build. Perfect kit for a first timer with more imagination/ambition than woodworking skills. Jay, hope you're feeling better. I'm close to getting current on my buildlog and aim to get the outstanding pictures posted soon. About time, too. Last week or so, I've actually been back in the shipyard for the first time in a year and half. Getting close to finishing the clinker hull and have started to reconstruct the stern counter. Sumner
- 57 replies
-
- 1
-
-
- caldercraft
- cutter
- (and 4 more)
-
Thanks for the vote of confidence, Kester! I've still got a long ways to go, and a lot to learn. In hindsight, I should have protected the stern planking better. The above pictures are almost 2 years old now, and the stern doesn't look as good now as it did then. Lesson learned! Best, Sumner
- 57 replies
-
- 1
-
-
- caldercraft
- cutter
- (and 4 more)
-
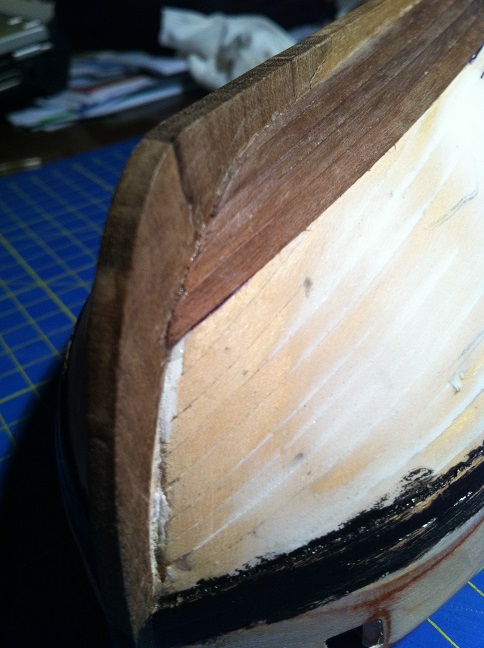
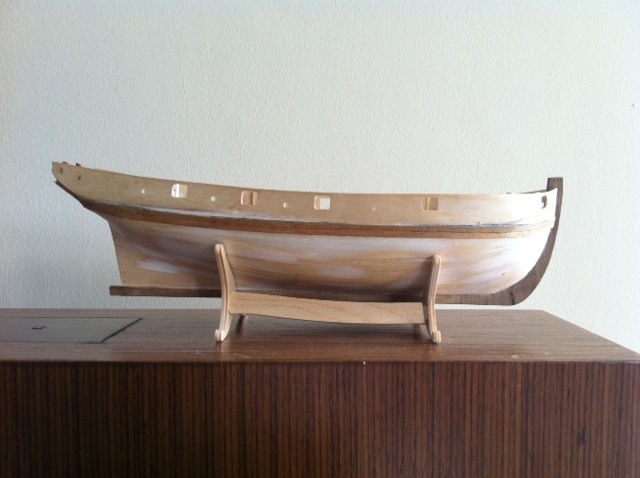
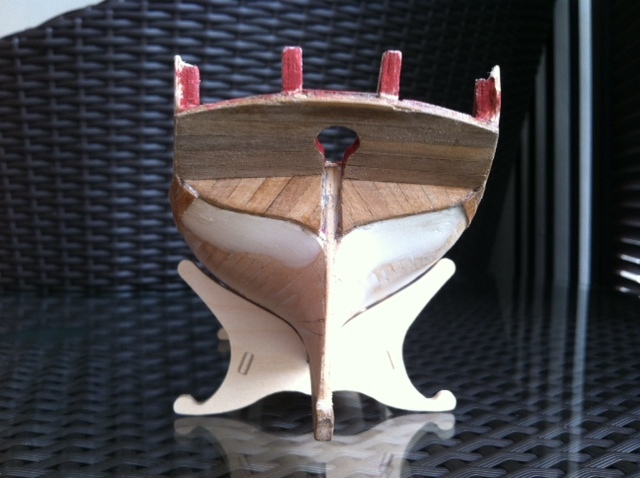
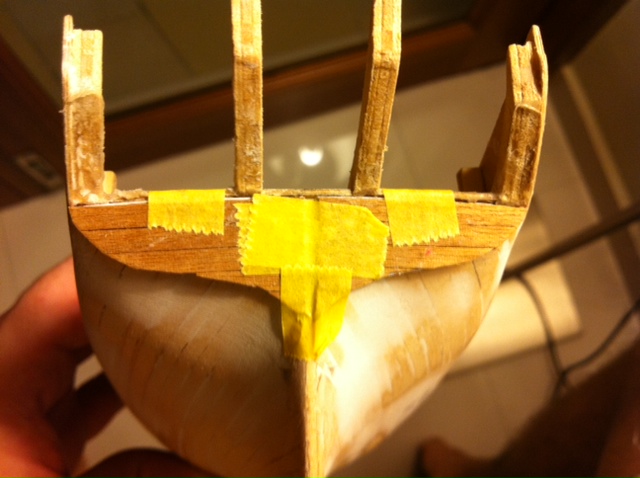
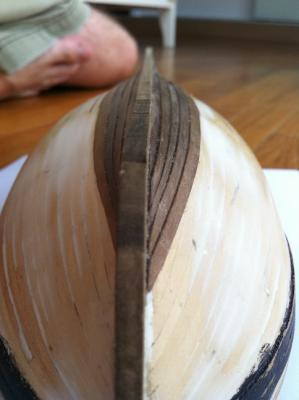
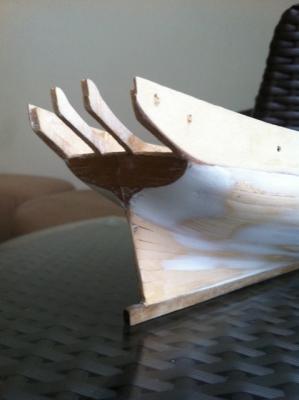
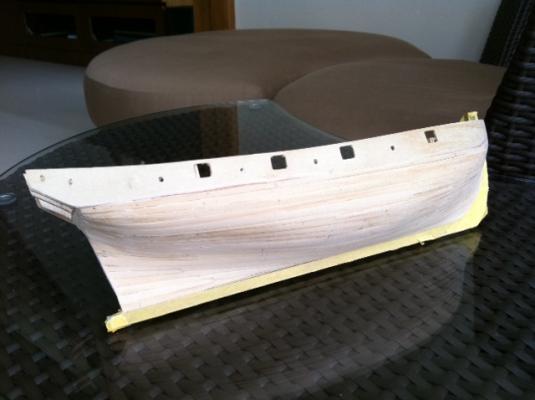
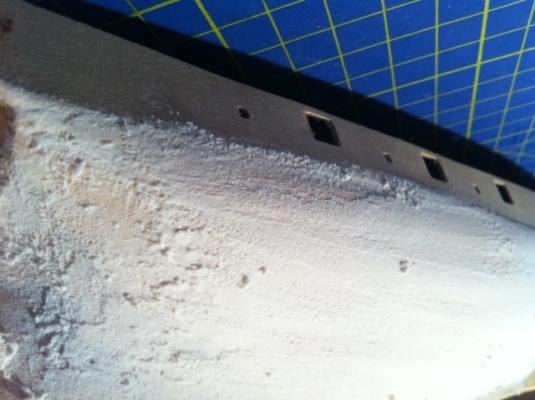
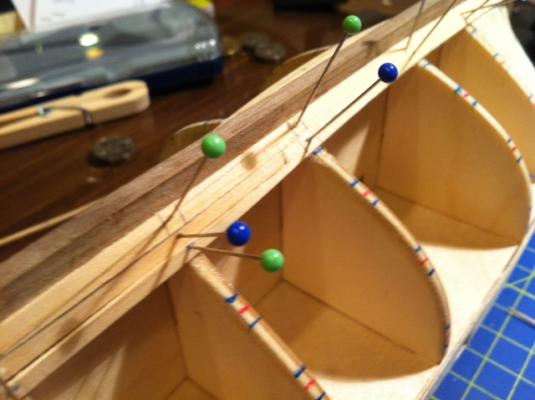
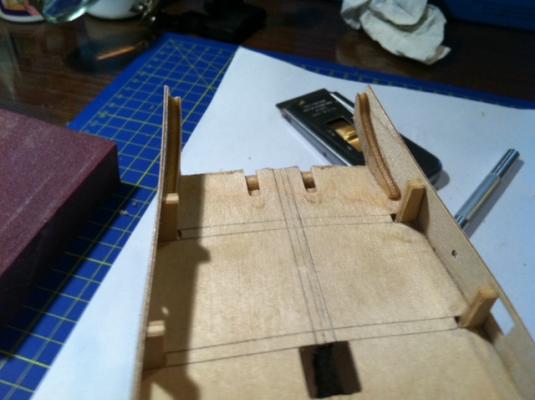
I started the second planking by marking the wales, using two 3mm X 0.5mm planks on each side. I marked the position by taking (rough) measurements off the NMM plans. I installed the these planks by gluing one section at a time with PVA glue, gradually making my way aft along the length of the model. Overall, I'm pretty happy with how they came out, both in terms of positioning and symmetry. After marking the wales, I installed the stern counter and planked over it using 4mm x 0.5 mm strips to mask the fact this is made from a single piece of walnut. I laid these planks diagonally because I thought it was visually interesting, even though I plan to paint the hull and this probably won't be visible when complete. Best, Sumner


- 57 replies
-
- 1
-
-
- caldercraft
- cutter
- (and 4 more)
-
That looks great, Kester. Nice job!
-
Thanks for stopping by, David. I see you've lined up the Lady Nelson as your next build. Will be great to have another cutter model on the ways. Seeing the excellent and precise work you've done on your Sultana, I'm sure it will be an awesome build, too. Best, Sumner
- 57 replies
-
- 1
-
-
- caldercraft
- cutter
- (and 4 more)
-
Thanks, Jay. I was pretty happy with how this turned out. I'll put up some pictures of my second planking tomorrow, which should pretty much bring me up to date on my progress. No worries at all, Tony!
- 57 replies
-
- 1
-
-
- caldercraft
- cutter
- (and 4 more)
-
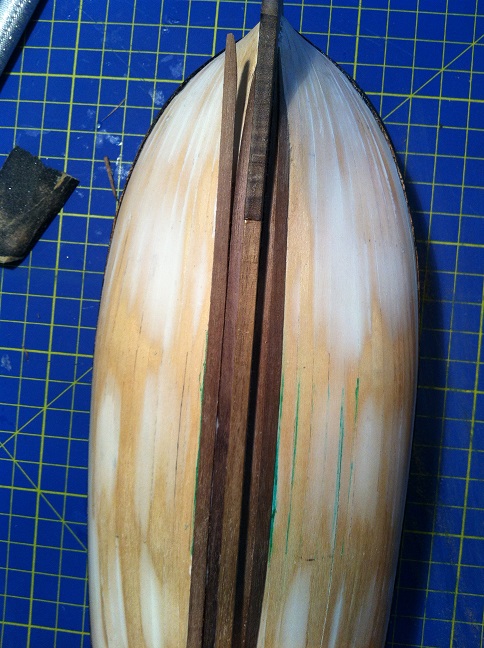
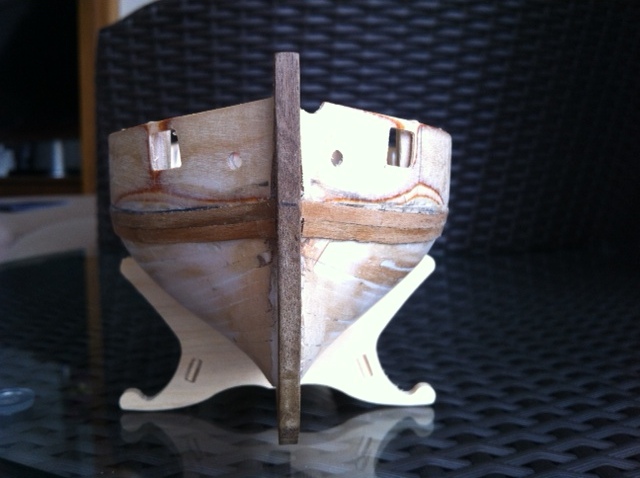
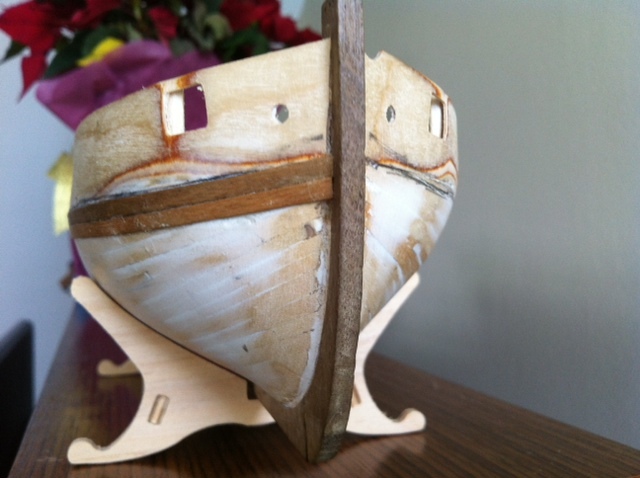
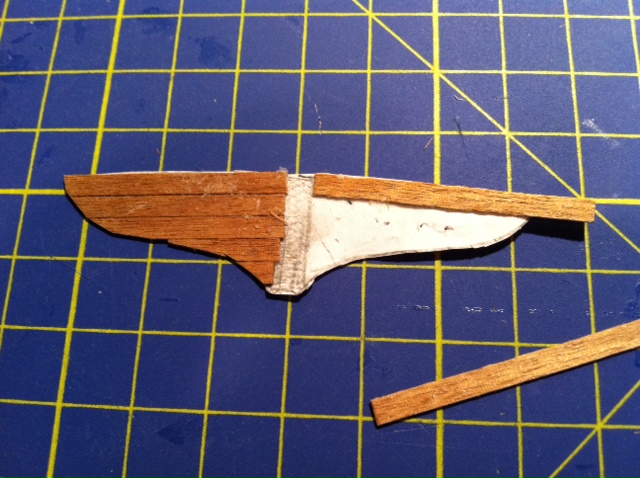
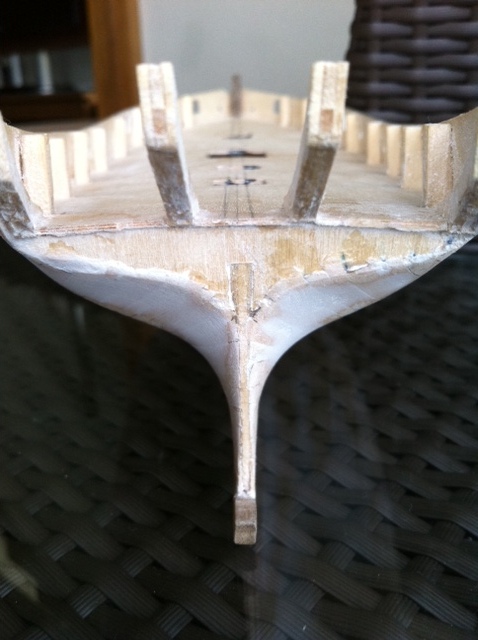
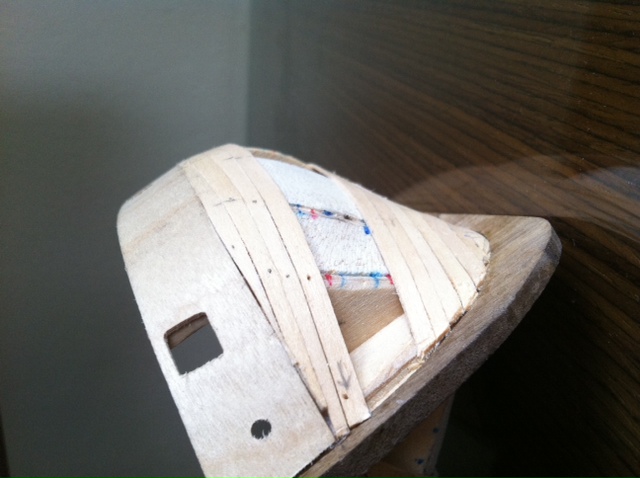
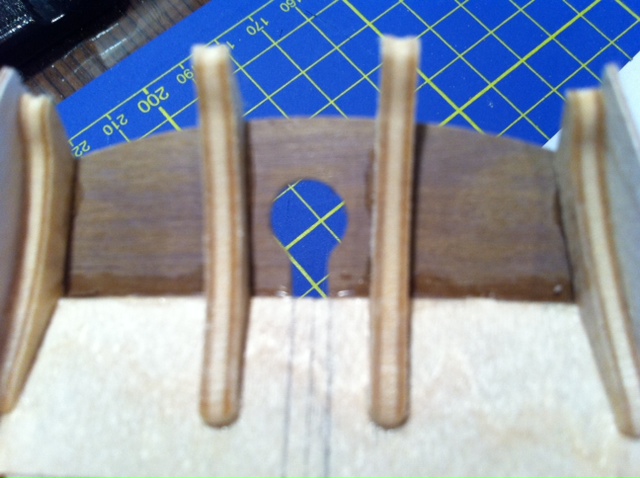
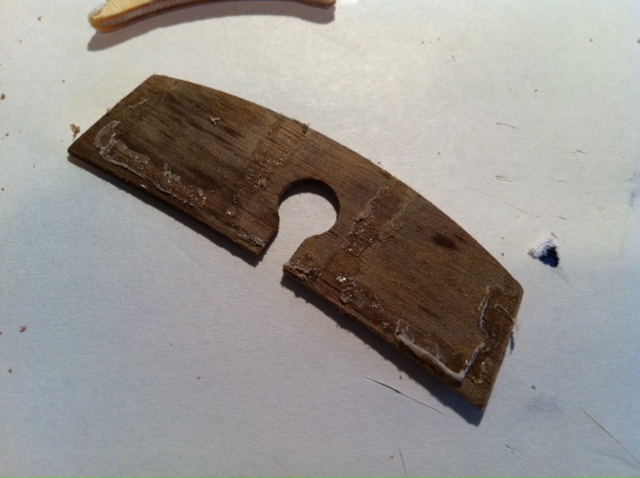
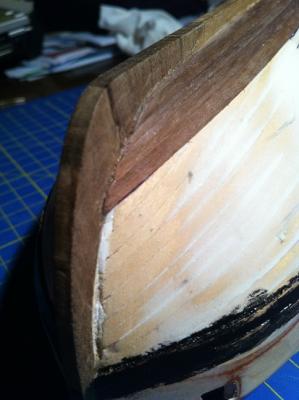
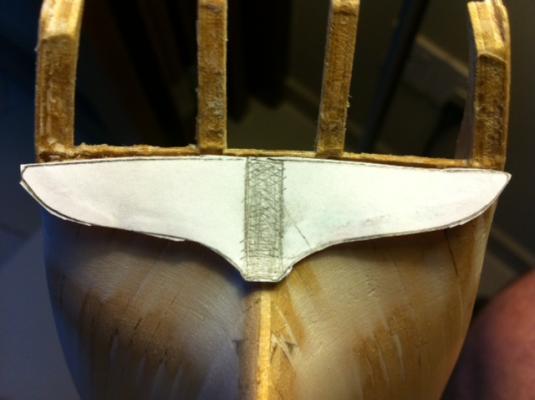
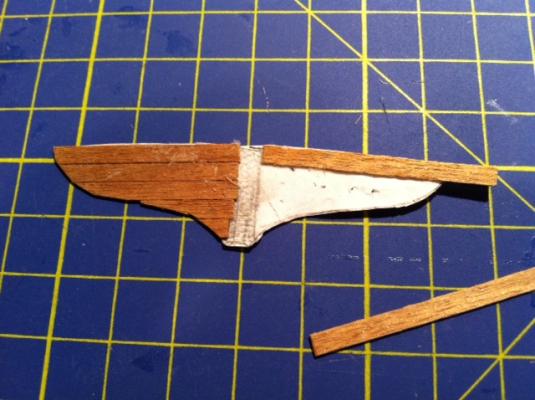
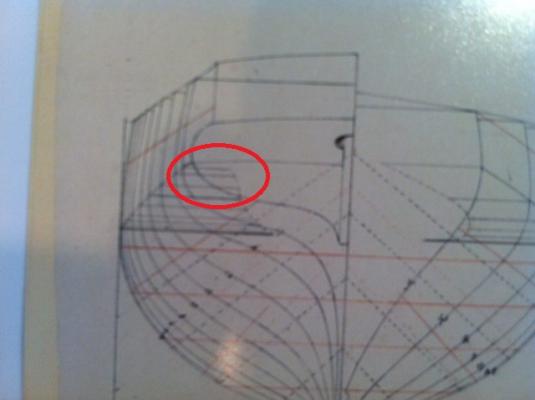
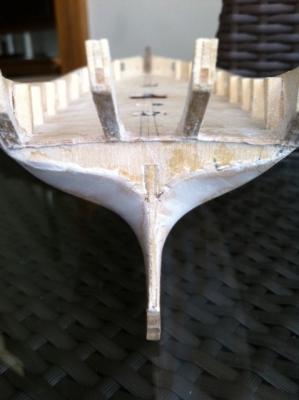
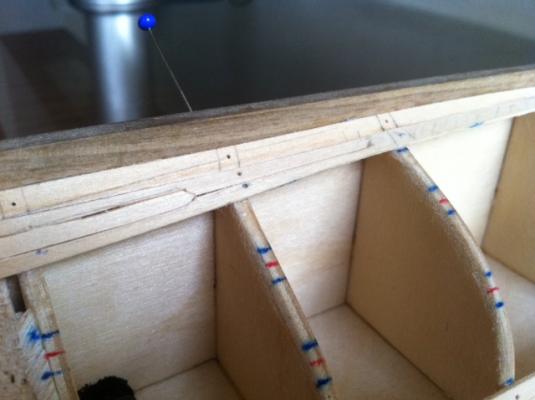
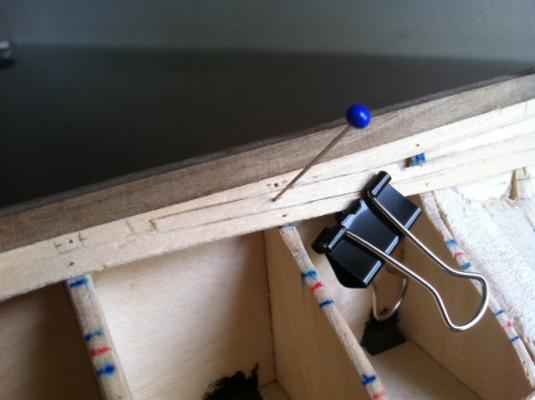
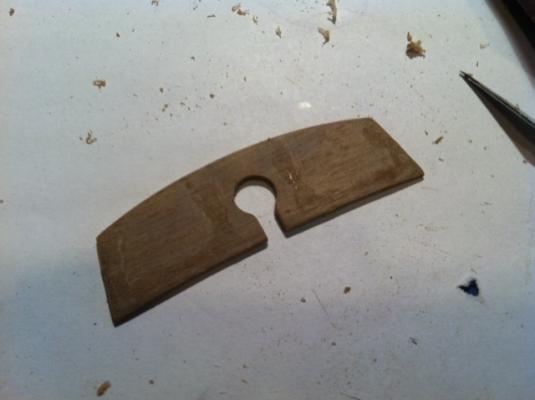
The error is more clearly apparent when you compare the final picture in my previous post with this shot from the NMM plans of the Sherbourne. Note the fuller curve of the stern, compared to flatter curve on my model. In my enthusiasm to fair the bulkheads, I oversanded the aft-most bulkhead which created a much flatter curve on the stern. If not corrected at this point, the model would not look as it did in the plans. To fix this, I traced the shape of the final bulkhead using the original piece of wood that it was cut from in the kit. When I taped that piece of paper to the model, the difference was significant. The red-shaded areas in this picture clearly show where I over-faired the final bulkhead. Next, I marked out the area on the template where the sternpost will stand, and glued strips of 0.5mm walnut to the template. I then cut out the middle of the template so it would better fit the size of the stern, and glued it in place. Afterwards I filled in the gap with filler and sanded it smooth. Here's the end result: Definitely closer to the curve shown in the NMM plans, I think. After using so much filler, I was concerned that the hull might not allow the PVA used with the second planking to properly grip the hull. I'm not sure whether that concern was well founded or not. At the time, I searched on MSW 1.0 and didn't find any information that clearly stated whether that was an issue. So, I took the step of painting the hull with PVA to give the glue something to grip when I started the second planking. Whether that made a difference or not, I cannot say. But I didn't have any issues with using PVA for the second planking, as I'll show in my next post.

- 57 replies
-
- 2
-
-
- caldercraft
- cutter
- (and 4 more)
-
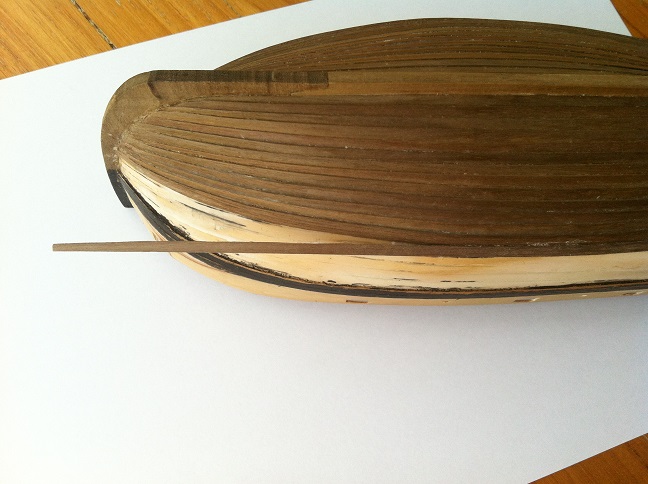
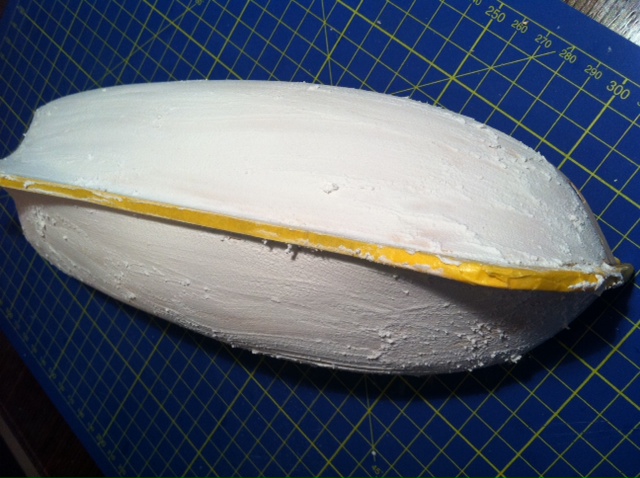
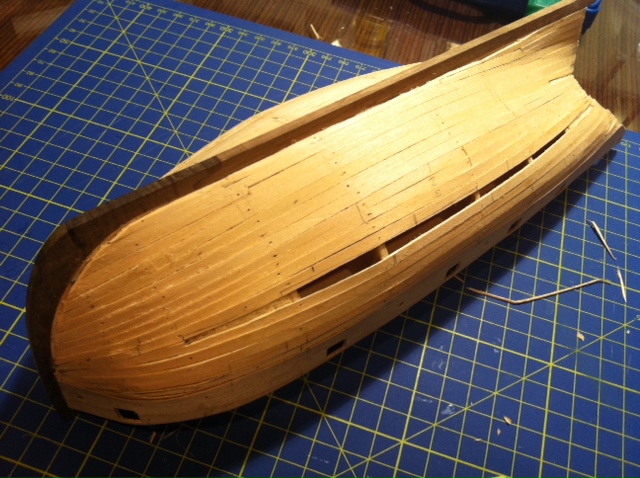
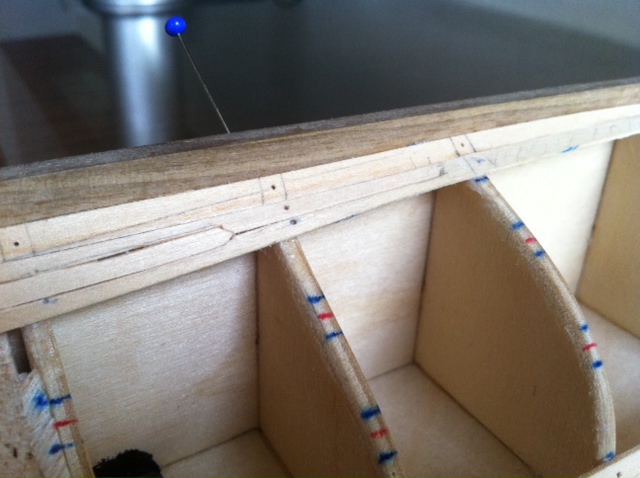
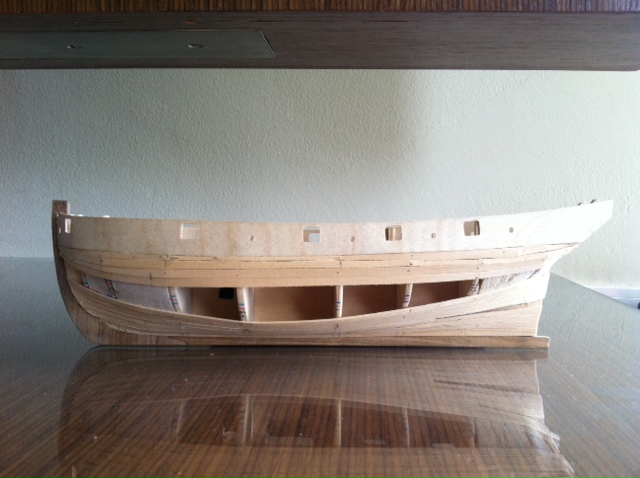
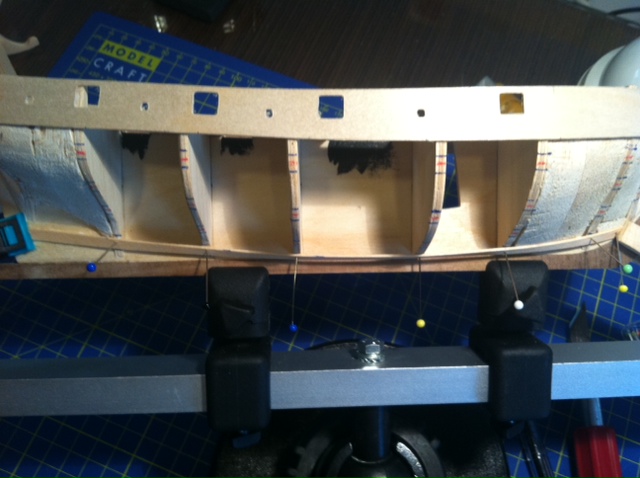
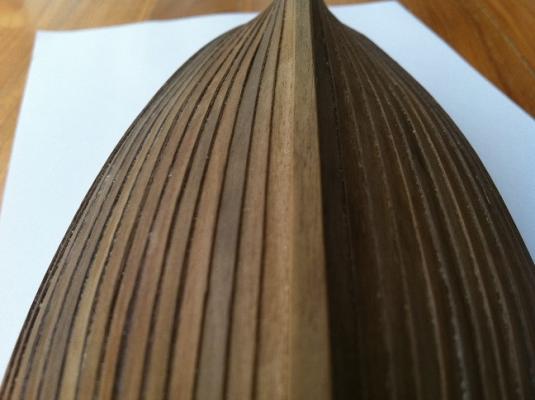
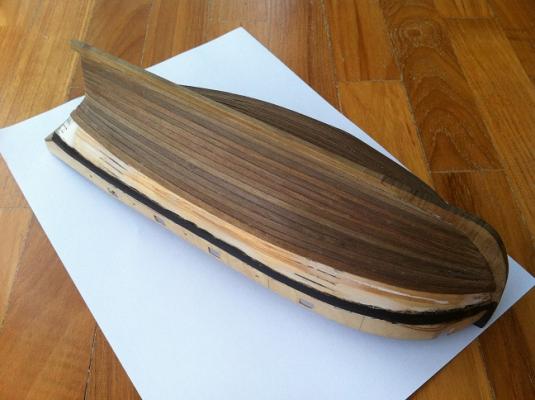
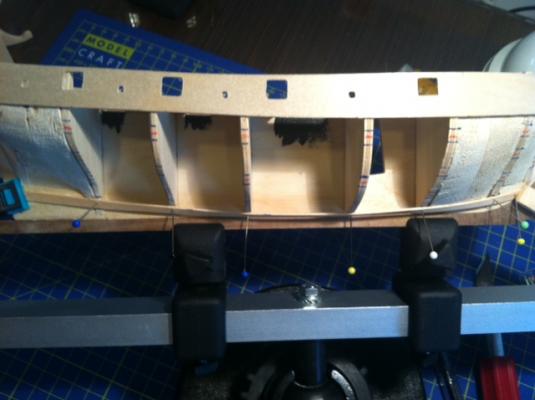
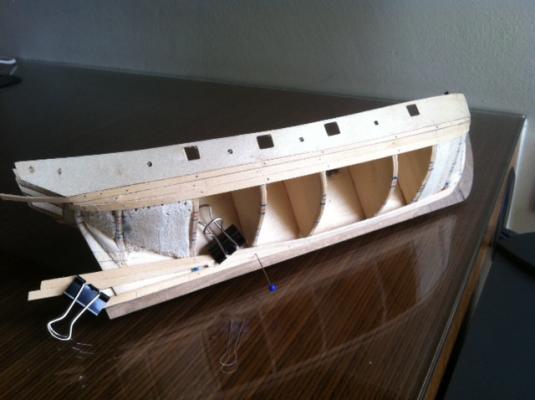
And so the build continued, with the first layer of planking taking me about a month to complete. I actually got to enjoy this phase of the build and the routine that came with it, although I was happy to finish it. As you can tell, there was a lot of clinkering caused by my amateur planking job. This happened because I didn't shape the planks properly and therefore had to apply too much horizontal force to the planks in an effort to have them lie properly against the hull. I was able to fix this with a decent amount of sanding, using Tamiya tape to protect the keel and stem from being damaged.. In the end, I was pretty happy with the end result. I felt that I'd learned a lot and was pleased to see the sweet lines of the cutter emerge from a stack of CNC-cut plywood and basswood strips! The next step after sanding was to fill the hull and sand again to get the smoothest possible surface for the second layer of planking. At this point, I was more or less ready to start the second layer of planking. Thanks to the inspiration and encouragement of Daniel (aka Siegfried), Kester (aka Stockholm Tar) and Laerte (who seems to have disappeared or changed his name since the Great Crash), I decided to try doing a clinker hull, which was more typical of early cutters like the Sherbourne. At this point, as you may be able to tell from the picture below, I'd made a pretty serious mistake that needed to be fixed before I could begin planking:


- 57 replies
-
- 2
-
-
- caldercraft
- cutter
- (and 4 more)
-
Hi Jay, Yes, I think the position of the tiller on the Fly plans probably comes close to what the tiller on the Sherbourne may have looked like, which means the companionway entrance was probably to port or starboard, with the tiller just aft of the companionway and the aft-most scuttle just ahead of it. It's a real pleasure seeing so much interest in the Sherbourne these days. There are a couple of really cool builds going on these days, and I'm sure yours will add an additional level of detail as I haven't yet seen anyone try to re-draw the Sherbourne plans. I'm looking forward to seeing what you come up with. Best, Sumner
- 57 replies
-
- 3
-
-
- caldercraft
- cutter
- (and 4 more)
-
Hi Jay, When you get your plans, take a look at the stern area in the plans. Also, take a look at the stern deck area on period cutter models or paintings of the cutter Alert: http://www.bbc.co.uk/arts/yourpaintings/paintings/cutter-alert-179885 I think you'll find the counter knees in the Sherbourne kit are way overbuilt and out of scale. I believe it's done this way for a good reason, giving modelers such as ourselves a solid structure to construct the stern and counter, and bend the respective pieces to their correct shapes. I'd like to find a way to do this with counter knees that are more in scale, and I have a few ideas in mind that I'd like to try when I get to that point. Of course, that means rebuilding the stern on my model but that's half the fun, right? I suspect that solving this puzzle will resolve the issue of where/how to place the tiller behind the companionway. I think the overbuilt counter knees give the appearance that this area is too crowded for the tiller, and hope to fix that with a structure that's more in scale. Let me know what you think when you receive your plans. I'd be interested to hear your thoughts. Best, Sumner
-
Before I started my first attempt at planking, I spent a lot of time looking at other build logs and reading the MSW planking guide. While the first layer of planking is hidden by the second, I wanted to do a reasonably correct job in order to learn as much as I could. I attempted to plot out the number and size of planks needed, using a combination of tape and battens. It didn't work out so well, The measurements I took were too imprecise and I didn't have a very clear understanding of what I was trying to accomplish. It wasn't very useful. However, the exercise did give me a *rough* idea of how the planks should lay on the hull. For a first attempt at planking a model, I think things went pretty well with the first planking. If nothing else, the experience gave me a deep appreciation of those modelers who excel at planking. Slowly but surely, my model started to look more and more like a cutter, and I could clearly see the Sherbourne's lines start to emerge.


-
Thanks for following along, Jay. I just took a look at your build log and see you're just getting started. The Sherbourne is a great model and a lot of fun to build. I look forward to following your progress as I'm sure that I will learn a lot. MSW has been an invaluable resource for me in that regard. Like you, I went with a clinker hull and got to within 5 planks of completing the second planking below the wales. At that point, work became too busy for me to continue. However, once I've caught up on my build log I would like to get some work on the model. Besides finishing the planking, I'm planning to rework the stern and counter so the deck more closely resembles the NMM plans -- or at least my amateur interpretation of them! Best, Sumner
-
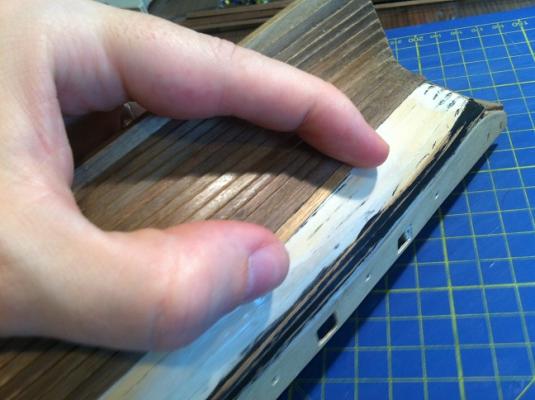
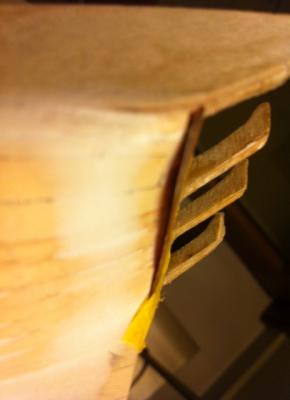
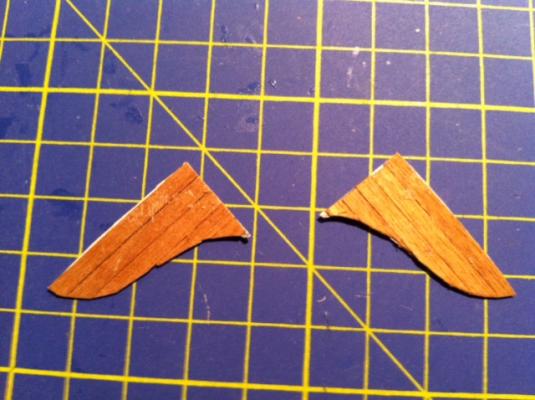
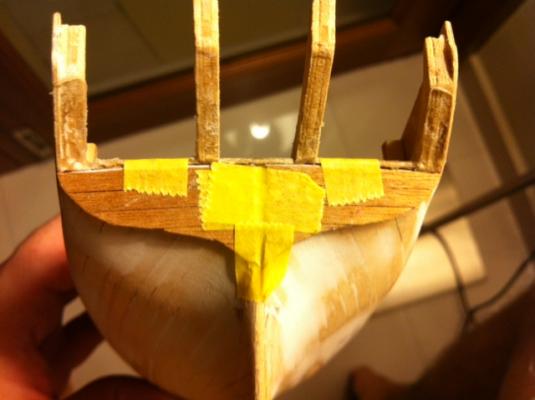
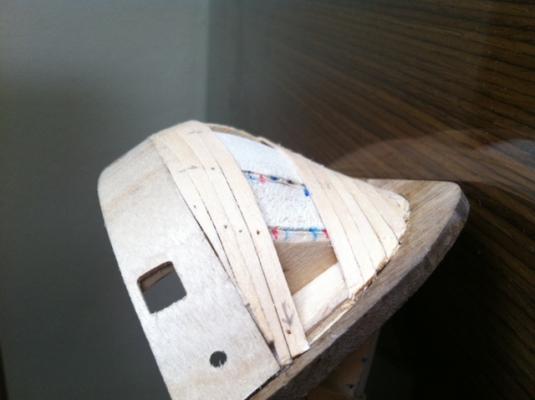
Before I started the first layer of planking, I decided to install the stern counter and this became my first introduction to isopropyl alcohol, and a clear understanding of why it's a very good idea to use PVA instead of CA. After I installed the counter, I realized that I'd jumped ahead too far. I decided that I'd rather wait to put the counter on when I was sure it wouldn't interfere with planking. It was also a good opportunity to try out the ability of isopropyl alcohol to dissolve PVA glue. As you can see in the pictures below, this was really easy. After about 30 seconds, the wood pieces were easily pried apart using a model knife. Excess glue was also easy to remove. After re-attaching the two counter knees (in part to avoid losing them), I was ready to start planking.


-
Thanks, Timmo. Your Sherbourne looks awesome. I hope that mine will look as good when finished. Best, Sumner