

leclaire
-
Posts
115 -
Joined
-
Last visited
Reputation Activity
-

 leclaire reacted to Cathead in Peerless 1893 by Cathead - 1:87 - sternwheel Missouri River steamboat
Next, I started on planking over this structure. In the original photo at the top of the last post, you can see that the lower portion of the walls is painted a darker color, but I have no way to know what this color was (probably a dark red?). I decided to try making this segment from the same cherry lumber as the deck, and make the white-painted upper surface from something else. In part, this was because I had leftover cherry strips from the deck planking and didn't want to waste them as making your own lumber is a lot of work.
However, as you might recall from the decking, these strips are not as uniform in thickness as purchased wood. So installing them directly on the model would leave a very uneven surface, and I don't want to sand them down on the model. So I glued up some longer panels of about the right total height, using my magnetic jig, then sanded the panels down to a reasonably uniform surface.
I then cut two to length and glued them to the outside walls of the engine house.
At this point, by now evening, disaster struck when I carelessly banged the model against the workbench while rotating it and broke off one of the paddle wheel extensions:
I had always known this was a risk and tried hard to avoid it, but sooner or later one gets sloppy (or at least I do). I glued it back on as best I could, clamped it down, and decided I was done for the night. I may drive in a pin on both sides to provide a bit more structural support.
Today I hope to make further progress on planking in this structure. I'm also trying to decide whether to leave the "colored" panels in the natural cherry, like the deck, or whether to paint them a dull red to match the eventual appearance of the paddle wheel. The natural color is still intended to look like a very weathered old coat of paint or other sealant on the deck, but I'm starting to lean toward actual color for the side planking. Thoughts?
That reminds me, I also did some weathering of the deck before I started on the superstructure. I use pastels, as I have throughout my modeling "career". Here you can see a side-by-side of the original cherry (left) and after some dark pastel (right):
And the full application:
I really like using pastels on bare wood as they bring out the texture in a way that paint does not, and that paint prevents if you put pastel over it. Here are a couple more photos showing the bare (left) and weathered (right) deck:
I personally quite like the look, but again am leaning toward painting the side panels. In part this is because the rest of the planking above that zone will be painted white, so a more consistent texture across the whole wall will look better (since the vessel didn't actually use two different woods there).
Thanks for reading this long-winded update, hopefully more to come later this weekend!
-
leclaire reacted to Cathead in Peerless 1893 by Cathead - 1:87 - sternwheel Missouri River steamboat
Thank goodness for American Thanskgiving, which finally provided some free time to get back to this poor neglected model. After an excellent Thursday of cooking and eating, I was able to devote Friday afternoon to Peerless.
Although I had been working on the framing for the boiler deck, I decided I needed to complete the aft superstructure first (the short enclosed "building" that houses the engines, just fore of the paddlewheel), because the rest of the deck going forward anchors to this. Here's a reminder photo from the beginning of this log:
My initial plan had assumed I'd build this as a framed structure that I would then plank over. In part, this was because it's not square. The deck starts to angle upward here to accommodate the wheel, so while the fore and aft sides are vertical, the port and starboard walls are at an angle. I thought that framing this in would be the easiest way to handle that odd shape. This is where I mean:
But the more I thought about it, I was worried that a framed structure would be hard to make both strong and perfectly in-shape; even a small amount of deformation would be a problem as this anchors the entire superstructure. So I switched to making this from a solid block of wood that I would plank over.
To do this, I cut a rough block from the leftover basswood I milled early on in this build (the same as was used for the hull). I chose this because (a) I had it lying around already, (b) it's quite light so it won't make the stern too heavy, and (c) there's a certain symmetry to using the same method here as I did on the hull (solid block planked over). The basswood wasn't thick enough for the height I needed, so I glued an extra slice on top:
When this was solid, it needed to be cut to the proper angle to accommodate the aft rise of the deck. If you look closely at my drawn plan above, you'll see that I intentionally planned this rise to start at this building to make model construction easier. Fore of this building, the deck is flat, meaning I can accommodate this rise wholly within the building and not by having to bend the rest of the boiler deck. To make this cut, I formed a careful pattern of the angle needed, taking it directly off the model sitting on a flat surface and using squares, then used that pattern to set an angle on my table saw, then ran the block through to achieve a slight parallelogram shape. It's barely visible in photos but it's definitely there.
Next I had to alter the hull to support this block. I'd built the after superstructure area as an open frame on which I'd intended to attach vertical framing, but that left the interior open, with very little surface to attach this big block. So I filled this with a thin sheet of scrap wood:
Next I had to accommodate the port-starboard camber of the deck. This was another reason I'd initially planned on framing this, but it just took some careful sanding to introduce a subtle concavity to the bottom of the block. When I was satisfied it was close enough, I glued and clamped it in place. Not shown, I also set several brass pins in the base of the block to hold it securely in place. I don't care about the mini seams you see, because they'll be planked over.
This building has a small extension right at the stern (refer to the original photo at the top of this post), so I followed the same practices to make and install another block:
That concludes the basic structure for the engine house. So far so good.
-
leclaire reacted to Cathead in Peerless 1893 by Cathead - 1:87 - sternwheel Missouri River steamboat
Oh, I agree, you don't want a vessel full of cowboys. But I was referring more to the overall style of dress in the European figures, it still looks distinctly European to me, though I don't claim an expertise in these matters. In the same way that, even today, I feel like American vs. European styles of dress are fairly distinctive, even setting aside obvious stereotypes like cowboy boots.
I'd say let's get this thread back on track, but since I don't have any progress to report, I don't have much standing in that regard!
-
leclaire reacted to Cathead in Peerless 1893 by Cathead - 1:87 - sternwheel Missouri River steamboat
Hey, thanks for checking in! The 1:87 scale was indeed chosen for a possible model railroad project that remains undecided. If you read through the beginning of the build log, you'll find a post where I explain this vessel's ties to local railroad history and how it might tie into a model railroad project. My previous Bertrand build (see link in signature) was also built at 1:87, for a similar reason, so this scale allows the Peerless to be comparable. Yet another reason is that, as you suggest, 1:87 makes a lot of accessories easier to obtain and use, whether figures, cargo, doors & windows, etc. The math on building in 1:87 is a bit awkward, but as you know, model railroaders manage it all the time.
I'd say that using 1:87 figures would be just fine in your case. The 1:87 figures would be slightly undersized for 1:80, which is also good as figures tend to be scaled for modern people sizes but 19th century people were noticeably shorter, so if anything one could argue it's more accurate than modern 1:80 figures would be. Also, the OcCre steamboat kit isn't particularly historically accurate or scaled (though it produces an attractive model), so it especially doesn't matter if the figures aren't perfectly to scale. I don't know about any 1:80 figures, but there are a variety of 1:87 "old time" figure sets available that would be appropriate for a steamboat.
I'll enjoy following along on your project and I hope you stick around for this one, which has gone on a longer hiatus than I intended but which is very much not abandoned.
-
leclaire reacted to kgstakes in Peerless 1893 by Cathead - 1:87 - sternwheel Missouri River steamboat
Just looked you up to see what you are building and it looks great!! I see the build is in 1/87th scale. I have a HO scale model railroad besides building the Mississippi riverboat kit and was wondering is your riverboat going to be part of a scene on a model railroad? Or do you like to build in that scale for some other reason?
I'm not sure but I'm hoping that the Mississippi River boat that I'm building which is 1/80th, I'm hoping that I can use some HO scale figures to detail the boat with. What is your opinion on that? Is there some "period figures" in 1/80th that can be purchased some where?
Anyway, be interested to see more on your build, so far again looks great and I like the idea of using trees "materials" from your property. Makes building more fun and enjoyable when you can say you made this from literally scratch. "Log to Model" should be a tag line of yours.
Keep up the good work !!
-
leclaire reacted to Keith Black in Caroline N by mbp521 - Scale 1:64 - Mississippi River Towboat
It indeed turned out well, Brian.
-
leclaire reacted to mbp521 in Caroline N by mbp521 - Scale 1:64 - Mississippi River Towboat
Hello again everyone,
It is finally about time that I get back to the bench and get some real work done, and not this around the house to-do list stuff. I don't have a lot to show right now, since I am just getting back into the groove, but I wanted to get something out there. I last left off working on getting the bottom of the hull covered. I was initially going to skin the whole thing over with basswood sheets, but the bow and the stern area had way too many compounding curves and angles to get the wood sheets to lie down correctly so I then decided that I would plank it to see how that would look. Still with the difficult curvatures around the Kort Nozzles, I still struggled to get the planks to line up and lie down as well. I started planking the middle and got so frustrated that I finally decided that I would just go in and fill the whole thing with body filler. So I tore out most of the planking and used a light weight air drying clay to fill in between the bulkheads, The clay was cheaper than the body filler, but took several days to fully cure. I then took a few strips of planking and glued them in place about an inch or so apart. The strips will serve as a depth guide for the applicator as well as an indicator of how far I need to sand the body filler down. I figured with all the gaps that I was going to have to fill in with the planking in this area, I might as well save some frustration and wood and just fill the whole thing in. Besides, this area will hardly be seen at all anyway.
Here are the guide planks going and the clay filler in place. Even pre-soaked the planks had to be held in place with weights to keep their form while the glue dried.
Next I slathered on a couple of coats of body filler and let that set. This is the first coat going on.
First round of sanding is done. There are some low spots and pinholes that need to be filled in, but for the most part I think it turned out well.
That is all for this update. I know it's not much, but I hope to have more next time around. Winter will be here before you know it which provides ample time for shipbuilding. I'm actually just tickled to finally get to use the new bench and shipyard setup.
Thanks for stopping by.
-Brian
-
leclaire reacted to John Gummersall in Chaperon by John Gummersall - FINISHED - Model Shipways - Scale 1:48
Not much to really report today...... Started inserting the boiler deck stationaries. As Cathead mentioned on previous post, putting a square stick into a round hole works out pretty well. Just the smallest touch of glue and the stationary easily slides into place. 1/4" above the huricane deck was easily maintained with a 1/4" piece of wood as a guide
As you can see toward the middle of the boat the hurricane deck flared up a bit on the overhang and to be (shall we say) persuaded with some jigs to keep the proper curve. Same jigs used between the main deck and the boiler deck were modified and did the job well. Once glue dried, the hurricane deck was in the correct position.
Closer look at the stationaries... No big deal.
-
leclaire reacted to John Gummersall in Chaperon by John Gummersall - FINISHED - Model Shipways - Scale 1:48
Brian,
That is a good comment.... And it would be like me to forget that. But fortunately this time I did not. Before I masked the sky light I located where the Texas cabin would be located and laid down the wood foundation to support the walls. Then I laid down the masking tape and painted around where the Texas cabin would be formed....
I will say, there is one issue with the masking tape method.. On the Boiler deck the stationary holes around the edge are square (to accept the 1/16" stationaries). But unless you have some sort to square drill (and I do not), to free up the holes (covered by tape) you have to drill or poke them out,,,, and they end up more or less round. But when I comes time to put in the stationaries, square wood is close to round, and with a hold that small, the square wood fills up the hole and it is not noticed.
-
leclaire reacted to Cathead in Chaperon by John Gummersall - FINISHED - Model Shipways - Scale 1:48
Using the masking tape method, I found that when I needed to insert something into a square hole that I'd drilled or cut out, that the extra little wings of tape at each corner actually helped hold the square stock in place when it was pushed down in; just a bit of extra friction fit. I think you're right that it won't be noticeable regardless.
-
leclaire reacted to John Gummersall in Chaperon by John Gummersall - FINISHED - Model Shipways - Scale 1:48
Cathead,
I agree with what you are saying... As I tried to dry fit some of the square stationaries into the round holes, those little extra bits of tape really help hold the stationary in place.
With the hurricane deck glued down it was a simple thing to slightly lift up the aft portion of the deck and slip in back wall.
For those that follow in the future with the chaperon... when building that back wall, the jig provided is good in helping with the curve, but not that accurate. Even my "juice can" method (mentioned earlier) is rough... No matter how you bend the walls, the most crucial point, and it really should emphasized in the instructions, is that that back wall curves need to match the last holes in the boiler deck floor. Otherwise the wall will not match up to the last stationaries and will just looks off. Had I know that fact when I was bending the walls, I would have insured the final bends matched the last stationary holes. In my case even with a little fiddling, the wall does not match up exactly to that last stationaries. At this point I think I am going to leave it as is..... But don't make the same mistake. This could have been better had I know the exact bend was critical
As for the bow and the forward stairs, as mentioned earlier, save yourself a lot of grief and do not mount the stairs prior to the hurricane deck as stated in the instructions. Once the hurricane deck is down it is easy to slip it into place. No way could I have glued those stairs in prior to the hurricane deck as expect them to line up exactly
-
leclaire reacted to bricklayer in Caroline N by mbp521 - Scale 1:64 - Mississippi River Towboat
Hello Brian, hi all
I´ve seen towboats on the Rhine. They tow two to six barges, only. Unlike the Mississippi towboats they have elevating wheelhouses to adapt to limited clearance of bridges across the river.
https://de.wikipedia.org/wiki/Schubboot#/media/Datei:Buran.rhein009.jpg
I`d like to see a continuation of your build log, if you don`t mind.
Michael
-
leclaire reacted to John Gummersall in Chaperon by John Gummersall - FINISHED - Model Shipways - Scale 1:48
Onward and upward... At long last the hurricane deck is finally ready to glue. All holes have been enlarged and ready to accept the corresponding parts that come next.
As for the simulated tar paper strips, I think the masking tape idea worked out OK. As indicated earlier, at my skill level I do not think I could have pulled off silk span or tissue paper methods.
A couple of points for those of us less skilled,,,,
The instructions call to glue the forward stairs, from the boiler deck to the hurricane deck before gluing down the hurricane deck. In my opinion, no way would I be able to pull that off and have the stairs align properly with the hurricane deck. If those stairs were glued down prior to the hurricane deck, with all the alignment (shall we say) "fun" lining up the hurricane deck with the stationaries, it would be too much to hope to assume those stairs would be in the correct position. Instead, since the hurricane deck overhangs the boiler deck, will be an easy effort to just slip in the forward stairs after the hurricane deck is glued down and before the stationaries are inserted.
Below is a show showing plenty of room to insert the stairs and secure them down to the proper size prior to the stationaries.
Same issue with the boiler deck back wall. Instructions call to glue down the back boiler deck wall when you glue down the boiler deck structure.
In the below picture, neither the back wall or hurricane deck have been glued down. As you can see, the edge of the back wall should align with the last stationery. In theory, if you were every accurate with the bending of this wall, it will align with the last stationaries. But if that bend was not exact (due to lack of skill of the builder), there will be an issue aligning with the last stationaries. Even if you bends were exact, after aligning the hurricane deck over the boiler deck, the back wall my not align with stationary. However, if you do not glue down the back wall until after the hurricane deck is aligned, then you can fudge a little to make the wall edges align with the last stationary. In my case there was fudging involved...
Again,,,, these last two issue are only for us less skilled builders 🙂
Here is a picture of the hurricane deck being glued down with back wall open. After the glue dries, the back wall will be inserted similar to the forward stairs mentioned earlier
Time to glue and pile on the weight.. everything including the kitchen sink... That coffee can is filled with water to add a little more weight.
Hope is does not leak, or there will be a lot of tears,,,,
-
leclaire reacted to mbp521 in Barncave Shipyard by mbp521 - Scale 1:1
Howdy everyone,
I know it has been a while since I last updated this log, This has been one busy summer and I have hardly had time to work on any personal projects. Most of the last few months have been spent helping my daughter and son-in-law get their house finished, most of the stuff they didn't want to contract out like running the 900' water line, fencing, dirt work, tree clearing and other odds and ends. However with the bulk of the work done I finally found some time focus on my projects and get some work done on the shipyard.
I am not real sure what day I left off on so I will just post some of the things that I have accomplished.
First, I took ,my adjustable work bench and scaled sown the top a bit to fit in the room. The length had to be cut down to 5' from 6' and I squared off the front to make it more uniform.
I took the old gray, dinged up bottom and gave it a fresh coat of flat black, to fit my color scheme of the room a little better.
Next, I wanted to dress off the edges of the top, so I purchased some vinyl trim to protect the edges, routed the groove and installed the edging.
The final product, I am completely satisfied with.
Then it was on to building the shelves for my reloading bench to help organize some of the clutter. I didn't take any pictures of the building process, but this is the finished results.
Next, I wanted to have a place that I could use to clean my guns, or work on them, or other tasks, but didn't want to take up more space, so I decide to build a Murphy Desk. Some thing that would fold up out of the way, but could be setup quickly if I needed the extra counter space. Again, I failed to take pictures of the build, but this is what I came up with.
Finally, needed a place to store all of my wood strips that wouldn't take up valuable counter top space. Some place out of the way, but with easy access. I decided that a small shelf under my storage area was the perfect place. I just purchased some inexpensive drawer dividers, turned them on their side and glued them into place on the shelf. Now I can keep them nice and organized and out of the way, and all I have to do is a 180 from the workbench and grab what I need.
I've started work on the book/display case. So far I have managed to get the main framework of it built, I just need to cut and install the facing and trim, then paint it all up. I plan on running lights to the display area, where my Chaperon proudly sits temporarily and I will also install a glass panel on the front to help keep the dust off of her.
More to come soon. The brutal Texas summer has finally started to subside and the weather is getting a bit more tolerable to work out in the barn.
Thanks again for stopping by, and I hope to not wait so long between updates. I'm really ready to be done with this project and get back to the Caroline. Her hull has been sitting on the workbench, neglected and untouched for way too long.
-Brian
-
leclaire reacted to Roger Pellett in OcCre Paint Conversion
These river boats were painted with cheap readily available colors. Bitumen is of course petroleum based tar, a byproduct of reducing coal to coke. It would have been used for tar paper on upper level decks not subject to foot traffic. White would have been white lead. Bright (expensive) colors would have been in applications intended to attract customers. Model railroad colors should be fine.
BTW, MSW has A resident riverboat expert. He hangs out on the Scratch Built Models 1850-1900 area under the name Cathead. He knows many times more about Western Rivers Steamboats than all of the European kit companies put together. Look up one or more of his outstanding models.
Roger
-
leclaire reacted to mbp521 in Chaperon by John Gummersall - FINISHED - Model Shipways - Scale 1:48
Agreed! But not near as monotonous as all those battens on the Boiler and Texas deck cabin walls. 😁
-Brian
-
leclaire reacted to Cathead in Peerless 1893 by Cathead - 1:87 - sternwheel Missouri River steamboat
Roger, sorry if this wasn't clear: we used Amtrak to shuttle our vehicle, not the canoe. Though I love the image of loading that thing into a baggage car! Basically, there are multiple towns along the river that have Amtrak stations and nearby waterfront parks with boat ramps. So first thing in the morning, I dropped my wife off at the upriver boat ramp with the canoe, drove down to the downriver ramp and parked the car there, walked over to the train station and took the morning Amtrak train back upriver (there are two trains a day each way along this route between Kansas City and St. Louis). We were on the river by mid-morning, and when we arrived at the downriver ramp our car was there waiting for us.
The funny thing, when it comes to asking about taking canoes on the train, is that this Amtrak route IS bike-friendly, and mostly parallels the 240-mile Katy Trail State Park rail trail that crosses most of Missouri. We've been using the rail line to bike the entire trail in four parts this summer, without having to stage or shuttle vehicles, because the trail connects to Amtrak stations across the state. We're 3/4 done, only one 60 mile segment to go that we'll hopefully get to this fall.
Thanks for sharing your canoes' heritage! Our canoe was once my mother's and I have a very long history with it, though it hasn't needed any restoration so far. She's still an active paddler in her mid-70s, though now she uses a small ultra-lightweight boat that she can still lift herself.
-
leclaire reacted to Roger Pellett in Peerless 1893 by Cathead - 1:87 - sternwheel Missouri River steamboat
Very nice work as usual Eric.
I have two Old Town canoes that I restored a number of years ago. The first is a 1916 Charles River. My sister belongs to a canoe club in Pittsburgh started by Westinghouse Employees over 100 years ago. Someone dumped the canoe off in the weeds next to the clubhouse. My sister told me to take it before it was burned in the spring cleanup. Restoration bordered on Abe Lincoln’s story about his father’s axe. New handle, new head, but it’s still my father’s axe.
The second is a 1944 OTCA. I traced it back to a camp in upstate New York that was the inspiration for the movie Dirty Dancing. Old Town wood canvas canoes are all stamped with unique serial numbers and production records are available on line. Restoration was easier; replacement of several broken ribs, some planking, new canvas, and fixing some rot. Photo below.
How does the Amtrak shuttle work? I can’t imagine loading the boat on the train.
Roger
-
leclaire reacted to Cathead in Peerless 1893 by Cathead - 1:87 - sternwheel Missouri River steamboat
Also, while you all wait for more progress, here's a bit more geographic context. Mrs. Cathead and I were able to get away for a day-trip paddle on the Missouri River, on a stretch that Peerless certainly navigated many times (although the modern channel is very different). We did an easy 30 mile paddle, using Amtrak service that parallels the river to shuttle our vehicle.
Here's a couple towboats waiting on a sand & gravel barge to be loaded (I thought of @mbp521's current project when taking this shot):
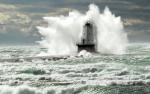
Here's a representative view of river bluffs and sand bars; the river is very low as Missouri's been in various stages of drought for close on a year now, especially bad for most of this summer:
If you're wondering about the outriggers, we're testing them for longer trips. The Missouri is a large, fast, deep river with a lot of control structures and other hazards, including woody debris. It's also a very isolated channel with very little development, access, or services; when you're out on it it feels more like you're in remote Montana than the Midwest. We're highly experienced canoeists and Mrs. Cathead used to be a researcher on the river. For day trips these aren't really necessary but we're planning some longer multi-day trips, and once the canoe is loaded down with supplies, outriggers really add some safety stability. Even those towboats can generate large wakes that can be bothersome.
These huge drought-exposed sandbars make great napping points.
Even though the channel is very different now, maybe you can envision Peerless steaming along under 200-300' tall bedrock bluffs, dodging extensive sandbars blocking the old river's braided channel, and trying not to hit logs like you see above that could easily punch a hole in her thin hull. Just a fun image to hold onto while the build waits patiently to resume.
-
leclaire reacted to Cathead in Peerless 1893 by Cathead - 1:87 - sternwheel Missouri River steamboat
Finally finished the main deck! This was delayed, in part, by yet more other projects, such as finishing the renovation of another bedroom by replacing drywall, repainting, and adding new window, door, and floor rustic trim made from cedar lumber cut and milled on-farm. This not only used up free time but made me less inclined to work on yet another wood project (the model). Now it's done, with window and exterior door curtains hung from cedar bars suspended on iron hooks made by a local blacksmith.
Anyway, I finally milled the last bits of deck wood needed, installed them, then started sanding down the deck. First, here's a clear look at the limitations of my current ability to mill precision scale lumber:
Those planks are all over the place in both thickness and width, despite using the NRG's depth gage made for the Byrnes saw. The good news is that this gives the model a very rustic appearance. I knew I'd need to do some significant sanding and just accepted that. I decided early on that I'd rather mill things too thick and sand them down, than deal with too-thin segments prone to breakage.
I took an orbital sander to this deck, starting with coarser grit and working down. I'm quite pleased with the final product, which I still need to buff by hand with very fine paper. You can see that the deck preserves its subtle camber even after sanding:
The sander made this mostly smooth, with just a touch of texture left where the biggest differences in plank thickness remain. This gives it a lot of visual appeal; as the viewing angle changes you can still see hints of shadows between different planks and it really pops and looks like a rustic deck.
This is a great example of an approach I've become comfortable with in modeling: focusing on what looks good/right over what's technically right. Any contest judge would instantly notice the inconsistent deck lumber thickness and some of the wider-than-scale cracks between individual planking runs. But visually, these create the impression of a rough-built vessel in the way that a truly accurate to-scale deck would not.
The photos don't really capture the effect fully, it really comes out in person, and I love it. The cherry wood is already halfway to the reddish color the deck should have (like my other steamboats) and I'm debating how far to go on further coloration (painting/staining/weathering) as the natural wood's variability brings out a lot of interesting complexity.
I was debating how to handle the boiler deck (next level up) as it's a much more fragile construction than this main deck, sitting up on its little posts with not much superstructure beneath it. If I were using perfect scaled planking from a commercial source, I'd just built it in place. But since I've shown no sign of being able to mill consistently thin scale planking, I'm thinking about building the whole boiler deck as a separate piece off-model, sanding it down once it's built (but when it can sit firmly on a solid surface while doing so), then installing it in its precarious final position on the model.
Thanks for your patience with this slow build. It's going to be a while before more progress is made due to an imminent family visit (one impetus for the timing of that bedroom remodel) and other commitments; fall is a very busy time on-farm between major produce harvest, start of bow season for deer, and various other commitments. I do appreciate likes and comments that remind me others enjoy this work as well!
-
 leclaire got a reaction from mtaylor in Peerless 1893 by Cathead - 1:87 - sternwheel Missouri River steamboat
Eric,
I wonder if the builders of these boats were as worried about some imperfections in their work as we modelers seem to be.
Bob
-
leclaire reacted to mbp521 in Peerless 1893 by Cathead - 1:87 - sternwheel Missouri River steamboat
I still think it’s impressive that you harvest and mill your own wood on property, then turn out beautiful work.
-Brian
-
leclaire reacted to Cathead in Peerless 1893 by Cathead - 1:87 - sternwheel Missouri River steamboat
Well, my model's imperfections don't threaten to take me and my livelihood to the bottom of the river!
-
 leclaire got a reaction from mbp521 in Peerless 1893 by Cathead - 1:87 - sternwheel Missouri River steamboat
Eric,
I wonder if the builders of these boats were as worried about some imperfections in their work as we modelers seem to be.
Bob
-
 leclaire got a reaction from Jack12477 in Peerless 1893 by Cathead - 1:87 - sternwheel Missouri River steamboat
Eric,
I wonder if the builders of these boats were as worried about some imperfections in their work as we modelers seem to be.
Bob