herask
-
Posts
219 -
Joined
-
Last visited
Content Type
Profiles
Forums
Gallery
Events
Everything posted by herask
-

Yet Another Pandora 3D build
herask replied to herask's topic in CAD and 3D Modelling/Drafting Plans with Software
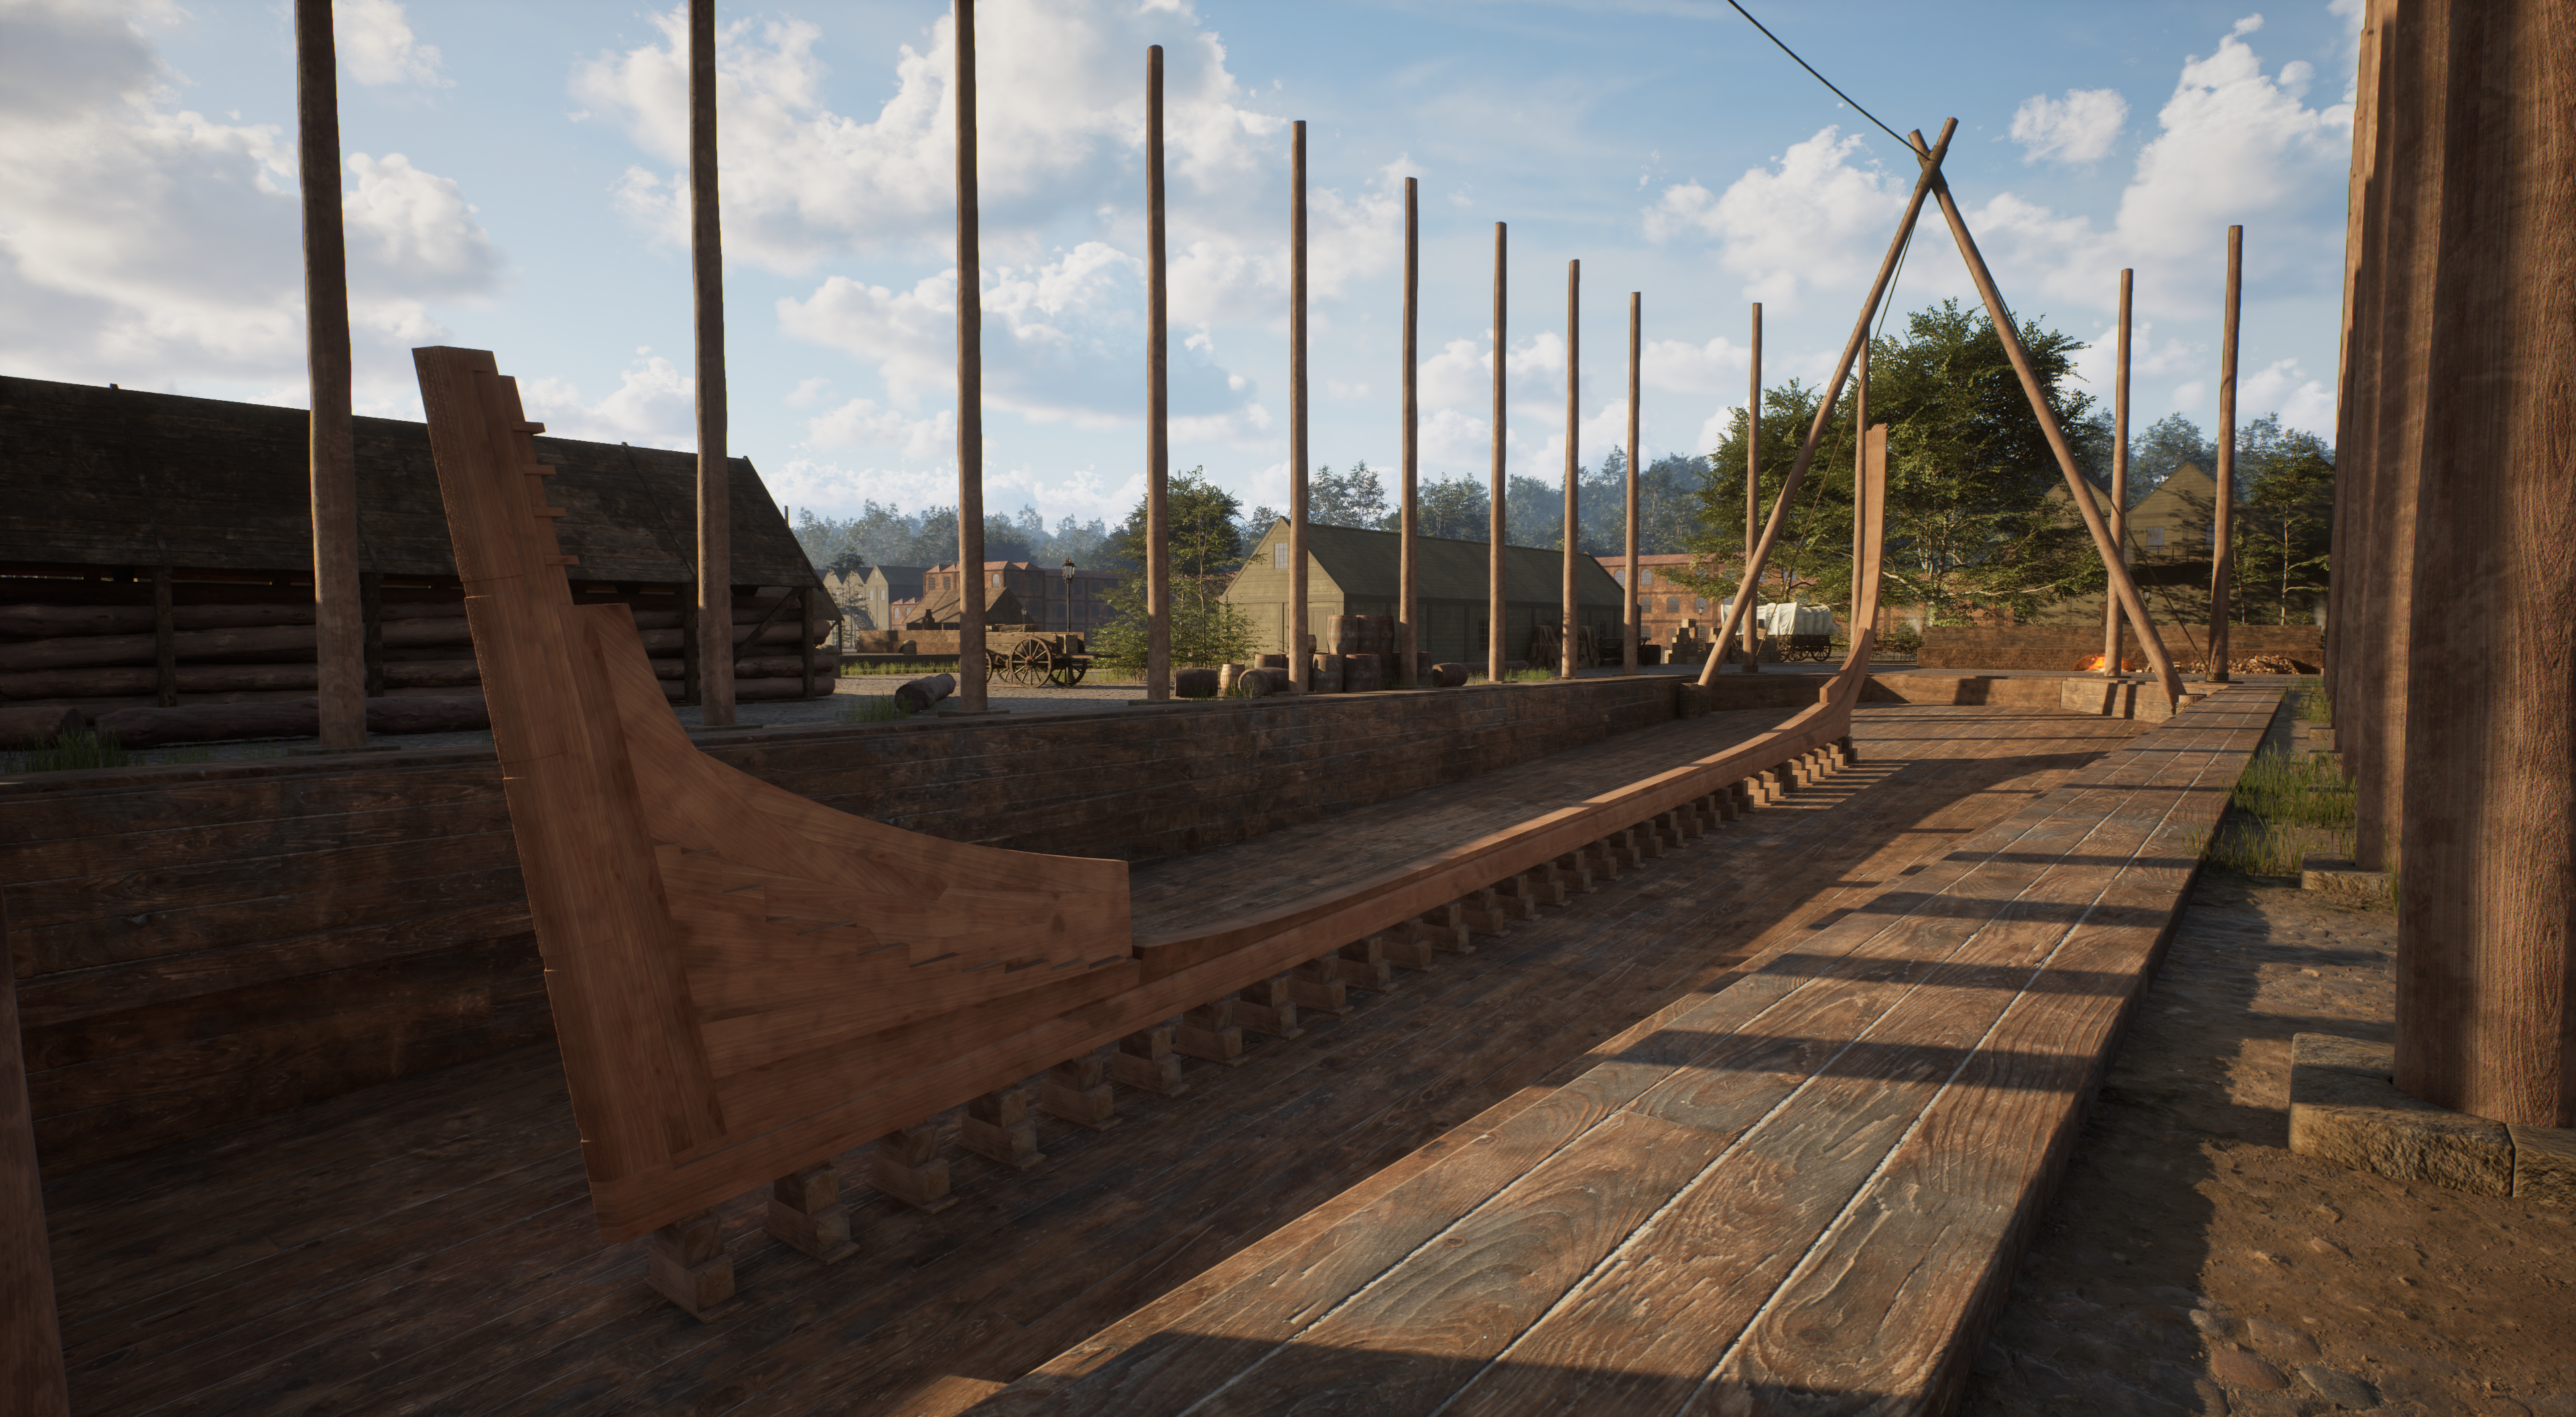
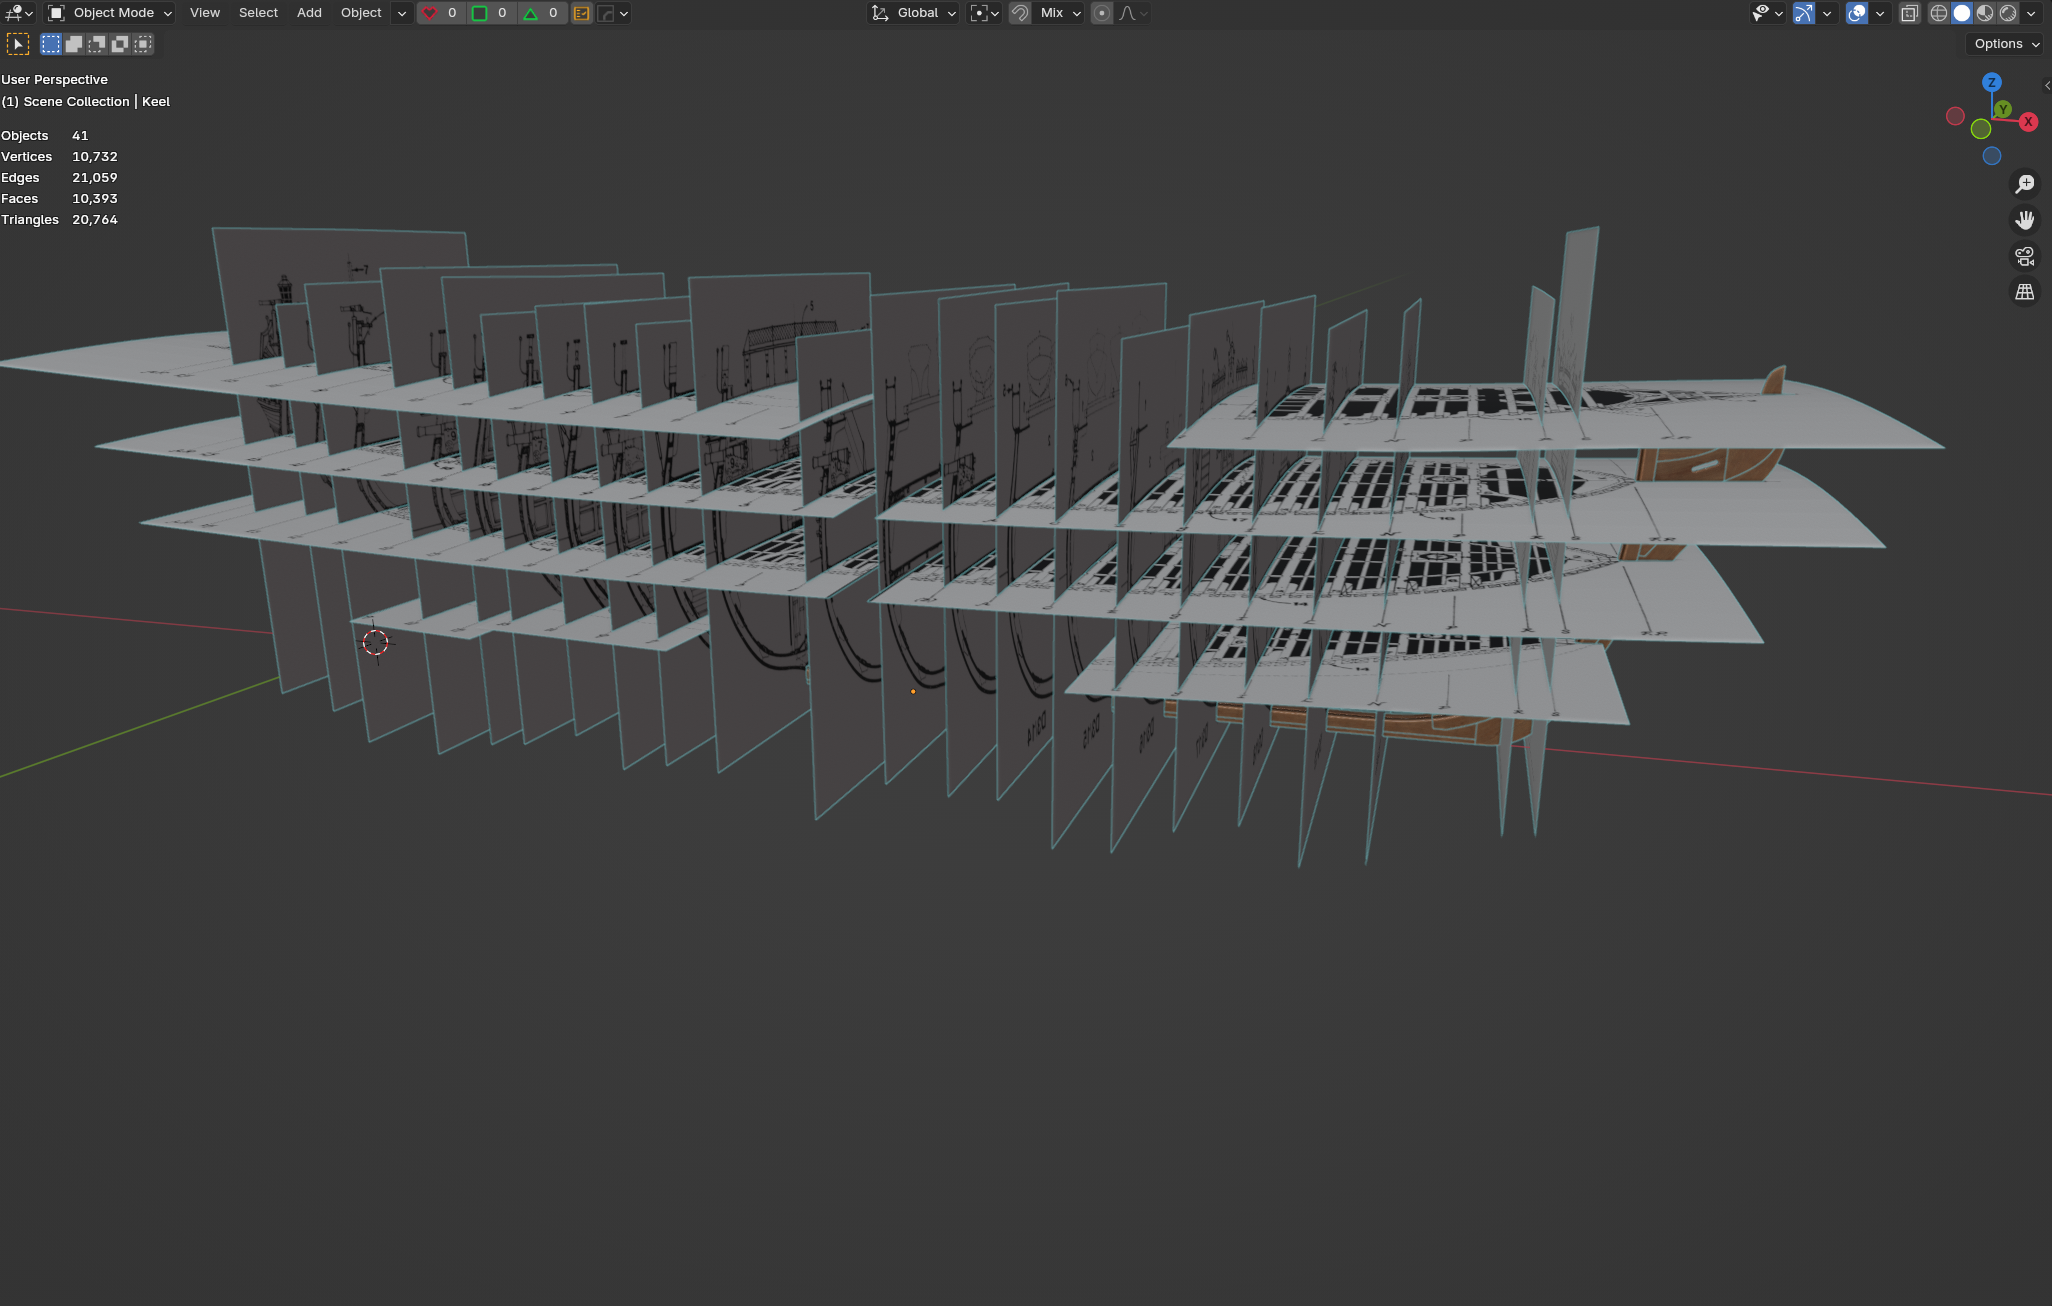
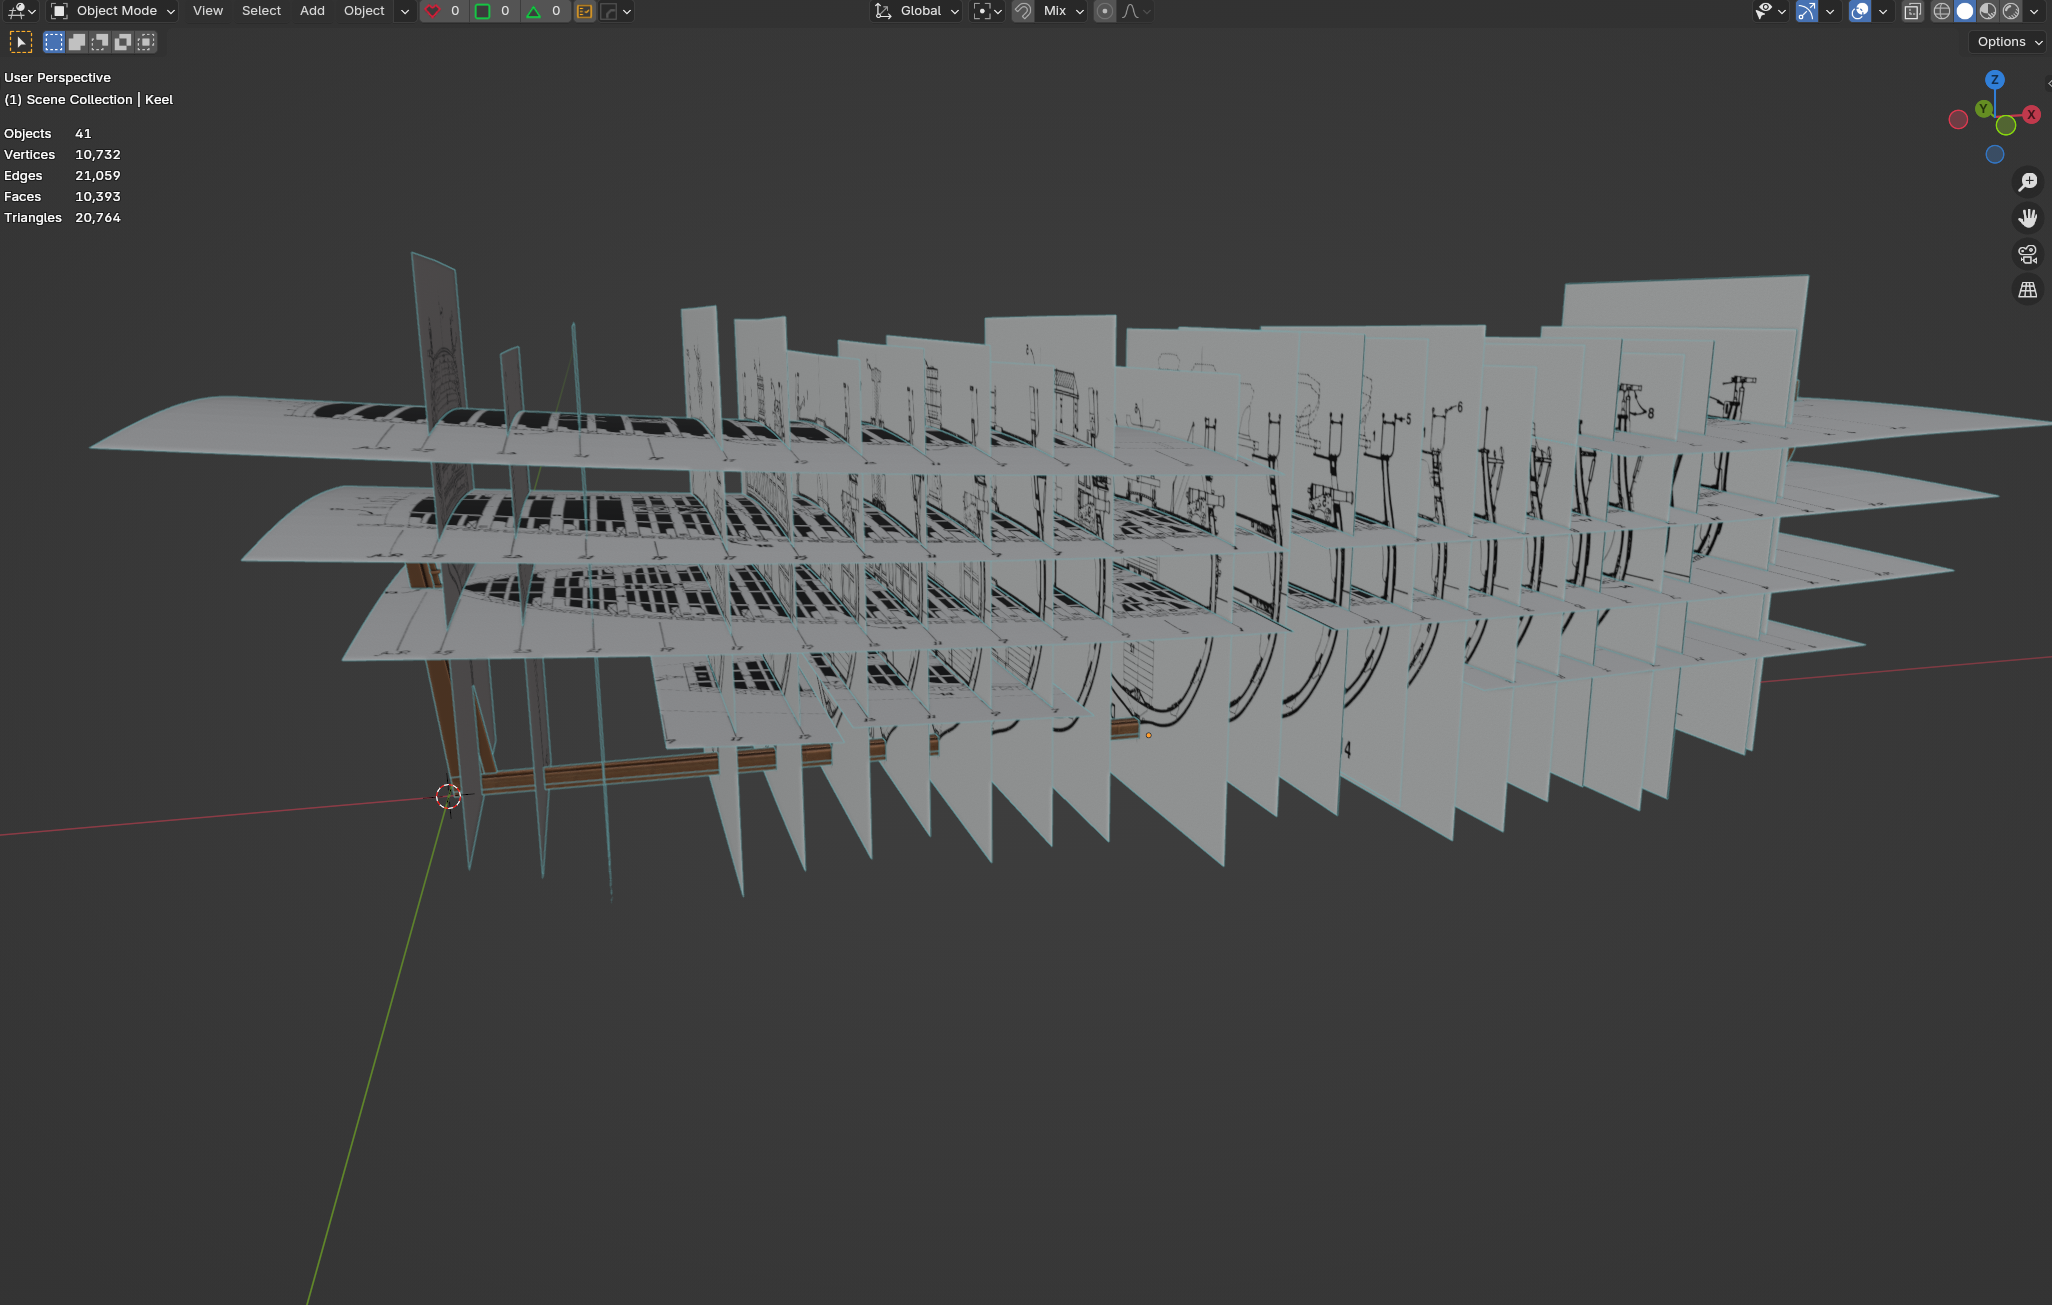
making progress with keel assembly...


-
Yet Another Pandora 3D build
herask replied to herask's topic in CAD and 3D Modelling/Drafting Plans with Software
hey Nate! thank you for your input. ok, let's see... 1. I like modeling my vehicles so they face either X+ or Y- axis, and viewed from front or right orthographic view. no particular reason, that's how I started modeling, I guess, by following tutorials. it's the second nature to me by now. if I oriented Pandora on Y- axis, from right ortho, the ship would be oriented from right to left on screen, the plans would be viewed from back, thus appearing mirrored. so for me only other choice was front ortho and X+ axis orientation. plans just sit naturally that way... 2. I put my origin there so when adjusting and resizing plans they scale from one side instead of from the middle. easier to adjust... I might as well move everything to (+) station now. good point... 3. no, I haven't yet. I'll deal with it once I get there. I already figured this out once, just have to remember how... 4. the origin will stay at the bottom of the false keel. so when you drag the ship into the scene in UE5 it snaps to terrain instead of sinking in to wherever the origin is. again, just personal preference... 5. you mean, the rabbet stops here: hm, yeah, my rabbet goes al the way to the sternpost and twists like on Pegasus. but then, what that line actually is, the one that goes beyond red mark? 6. I didn't model the rabbet with the straight bottom rabbet. again, my resembles that on Pegasus. can you clarify or show on your model a bit more? I can't really visualize it... 7. I believe that false keel was laid sometimes later by knocking off those smallest top pieces of wood on keel blocks and slipping false keel inside... I think I've read it somewhere but for the life of me can't remember where... but in 3D visualizations it doesn't really matter, it's just easier to position everything right from the start and add stuff later than move stuff back and fort, especially with hundreds of objects in the scene. yeah, some things might float in the air at some point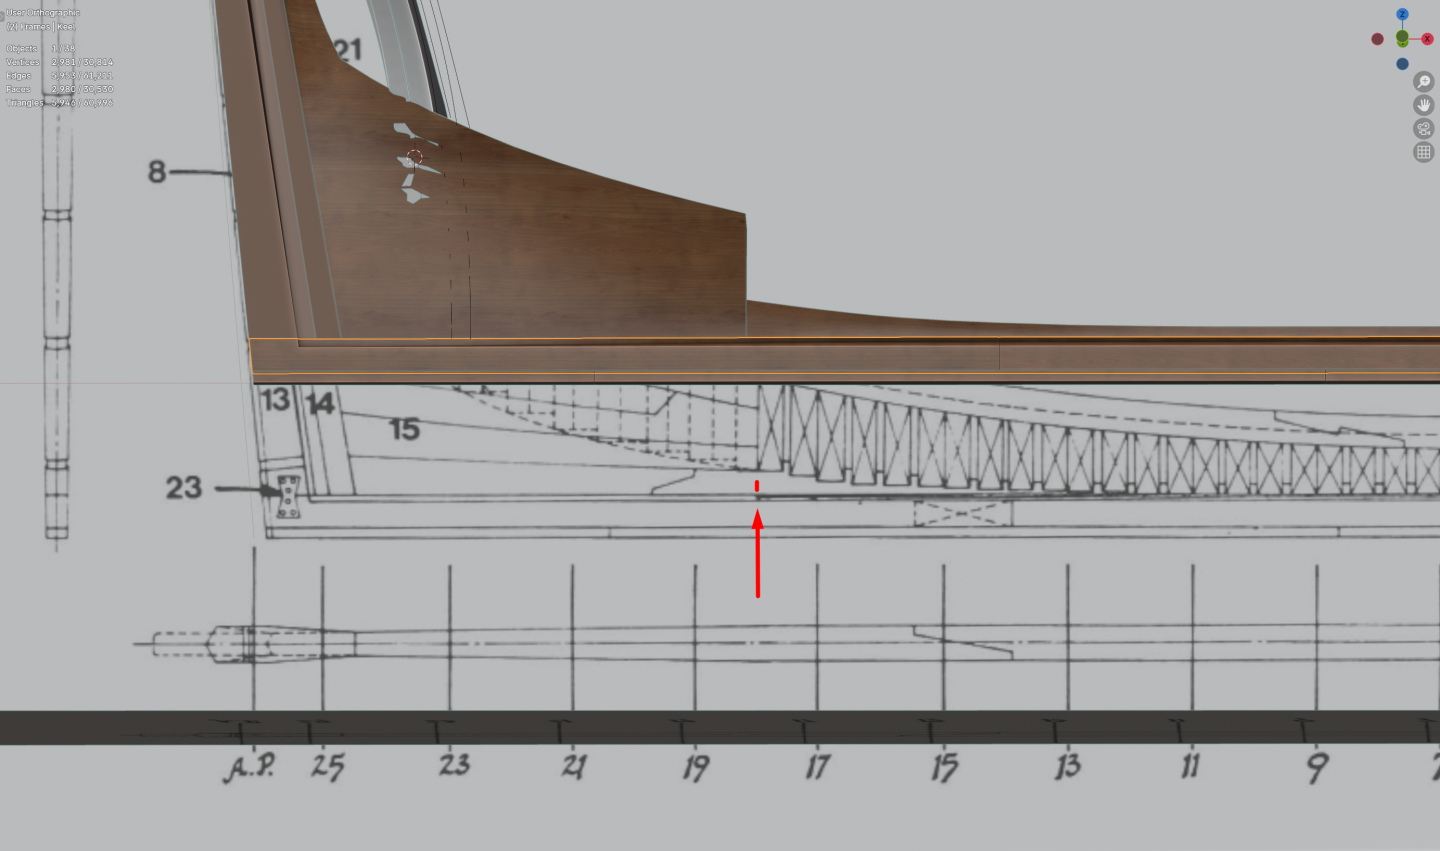
-
Yet Another Pandora 3D build
herask replied to herask's topic in CAD and 3D Modelling/Drafting Plans with Software
Thank you Greg! I agree, Pandora is a really great looking ship, and I'm currently really enjoying working on her. AOTS Pandora is definitely not without its little quirks, but for a nice looking ship it'll do. Pandora will not be as accurate as the Pegasus was but that's not the goal here. that said, I do have my TFFM books at hand, and The Elements and Practice..., and Construction and fitting..., and Arming and fitting... regarding Pegasus, she'll most definitely end up in one of the slipways. how could she not, haha? it's just, it'll probably happen during my first burn out that will inevitably happen sooner or later. I need to import her into the software and that will take a while, so yes, but later... -
Yet Another Pandora 3D build
herask replied to herask's topic in CAD and 3D Modelling/Drafting Plans with Software
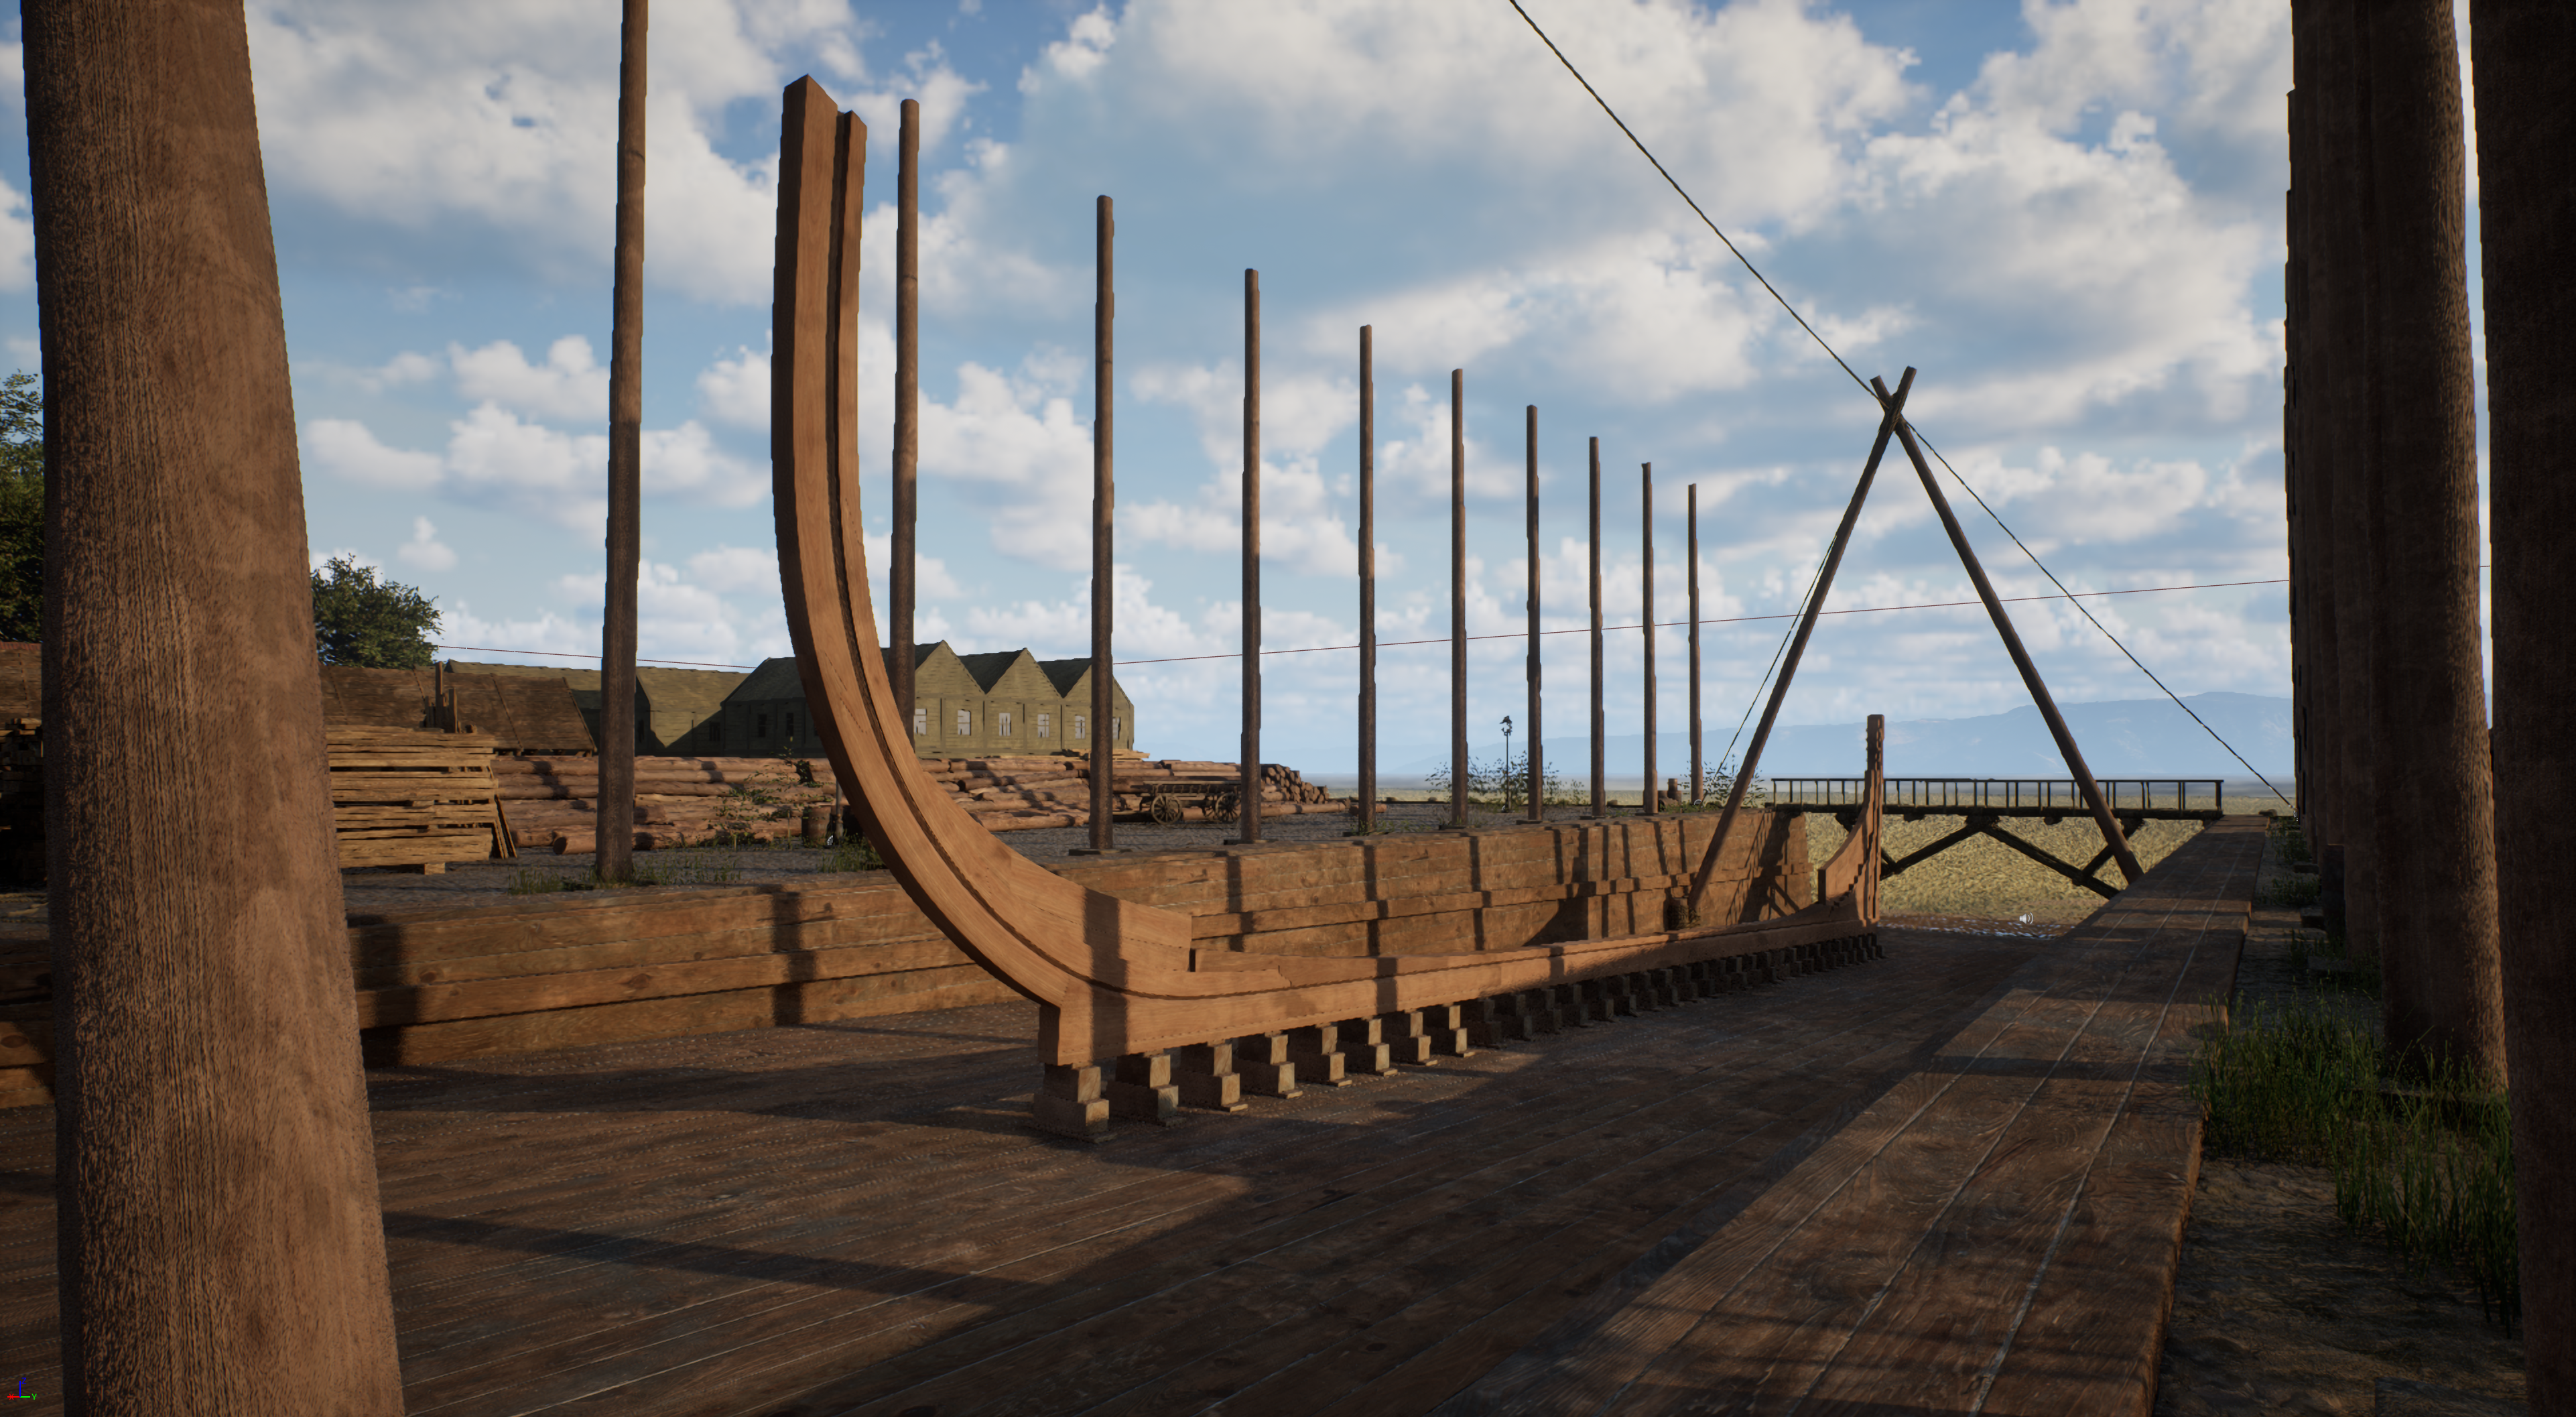
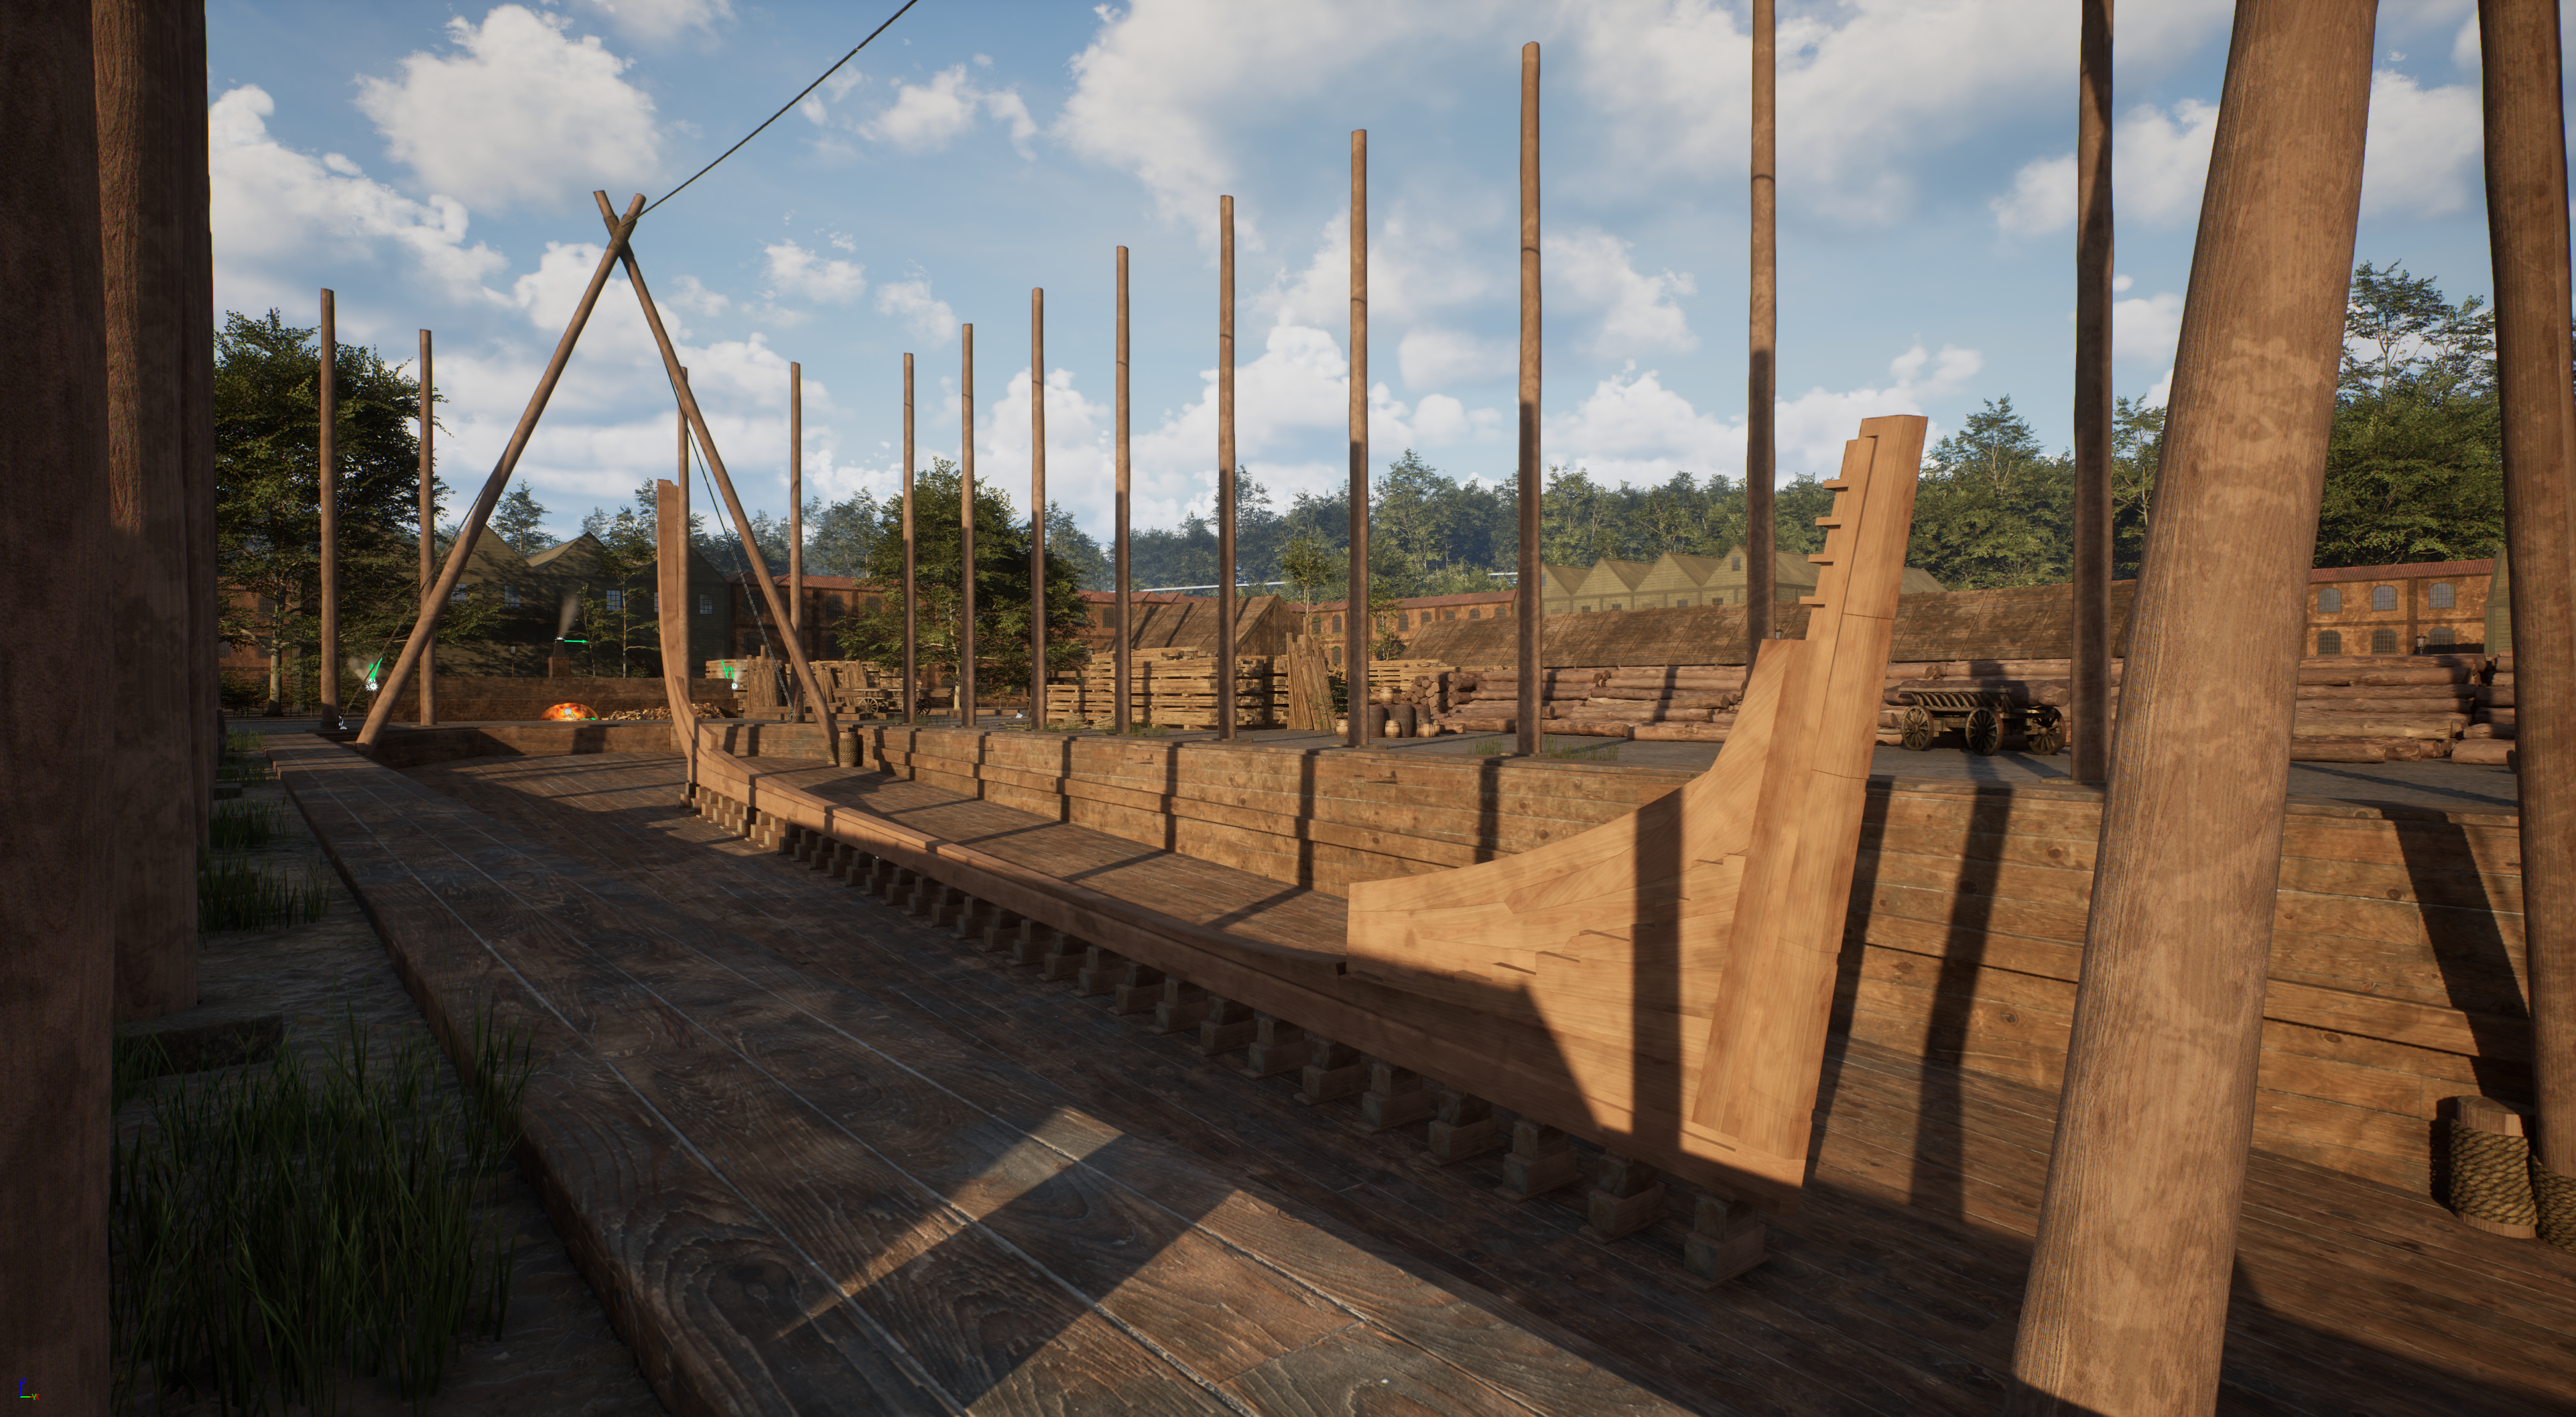
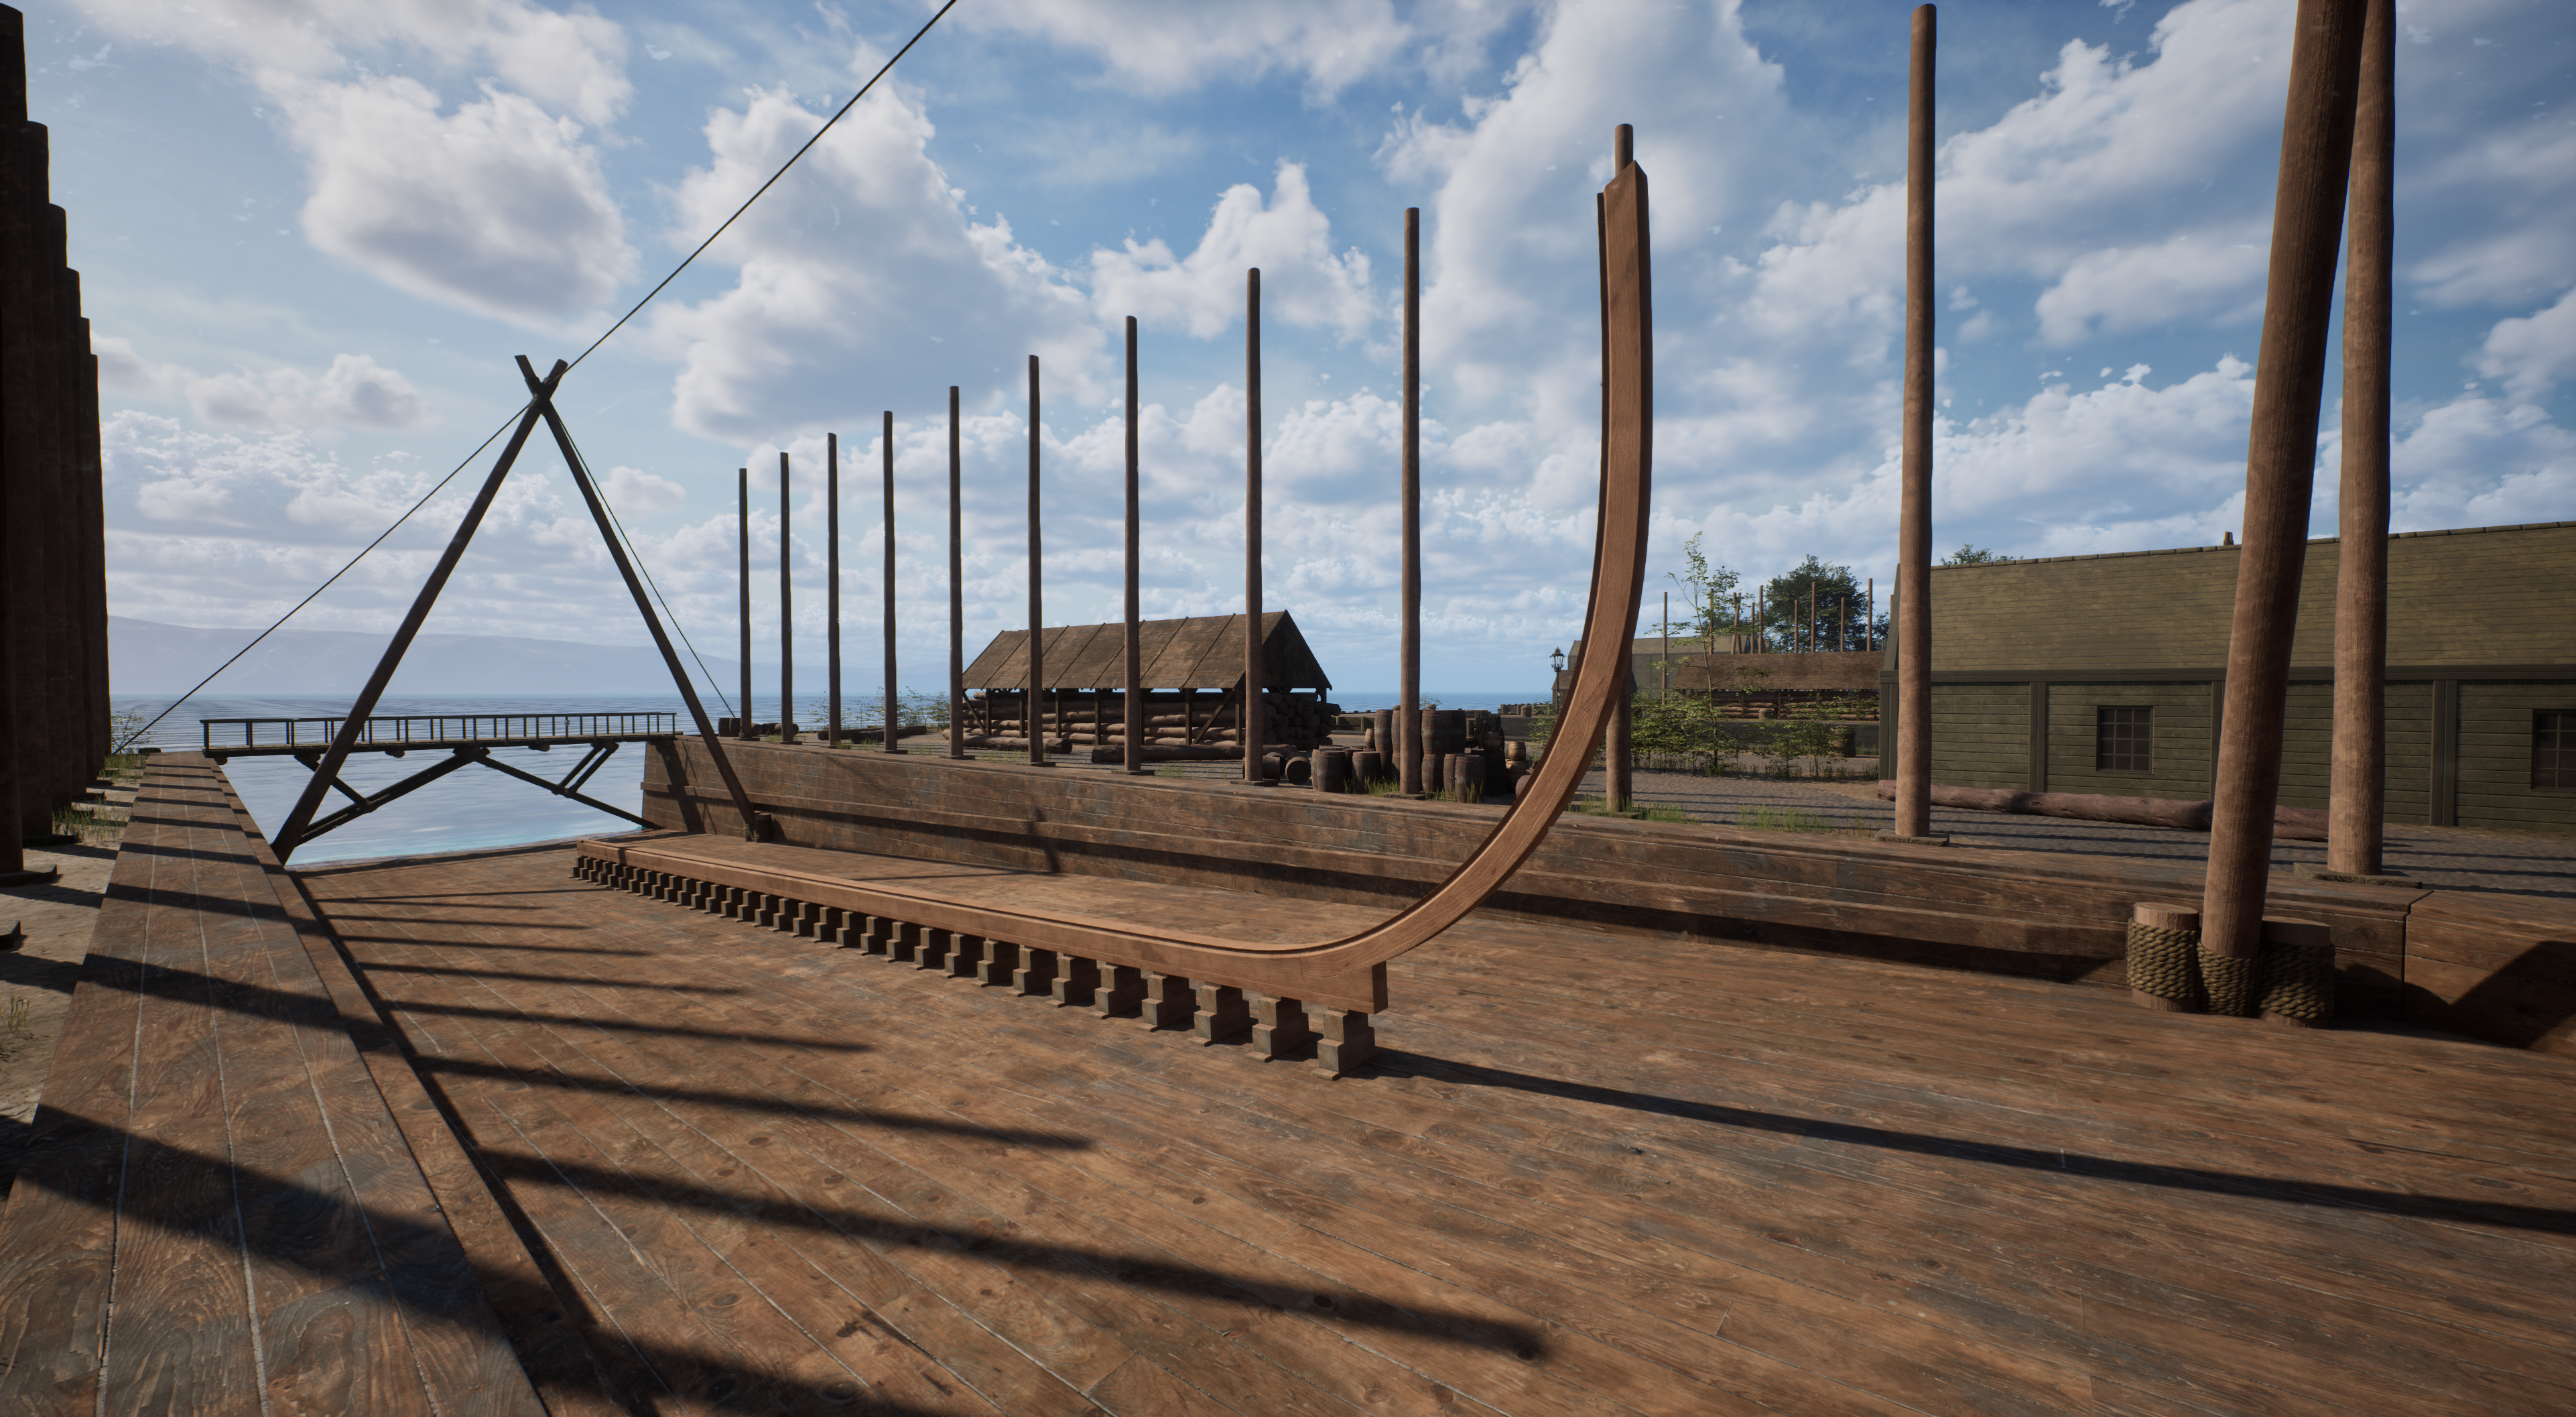
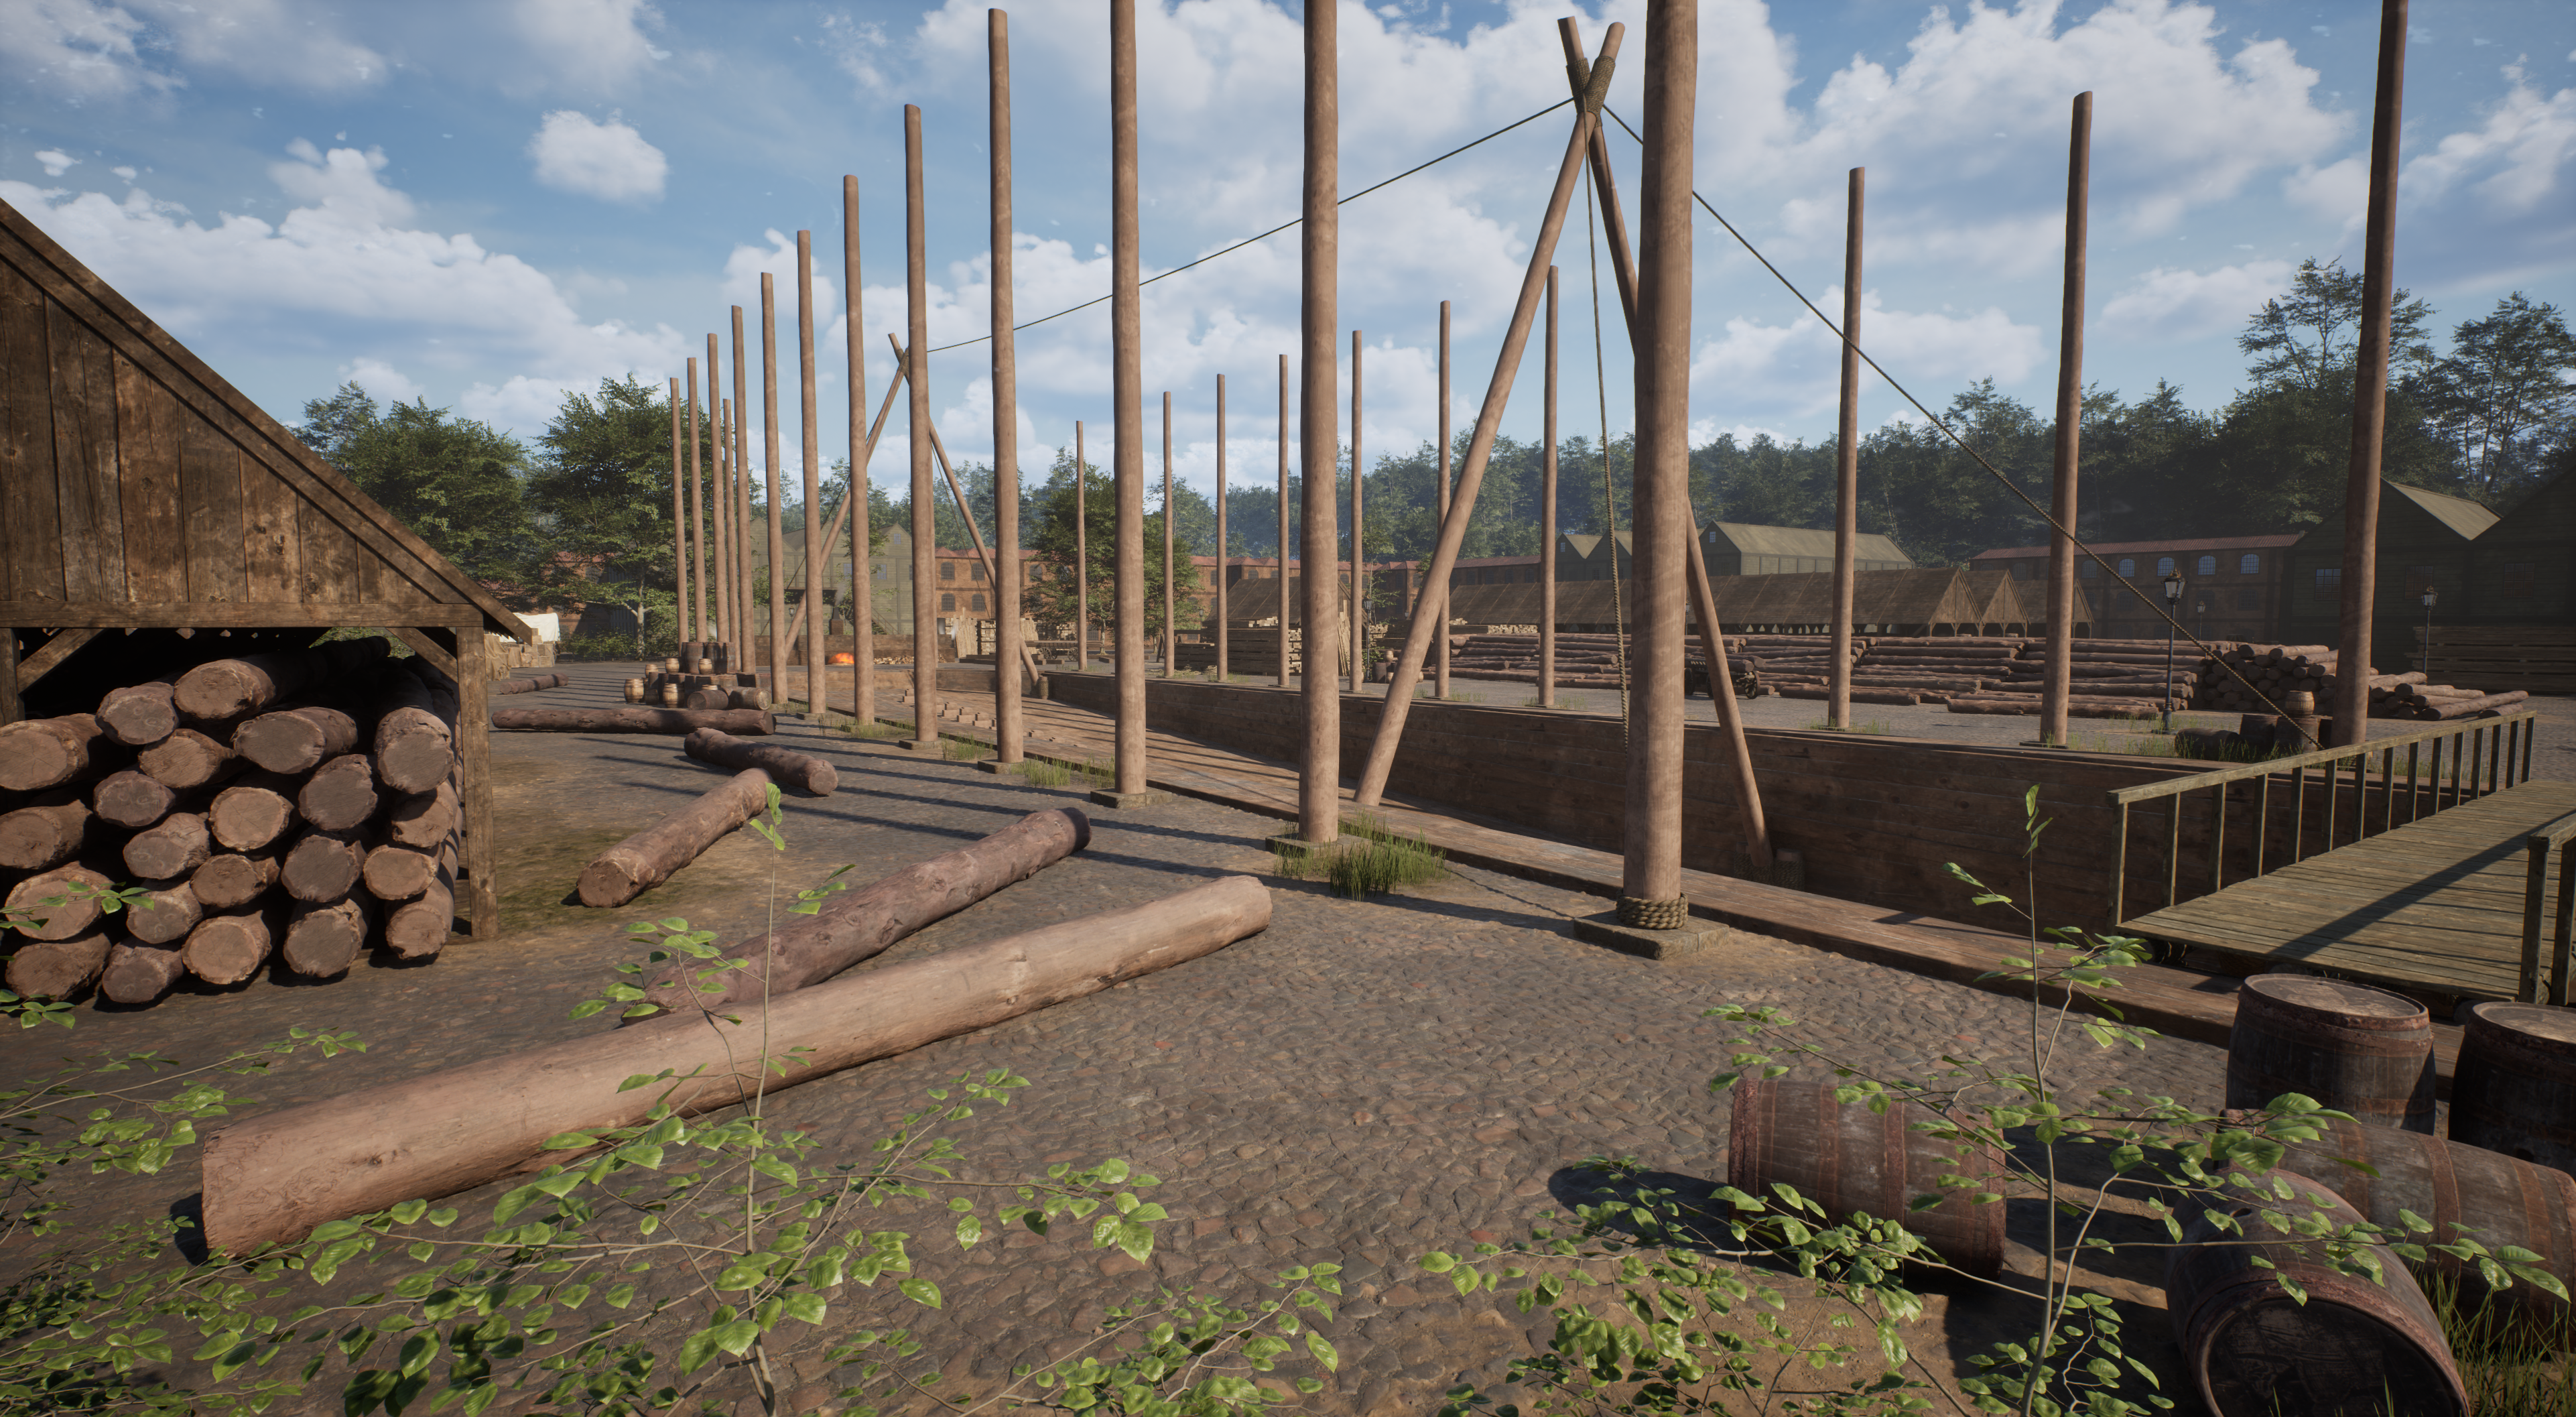
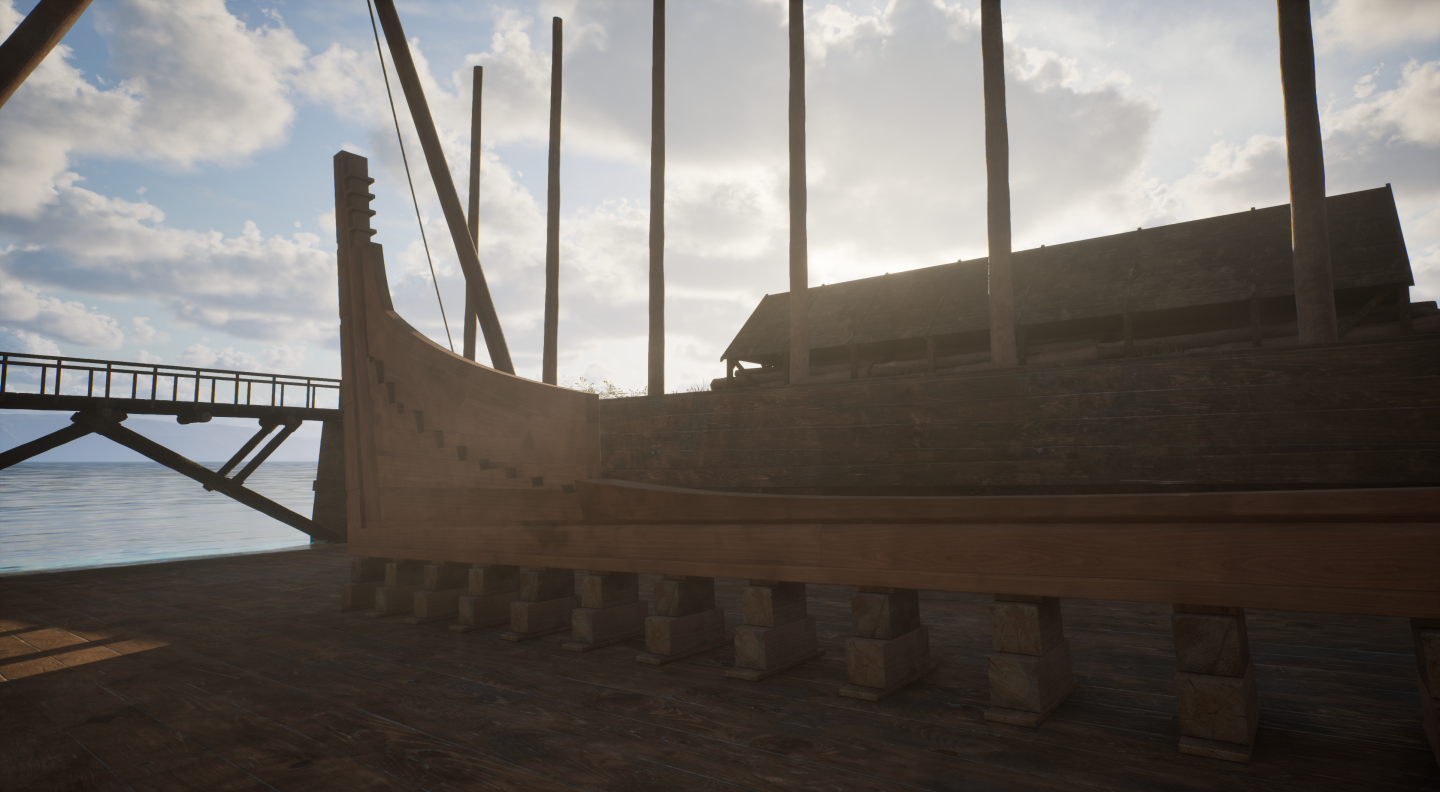
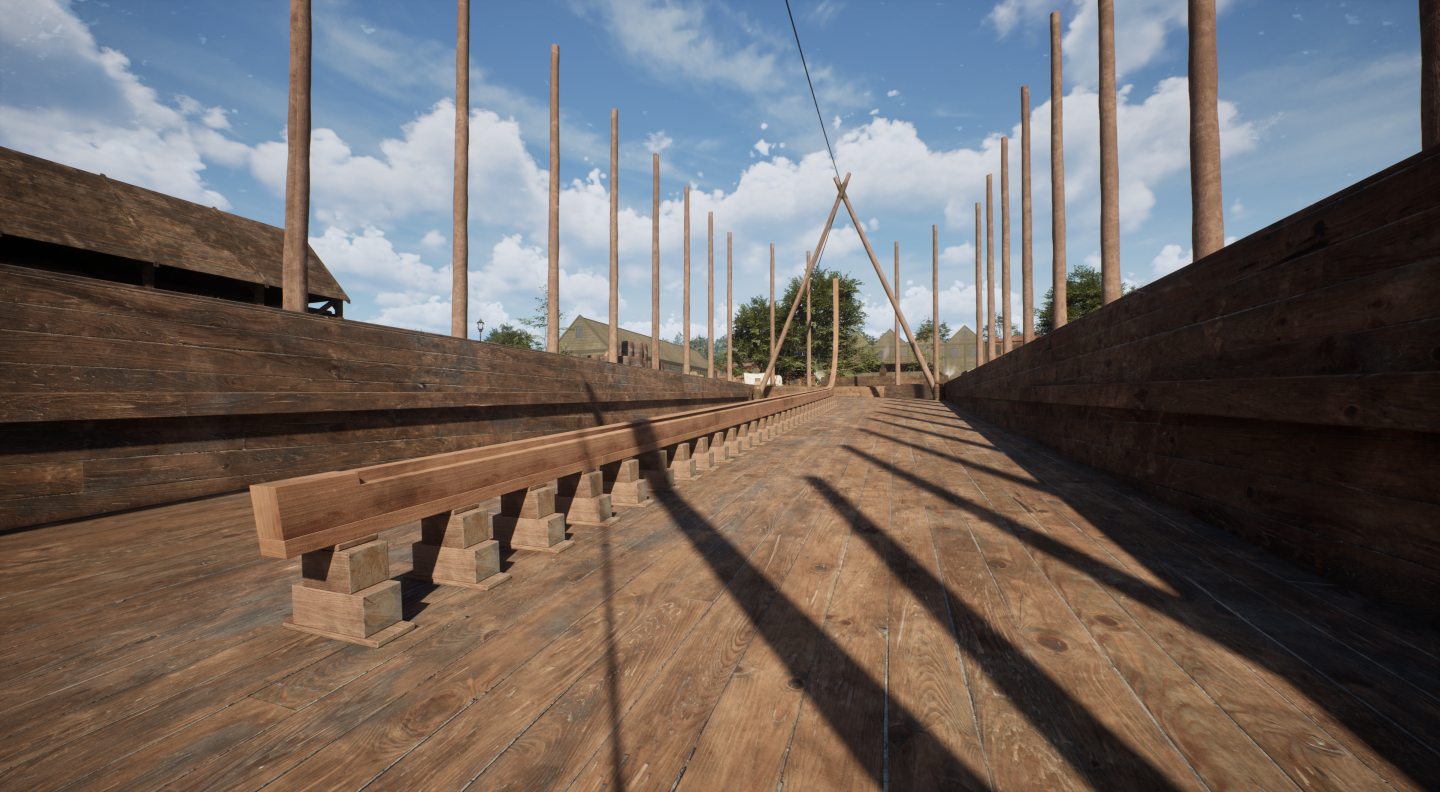
the keel has been laid....

-
Yet Another Pandora 3D build
herask replied to herask's topic in CAD and 3D Modelling/Drafting Plans with Software
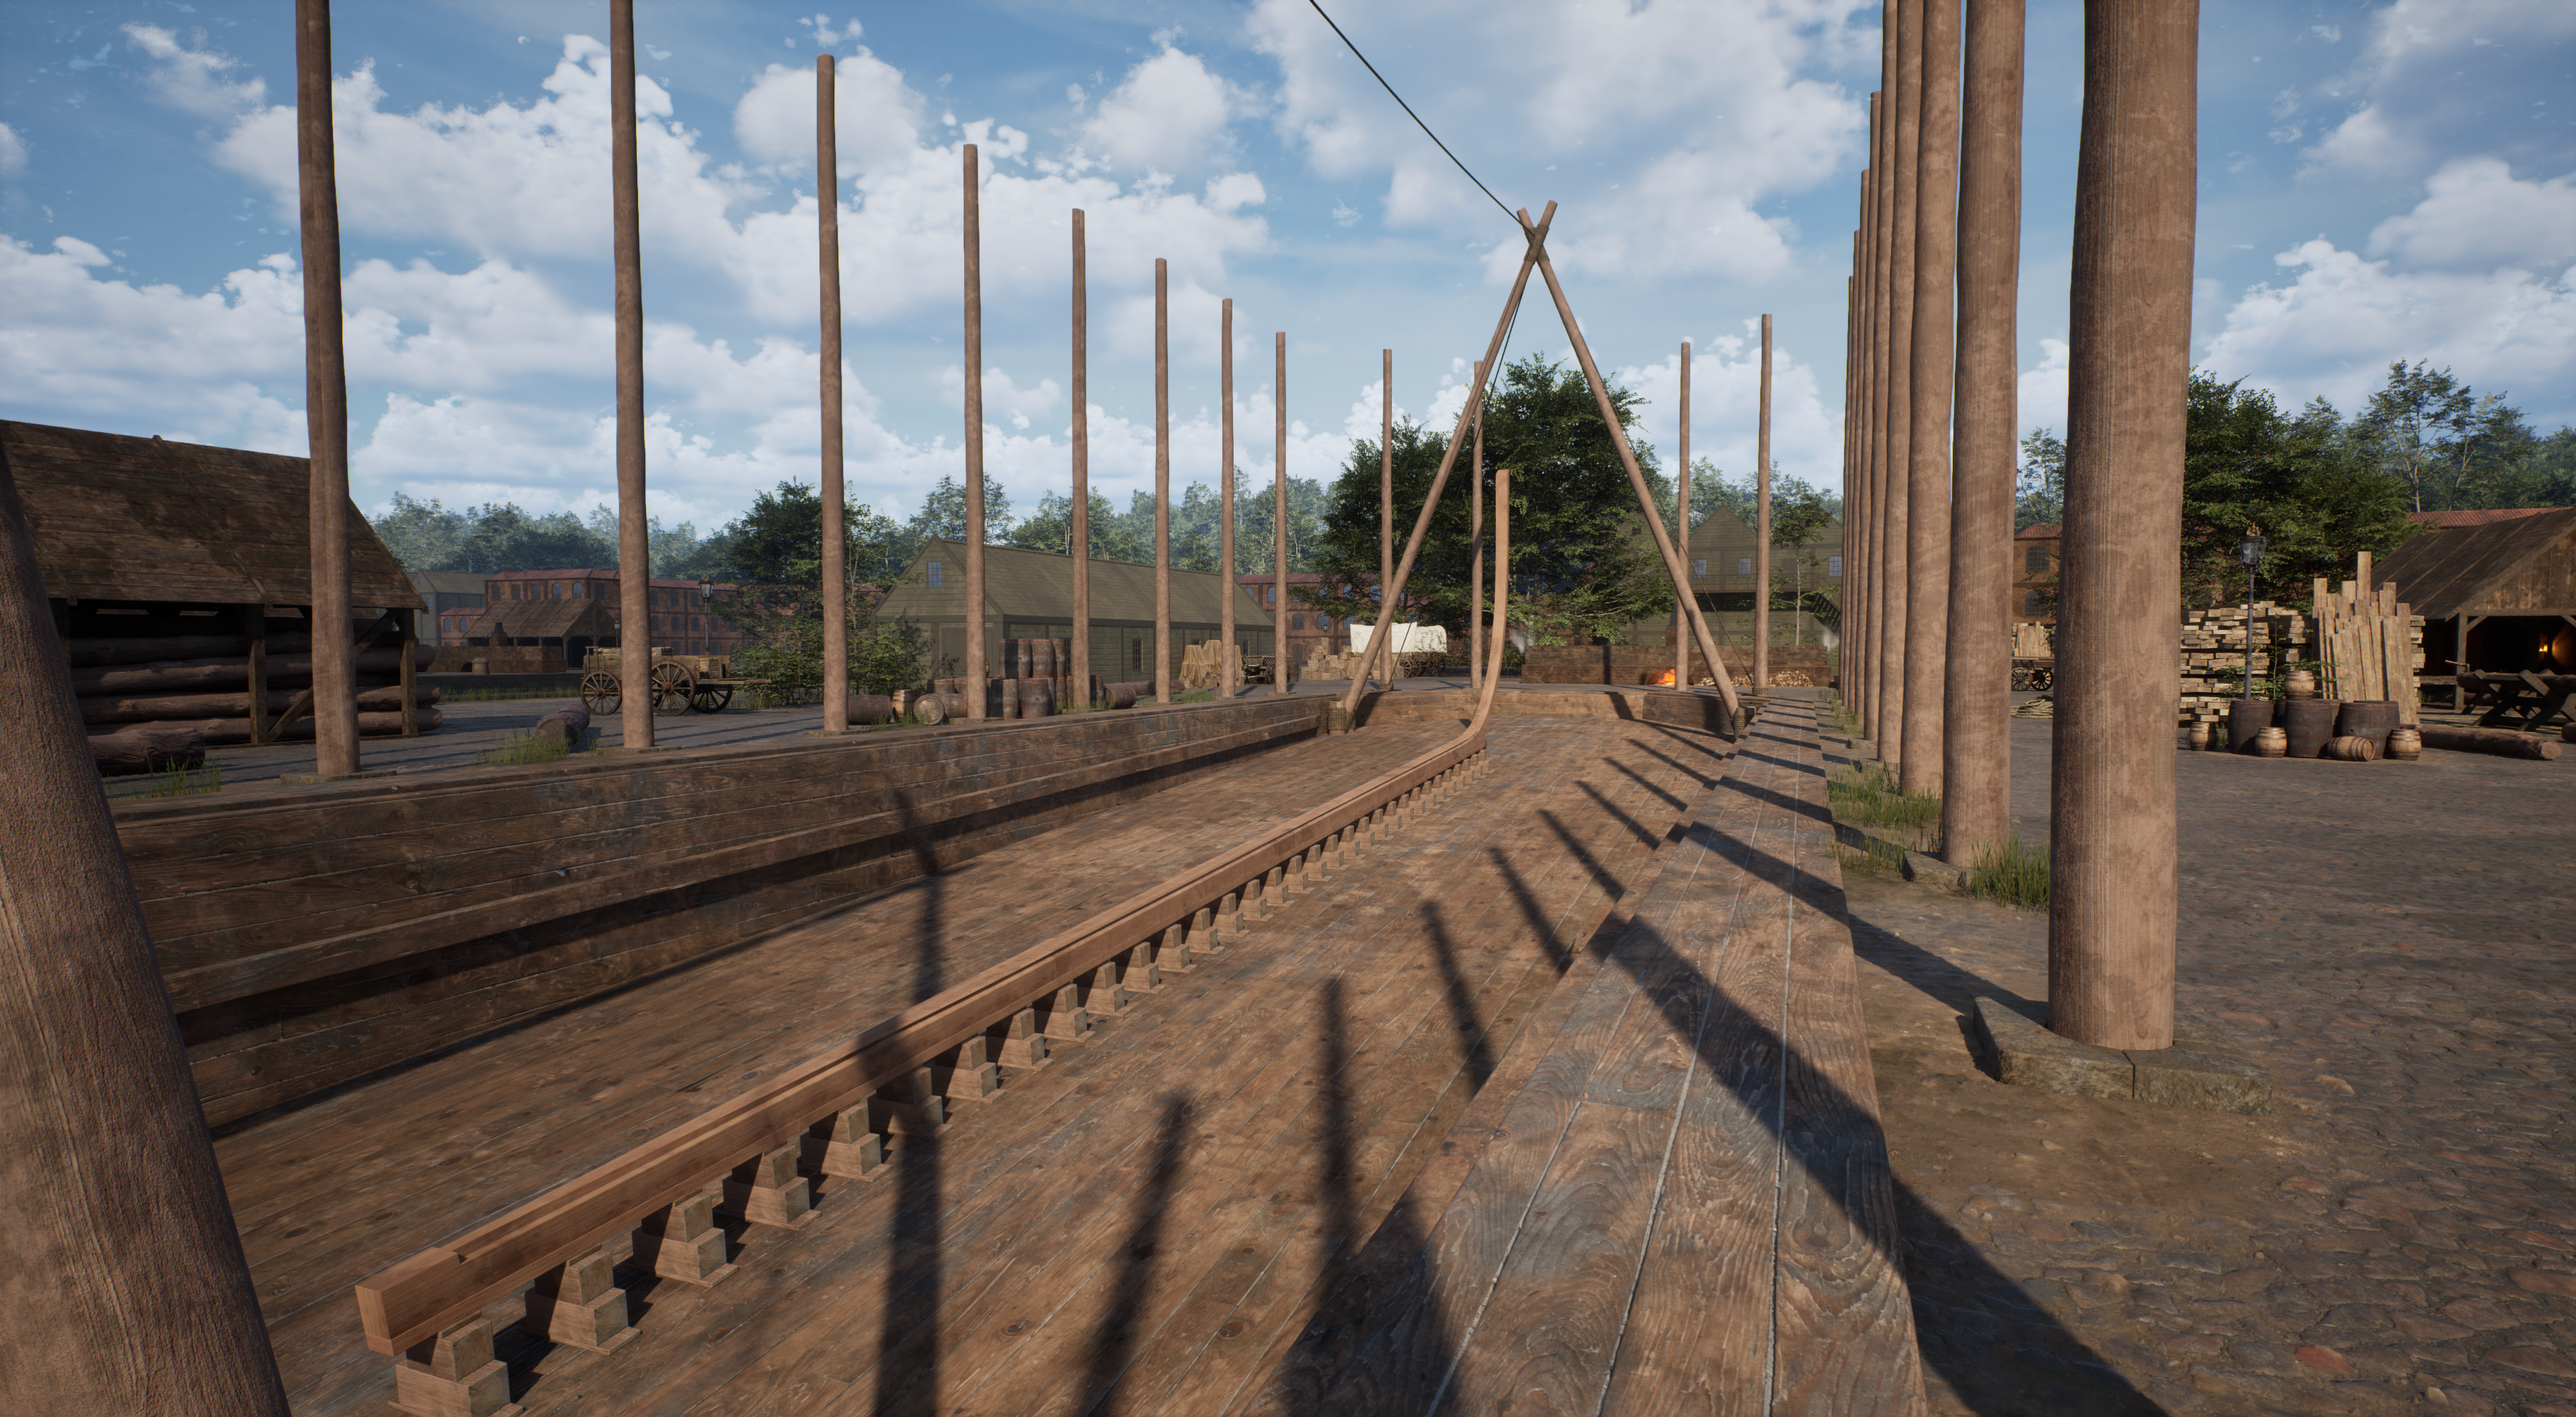
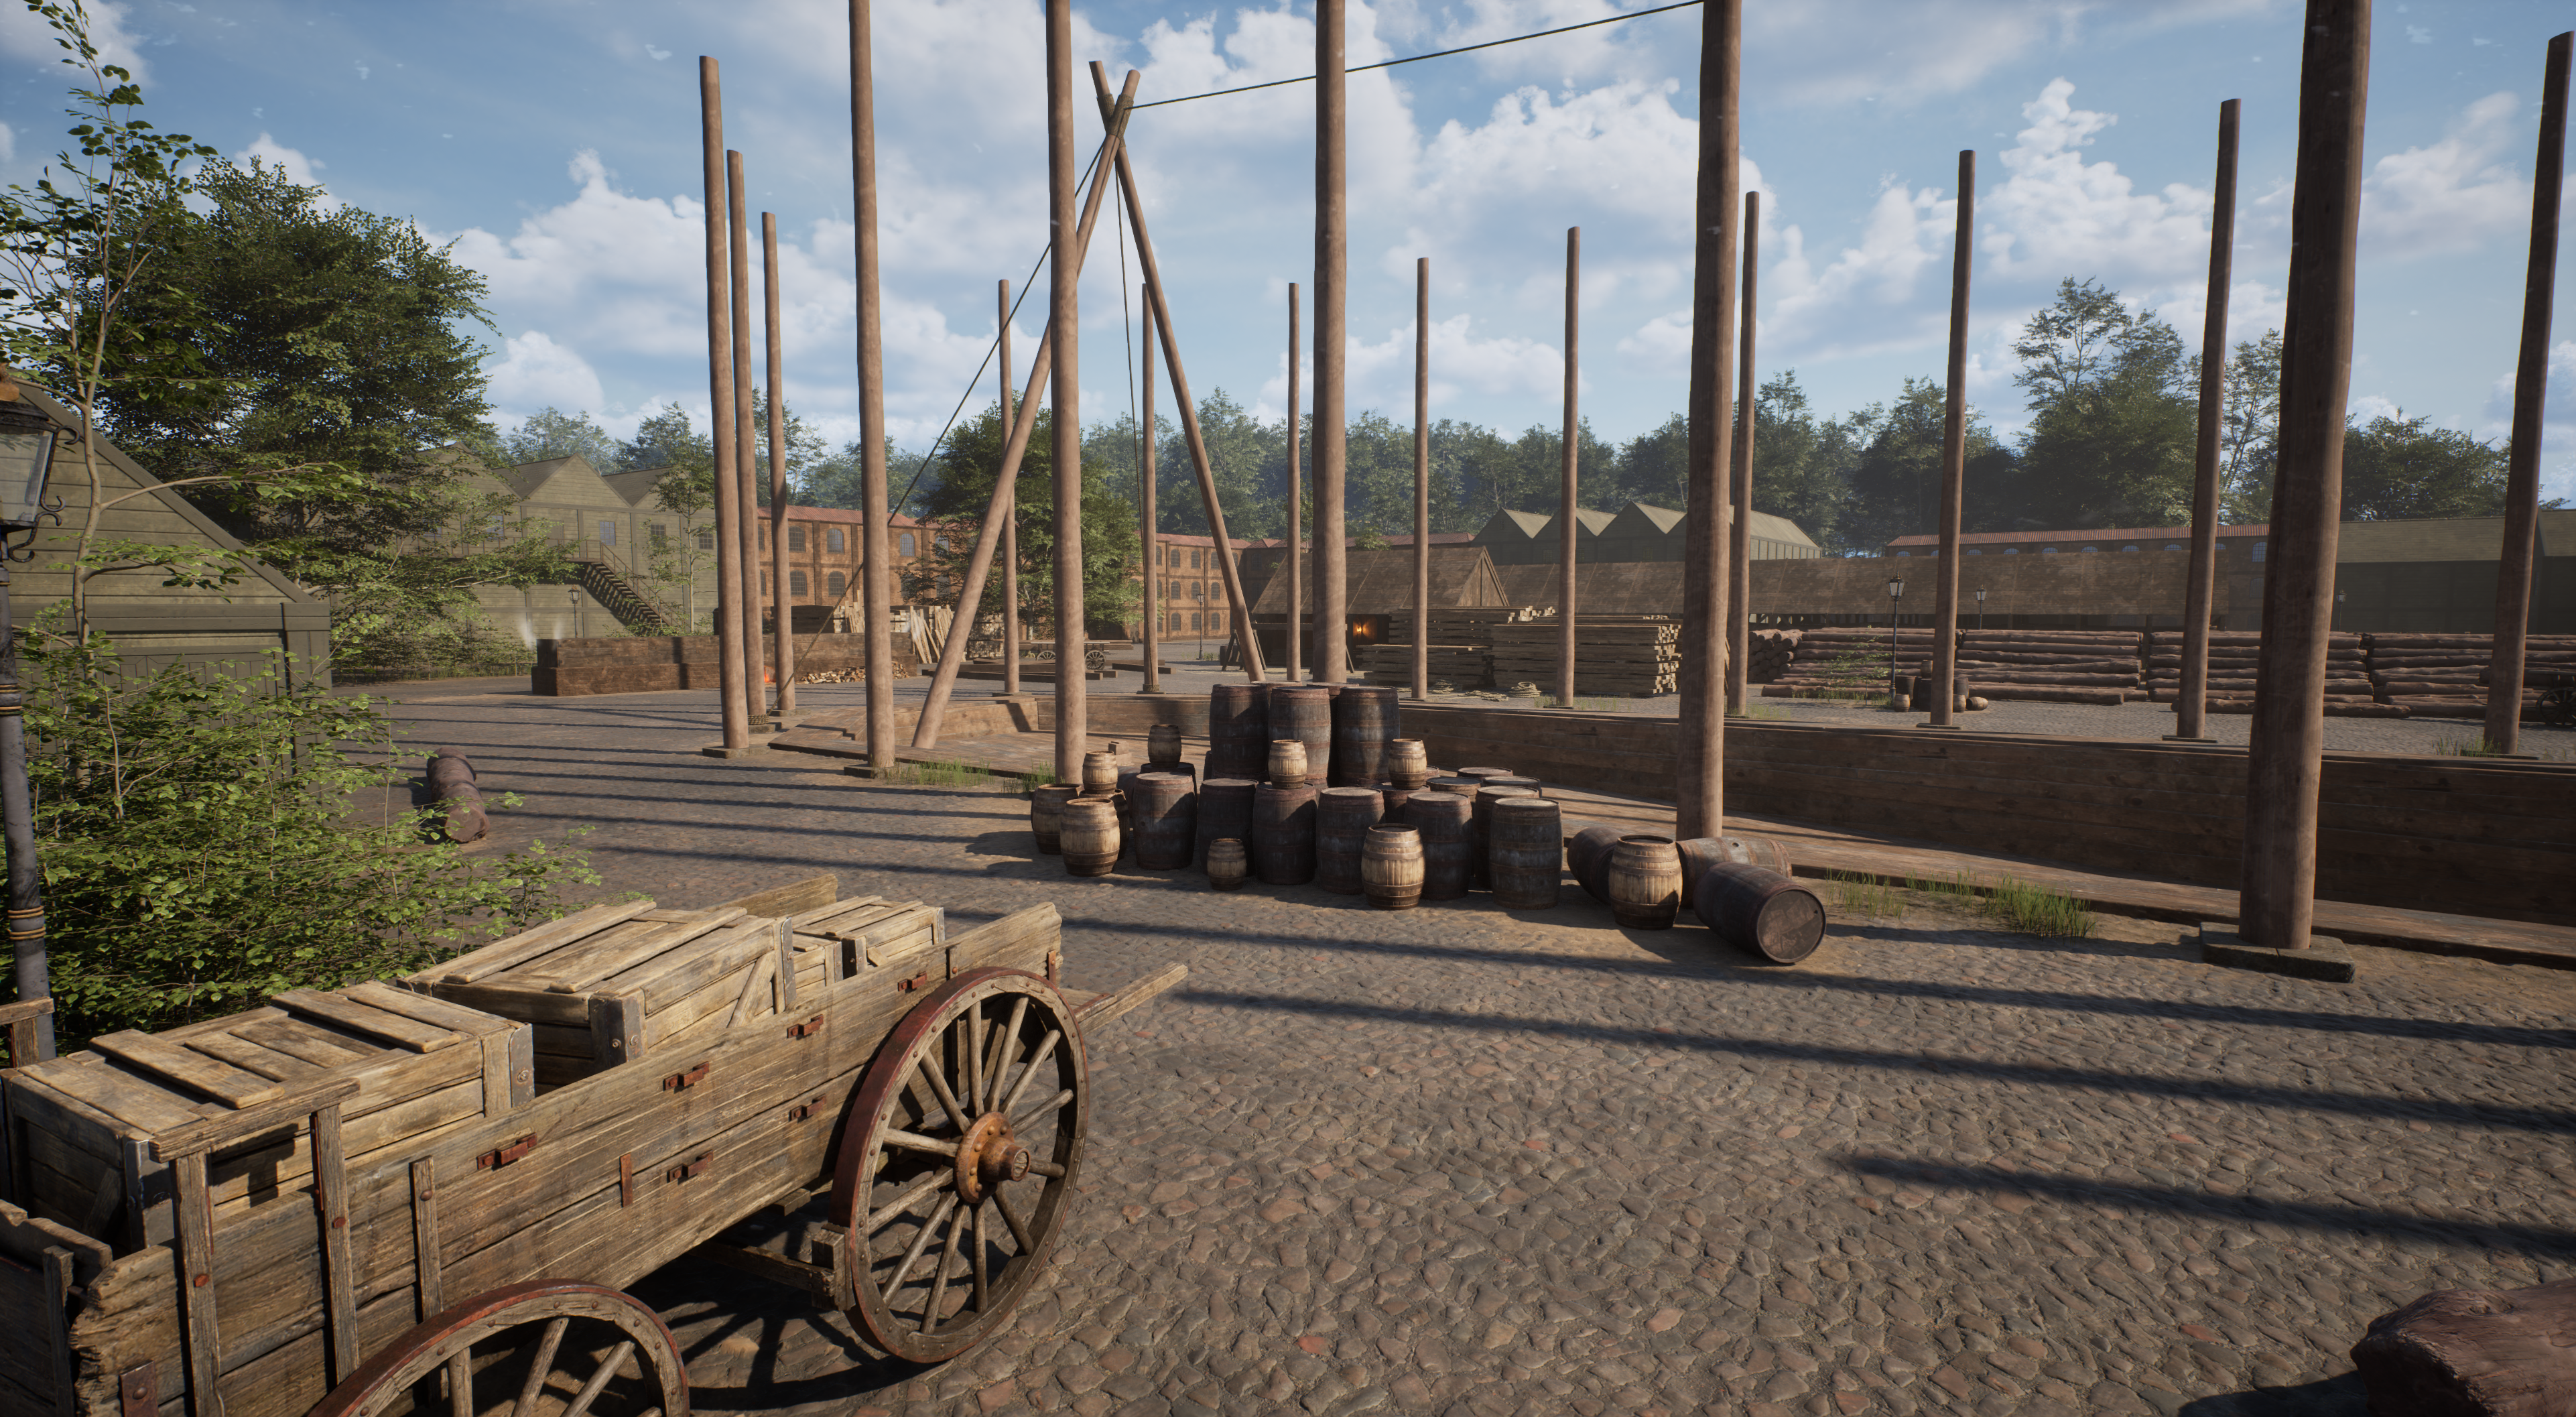
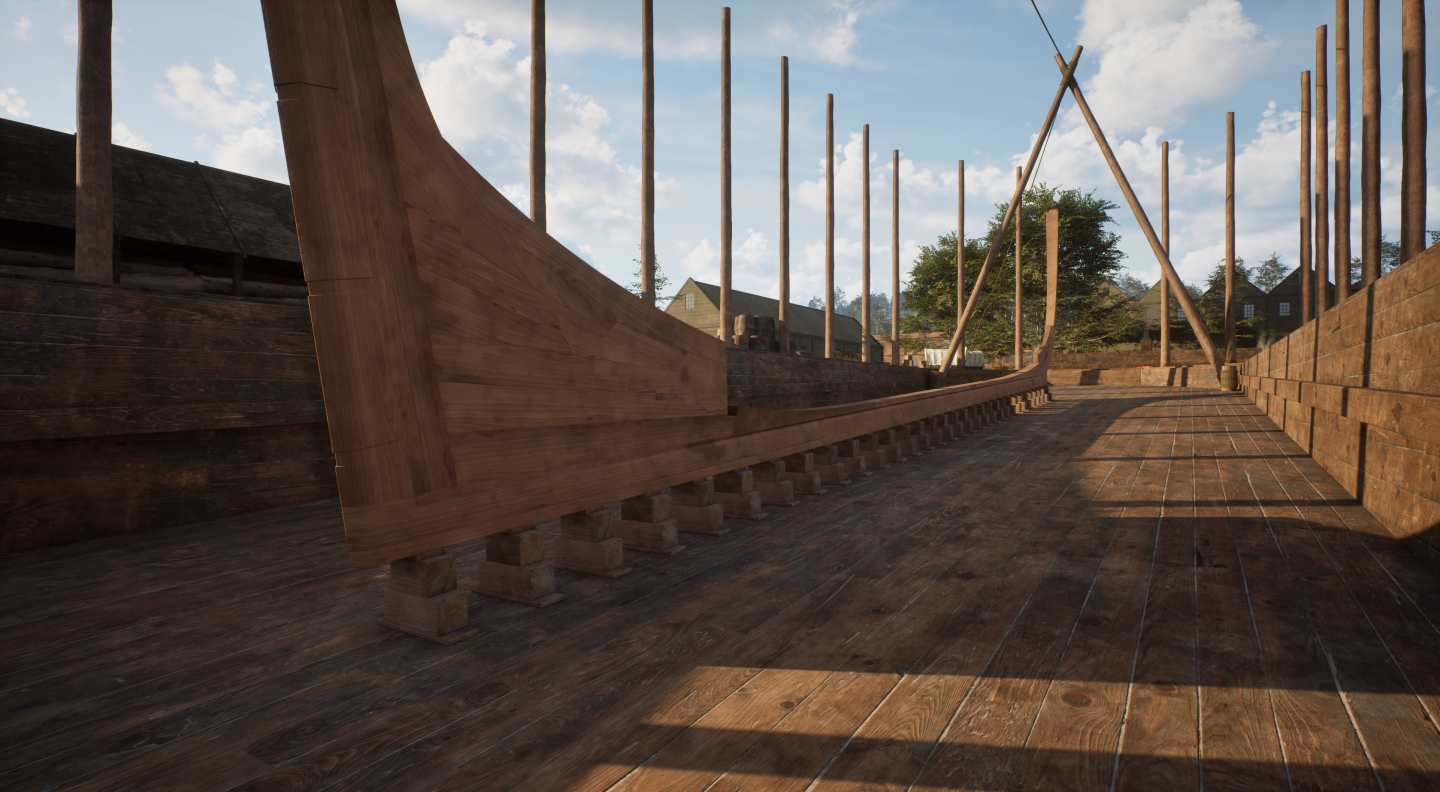
this took a while, aligning everything together, but finally I think I'm good to go...😆

-
Yet Another Pandora 3D build
herask replied to herask's topic in CAD and 3D Modelling/Drafting Plans with Software
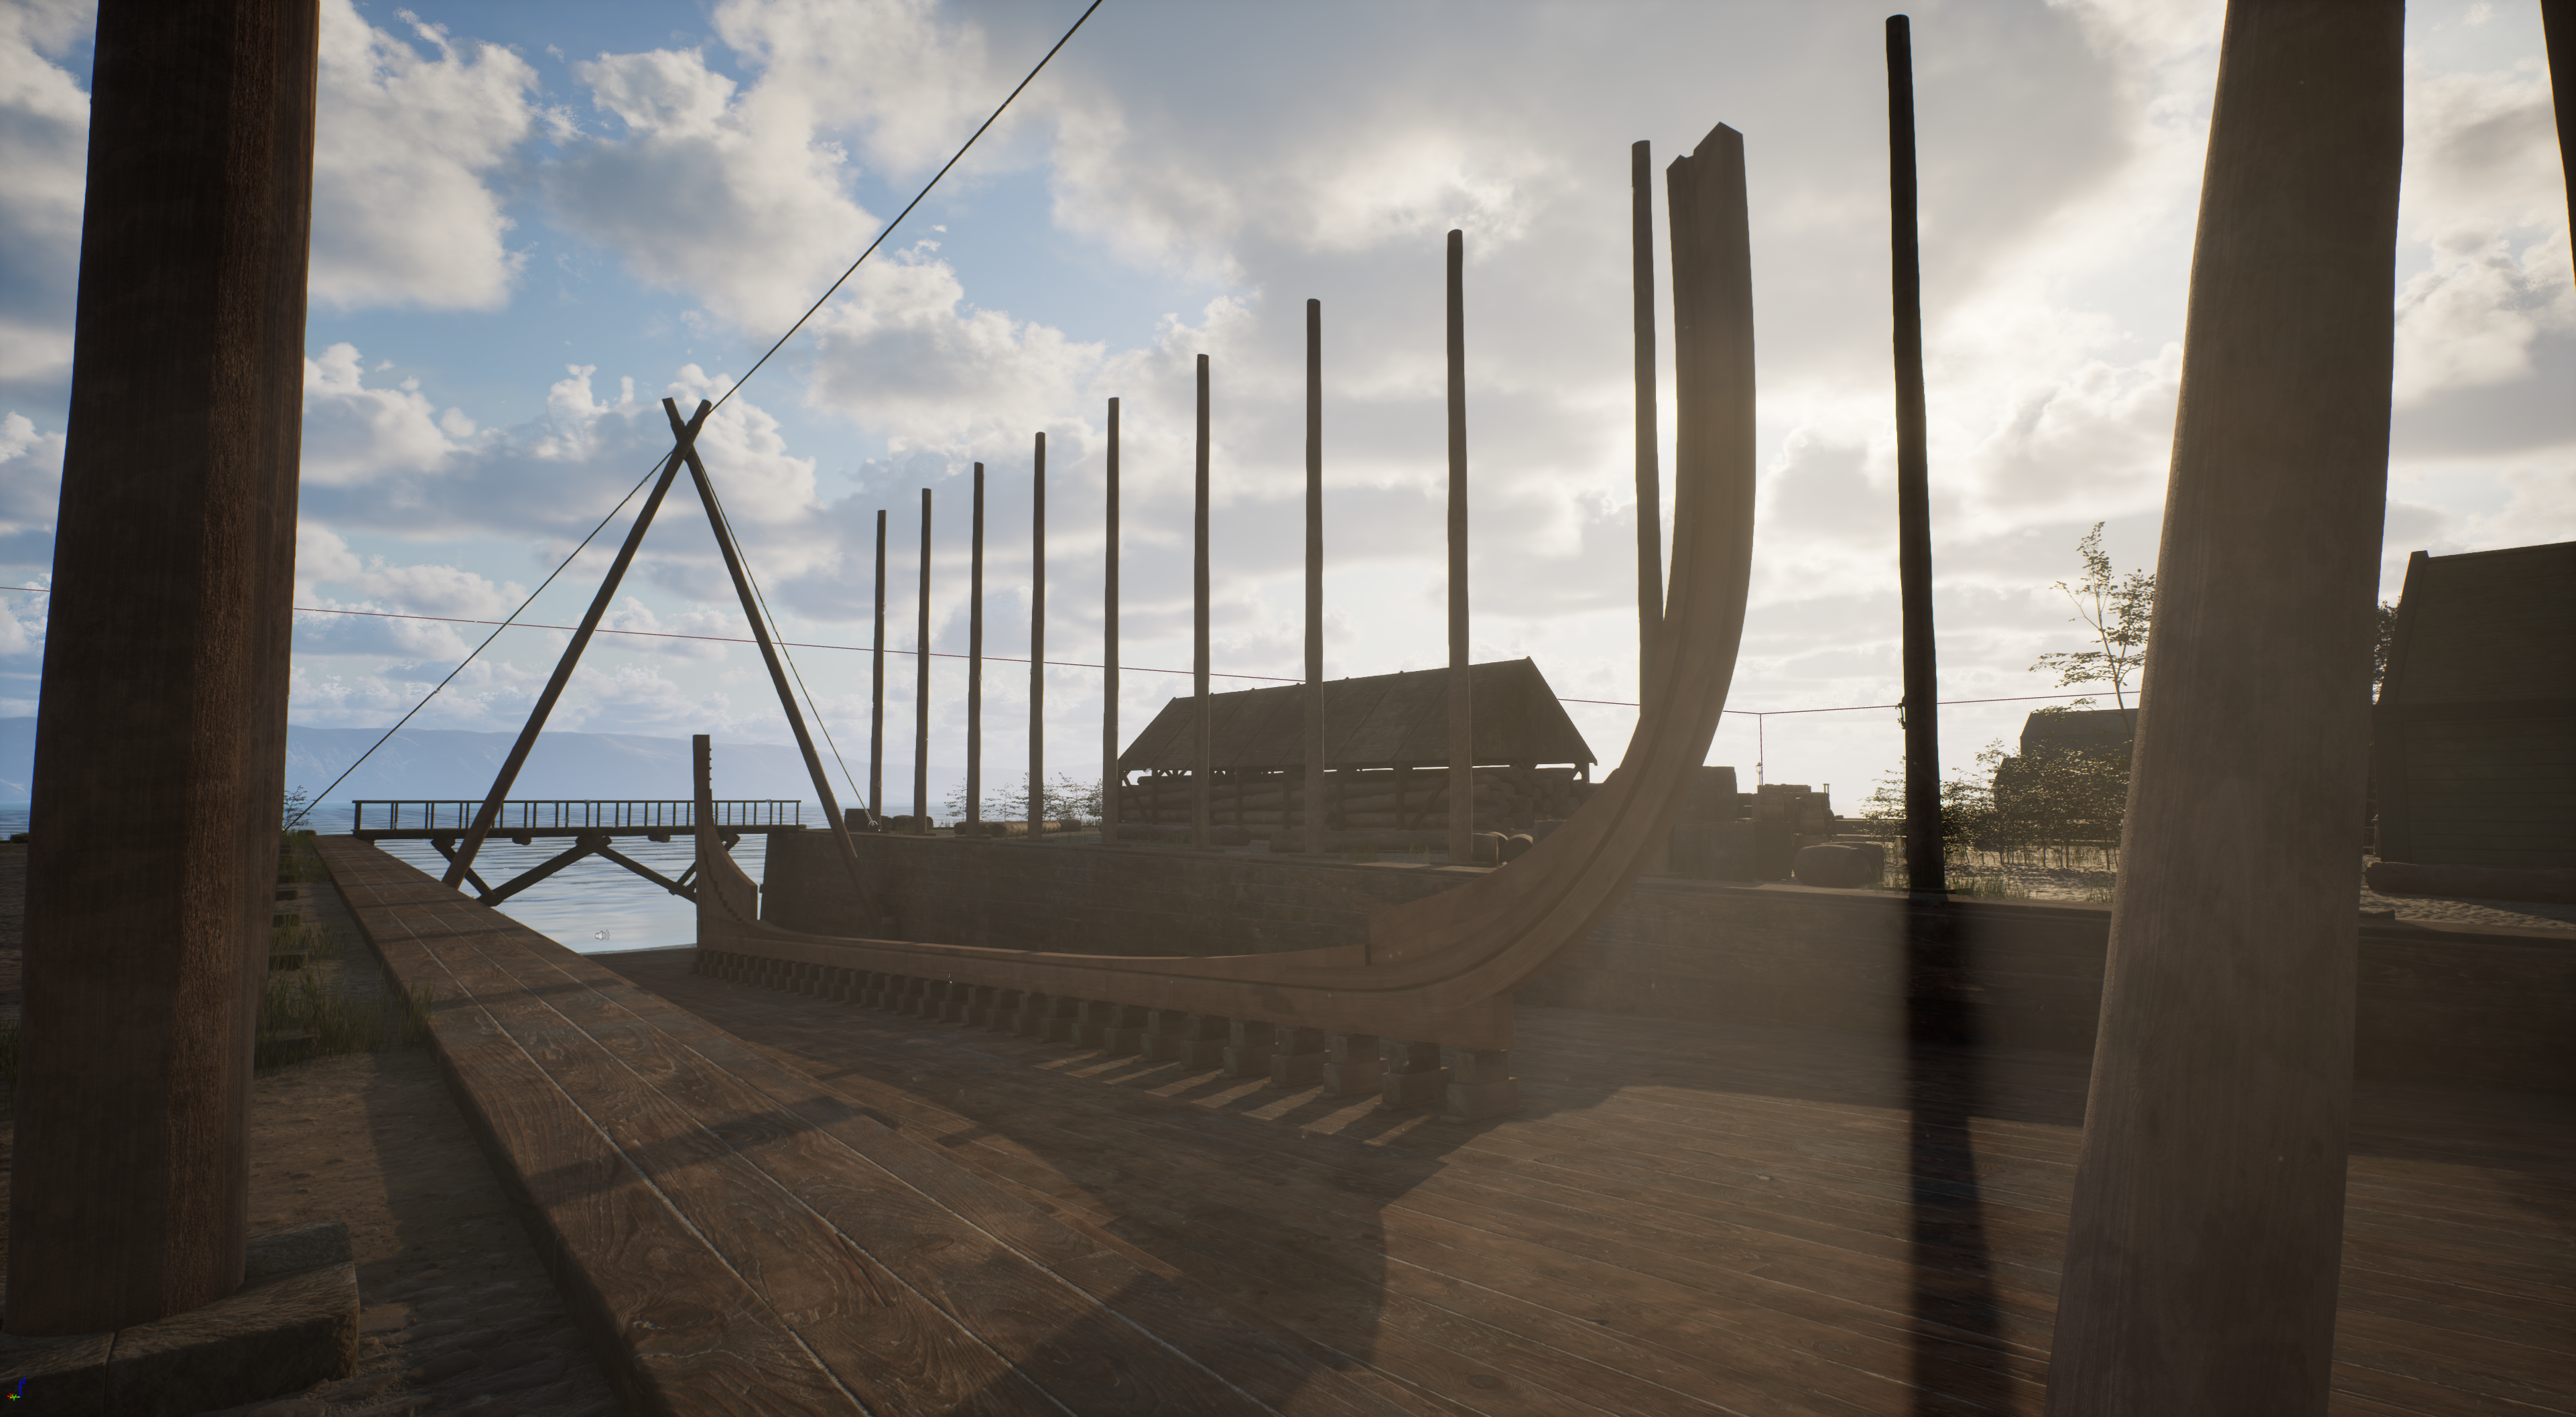
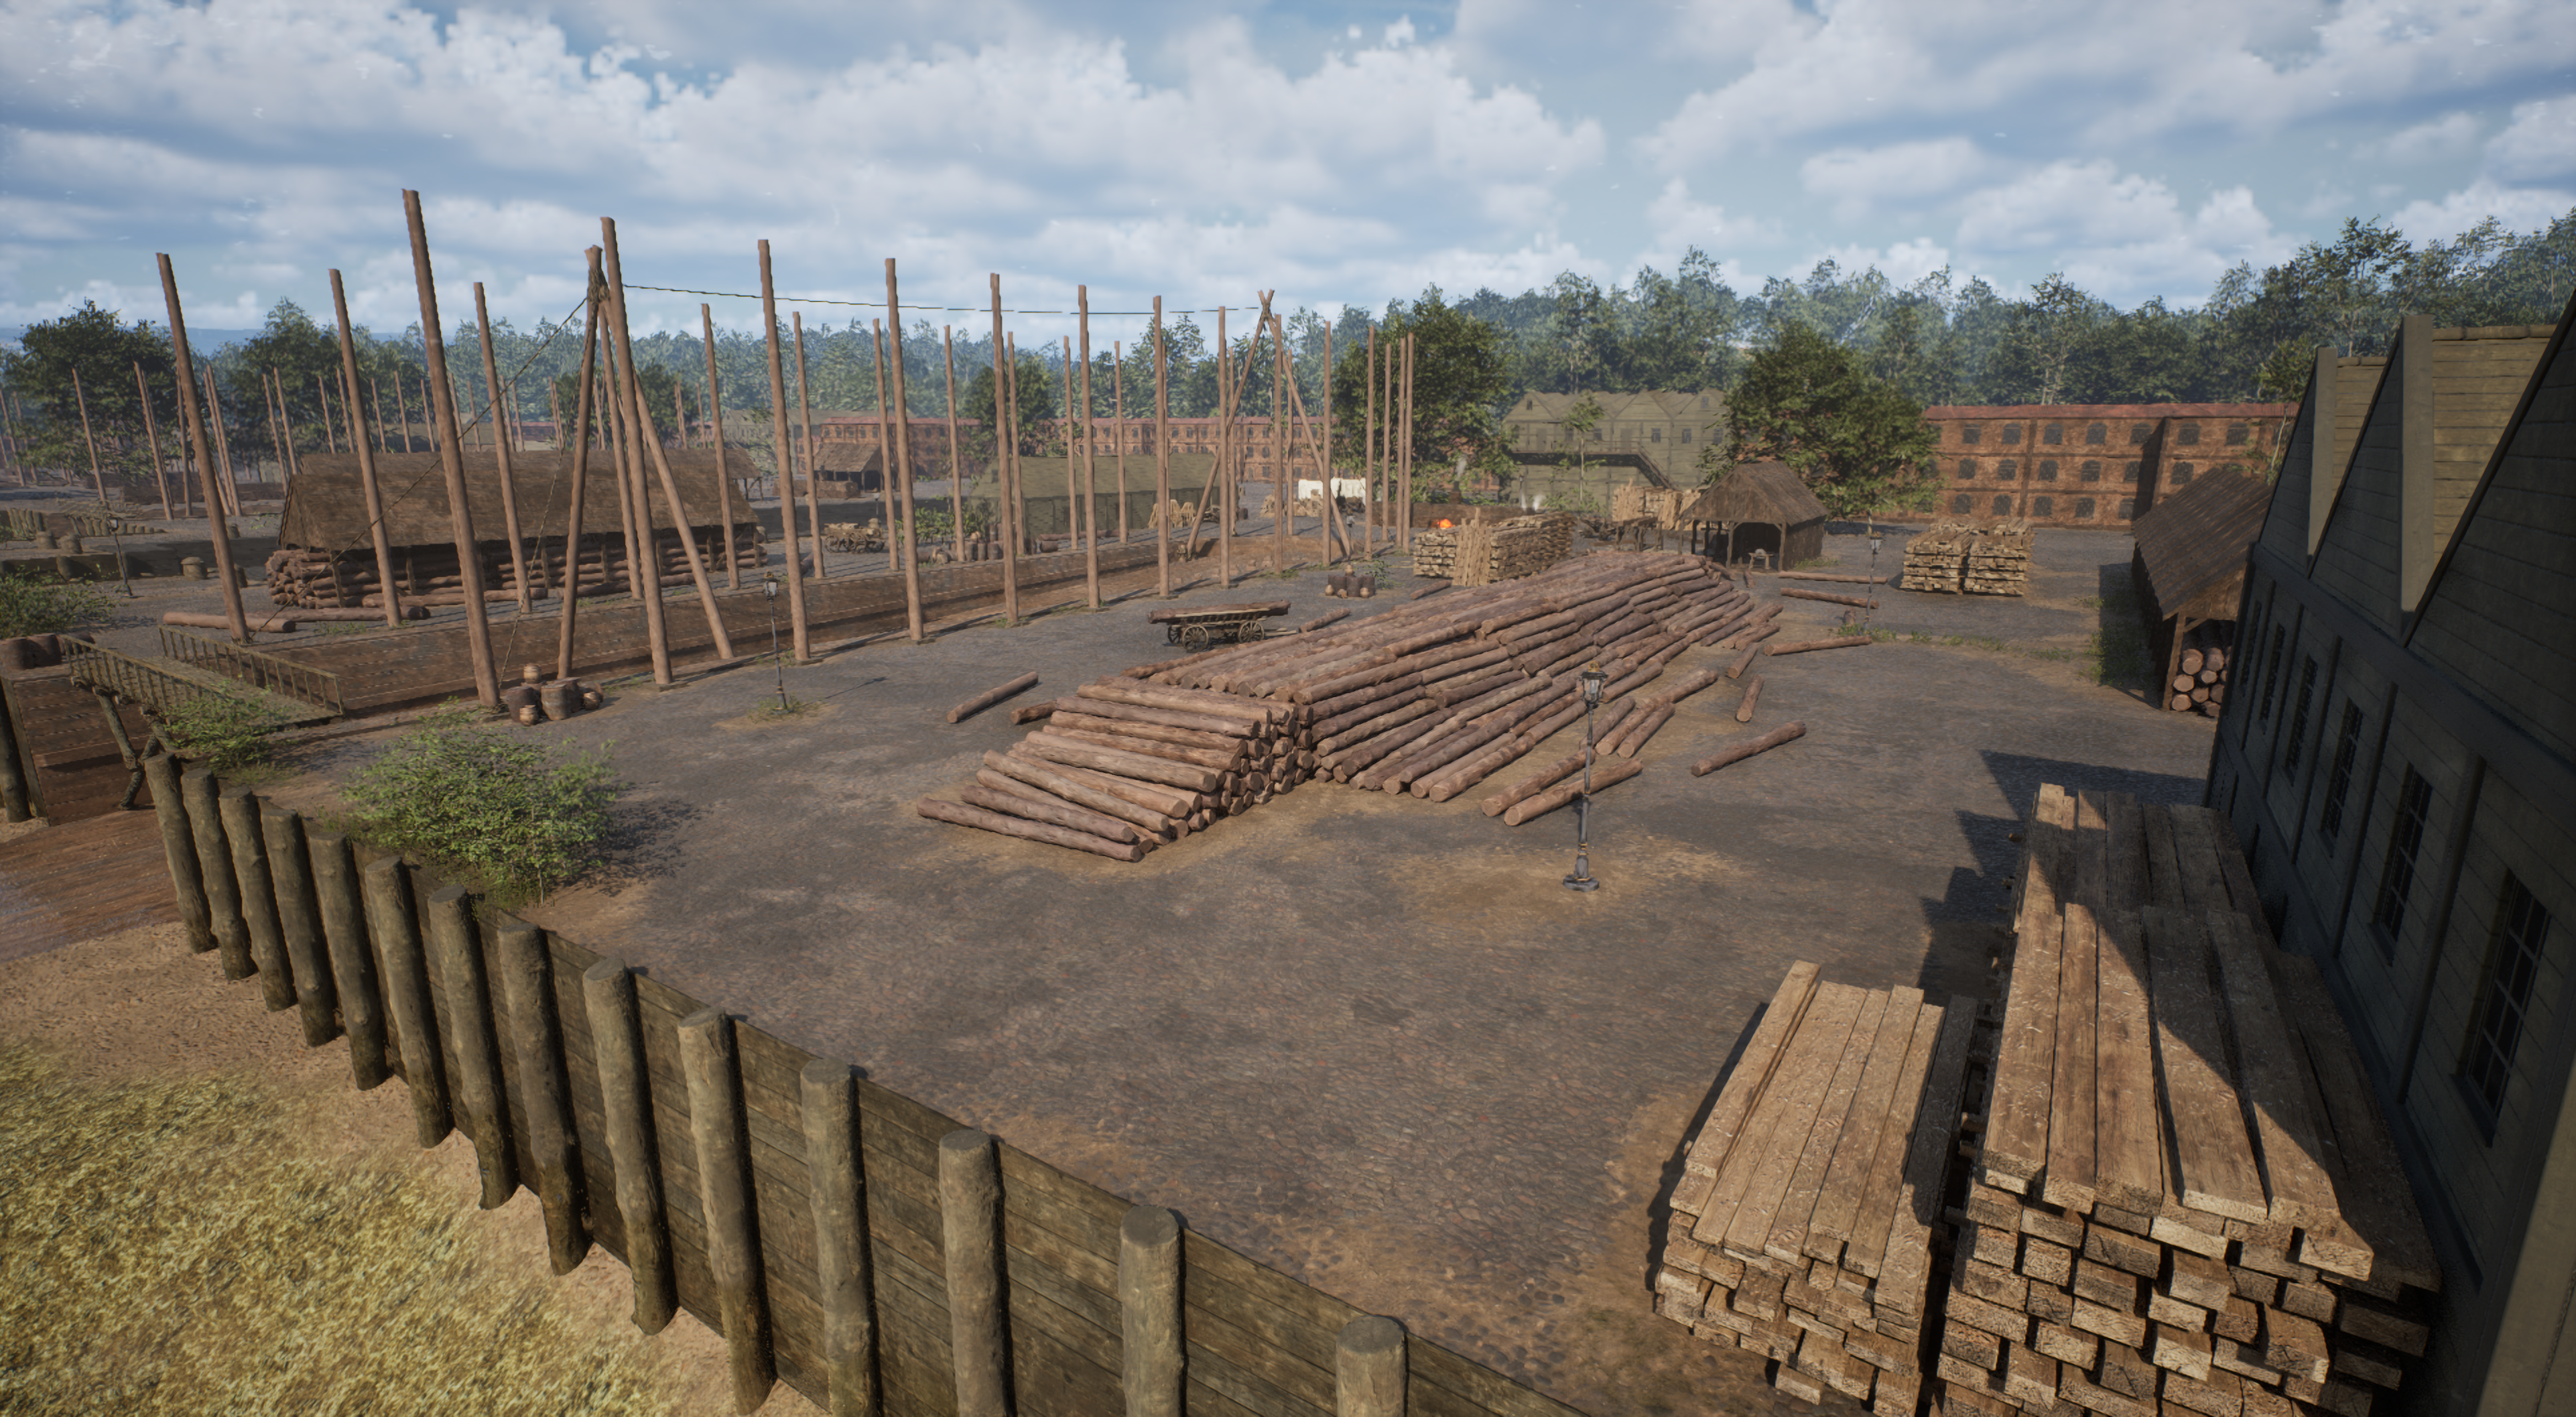
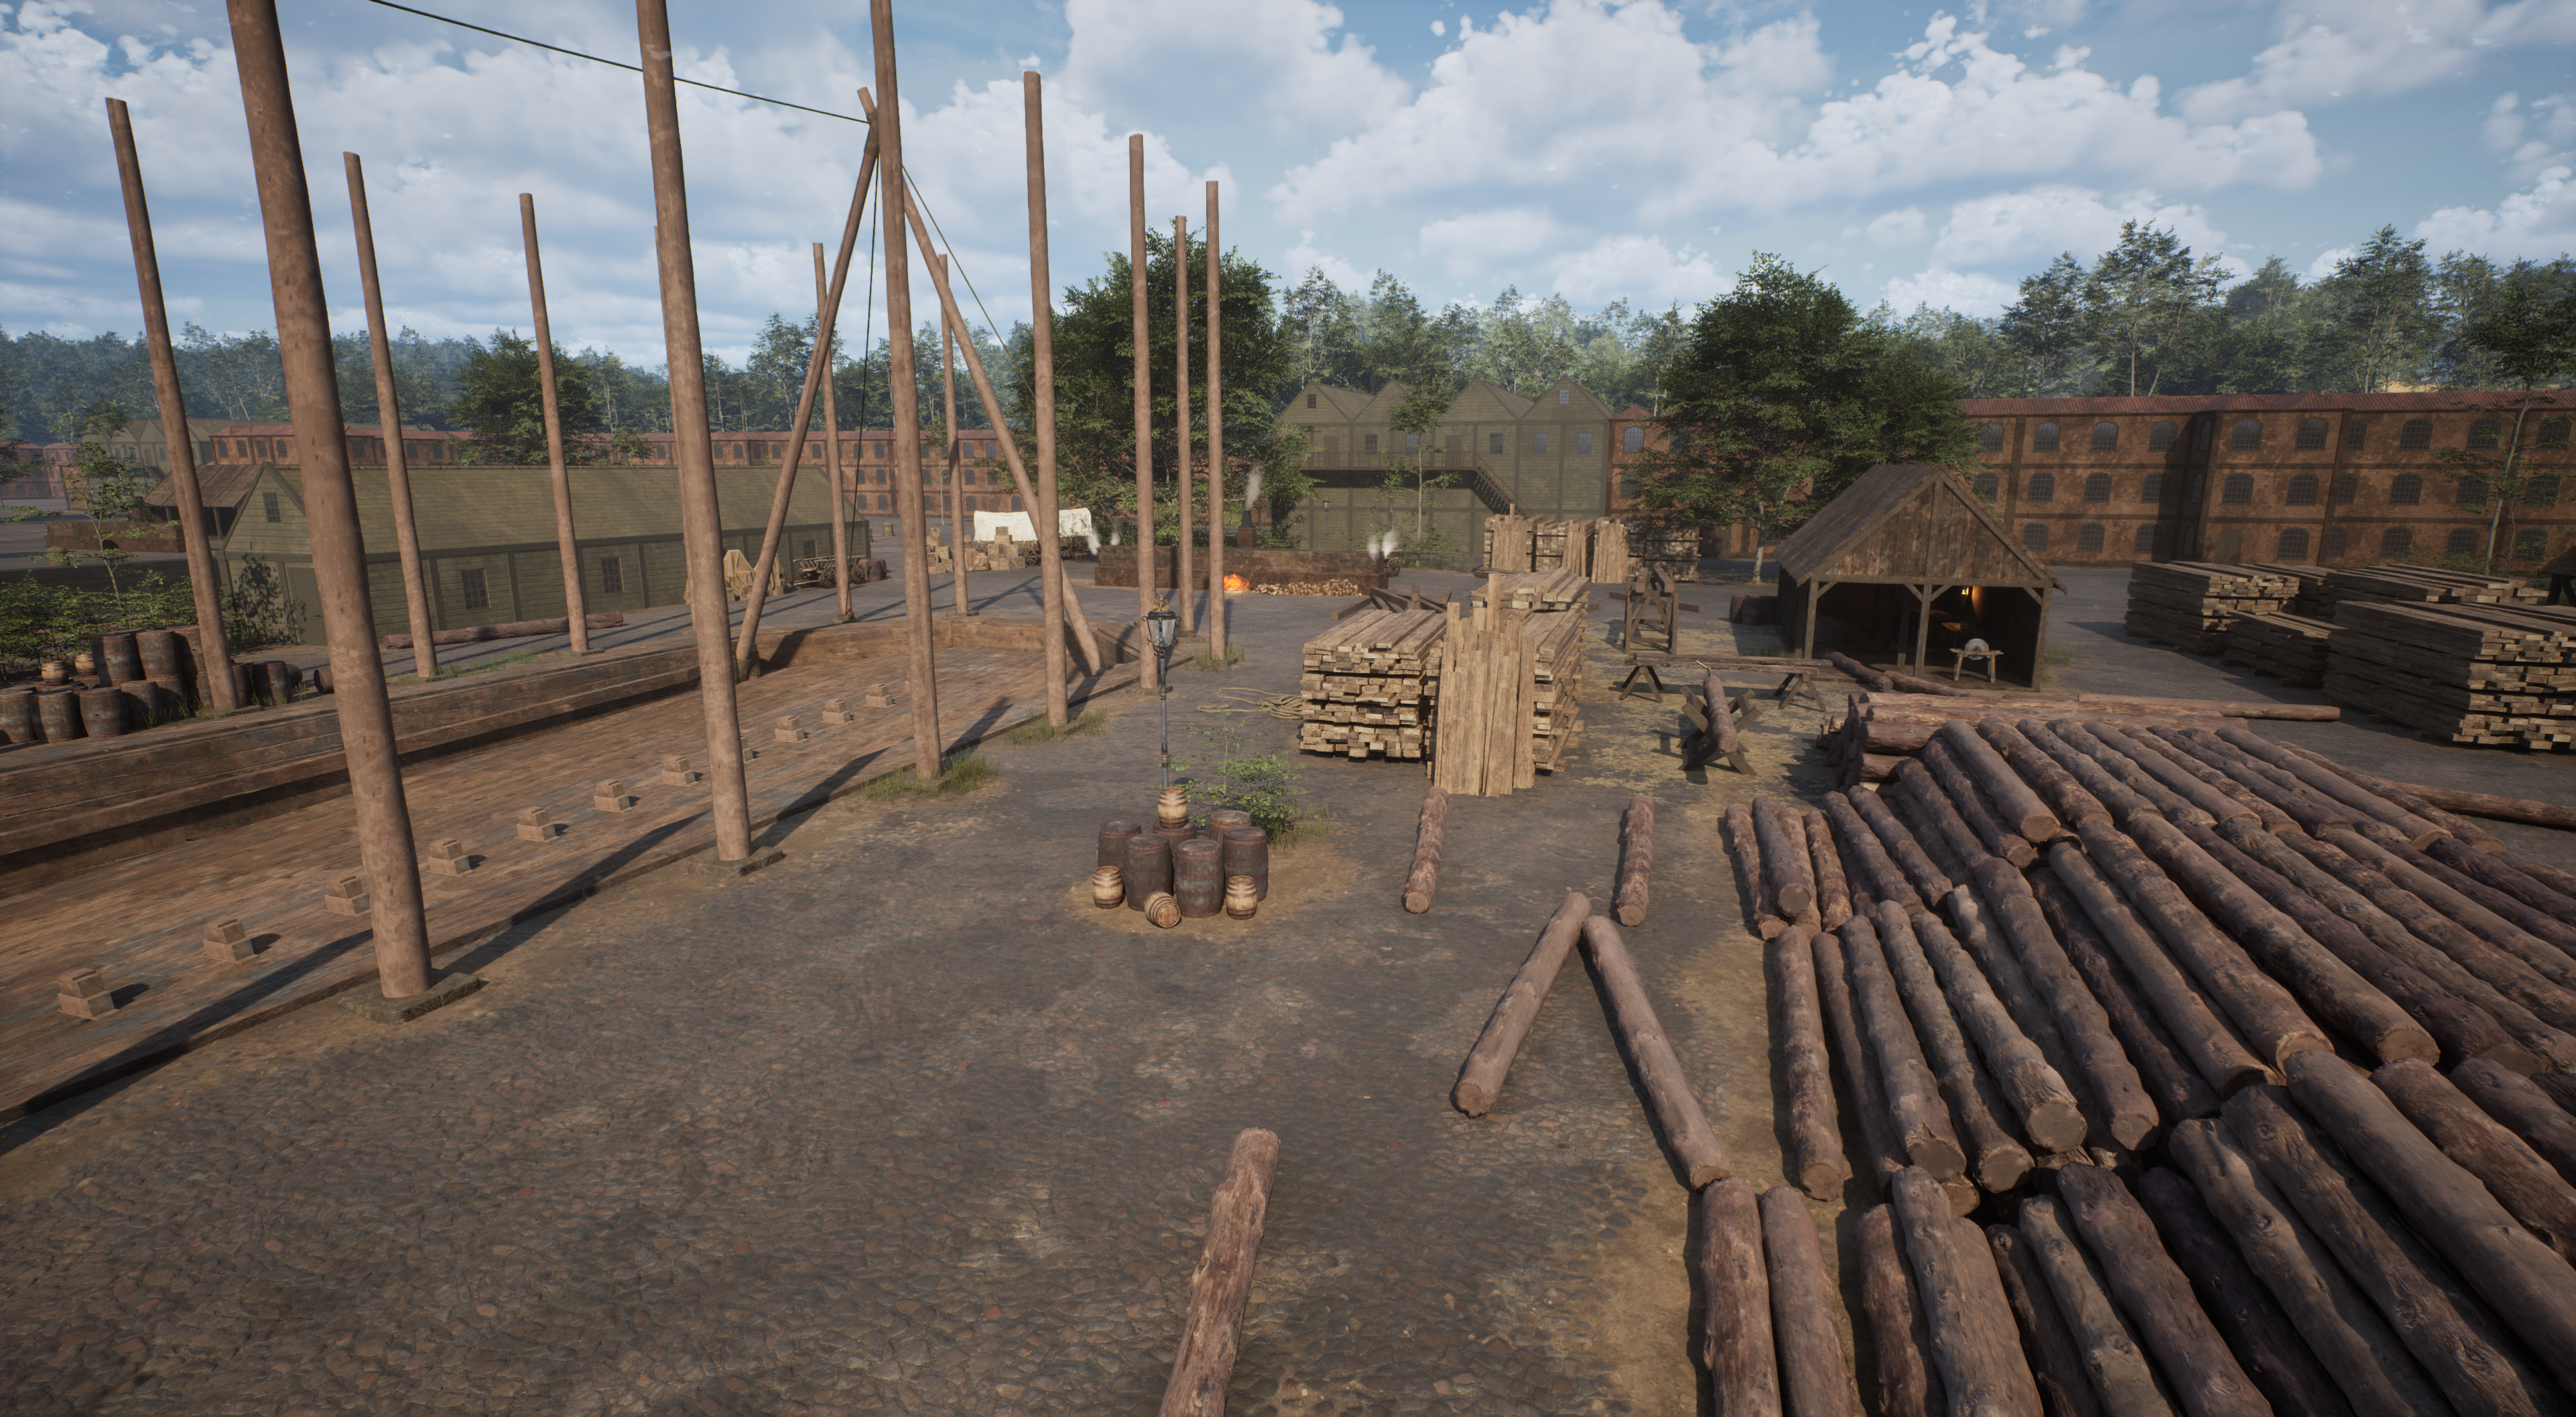
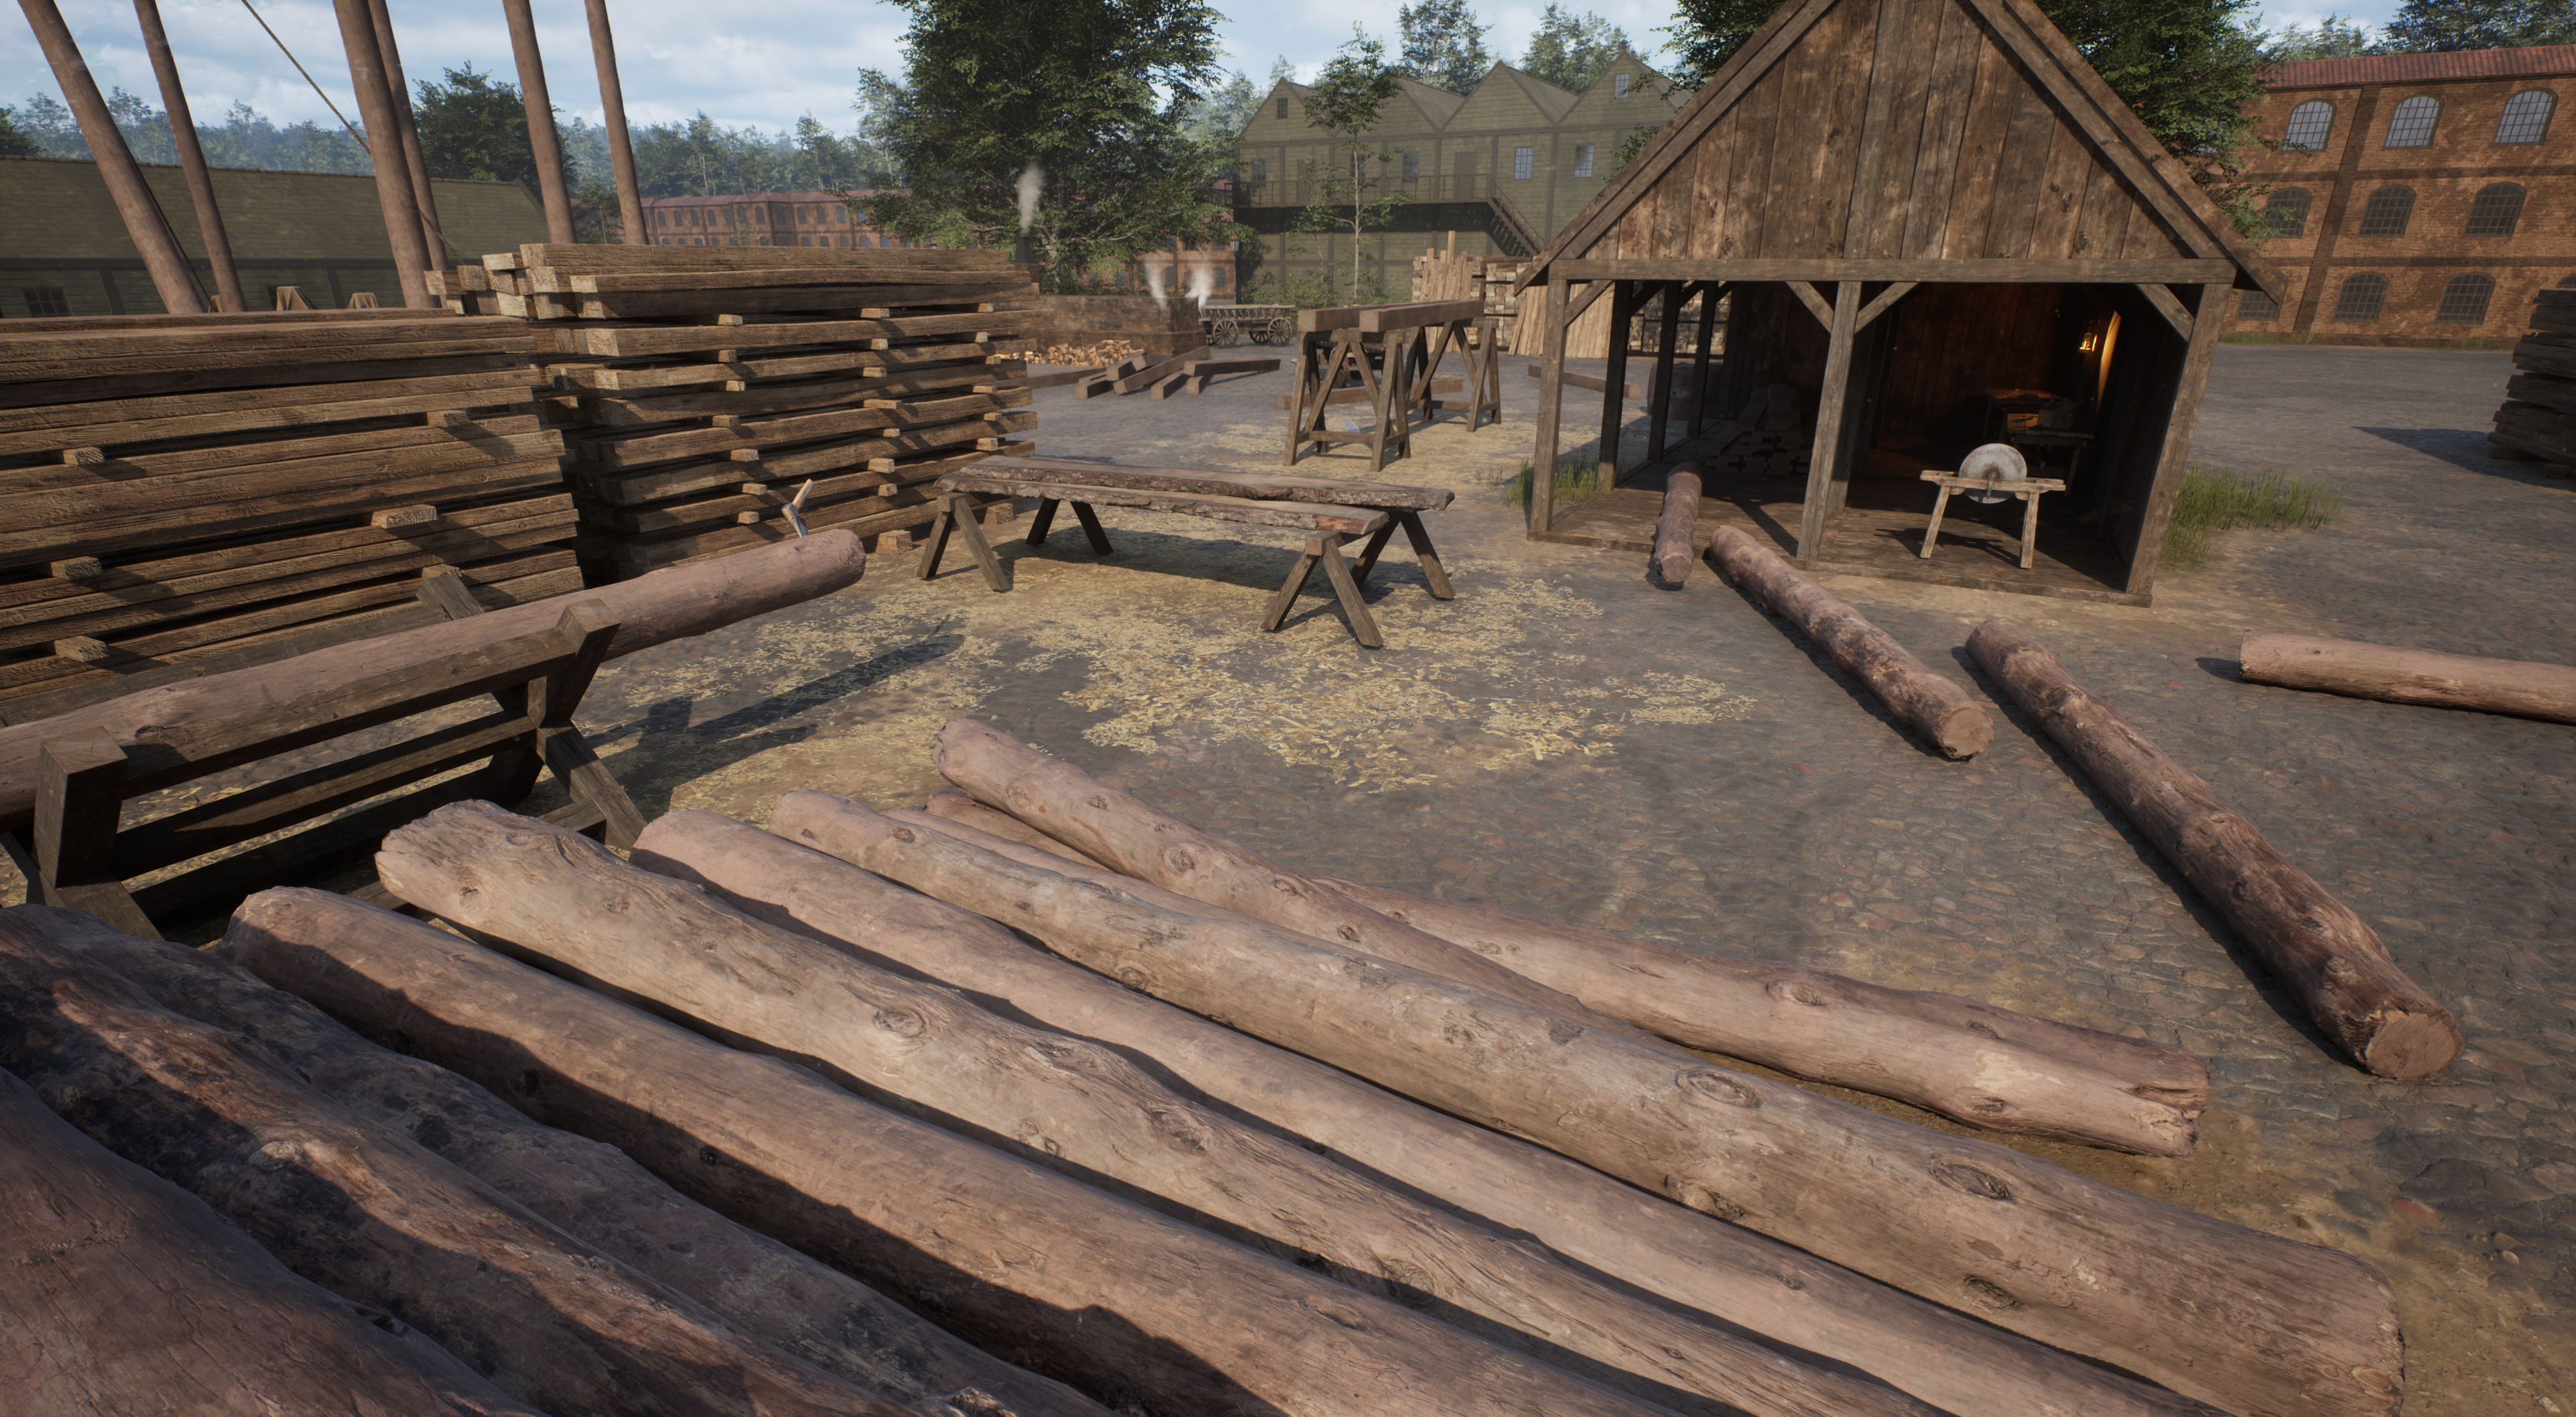
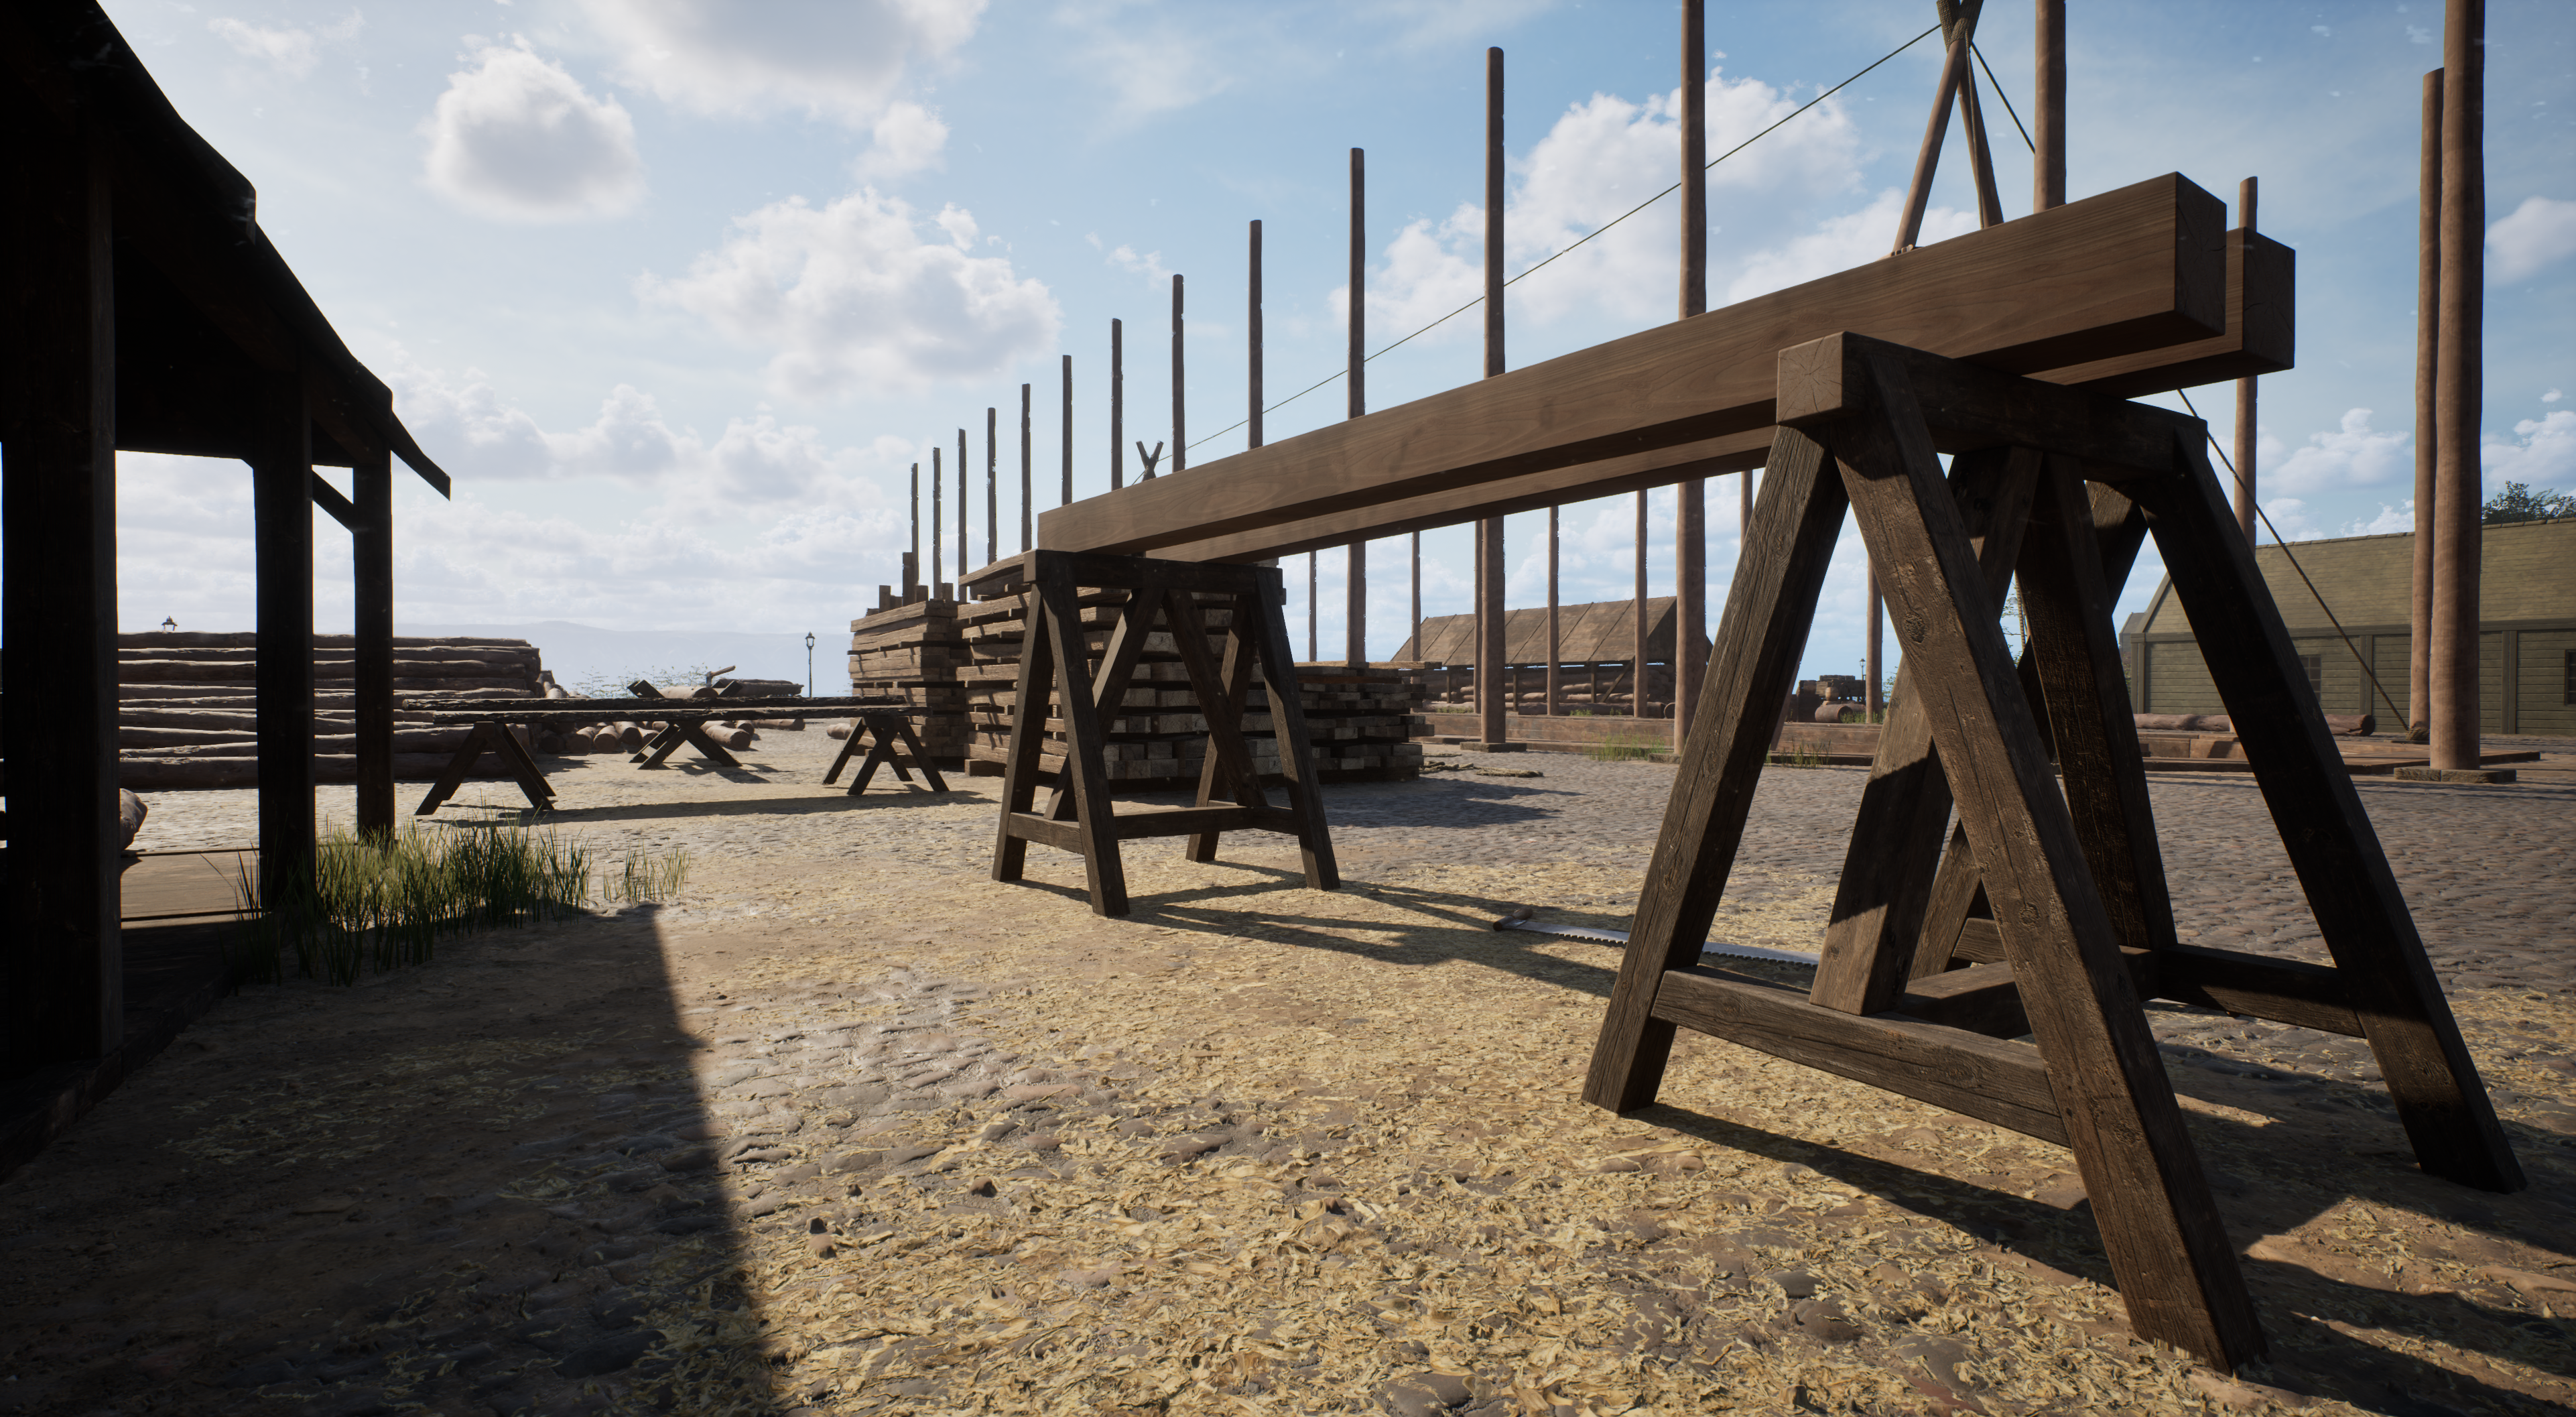
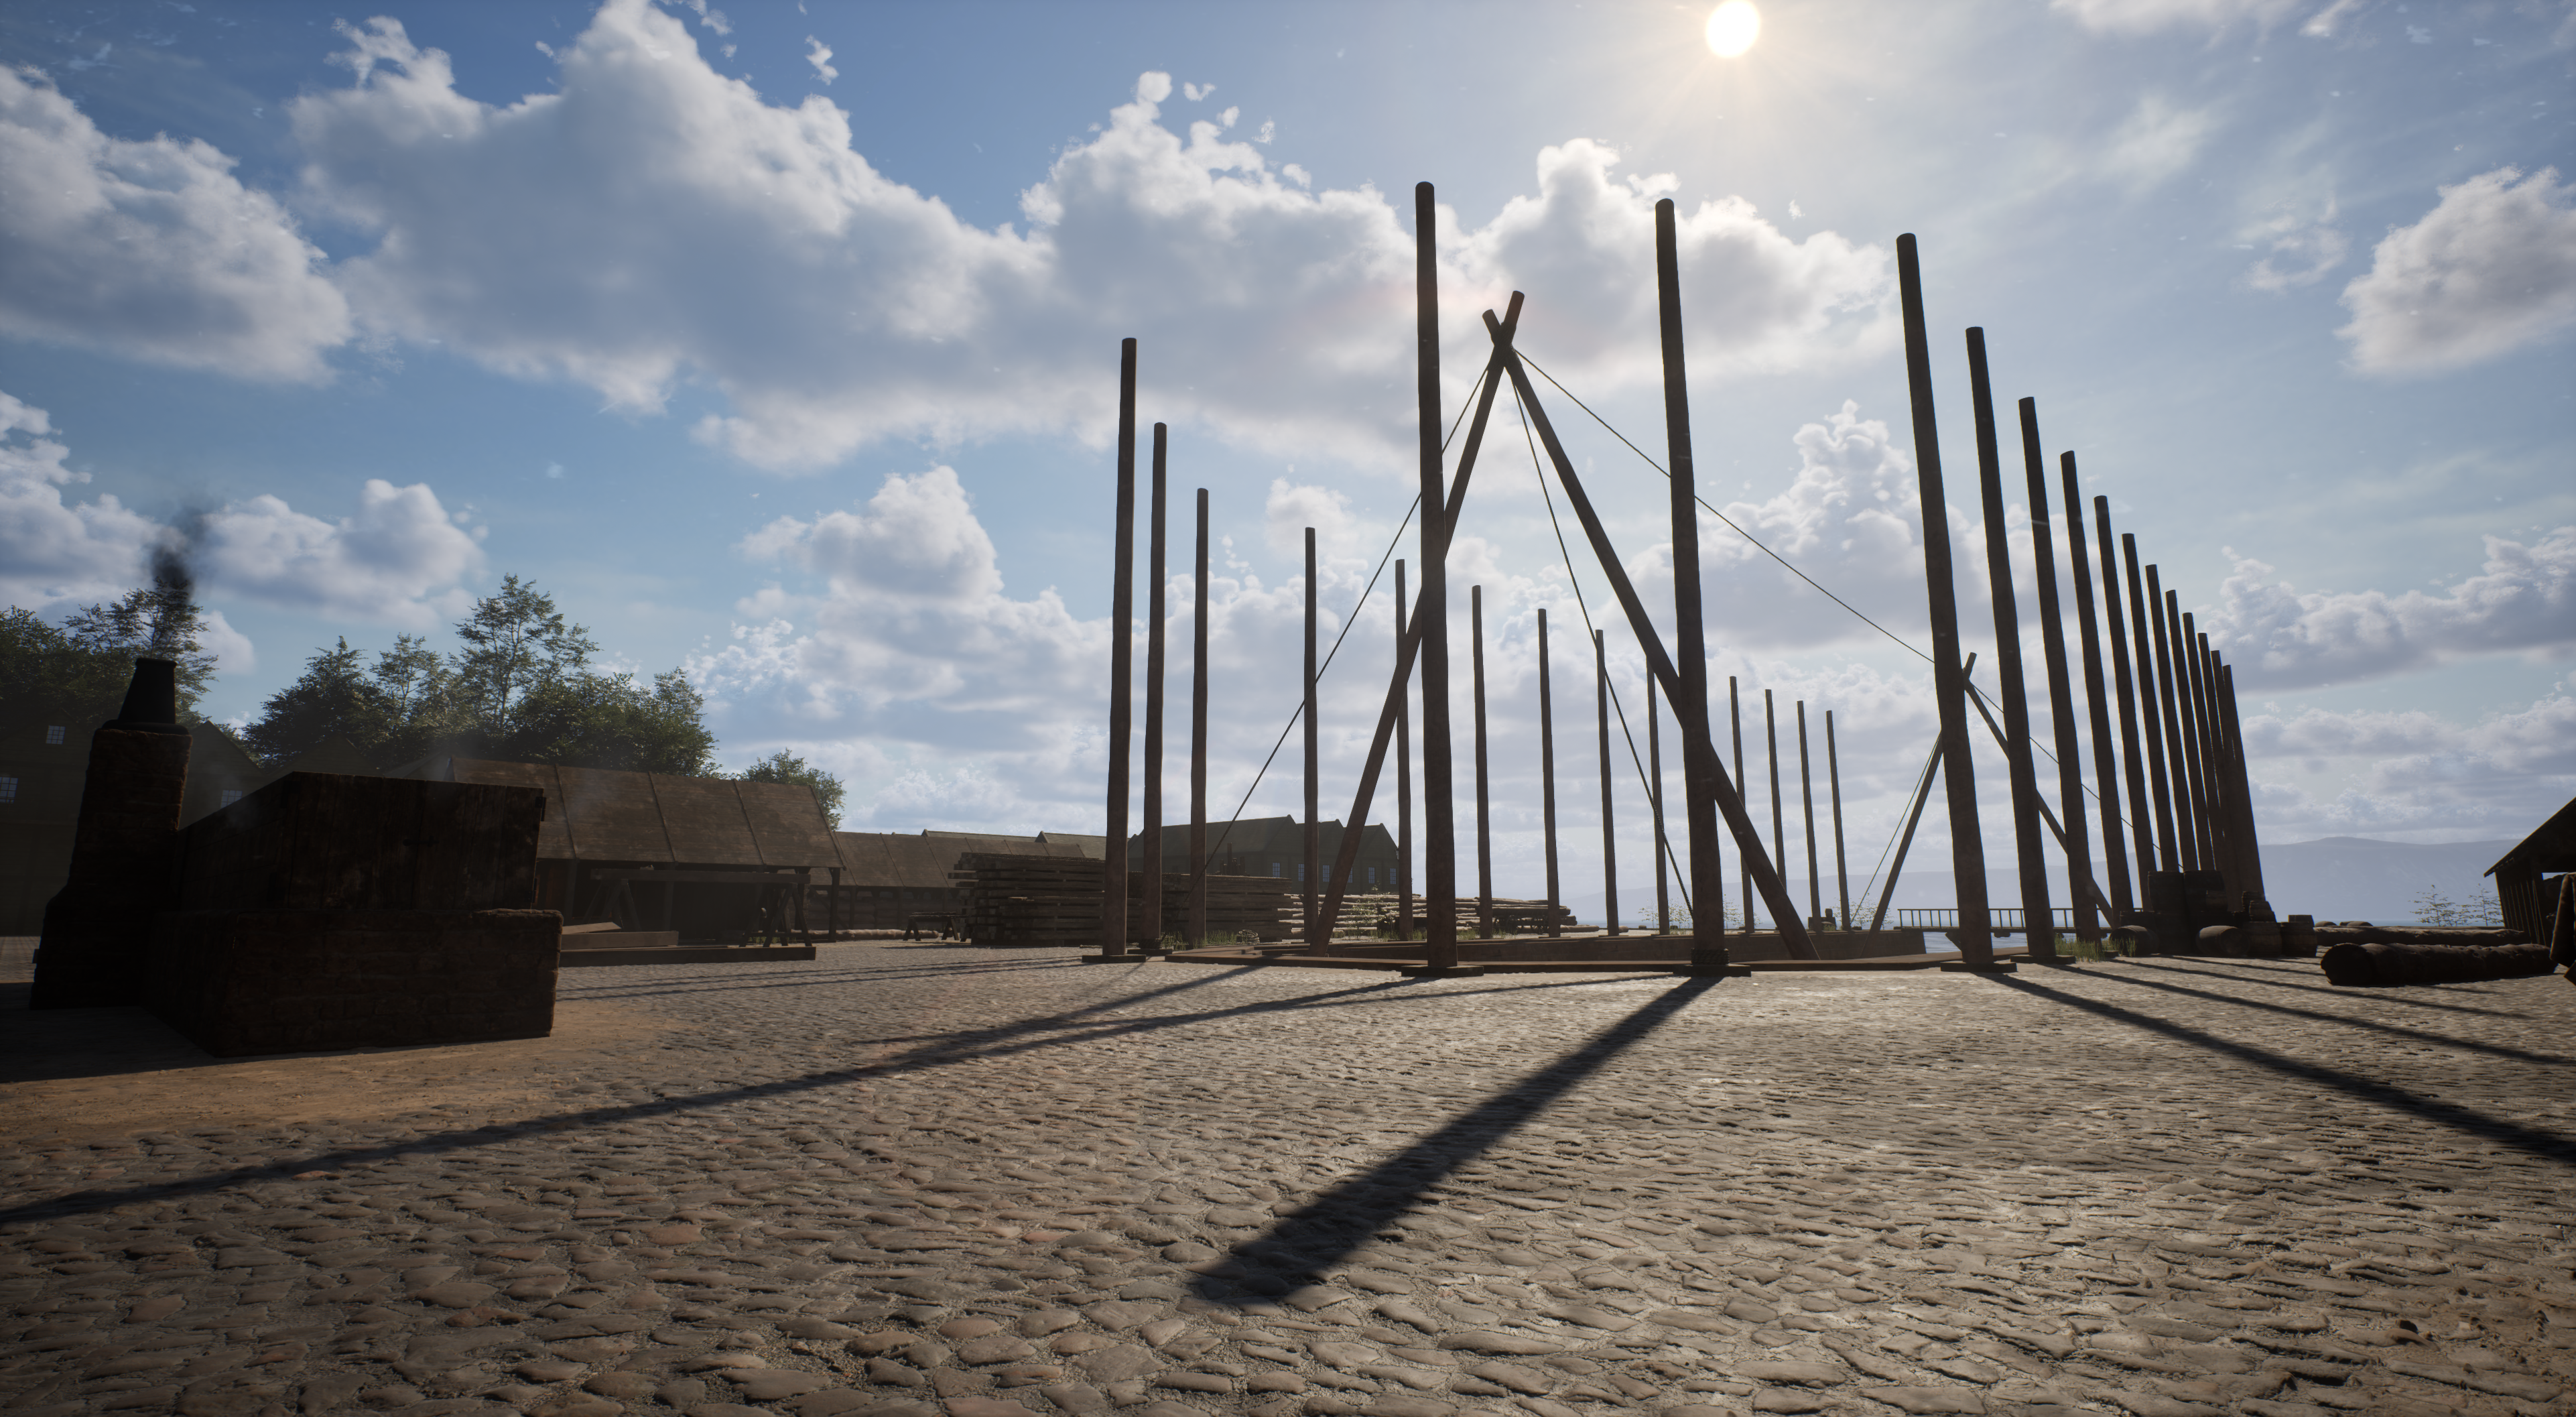
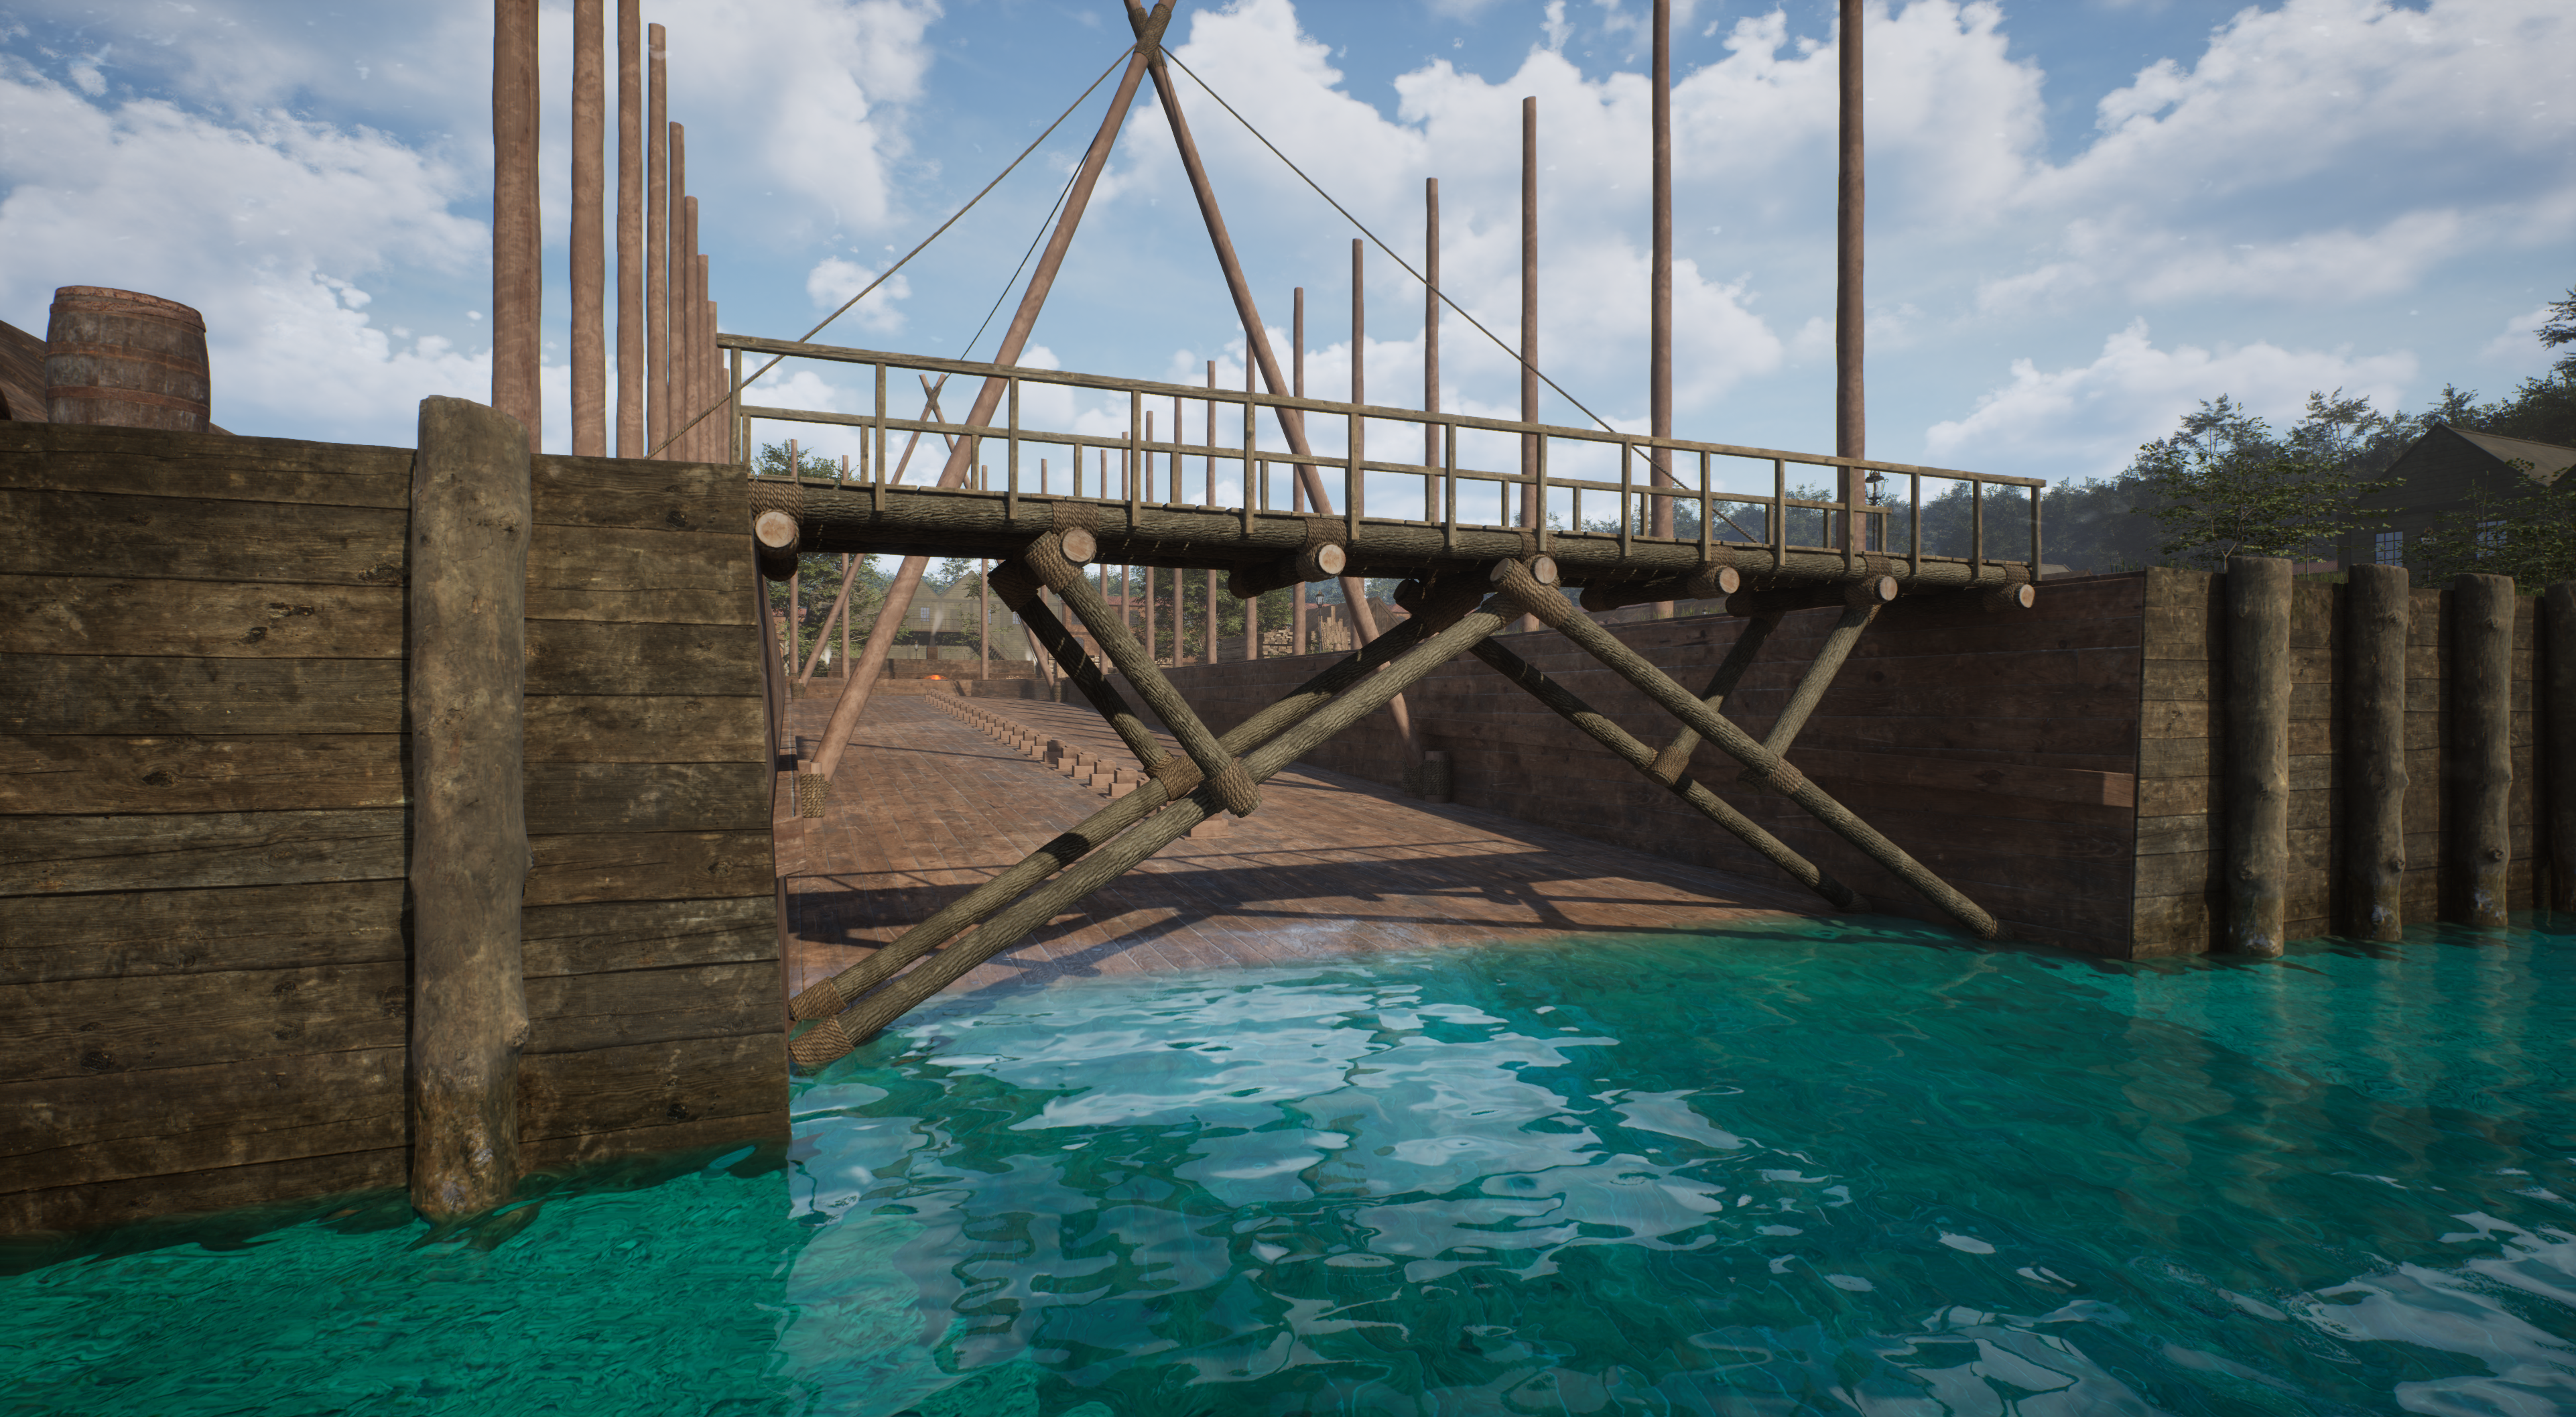
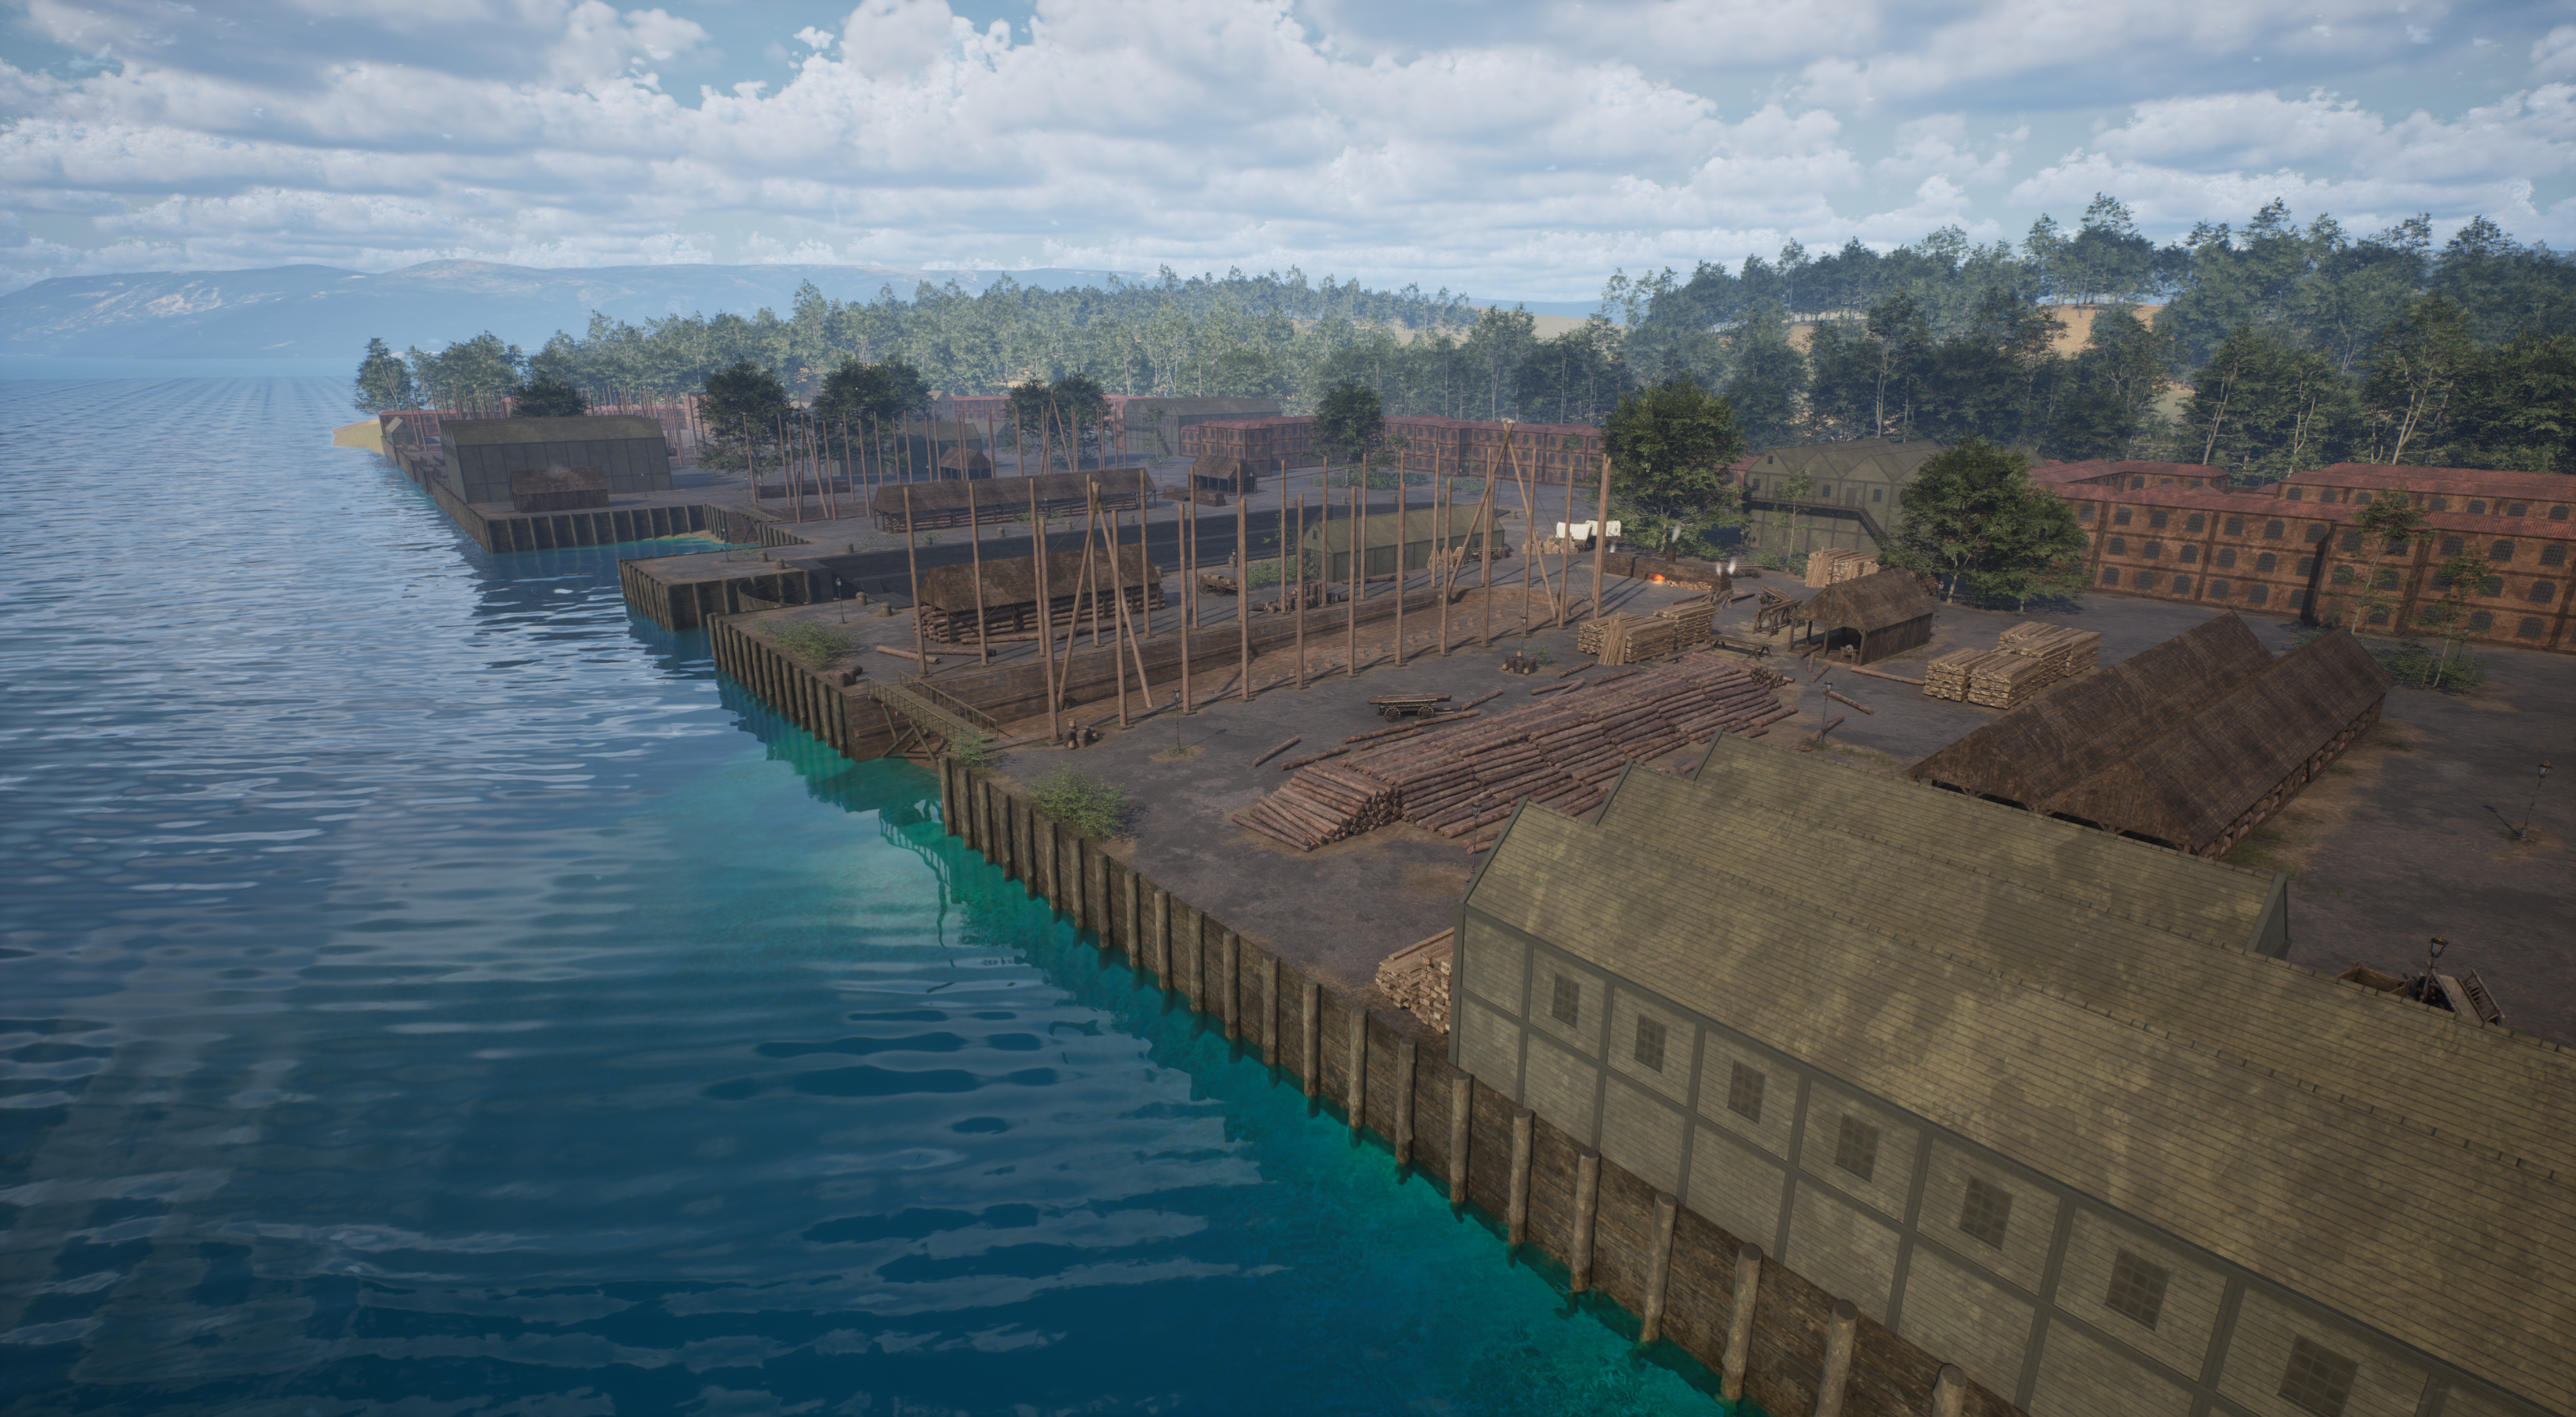
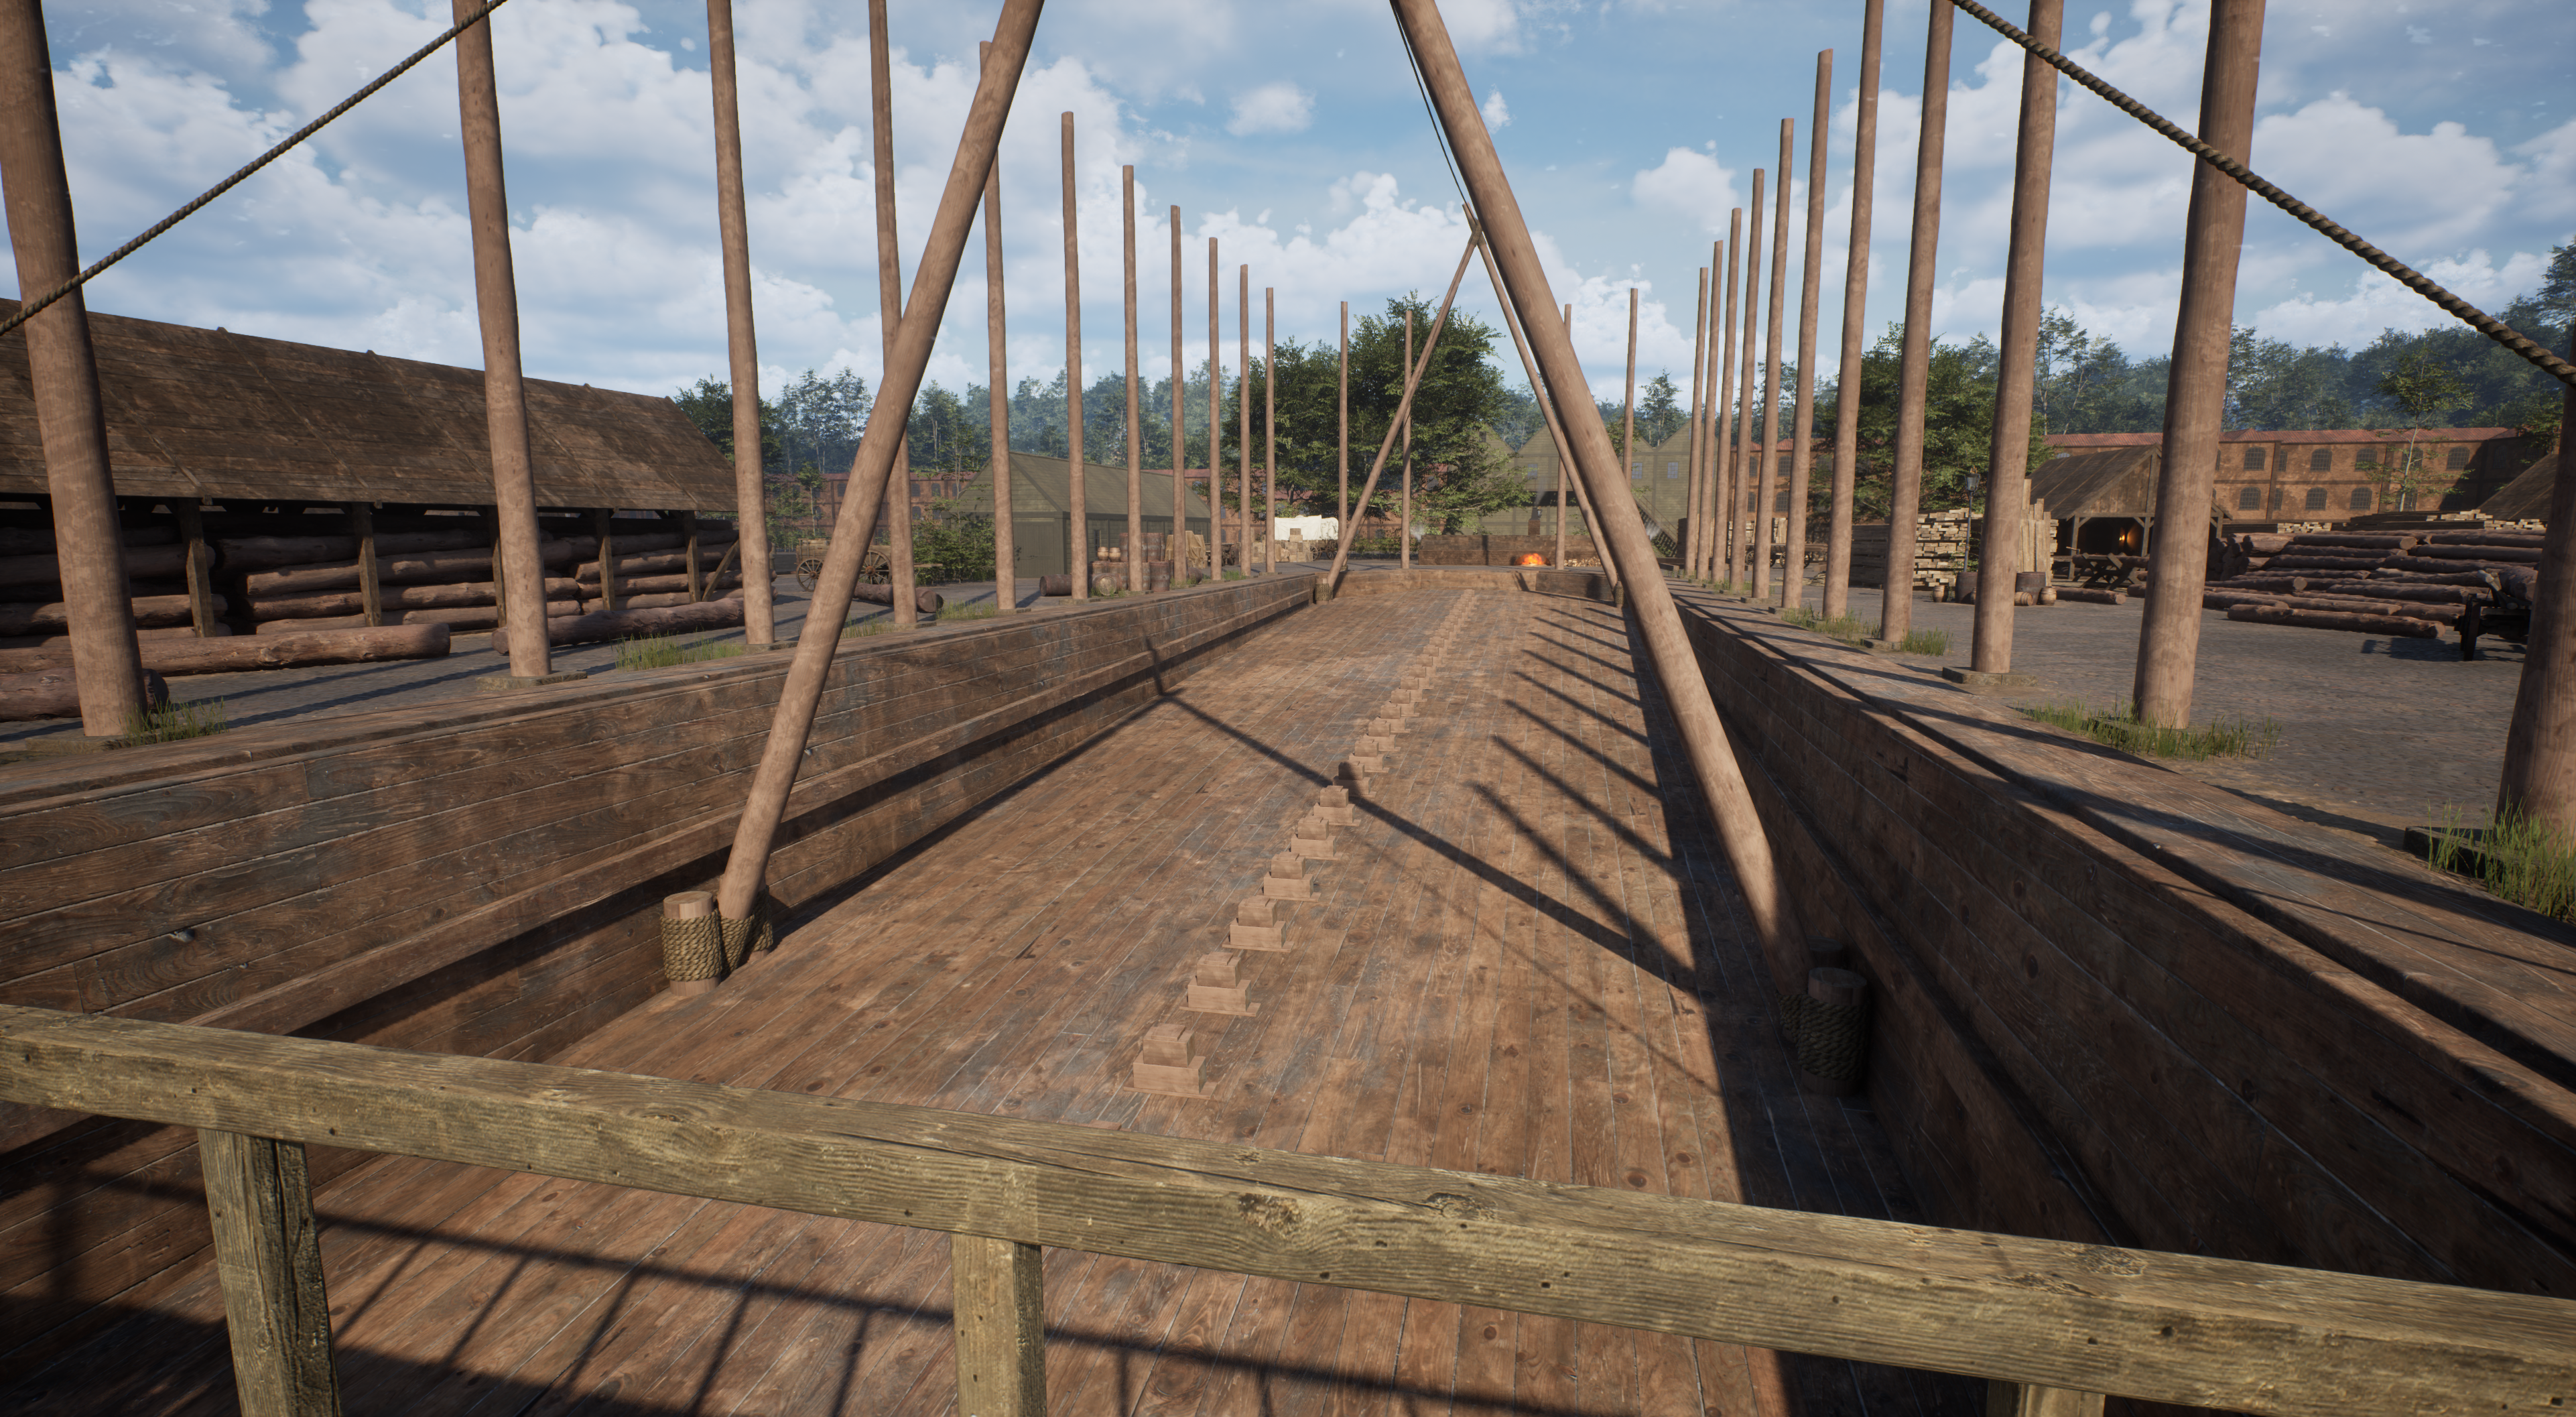
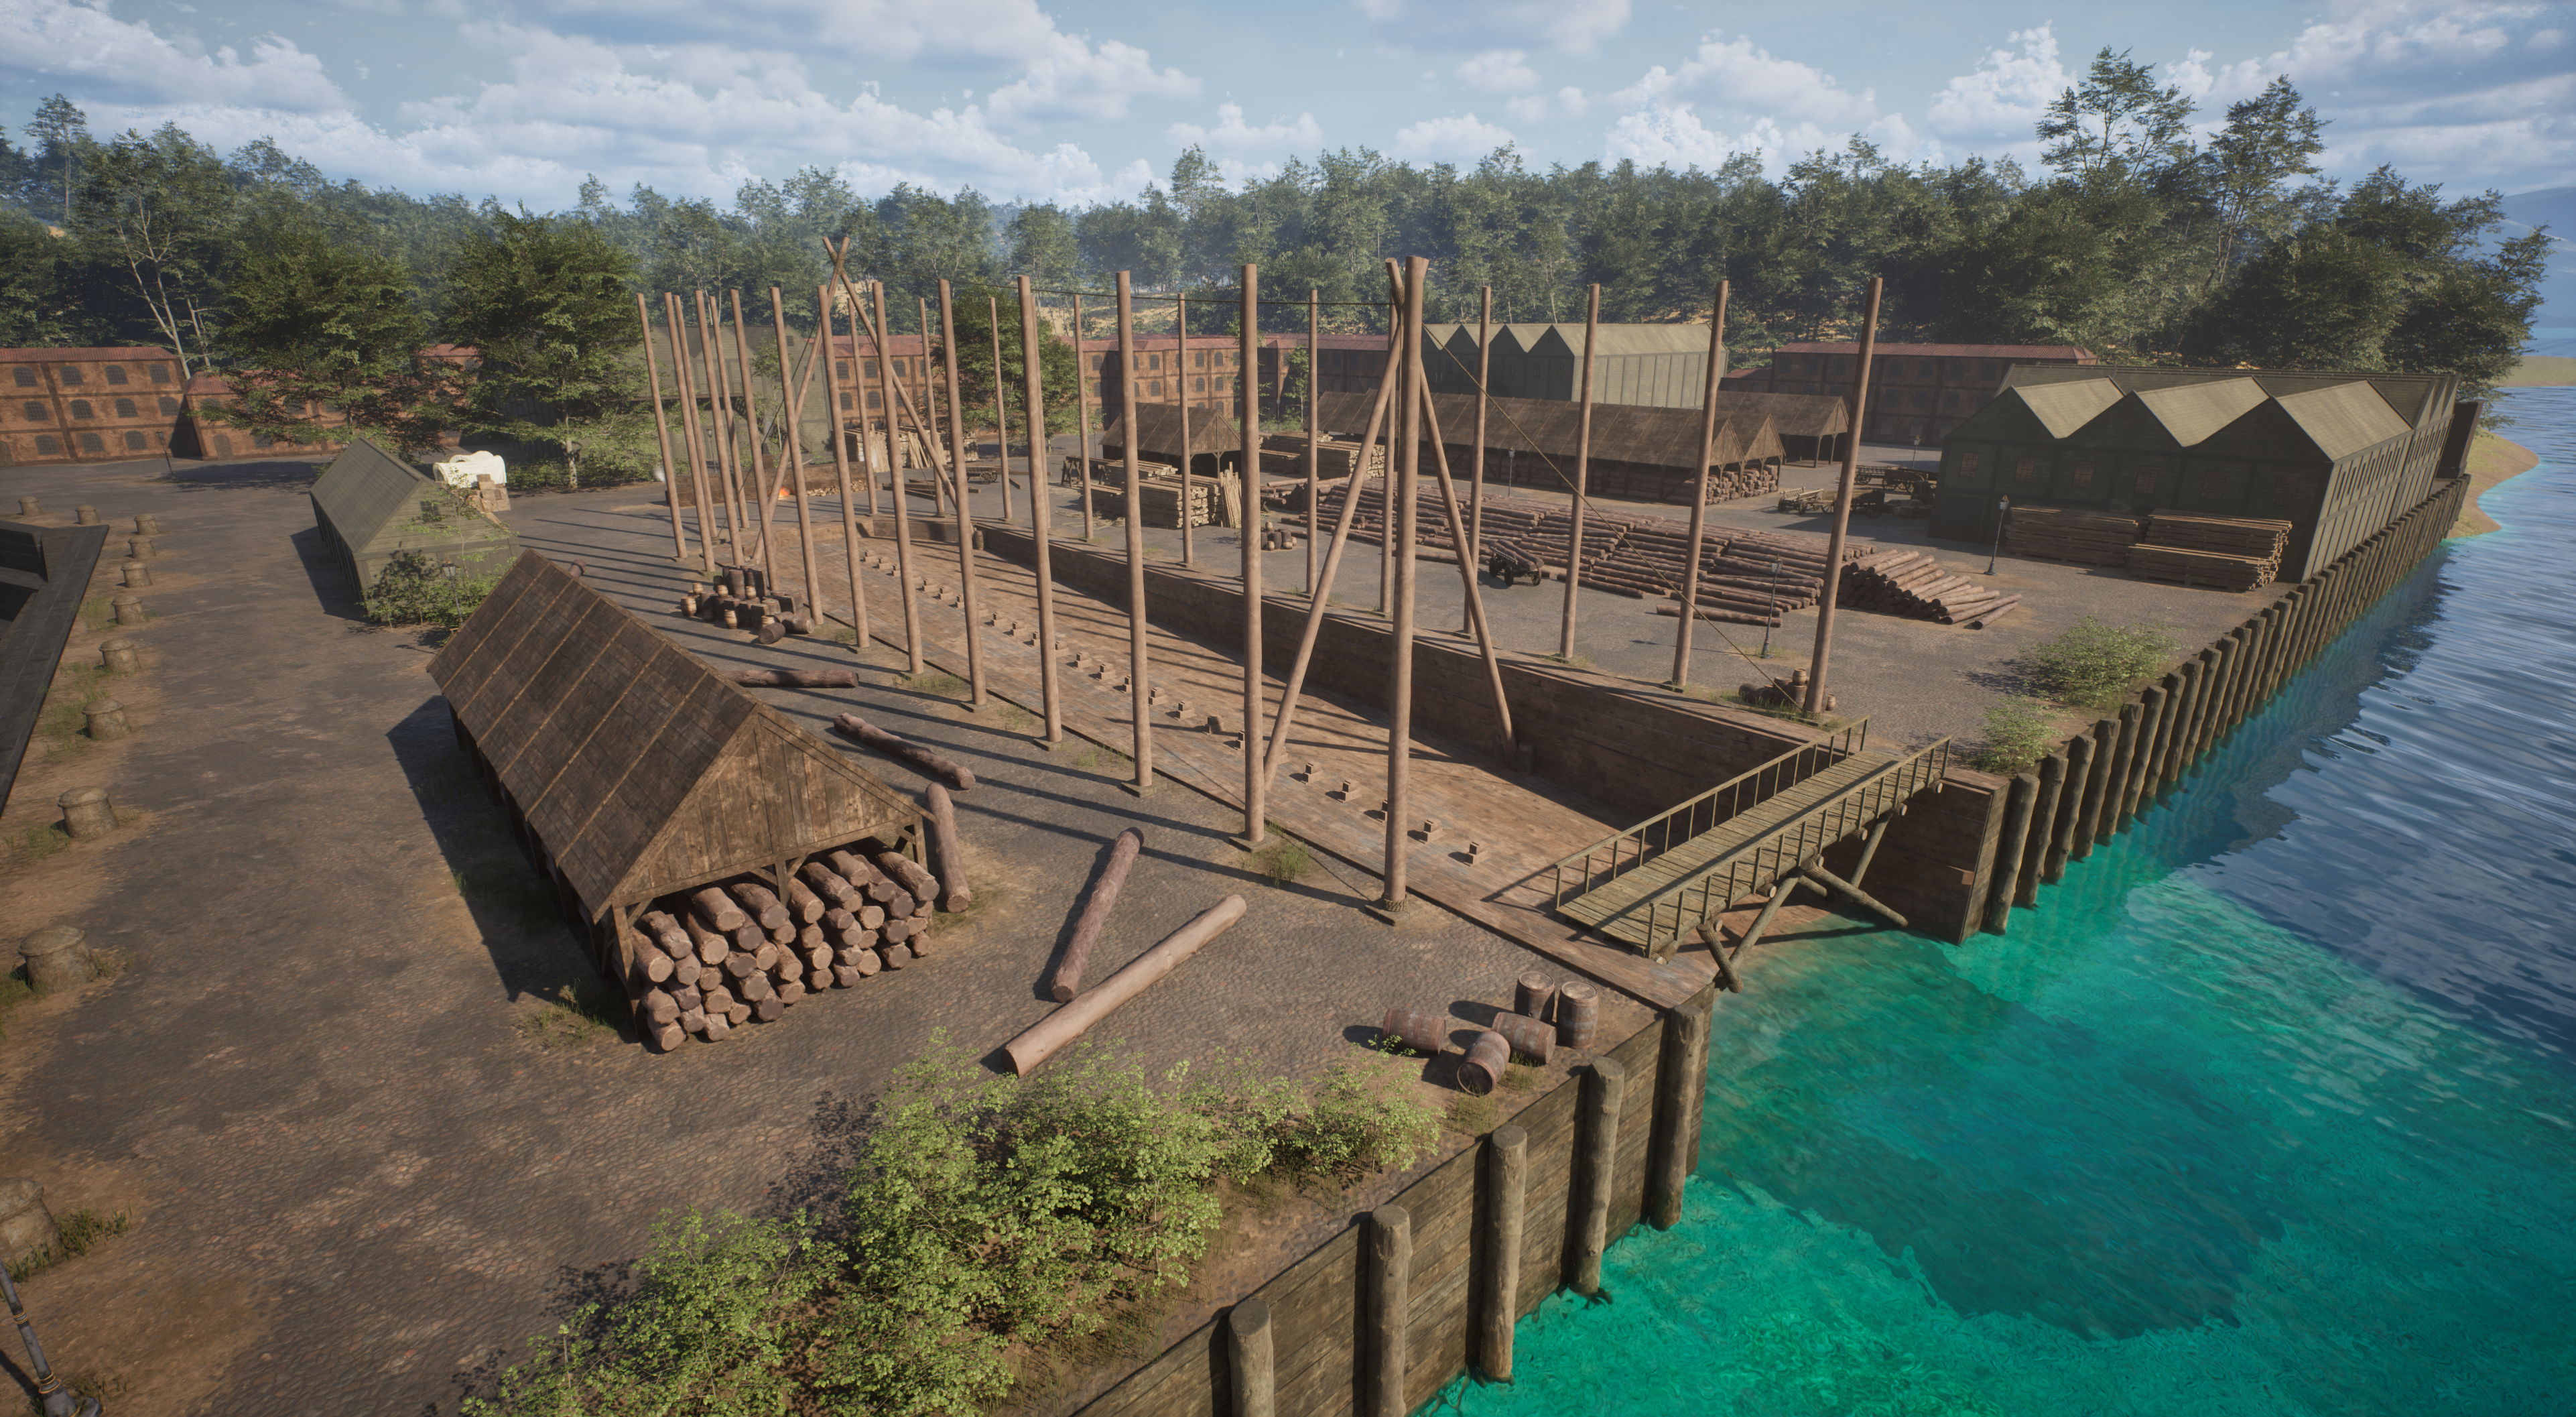
OK, I think the shipyard's ready. time to lay the keel next...


-
Yet Another Pandora 3D build
herask replied to herask's topic in CAD and 3D Modelling/Drafting Plans with Software
Nate, thank you for your input. what you said actually makes a lot of sense. I didn't think of our two builds competing with each other, but rather people getting bored with the same ship 😁. personally, I'm also leaning more toward Pandora, and indeed it might be fun having a group project. OK, you talked me into it 🤣 I've a few more things to wrap up with the shipyard and then I'll have to catch up with your build, as I plan to start over with the Pandora. I didn't know a lot back then when I started it the first time and a few things need to be done better and more accurate. and once I do build Bounty we can send both our Pandoras after her. poor thing won't stand a chance... 😅 -
Yet Another Pandora 3D build
herask replied to herask's topic in CAD and 3D Modelling/Drafting Plans with Software
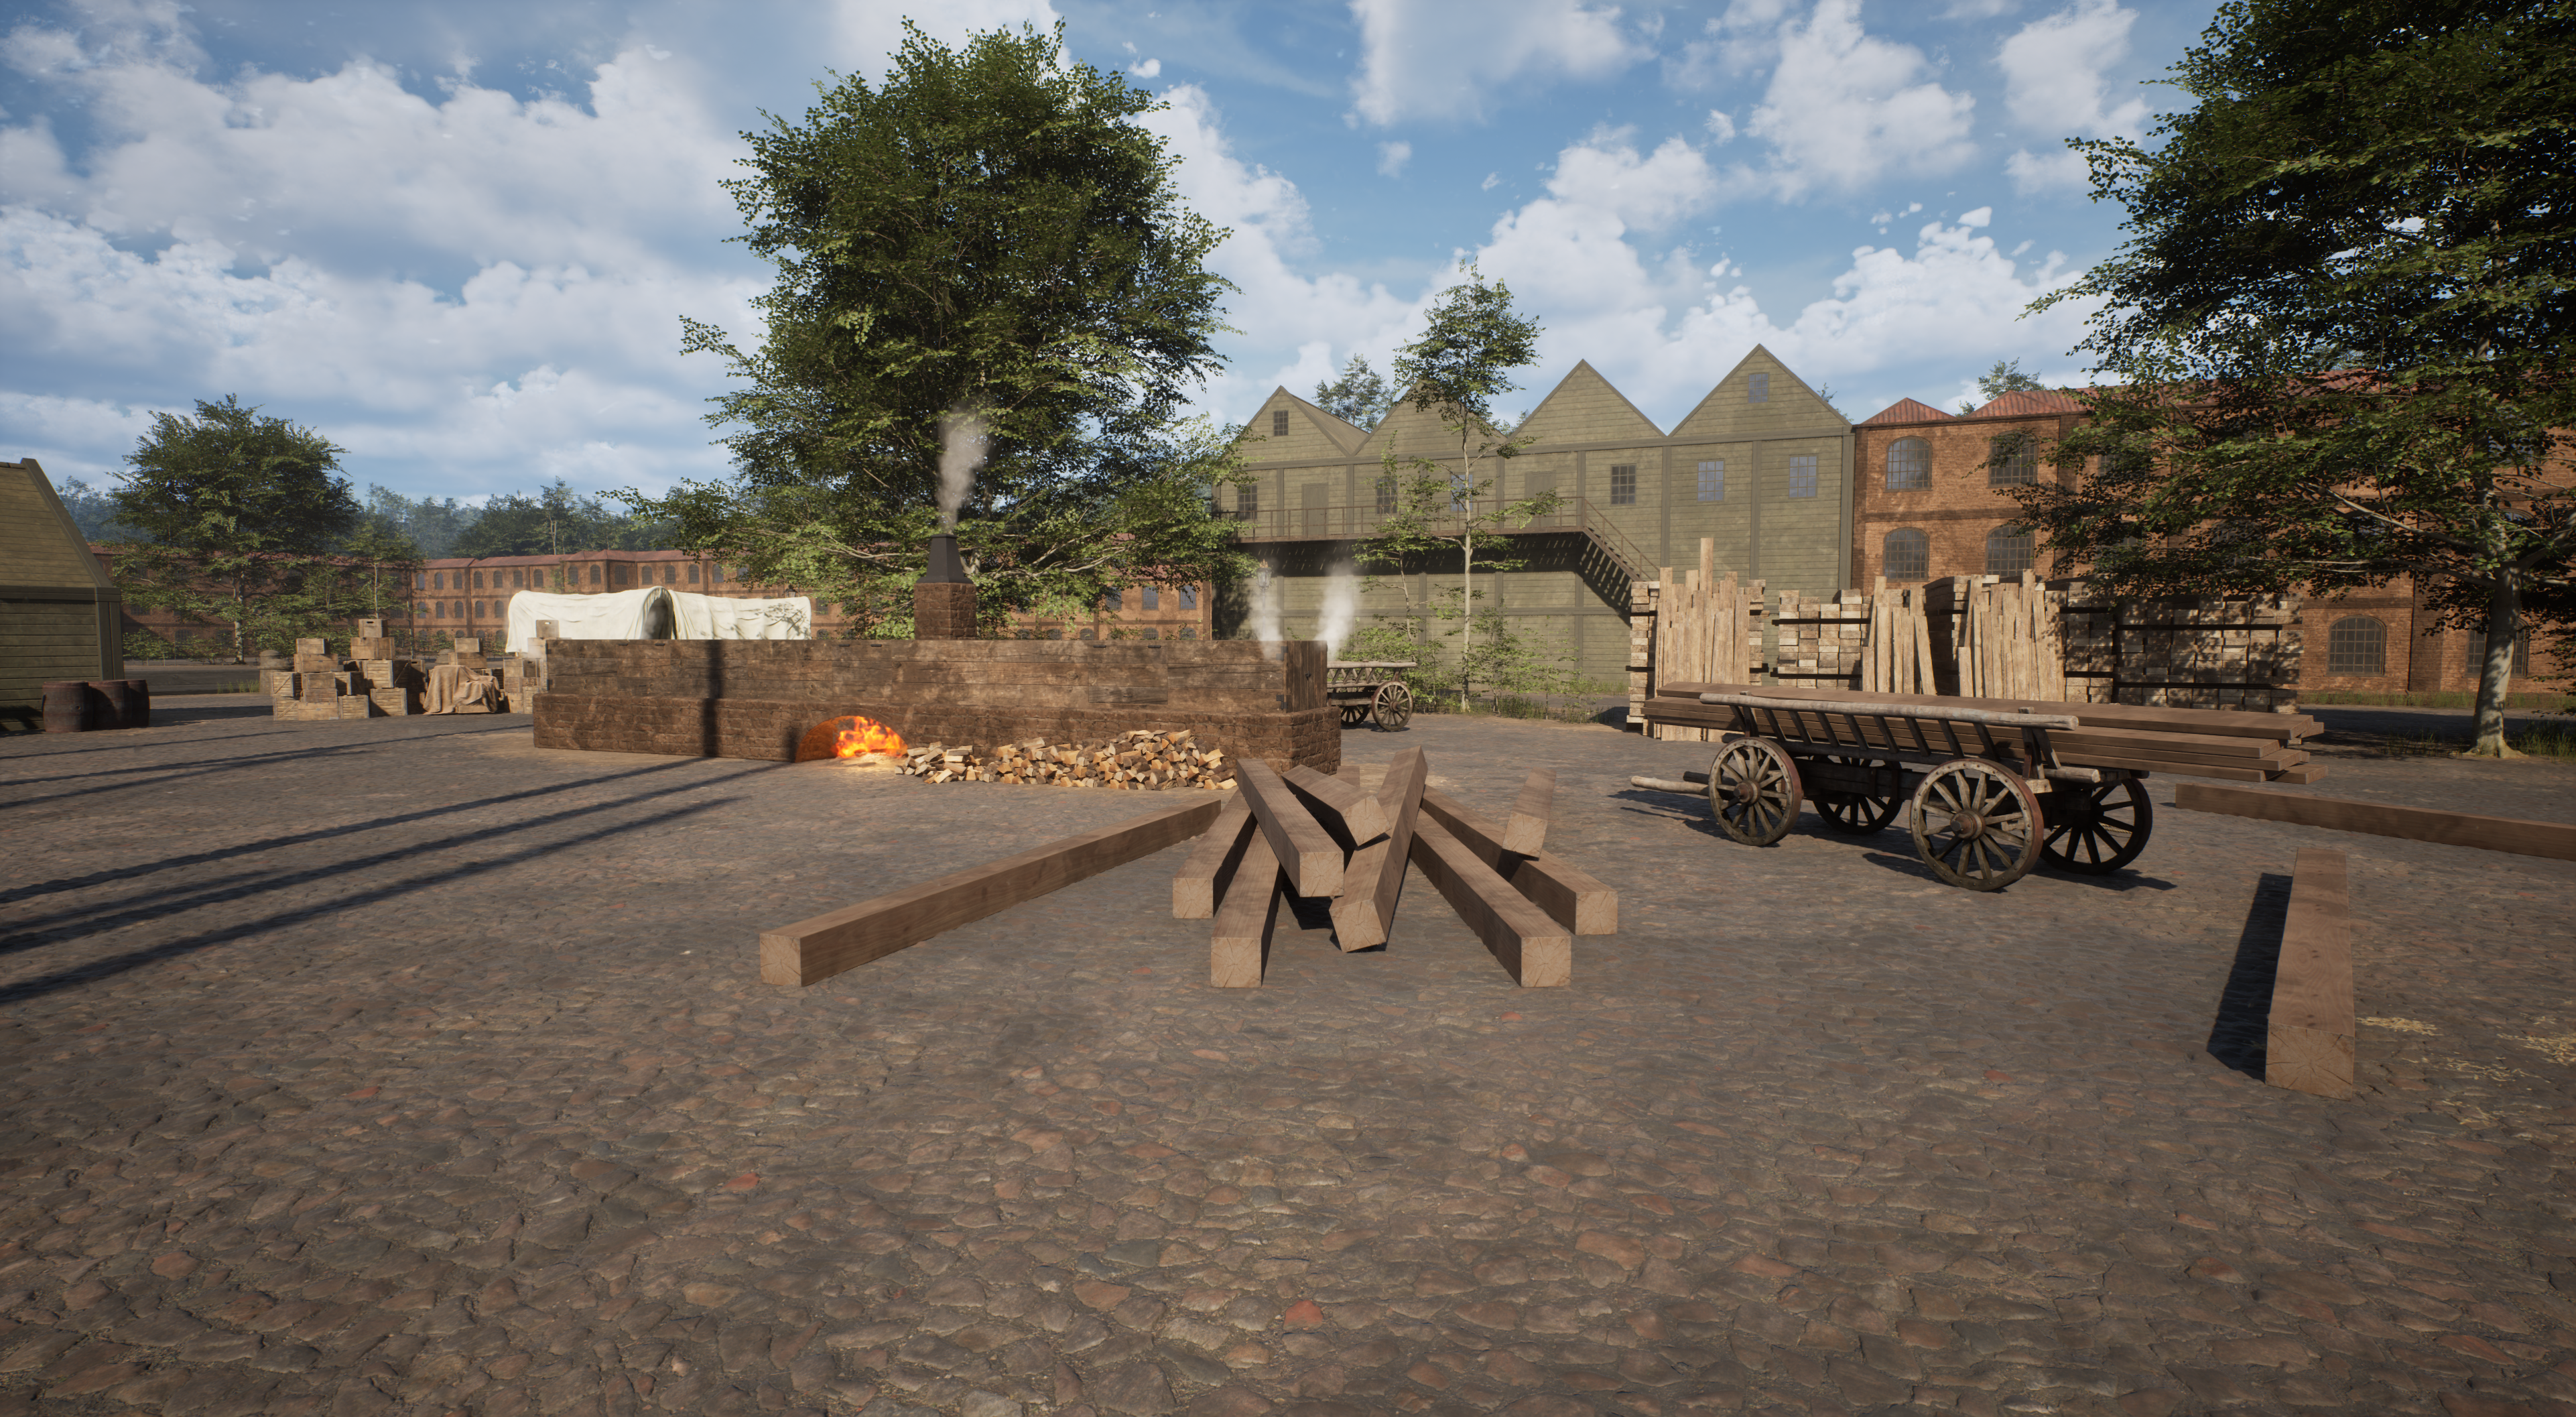
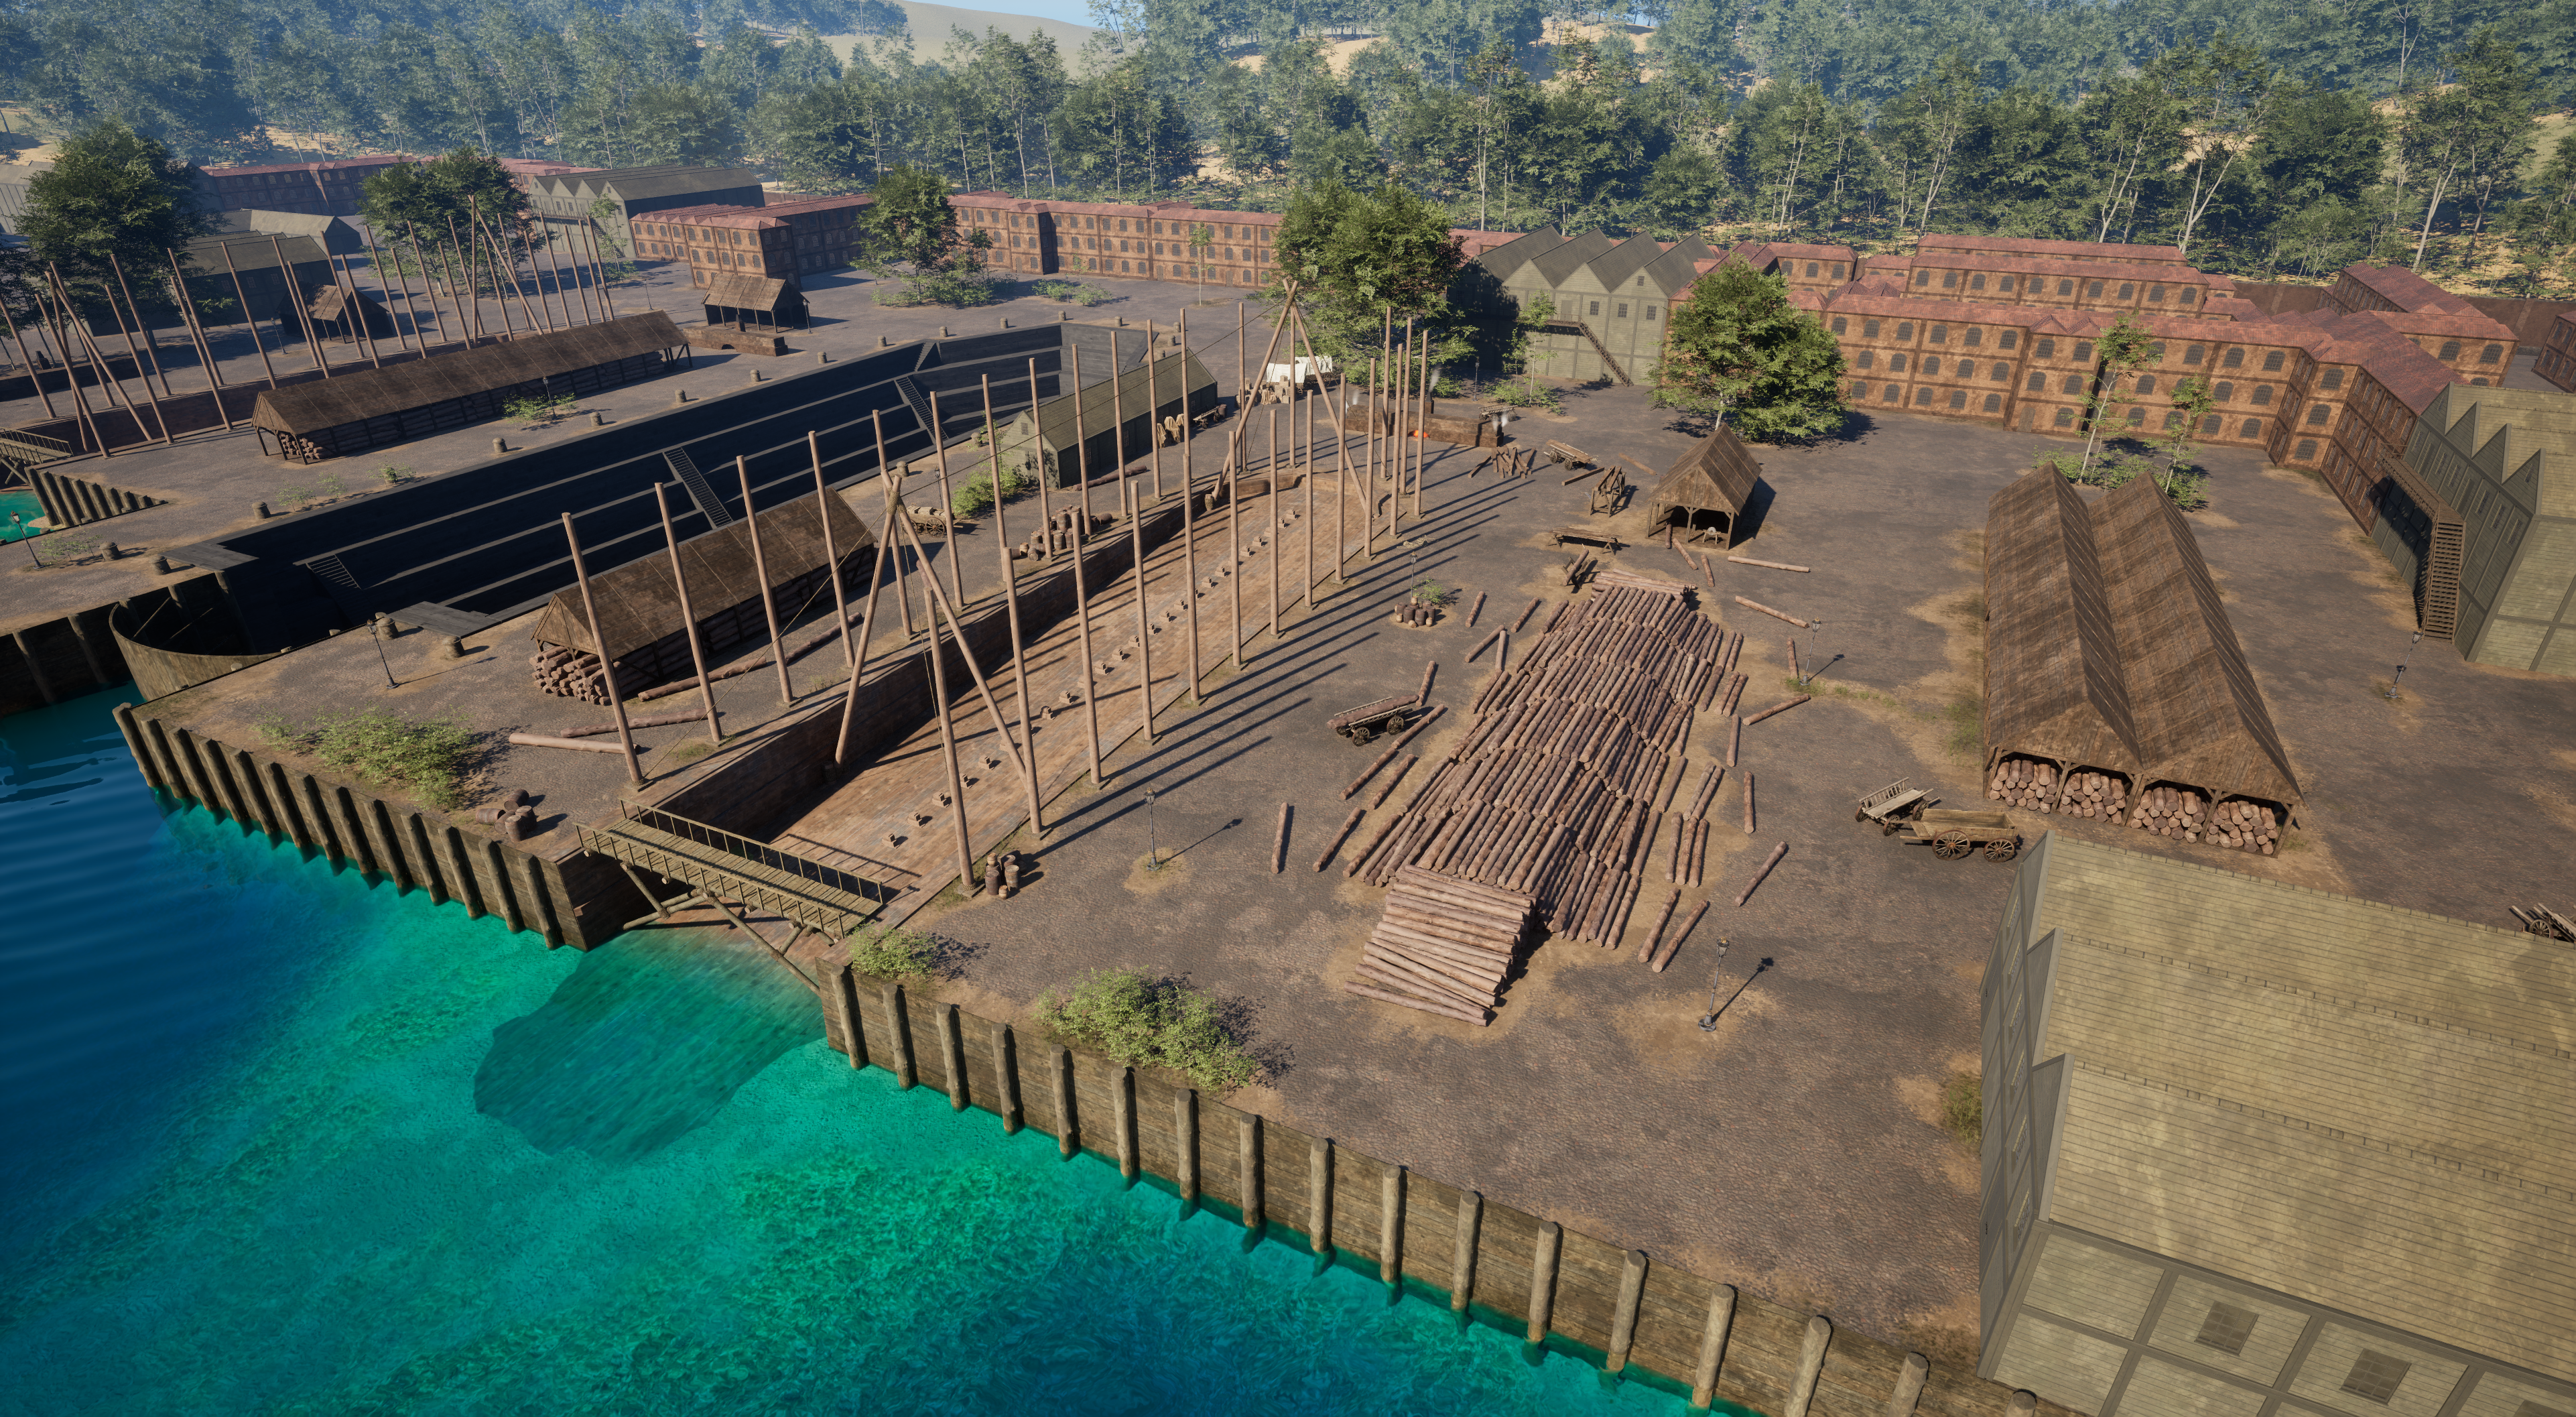
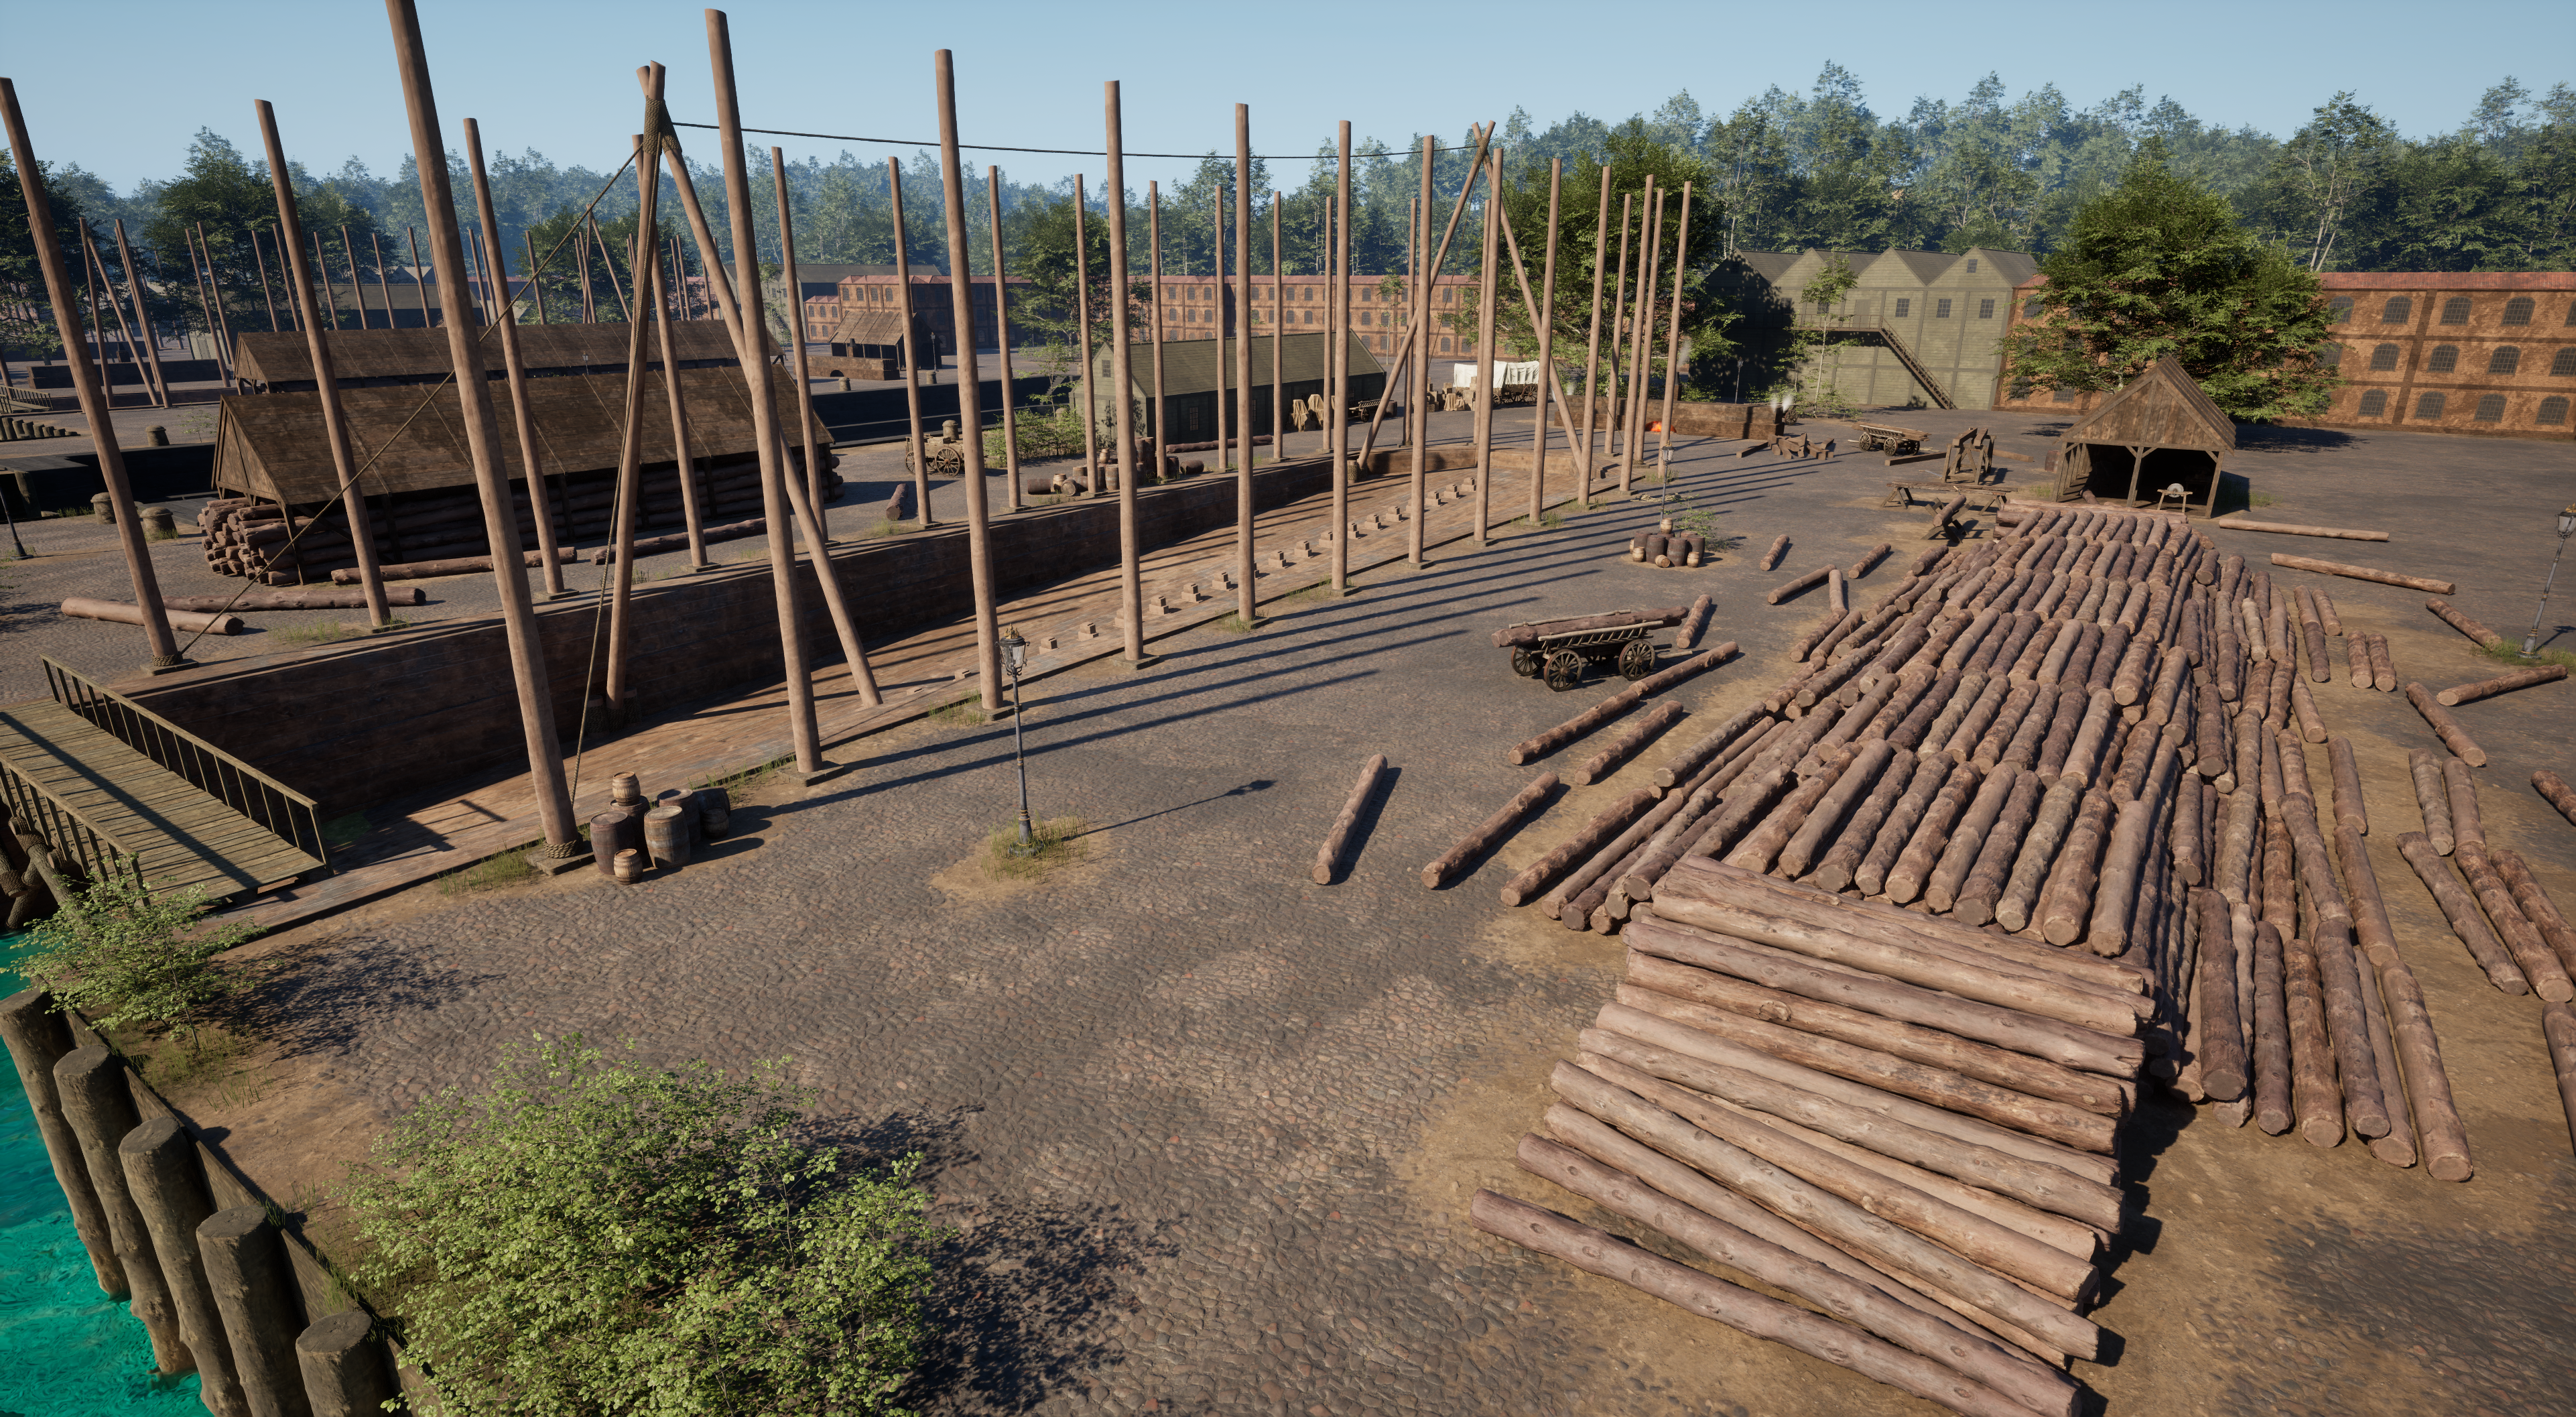
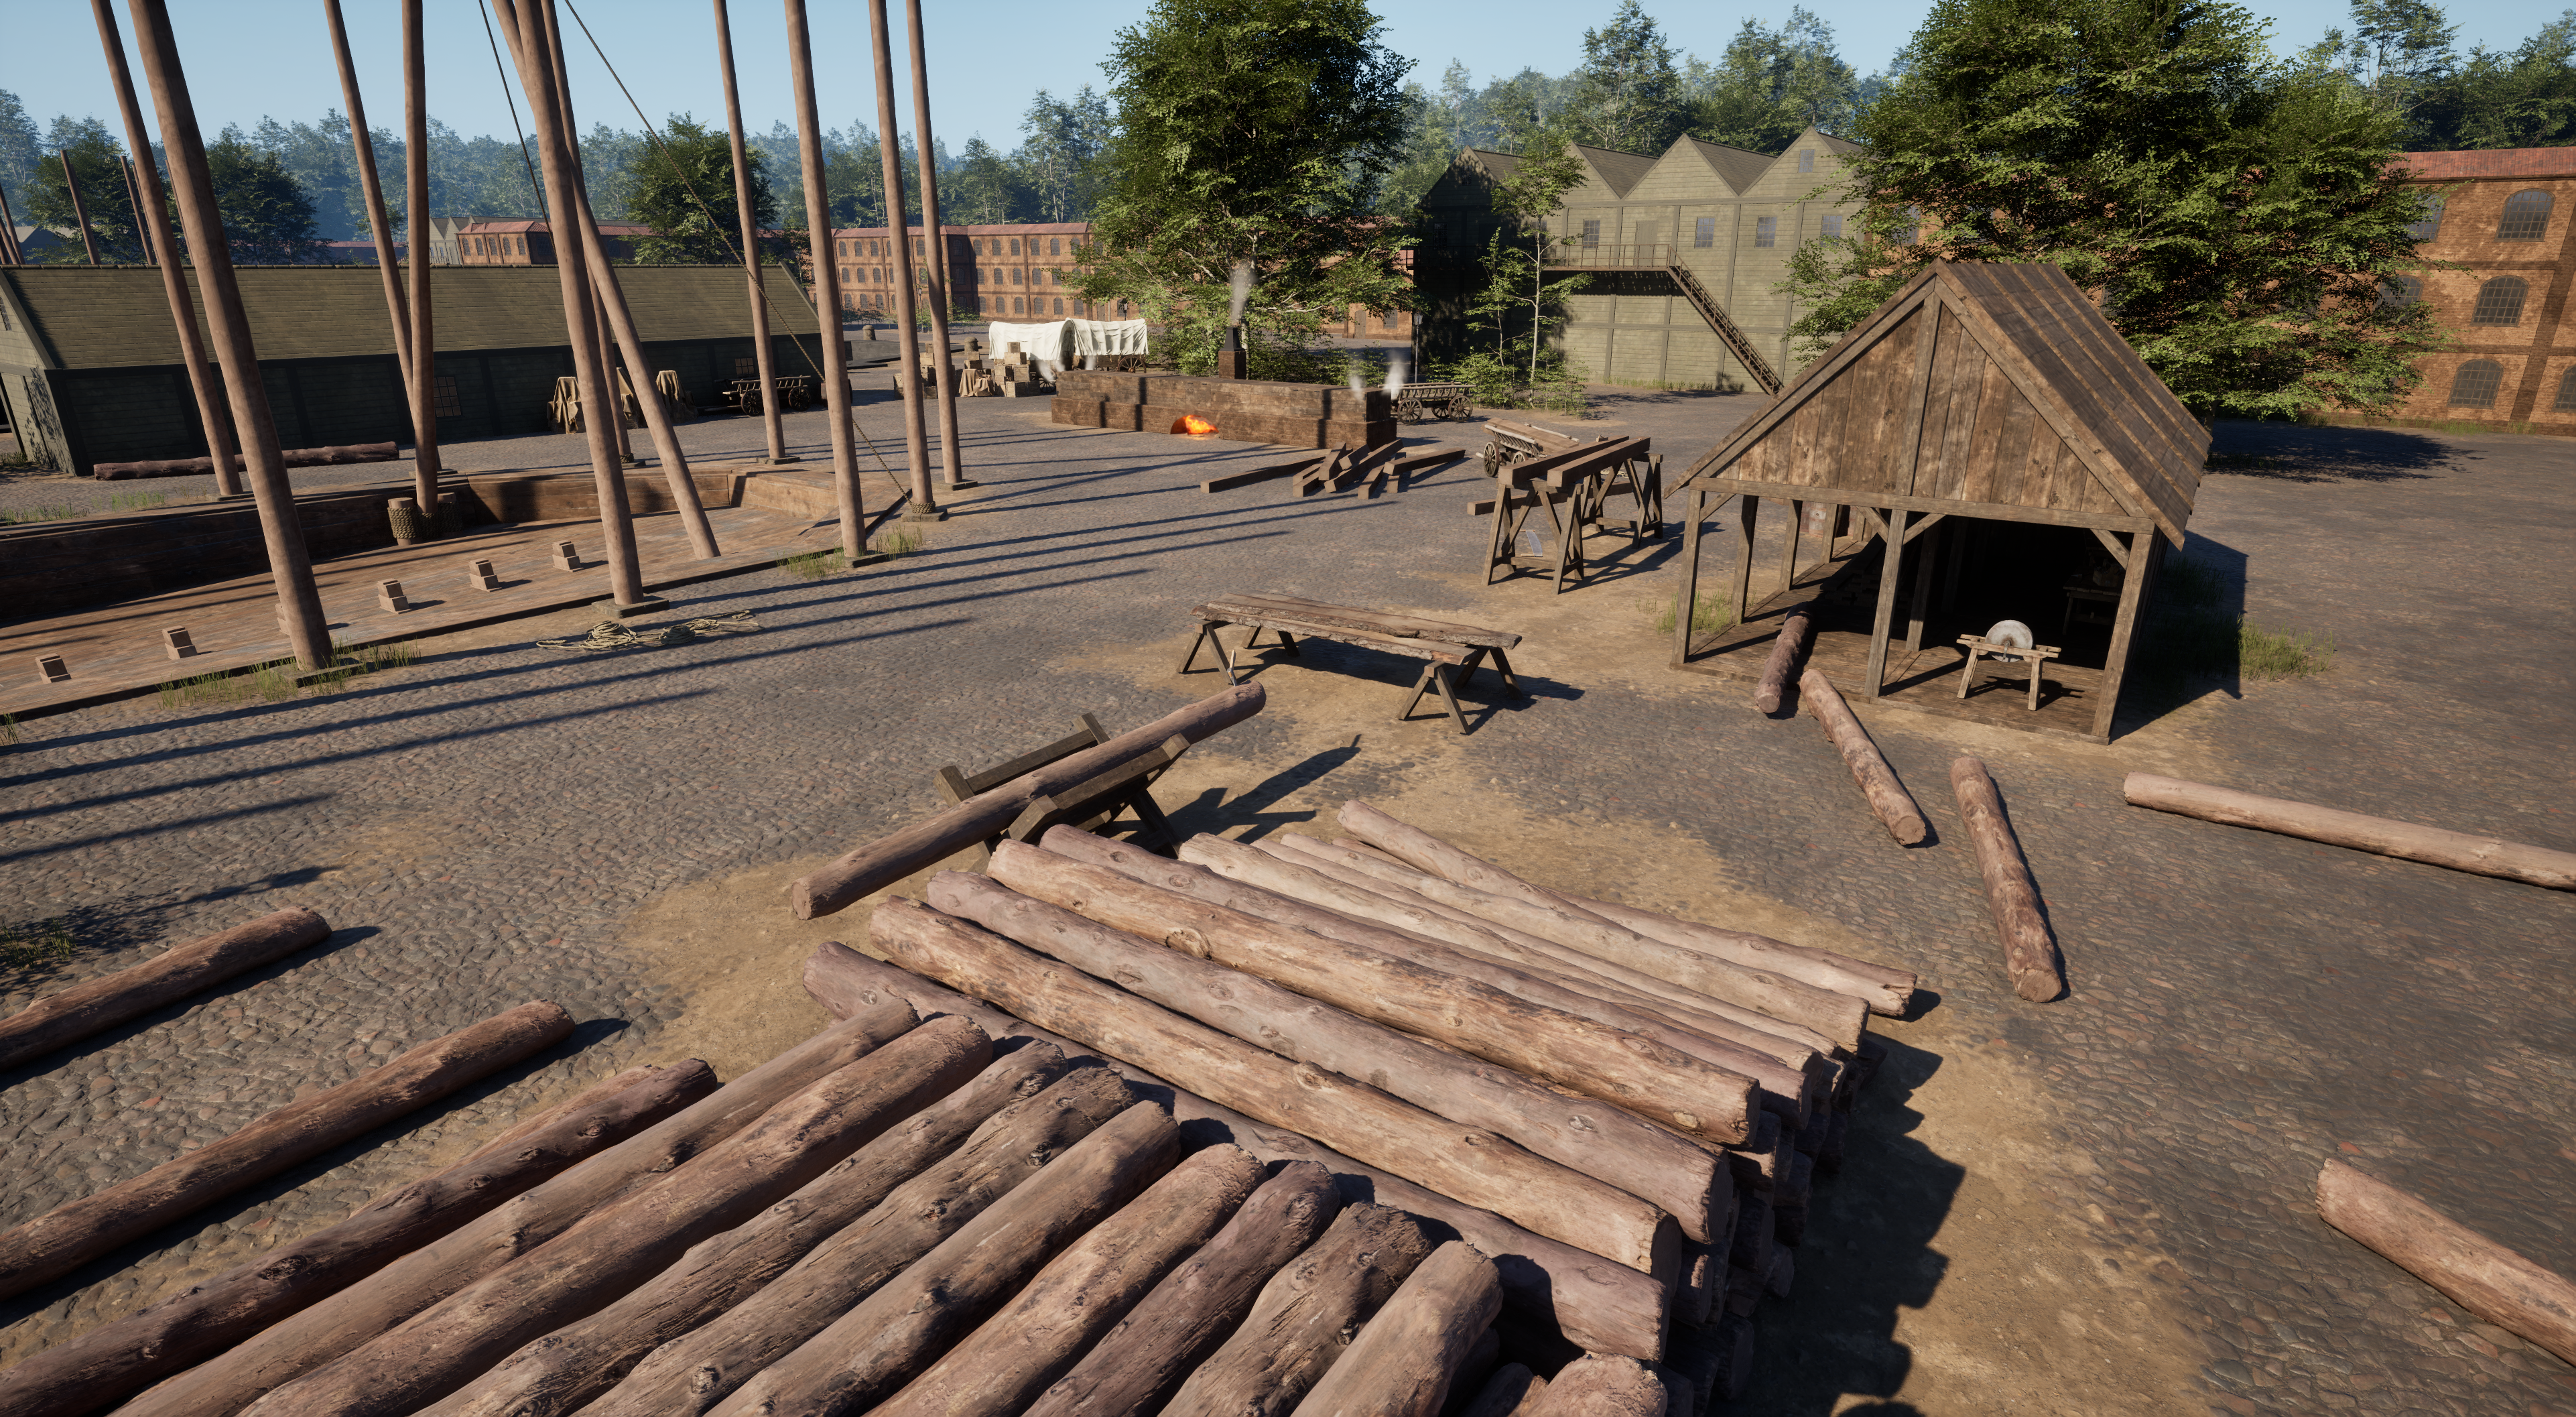
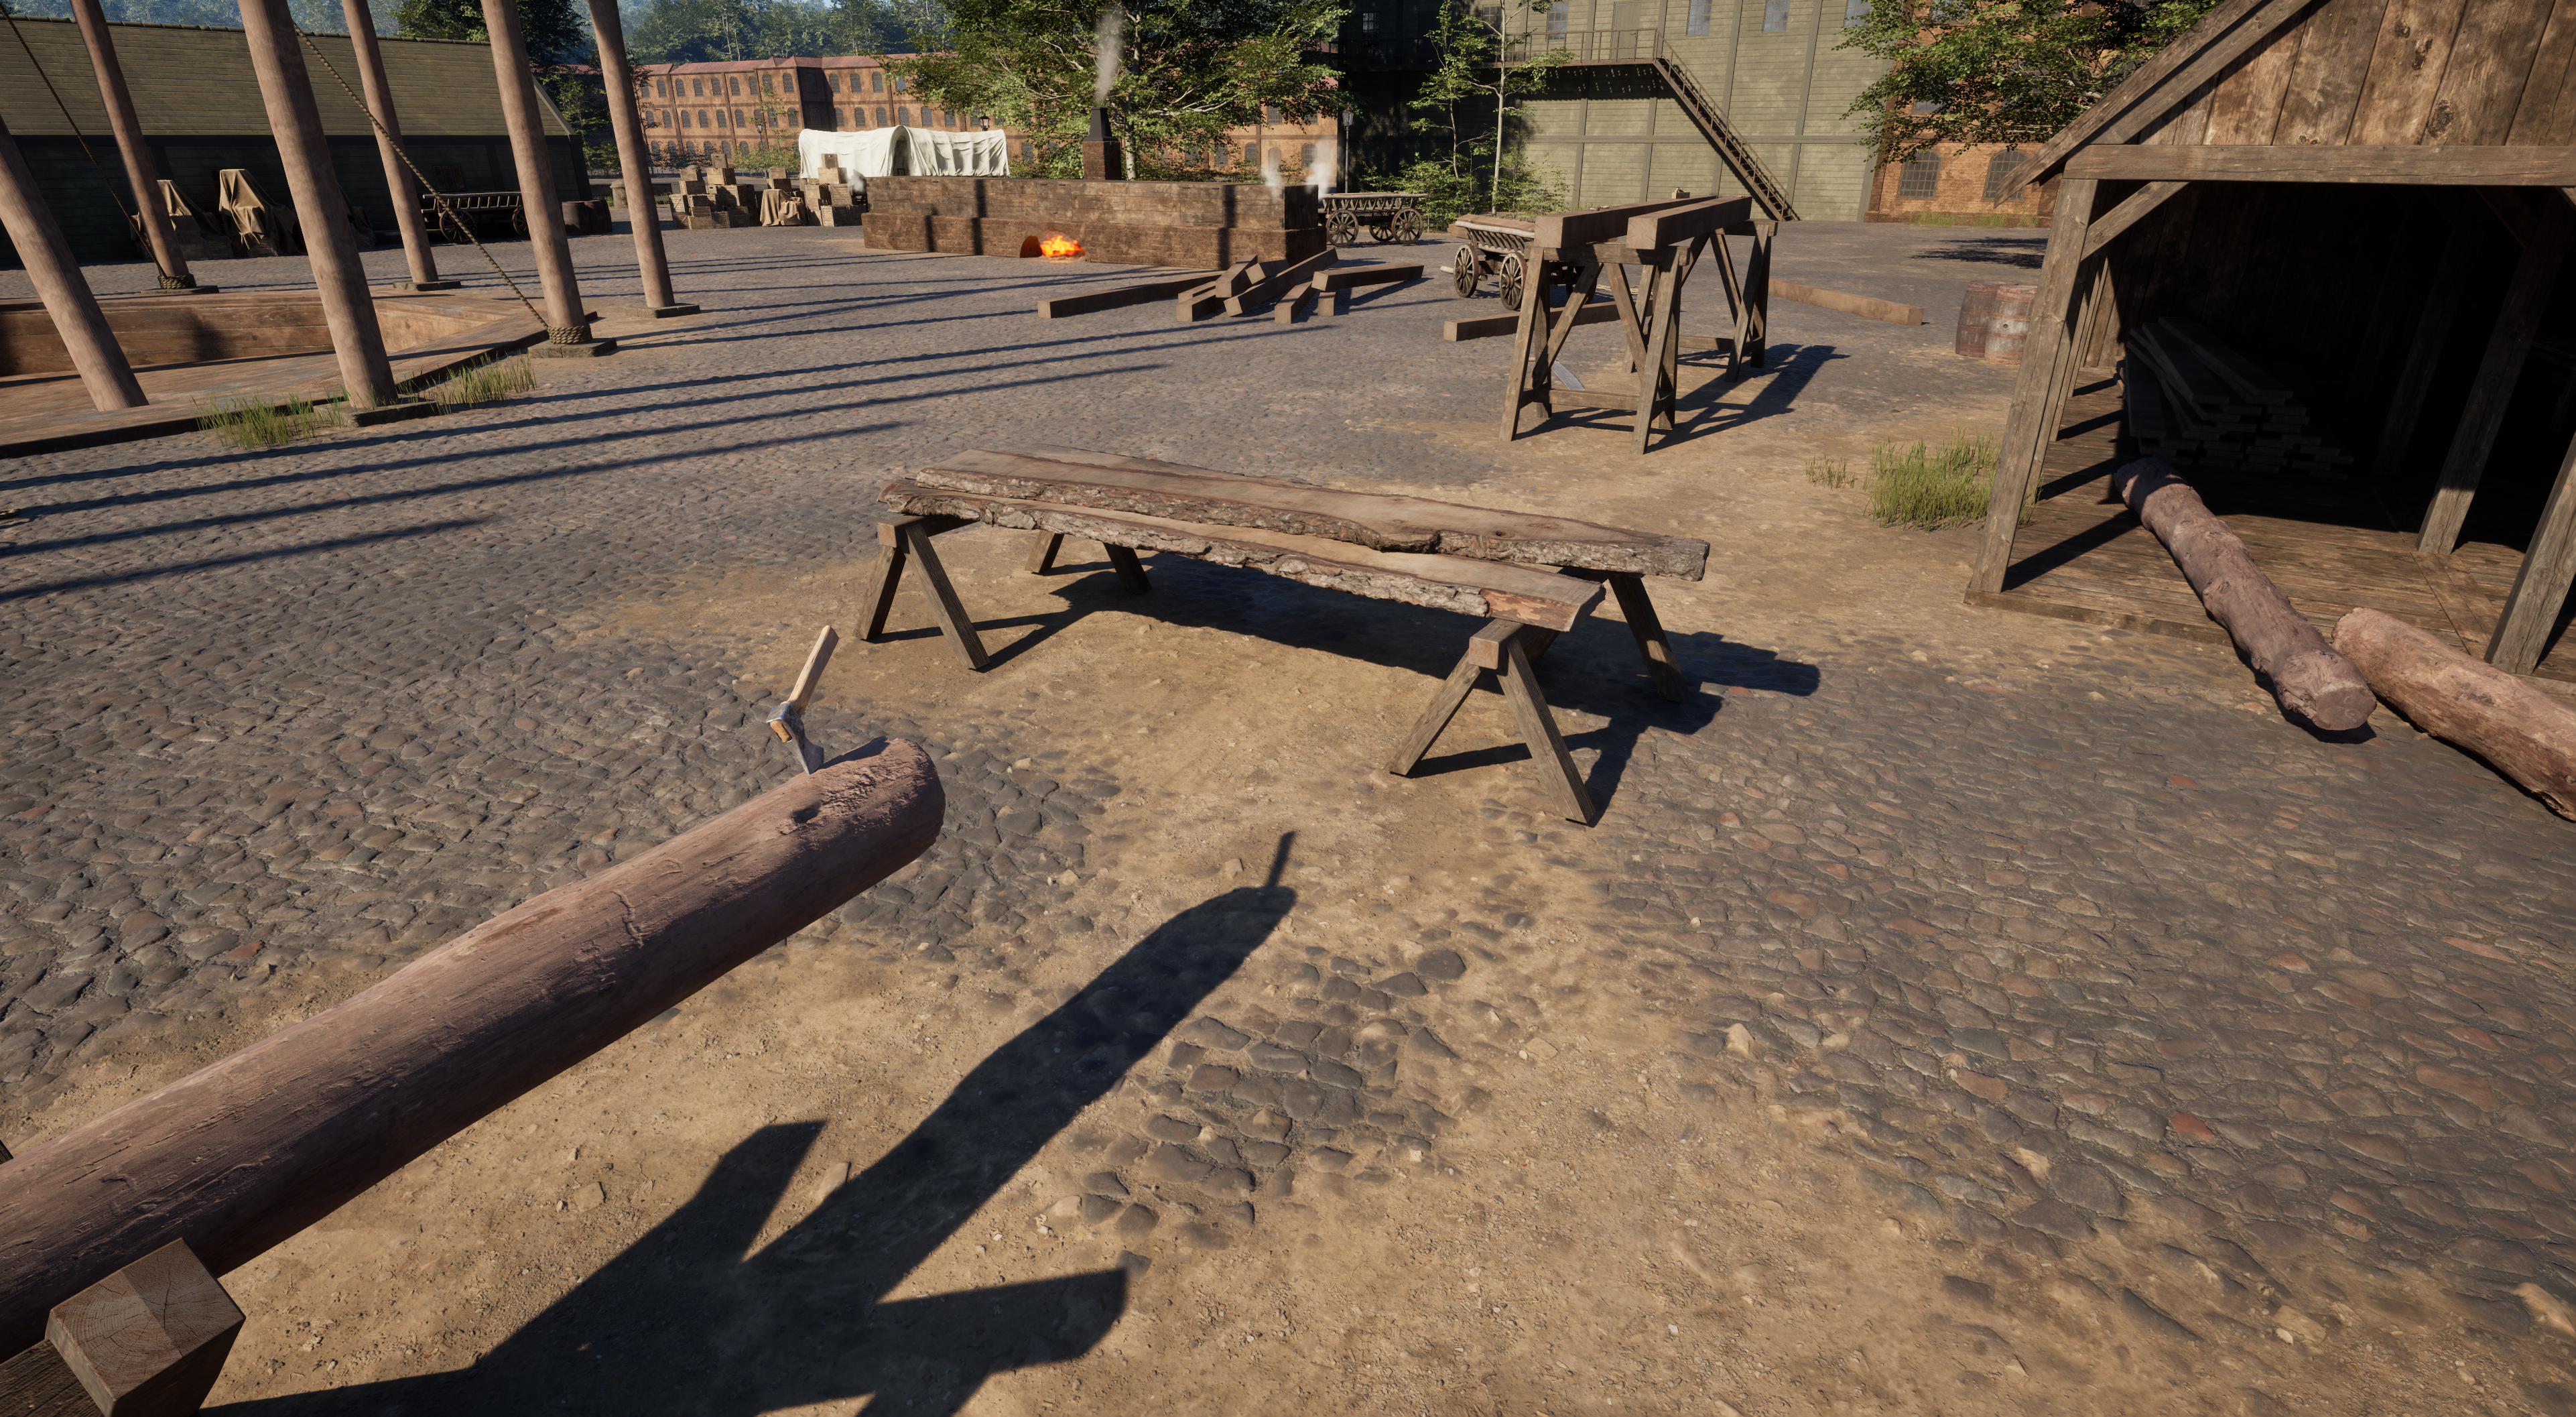
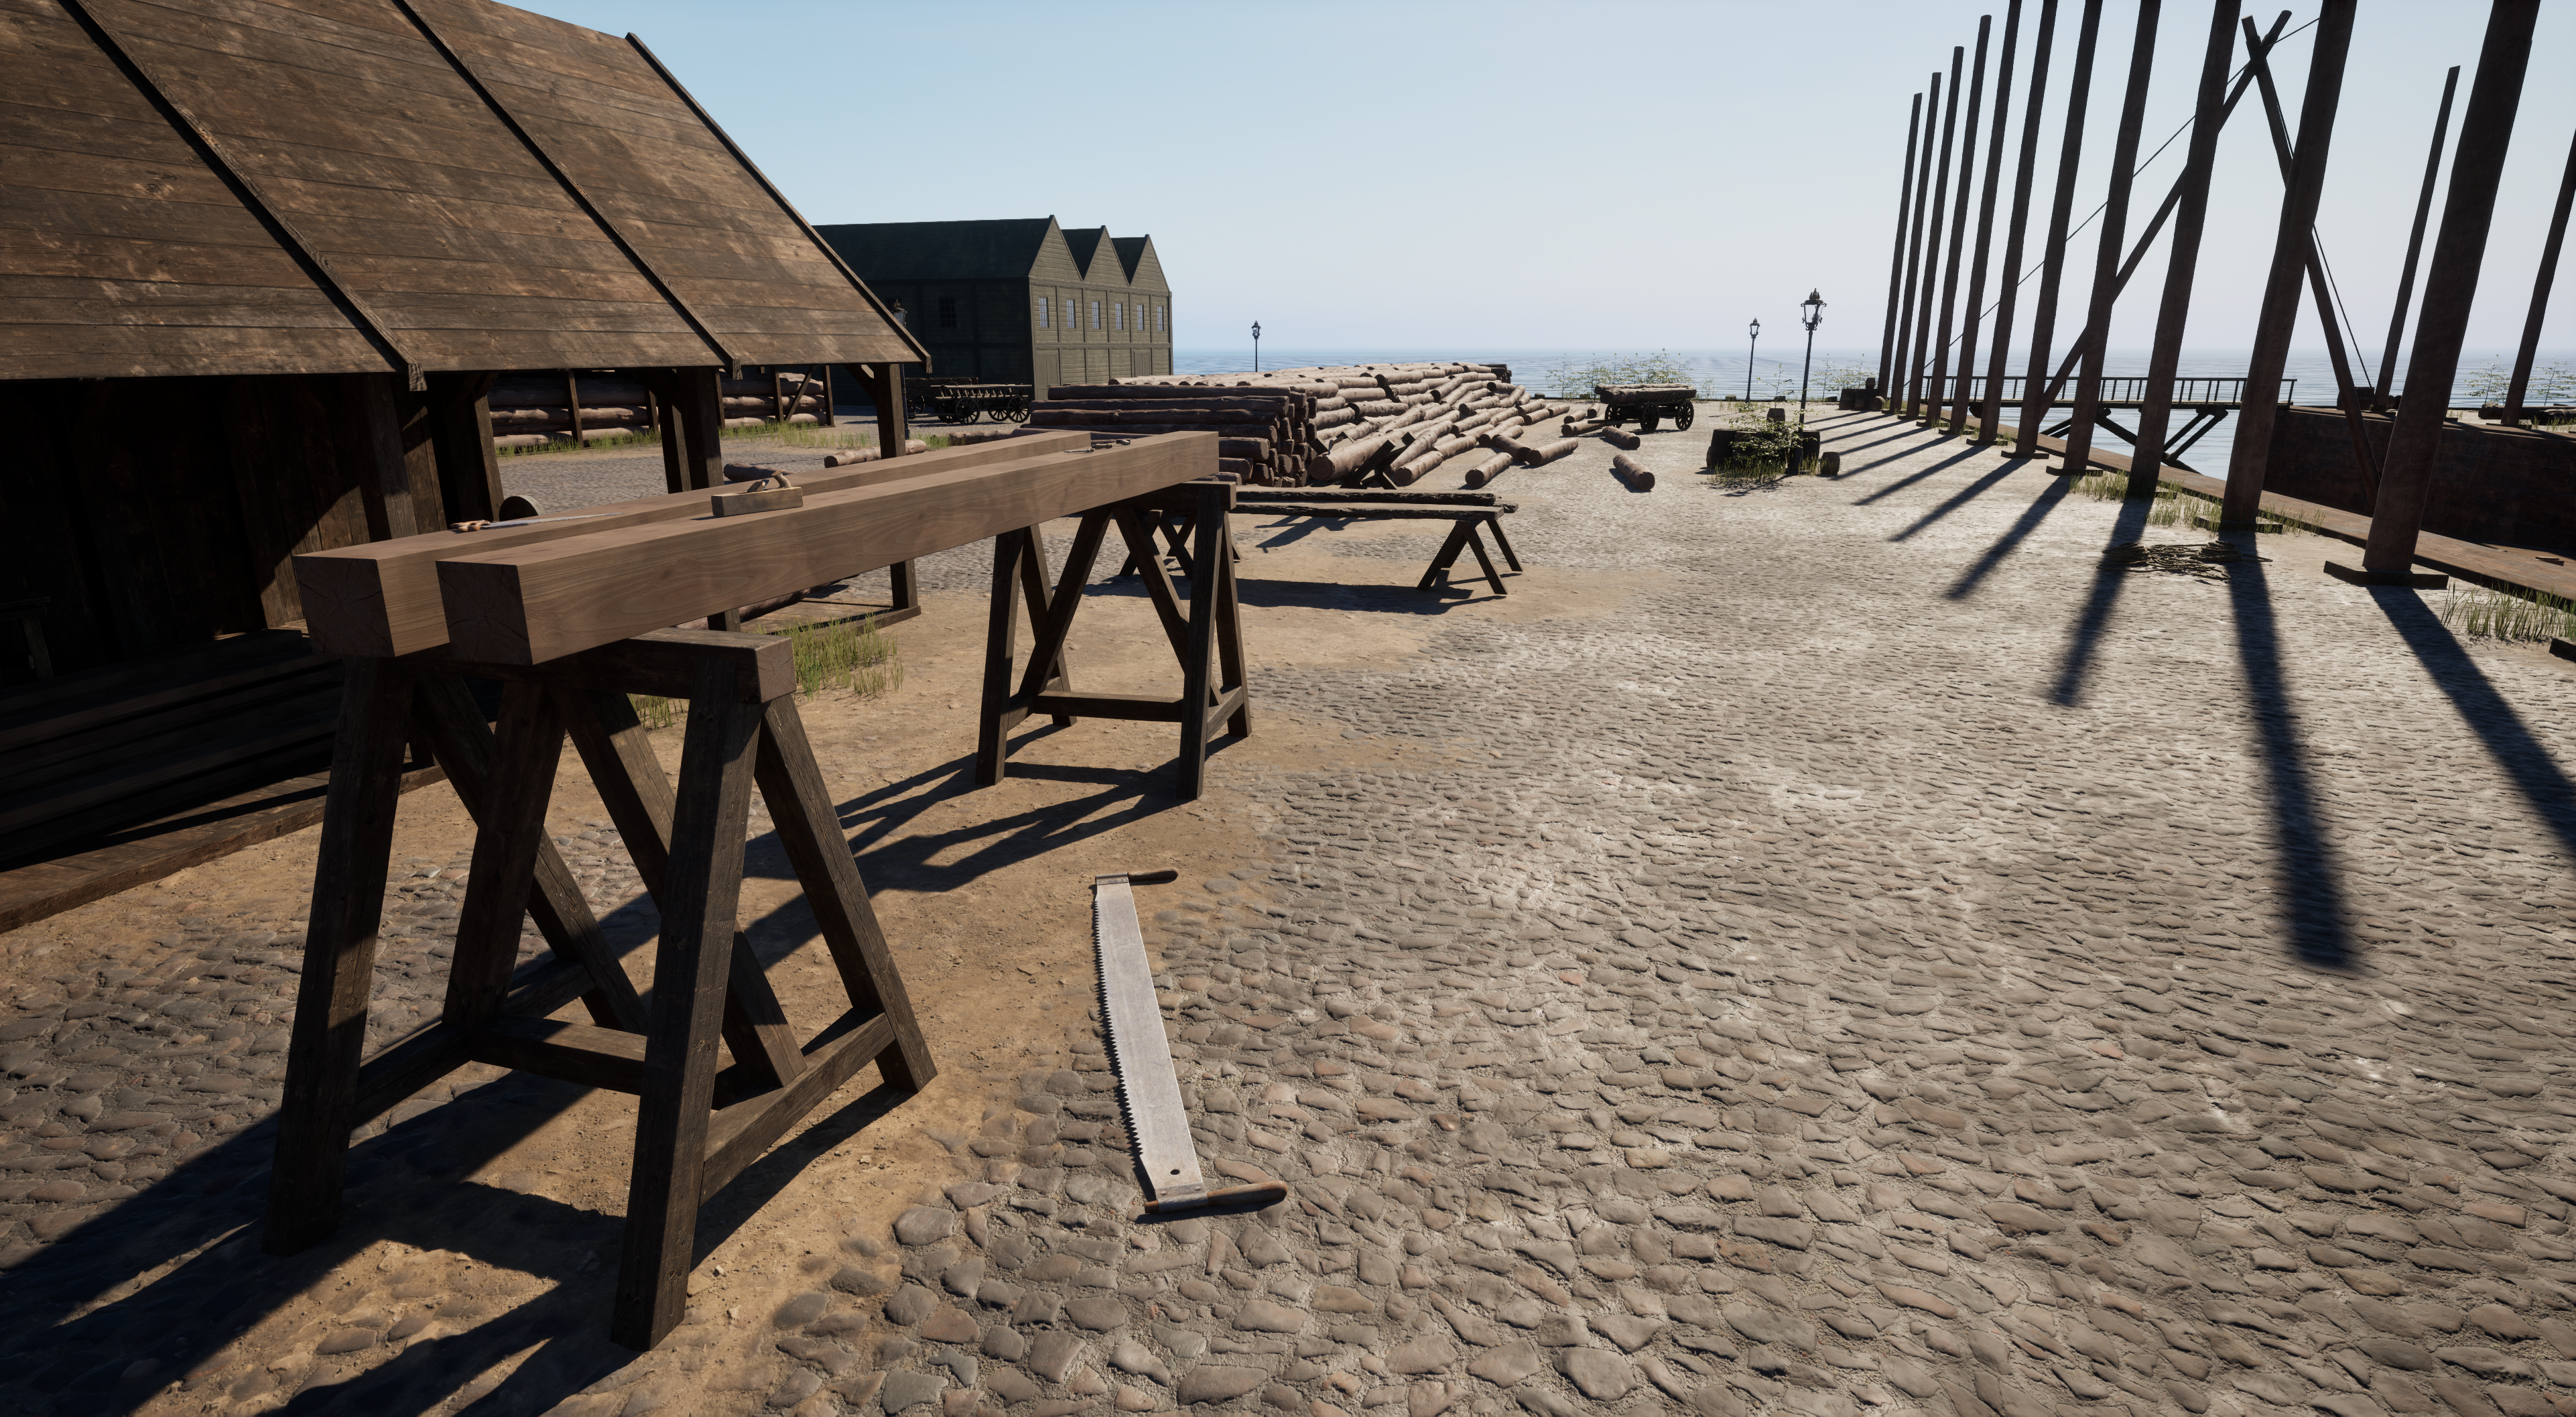
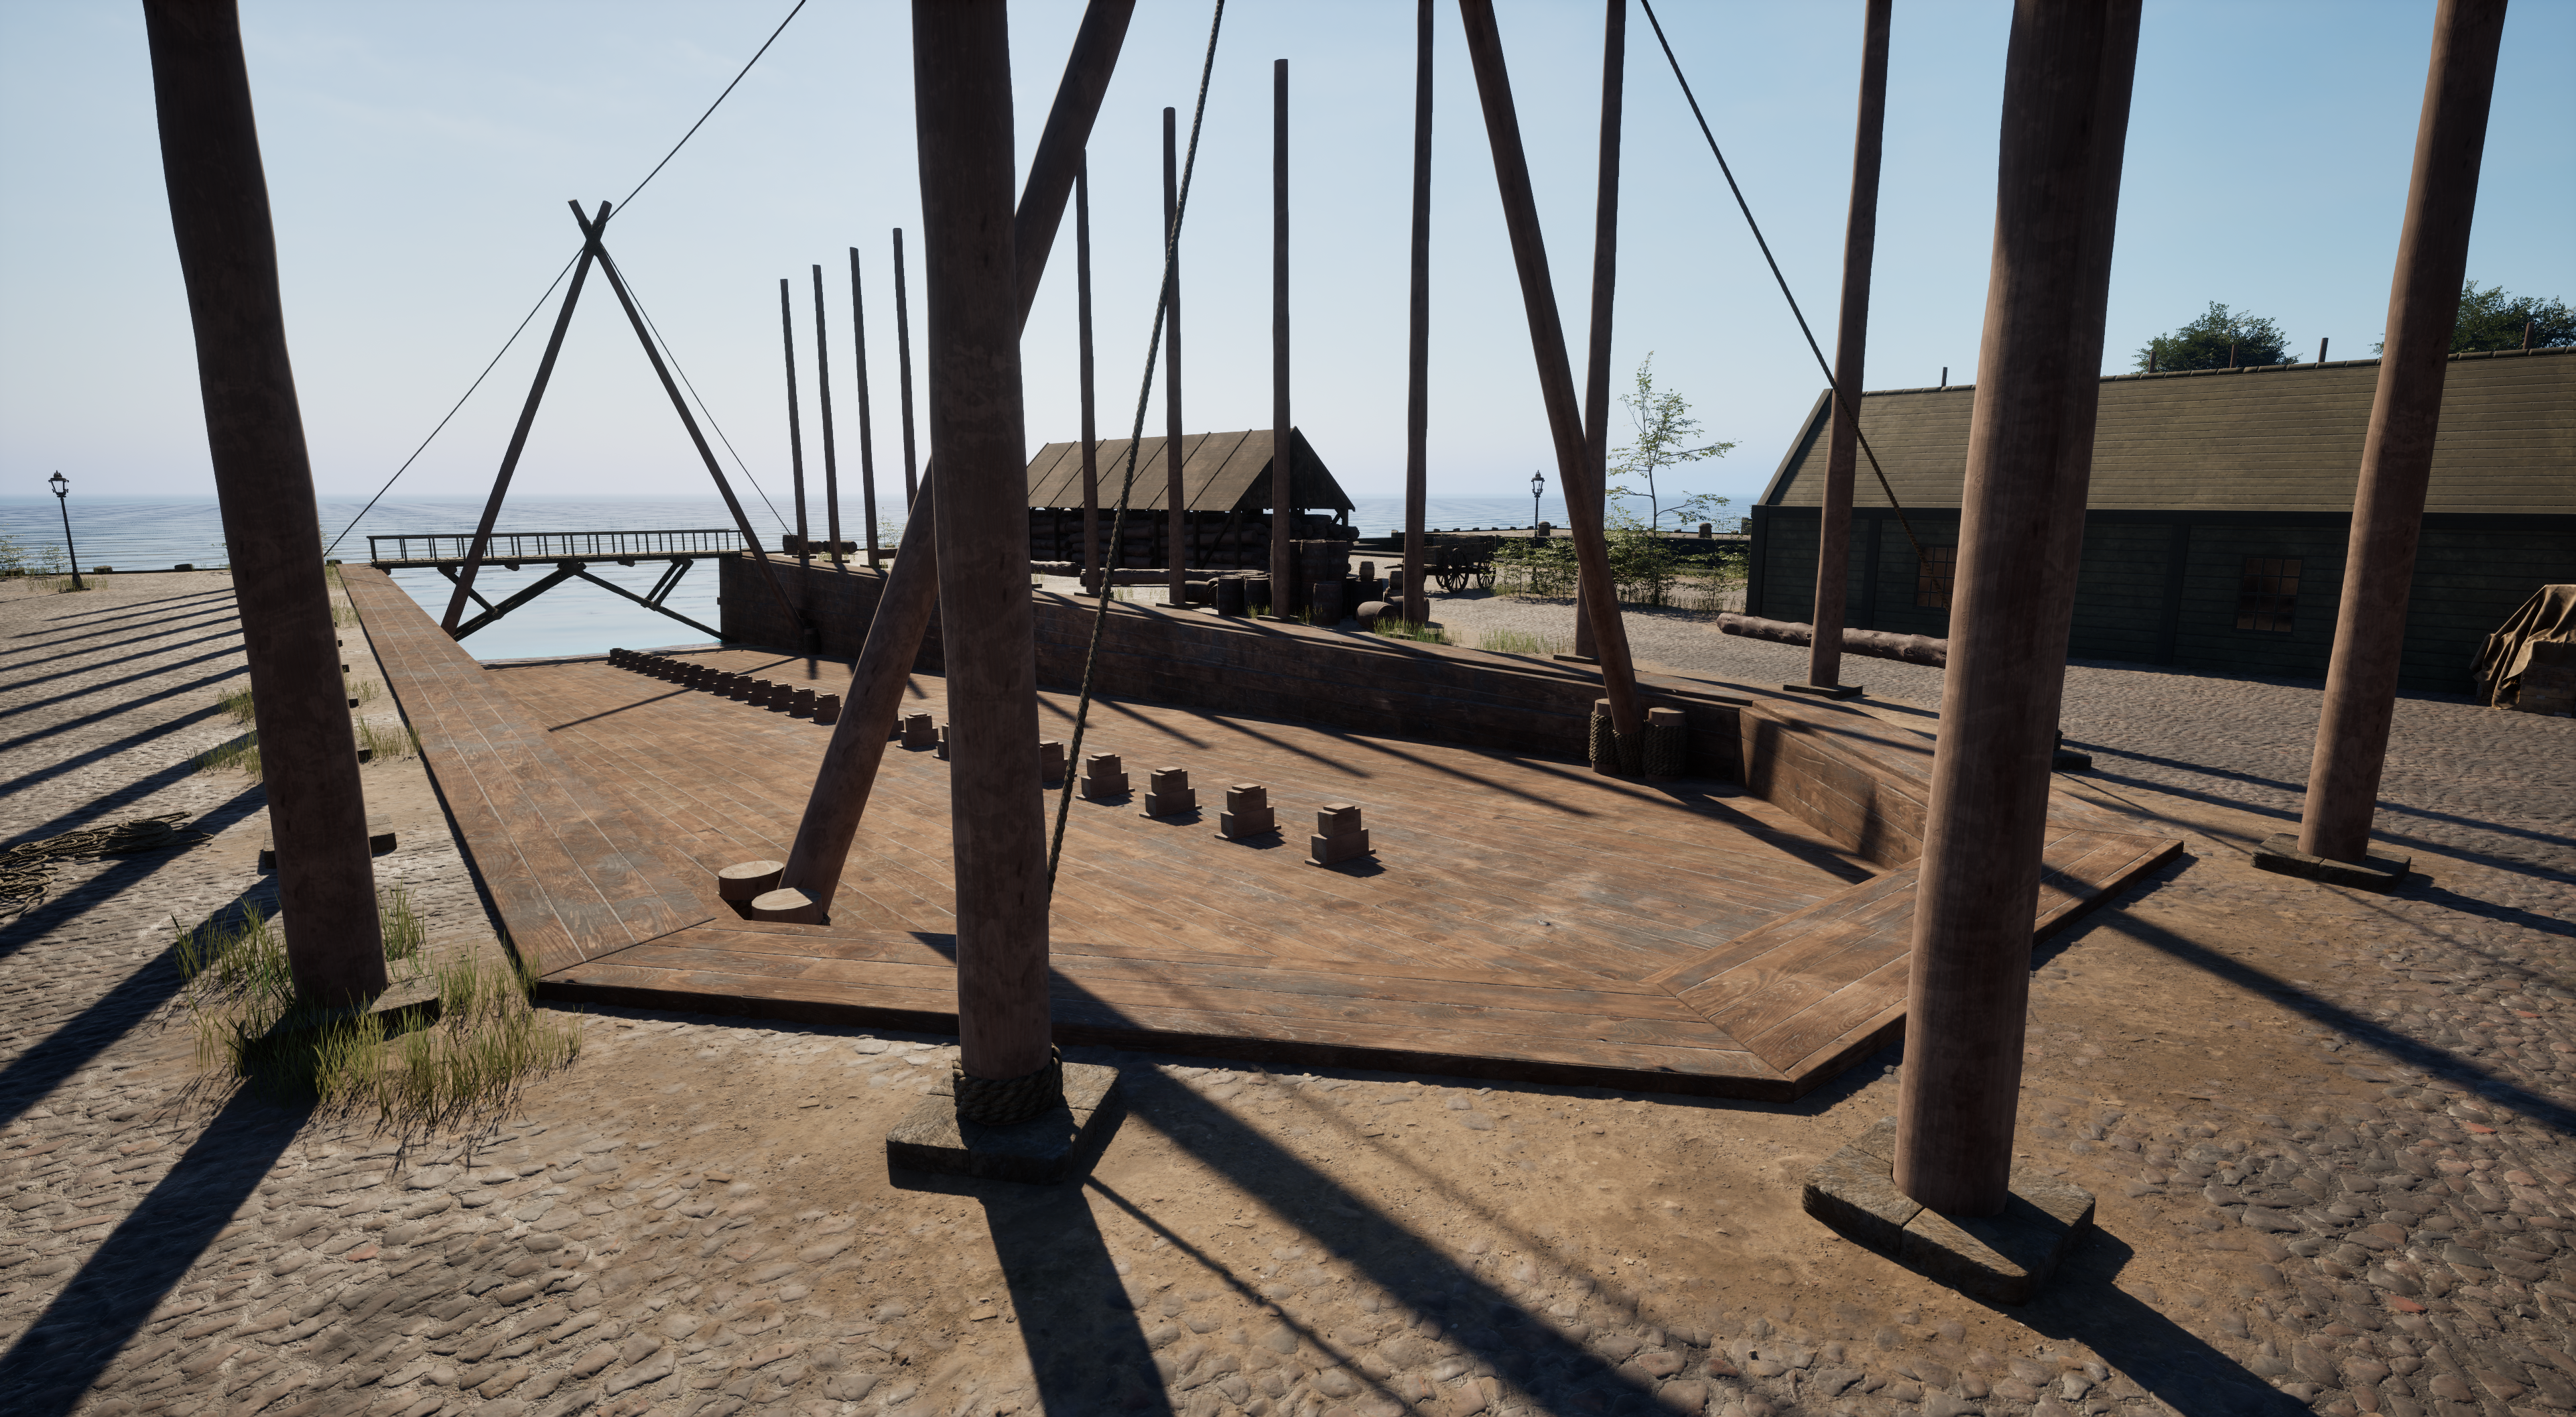
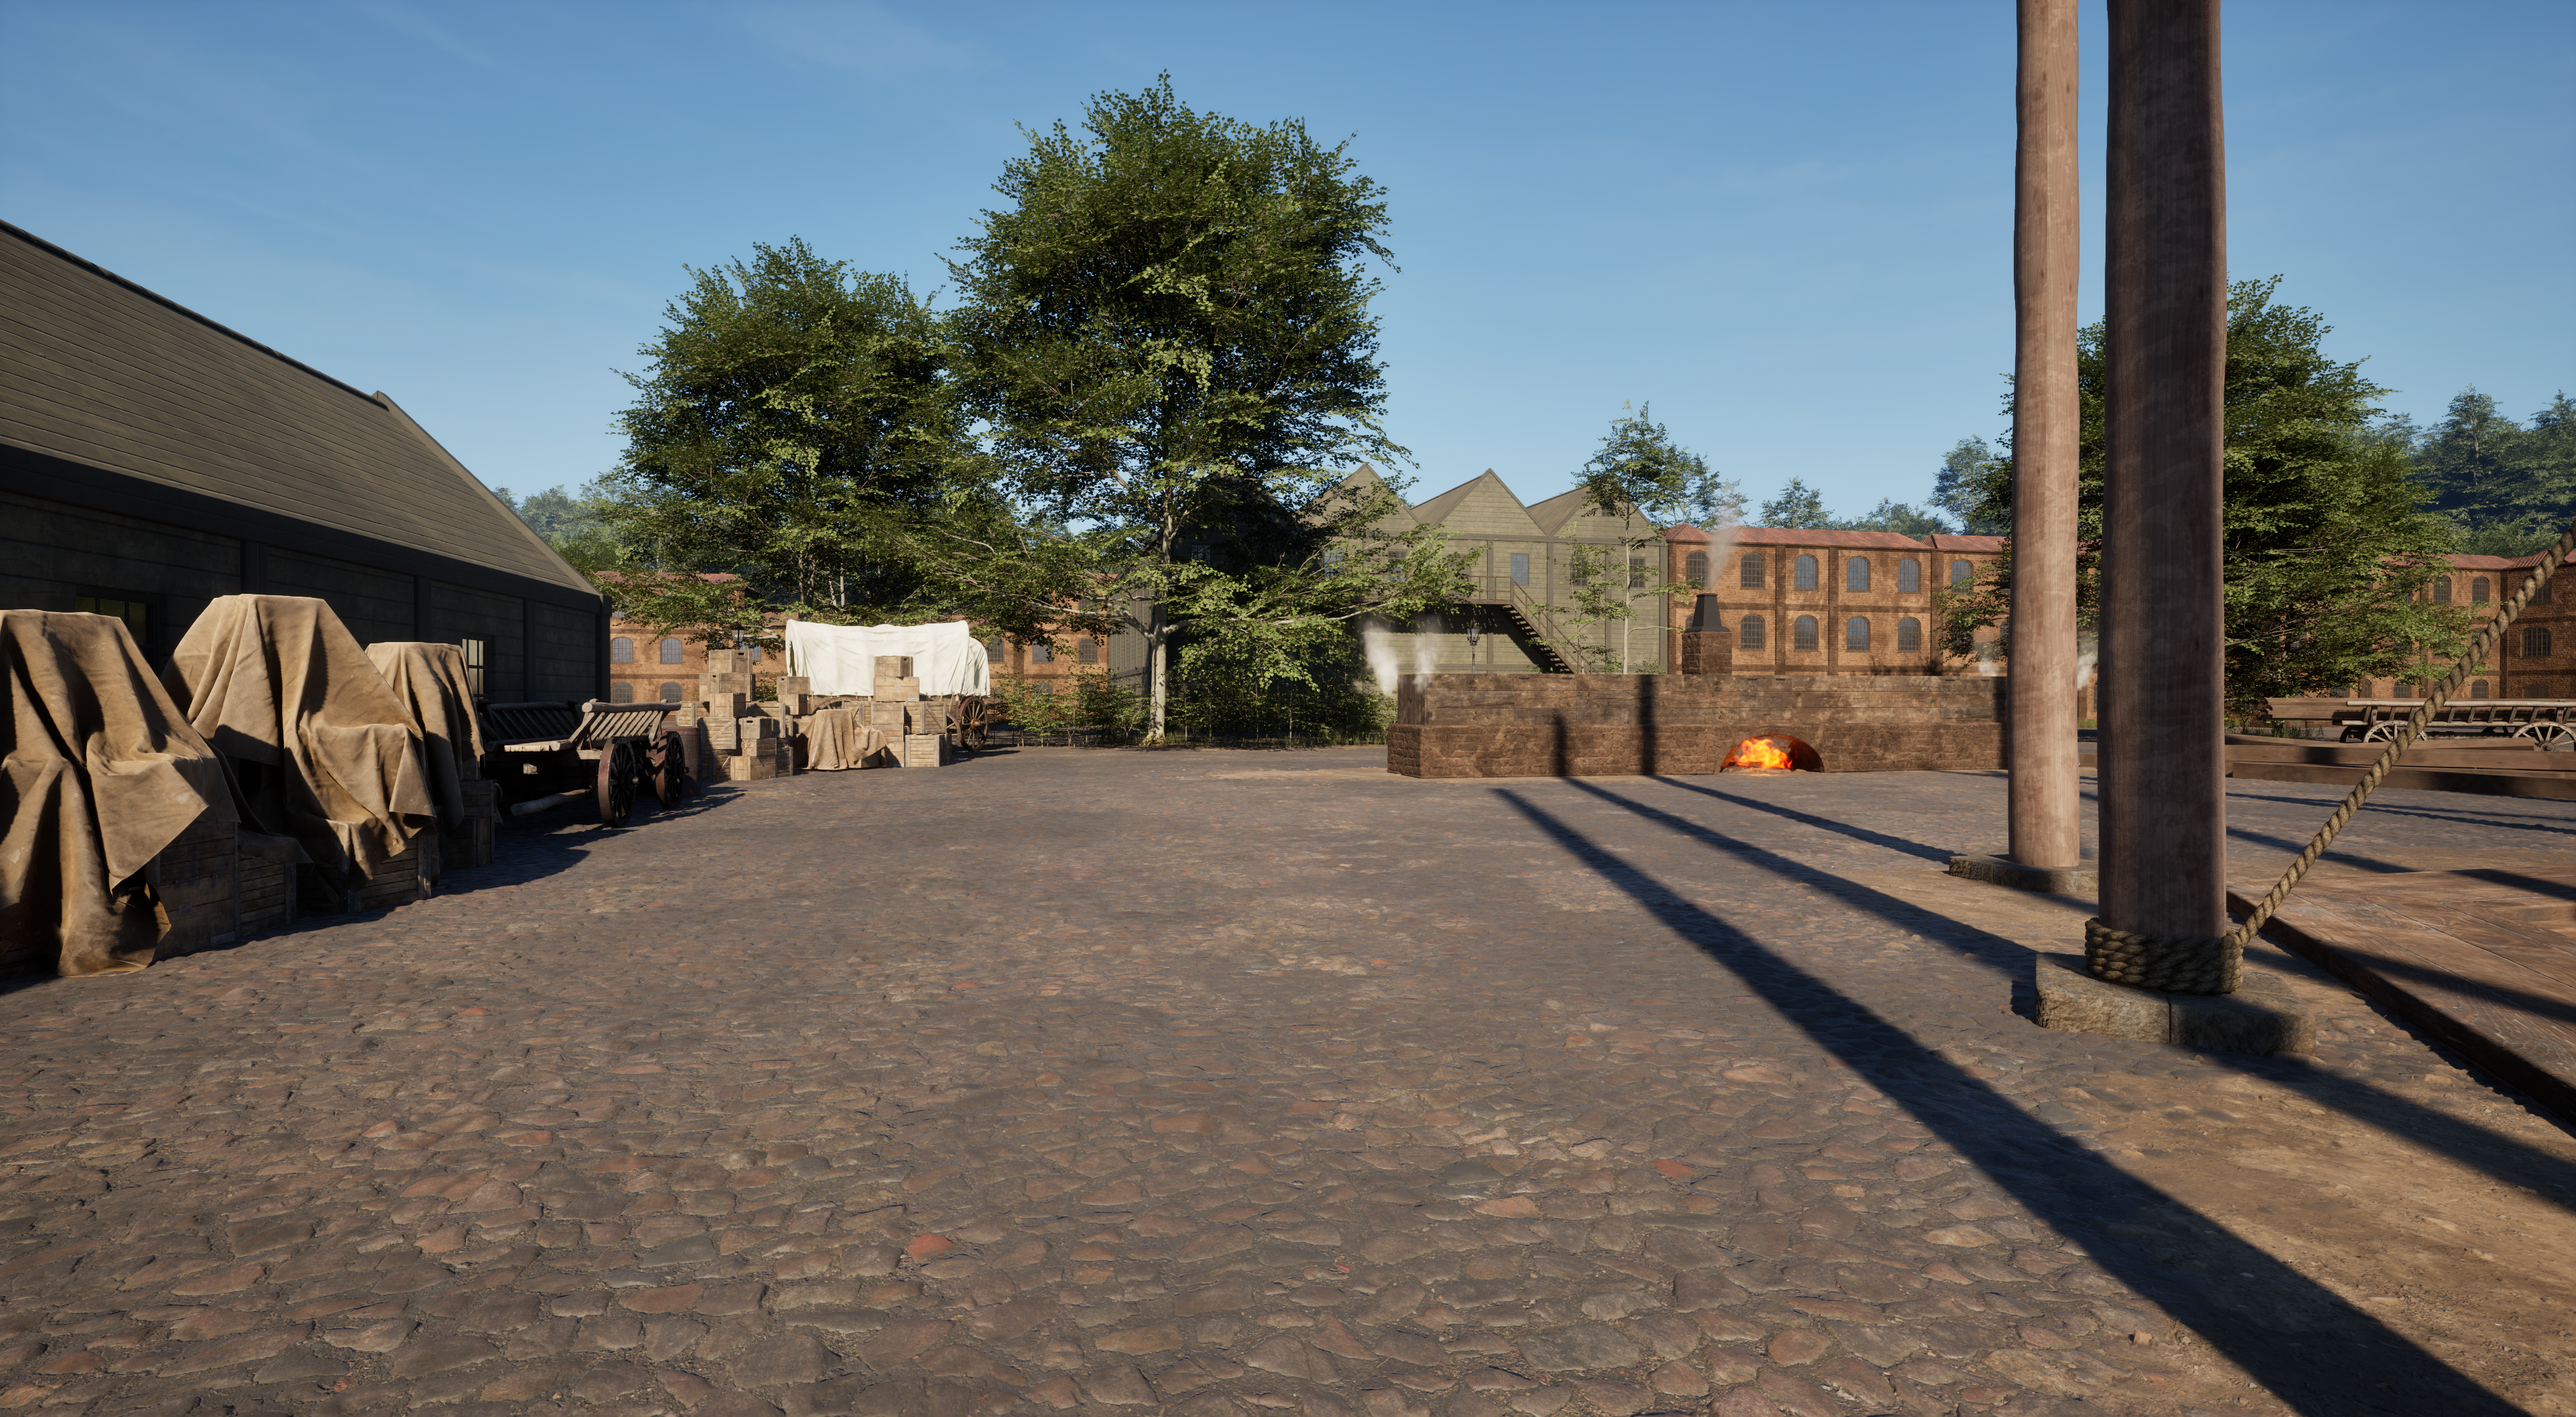
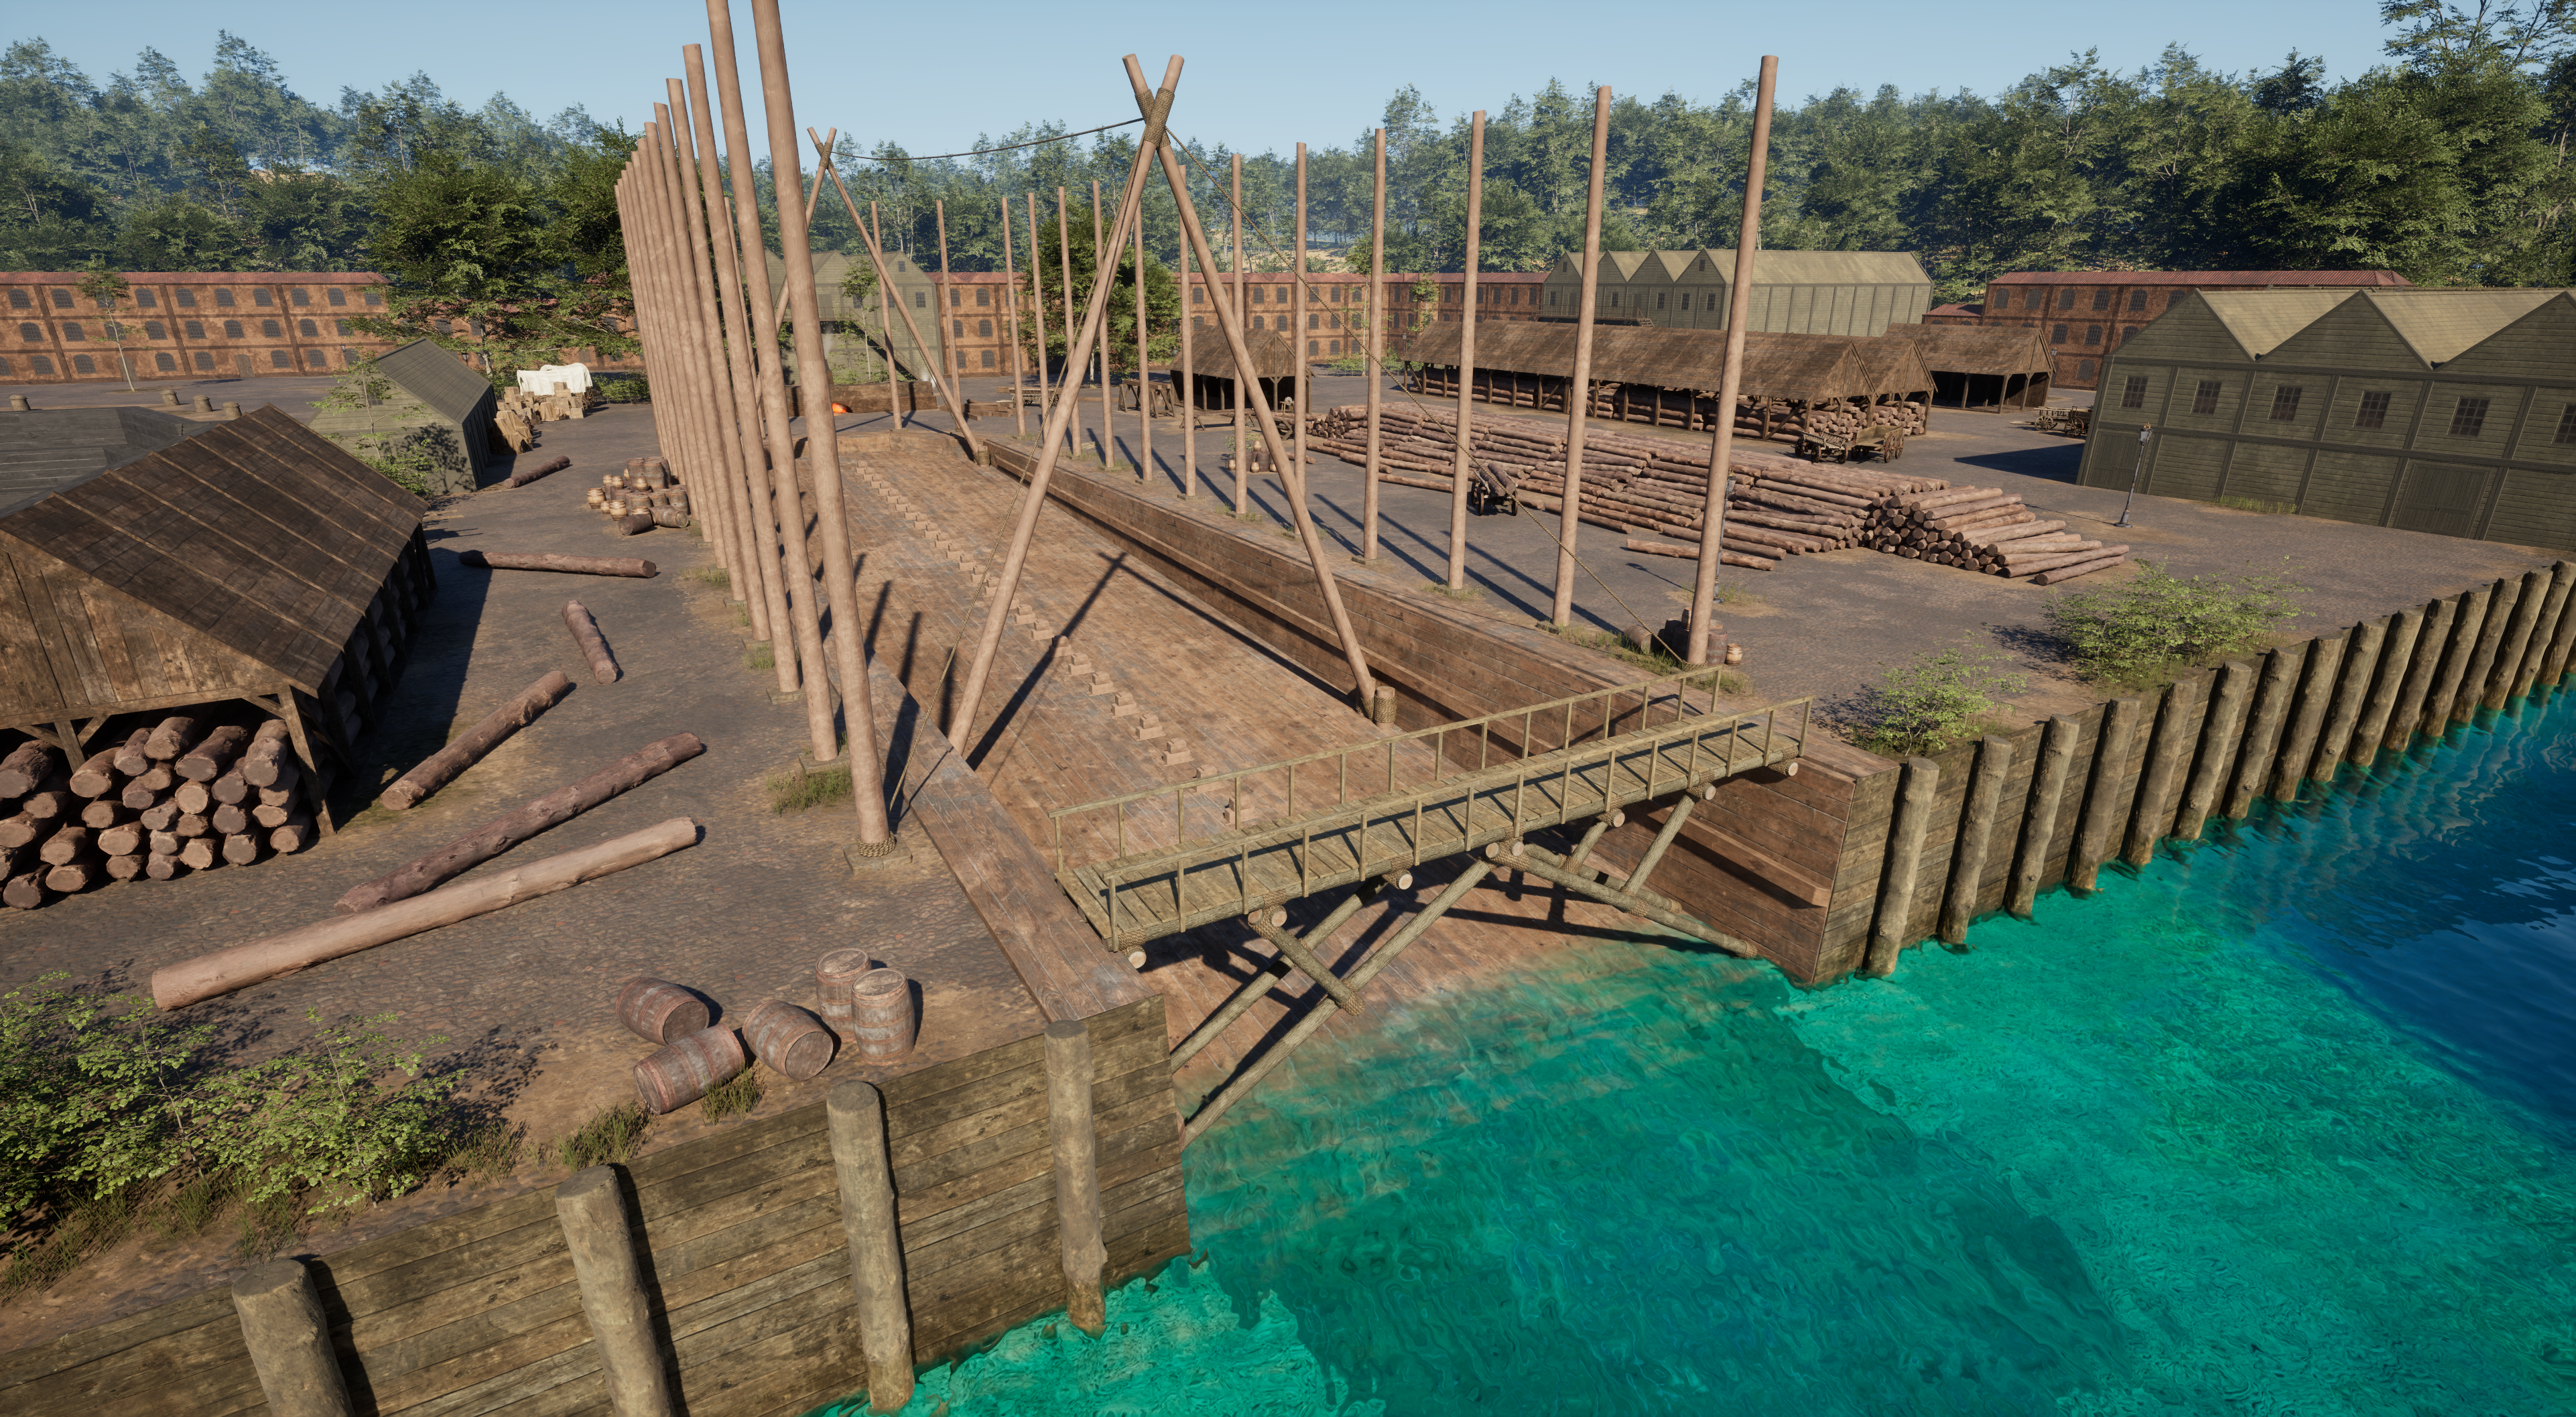
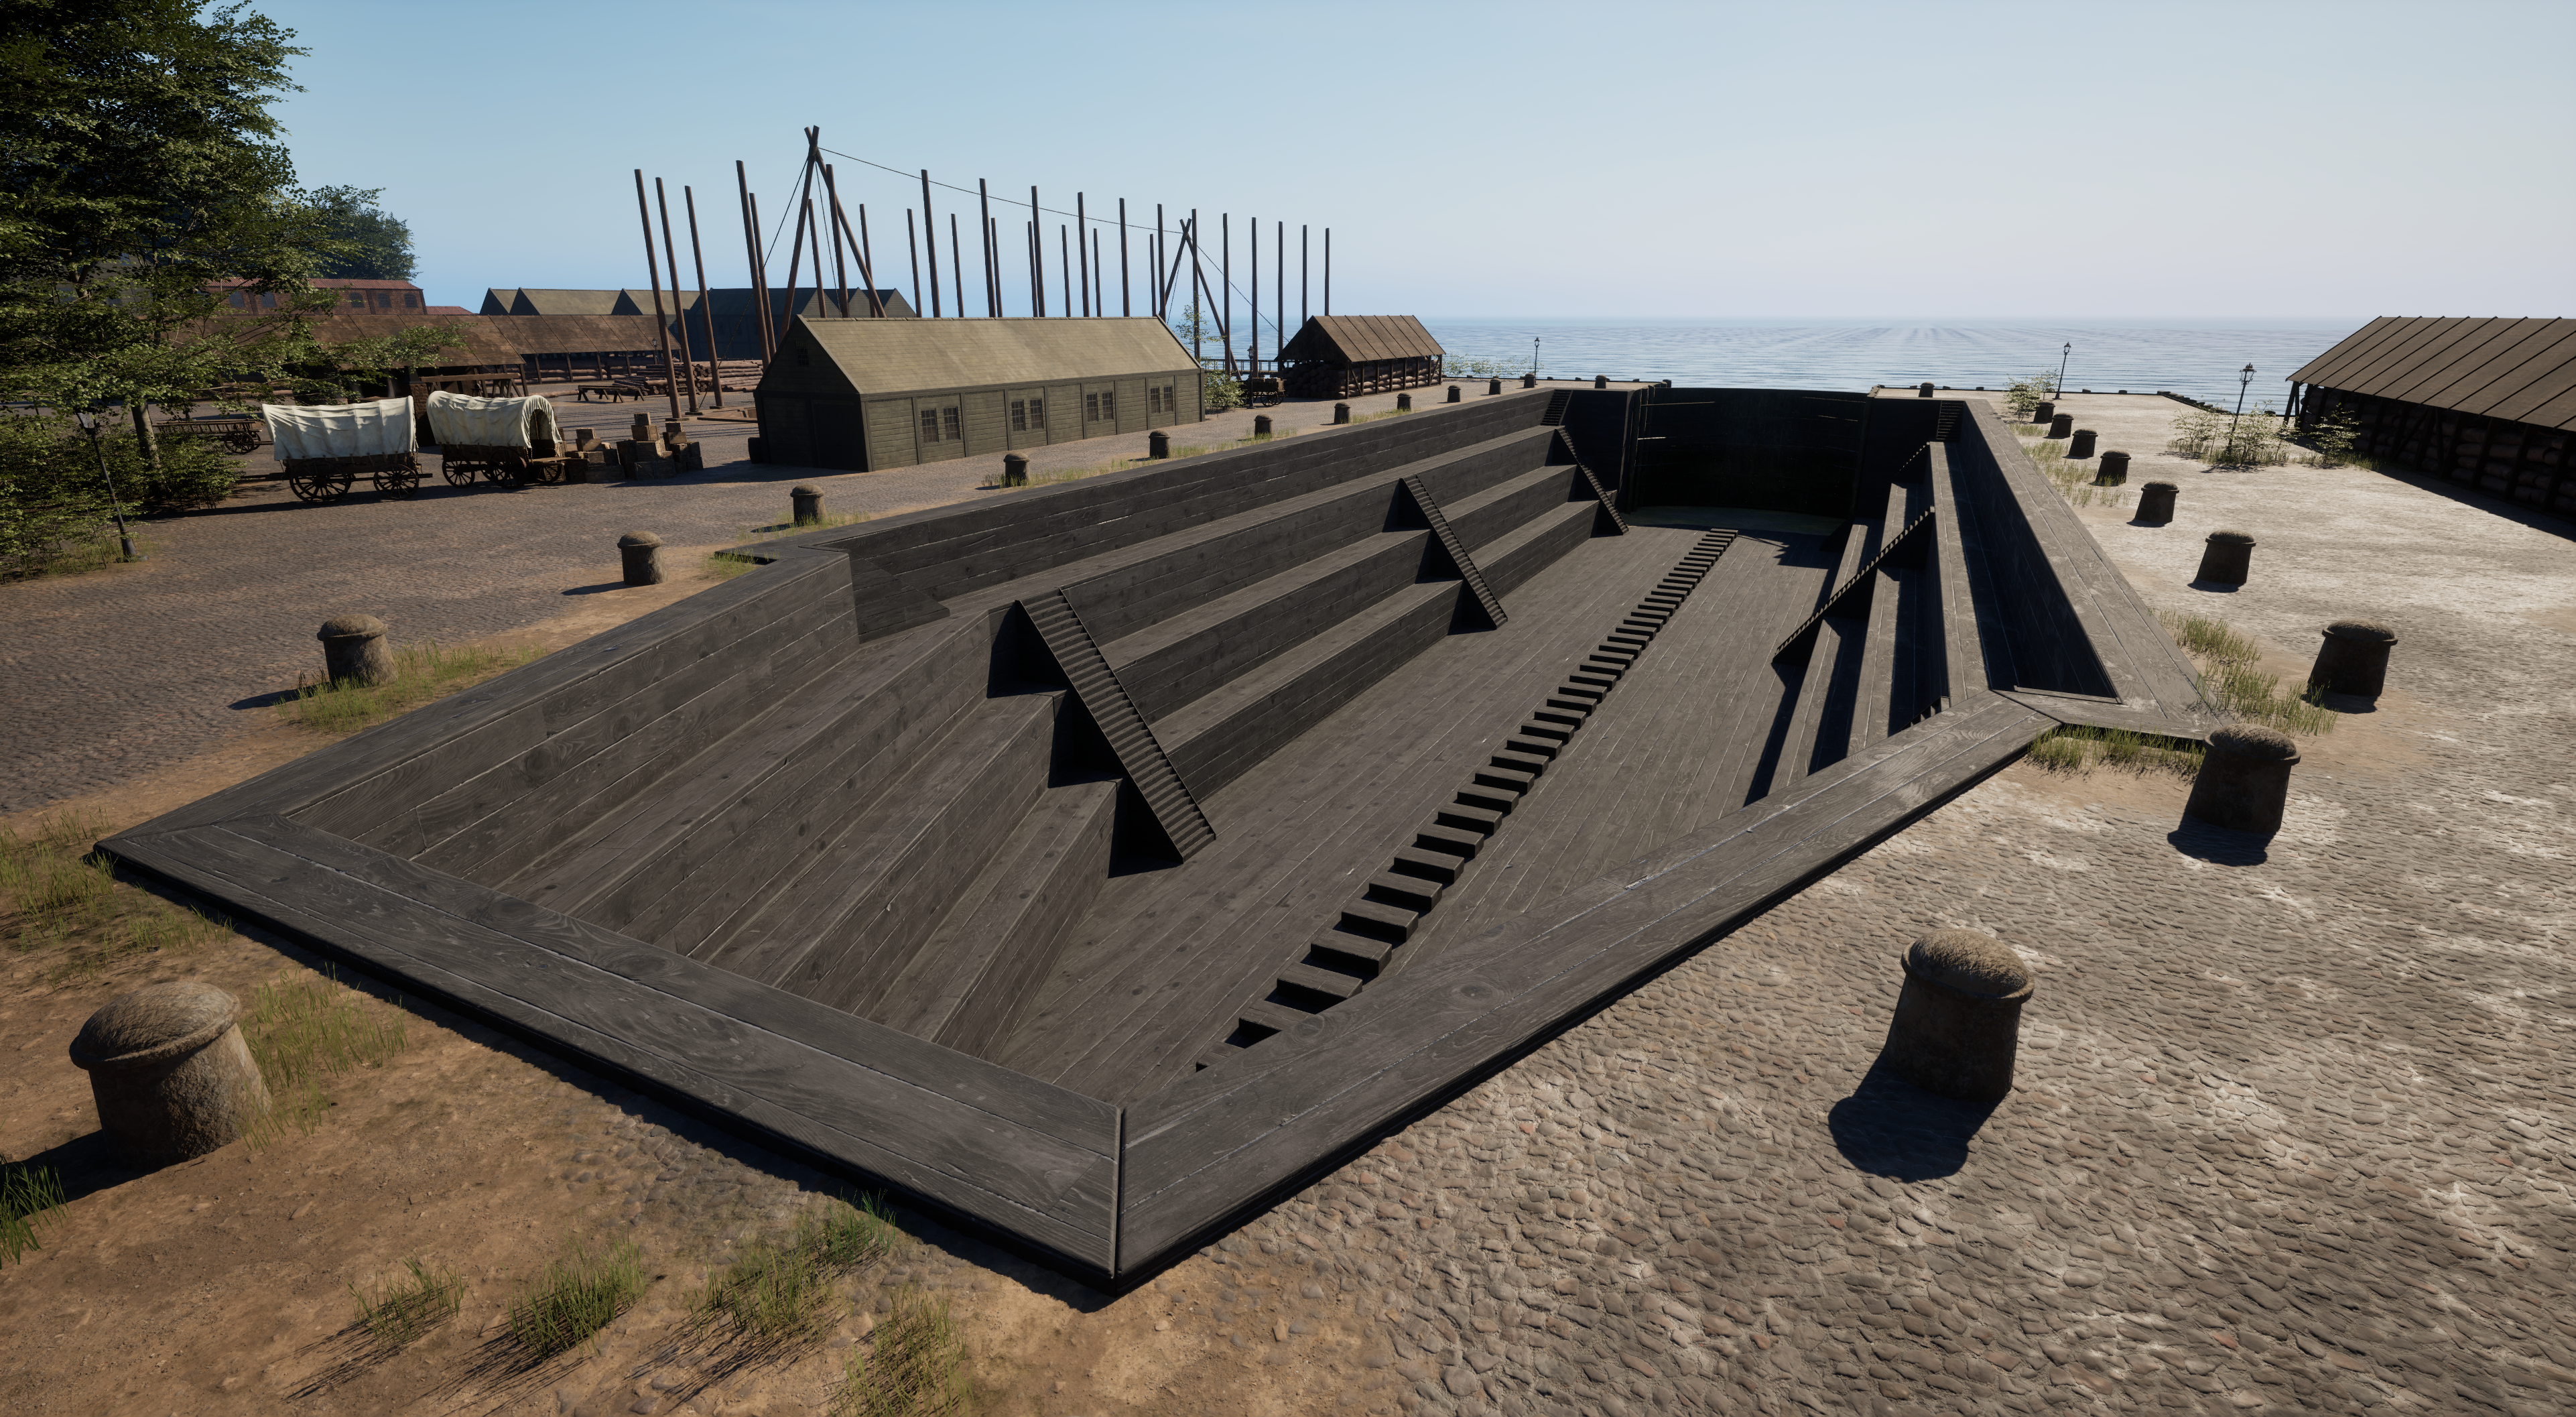
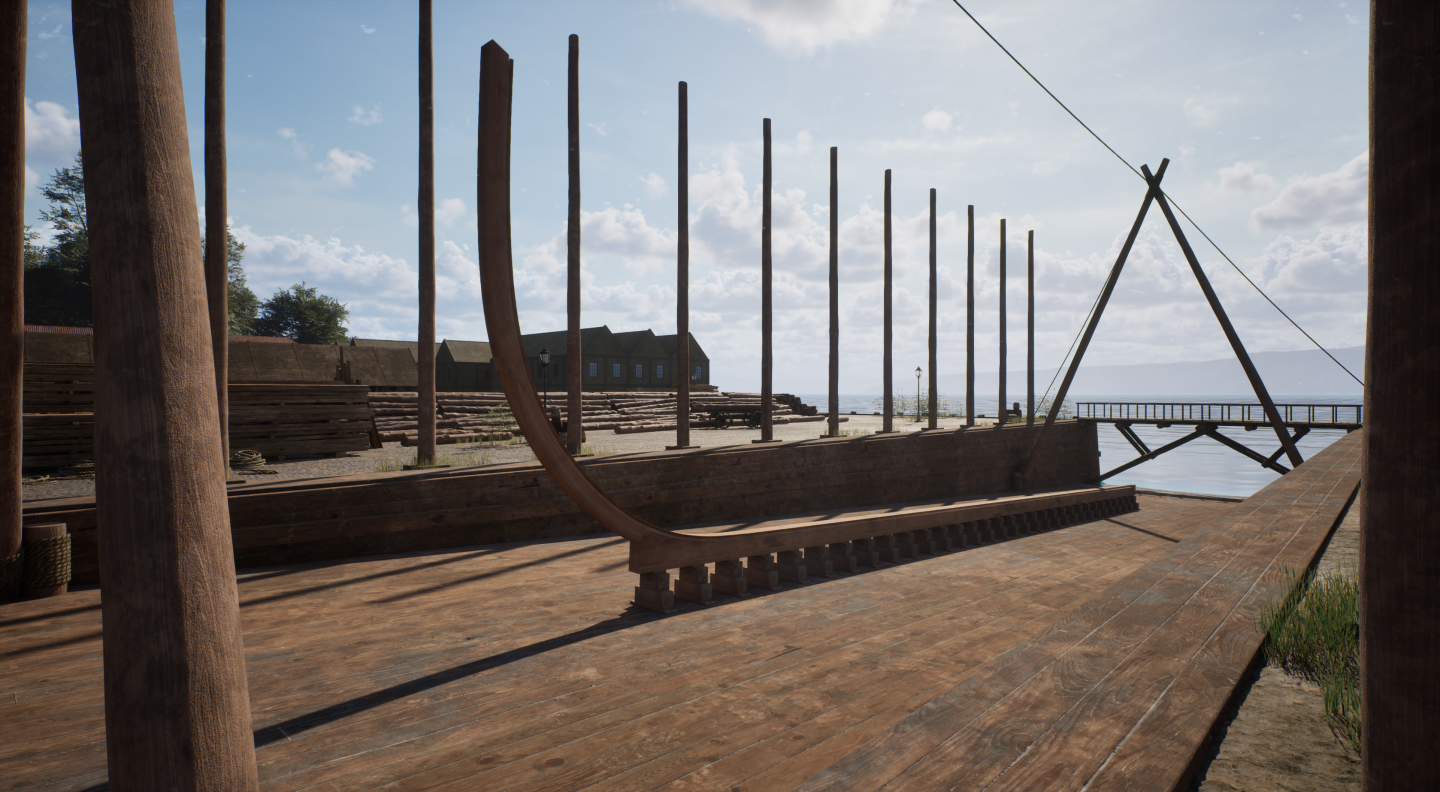
hello, guys! long time no write from me regarding this beautiful ship. it seems like I've started this build in another life long long time ago. good news is, I think I'm ready to either continue with Pandora or start another build entirely. reason for being hesitant about Pandora is Nate's fine start with the ship. not that it affects me in any way but me joining in might lead to topic saturation. so instead I was thinking about building one ship that's closely tied to Pandora. the ship in question is of course the HMS Bounty. I'm still debating with my inner voices about it, so if you if you wanna join in the conversation feel free to drop some suggestions. personally, I'd like to finish what I've already started but I'm open to suggestions. now, onto something different. when I started modeling Pandora way back when, Greg suggested that I build a shipyard as a backdrop. back then it was too much for me to handle. I didn't know anything about shipbuilding, didn't have resources and didn't know that much about worldbuilding in Unreal Engine. now, on the other hand, working in gaming industry gave me some experience needed to tackle such task. since I've been thinking about Greg's suggestion for quite some time now, I've decided to make myself a nice scene to put a ship in and create renders of work in progress. beats the hell out of simple, boring, gray studio background I've used so far. so, without further ado, I present you my representation of what I think is 18th century shipyard. it was inspired by Woolwich Shipyard Diorama the most, but a lot of other photos, dioramas and scale models were used as an inspiration. so, I got myself some timber stockpile, some tools and equipment, the kiln is merrily steaming future frame timbers... I just have to start. again, feel free to chime in: Pandora or Bounty? I'll continue in this thread with Pandora or open a new one for Bounty if needed. just a short disclaimer. the scene is not completely done yet, it'll evolve as I build the ship. there'll be more cut timber, sawdust, mess and whatnot as I go. also worth mentioning, I could easily spend quite a few more months on the scene, adding various details, small and big, doing more research and adding historically accurate details, but the main star of the show is still a ship that's going to sit in that slipway, so I'll be diverting more energy into shipbuilding than into shipyardbuilding. that said, please do share some feedback and suggestions on what could be better or what is completely wrong and what particularly sticks out as bad. there will most certainly be some downtimes in ship building, as it happened before with HMS Pegasus, in which time I can work on the shipyard. it's just that the ship takes the top spot on priority list. cheers!!


-
Swan class 3D model in progress
herask replied to dvm27's topic in CAD and 3D Modelling/Drafting Plans with Software
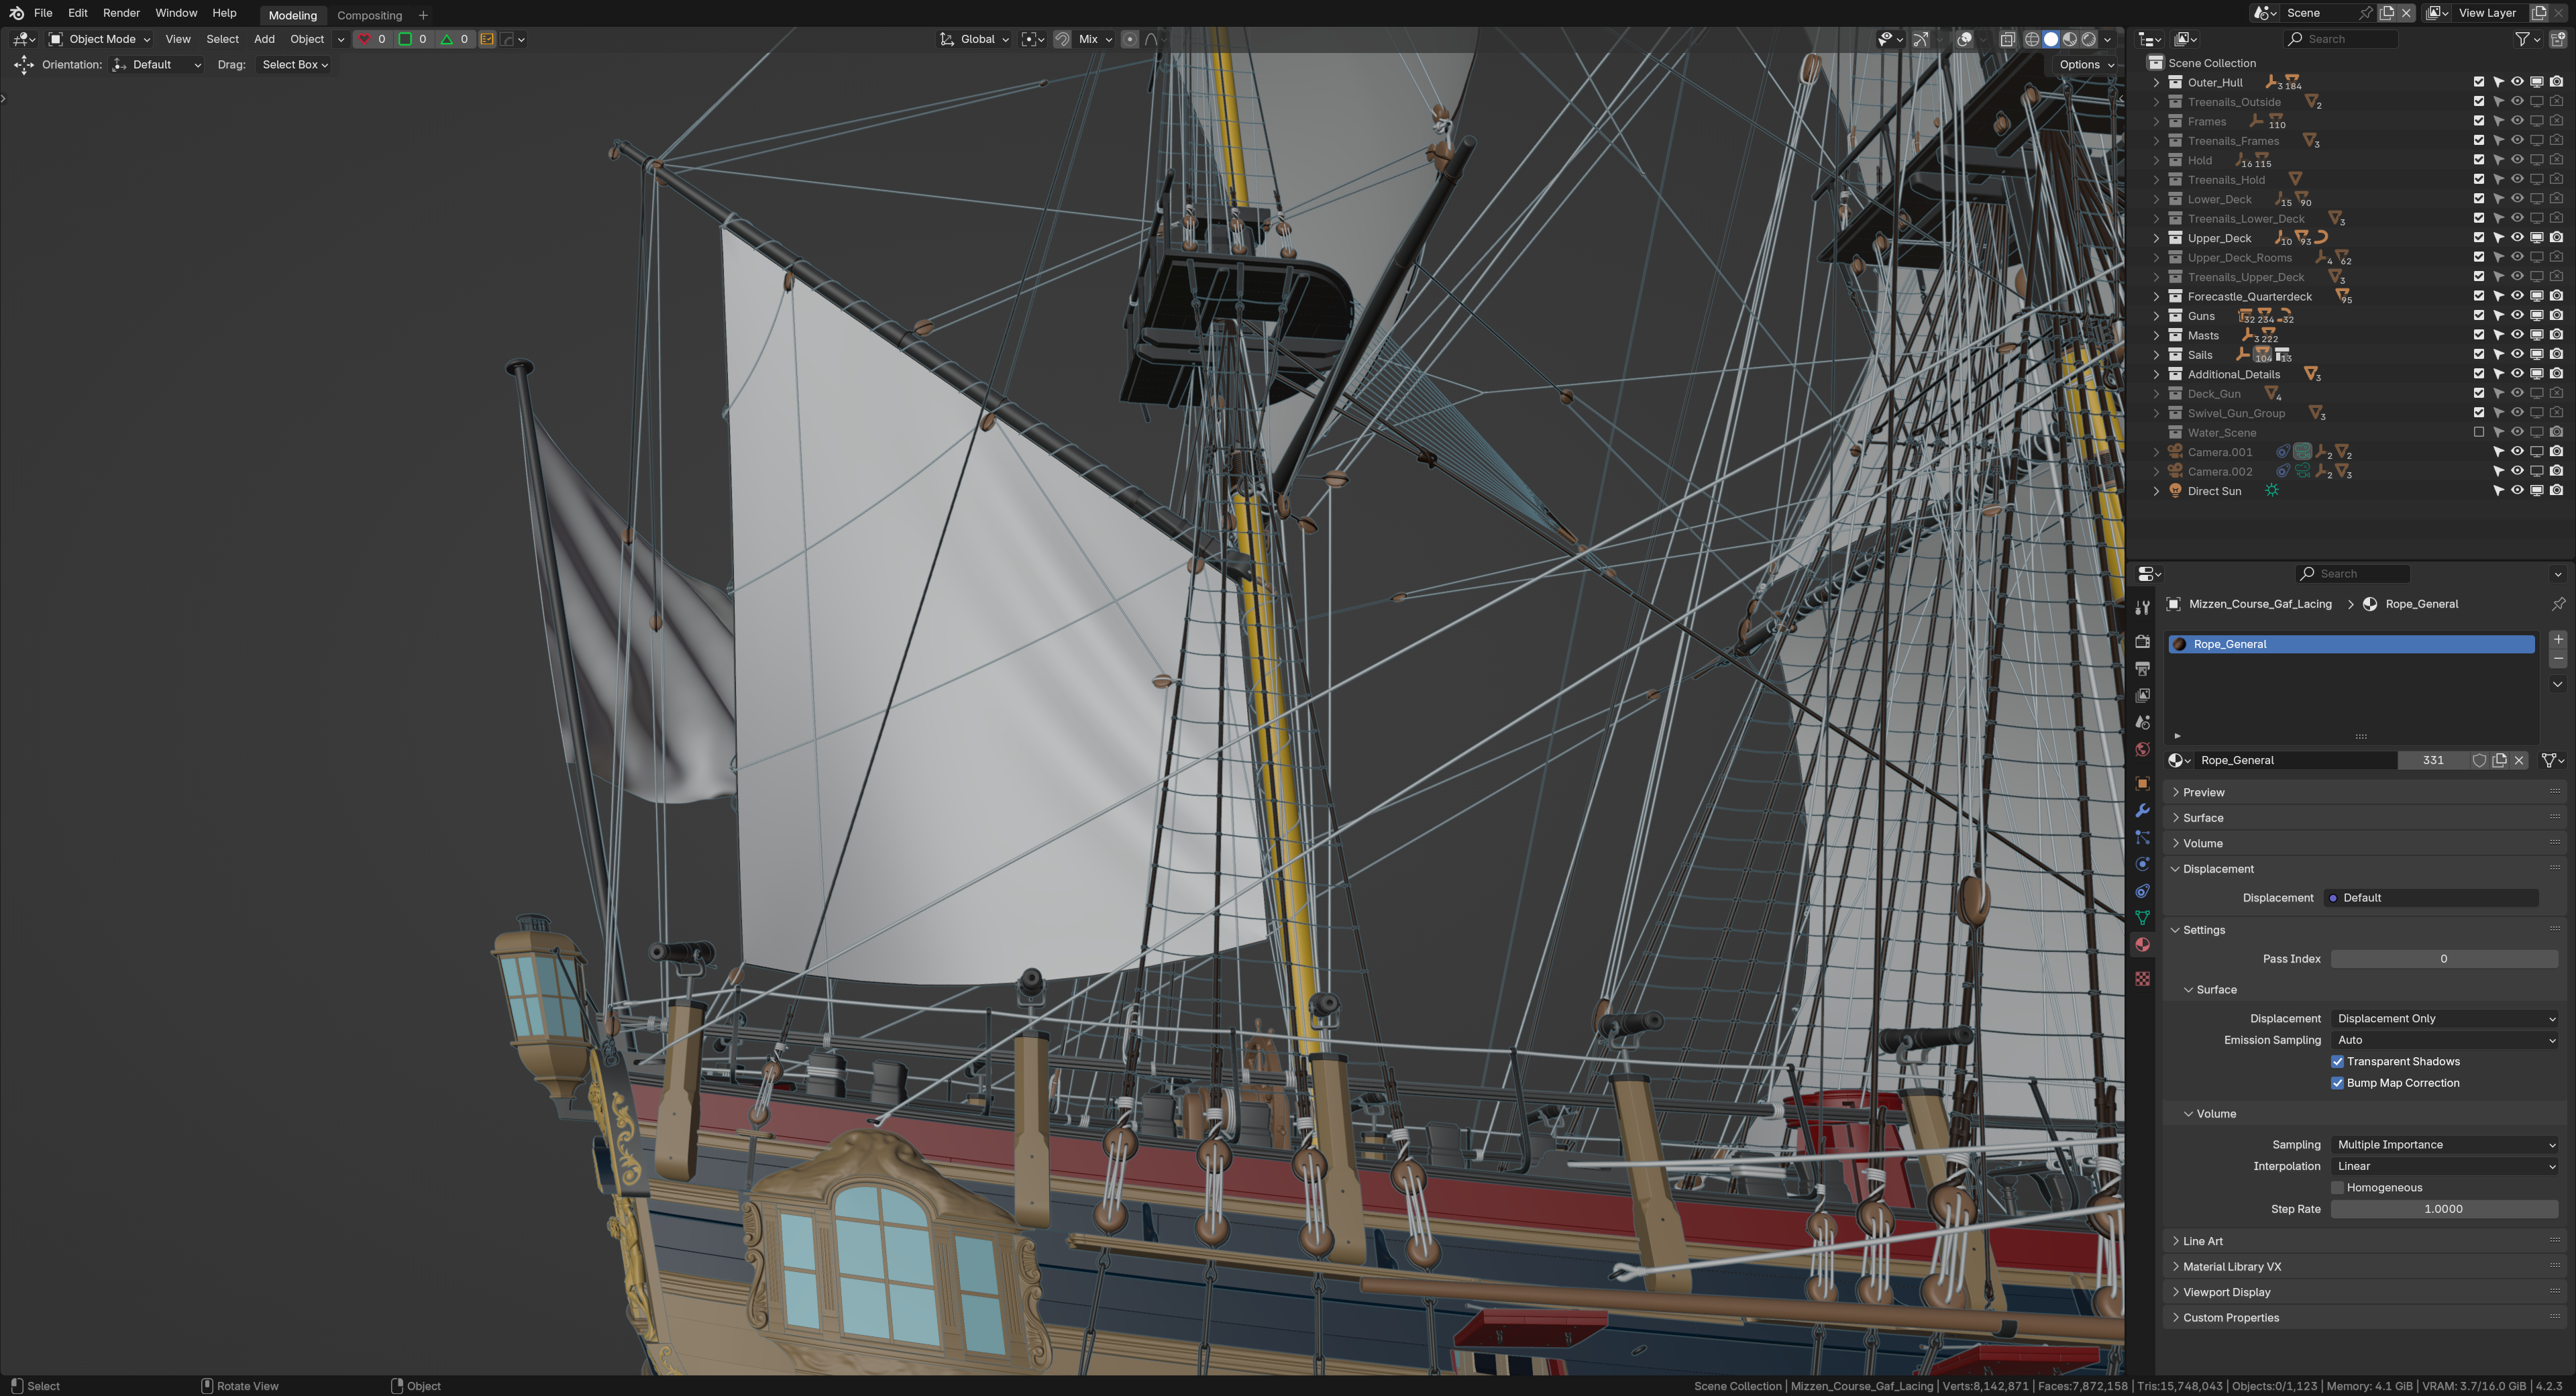
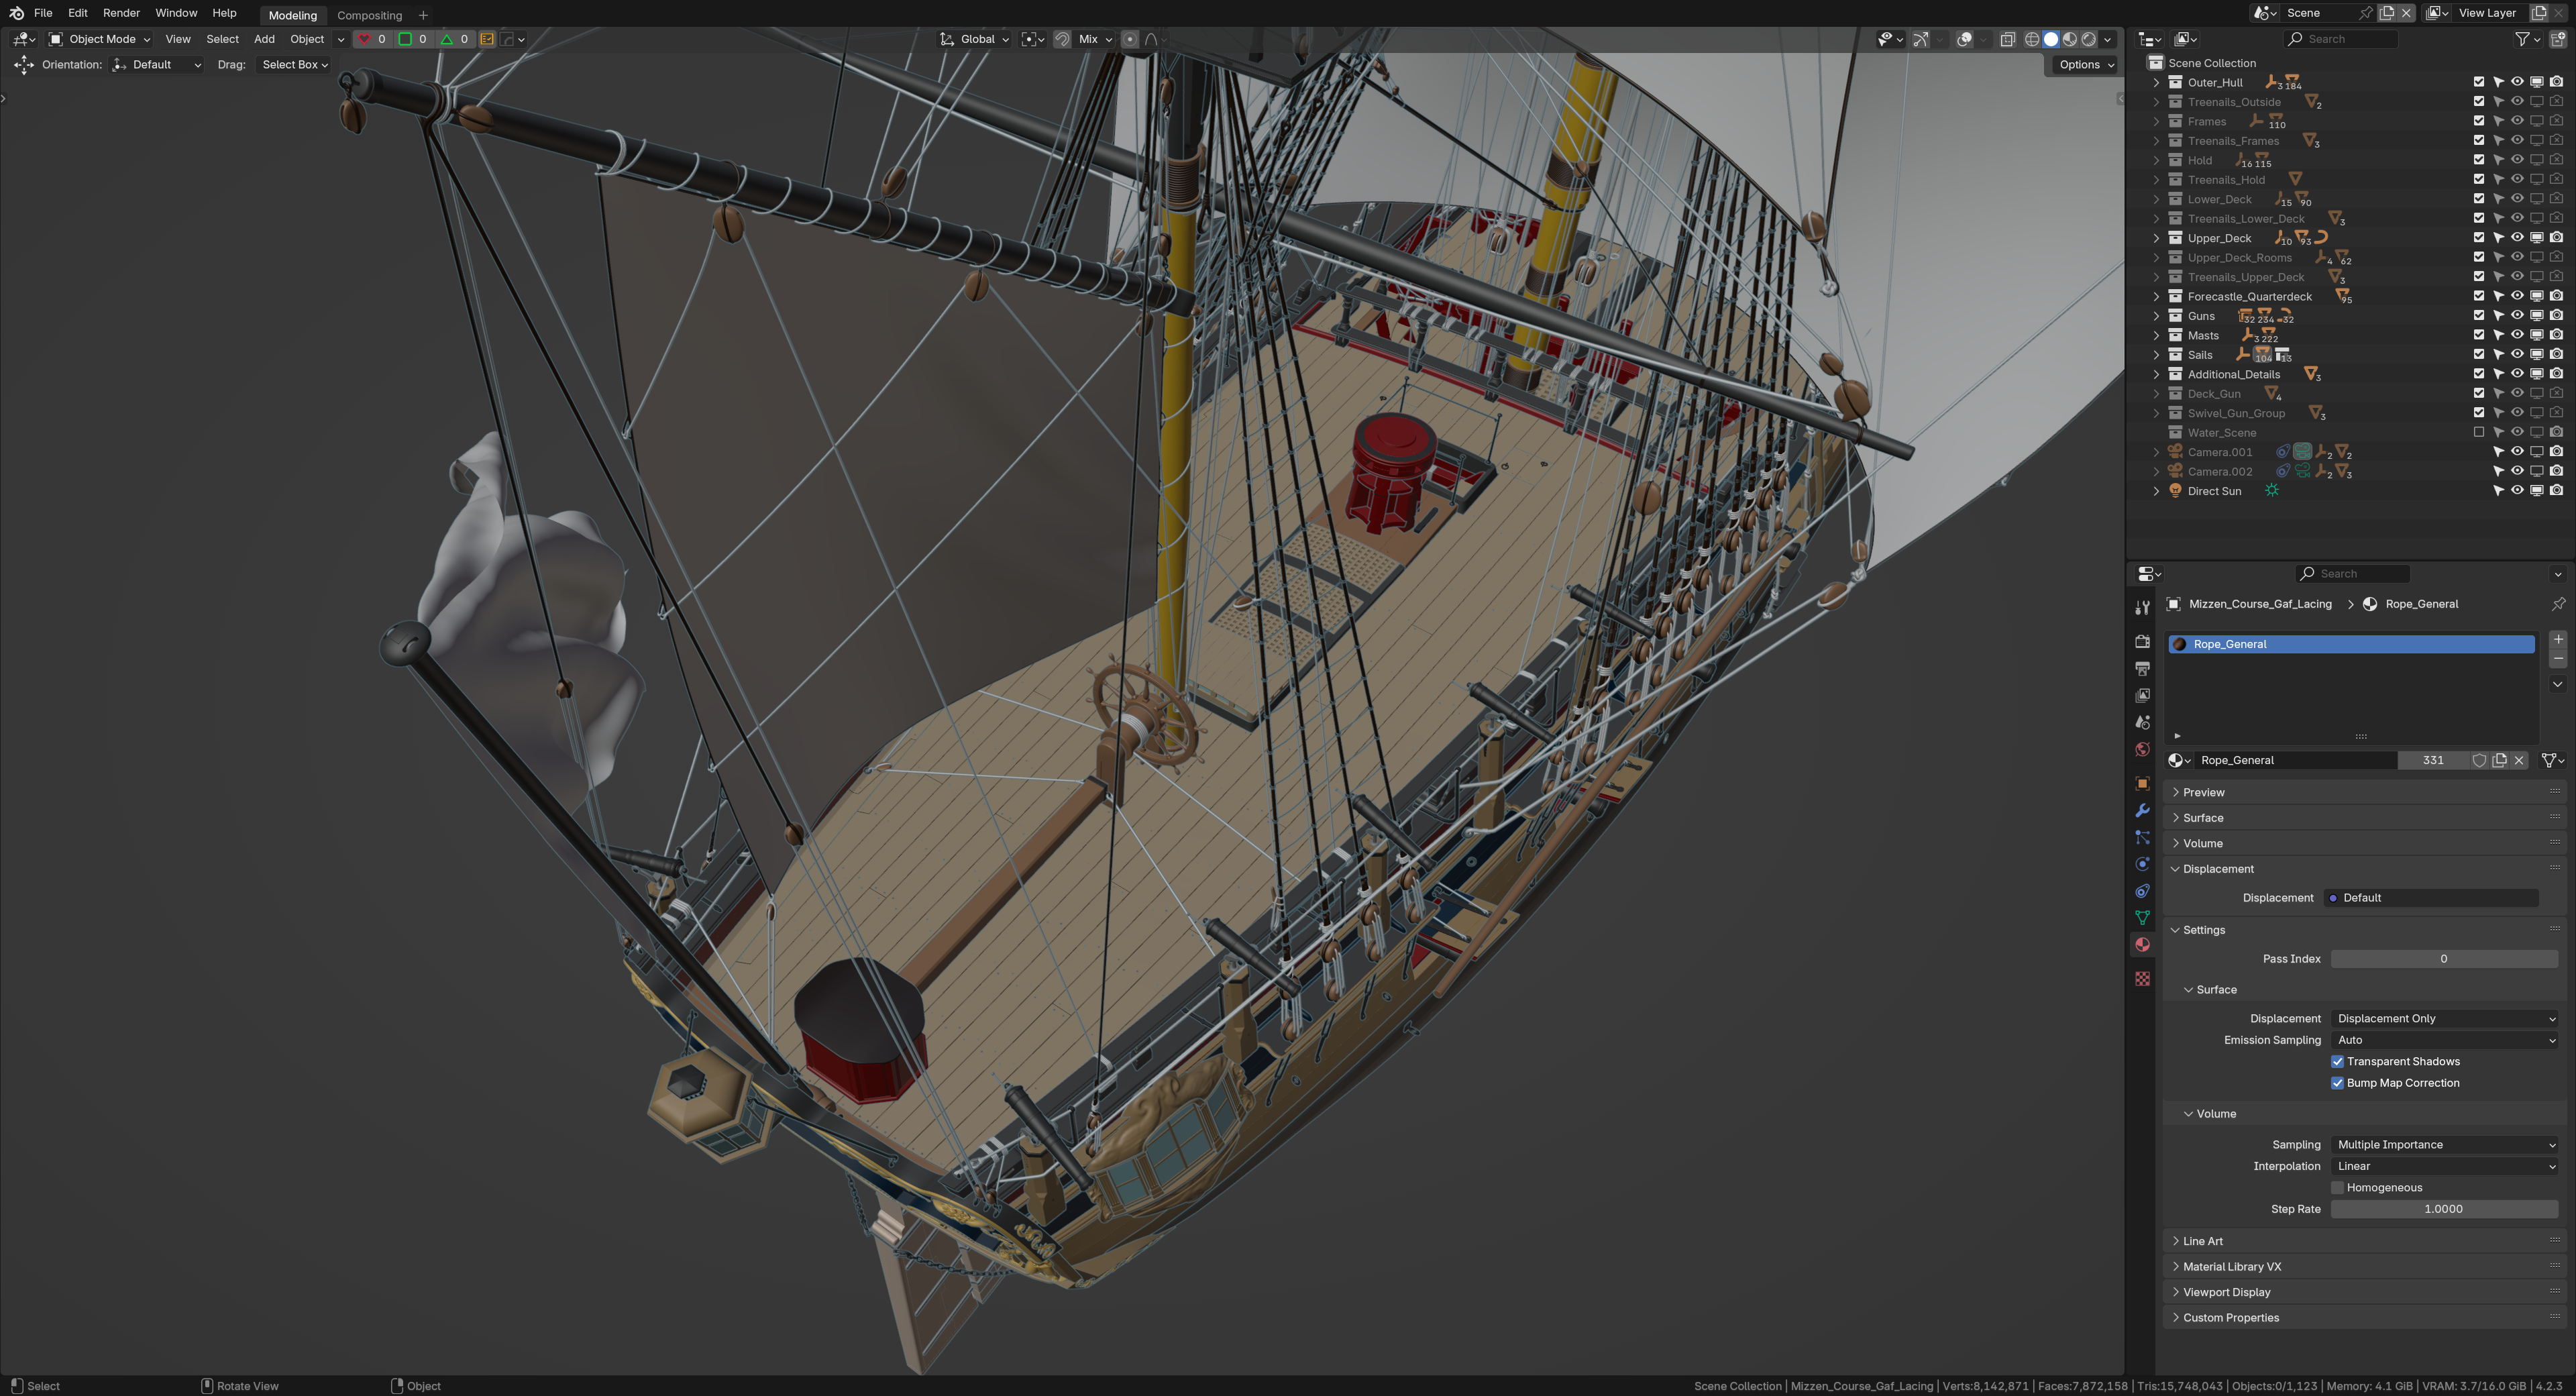
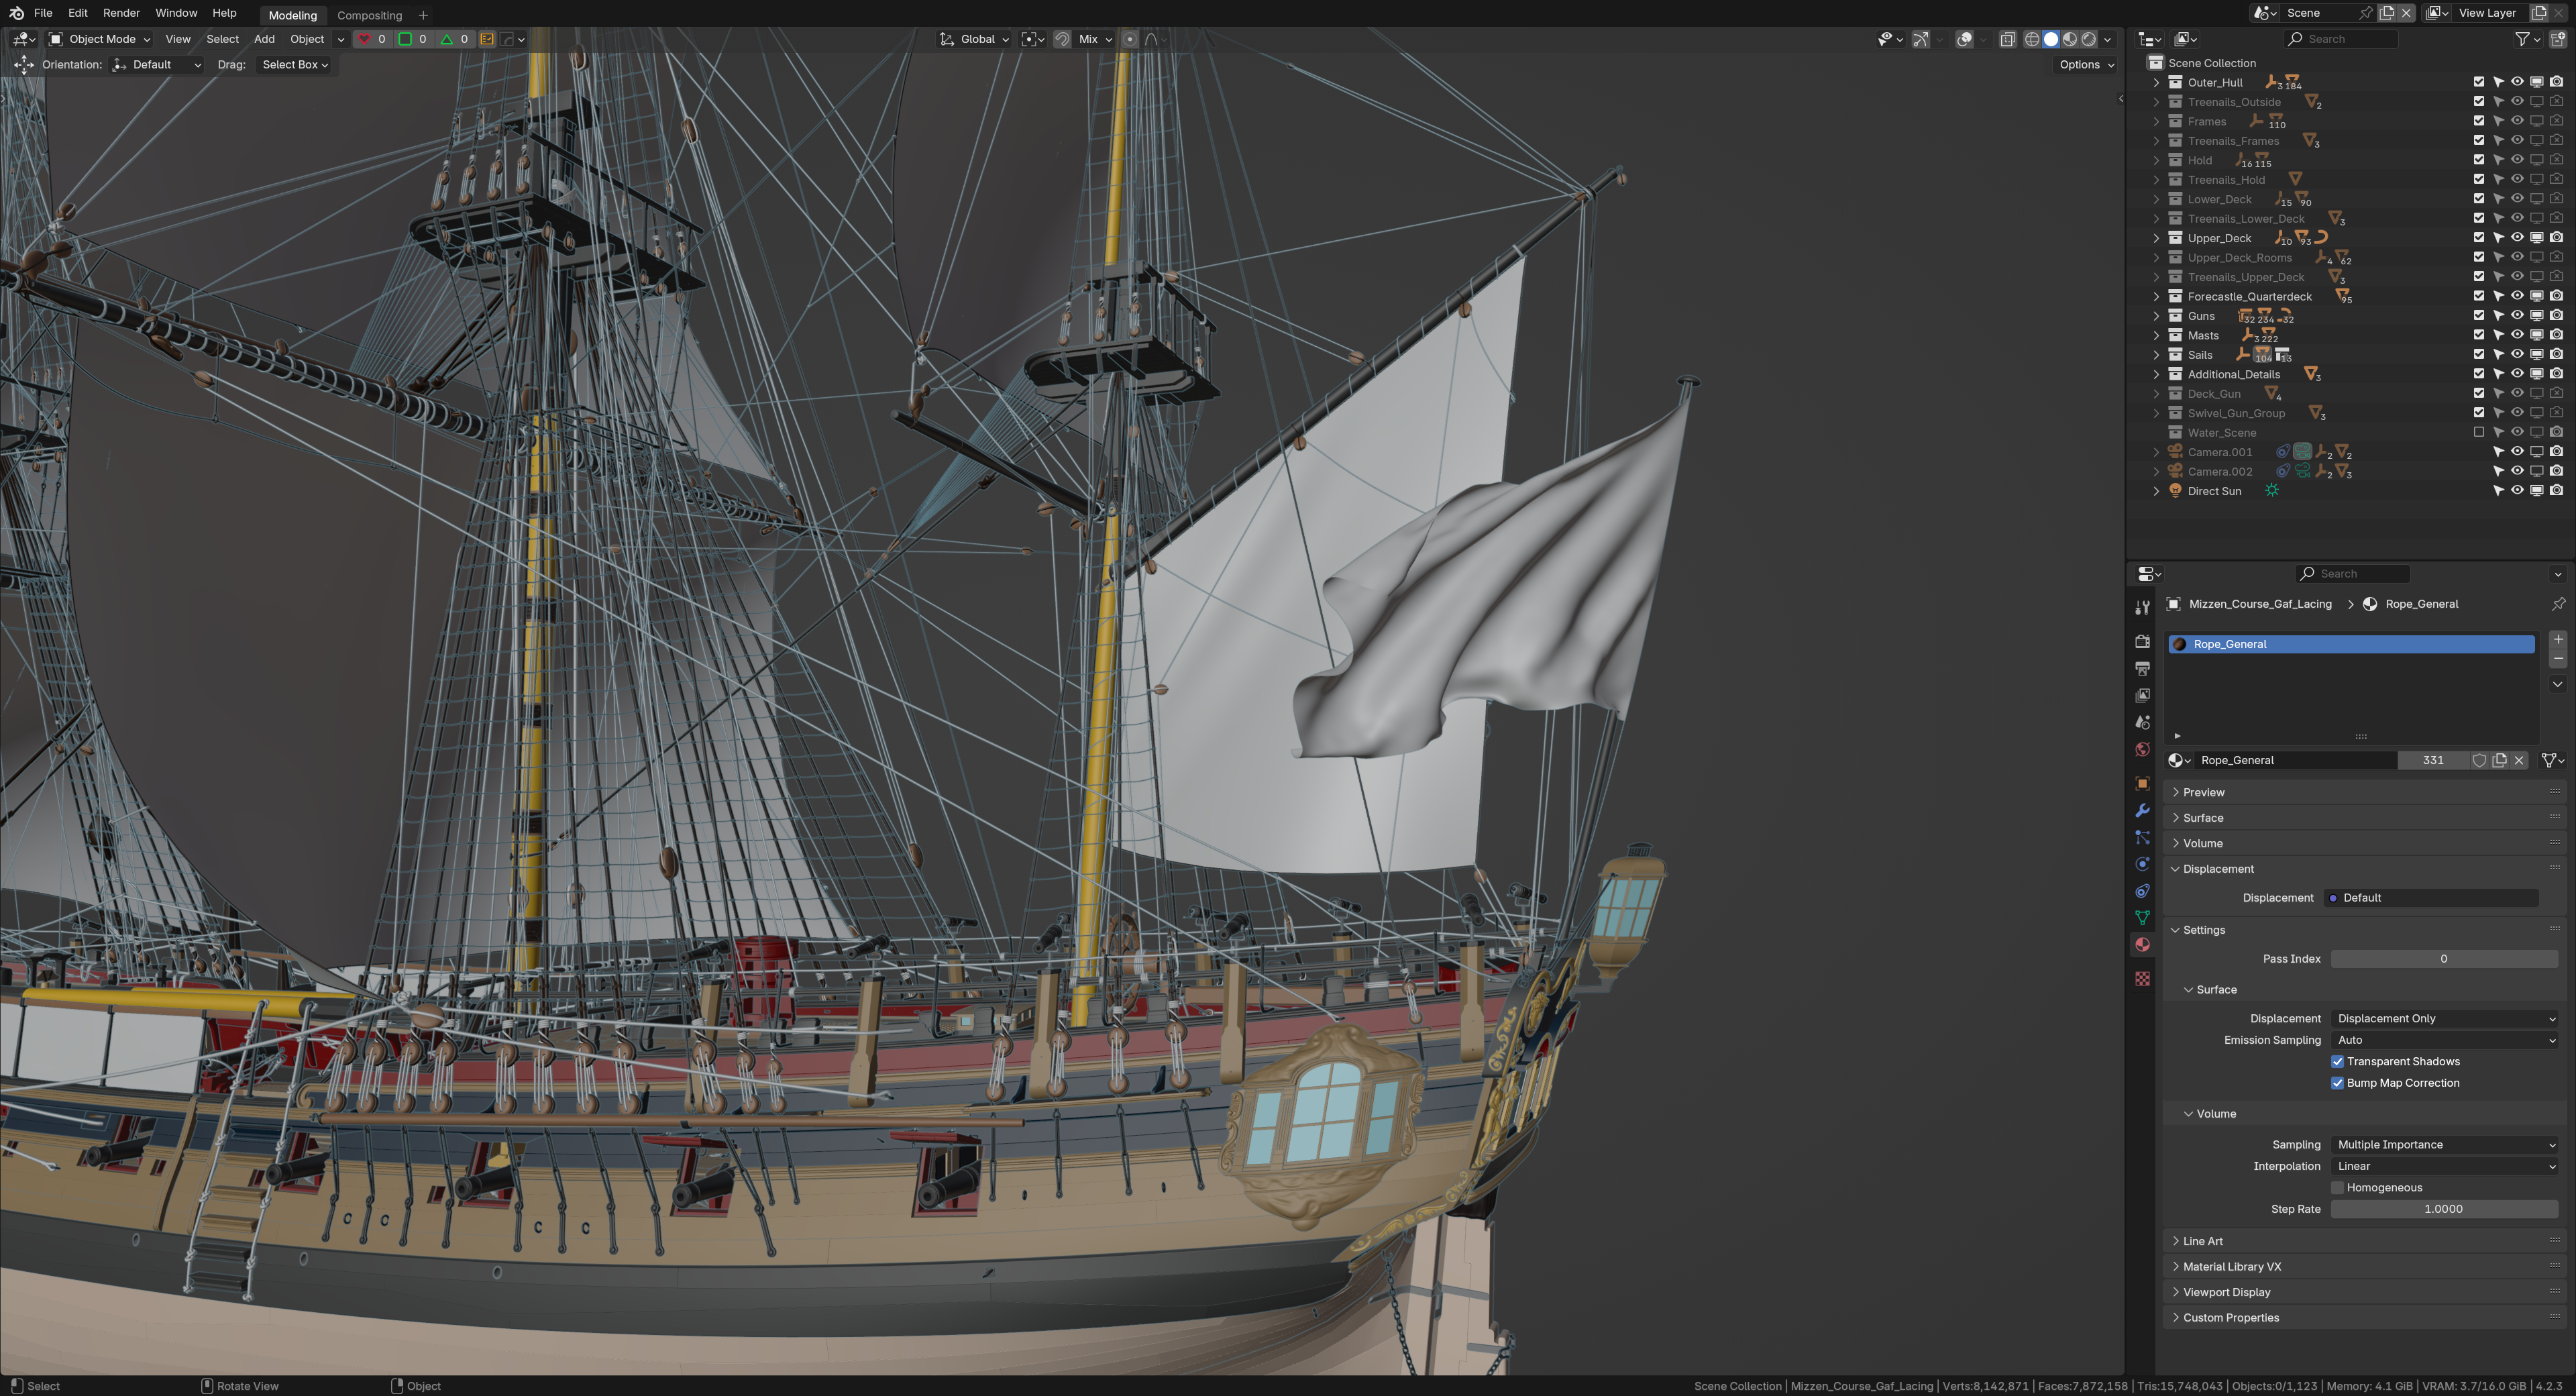
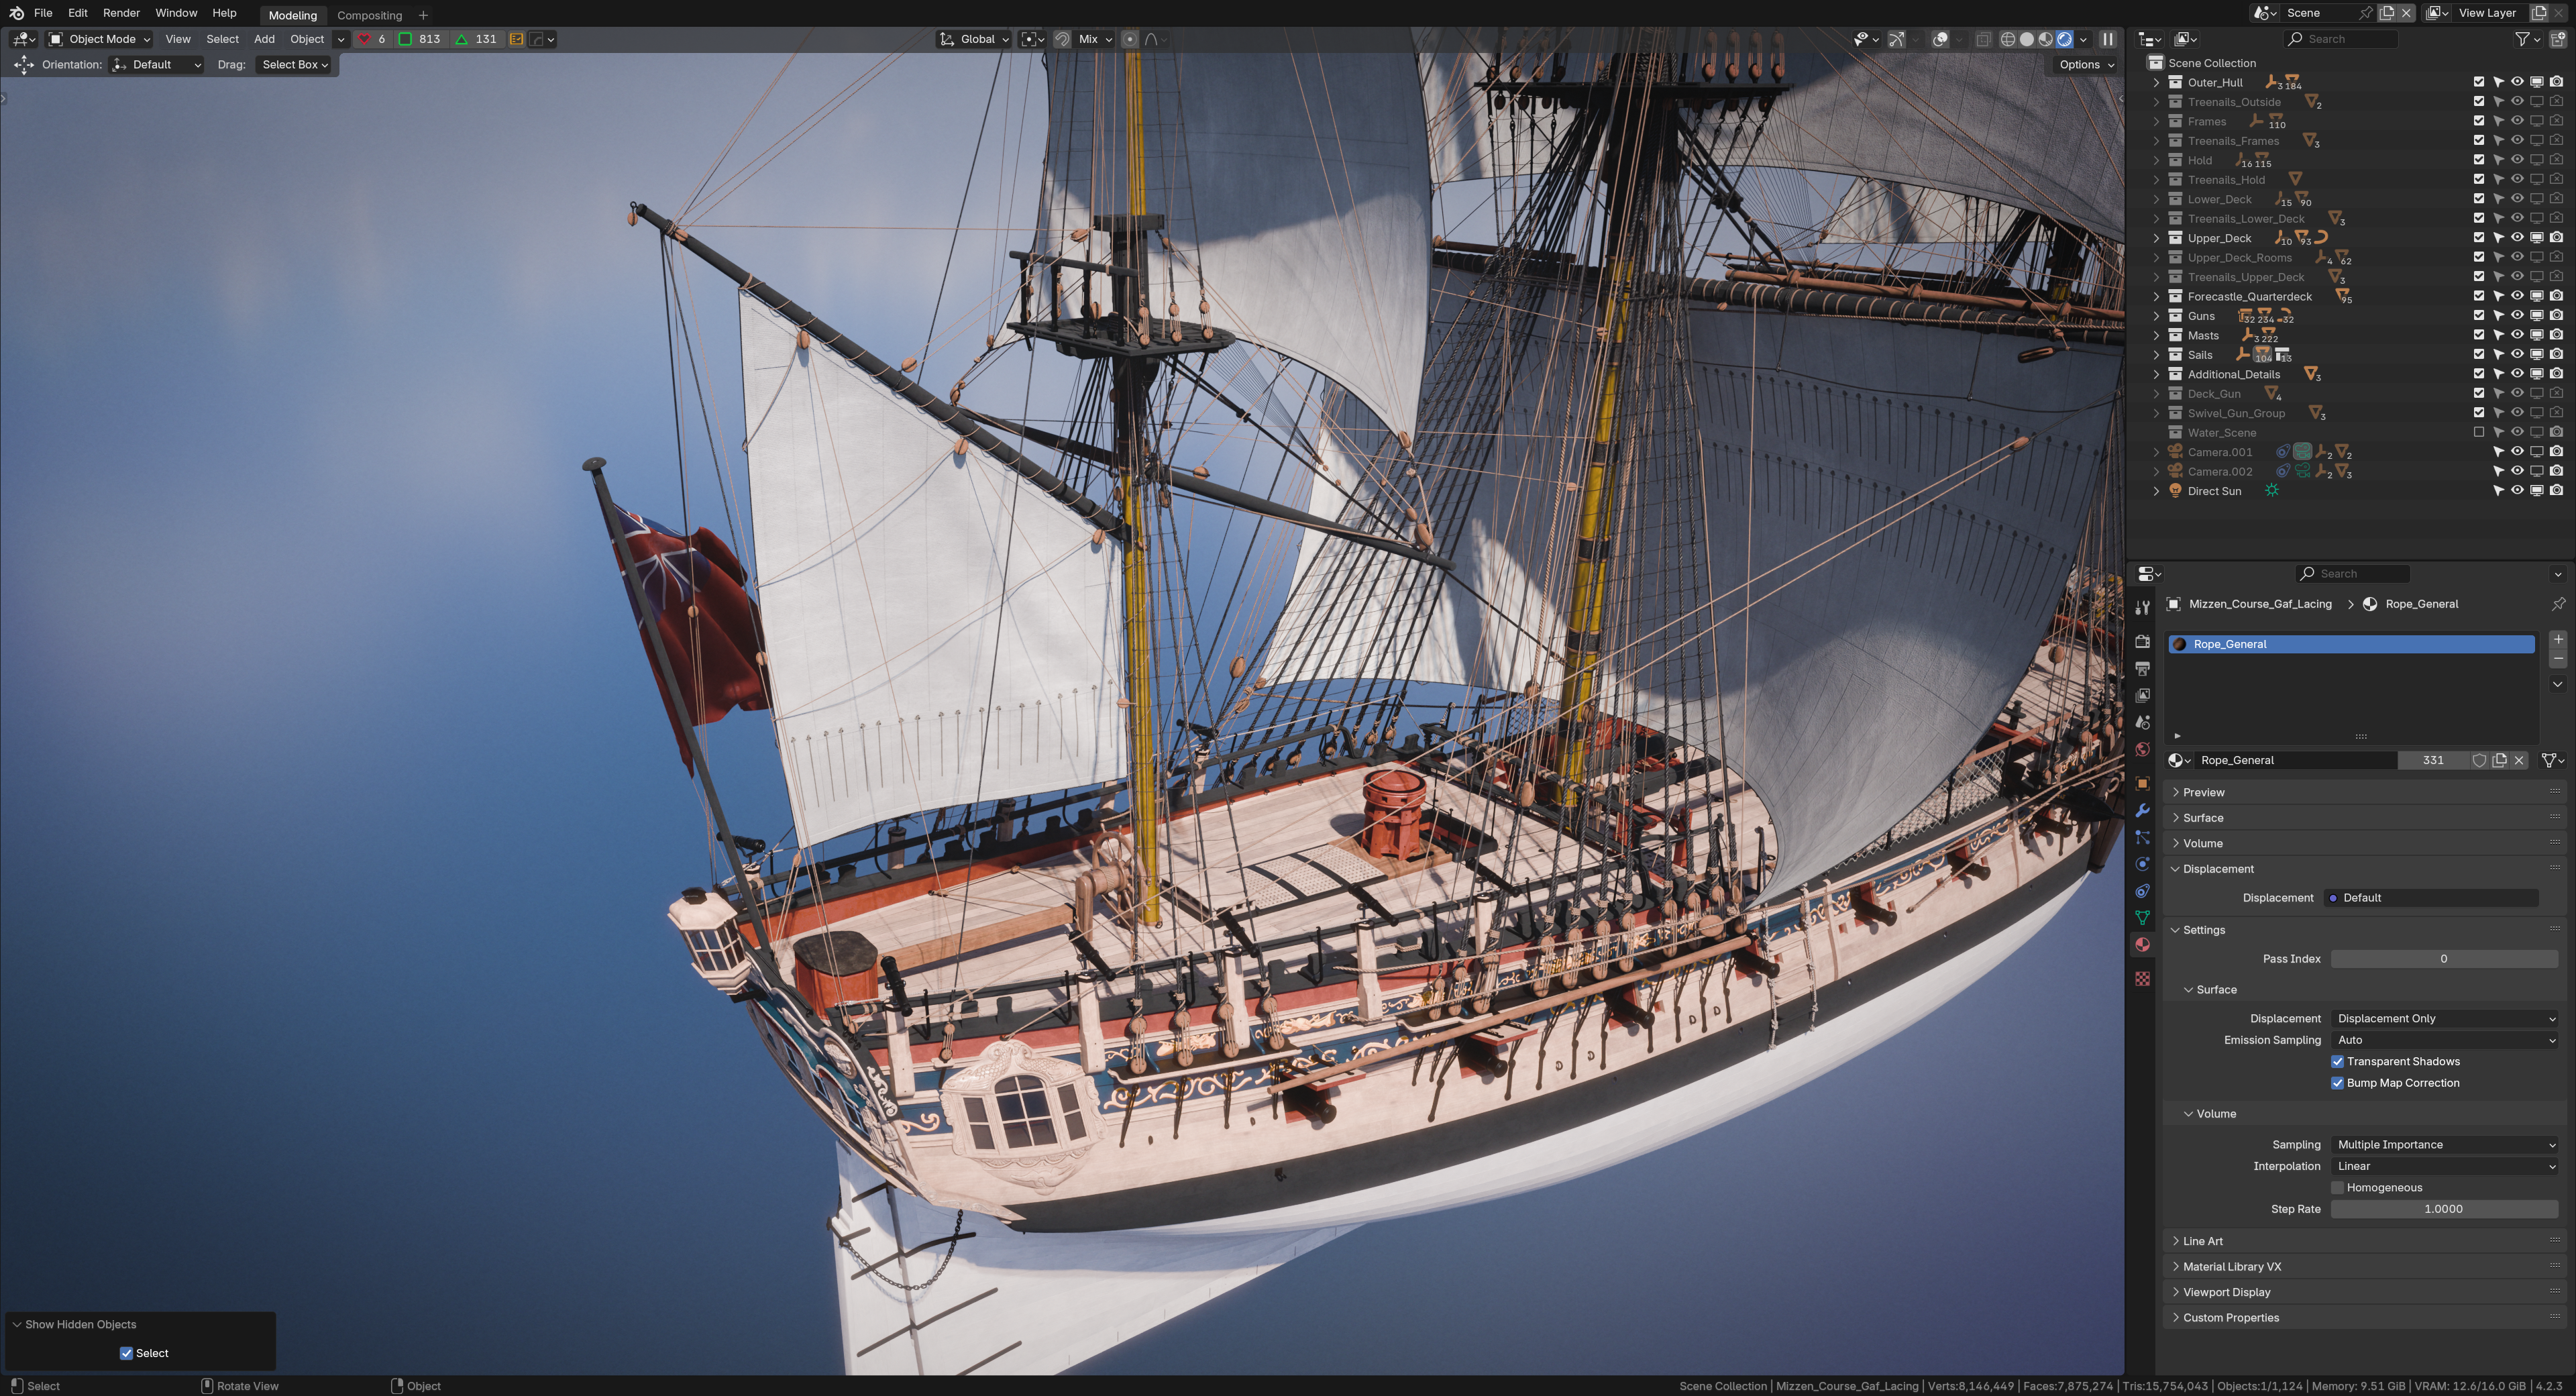
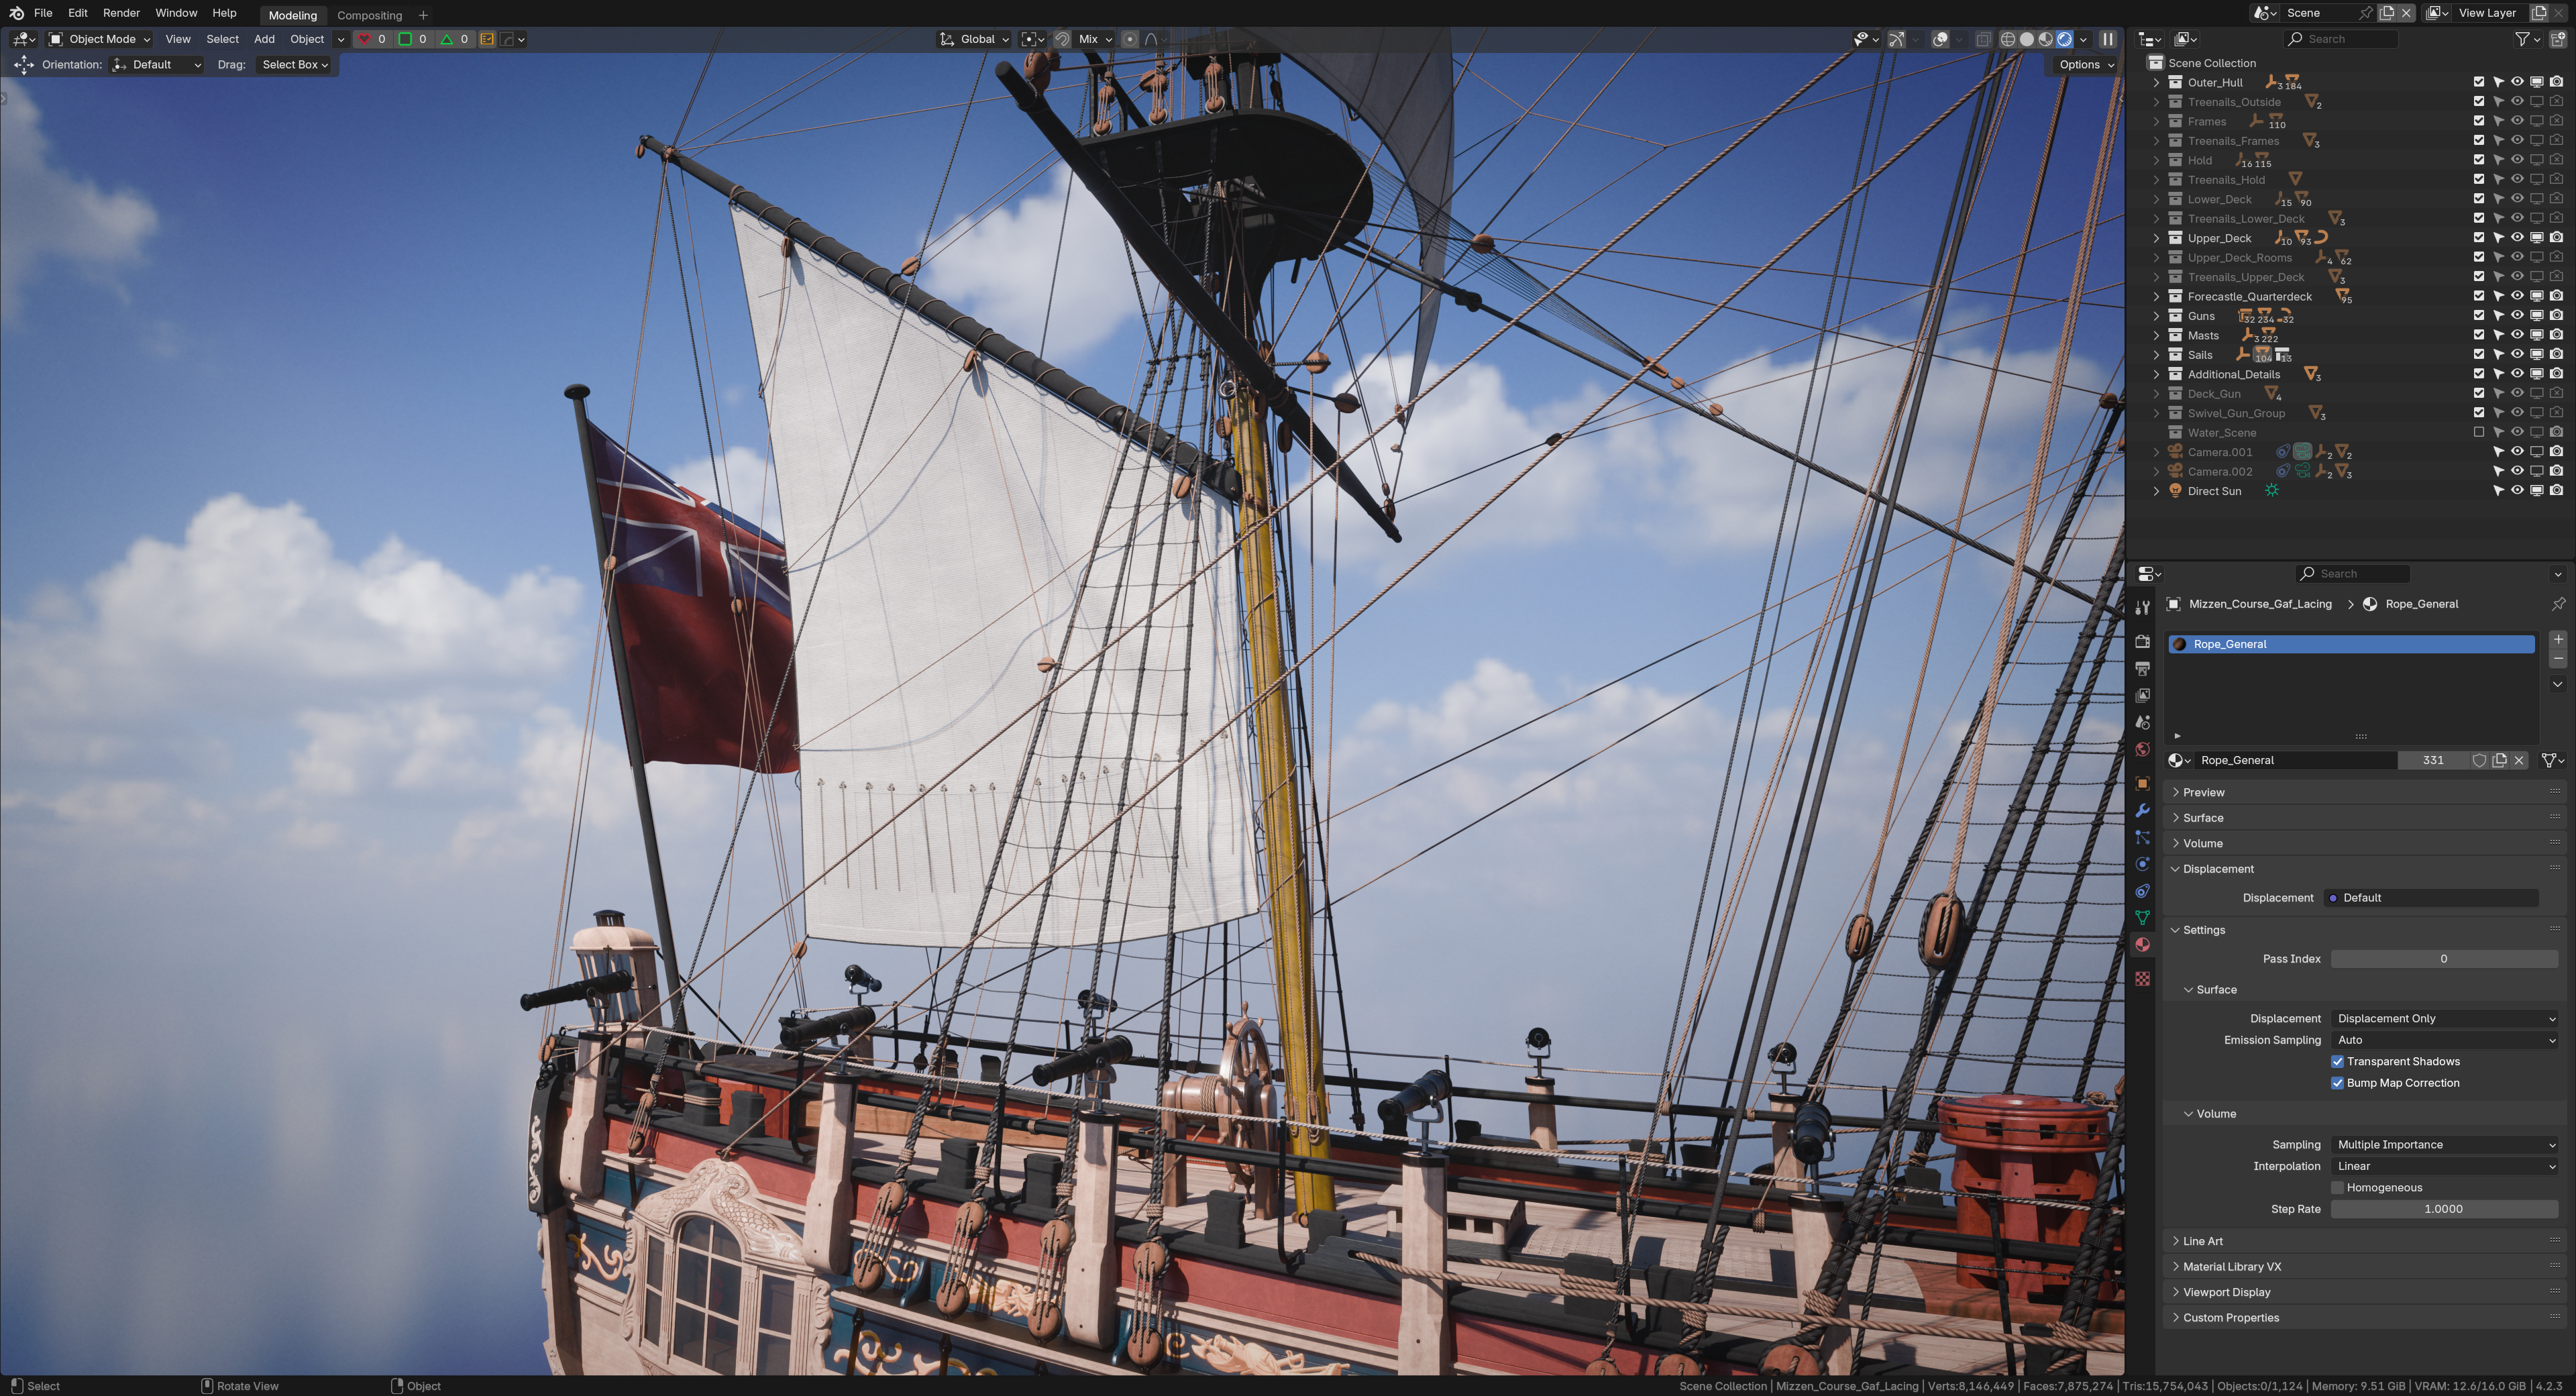
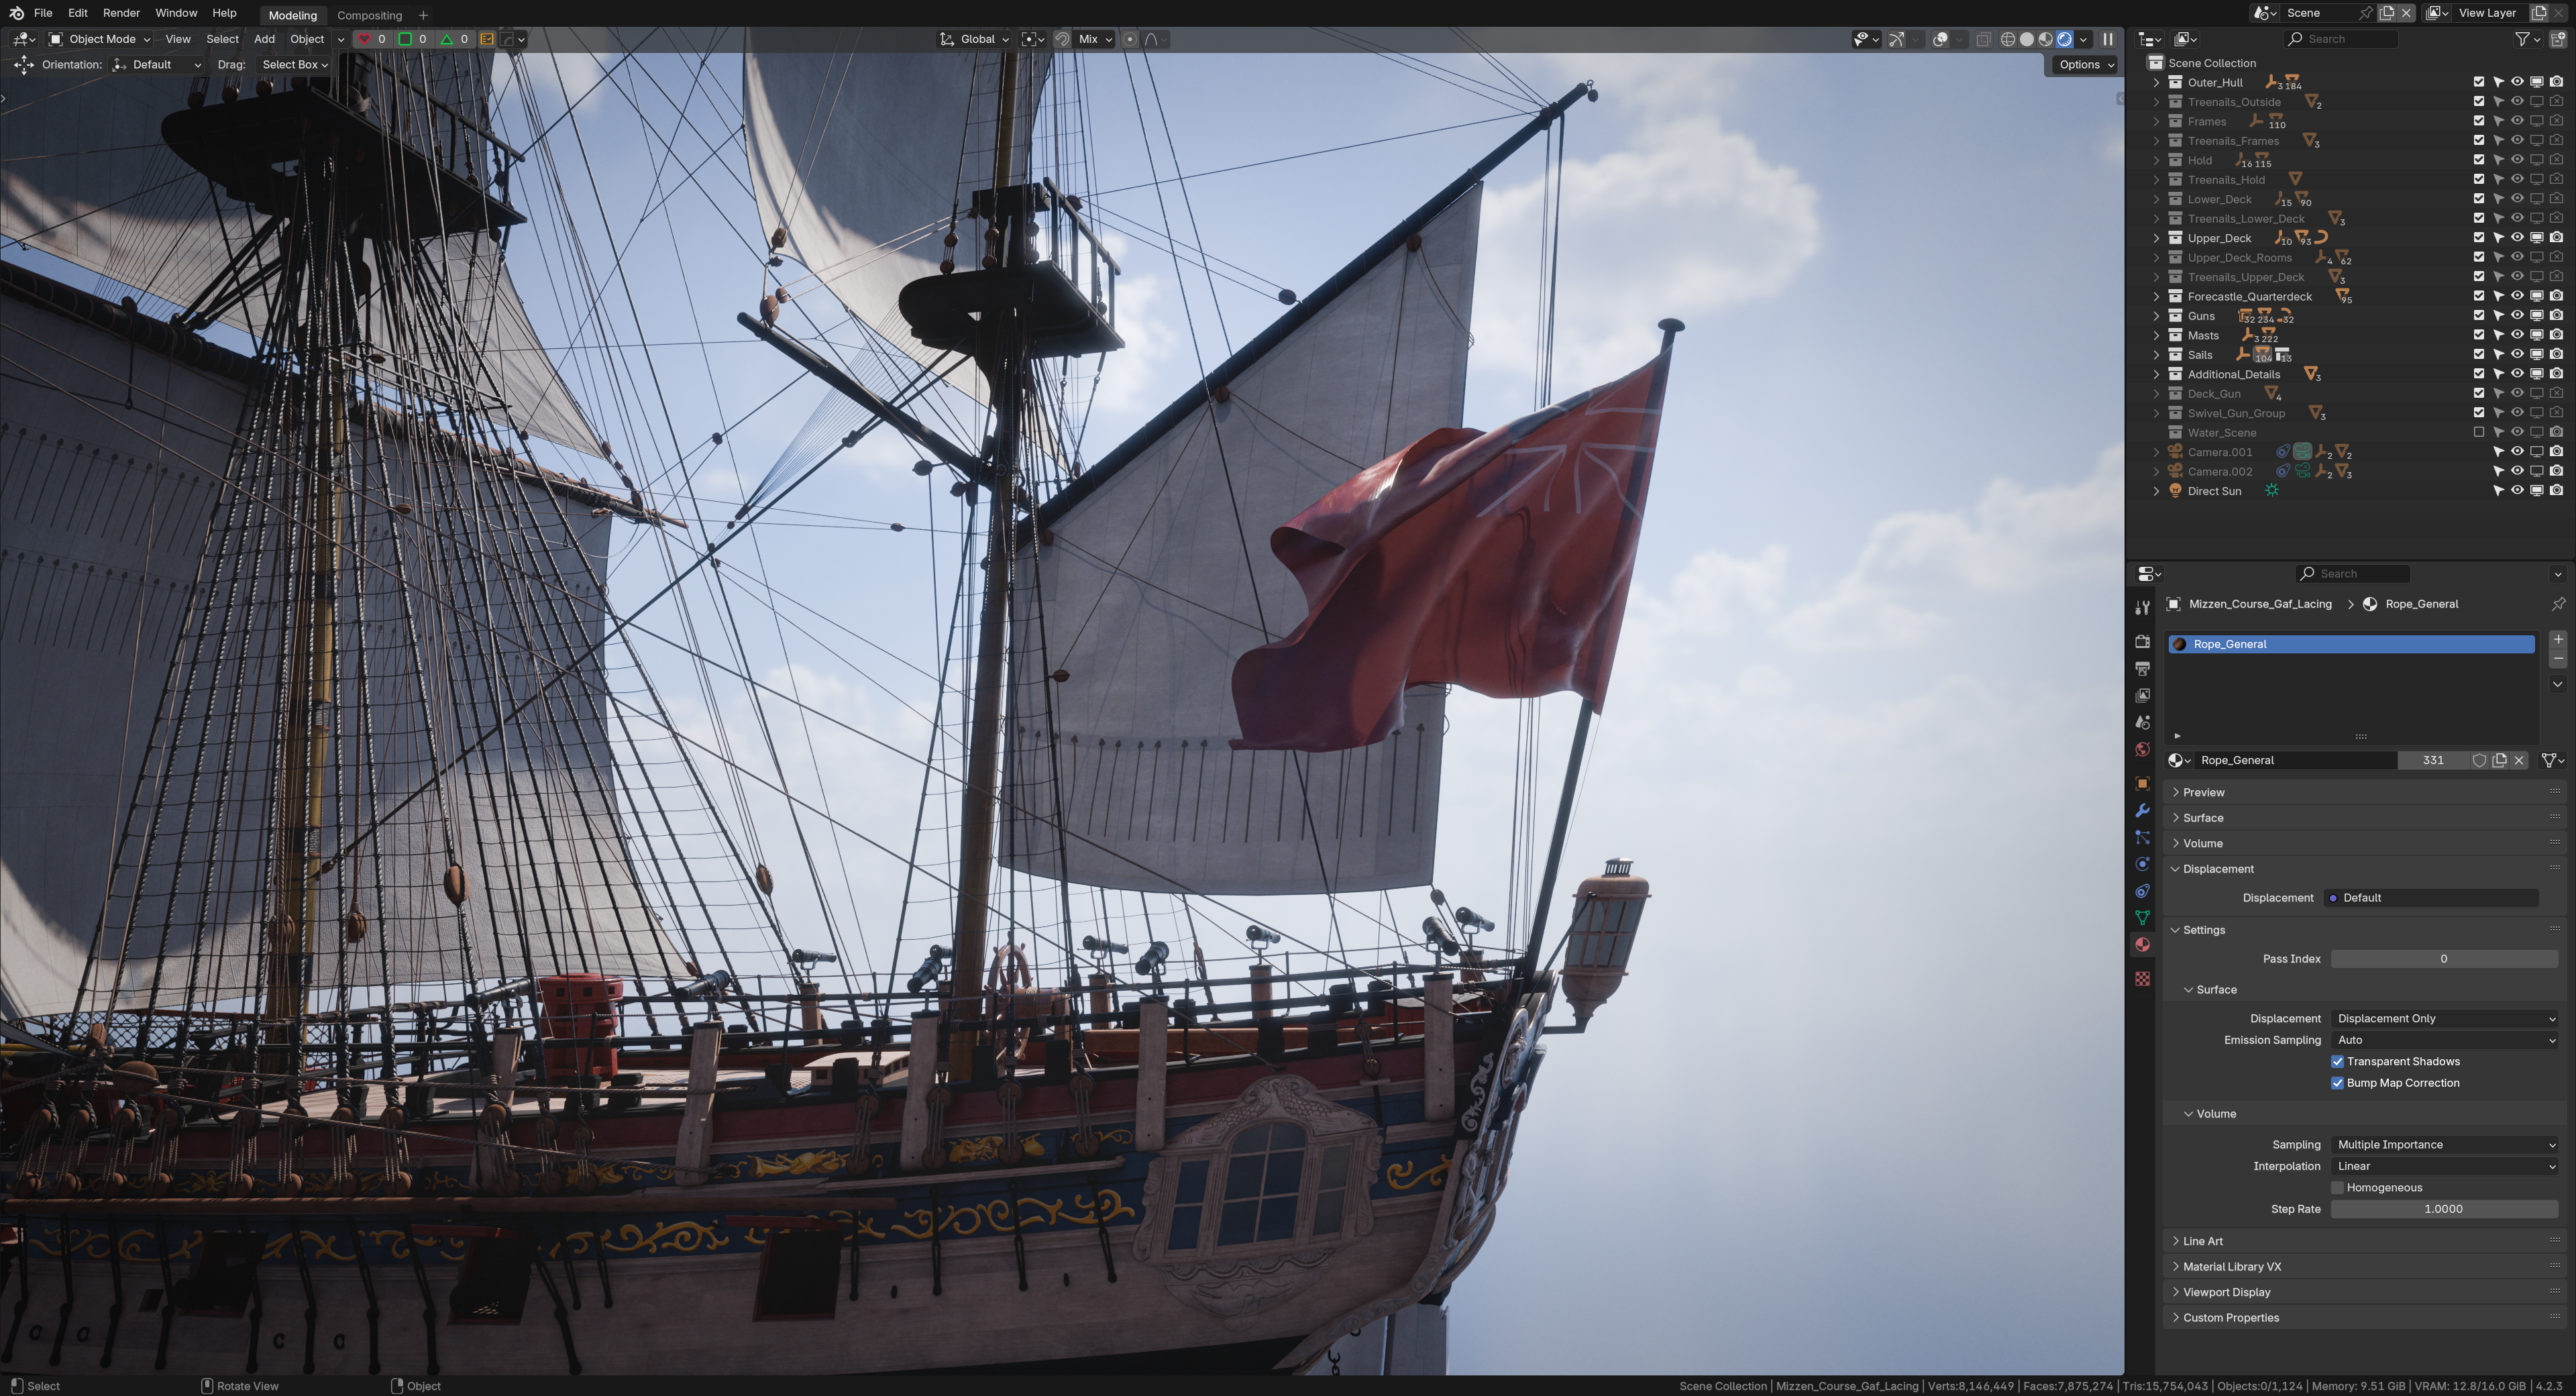
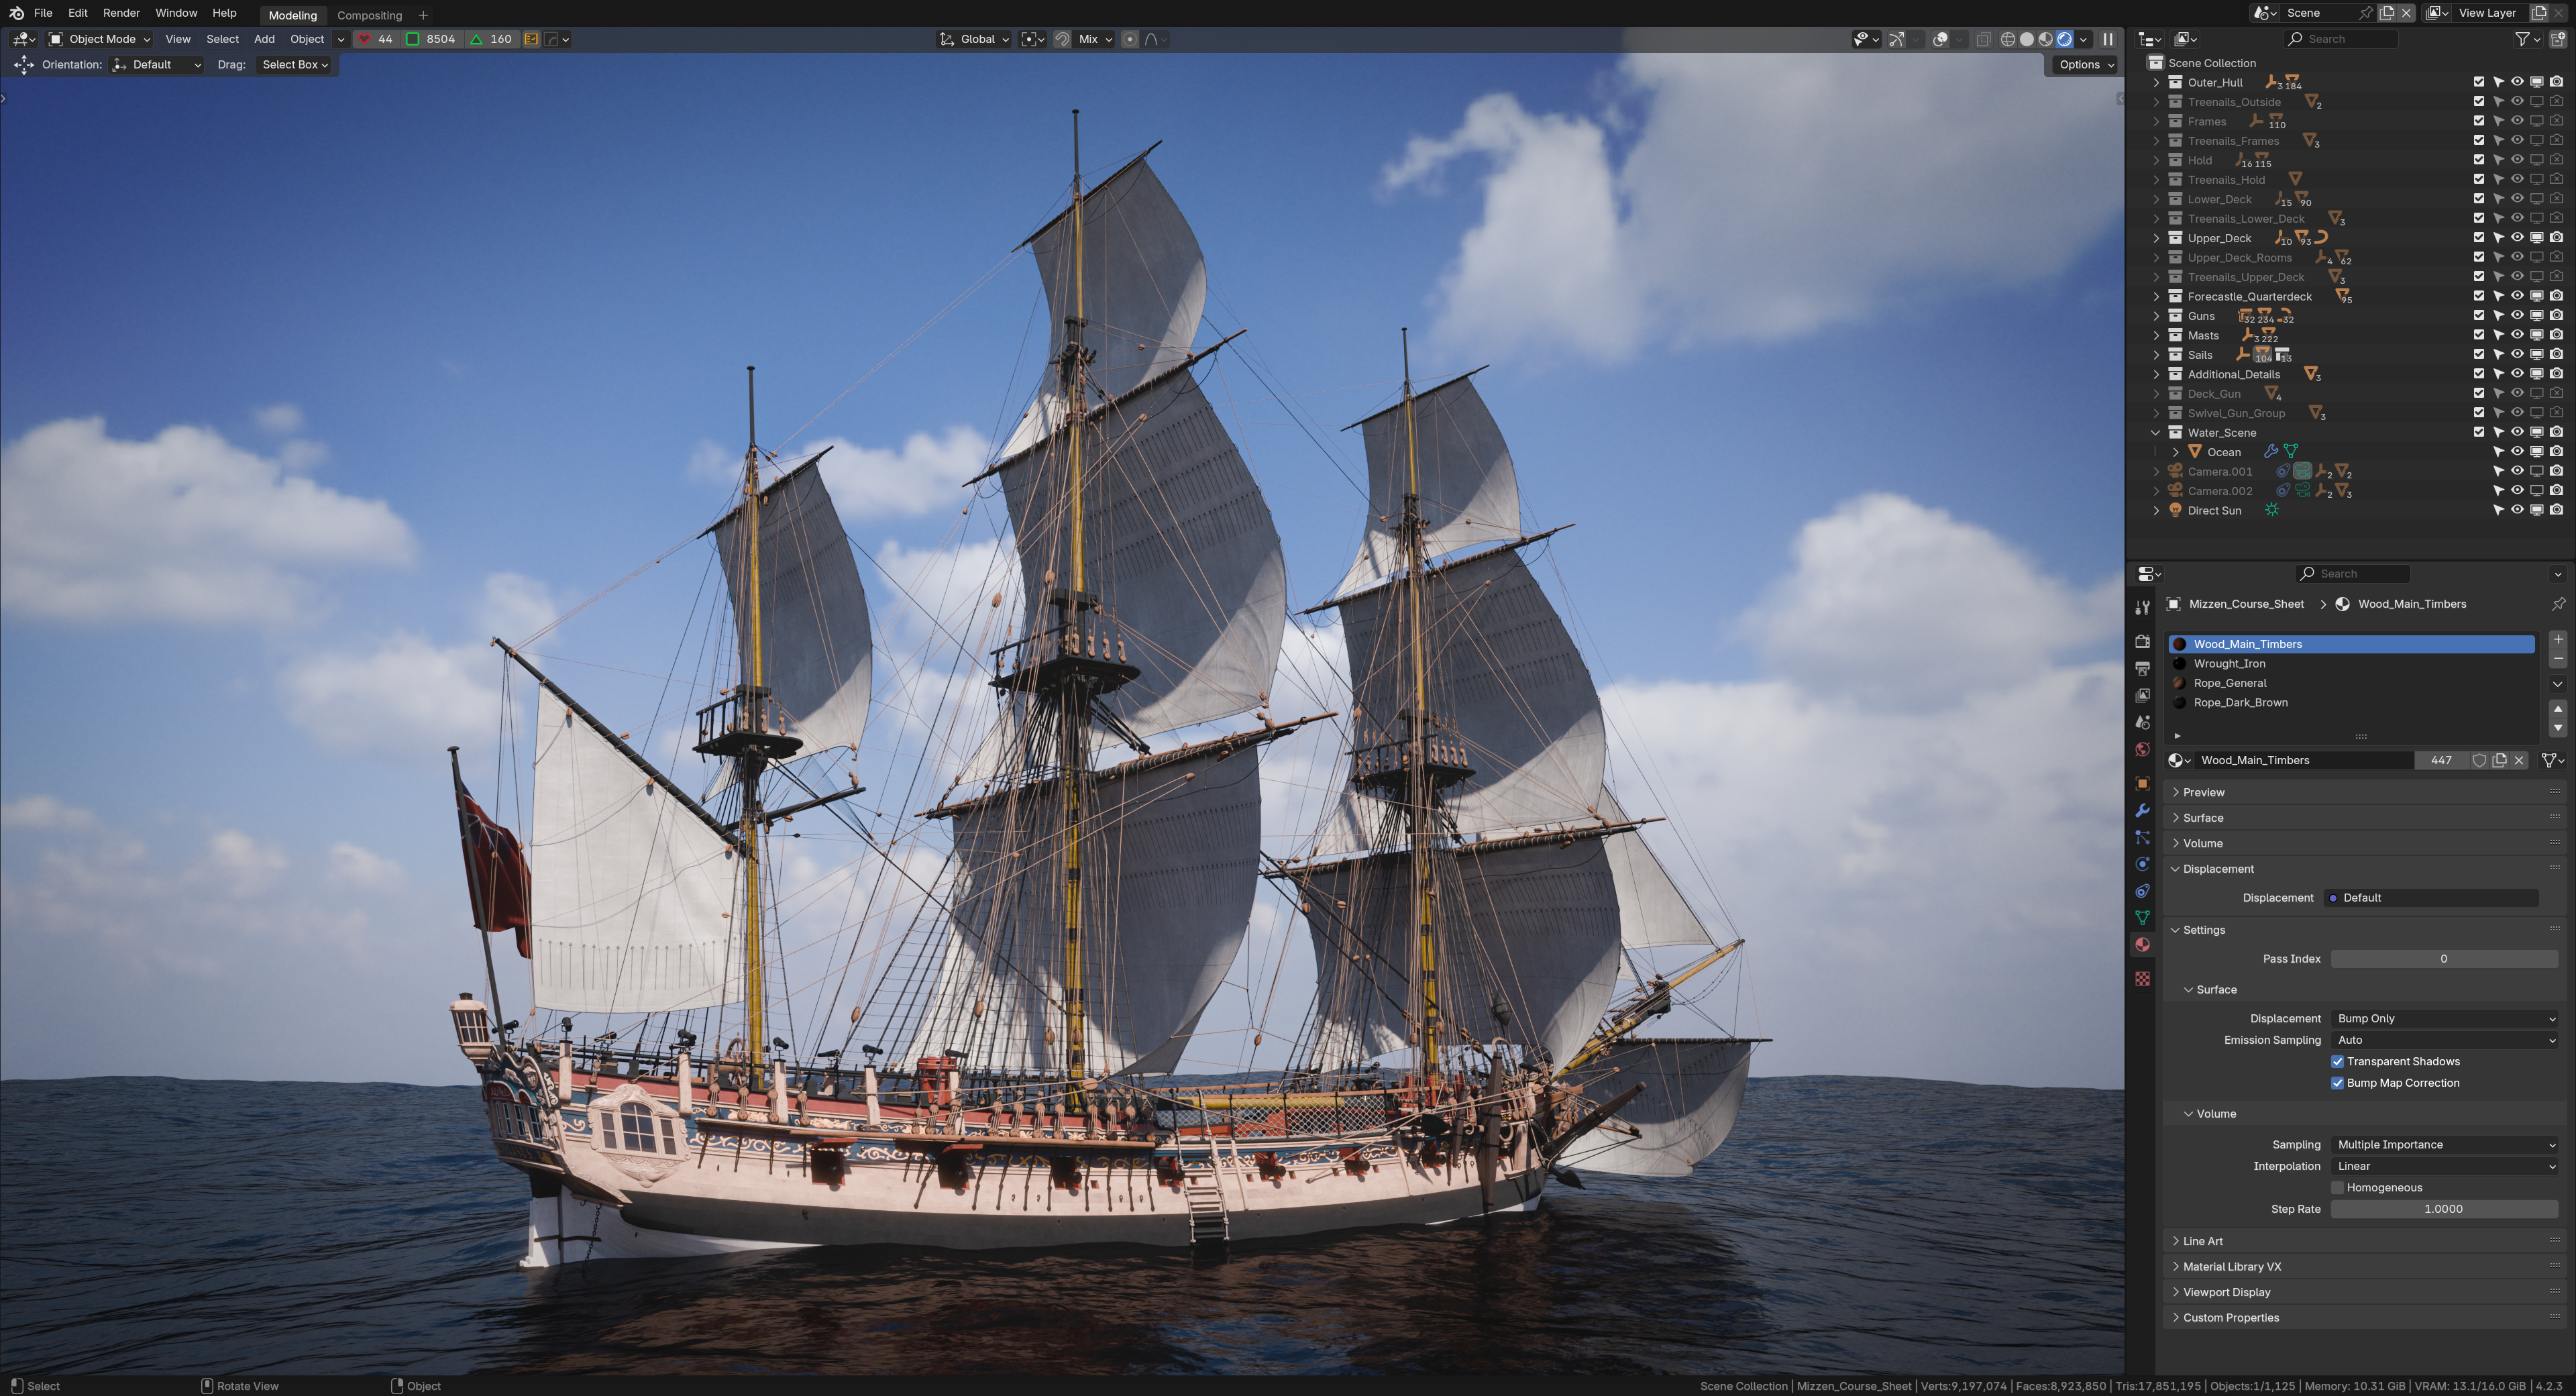
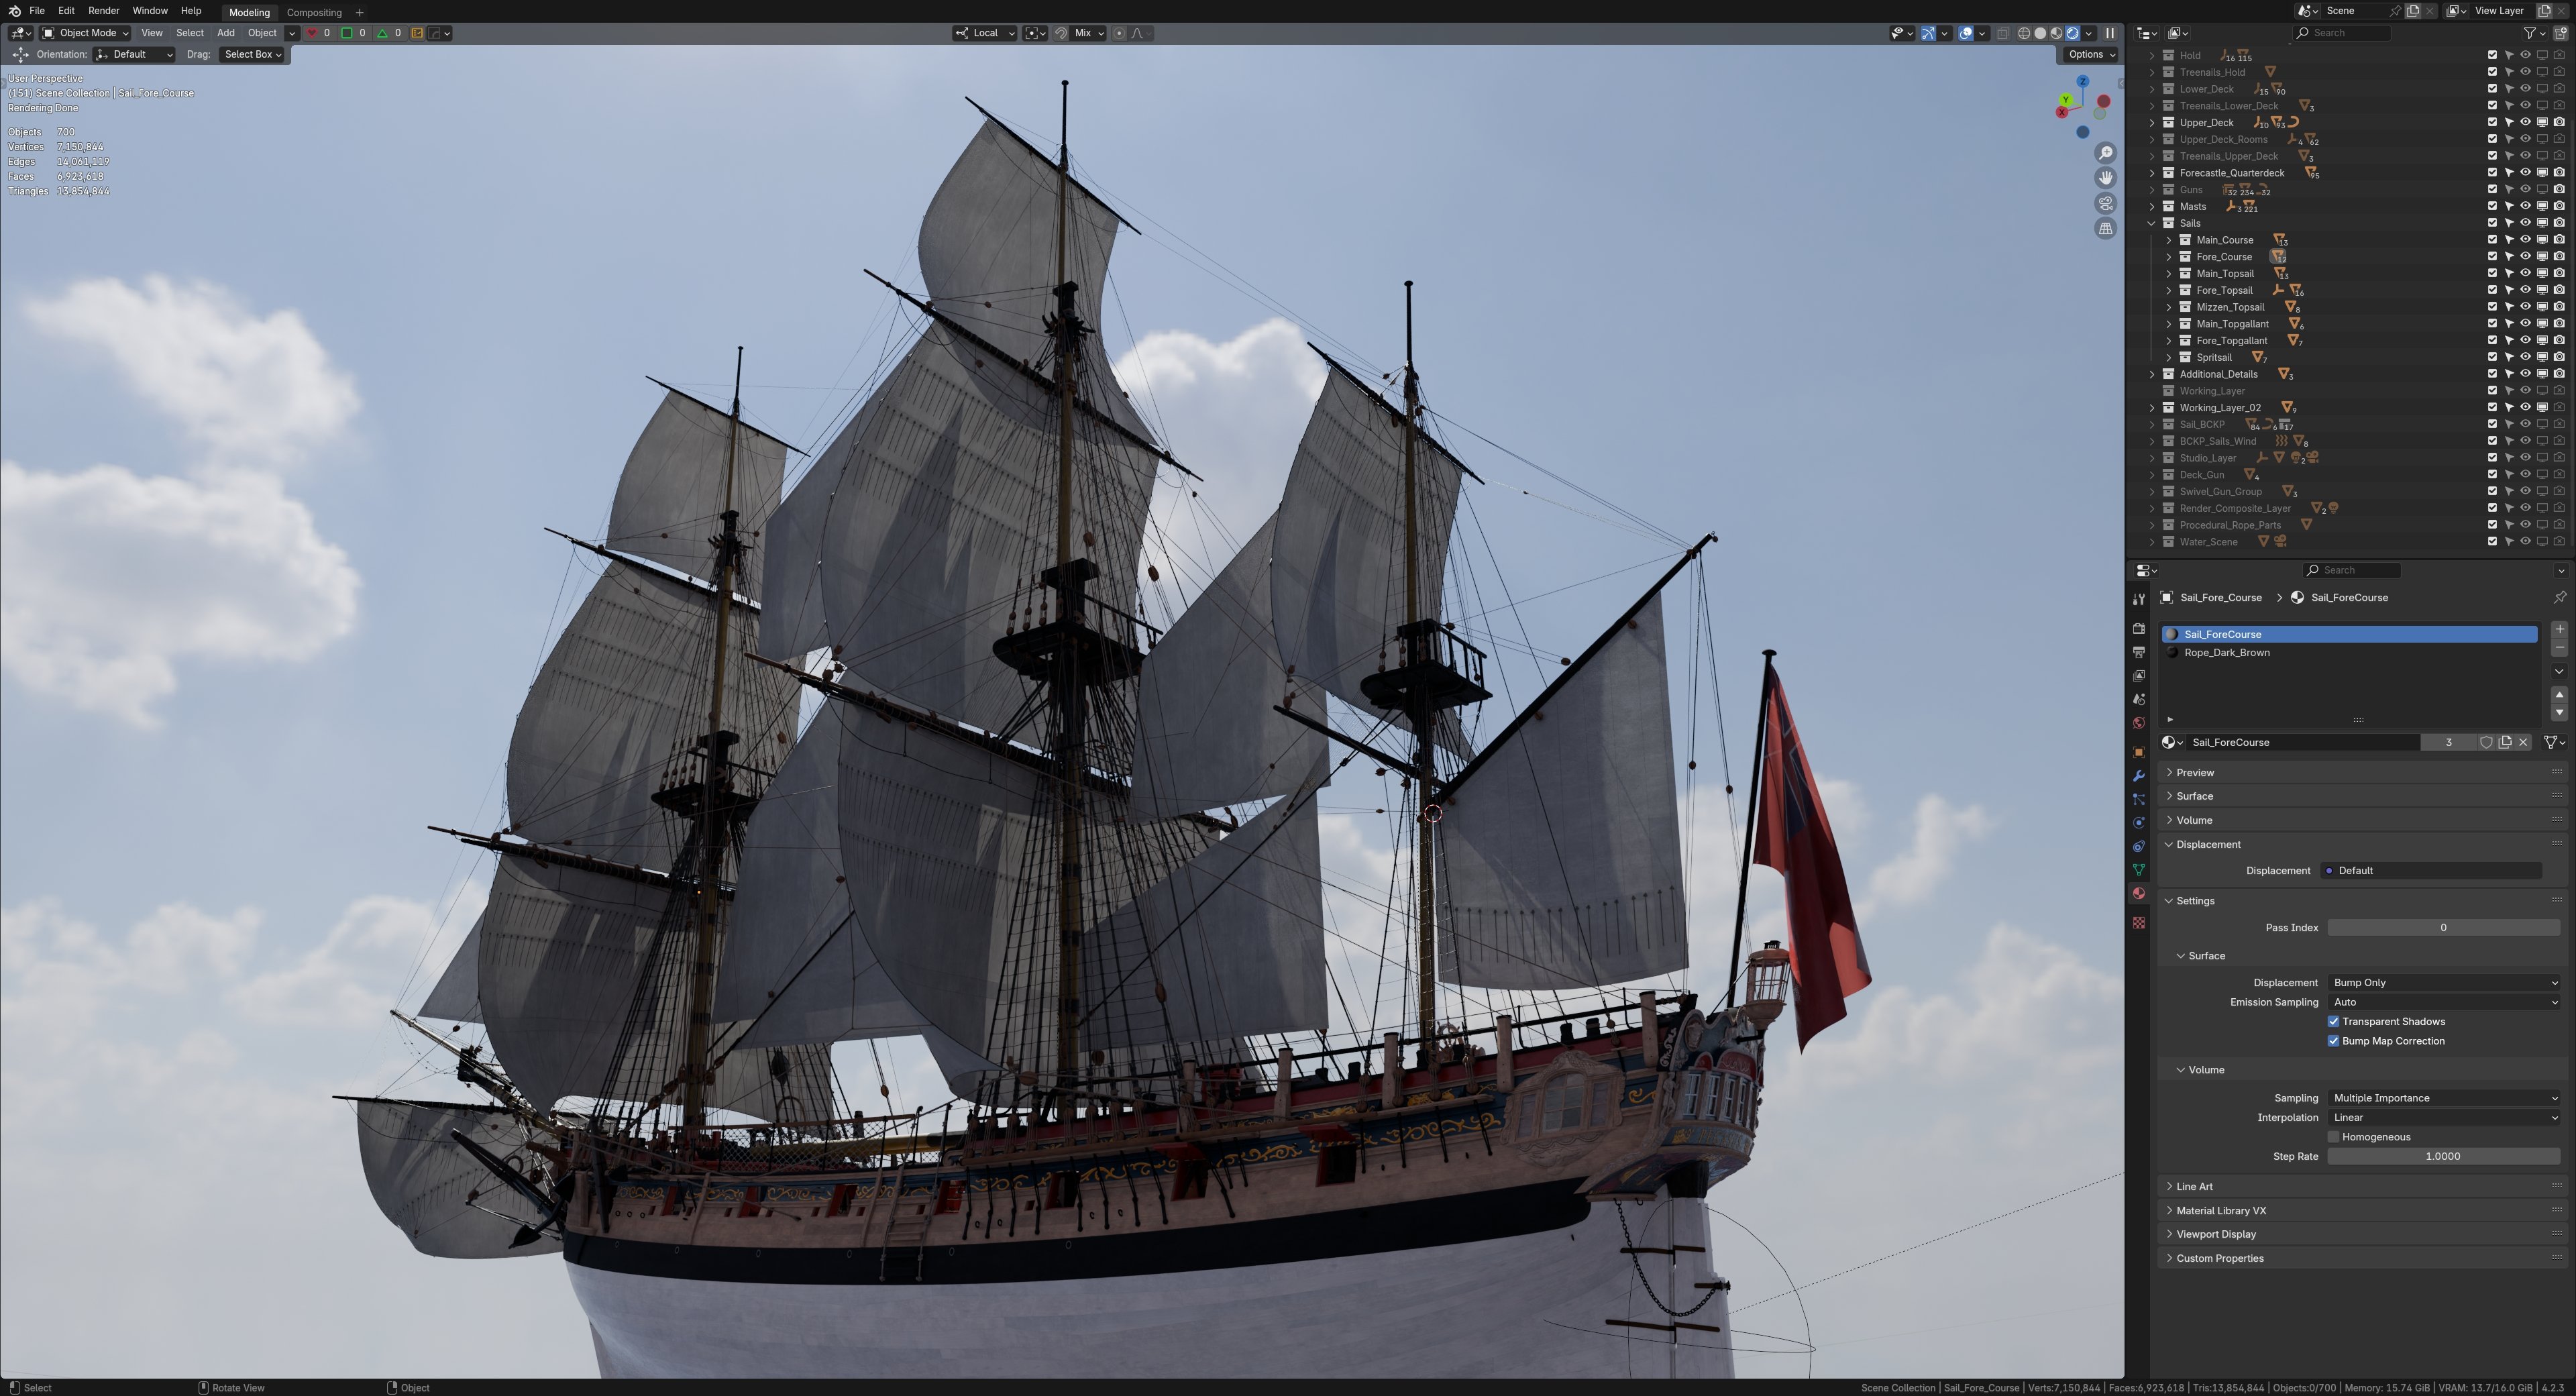
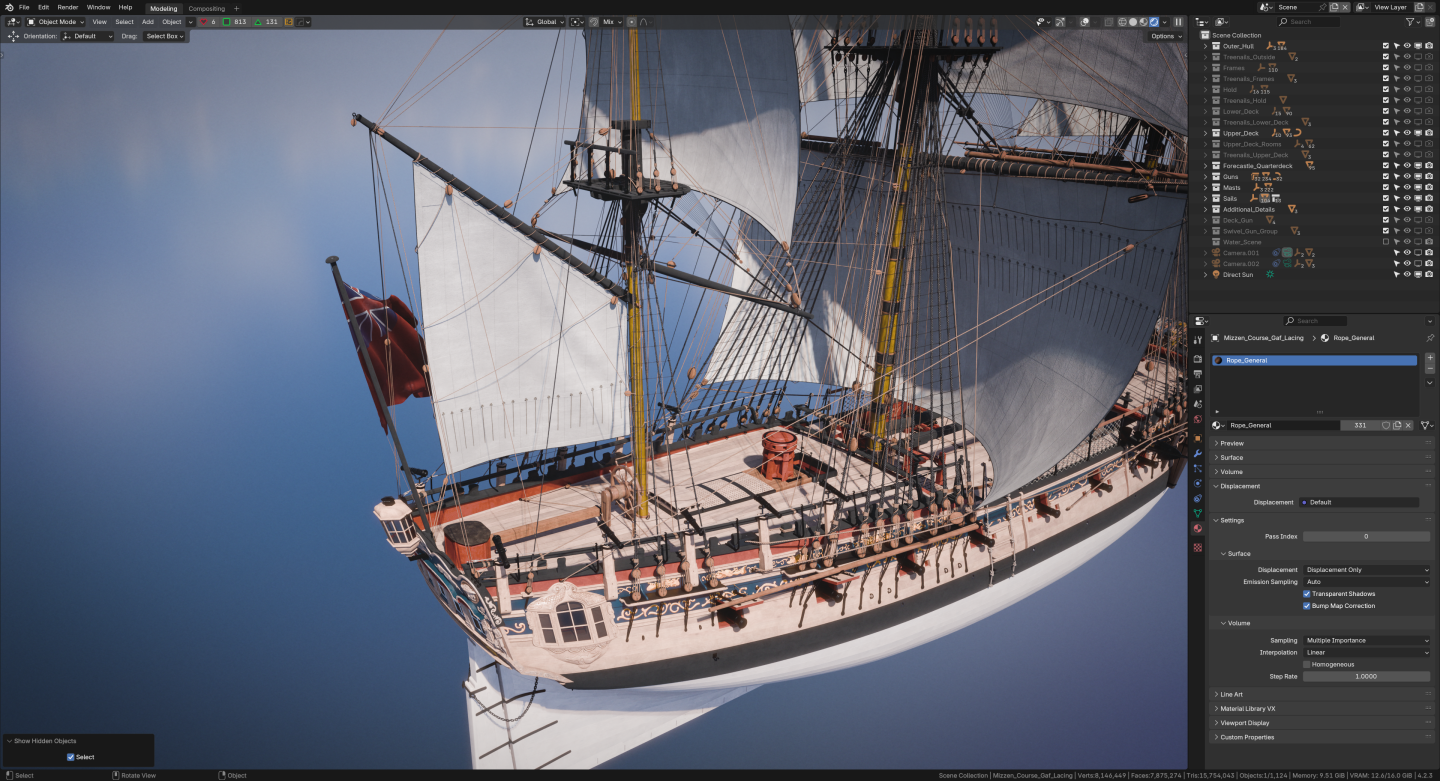
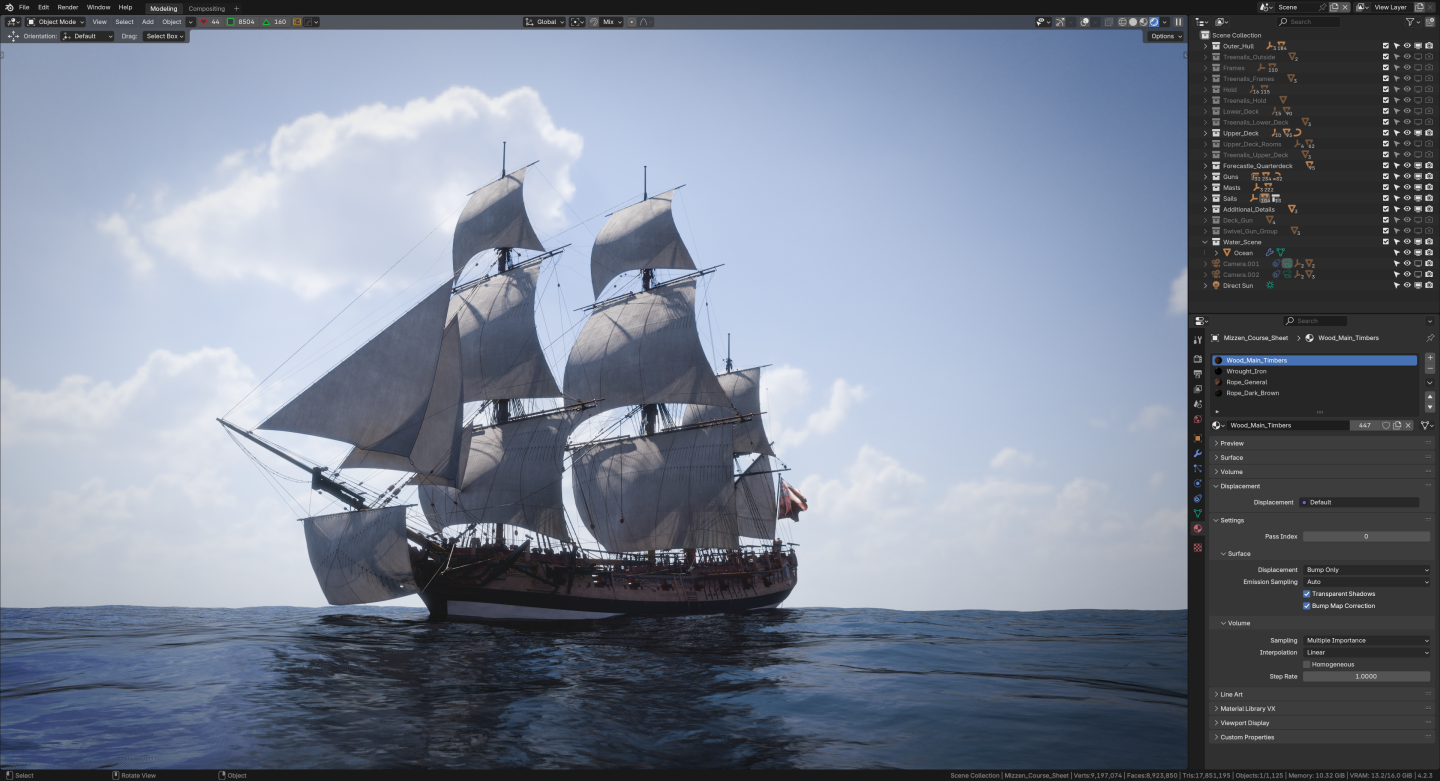
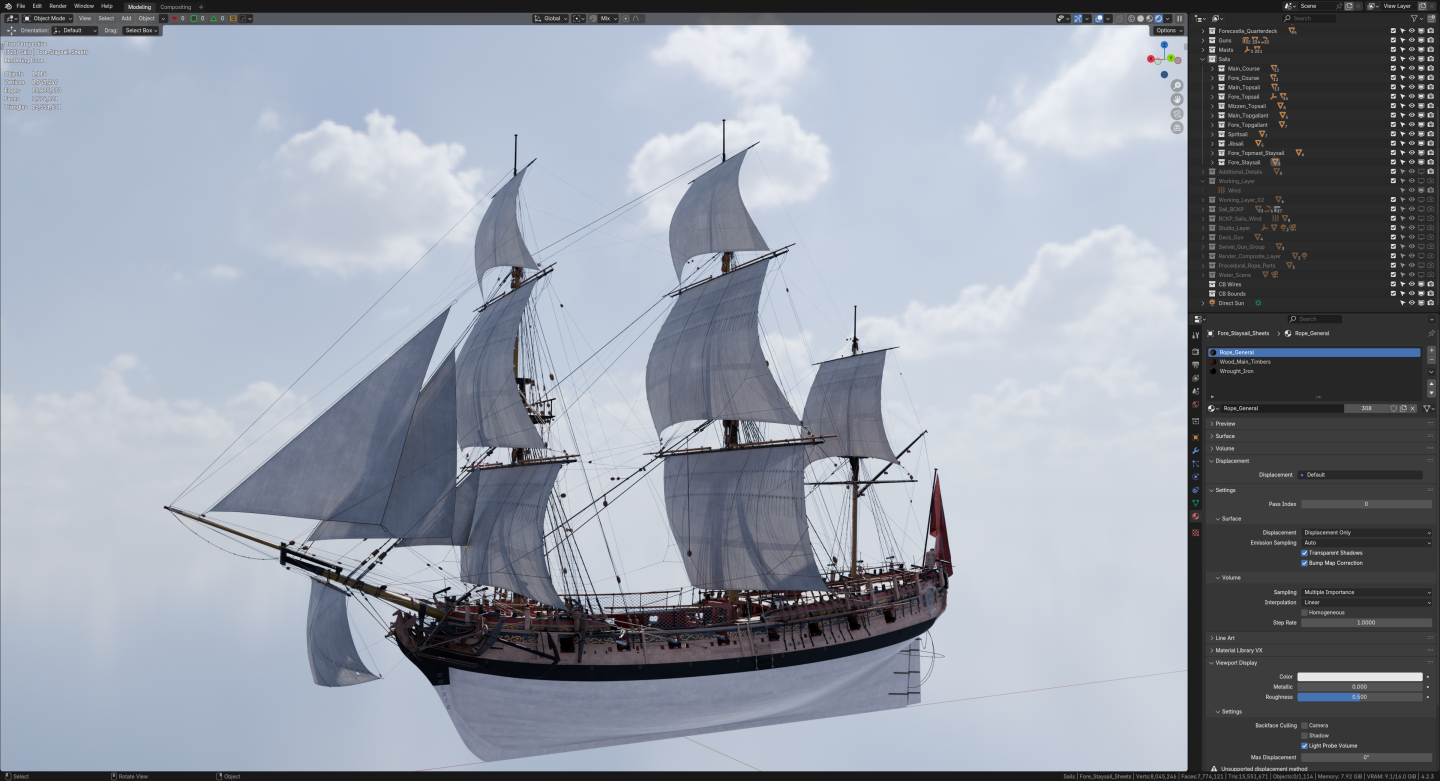
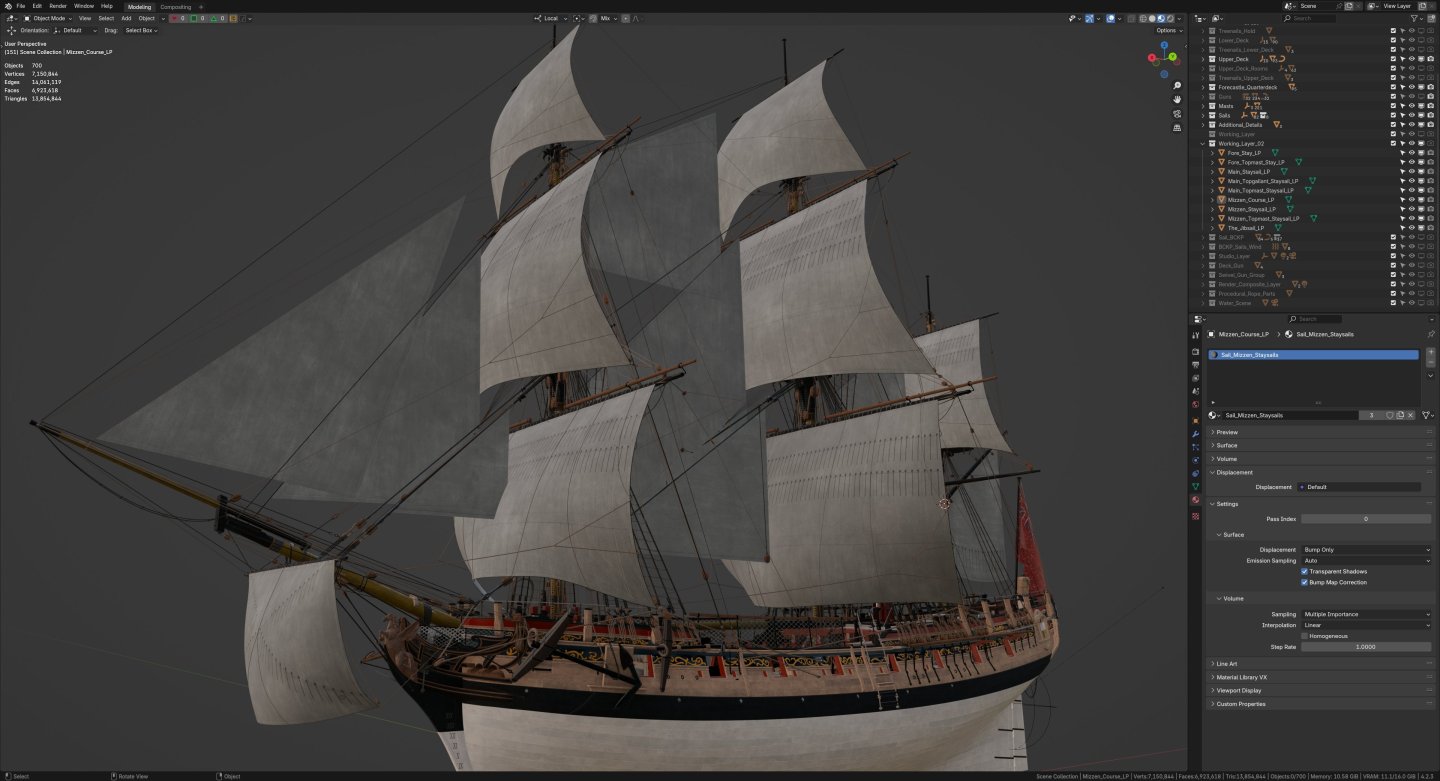
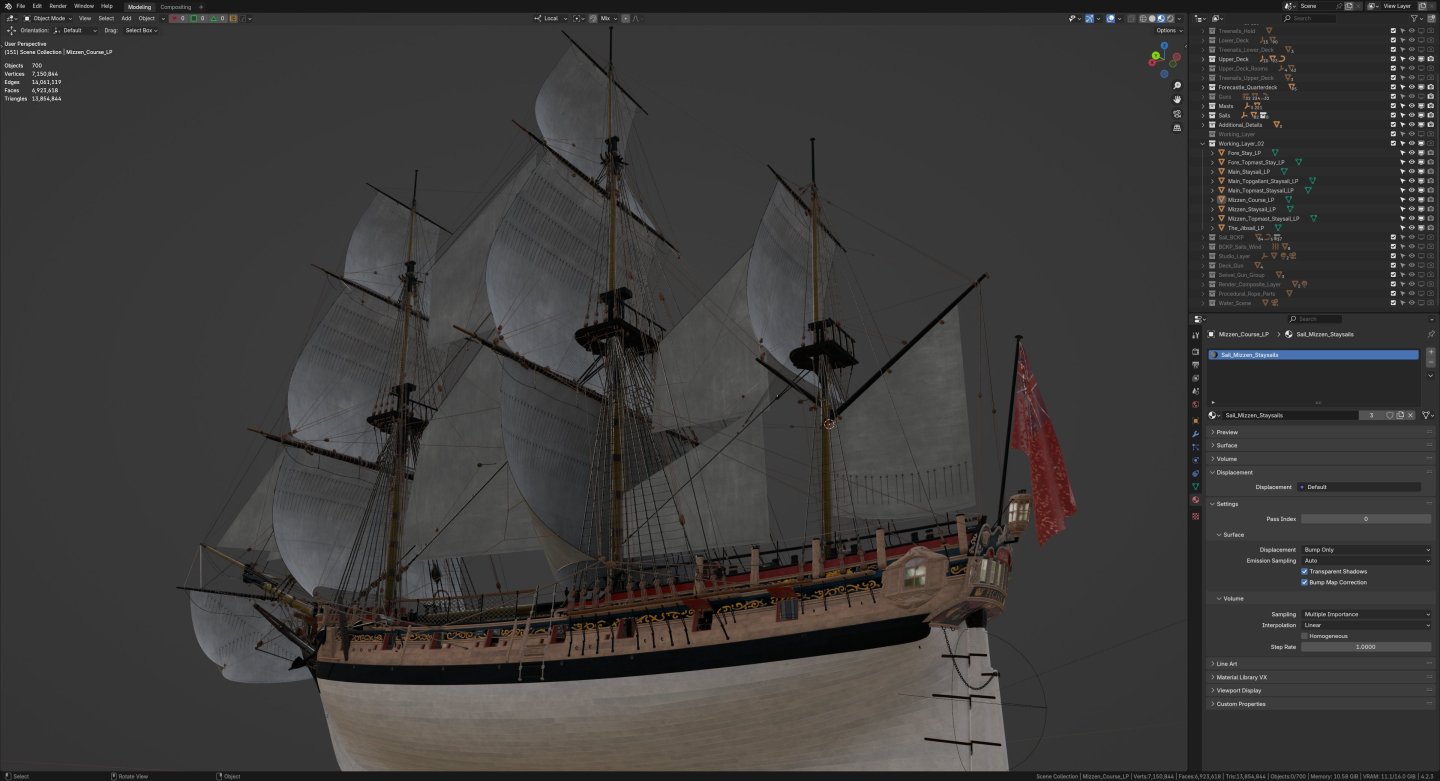
hi all! first, I wish all the very best in New Year to everyone. may it be full of great ship models, especially finished ones :)). and second, I think I'm finally calling this project - done! I haven't finished all the fore-aft sails since I can't figure out how to physically put them in place without intersecting with various lines there. so, with mizzen course done I put an end to this great journey that started almost seven (yes, seven! yikes!) years ago. thank you all for pulling up chairs and being a part of this endeavor. and the biggest "thank you" to David and Greg for for making me a part of this endeavor, as well. I have learned a lot, have a lot to learn still, and right now I'm going to sit down and try and decide what to tackle next. for now, finishing Pandora seems most likely candidate, but more on that in due time. thank you and cheers!!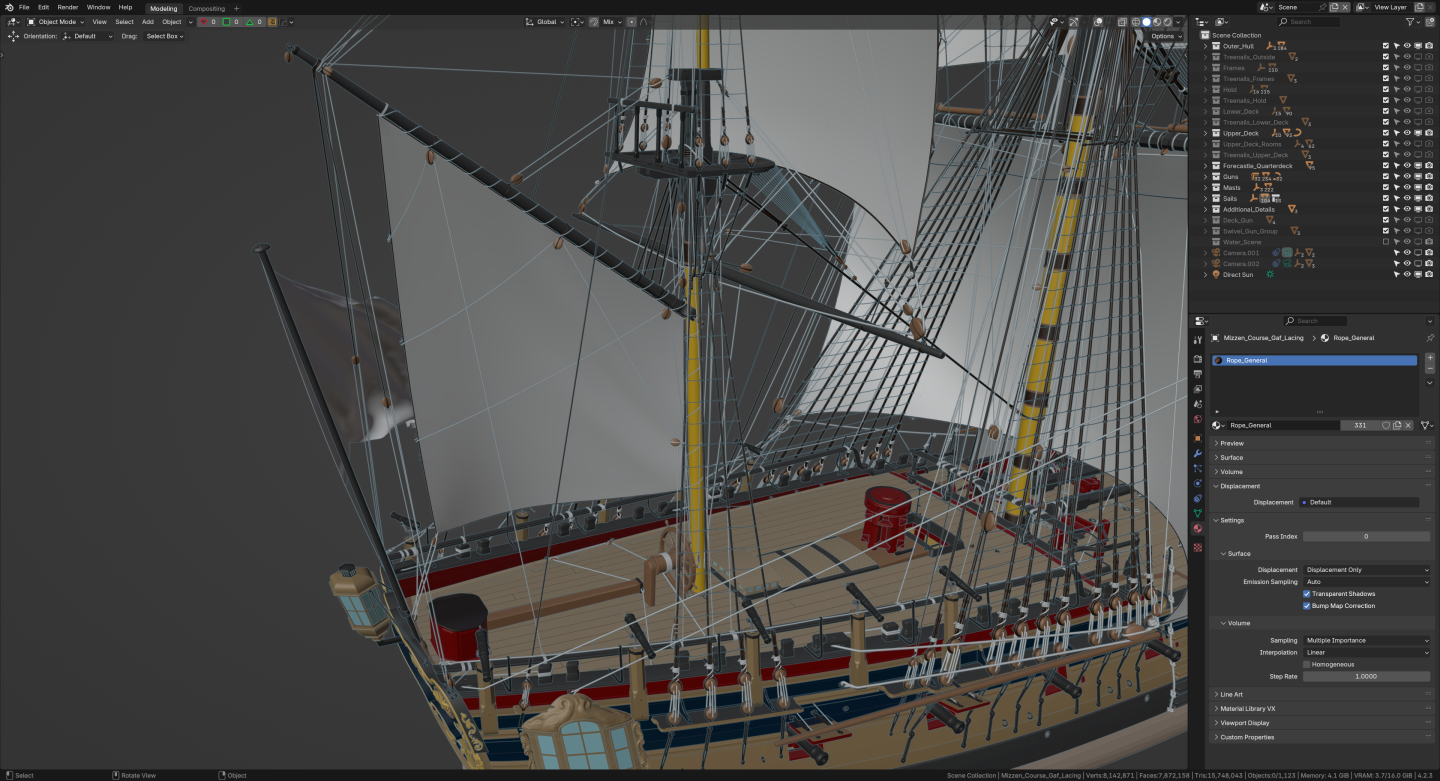


- 141 replies
-
- 6
-

-

-
- pof swan series
- swan
- (and 1 more)
-
Swan class 3D model in progress
herask replied to dvm27's topic in CAD and 3D Modelling/Drafting Plans with Software
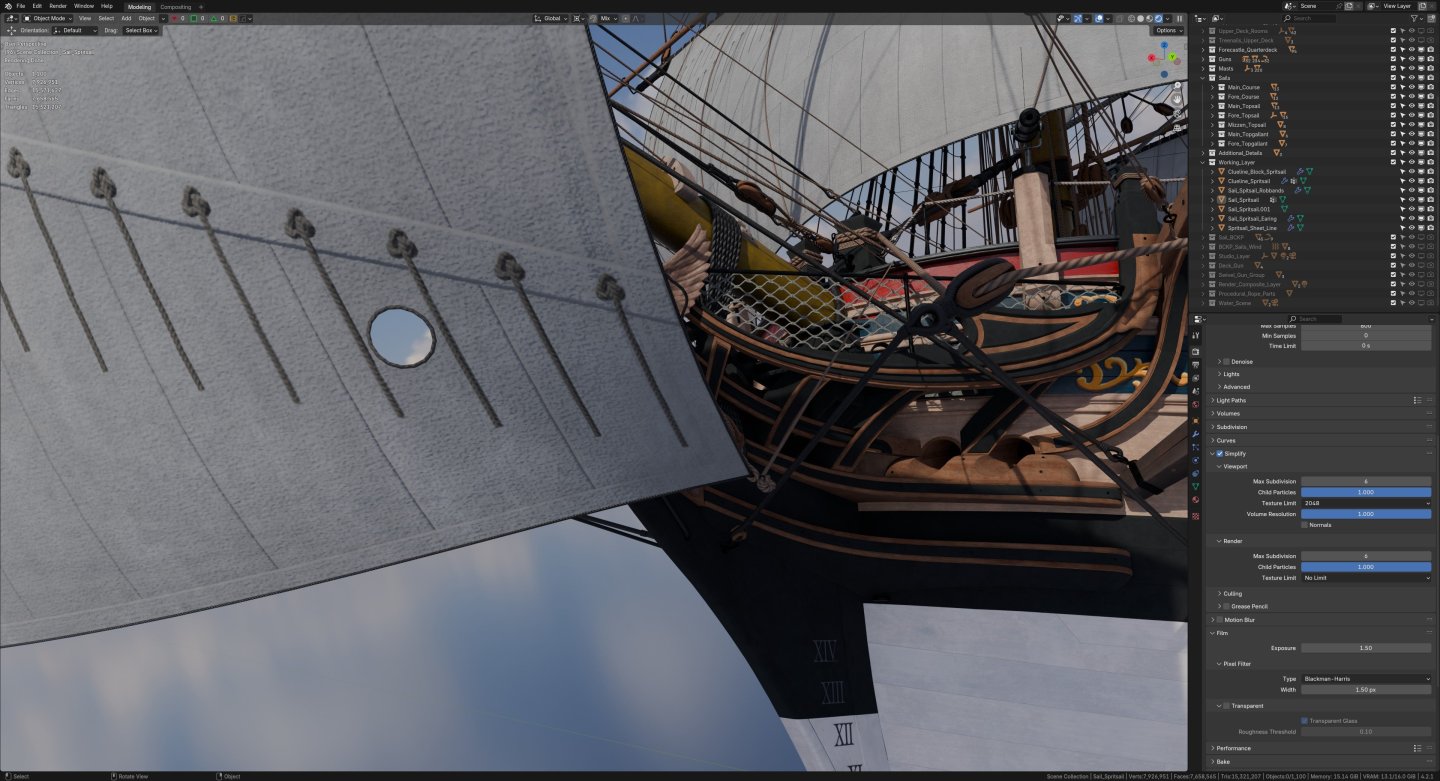
thank you for the tips! I did try full sim on sails but it all got weird. sails would clip through ropes, or even stick to them like glued for no apparent reason... I'm aware that the sails are somewhat simplified affair but in all honesty that's the intention. as much as I would like to engage full cloth sim on everything I've decided to skip that step for the sake of my sanity . will try and make furled courses, though. the initial idea was to make three states for each sail: fully set, half furled and furled, so I could cover all sail deployment(?) scenarios. but, again, my sanity... what actually halted my progress here is that I don't know where to squeeze the staysail between all these lines. full sim or not, I can't see how the sail actually fits there... EDIT: by the way, when I was looking at your post on my phone I had to squint to really notice that your renders aren't photos. that blender gizmo in the upper right corner gave it away. great work!- 141 replies
-
- 1
-
-
- pof swan series
- swan
- (and 1 more)
-
Swan class 3D model in progress
herask replied to dvm27's topic in CAD and 3D Modelling/Drafting Plans with Software
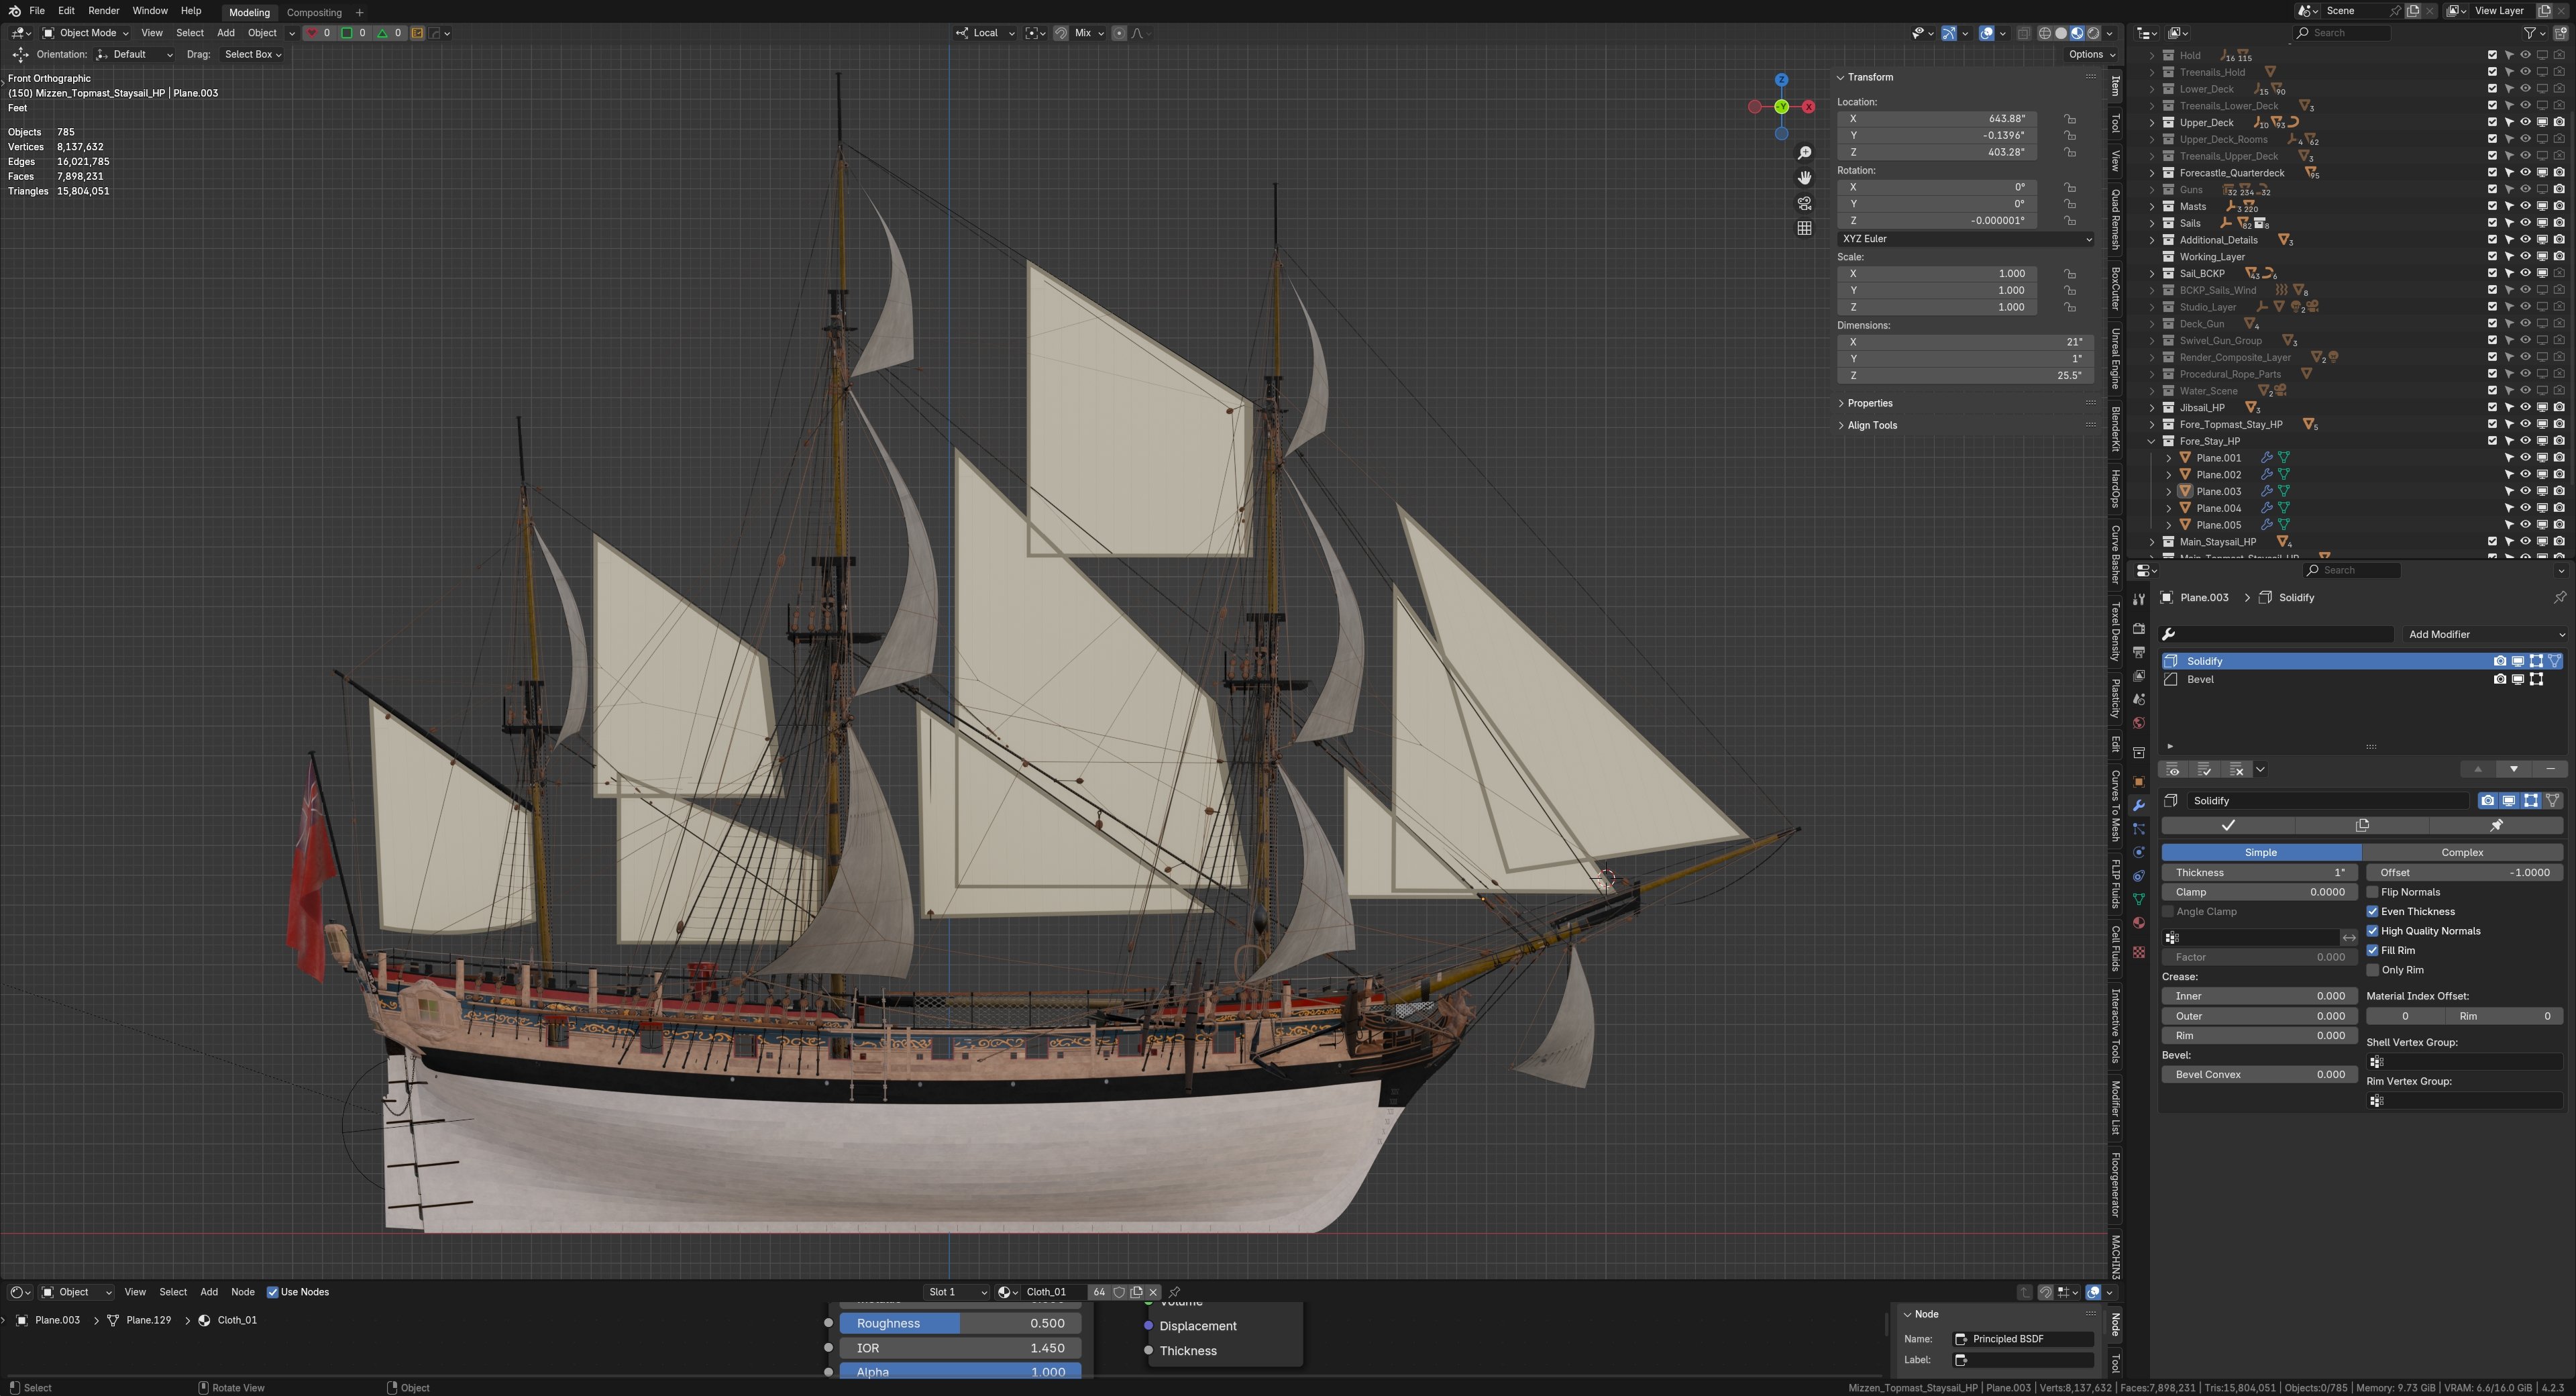
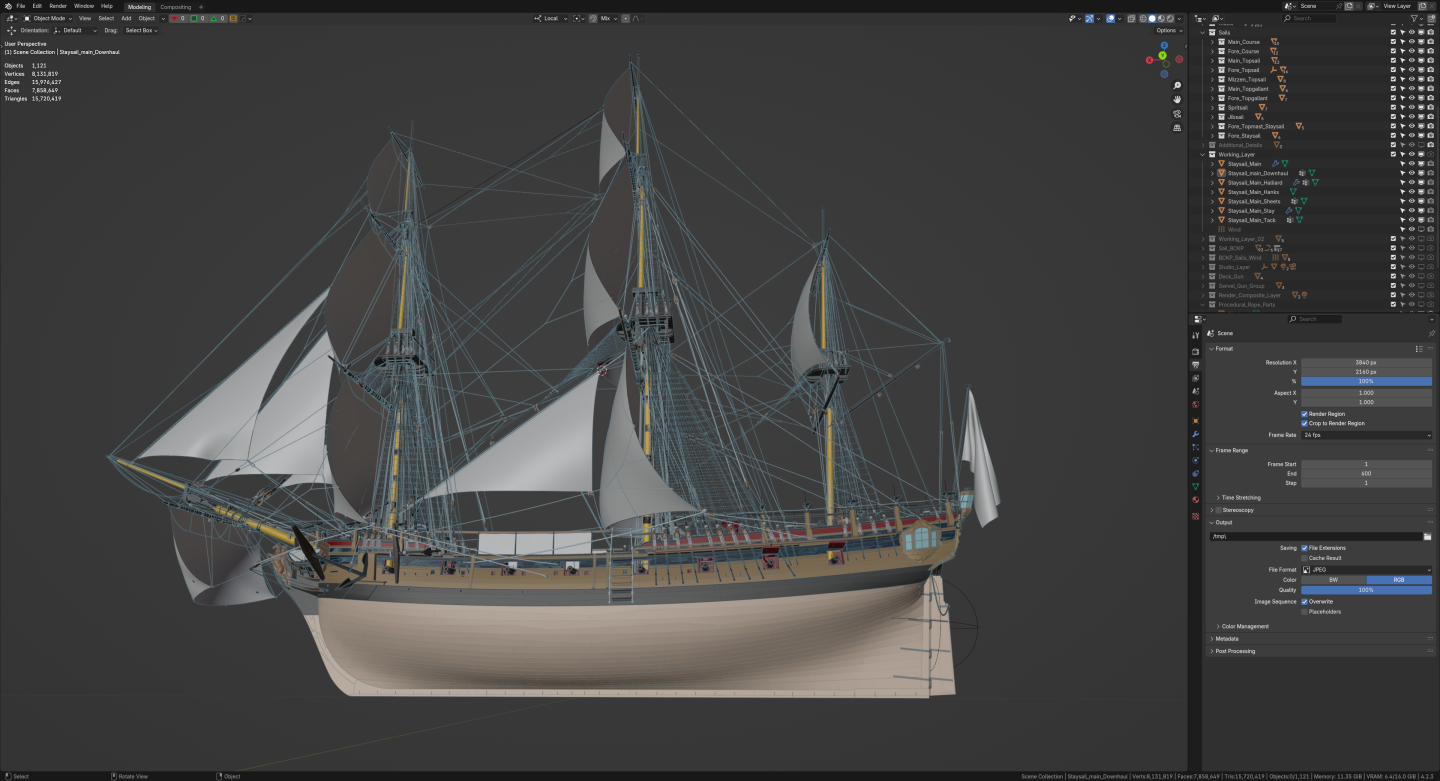
it's a shame that ropes are getting in the way. the sails are looking really impressive as they are right now. come to think of it, was this sail setup even used back then? what was the most common configuration of sails? maybe I could omit some, instead of going full throttle?
-
Swan class 3D model in progress
herask replied to dvm27's topic in CAD and 3D Modelling/Drafting Plans with Software
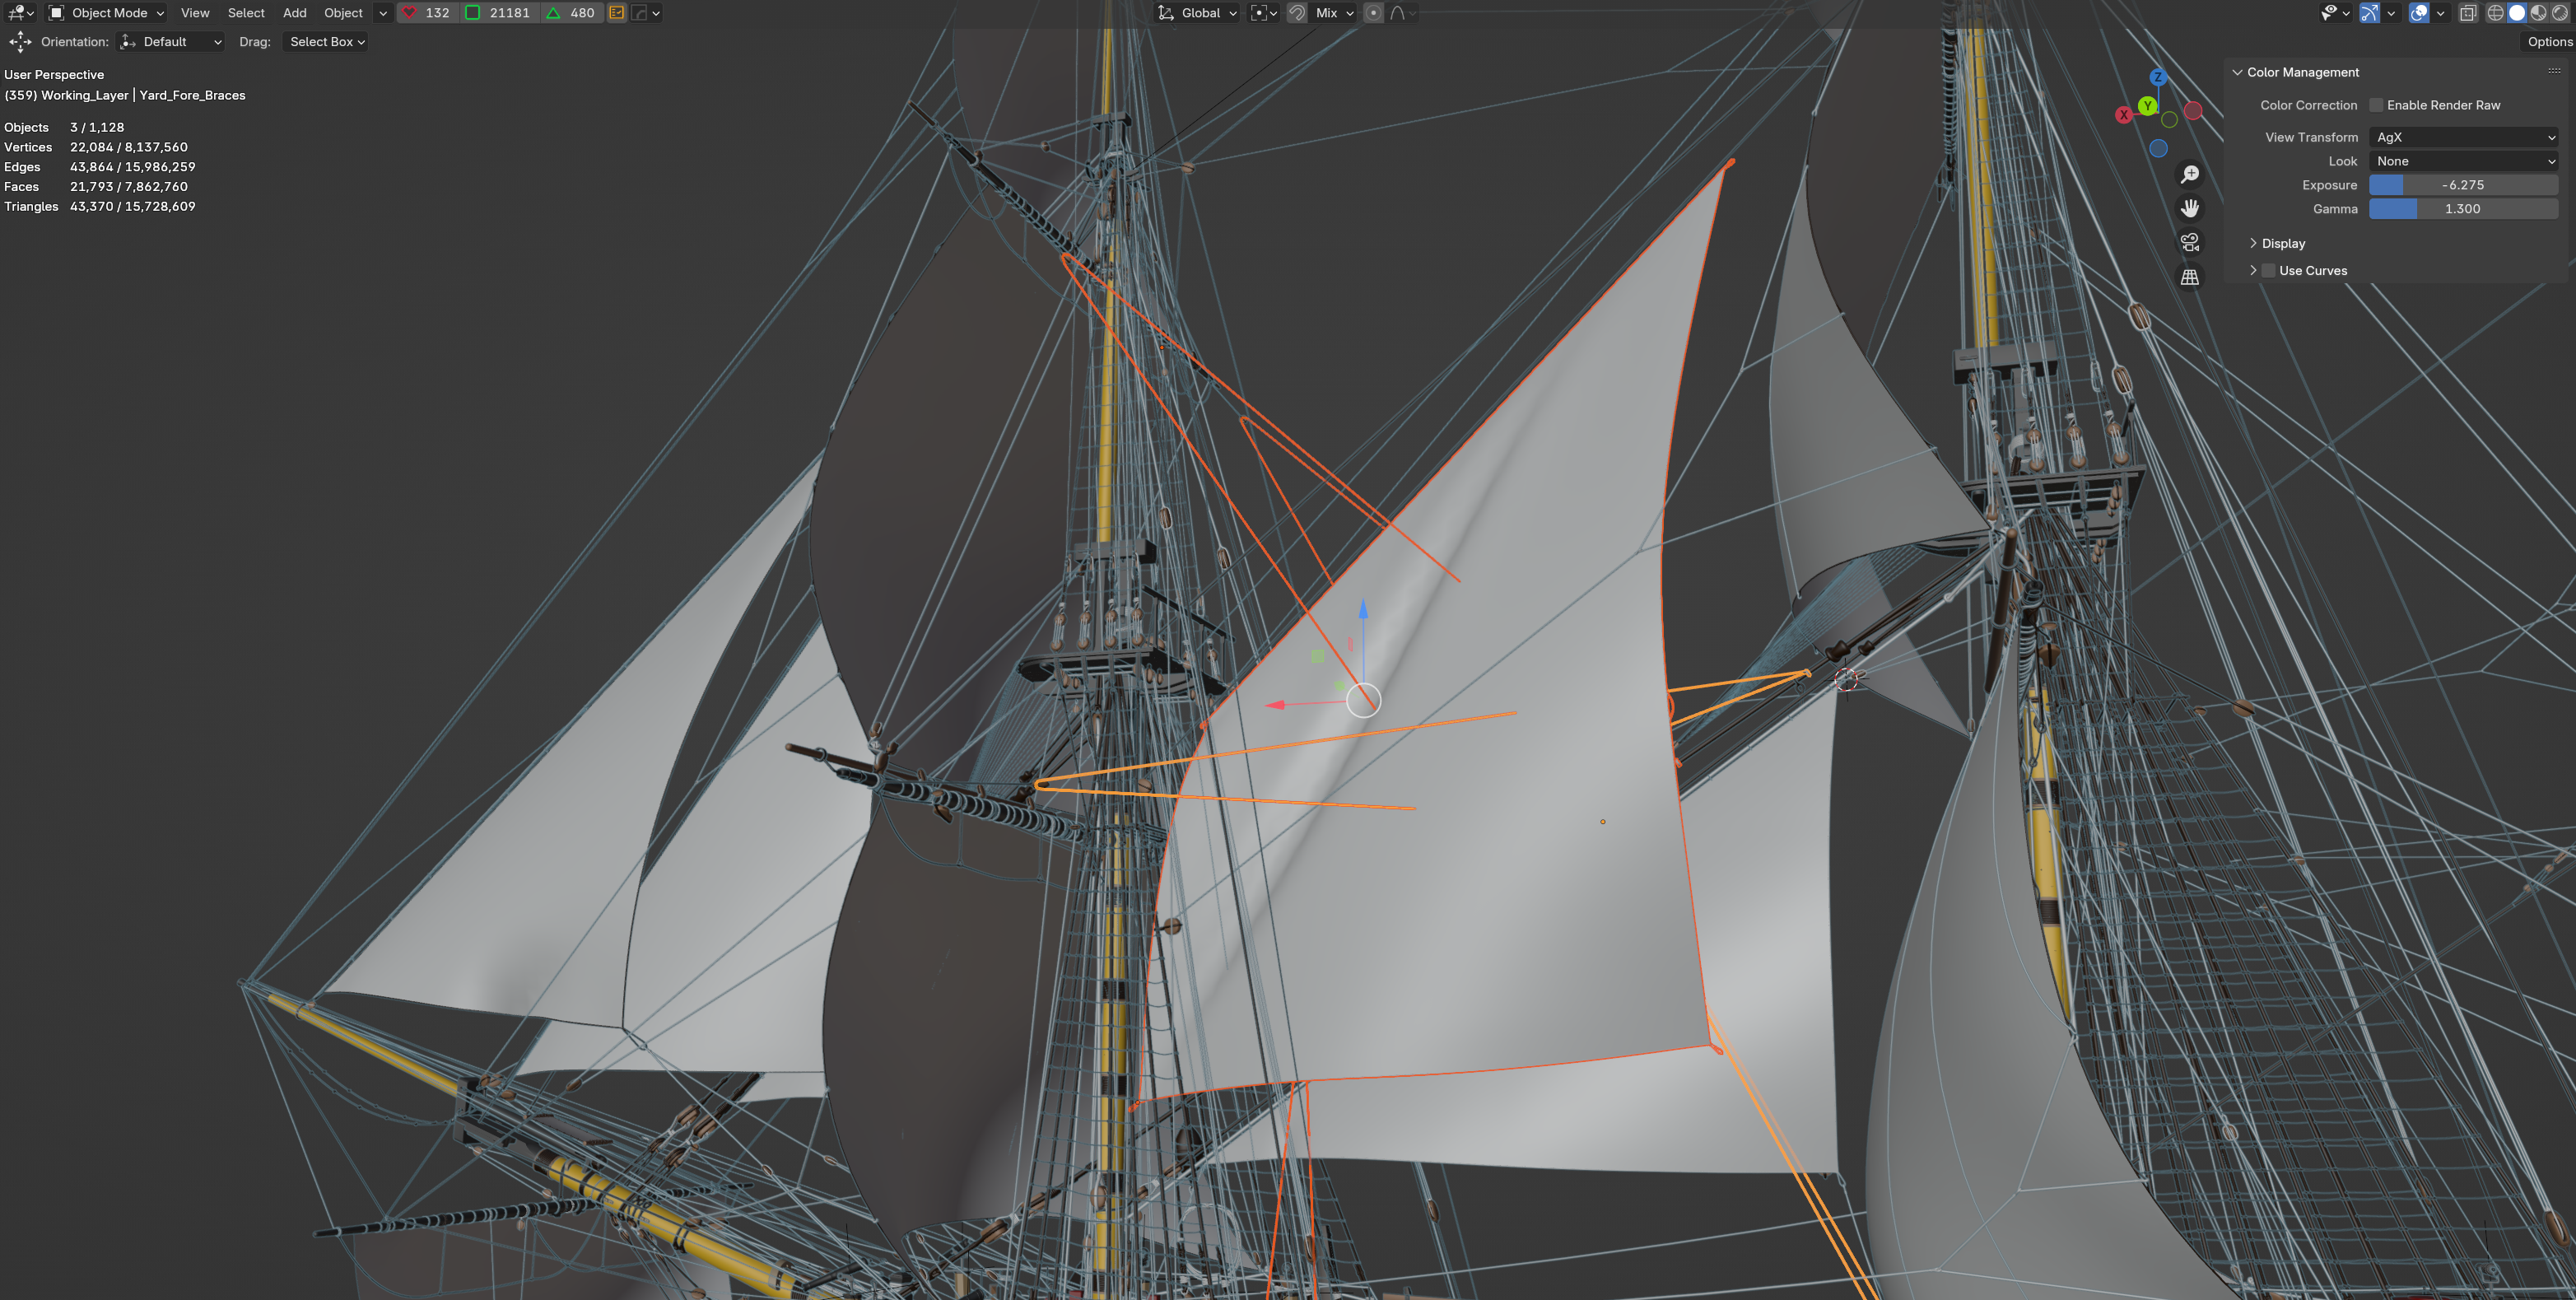
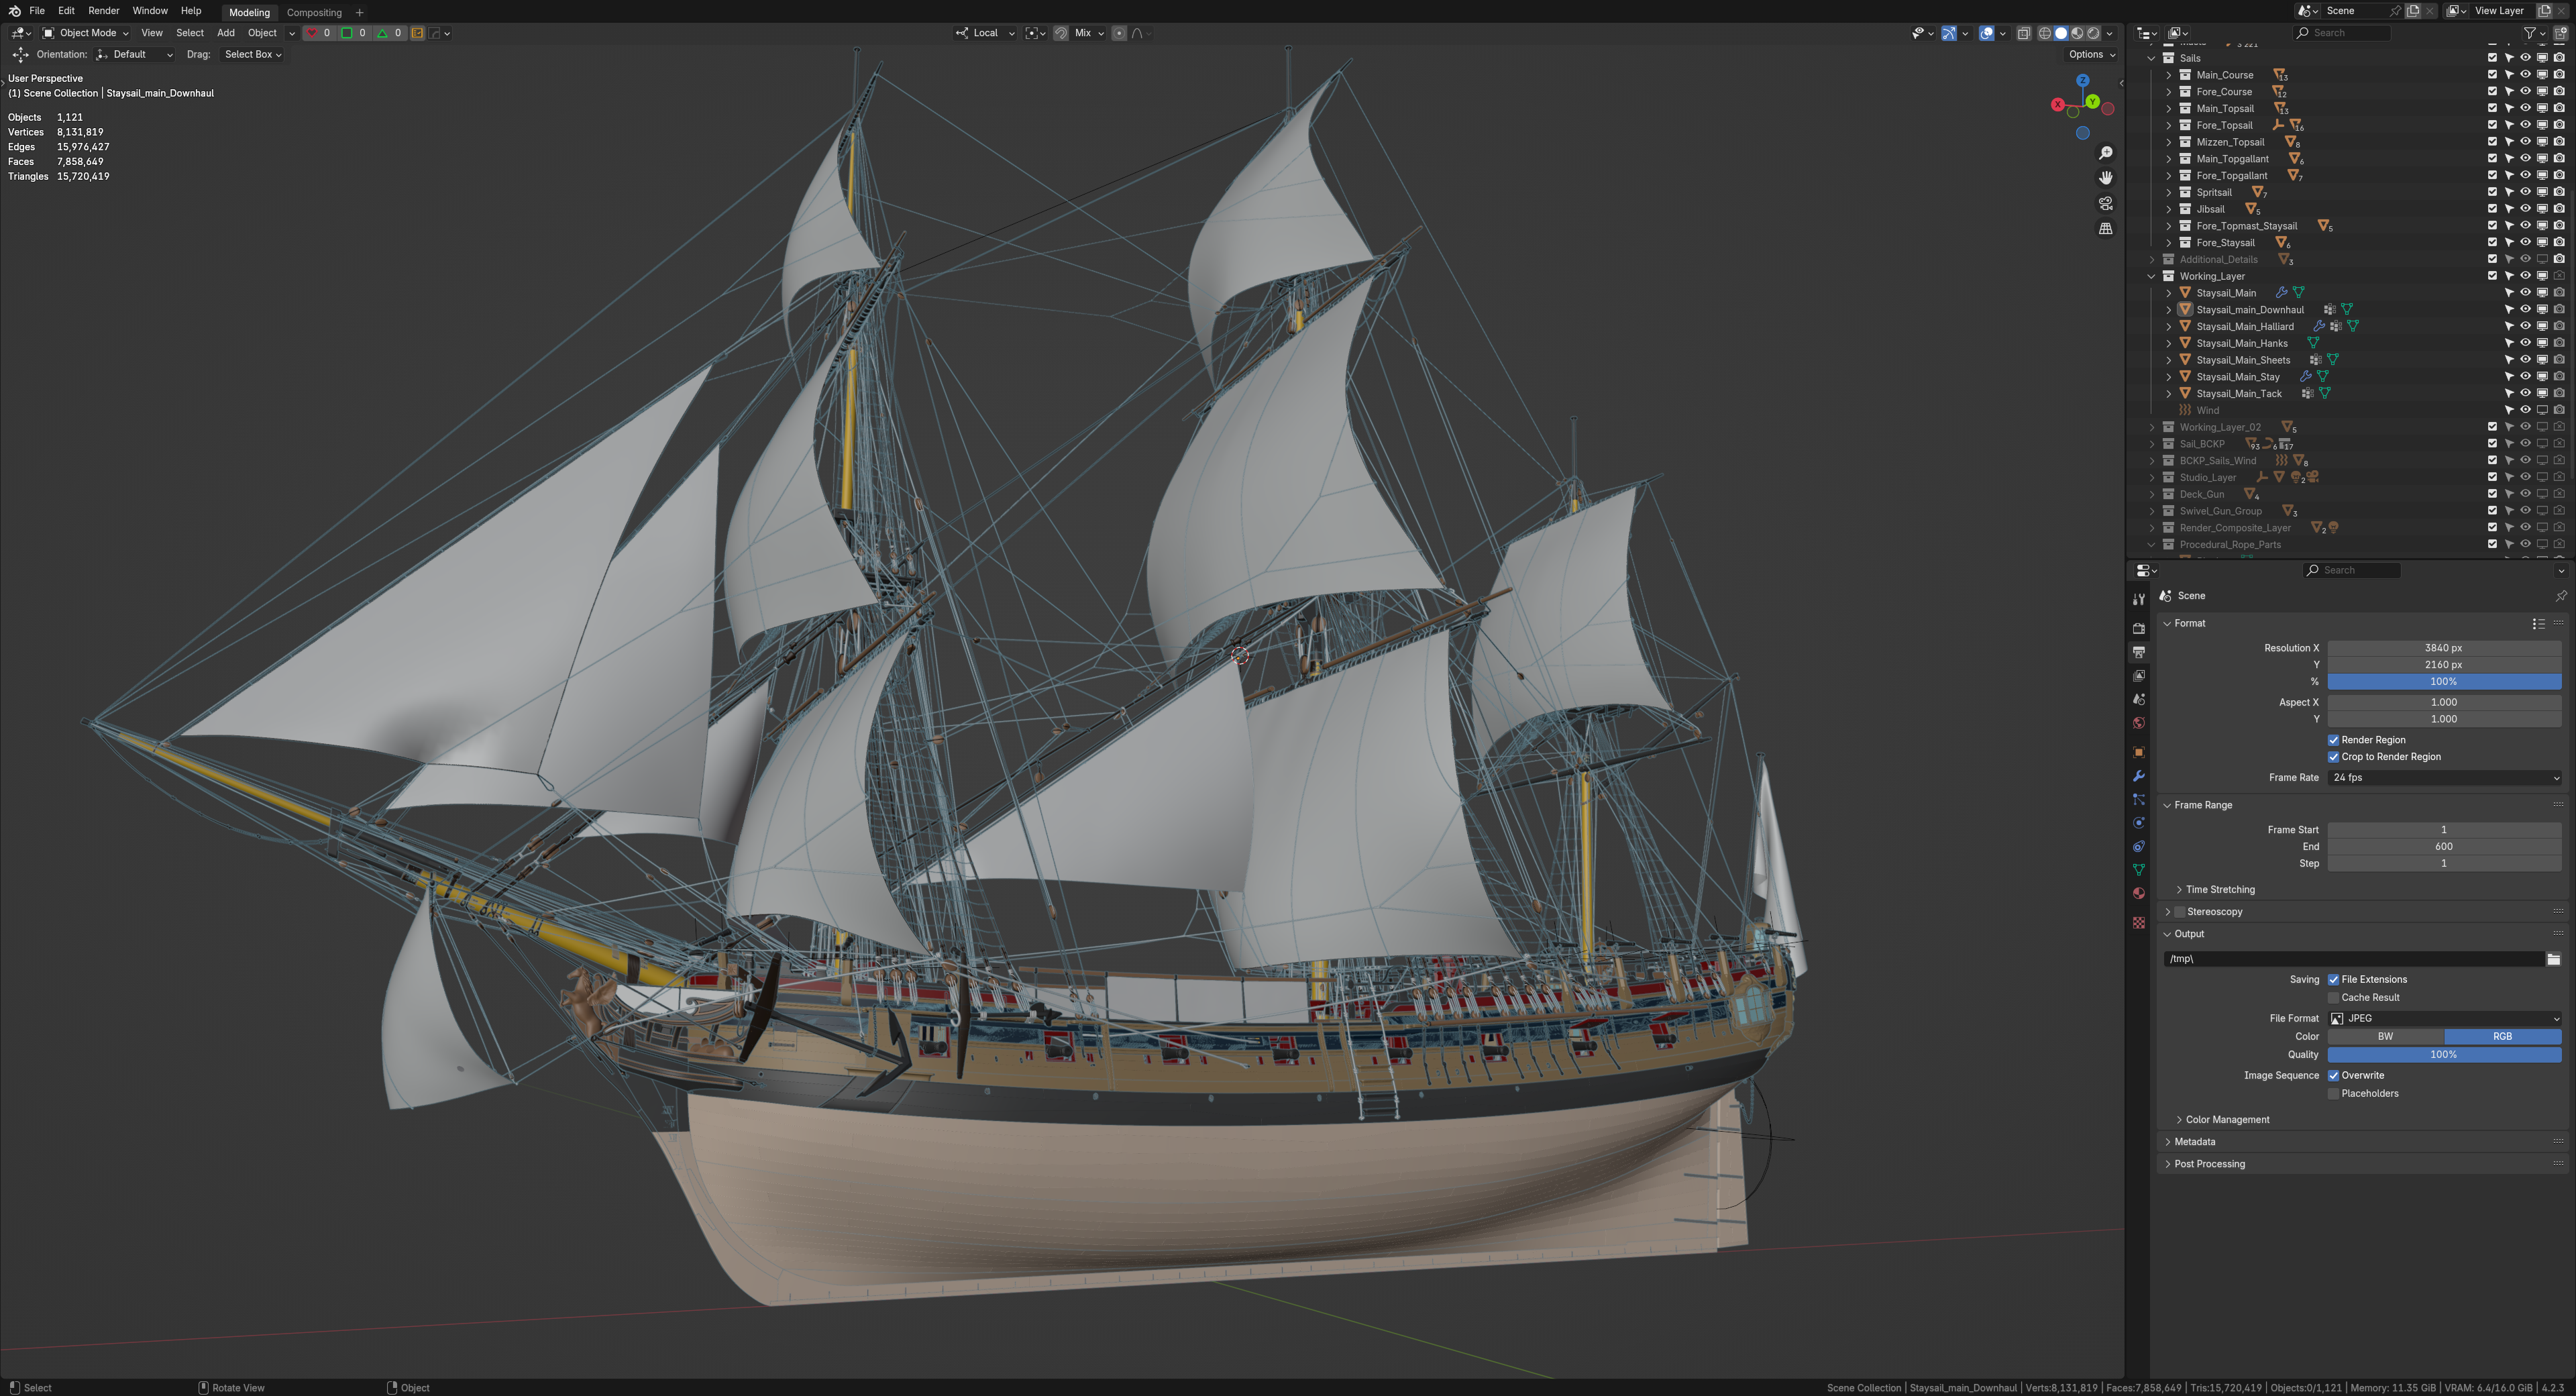
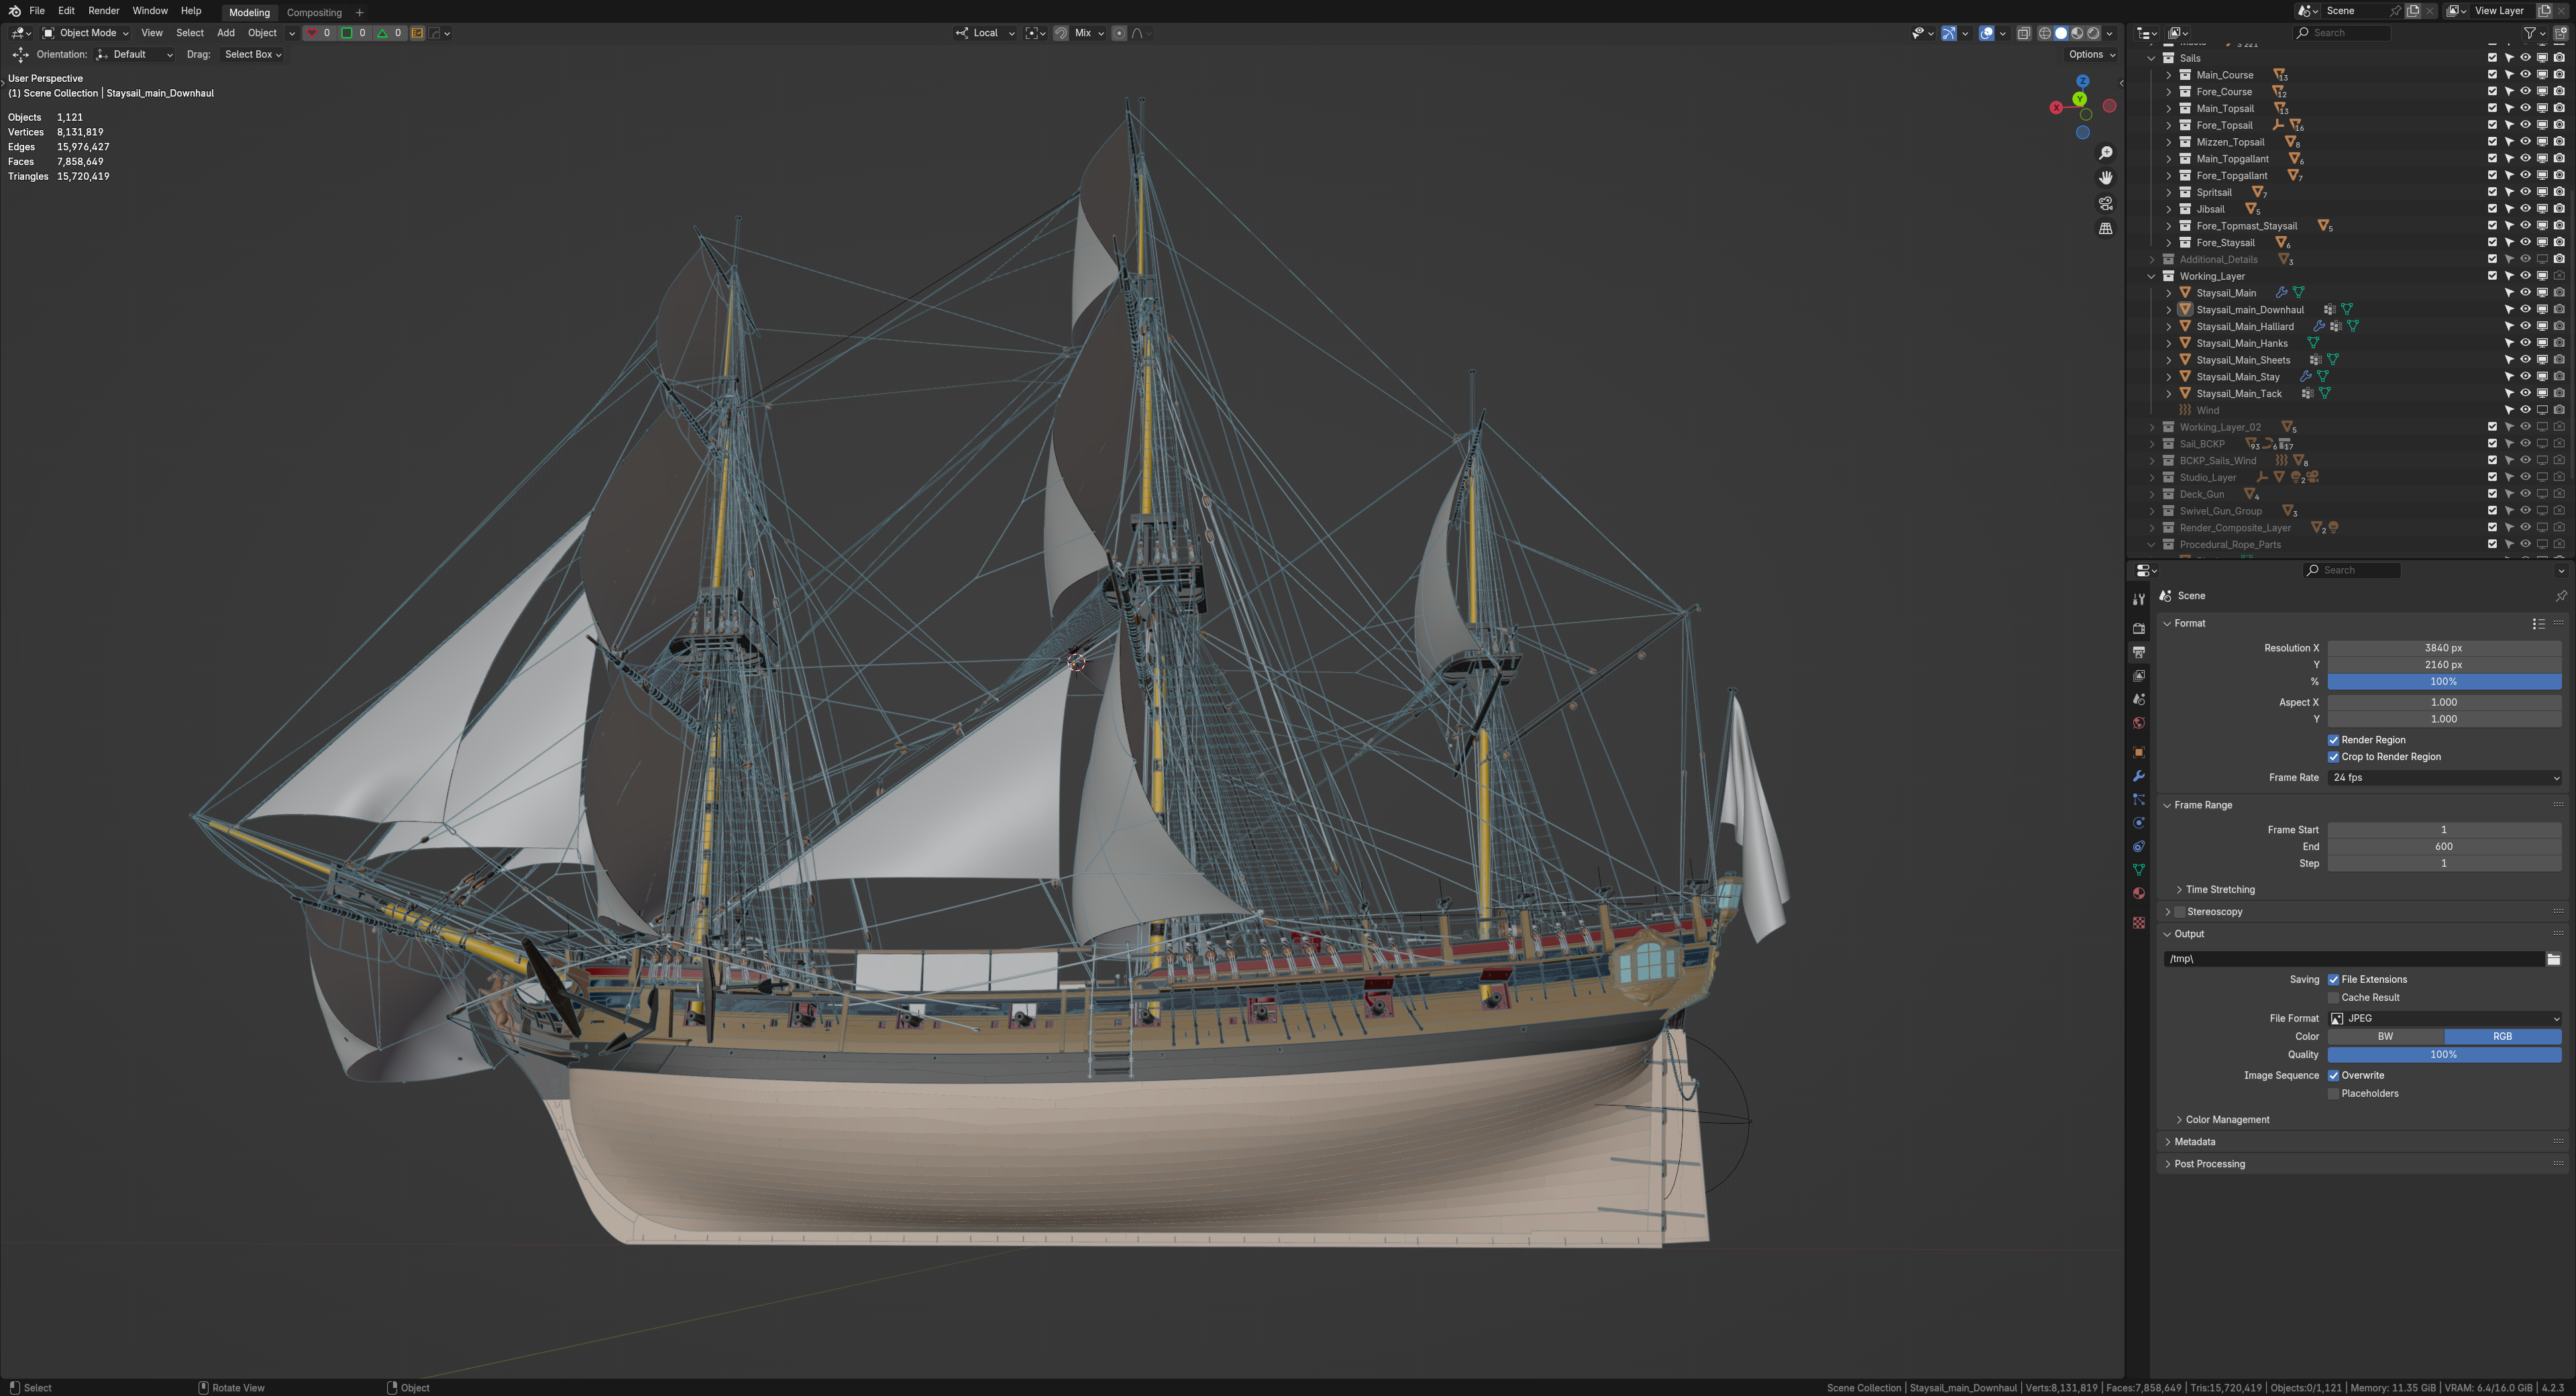
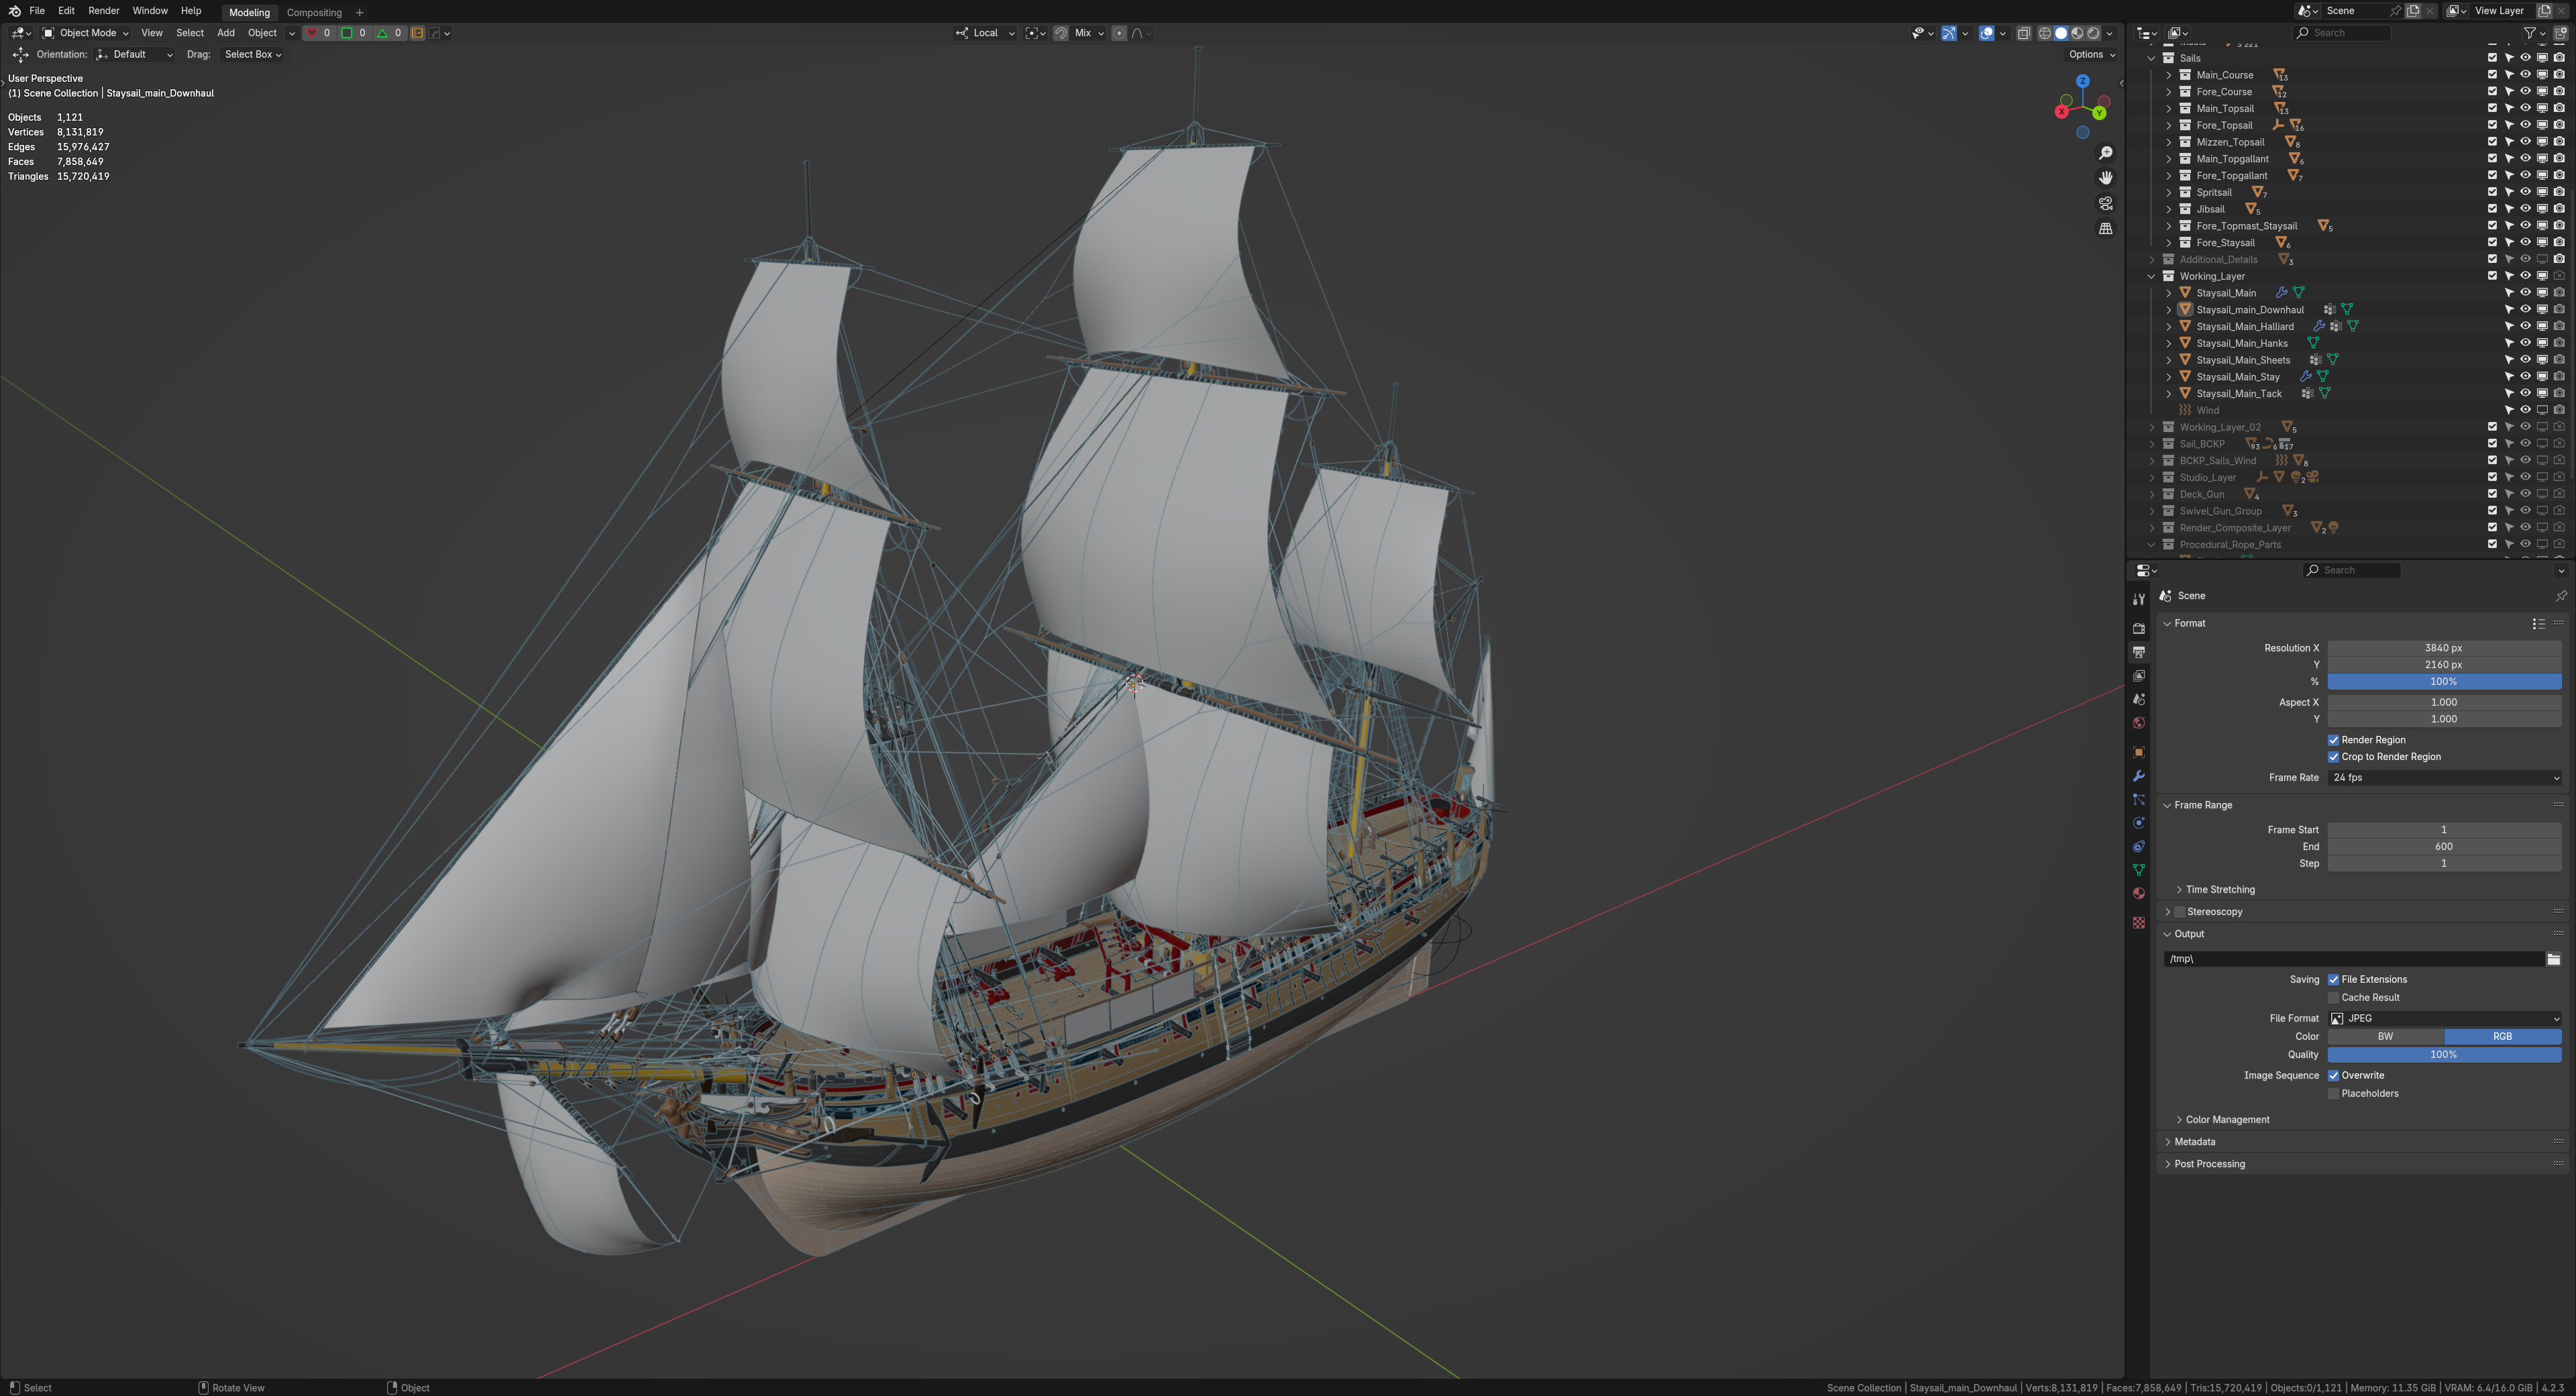
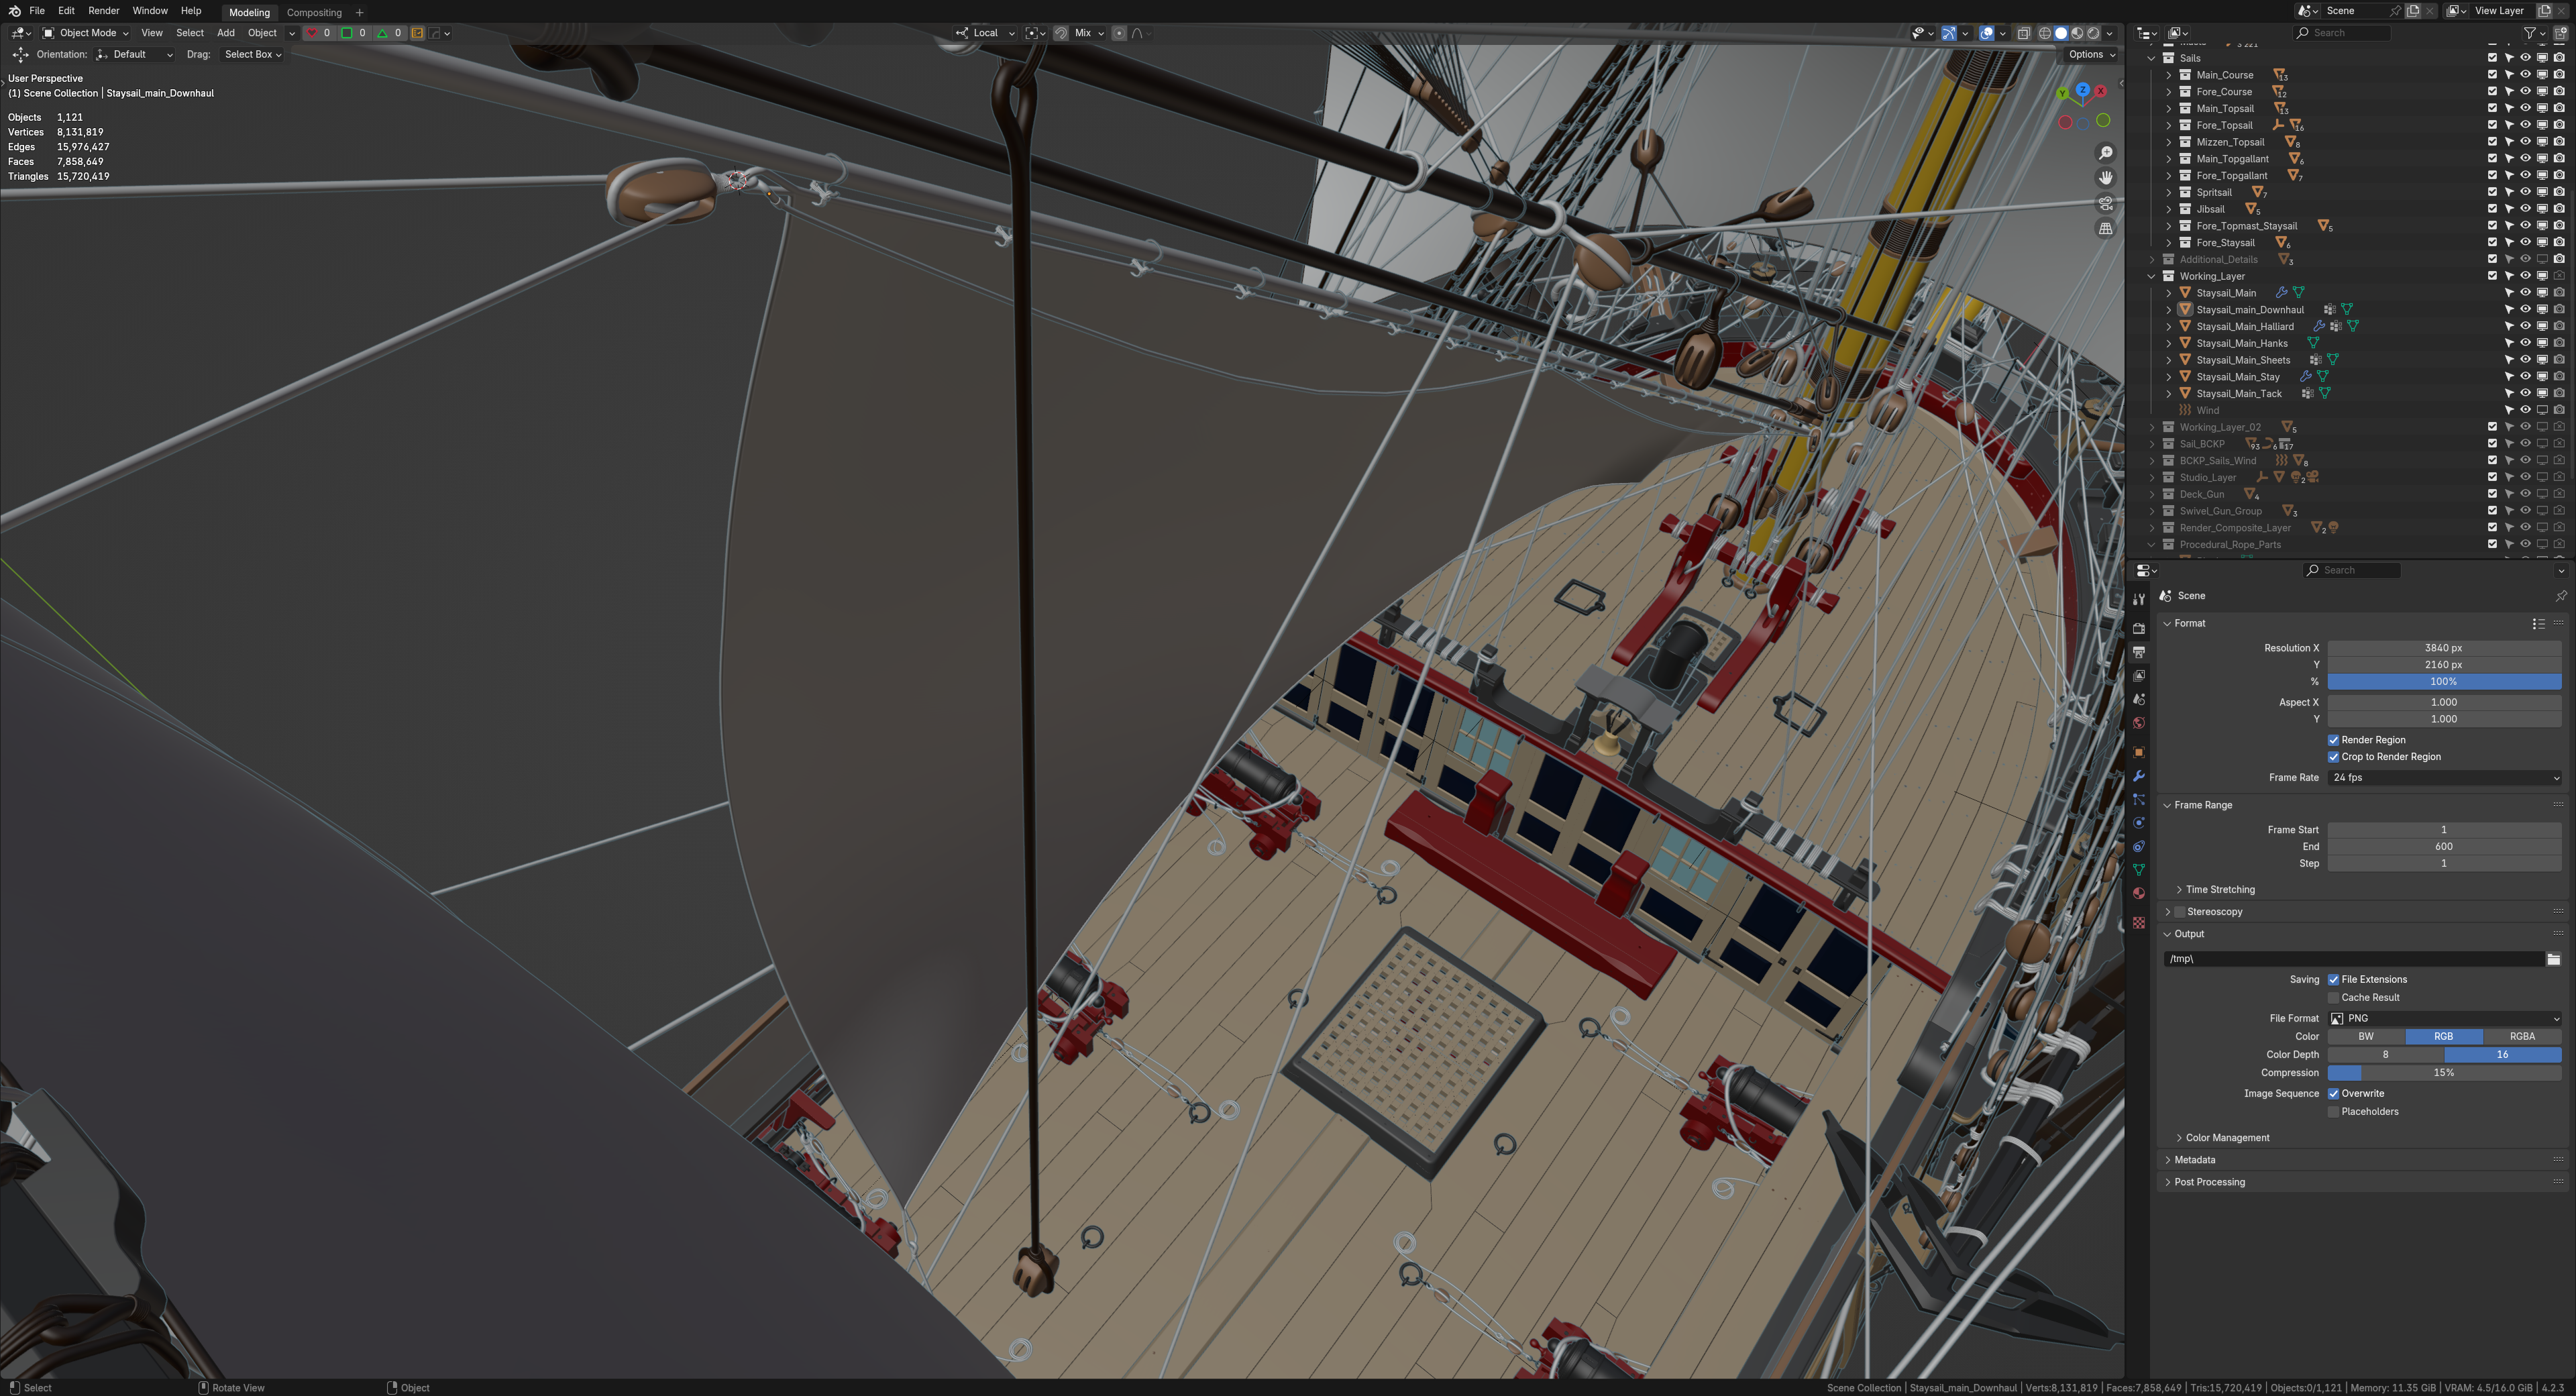
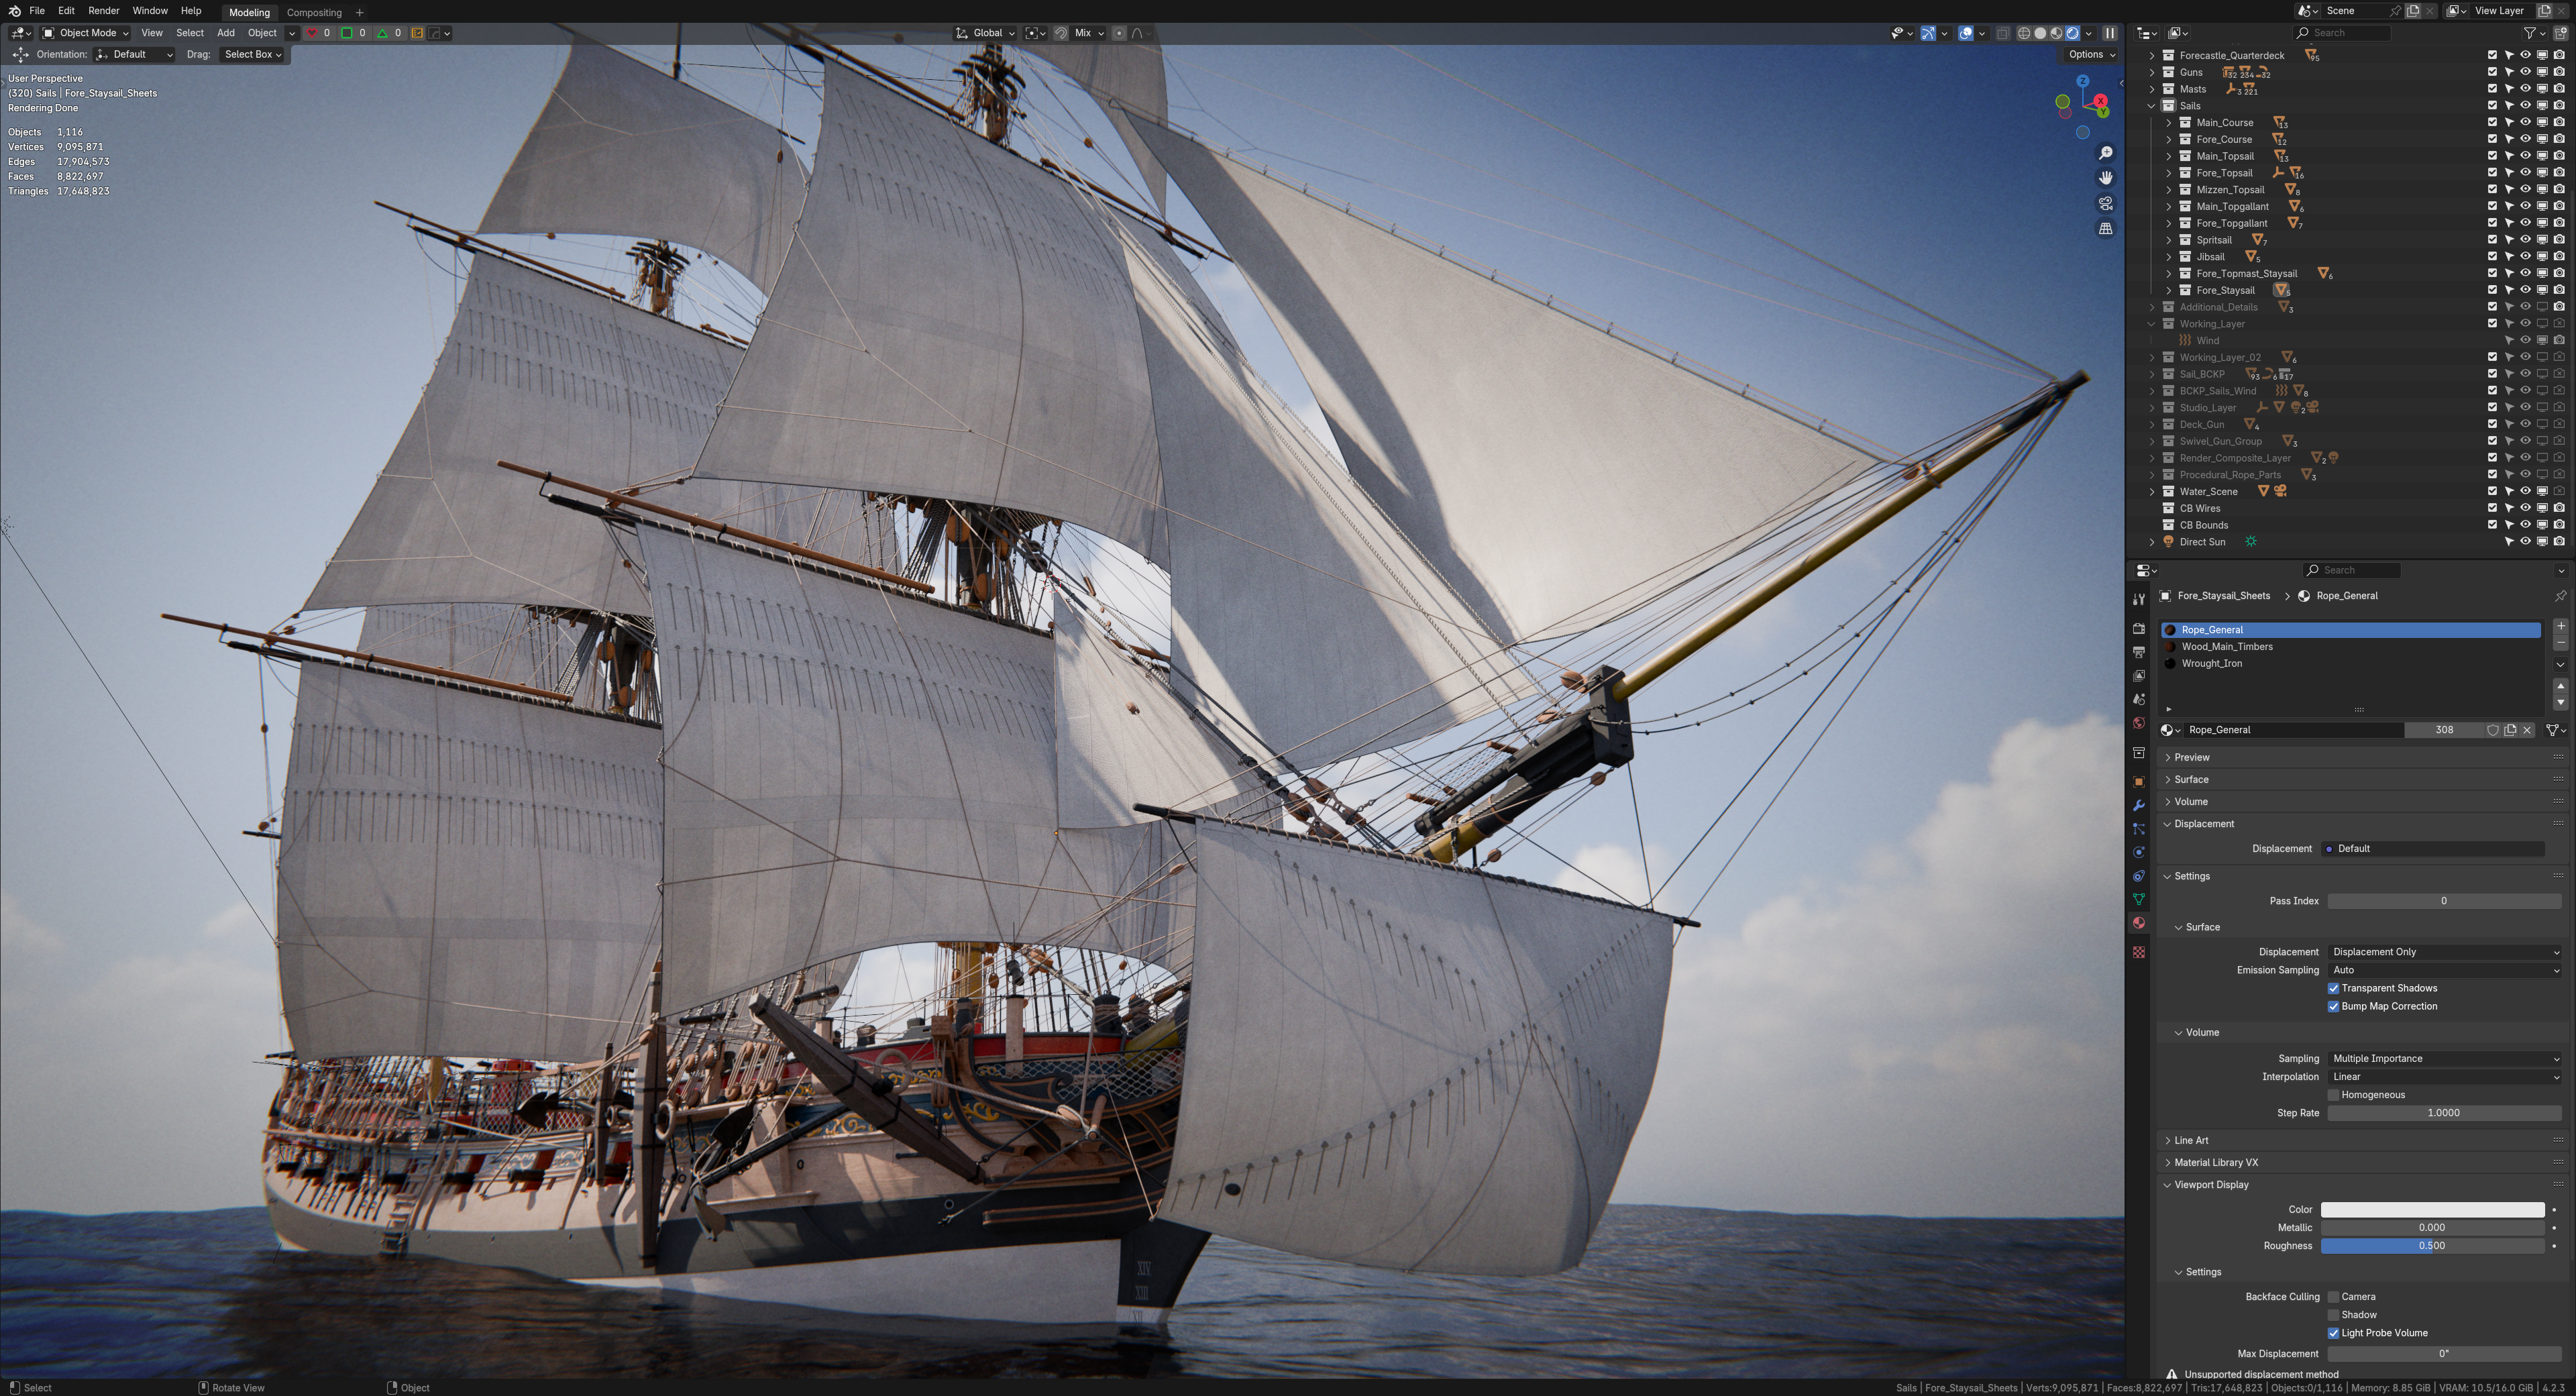
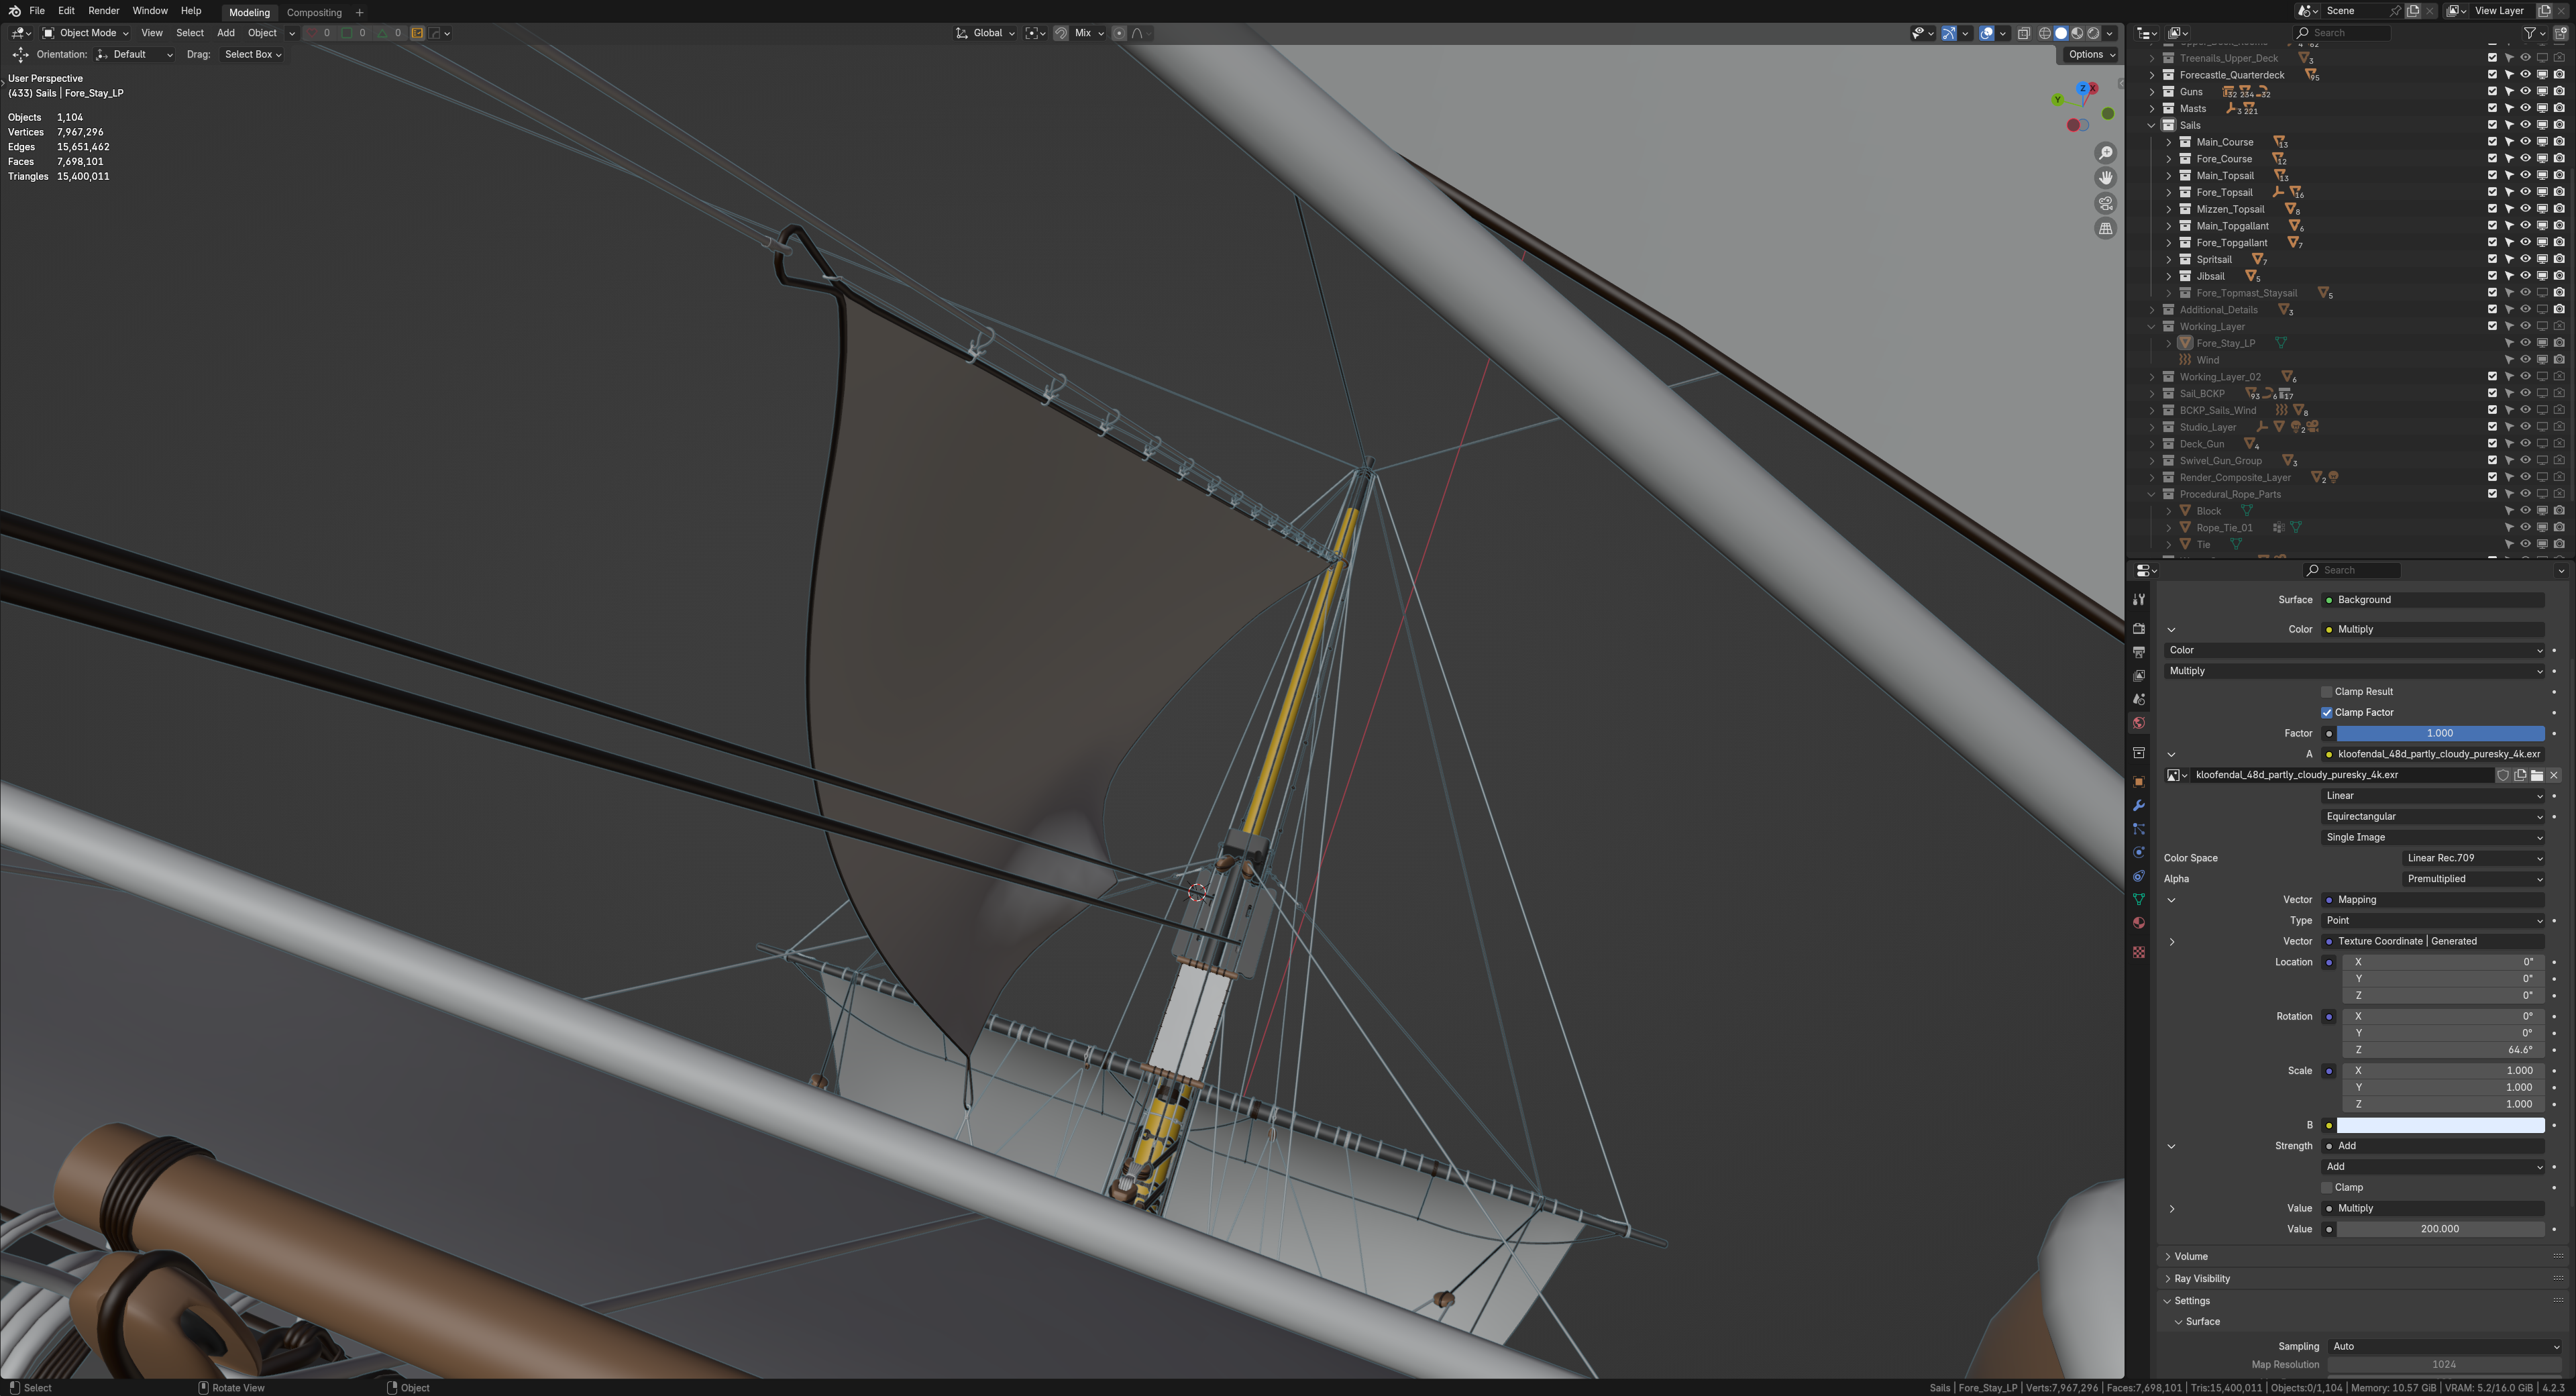
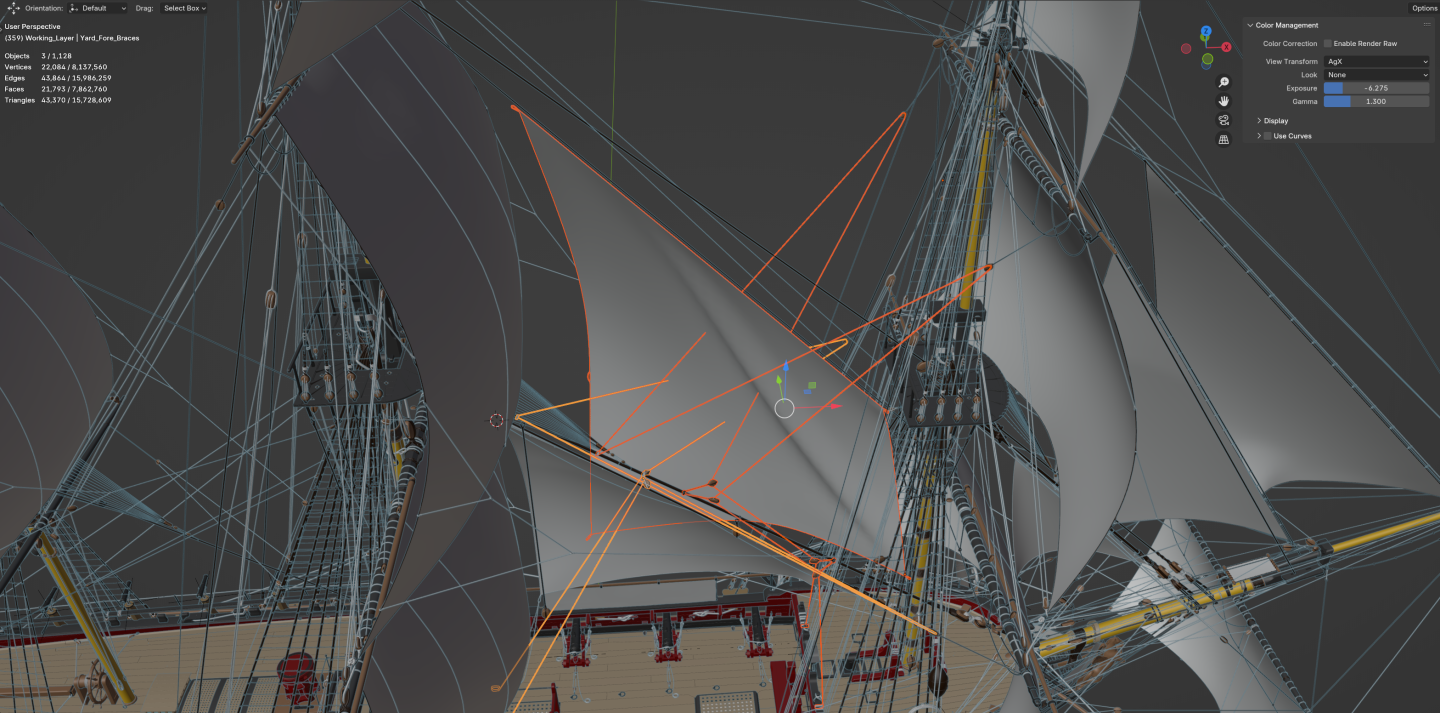
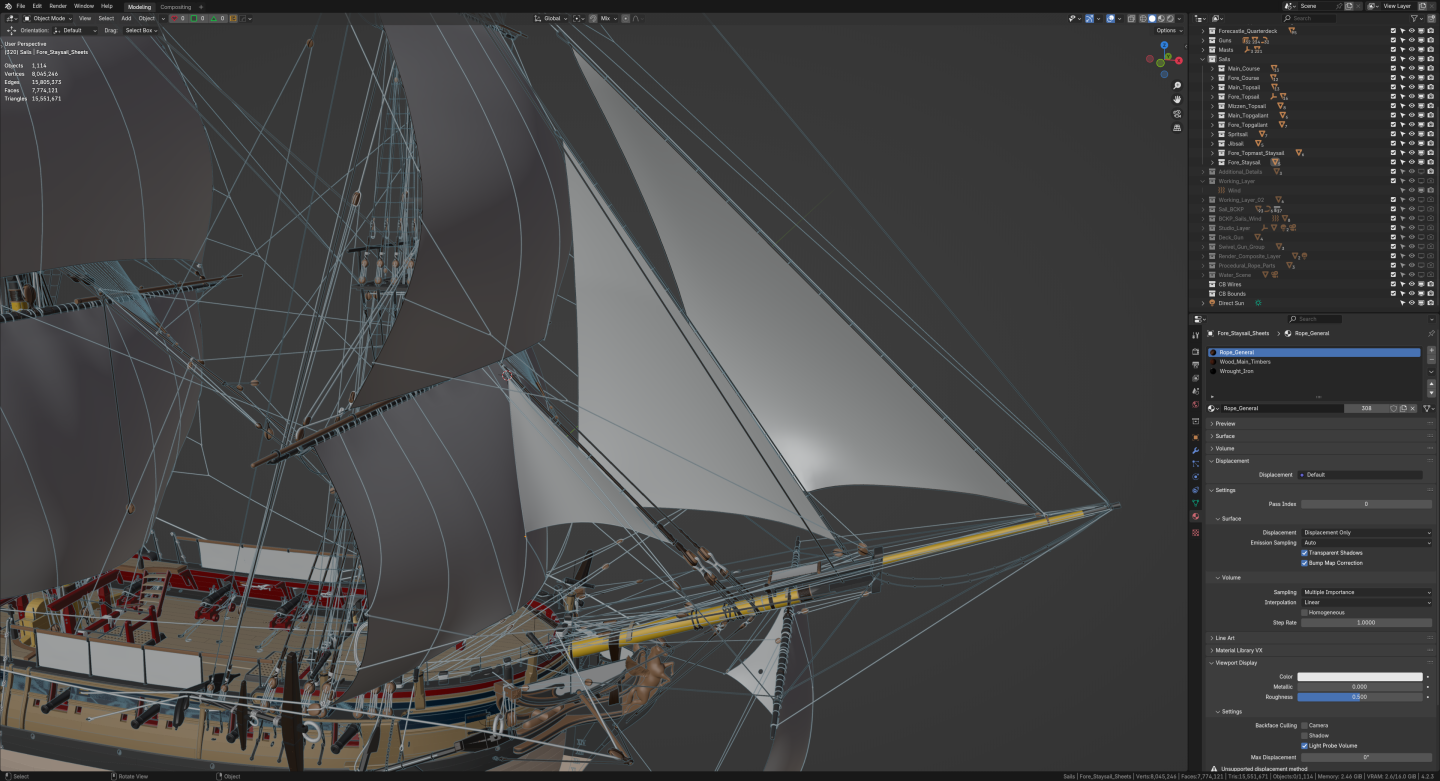
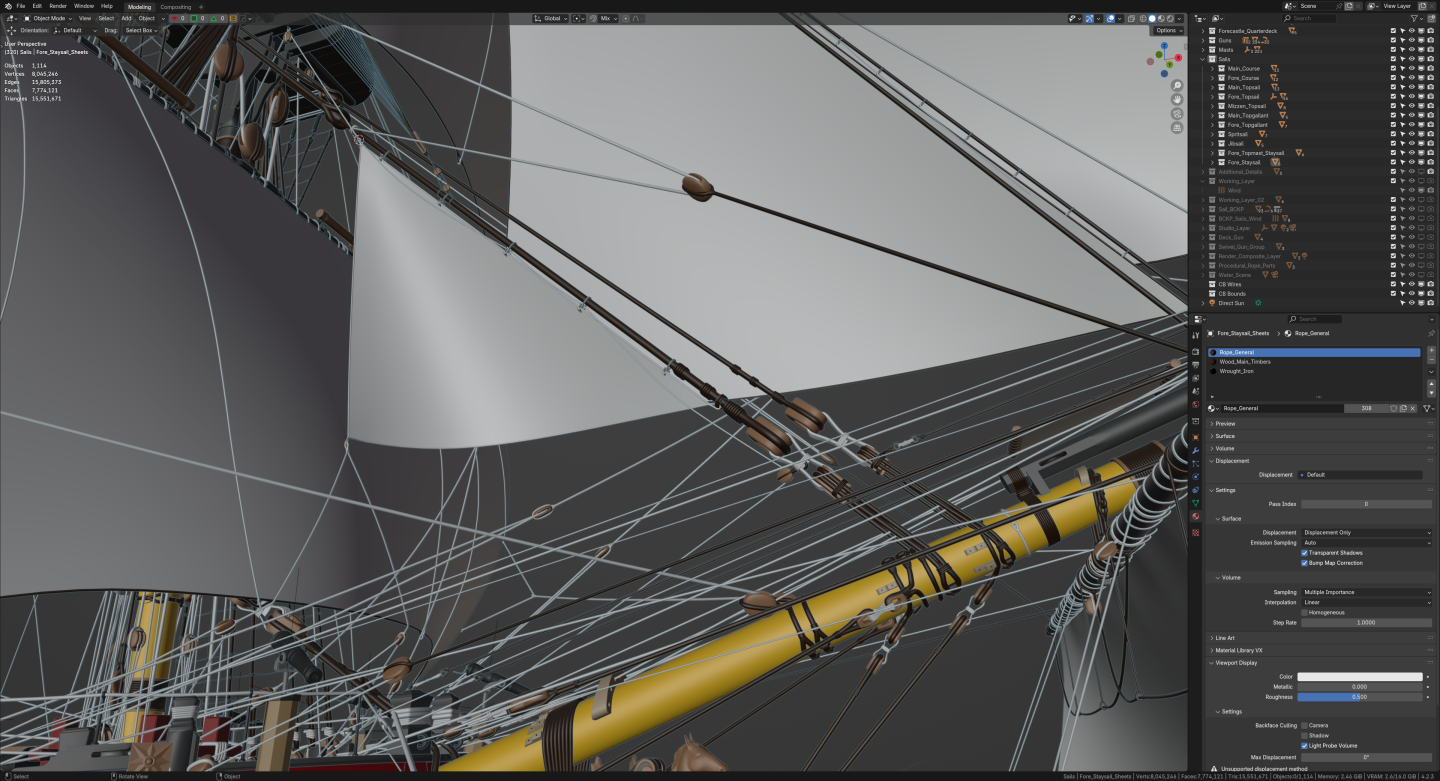
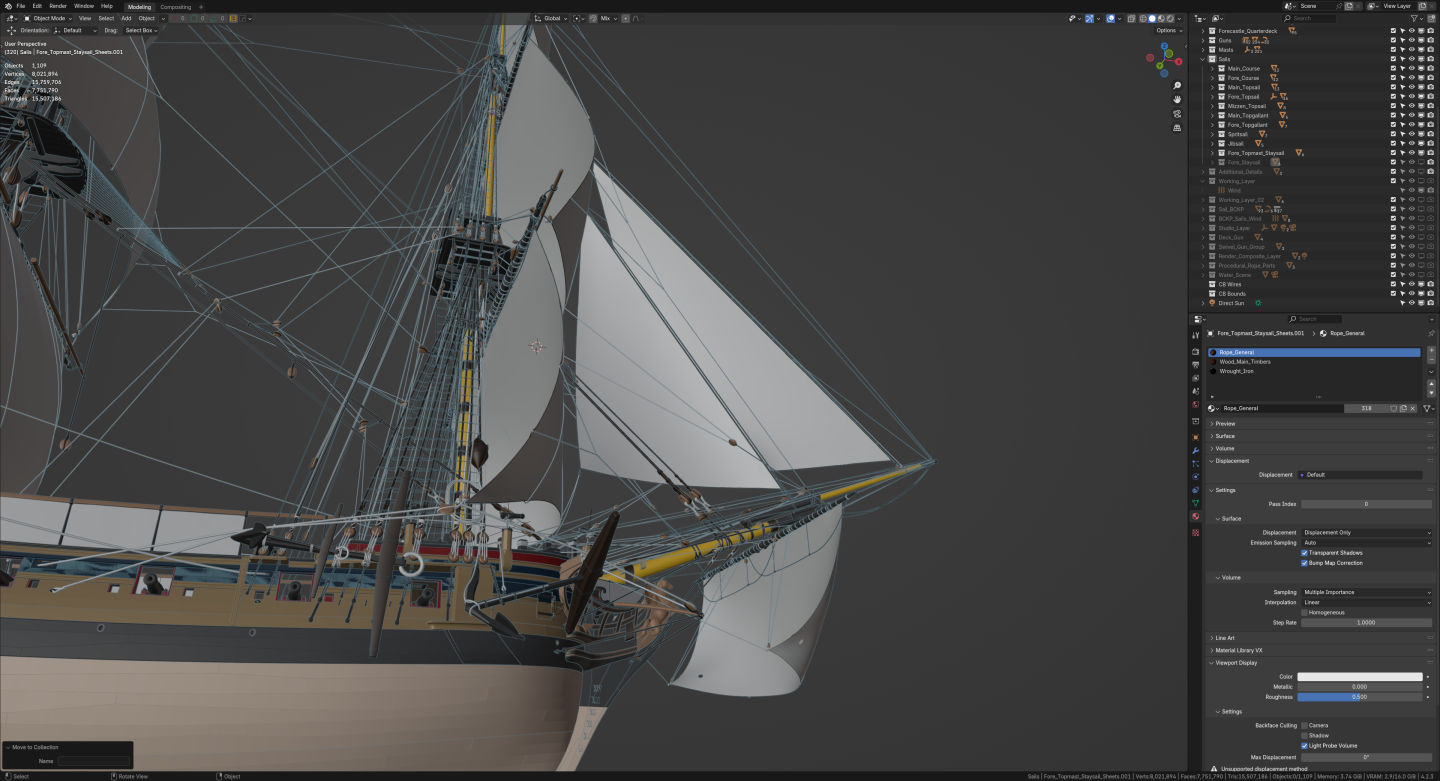
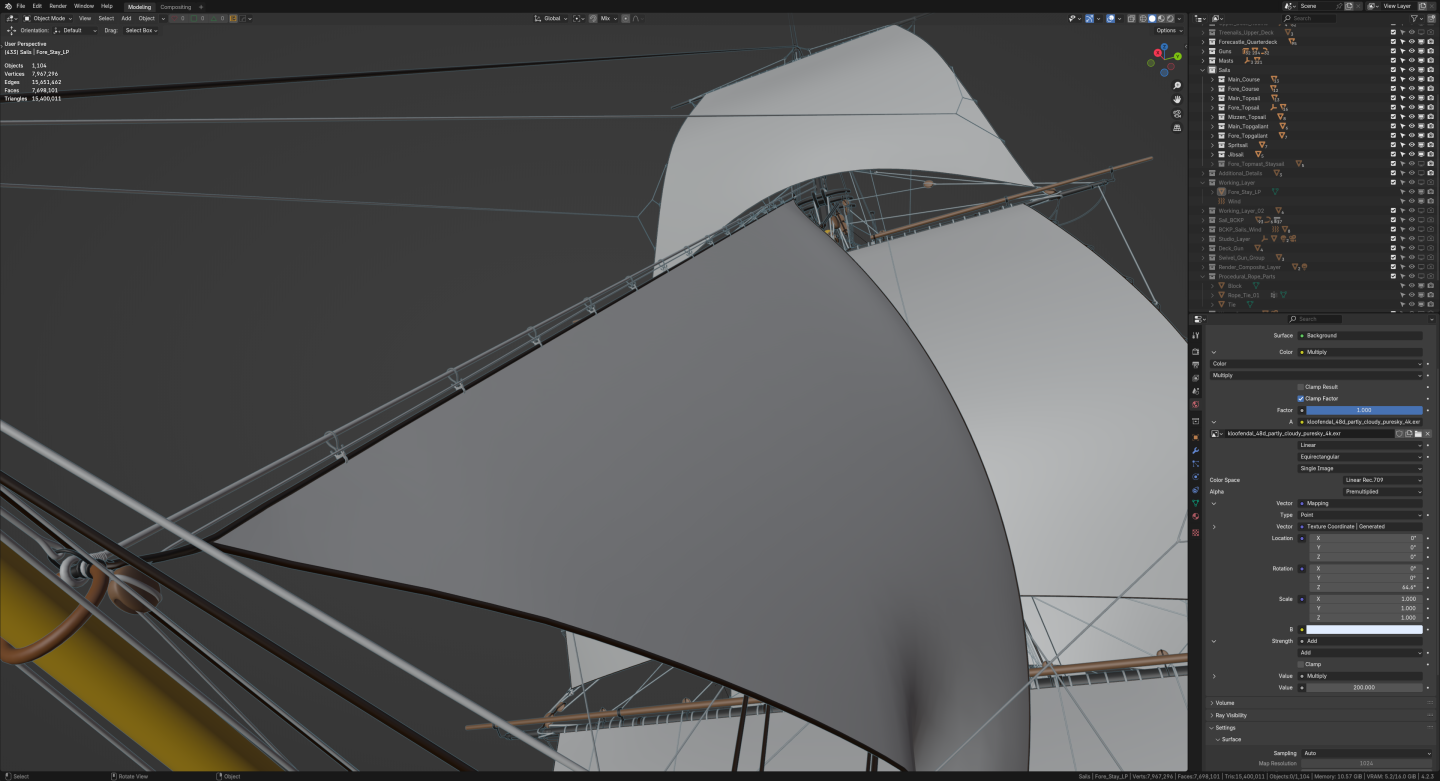
hm, it seems I've hit a snag. I've put the main topmast staysail in place but there are a lot of lines that get in the way. I can't seem to come up with a satisfying solution to the problem. where could I actually squeeze said sail where it wouldn't interfere with other lines? please, help.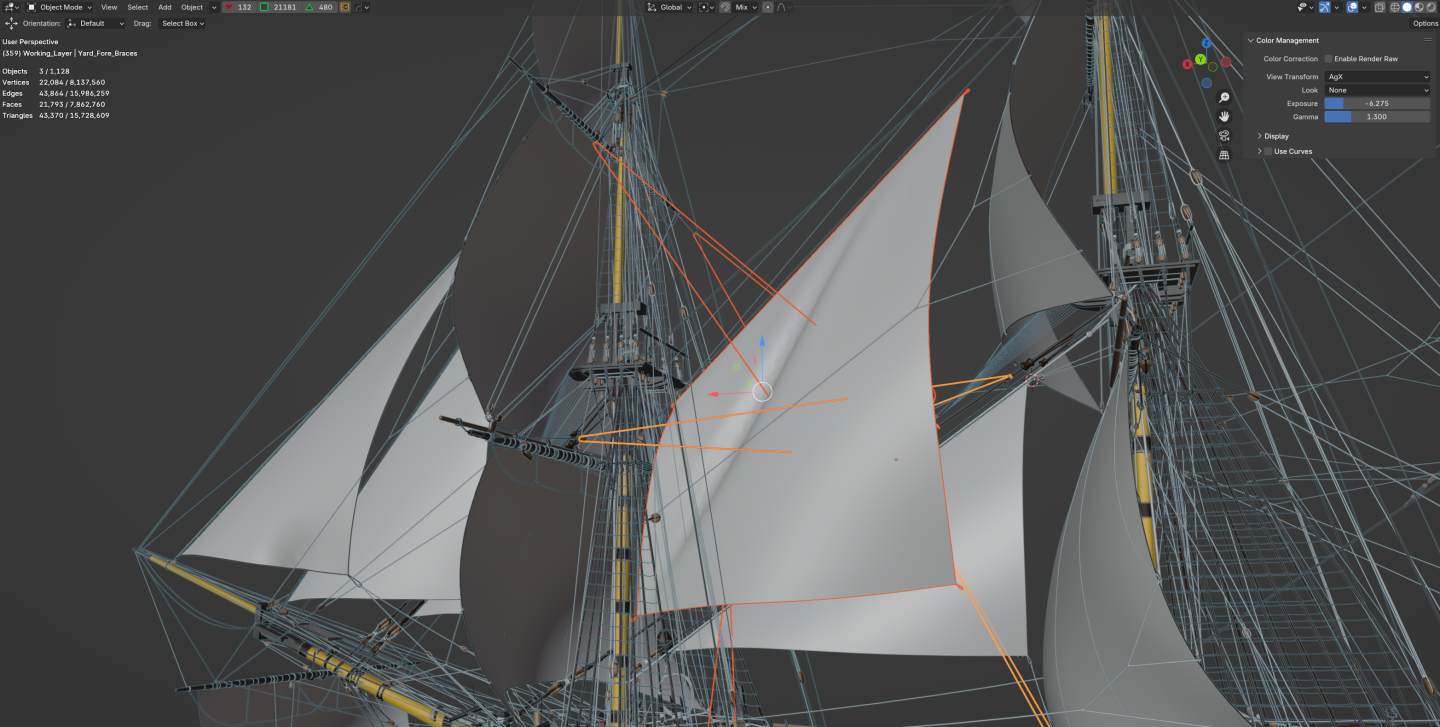


-
Swan class 3D model in progress
herask replied to dvm27's topic in CAD and 3D Modelling/Drafting Plans with Software
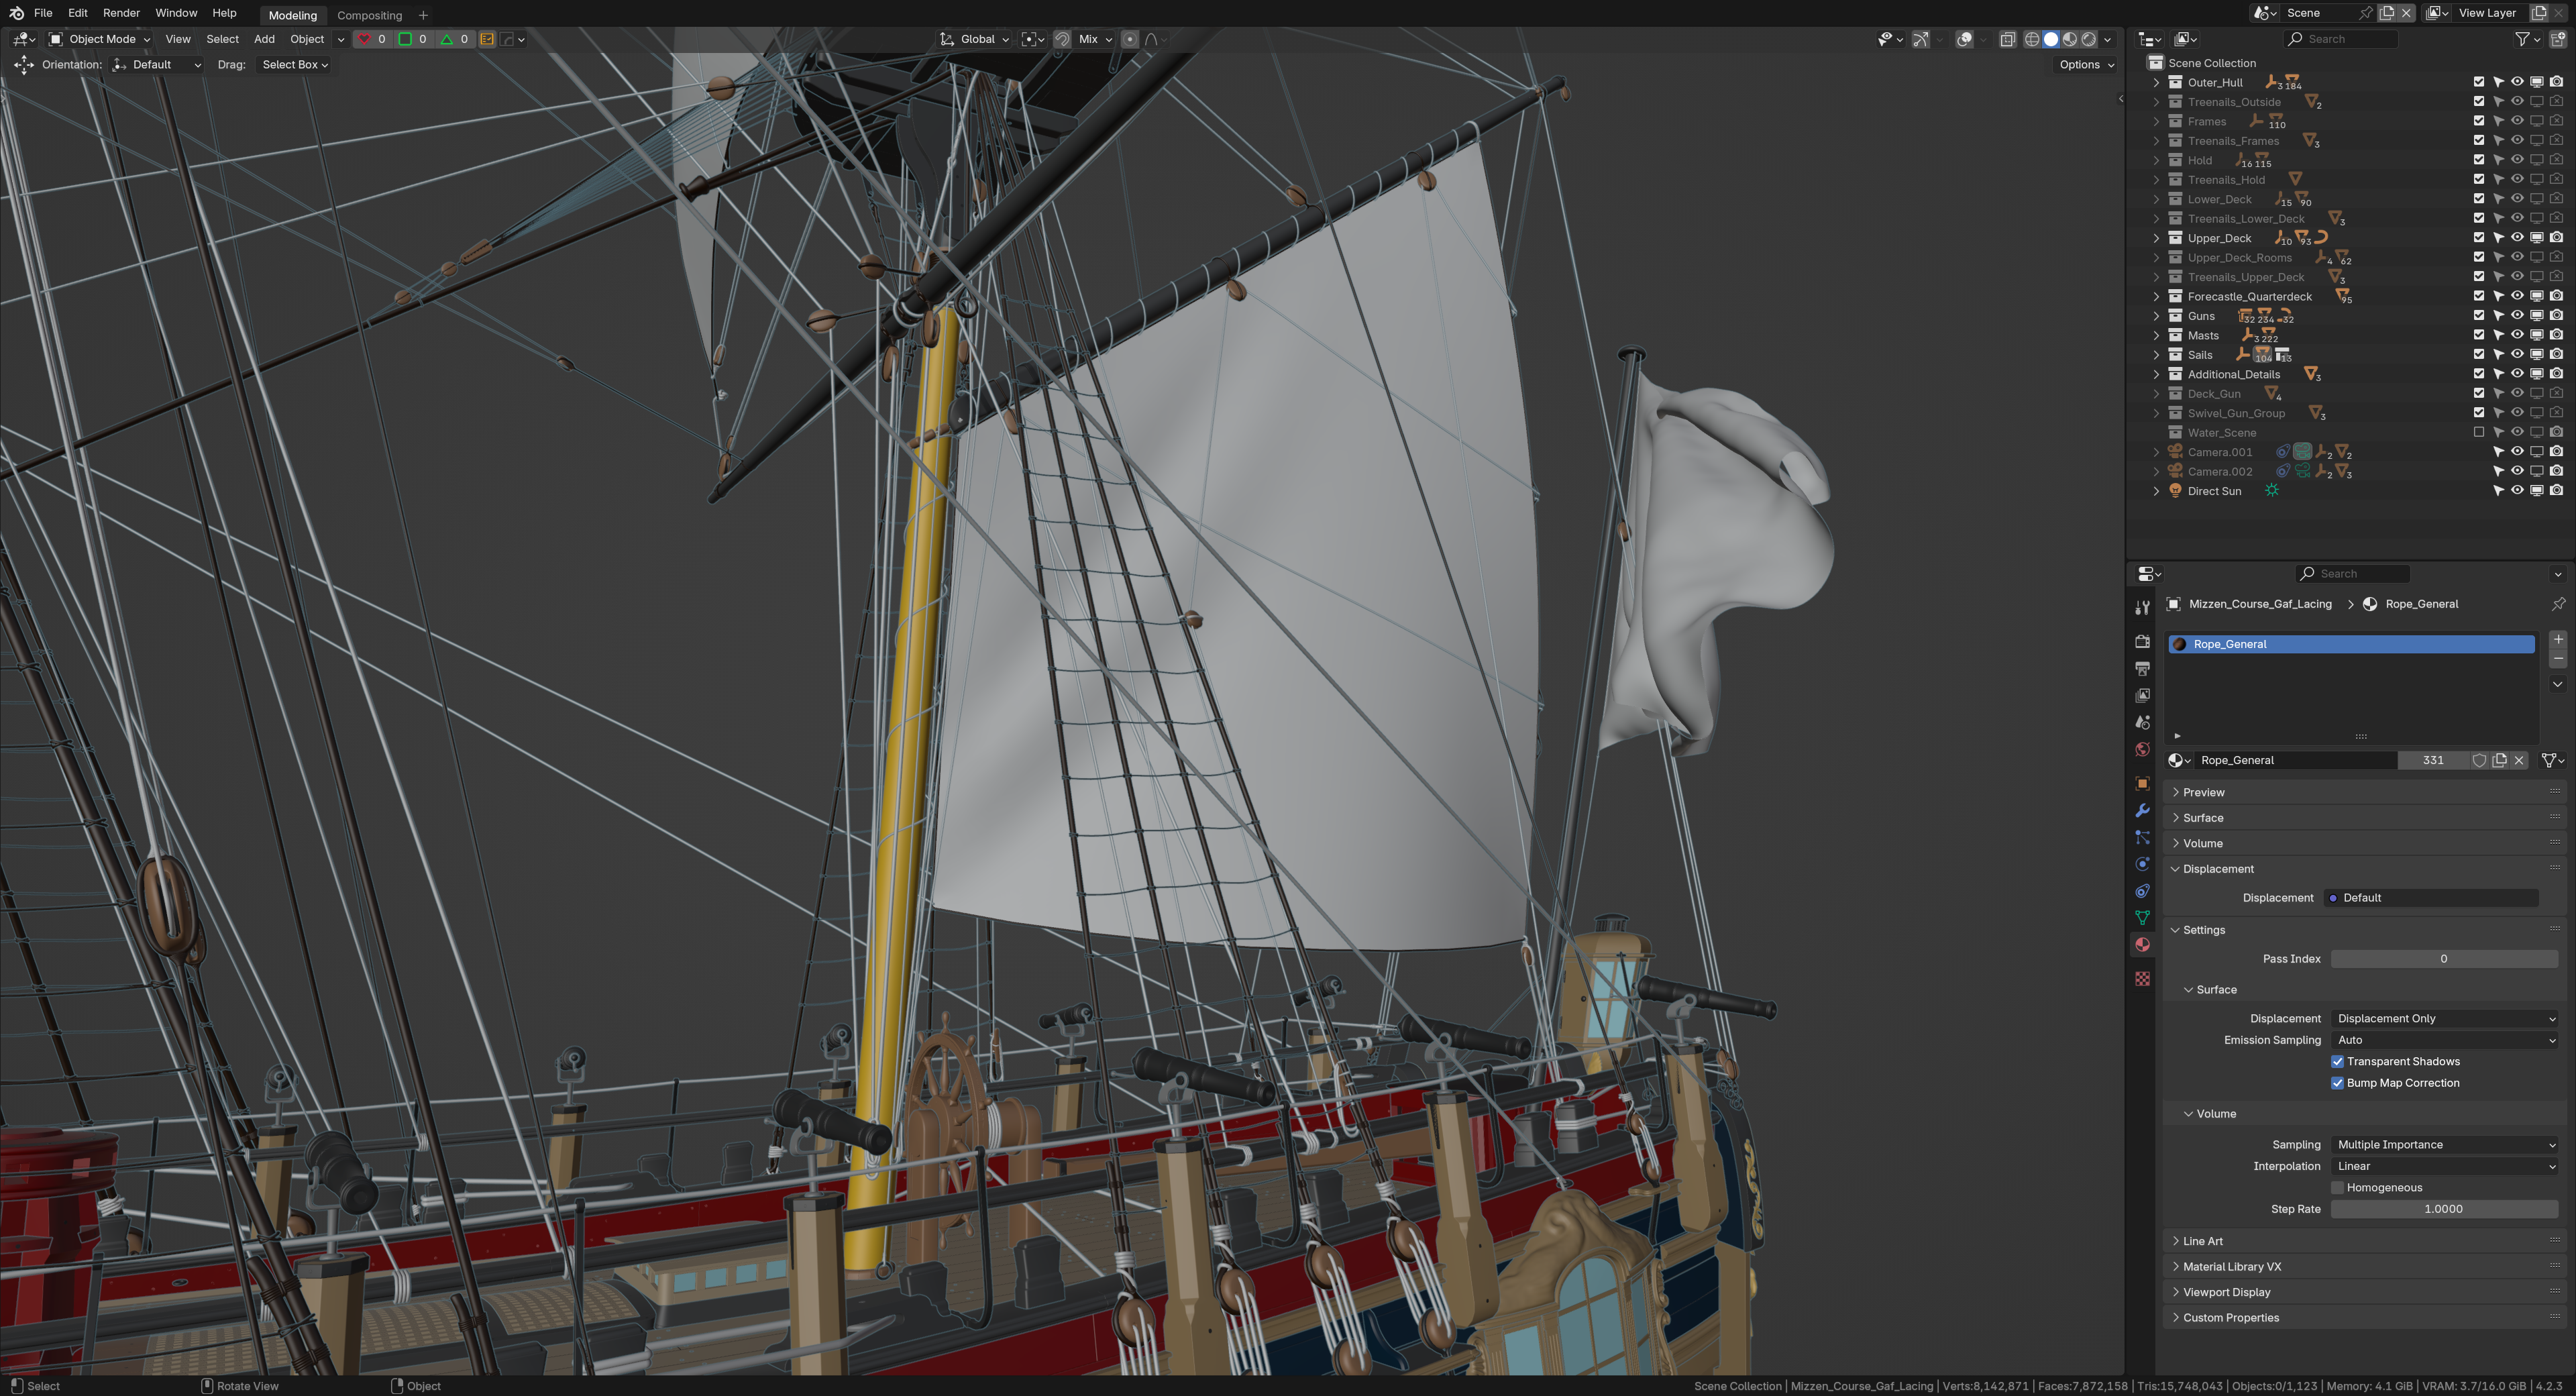
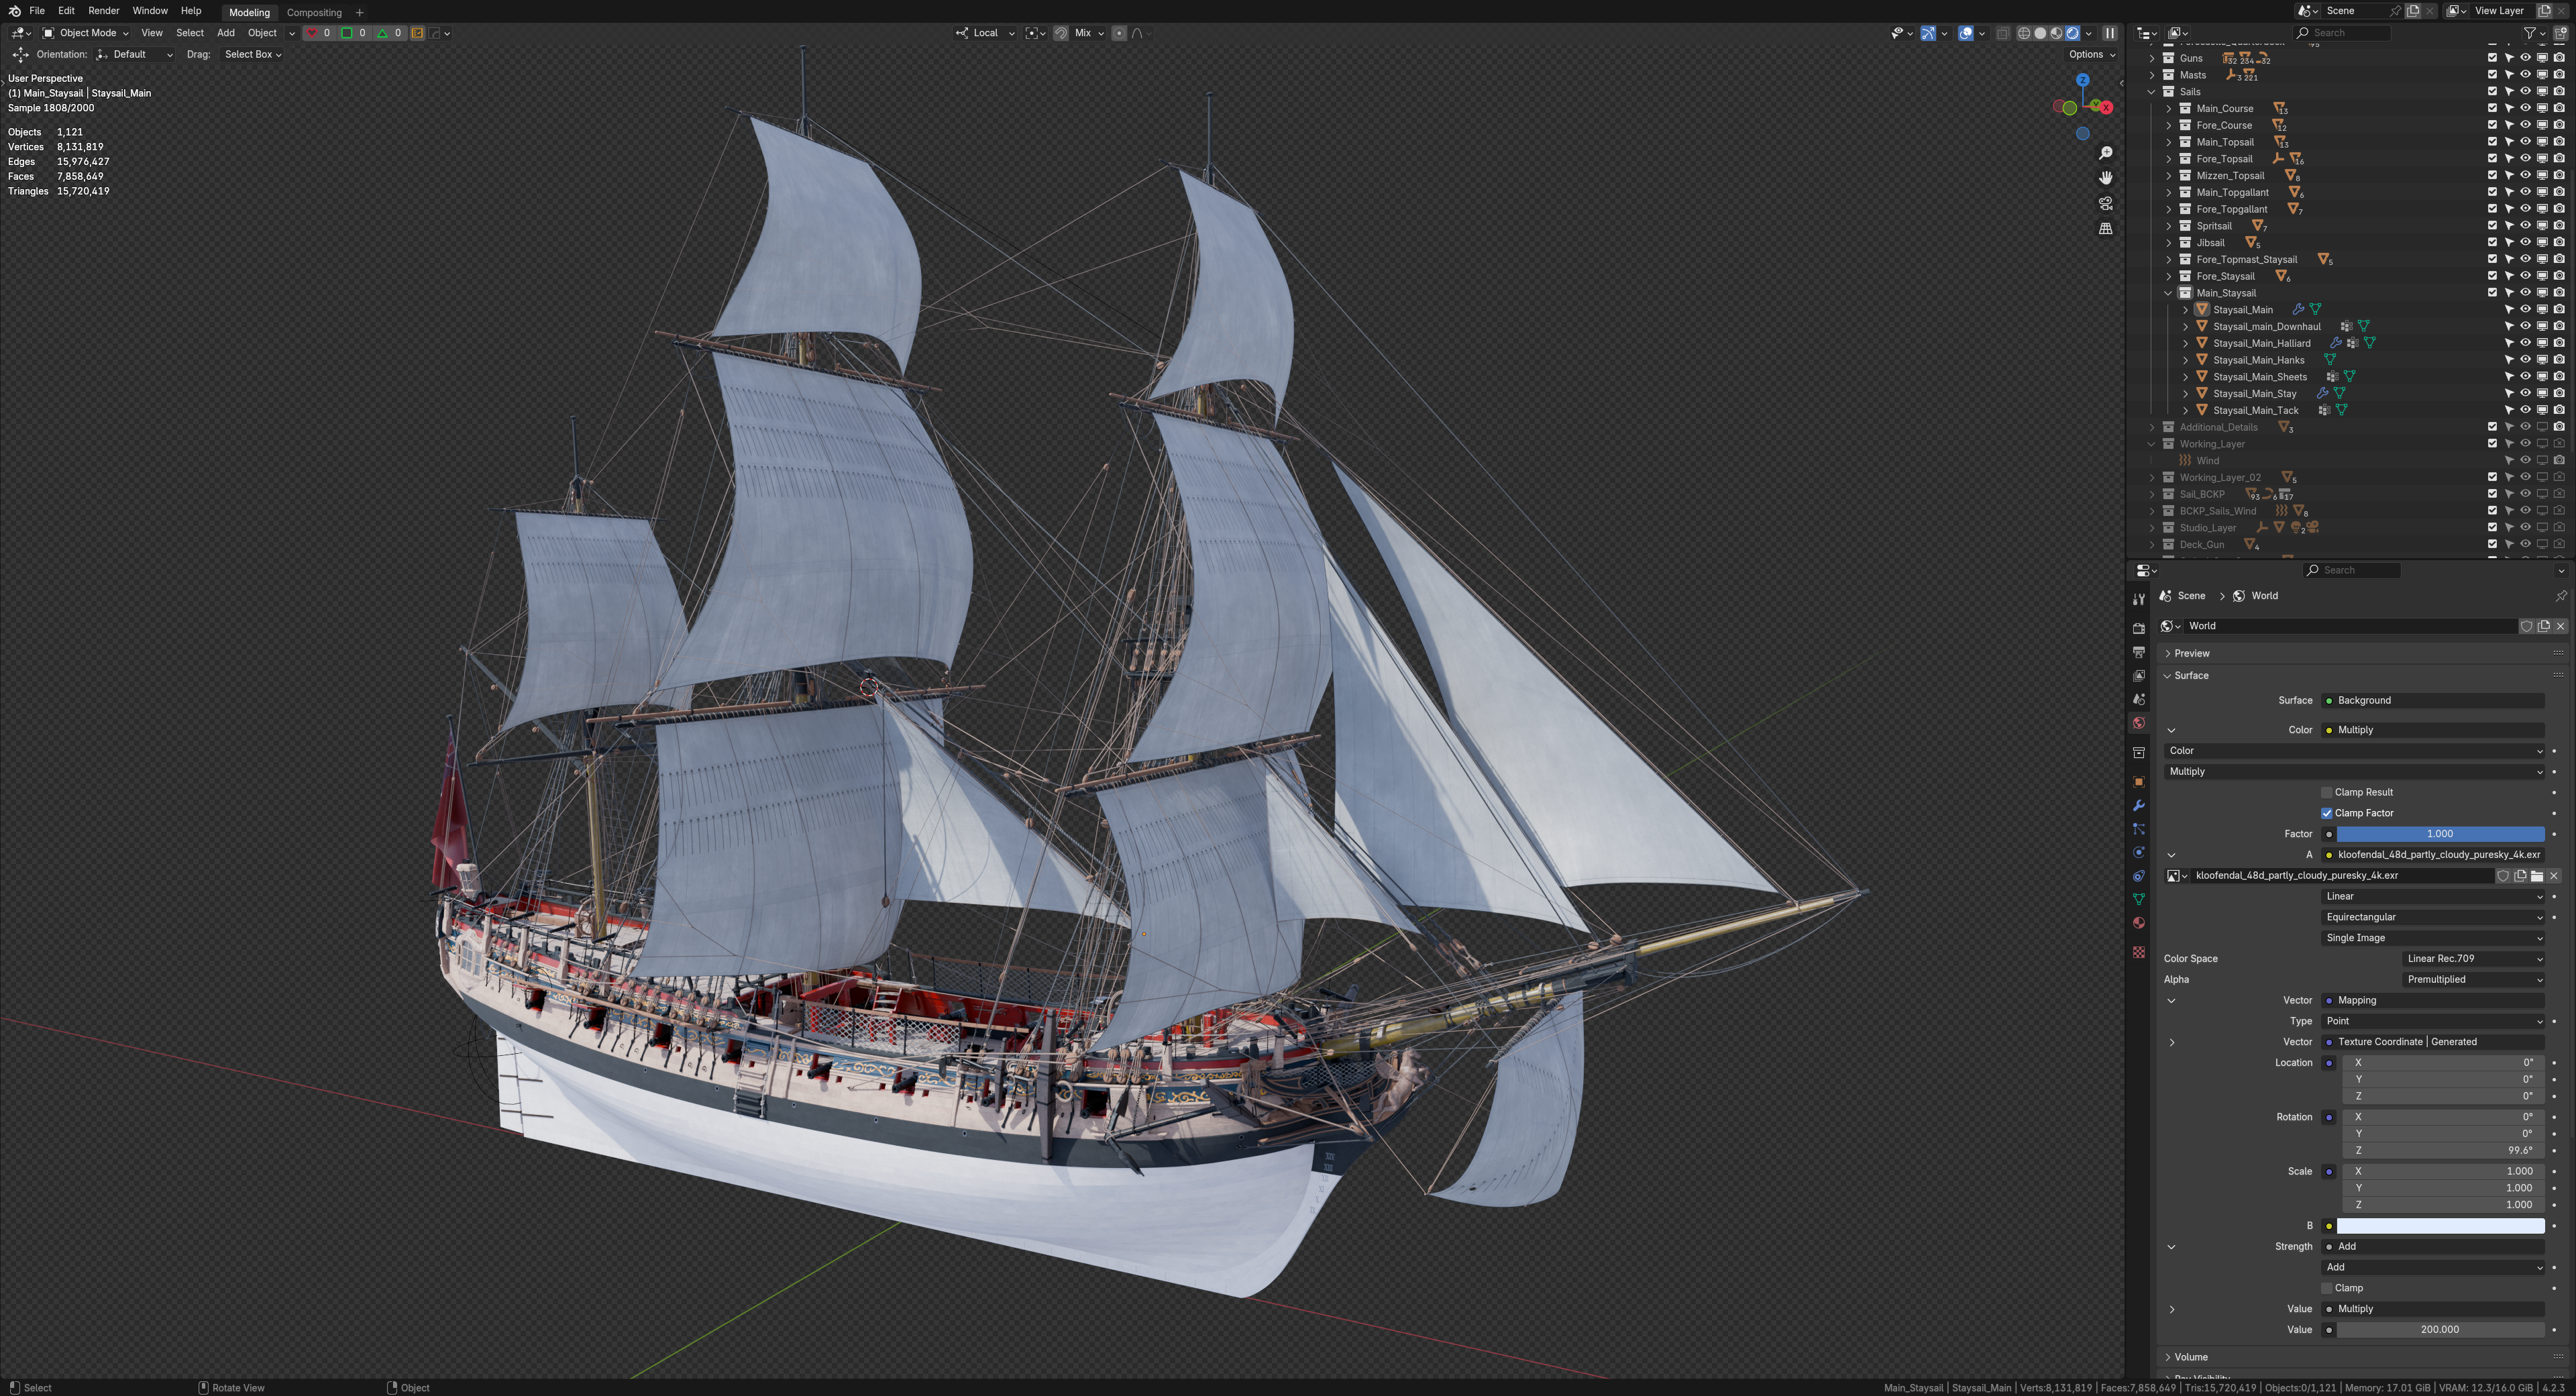
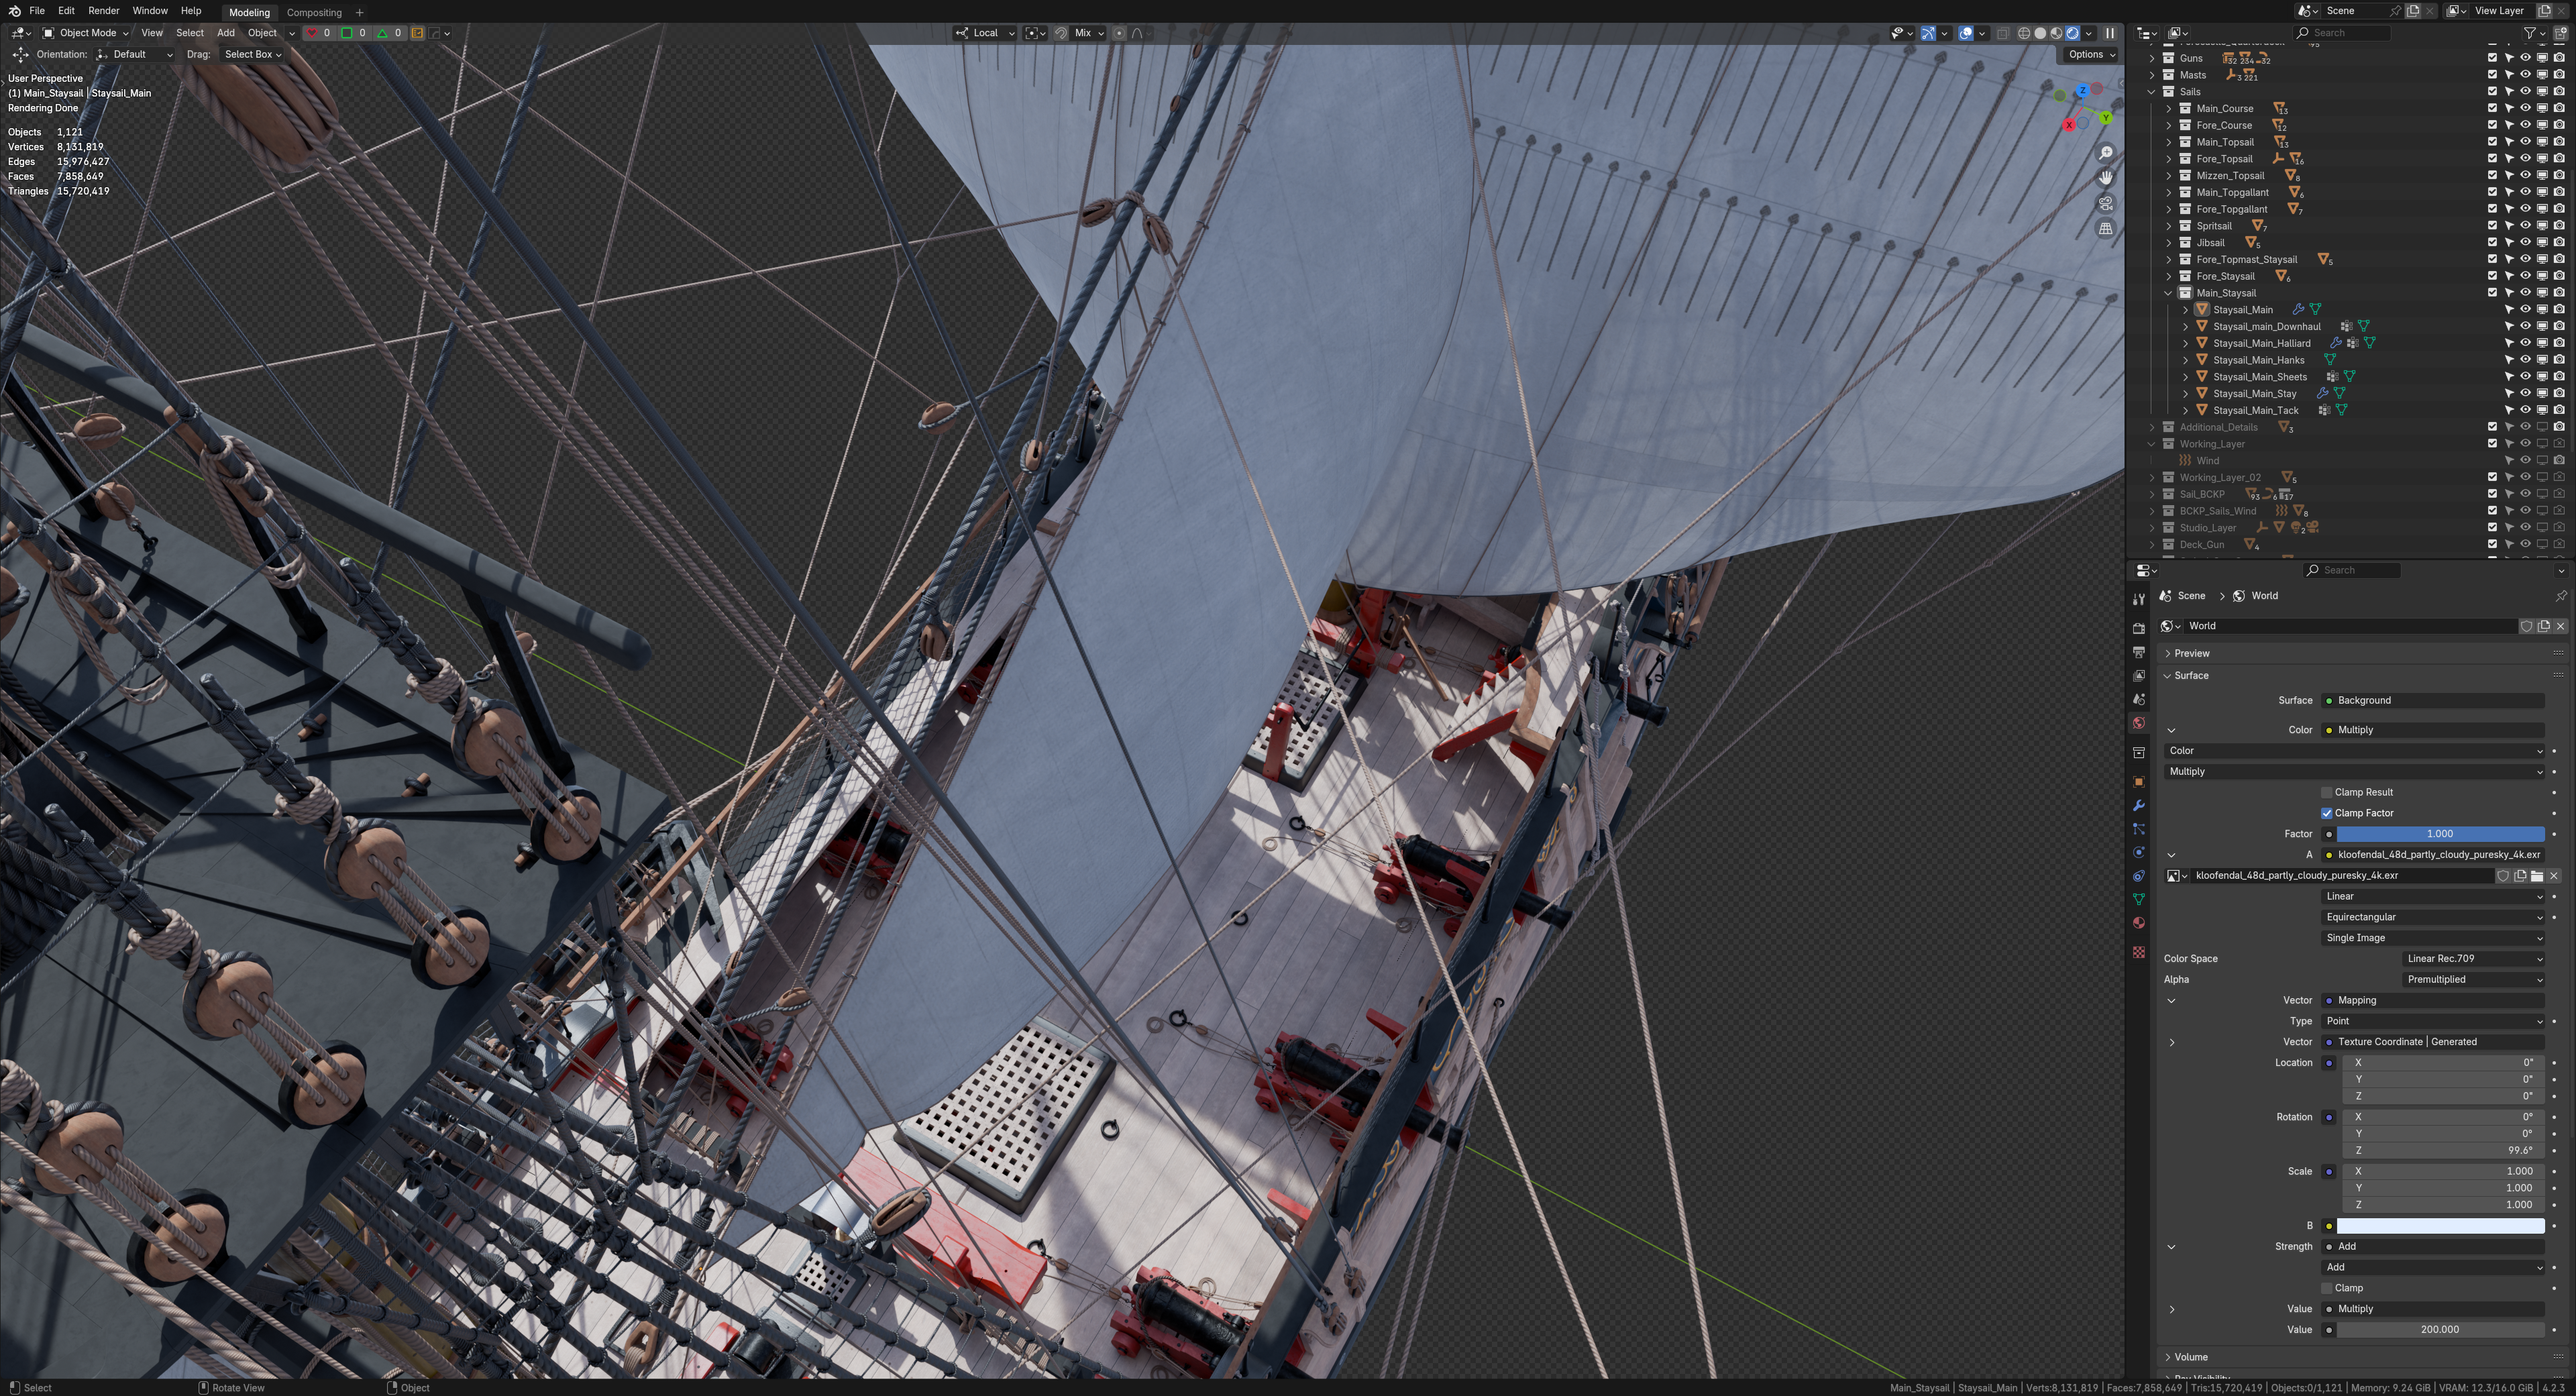
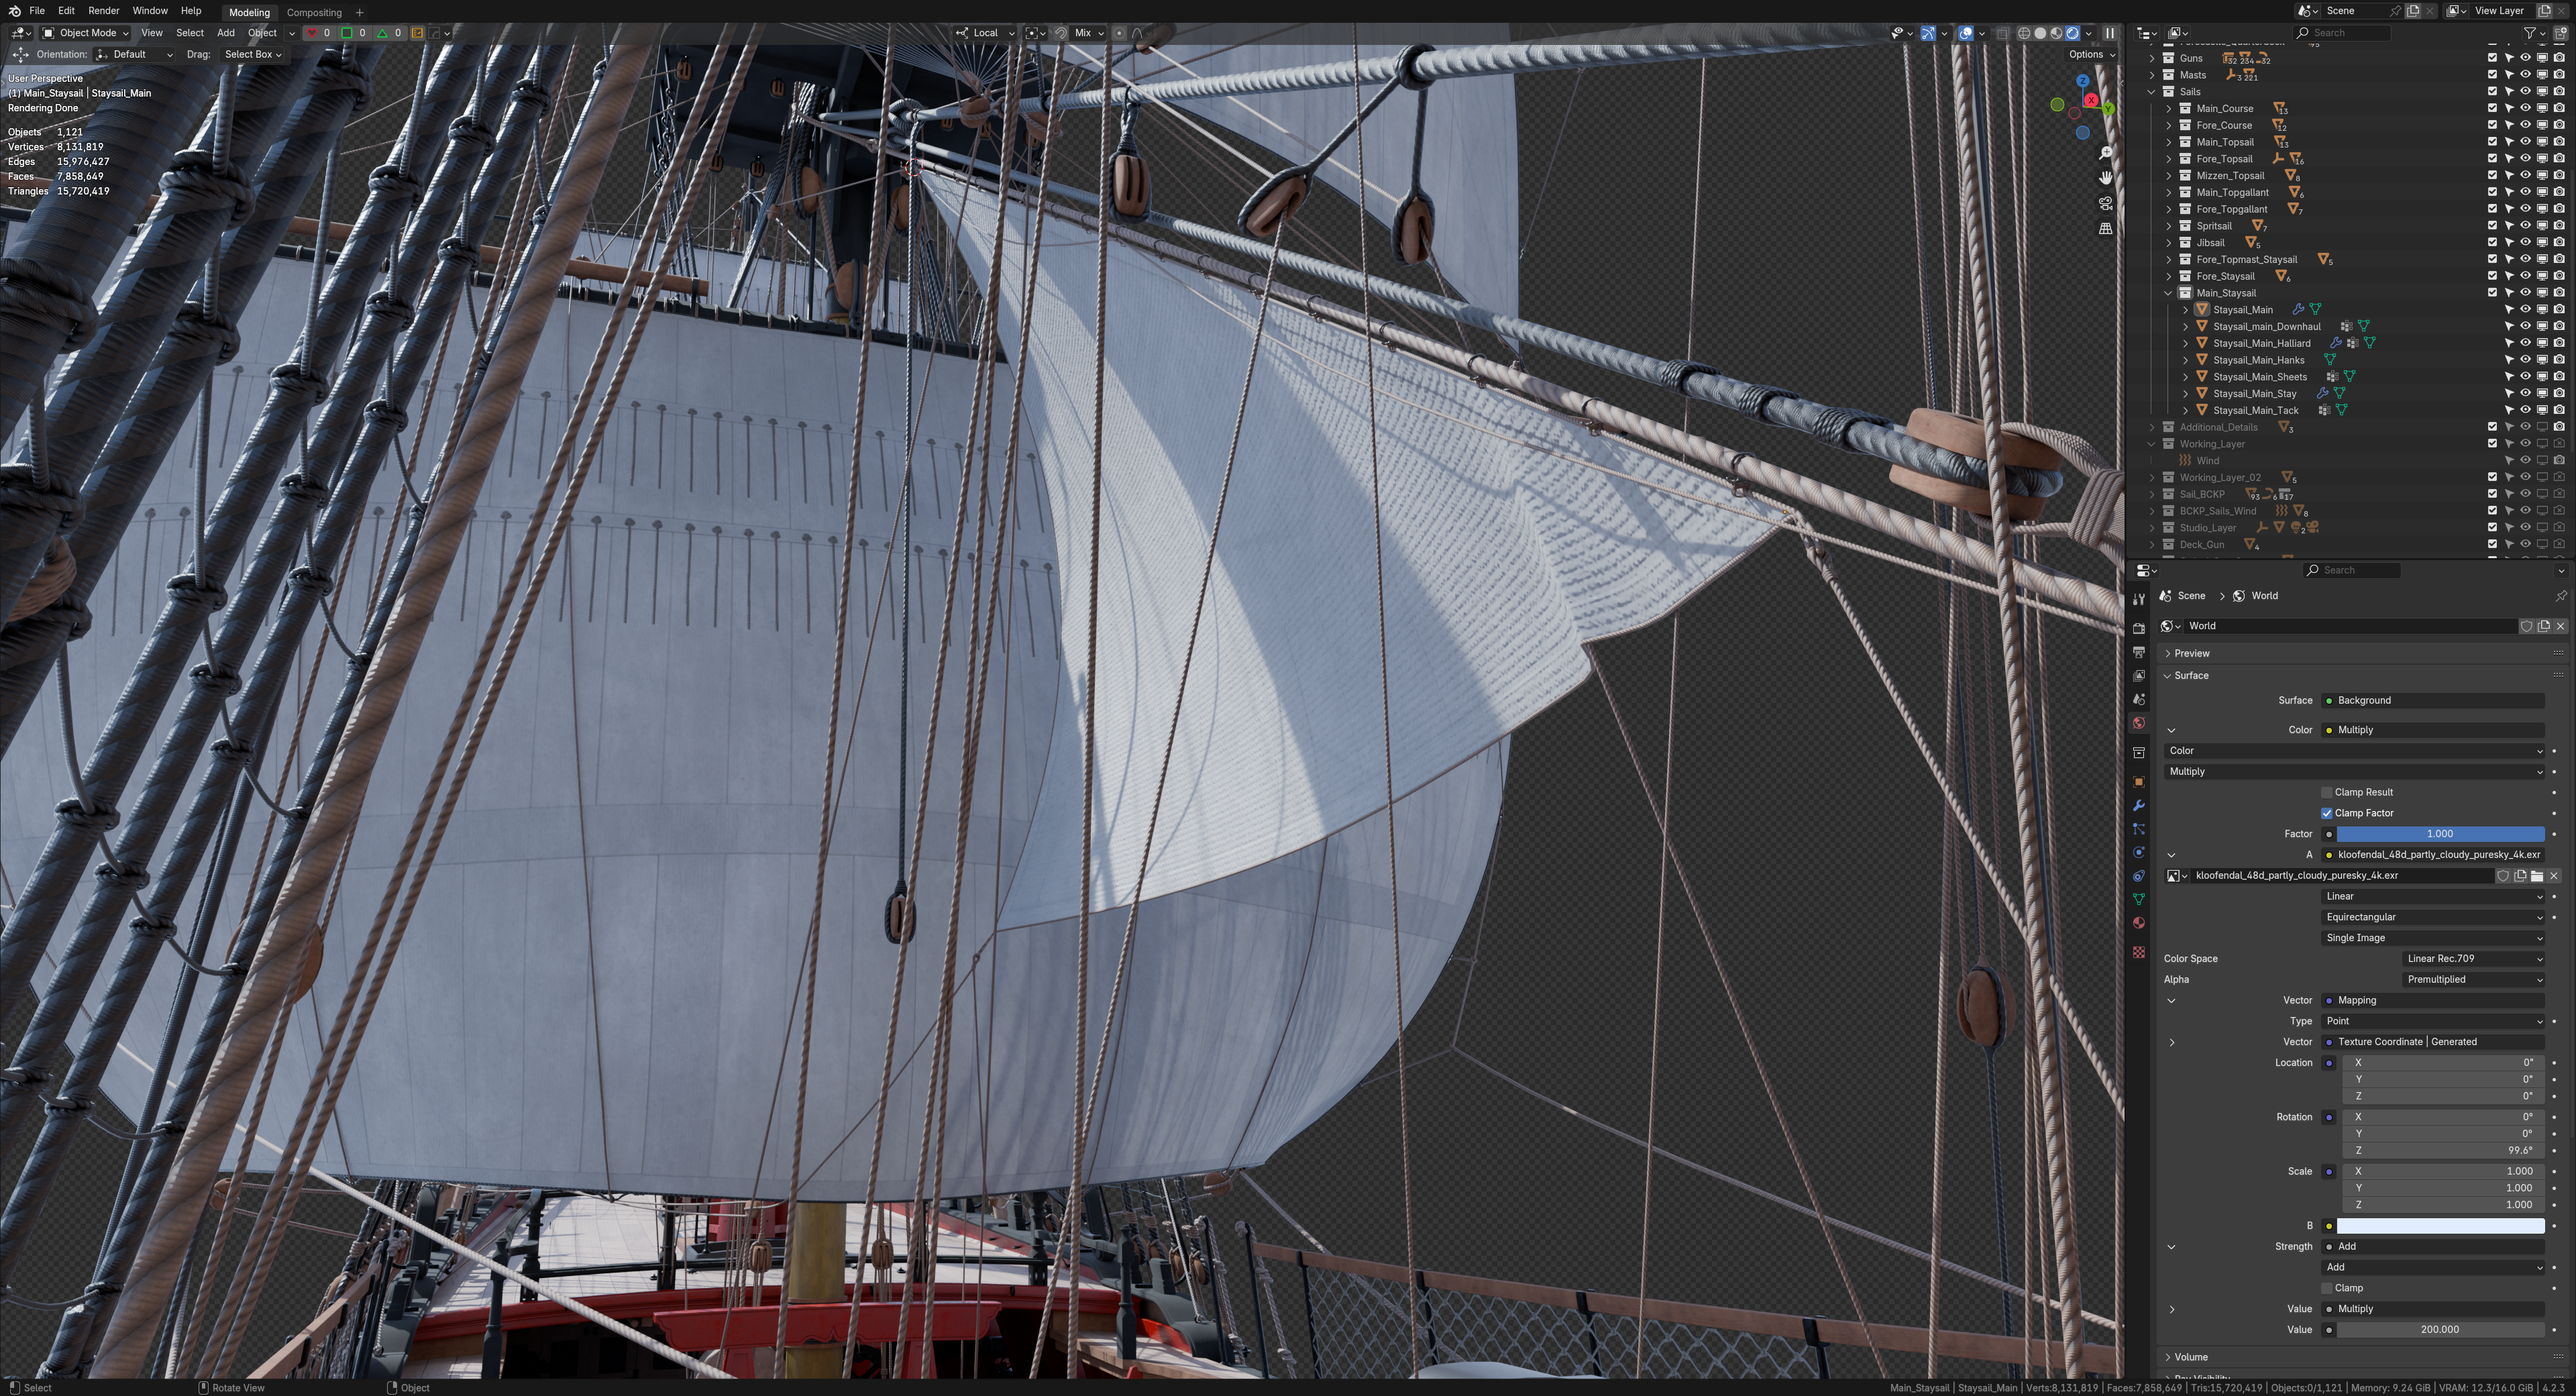
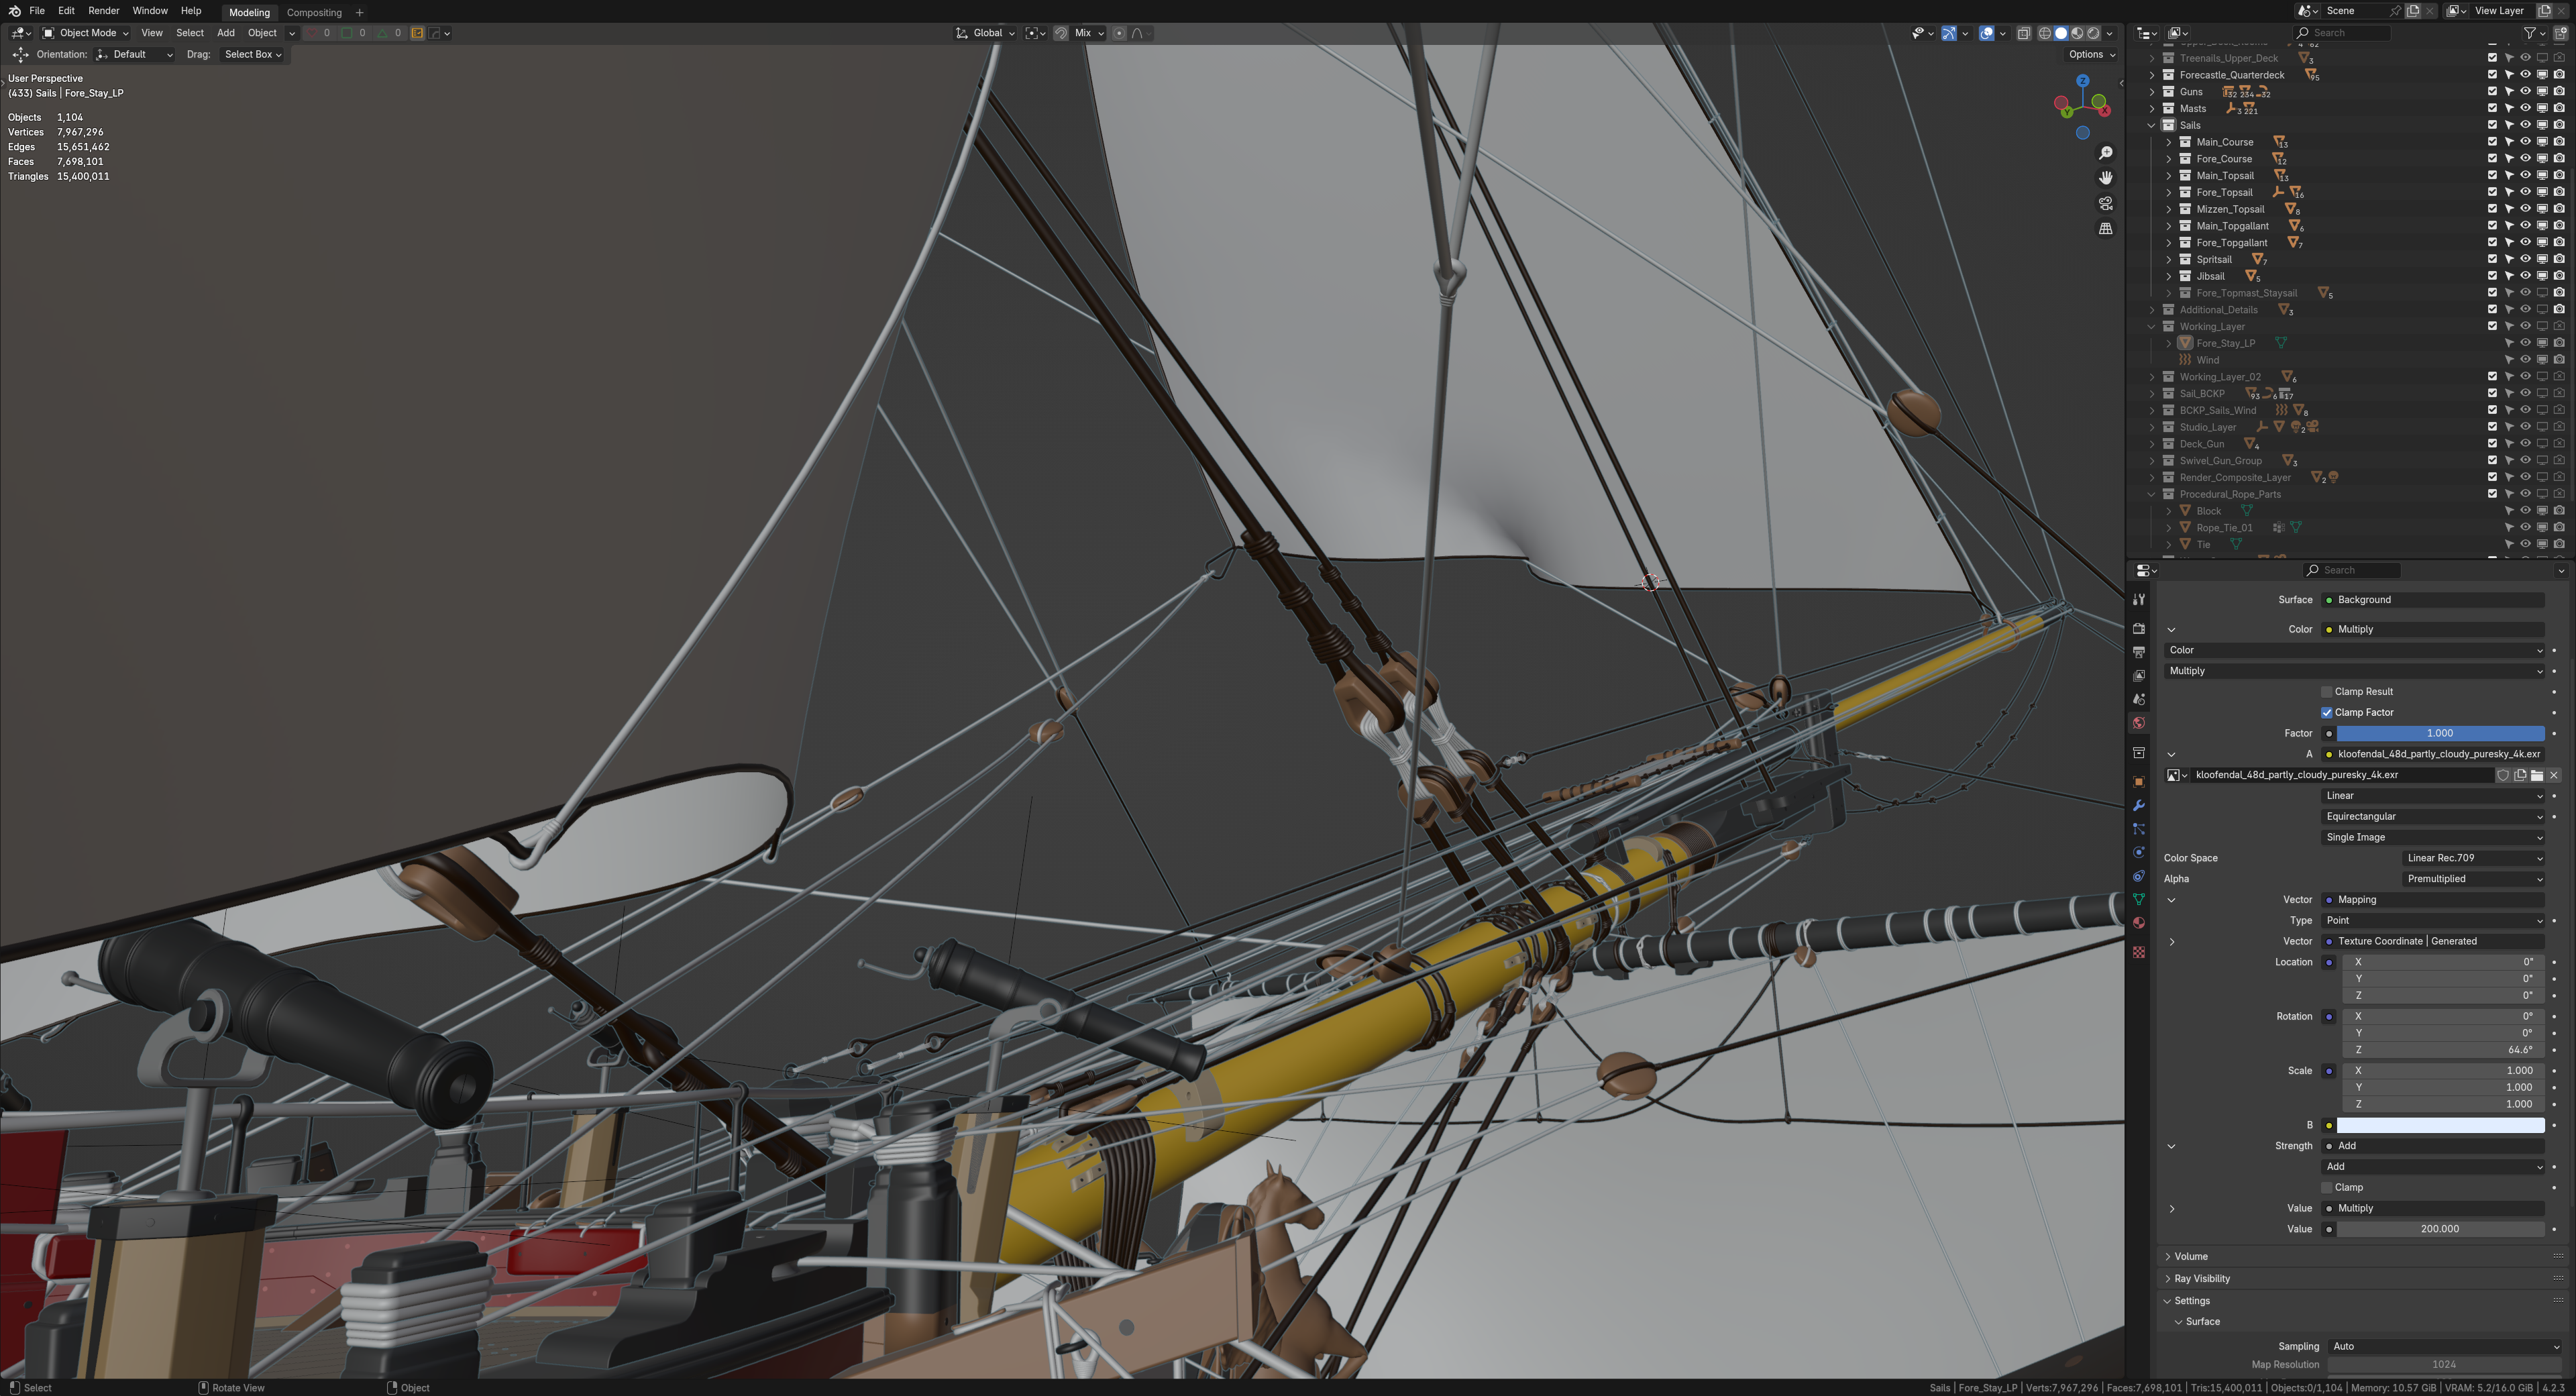
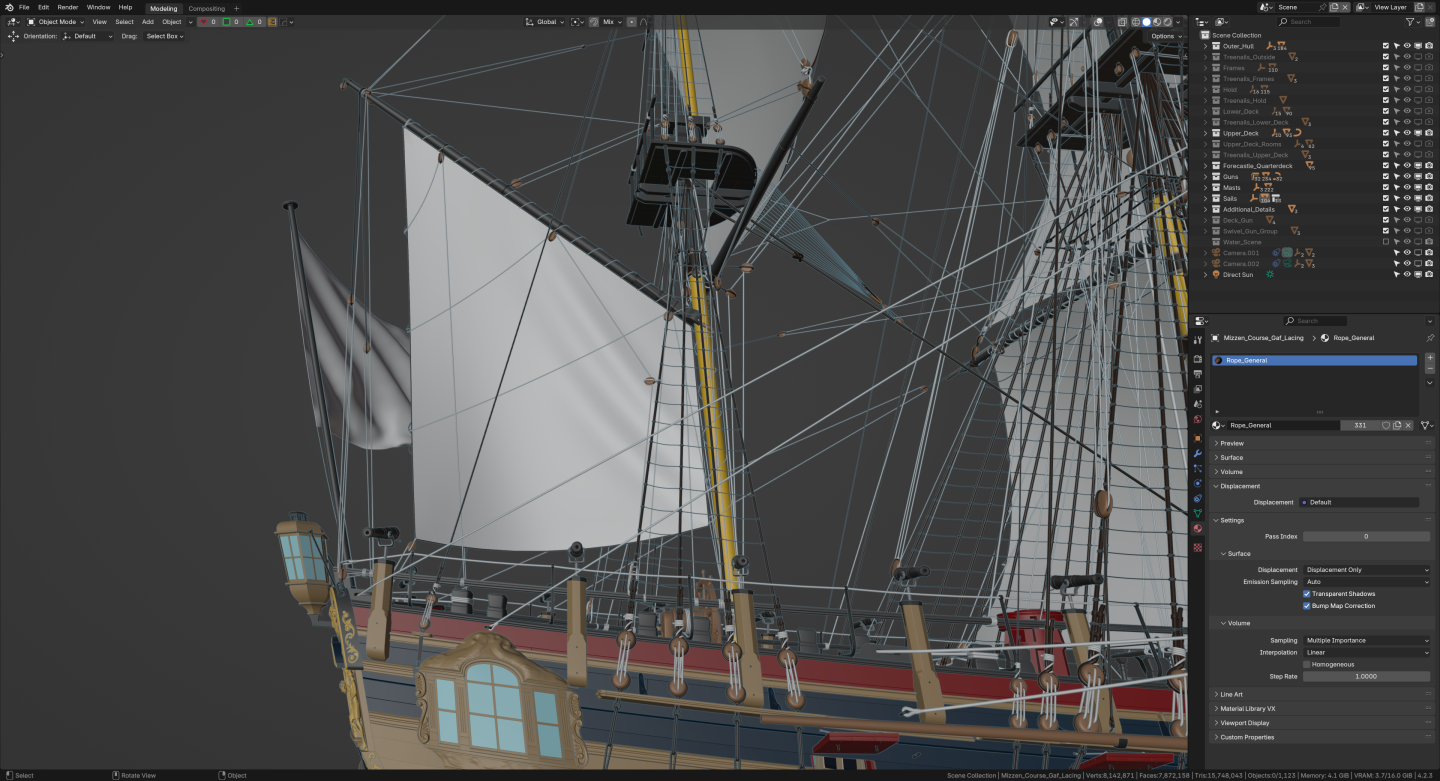
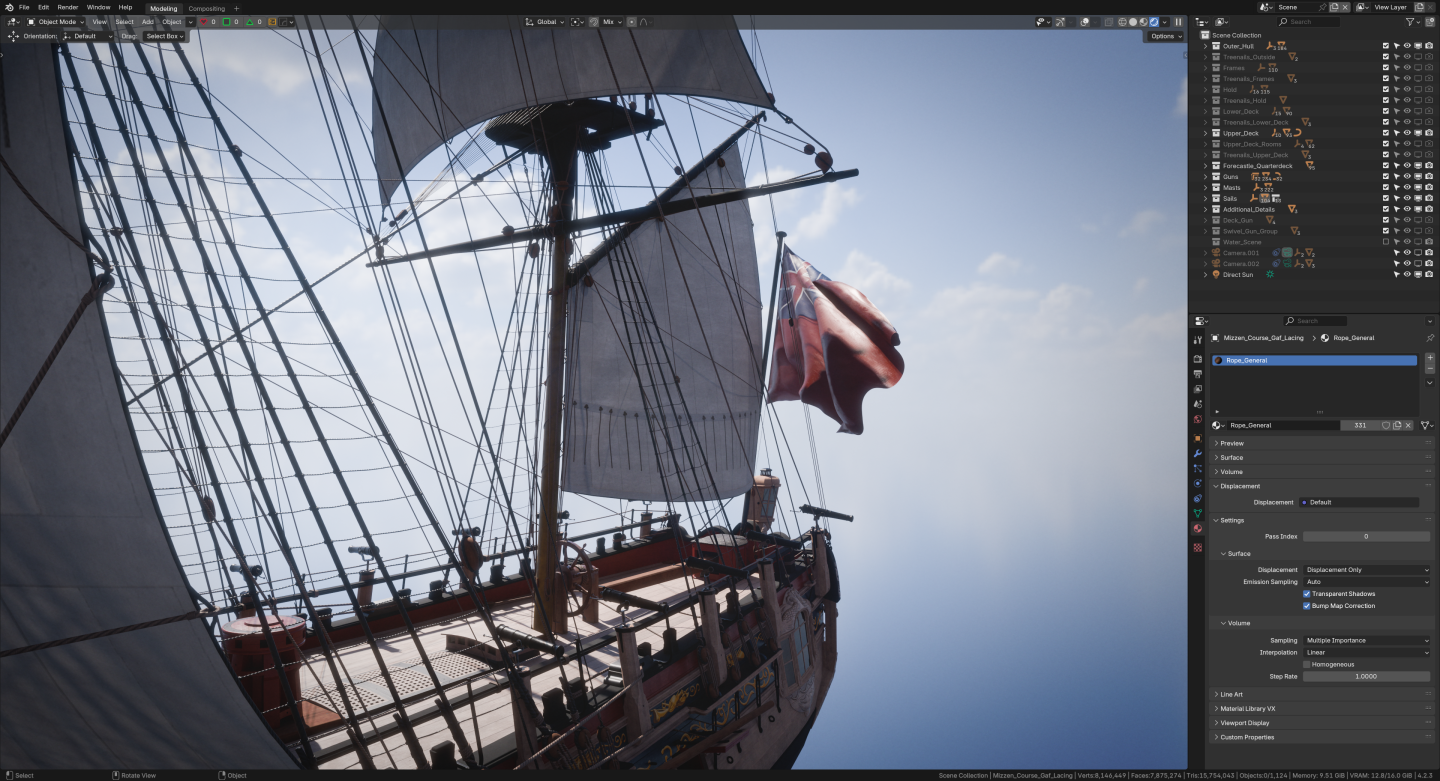
hello guys! main staysail is done...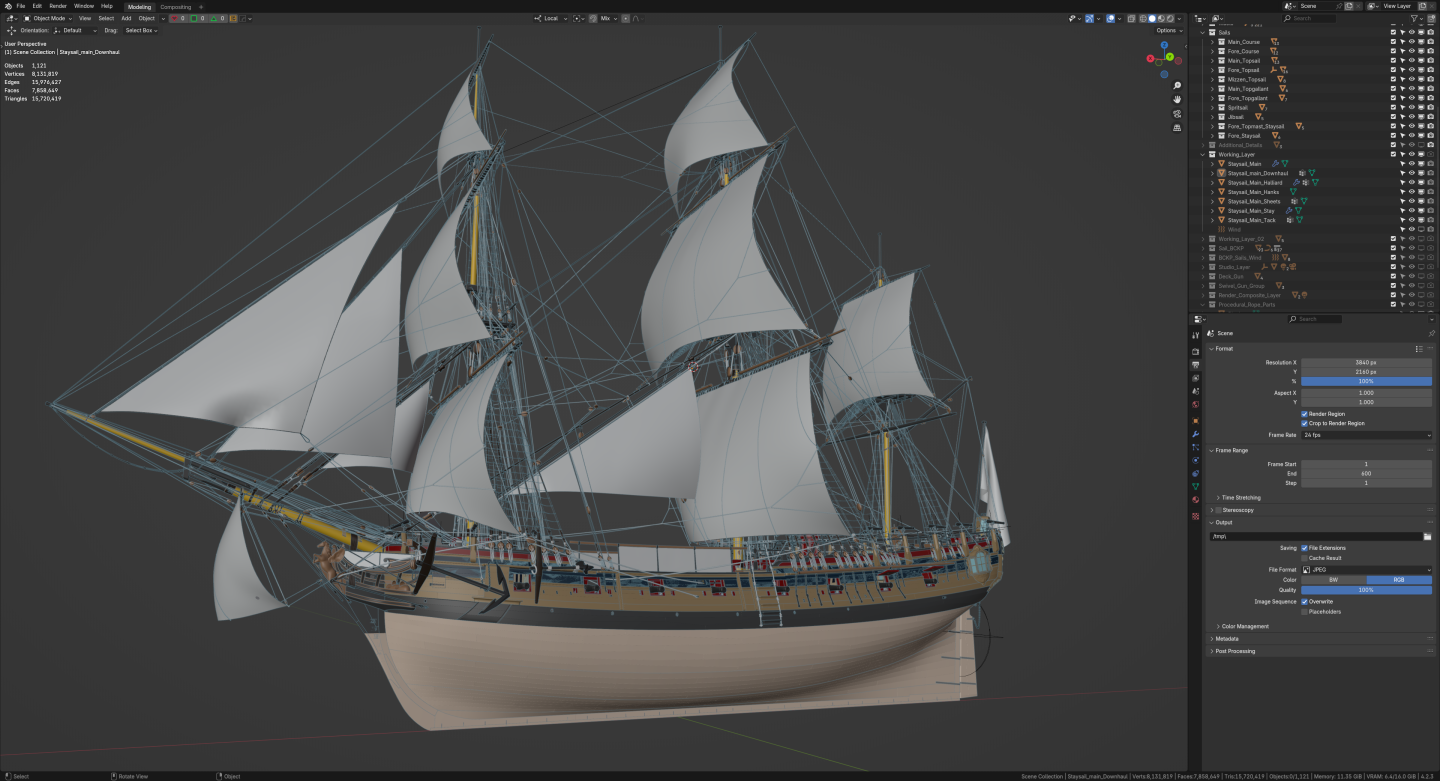


- 141 replies
-
- 6
-
-
- pof swan series
- swan
- (and 1 more)
-
Nate's PANDORA in 3D
herask replied to 3DShipWright's topic in CAD and 3D Modelling/Drafting Plans with Software
nice one! I also have Pandora on hold, I thought of continuing after I finish the sails on HMS Pegasus, but I think I'll reconsider because topic saturation 😁. good luck, will follow -
Swan class 3D model in progress
herask replied to dvm27's topic in CAD and 3D Modelling/Drafting Plans with Software
thank you, Druxey! they do look better than flat colored ones- 141 replies
-
- 1
-
-
- pof swan series
- swan
- (and 1 more)
-
Swan class 3D model in progress
herask replied to dvm27's topic in CAD and 3D Modelling/Drafting Plans with Software
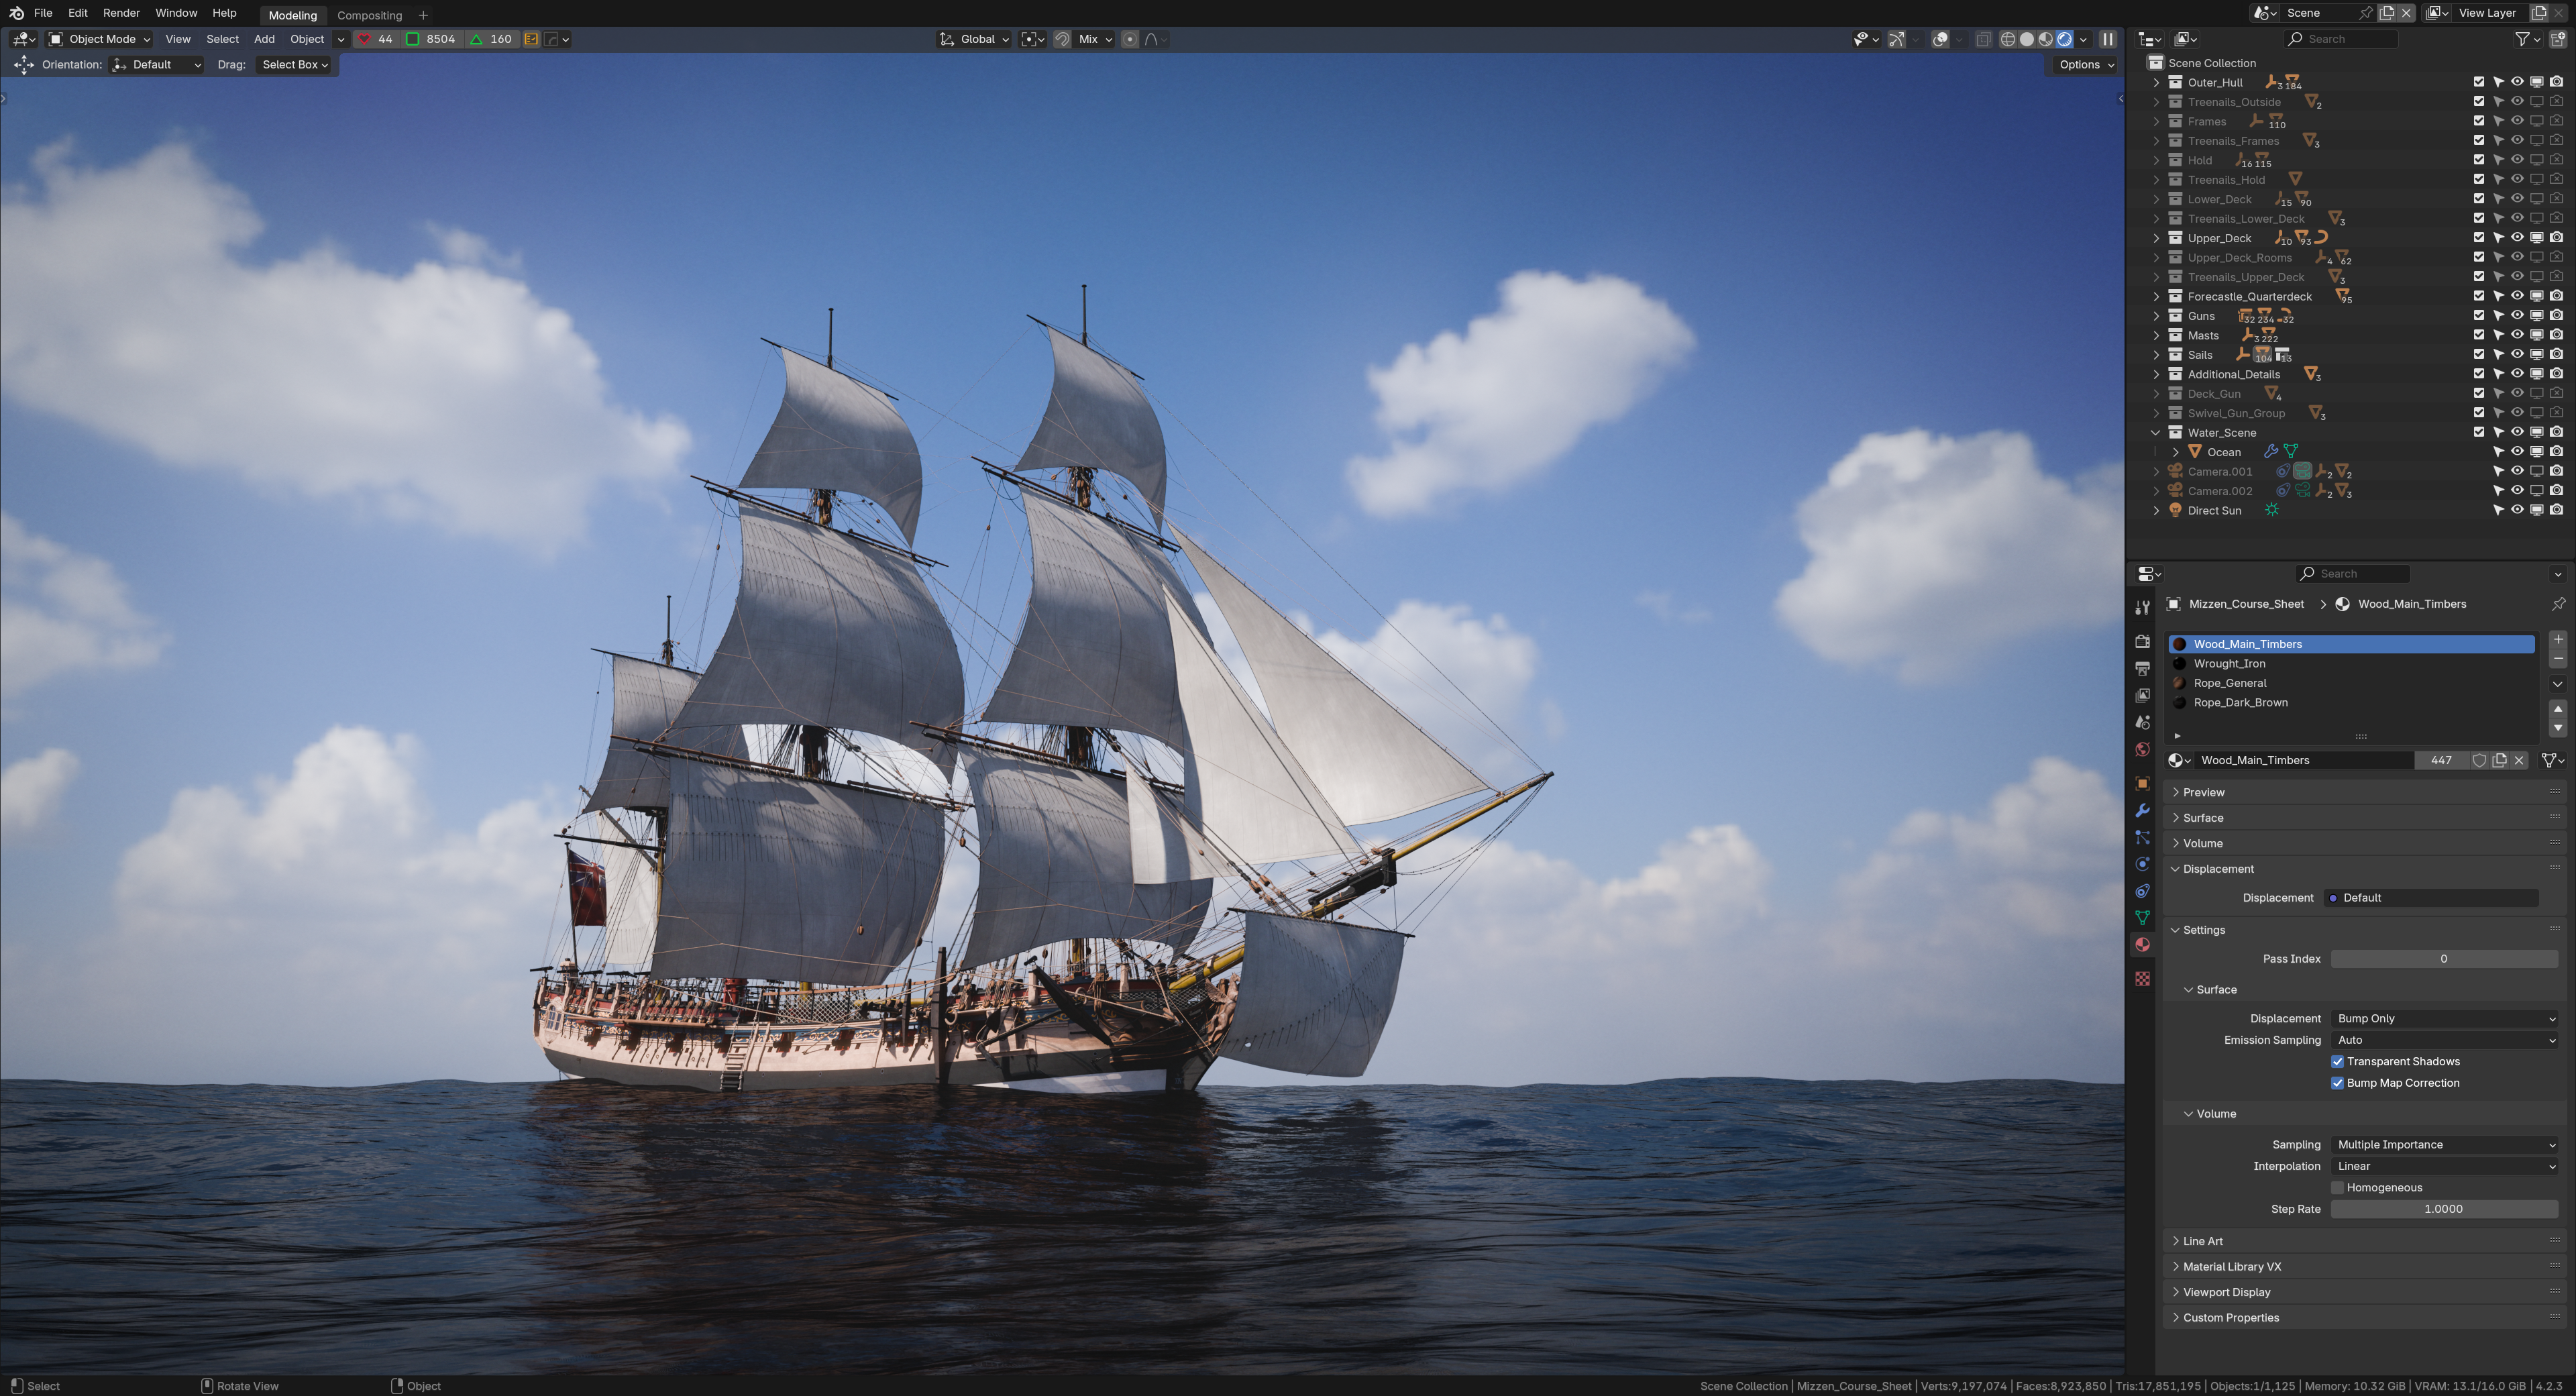
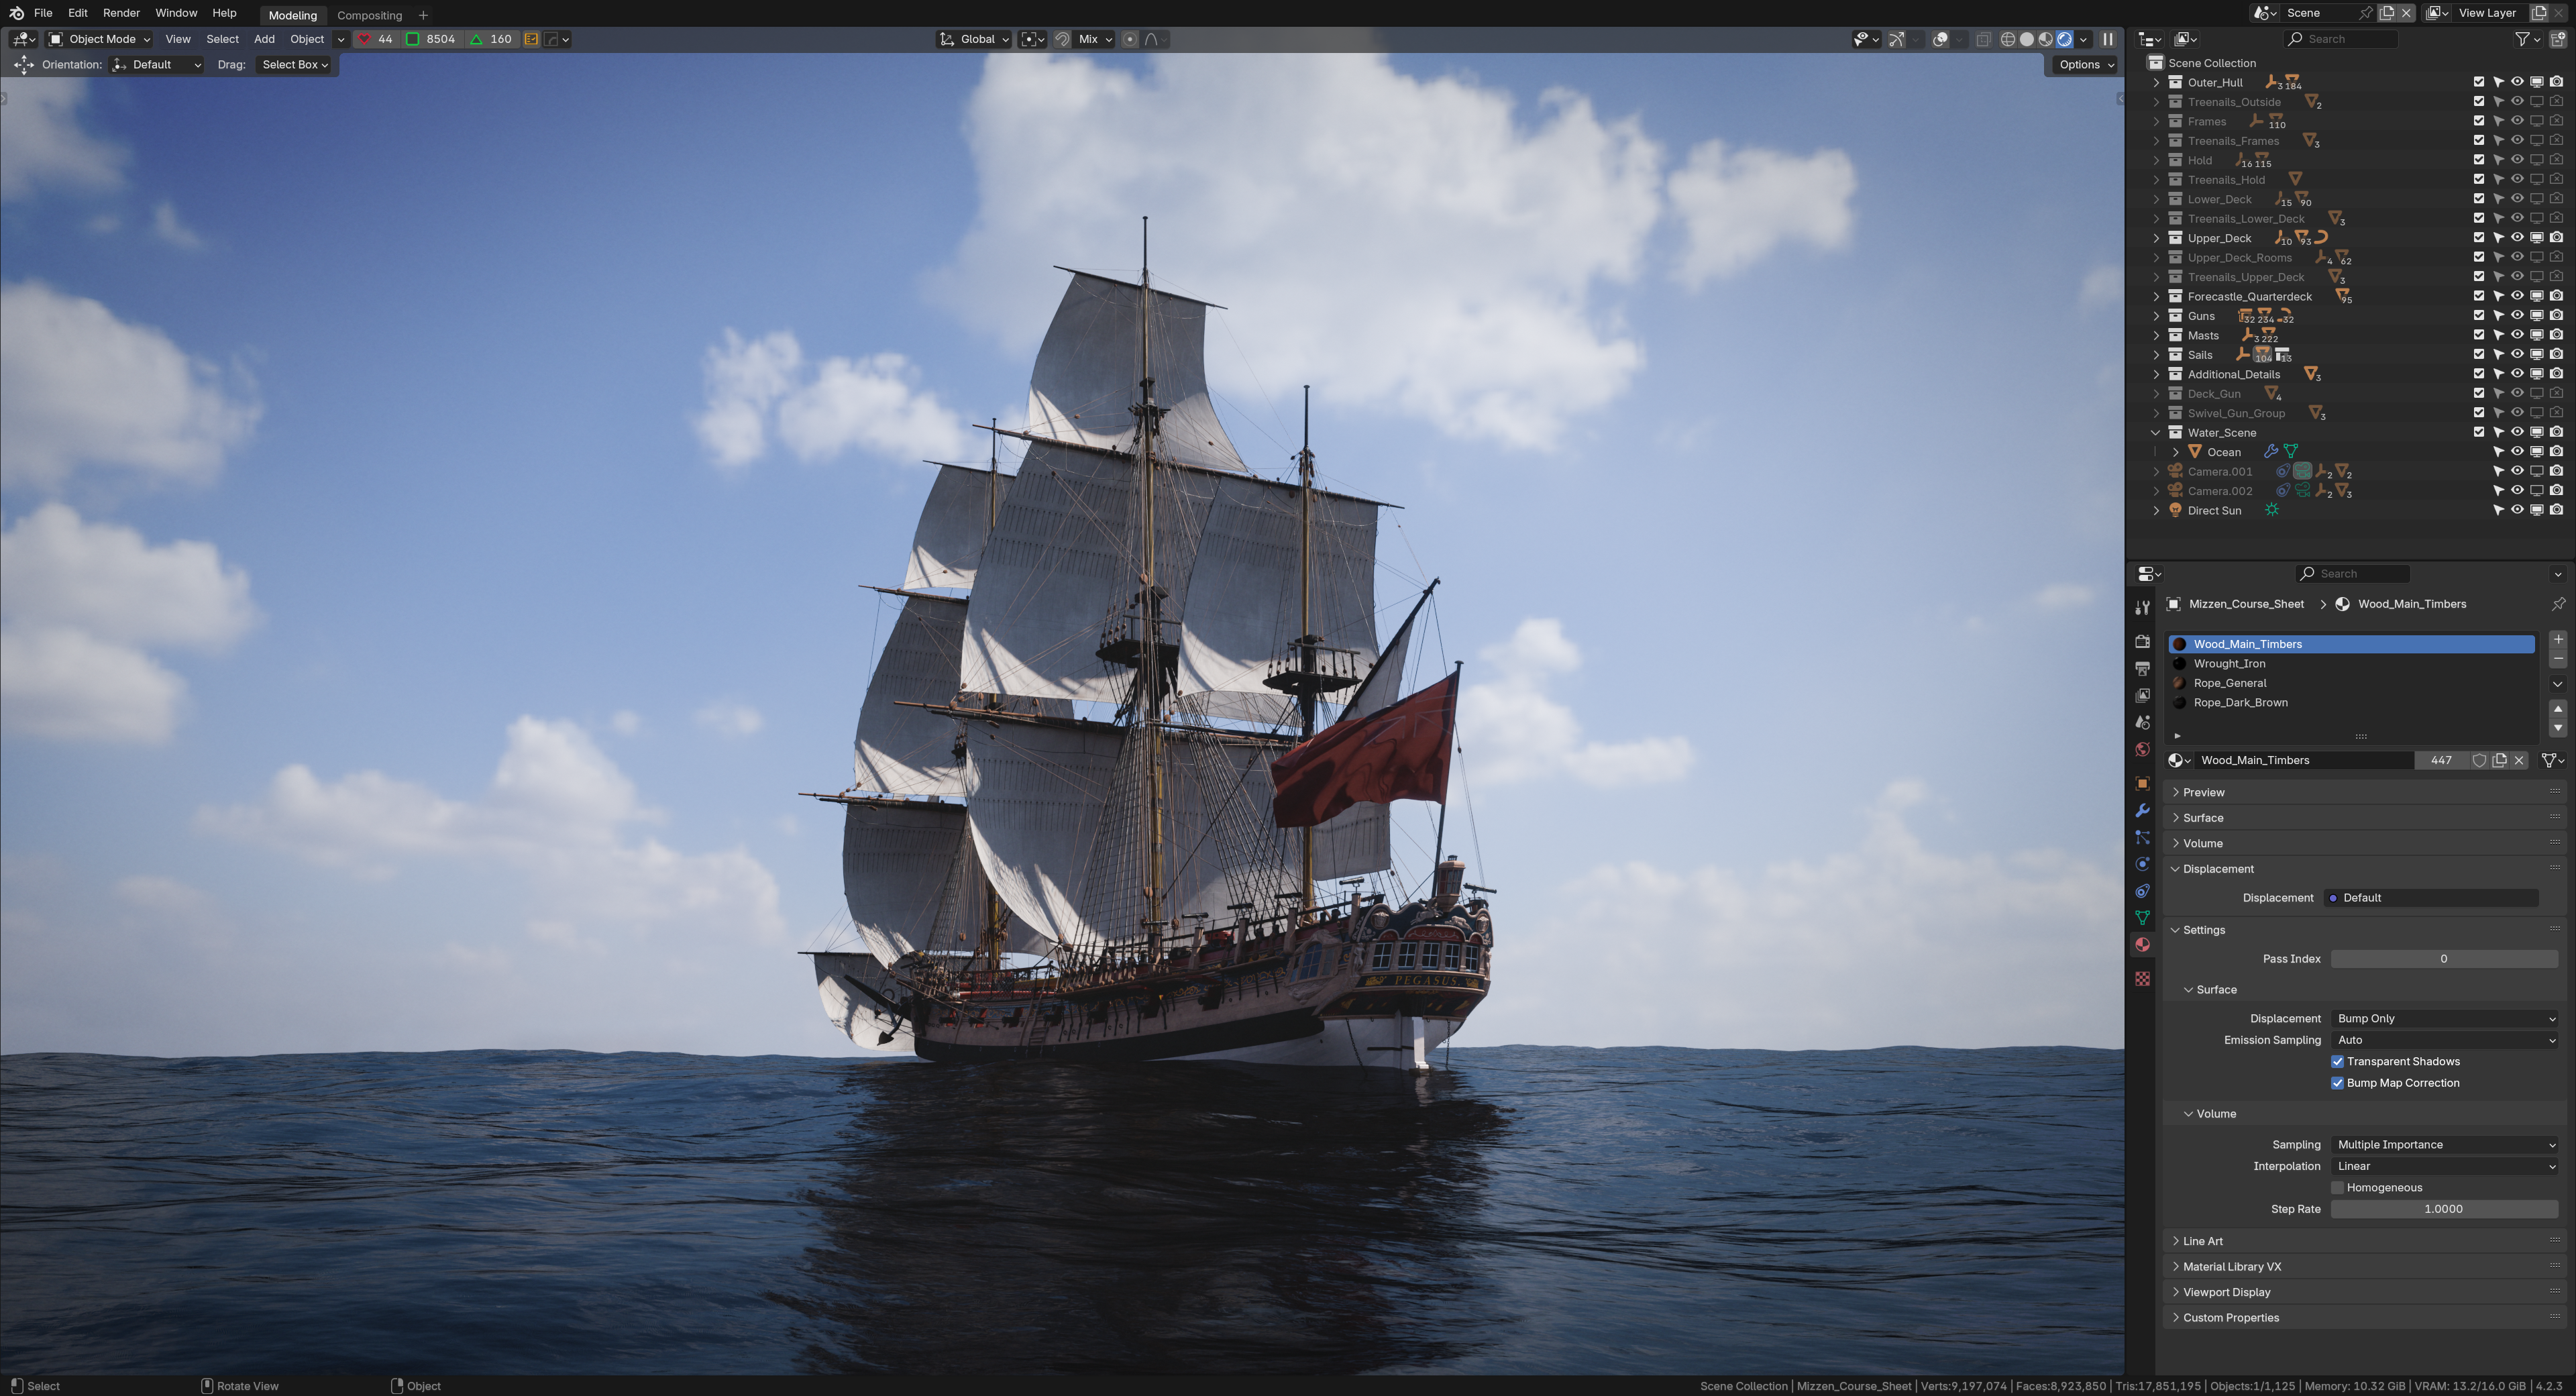
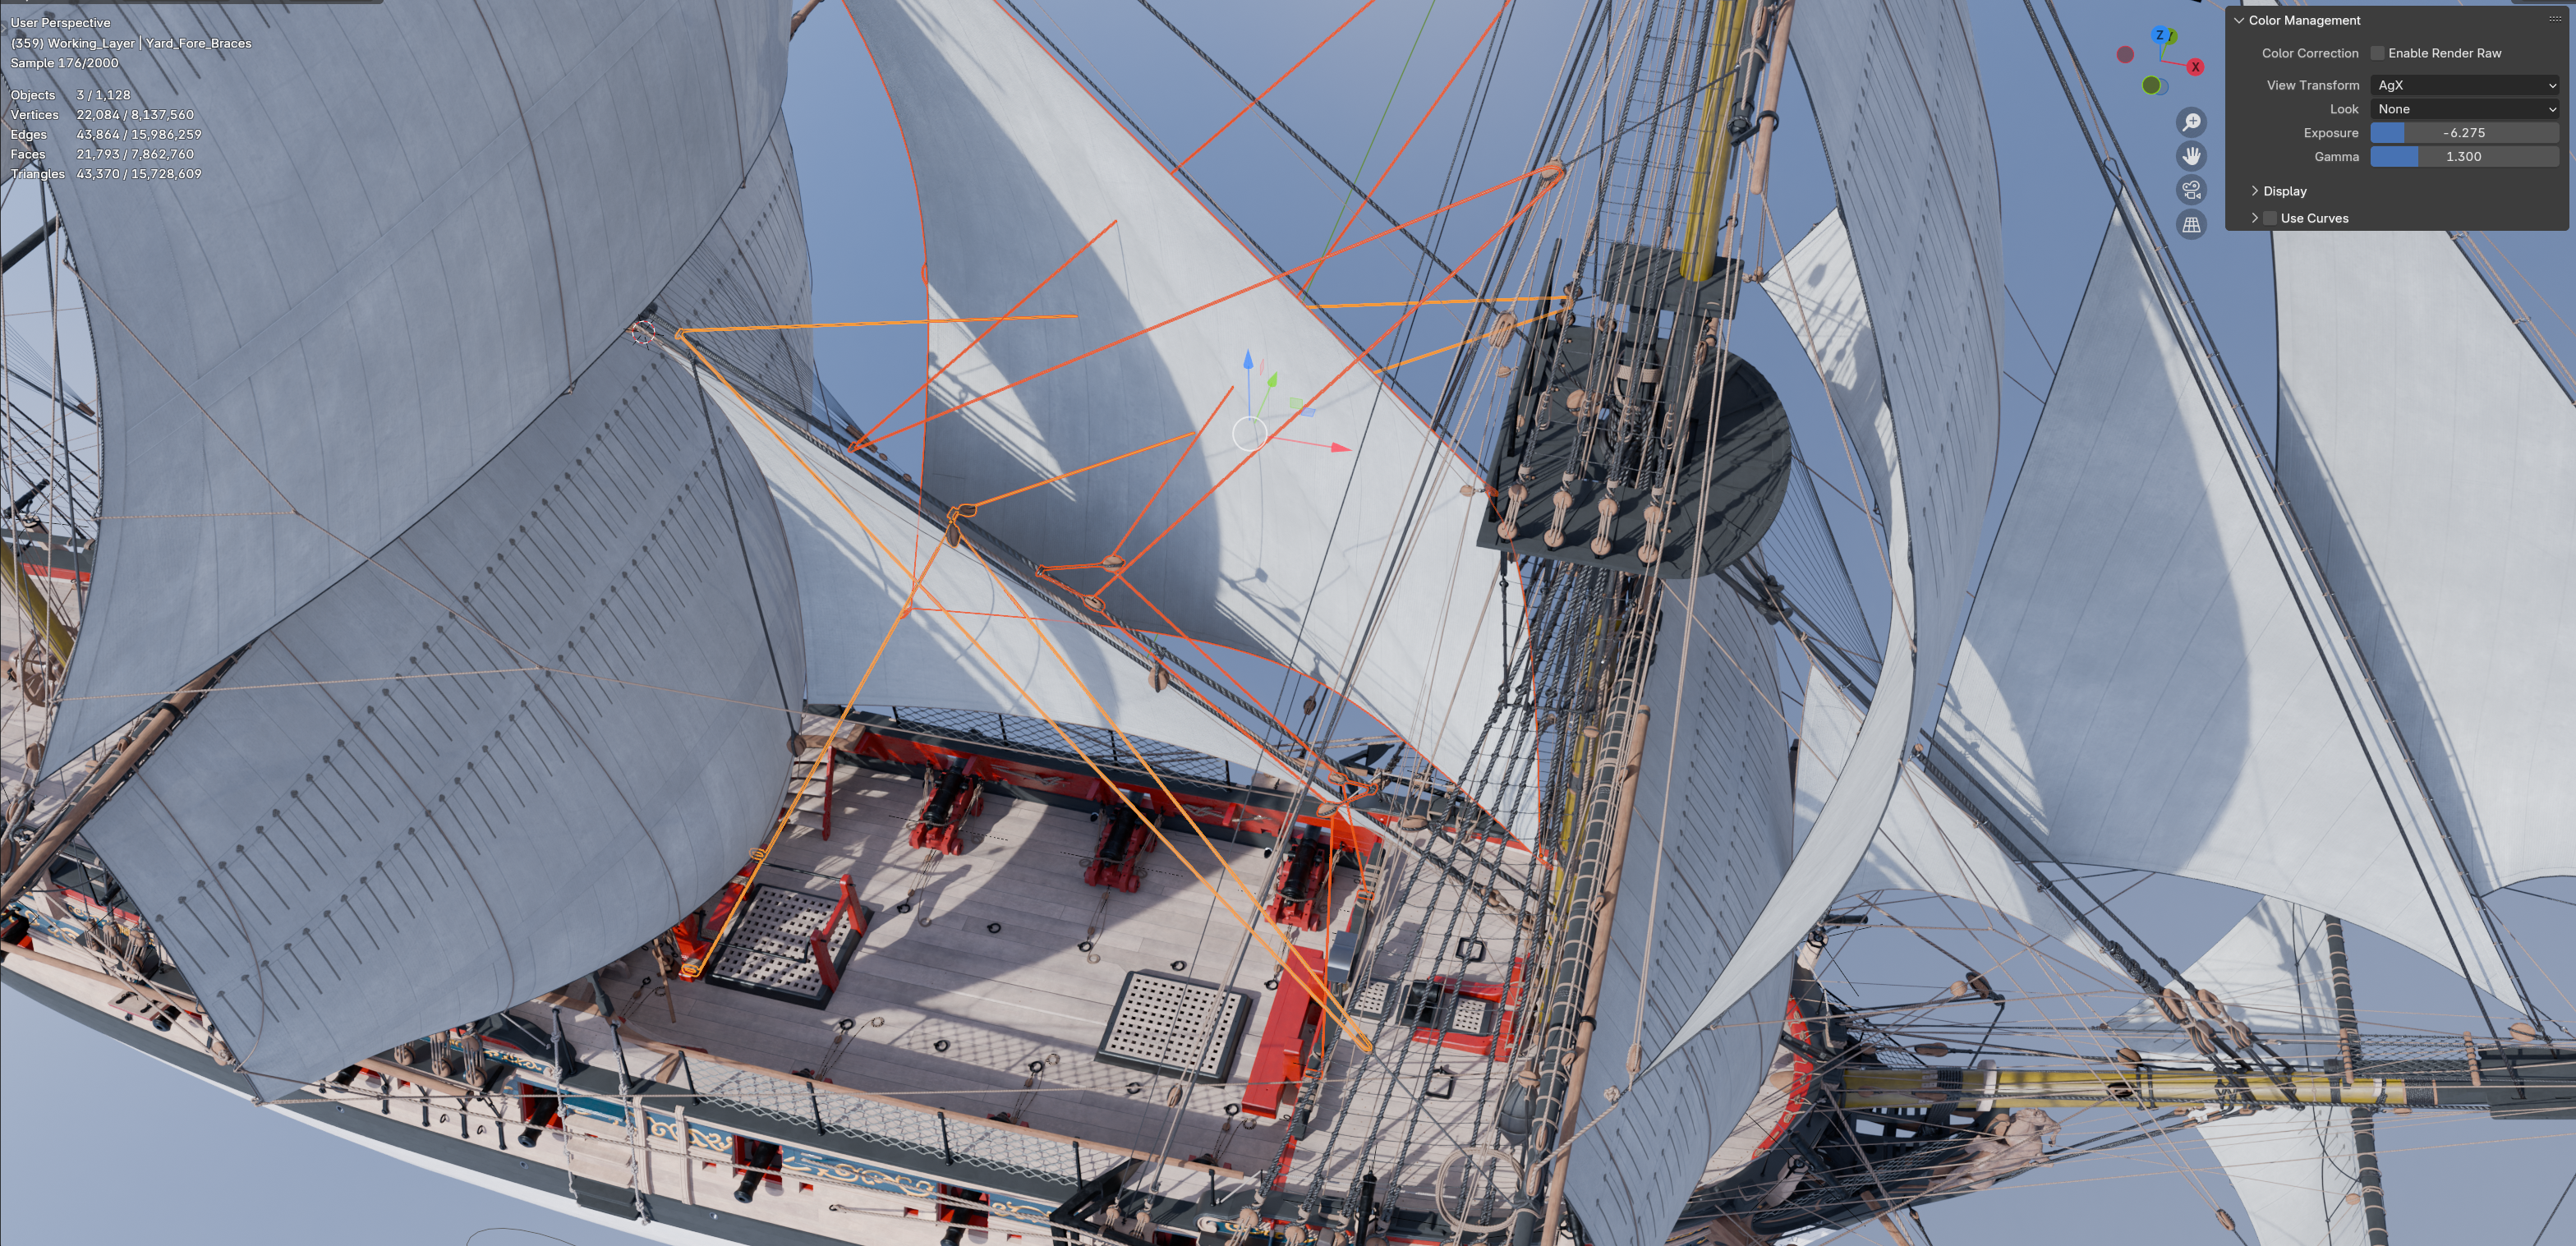
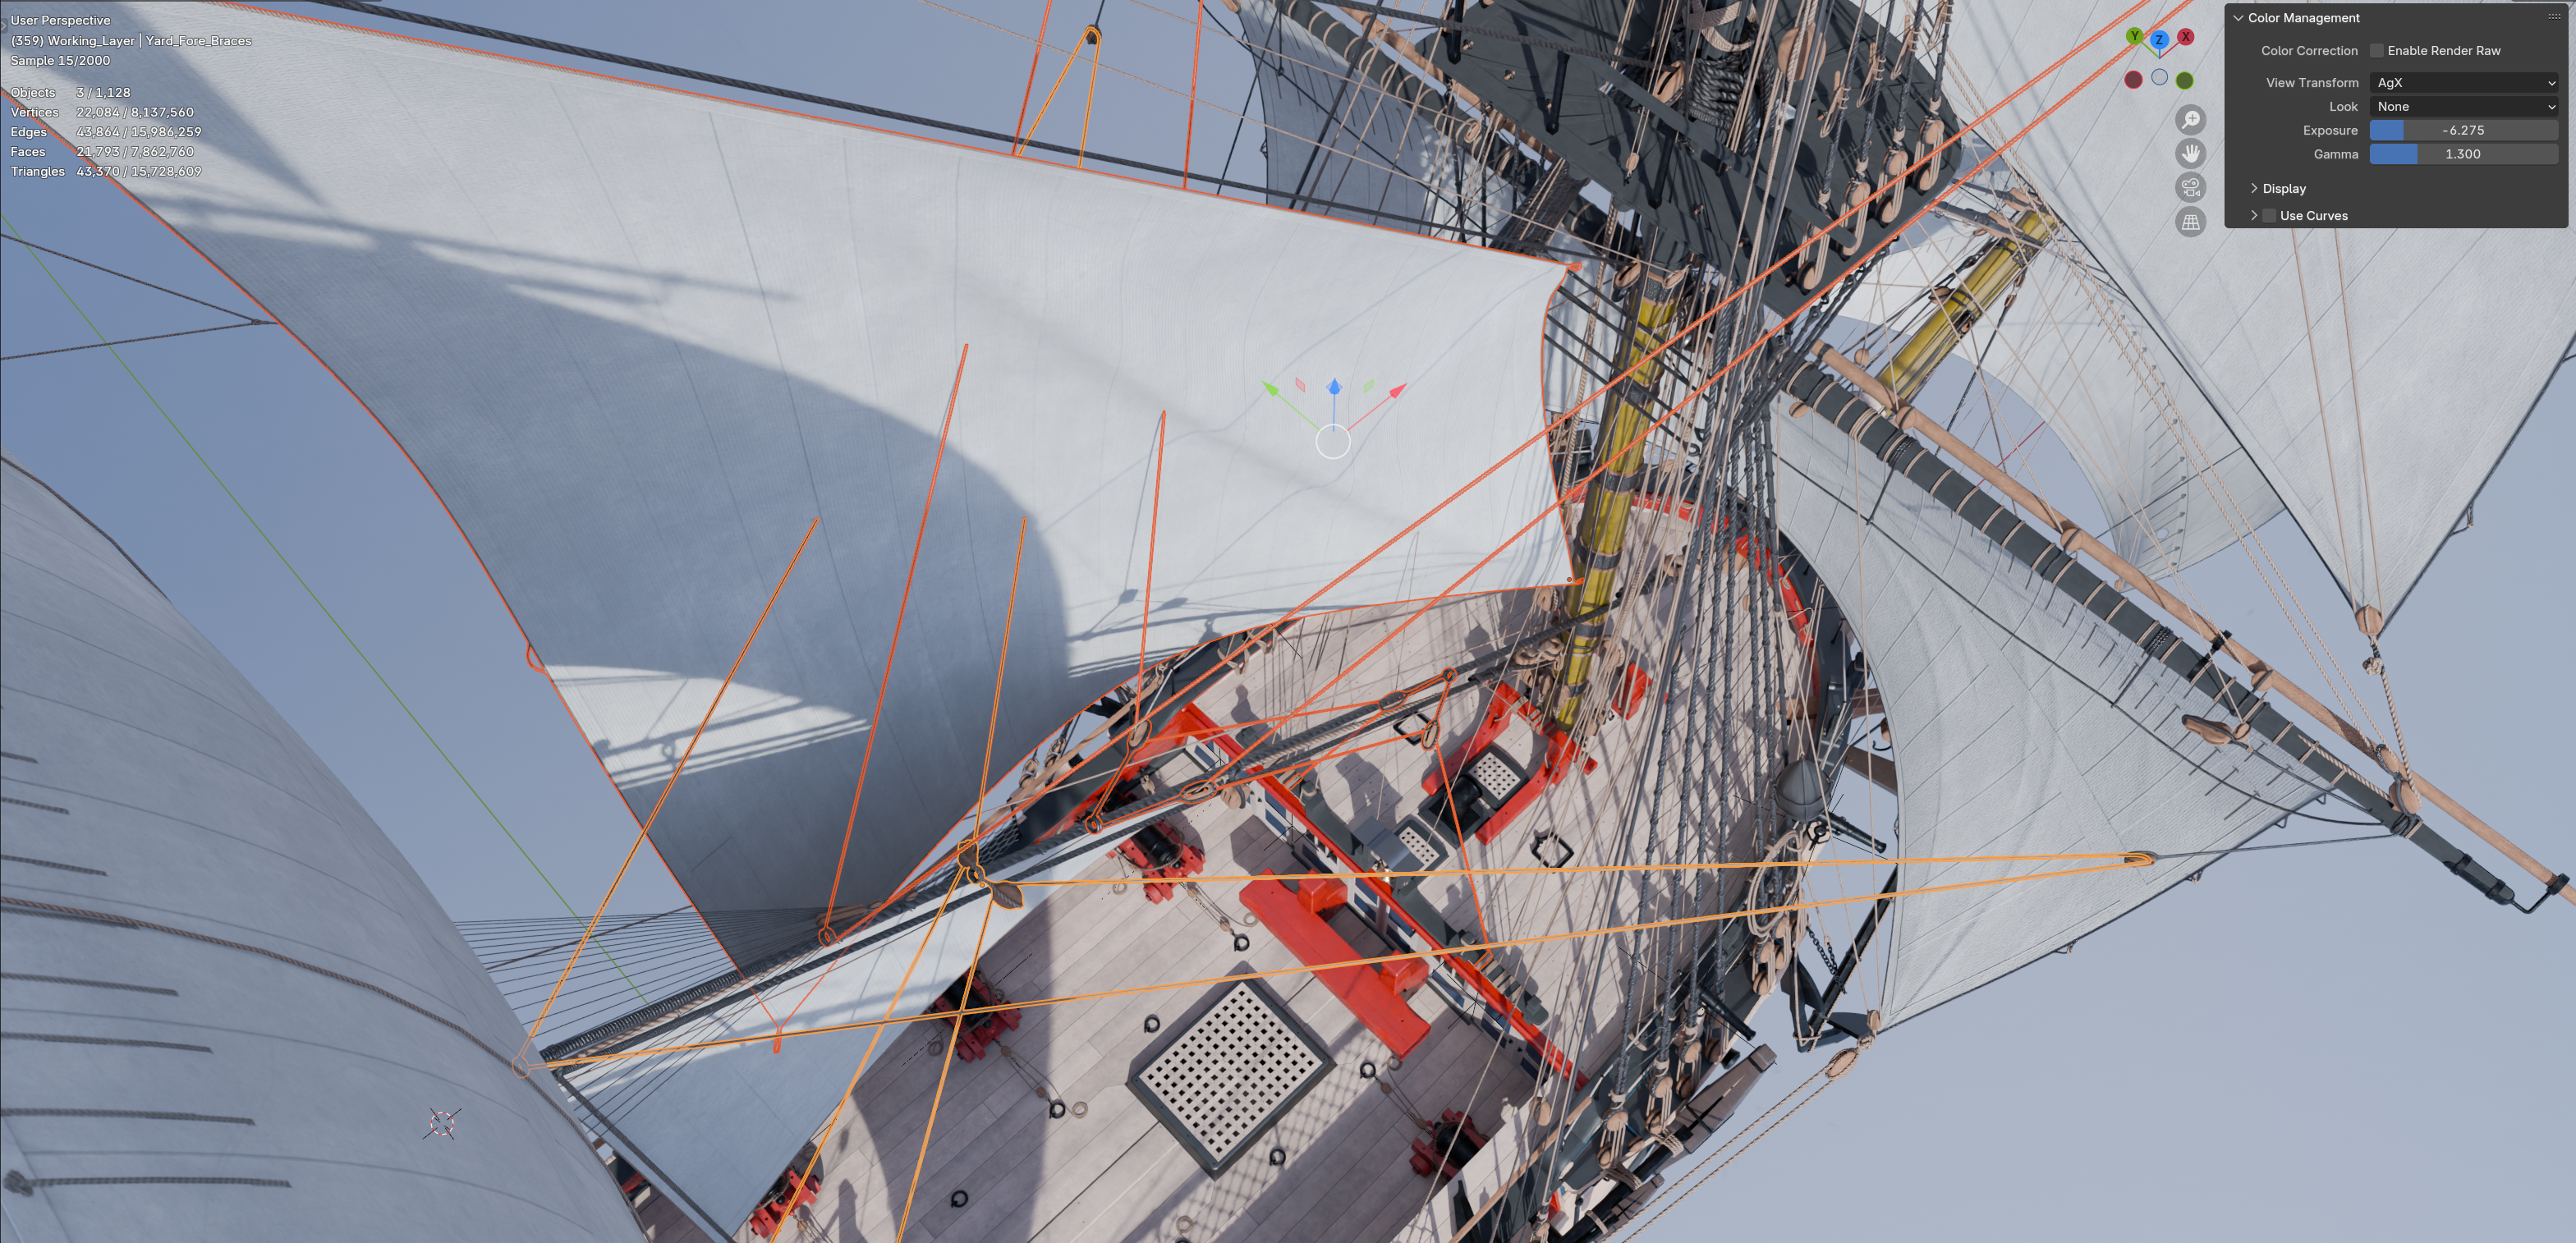
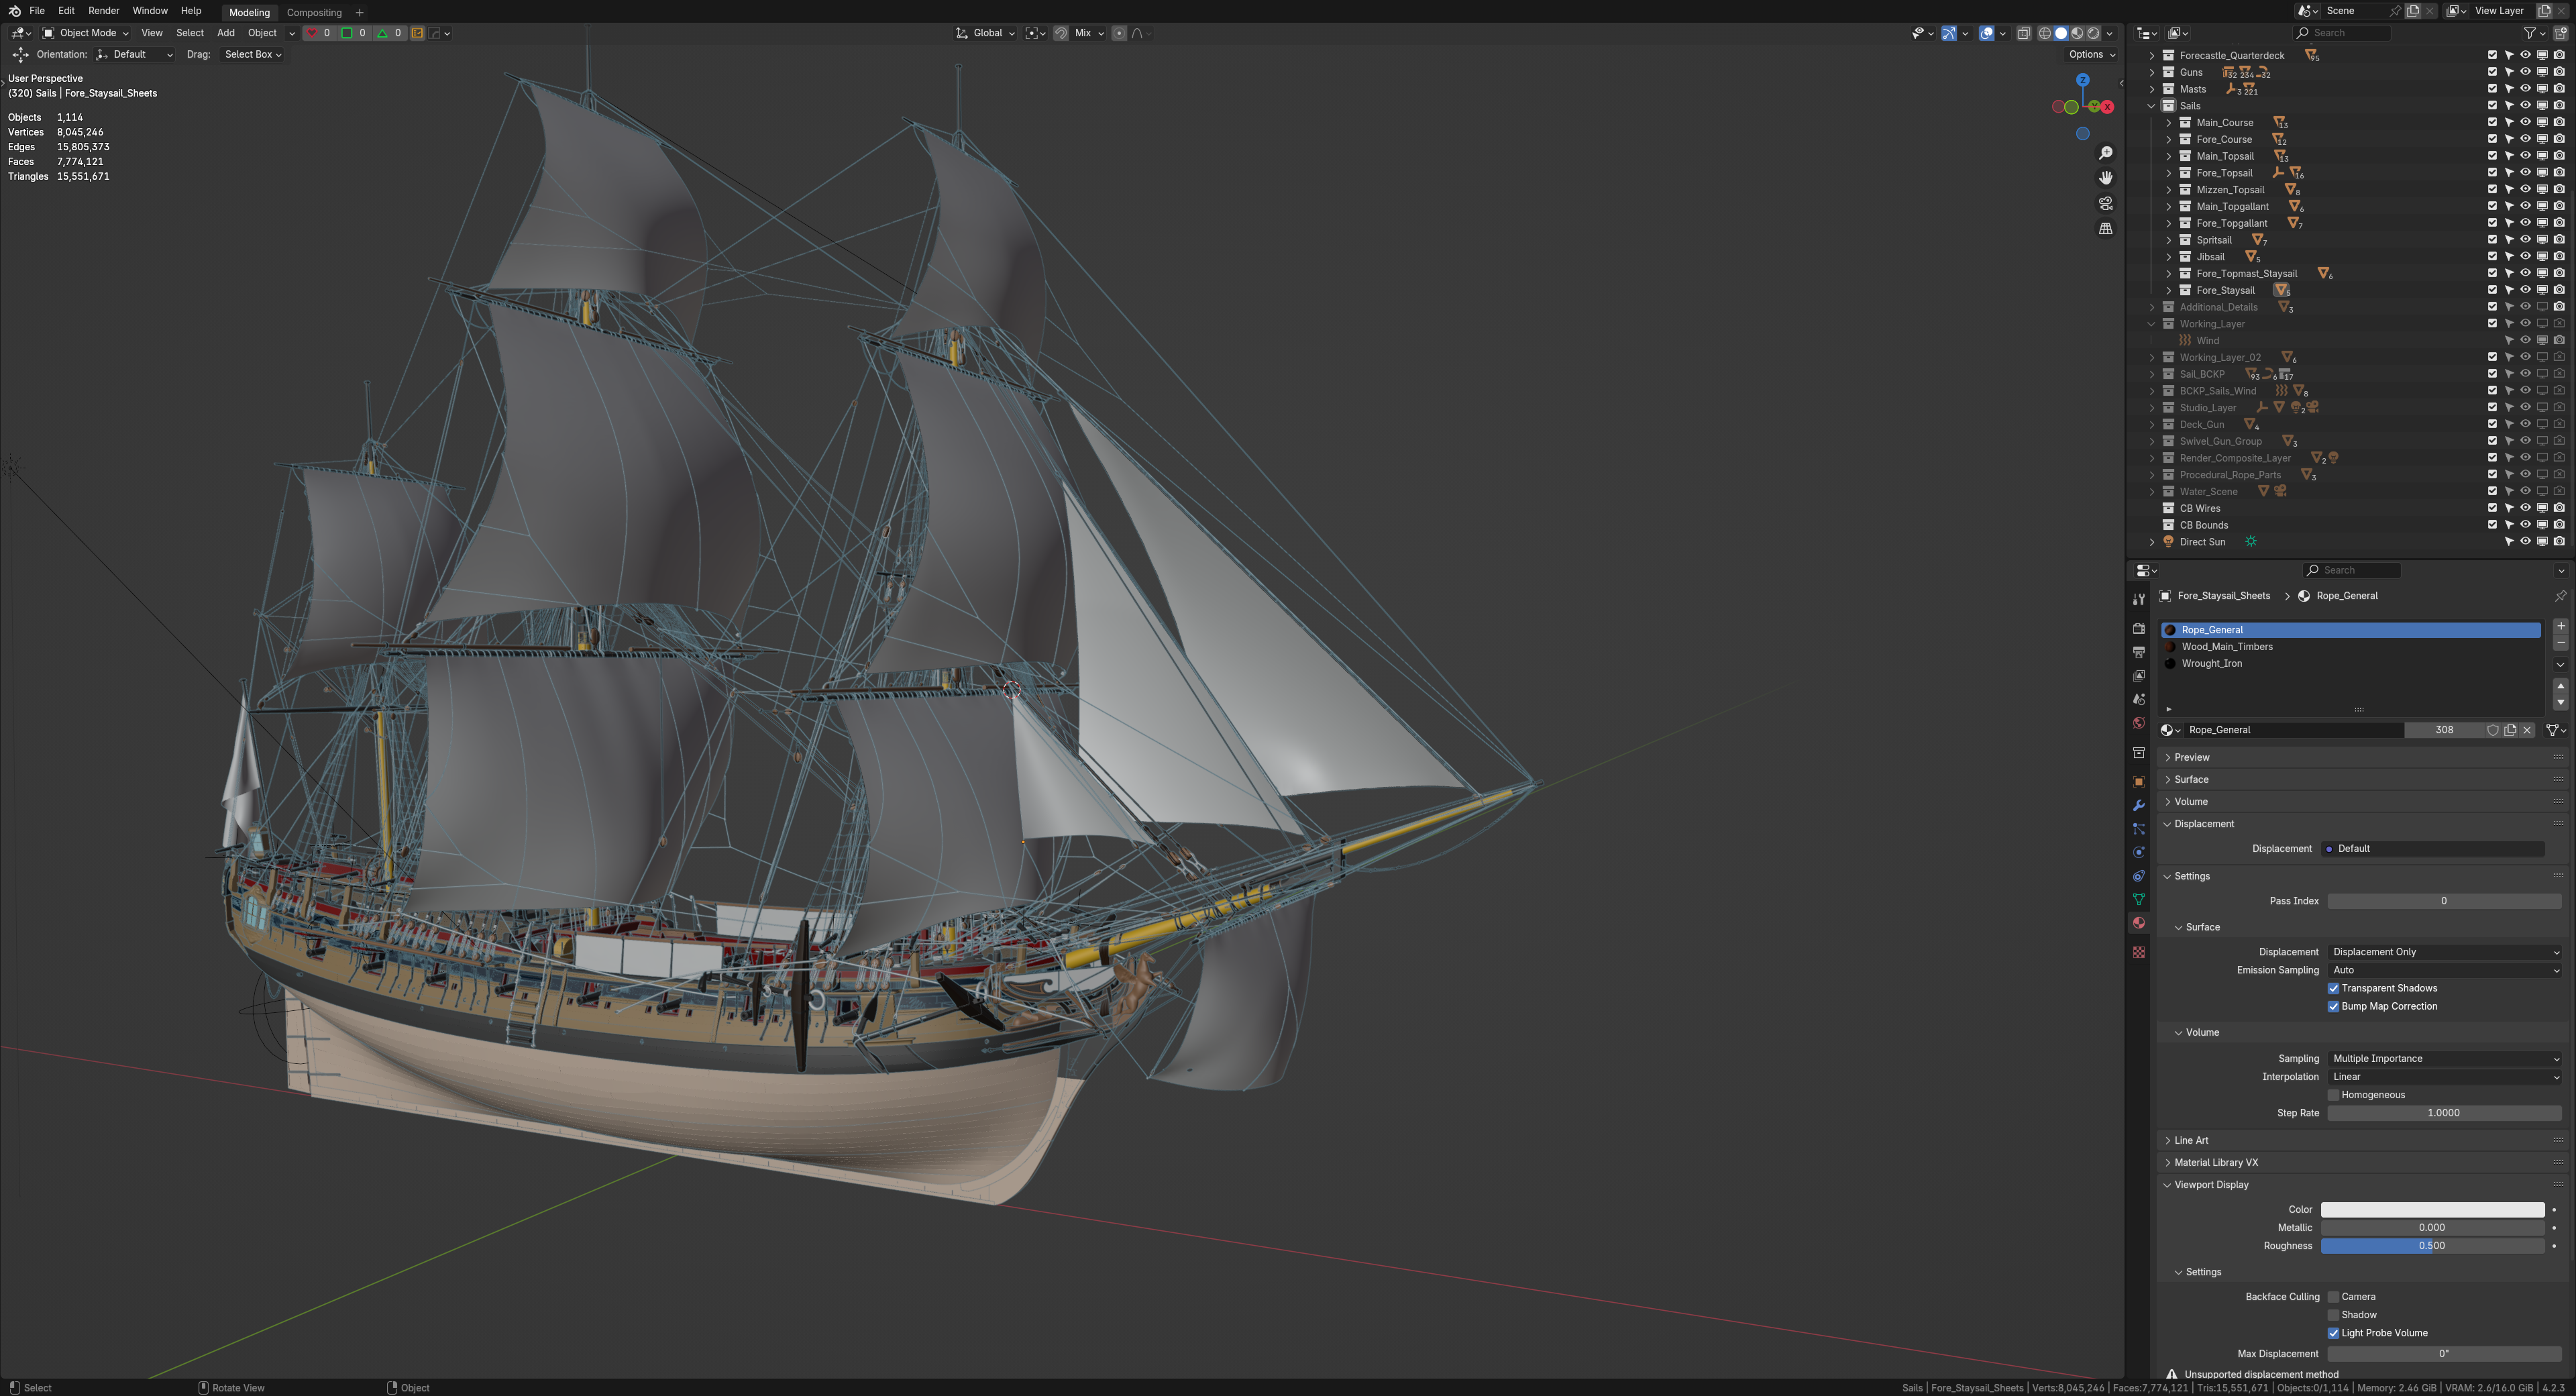
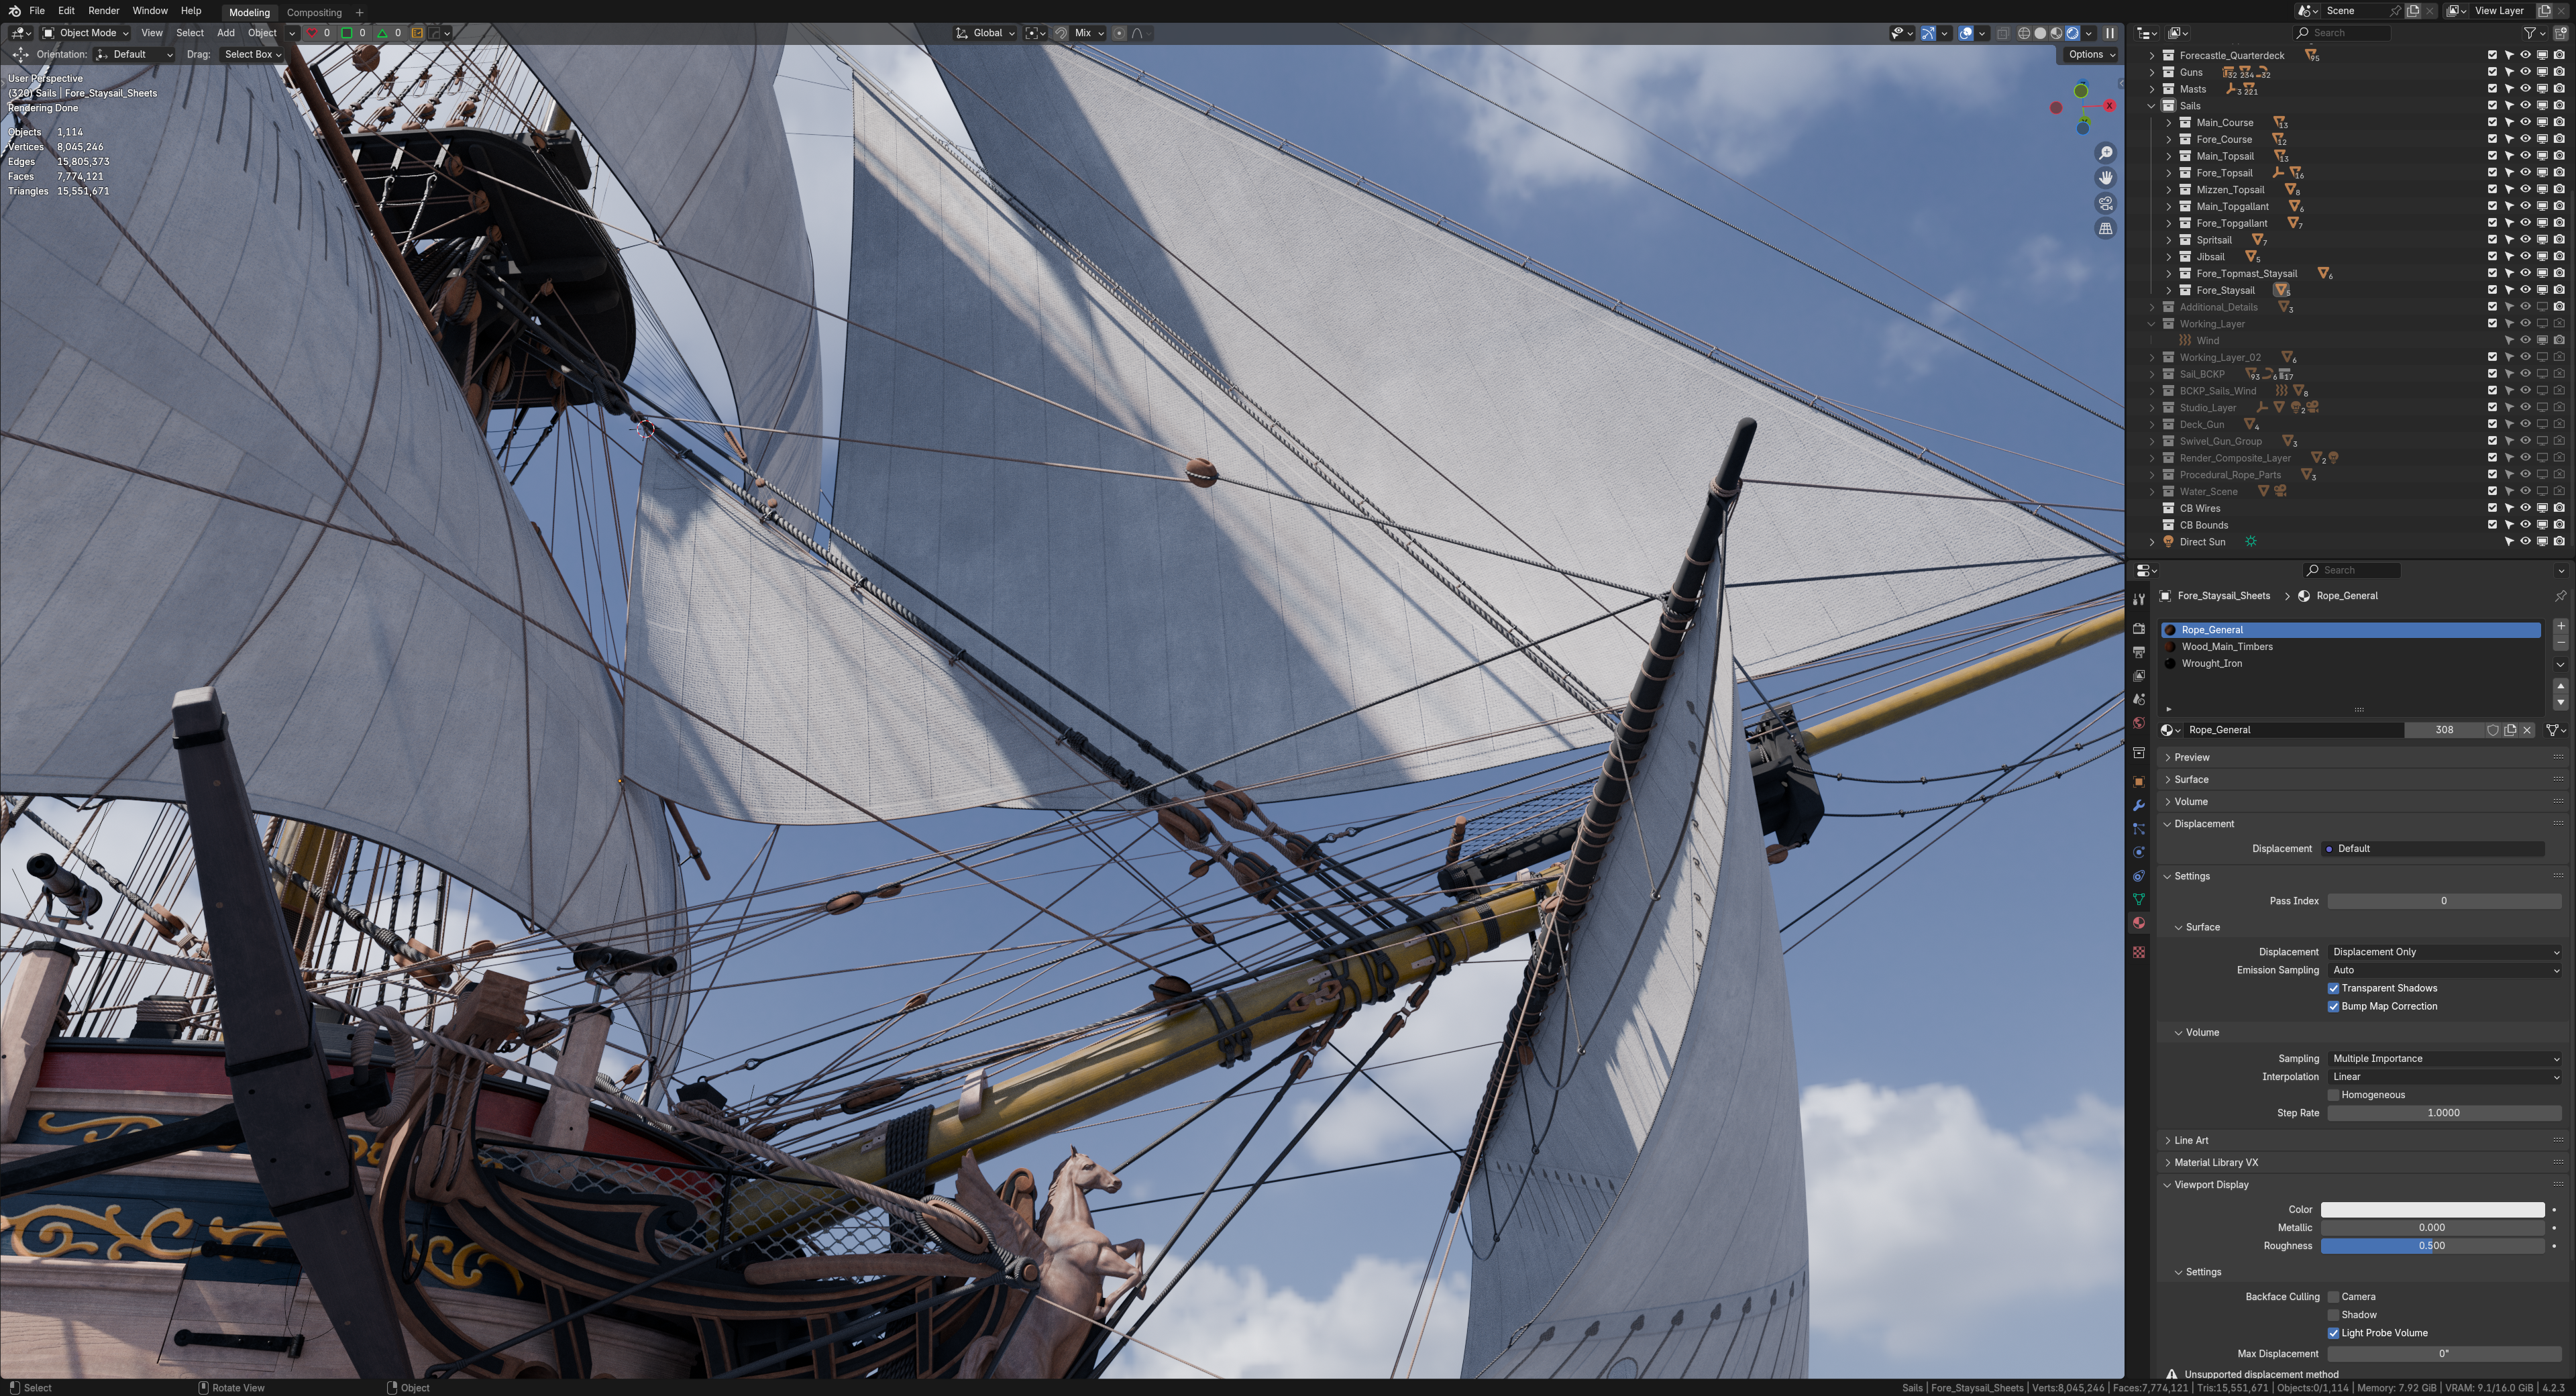
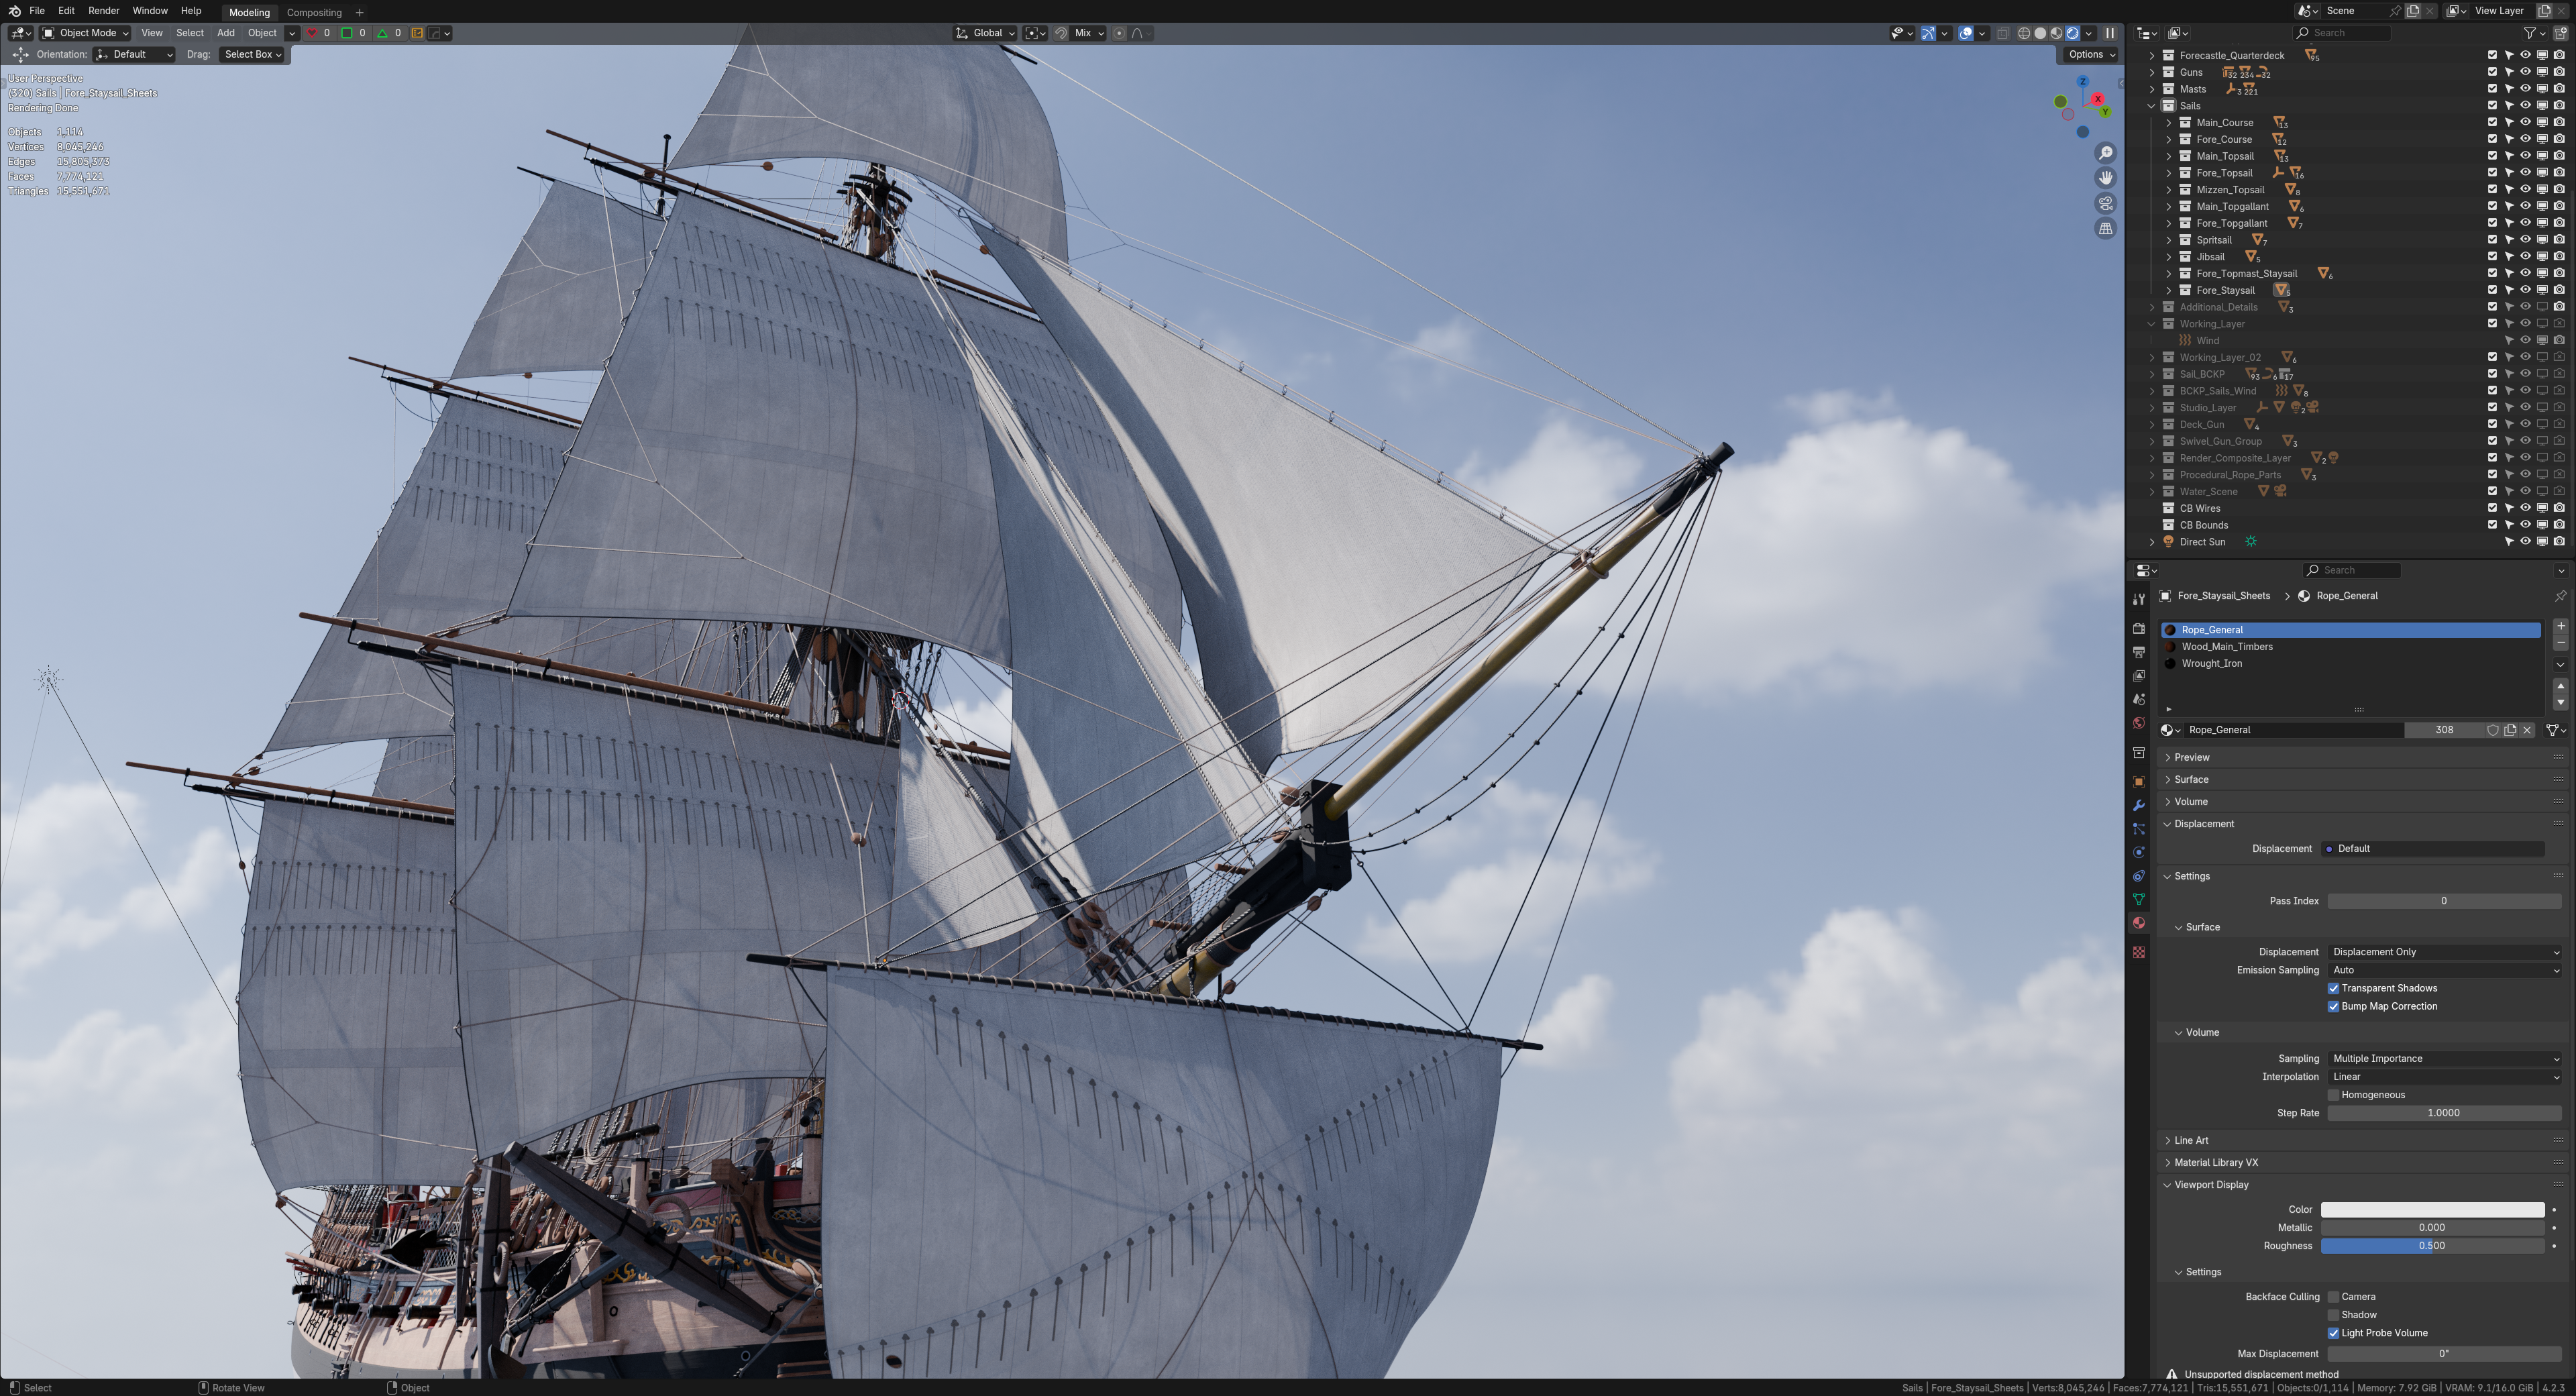
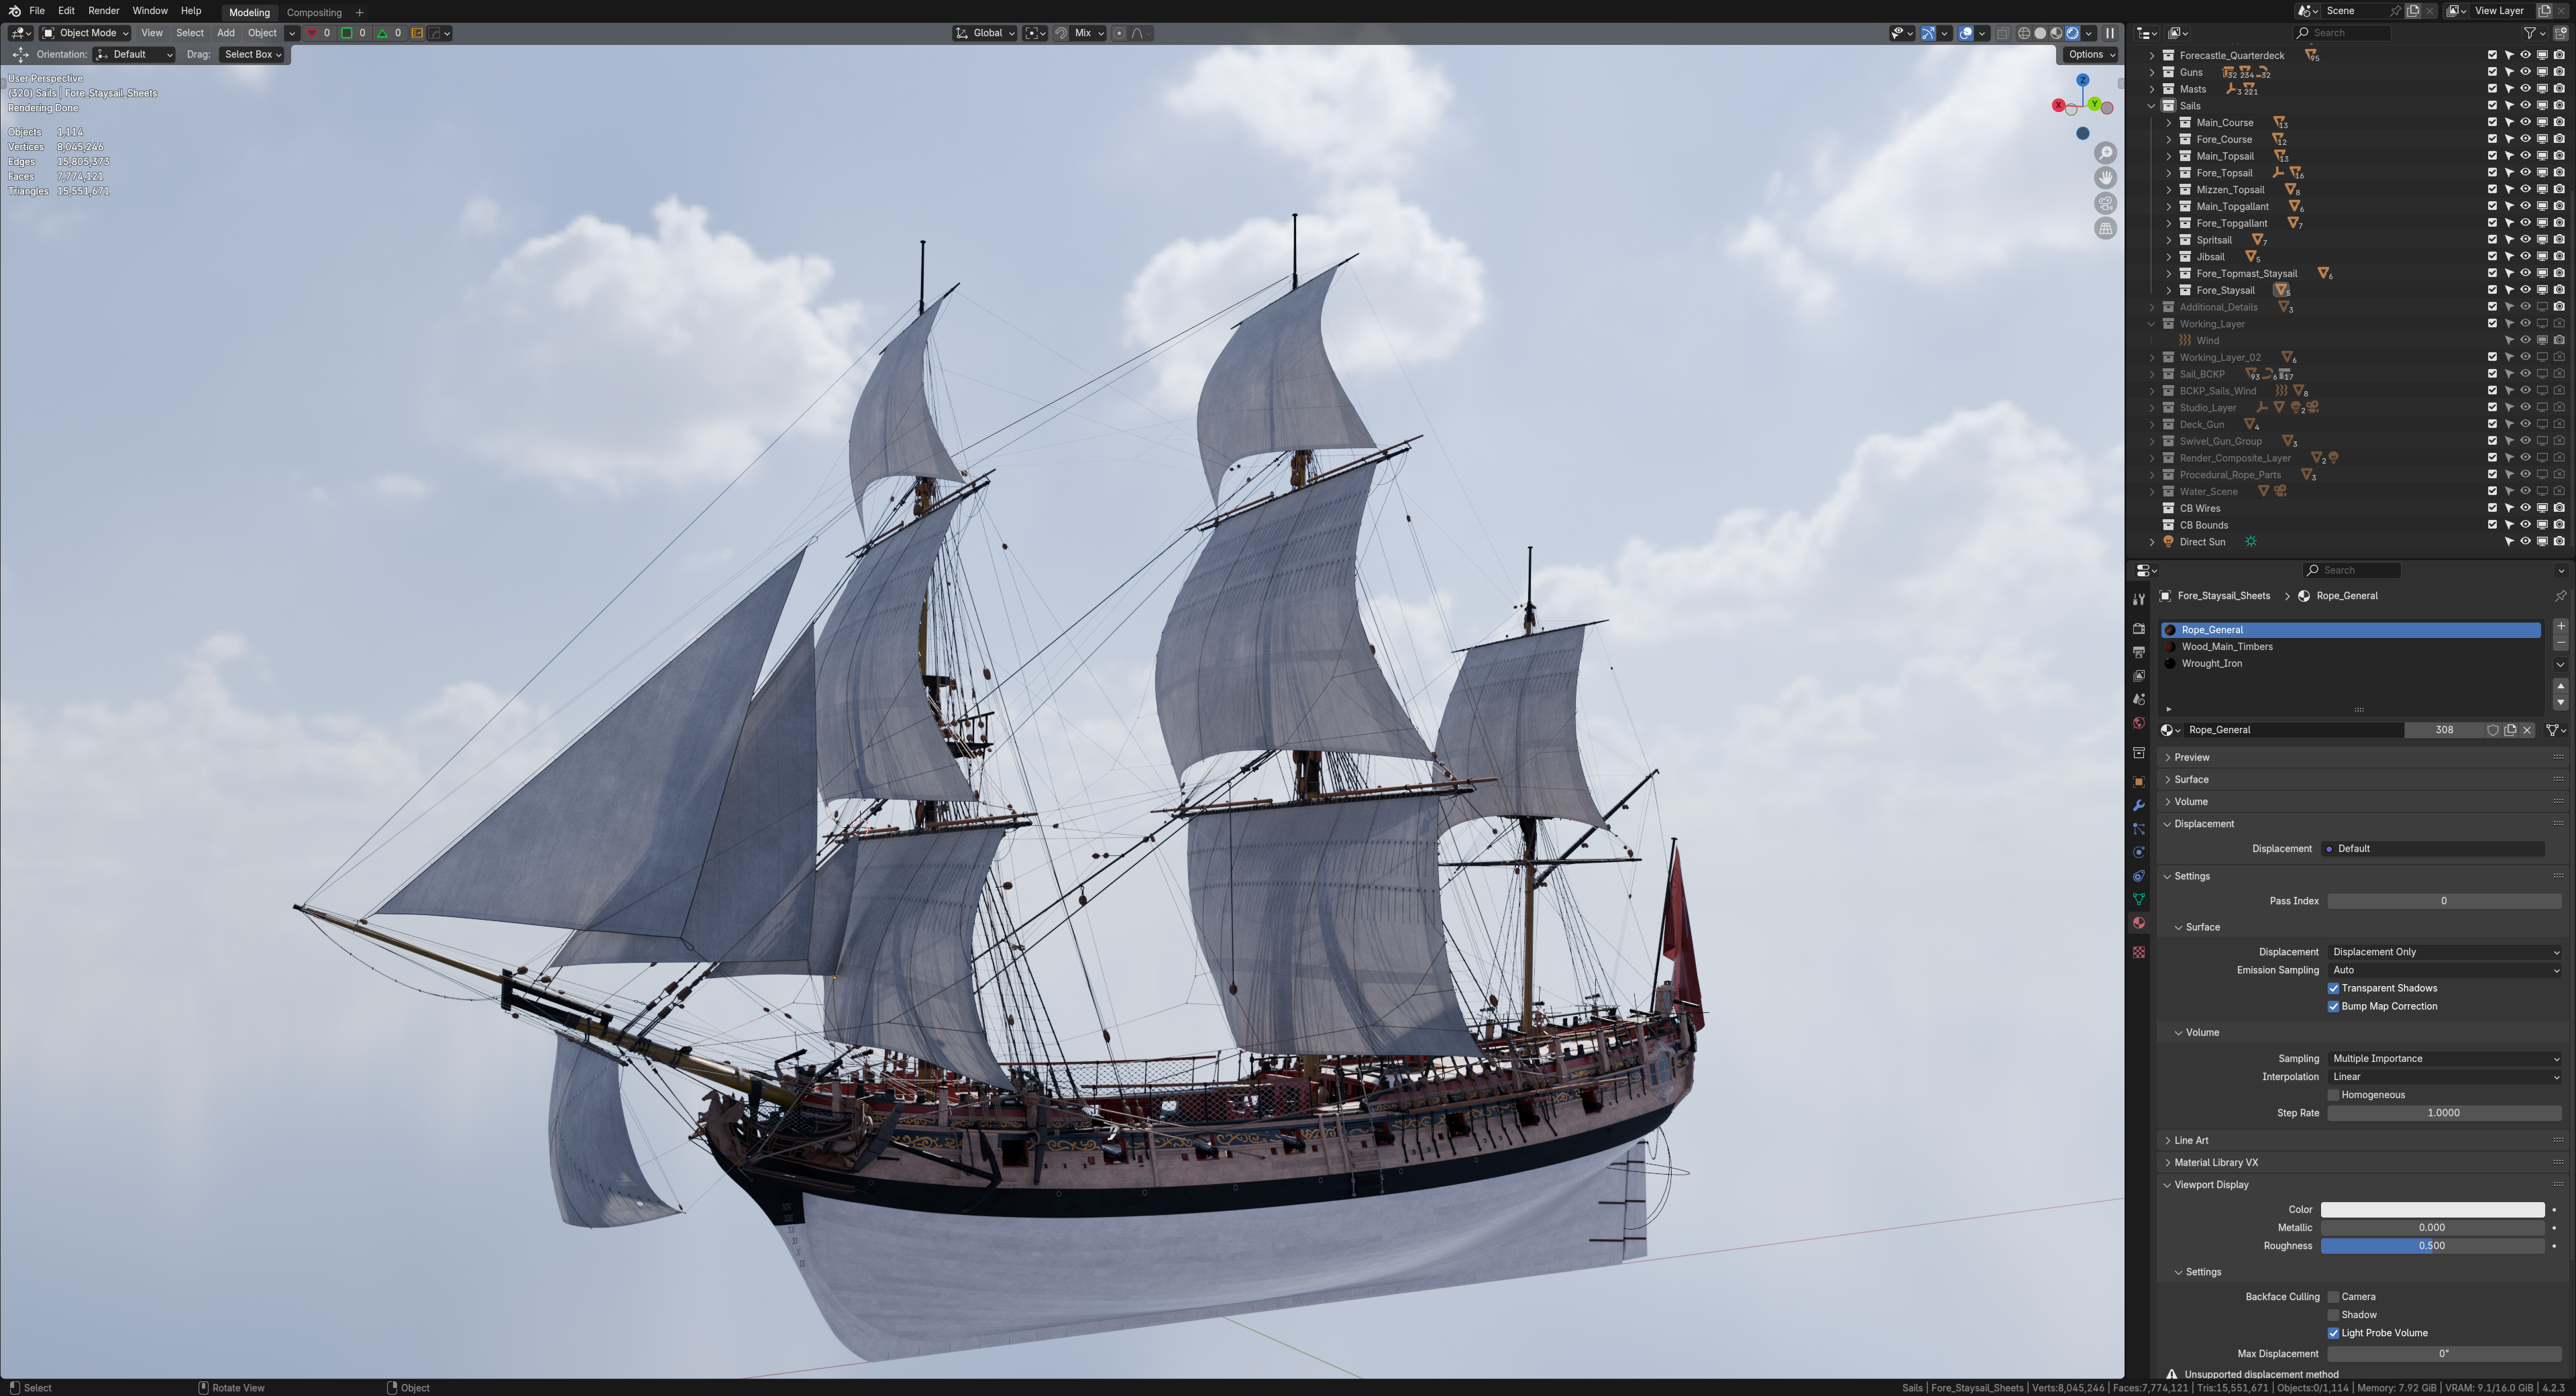
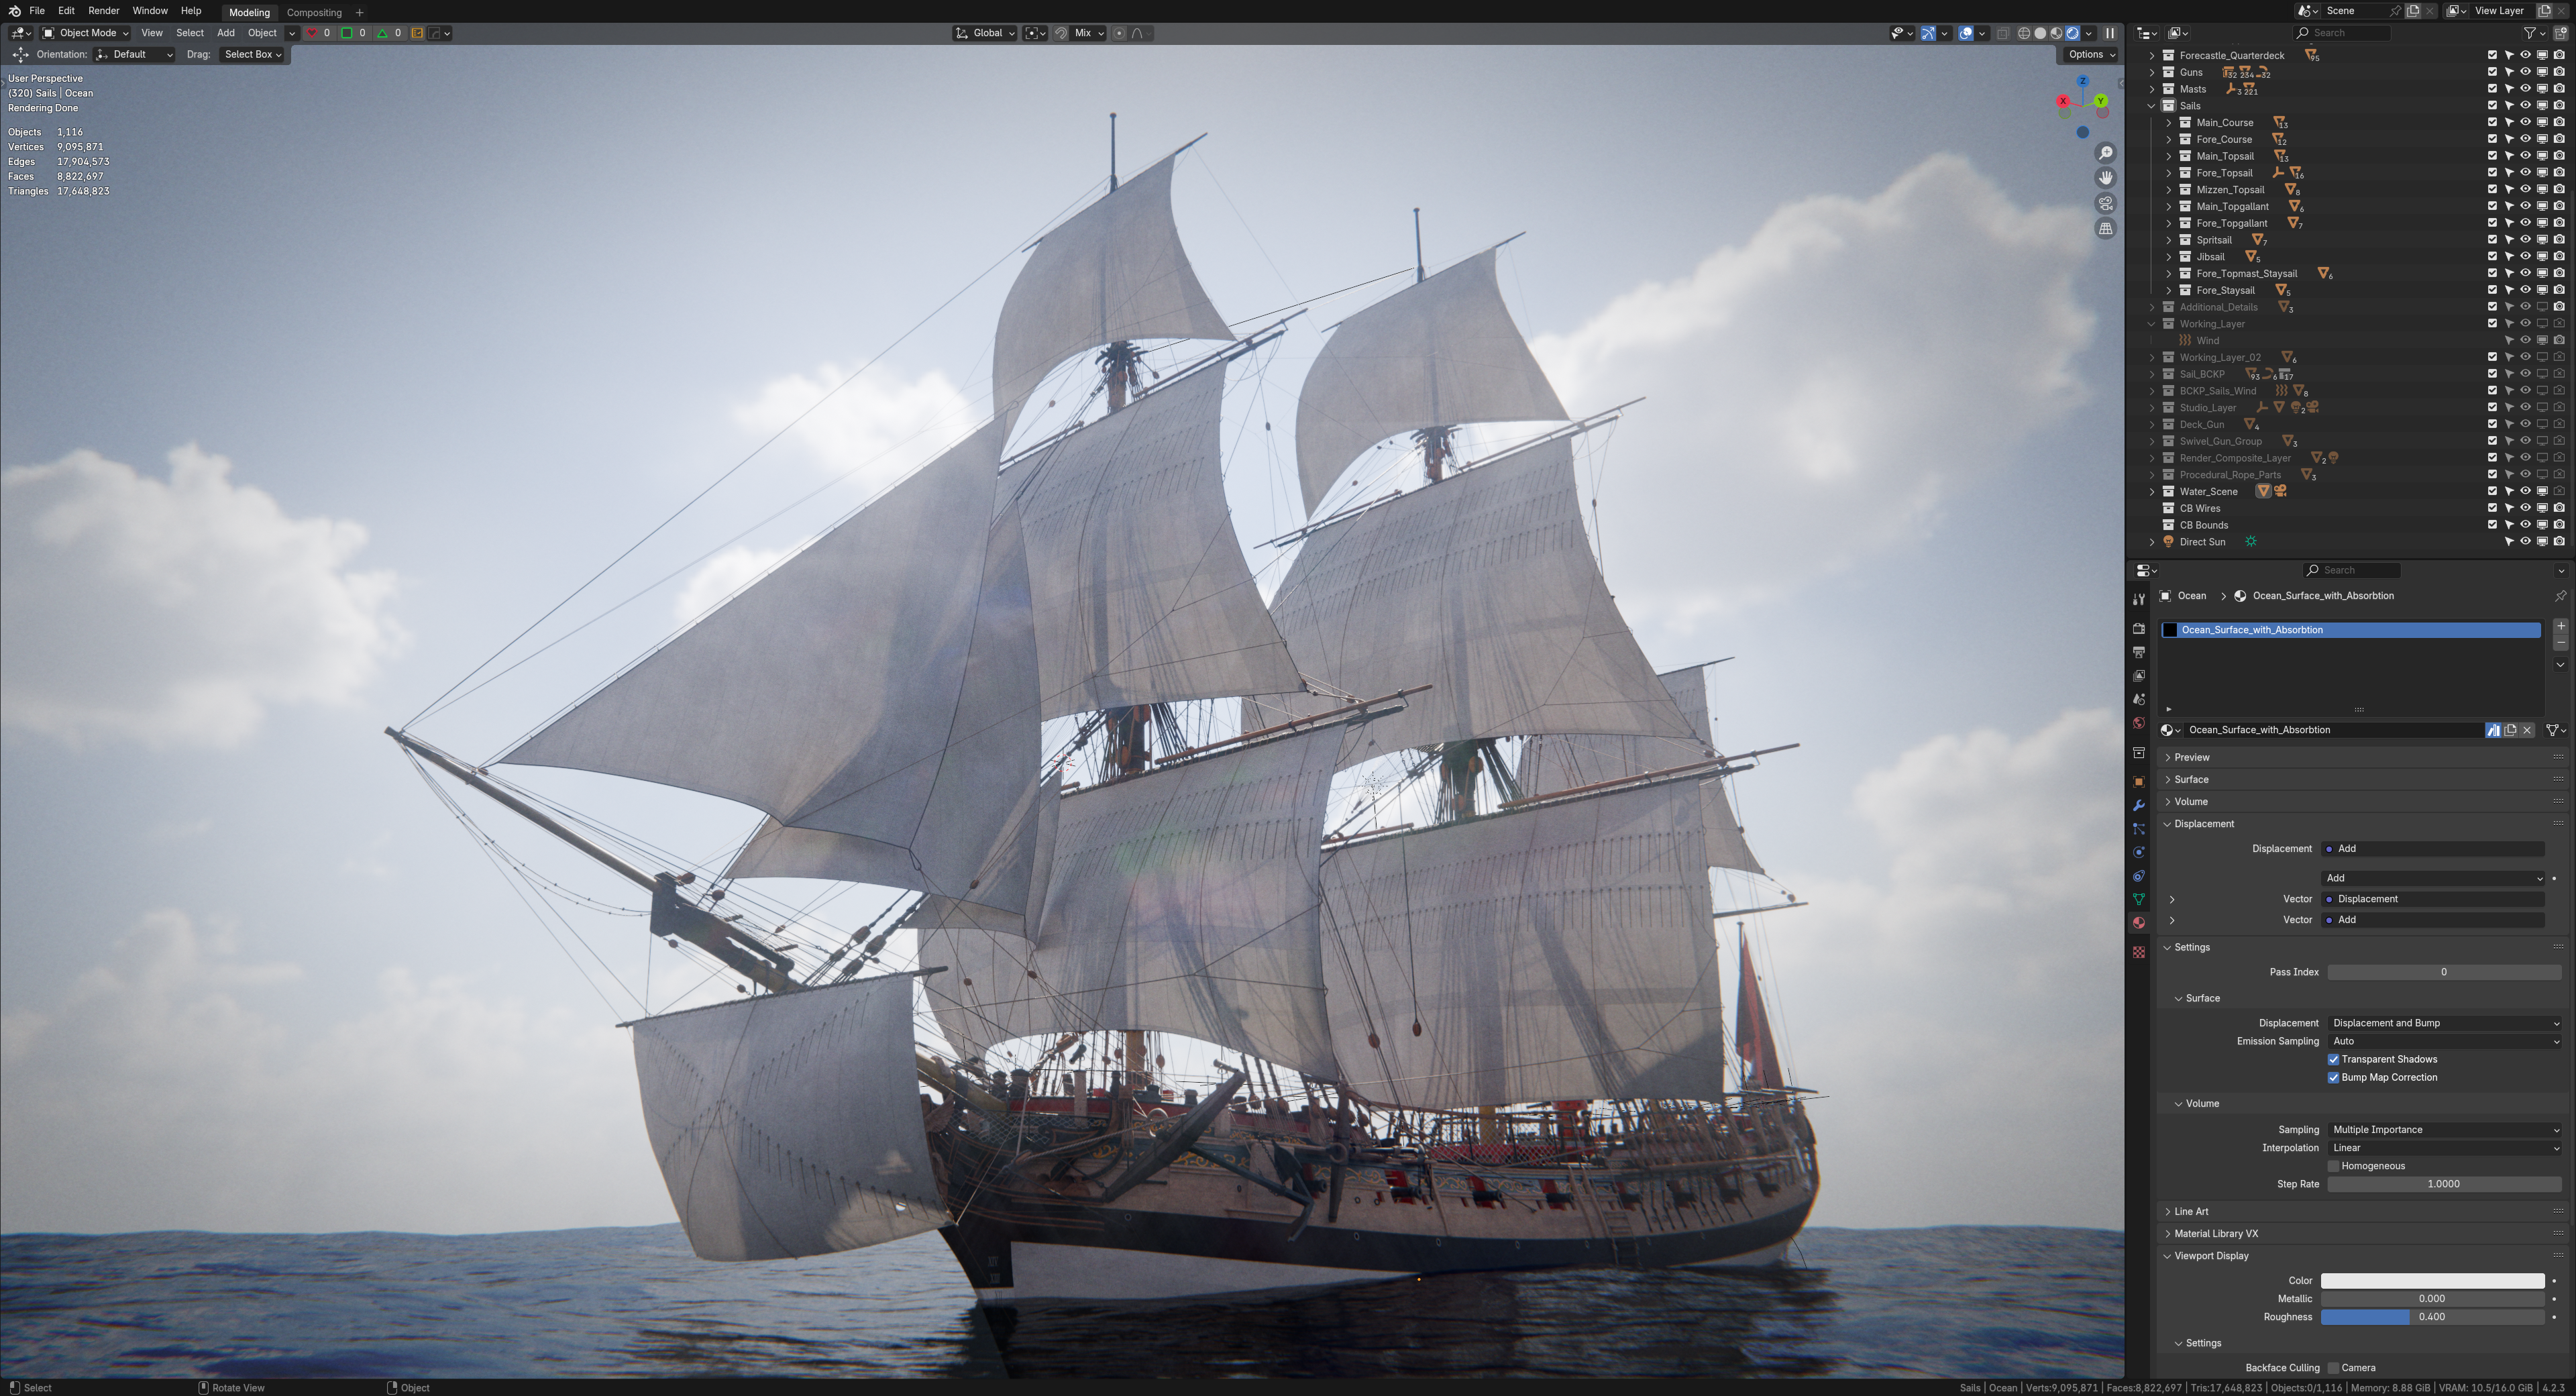
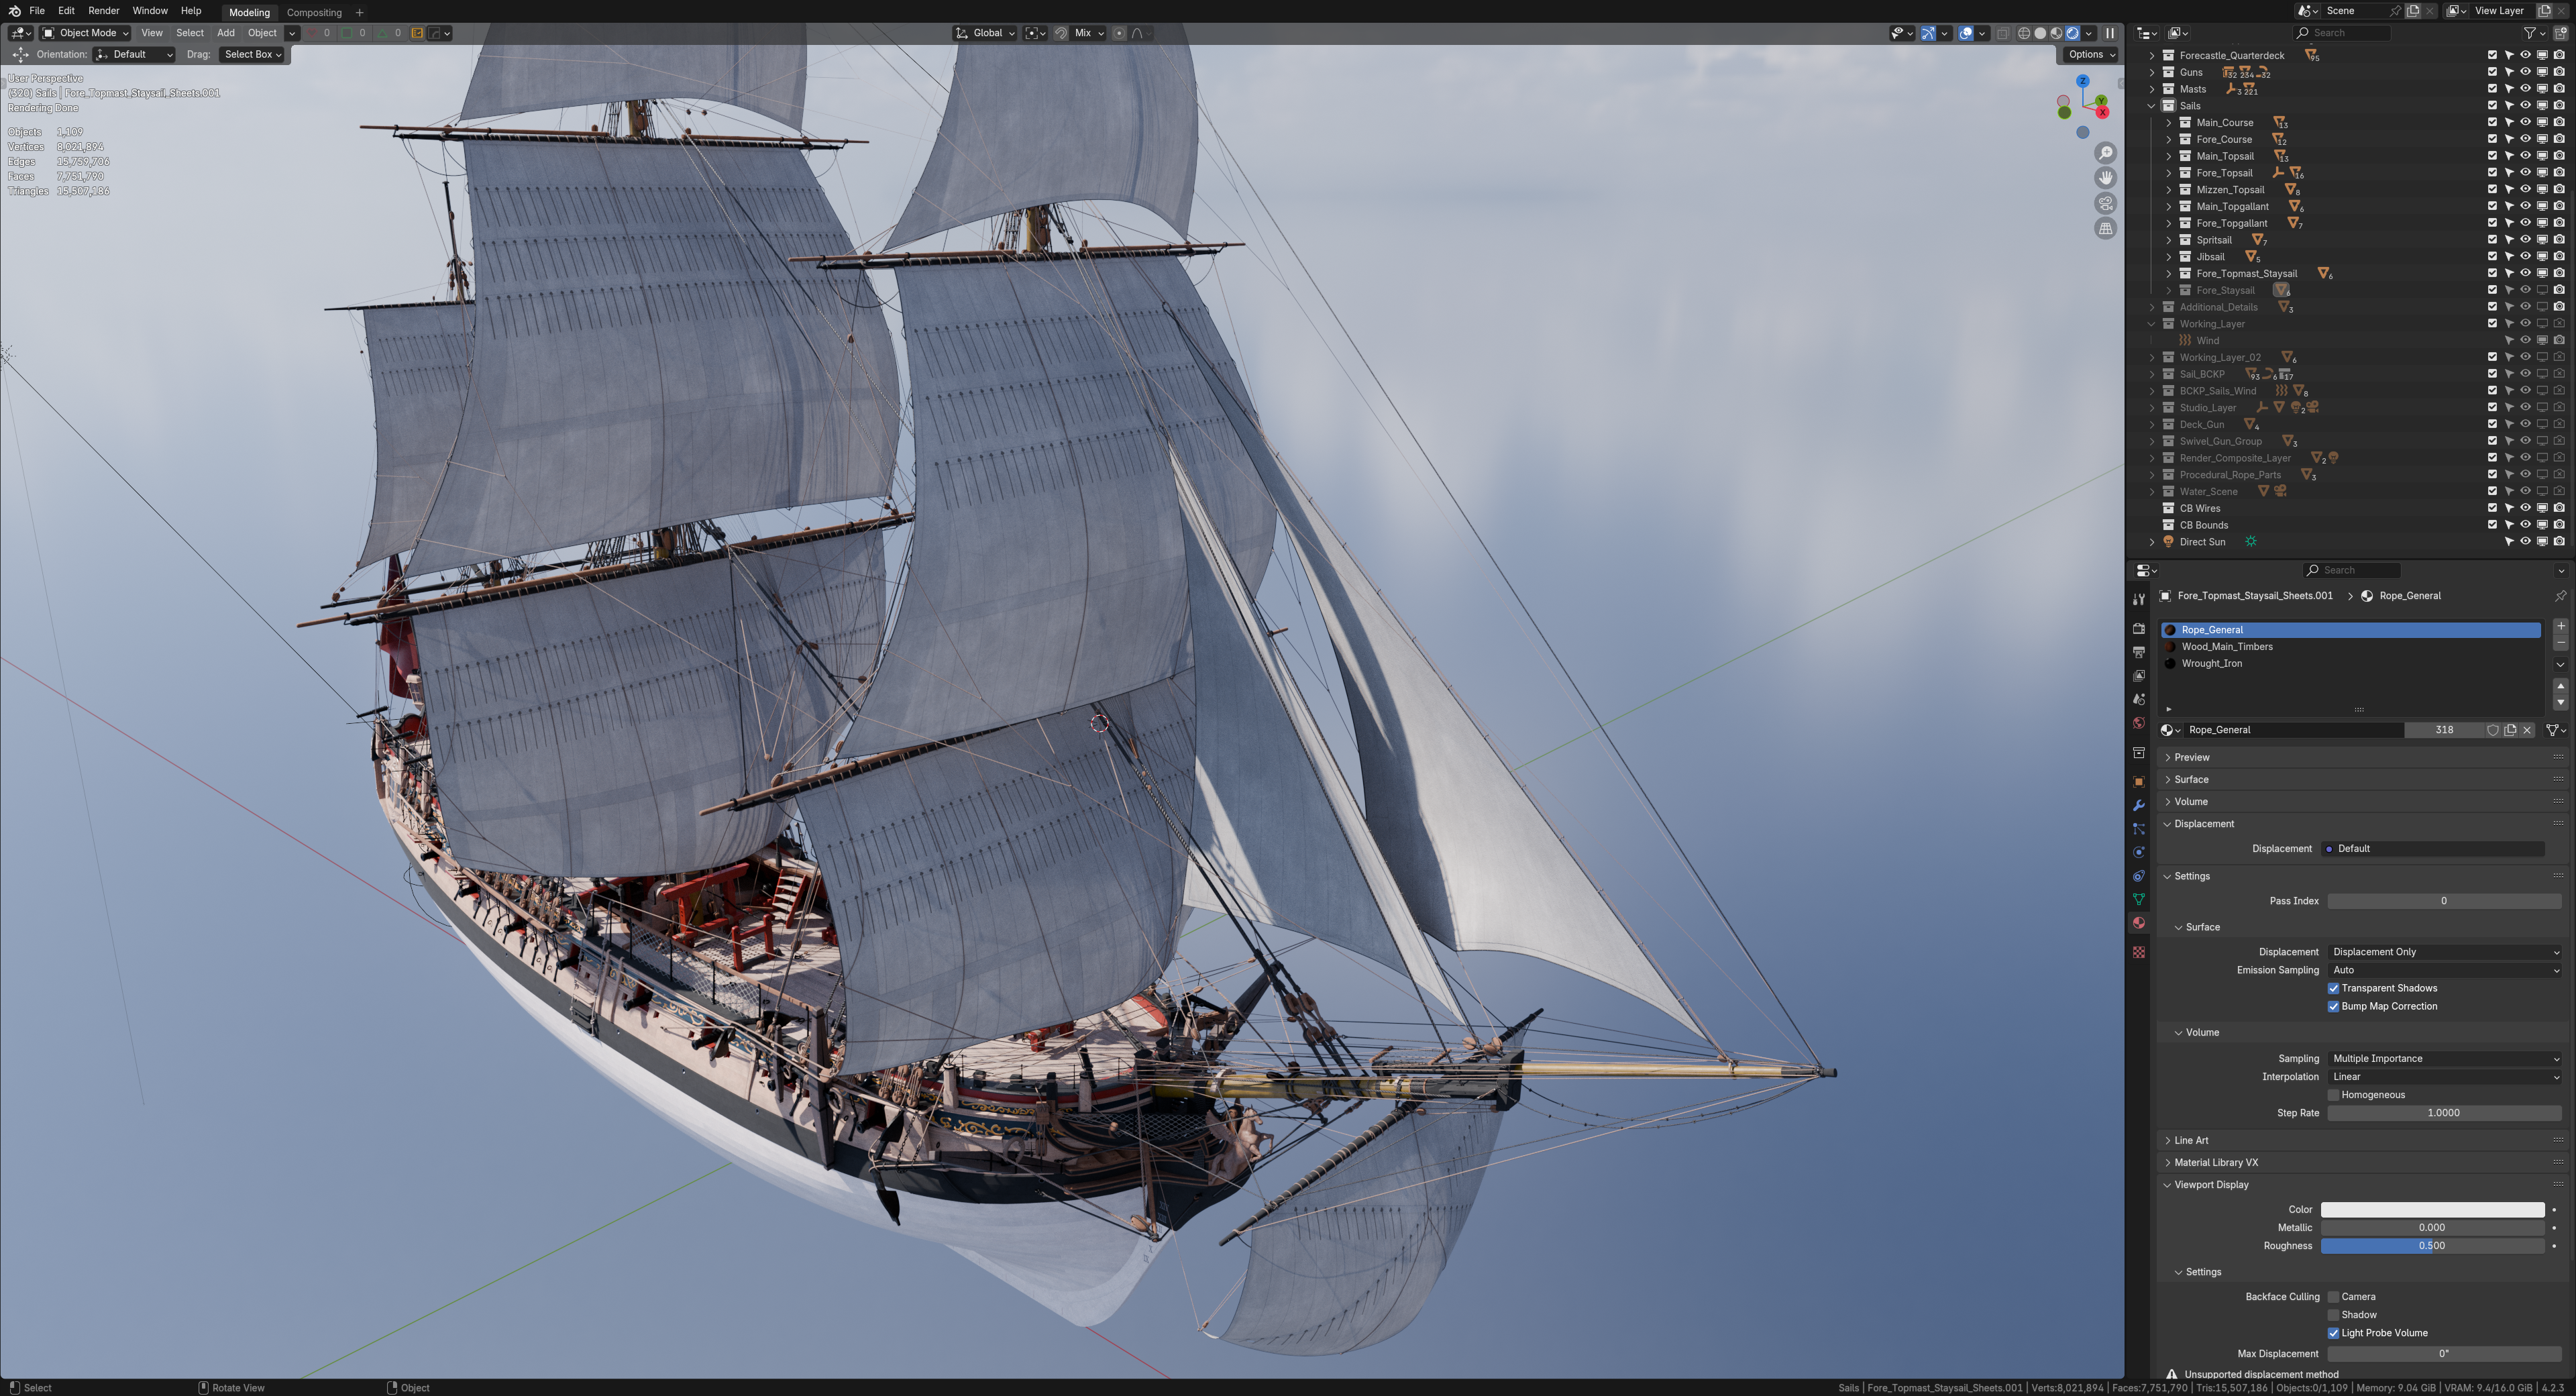
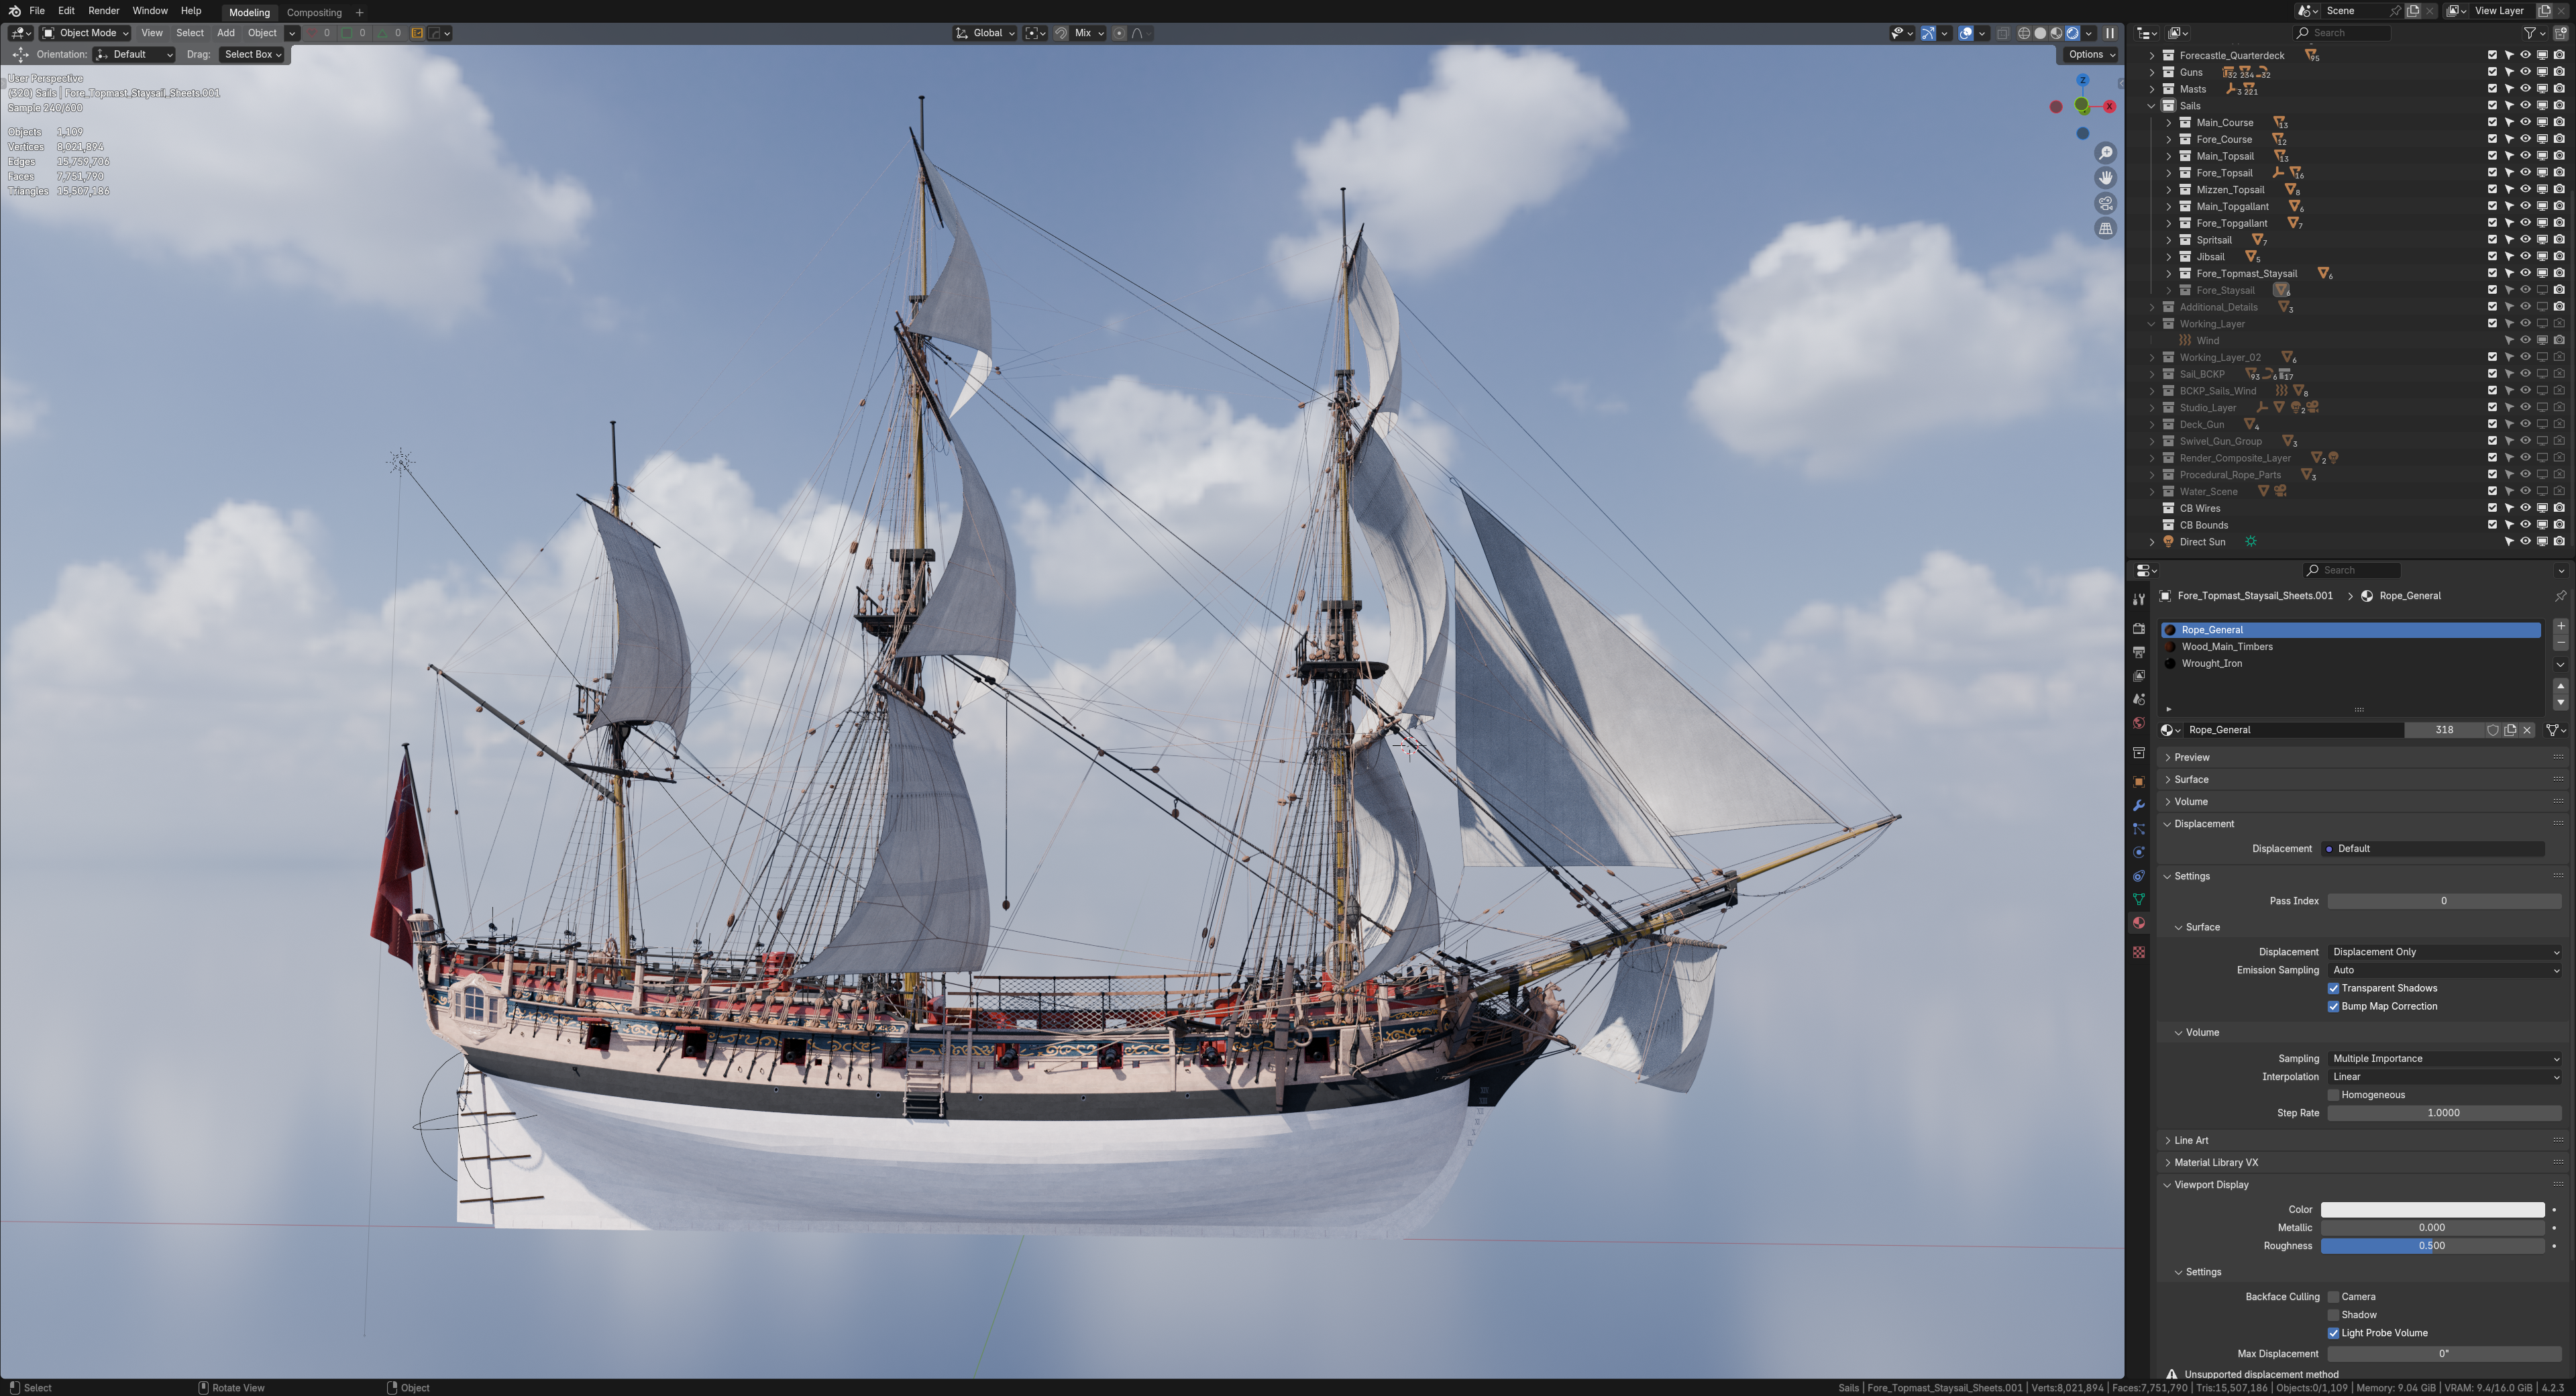
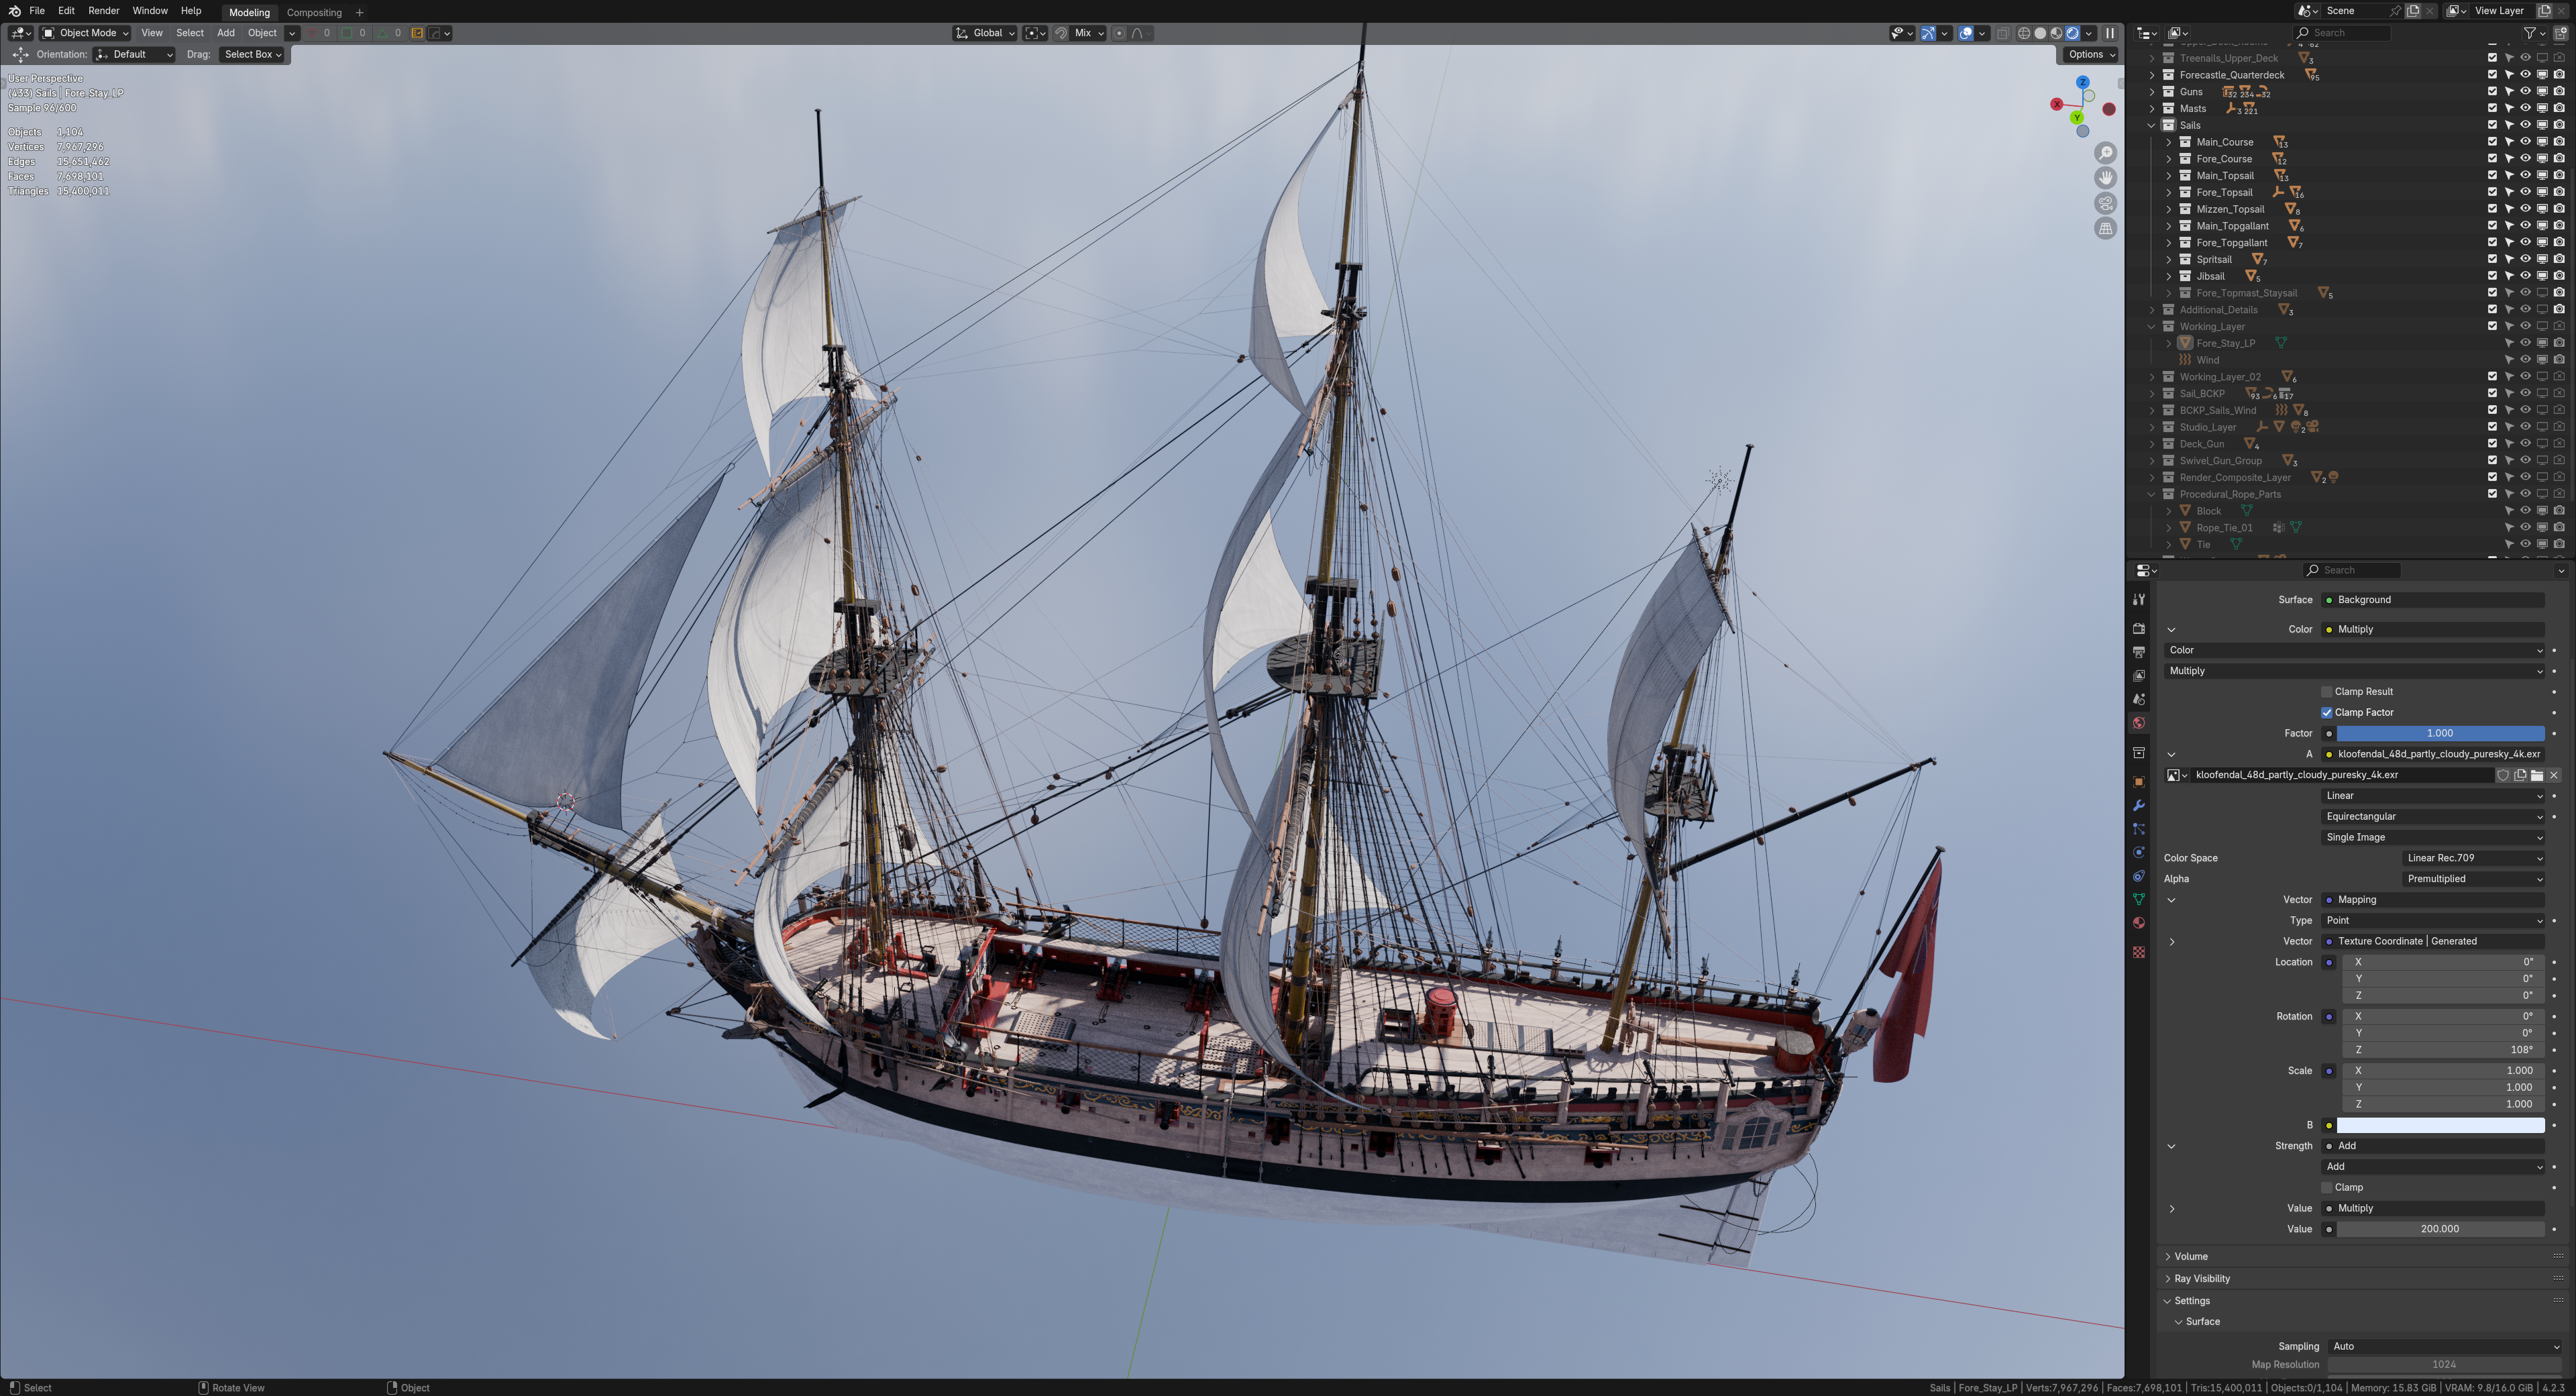
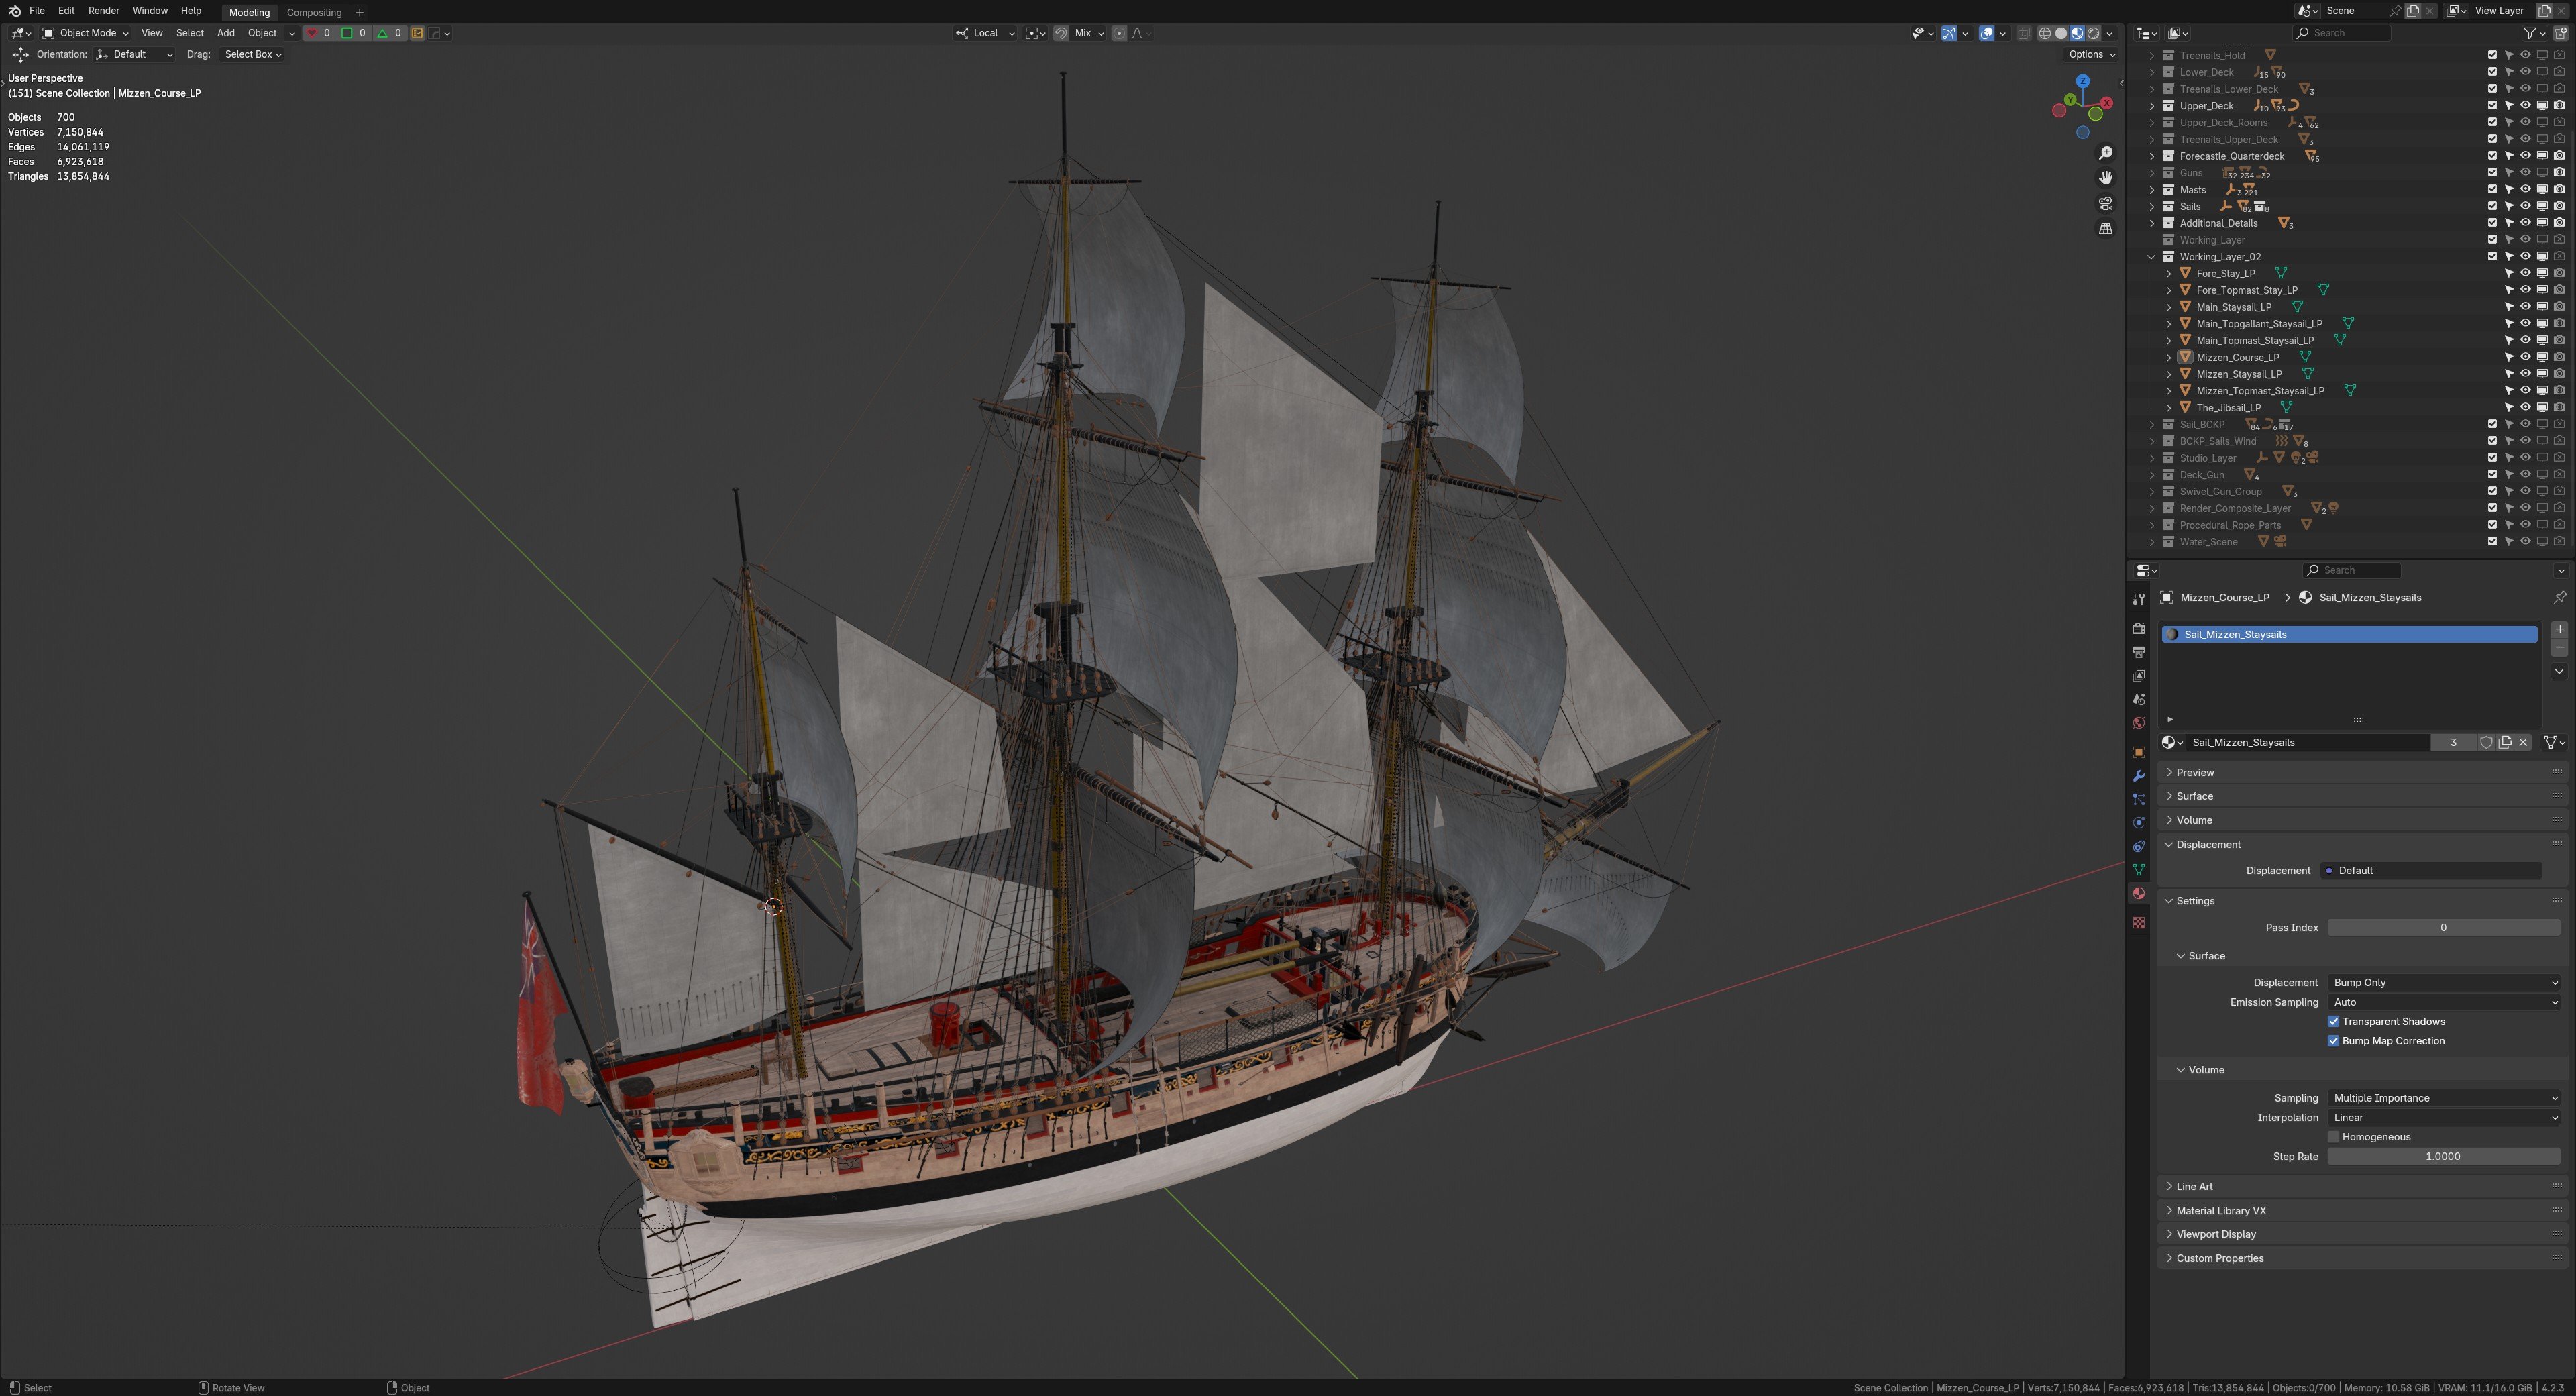
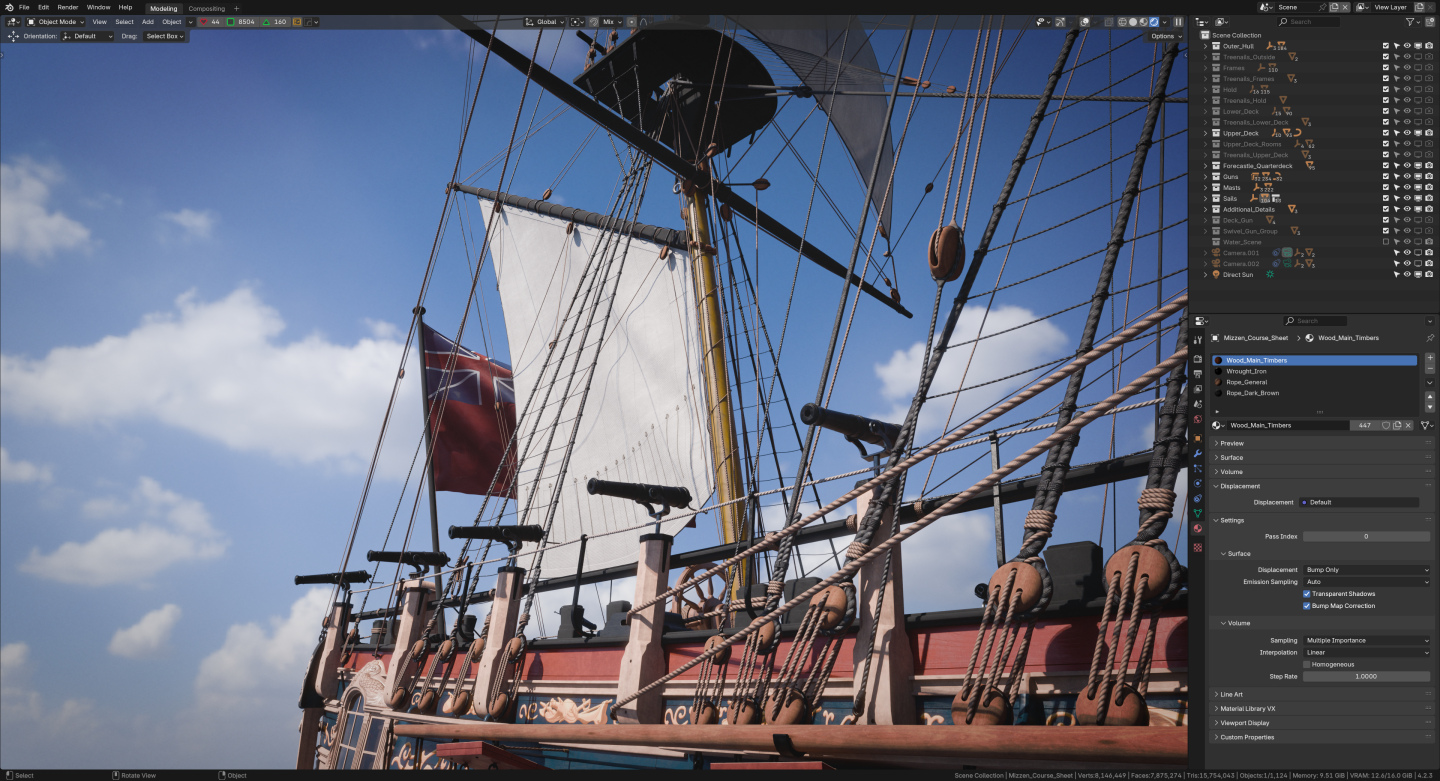
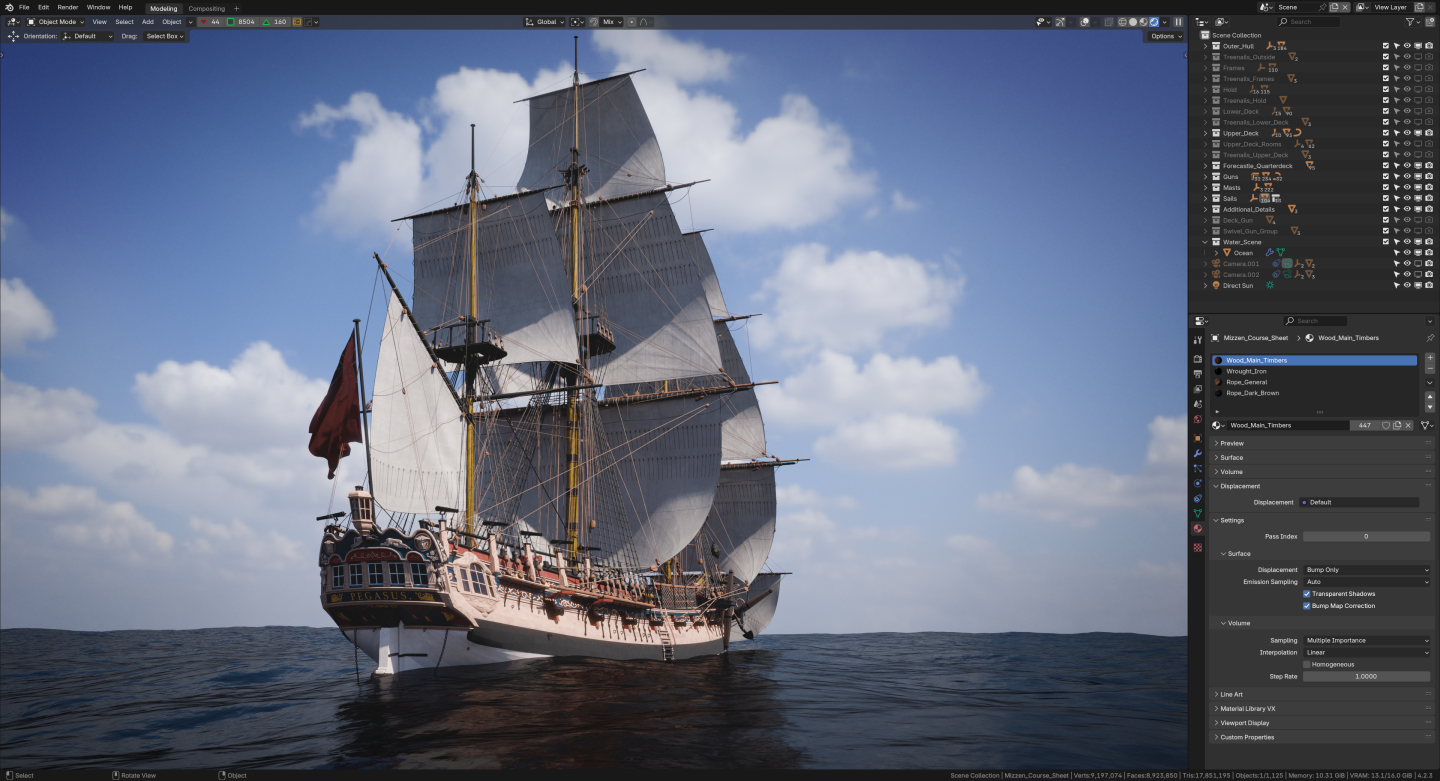
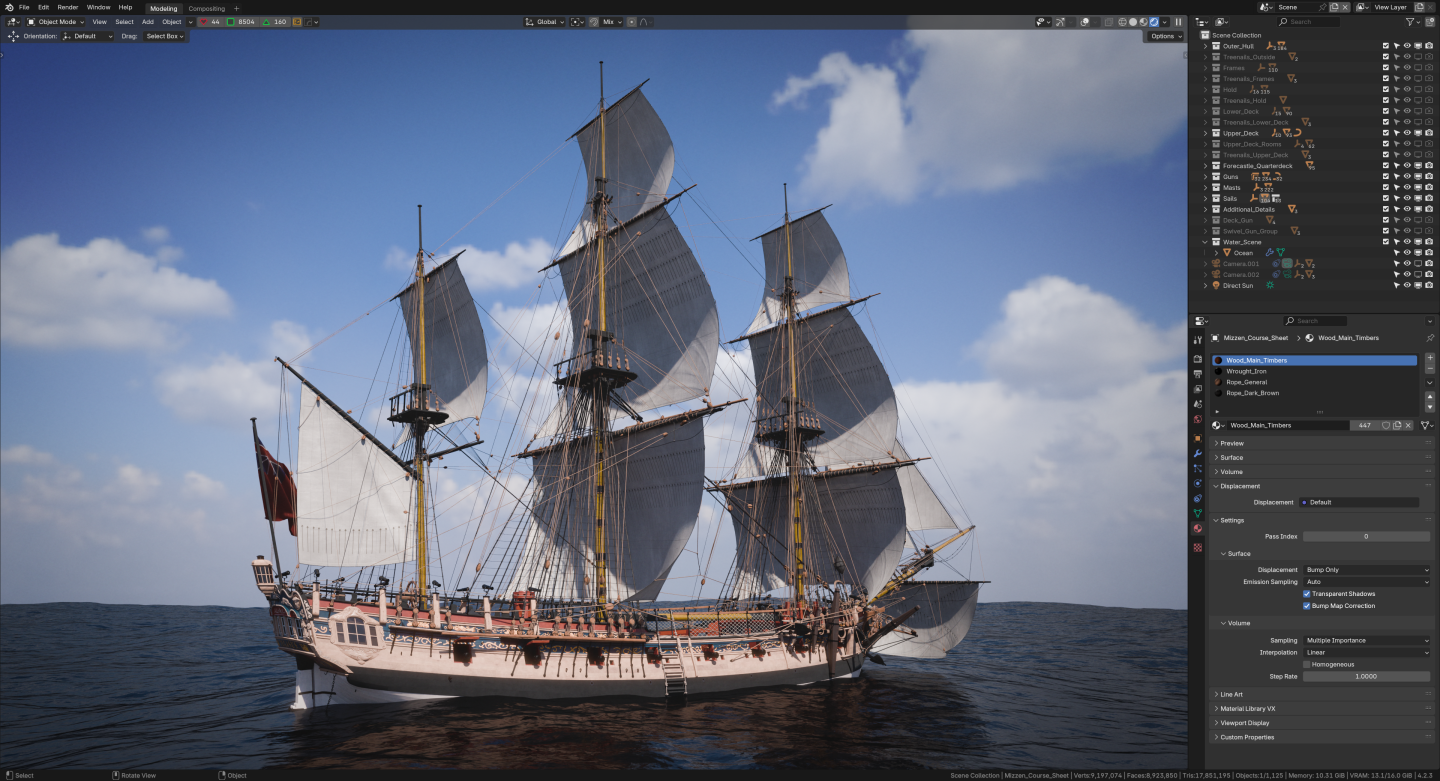
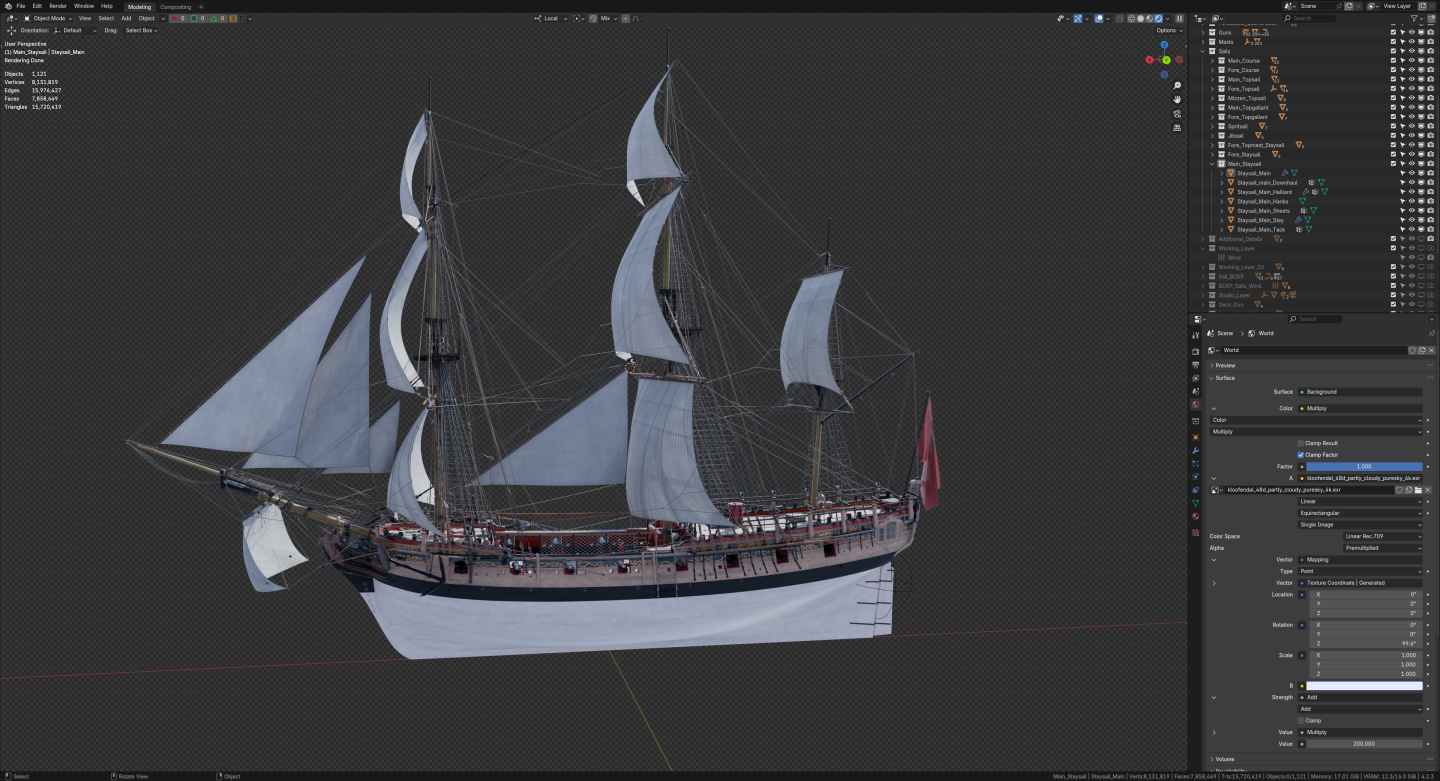
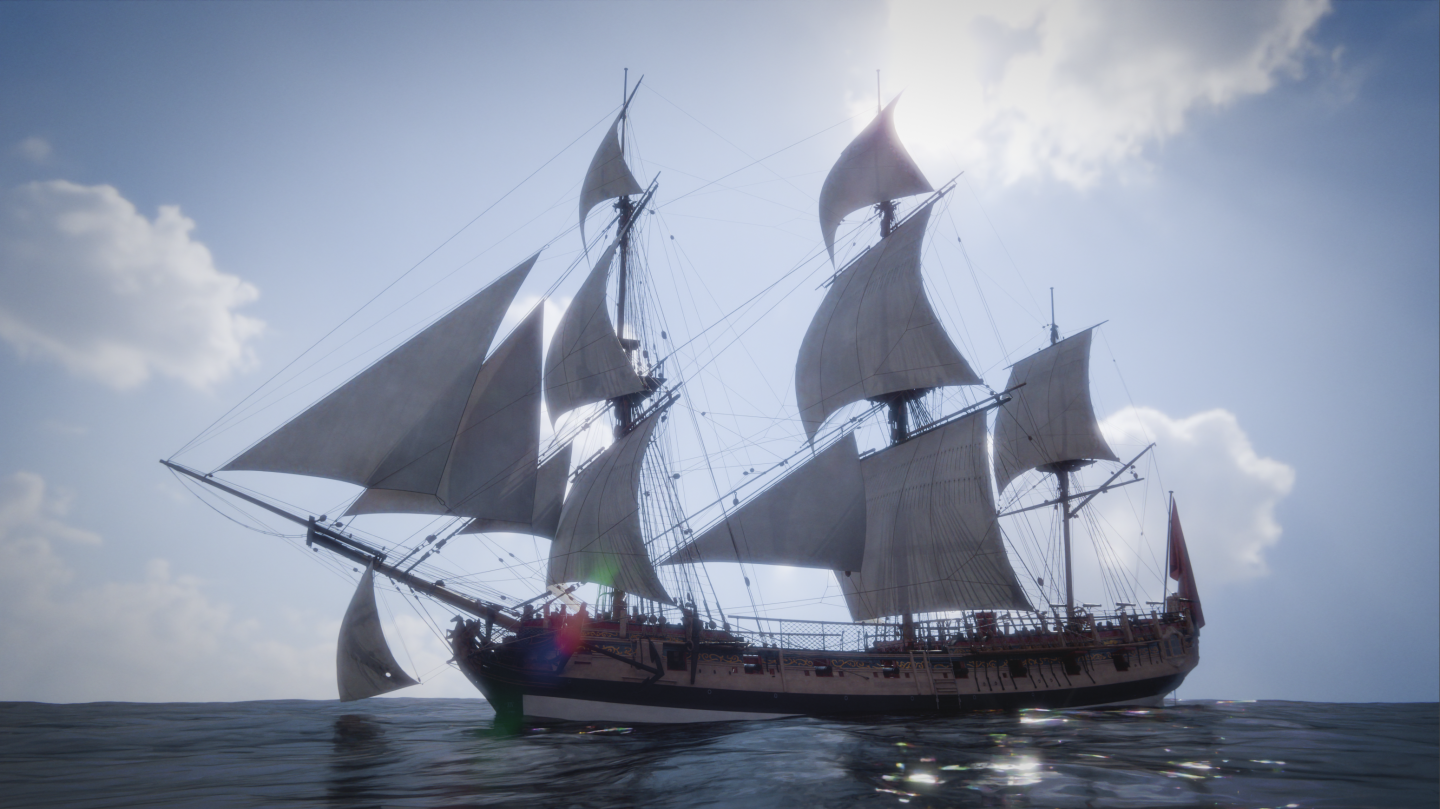
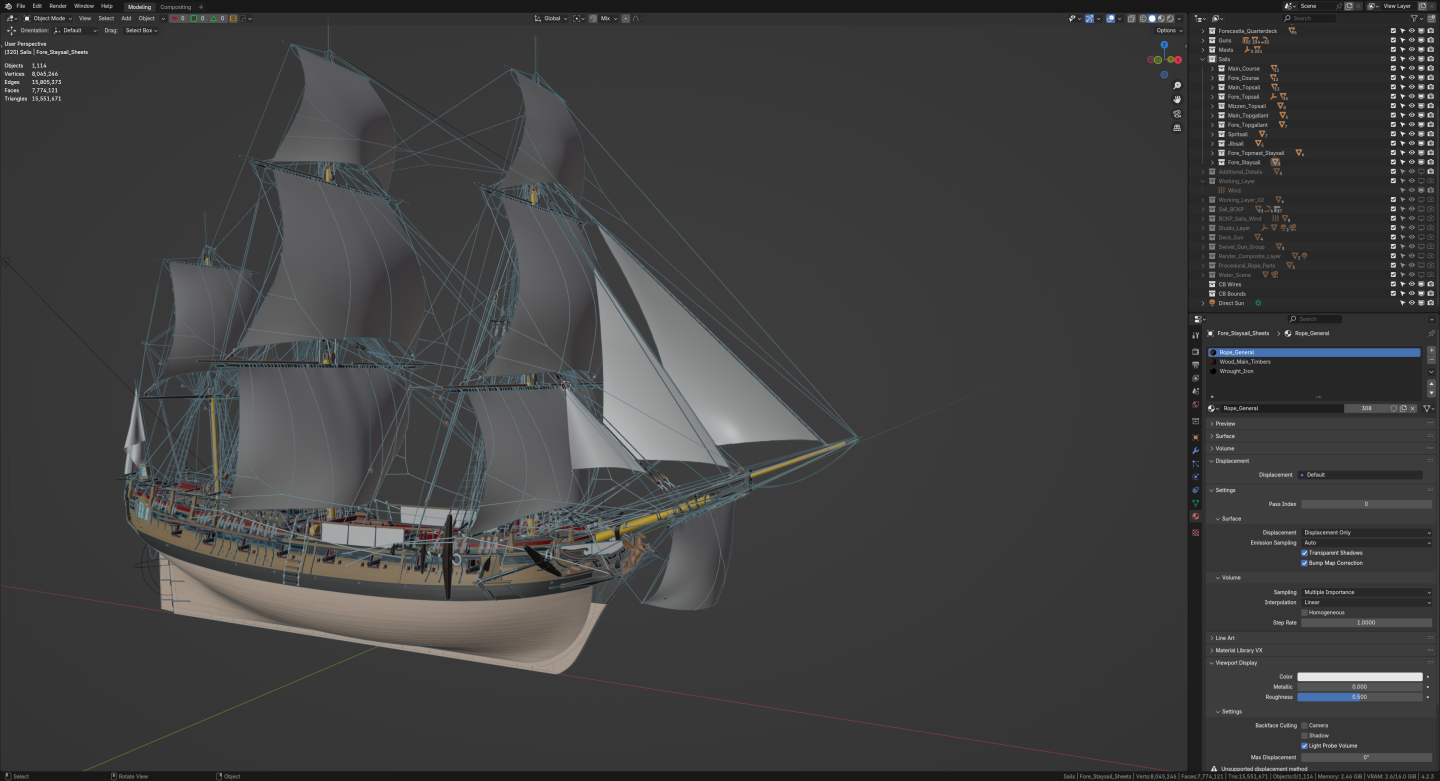
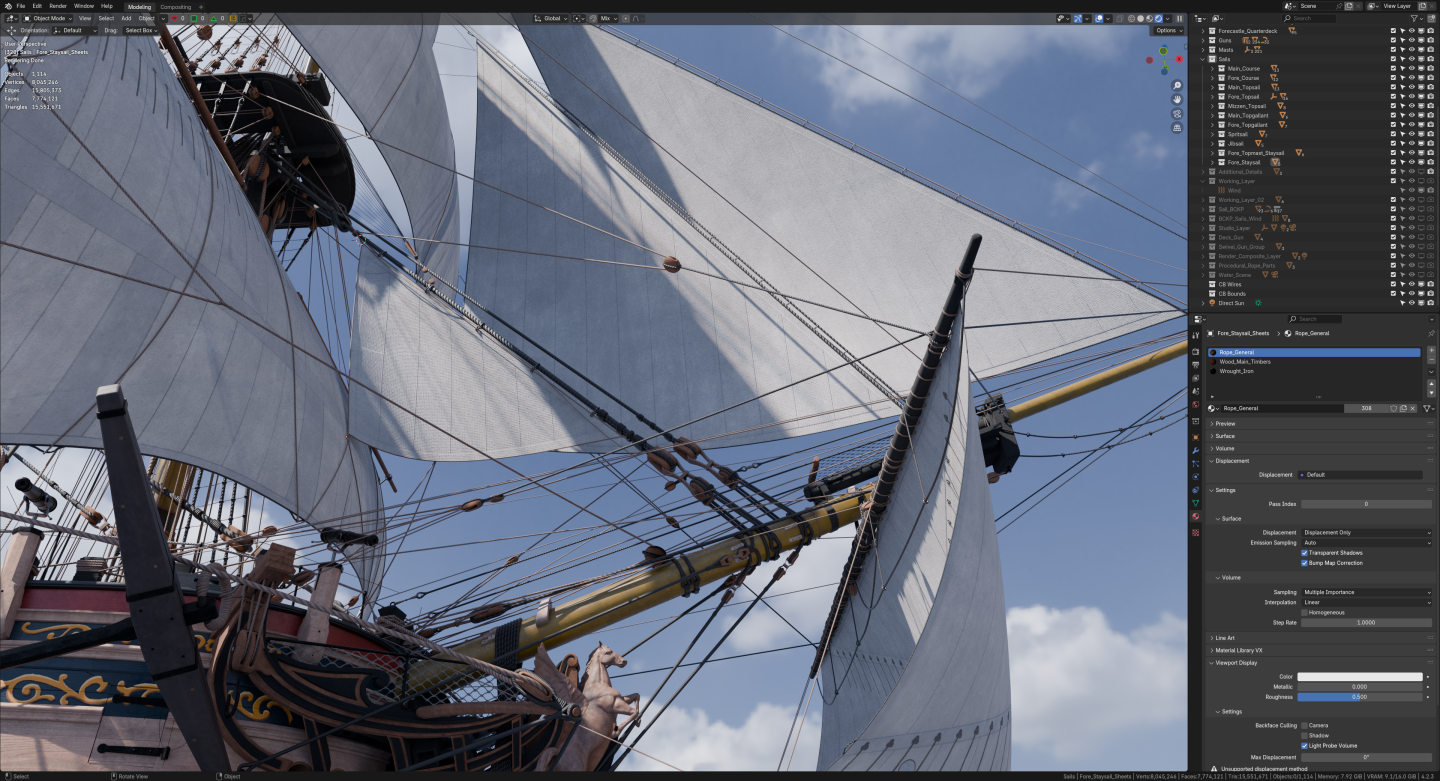
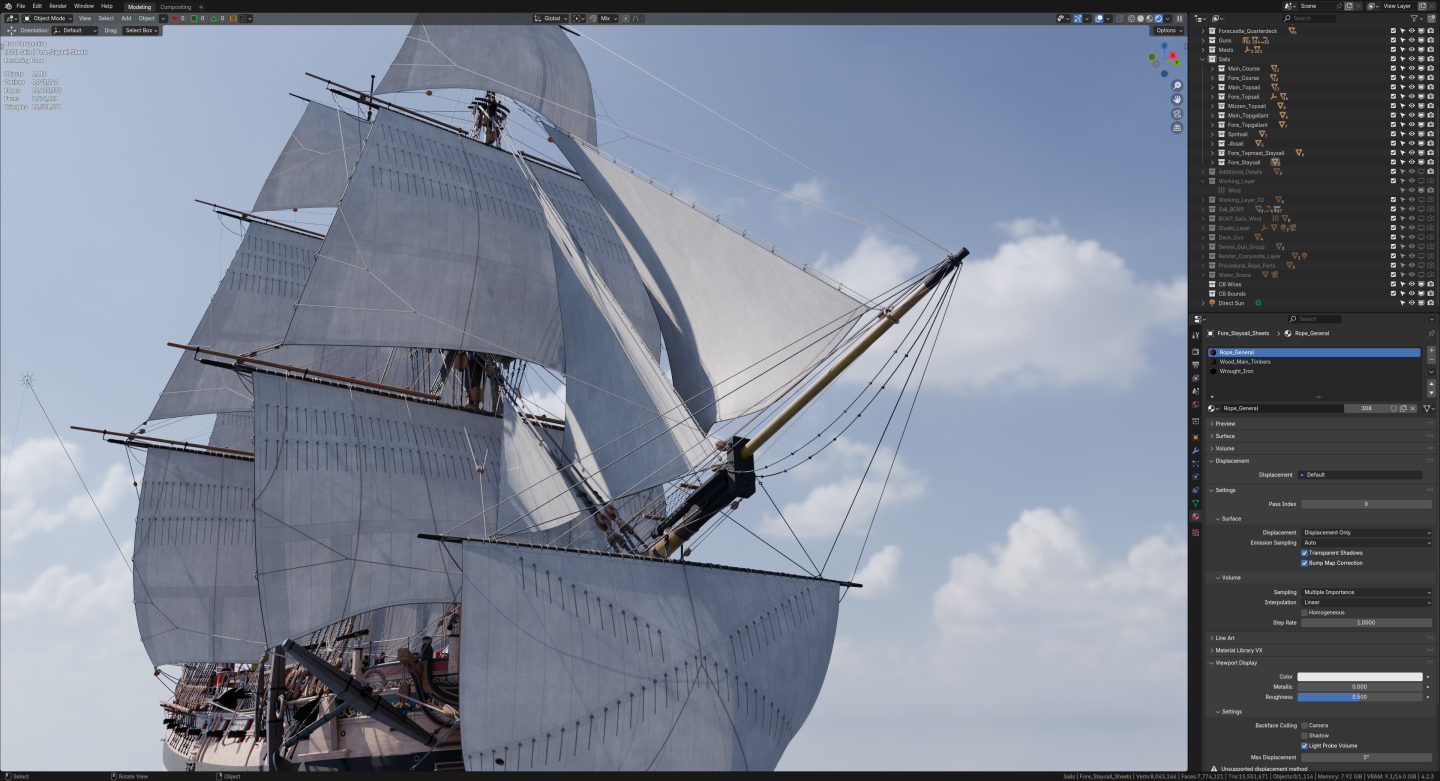
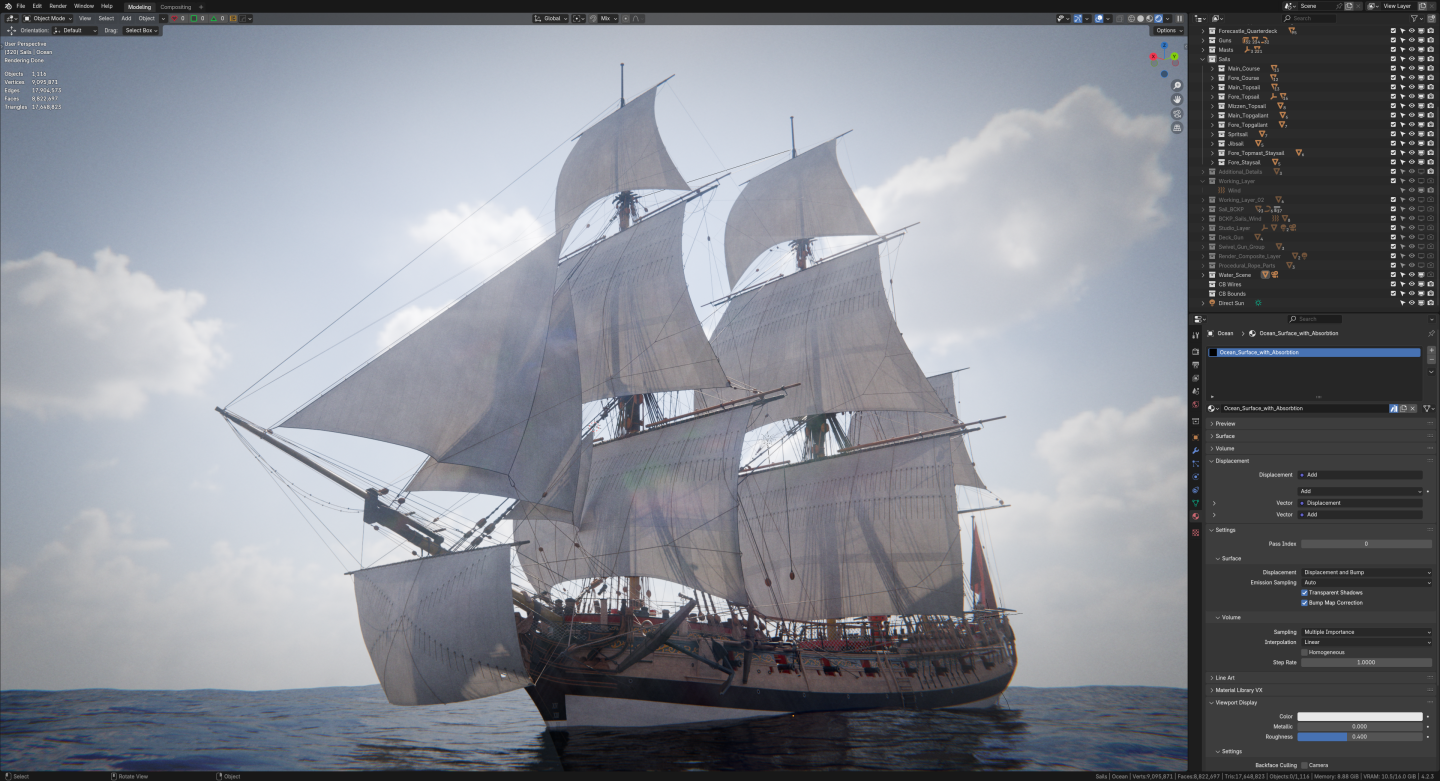
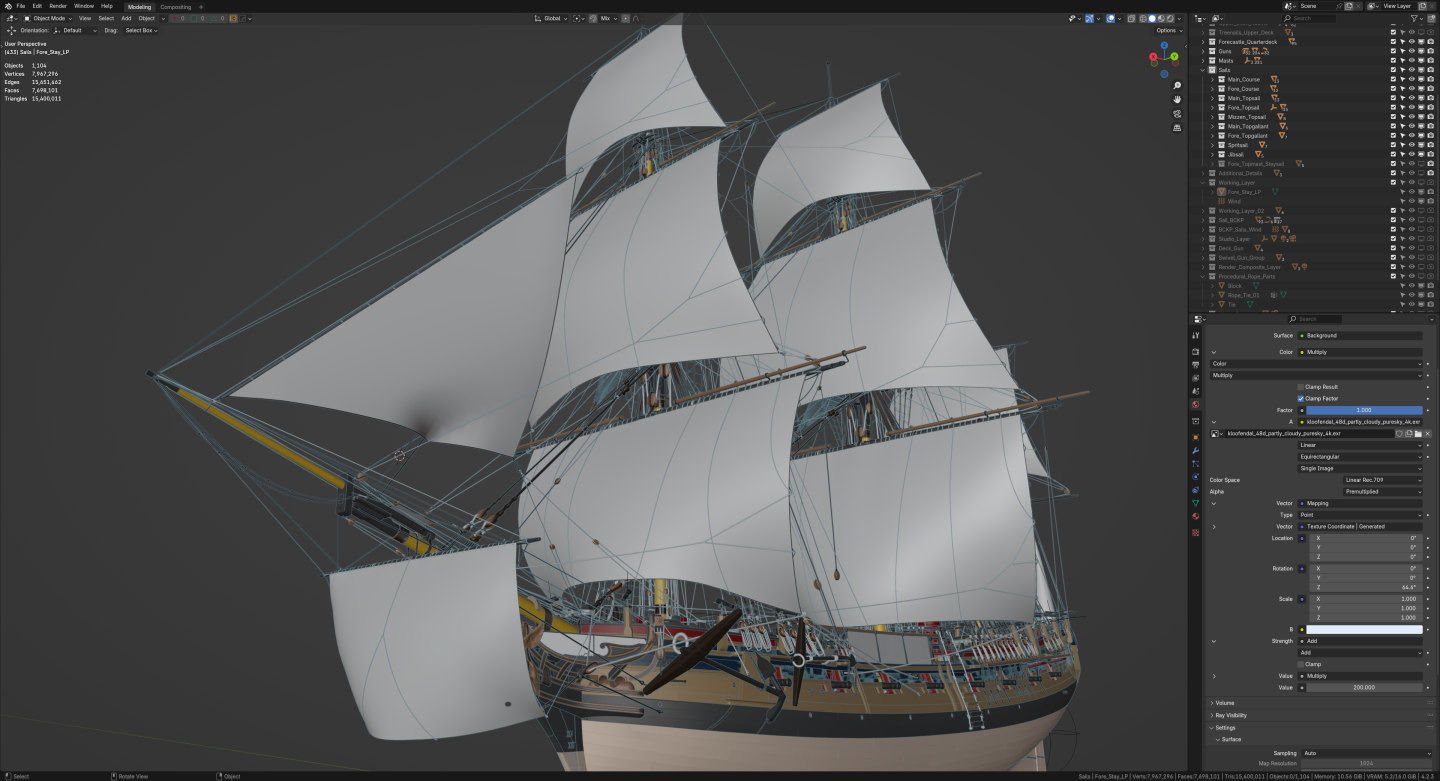
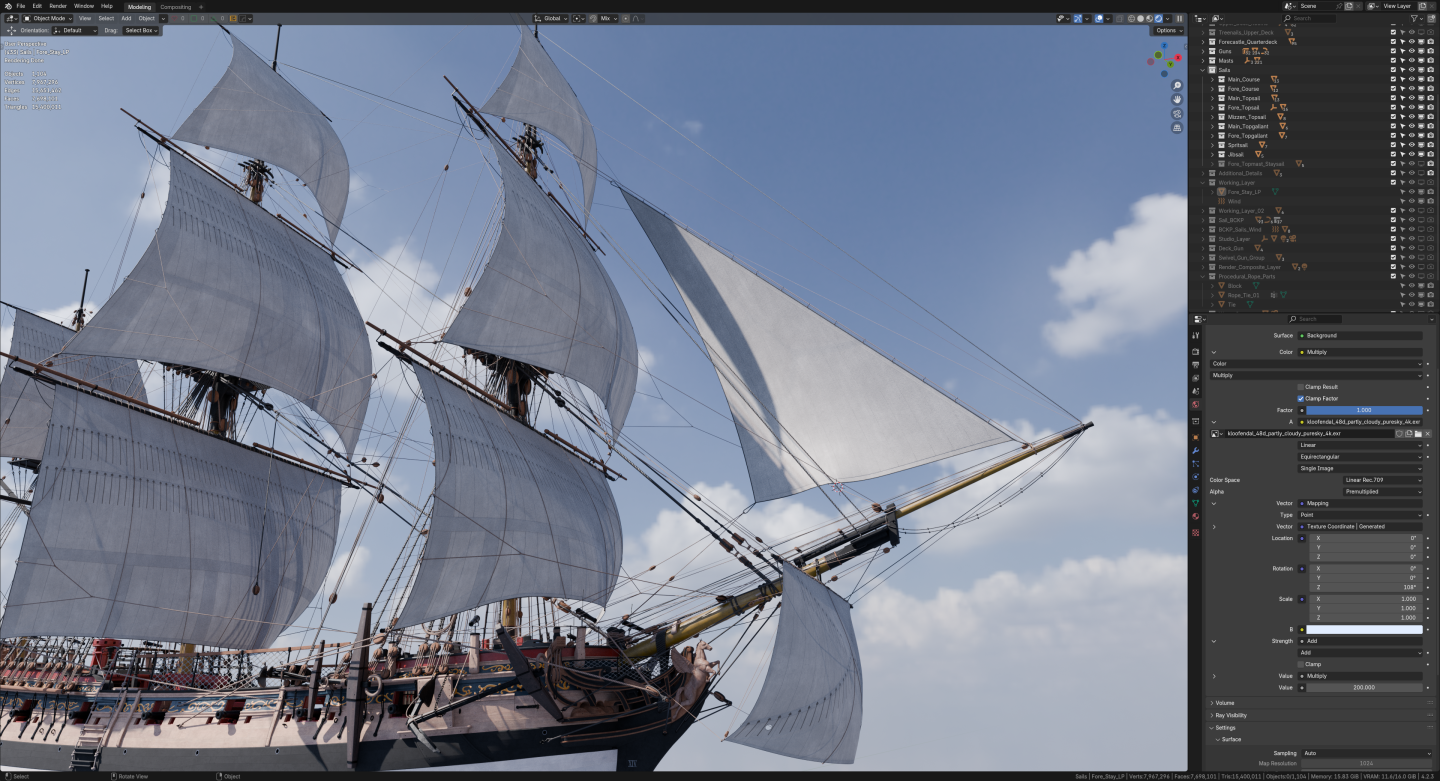
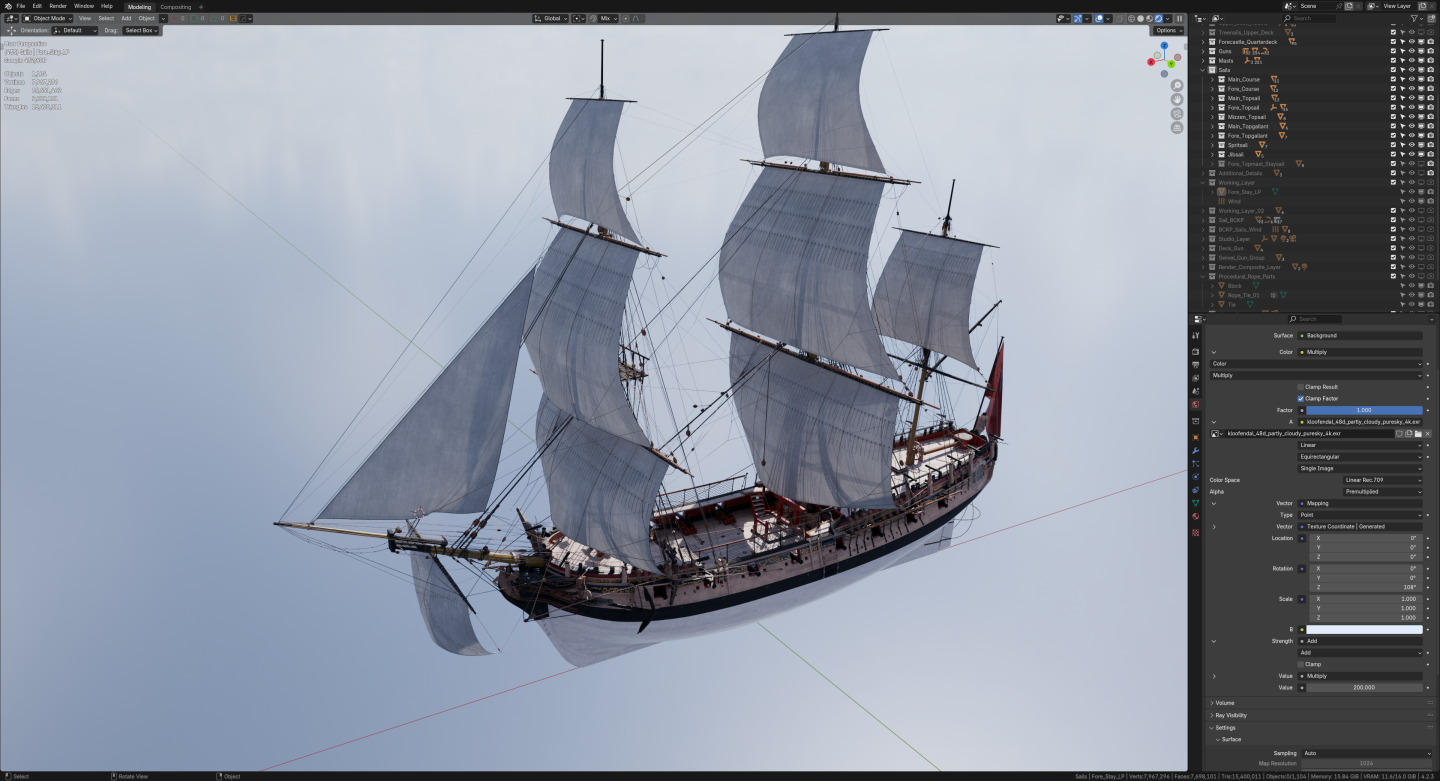
The Fore Staysail is done. onto the middle staysails... and a couple of ocean renders, because she looks beautiful with sun behind the sails...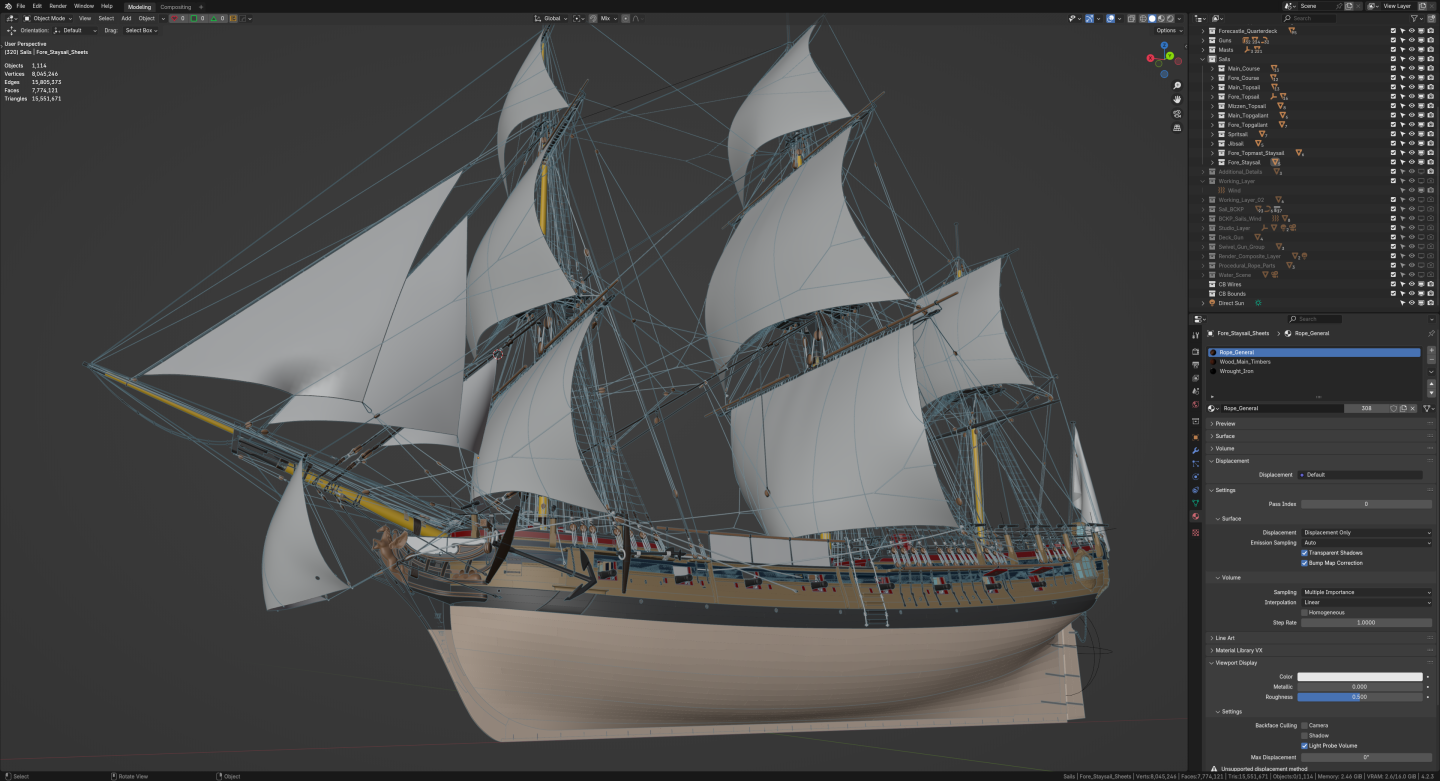


- 141 replies
-
- 5
-
-
-
- pof swan series
- swan
- (and 1 more)
-
the problem with learning Blender is that it can do almost anything. it really is a jack of all trades. an honest advice I can give you, should you choose it as a main weapon, is to learn one thing at a time. you can quickly get overwhelmed with all the stuff it can do: hard surface modeling, sculpting, simulation (fire, water, gas...), rendering, compositing... that's the very mistake I made at the beginning: I wanted everything!! so it prolonged my learning experience. by staying focused (in your case, to hard surface modeling) you should progress much quicker. I doubt you'll find quality tutorials focused specifically on ship building. but, going through some tutorials for cars, airplanes and weapons should give everything you need to build any ship you like. about naval terminology and specific maesurements, I'm affraid you're in for some pai... er... challenging experience
-
Swan class 3D model in progress
herask replied to dvm27's topic in CAD and 3D Modelling/Drafting Plans with Software
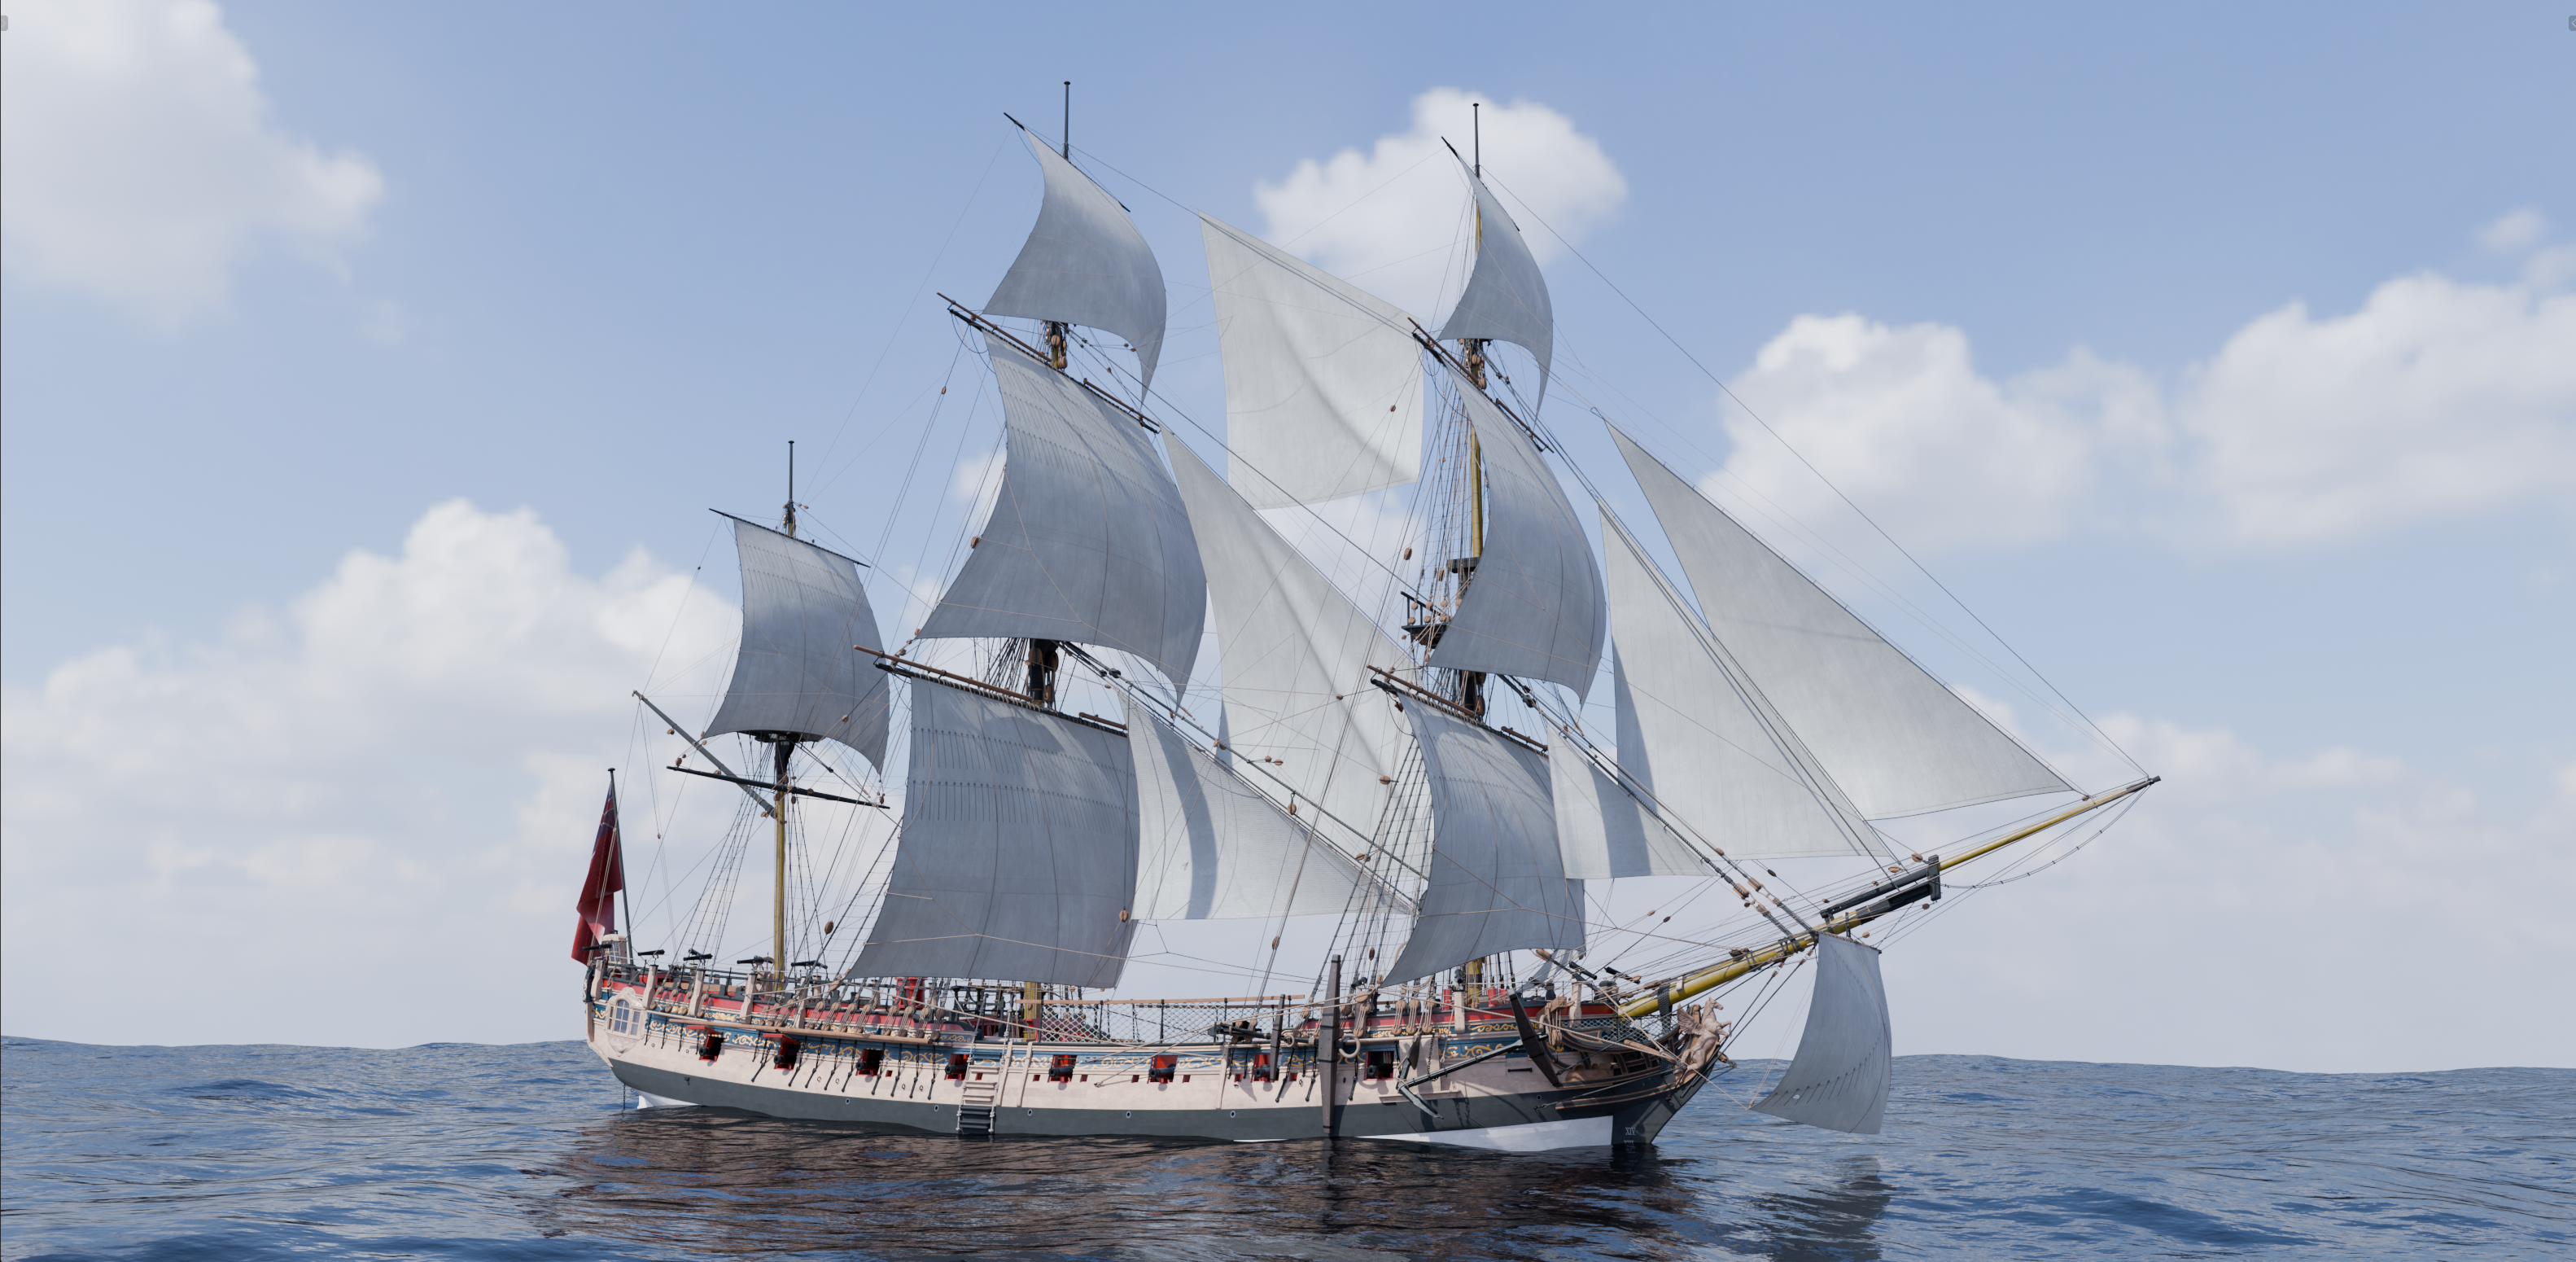
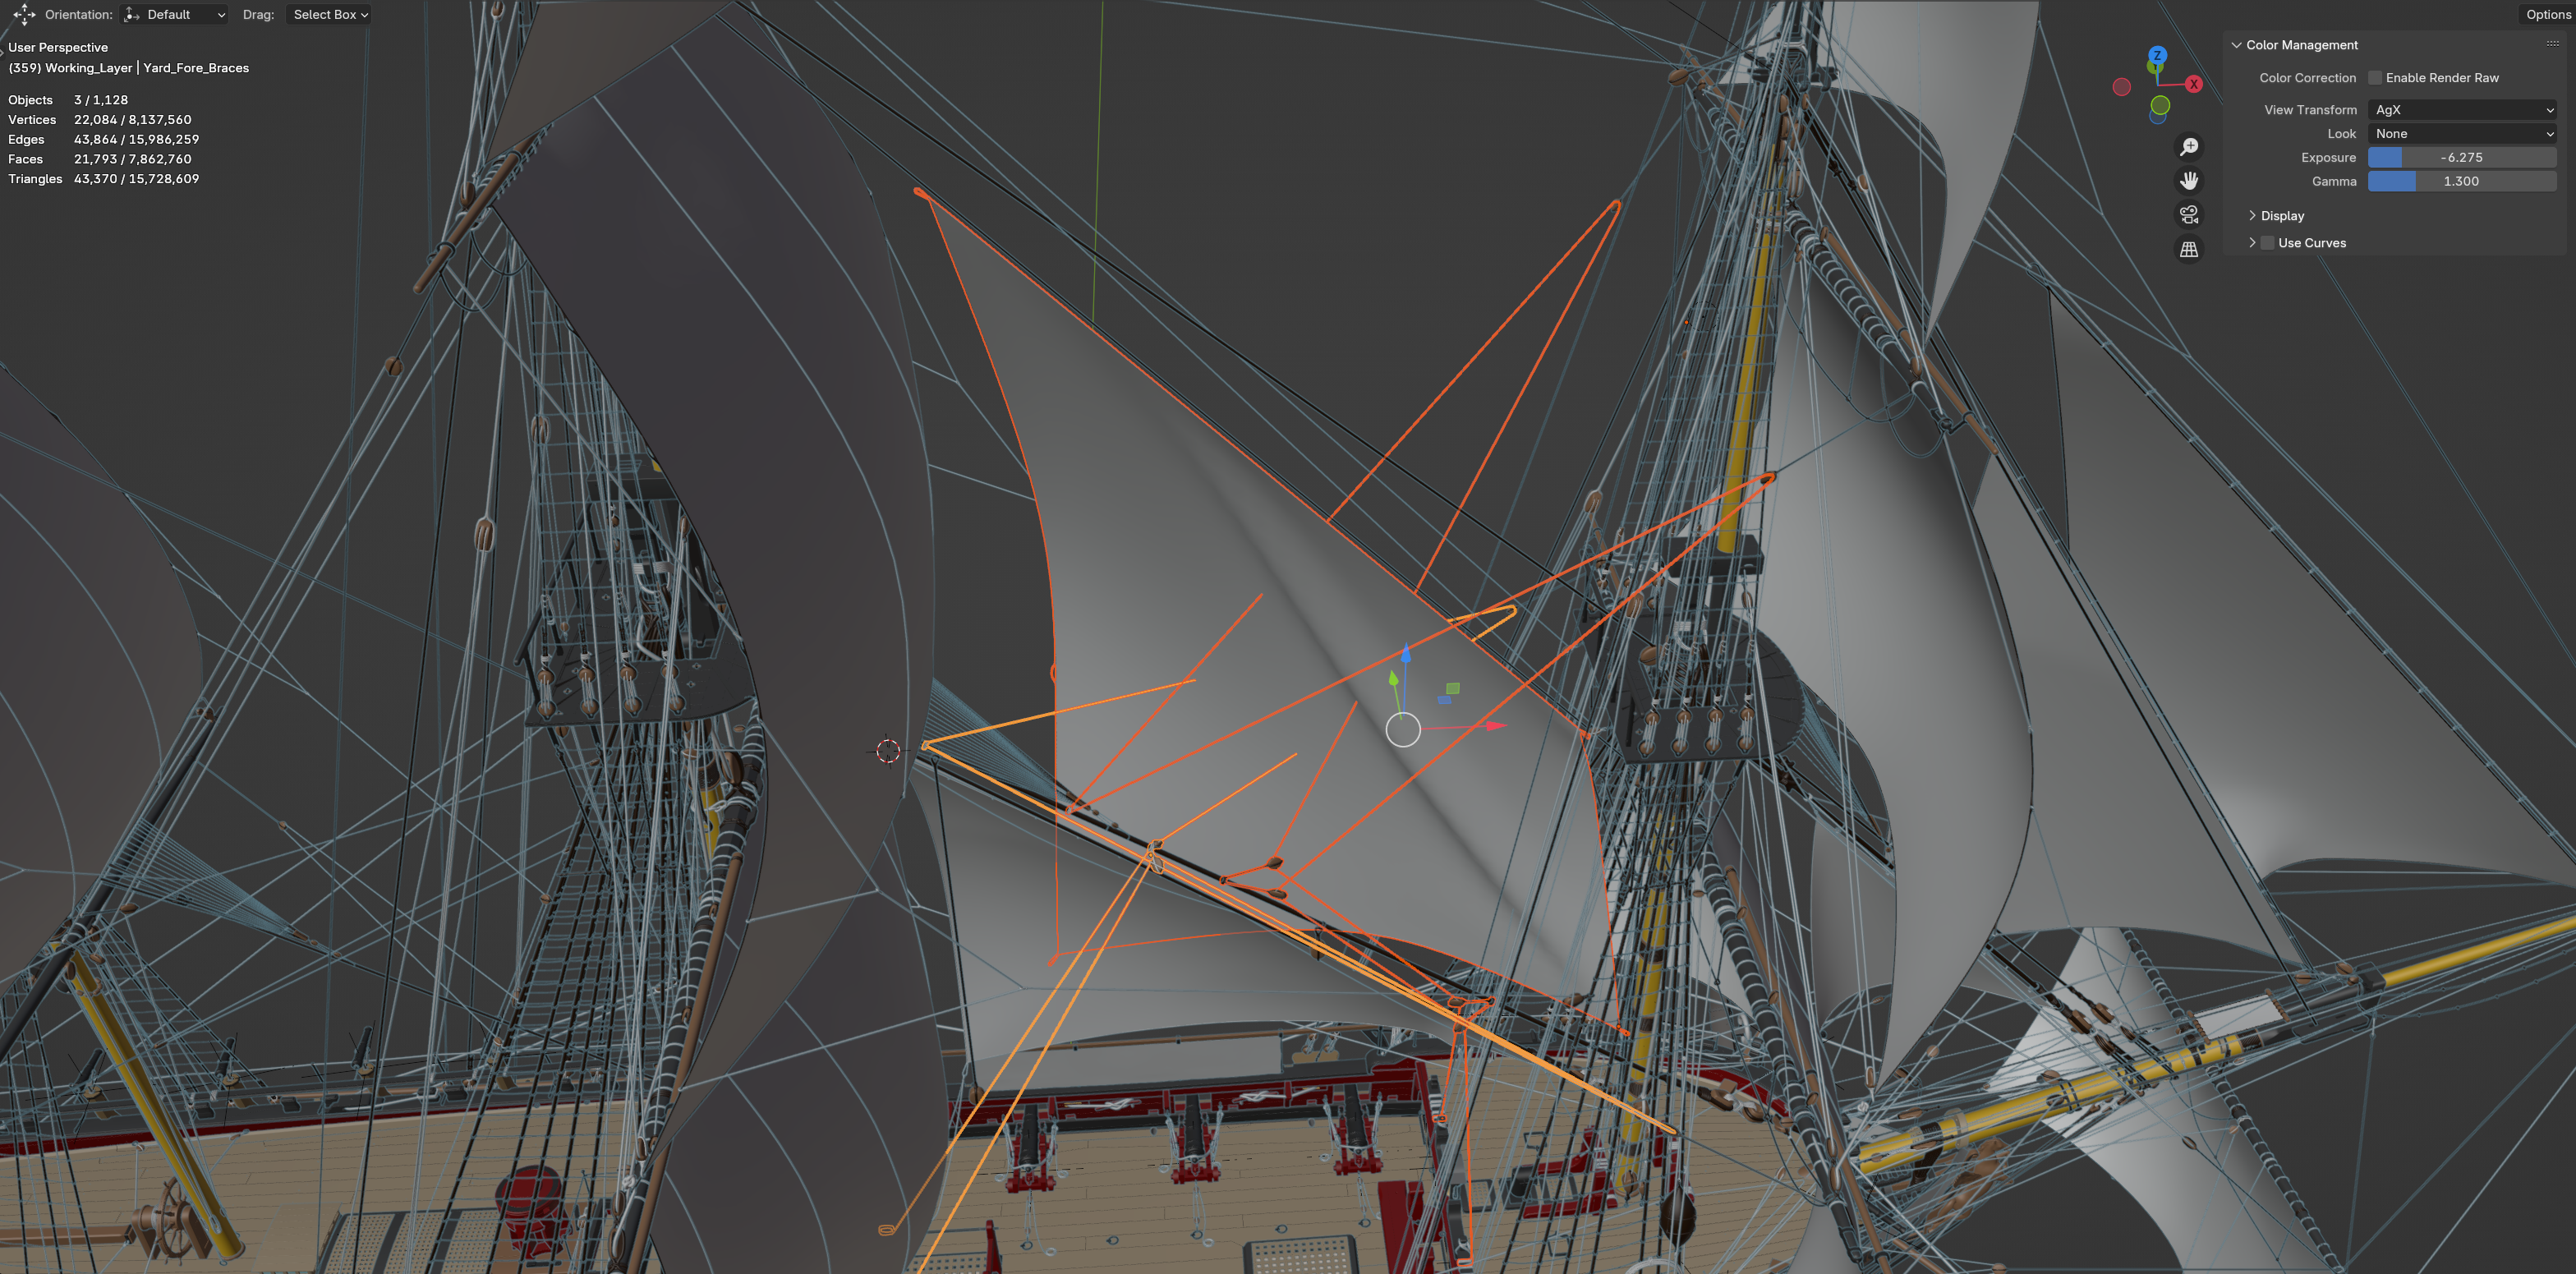
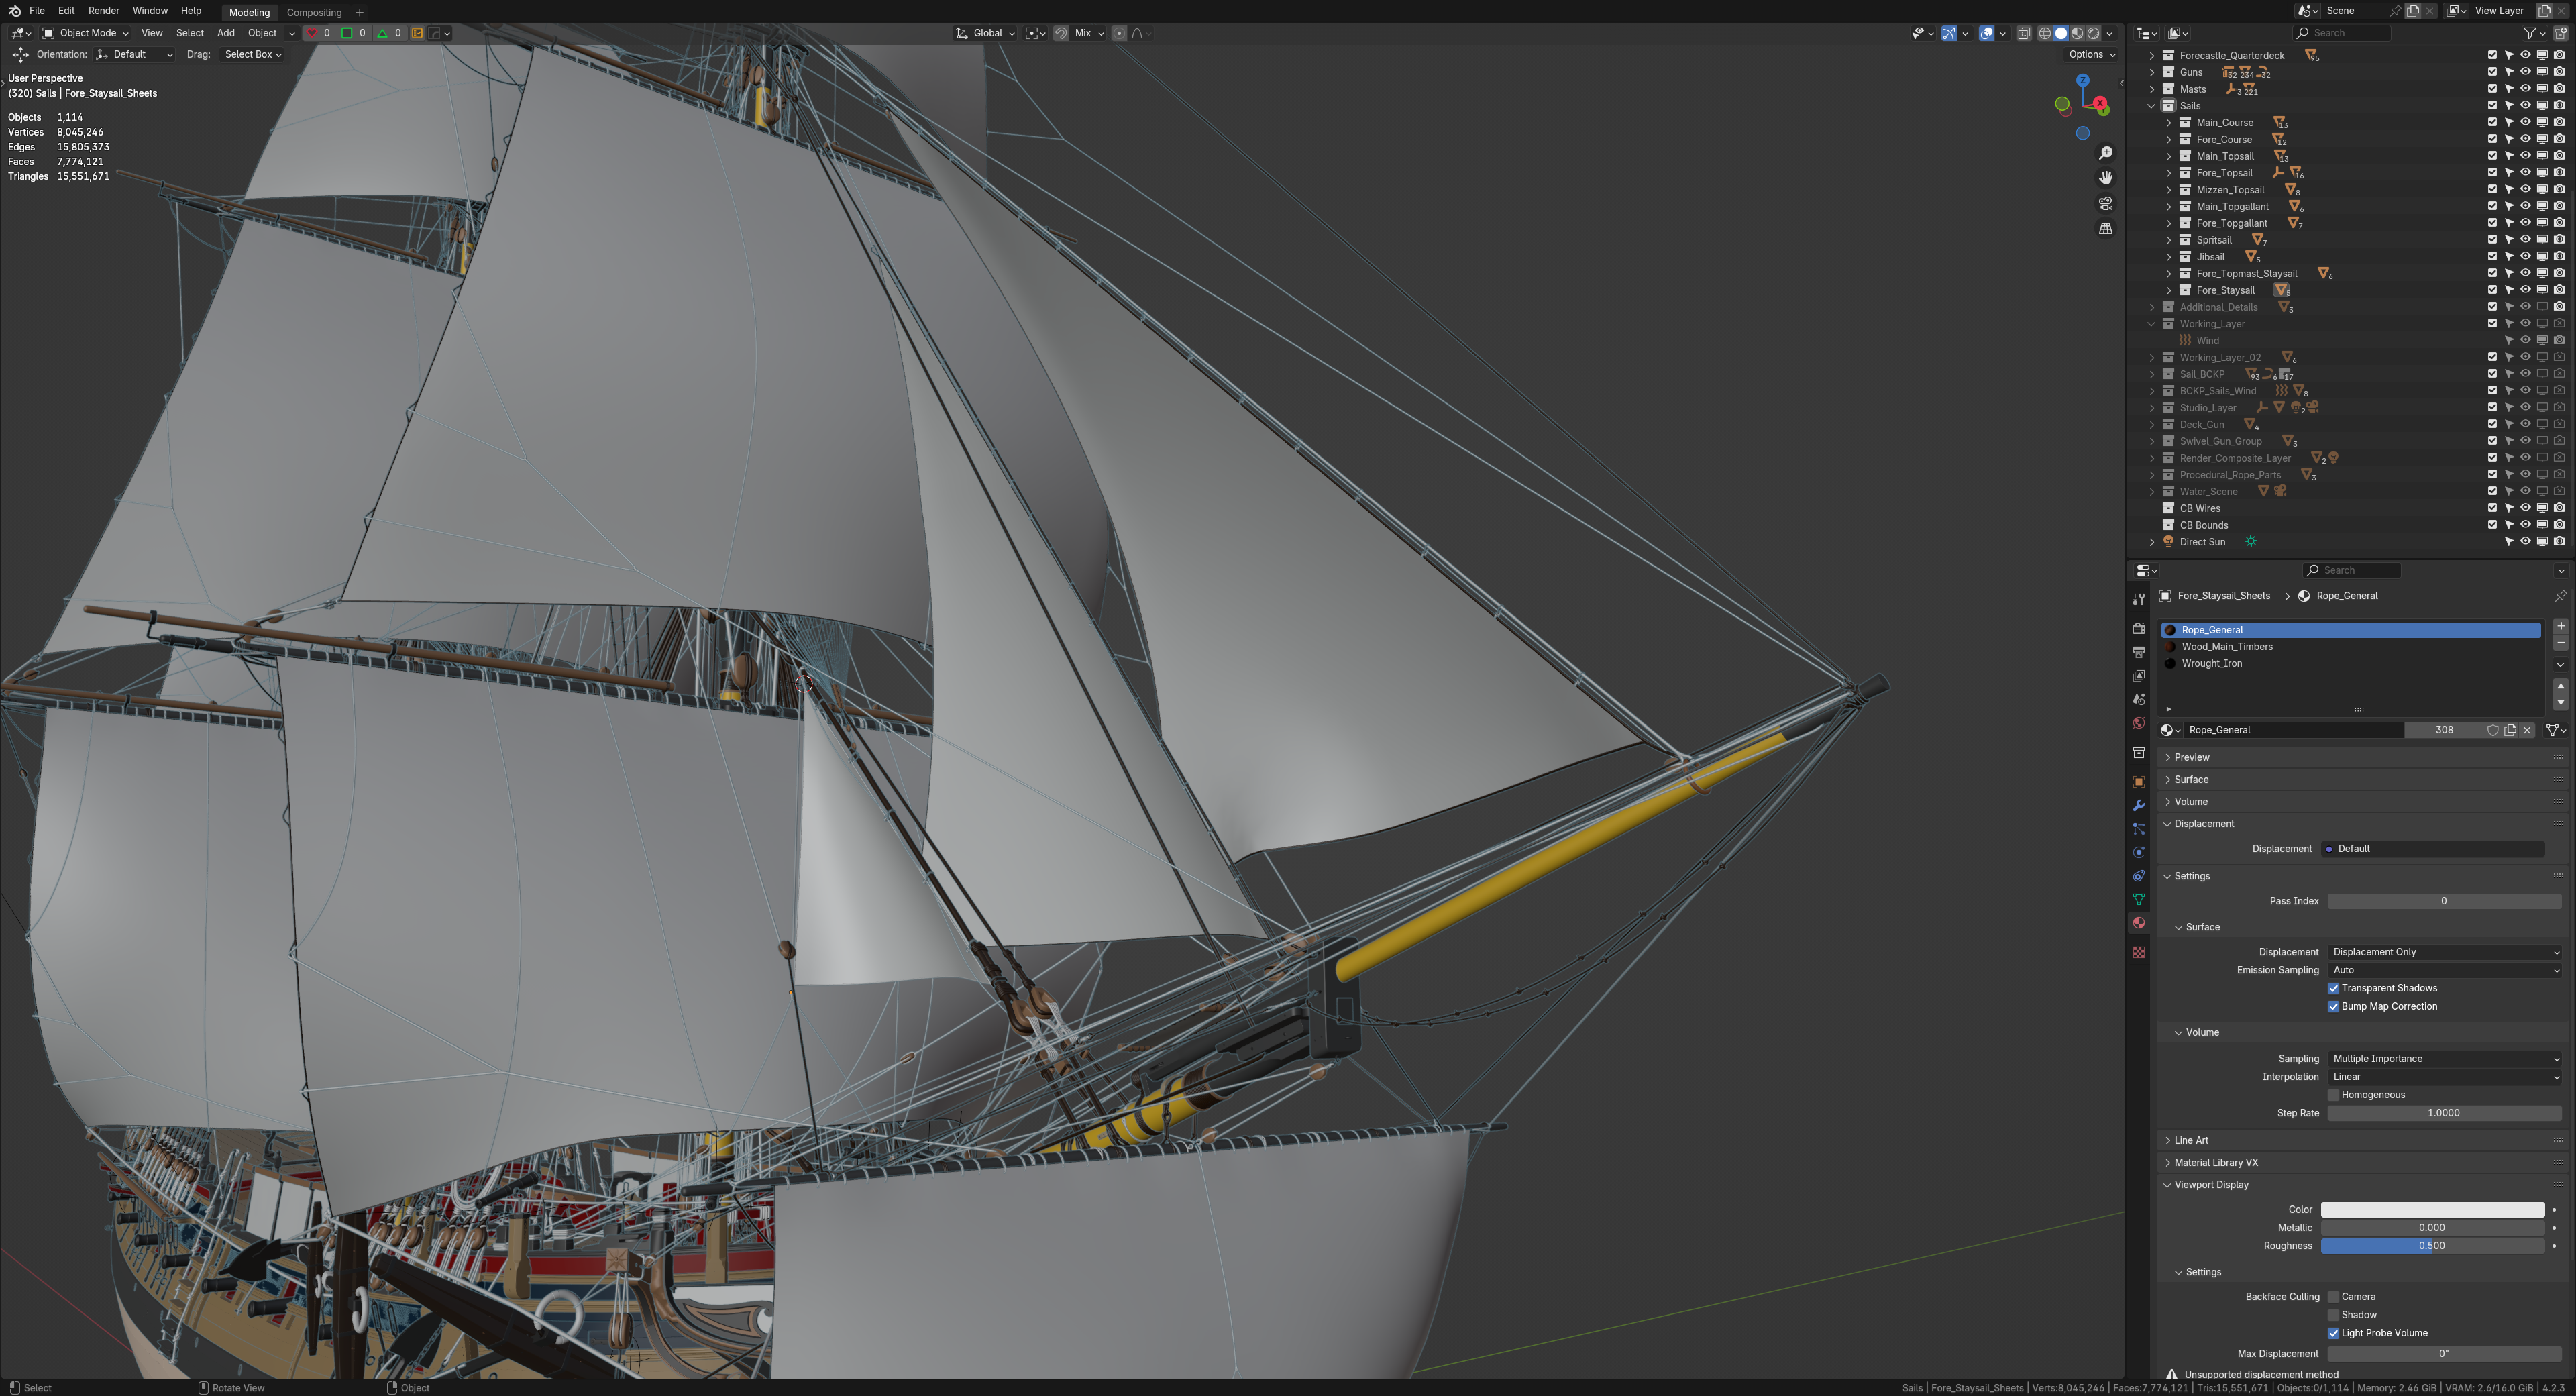
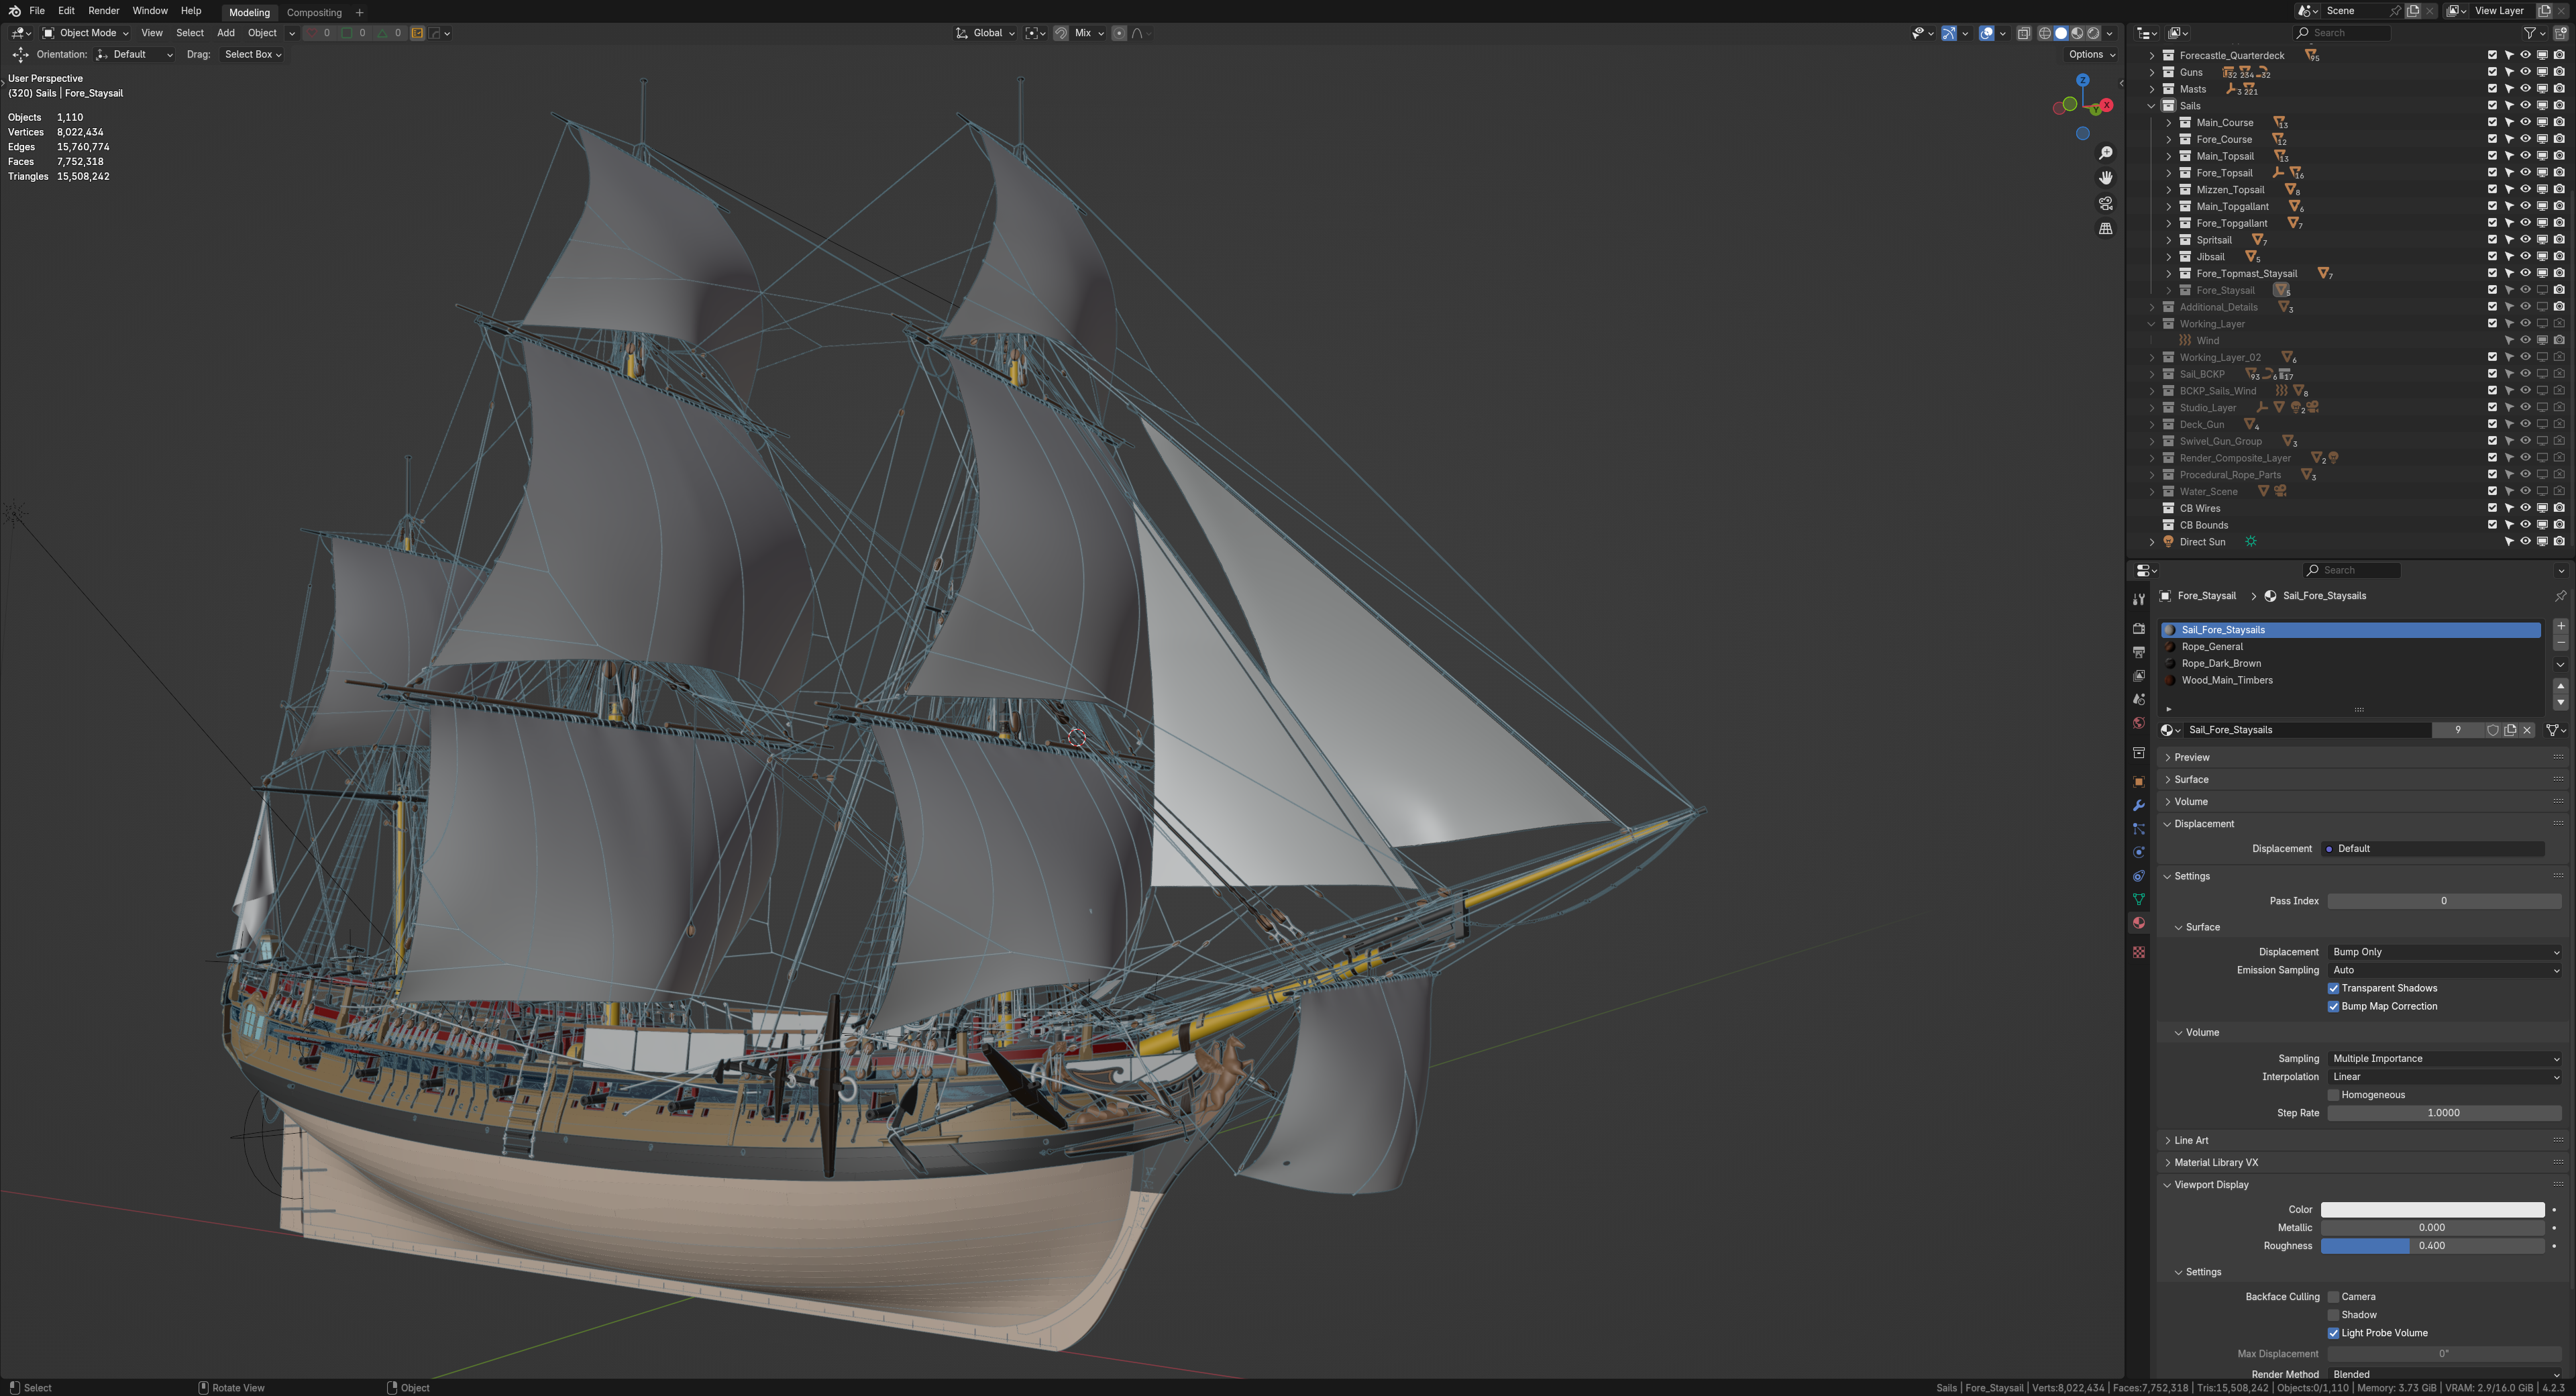
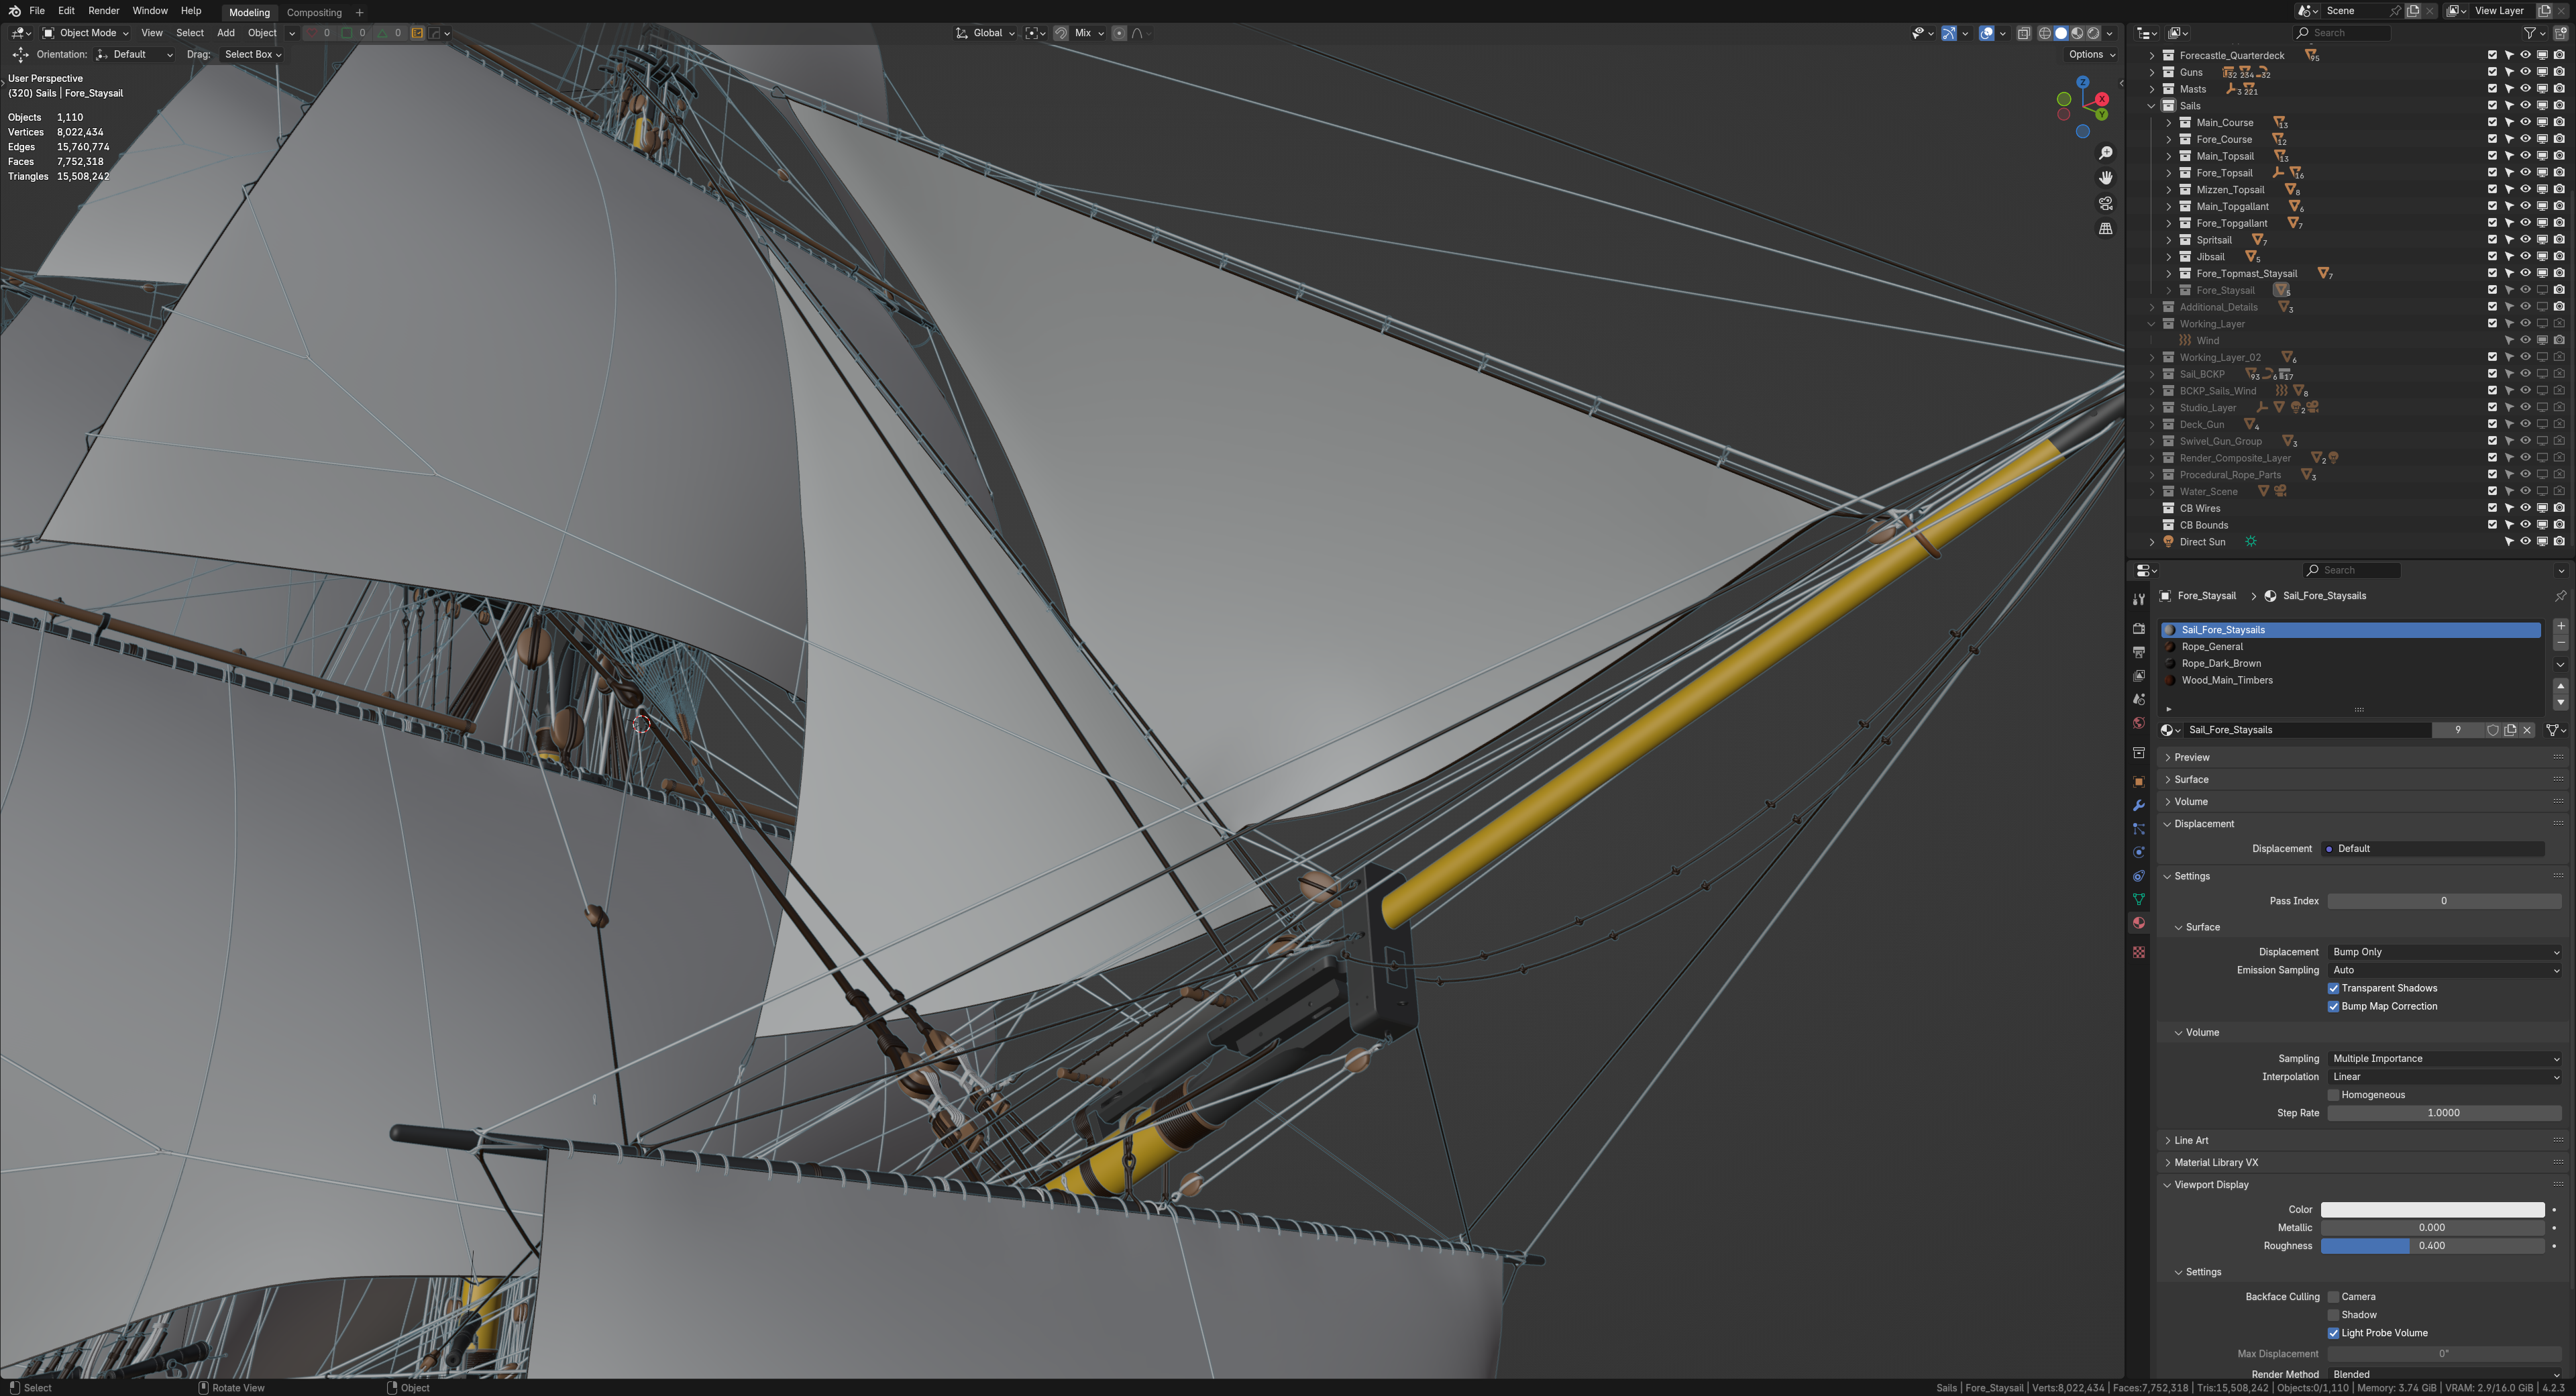
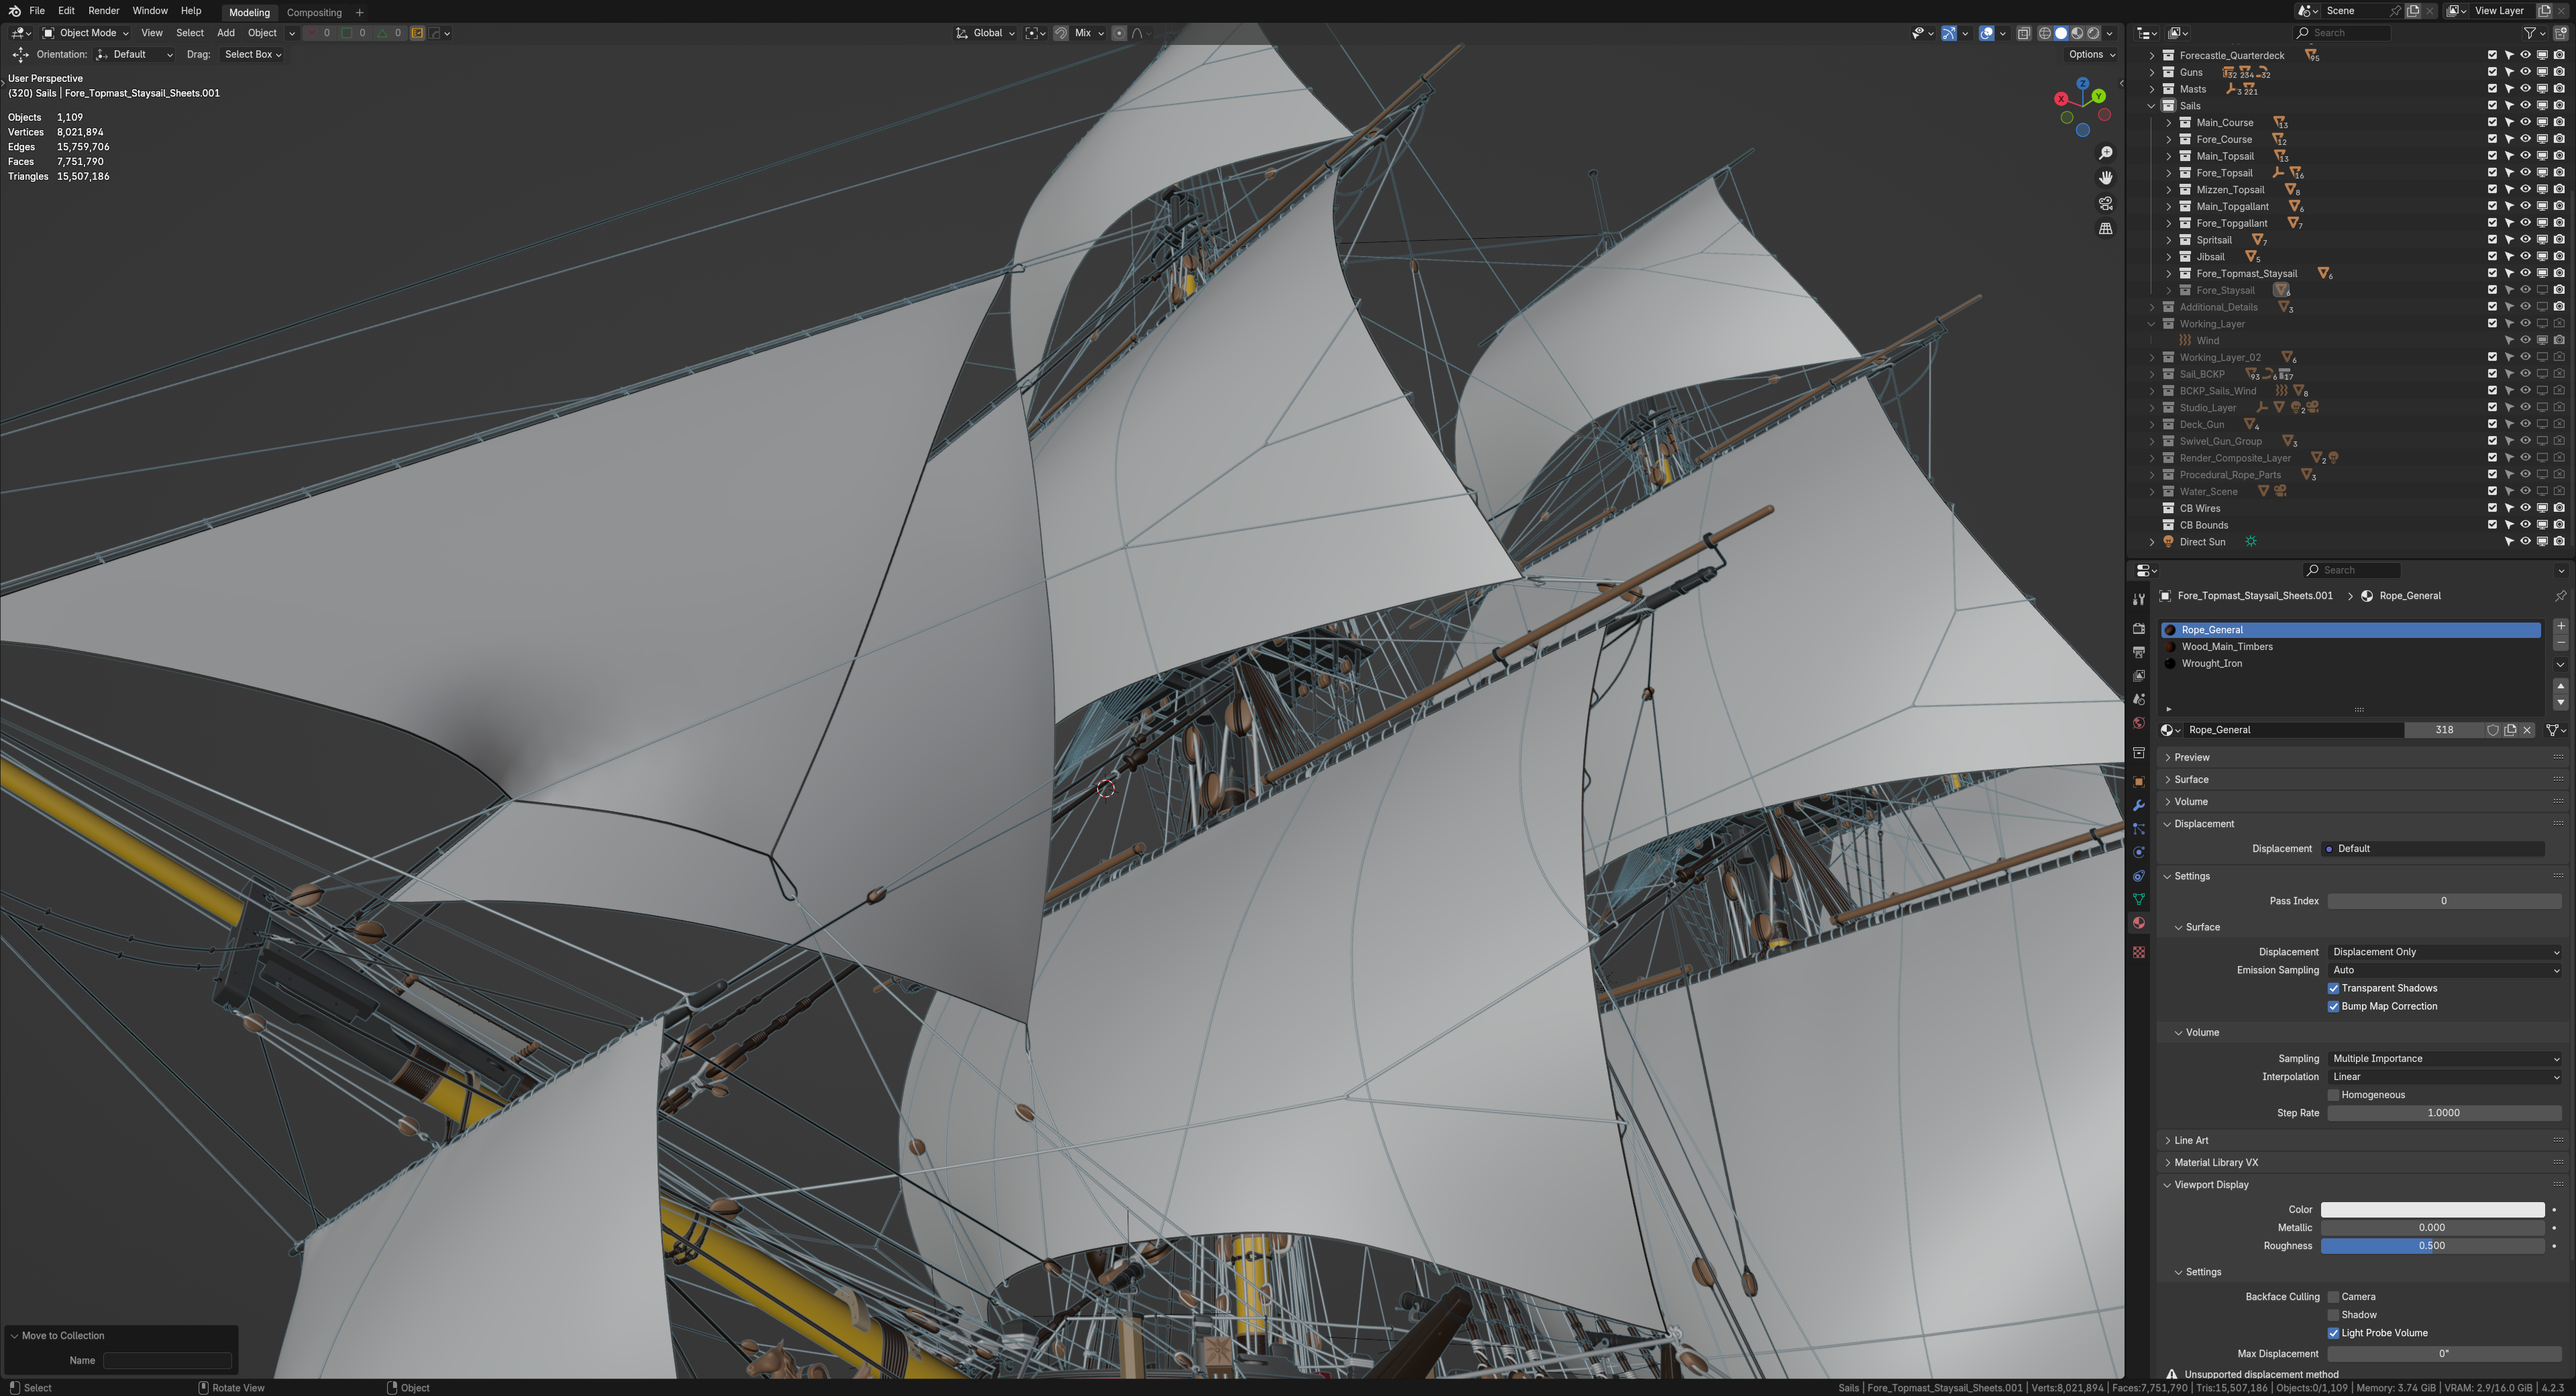
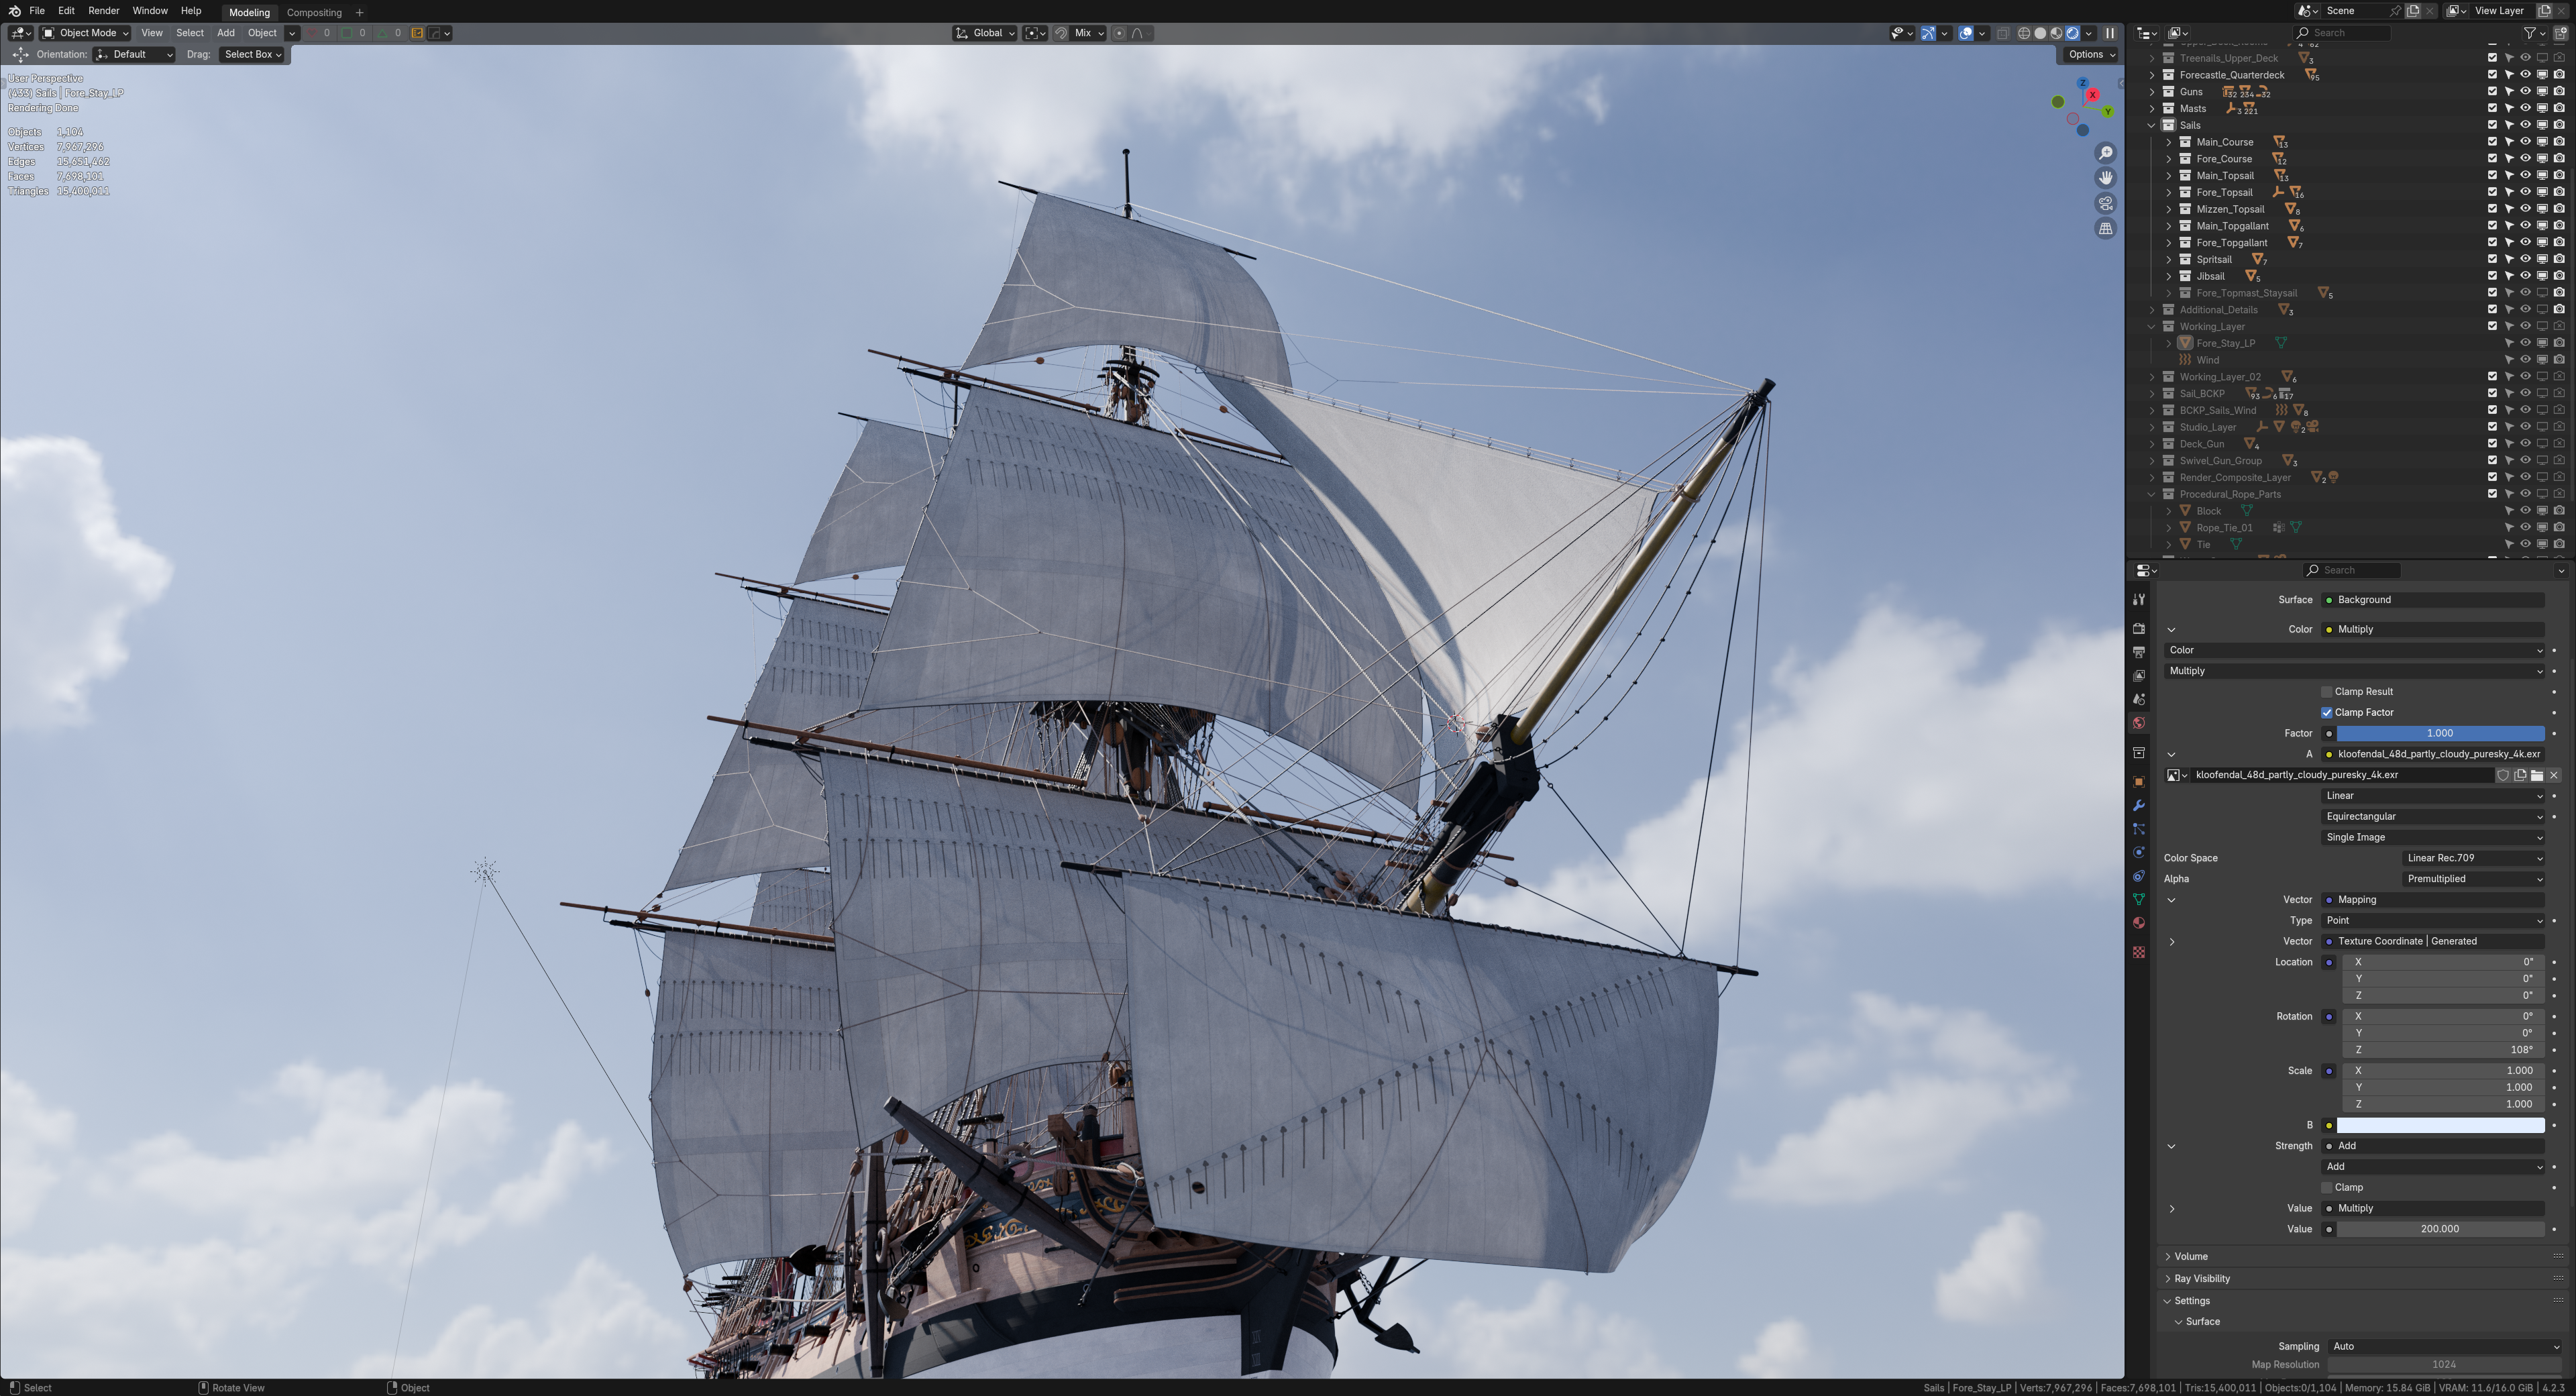
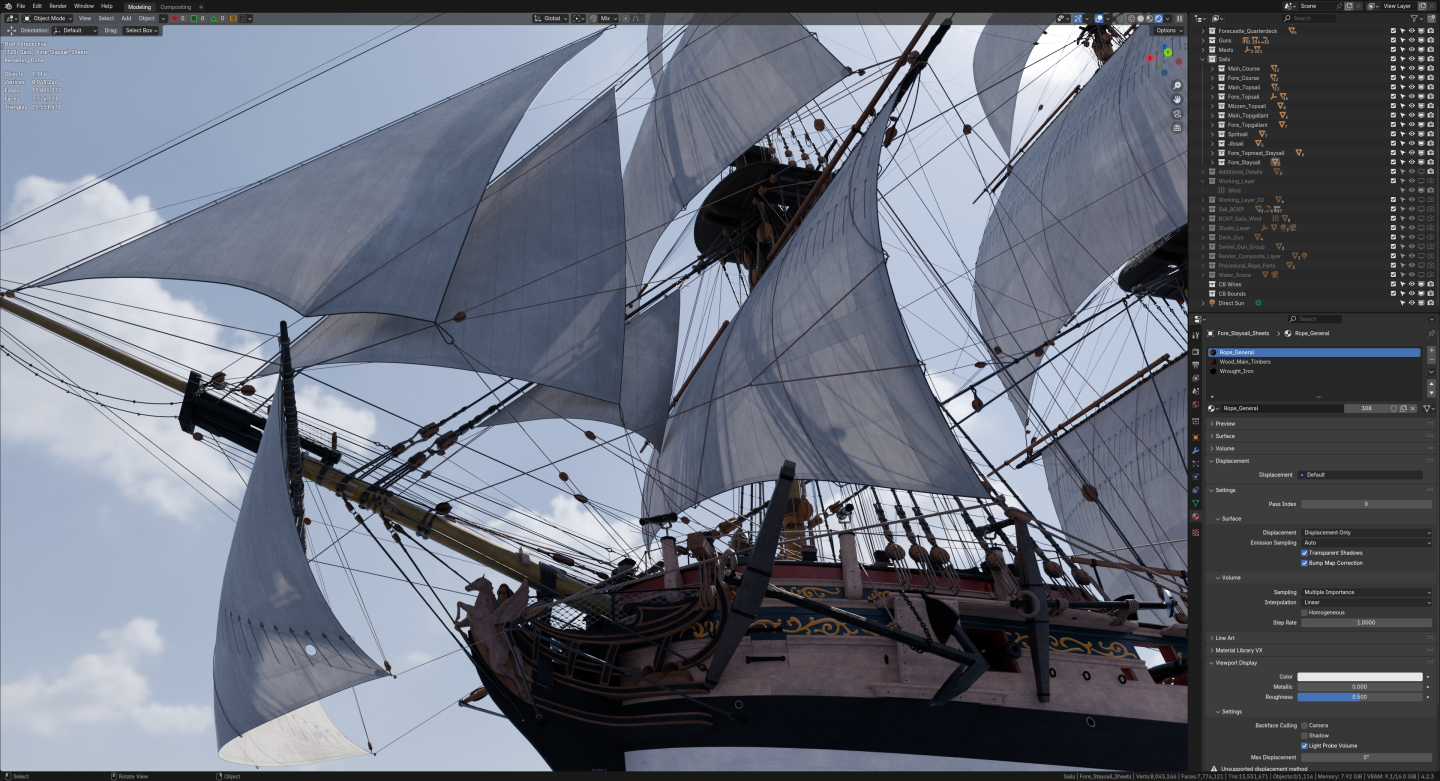
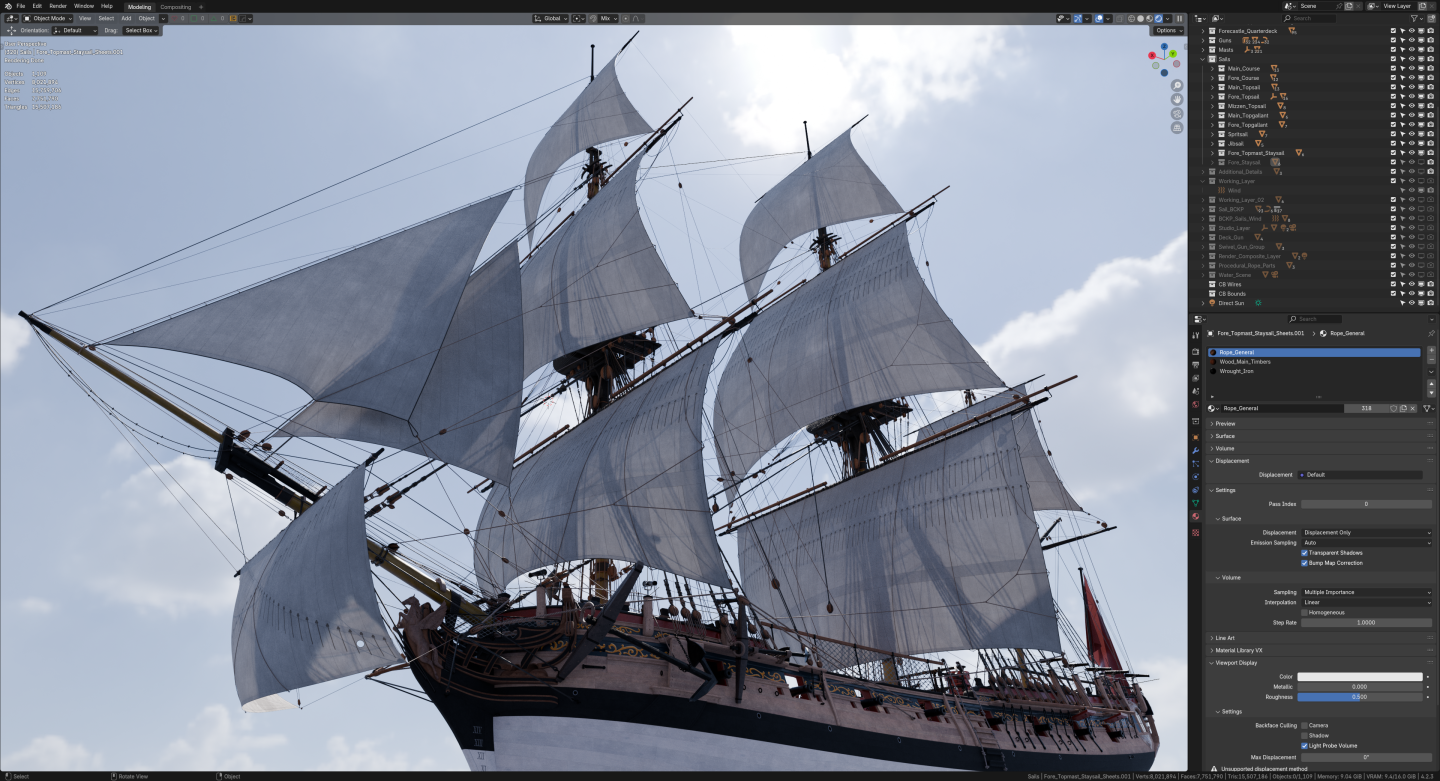
Fore Topmast Staysail is done... at this point the ropes are criss-crossing each other in a very unrealistic manner. if you spot such rope, please ignore, because unless I do a full simulation of all ropes and sails at the same time (pretty much undoable at this scale), there's no way around it.


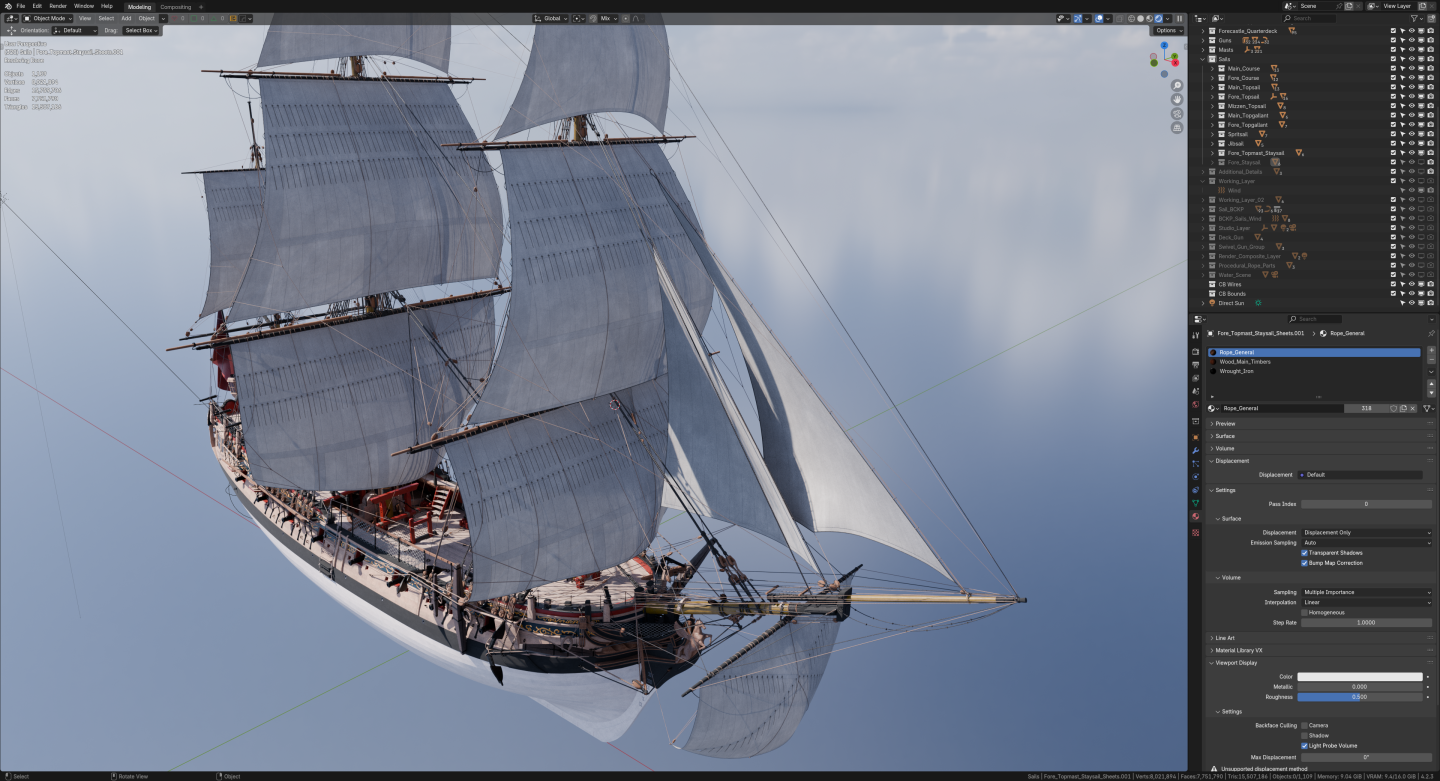
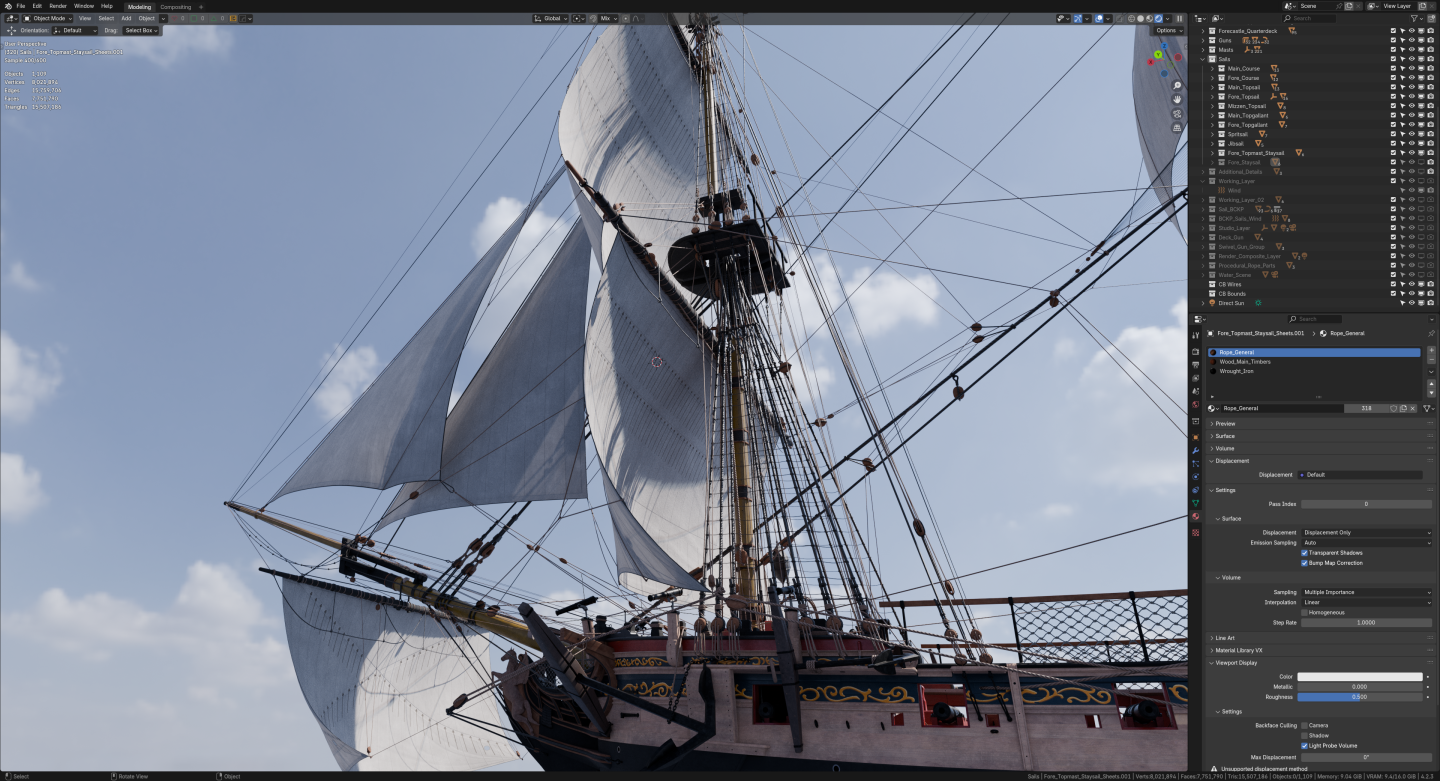

- 141 replies
-
- 6
-
-
-
- pof swan series
- swan
- (and 1 more)
-
Swan class 3D model in progress
herask replied to dvm27's topic in CAD and 3D Modelling/Drafting Plans with Software
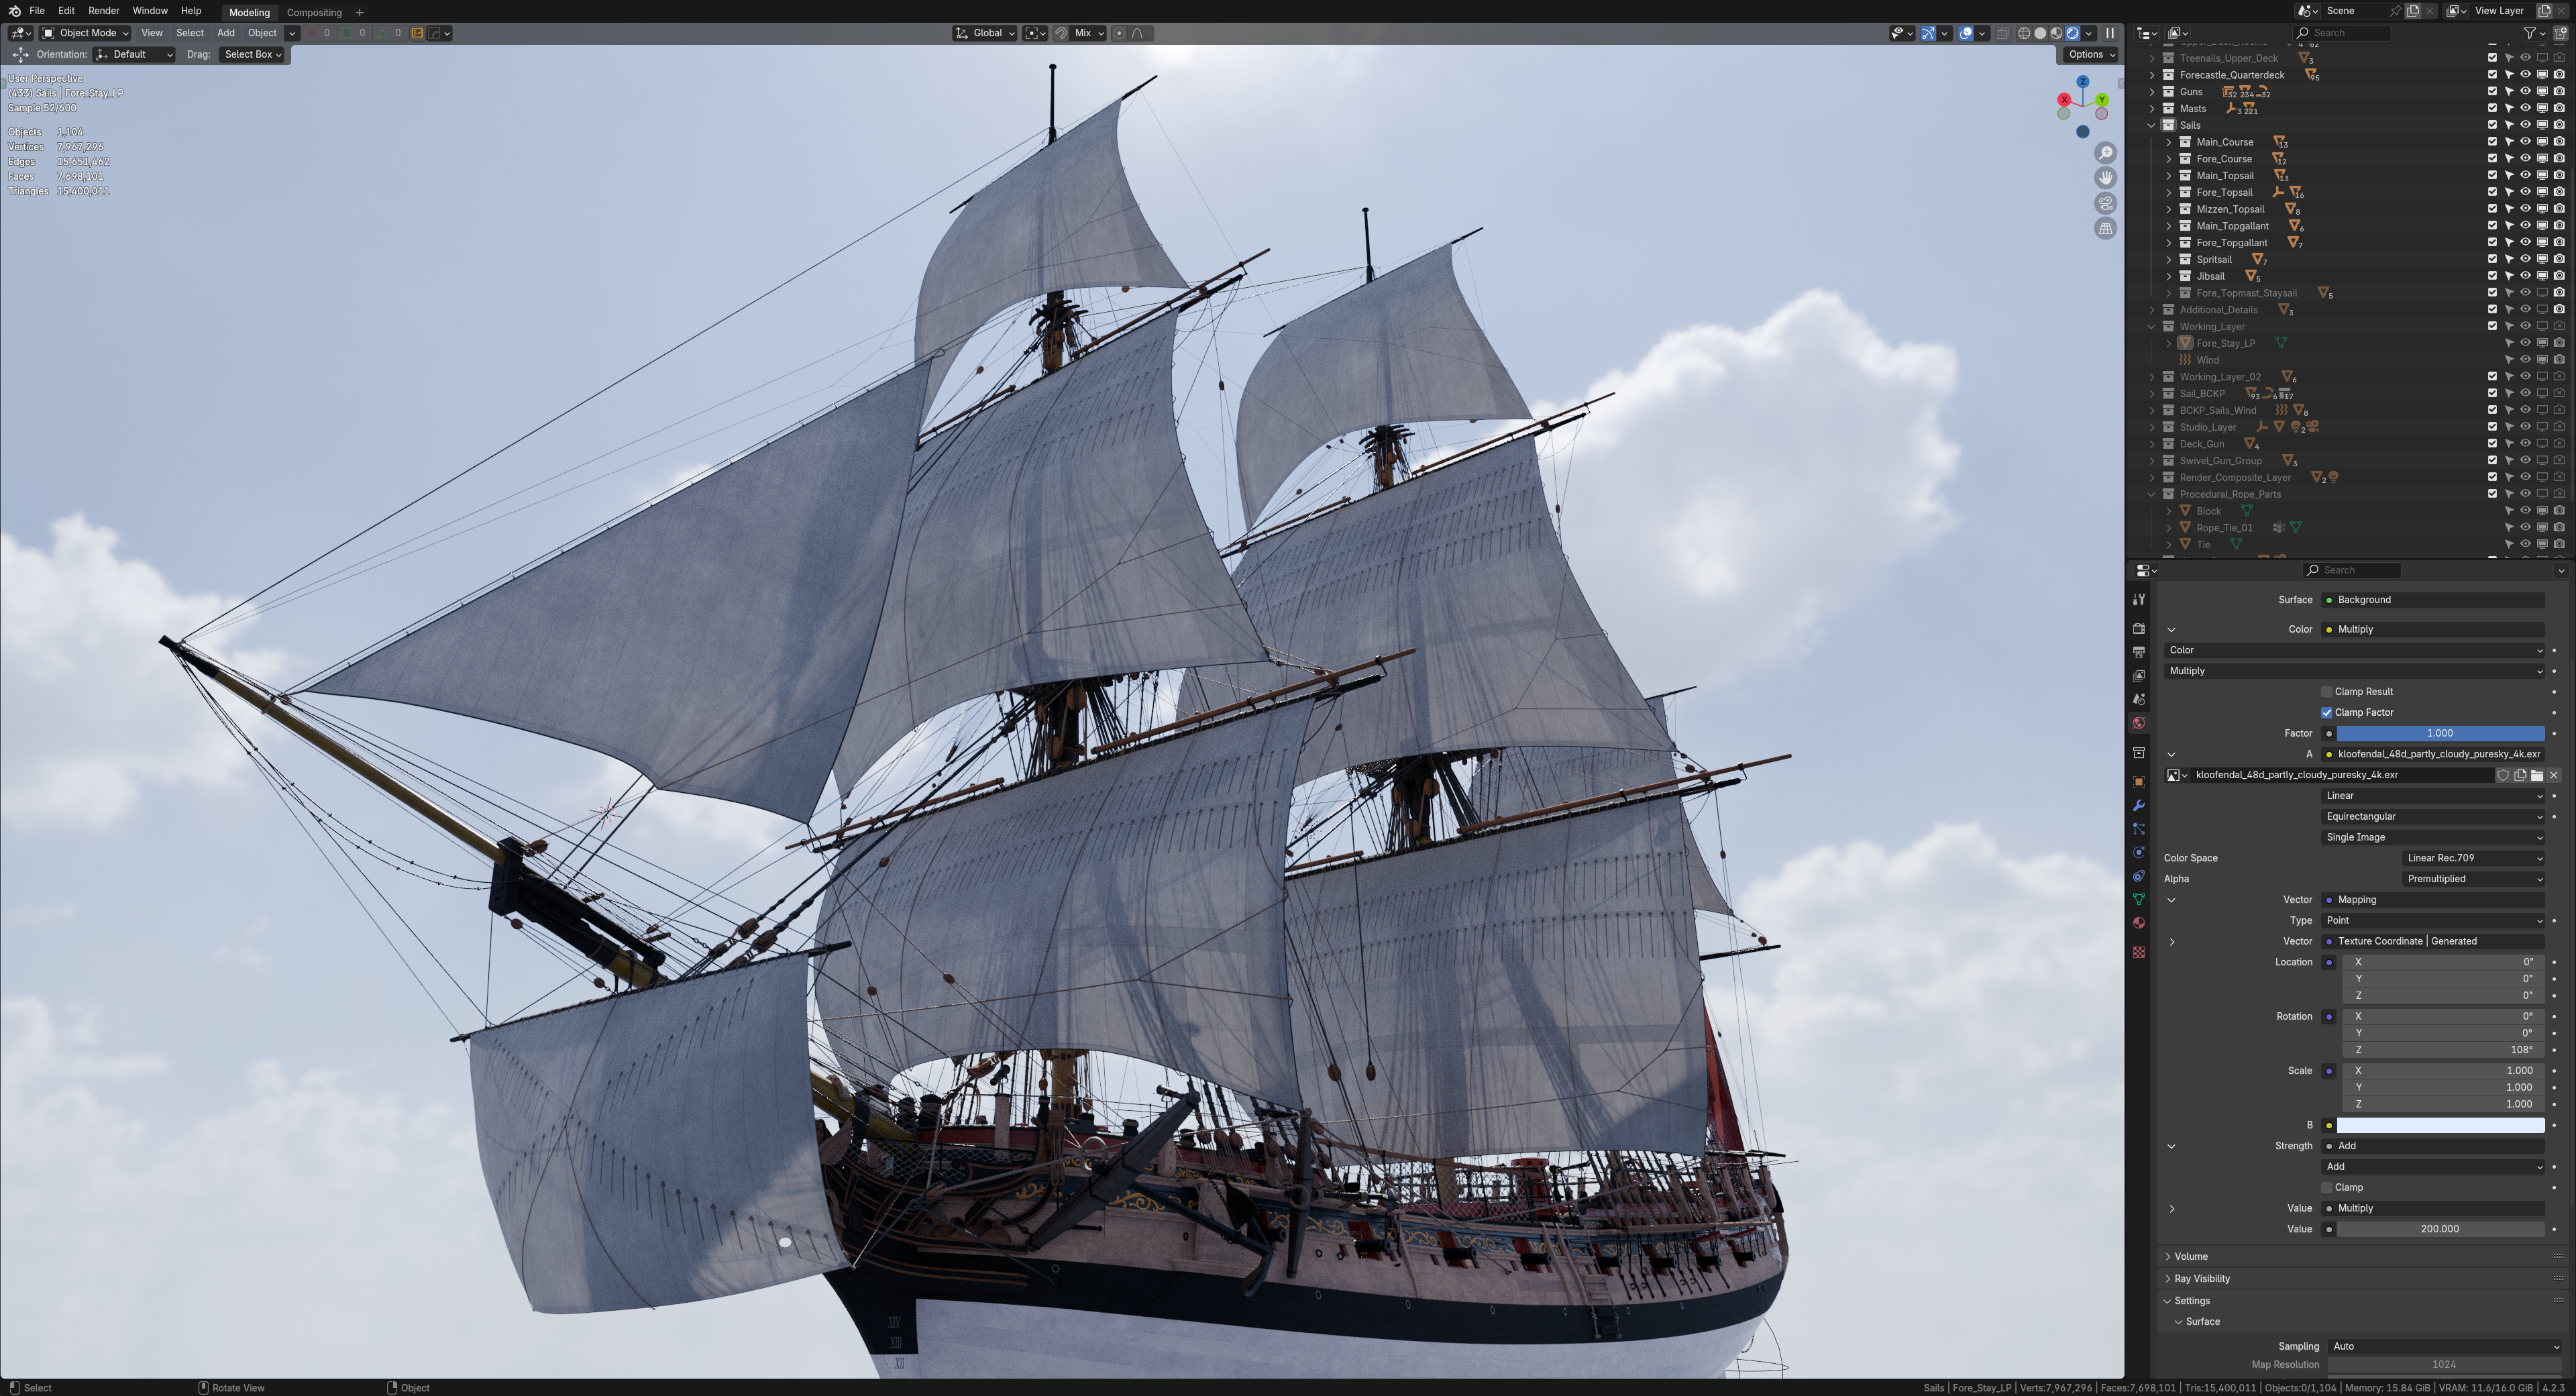
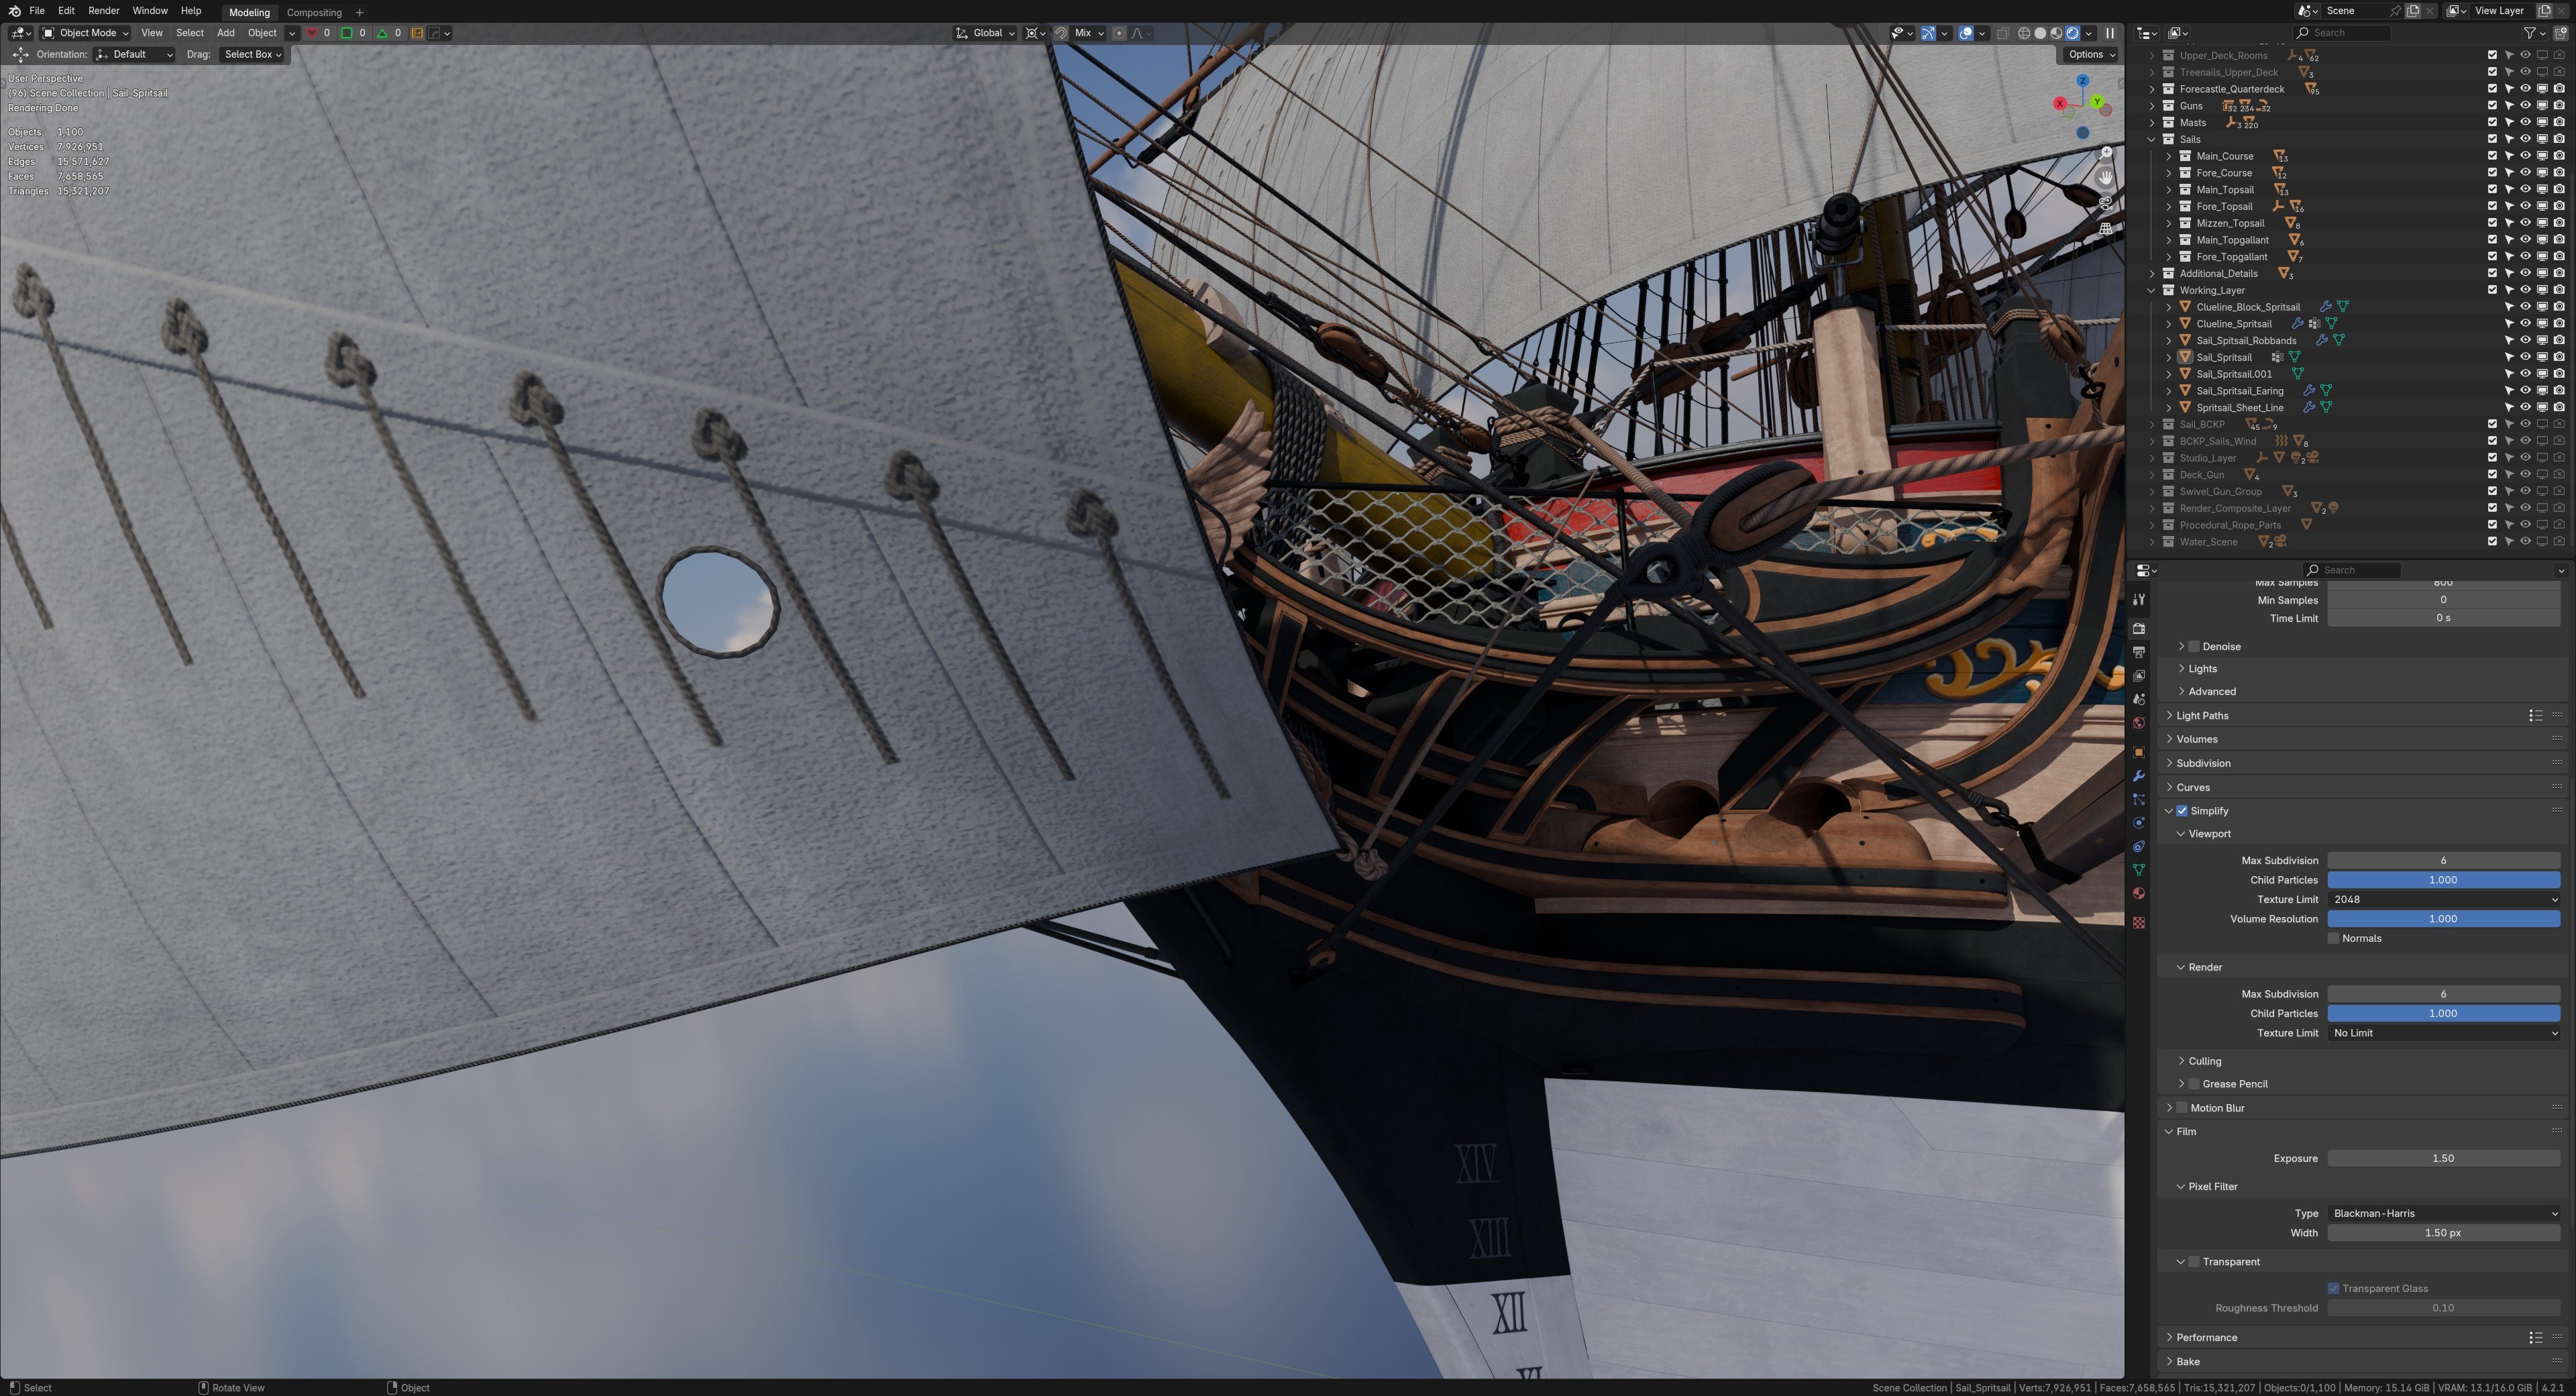
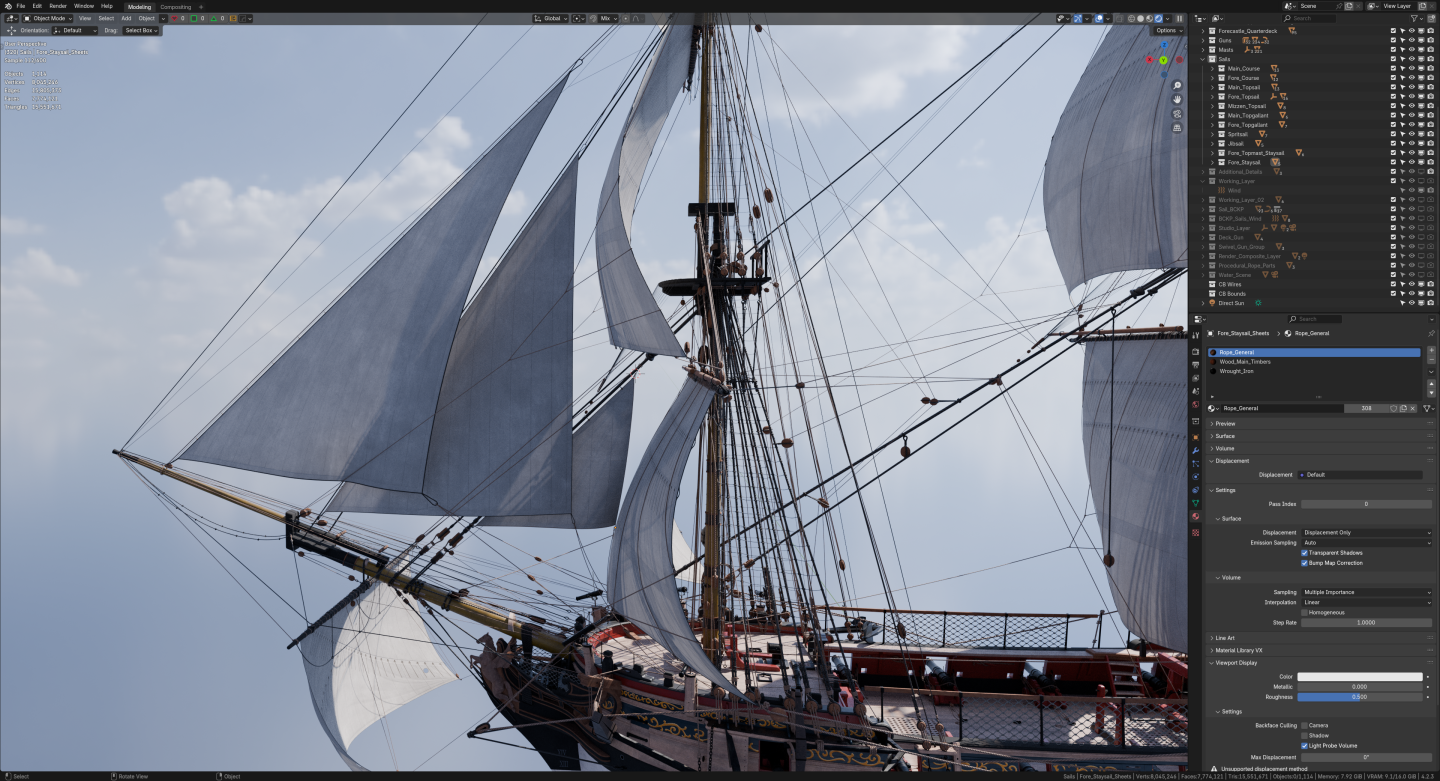
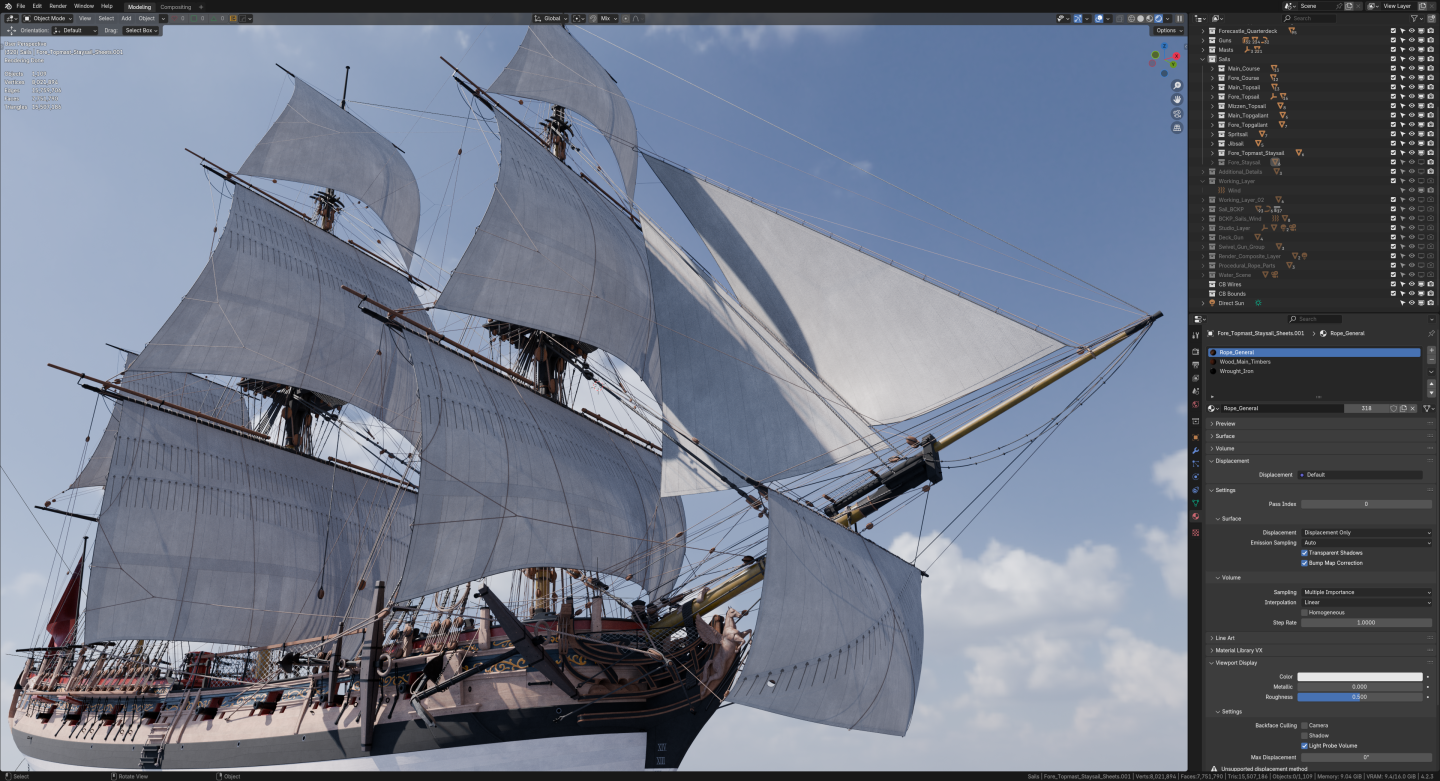
hi, all! the jibsail is done. it's getting a bit crowded with all the ropes up there...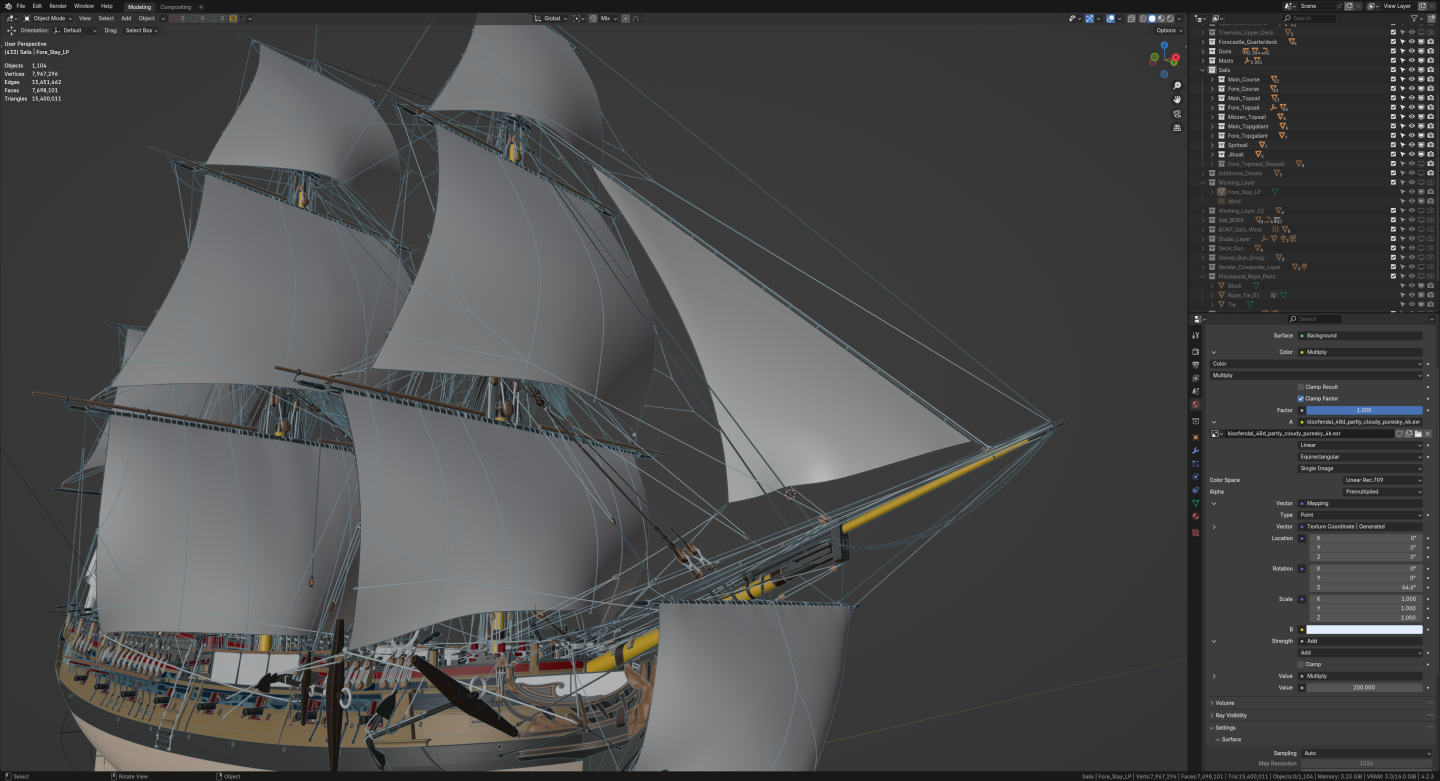


- 141 replies
-
- 5
-
-
-
- pof swan series
- swan
- (and 1 more)
-
Swan class 3D model in progress
herask replied to dvm27's topic in CAD and 3D Modelling/Drafting Plans with Software
they are there, they're just not visible in latest screenshots... 😉- 141 replies
-
- 2
-
-
- pof swan series
- swan
- (and 1 more)
-
Swan class 3D model in progress
herask replied to dvm27's topic in CAD and 3D Modelling/Drafting Plans with Software
sails and materials are done (-ish)... now I need to shape them and tie them down...


- 141 replies
-
- 4
-
-
- pof swan series
- swan
- (and 1 more)
-
Swan class 3D model in progress
herask replied to dvm27's topic in CAD and 3D Modelling/Drafting Plans with Software
hi all. just wanted to post a small update. getting sizes and proportions of staysails at the moment. next is making textures and then puffing them up with the wind, and only then come digital ropes again...
- 141 replies
-
- 4
-
-
- pof swan series
- swan
- (and 1 more)
-
Swan class 3D model in progress
herask replied to dvm27's topic in CAD and 3D Modelling/Drafting Plans with Software
Alan, how's this look?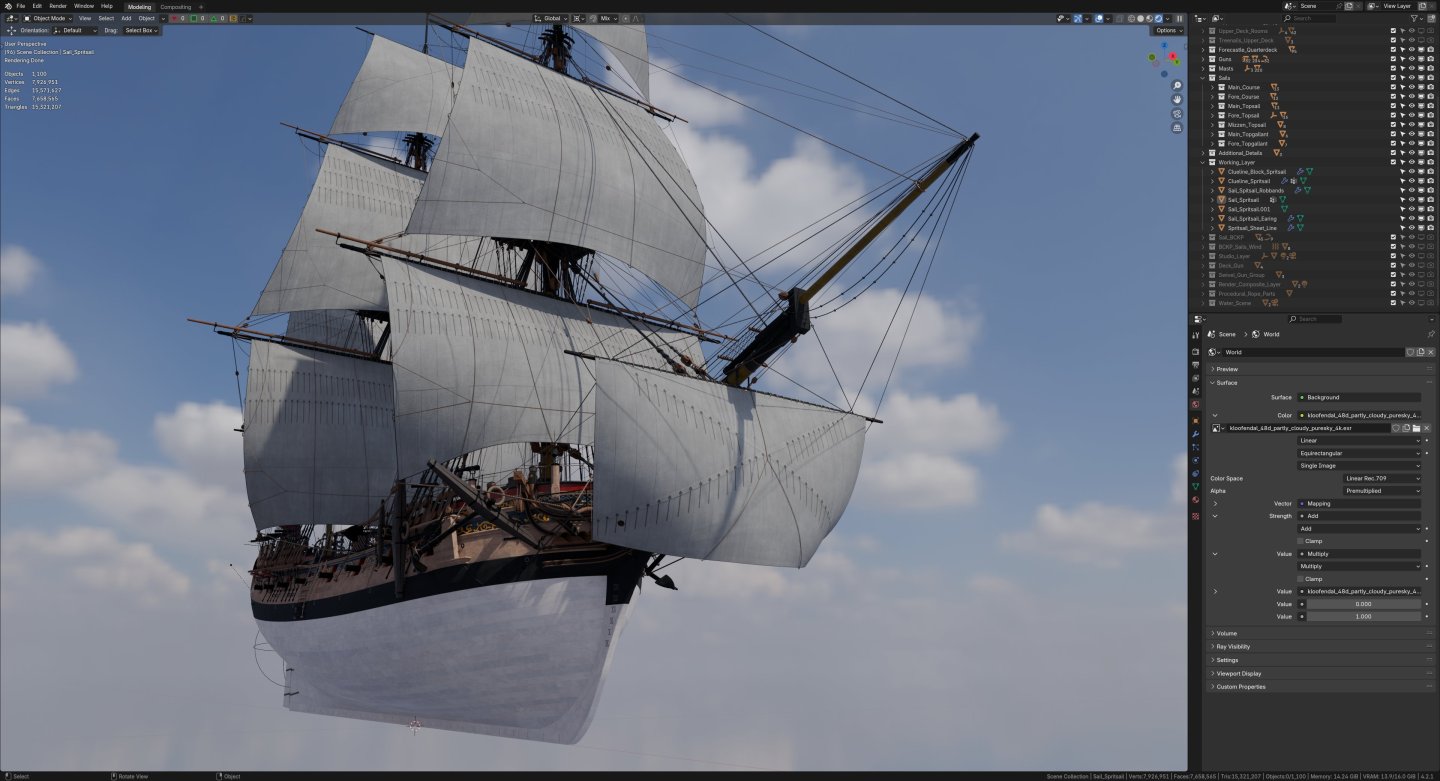
- 141 replies
-
- 1
-
-
- pof swan series
- swan
- (and 1 more)
-
Swan class 3D model in progress
herask replied to dvm27's topic in CAD and 3D Modelling/Drafting Plans with Software
Alan, I'm pretty sure that Greg chuckled while reading this, considering my OCD... 😊 I'll see what can be done about the holes...- 141 replies
-
- 2
-
-
- pof swan series
- swan
- (and 1 more)
-
Swan class 3D model in progress
herask replied to dvm27's topic in CAD and 3D Modelling/Drafting Plans with Software
I'm still to this day fascinated how you guys are able to spot such small details! I thought of omitting drainage holes, but now I obviously can't anymore... 🤣- 141 replies
-
- 1
-
-
- pof swan series
- swan
- (and 1 more)