HOLIDAY DONATION DRIVE - SUPPORT MSW - DO YOUR PART TO KEEP THIS GREAT FORUM GOING! (Only 36 donations so far out of 49,000 members - C'mon guys!)
×
(2).png.8ea3e9b5d119e85c31982336f68c92c0.png)
FrozenRabbit471
-
Posts
77 -
Joined
-
Last visited
Content Type
Profiles
Forums
Gallery
Events
Everything posted by FrozenRabbit471
-
(2).thumb.png.08e26c1b7271617455d04b102a2b4077.png) No problem on this end Jud. As I said, I kind of thought you were funnin. The way you explained the thruster install is pretty much what I had in mind. thanks a bunch. I'll keep you guys posted.
No problem on this end Jud. As I said, I kind of thought you were funnin. The way you explained the thruster install is pretty much what I had in mind. thanks a bunch. I'll keep you guys posted. -
see, im so green i dont know if thats a suggestion or funnin! haha, I gather its funnin! bahahaha
-
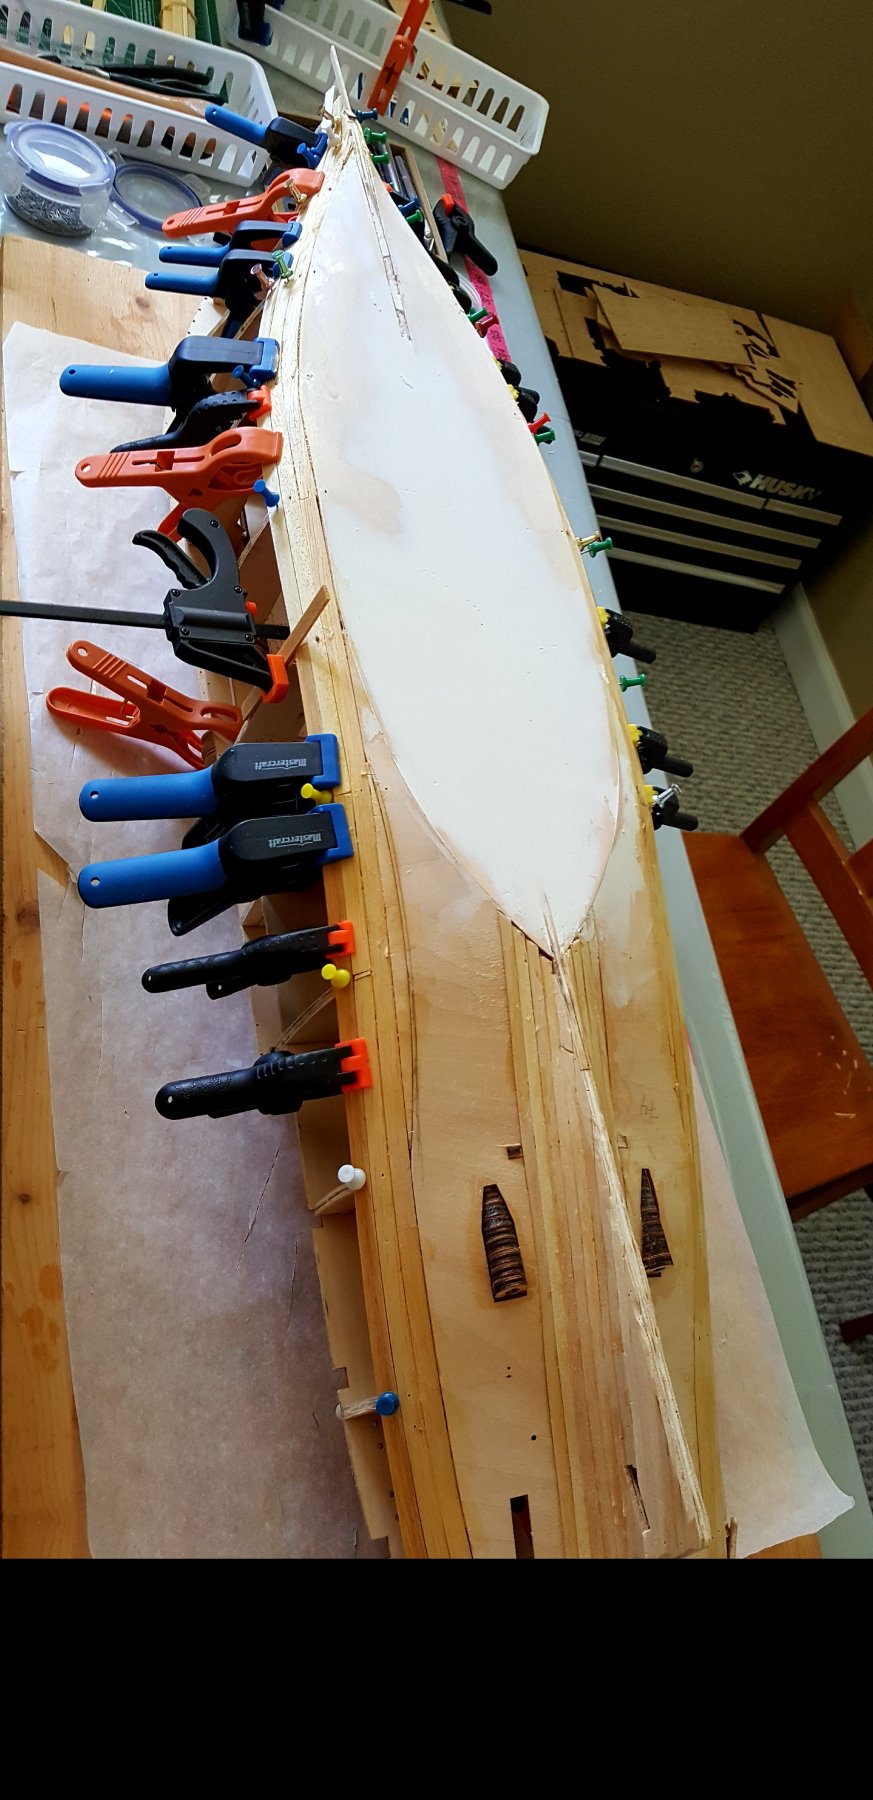
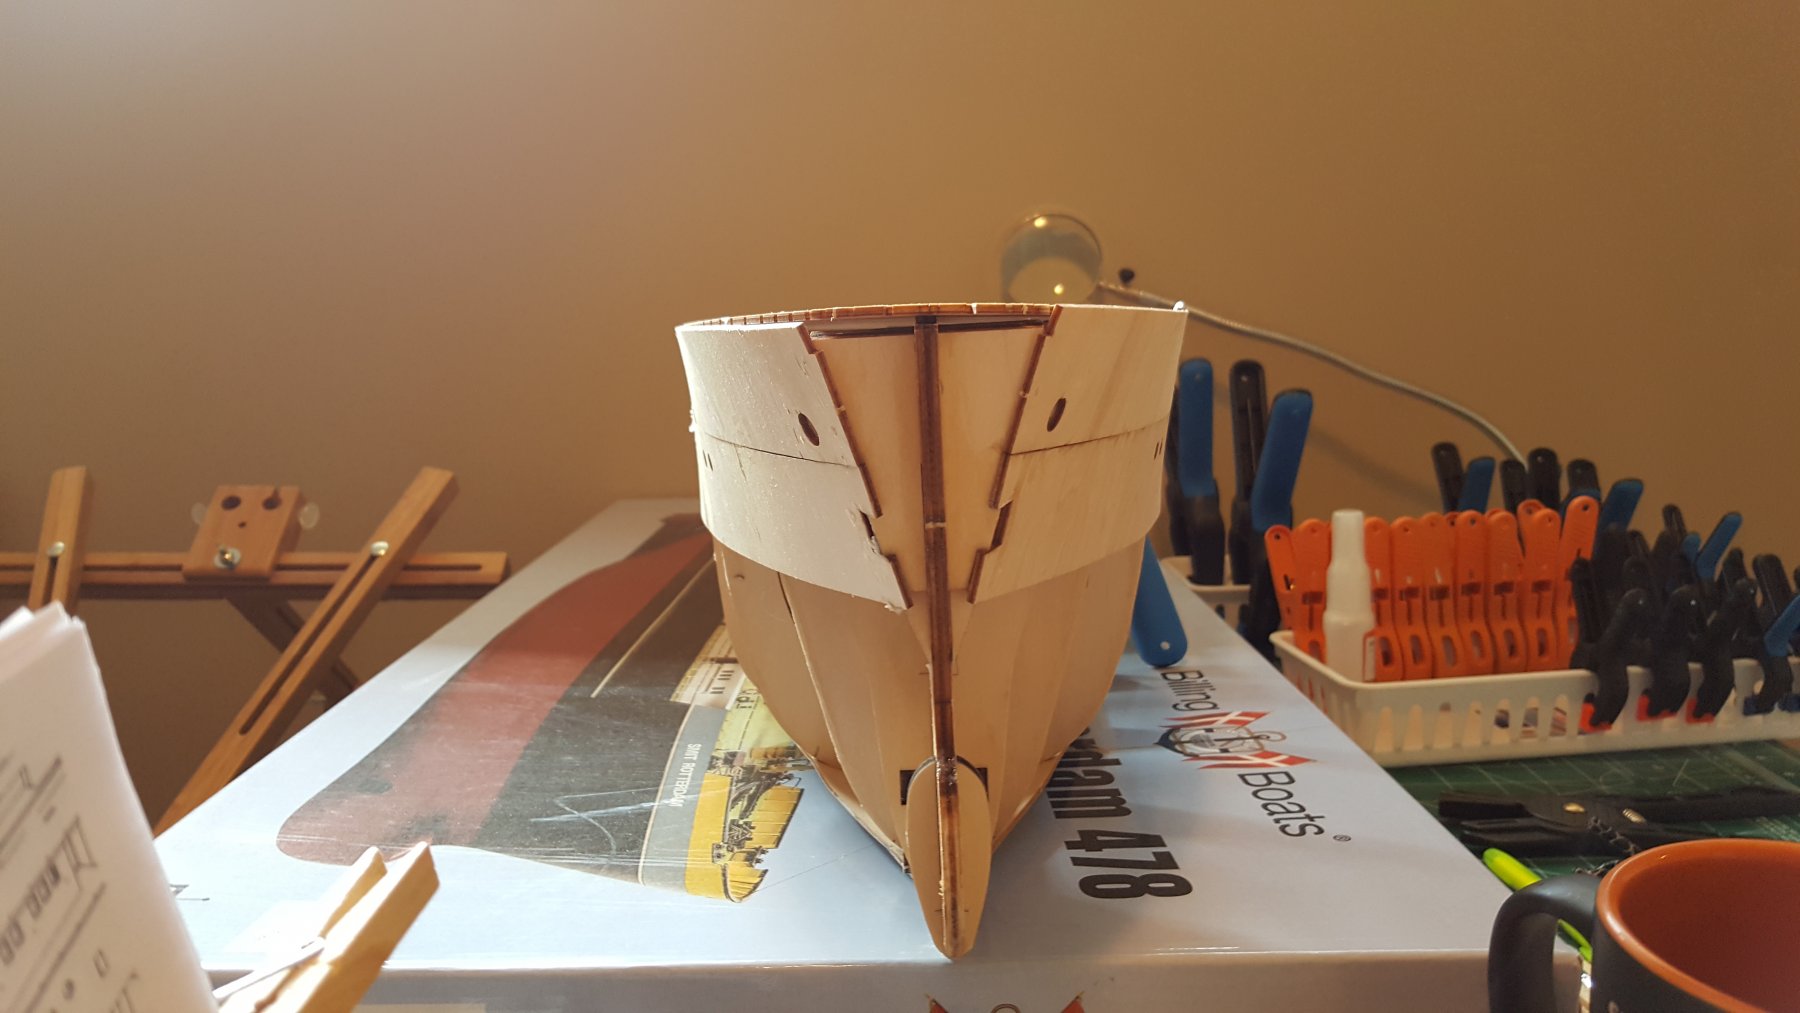
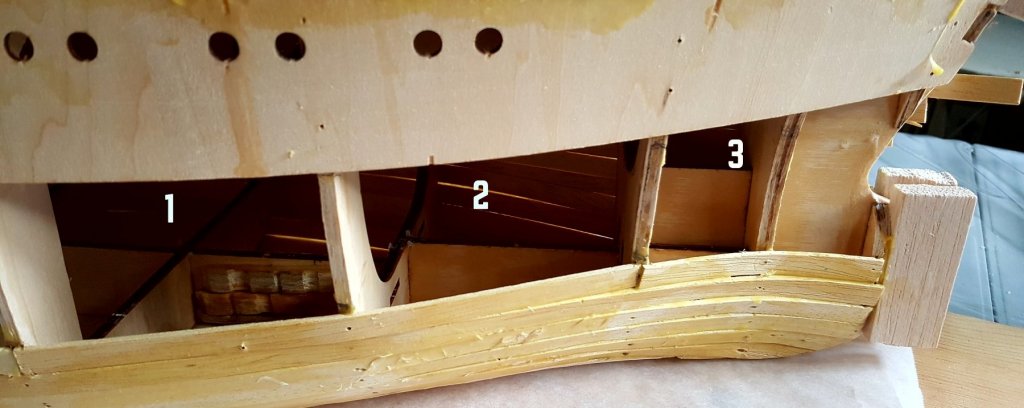
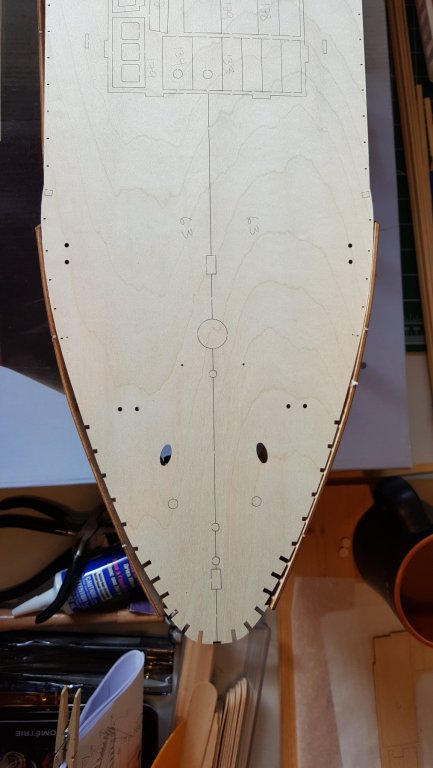
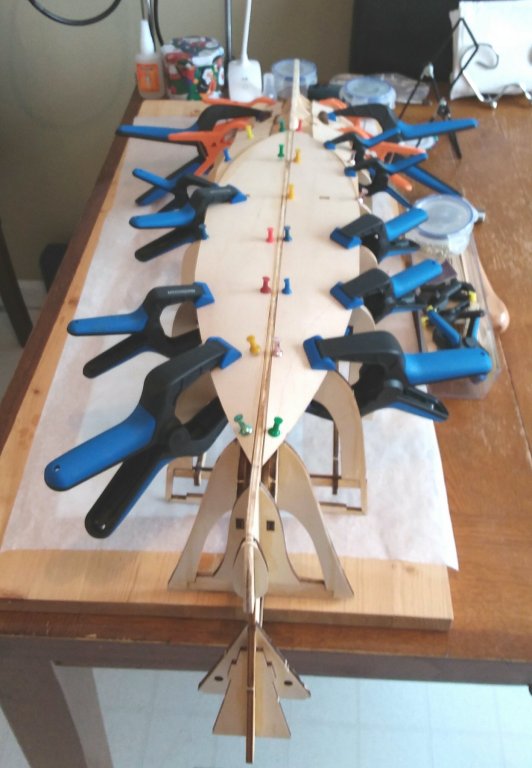
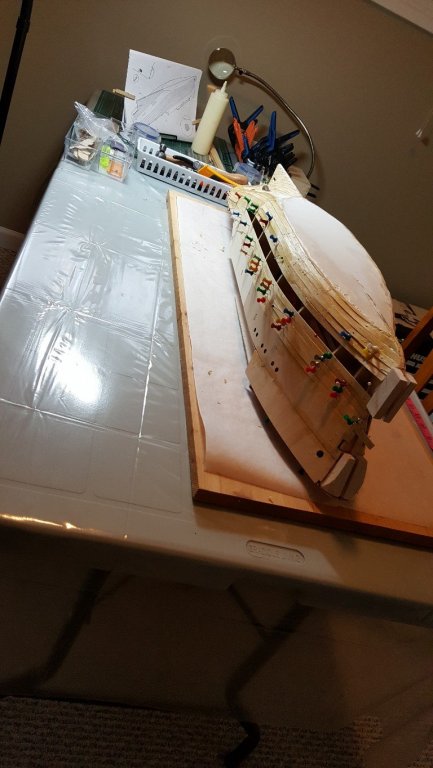
Hey all, I was about to plank this side in. The other side is completely done. I won't be ordering my bow thruster until the end of this month. If I complete the planking here, the only access to the cuddy (inner nose of the bow) will be through the top. The top would be open as I only have the decks pinned down. My intention is to prep and cut 20mm holes but order a 30mm thruster. Can all this be done if I close this planking off? I've also attached a photo. Regardless of the planking stuff, which of the 3 compartments does the thruster typically get installed? (i have a build thread labelled as Smit Rotterdam)
-
That looks like a fun model. A little more detail required than mine. Maybe I'll do a war boat someday.
- 151 replies
-
- 5
-

-
- duke of york
- tamiya
- (and 2 more)
-
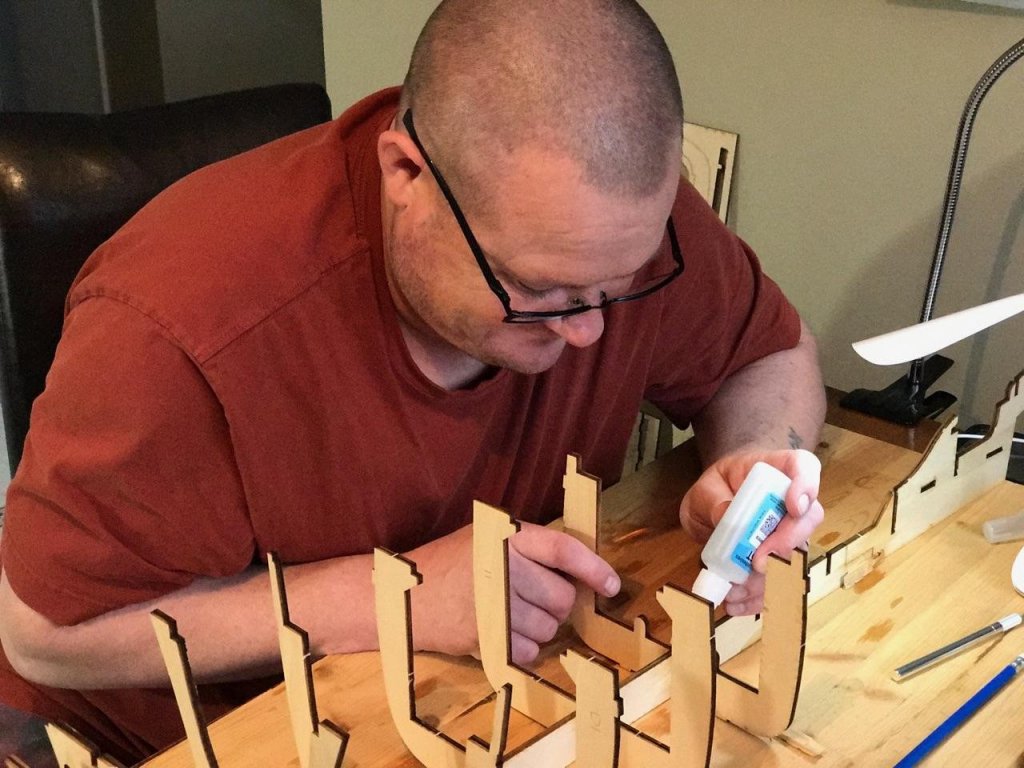
ALL WOOD GLUE FROM NOW ON! Save the super glue for the tiny parts above the deck, the superstructure Just a couple progress pics of progress.


-
Both the outer bow wall and bow deck are dry-fitted and matches great. I now have all decks dry-fitted and will remain so until the bow has been filled, sanded, clothed, epoxied. I'll be applying epoxy and maybe cloth inside before outside.
-
Hey cog and CDW. I happy to read your posts. cog I already have my hull completed on 1 side and over 3/4 done on the other. I hope i can still get the bow thruster installed. Im not closing in the top at all, untill the thruster and the rest of the rc components installed. Hey Craig, I was told by several builders NOT to take on the Rotterdam for my 1st boat build. Thaey said i was too ambitious. Well, I had confidence and never did listen very well, thats just boring! I dont know what your experience is, but yes, a amateur can build this. But you have to do a lot of research, get involved with a ton of facebook groups, web forums like this one, you tube videos and what ever else you think of. Ask a ton of questions. Be open to criticism. I love the web forums for boats (there are not many) They are serious about having fun. Theres no BS allowed and there are a lot of experienced builders. Go buy your favorite canoe, slow and steady!
-
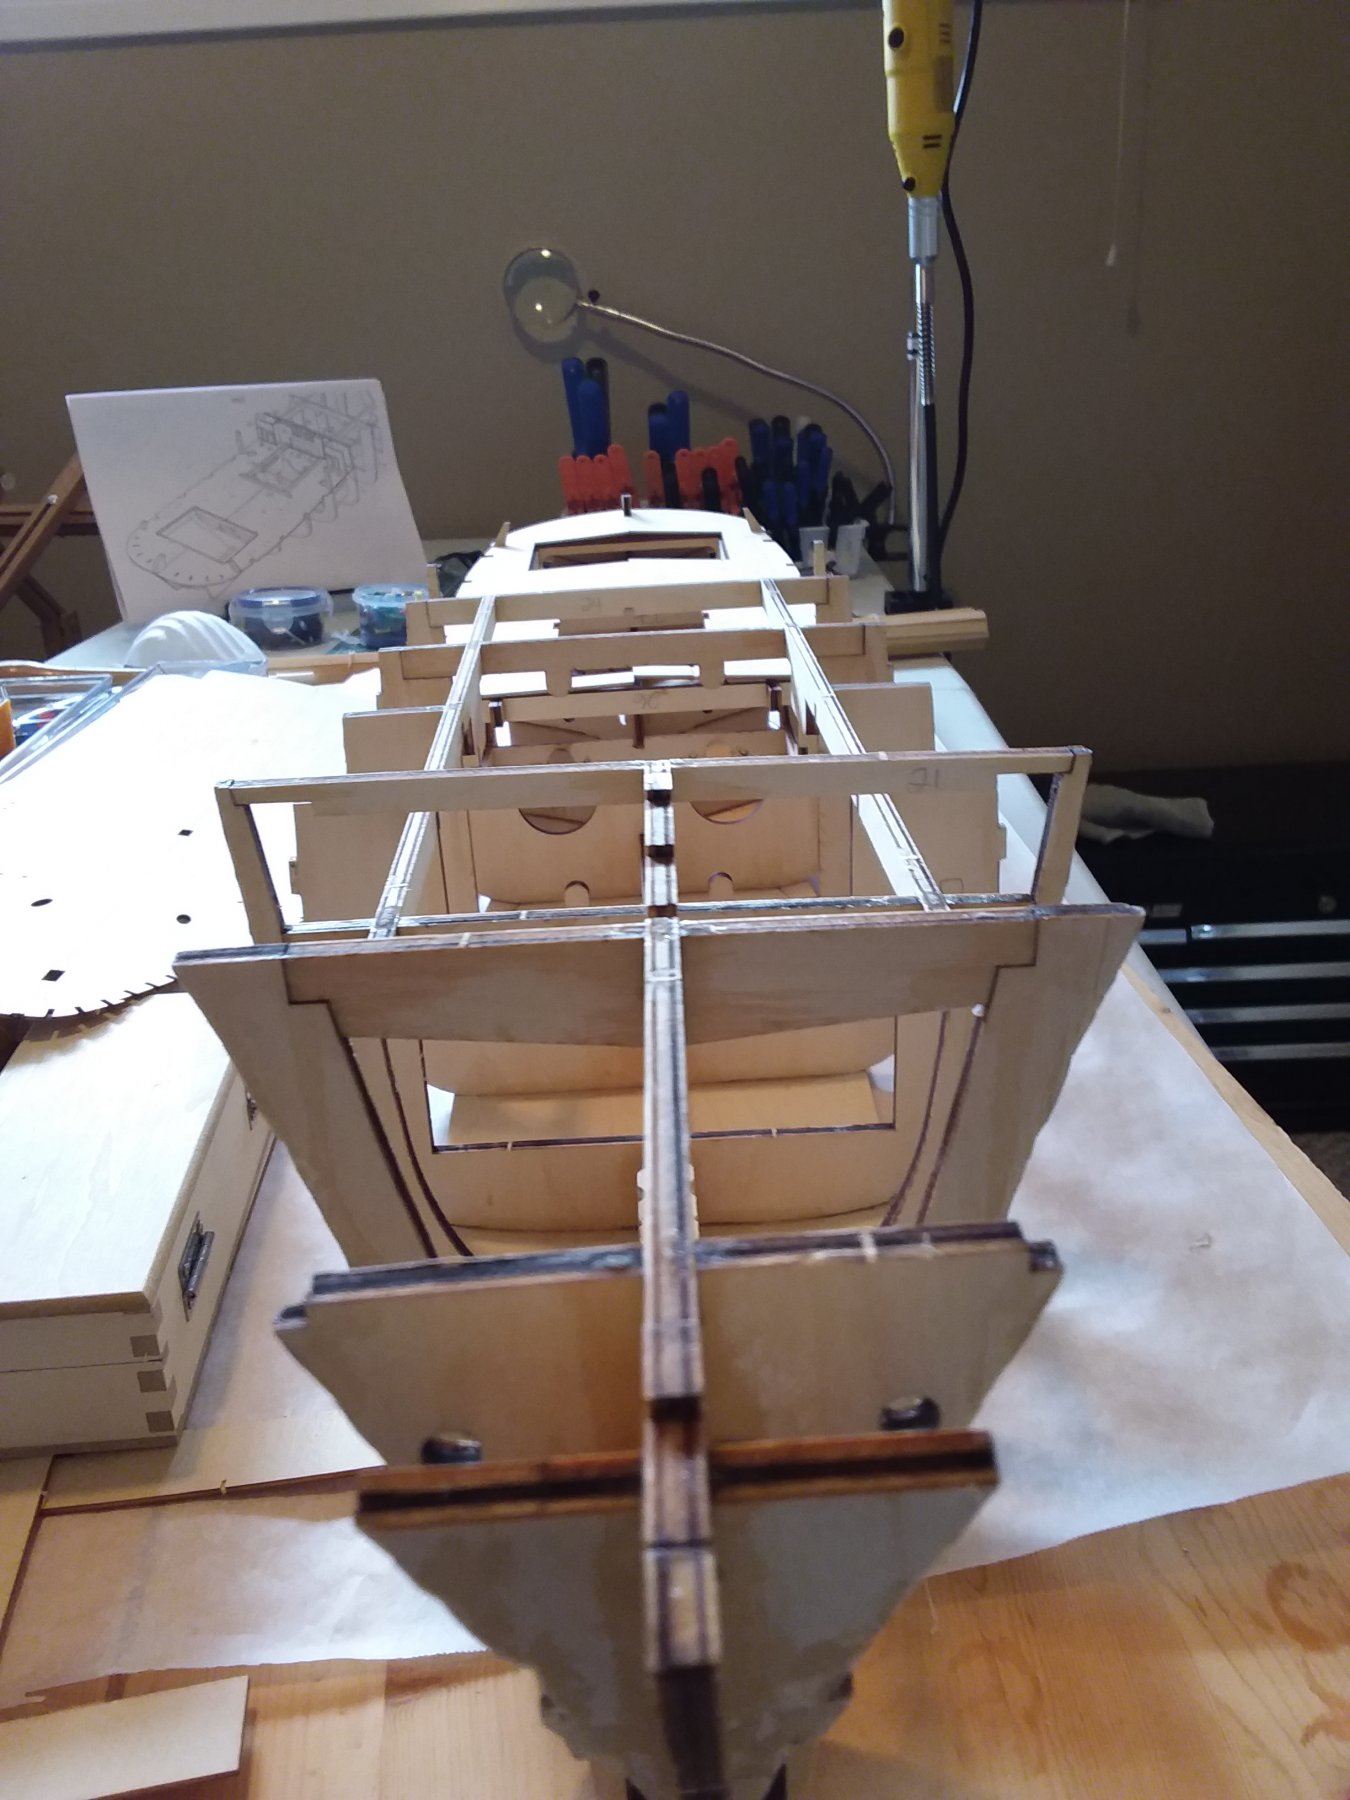
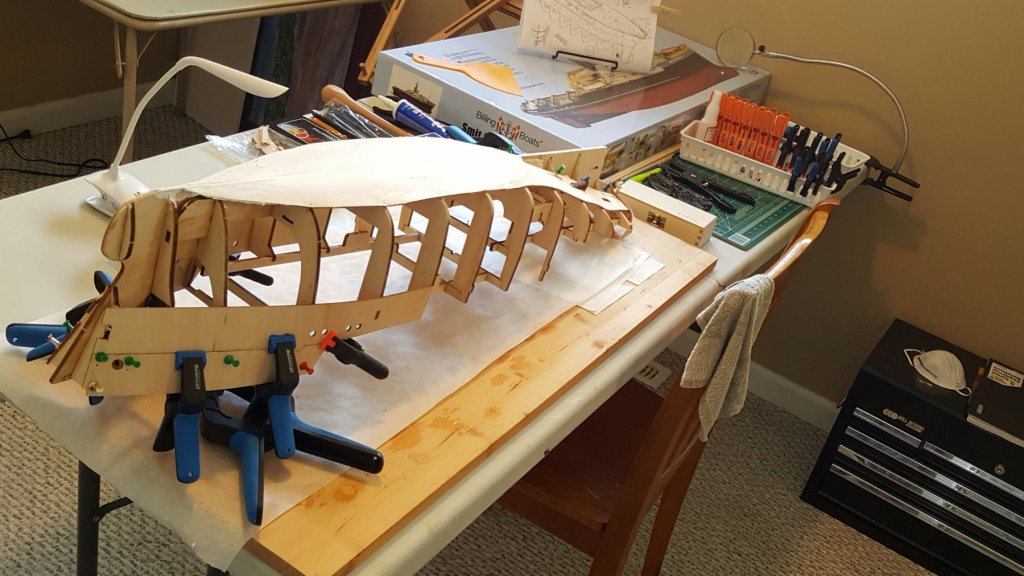
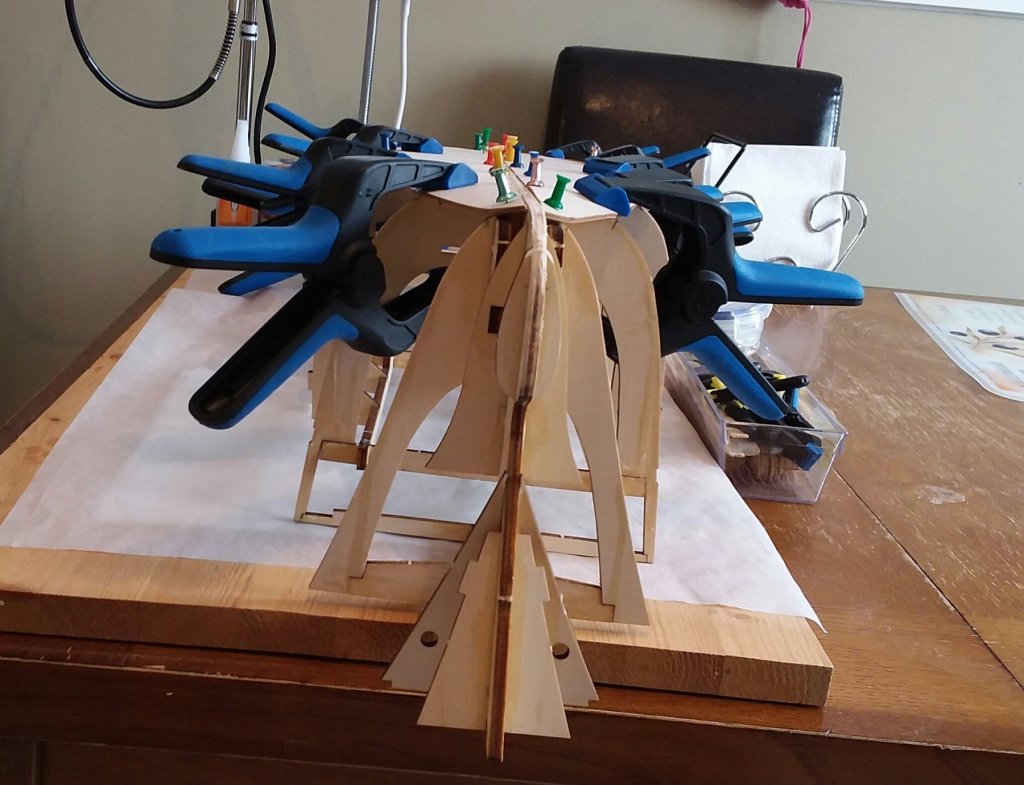
So, I very gently removed the outer bow walls, minimal damage, then scraped and sanded the leftovers off the ribs. I stared it down, gently moved and twisted the entire boat. The twisting and moving is not easy, its very strong. That's when I found where the problem was. You can see in the photos, the front 3 or 4 ribs turn right. What to do....? I figured the floor had to come off. By now, I had a few layers of filler applied to the floor. turn yer stomach. I gently started to lift the floor off at the bow end. At the second rib she cracked, but not too bad. I cut away at the glue on the next rib (3rd from the front) and the front of the bow snapped to the center. That's where the problem was. I dry-fitted the bow walls and bow floor.... almost perfect!


-
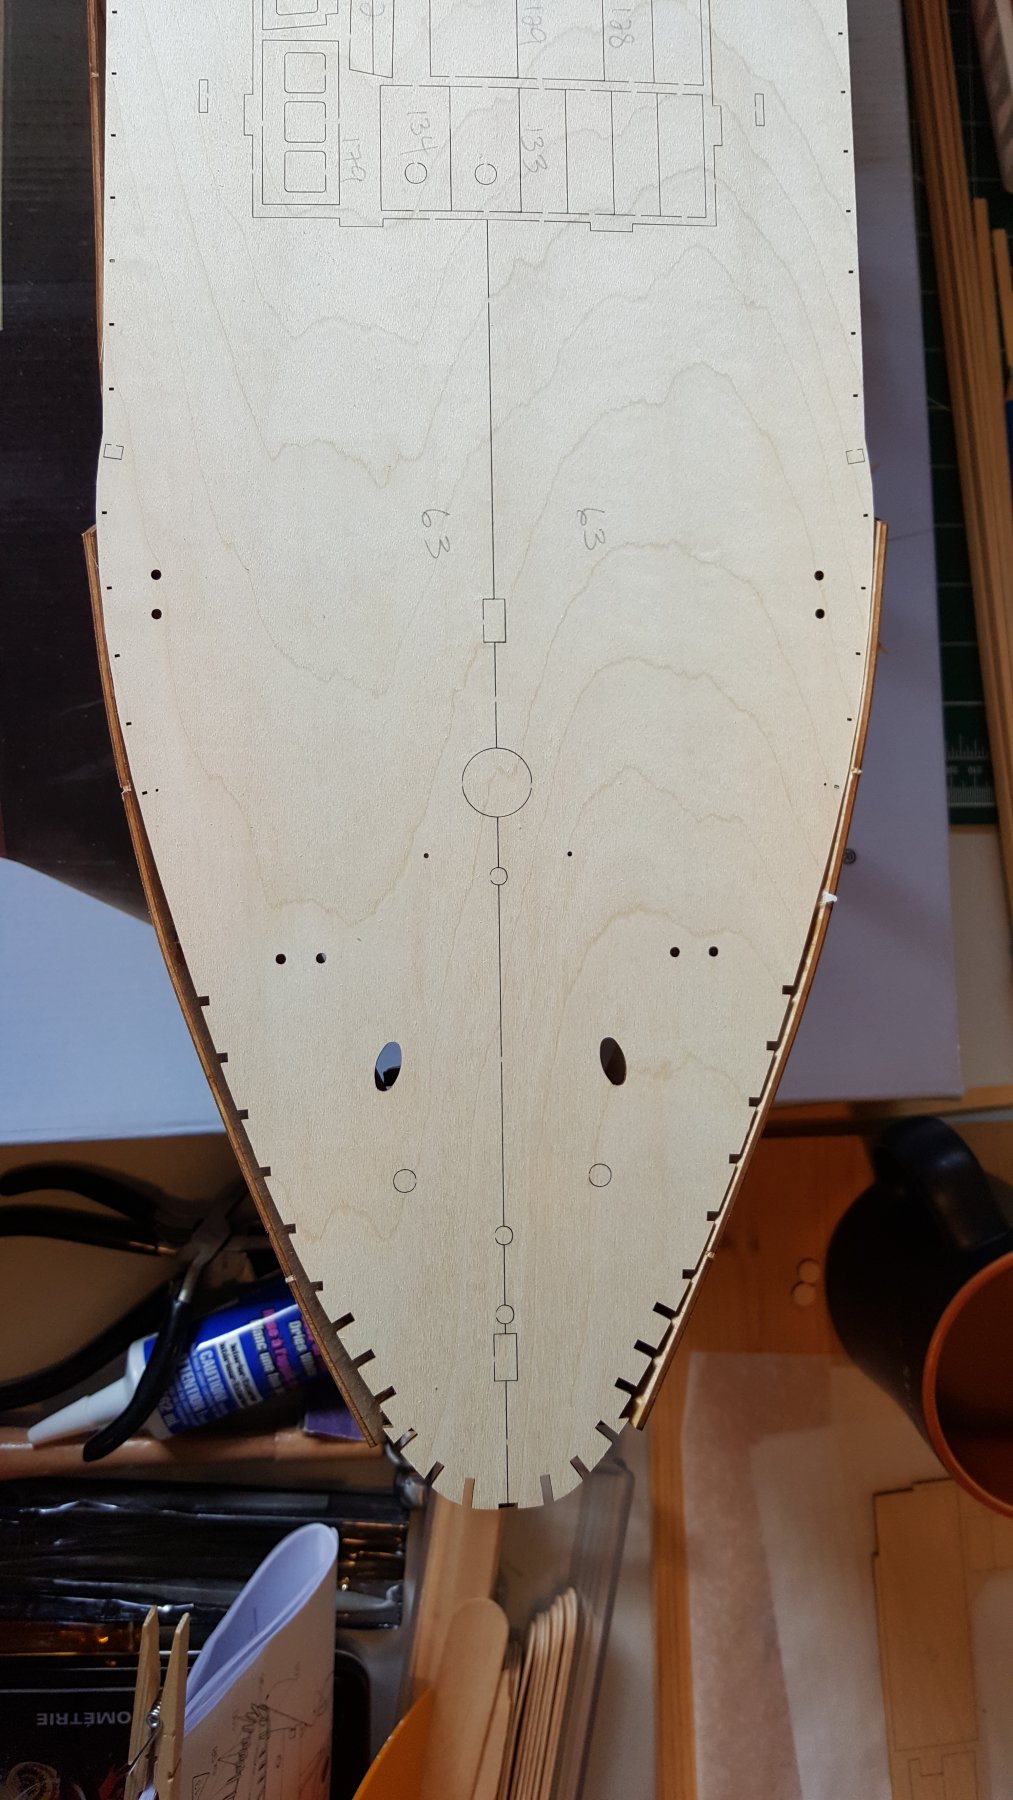
Welcome to my learning curve. As you can see from my pics here, when i dry-fitted my bow floor (and at the time i had no idea it was called dry-fitting) , to my horror, the bow floor and the outer bow walls never lined up! The factors that lead to this was not ensuring the keel length and the ribs were true. The super glue in big amounts applied, can and did draw the structures one way or the other and instantly dried the pieces in place. This would normally drive an amateur to walk away and the kit thrown under some piece of furniture. Nope, not me. I never blinked. I wasn't going any further until it was fixed.

-
I continued on, without any change to my wavy bow floor, thinking, "i will deal with it when i get to the planking". I also got ambitious and added the outer bow walls. (plywood) remember, plywood has a memory!

-
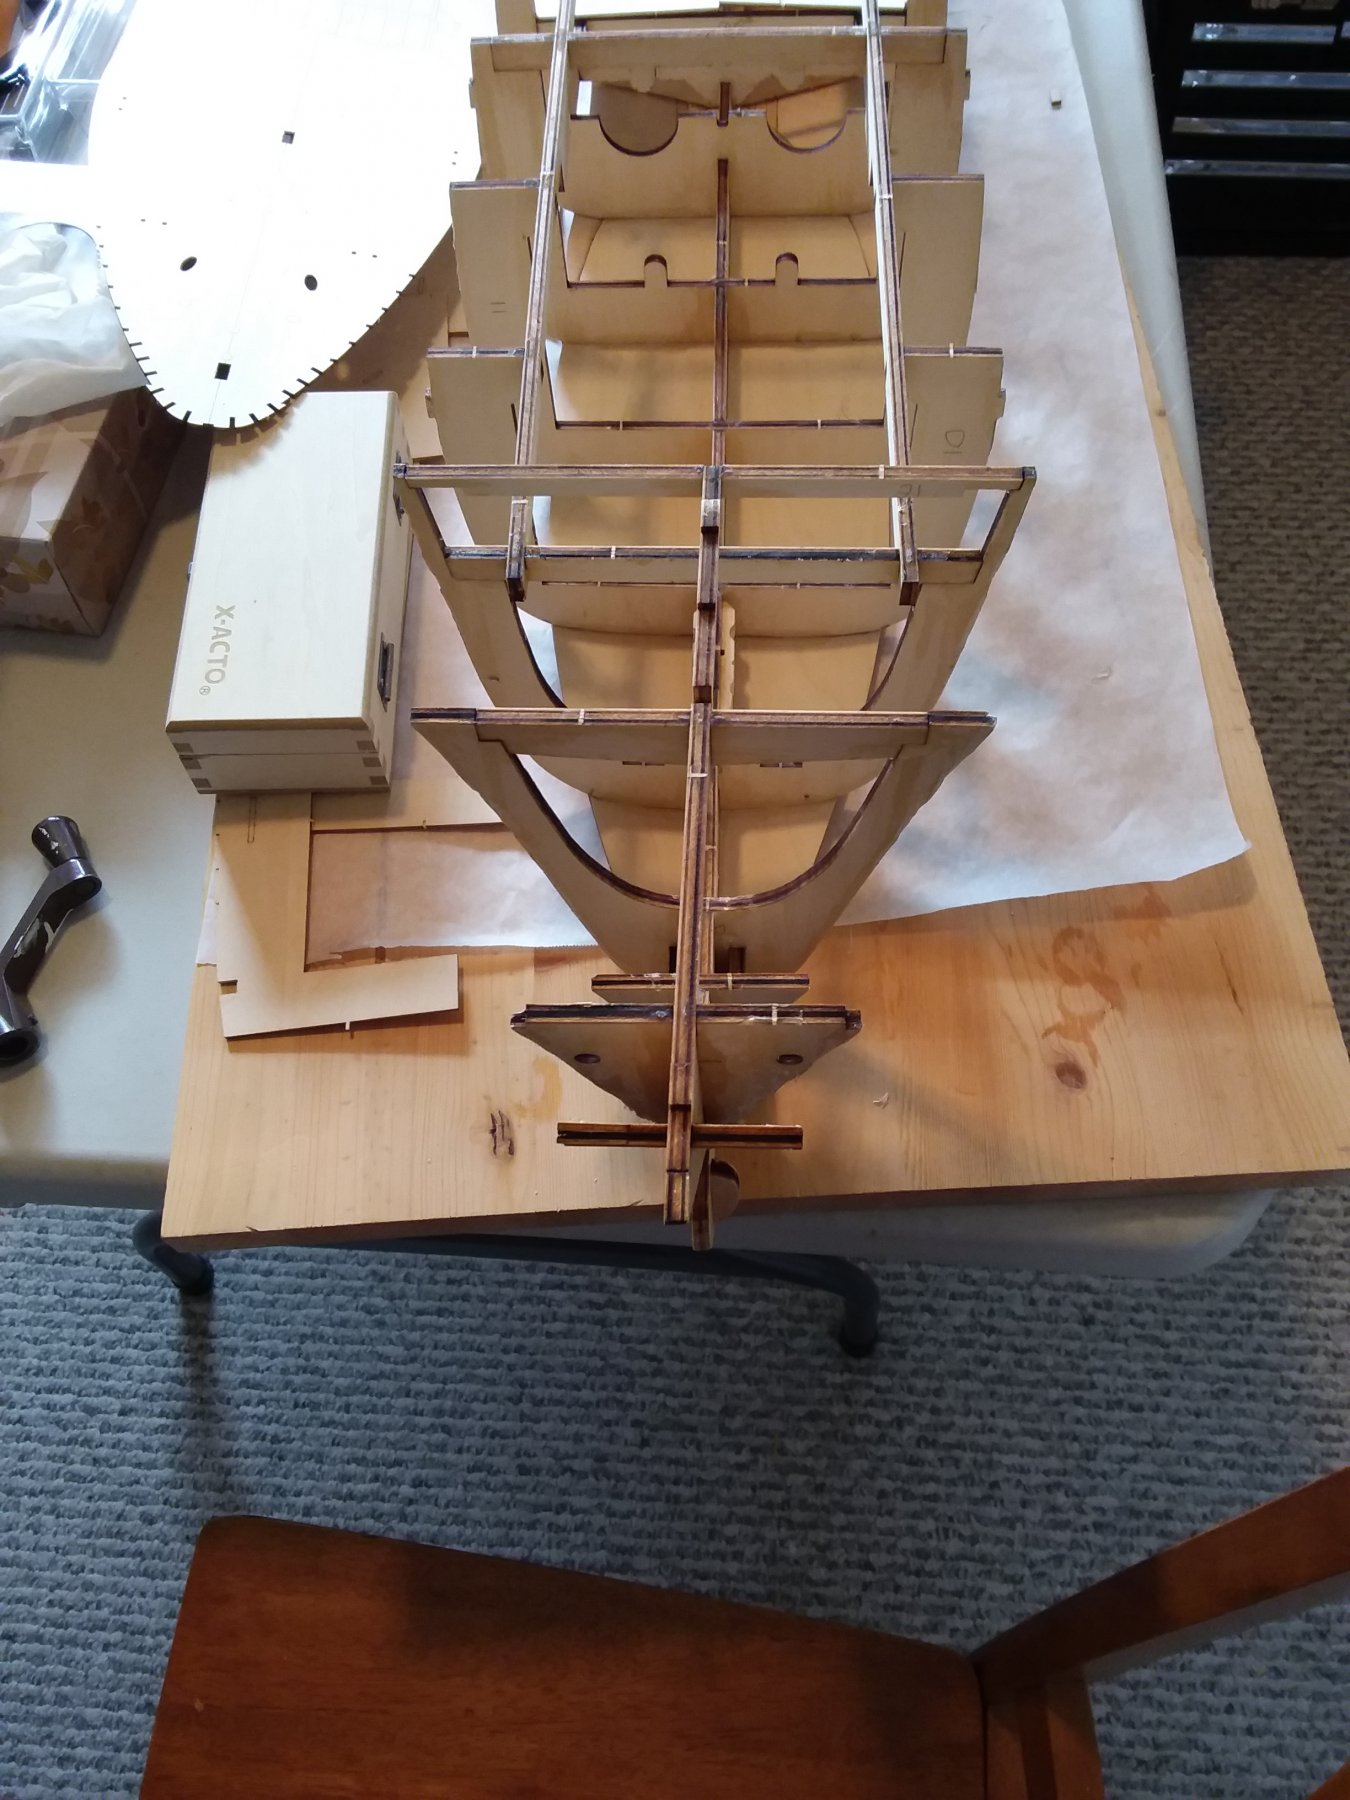
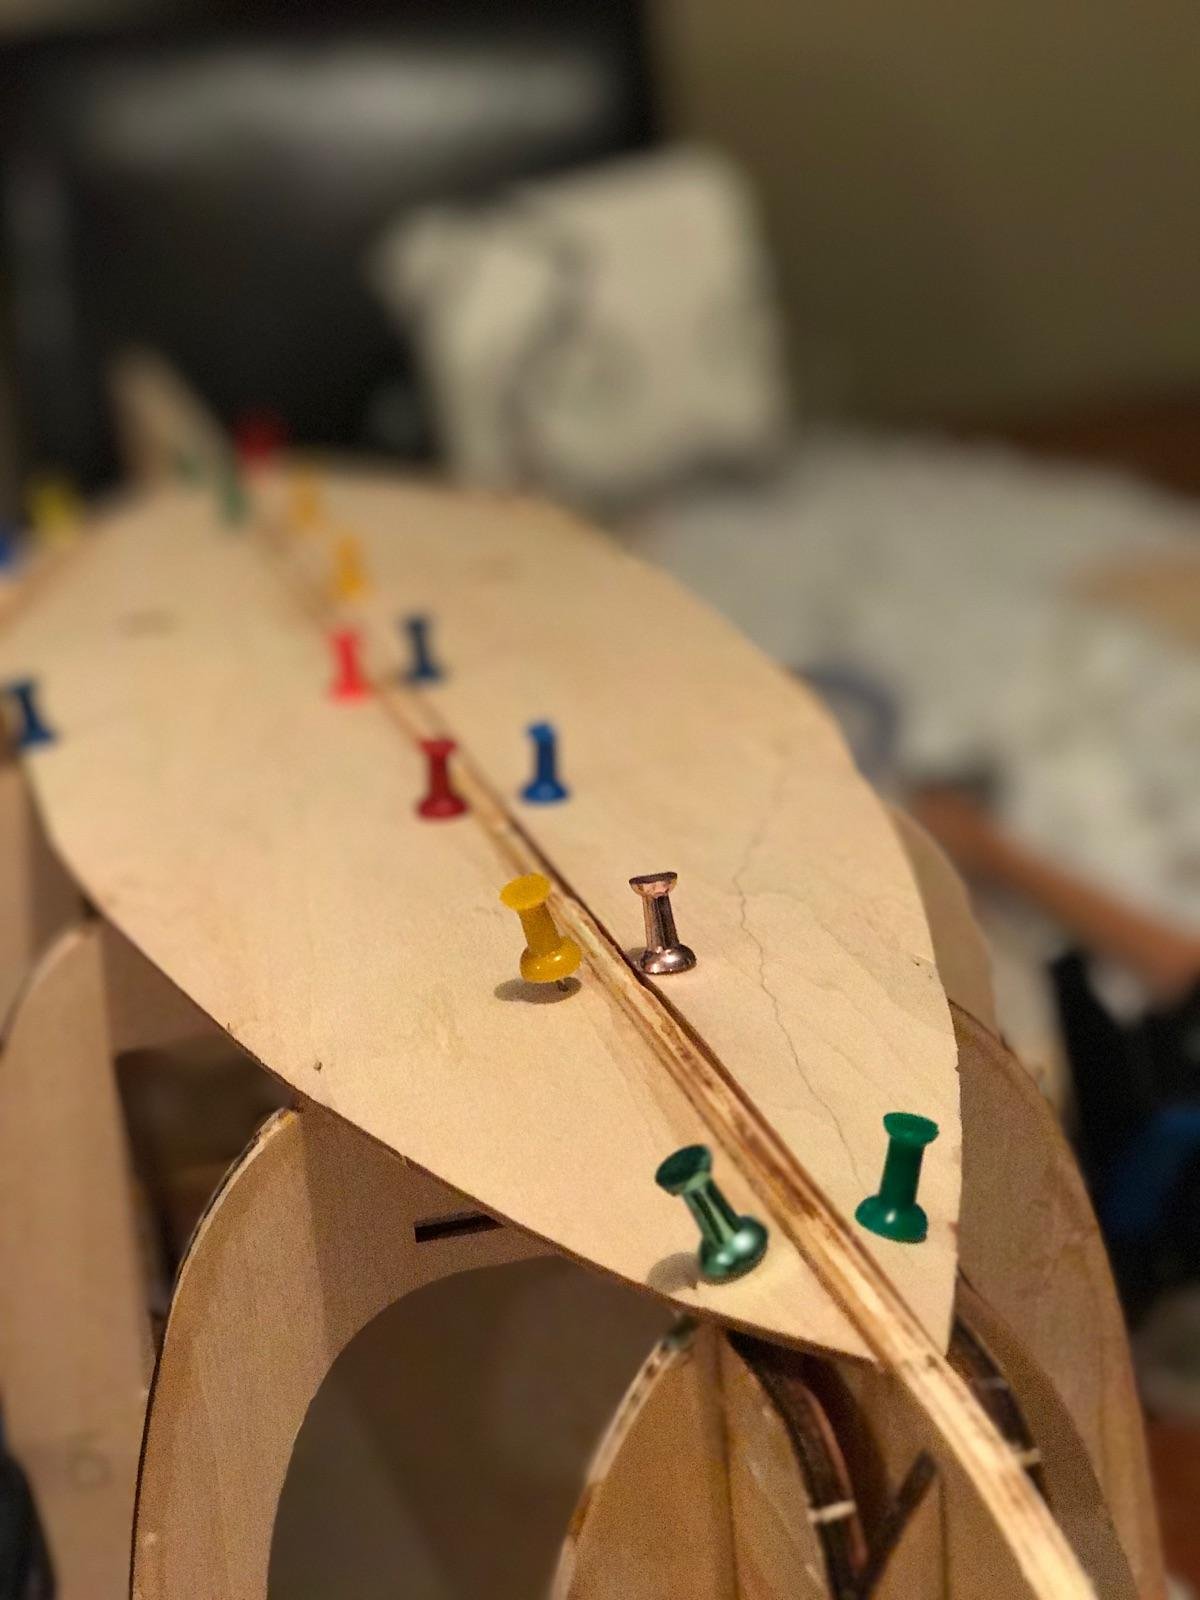
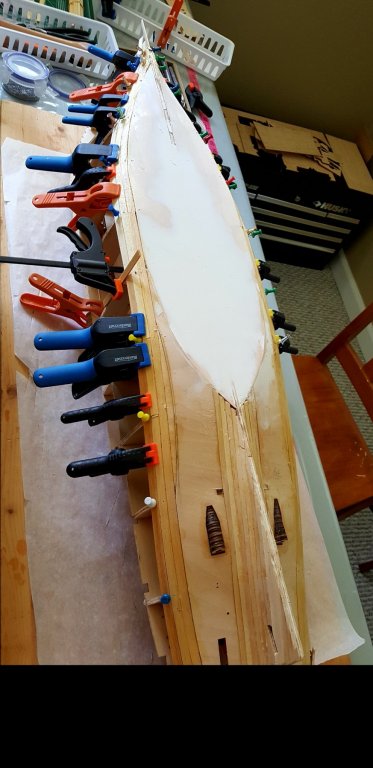
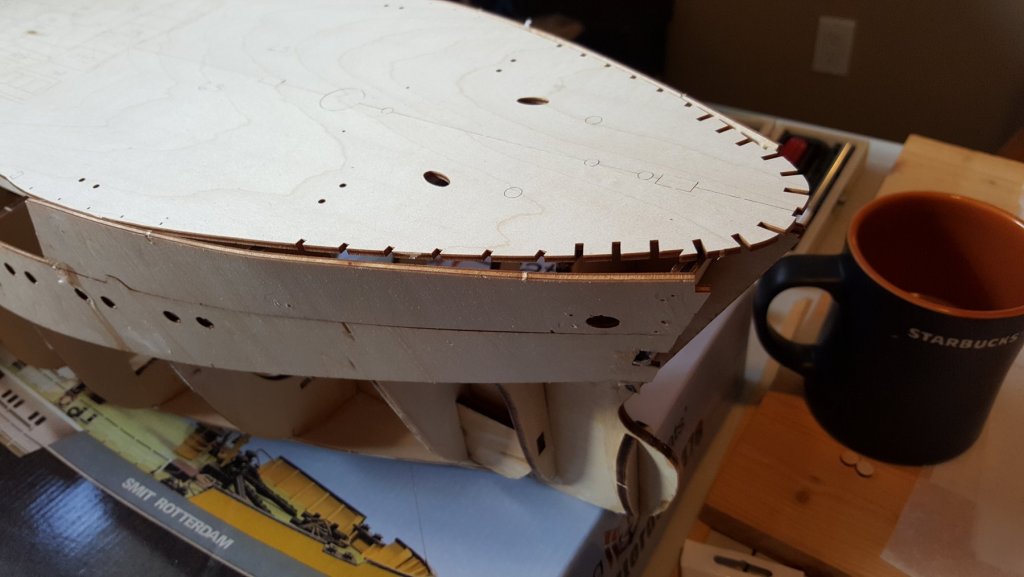
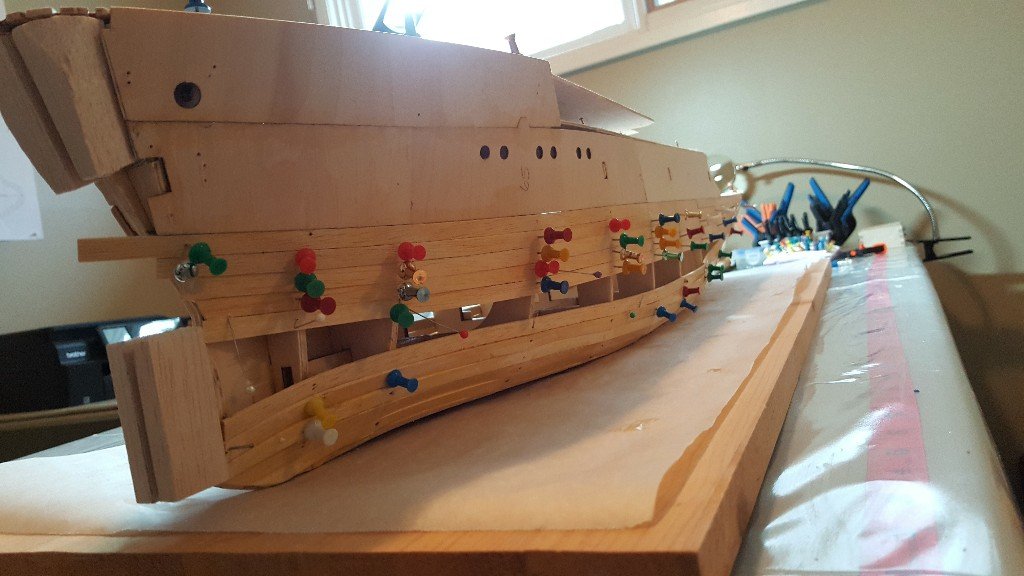
Regarding the addition of the keel floor, it installed pretty easy.... Until I moved up to the bow section. The plywood floor has to bend or be bent as to take shape of the bow. It doesnt bend easy. You can soak the narrowing half of the floor planks as to give you some playability, but remember, it's NOT balsa plank, its plywood... and plywood has a memory. Once the bow-ward halves are plyable, secure them in their proper place. Always check for frame anomalies before major work. I bent mine by hand and just applied thumb tacks and clamps. What I didn't look at, due to inexperience, was what the plywood was doing between the ribs. It was fighting to spring back. So now, I had a wave effect. I never realized this until the "super glue" and plywood floor was dry and all my tacks and clamps were off. And beleive me, those waves between the ribs we not moving. I found out after the fact, some builders use zip ties, sometimes joining 2 or 3 ties together and span them around the hull floor from starboard to port (right to left... i think) so that the tie would tighten down the wave between the ribs. Thats just one idea. Seen, here, between the blue clamps, on the right side, the plywood wanted to spring back up because I never helped the clamps and tacks keep it down.
-
Hey Carl, Glad you're on board too. As I mentioned to Sjors, by all means, if you read something that you have different opinions on, make sure you say so. That only strengthens the community.
-
The popcorn machine stays Sjors! Thanks for popping in. That seat will be reserved by you. The photos I am posting are of what I have done so far, with some added notes worded toward any amateurs that might look for information in the future. Don't be afraid to voice your opinion on my entries, good or bad, as that only helps the next deckhand.
-
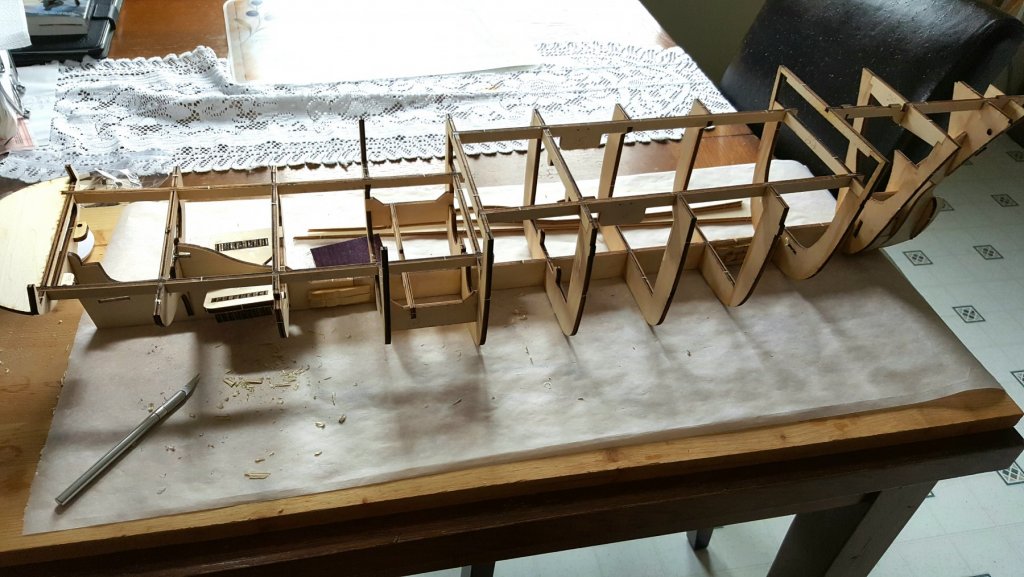
I started off laying the keel on a bare surface, then inserting the the ribs with super glue. For measurement, I used a simple 90° triangle from a protractor set. This, as I learned from trial and error, was a huge mistake. I should have known the difference as I had read about this during my research. You have to secure the keel "true" to measure, that is place it into a tight and straight grove or something tbat will keep it straight. Add two ribs at a time at the most until "wood glue", not "super glue" is dry. You must ensure your ribs are true to measure and square. Measure the heck out of it to be sure. Patience!! and time!!

-
Ah, gotcha. I did everything right except add "Radio"
-
Up to this stage I was using CA glue (super glue) with a high viscosity (very fast curing /drying time). Another, more experienced builder advised me to discontinue that glue for various reasons. The primary being, not enough time to work with and it was a very unforgiving bond. It is very runny, gets over everything and once you put your wooden pieces in place, bang, thats it. It was suggested to use a good quality carpenter's / wood glue. Use of clamps and pins to let dry properly. Slow down, relax, use great care and finesse. So I used a medium viscosity of the same glue instead of adhearing to the advise given. I found out pretty quick, the advise was valid. As much as I was convinced things were going great, as I went along, I discovered a misaligned piece 5 moves ago, messed up my current plans. research before you make your next move. pay attention to the advice. If you're uncomfortable with the advice, ask around.
-
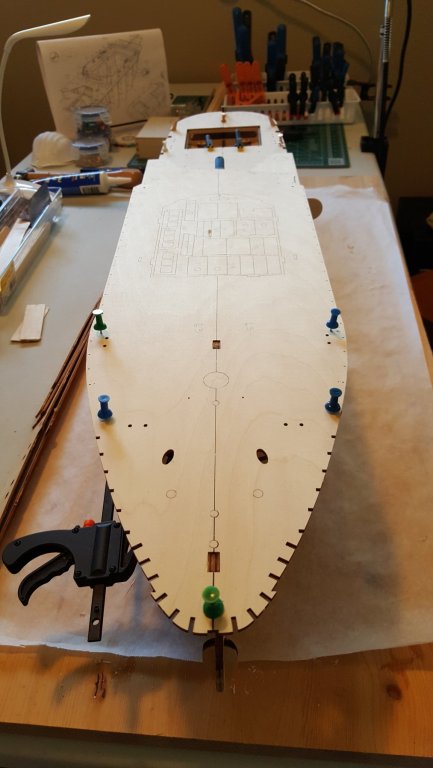
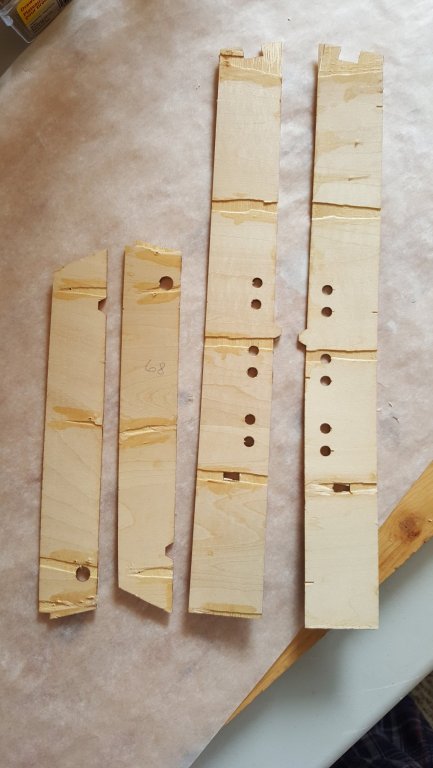
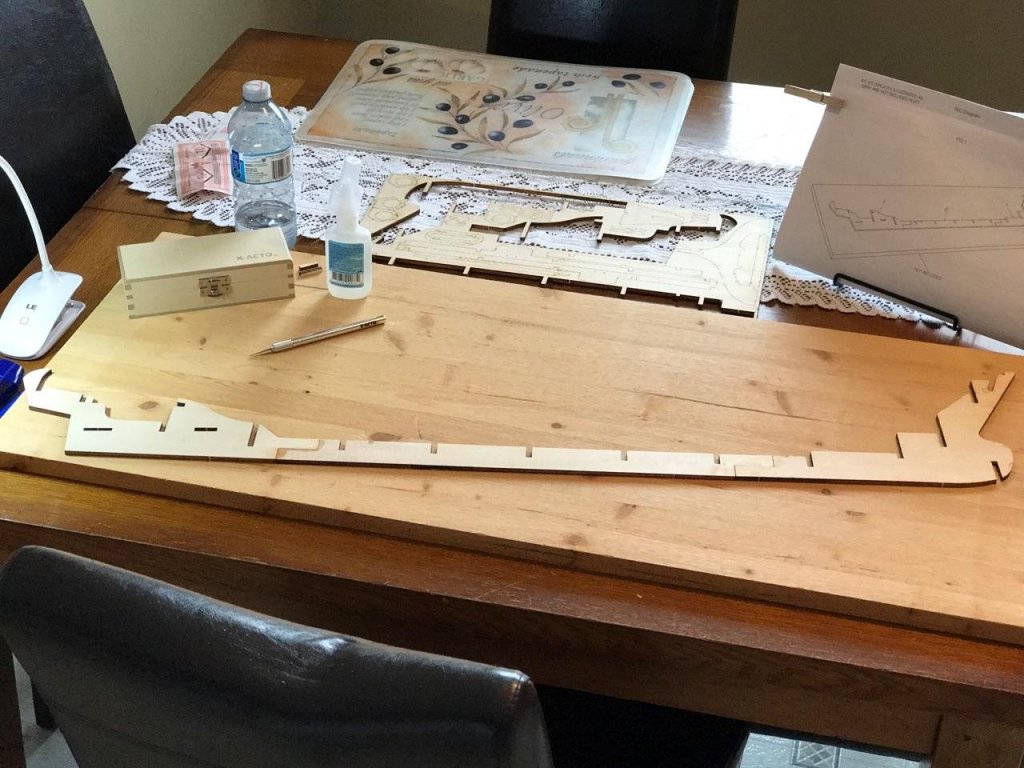
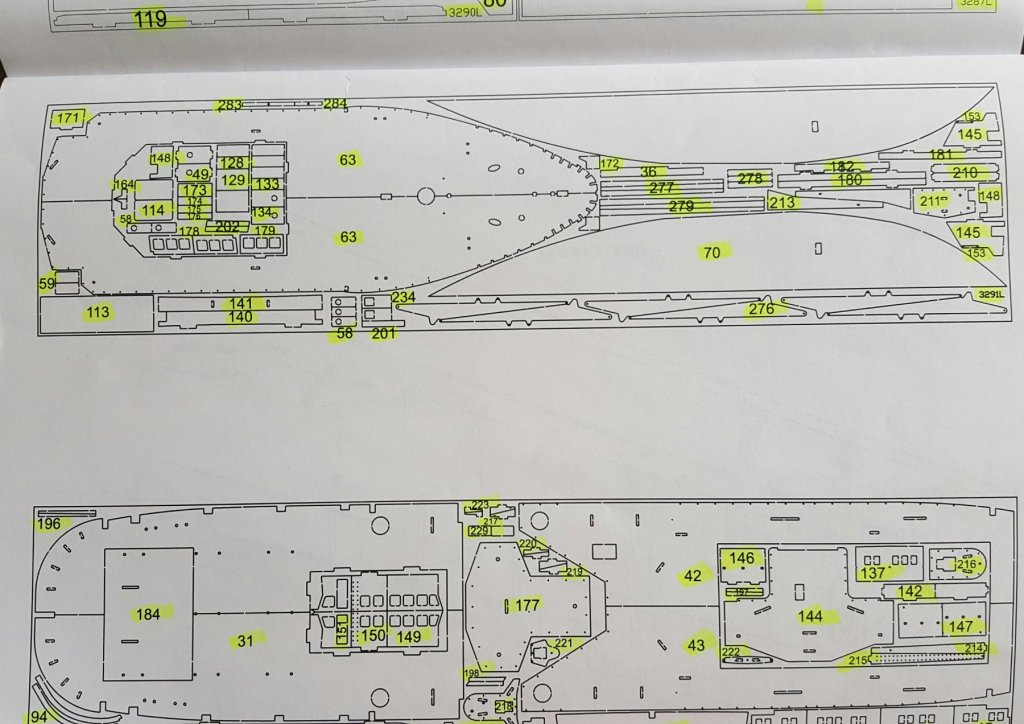
Here, Ive highlighted each part number after I pencilled in the numbers on or next to each piece on the sheeted plywood templates in the kit. The laser etched wooden parts on the plywood sheets "are not numbered" So for any builders following me in preparation to build this kit, be aware of that.

-
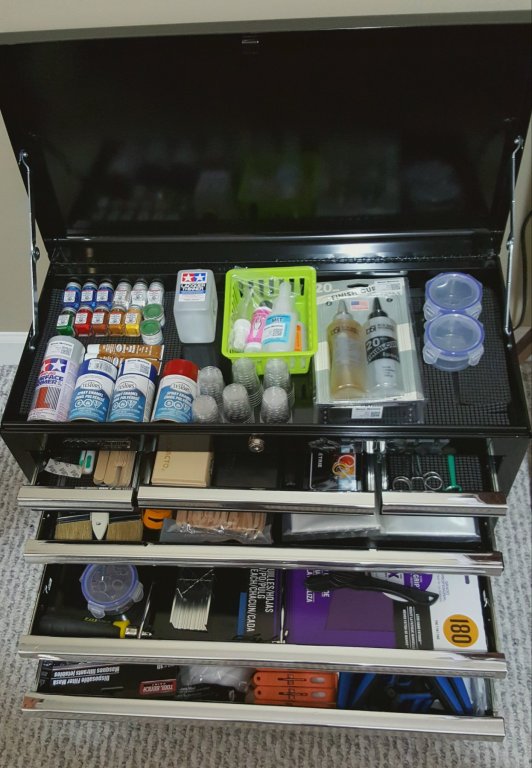
I've converted my tool chest to serve as crafting tools cabinet. This will serve as a starting point. I think its pretty neat.
-
Woohoo! Welcome aboard! please don your life preservers as our hull is not yet completed and we are likely to spring a leak
-
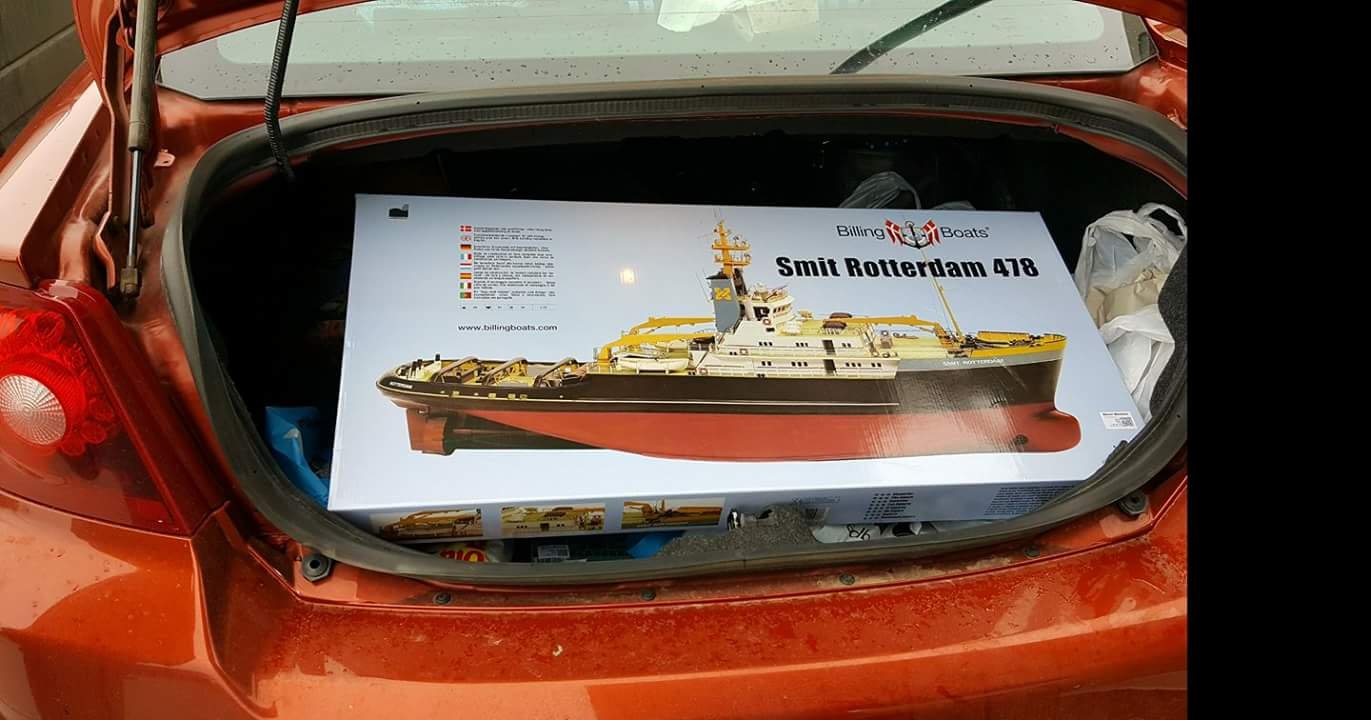
Hello everyone, I come from Newfoundland Labrador, Canada which is surrounded by water. Unfortunately, living in the western region of Canada I'm in, Lloydminster, Alberta, Canada, (the vast prairies), water is very scarce. Ironically, my new passion for model watercraft will move ahead regardless. I have no interest in speed boat style vessels, but rather, the larger tug boats, fishing boats and eventually, tall ships. Ive done a lot of research, and it makes more sejse to reach for the mountain before the sky. So for my first build, I've chosen the Smit Rotterdam, by Billing Boats. I also intend to install RC components. This model is expert level for that group/style of vessel. Some say I am, "ambitious". We will see. So far, I am loving it. An entry level exploration tall ship is my next target. But, if it takes another boat, such as a fishing trawler, well, I will get my tall ship in good time. "Long may you big jib draw"
-
Thanks Anja. Ive read it and its pretty straight forward. The Rotterdam is obviously static by the standard kit. If one decides to install the RC components, should it be still listed as static? Just checking before I start a build thread. I don't want to walk the plank
-
Haha, I should have just started a build thread.😁 Not bad progress today. My planking doesn't look the best, but not too shabby for an amateur. Once the hull is all closed in, I'll epoxy the inner hull then the sanding and fibreglassing starts.
-
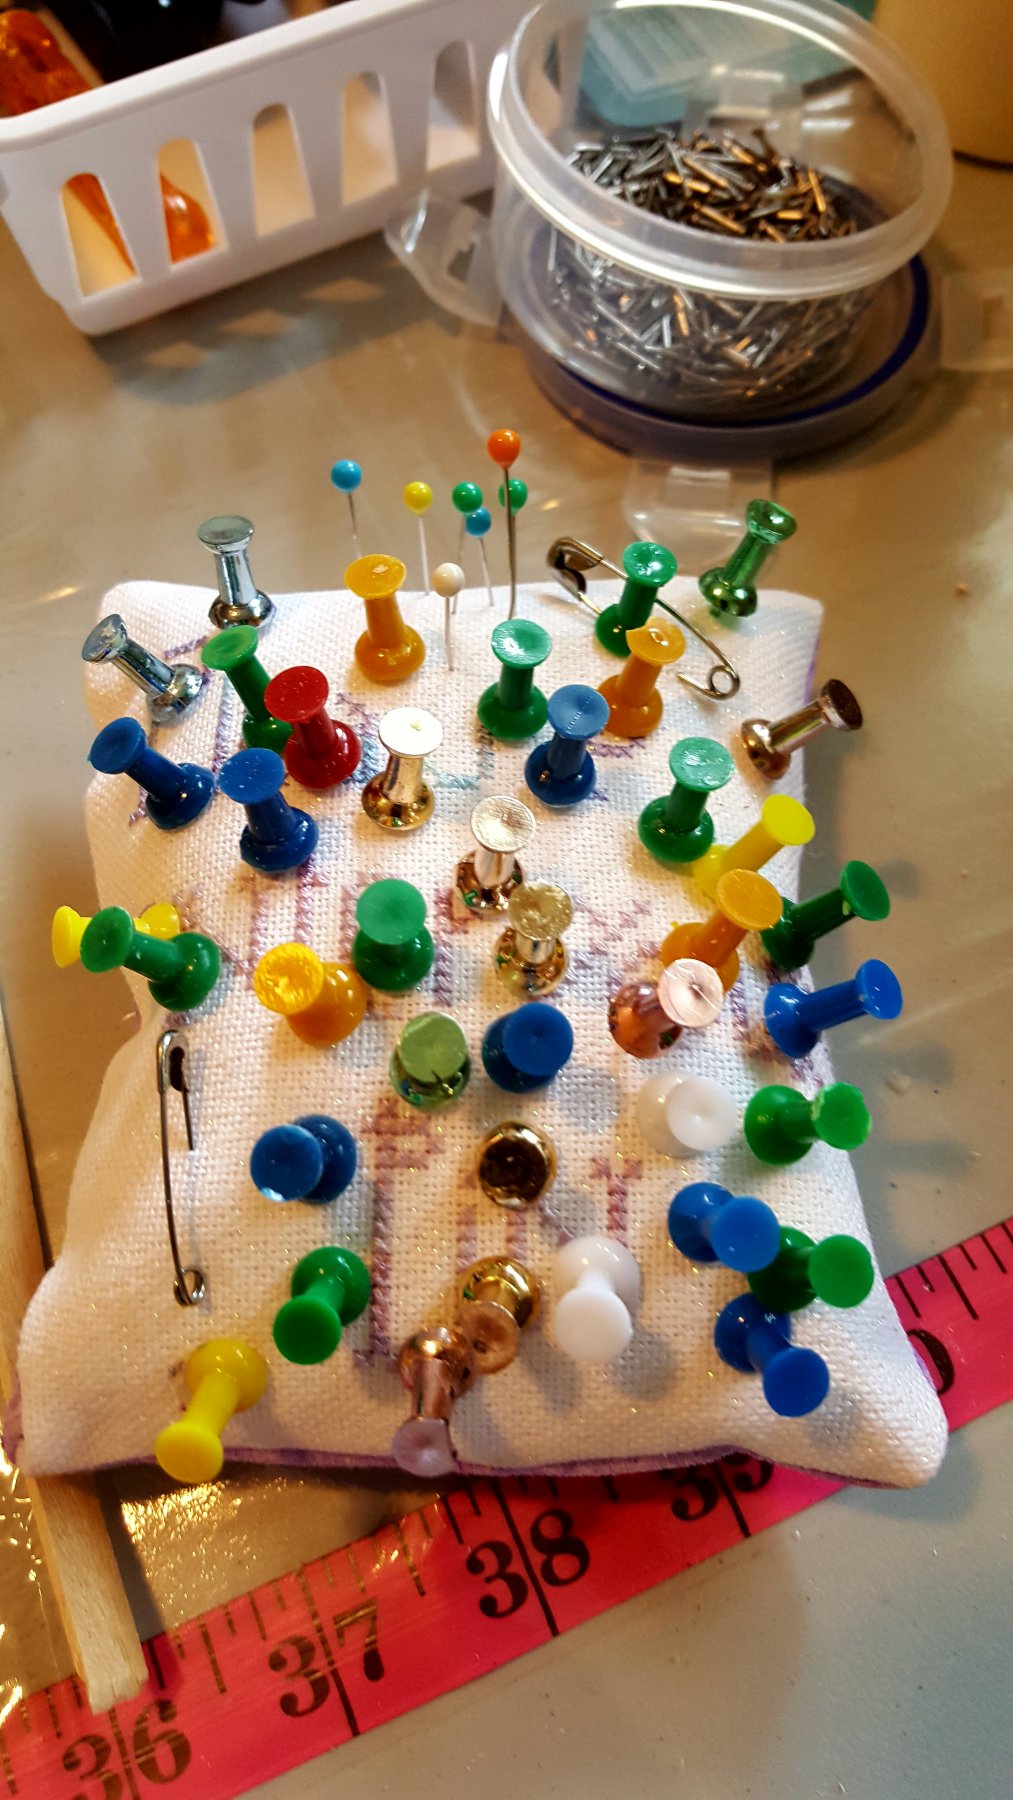
I got tired of my fingers being jabbed by pins and tacks when I took them from the containers. So my wife made me this. #boatbuild #smitrotterdam #rotterdam #tugboat #rcboats #billingboats #modelboats #modelships #hobby

-
I thank everyone for the welcome. I am truely enjoying this build and use the tools and the broad range of advice from various build communities to help me become better as I go along. It means alot. Terry😊