HOLIDAY DONATION DRIVE - SUPPORT MSW - DO YOUR PART TO KEEP THIS GREAT FORUM GOING! (Only 36 donations so far out of 49,000 members - C'mon guys!)
×

(2).png.8ea3e9b5d119e85c31982336f68c92c0.png)
FrozenRabbit471
-
Posts
77 -
Joined
-
Last visited
Content Type
Profiles
Forums
Gallery
Events
Everything posted by FrozenRabbit471
-
(2).thumb.png.08e26c1b7271617455d04b102a2b4077.png) Did some sanding of the hull this morning and primed the cabins for the top deck
Did some sanding of the hull this morning and primed the cabins for the top deck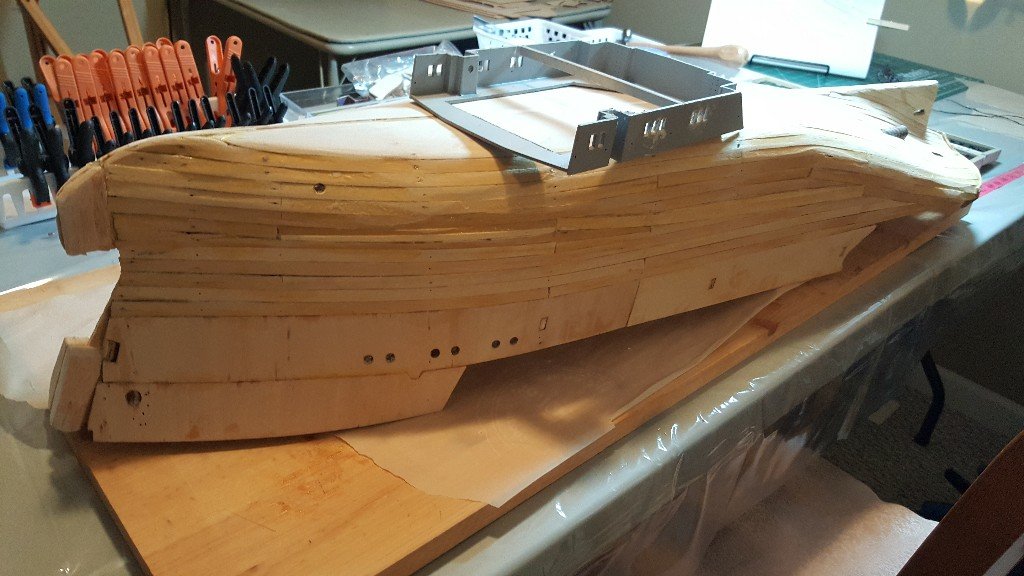

-
well, not easy for me. But fun.
-
Thanks Sjors. I'm really enjoying it
-
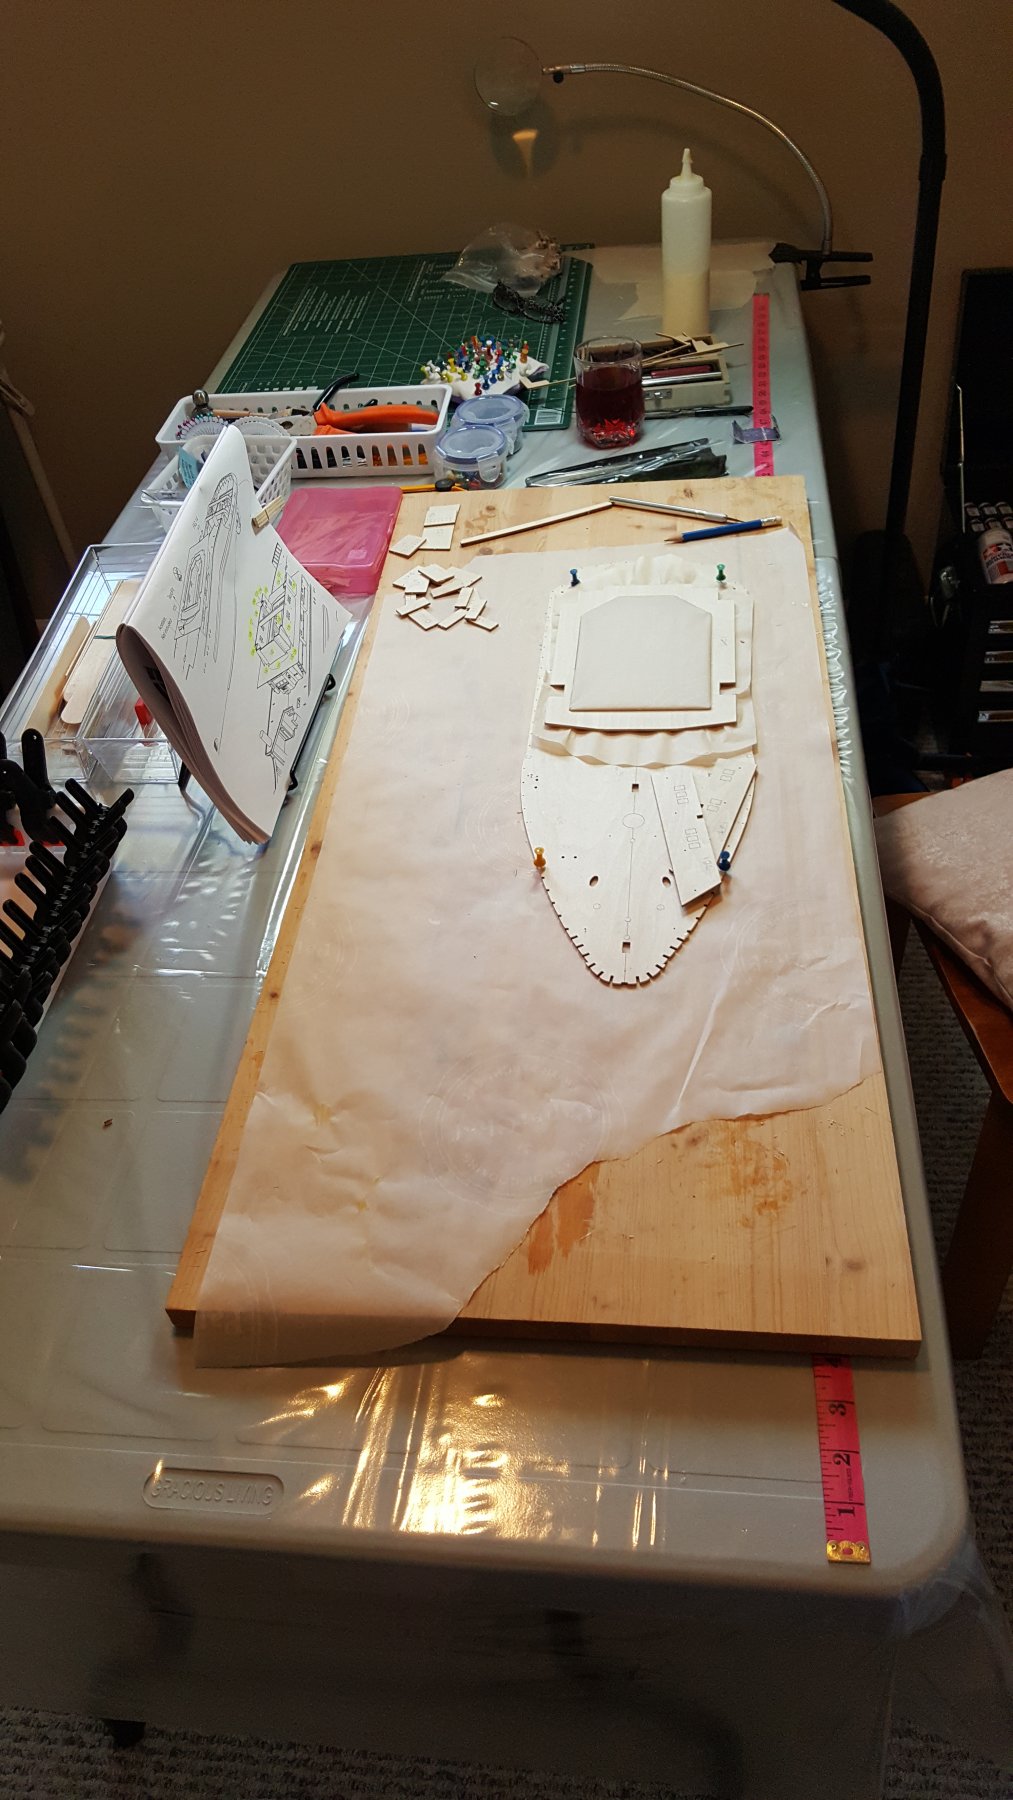
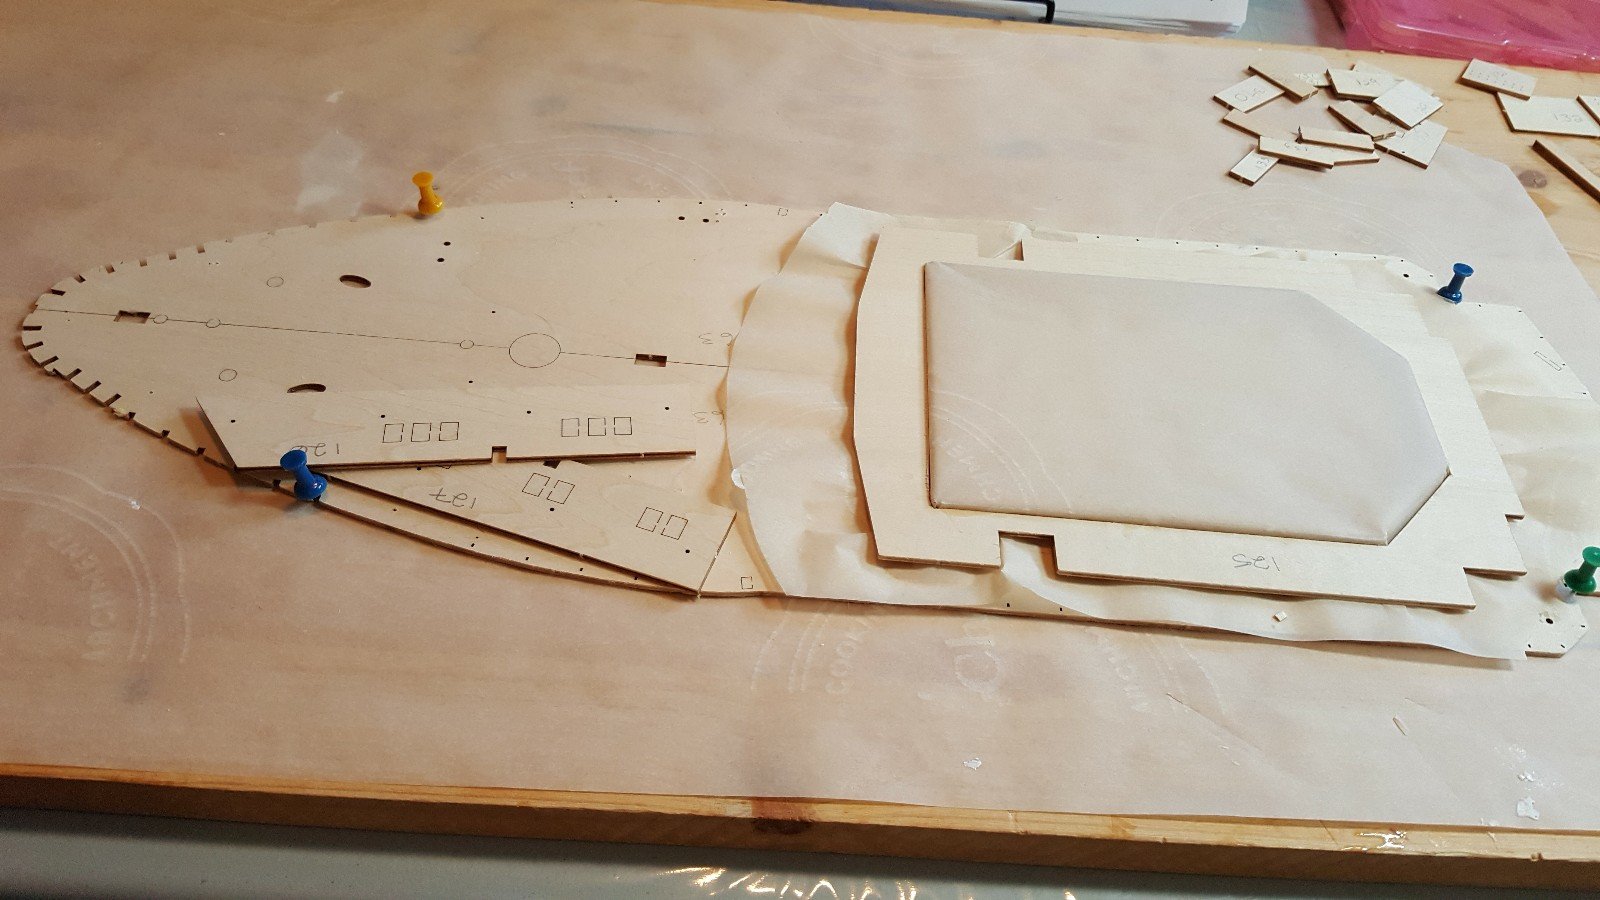
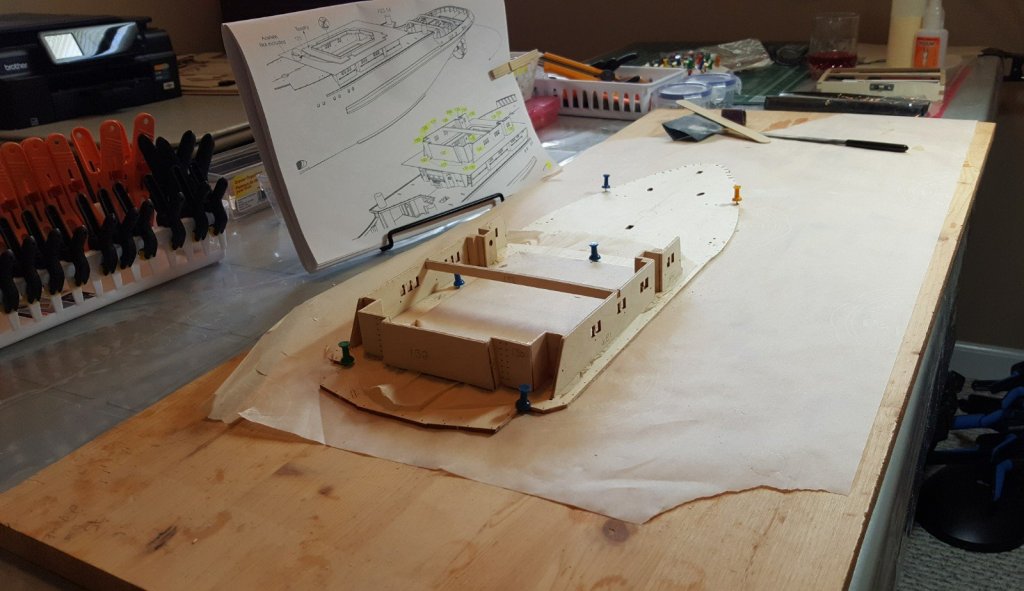
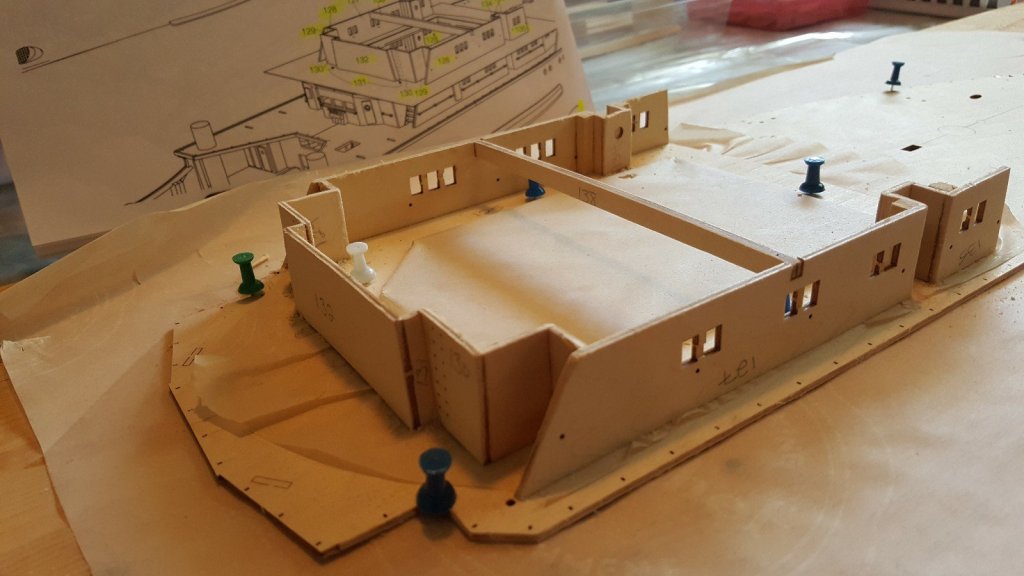
Popeye, Anton and Jan, Thanks guys. You're all correct. I decided to use parchment paper, as thats what I've been using atop my wooden slab. It helps move everything around easy, also easy to sweep dust and wood off and great resister of glue. So today, while waiting to collect more information accross all the forums and groups regarding what filler to use, I started on the 3rd deck cabins. 😁


-
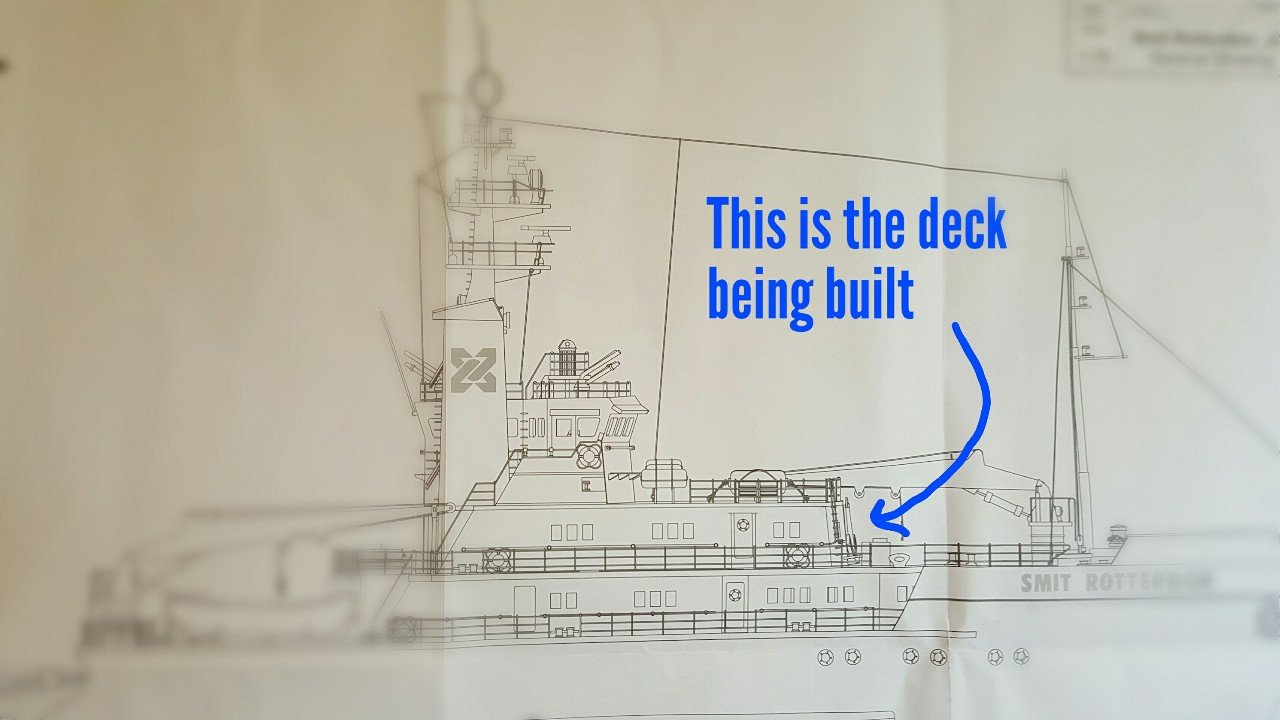
Hi all, I couldn't decide where to place my query as the margins for the subject are so wide. The answers are so vast, it almost becomes complex. I'm building the Smit Rotterdam by Billing Boats 1:75 scale. I am about to start sanding. I have applied non-polyester resin and 3/4 oz fibreglass cloth to the inside of the hull. Solid as a church! Looks great. Most builders share either home made ideas or suggest fillers by brand name. This serves well if you're near the same county, province, state or country. I want to fibreglass the outside of my hull after I have it all filled and sanded smooth. I'd like to know what type of filler is compatible with the type of resin / fibreglass I am using? Much appreciated mates.😊
-
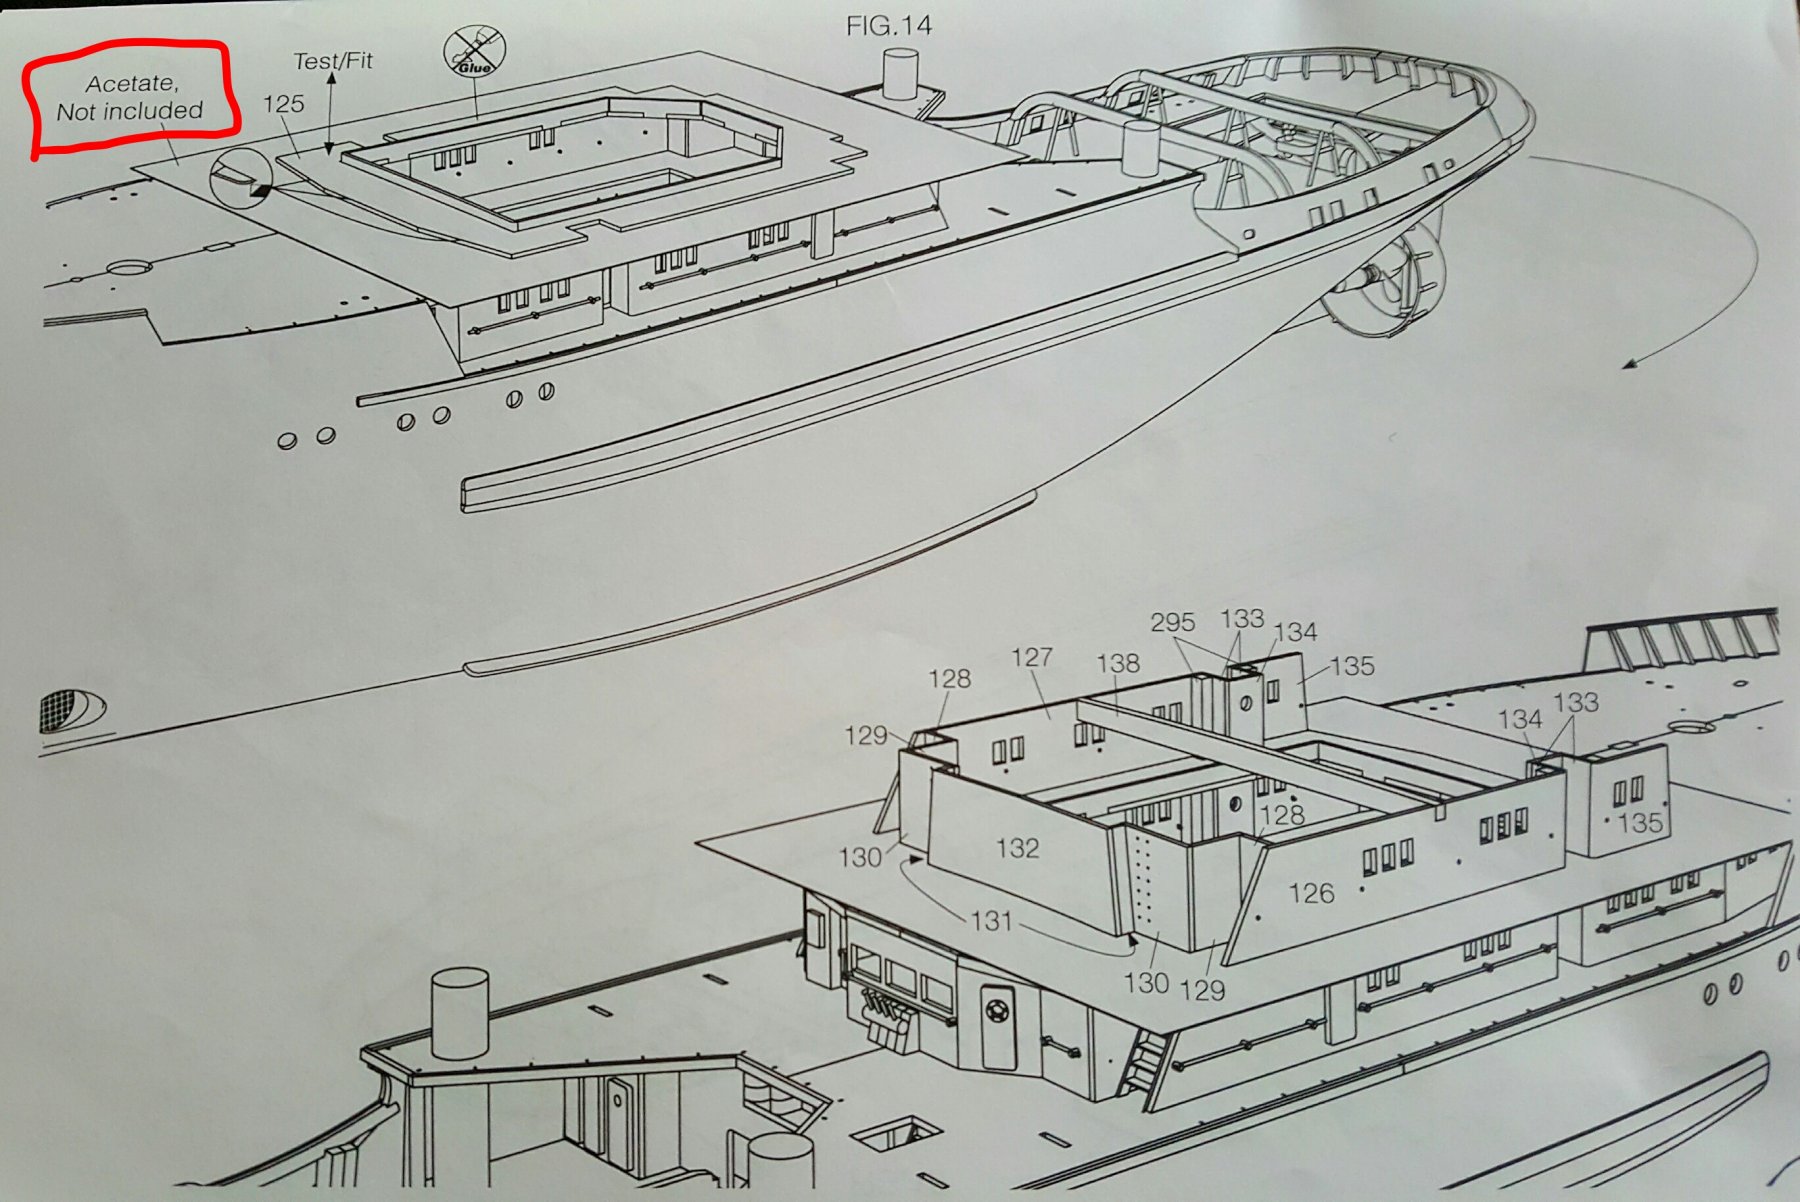
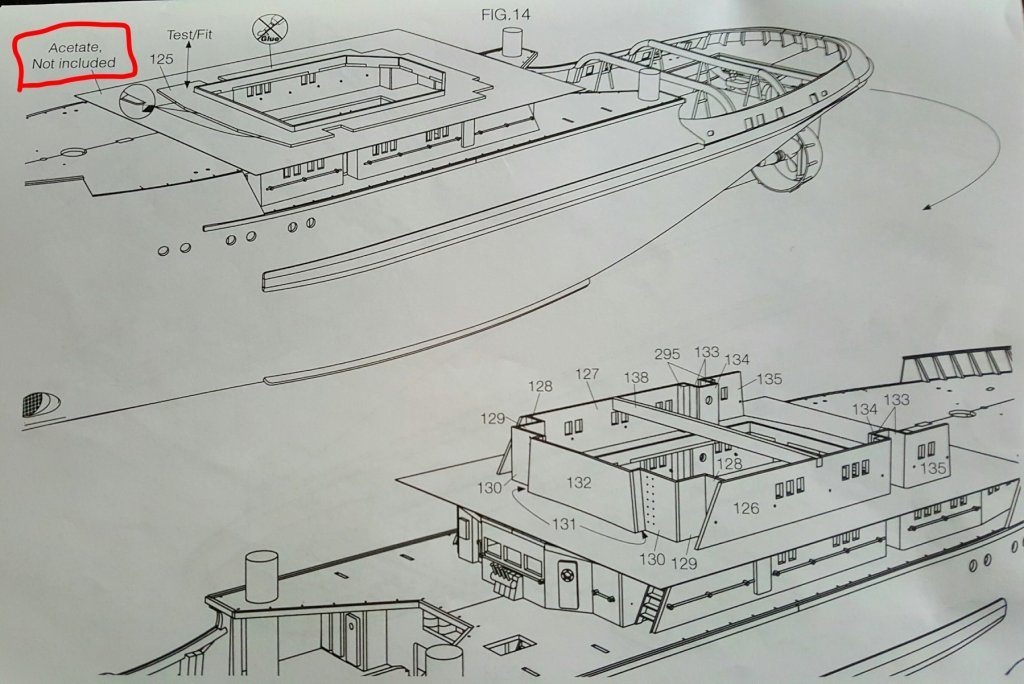
Question guys, the acetate indicated here, is it merely used as a test fit sheet? A couple guys suggested thick paper. This would allow the superstructure to go on and come off the boat easily. In the diagram, it shows a a pretty big piece, that eventually disappears in further diagrams. Just a wee stumped.
-
Well, to that note, ill start on the superstructure. thanks aton and jan
-
Anton, I have to order a few more RC components next week. Could a guy start the superstructure in the meantime or would you advise against it?
-
Got it all done now Carl. Nothing wrong with a bit of extra stength. You're right though, it was a pain in the ♤$$. Popeye, thats what i used to dab it all on. 1/2" Brush. 4 of them cheap ones. All worked out. No worse for ware.
-
Well fellas, the inner epoxy and glass cloth application is not elegant that's for sure. But, It's done. When it's all dry and fully hardened I'll cut off the excess and i guess thats it for the inside for now. Unless you all have anything to add? While I'm waiting for the RC components to show up, I'll start in on the outside. Terry
-
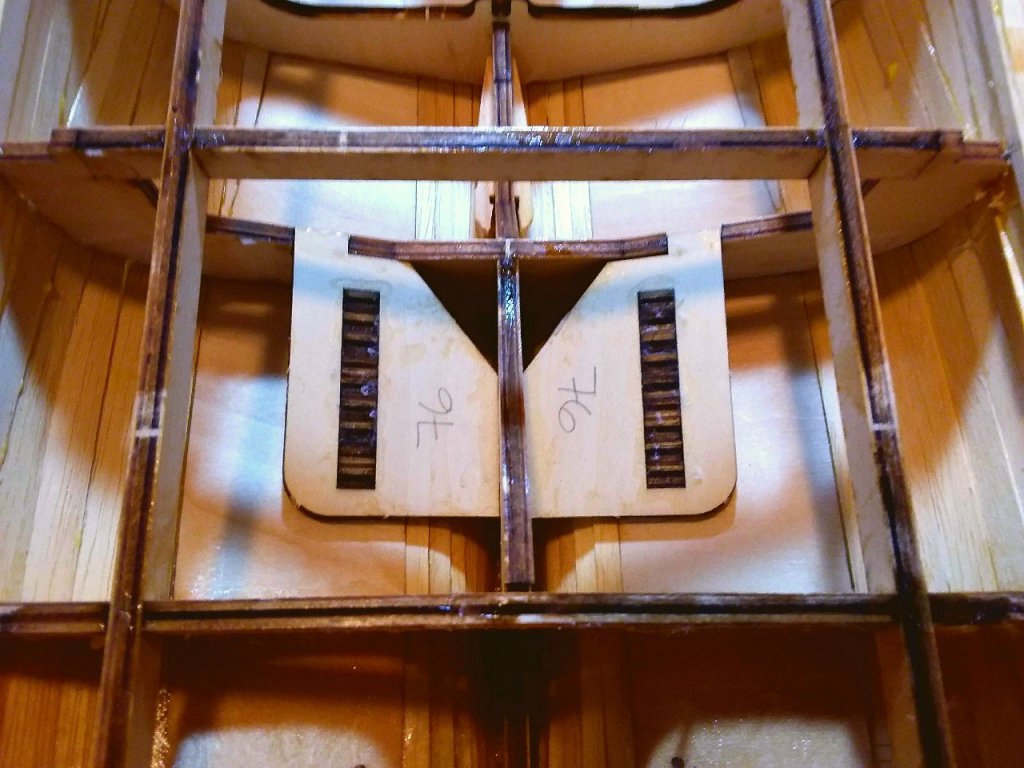
yes it's the rudder compartment. I can just pour some resin in there and swish it around.
-
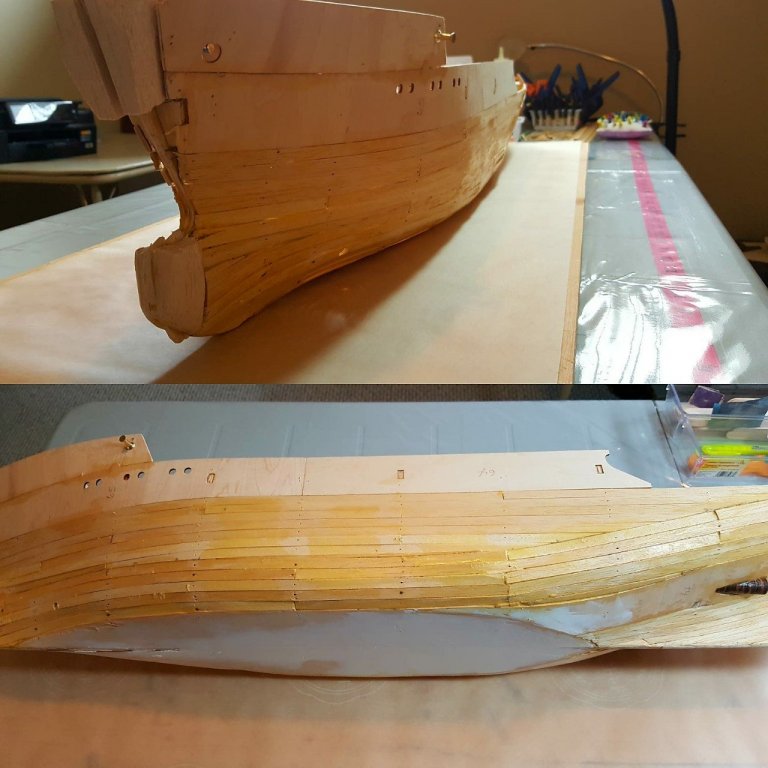
Sjorseye and Passer, thank you very much for dropping by my warf! I agree I have alot of sanding to do. I think I'll pick up a mini mouse or palm sander and sand it gently with that, then obviously by hand after filling some valleys. Before I start all that I intend to epoxy the inner hull with strips of glass cloth as best I can. The deck is only lightly tacked on and will be taken off tomorrow morning after the last few hull planks are dry. All your input is genuinely appreciated. Stick around. Lots of fun left yet.
-
I know I could have epoxyed this compartment way back in the beginning of the build, but inexperience is at fault. Now I'll know for next time. Any advise on how the heck to fully coat this compartment now?
-
That cloth and resin is messy $#!+ I dont care how experienced you are. 🙃
-
Hey Keith. Thanks for the much needed tips. The tips, tricks and critiquing I get on this and one other ship build forum are like gold dust to me. Though 90% of it being too late, is created a well fitted dry-dock for a future build. I plan on studying all my threads before the next build. This of course is not to say I still cant use the advice on some current applications. By the way, I hope you don't send me to the gallows, your pics are stunningly crisp and bright. I have saved them in my "Rotterdam Build" file on my table, so I can refer to it to get that mental picture. The pic on the box must have been taken in 1973. Gross! Thanks Keith
-
thanks a bunch guys. to be honest to the 3 of you, i intended to resin the inside first and maybe dab on strips of cloth. Regarding the horrible outside, I was going to give it a rough sand, use filler, rinse and repeat. Im going to pick up a mini plam sander. If I had ended up with a perfect hull I would not have bothered, but I think it may save my hands. On another note, I have posted these pics and texts to several other groups and forums. I can honsestly say, this group and NRG are amazing. The support is top shelf. I opened one of my facebook threads in a boat building group this morning. An experienced builder had told me I was rushing and that's not what model boat building was all about. He said I should be buying #ready-made-boats / rc boats. I was heartbroken, crushed, woundedm choked......... for about 11 seconds.
-
Hey tallshiptragic, The ship is beautiful. Damn fine job. What you've suggested is the way I will go. The inside seams have been wet finger glued with good wood glue. I hope that wont hinder the epoxy bonding.
-
Hey Steve, I was late coming to this group. I had already completed the frame and hull floor and just starting the planking. I am up to date. I wanted to be sure to post in chronological order.
-
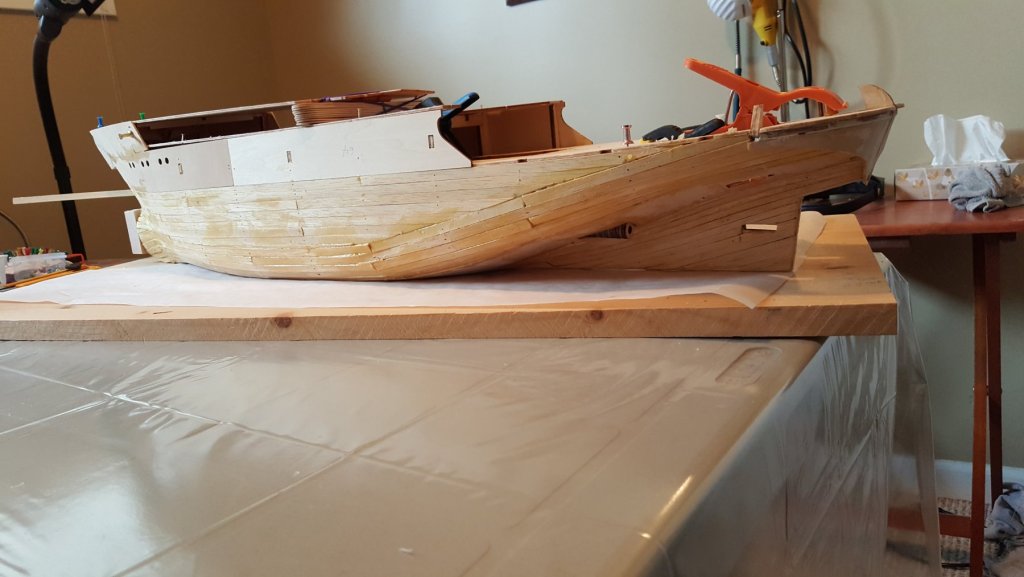
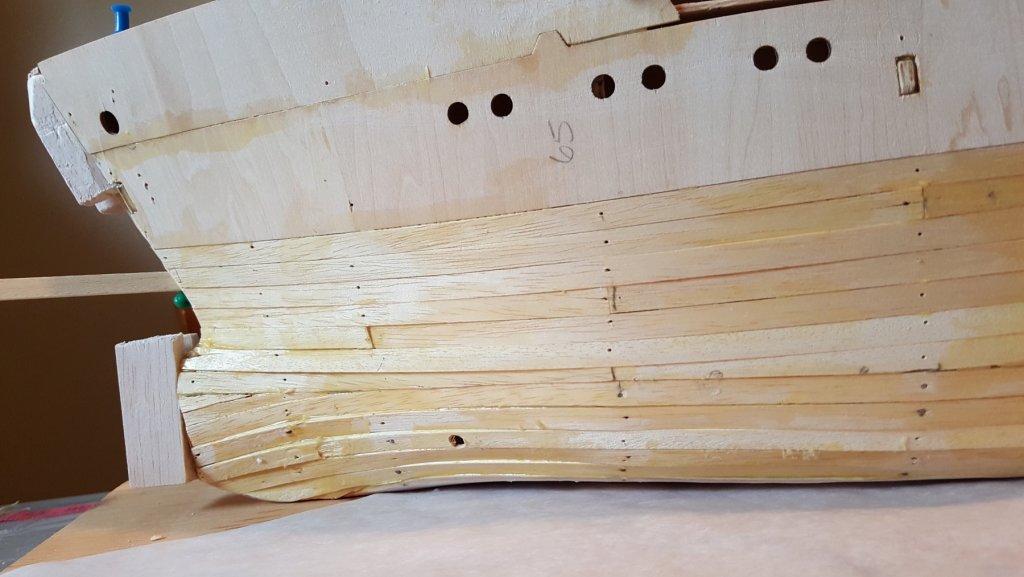
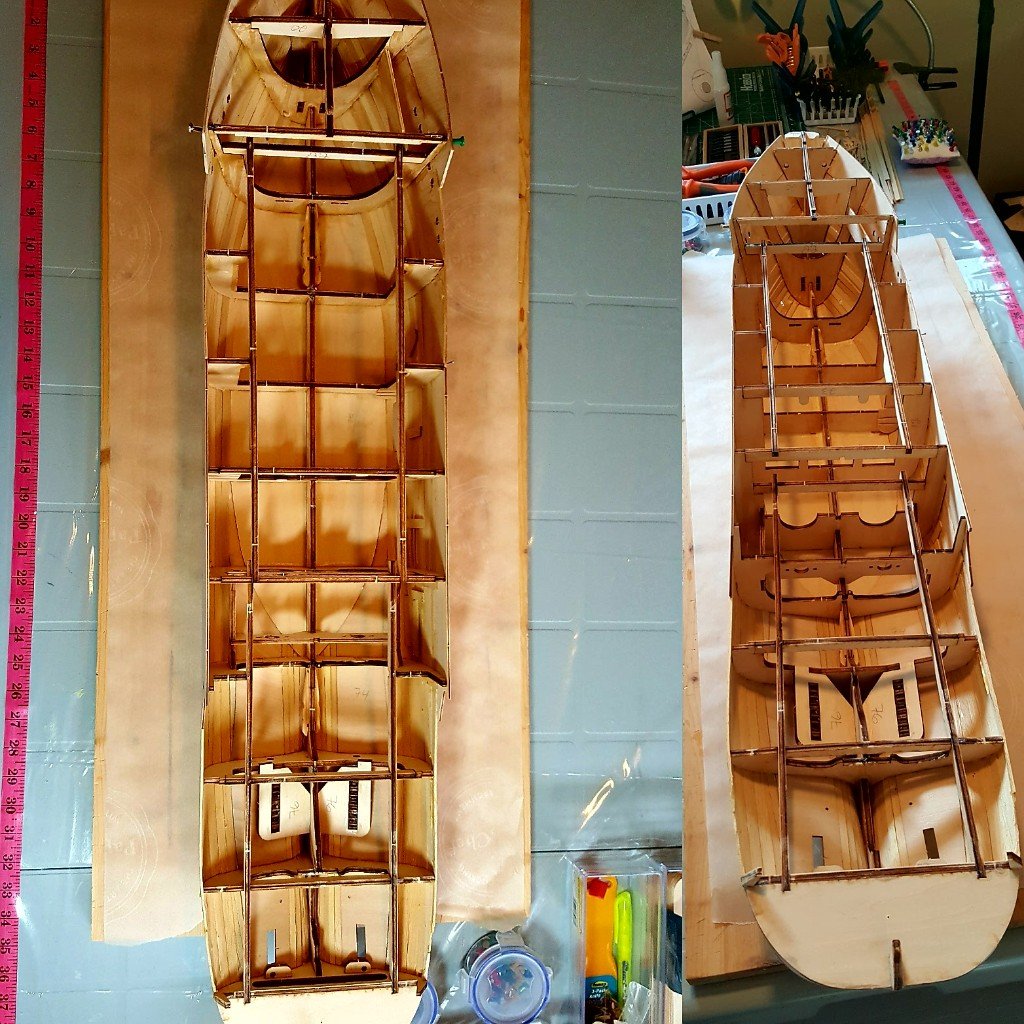
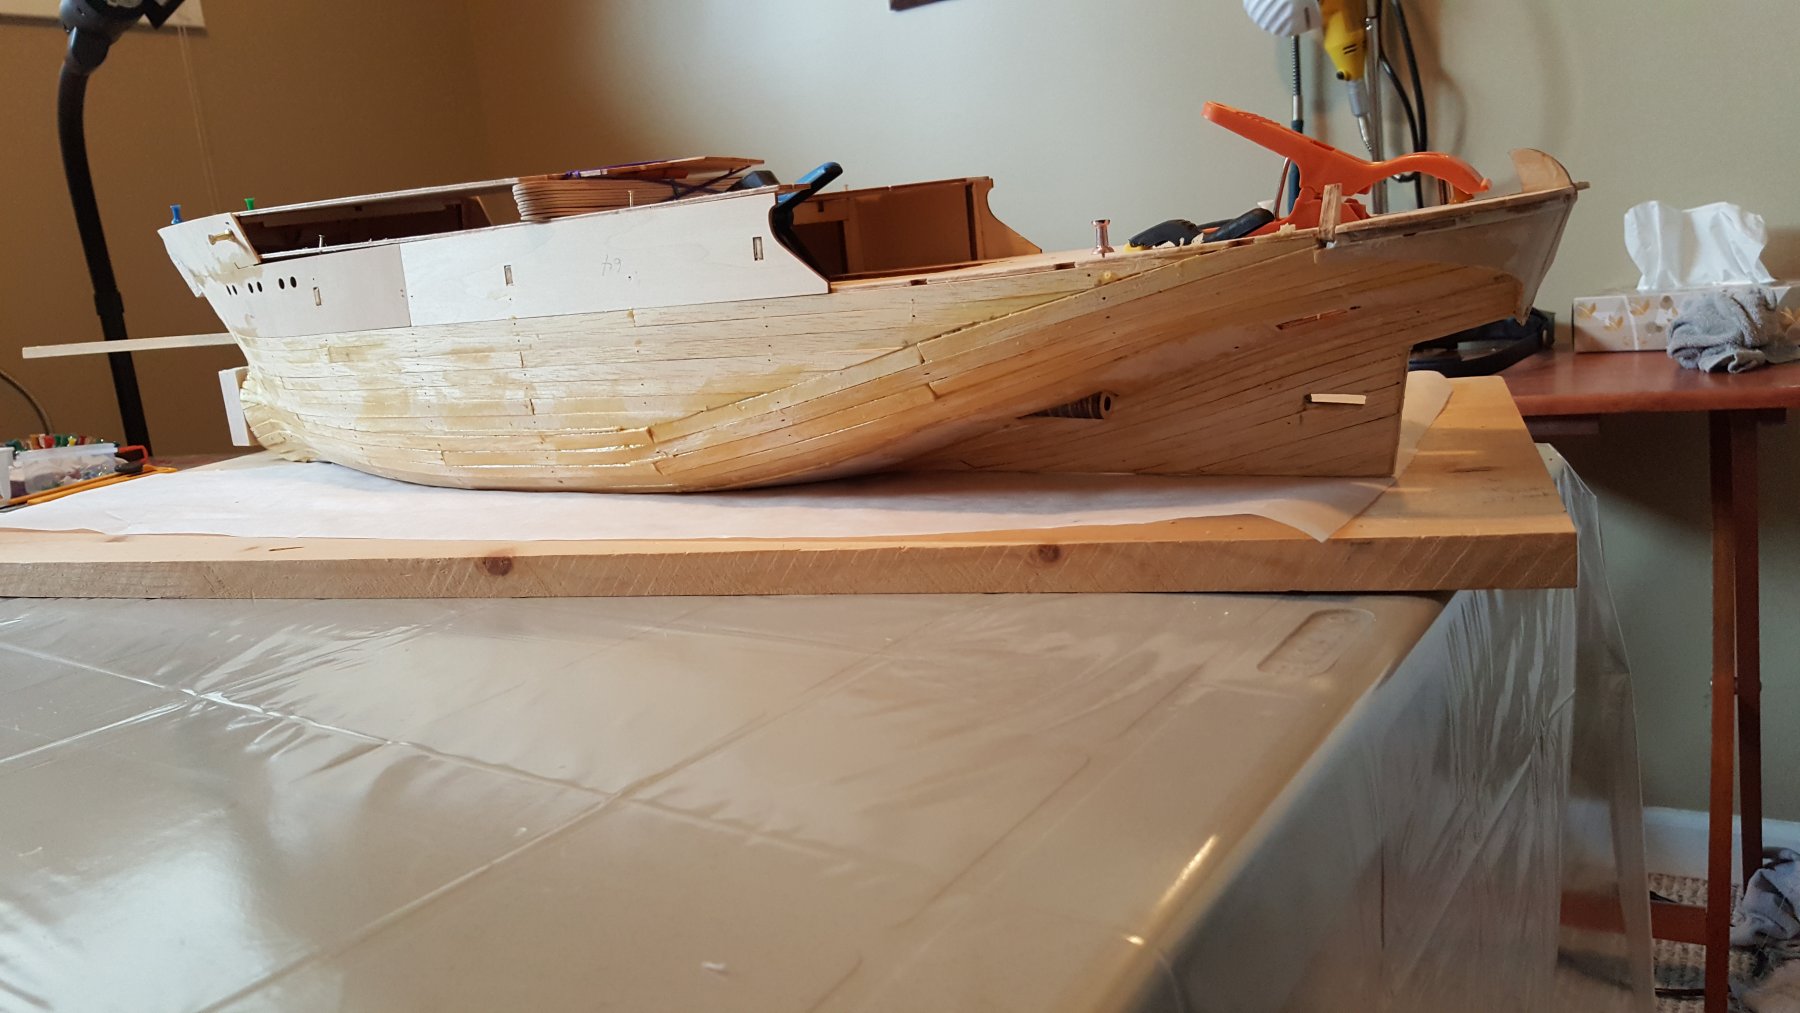
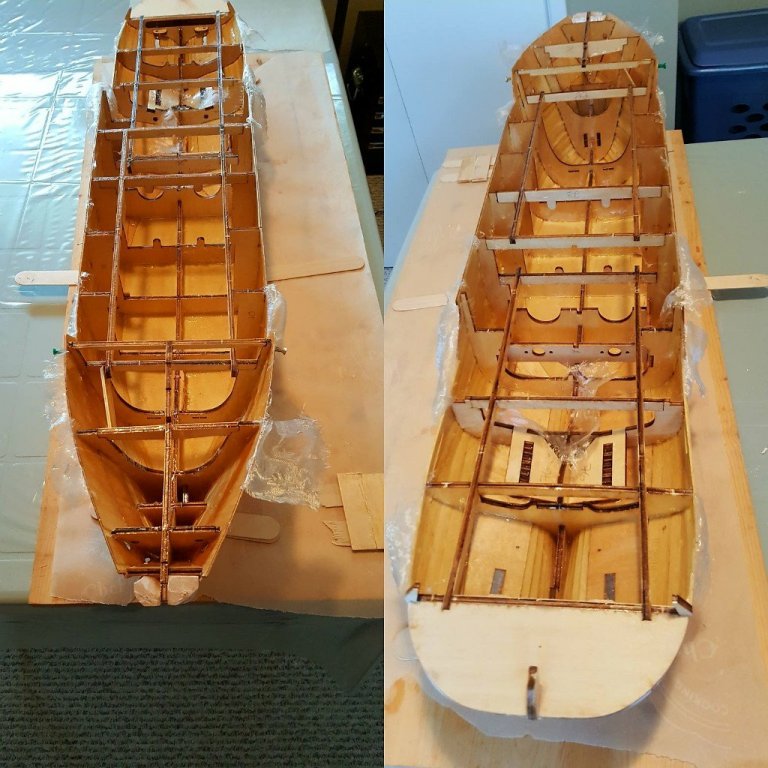
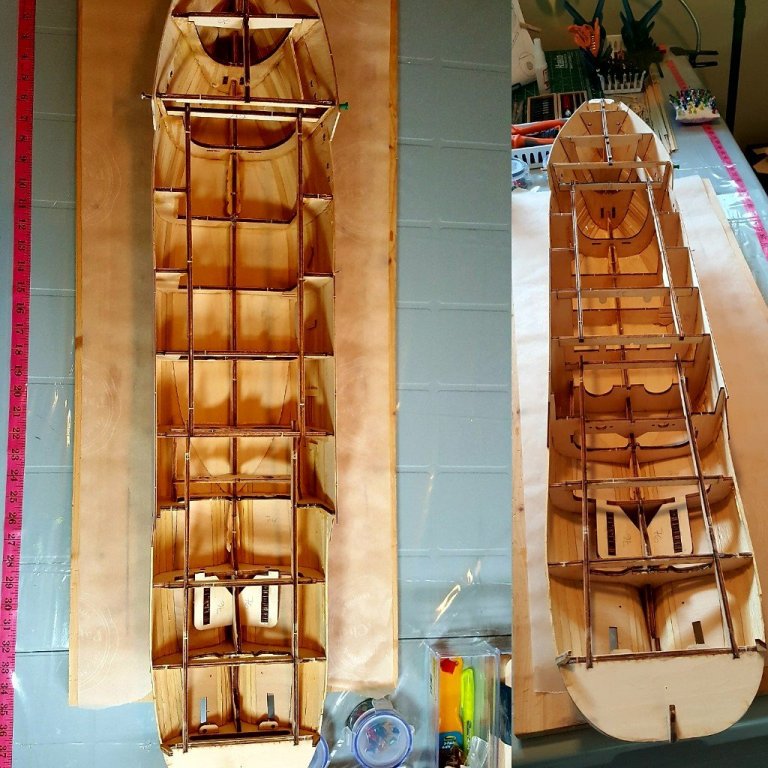
Ahoy I have a few pics here. You will all throw pie in my face on these pics. Keep in mind, I am a perfectionist, for real!I majorly messed up on the starboard side planking. In comparison, you can see I did quite well on port.Before you all make me walk the plank, just know, I'm am still not discouraged in the least. I worked a hard a possible to compensate fir the horrible placement and lack of keeping true. My wife came in the room, as she often does to show interest and cheer me on. When she seen it, she give me "a look".The jig was up. I stood up, stepped back and briefly lost all confidence.... briefly.I strongly considered no posting them as it would have been easy to just post the port side etc. Then I thought about it and concluded that this is a forum to help everyone. I another builder is searching for how not to do planking, well I have toes pictures posted here.So have a look and Post your honest opinions and reviews, for me, and future builders.

-
Sjors, Popeye and Passer, thank you very much for dropping by my warf! I agree I have alot of sanding to do. I think I'll pick up a mini mouse or palm sander and sand it gently with that, then obviously by hand after filling some valleys. Before I start all that I intend to epoxy the inner hull with strips of glass cloth as best I can. The deck is only lightly tacked on and will be taken off tomorrow morning after the last few hull planks are dry. All your input is genuinely appreciated. Stick around. Lots of fun left yet.
-
I should be shot! Using this lexan reamer on anything other than "lexan" (RC truck plastic body), is sacrilegious in the RC world. But what the heck. It worked perfect for reaming a 20mm hole on each side for my bow thruster.