HOLIDAY DONATION DRIVE - SUPPORT MSW - DO YOUR PART TO KEEP THIS GREAT FORUM GOING! (Only 69 donations so far out of 49,000 members - Can we at least get 100? C'mon guys!)
×

Zarkon
-
Posts
295 -
Joined
-
Last visited
Content Type
Profiles
Forums
Gallery
Events
Everything posted by Zarkon
-
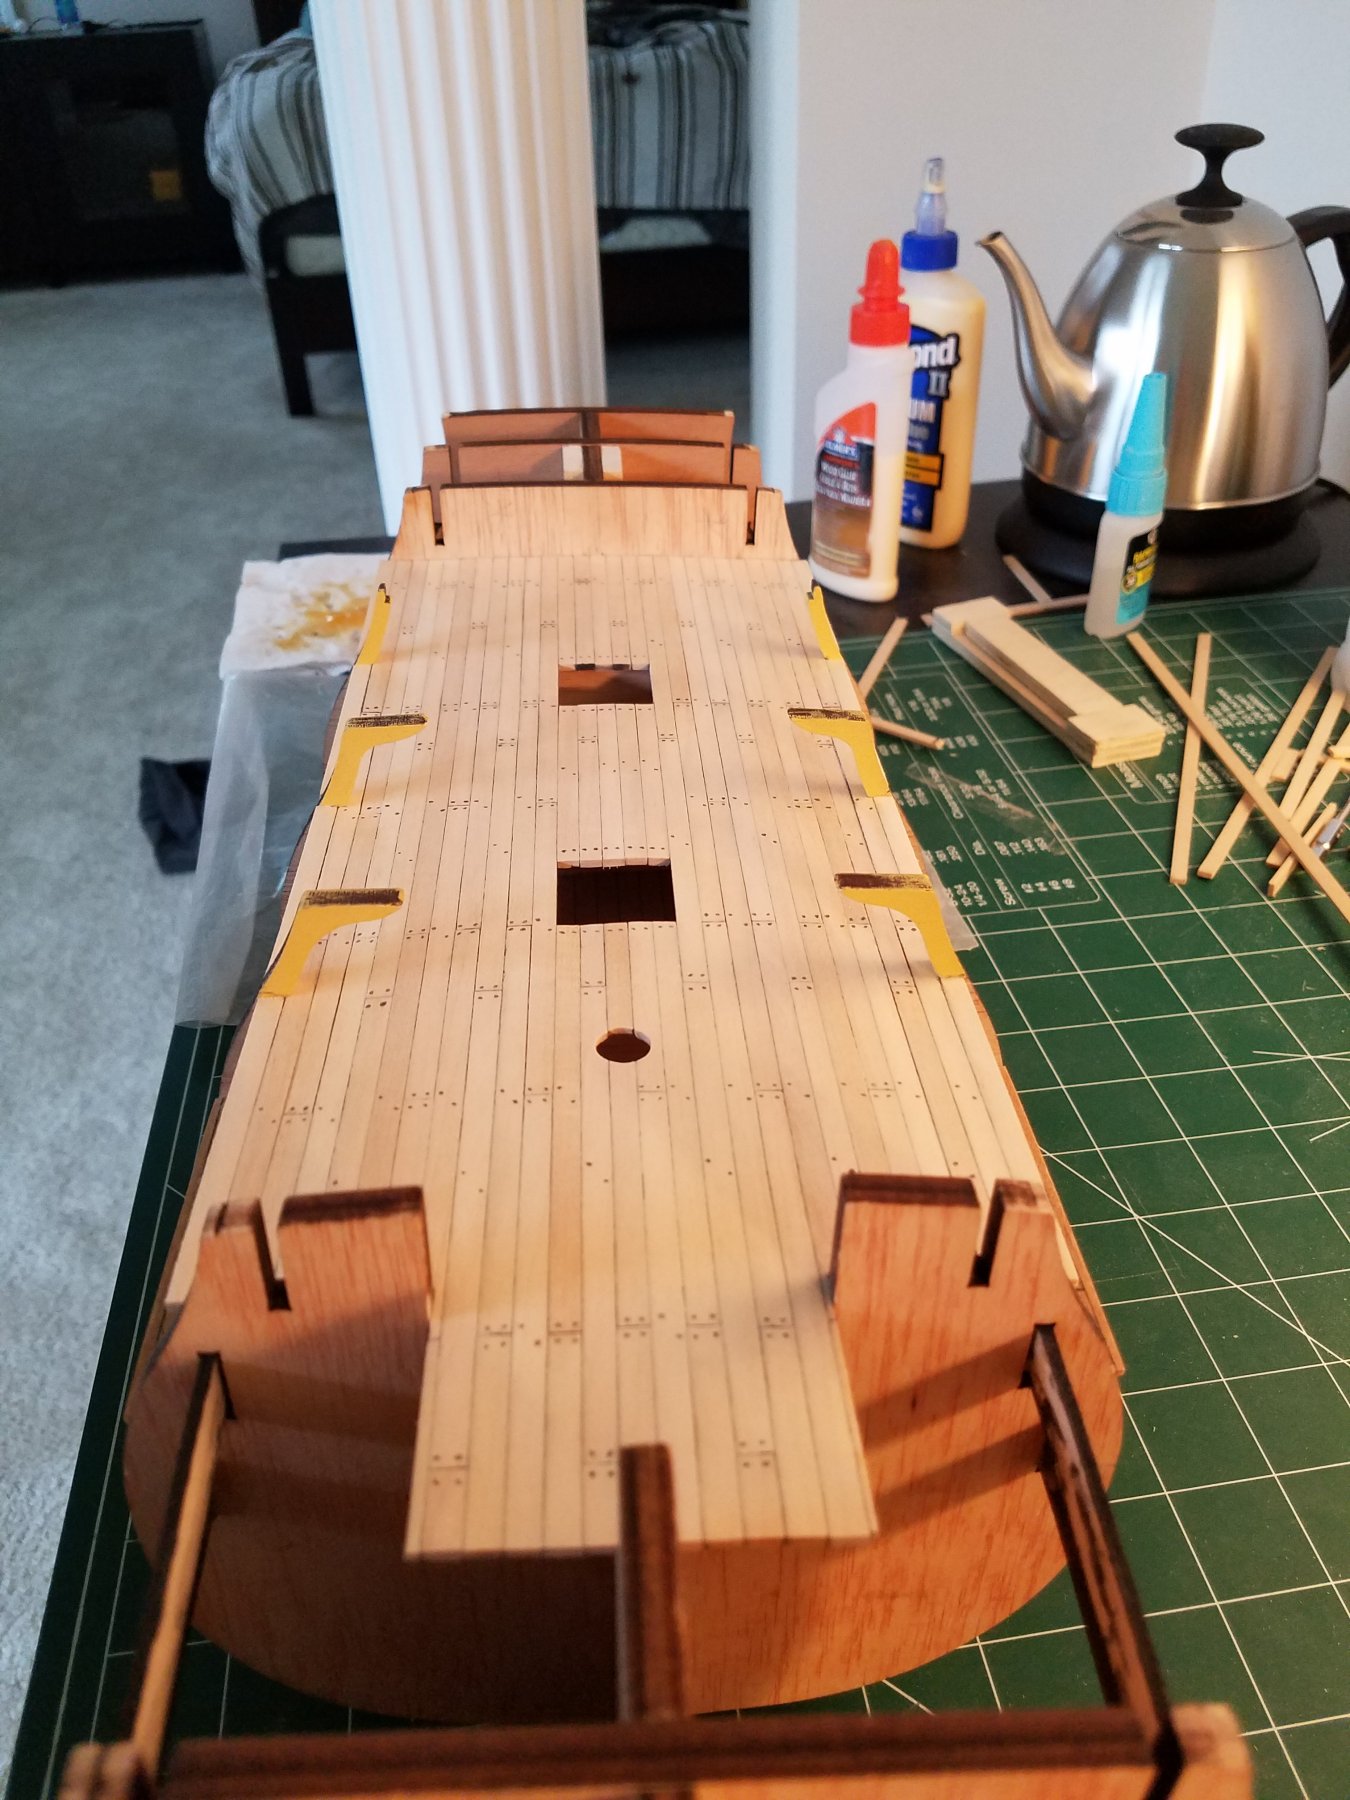
Dan, thanks for the insight onto the curvature of the gratings. I will take that into consideration on the upper deck and above. I finally have a little to show. I got the new deck plank strips and I am VERY happy with the quality of the wood! I just hope I can do it justice with my deck planking. Here is where I am so far. The width of the planks is about half of that of the kit supplied plank strips. This is much more inline with the correct width of the planks according to the book. They are still about 0.5mm too wide, but I don't think many people would notice at this scale.... I hope hahaha! It sure takes a long while, but I hope the results are better. I haven't been able to work on the ship as much as I would like. Life with a 2.5 year old is never dull. We just enrolled him in hia first soccor camp. He just ran around the indoor facility for most of the 50 minutes, occasionally kicking the ball. Haha! I think the next session this Saturday, he will understand more of what he is suppose to do. Anyway, I am going to continue hacking away at this deck. I usually can get 1 row done per day, but sometimes I'm too tired from chasing my son around to work on it, but I'm not in any rush. Thanks! Jeff


-
Is there anyway to like your posts multiple times? Your work is incredible and inspires me in my current build. I can only dream of matching your skill! Jeff
- 682 replies
-
- 4
-

-
- halifax
- lumberyard
- (and 1 more)
-
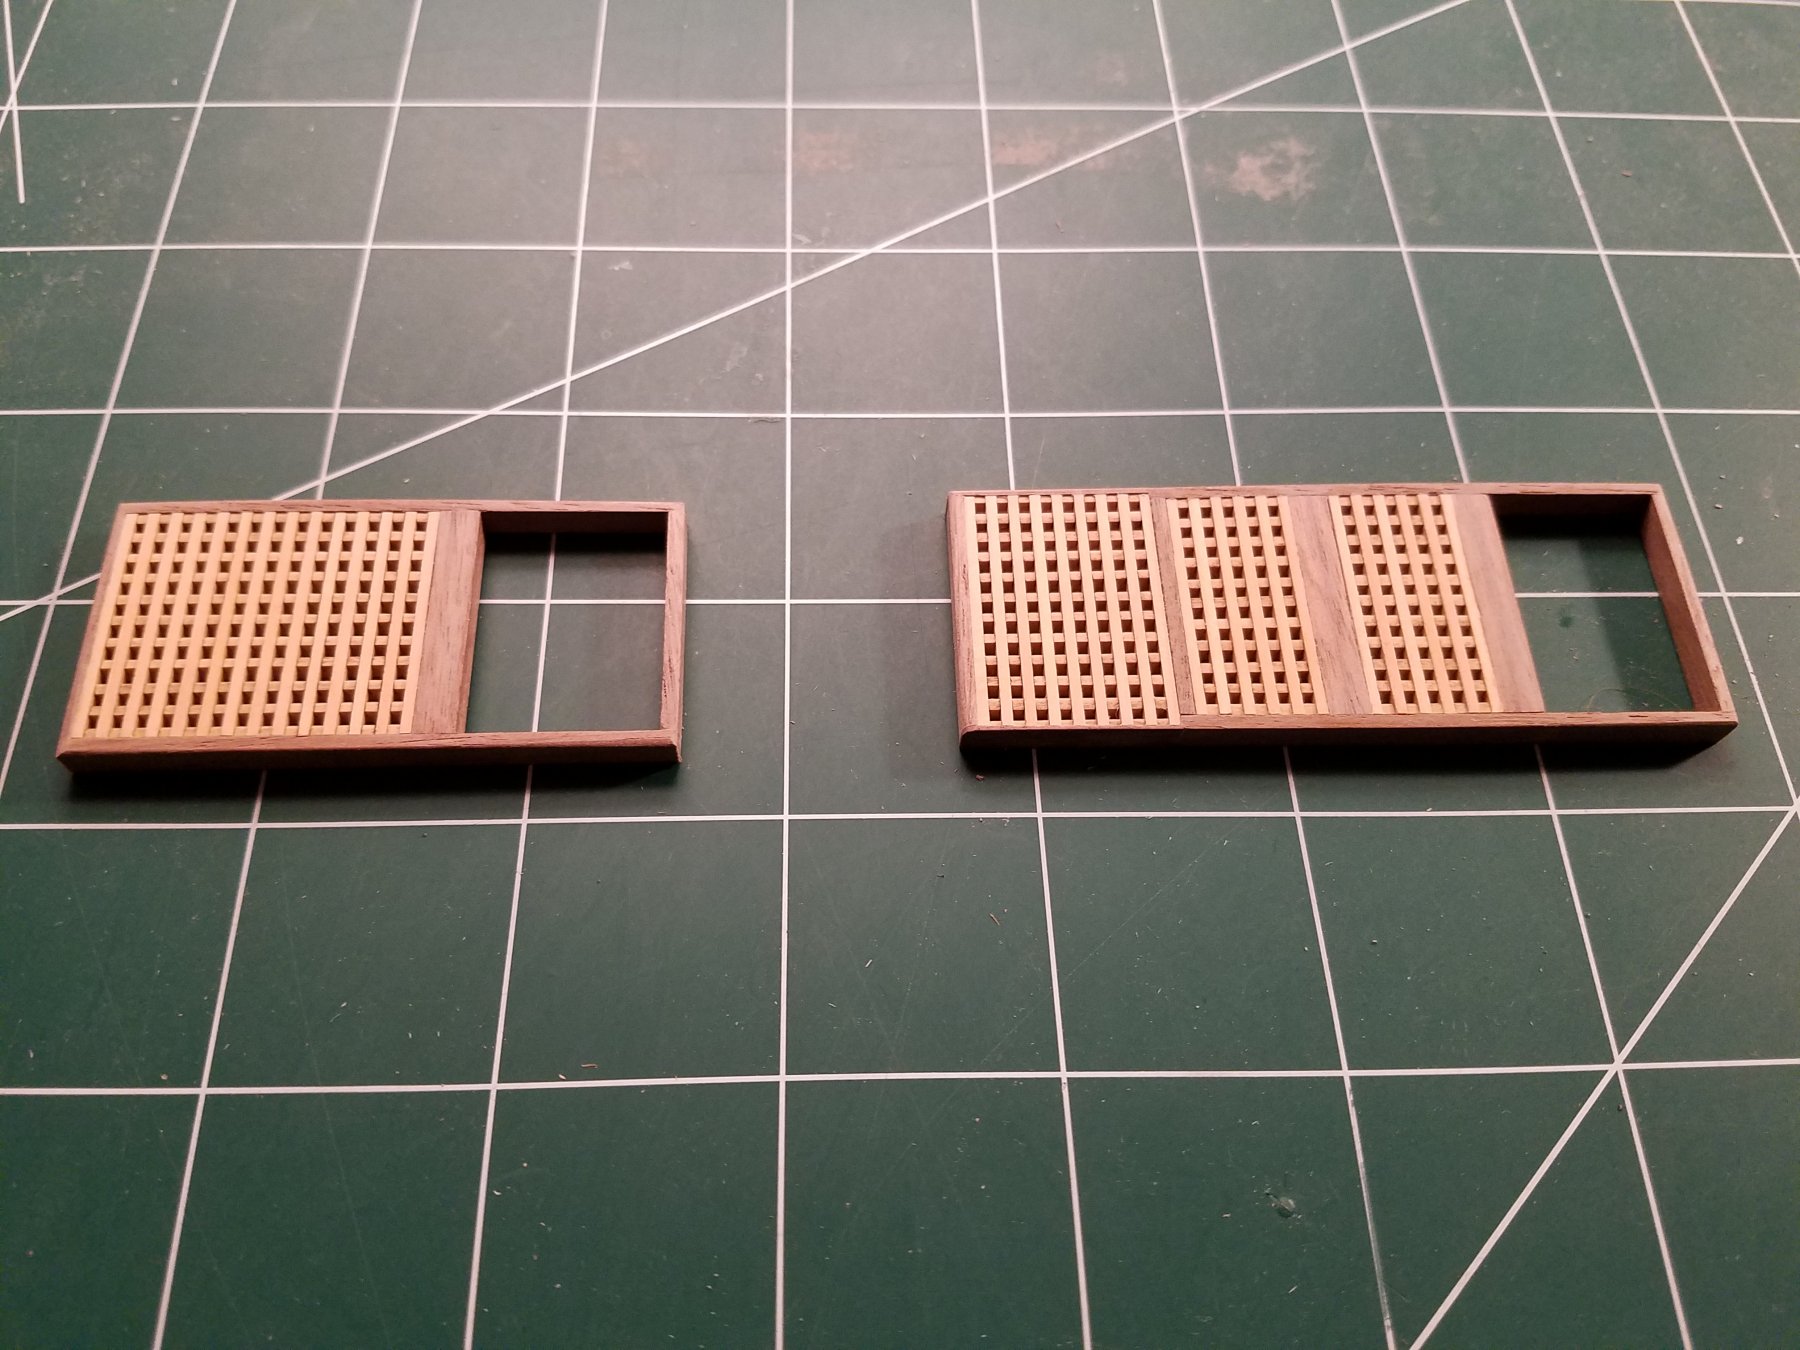
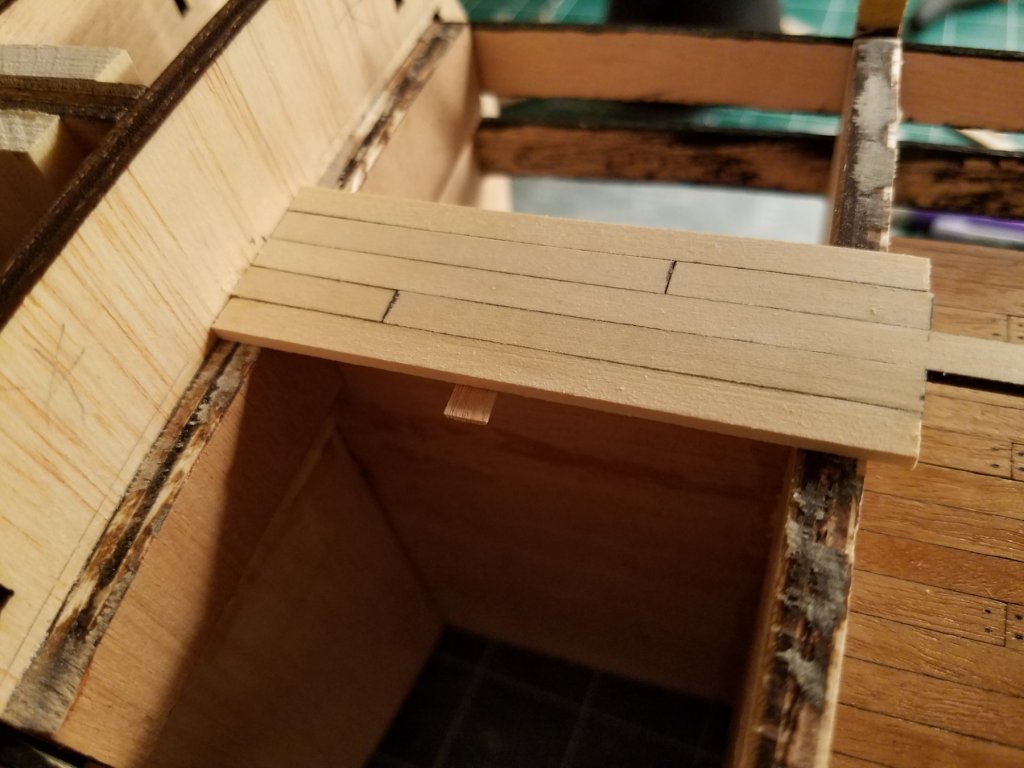
I have remade the hatchs as I am still waiting on my wood strips to arrive. I think it looks a lot better than my first attempt at it. The last hatch is drying and needs to be sanded. Next, I will work on the knee (I think thats what it's called?). Making it from scratch based upon what Dan posted earlier. Not too much work done, but slowly making progress. I hope the strips come in soon as I am ready to plank the middle deck. Then I will feel like I'm finally making good progress. Jeff

-
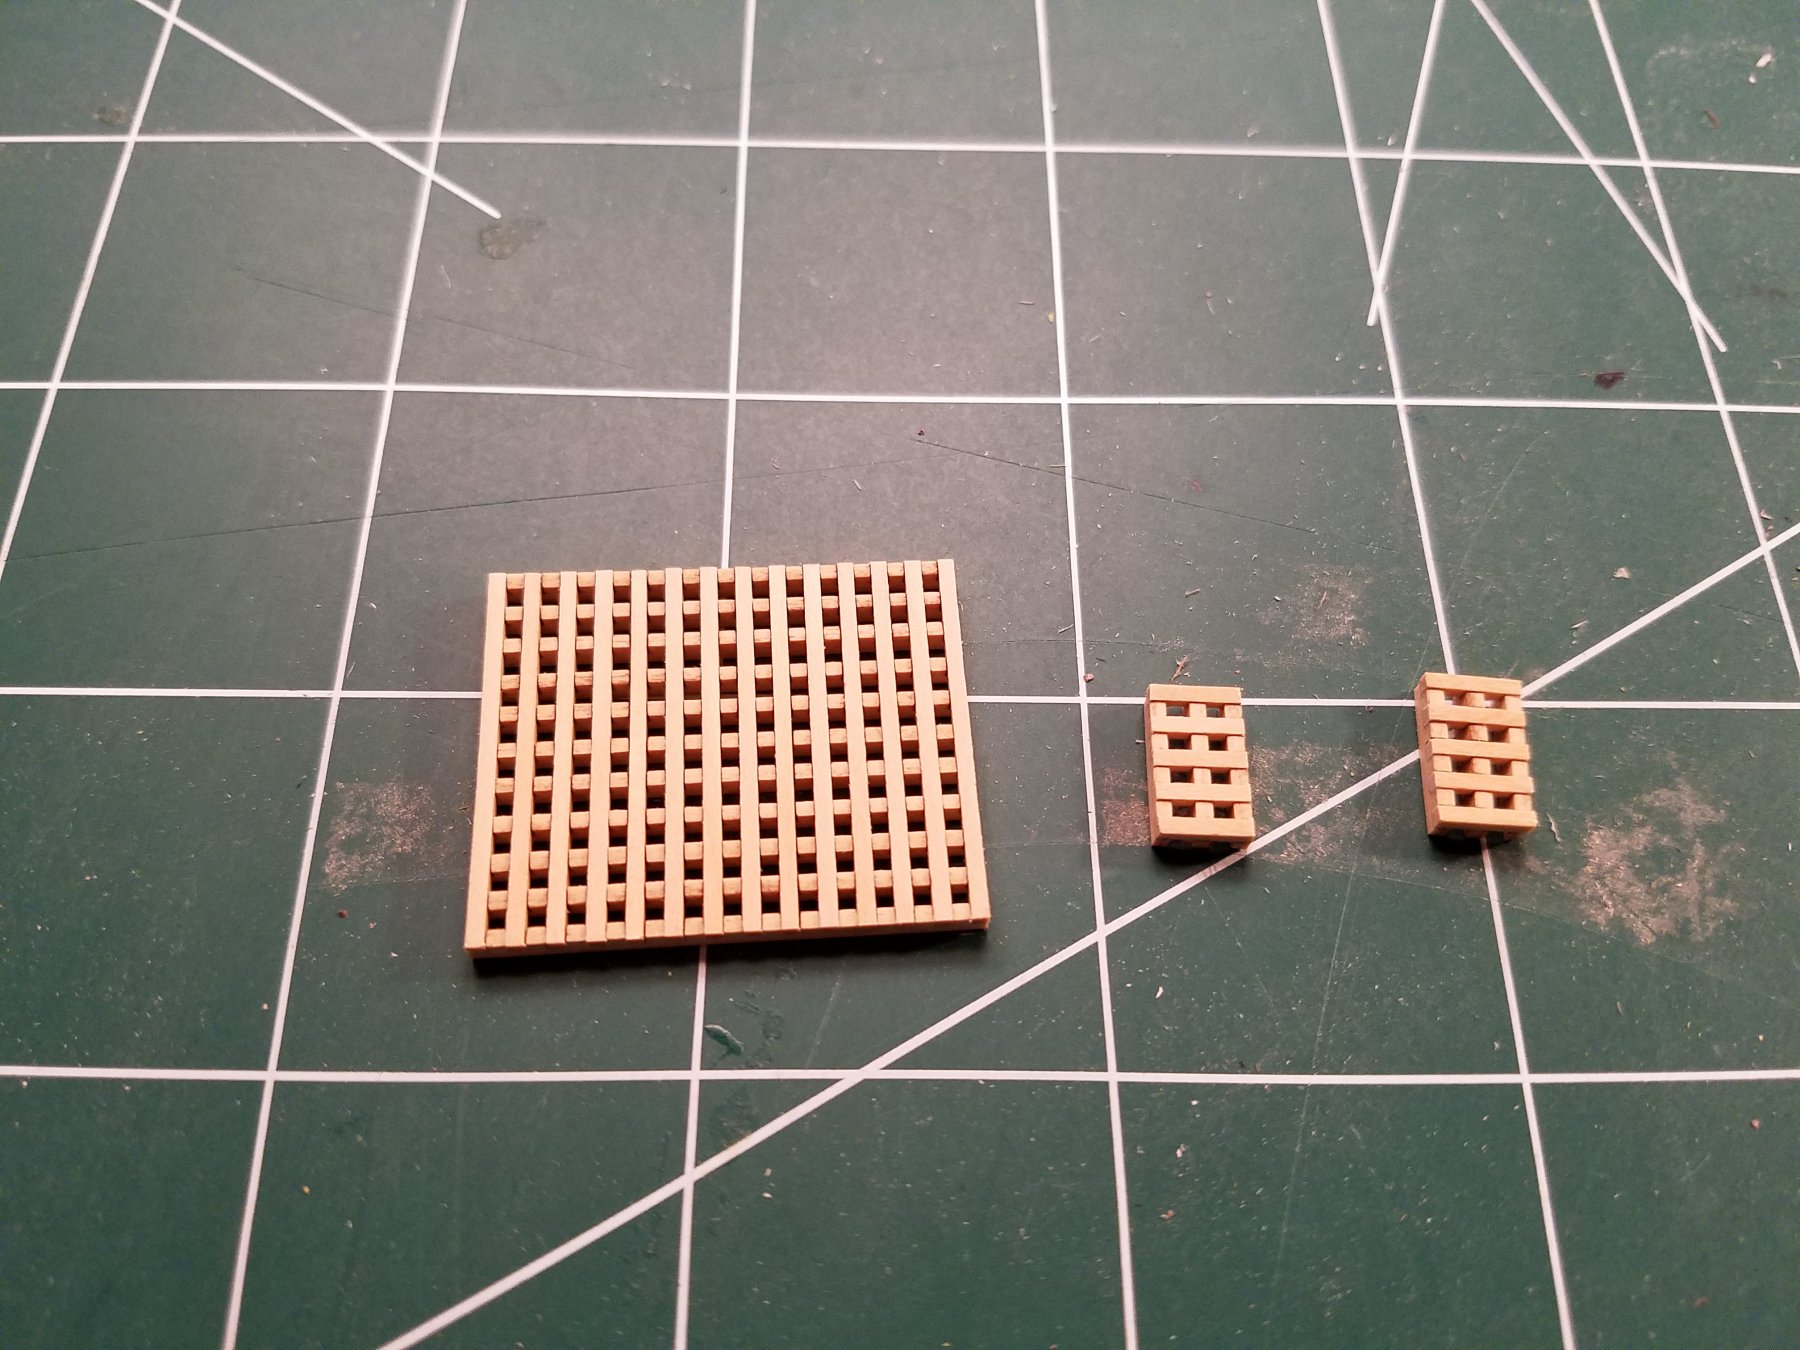
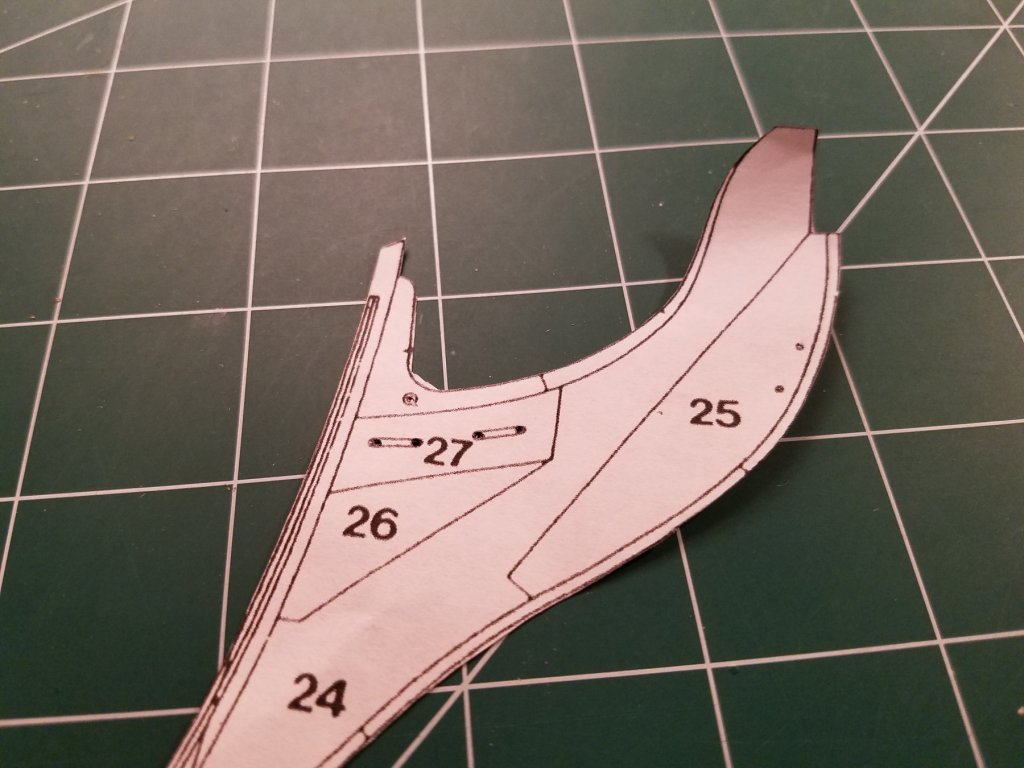
I have made 1 gun and you are correct, it does fit! Barely haha!! So thats all well and good! I figured out what I will do with the ends of the middle deck. Like both Dan and leginseel said, I will be planking the sides as walls. I will make the galley room with doors, but extend the wall to the edges of the deck to cover up the bulkhead. On the other side, I will be building my own wall after the stairs to the lowet deck. I will be adding some detail to these walls (and doors too!). Im not going to do this yet until I get the deck planking wood so I can figue out what wood would go well with it. I should get the wood in a week or so since they said they were really busy and should be shipped today. I realized I don't have enough hatch gratings for the model since I am adding the middle deck. I want them to be uniform, so I ordered some gratings from Syren Model ship company. Wow! What a difference in quality! I'll be using only hatches from Syren on this model. I built a few and I really like what they look like! After making them, I realized I made the hatches in the wrong order. Because the gratings won't fit. Duh! A very noob mistake. So I will be making the hatches again after making the gratings of the correct size. Live and learn. I feel like I am making about every mistake in the book so far. After making the gun, I realized that I will need to make an extra 18+ guns with carrages to fill the new middle deck. So I won't have enough from the kit. Would you guys recommend getting them from Syren too? What I am concerned about is that if I only get the extra that I will need, they won't look the same as the upper deck guns (both the cannons and the carrages). I'm wondering if I will need to replace the upper deck cannons/carreges too. I do want it to be uniform (both quality and wood color) and I think it would bother me if the cannons/carrages looked different on these decks. I did realize how off the gun carrages are in the kit compared to the plans in the book. Slowly, but surely, I am realizing how different these kits are from the actual ships. While I'm waiting for the wood, I realized the laser cut stern part is shapped too differently than the kit plans, the book plans, and dry fitting it to the keel. The kit shows it will butt up against the keel directly and not onto the hull planks. I want to make another one from scratch but have a few small questions. Should I make it with 1 piece of wood, or try to cut out the individual sections like the book plans show for a little sense of realism? Lastly, how do you create the elongaded holes in the stern (where the #27 is)? I know my build is really slow, but it should pick up some once I recieve the deck planks. Once I have that, I will be able to finally start to build the middle deck! Thanks for reading!!! Jeff

-
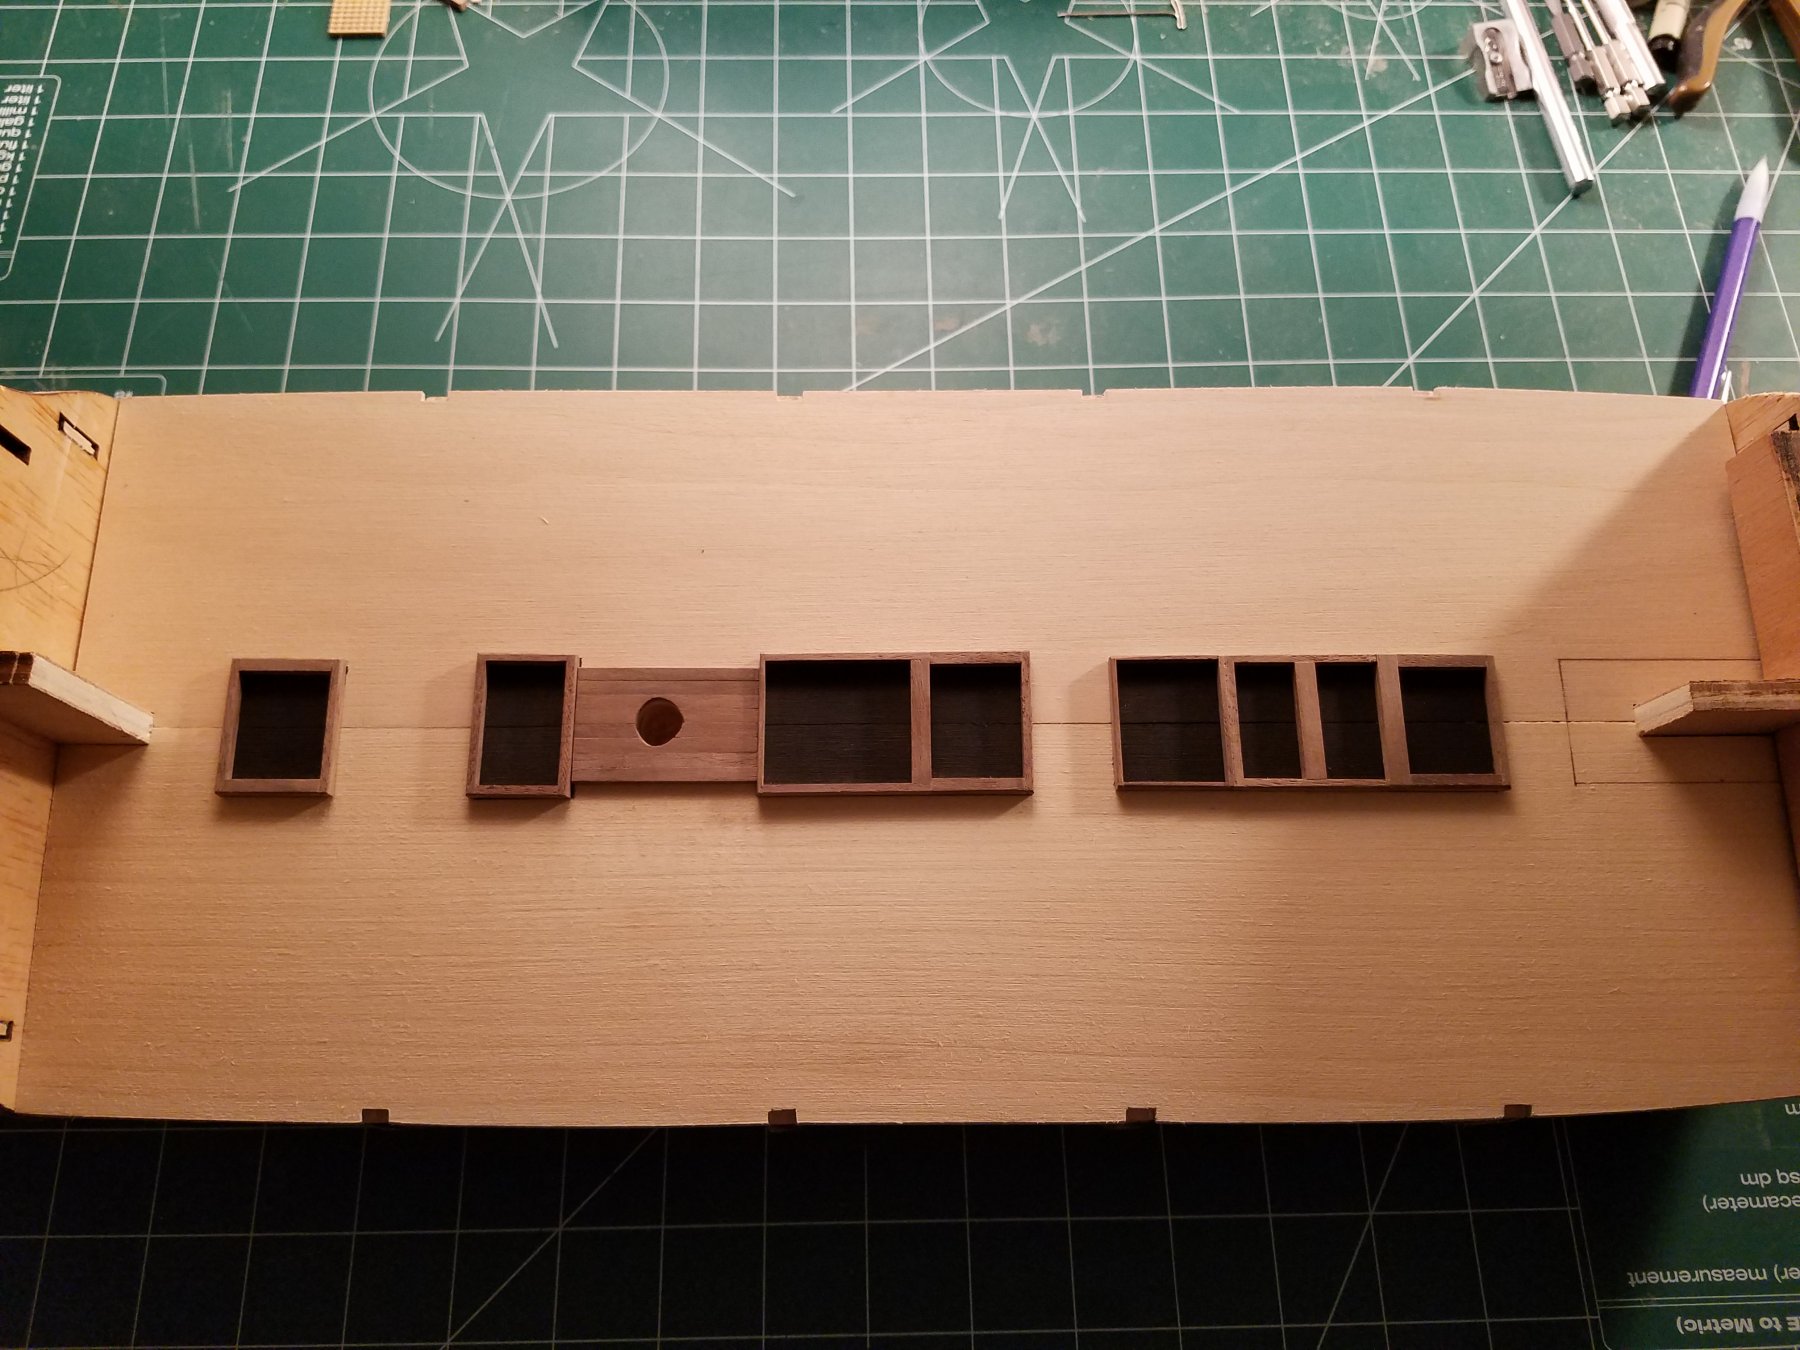
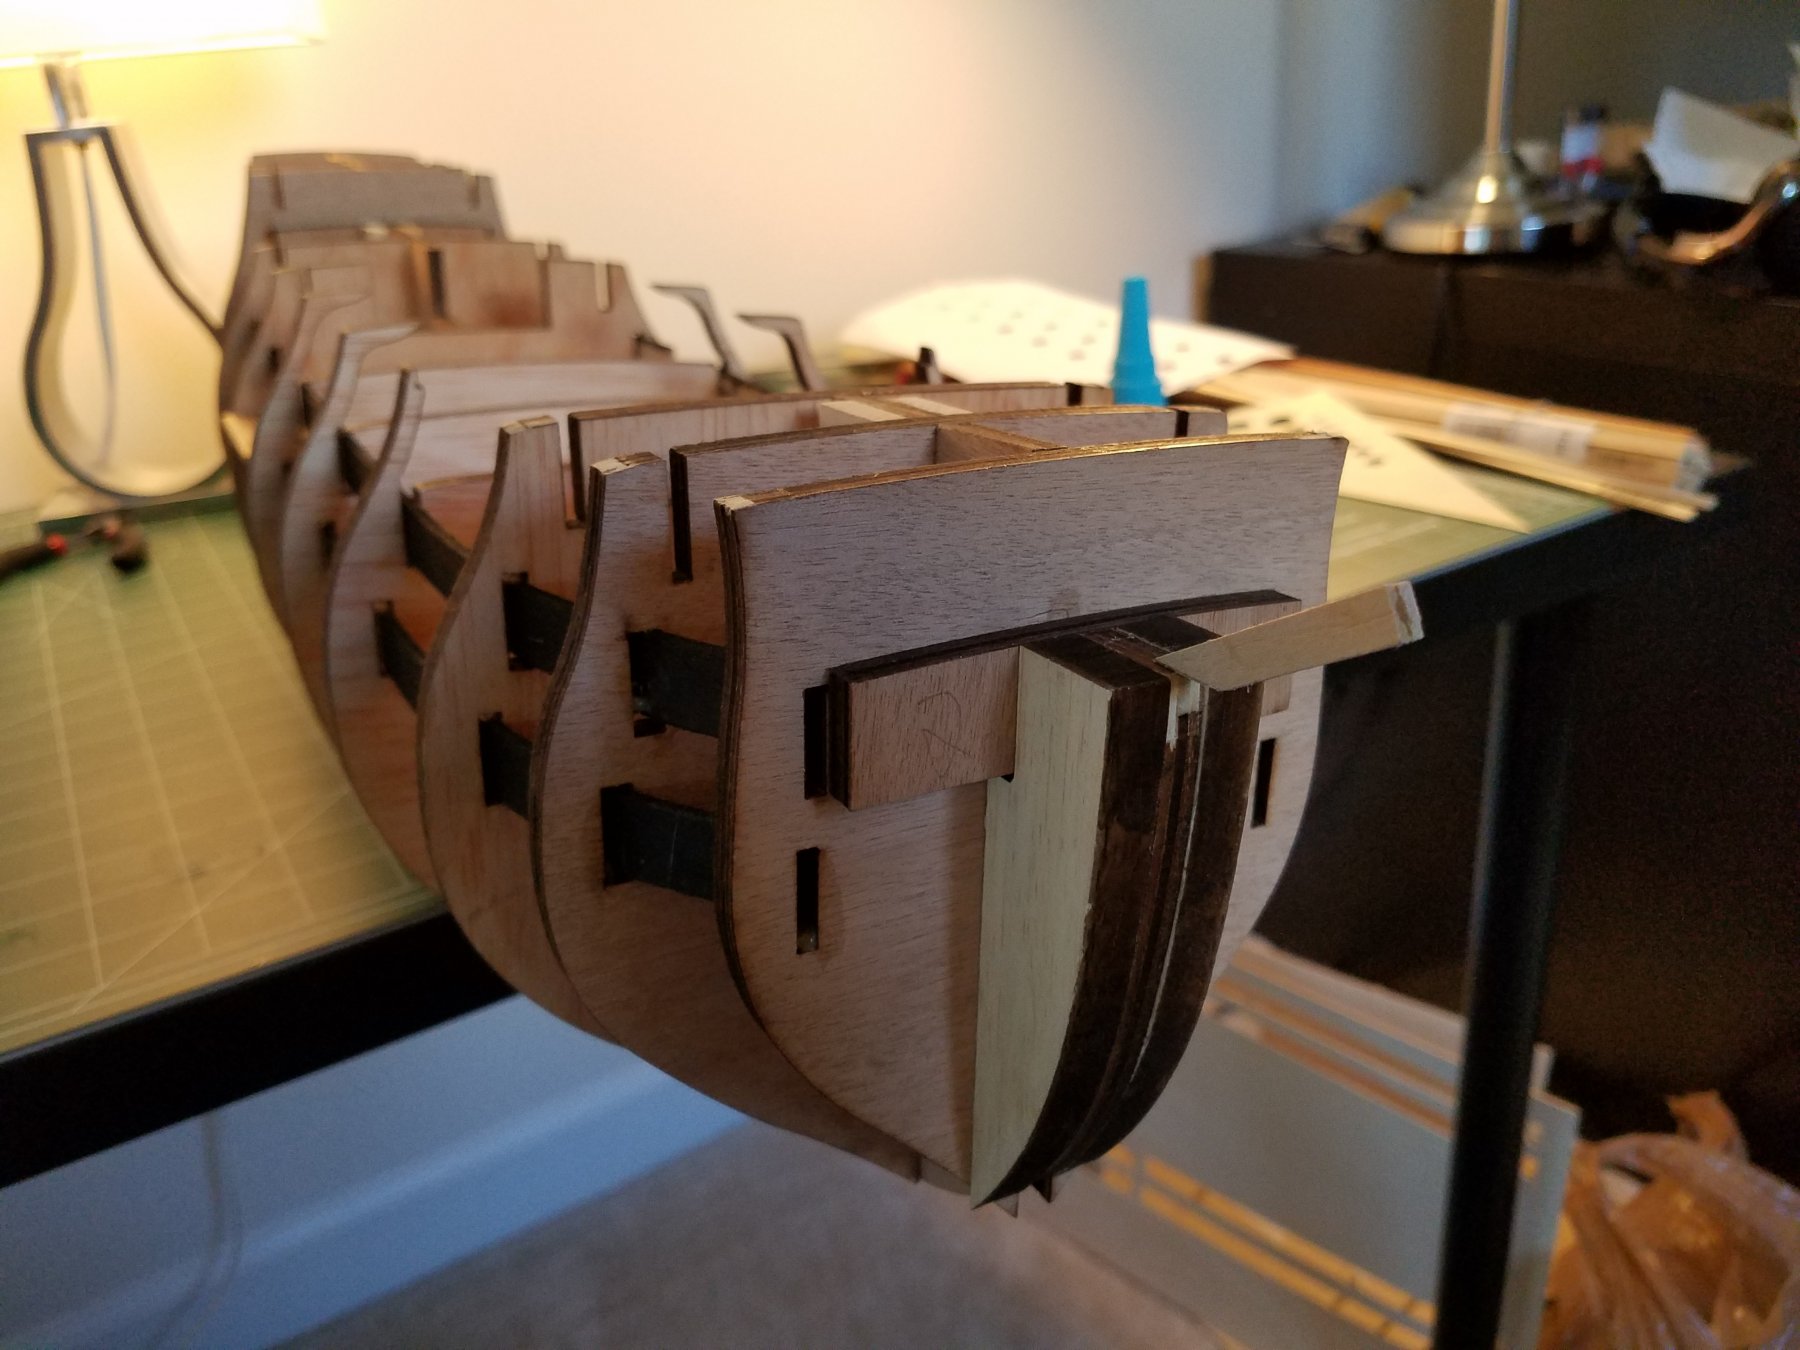
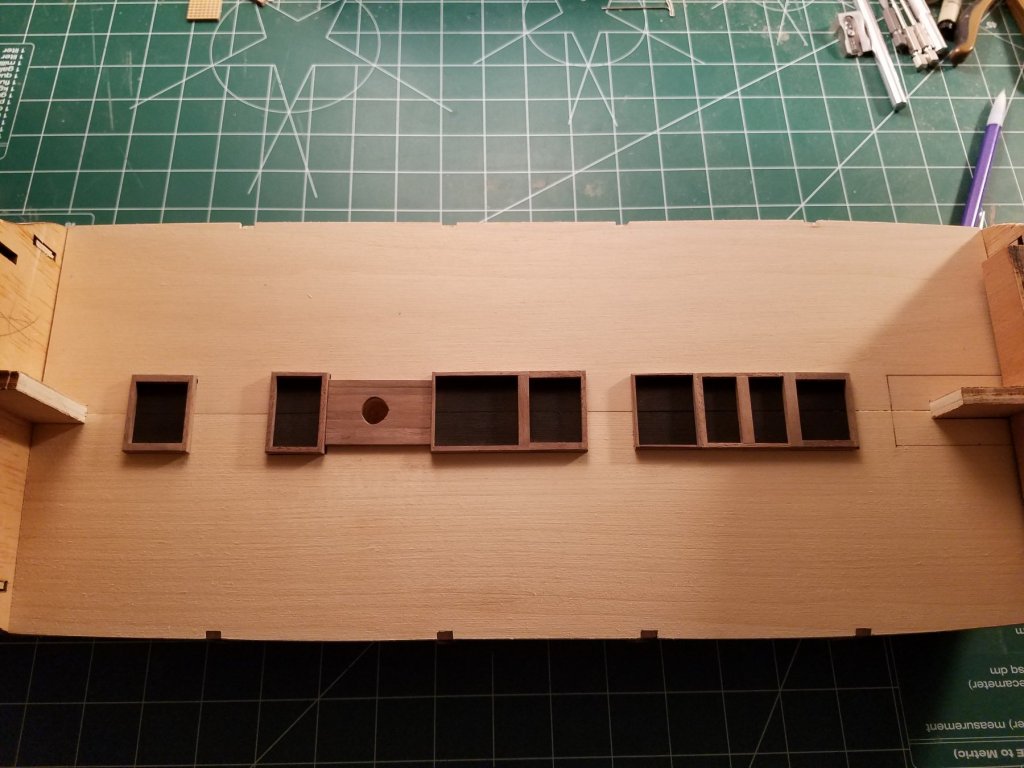
I'm not entirely sure what to do about the ends of this middle deck. I don't want any ply to show, but not sure what would be the best solution. The markings on the edges of the deck portray the gunports. I marked them now so I could see where they would be placed and if they will hit any of the frames that I need to make. This is where part of my problen lies. As you can see, the last gunports on both sides are very close to the frame. Should I build a wall on the frames next to the laat gunports? Should I cut out more of the frames so the cannon has more space between? Should I say, "HECK WITH IT!!!!" And mow down the rest of the frames and fully model the middle deck? I swear, it feels like once you have done some scrarch building, it's hard to stop! I dont need the model to be 100% accurate, but placing a wall right after the last marked gunports doesn't feel right to me. I plan on planking only half of the upper deck (but adding the deck beams, ect ) so you can see through to the middle deck. Any opinions would be very welcome! Jeff

-
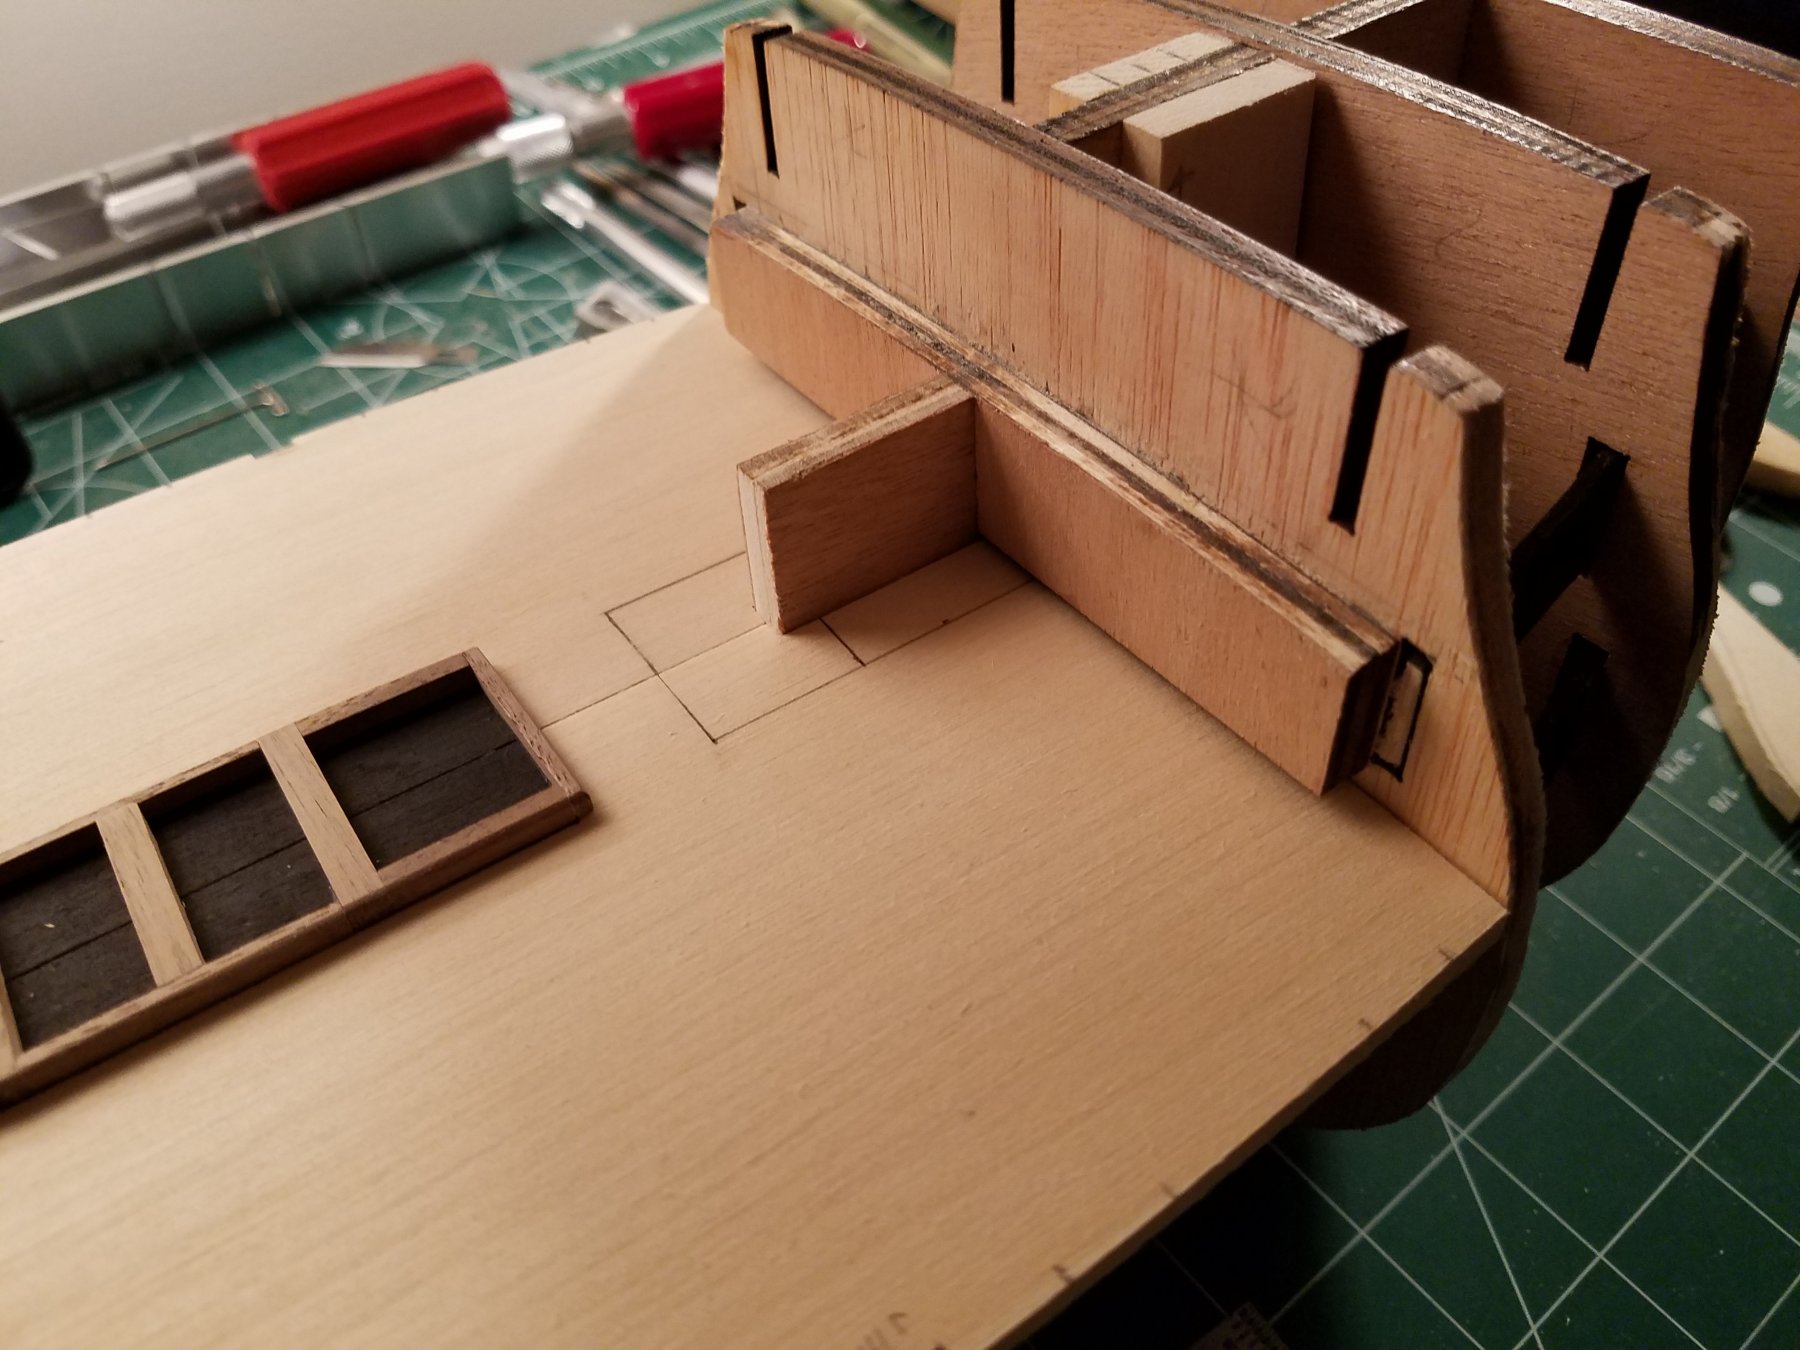
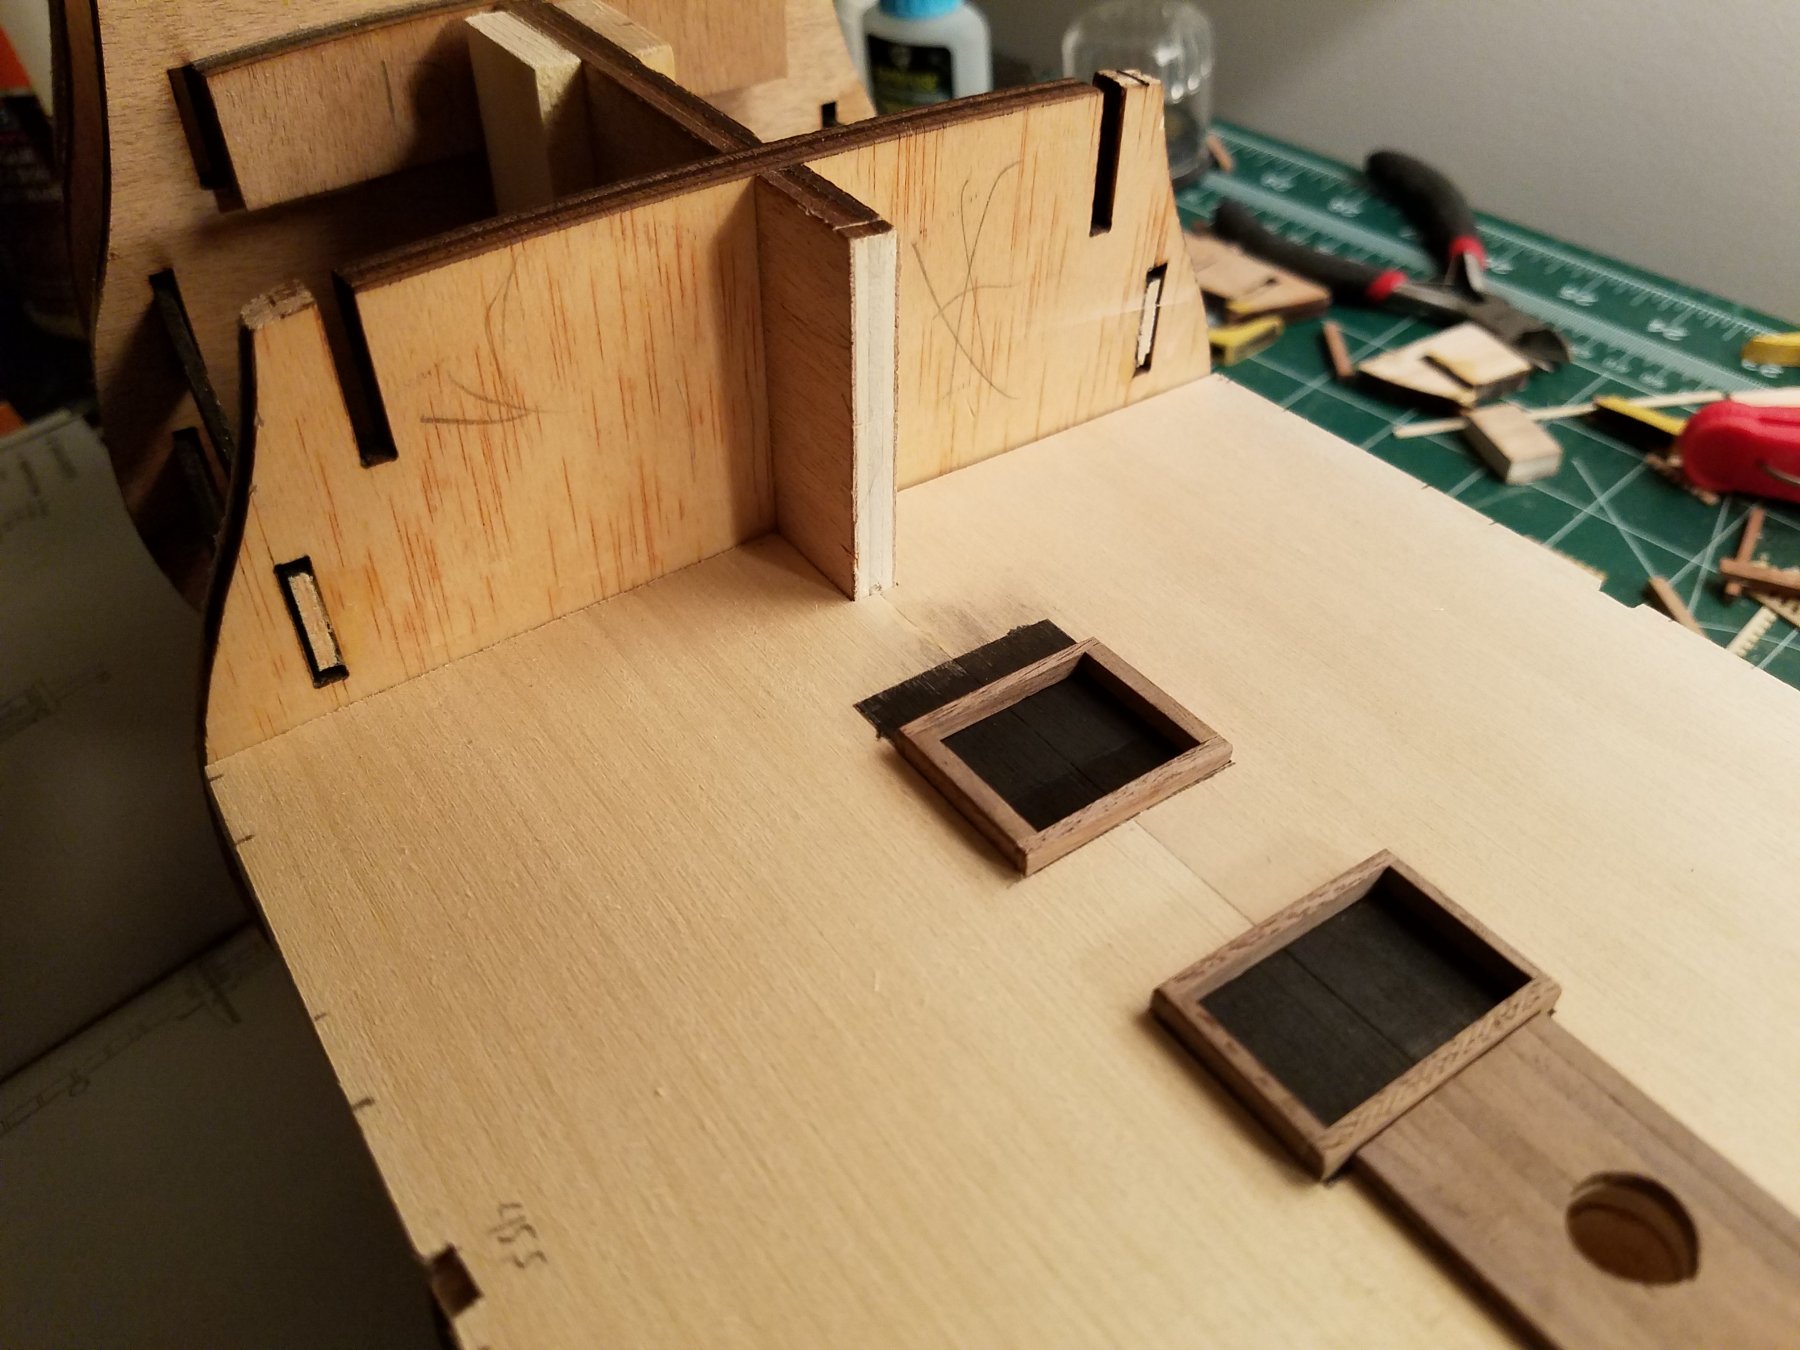
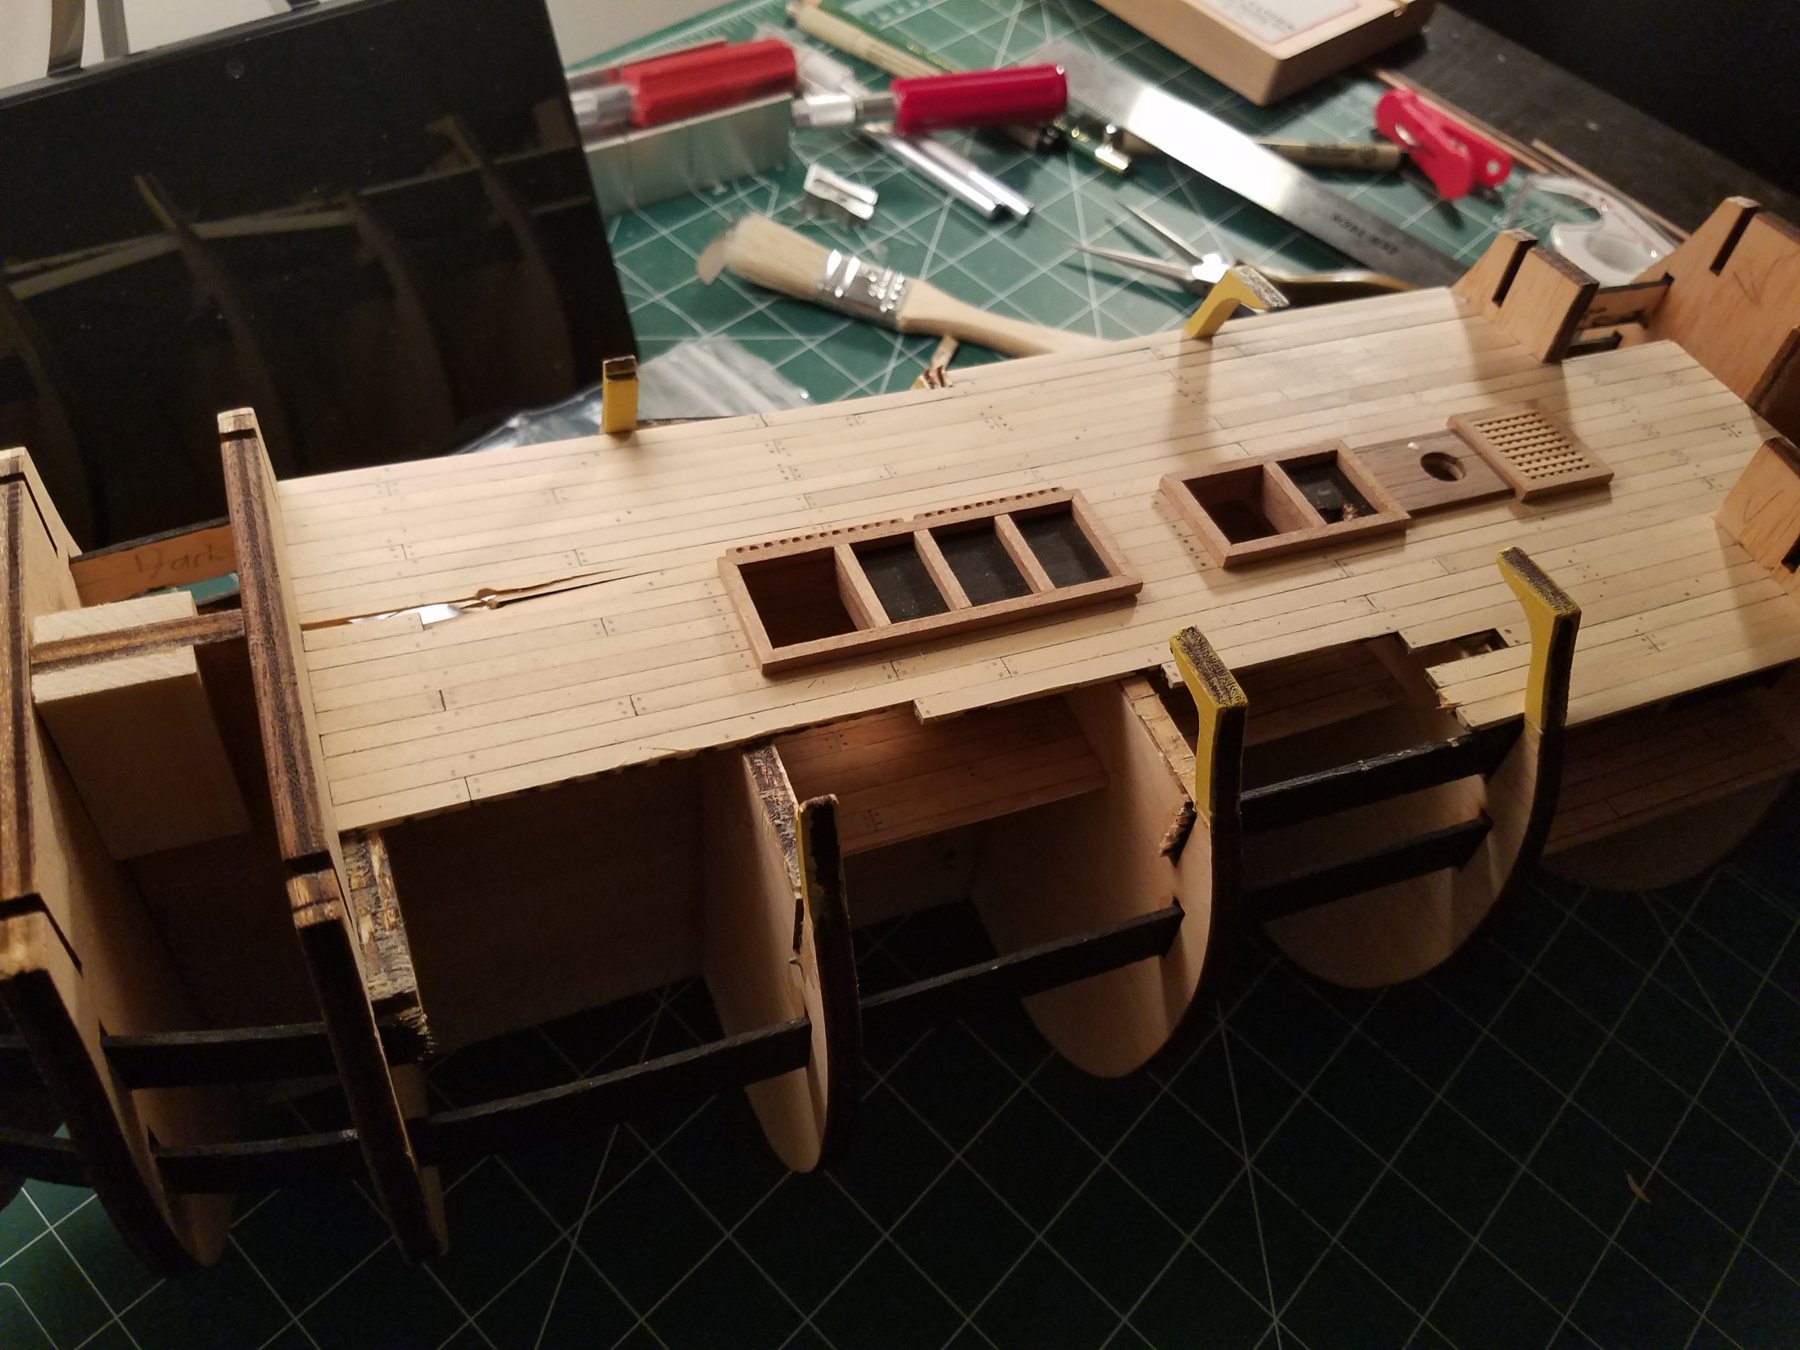
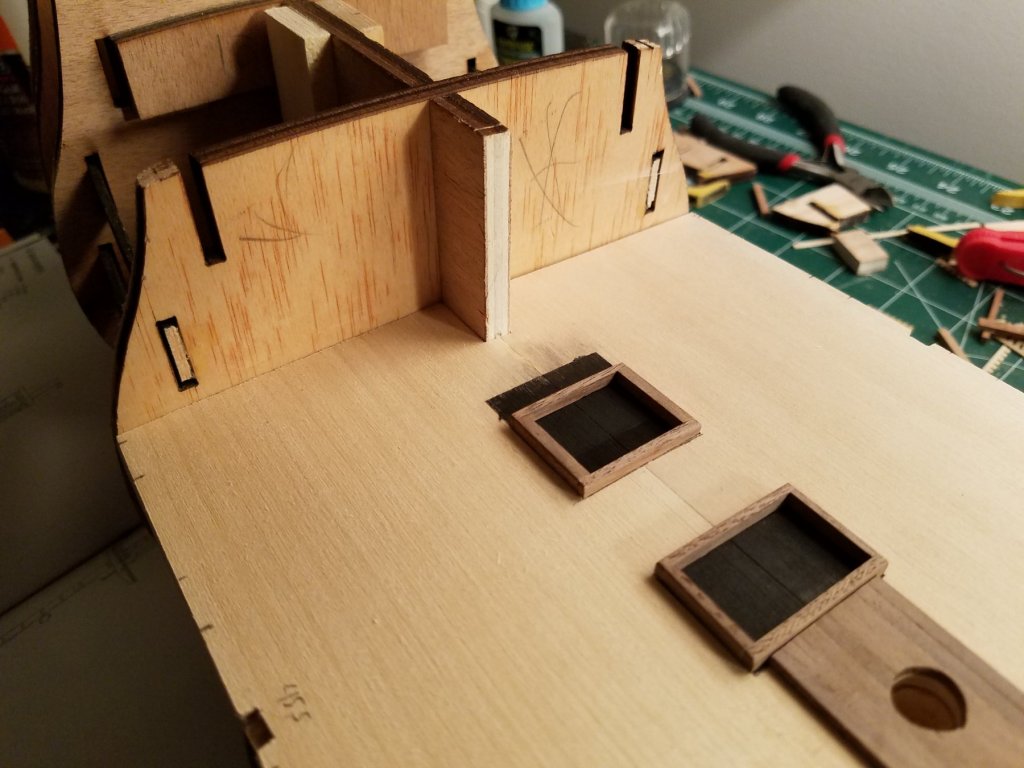
That is a great idea! We live close to some apple orchards actually. I could go by and ask! I never thought of that before. I might also get some cherry soon and see how it looks. Thanks Steve! I checked out their site and was able to order some boxwood! I had to order strips for deck planking because if I used the supplied kit strips, I know I would run out before I was done. I finally was able to add the hatches and stair sections to the middle deck (minus the gratings I will add those in a bit). I used the book plans for the placement, size, and thickness of the wood. I think it turned out better than when I did this for the upper deck. Next up, is either to plank this deck, or cut out the side frames and glue them on. I'm leaning more towards finishing the frames first and then plank. Jeff
-
I looked at Crown Timberyard, and it is a really nice site! The only issue I have is that the store always says it's under maintenance and I haven't heard back from trying to contact them. I would like to check their prices, but since I can't add anything to my cart, I can't tell how much I will have to spend on the materials. I see that there are other wood suppliers that are MSW's sponsors, so I might have to look there.
-
Thanks you guys for the comments! It made my day reading them! Dan, question for you. I really like the idea of adding the deck beams, carlings, and ledges to the upper deck! I have the plans so I'm good with what I need to build. My question is, what's the normal wood used to build those pieces? I've looked around, but couldn't figure out what wood I should use. That step is farther out in the build, but I woukd like to get the supplies. Thanks!! Jeff
-
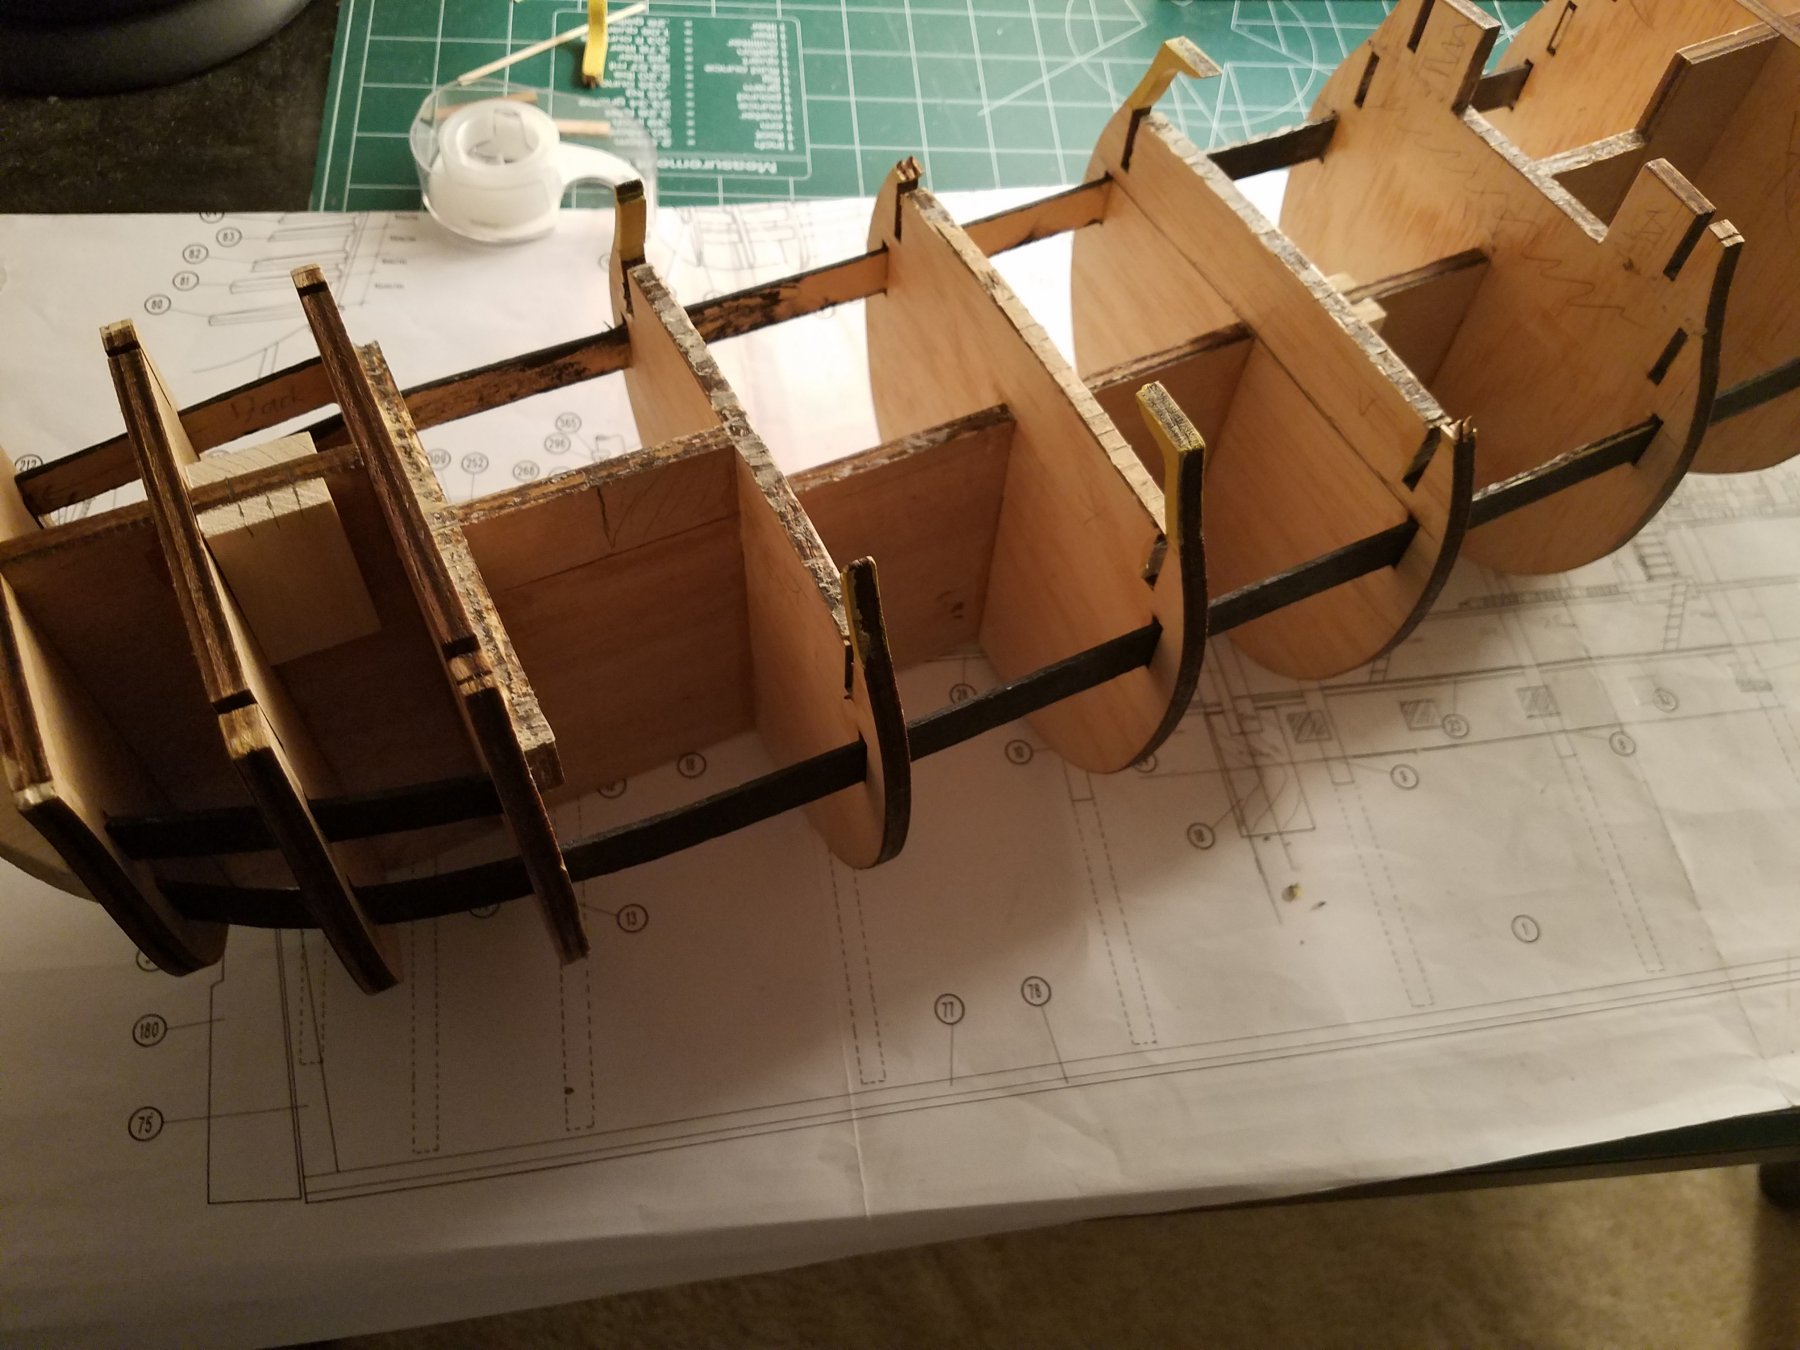
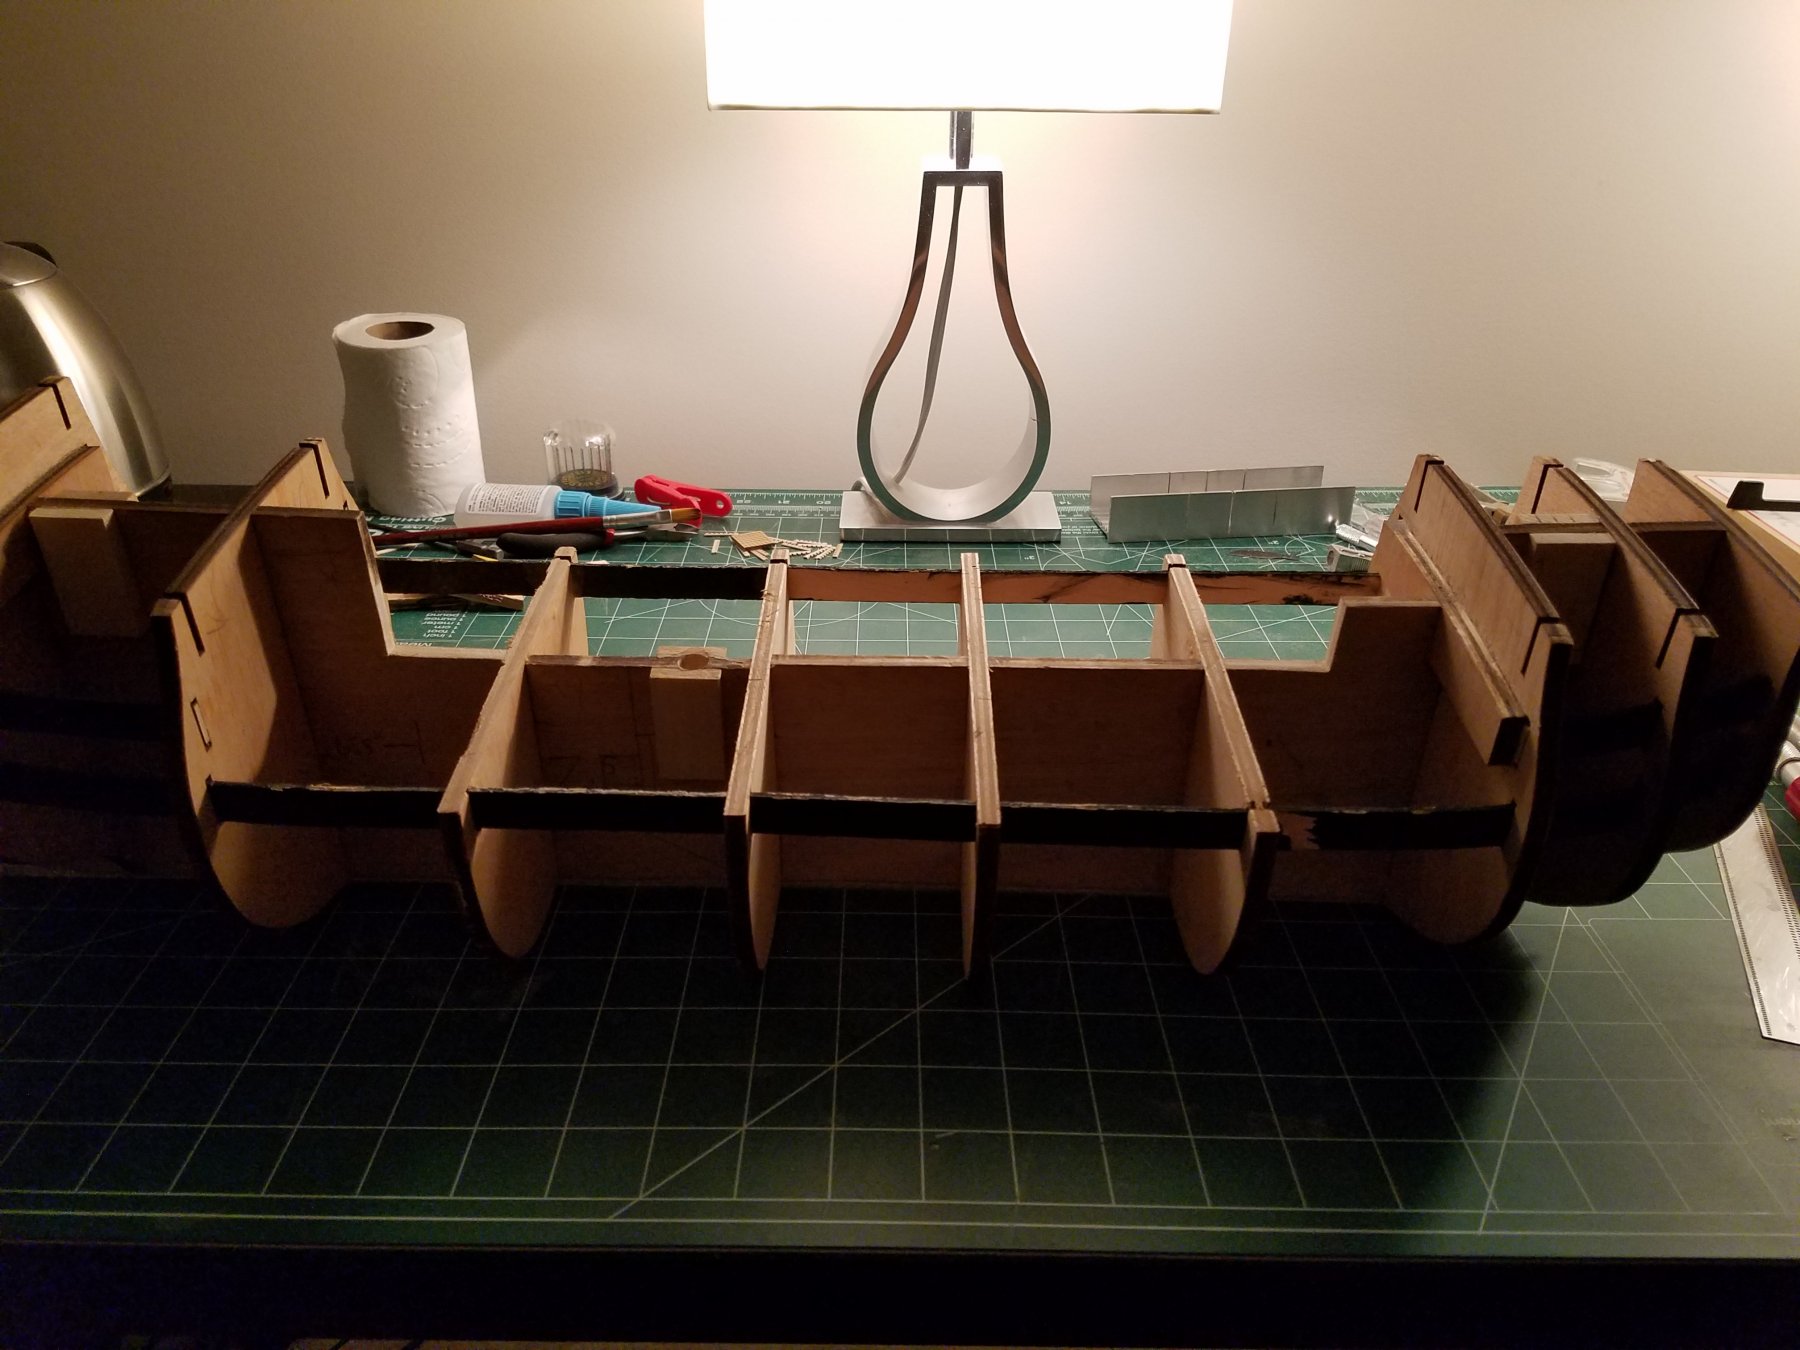
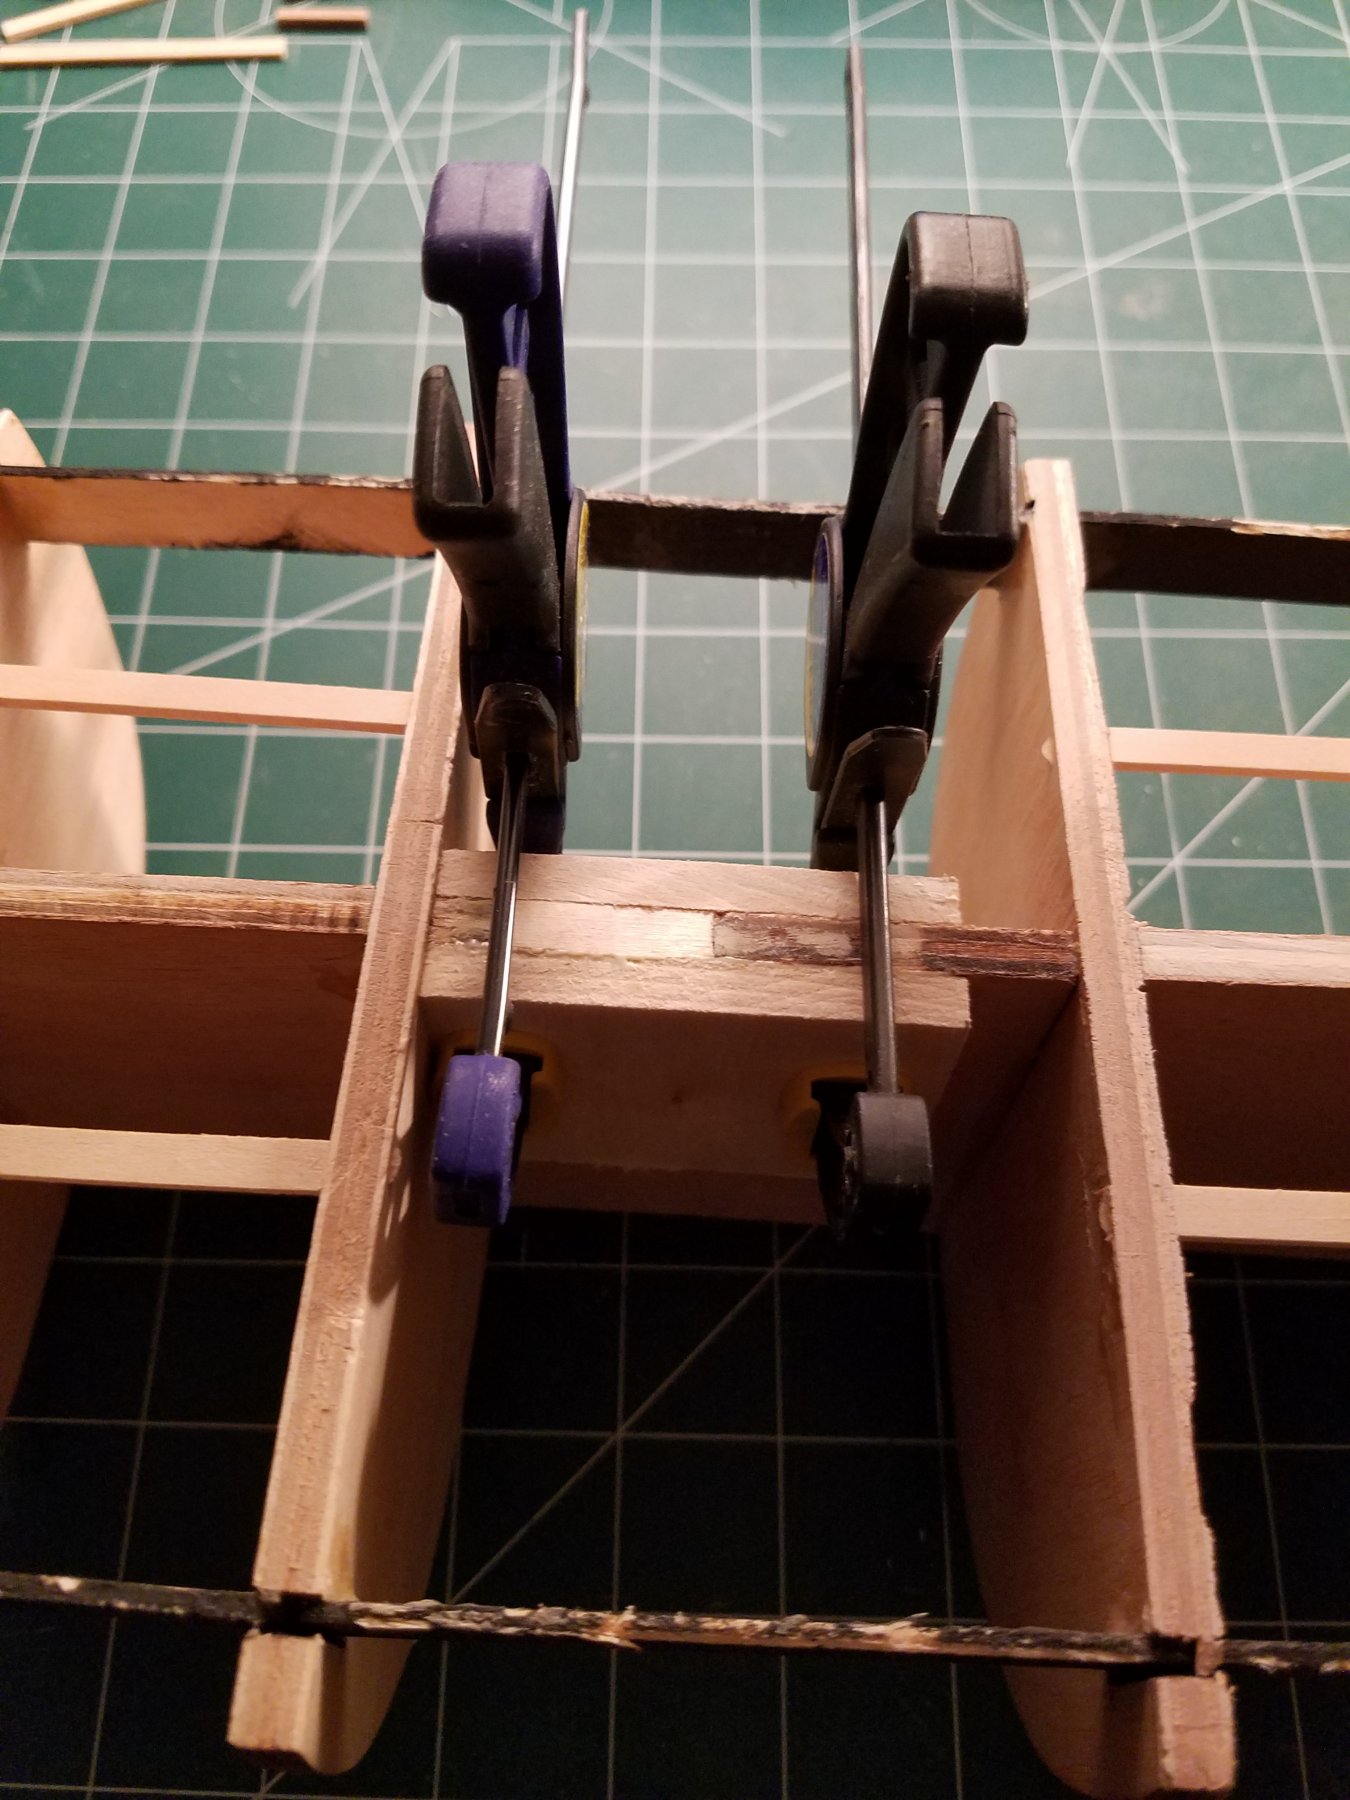
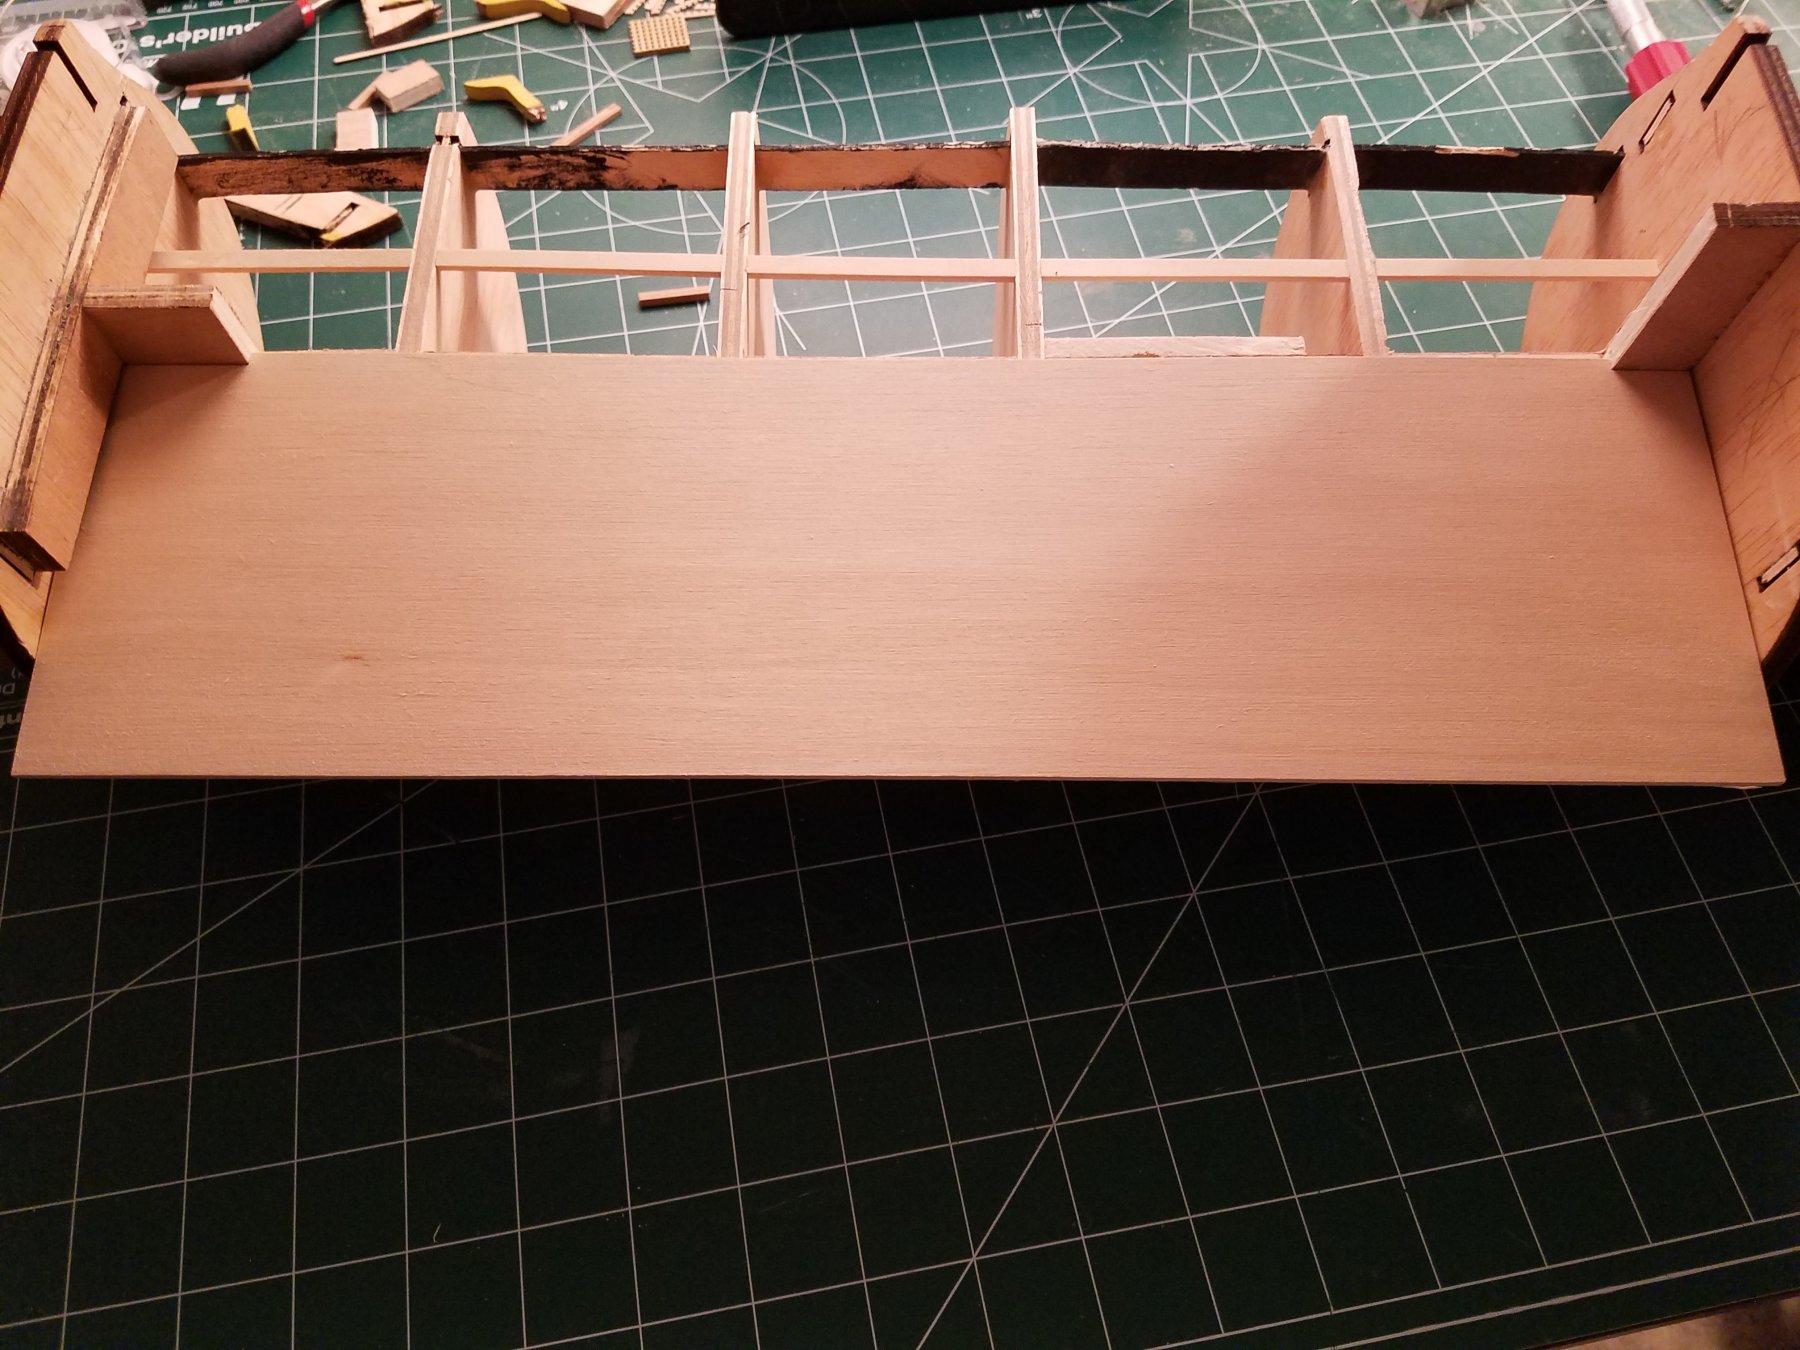
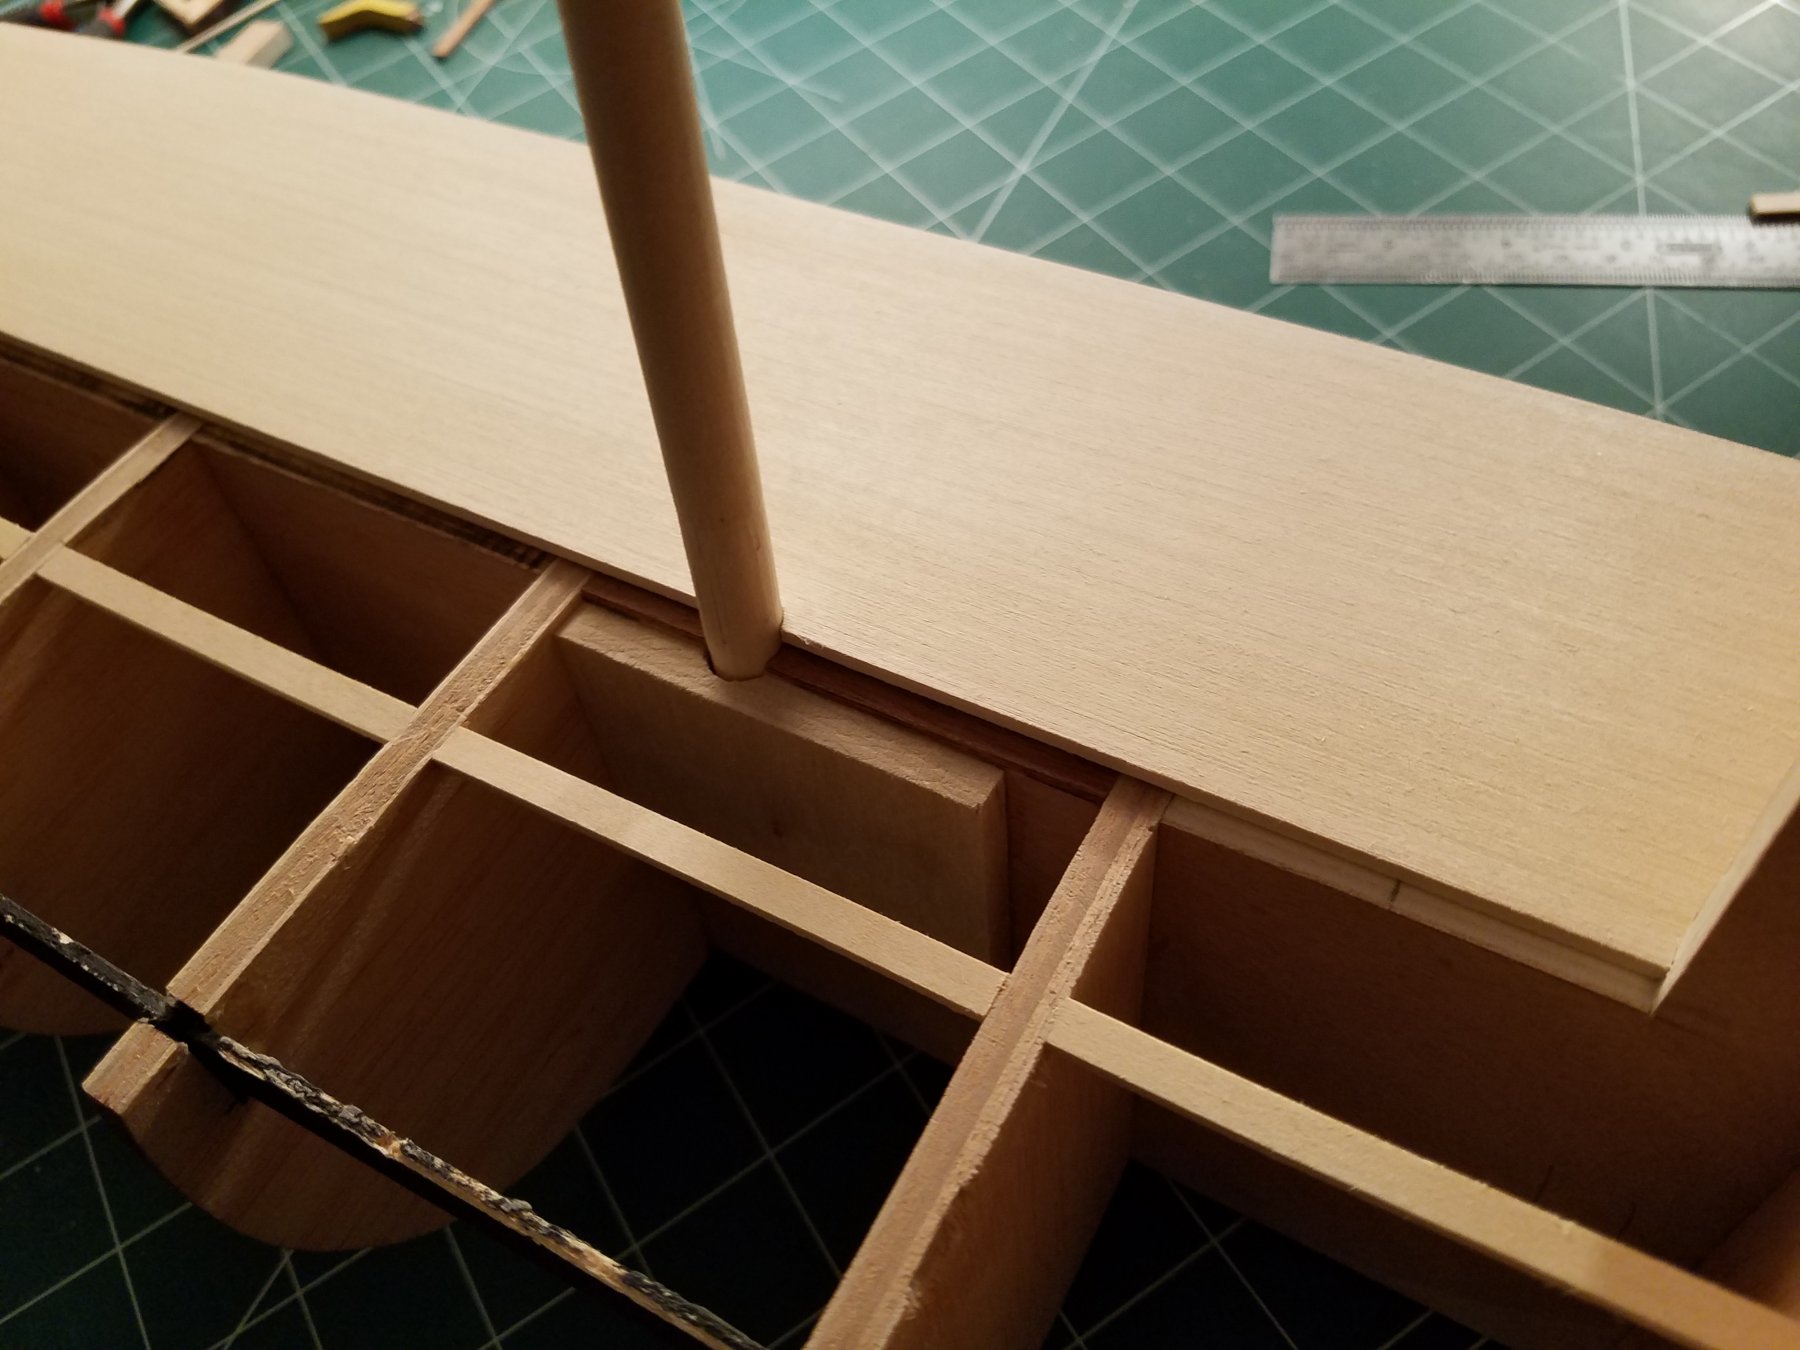
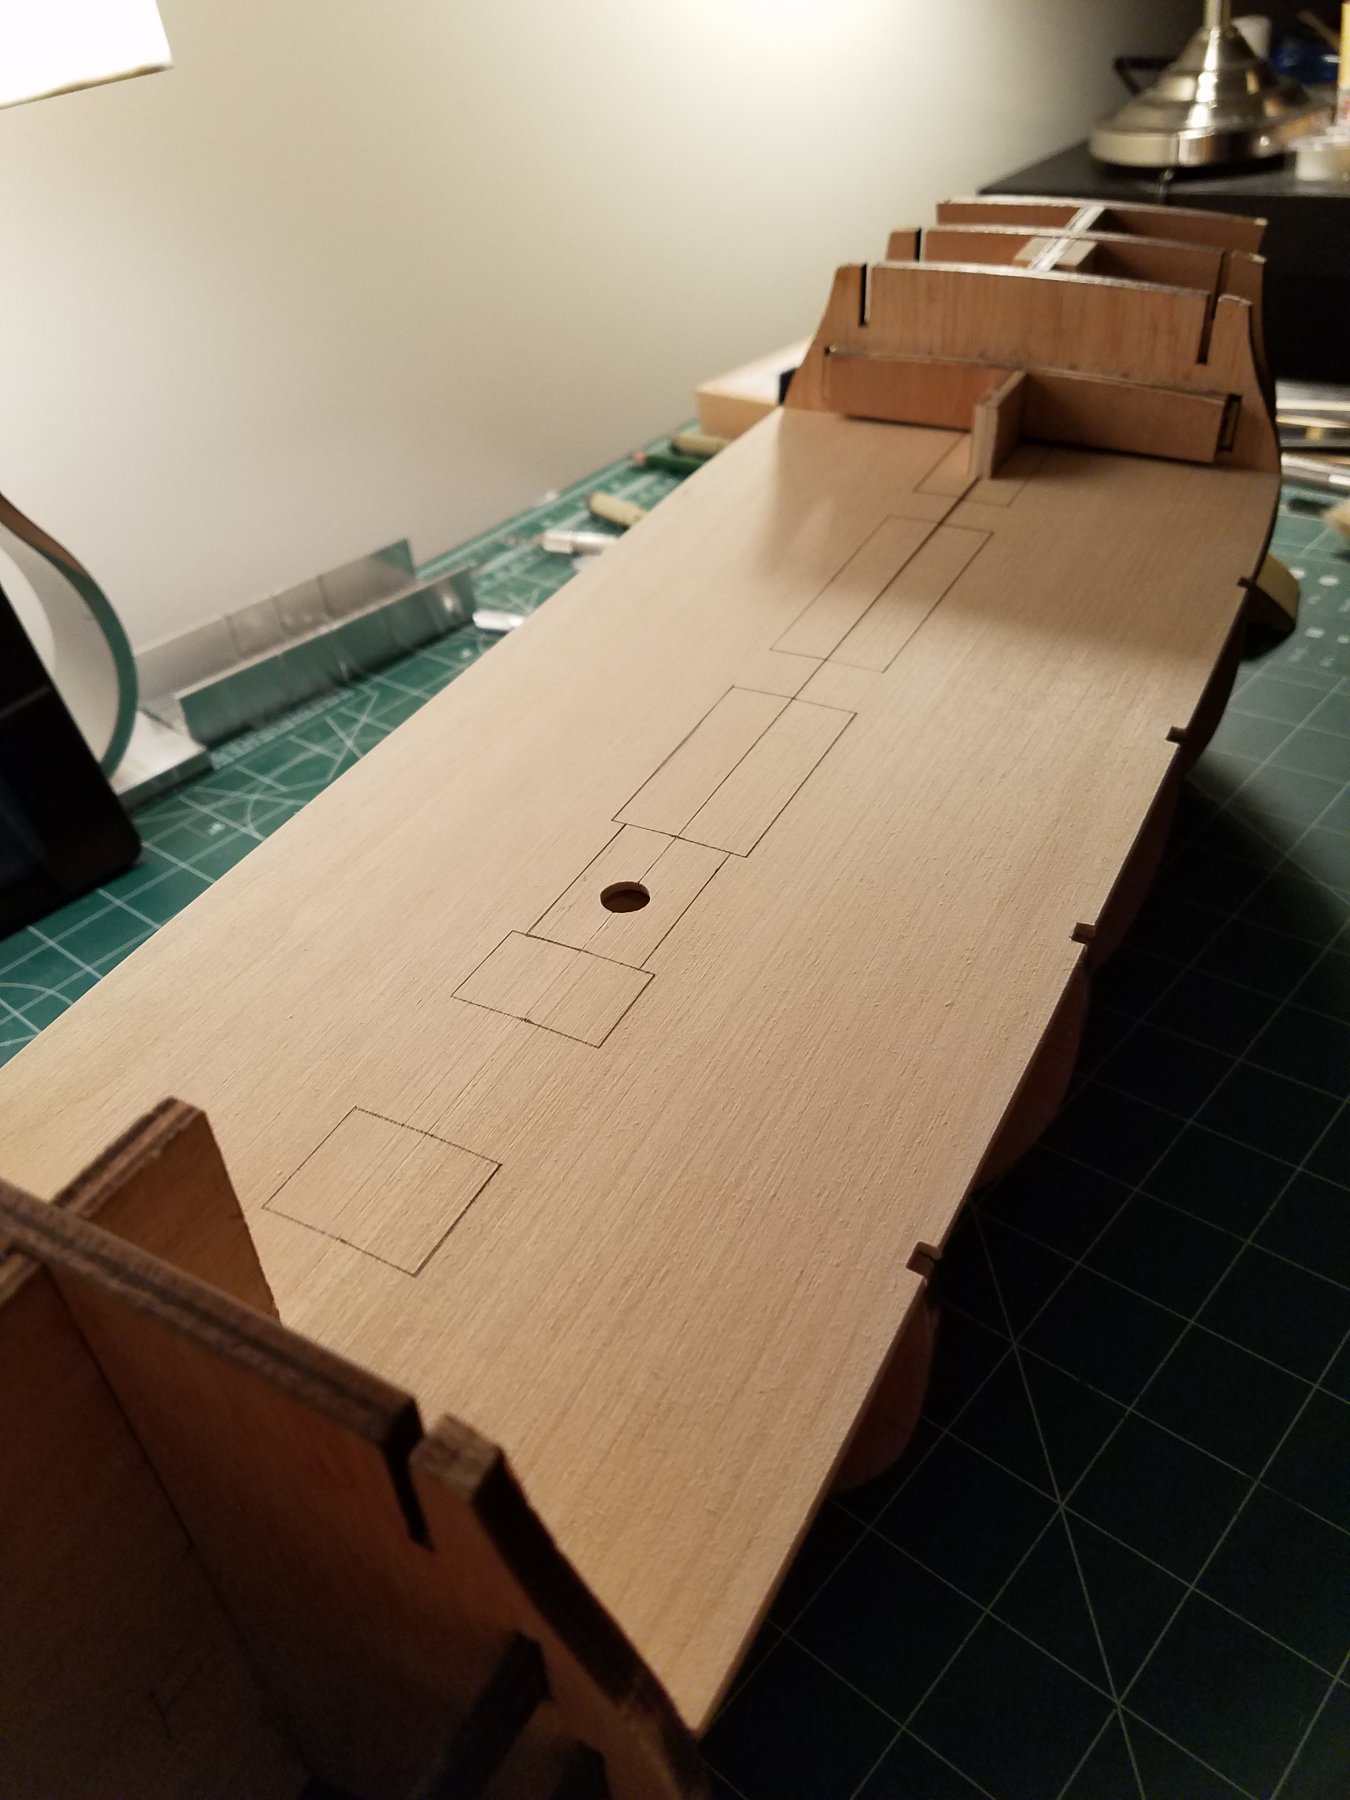
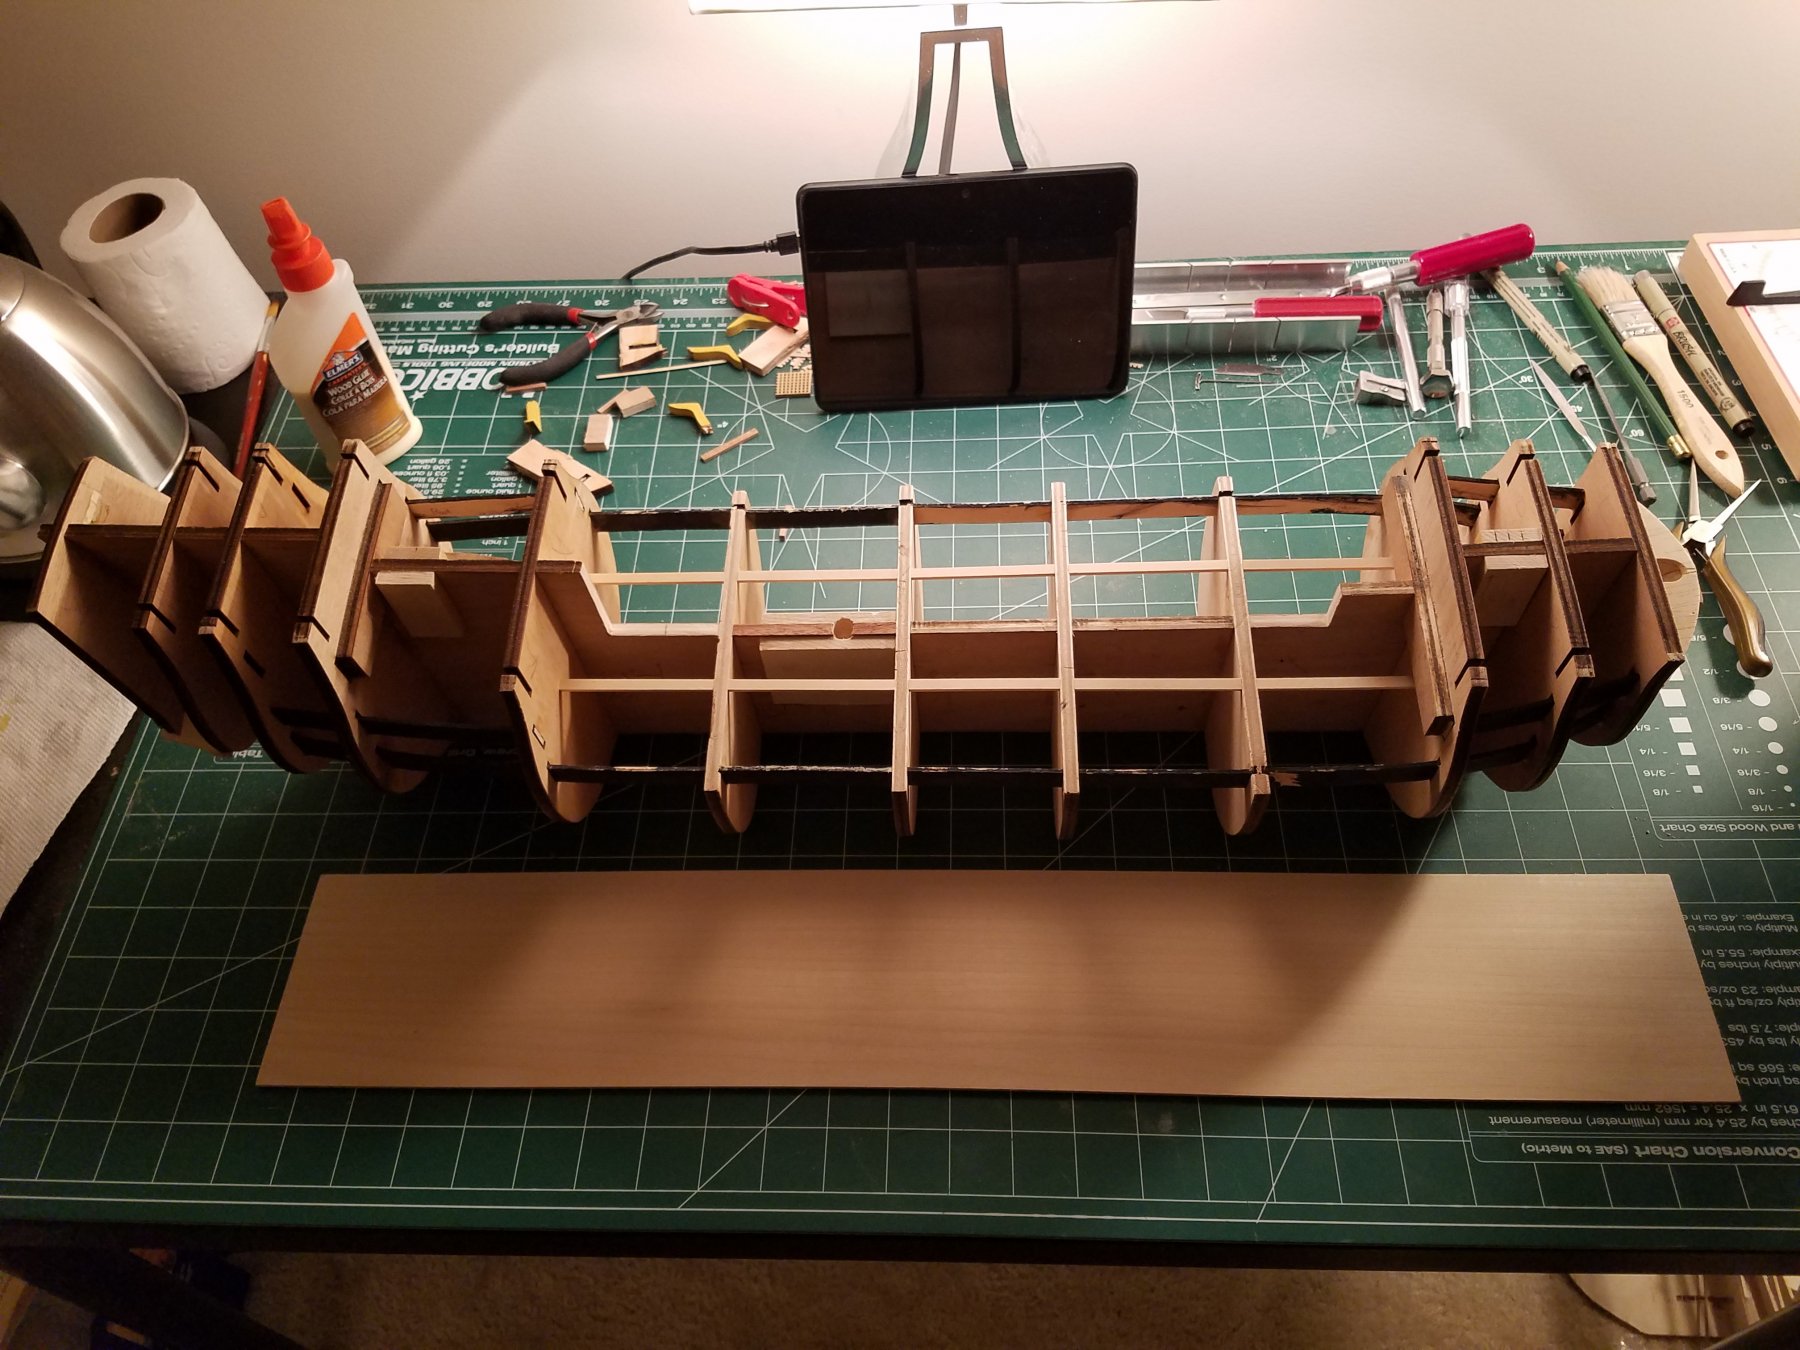
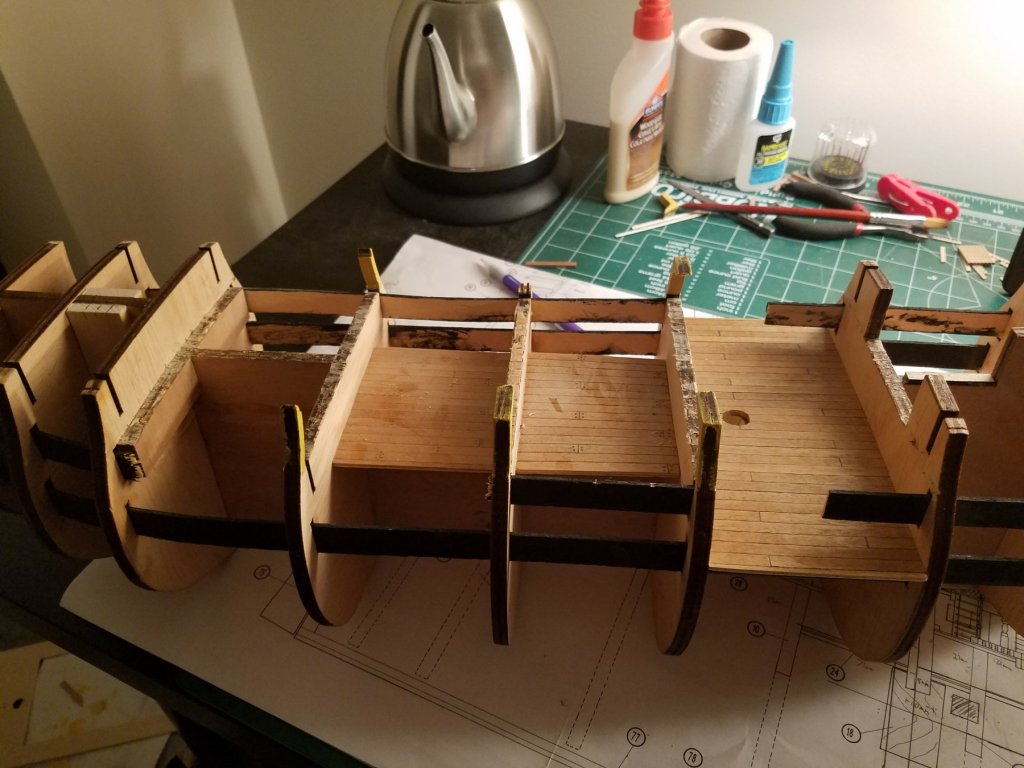
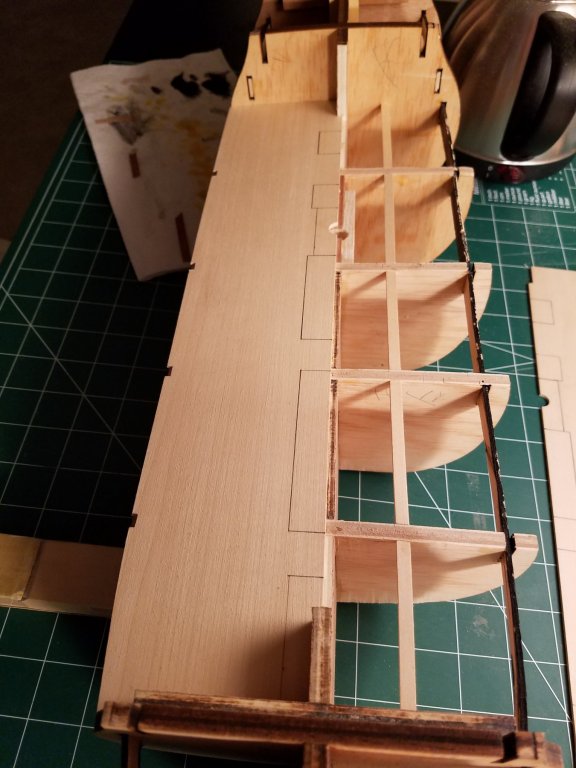
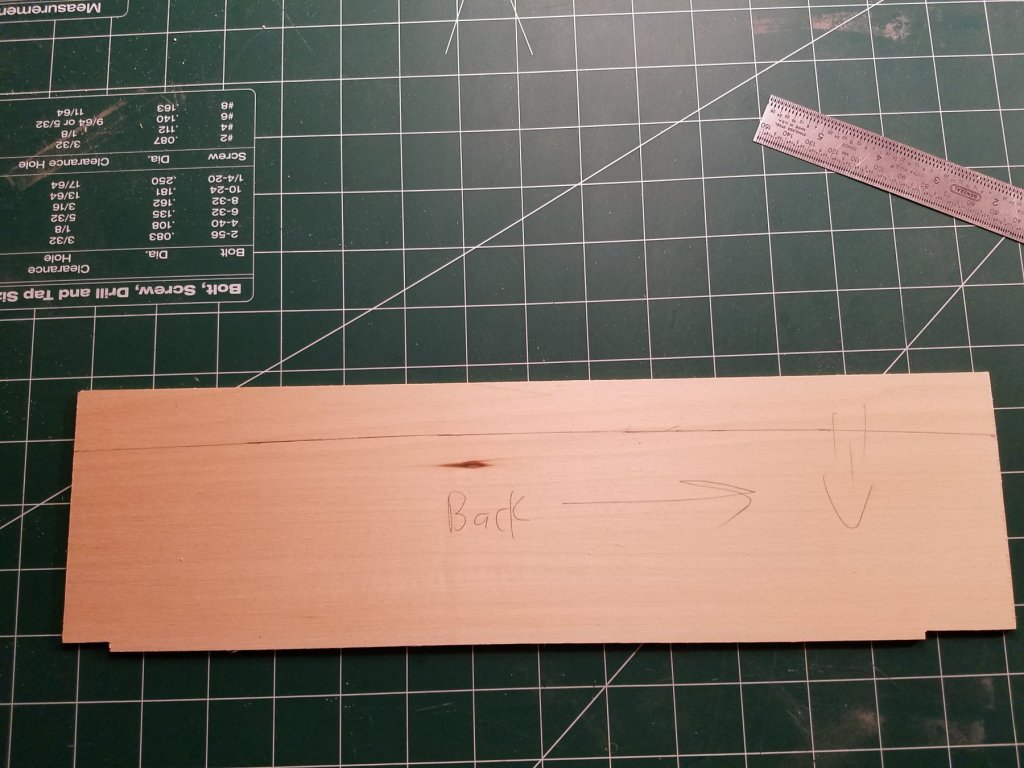
Thanks everyone for your comments and support! Its really helpful for me and keeps me wanting to do better! Its been a little while, but I have been thinking a lot about this. After the upper deck got damaged, I took a hard look at it and felt I could do better. Like you guys said, it's wood, so it can be fixed! So, I took the rest of it off. This allowed me to then make another decision: to move the main mast to the correct positon based upon the plans in the book, not the kit! Not only that, I noticed that the stairs going down to the middle deck never looked that good because if you would have looked down to it, you would see the sides of the plywood frames. So I decides to fix that too: At this point, I really felt like Dr Frankenstein! So really, I realized I just have undone pretty much everything. But I think that if I can pull this off, it will end up much better. Bear with me! (I must be crazy at this point) Sawing off more of the frames allowed me to: 1) More easily move the main mast 2) Plank a good portion of the middle deck 3) Put in the hatches, doors, and build more cannons for the middle deck among other things. 4) Allow me to half-plank the upper deck so you can see into the middle deck Ect... The first thing to do was to re-position the main mast. I took a lot of measurements from the book and triple checked the position. I removed the false keel section and bracers and replaced them: Then I marked and drilled the new mast hole. Next, I needed to create the middle deck. I went to the local craft shop and got 2 basswood sheets for this task: I also marked out the important bits like the hatches, stairs, etc. I will put in more detail later as I get closer to actually planking the deck. Finally, tonight, I was satisfied with it and glued the right side: Tomorrow, I will finish up the left side and glue that on too. WHEW! I know I'm not going to make the next set of stairs down to the lower deck because I think I'm doing enough modifications already, and I don't feel like cutting up anymore of the frames and things. Lastly, you might have noticed I also cut off the side of the frames too (the bits of the frames that cover the middle deck upwards). Before I did that, I made sure that I had kept the laser cut ply leftover board where the frames came out of. Im tracing them to the correct curve and will place them back on the model AFTER I sand down most of the hull for planking. I don't want to place them on and accidentally break them off during the fileing/sanding. Well, thats a lot and it required much thinking, debating, and a whole LOT of measuring! But hopefully, in the end, a better model will come out of it. Thanks for all your support! Jeff


-
Thanks everyone for the nice encouraging comments! They have inspired me to sit down and think about what I want to get out of this model. I took a few days off to relax and think about what I want to do and how I want to fix it. I think I came up with a solution that, I hope, will actually work out better in the end. It will require more effort, time, and materials, but if it goes well, will result in a better outcome than what I had completed before the insident. I am not deterred and will continue on! I might not post much for a week or so because I'll be busy with figuring out how I want to proceed. Jeff
-
You are right. I won't do anything rash. I tripped while holding it and fell over hard. It broke my fall, but it broke like this too. Im ok, but have some scrapes because of the wood. Ouch! Jeff
-
Well, this is a really sad day. My birthday was today and this happens: The deck is destroyed, parts of the bulkhead were torn off, a hole in one of the hatches, and part of the ply piece where the gun ports stick from is torn off... This is a nightmare come true!!!!! I'm not sure where to go from here. My heart is broken right now... Jeff

-
I have done some work on the hatches. Im thinking of adding 1 hatch to the left of the main mast as shown in the book but not in the kit. I have painted the deck floor black where the gratings will be. I need to also build the stairs as well. Jeff
-
I was currently making the coamings and grille combs for the second deck, but then I took a look at where the main mast was positioned on the model. Looking at the plans, the main mast position looked a little too close to the edge of the deck. I then referened the book Anatomy Of The Ship The 100-Gun Ship Victory by John McKay. After some calculations, I realized how different the kit is to the real ship. The masts arent positioned correctly, the stairs are in the wrong spot, a ton of details are missing or looked over (this i more understand because it is a kit), ect ect ect. It was sorta a revelation as to how much detail and accuracy is missing from the kit. It made me question if I should modify the kit to correct the more obvious bigger differences or just leave them how the kit had it planned out. I havent decided what to do. I would be curious what others have done! Jeff
-
maaaslo, Thank you for the compliment!! That really makes me feel like I'm doing a good job and helps me want to do my best! Directing him to this forum was a great idea! This site has a LOT of helpful information. I just wish he had listened to you. Jeff
-
Over 12,000 treenails?! WOW! Thats a lot! Super impressive! I can see that doing them as yiu build the decks and hull is the better way becausr doing all those nails at once would be very tedious and monotonous. I will stick with how I'm doing them right now. I did notice that I will need to sand more on the edge planks because the deck slightly curves down and my deck doesn't currently do that.
-
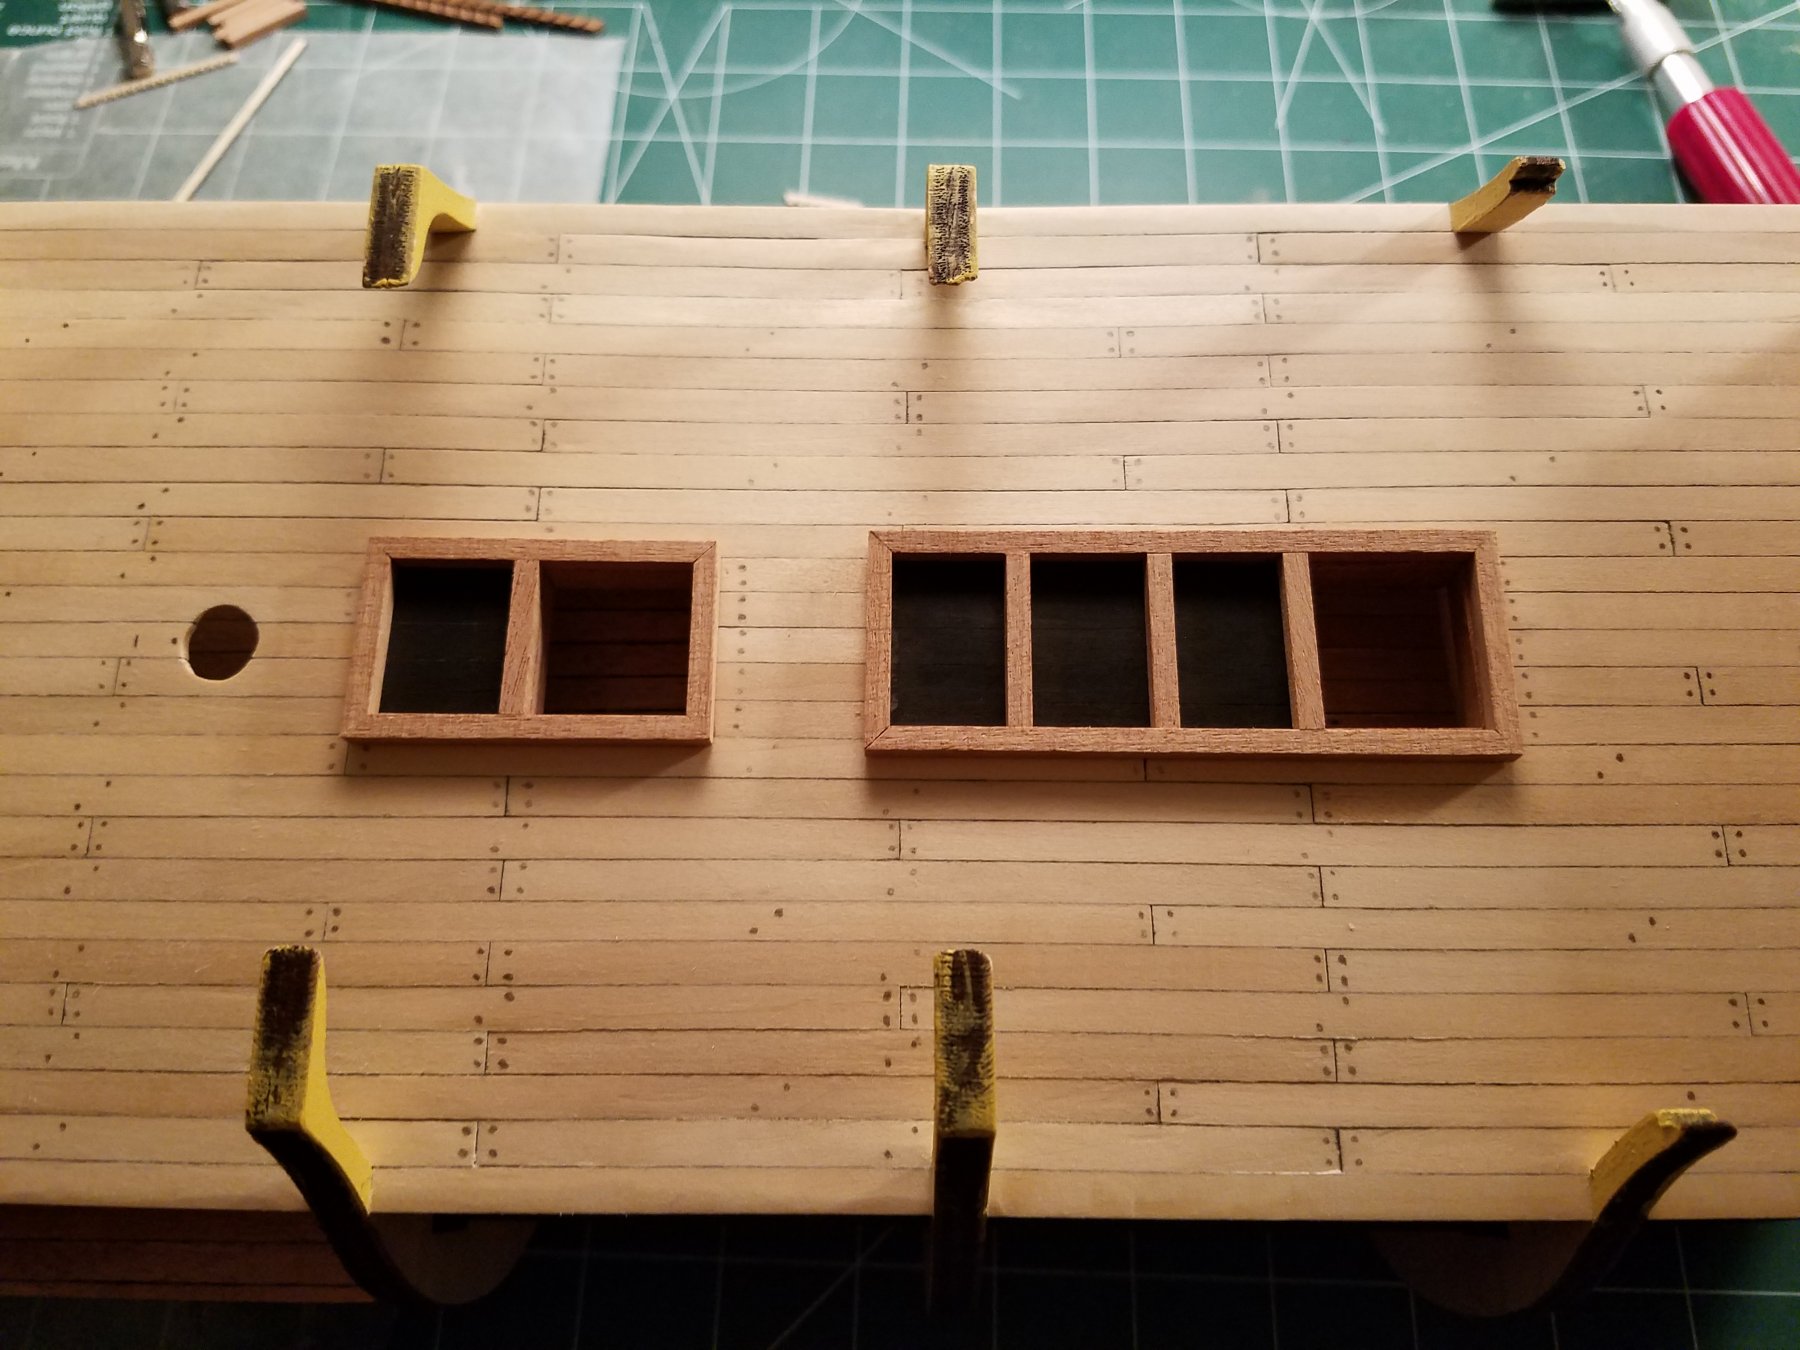
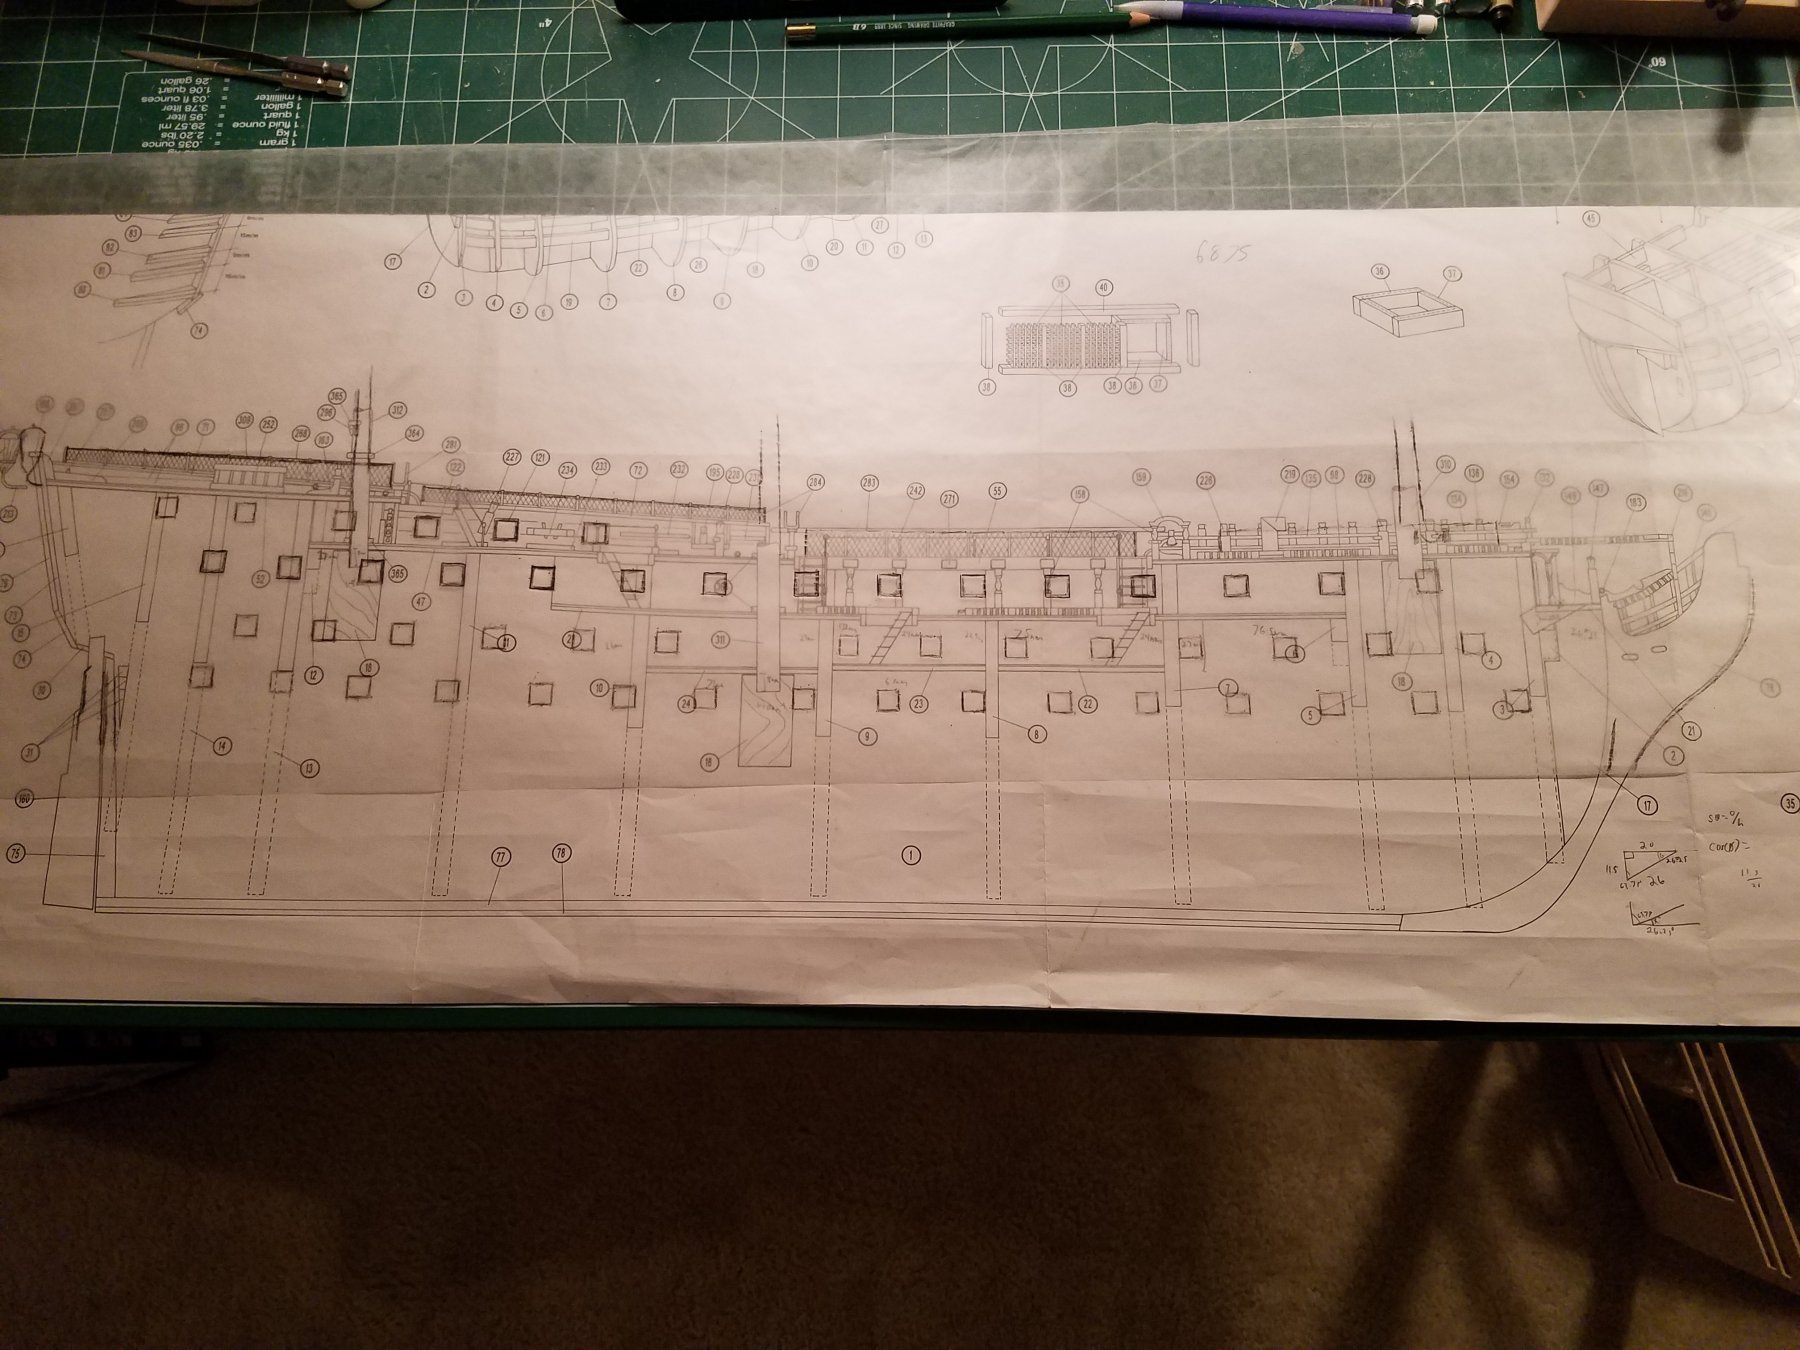
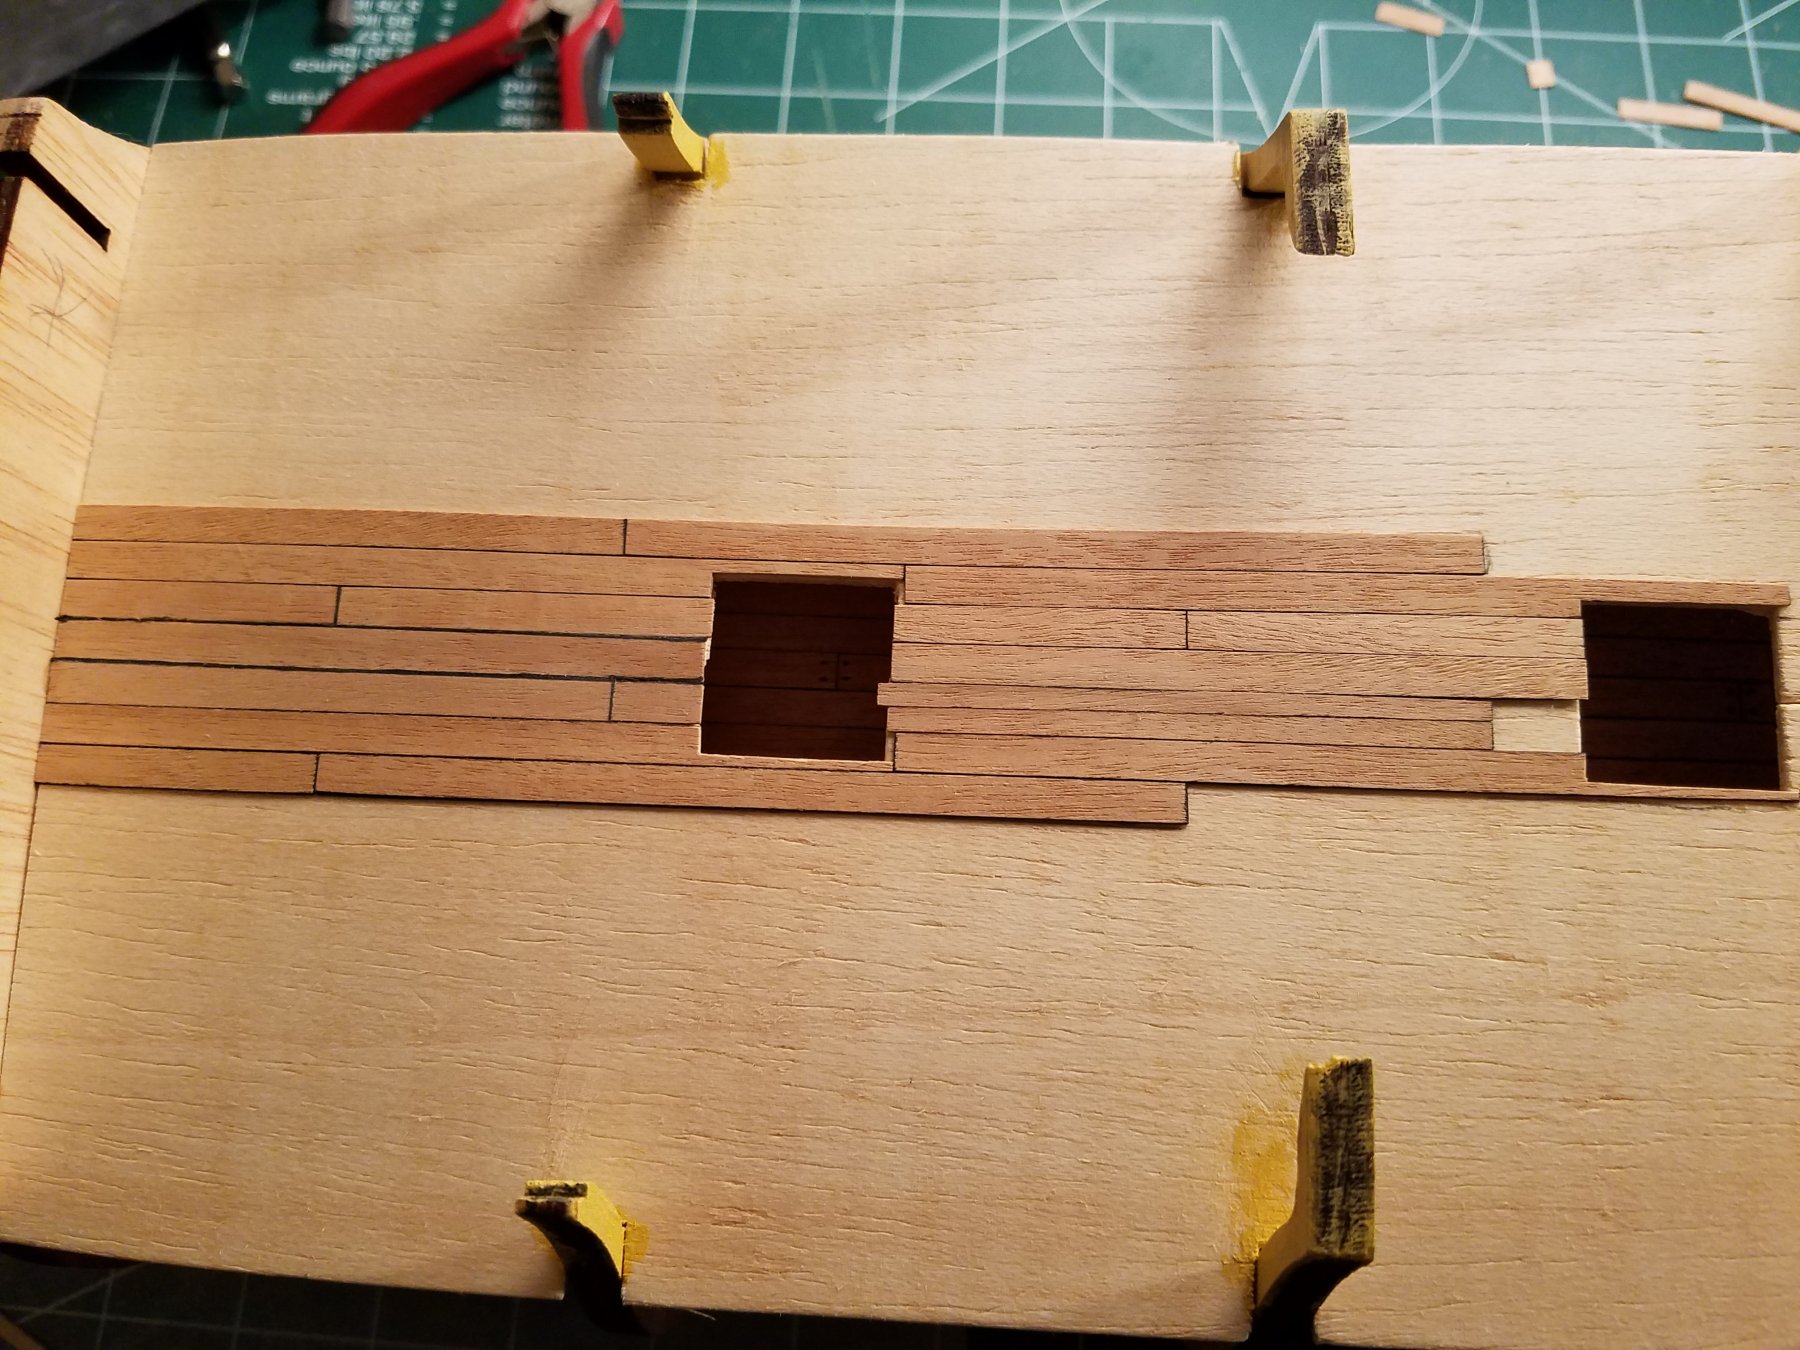
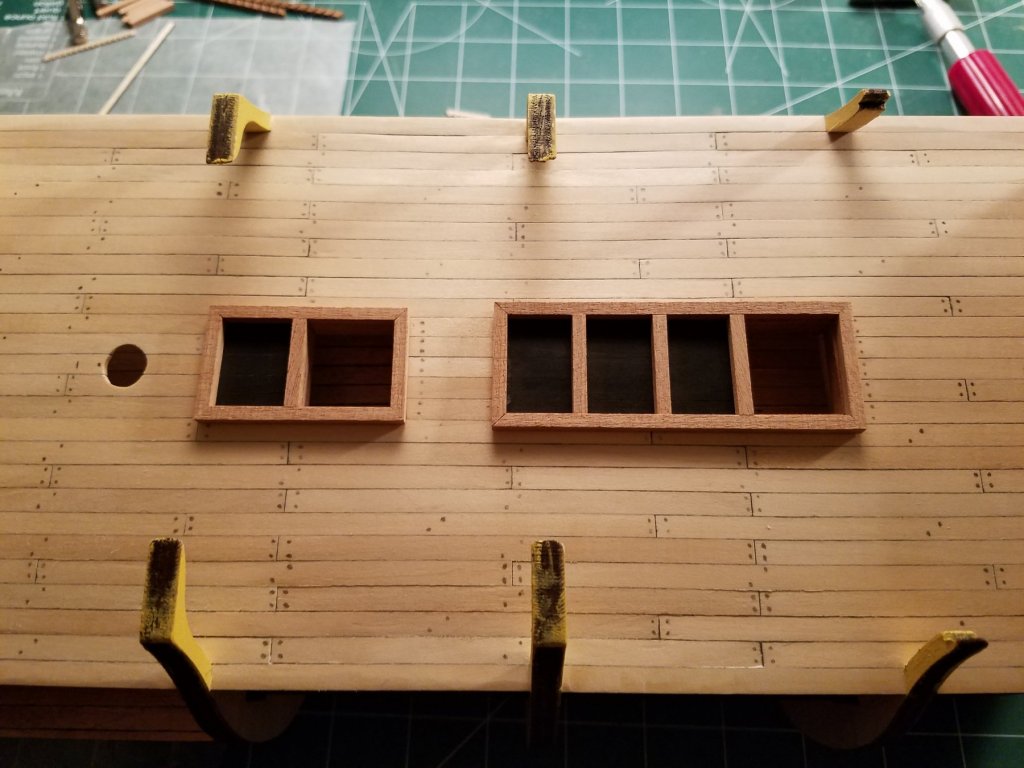
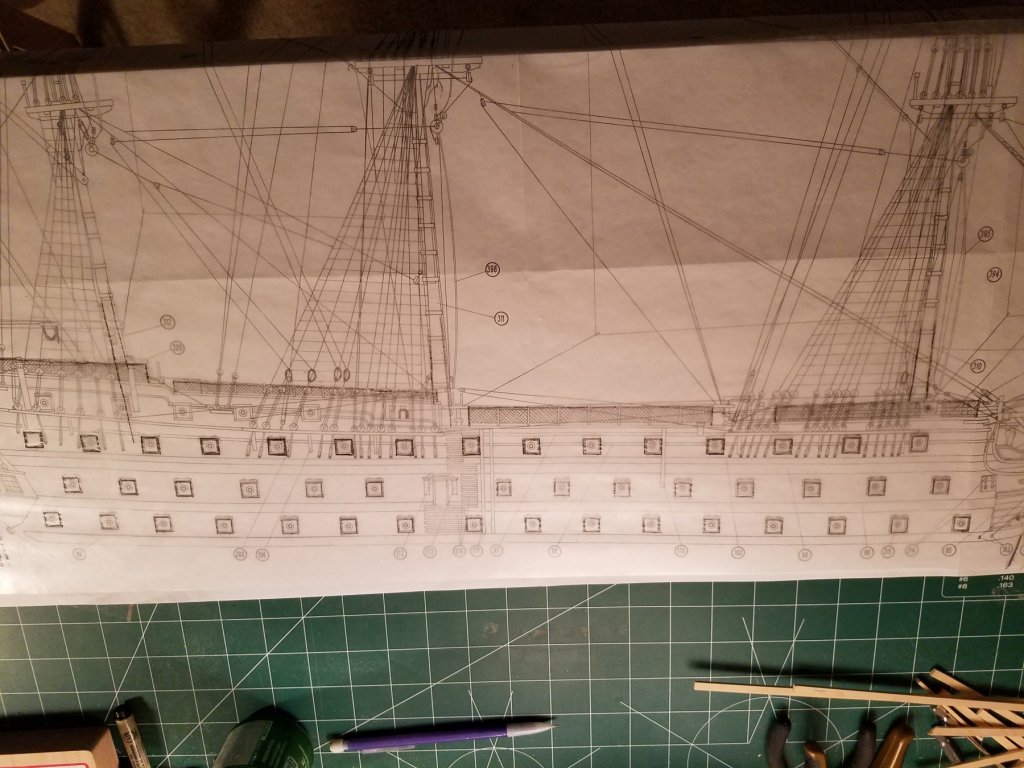
I finished planking the deck! I also sanded and drew the treenails onto the boards. I think there is a better way to make the treenails though... After taking this pic, I noticed on the right side, that a few boards needed more sanding. So I sanded it down. I noticed in the instructions on this deck, you don't actually plank the inside of the hull. I wanted to see if that was noticeable so I cut out the next deck piece and placed it on. As you can see, its easy to see the inside part of the hull where the cannons will be placed. Even with the model finished, you will be able to see it. Of ALL the pictures (100+) in the instructions, they meticulously DON'T show a pic from this angle. So for me, I will plank the inside where the cannons are located. So, (I know this is early) I wanted to see where the cannons would be located. After reading Paul063's build log of the same kit, he said to place the gunports early and line them up to minimize the gun ports running into bulkheads. Yikes! That would stink since there are so many guns! So I took some wax paper and tapped it across the plans with the gunports and drew them and other things onto the paper. I then placed the wax paper ontop of the bulkhead plans: This is going to be super helpful when placeing the gunports! I see there will be a few that will overlap the bulkheads, but if I'm careful, I can mitigate others so they will miss them. I wanted to continue, but it was getting too late and I wanted another day to make sure I like the look of the deck before varnishing it. Also want more time to find a better way to make the treenails. Jeff


-
I found some time to work on the deck planking. Its sure taking a while, but I'm taking my time. I am not quite done yet though. I have a few more rows to plank, add the treenails, and sand/varnish it. But I am just happy to have more done on it! Jeff

-
Thanks Dan. I think I understand what you are saying. I'll be tearing up the deck and starting.. just kidding! I will take that into consideration during the next deck planking. I really do appreciate your advice and critisism as it will just make my modeling better. I looked at your pics and have a question. I noticed that some of your deck planking is curved. Im curiois why that is? Thanks! Jeff
-
Thanks a lot! Its taking a lot longer to plank this way for me, but I think its worth it. Here's what I have finished so far Whew! This is my first time planking so I am actually learning a lot doing it this way. I decided to plank like this the other decks too so they are consistant. I know the next decks I plank should benifit from my learning on this one. Jeff

-
I have definetly learned quite a bit already with this kit! Thanks guys for all yout help and comments! Jeff
-
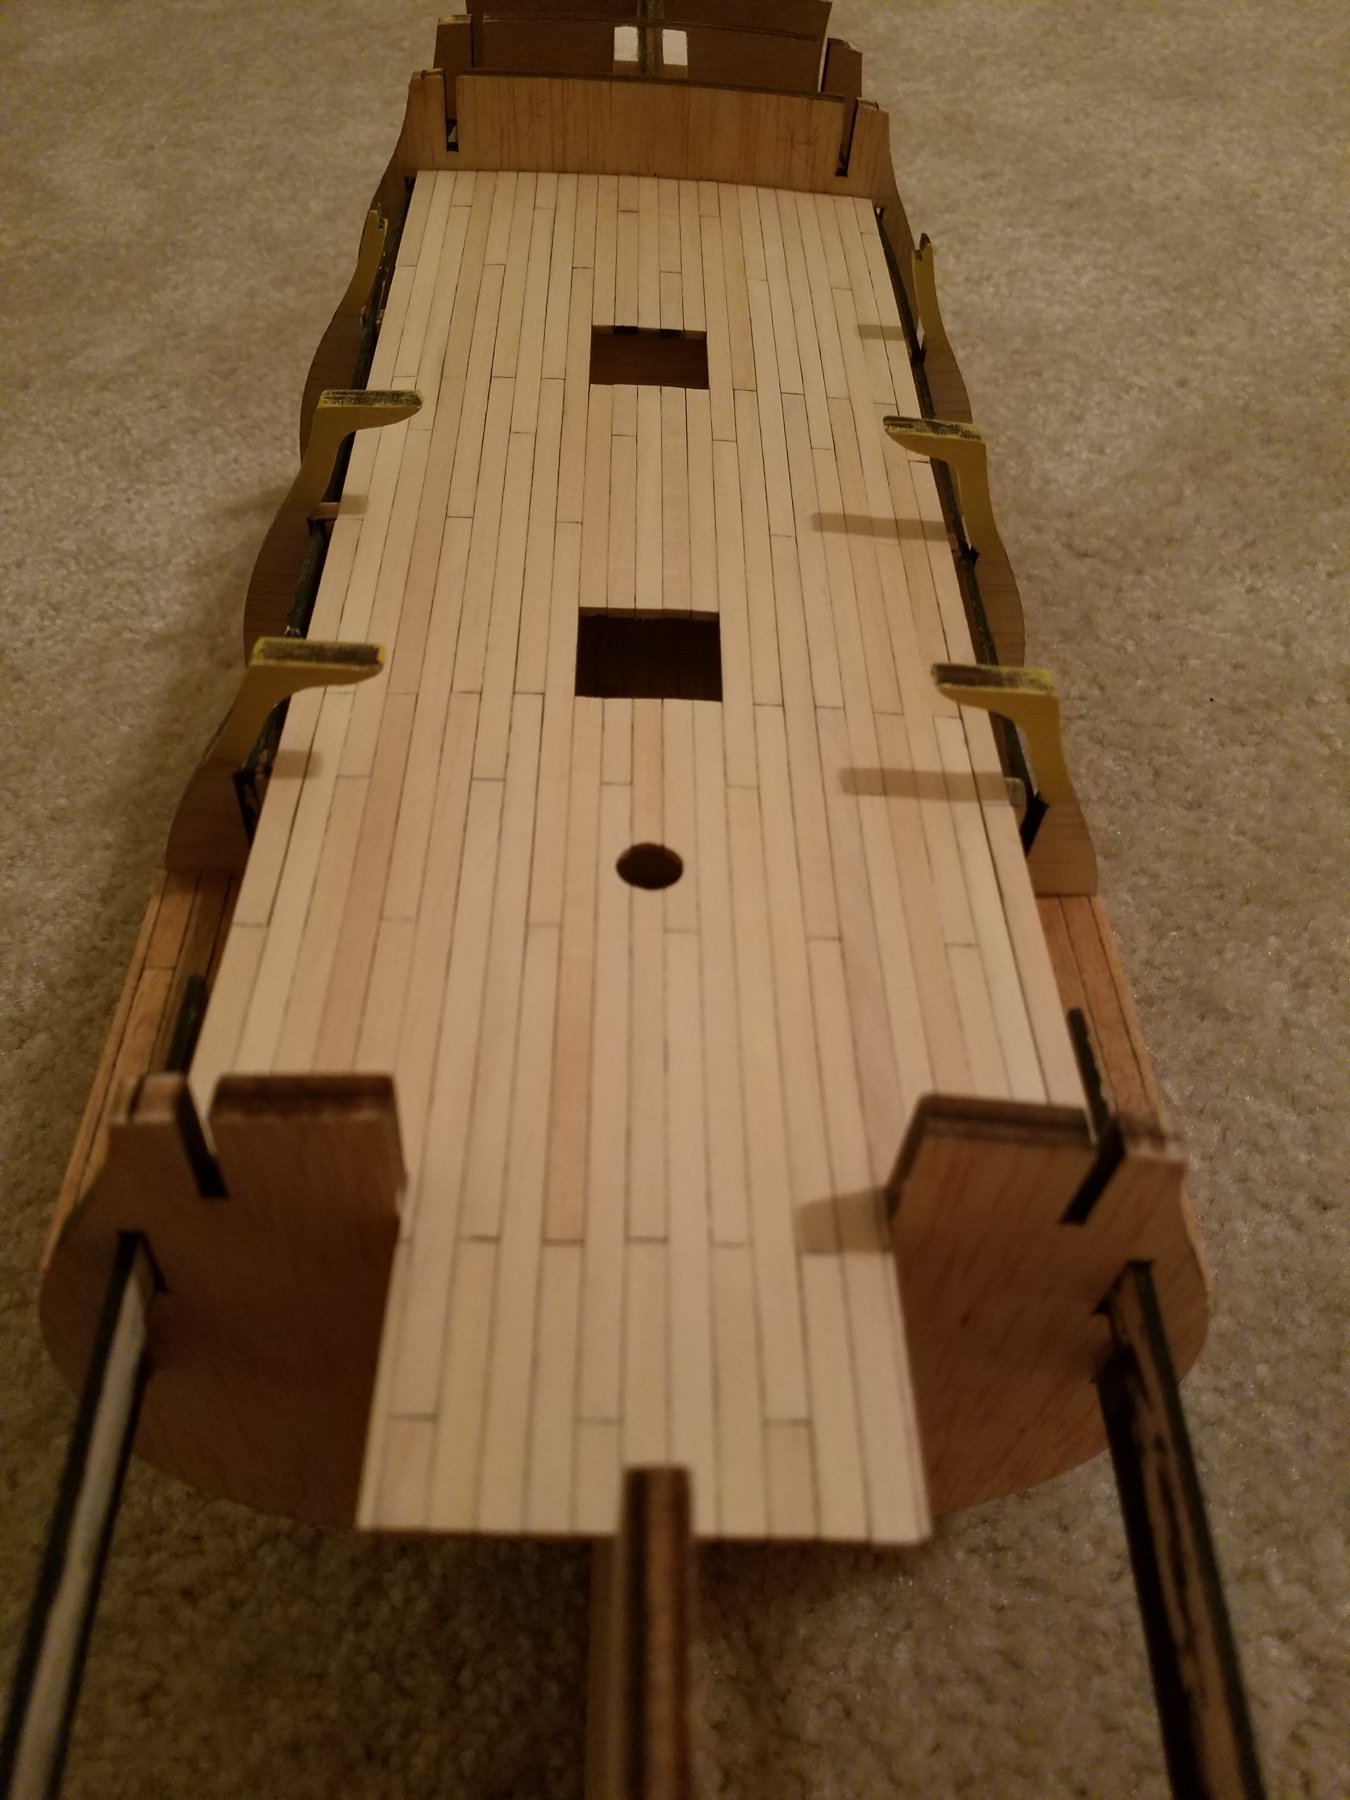
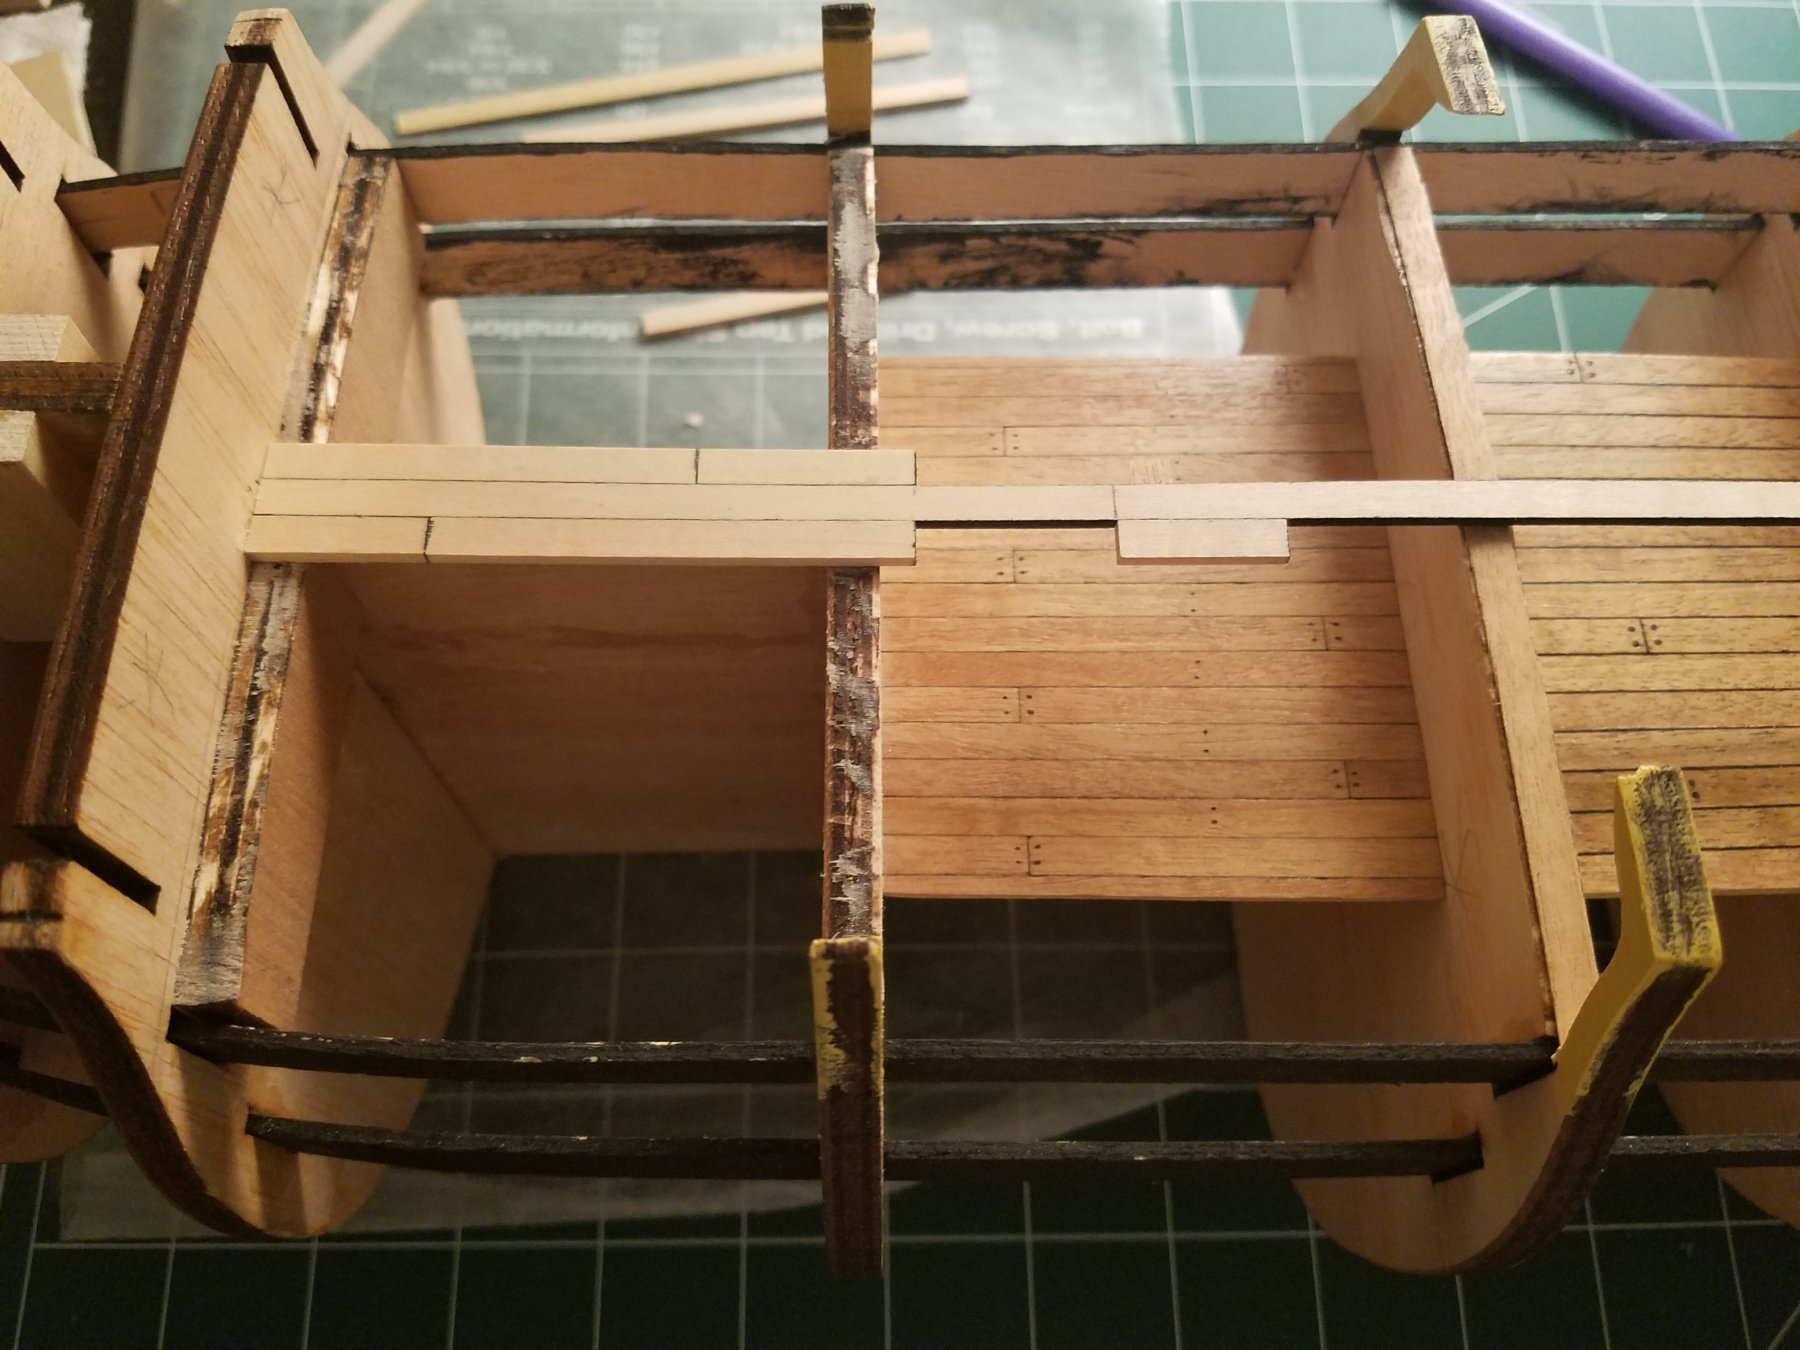
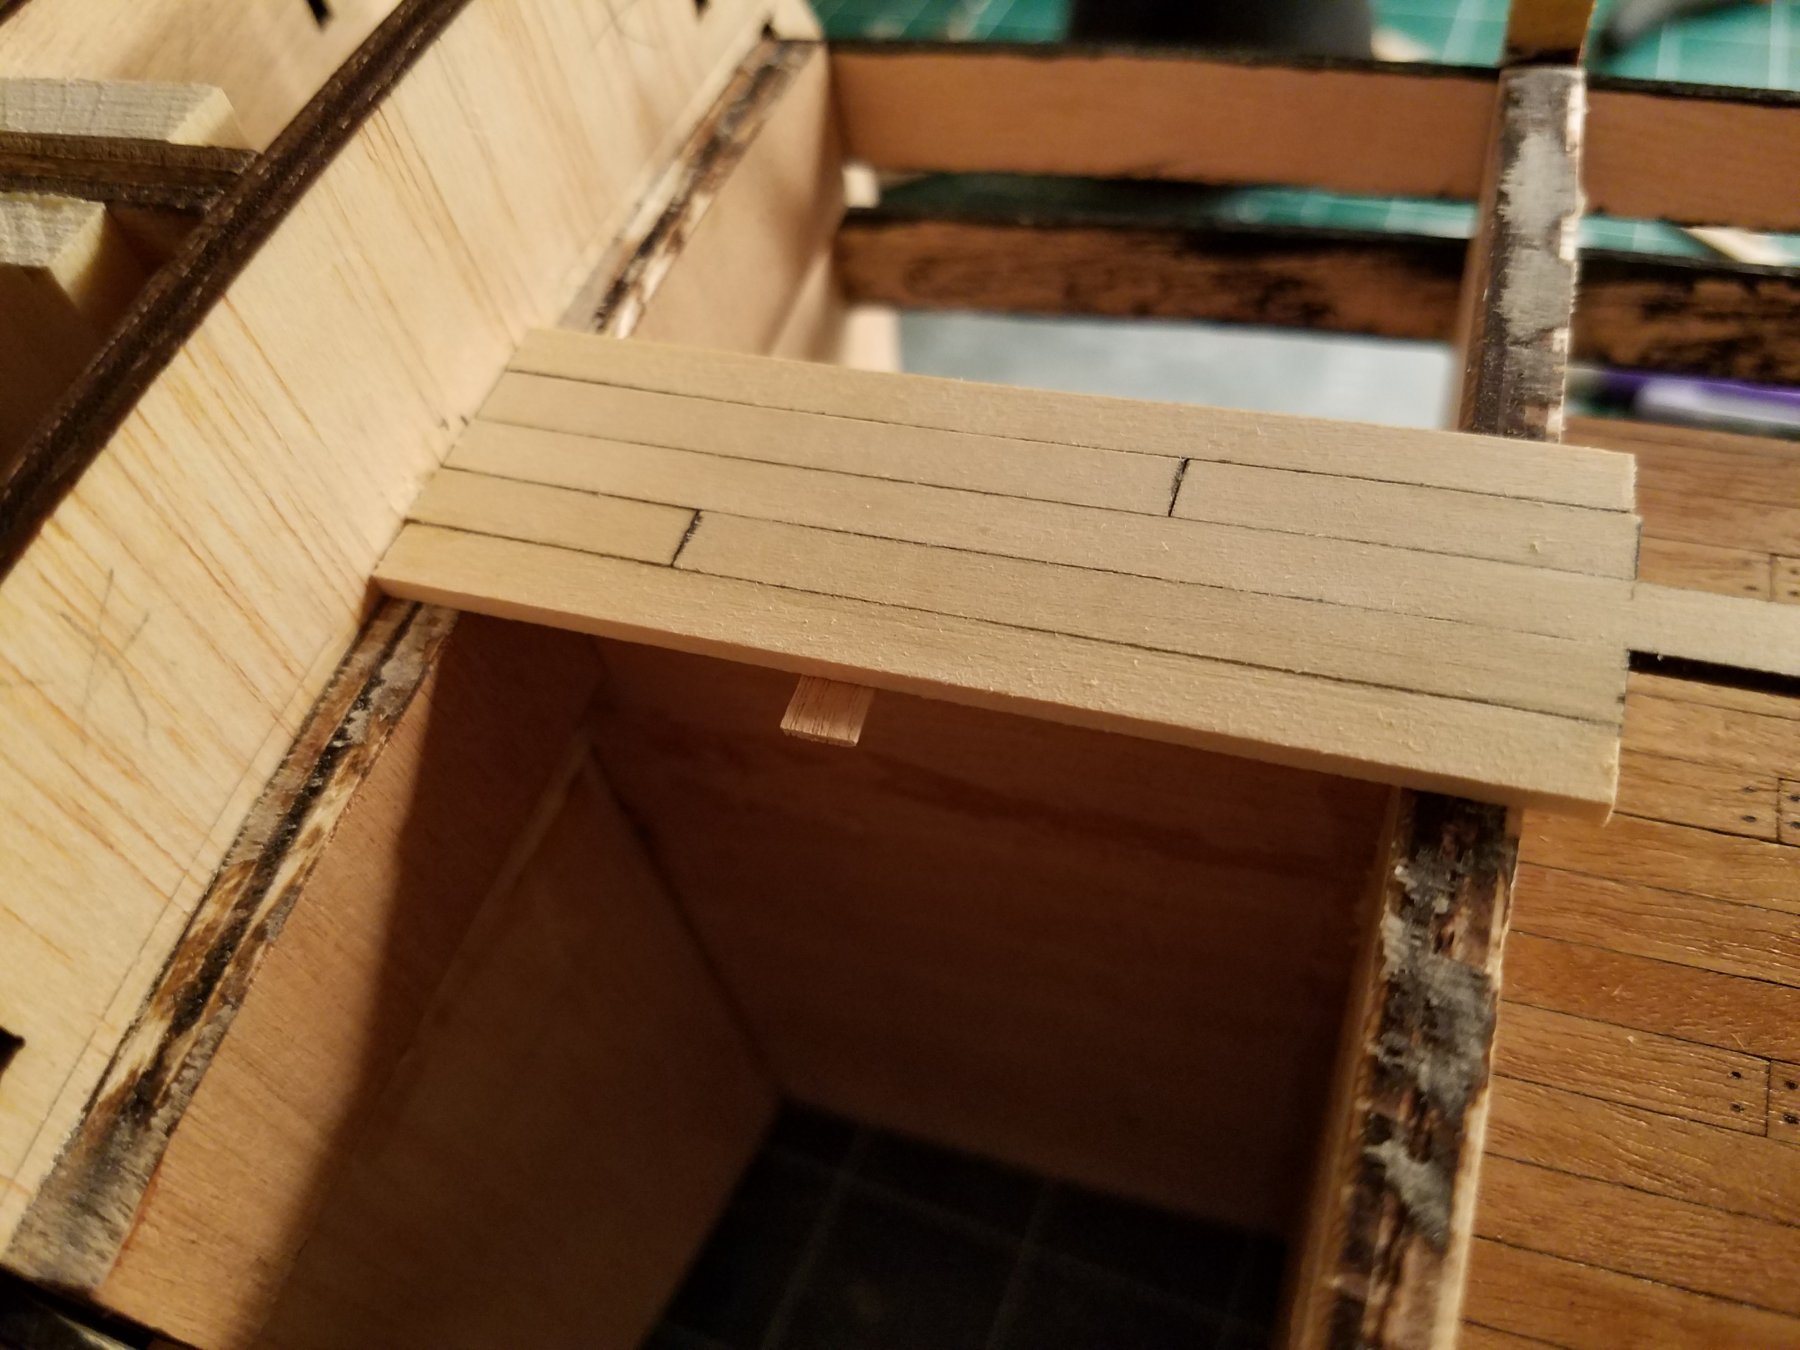
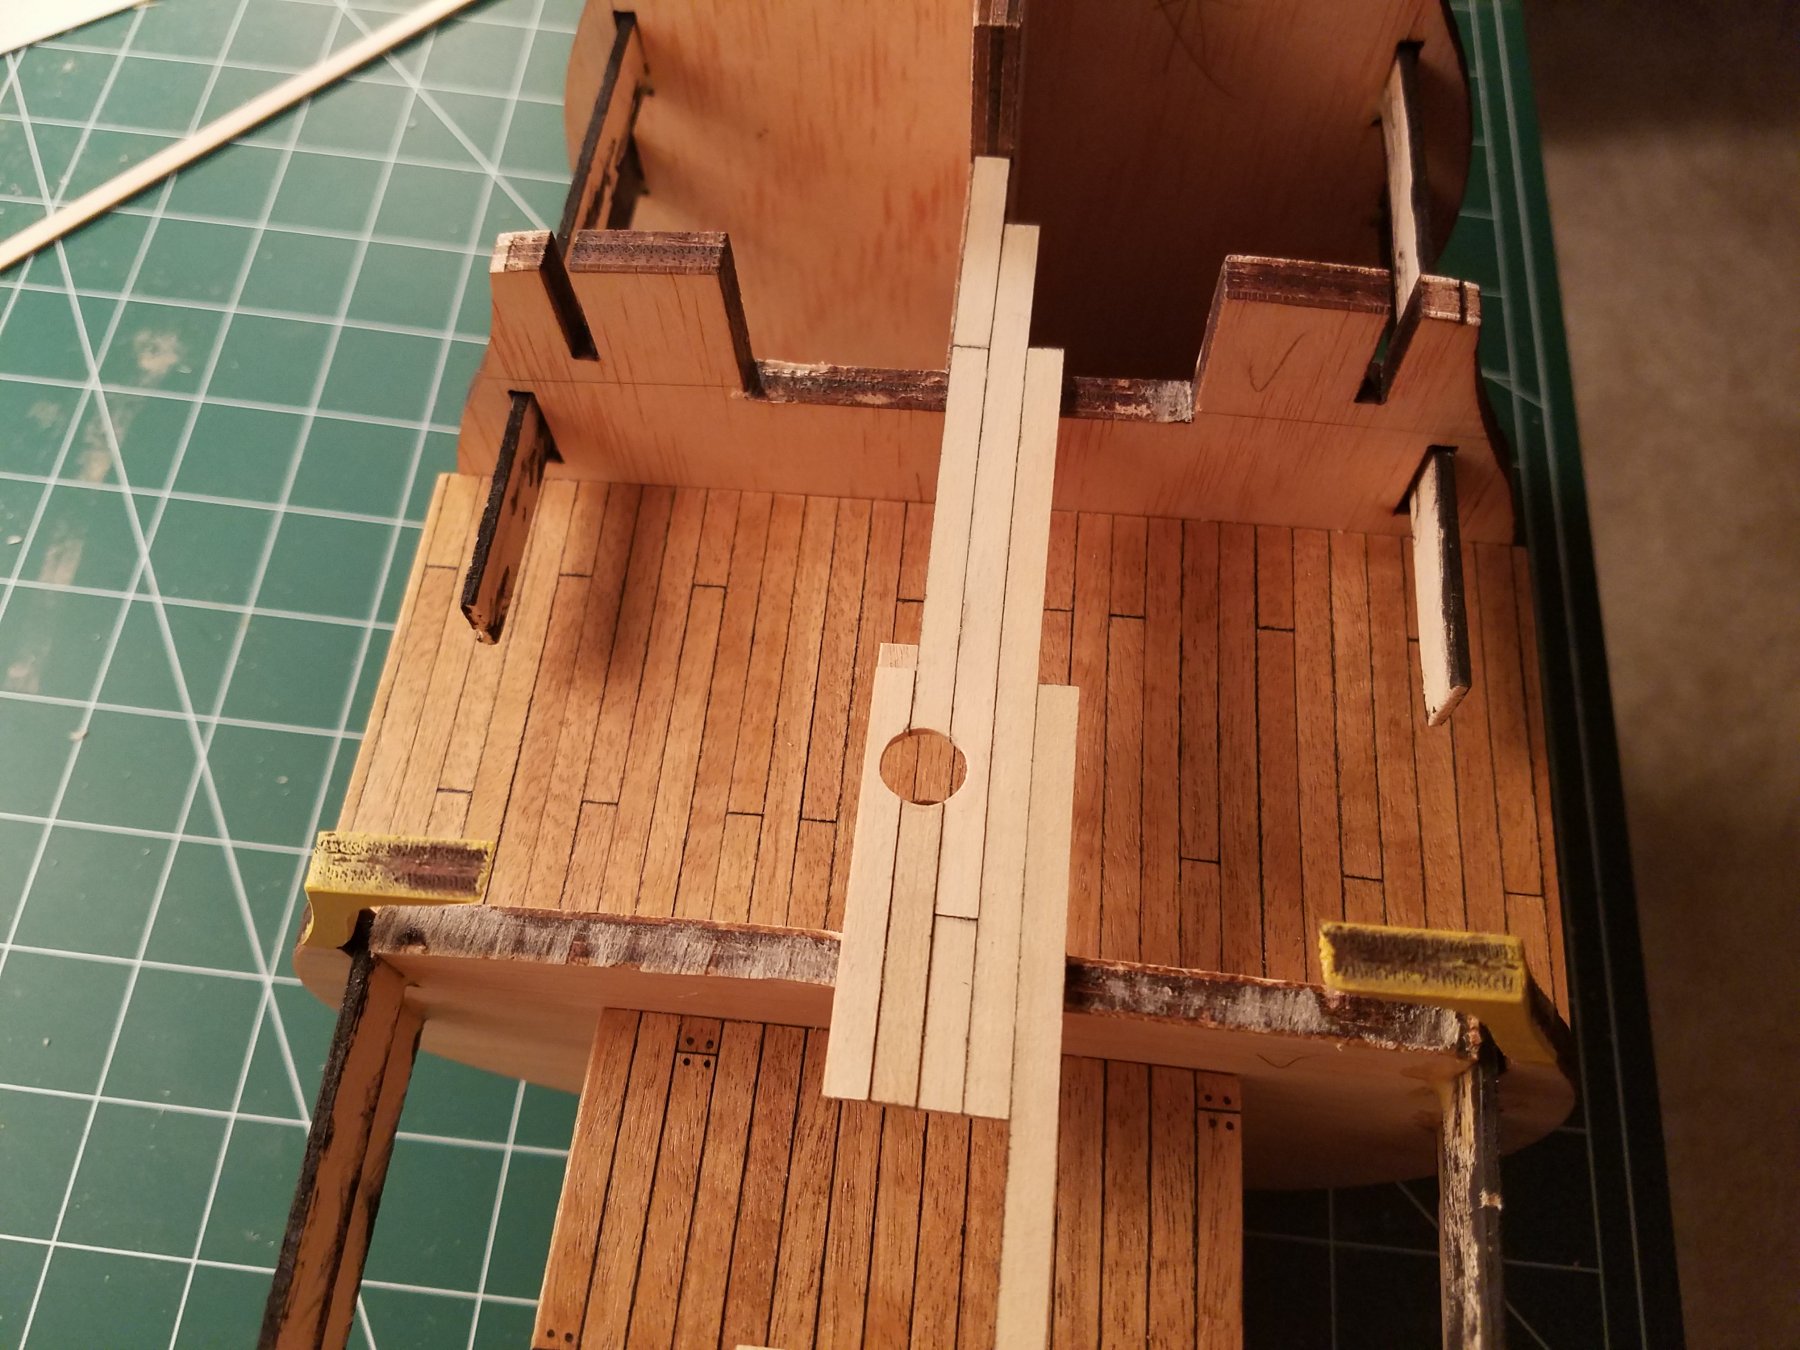
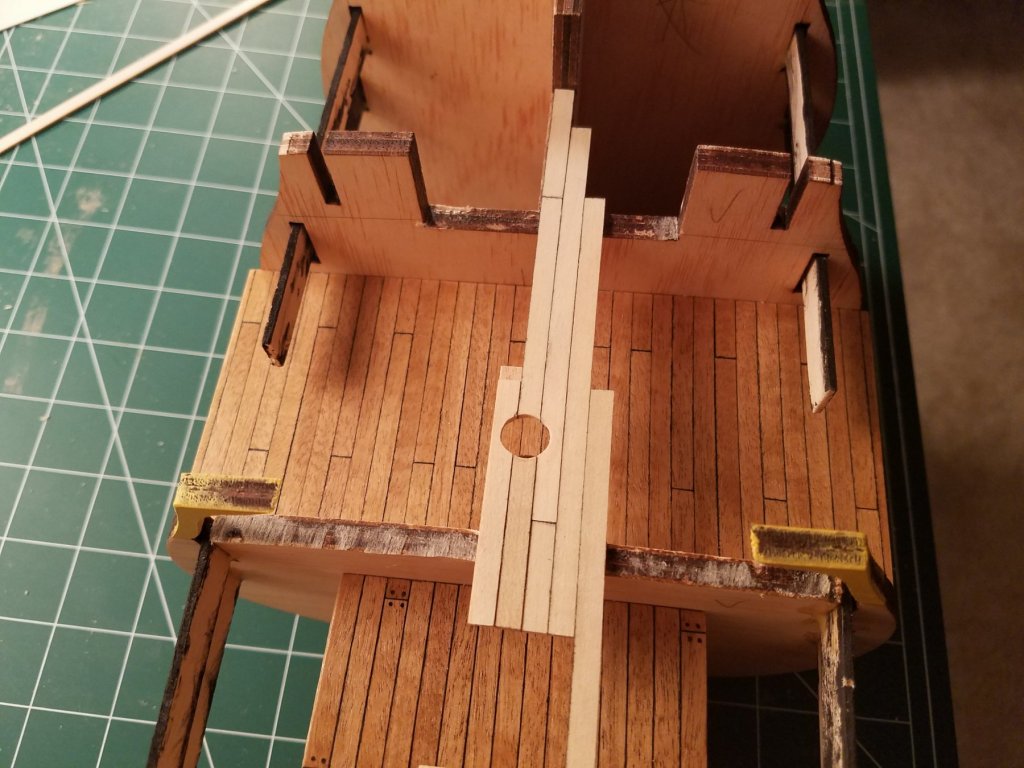
Finally, a few updates! Been super busy with work with little time for Victory. I tried glueing the second deck piece on then I started to plank. I hated how it was looking: Not only that, but the base deck piece was warped and I couldnt seem to straighten it out. Yuck.... So, I made the executive decided to start all the way over again. I ripped up ALL of it, including the warpped base deck piece and removed as much glue as I could. This was super demoralizing for me because that was about a weeks worth of work for me. But I just couldn't live with myself if it looked that bad so it was better to try again. I then measured the height of the base deck piece and the thin deck planks. 2.5mm total. Then, I rummaged around in another kit I got but not built and I actually found 50 strips of very nice 5mm x 2.5mm basswood! It was the correct width and height. So, I started to use the strips really slowly. So i came across where the mast sticks out. Since i didnt have thr pre cut sheet anymore, I utilized the plans and some angle maths to determine the angle and where to place it. So I drilled the mast hole and planked the hole very carefully. The mast is straight as I took care with its measurements. I'm still at it, planking slowly but surely. It will need a small bit of sanding too. But I personnaly like this look better than the thin strips, so I'm having a good time putting this deck together. Thanks Dan for the advice about the black pen. Its working out really well!


-
Thank you guys for the kind words! It really helps me want to do my very best! I'm going to start planking the next deck starting today. Since most all of my waking hours are dedicated to either work or spending time with my son, it will take a bit of time. I'll keep updating as I progress! Jeff
-
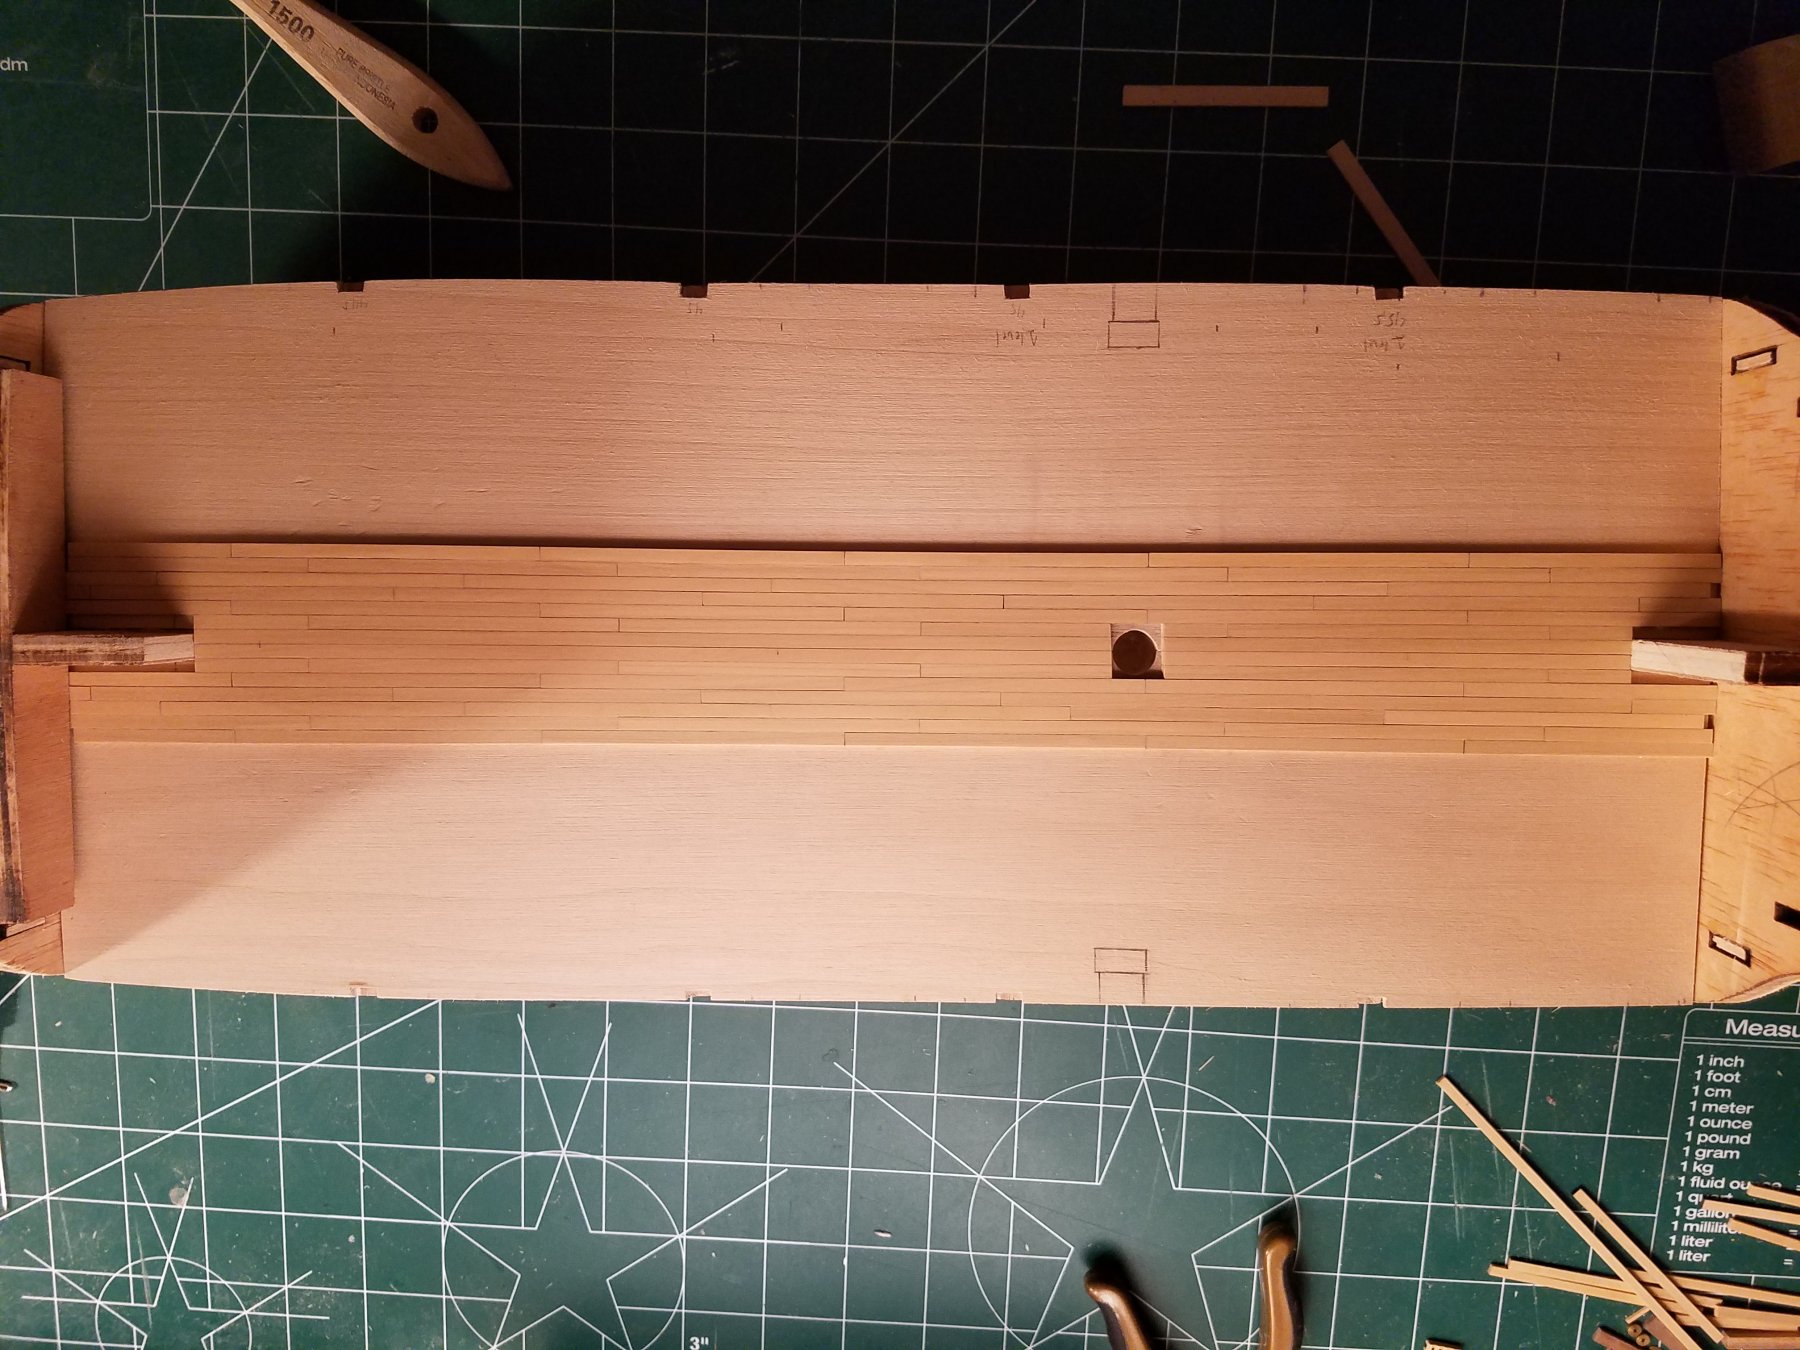
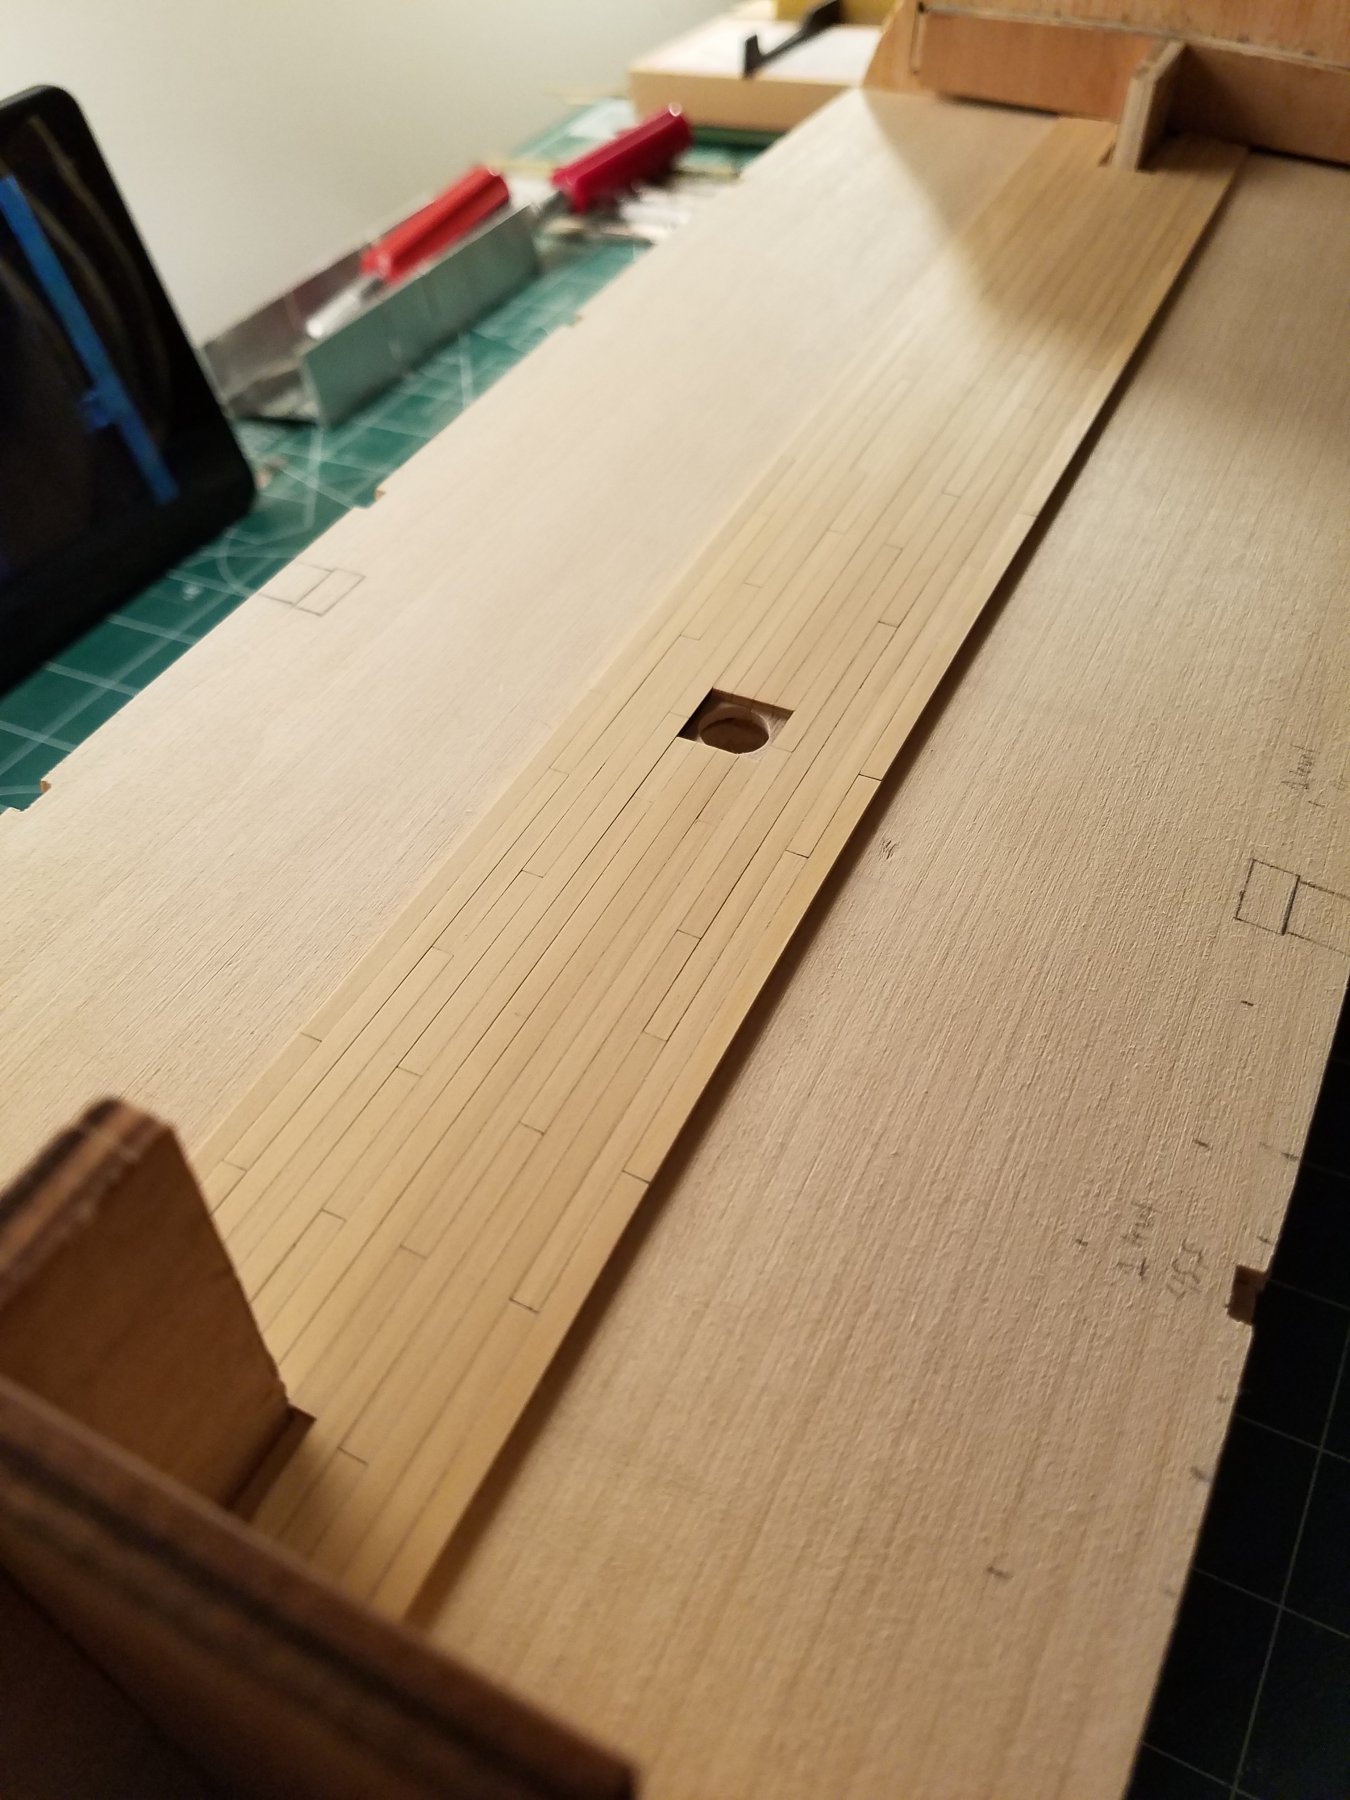
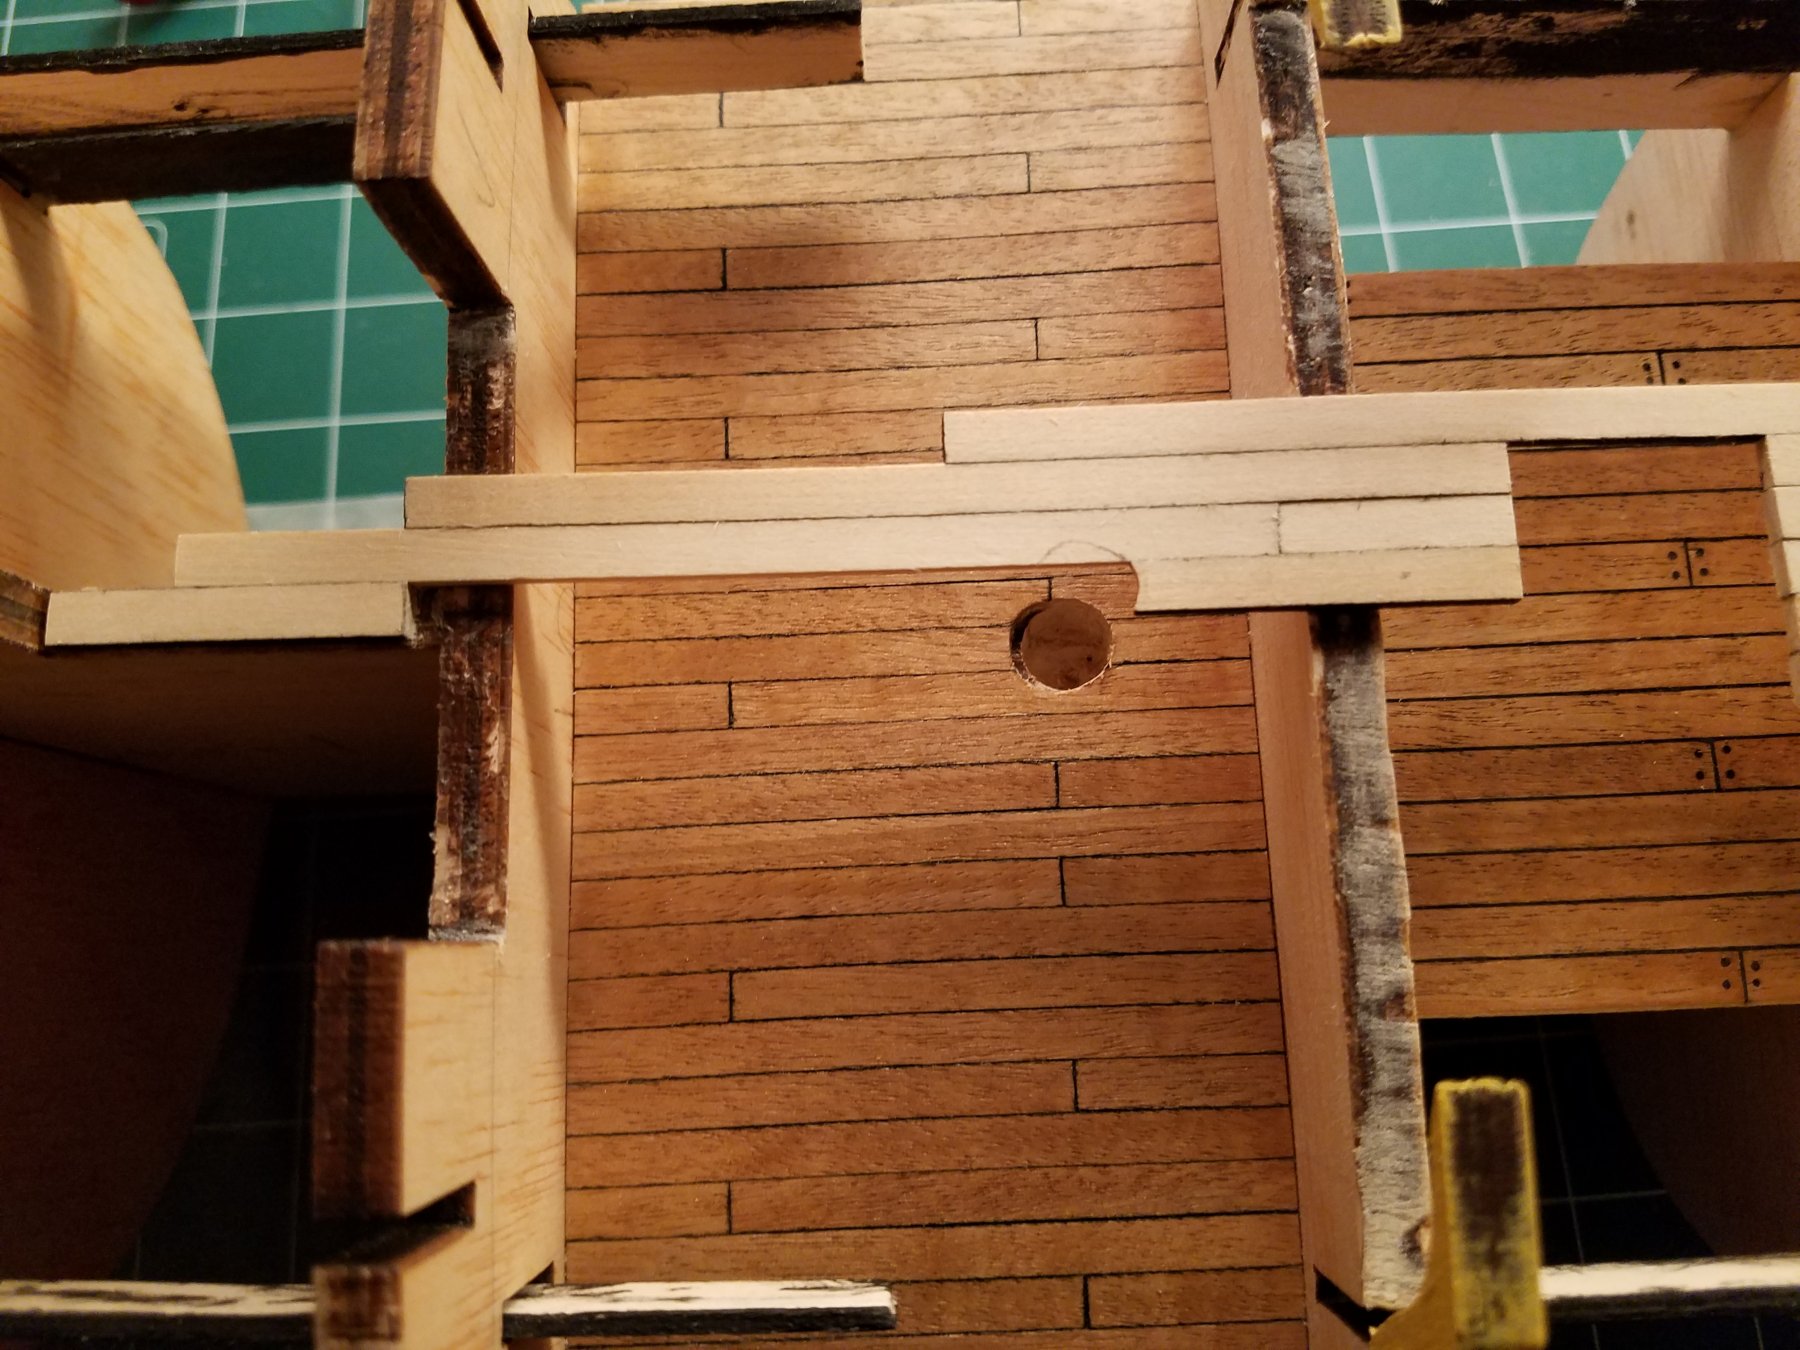
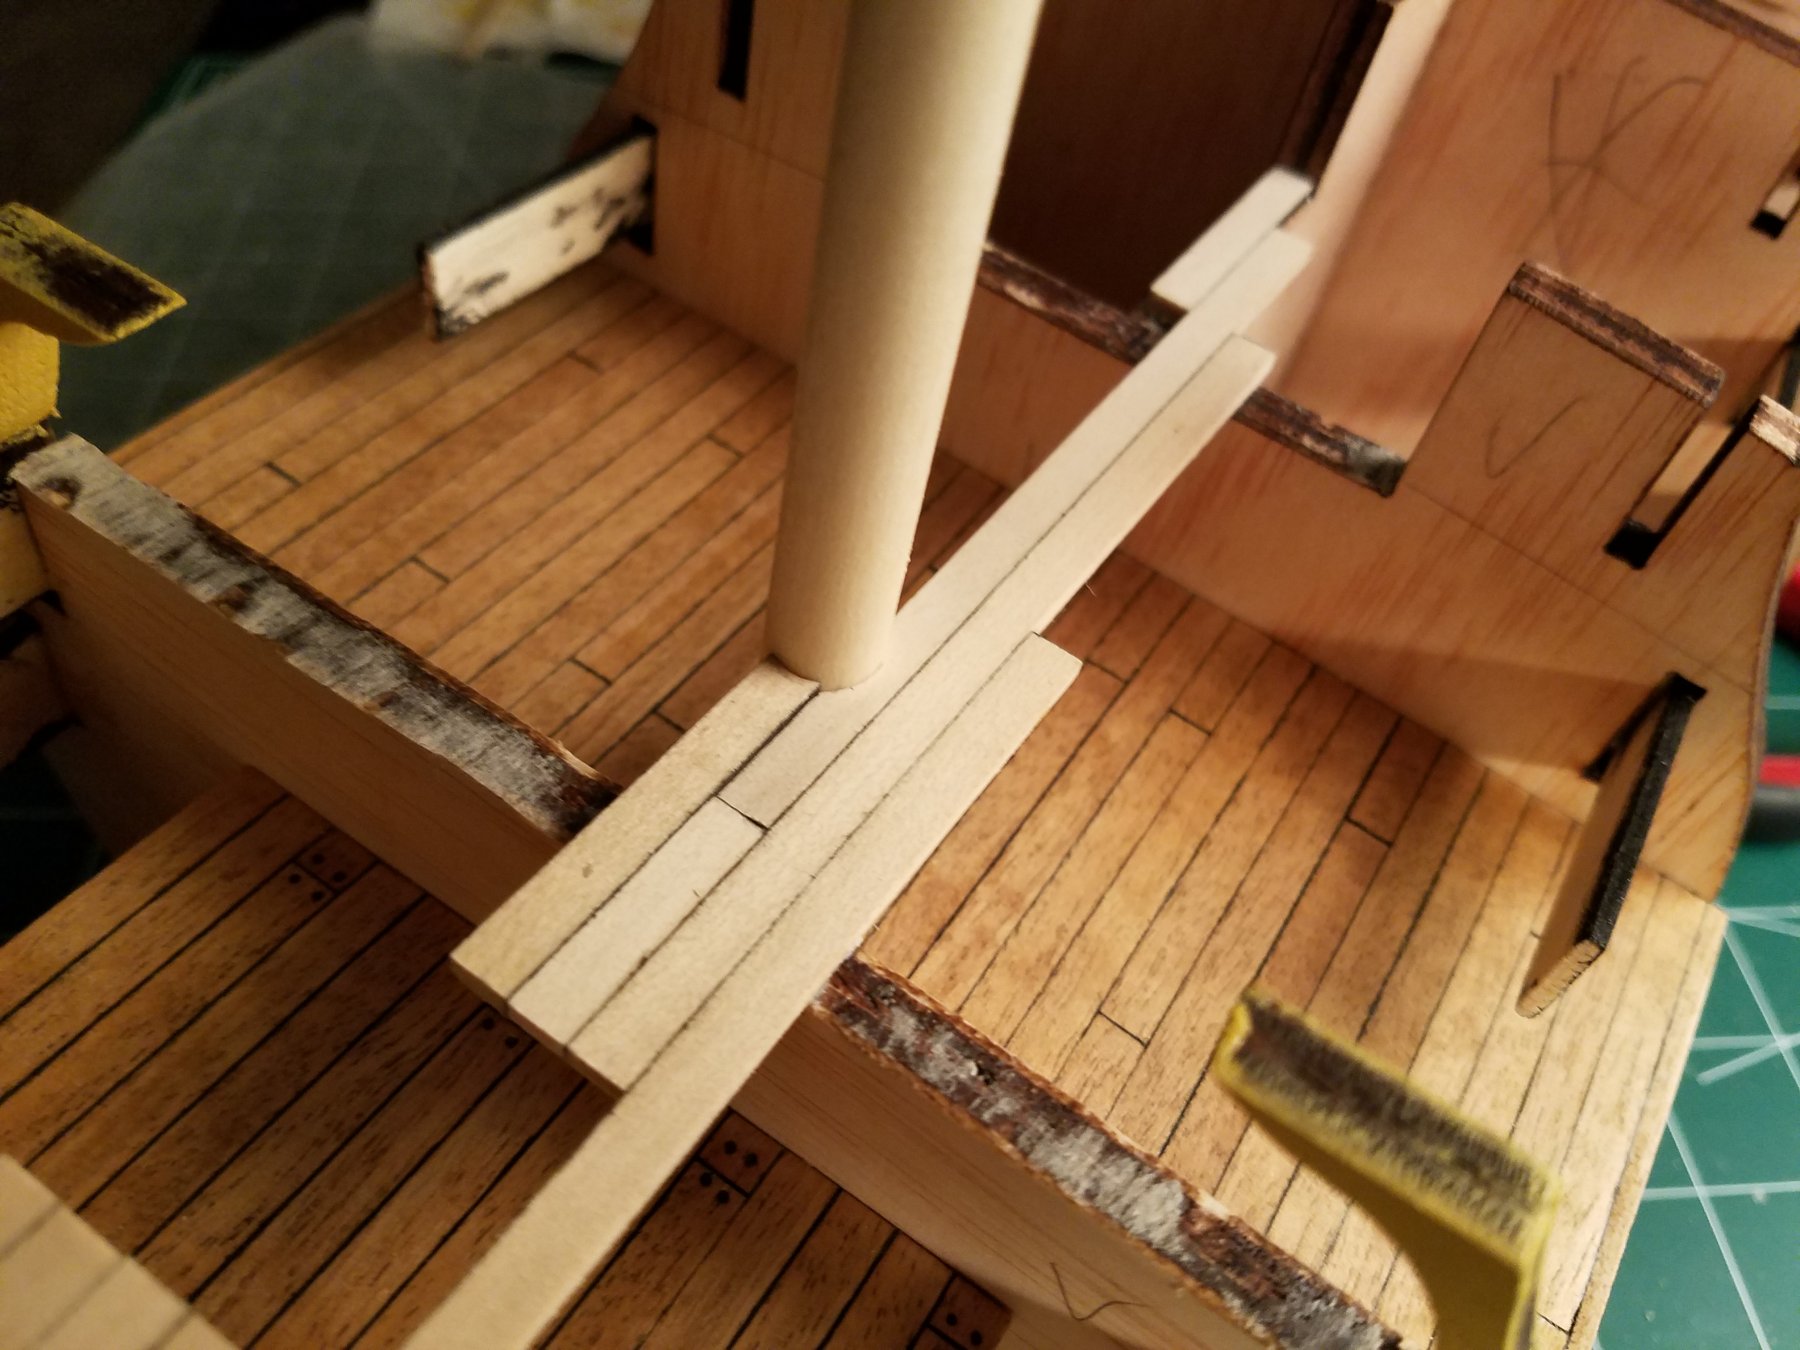
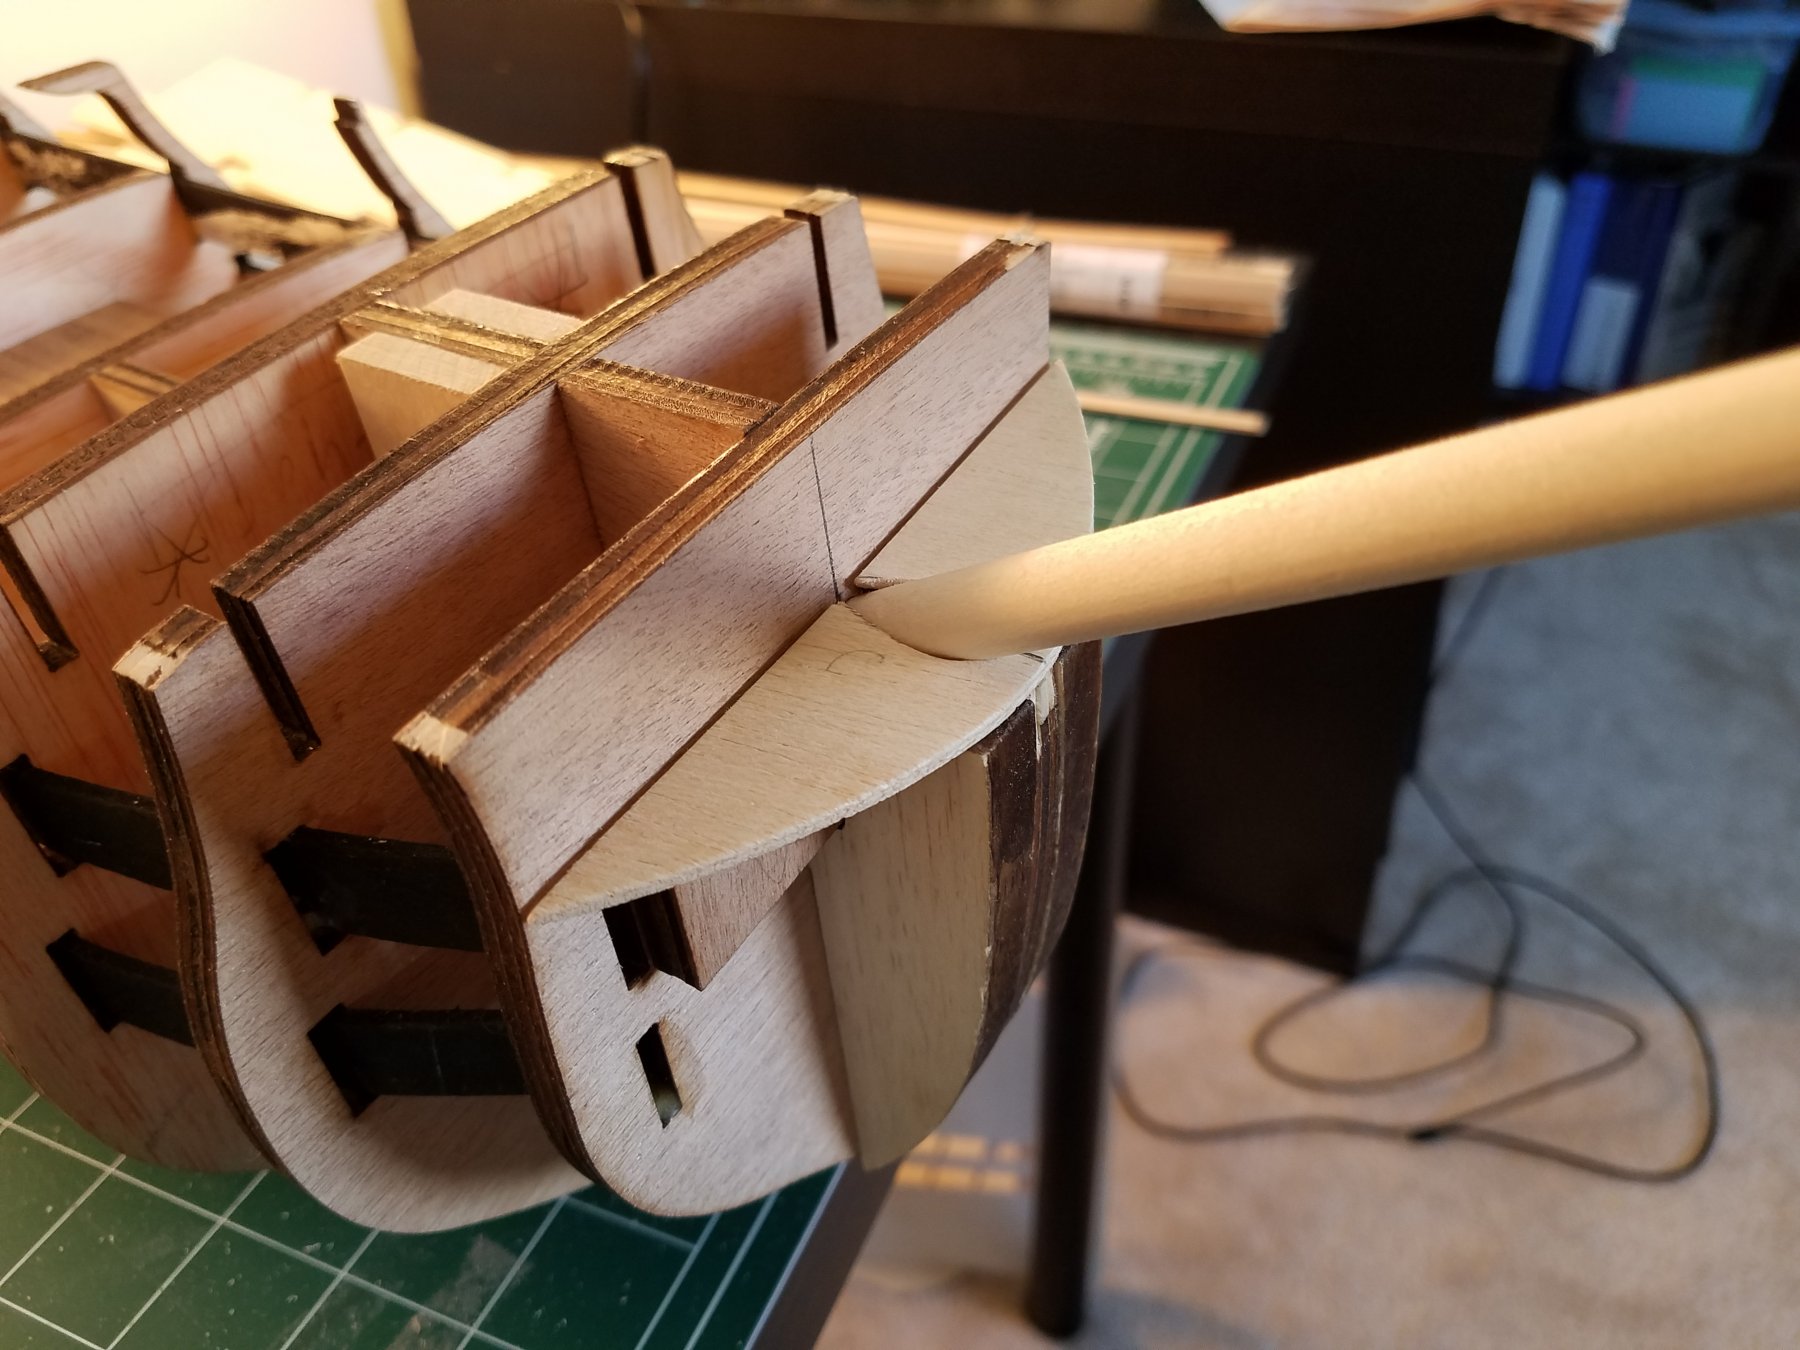
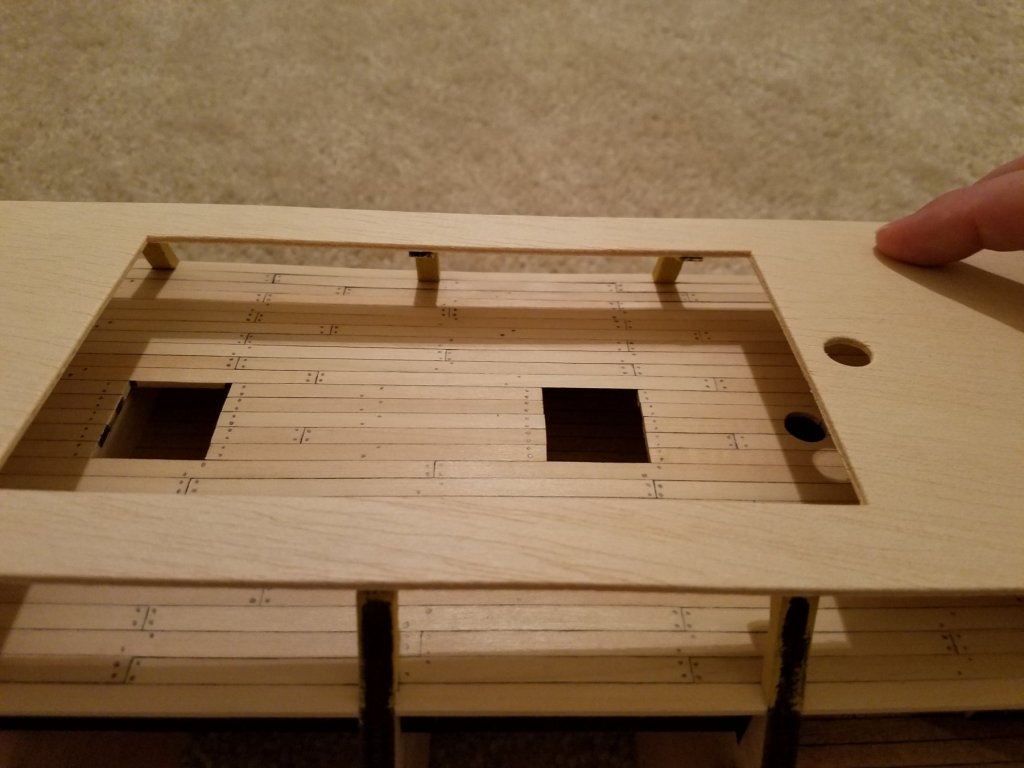
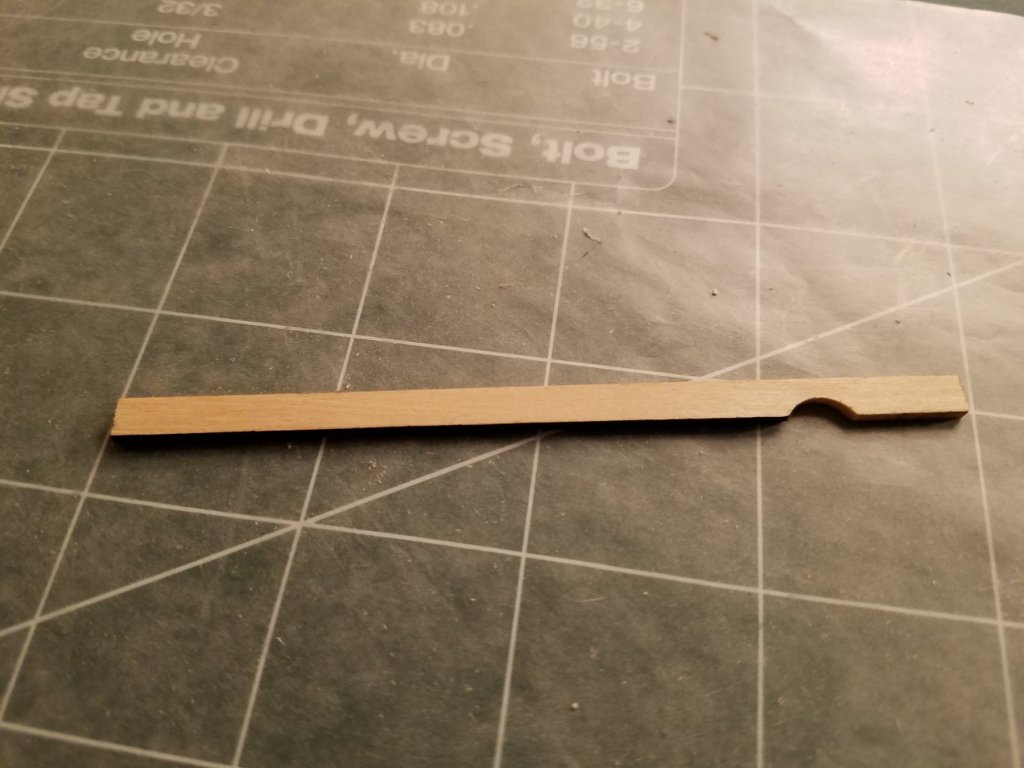
Finally some updates! I finished the lowest deck planks and installed them. None of them are really very visible at all so it was the perfect test bed for me to figure out how I want to produce the next deck of planking. I also saw in the plans that a lot later, you need to drill out the bowsprit. I didnt like the fact that I would have to drill at an angle, through my varnished decking. Yuck! So, I decided to do that now. I do not have a drill press, so I made a small jig to temporarily glue onto the ship to guide my drill to the correct angle for thr bowsprit. I then drilled the hole. Afterwards, i cut out the hole that the bowsprit will pass through in the deck piece and glued it to the ship. I will plank this section later. I test fitted the bowsprit into position and made sure it was straight and at the correct angle when installed later. I decided not to plank this portion right now even though the instructions say to. This is because I still need to sand the hull down in a few steps to get ready to plank the hull, and I didn't want to sand it and risk scratching the front deck planking. Jeff