HOLIDAY DONATION DRIVE - SUPPORT MSW - DO YOUR PART TO KEEP THIS GREAT FORUM GOING! (Only 69 donations so far out of 49,000 members - Can we at least get 100? C'mon guys!)
×

Zarkon
-
Posts
295 -
Joined
-
Last visited
Content Type
Profiles
Forums
Gallery
Events
Everything posted by Zarkon
-
Very much appreciated Harley! It is much better than even a few months ago. He used to have to get blood draws every week. Now its every month. Also, he has been on steroids since August too. The side effects of that are very hard to manage in a 3 year old. But the good news is, he is on a much lower dosage now. Thanks for the kind words! Jeff
-
Hey all, I have had a very tough year since August. My son was diagnosed with chronic Auto Immune Hepititus. He spent 5 days at the hospital with acute liver failure. My wife and I were terrified, and we still are trying to keep up with our new "Normal". He was 3.5 when admitted. Of course, my ship projects halted. I put them away because there wasn't anytime to work on them. After months of taking care of him all the time, he is getting better! I then started a smaller ship, the Model Shipways 26ft Longboat. I am almost done with it, and so I am now looking for my next ship model. I have enjoyed the kit and i really like how well the instructions are written! I need some help to choose the next kit. I need something bigger because, for me, the longboat was a little too small. The metal bits were giving me trouble! Haha! And something that isnt very difficult. I was thinking of a 1 or 2 mast ship. Since I don't have too much time because I am busy with my son, something on the easier side that helps build modeling skills would be best! The ships I already have are too big and complex for me right now. I need a smaller project. Any suggestions would be wonderful!! Thanks!!! Jeff
-
Hi all, I have some bad news. The reason I have not been able to work on the ship is because my son got worse and was admitted to the hospital. He was diagnosed with a rare chronic disease and the drs were worried he might have needed a liver transplant. This is a parent's worst nightmare. I have a new found respect for all those pediatric nurses and drs. They were all SUPERIOR. He just came home this week and we feel super lucky that he getting better. He did not need to get a liver transplant. I hope to get going soon on the ship. Jeff
-
Looks excellent!! Keep up the wonderful work!! Jeff
-
Thank you both for the advice and kind words. I will continue forward and finish this hull and sand and use filler. Since its just basswood, my local arts supply store carries bassword wood strips at the correct dimenions. I will get some this weekend. Unfortunetly, I have had to stay home from work this week because my 3 year old son got strep. Poor guy. He is just starting to feel better thank goodness. Thanks again!! Jeff
-
I have been following the guides on this site on how to plank a hull, and I have to say, they are very good guides, but I am not happy at all with MY skills at planking: I am getting fruatrated because I also do not have enough planks to finish it. I feel I need more practice with it. I haven't really broken any planks bending them. It feels like AL just gave me enough to plank the way they want you to. I know it will be painted, but I would know how badly planked it was. SO I need some advice. I see where my errors are, but would require ripping up most, if not all the planks. Should I just "get on with it" and get more wood and finish it, Or Should I rip it up, order more wood, and pay more attention and do it again (learning more in the process) Thanks! Jeff

-
Wow! Perfect! I am in awe everytime I look at your log. You are an inspiration to all of us!! Question though, and my appologies if you have posted this earlier, how do you cut out the joints and other pieces? Do you use specific tools or hand tools? Thanks!!!! Jeff
-
I just want to thank your for all the help you have provided me throughout my posts on my HMS Victory build. Your help has made me a better builder and I just wanted to say thank you. I have tranfered your advice to the easier AL Lafayette Hermione kit. Which I am currently building. (Victory is on hold)
Wishing you the best, and thank you!
Jeff
-
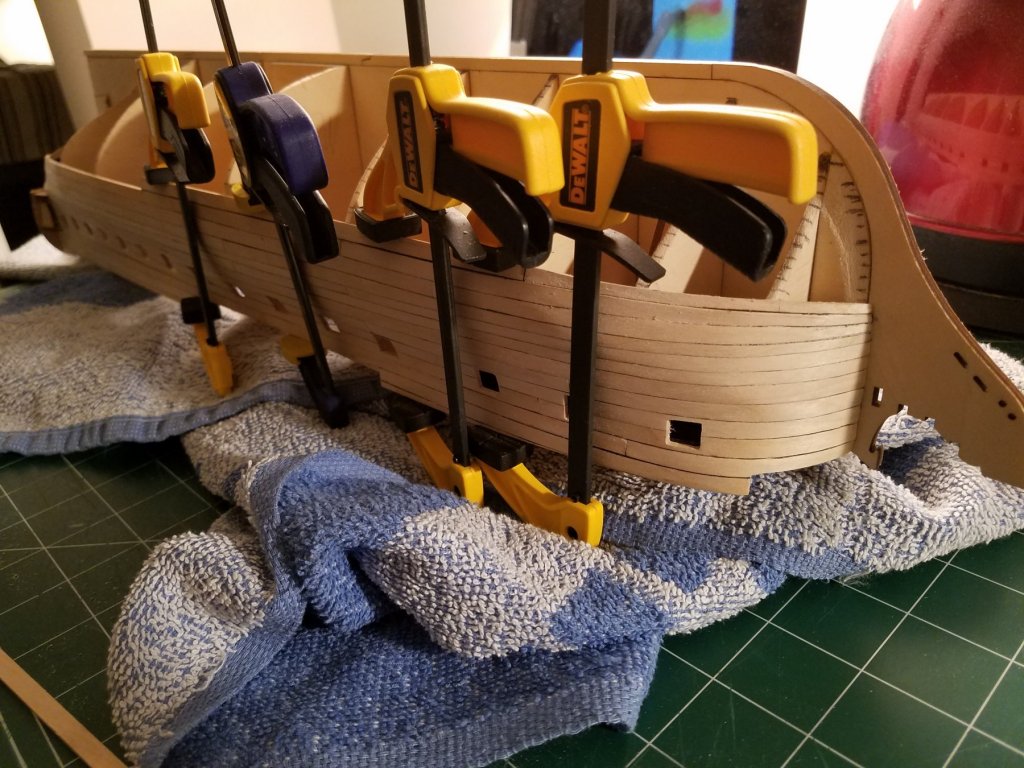
I'm a little late to the party, but I will grab a seat and follow along! Your planking is coming along very well! Looks great! How do you like using those plank clamps? It looks like, through your pictures, that they work well. Your deck planking looks great too! Dan gave me the same advice about using the pen, and after varnishing, the pen lines lool great! Keep up the great work! Jeff
-
Thank you! I have been sick as of late, and my wife's family is staying for the week so not much progress this past week. But I will have much more time starting on Monday when everyone leaves our house. I'm looking forward to new updates from your build! Jeff
-
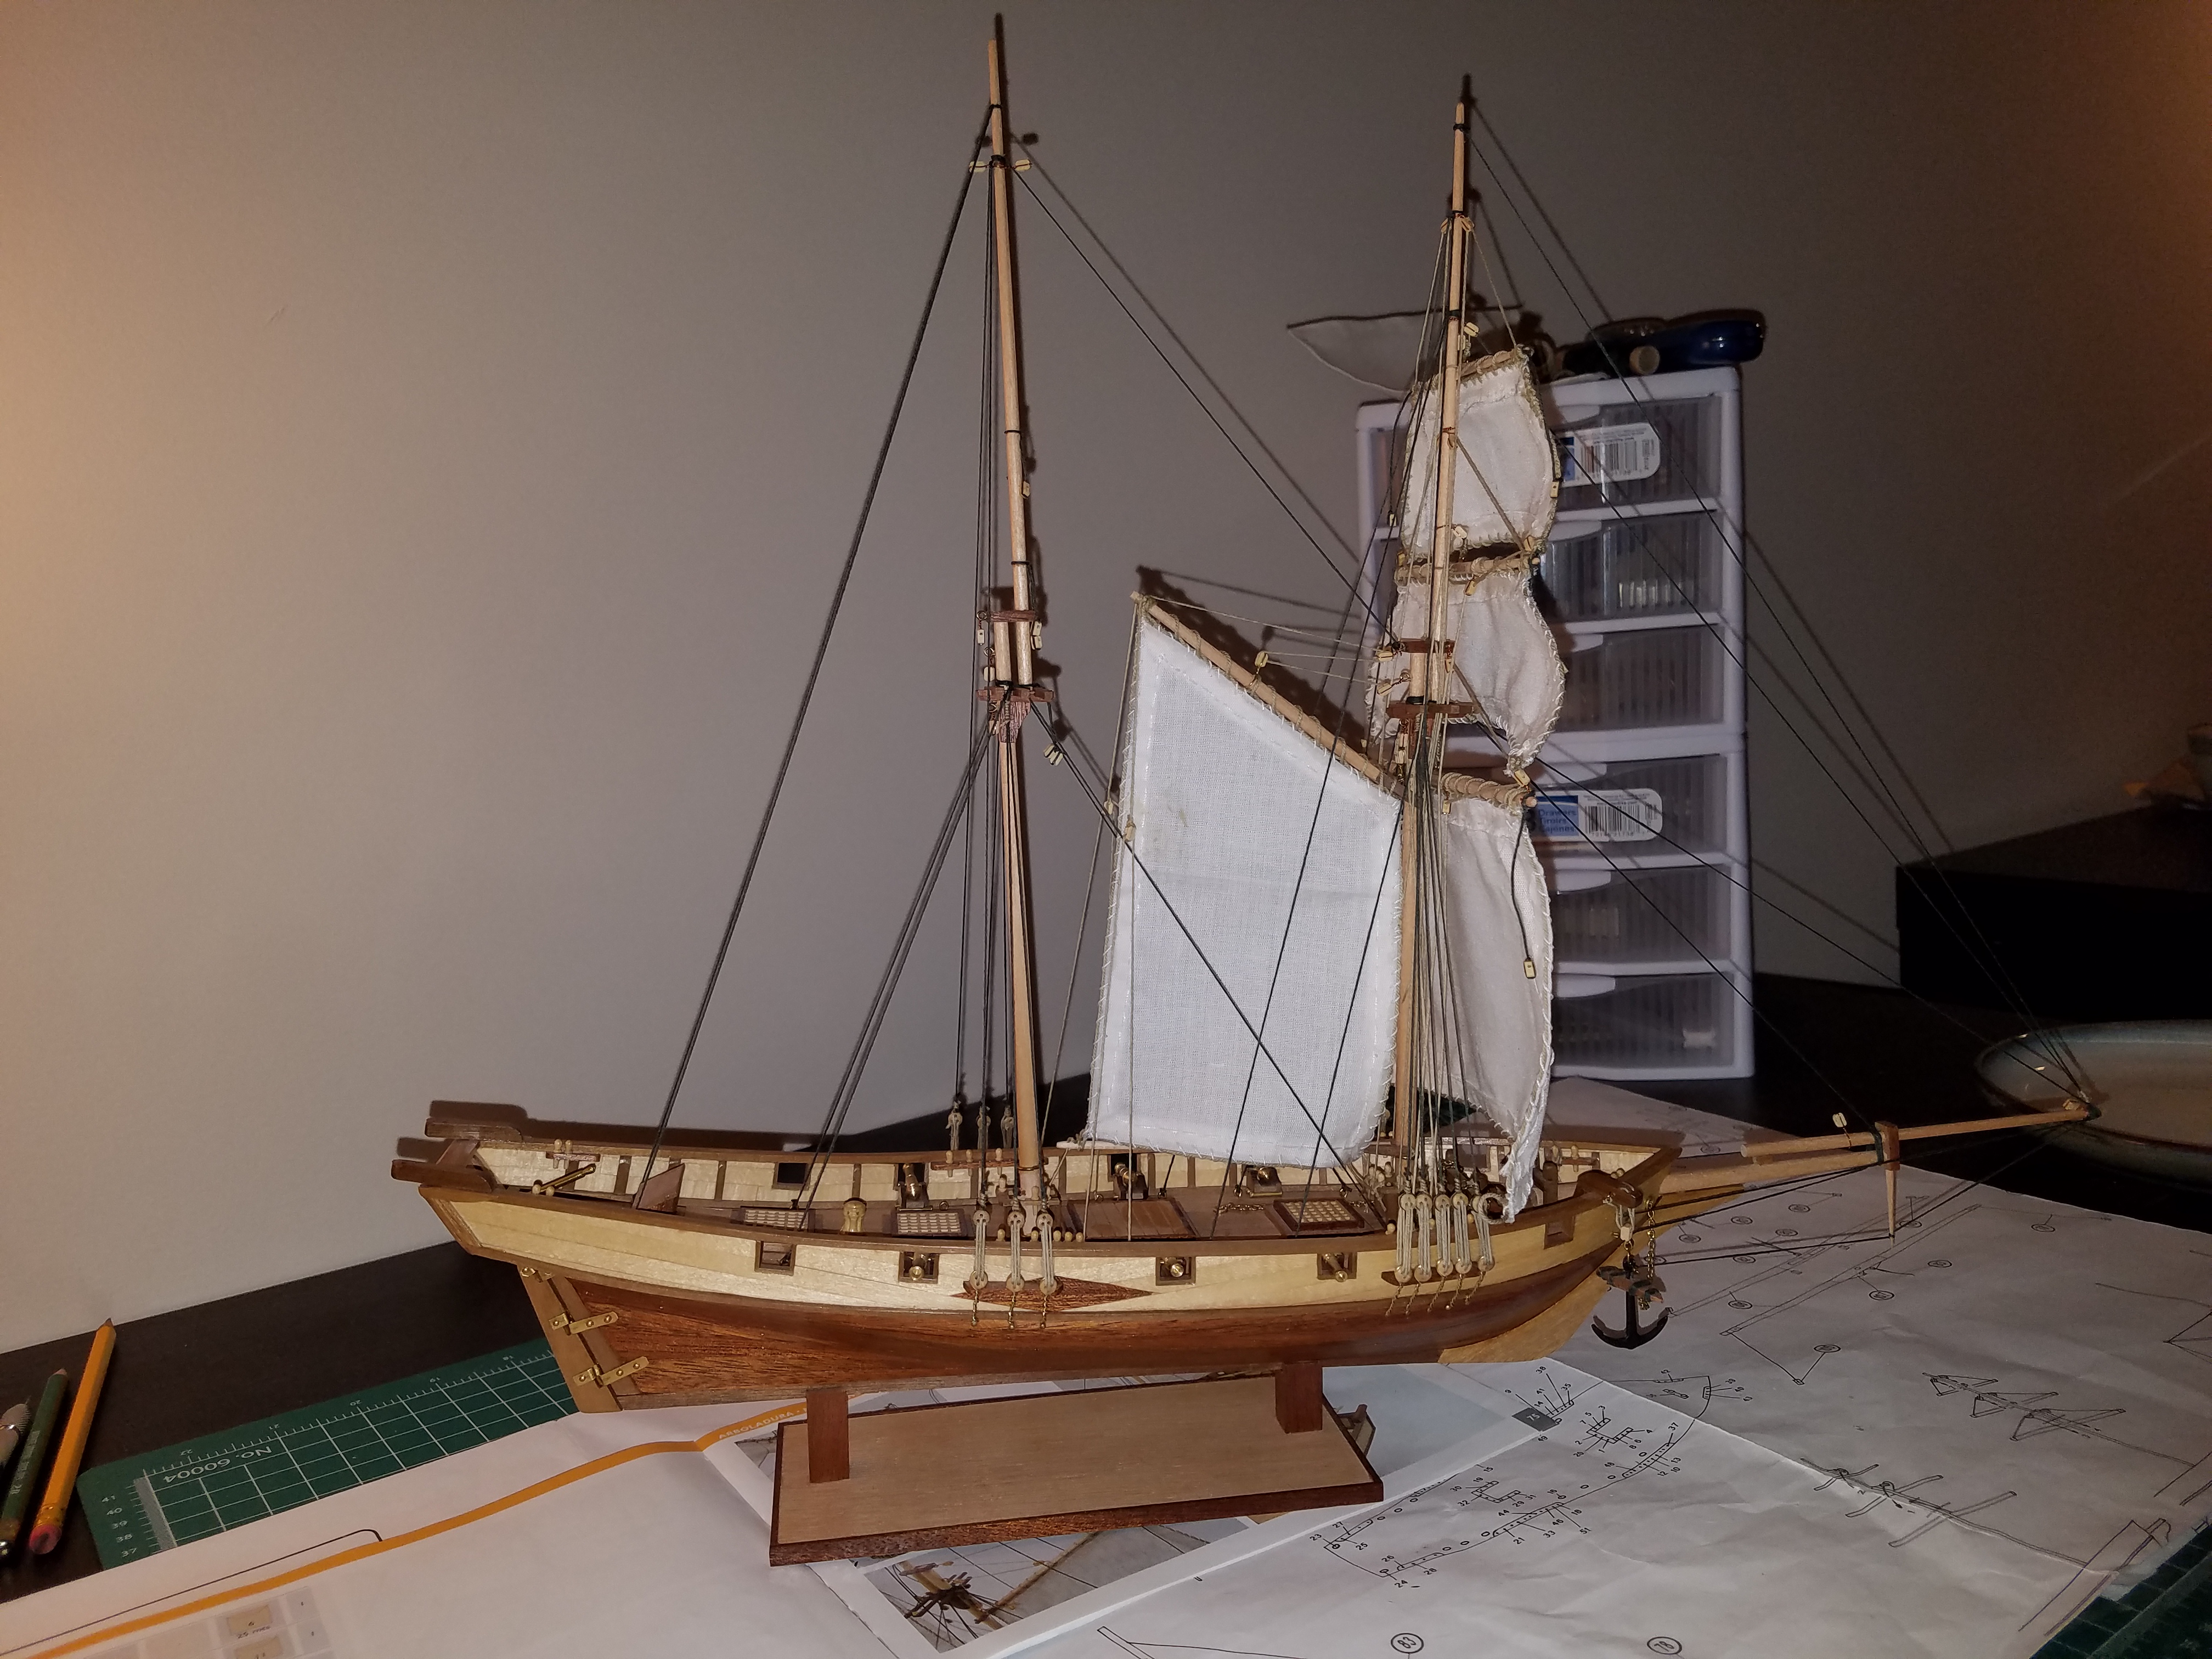
Wow! Your Hermione looks great! Very impressive! I really like how you have painted it. Jeff
-
Thank you Dilbert! I will do just that! What happened was that I accidentally sanded the wrond edge of that plank so it was a lot thinner than it should be. I learned my lesson there. Christos, Thank you for the advice. Since starting the planking at the keel, I have stopped sanding, and I won't sand anymore until the hull is fully planked. Haha I learned my lesson there too! Thanks you guys for all your help! Jeff
-
Thank you Messis! I will have to pick up some and try it out! For this build, I need some help. I sanded too much off a plank from the stern plank strip as shown below: I am trying to plank the next row but there is no way to make the curve. Any suggestions? Or will I have to take it off and make the plank again? Thanks! Jeff

-
I was able to get a small sanding attachment for my dermal tool. It worked very well! Now after the glue dries, I will need to sand it and fill in the cracks with some sawdust. Thanks again for the advice!! It was very helpful! Onto my build, I am still planking away and as soon as I have more completed, I will give another update. Thanks!! Jeff

-
Graham and Christos, Thank you very much for your replies! I will look at some drum sander kits and other rotating sanding tools. As both of you say, this too is very important; so I will be buying one soon and will let you know how it turns out! Its actually fun, looking at tools haha!! Its been hard, hand sanding those edges to the stem, so this should help IMMENSELY!!! Thanks again!! Jeff
-
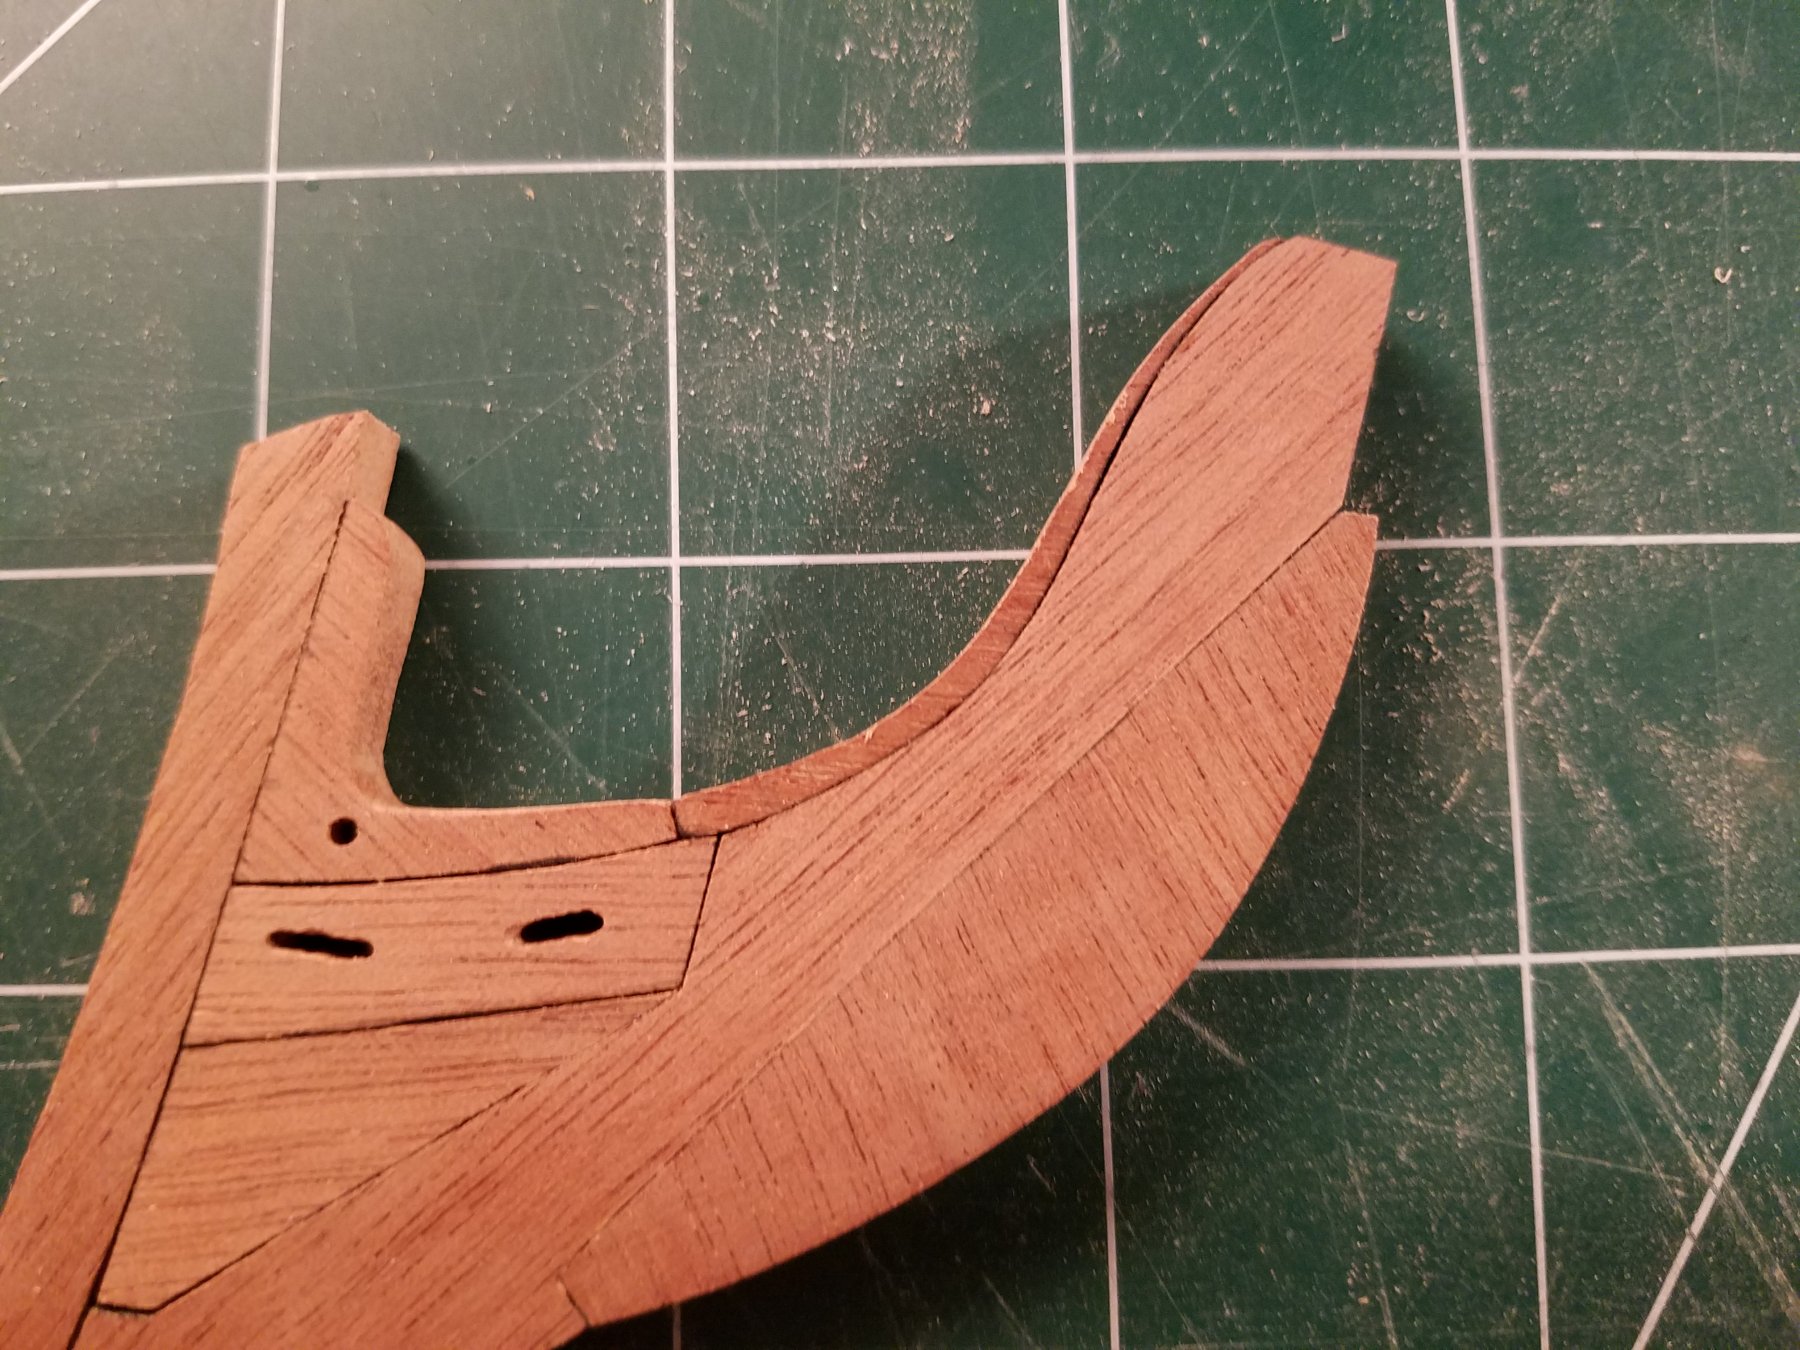
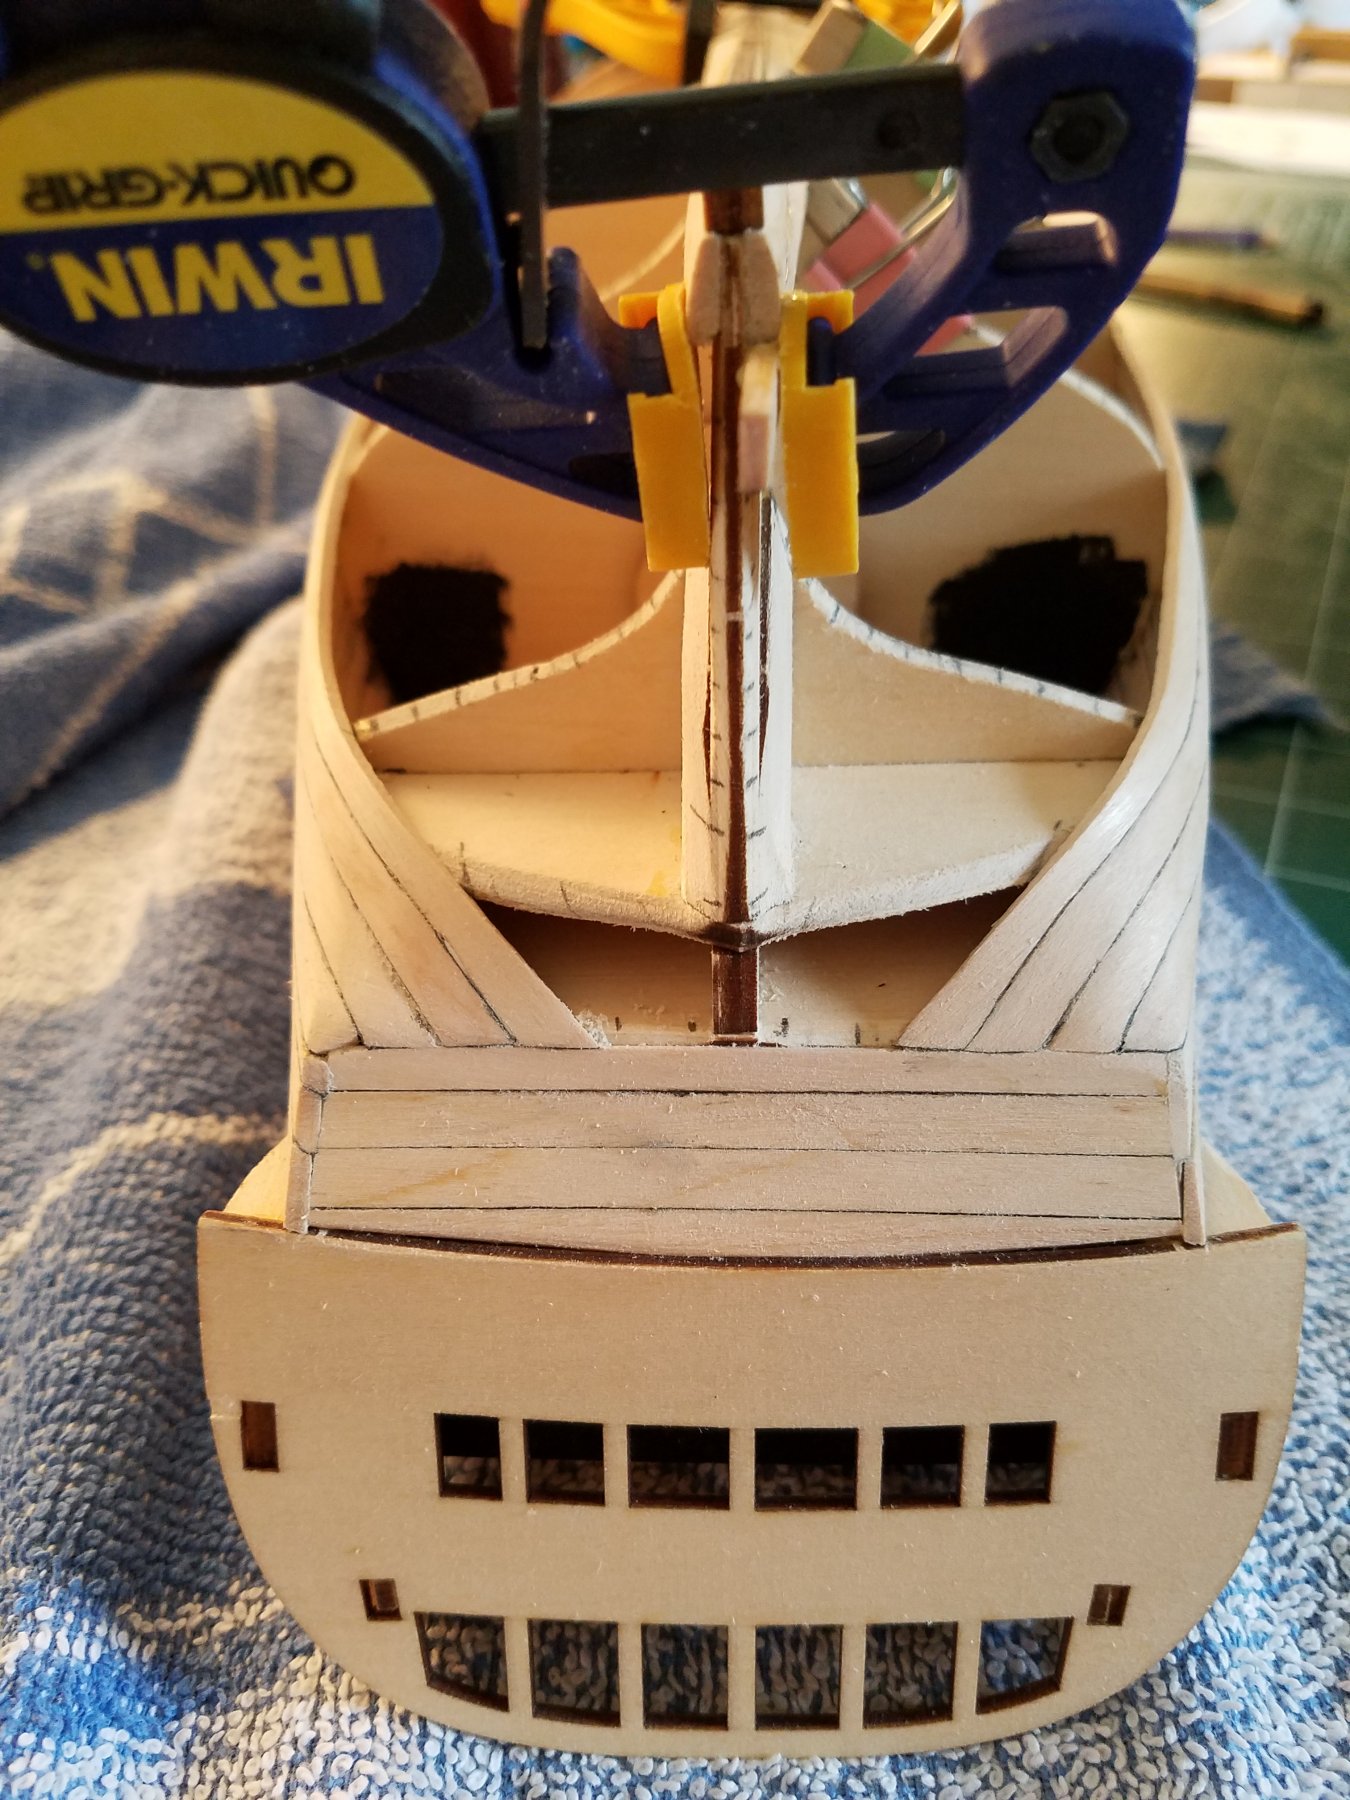
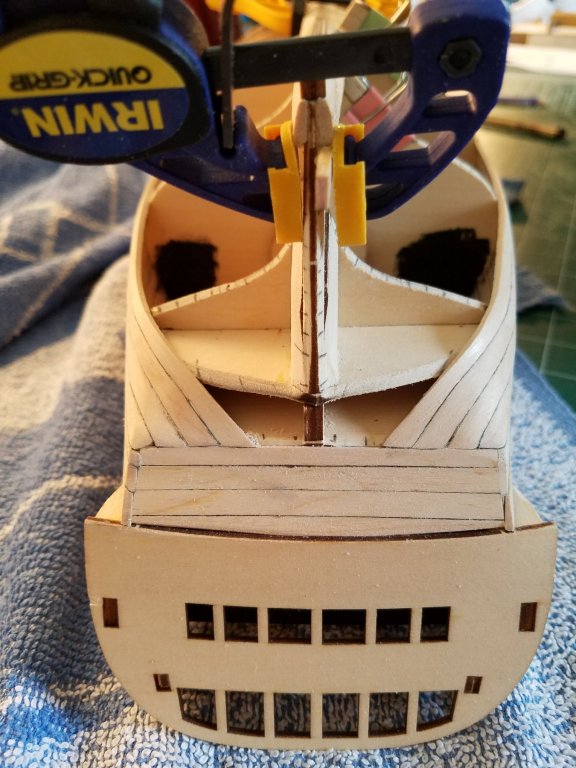
Hey all, I do have a question. I took another shot at creating the stem on my hms victory. This is more of a general thing than model specific. All I have are small hand tools and a scroll saw. I'm trying to make the last piece but not sure the best way to take off the material. I have quite a bit to take off for this piece to fit. But I don't want to hand saw/sand all that wood away. (I also need to fill in the small cracks since I hand made all the pieces). What would be good way to remove a lot of material from this last piece? Or would investing in a sanding power tool be the best option to build these pieces better? Thanks for any advice!! Jeff
-
Thank you for the like and comment! Yes! I have been trying to make it a point to plank at lease one piece per day. Each row requires 2 pieces per side. Plus, Ive gotten a little quicker bending and beveling the strips. Jeff
-
Hey all, Here is an update. I am just continuing to plank the hull and I am on a good pace. I am glad that I will be using wood filler and painting it because it sure will need the. Filler after I'm done planking!! I have started to plank from the keel up and Its going pretty well. Im just a little worried about if the curves are correct when the last set of planks are laid. So after this section, I will remeasure the plank widths. Thanks for reading and the likes and comments!! Jeff
-
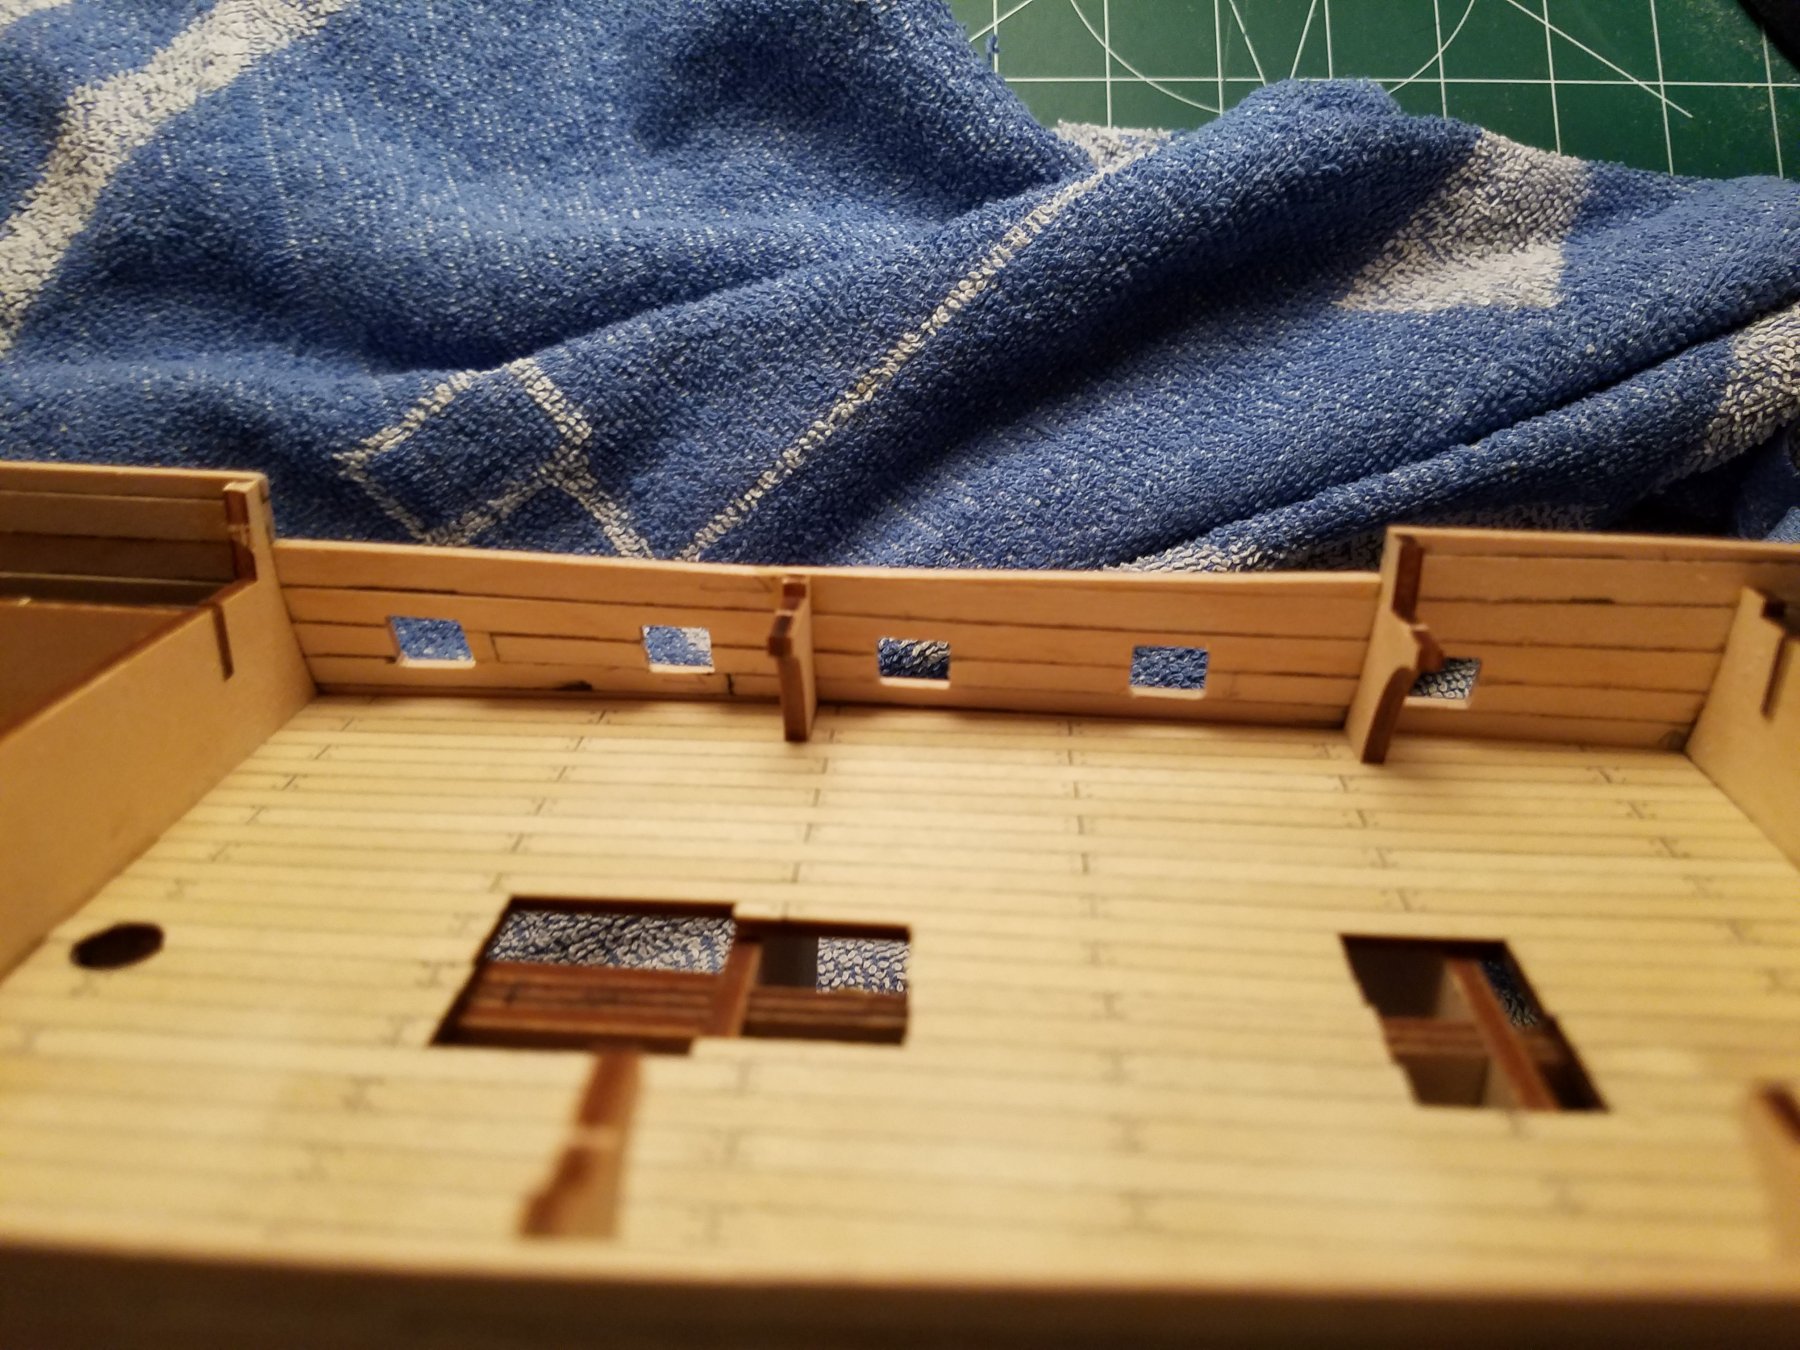
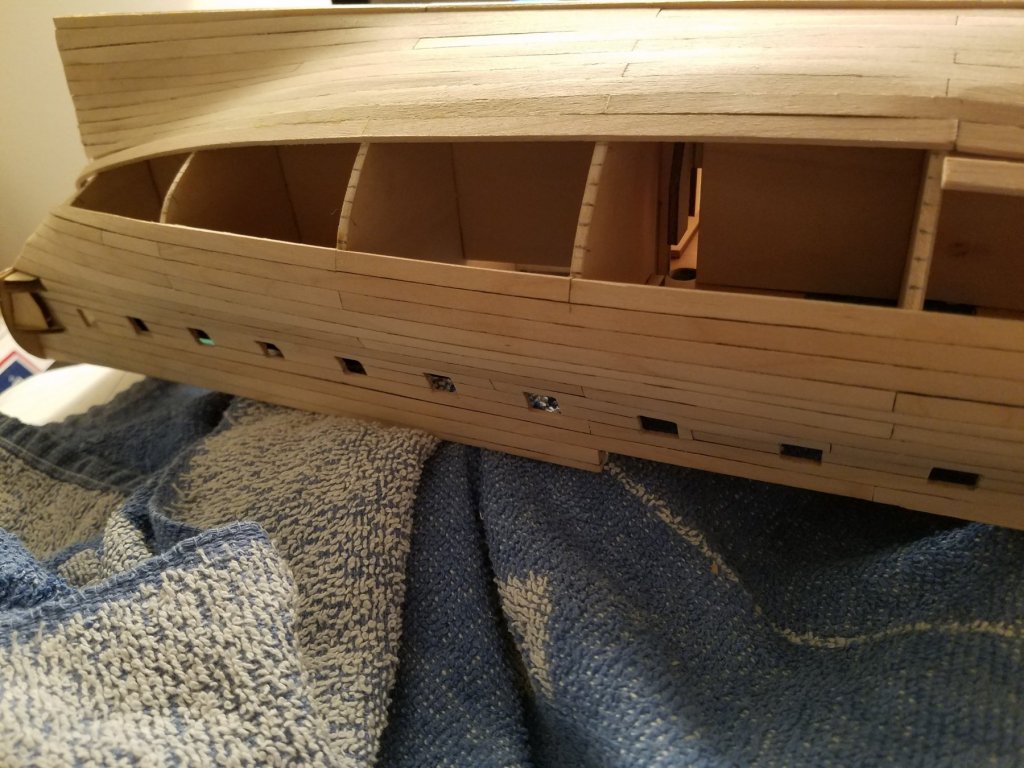
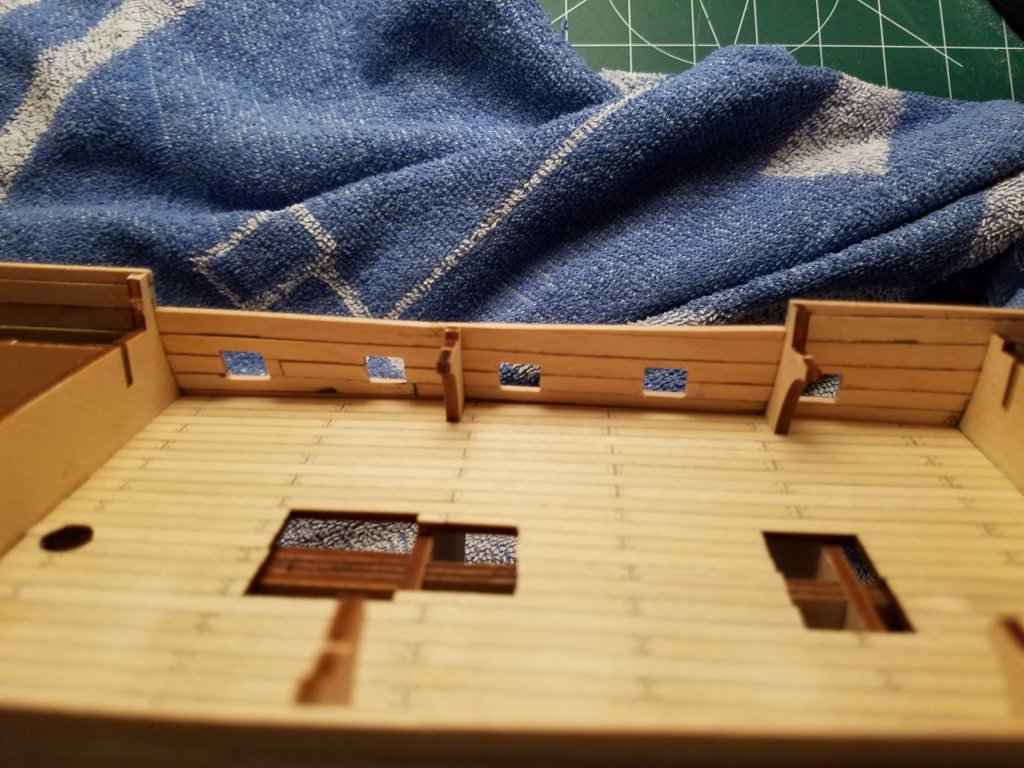
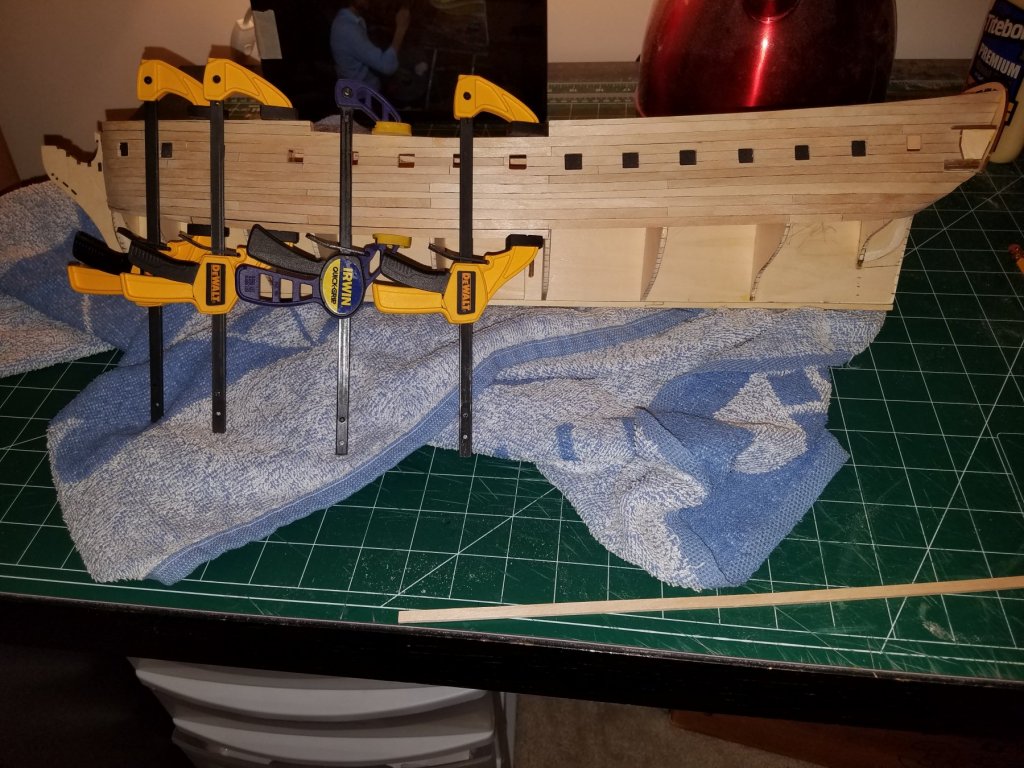
Dilbert, Yes. I have decided to paint the hull and the model like the kit says to for a few reasons: 1 ) The quality of the basswood provided isnt high enough to display. A.L did not provide a second hull planking and assumes the builder will paint it. I think thats why they didnt include a nice hull finishing planking. (Plus lower cost for them) 2) Since this is my first forray into trying to plank the right way with no planks ending in a point, etc, I know I will have mistakes and will learn from it. So being able to fill with filler and paint will go a long way in hiding those mistakes. 3) I like the paint scheme and I want to try my hand at painting anyway. Reasons 1 and 2 are the main ones of why I will paint it. If I wasn't going to paint, I would HIGHLY recommend either replacing the supplied basswod strips with higher quality wood (the type would be up to you) or buy a thin second planking wood strips and make sure to sand the frames/keel appropriately so to make room for the second planks. On that note, they want you to paint the inside hull planking where the guns will be. I have quite a bit of glue on the inside of the planks and its not even: So, I am going to cover both inside planks with a thin, 0.5mm planks, then sand and paint it to make it more even. Jeff
-
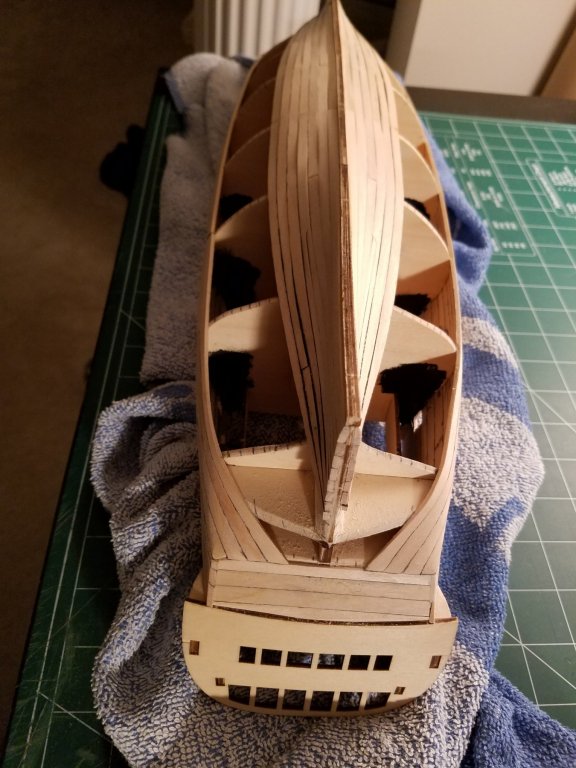
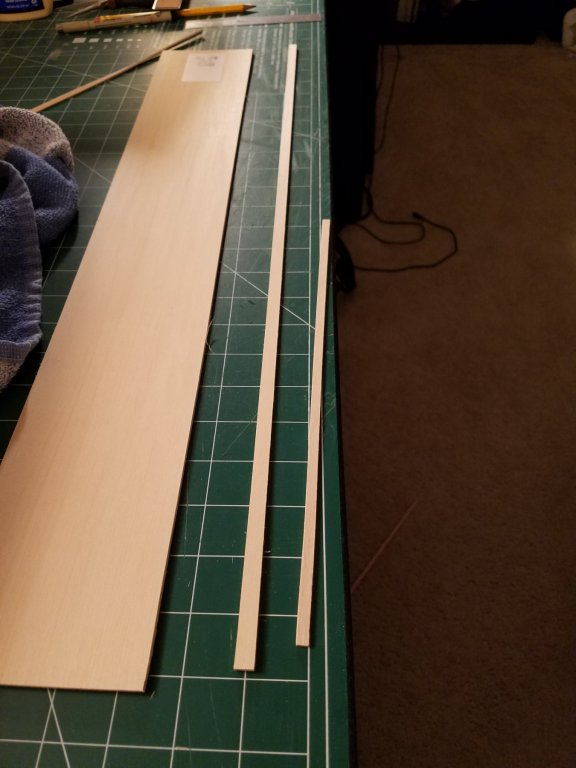
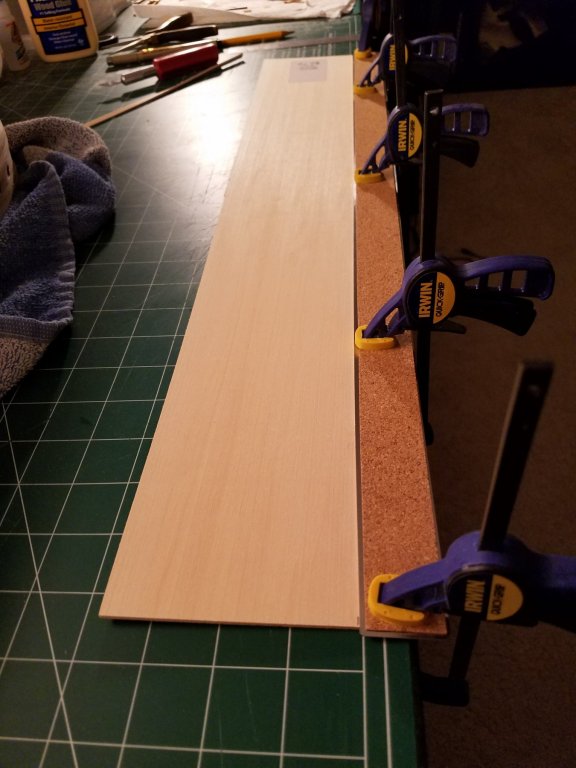
Thanks everyone for the likes! I finally finished my first section of planking! I have learned quite a bit doing this section, so the next sections of planks should turn out even better. I have now started to plank the section closest to the keel. After reading a lot of guides, I realized that the garbord plank needs to be wider than the rest because of the curvature it needs to be at the stern of the ship. Since the kit didn't come with any wider planks, I had to go to the local hobby shop and get some basswood sheets. I measured the width I needed and was able to cut it straight and correct with nothing more than a straight edge and a knife! That felt good to know I was able to make a straight plank by hand! So I cut 2 out and started to plank the second section. I have not been following the kit instructions about planking. As of right now, doing this planking makes me want to plank my HMS Victory model right afterwards just for the experience! Haha! Thanks! Jeff


-
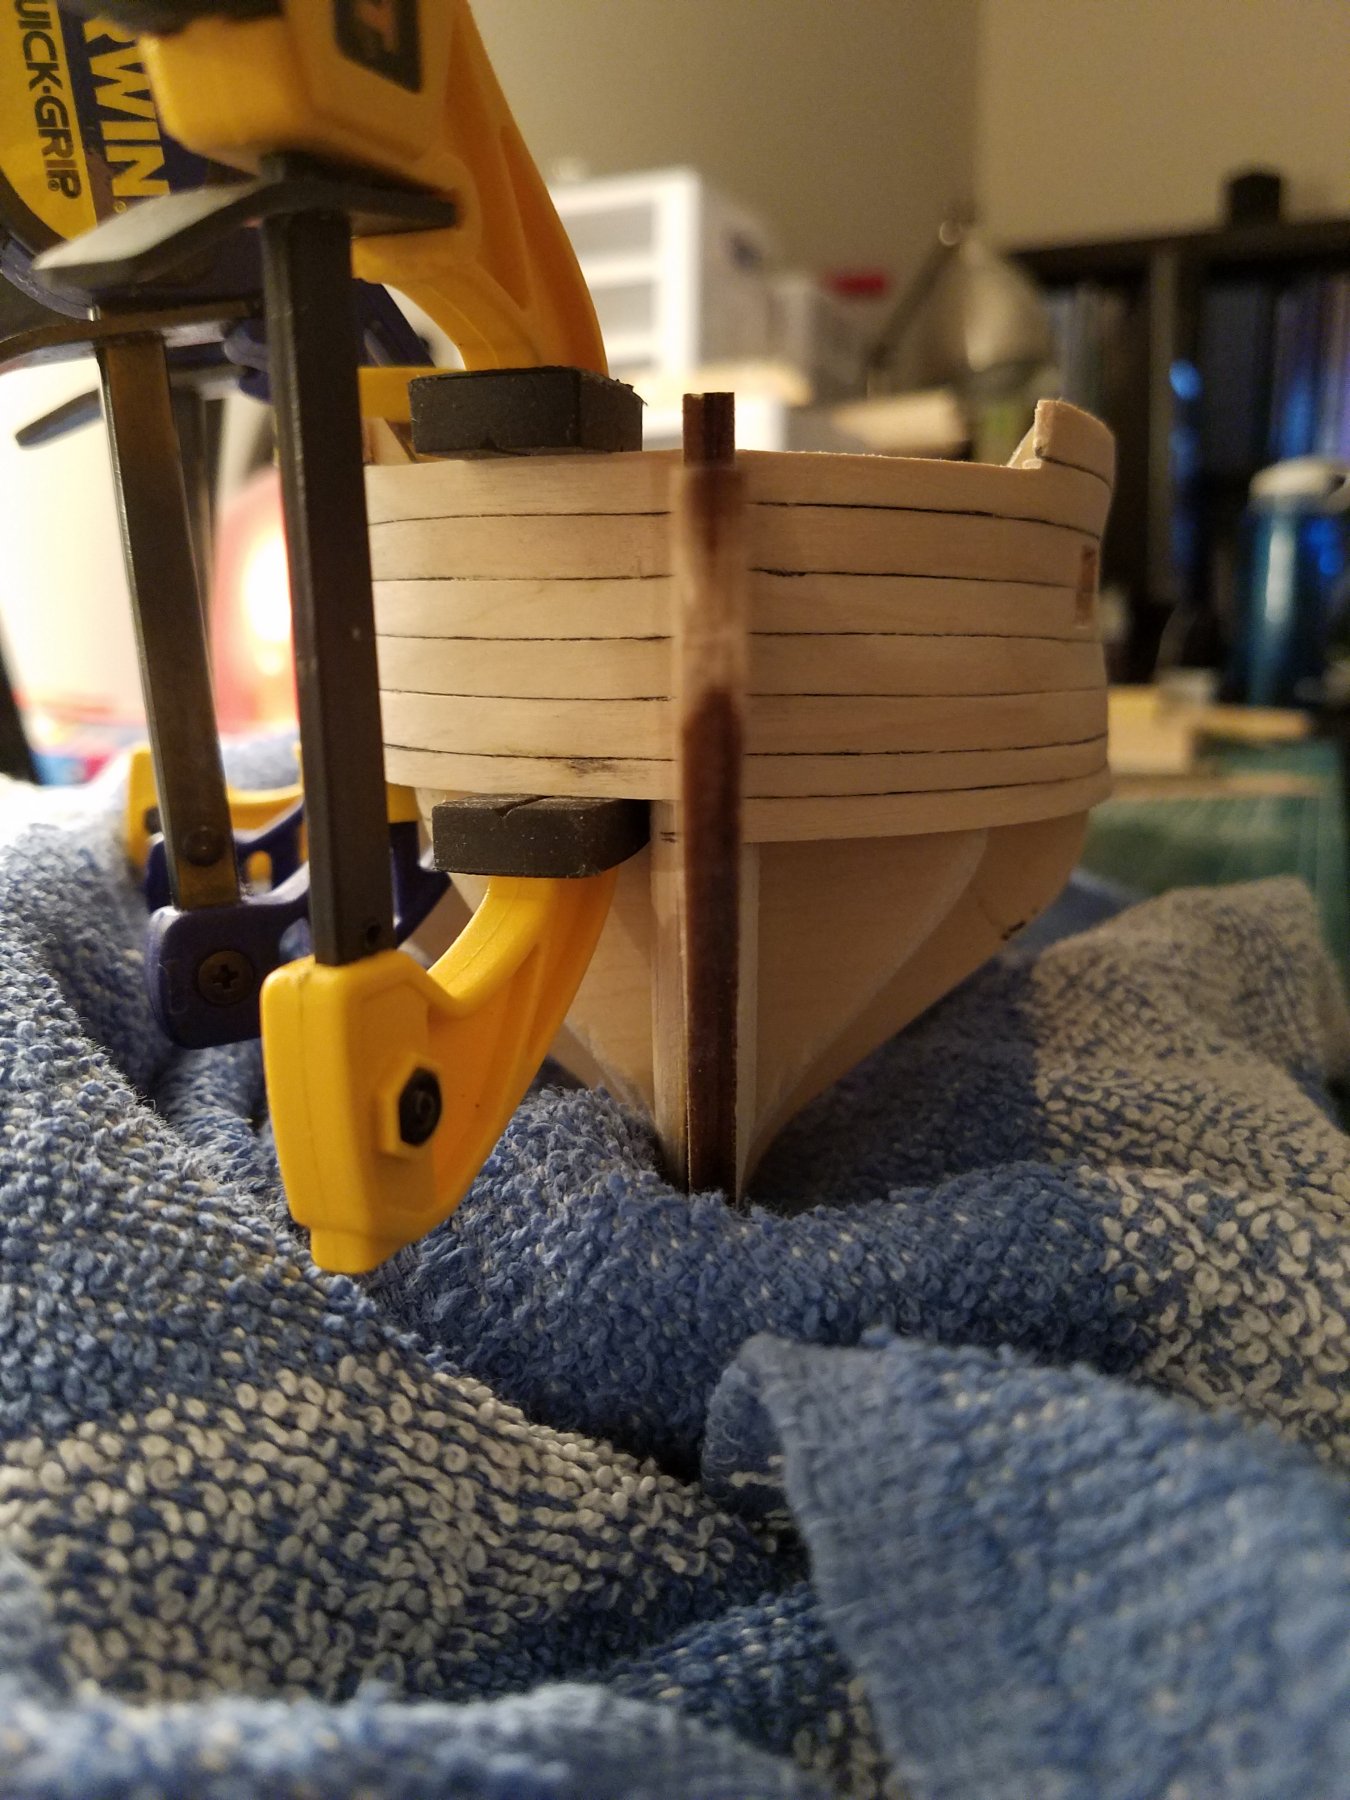
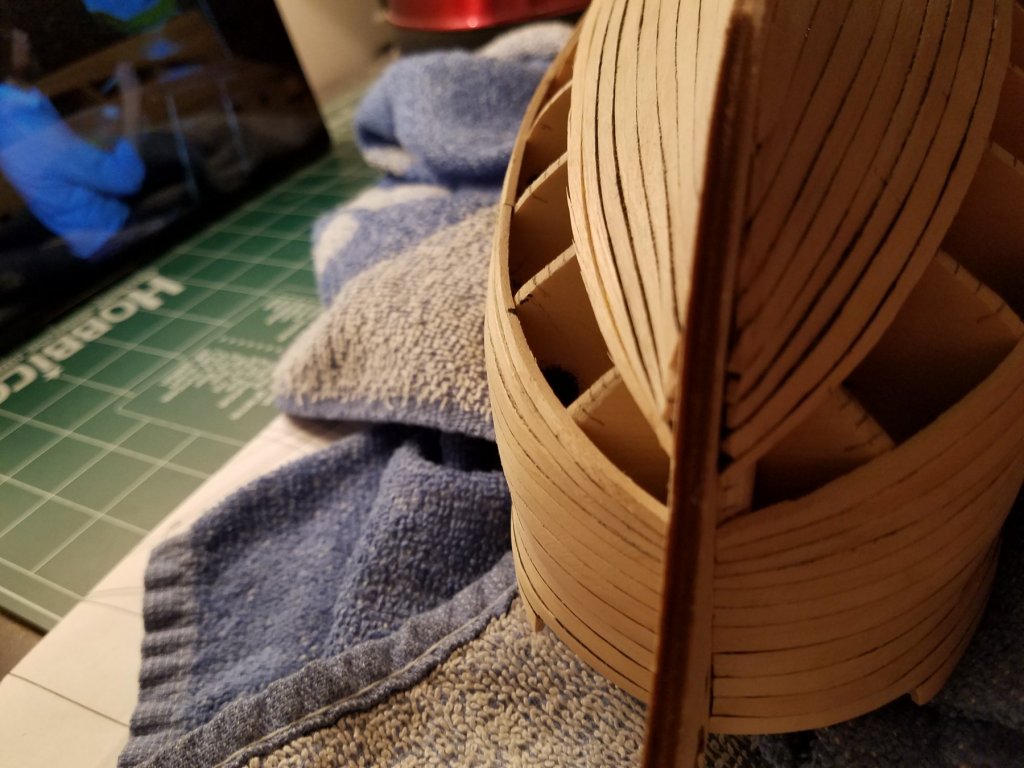
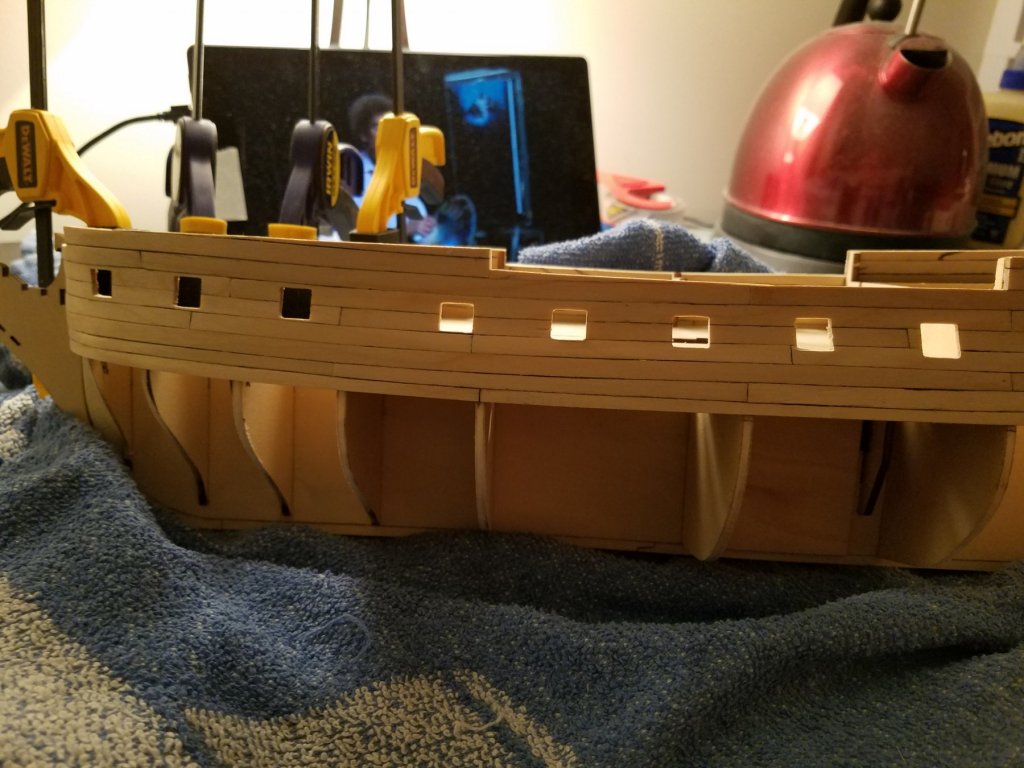
Hi all! Just a small update of my hull planking. Its taking a while because of life stuff, but its coming along. Im realizing what I should have done on the upper planking which would have helped curve the lower planking more correctly. Also, I am using Chuck's technique of putting clear tape over the plank of the previous row and using a pencile to draw the correct line to then transfer to the next plank. I'm slowly getting better at it. I can already tell that my next hull planking will be much better than this. The pic above shows the curving of the planks. This was really tough to get the right curve but very rewarding. Thanks!! Jeff


-
I see what you mean now. Thank you for your insight! I will make the corrections now so it won't be a headache later. Jeff
-
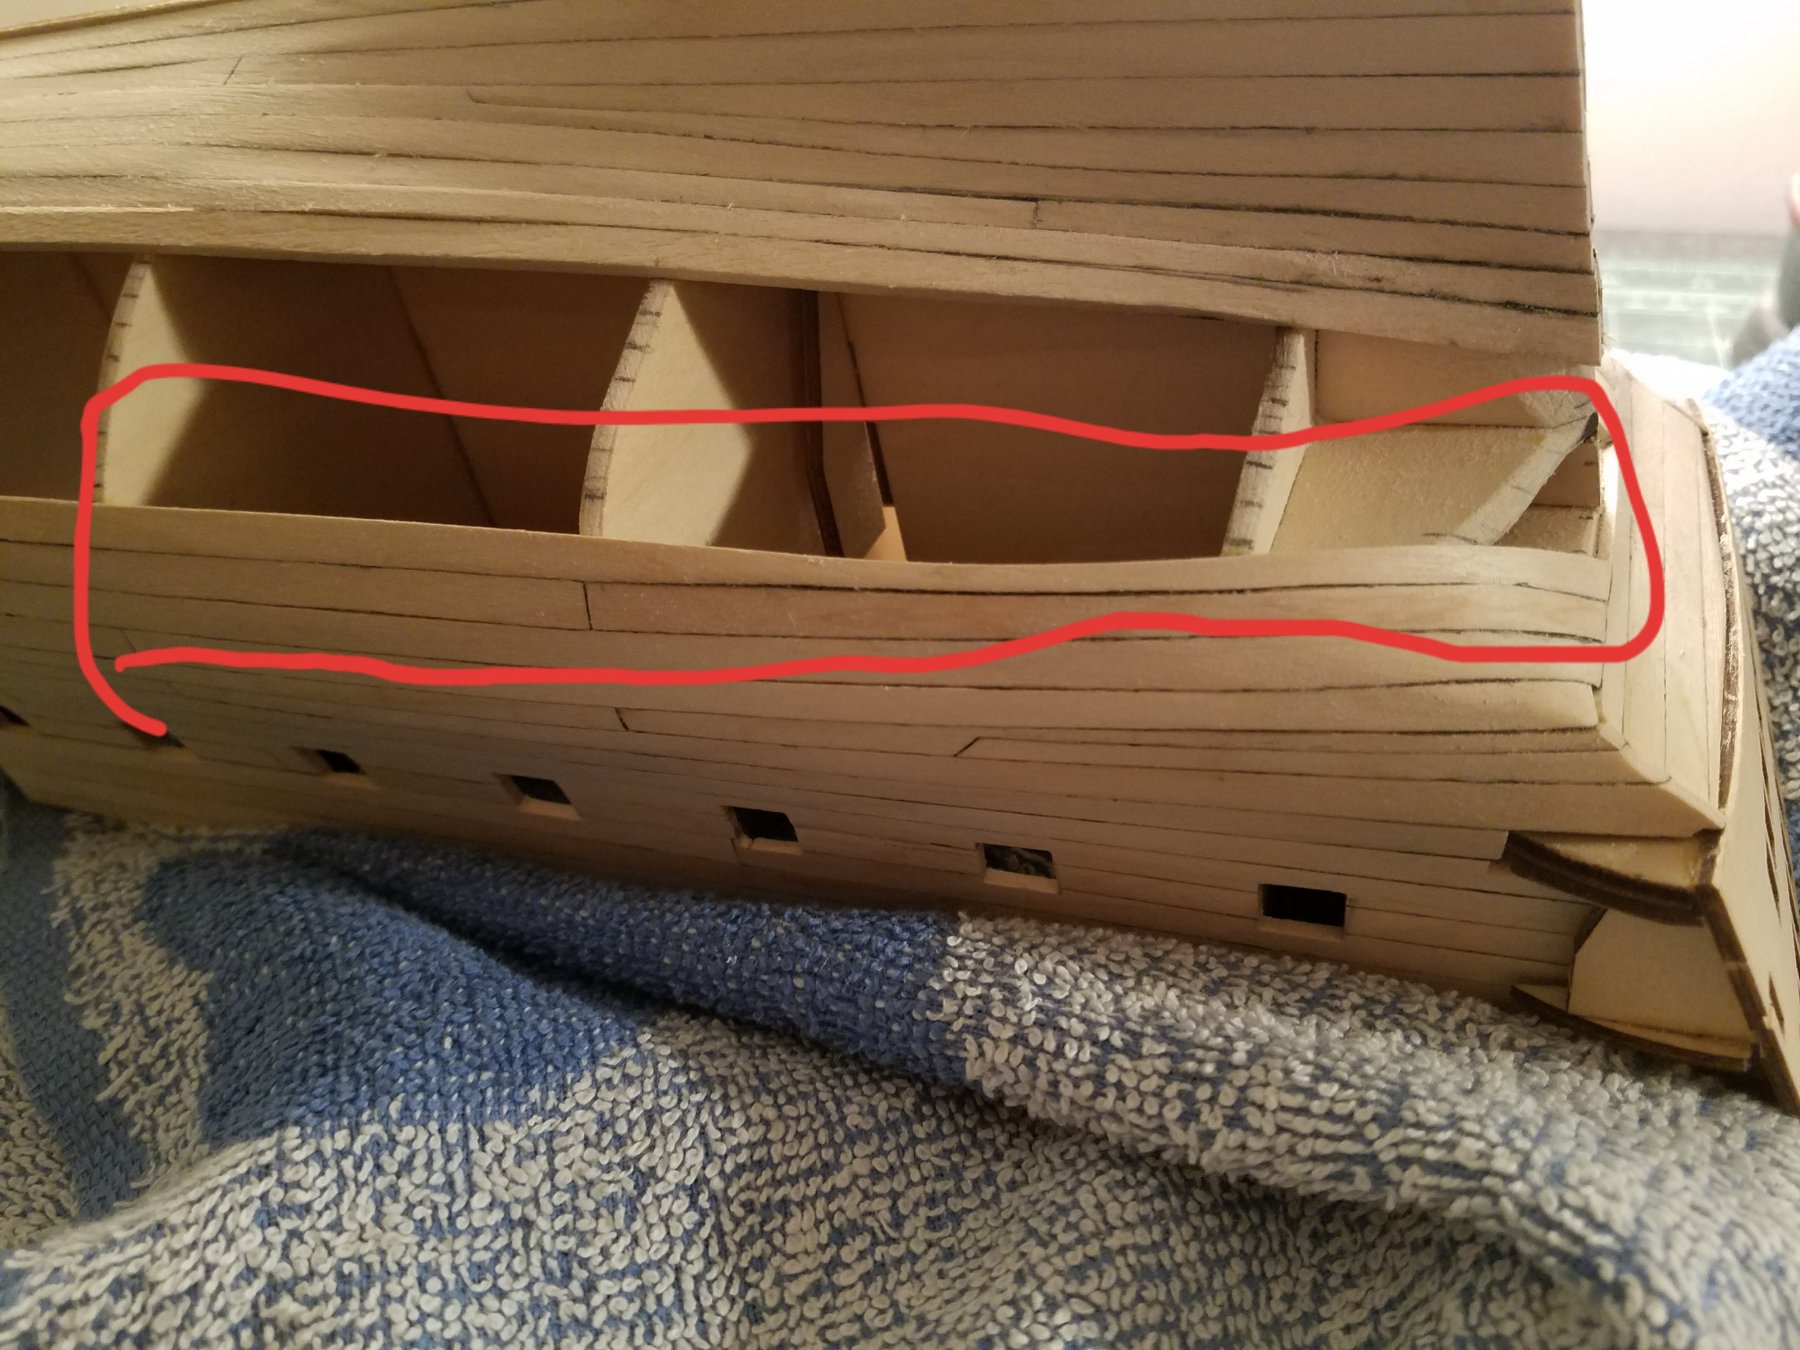
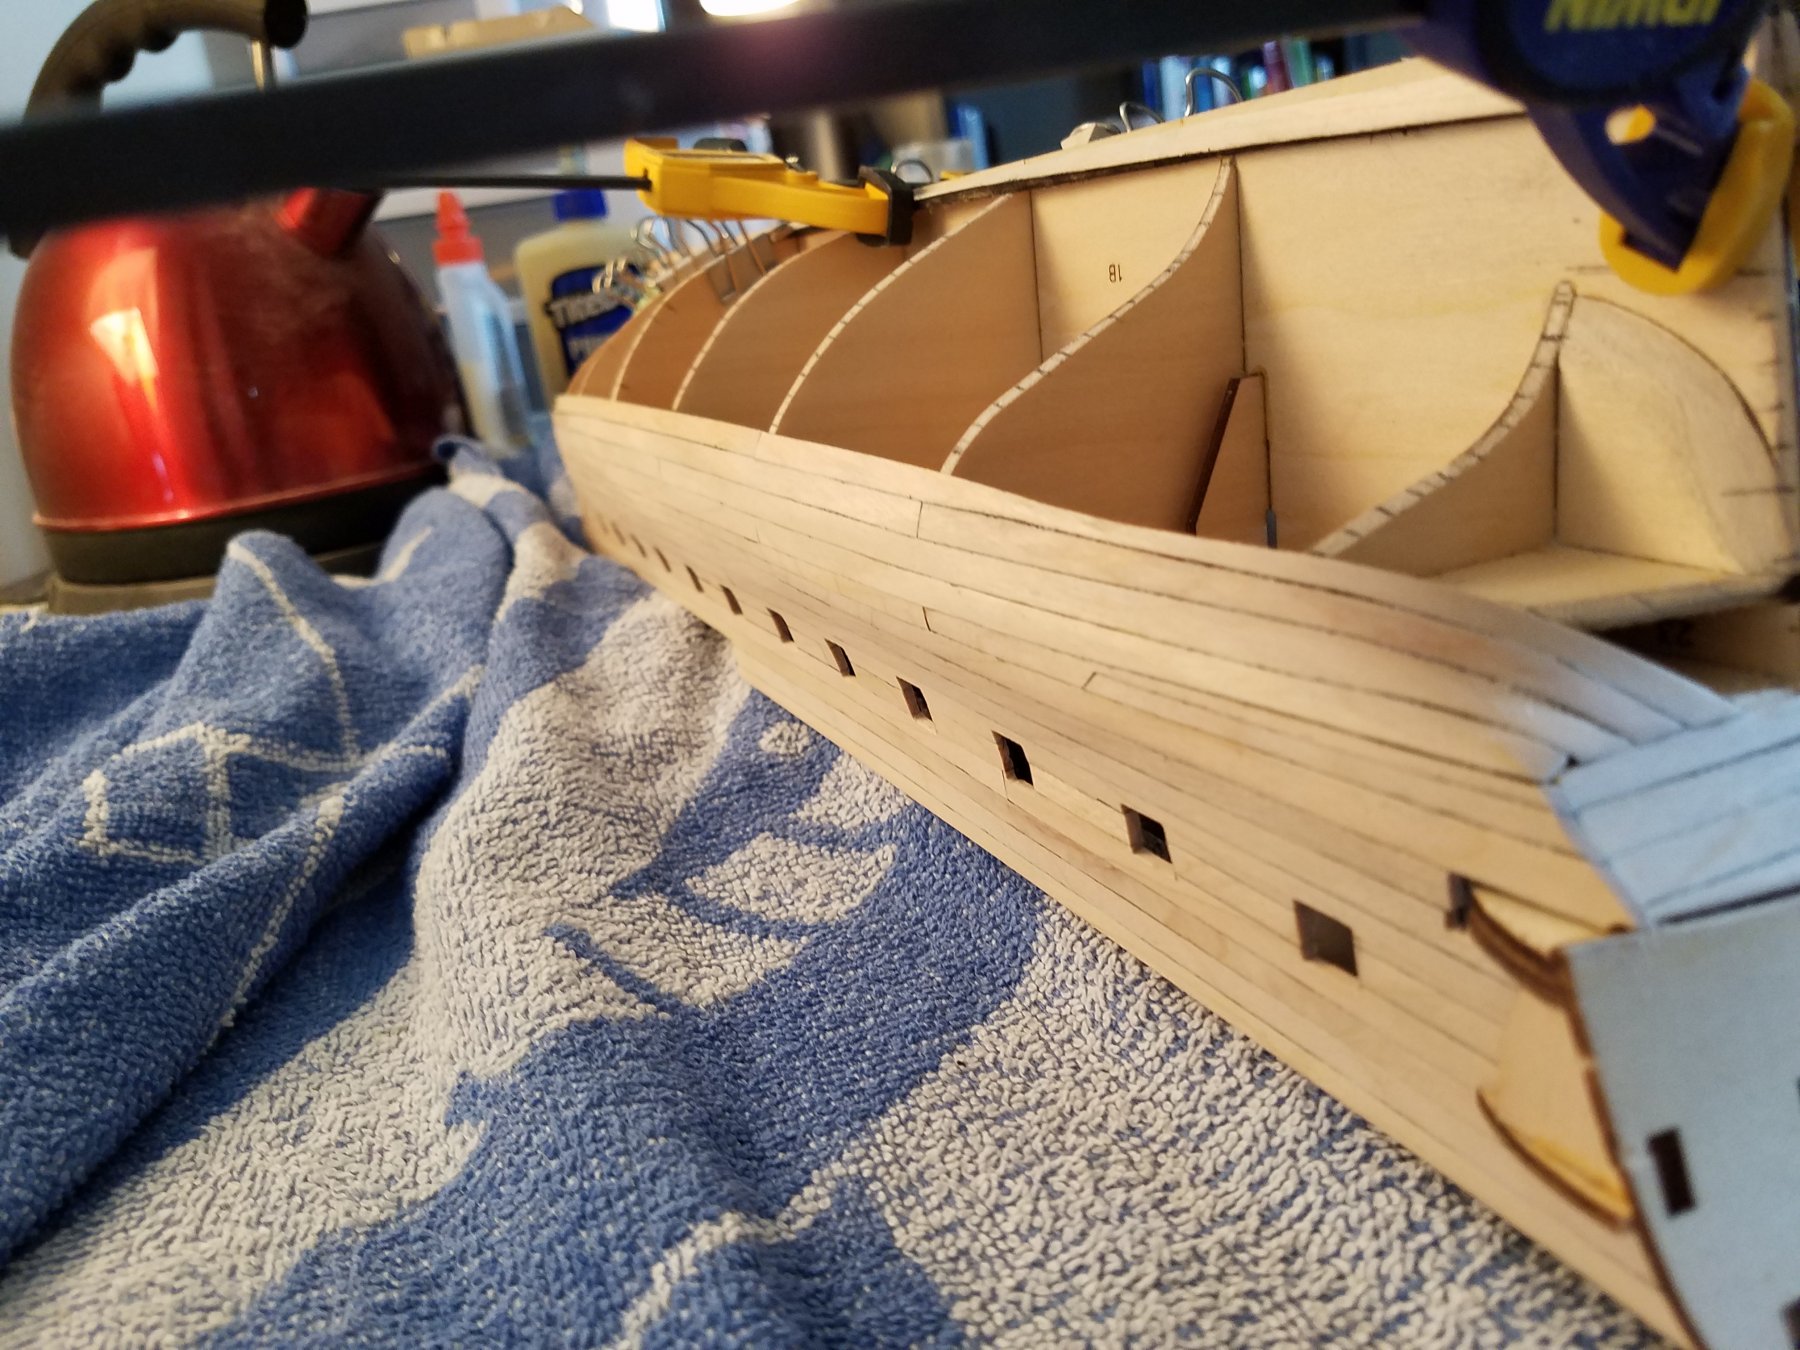
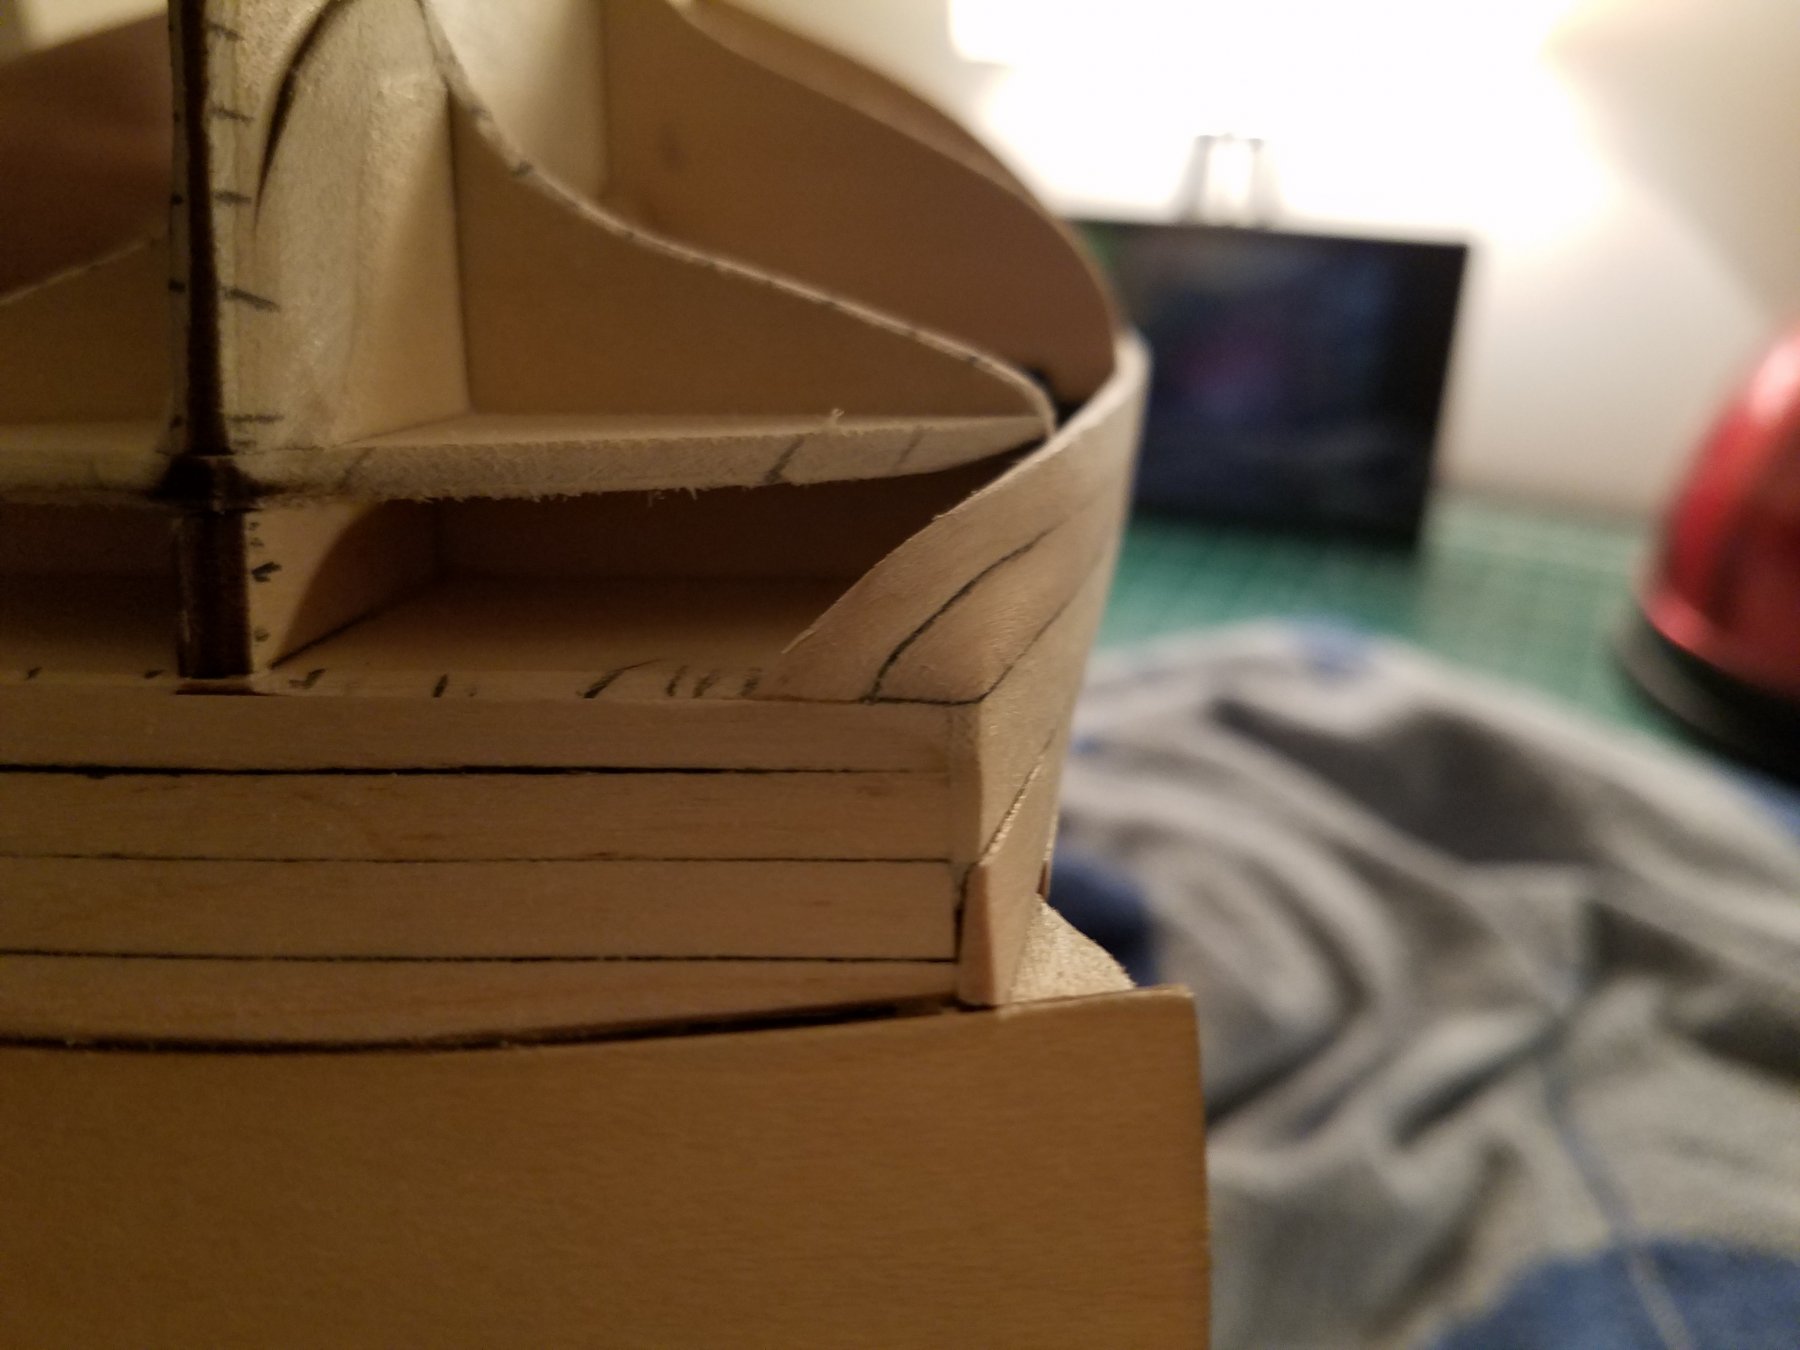
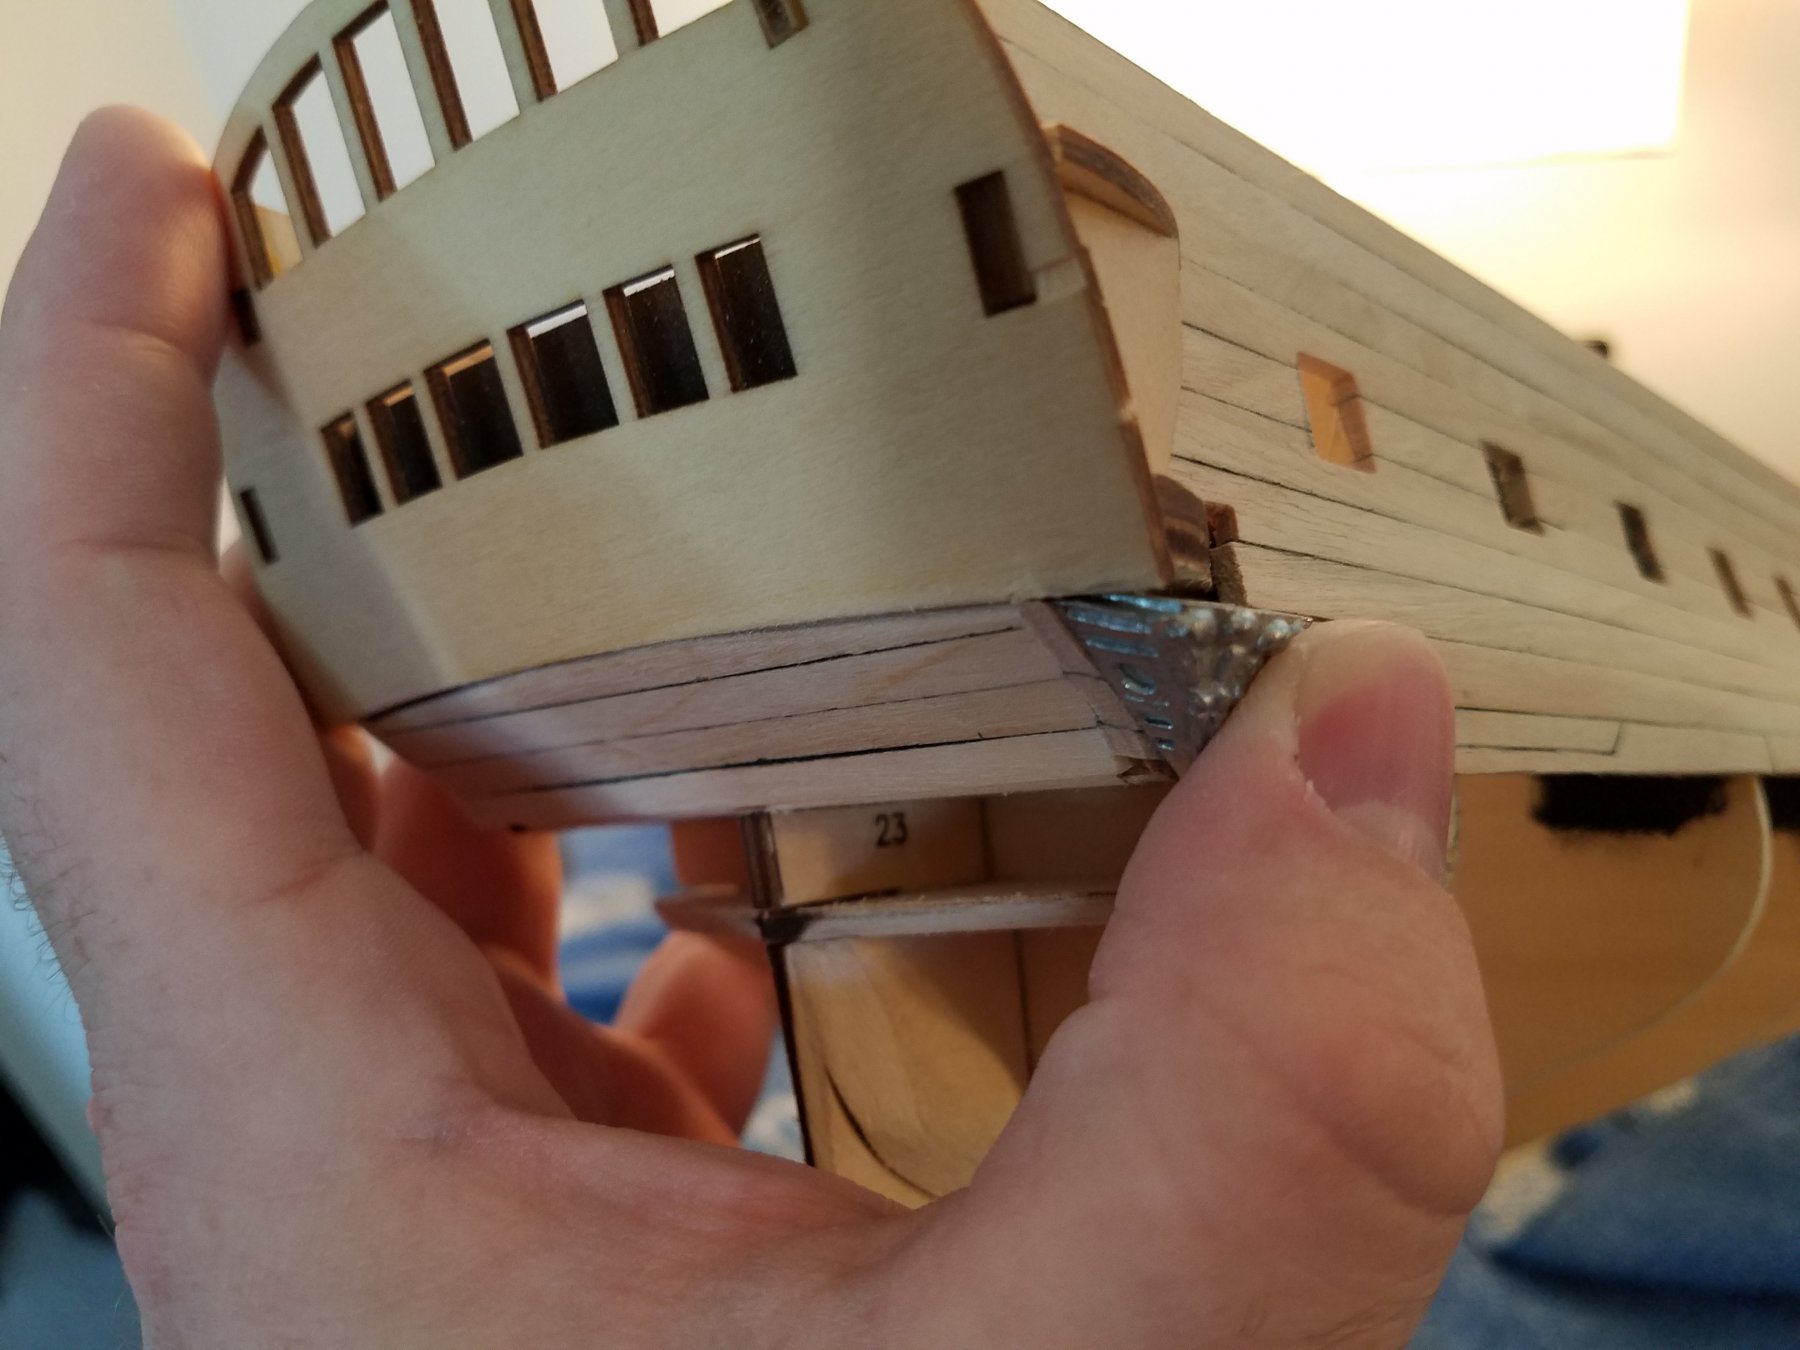
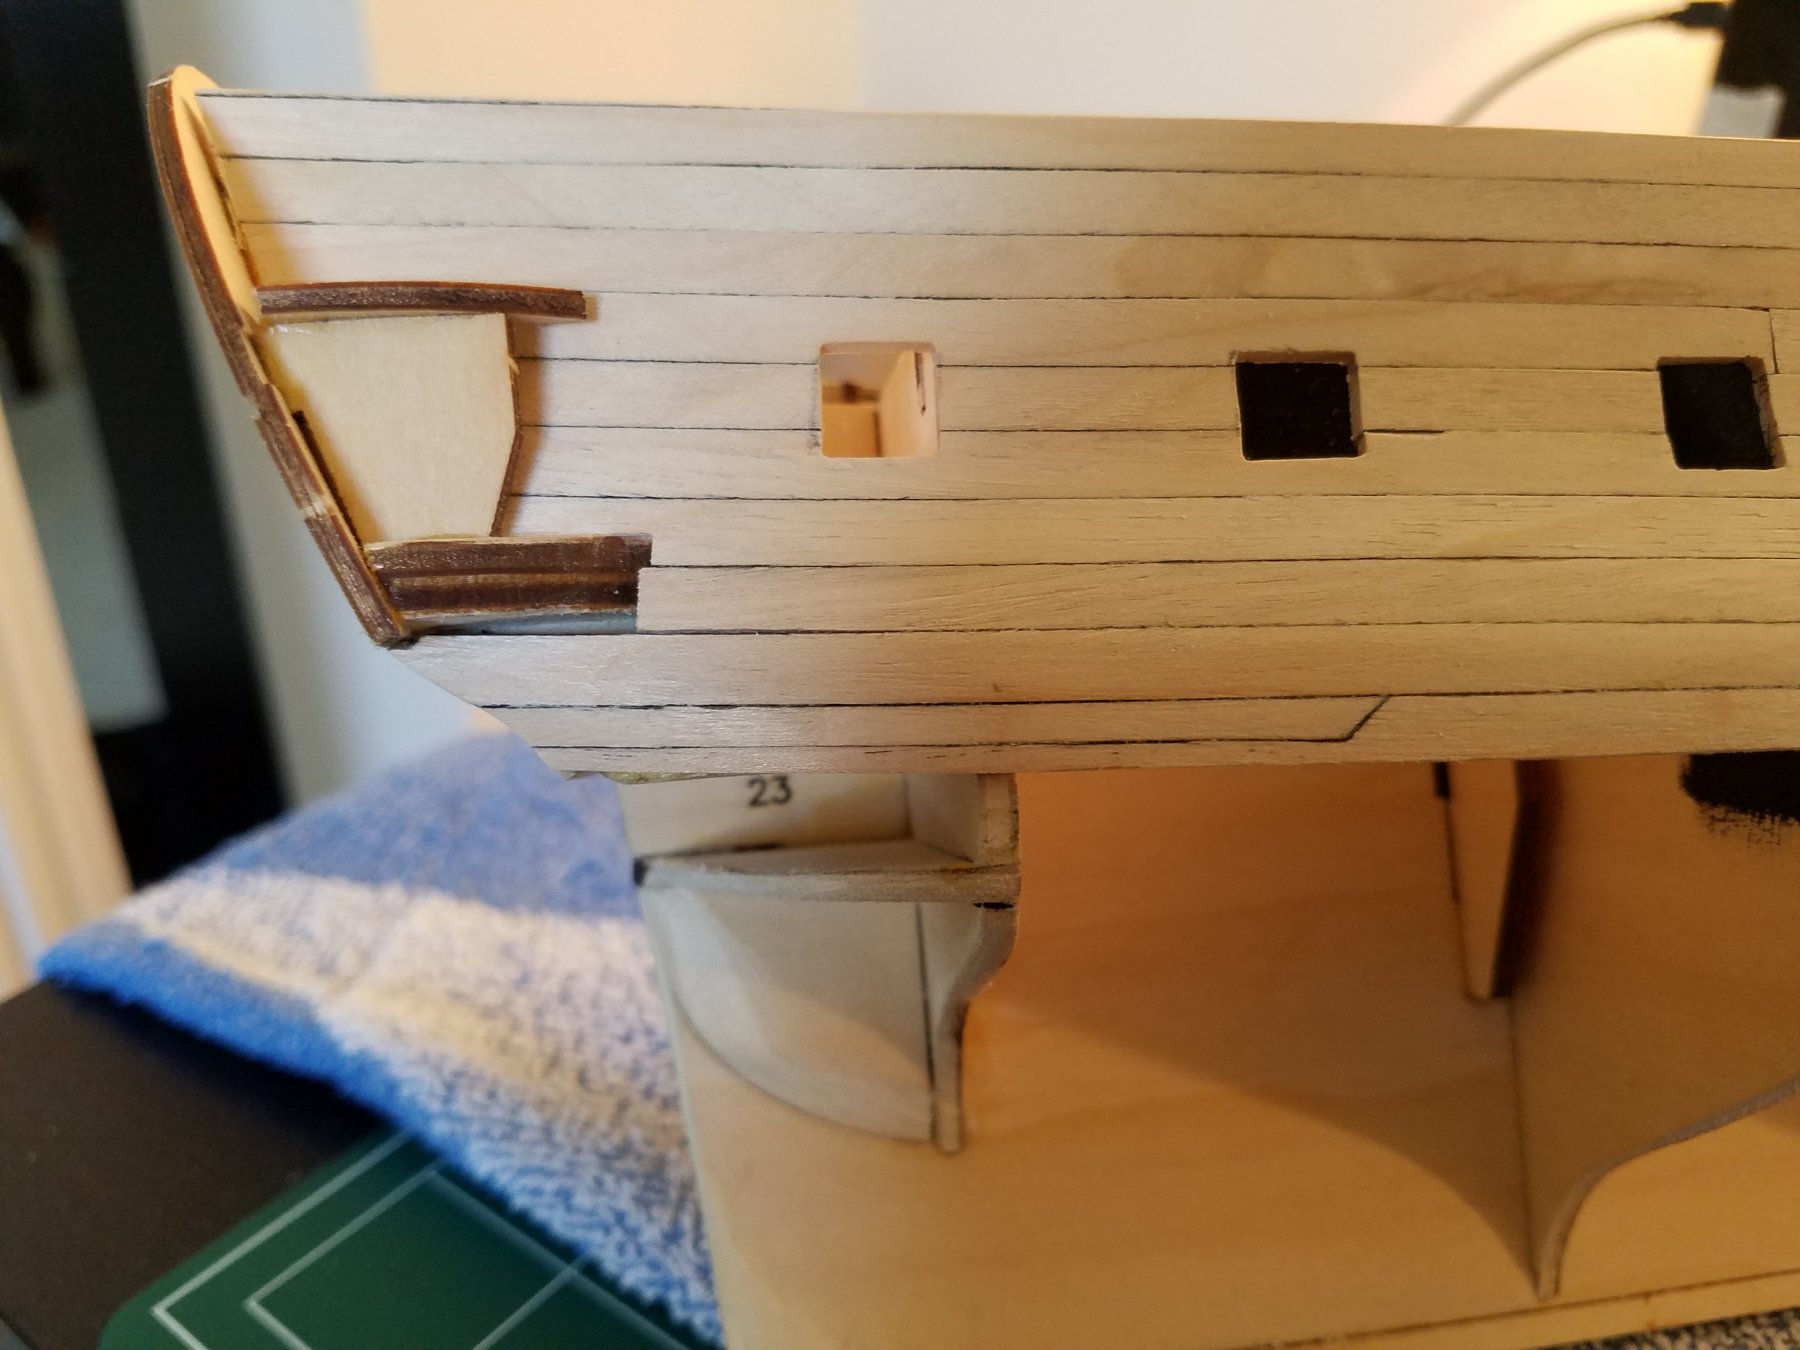
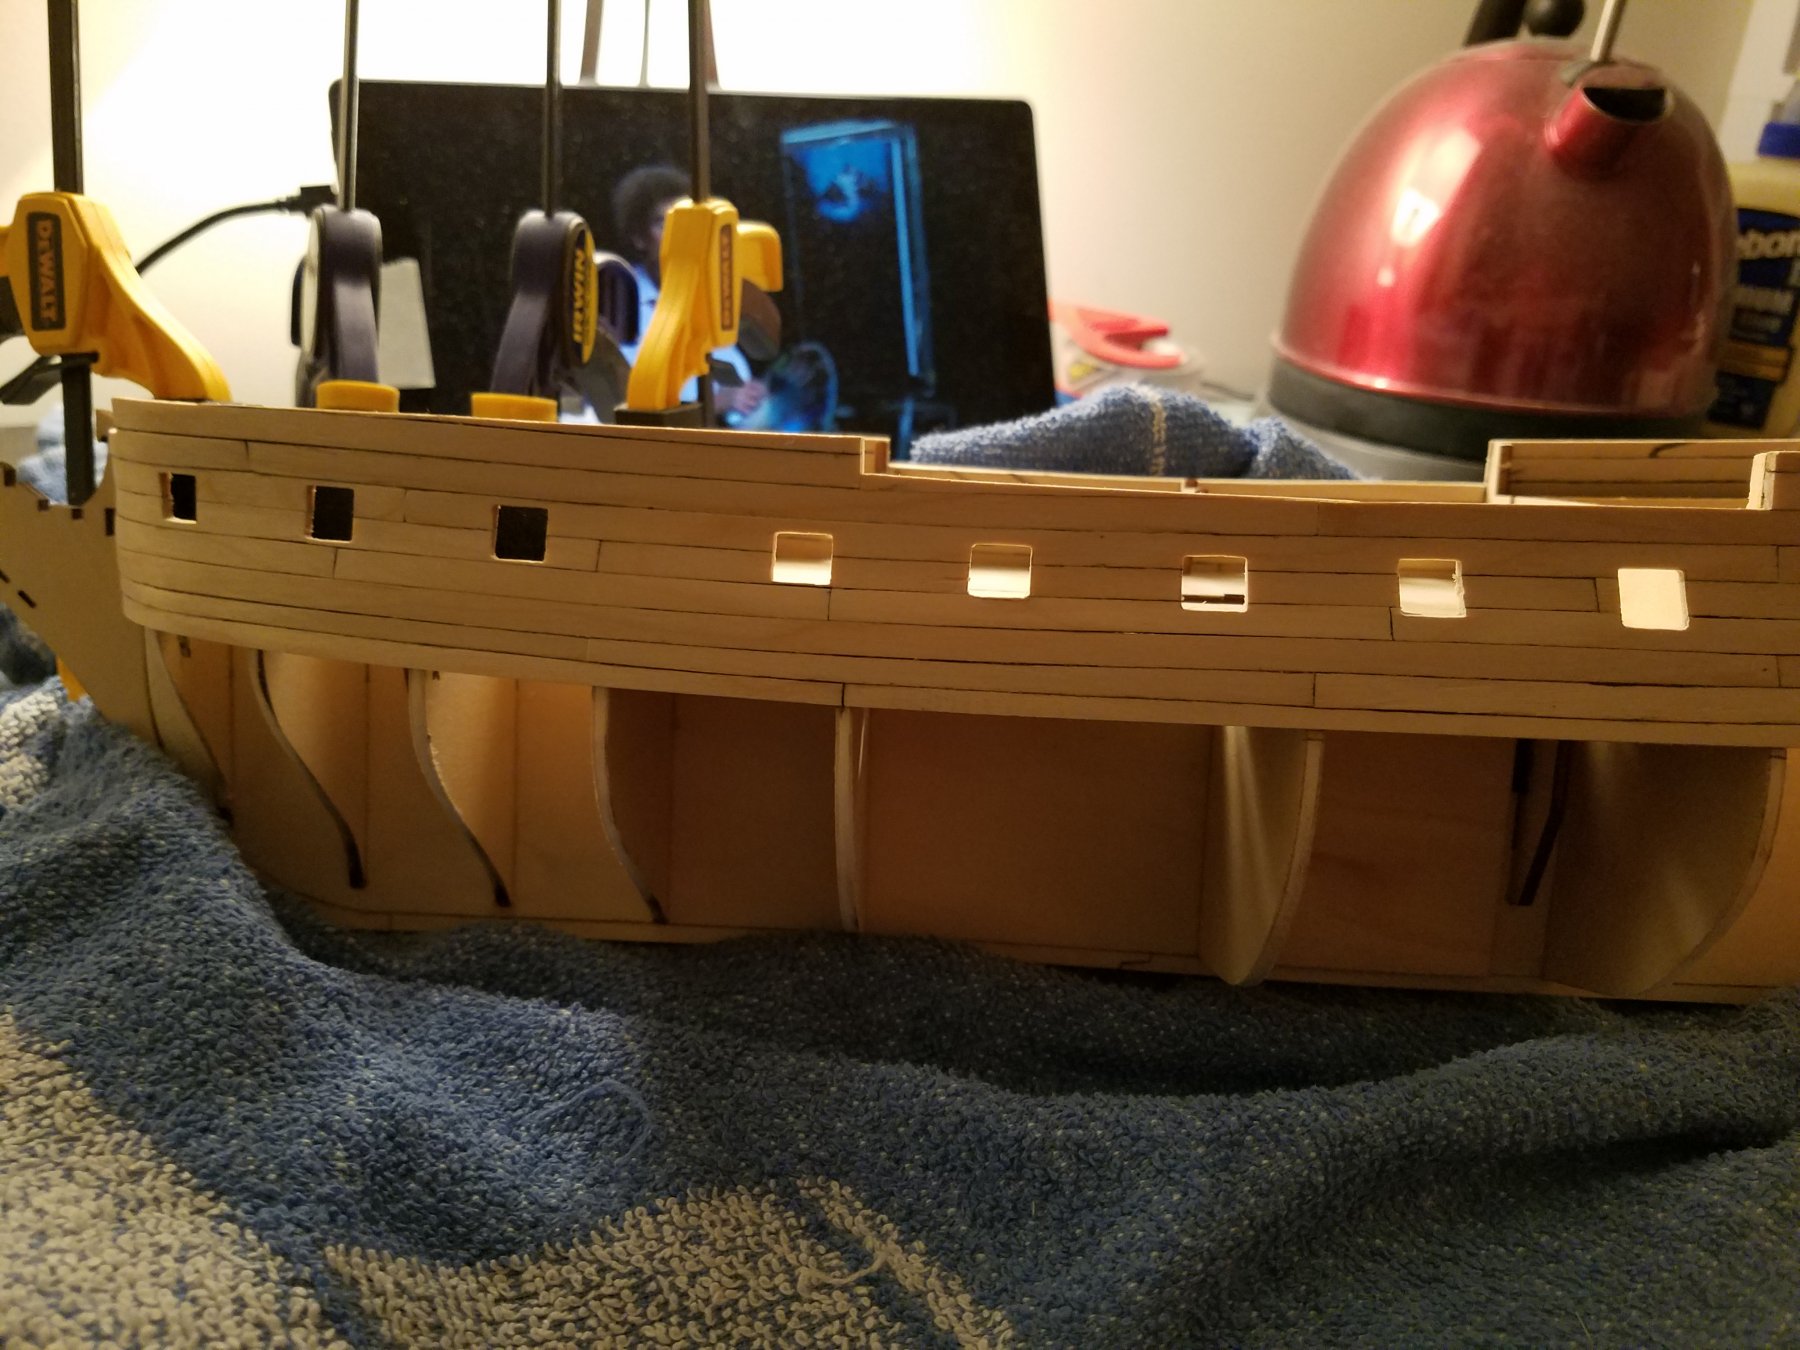
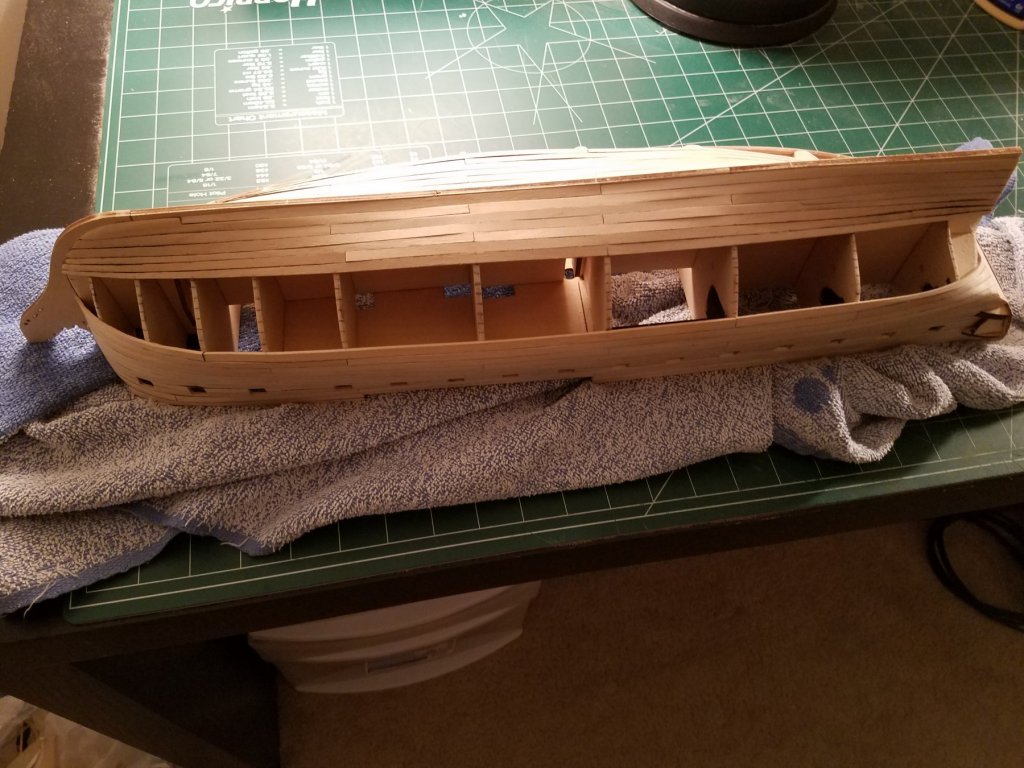
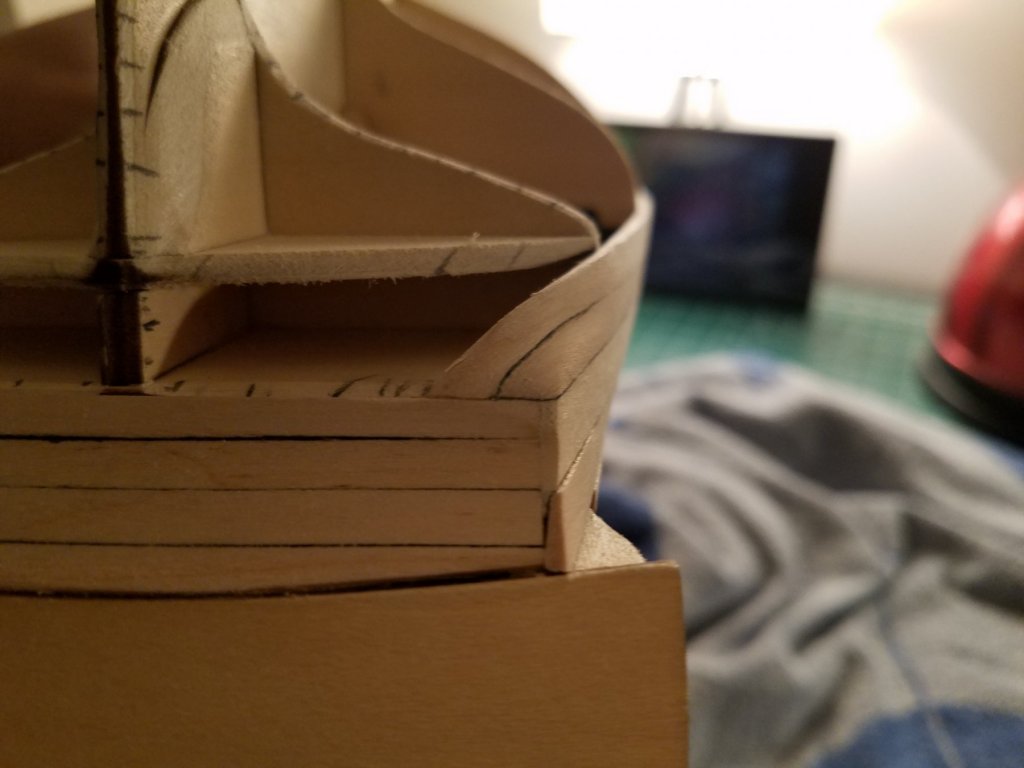
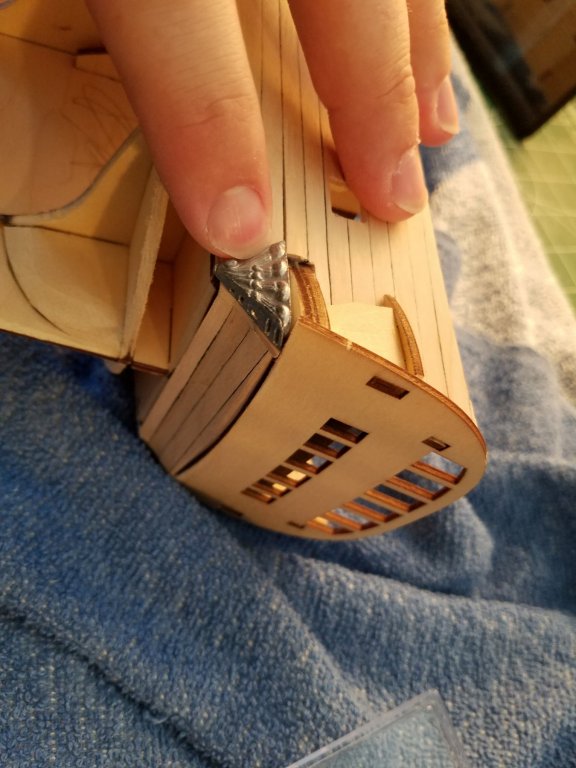
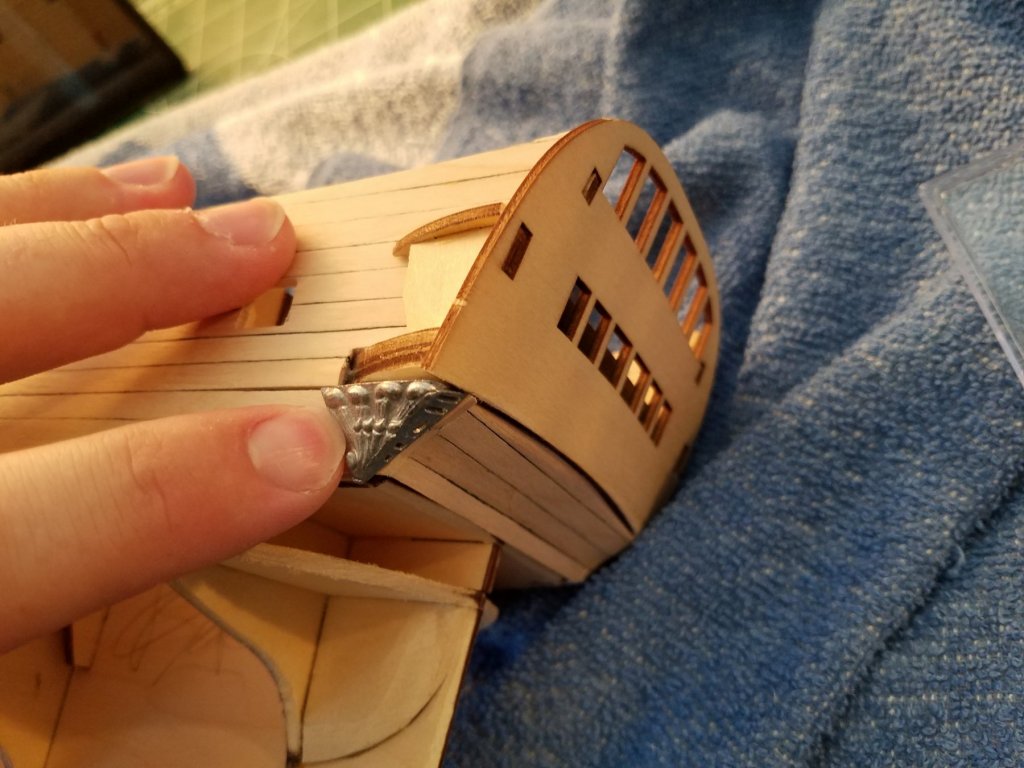
Thank you for pointing this out! I would not have fitted that decorative metal piece at this time. I broke out those metal parts and test fitted them to the sides of the ship: According to the instructions, they should fit here. If this is wrong, please tell me!!! Haha! Currently, both metal pieces fit flush against the hull. I also made my first half-stealer! I realized that i didnt give the bottom plank enough height. Boo. But, this is my first attempt and the fit of the stealer to the bottom plank is quite snug. So I am happy about that part. This section will be smoothed out with wood filler anyway and painted so you won't be able to tell (I hope!). I am now reading the three planking guides on the site: Lining Off your hull for planking Planking Primer Plankingprojectbeginners Lastly, I have to say, the supplied basswood for the hull planks are not of very good quality. All the pieces have terrible edges that etch into the plank and makie it impossible to get a good fit. This piece I took out at random, has scores in it that, if sanded smooth, would make the plank way too thin. I will have to fill them in with wood filler. Also, with this example, both the top and bottom edges have many scratches as I hope you can see. With these scratches, there will gaps between planks that I will have to fill with wood filler too. Also, this is the good side of the plank! The other side of this plank has worse edges. Lastly, there is only one layer of planks. I know that this kit wants me to paint the entire hull and to use wood filler to smooth out everything, but its taking me a LONG time just to prep the plank to place on the hull. I want to practice making the hull correctly by following the guides and not have any planks end in a point, but the supplied wood is just making more work for me. Jeff


-
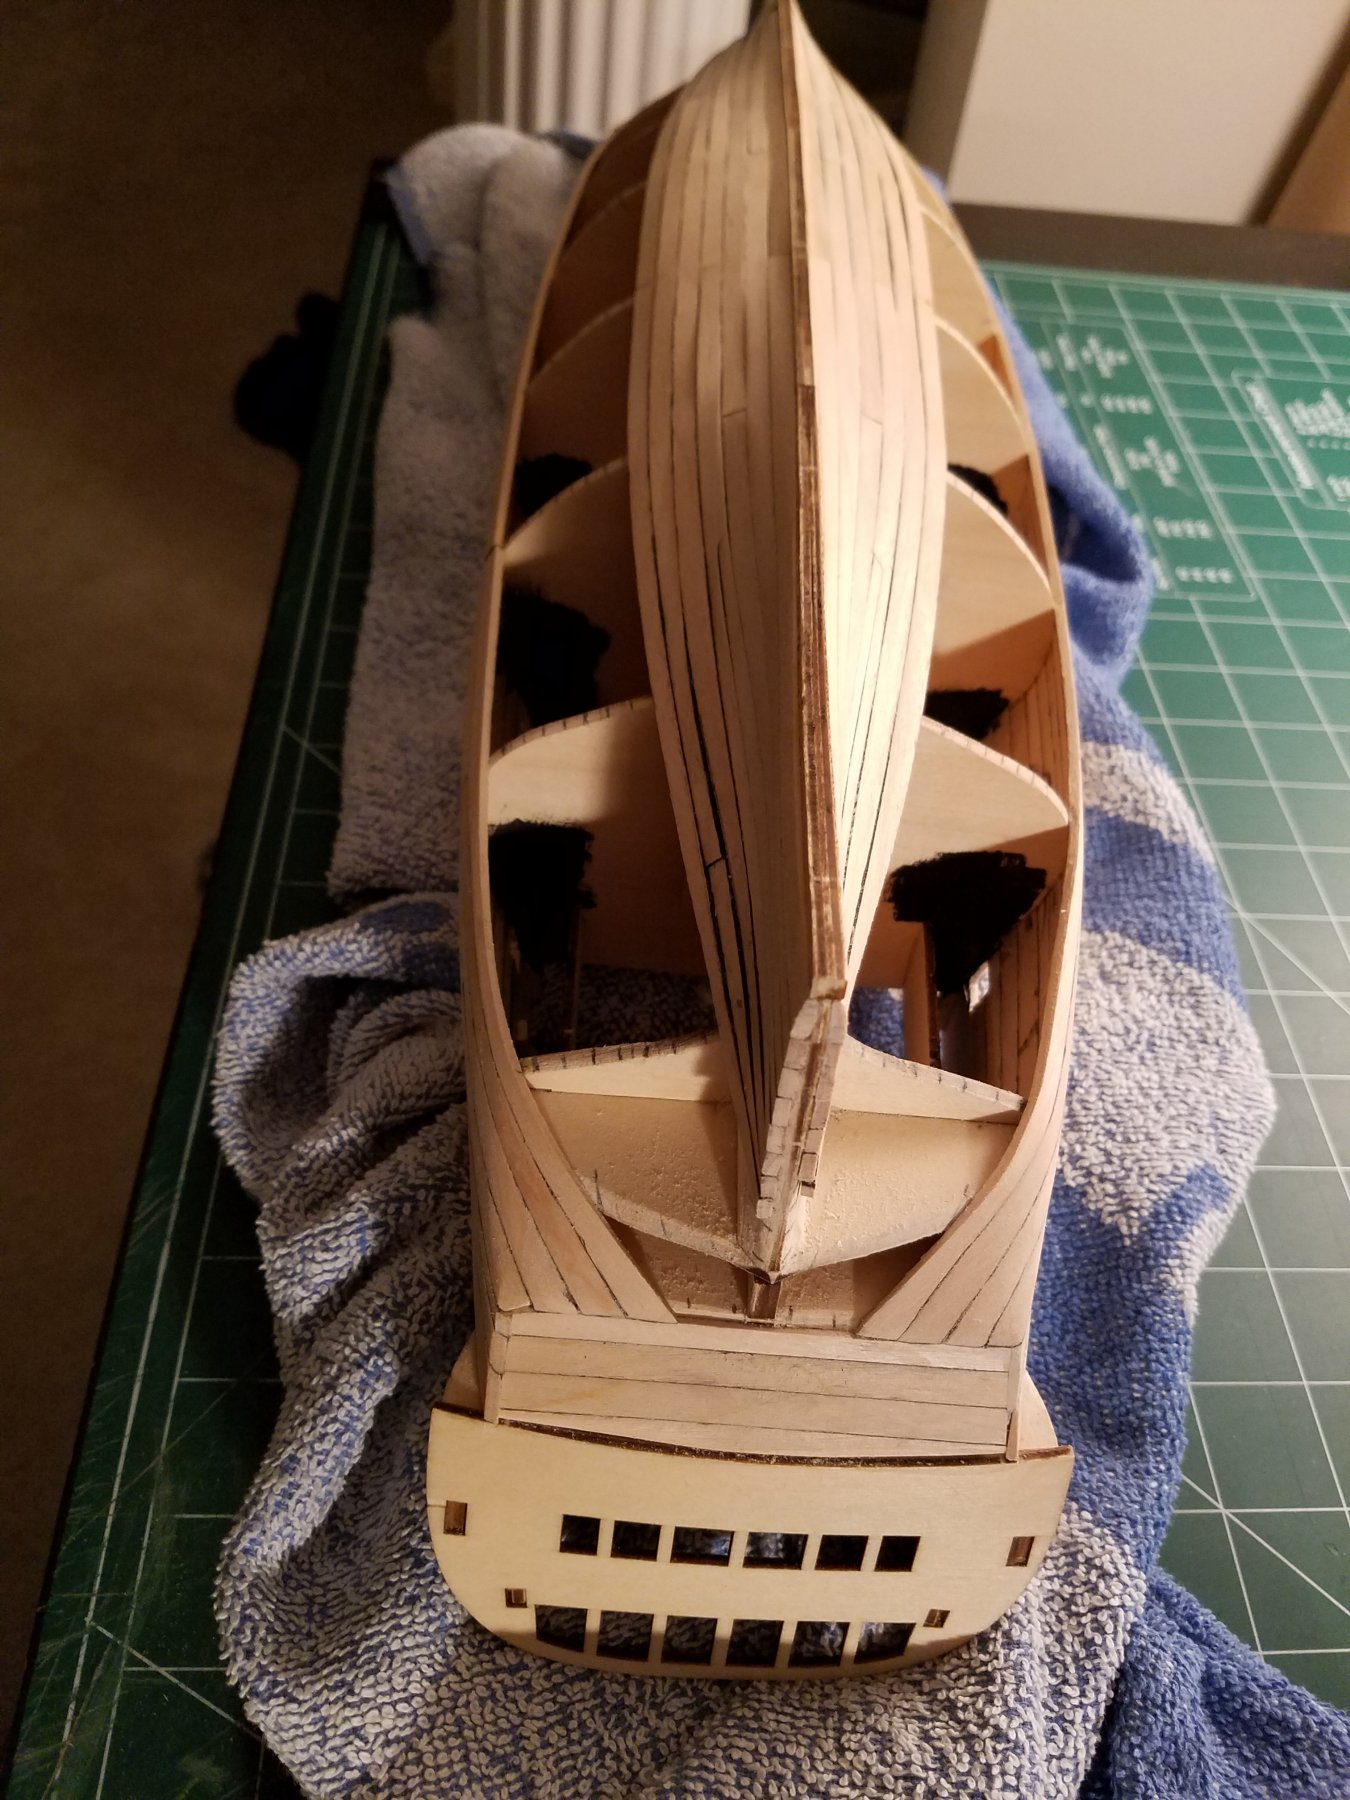
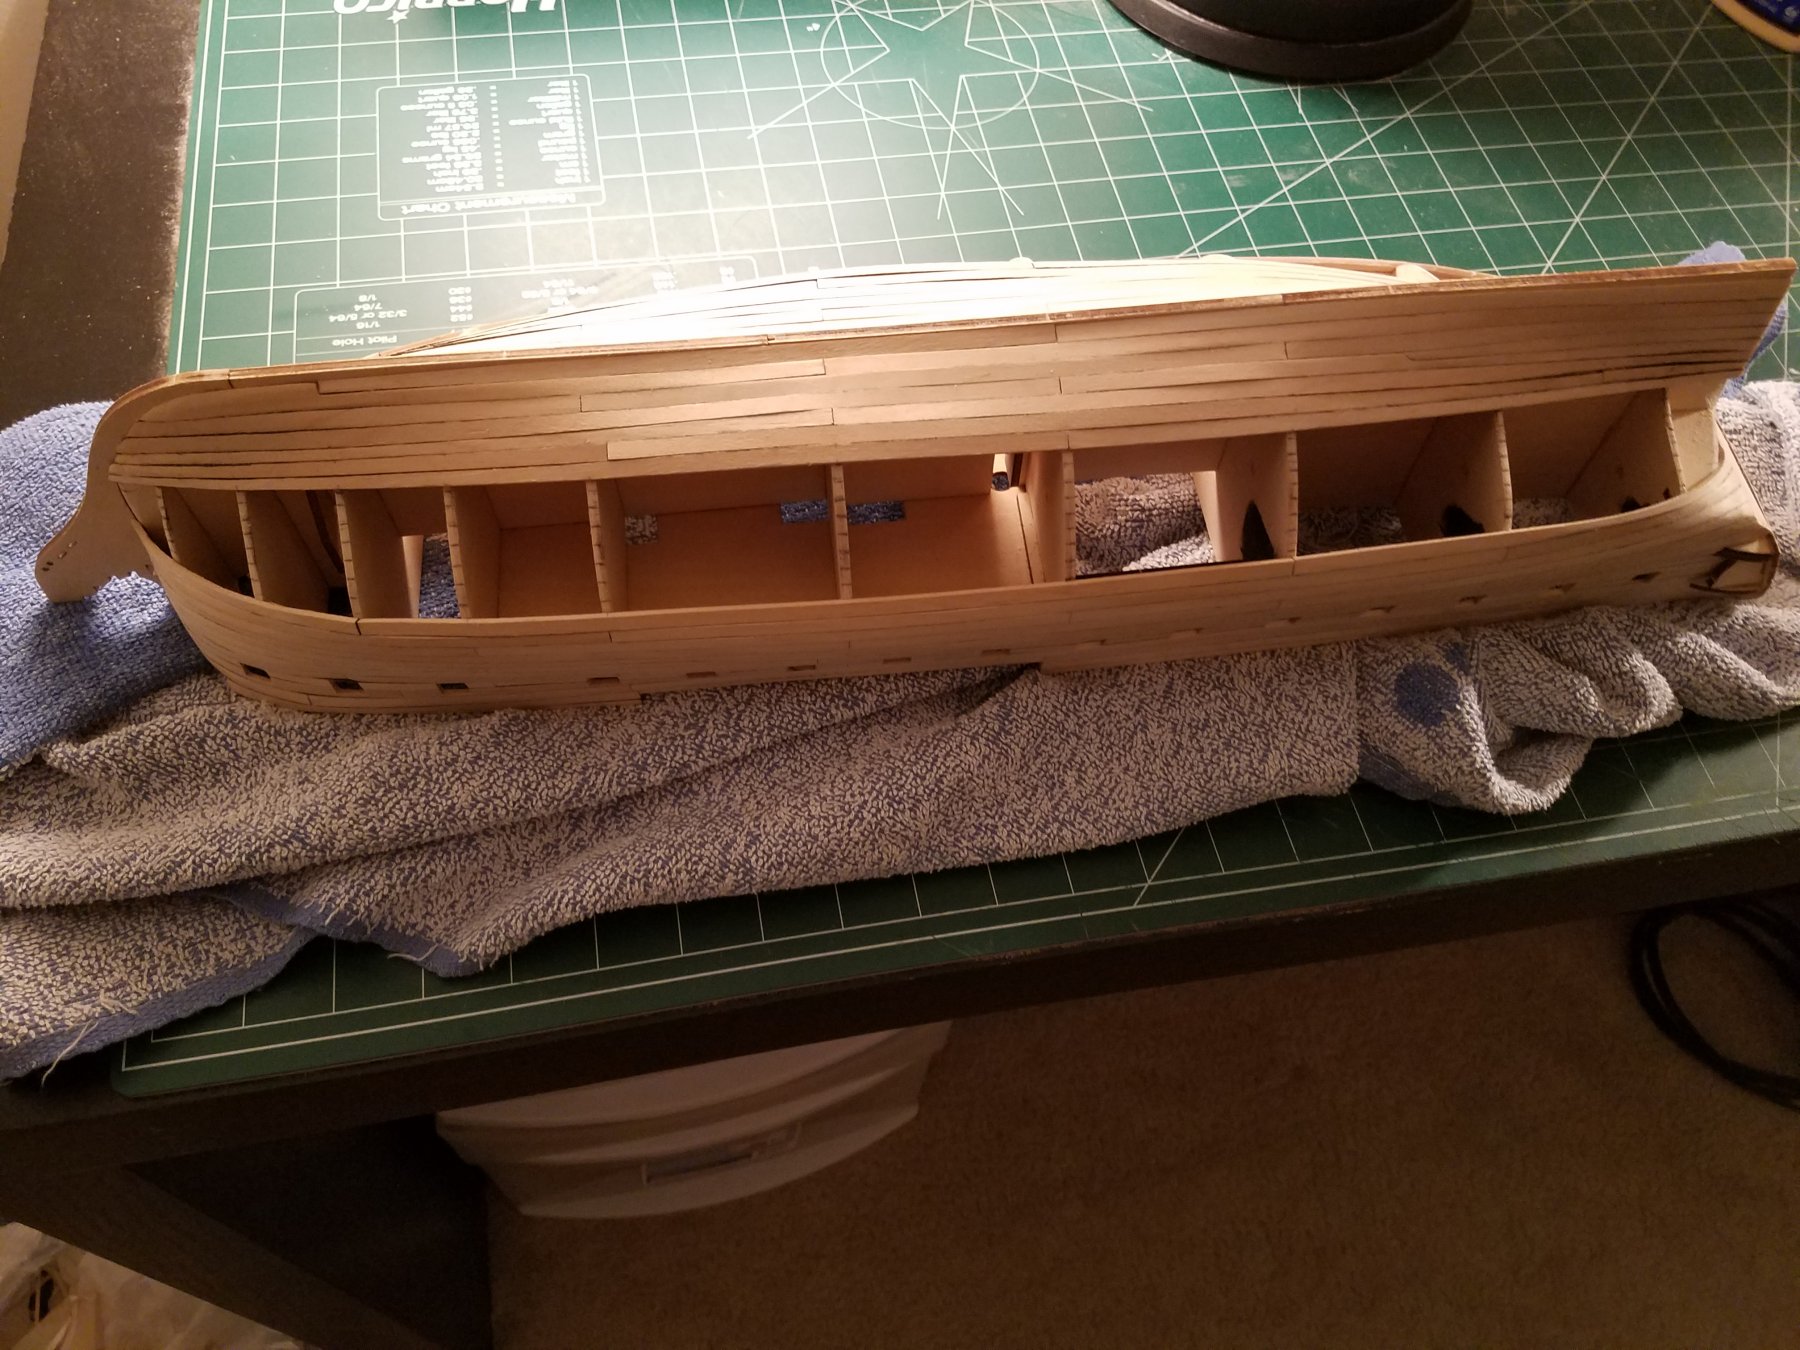
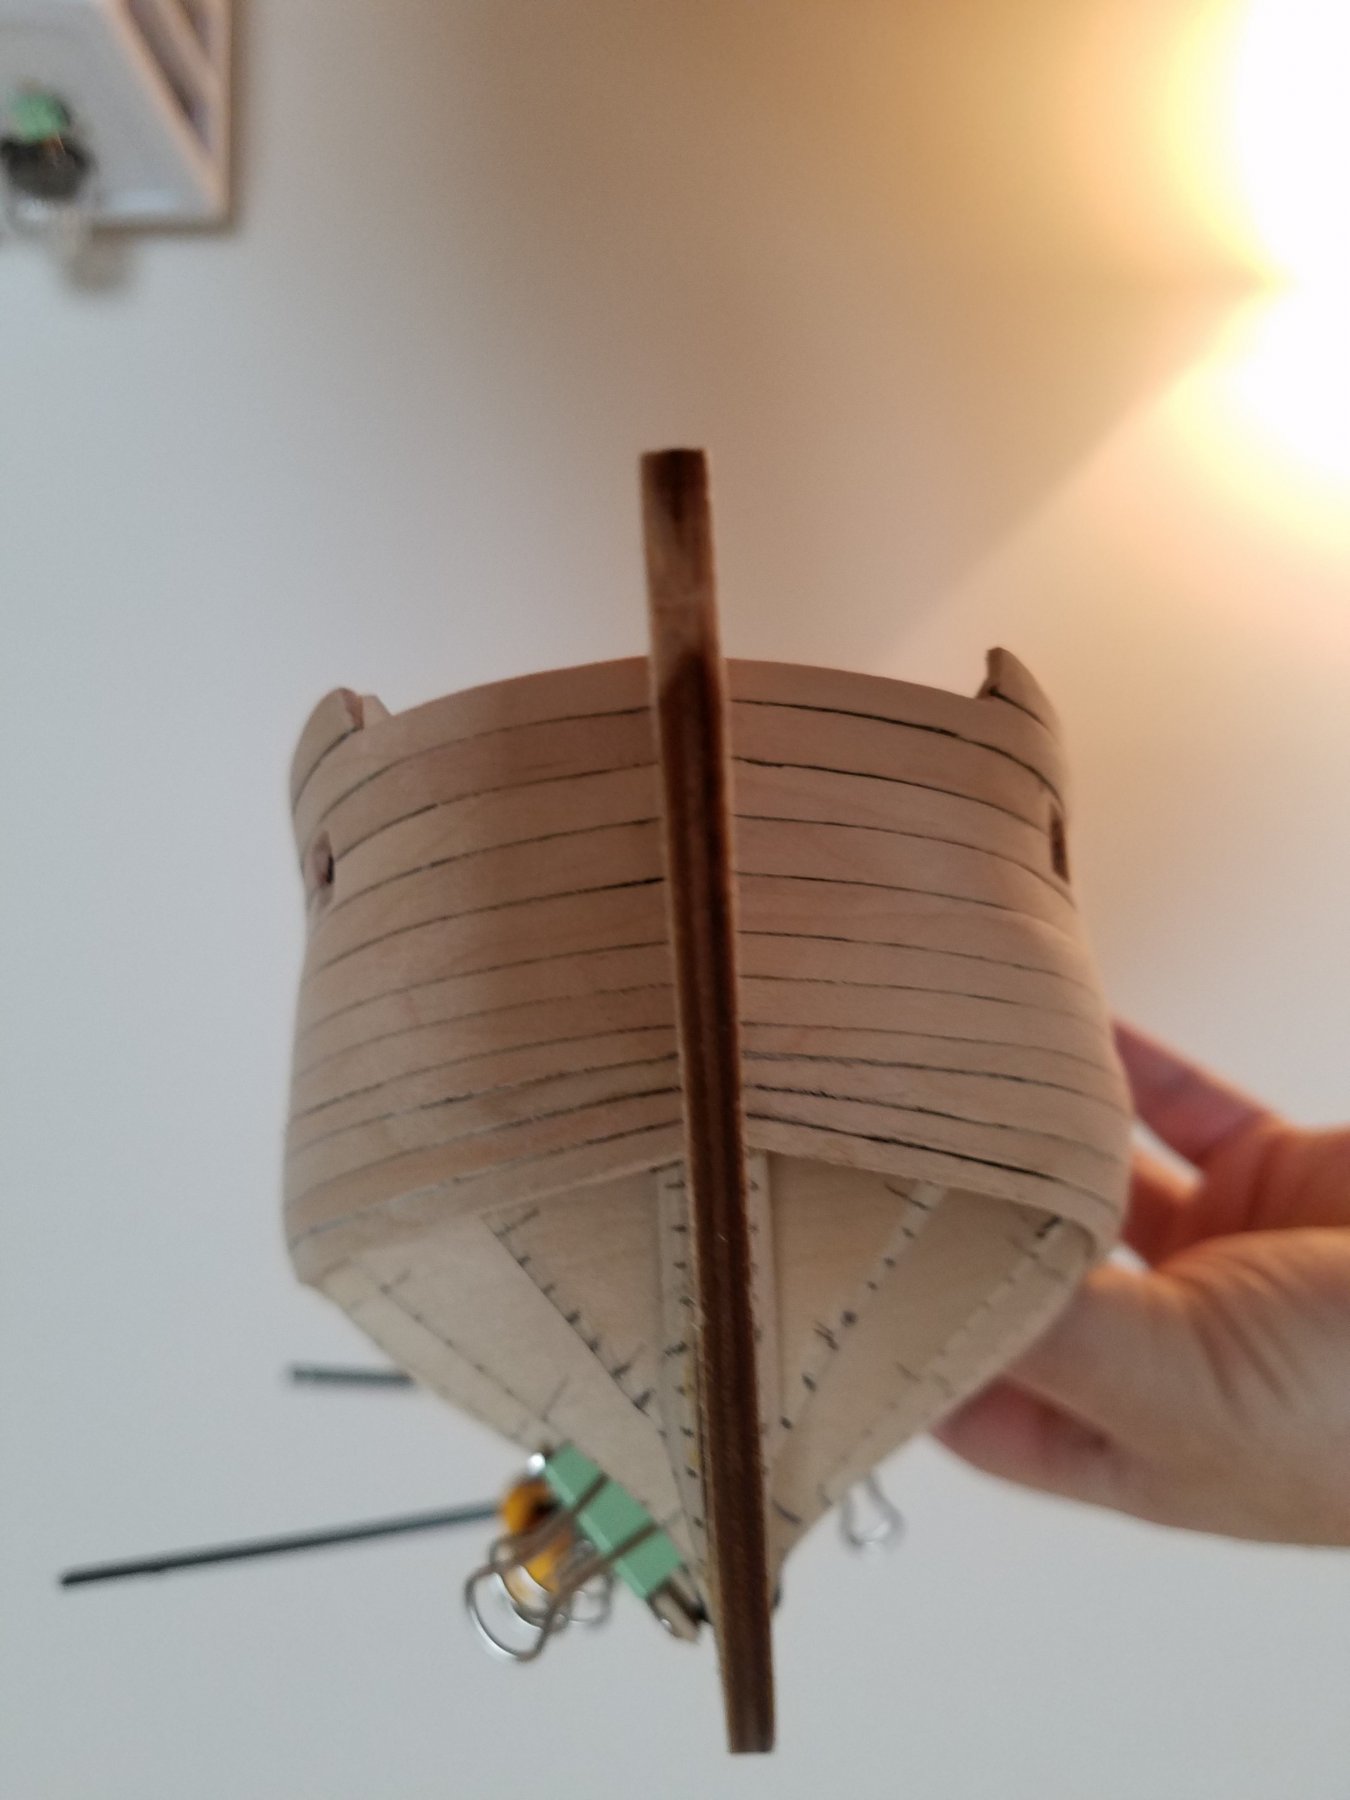
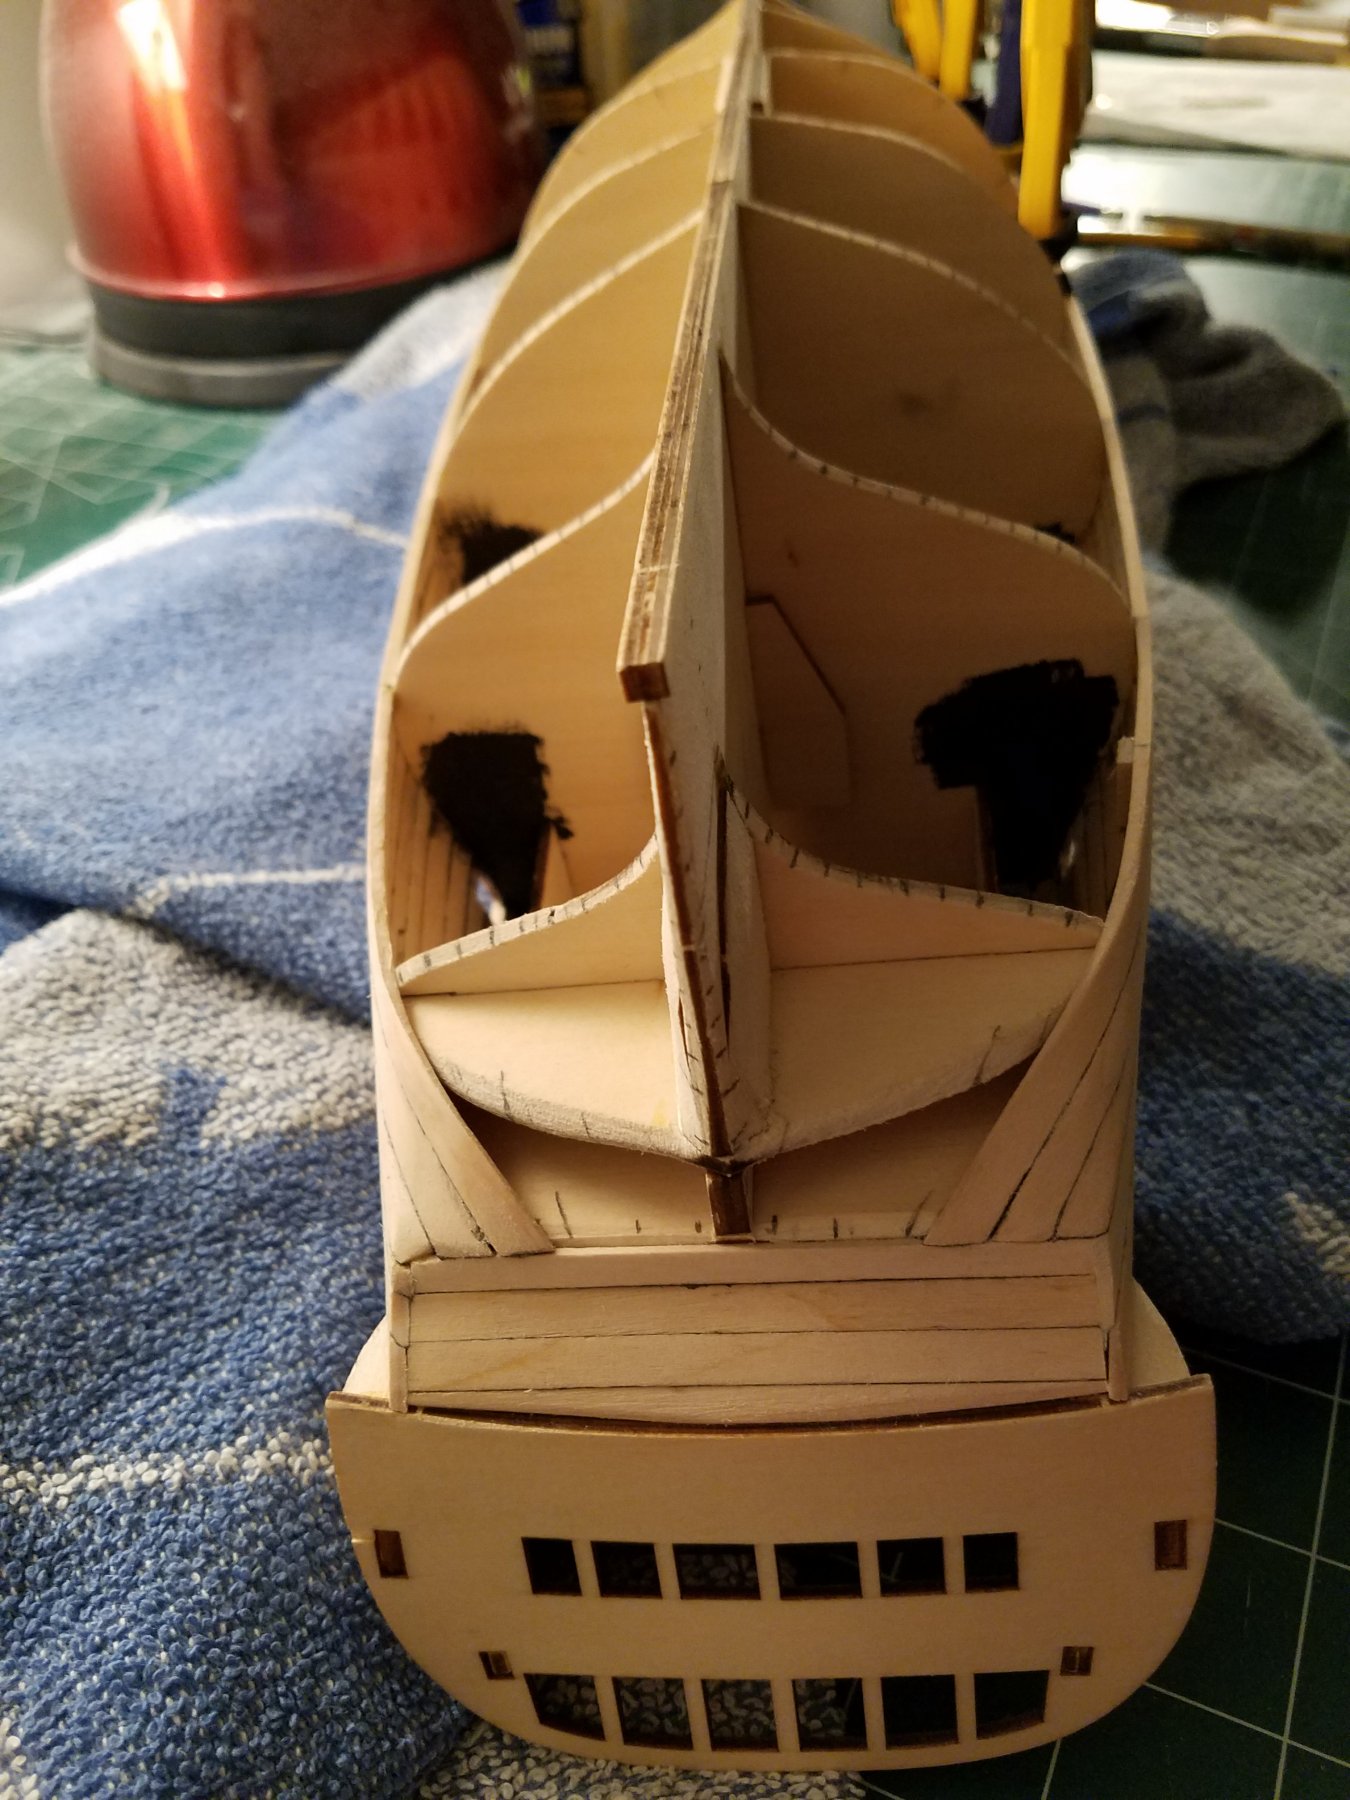
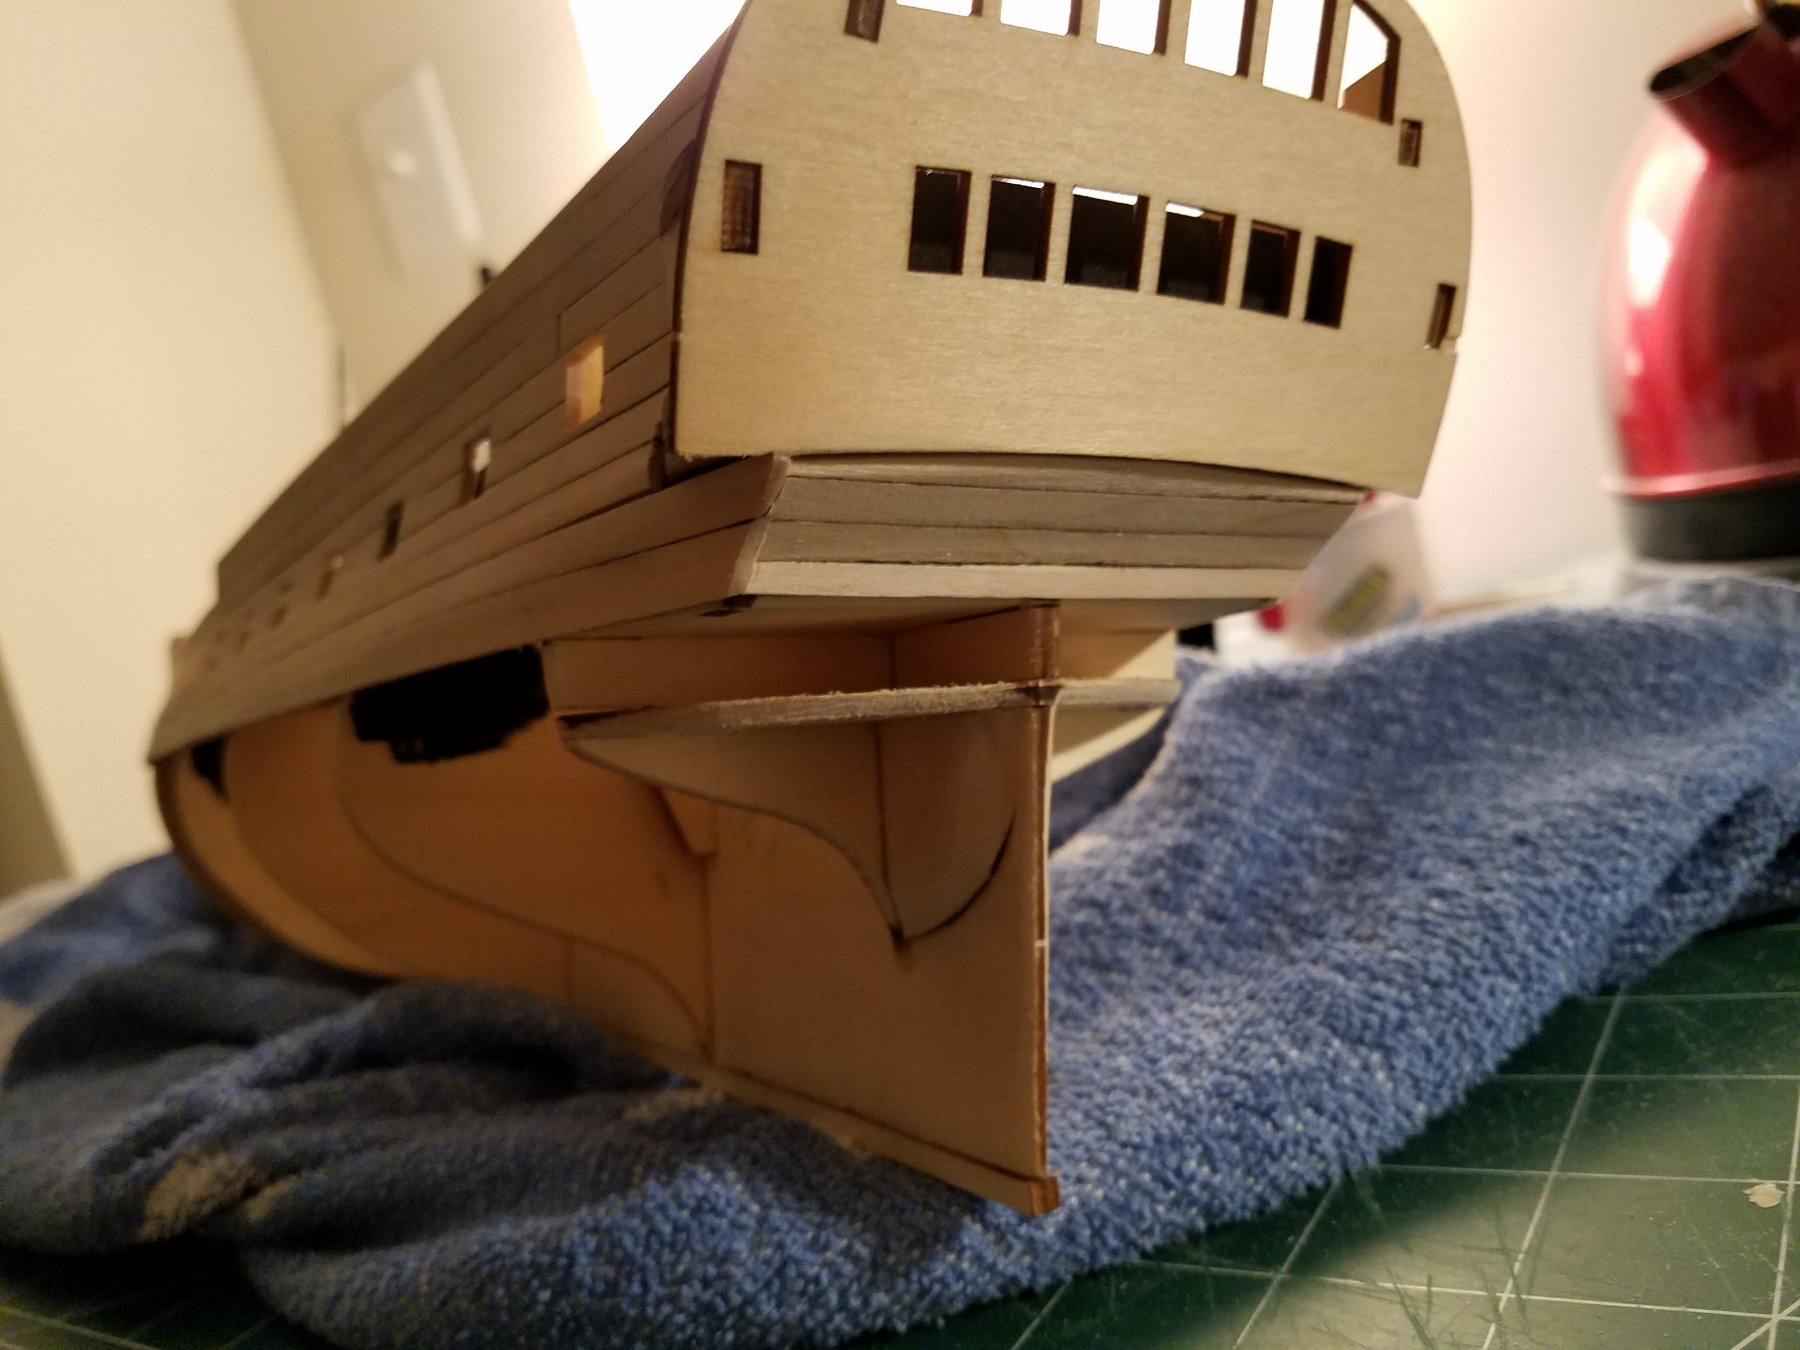
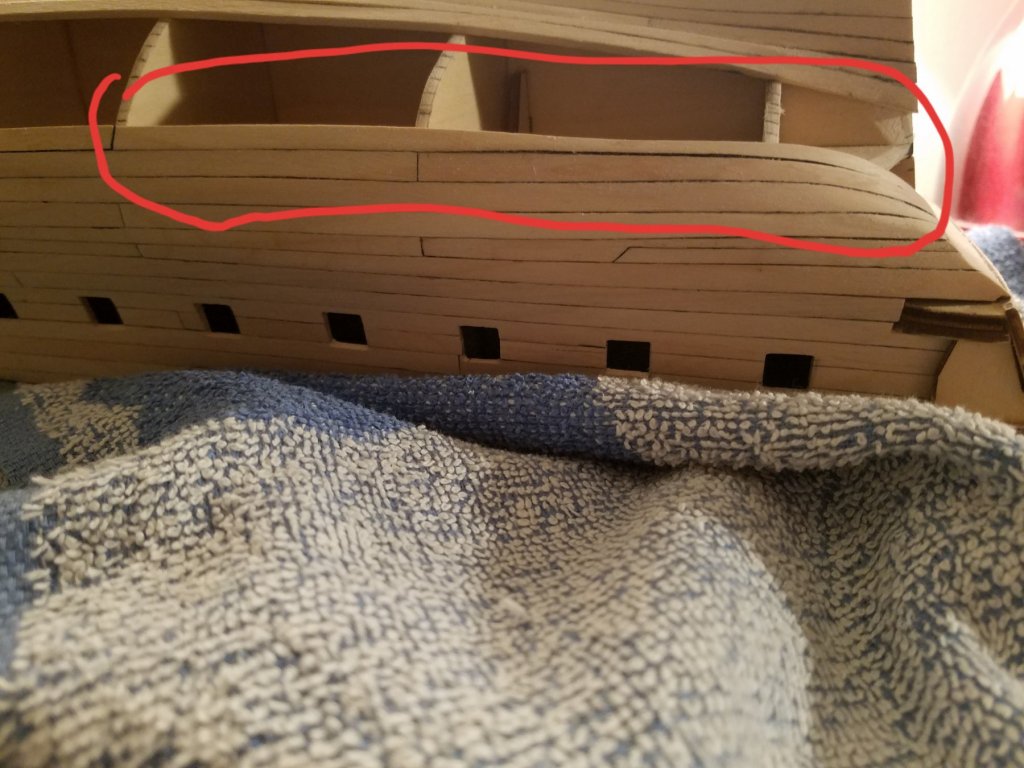
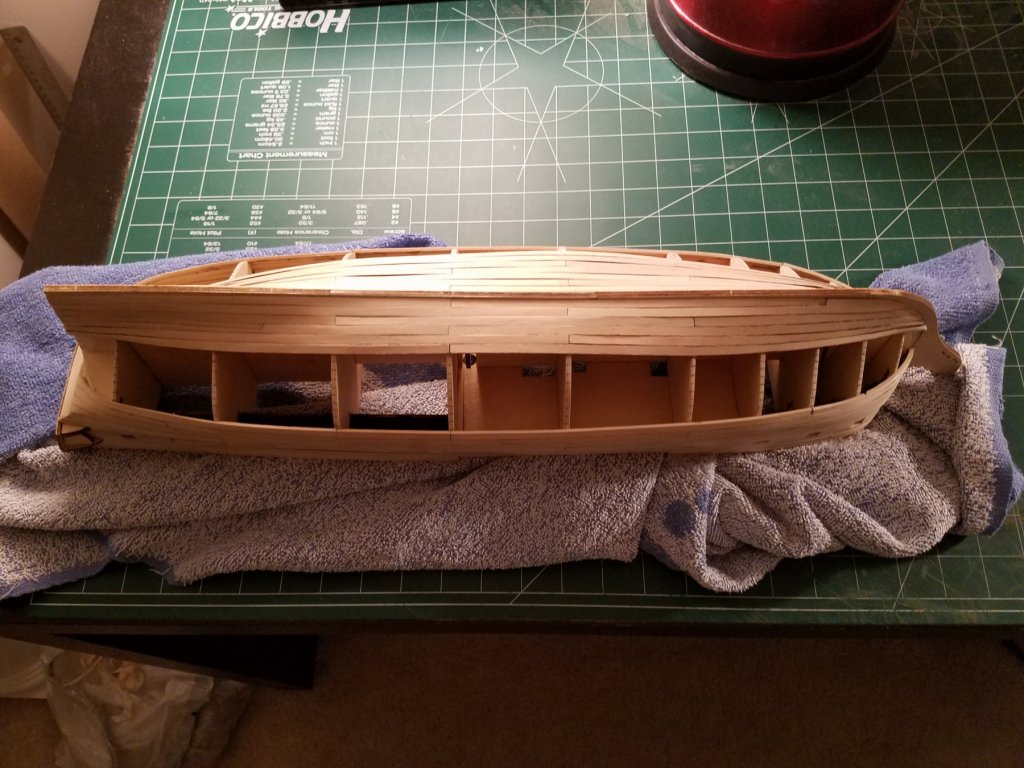
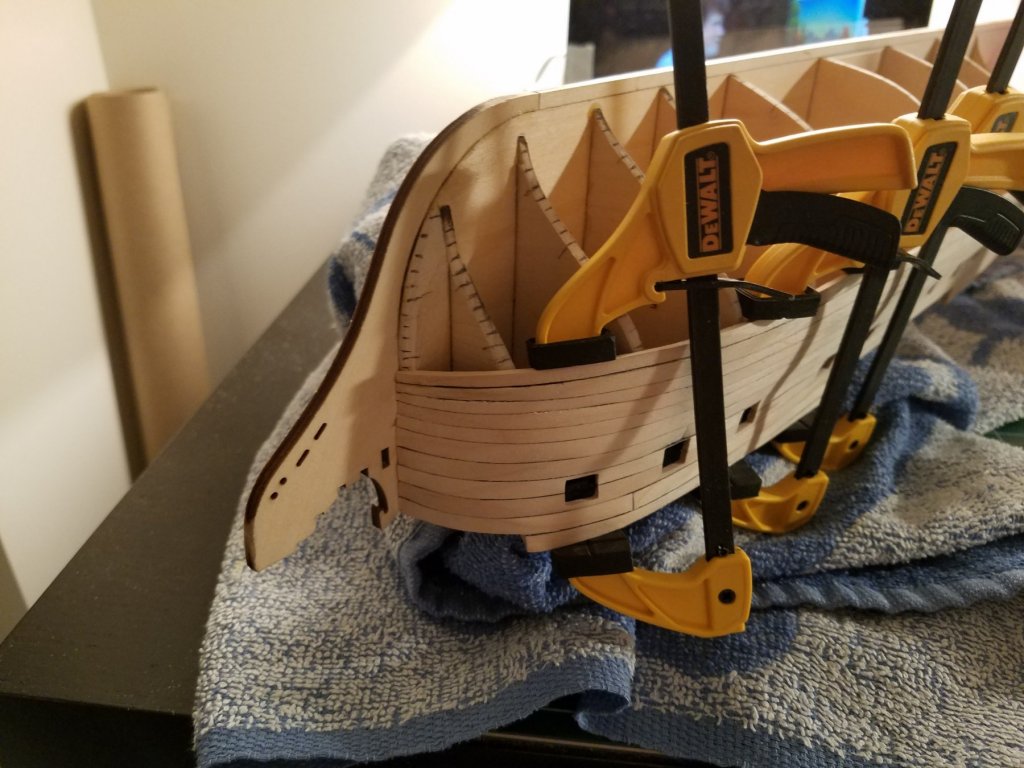
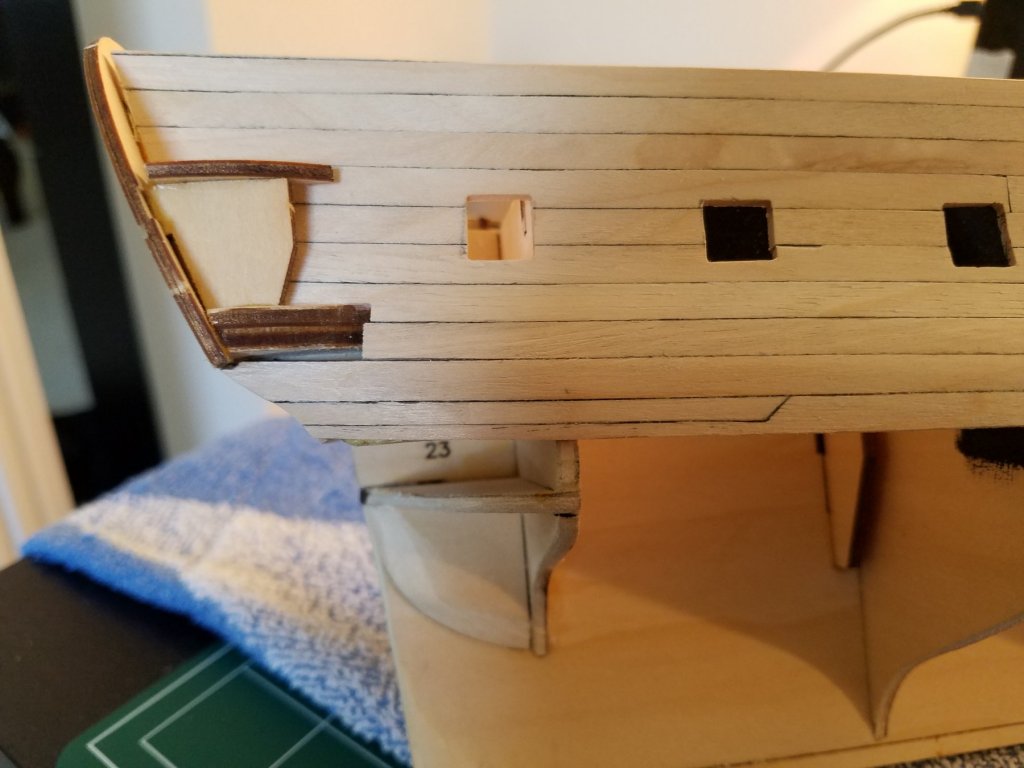
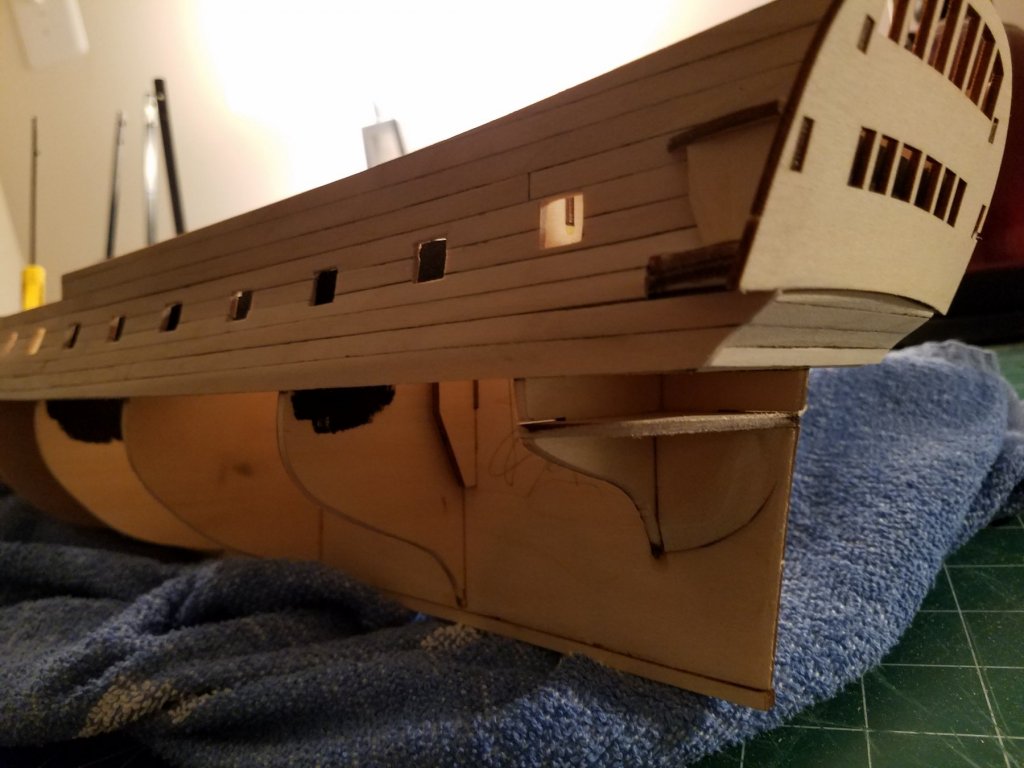
Just a small update. I have completed one side of planking that I will consider the top hull planking. The bottom two rows are smaller height wise to correct 2 things: 1) the hull planks at the bow on both sides of the ship do not match up (pic below) 2) following the planking instructions, I felt that the top rows of planks had too much of an upward bend towards the stern and needed to be slightly corrected for the bottom planking. If you look closely, the planks do not match up correctly until the last row. I cheated a little with the last row plank at the stern. This piece was a little wider than the other planks but fit well. This was to help correct the too much of an upward curve from the previous planks. I have started the other side. Once that is done, I will follow thw guides at this site to complete the bottom hull planking. Thanks! Jeff


-
This is my last post for this build for a while. I have started a new build here for the Artesania Latina L'Hermione kit. Thank you all for your support and kind words! They will help me a lot for my new build! Jeff