HOLIDAY DONATION DRIVE - SUPPORT MSW - DO YOUR PART TO KEEP THIS GREAT FORUM GOING! (89 donations so far out of 49,000 members - C'mon guys!)
×


Tomculb
-
Posts
345 -
Joined
-
Last visited
Content Type
Profiles
Forums
Gallery
Events
Everything posted by Tomculb
-
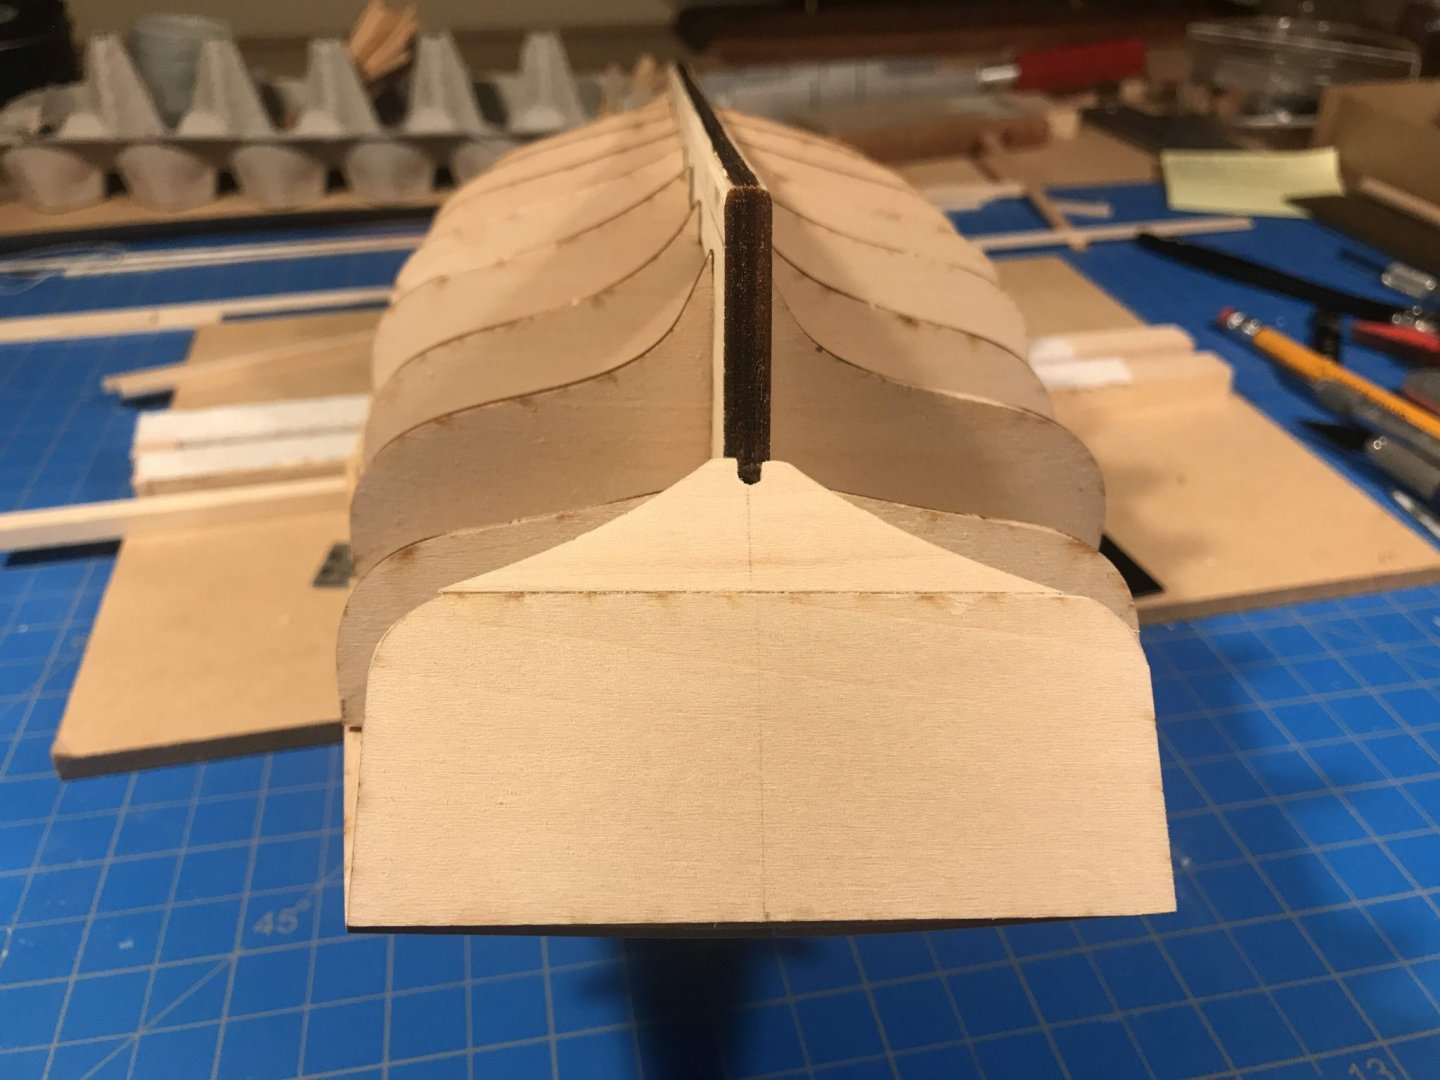
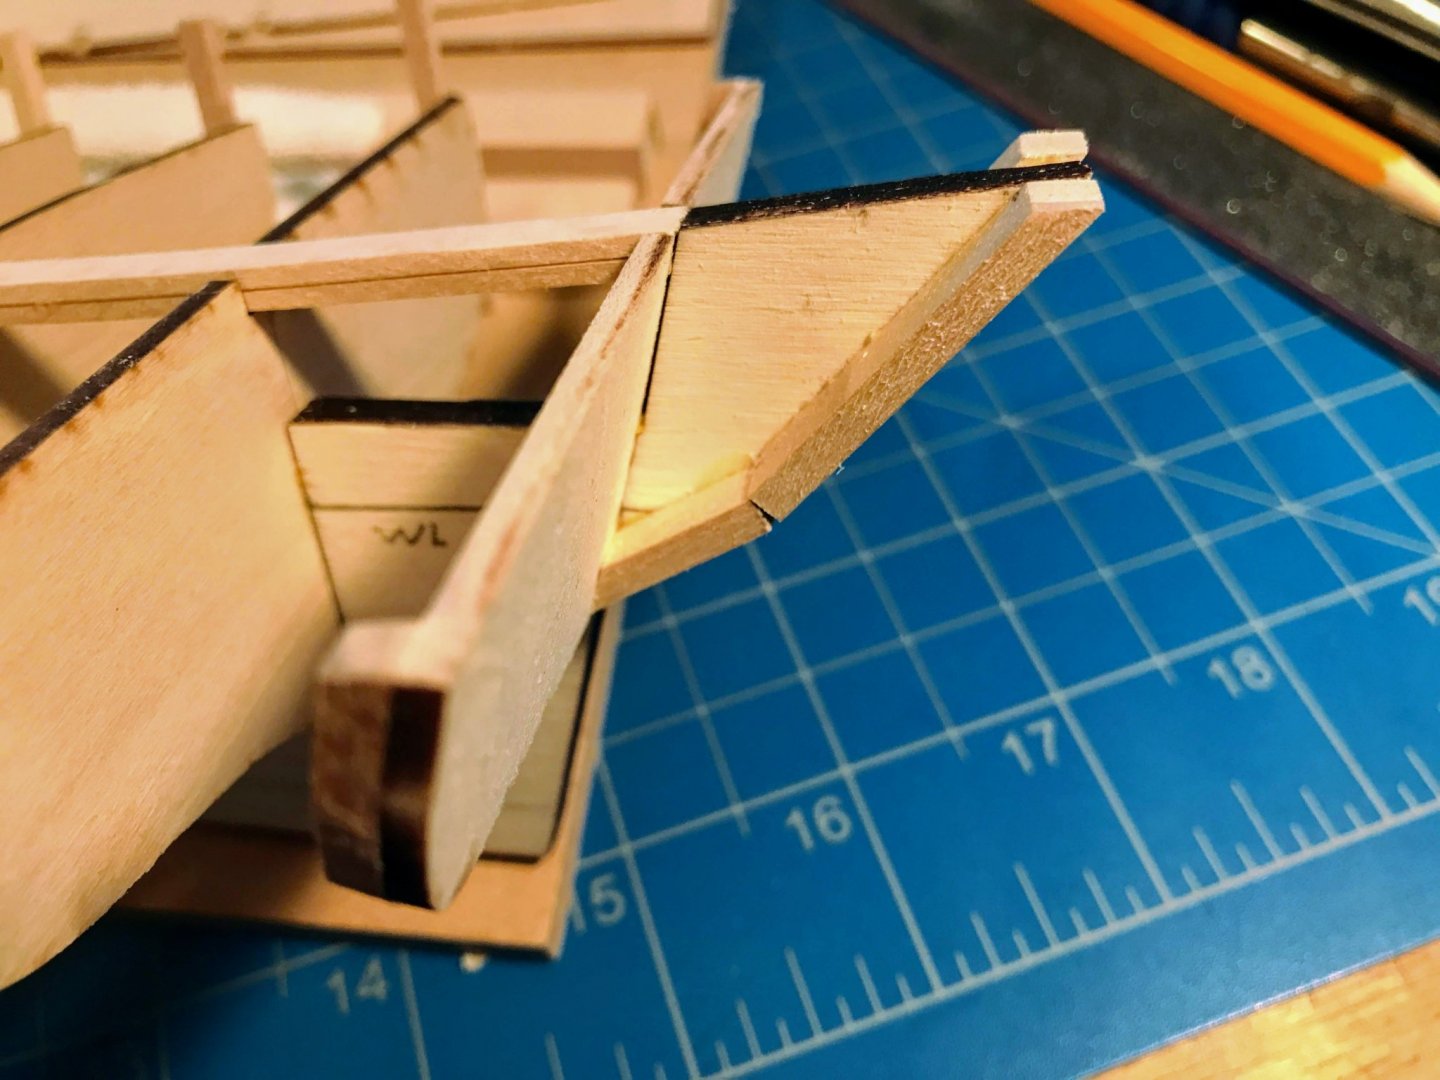
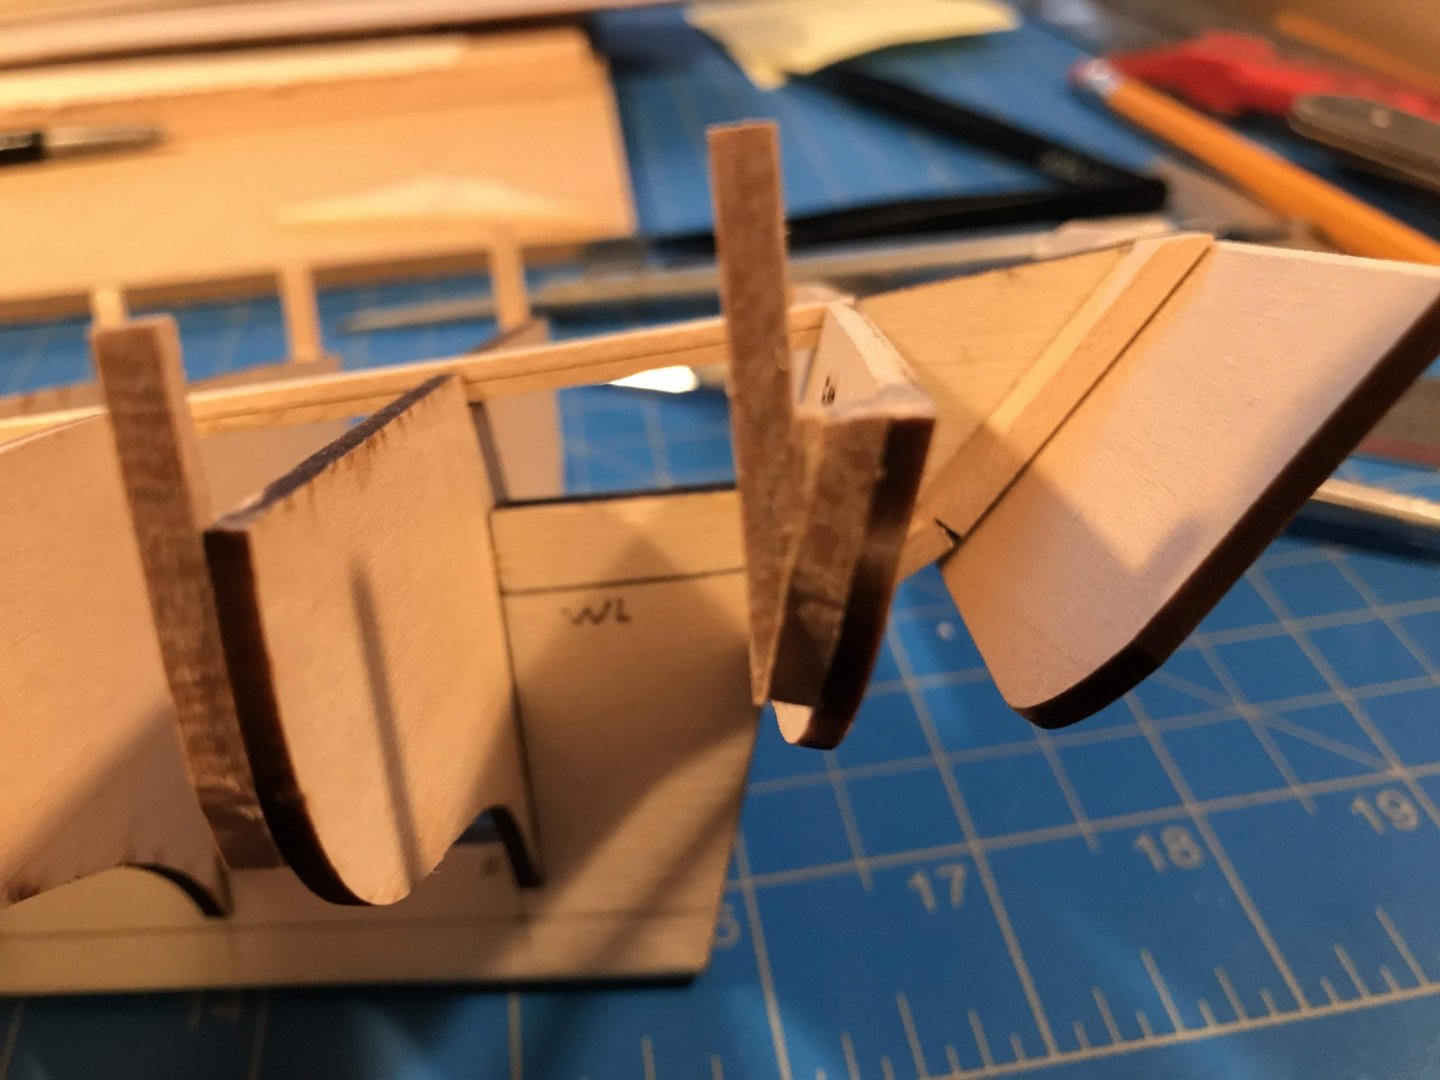
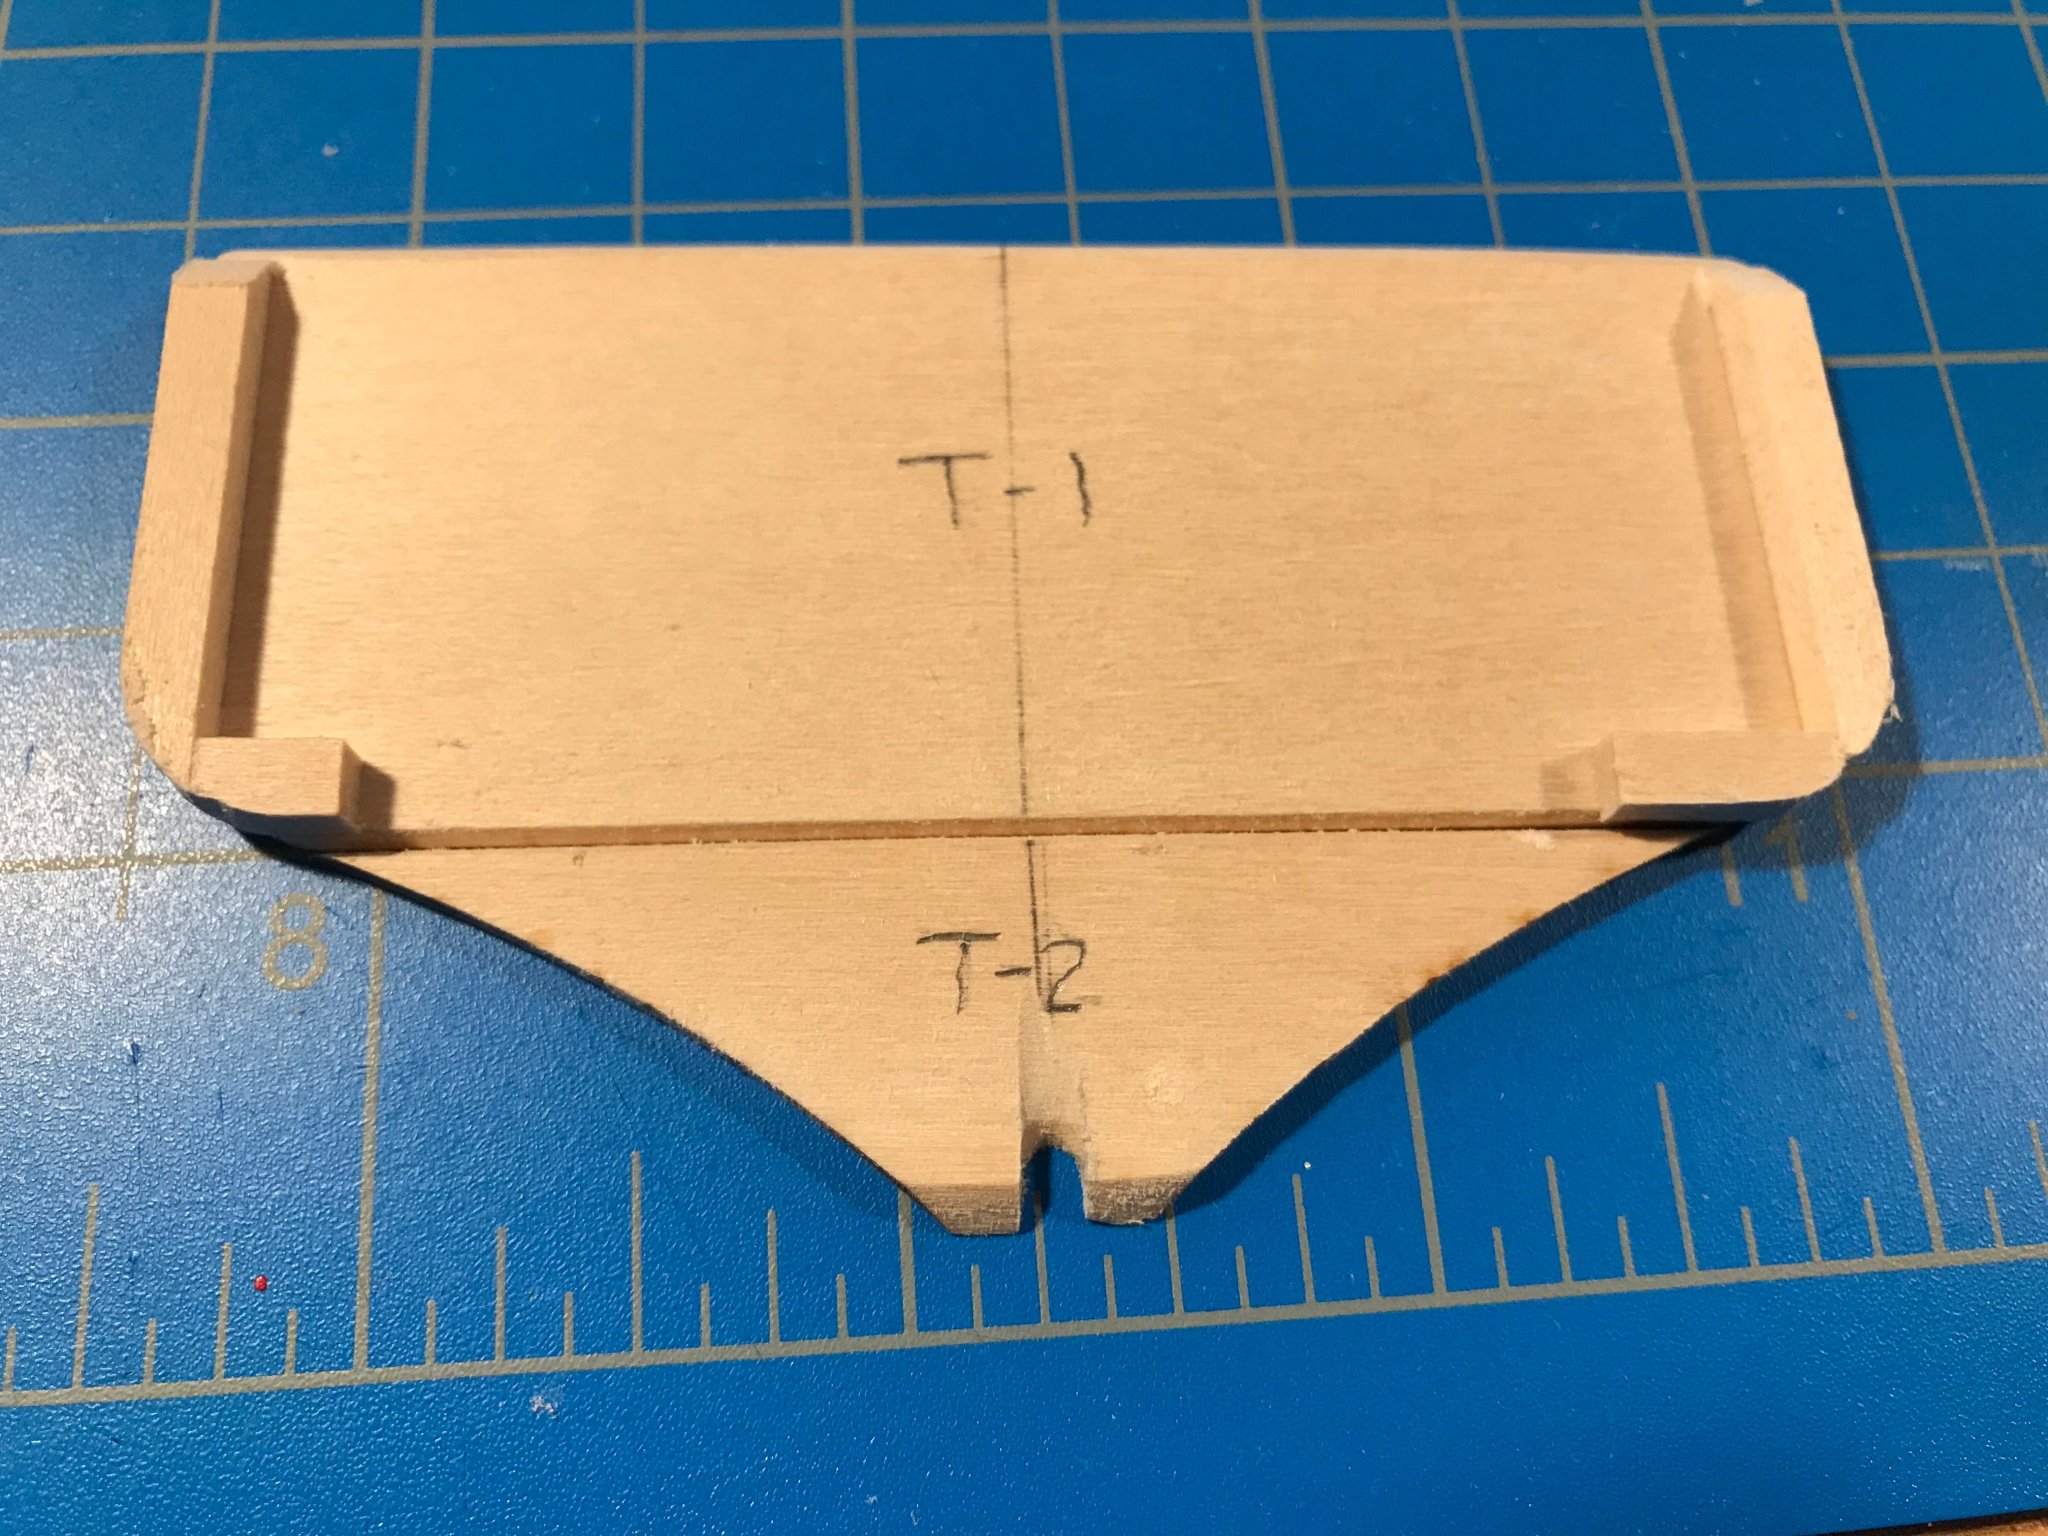
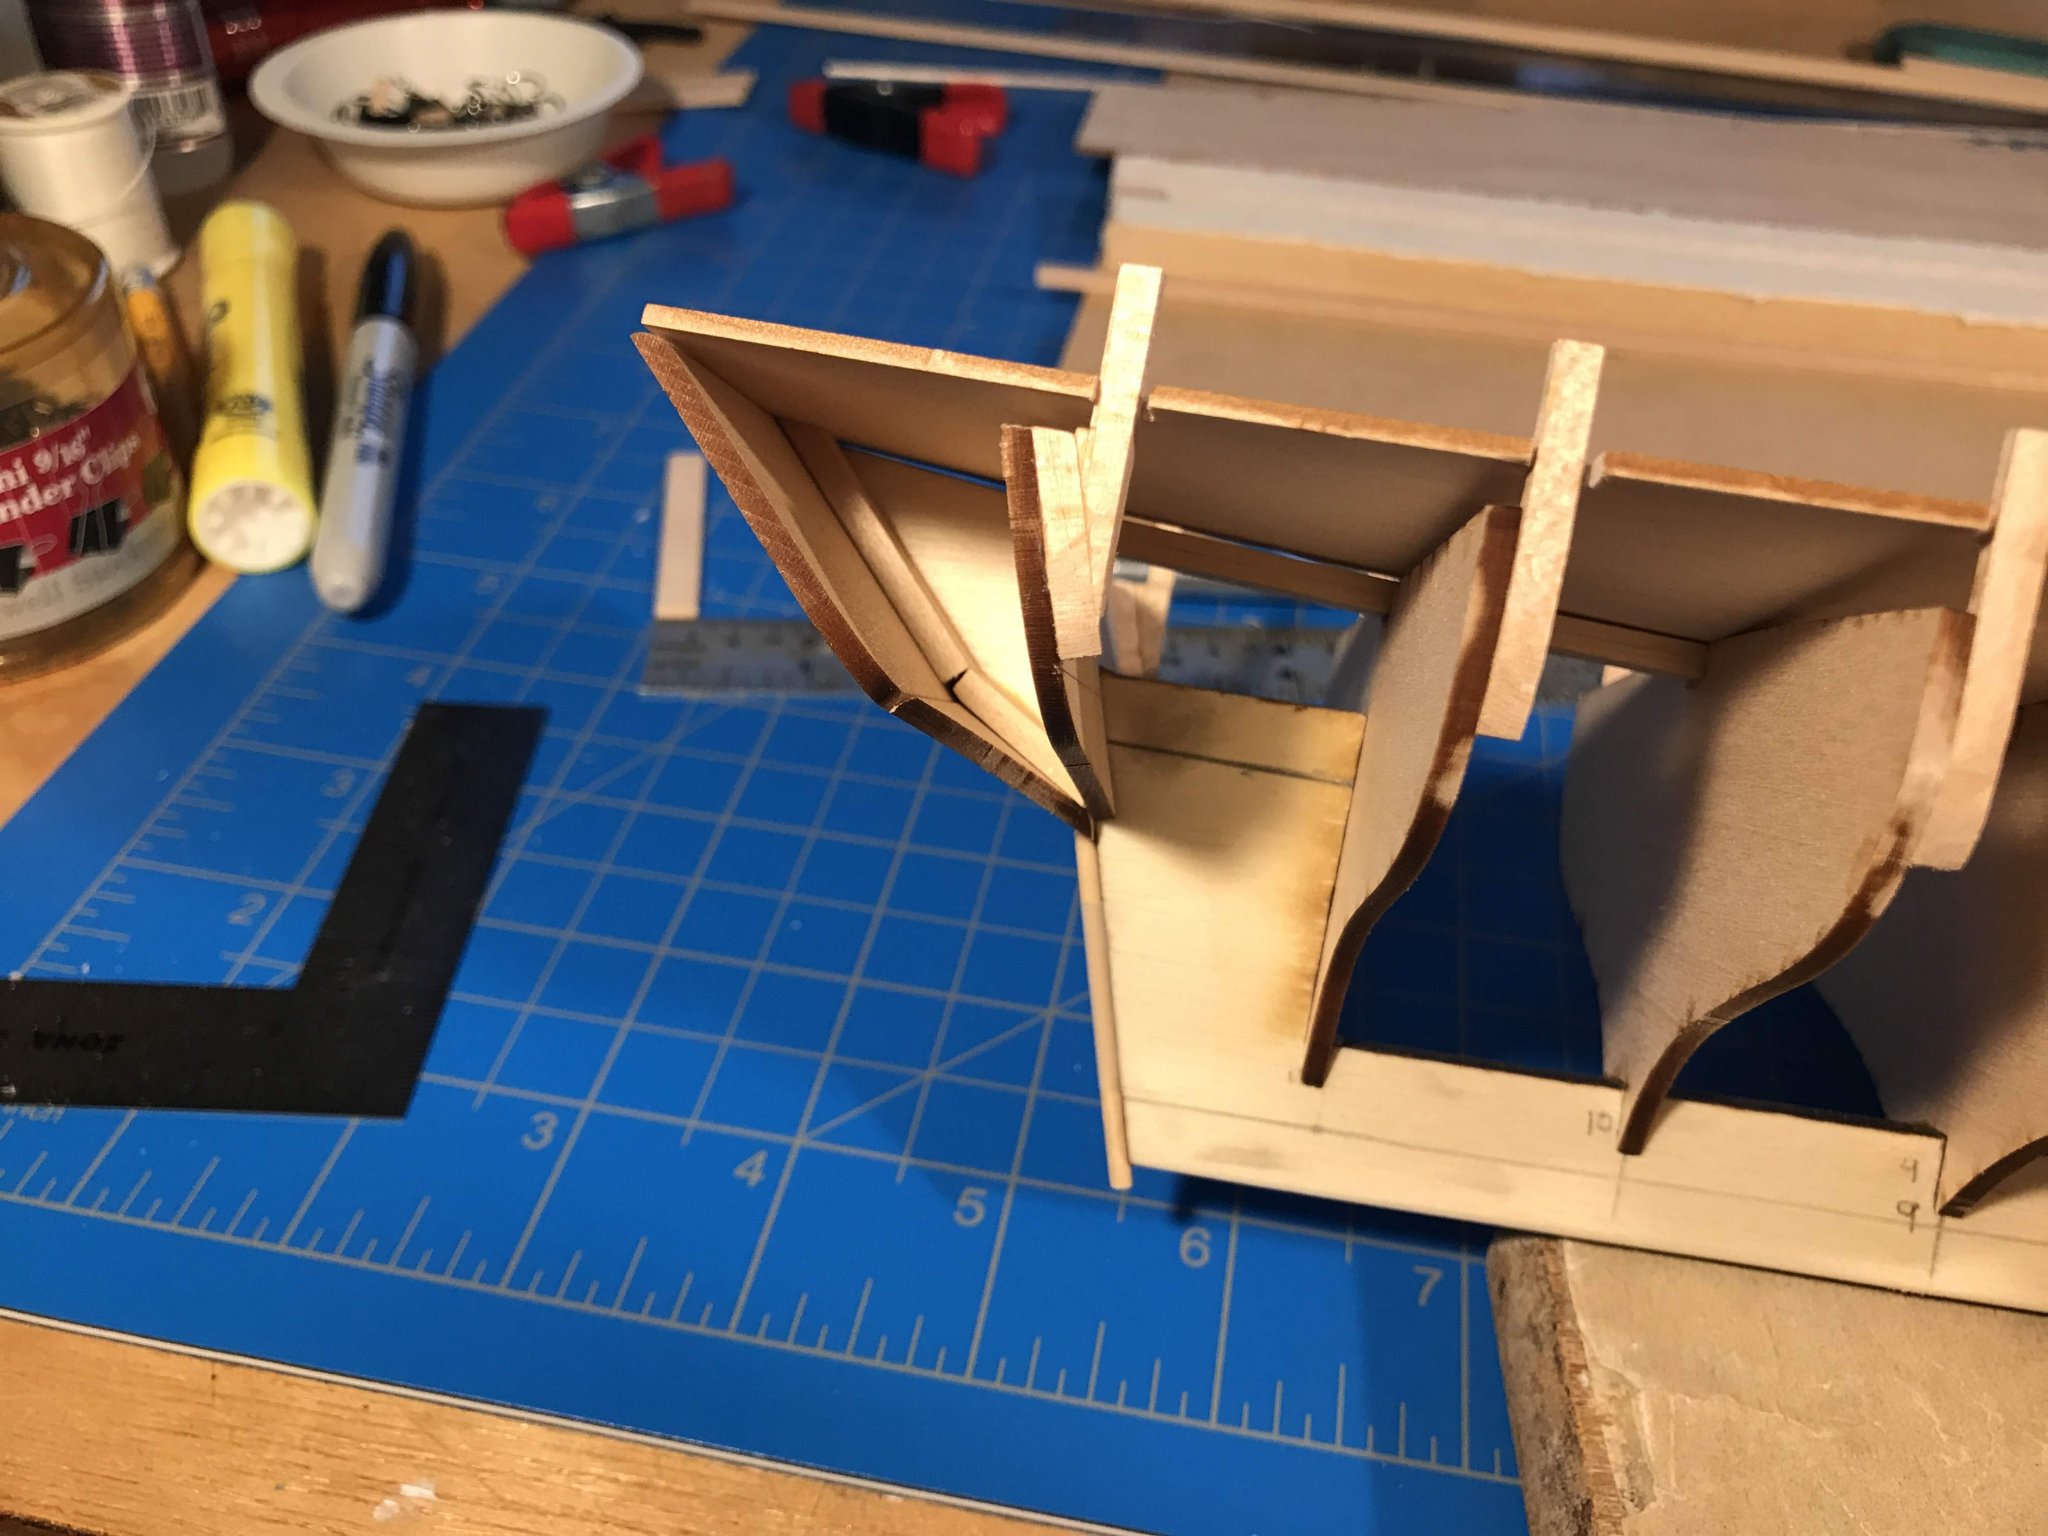
 Before gluing Transom 1 and Transom 2 in place, I glued 1/8th by 1/8th strips to the outside edges of Transom 1, so that the hull planks would have something substantial to be glued to. I did not do that to Transom 2, since it will be beveled pretty extremely to accommodate the planks, and I think there will be plenty of wood to glue them to. The transoms were then glued in place. Gluing the transoms on presented another minor challenge. The deck of course slopes down to the bulwarks, while the upper edge of Transom 1 (ie at deck level) runs straight across. I gave a moment’s thought to rounding the top of Transom 1 to match the deck, but I realized that wouldn’t be necessary. The first plank of what I will call Transom 3 (the yet-to-be-built stern bulwark) will hide the gap quite nicely. That brings me up to real time, and I can move back to building mode from blogging mode. The bulkheads and bulwark stanchions need to be beveled and the structure needs to be otherwise prepared for planking. And, I need to do a little experimenting with plank bending -- soaking, steaming, adding ammonia (or not), etc. Some of the plank bending, especially in the bow, will be pretty radical, involving twisting as well as bending both horizontally and vertically. It should be a fun learning experience.


- 82 replies
-
- 3
-

-
- spray
- BlueJacket Shipcrafters
- (and 1 more)
-
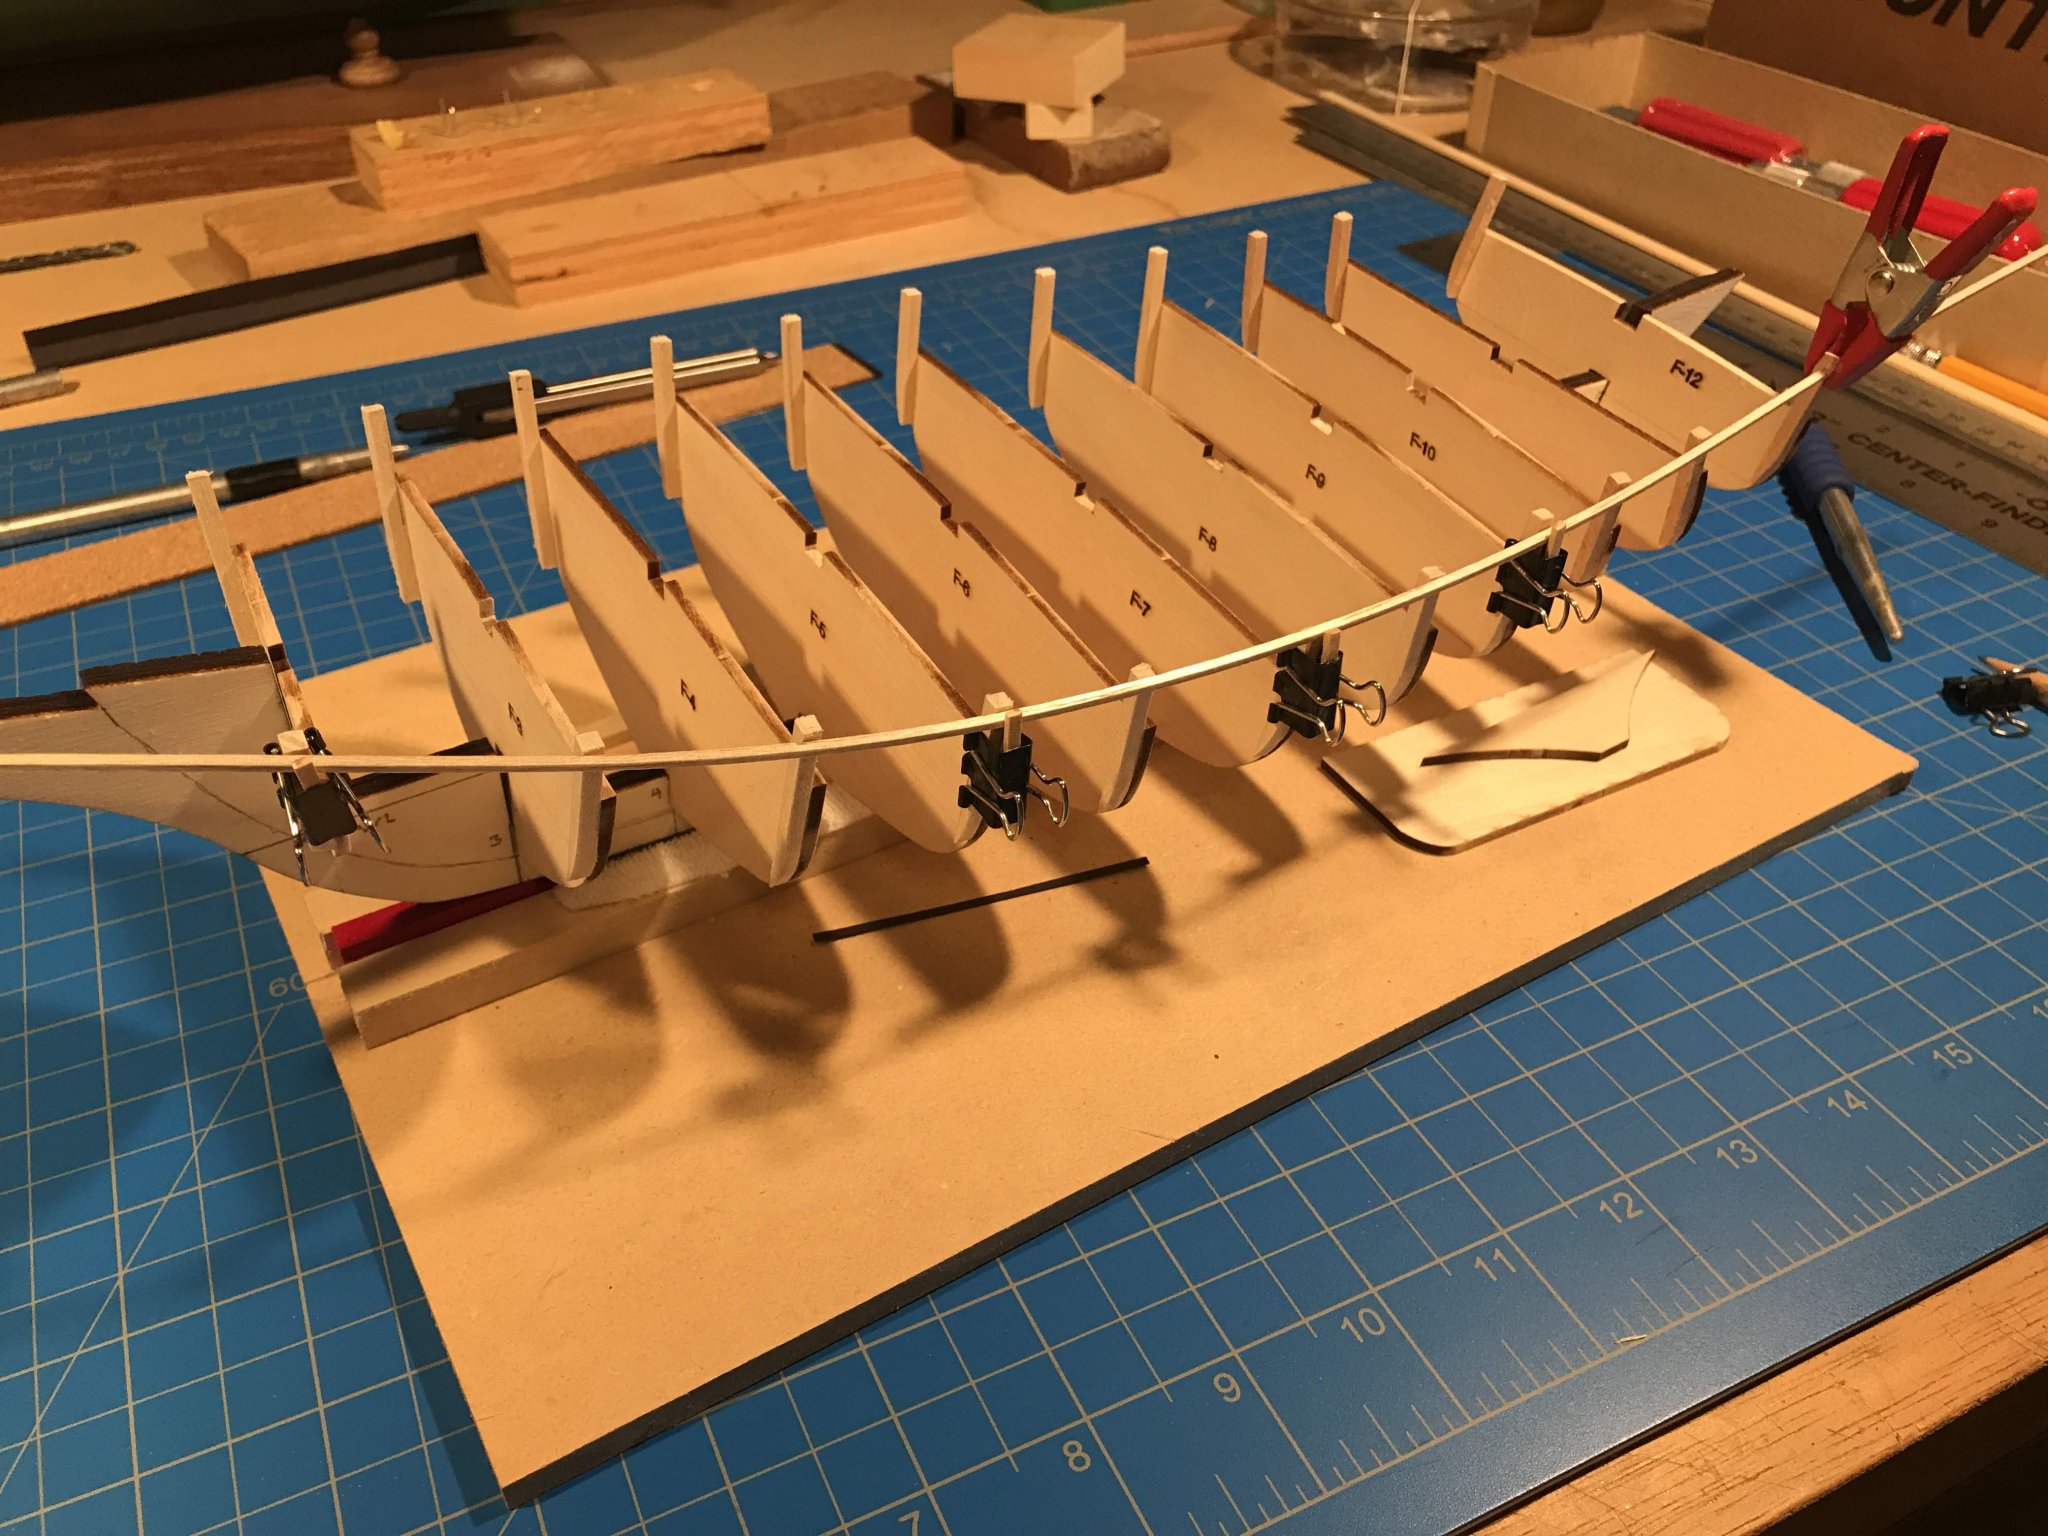
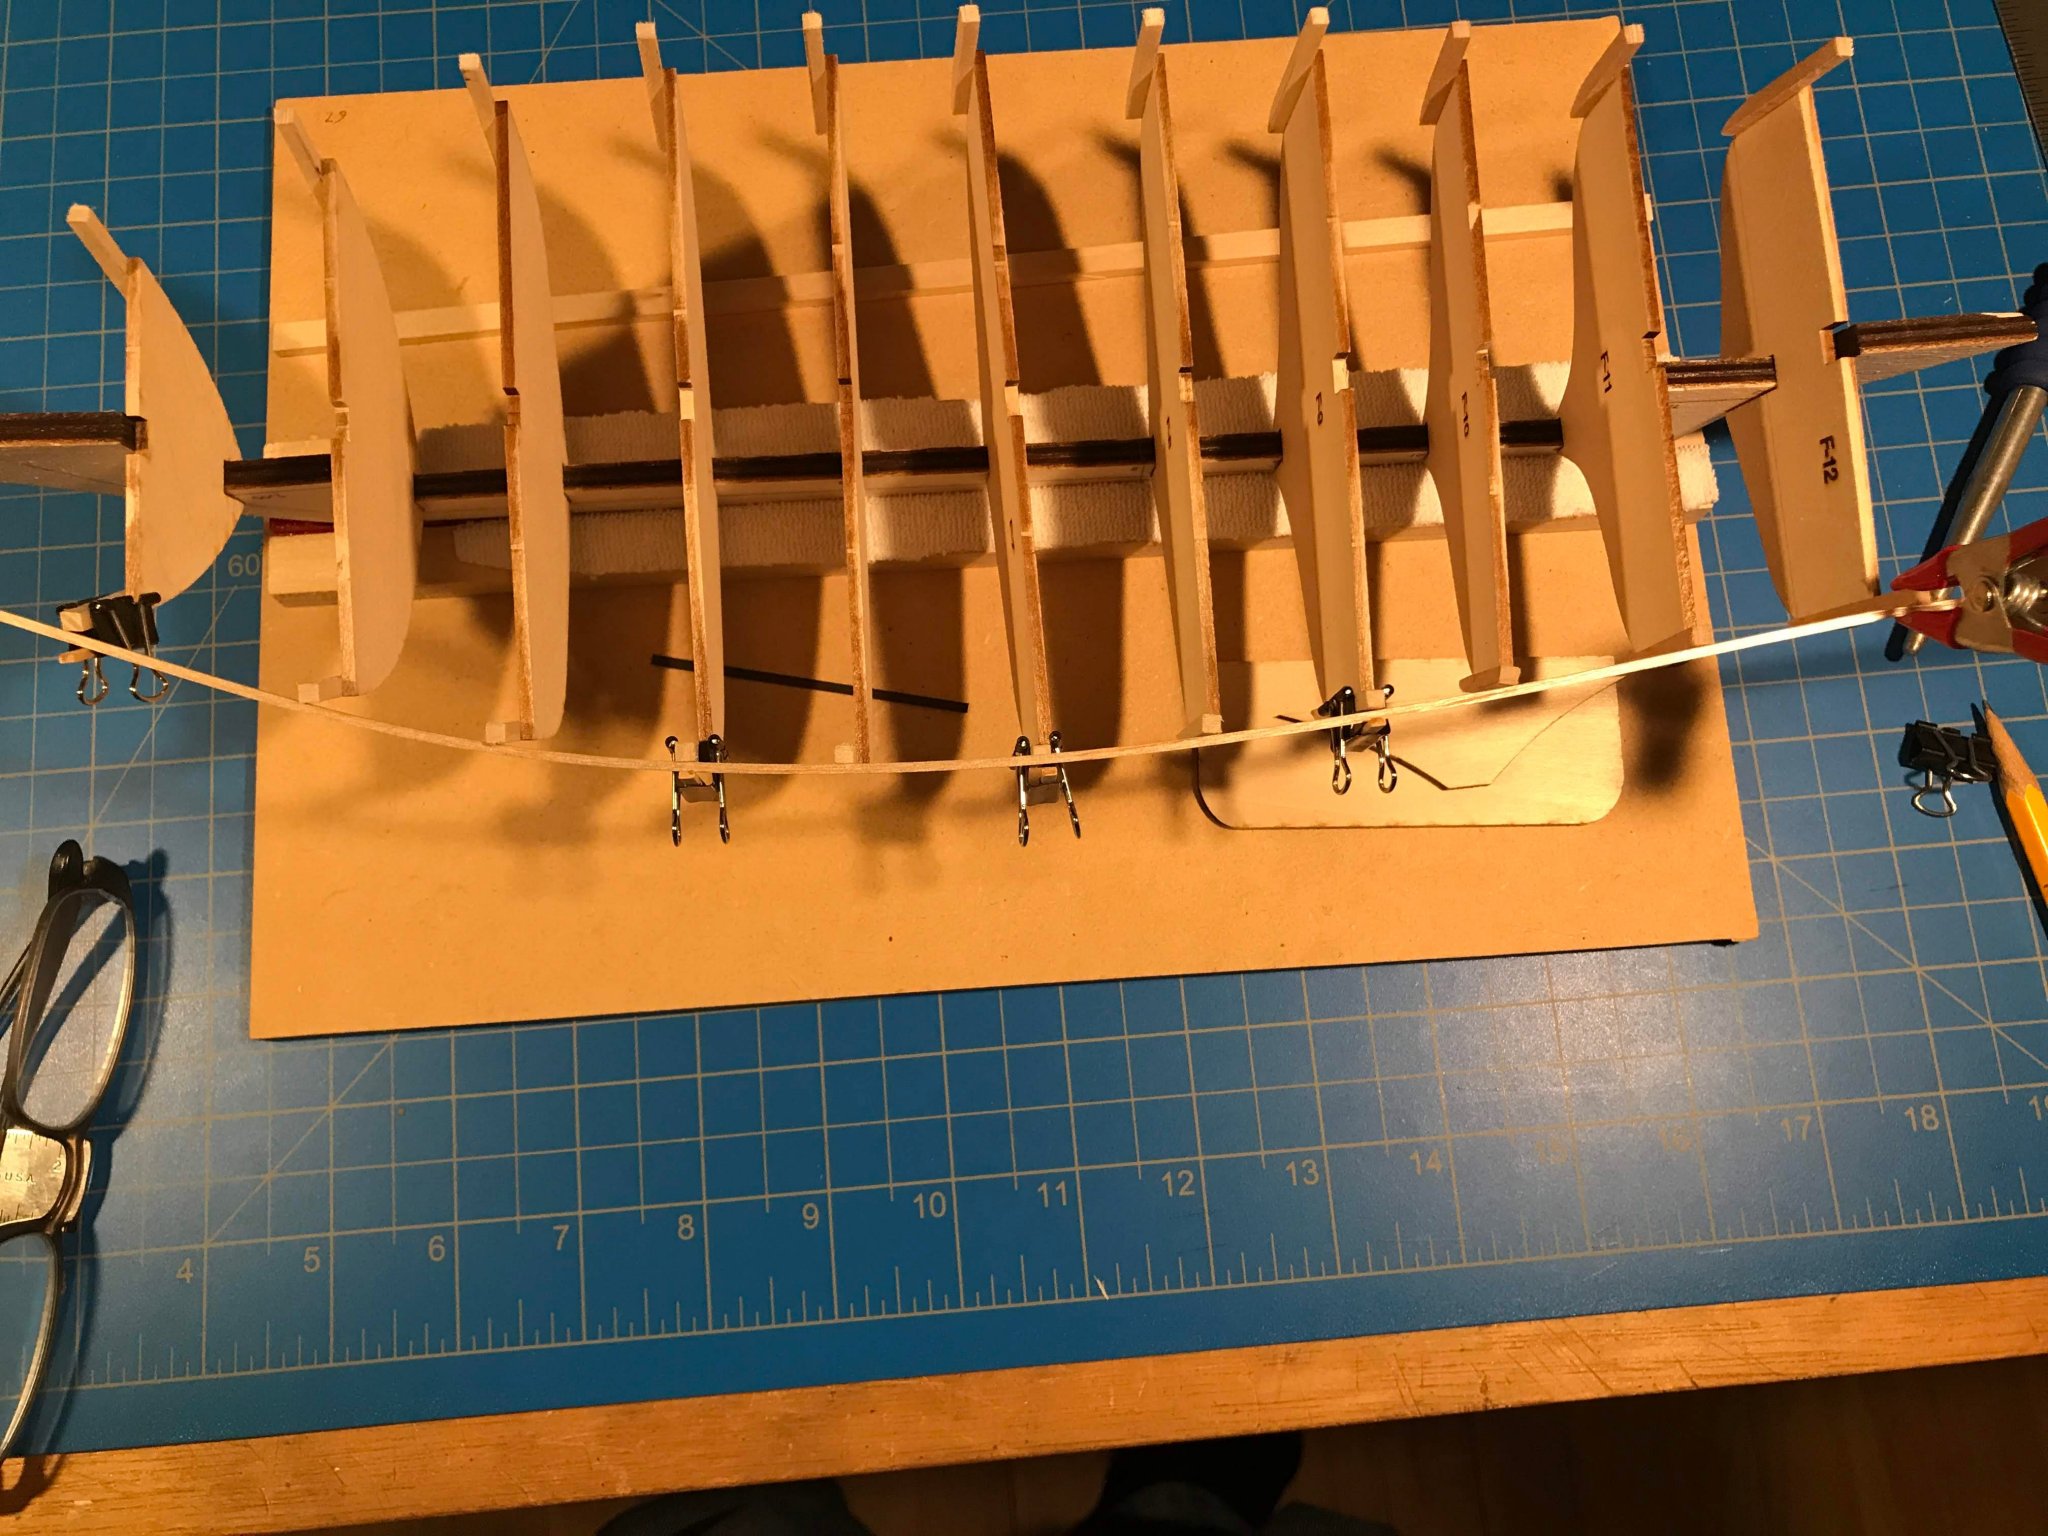
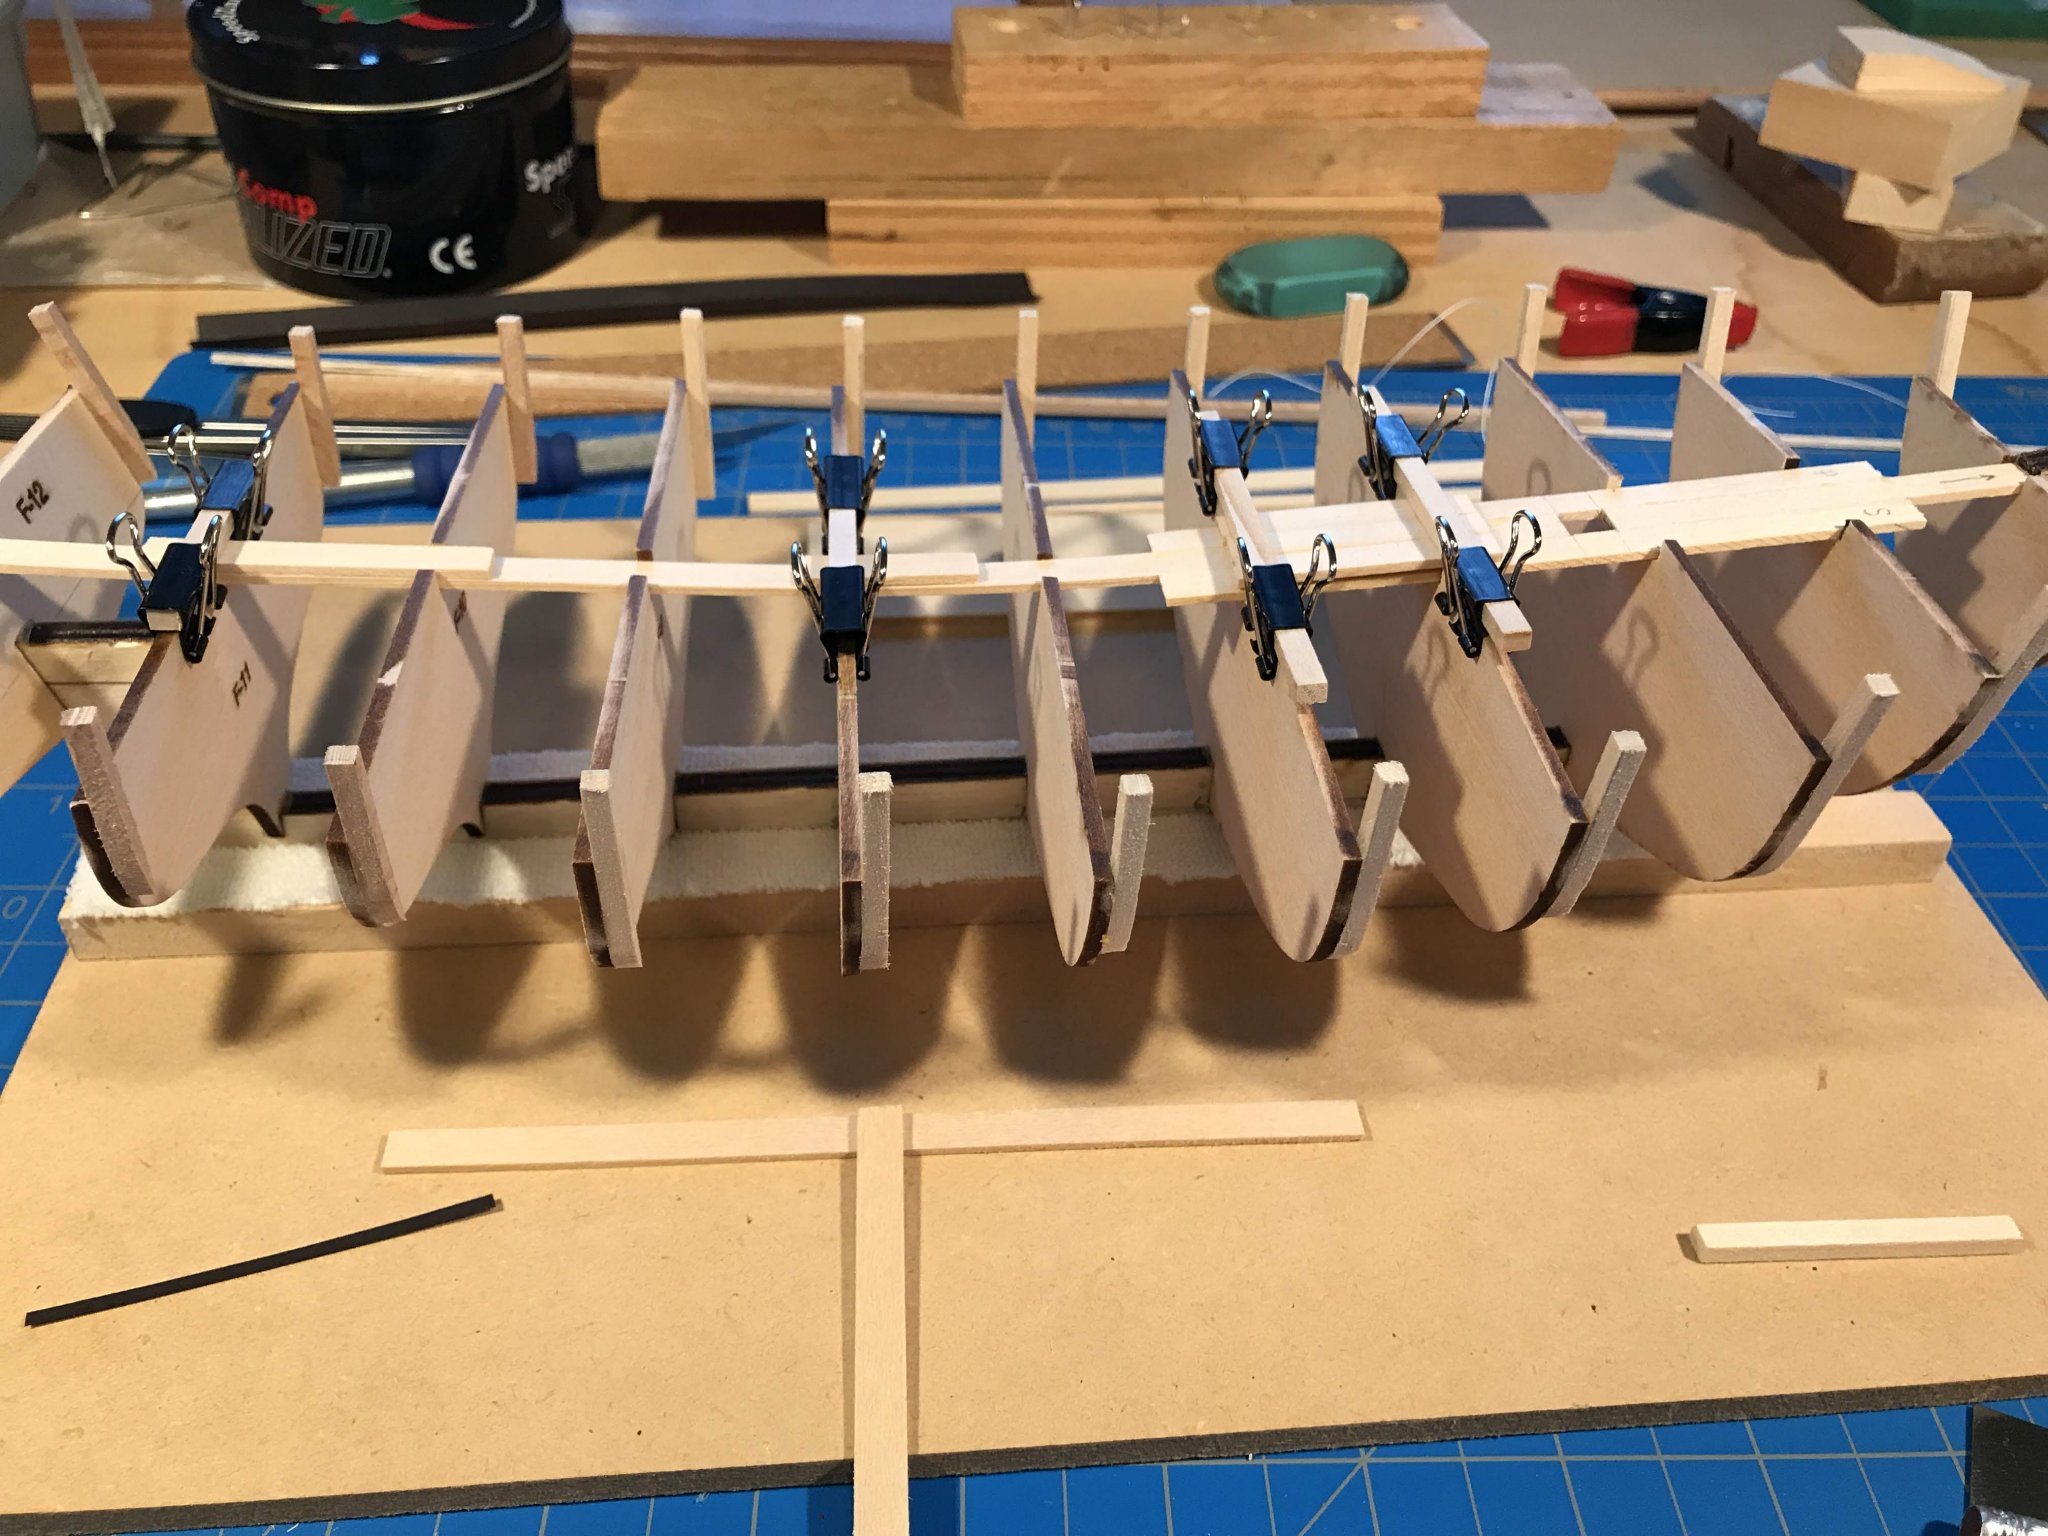
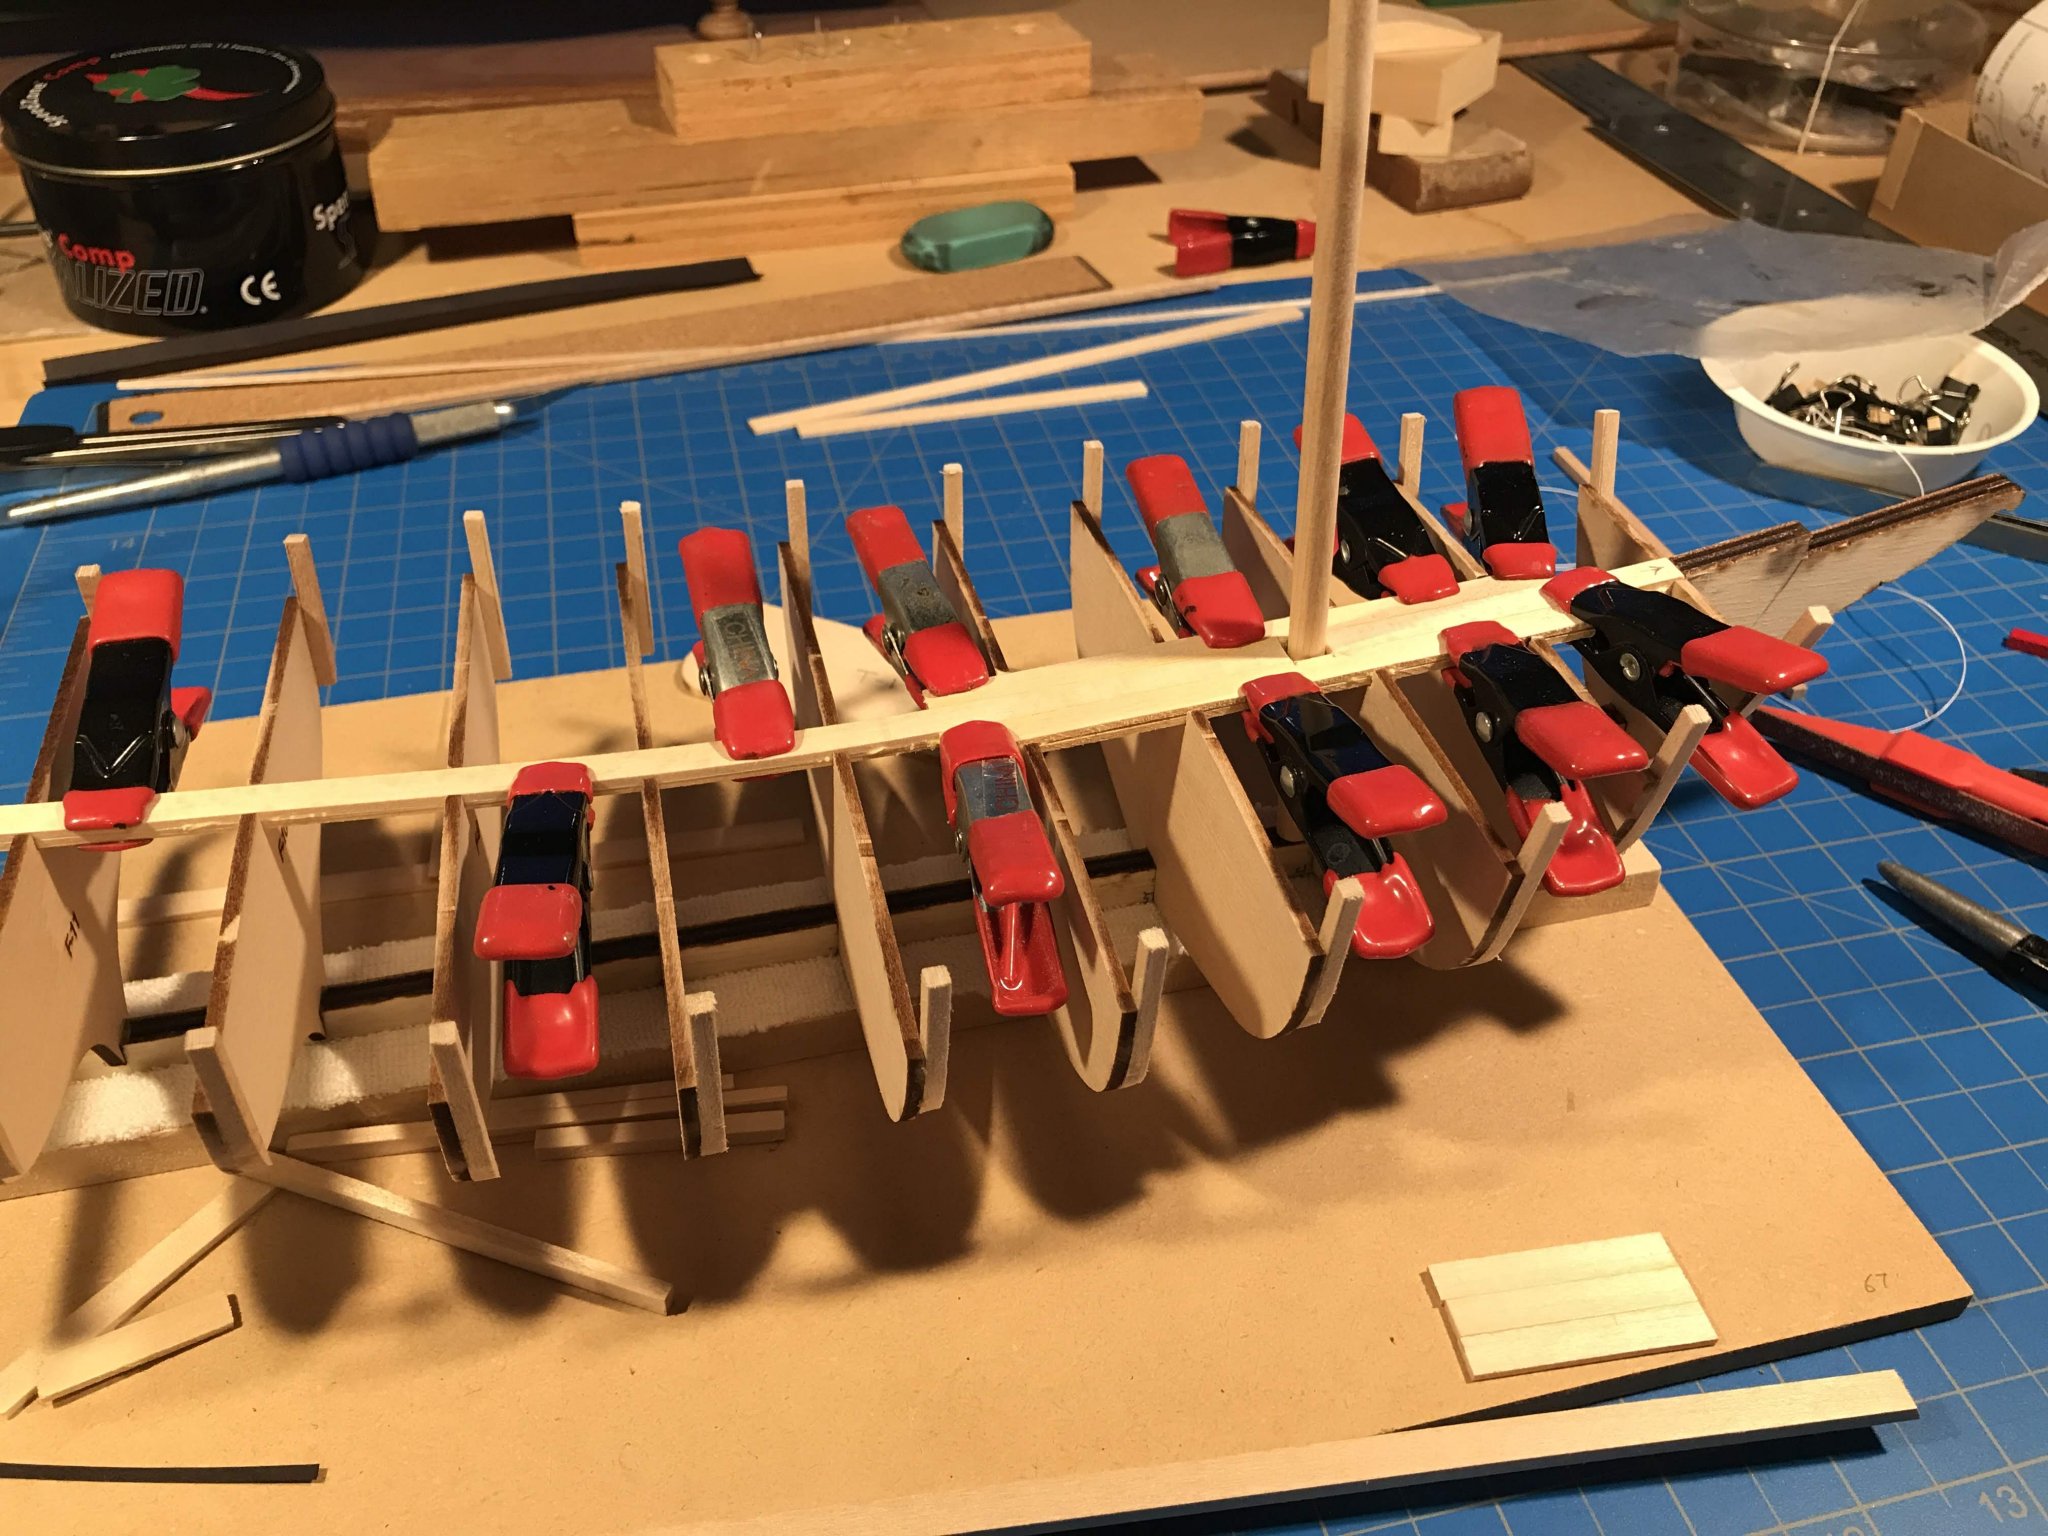
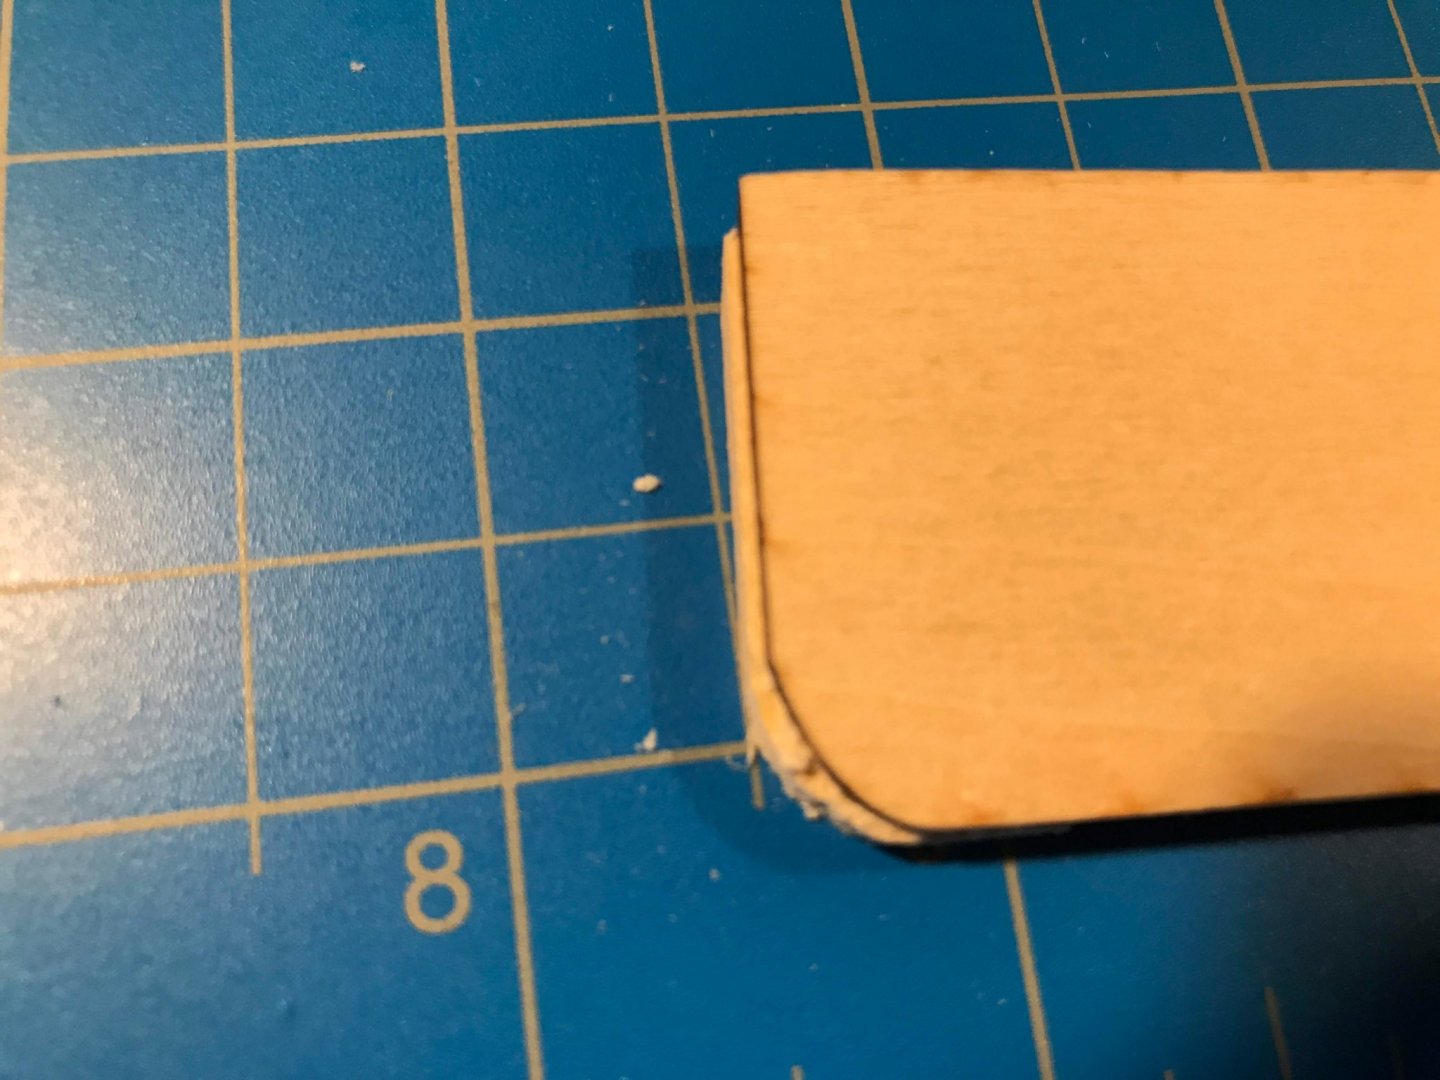
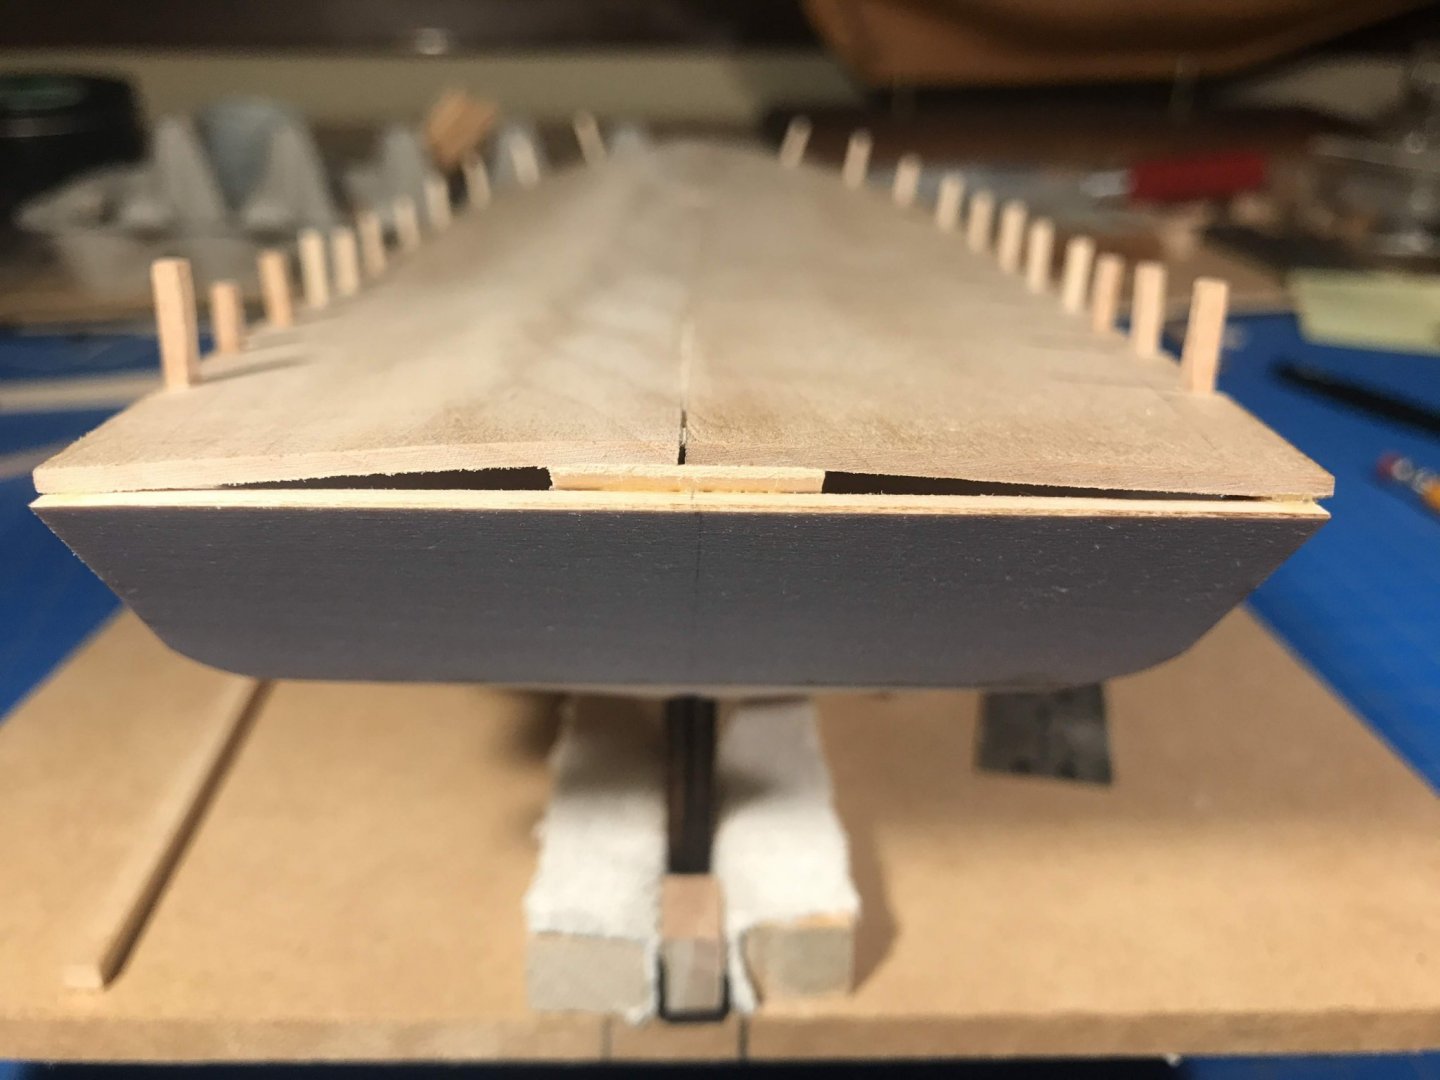
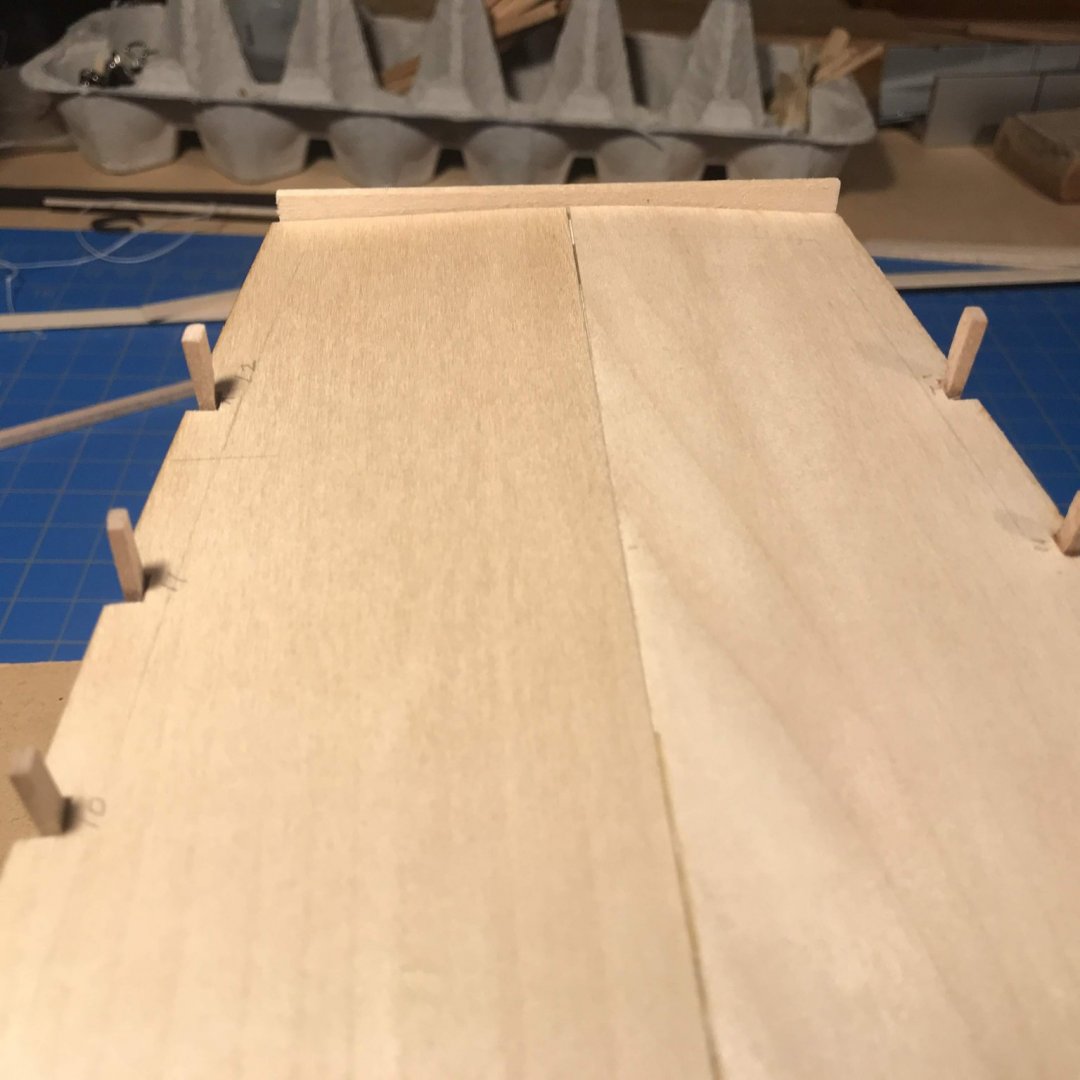
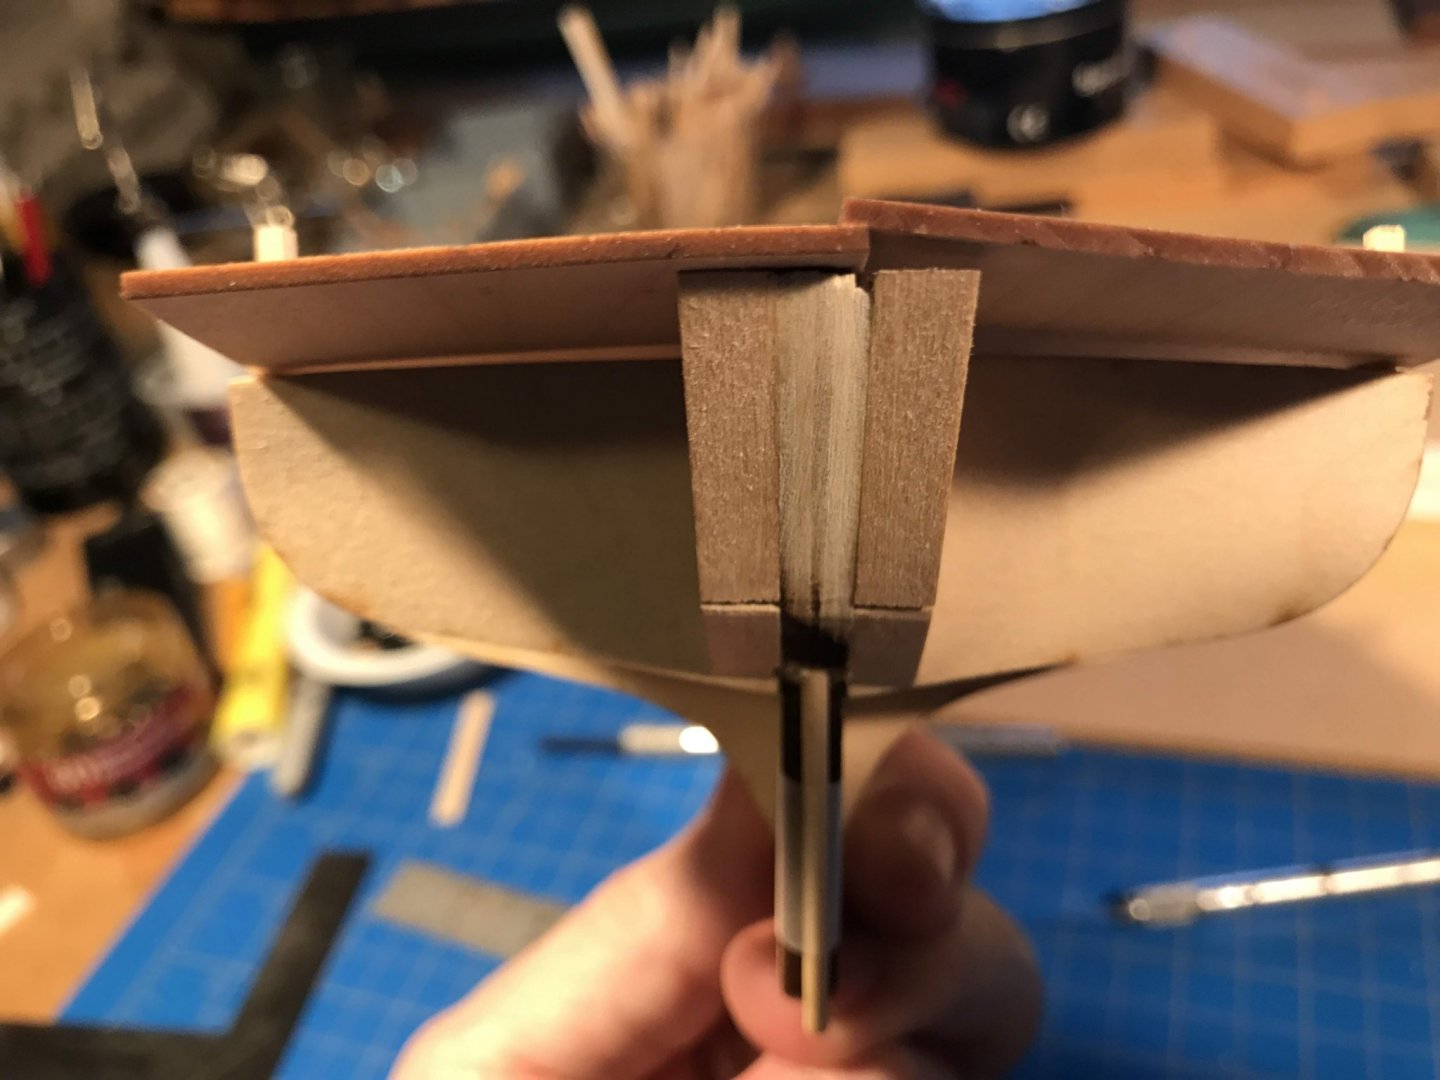
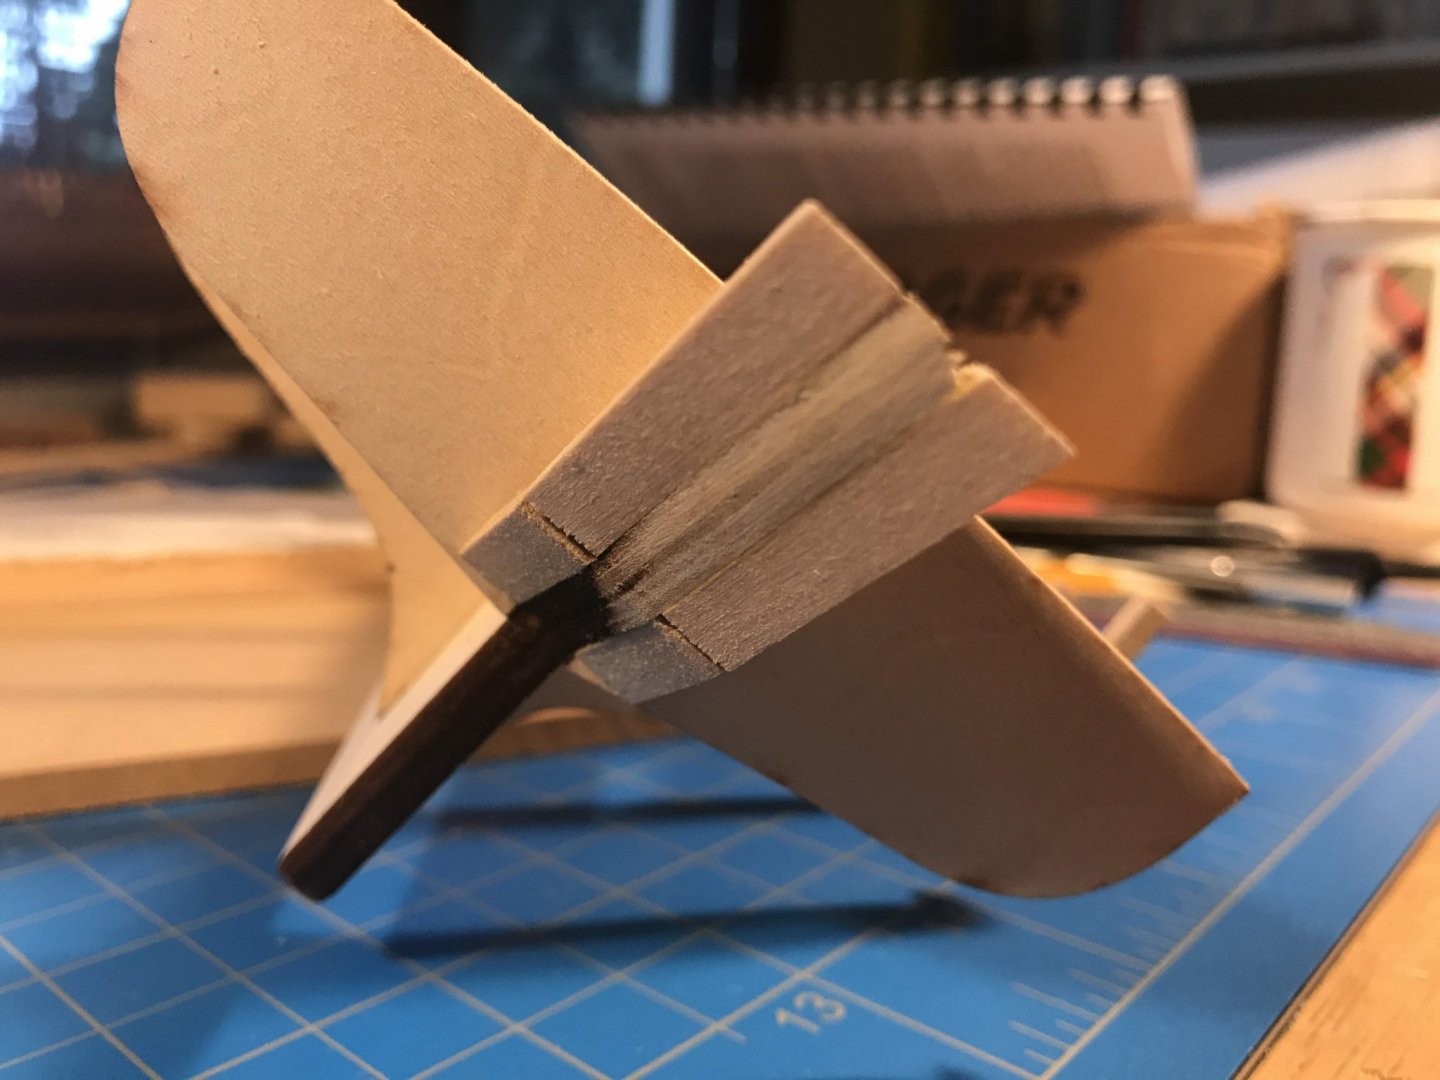
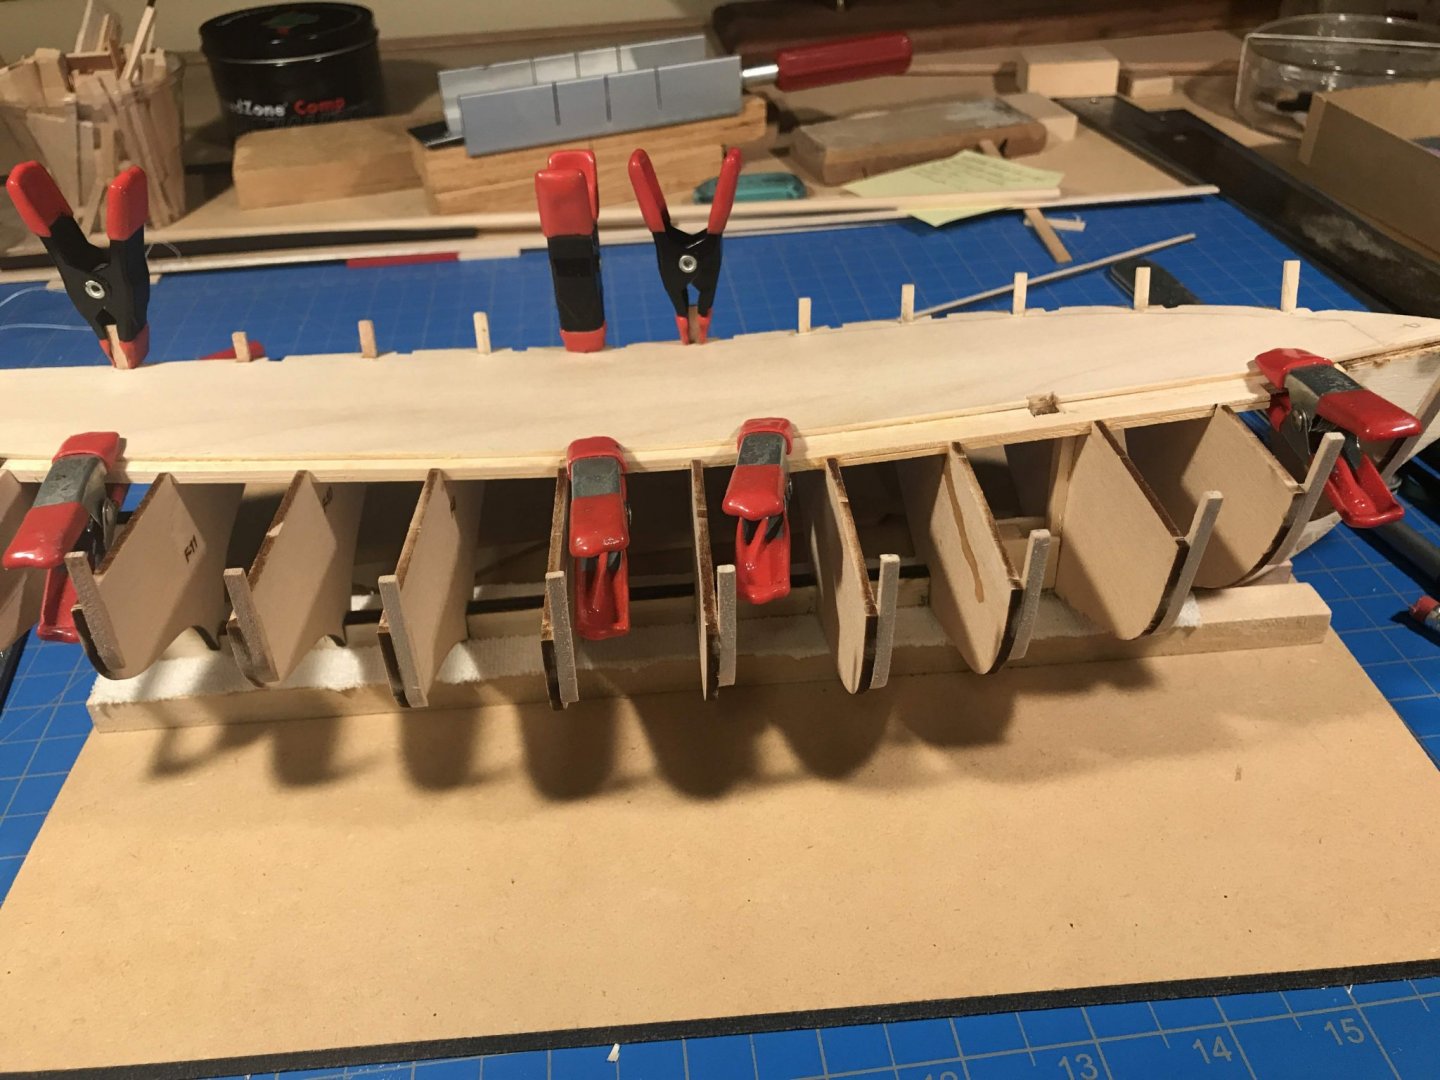
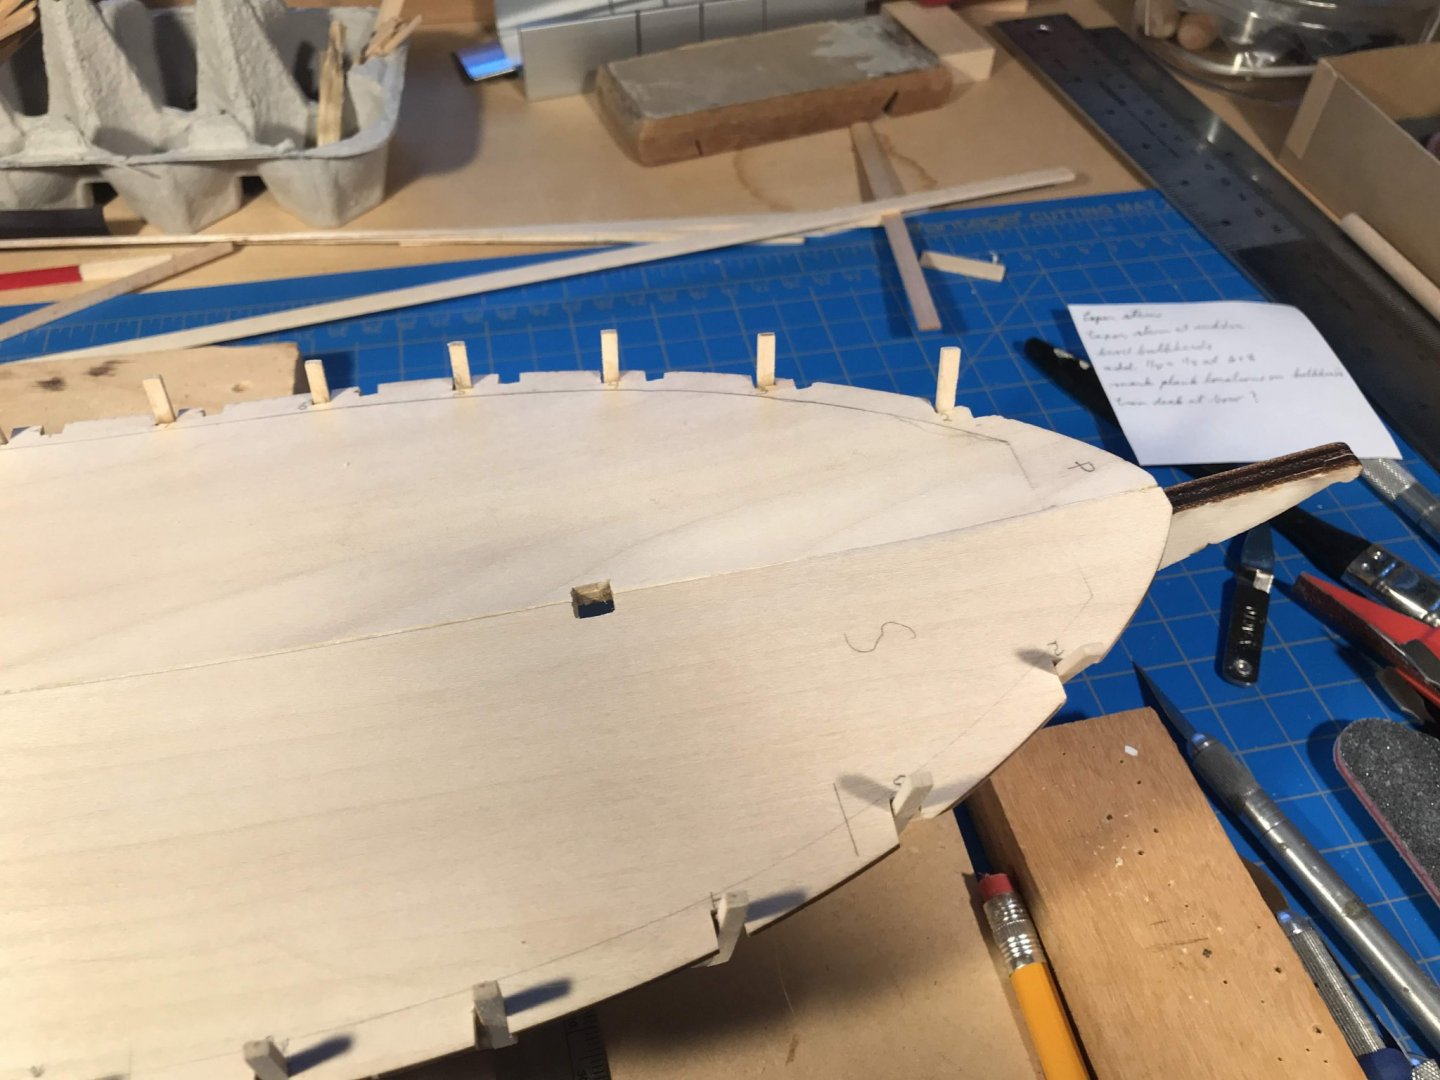
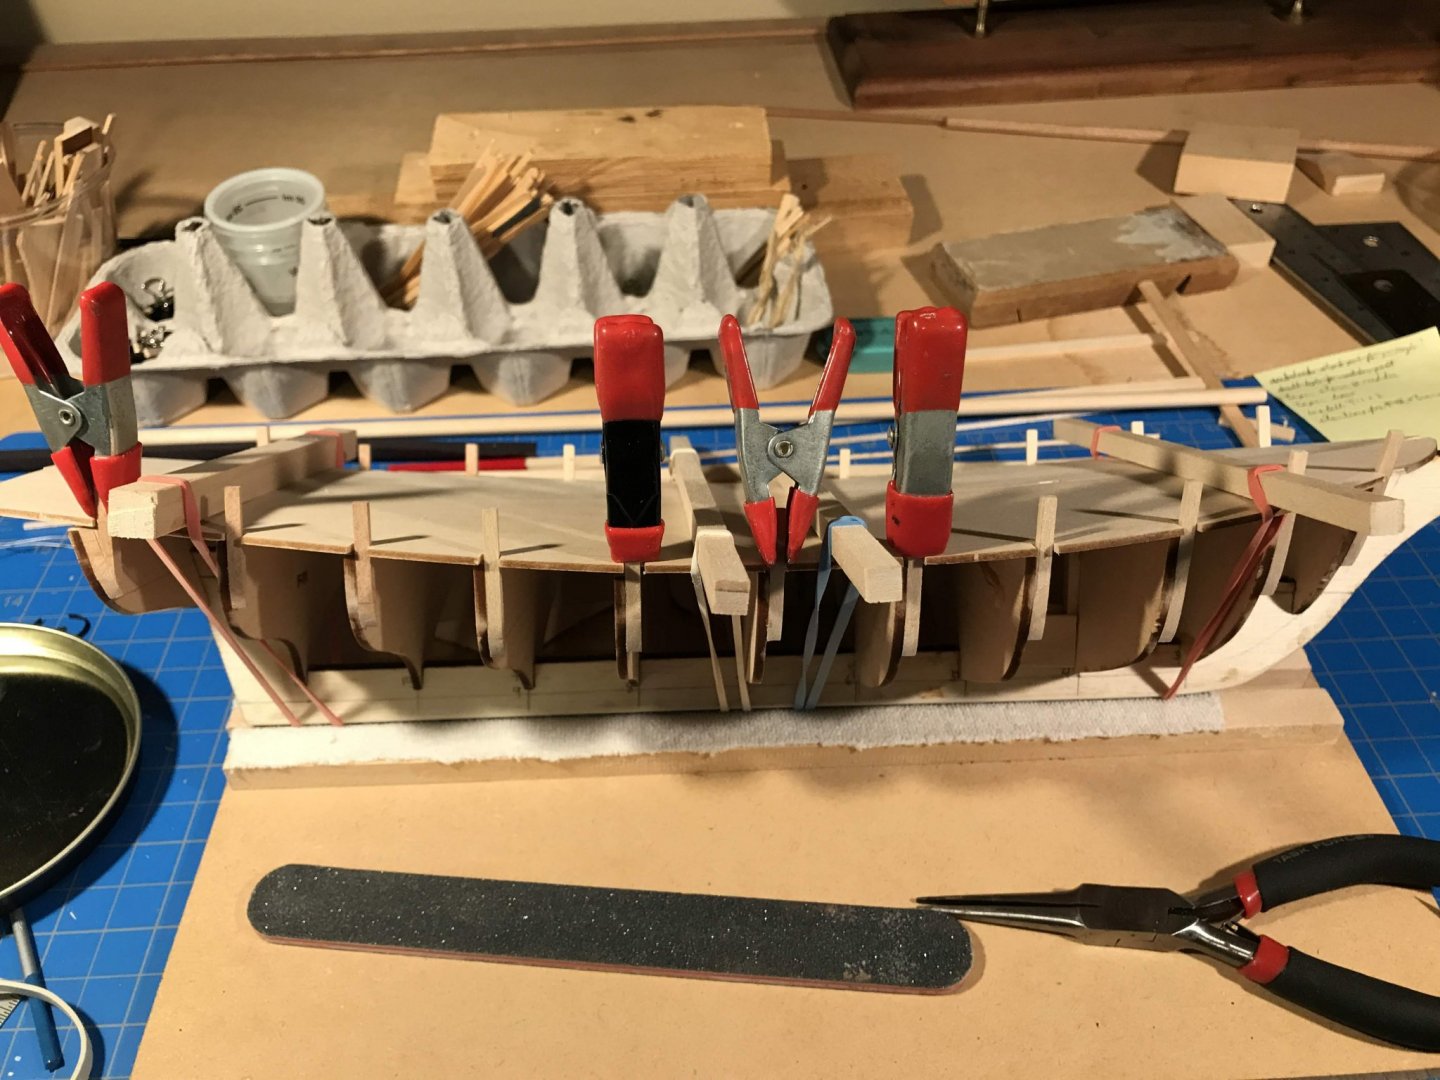
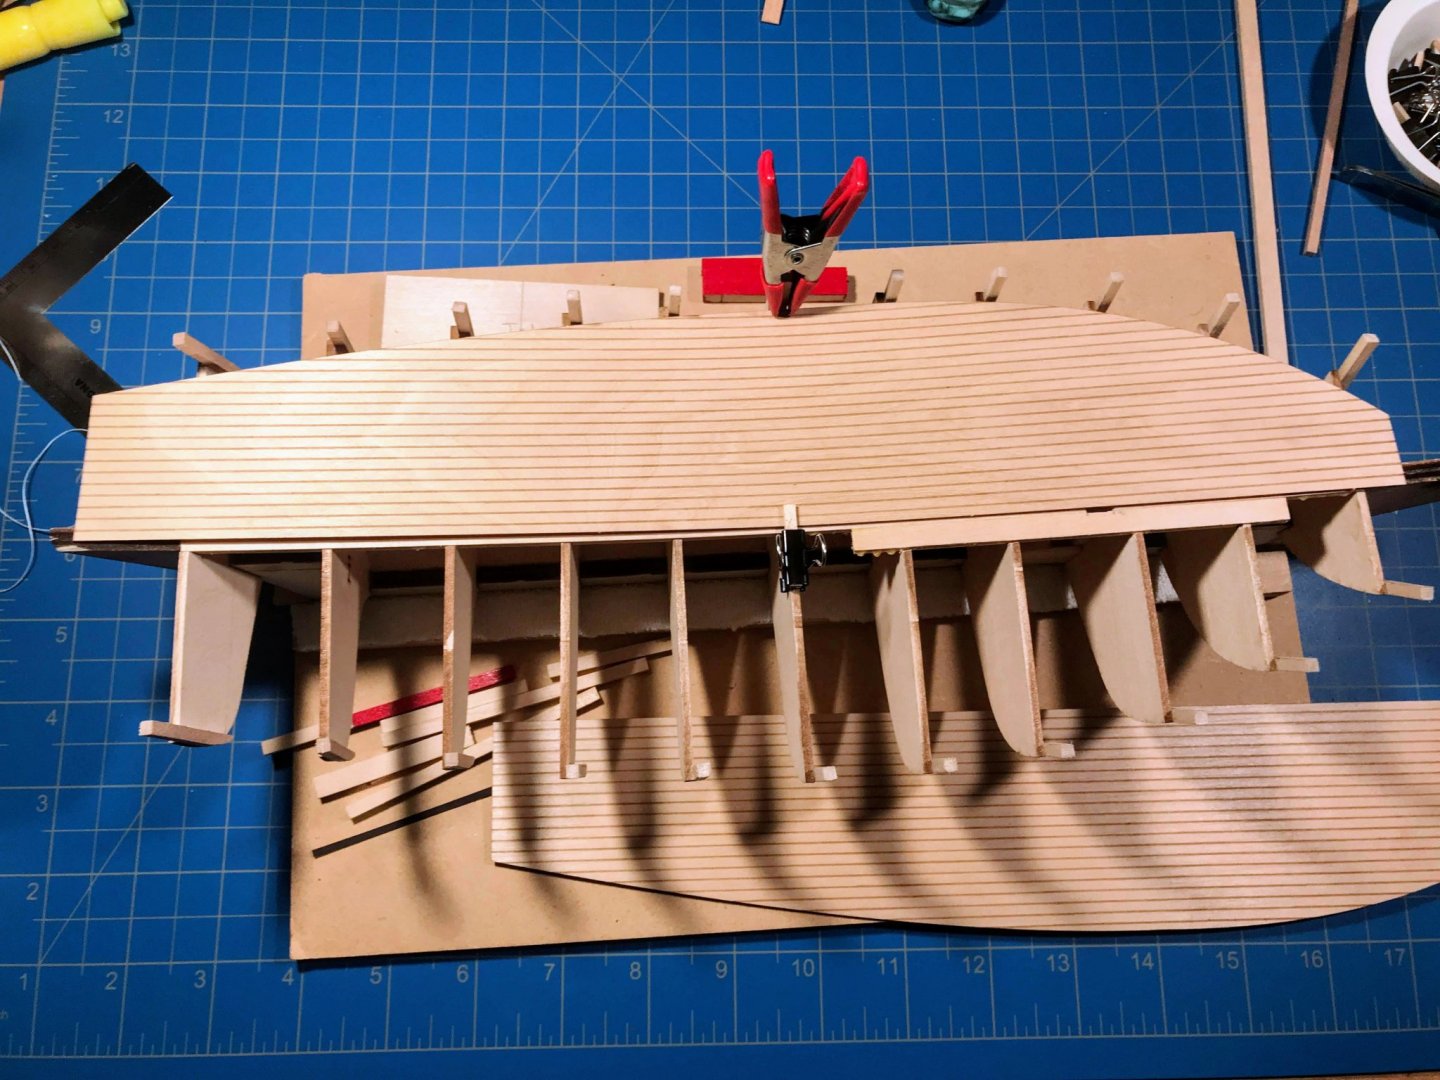
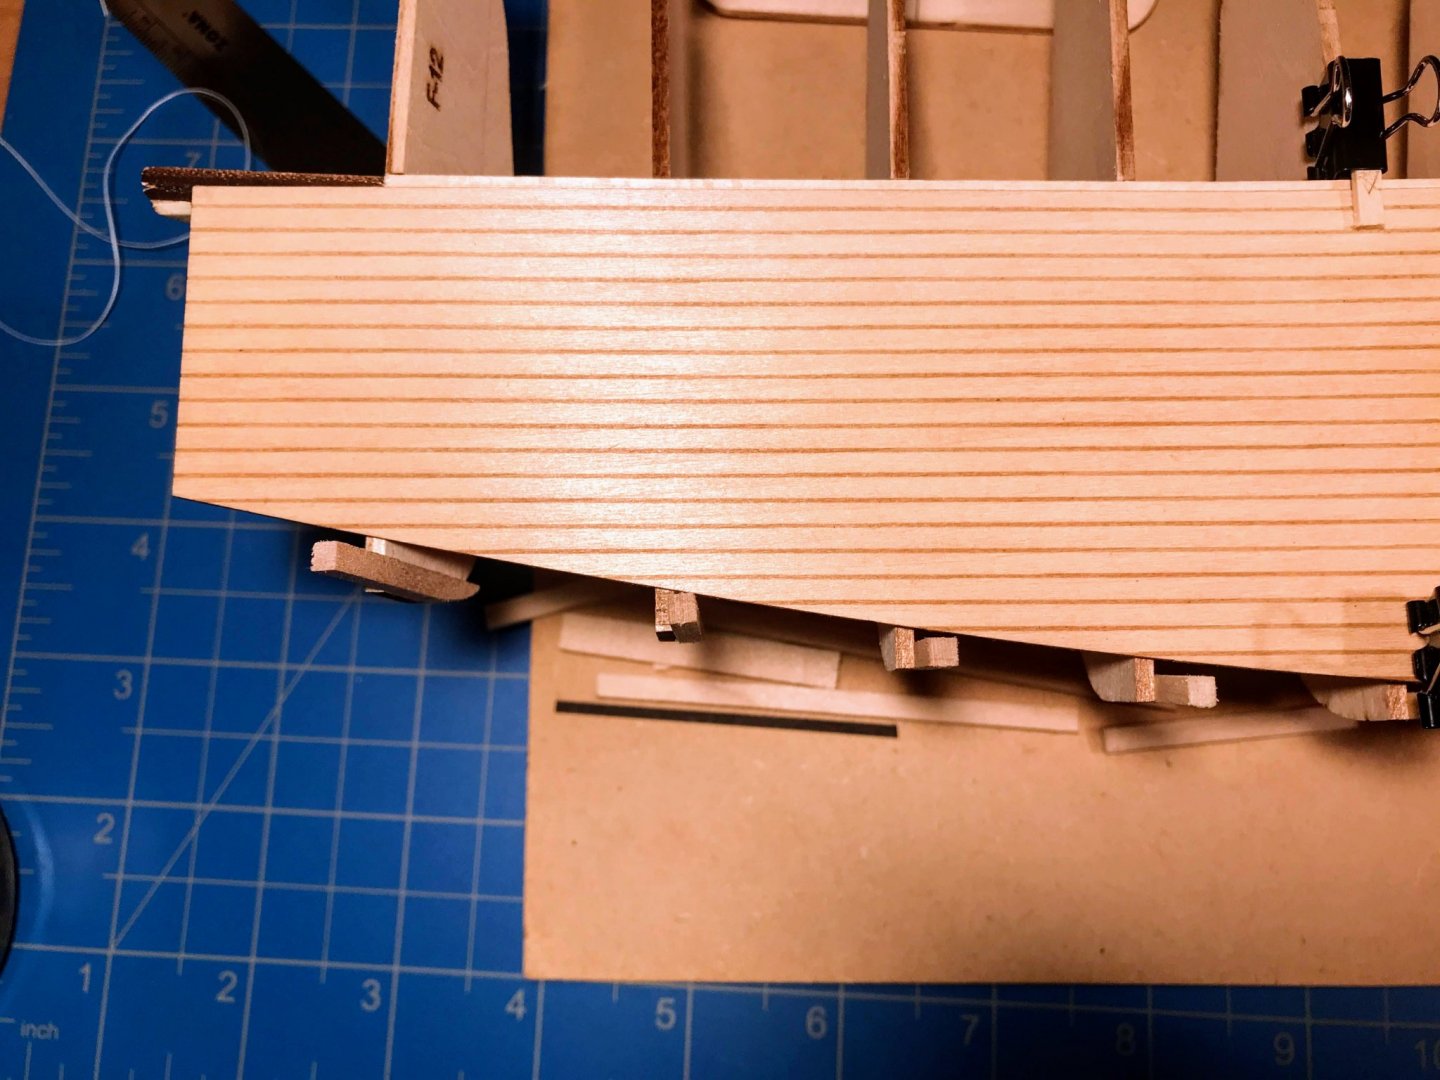
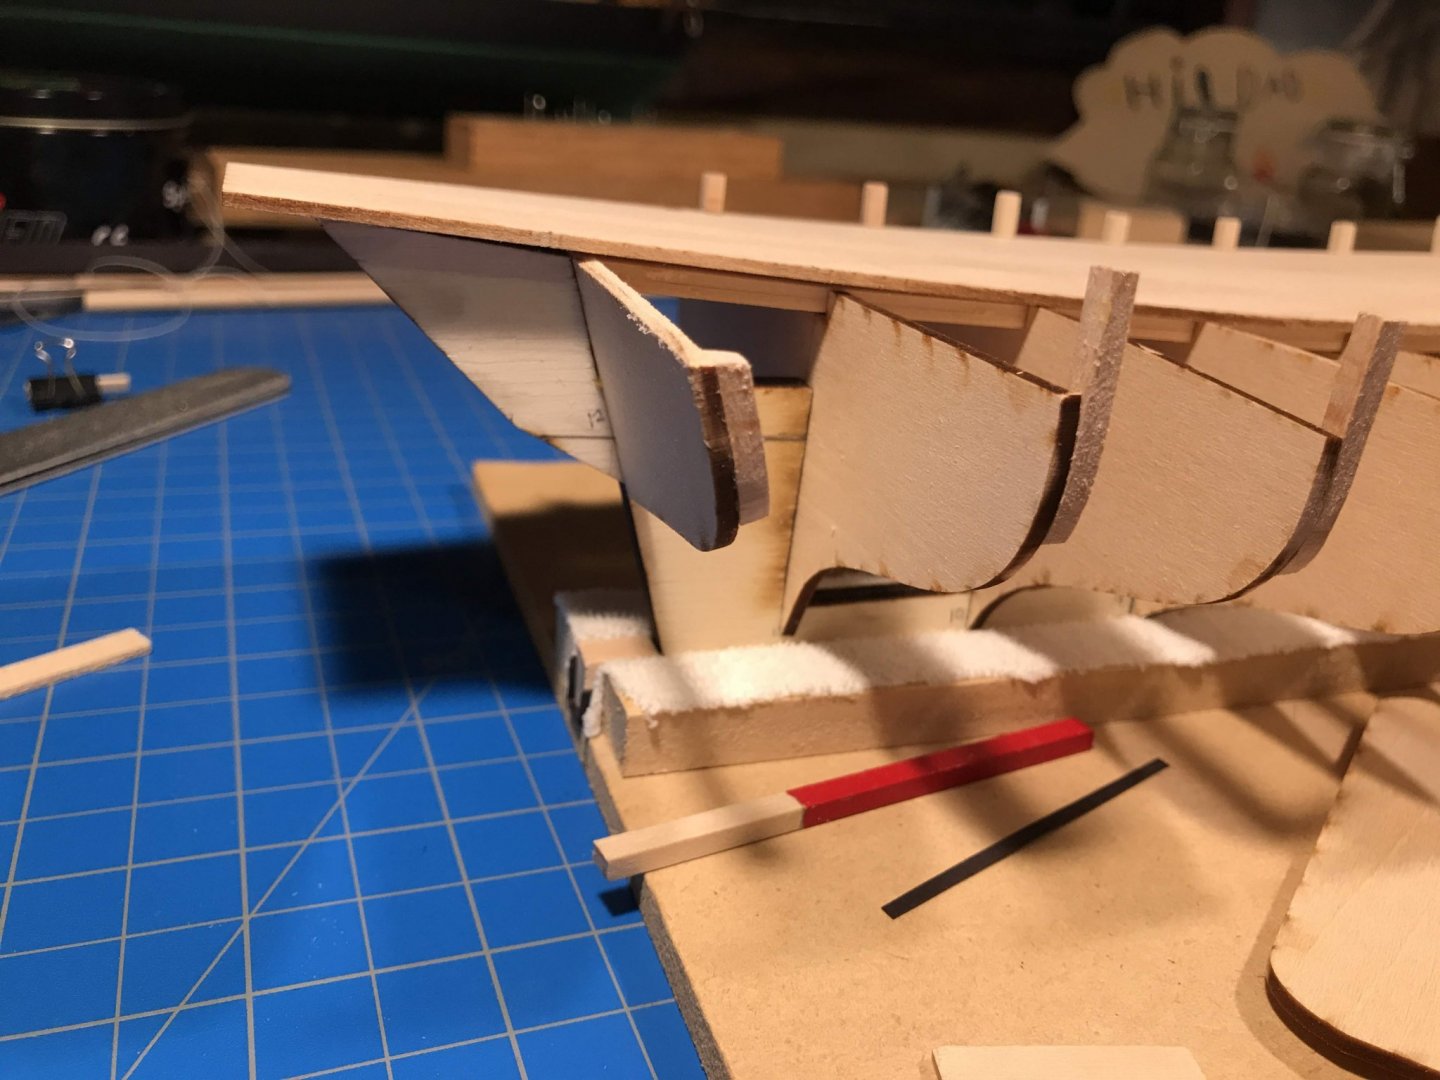
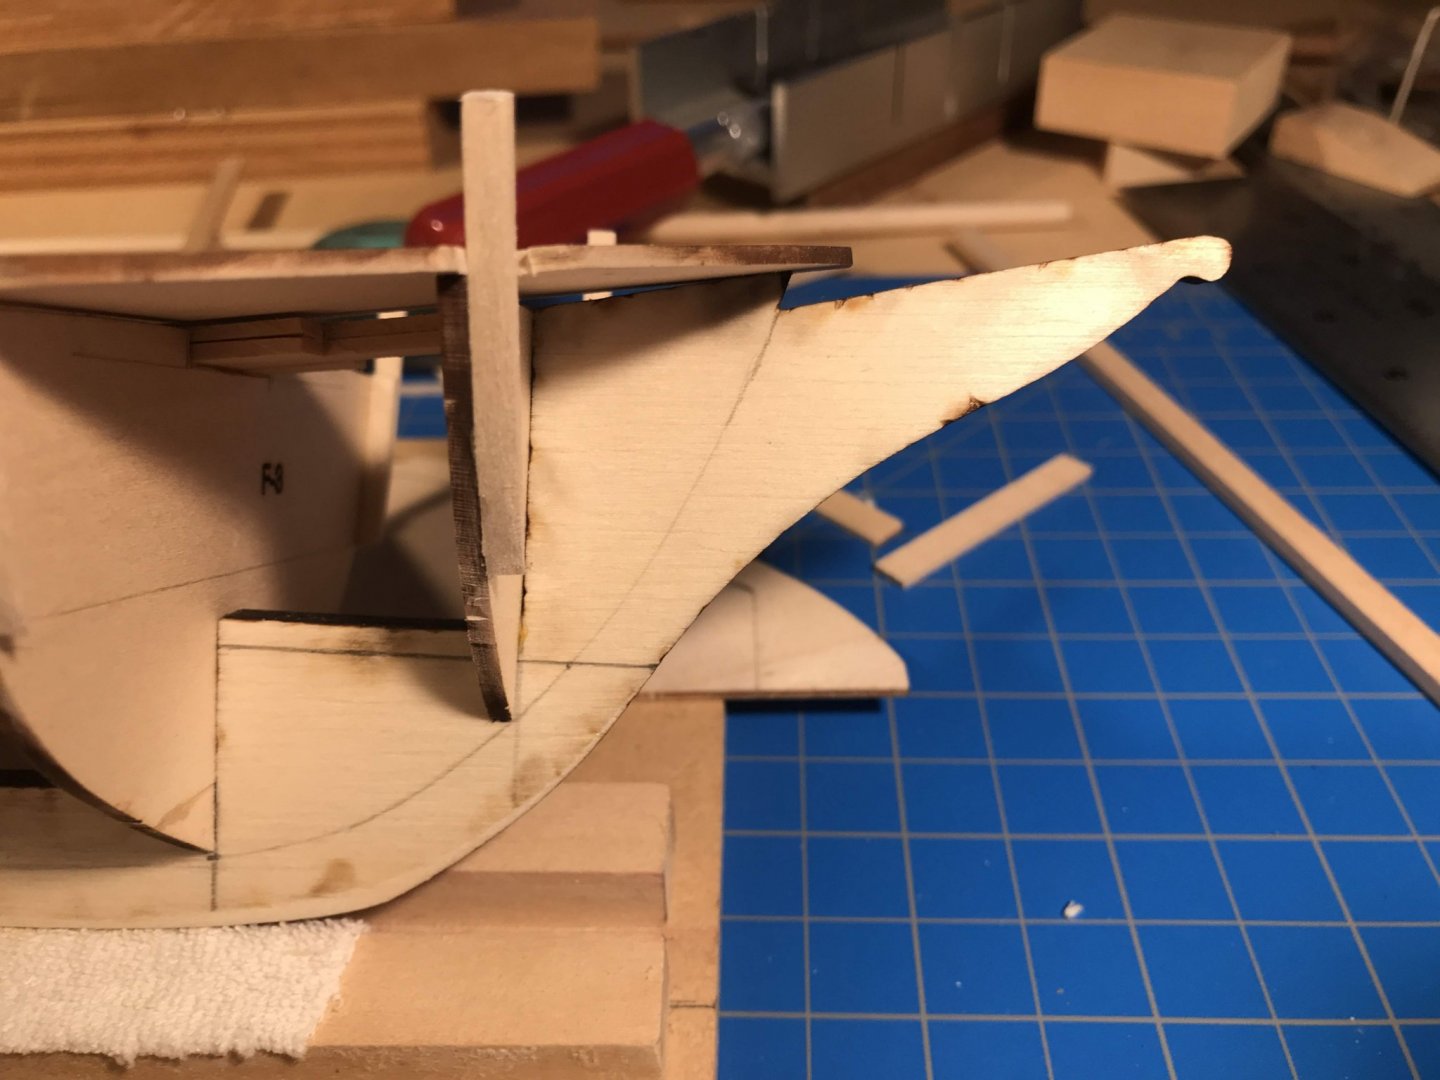
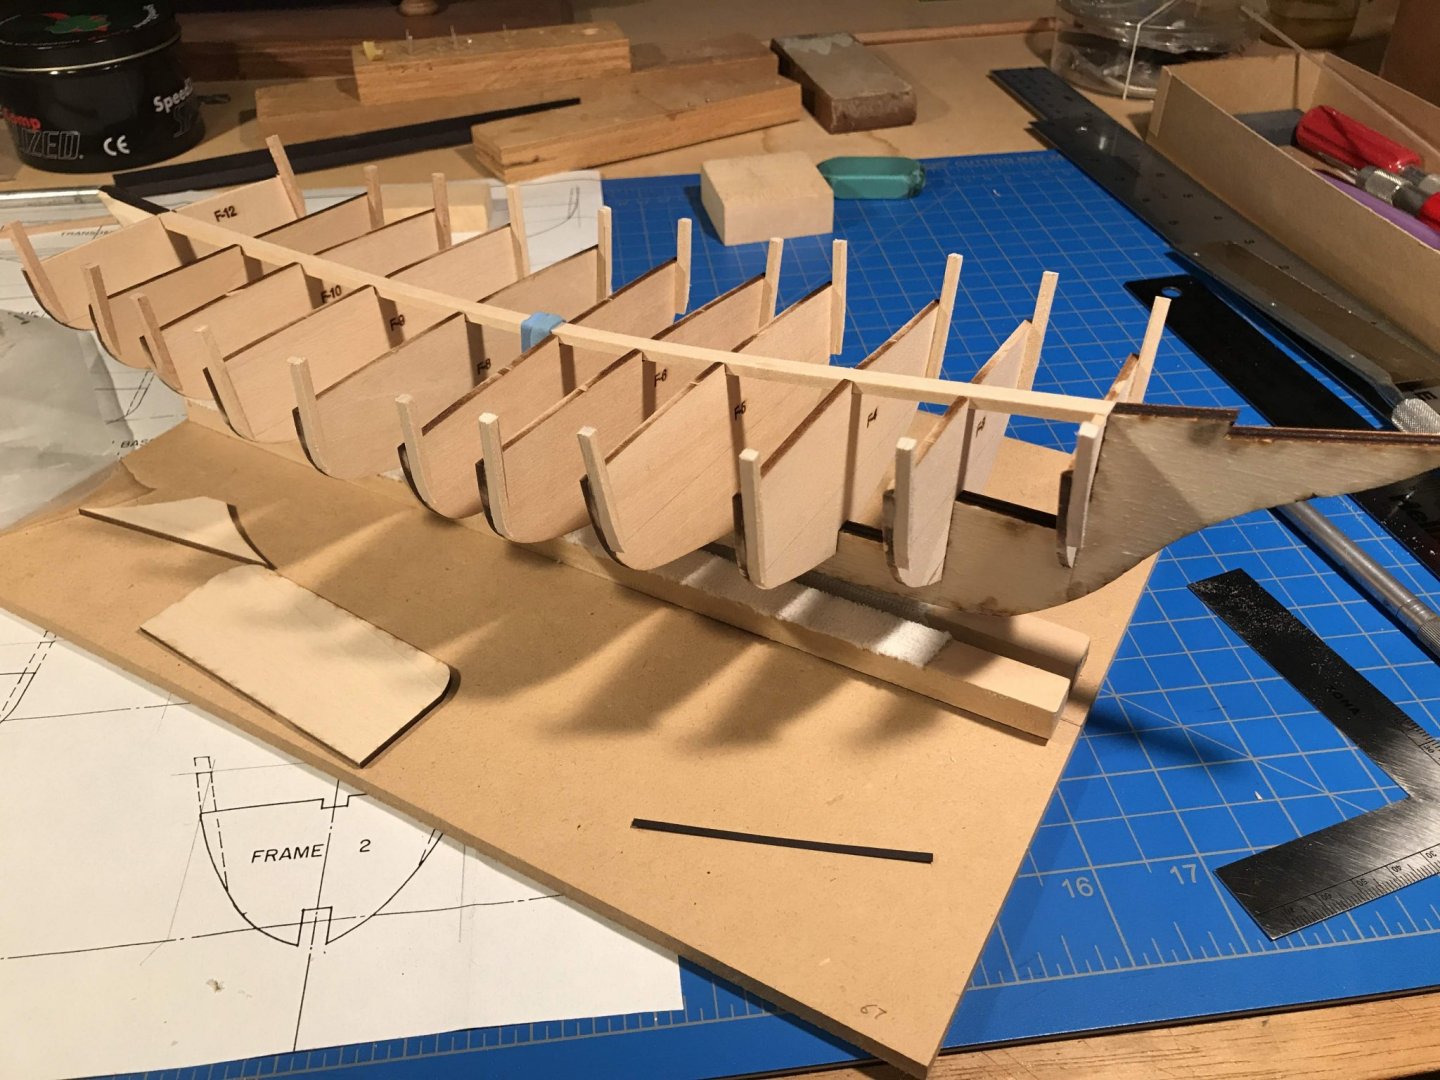
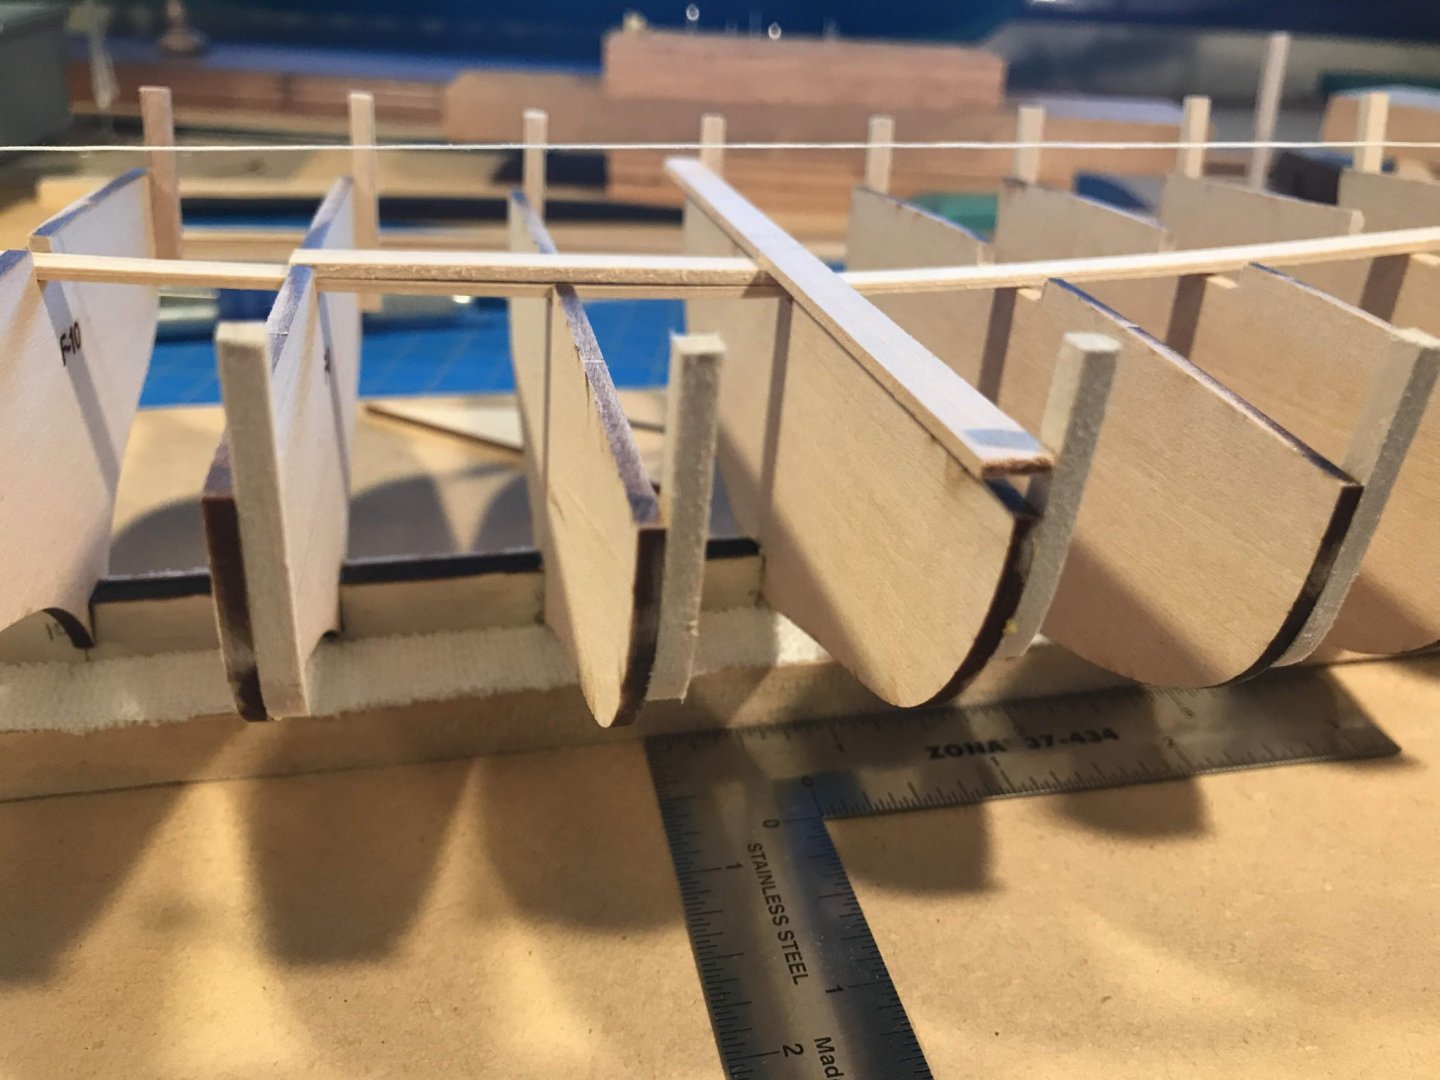
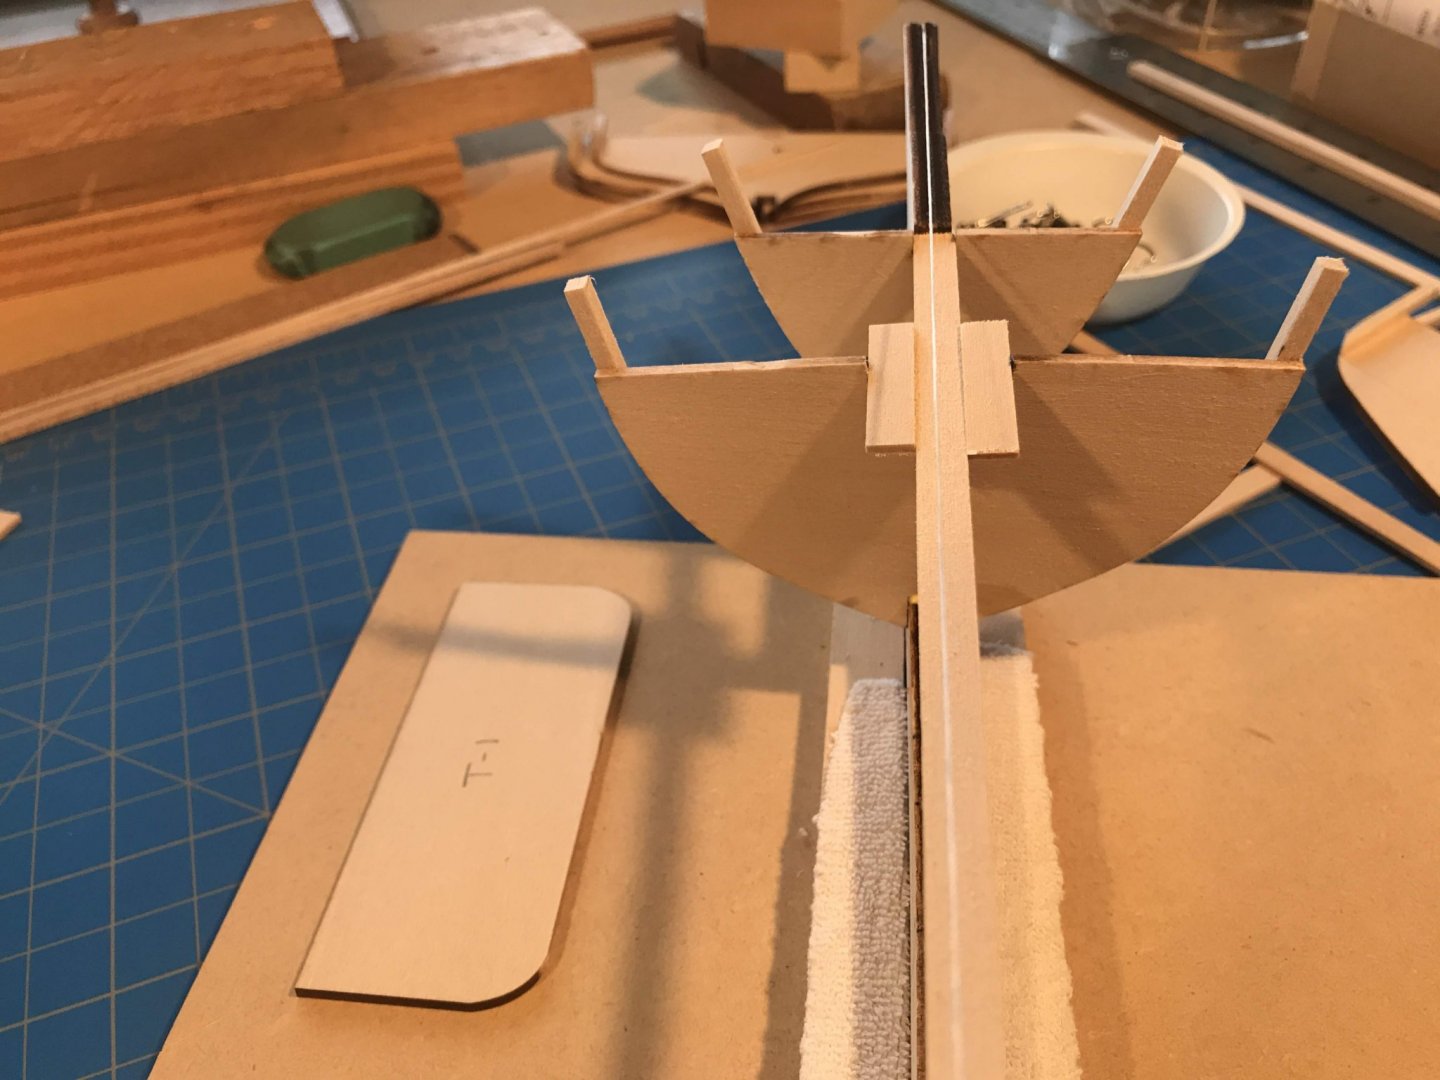
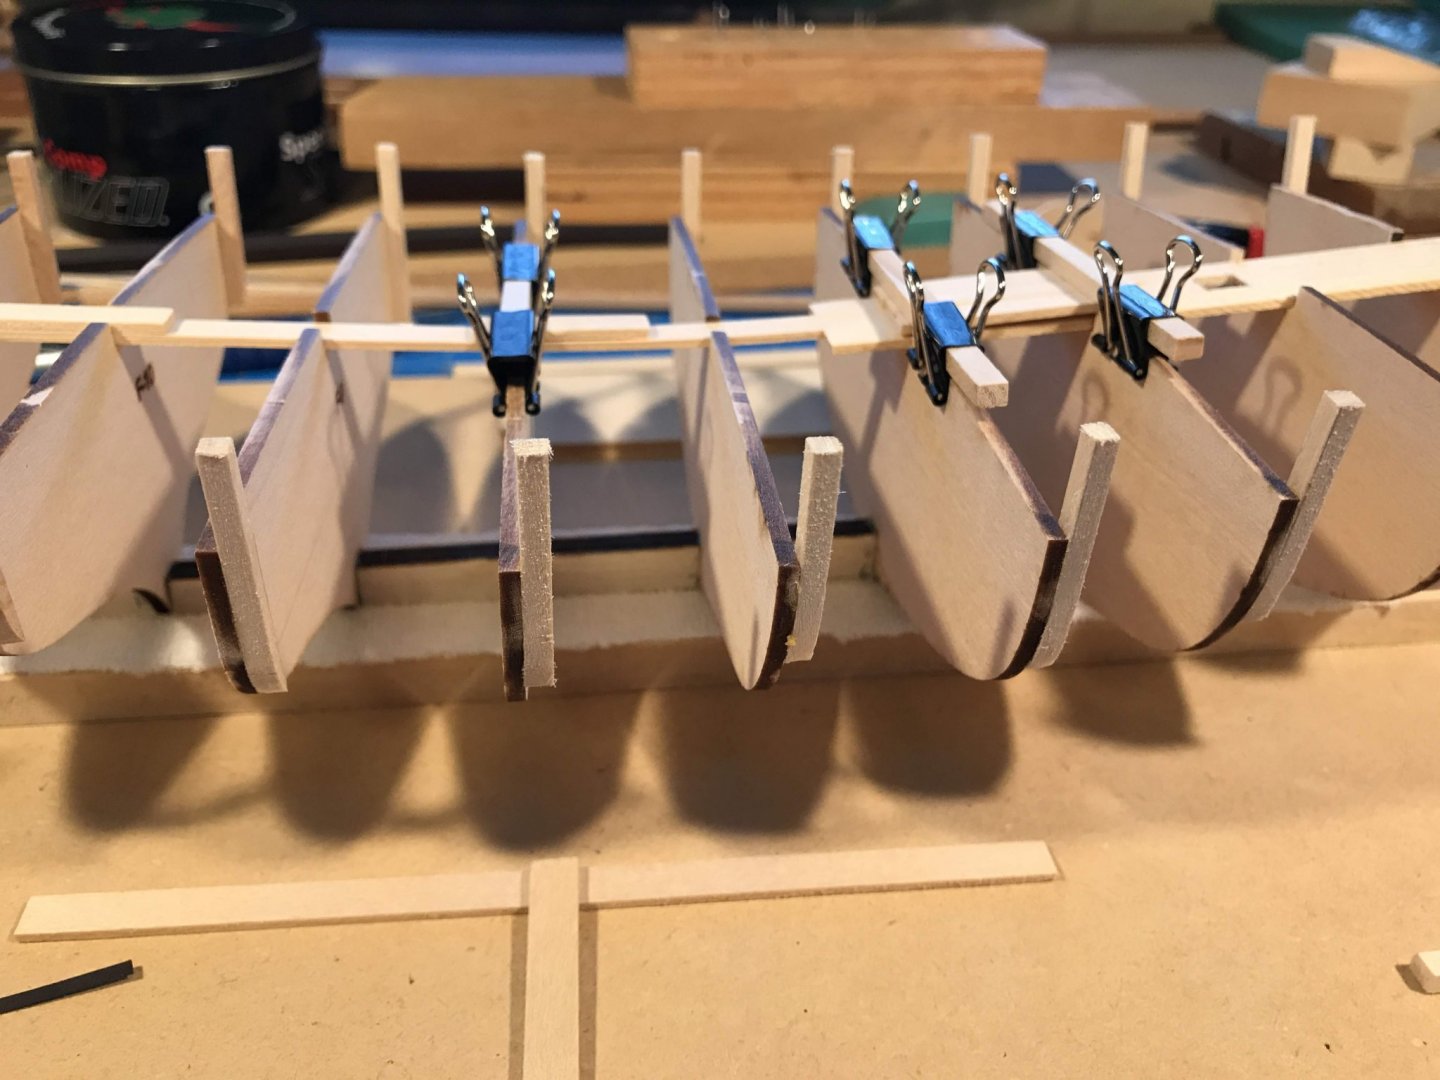
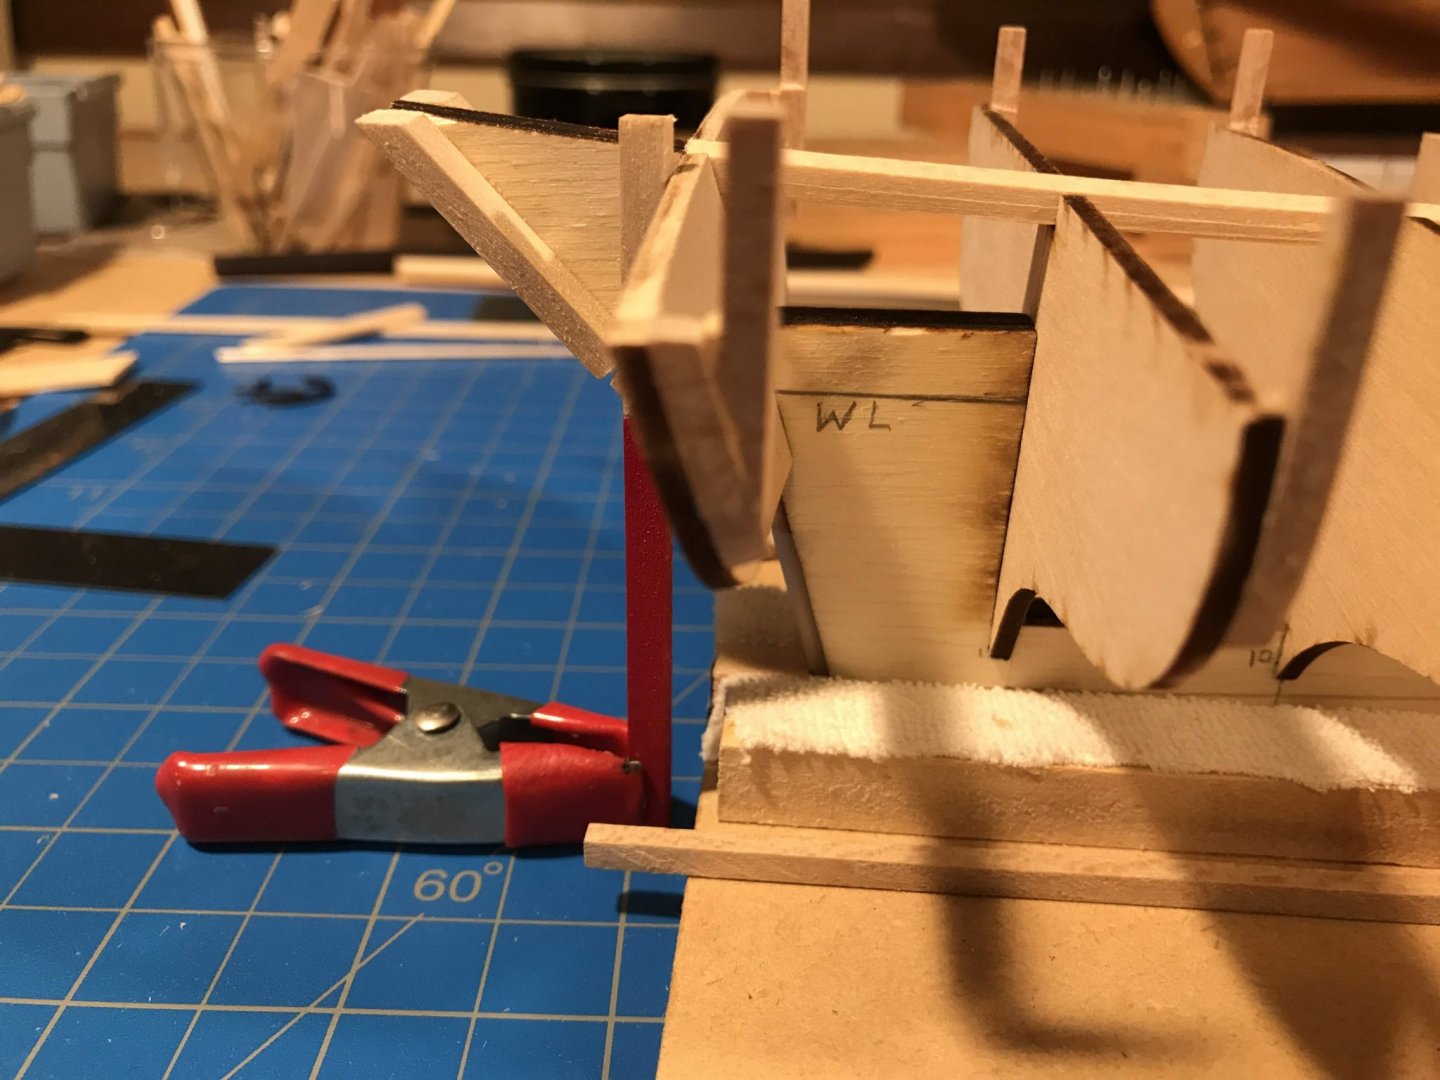
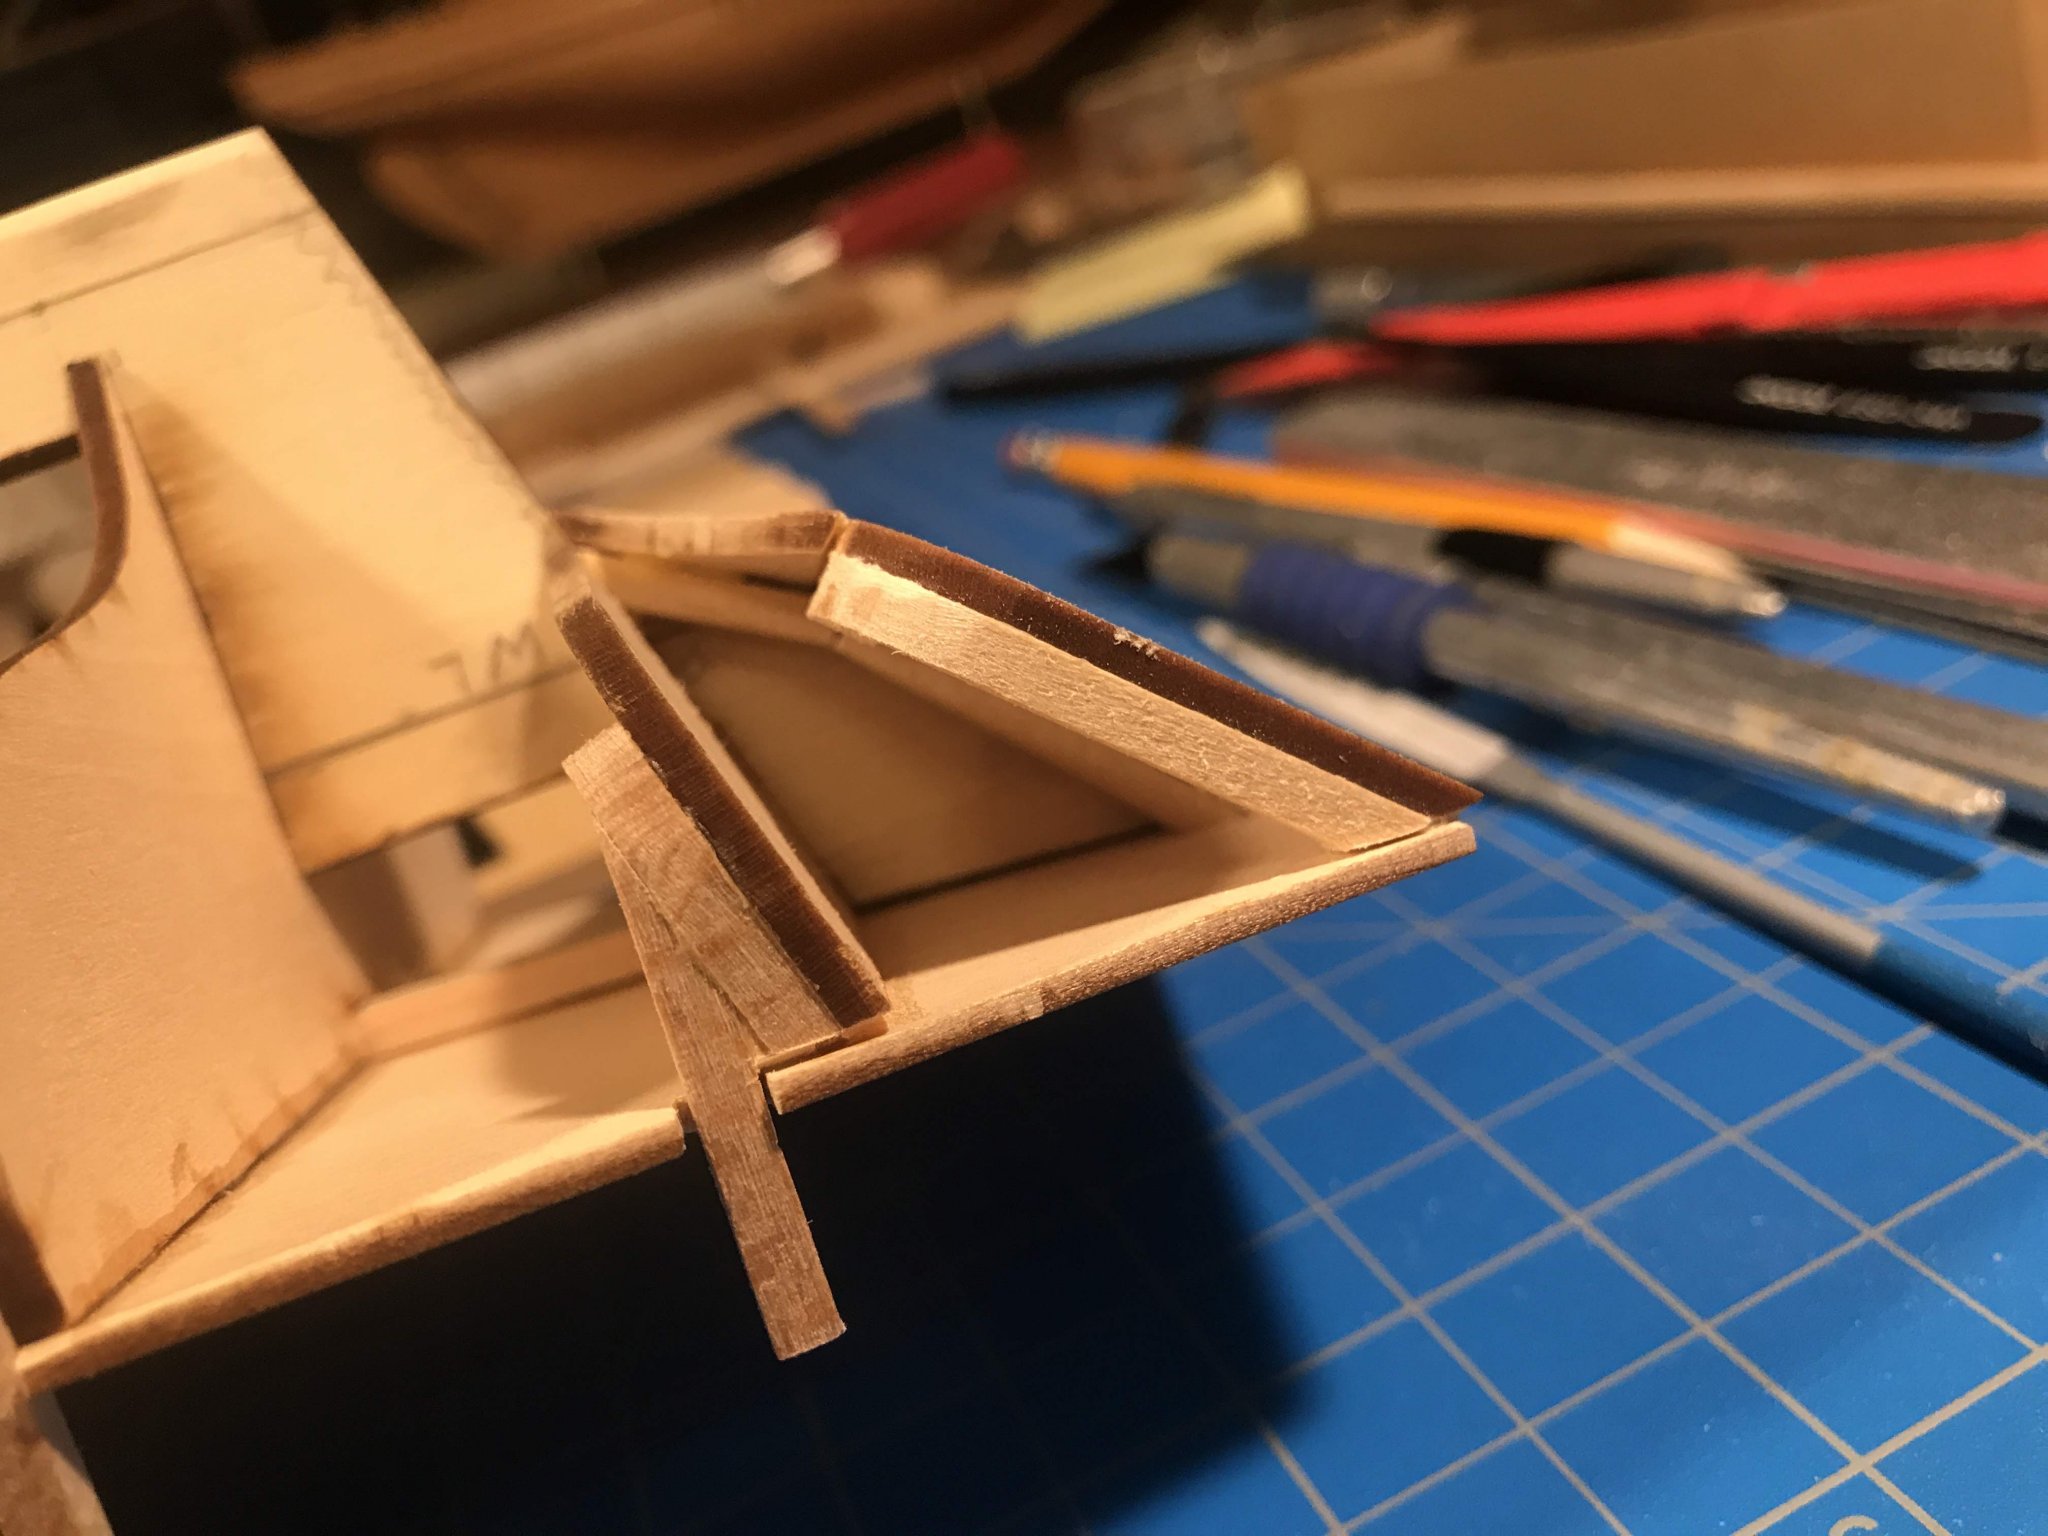
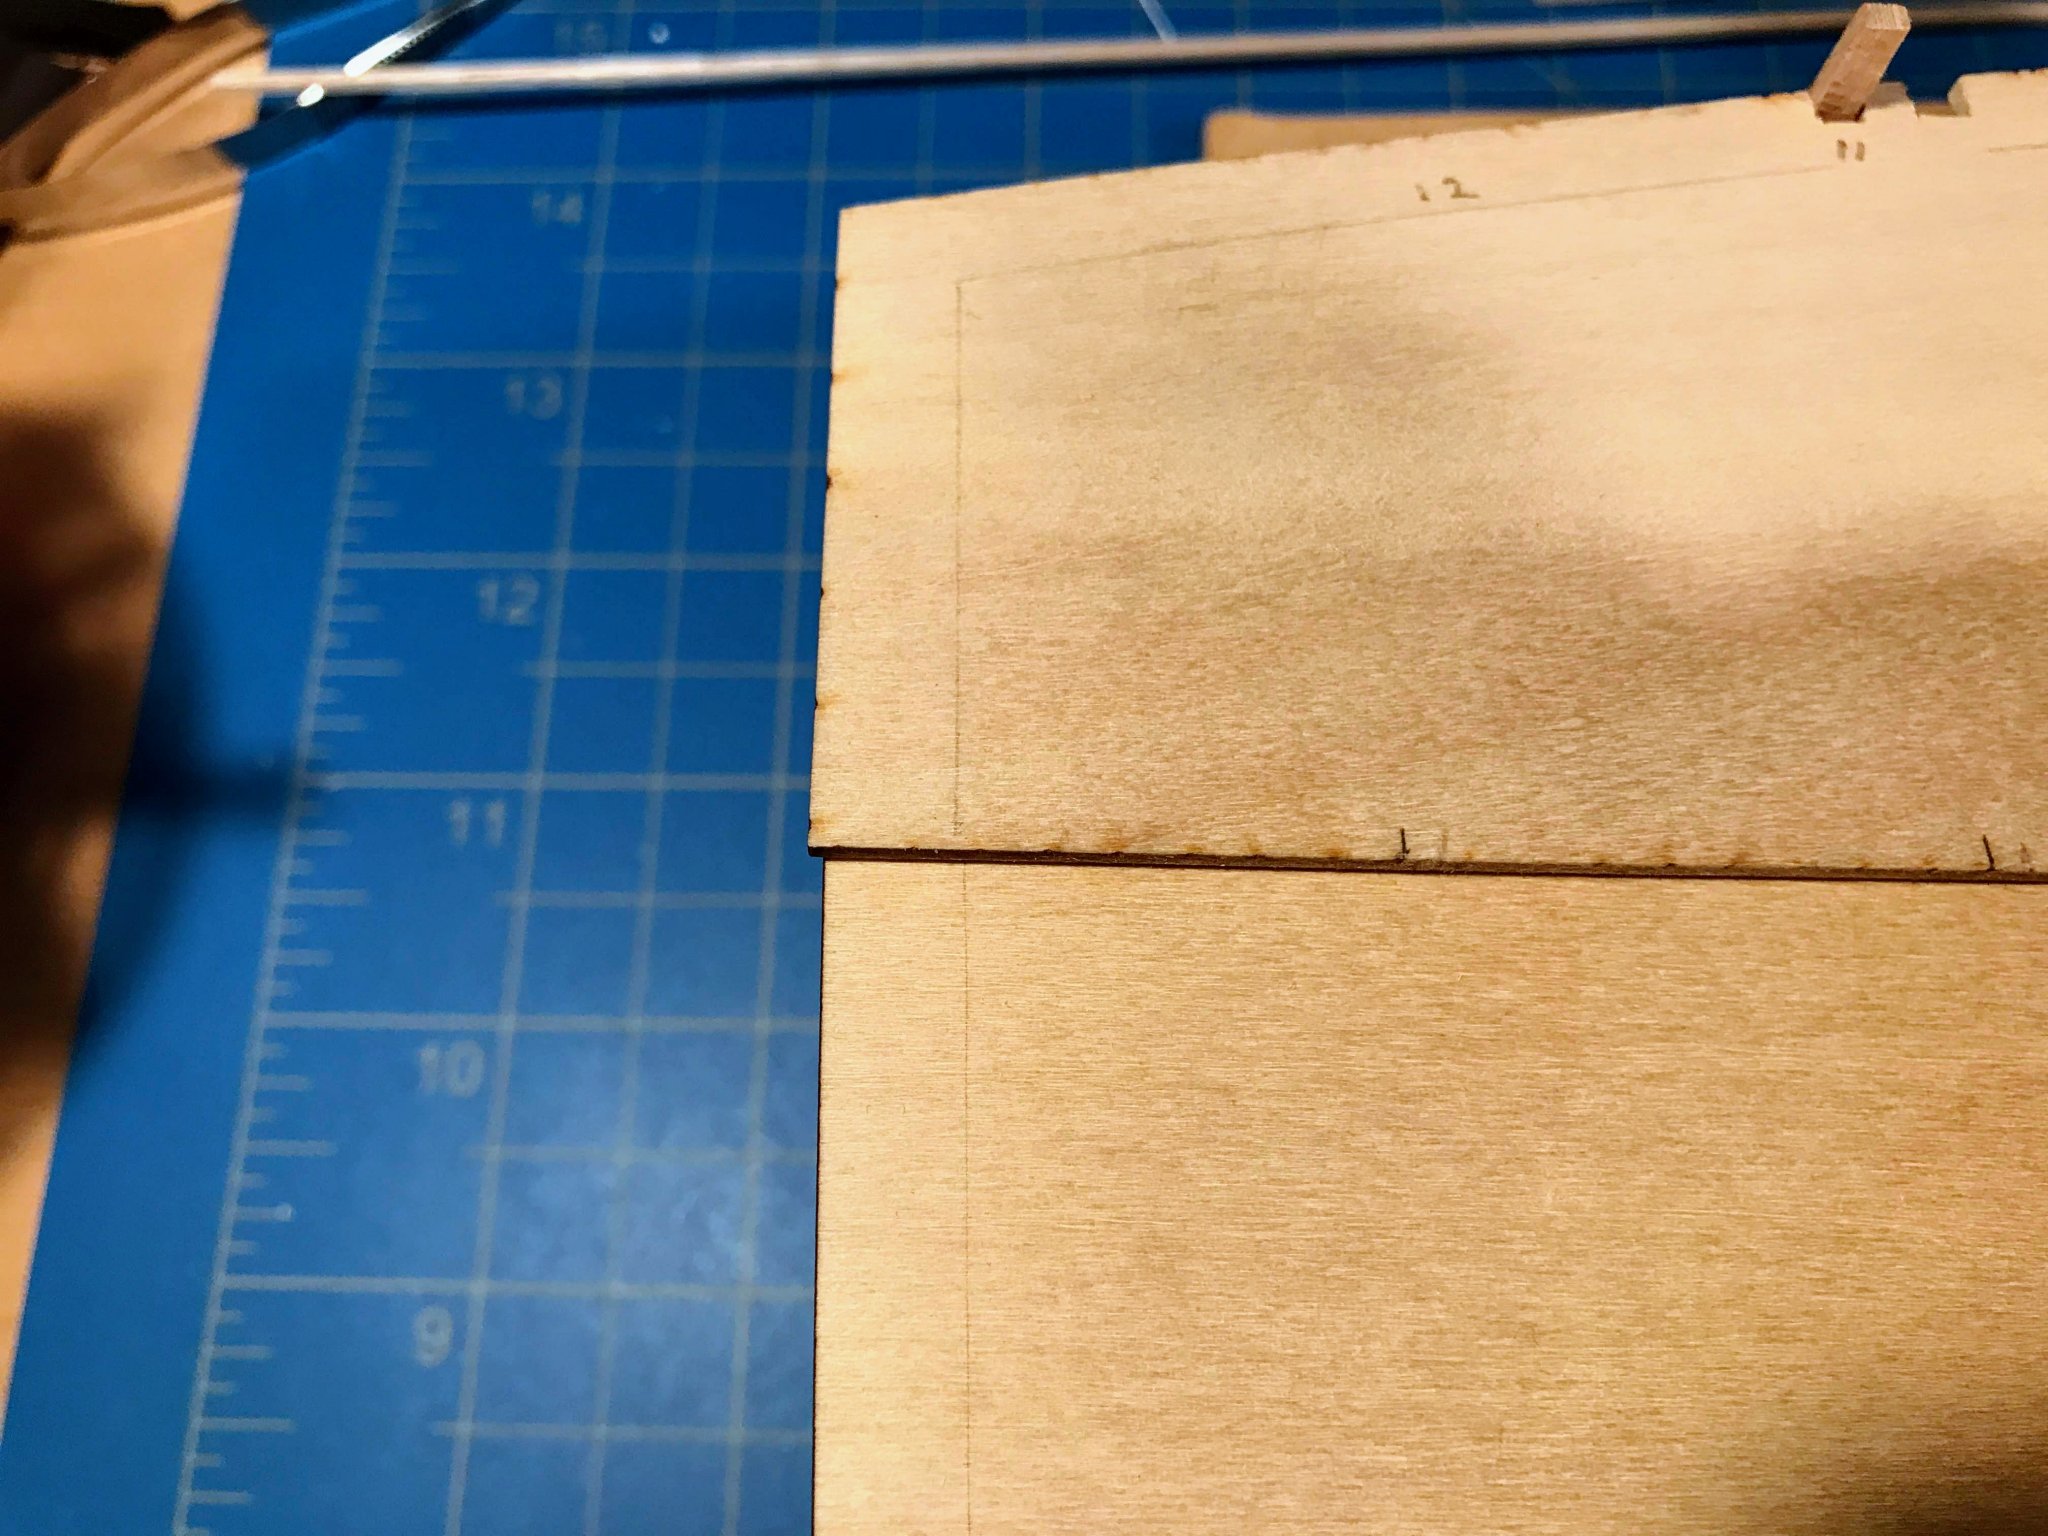
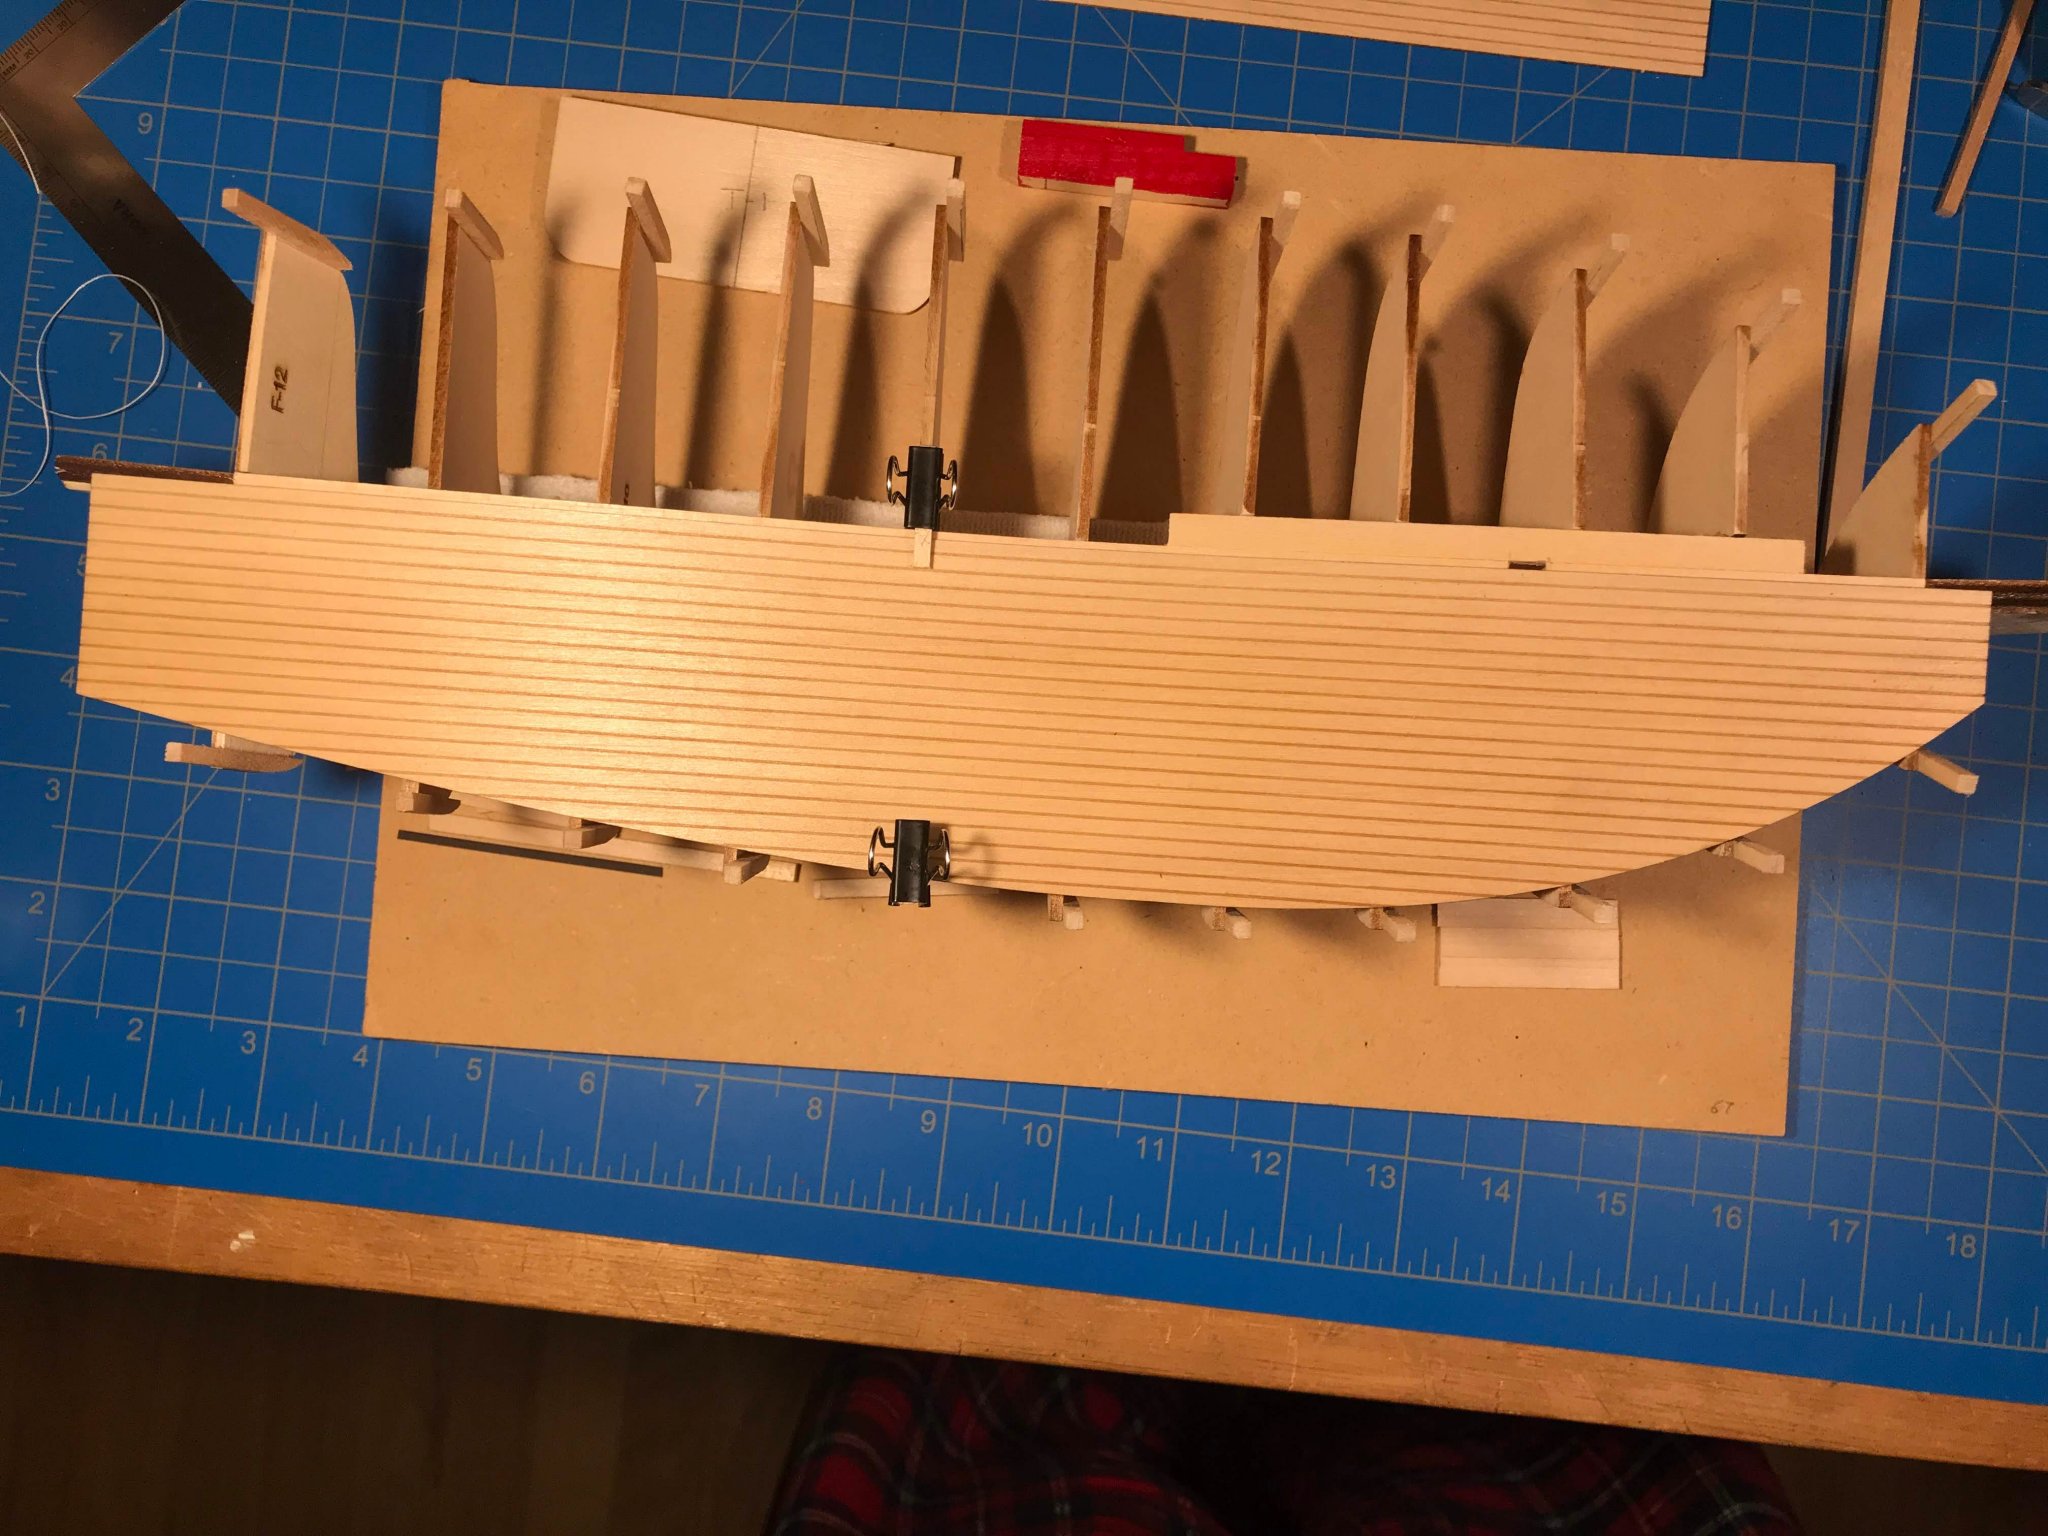
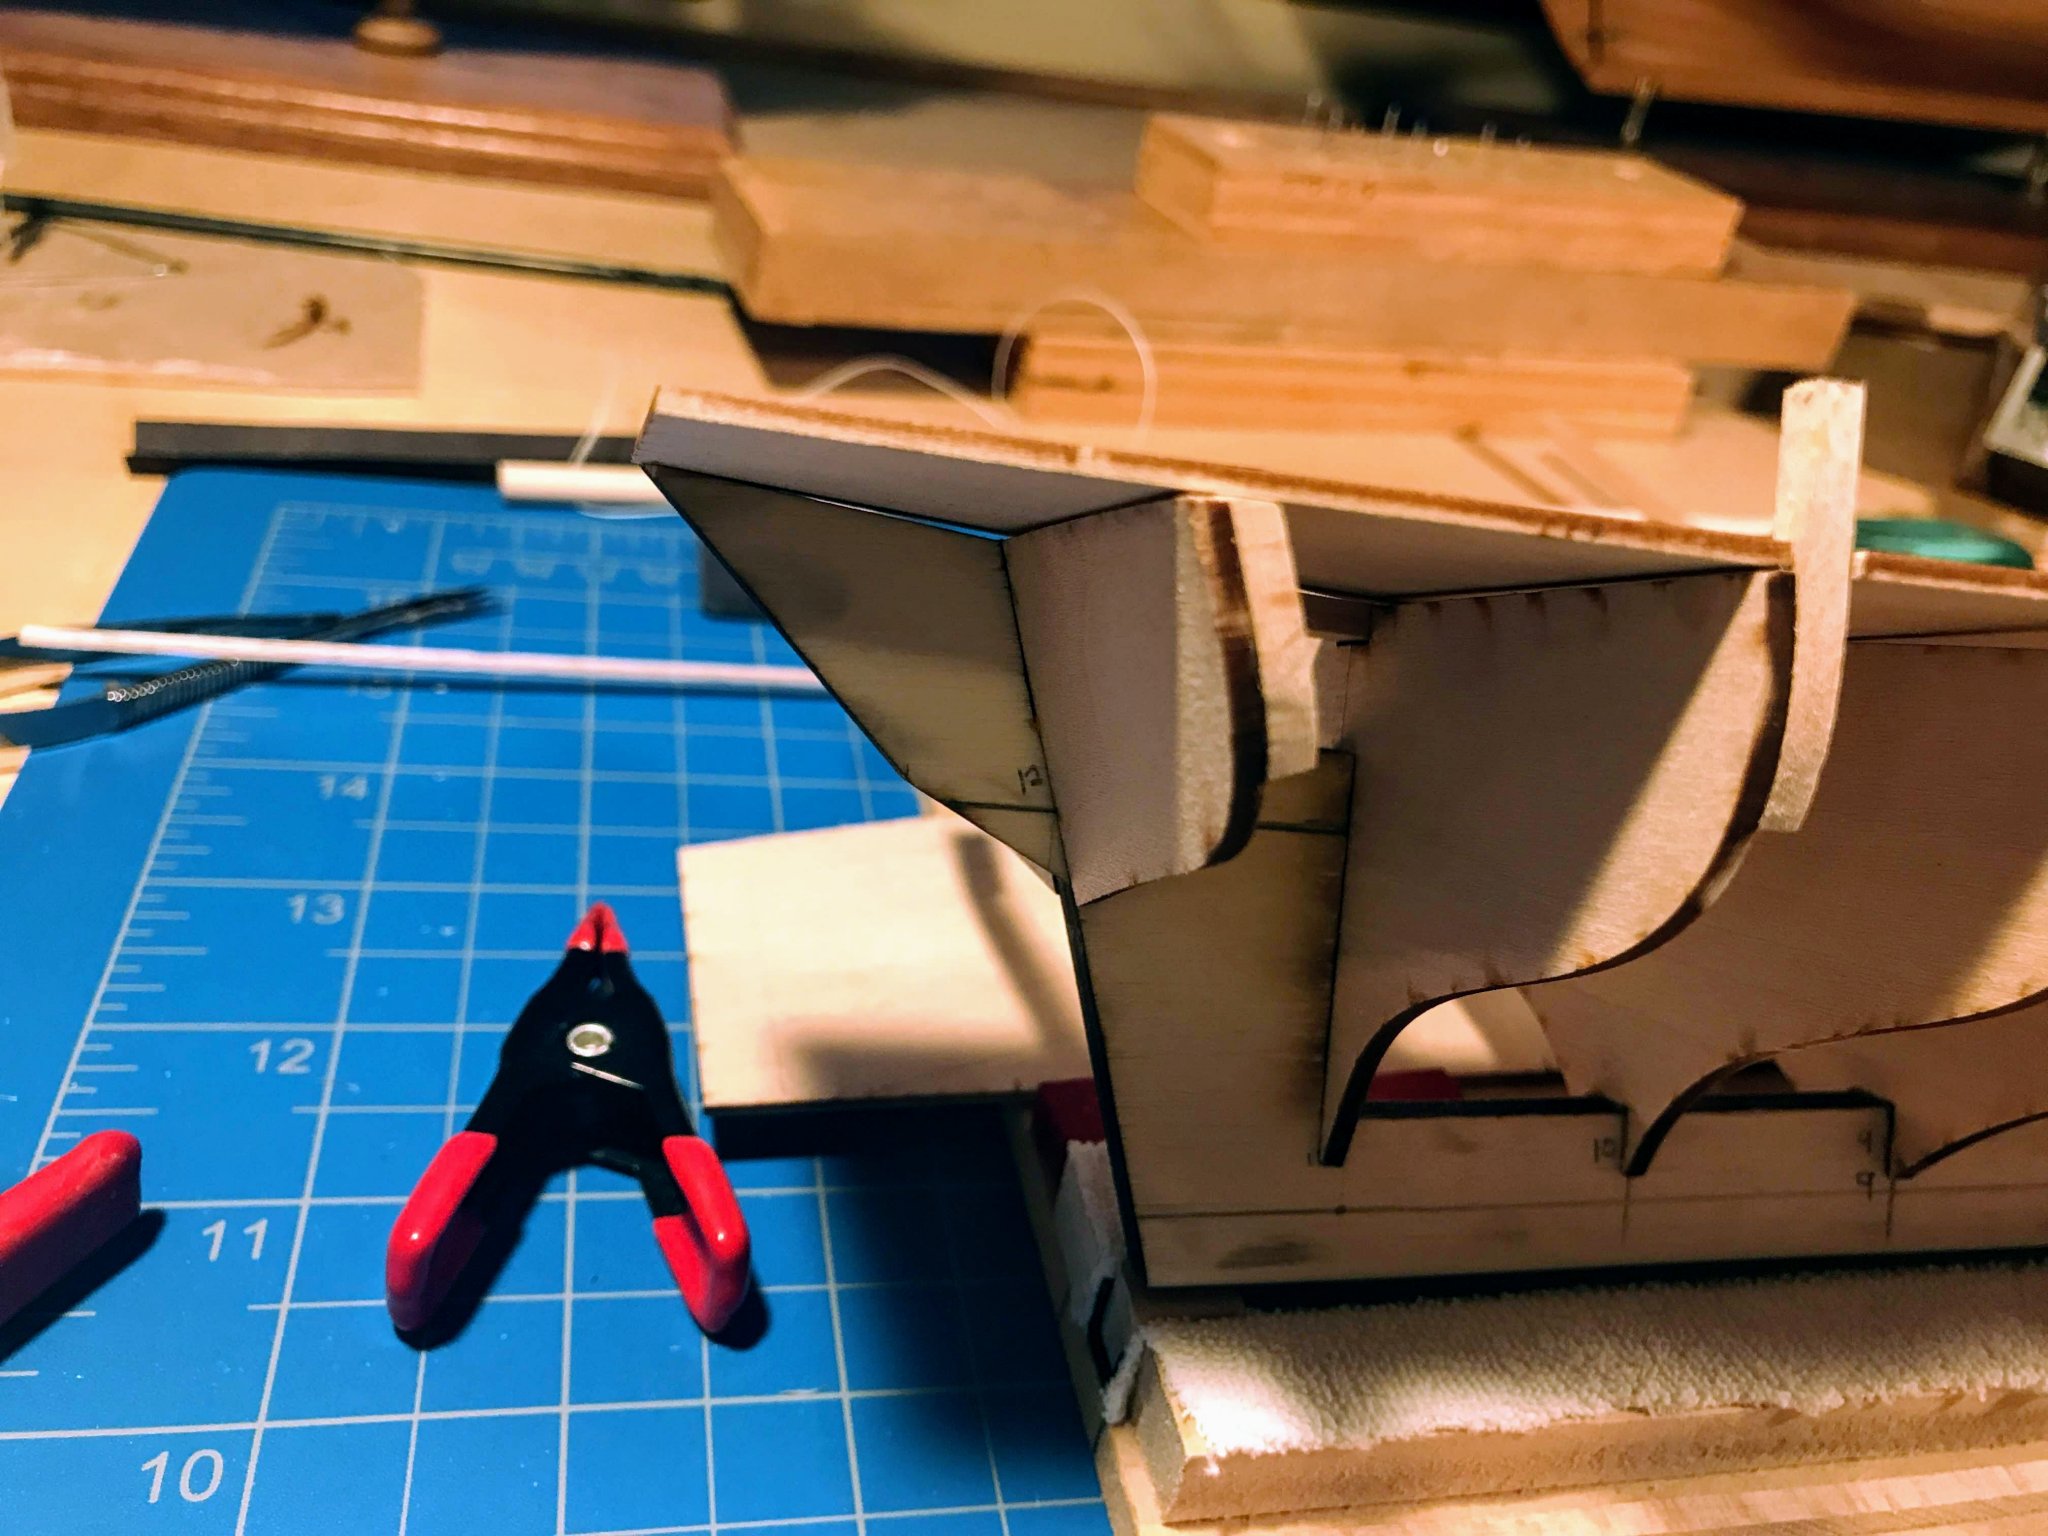
An issue I was somewhat in denial about is that the port subdeck in place extends about ⅛” inch beyond the centerline. The starboard deck in place also extends beyond the centerline, but not by as much. The logical thing to do would be to extend the stanchion slots further in (allowing the subdecks to extend out a bit further), but at least on the port side, they would have to be extended far enough in that the inside face of the stanchions would extend as far as the inside edge of the waterways (or “margin plank” as it’s referred to in the kit). To avoid that and to move both subdeck pieces farther outward, I both extended the slots in a little and also thinned most of the stanchions to about 1/16”. I may add shims on the outside of the stanchions to bring them back to the intended width, but that’s a project for another day. The subdeck pieces still overlap slightly, and I feared (correctly) that I would have to trim one of them so that they butt against each other somewhere close to the centerline. I again dry fitted laser cut Transom 1 and Transom 2 to the stern with double sided tape, with the thought that I would glue them in place before gluing the subdecks on. I quickly decided that was a bad idea, as the top of Transom 2 and the stern of the subdecks have to fit precisely and it would be much better to fit the transom to the deck rather than the other way around. I did however glue some ⅛” x ¼” strips to the sides of the keel at the transom to provide a wider surface to which to glue the transom pieces at the appropriate time. With the help of a dremel tool and a rat tail file, I created a slot in the bottom of Transom 2 to accept the rudder post, doing so carefully enough that I didn’t split the remaining wood on either side of the slot. Finally I got up the nerve to trim the port subdeck, cutting about a long 1/16” strip off its length, and with a little additional sanding, I got the two halves of the subdeck to lie flat without overlapping. I will have to do something similar with the two halves of the deck, which will be a challenge if I want the pre-printed planks to run parallel and equal width, but that’s a problem to be addressed another day. I have already given some thought to actually planking the deck rather than using the precut pieces, but again . . . another day. I first glued the port subdeck to the center stringer and bulkheads. I used wood glue (Titebond being my glue of choice) on the stringer, clamping the deck in place, then used clamps to bend the outer edge of the subdeck down to the bulkheads, accommodating the curve in the bulkheads. Once in place, I then used CA glue to glue the subdeck to the bulkheads, both thin and gap-filling CA, depending upon how well the subdeck fit to the bulkhead. Twelve hours later I removed all the clamps, and it all held together. Whew! I then did the same with the starboard subdeck, but this time I couldn’t use clamps to clamp the subdeck to the center stringer, so I instead used scrap wood and rubber bands. In the picture below you may be able to see the strip of wax paper I ran along the centerline: if any glue oozed out of the space between the two subdeck halves, I didn’t want to glue the clamping sticks to the subdeck. This subdeck too held together after the glue dried!


- 82 replies
-
- 5
-
-
- spray
- BlueJacket Shipcrafters
- (and 1 more)
-
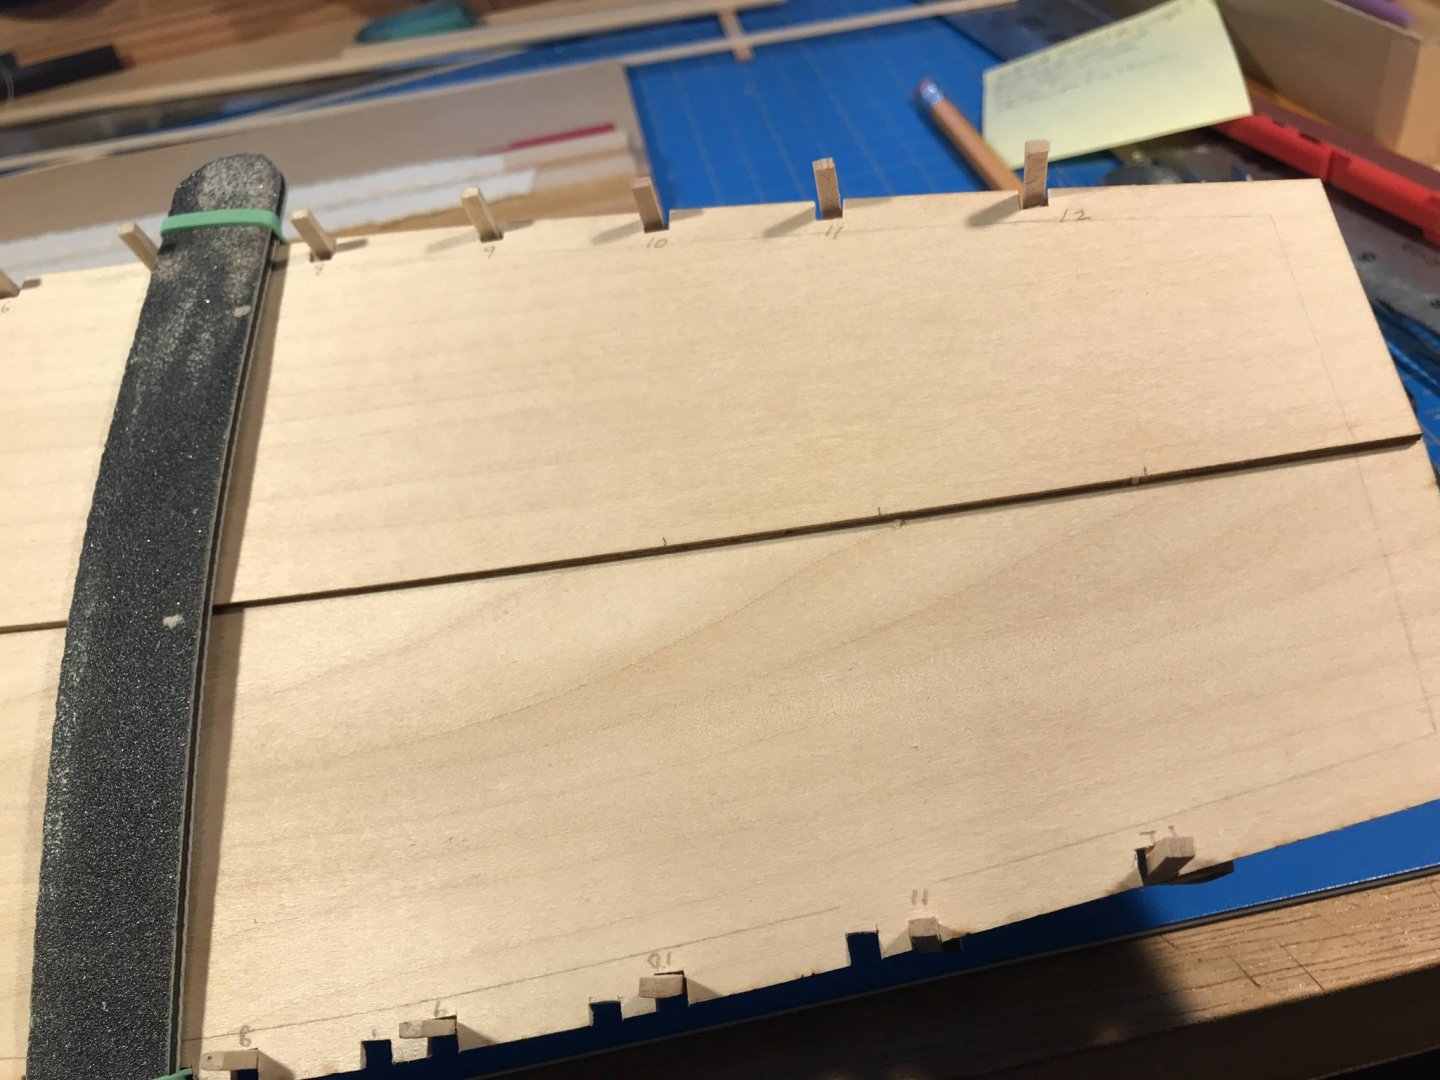
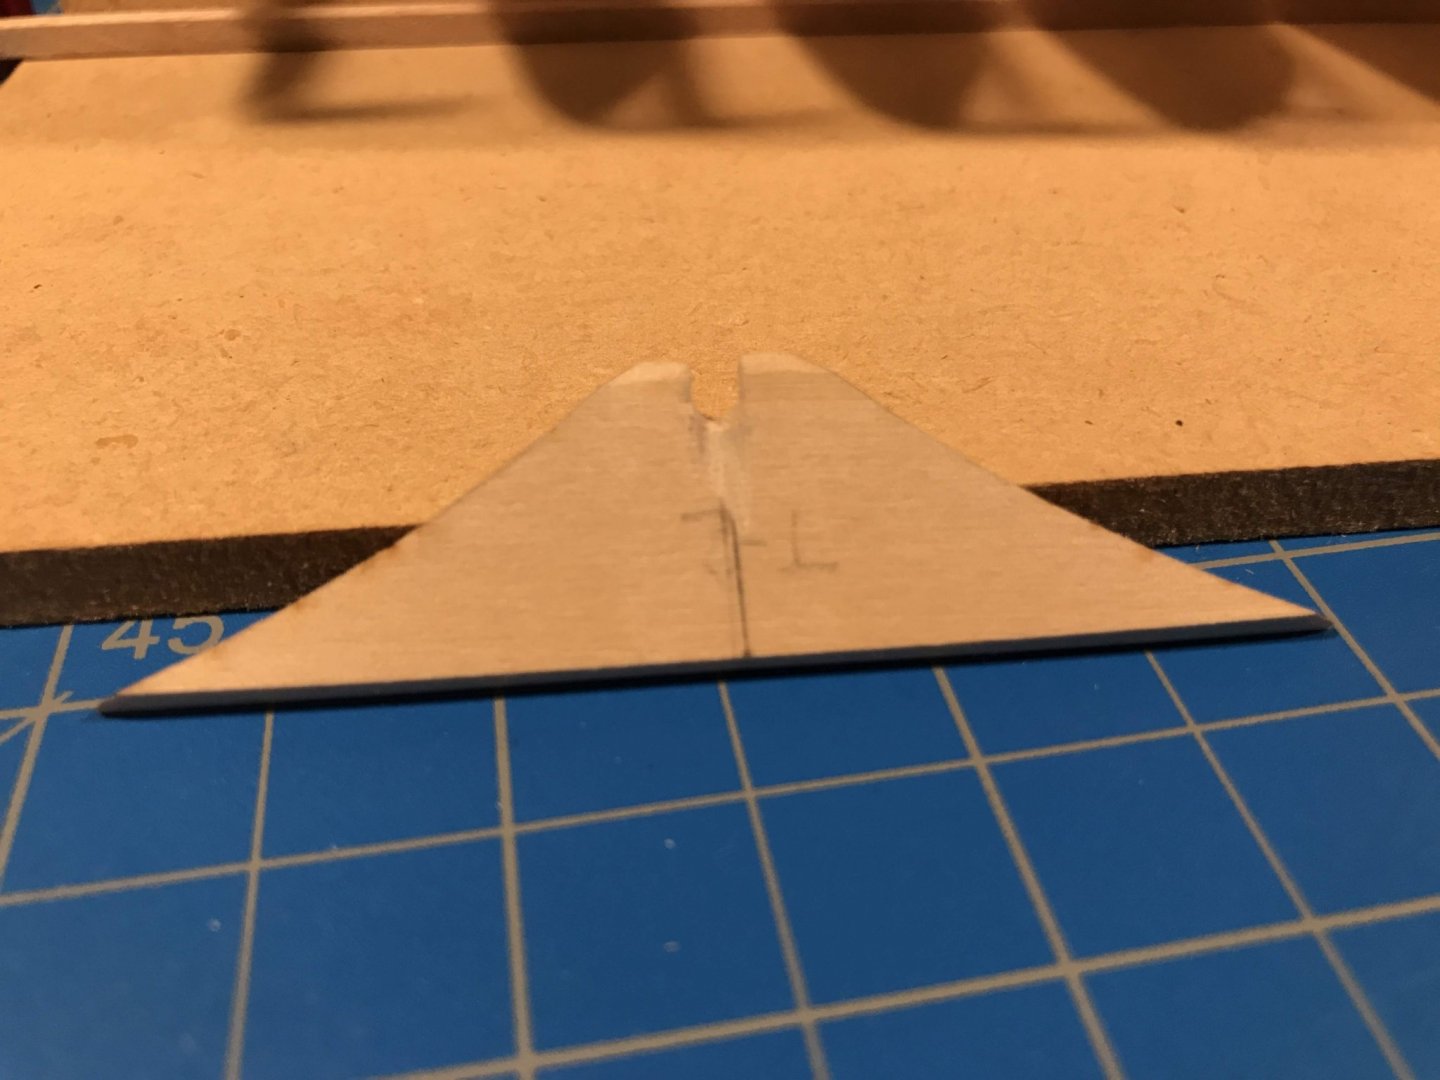
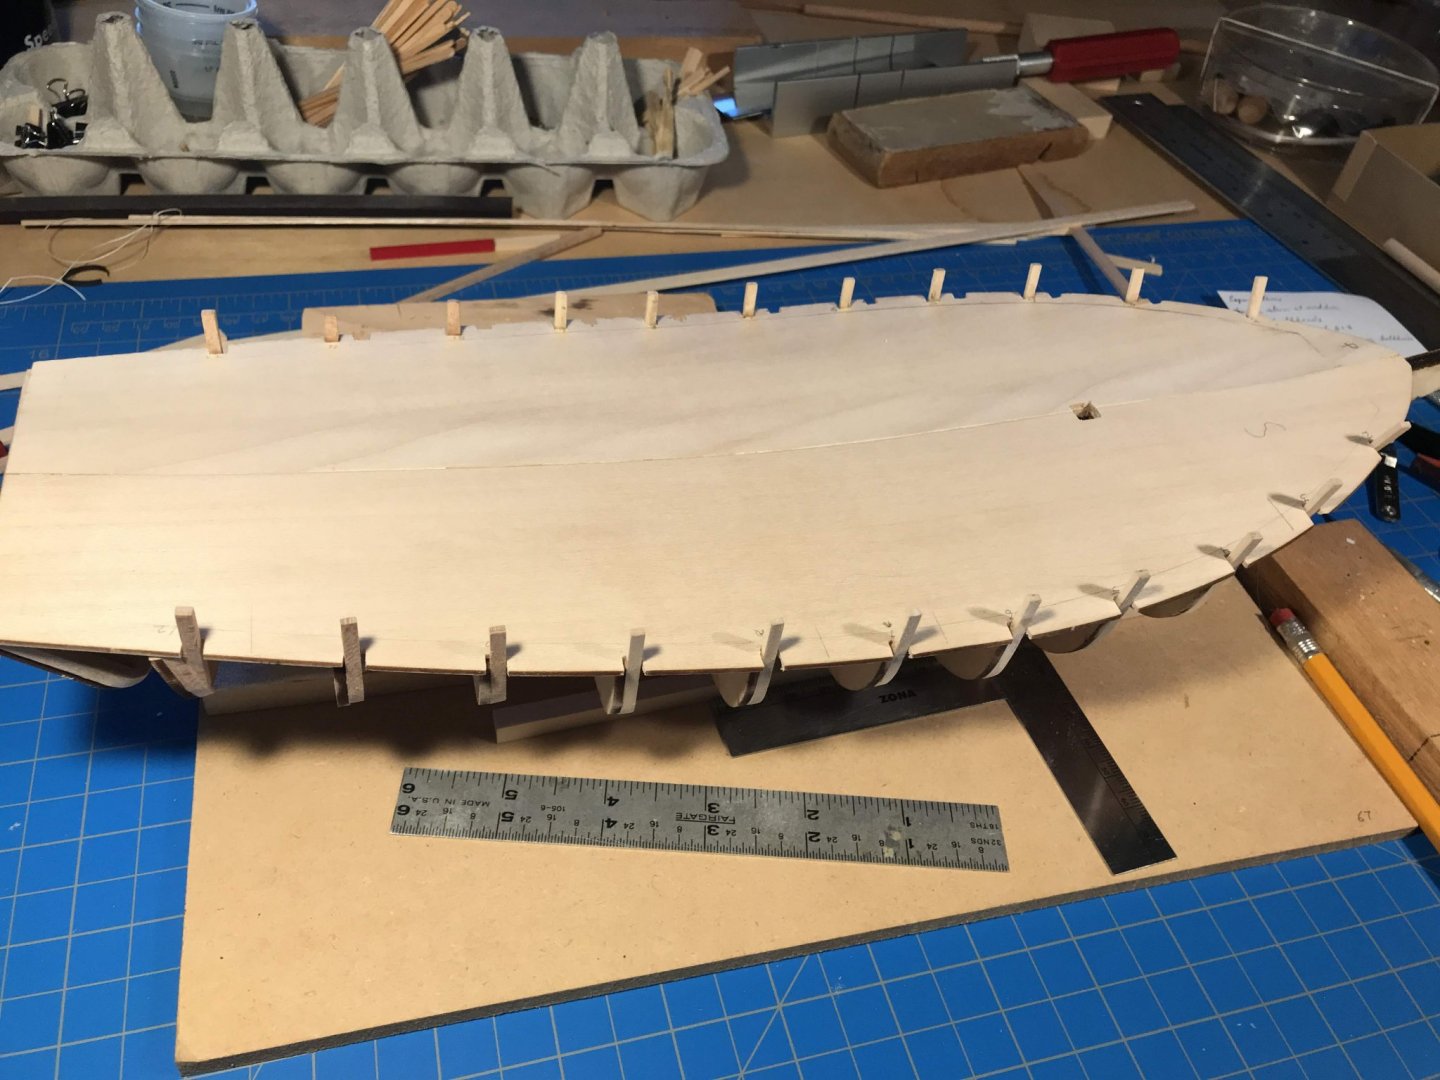
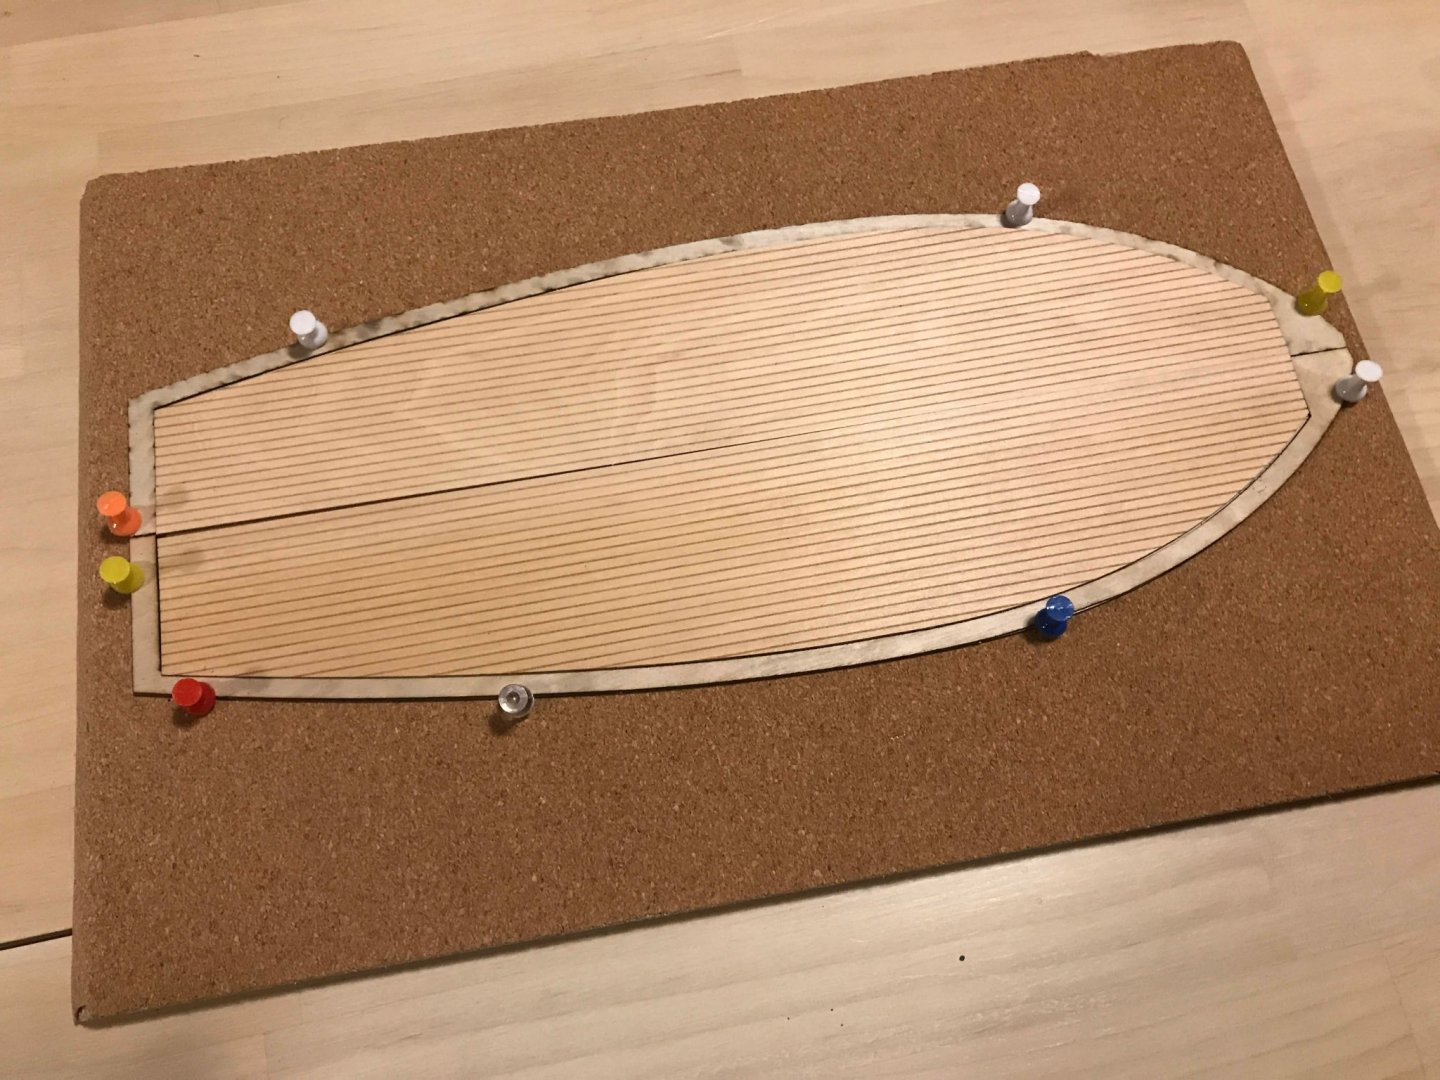
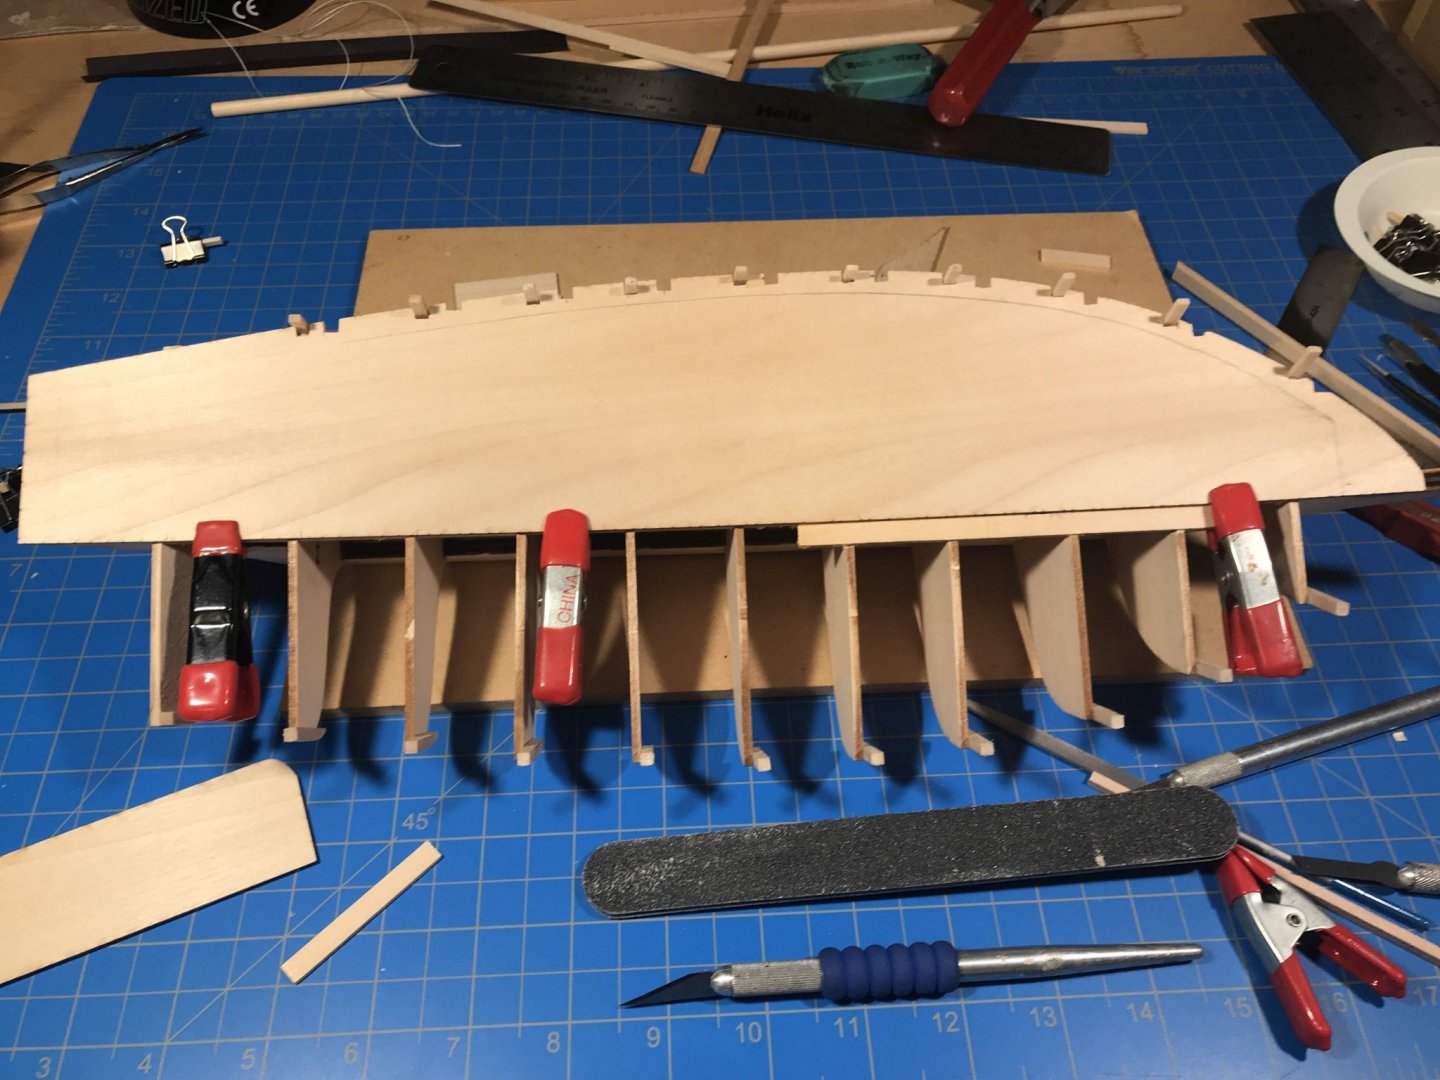
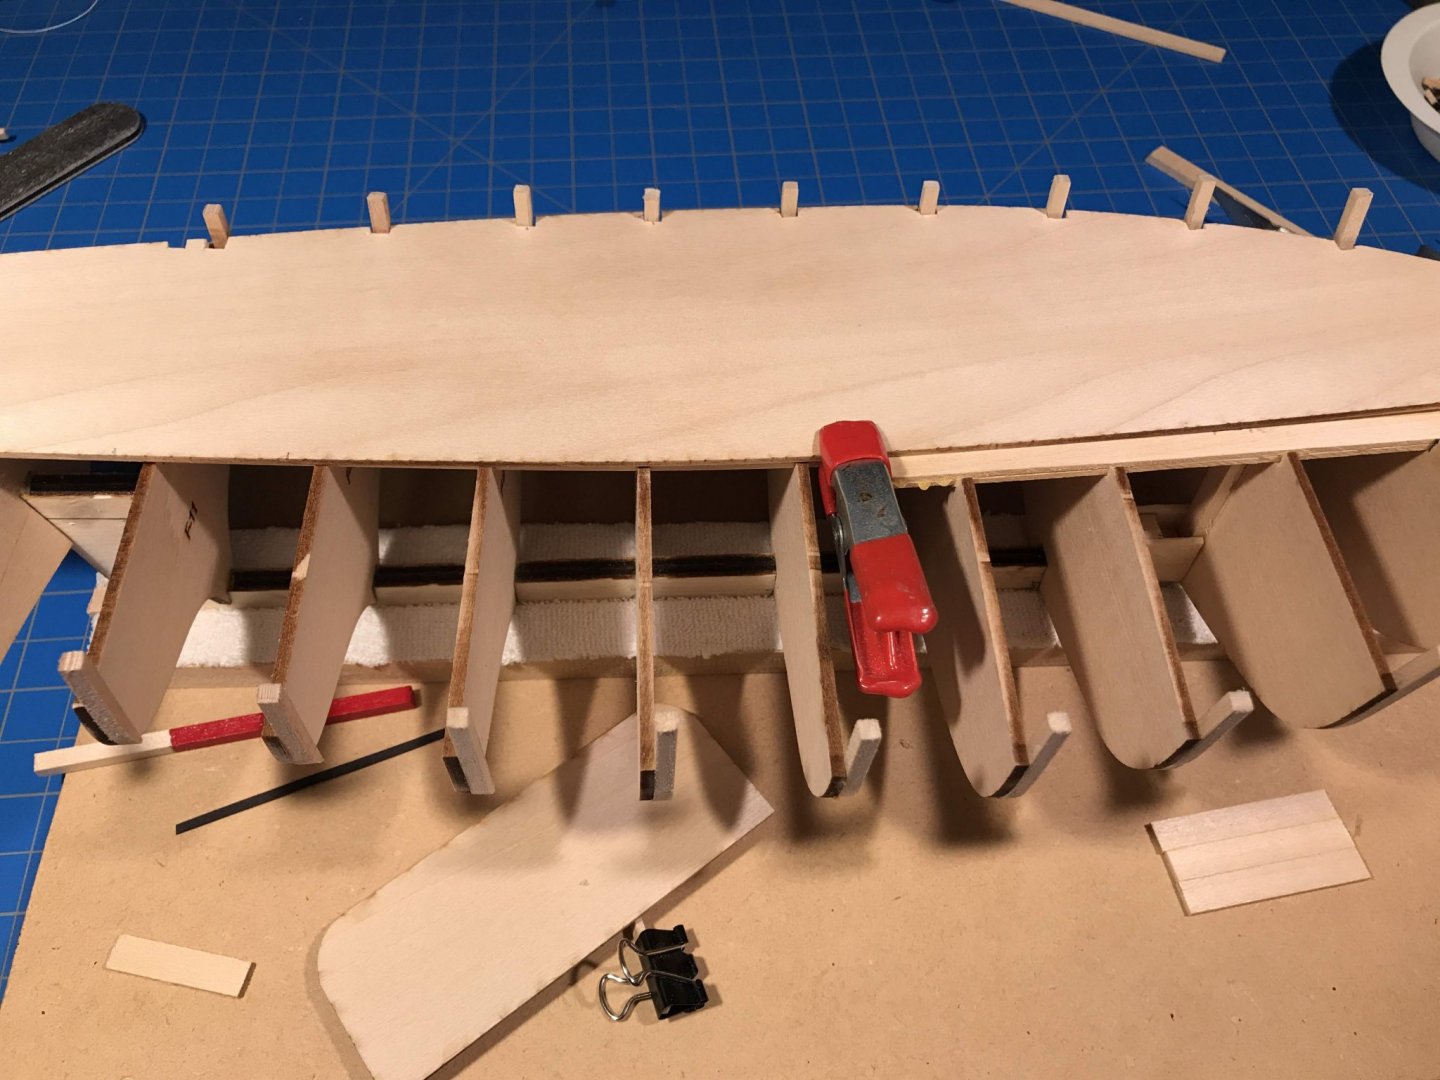
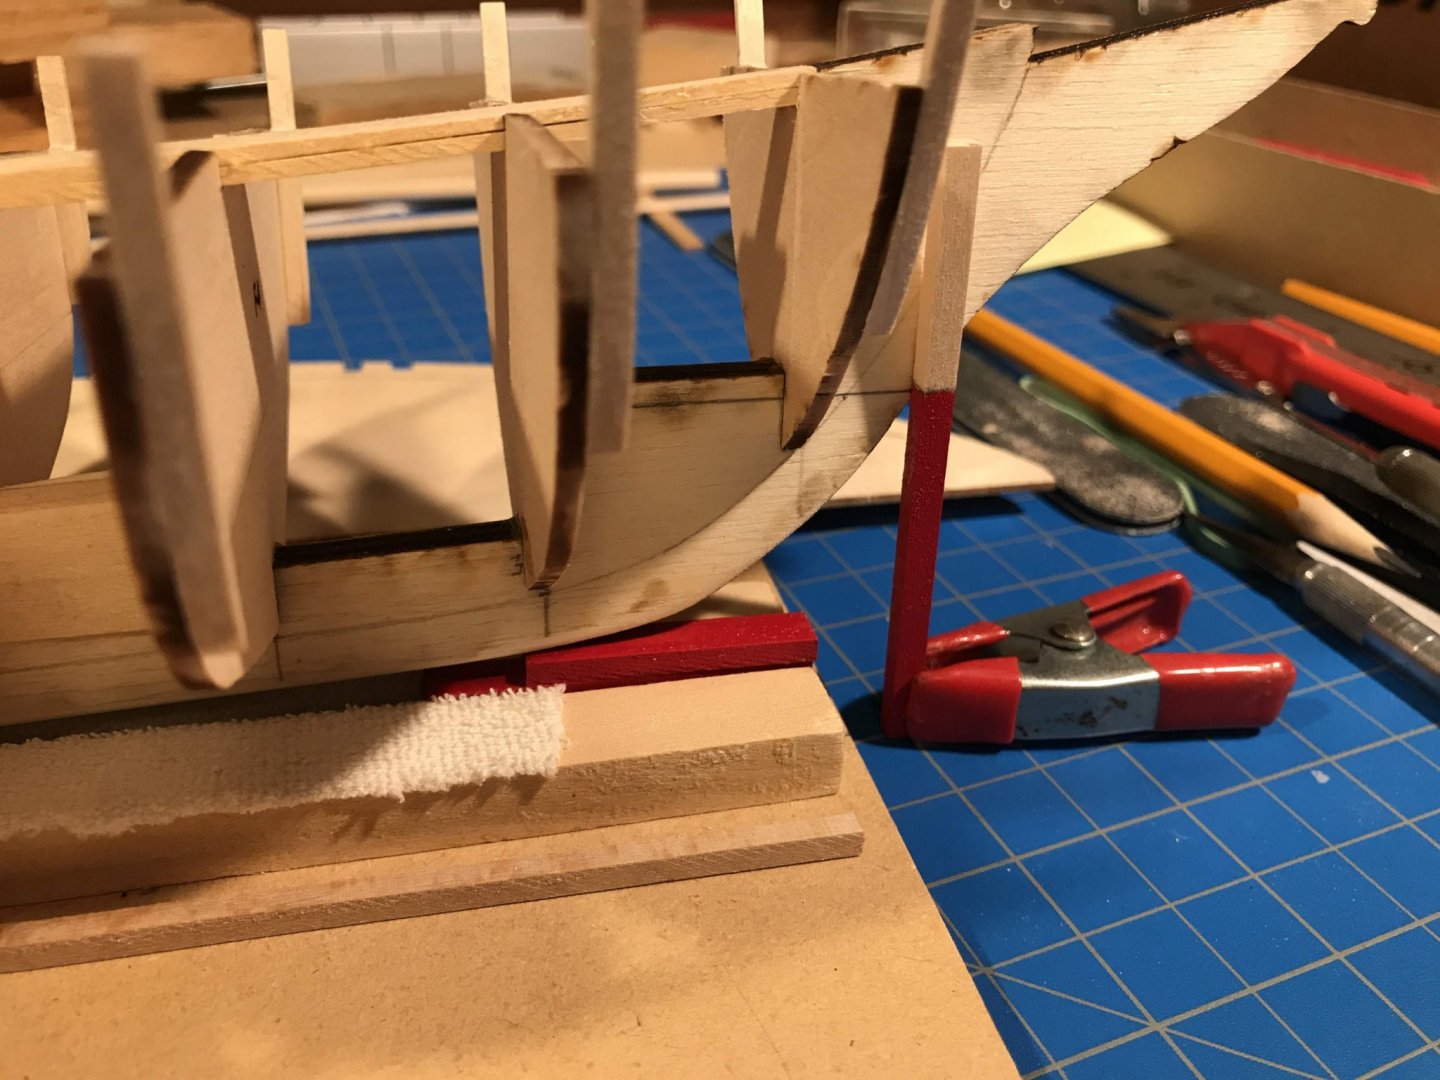
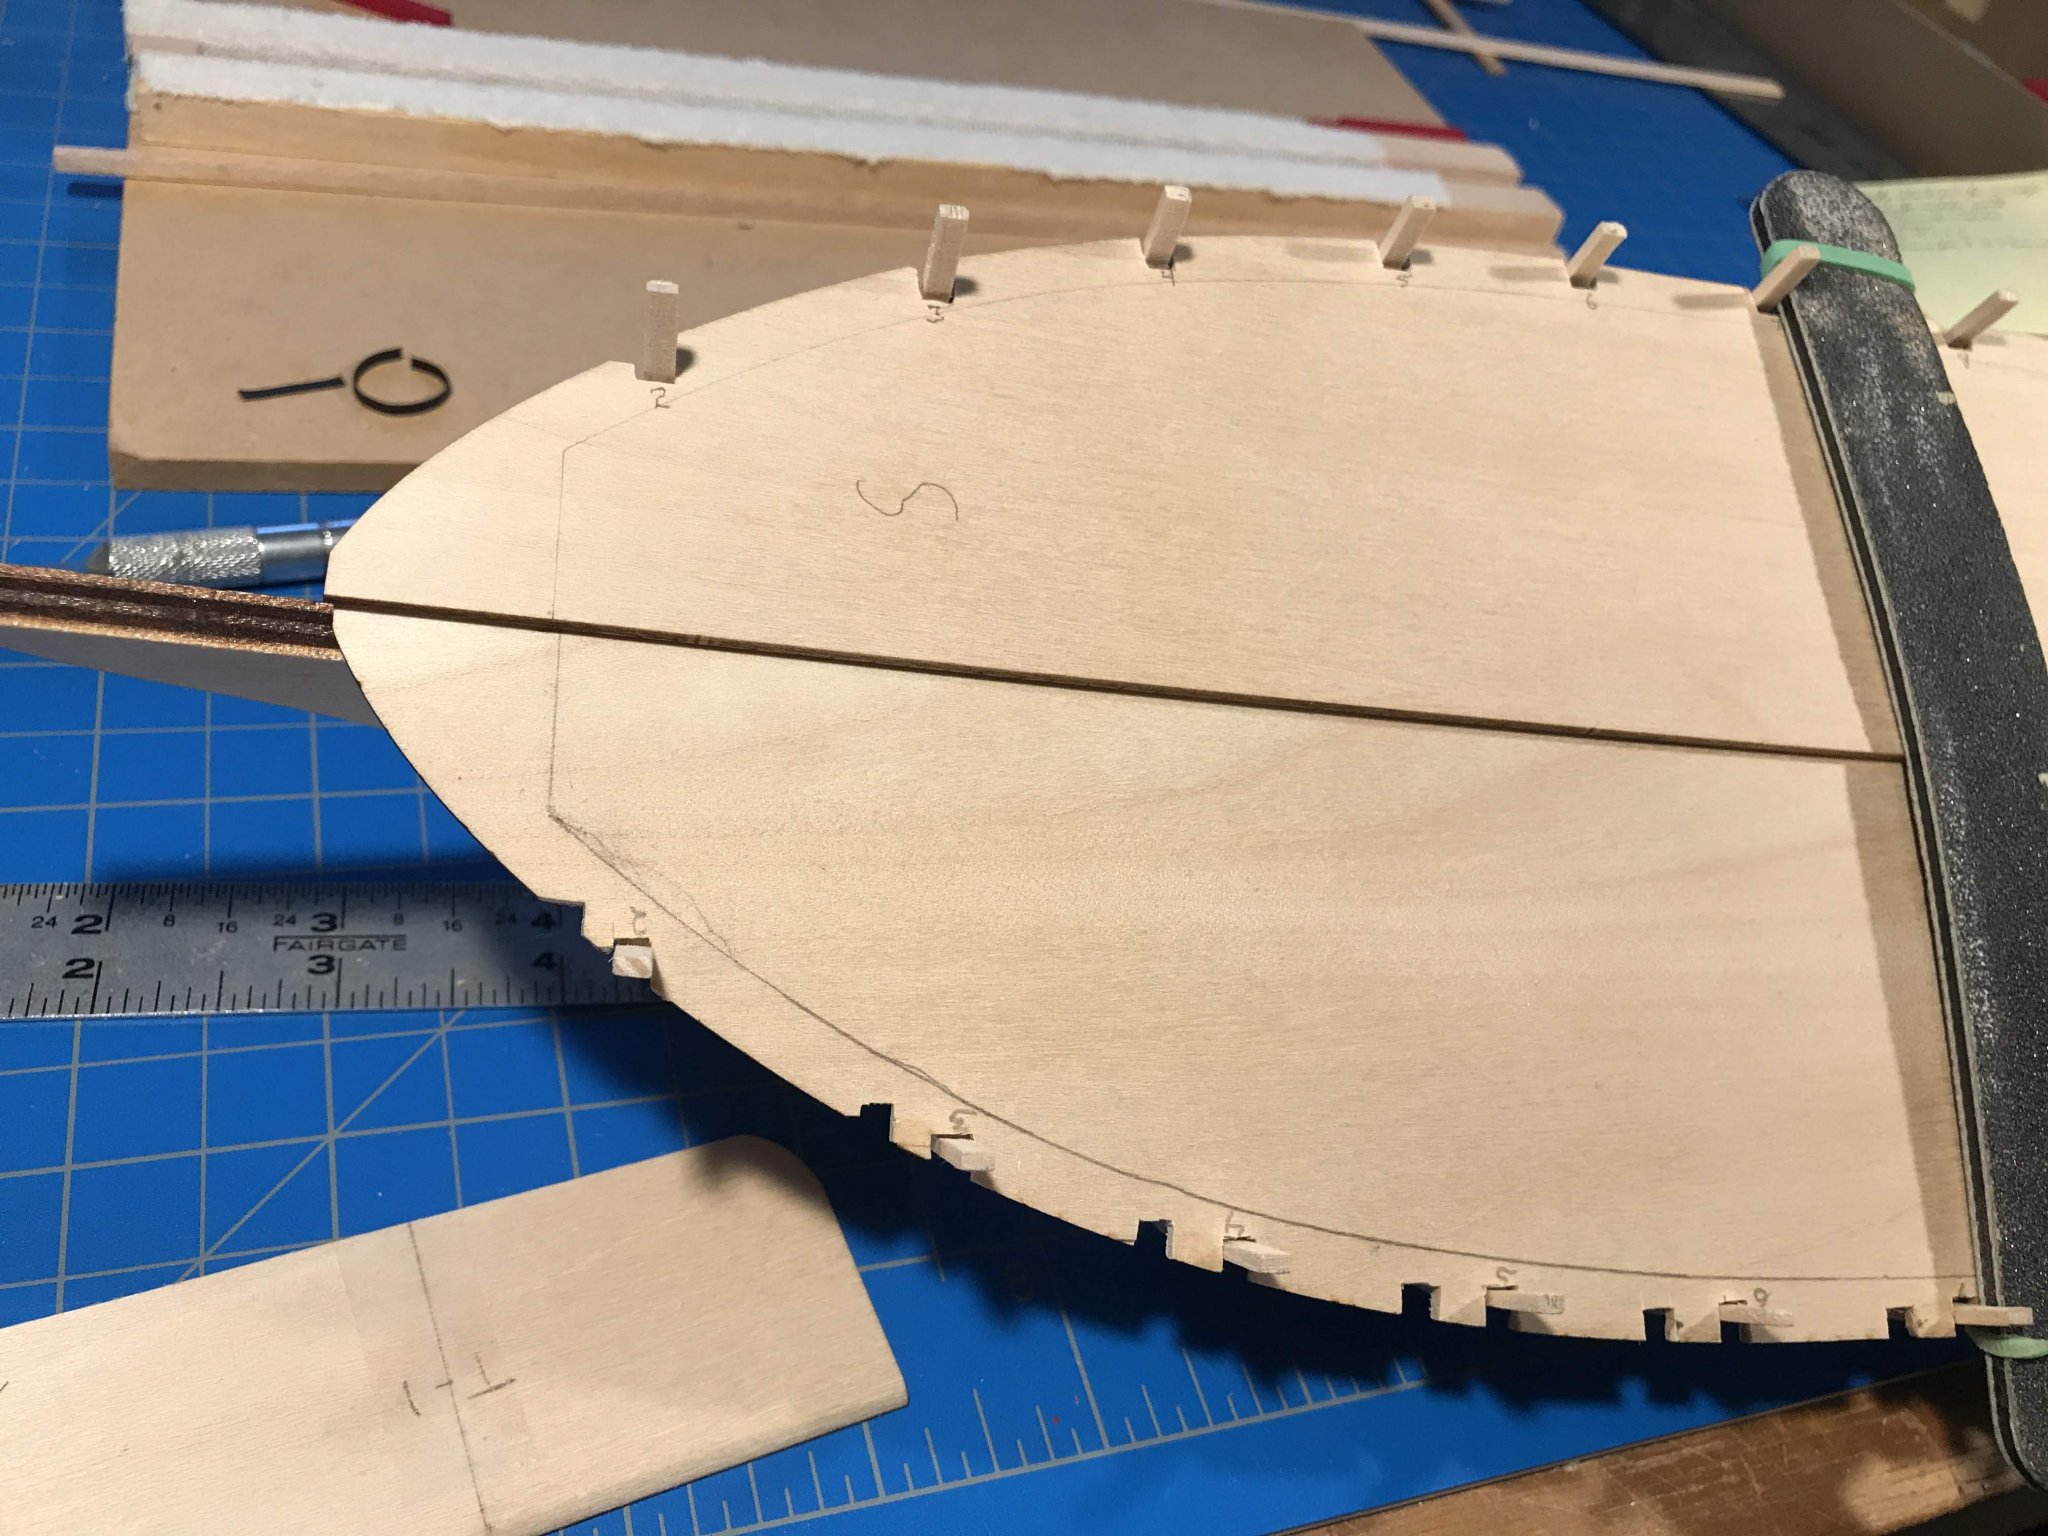
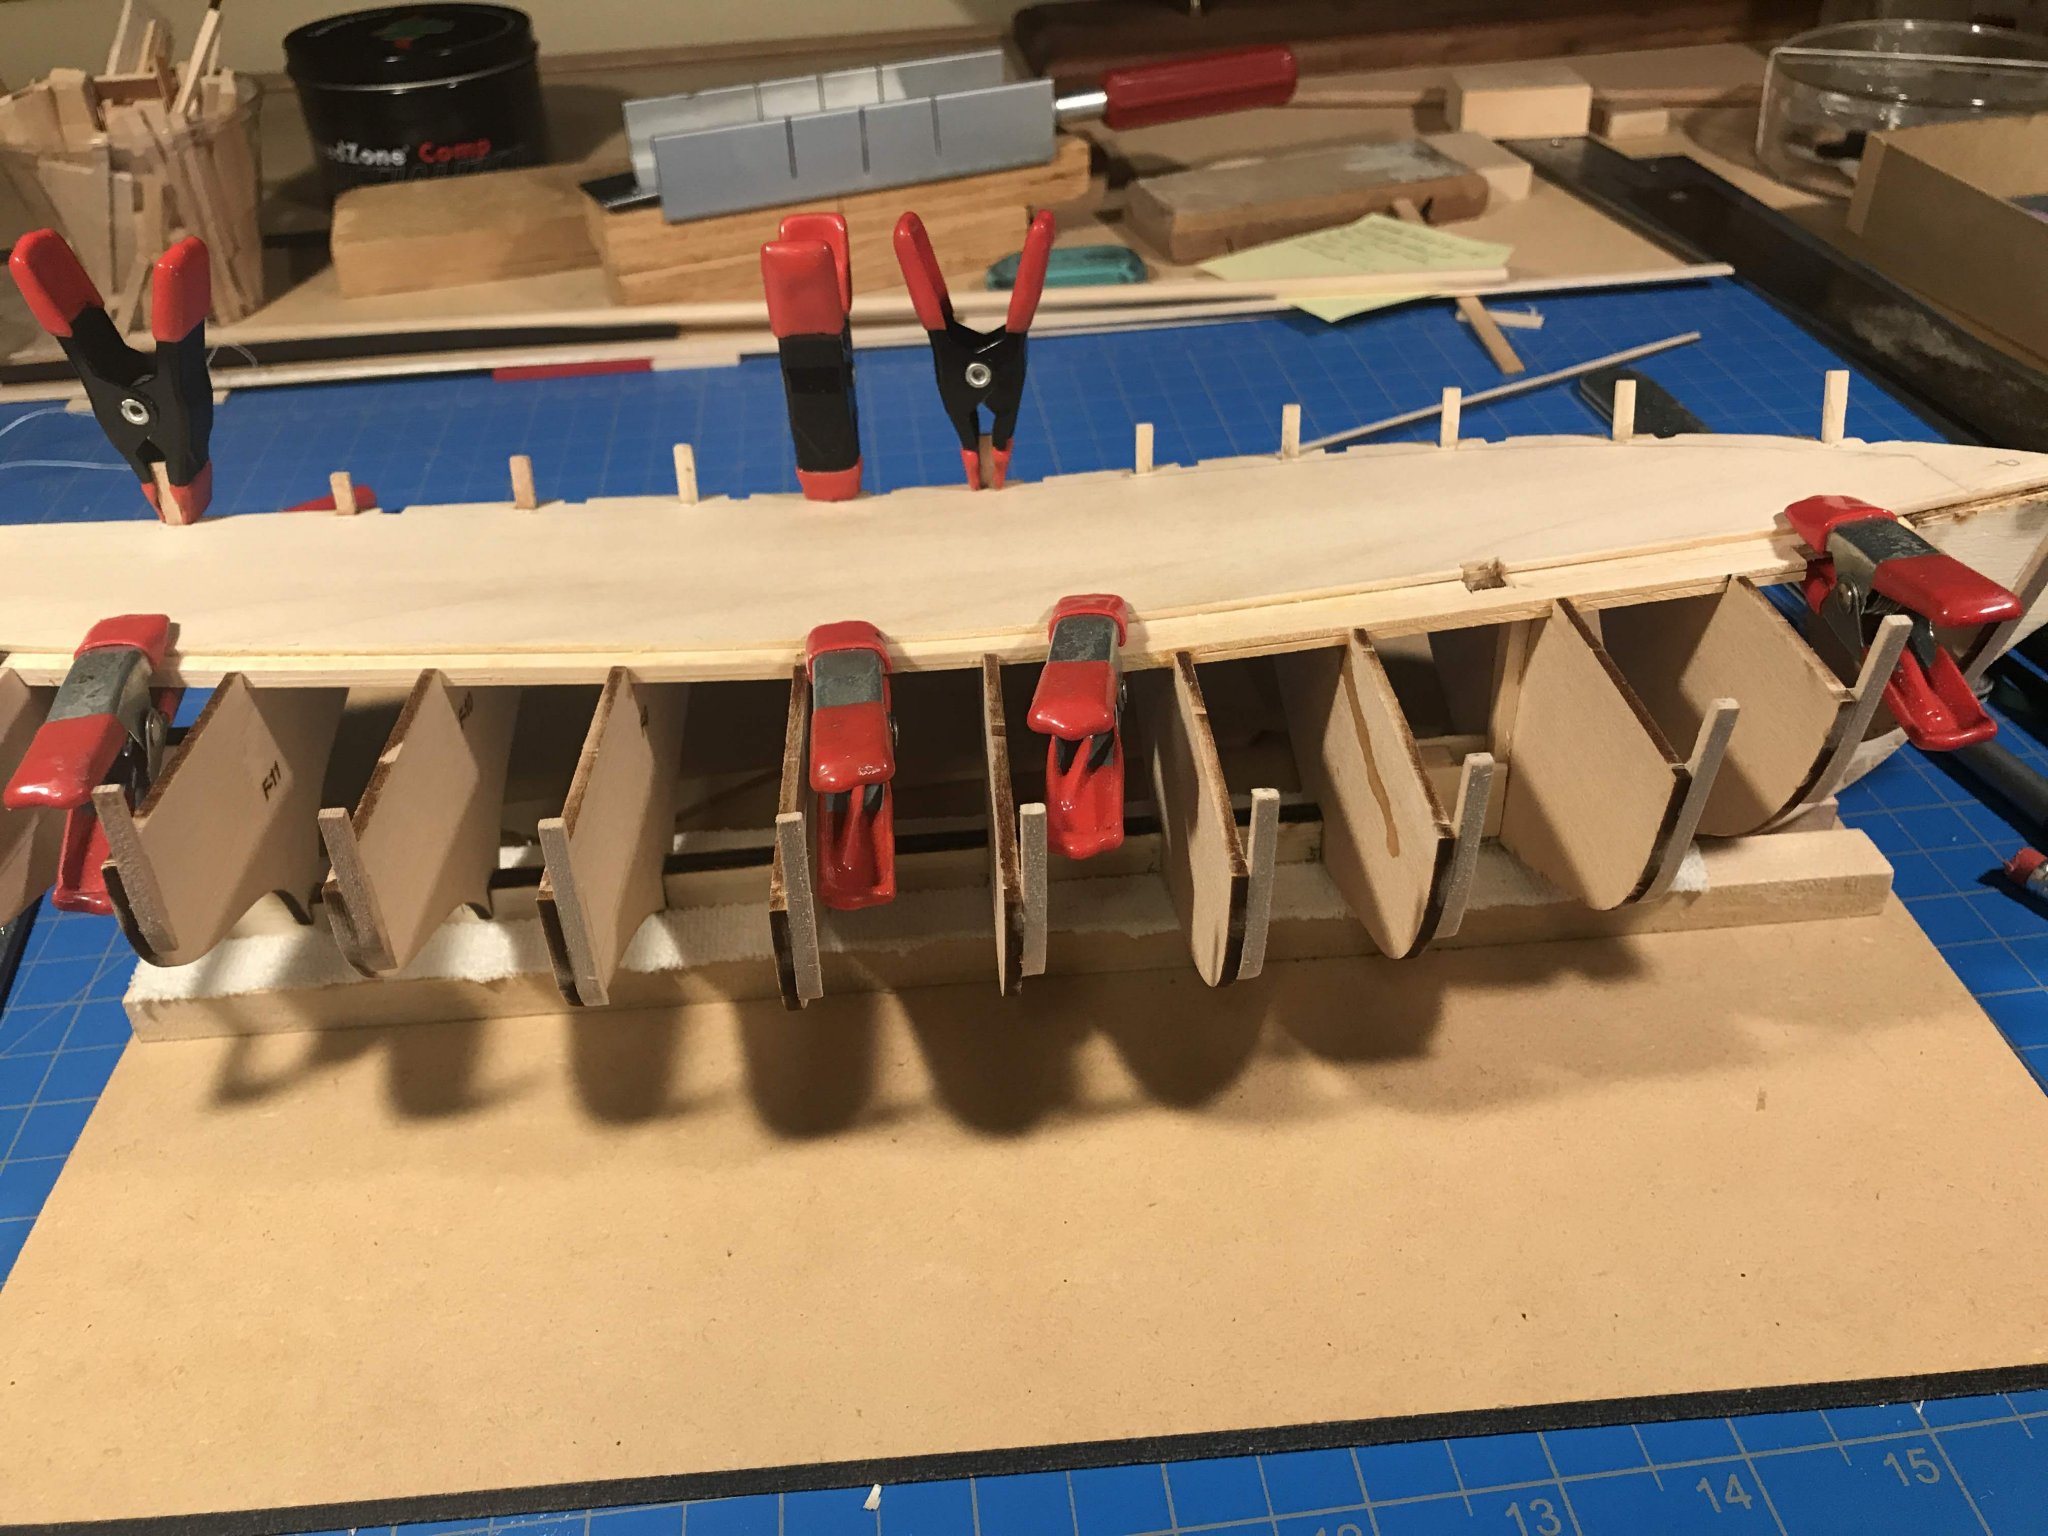
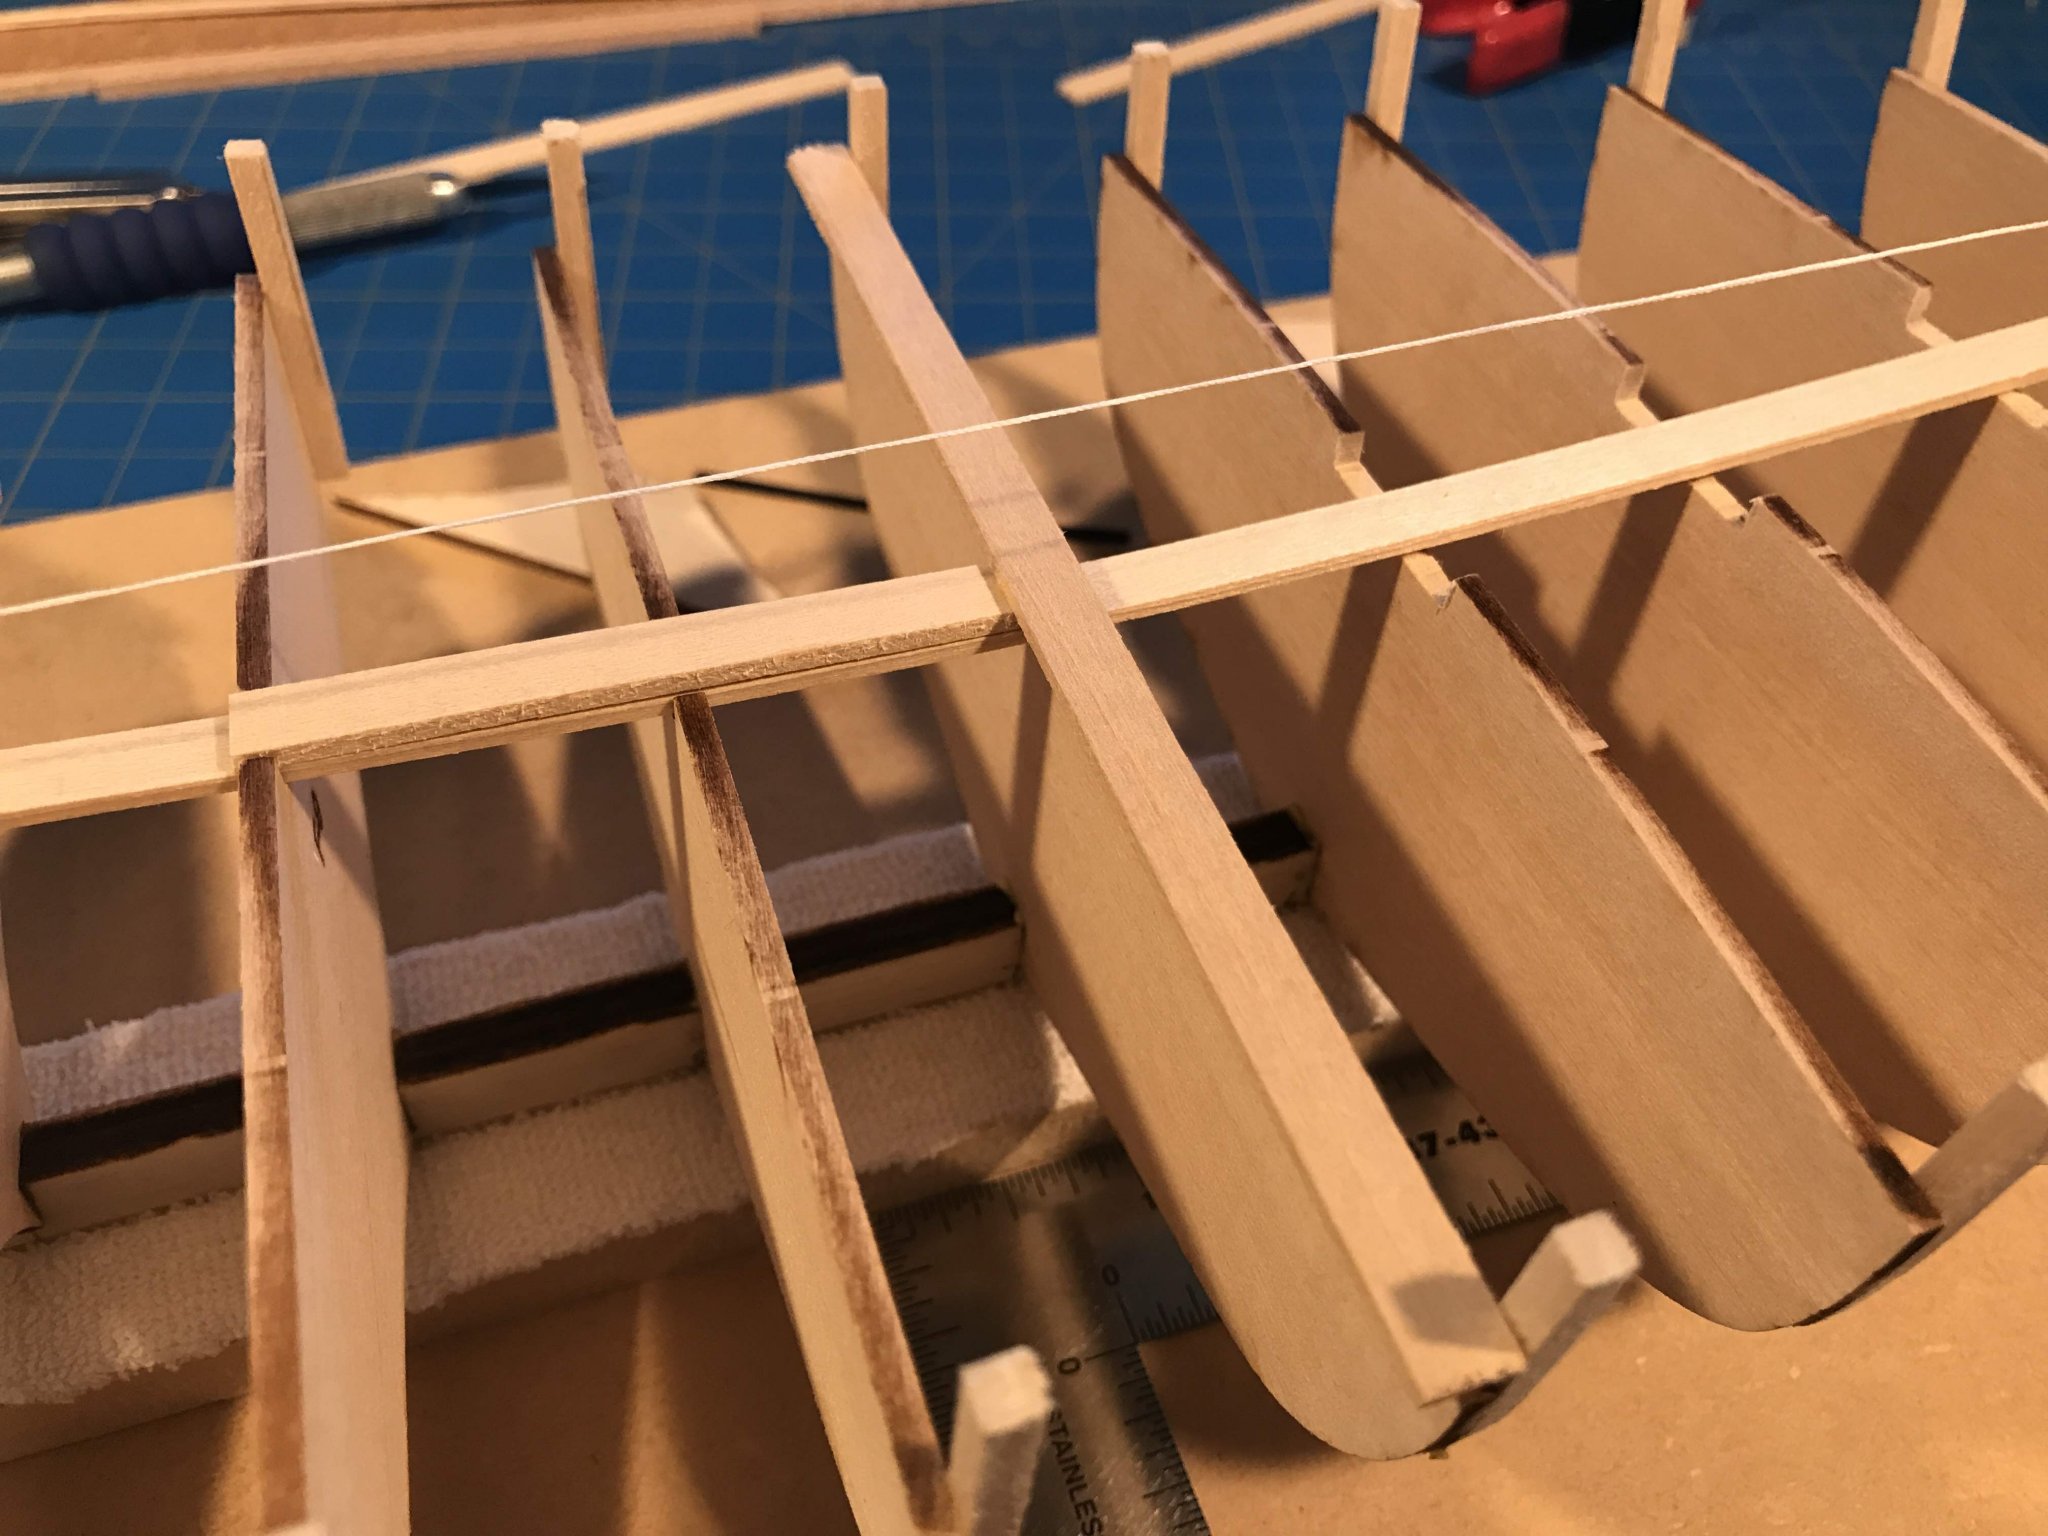
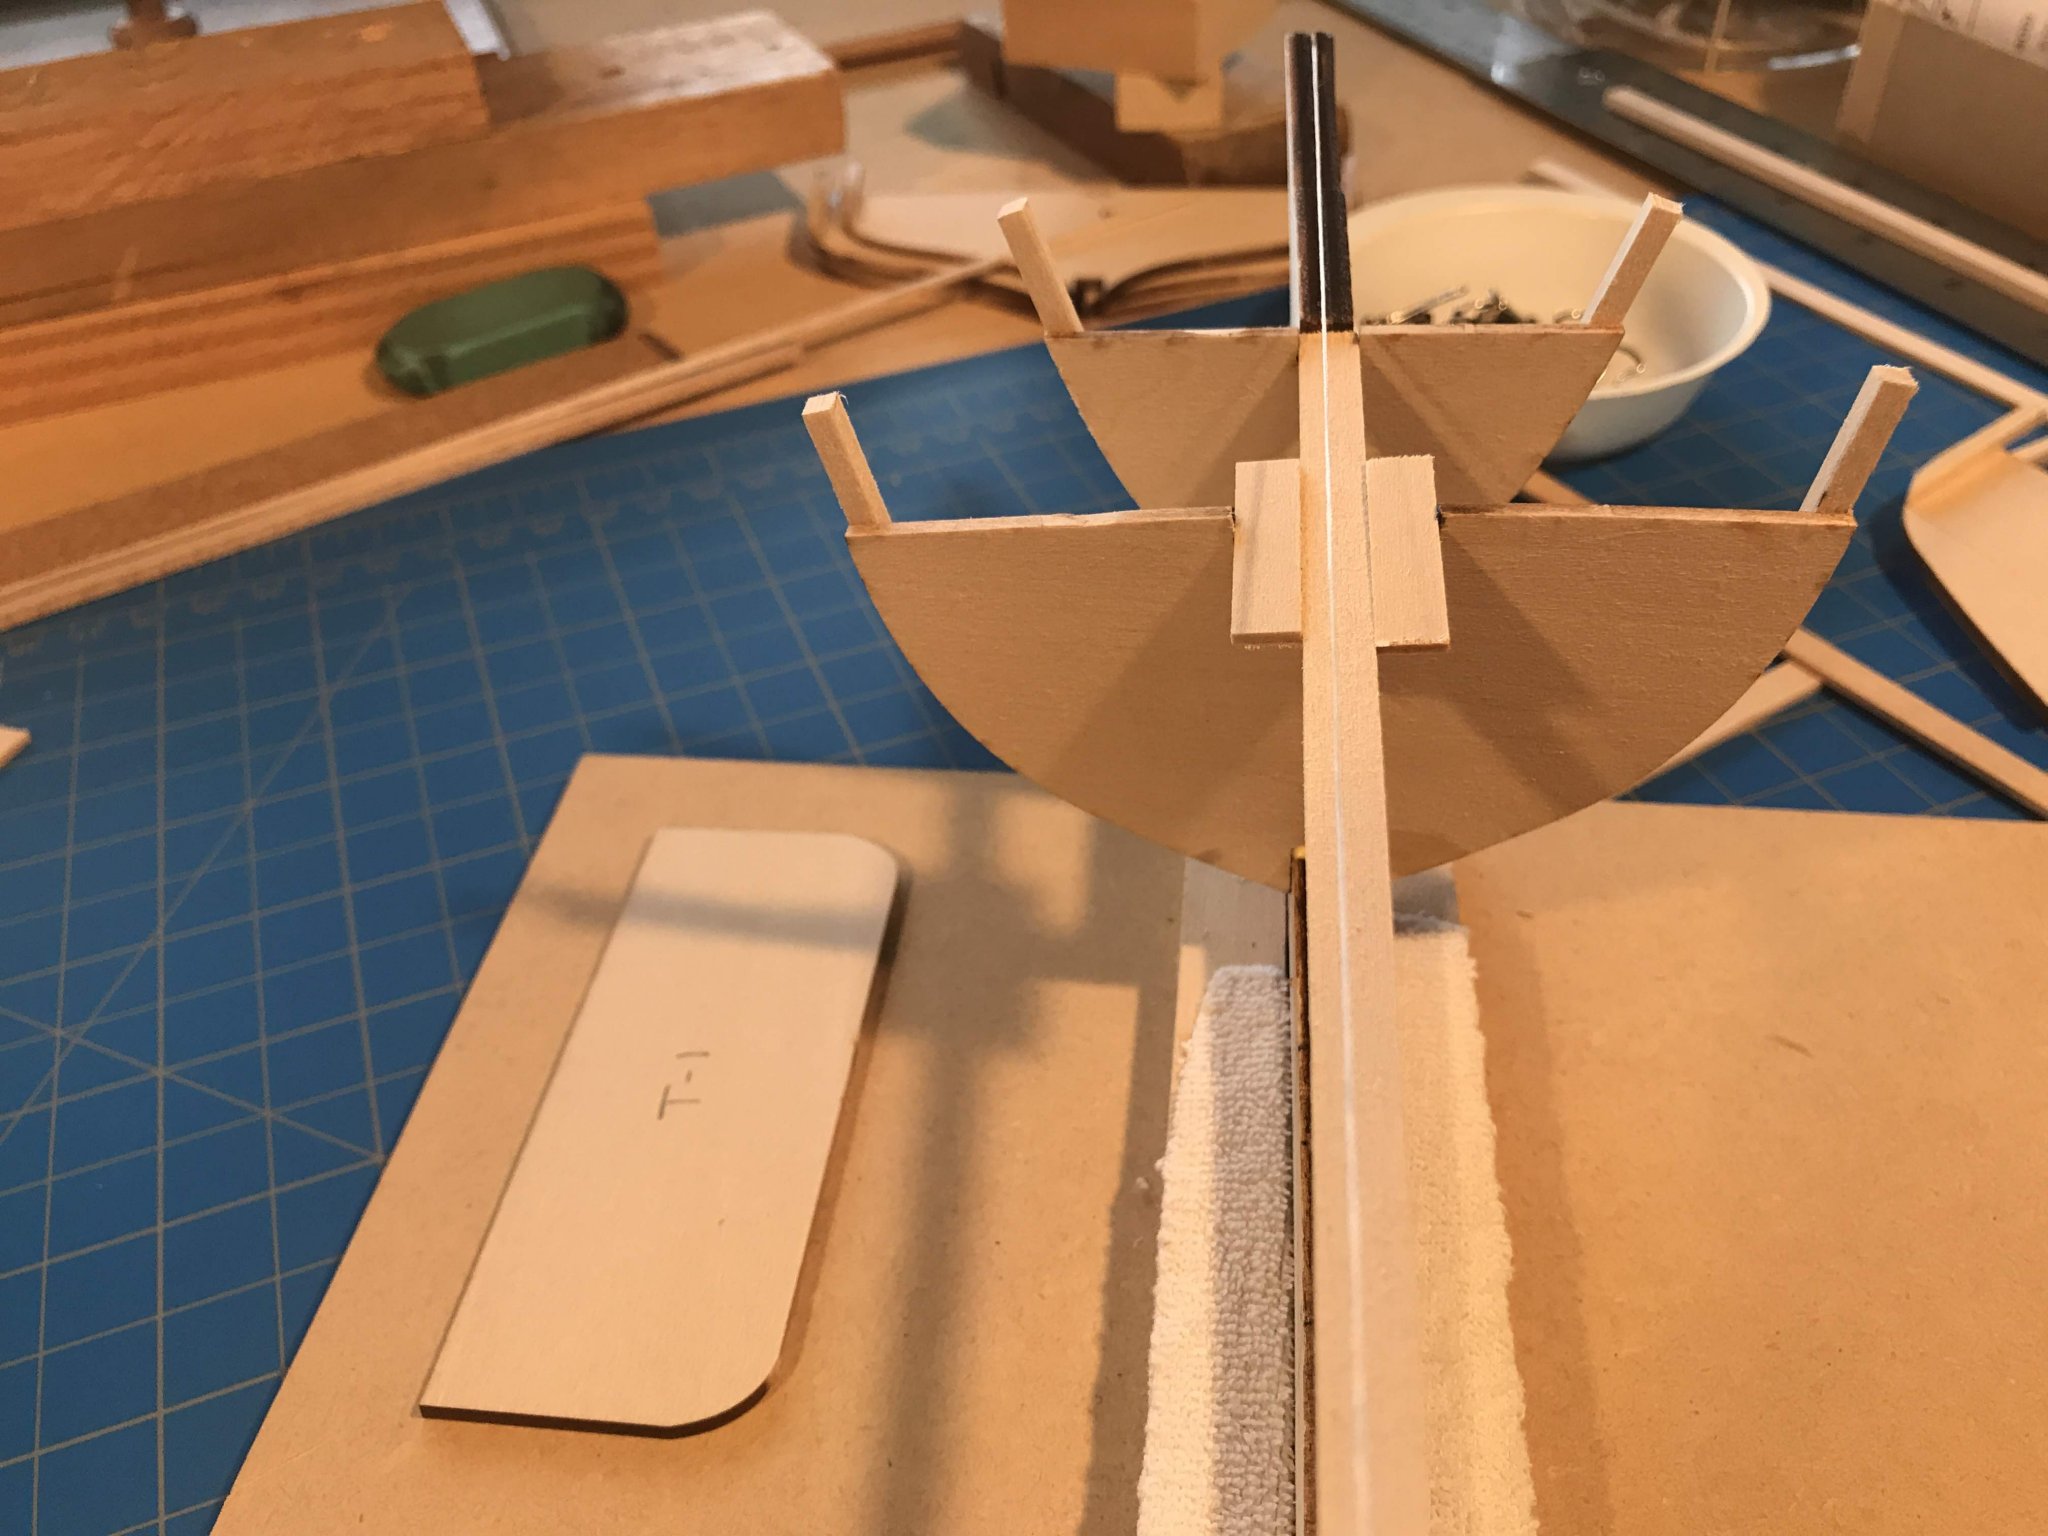
I decided to install the subdeck next, thinking the deck adds significant structural strength to the whole assembly. The instructions would have you do the planking below the sheer line first, then add the subdeck. The bulkheads are only 1/16” thick and they are easily flexed, and the idea of bending planks onto a somewhat mushy feeling hull didn’t sound like a lot of fun. The subdeck is laser cut in two 1/16” thick halves. The deck is laser cut from two 1/32” thick halves, pre-printed with planks. The waterways are also laser cut from a 1/32" sheet, and they seem to fit the deck pretty well. I did a fair amount of dry fitting of both the subdeck and deck, to see how it would all fit together. The way the keel piece is cut, bulkhead 12 (the furthest aft) is not perpendicular to the waterline but instead leans aft (against the keel piece), or so I thought. Actually, I'm still not clear as to what the plans contemplate, but that’s how I glued that bulkhead in place, with the result that its stanchions also lean aft (the transom pieces in the picture are only temporarily attached, with double sided tape). Leaning stanchions didn’t seem right, so I cut them off at the sheer line and glued on new stanchions, with wedges between them and the bulkhead to make them vertical. The following pictures jump ahead a bit chronologically, but show the revised, vertical stanchions. Slots need to be cut into the subdeck to accept the stanchions. I carefully lined up the bow of the port subdeck where it is supposed to be on the stem, then went to work carefully cutting the slots, working my way aft from the bow. But when I got to the stern, the subdeck extended close to ½” inch beyond the transom end of the keel piece, something I didn’t notice until all the slots had been cut. Clearly the subdeck was positioned too far aft. I cut new slots about a ¼” aft of each of the old ones to get the subdeck positioned farther forward. (Some part of “measure twice, cut once” seems to elude me; when sending email the equivalent is “type, send, attach”.) The bow end of the subdeck is a little forward of where it should be, but I think I can either trim it back, or run the planks slightly forward of where they are supposed to be. At least the stern now lines up like it should.


- 82 replies
-
- 2
-
-
- spray
- BlueJacket Shipcrafters
- (and 1 more)
-
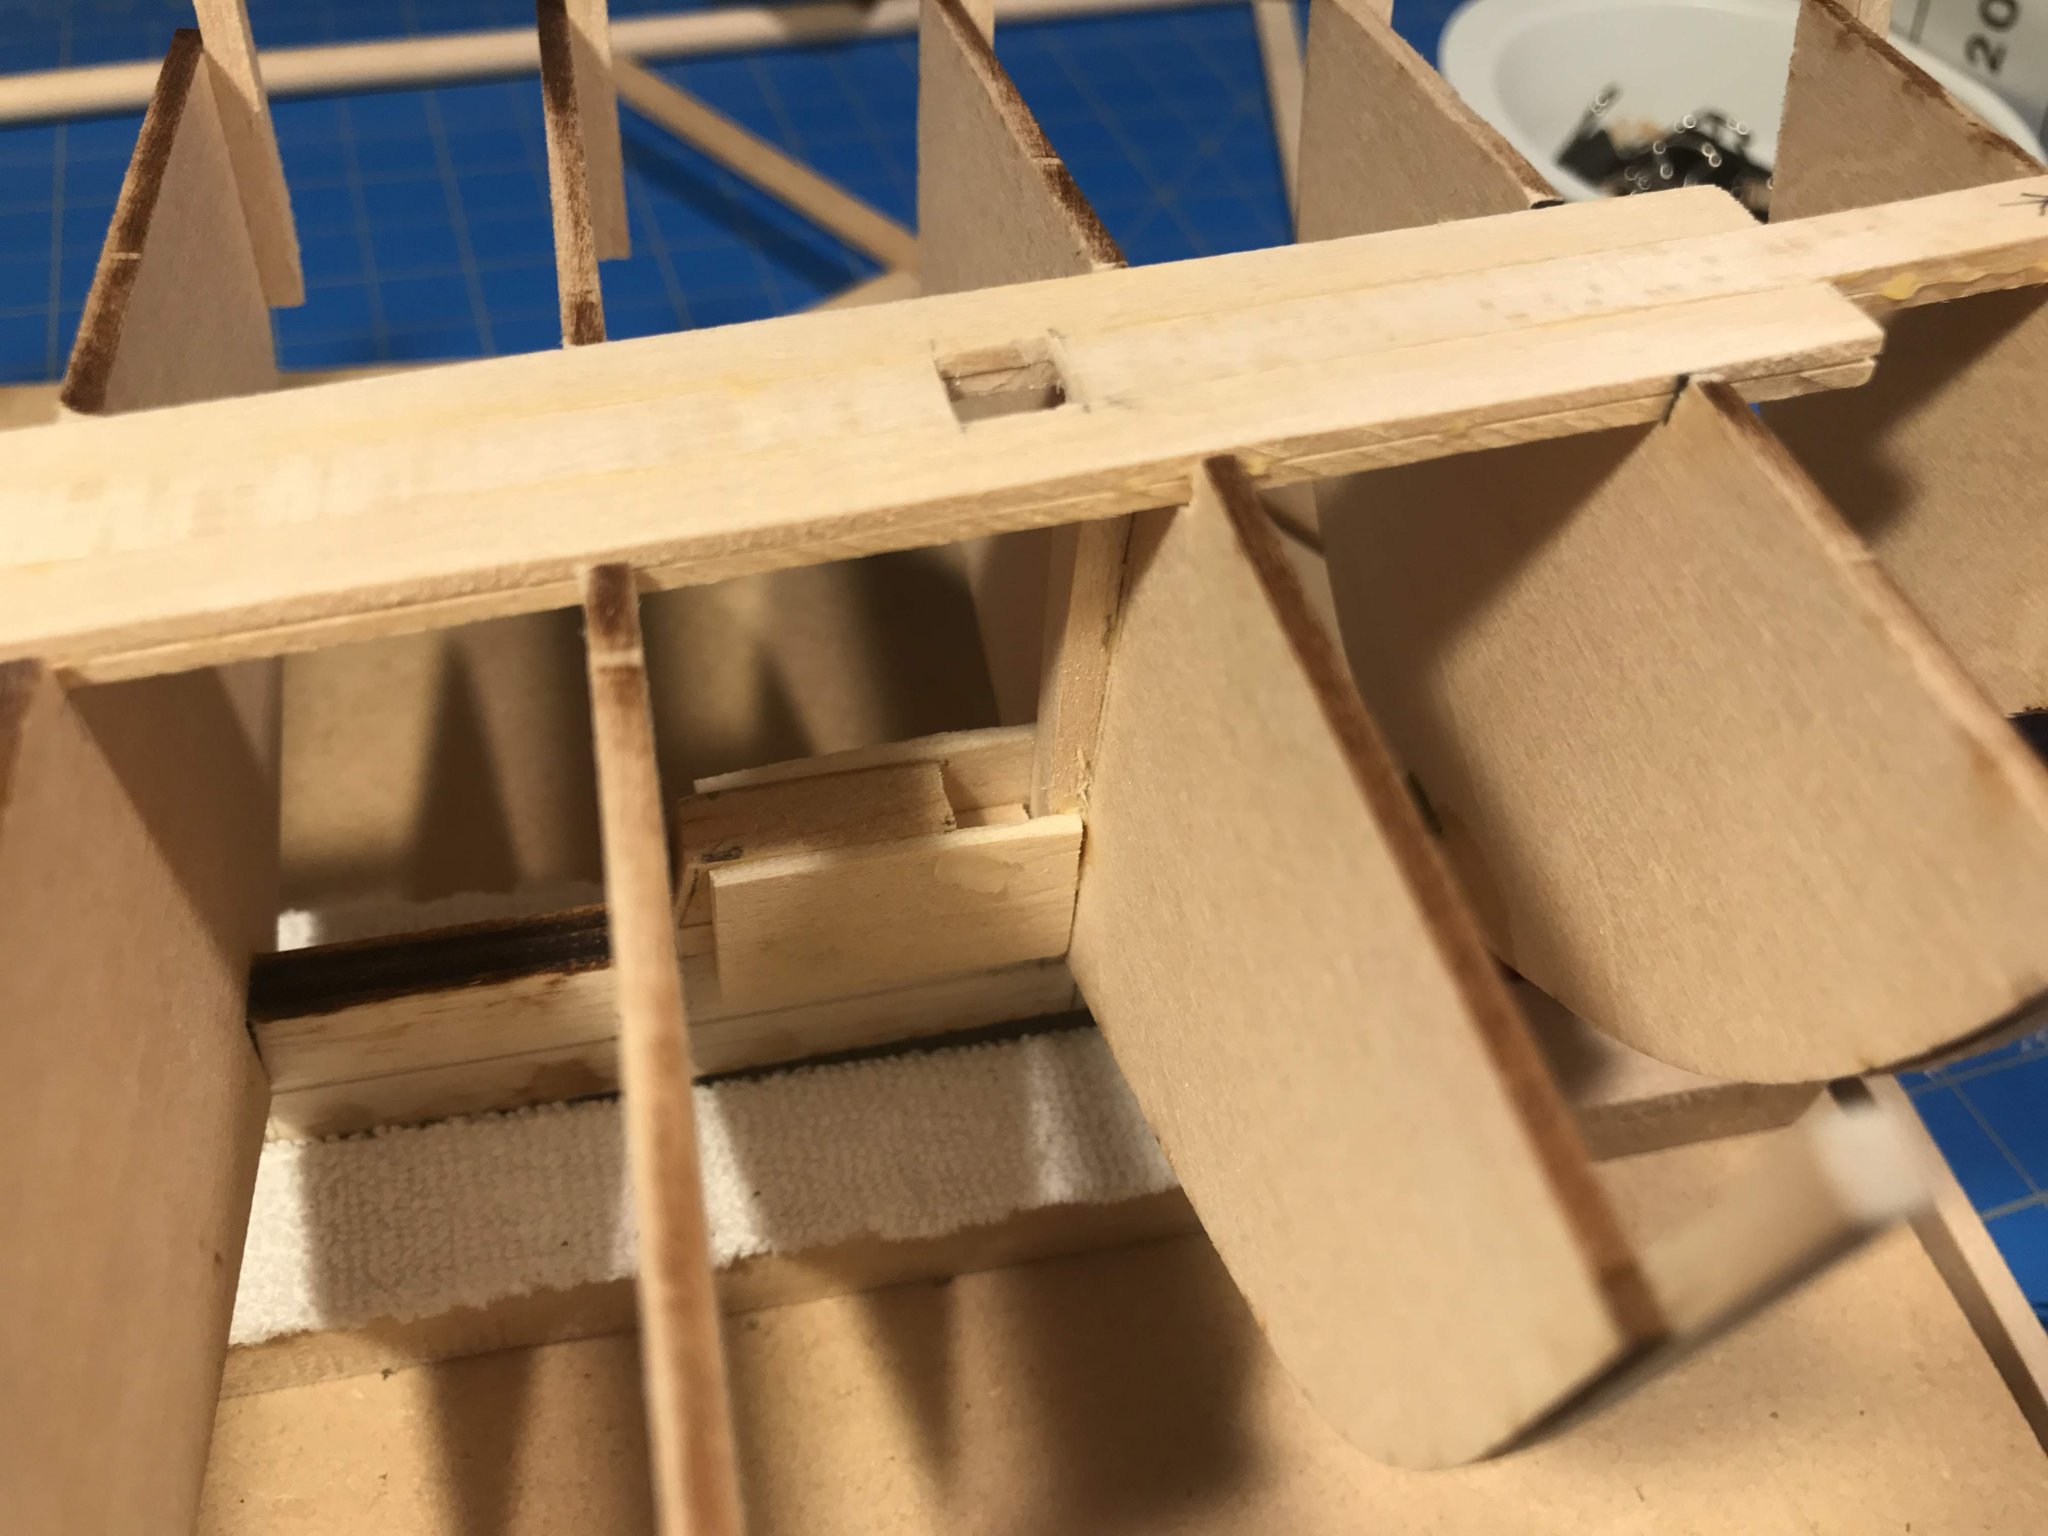
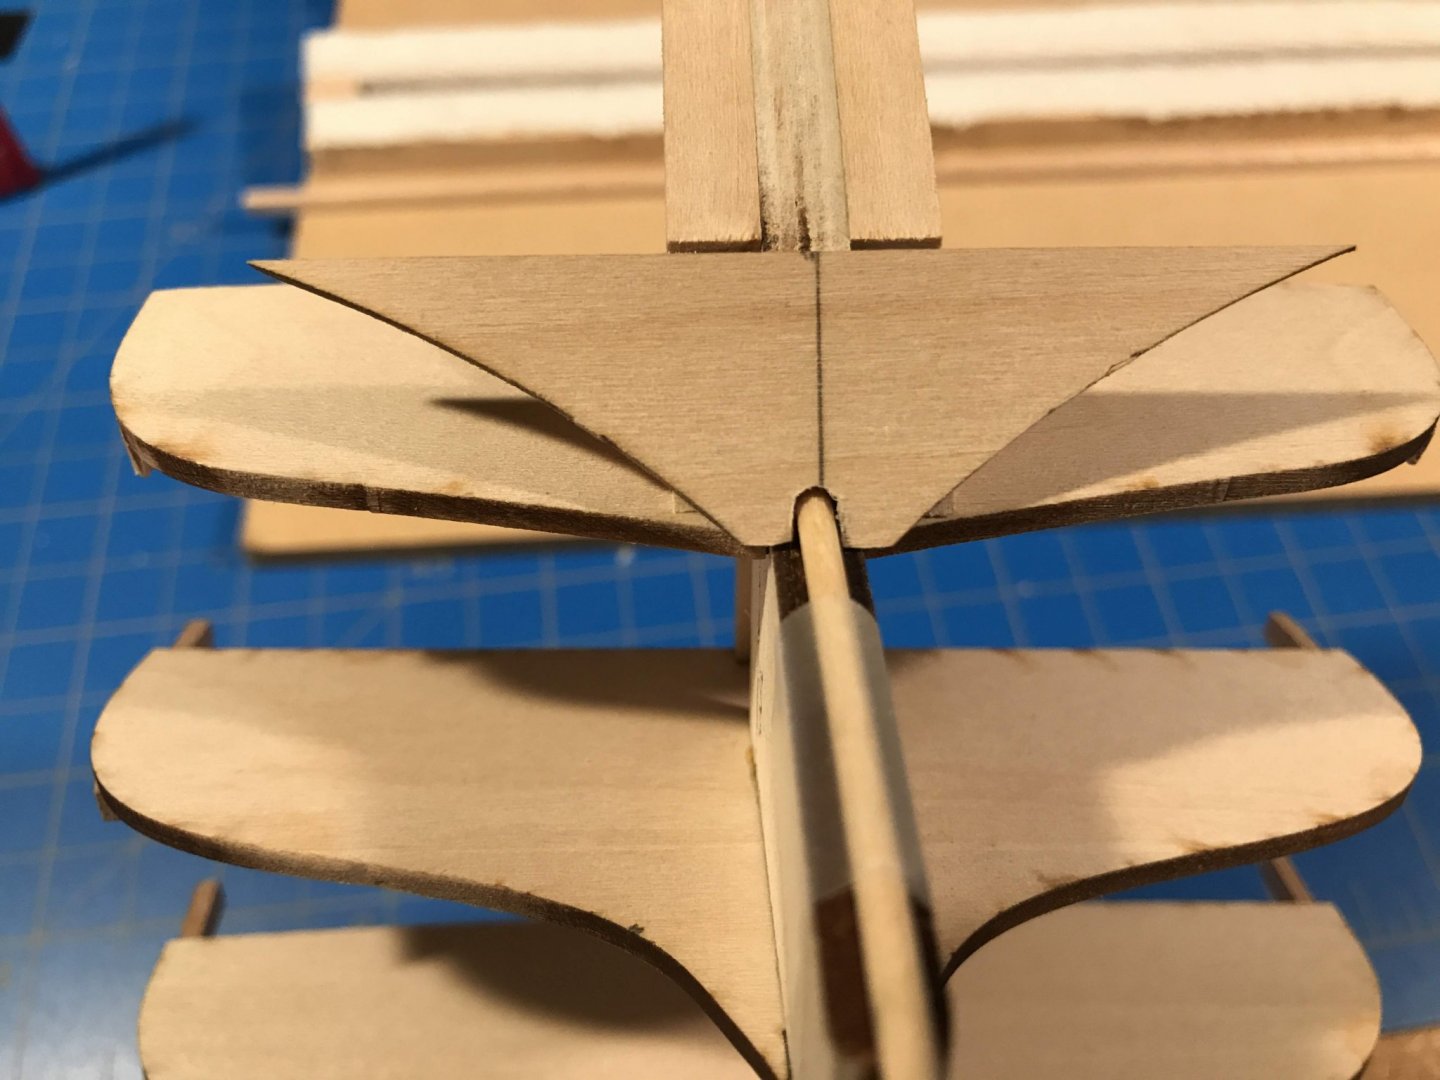
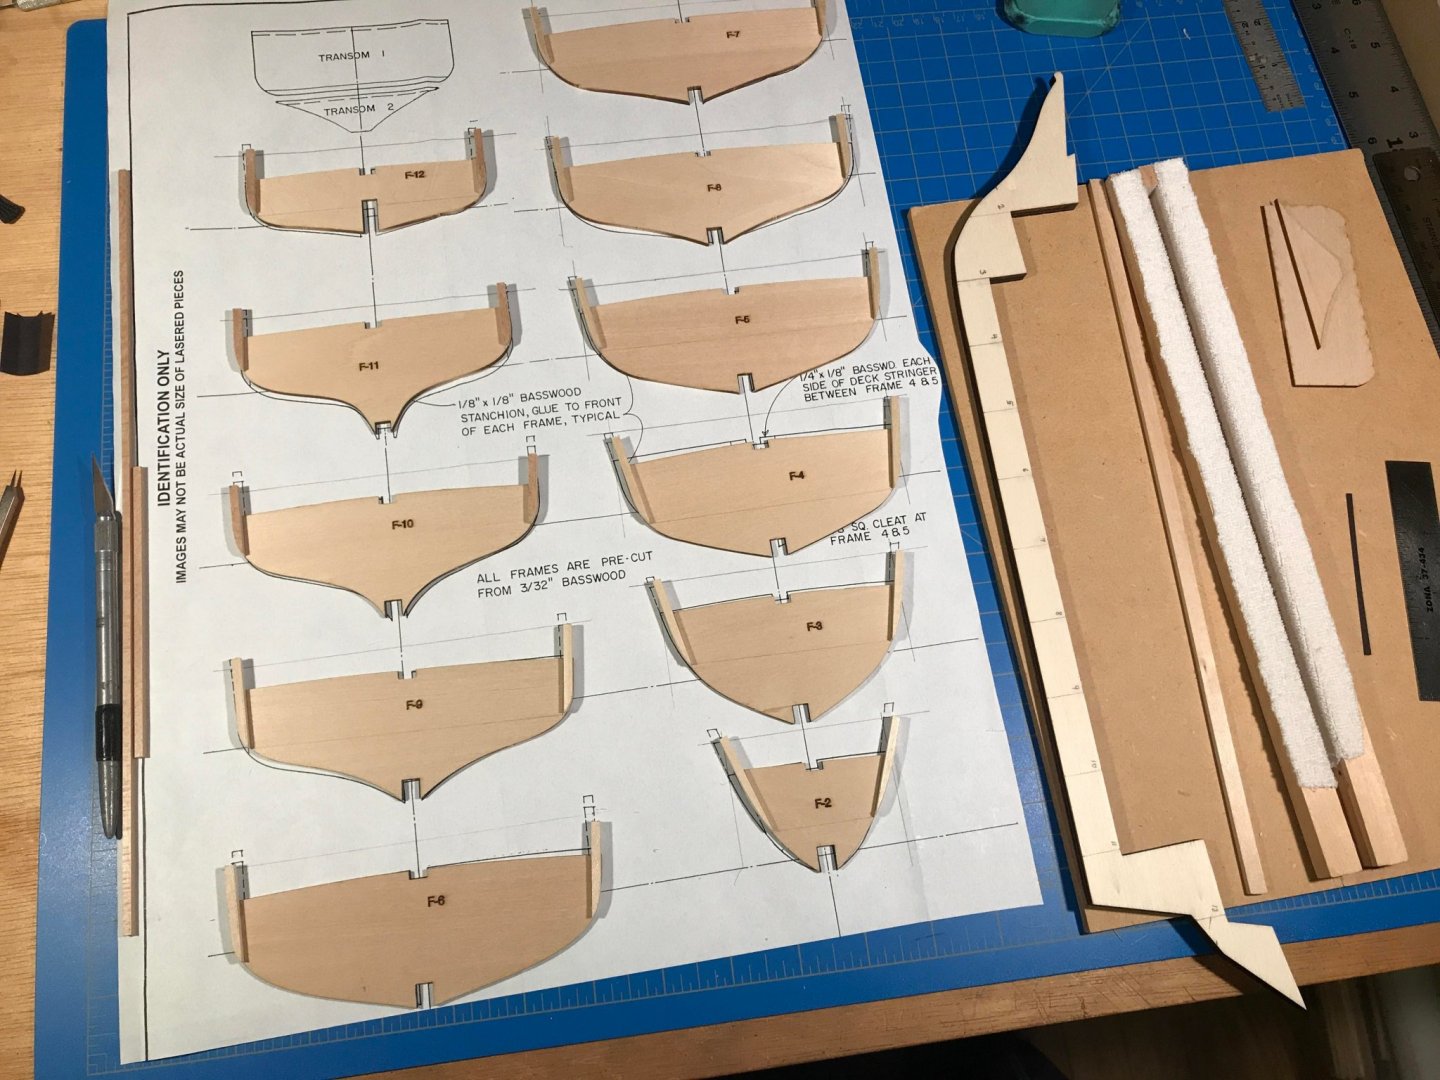
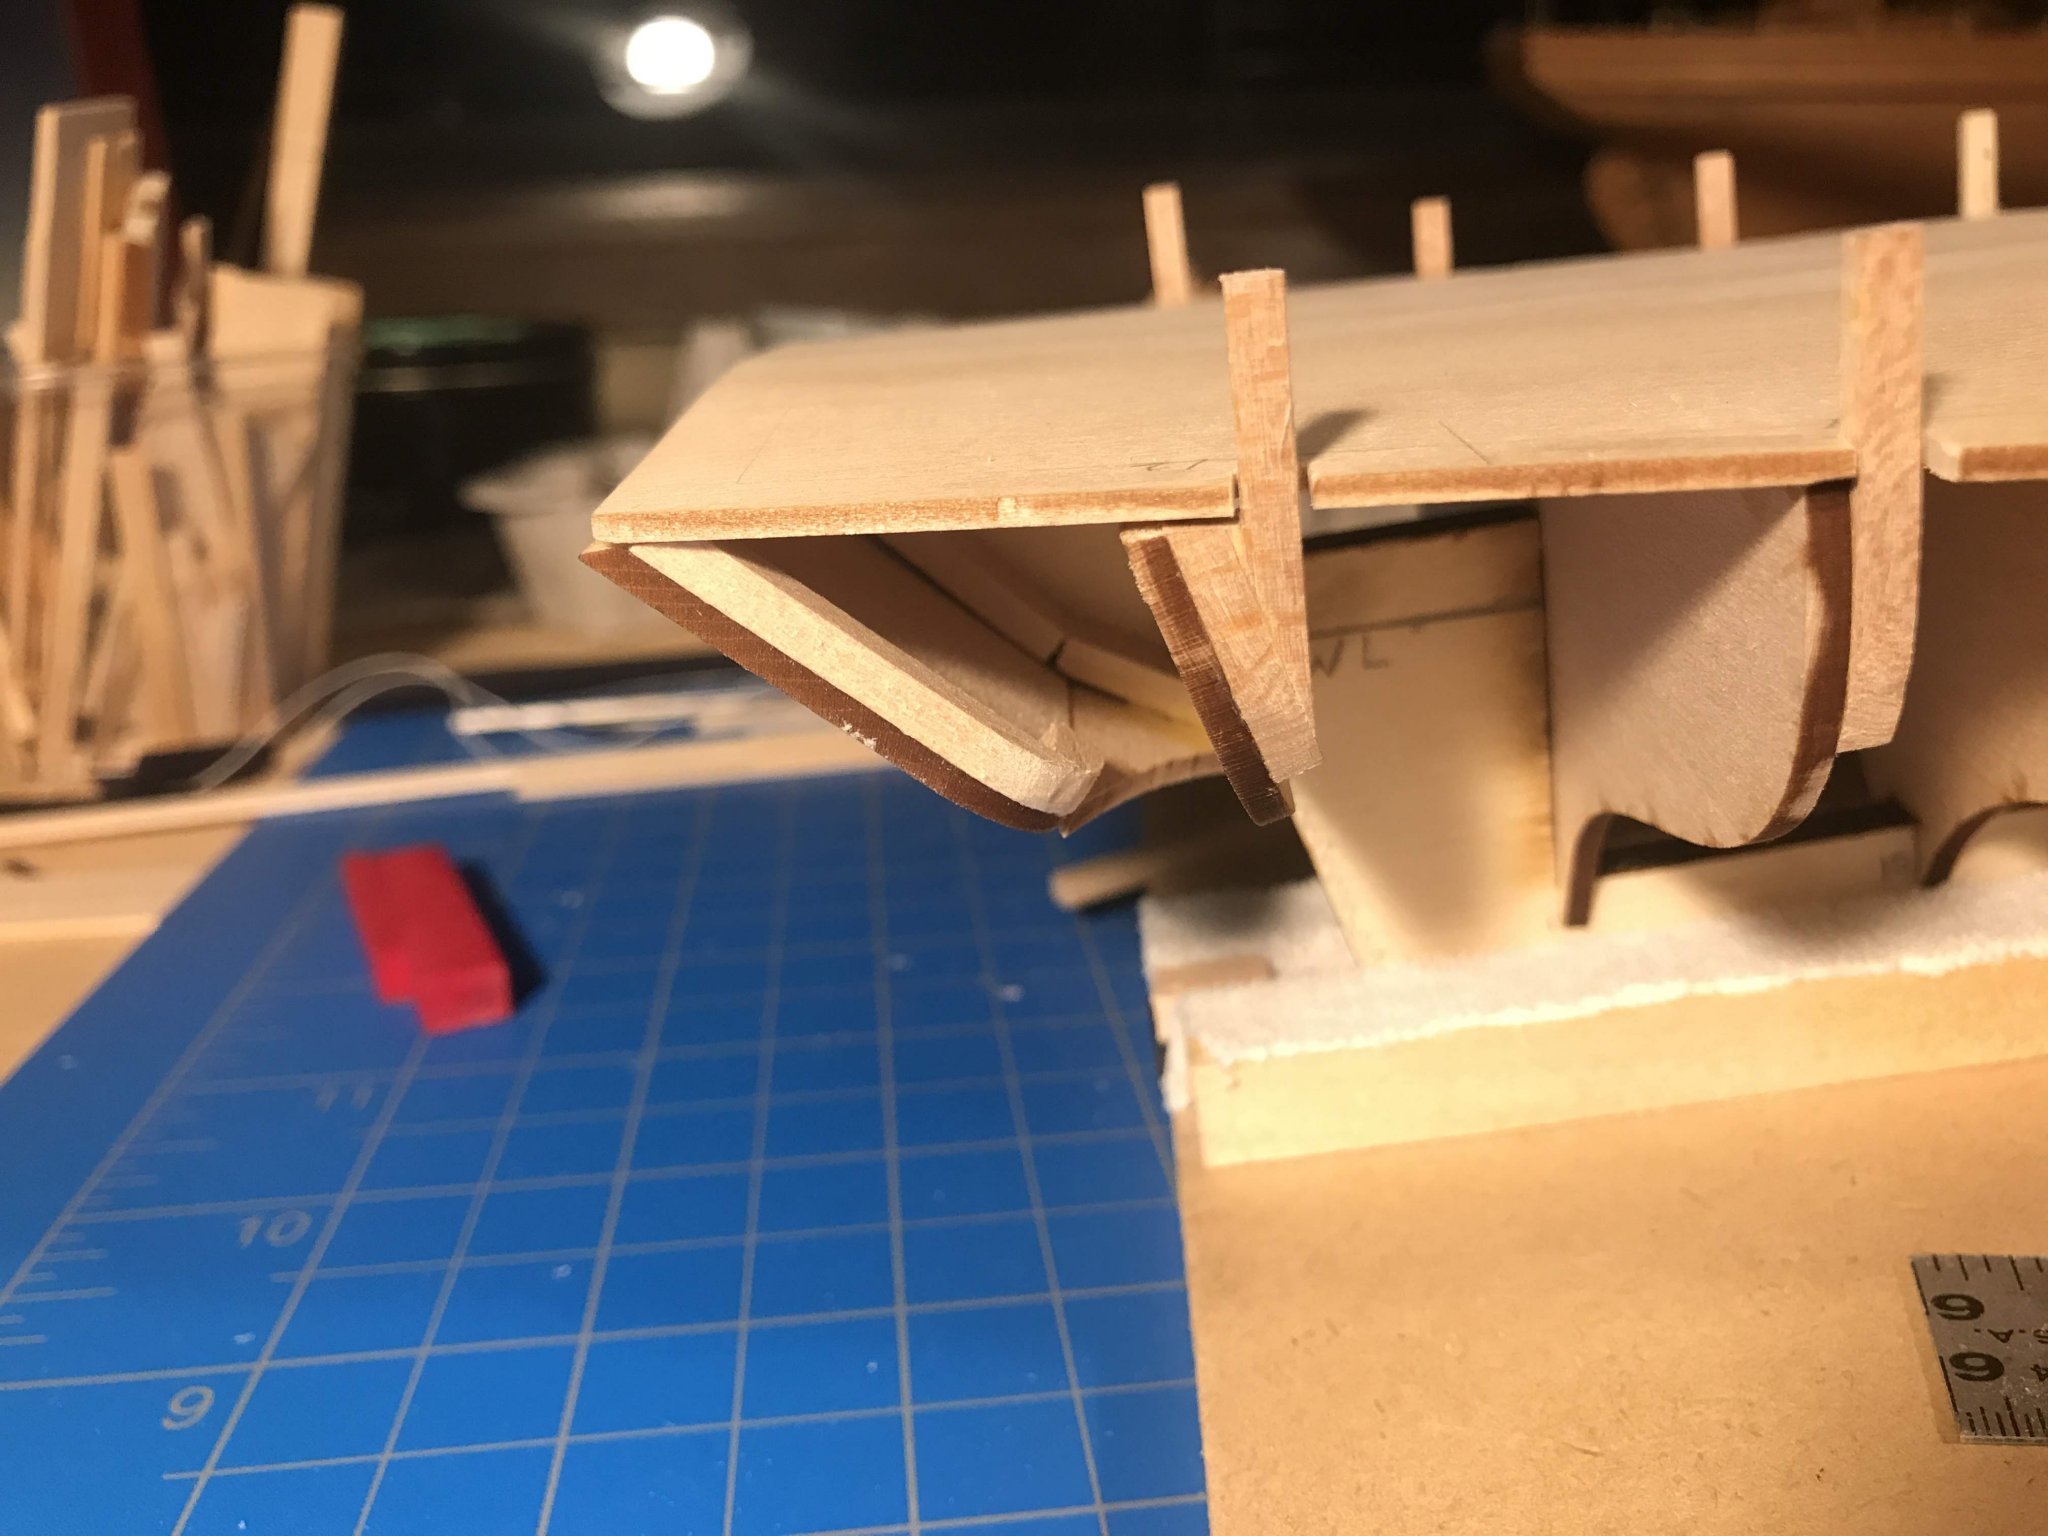
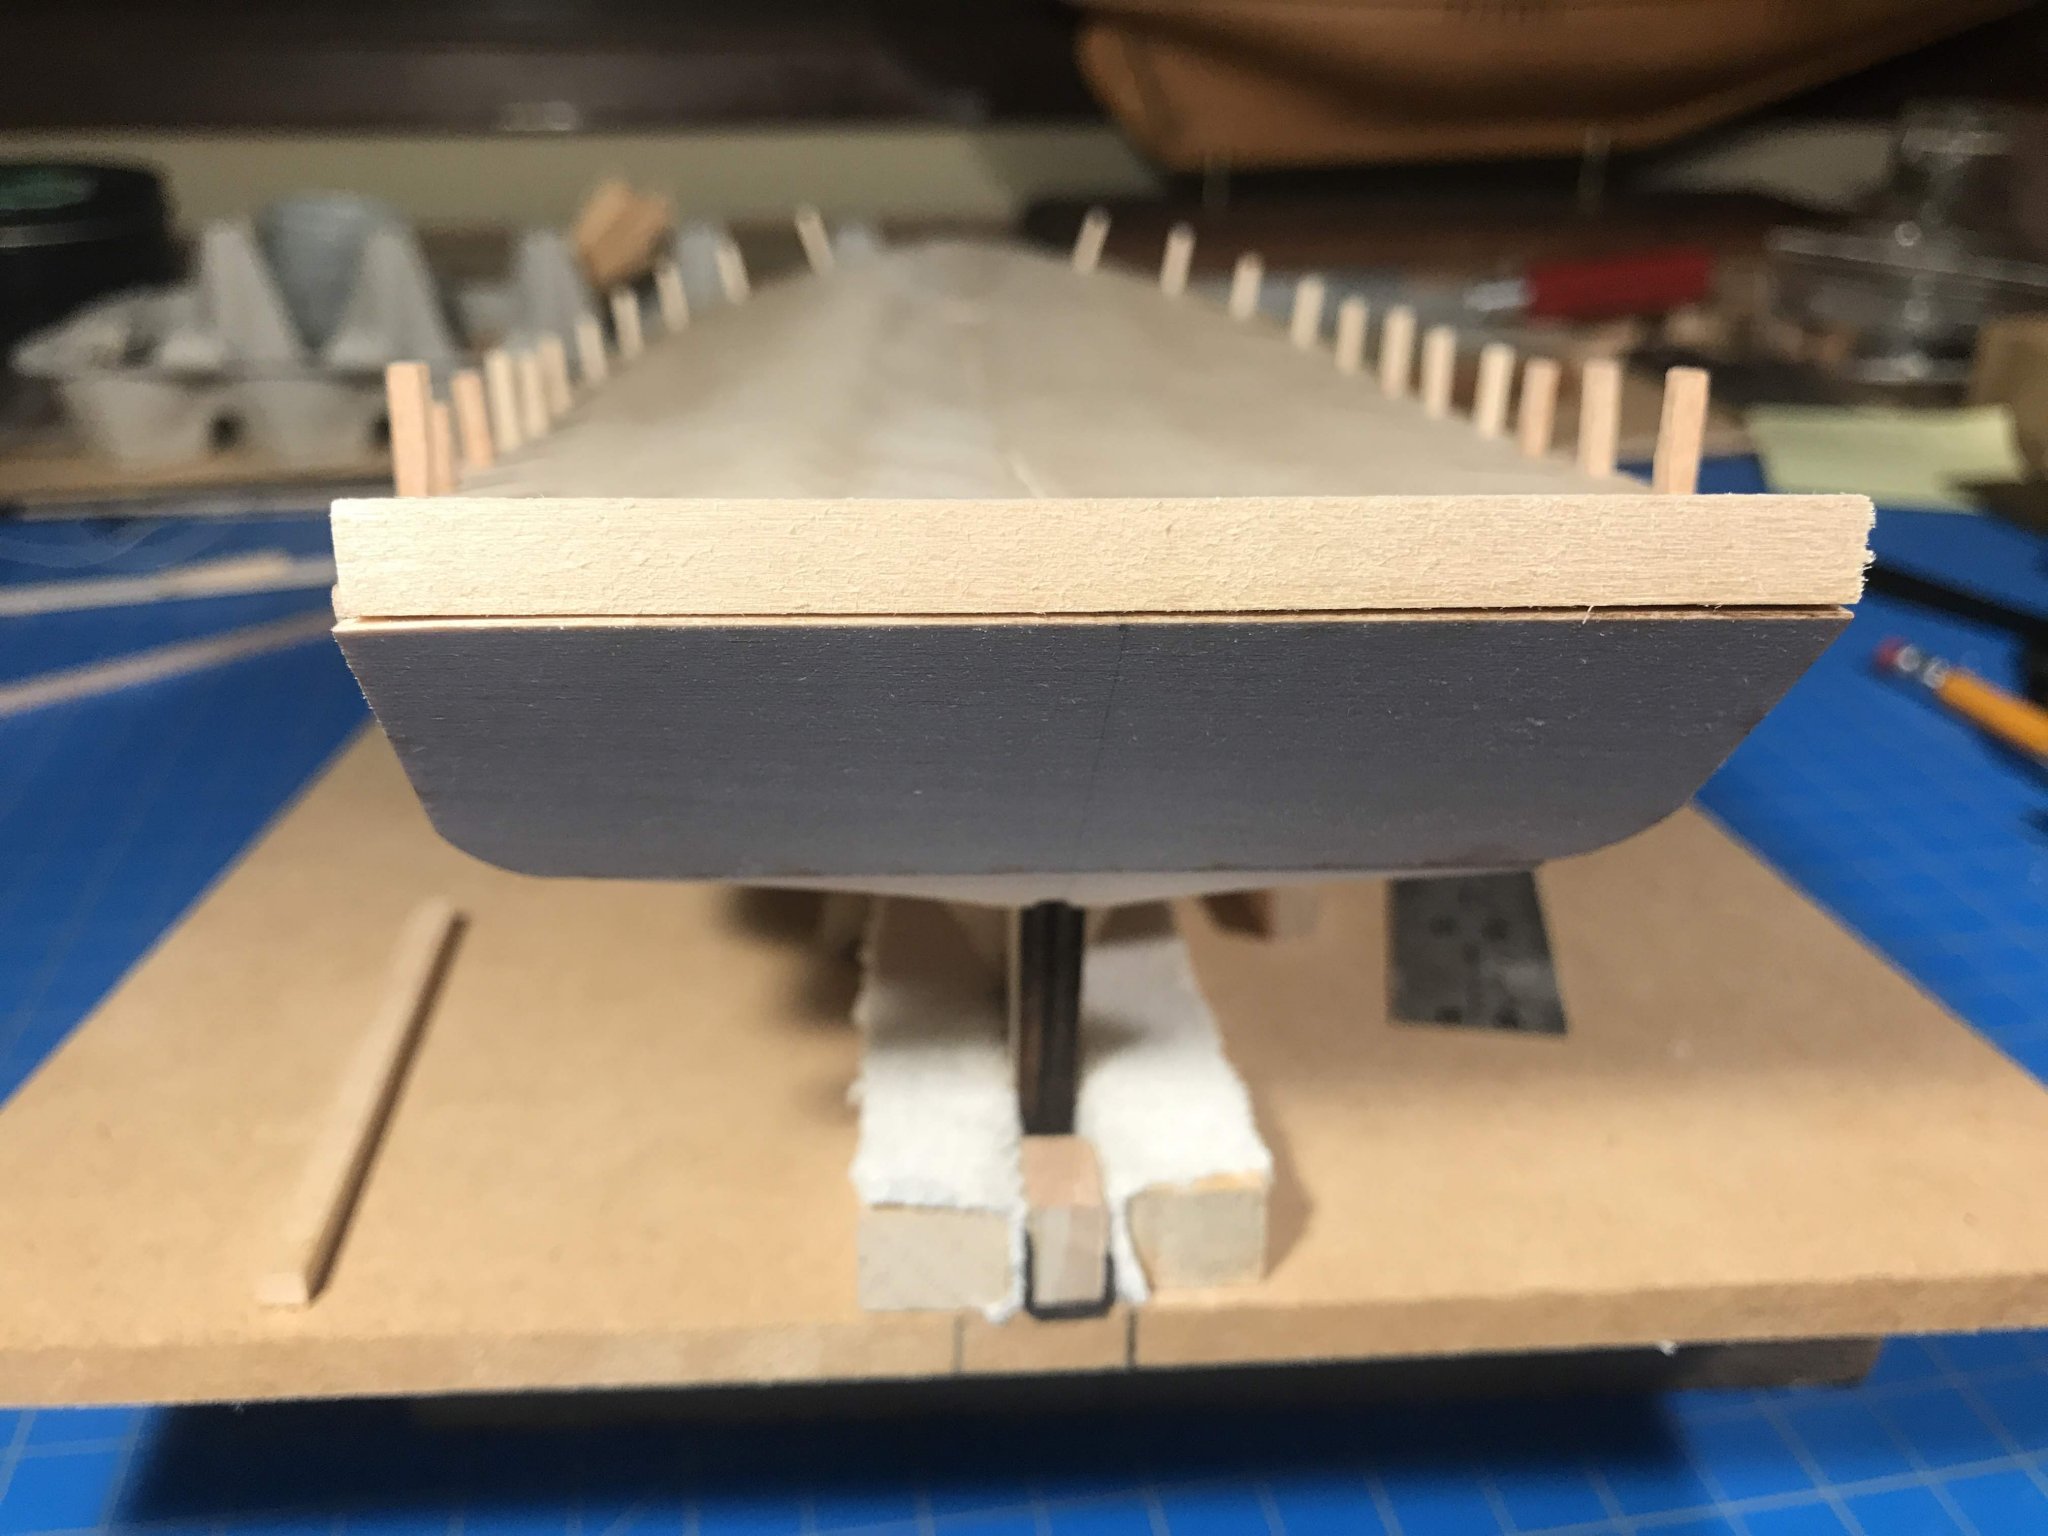
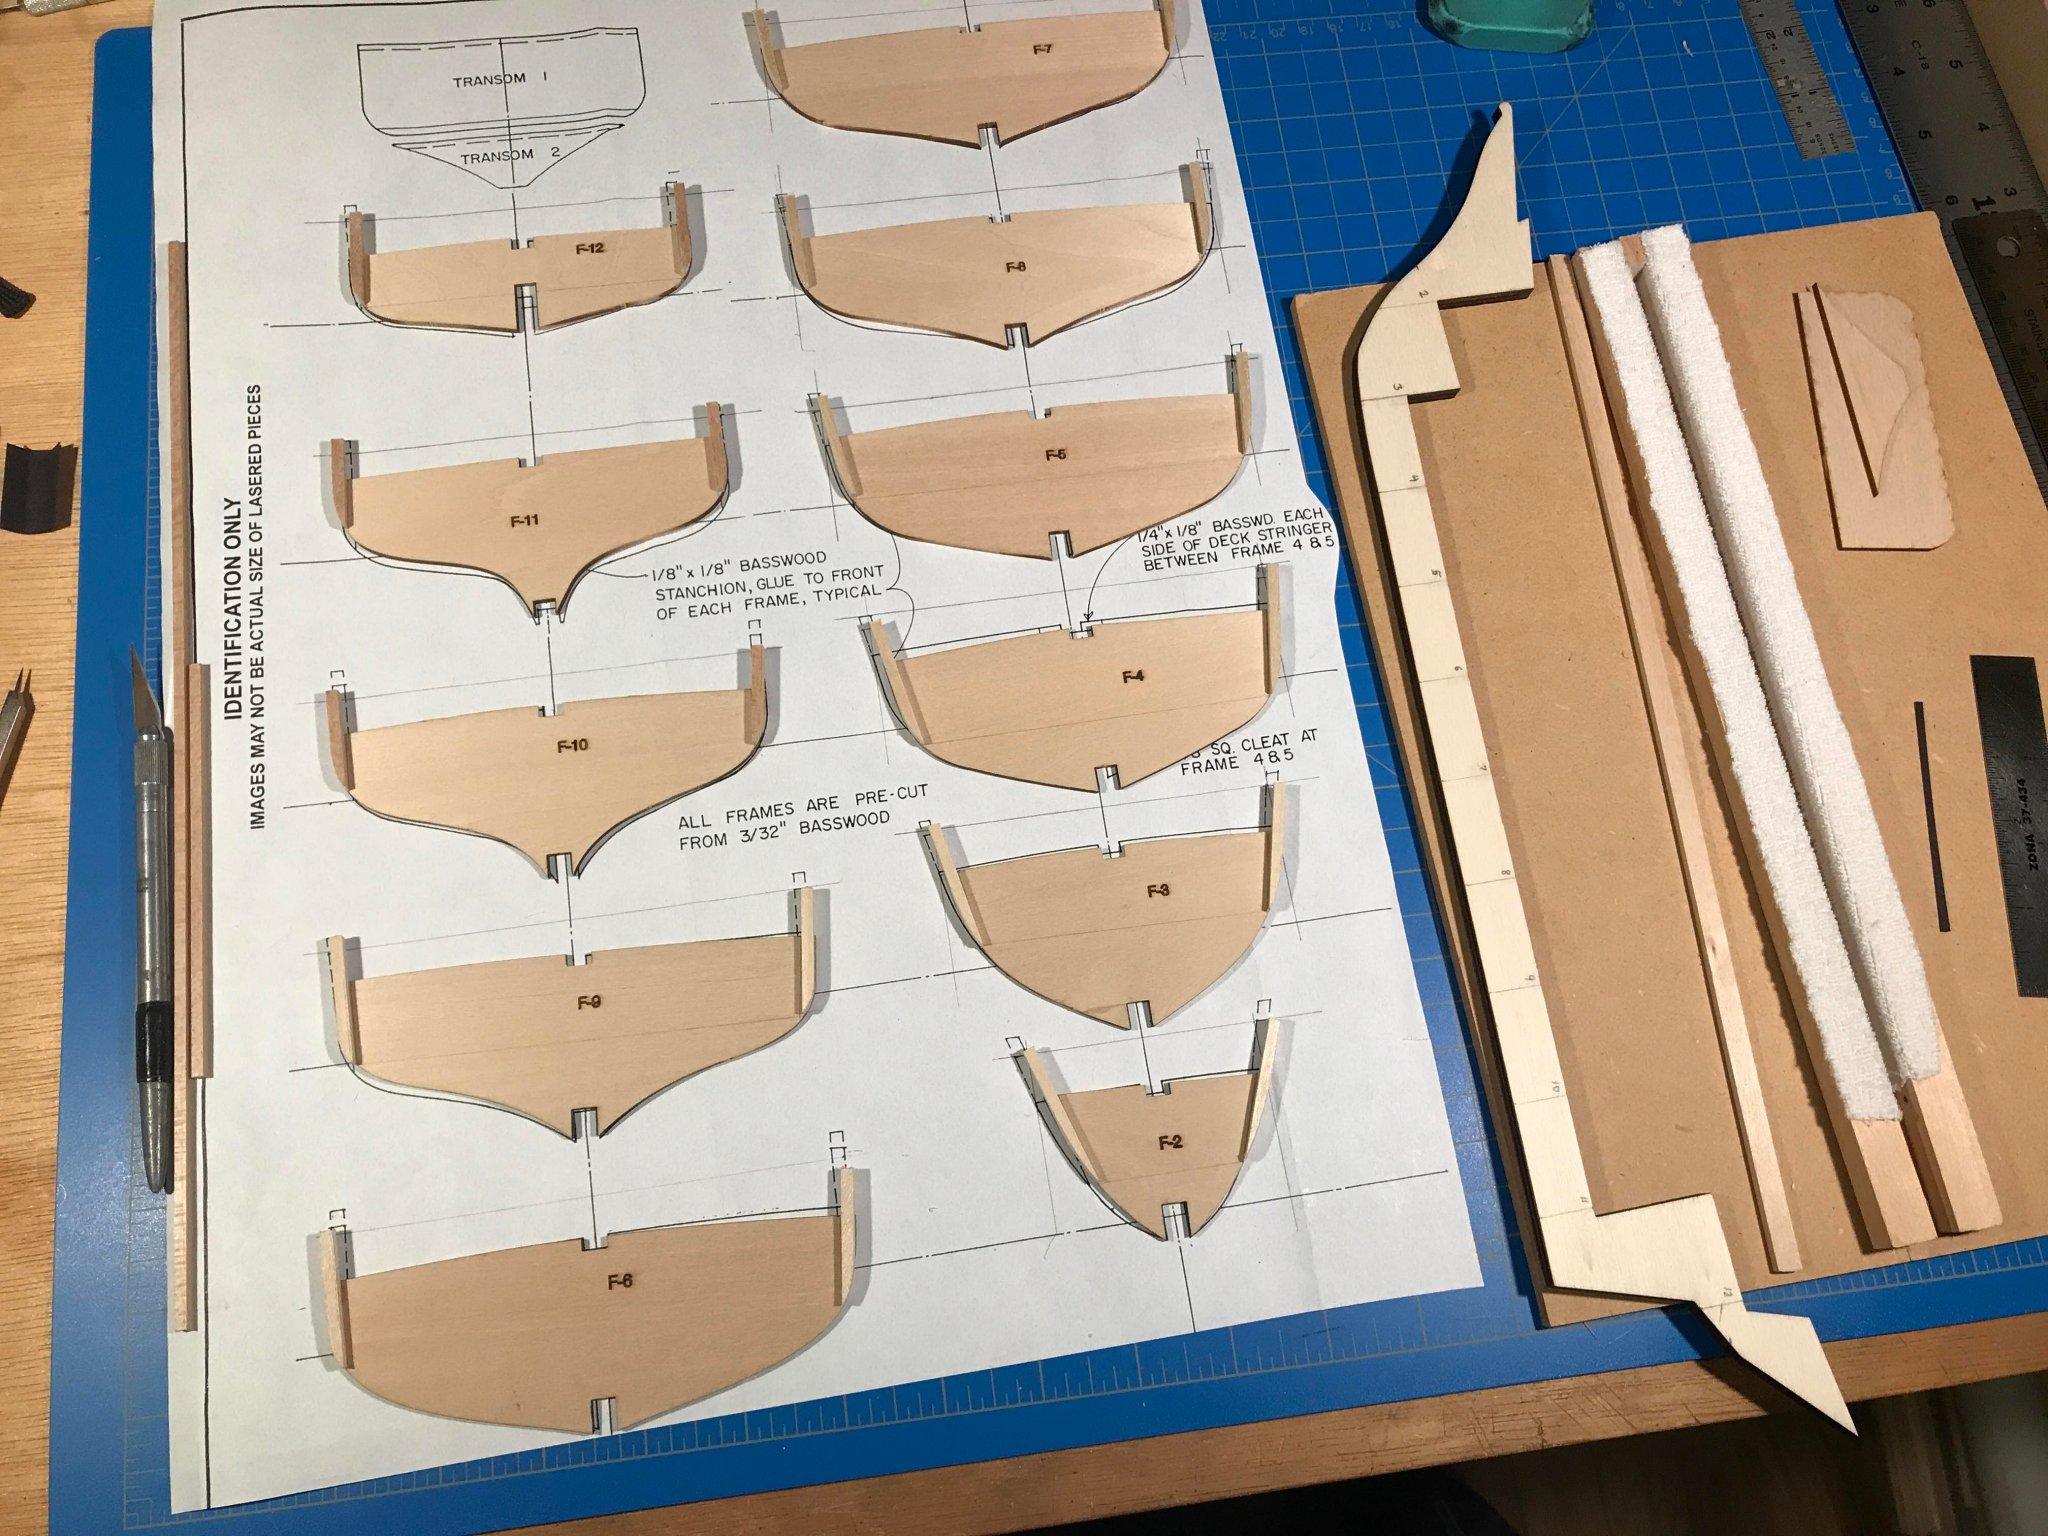
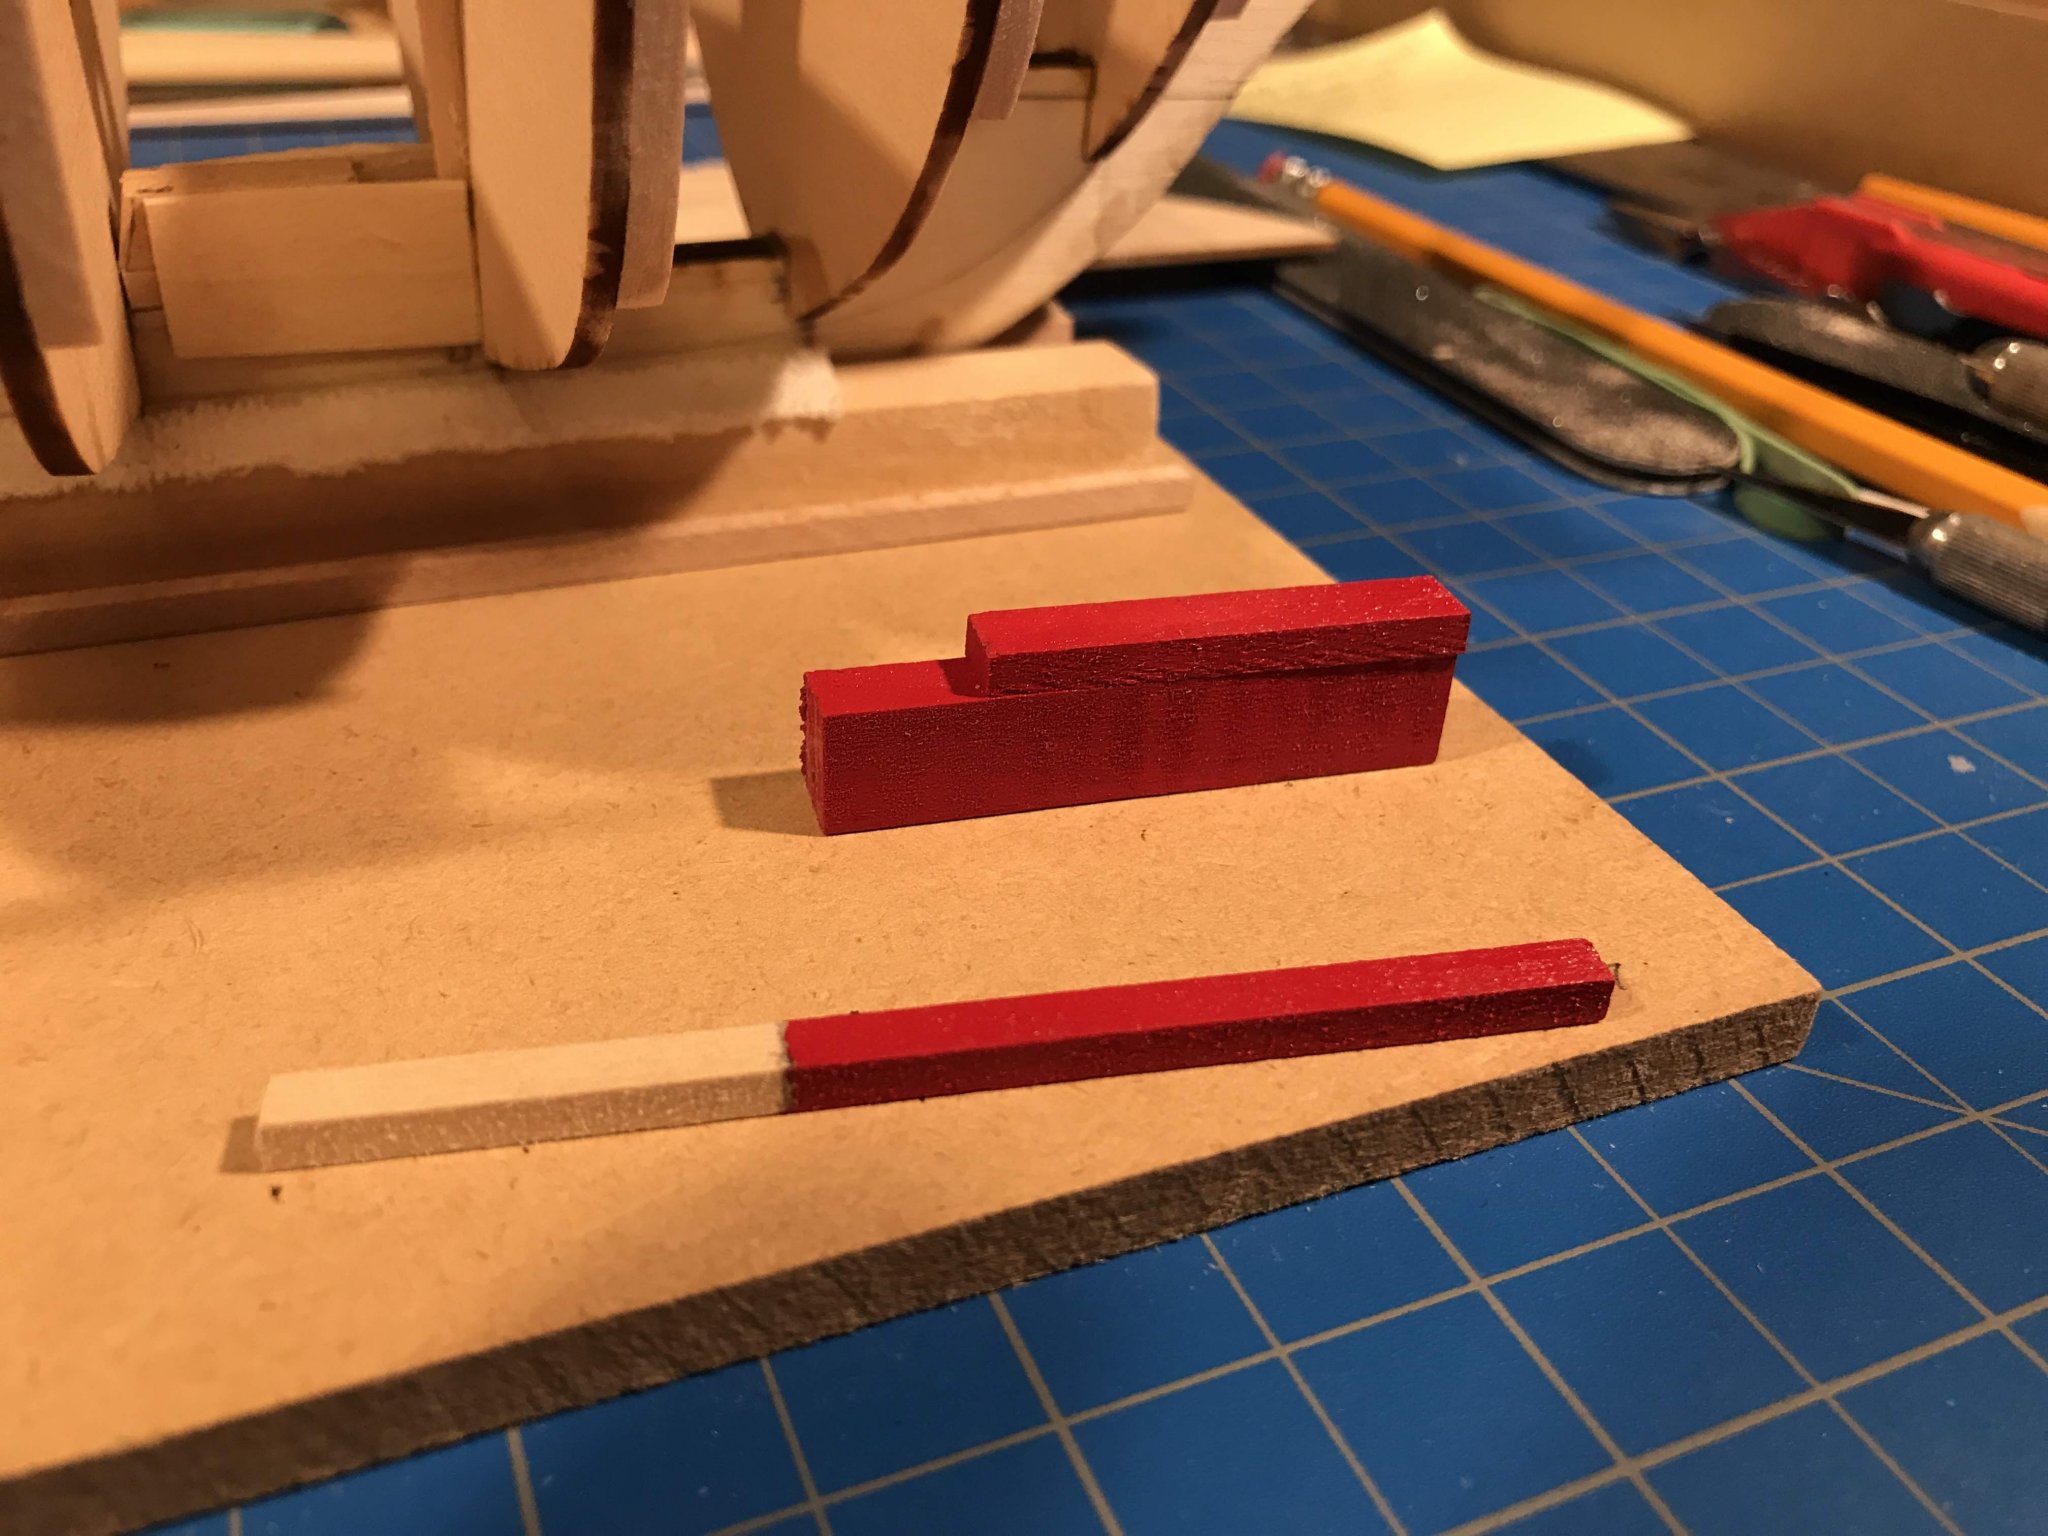
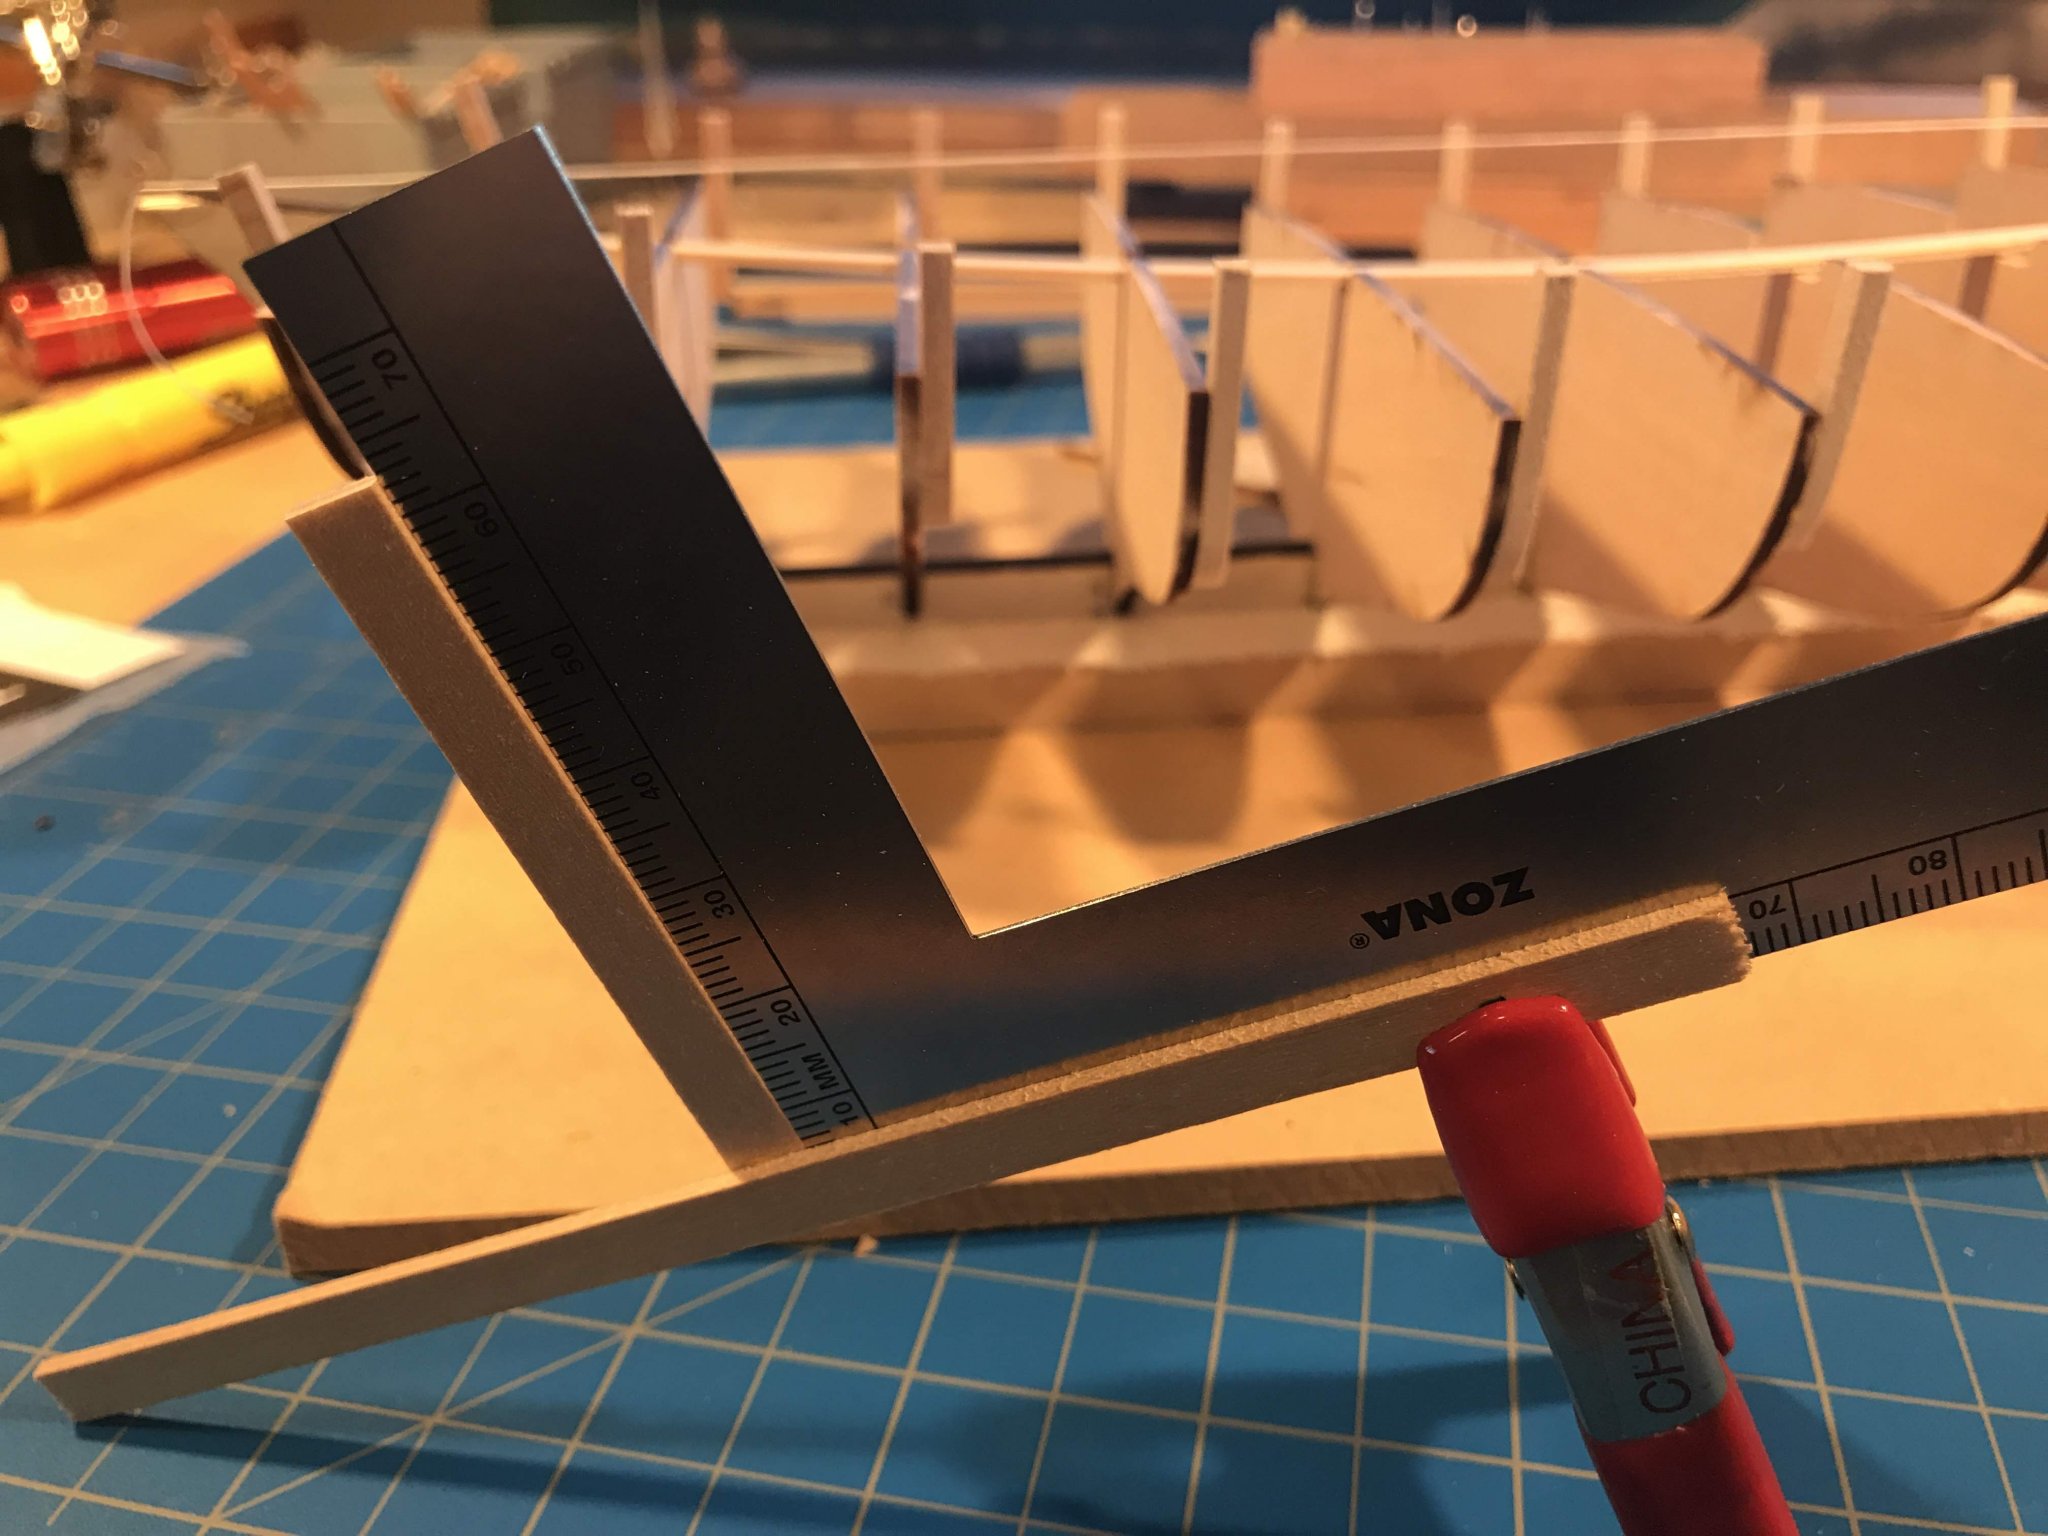
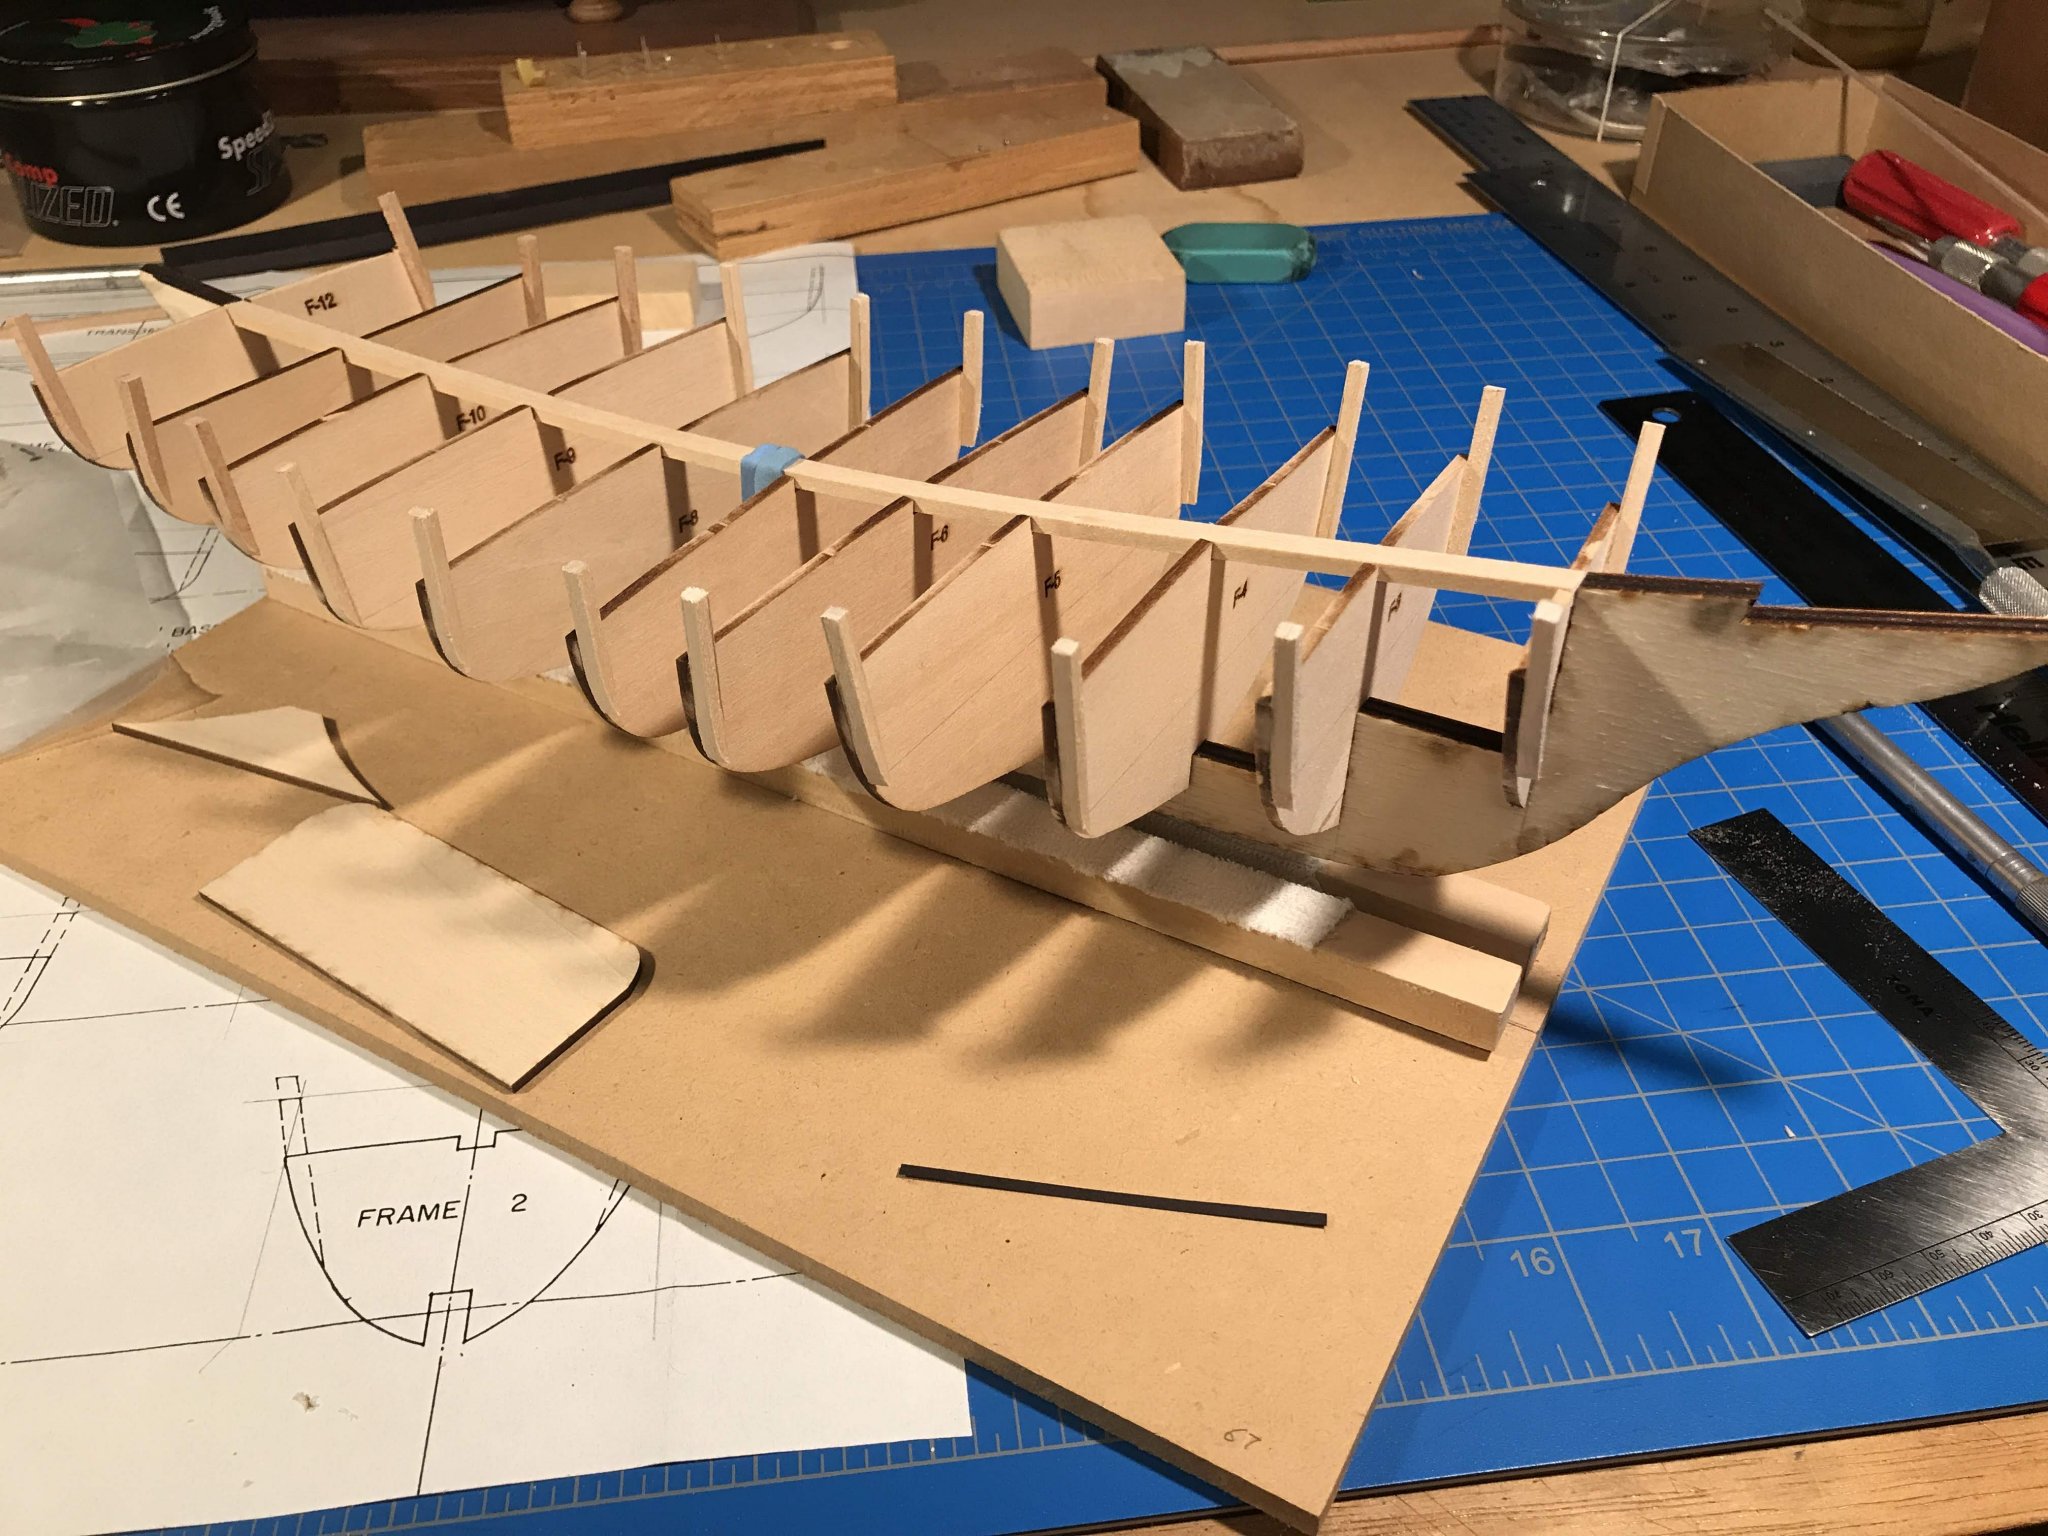
On starting the kit, I did not take much of a look at the instructions, and thus my first “mistake”. Unlike the two other POB kits I have built, the bulwarks stanchions are not part of the bulkheads, and they have to be cut from ⅛ by ⅛ strips and glued to the bulkheads. Following the plans closely, my next step was to cut and glue the stanchions to the bulkheads. Then I read the instructions and learned that the stanchions are to be glued in place after the deck is installed and the hull is planked below the sheer line. Even if I had read the instructions, I’m not at all sure I would have followed them. What they contemplate is cutting holes in the deck, lowering the glue-covered stanchions into the holes, and pressing them against the bulkheads and the inside of the planks. This would make it very difficult to shape the lower part of the stanchions to conform with the curve of the hull and difficult to apply enough pressure to have the stanchions in any sense clamped in place while the glue dries. I guess I will find out soon enough whether I really did make a mistake. At this point the bulkheads are still dry fitted. To see whether the stanchions were more or less aligned, I ran a small strip along them, looking for major deviations from a smooth curve. I found one offending stanchion, which I cut off the bulkhead and replaced. Not bad out of 22 stanchions. Next step was the center stringer, in effect the spine of the hull. First I dry fit a ¼” by ⅛” strip in place. Rubber banding it in place felt a bit like setting a mouse trap. For that and other reasons, I decided to deviate from the plans in three respects. First, the slots in the bulkhead are cut for a ¼” wide stringer, but to help assure the stringer is straight (remember the slight warp in the keel), I widened the slots and added another ¼” strip on either side of the stringer in the vicinity of the mast (bulkheads 3 - 6). Since I still hadn't glued the bulkheads in place, widening the slots was easy to do. Second, this meant that the hole for the mast is ¼” wide. The kit includes a 5/16” dowel for the mast, and the parts list and the plans refer to a mast of that diameter. I could have widened the hole with some sanding, but the mast as drawn on the plans is no more than ¼” in diameter, it looks just fine at that size, and I happen to have a straight ¼” dowel lying around just waiting to be incorporated into a project. And third, I build two center stringers out of ¼” by 1/16” (rather than 1/8th) stock, glued the first one in place, then laminated the second one on top of it. I also built a ¼” square box on top of the keel to accept the butt end of the mast. Fortunately the mast in place fits snugly, it's vertical, and it has the slight amount of rake shown on the plans. To help me assure that everything was properly aligned, I built myself a small T-square (visible in a couple of pictures above). The bulkheads of course have to be perpendicular to the keel and also perpendicular to the waterline. I also cut a small slit in the top of the keel piece at the stem and stern and ran a thread through them. Everything looked good. As can be seen in several of the pictures, my building stand is home built -- a couple of fabric covered ½” by ⅜” strips screwed to a square platform. For those times I want the water line to be truly horizontal, I wedged a small ¼” block between the strips to push the stern up against, then built a block that, when wedged in flush at the bow end of the strips raises the bow and waterline to horizontal. I painted that red so as to avoid losing it in the mess my work bench often becomes. I also took a scrap 1/8" square strip and painted it red up to the height of the waterline so I can check the waterline mark on the keel at both the bow and the stern.


.thumb.jpg.aa959656d733fc9e9505efffc5c25990.jpg)


- 82 replies
-
- 6
-
-
- spray
- BlueJacket Shipcrafters
- (and 1 more)
-
Well I'm learning . . . the alignment of photos and text when composing the blog, especially when putting photos side by side (or trying to) doesn't always conform to the final product. And the last photo (the kit's box)-- I don't recall putting that in the blog at all! A mistake, but not the mistake I was referring to. But I'll mention that the box was flat enough that the plans had to be folded, but only lightly creased. I have found them to be easy to roll, and to lay out flat when used.
-
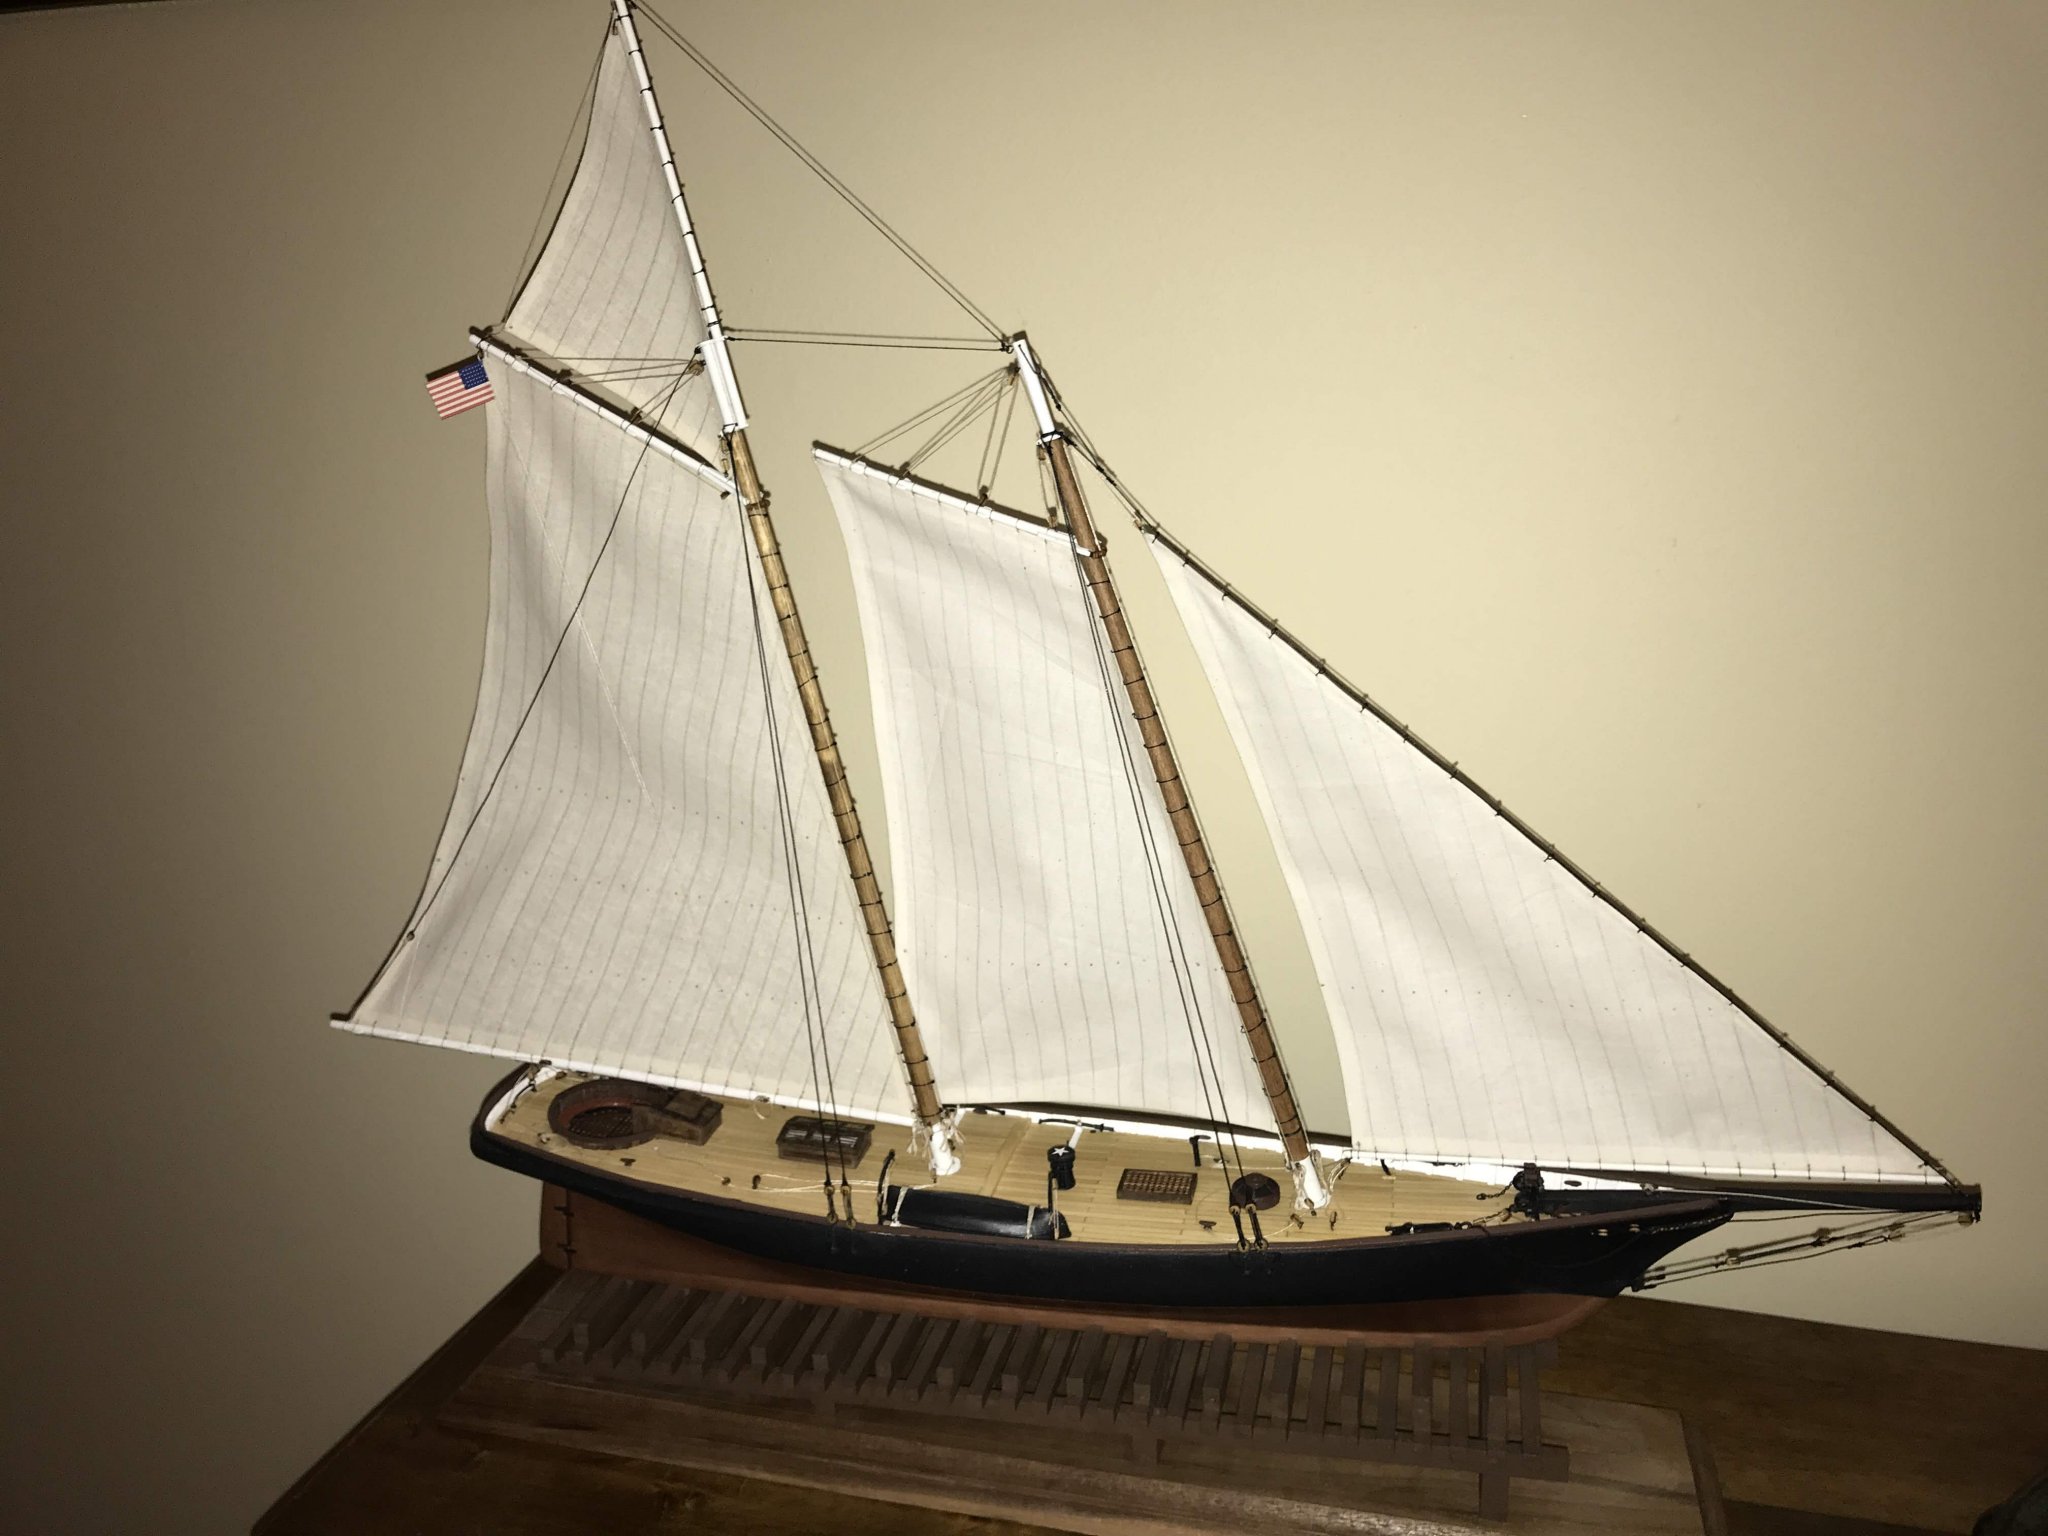
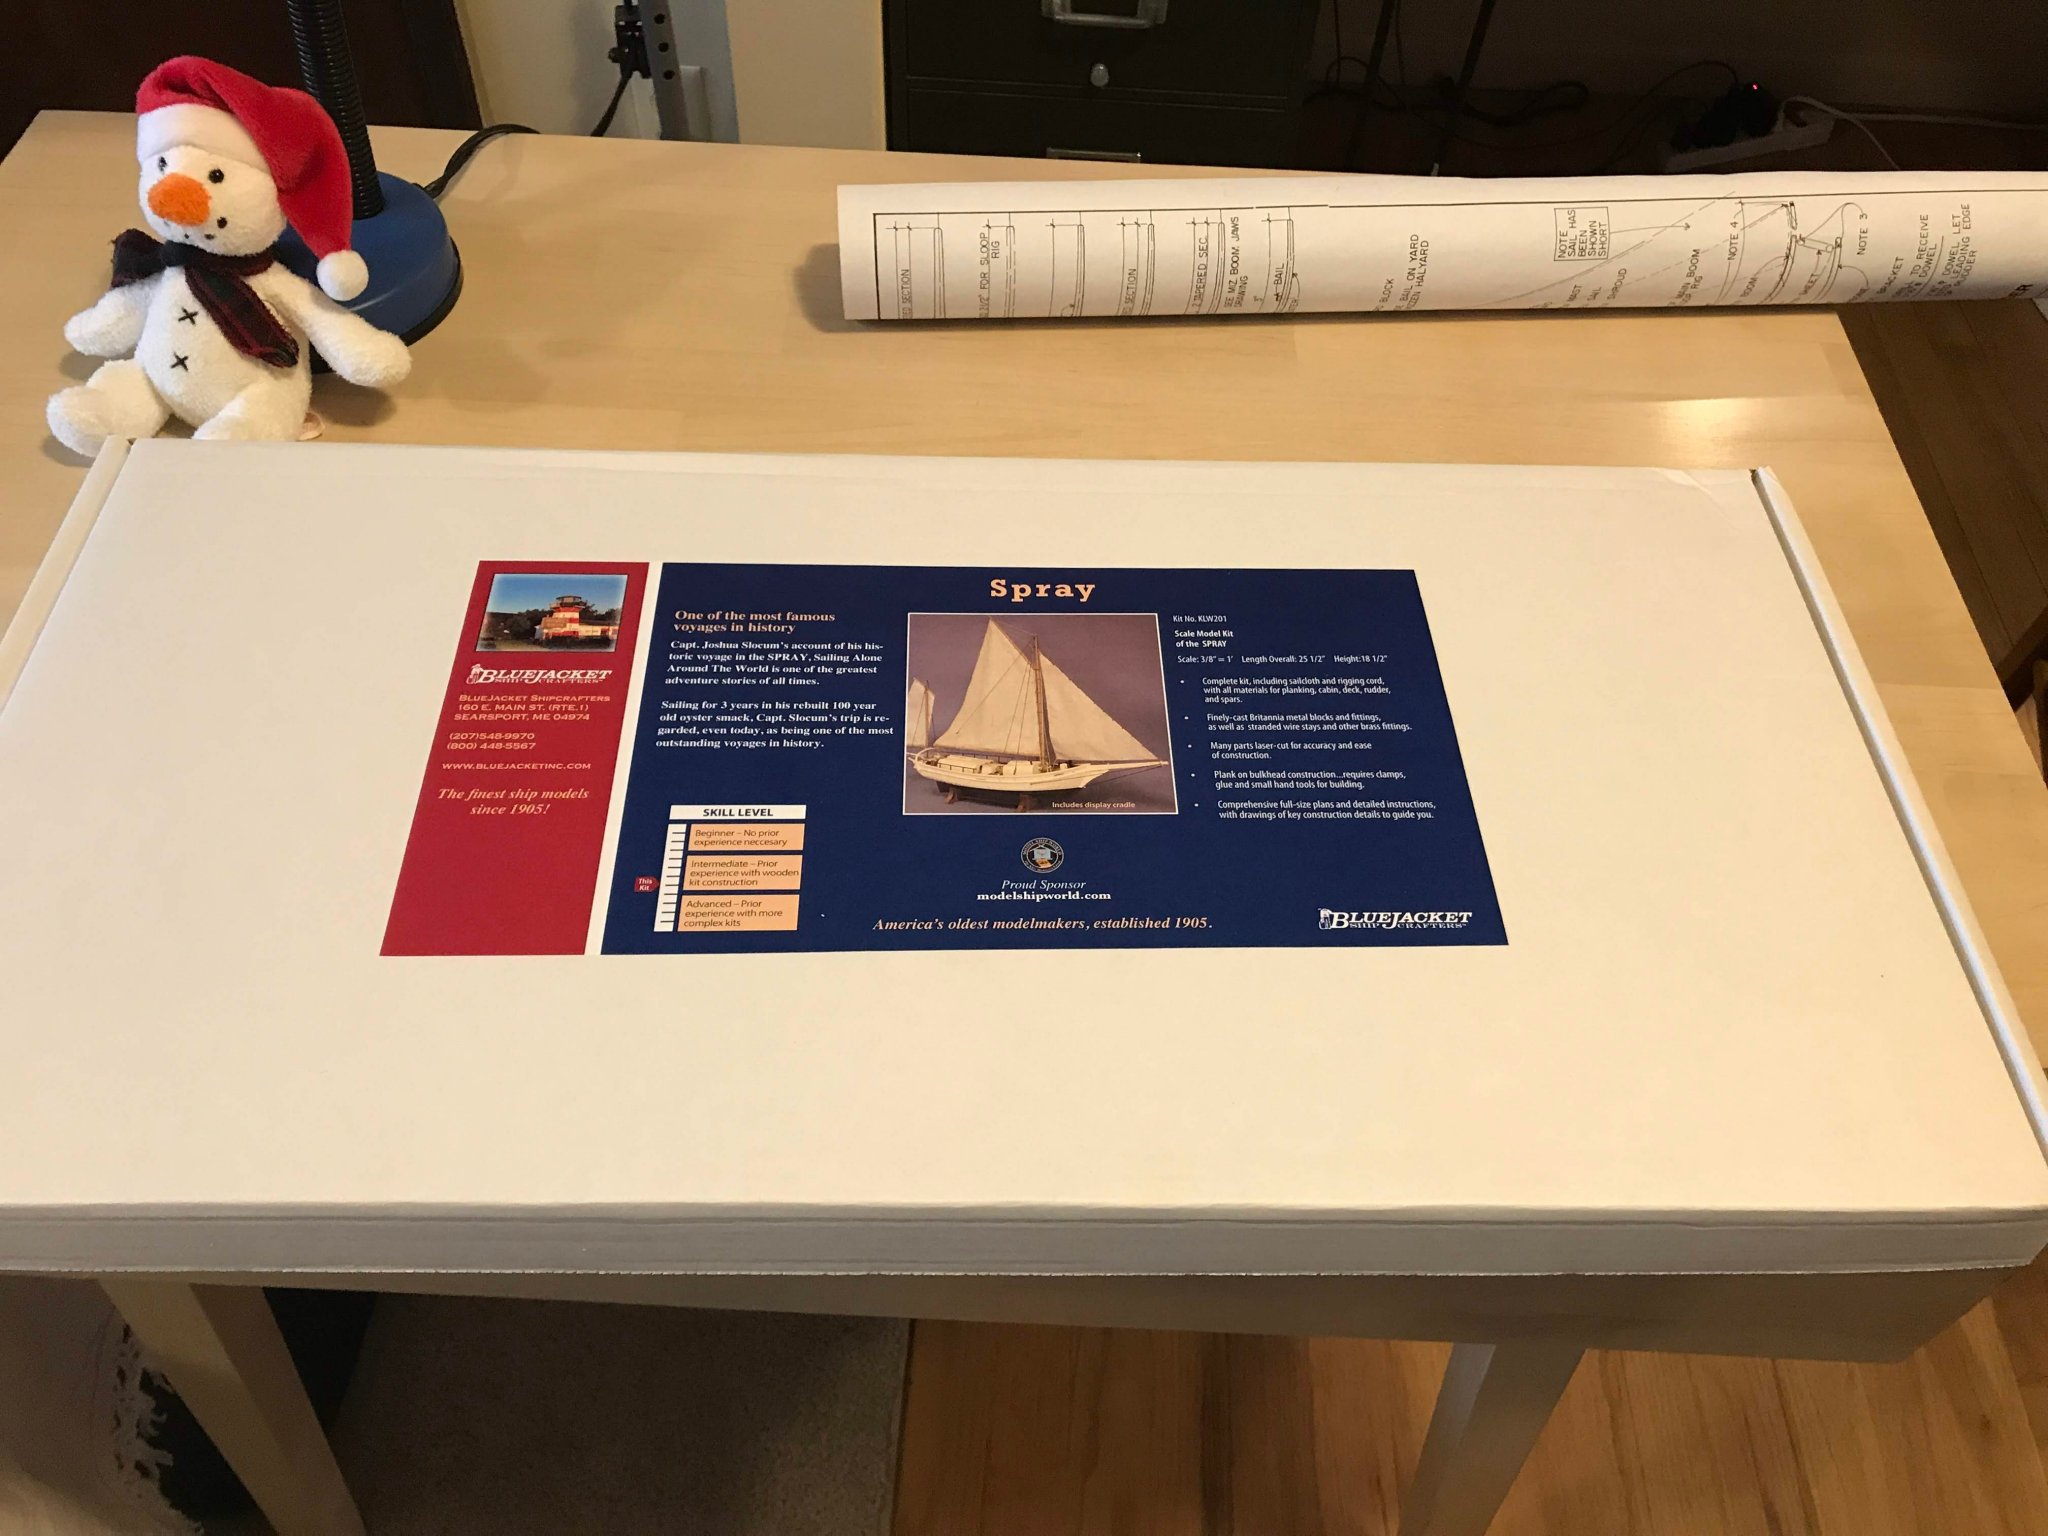
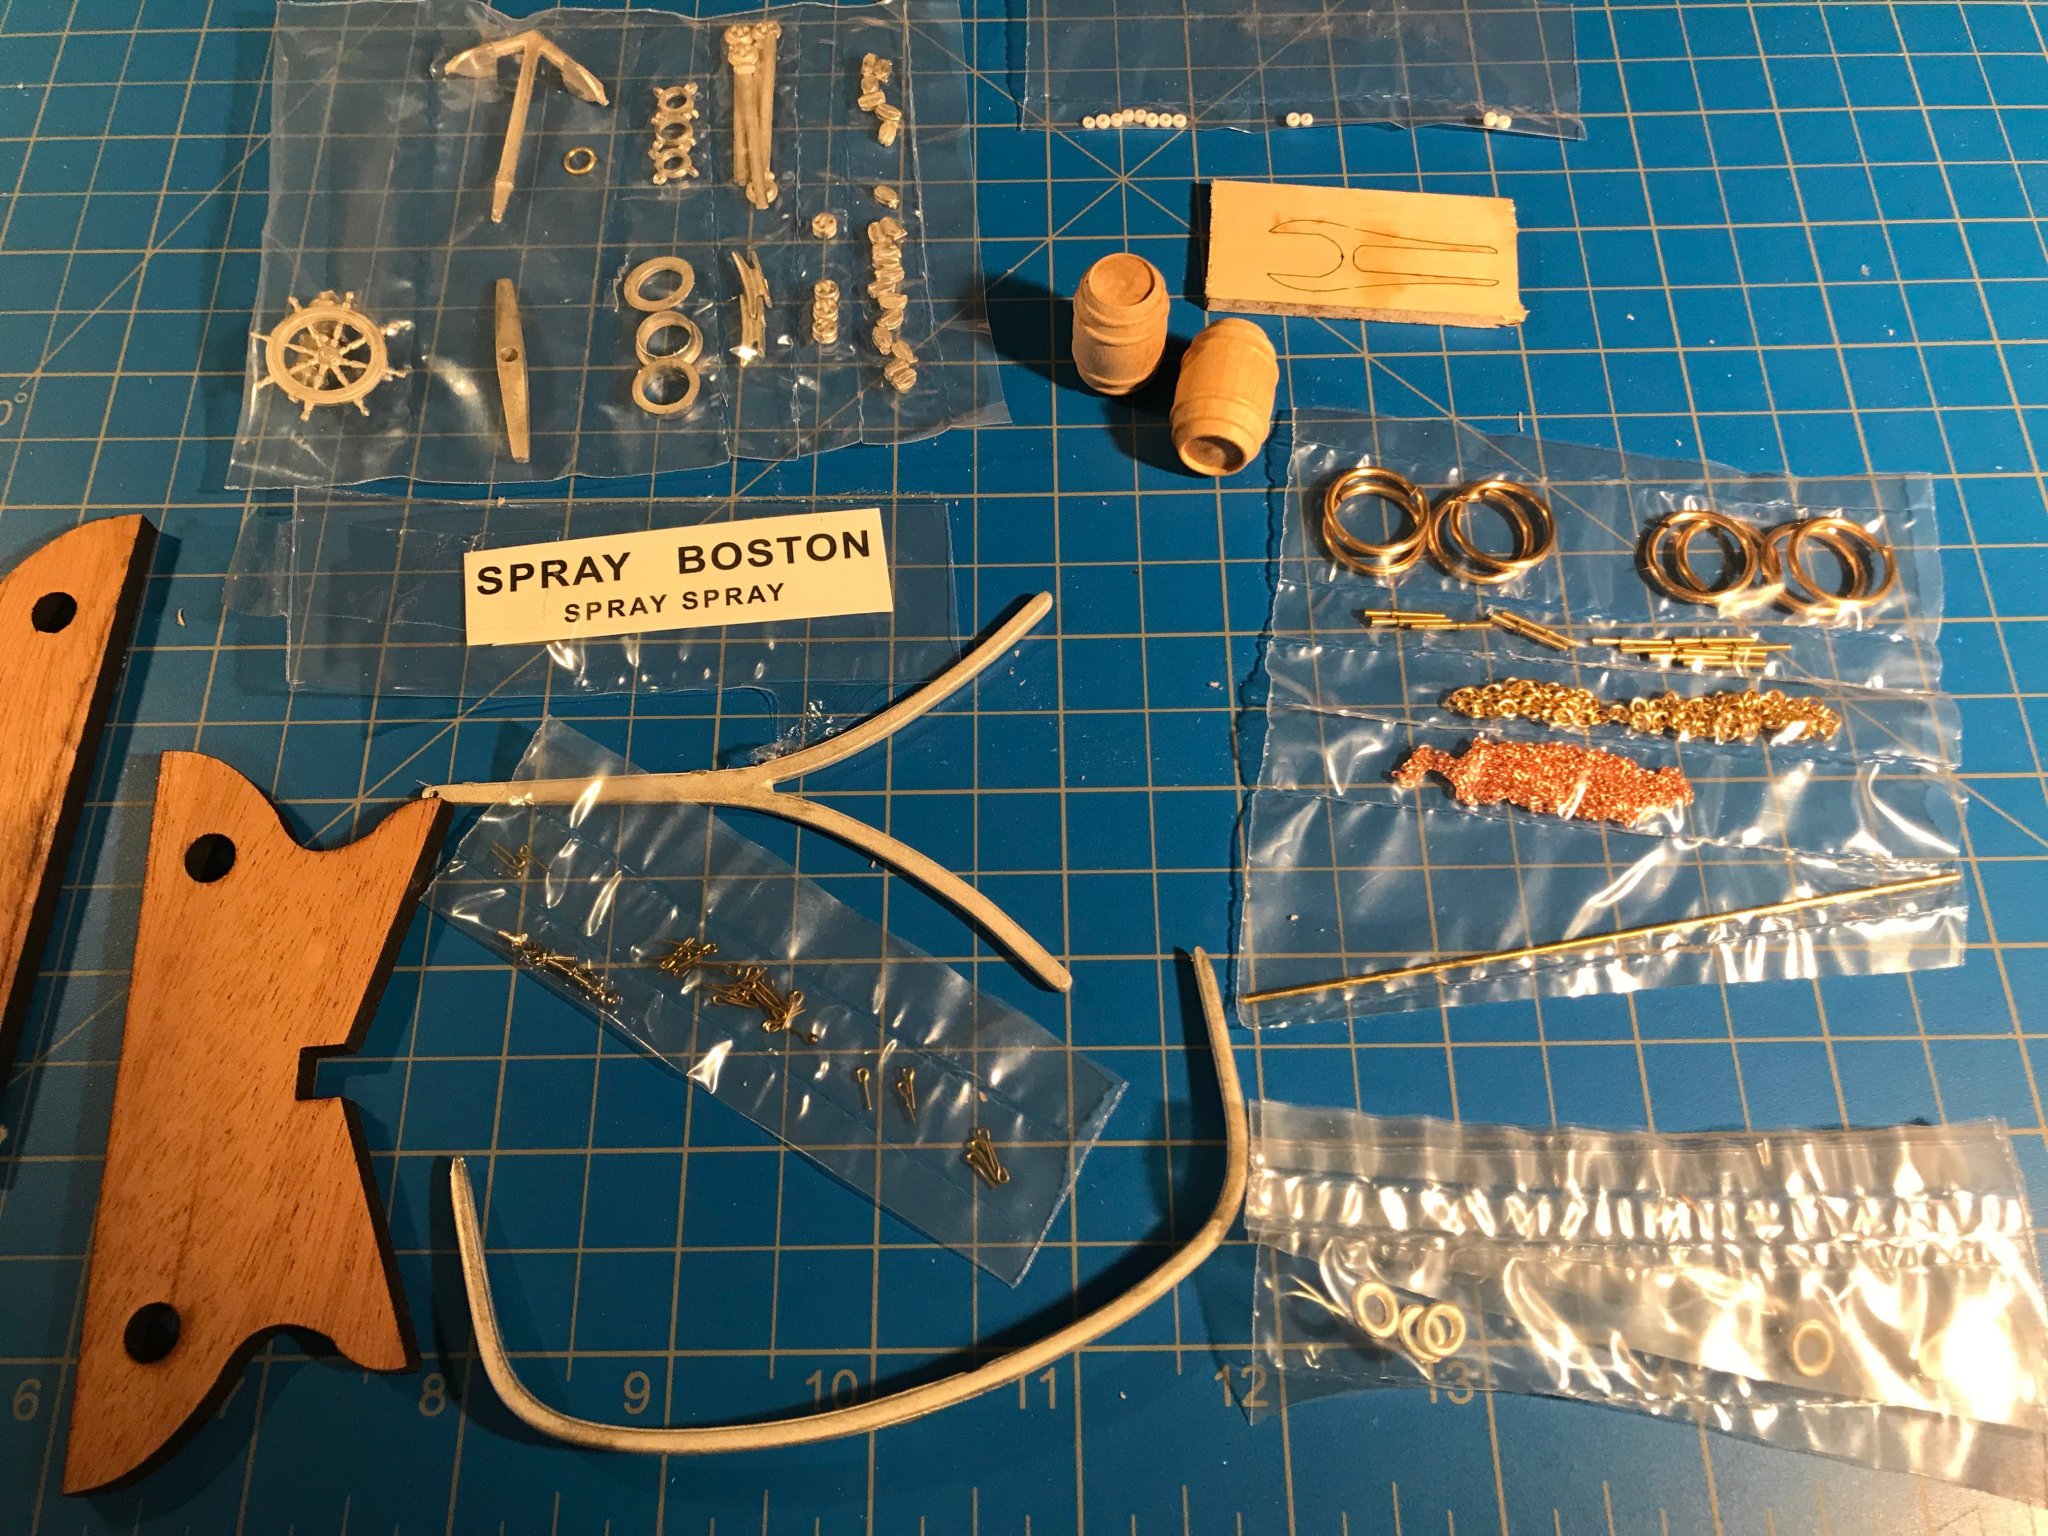
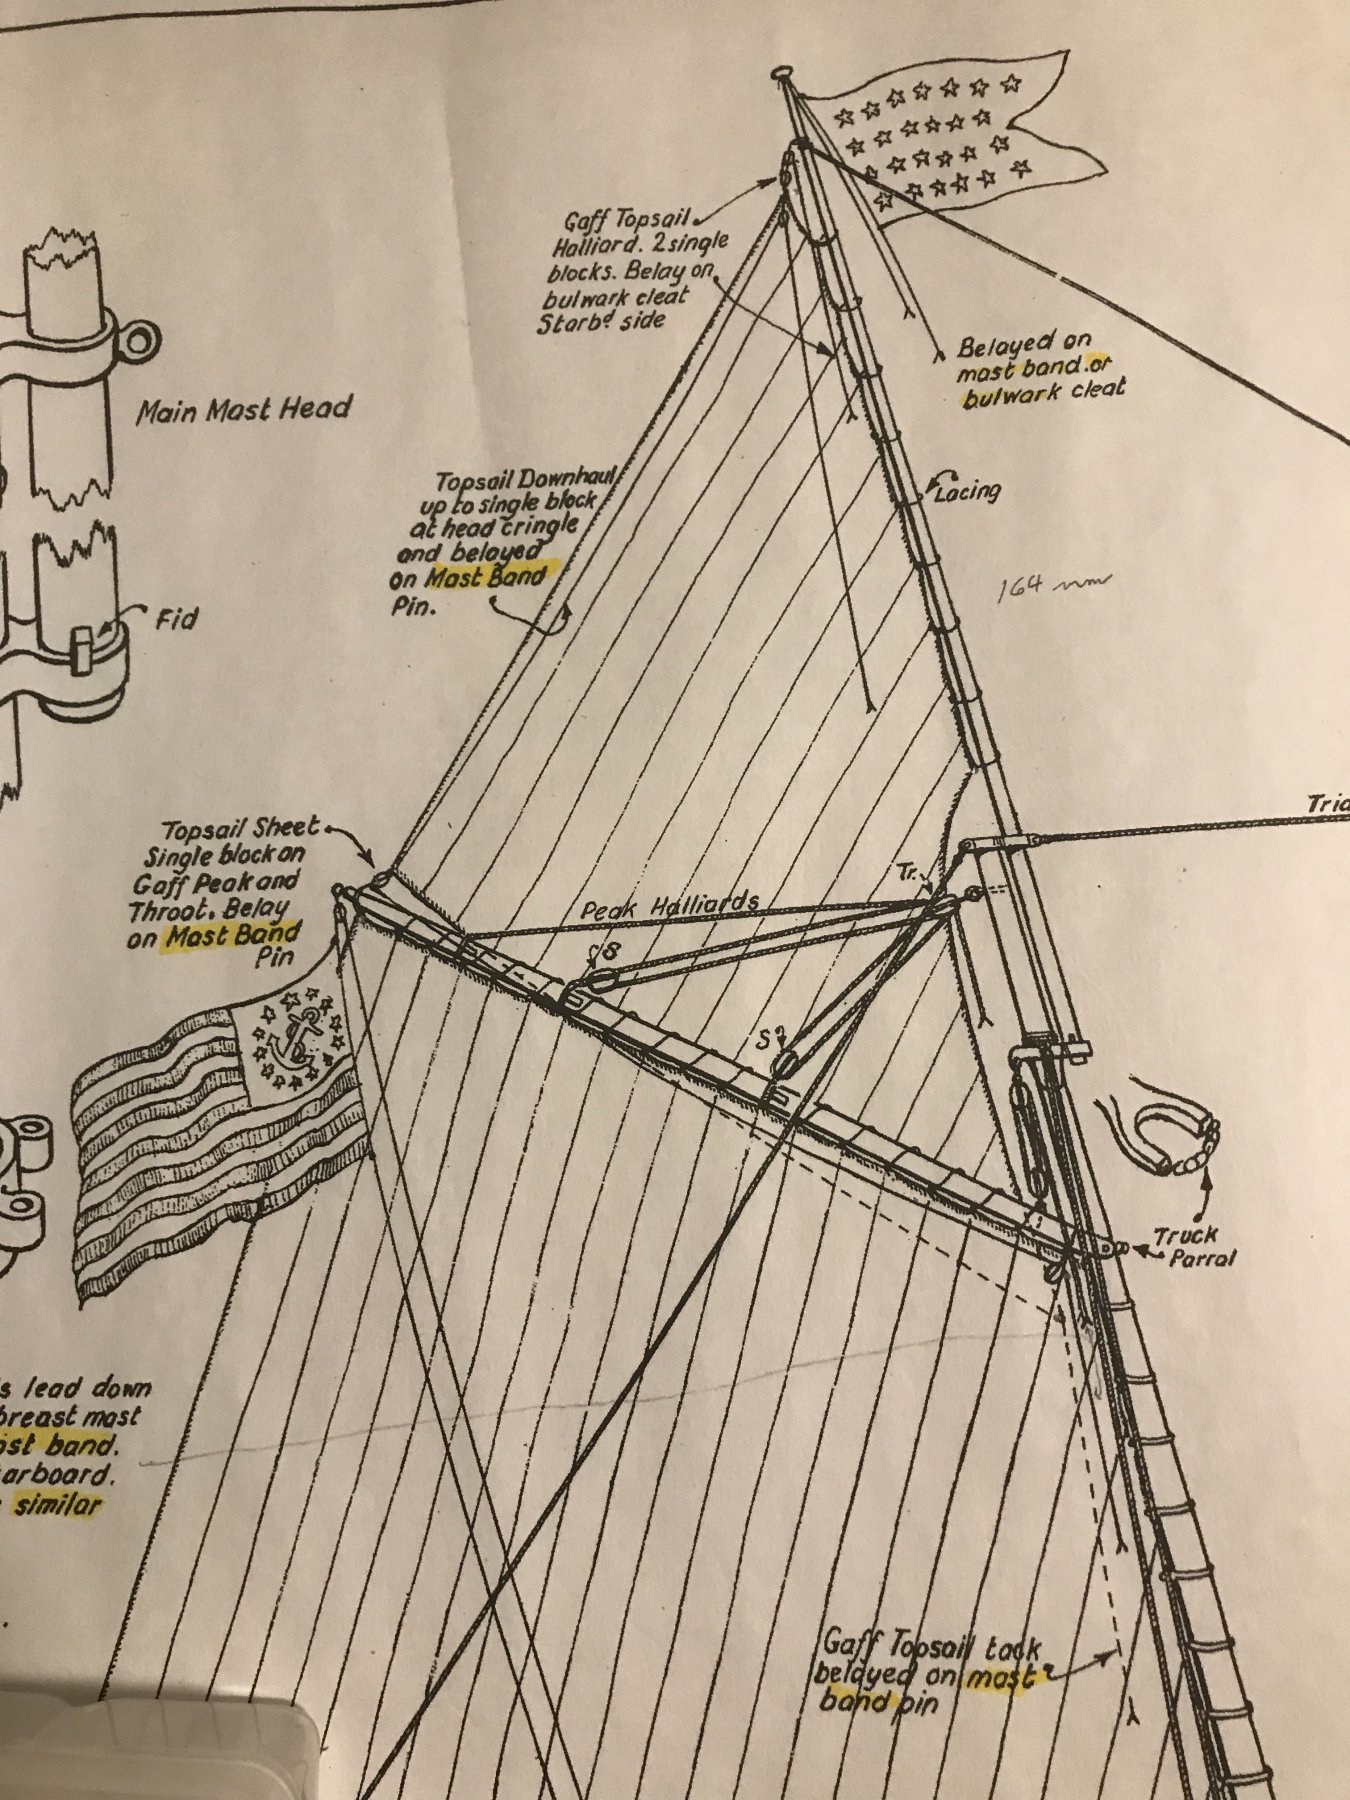
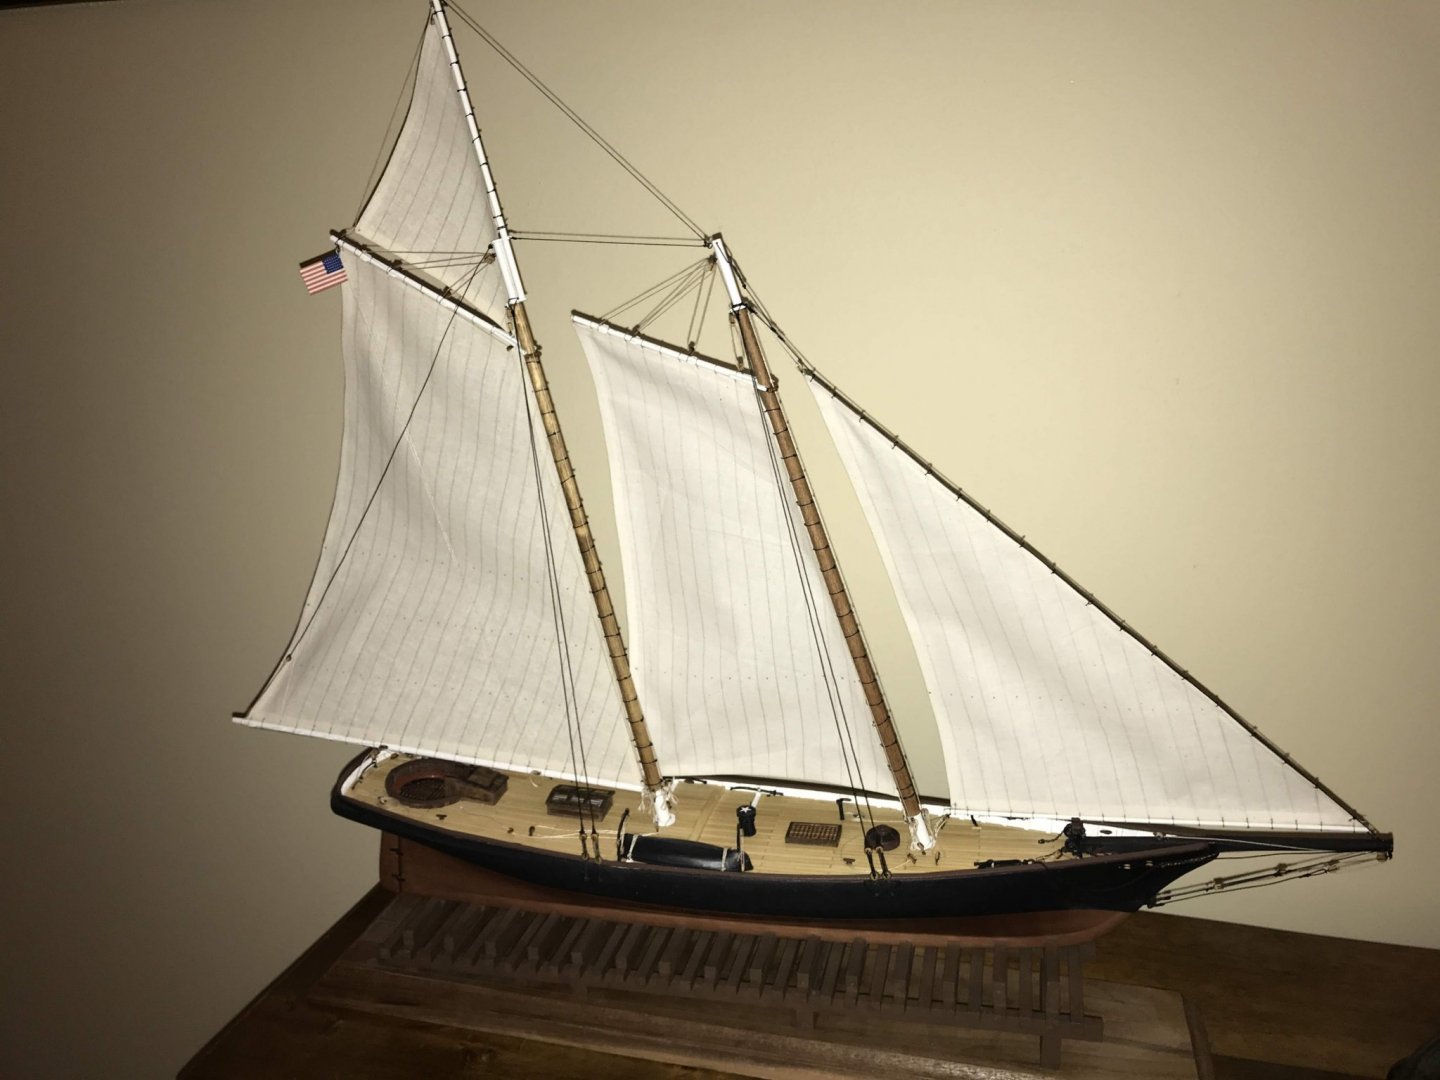
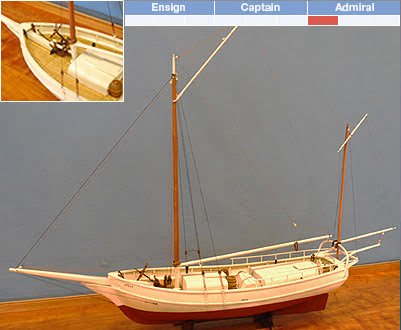
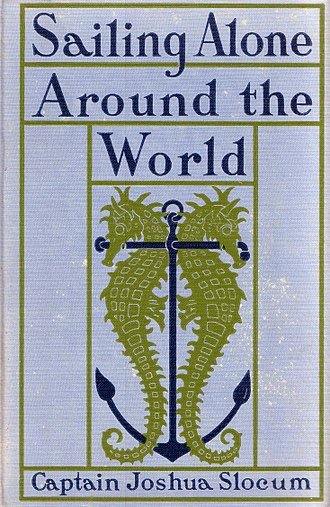
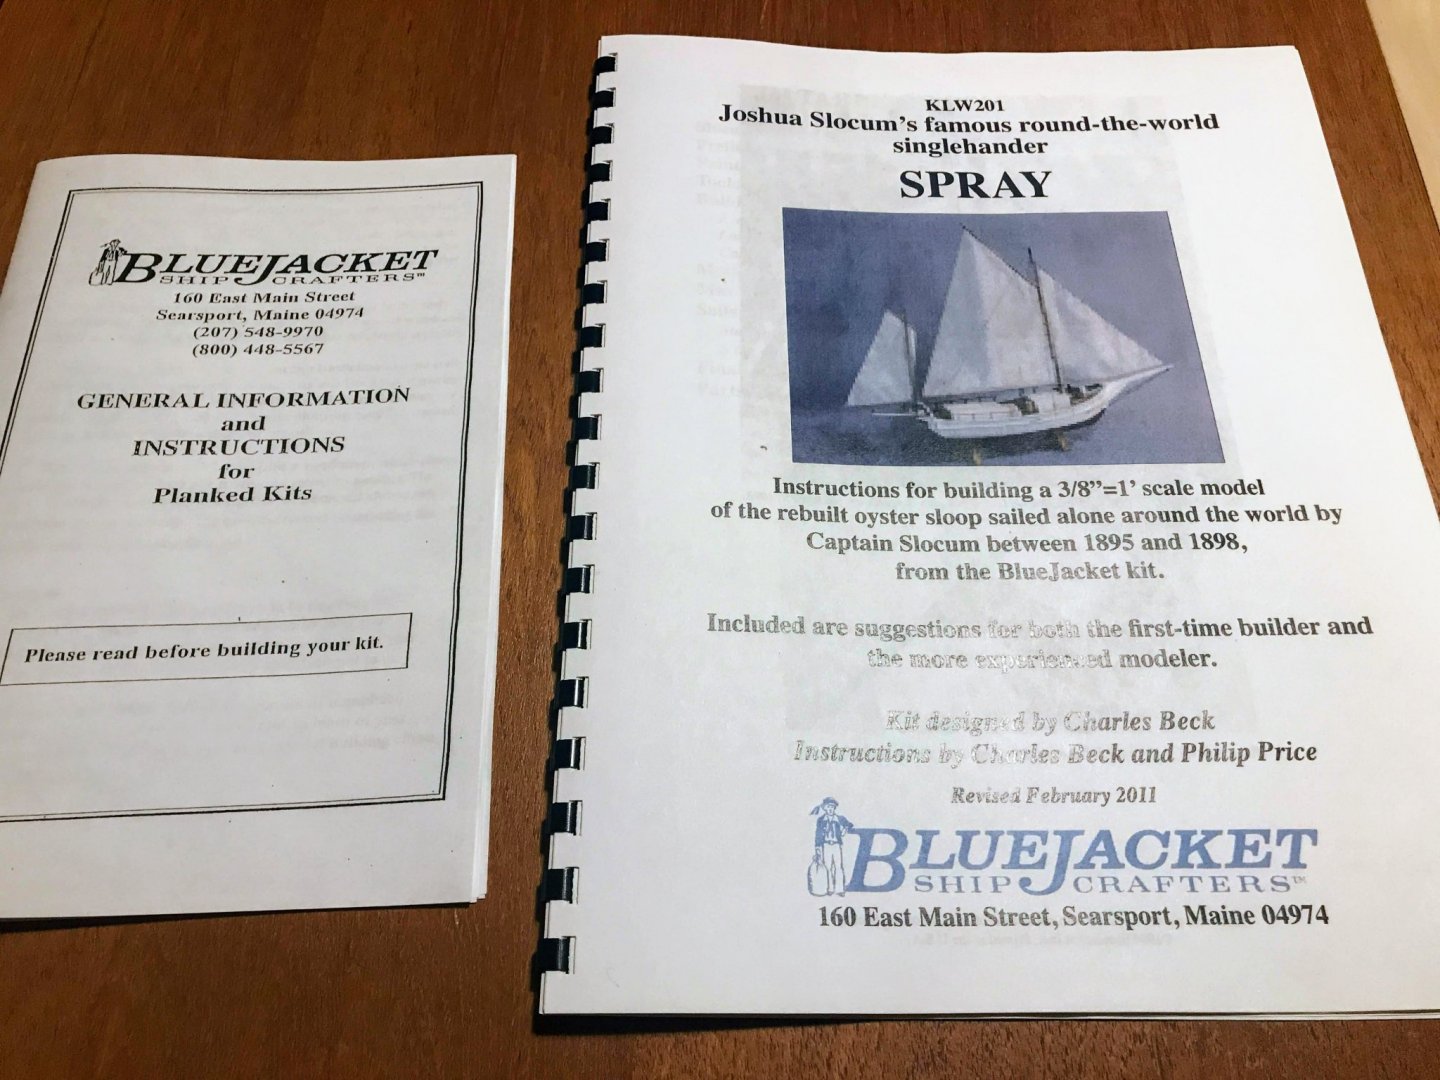
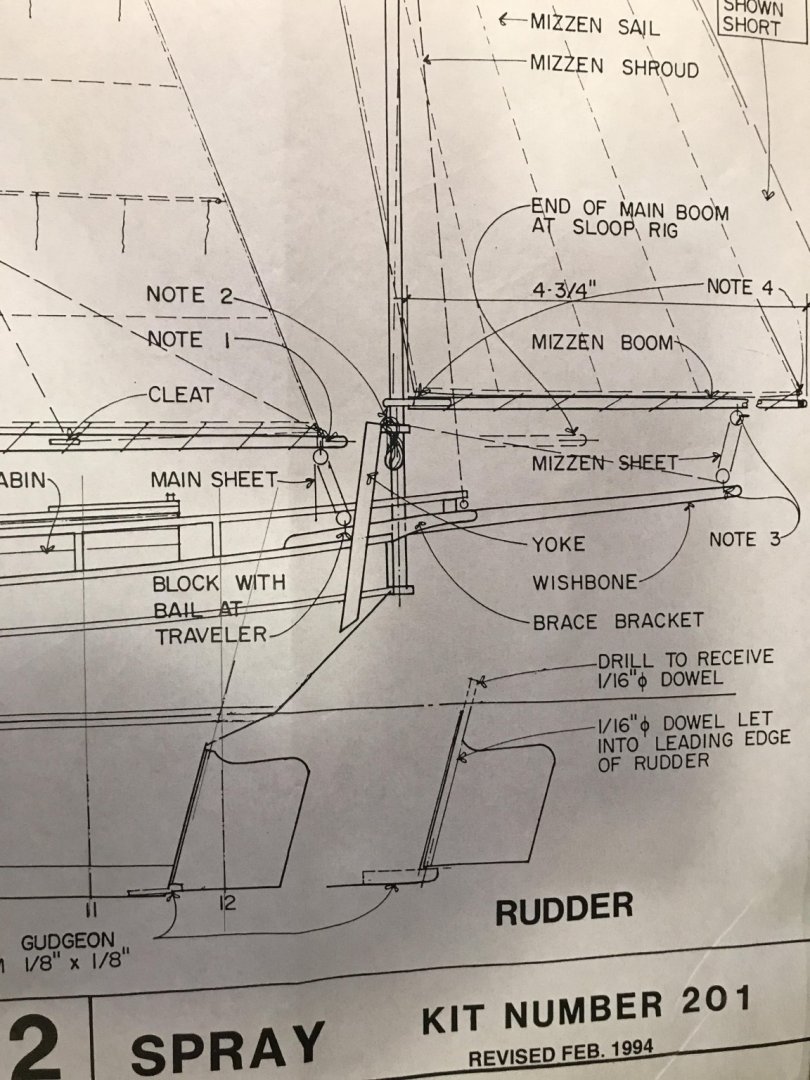
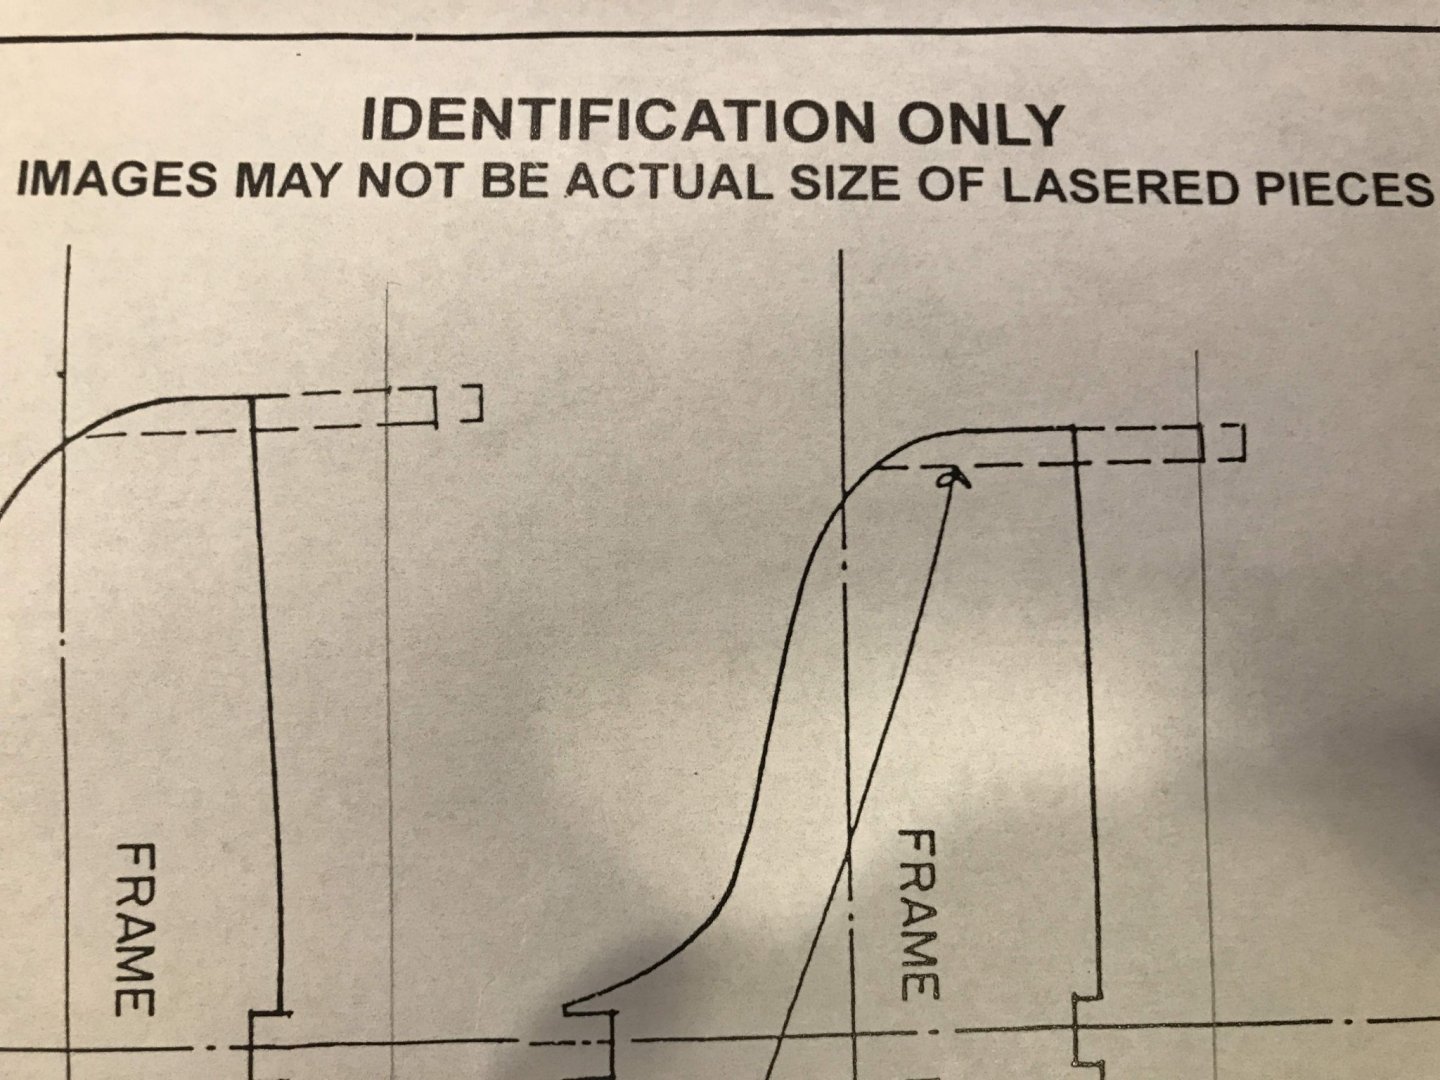
My first attempt at a builders log (we all know that long before it became a fashionable term, that is what "blog" referred to). I write this as I am a couple of months into the build. I expect to have the blog catch up to real time over the next week or so). * * * Joshua Slocum left Boston in April 1895 aboard the 35 foot sloop Spray, finishing his circumnavigation of the world over three years later, in July of 1898. He was the first to circle the globe alone. We know quite a lot about that trip since the definitive book on the subject, Sailing Alone Around the World, was written by none other than Joshua Slocum. Less well known is that he left New England in 1909 for South America, sailing alone again on Spray, never to be heard from again. While working on Model Shipways’ Yacht America, I decided to look to Blue Jacket for my next build, and while exploring its many interesting offerings, I skipped over Spray several times as not being interesting enough a boat, not realizing its historical significance. But about a year ago the name Slocum caught my eye, and Spray stepped into my on-deck circle. This was inspired in part by an imminent trip to Patagonia, including a short cruise on a small ship visiting the Straights of Magellan (where Slocum sailed), Beagle Channel, and Cape Horn. First thing, of course, upon getting the kit in the mail, I inventoried the parts (all present and accounted for), quickly read through the instructions, and examined the two sheets of plans with some care. The plans are in my view quite clear and detailed--here’s a small excerpt. The instructions are less detailed than I am used to (at least compared with Model Shipways). They include a separate booklet with general instructions for planked kits. BlueJacket identifies this kit as one of its more difficult ones (rated 7 on a scale of 1 to 9, although BlueJacket doesn’t rate its kits with numbers like that). Eight months later, after finishing America, I opened the box again, took another close look at the plans, and began cutting out the laser cut bulkheads. The bulkheads are referred to in the kit as “frames”, numbered from 2 (oddly) to 12. That aside, they are sharply and precisely cut and easy to remove from the sheets they were cut from. I also took a close look at the keel. It was slightly warped, but not sufficiently so to cause me any concern. You have to look closely to see it in the photos below. I later noticed that the warp has a slight twist to it (so the stem and stern portions are not quite in the same vertical plane), but again, not enough to be of any real concern. Using the plans as my guide, I marked the bulkhead locations and the water line on the keel. While cutting out the bulkheads, I quickly glanced at the instructions and noticed an oddity--the plans have this warning written on one sheet, while the instructions imply the opposite. Oh well, it certainly is easy to be critical; I shudder to think what my plans and instructions would look like were I to try to manufacture a kit. The instructions say that the fit between the keel and the bulkheads should be snug, but they warn that some bulkhead slots may need to be sanded to open them up a bit and avoid splitting the bulkheads. I had the exact opposite problem; most of the bulkheads were too loose to stand up unassisted. I cut a thin strip of construction paper and glued shims to the inside of the slots on most of the bulkheads--that took care of the issue. Here are the bulkheads dry fitted to the keel. Next installment, my first mistake. . .


- 82 replies
-
- 6
-
-
- spray
- BlueJacket Shipcrafters
- (and 1 more)
-
I have been a member here for a few years, but treating it more as a spectator sport than I should. I’m hoping to post the beginning of my first builder log within a week or two, so thought I should introduce myself. I have been a model builder off and on throughout my 7 decades on the planet. I built lots of plastic models as a kid (mostly airplanes but also a few ships) and an occasional stick and tissue glider, as taught to me by my dad. My first wooden ship model was a solid hull America built in high school. I still have it, but it has not survived the decades well at all, and thus my most recent build was the MS kit yacht America (which I think is no longer available from MS). Fast forward from high school to my late 30s, and I got back into the hobby of model building, first with three RC gliders. Revell’s 1:96 plastic Constitution followed, then a plank on bulkhead Bluenose (Artesania Latina), a canoe (Midwest), Endeavor (America’s Cup J Boat, an Italian kit), Brig Niagara (Model Shipways), and more recently Model Airways Wright [Brothers] Flyer and Yacht America. Somewhere along the way I finished a half-built Sopwith Camel (Hasagawa), after the father of a good friend of mine sadly passed away mid-build. Current build: BlueJacket’s Spray, the tiny boat Joshua Slocum soloed around the world. My builds tend to take a while, since there is a lot of competition for my time. I still work, slowly transitioning to part time (trust & estate lawyer), I am an avid cyclist, and my wife and I enjoy traveling, hiking, kayaking, biking, pickleball, skiing (especially XC), reading, and hanging out with our young adult kids. And living in Spokane, Washington, we are of course avid Gonzaga basketball fans!
-
I too will be very interested to follow your progress, as Spray is in my on deck circle. I first read Sailing Alone Around the World in high school or thereabouts, then read it again earlier this summer. The recent read and my purchase of the kit were inspired by a hiking and cruise adventure we did in Patagonia back in March. The cruise put us ashore at Cape Horn, which for a life long sailor was an incredible thrill. This will also be my first BlueJacket build and am looking forward to it. I'm about 95% finished with Model Shipways Yacht America, and I even started a "post-mortem" log I might finish and post (another first for me) before starting Spray. Again, looking forward to your build . . . Tom
- 29 replies
-
- 1
-
-
- spray
- BlueJacket Shipcrafters
- (and 2 more)
-
Very helpful responses, and much appreciated.
-
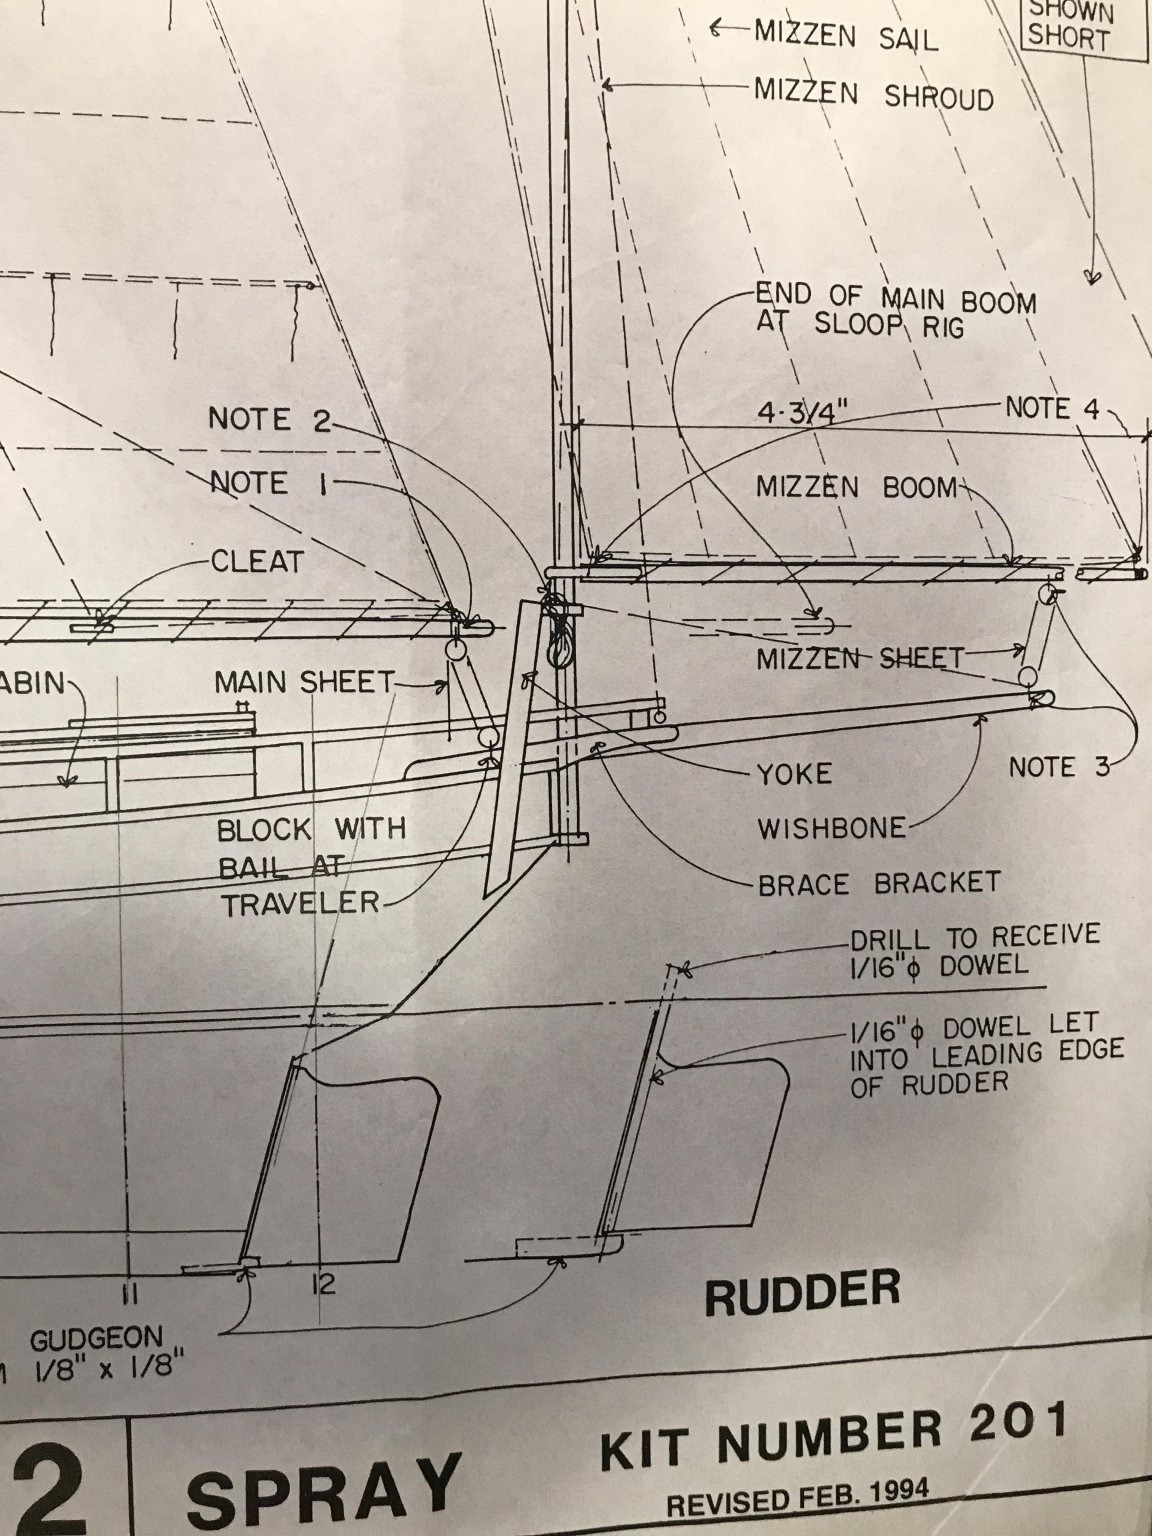
I am working on Model Shipways now-discontinued yacht America, to which I have decided to add sails. The gaff topsail rigging in the plans has me befuddled. It shows the sail attached to the topmast with “lacing”. If that means loosely tied, then I suppose the sail could be lowered as far as the point at which the mast and top mast overlap, but that wouldn’t be a very satisfactory way to douse sail in a sudden squall. The downhaul is shown as running from the clew up to a block at the heat of the sail and then down to the deck, and if the halyard was eased and the downhaul pulled tight, the clew and head would be bunched together at that point of mast overlap, but that still leaves a bunch of sail flapping in the wind, and the only way to get the whole sail down to the deck is to run someone up the mast in a bosun’s chair. Is that what was done? Alternatively, maybe the sail isn’t attached to the mast at all except at the halyard (contrary to the lacing shown in the plans), but I don’t see that working very well going to weather. But maybe this is a sail that is used only when r broad eaching or running? I can’t think of anyone better equipped to provide some insight than the learned members of this forum. Thanks


.jpg.83a79981b52db761eb5a927b67e2585a.jpg)