HOLIDAY DONATION DRIVE - SUPPORT MSW - DO YOUR PART TO KEEP THIS GREAT FORUM GOING! (Only 24 donations so far out of 49,000 members - C'mon guys!)
×
Tom E
-
Posts
469 -
Joined
-
Last visited
Content Type
Profiles
Forums
Gallery
Events
Everything posted by Tom E
-
 Thanks Jim, I'll pre rig all the cannon tackle off the boat. Once rigged, take it from the jig and transfer it to the deck and hook it back on. For the Breech line I'll have some metal rod installed on the jig to hook the ring at the end of the Breech line to. Credit should go to others, definitely not my idea! I should have pics soon. I may not need the cannons yet, but I think I wanna try and rig a cannon with the product I got from Syren. Really want to see how it looks! Tom E
 -
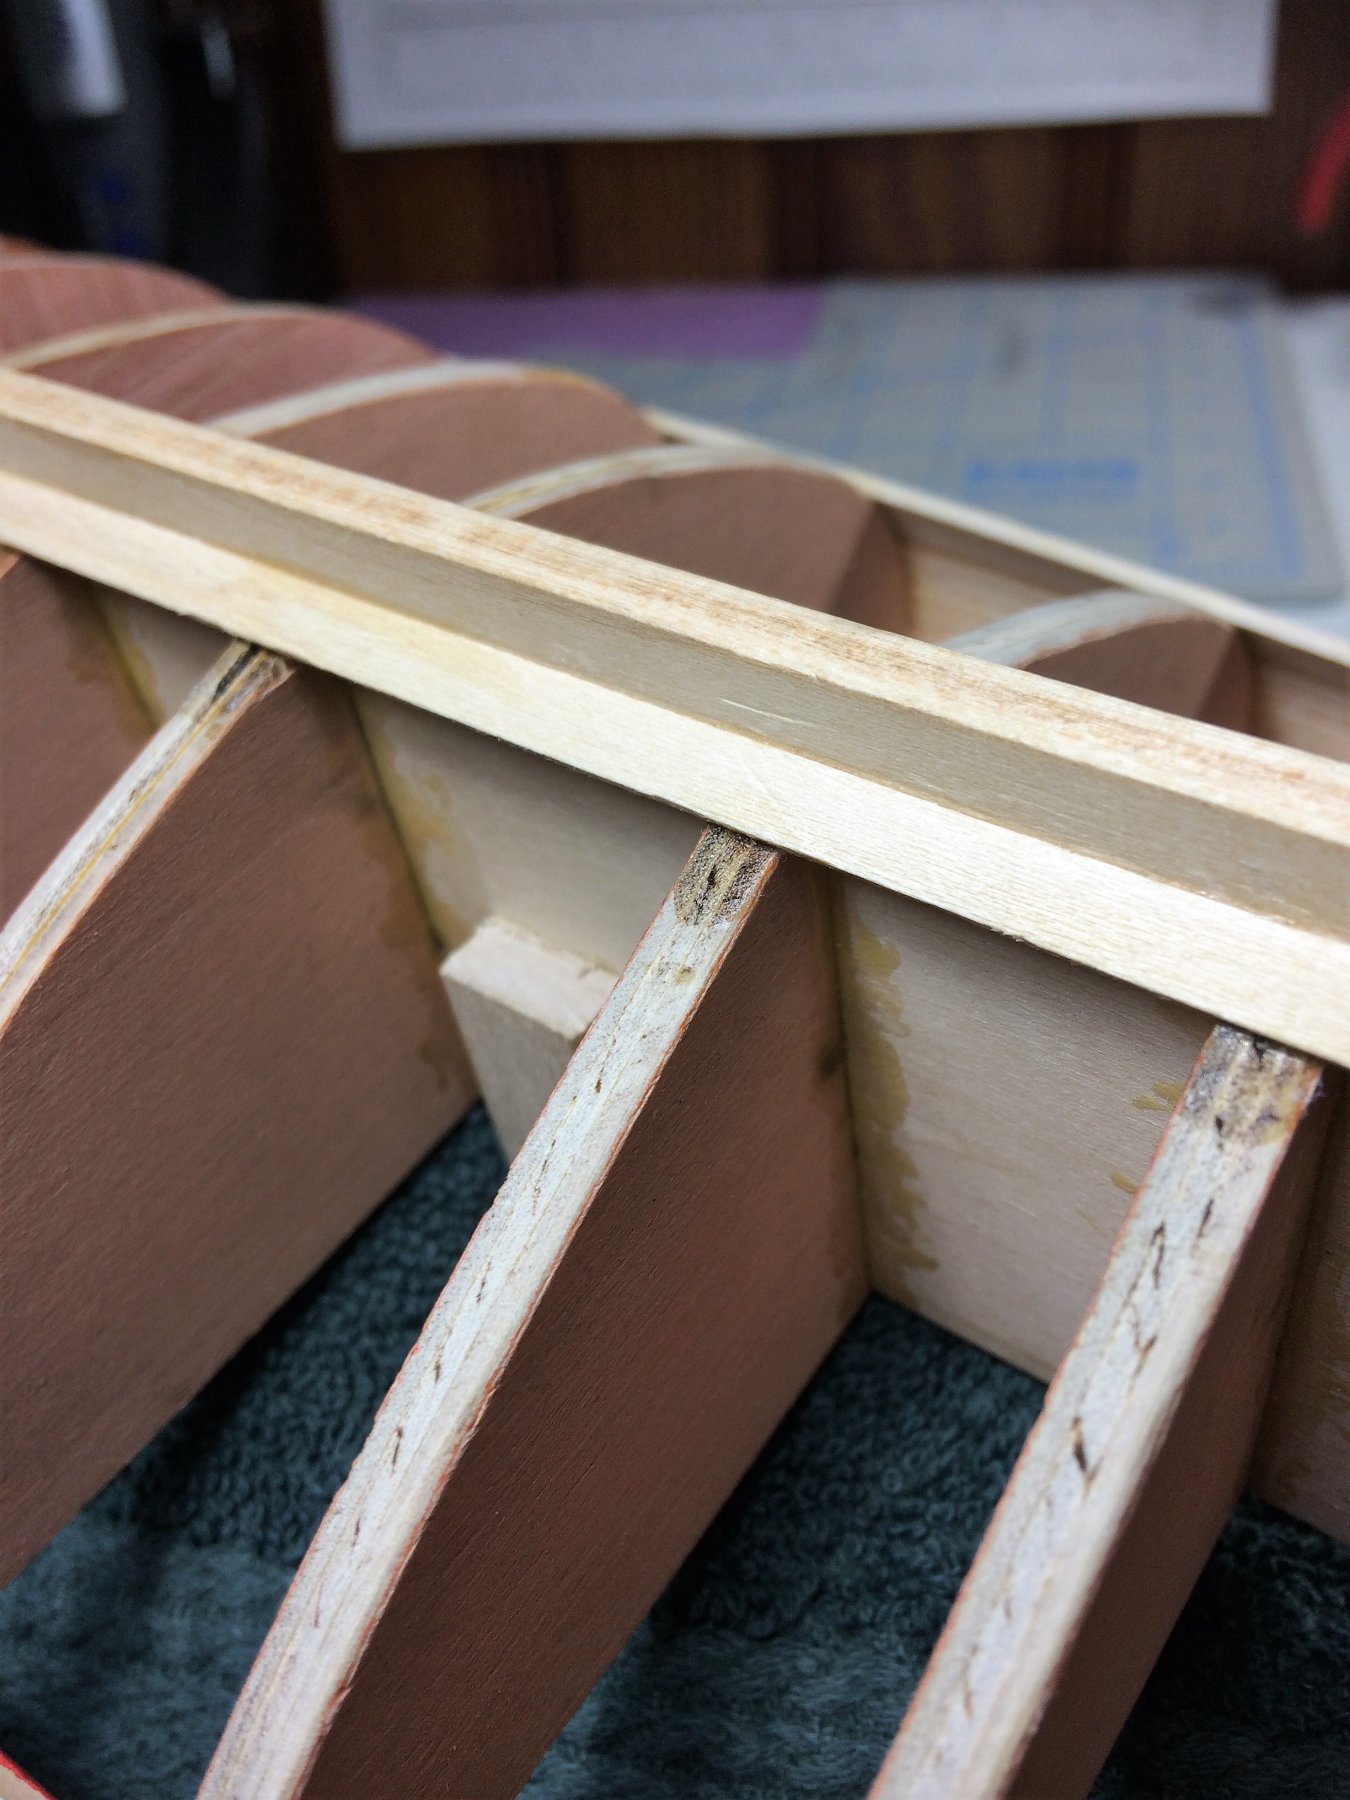
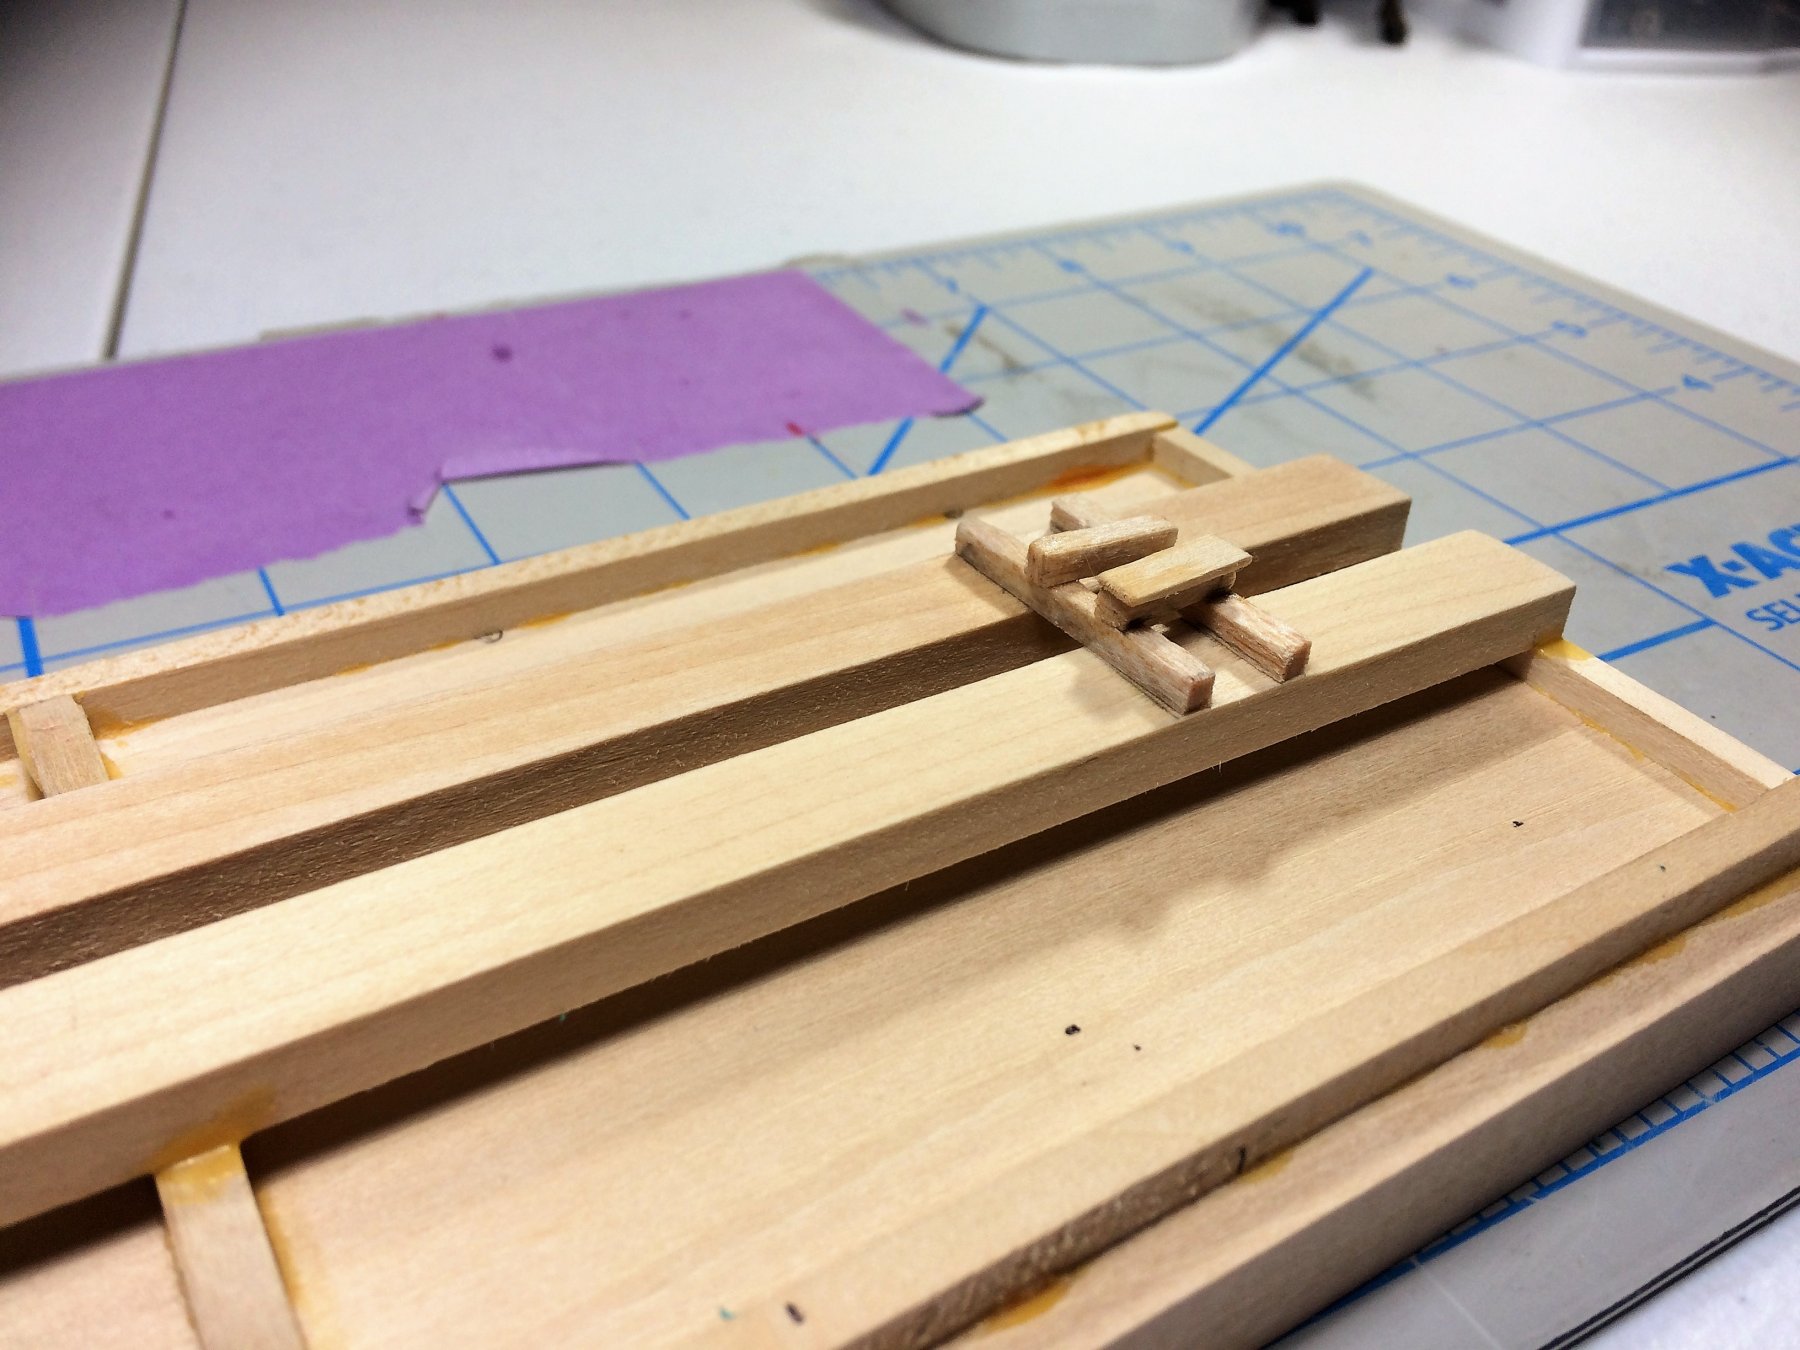
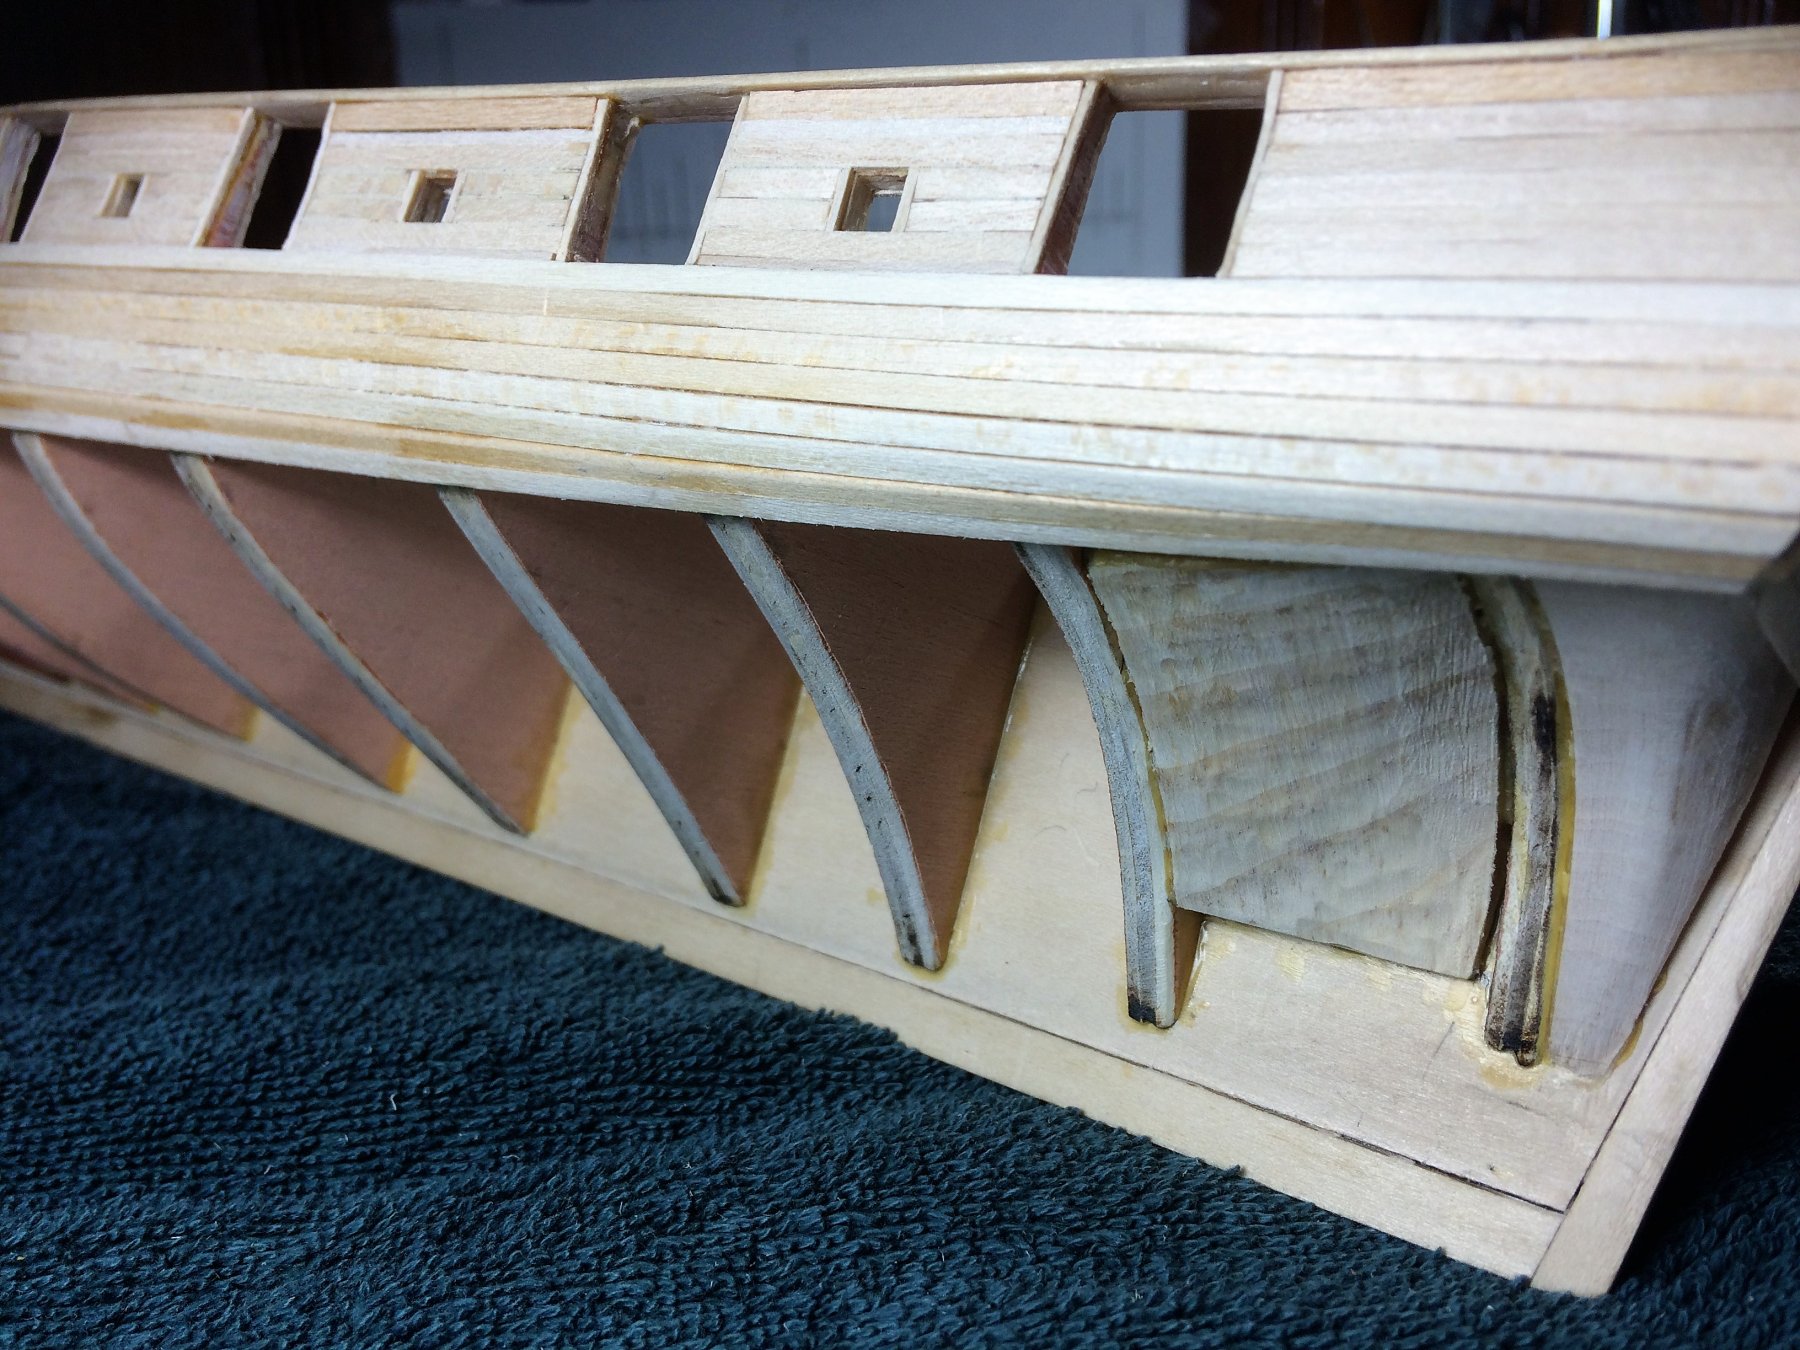
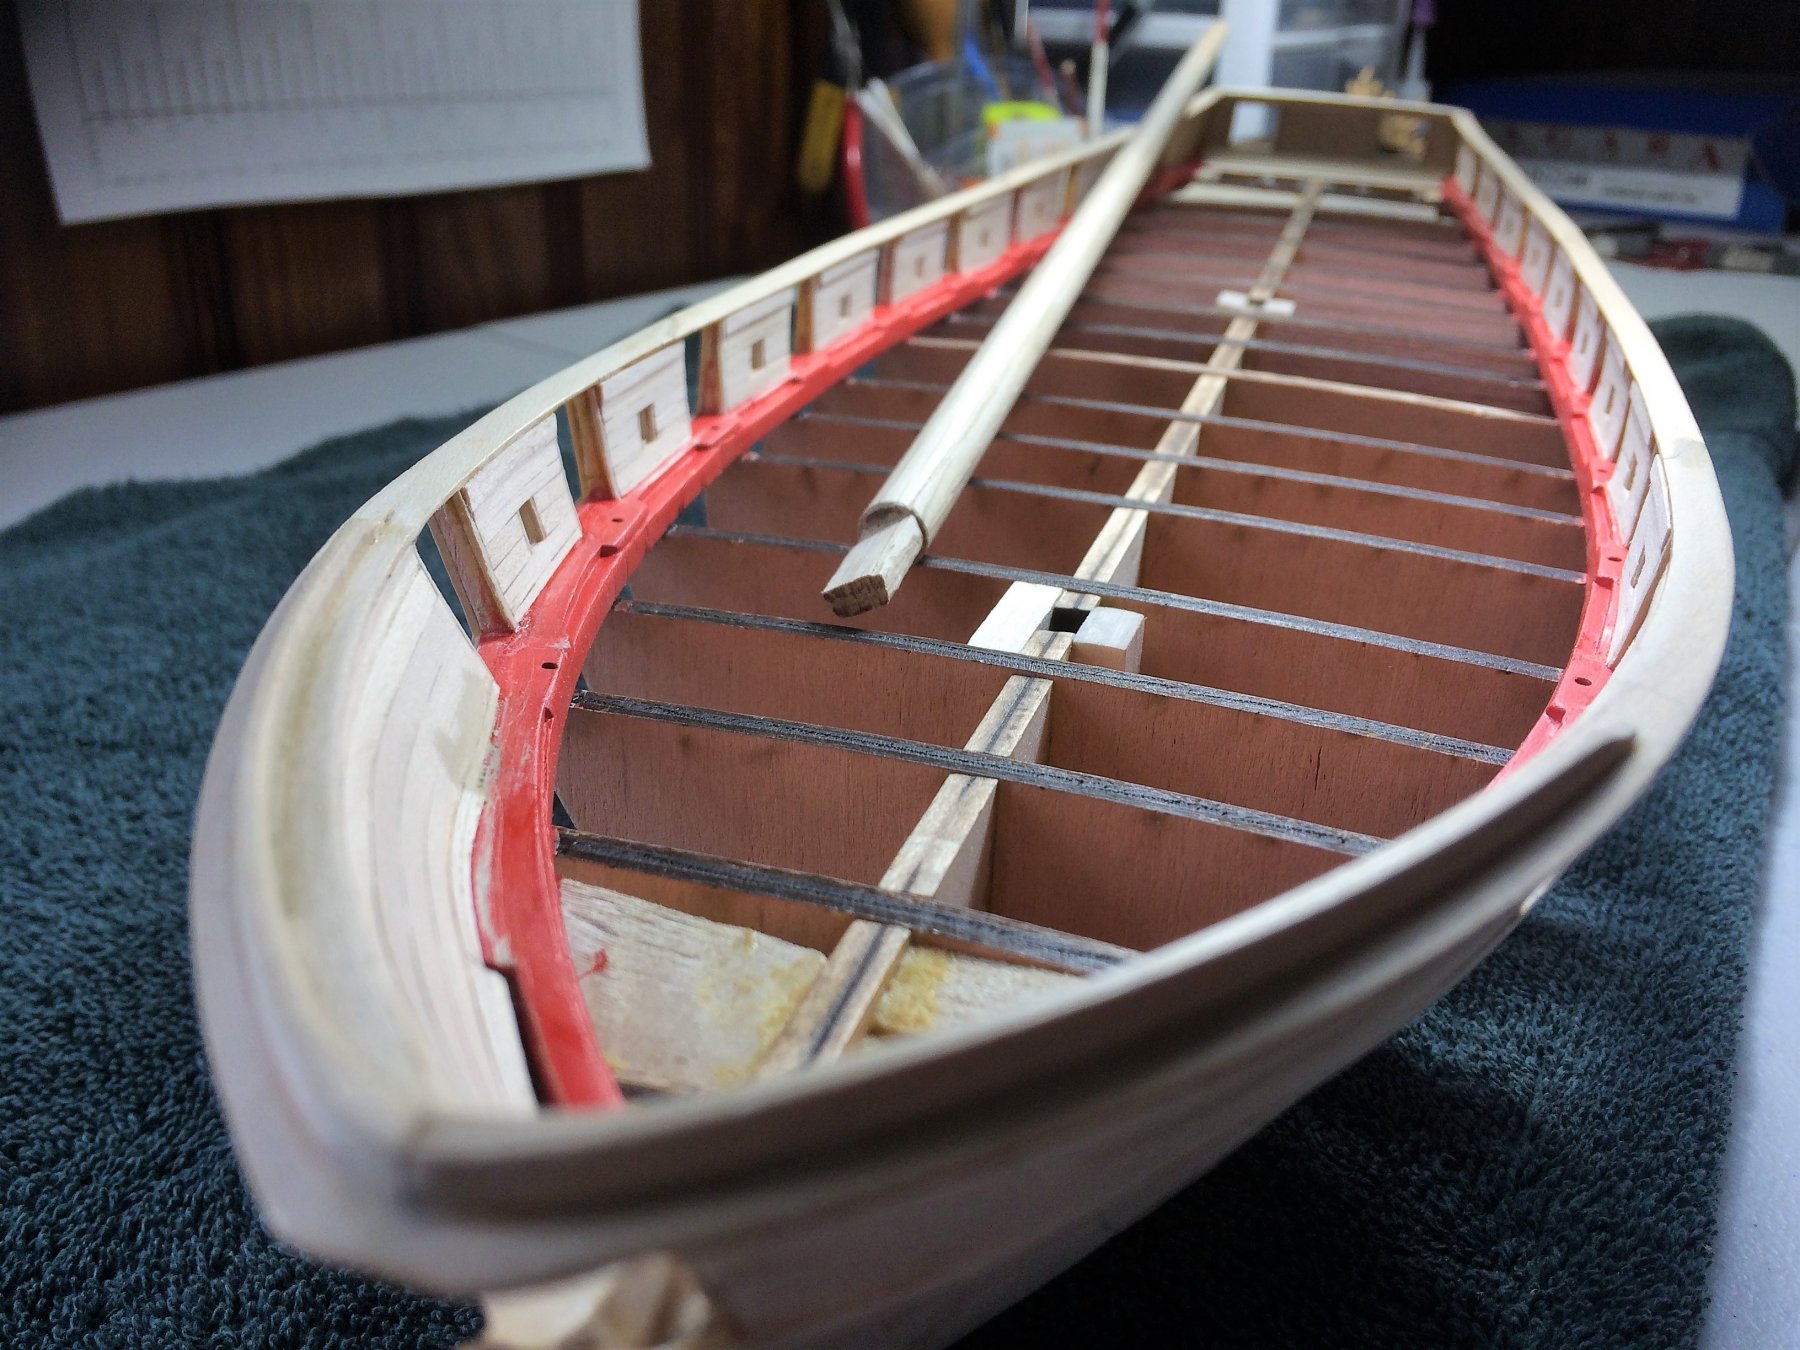
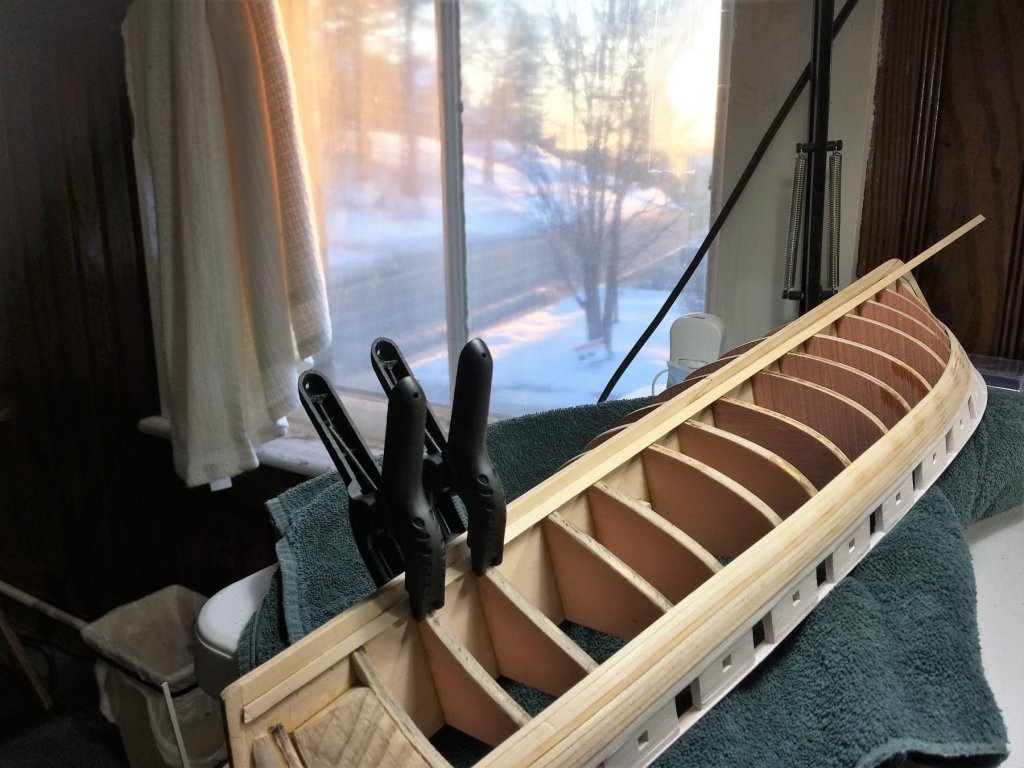
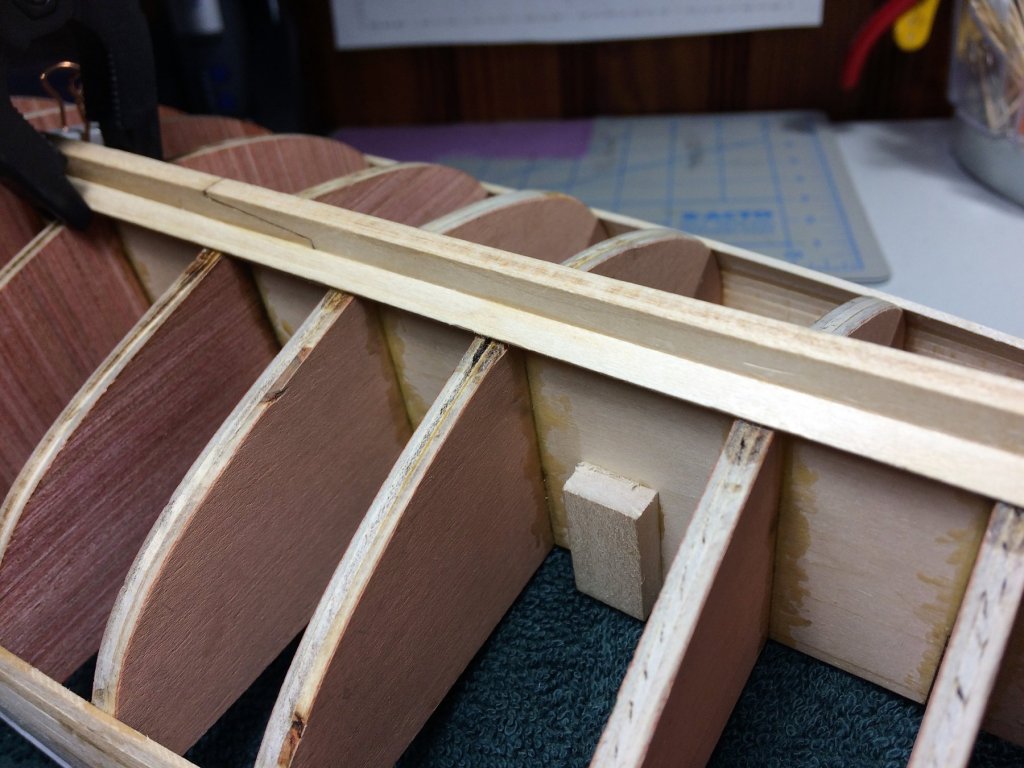
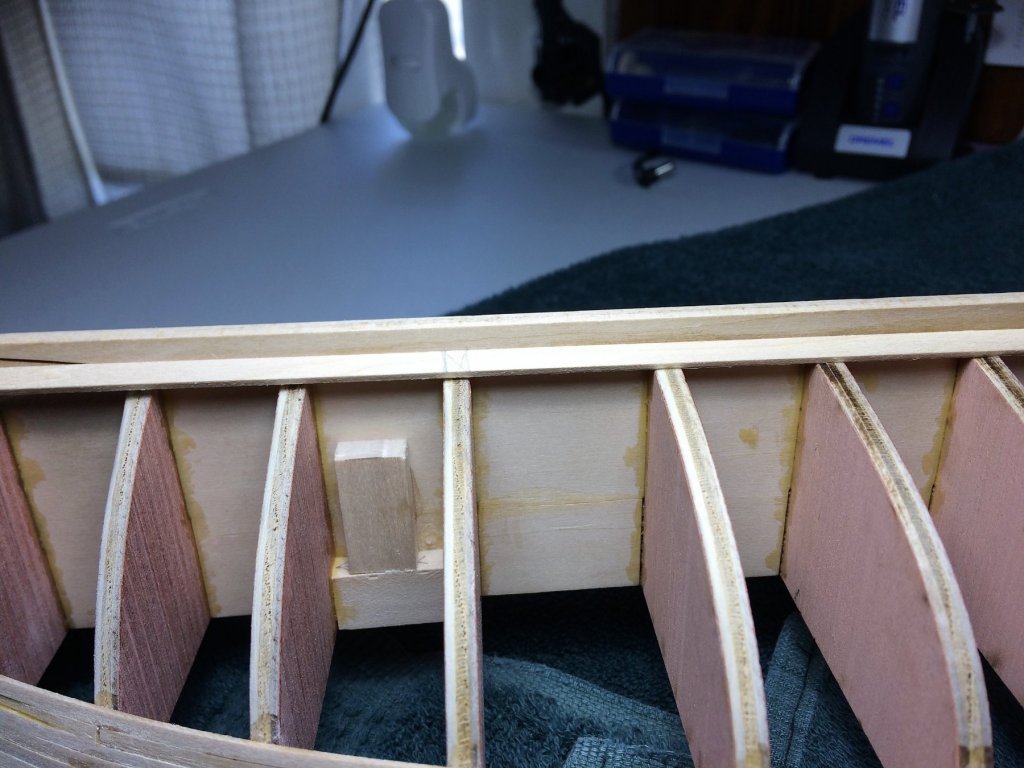
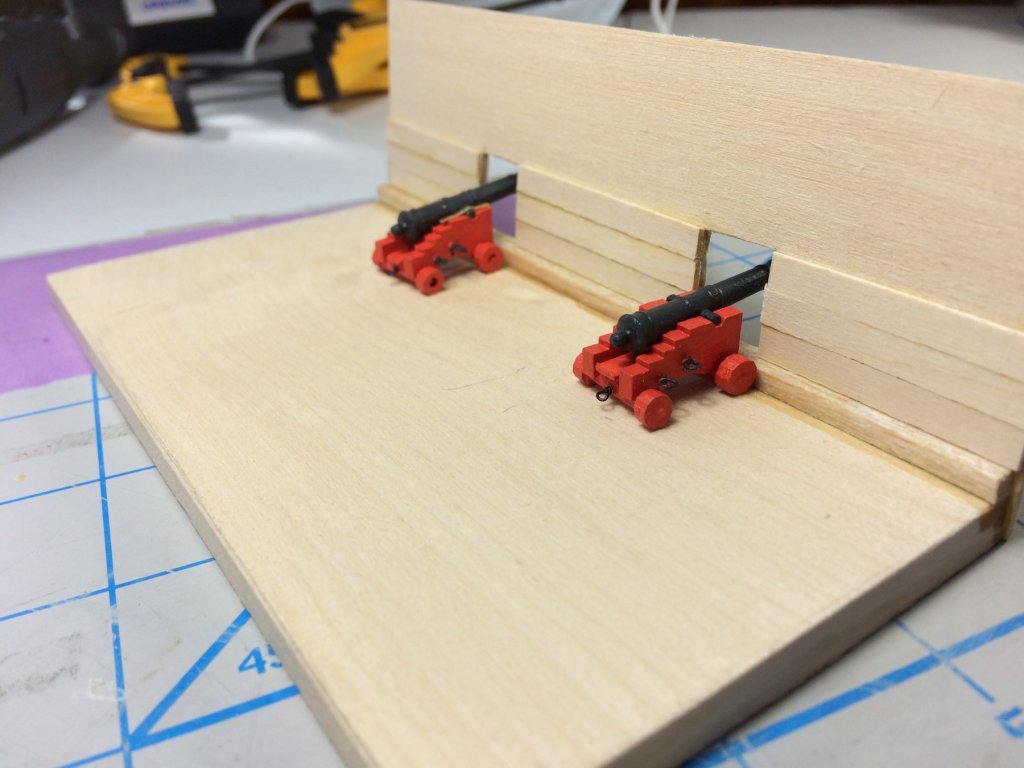
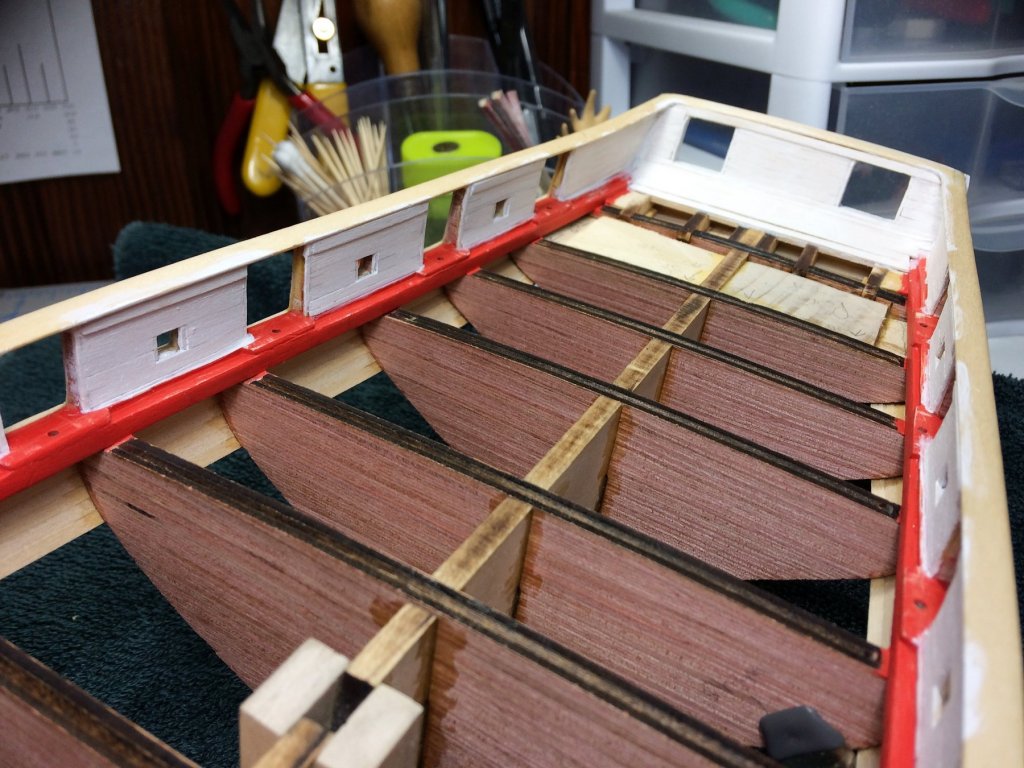
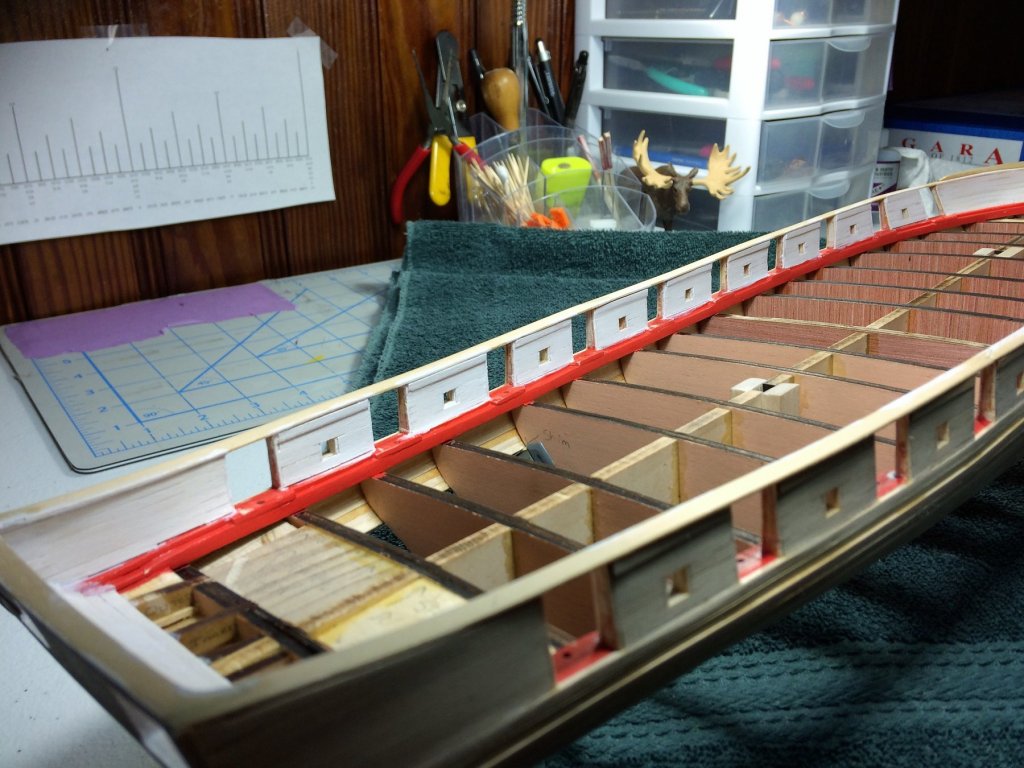
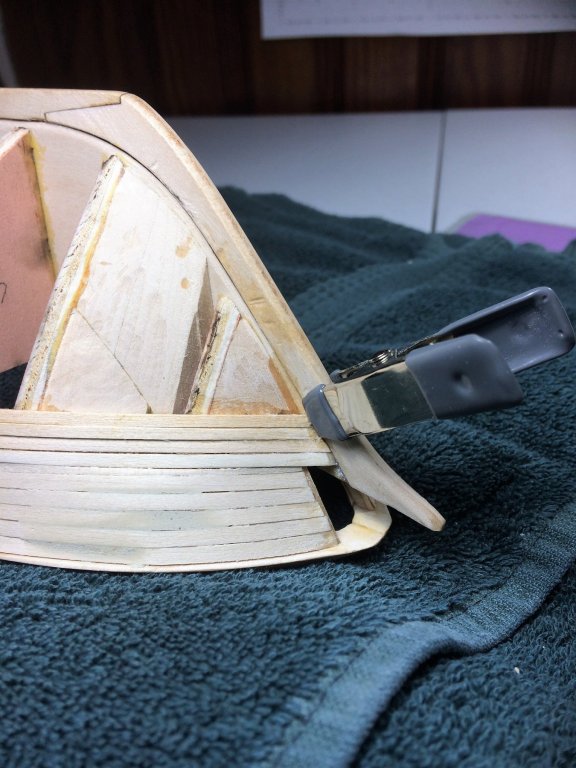
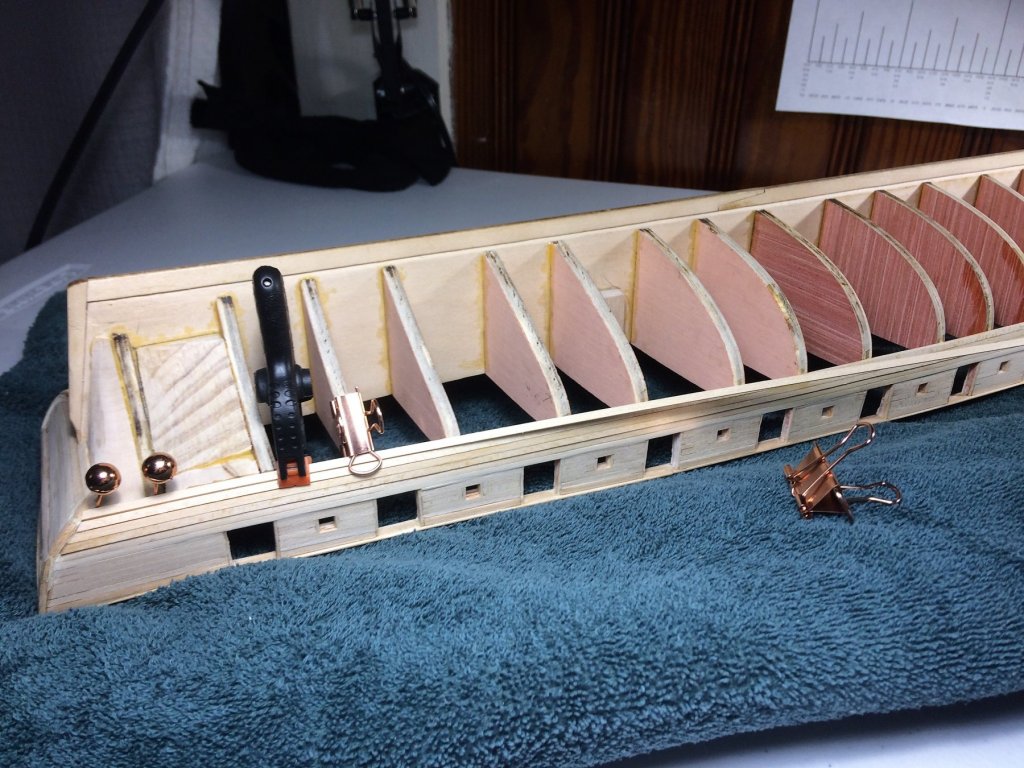
Evening, This build needs an update. Admittedly, been sheepish in the Shipyard lately. Still building, but that dang March Madness basketball tourney sure does take a bite out of the weekend. Great basketball so far with some great upsets. I started putting the Garboard plank on. All the fairing and a well cut Rabbet paid off......I think. Sometimes the view from the Shipyard gets good! My plank and Rabbet look like they meet well. Its a great seam the entire length. Sorry for the fuzzy pics. It must have taken me an entire day for each Garboard. Mike, I listened to your advice from Mr. Sandborn. I found that "spot" where it starts to shift/move up/twist as it enters the bow area. Marked it and ended the Garboard there. My next plank will lay on top of the first and hopefully run the entire length. That should show where a stealer will be needed at the bow. I laid a plank on top of the Garboard already and I can see the stealer. Should be easy to make. Then I'll move back to Band B for a few planks. On the above pic, 3 frame from the left. There's a pencil mark on the plank. You can see where the plank is off the frame. All 3 on the right it lays right on them. Below you can see that's where I ended it. Should I move it back another frame? Is a larger stealer easier to make over a small one or vice versa? On a side note I've started building a "jig" for rigging the cannons. Its a 2 bay garage. Both sides will be made up so that either a cannon or carronade can be rigged. Honestly, It has been a blast building this jig. Its a mini model all out of the scrap pile. All measurements for this are direct from the plans. Although its Niagara specific, I'm pretty sure it can be used with other kits. Tom E


-
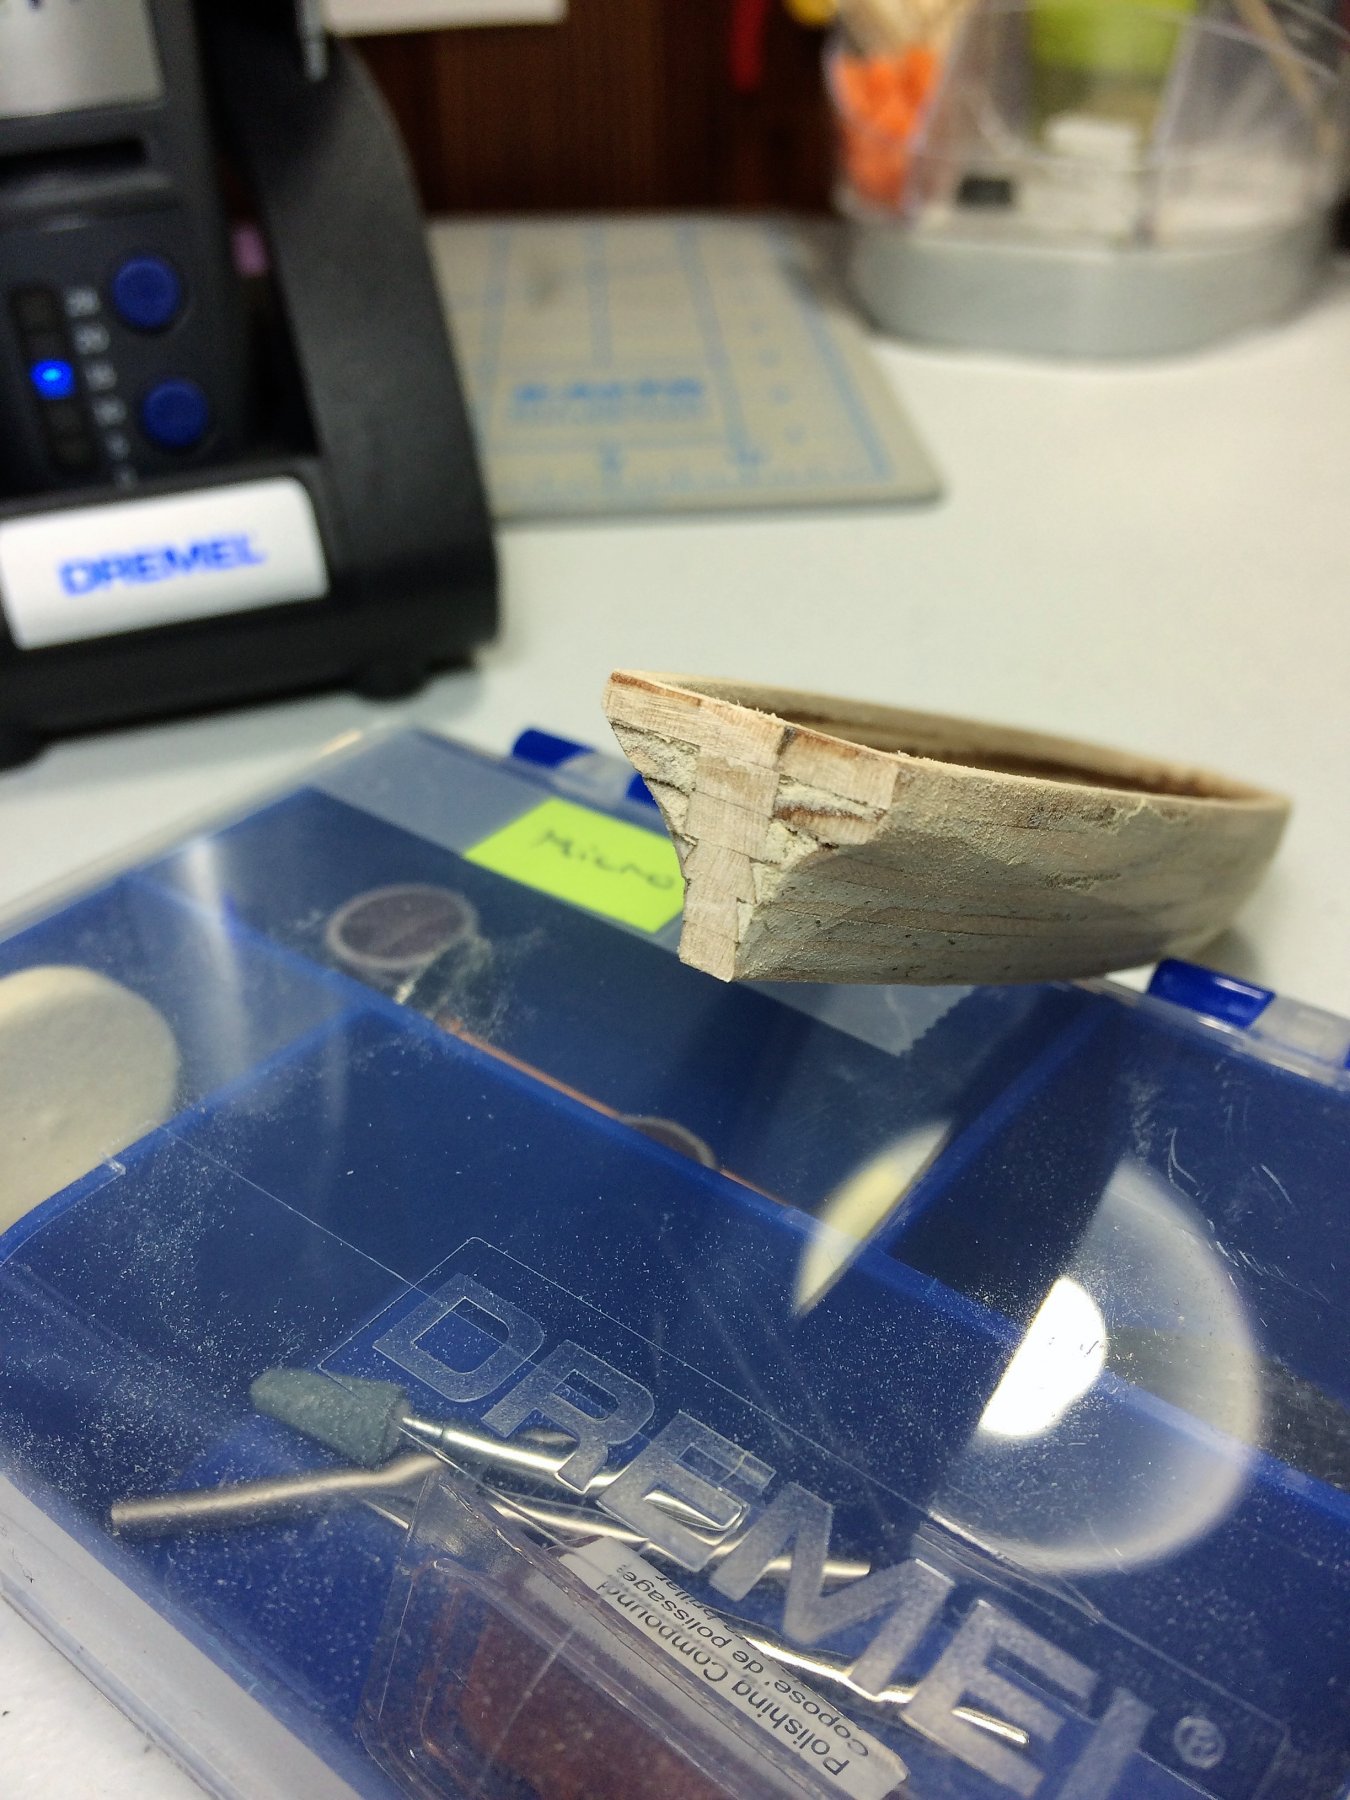
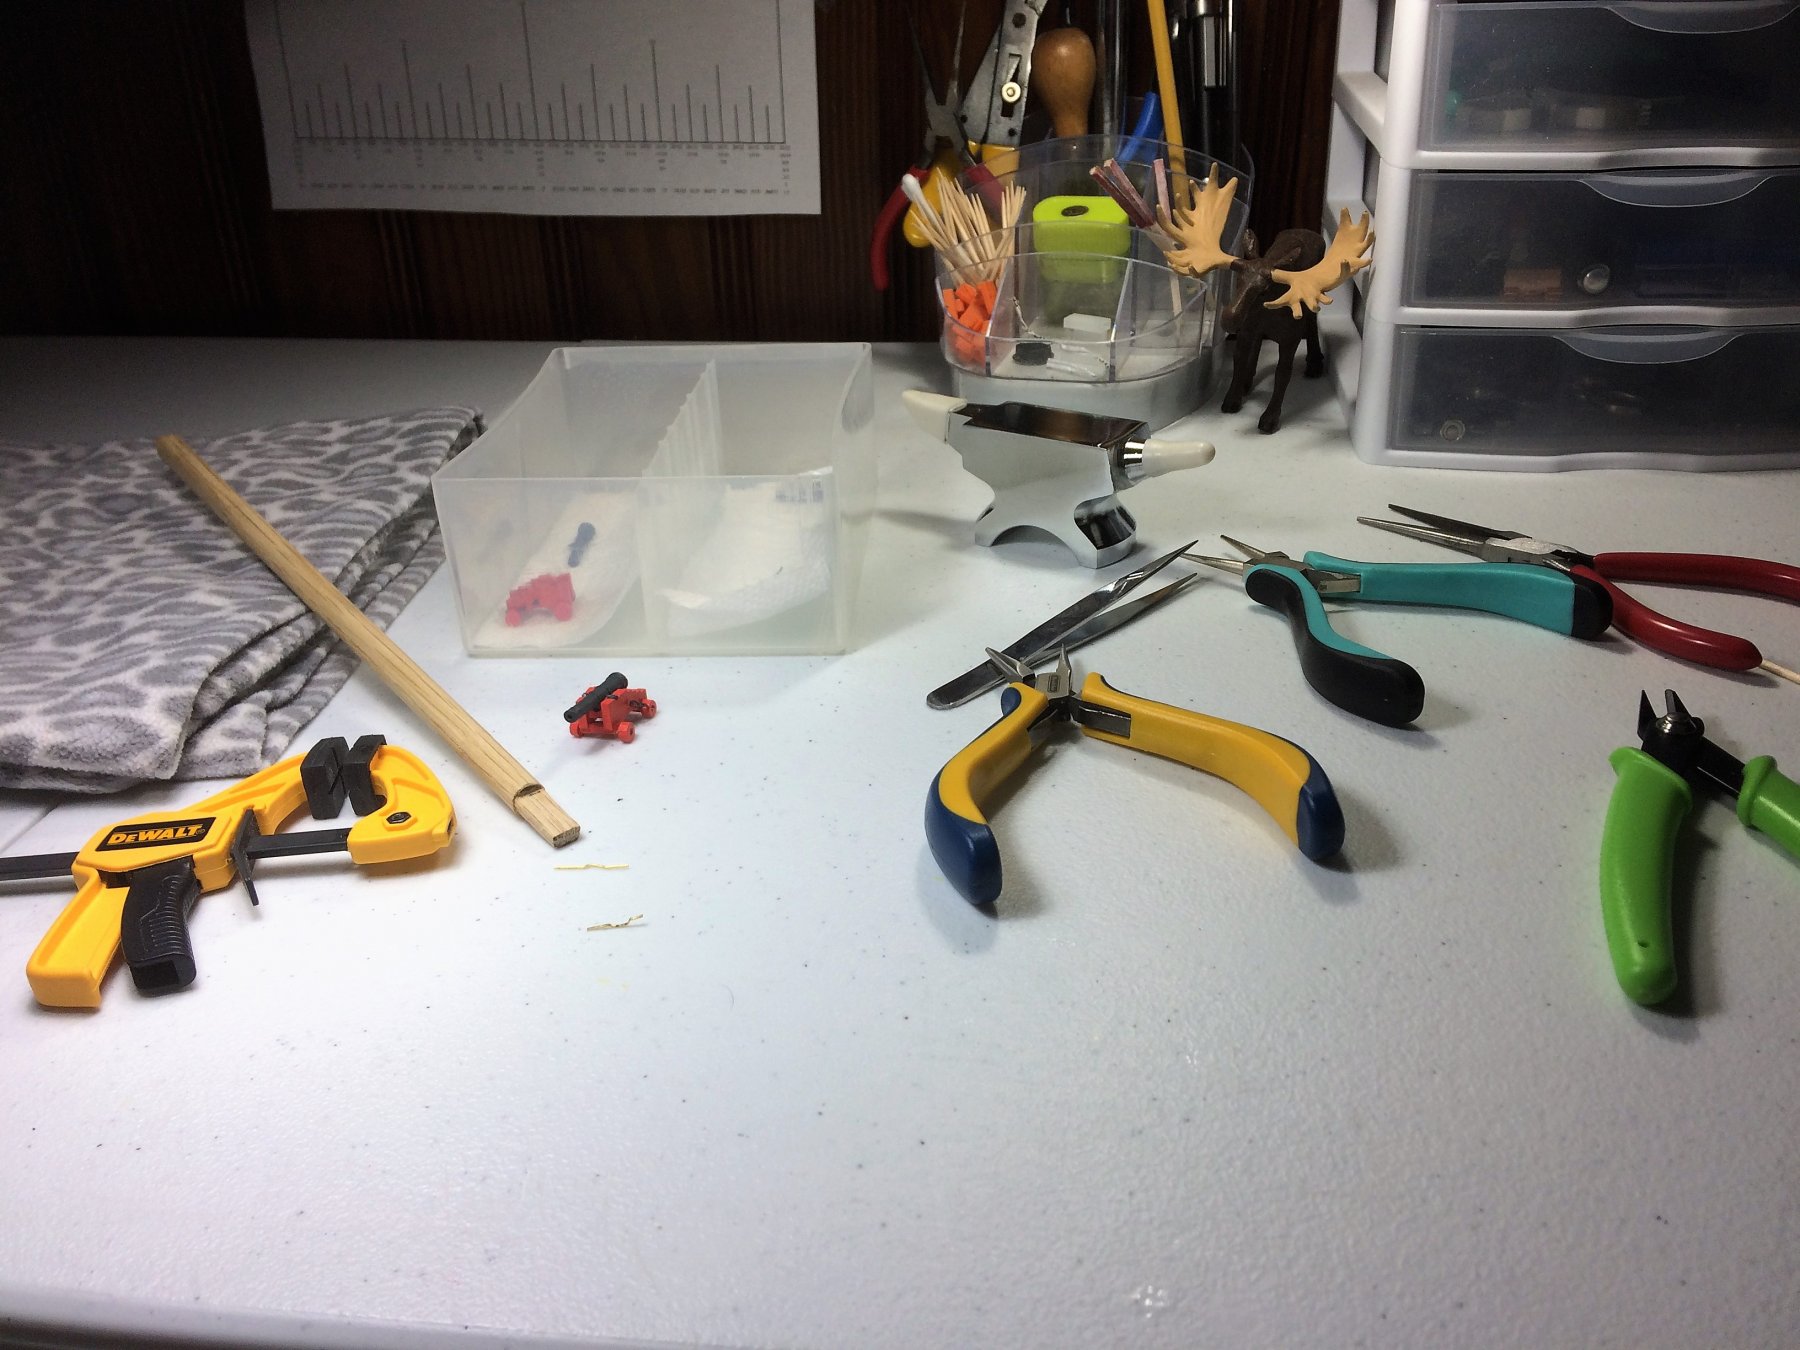
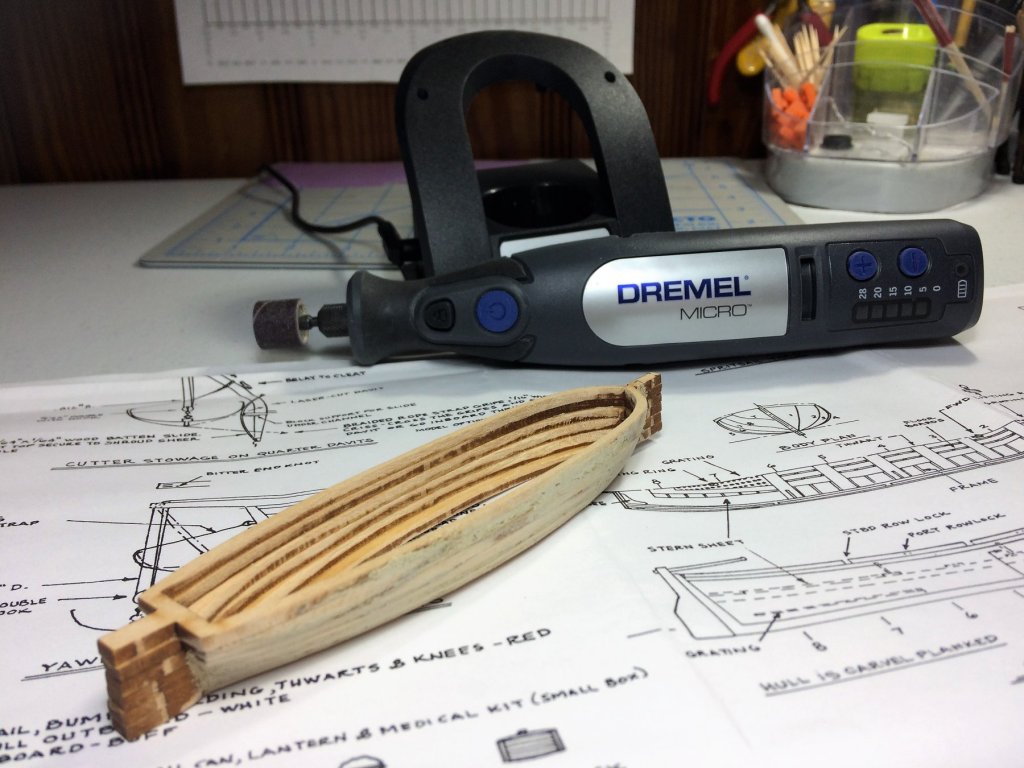
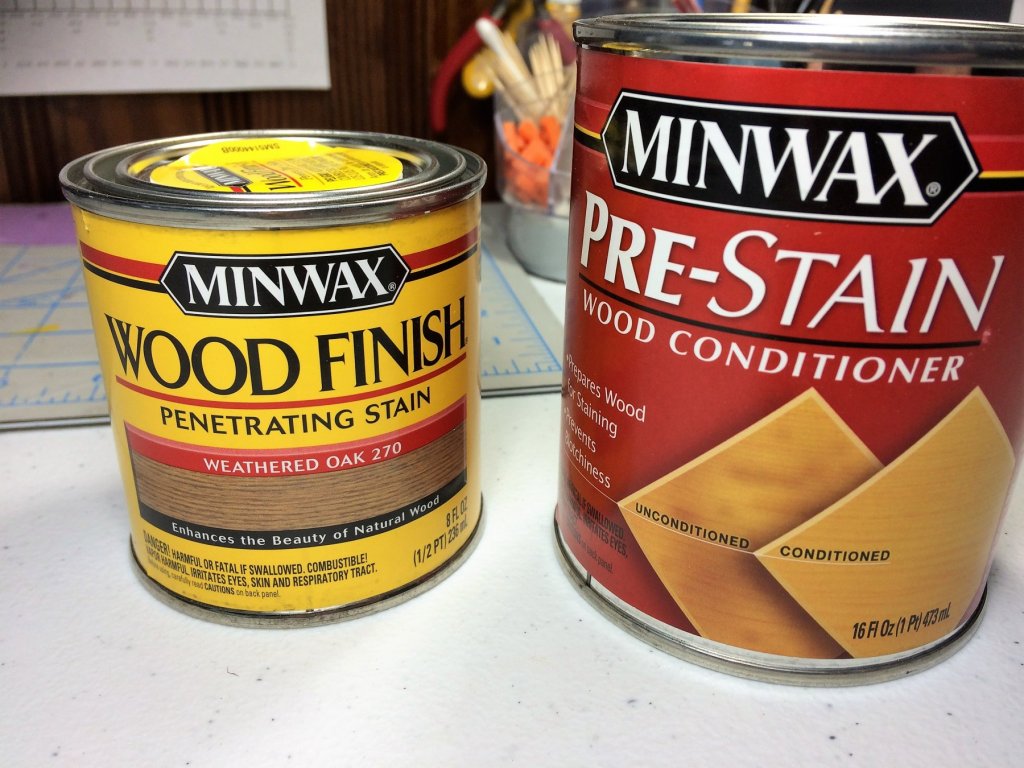
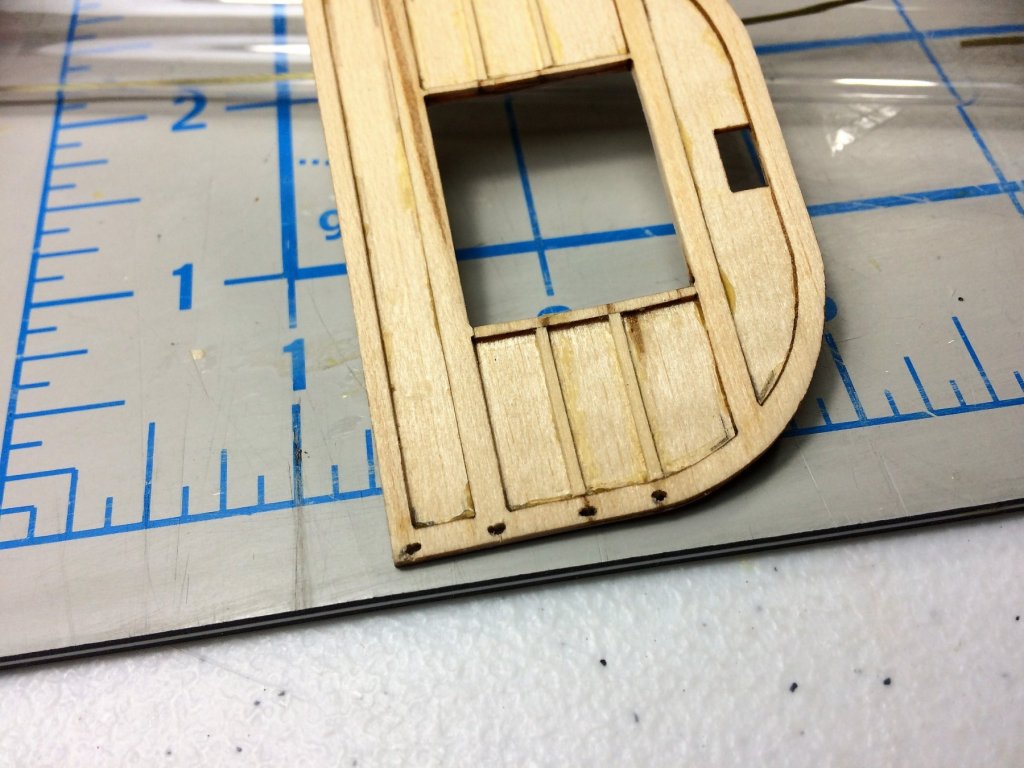
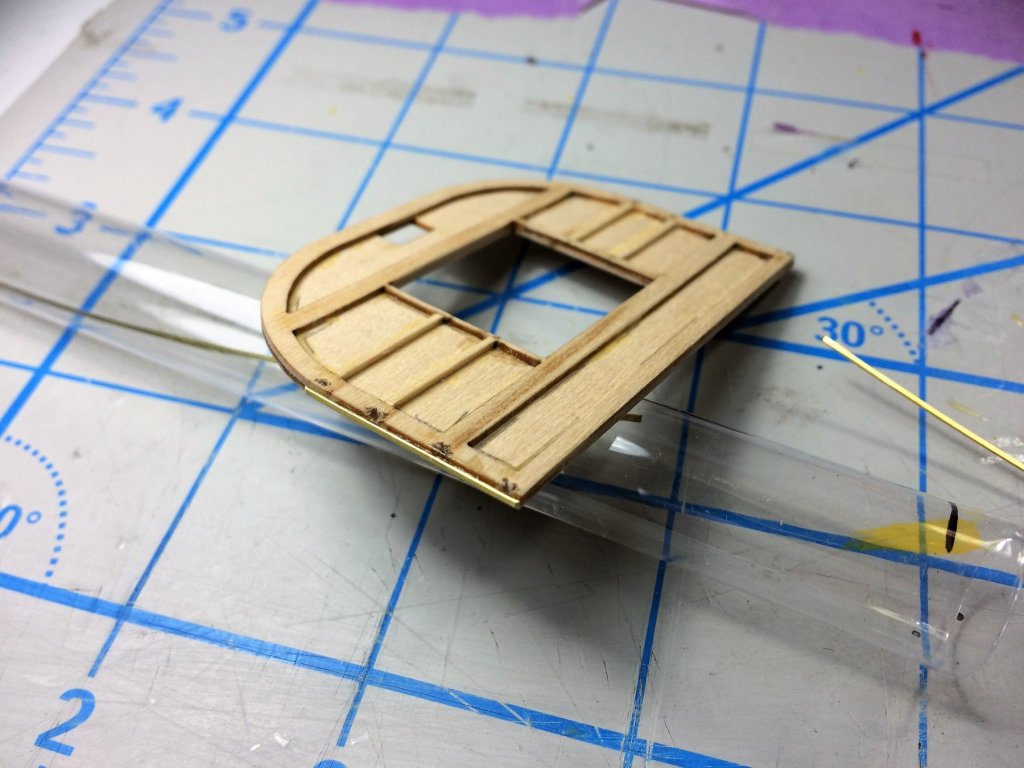
Darrell, Welcome back aboard sir! Thanks for the kind comments. Mike, If you want any of this weather up here, there's plenty to go around. 3 large storms, or what we call Noreastahs!. All in 3 weeks. Very winter weary, ready for any warmth. I see what you mean about the stealers. Play it by ear, don't follow the plans to the letter. The boat will dictate when and where a stealer is needed. With that in mind, and to have my planks join/meet lower down the boat, has me thinking. Lay the Garboard, maybe 1 more plank, start belt B. After 2-4 planks of belt B, lay a plank in garboard/belt D section, then I'll probably alternate from there. I figure that's where I'll use a lot of the cut planks instead of whole. Anywho.... Got the afternoon off from work. Another Nor-eastah is heading in and the gal I work with doesn't, and cant!, drive in the snow. WAY too nervous! I get the afternoon off, she gets a snow day tomorrow. I don't care. I don't mind driving in the snow. It freaks some people out tho! And those are the people that DONT belong on the roads during a snow storm. So I headed to Home Depot. Spent about an hour in there! I found the below cordless mini Dremel. I love this thing! I made more progress in 1 day on the Cutters than at any other time. It's so light, and easy on the hands. Cordless and rechargeable too. The cordless is what sold me on it. It's a heck of a lot easier than breaking out the big Dremel every time I need it. It's powerful enough for our medium here. Nothing too thick tho. The mini Dremel makes easy work of the "stack up" Cutters. I have been dreading this task. This thing just took care of it. Below is still the rough cut. I think I have also decided on a deck stain. I must have hung out in front of the stain section at Home Depot for half an hour. Went with Weathered Oak. Not too bright, not too dark. Plus, I like the look of it, and should work well with the rest of the colors involved with the ship. Would period ship builders even have access to Oak? Tom E

-
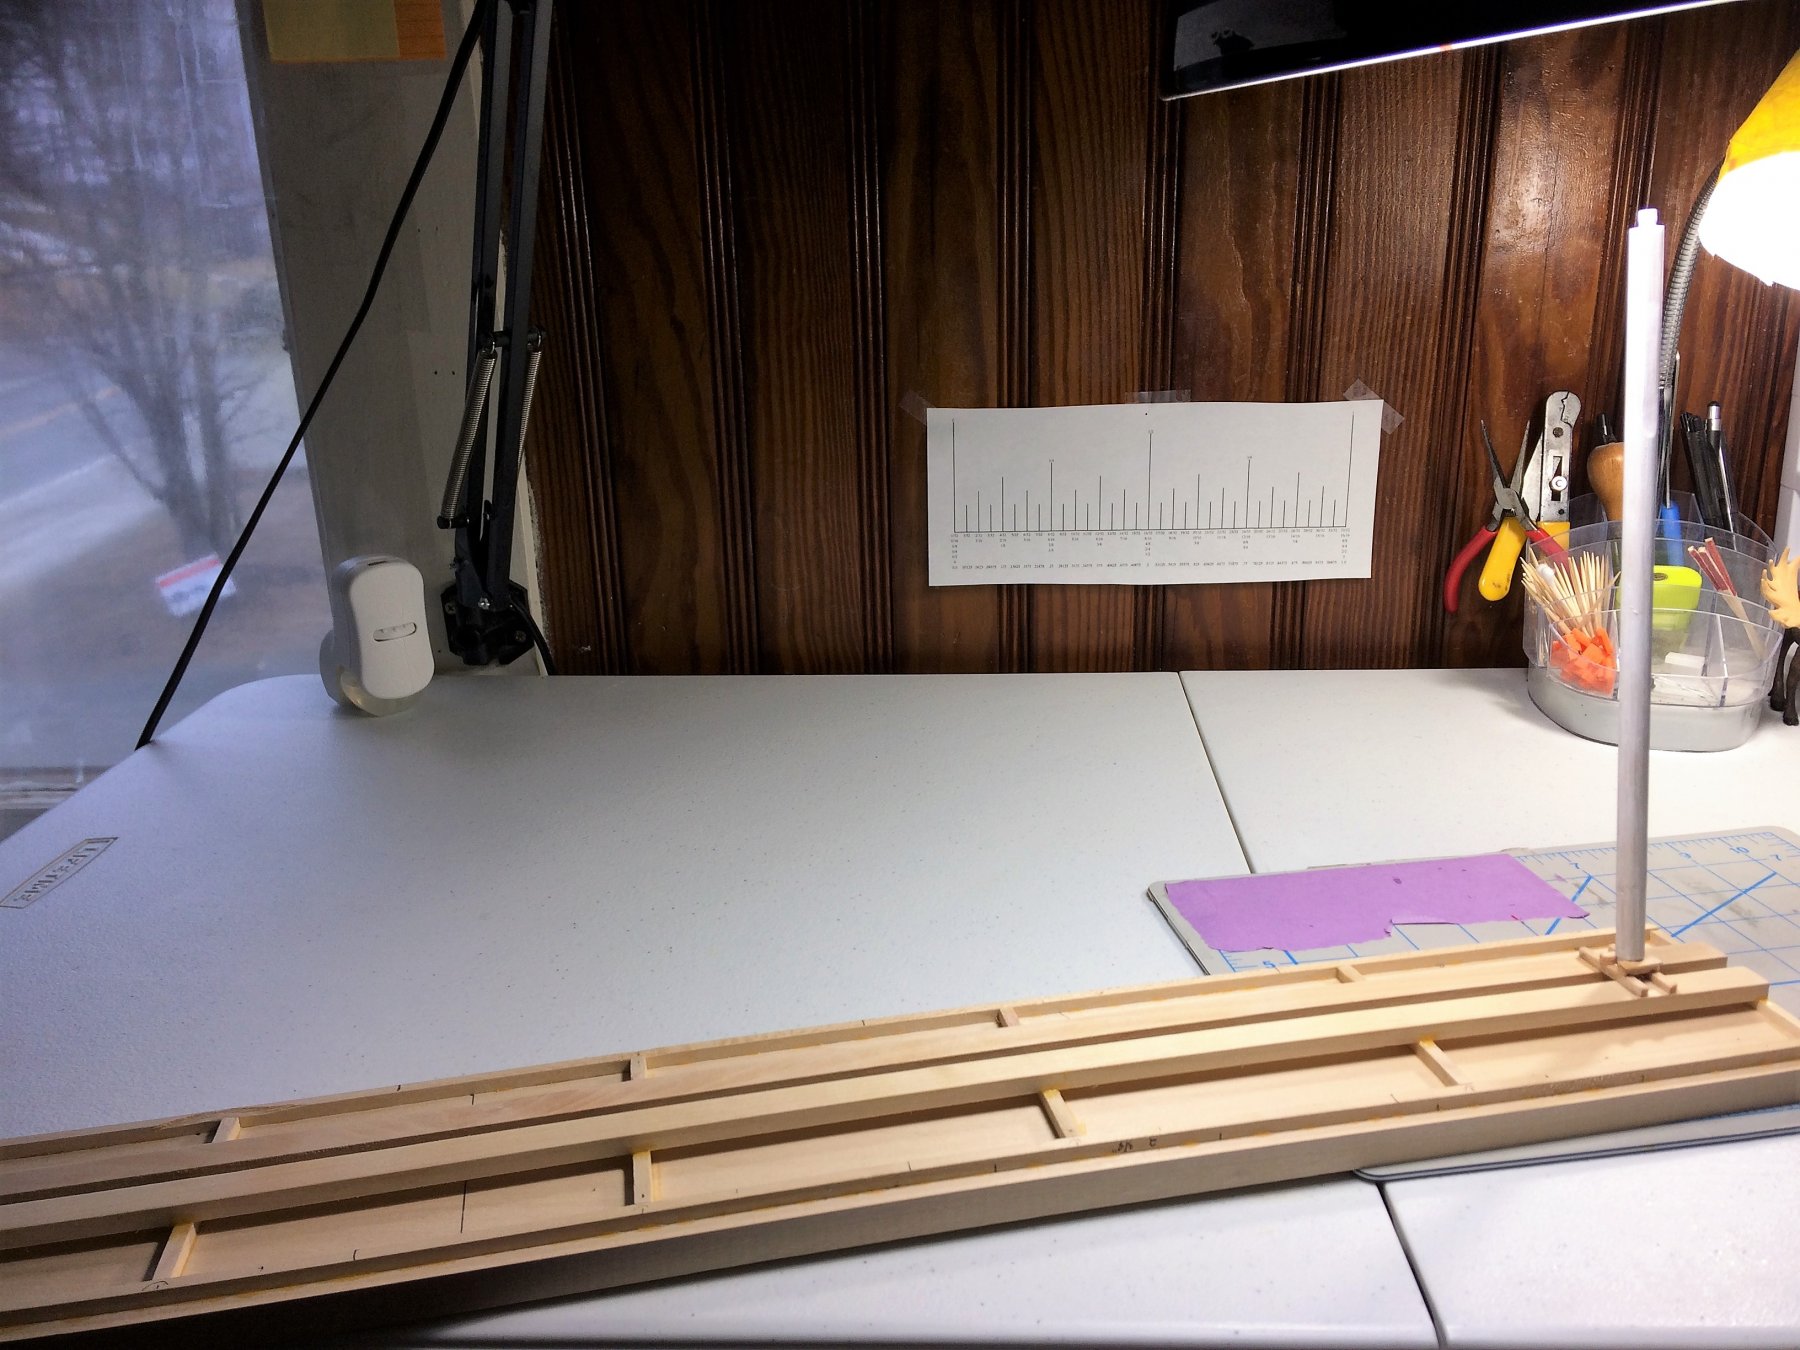
A nice quiet Sunday. Most was spent in the Shipyard. I started drilling the holes for the Futtock Shrouds. Below is my second attempt. Not bad, some flaking of the wood. I'll still be putting a brass strip on the edge. One for structural rigidity, it makes sense. Second, to match the first attempt. Below is the first attempt, after much coaxing and TLC. Looks like the dog grabbed it off the table, chewed on it, and brought it back! Luckily, with that brass strap, it should be structurally sound for the shrouds.....I hope. Fore mast received it's first coat of Buff. Very light coat. Will strength it up after I get a first coat of black at the top/square area. Mike, I took your idea about a build board for the masts and what not. Looked around the place to see what I had kicking around. I had bought the Fair-A-Frame jig a while back. Useless for the most part, but I kept the good pieces of wood. I had used the below strip of wood to hold the keel while setting up the frames. This thing is more useful for many other things than it was as a fair-a-frame jig! As the other parts are built, they'll just line up behind them. With some supports, the masts slide right in. I also have blocks of wood in the middle channel for more stability. First coat of black for the Fore Mast. This will dry for a few days before I touch it again. Work will do that!!!!! Tom E


-
Mike, Is it wise to follow the plans and use a stealer running from bulkheads Q thru M? Or just one plank running the length to that transition spot you mentioned? "Where it begins to lift up" Tom E
-
Thanks Mike, I see it now, I want my planks to meet towards the bottom. Hide the adjustments. I hear ya about that balsa wood. I have some in my wood pile. I know I've grabbed some when I can pinch it flat with my fingers. Tom E
-
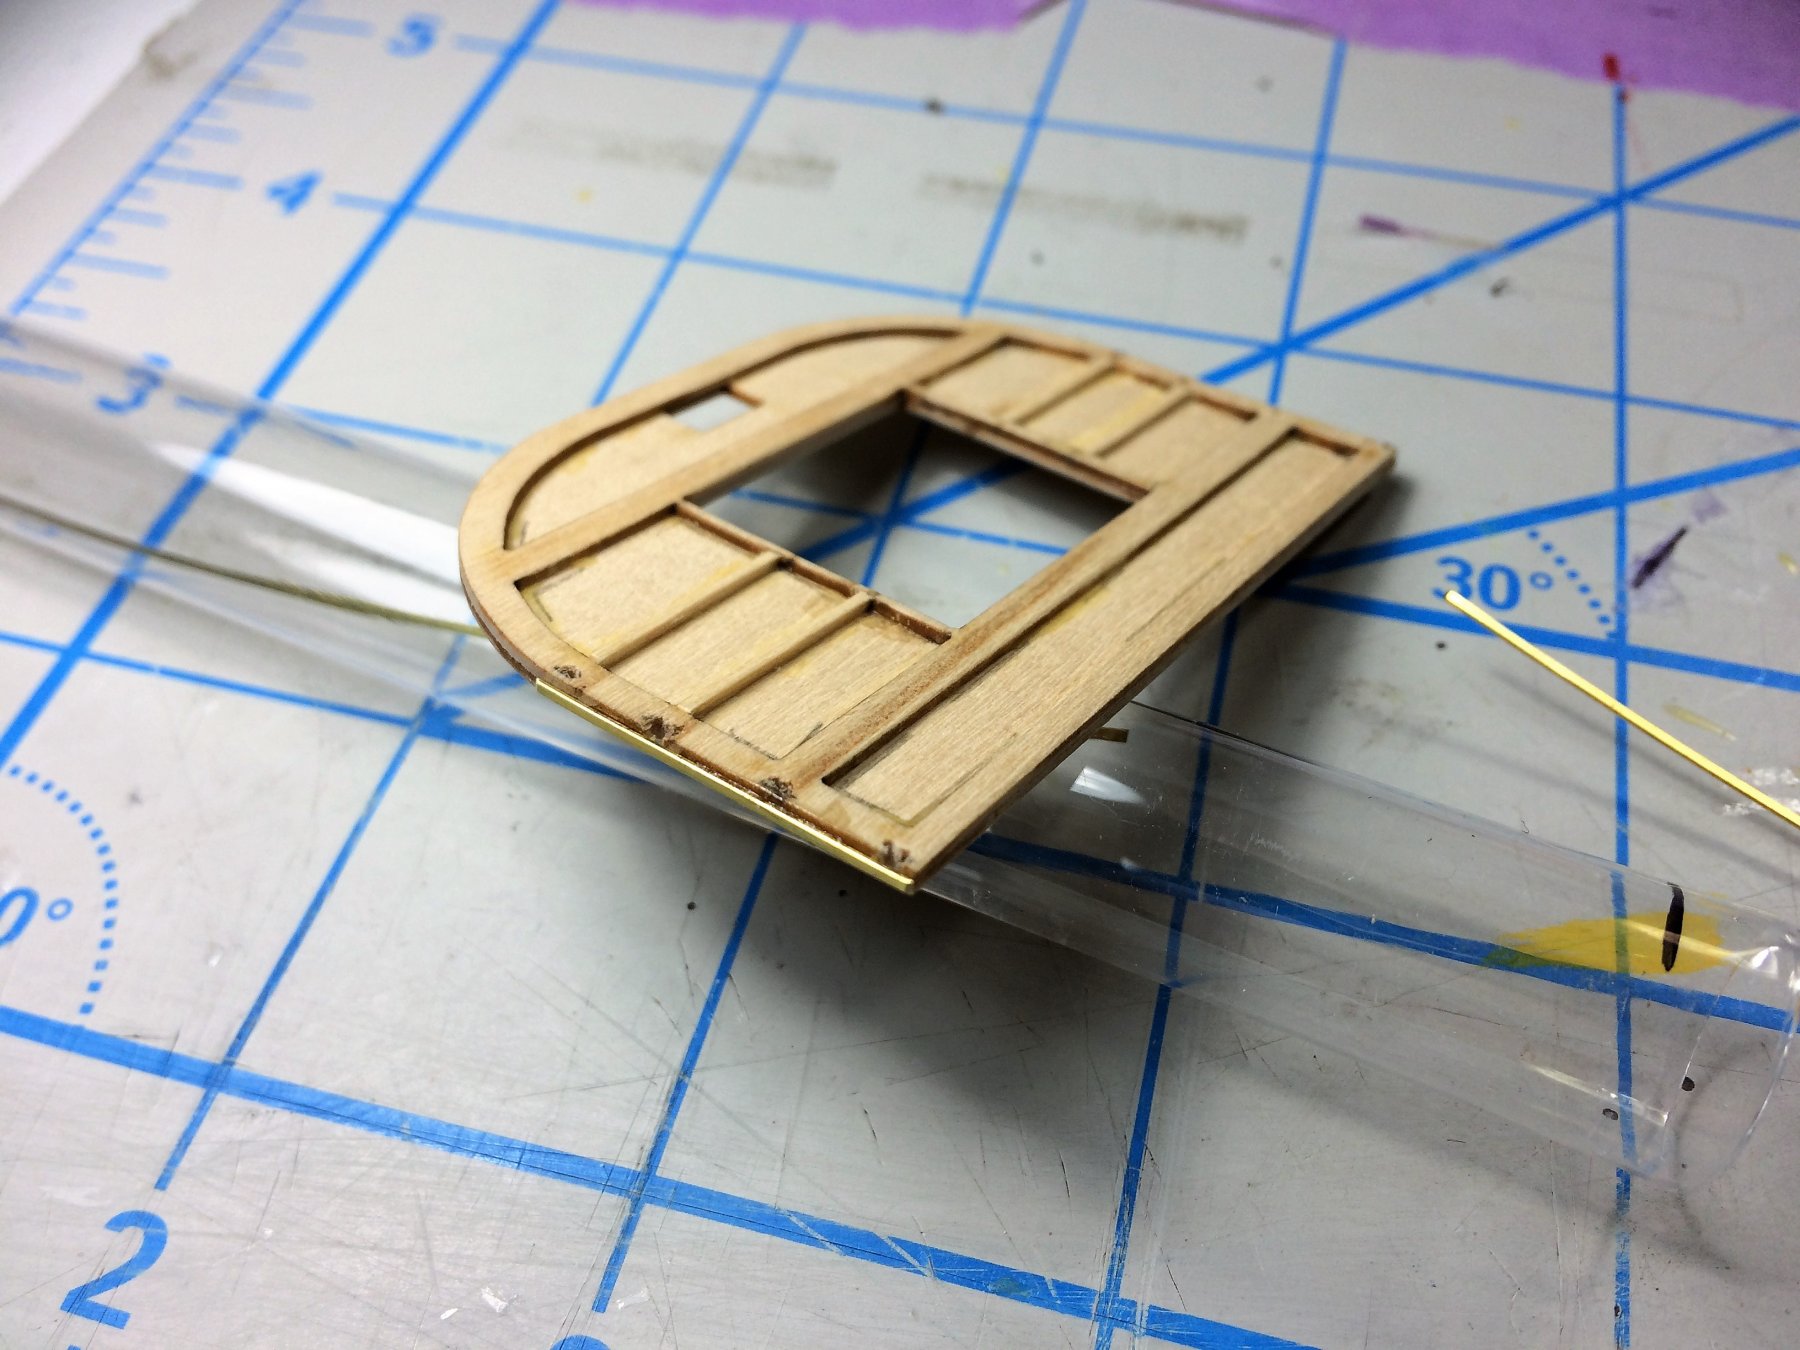
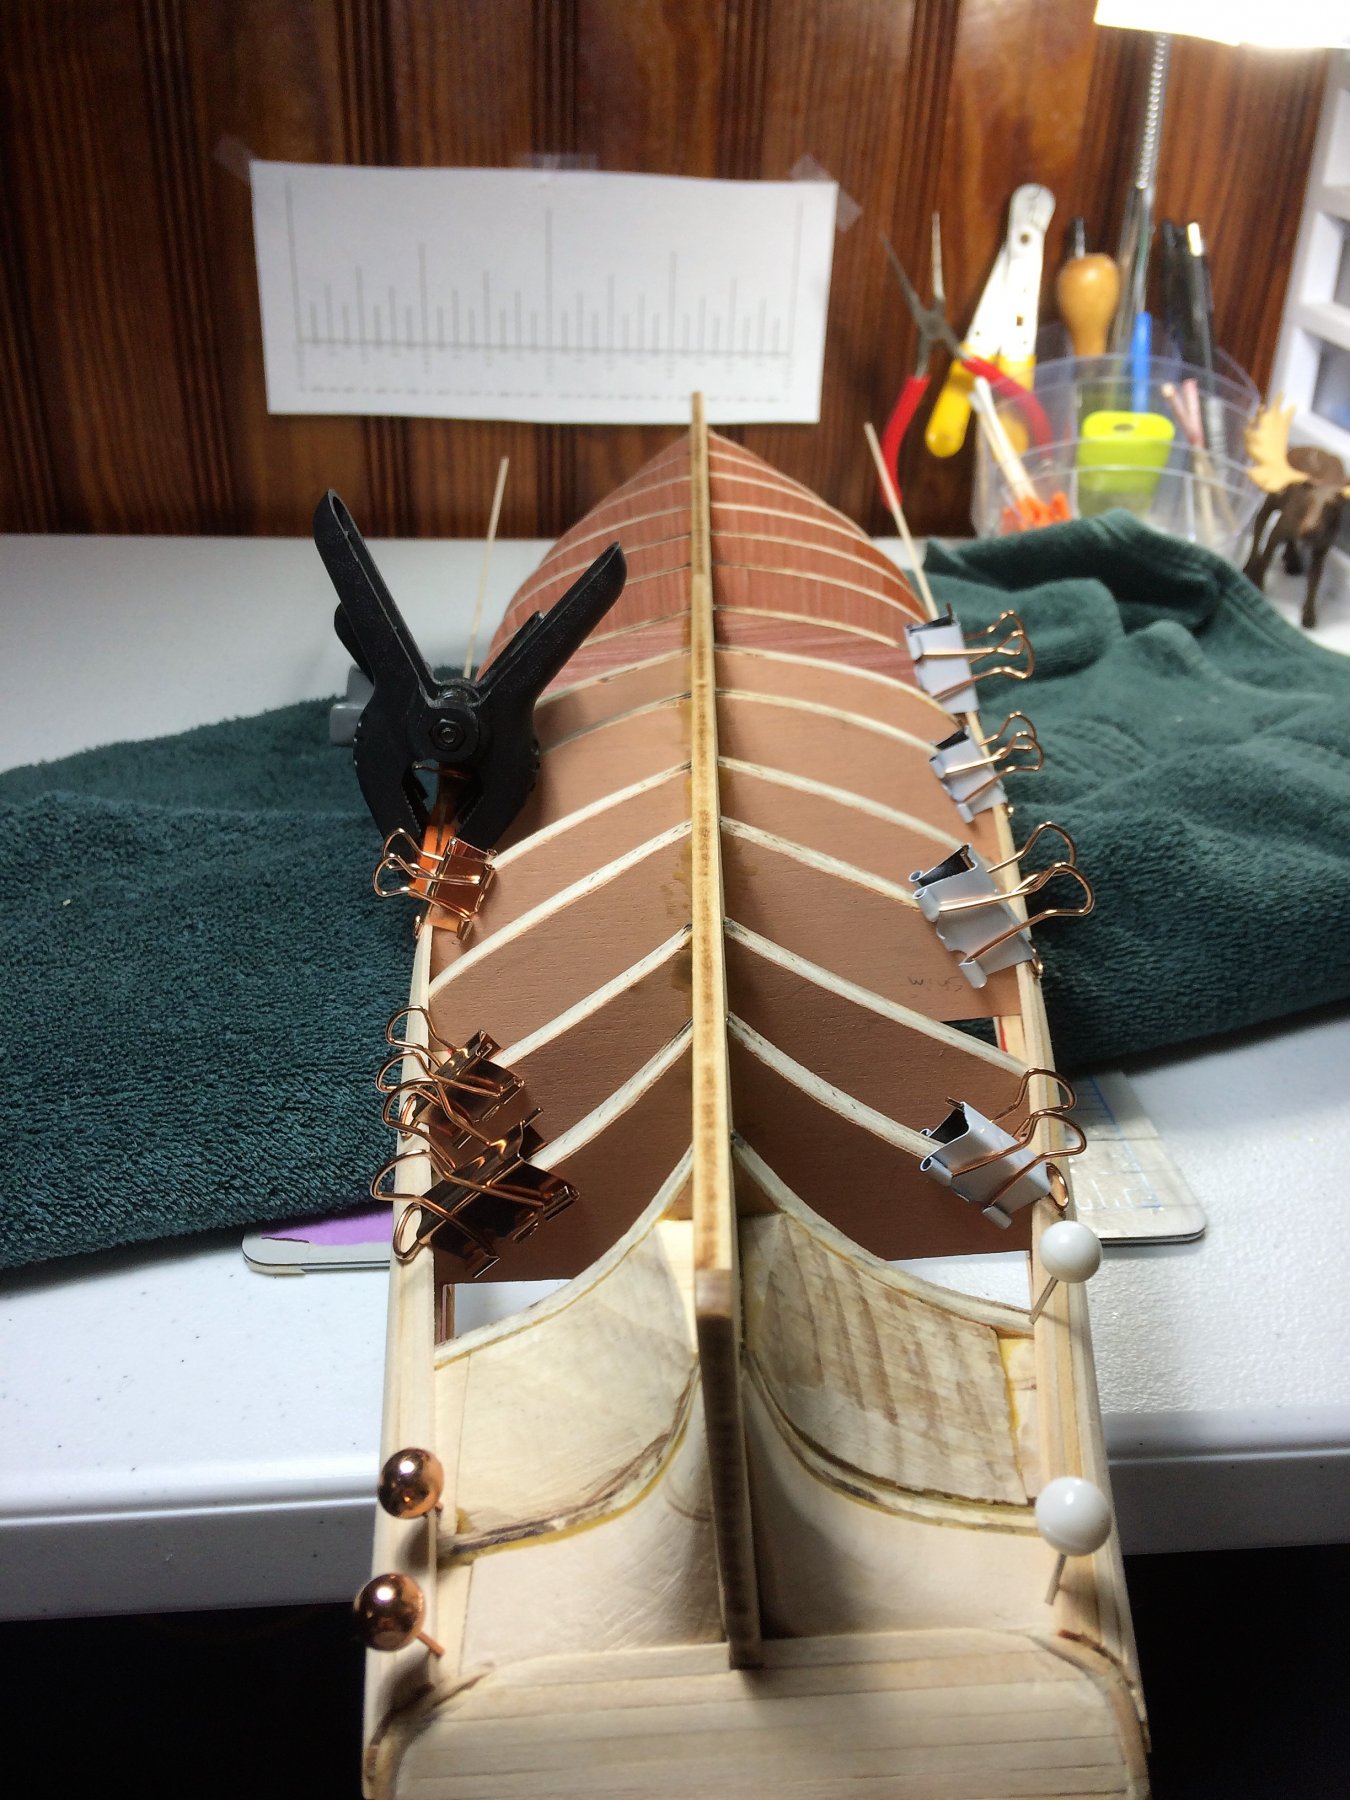
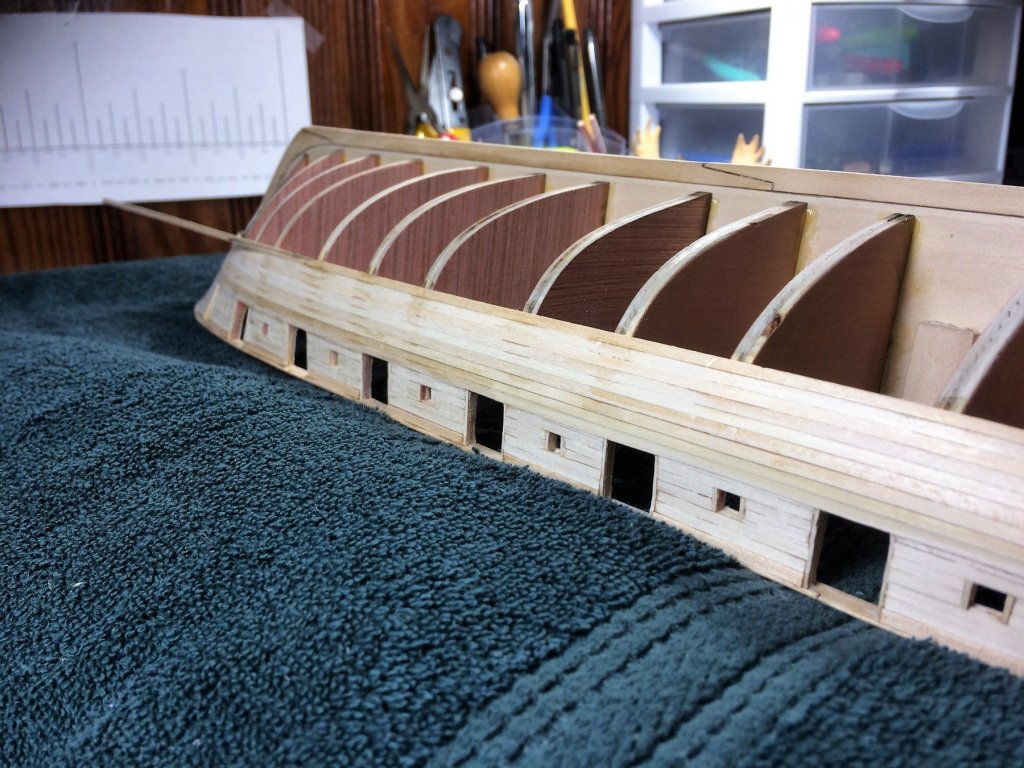
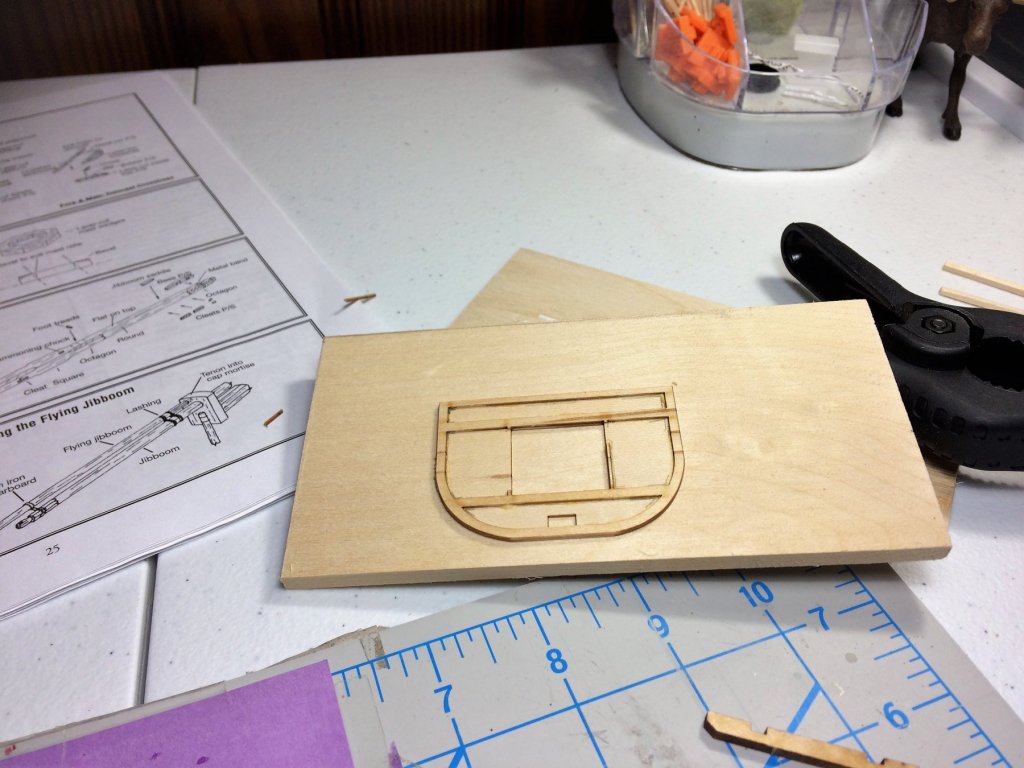
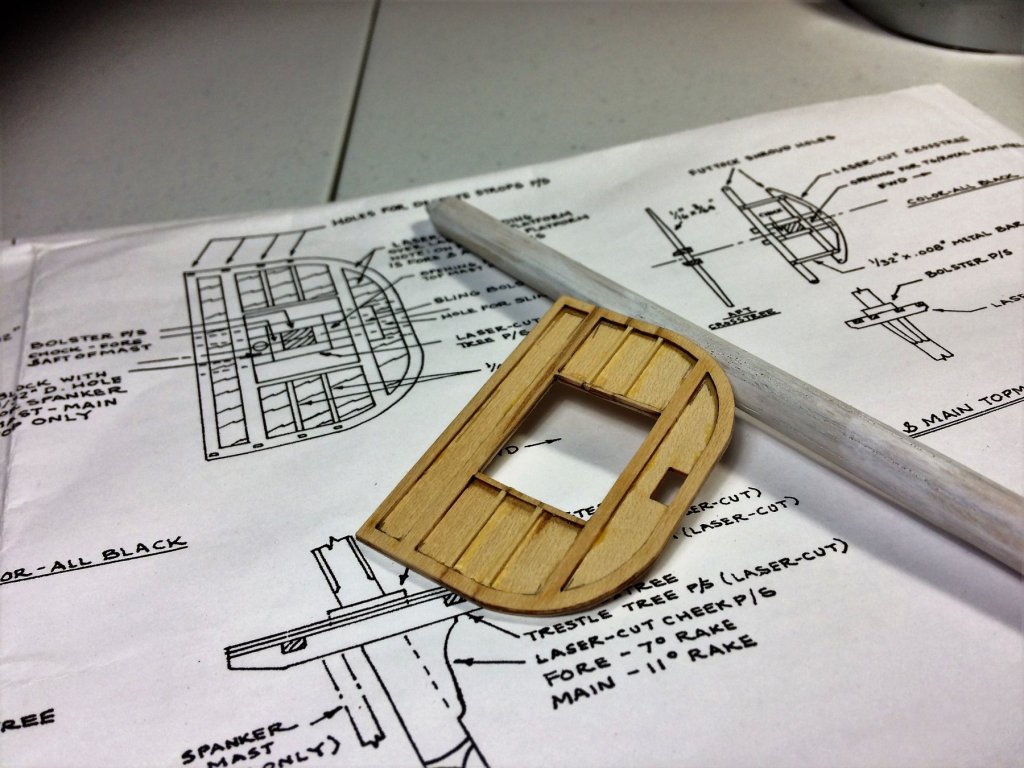
Morning, Another quiet Sunday morning. With a cup of coffee (and doughnut!) in hand, the workshop beckons. Chores are done, so should be a good day. Has been slow as of late. Seems if I'm not at work, I'm shoveling snow. 2 Nor'easters in 2 weeks with a 3rd in the forecast for Tuesday. Each one of these storms has brought 18" of snow each time. Spring cant show up quick enough. Anywho.... The planking continues. I wont bore with too many pics of that. Belt A is done, the Garboard plank/belt D will be done next. My planking will meet/finish in the middle, or somewhere in that area. I have started the process of painting the gunports. Starts with a coating of primer. I do have masking tape on hand. A lot will be free hand, its what I'm best at, it's all I know. Everything is ready to go. Should have some color to her soon. The Foremast got a coat of primer as well. With the Foremast coming along, thought I would start fiddling with the Foremast Top. Man! This thing is fragile! Everything lines up well, but you just look at it wrong and one of the thin strips of wood will snap! Put in the press for a while to dry. Not too bad! I may line the outer edge of it with some spare brass strip. It looks like it will flake apart when I drill the holes for the Futtock Shrouds. I have seen a lot of Niagara builders do this, not my idea. It will eventually get primed, then a coating of Hull Spar Black. I just had to throw in the below 2 pics. Winter ain't done yet! This was the site that awaited me leaving for work last Thursday. Solid 16-18" of snow. Had to shovel out the bed of the truck. Way too much weight on the leaf springs! I've popped springs from leaving too much snow! Cost me $600. I worked more that day cleaning my truck off than I did at work! It still has it's pretty moments. Tom E


-
Really admire this ship. She's in my "to do" stash of kits. Probably my next, If I ever finish Niagara! Your build is looking great so far! Will watch with keen interest. Tom E
- 109 replies
-
- 1
-

-
- model shipways
- kate cory
- (and 1 more)
-
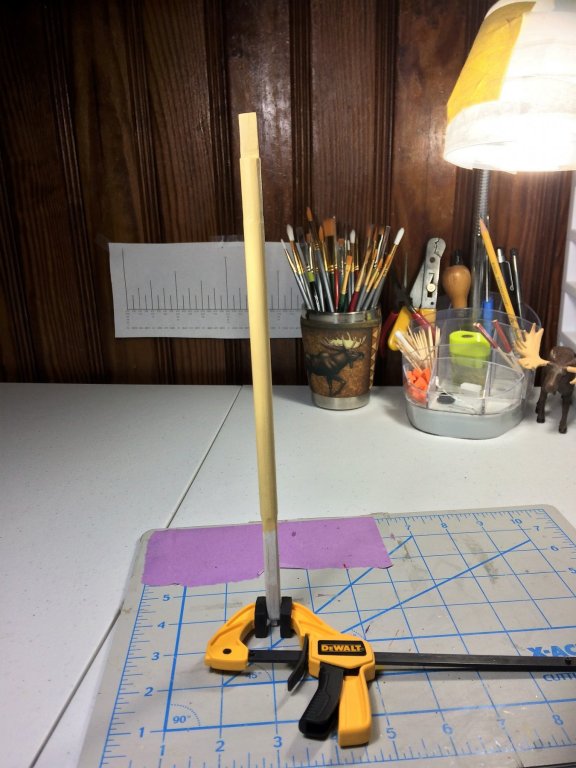
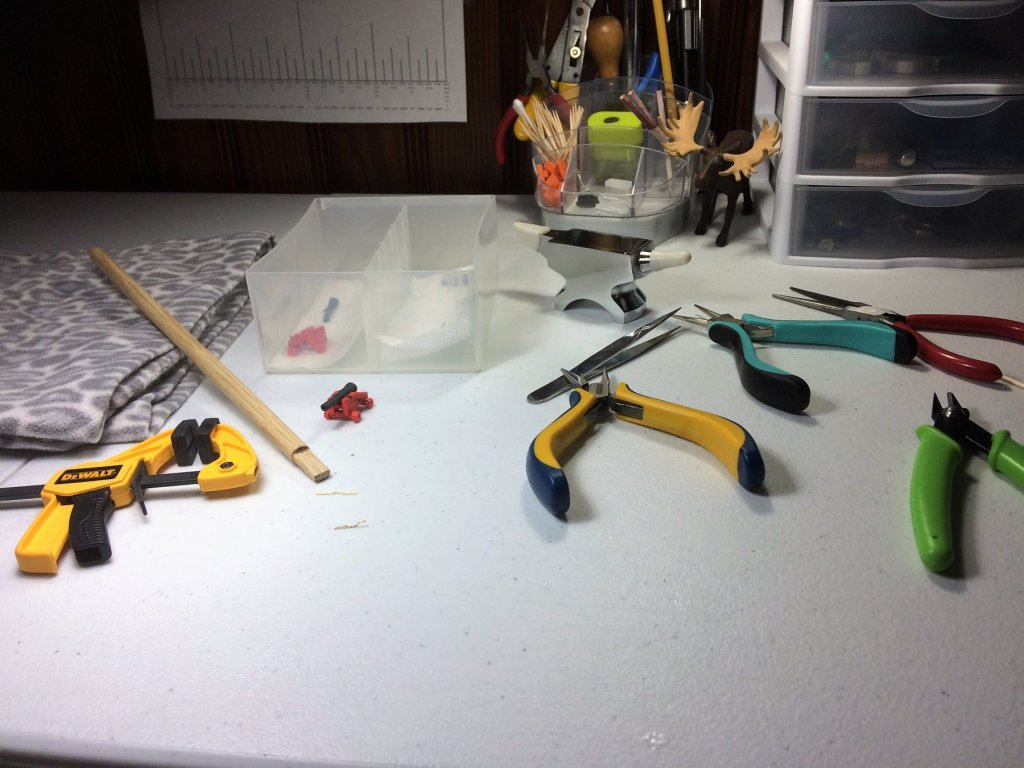
I'm stealing that one Mike! As of right now, the Foremast is in a 4" DeWalt clamp. I imagine with so many spars, yards, arms....everything, it can become a logistical nightmare. I'm self confessed OCD........when it comes to modeling. Or at least try to be with my limited skills. Out of place, and it bugs me to no end. Its an organizer and build board, all in one. Tom E
-
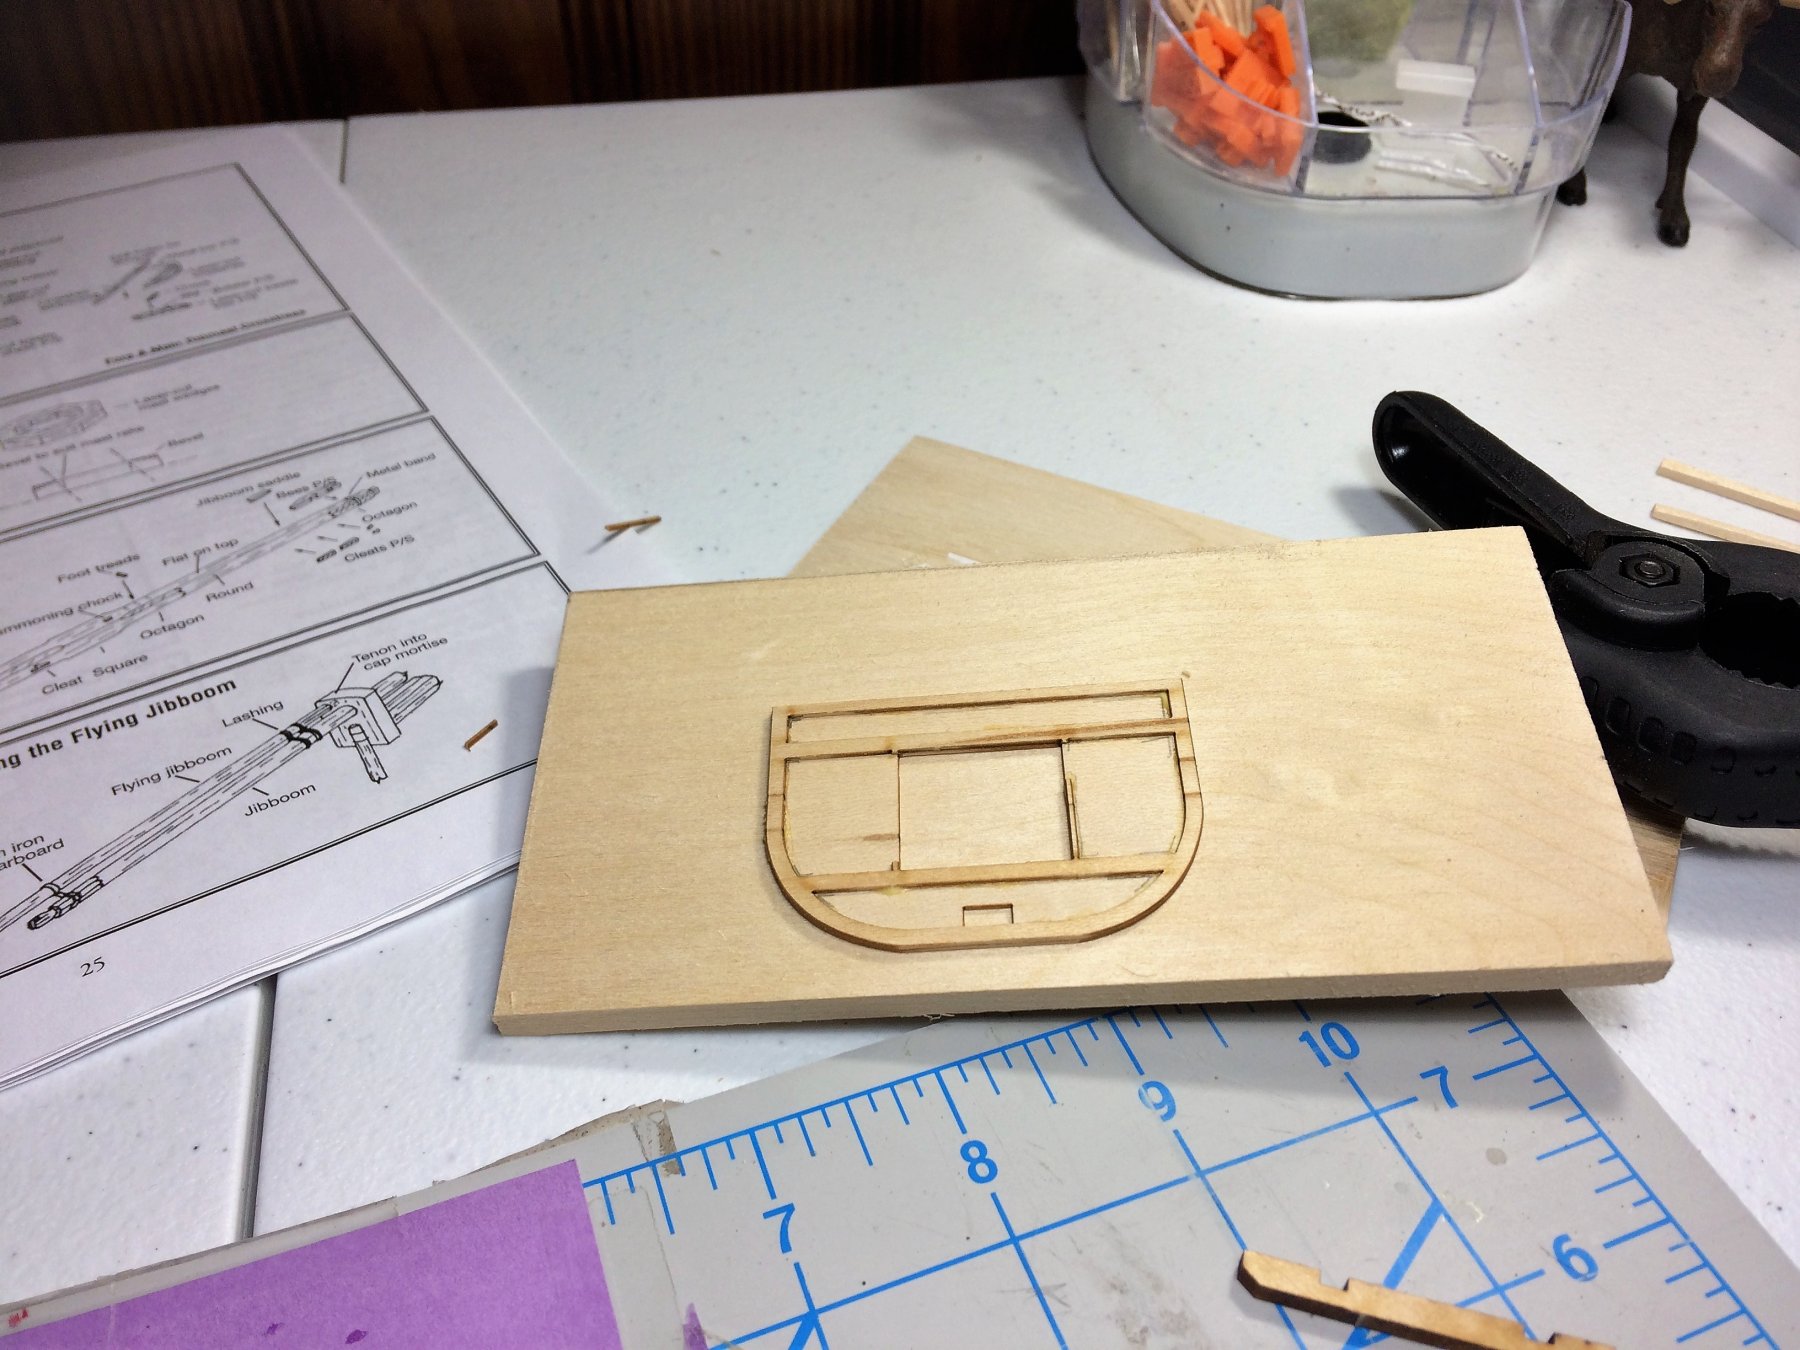
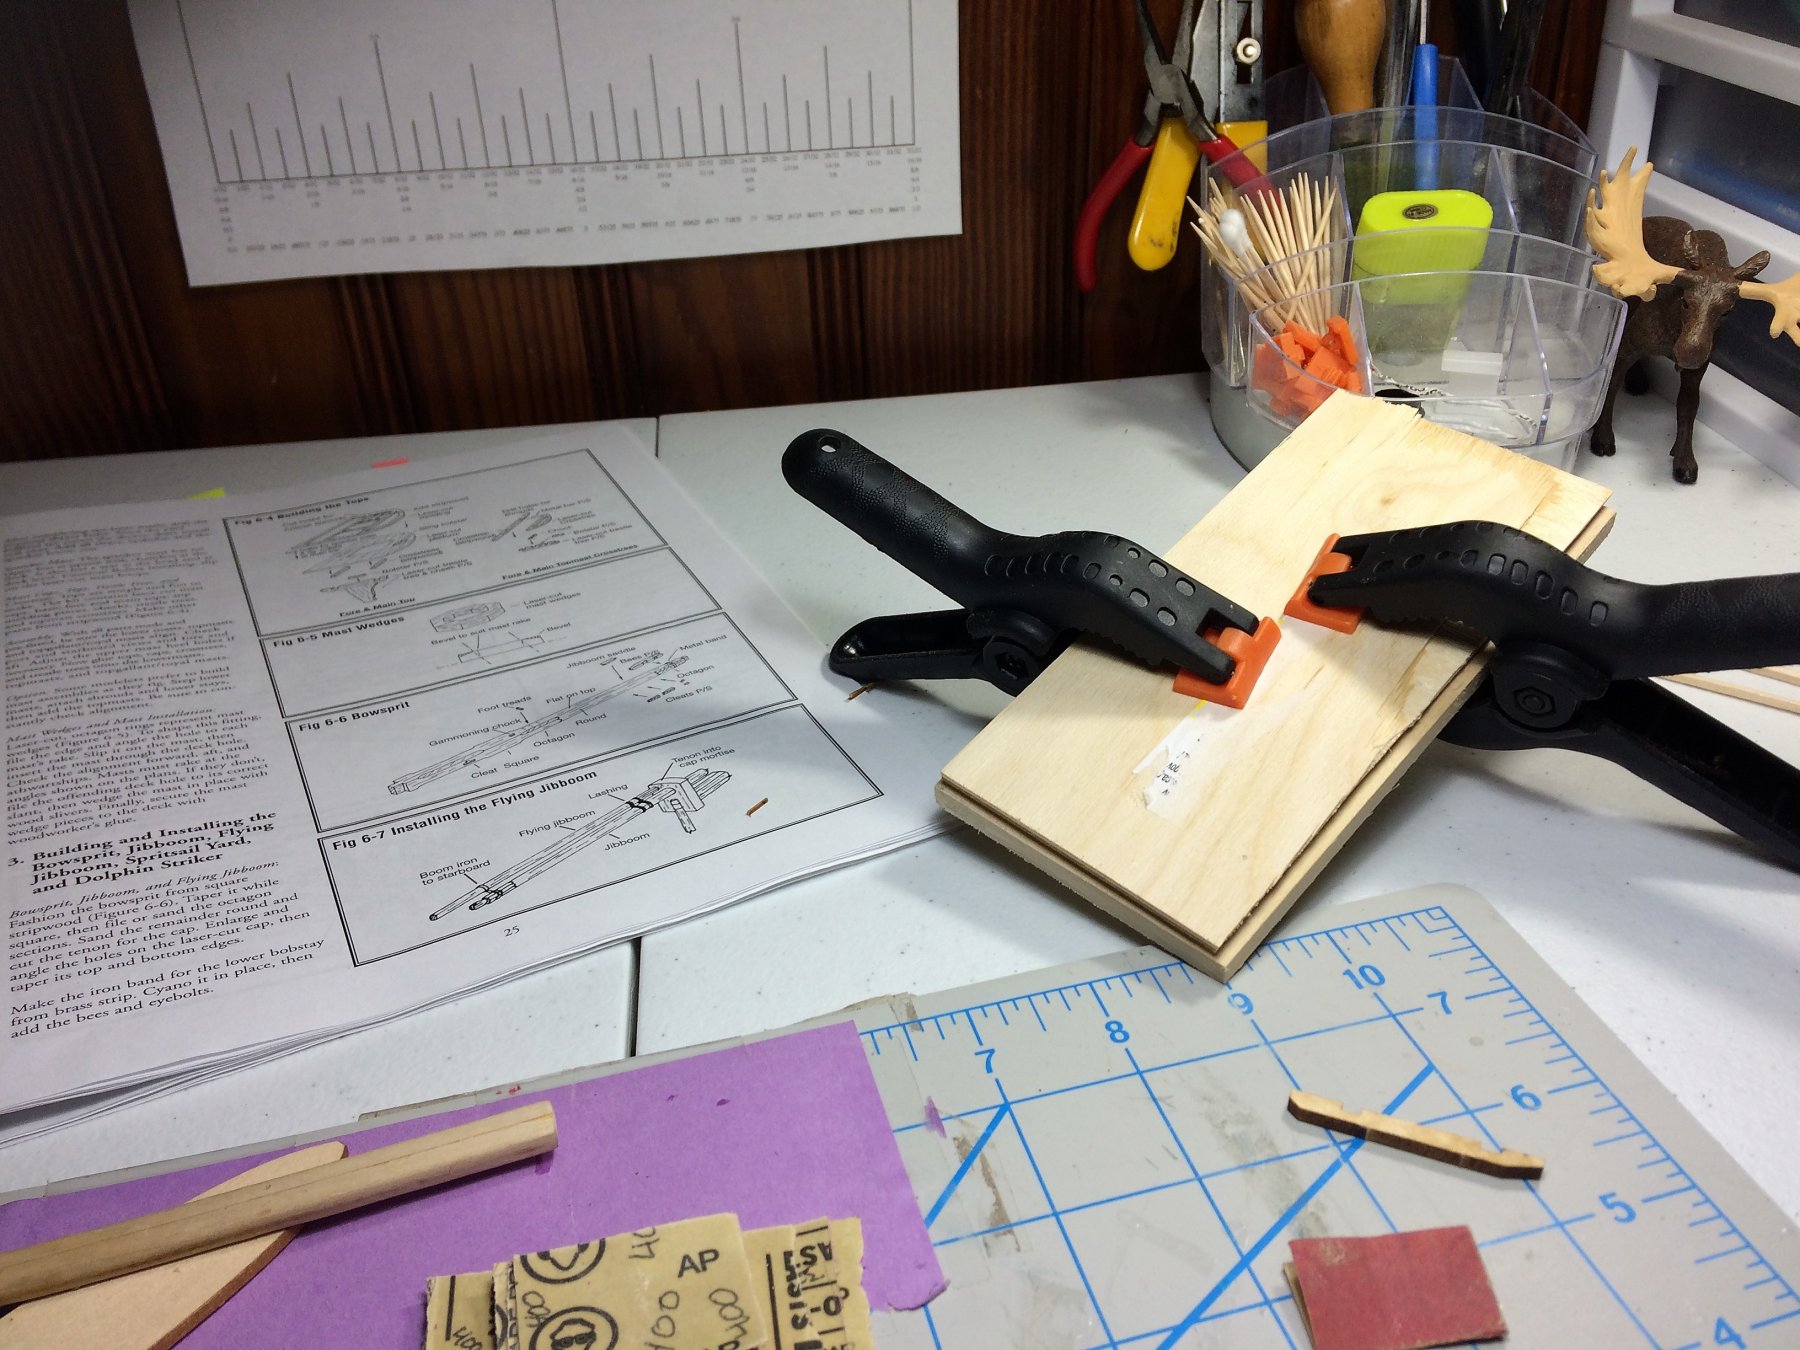
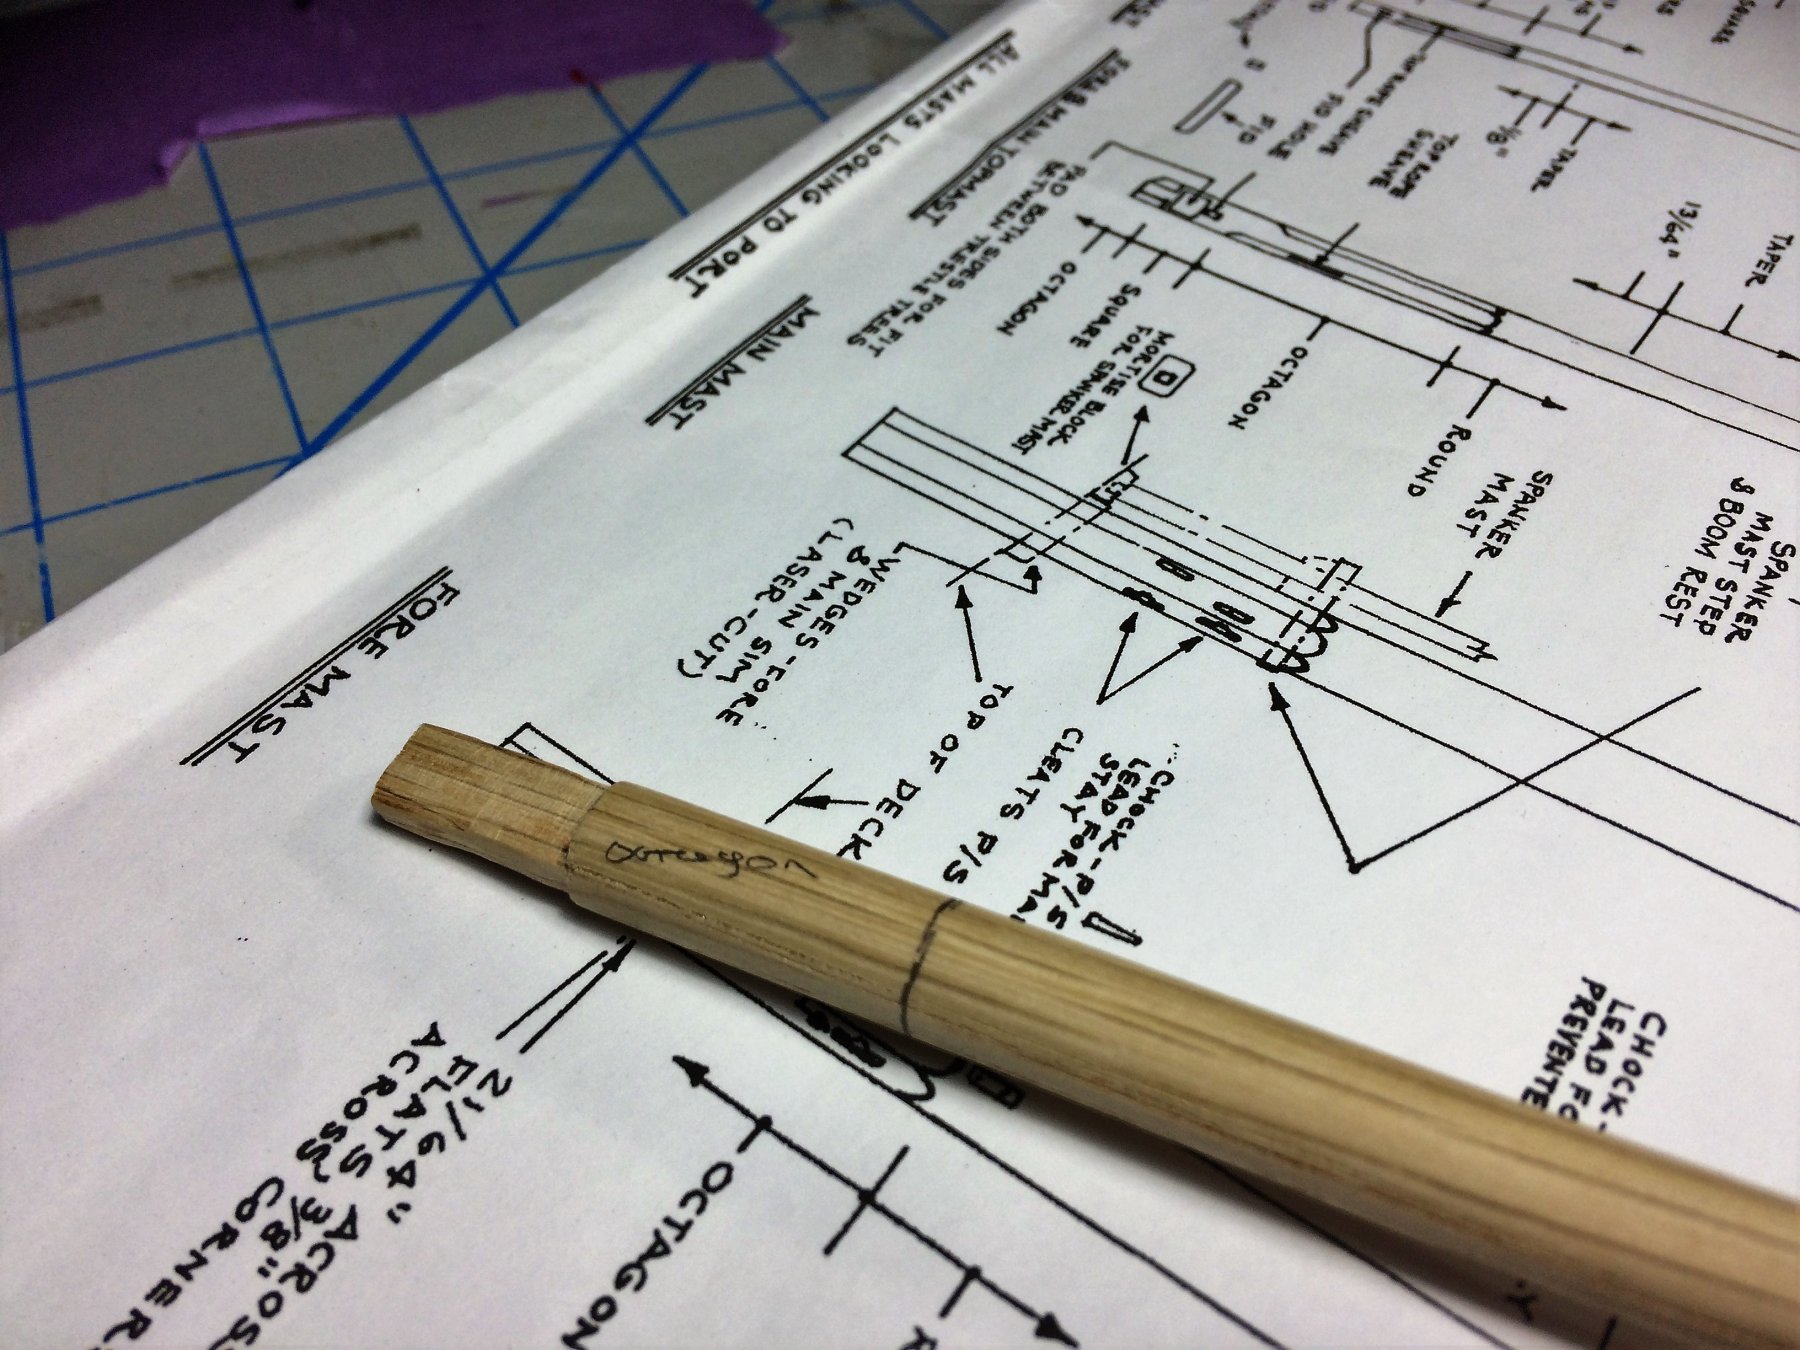
Morning, A beautiful Sunday, a quiet house.......heading back to the Shipyard! Thought I would share an update, I have been busy and want to get back at it! I'm feeling motivated! A lot going on right now, below is a small update. Beside planking, the fore mast has been shaped, started the Foremast Top, started priming the Gunports, guns always continue...... SO much going on...I love it! Sorry for the fuzzy pics on the Fore mast. No professional photographer here! I'm happy with my Fore mast, but shaping will continue. Once the rough shape is there, it will get a better shape as I sand in-between coats of sealer. Only 2 light coats, bring the grain up, then smooth it down. I know all this work will just get covered over by the final color of the mast, but in my little brain, every little extra helps. If its only in my mind! I know, its weird......my little "build" goblins running amuck! When I was forming the mast I left myself a little extra wood at the top. Made it easy when forming the tenon. Once the rough shape was there, I slowly brought it down the its final shape. Worked well. There is the Octagon on the bottom of the mast. But its darn near impossible to get on a pic. Below is the best pic I can get of the Octagon area. Like I said earlier, the workbench has been busy. I've got masts, guns, whatnot laying all about! Constant cup of tea or coffee helps! Although admittedly, I took a long break to watch the Boston Bruins play the Montreal Canadiens last night. Great game, Bruins won! They are looking good and should make some noise in the playoffs. I'm not saying nothin about a Stanley Cup just yet! Planking continues, I should have an update on that later today. I've heeded everyone's advise and tapering is now a huge part of every plank. I knew I wasn't tapering enough from the beginning. That's ok. Adapt and adjust. Time out for a great homemade breakfast of bacon, egg and cheese croissants! Then college basketball on the TV and back to the Shipyard! Tom E


-
Thanks Jim, I'm learning as I go. I've heard the saying "treat each plank as a minor victory", or something like that. I like to think I'm doing that but its every 2 planks is a victory. I need to stop dilly dallying and get serious about some color for this ship. Or wait until after the hull is planked?........I don't think I can wait! My gunports are technically ready for paint. If I don't do it soon, it will definitely be before I lay a deck down. Which is next after the hull is planked. Tom E
-
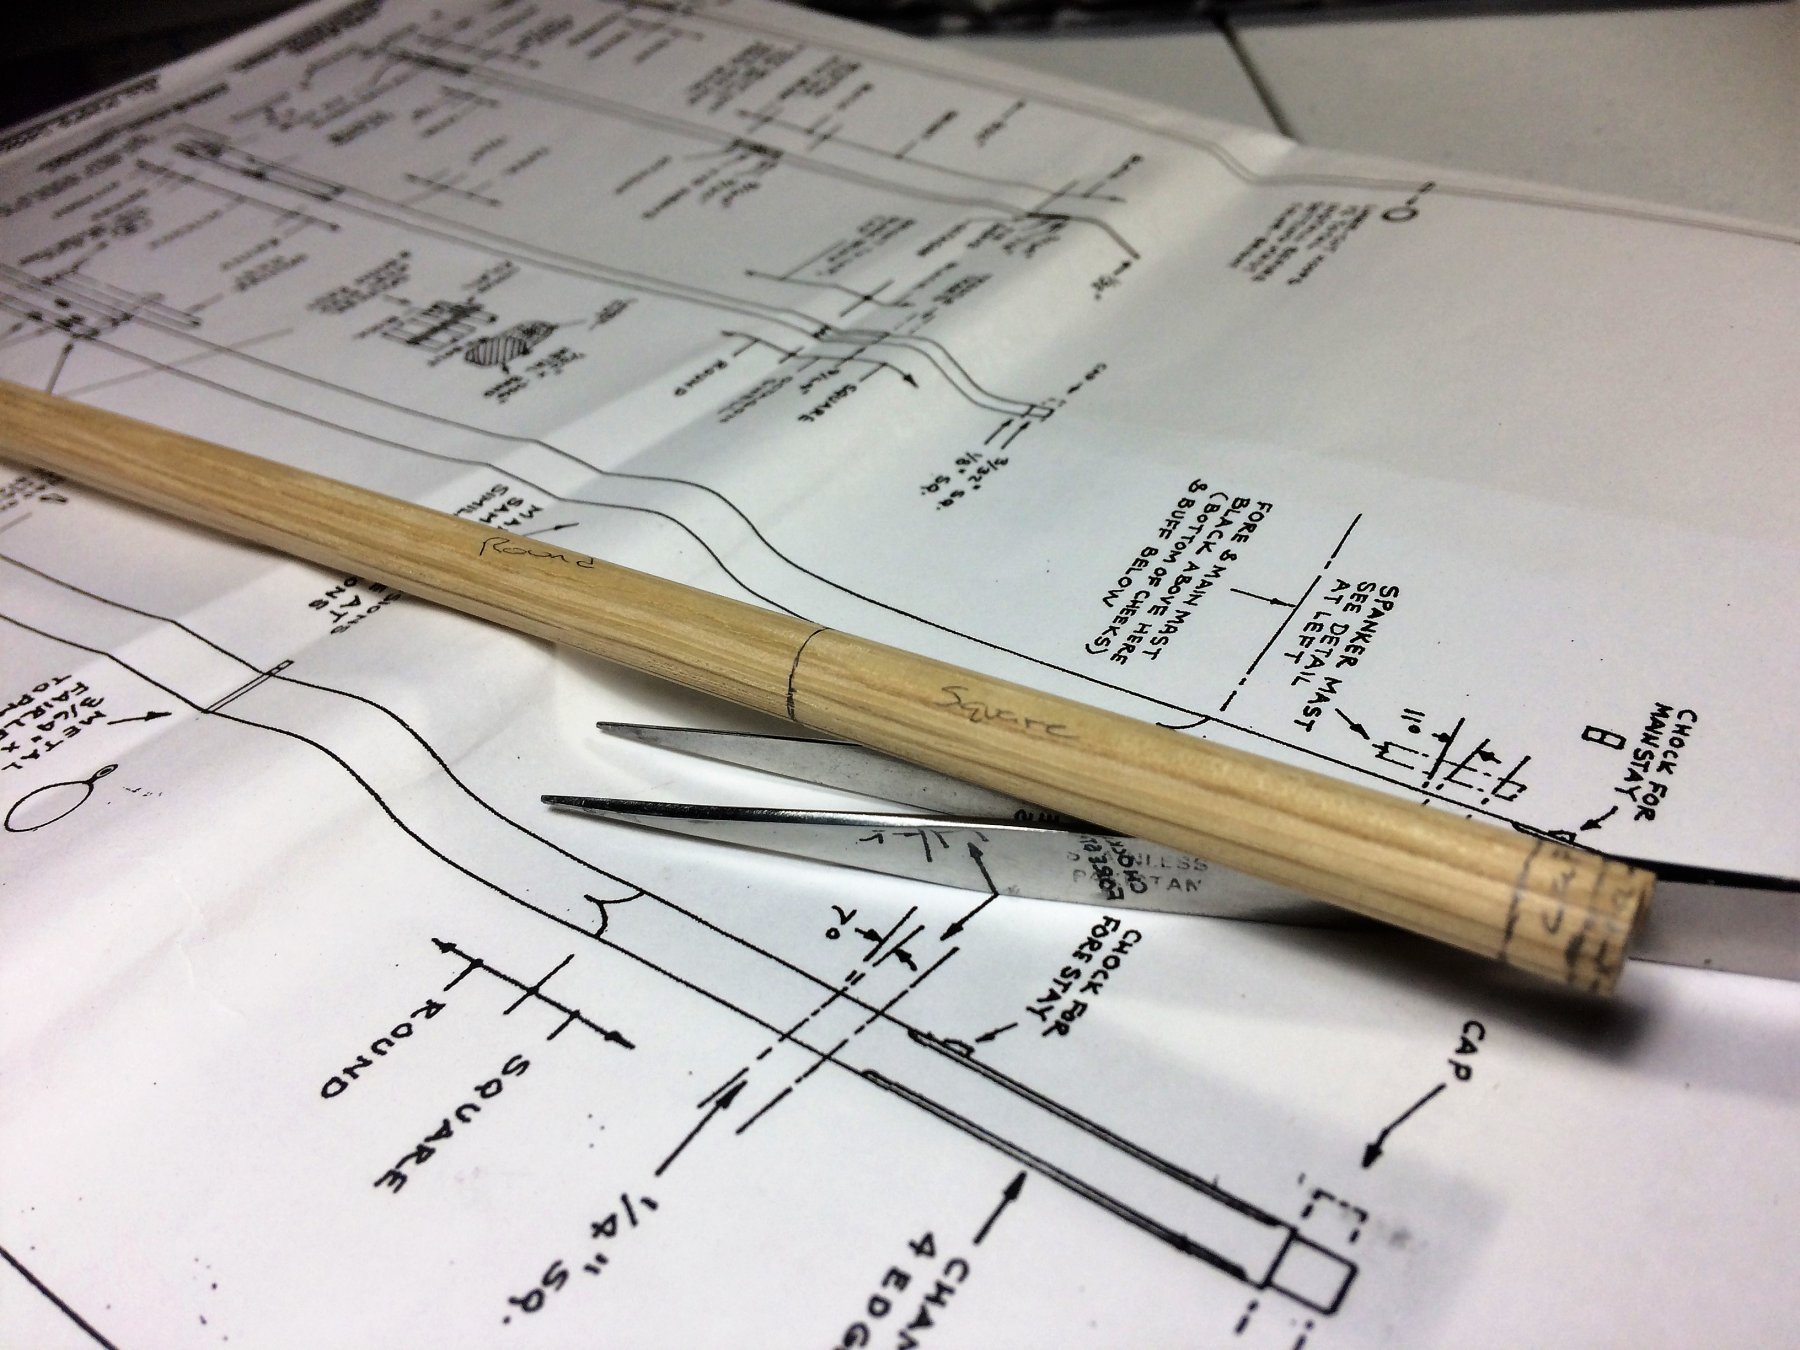
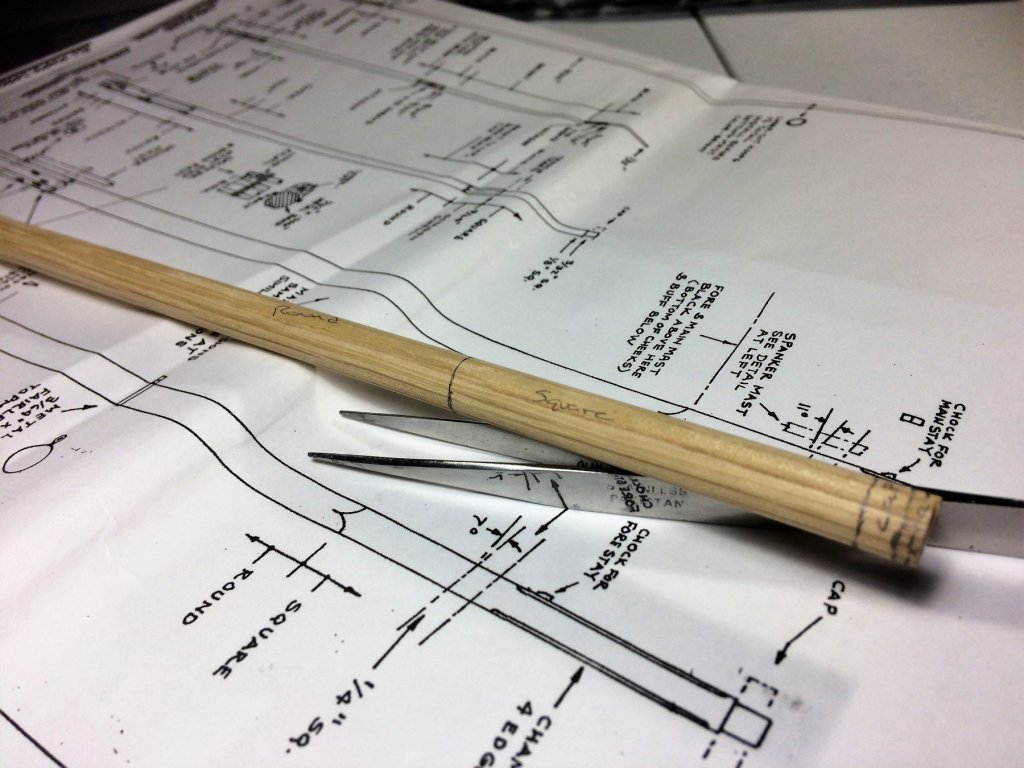
Evening, Very quiet weekend in New Hampshire. Fresh coat of snow today, nothing too bad tho. With most chores done, and the house quiet, time to head to the Shipyard. A beautiful sunrise, hot cup of coffee, and spent the rest of the day building. Only intermittent laundry interrupting my joy! Planking continues. I'm in the area where the planks make a heck of a twist to lay flat on the transom. I'm being very slow and deliberate with this area. They get a good soak. I've read a zillion different theories about soaking wood. Add bleach, don't add bleach. I've done some planking in the past, limited as it may be. I've had great results when I just let them soak for at least half an hour in hot water. Even that seems too much, they come out kinda spongy, but workable. When damp, there laid out on the hull and clamped. The plank heater makes a few runs and then re-clamp. It then dries for as long as possible, usually overnight, on the hull. I'll "time" my build sessions so that the last thing I do is form and clamp the next days planks. Its slow, but it works. I think its working well. Admittedly, I know I haven't shaped/tapered the ends of the planks well. That will show up eventually. With each and every plank I am learning something. Adapt and adjust. I'm still using whole planks. I would like to get belt A done with nothing but whole planks. Then I'll switch to cut planks. Once Belt A is done, I will lay the Garboard strake, before moving onto Belt B. Mike, you weren't kidding when you said a lot depends on that Garboard plank! While planking continues, side projects move forward. I have my Fore mast cut to length and is marked for carving. Working on it now as I write this update! I gave my self some "extra" wood above the Cap so I could work my way down. You can see it marked below. Once shaped, It will get a coat of sanding sealer, then primed. I have the "Buff" paint from the ME paint set that will be its final coat. Well, It all works out in my head! Tom E


-
Thanks Jim! I agree, I'm gonna mix the two and should give just the right color. Its funny, I'm looking all over the internet for the perfect yellow. Was looking at weird "Milk" paints. Had what I needed the whole time! Tom E
-
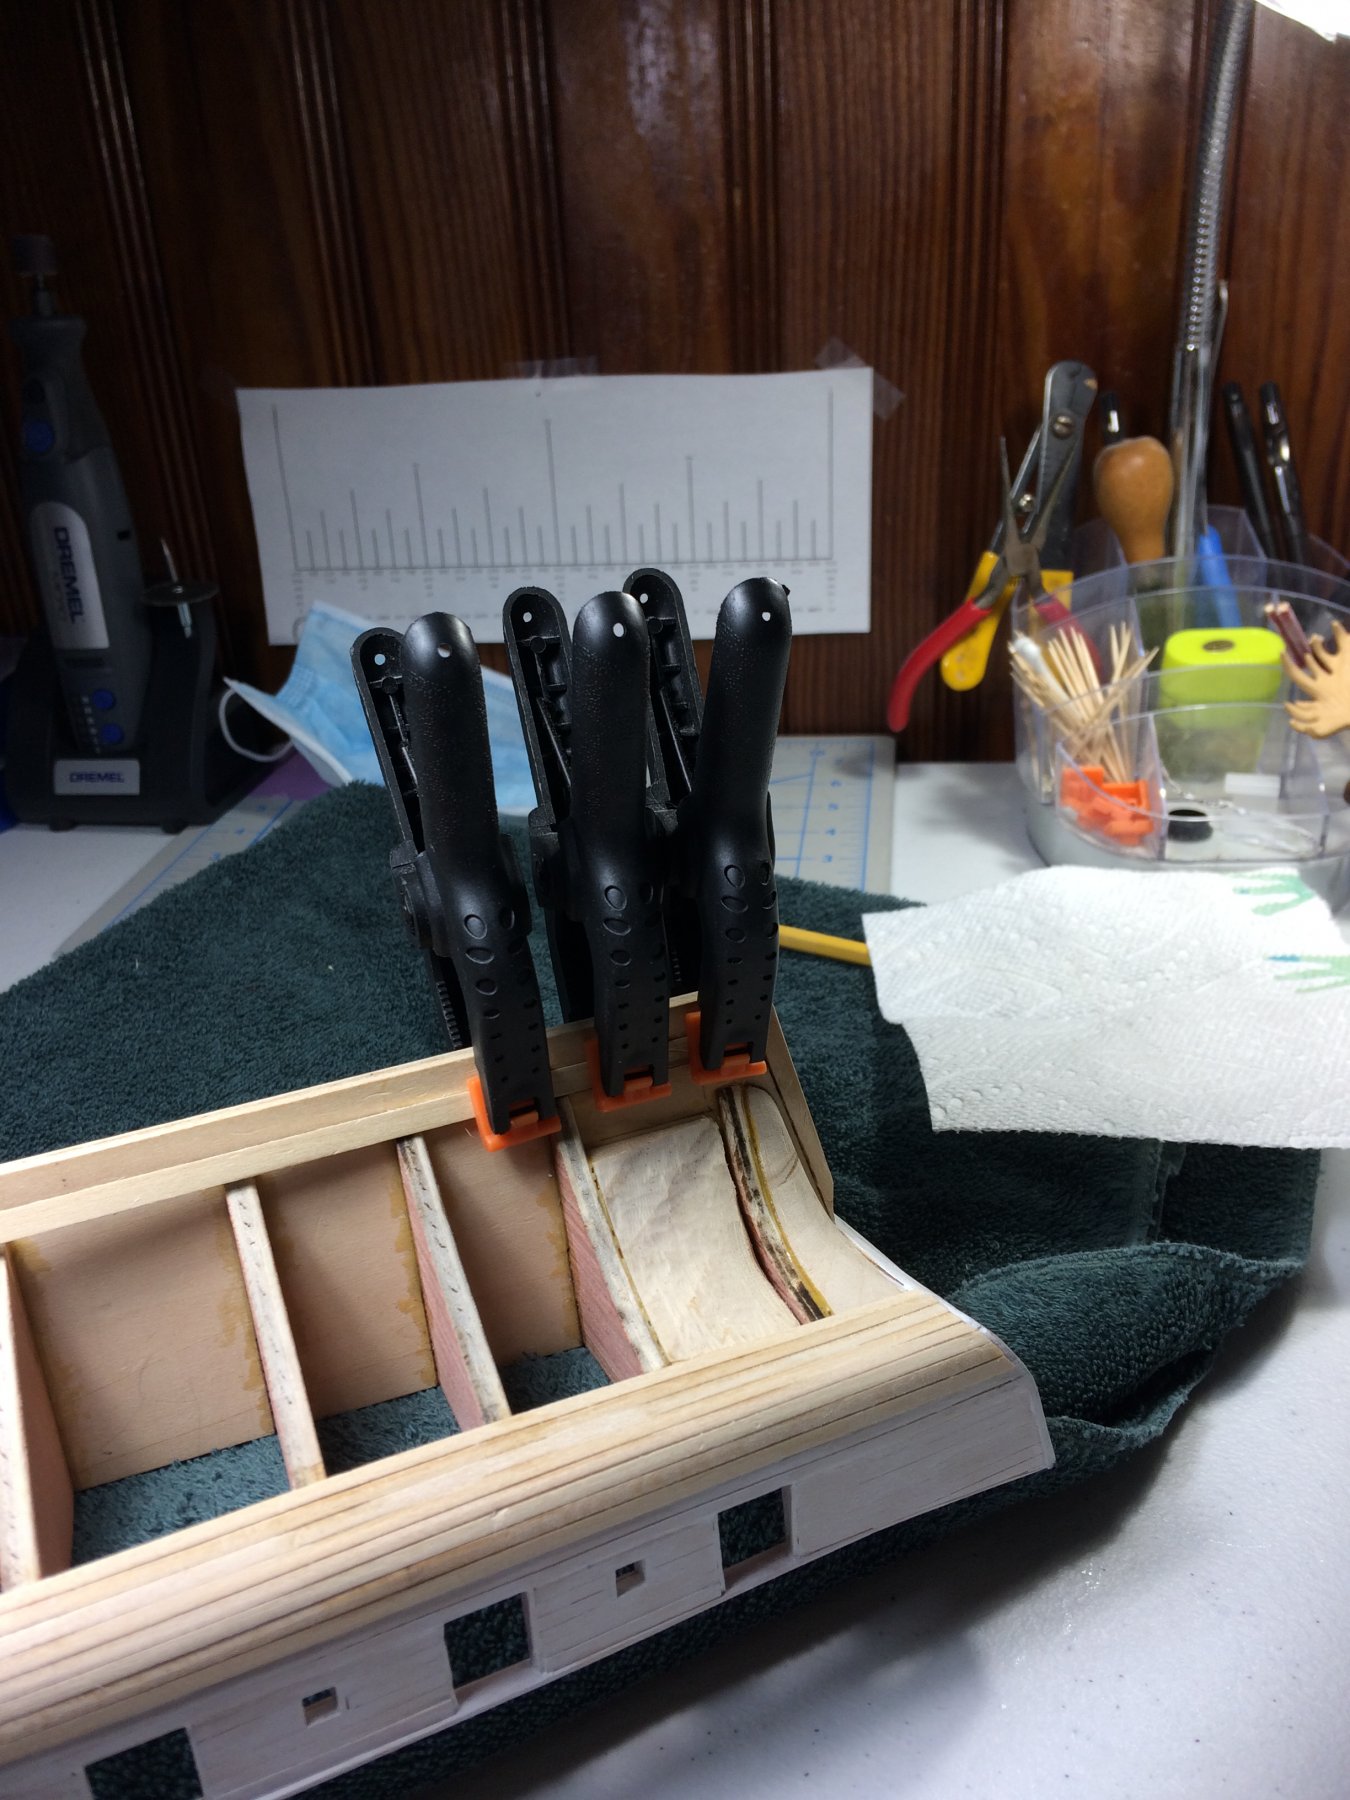
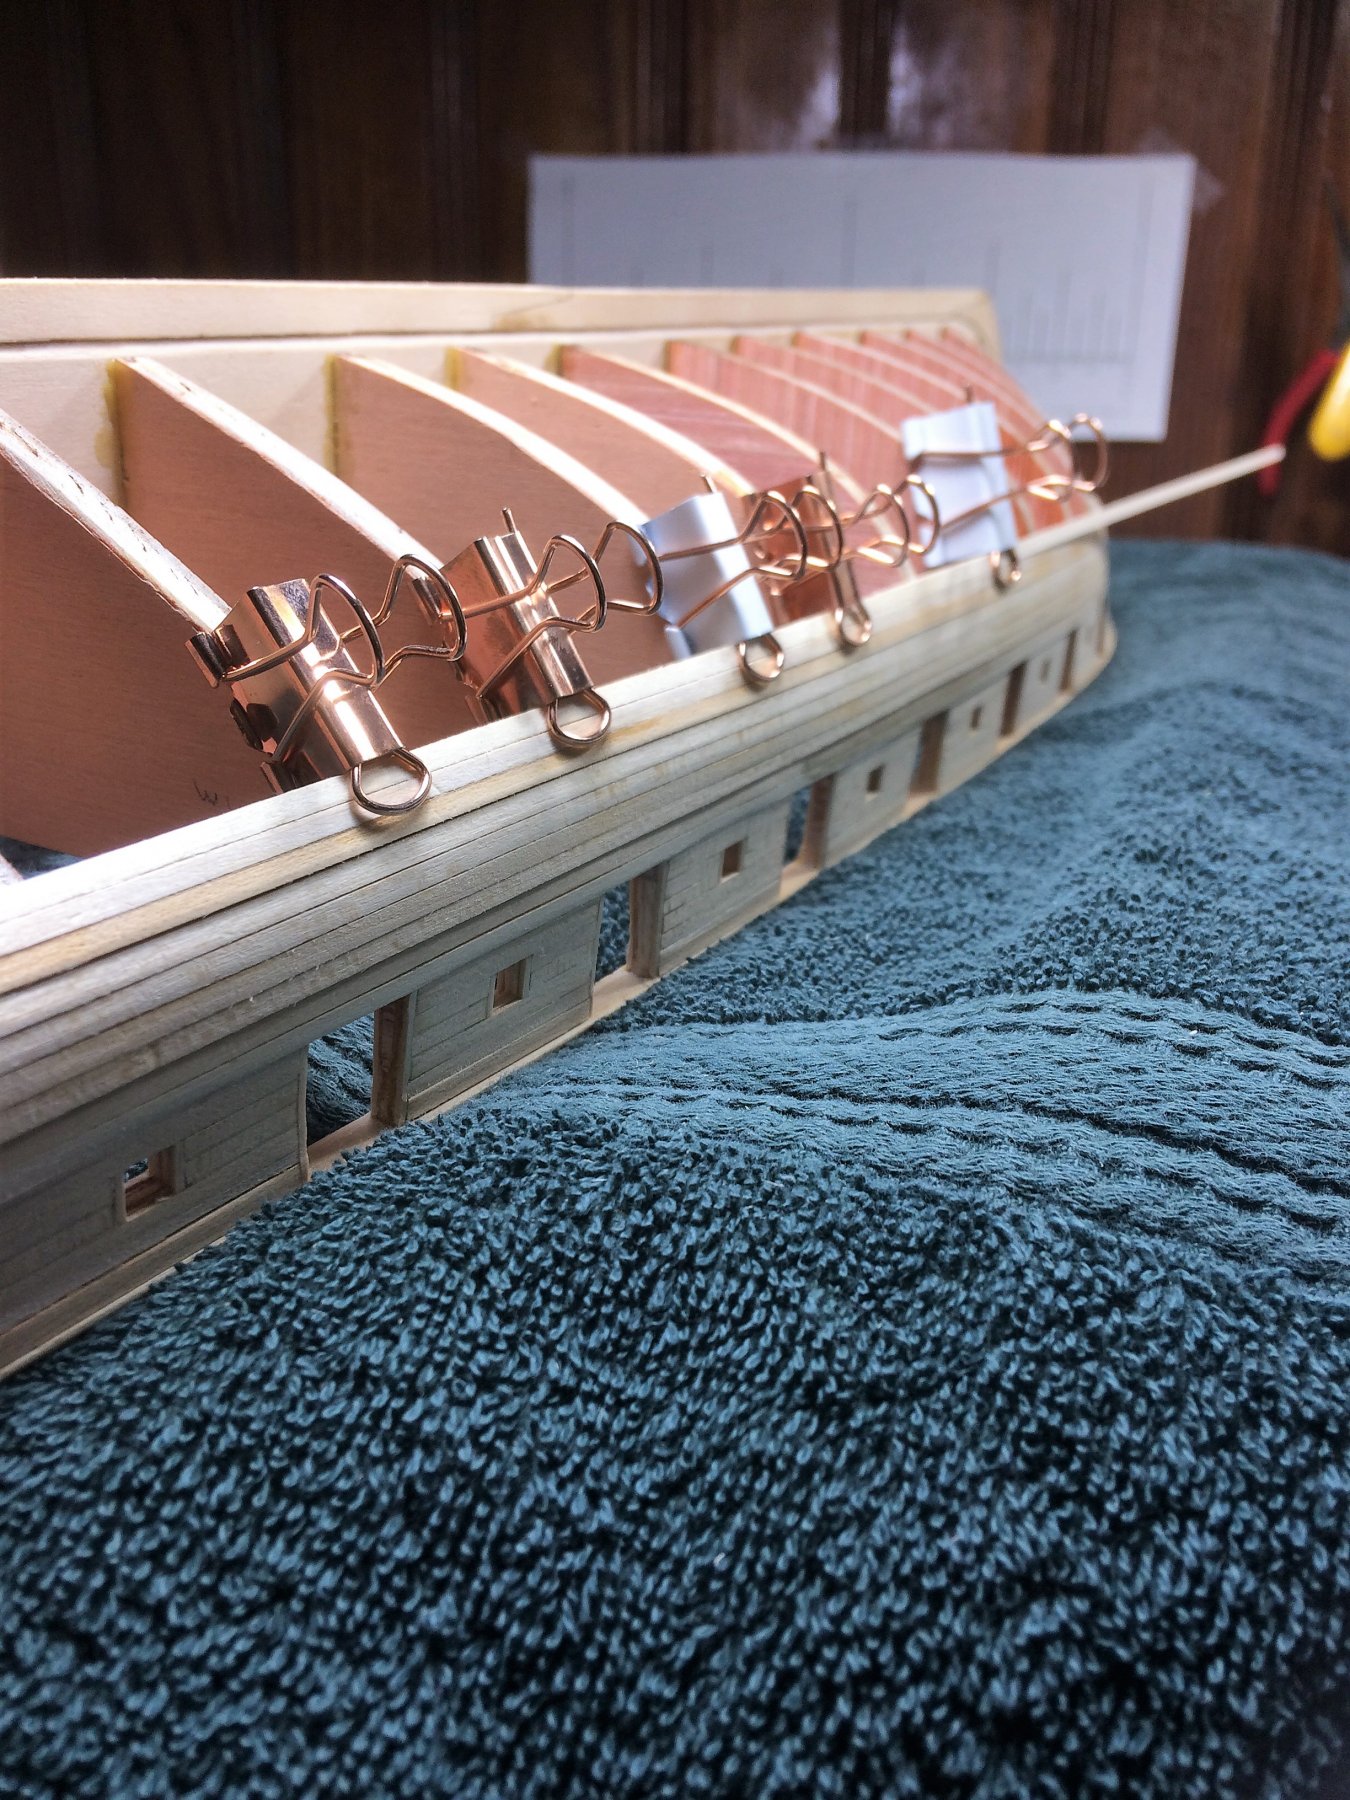
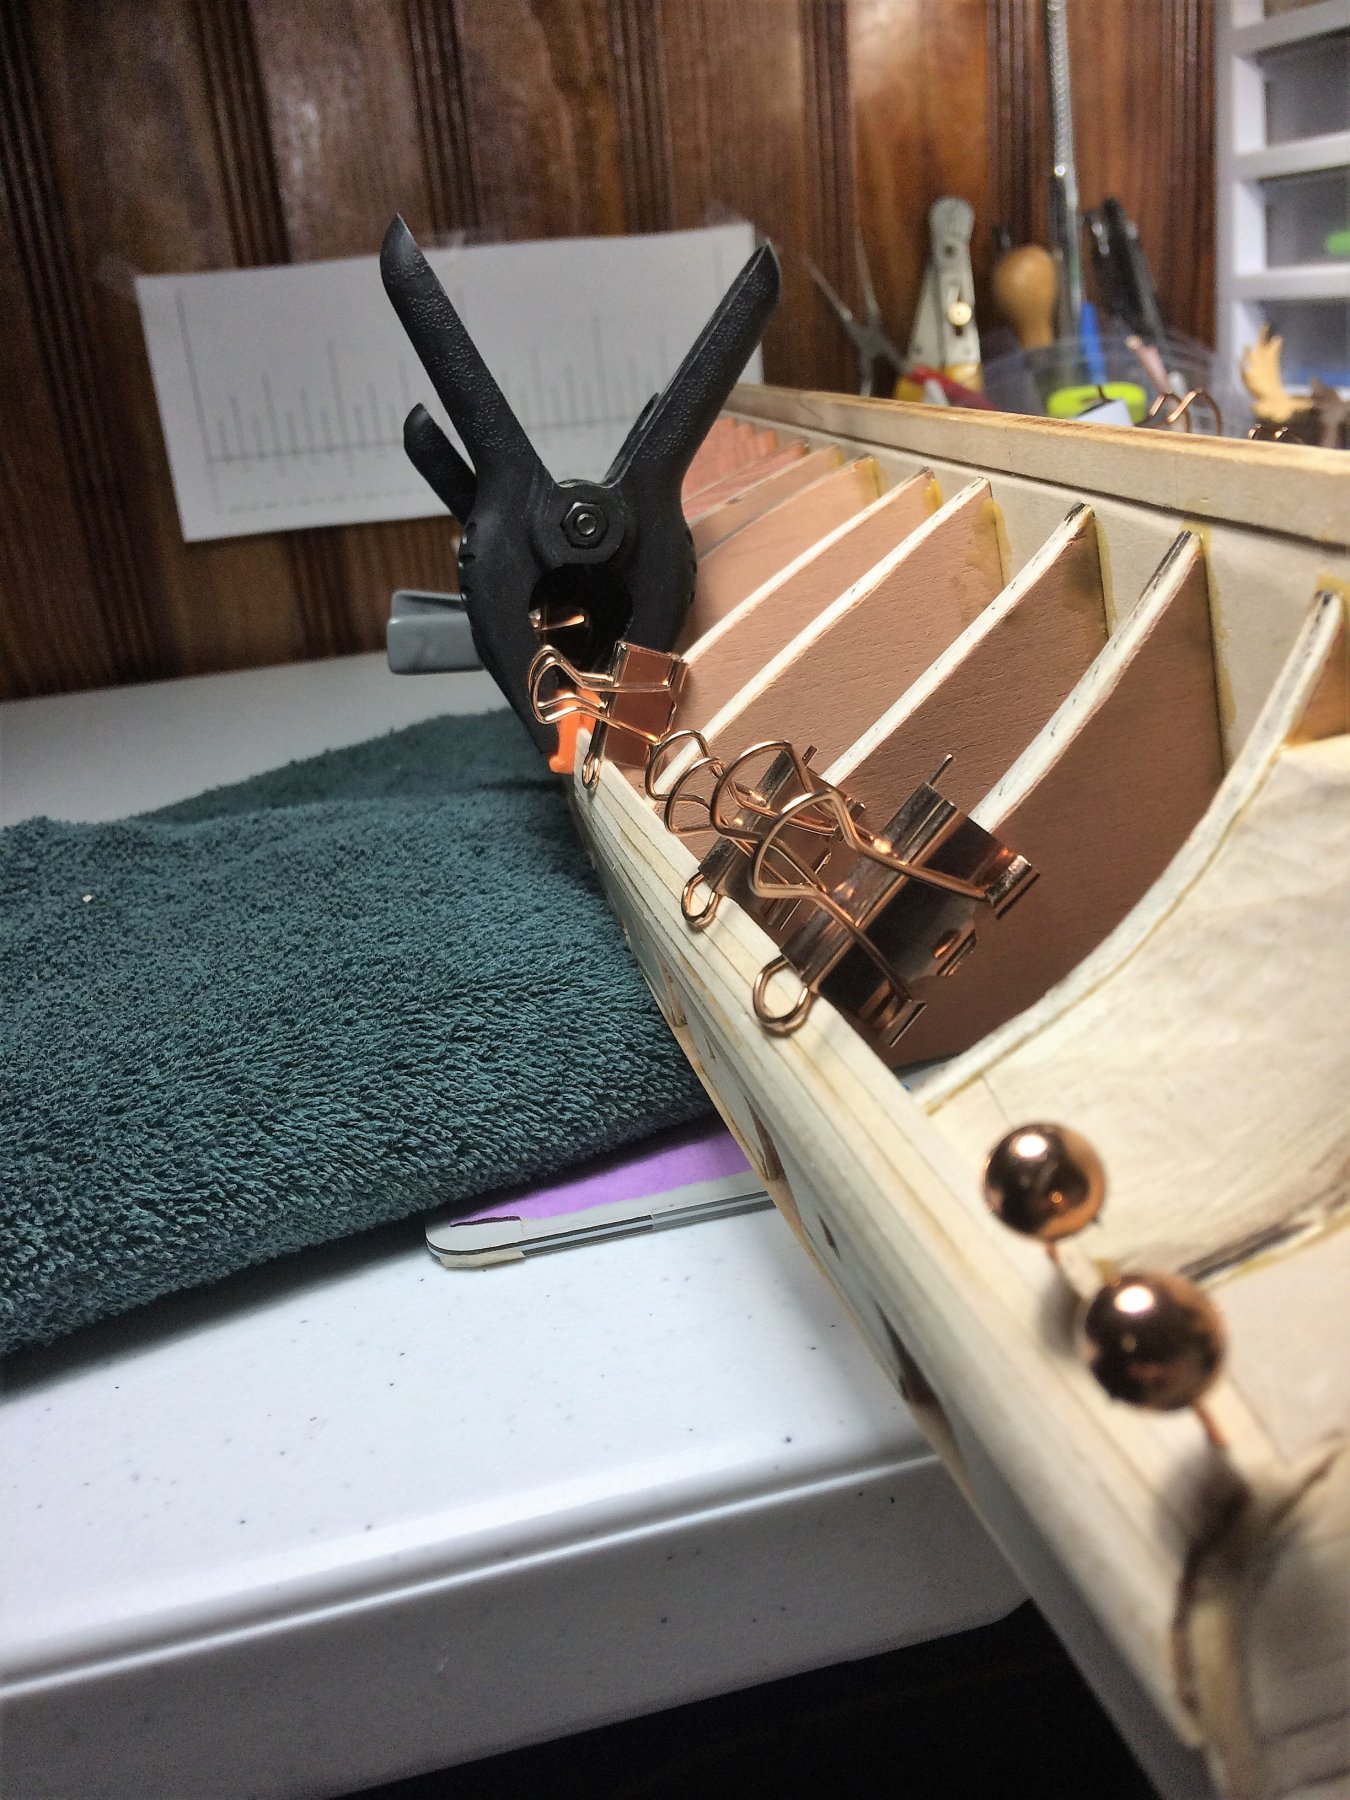
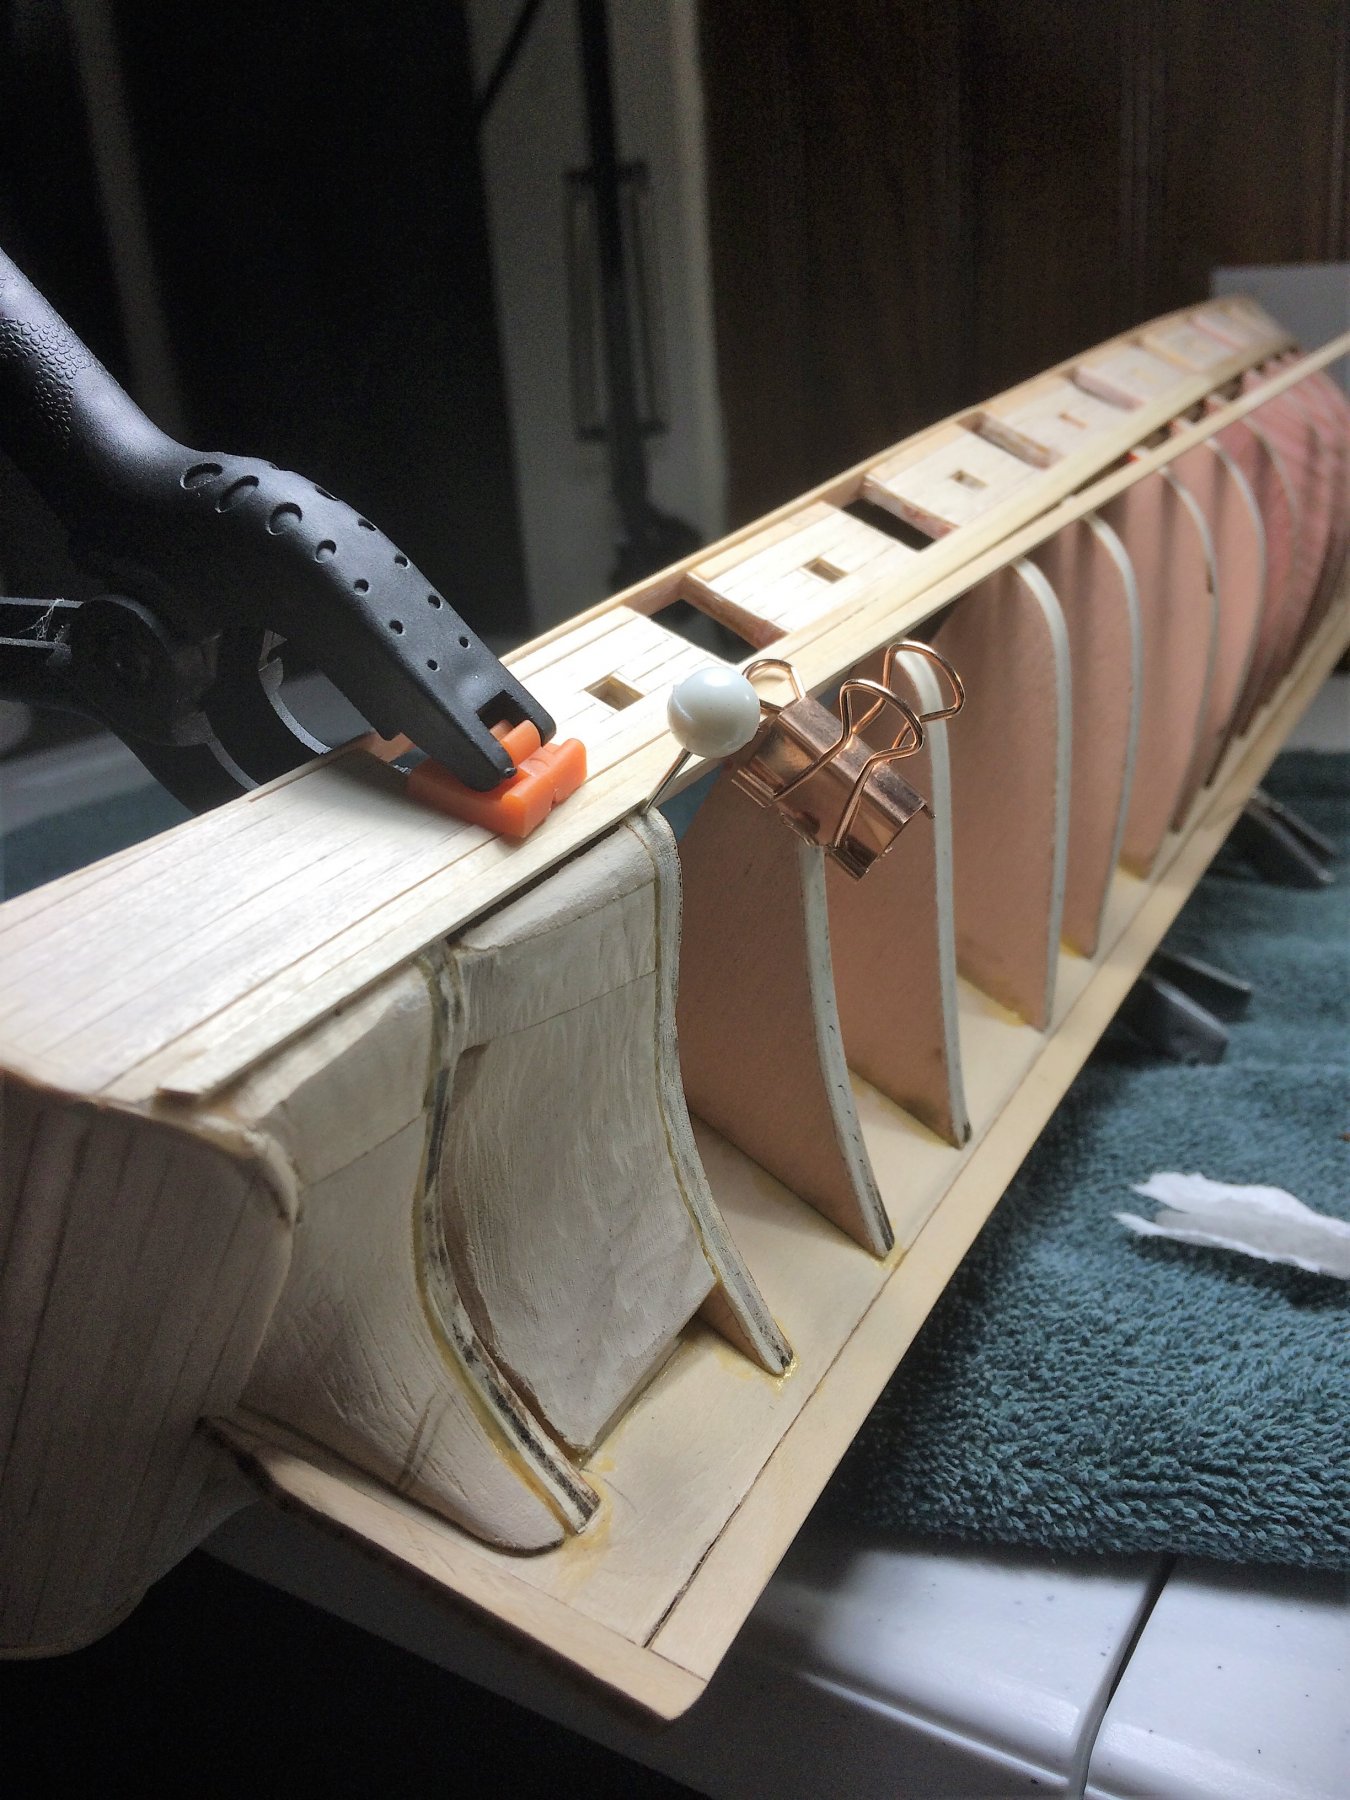
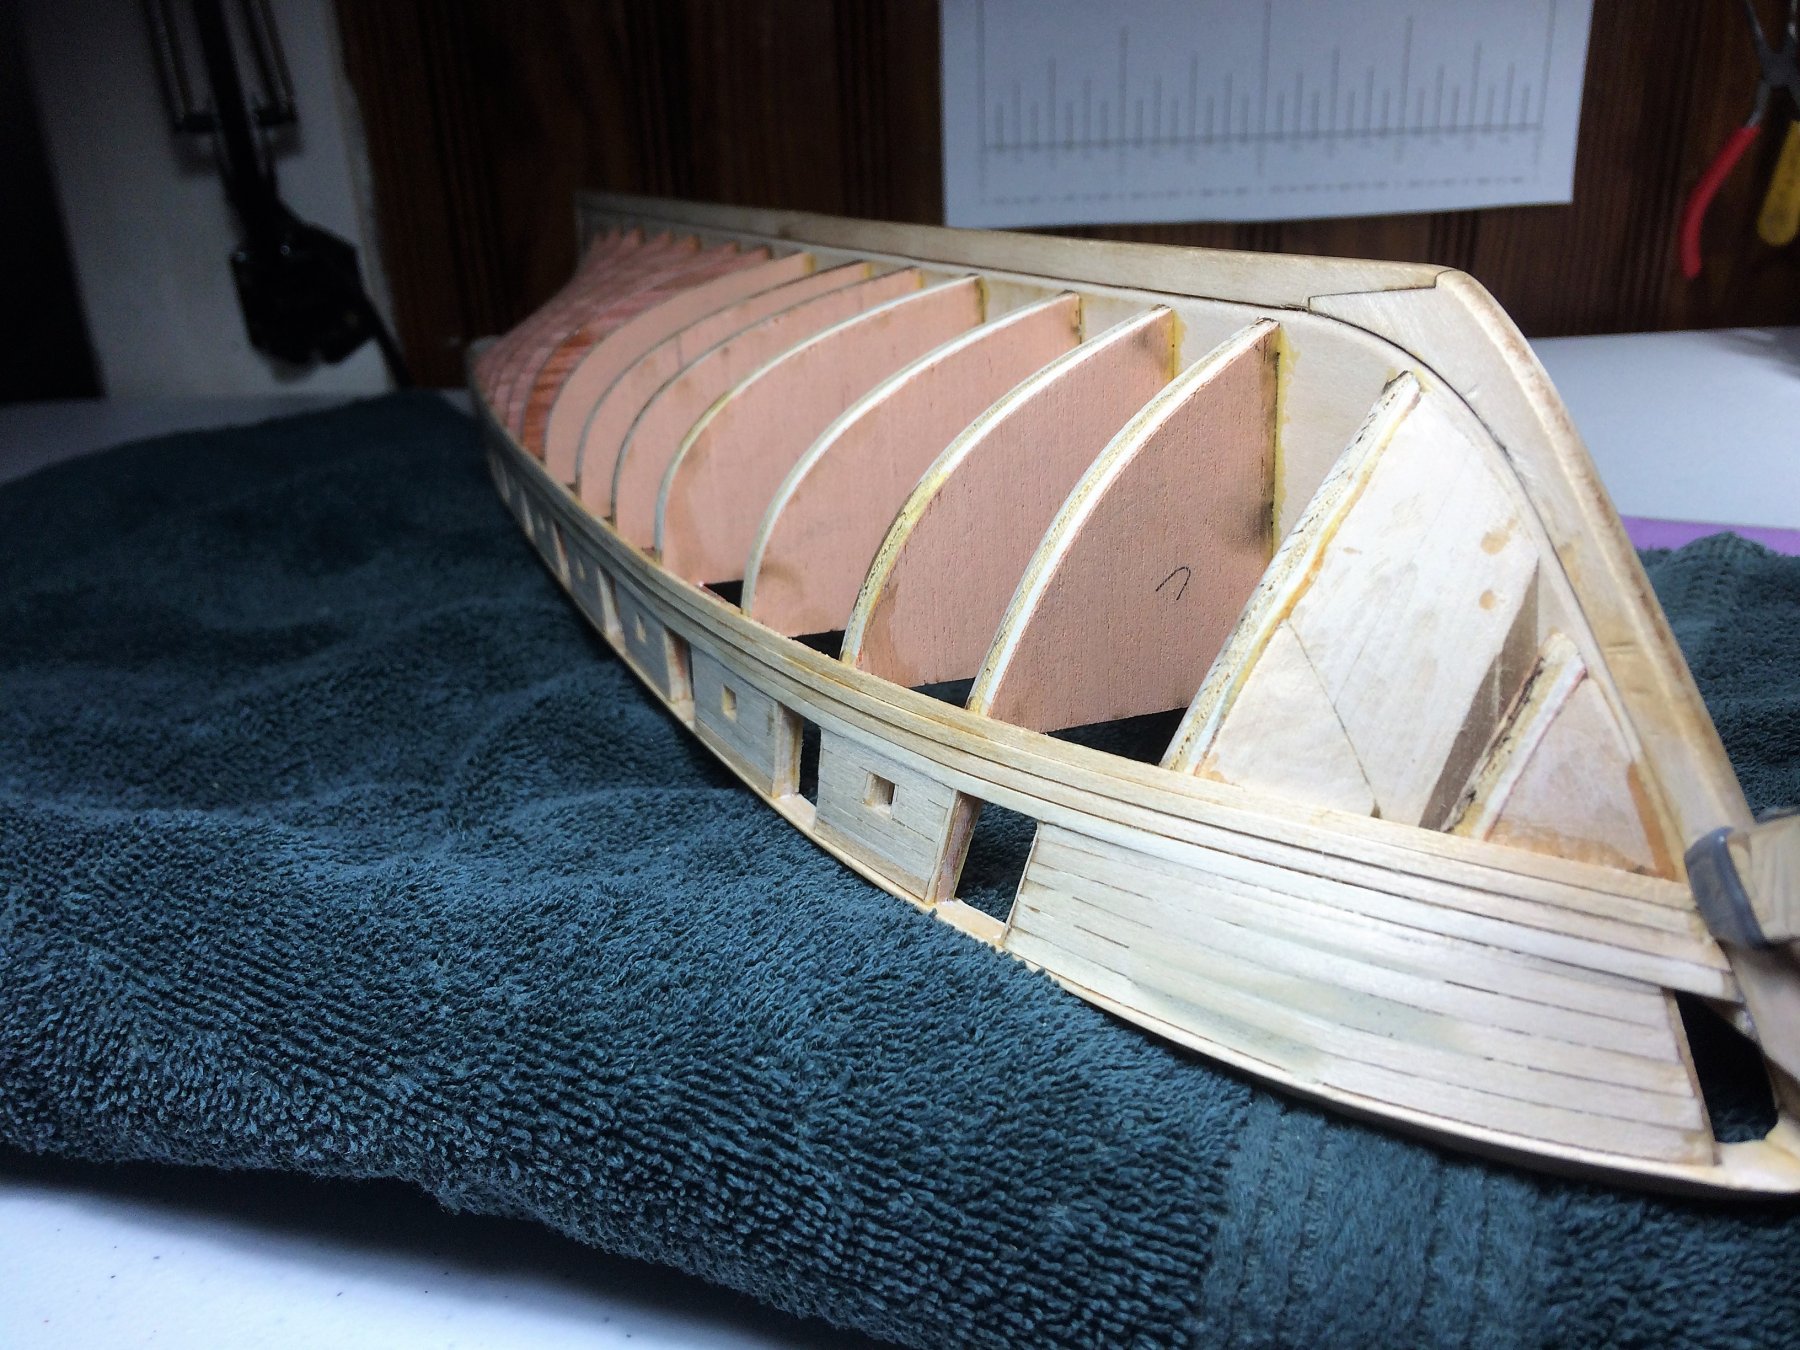
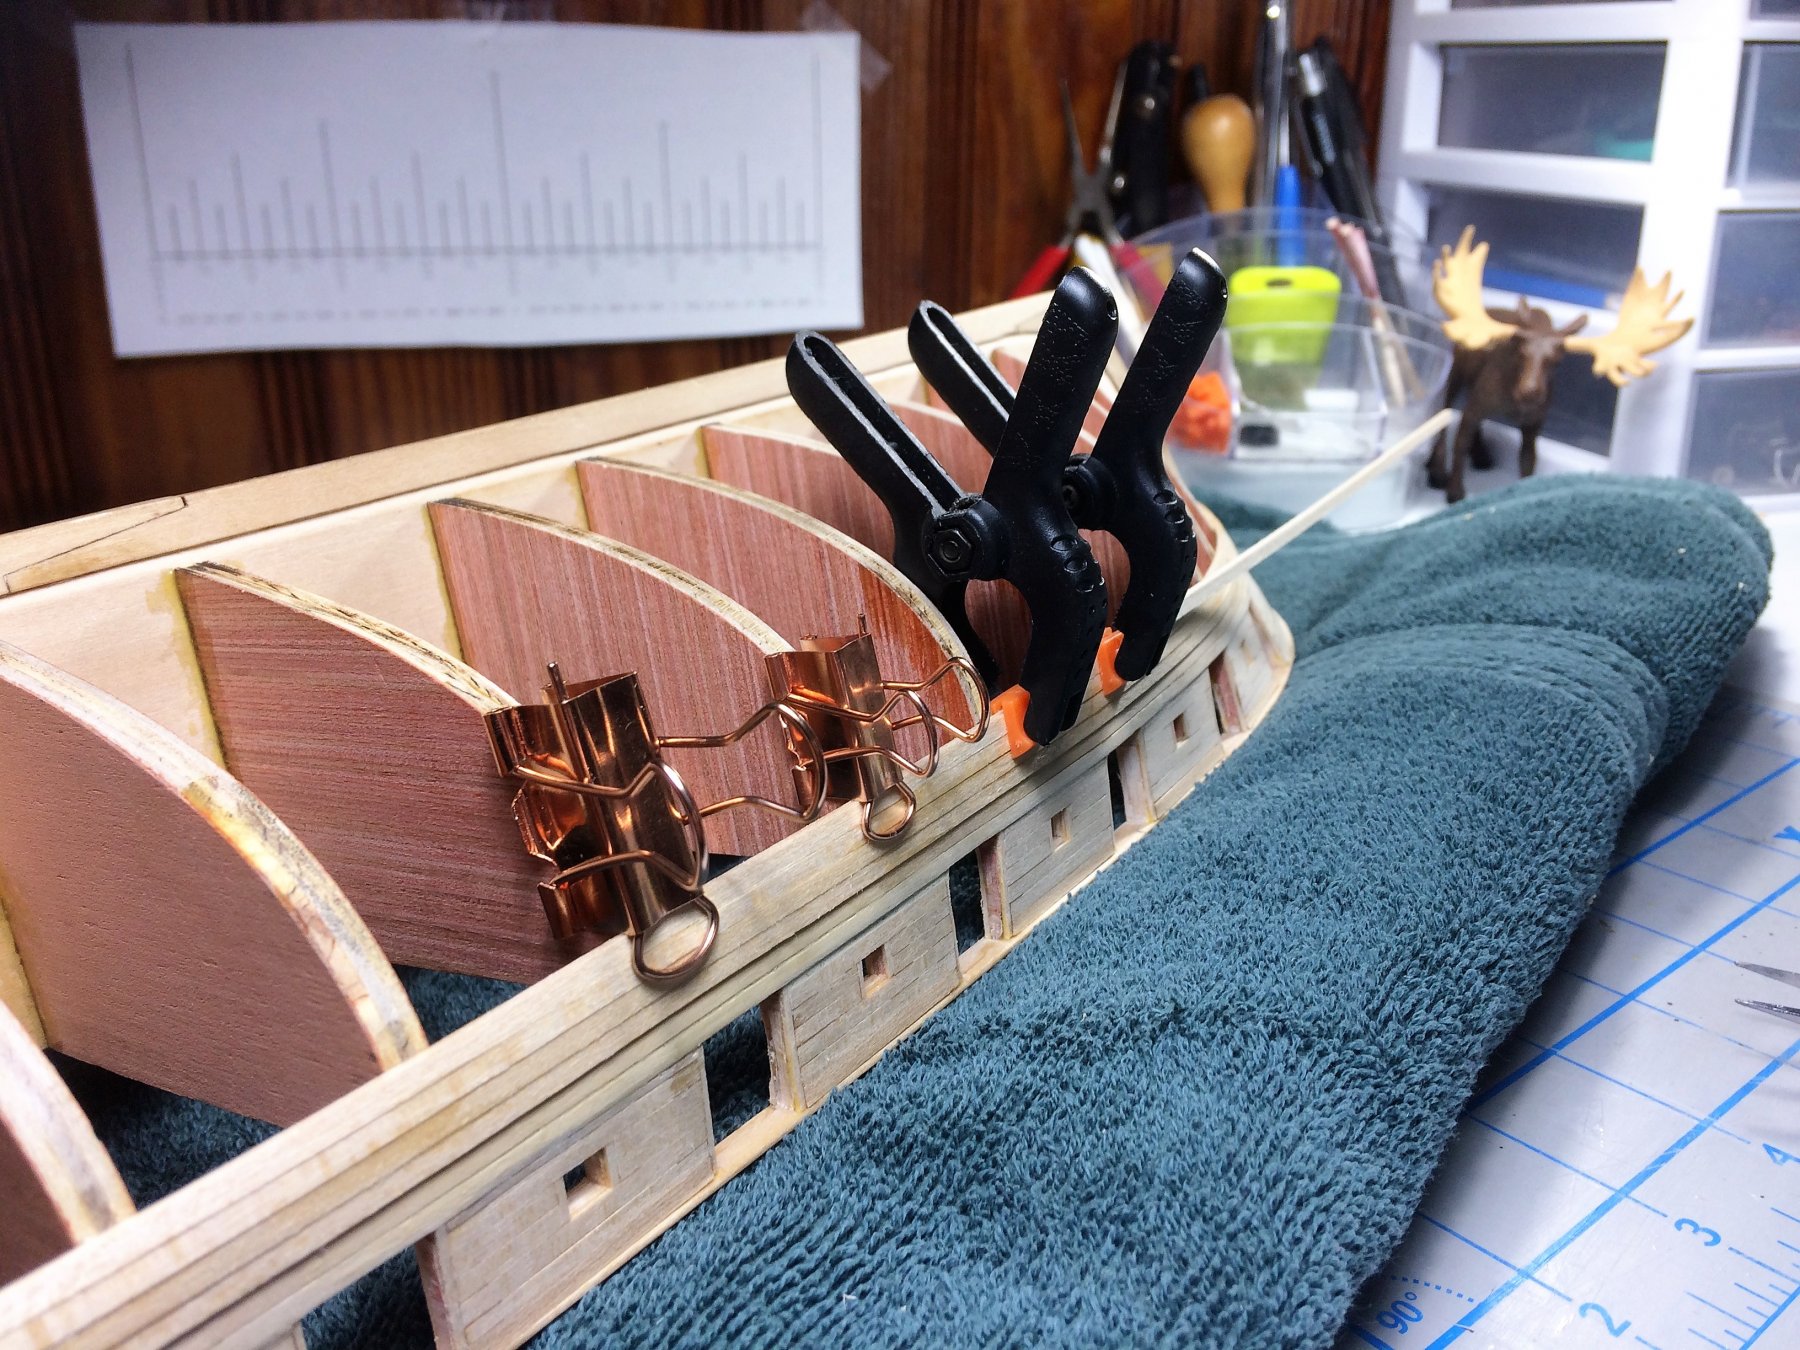
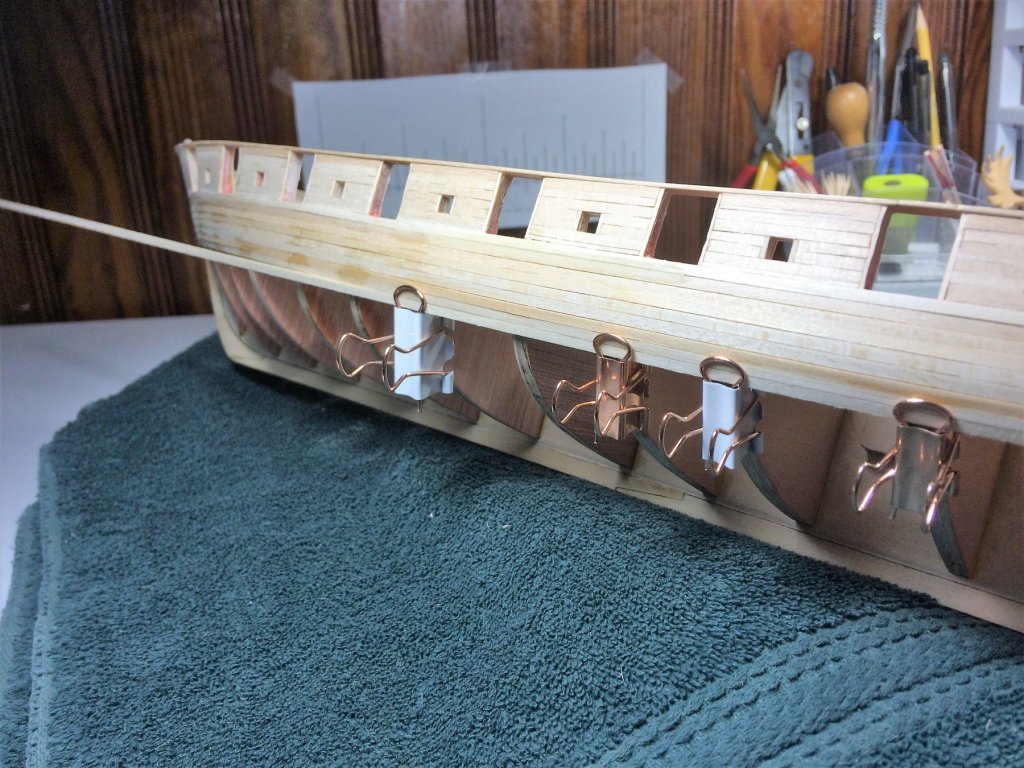
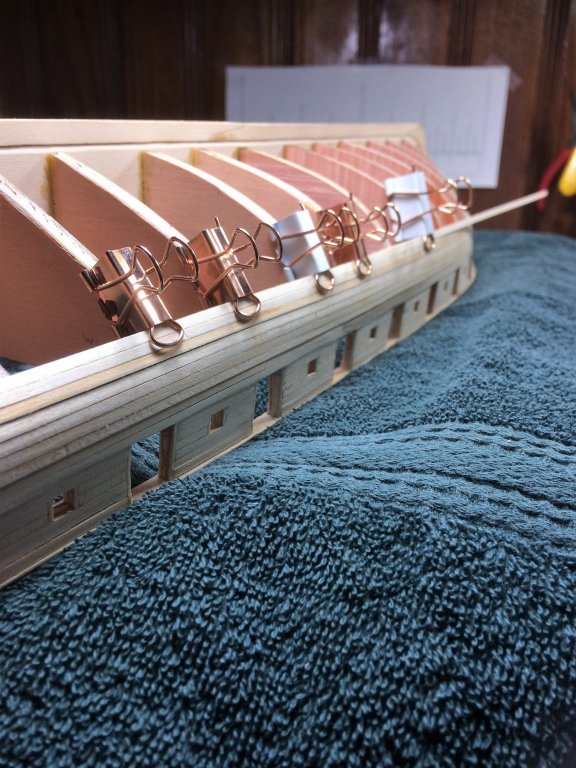
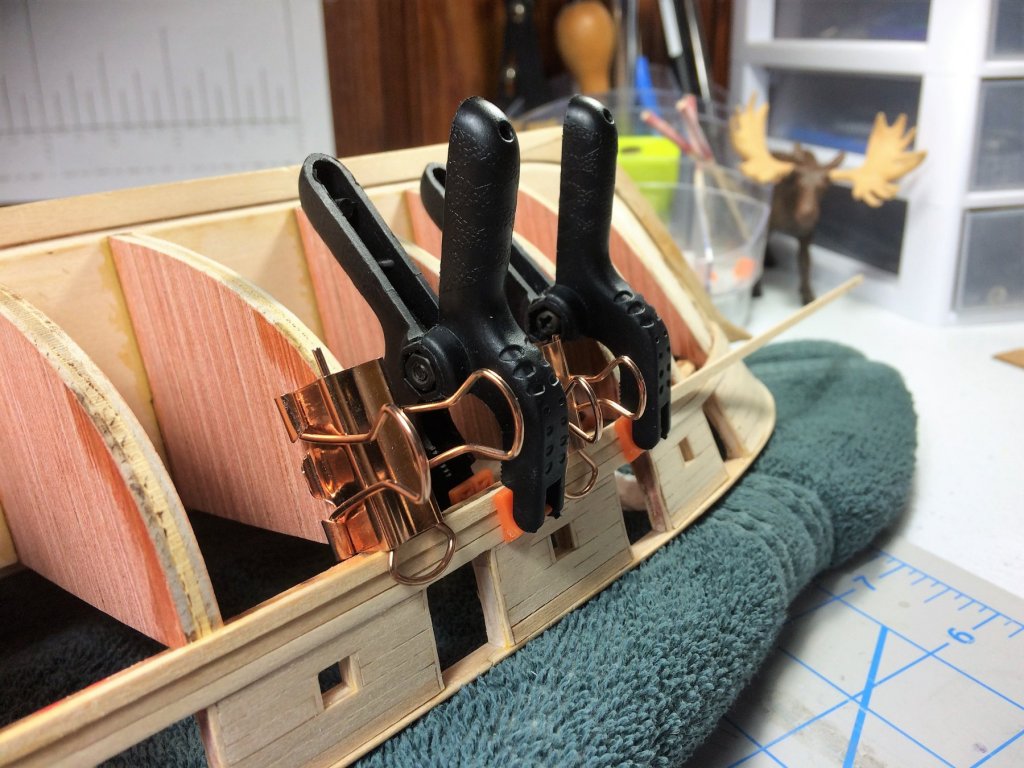
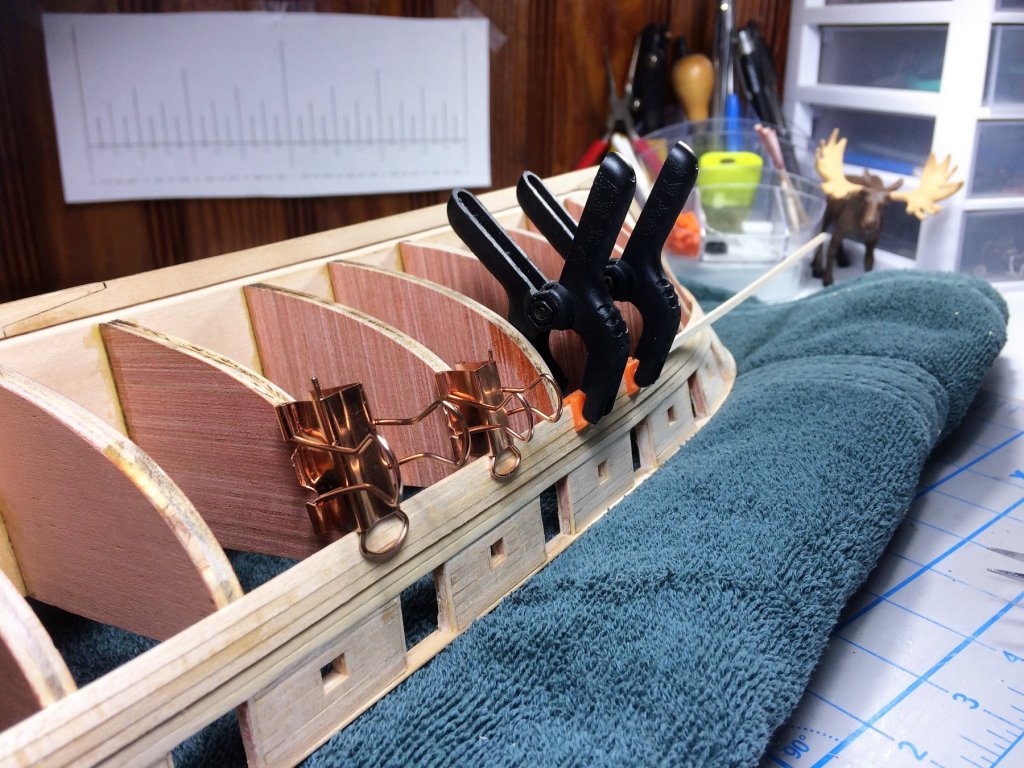
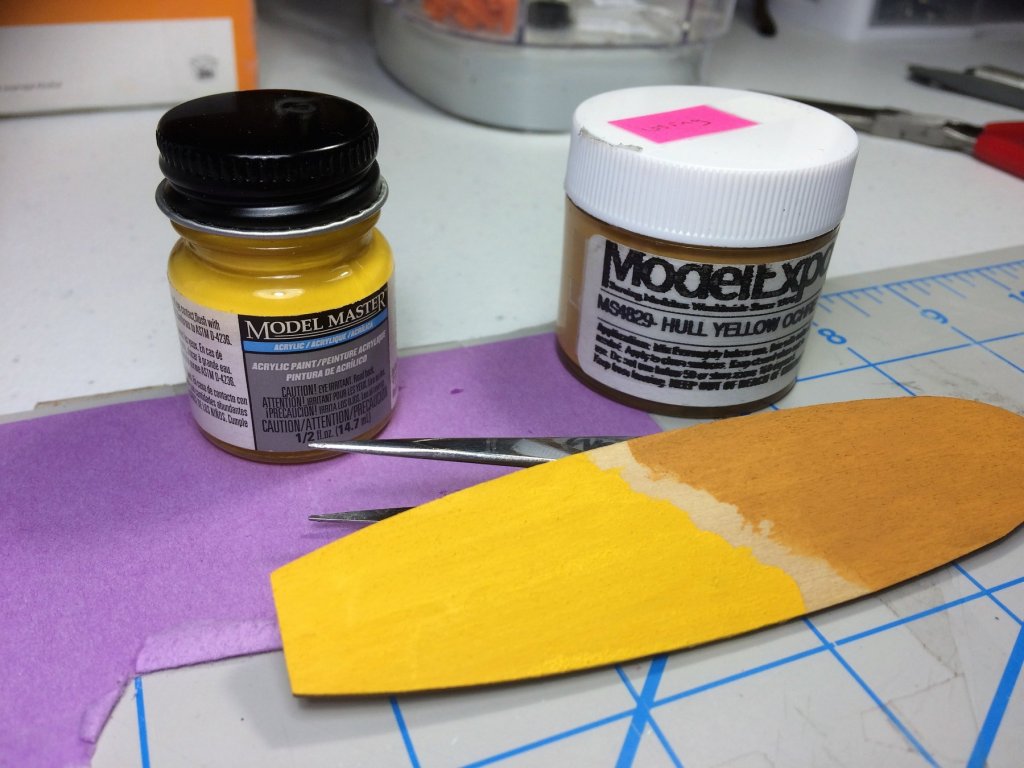
Evening, IT HAS BEGUN..... I have started planking the hull! I have this recurring dream where I glue all my fingers to the boat and while trying to remove them destroy the boat! With bits of wood still stuck to my fingers I wake up....... This ship is going to get some skin. Nervous as hell!!!!! Done the tick strips, measured, re-measured. Still don't have any Proportional Dividers. There on the list of "things to buy" but not too high up on that list right now. It's heating season, oil bill gets highest priority. I will follow the belts tho. Anywho... In prior posts I mentioned I would plank the hull with cut planks, not single. The first few planks, I left them whole. It was easy, some curve but not bad. Allowed me to get my beak wet when it comes to planking a large hull. I'll try and get belt A done this weekend........try! The normal planking hardware. Who ever thought of the clip method should be made a Saint! It's simplicity is staggering. Using 1/16x3/32 for belts A and B, per the plans. I notice the Parts List shows 1/16x3/16 for belts C and D. Am I reading this right? Is there a size shift? Its because of this build that I will always use extra filler blocks in all future builds. The extra bite really helps. She seems to have a good flow. Some glue stains, but not too bad. Nothing a good sanding wont fix. I ended up getting half of belt A on both sides on. And I was shooting for one full belt both sides! HA! I stopped here deliberately. There are some curves ahead. I'll let what I did get done sit for a while and firm up. I'll tackle some steaming and bending some time this week. Clamps! Mike, I took your advice about paint and looked at what I had first before buying anything. I have been using the Model Expo Niagara paint set for the entire build. I've seen others use it as well. In those other builds the "Yellow" they supplied was always too bright. Below, the bottle on the right is what came with the ME Niagara paint set. No where near as bright as I've seen in other builds. Its like a dark mustard. For comparison I had a bottle of Model Masters Insignia Yellow. Is this a change from the manufacturer? I feel like the Model Expo paint needs a few drops of the Insignia Yellow just to tone it up a smidge. Am I looking at this right? Tom E


-
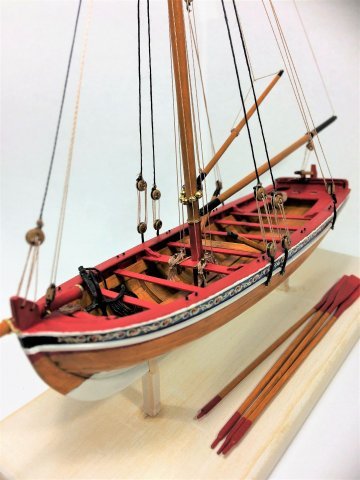
She's looking great! You've kind of changed my mind about cross sections. Never paid much attention to them until your log. With Chuck(Syren) talking about developing a cross section my interest has been peaked. Don't think I could do a scratch build yet like you have. I still need a kit to guide me. But I would most certainly bash it up with some of the woods you have used. Tom E
-
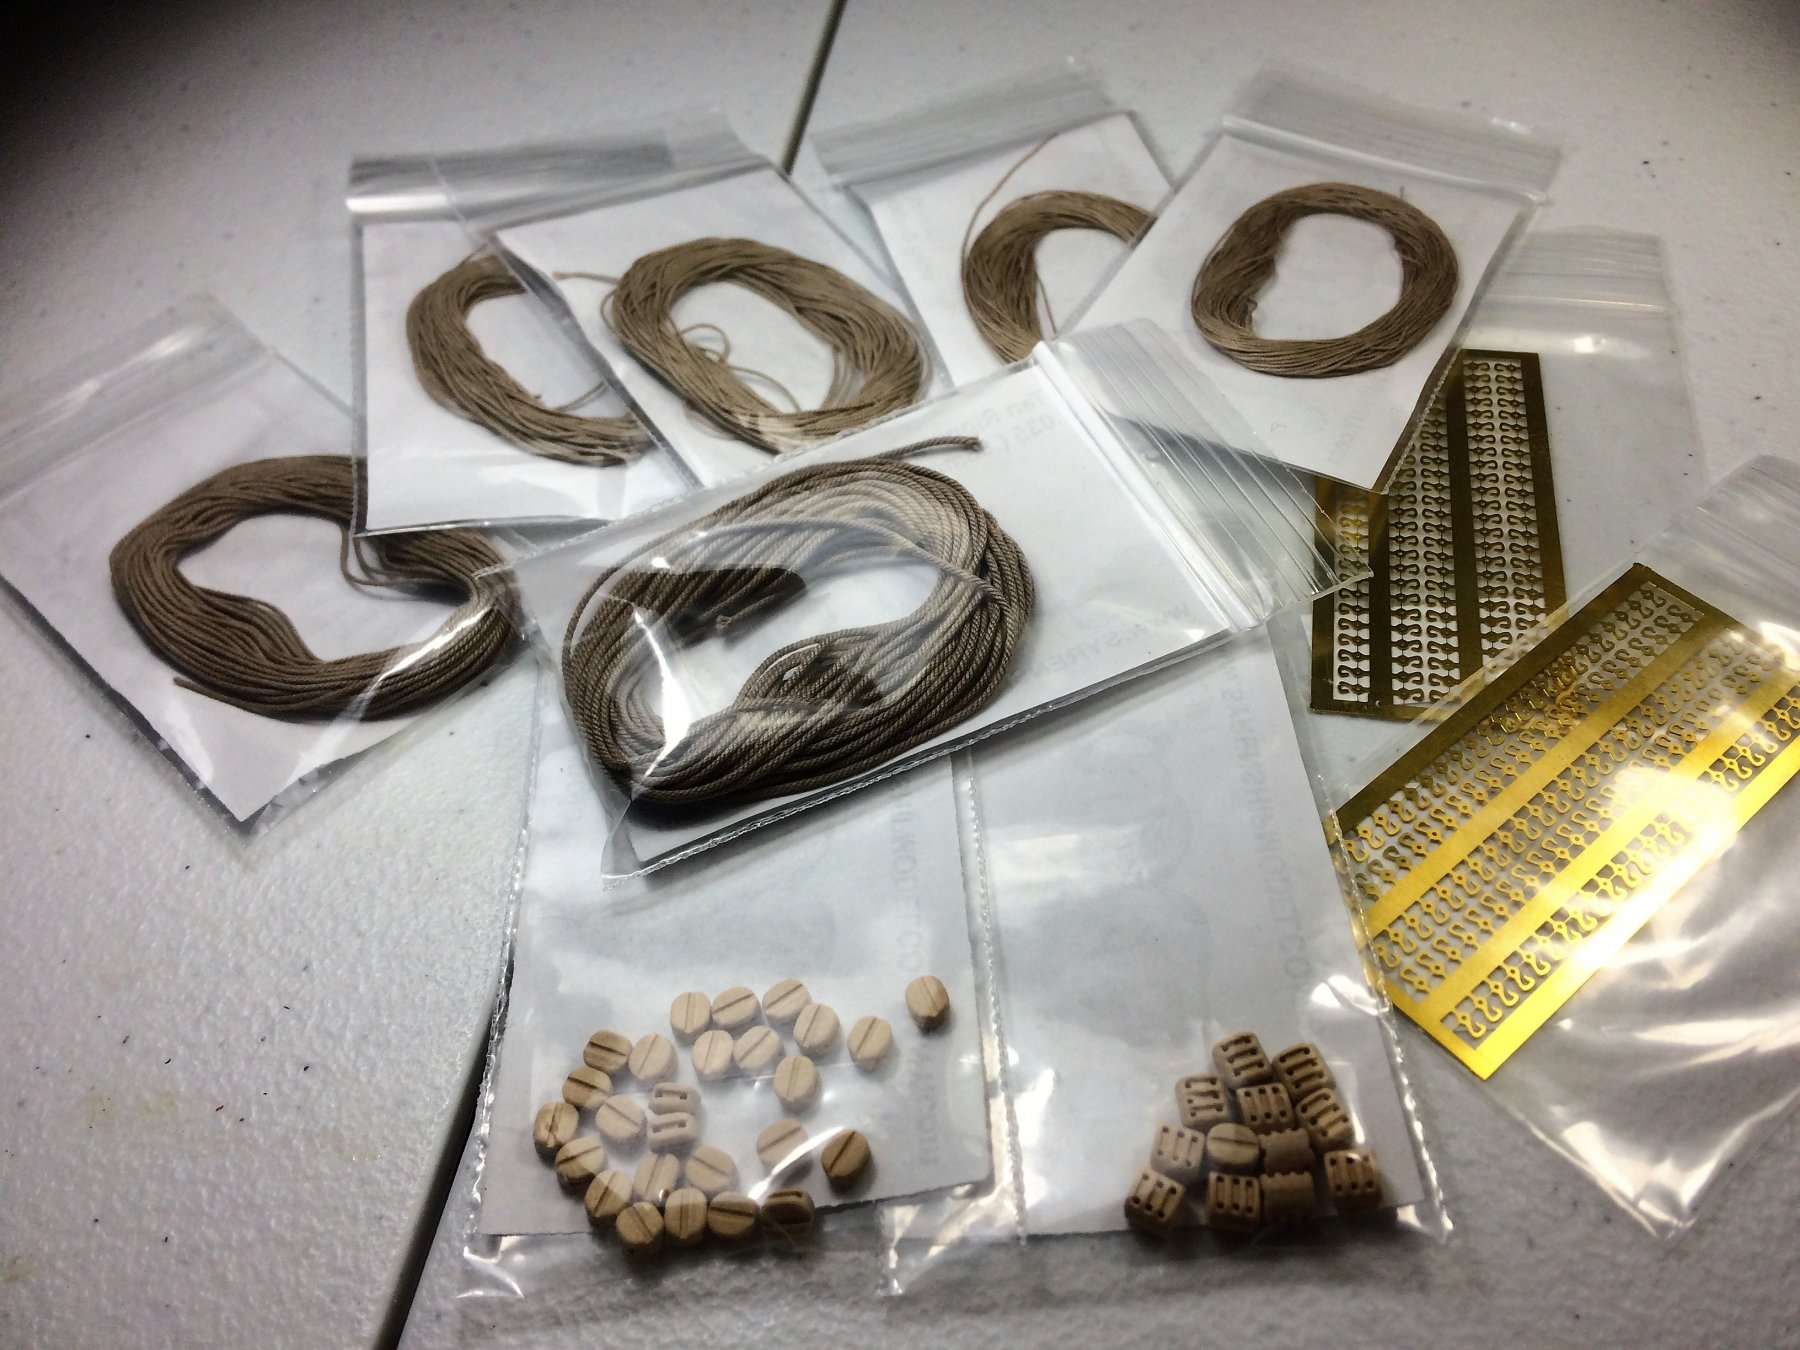
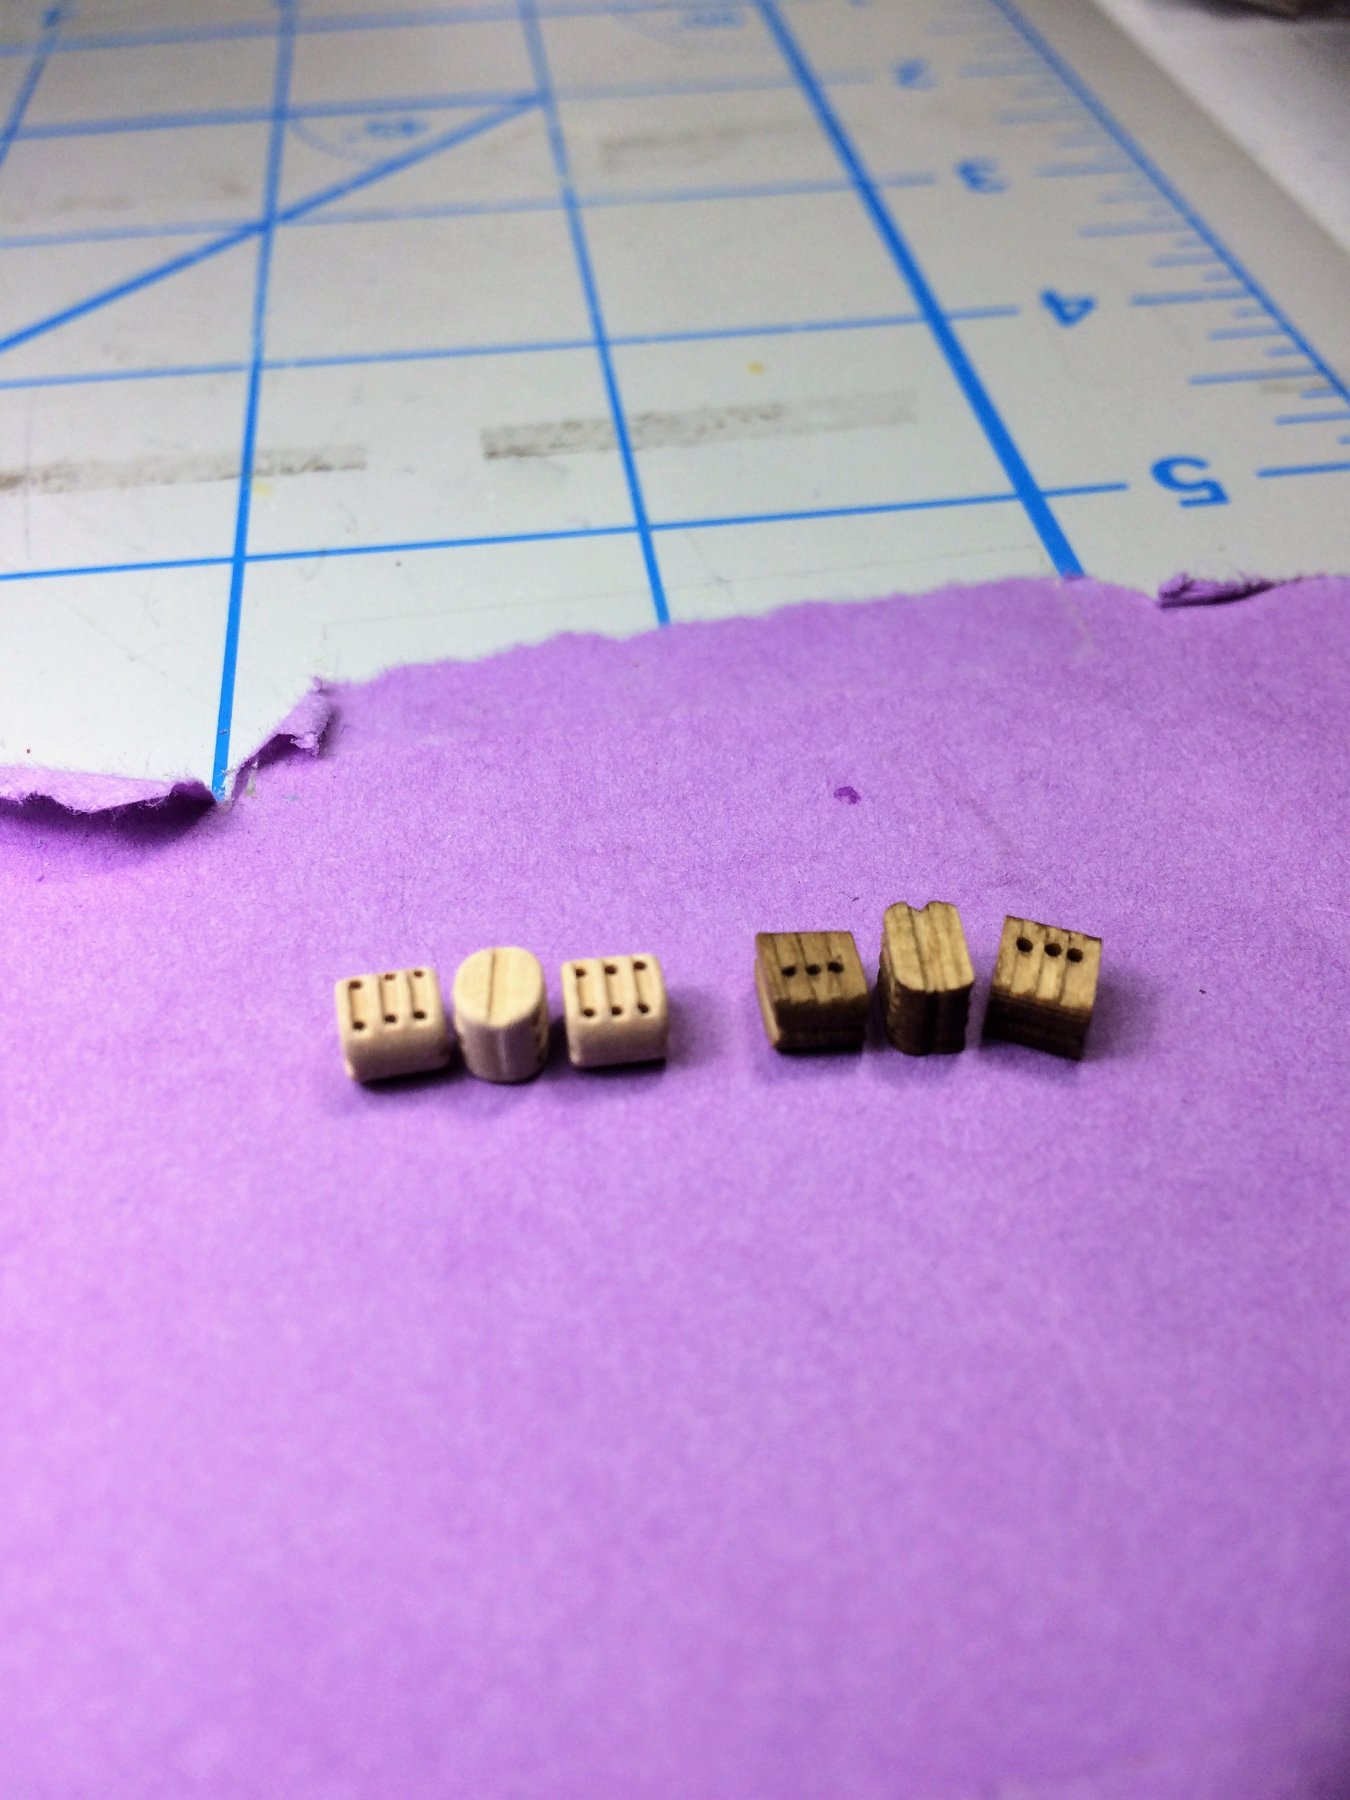
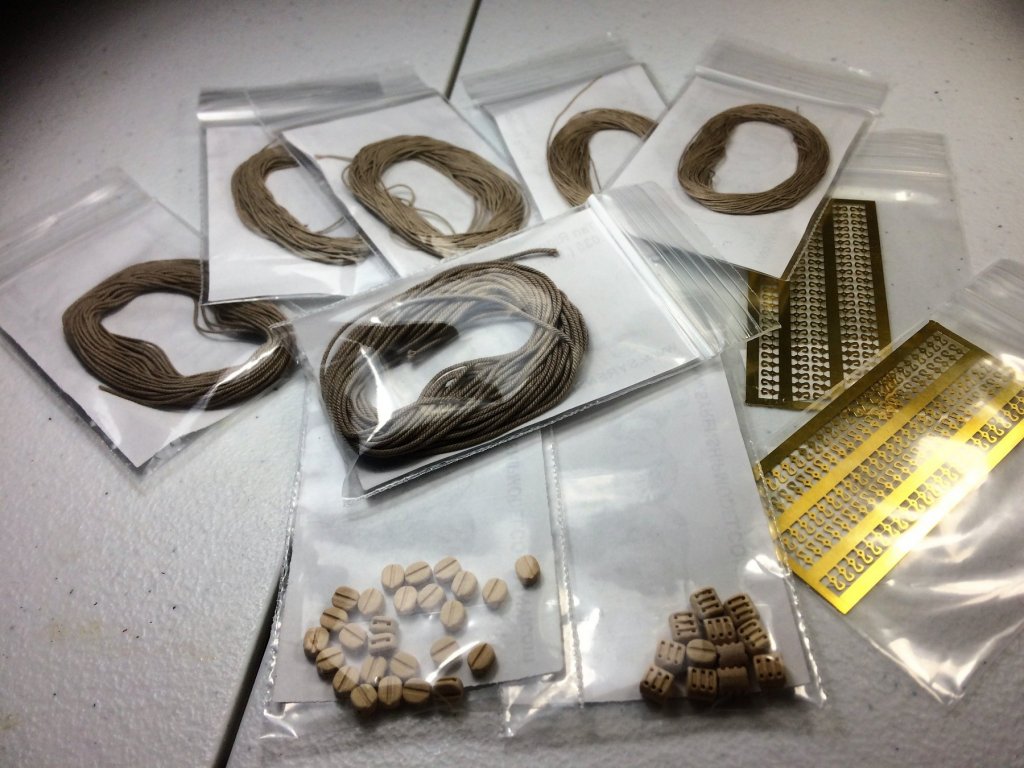
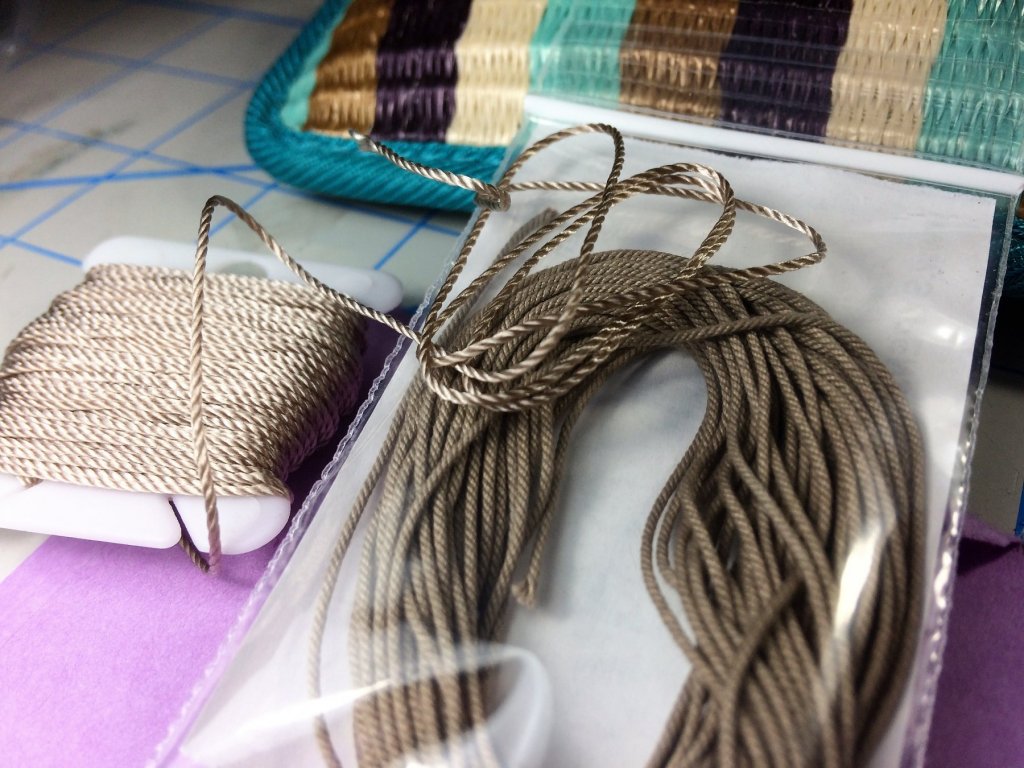
Evening, Earlier this week I placed my first order from the Syren Co. All I can say is WOW!!!!!!! I'll take the Pepsi Challenge any day with this product! It will be a joy to work with these. Can you tell which blocks came with the kit? The color of the rope is awesome. It looks weathered. I suppose I can save the gold stuff that came with the kit for next years Christmas tree. In all seriousness, I will hold onto all replaced parts. Never know when and where you, or someone else, might need something. This will only be the first of many orders with Syren. Tom E


-
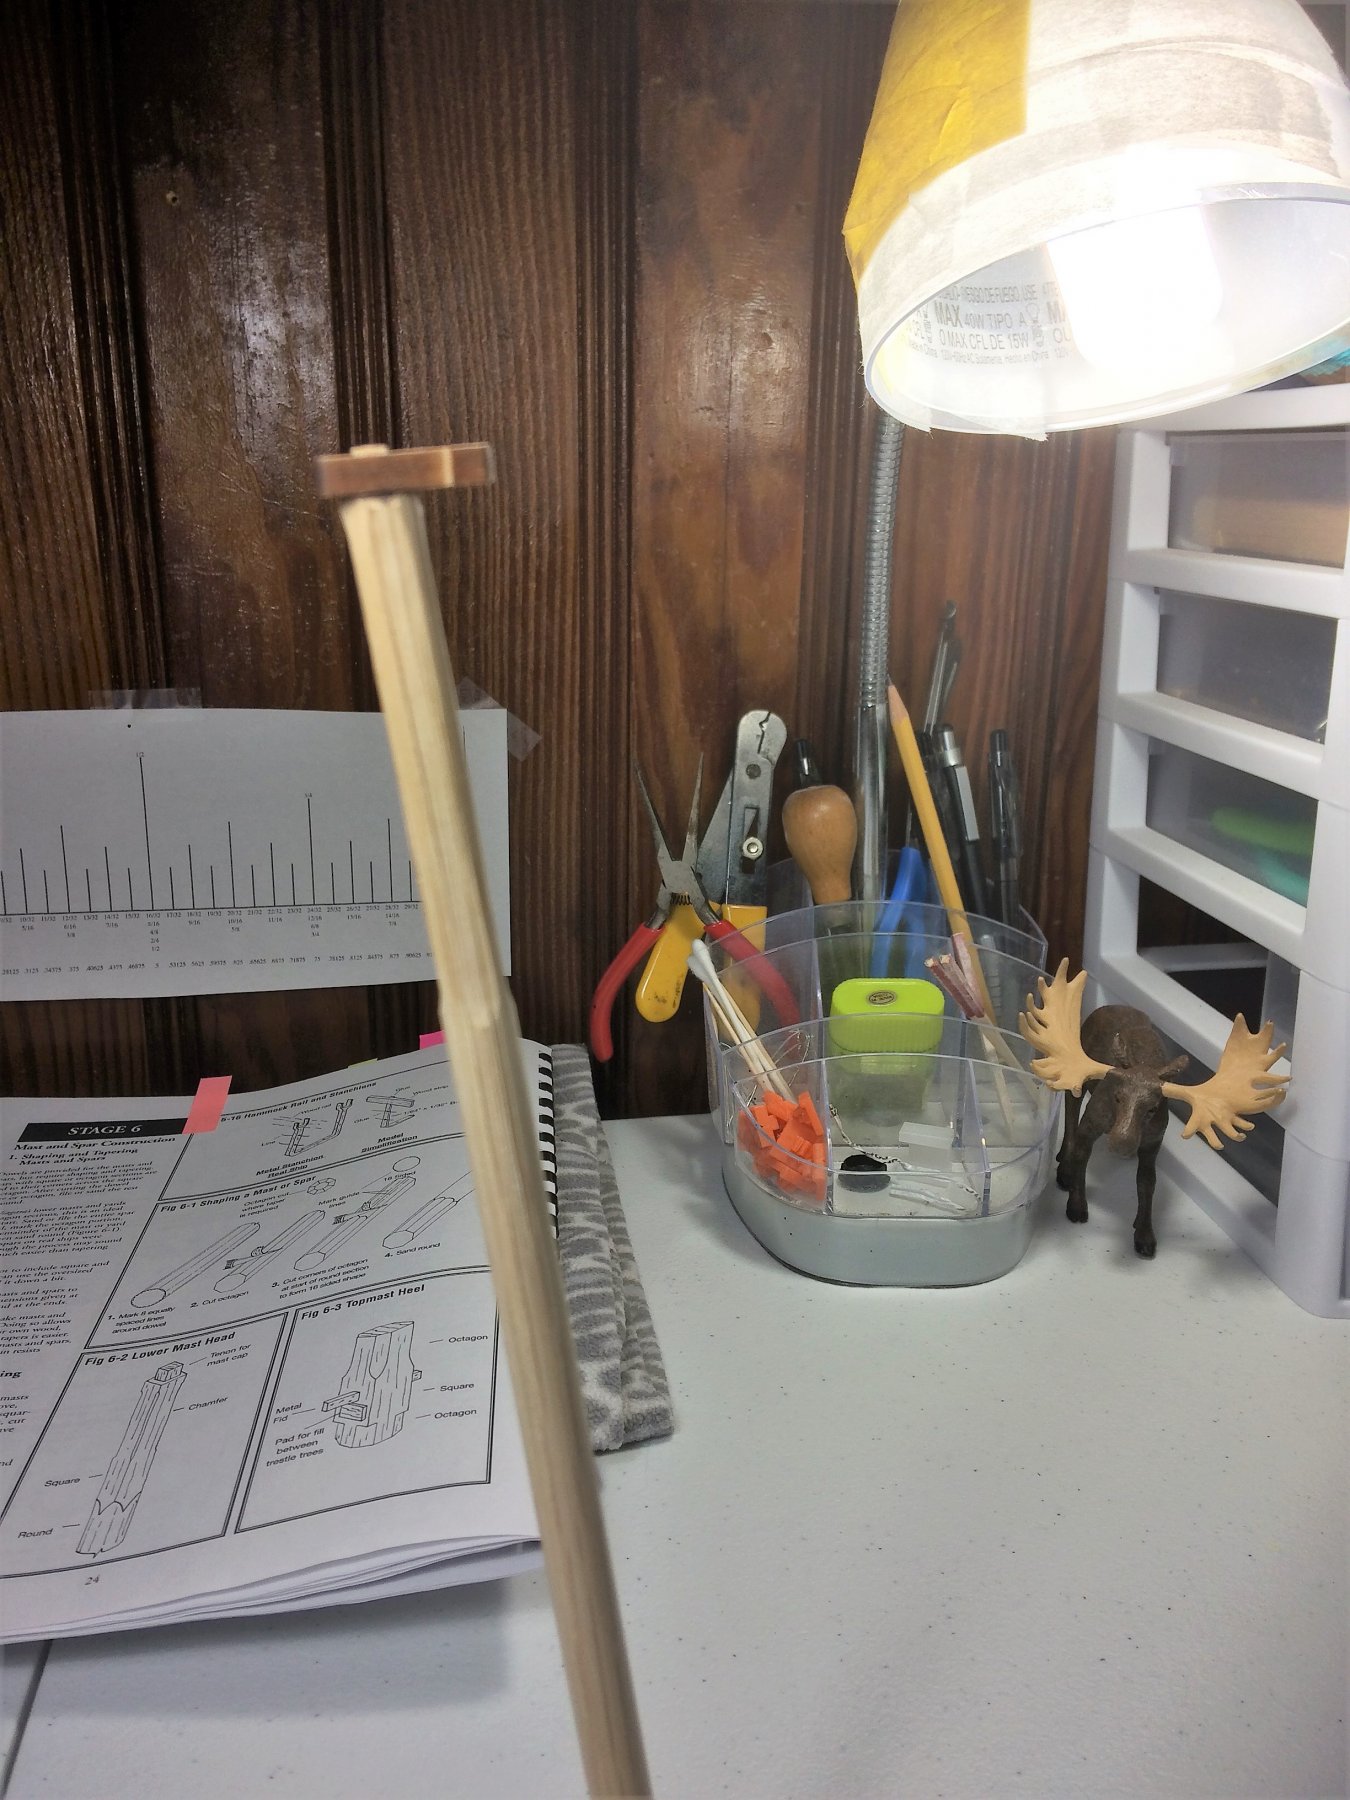
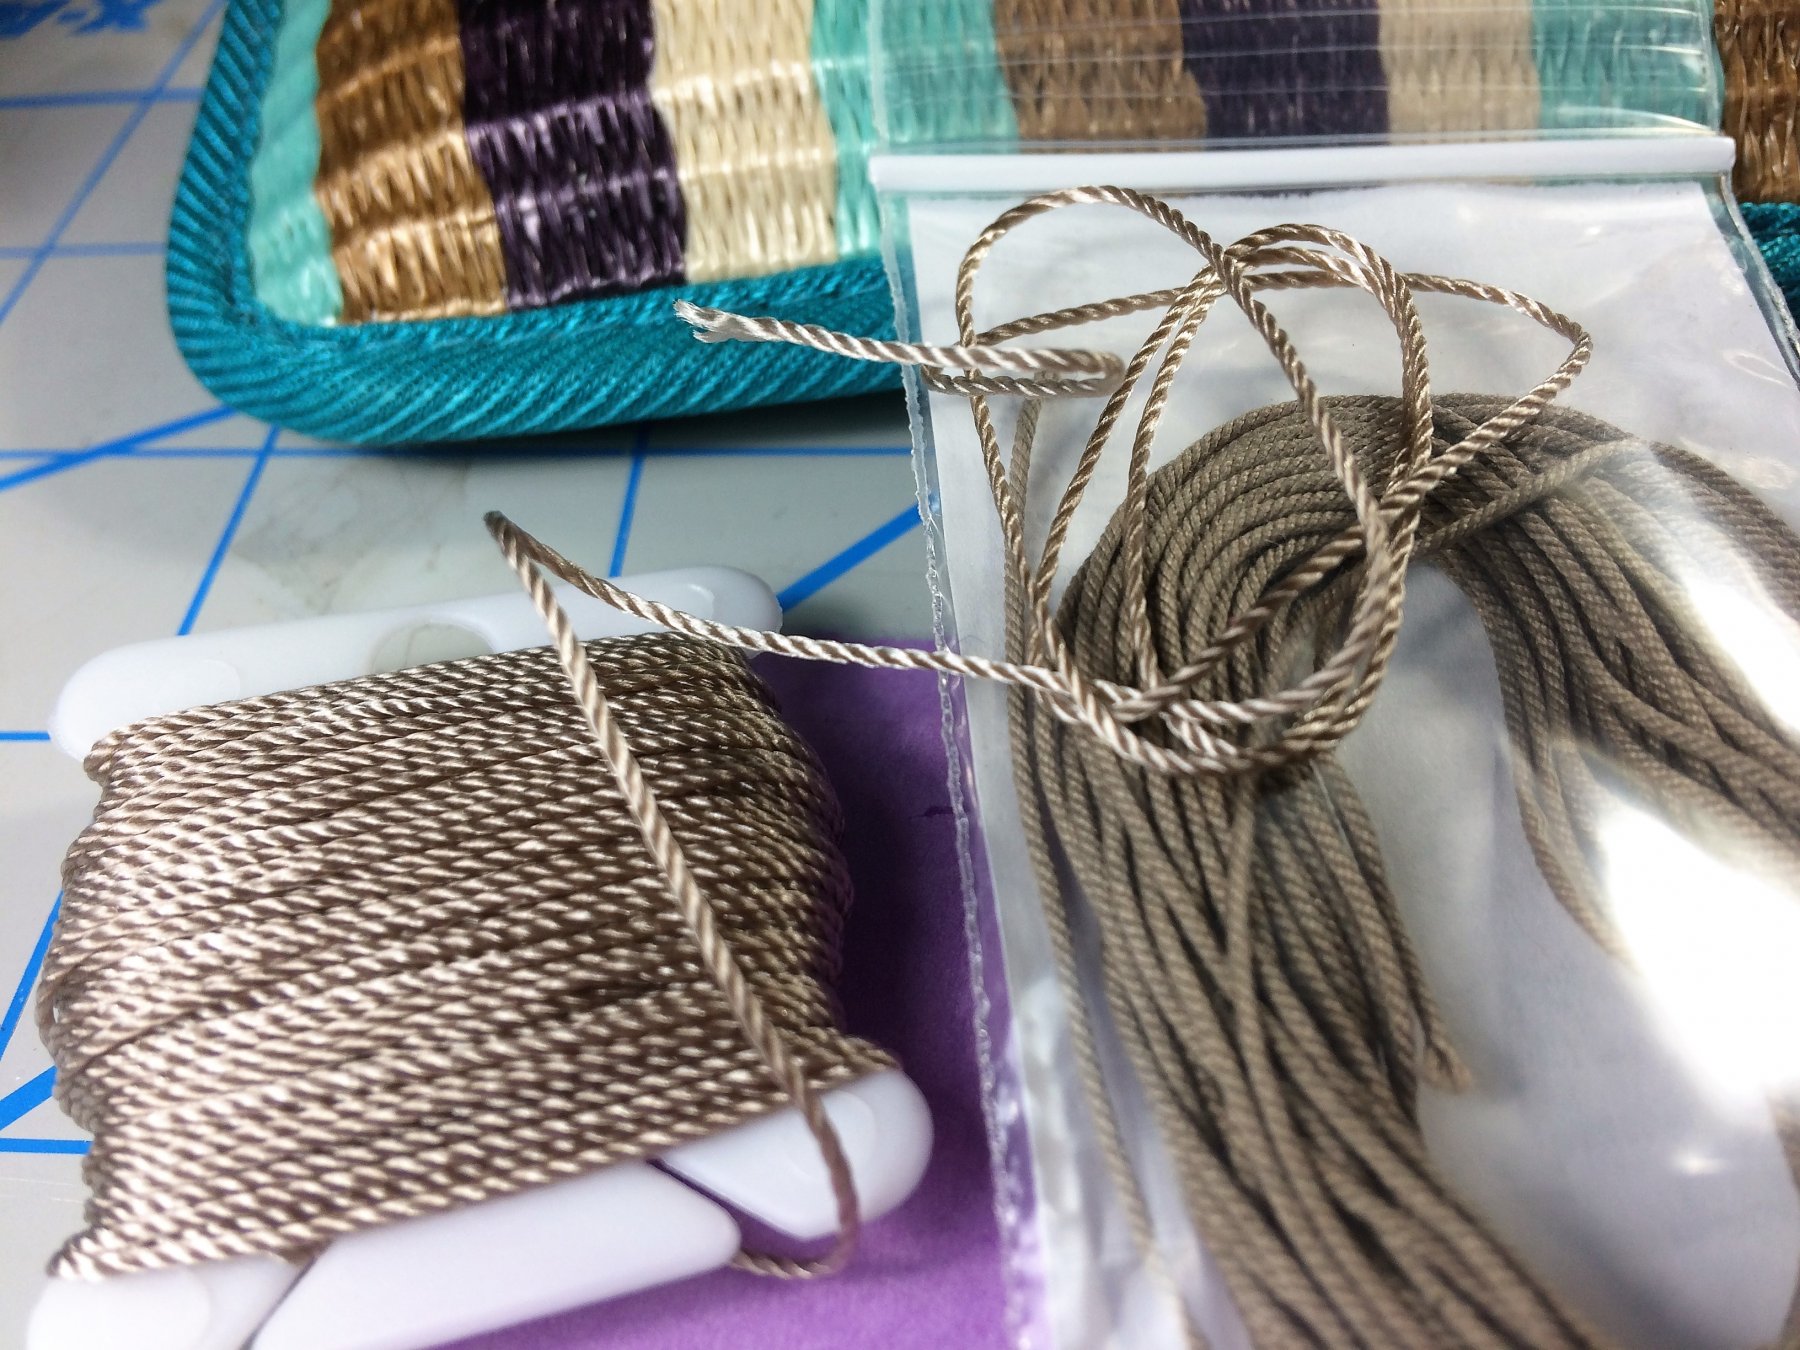
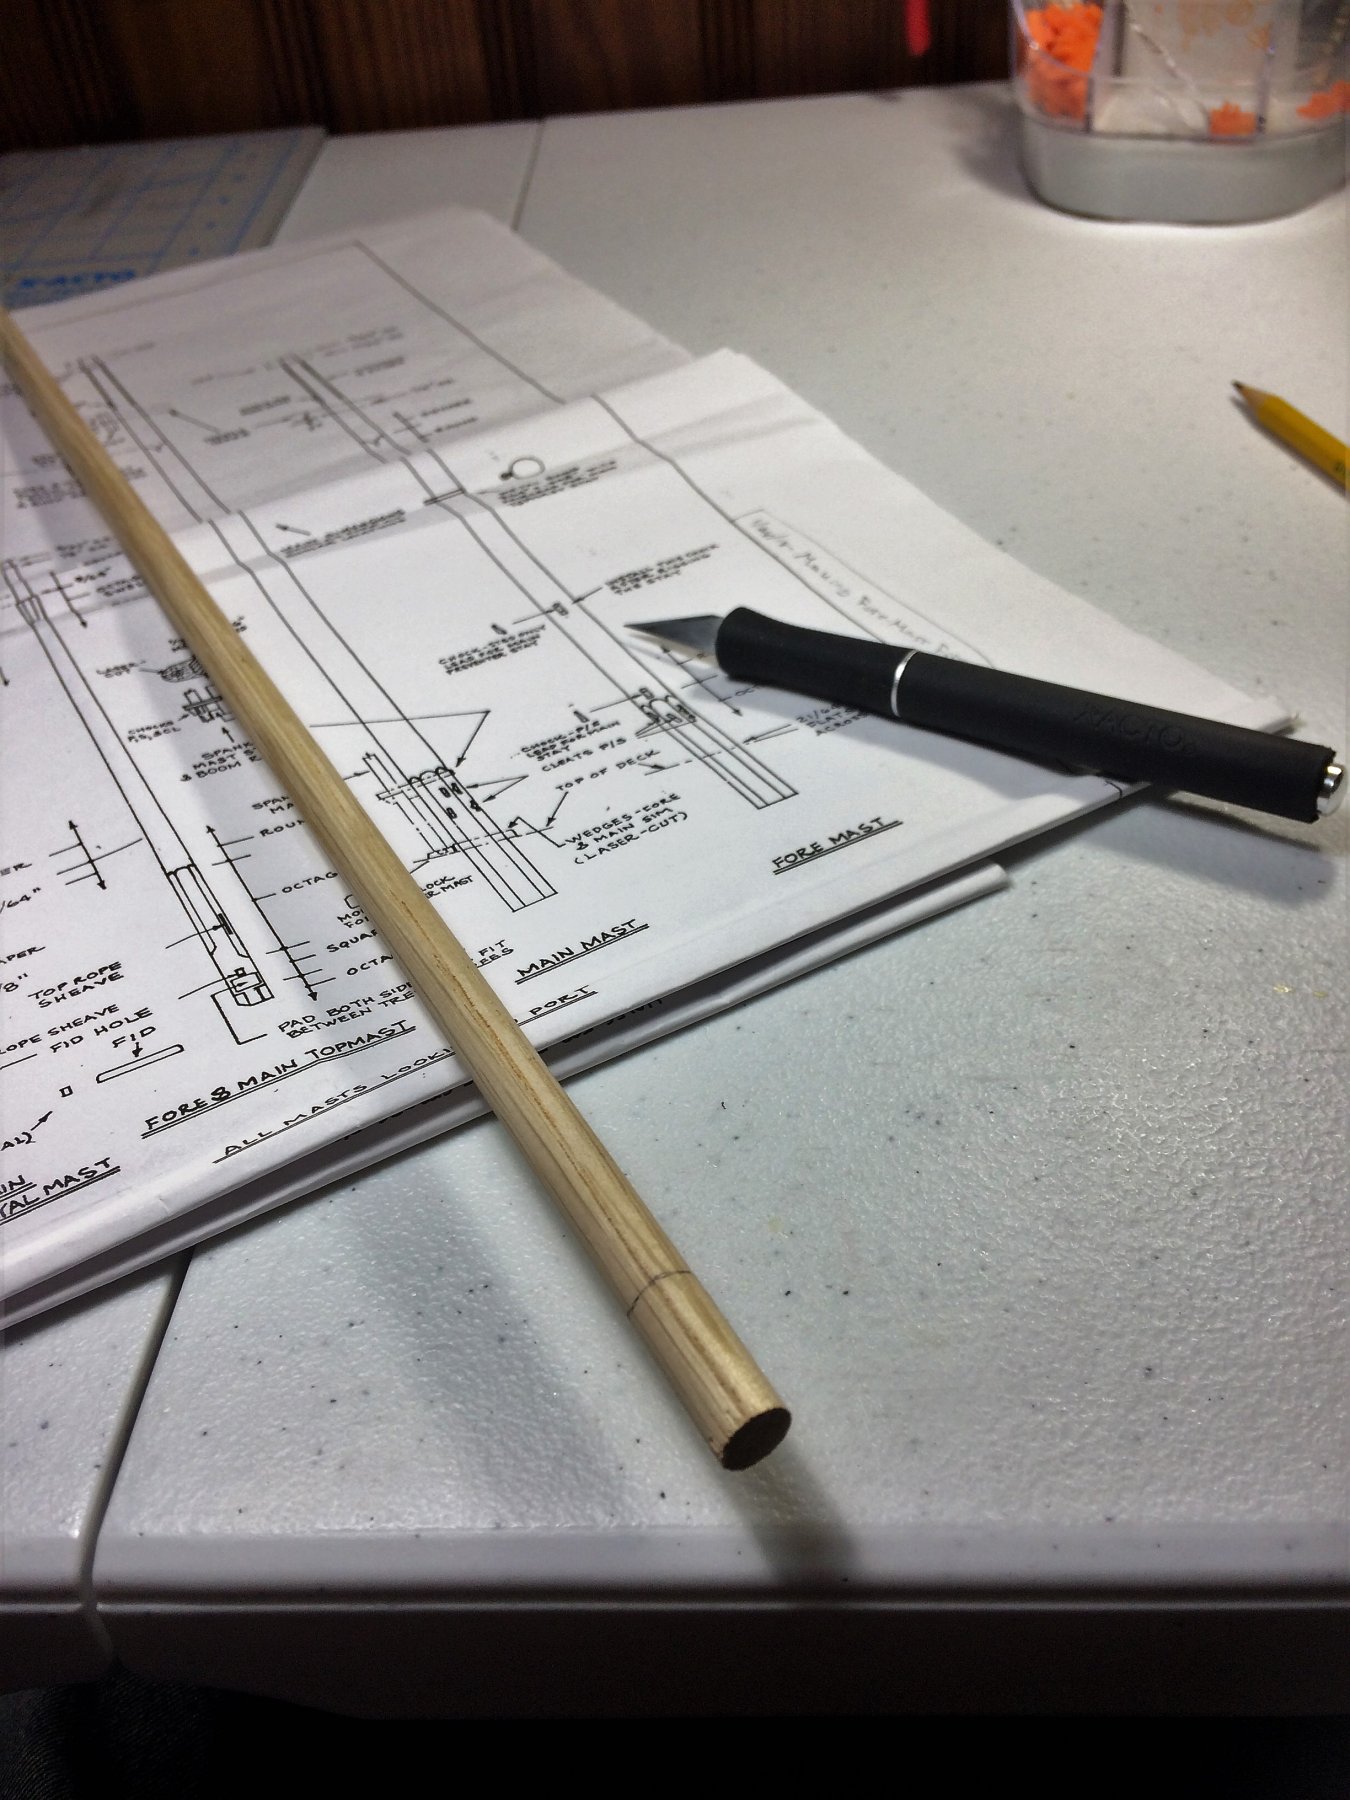
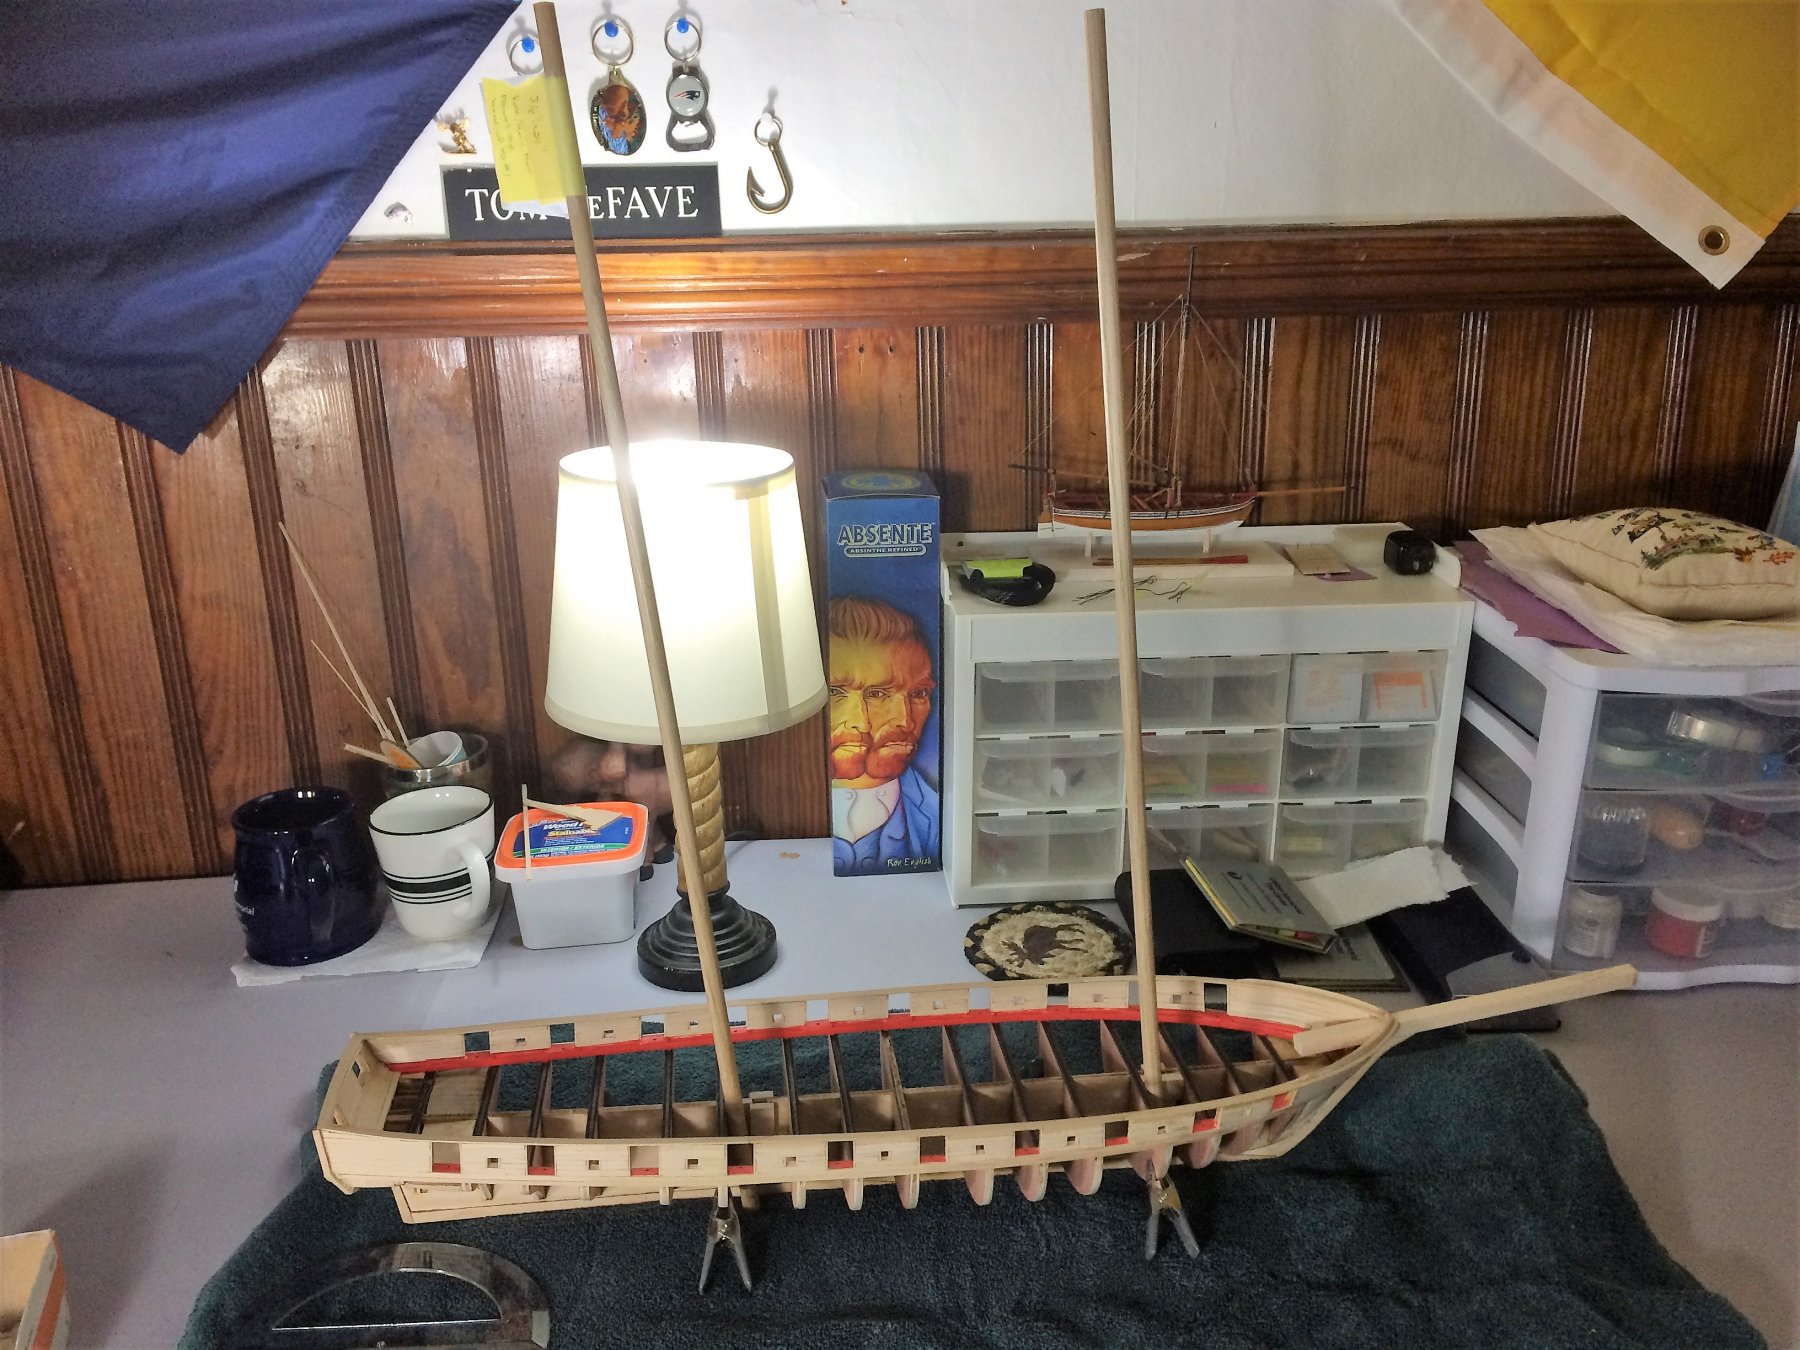
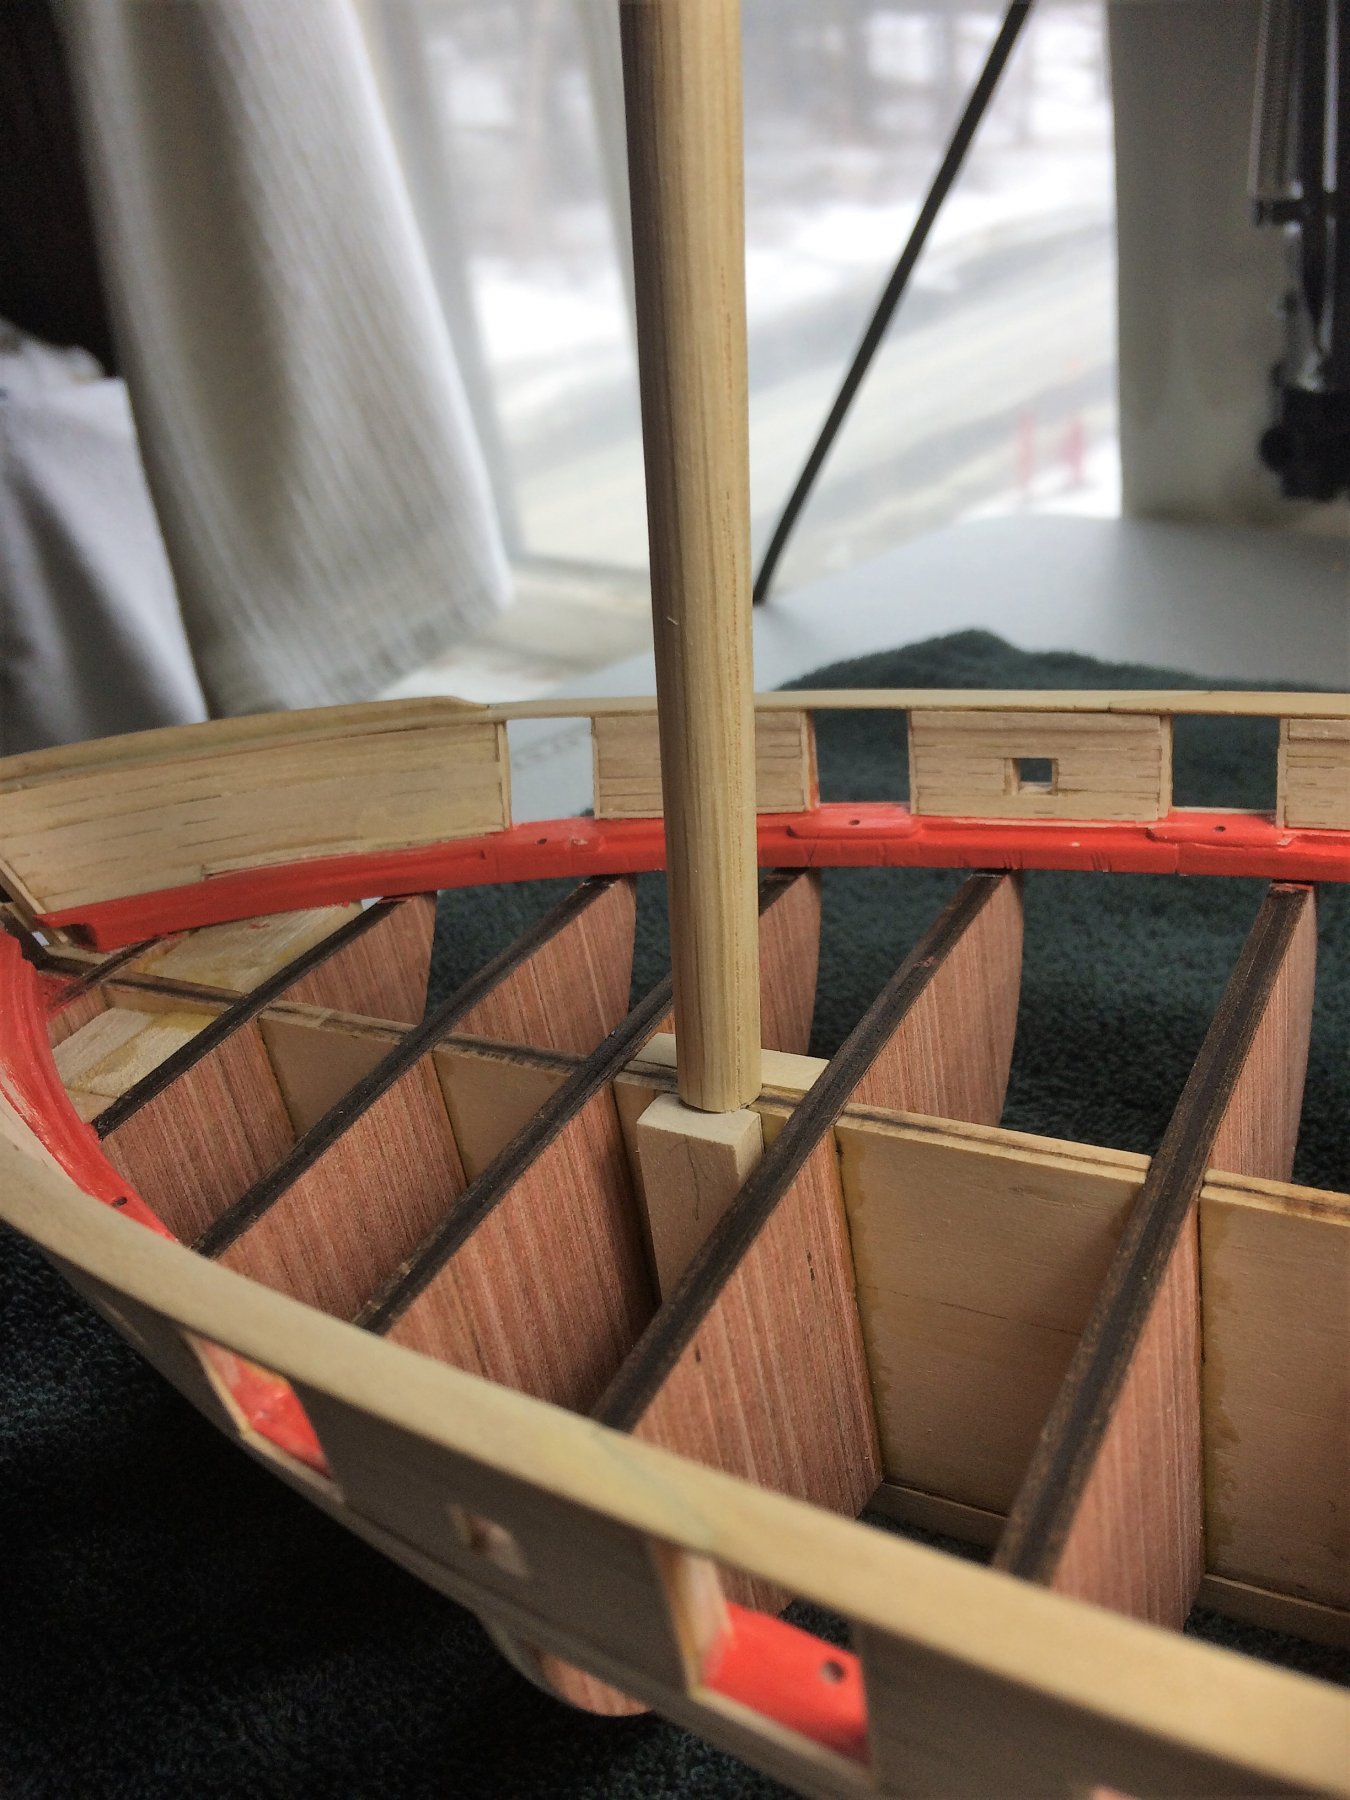
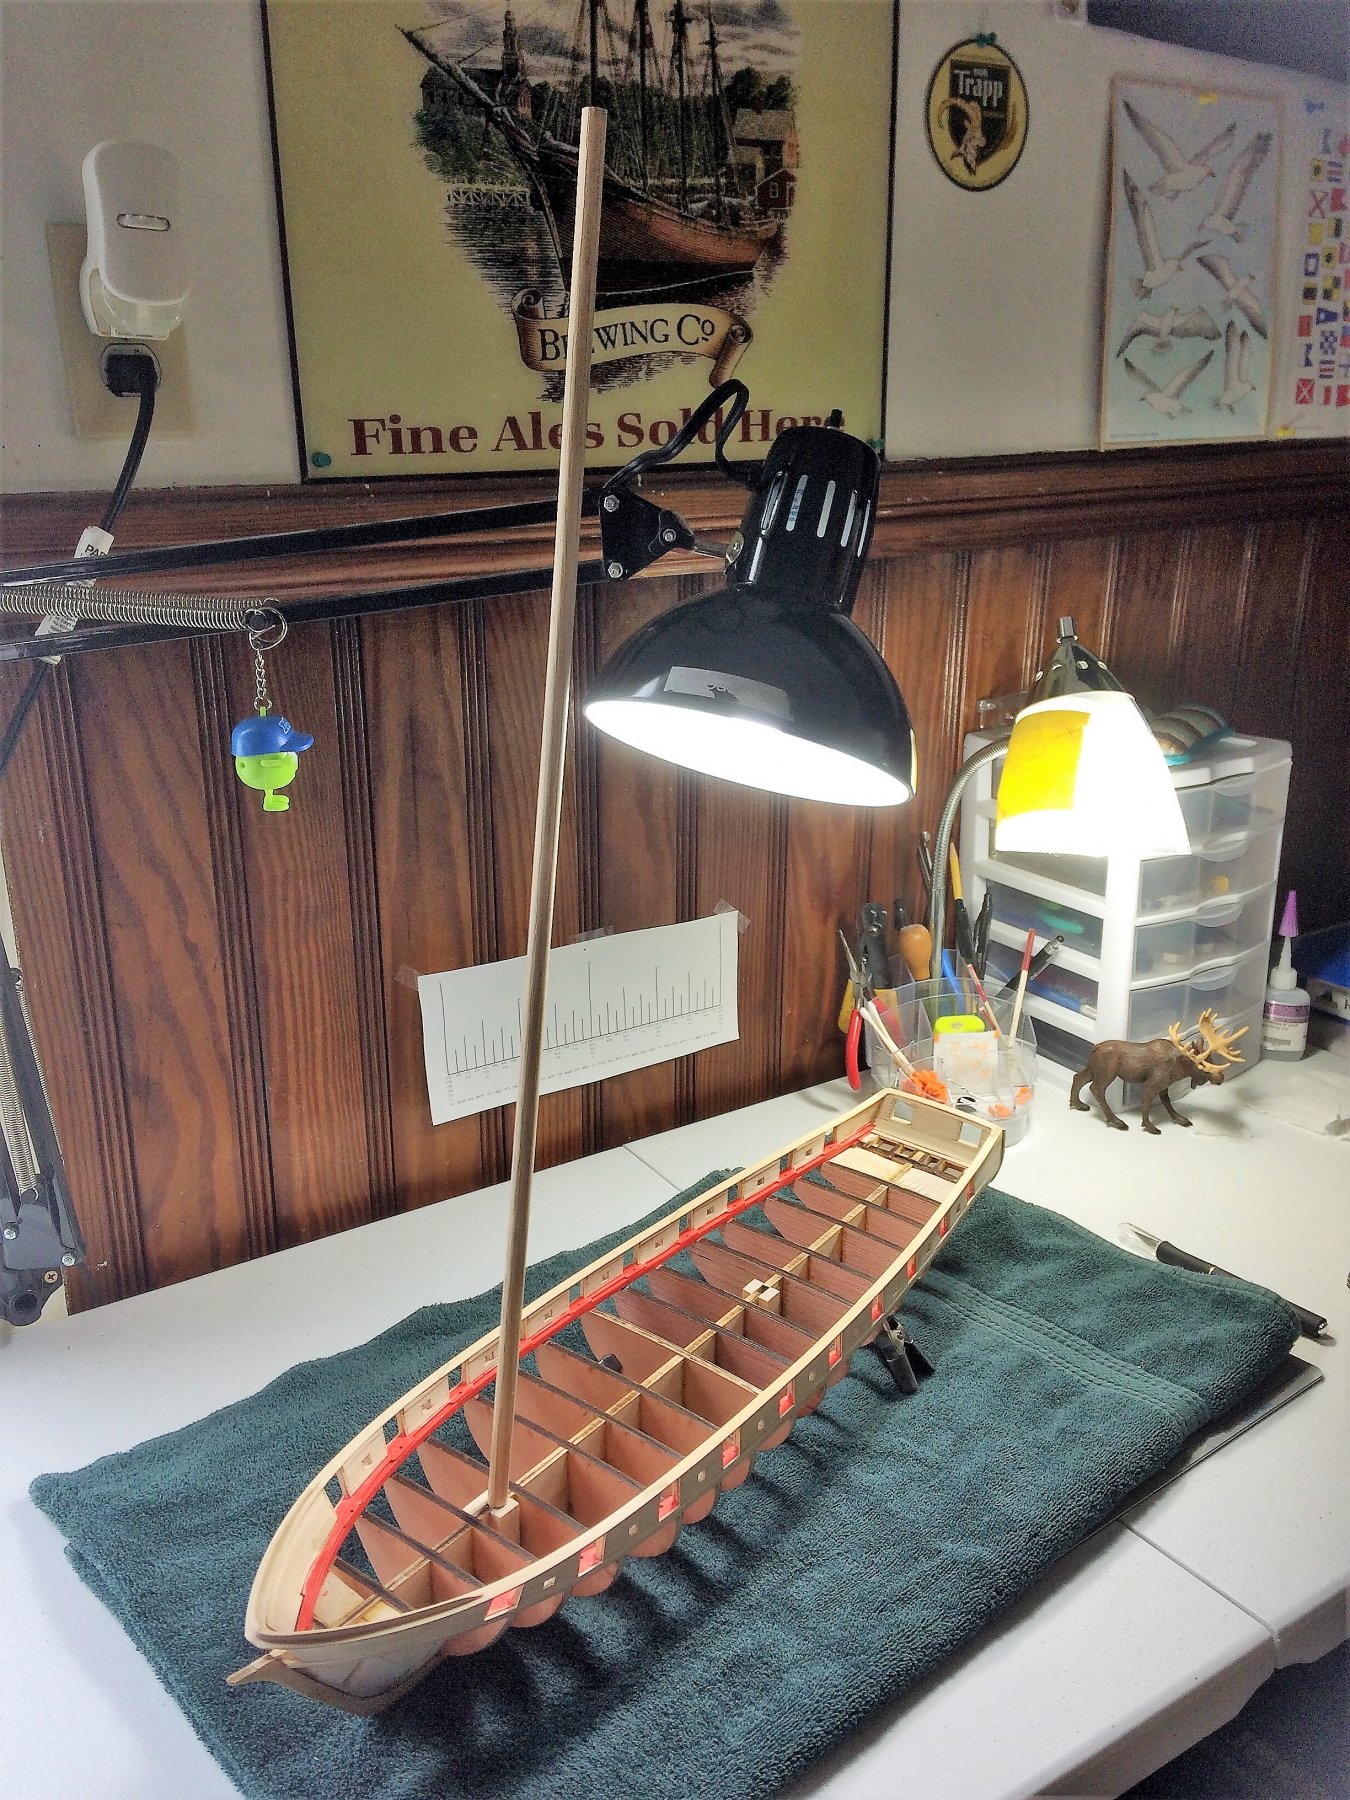
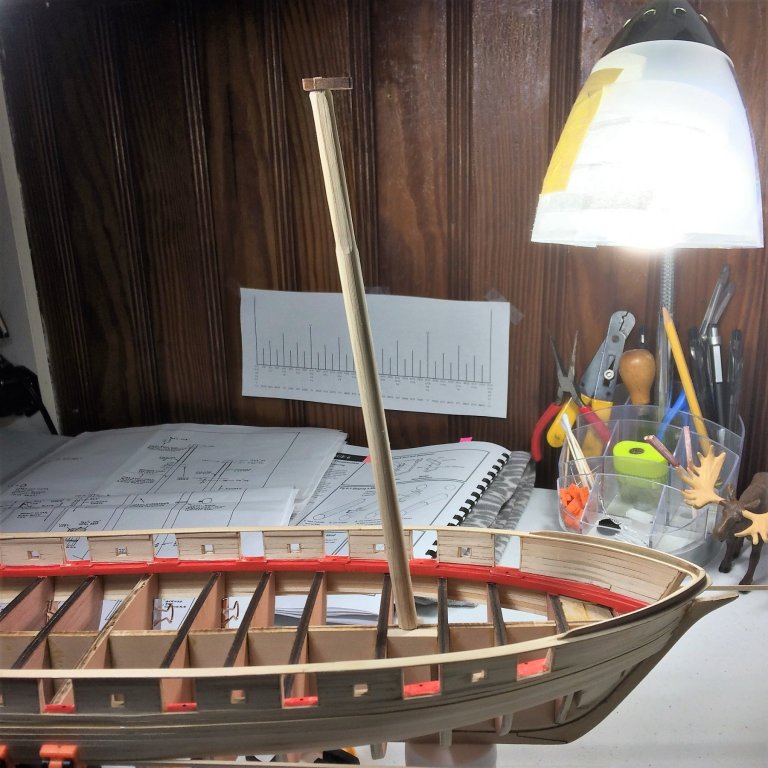
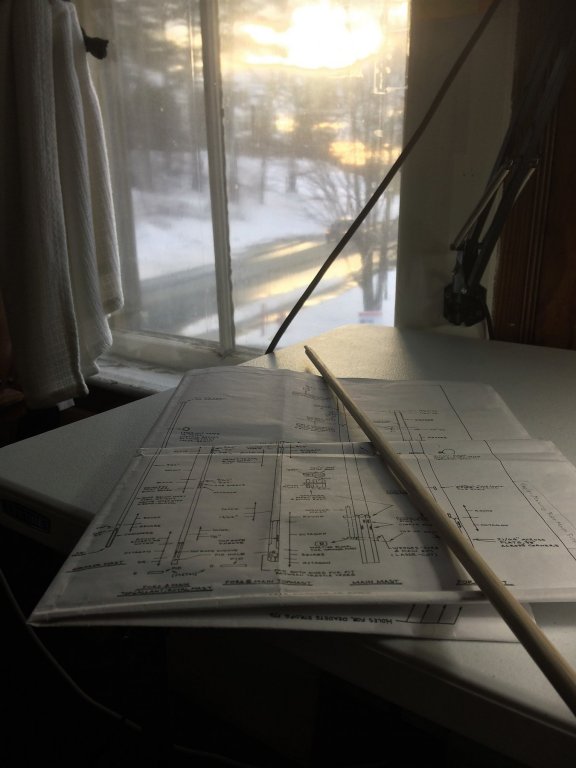
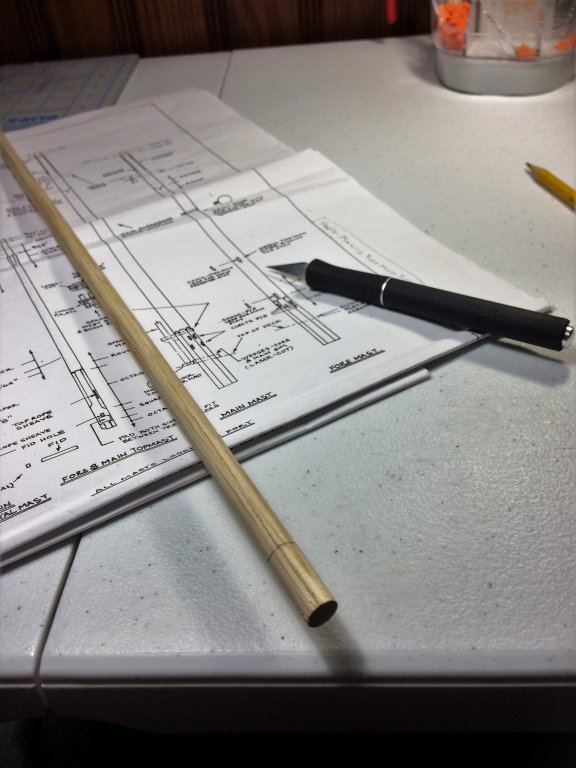
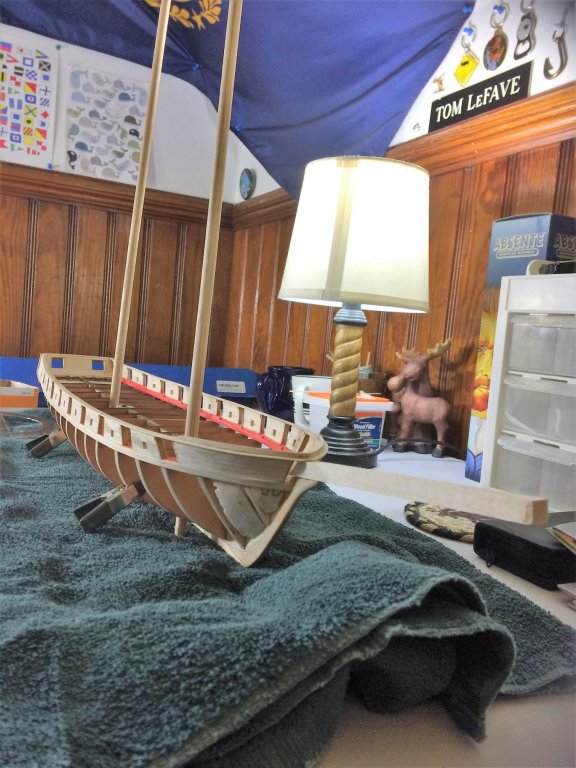
Evening, This past Friday I passed my Certification exams for work!! Months of studying paid off in the end, did really well. That means I can continue to work!! To celebrate passing my exams, I splurged and placed an order with Syren Co. Think I got the last 2 packages of 3mm hooks. Plus a selection of rope of different sizes to rig the guns with. Bought extras of rope, just to have on hand. Also threw in a bag of 3/16 single and triple blocks. Just bought a few of the blocks that I will eventually need for the entire build. This order was just a taste! With exams behind me, took care of all chores on Saturday, and got some great build time in this weekend. I haven't left my house in 48 hours! As mentioned in a prior post I've started marking and carving my Fore mast first. The dowel stock that came with the kit was surprisingly straight. Except for one end of one of the dowels, I'll avoid that end. Mind you, this will be all by hand. I don't own a lathe, mill, or any larger power tools just yet. As you can see below, as I was measuring things out and couldn't resist a "dry fit" on the masts. Its somewhat representative of the final height of the ship.....somewhat. She's a big one!! Below is my very first cut mast. I used a Dremel and Exacto to whittle it down. With some appropriate sanding to the insert and I should be able to control the final angle of the mast. Well, It sounds good in my head! Surprisingly it fits really well. Snug with little side to side play, and she's straight! A larger view. Obviously this is just playing around and the dowel will be appropriately cut to final dimensions for a Fore Mast. Meanwhile, Old Man Winter continues to batter outside. Below was last Wednesday night. We received about 10 inches. Signs of Spring are around. Its a lot brighter when I get out of work at 5pm. Toasty warm in the Shipyard tho!!!! As much as I love Winter...........I'm ready for some baseball!!! Stay warm, Tom E


-
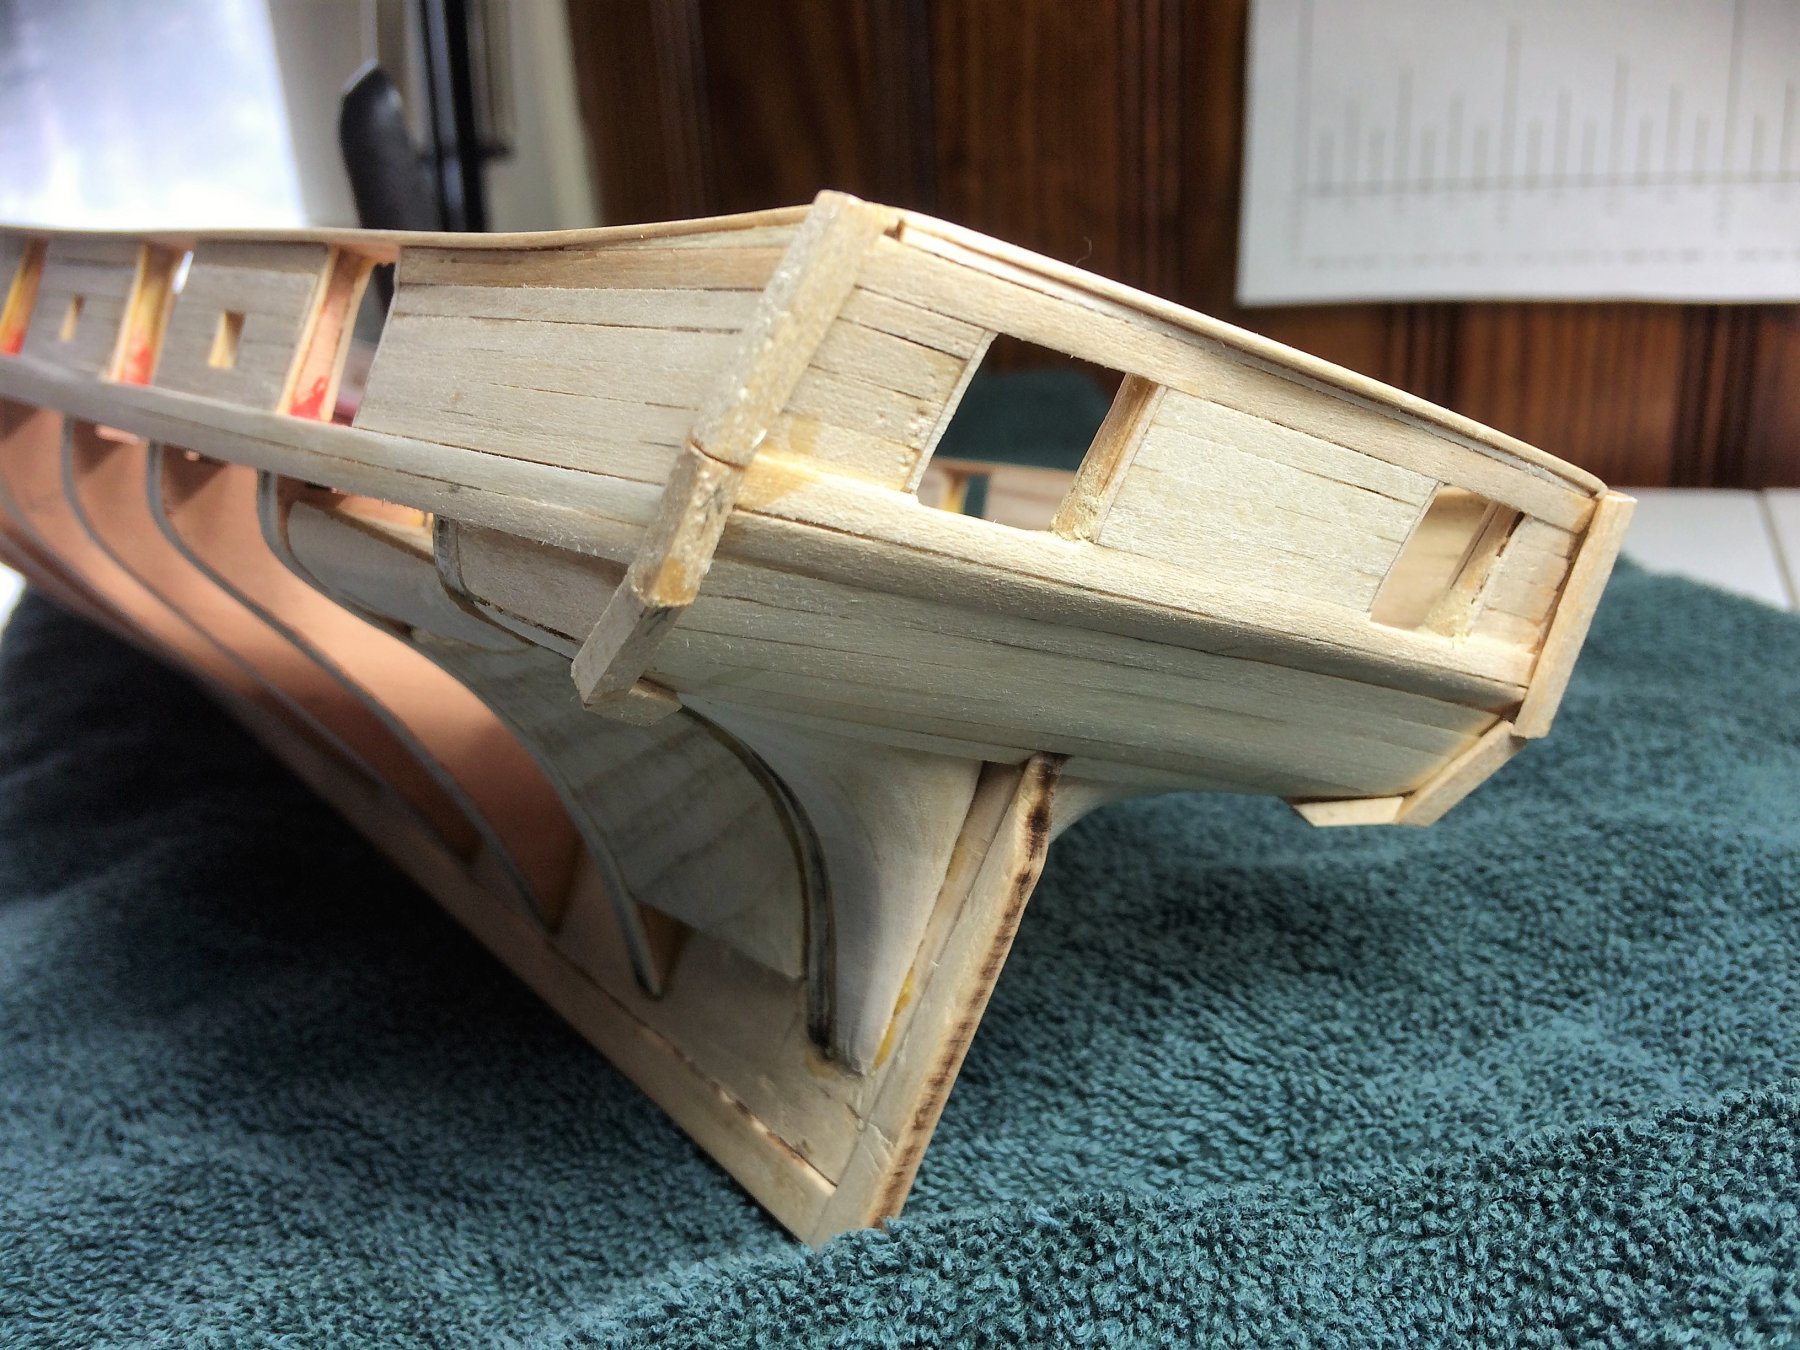
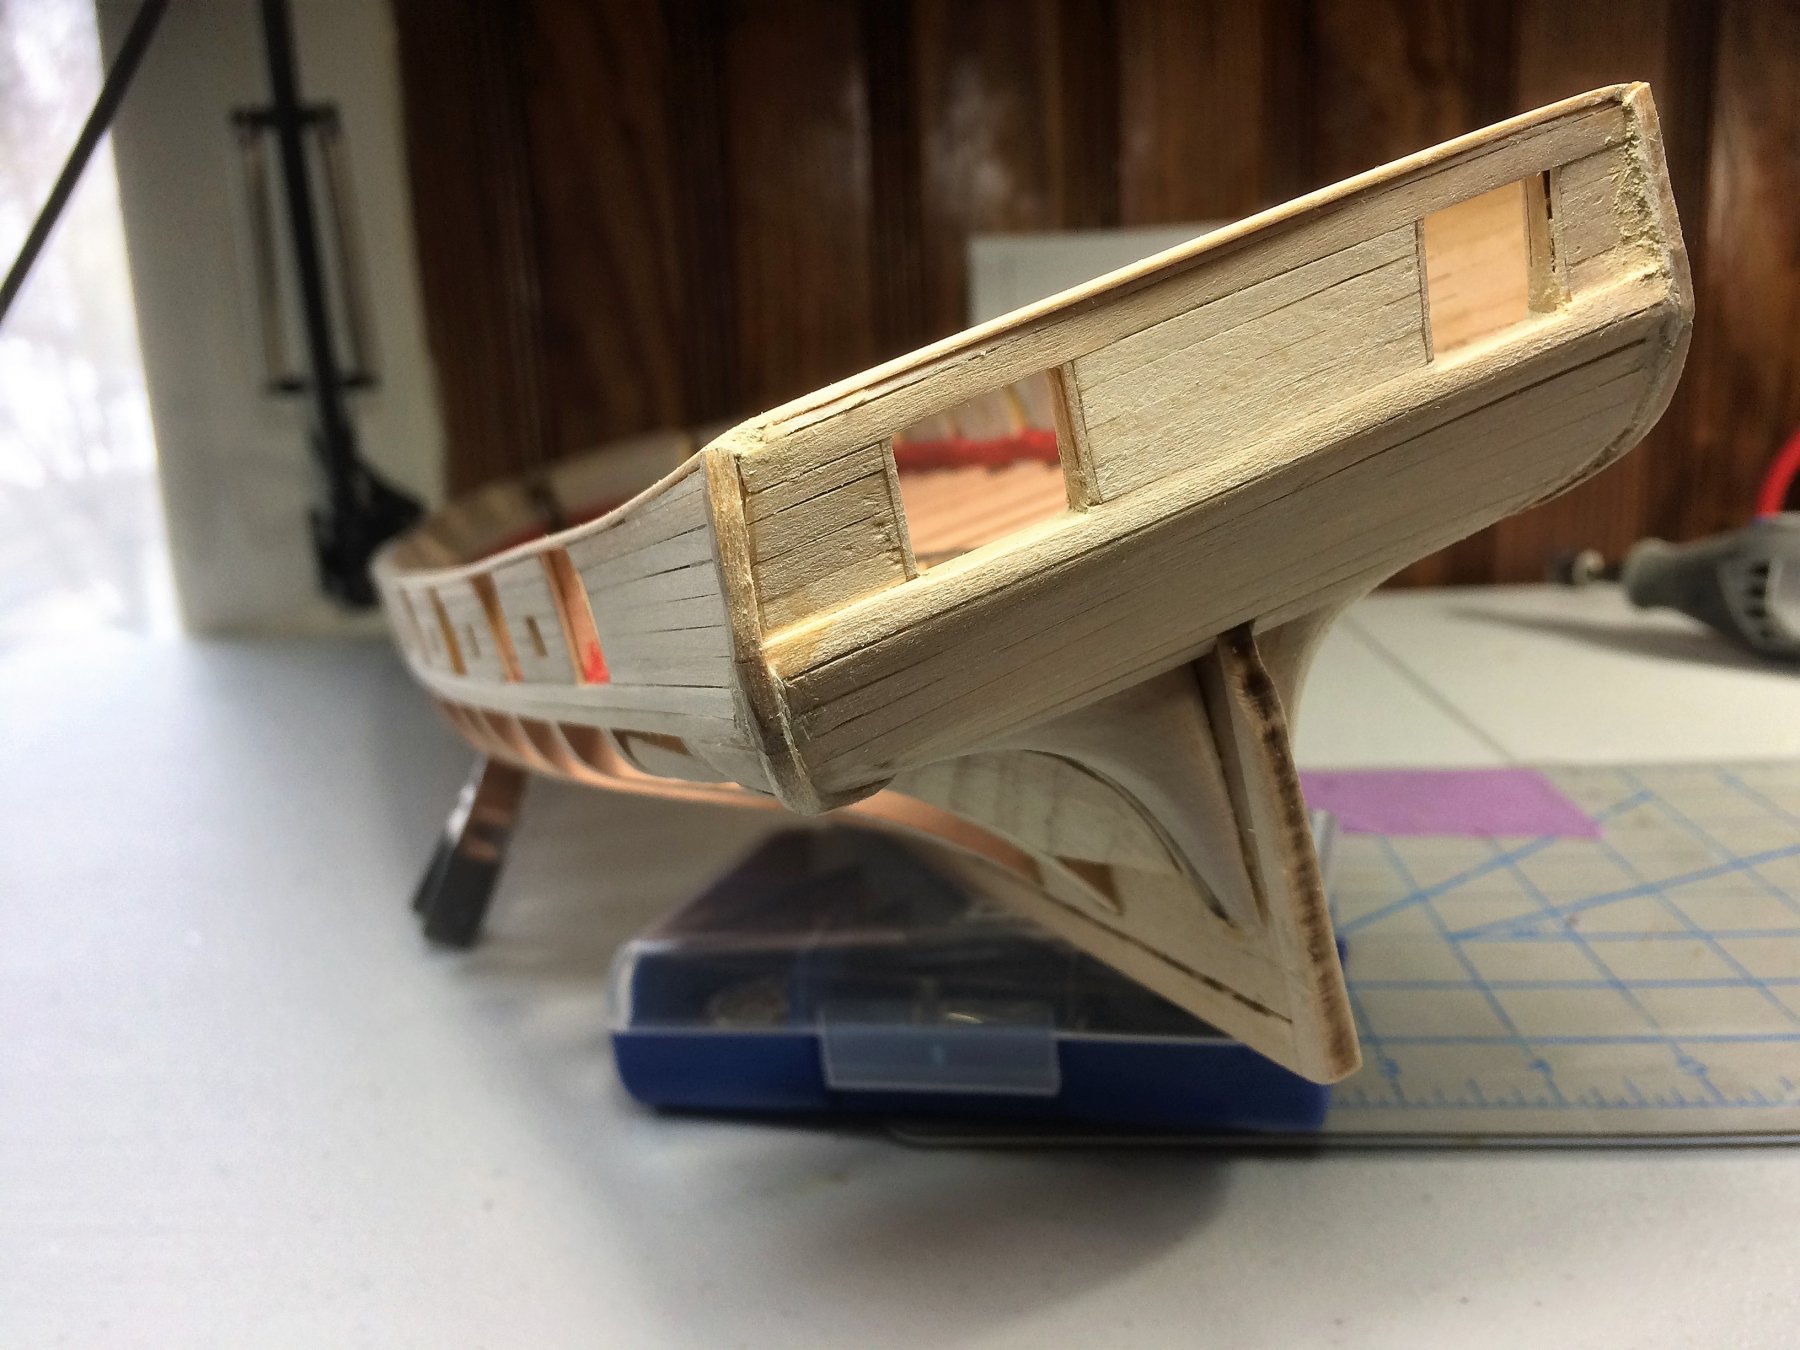
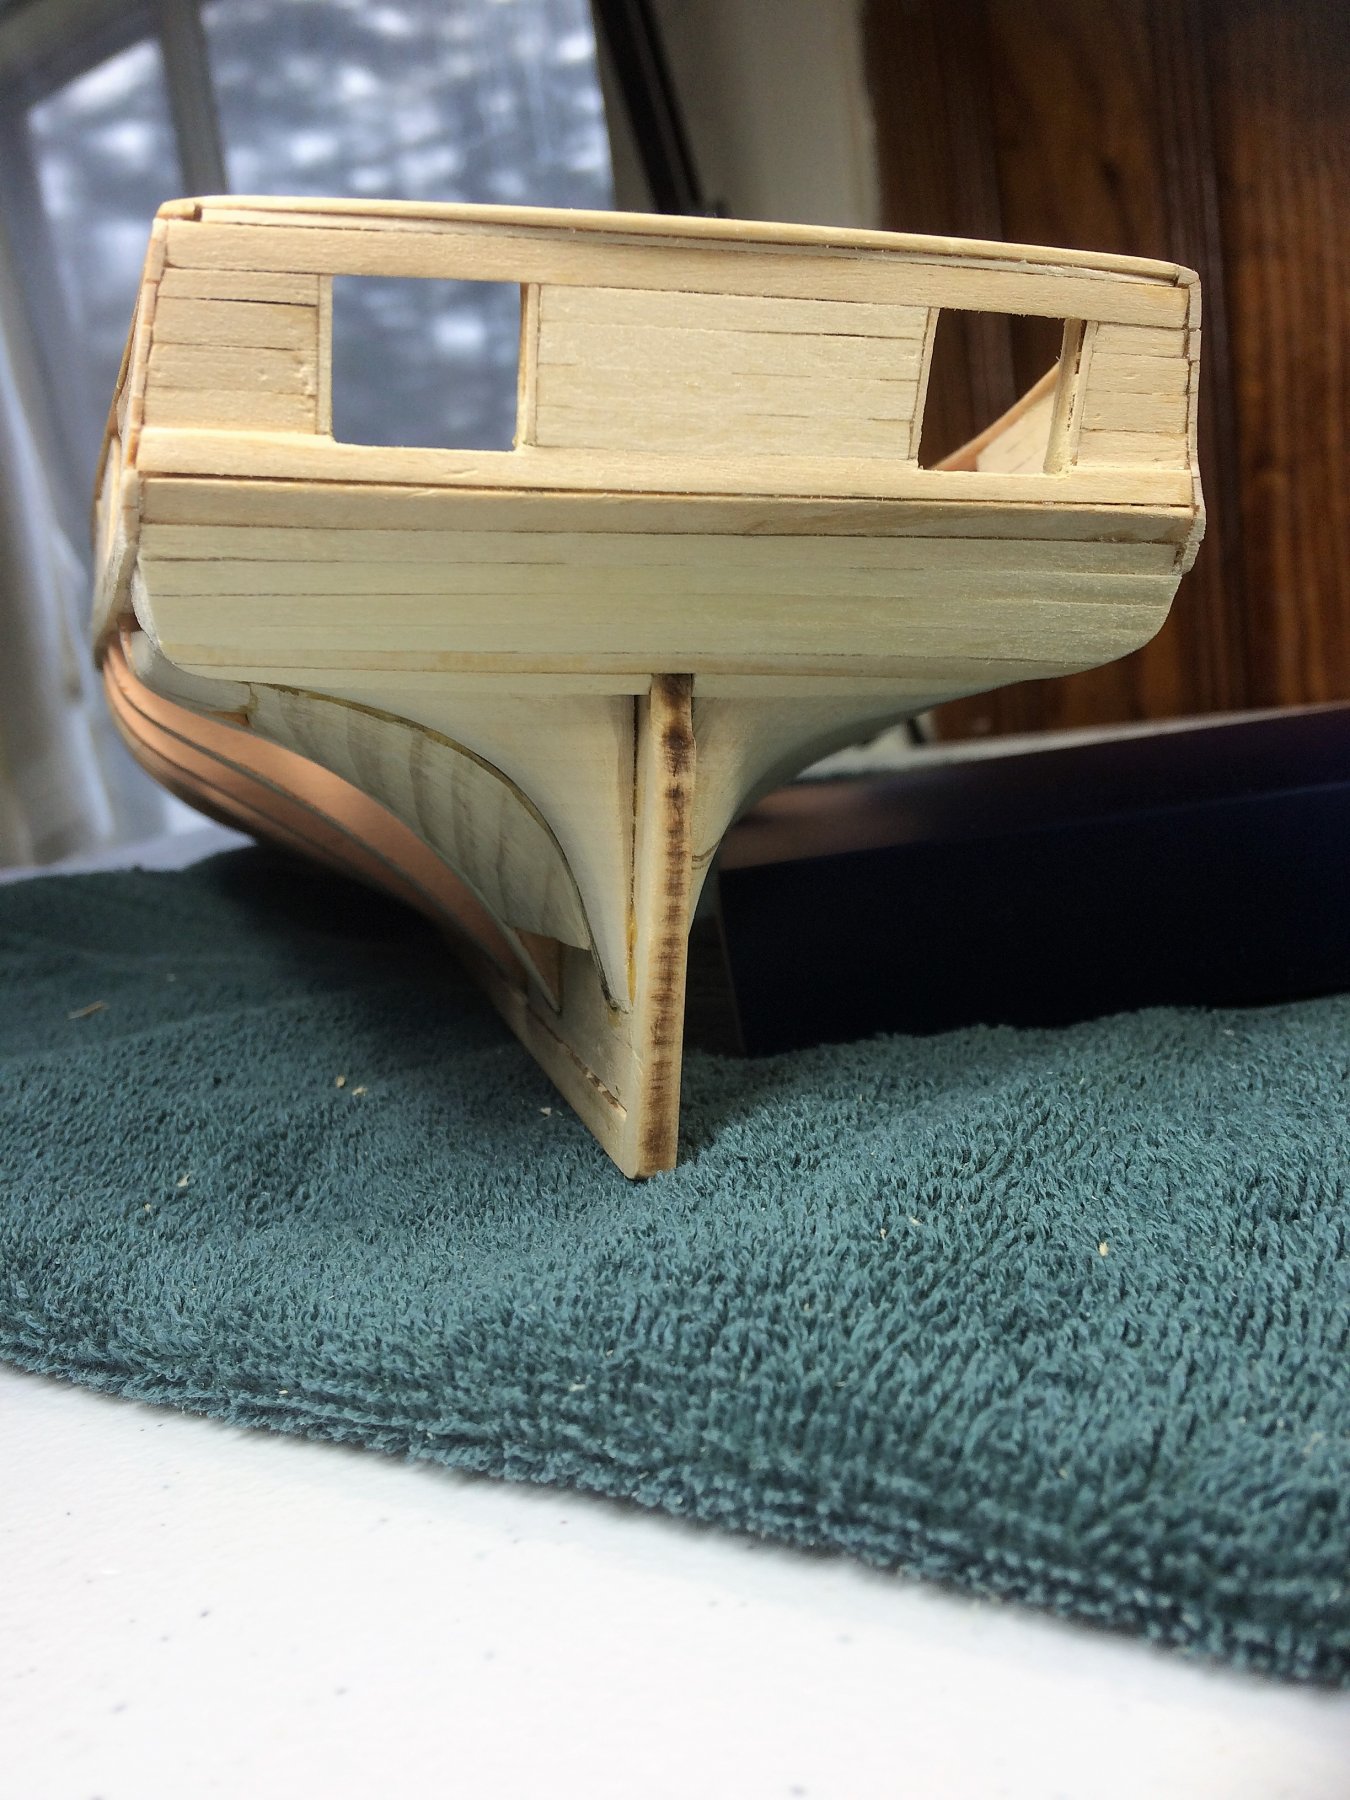
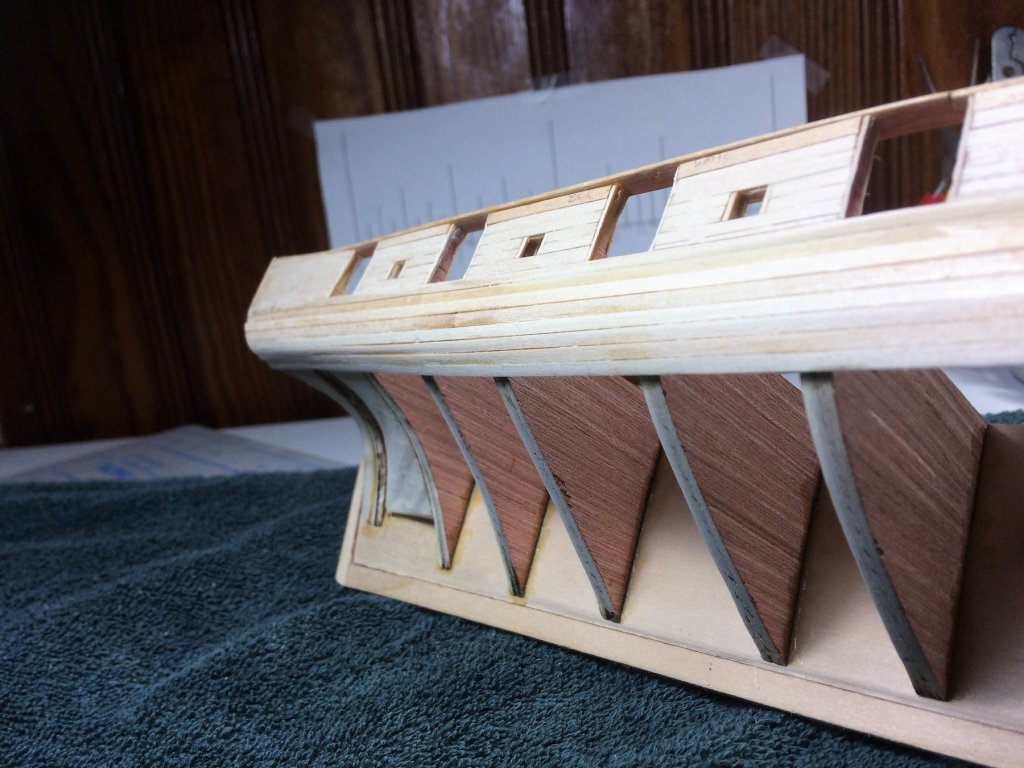
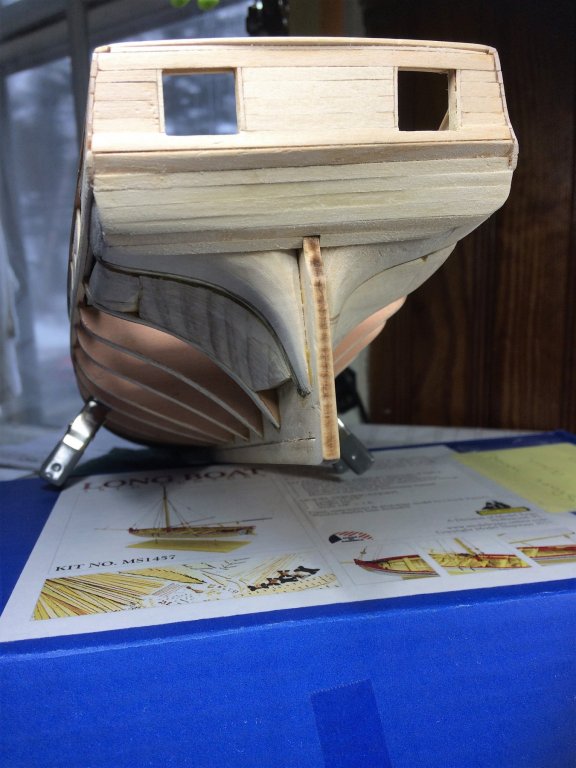
Evening, Well the Super Bowl didn't go the Patriots way, Oh well.......Go Bruins! I did get some done in the Shipyard. Got the Fashion pieces done. Man I was nervous about these things. I tried several times. Below, I started with the straight pieces, easy enough. I couldn't carve too much out from where they meet the hull, I just kept splitting them. My fingers learned that lesson. Must have stabbed/sliced myself a dozen times. Nice easy pieces. They protrude a bit from the hull, but that should come down with sanding. Wouldn't wooden arms that hold the small ship (yawl?) that hangs over the back come thru this area? Maybe a I can do something there to "blend" them in better. Below is one of my first fashion pieces. I had to bring down the amount of pieces used for the curve. It was getting out of hand! Below, you can see I got it down to 3 pieces, instead of 4-6 pieces. In the end, one side had 3 pieces, the other had 4. From the dings in that wood, it looks like its already taken some cannon fire! Mike, In the end I did what you mentioned. I carved them, with some filler to help. A Dremel helped as well!! I went a little heavy with the sanding in some areas. I can live with that, and the paint will cover as well. The Port side has been cleaned up, Starboard was next. With more sanding they shine up. Tom E


-
Hate it when that work thing gets in the way! A bad day at work, and I tend to stay away from the Shipyard. I would break more things than create. I really like how there's still some light reaching the inner areas of the boat. It really shows off the detail. She is looking awesome! Tom E
-
The old saying......"good from a far but far from good" Tom E
-
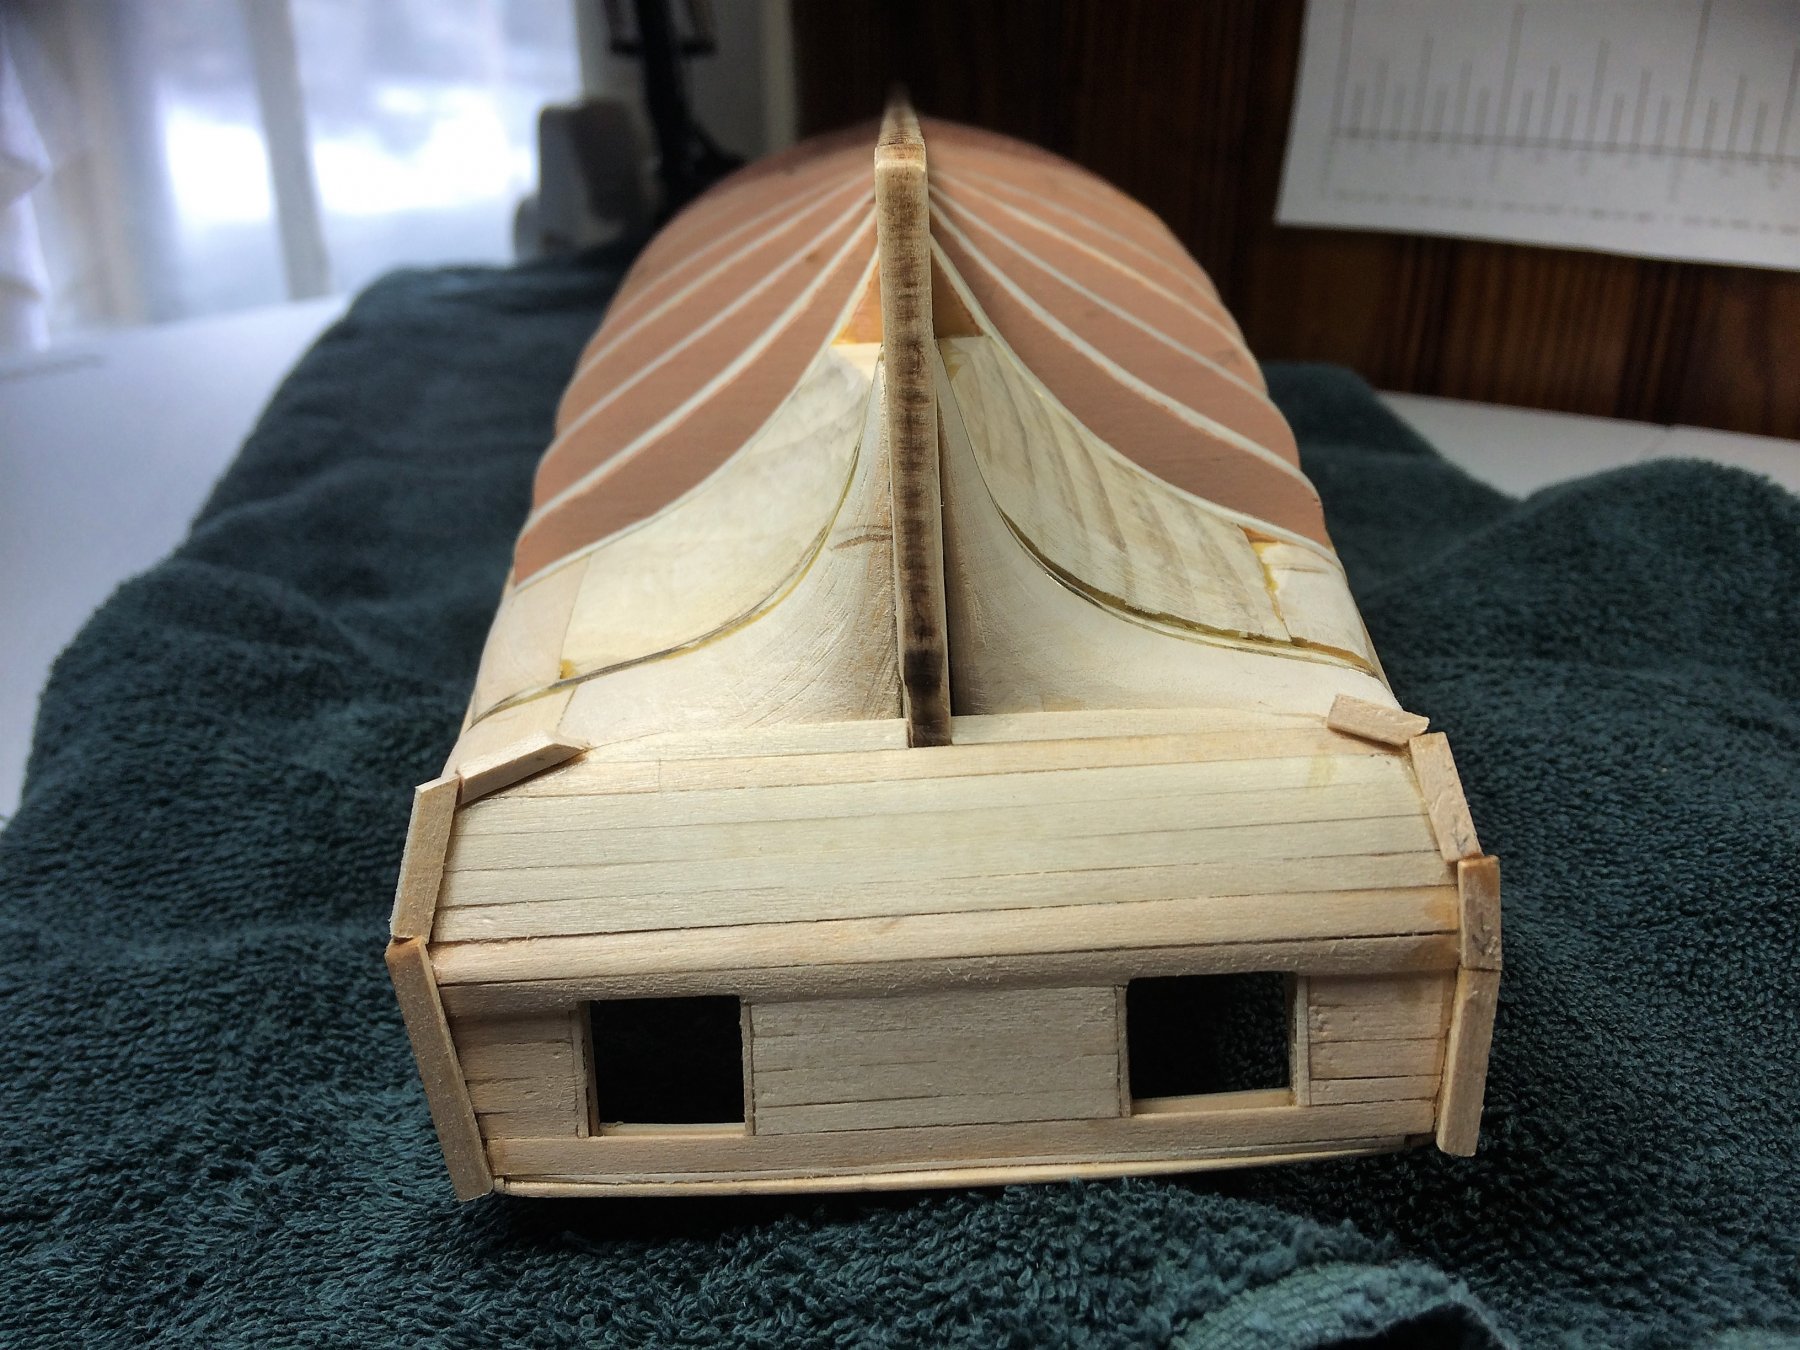
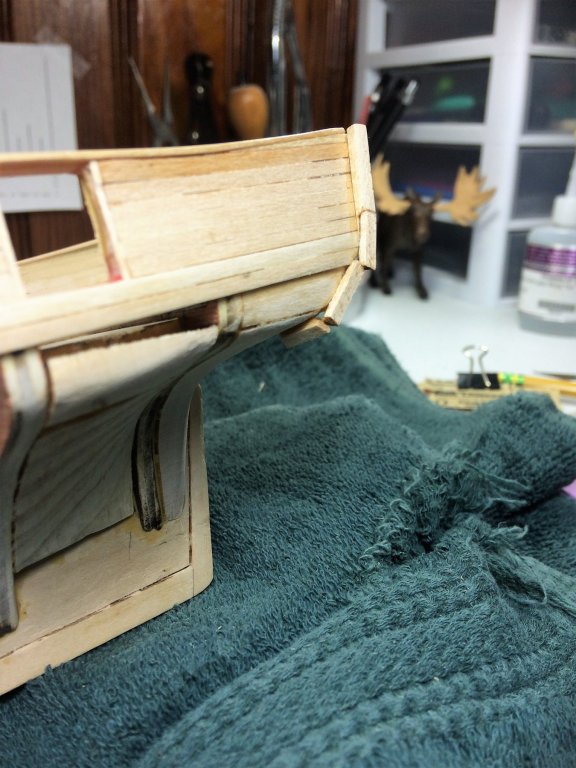
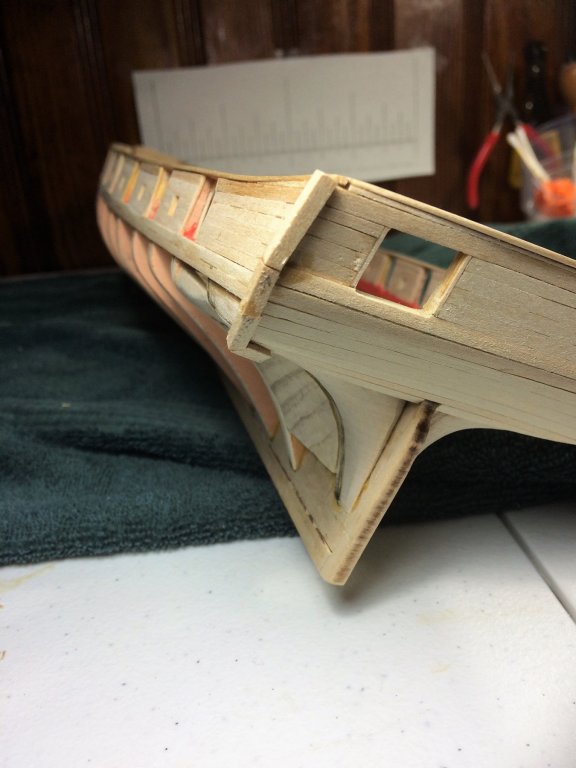
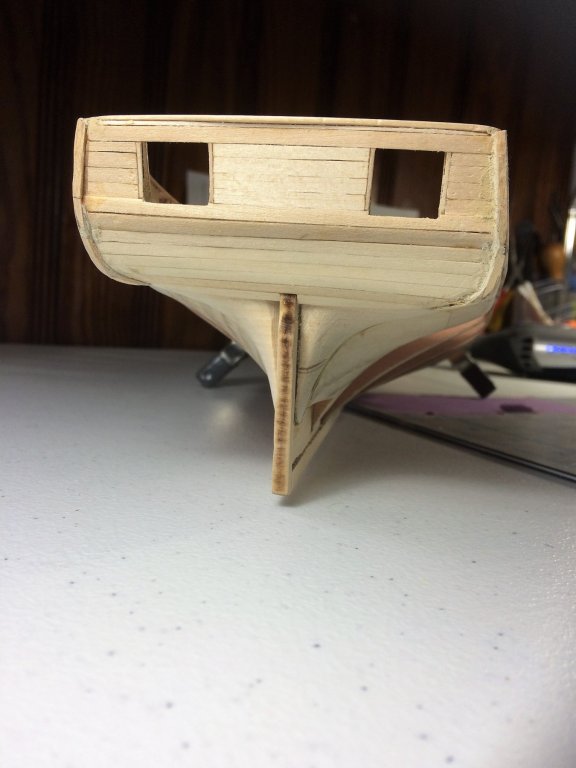
Thanks for the kind words Alan! Thanks for the likes MSW! Mike, On the slant for the transom ports, that's my own doing. I was so gun shy about this area. I had seen that slant in the plans and on other builds. I had also seen some beautiful outcomes, as well as outcomes, that I thought, had too severe of a slant. When I started this area, I would have been happy with something in between. I went real easy when planking, and wanted to keep things more symmetrical than having that slant. With my limited experience if I went head on into having that slant, my ship would probably look like it was winking at ya! In the end, I think she looks pretty sharp with better symmetry/alignment than the slant. I made a test Fashion piece last night. I tried multiple pieces to form the curve around the counter area. Oh man, I'm really hoping the second try is better! This thing looked like a busted stick stuck to a ship! One thing I realized, where I sanded down the corner of fashion piece that sits on the ship, was not deep enough. This thing looked like it would clip another ship just floating by! That's this weekends project. Tom E
-
I'm pulling up a chair for this ship! Back about 20 years ago my first wooden ship was the Bluejacket Smuggler. Sadly, I never finished it. Beer and partying were my main concern at that time. Since those days are over, per the Admiral, I've always wanted to try this ship again. I will watch with keen interest. She's a beauty already! Tom E
-
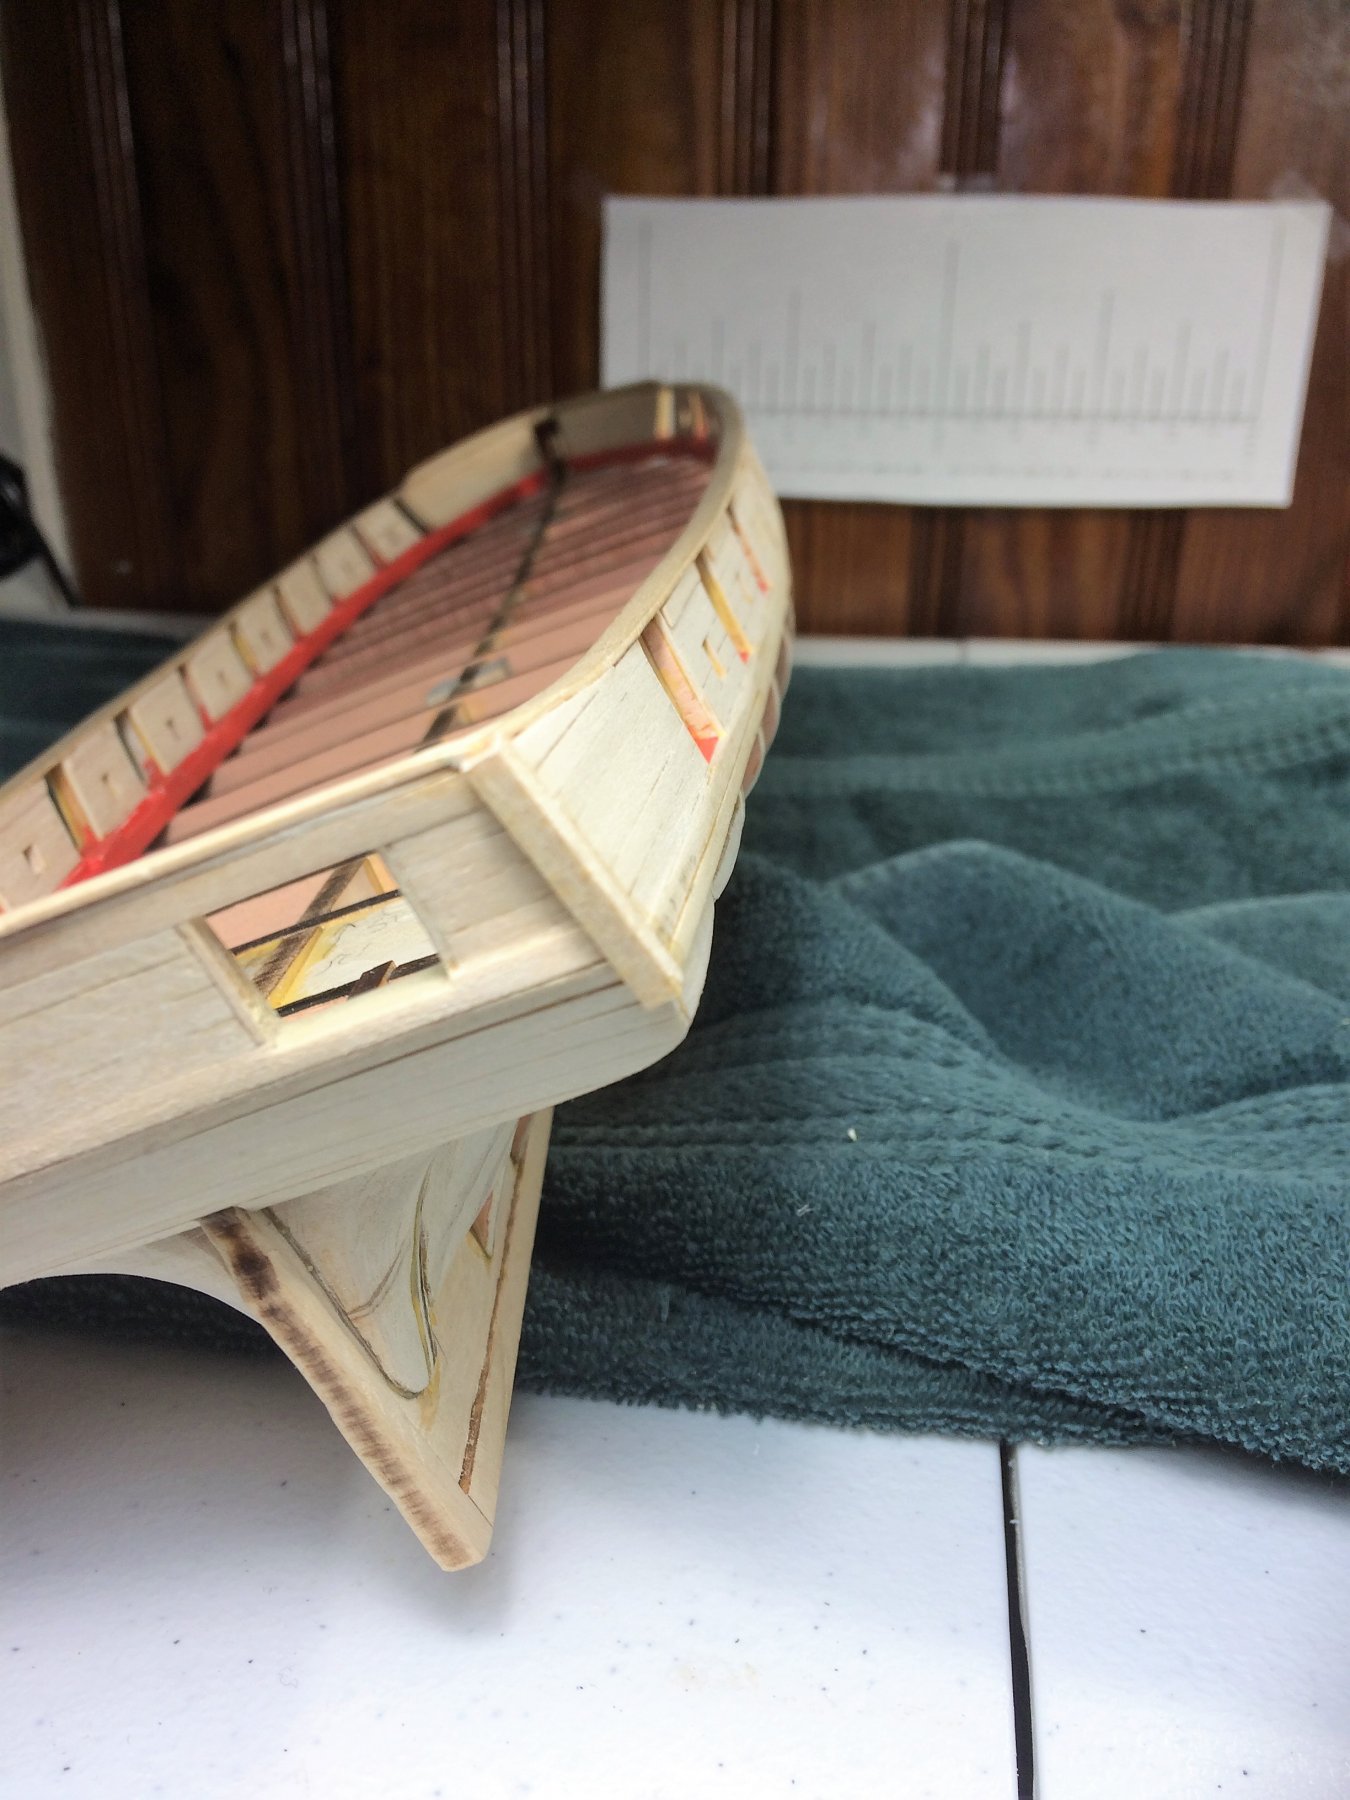
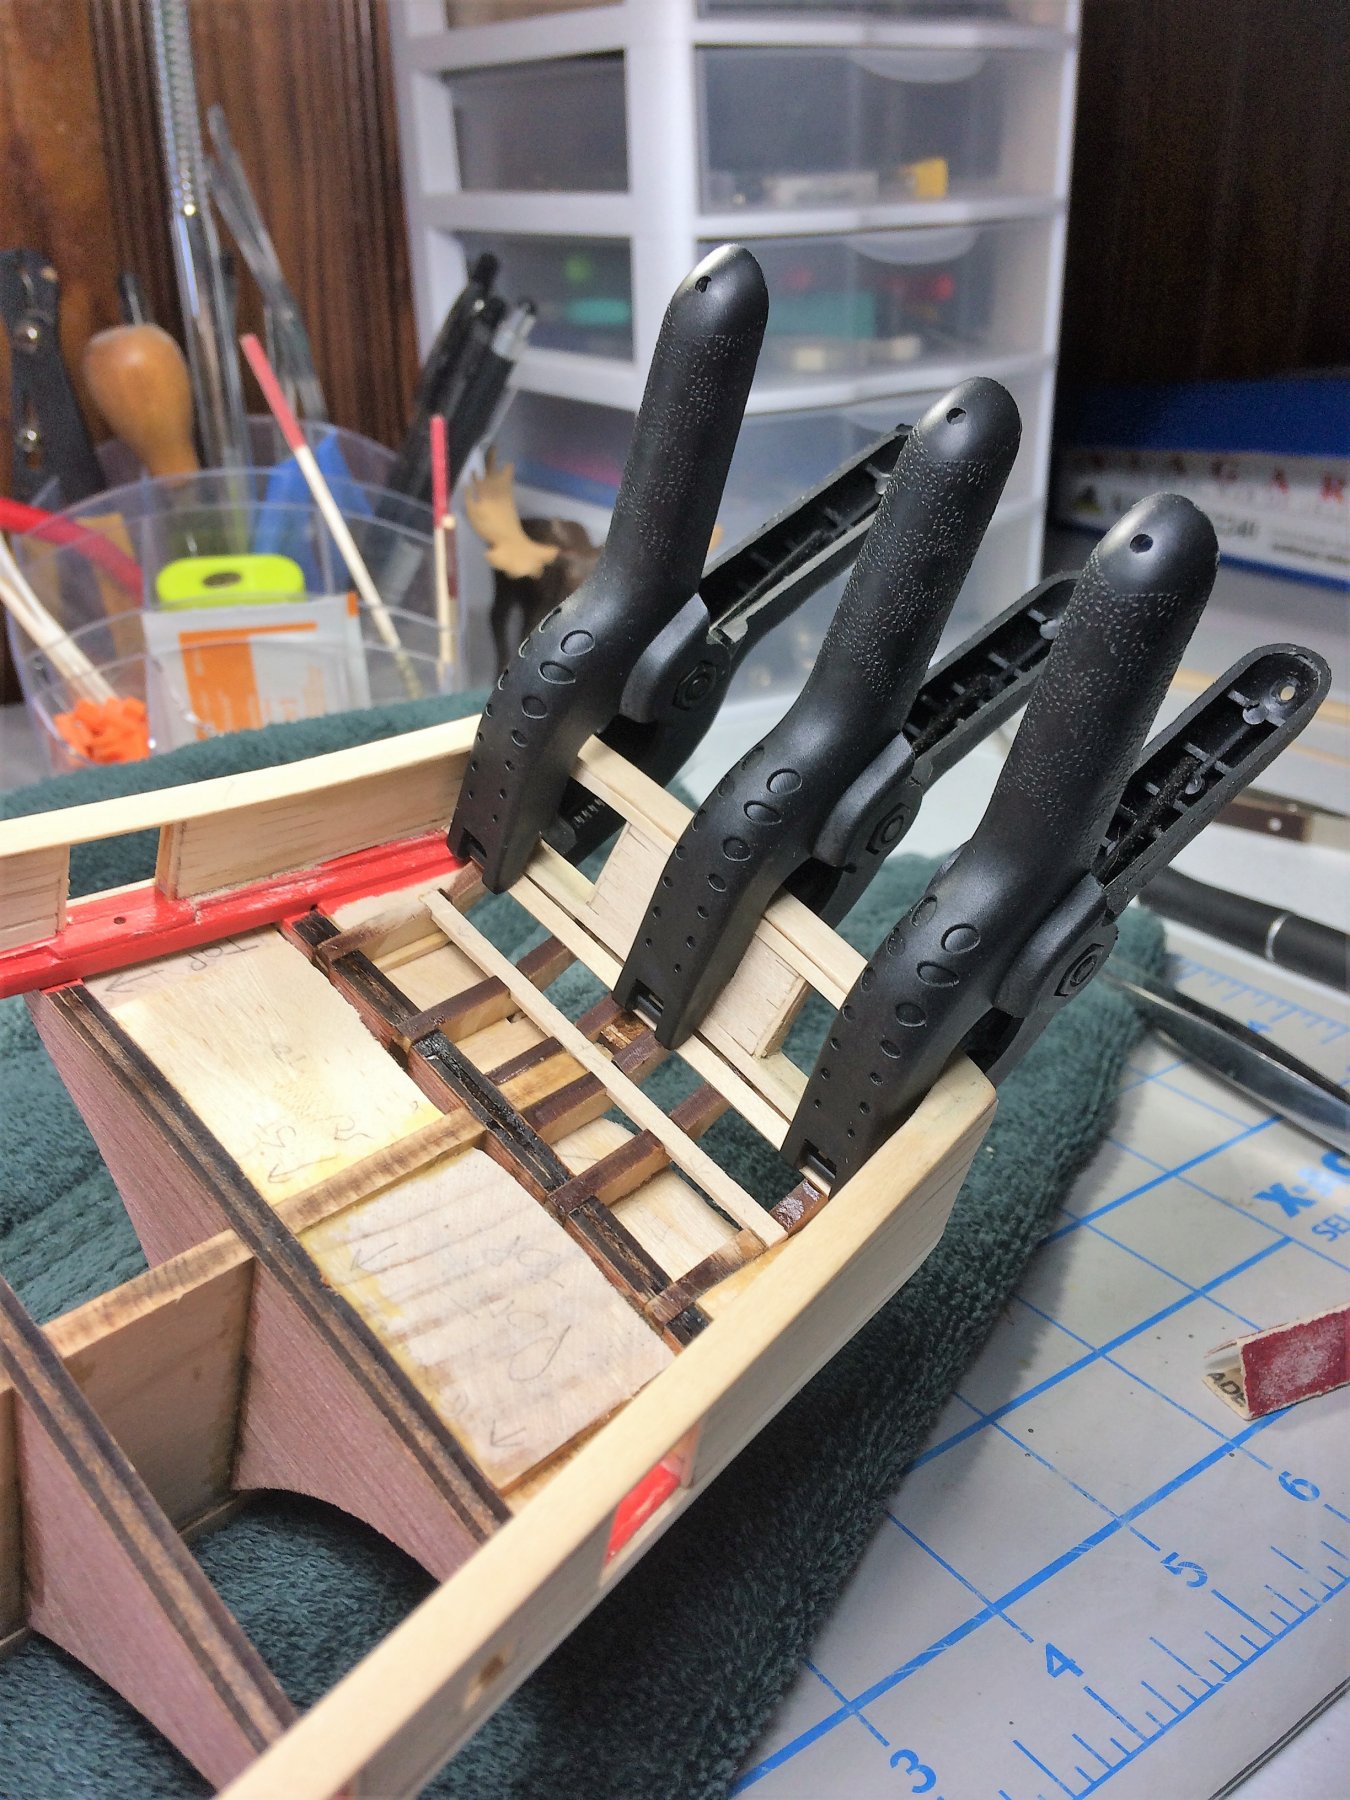
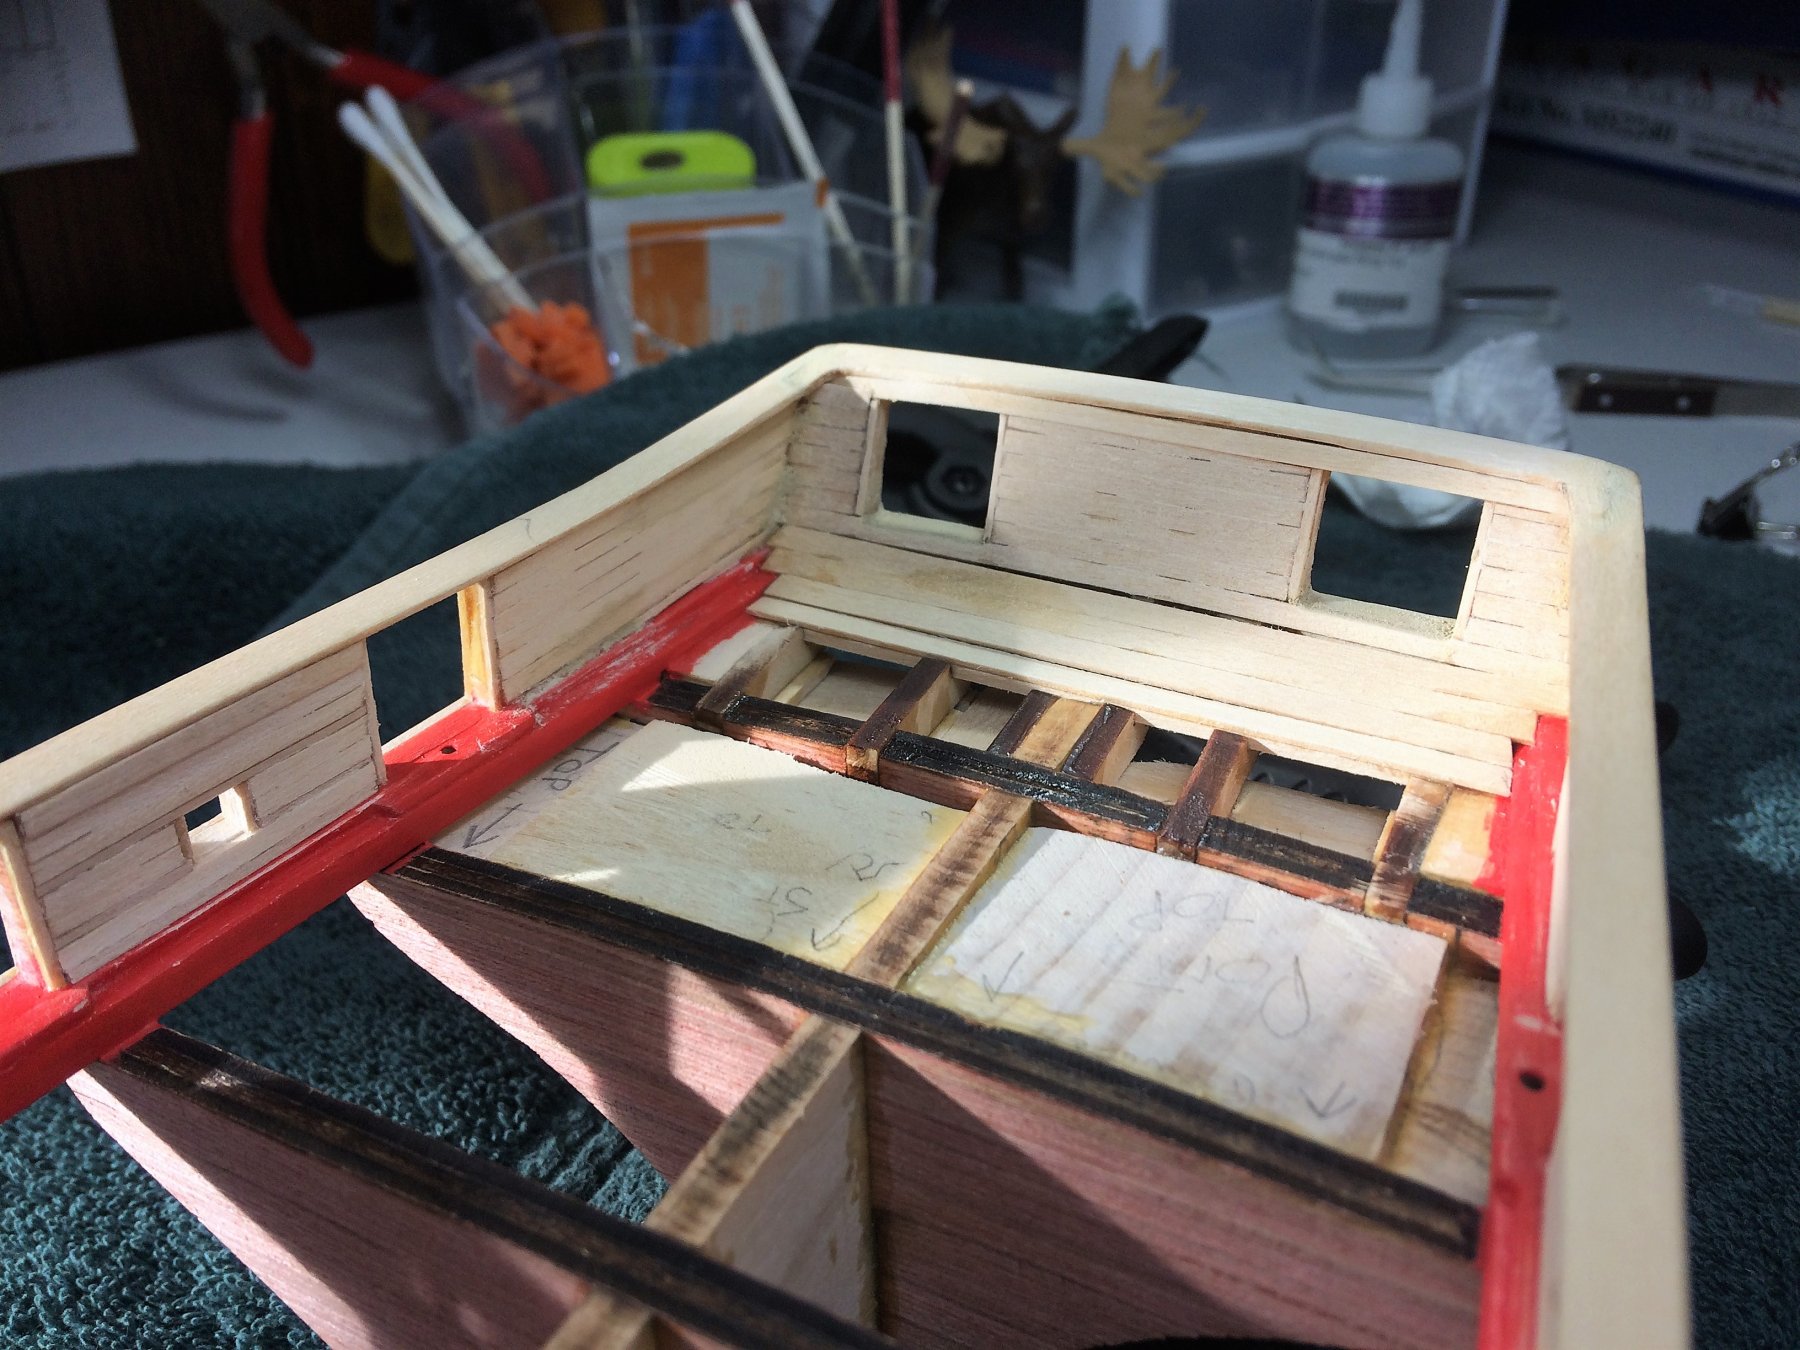
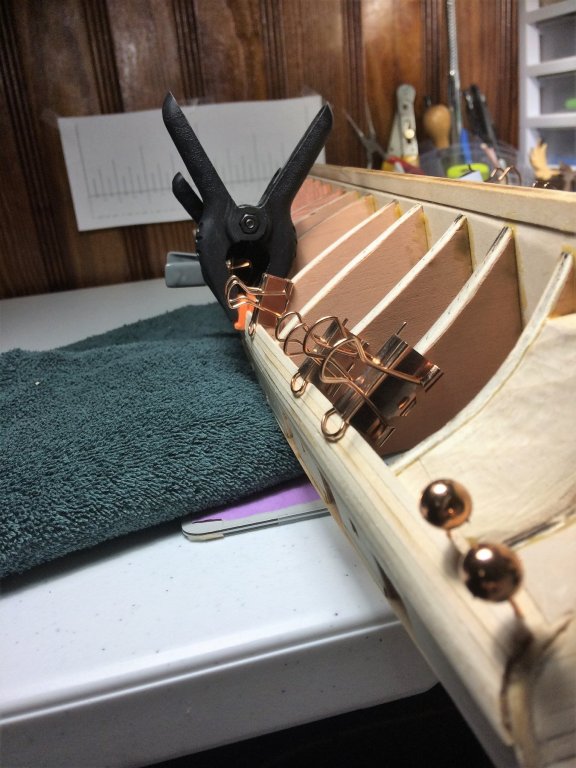
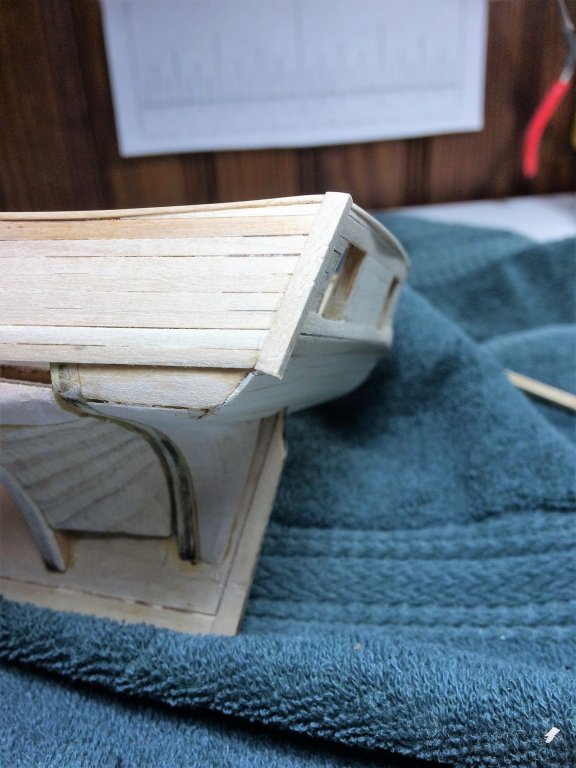
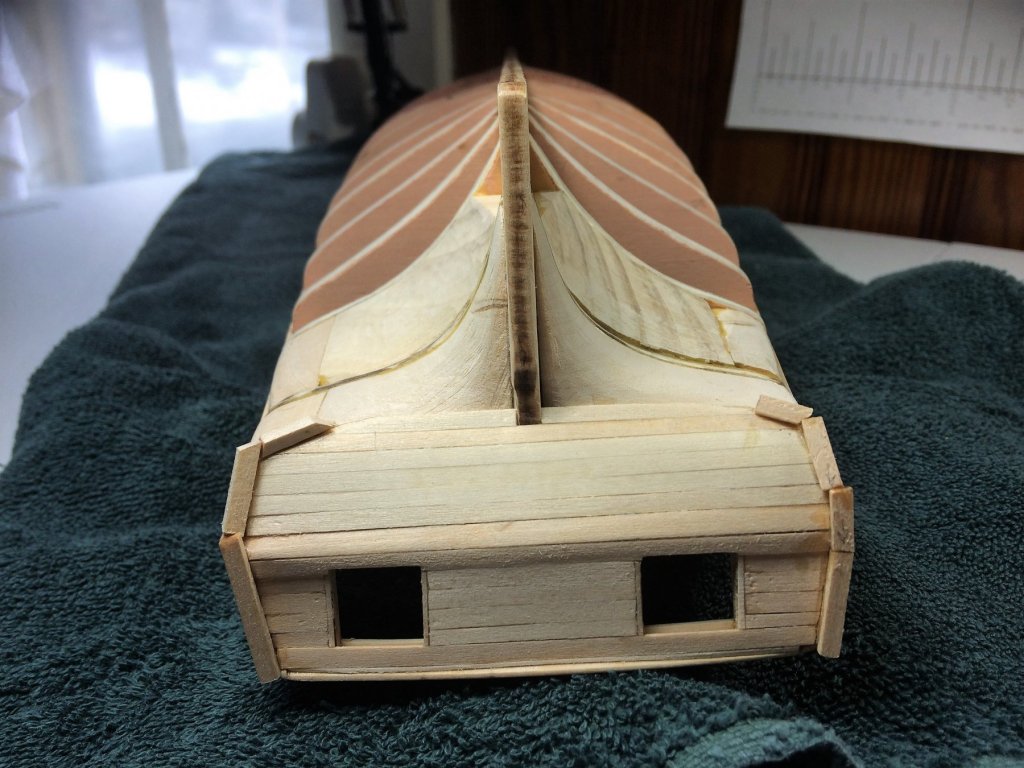
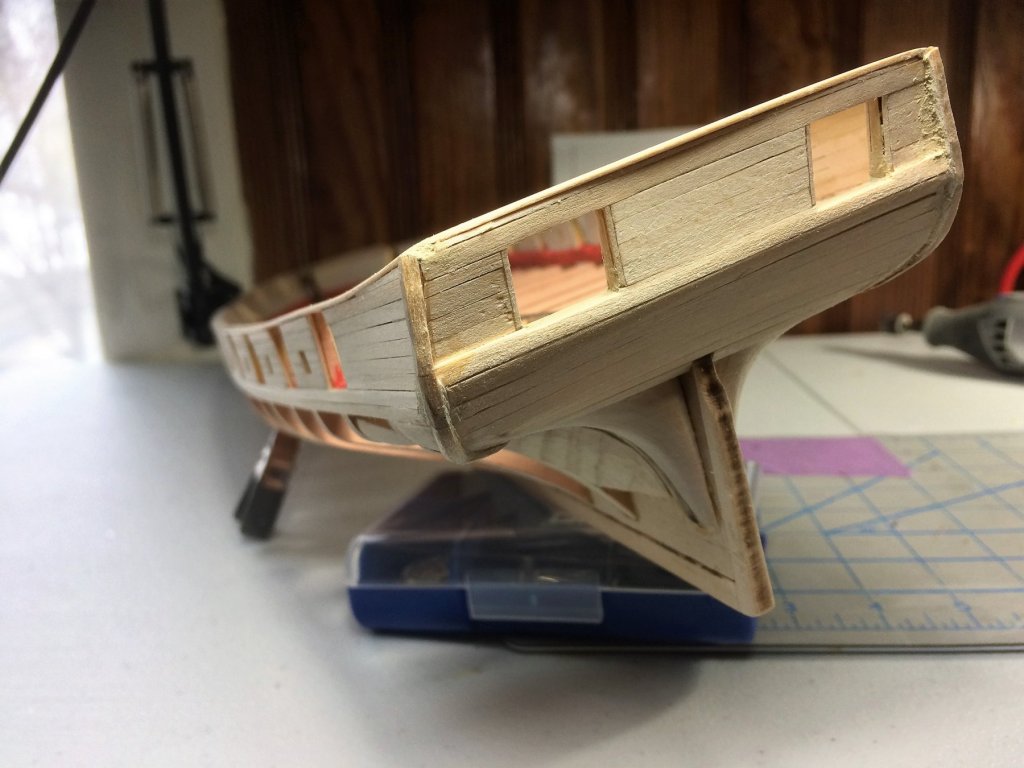
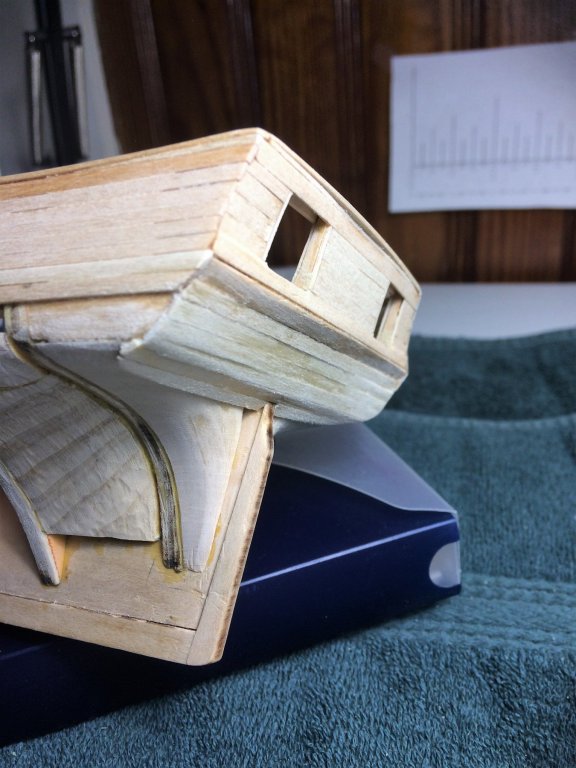
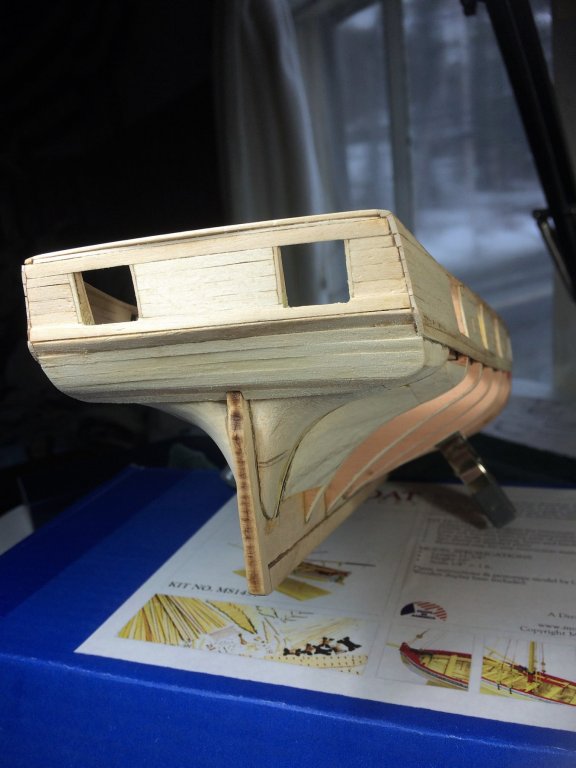
Evening, I'm starting a list for a Syren order. Not made of money, so It may take a bit to get what I'll need. I can see some of my tax returns going towards the cause! Meanwhile, I did get some done in the Shipyard. I planked the angled area in the stern where the tiller/rudder will be. I don't think I'll ever have enough clamps. Inherently some gaps formed. That big one smack in the middle was easily filled with a shaped 1/32 sq strip. The gap 3 planks down closer to where the deck will be, is the edge where the deck meets the planks. The wood that's on the very bottom is the strip I installed with the stern timbers. It was also the only thing that lined up on those timbers. My edges will need some filler. I also worked on the counter area. Below is the basic planking for this area. I'll trim it appropriately as I work in this area and work in the fashion pieces. Below is after some trimming, now needs some sanding. With some sanding it shines up a bit. There's a hump in that big plank in the middle by design. I want to keep that just a bit thicker than the rest and will even it out later. Tom E


-
To be honest, I was thinking the exact opposite. I was waiting to buy the blocks and ropes because I didn't want them just sitting. My weather up here is either dry and cold then moist and hot, and can go from hot to cold within hours. I thought the longer it sat, it may degrade/warp/change. I'm not calling Syrens products low grade, oh God no! Its quality product, that's easily seen. But rope is fabric and blocks are wood. All subject to weather/temperature/humidity. It seems my thinking was wrong?! I realize the ones supplied in kits may sit for years, but that may explain a lot. Earlier, Jim mentioned waiting for the 1/8ths to be in stock. Sure enough, that's what I need, and all the other sizes as well. I need to place an order! I noticed some of Syrens rope aren't the exact size called for in the plans. When replacing rope with approximate sizes, do you round up or down for sizing? Or is there another method for sizing? Tom E
-
Thanks fellas, I appreciate all the input! I have to re-think those hooks. Maybe I'll order some and see what happens. Last I looked, they were about $10 for 125. That's about a $20-$30 investment that seems well worth it. As for the blocks and rope, I was going to replace all those from the start. They look so much better than what's supplied. The blocks in the kit look like they went thru a wood chipper! Tom E