HOLIDAY DONATION DRIVE - SUPPORT MSW - DO YOUR PART TO KEEP THIS GREAT FORUM GOING! (Only 24 donations so far out of 49,000 members - C'mon guys!)
×
Tom E
-
Posts
469 -
Joined
-
Last visited
Content Type
Profiles
Forums
Gallery
Events
Everything posted by Tom E
-
 Ken, That's just plain water for a rinse. I'm not clever enough to think of Vinegar for a good cleaning. But I'm definitely going to use that one on a future build, it makes sense. Denis, When I ordered the Cannon I was looking at the "upgrade" wheel set but never pulled the trigger on buying them. I thought they looked pretty good. If I build another cannon, I'll definitely upgrade the wheels. Tom E
 -
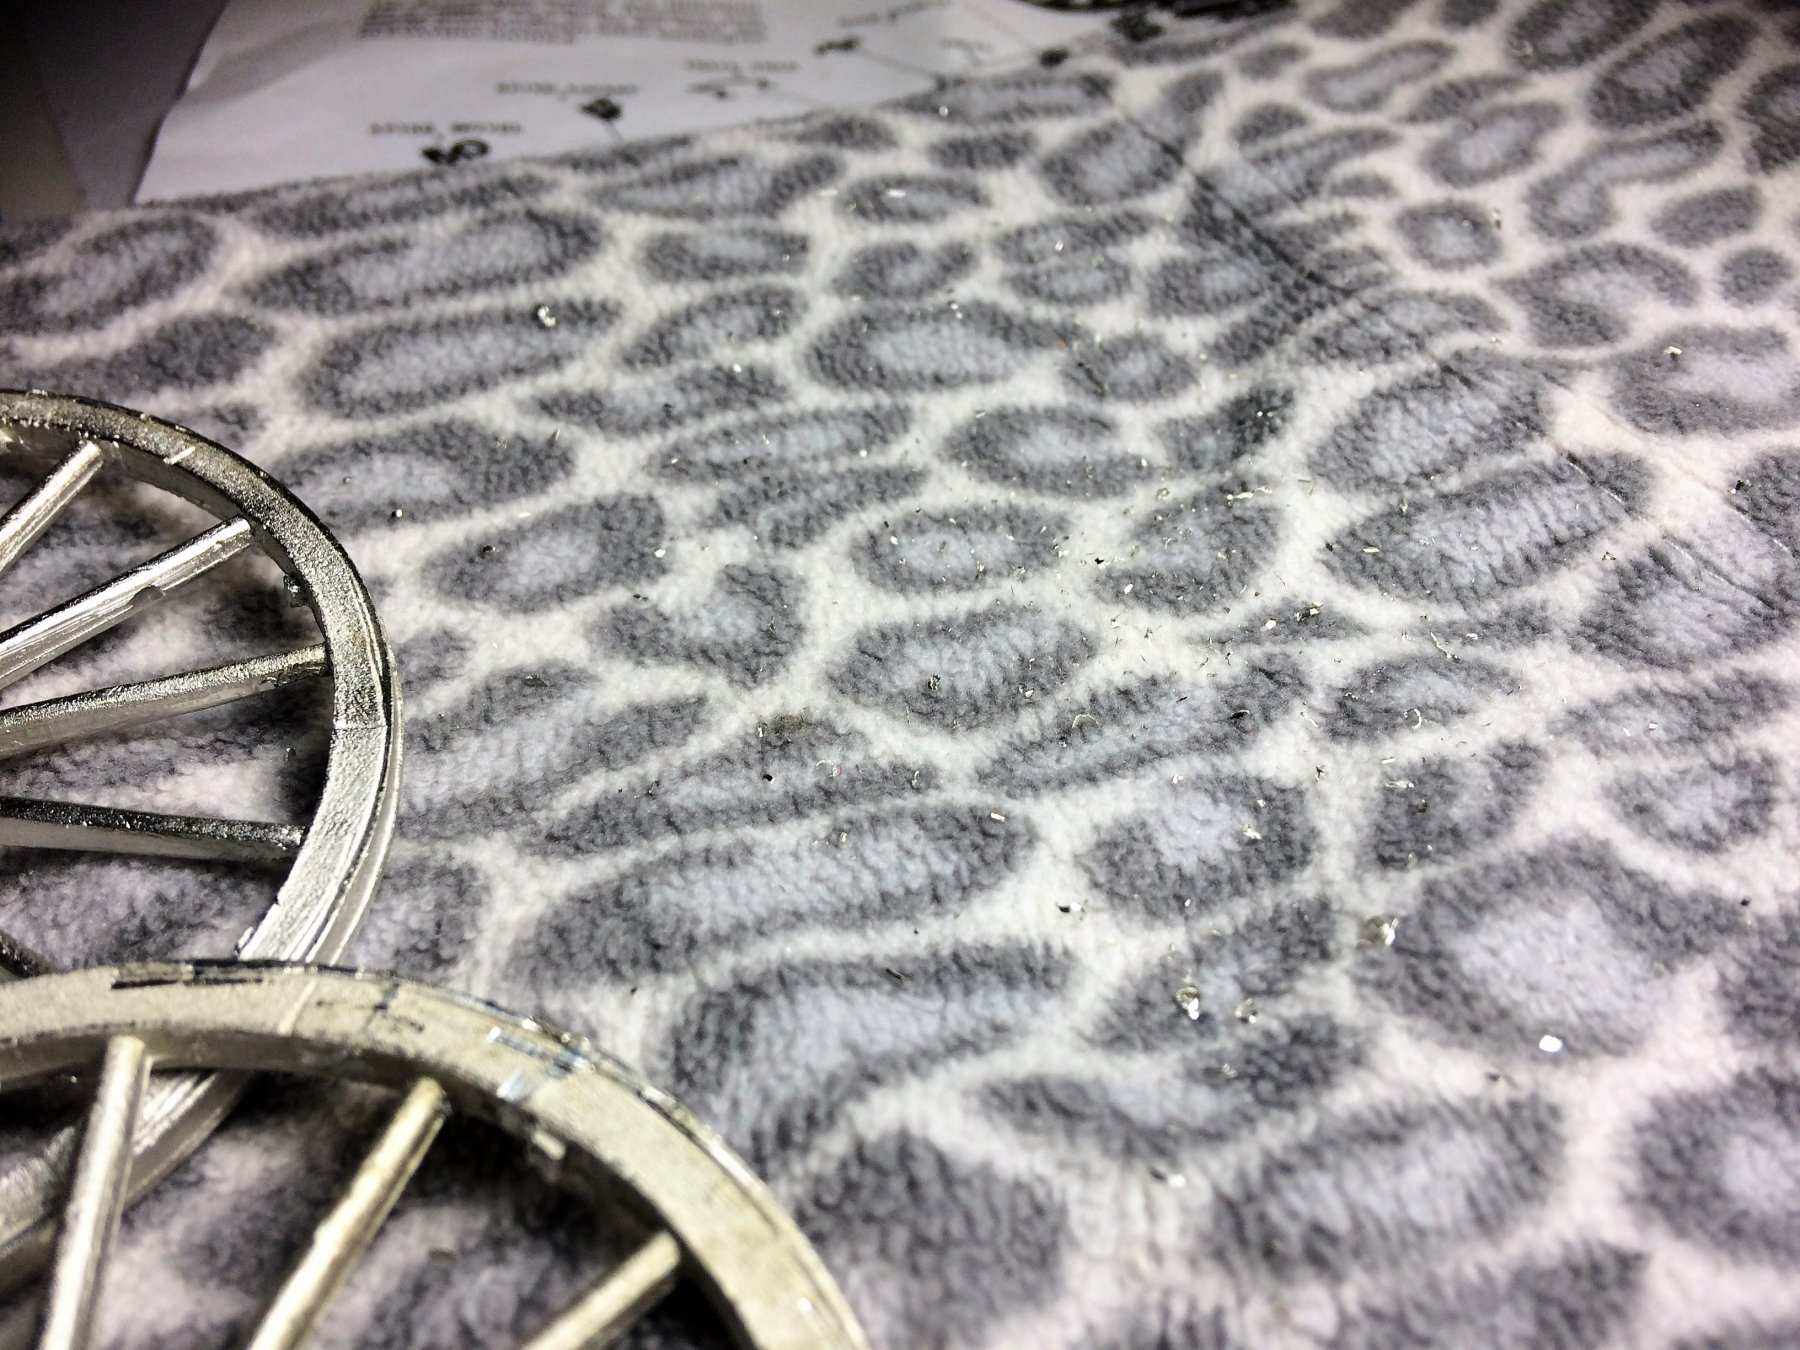
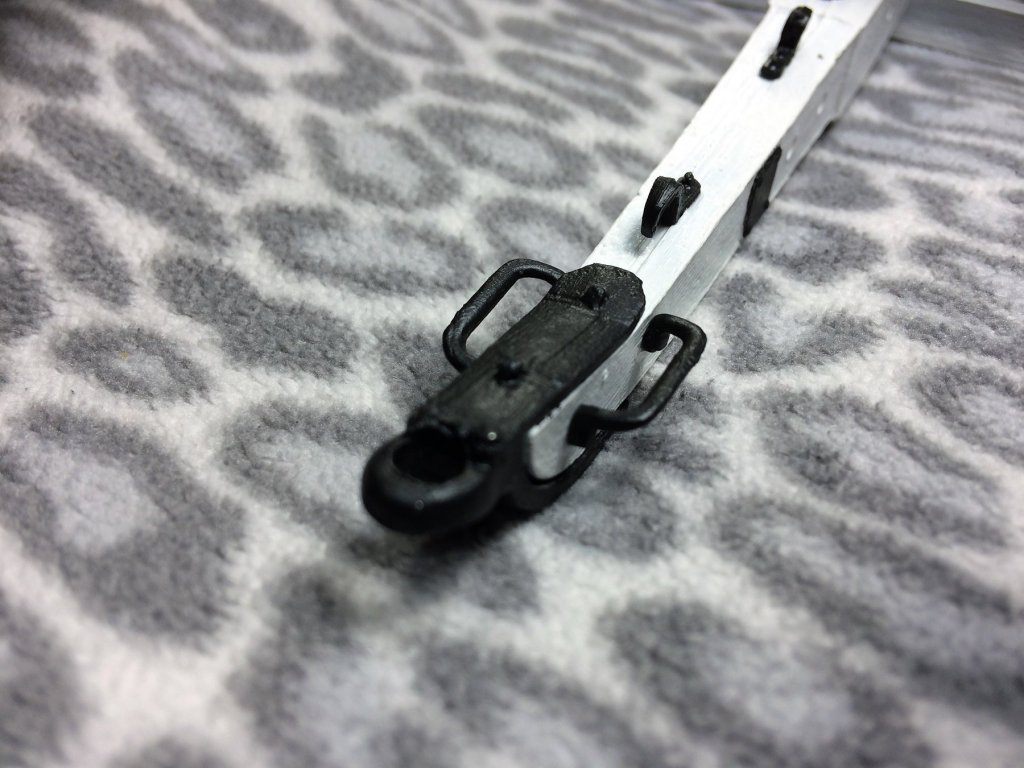
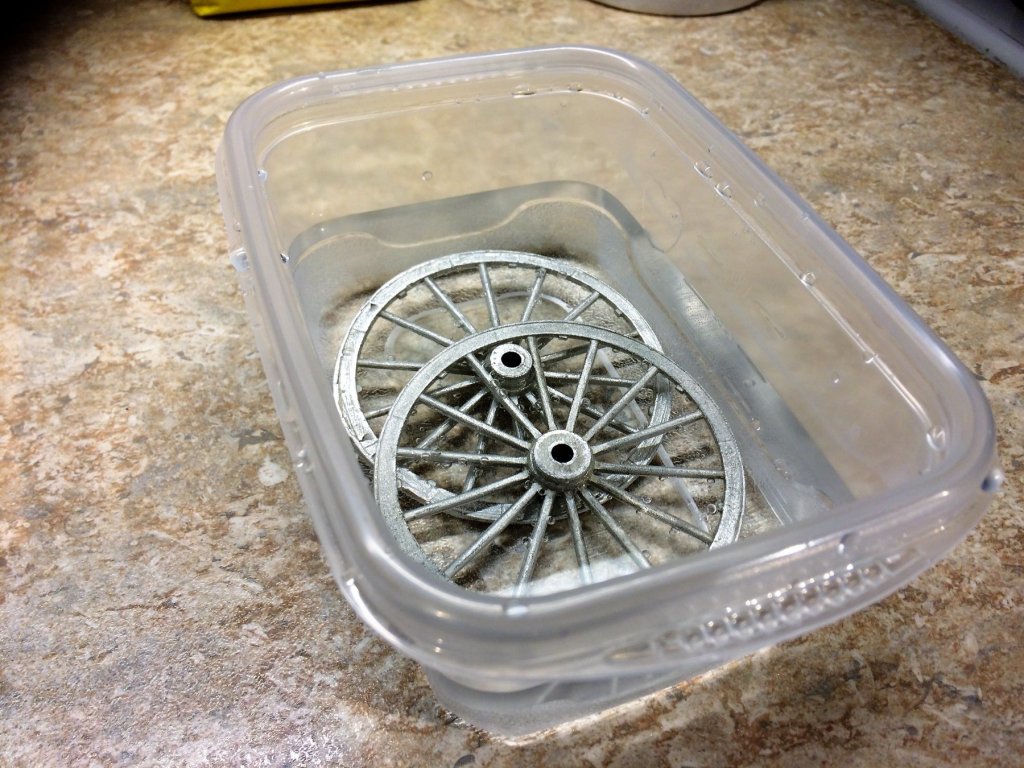
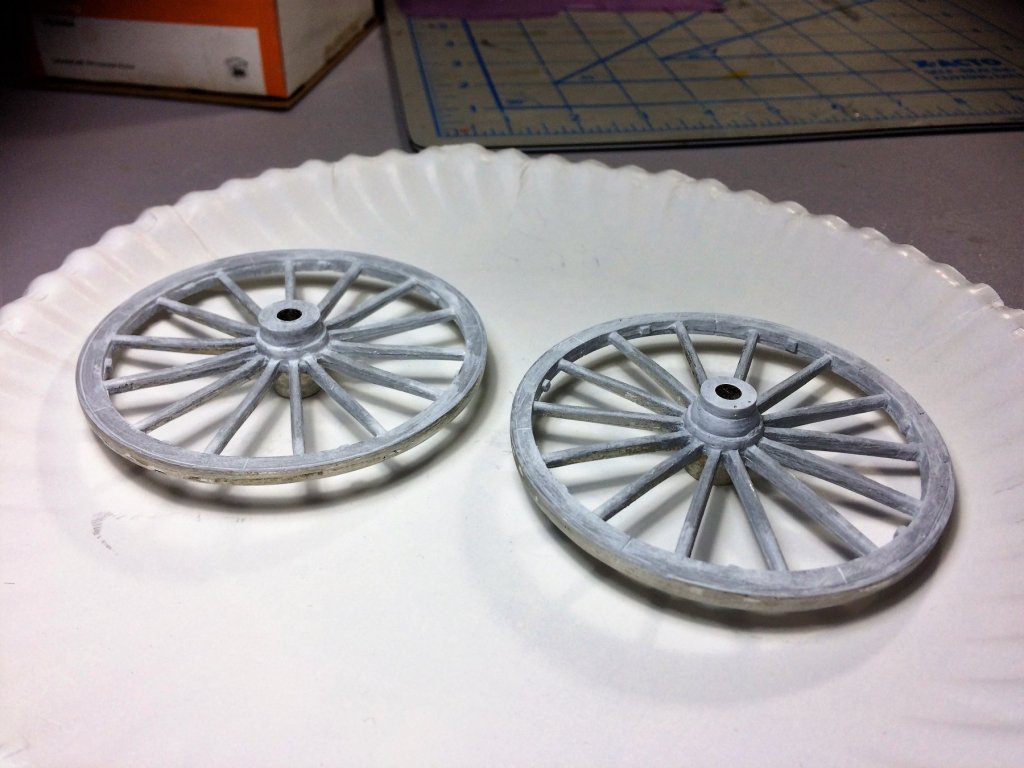
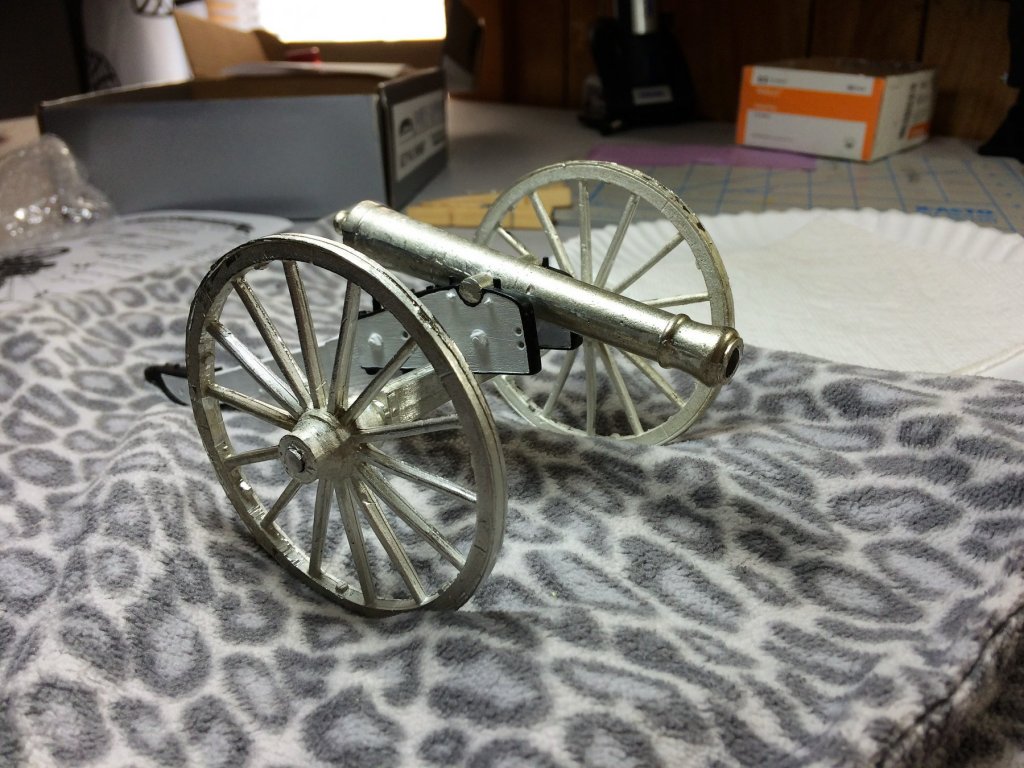
Evening, Hope everyone is well. It's been a slow go on builds lately. It's been short bursts of building that don't last long. It's a bad back/nerve thing. Hard to sit at the table for long times. Anywho….. The James cannon does continue! Instead of adding the cheeks to the main piece, thought I would add some small pieces before hand. Added the Trail grabs. These are both port and starboard. Easy enough. I also started prepping the wheels. As you can see below, they need just a touch of clean up! There was so much here, I put it in the metal recycling bin instead of the trash. It was quite a bit. Hind sight, ME sells wooden "upgrade" sets on the wheels. A good bath and rinse. It took a lot of sanding/carving, but they cleaned up nicely. Then a coat of primer to start the painting process. Tom E


-
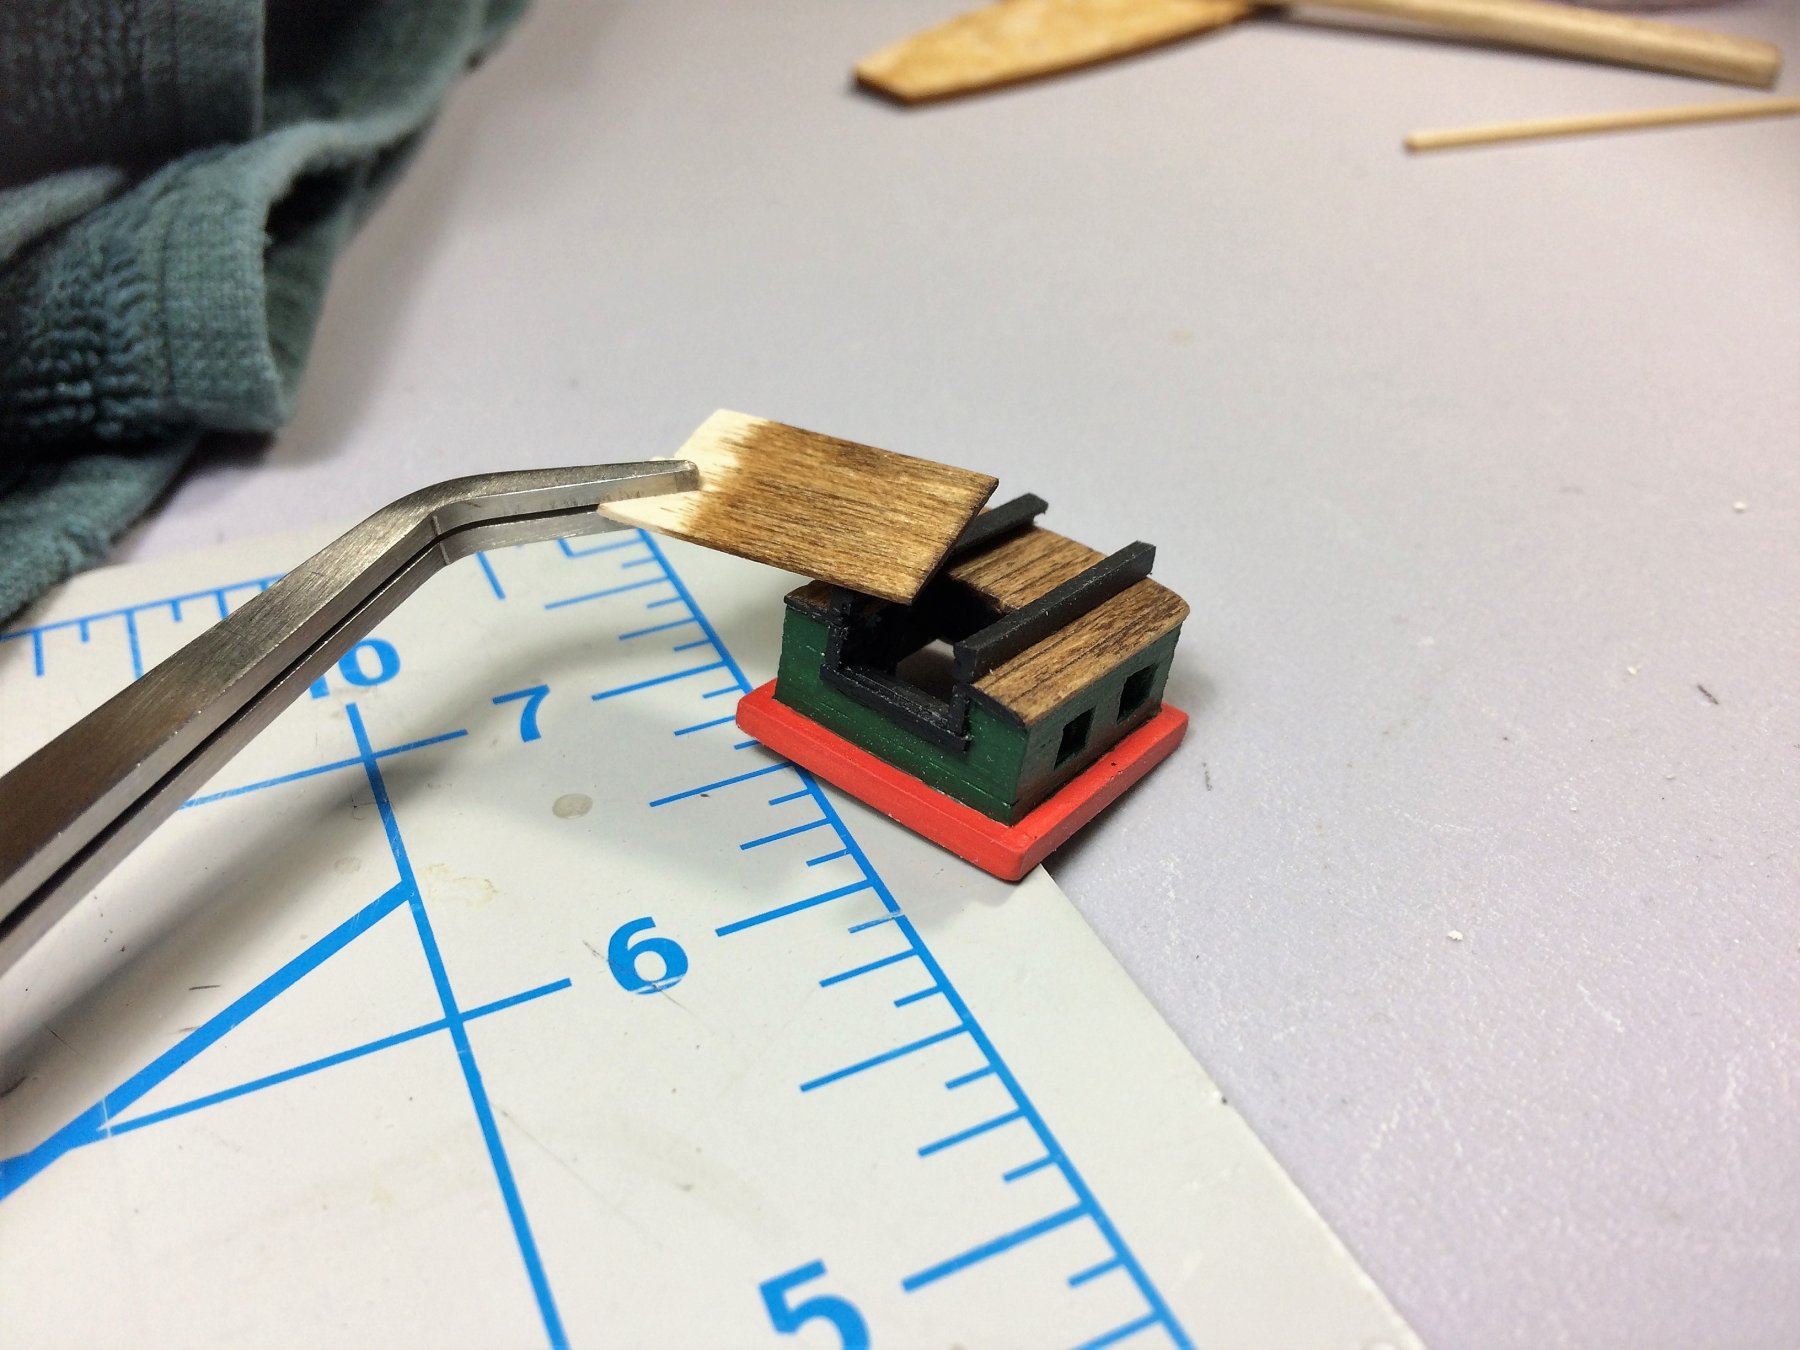
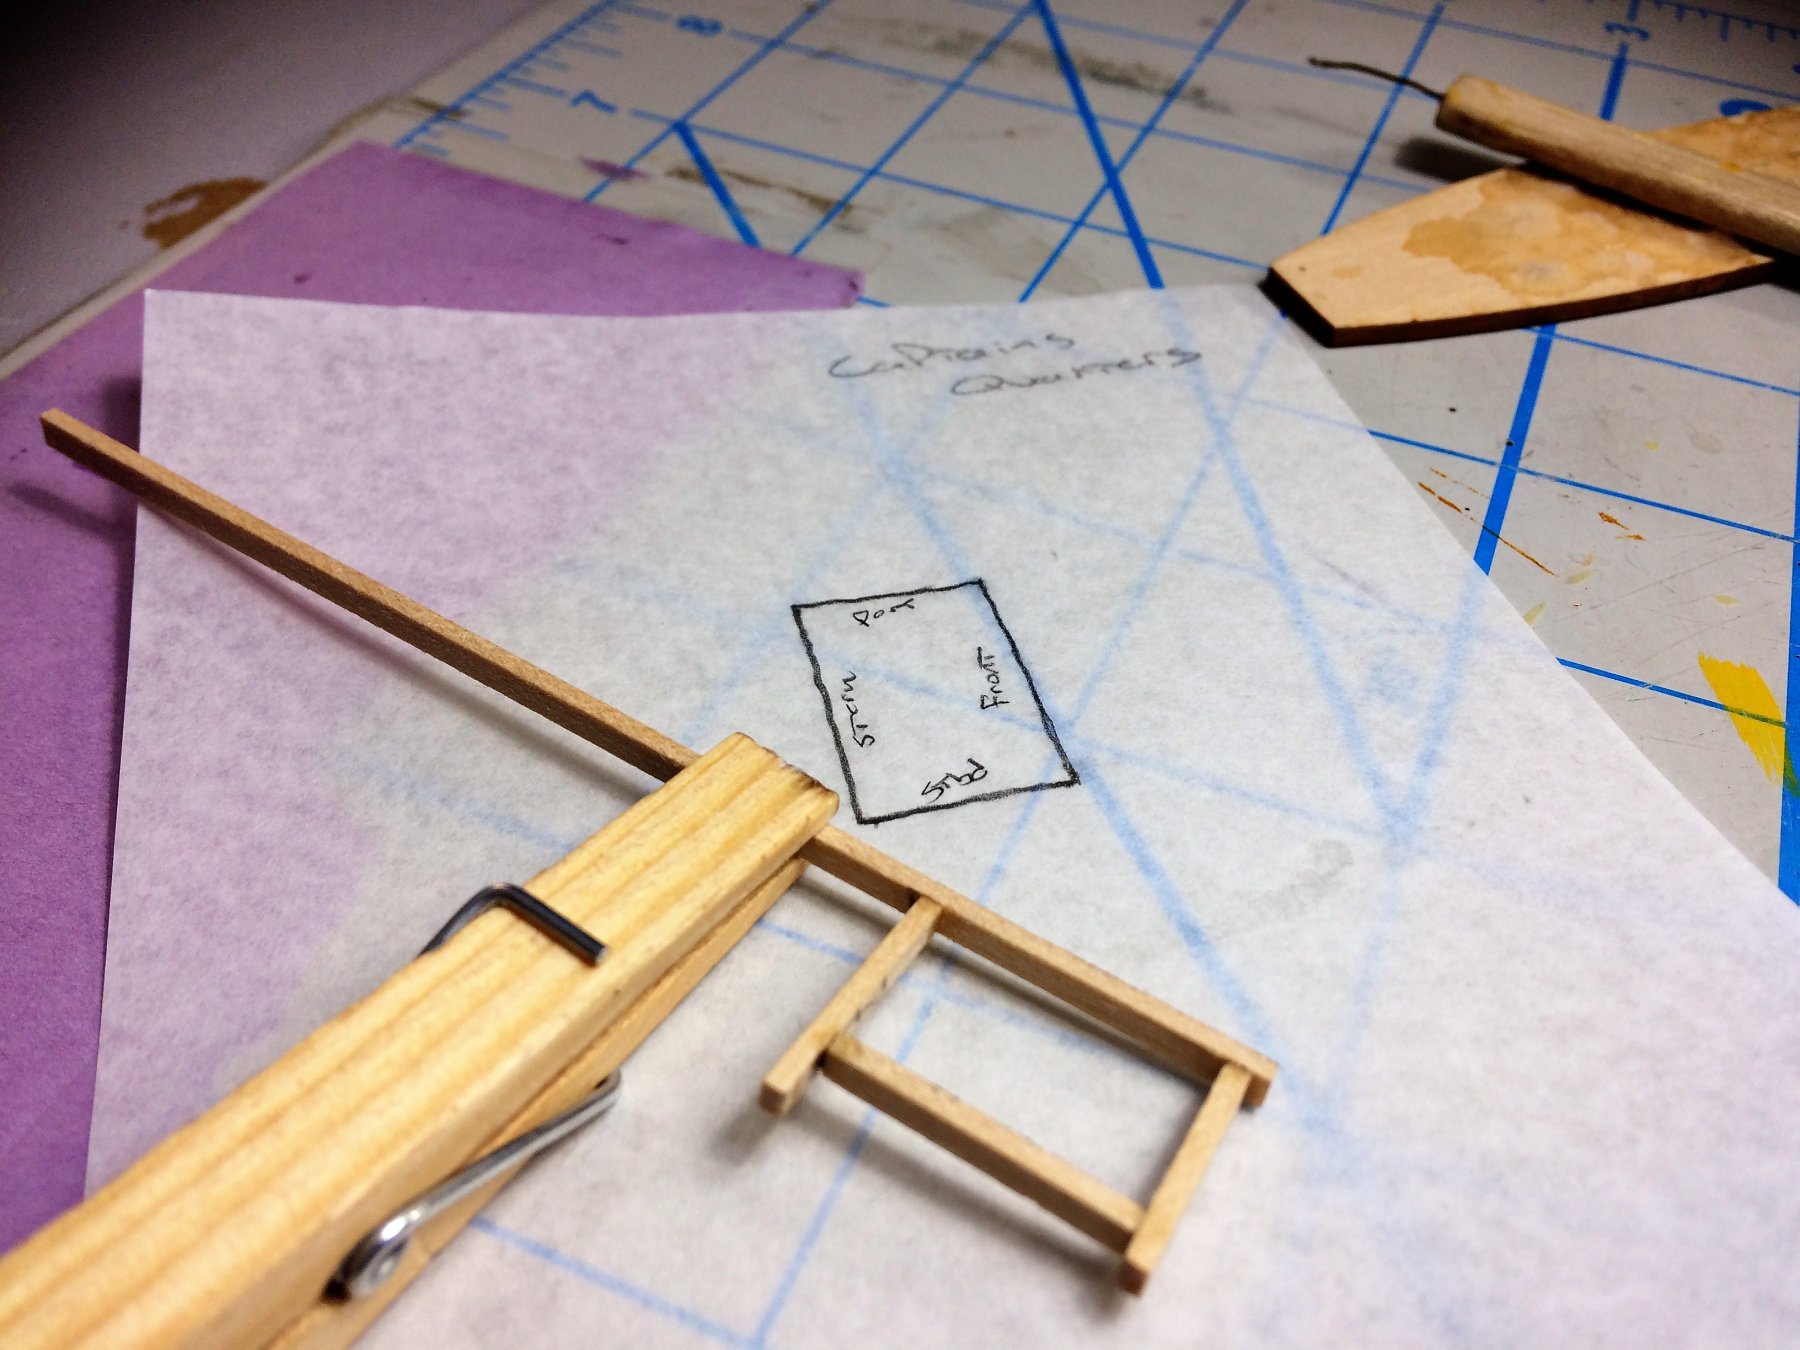
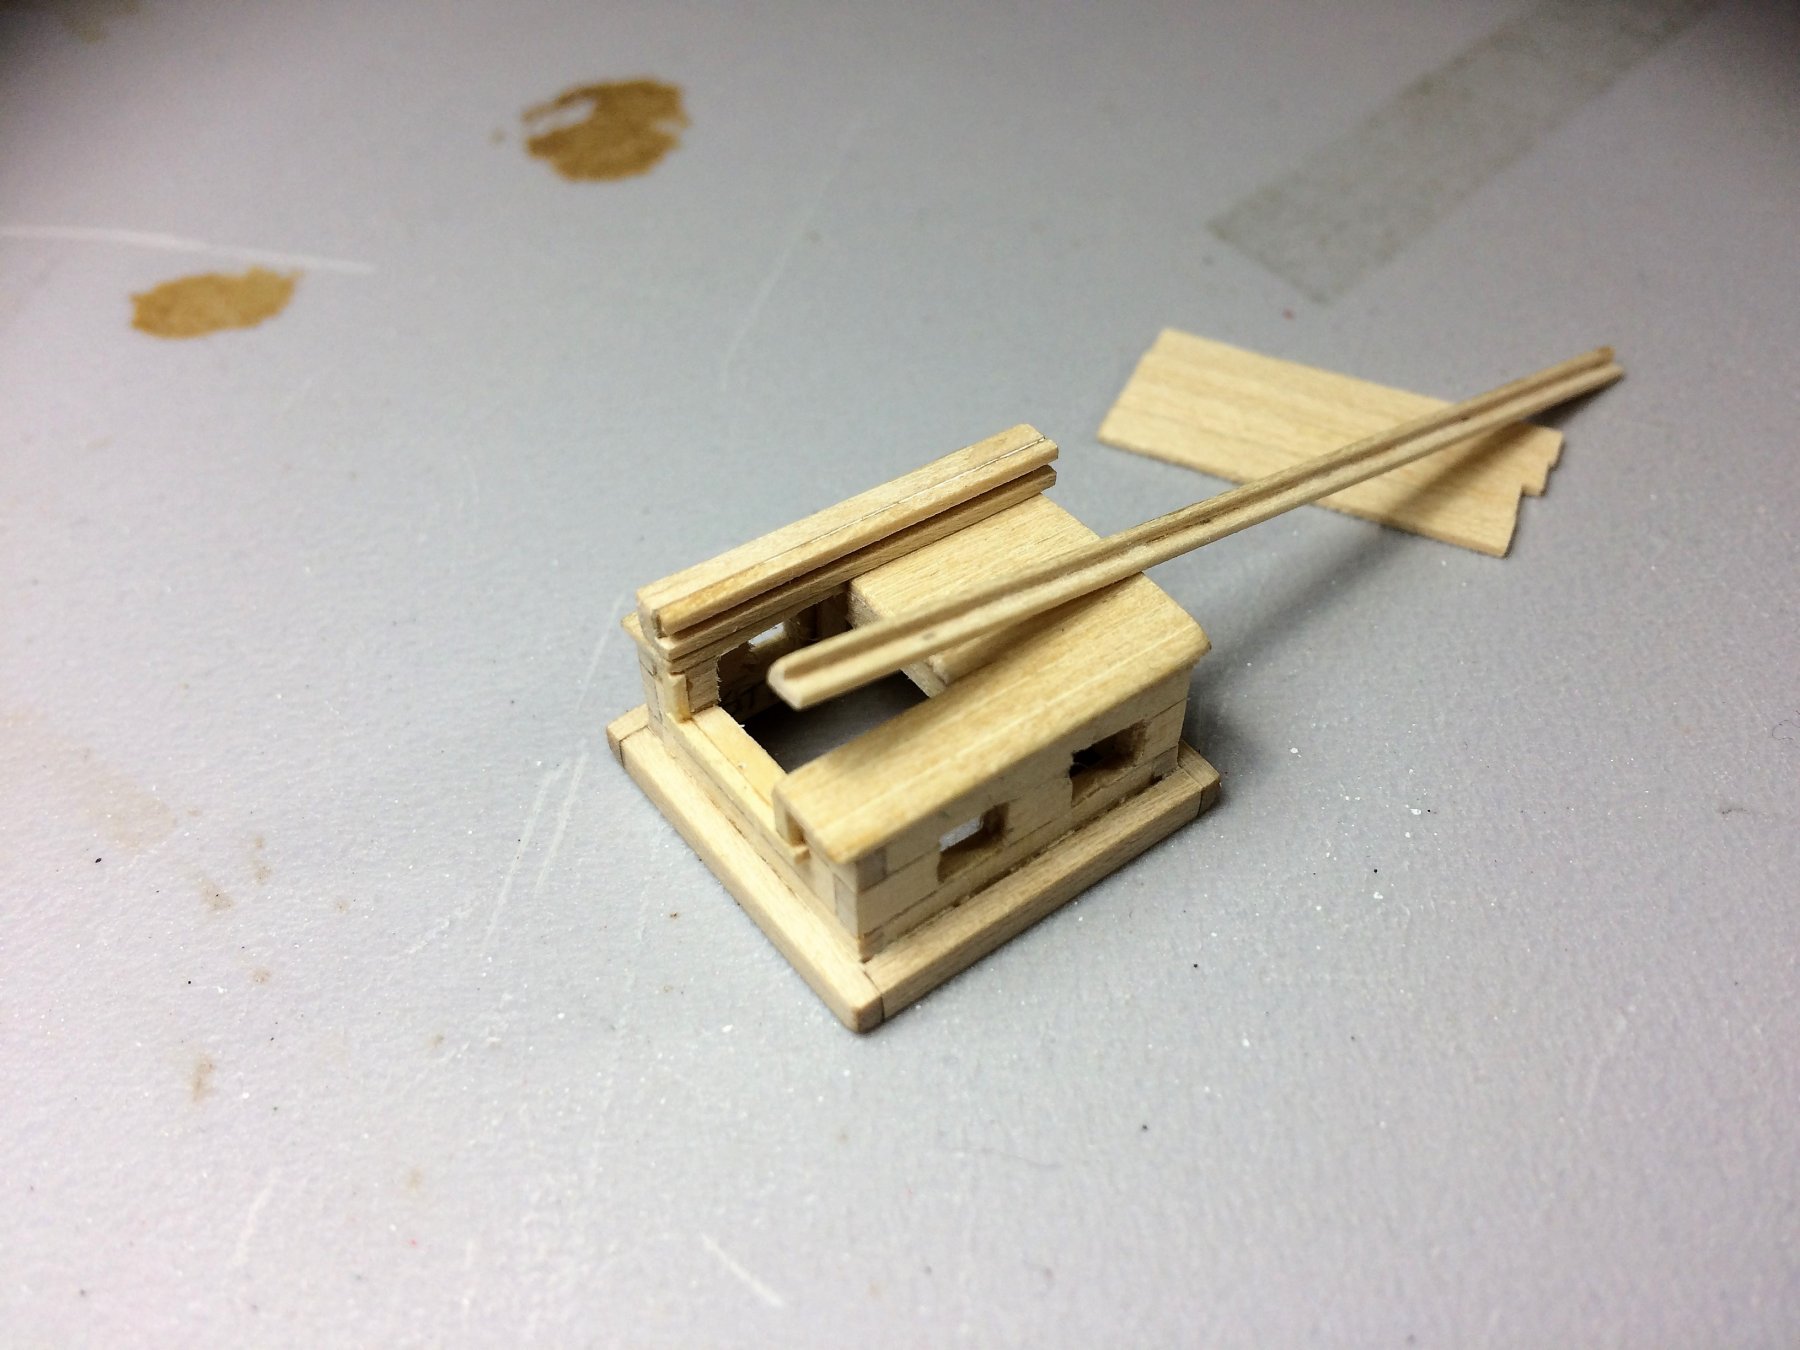
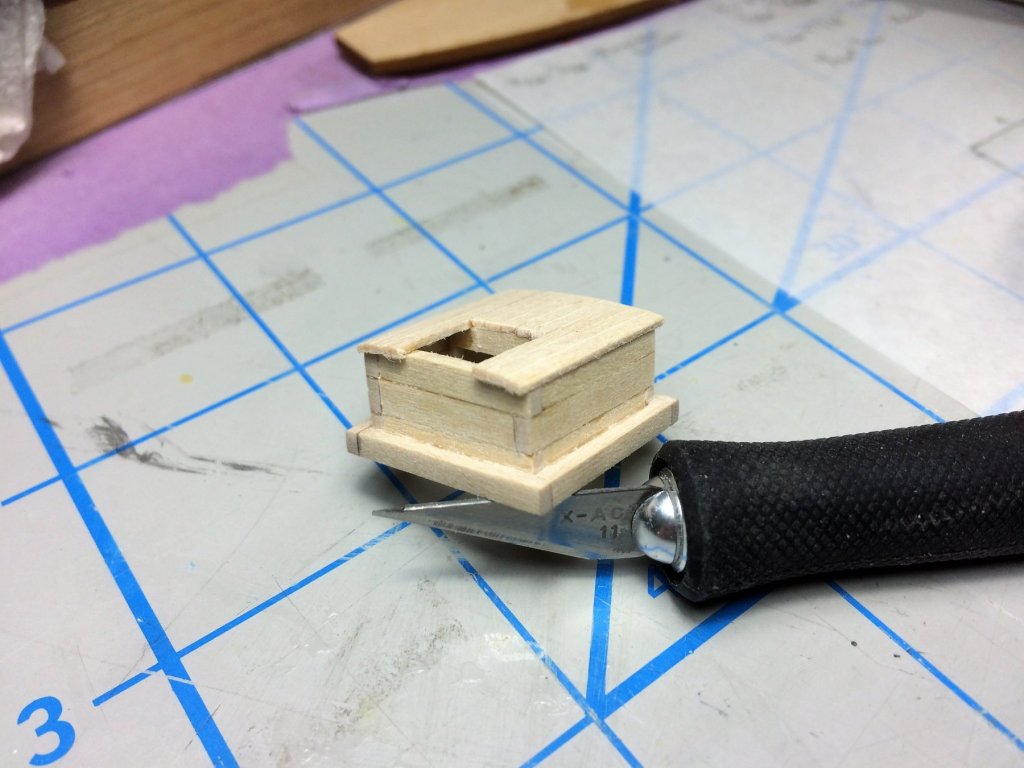
Evening, Hope everyone is well. Had a nice quiet weekend with some building done. But more importantly...…….taxes are done, signed, and accepted! I did several things over the weekend, but I did a lot for the Companionway. The paint scheme is coming together, and the roof has its stain. The small bits for the slider are cut. The ends will get painted black. All glued in. They seem to have a curve downward, but there straight to the roof. Shouldn't pose a problem. I will "plug" the ends of the 2 bits for the slider with tiny scrap pieces of wood glued in, then painted. I also stained the piece that will eventually become the slider. Same stain as the roof itself. This will eventually get cut and sanded to shape. Then some bars in the windows. I also started laying out the Coamings for the Captains Quarters. It starts with a box. Tom E


-
Thanks J, I am using Model Expo paints. Those are acrylics. It's all Primer, Hull Spar Black, and White from an old 18th Century Long boat paint set. It takes about 3-4 coats for an acceptable look. I probably don't help things by watering down the paint. Model Expo's stuff runs thick in my eyes. All by hand, I don't have an airbrush. It takes a few coats but the model doesn't "look thick" due to numerous paint coats. I have a bit of a pre paint ritual which may doing the trick. All pieces get a good sanding and wipe down with a micro fiber cloth, I do the same for wood. It takes care of all the sanding dust/fuzzies ! Then they get a warm, long, soapy bath. No hard scrubbing but a good washing and air dry. All pieces get one coat of primer, then several coats of the main color. Also, some things will sit for a week to dry before its next coat of paint. It works. Tom E
-
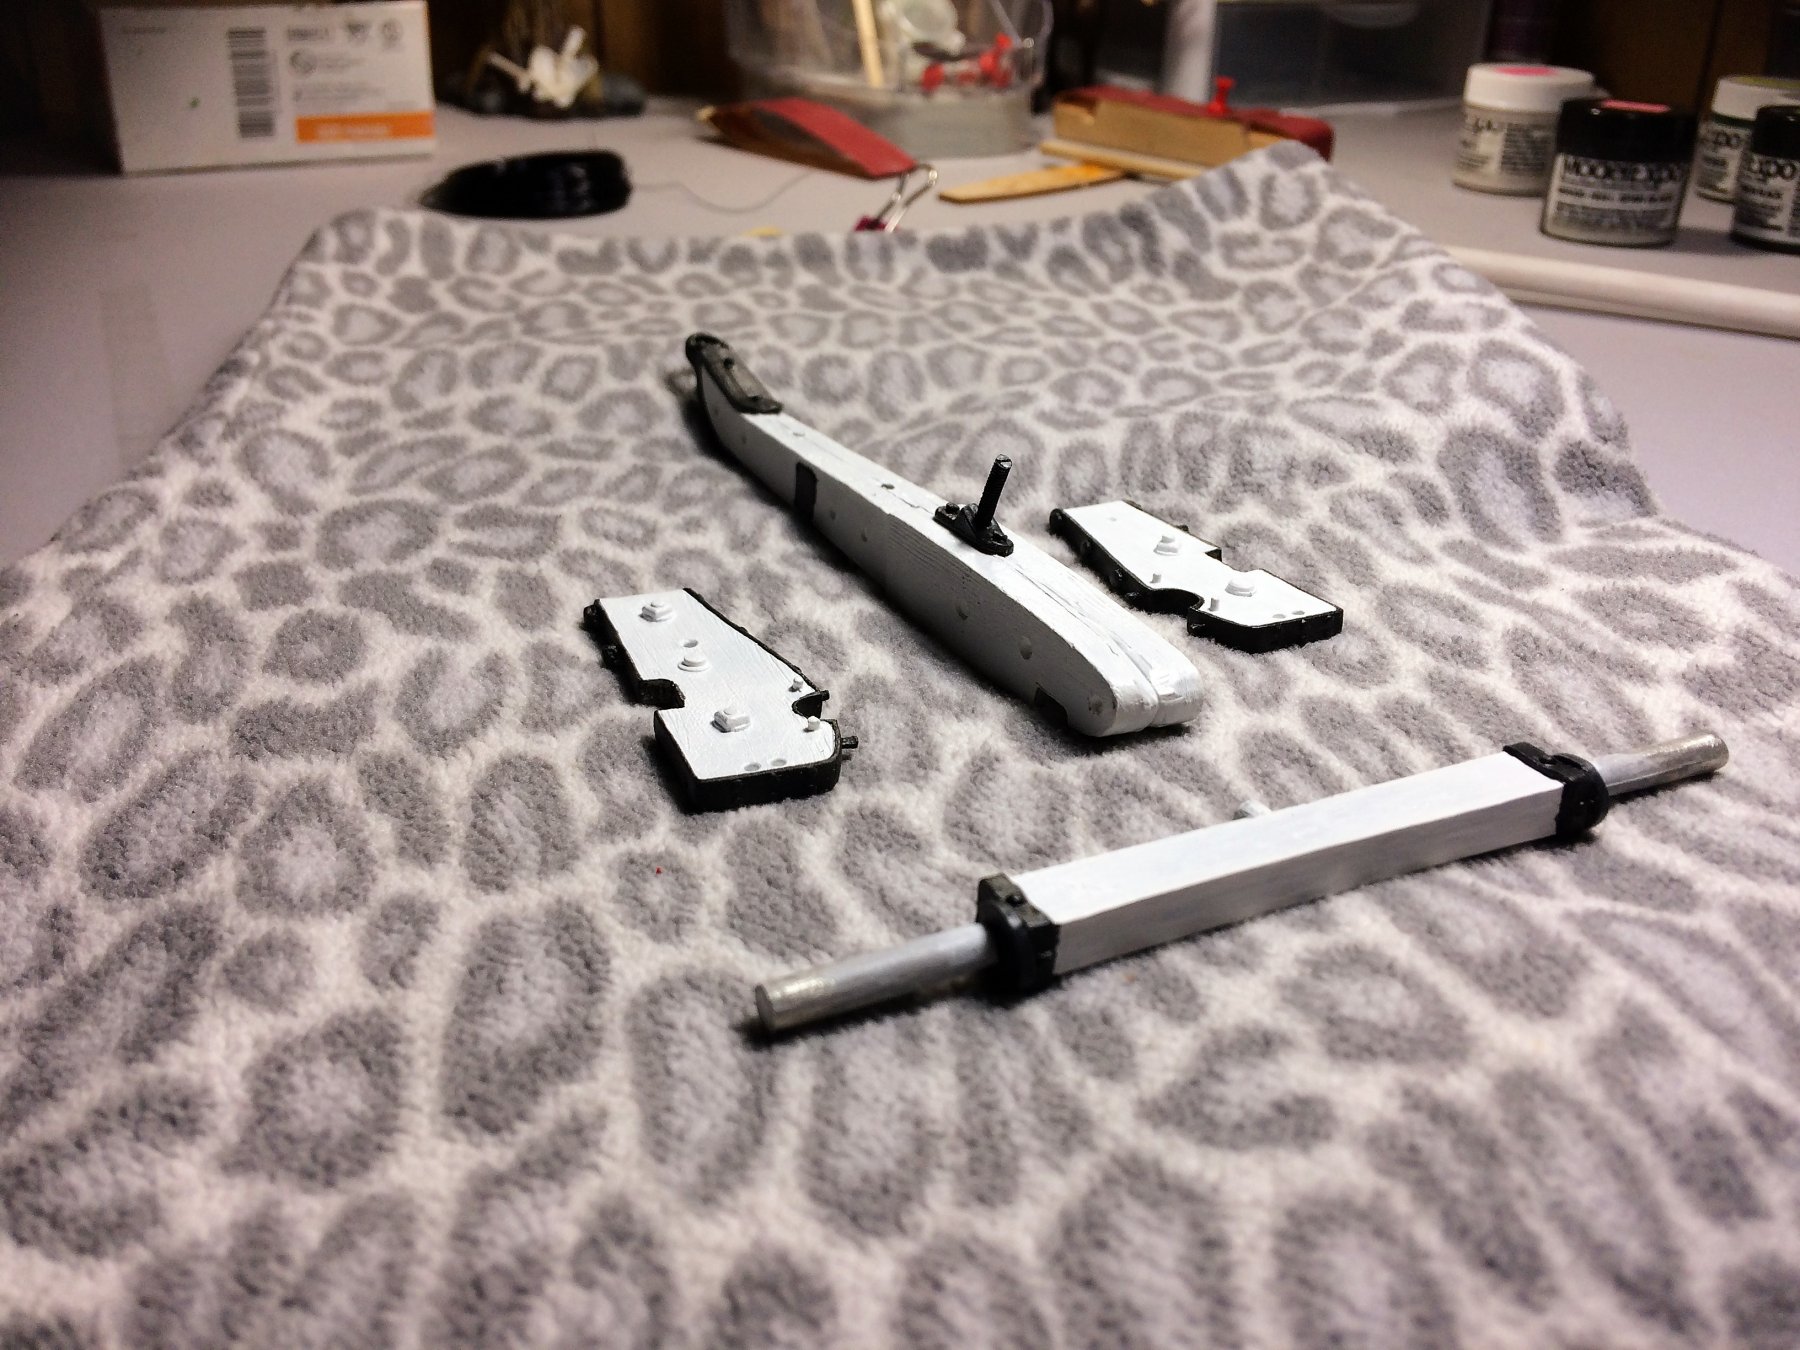
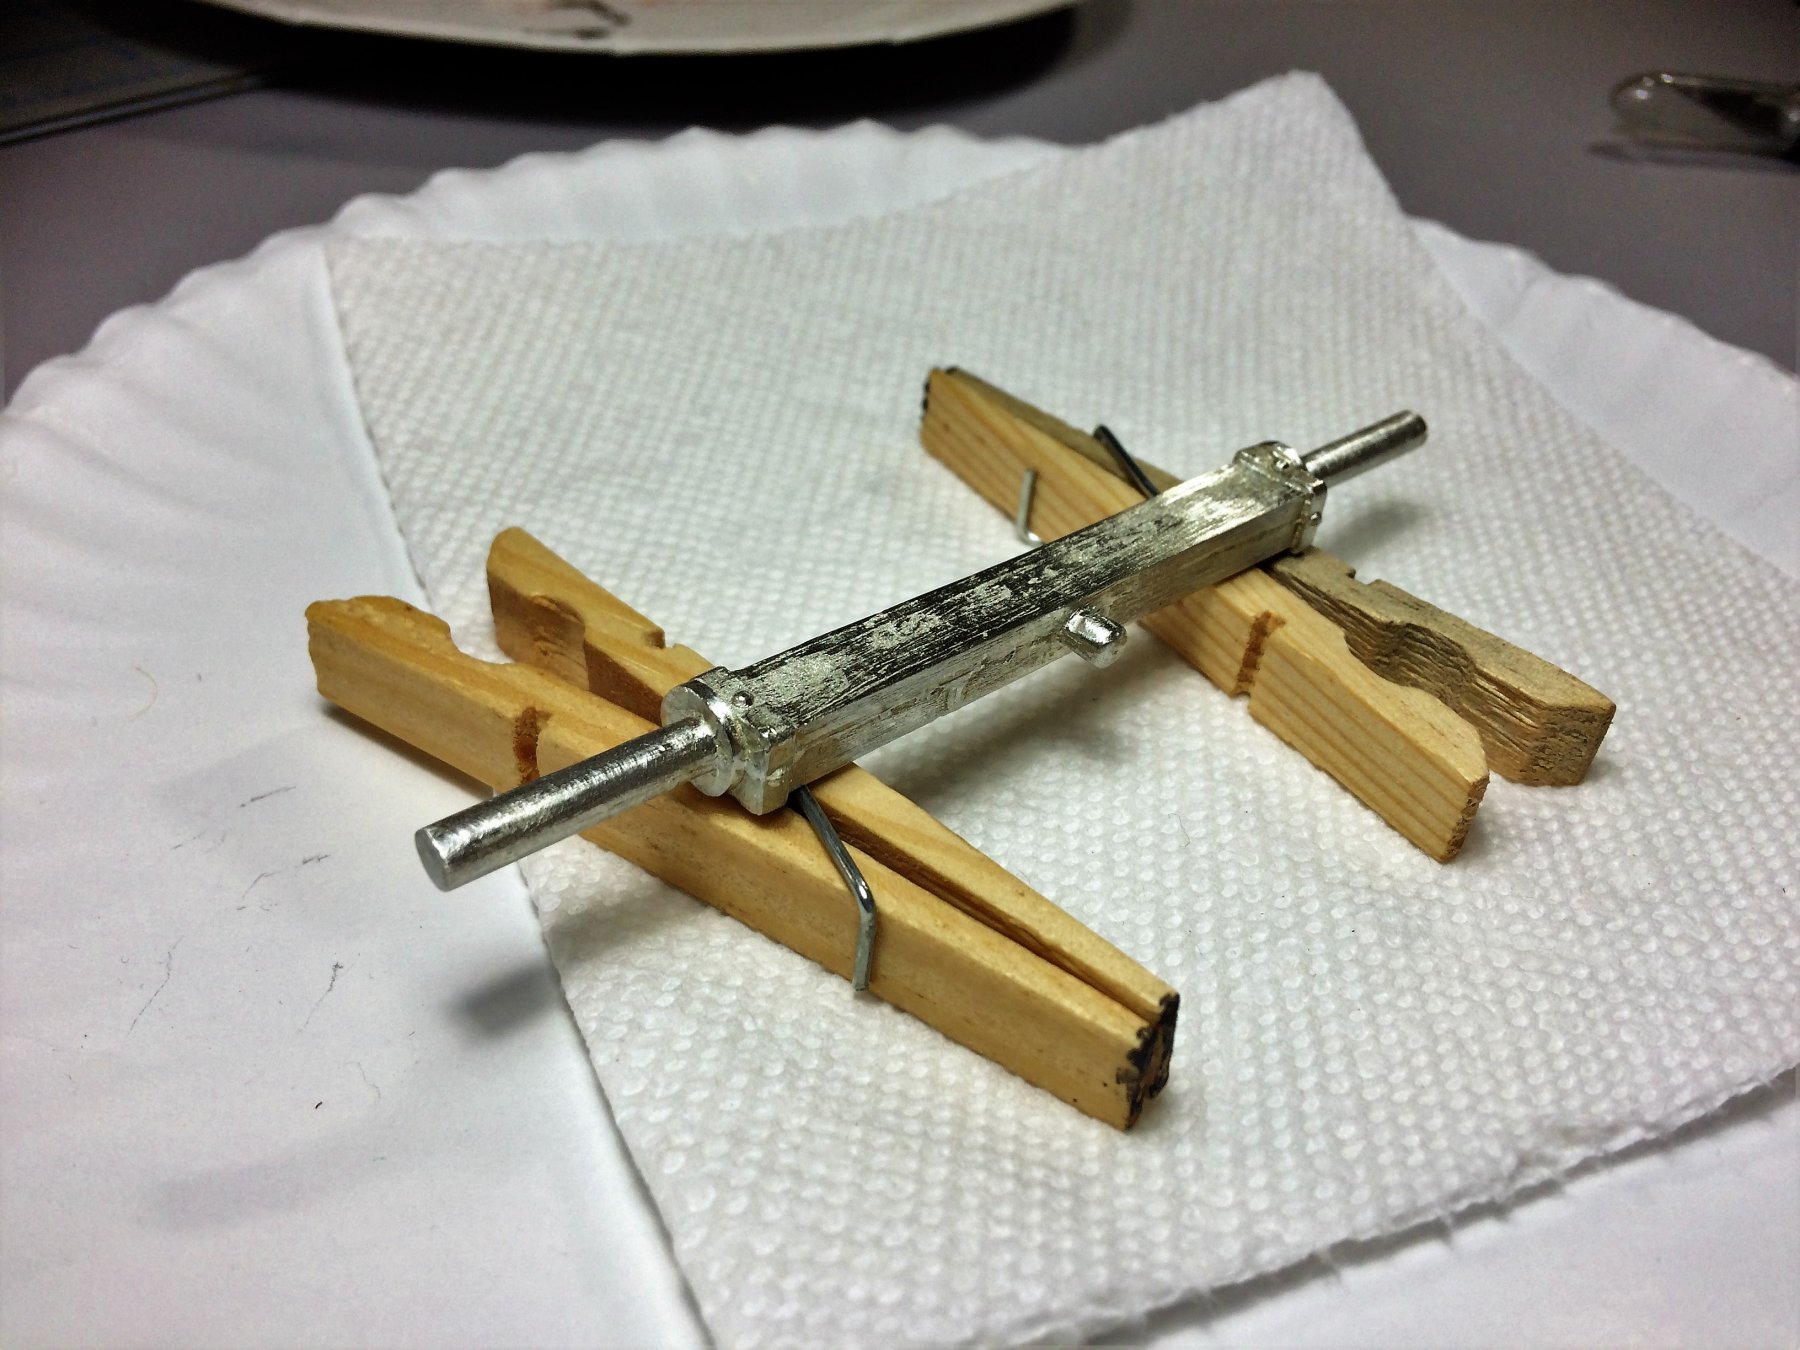
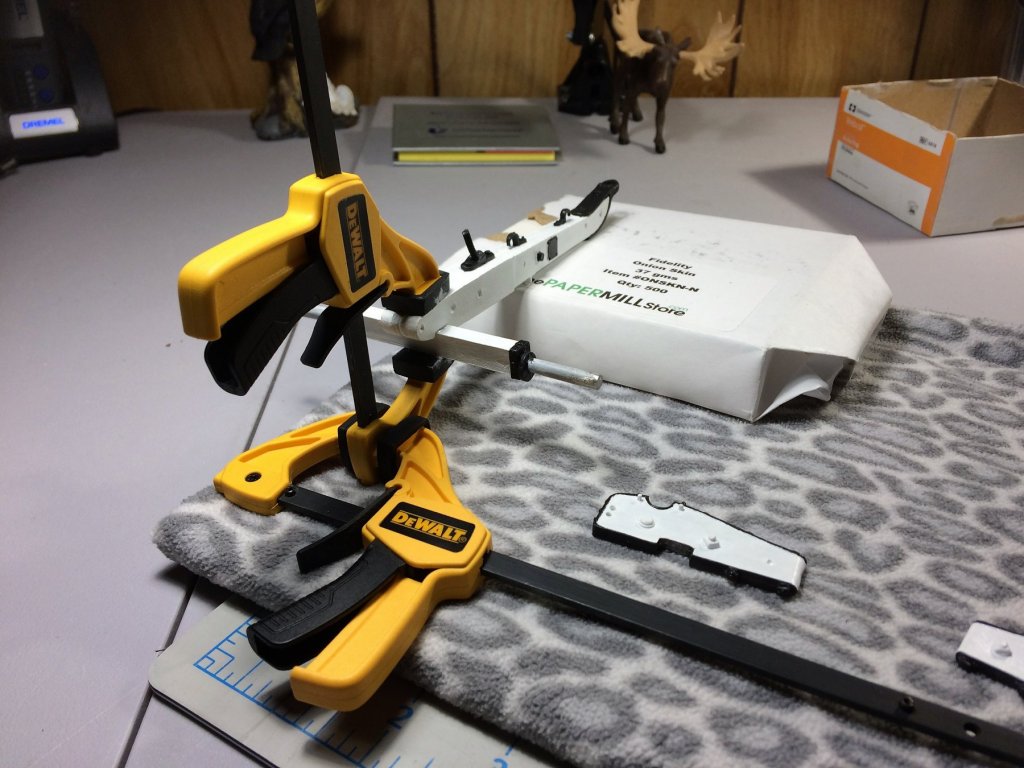
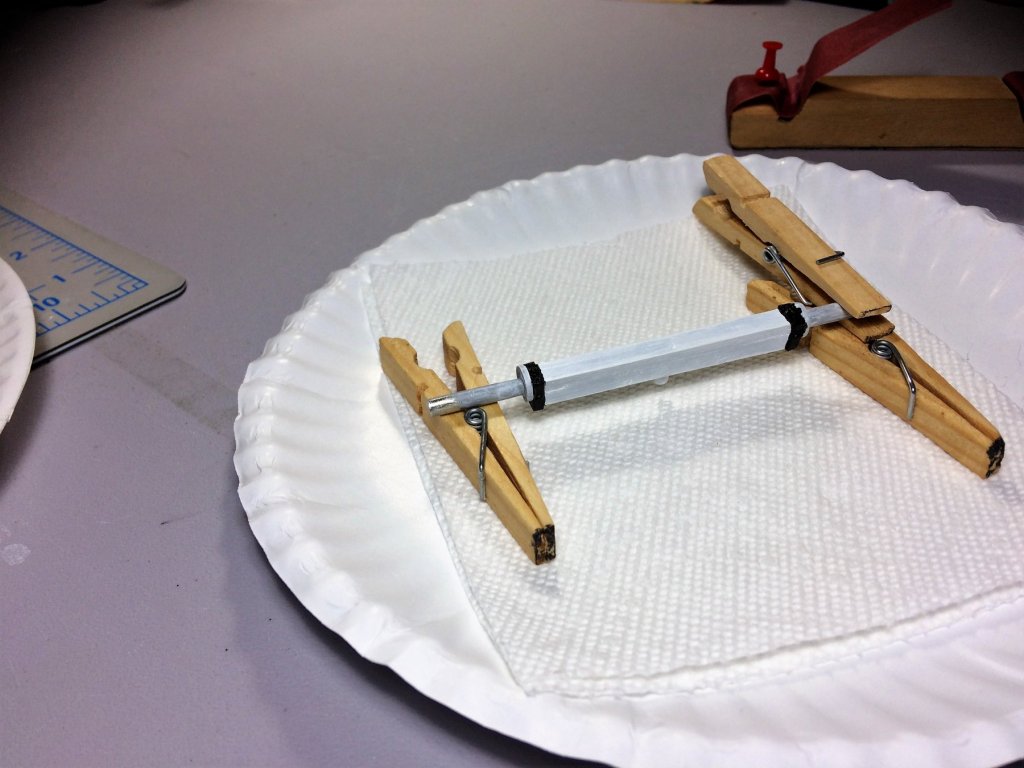
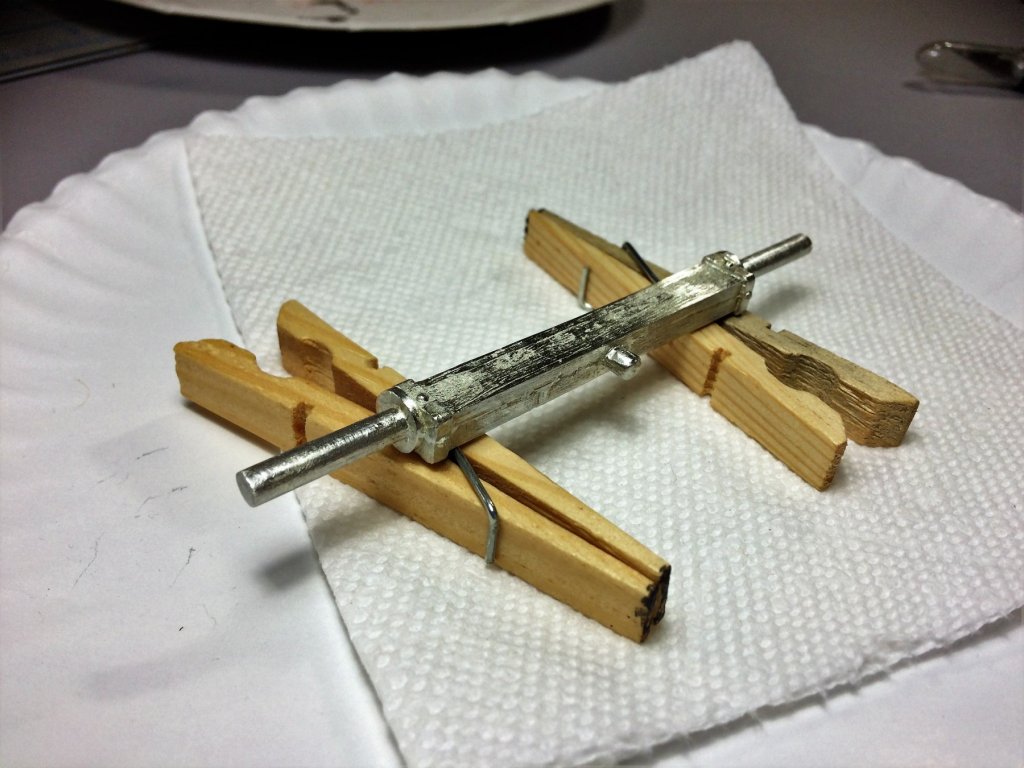
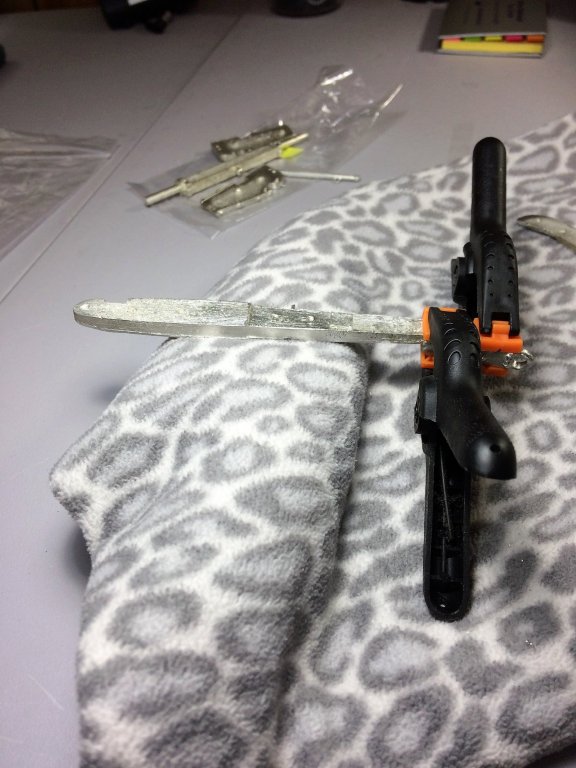
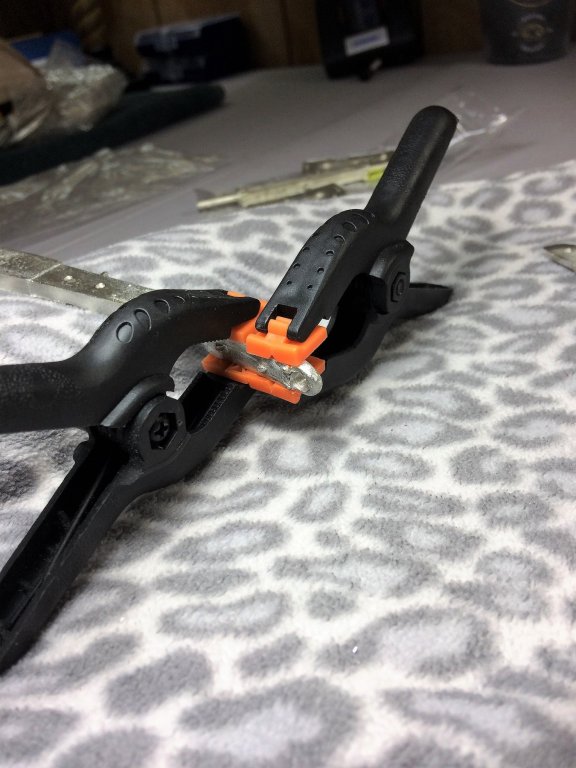
Evening, Time for an update. Chores are done, hot cup of Tea in hand, and the Celtics are on the TV. Good times, good times...... Some progress has been made. Admittedly, most of today was spent on my Niagara build. Most here was done last night. Since all the major parts are essentially painted, there's always touch-ups, I decided to attach the Axle to the main body. My little jig worked well, kept everything aligned real well. A tight grip and it was left overnight. It sets up well. I used epoxy to attach the Axle. There are some gaps where the two pieces meet. I might try and fill those. Painting may help that. I probably wont touch this for the next few days. Let it set. The two side cheeks will be added next. Tom E


-
Don is awesome! I just spent about 2 hours on his site, and still not done. Thanks for the link Popeye. Tom E
-
Mike, It's the Model Expo Bulwarks green, part of the Niagara paint set. I do prime everything. But, The weak paint is probably all me. A few days back, the green was getting low and becoming mud like in the bottle. So I added some water to loosen it up, thin it out a bit. Try and stretch out the bottle a bit. I may have gone a bit to far. It's thin, and it takes a few coats before its acceptable. I have a fresh bottle ready to go, may crack it open sooner than later. Tom E
-
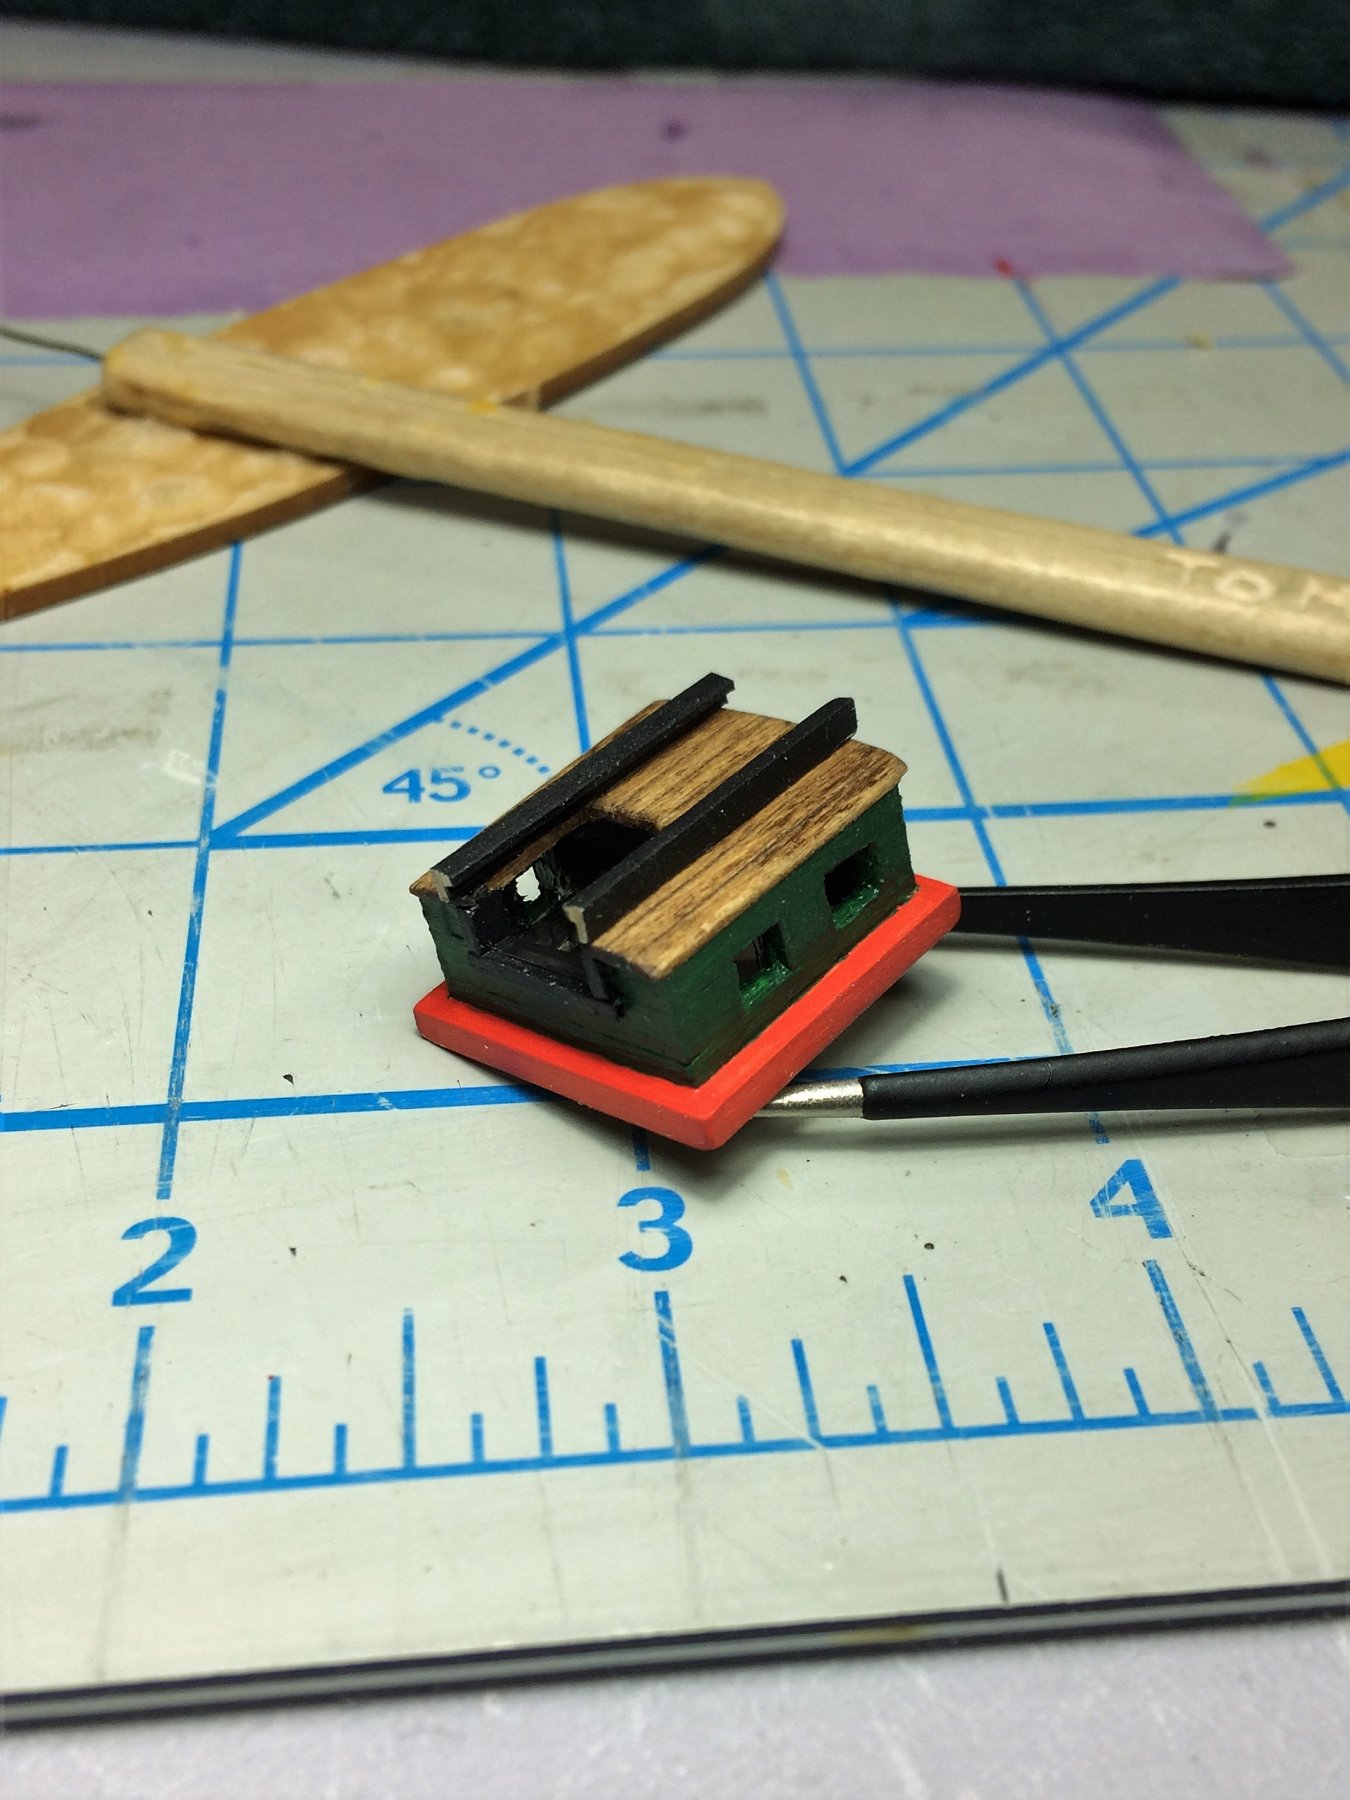
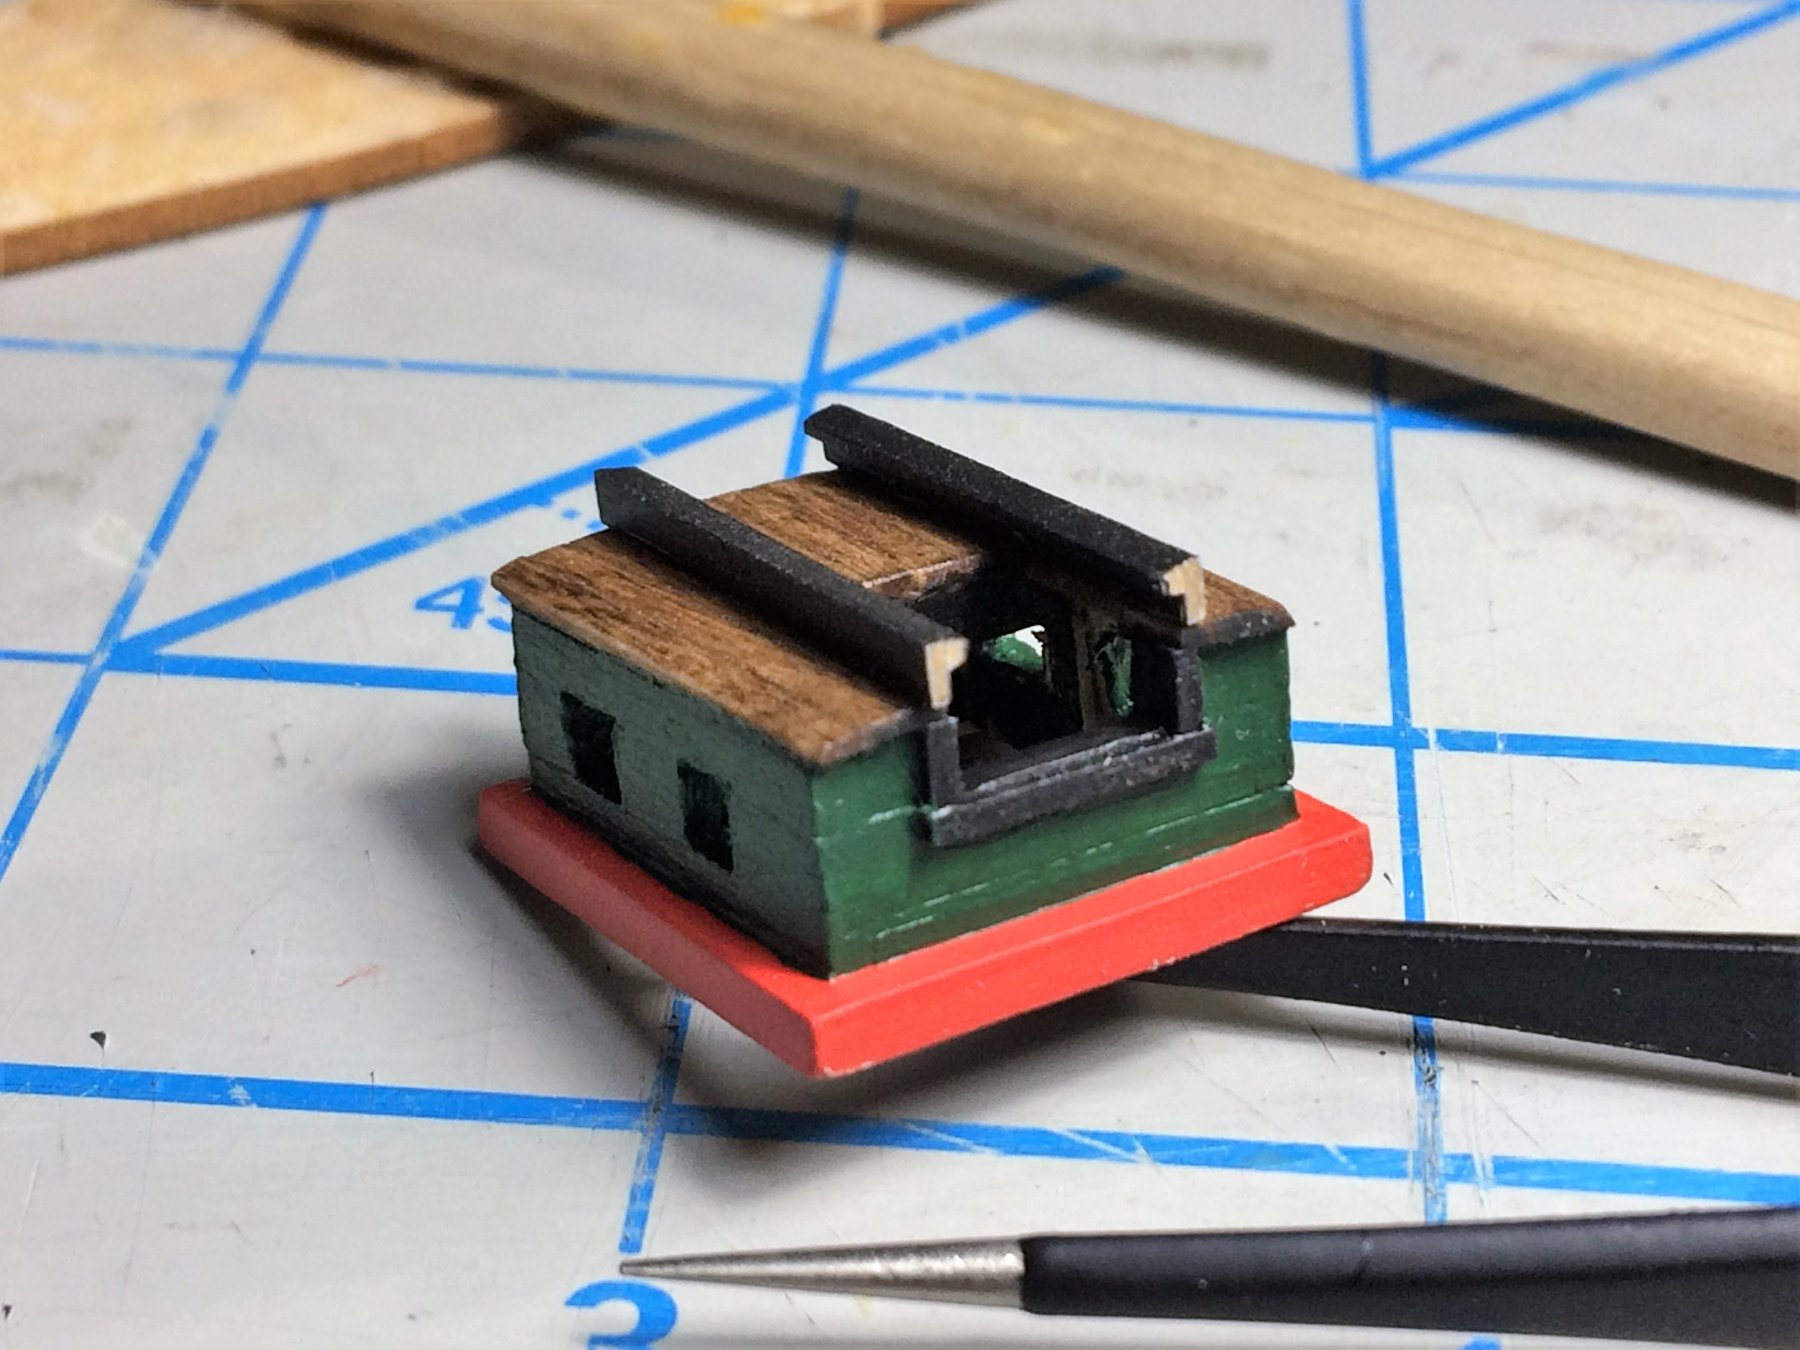
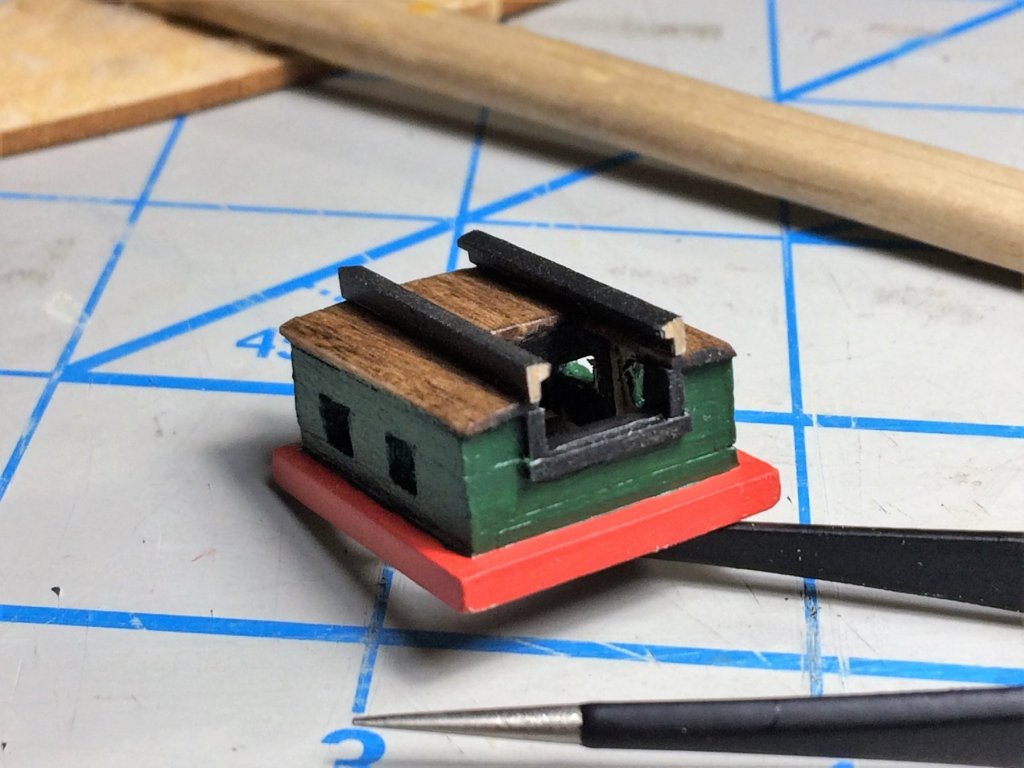
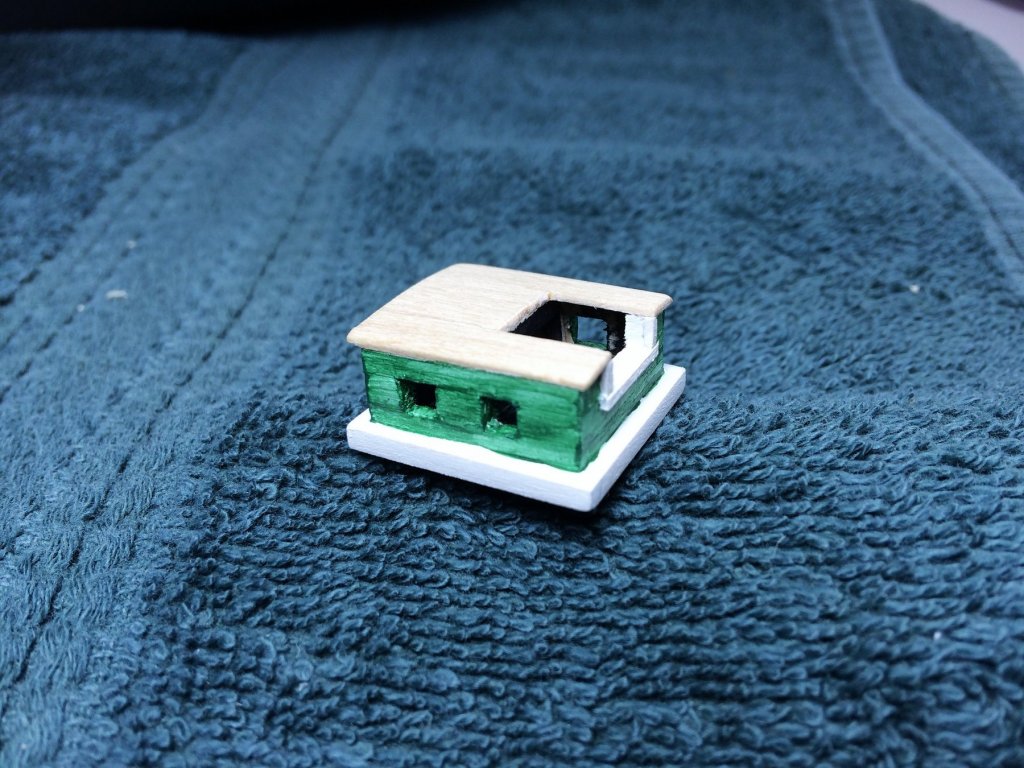
Evening, Time for an update, albeit a small one. Work continues on the Companionway. Below, is my first attempt at the bits above the opening. Grossly out of scale, way to thick and tall! Below is the comparison of first try, on the left, and my second attempt, on the right. A lot better. The sliding cover will basically rest on the companionway itself. Should still be able to slide it. Its a work in progress! As of tonight, its out for painting. The roof will be stained, green middle, and red coaming. Same as the rest of the deck furniture. The sliding cover will be stained with the bits holding it painted black. In my head it looks nice, we'll see what comes out the end! Tom E


-
Overall, I didn't think it was too bad. It has some flash to cut off, a good sanding, and a warm soapy bath and they cleaned up well. Now, the caveat to that is that this is my first metal build and have nothing else to compare it to. I've noticed since I've started painting that some blemishes do get filled in. Vossiewulf, That's a nice looking rifle. I don't think I could reproduce that with what comes in the kit. Tom E
-
Thanks J, I'll have to take a look at that one. Just did a quick search on Google and there's a lot of info on that model. The quieter the better! Tom E
-
The NEO CN brush is on the "to buy" list. What really caught my eye on that one is the different sized, and detachable, paint cups. Seems clean up would be easier. I've pretty much made up my mind on the Badger TC910 Aspire Pro compressor. Just waiting on some tax money. Tom E
-
J, That airbrush should be soon! Still doing my homework before a big purchase like that. Trying to stay away from these "starter sets" I see online. Seems better to make the initial investment piece by piece with quality equipment. Jack got it right, It's named after General James. Besides, shouldn't a weapon have a girls name!?!? Charlene or Christine seem most popular! Tom E
-
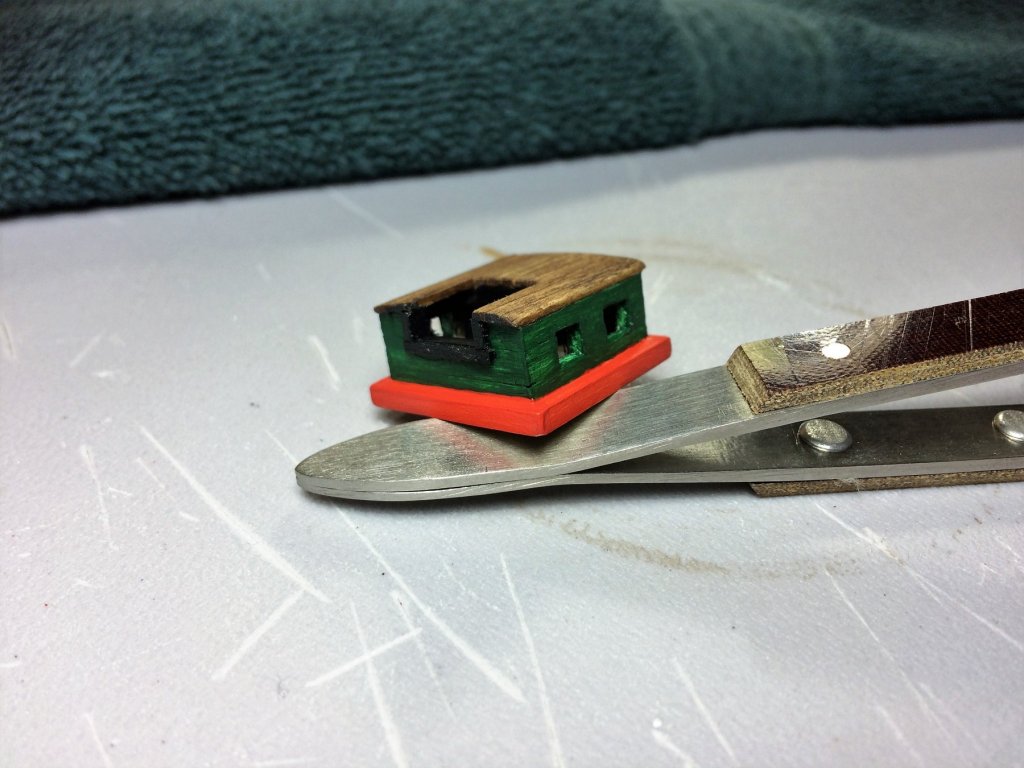
Steve, Jesse, Thanks for looking in. As towards those forceps, I have not experienced that with these. With that said tho, they are brand new and haven't been used as much and still pretty tight. Will they be like that after a year or so of use, well see. I do have older forceps that do that, but they are made of fine/thin stainless steel and feel flimsy compared to the new ones. Tom E
-
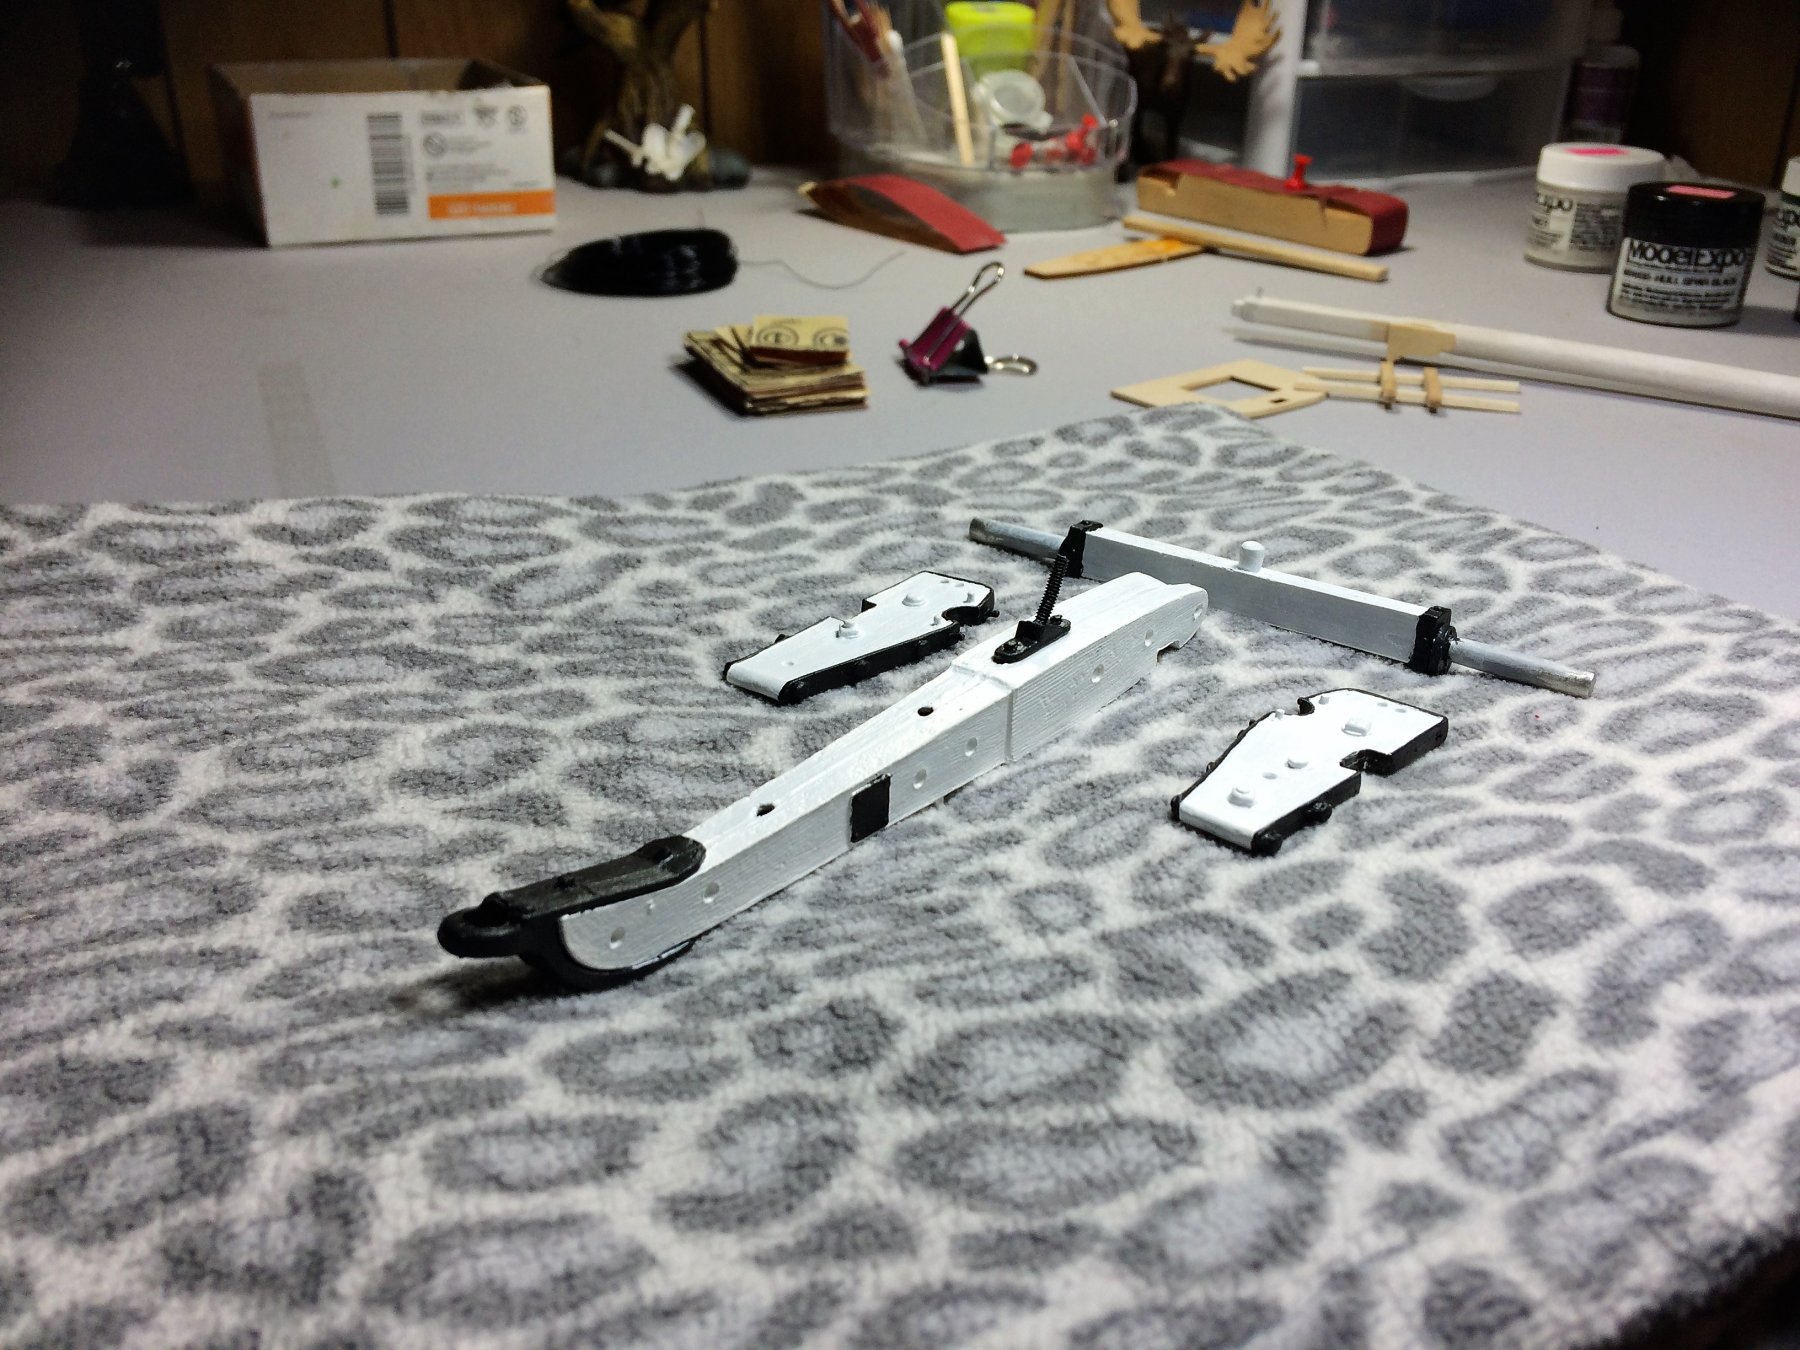
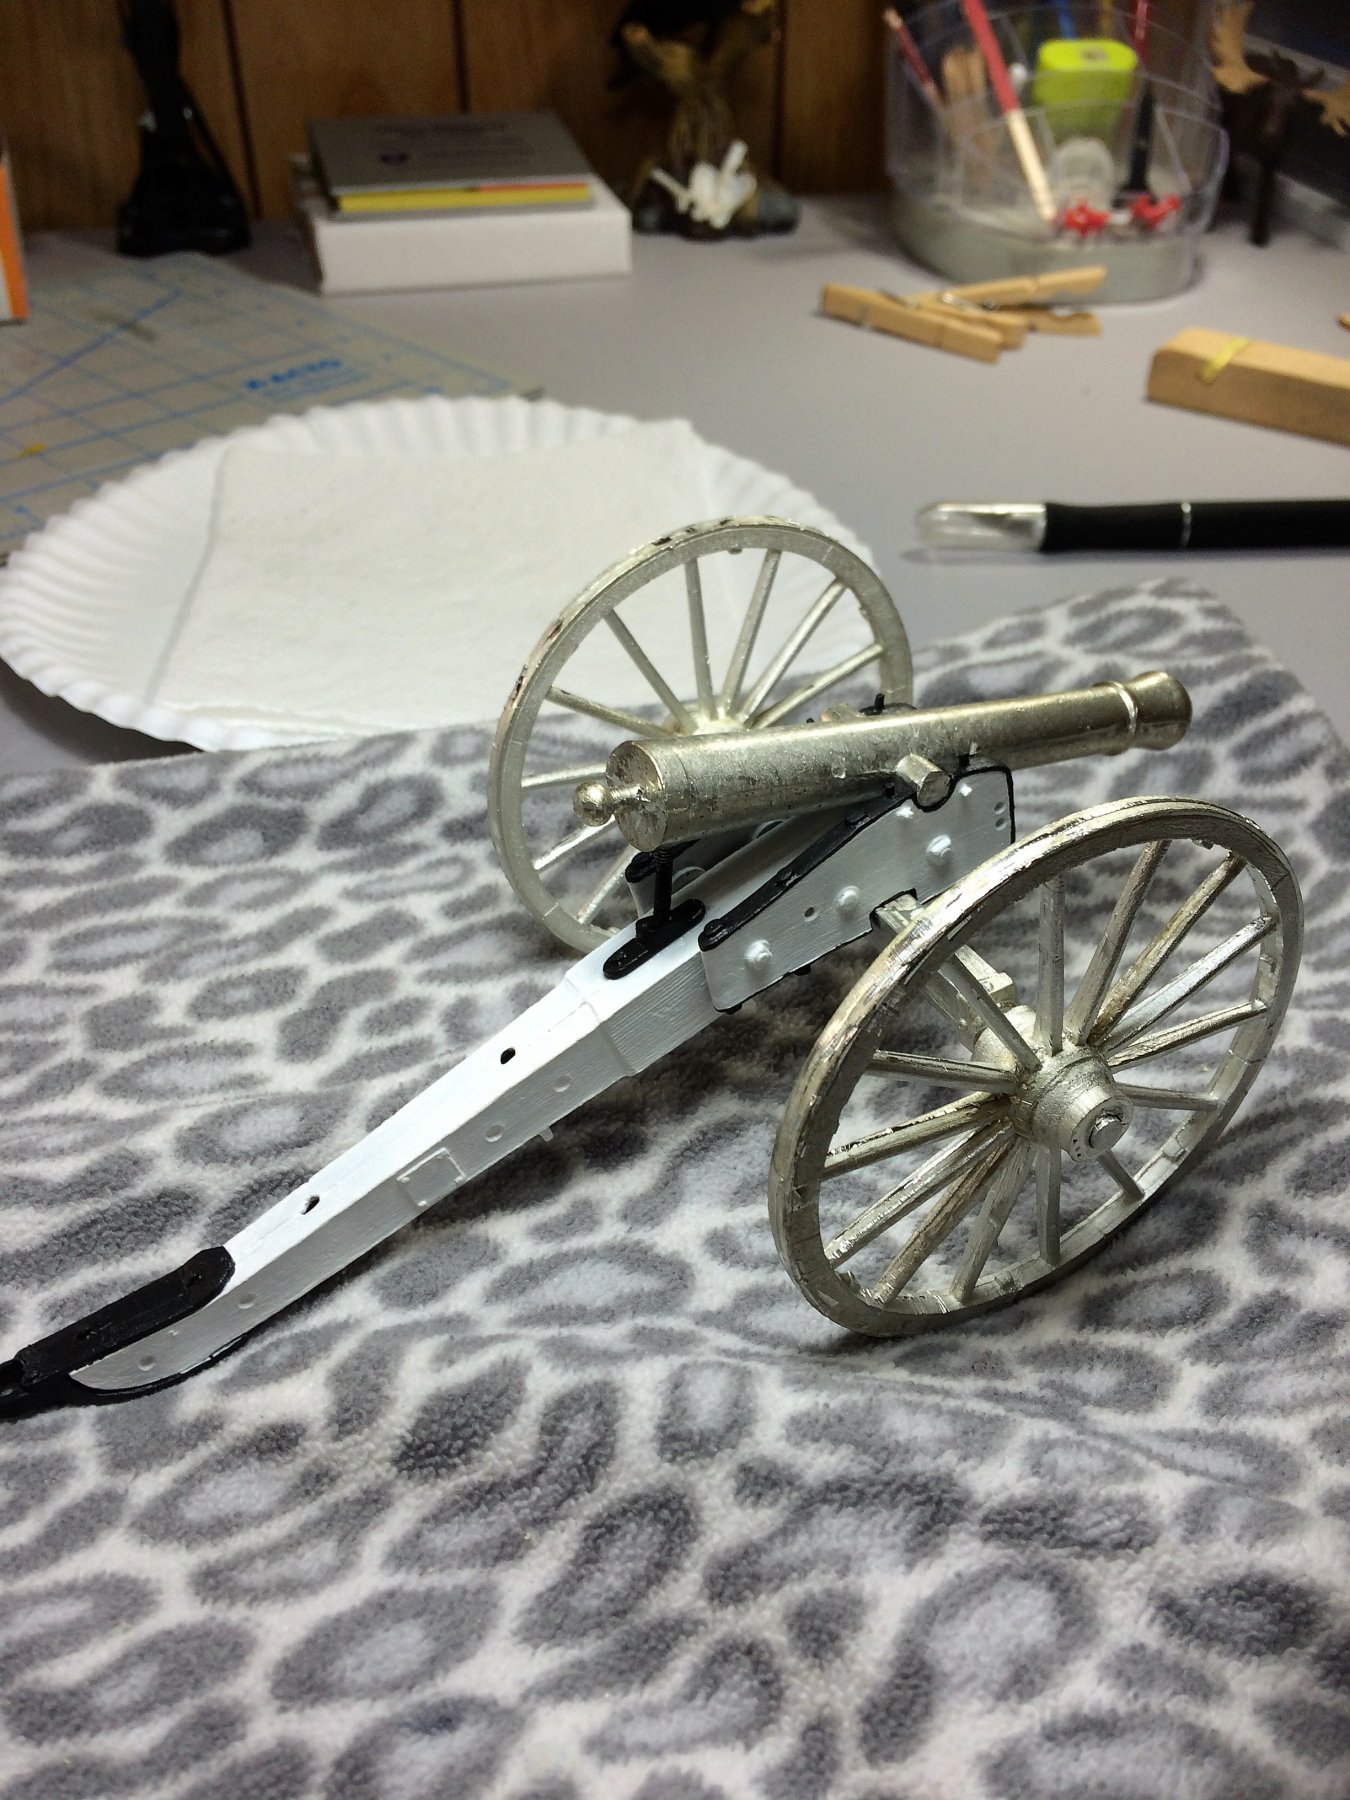
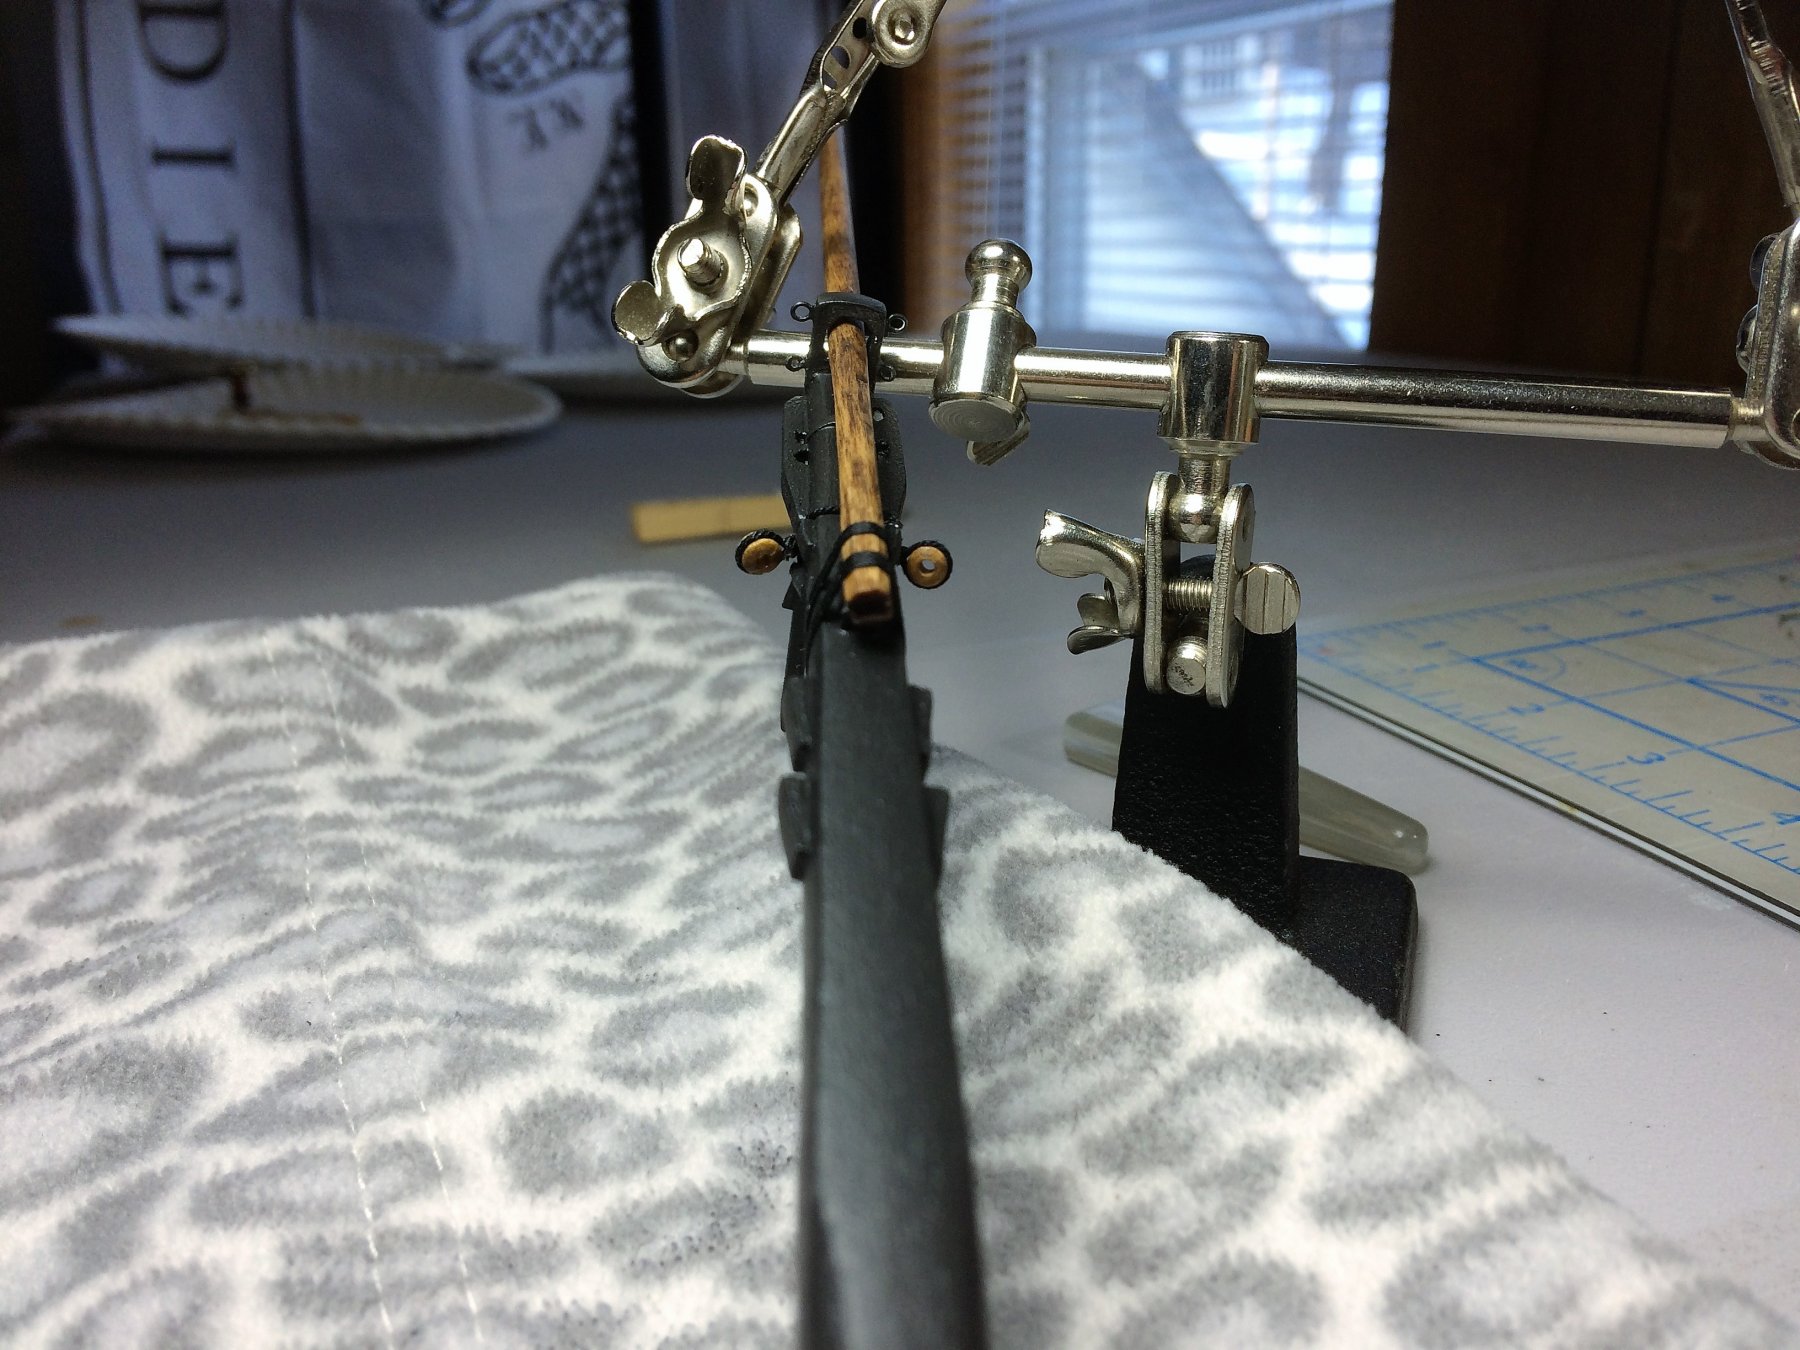
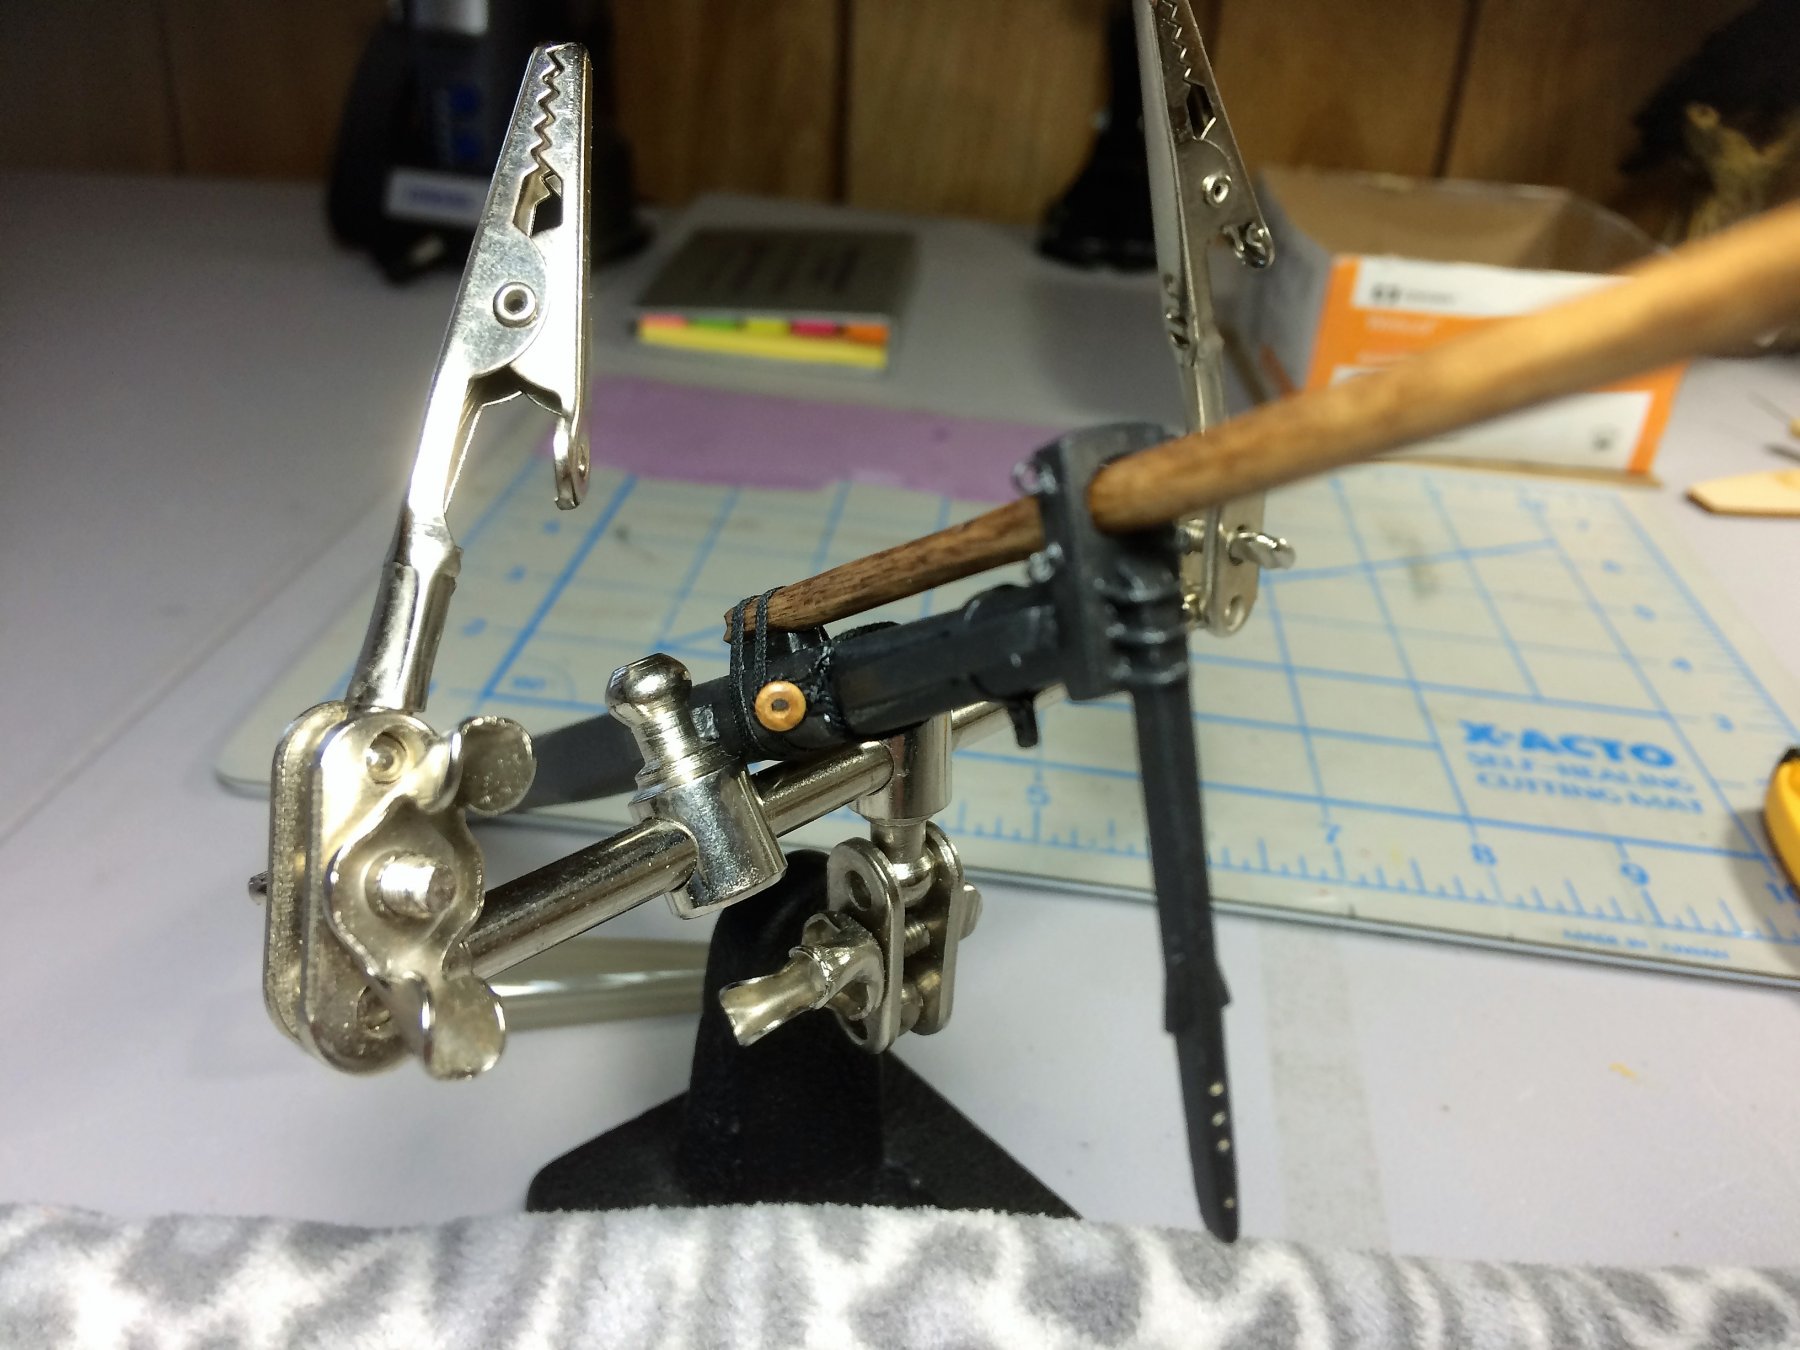
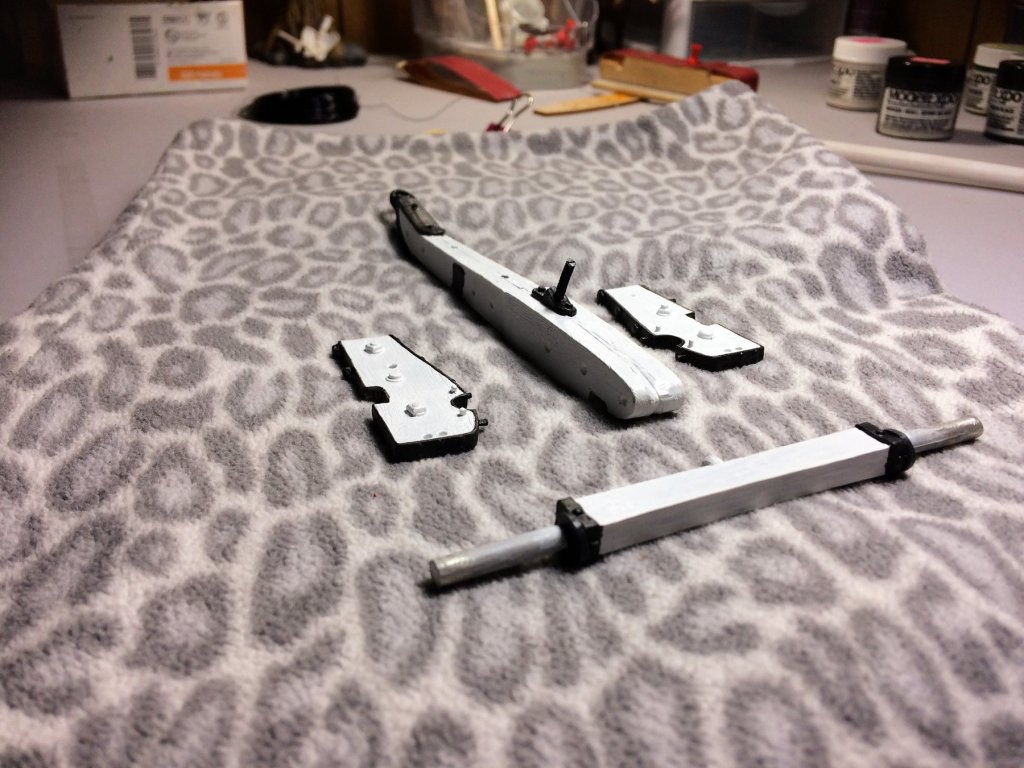
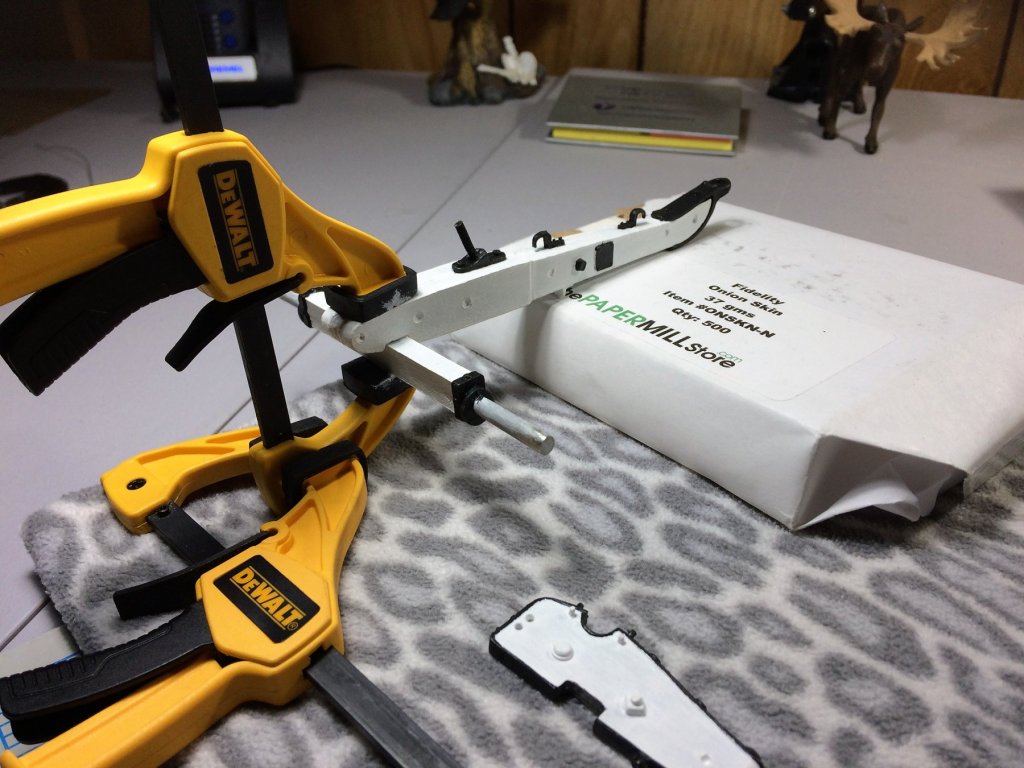
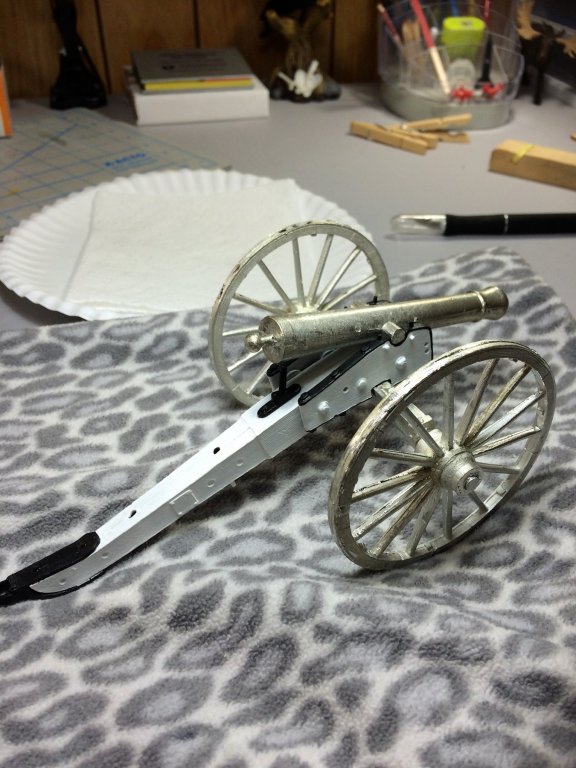
Evening, Now that I seem to be on the mend from last weeks fever, updates are needed. I haven't been building much, but it's coming back. The below pics are purely just play. Nothing is glued together, purely just a test fit. Plus, I wanted to get an idea of what this will look like. There's still plenty left to do. Odds and ends to be painted and attached to the sides. The Adjusting screw for the Cannon needs to be trimmed. I'll hold off on that for now until a bit further along. The Cannon and wheels themselves need some serious work. Back to reality! The Axle has it's first few coats. I'm so close to pulling the trigger on a proper airbrush set up. All in good time. Appropriately planned purchases wont hurt the household bottom line! Tom E

-
Thanks KHauptfuehrer, I appreciate the kind words. Bluejacket fittings never even crossed my mind. I'm a big fan of there products. I'll definitely check them out in future builds. I've been watching your Connie build. She looks great. It's in my stash, but the Model Expo kit. Lord knows when I'll get to it! Tom E
-
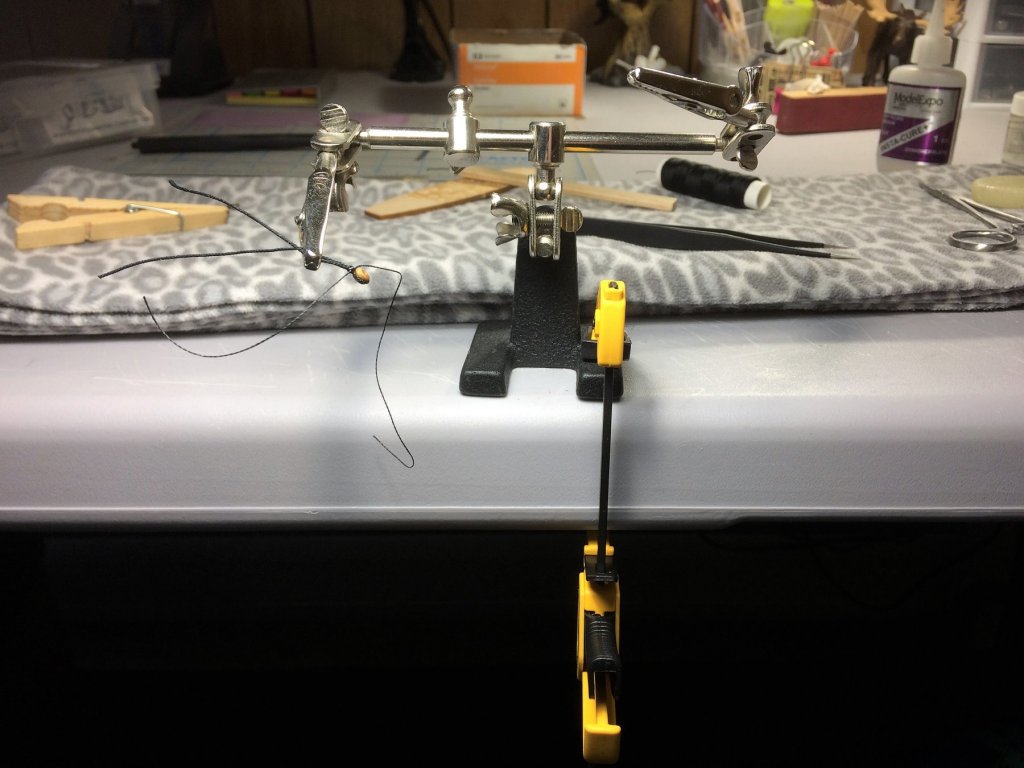
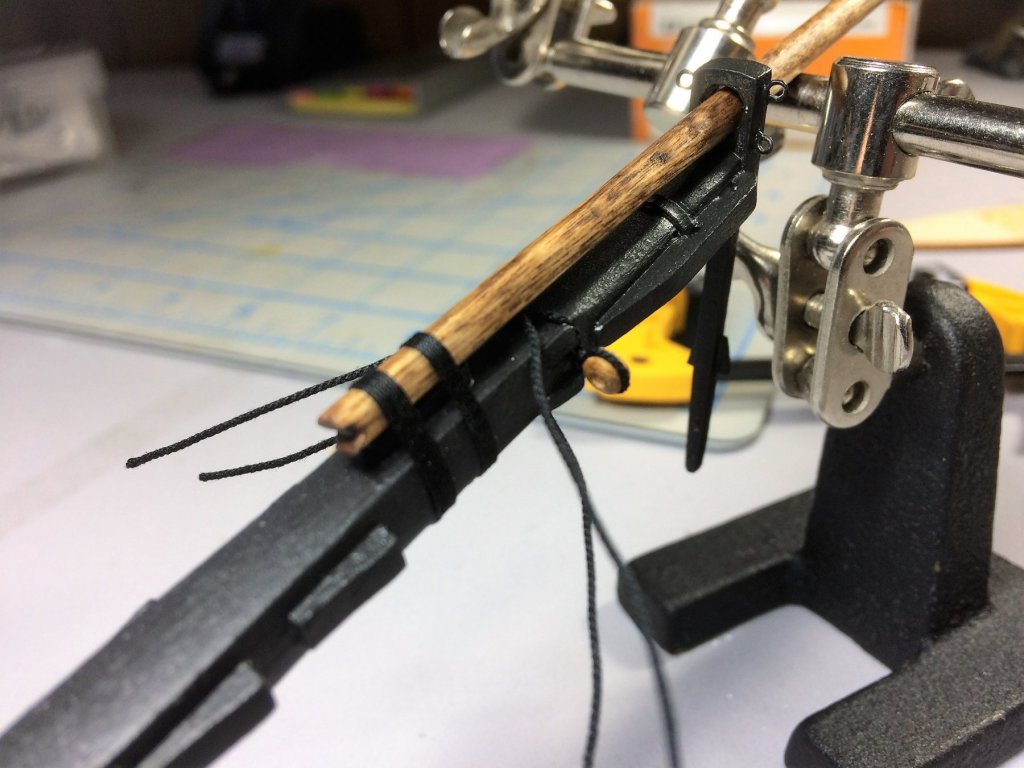
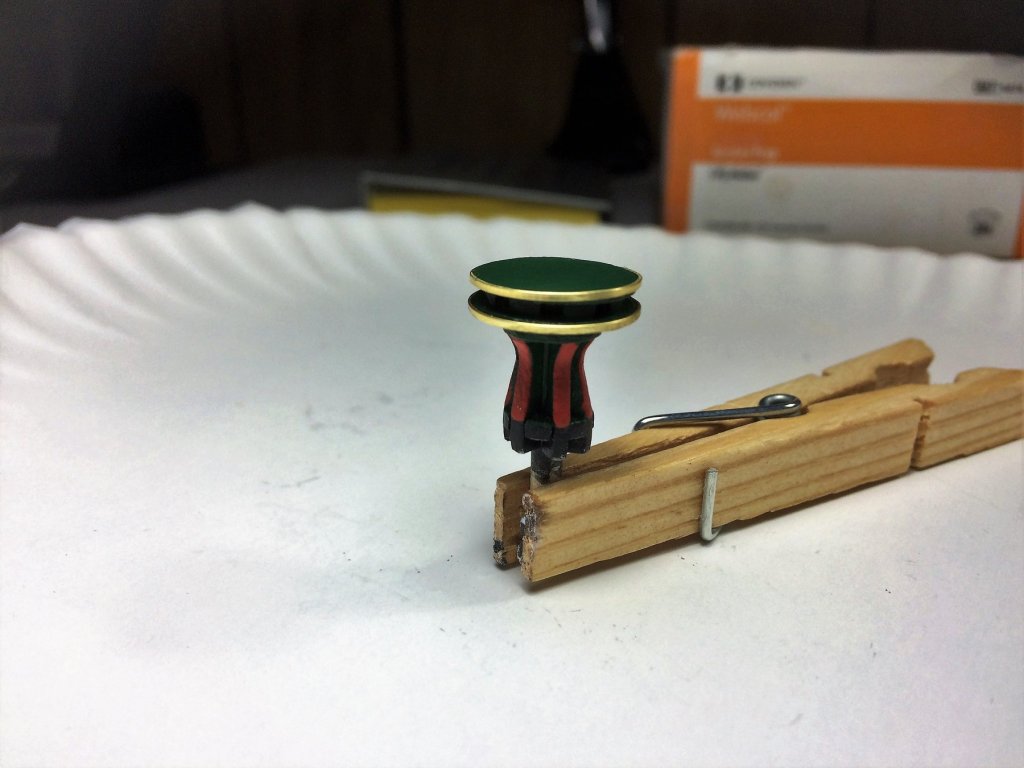
Evening, Hope everyone is well. Very little work on Niagara recently. Been sick as a witch the past few days. I've lived of mugs of hot tea for the past 5 days. Really came on last Thursday, went to work on Friday......was promptly sent home!! Think I was on the clock for less than an hour. Have not been that sick in 10+ years. More a fever than a flu. Since I work in medicine, with patient contact, it's required that I get a flu shot. If it was a flu it would have been worse and longer. Any whoo….. Feeling better, and thought I would update. All of below was done 2 weekends ago. Hope to be back building soon.....the "building itch" has returned and I feel so behind! I stropped and mounted the Bullseyes on the Bowsprit for the shrouds. I was wrapping the Bullseyes, when it dawned on me I don't need the clothes pin. I do have a "3rd hand"! Forgot all about it. It really does help. The Bullseyes were wrapped separately then "tied" together strategically so it cant be seen well. This maintained the Bullseyes in there final locations well. A little CA glue really helped too! All black rope is .025 from Syren. I'll use the same size rope for the actual Bowsprit shrouds. The Lanyards will be .018 tan rope. As some may have noticed, Syren no longer makes black rope. Before they sold out I was able to get an order in that should finish the Niagara with plenty of extra for screw ups. The Bullseyes were bought from Model Expo. The instructions have you drill out 1/8th Deadeyes to make Bullseyes. That was a comedy! I must have ruined 20 trying a dozen different ways to do it. They just flaked apart, might have been dried out the way they crumbled. Coating in CA glue before drilling didn't help. They should just include the Bullseyes with the kit. Tom E


-
Impressive. What a beautiful aircraft. You make it look so easy. It's a build like this that's gets the "plastic itch" in my brain going! Looking forward to your next project. Tom E
-
Nope, That reds not me, well at least not yet! I hate to admit, but I would have to say on most of my builds I've gotten myself. Really opened up my thumb last April! No stiches but you'd think I spilt spaghetti sauce! Band-Aids are always well stocked. Tom E
-
Phantom Henry J Gasser by jct - FINISHED - 1/24 scale - PLASTIC
Tom E replied to jct's topic in Non-ship/categorised builds
I have a habit of wearing a sweatshirt in my Shipyard. I don't know how many times I've hooked something with the sleeve and sent it flying. Thank goodness we all have a lot of glue around! Tom E -
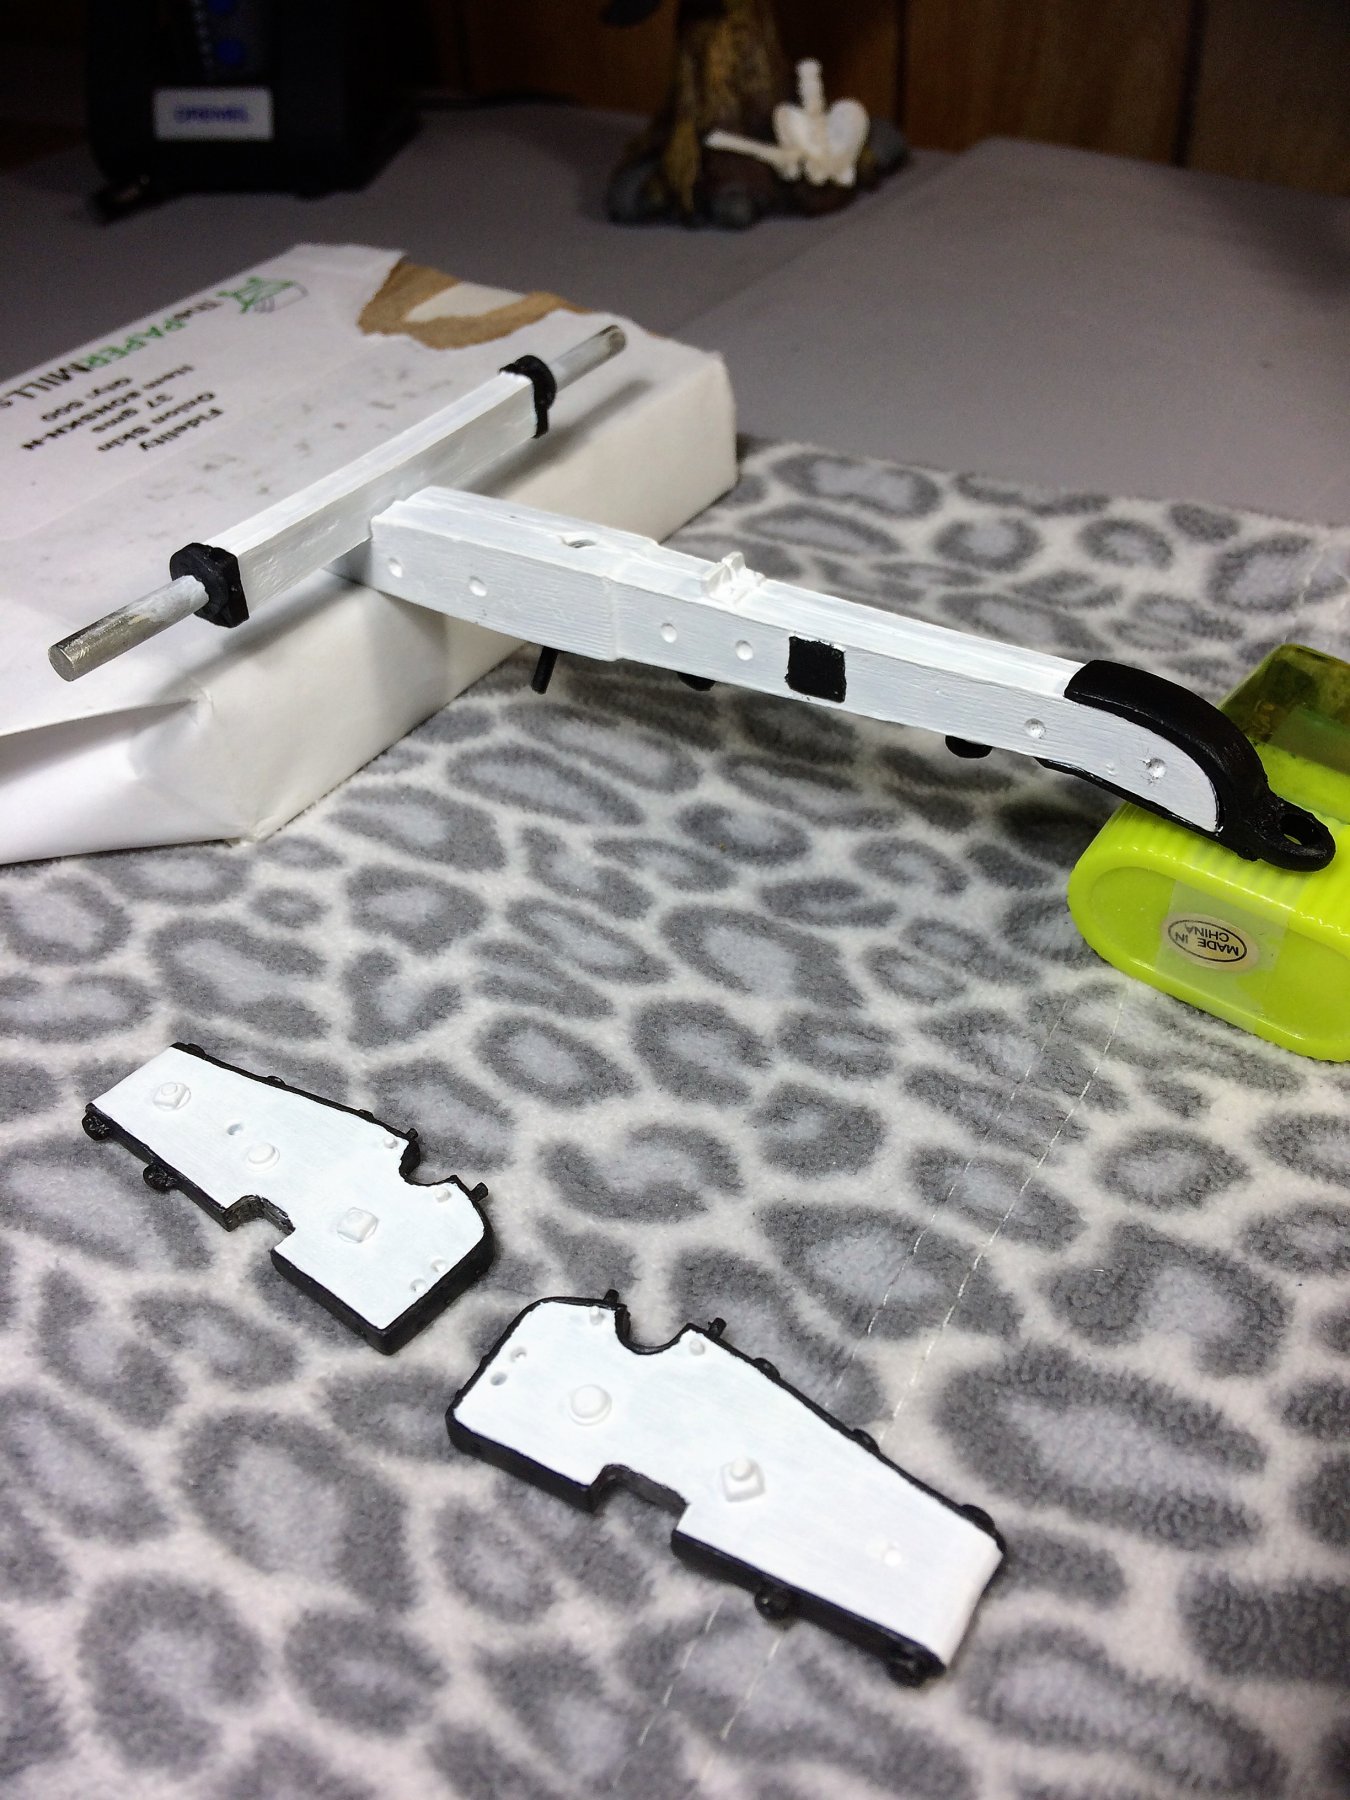
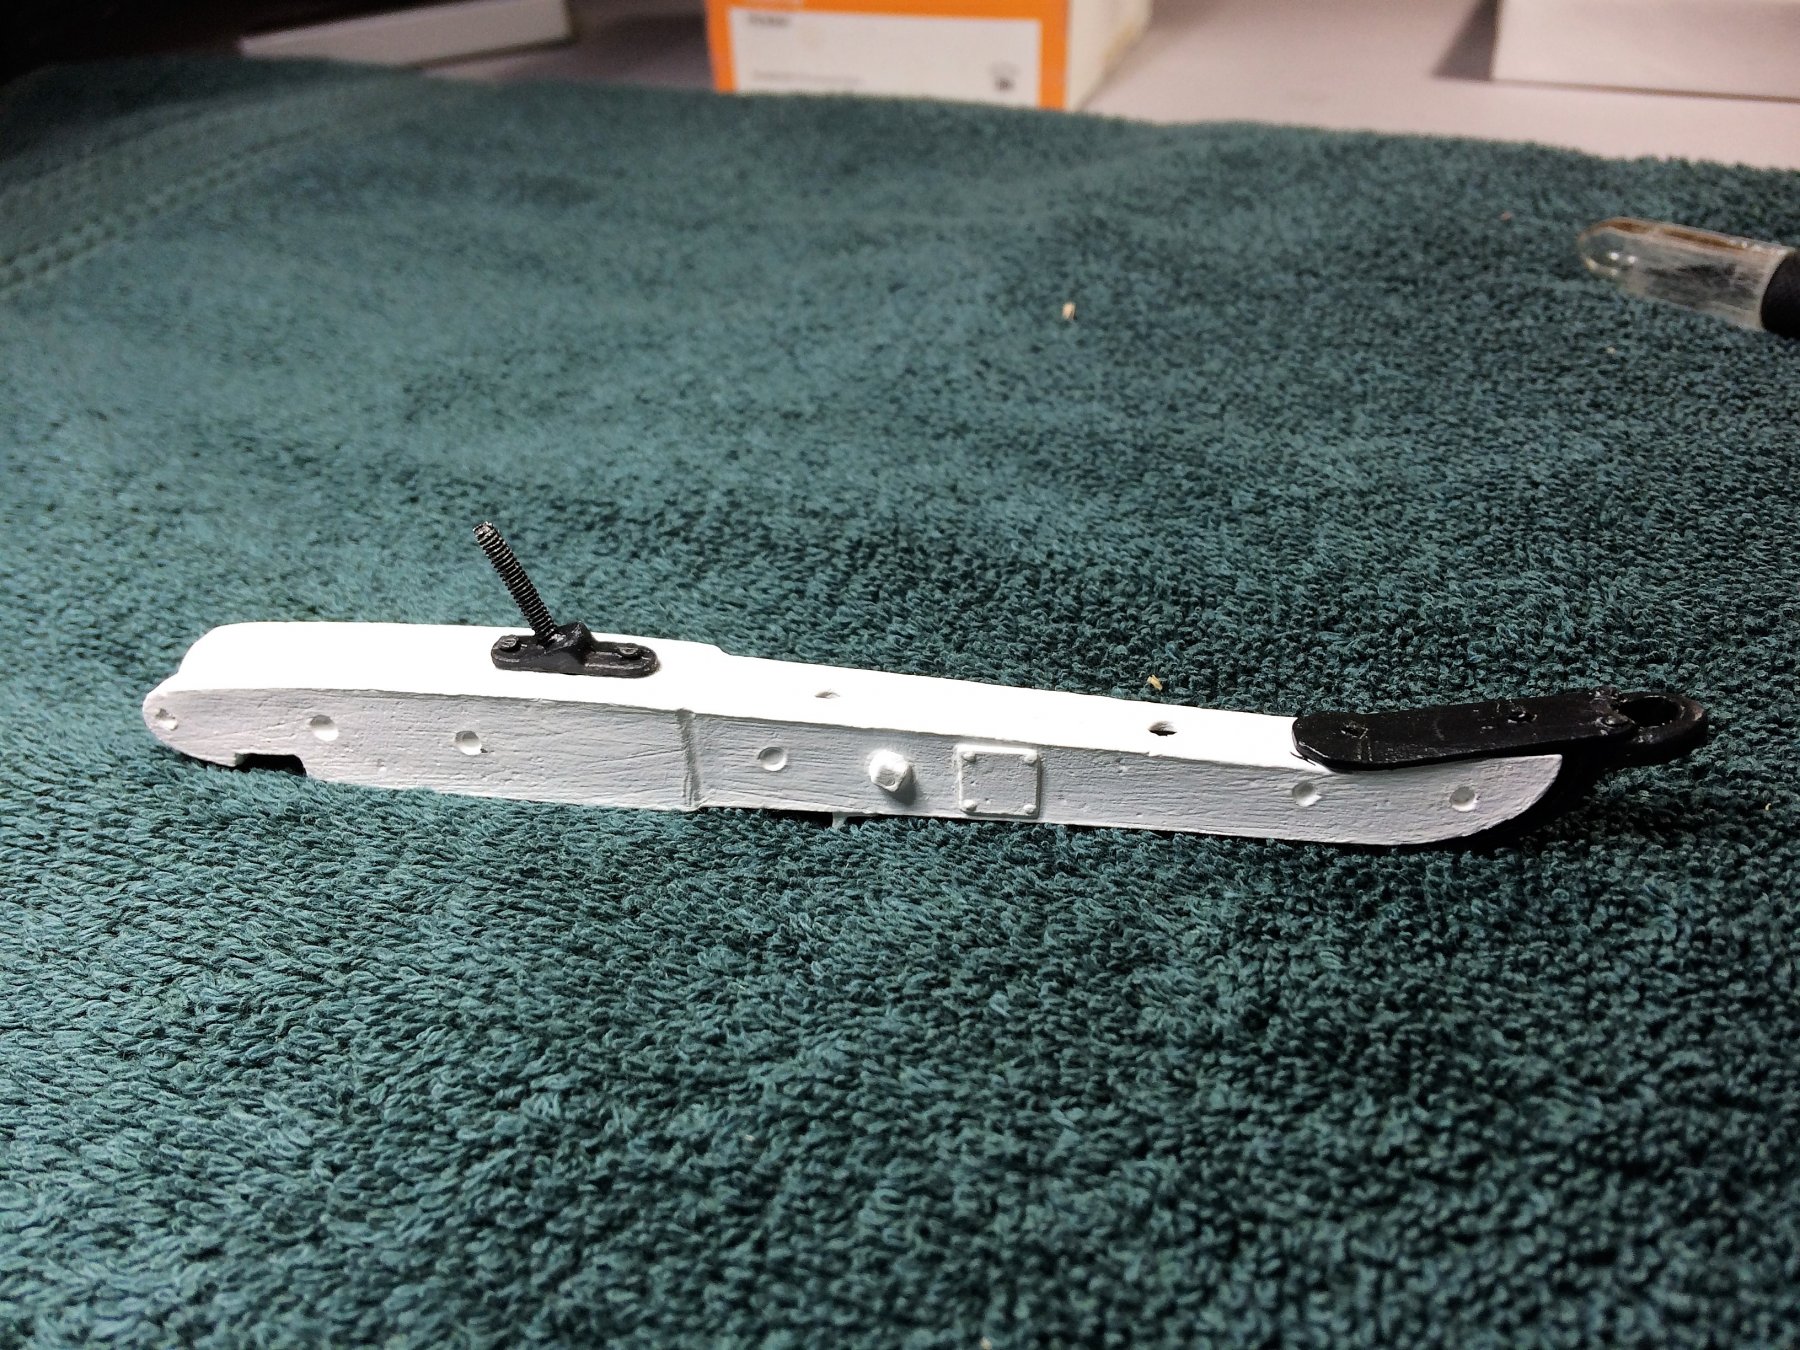
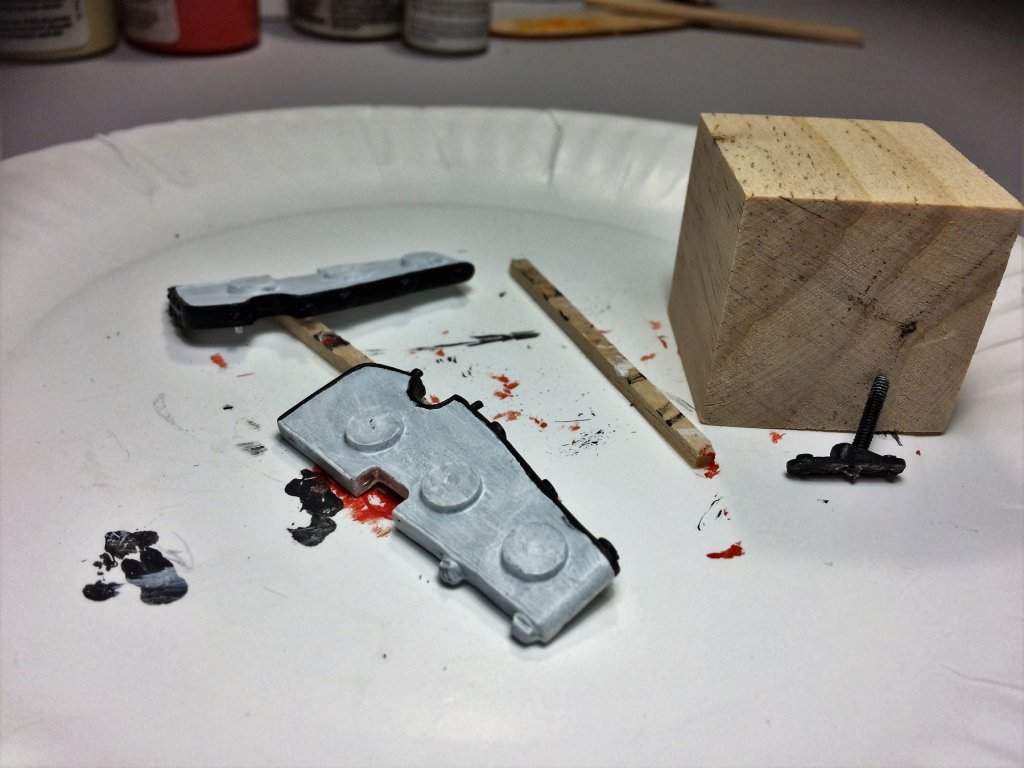
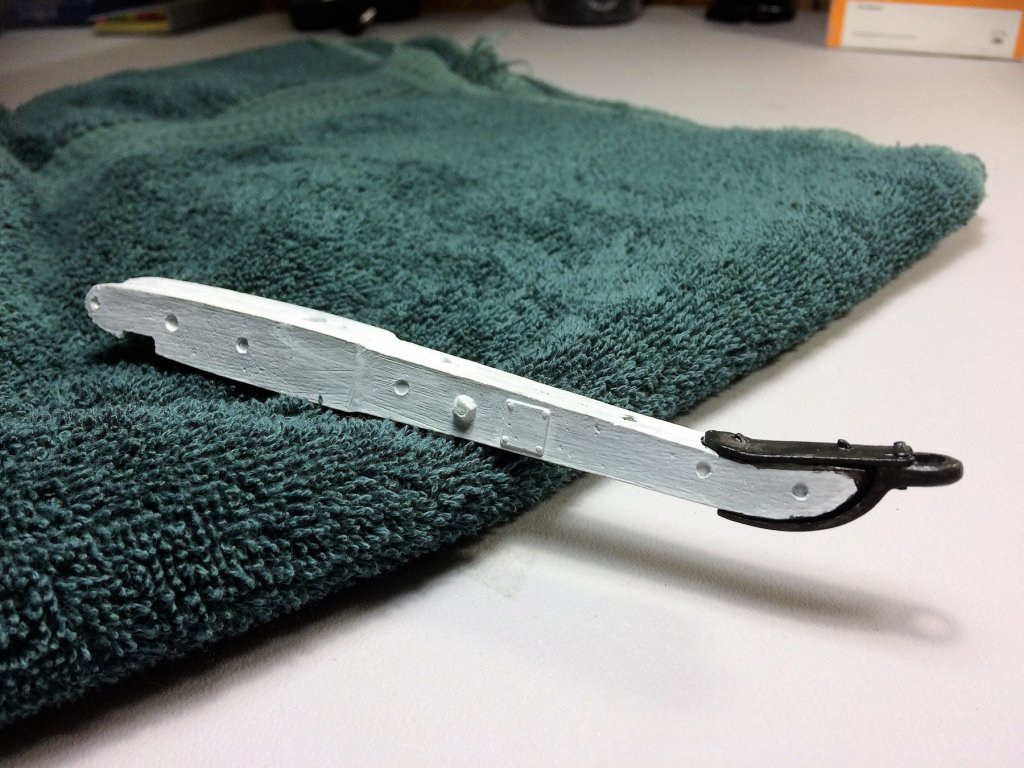
Evening, Just a small update on the James Cannon. Most of my weekend was spent with my Niagara. There's a lot of painting! I started the 2 Cheeks and Elevator Screw/Housing. Below, the cheeks have only the white primer, and the first layer of black on the edges. The Elevator Screw was easy. A few coats of black and I glued it to the main body. I started to spruce up the Main Axle. I assure, It didn't start out that shiny! Lots of sanding, and a faux wood grain to the metal that you don't want to completely remove. It will get a bath, dry, then a coat of primer. Tom E

-
That's truly fantastic work. You've also built a build log that others will read for years, and should. It's that good. I'm already following your MO! Tom E
-
Congratulations Christos! That is an impressive ship. Wonderful addition to your increasing collection of ships. Any thoughts on your next project? Tom E
-
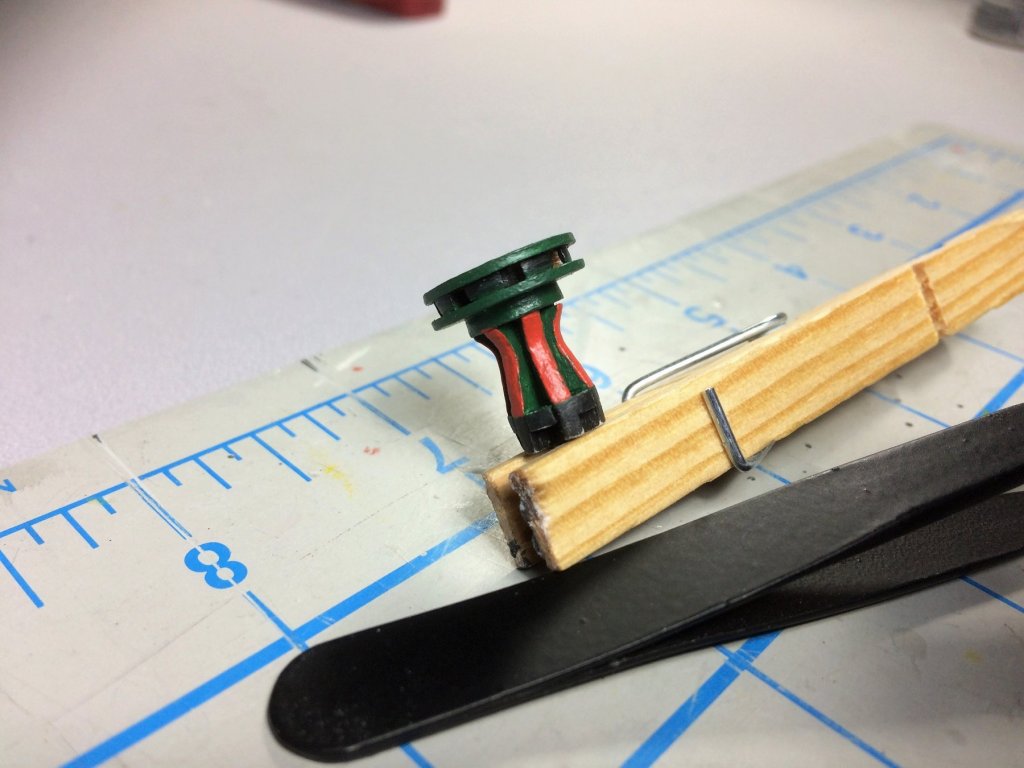
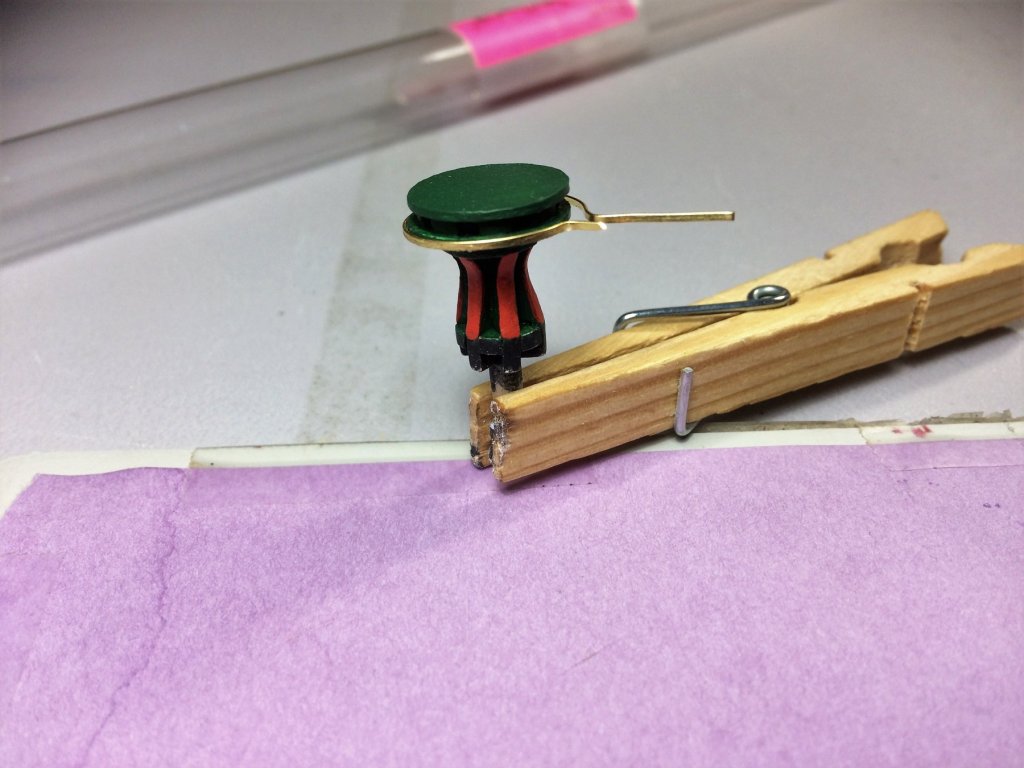
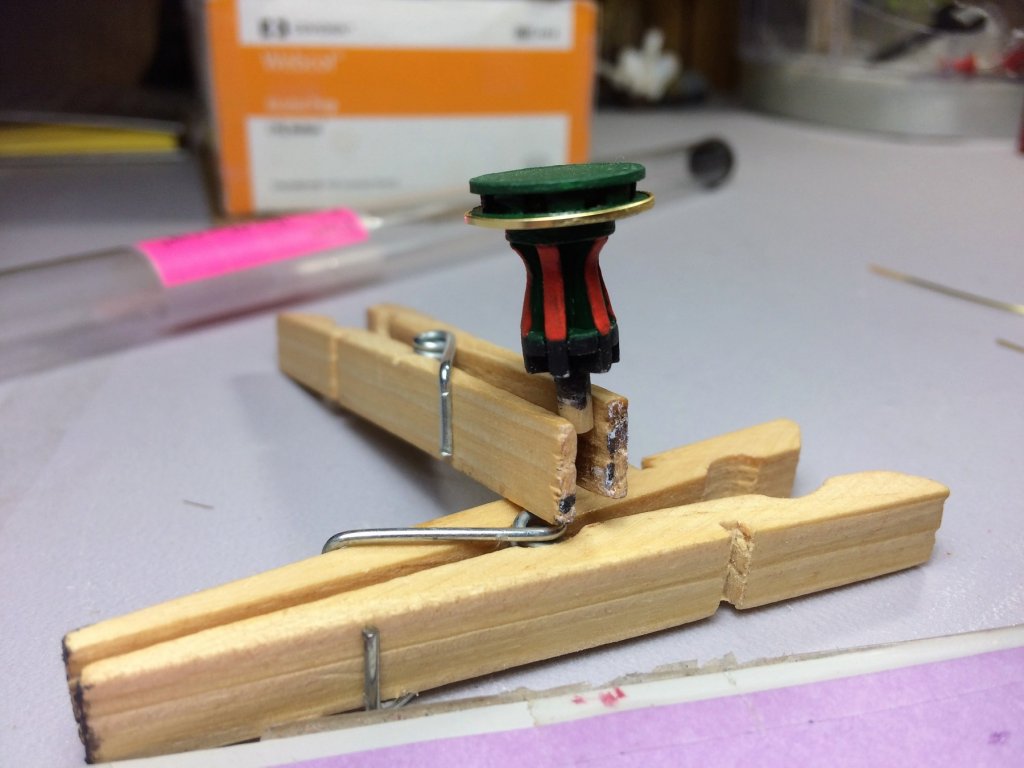
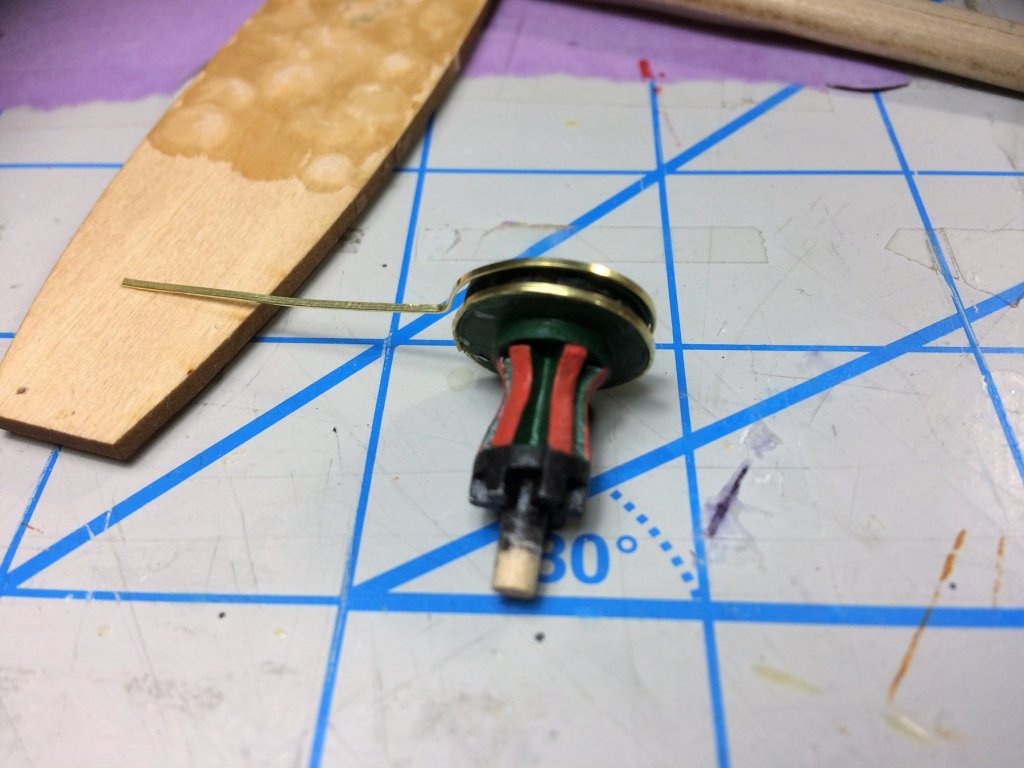
Evening, Good day at work today, tomorrow is Friday, feelin good heading into the weekend. Time for an update. I'm basically done with the Capstan, just needs some touch up's. Still staying with the darker color scheme. I like it......it just needed something.....extra. Way in the back of my head an idea said to wrap some brass around the edges. Just to give it a little shine. Don't know why, just thought it would look good. It'll probably just blend into the deck to the casual observer. Took a good length of extra strip brass and pre formed it around the edge first then glued. A little wobbly, but not bad. Then the top edge got its brass. I think it looks good. Really defines the edge of the Capstan. I may omit the star on top. I've tried hand painting it, stencil, straight edges.....everything and it looks horrible. Tom E
-
Thanks Popeye! It's my first cannon as well. It's fun to build something different, mix up the scenery a bit! I do love ship building, but this new "non-ship" section is cool. There's a lot of techniques done here that translate into ship modeling, at least I think so. Tom E
-
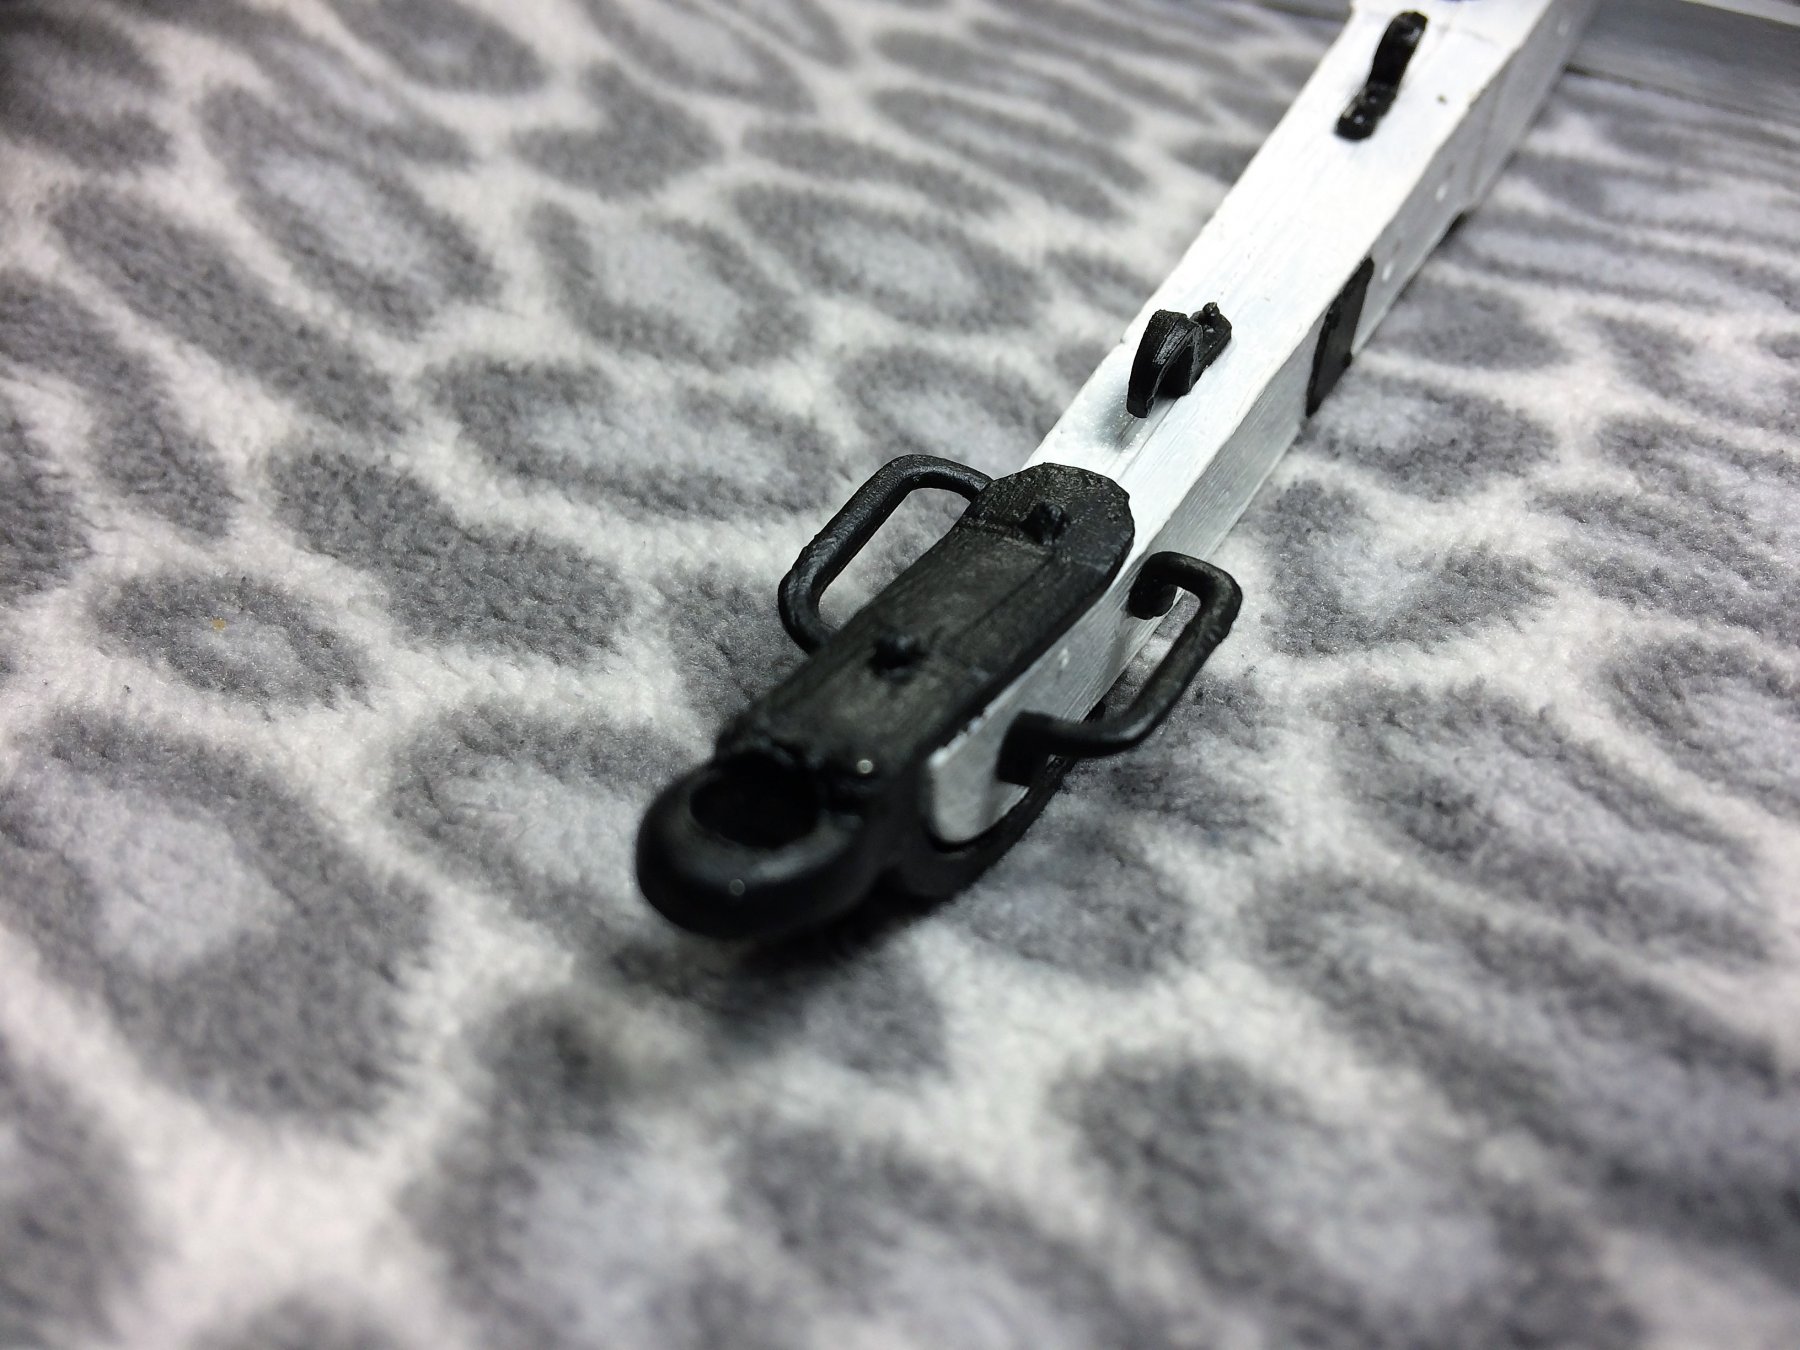
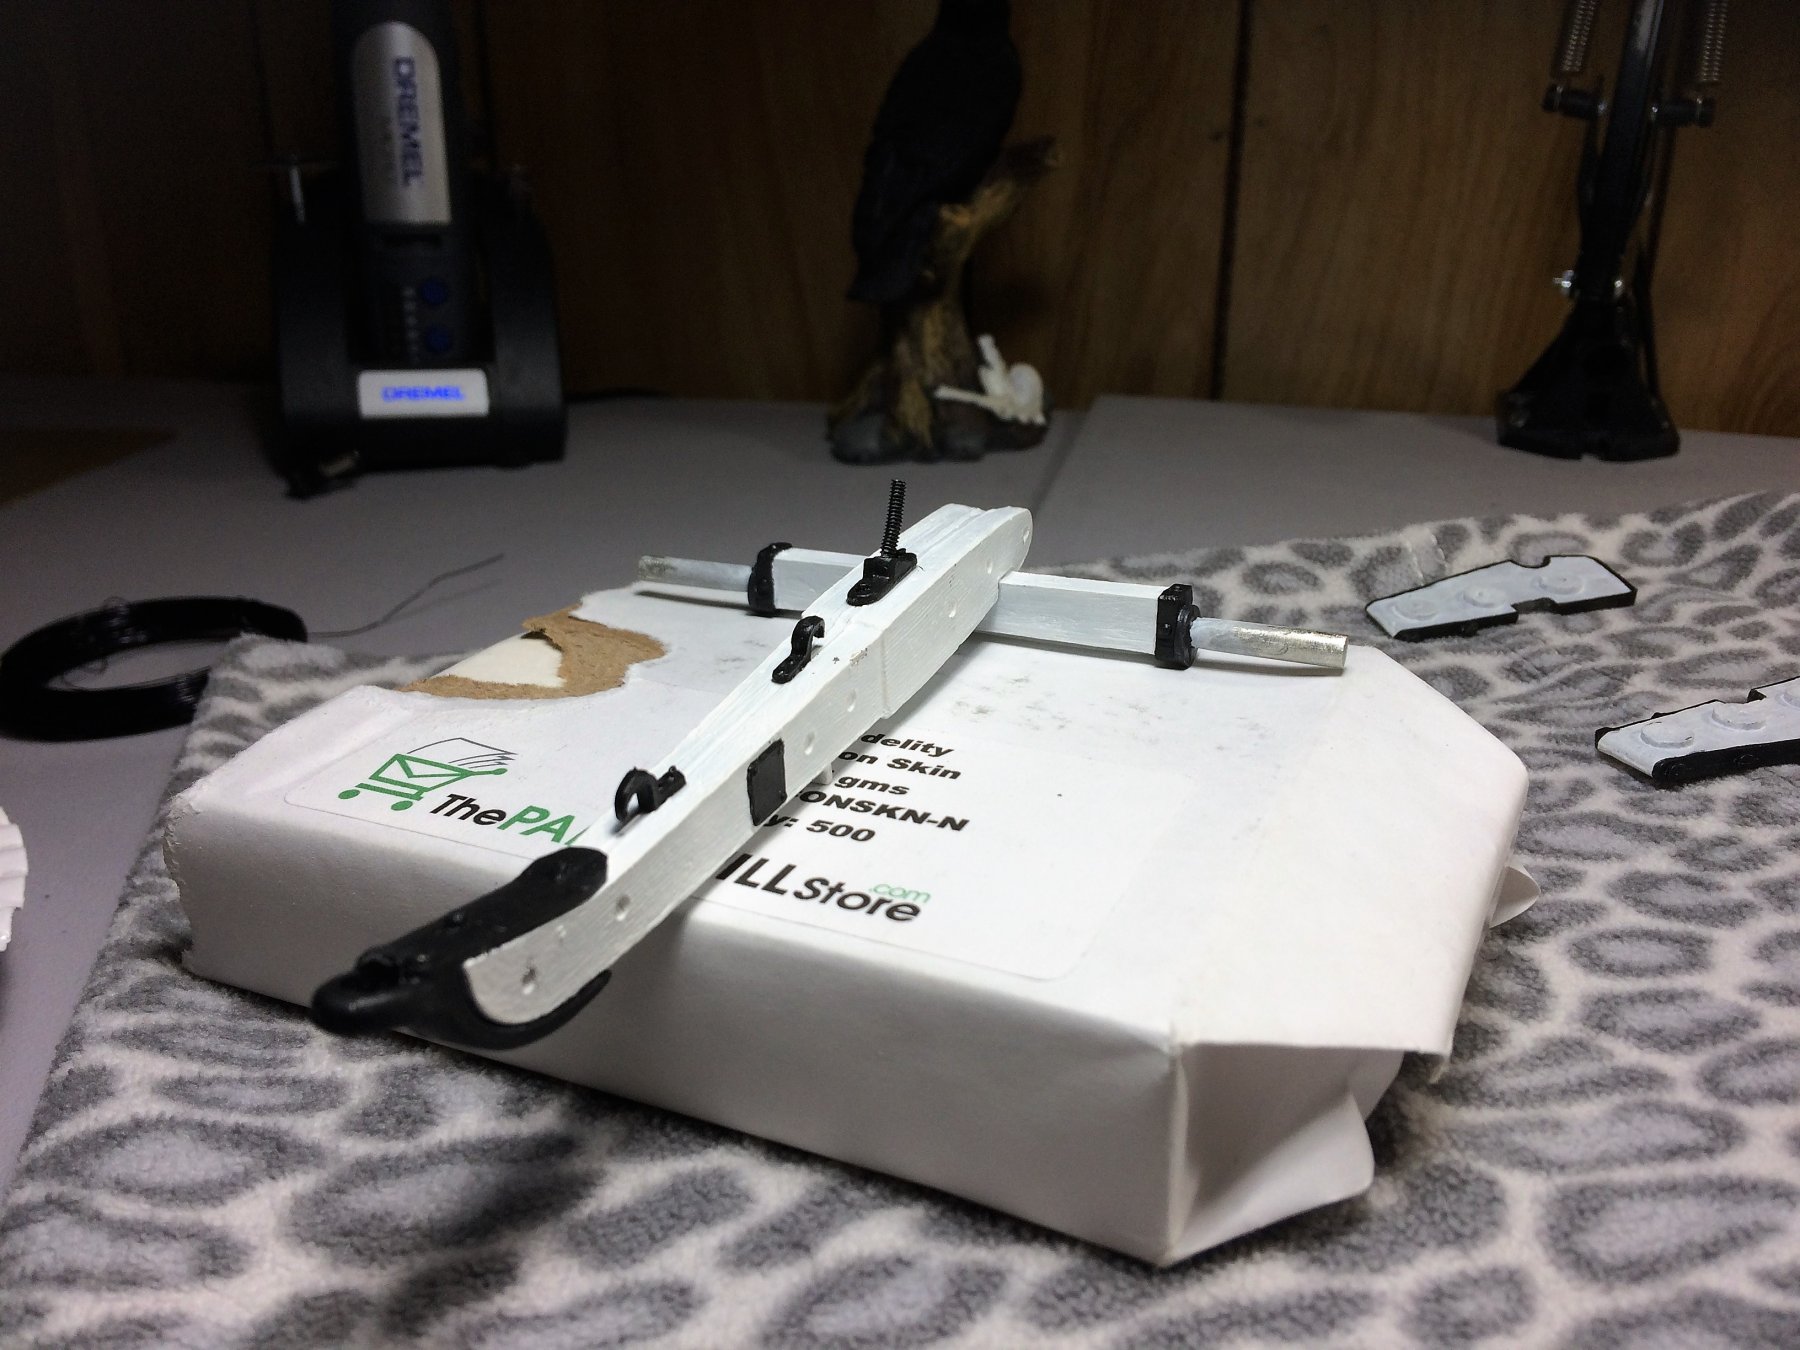
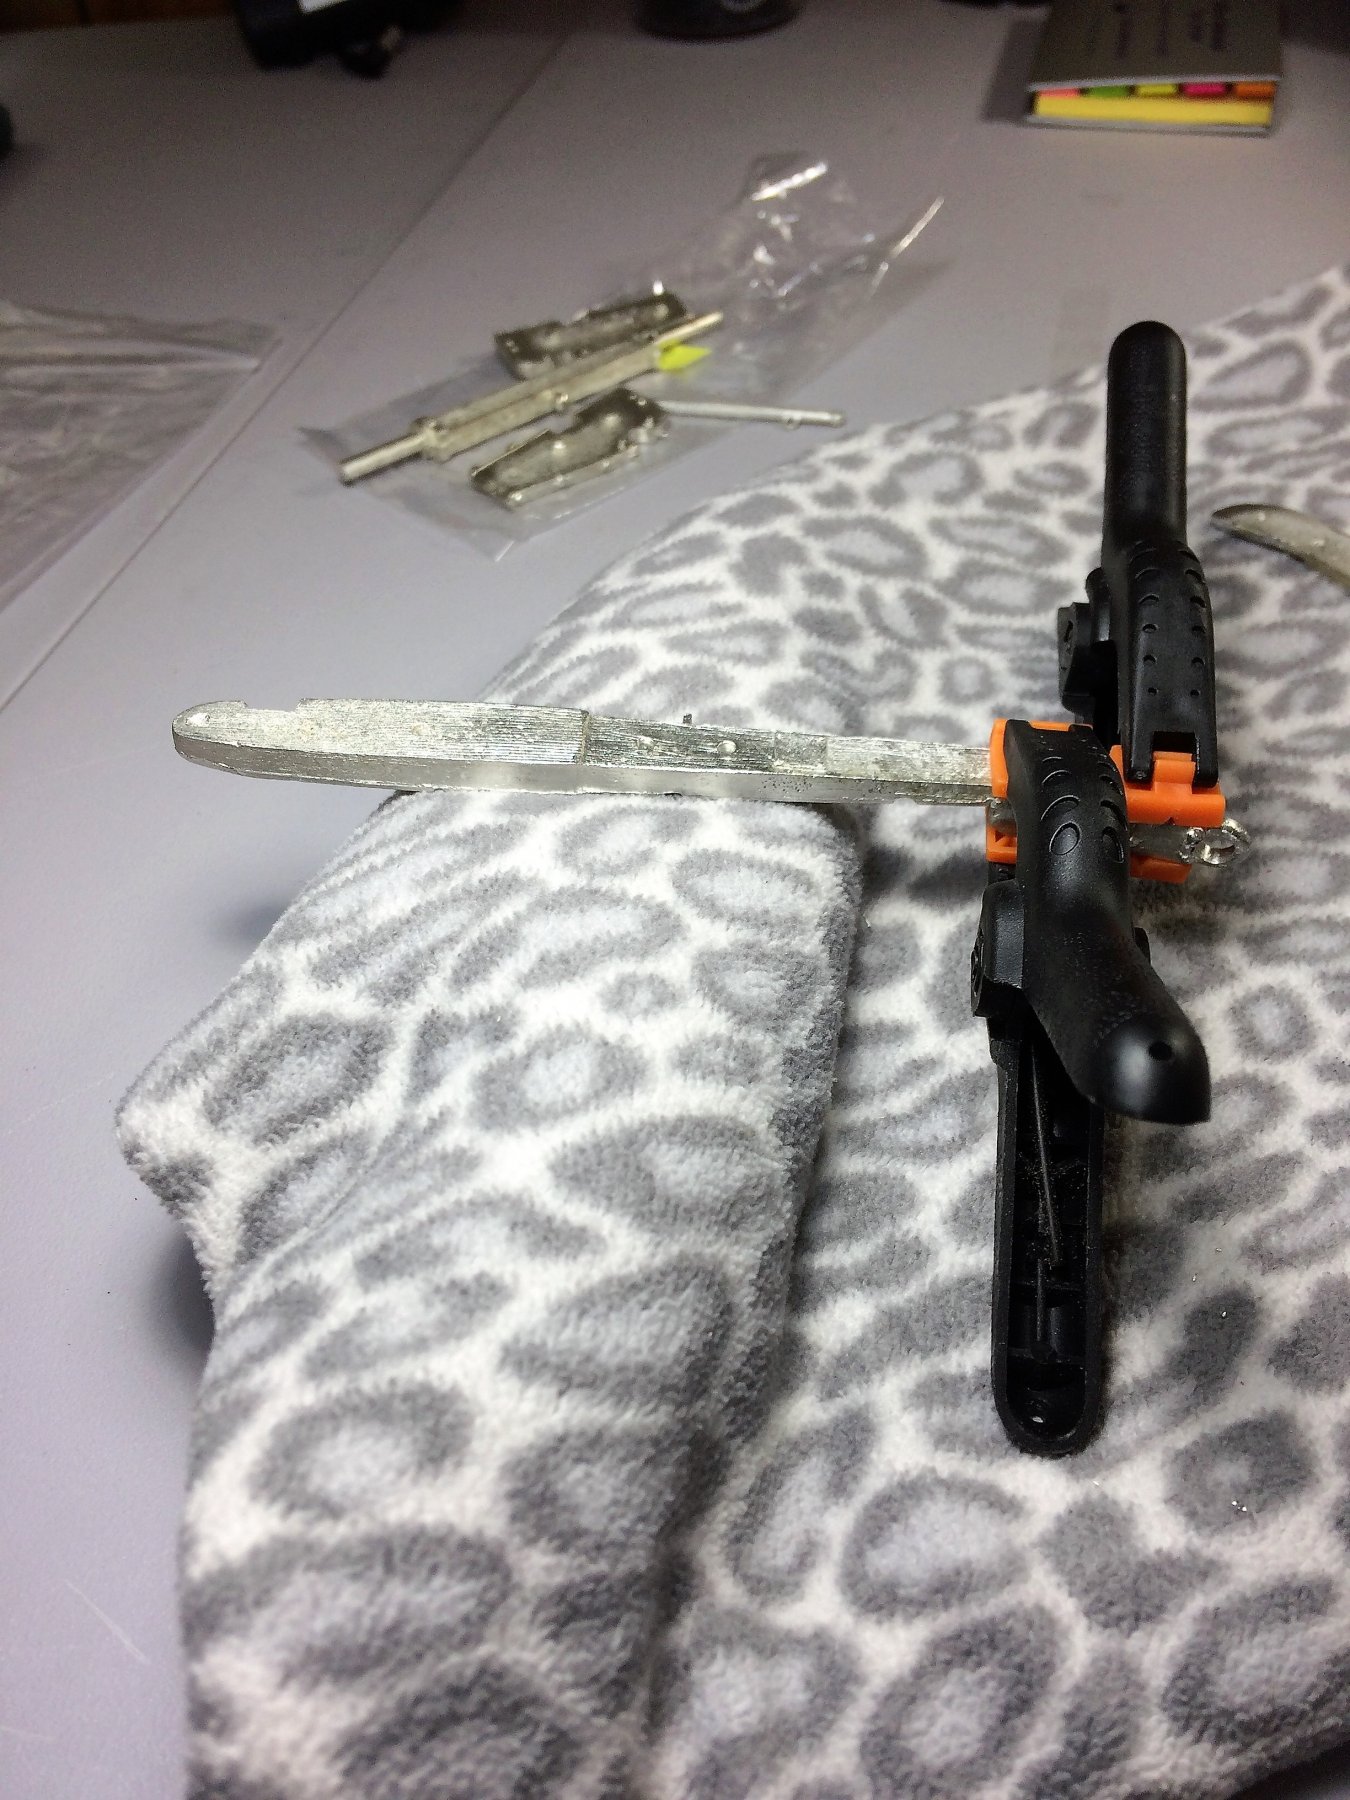
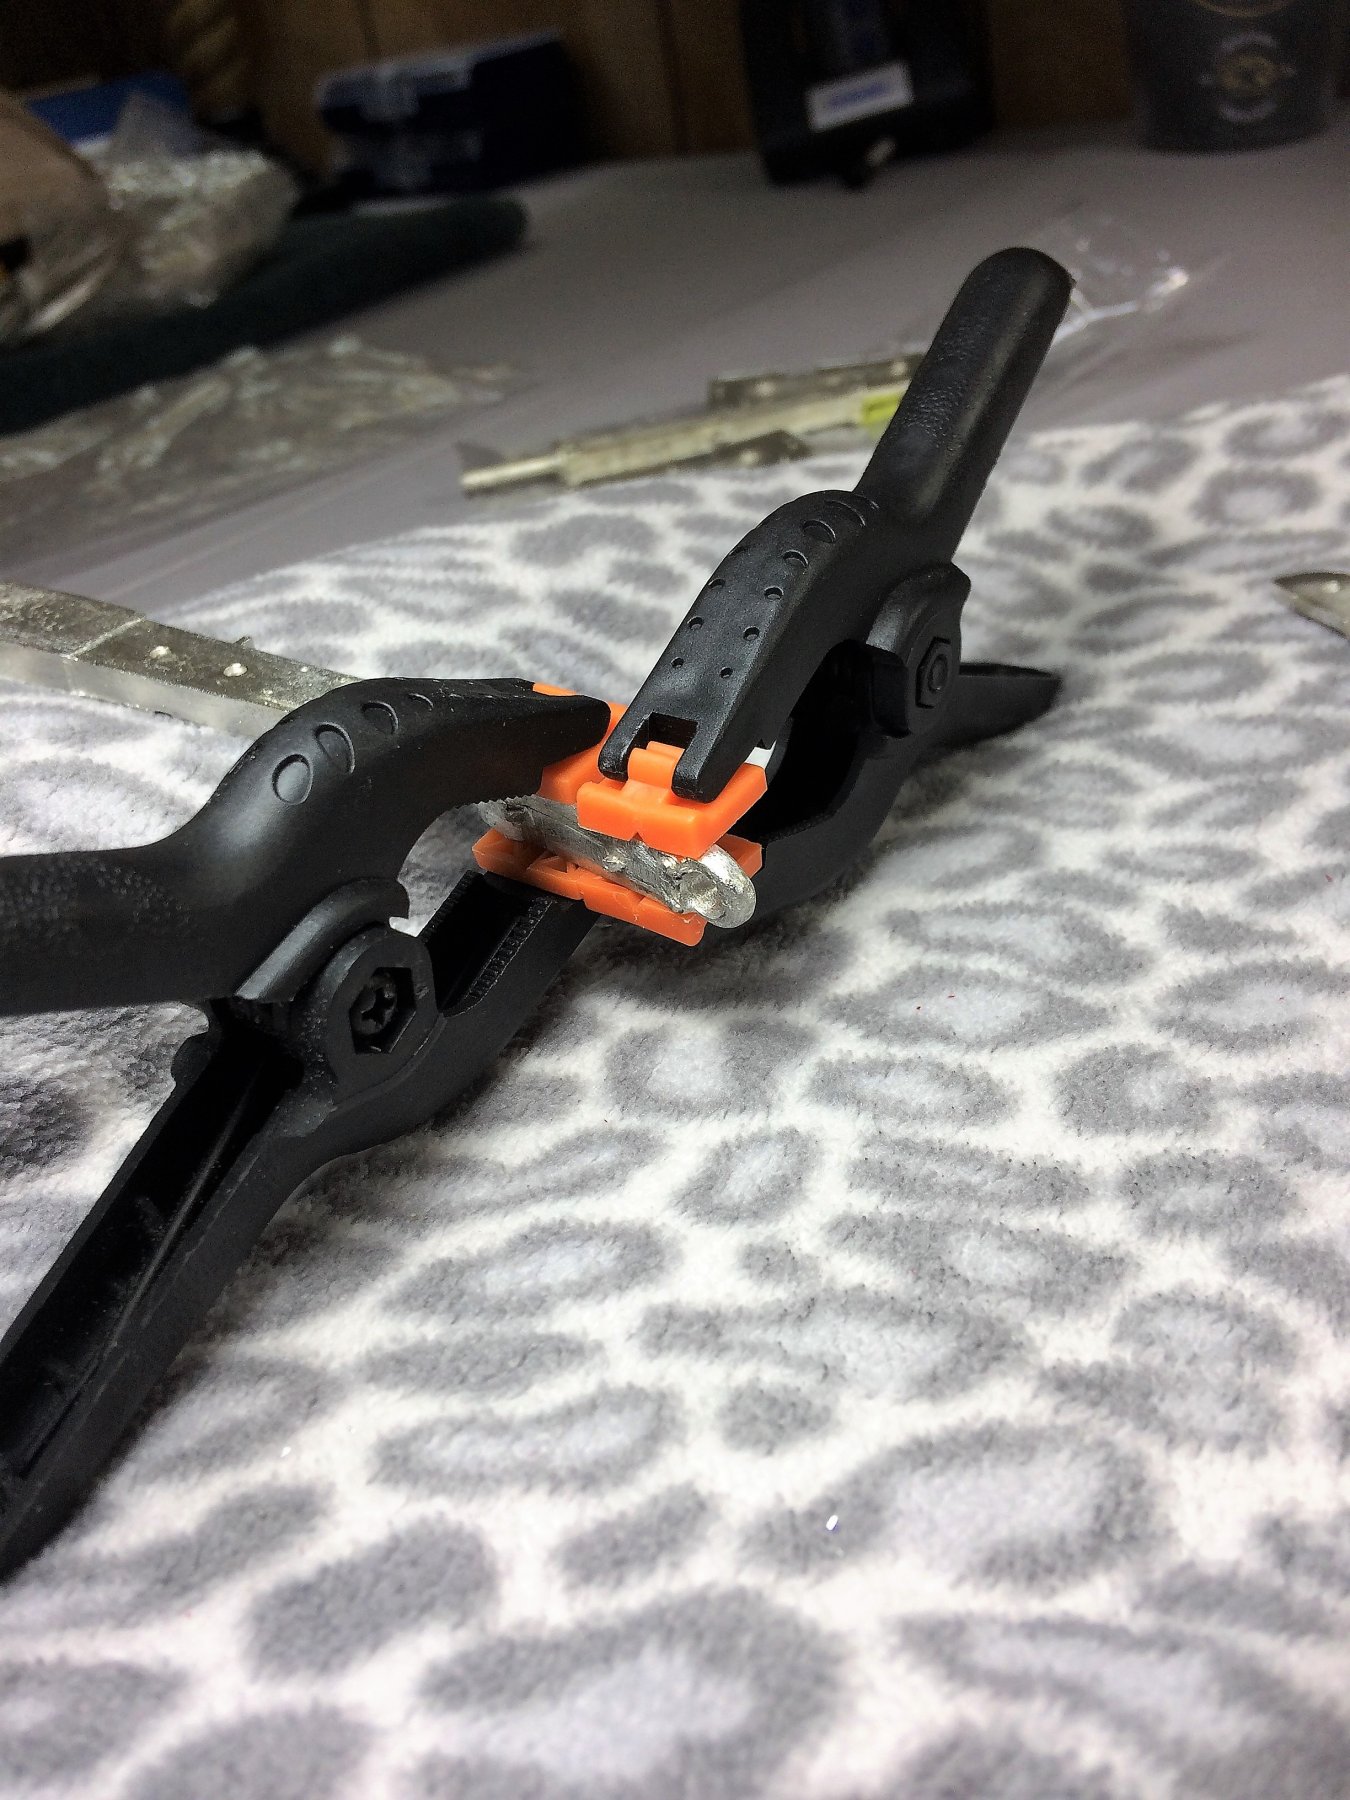
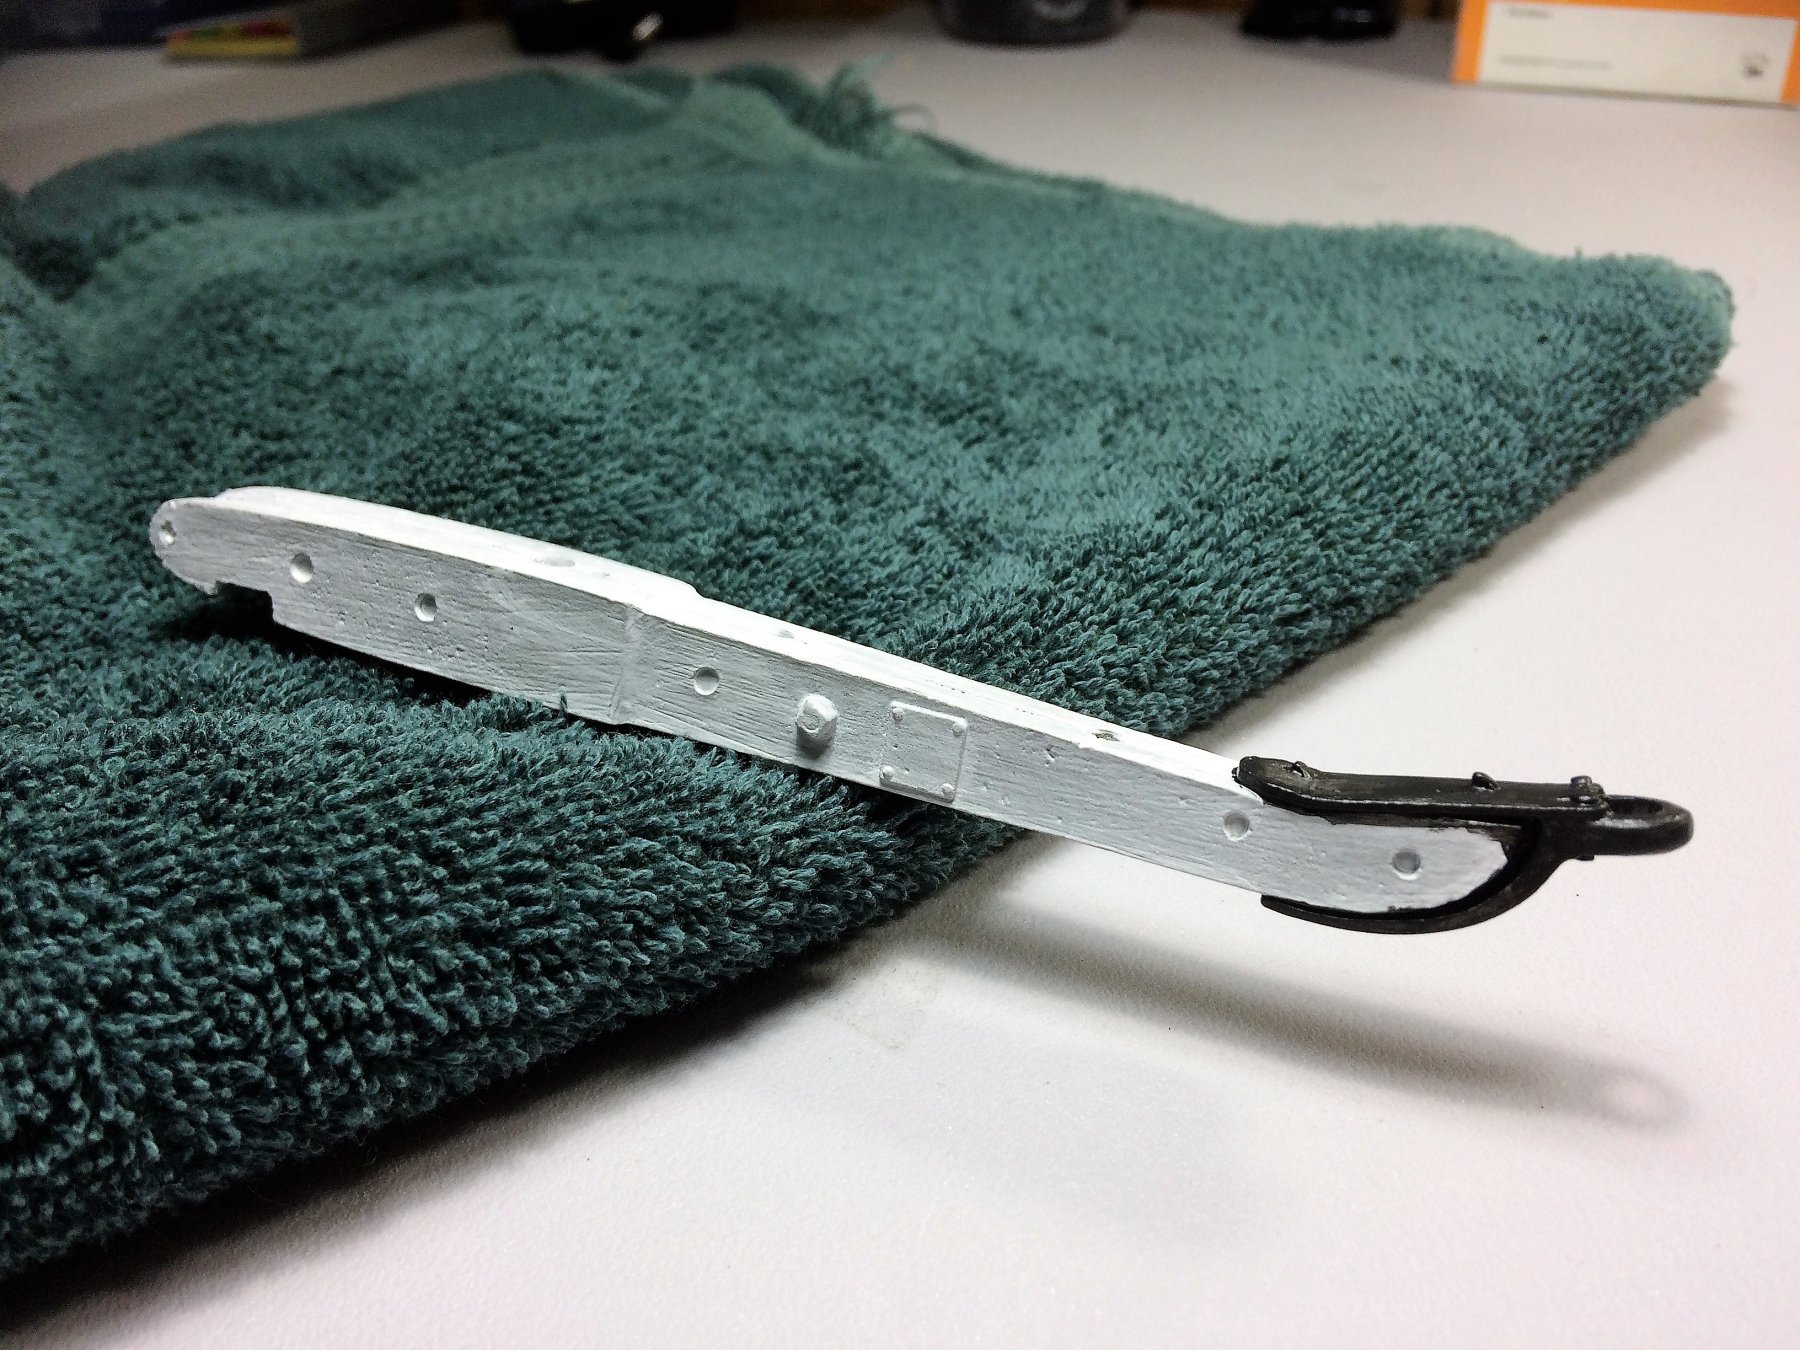
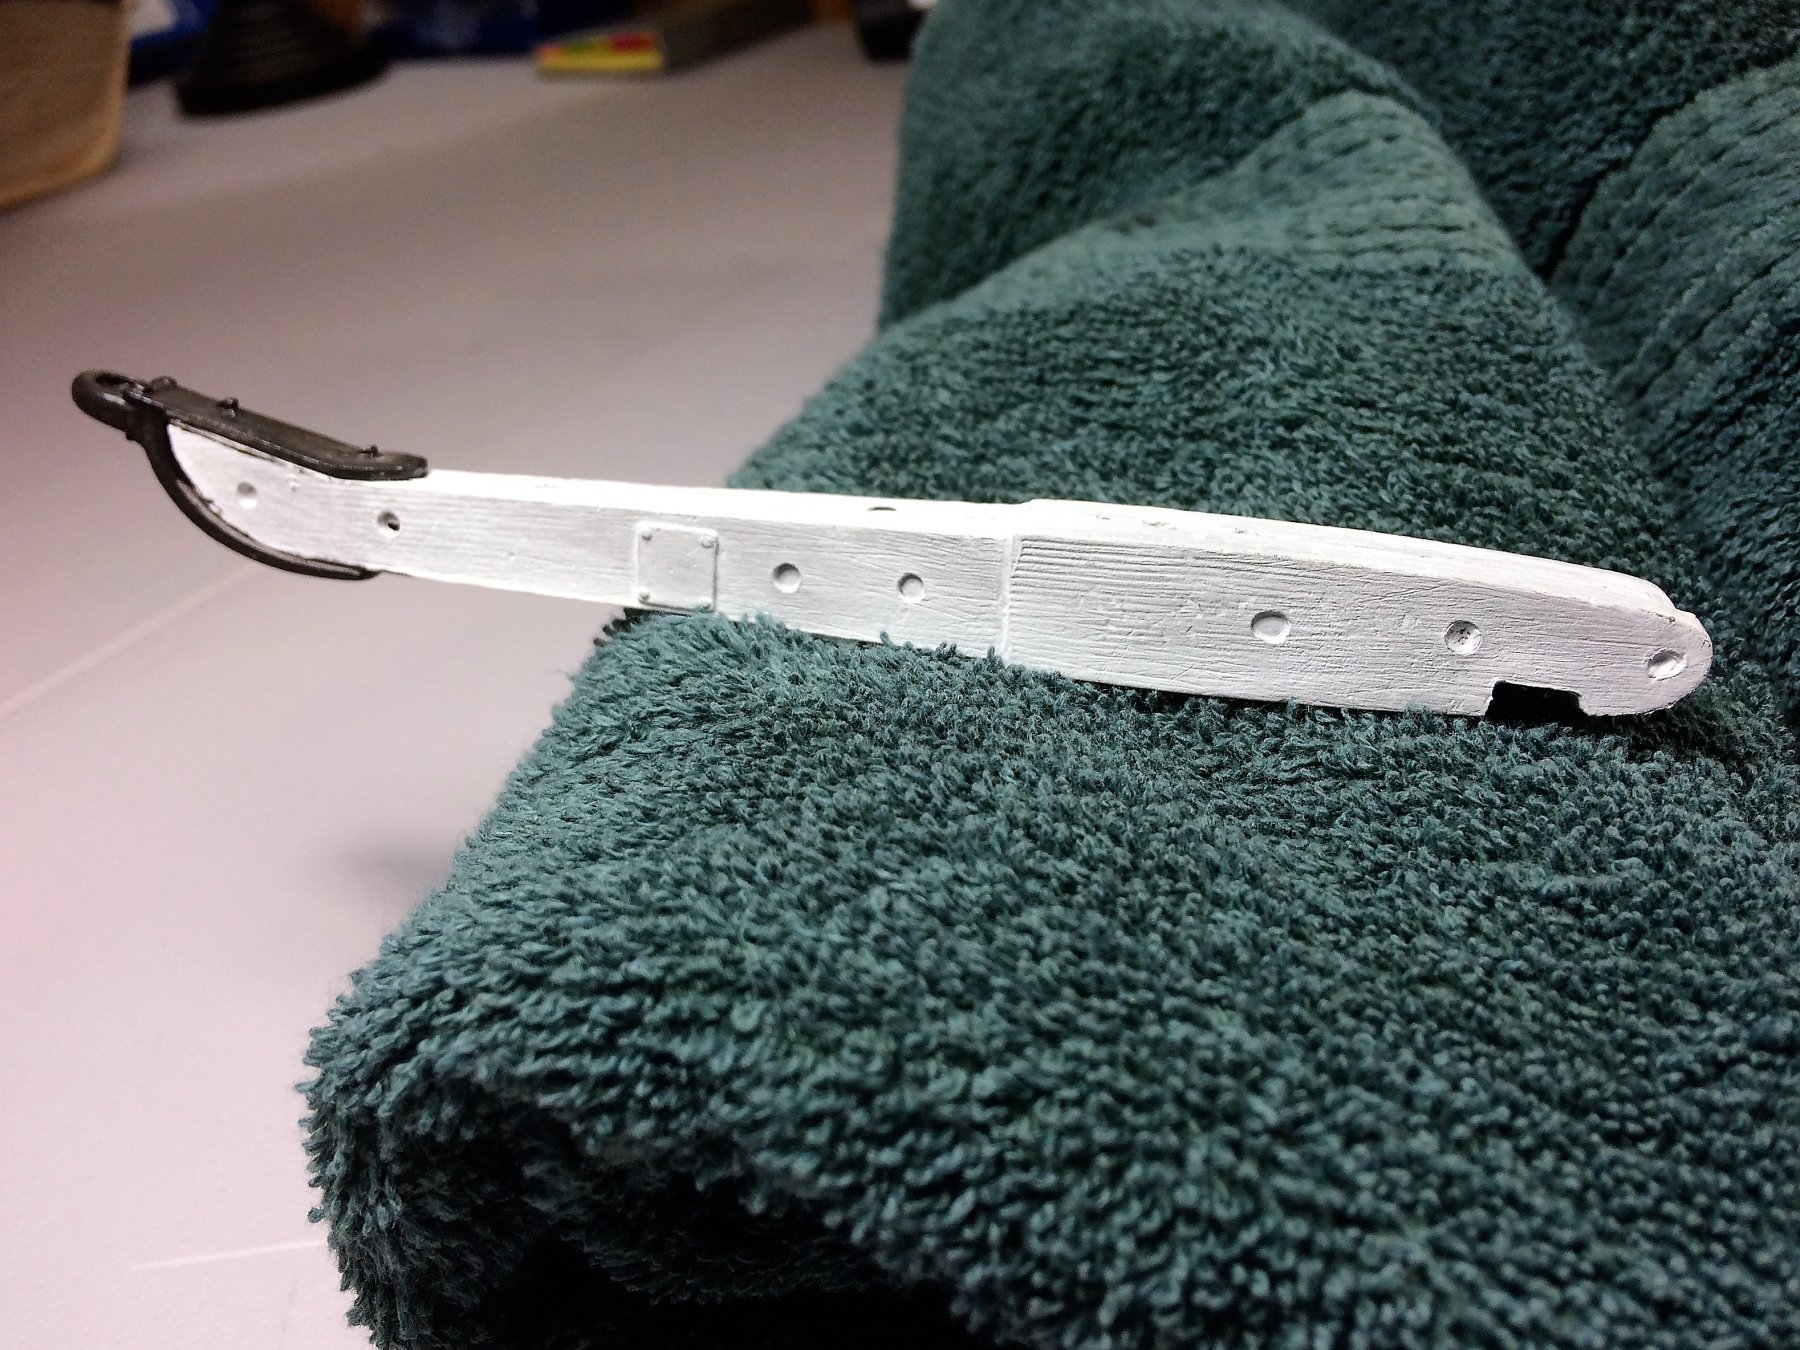
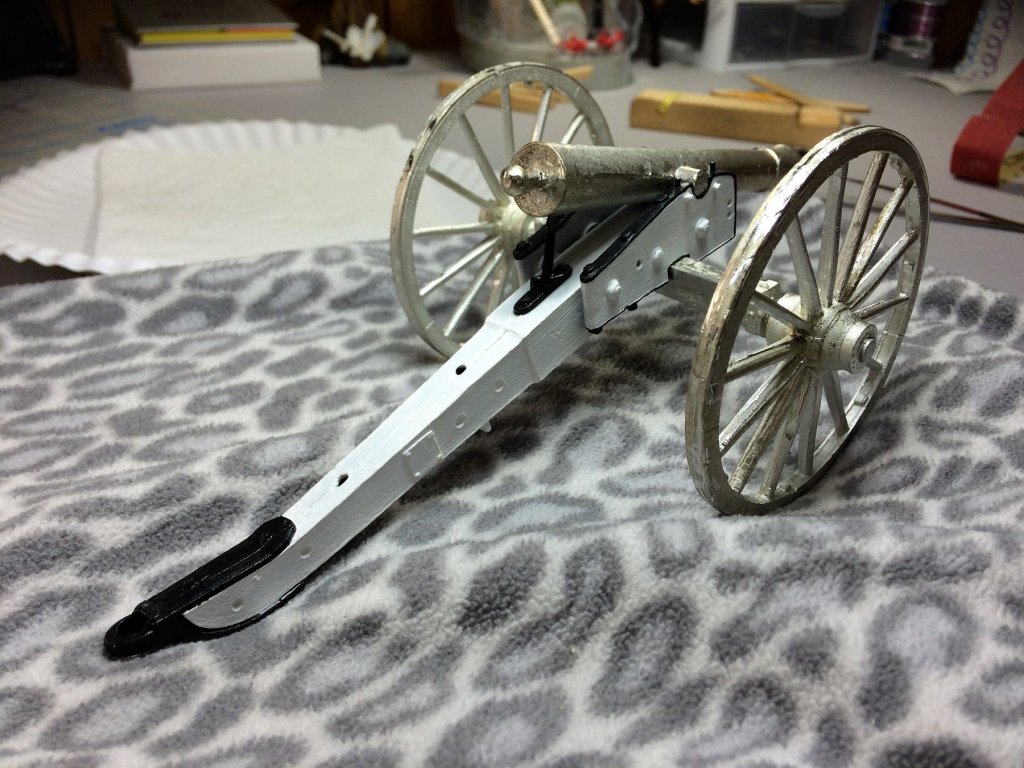
Evening, Well...here we go! When I first started this I was going to pre paint everything prior to gluing. That changed on the very first few steps. I am using a 5-minute epoxy for the first 3 main pieces, The left and right Trails and the Tow Bar/Skid. Not quite sure what would happen when pre-painting, then applying the epoxy afterwards if it would screw up the bond. In the end, the 3 pieces went together, then I'll paint. They fit relatively easy. Plenty of sanding and trimming extra metal. All where washed and dried overnight before gluing together. They went to paint afterwards. These pics are after the first coat, I tend to do three. I REALLY need to invest in an airbrush set up. There's a lot of touch up to be done where the white and black paint meet. Tom E


- 66 replies
-
- 11
-