DONATION DRIVE - SUPPORT MSW - DO YOUR PART TO KEEP THIS GREAT FORUM GOING!
×
Tom E
-
Posts
469 -
Joined
-
Last visited
Content Type
Profiles
Forums
Gallery
Events
Everything posted by Tom E
-
 Thanks Jack, The Crow and Moose are just plastic knick-knacks given to me by an Ex-Admiral. They've been with me for years now. I keep them as my Shipyard mascots I guess. Tom E
 -
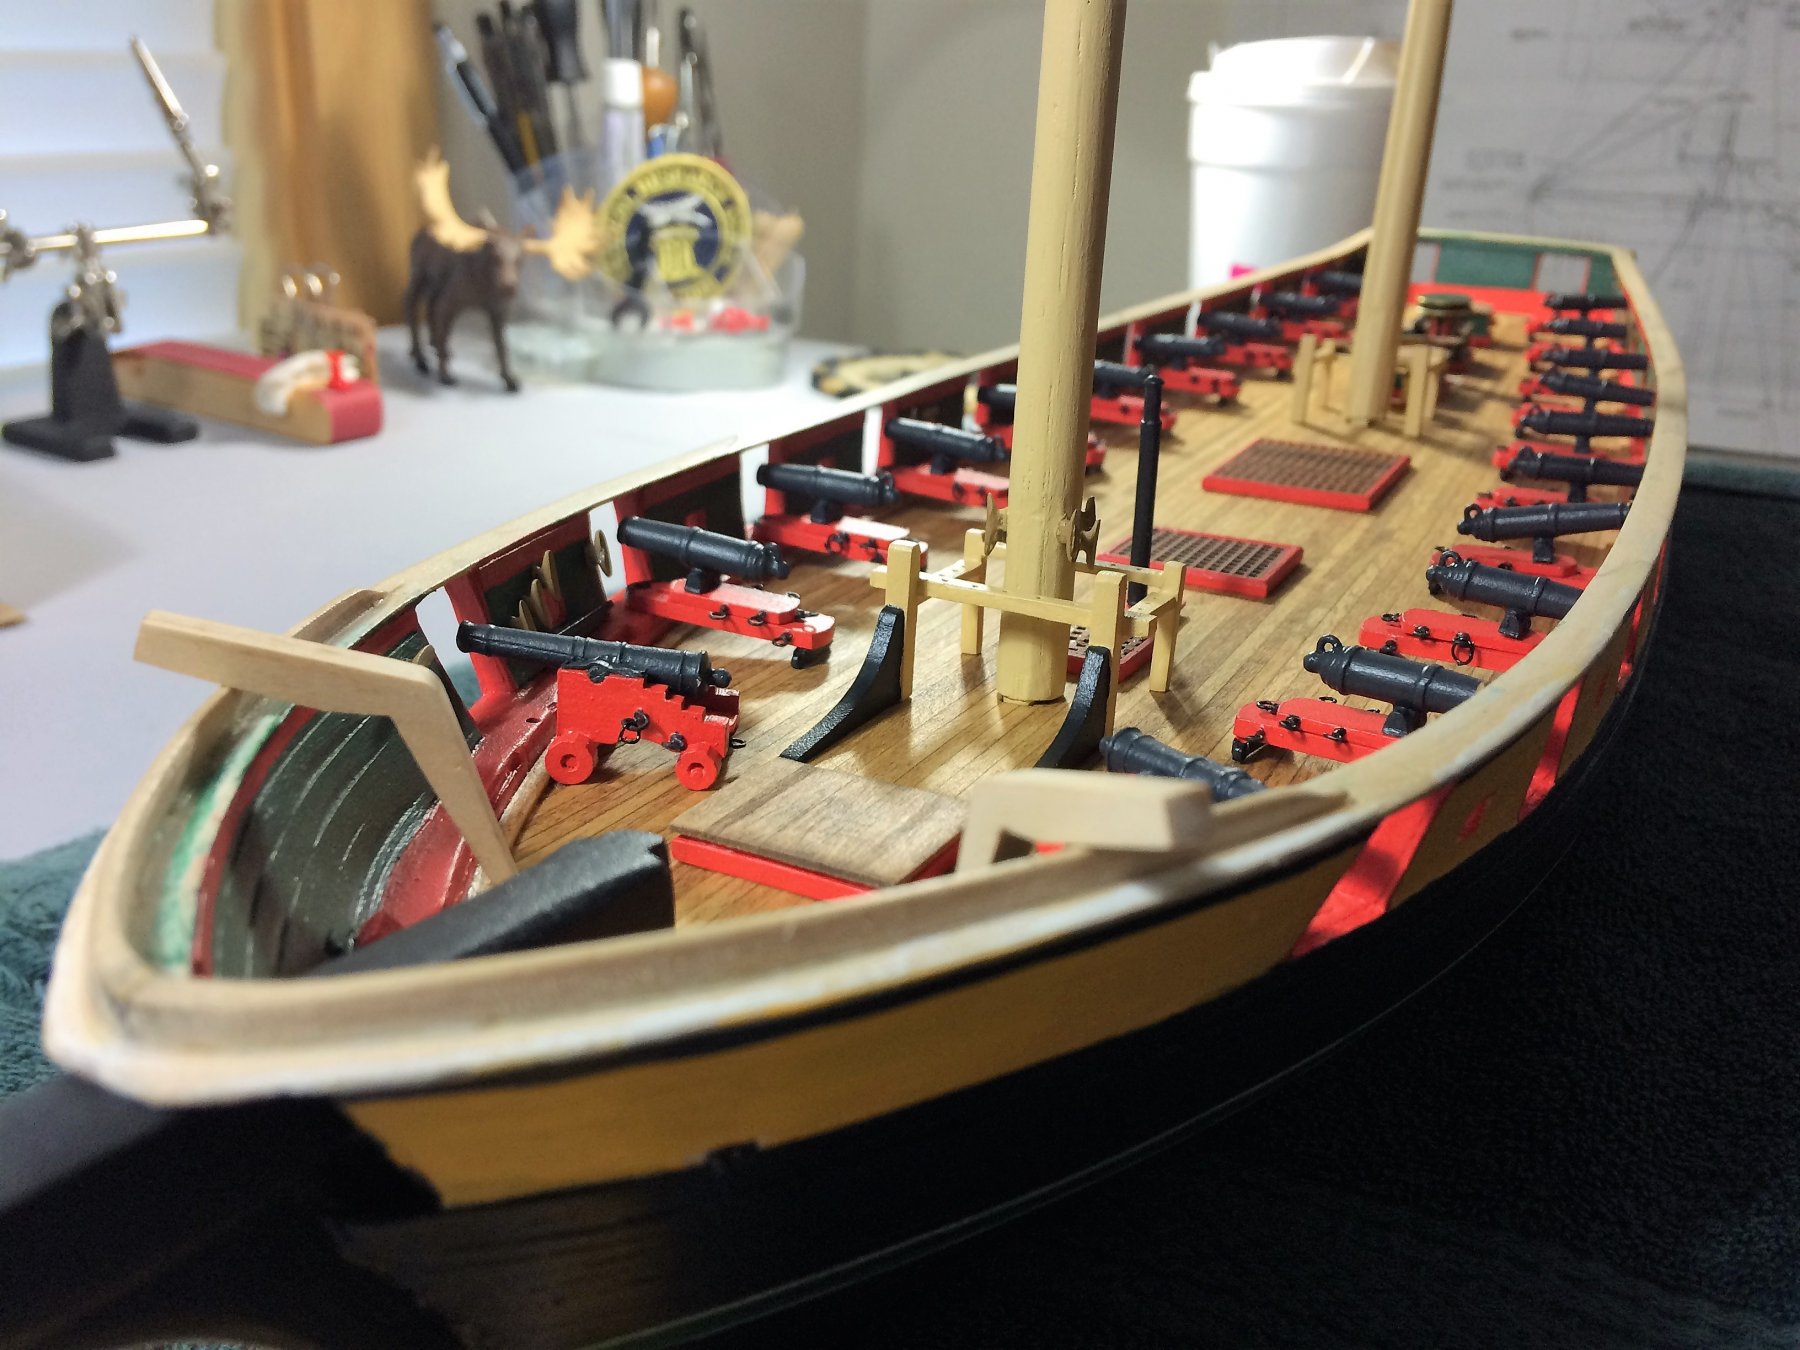
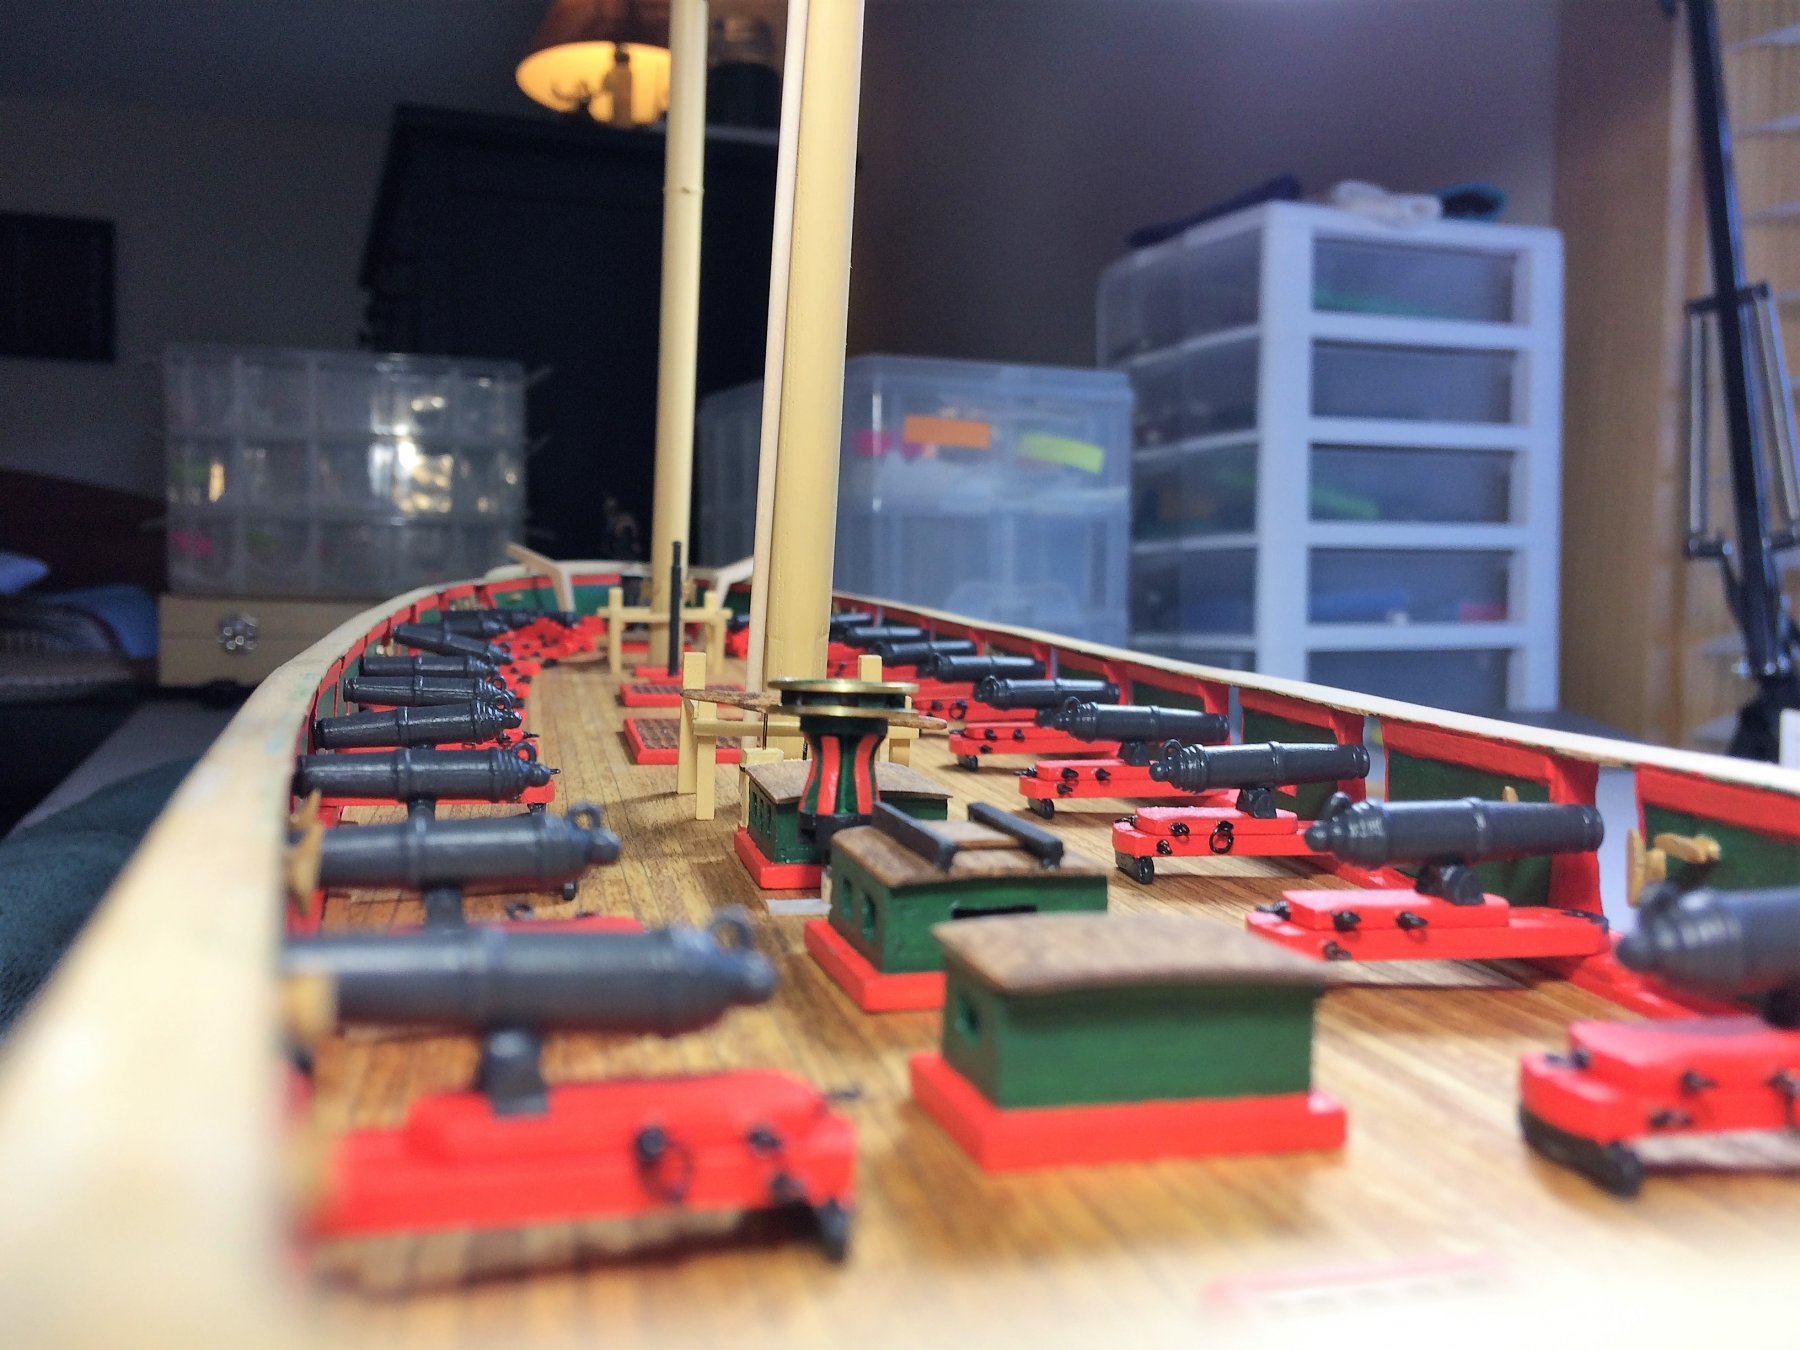
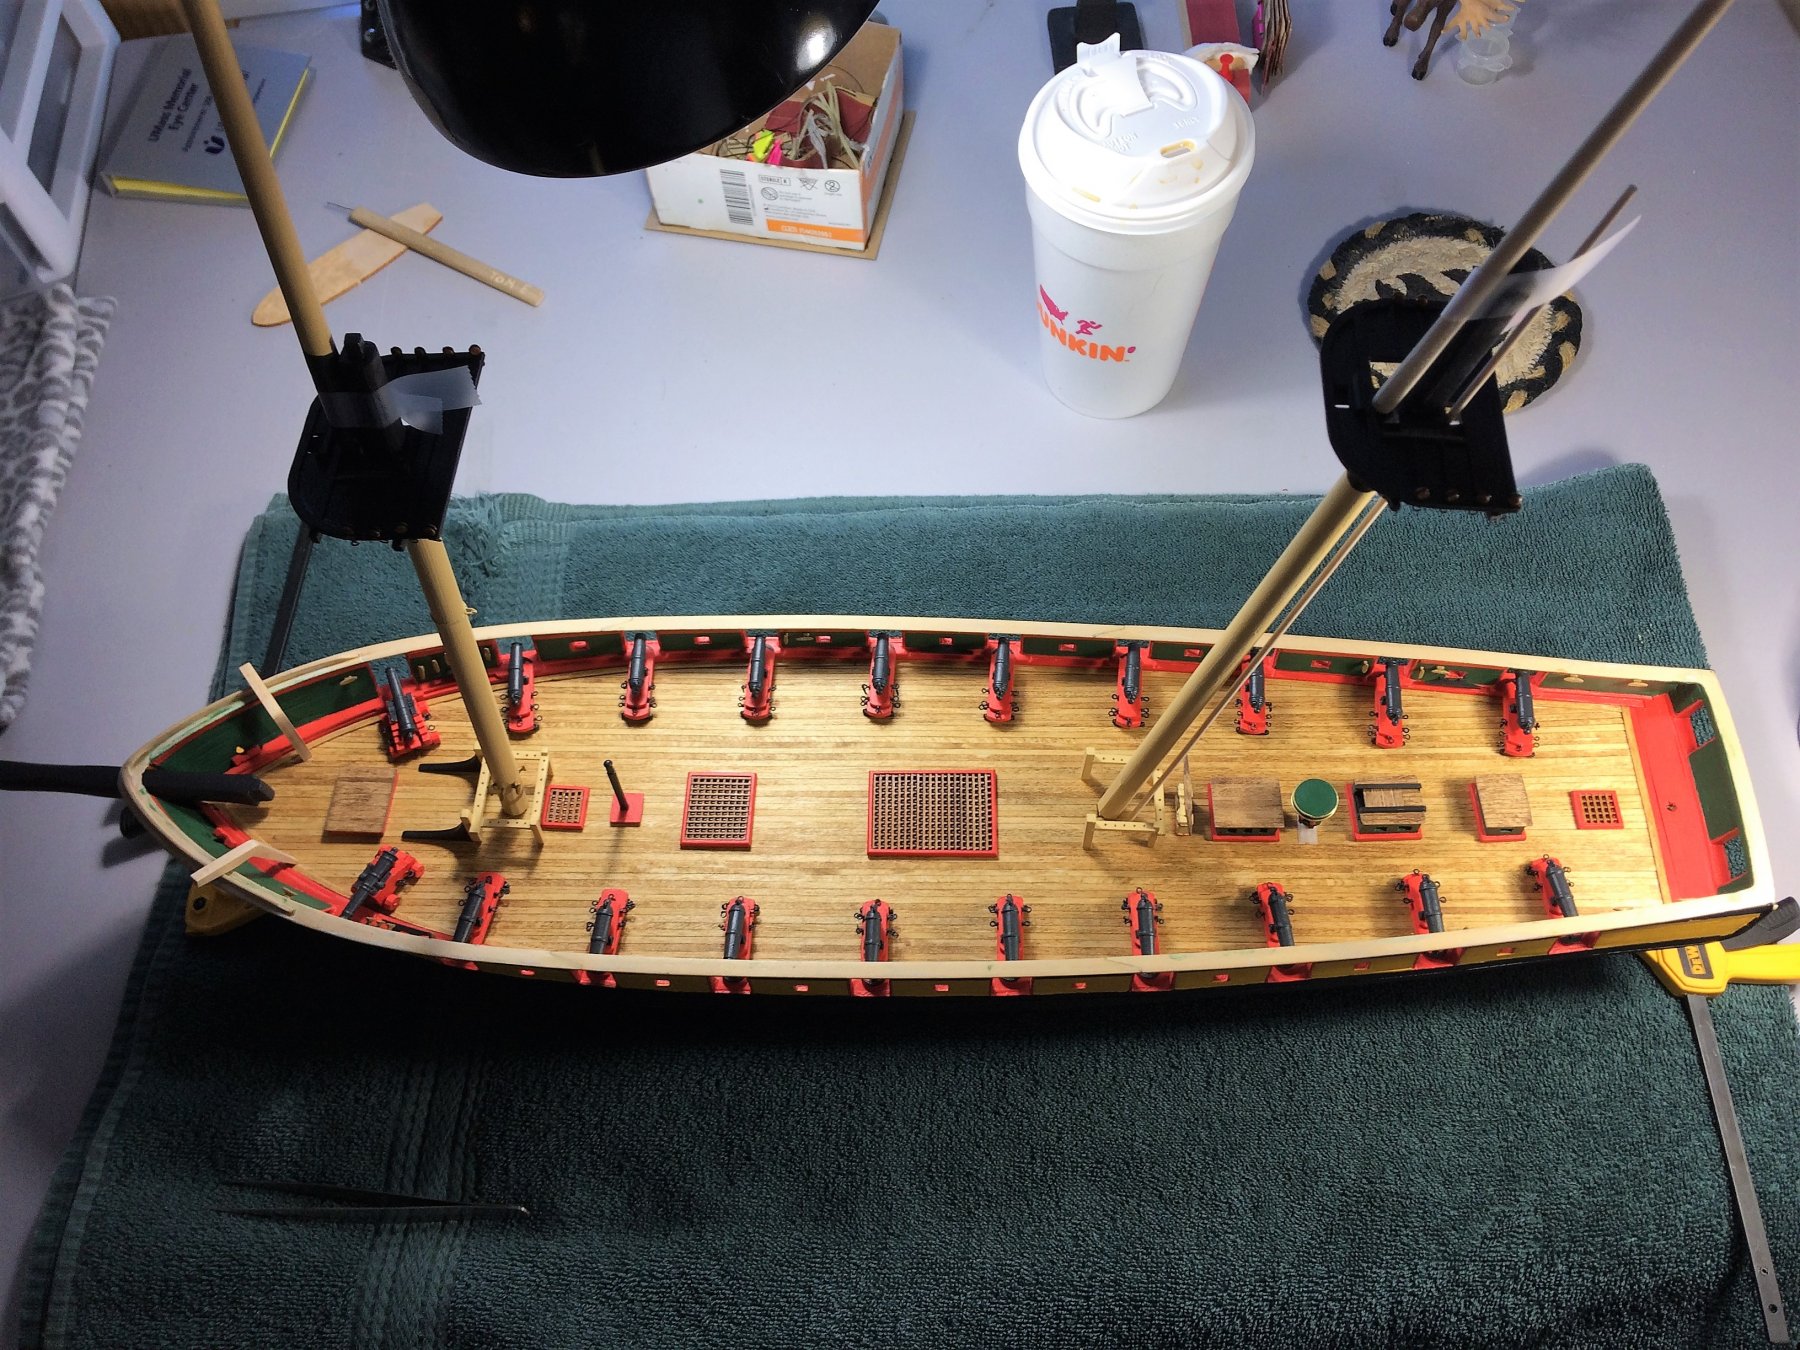
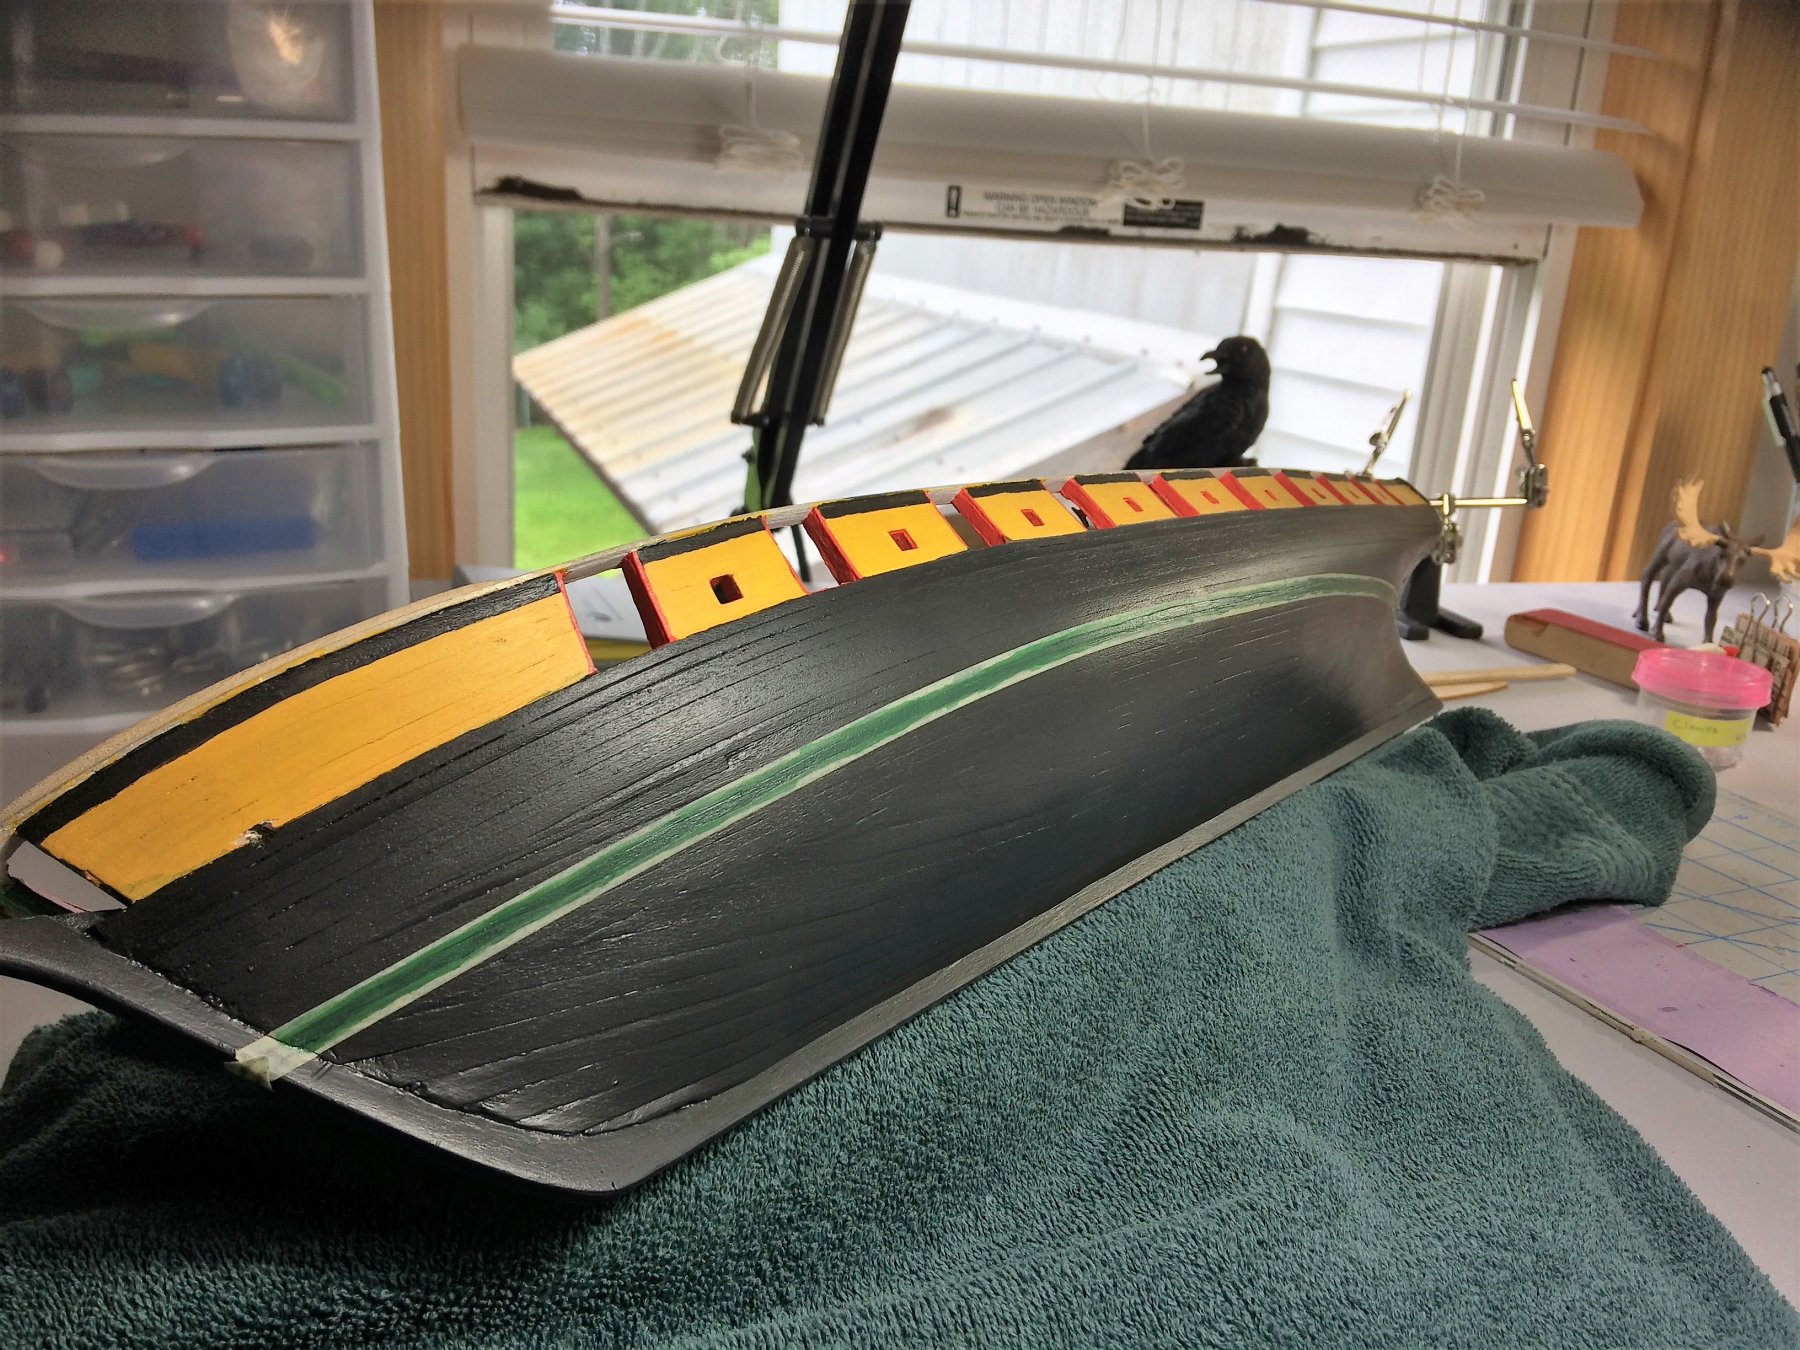
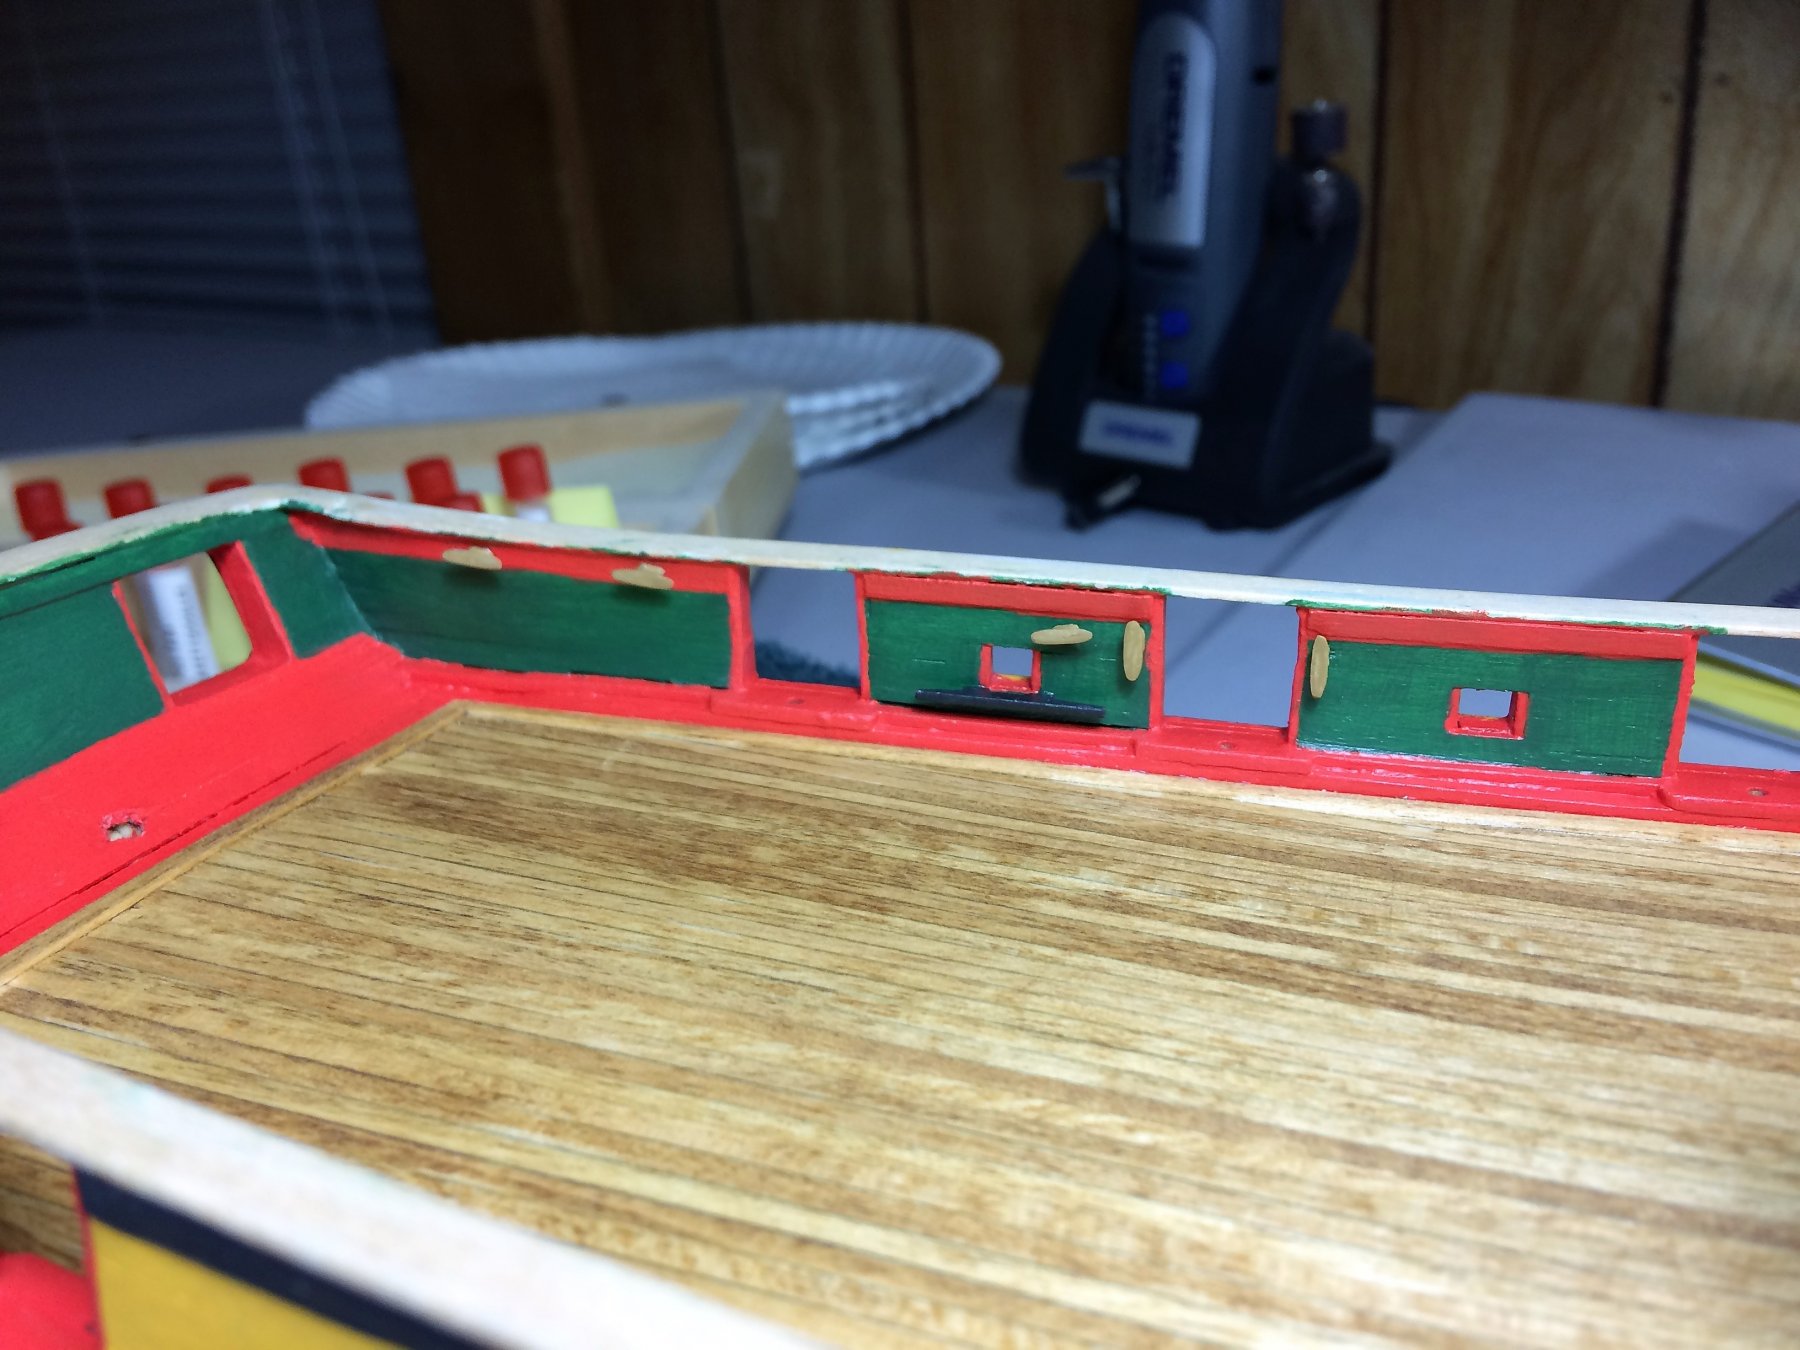
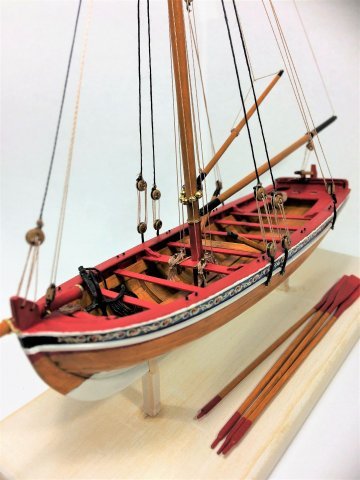
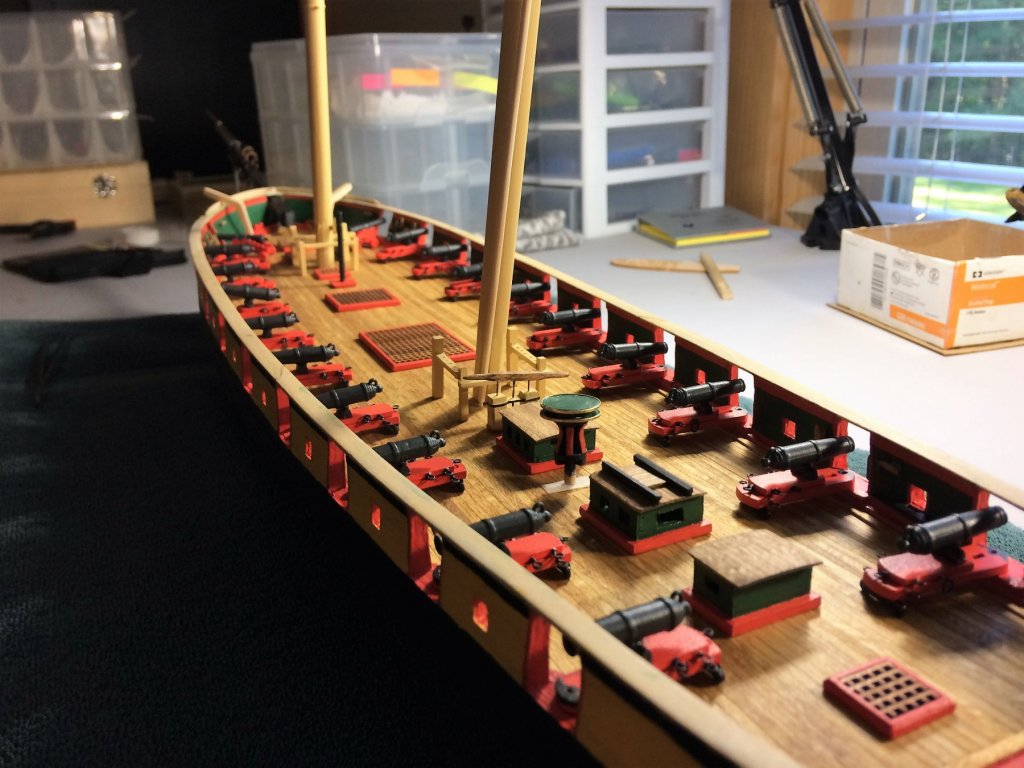
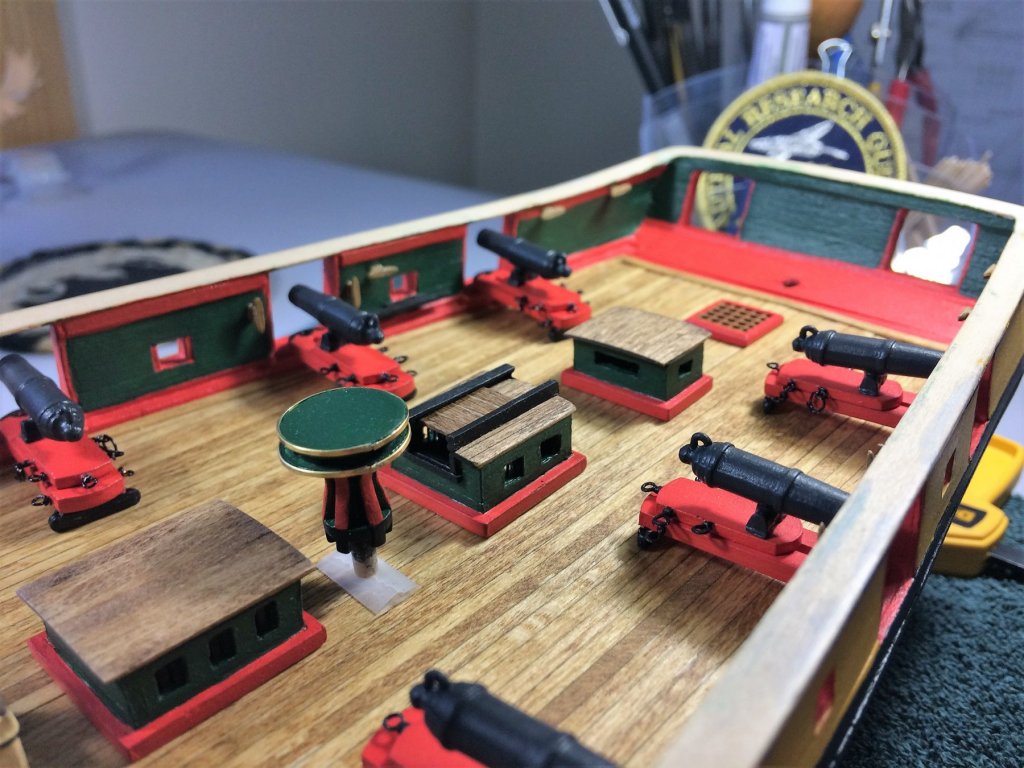
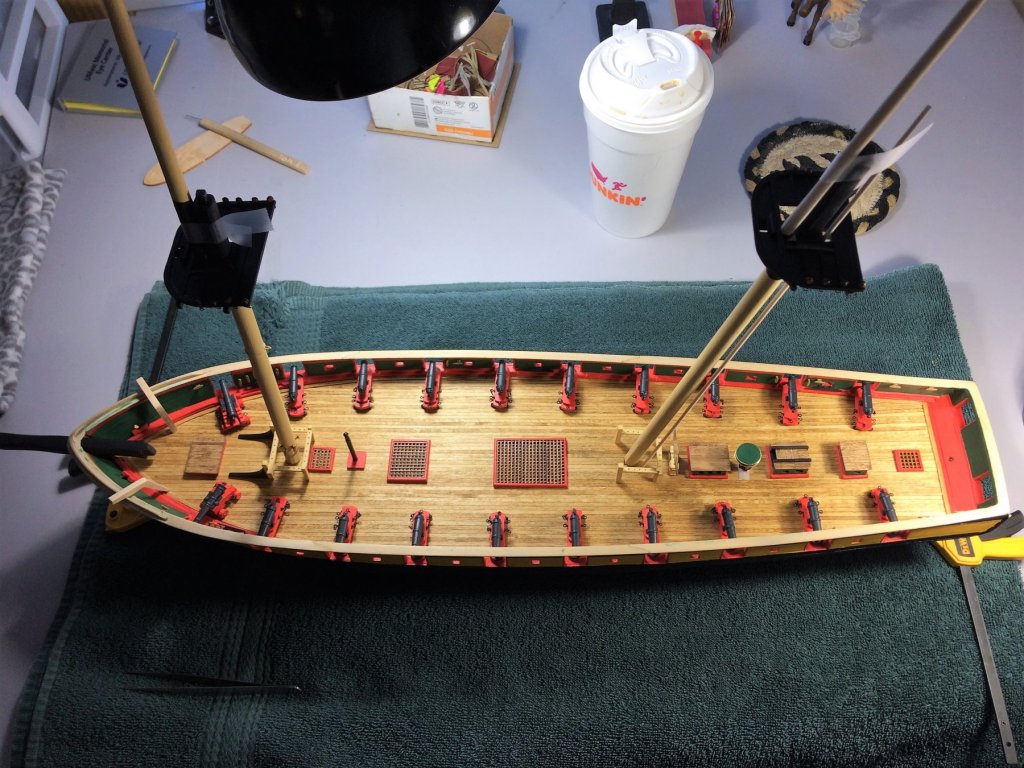
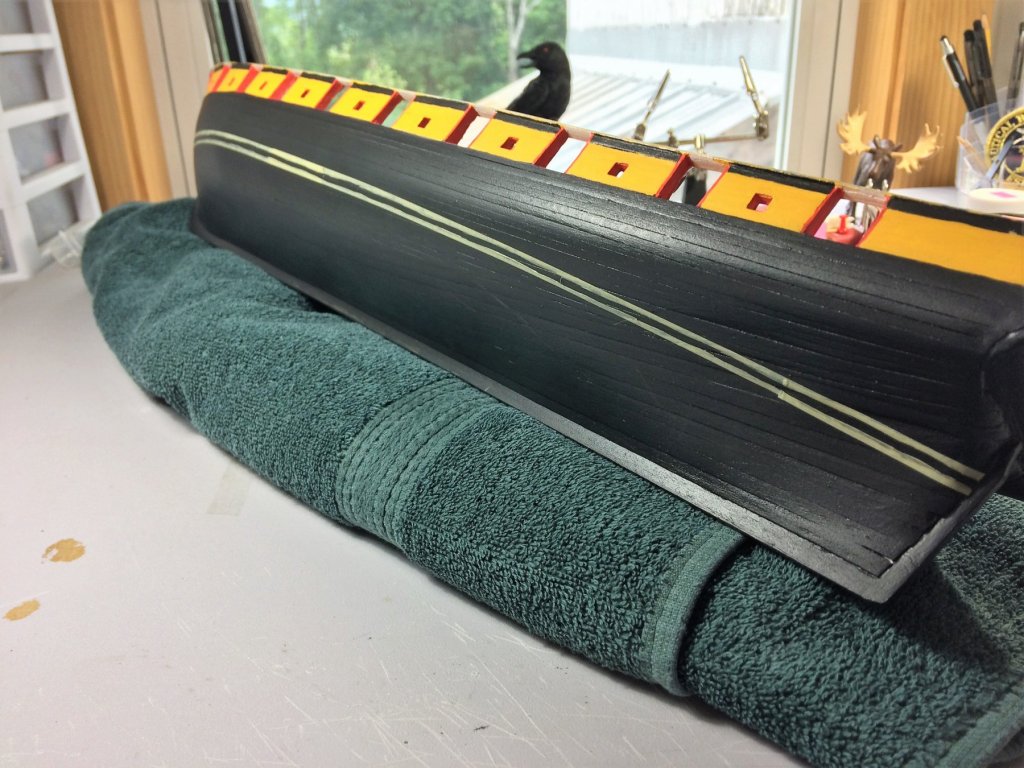
Evening, Hope everyone is weathering this summertime heat. Recently I decided to put all my sub-assemblies on deck and see where I am. Not something I've done since before I started building the deck furniture. Must say I'm pleasantly surprised, although I do wish I could spend more time on her. I must admit, I may have been spurred on by all the wonderful Niagara builds that are ongoing right now! Seeing there progress is Inspiring. Excuse the scotch tape holding some of the masts. Absolutely nothing has been glued in place. I see some furniture is backwards. My bad! Work does slowly continue. The Main Rail has been primed and will be painted black. The Catheads are shaped, then stained the same shade as the deck furniture. I'll update that in the near future. Tom E


-
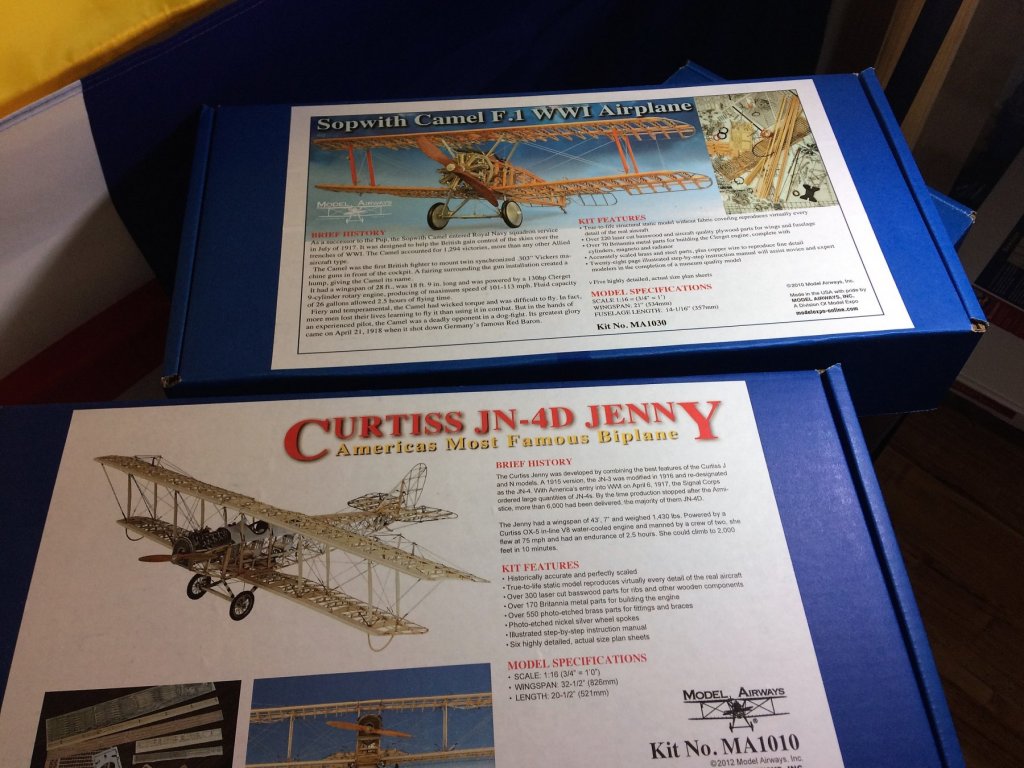
Thanks Denis, Thanks everyone for the likes and looks! Appreciate the kind words. I really like that Idea about a modern Howitzer. That would make a great display. I've been really interested in trying a plastic project. Wonder if there are "upgrade" kits for artillery models. The Jenny should be up and going late summer/fall. I want to put some good time in on my Niagara. She's feelin a little neglected! Tom E
-
Thanks Gents! Appreciate the kind words. Steve, would love to have that cannon in the back yard. Sure would keep the neighbors away! My first love will always be ship building. Niagara being my main build right now. But sometimes I can get burned out, and almost always have a second project near by. I'm leaning towards the Curtiss Jenny. Tom E
-
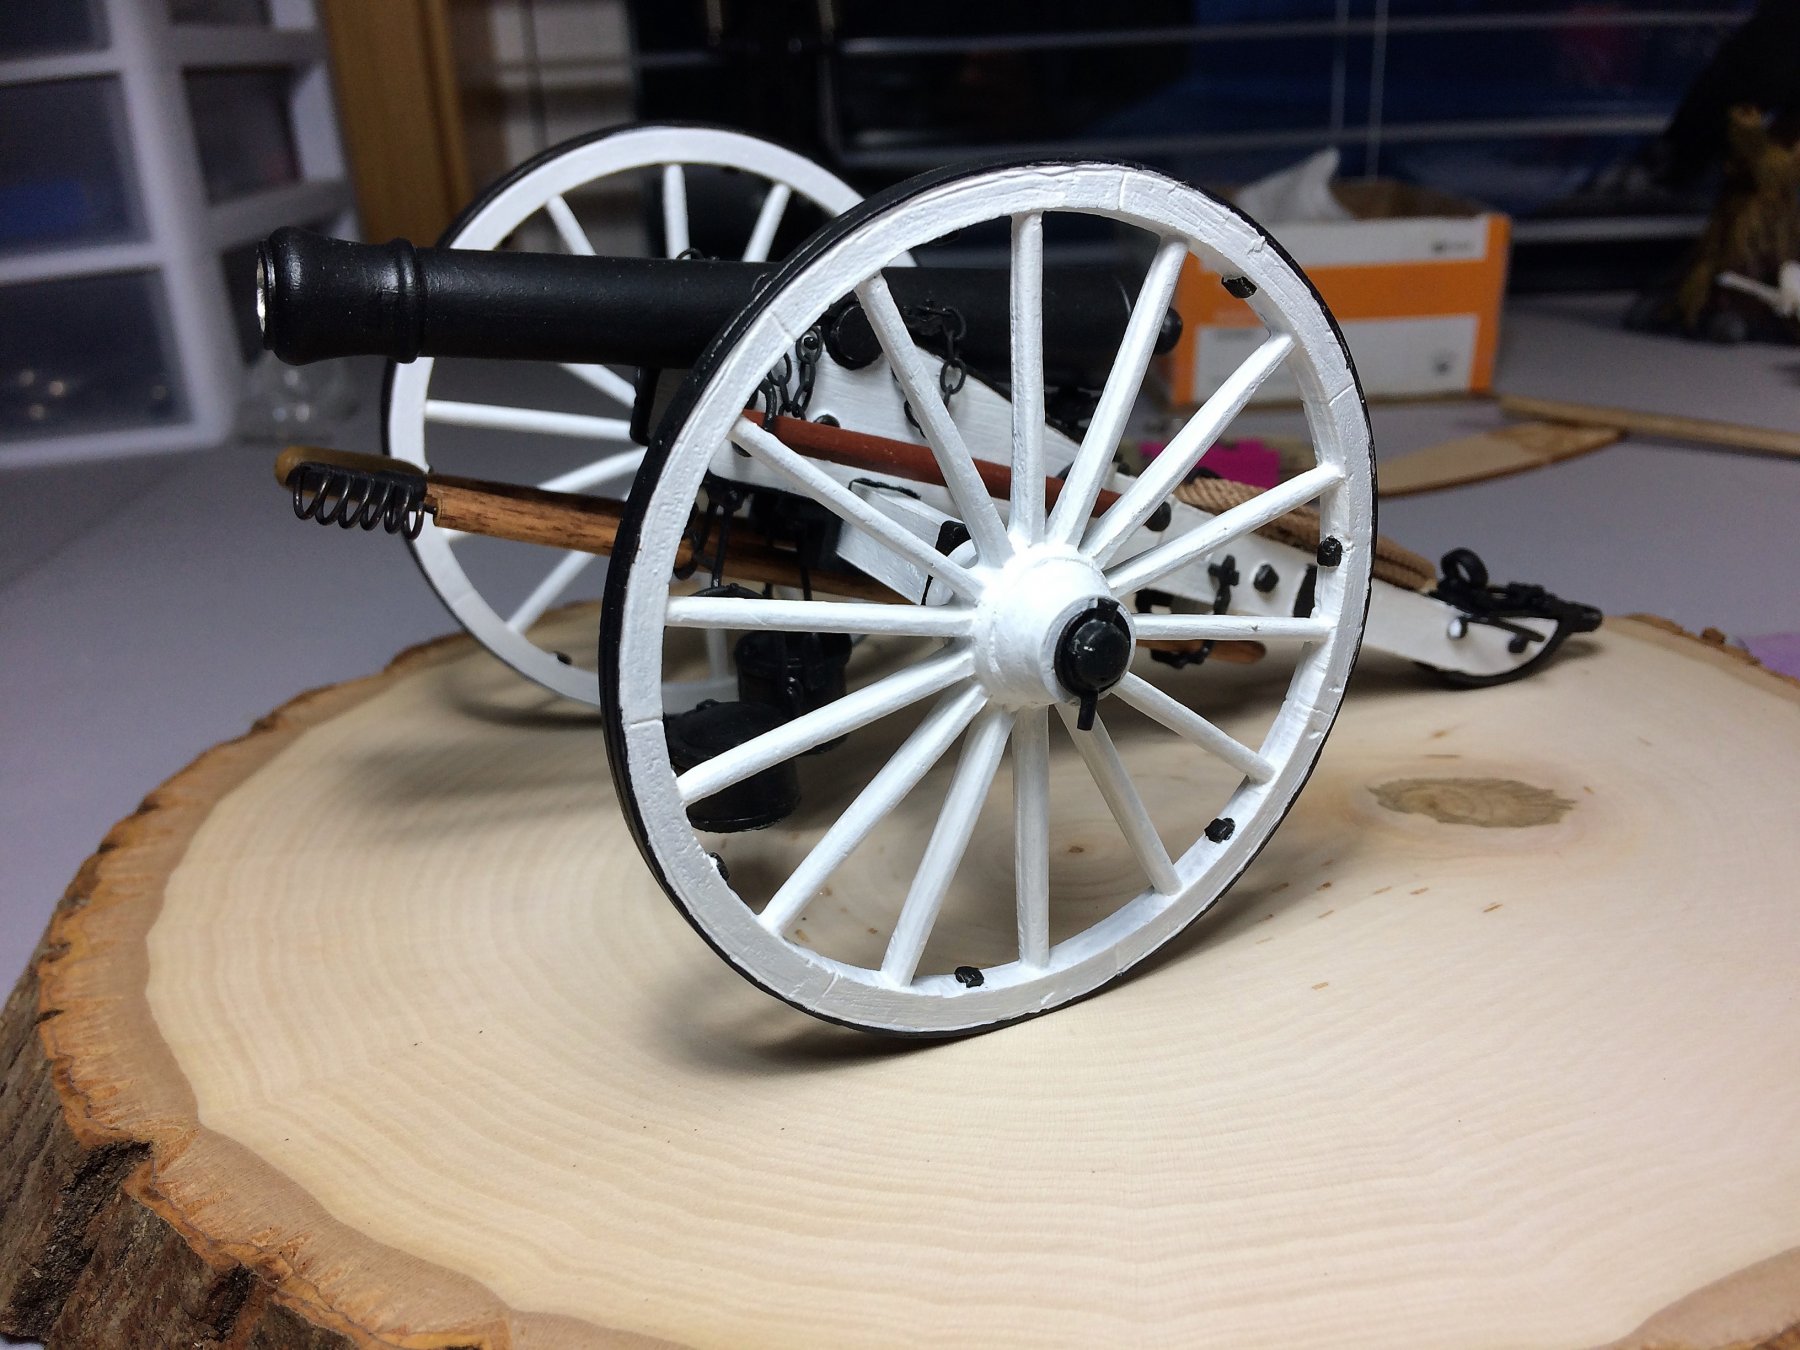
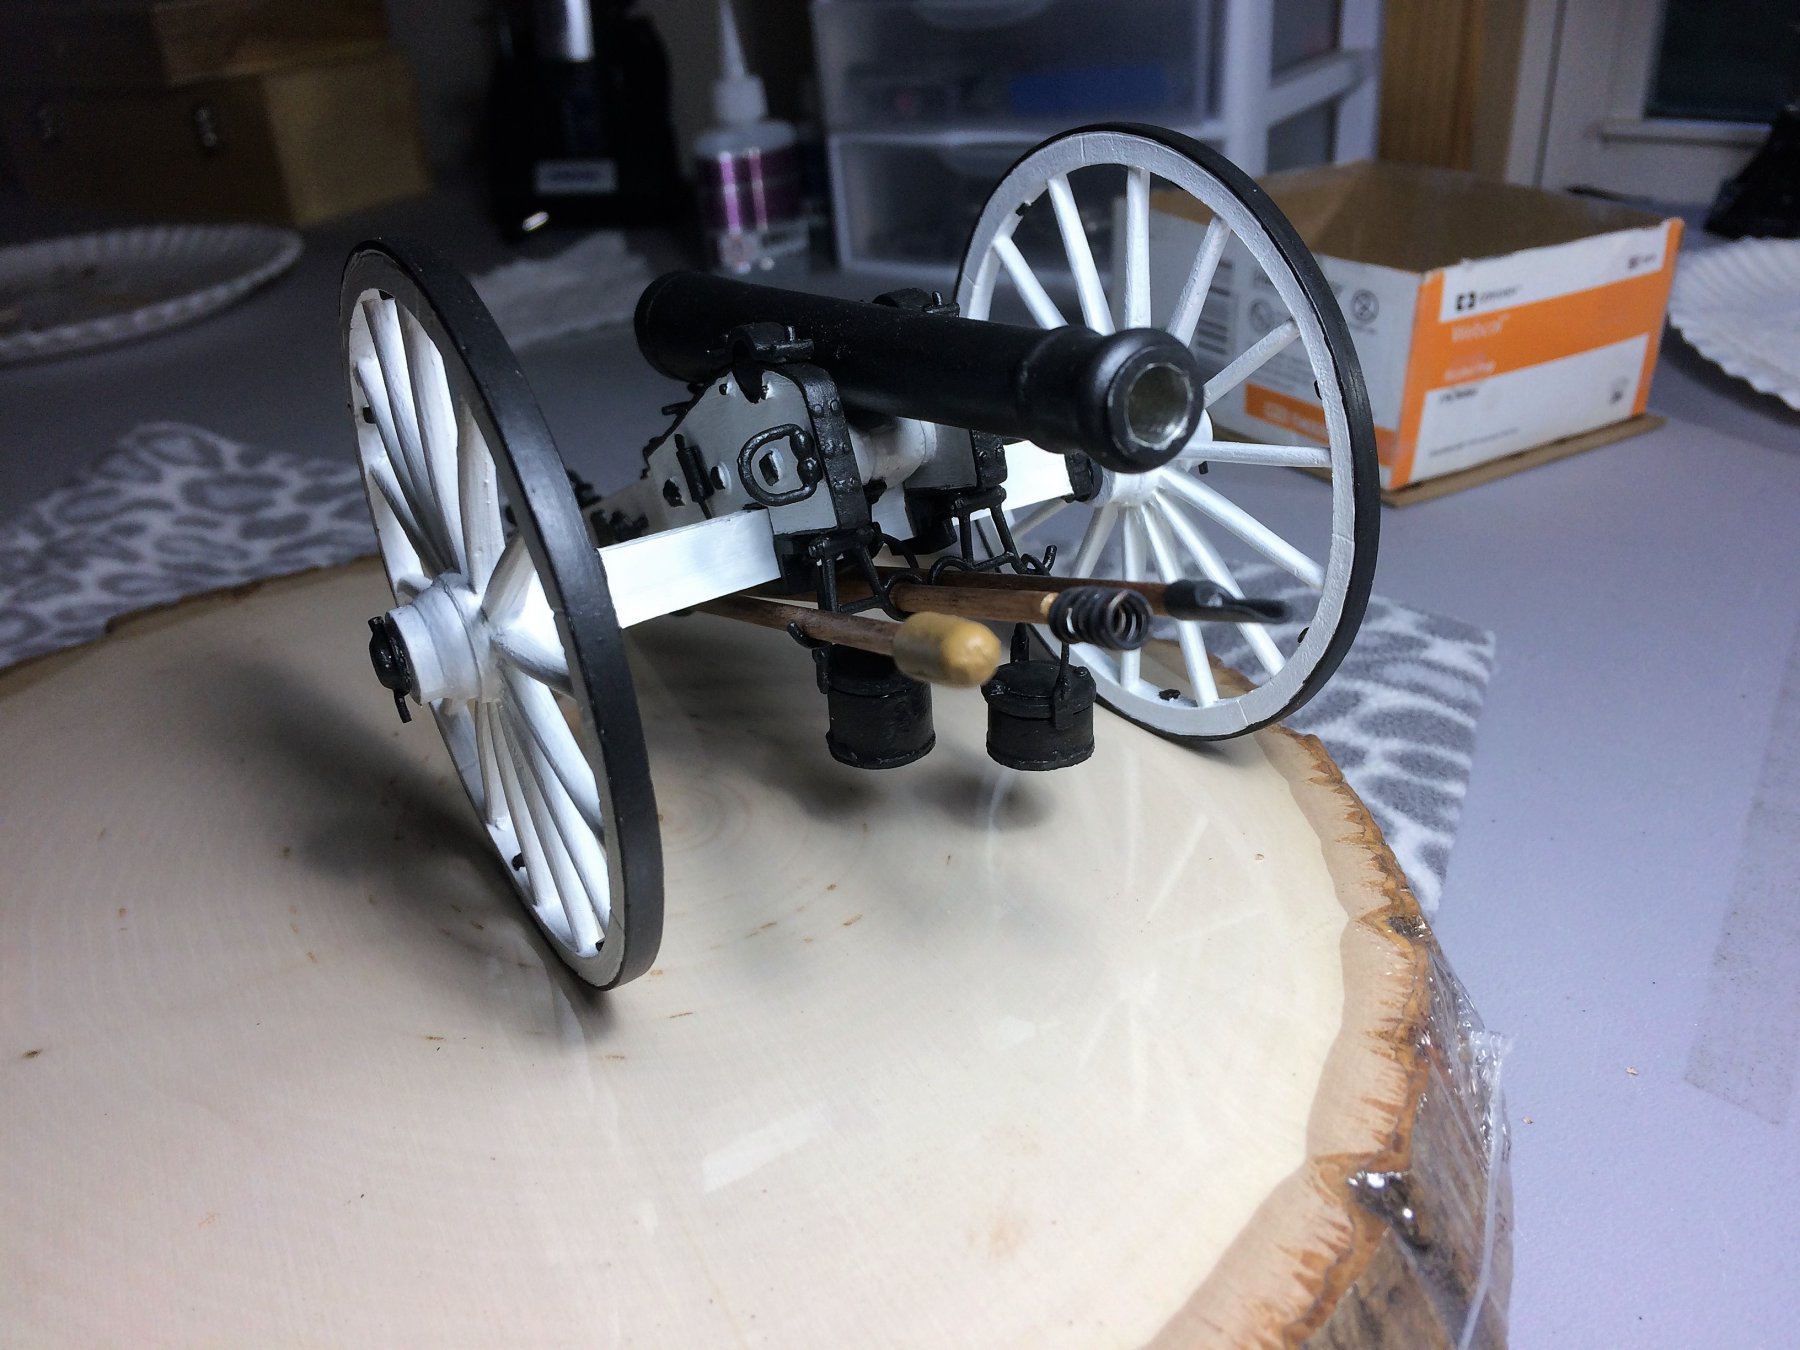
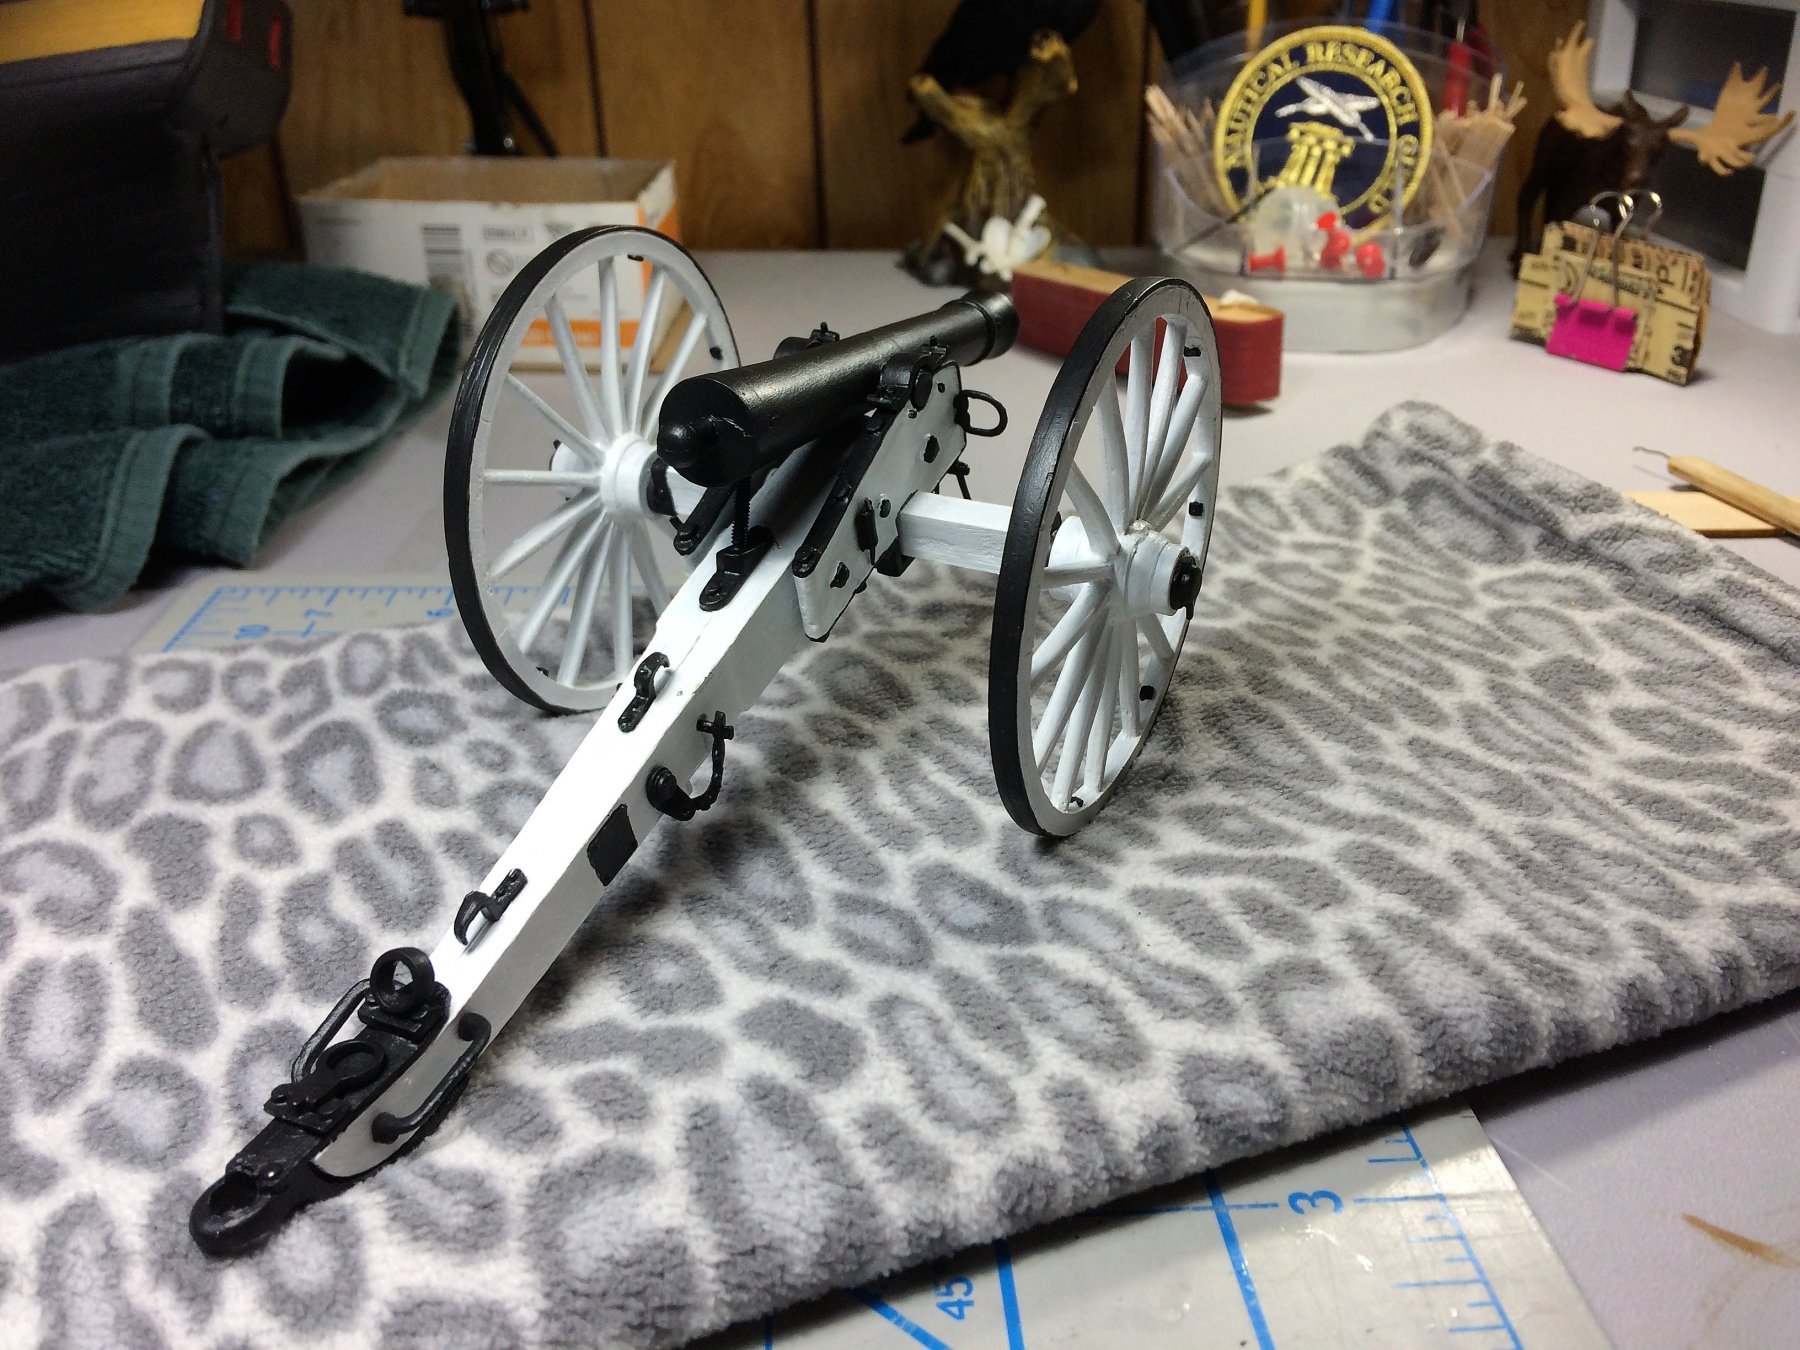
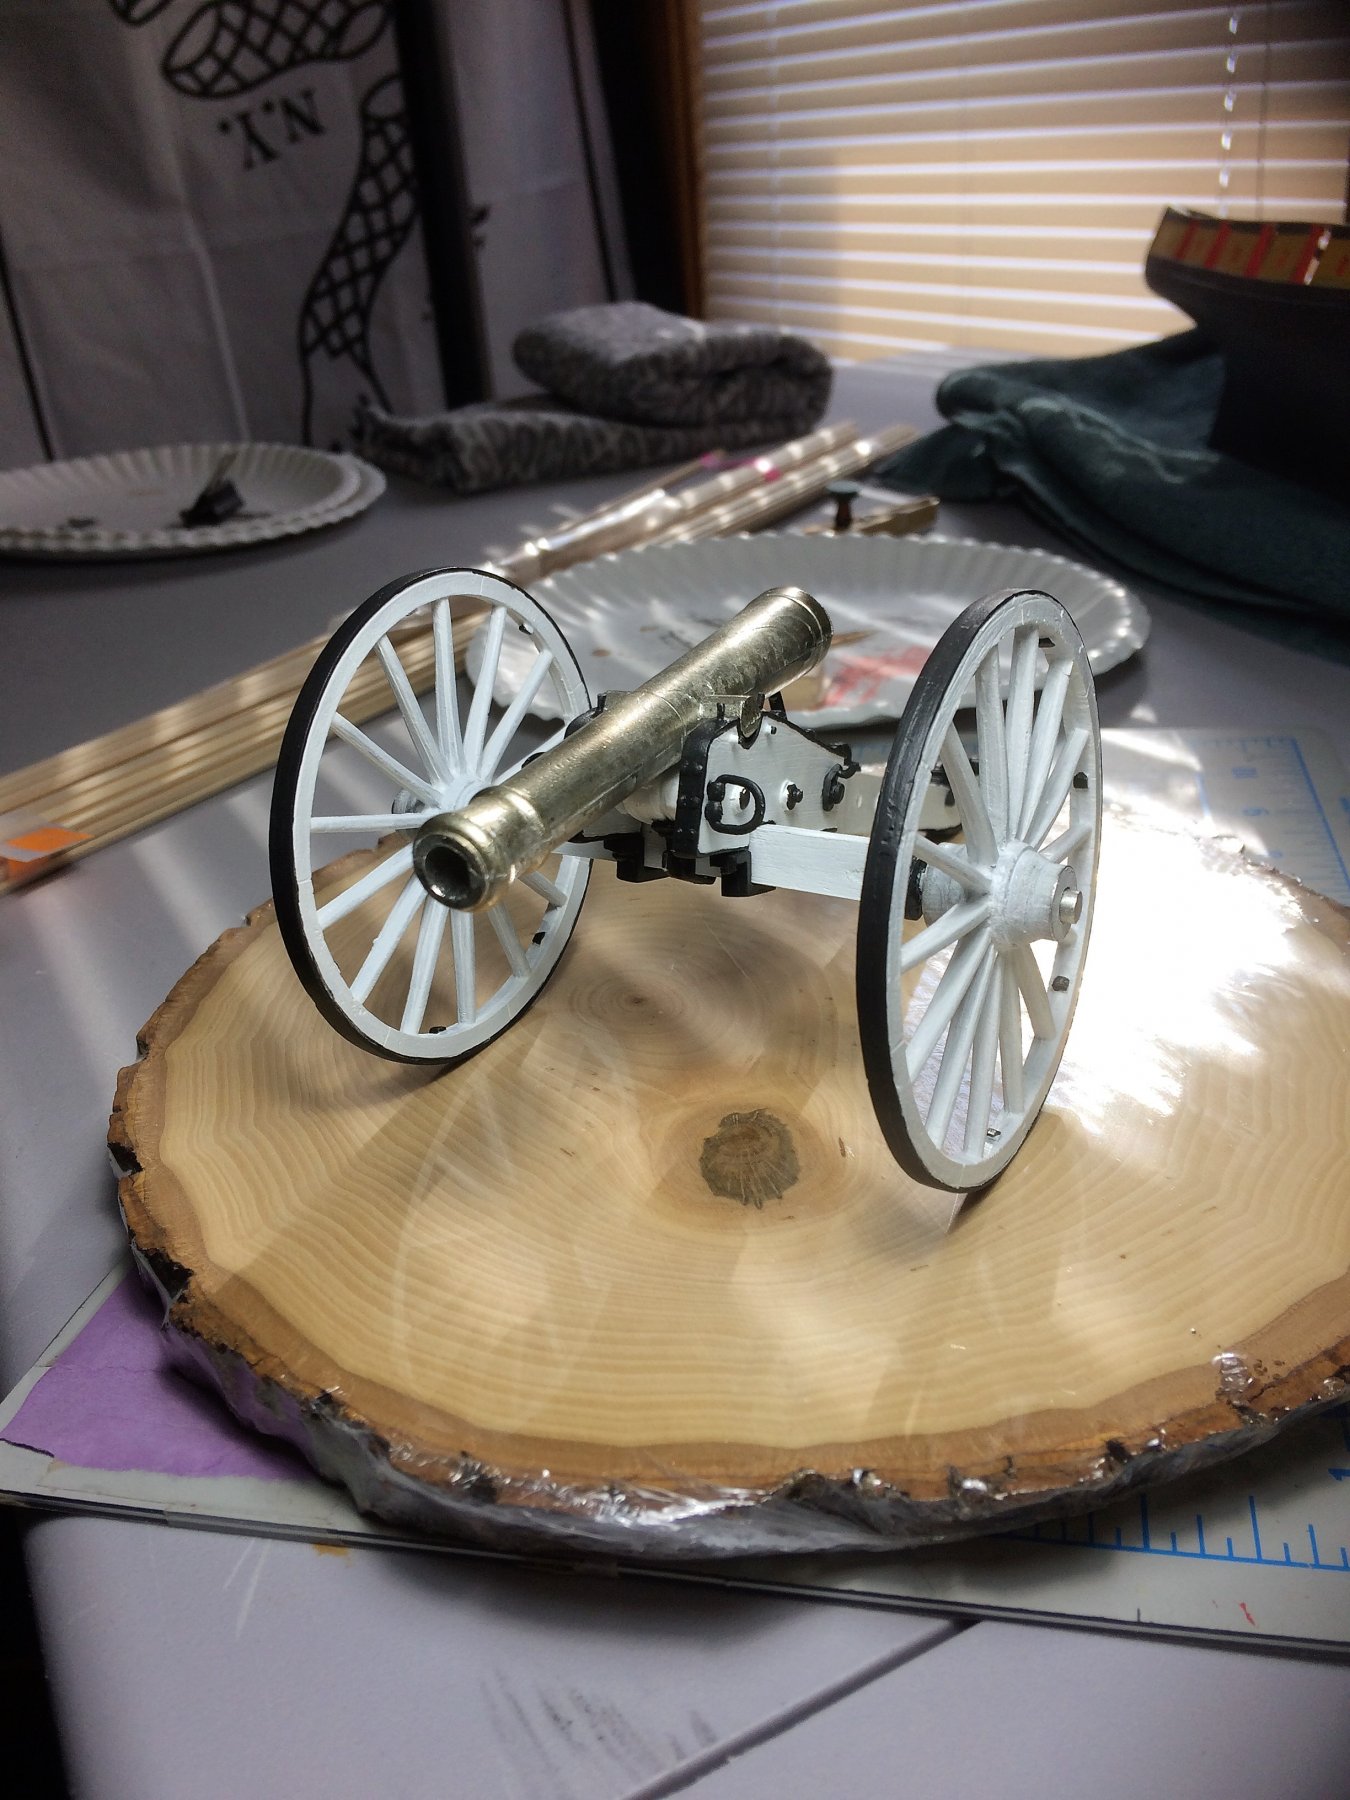
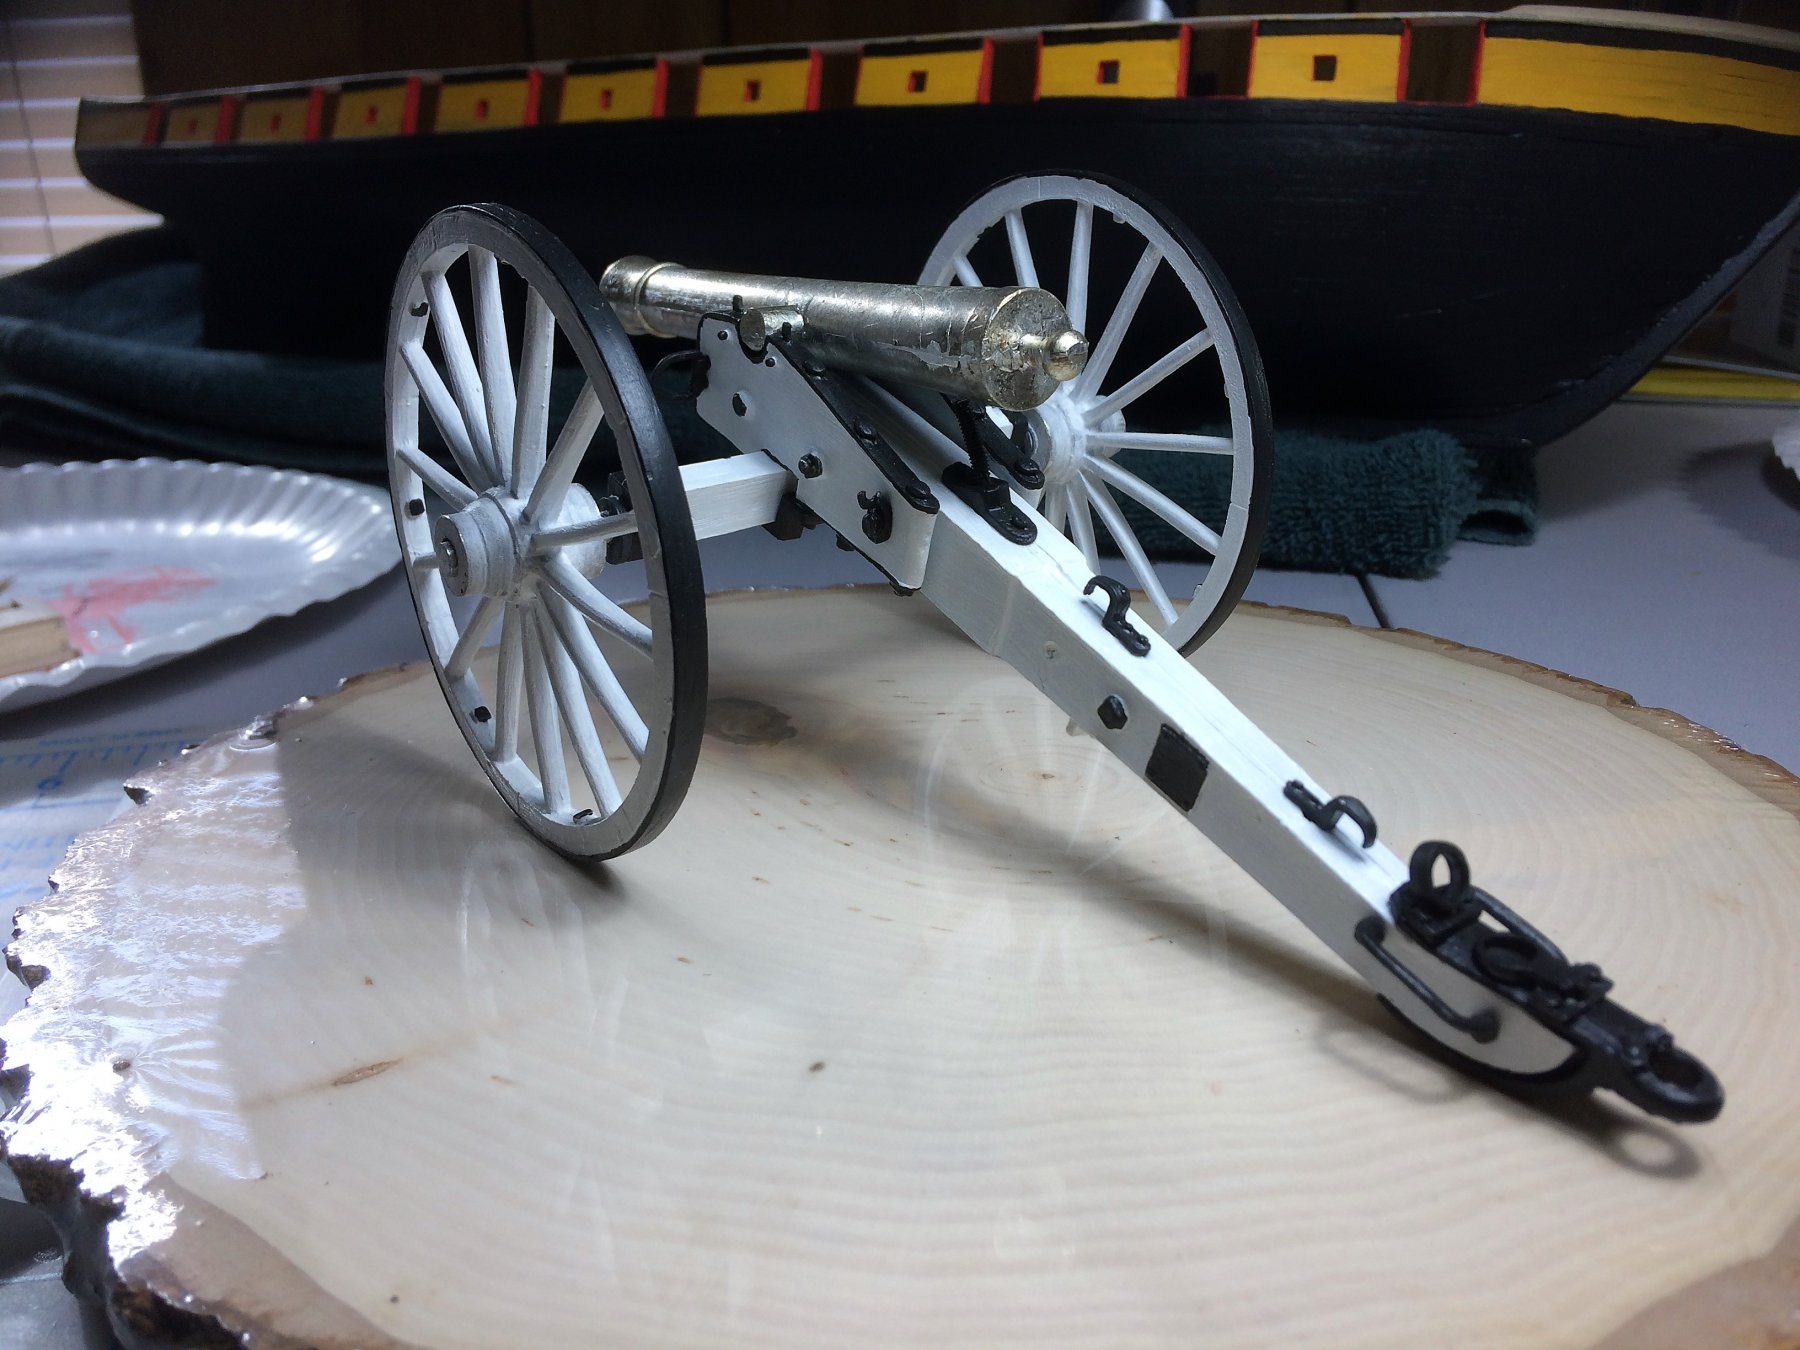
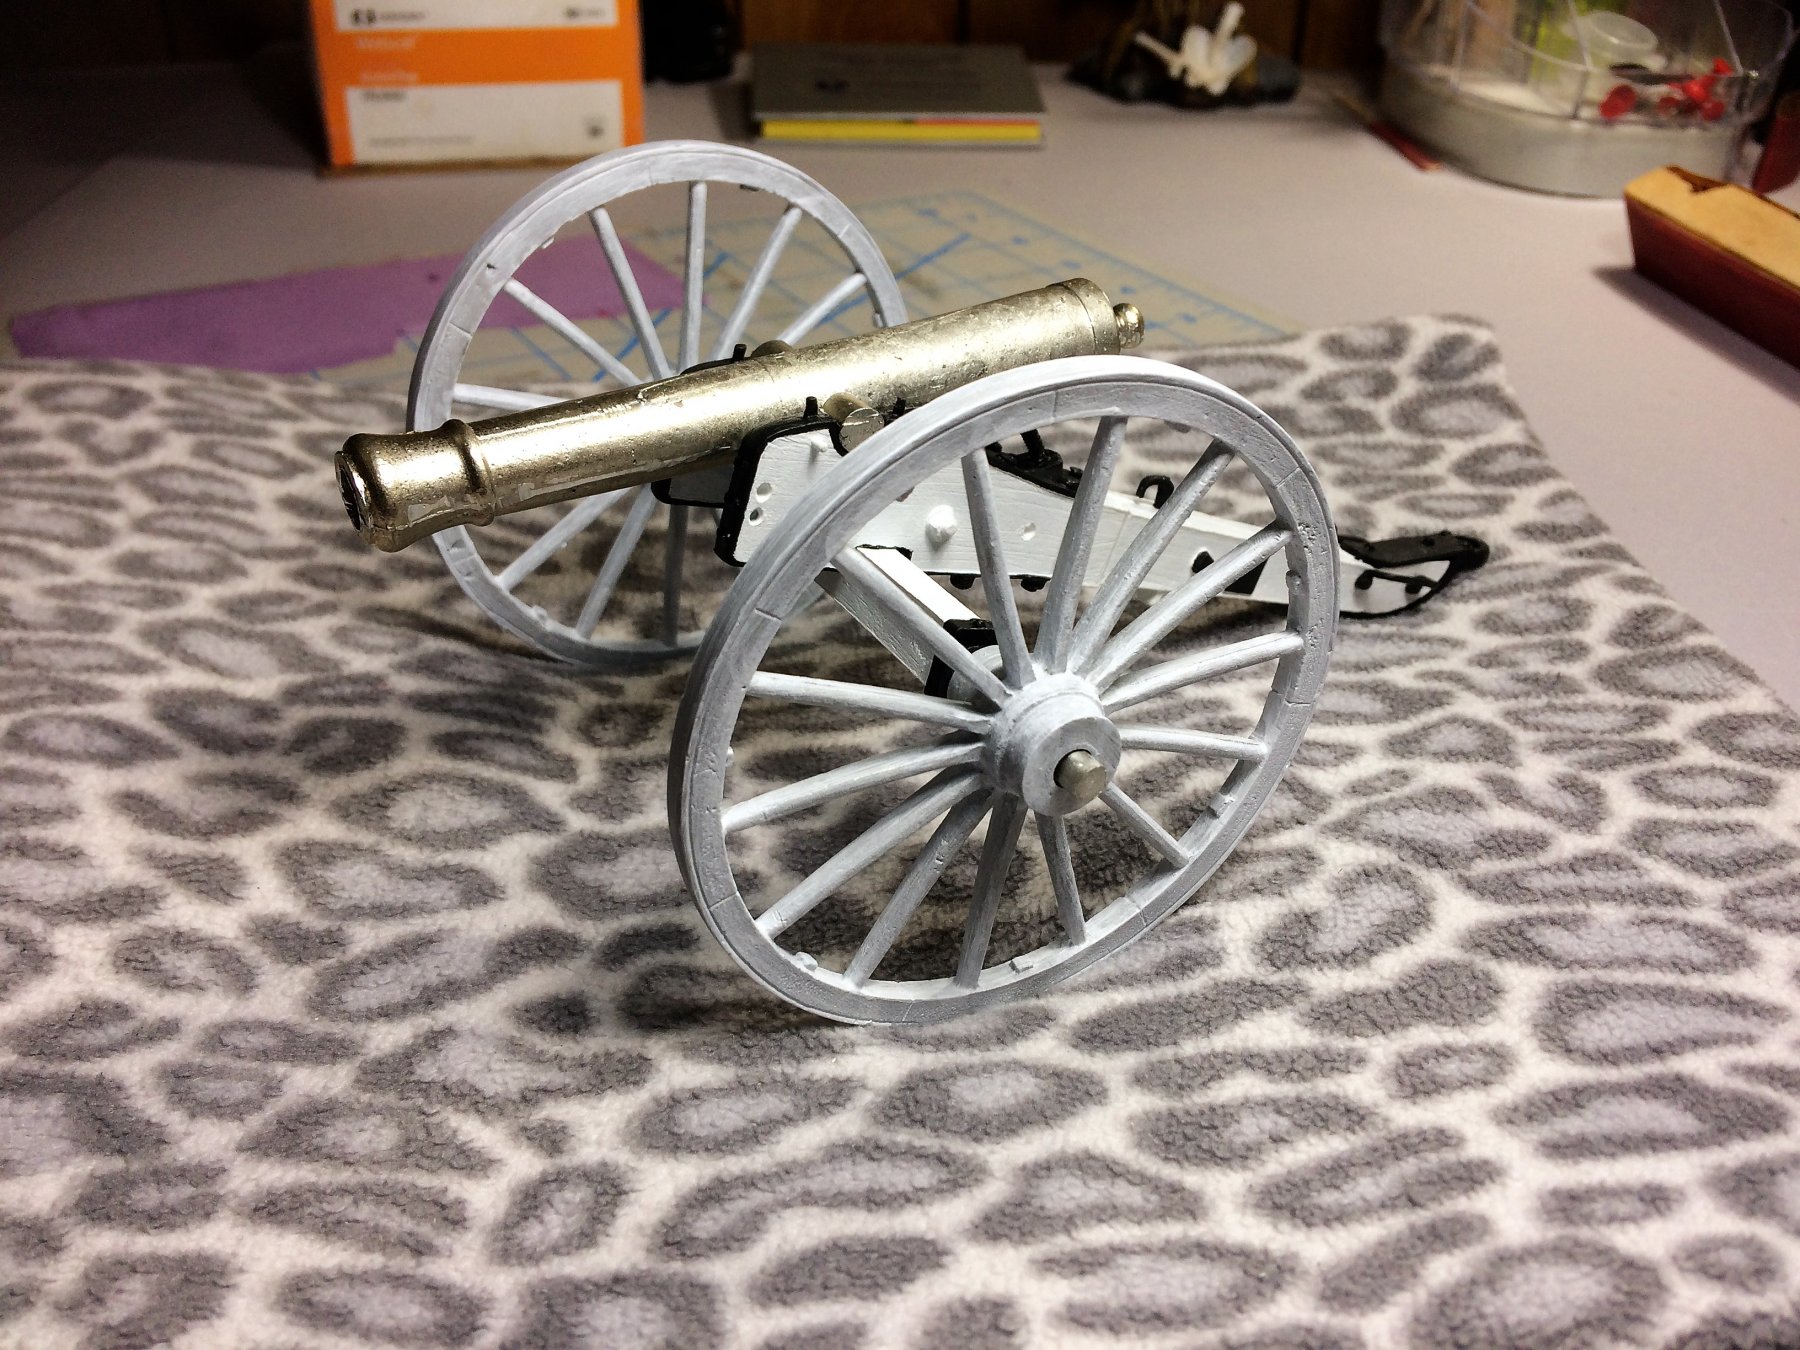
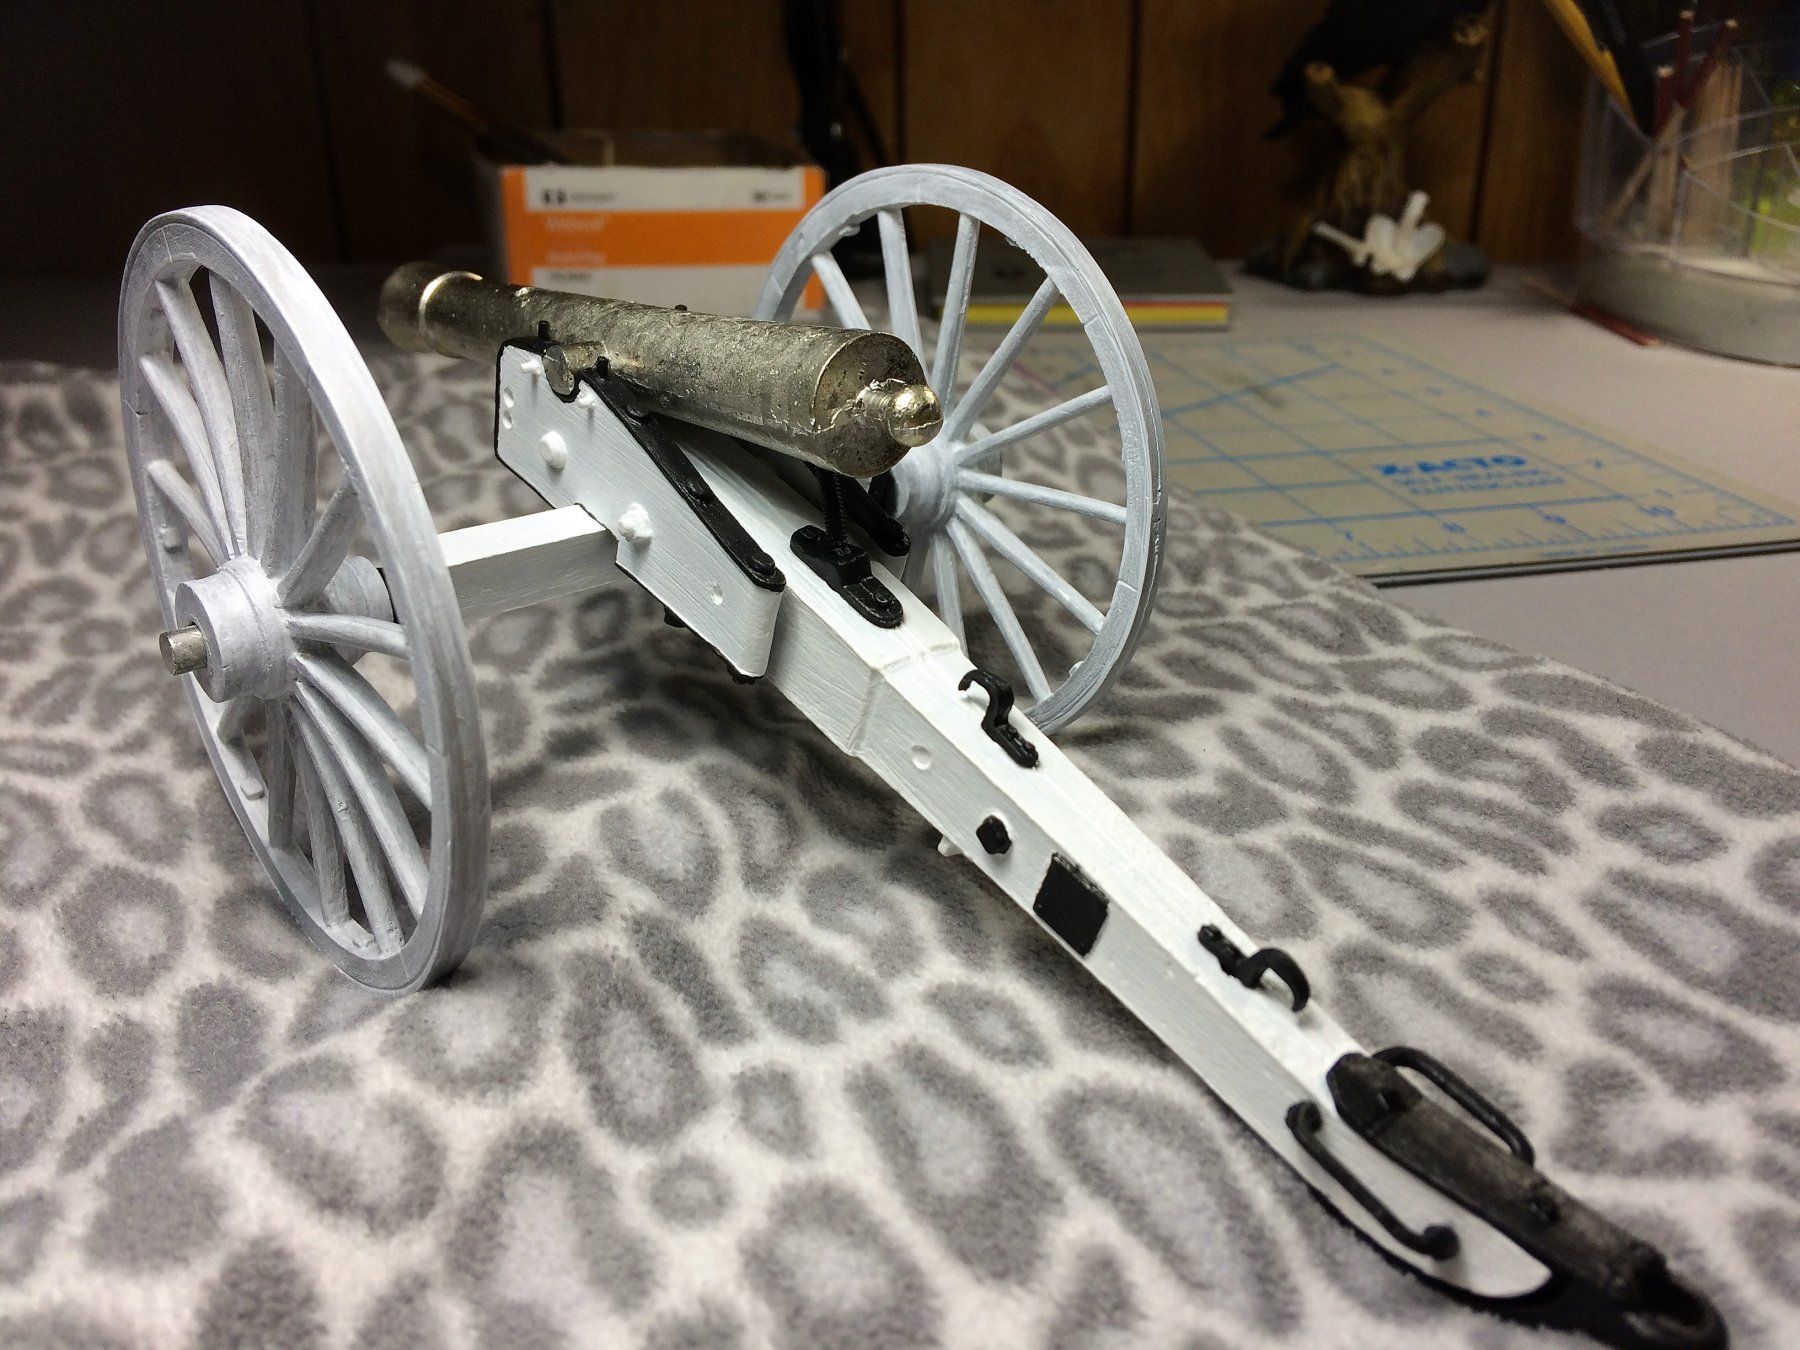
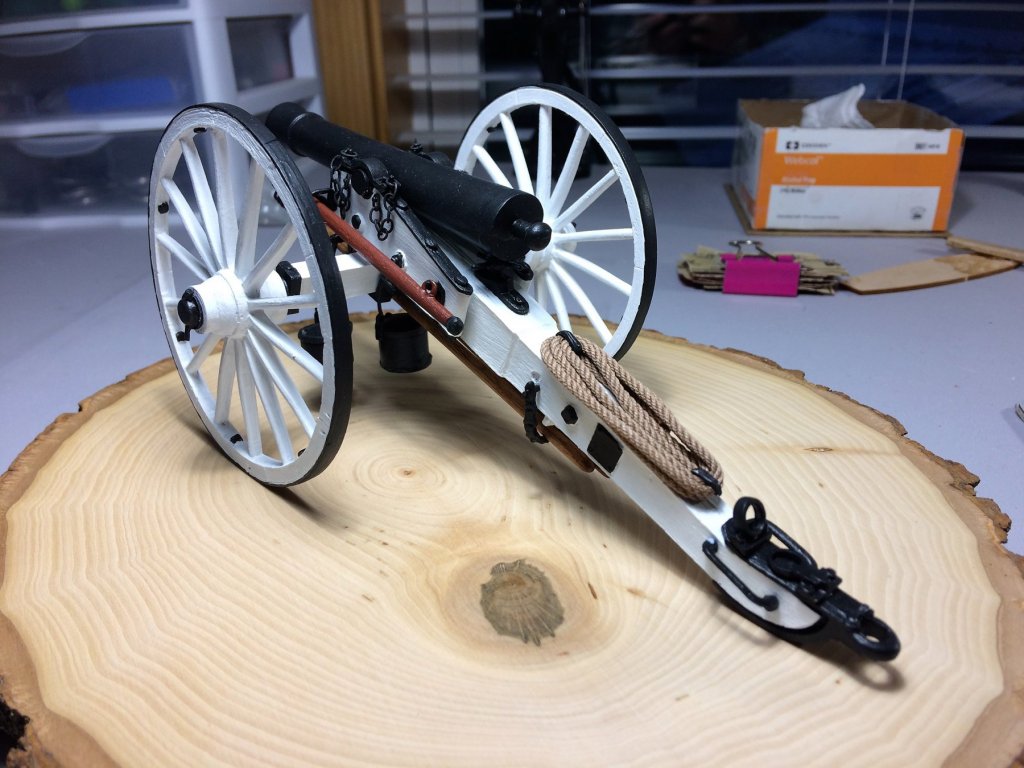
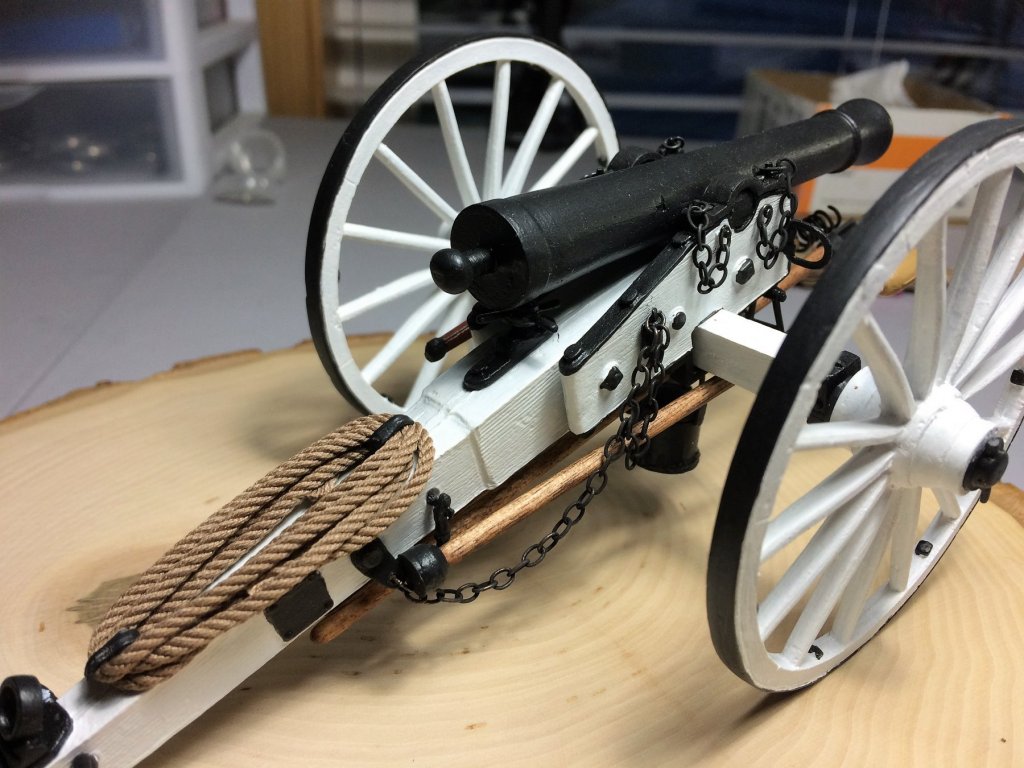
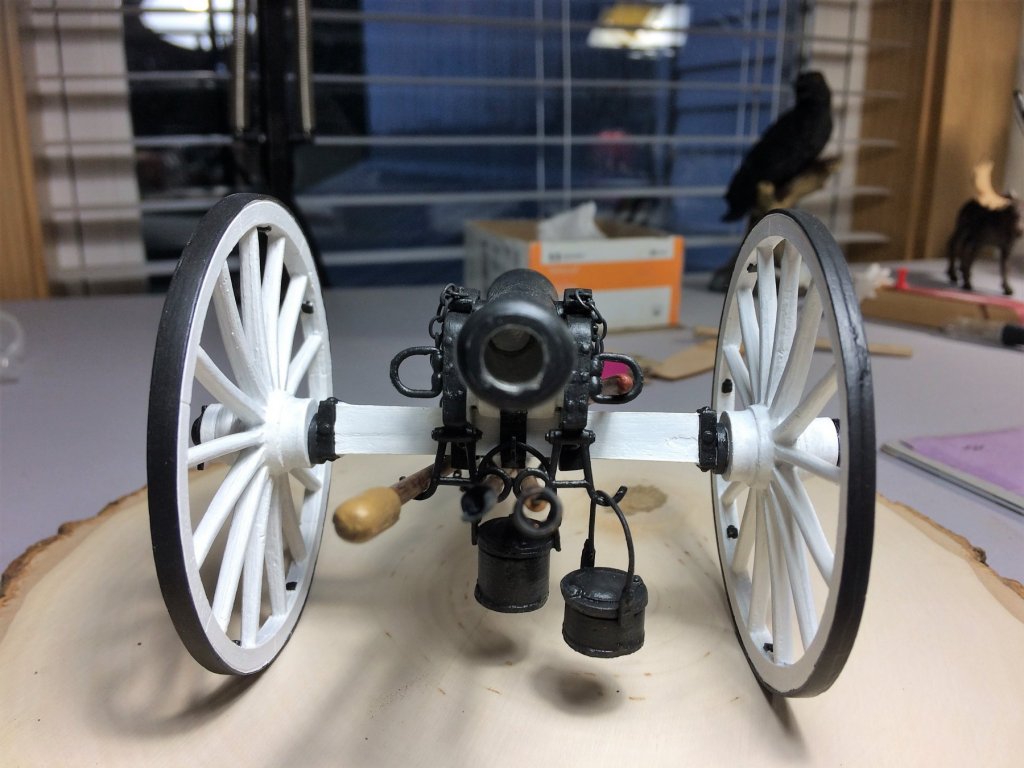
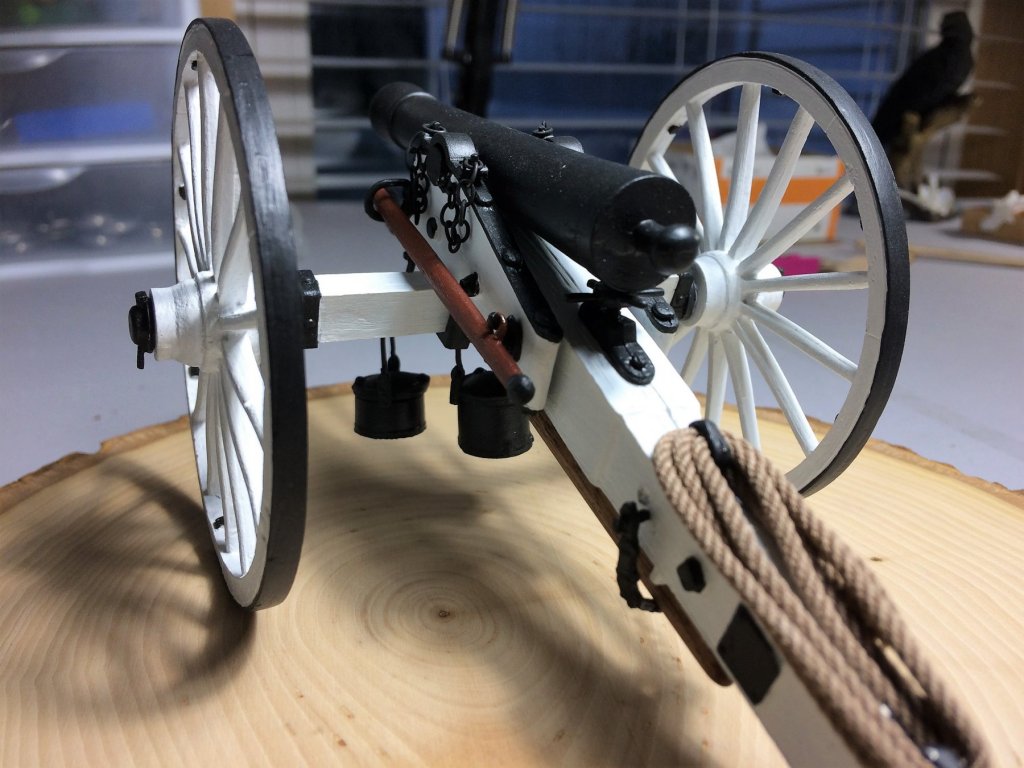
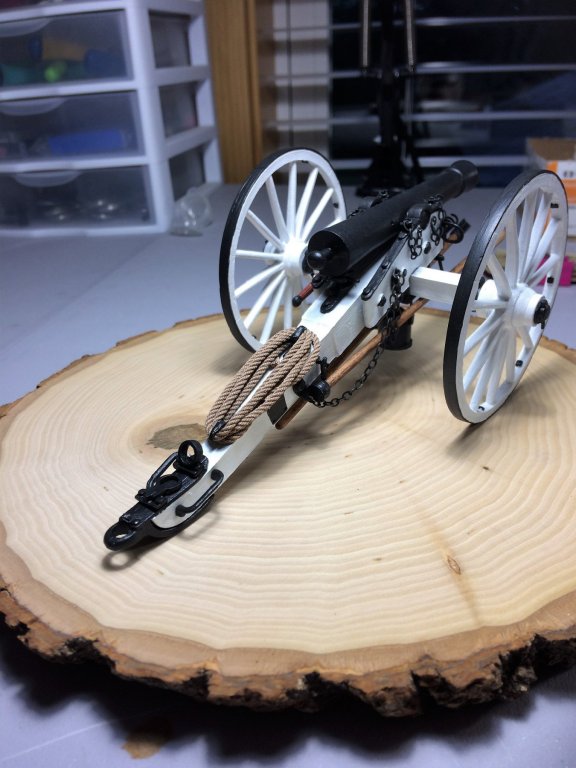
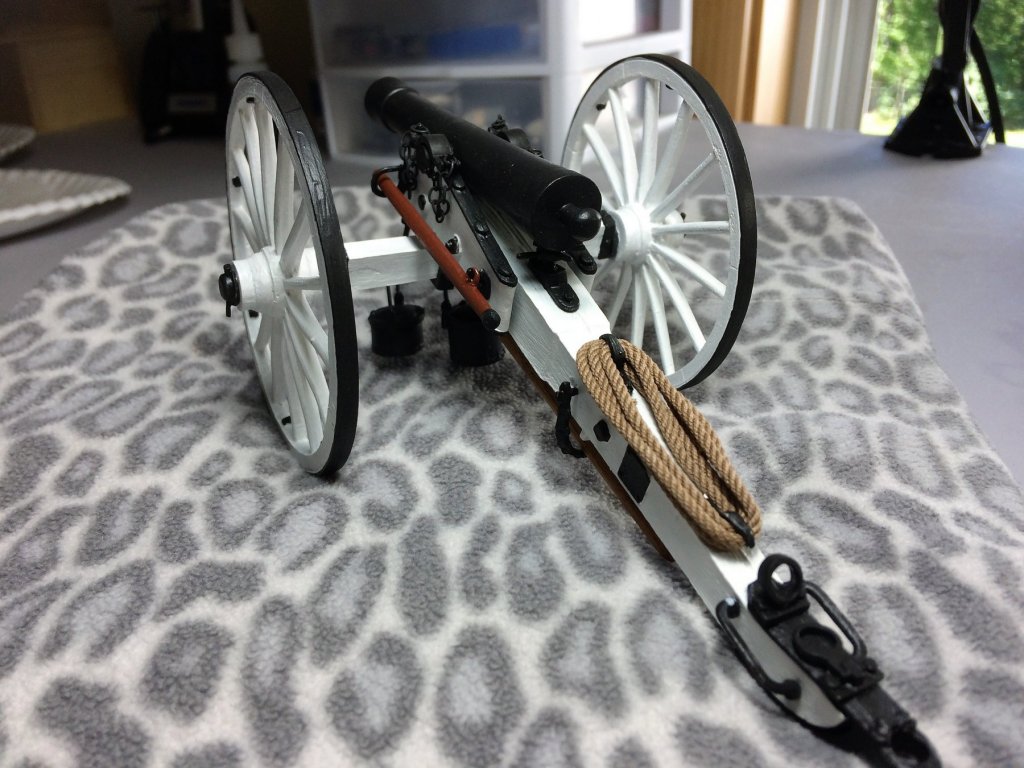
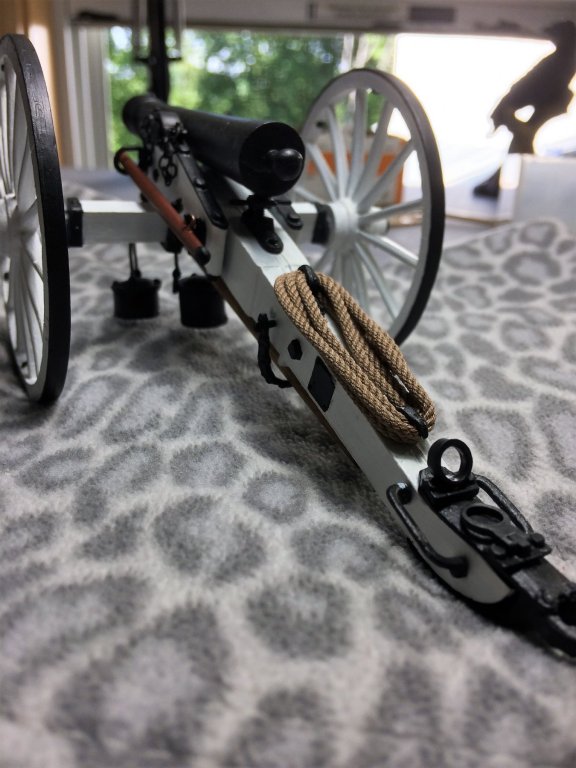
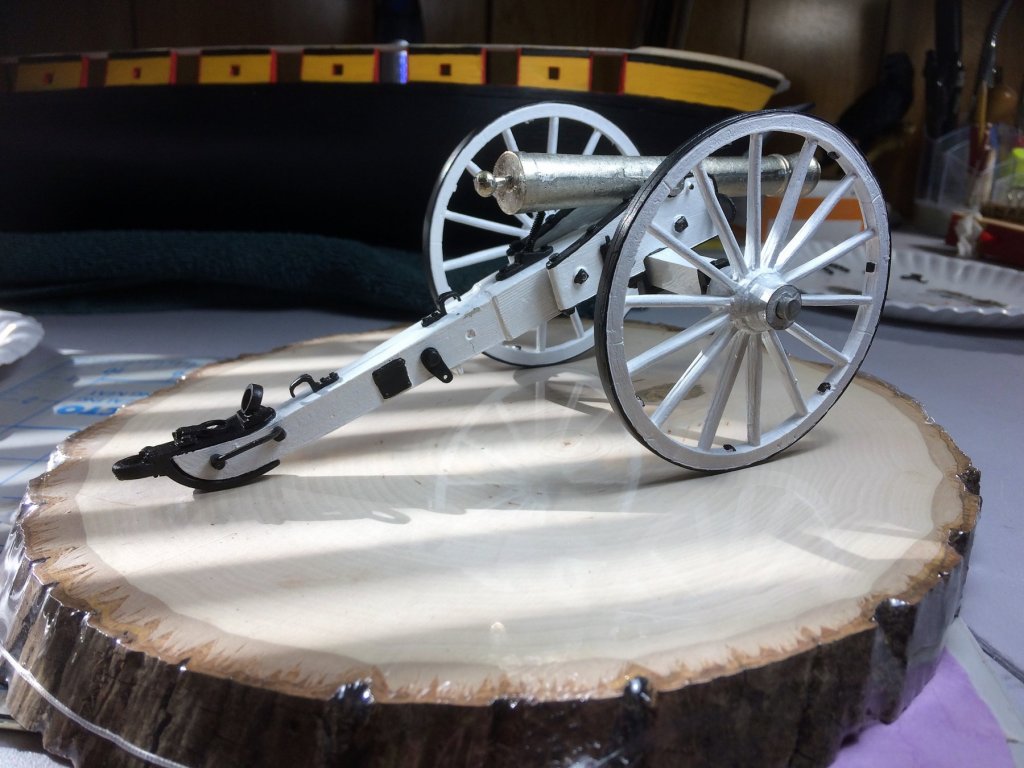
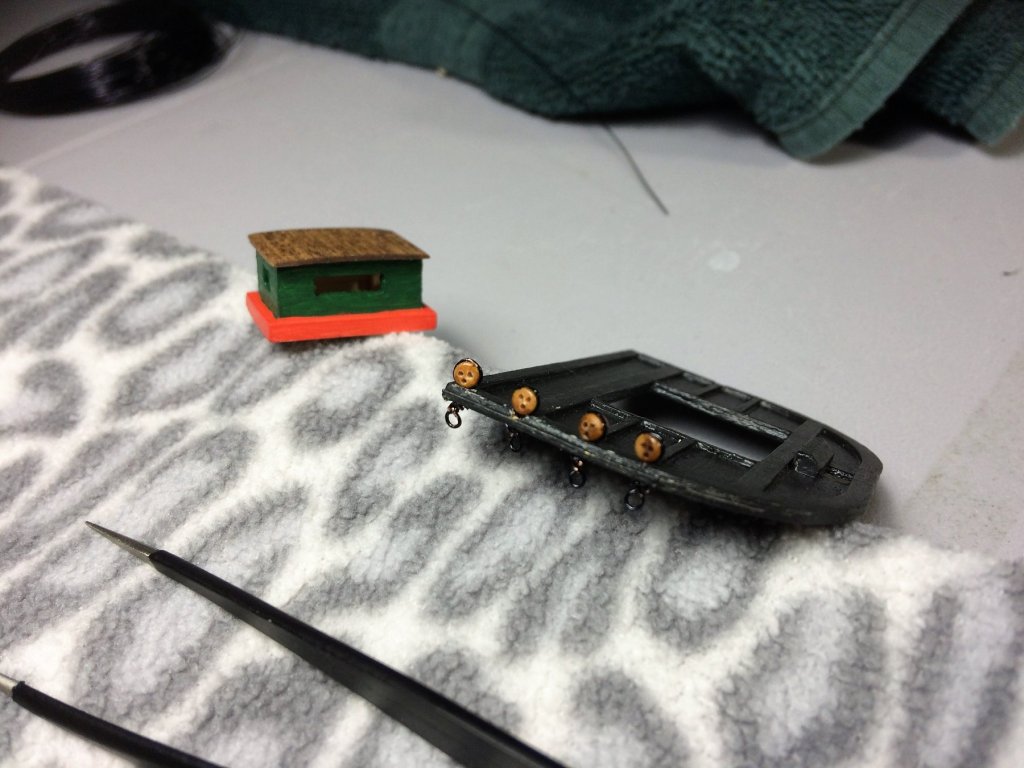
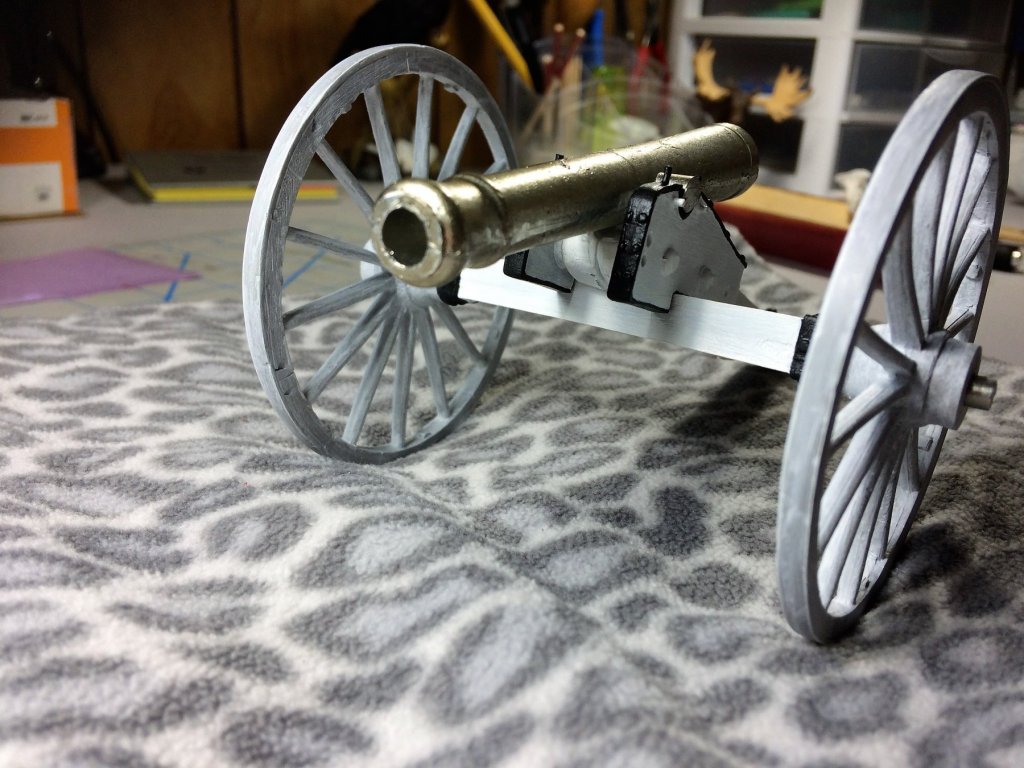
Evening, Well, I'm gonna put the wraps on this project. The James Cannon is done. Really nice kit. If you put the time in, a nice piece emerges. I see myself building another cannon kit. Would actually like to see a few cannon built. That would make for a nice display. I was going to do some rock walls around the cannon but proved to be difficult and I couldn't find any good rocks that looked in scale. Maybe for another build. Thanks for watching! Tom E

- 66 replies
-
- 11
-

-

-
Gary, Your Niagara is beautiful. Even thru that "rats nest" you describe, its really looks great. Tom E
-
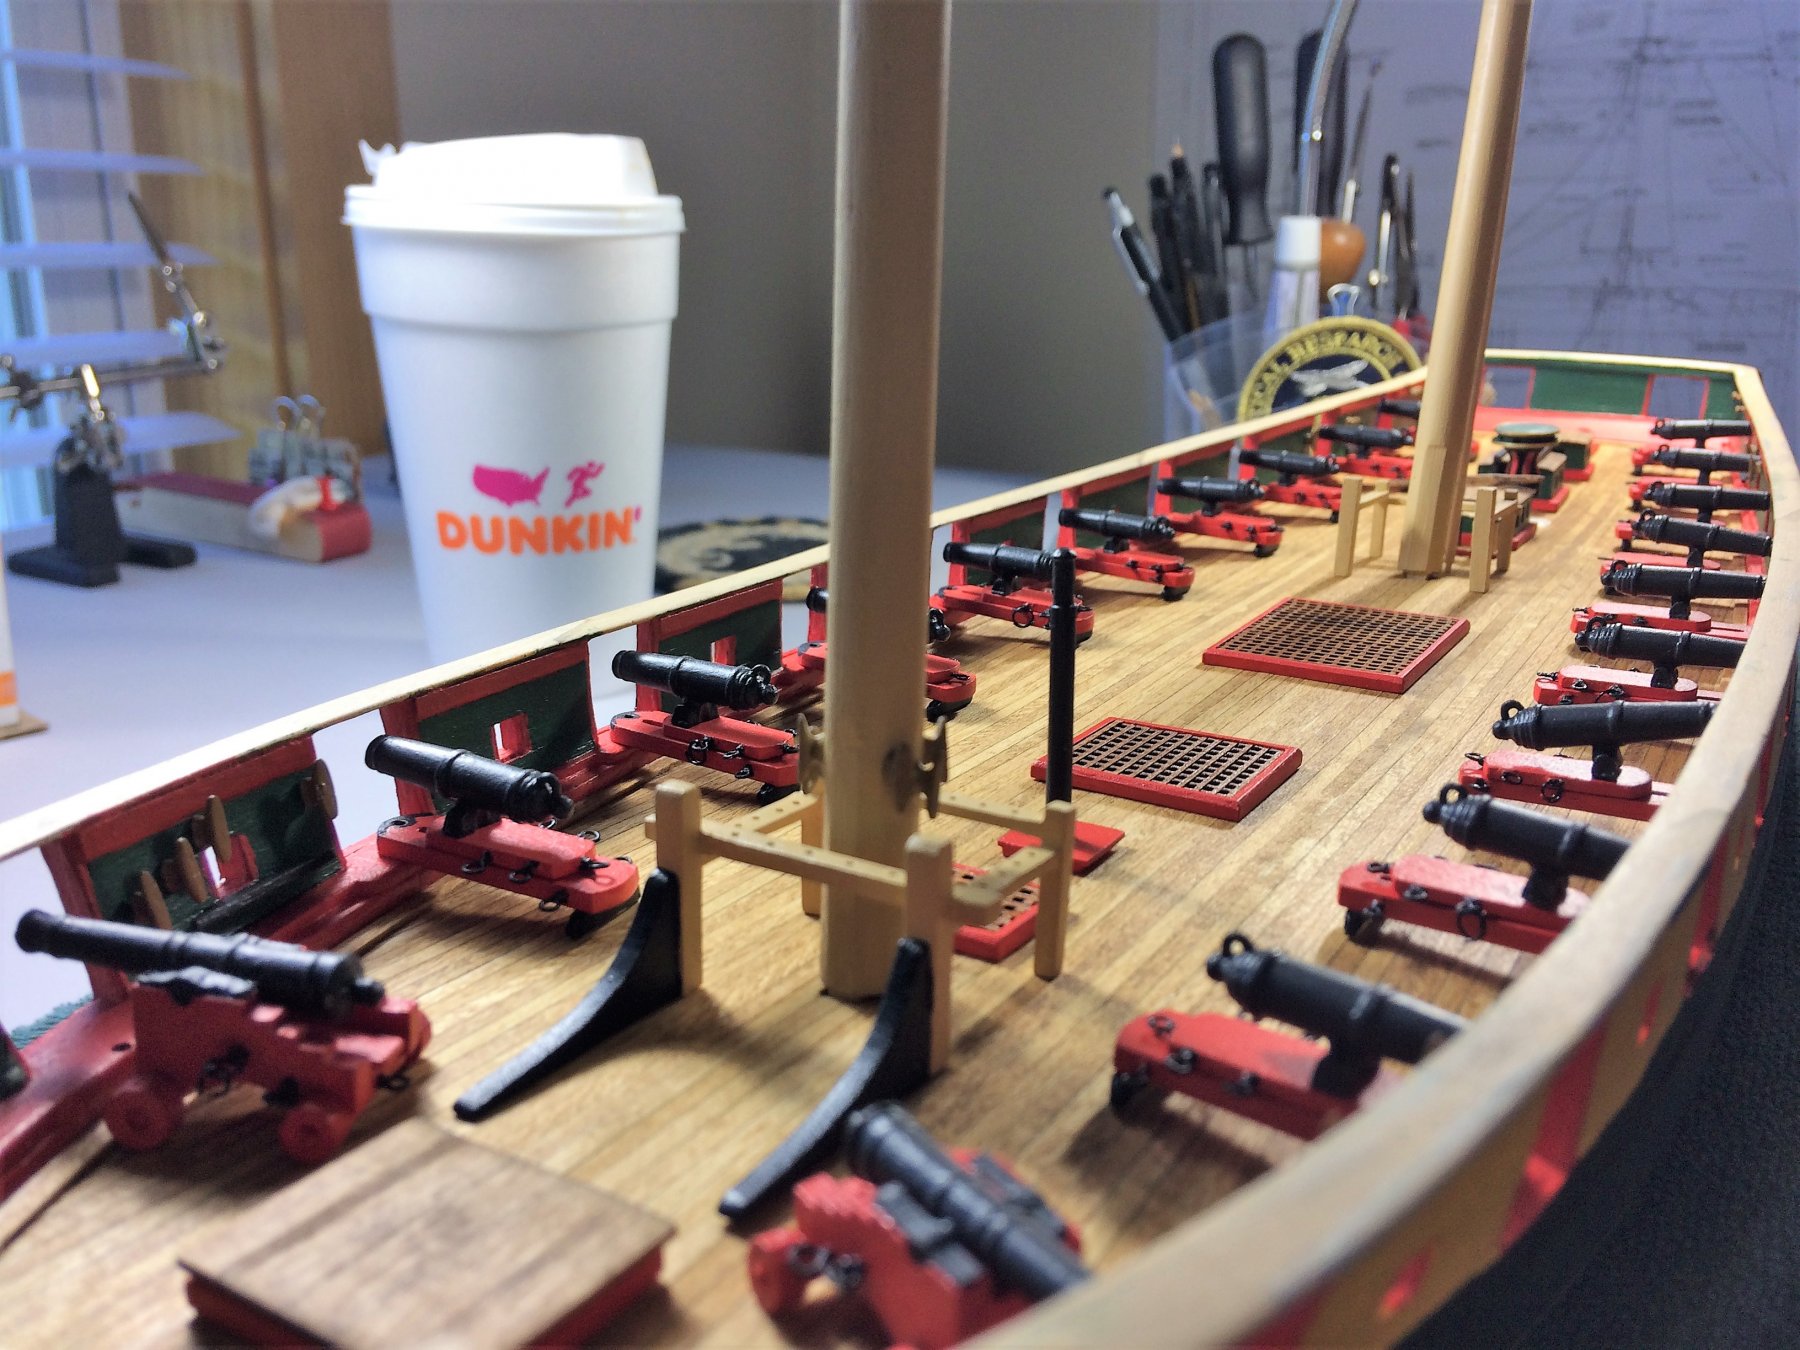
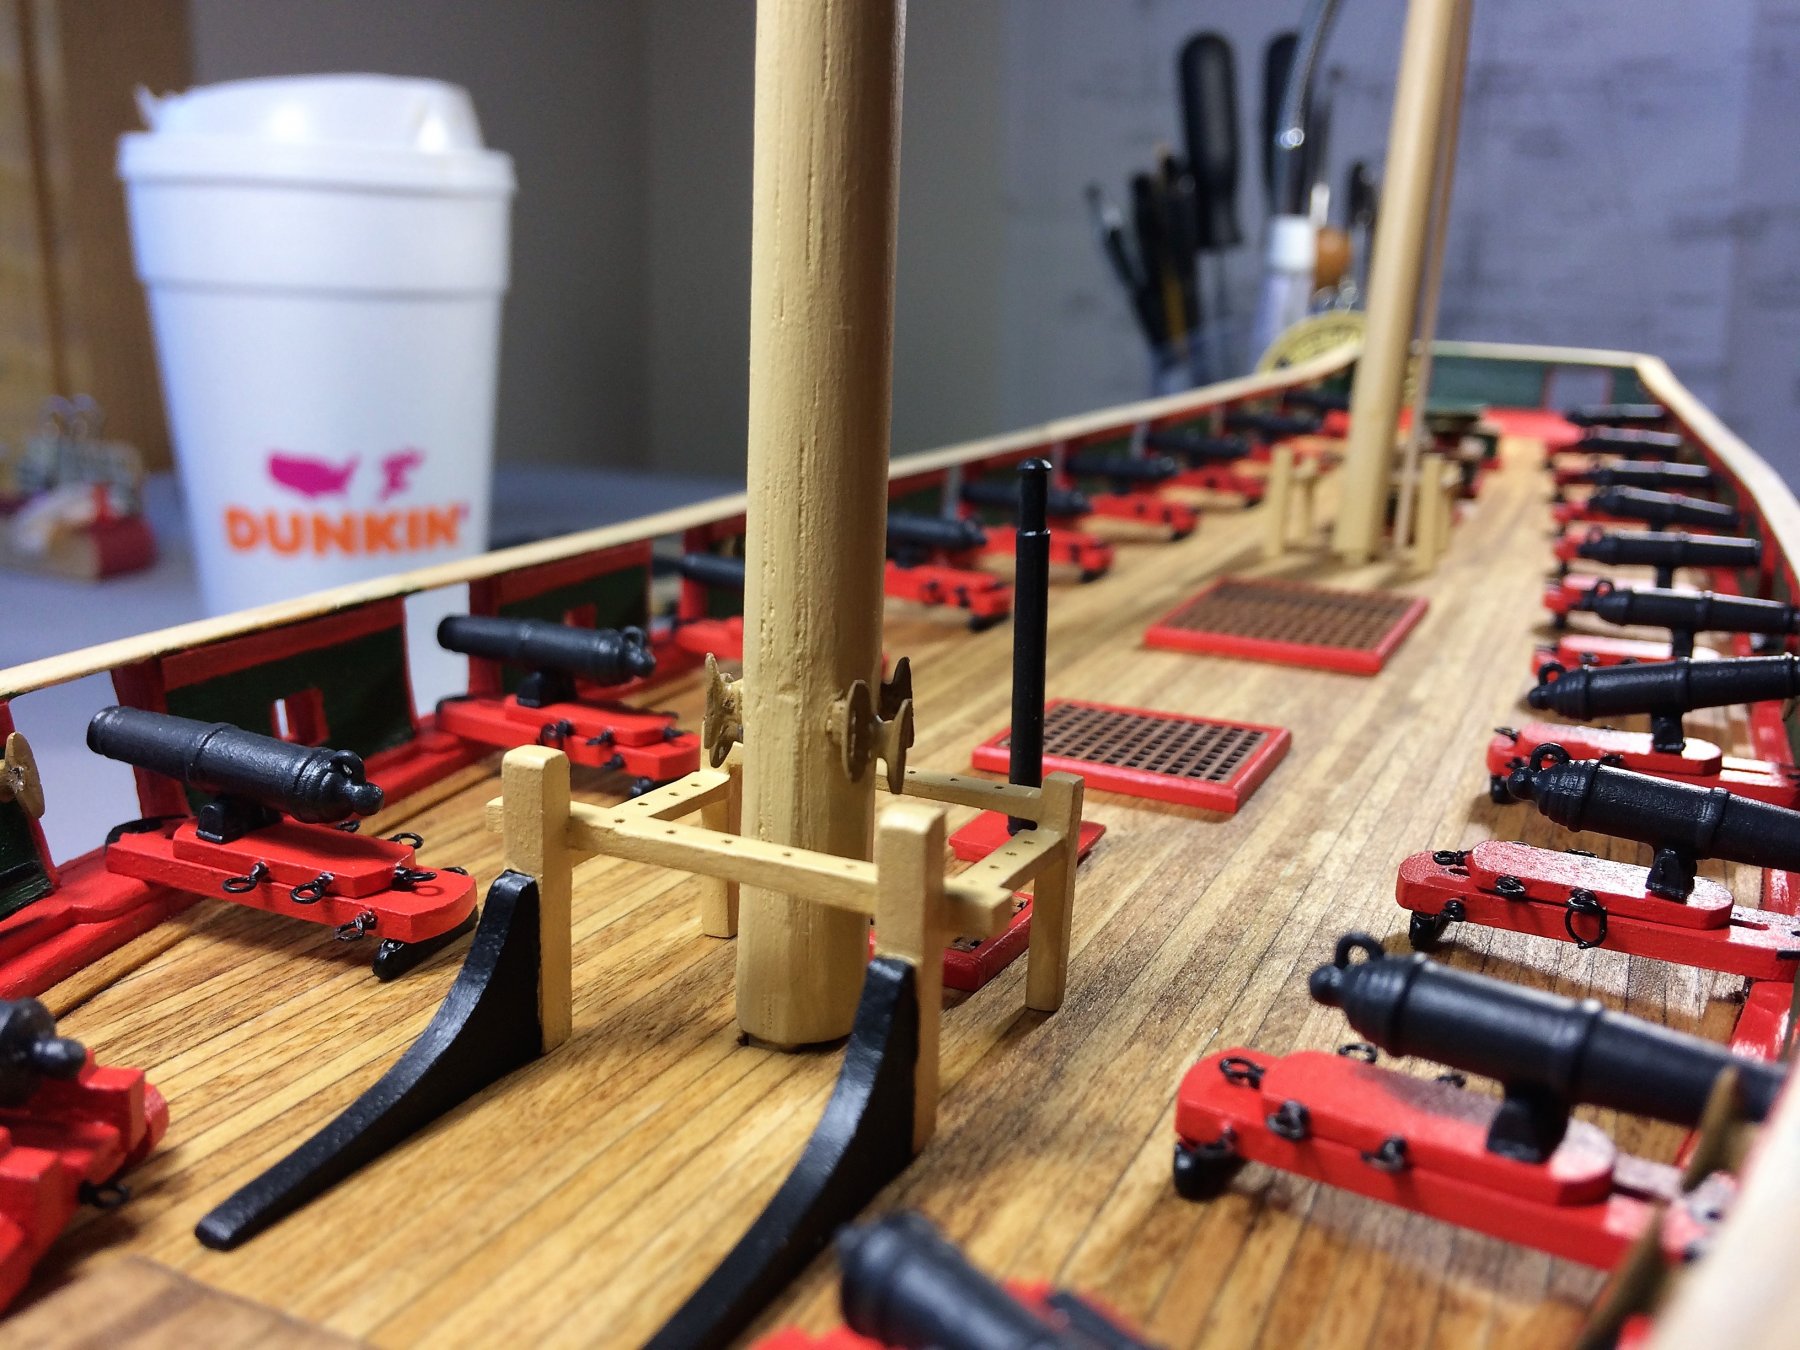
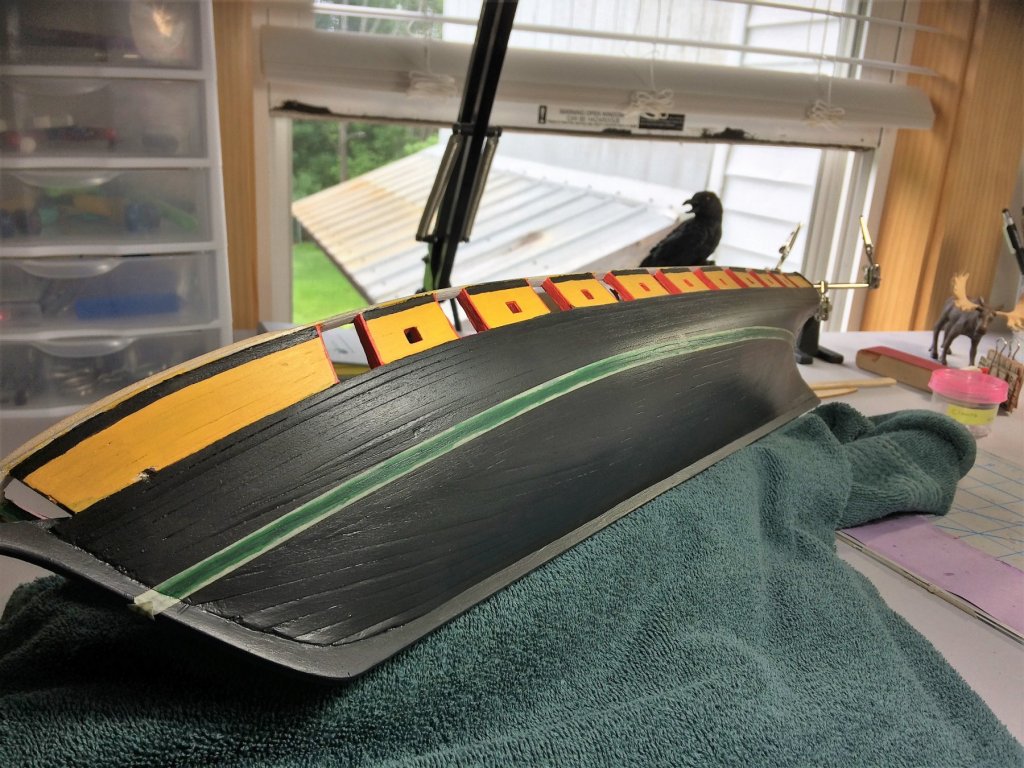
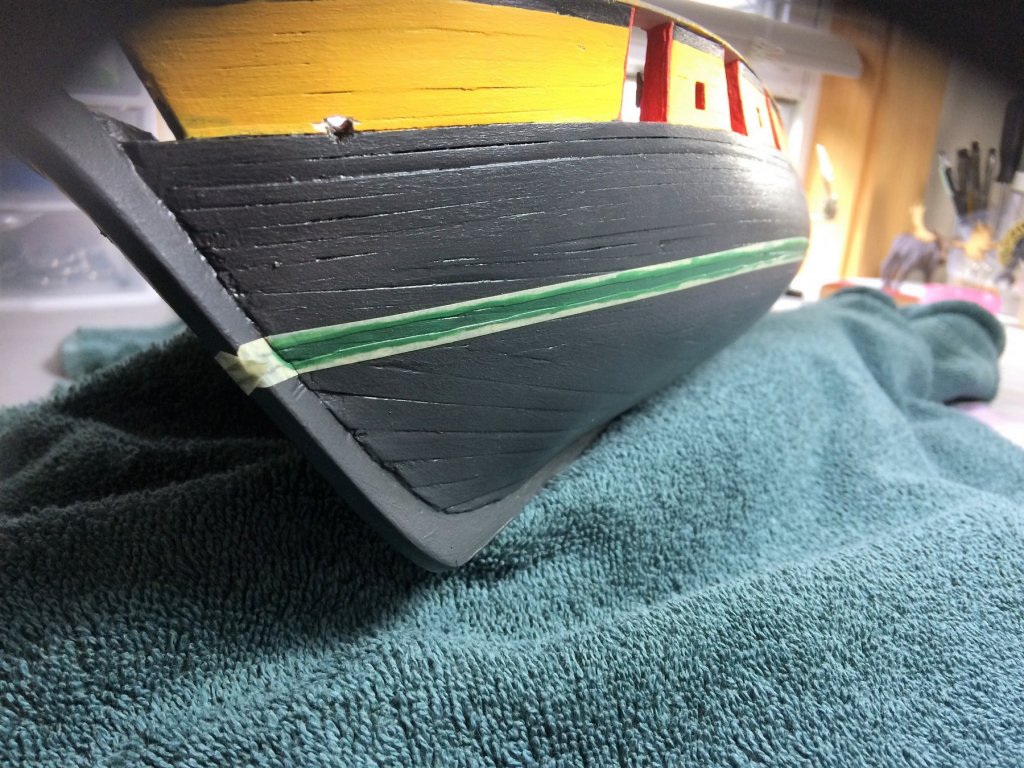
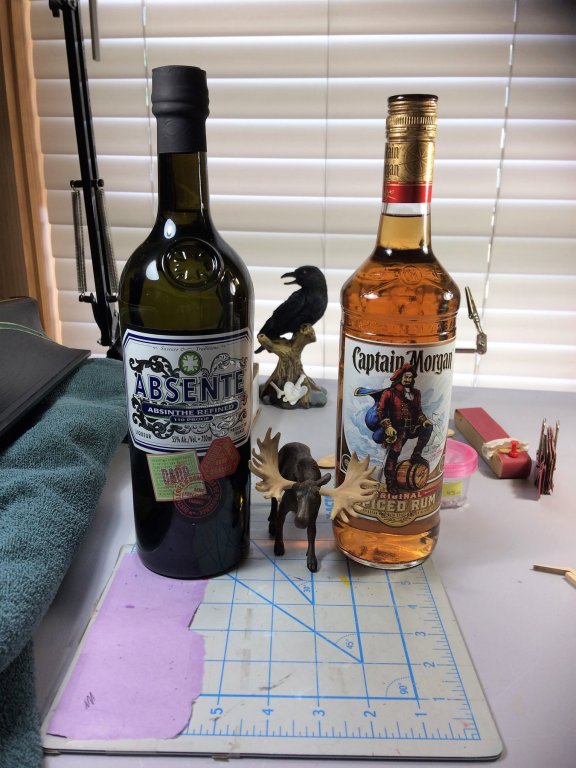
Evening, Hope everyone is staying cool during this latest heat wave. Since I'm stuck inside in the air conditioning, thought I would do some painting. Really wanted to check the Boot Strap off the to do list. Want to get it done before I paint the Main rail. I'm going real simple, and have one strip painted dark green. Maybe not the most scientific method, but should work. Any large errors can be cleaned up. Not really looking for a perfect boot strap. Looking for symmetry on both sides. It may look a little ragged, but should clean up. A few coats will be necessary. In the end, It may be a bit lower than I wanted it, but I can live with it. Had to include the below pic. Every once in a while I'll go to the New Hampshire State Liquor store. Stock up. The prices are insane! The below 2 bottles in total was only $35. The rum alone would be $20 or more in other states. Every time I walk out of there, I feel like I've robbed the place. Stay Cool! Tom E
-
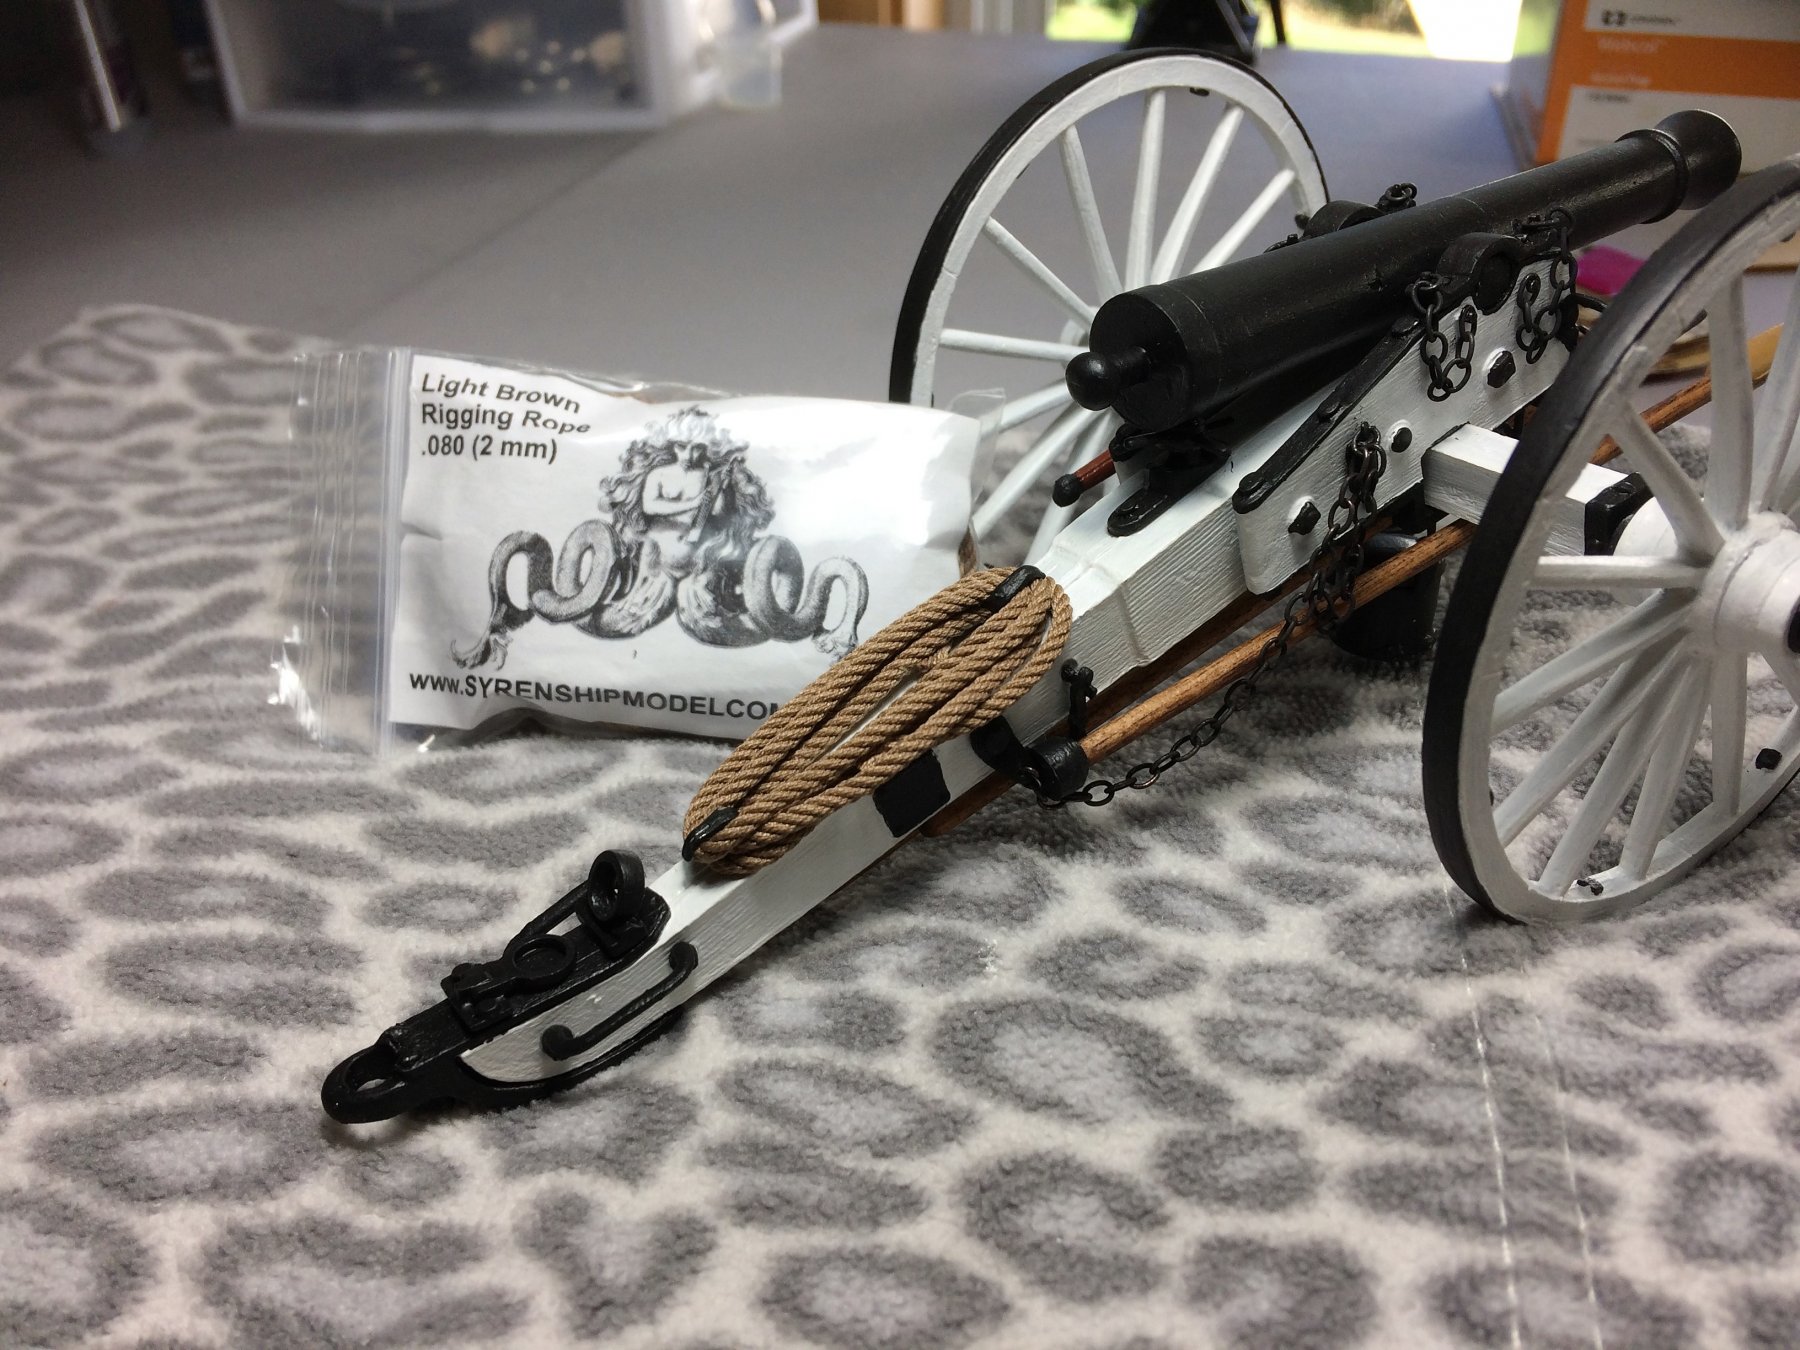
Morning, It's going to be unusually hot and muggy this weekend......to the Shipyard it is!!!!! Absolutely hate the heat, I'm a New England boy and prefer the cooler weather. A sure sign that summer is almost over...…..the New England Patriots report to camp next week! Update on the James Cannon. The blackened chains were air dried for a day or two then installed. She's really filling in. A while back I bought some .080 brown rope from Syren…..I sure glad I did! It looks pretty sweet compared to the "rope" that comes with the kit. A few touch ups are next. Hope to have this project wrapped up soon! Tom E


- 66 replies
-
- 12
-
-
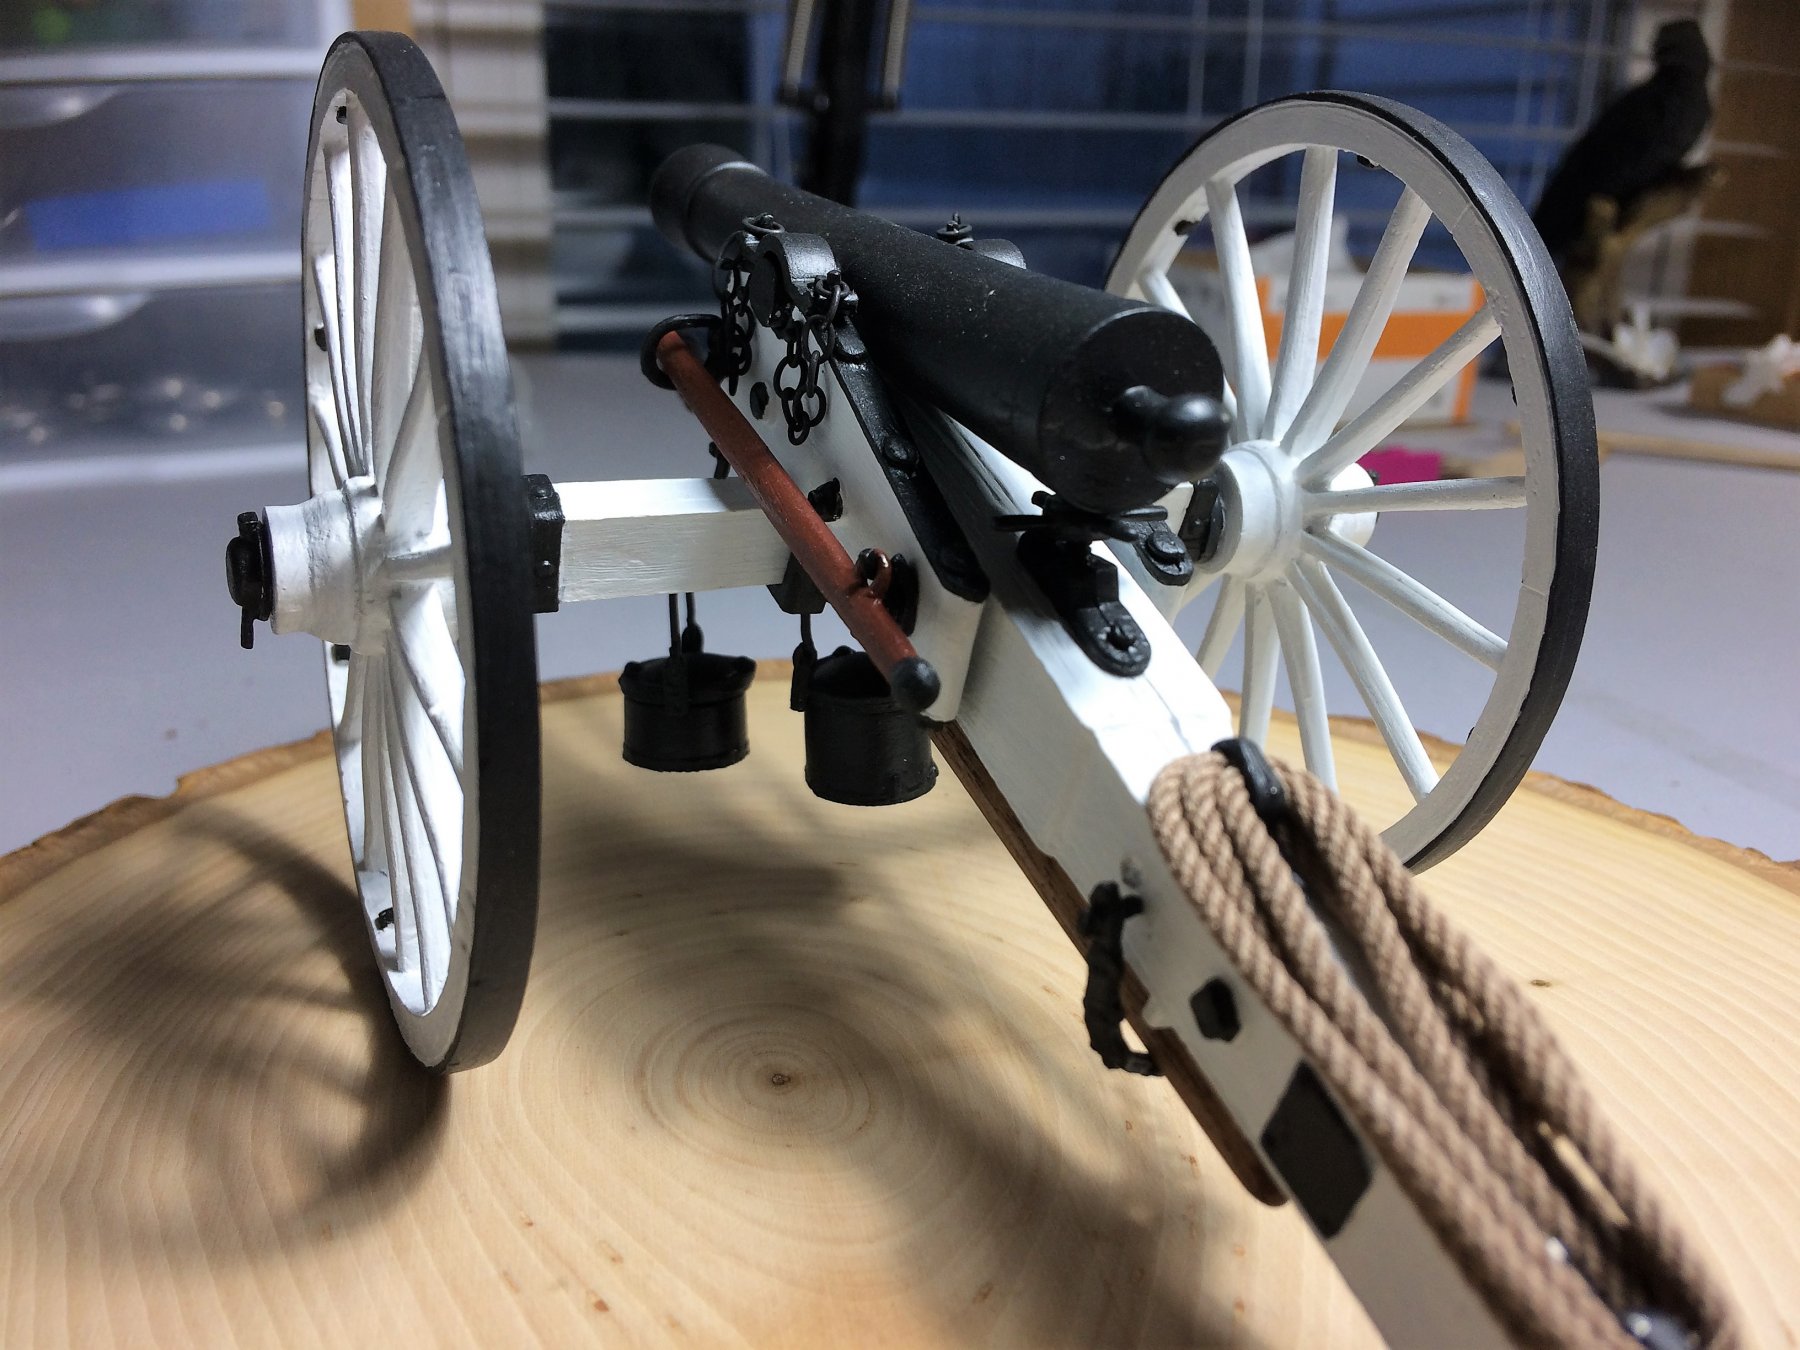
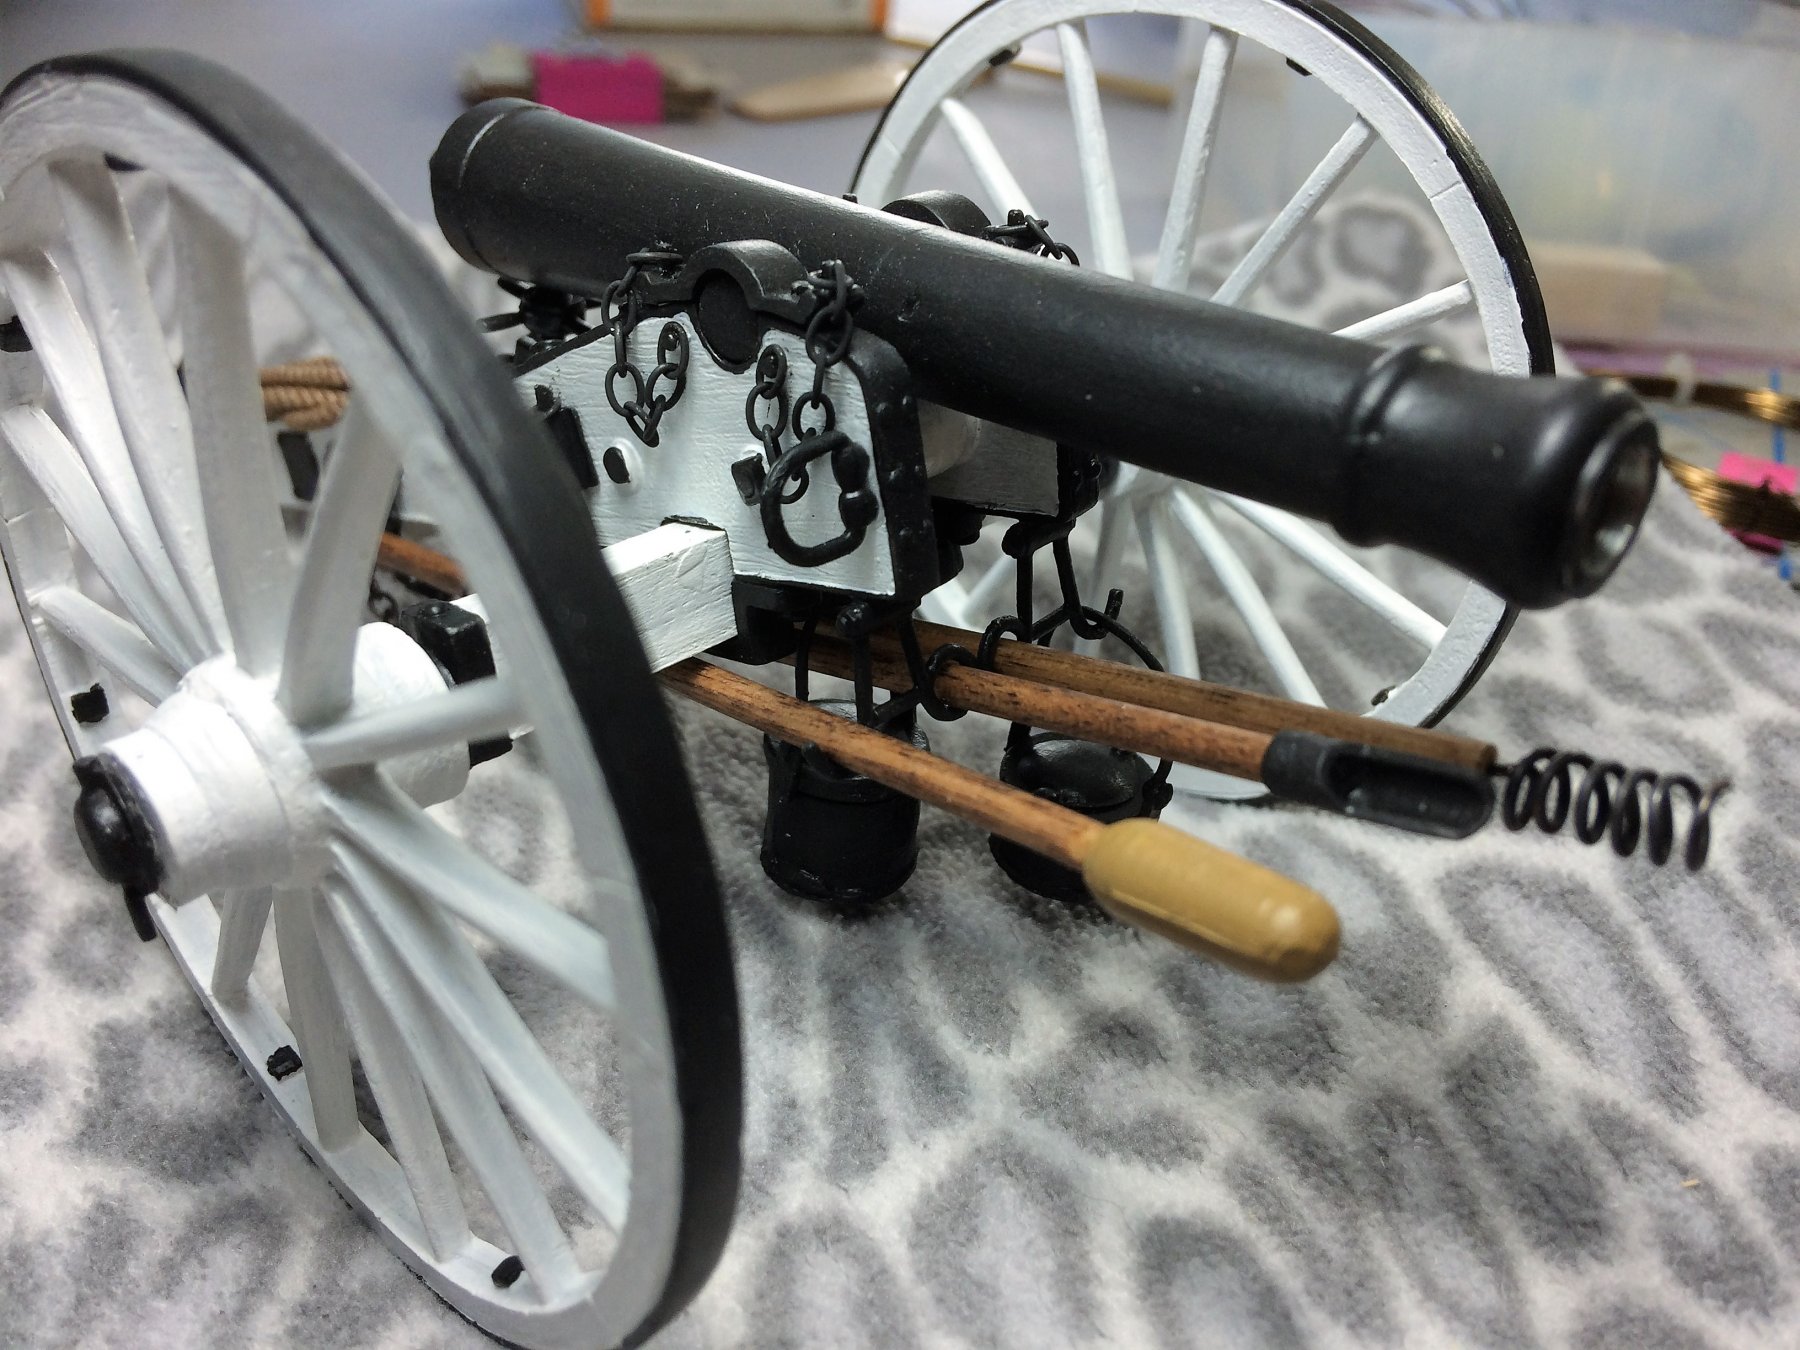
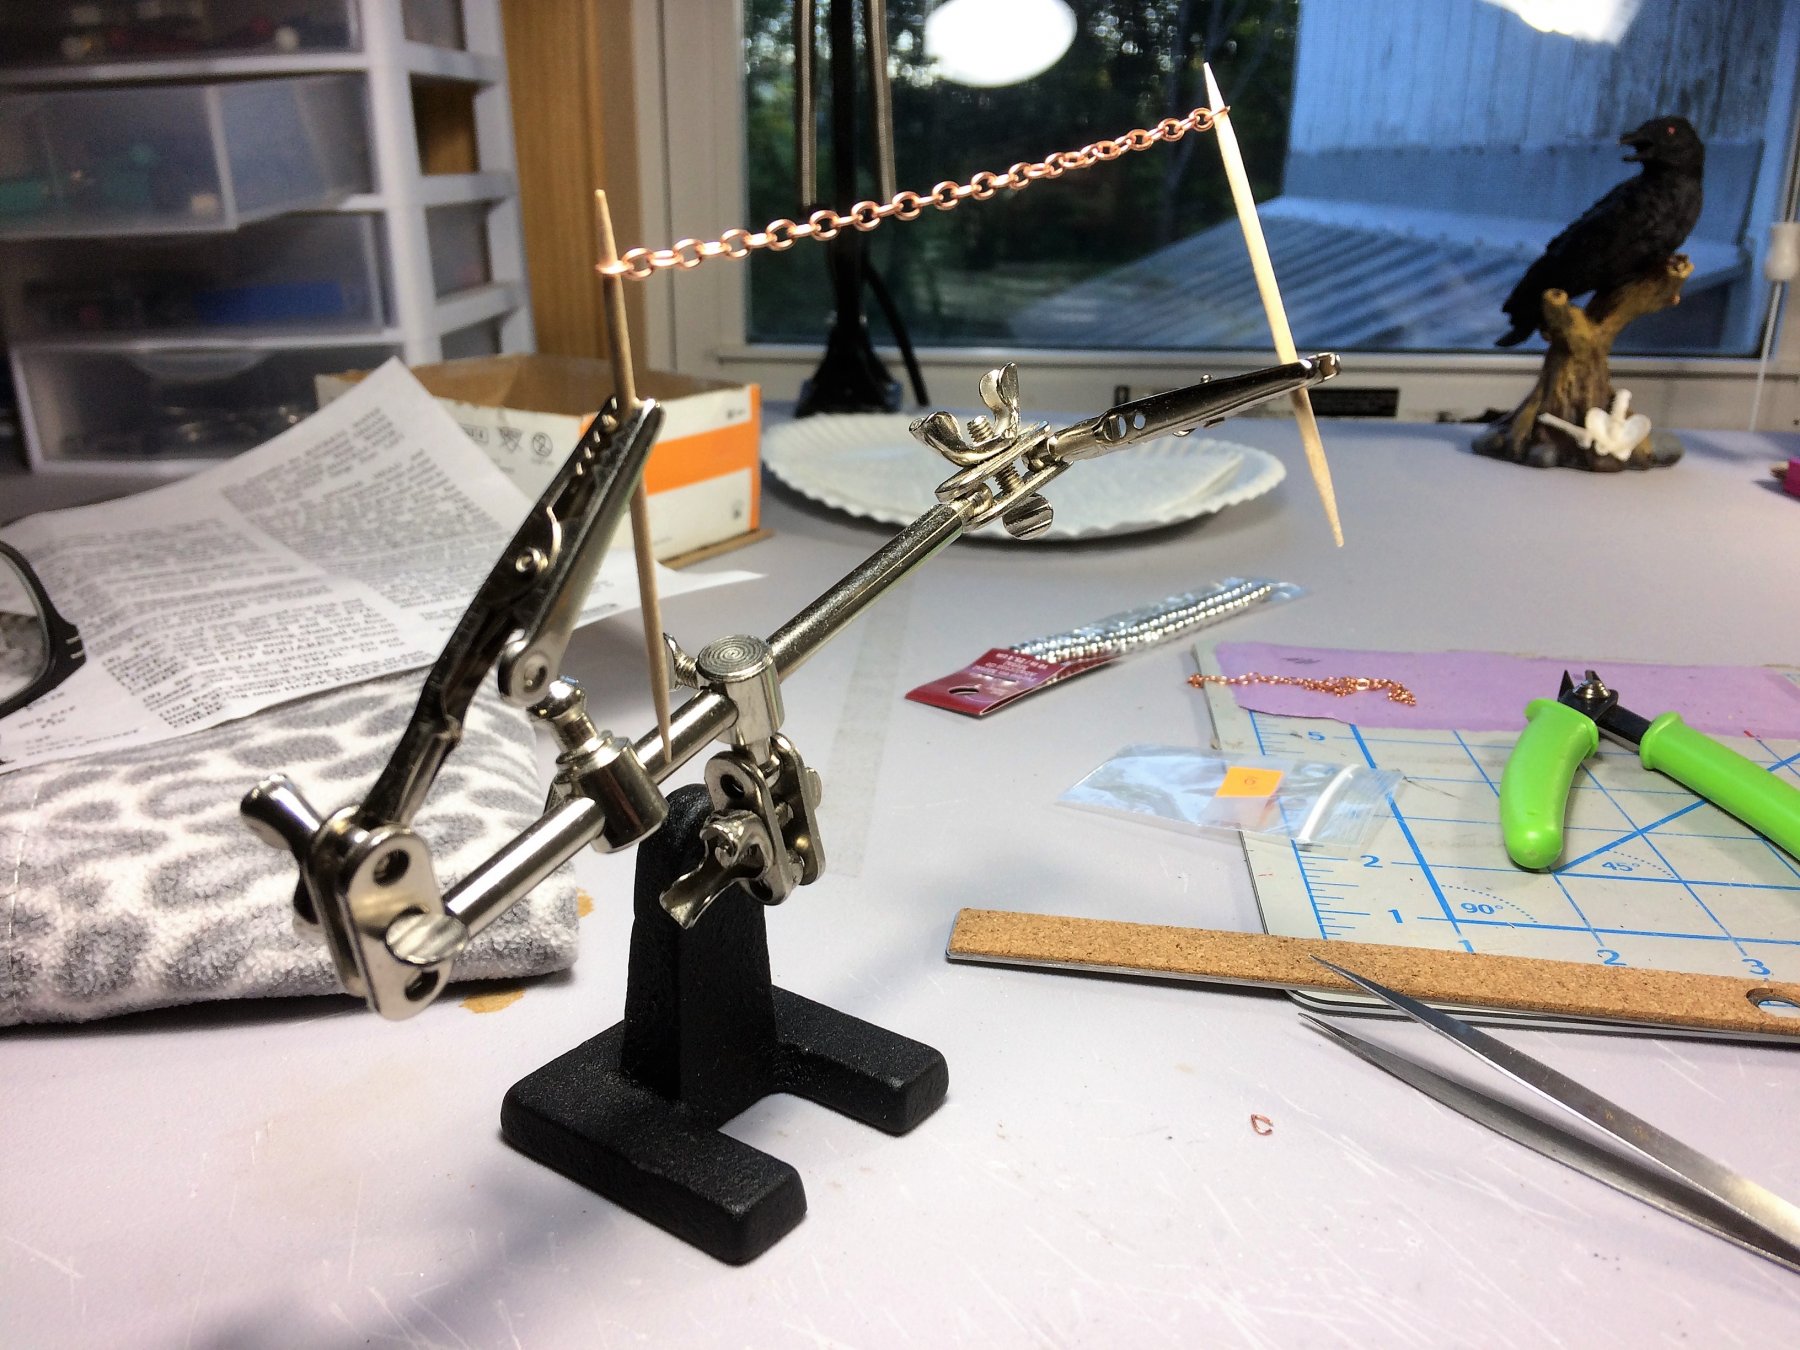
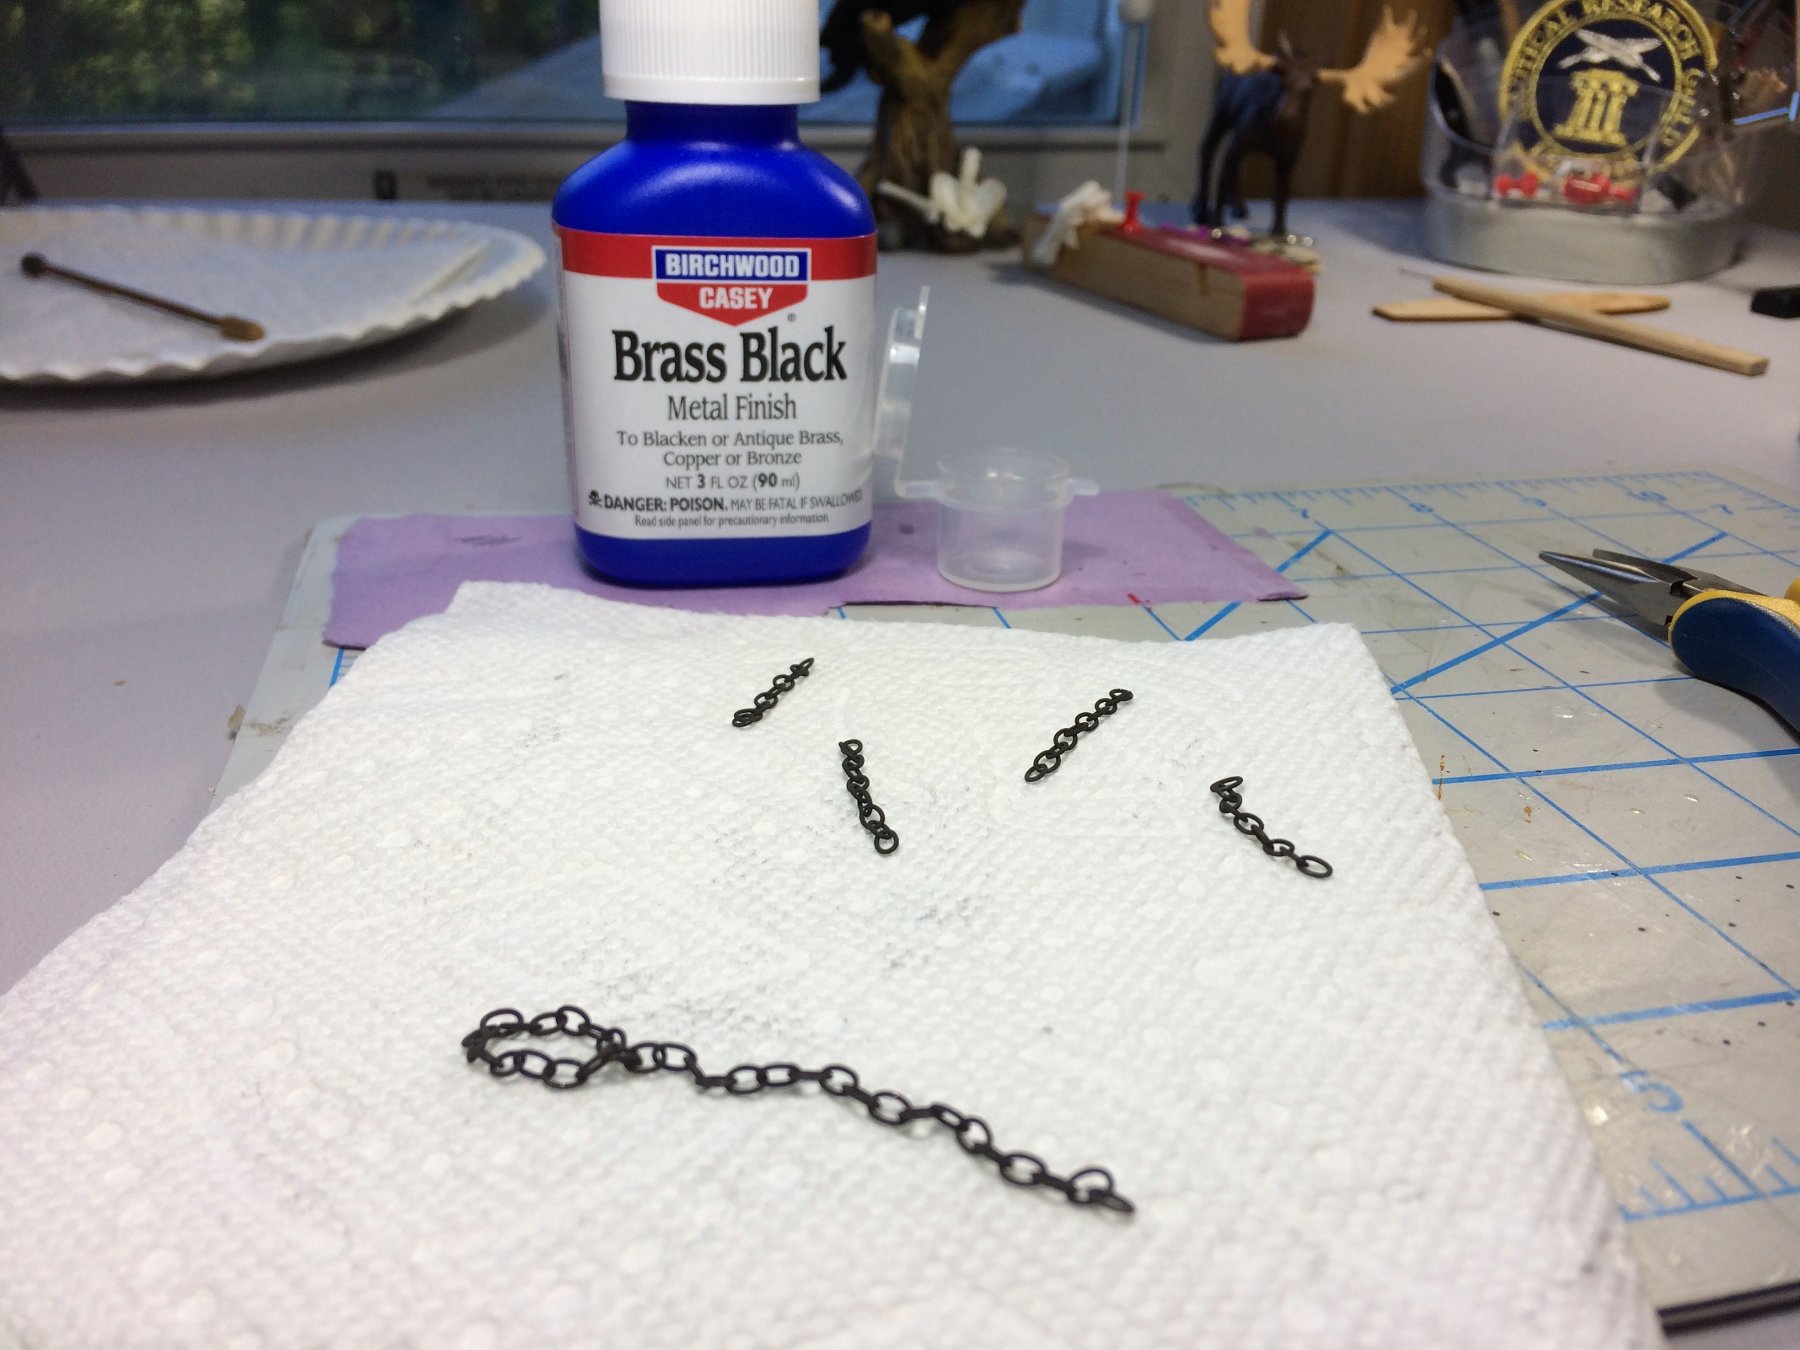
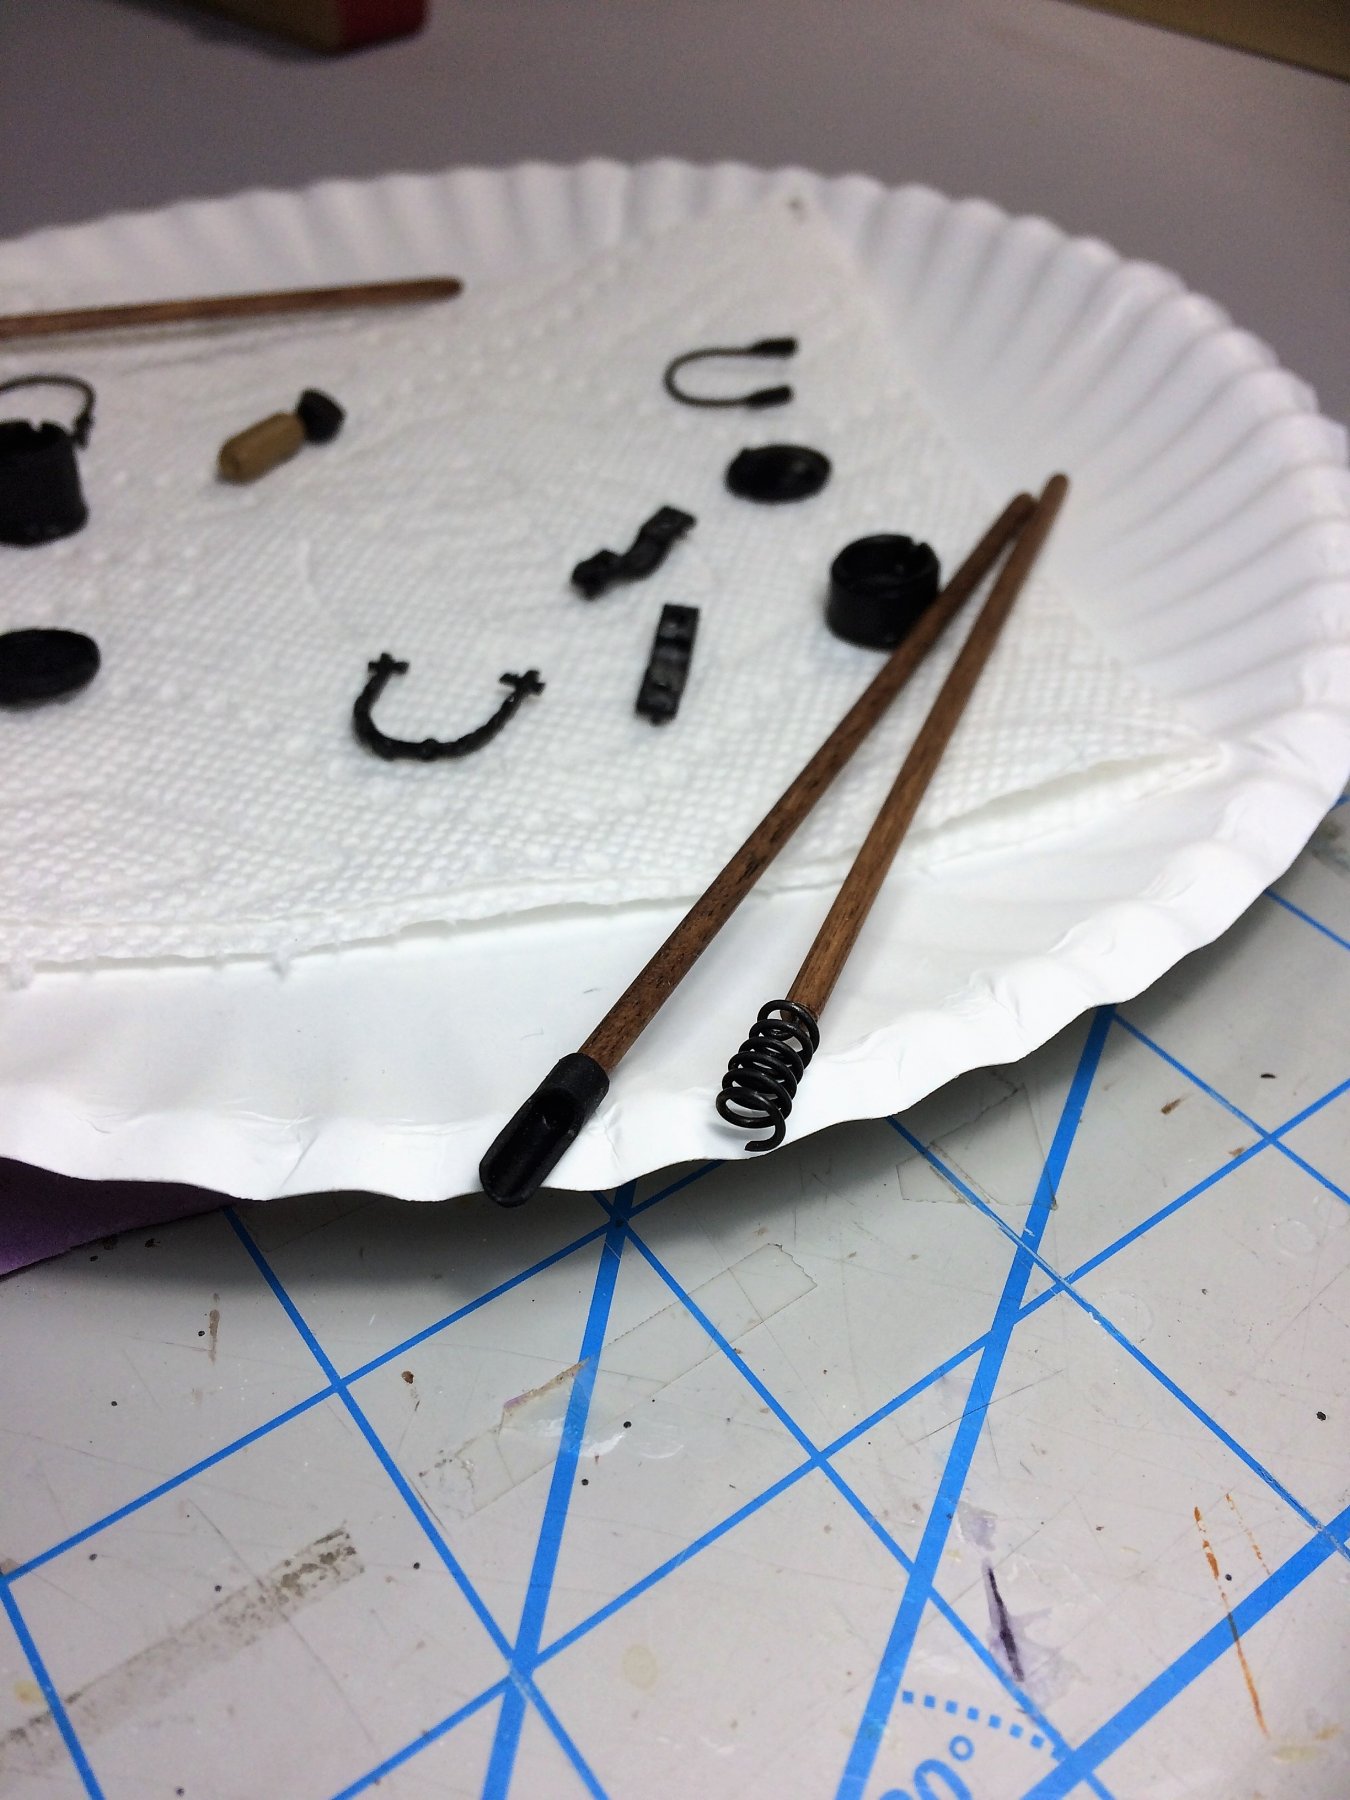
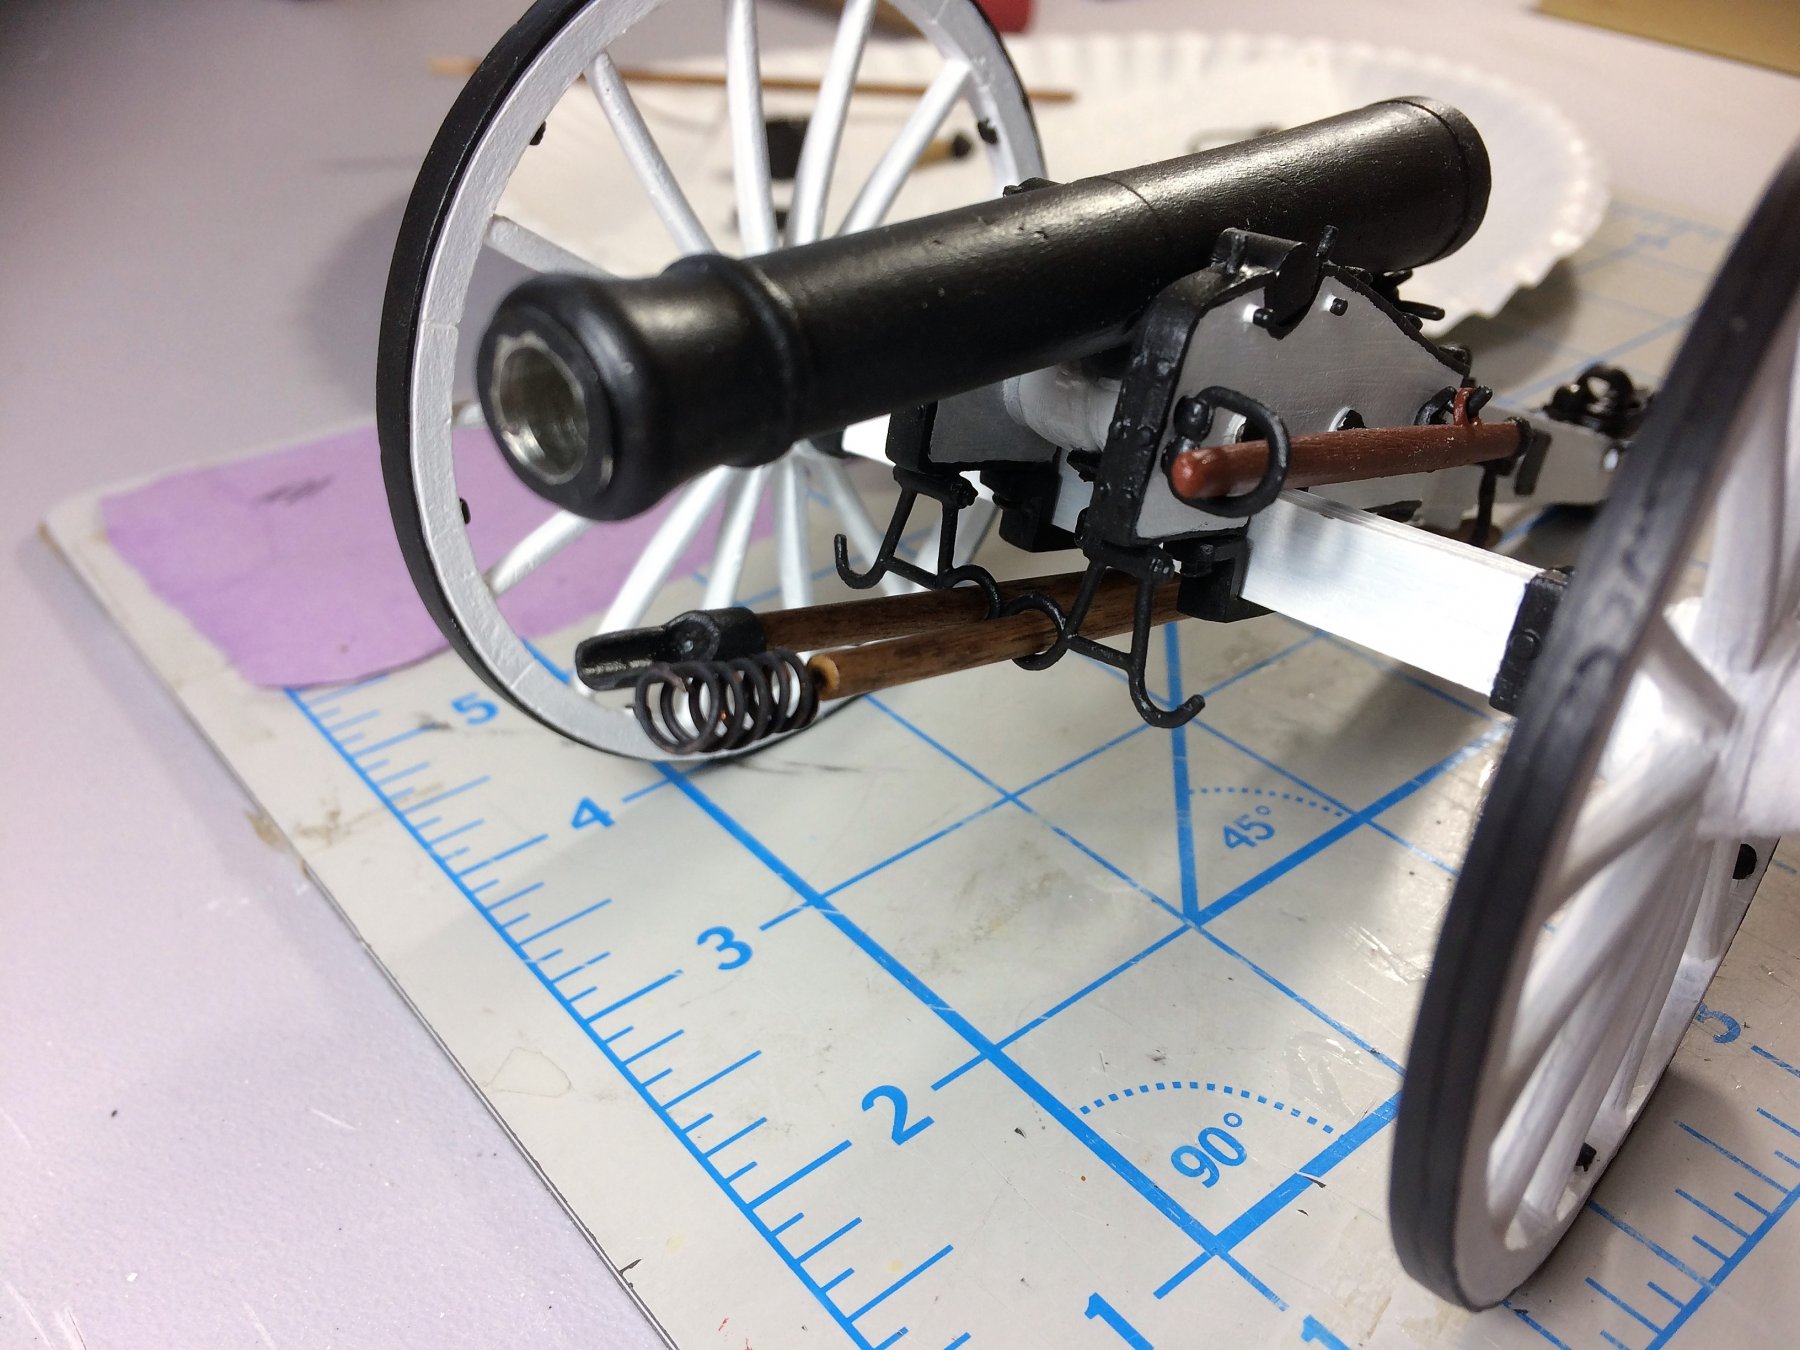
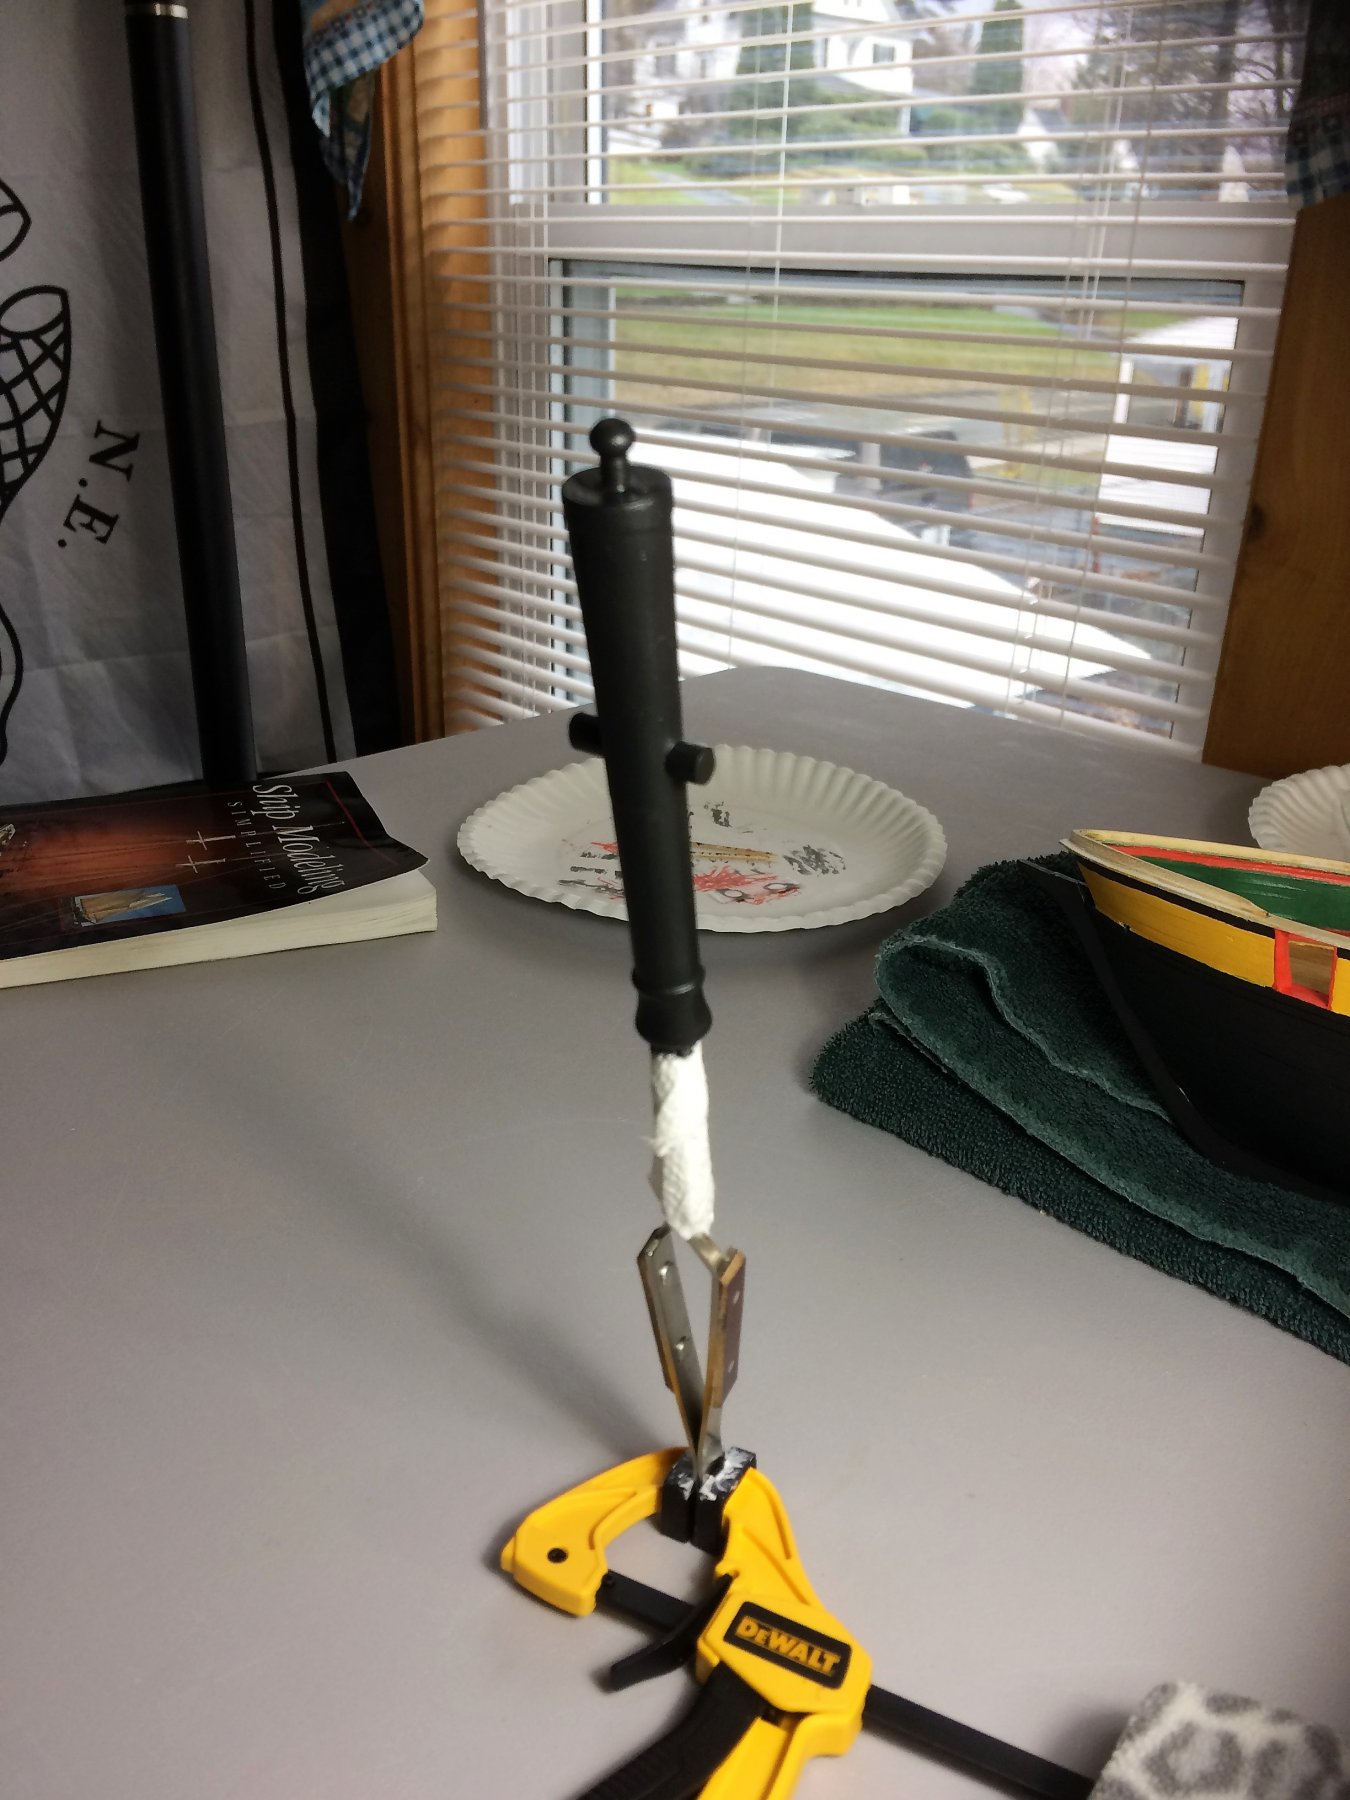
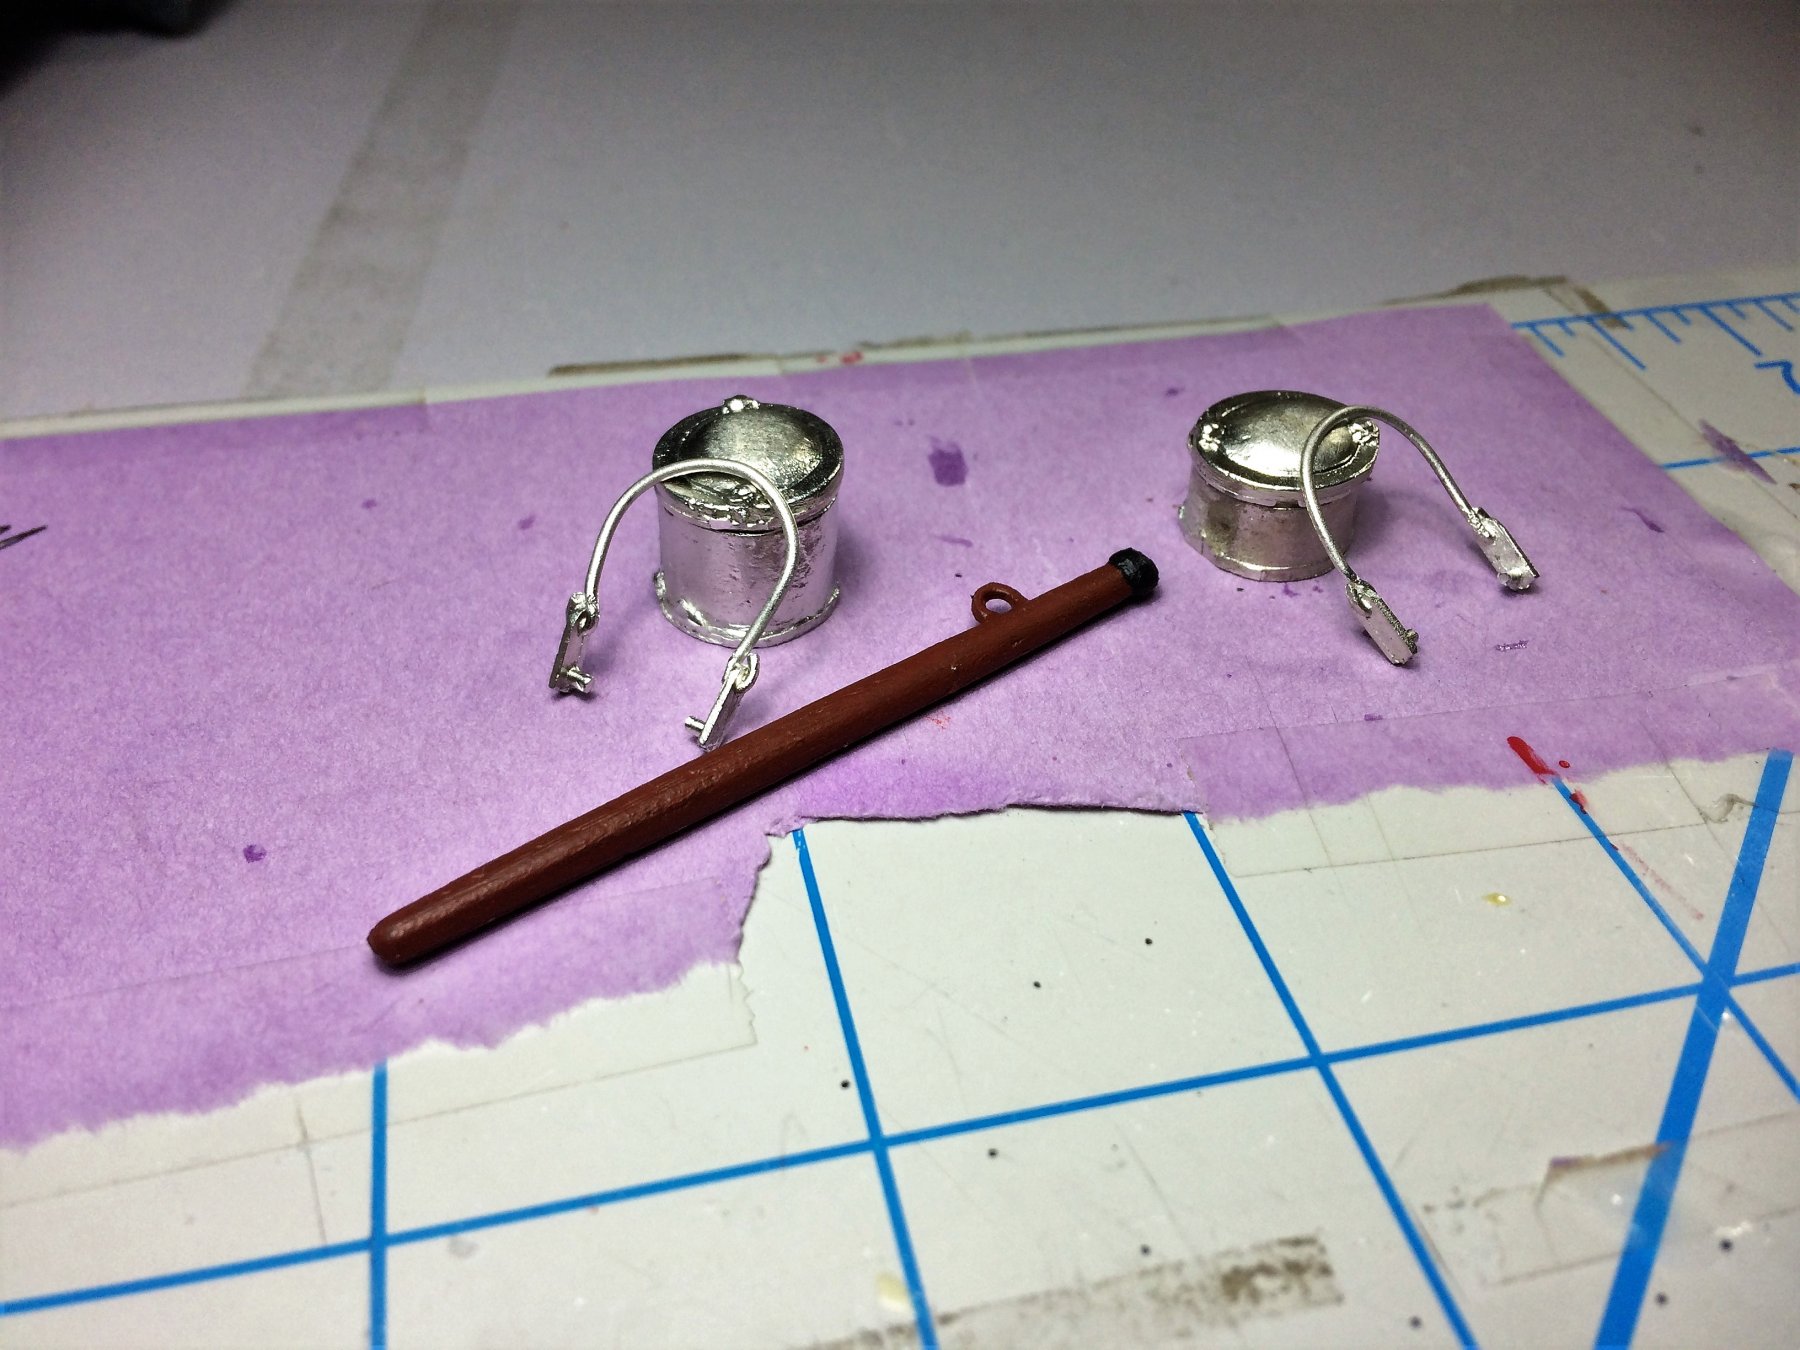
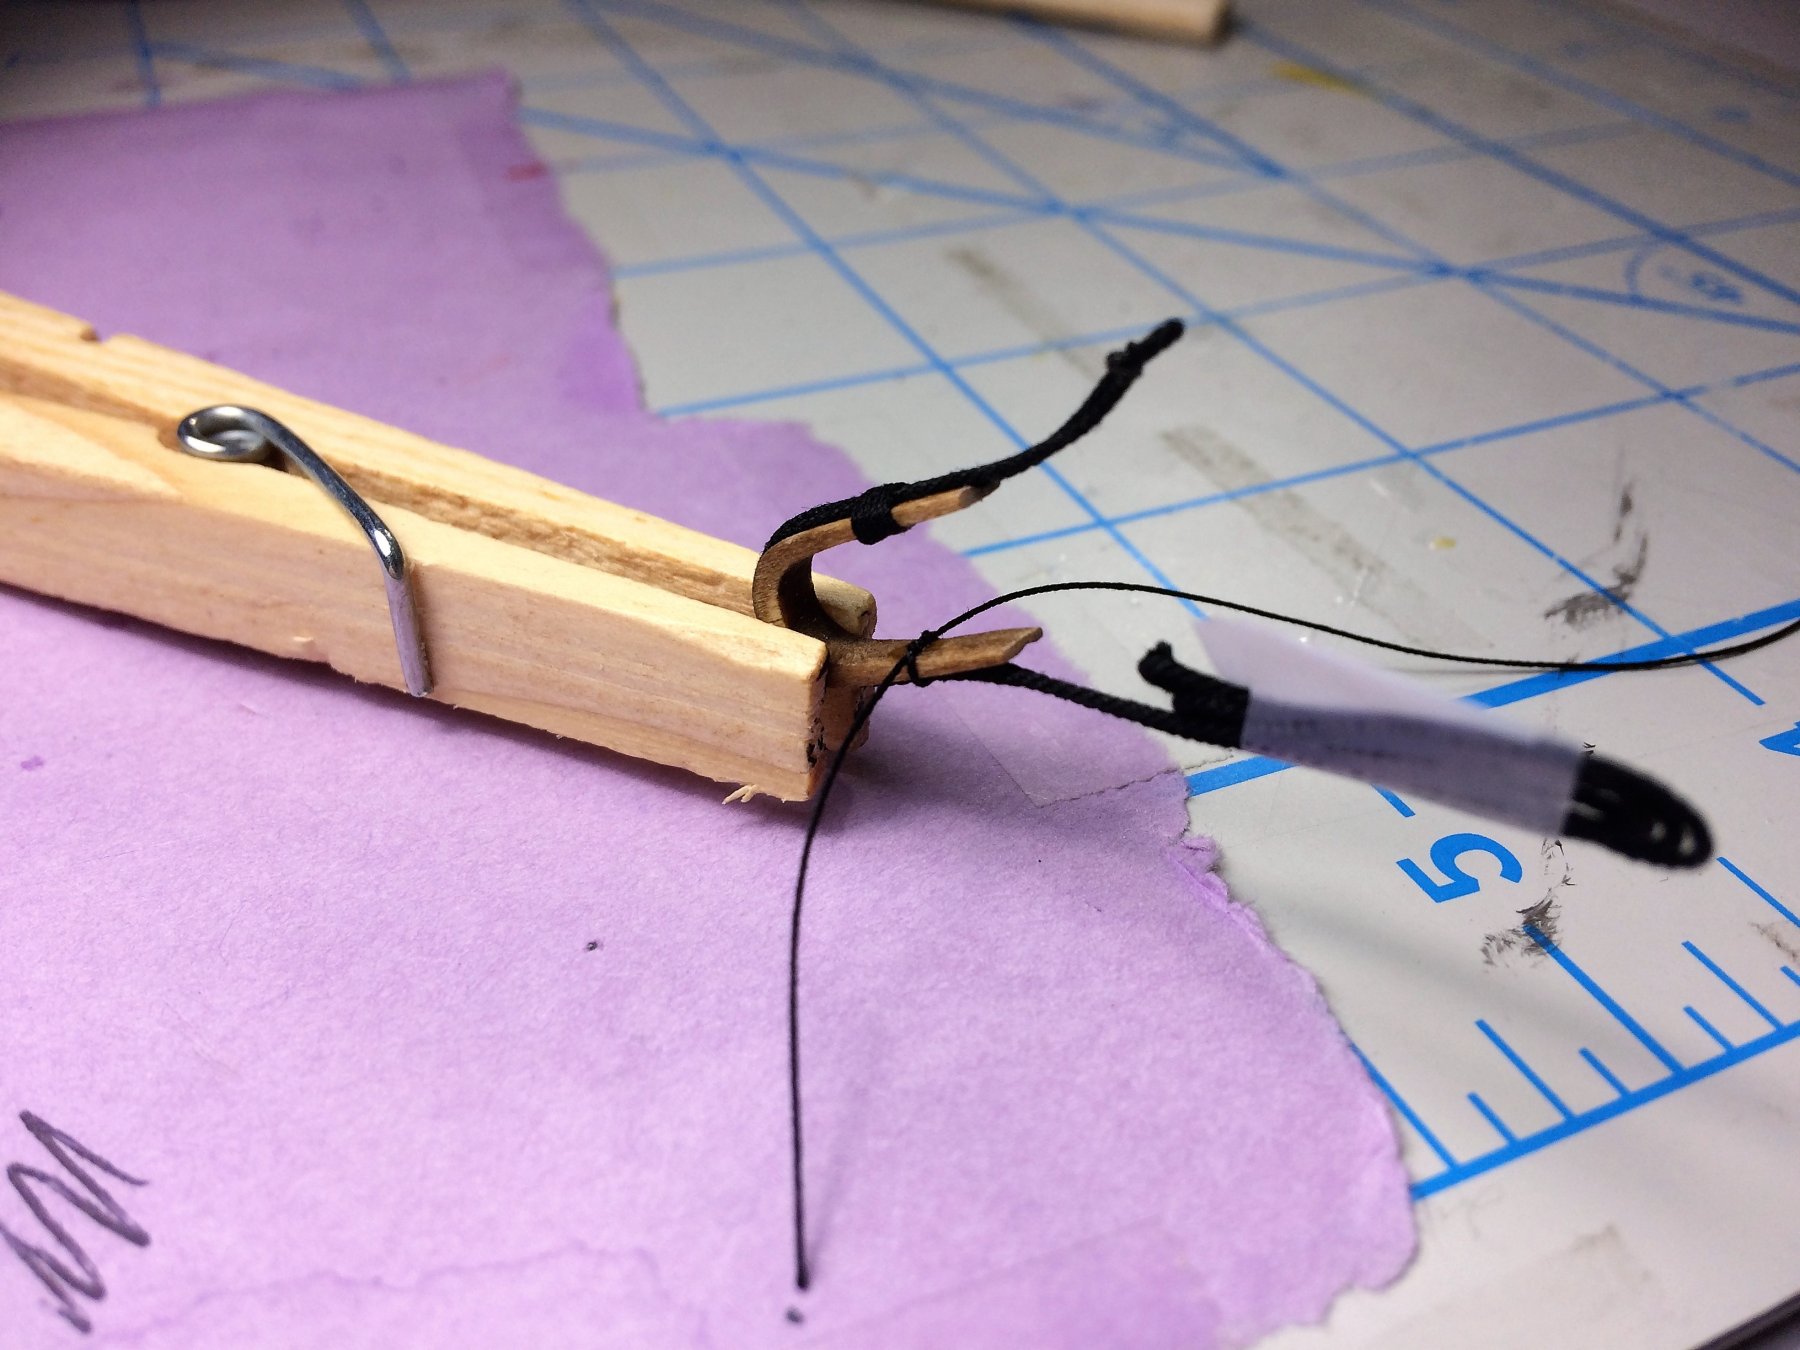
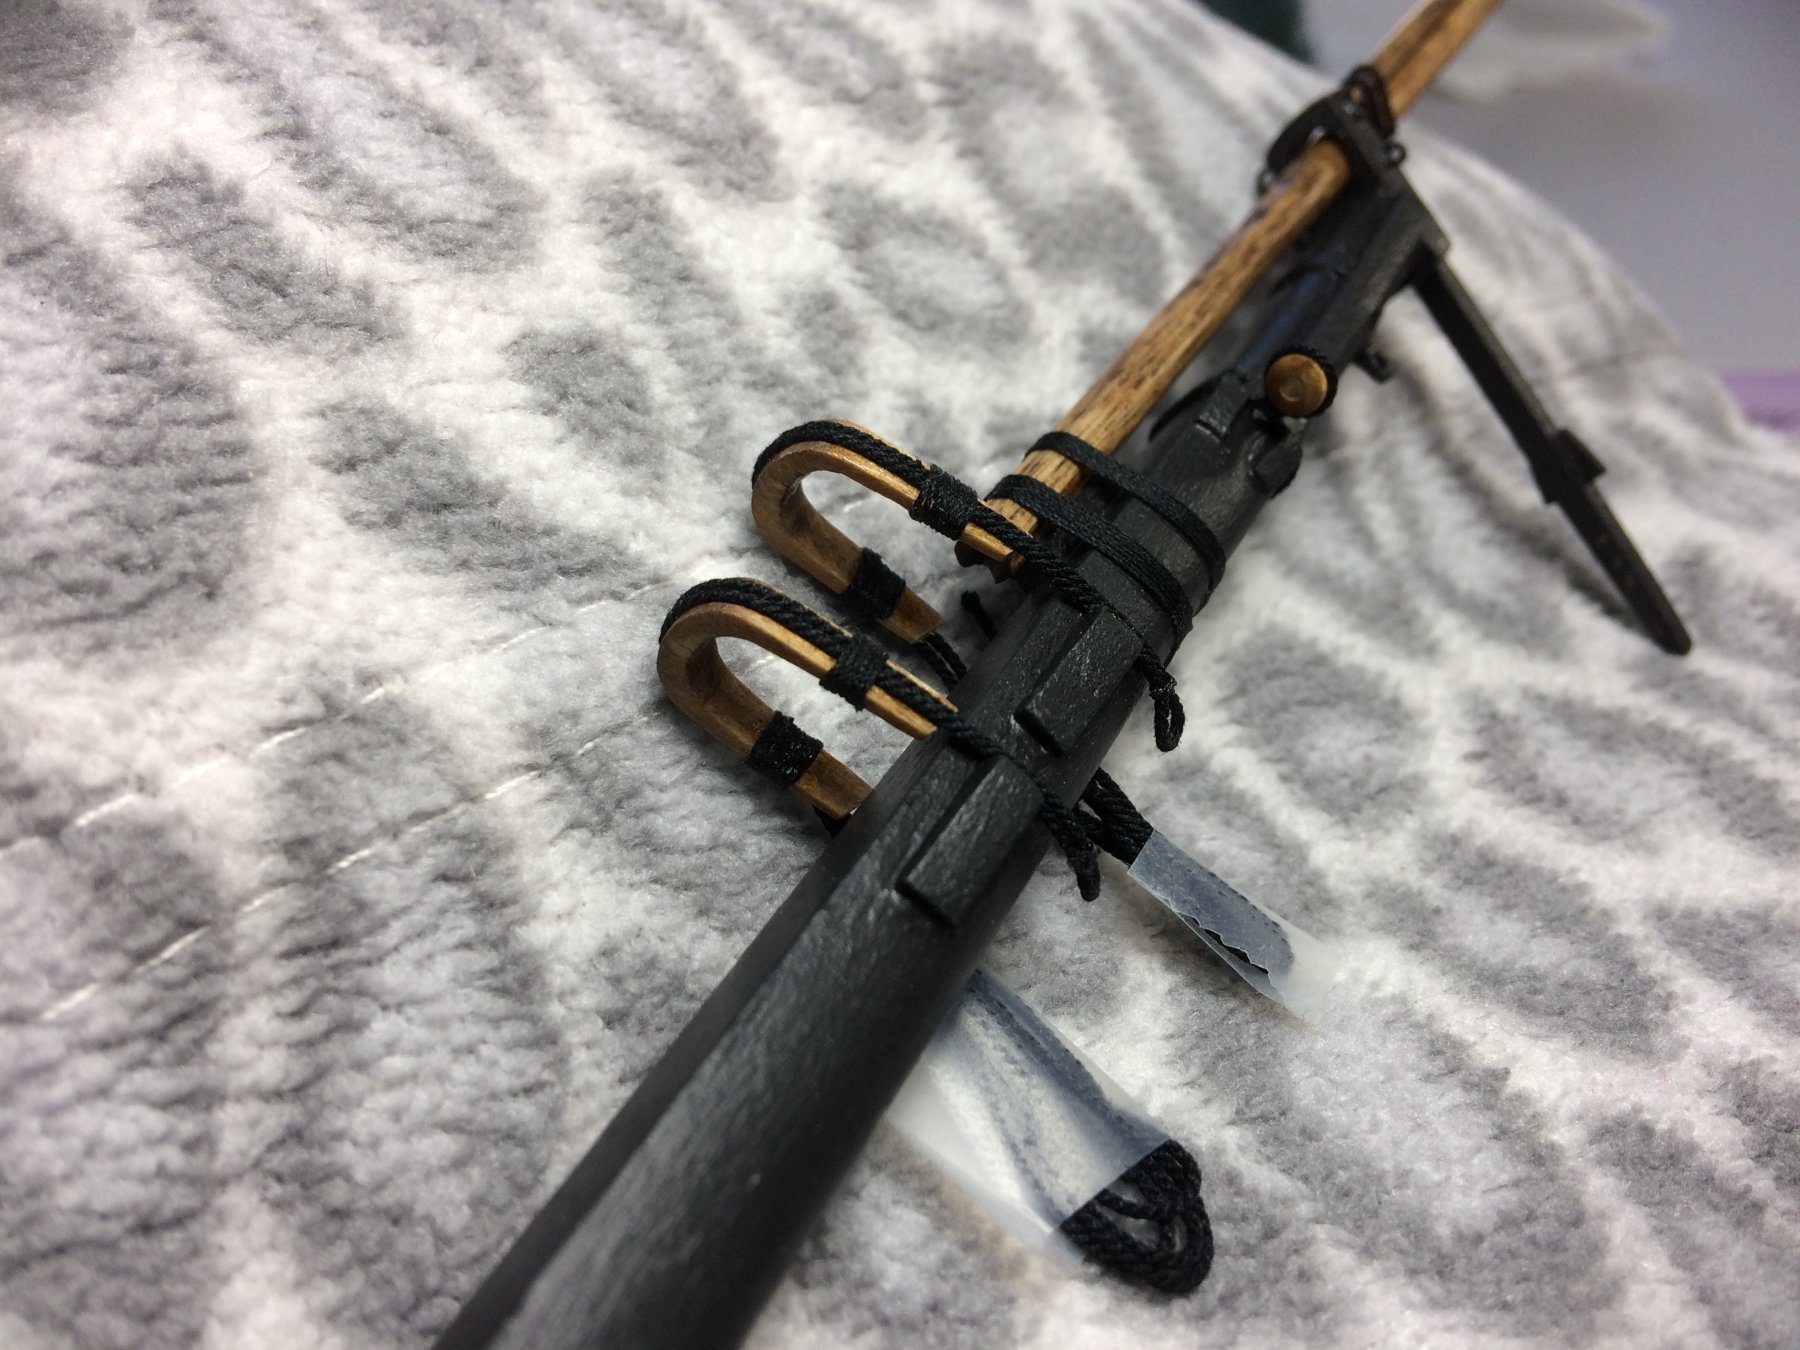
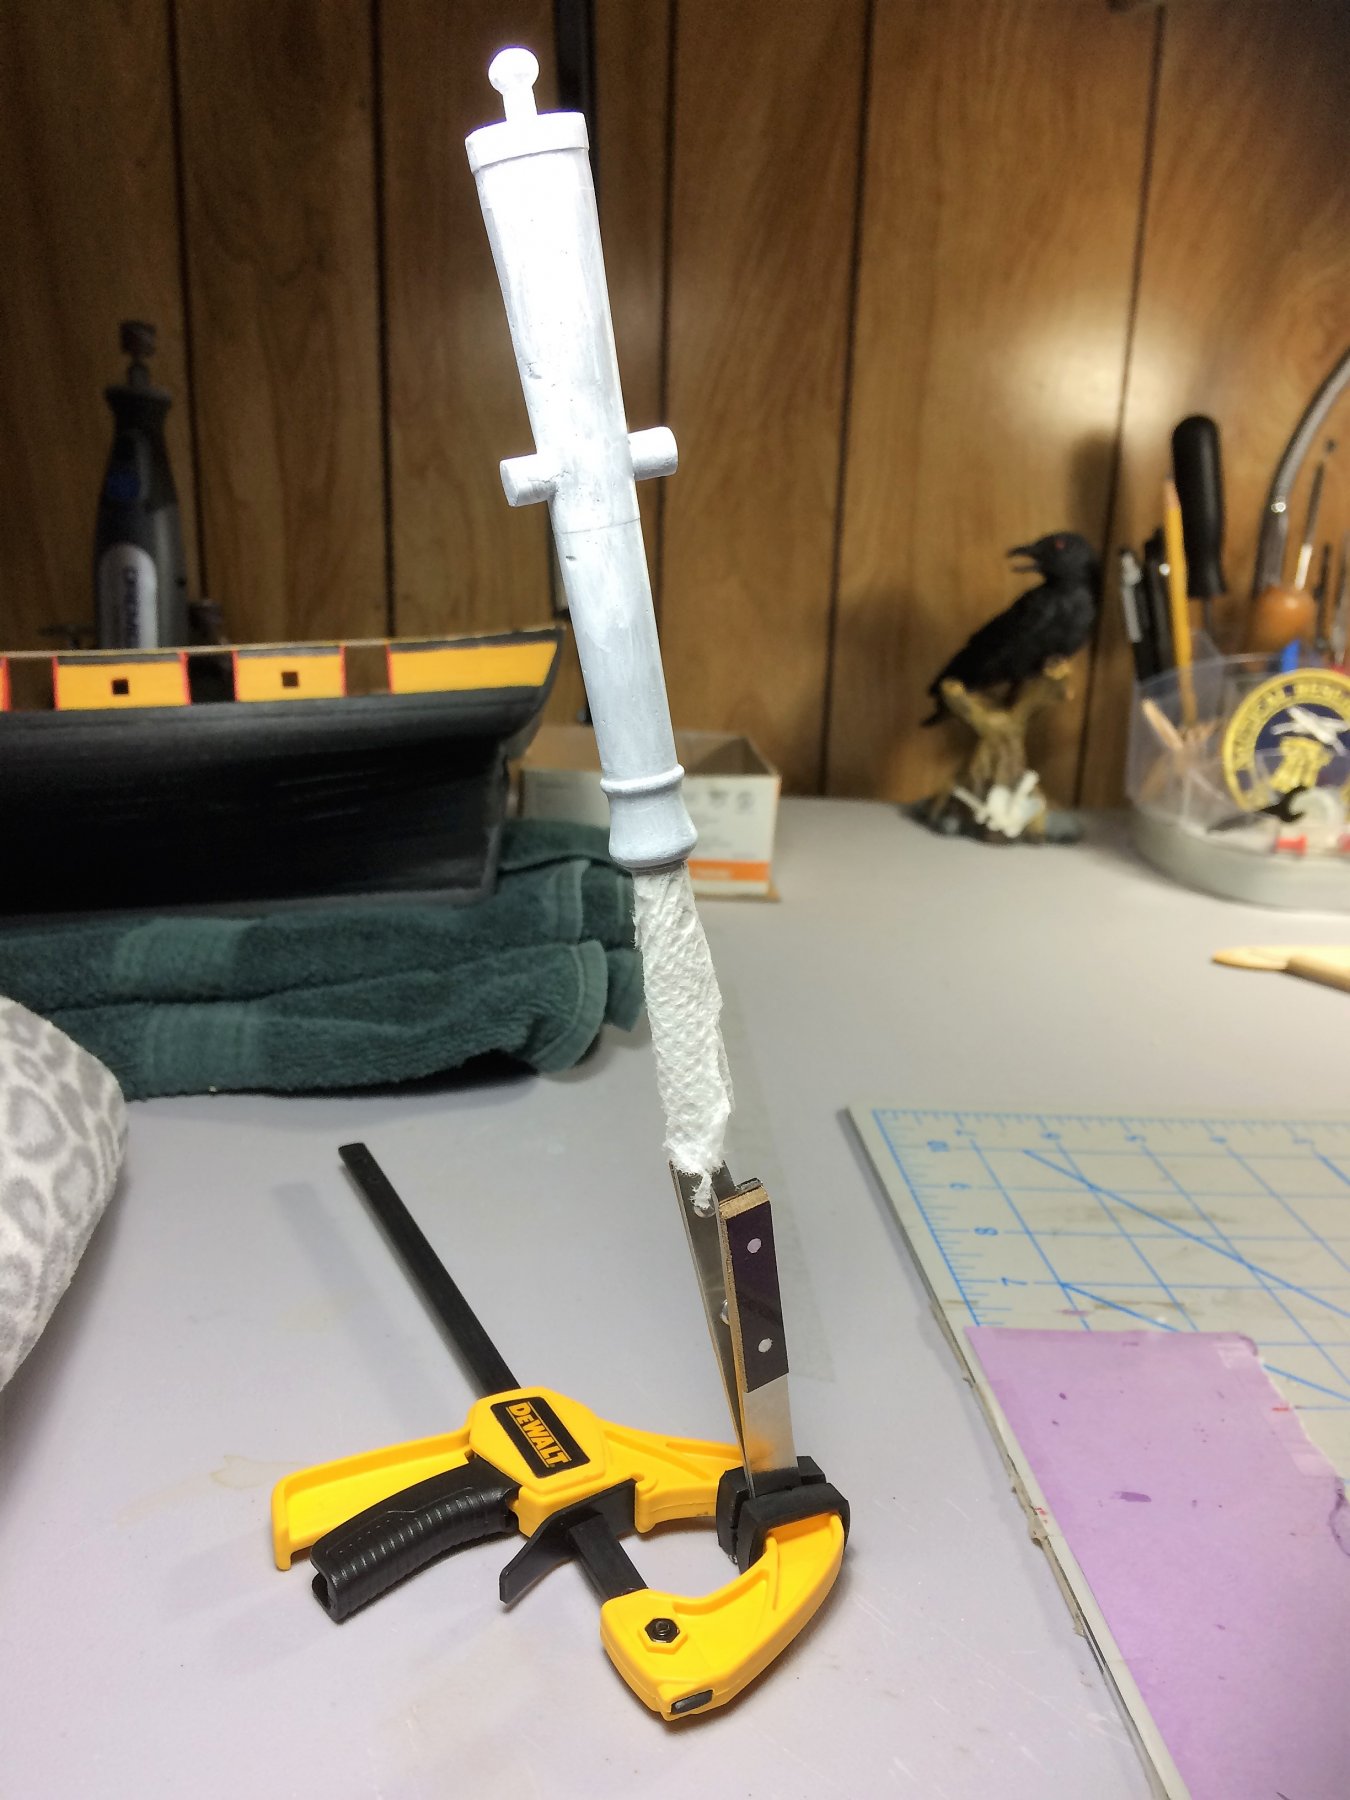
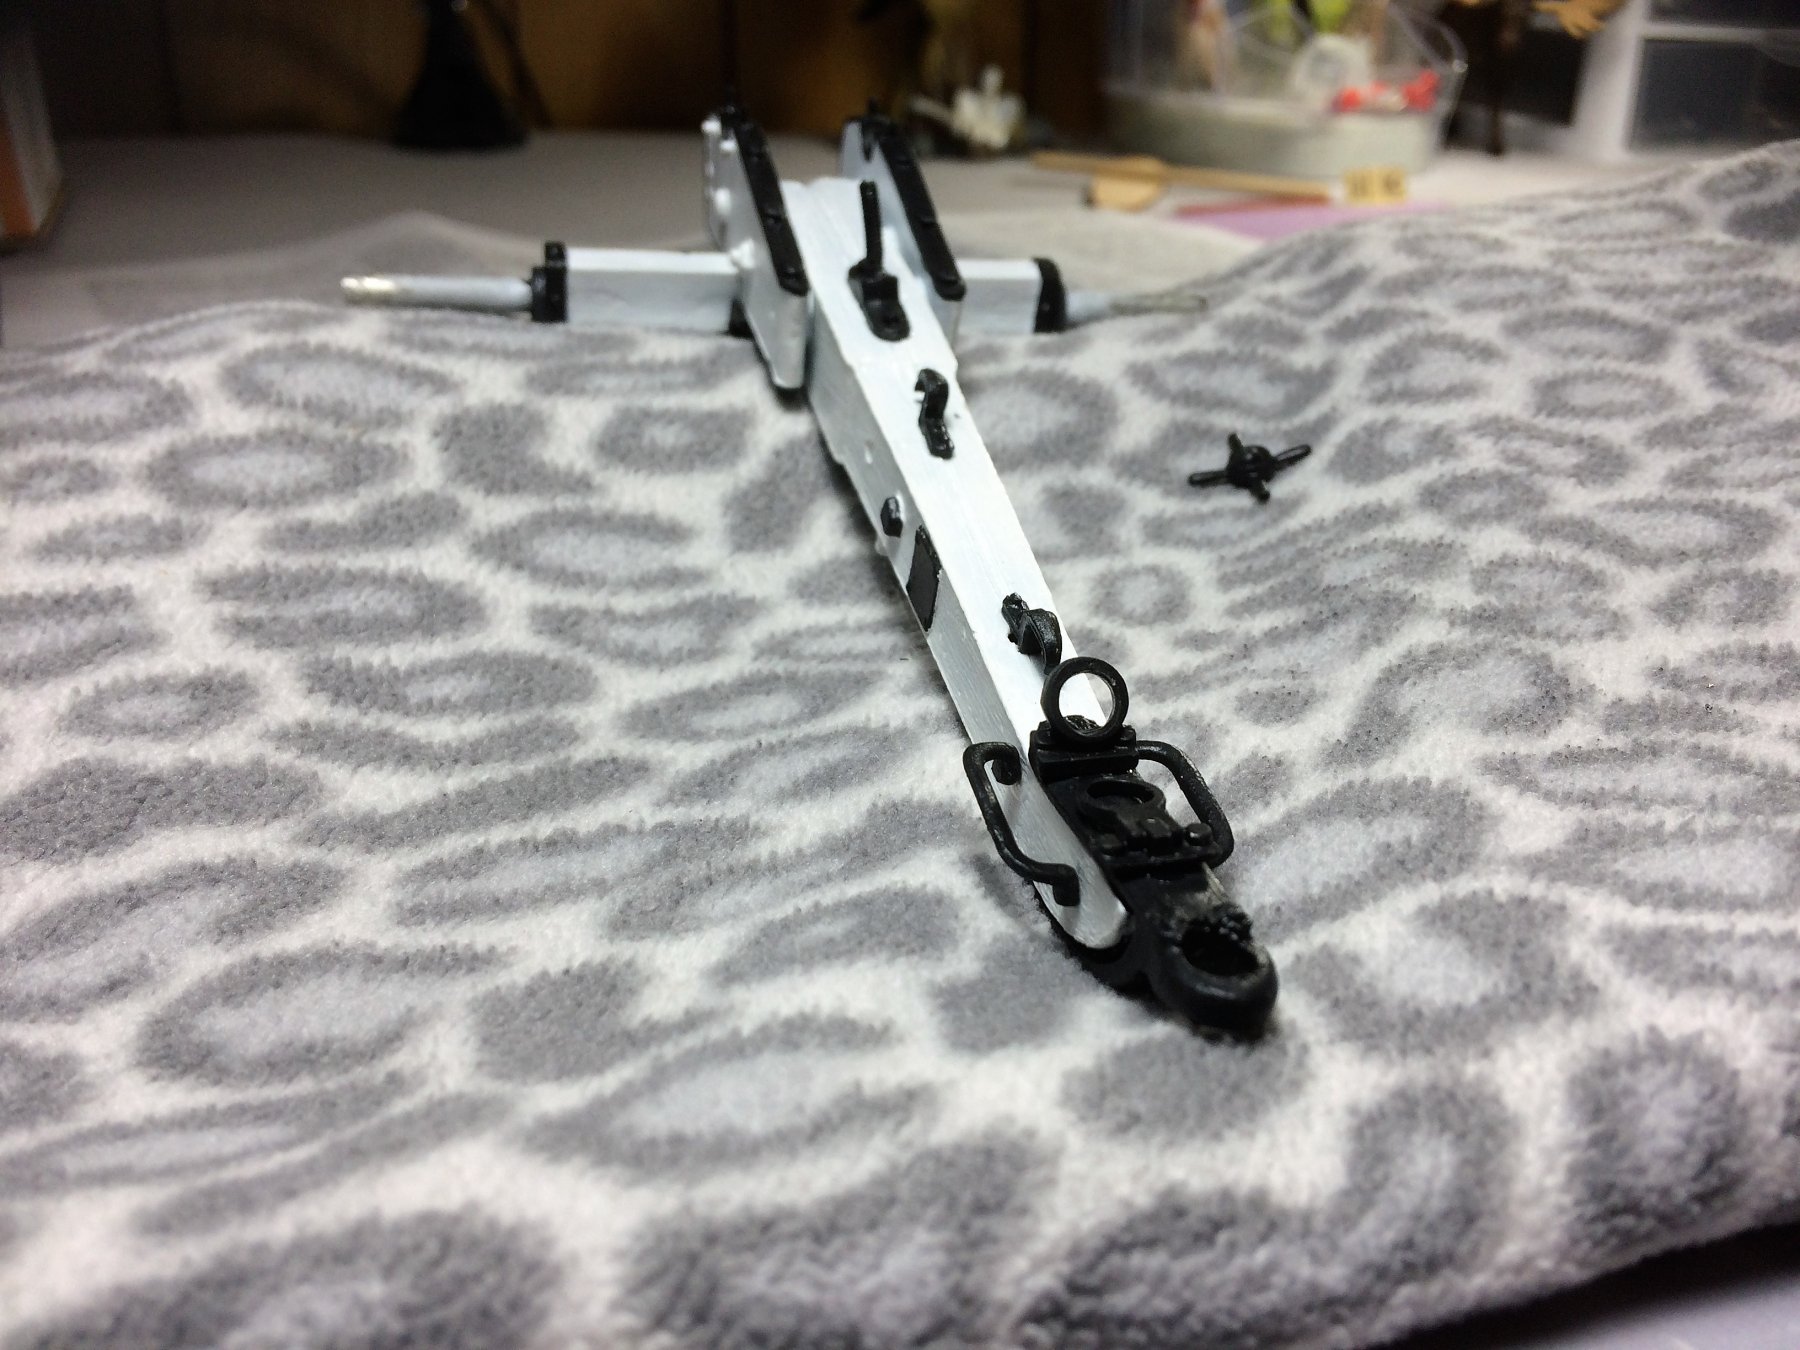
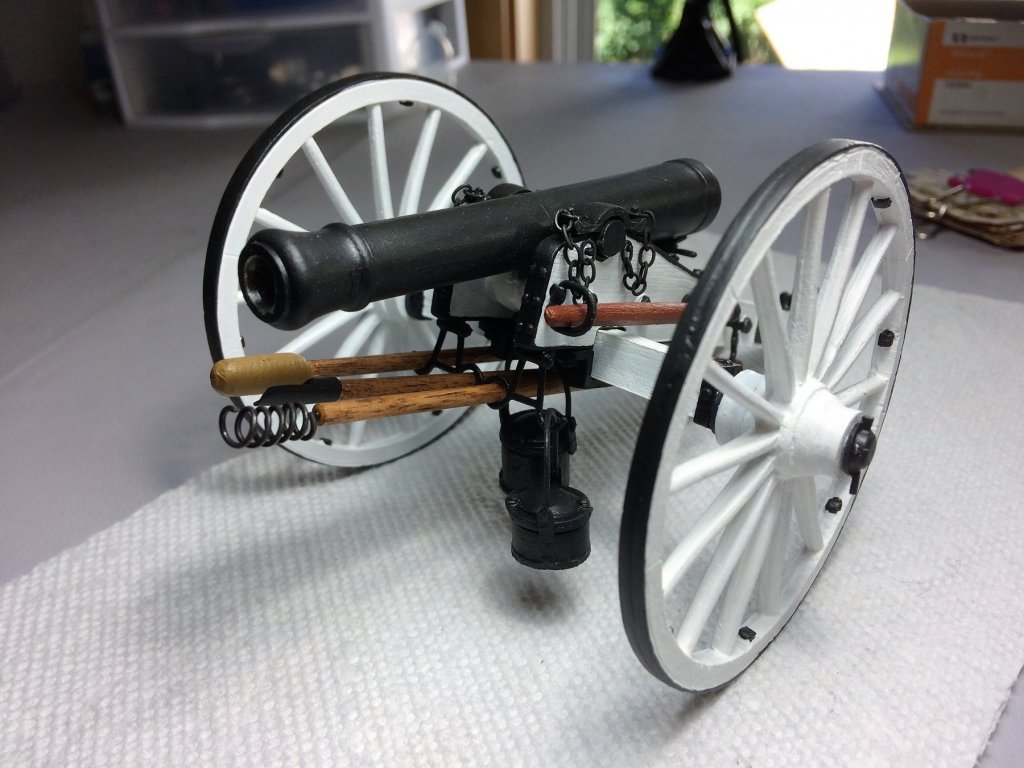
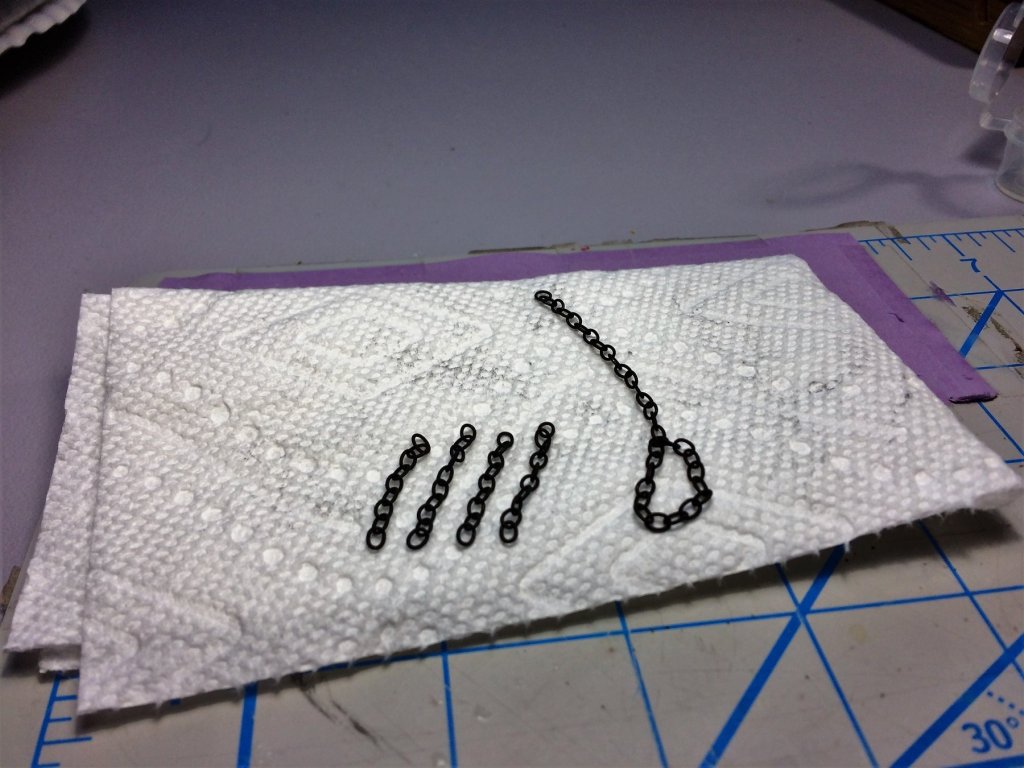
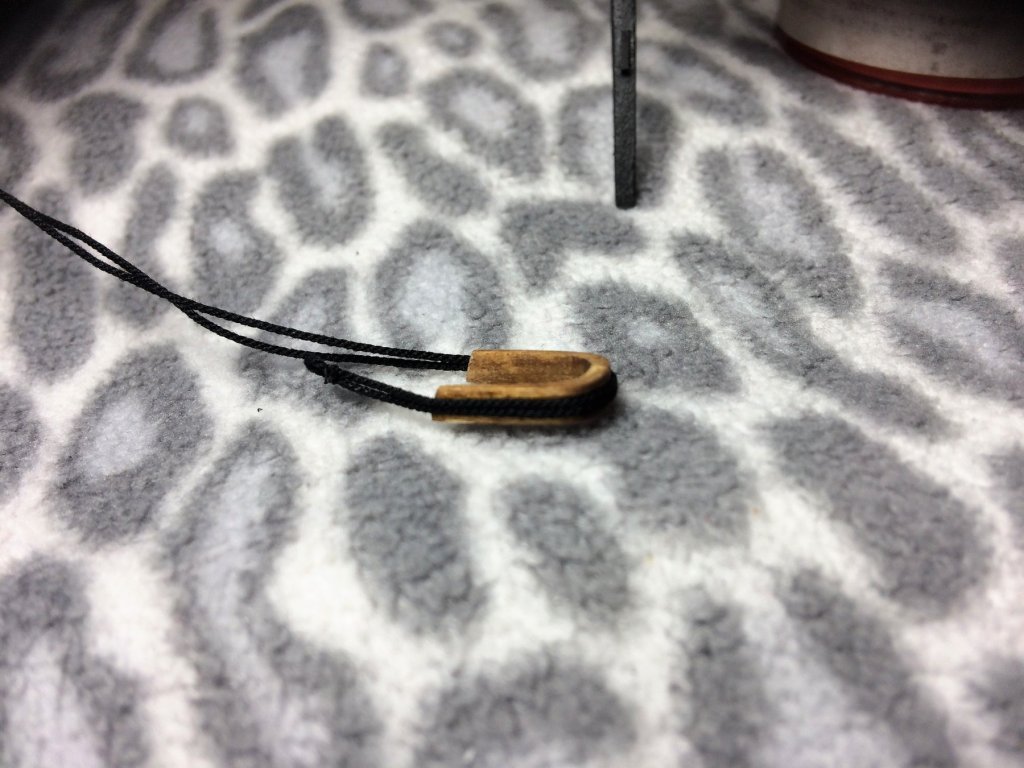
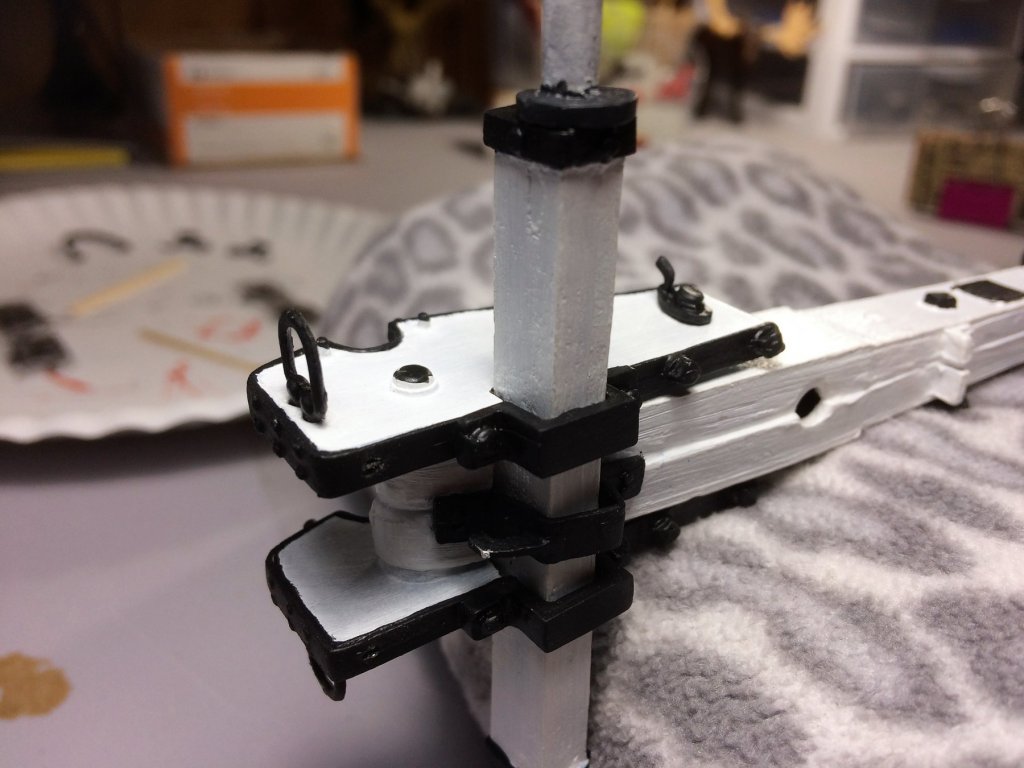
Evening, Thought I would share an update. I'm so close to finishing, I can smell it! But, that might just be paint/glue I'm smelling! The buckets and the Sponge/Rammer are done. With the Worm and Scoop. There are a few lengths of chain attached to the main body of the cannon. I concocted the below Jig to hold a length of supplied brass chain that will eventually be attached back to itself forming a loop. A few other smaller lengths were measured out and blackened. We'll let these dry for a spell. Tom E


-
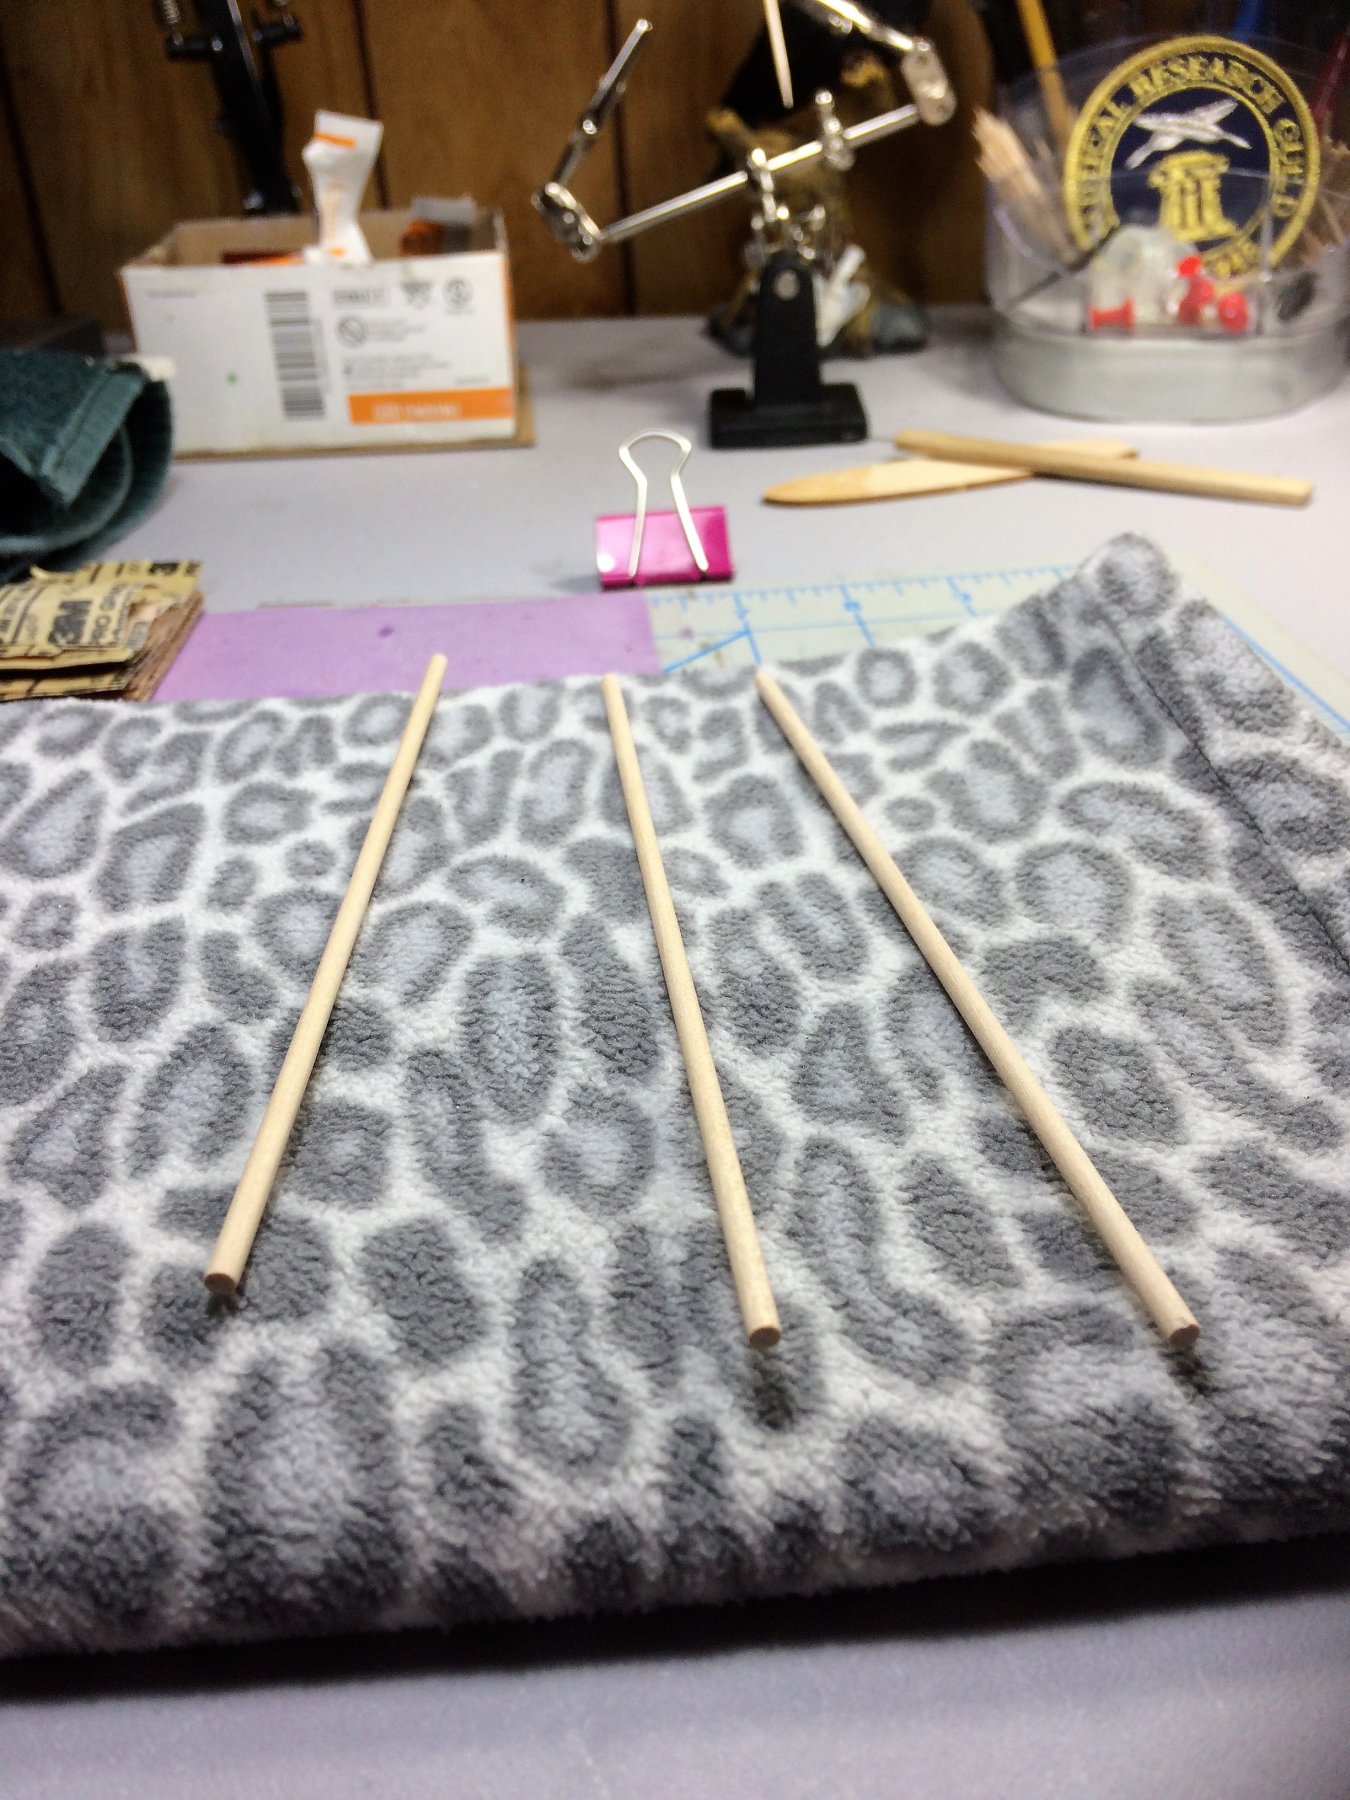
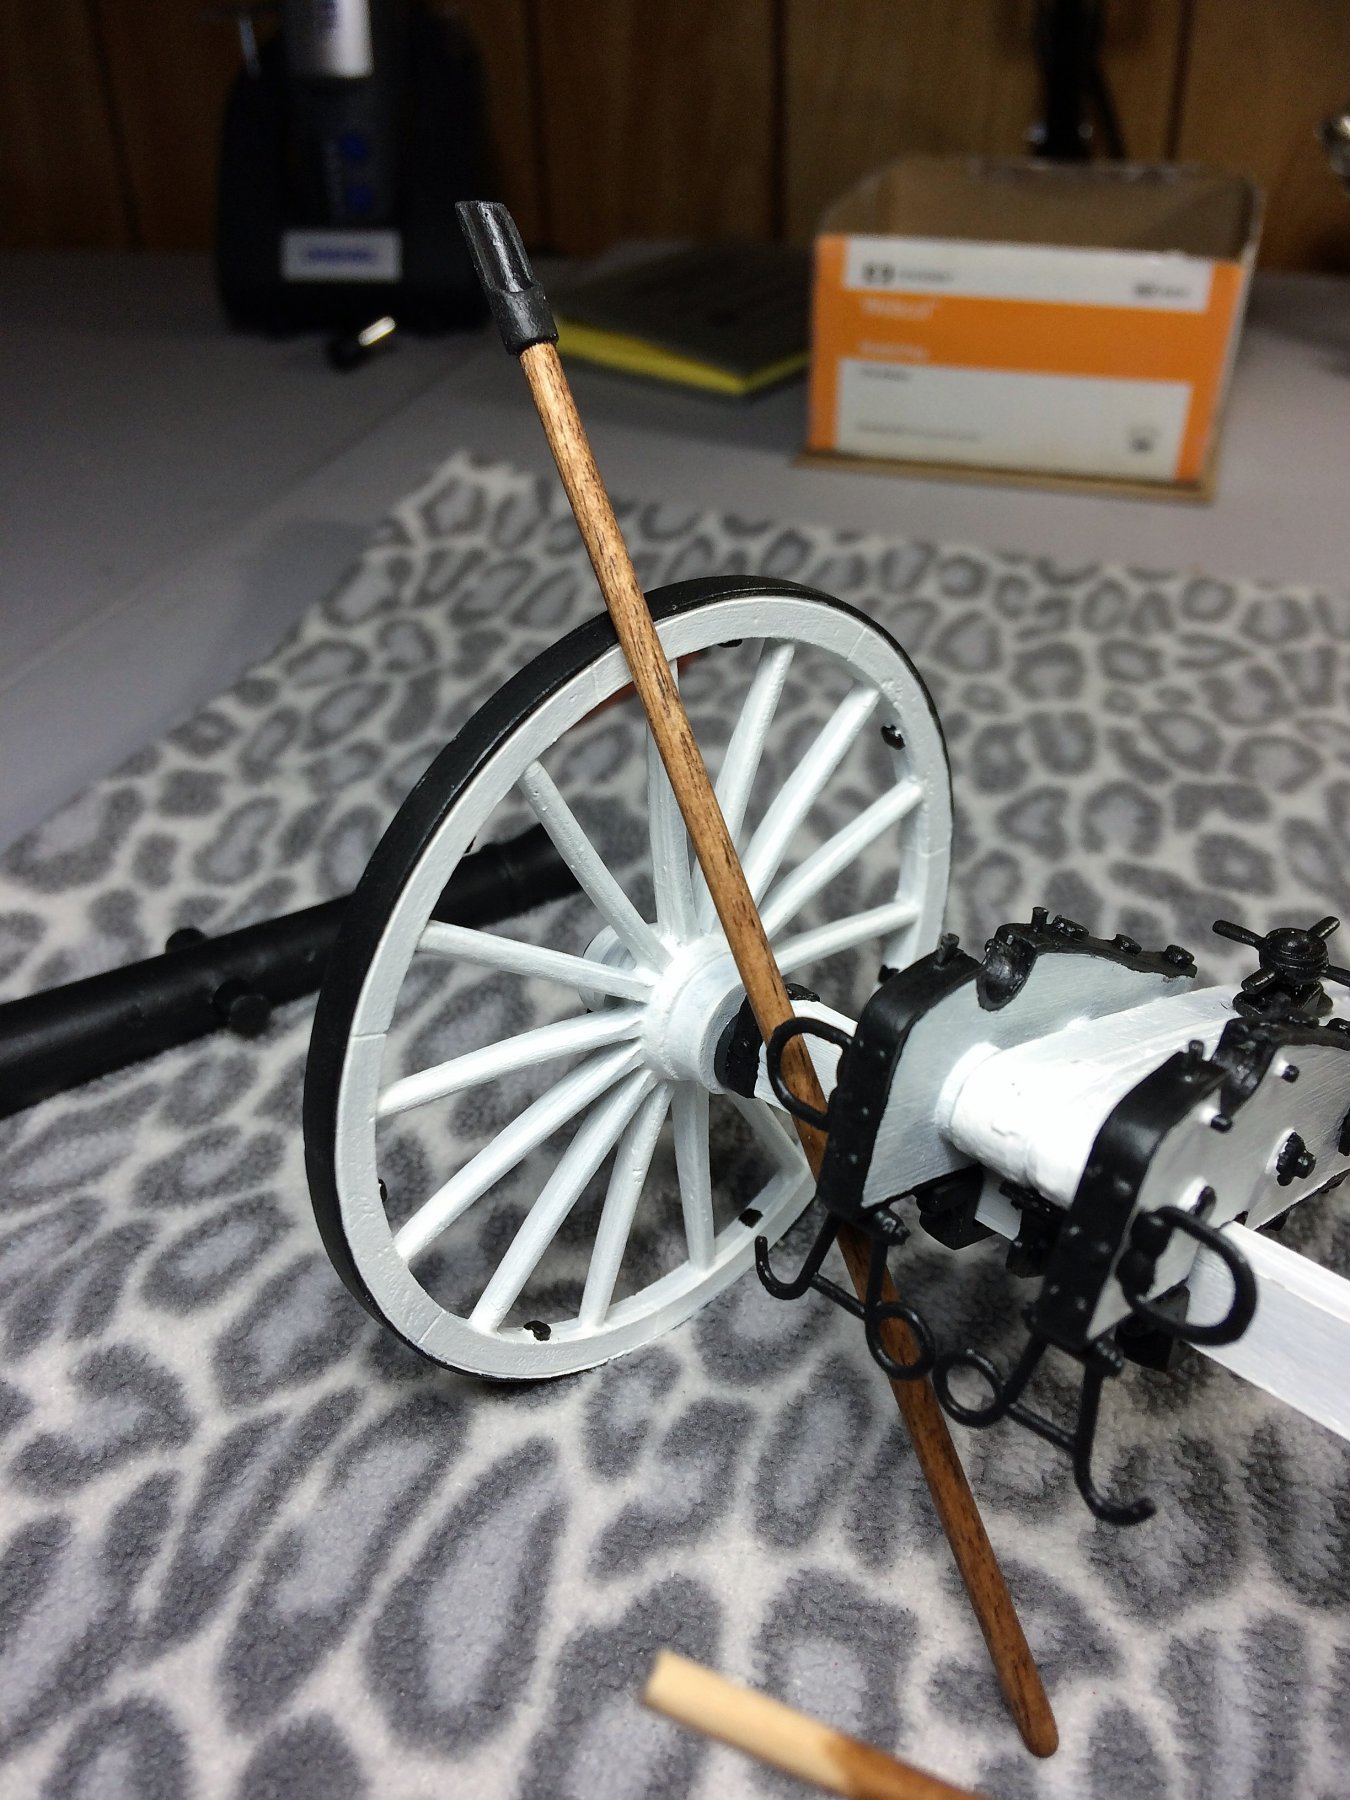
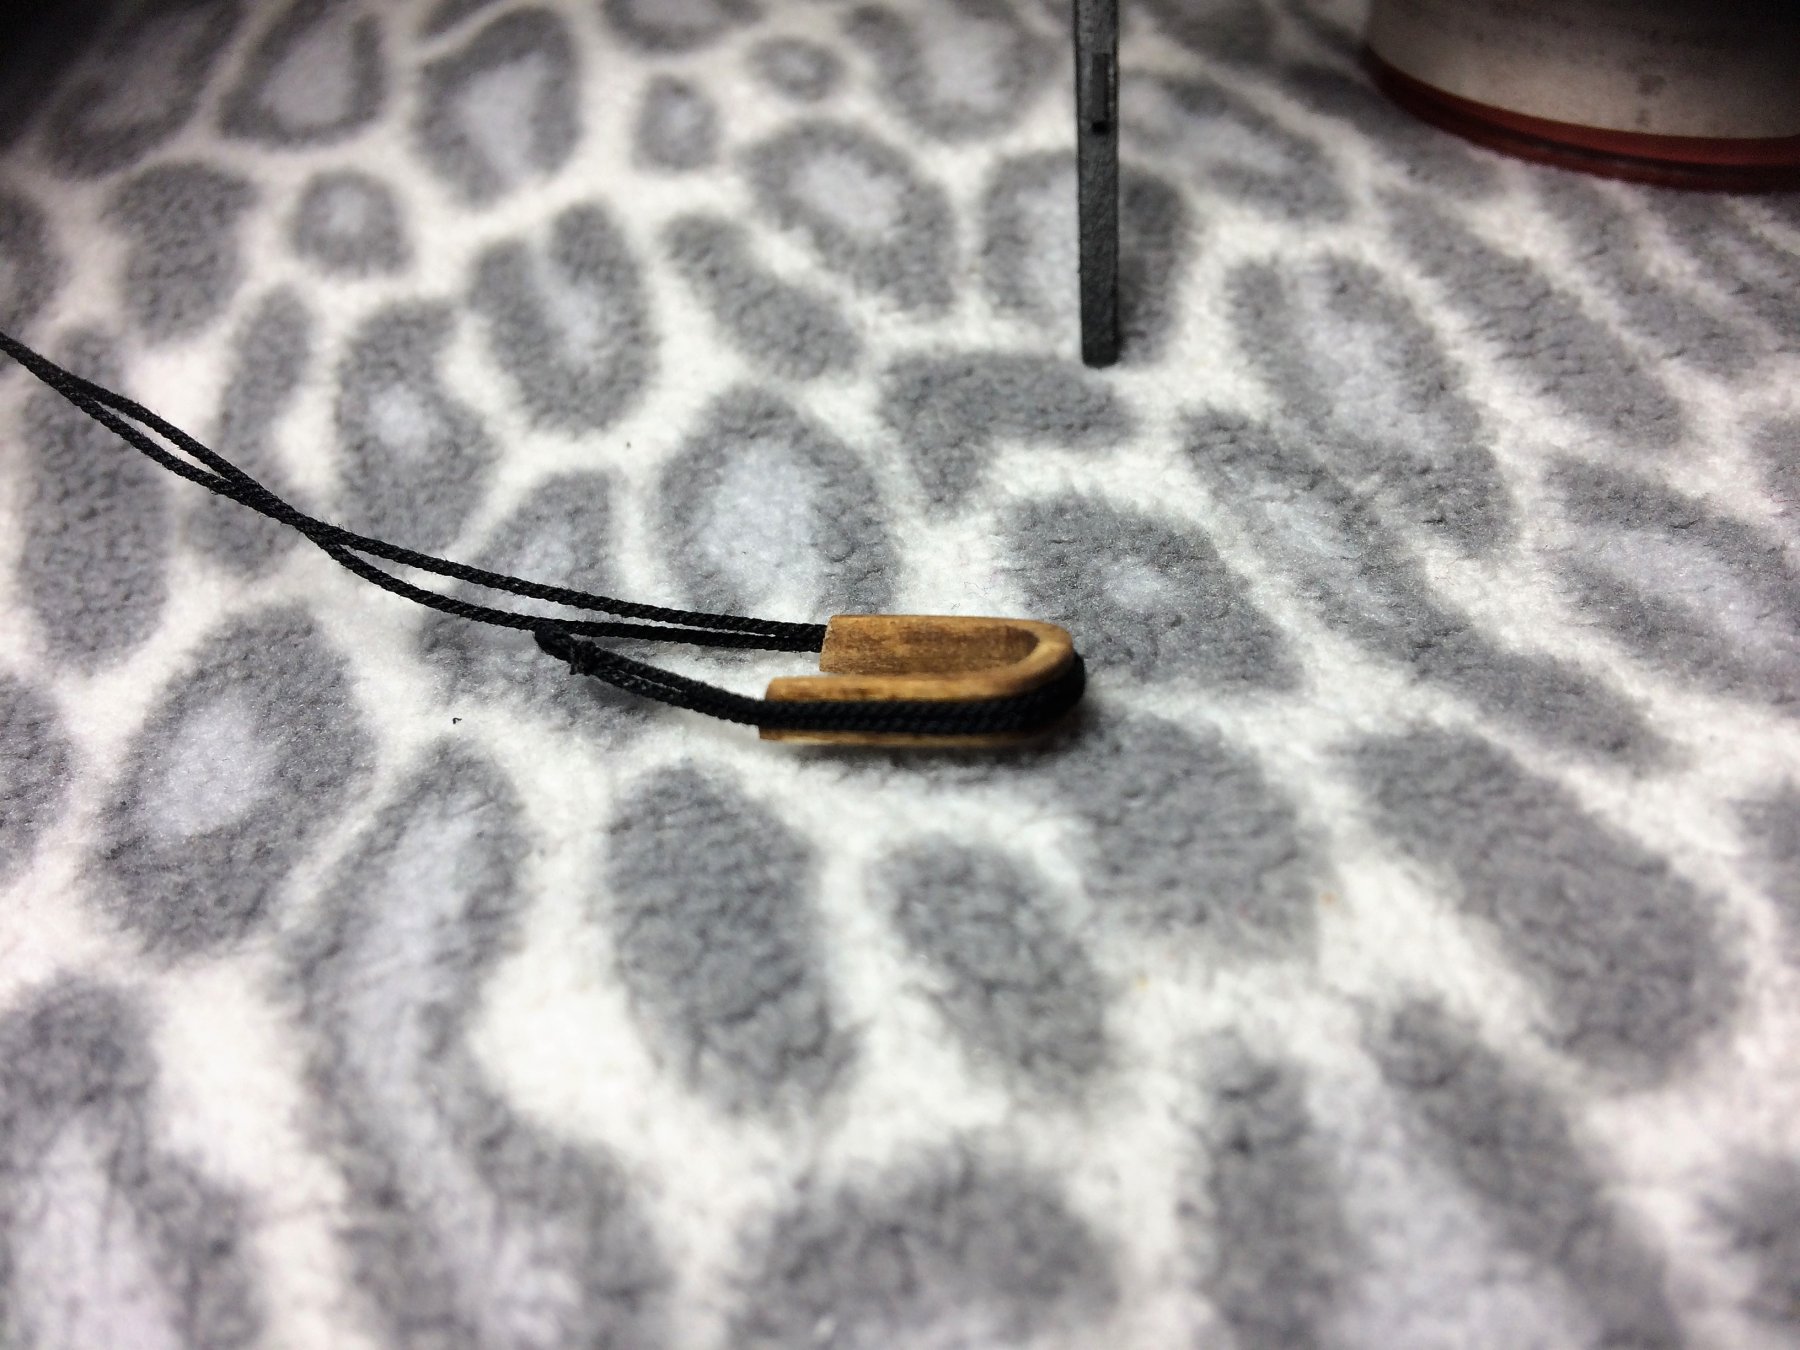
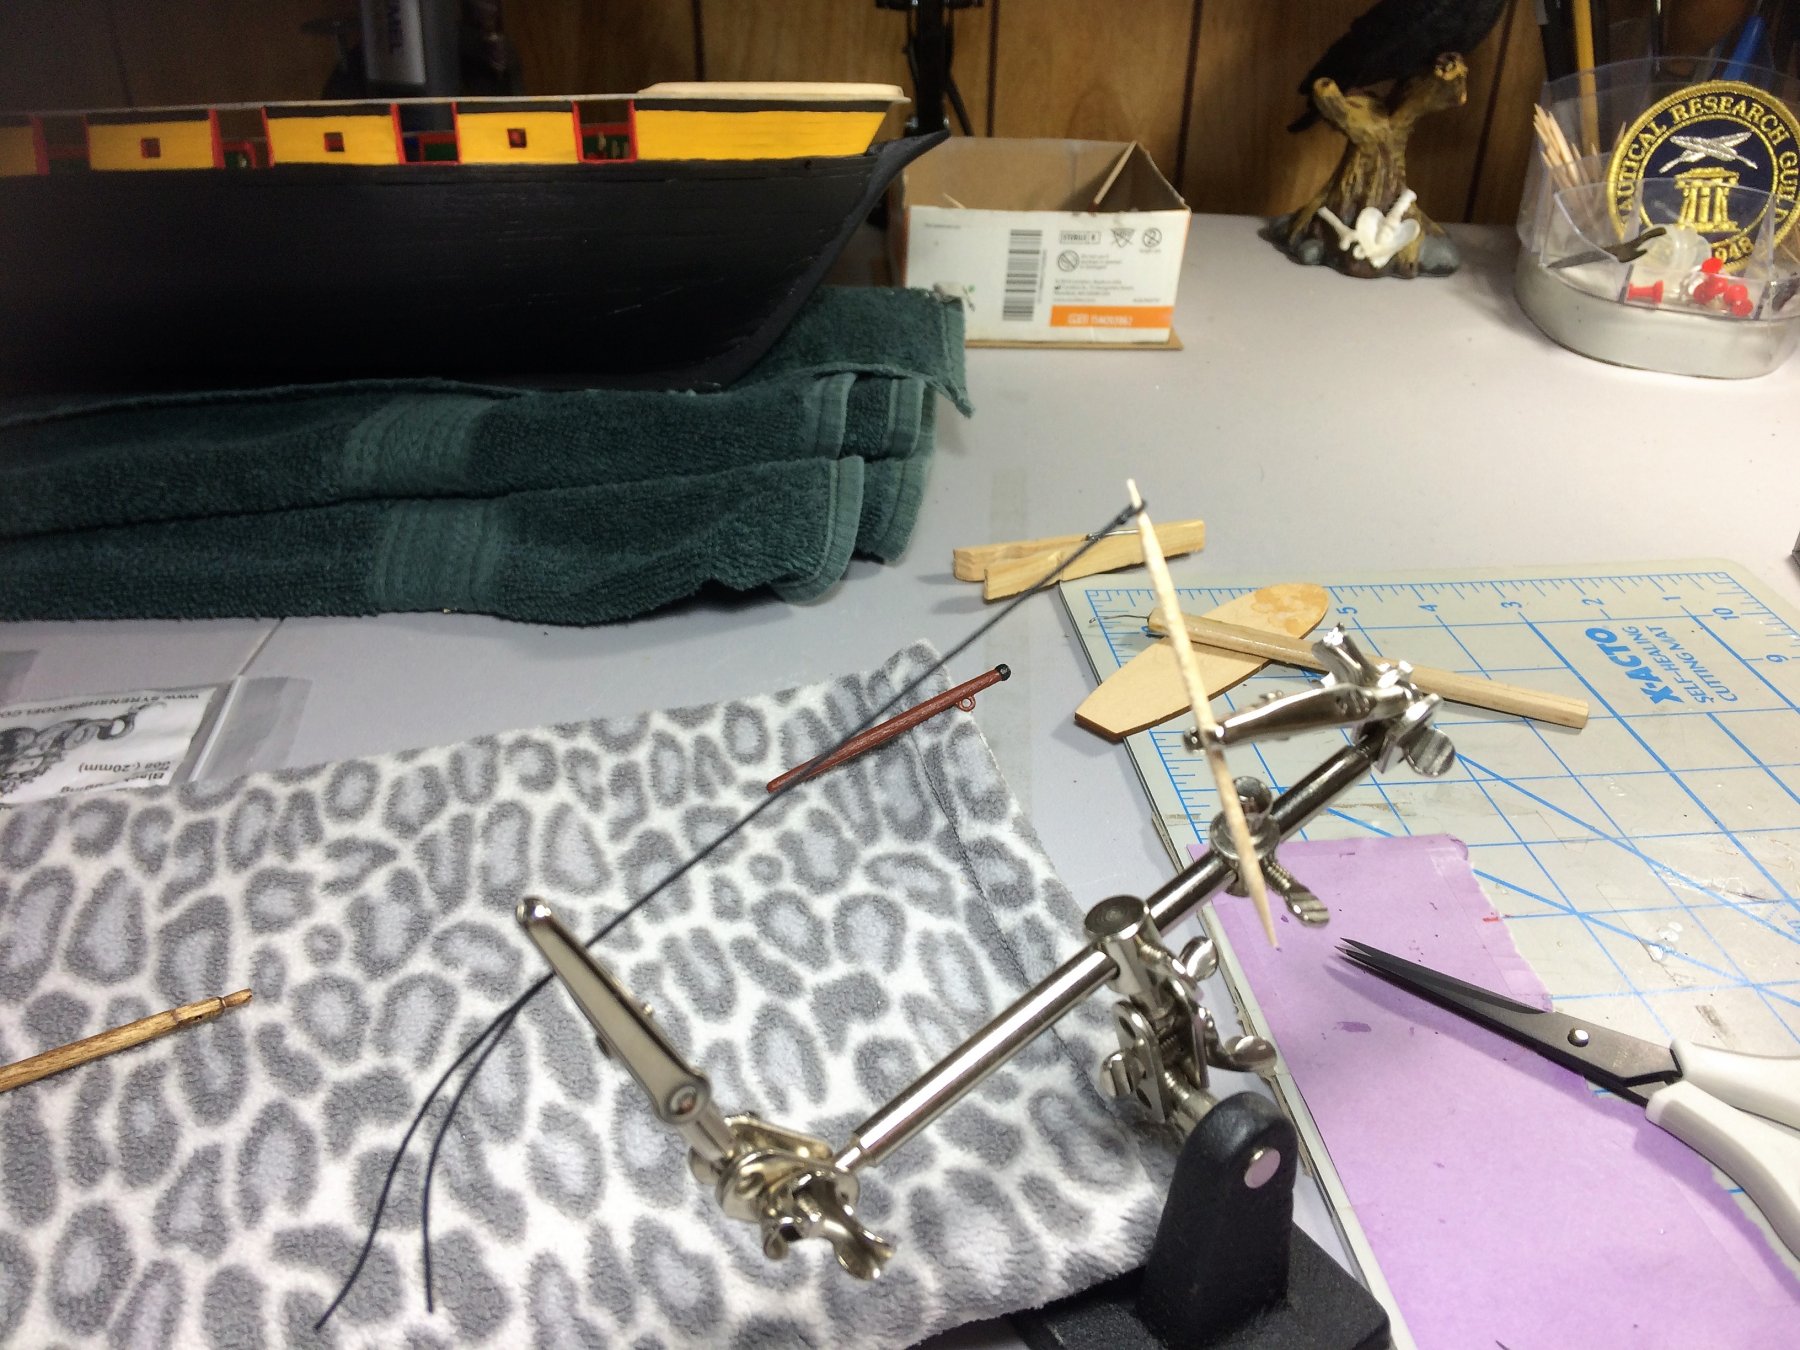
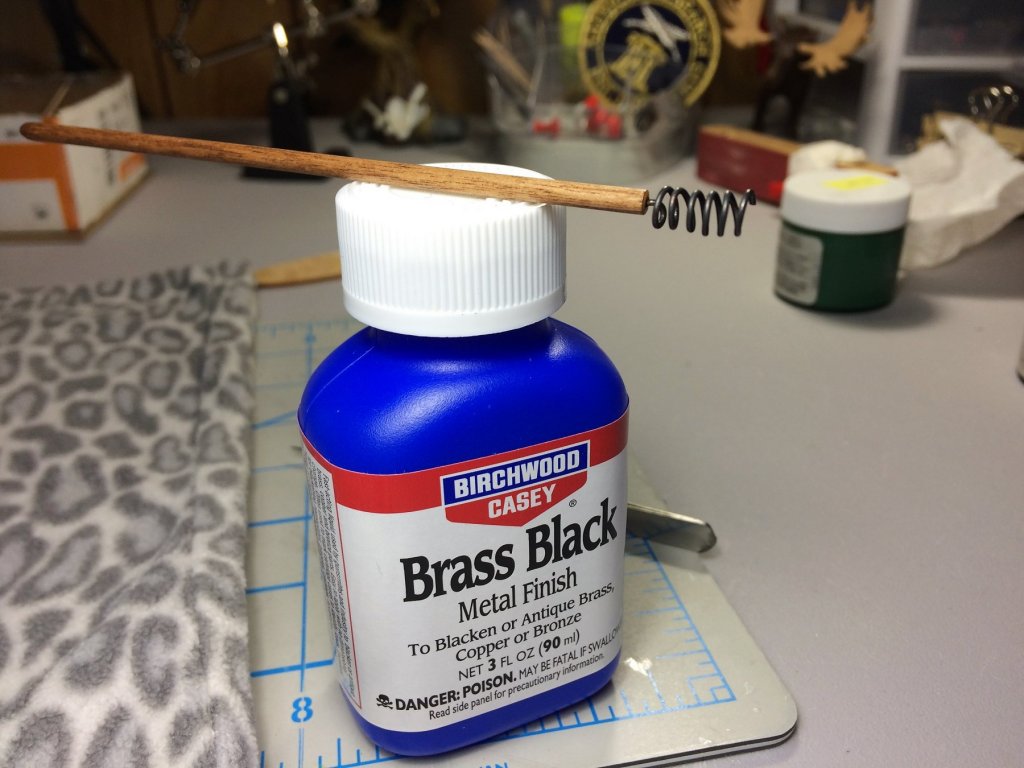
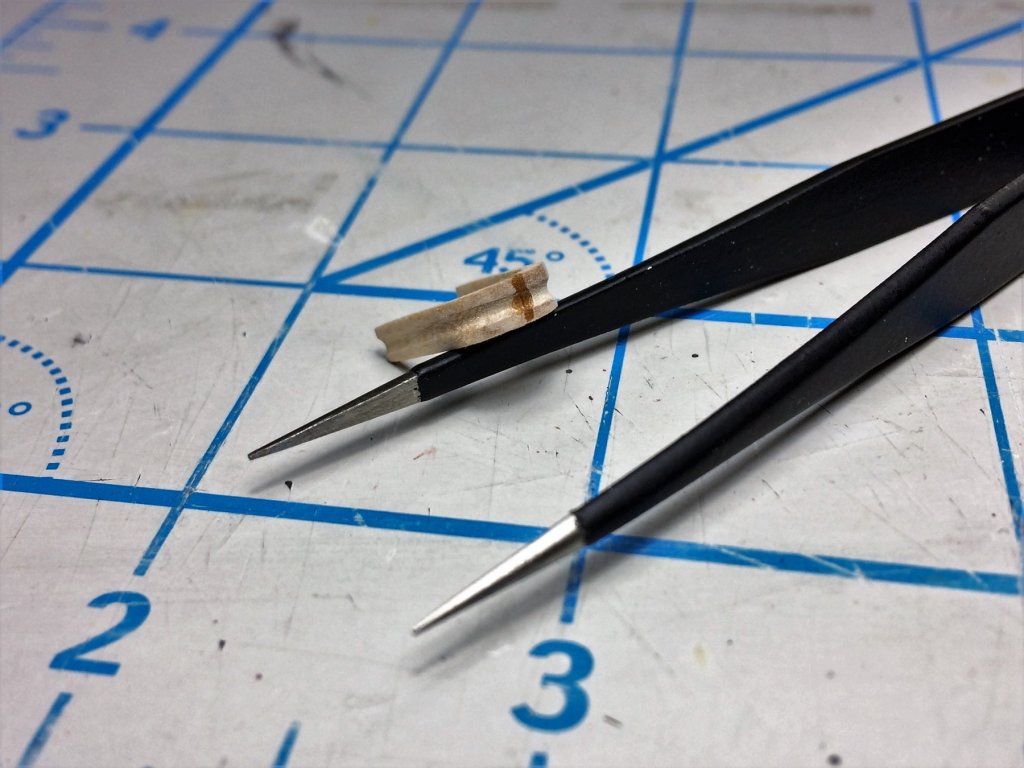
Evening, I just updated my Niagara build, figured I would update the James Cannon as well. I was a building machine this weekend! I started shaping the poles for the Worm, Scoop and Rammer/Sponge a few days ago. They were stained with an "Early American" stain. The Worm was made from the supplied wire wrapped around a scrap 5/32 dowel. After I removed the wire and placed it into the Cannon mouth to see if it looked good, It fit perfectly! Once trimmed it was blackened with Birchwood-Casey Brass Black. Love this stuff, works almost instantly. The Scoop is done. With all the "accessories" being assembled she looks almost ready for the battle field. Tom E


- 66 replies
-
- 10
-
-
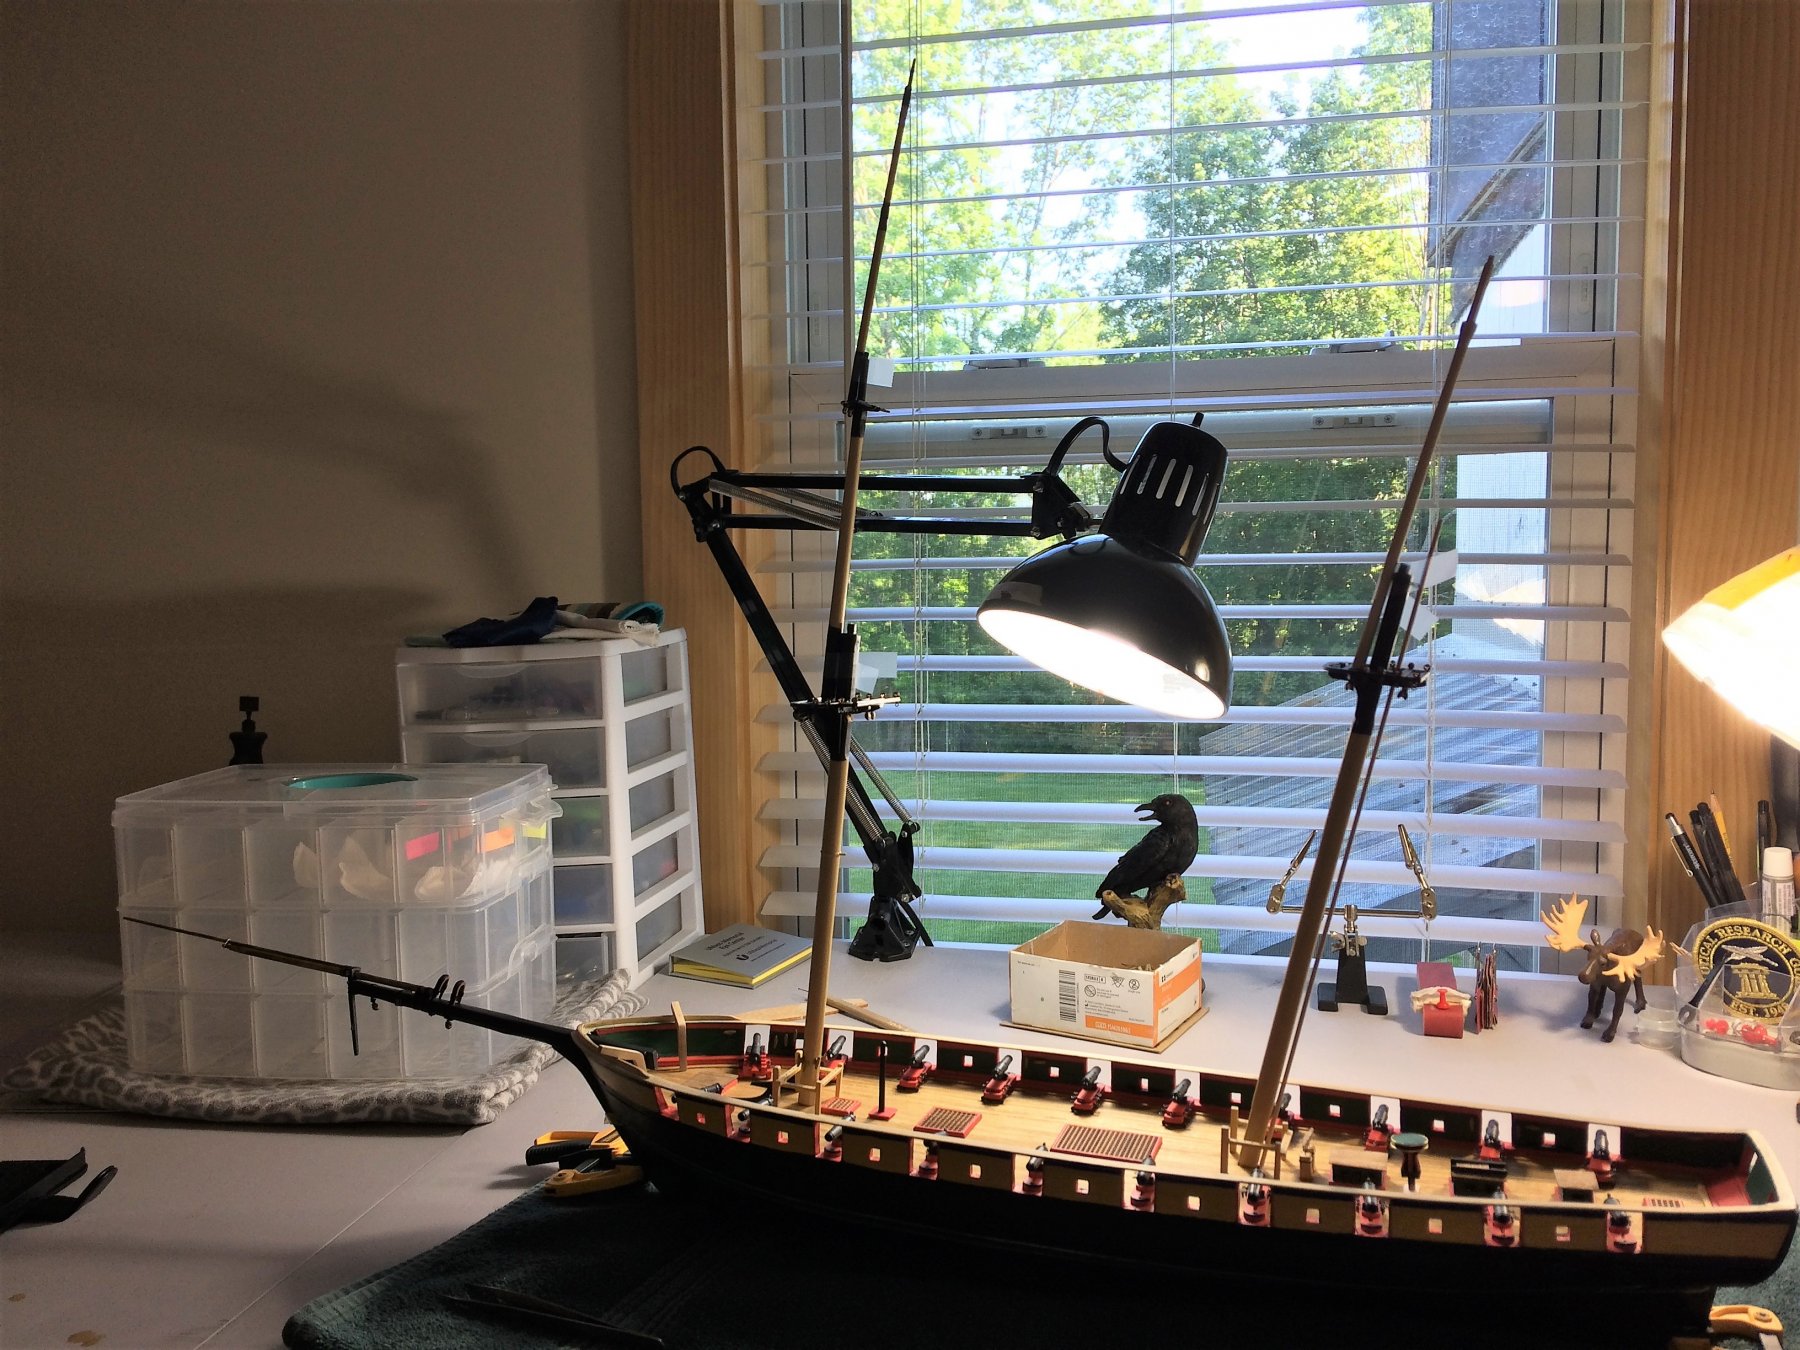
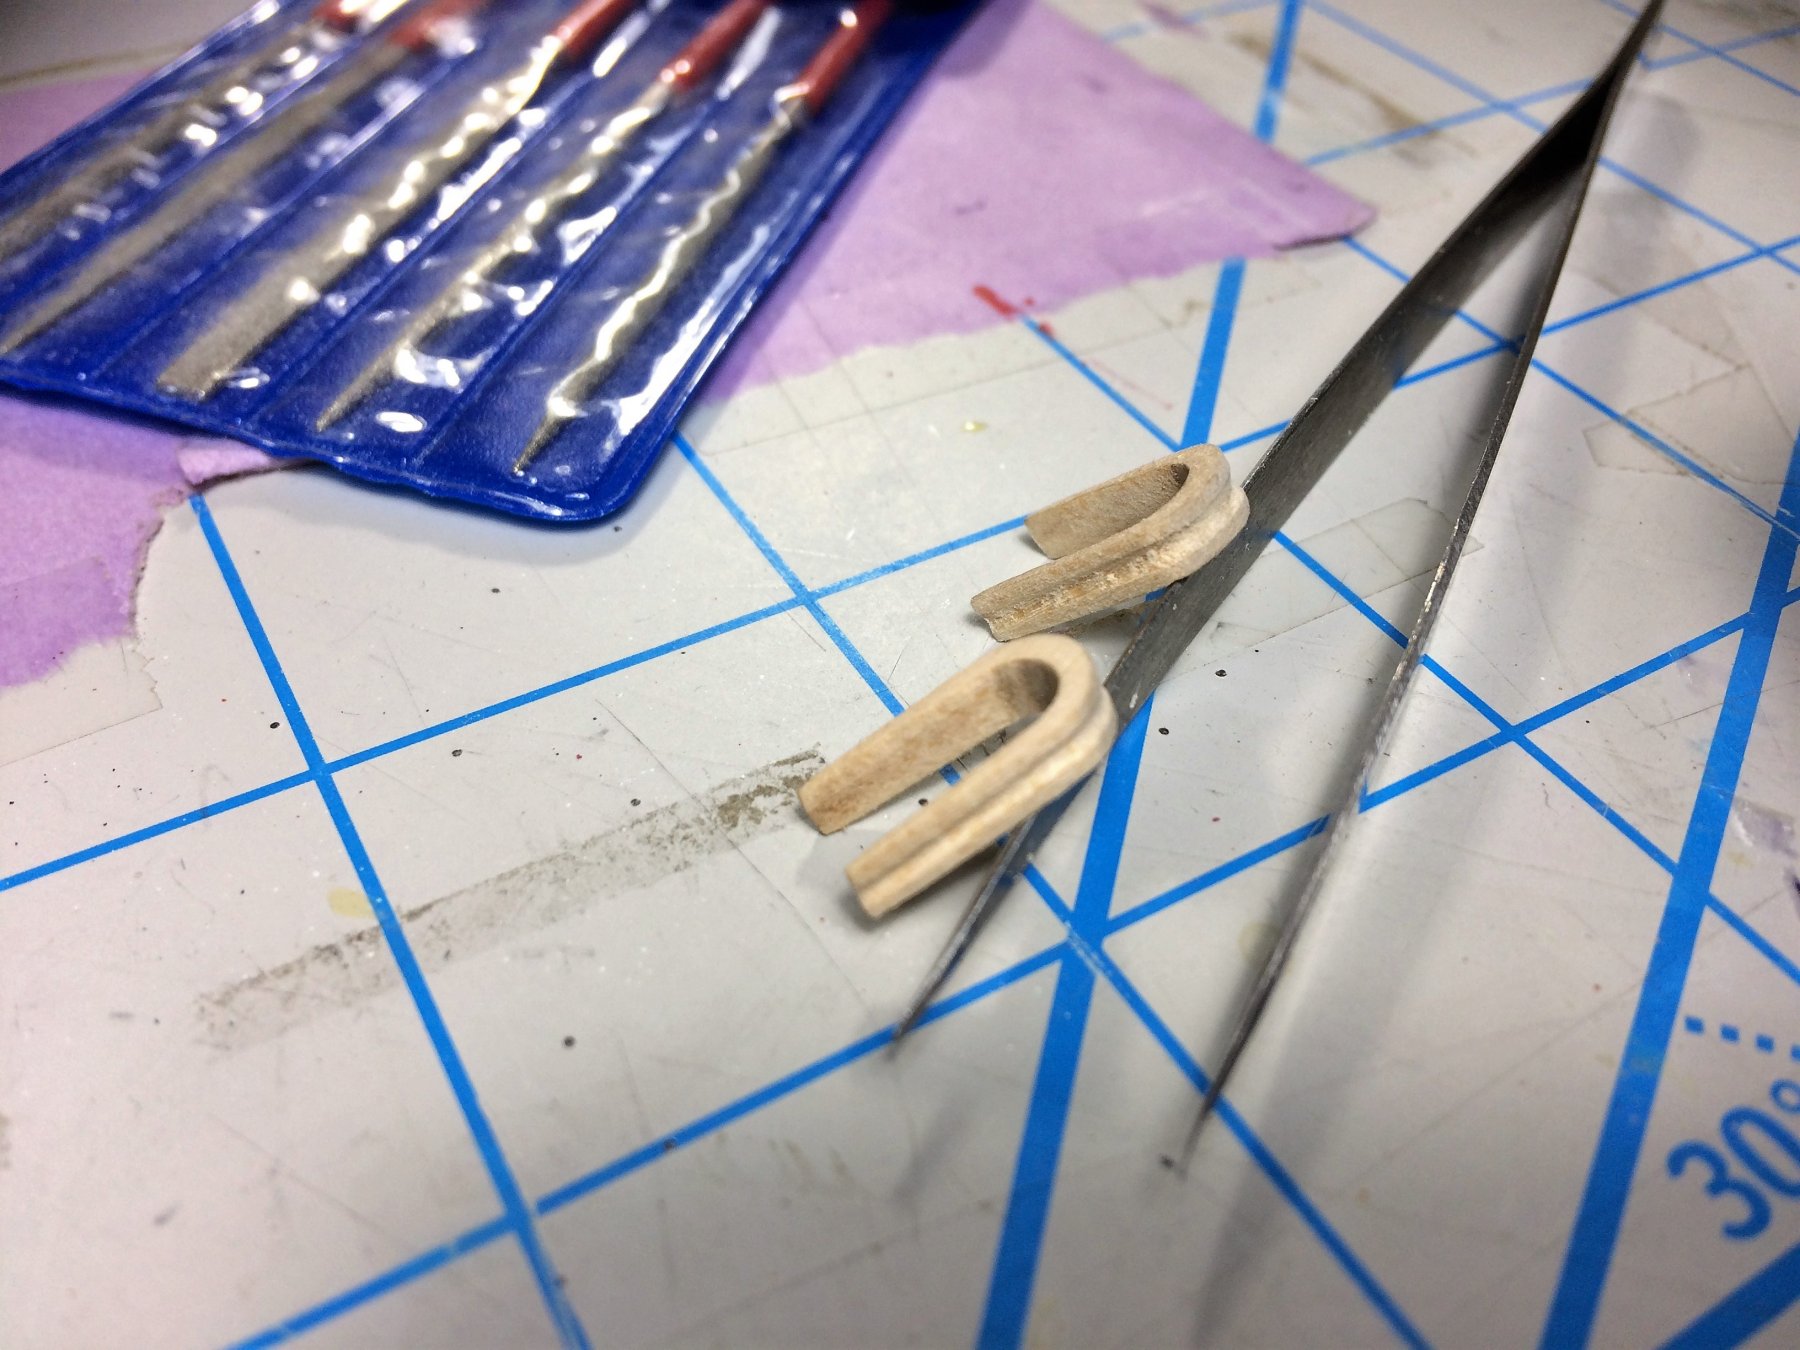
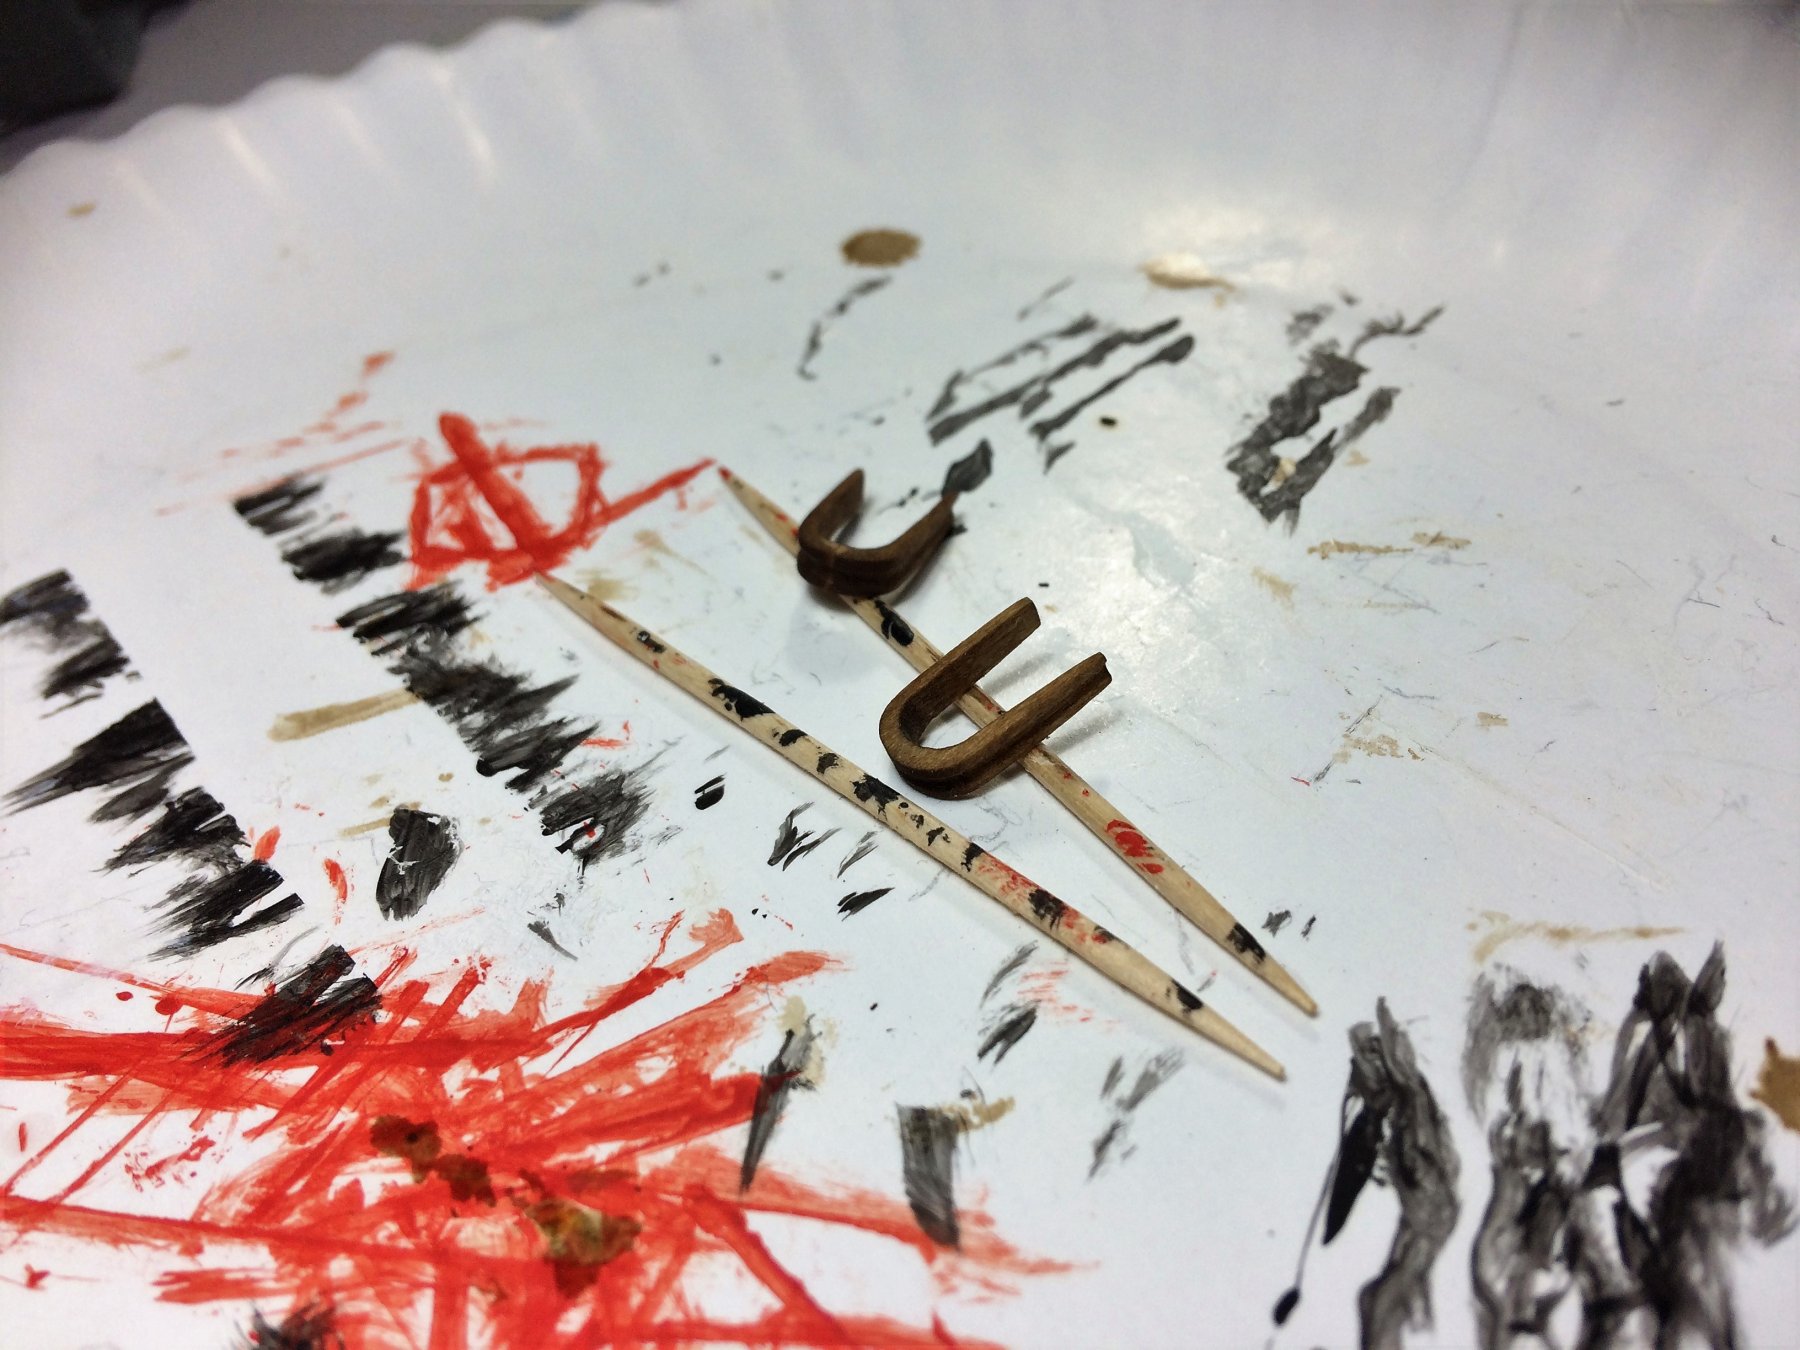
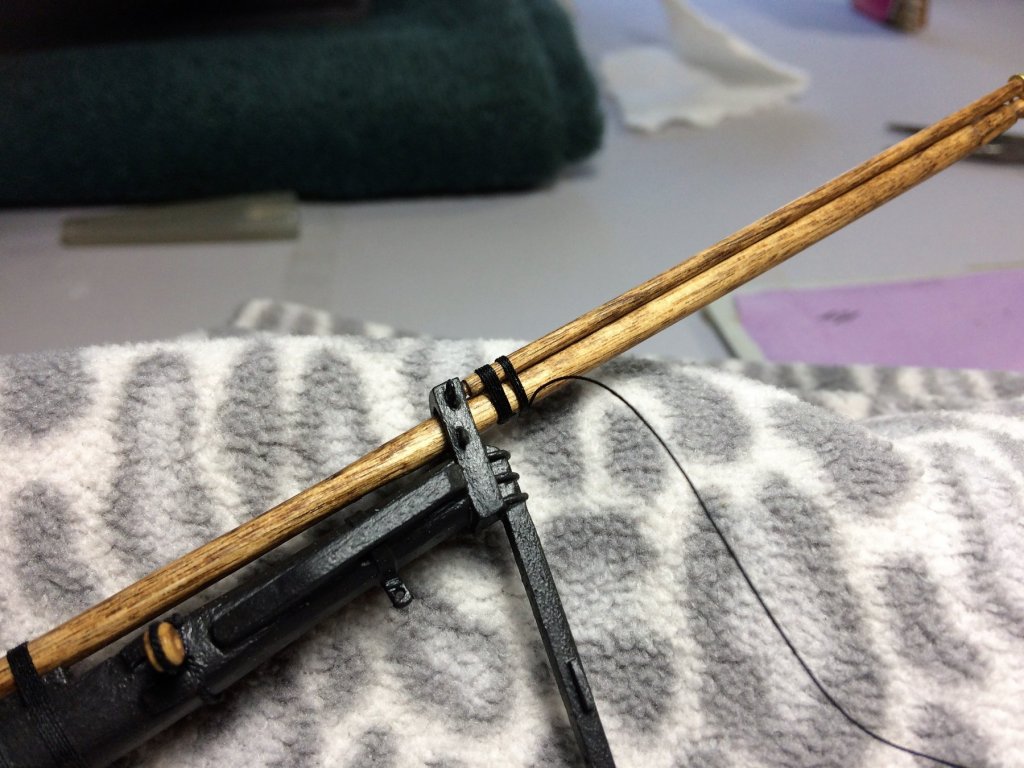
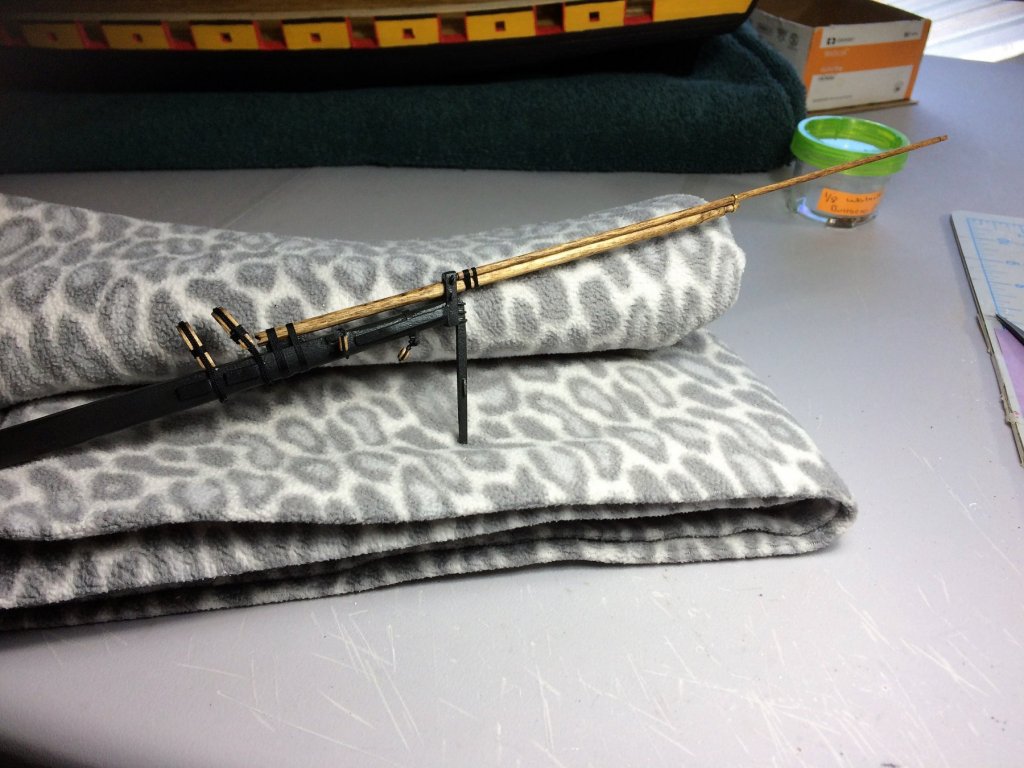
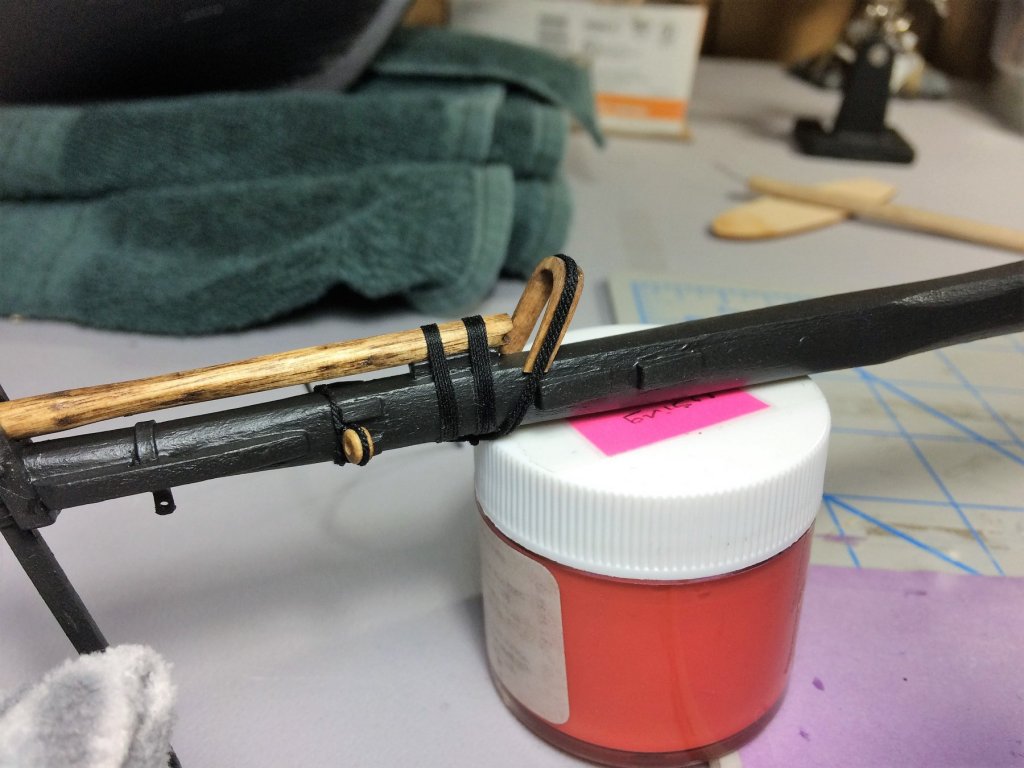
Evening, More was done over the weekend. I started shaping the Main Topmast. I'm hoping to have this shaped and primed by this weekend. The cross trees will be built and installed shortly. I finished the rear Lazaret Hatch. Still learning! I could have done better. With the Bowsprit Hearts prepped, I decided to install the Flying Jib Boom. All rope used is from Syren. Except for a few things that need to be installed after I step the Bowsprit, It's mostly done. I have just started to prep the Catheads. I've only given these a brief sanding, but I have to deal with the Main Rail soon. I'm torn between painting it the recommended Buff color, or all black. Trying to stay away from the Buff color and I'm leaning towards a Black rail. If I paint the Main rail black, I may stain the Catheads. Probably use the same stain as the Bowsprit for continuity. Tom E


-
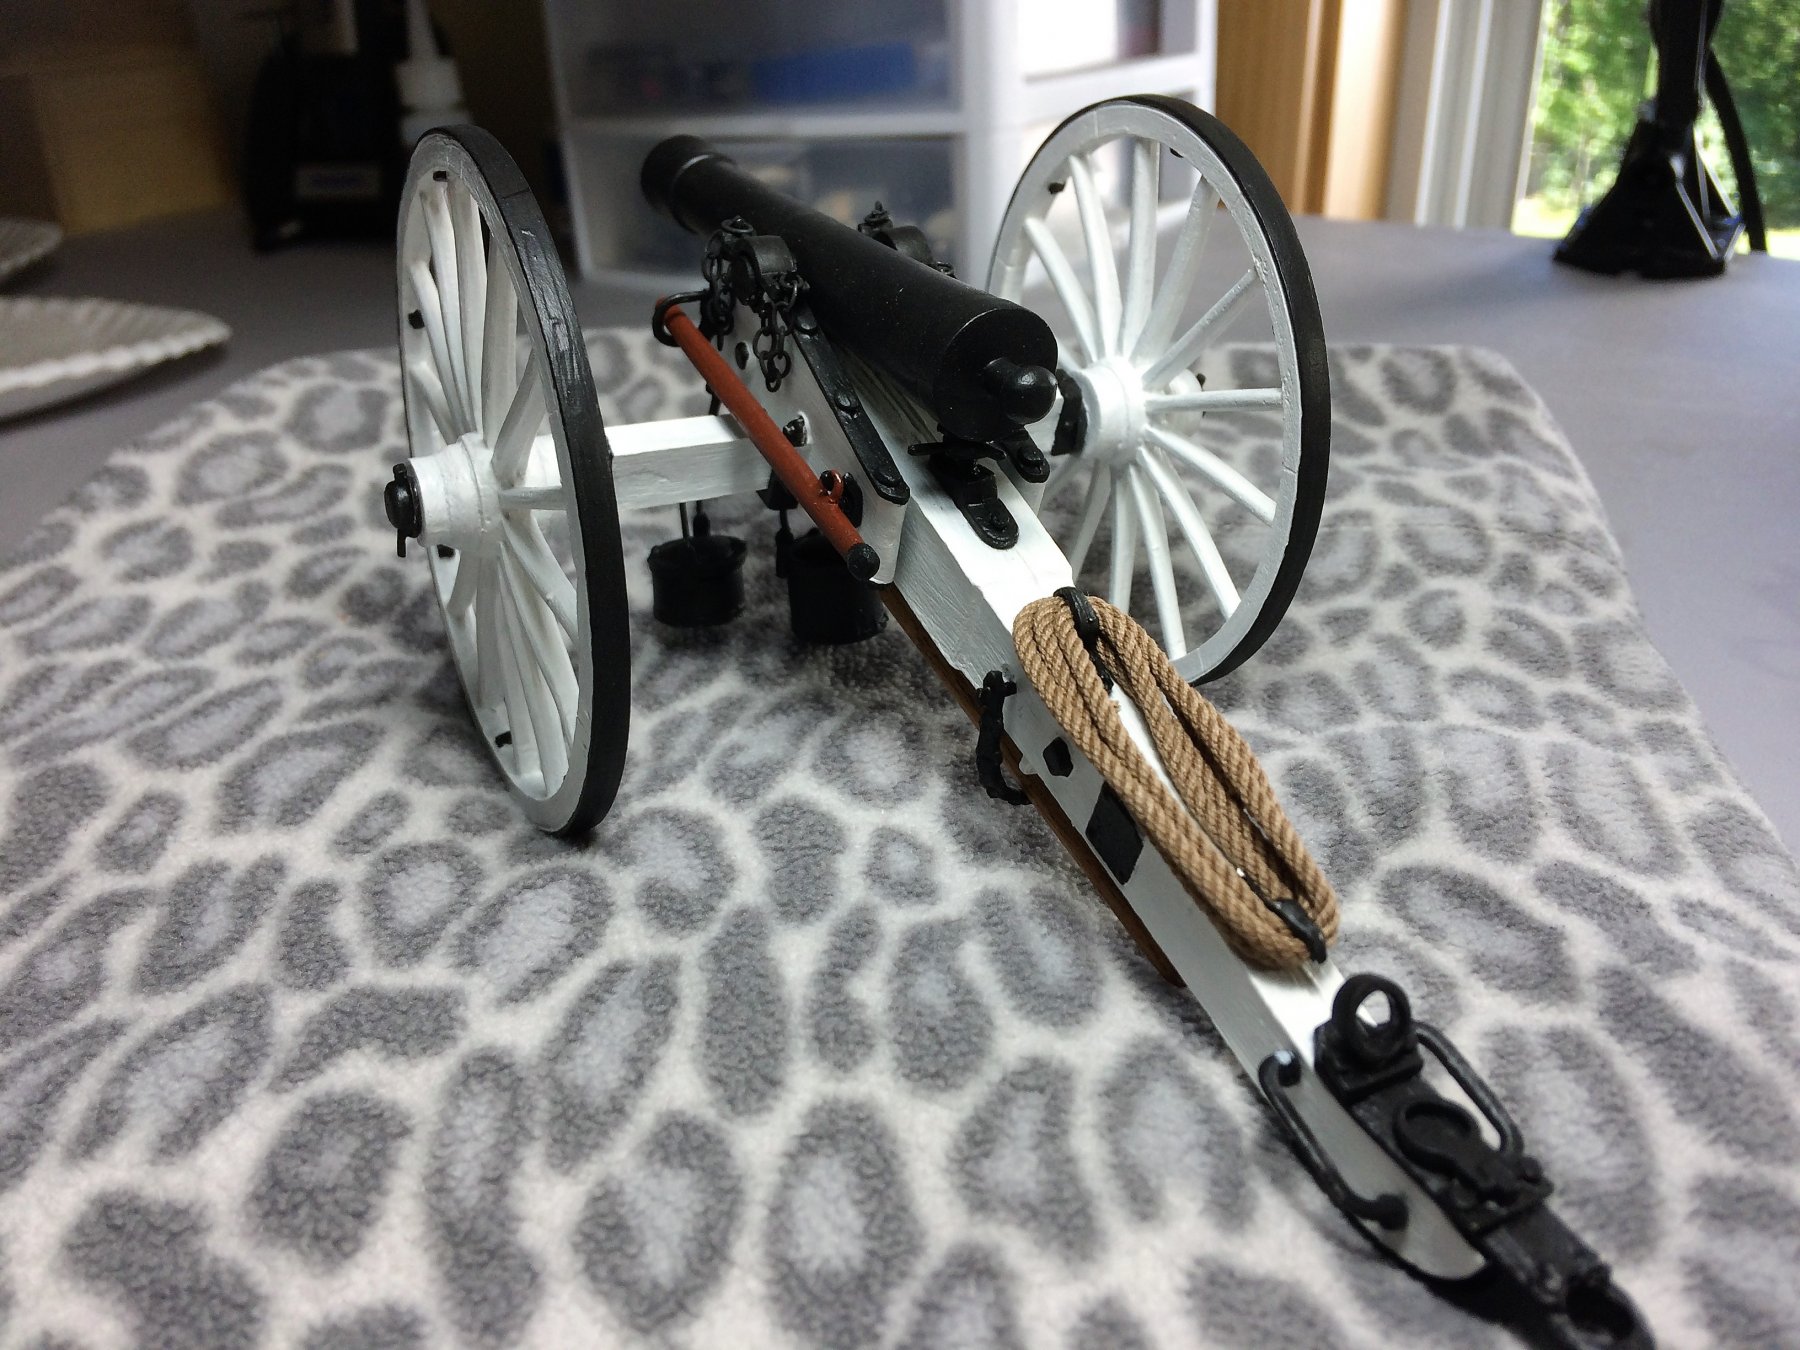
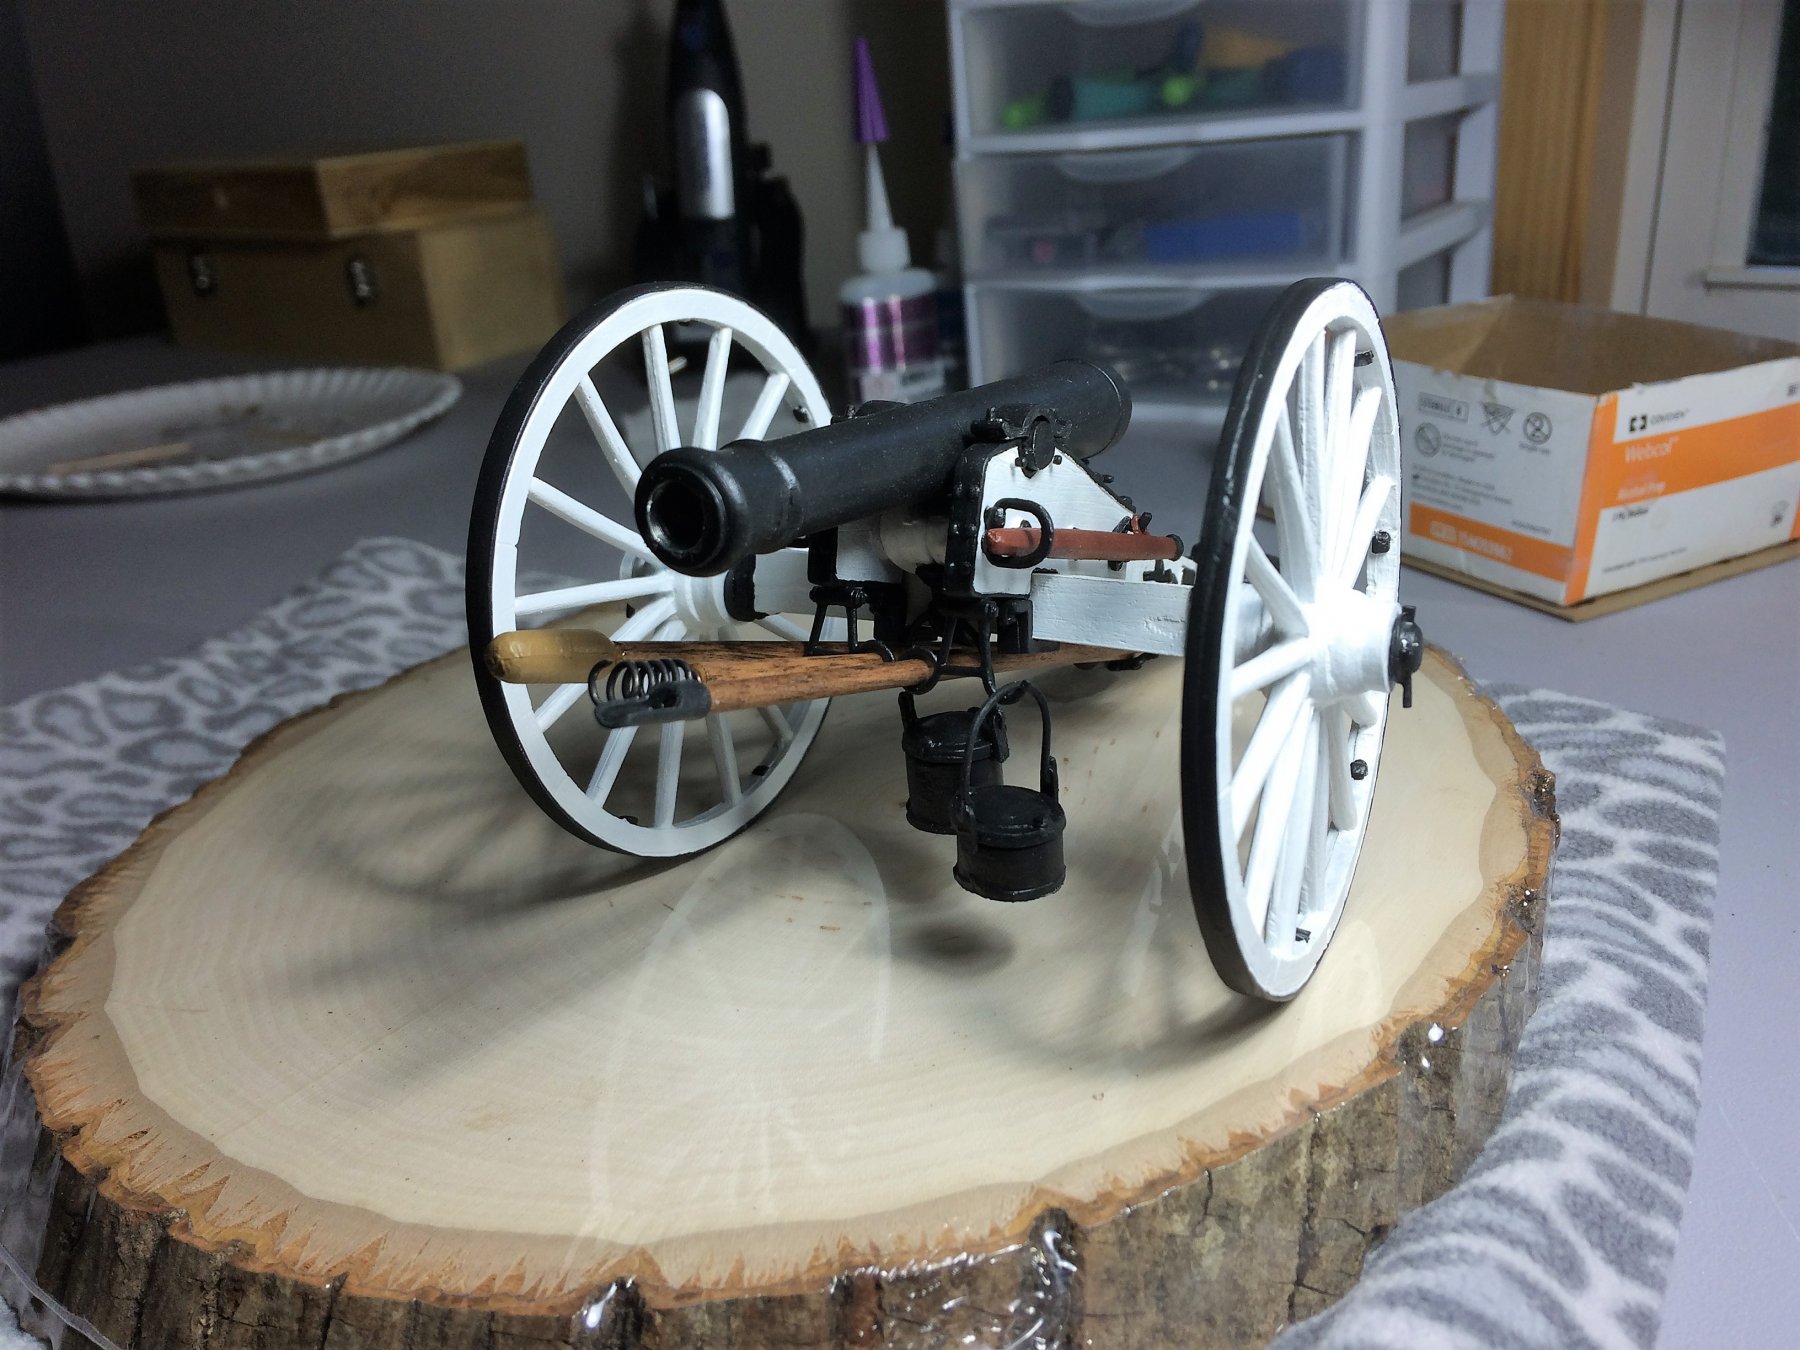
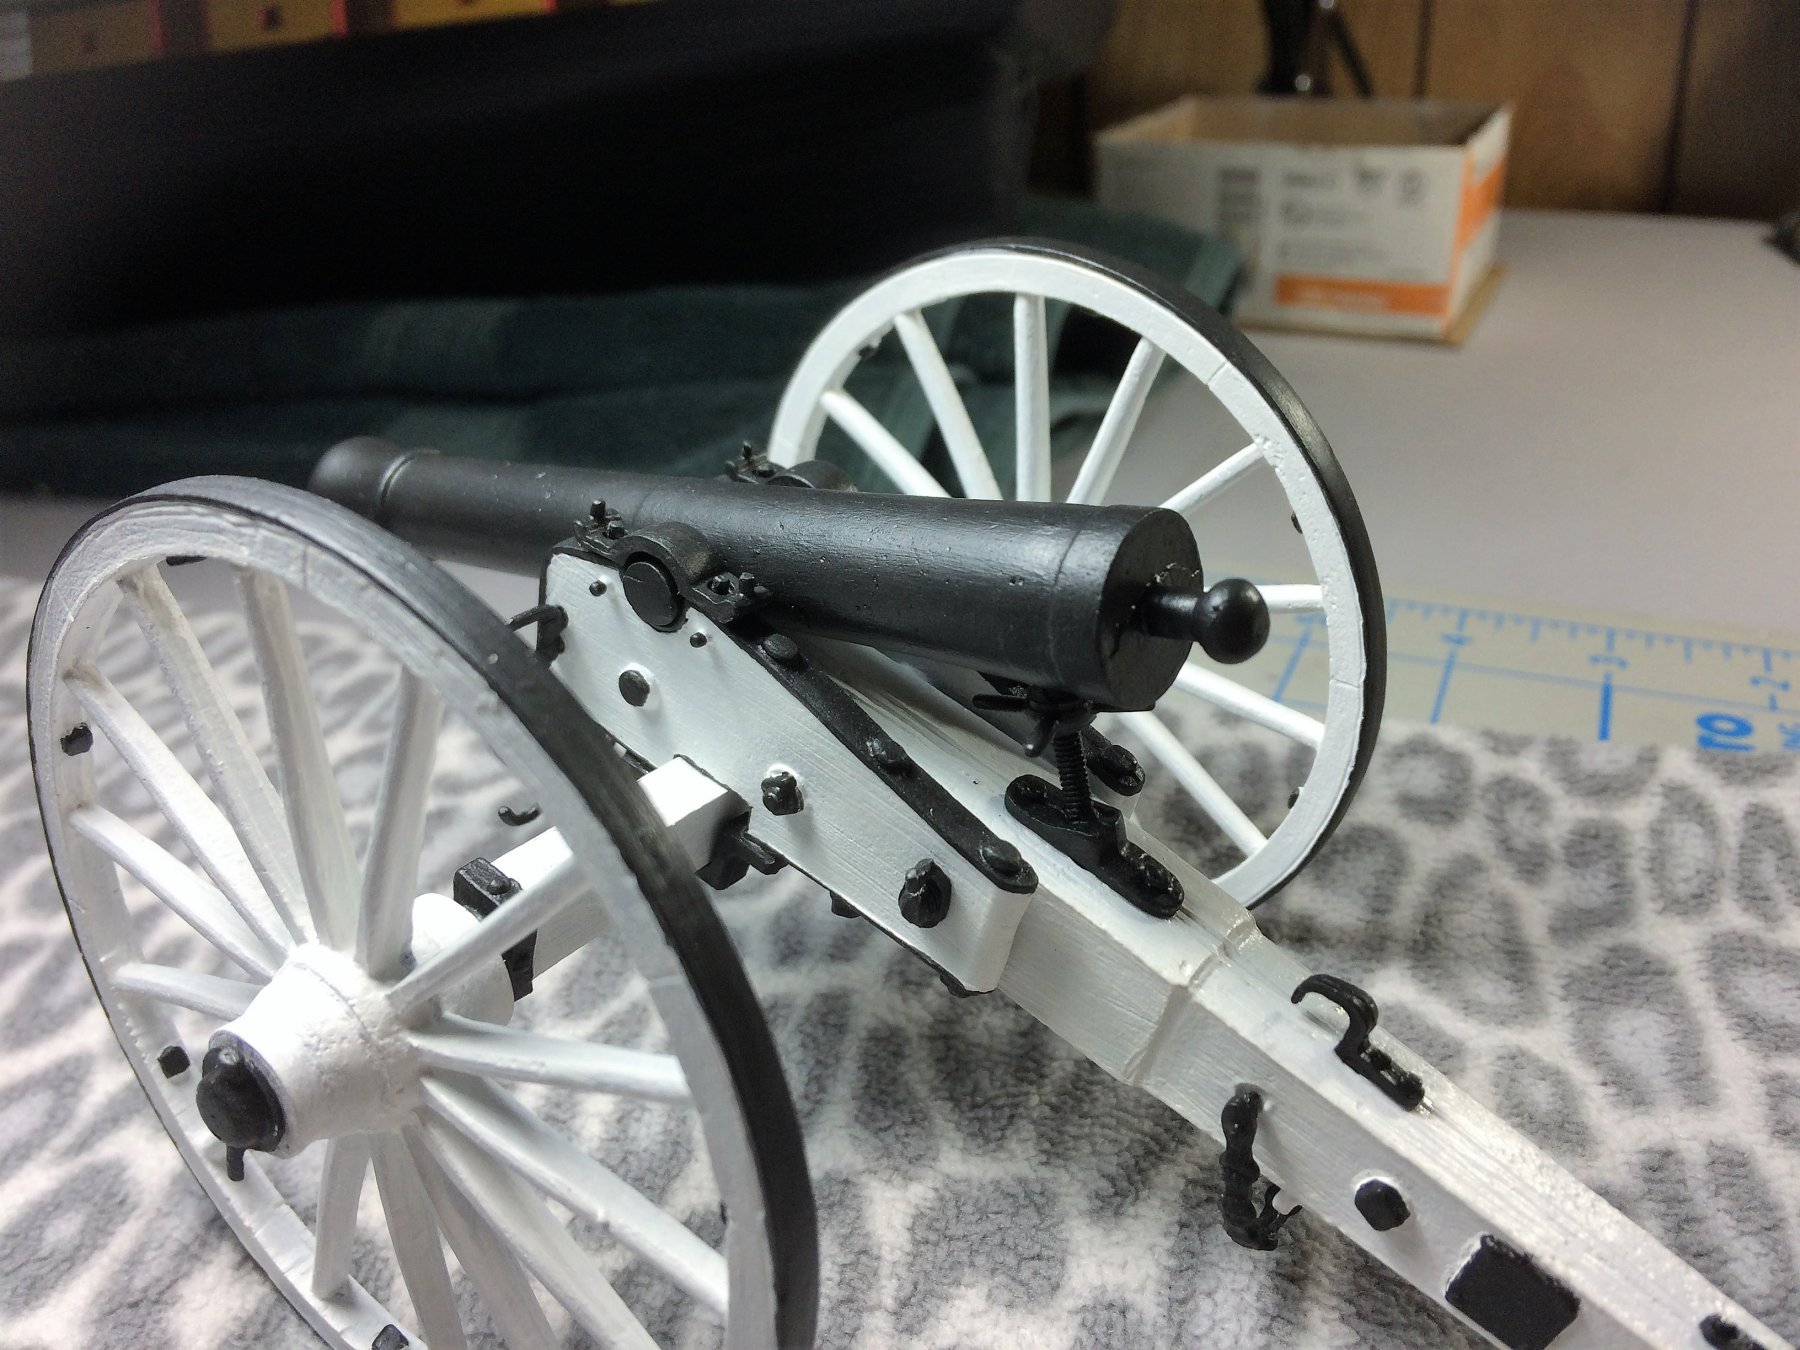
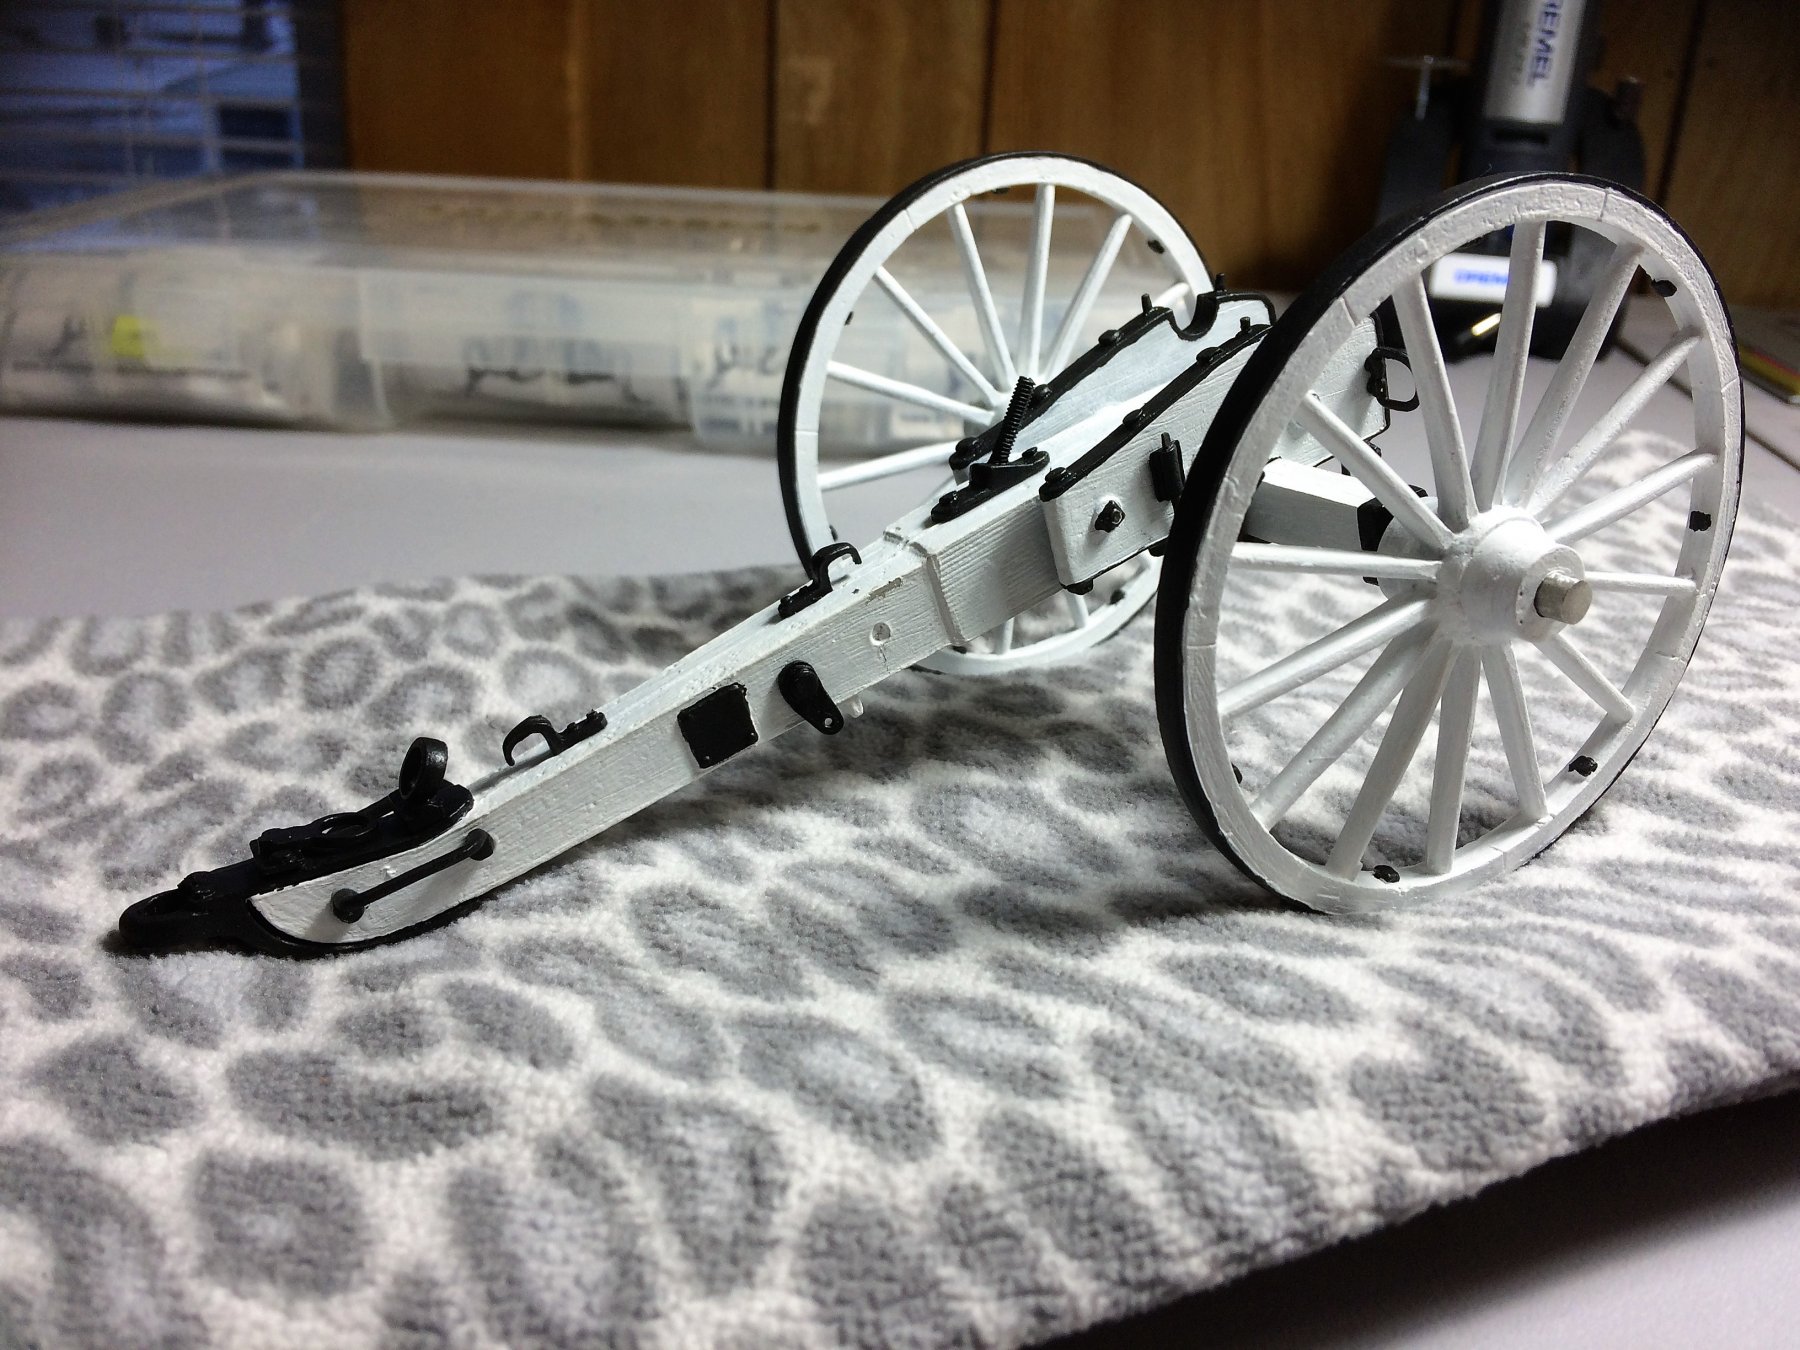
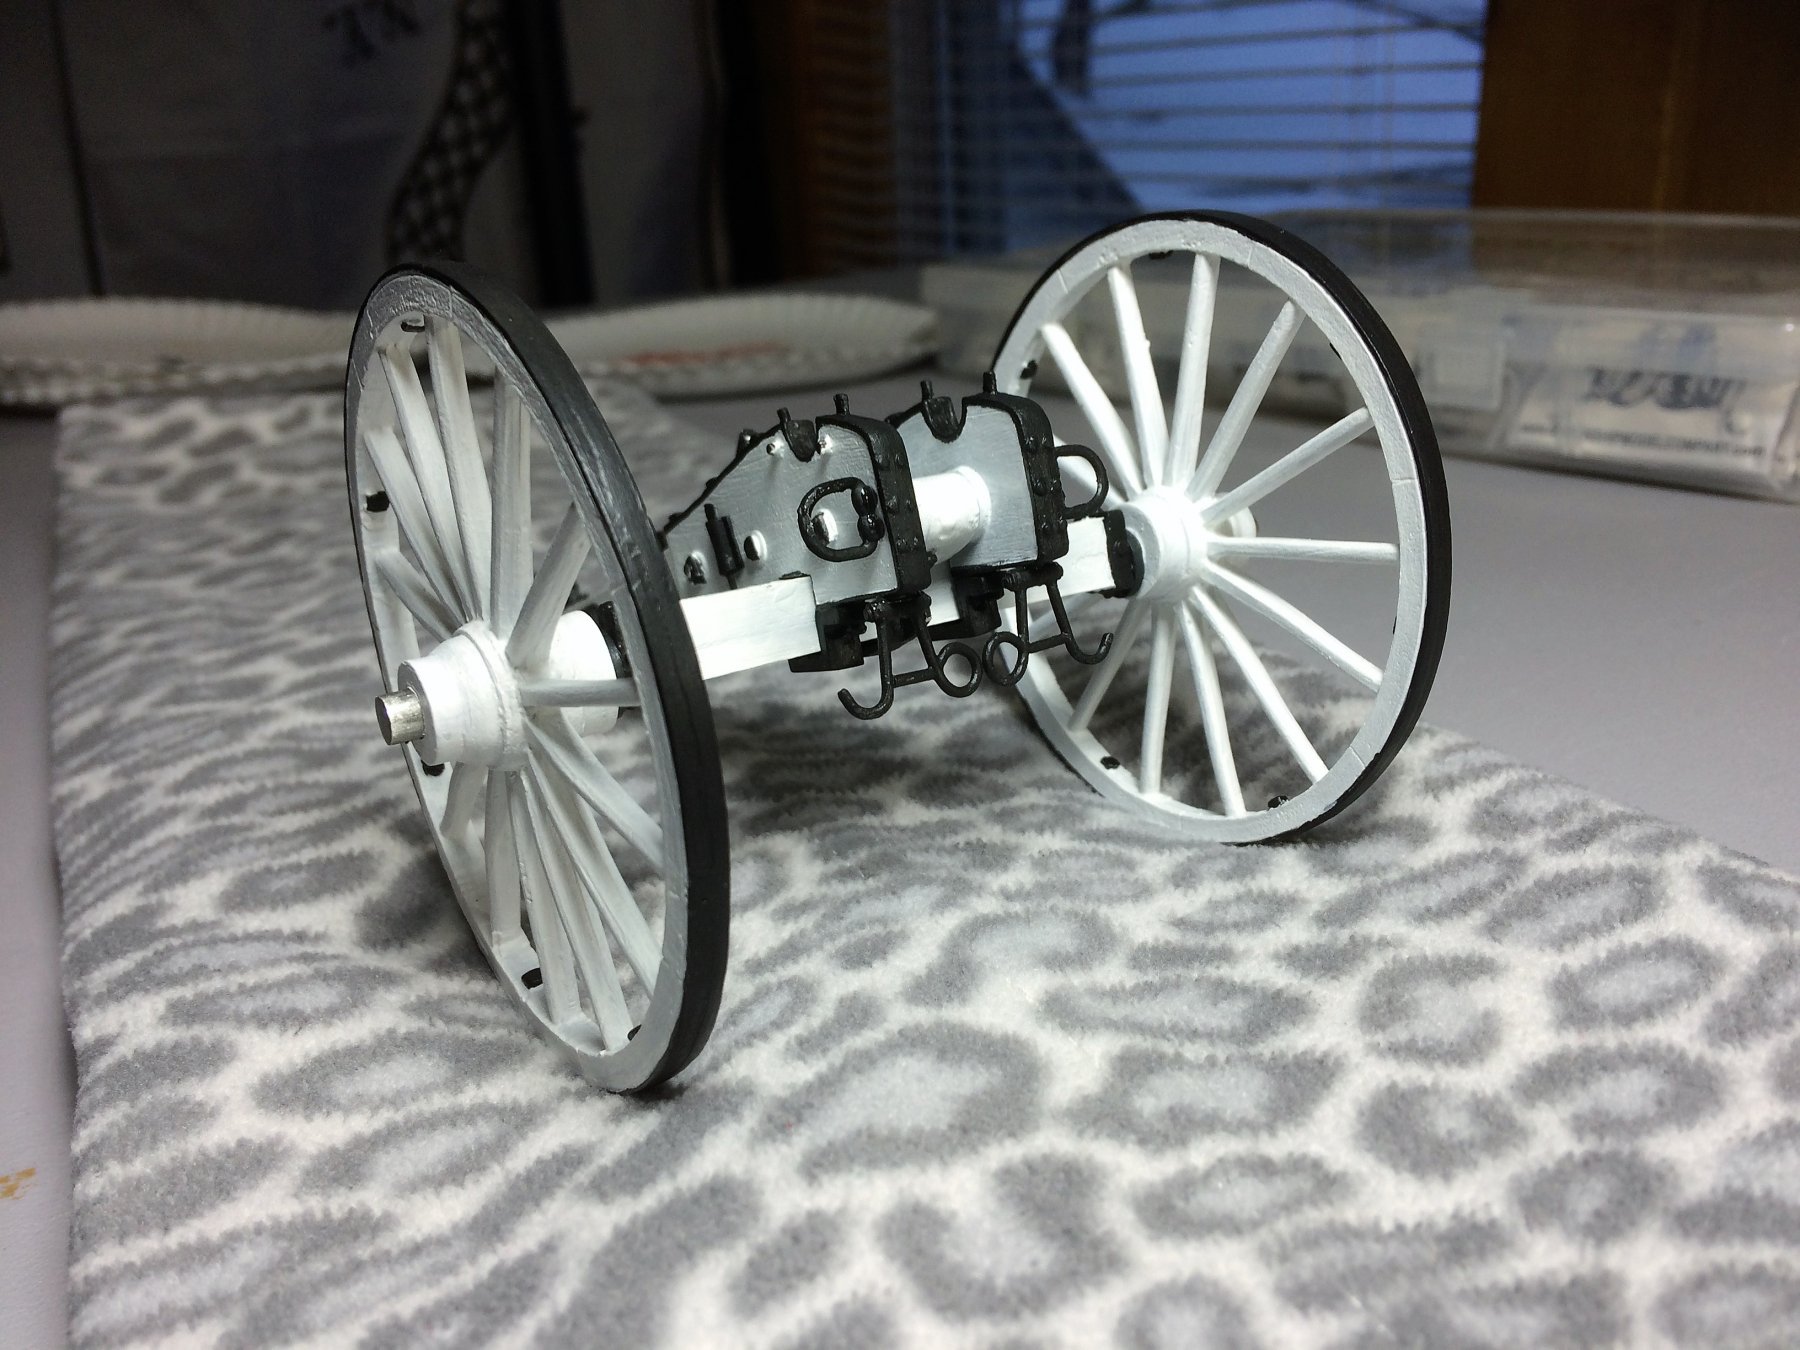
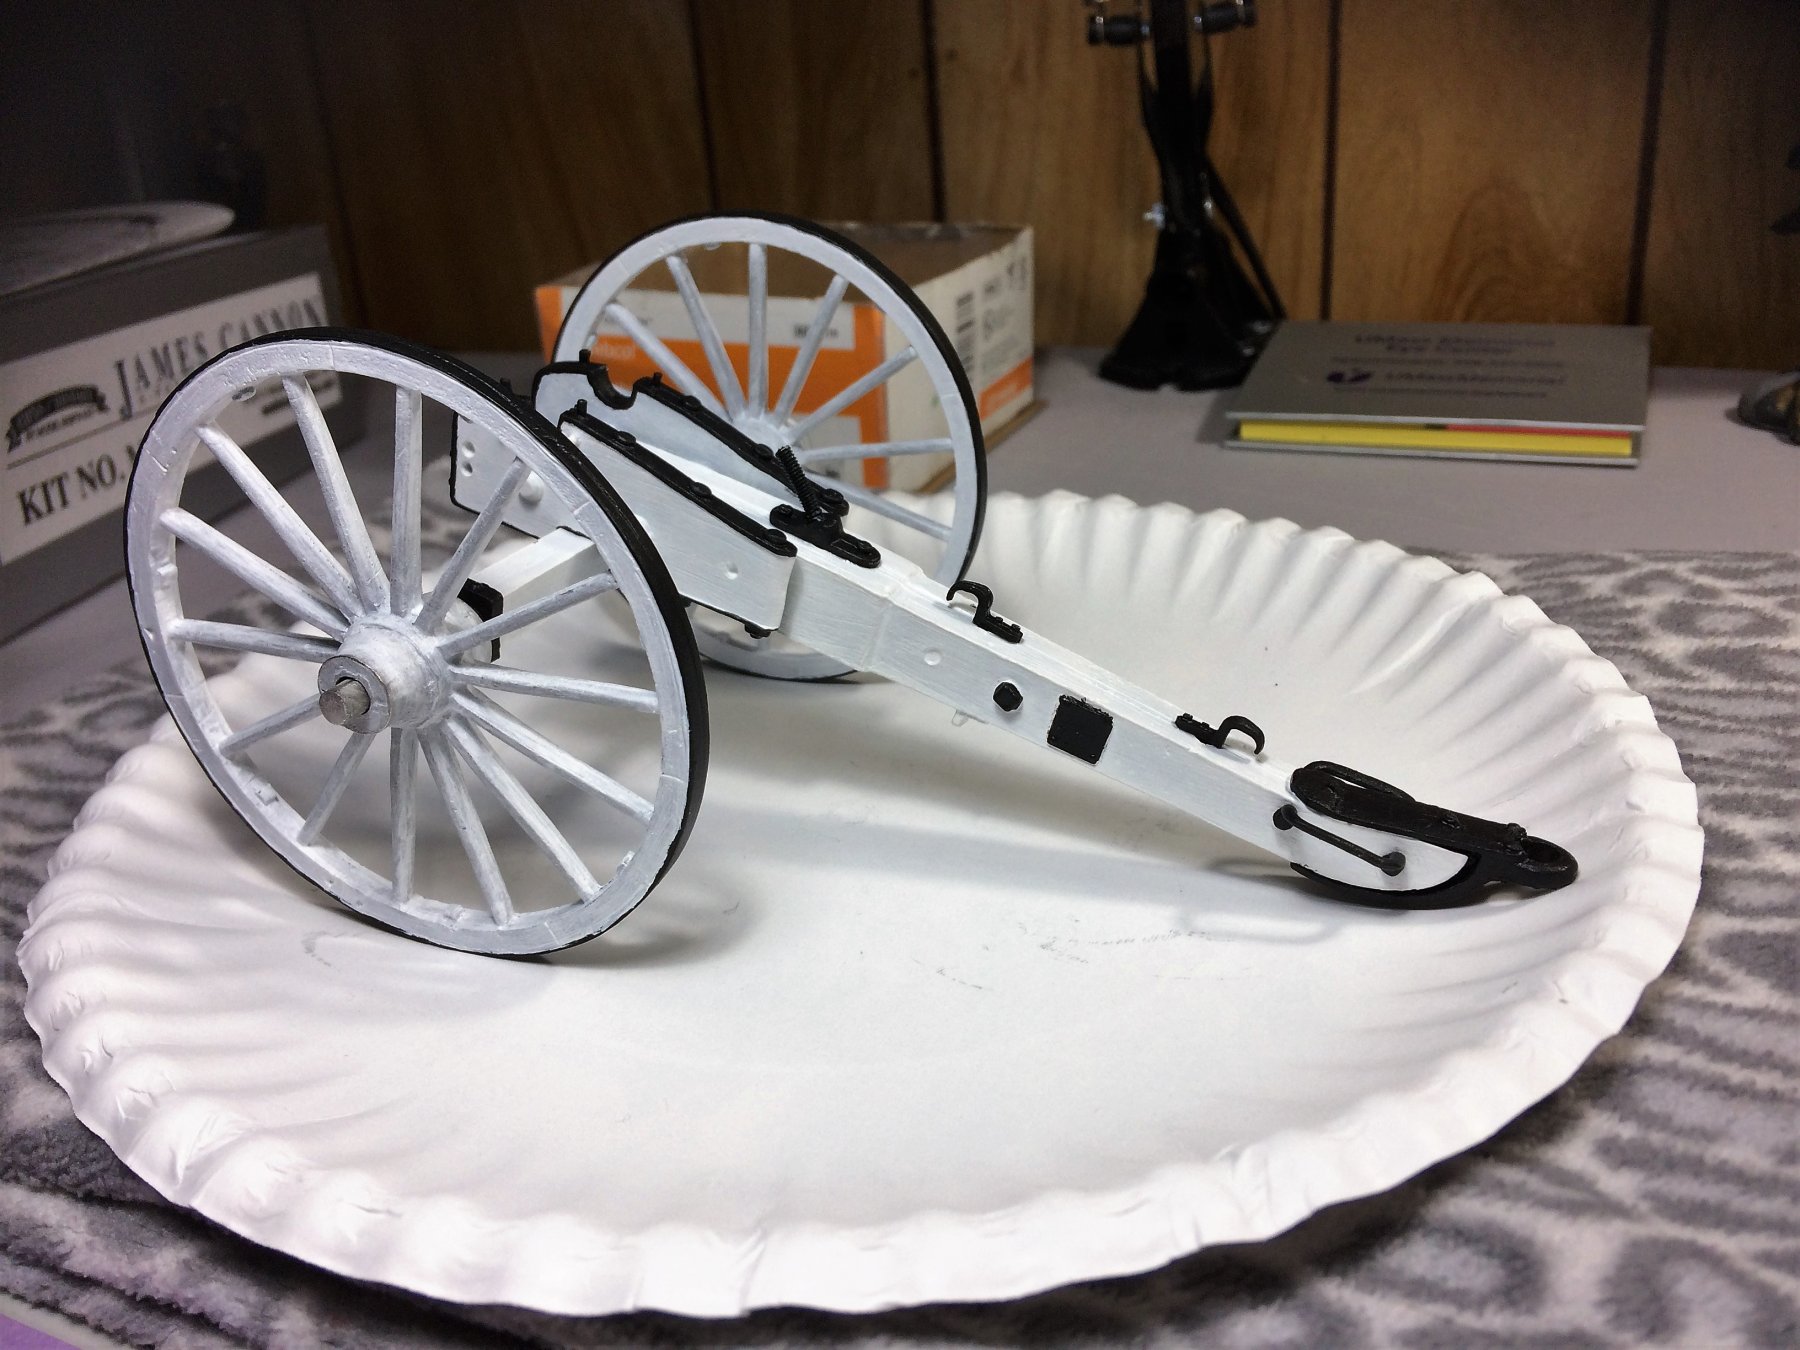
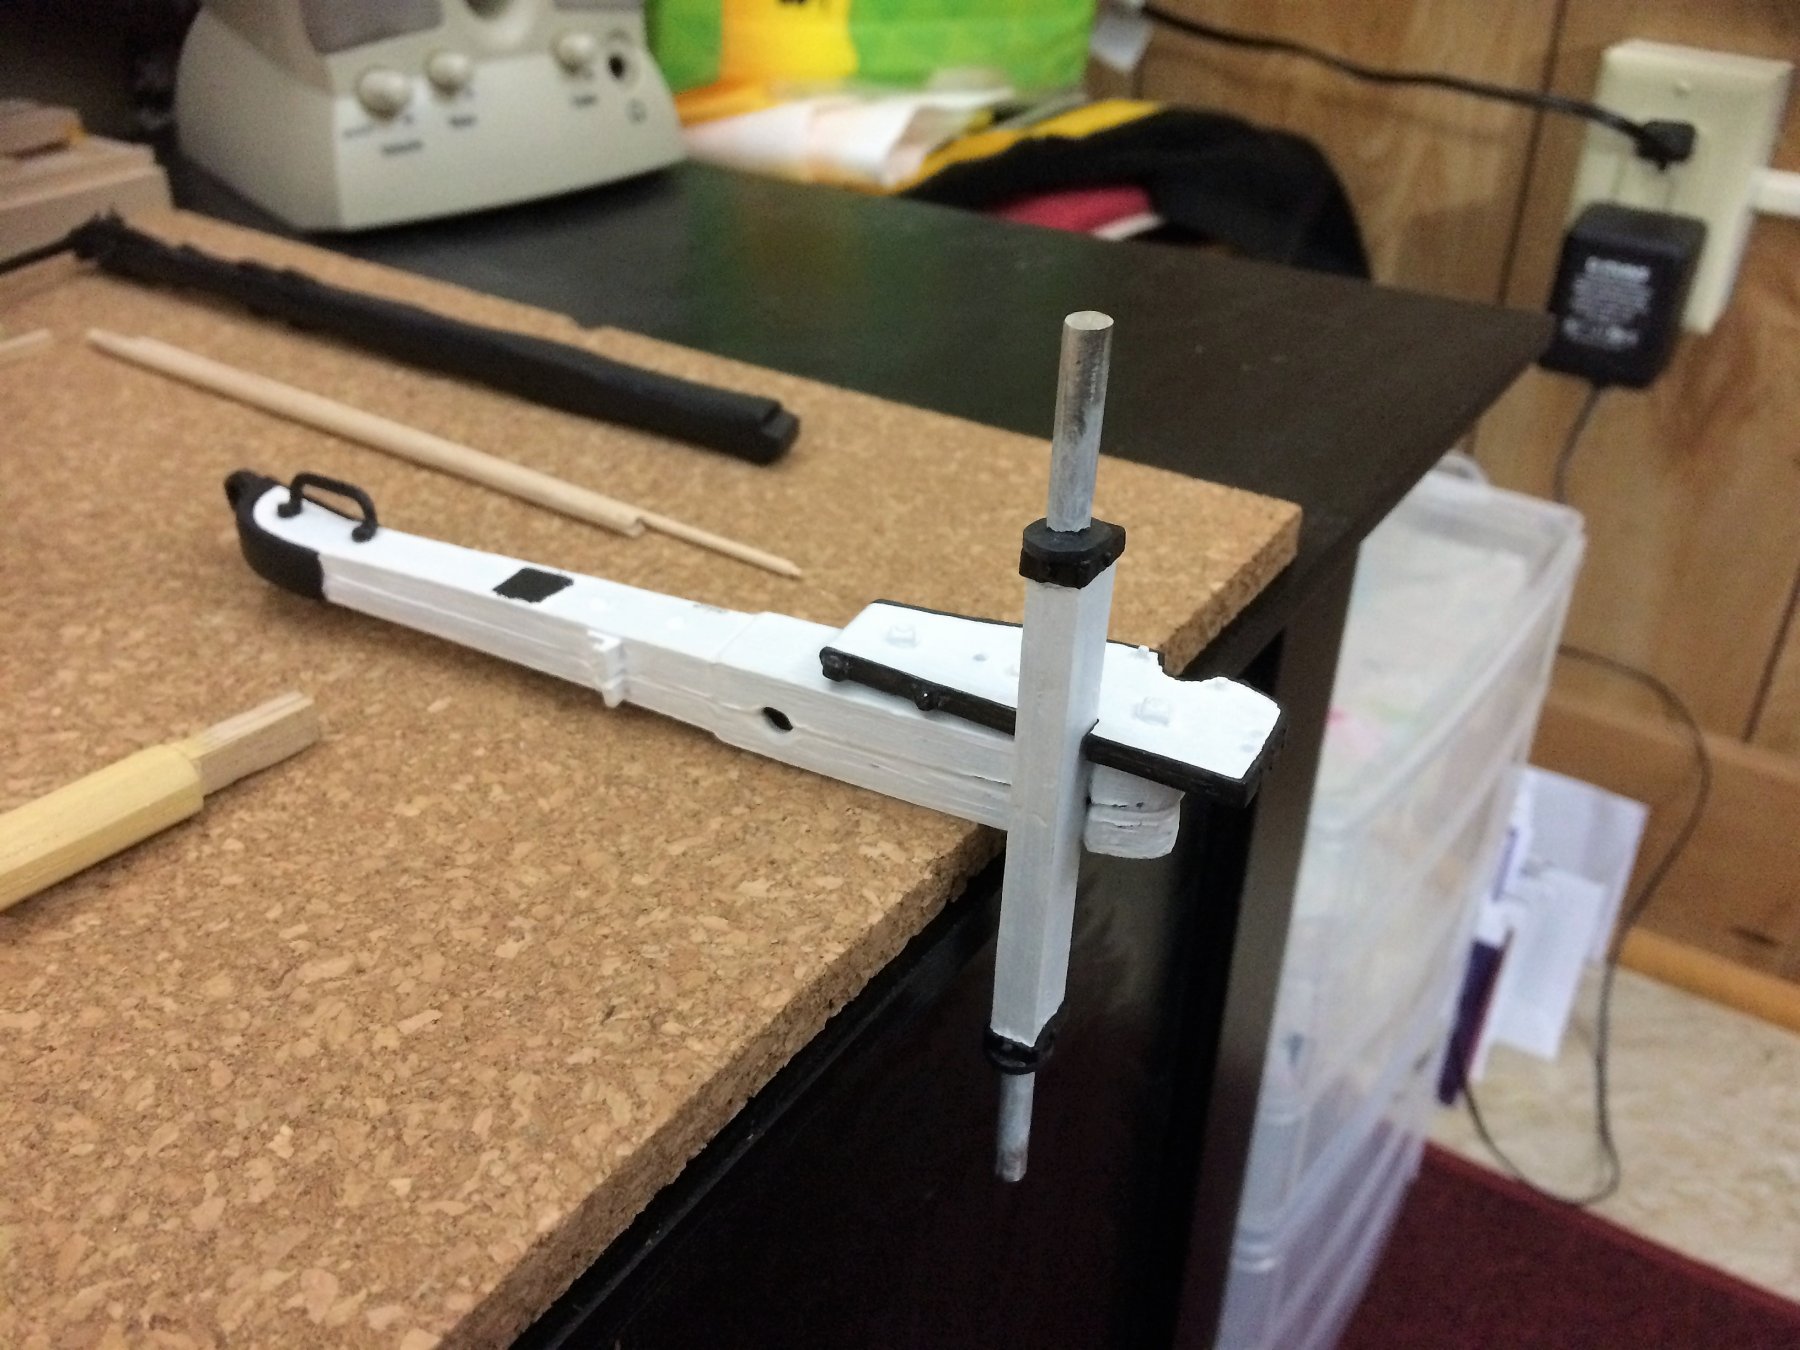
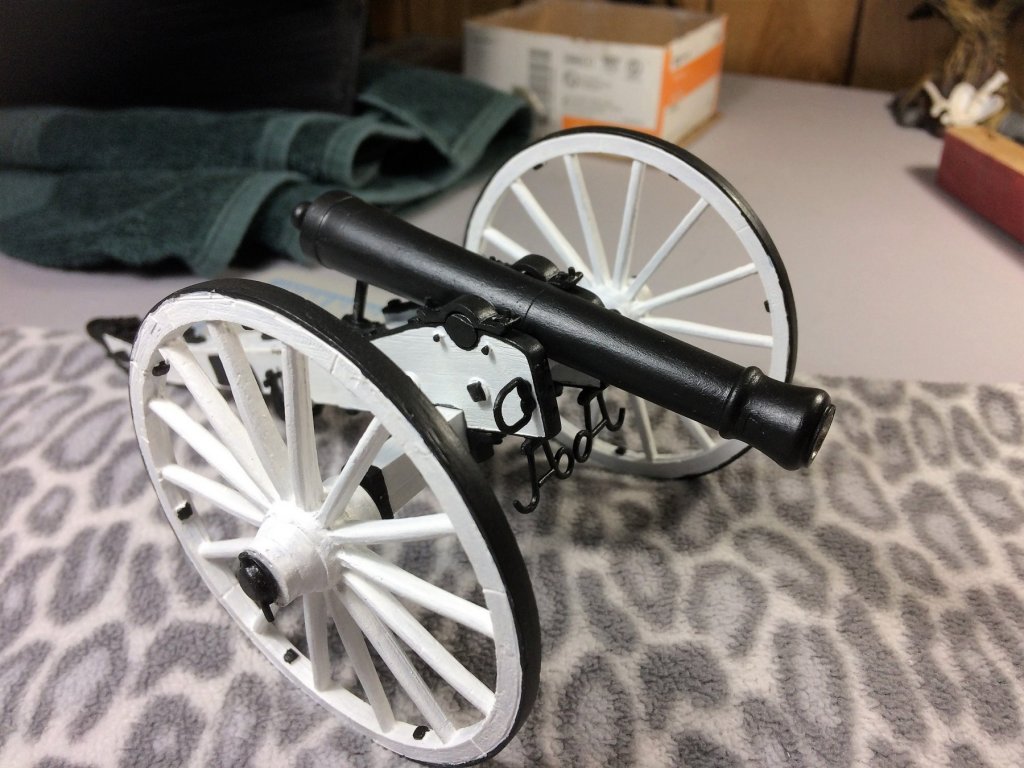
Evening, With my Niagara build properly updated, the James Cannon needs an update. The Cannon came out nicely with a few coats of black. I didn't go to heavy with the layers of black for the Cannon. Once I was satisfied, the Cannon, Cap Squares and Elevating Screw where installed. The Elevator Screw and Housing have been trimmed to give a pleasing angle to the Cannon. It's still pointing down in the below pic. Having all these pieces together really brings it to life! The buckets will get a coat of black. The Turning Spike was painted a dark brown with a black ball on the end. Tom E.


-
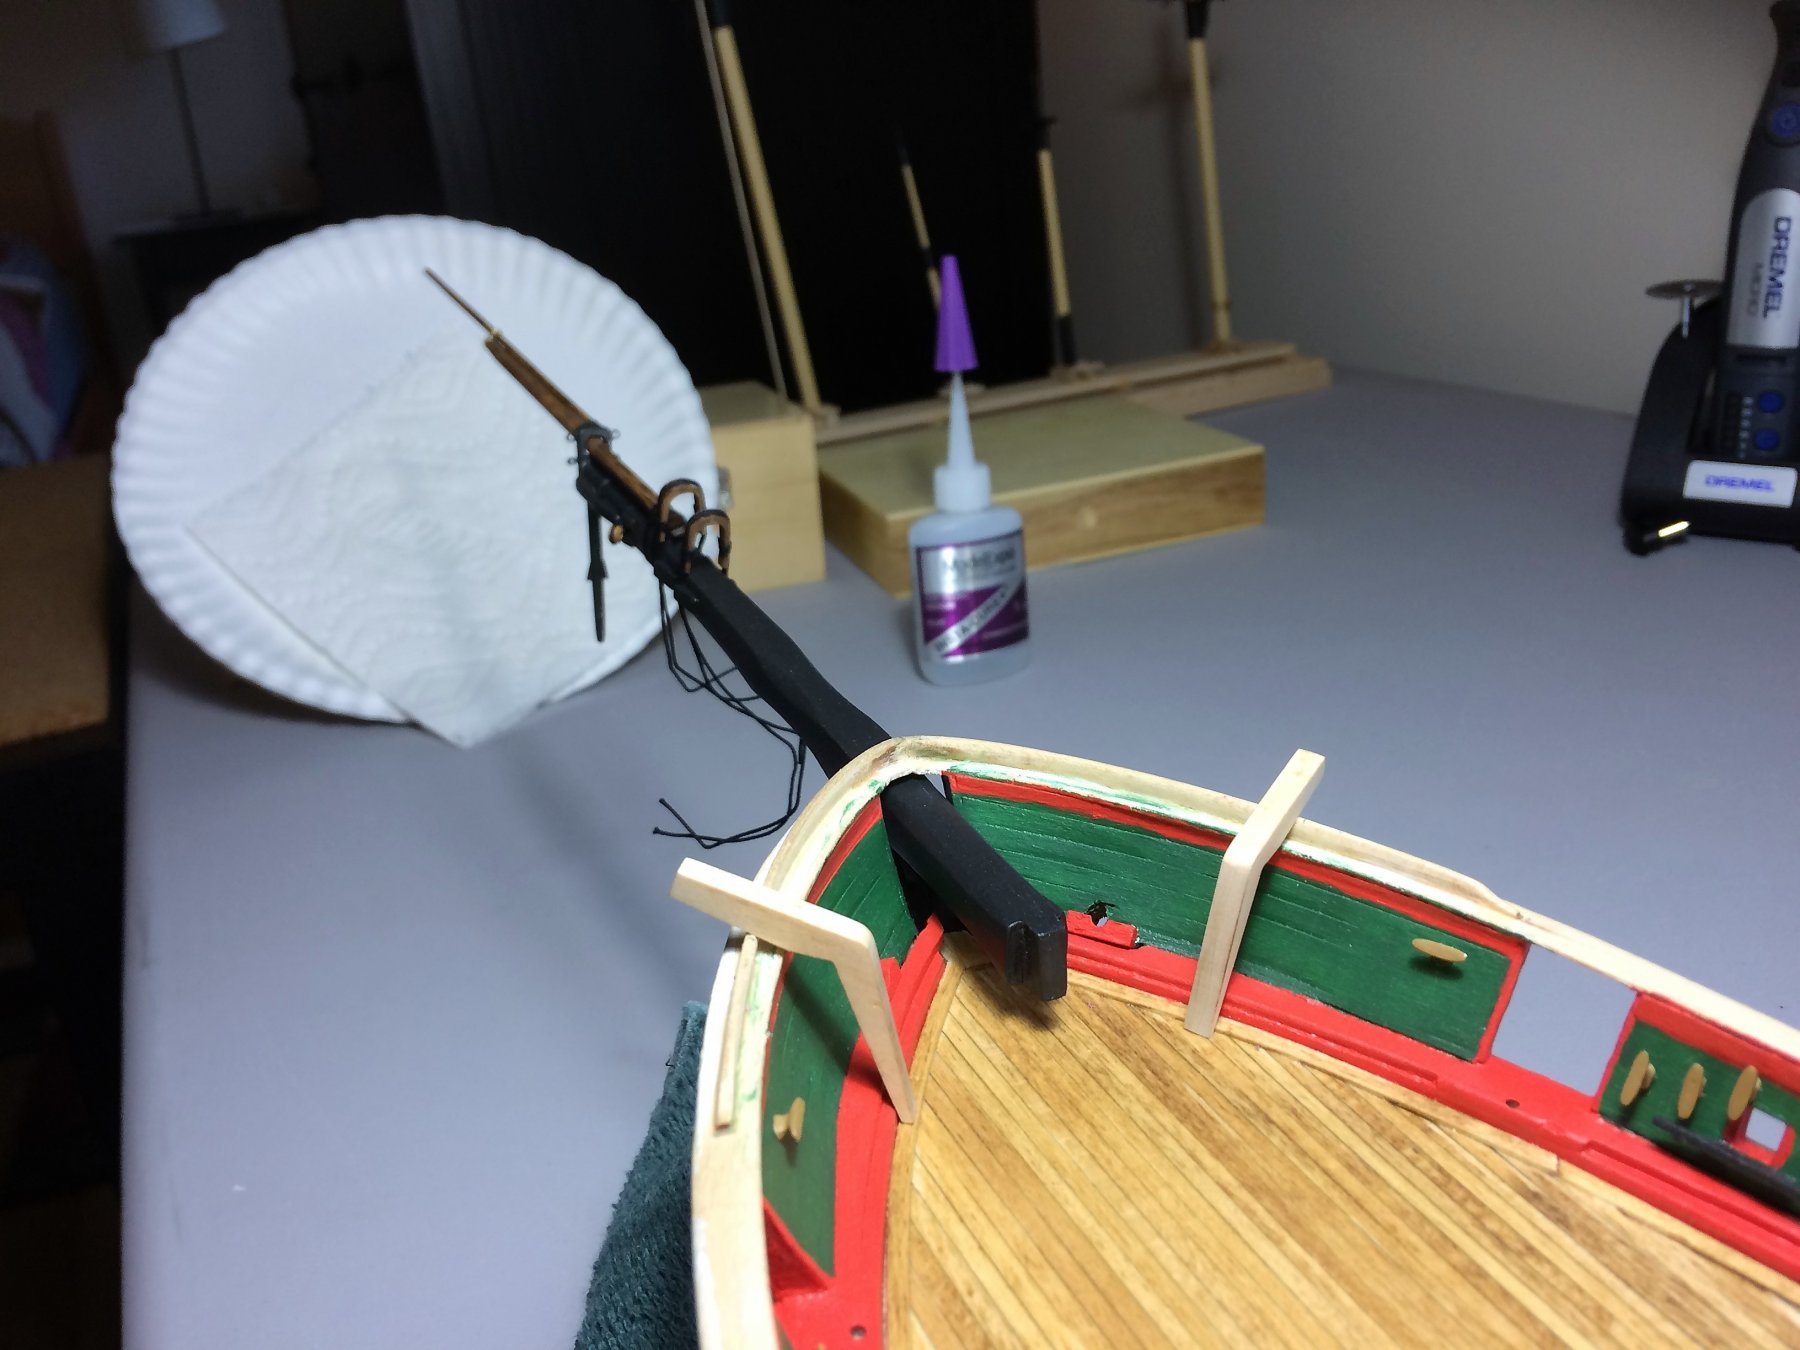
Evening, I cant believe its been 2 months since I last updated, sheesh! Suppose swimming, fishing, barbeques and just some plain old summertime fun will get in the way! With the dog days of summer and the humidity in town, time to crank the air conditioner and head to the Shipyard. I've got the build itch again! Started right where I left off with the Hearts for the Bowsprit. I cheated a bit with a small bead of CA down the outer grooves of the Hearts to anchor the rope. One end of the rope has a loop served. Sorry for the blurry pic. Its the only one I have of this part. A smaller diameter rope wrapped the outside. All rope used is from Syren. The other end of the rope will go thru the loop and anchored on the underside of the Bowsprit. The below shot shows the area a bit better. I also started the rear Lazaret Hatch. This will be the final piece of deck furniture. Once I'm a bit further along with this, the Tiller will be next. It's great to be back!!!!!! Tom E


-
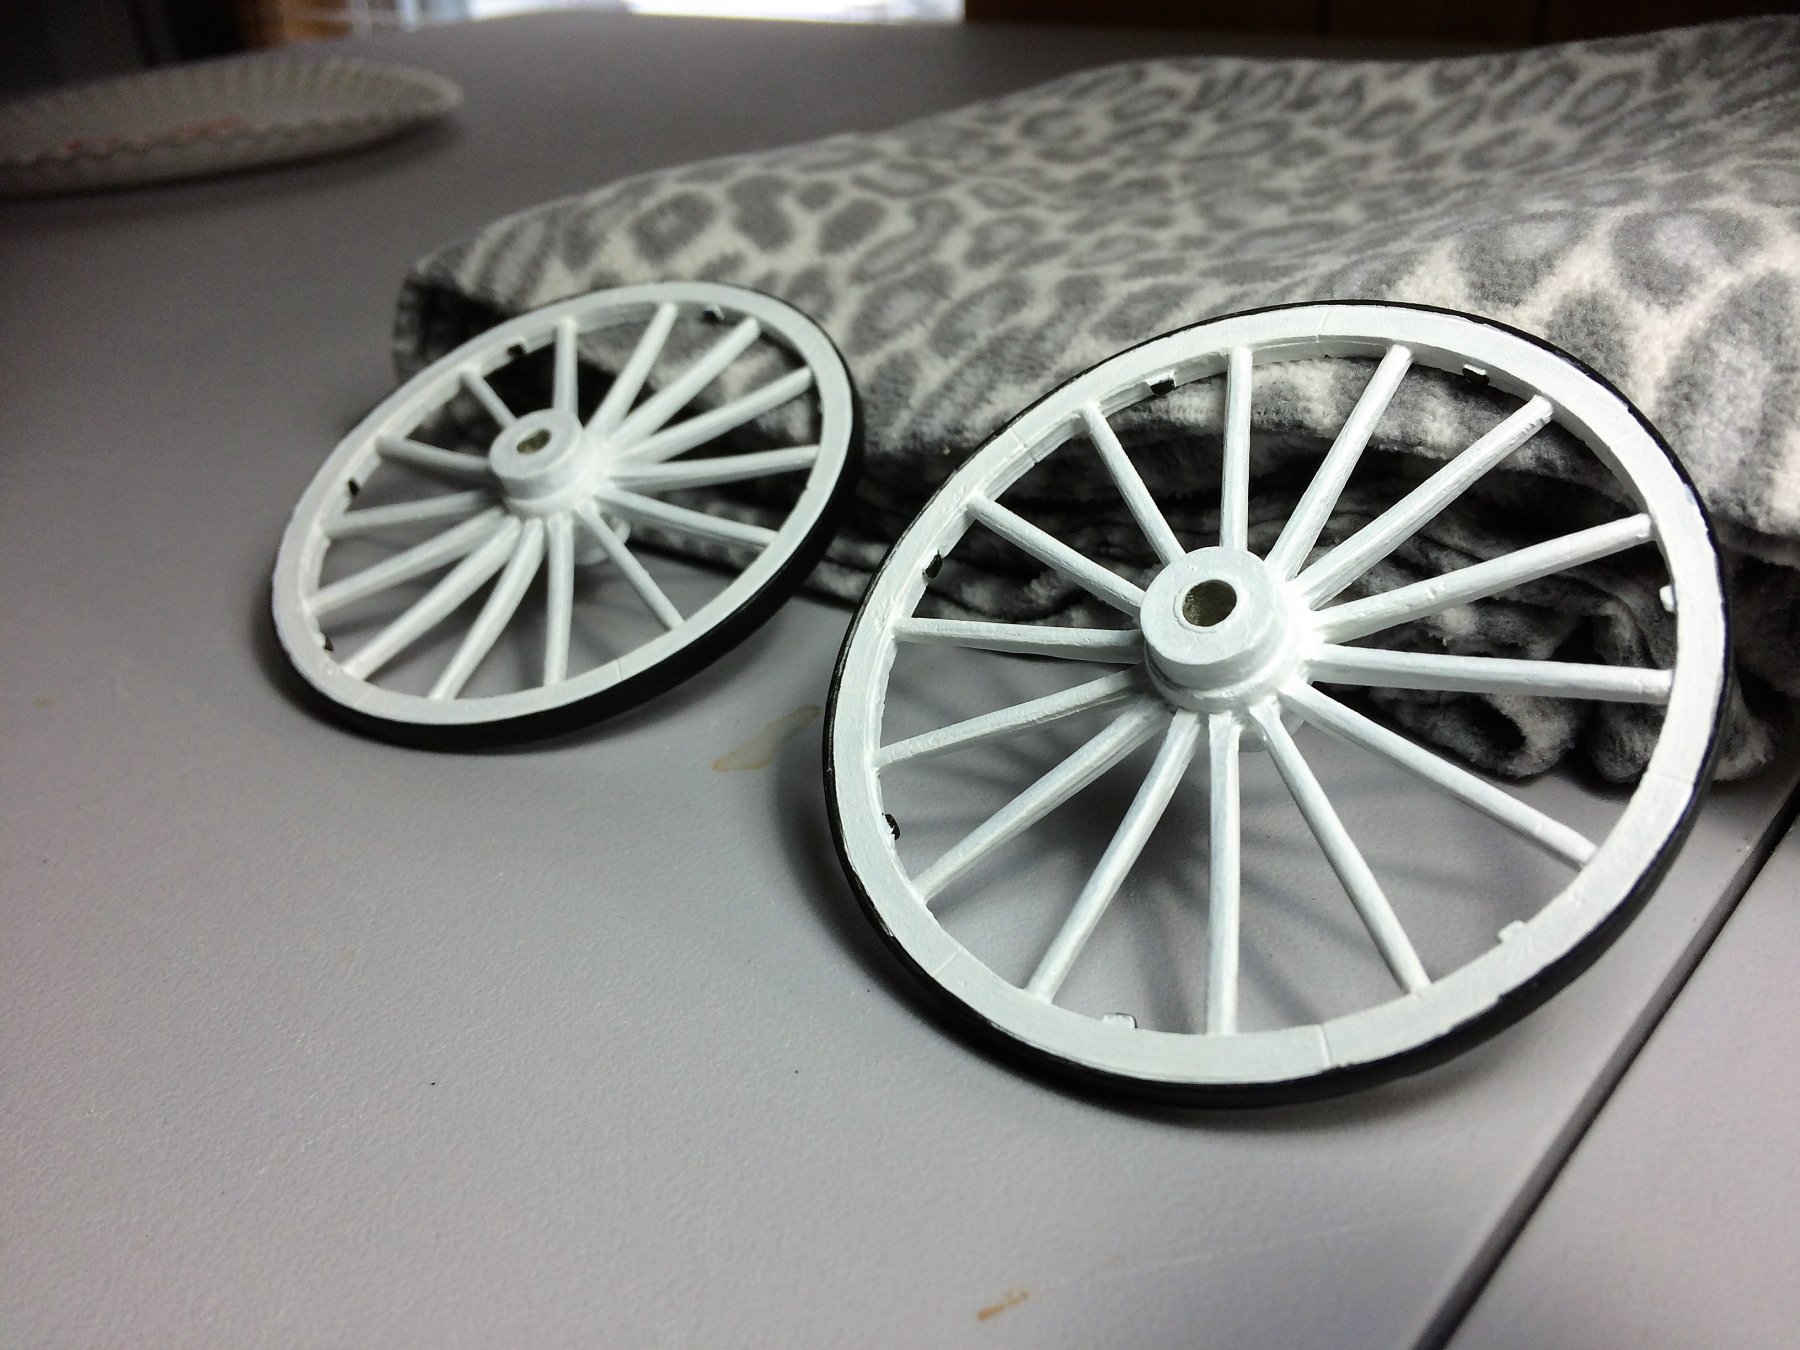
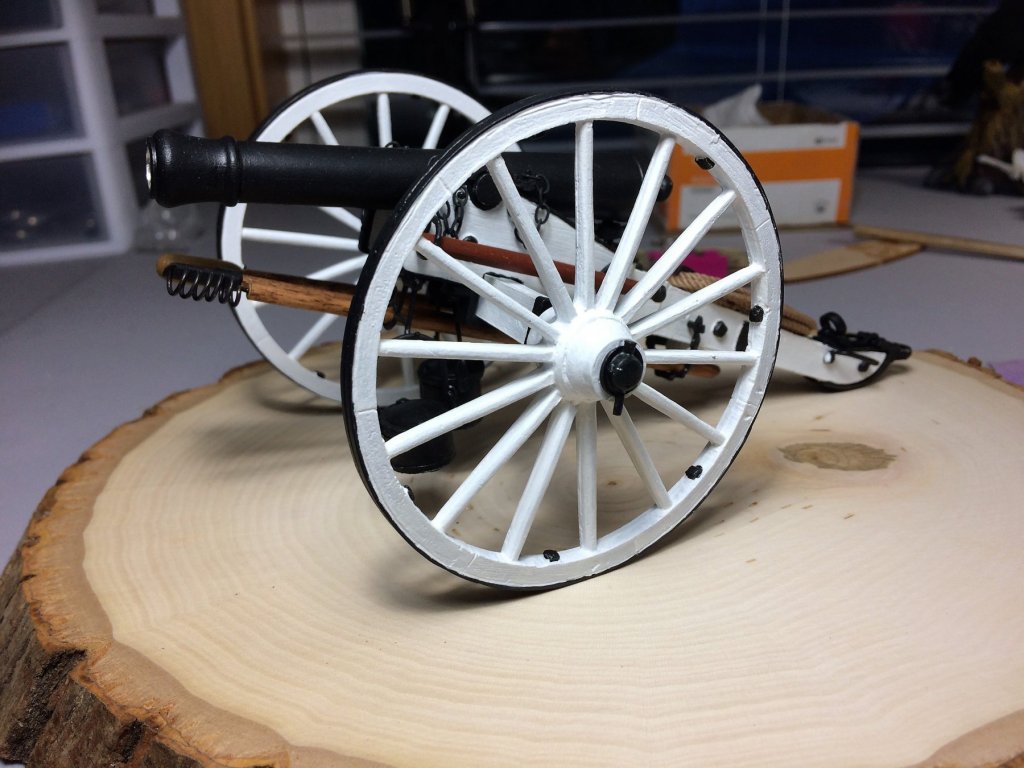
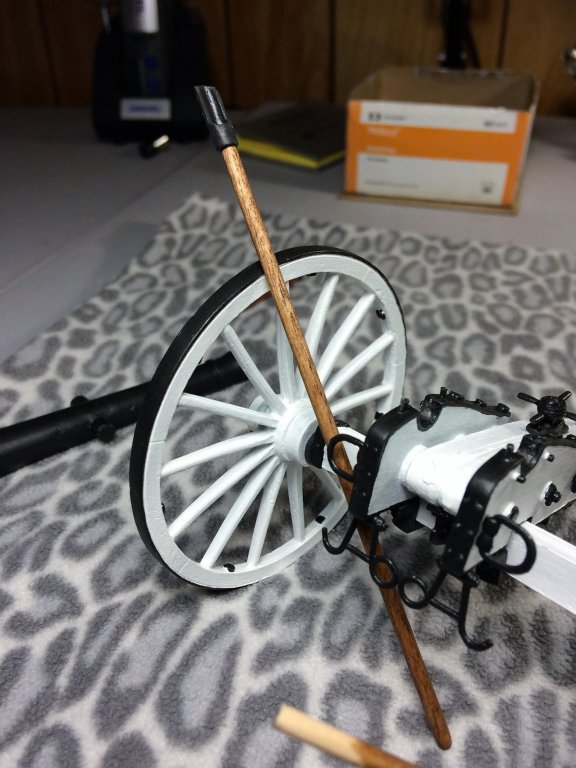
Evening, Been a while since I updated, Honestly, It's been all me! It's springtime in New England and the fishing has been good. Very wet this spring, river levels are up and cold and the trout are loving it! Plus, my beloved Boston Bruins are in the Stanley Cup Finals!!!! The build continues! The Pittons have been painted and installed. Poles will hang from these. These curly things were tricky. Once the glue was placed you had to hold these things so they wouldn't move/flop off. I probably used too much glue, its shiny in the below pic. It will get a coat of black. But should prove a solid bond. The wheels get another coat. The wheels are catching up to the "brightness" of the main body. One coat at a time! I started the Cannon finally! I went to town on this thing, cutting, trimming, sanding......etc...... A good couple of hours it took! A whole bunch of coffee and doughnuts! In the end, it's looking much better in person. Below it has its primer coat and does it no justice. Still has its rough areas, but presentable. We'll have a better view of it once it has it's black paint. Go Bruins! Tom E


-
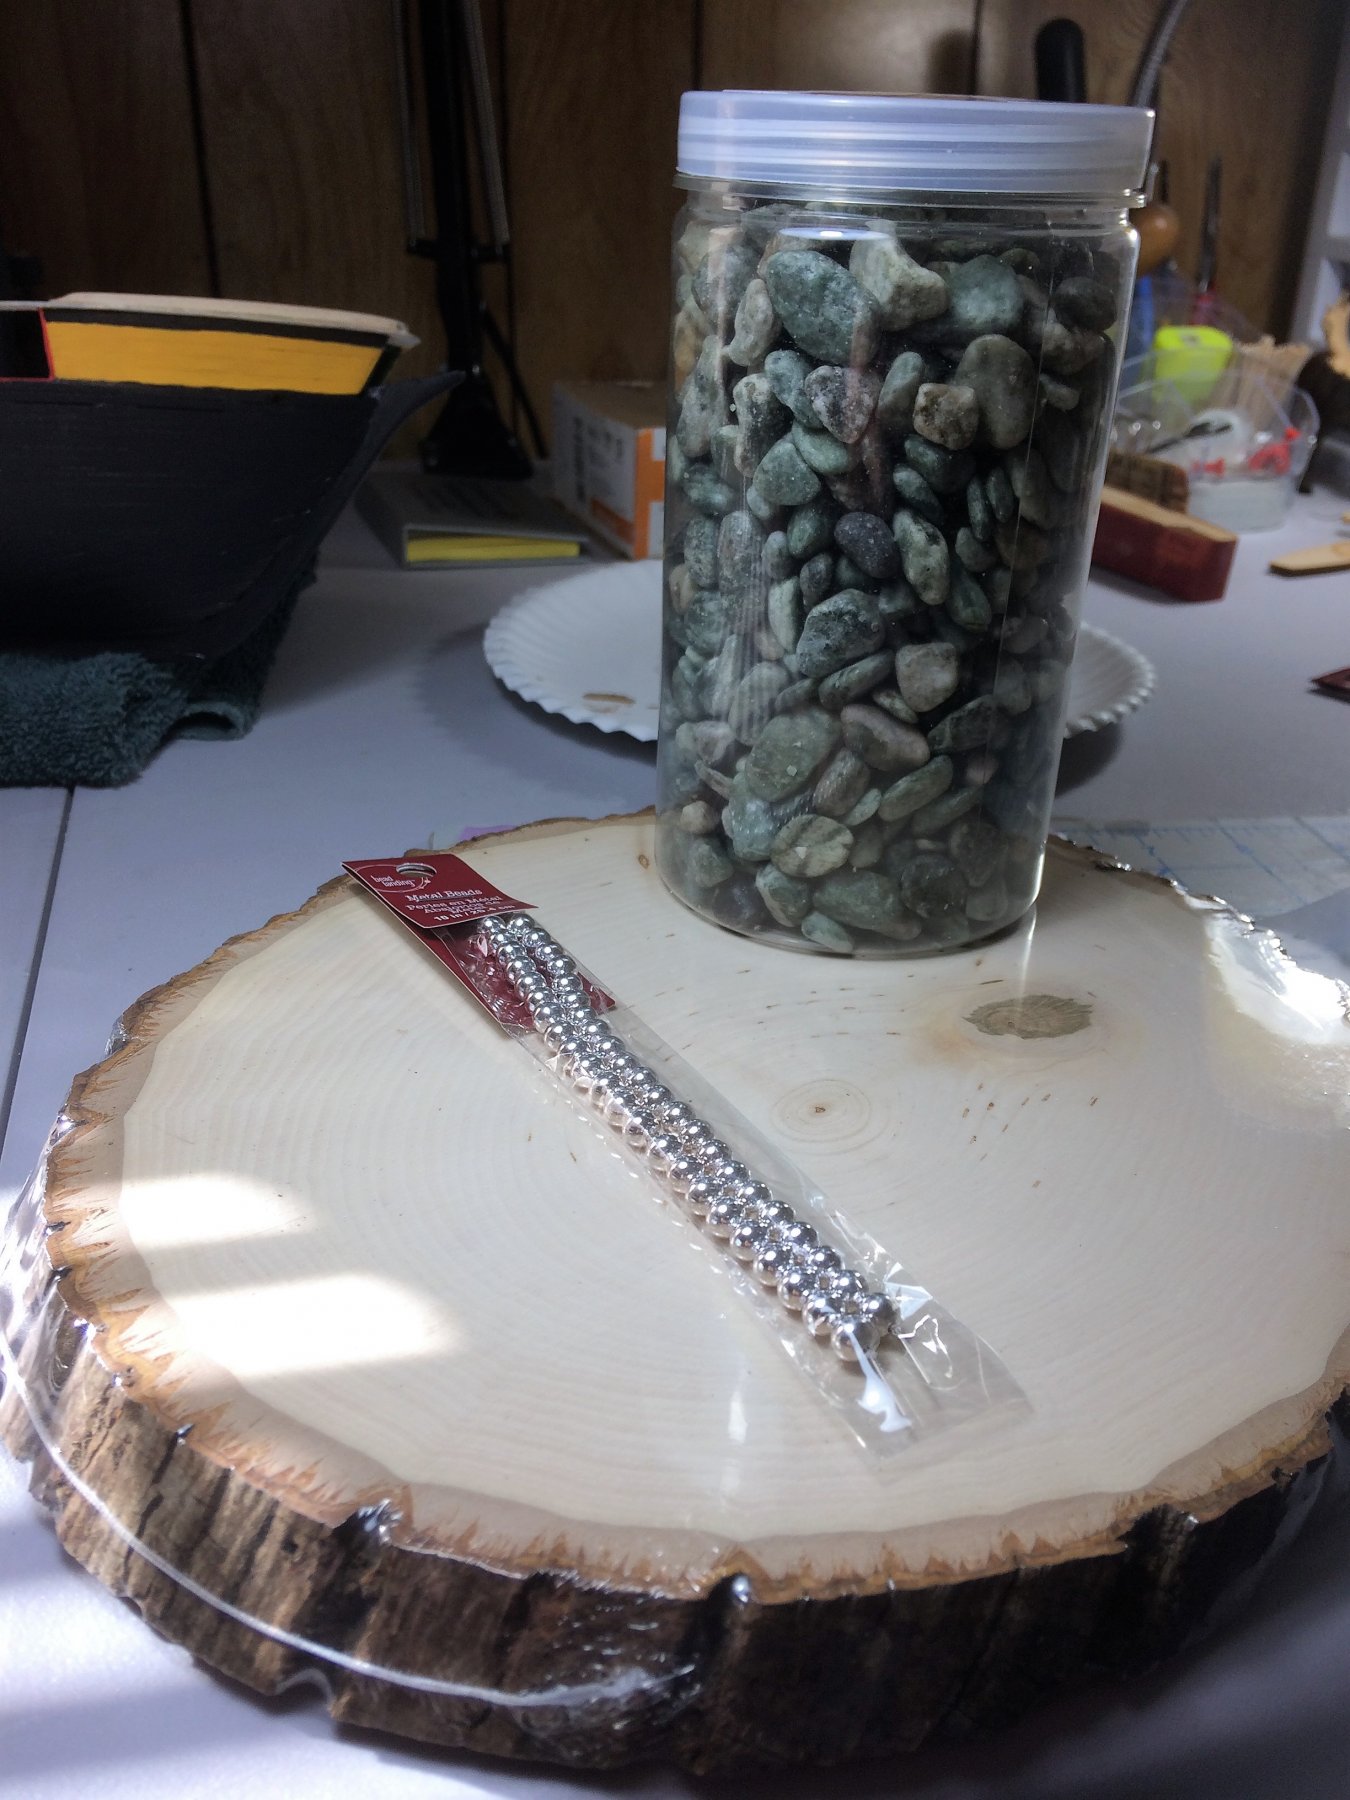
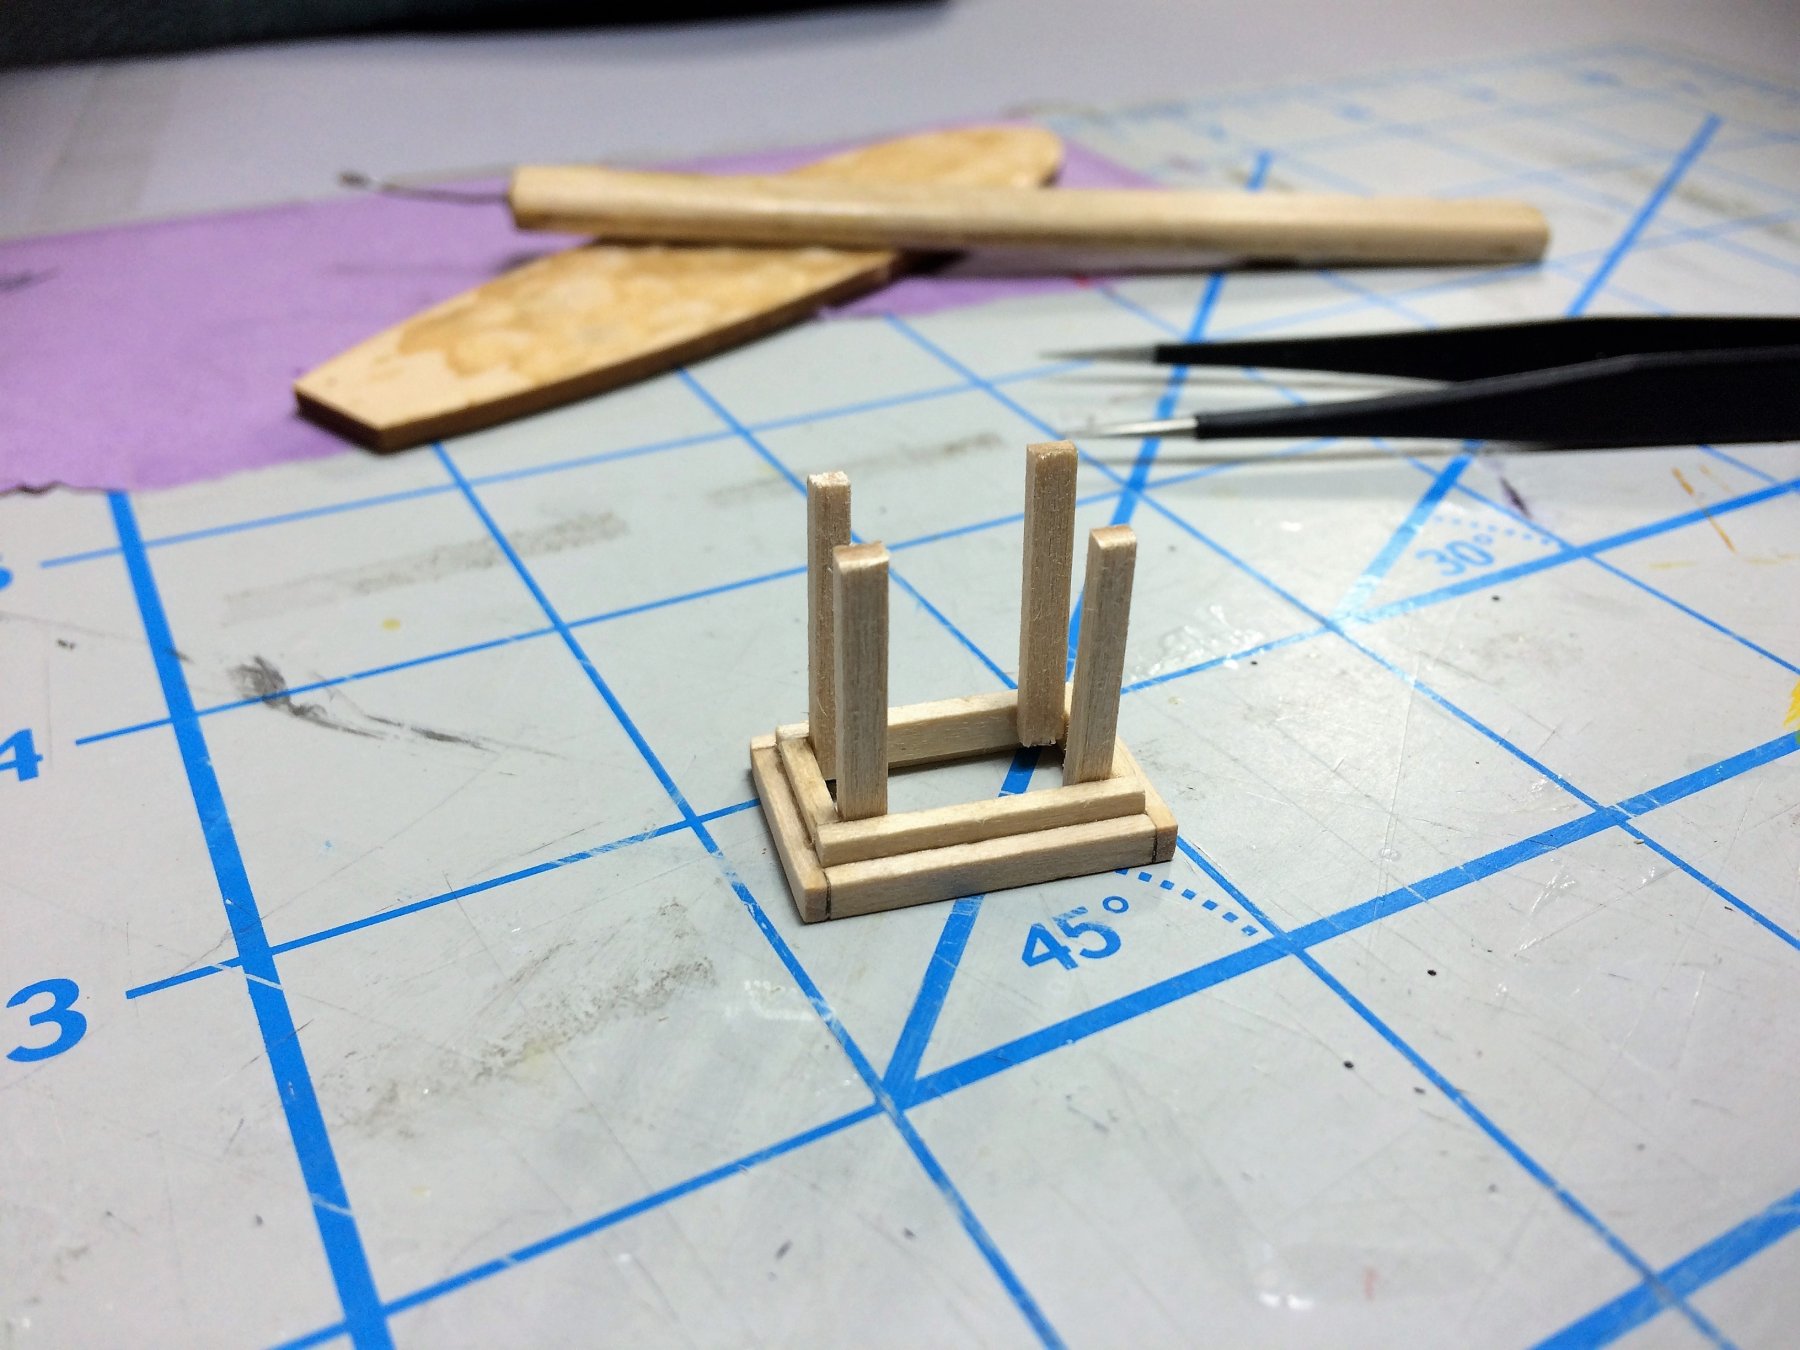
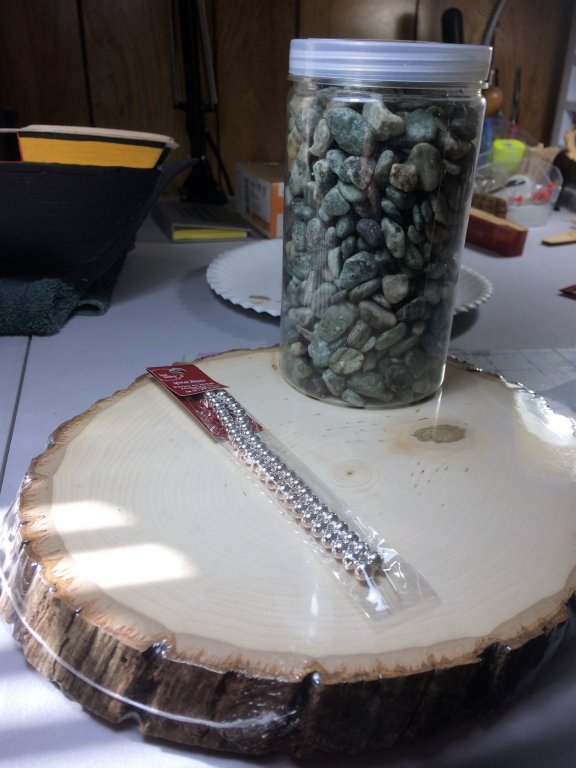
Evening, Thought the James Cannon could use an update. Over the past work week I've started thinking about how to display/mount it. I was at Michaels recently and found some things I can make a display for the cannon. First, a slab of basswood for a base. Then found some beads that will simulate cannon balls, after a good painting. Figure I'll make a stacked triangle of cannon shot. I checked the size of the beads to the size of the cannon and they fit perfectly. Almost like they were made for it! The rocks I bought to simulate an old New England style rock wall somewhere behind the cannon, I'm still chewing on that one. I just couldn't resist putting it together to see what It will look like. I really need to start the cannon! I think she's cleaning up nicely. I may stain the basswood base. The white of the cannon gets kind of washed out by the basswood. Maybe a dark stain, I have a Red Oak stain already.....Hmmmmmm…. The below pic is what has me re-thinking a rock wall. The entire cannon fills up a fair amount of the base. Cannon shot will be stacked somewhere near by. Tom E


-
Gary, I agree with Christos. That's an amazing spreadsheet! It's nice to see everything neat and organized. I especially like how it's separated between the Fore, Main mast and Bowsprit....nice touch! Trying to interpret the plans, and hoping, that I accounted for everything was already in my head. Many thanks! Tom E
-
Gary, That sounds interesting, I'd like to see that. Thanks, Tom E
-
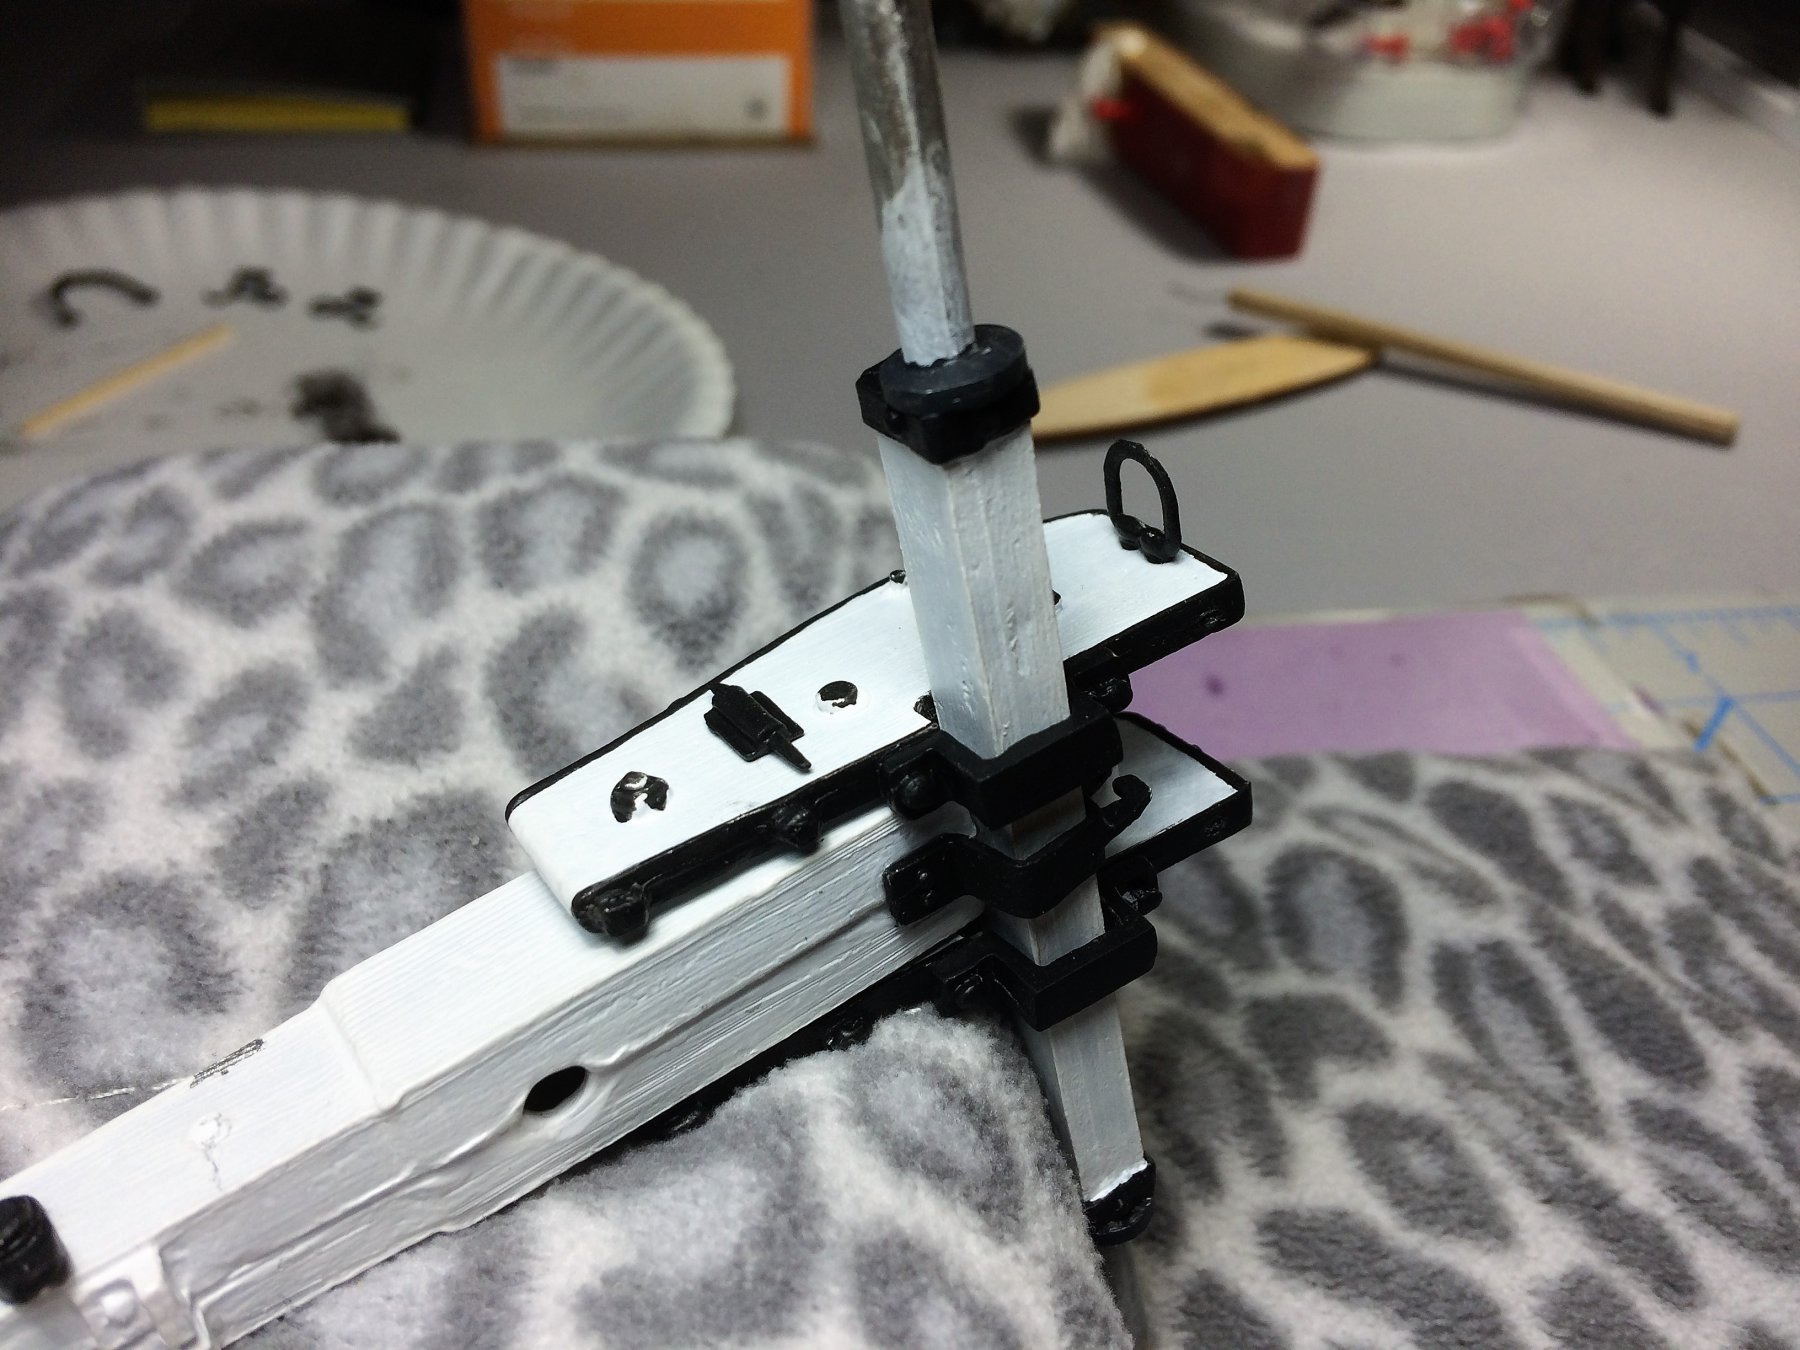
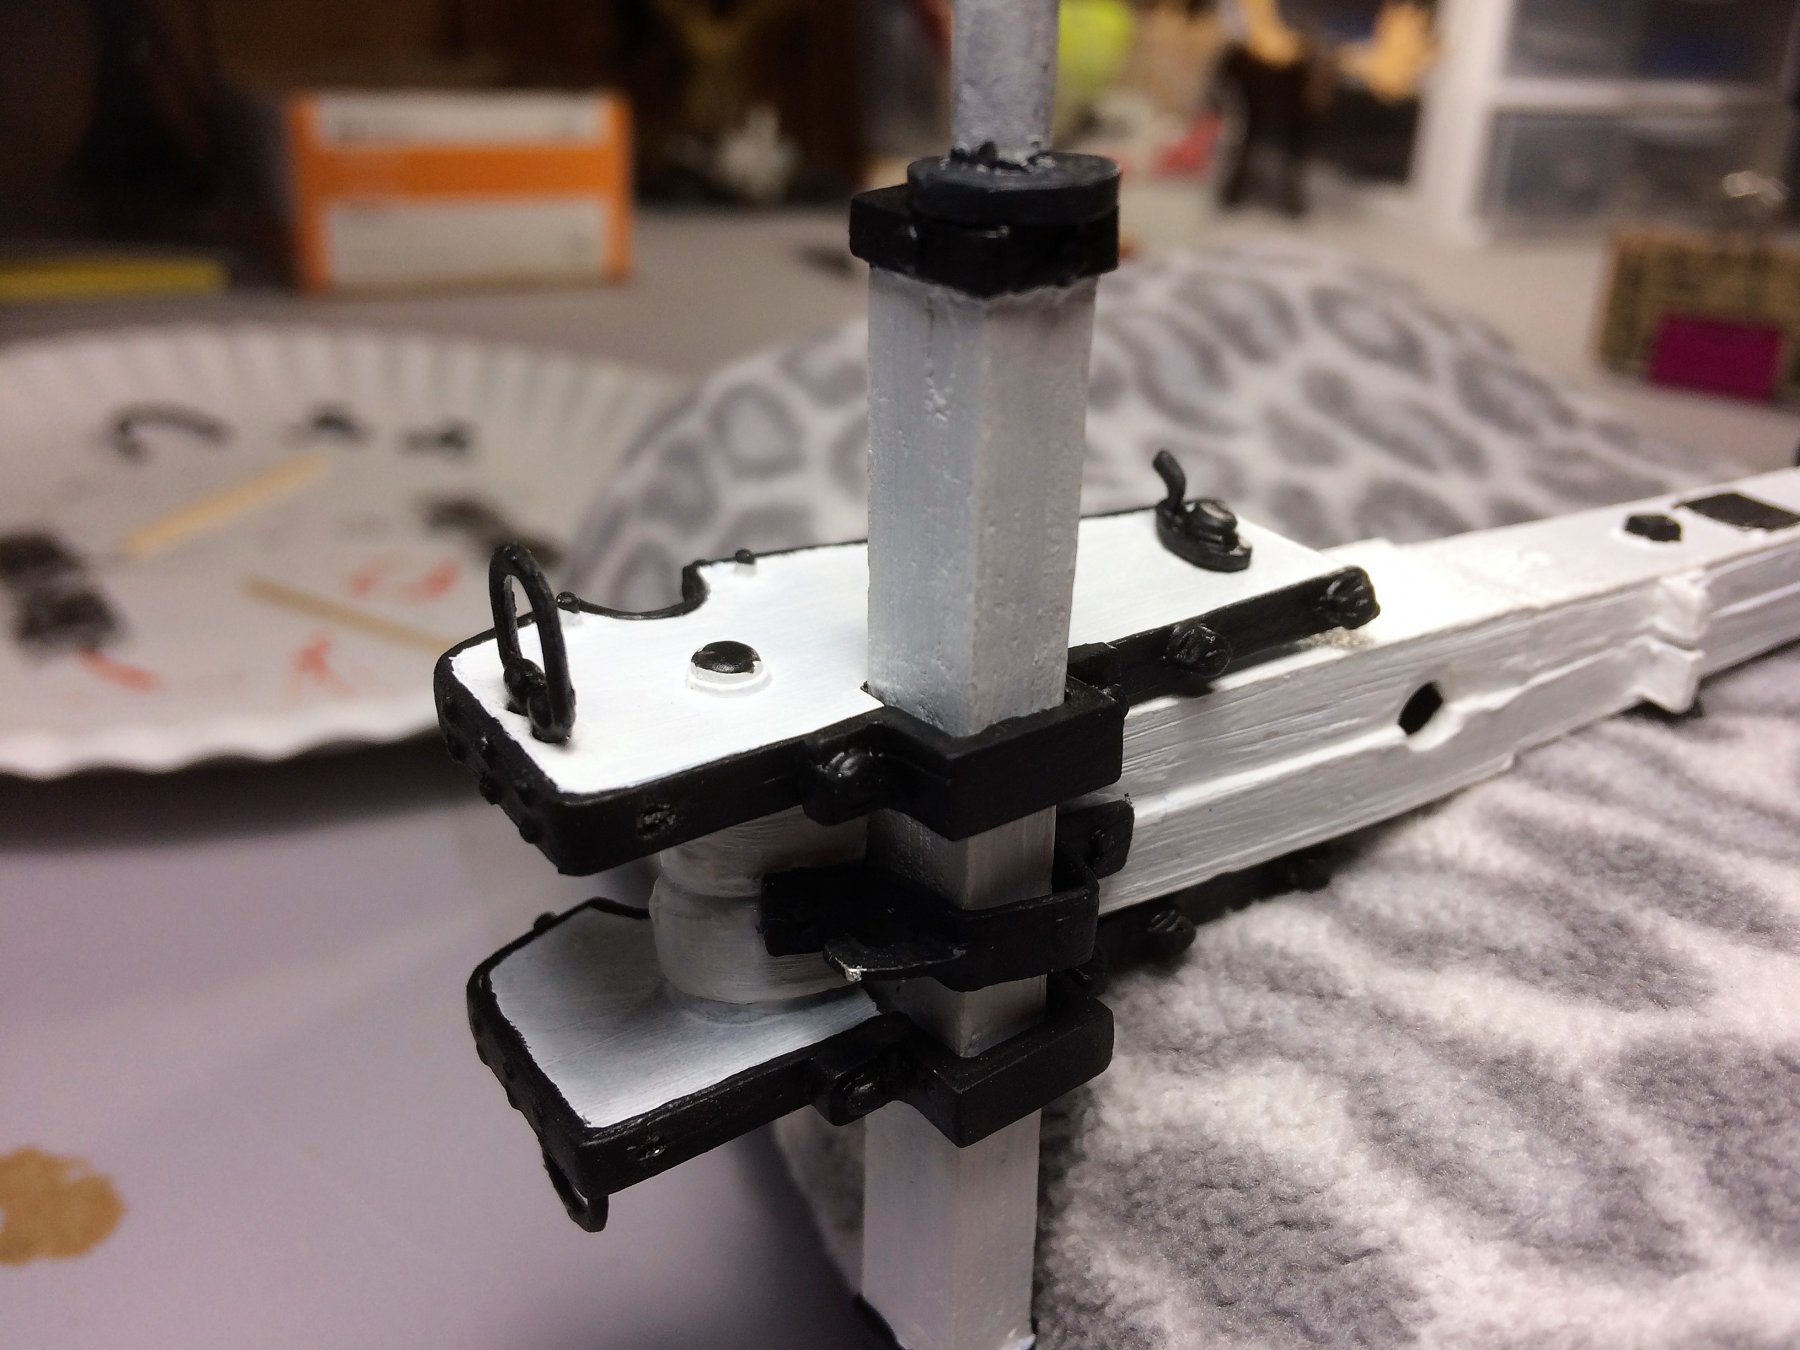
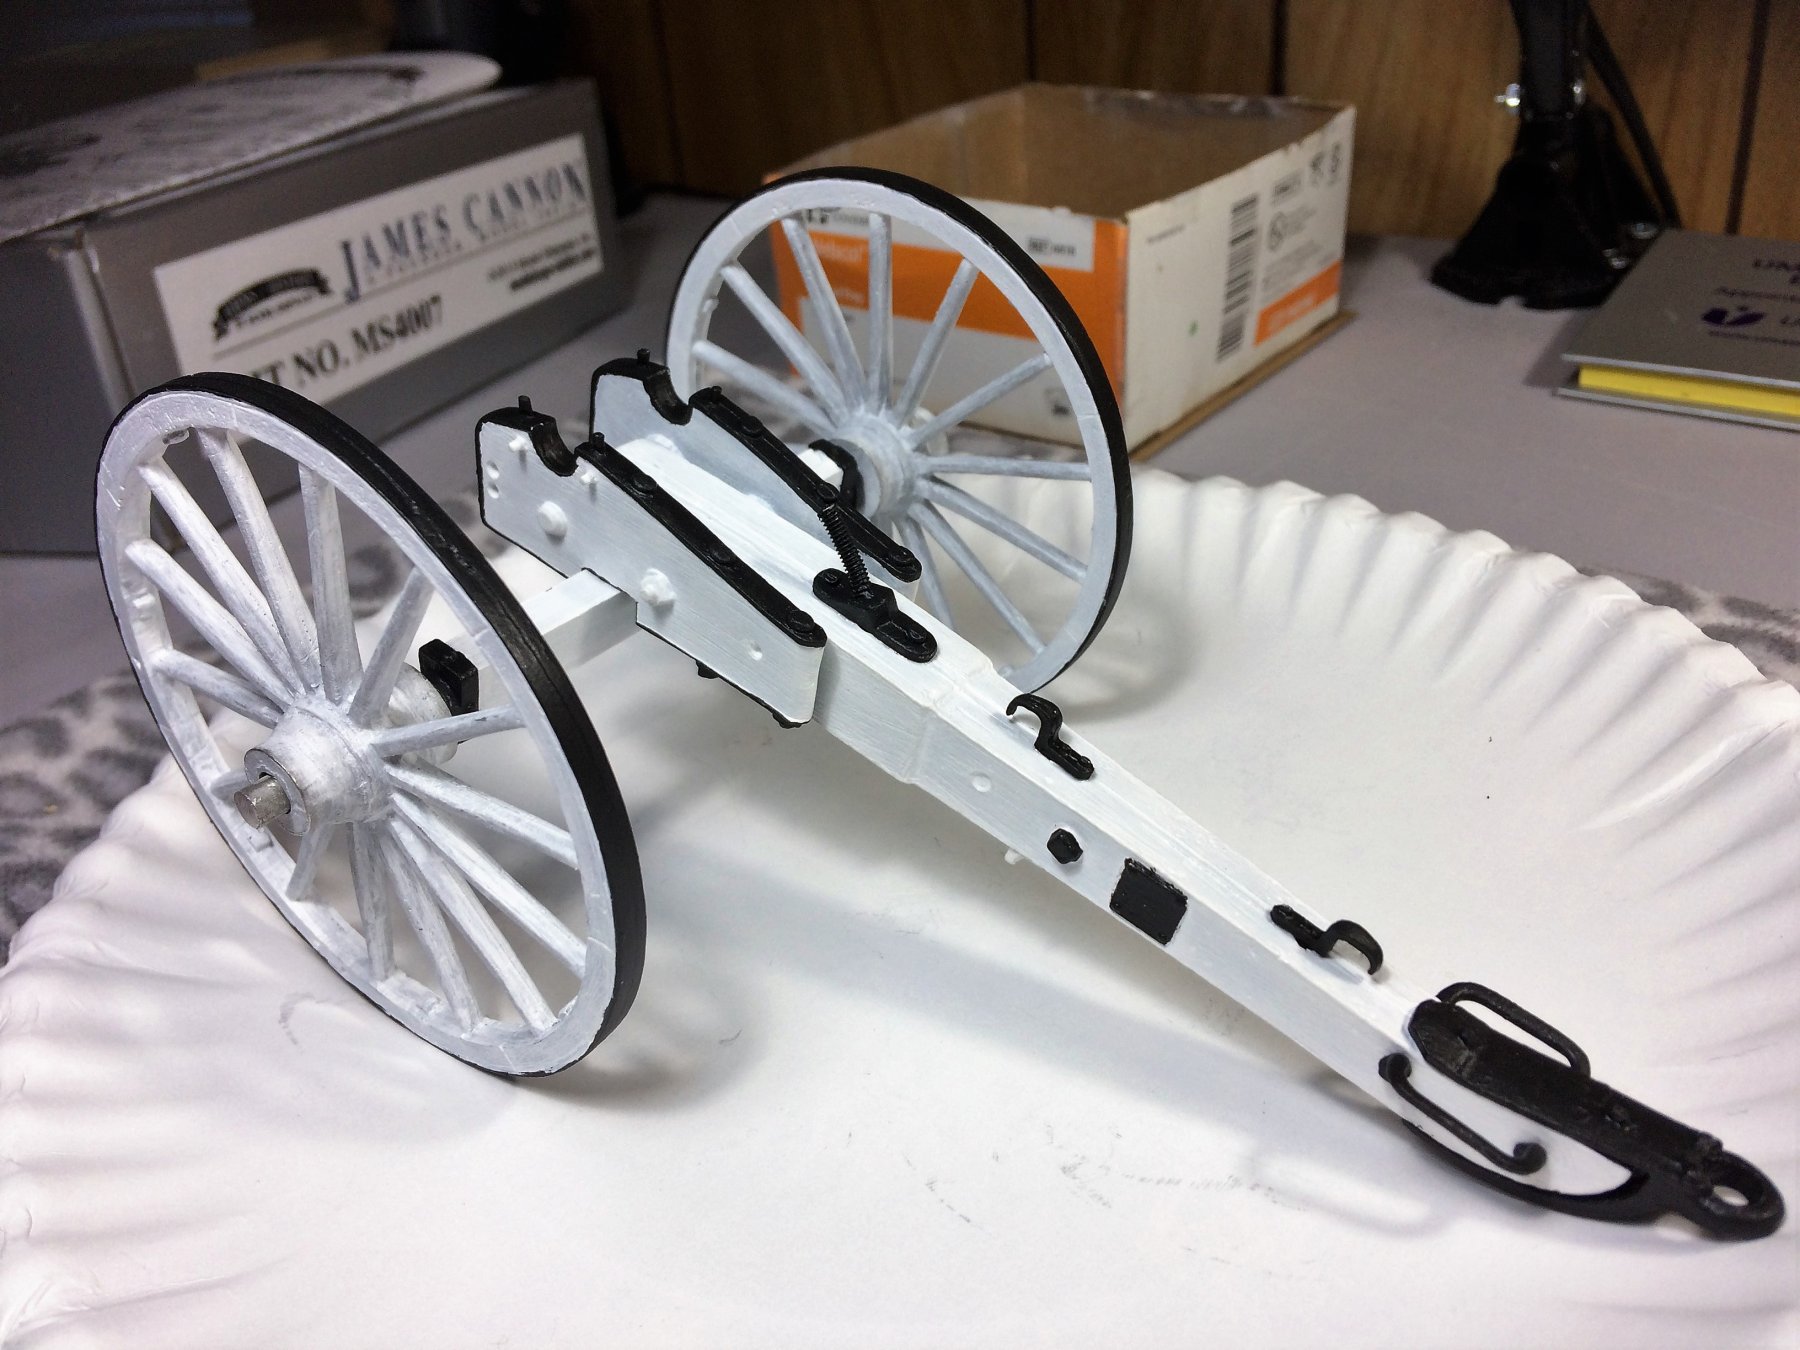
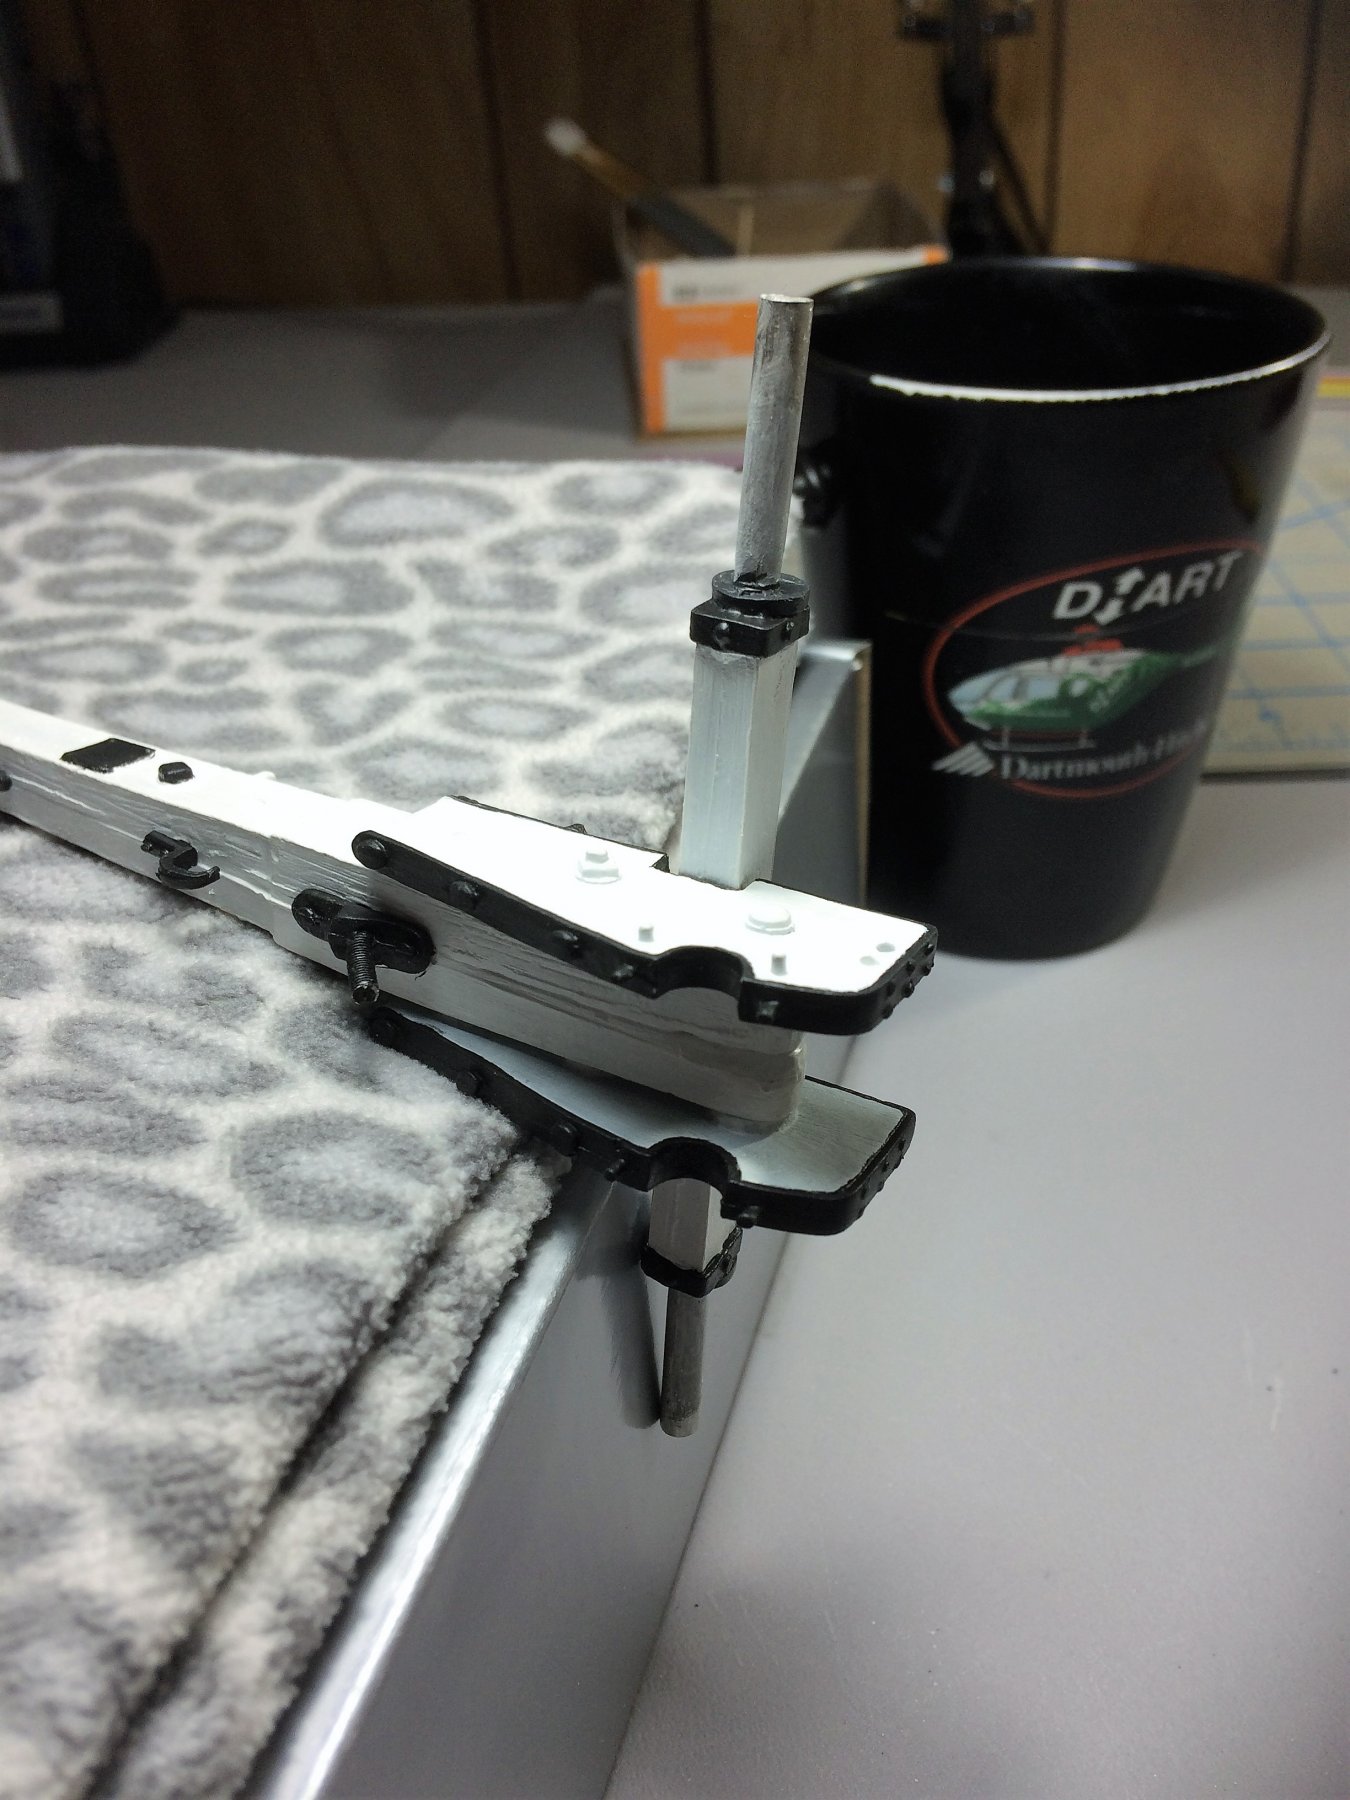
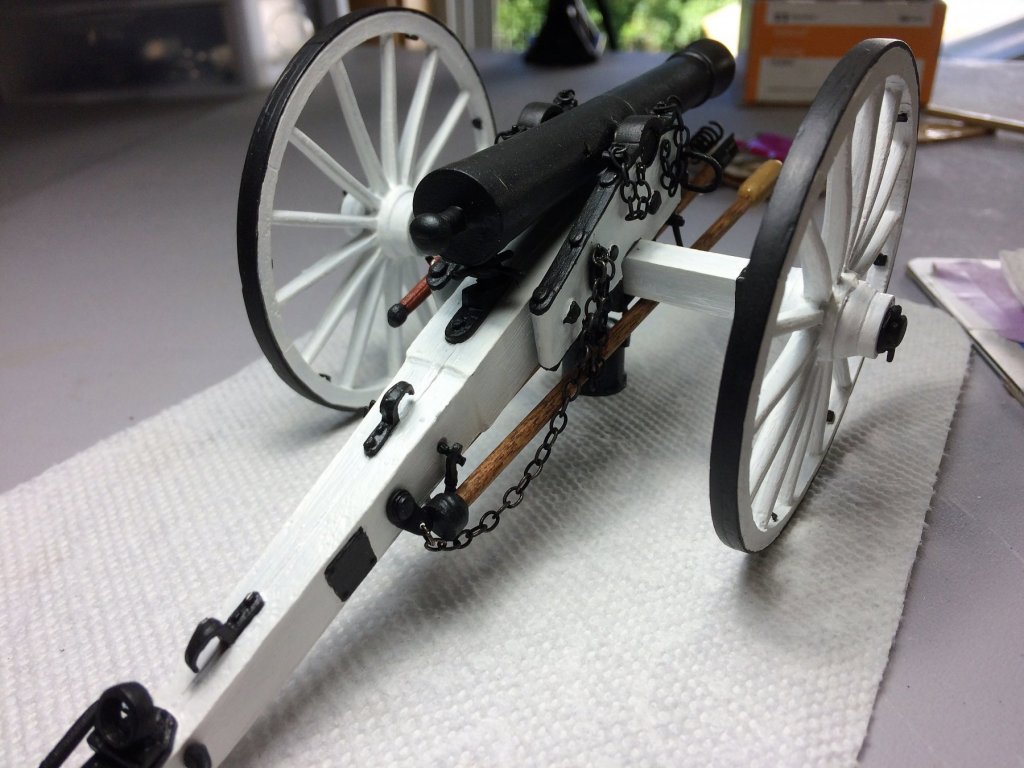
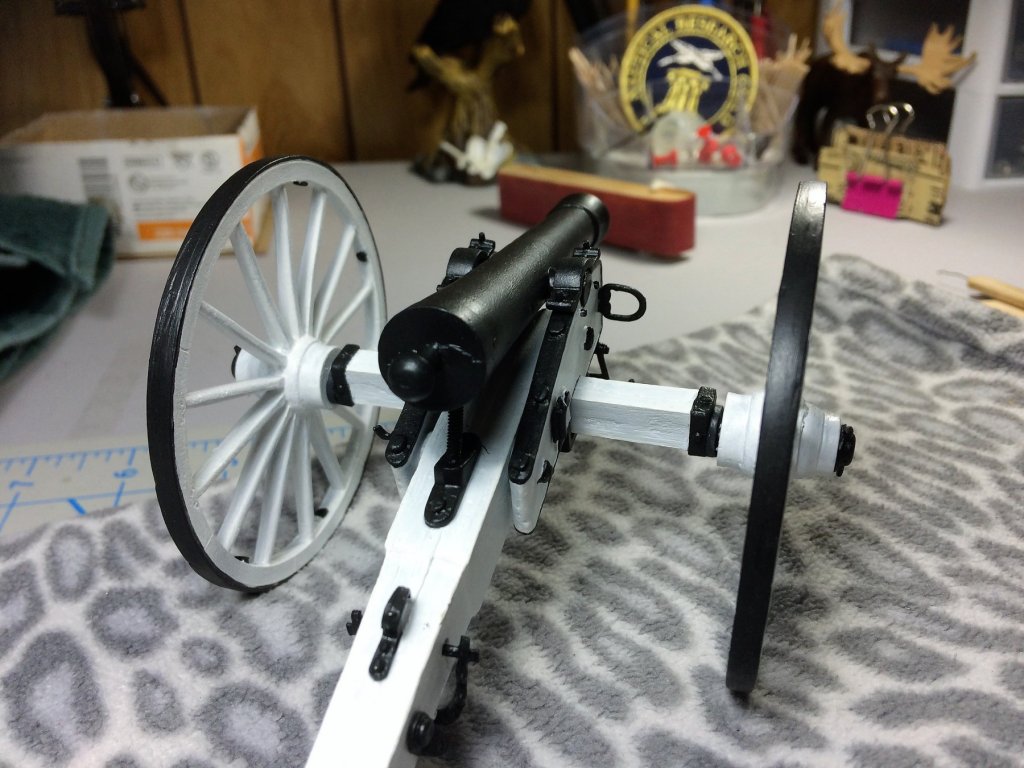
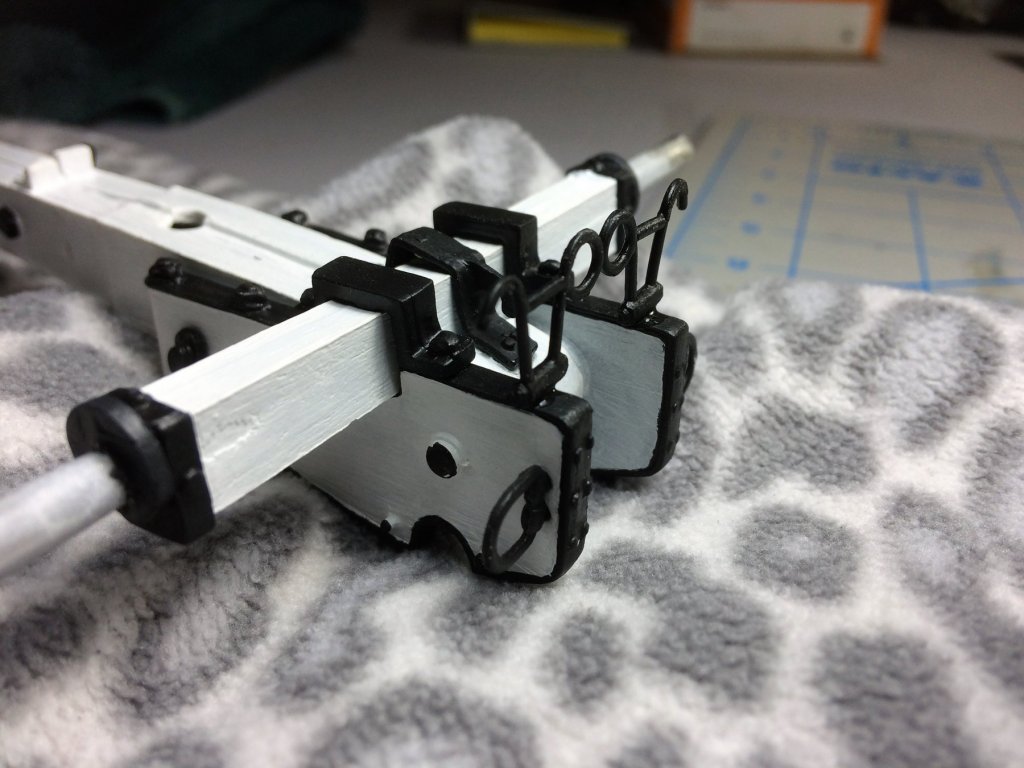
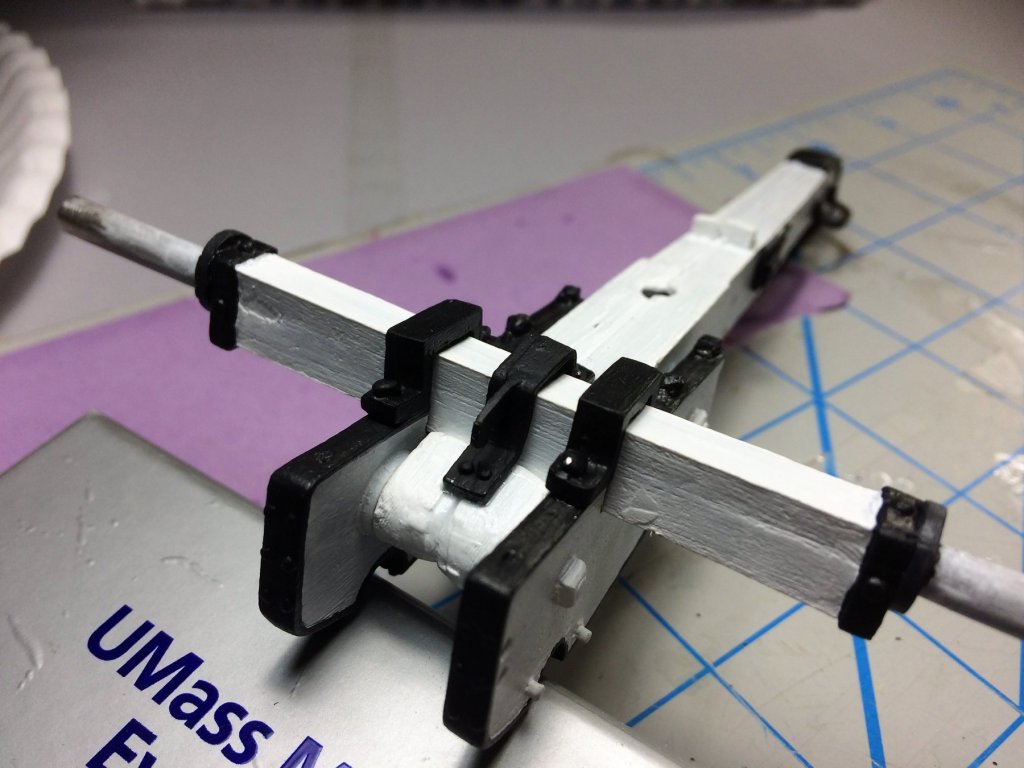
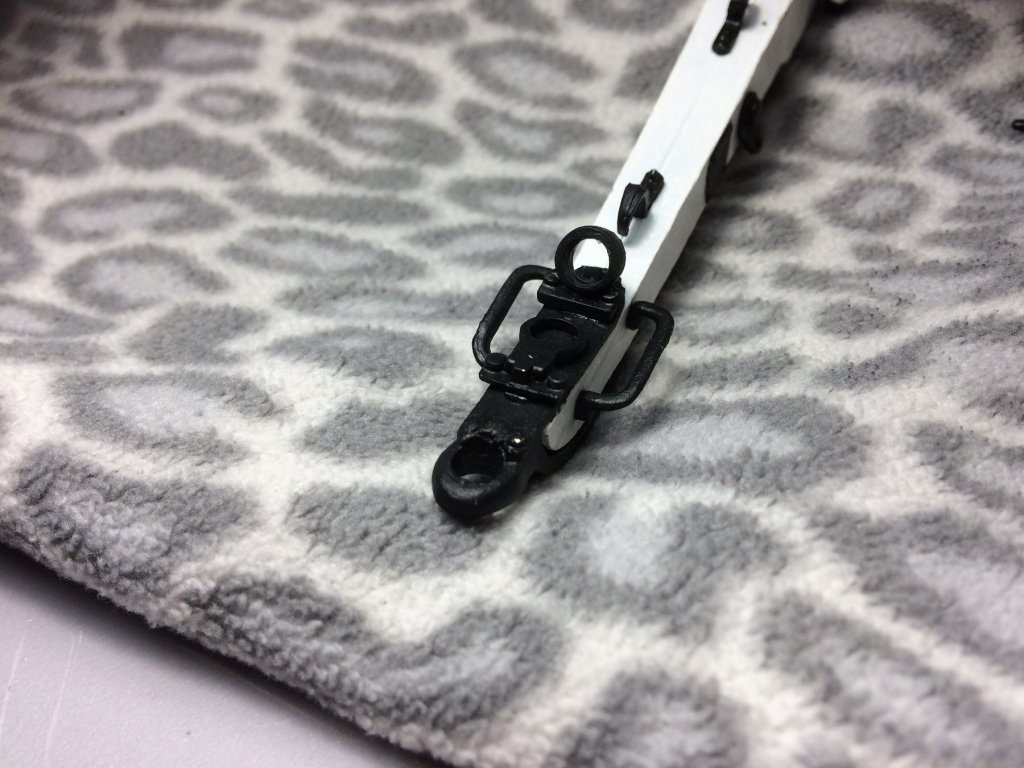
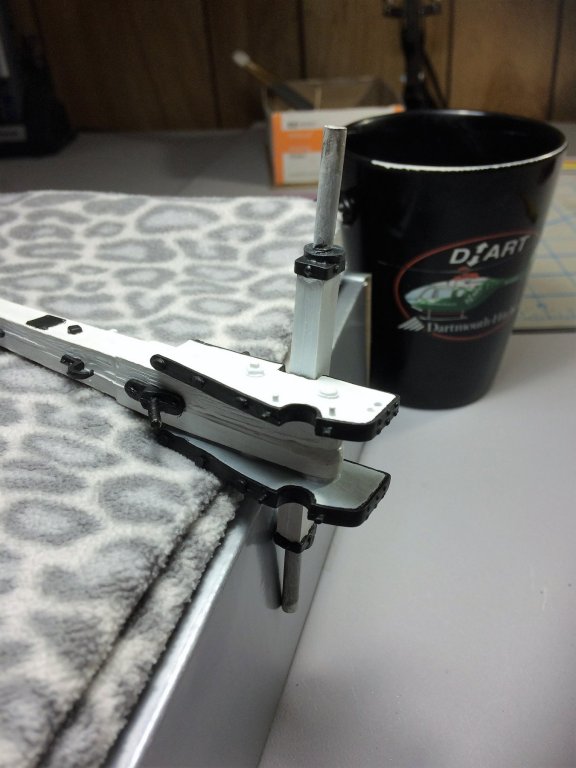
Morning, Kinda quiet in the house, thought James needed an update. I attached the Axle to the main body then the Center and Side Shackles went on. It's a soft metal so it's easily shaped to the contour. A bucket will hang from the hook. More small pieces are on. The Spike Swivel and Socket were next. On the Starboard side, a Linstock and Spike Ring are installed. Port side is a Spike Ring and Hook Plate. Tom E


-
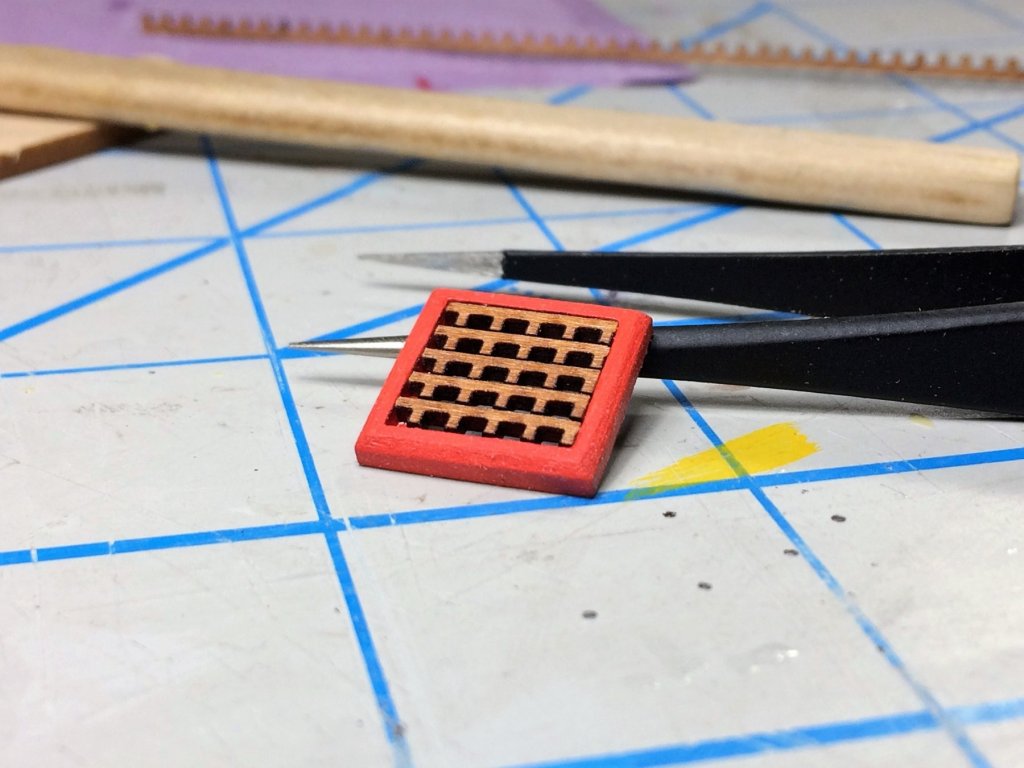
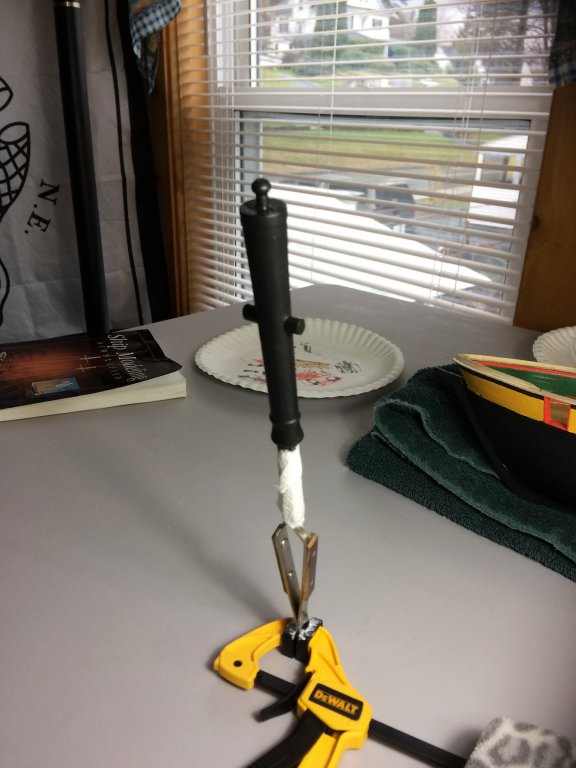
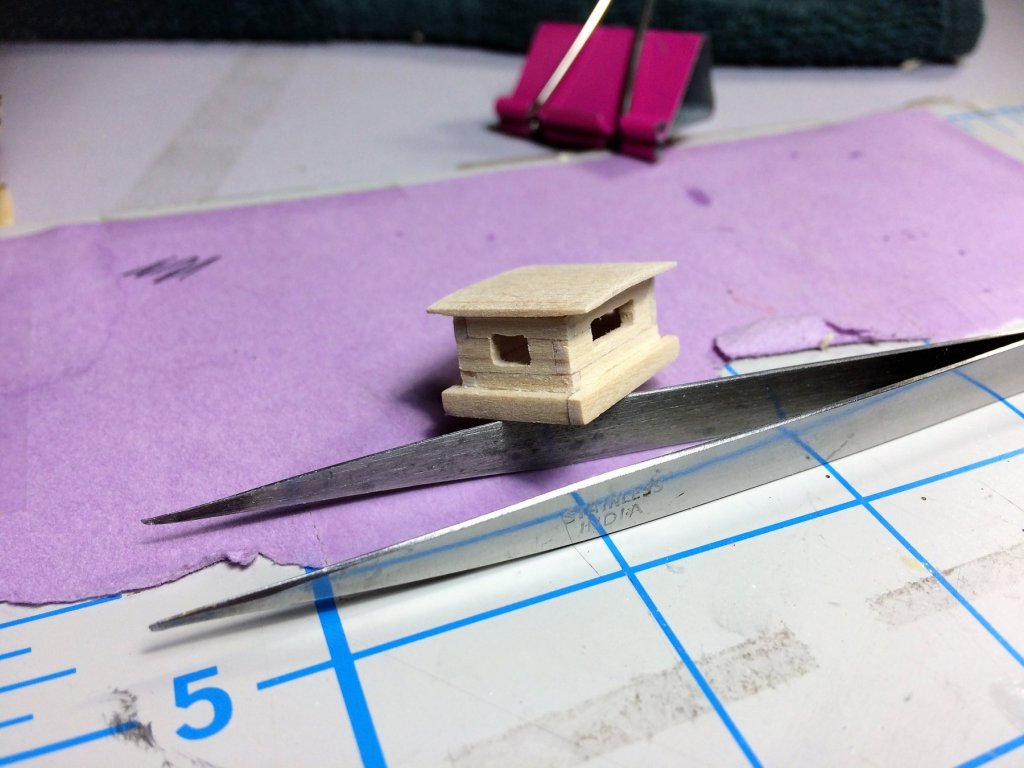
Evening, Hope everyone is well. All the chores are done, the house is clean and quiet. Off to the Shipyard I went. Bonus......Full Metal Jacket is on tv tonight, uncut! One of my top 5 favorite movies. Nothing better than finding a great movie while building. Steve, I really like that idea about a Compass. I think that would look really nice. I'm going to research that and see what I can come up with. We'll see what actually comes out in the end! I've started the 2 Hearts for the Bowsprit. These are laser cut parts and needed a good sanding. I slowly sanded out the groves on the side, these things are fragile. I'm assuming its "par for the course" to snap these things a few times! Luckily this glue stripe should be covered by rope. They were stained the same color as the deck furniture. I also started mounting Deadeyes to the Tops. Took a few times before I actually strung one with a respectable loop underneath. Then, below, I realized my Deadeyes where upside down! The two eyes should be on top. So I got plenty of practice with these. With the Deadeyes in the right position, It's starting to come together. The Skylight is almost done being painted. Bars in the windows will be next, and maybe a Compass?.....Thank You Steve. Tom E


-
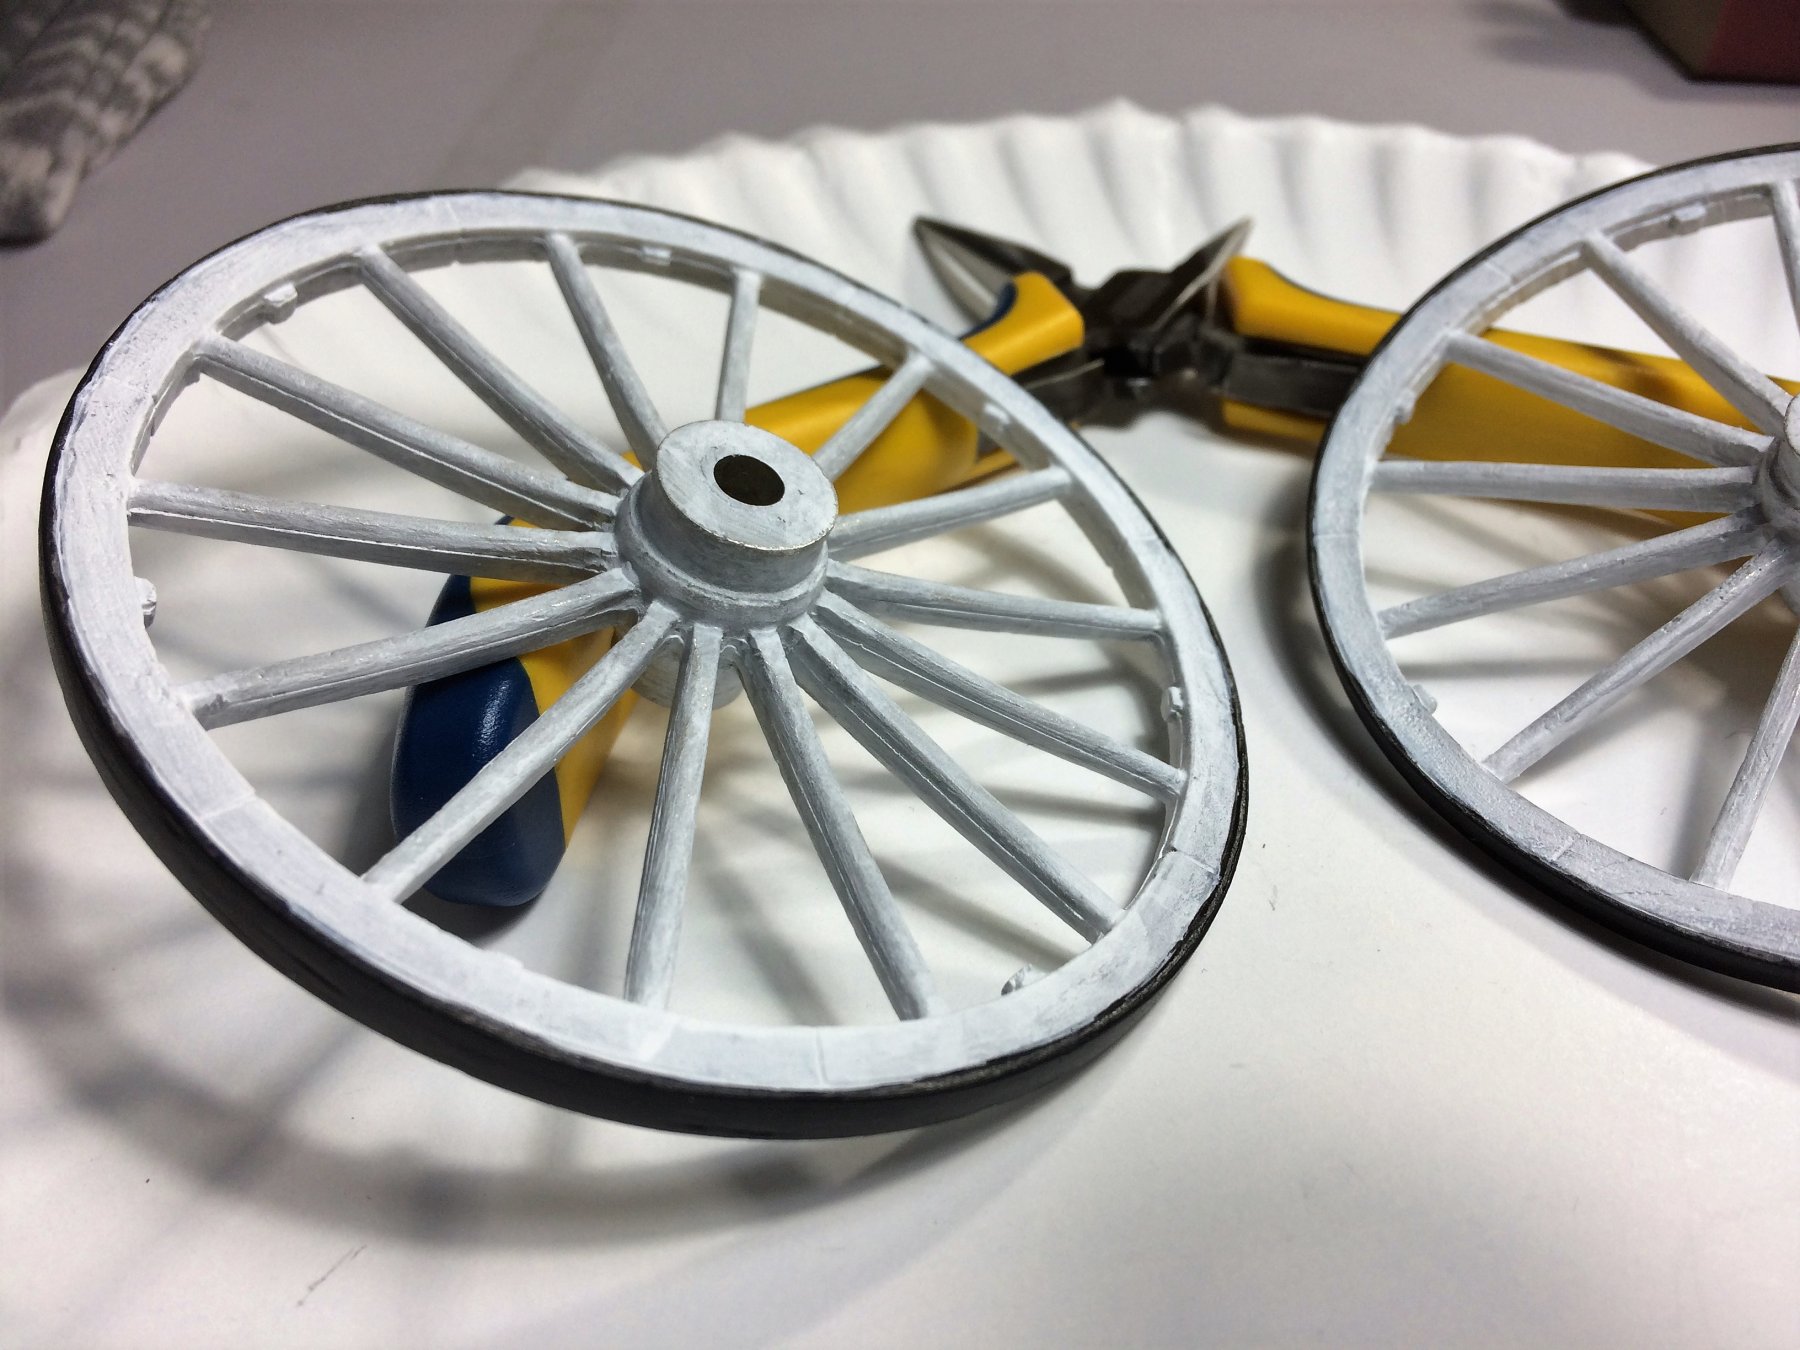
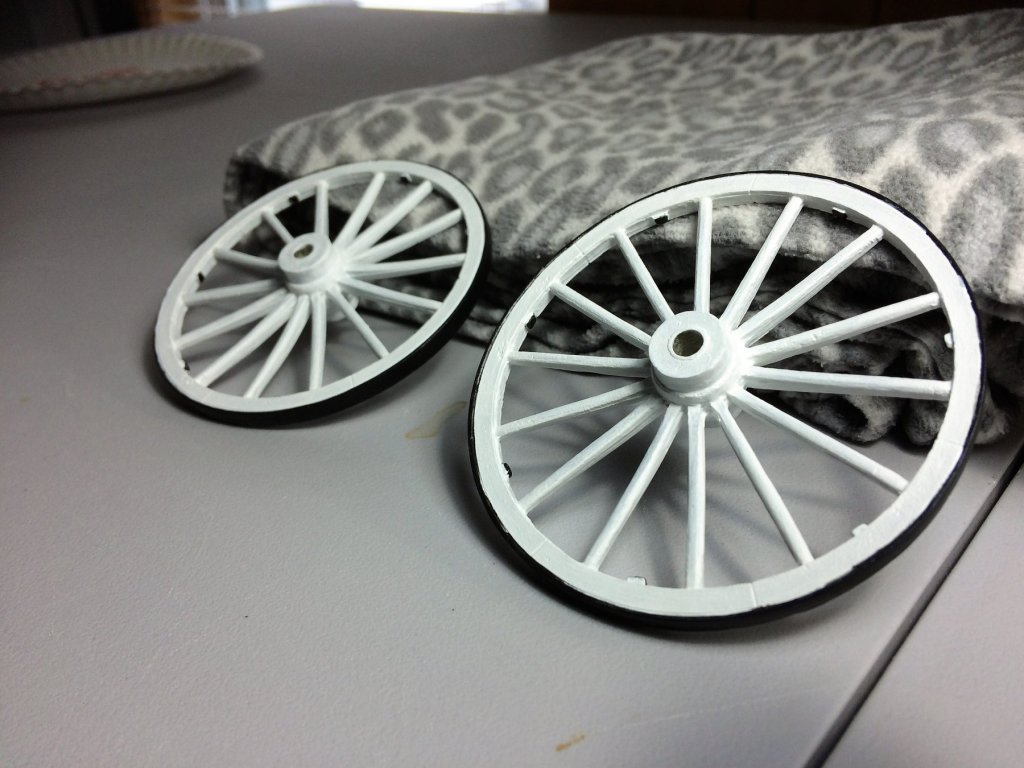
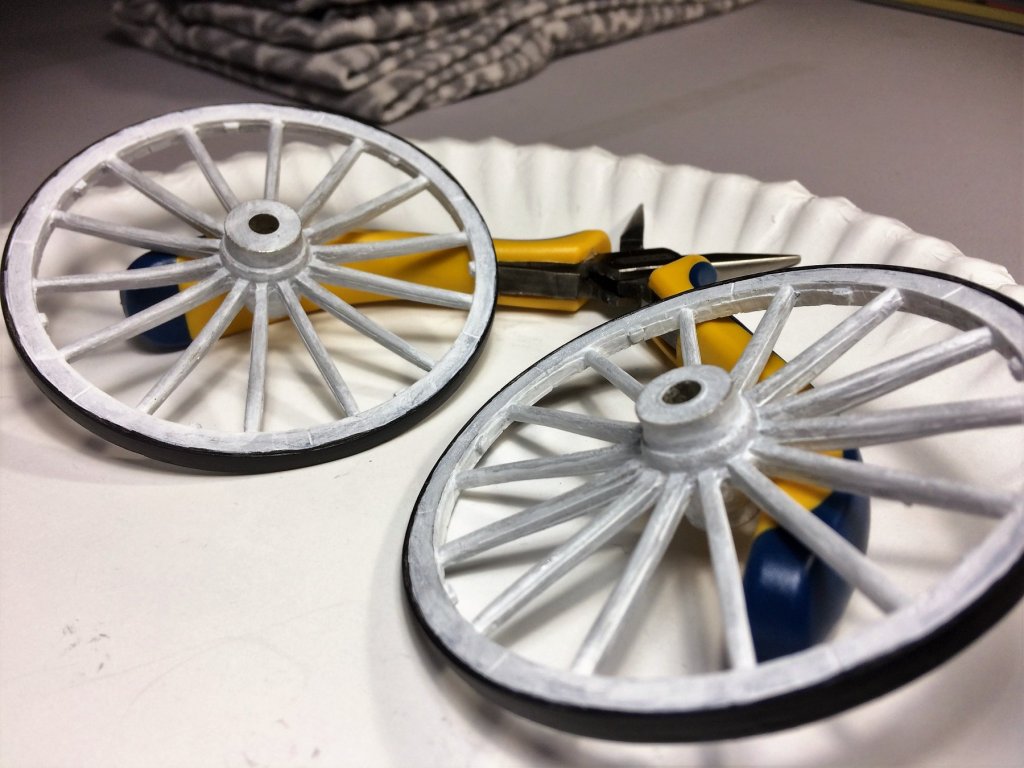
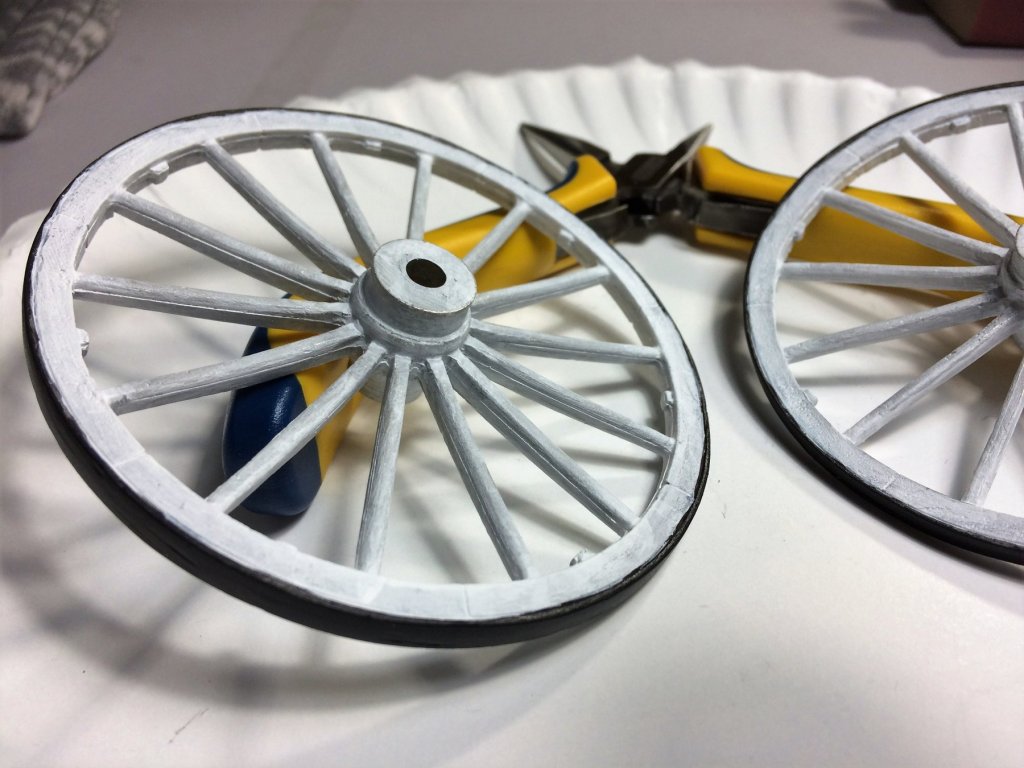
Evening, Quiet in the house right now, every one is off doing there thing. Time for an update! Its been a lot of painting, then paint some more. Admittedly, I've been putting a fair amount of time on my Niagara build. Any who...….. The James Cannon continues. It's been mostly painting the wheels. Everything got a coat of Primer and left alone for a week. Then I alternated between Black and White paint. At least 3 coats of each. The small square bits on the inside of the wheels represent bolts. These will be painted last. Nothing is attached to the Main Axle. But with some color on the wheels, it feels like it's coming together. Several more coats to go, especially with the white. Tom E

-
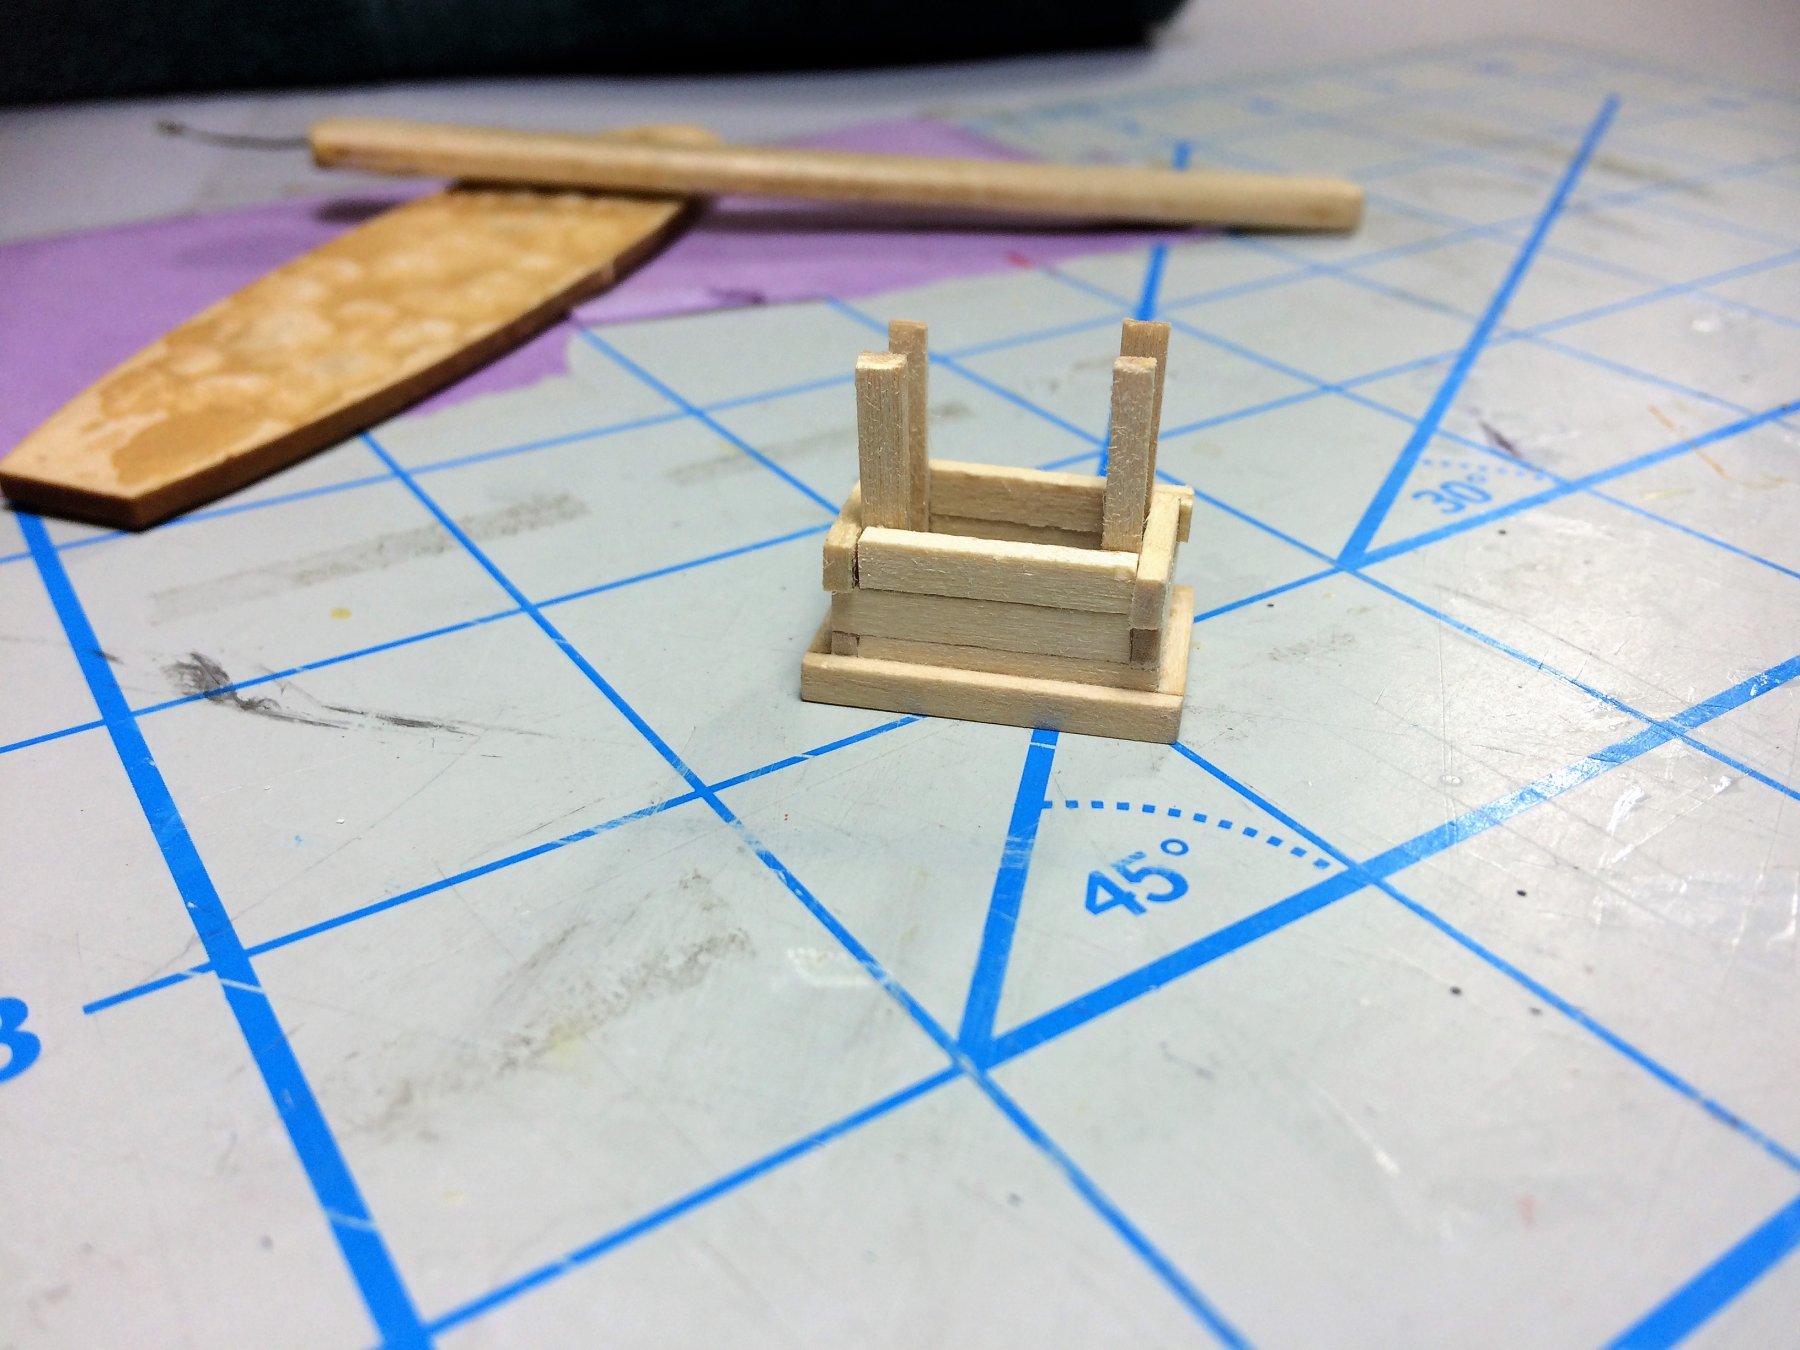
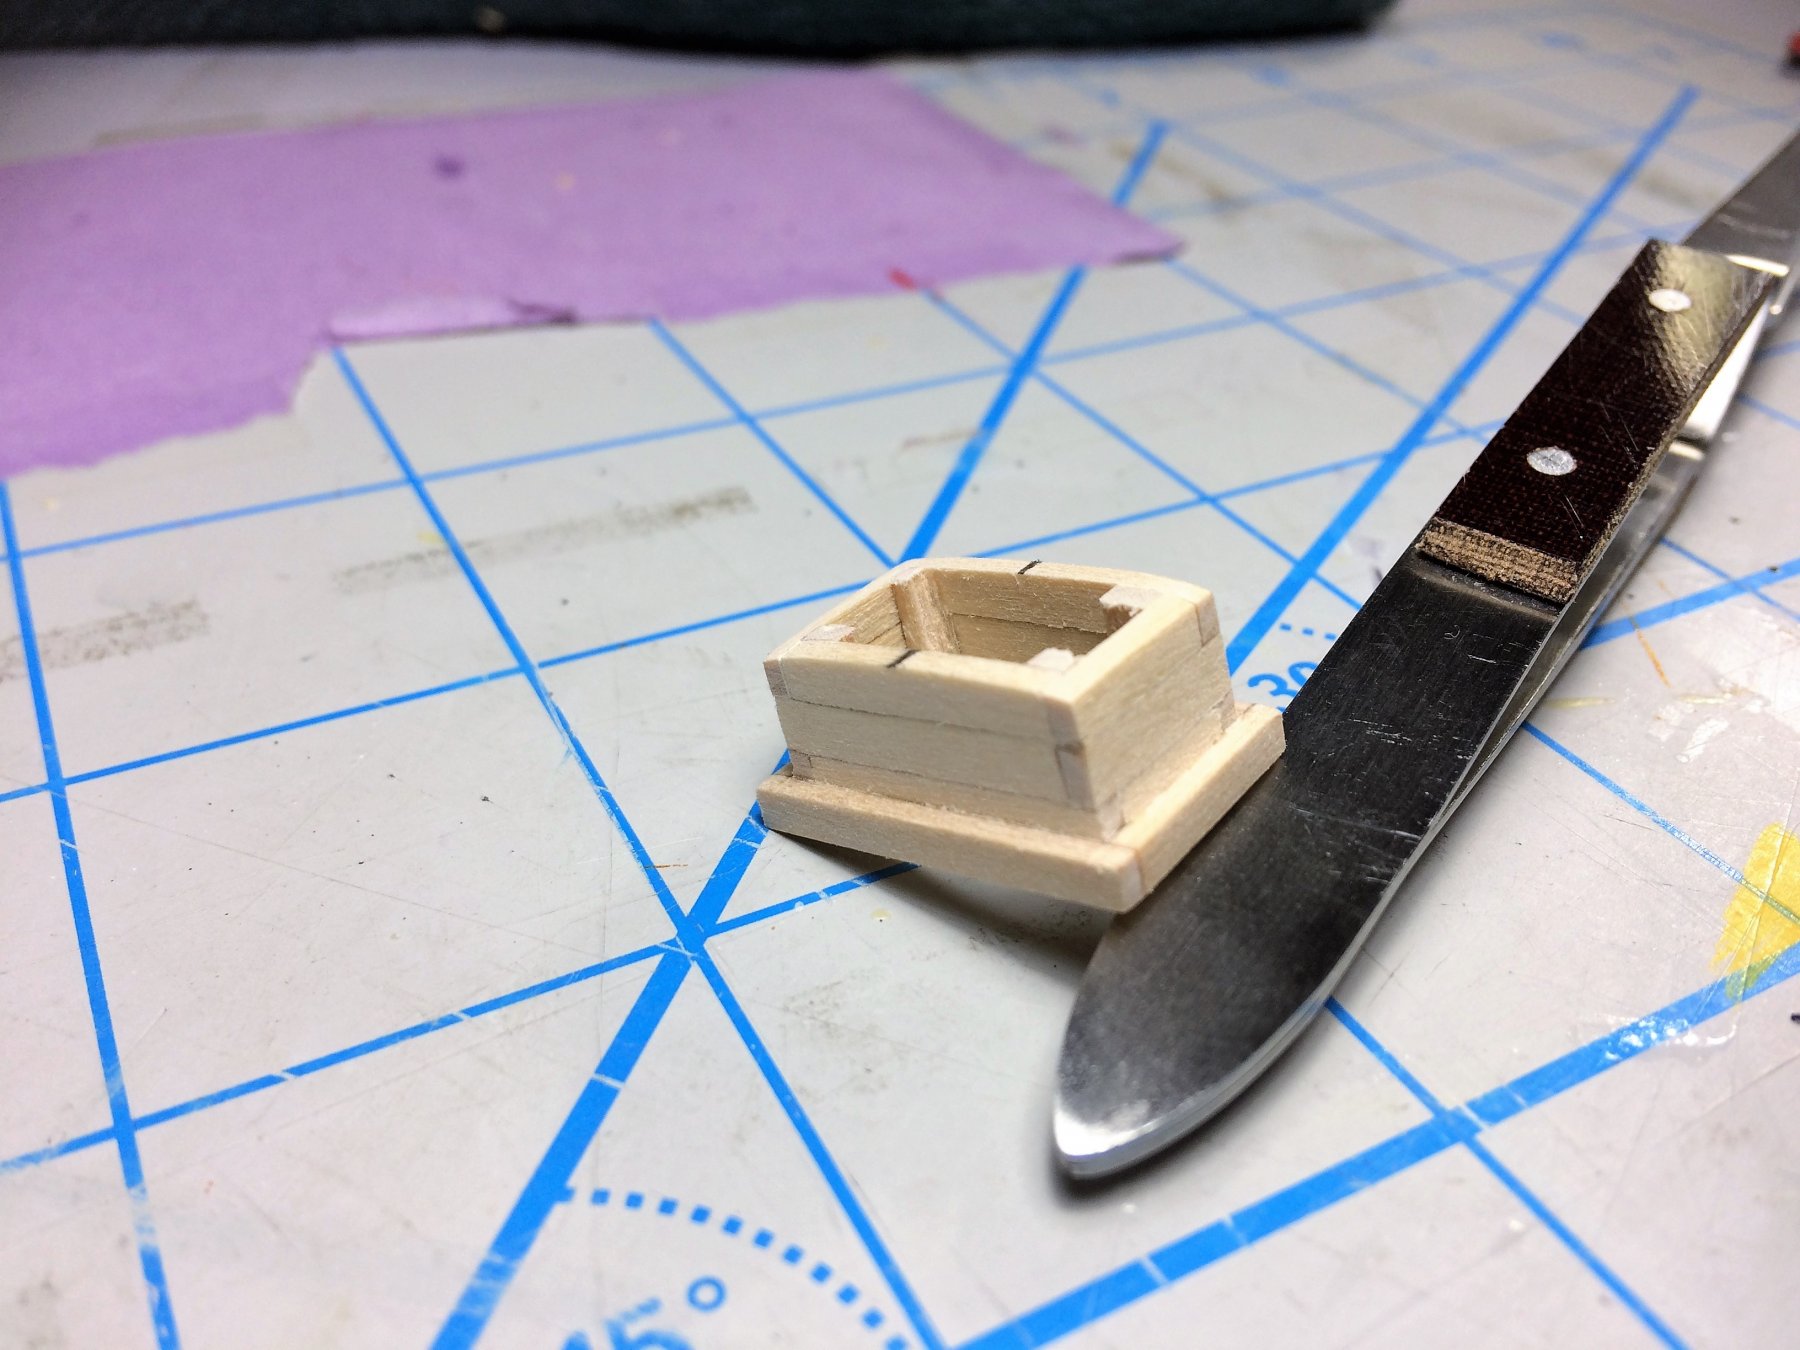
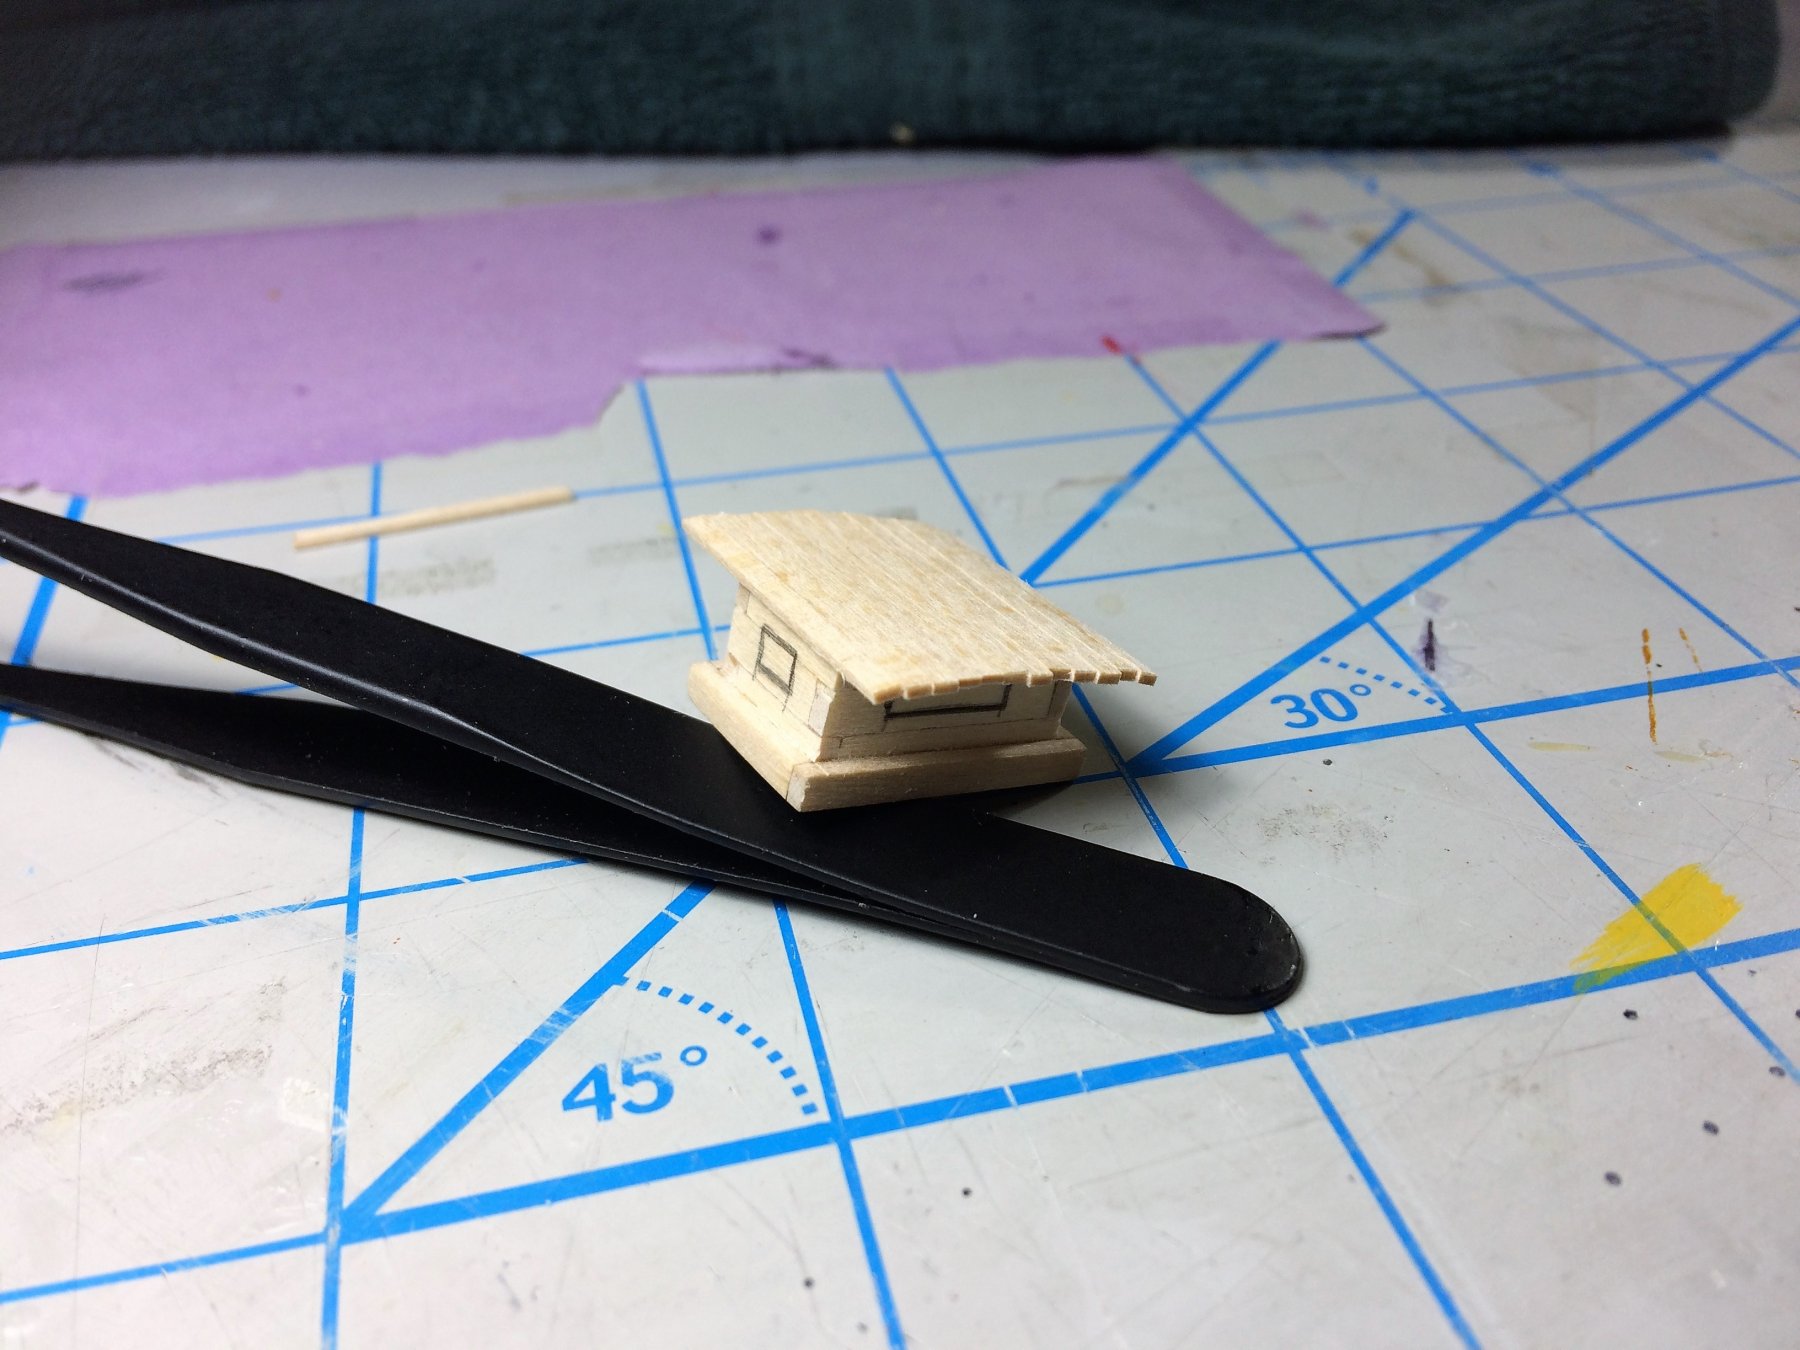
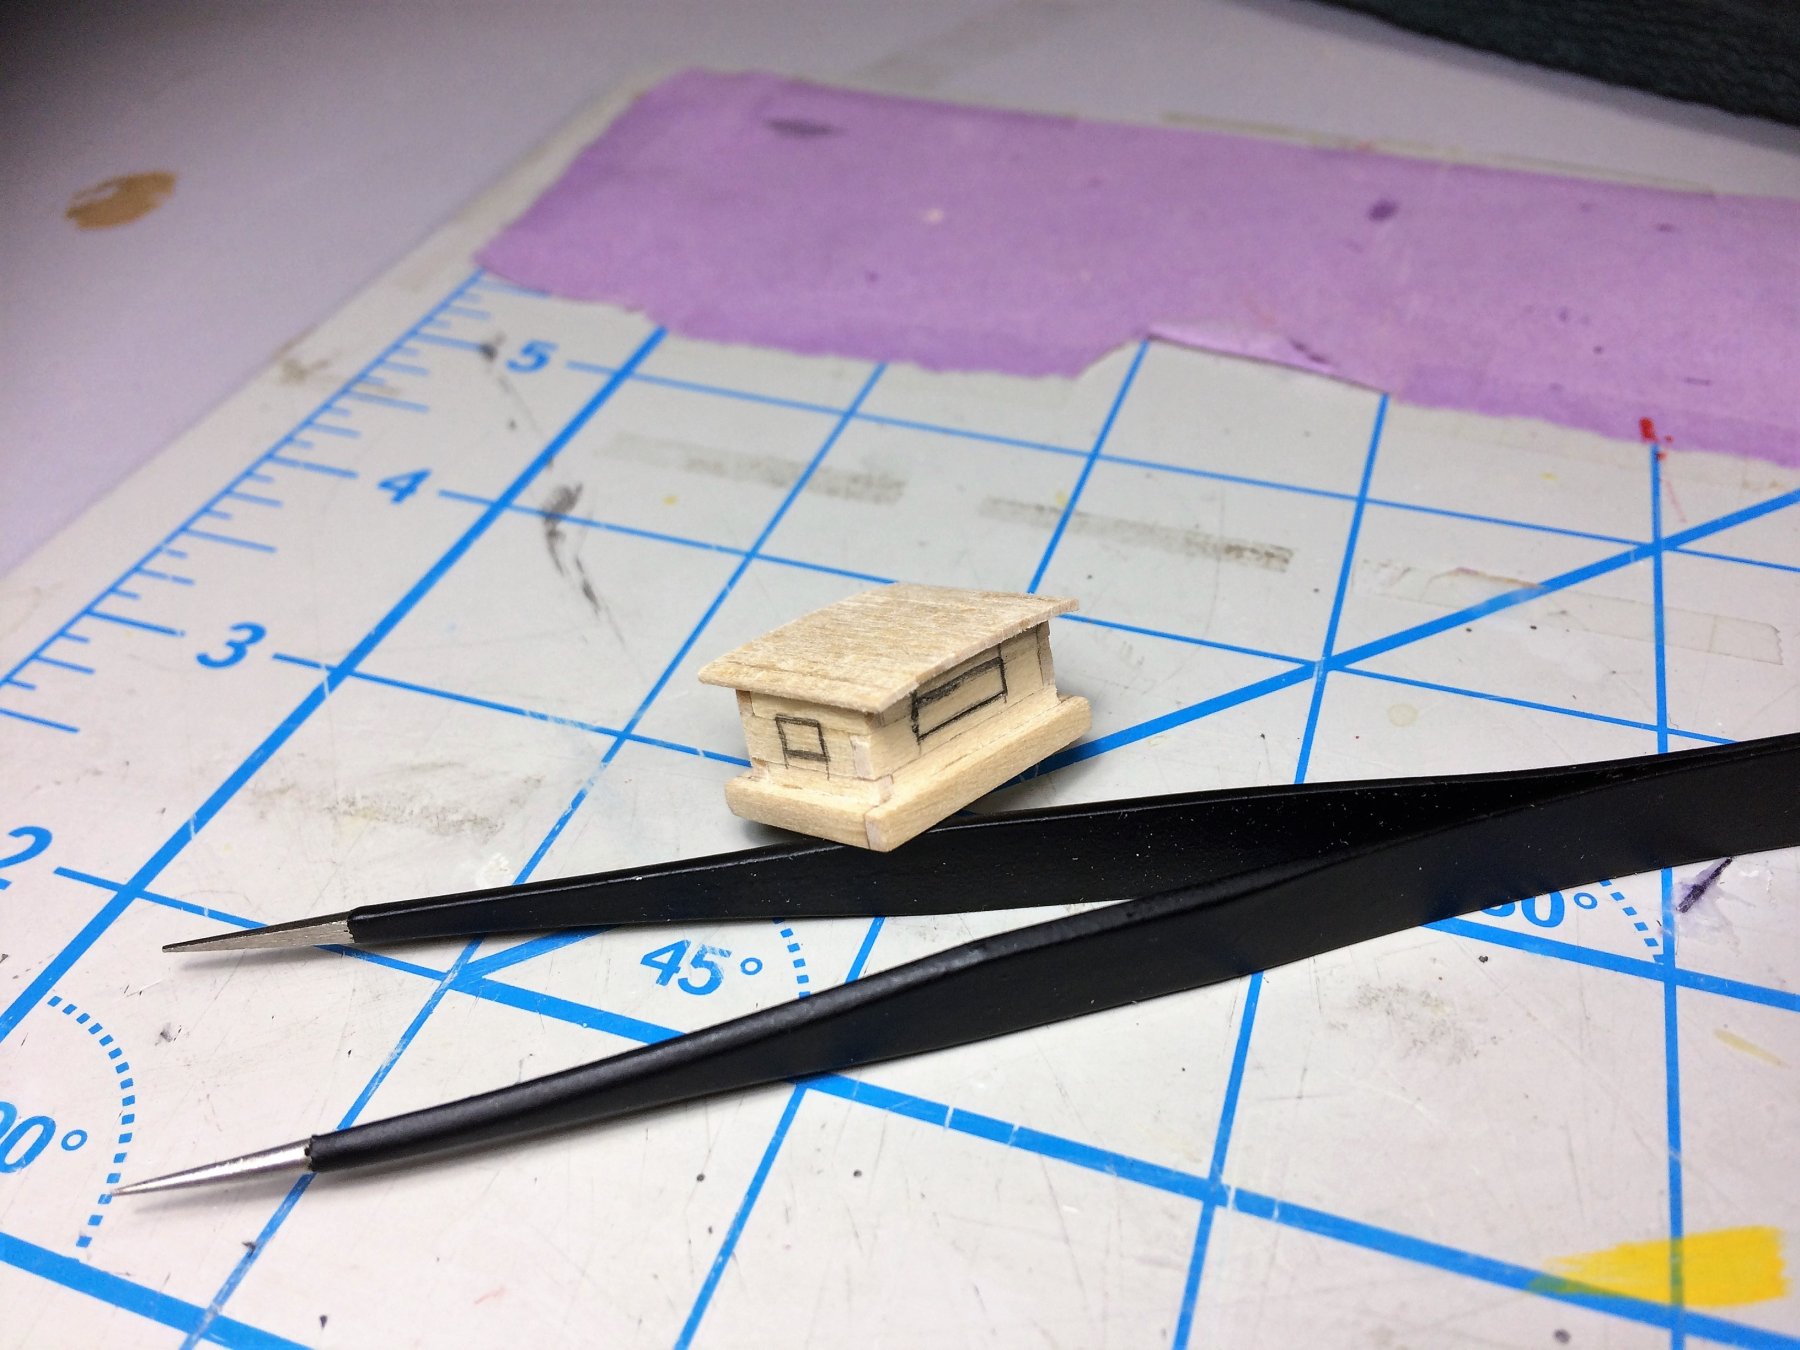
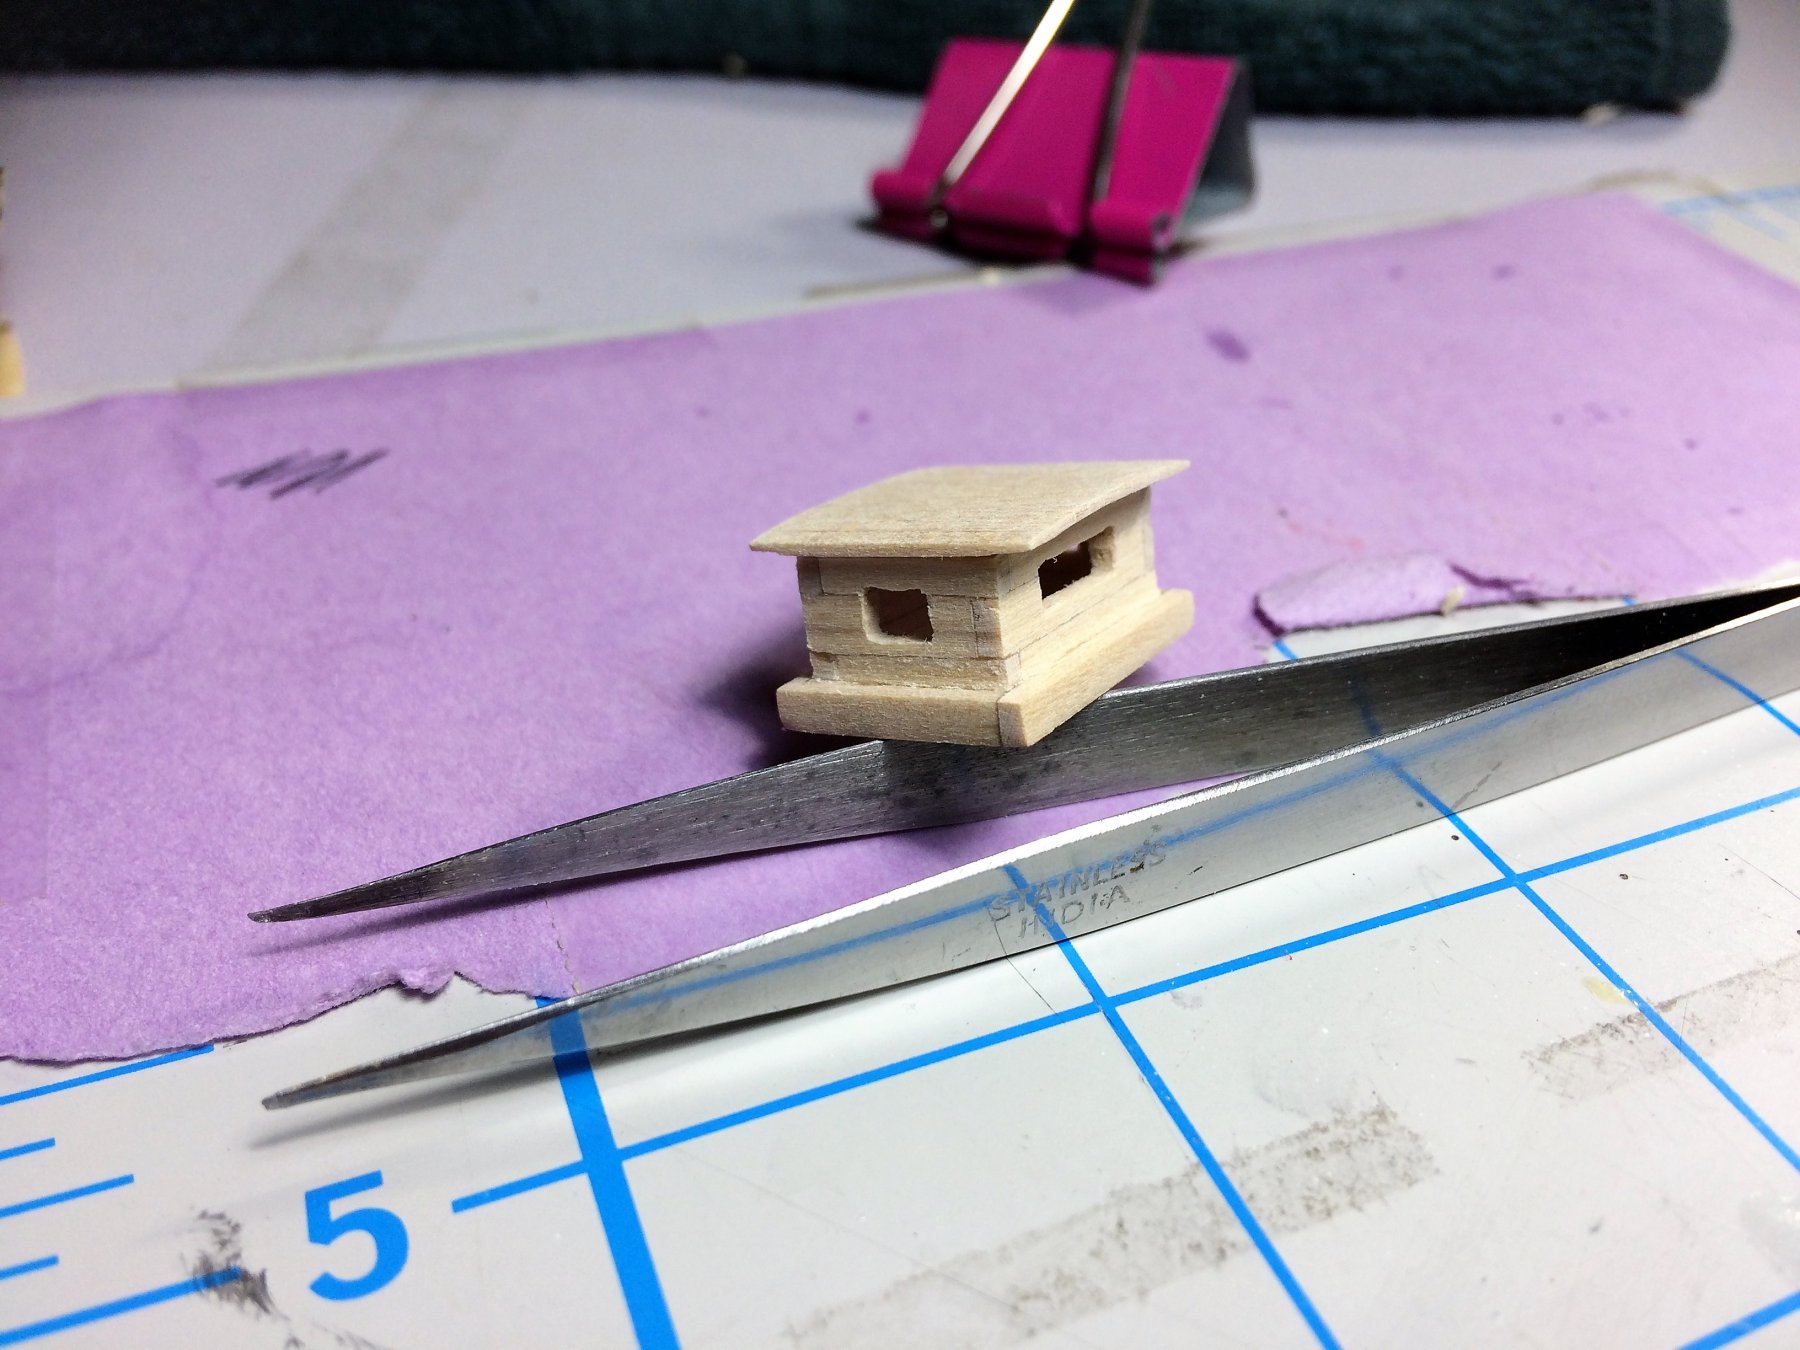
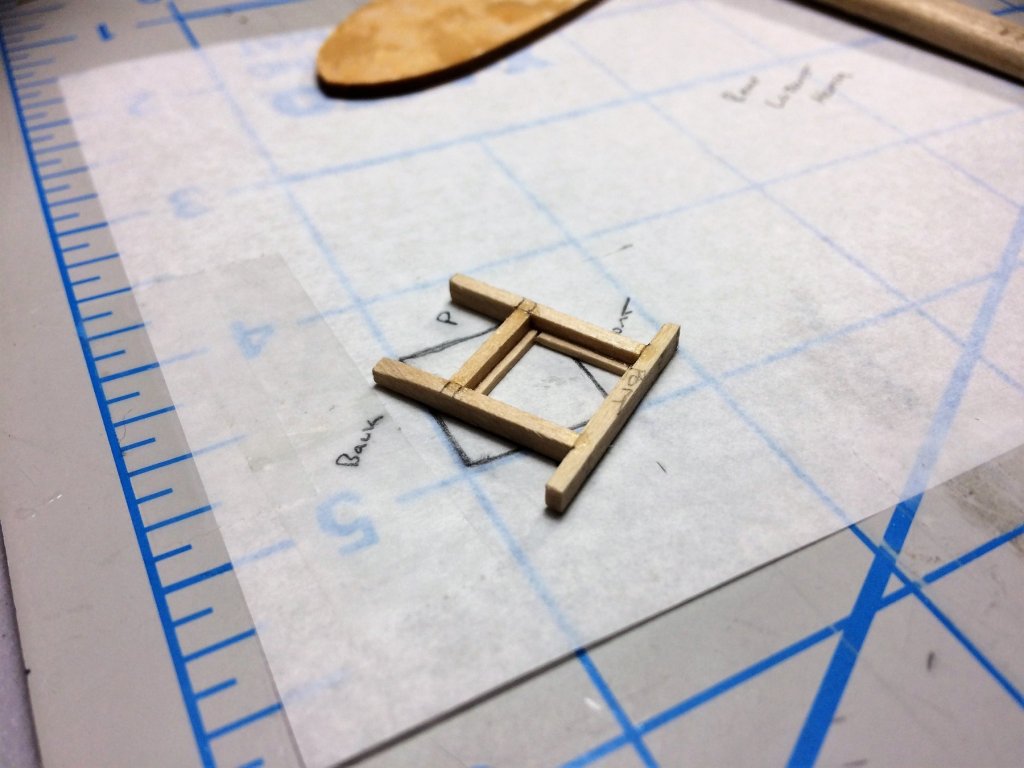
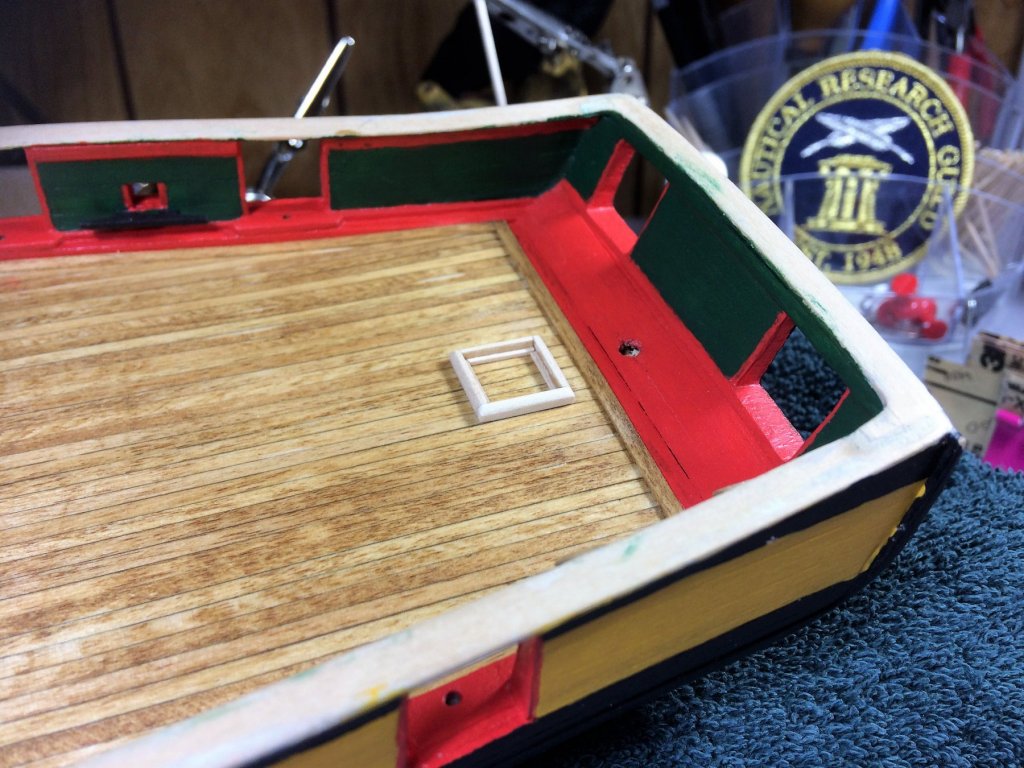
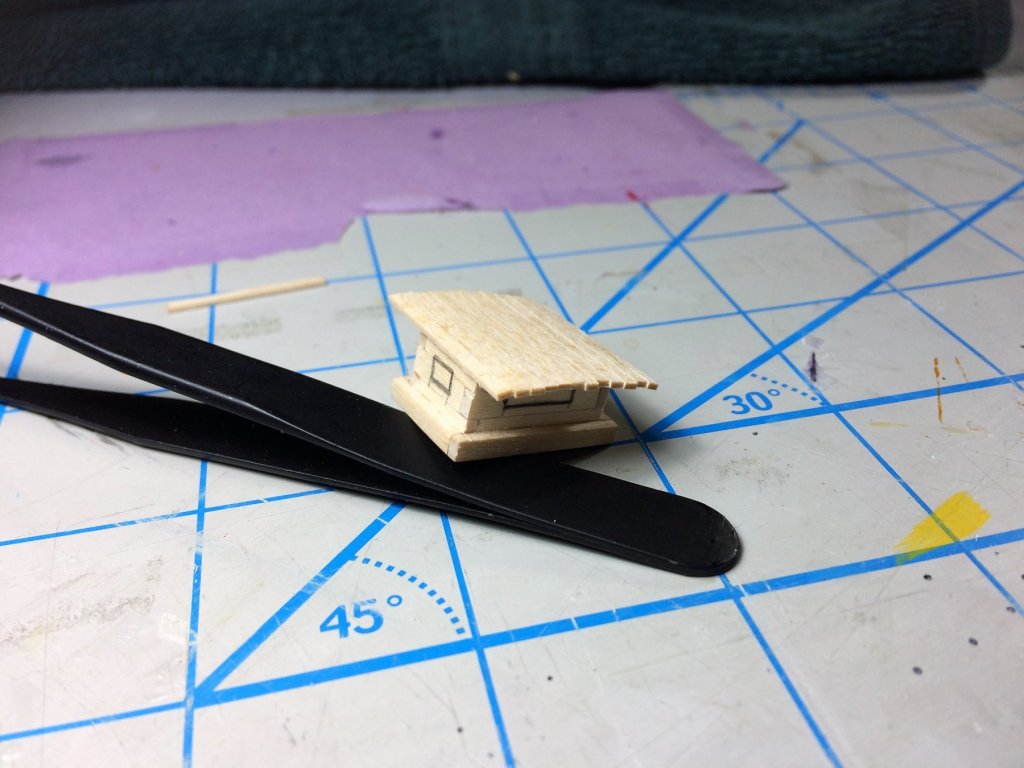
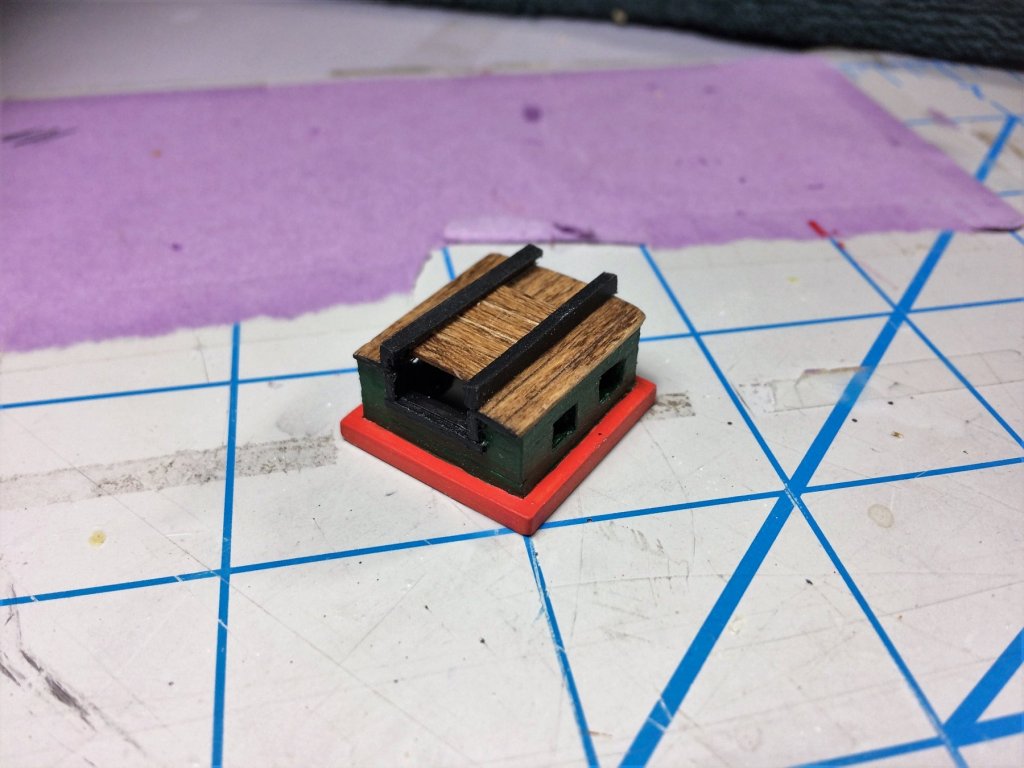
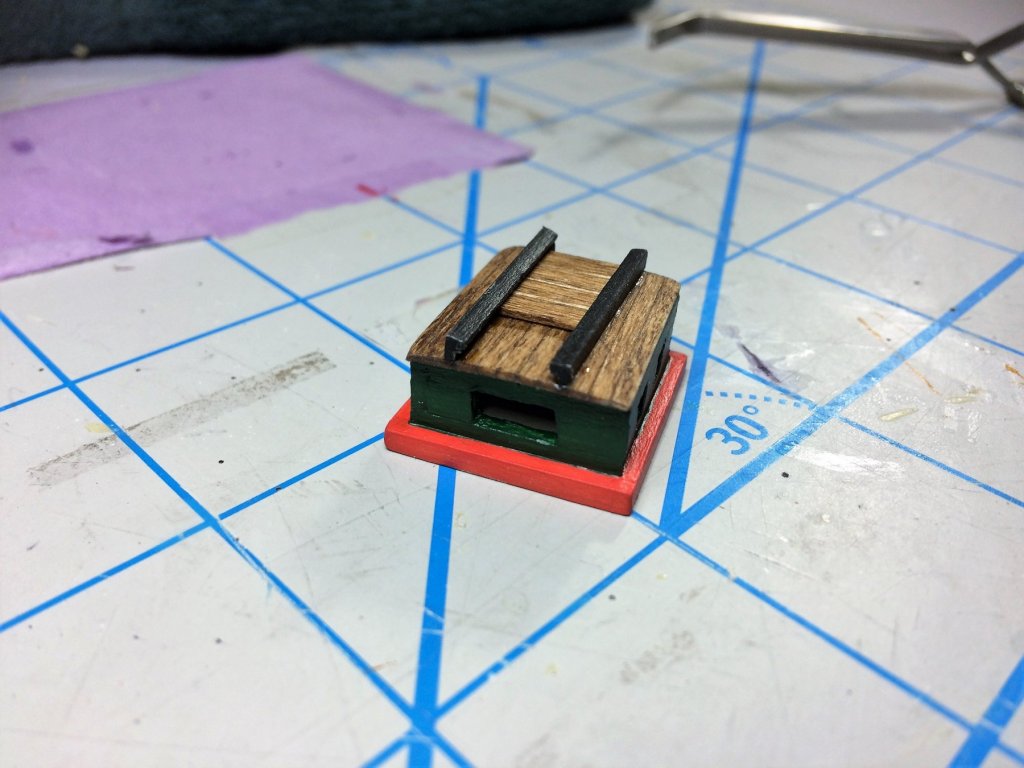
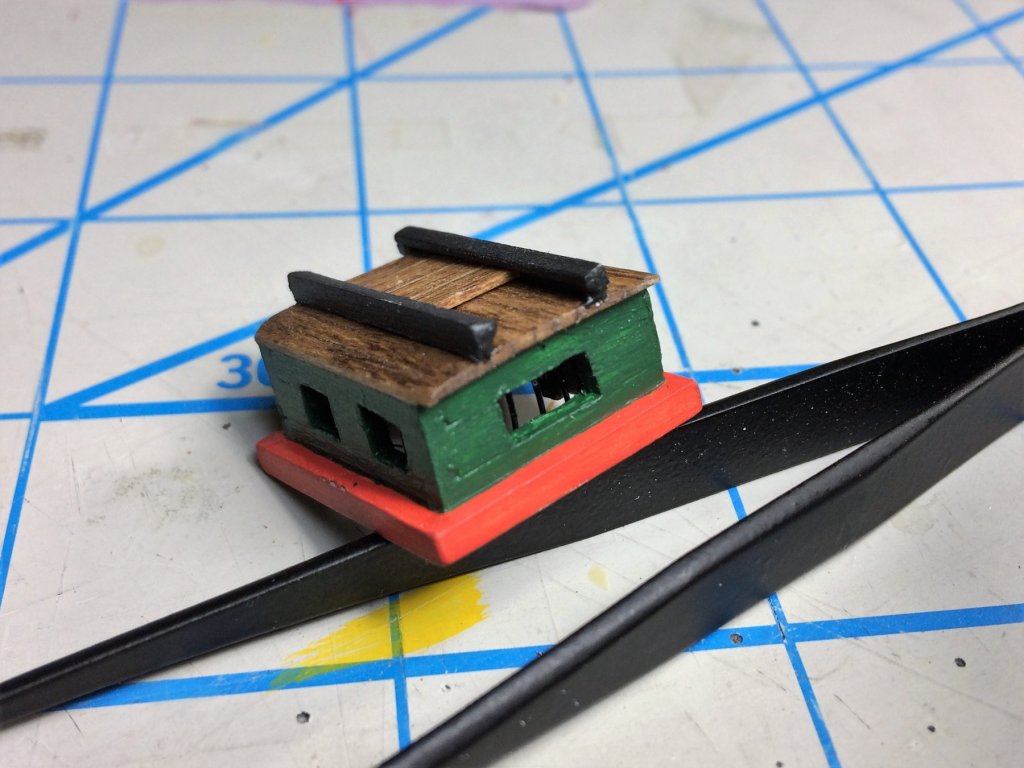
Evening, Been a while since I updated. The build does continue! The Captains Skylight is just about done. After this, its one more small hatch under the Tiller and the furniture will be done. I remember starting the furniture and being all worried about how to approach it. It was more difficult in my head than in reality. All of the furniture started with a box then internal supports. Then built up the sides. I don't go all the way up the supports, but within reason. What's good about making the sides a bit tall, you can just sand it down to the right height. Everything gets a good sanding. The pencil marks are my center marks. I don't try to get to fancy with the curve (camphor?) to the roof. I generally just sand in a gentle slope while sanding. From the pencil marks working out, the roof goes on. Like the deck, I like to pay attention to the grain of the wood. I try for good definition and uniformity as it will be stained.....I try. The roof is trimmed to appropriate size. The windows have been marked. My "window cutting" abilities have improved! One more final sanding and it's off to paint. Go Bruins! Tom E


-
Mike, Every time I look at the plans, I see new items. It never ends! But I think I have a plan. Most can be put in before hand, that's no problem. Probably the only ones I wont put in until I rig it are the eyebolts for the Royal Backstays. If I'm wrong in placing those, the end product would be uneven, too far away or to close. Tom E
-
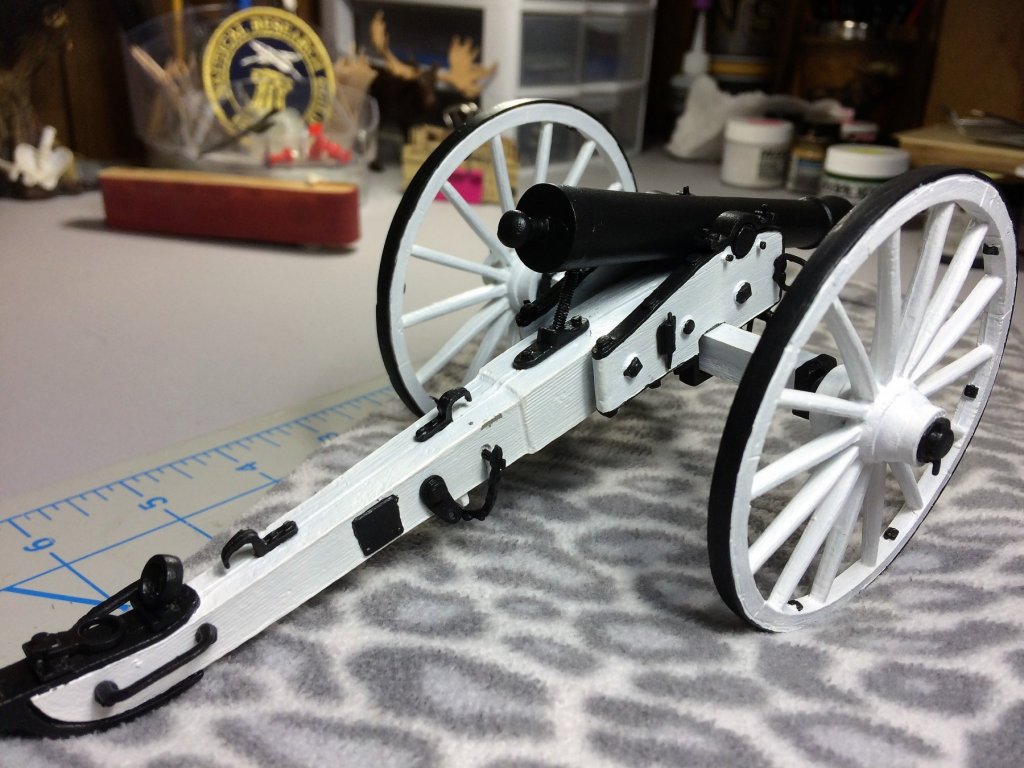
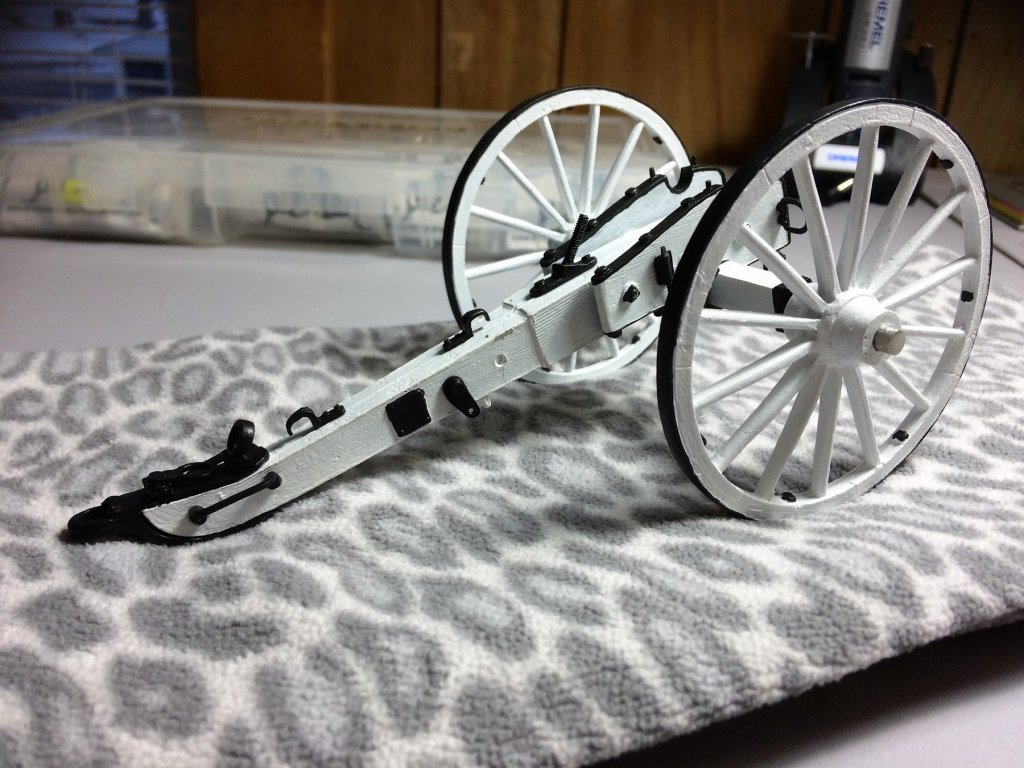
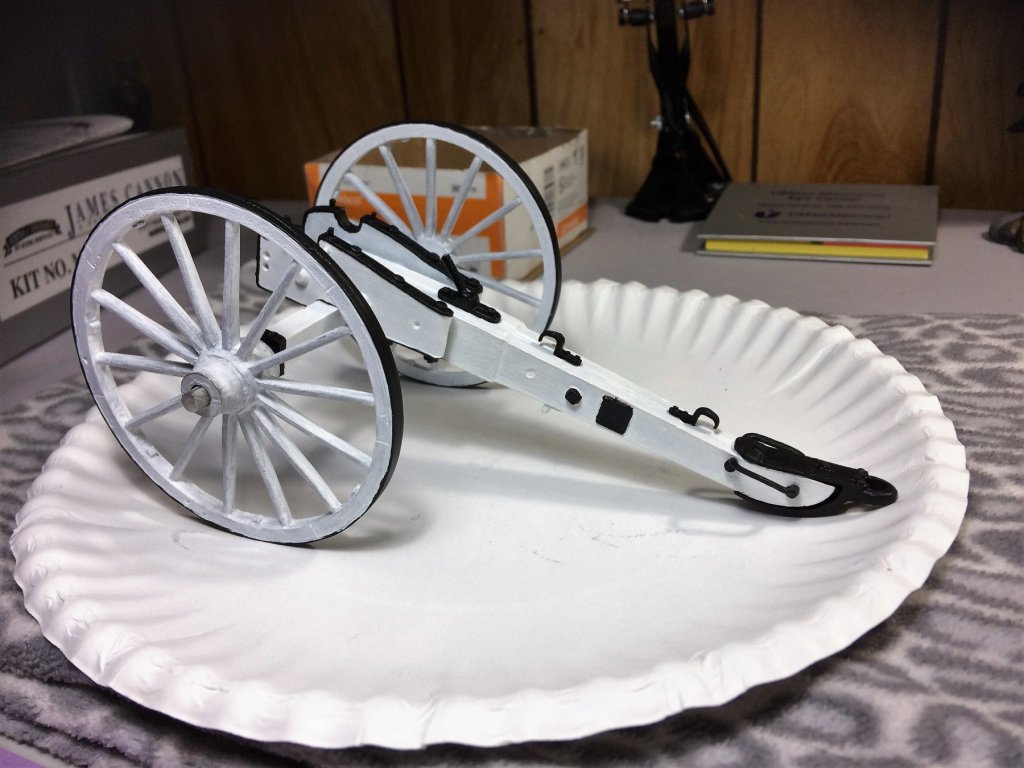
Evening, Hope everyone is having a nice Easter. I'm on the road all day tomorrow for Dinner with the family. So an update tonight! The Cheeks were installed. Both sides. I couldn't help myself. Nothing glued together below, just wanted to see what it looks like. Once the wheels get there black band and a good coat of white, should really come to life. Some small pieces need to be painted and installed on the main frame. Haven't even started on the Cannon yet. It's going to need a lot of work. Tom E


-
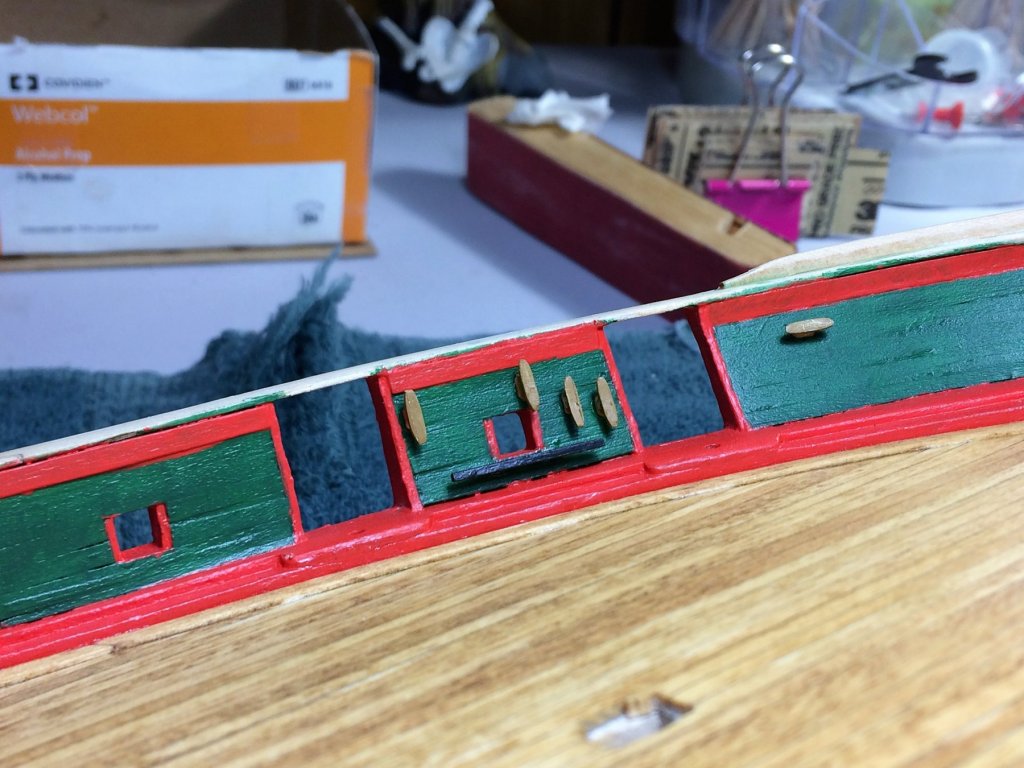
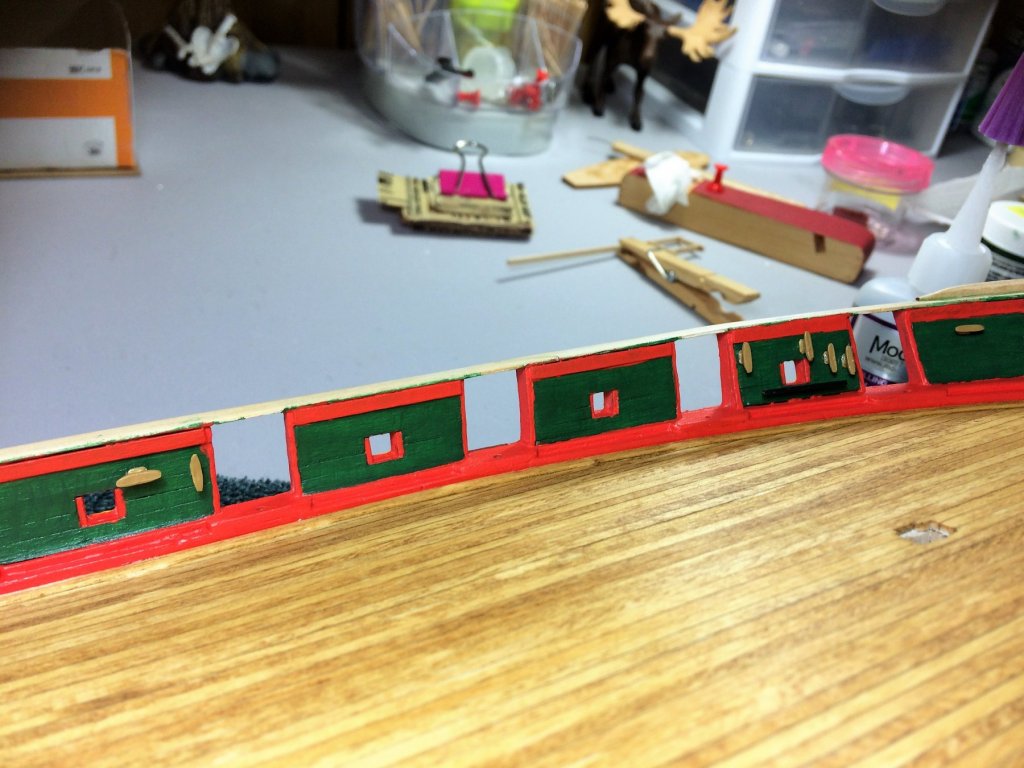
Evening, Quiet Saturday night, cup of Tea in hand...time for an update. I've had limited building this past week. The old Sciatic nerve decided to pay visit. Hurt like a bugger! But went to work all week! ?!?!?? Finished the Companionway. I think It came out well. I stayed with my darker color scheme. Should look good when it all comes together...….somewhere in the future! A thought, with my darker color scheme throughout the build, what should I do for the Main rail? Paint or stain, I'm thinking stain it the same color as the deck furniture, or, it will just get painted black. No buff! Added some bars to the inside as well. I have the Port side fitted with its Cleats. Using an old bottle of Model Master Wood paint for color. They do get a sanding. The Starboard side will get it's cleats sometime this weekend, hopefully. I figure after cleats I'll start identifying where eyebolts go next. There are a few in the Waterway. Some eyebolts I wont put in until much later in the build. Once the tiny bits are in I want to shift to the Catheads and Channels. Tom E

-
Ron, That has to be one of the best tutorials I've seen so far on airbrushing. Really liked his talk about compressors. I haven't bought anything yet, but it has me re-thinking what I was thinking of buying. I was going way to big for a compressor! He explains it in layman's terms and no BS. Thanks! Tom E