HOLIDAY DONATION DRIVE - SUPPORT MSW - DO YOUR PART TO KEEP THIS GREAT FORUM GOING! (Only 24 donations so far out of 49,000 members - C'mon guys!)
×
Tom E
-
Posts
469 -
Joined
-
Last visited
Content Type
Profiles
Forums
Gallery
Events
Everything posted by Tom E
-
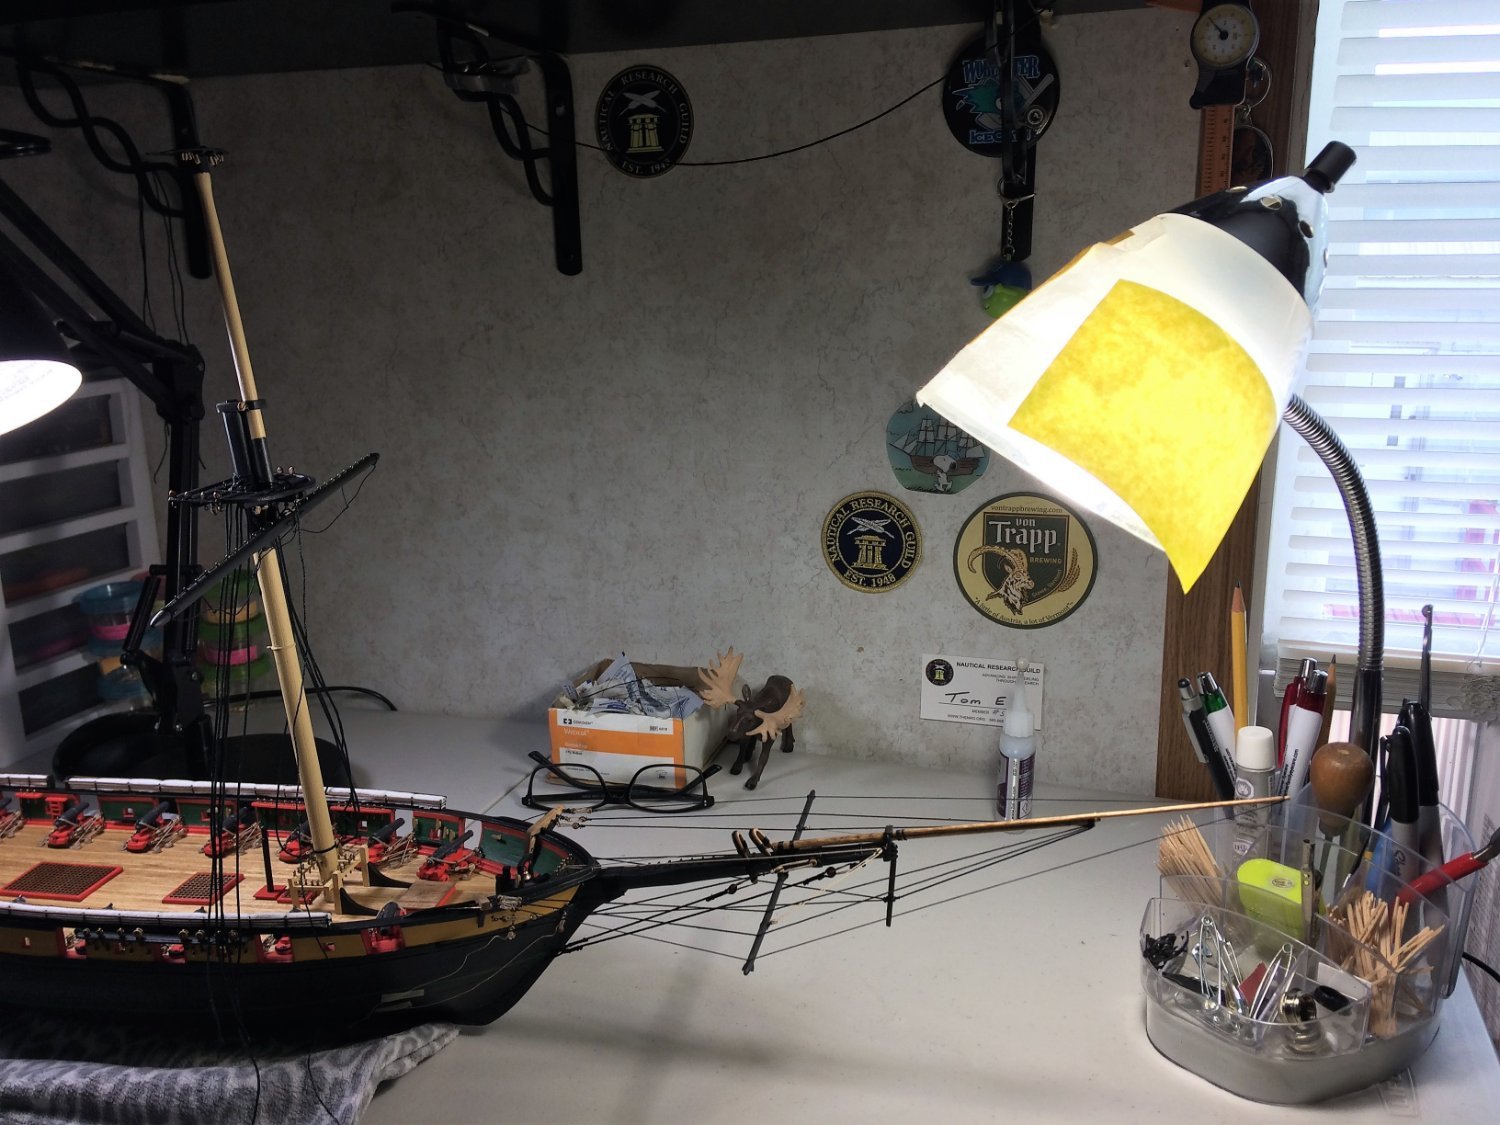
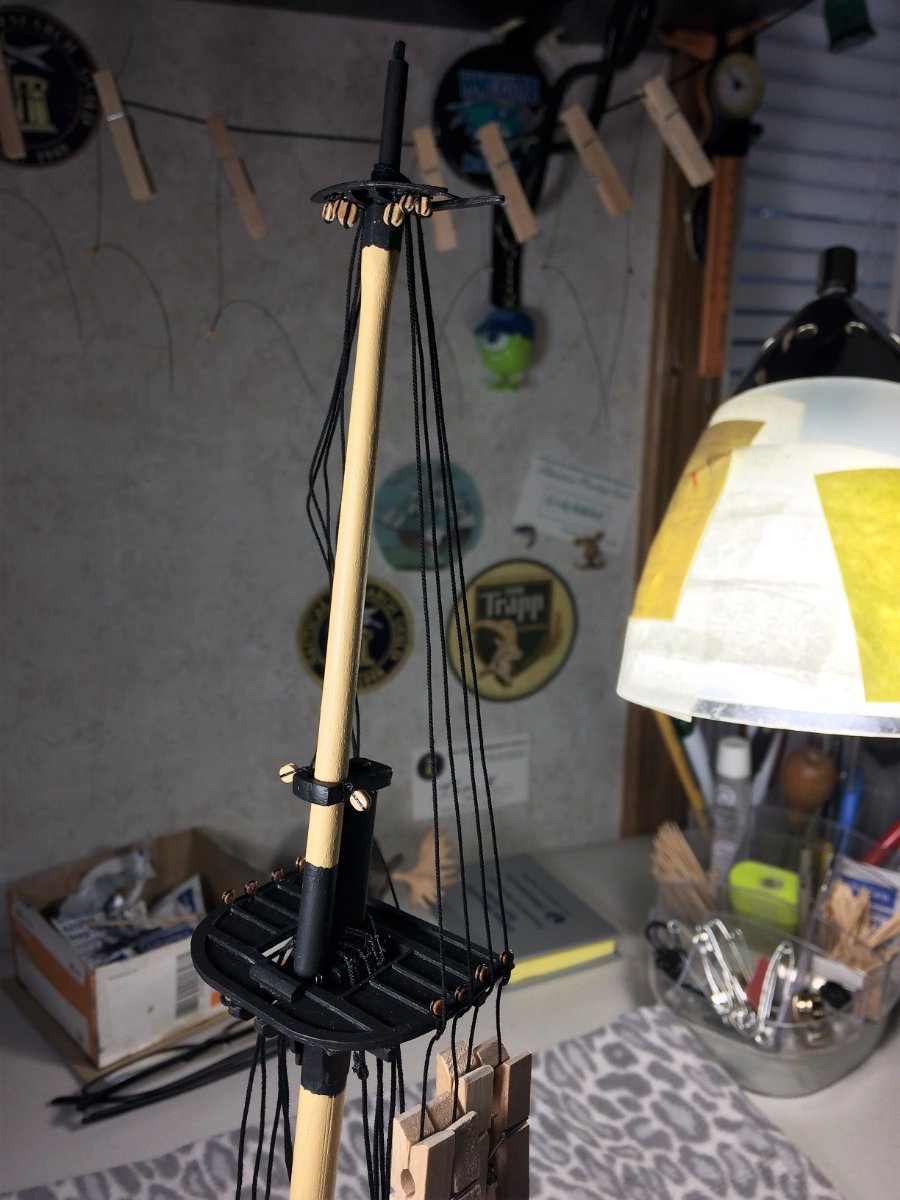
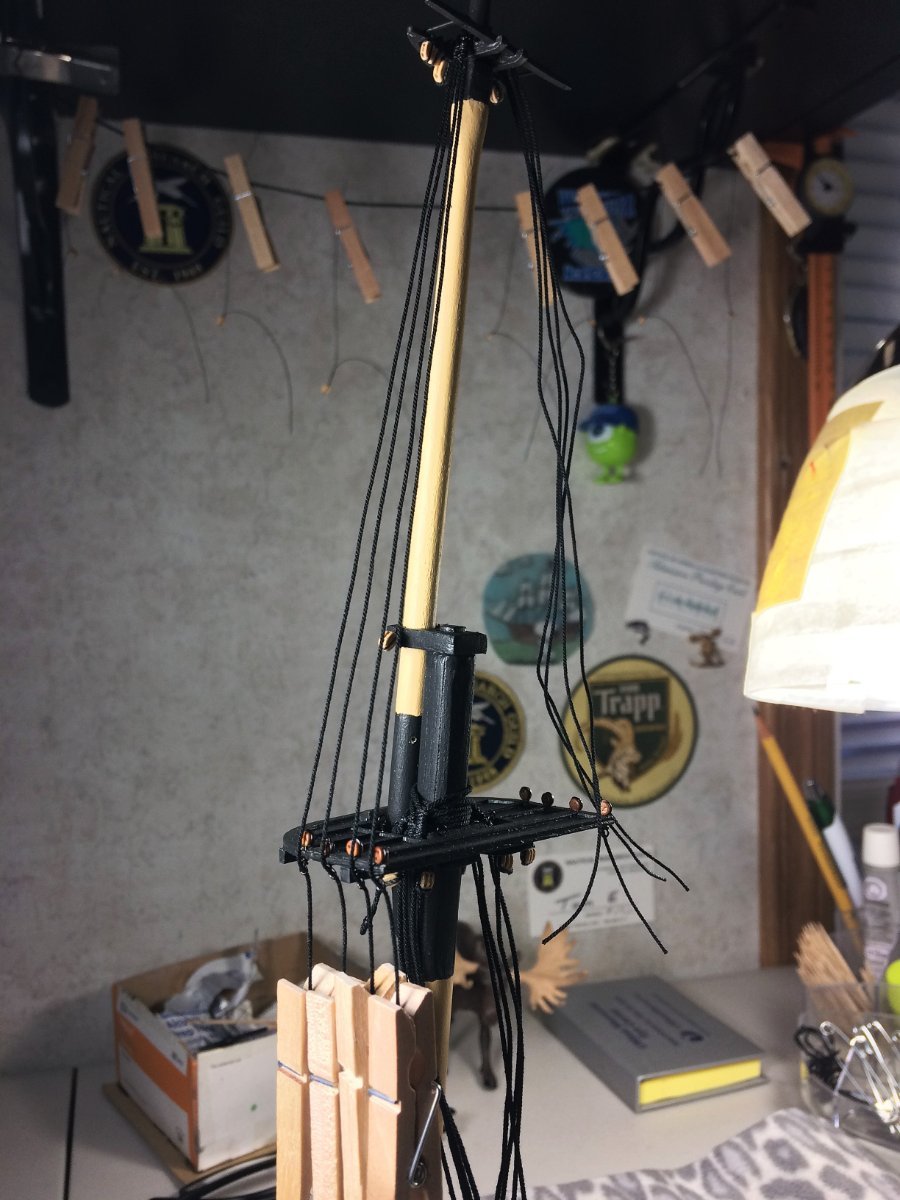
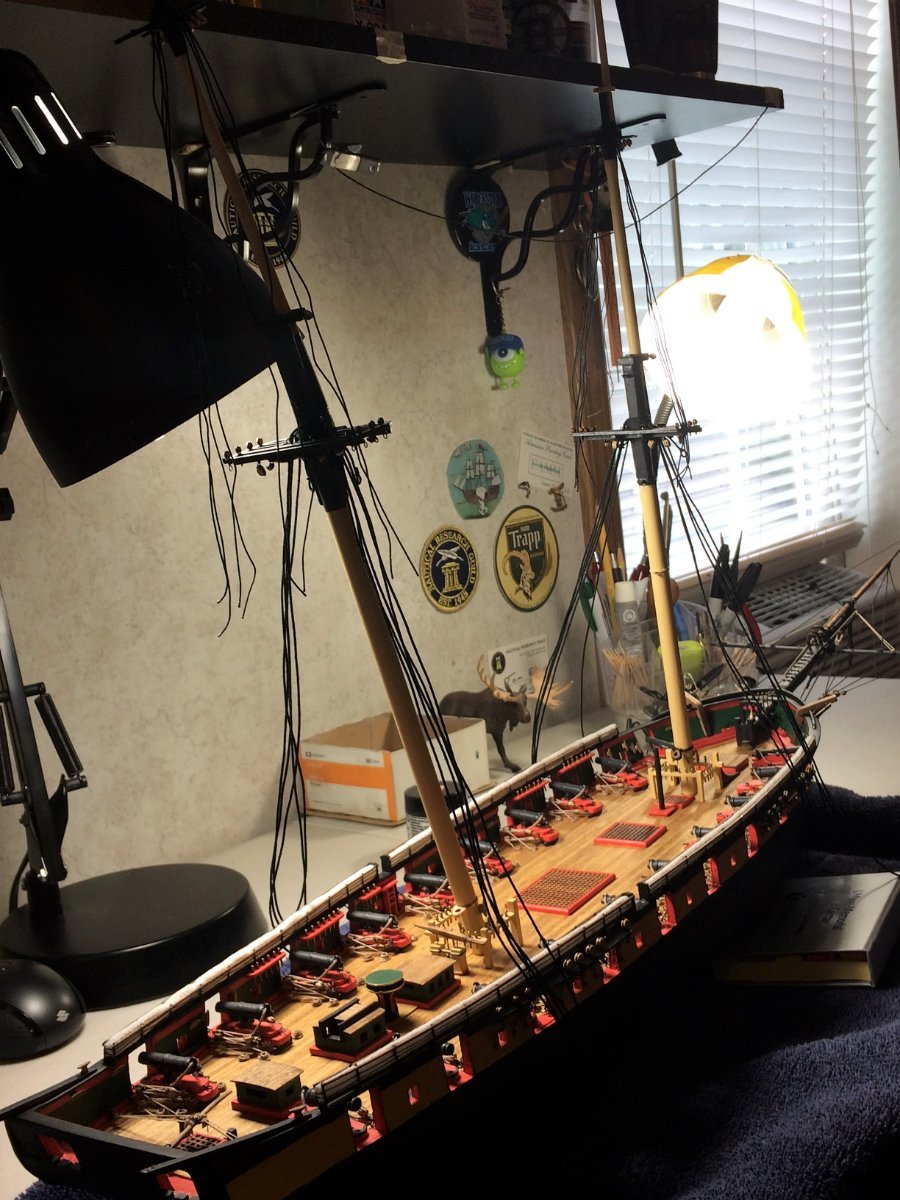
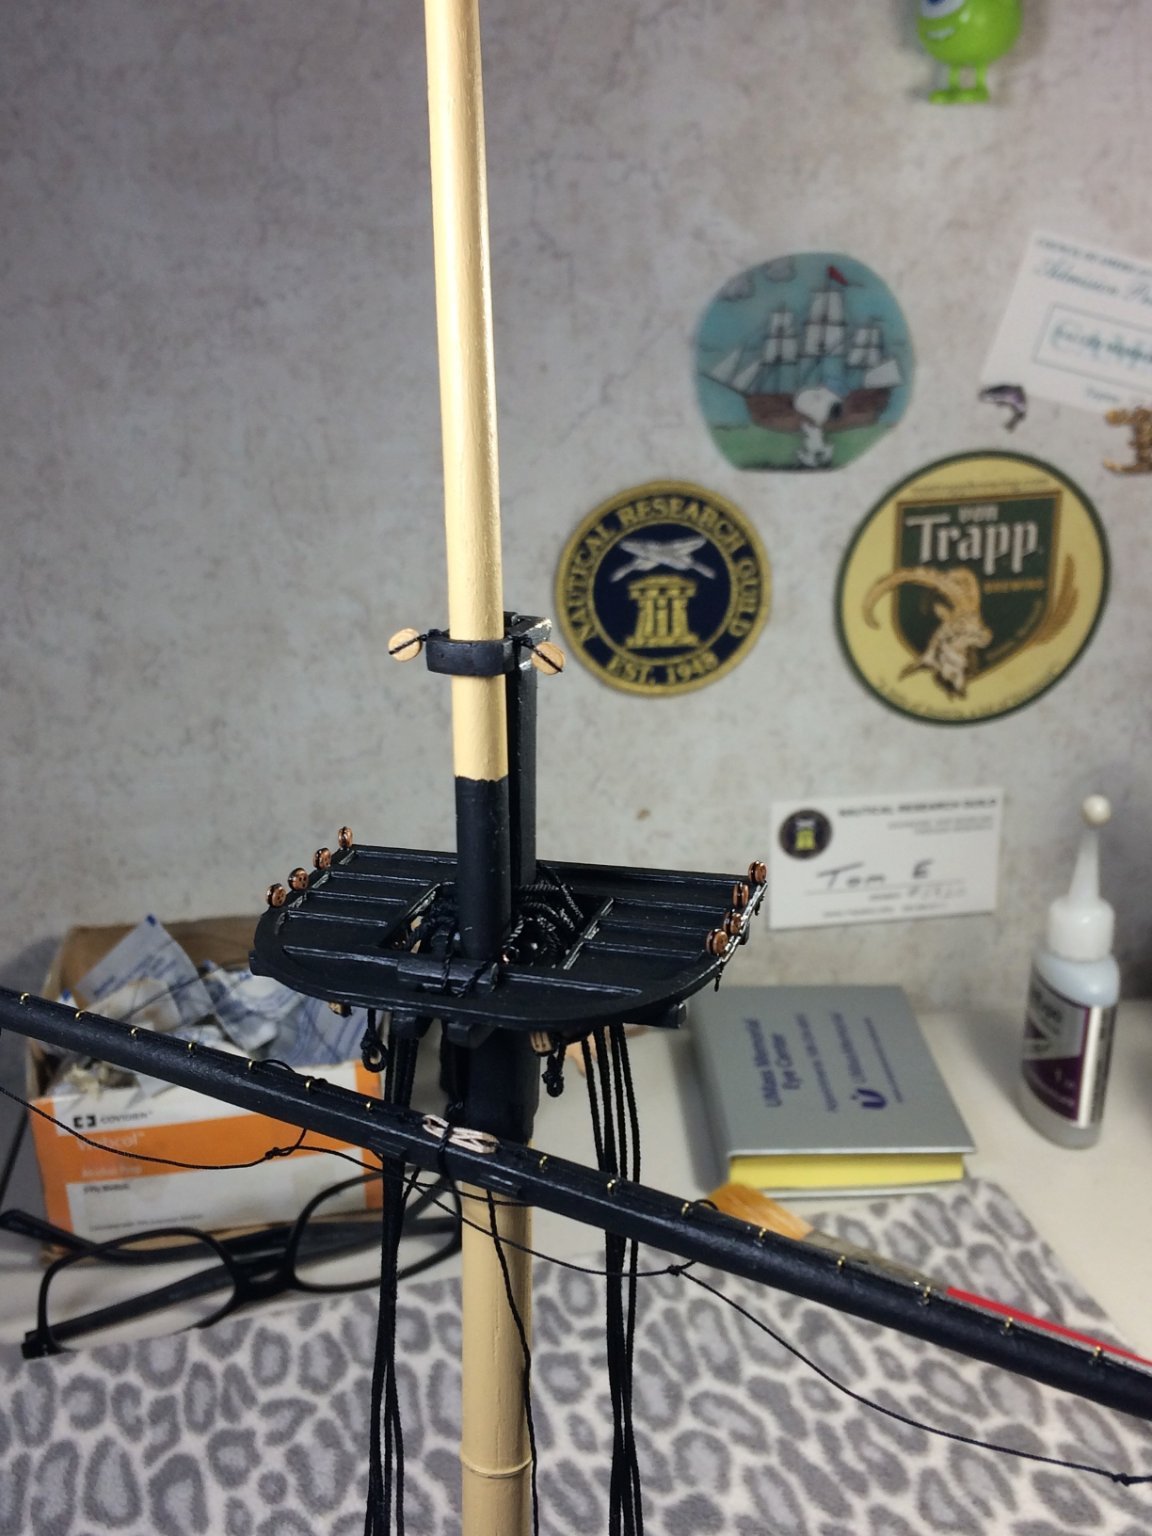
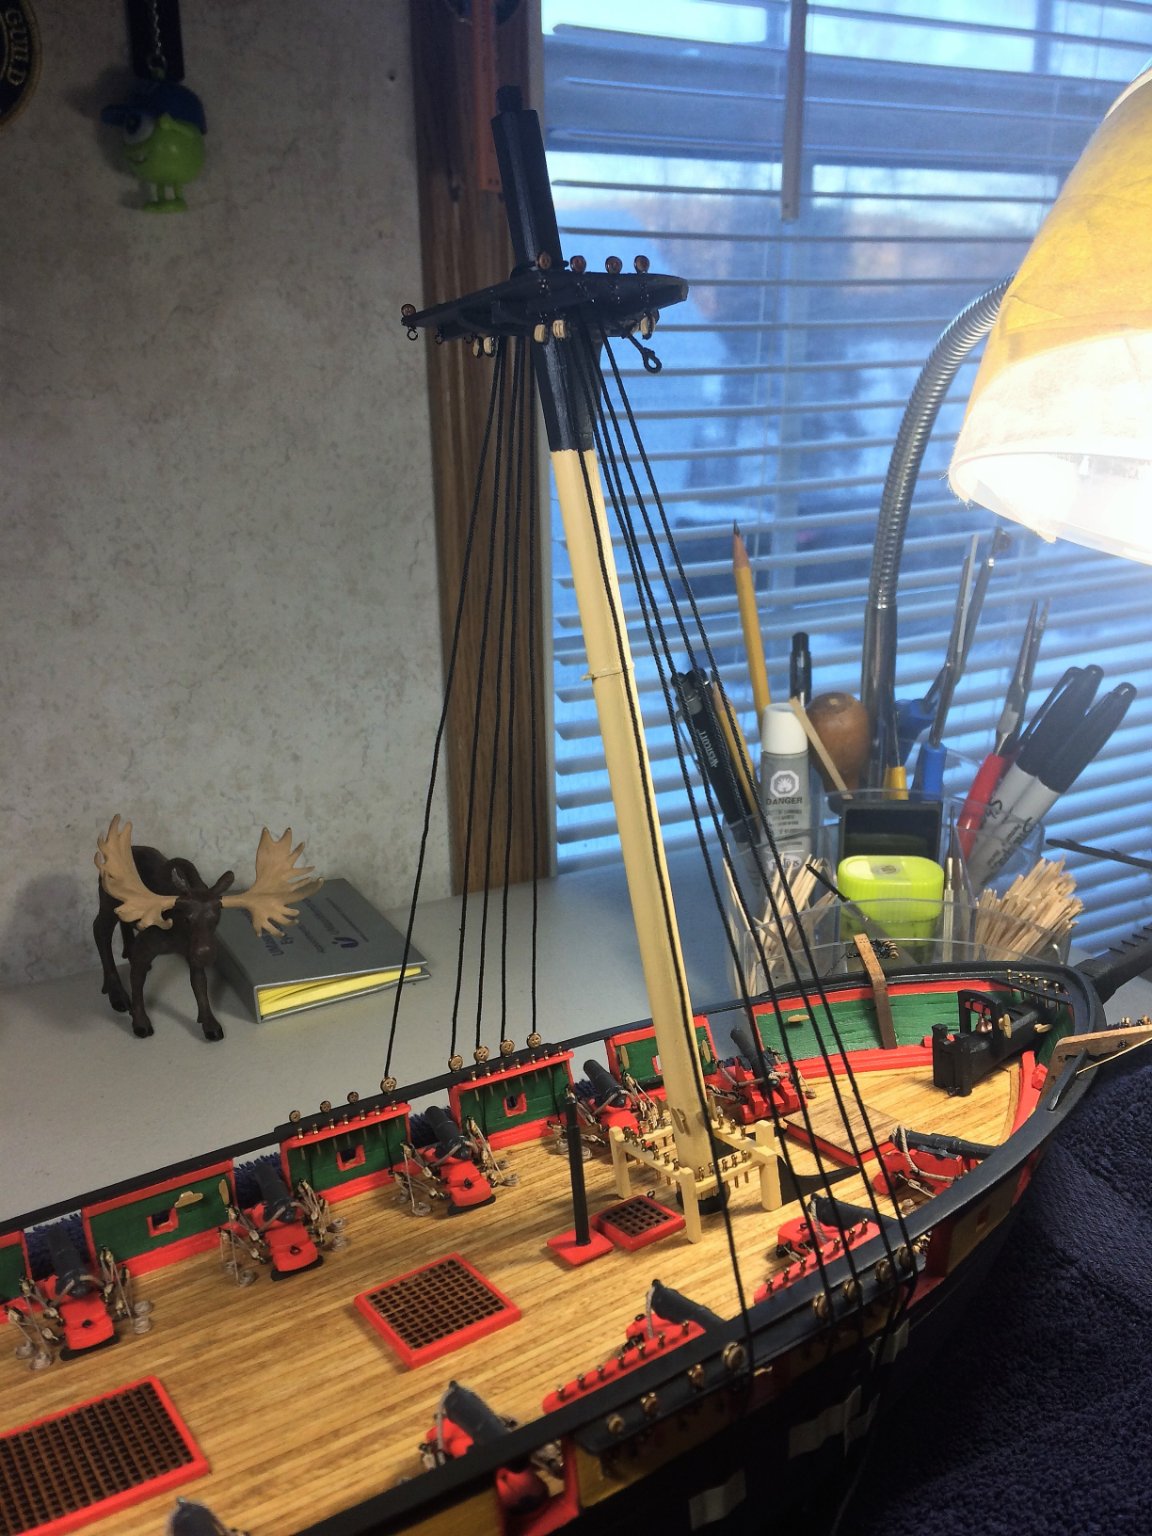
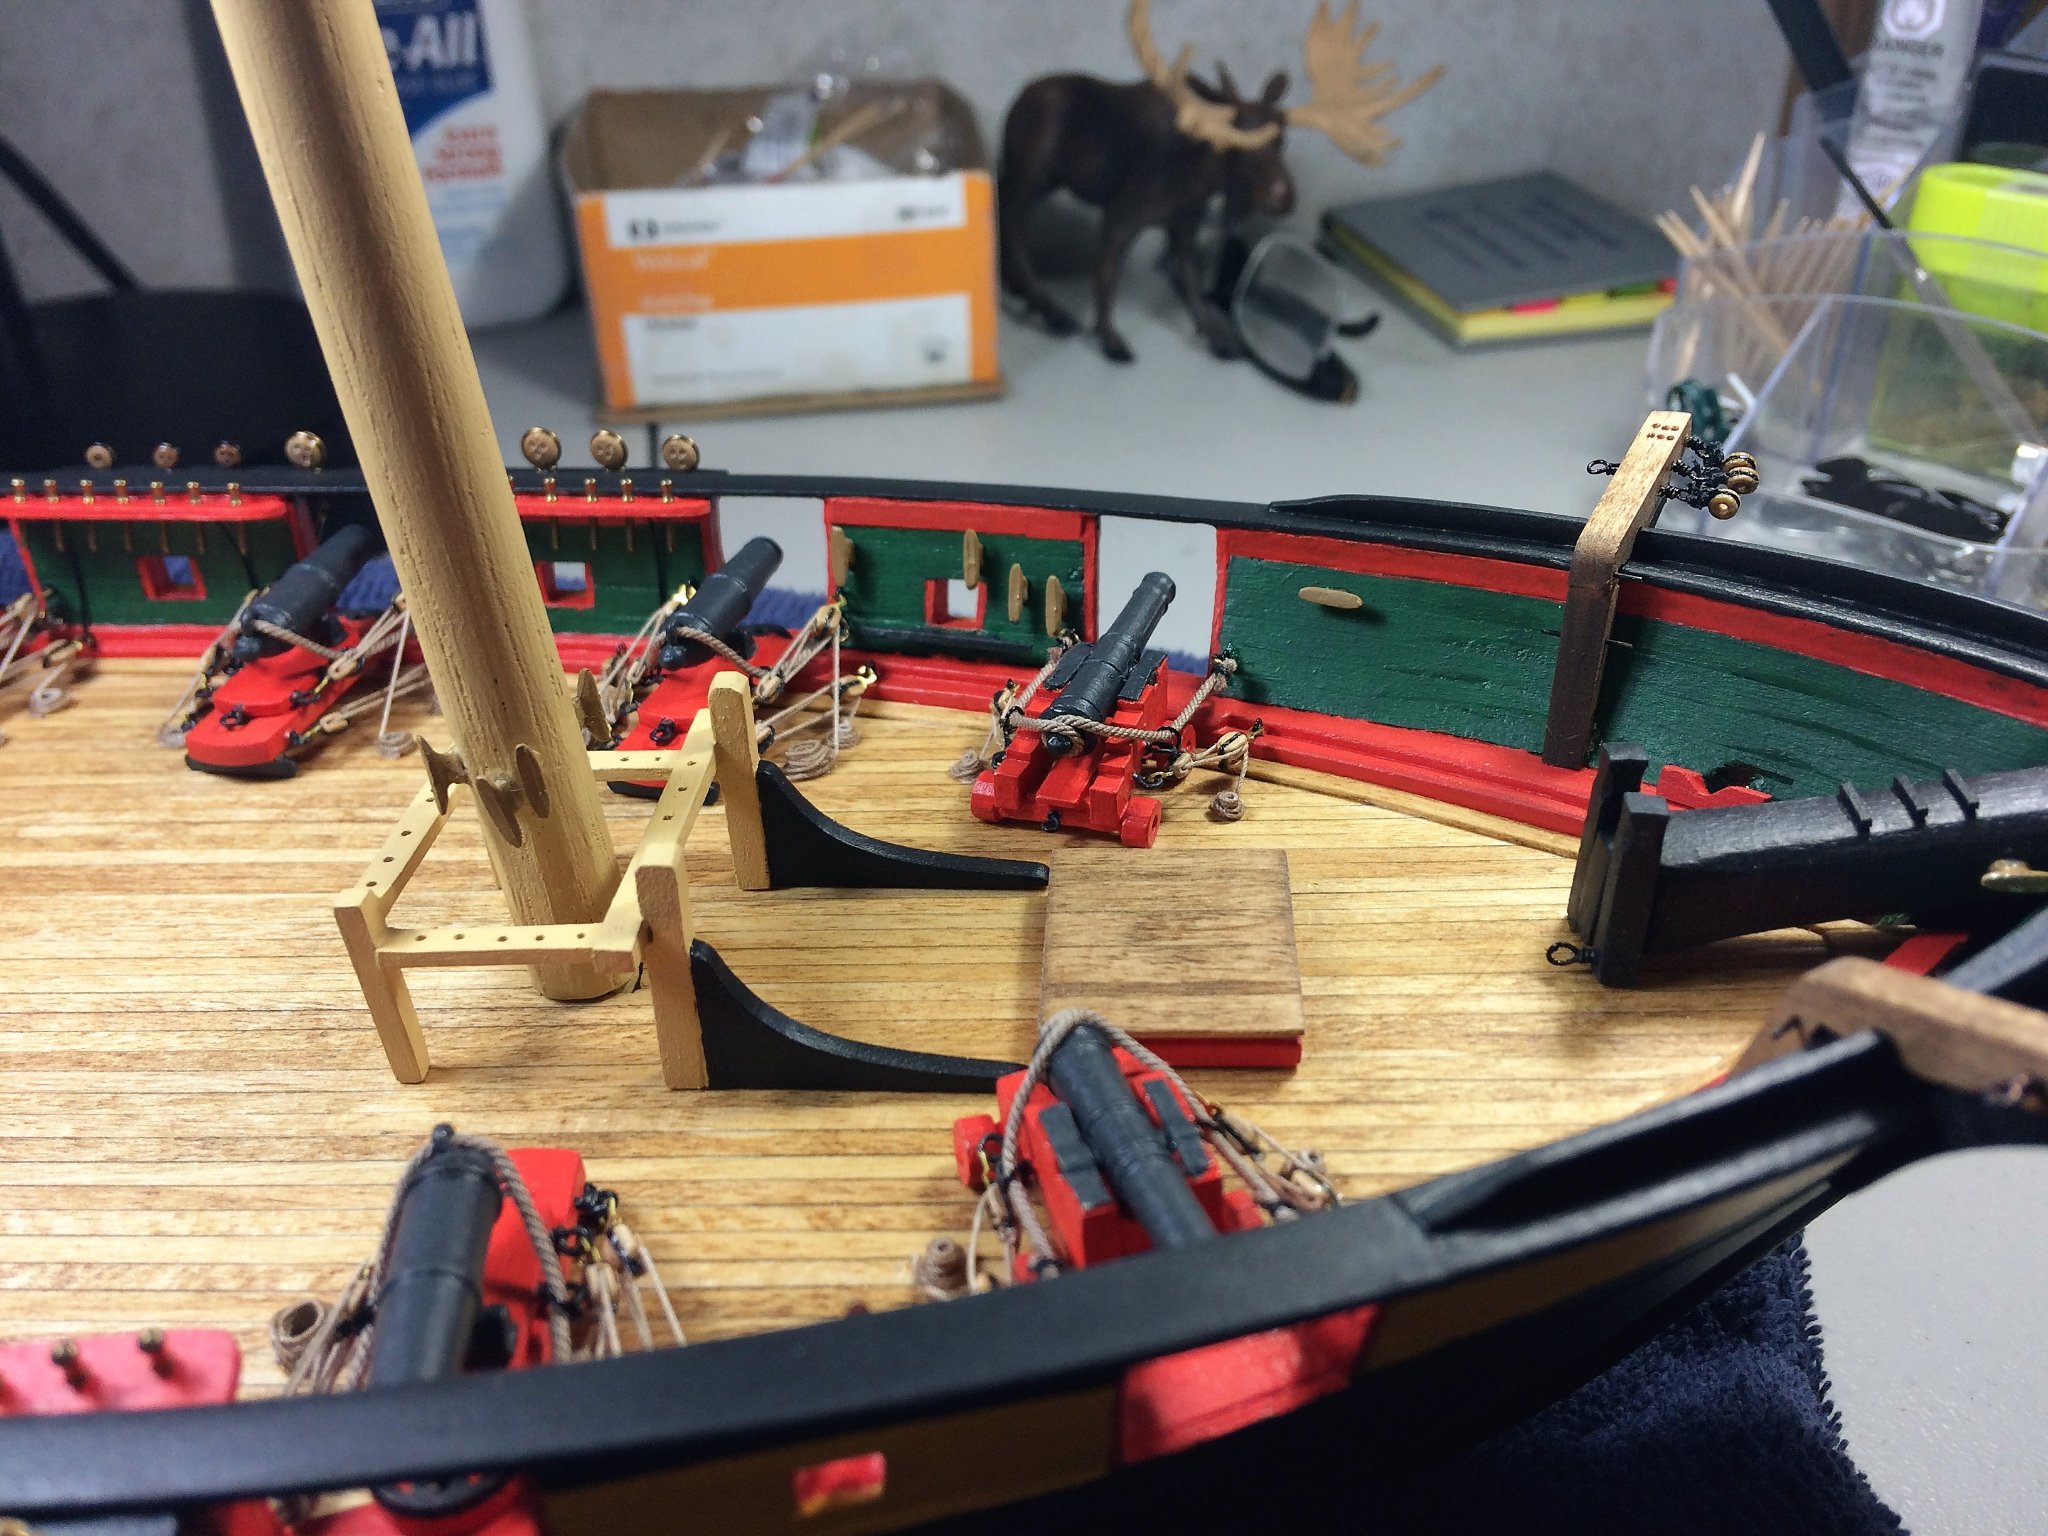
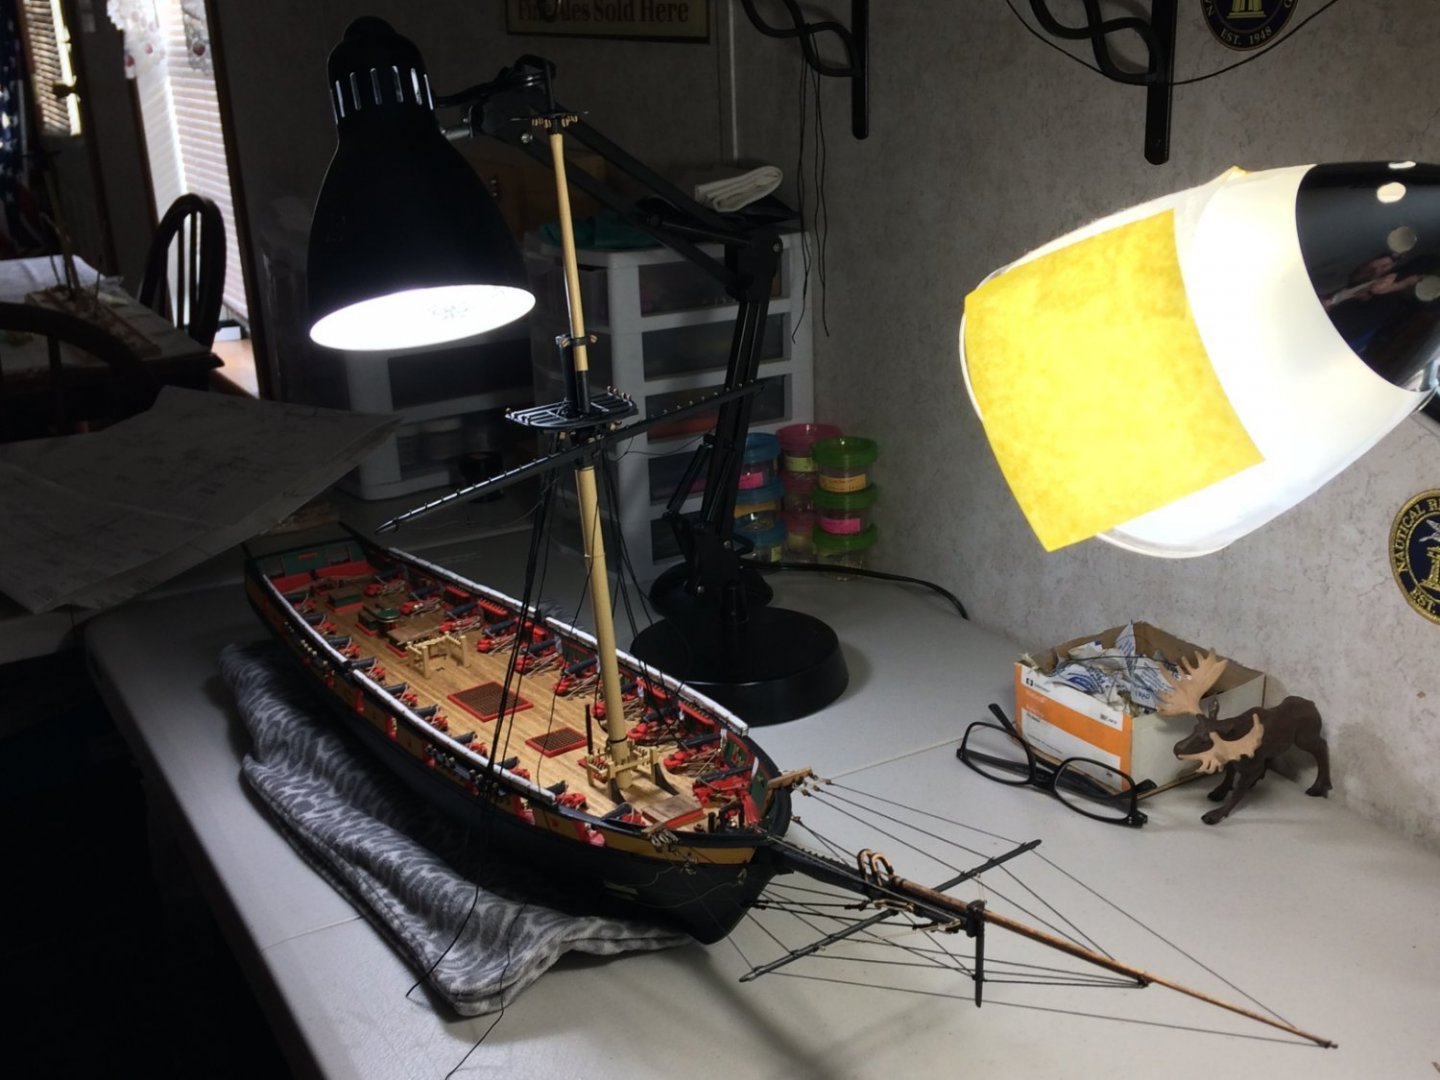
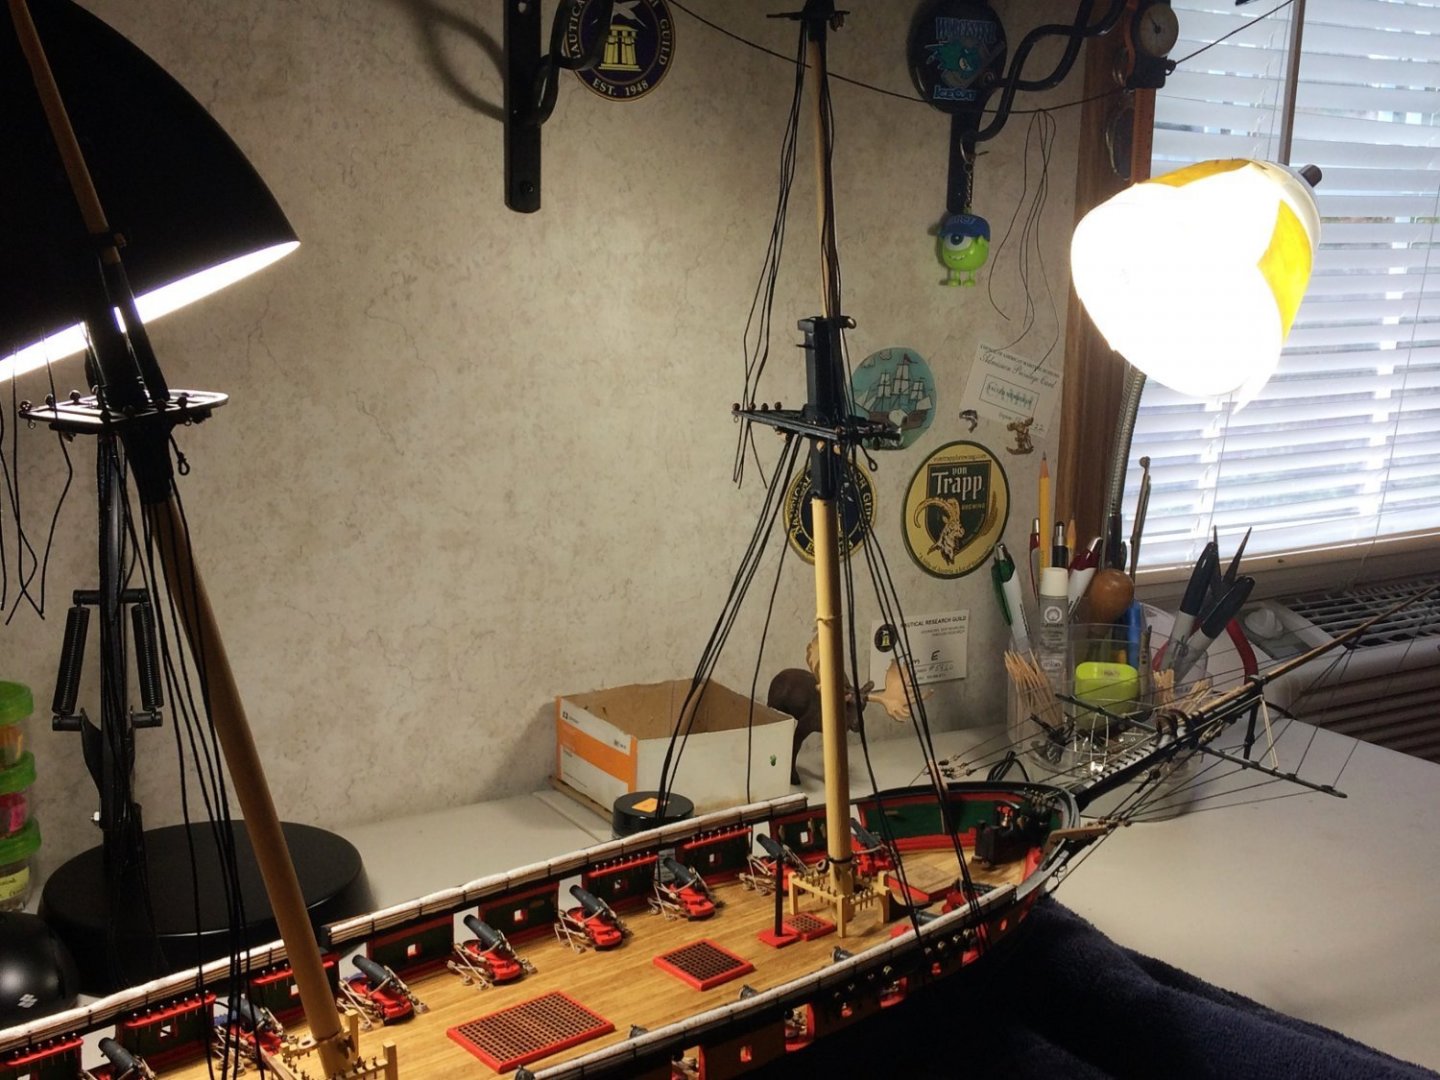
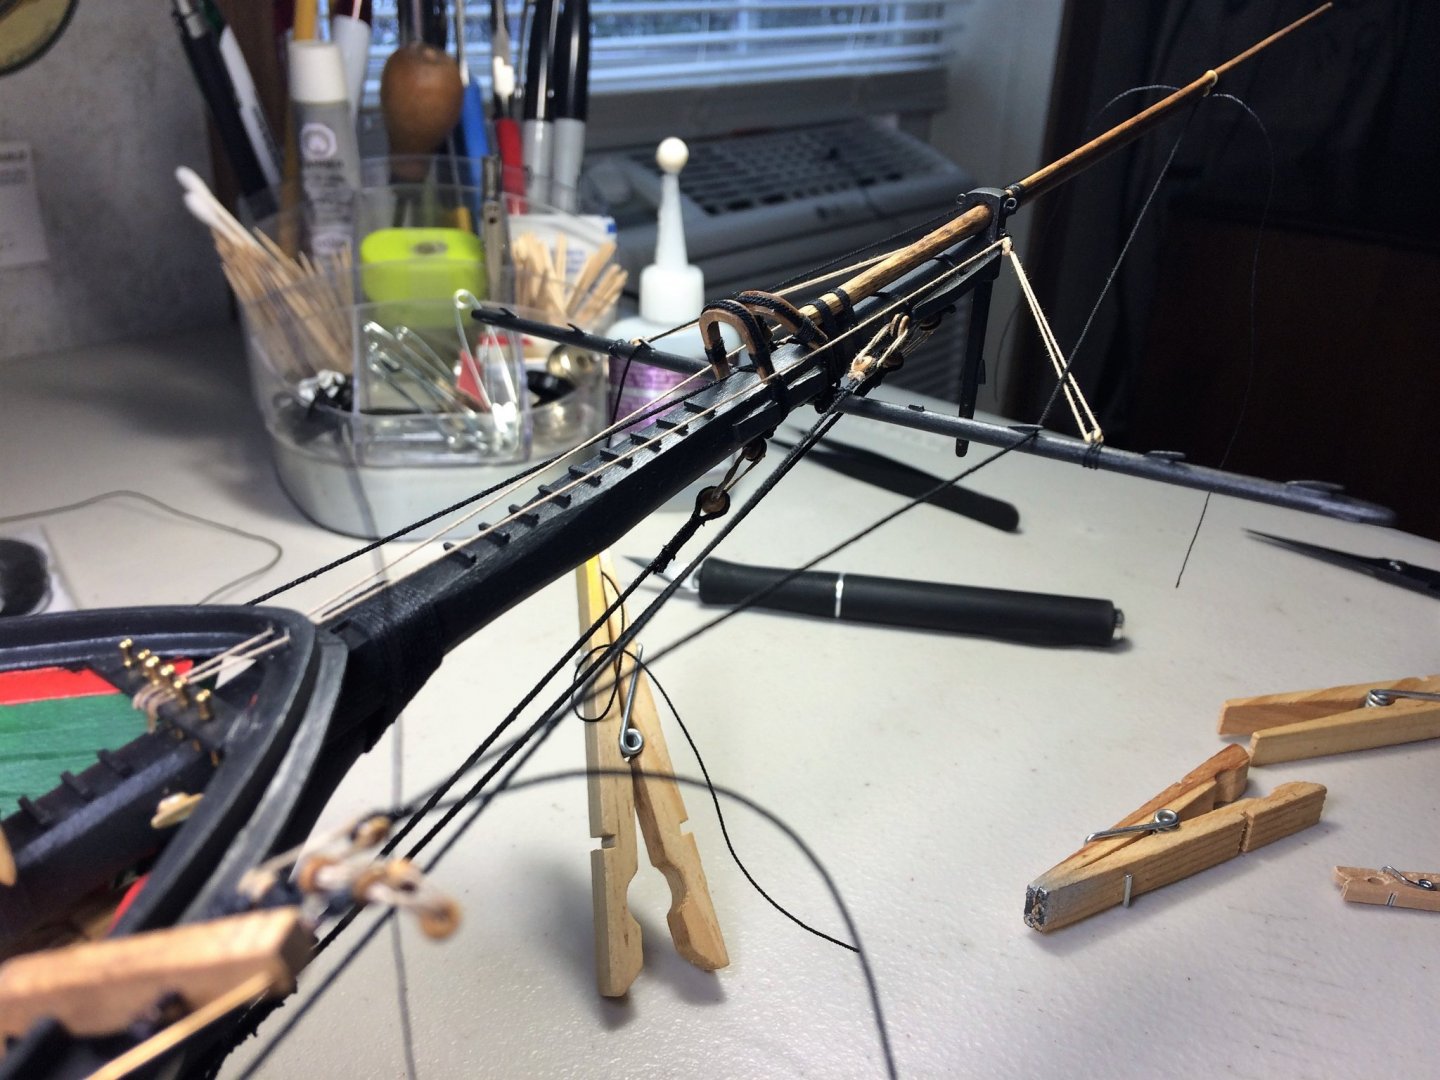
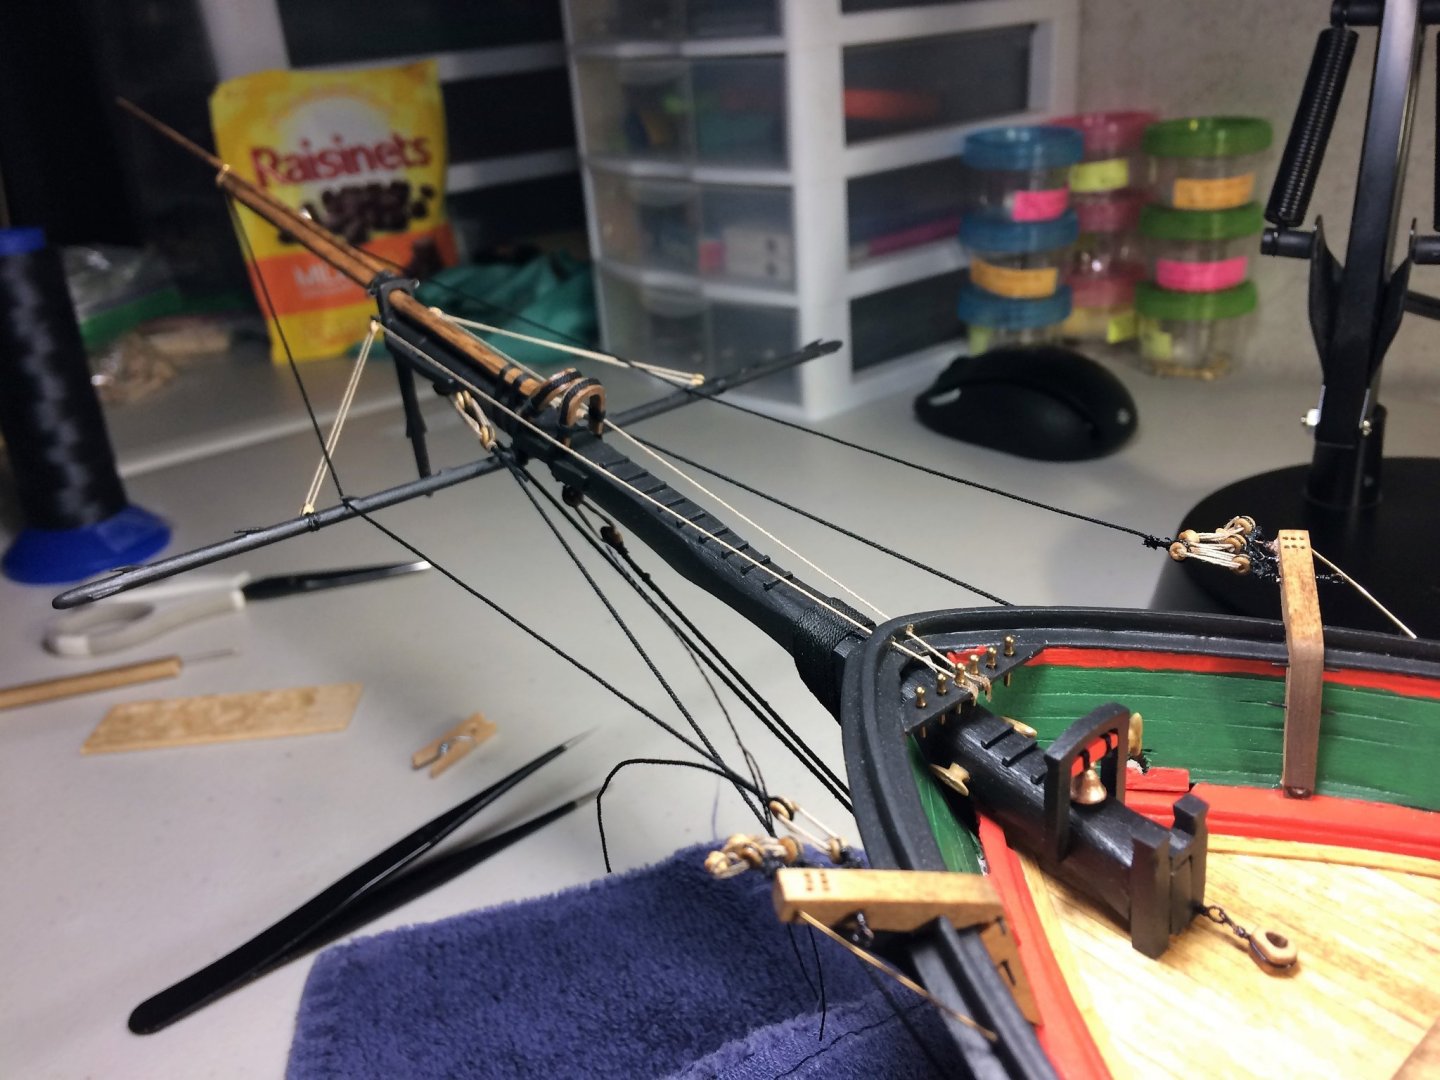
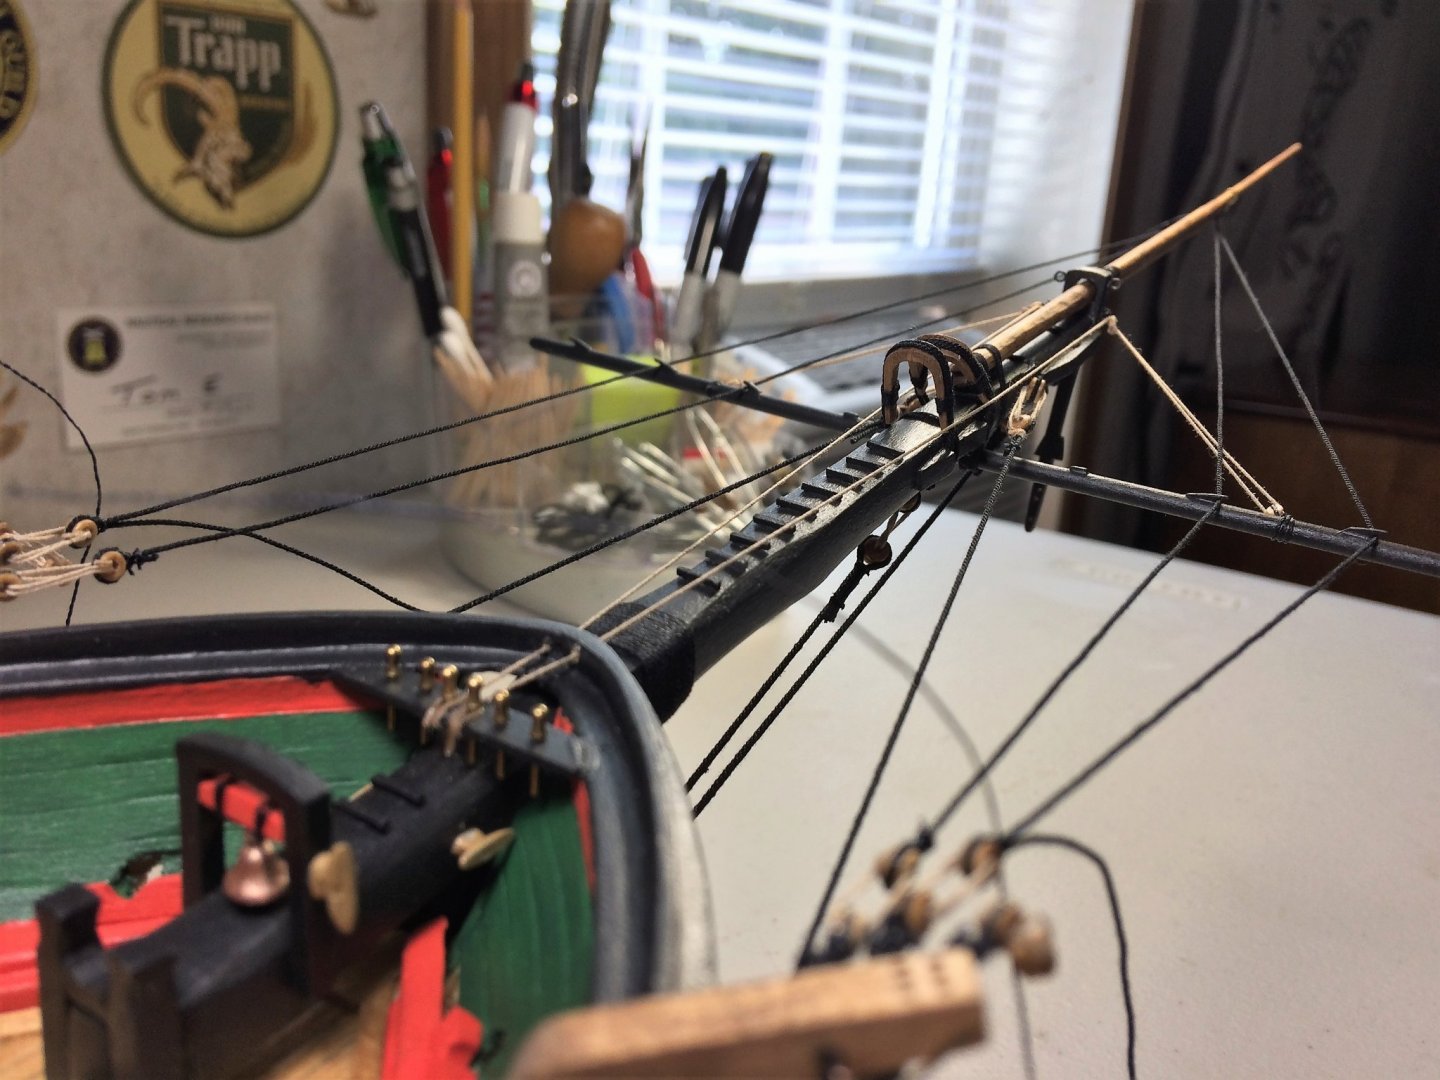
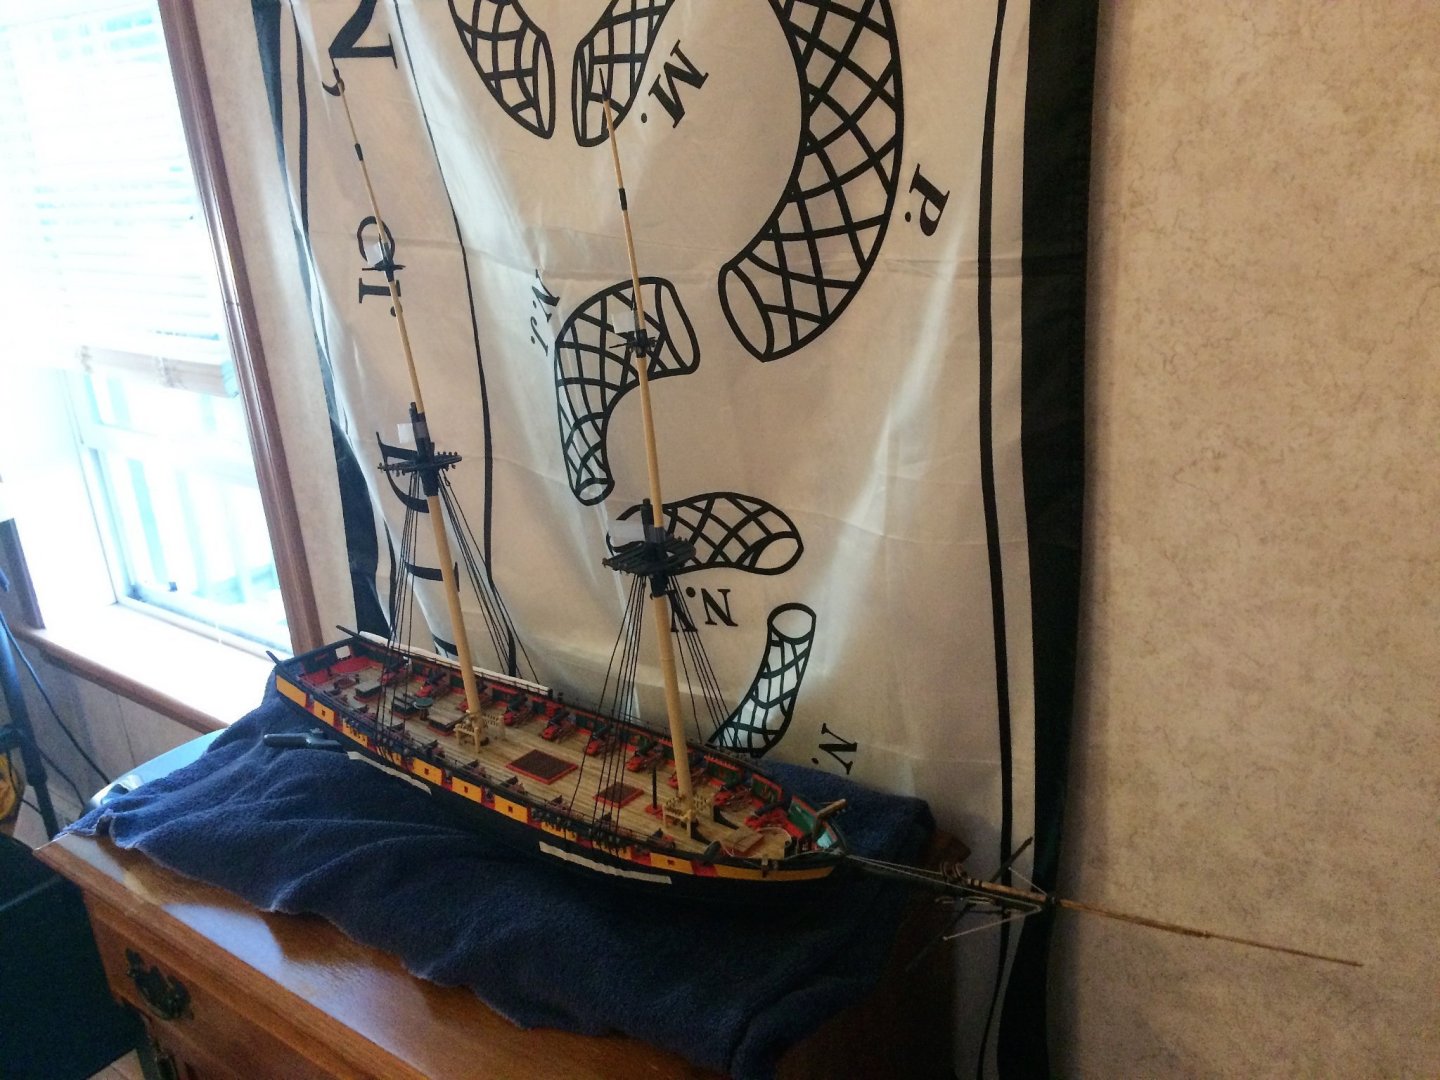
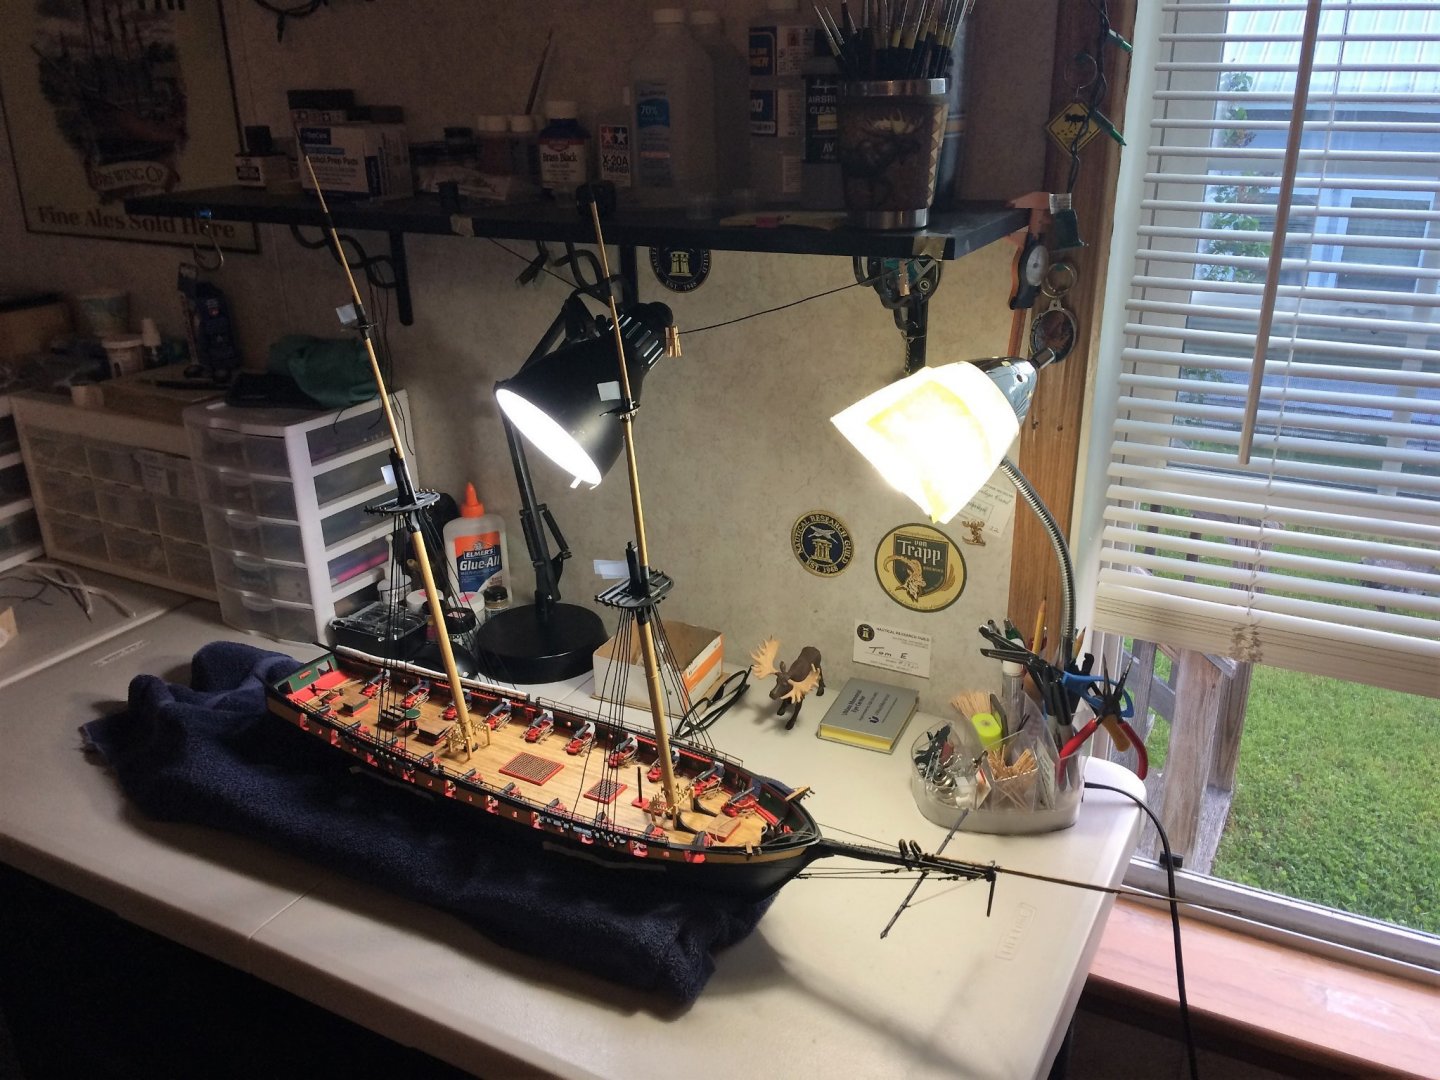
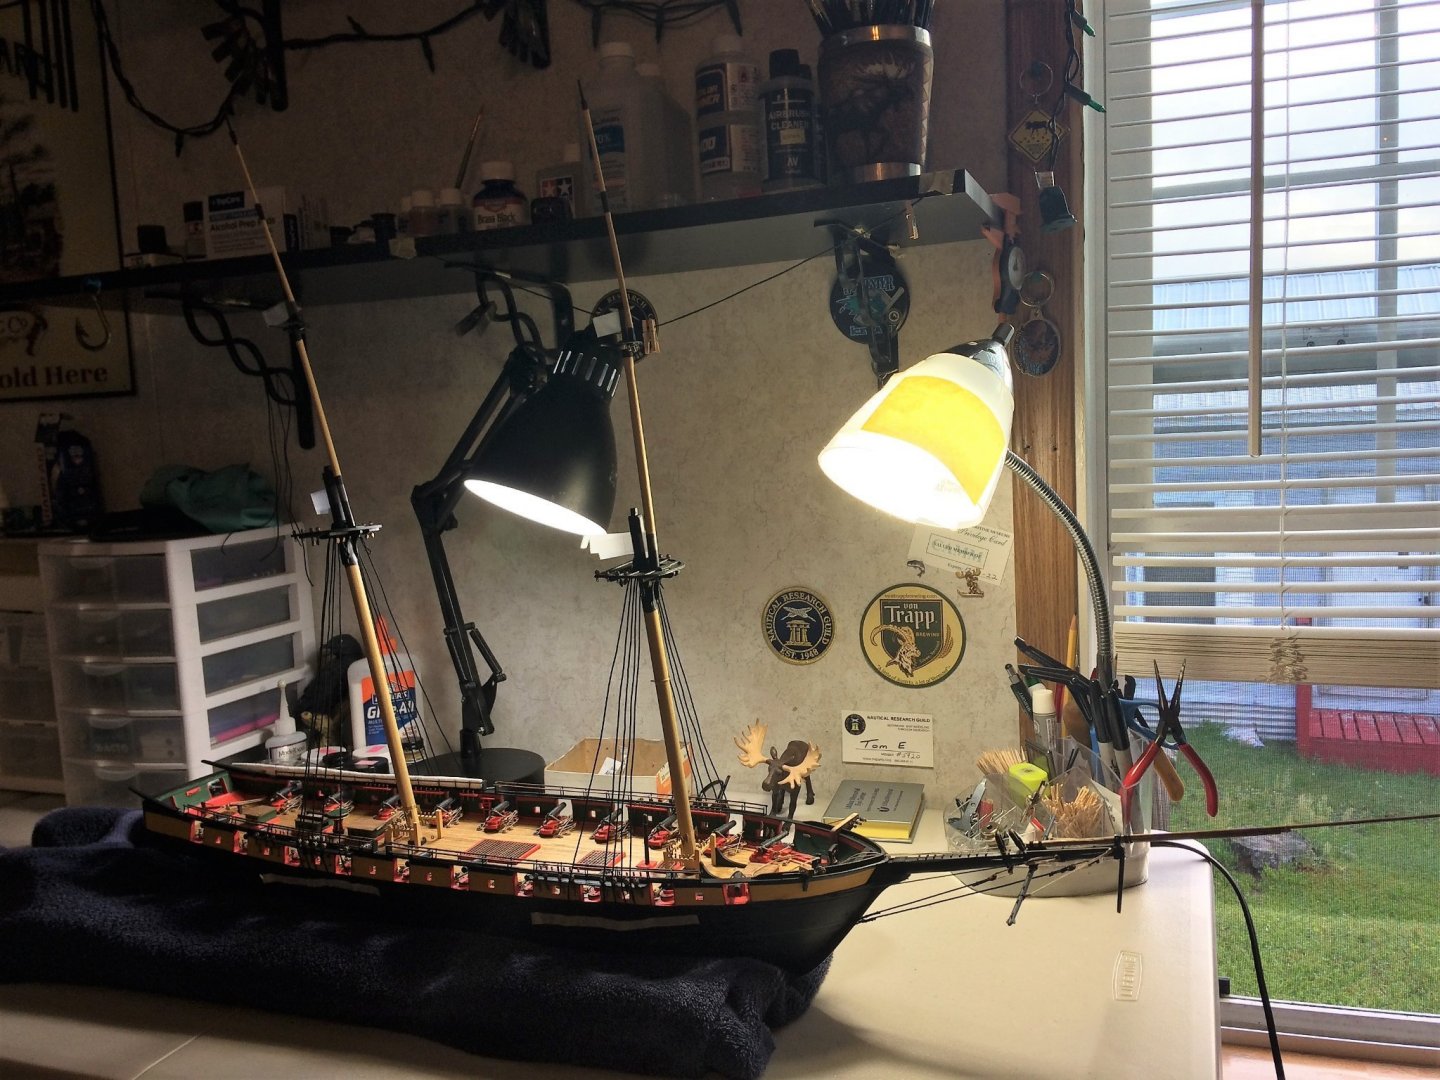
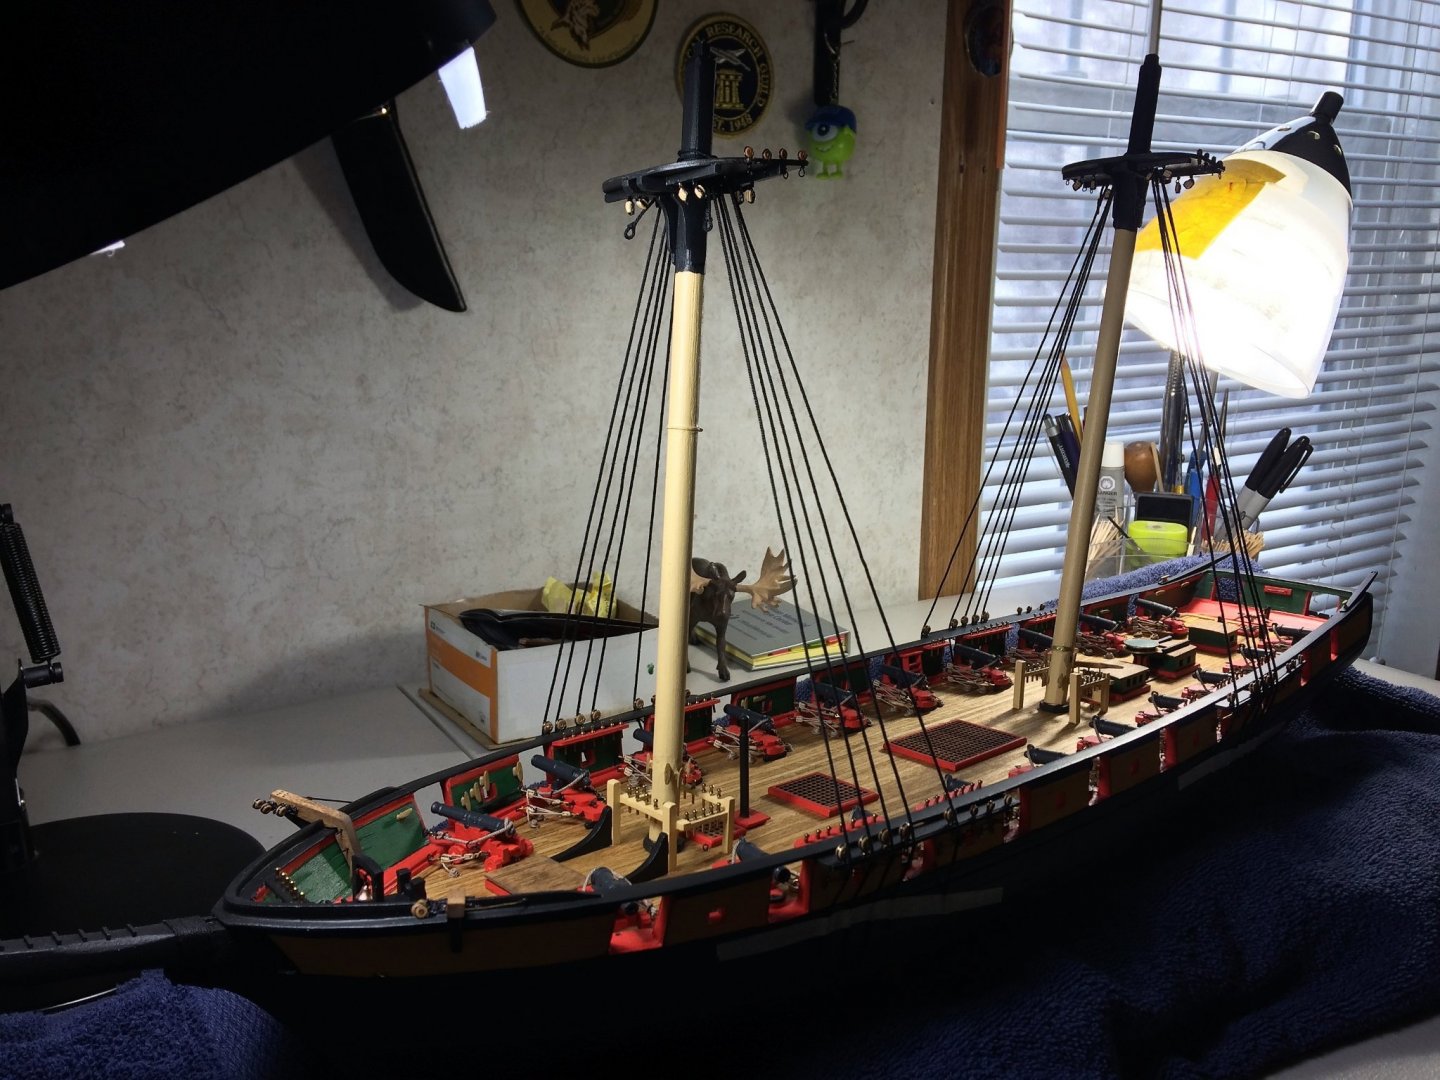
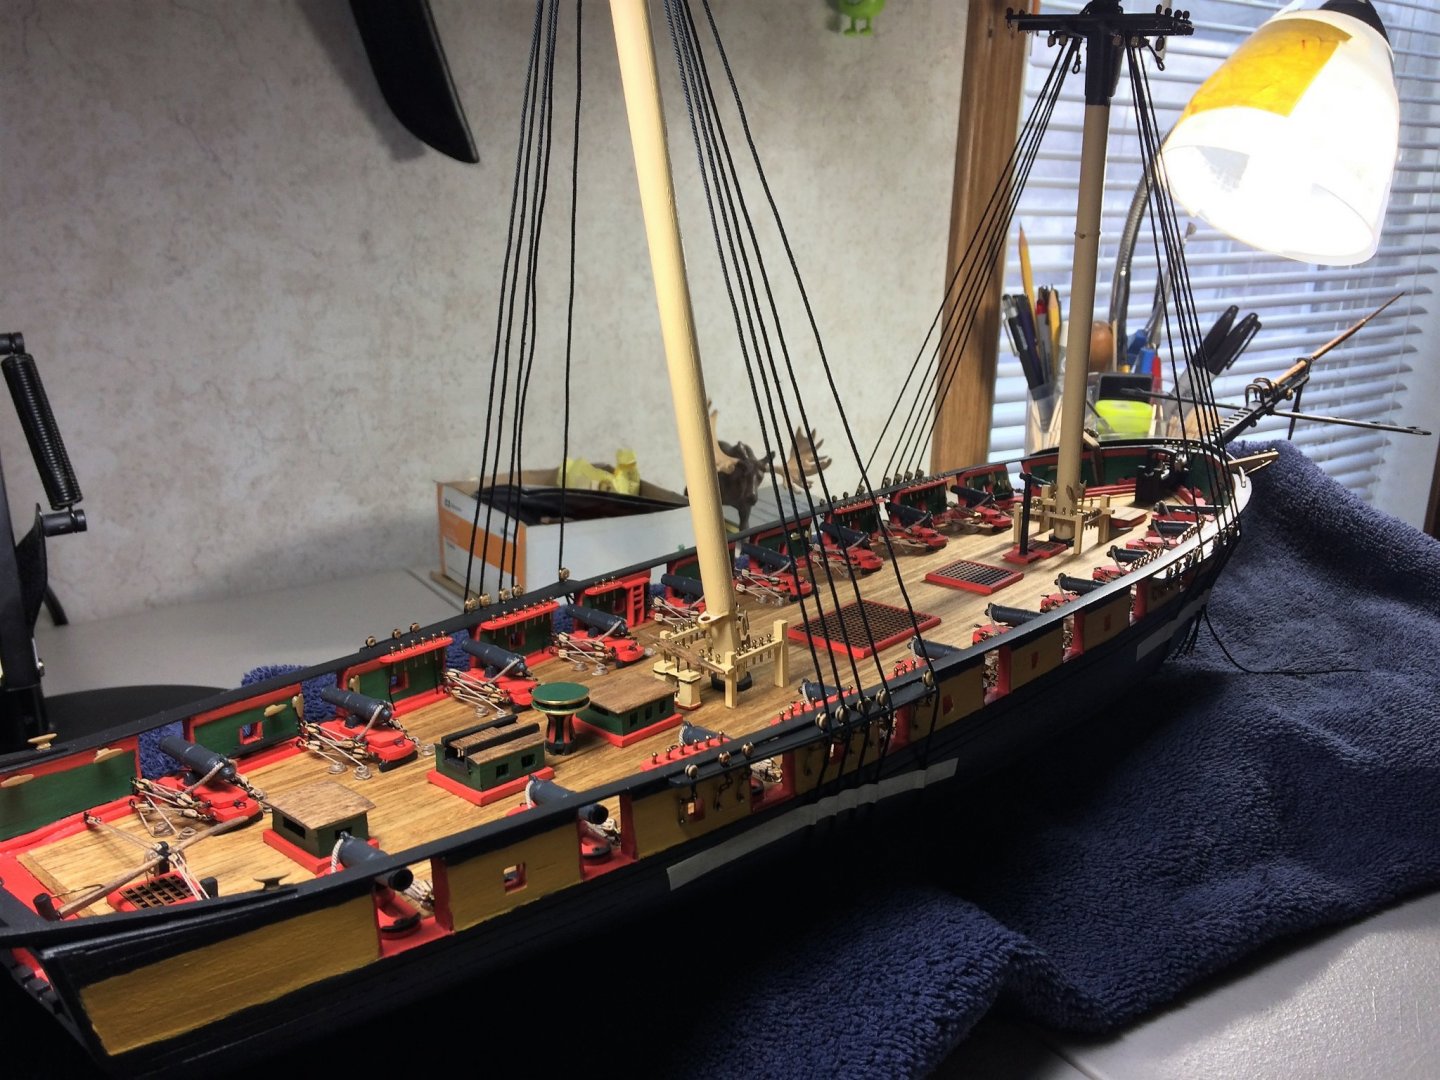
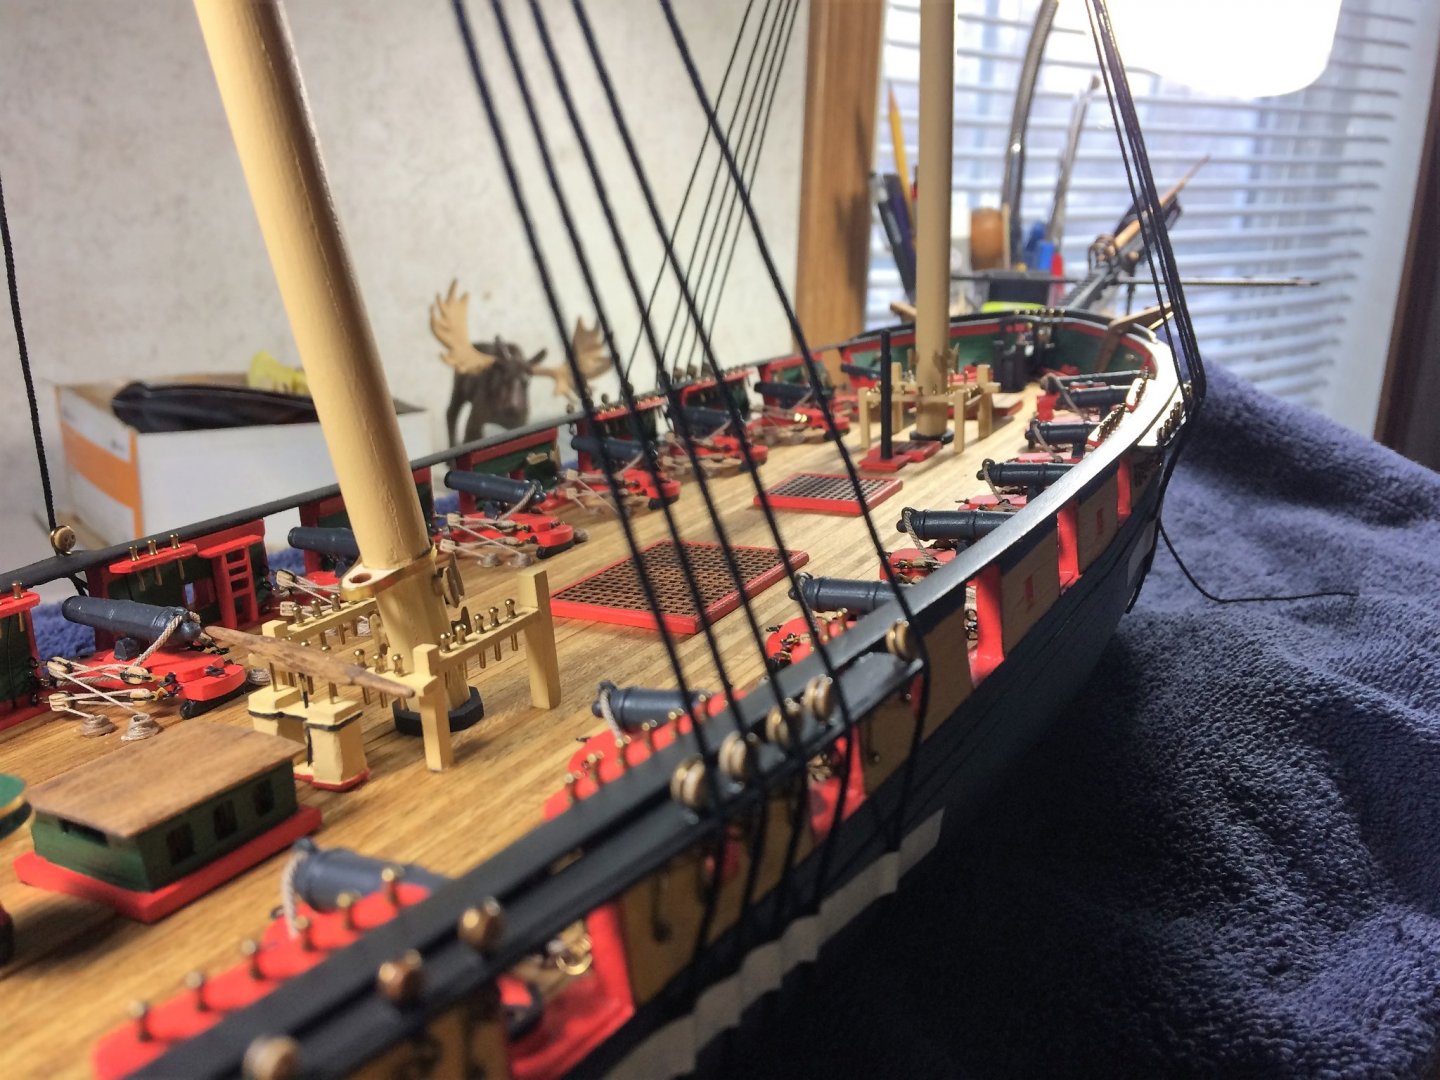
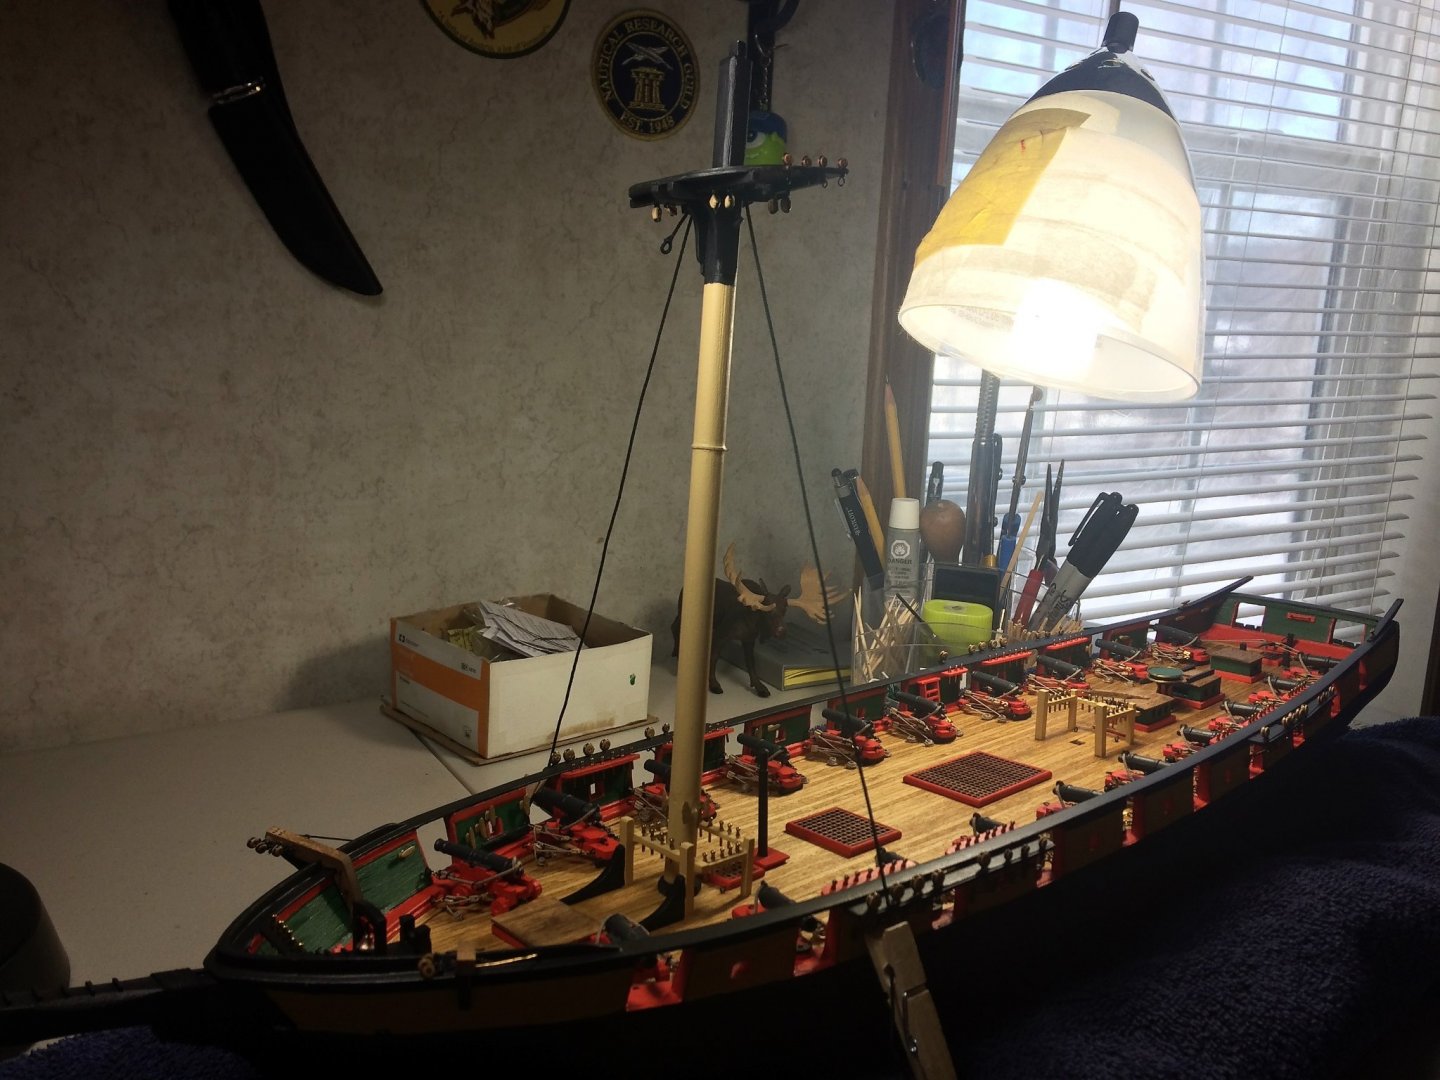
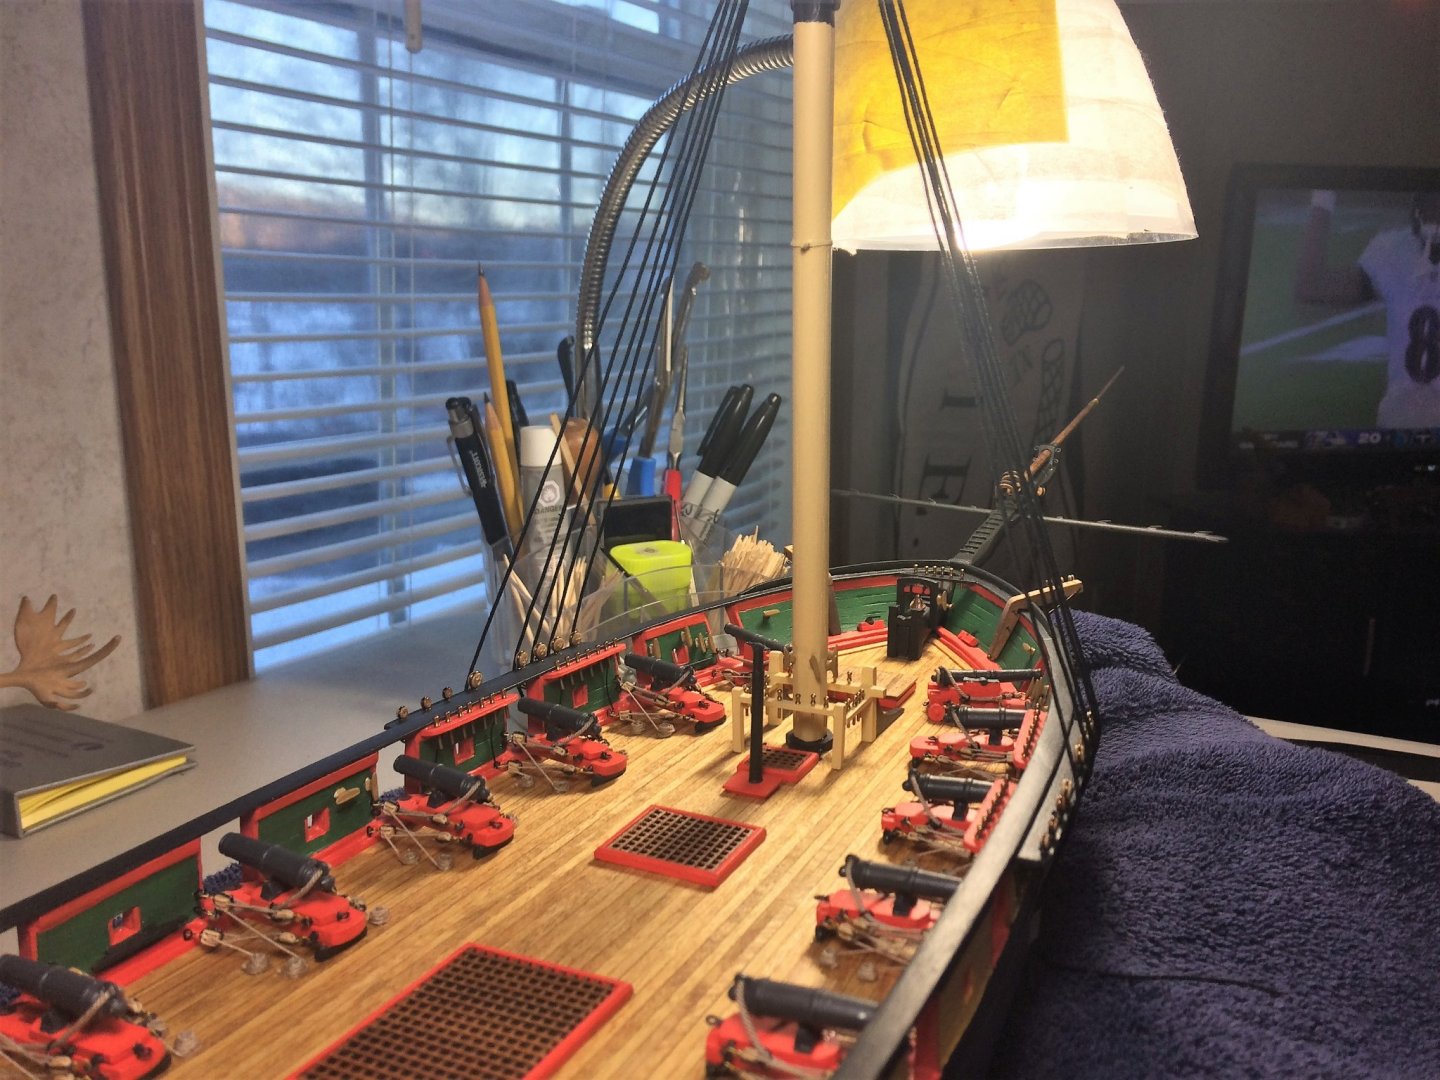
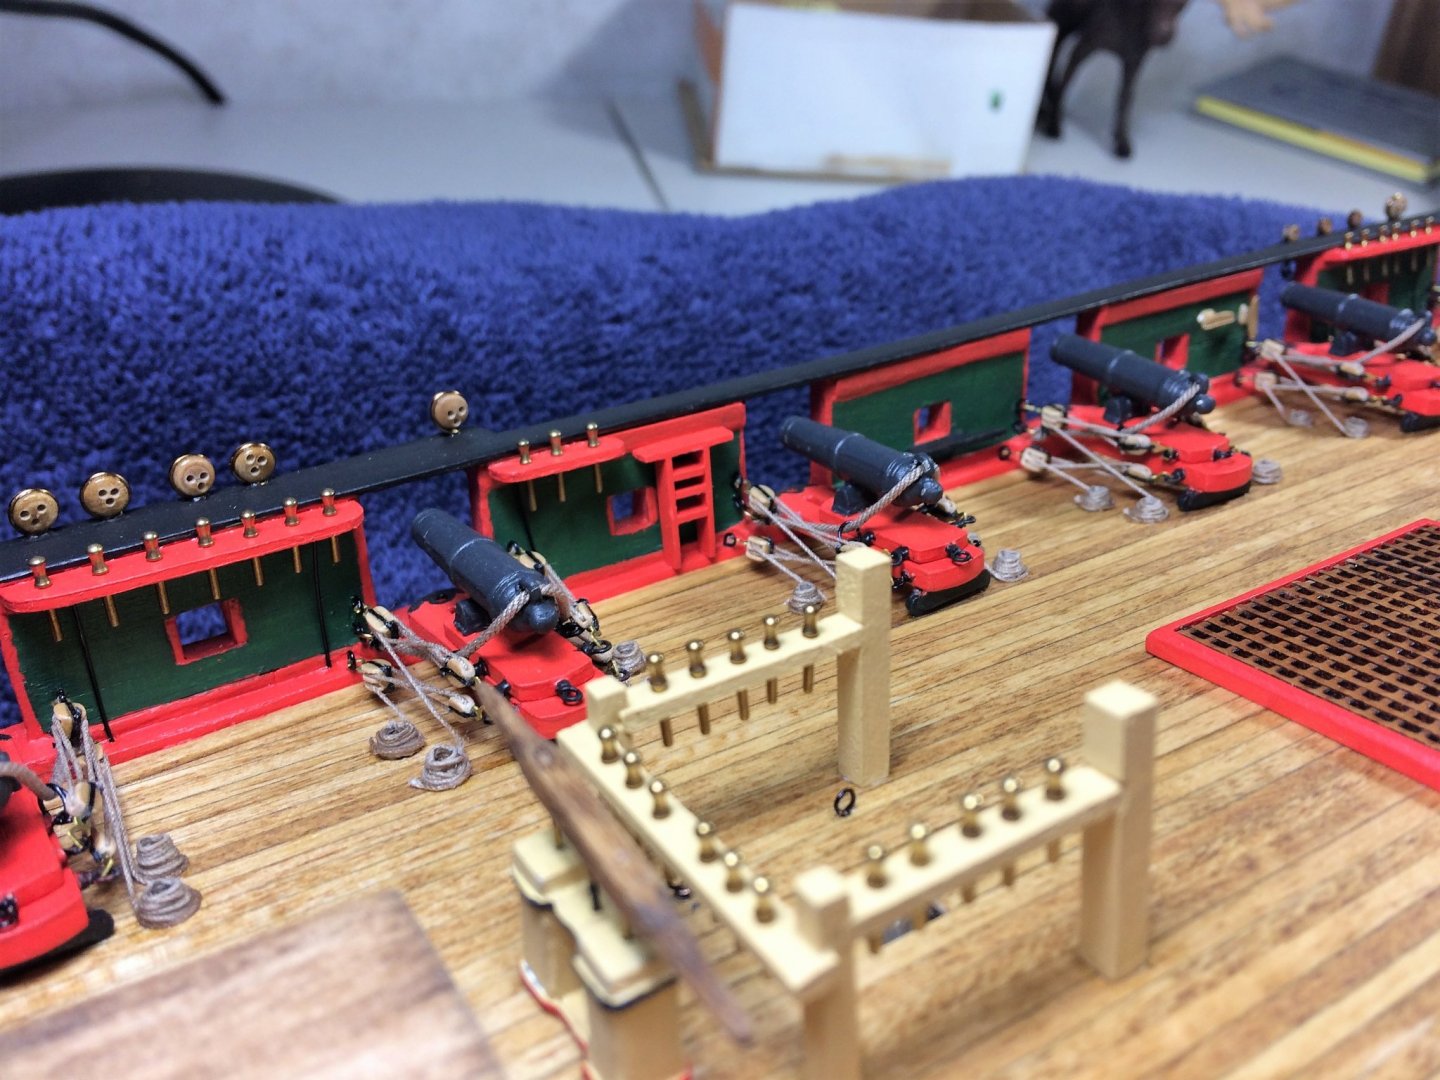
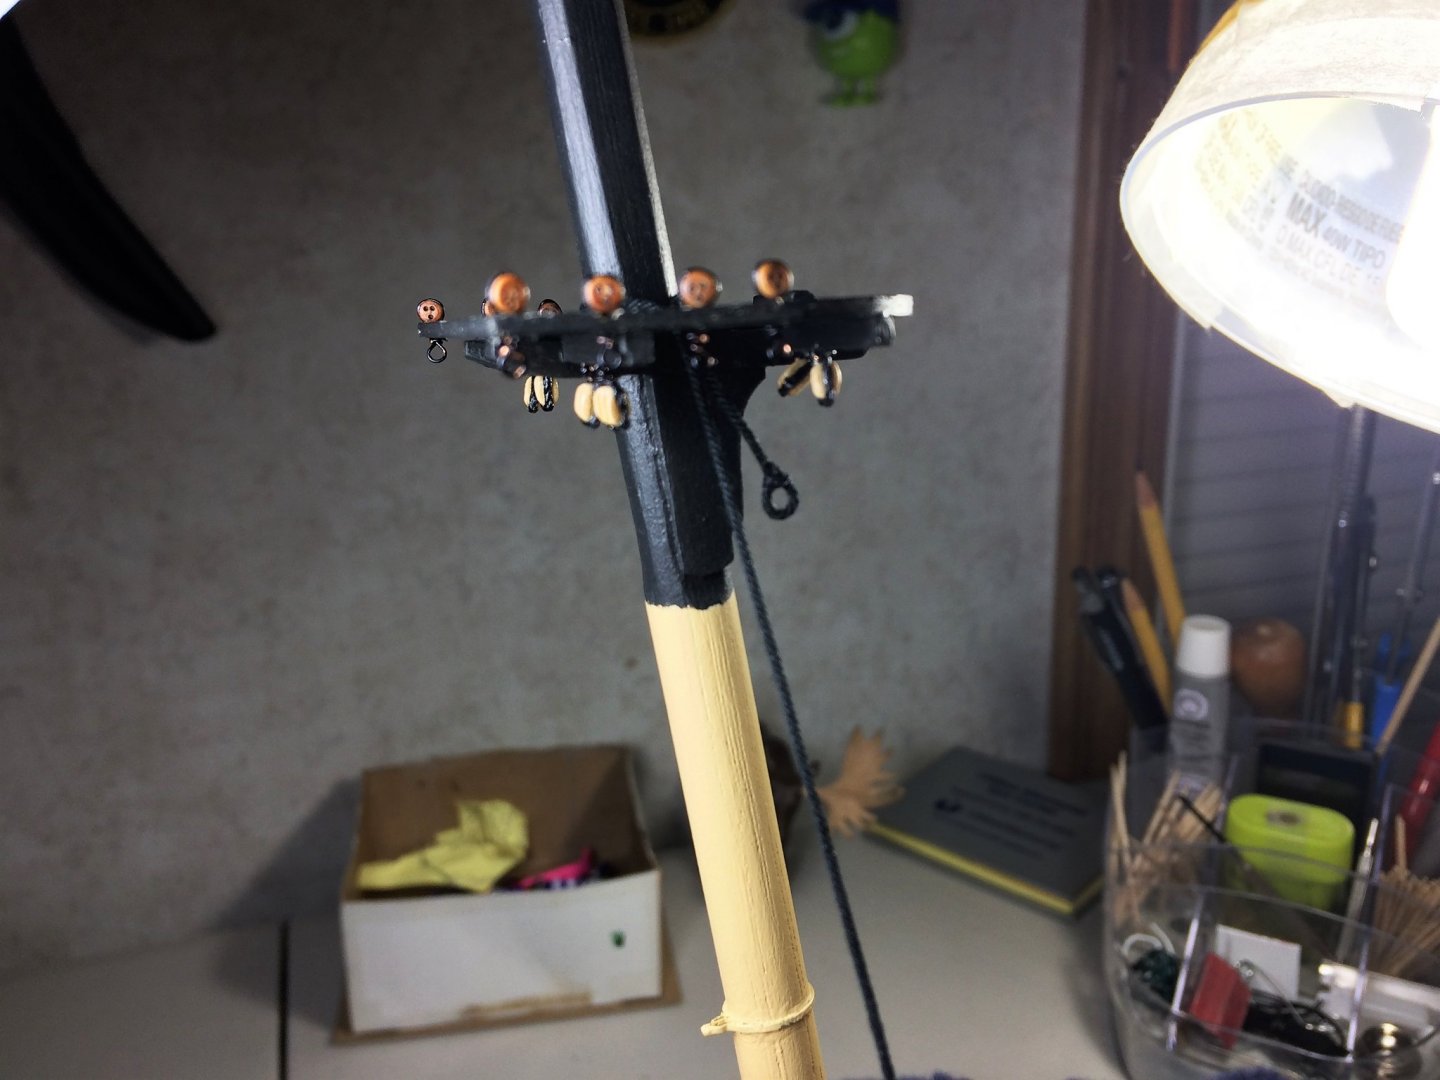
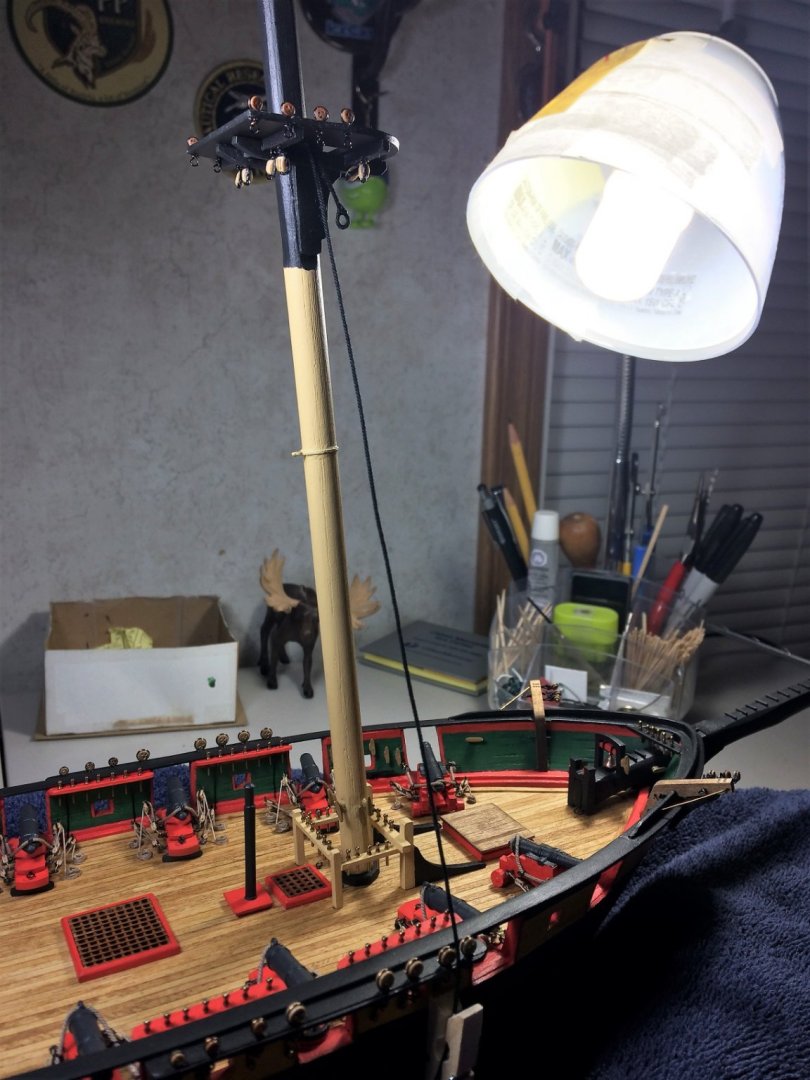
 Evening, Most of the day's chores are done. One last load of laundry spinning in the dryer and that should do it. Football on the TV, full belly......figured Niagara could use an update. I couldn't help but see what she looks like with a yard in place. Things to come I suppose. Anywho..... I felt confident in securing the Topmast to the Main mast at this point. With that in place I wanted to start with the Topmast shrouds and get those secure first. A few things key off these shrouds being in place first. I didn't install blocks directly into the shrouds themselves. I didn't see that part!!! To fix, I'll eventually strop some blocks and tie them directly to the shrouds themselves instead of weaving them into the shrouds like you're supposed to. Typically, As I work on the Foremast, the Main mast is being done at the same time. I'm going to rig as much as possible off the model. Shrouds, stays, yards and the like. All rope is from Syren. She's getting there. Stay safe, Tom E


-
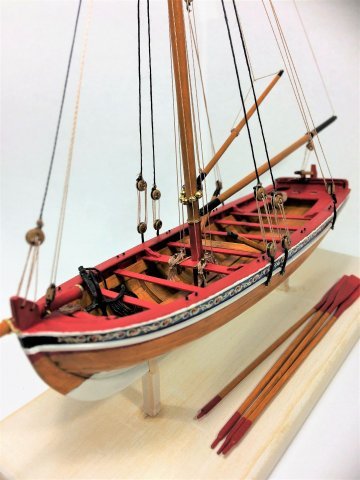
Jared, Your Niagara is off to a wonderful start. Really looks good! And from the looks of your Armed Longboat your workmanship will translate well. I'm going to pull up a chair for your build! Niagara is one of my favorite ships. Tom E
-
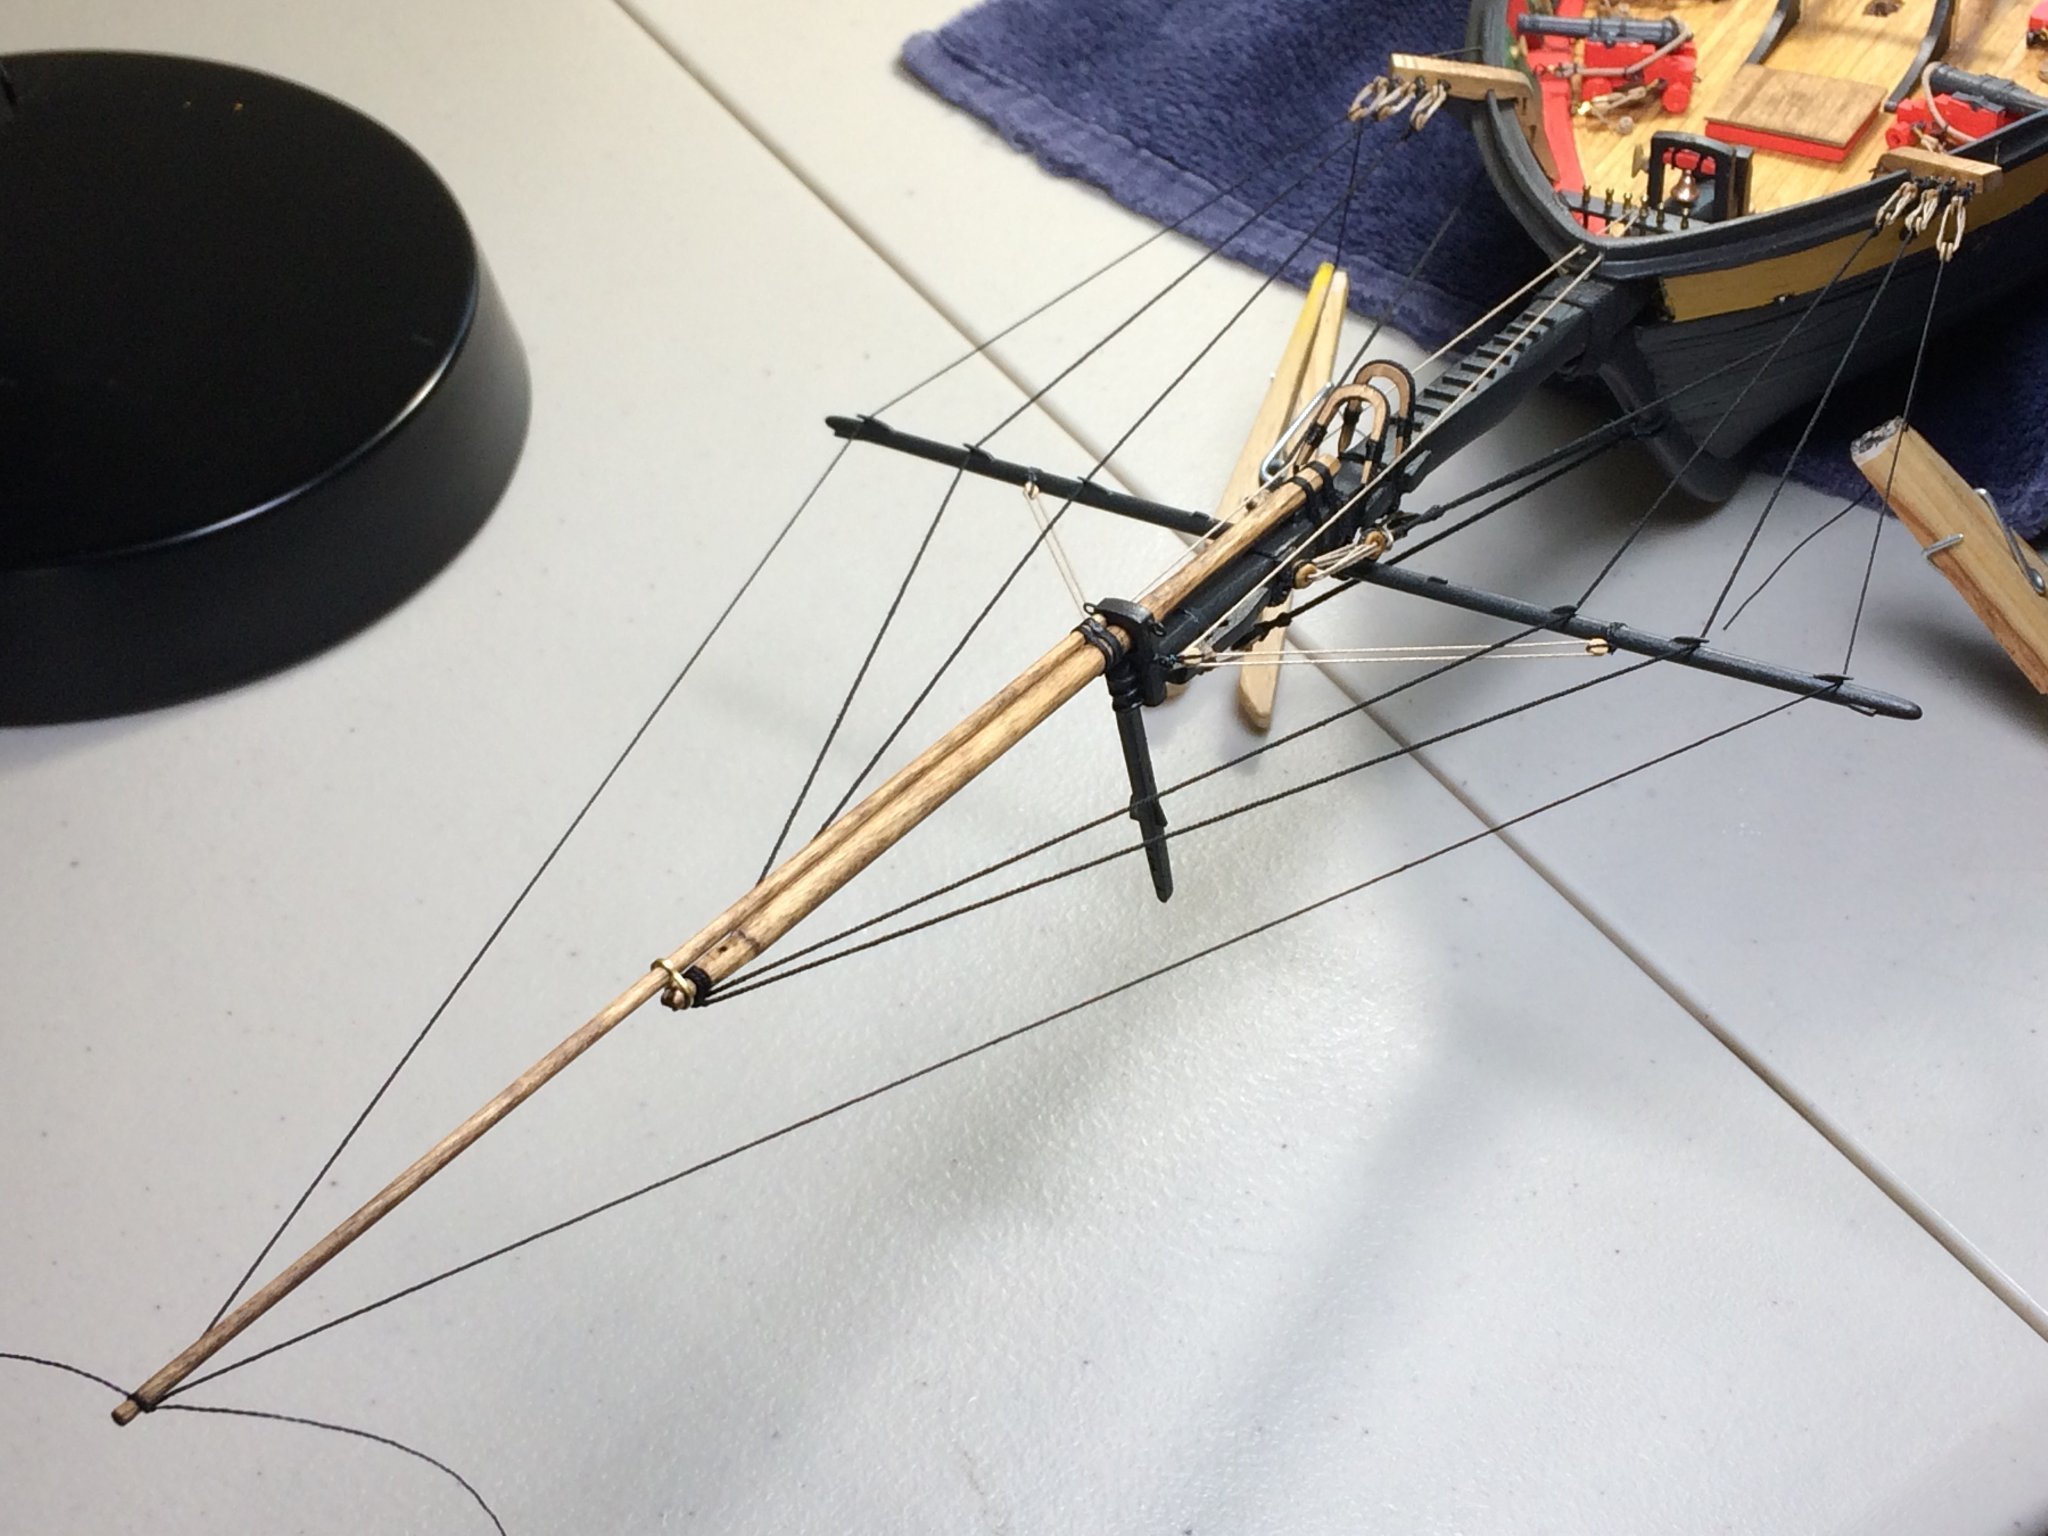
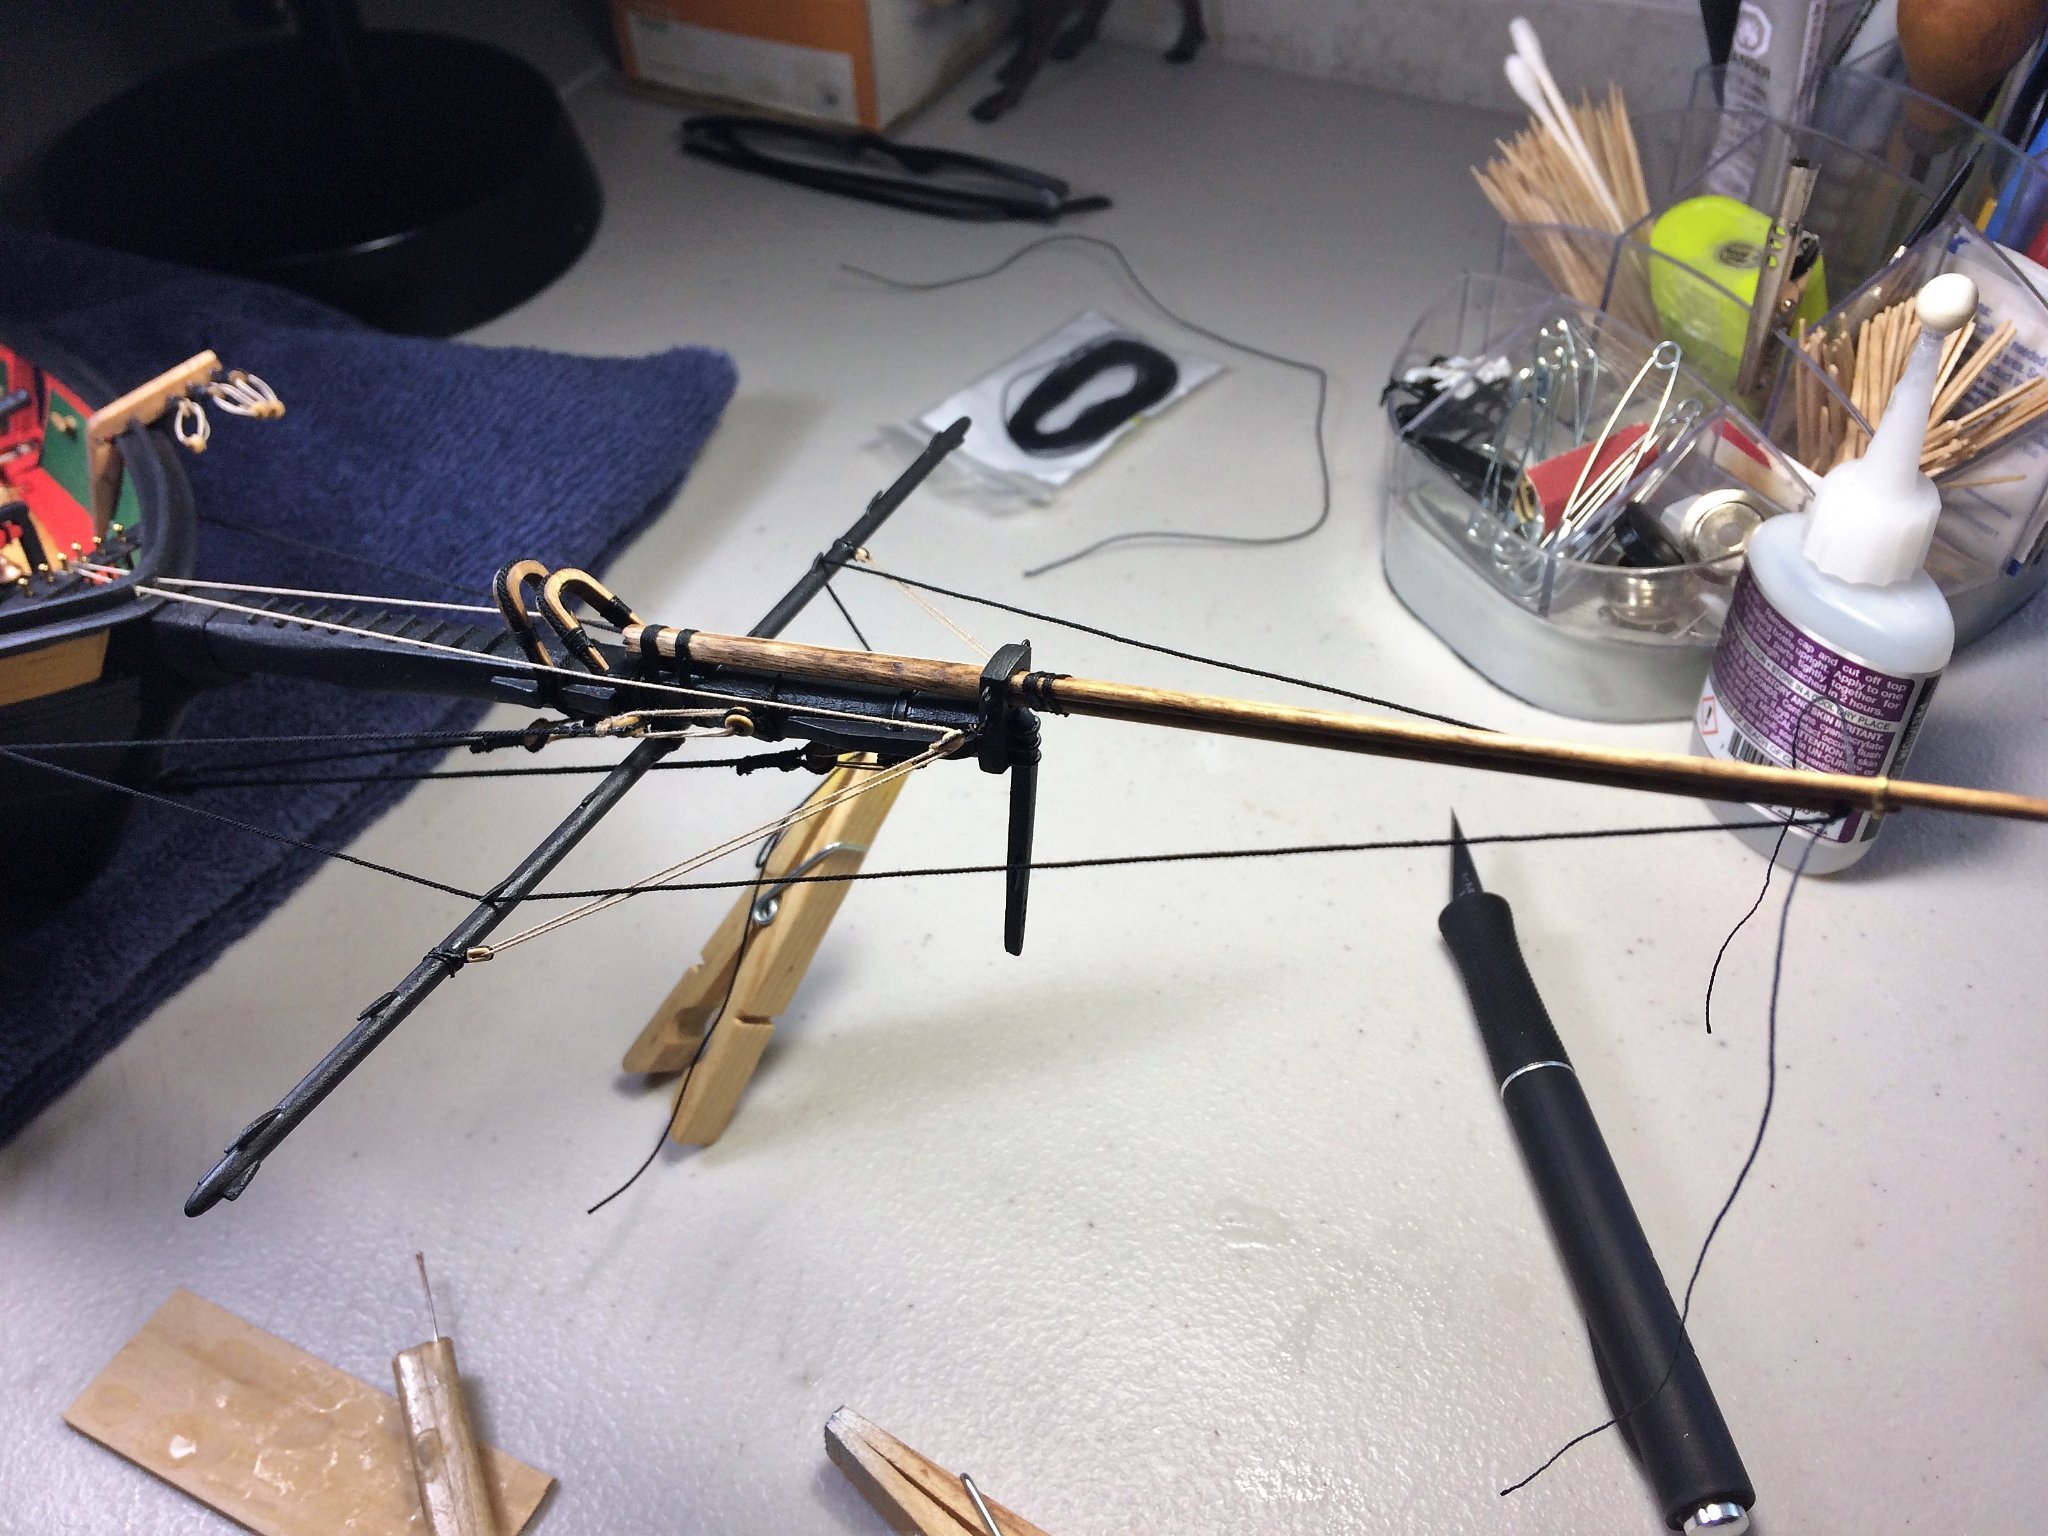
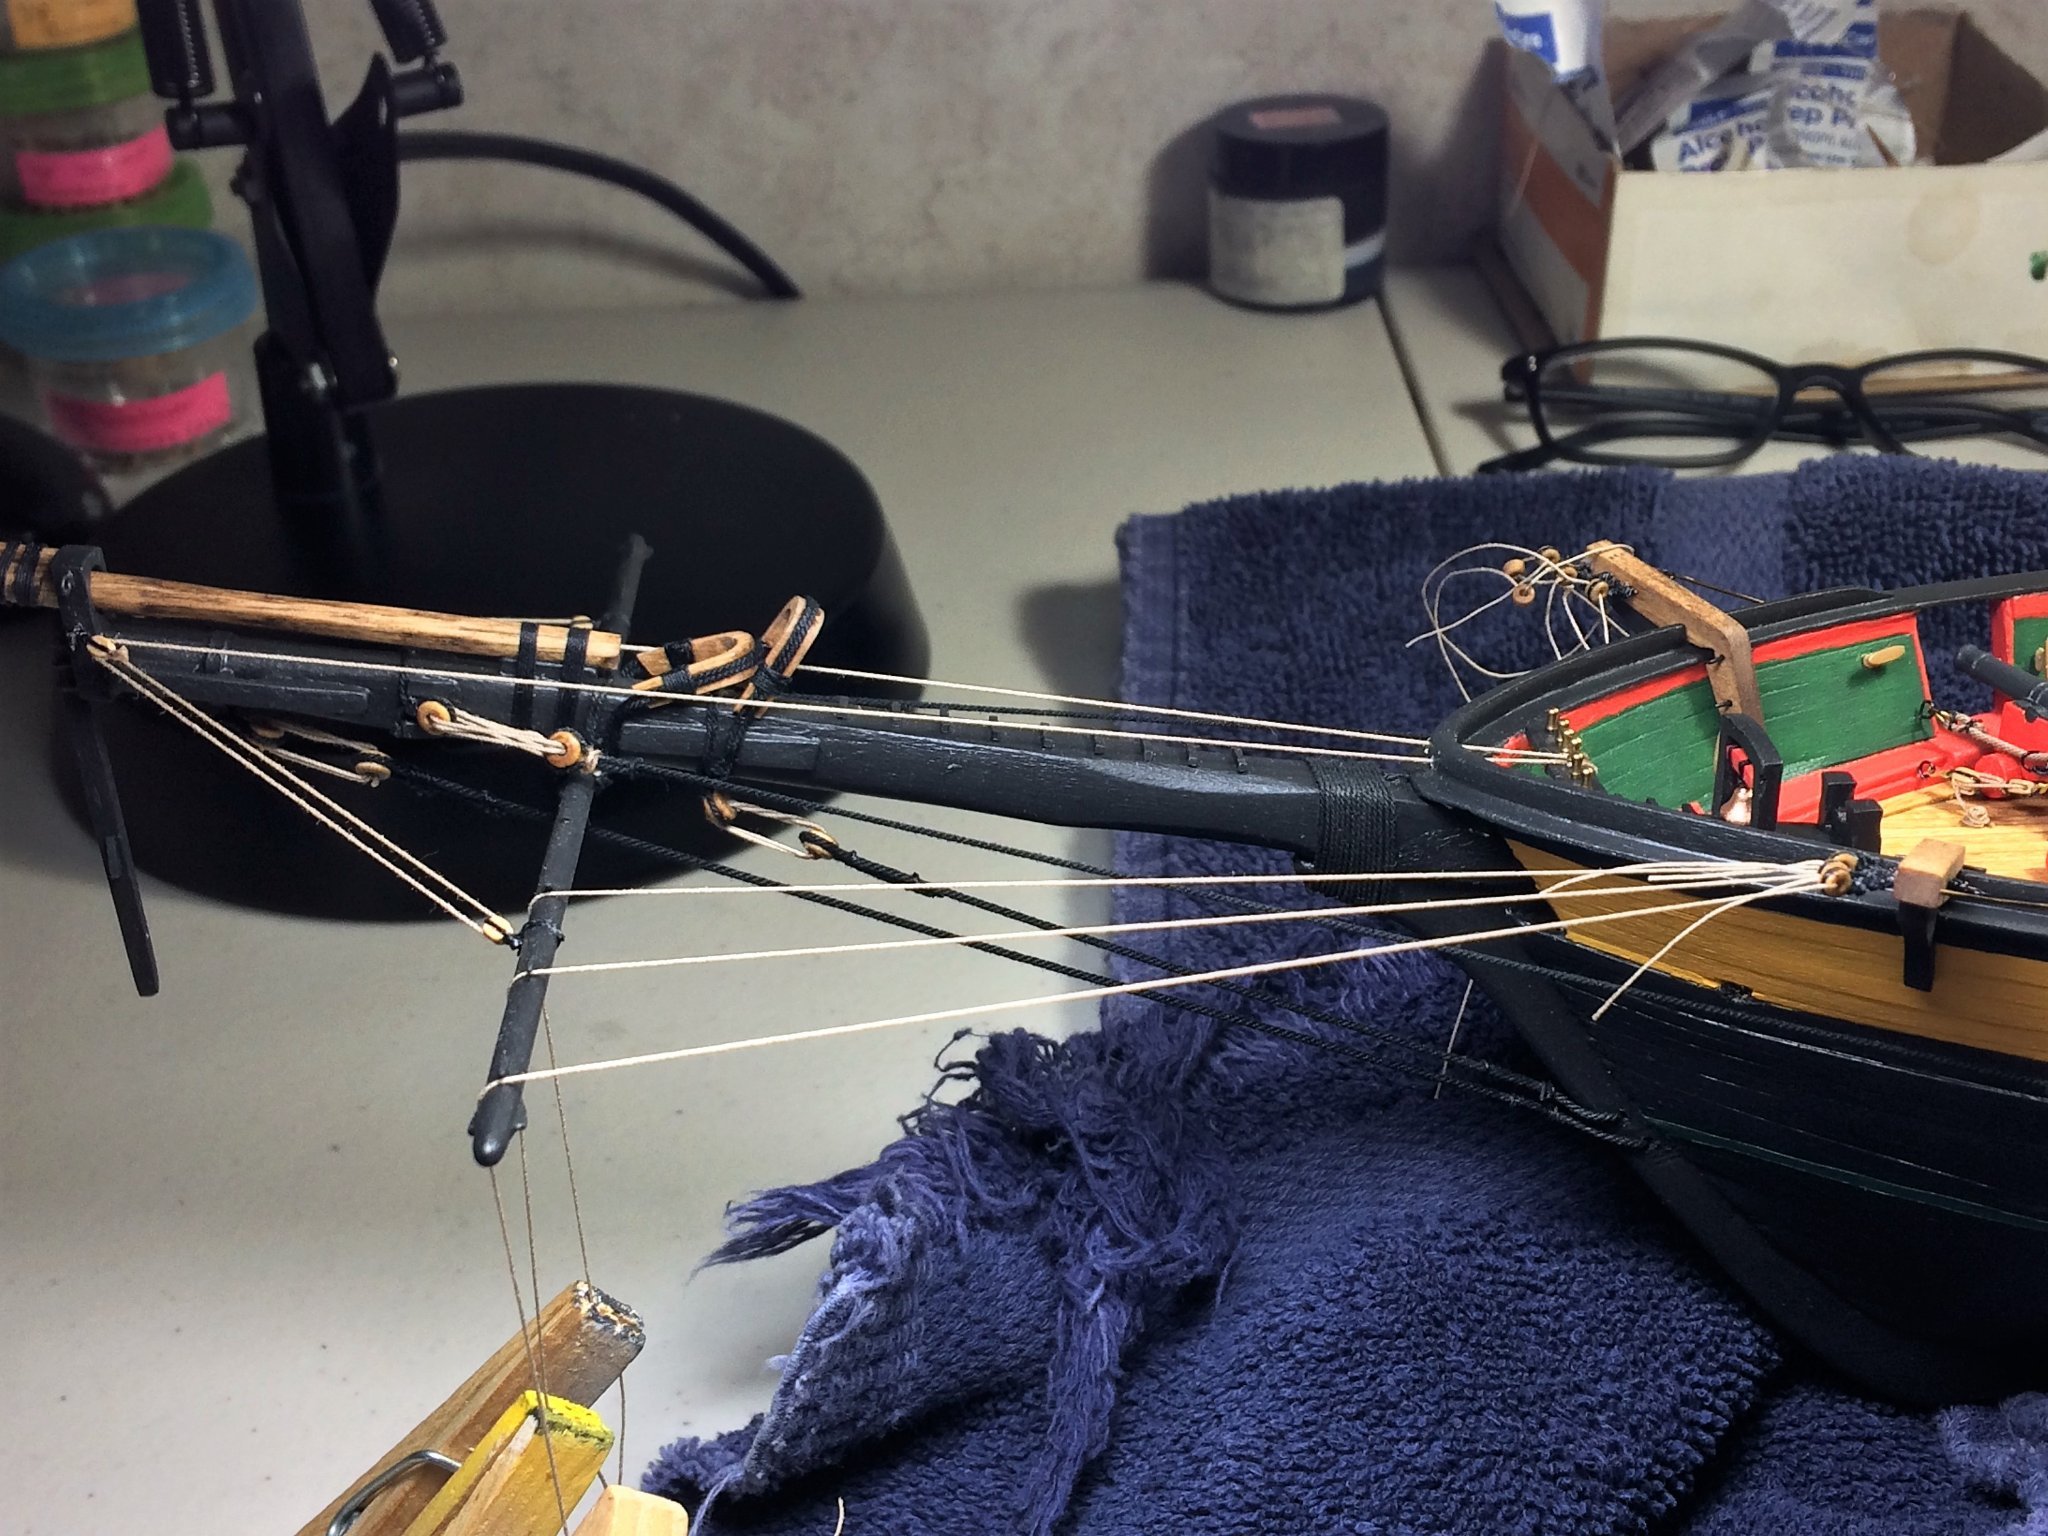
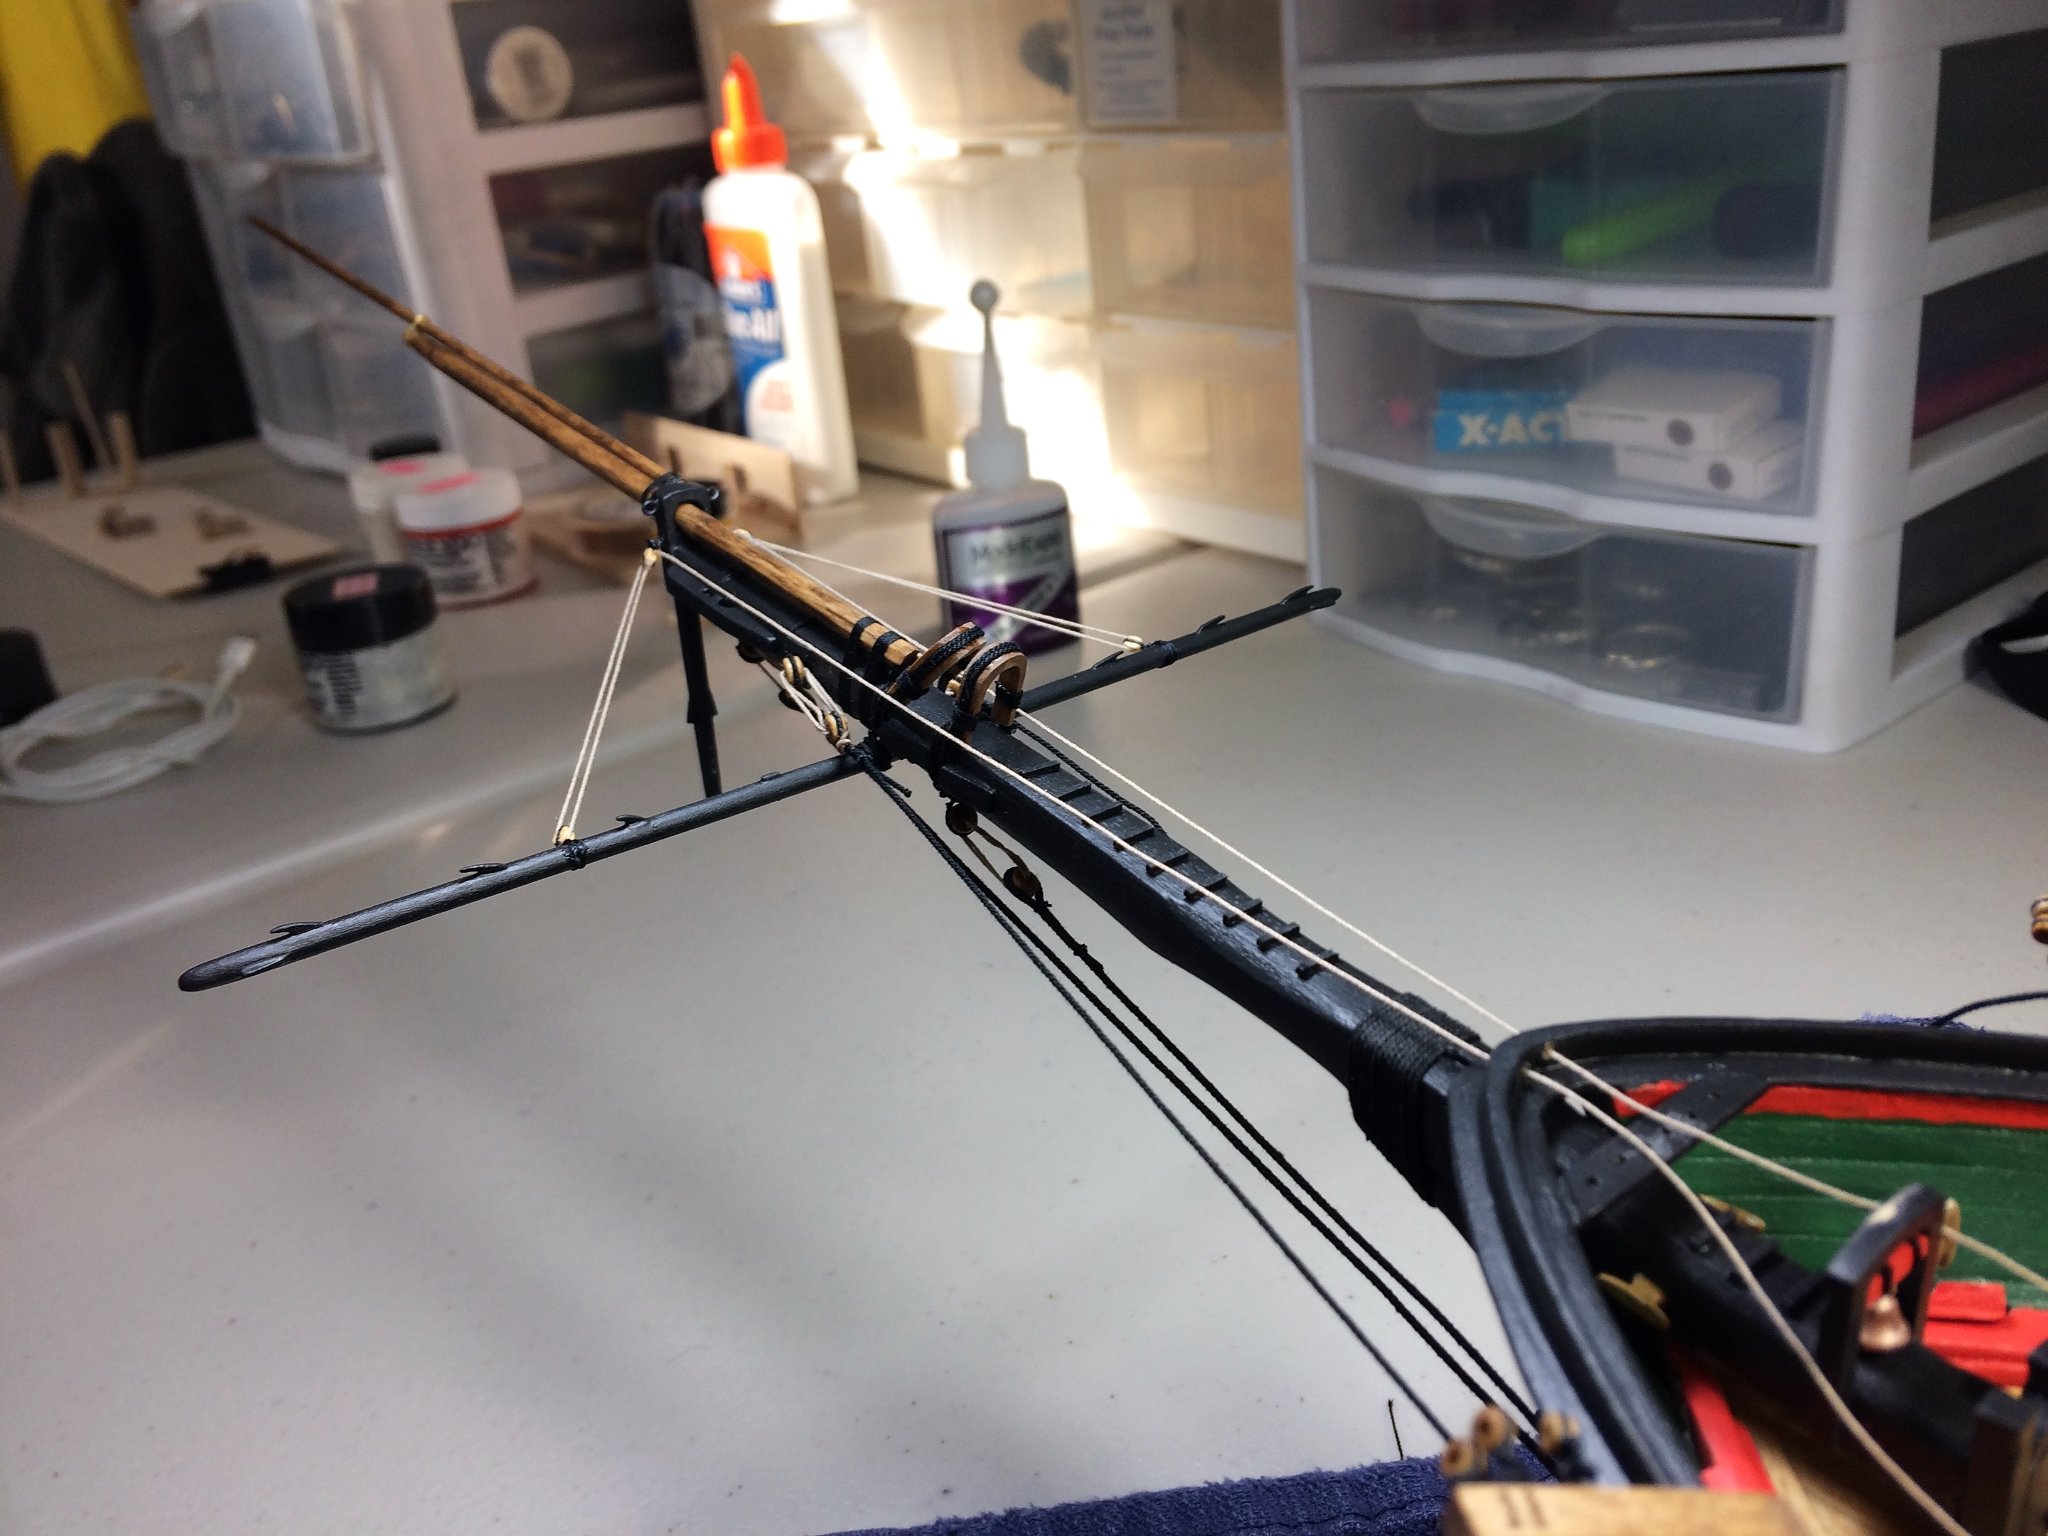
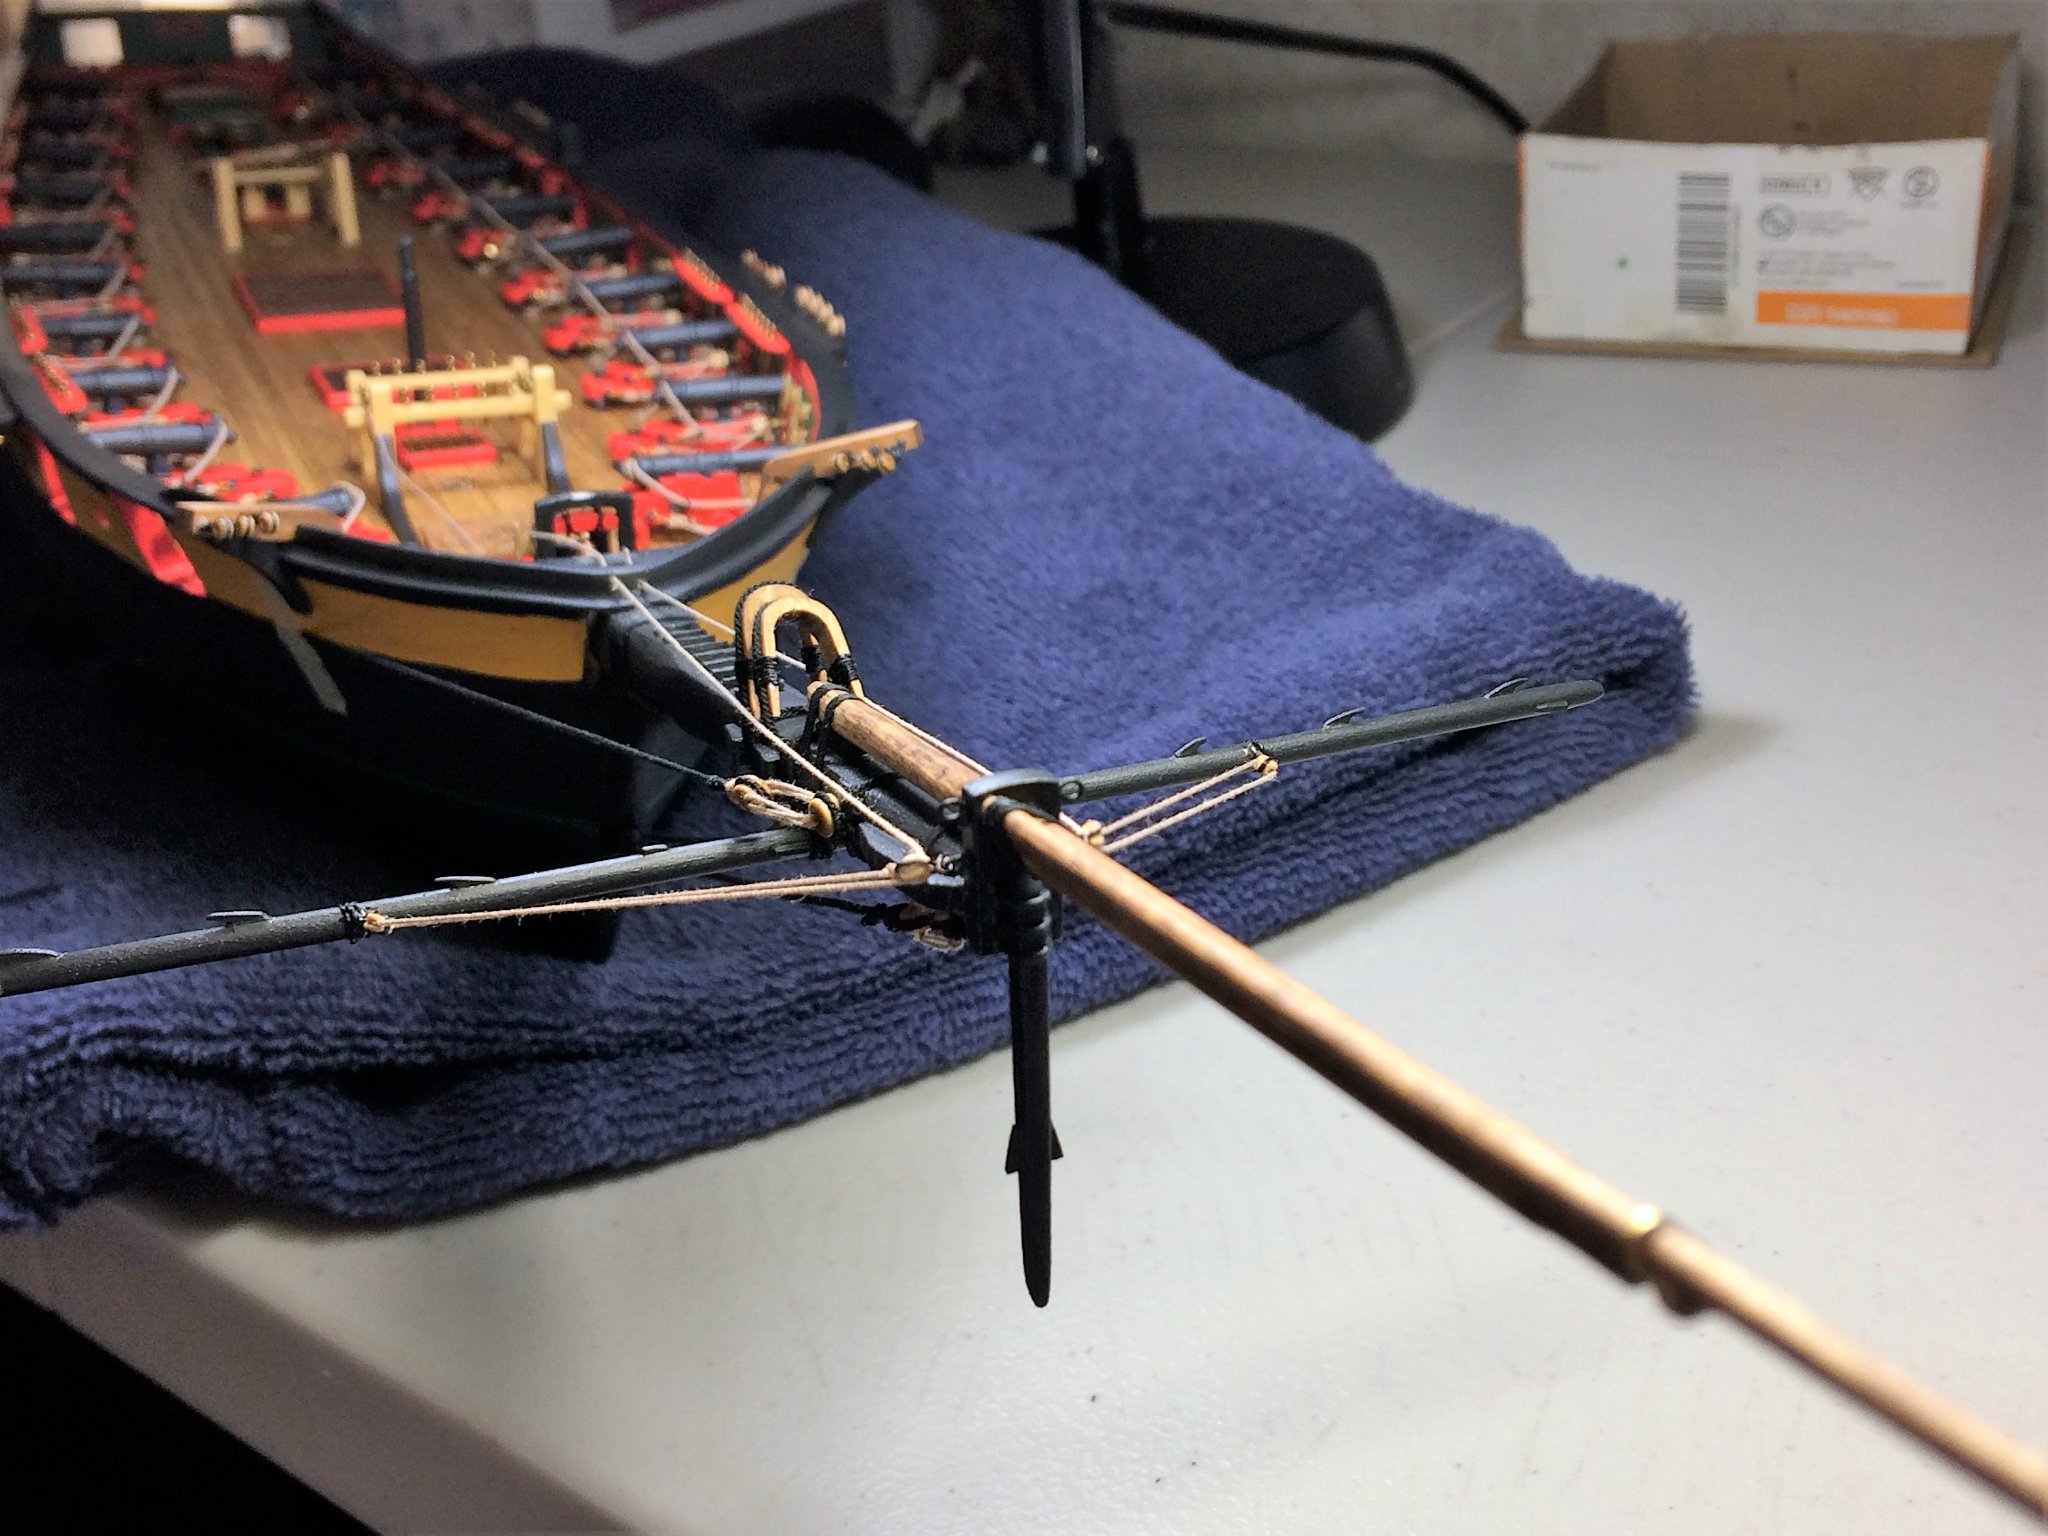
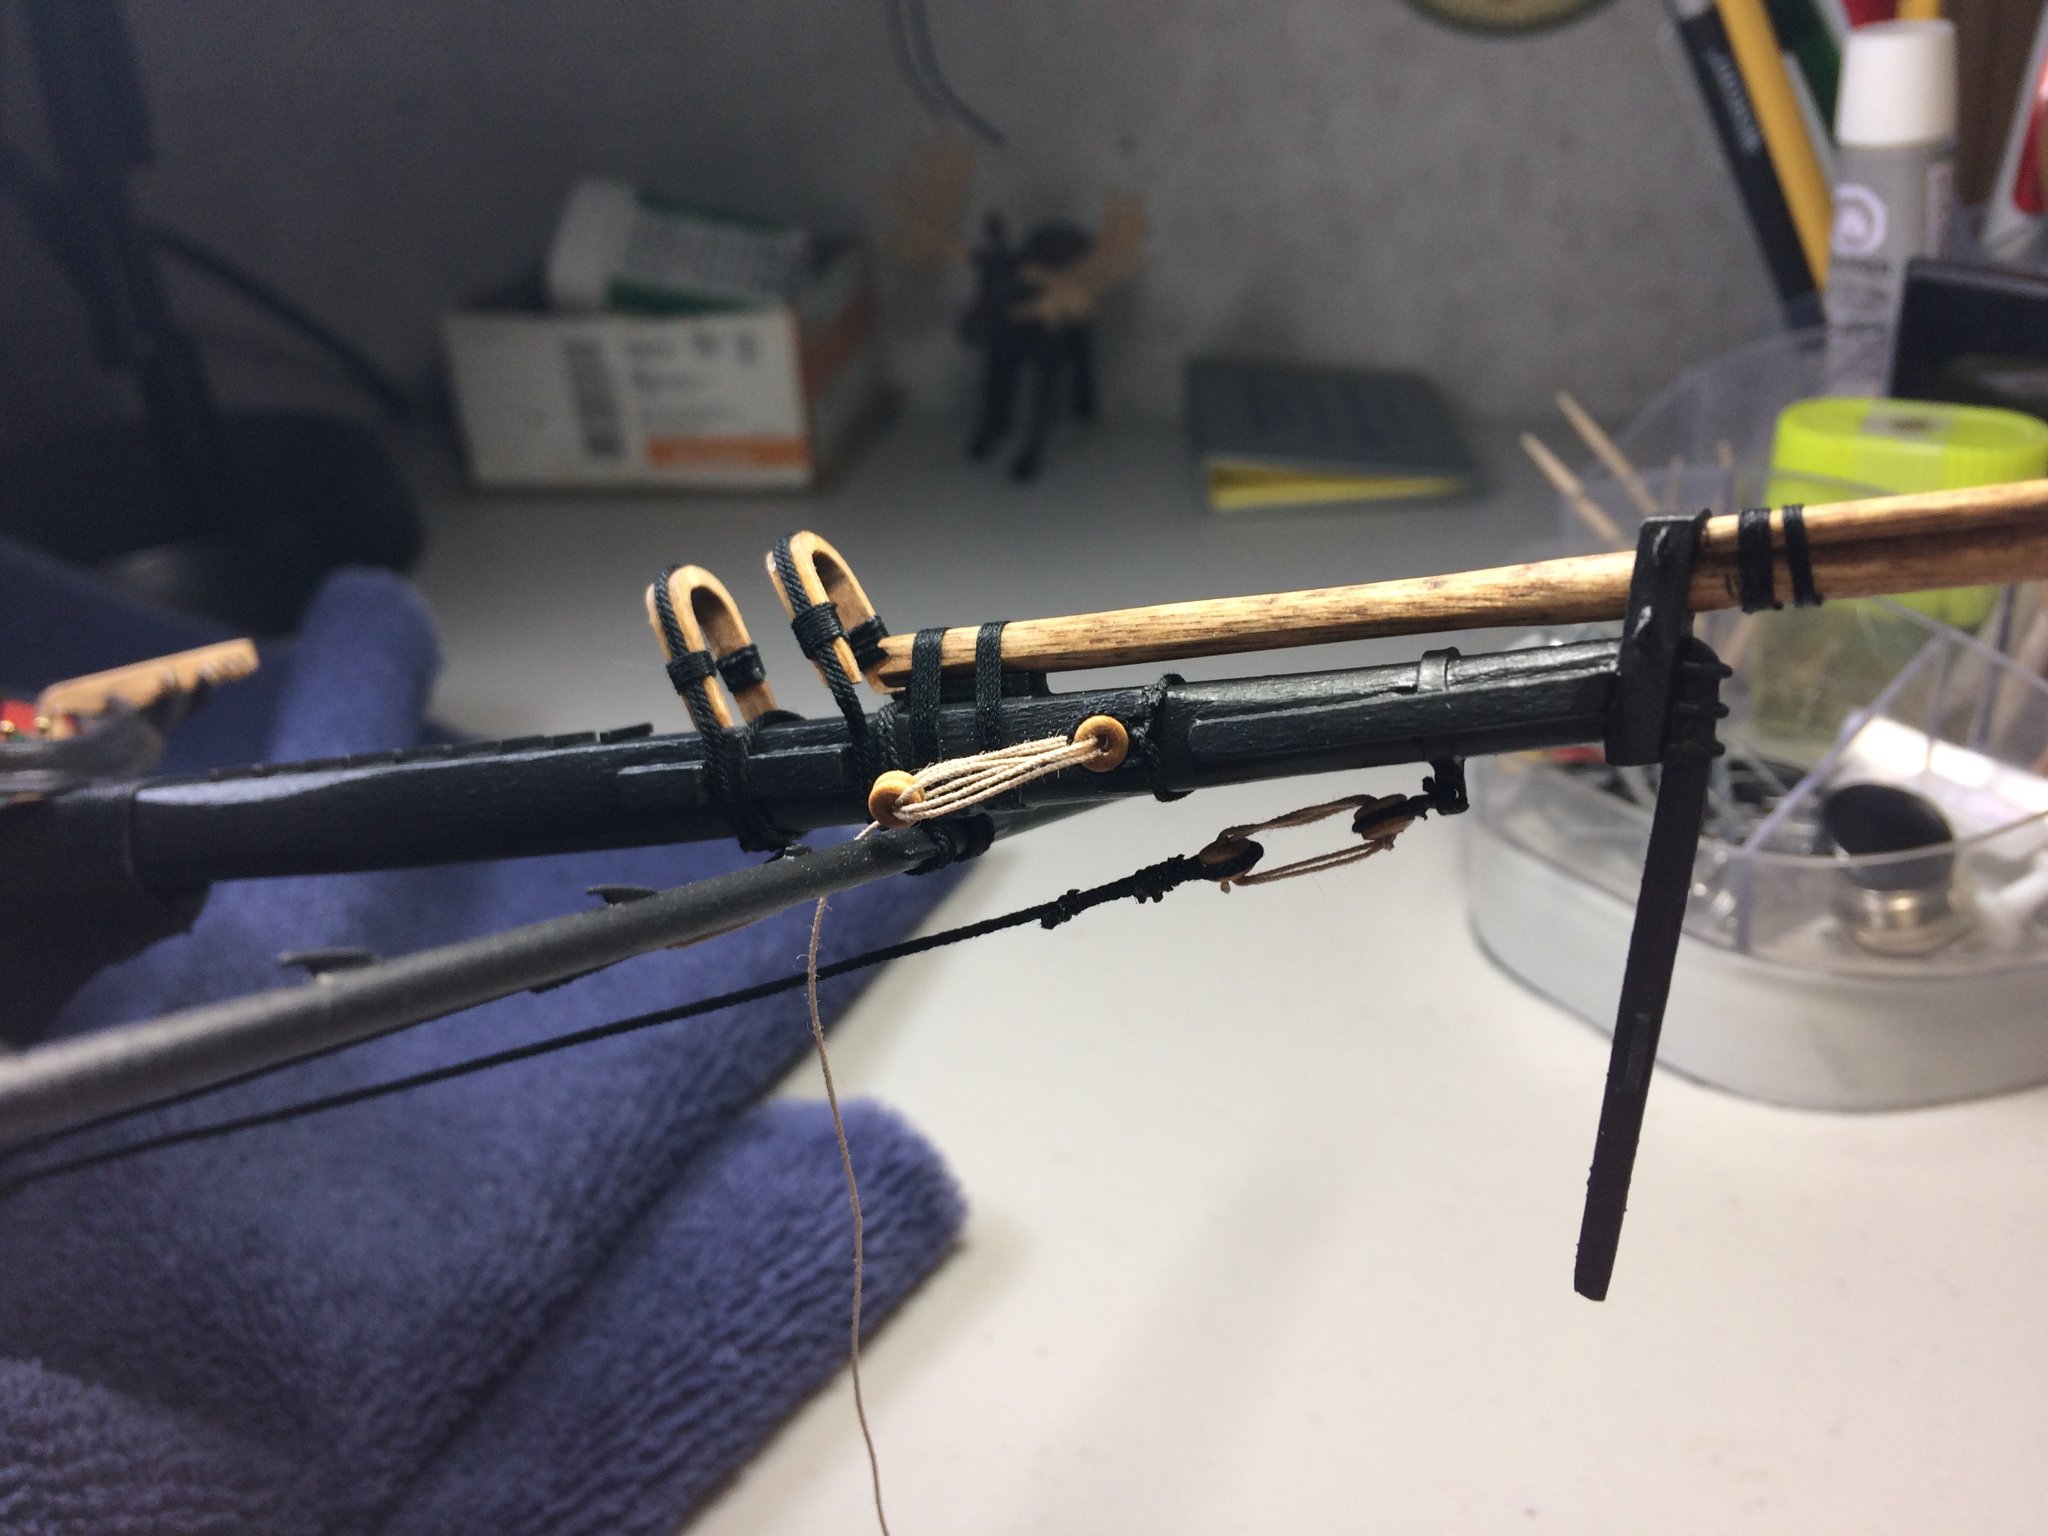
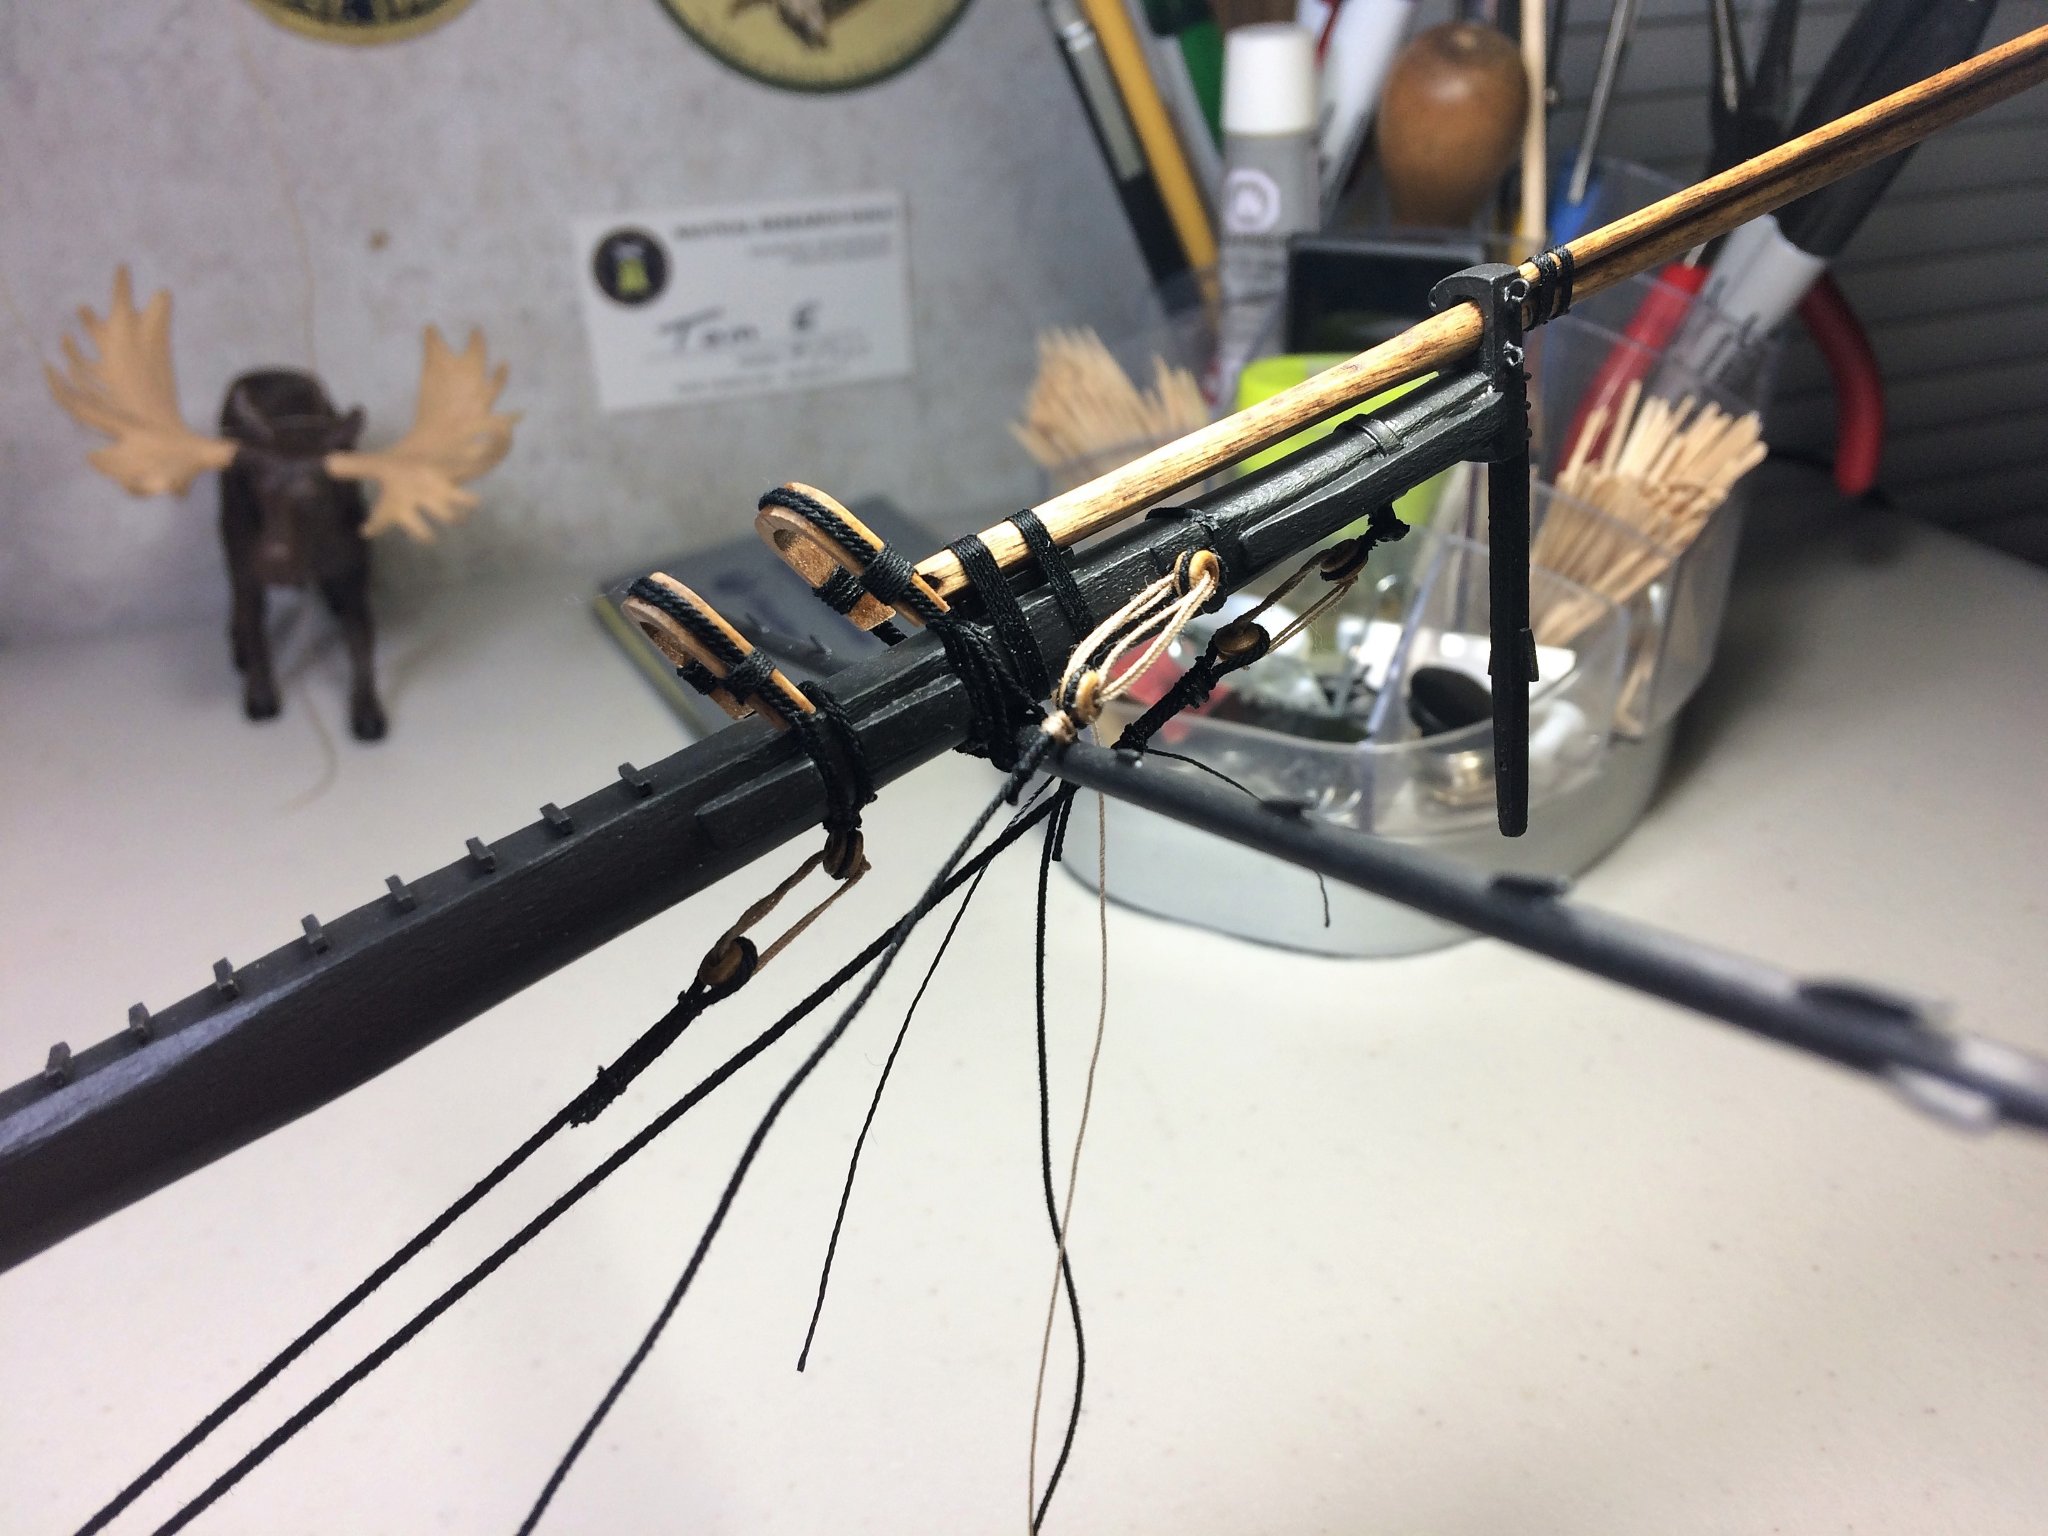
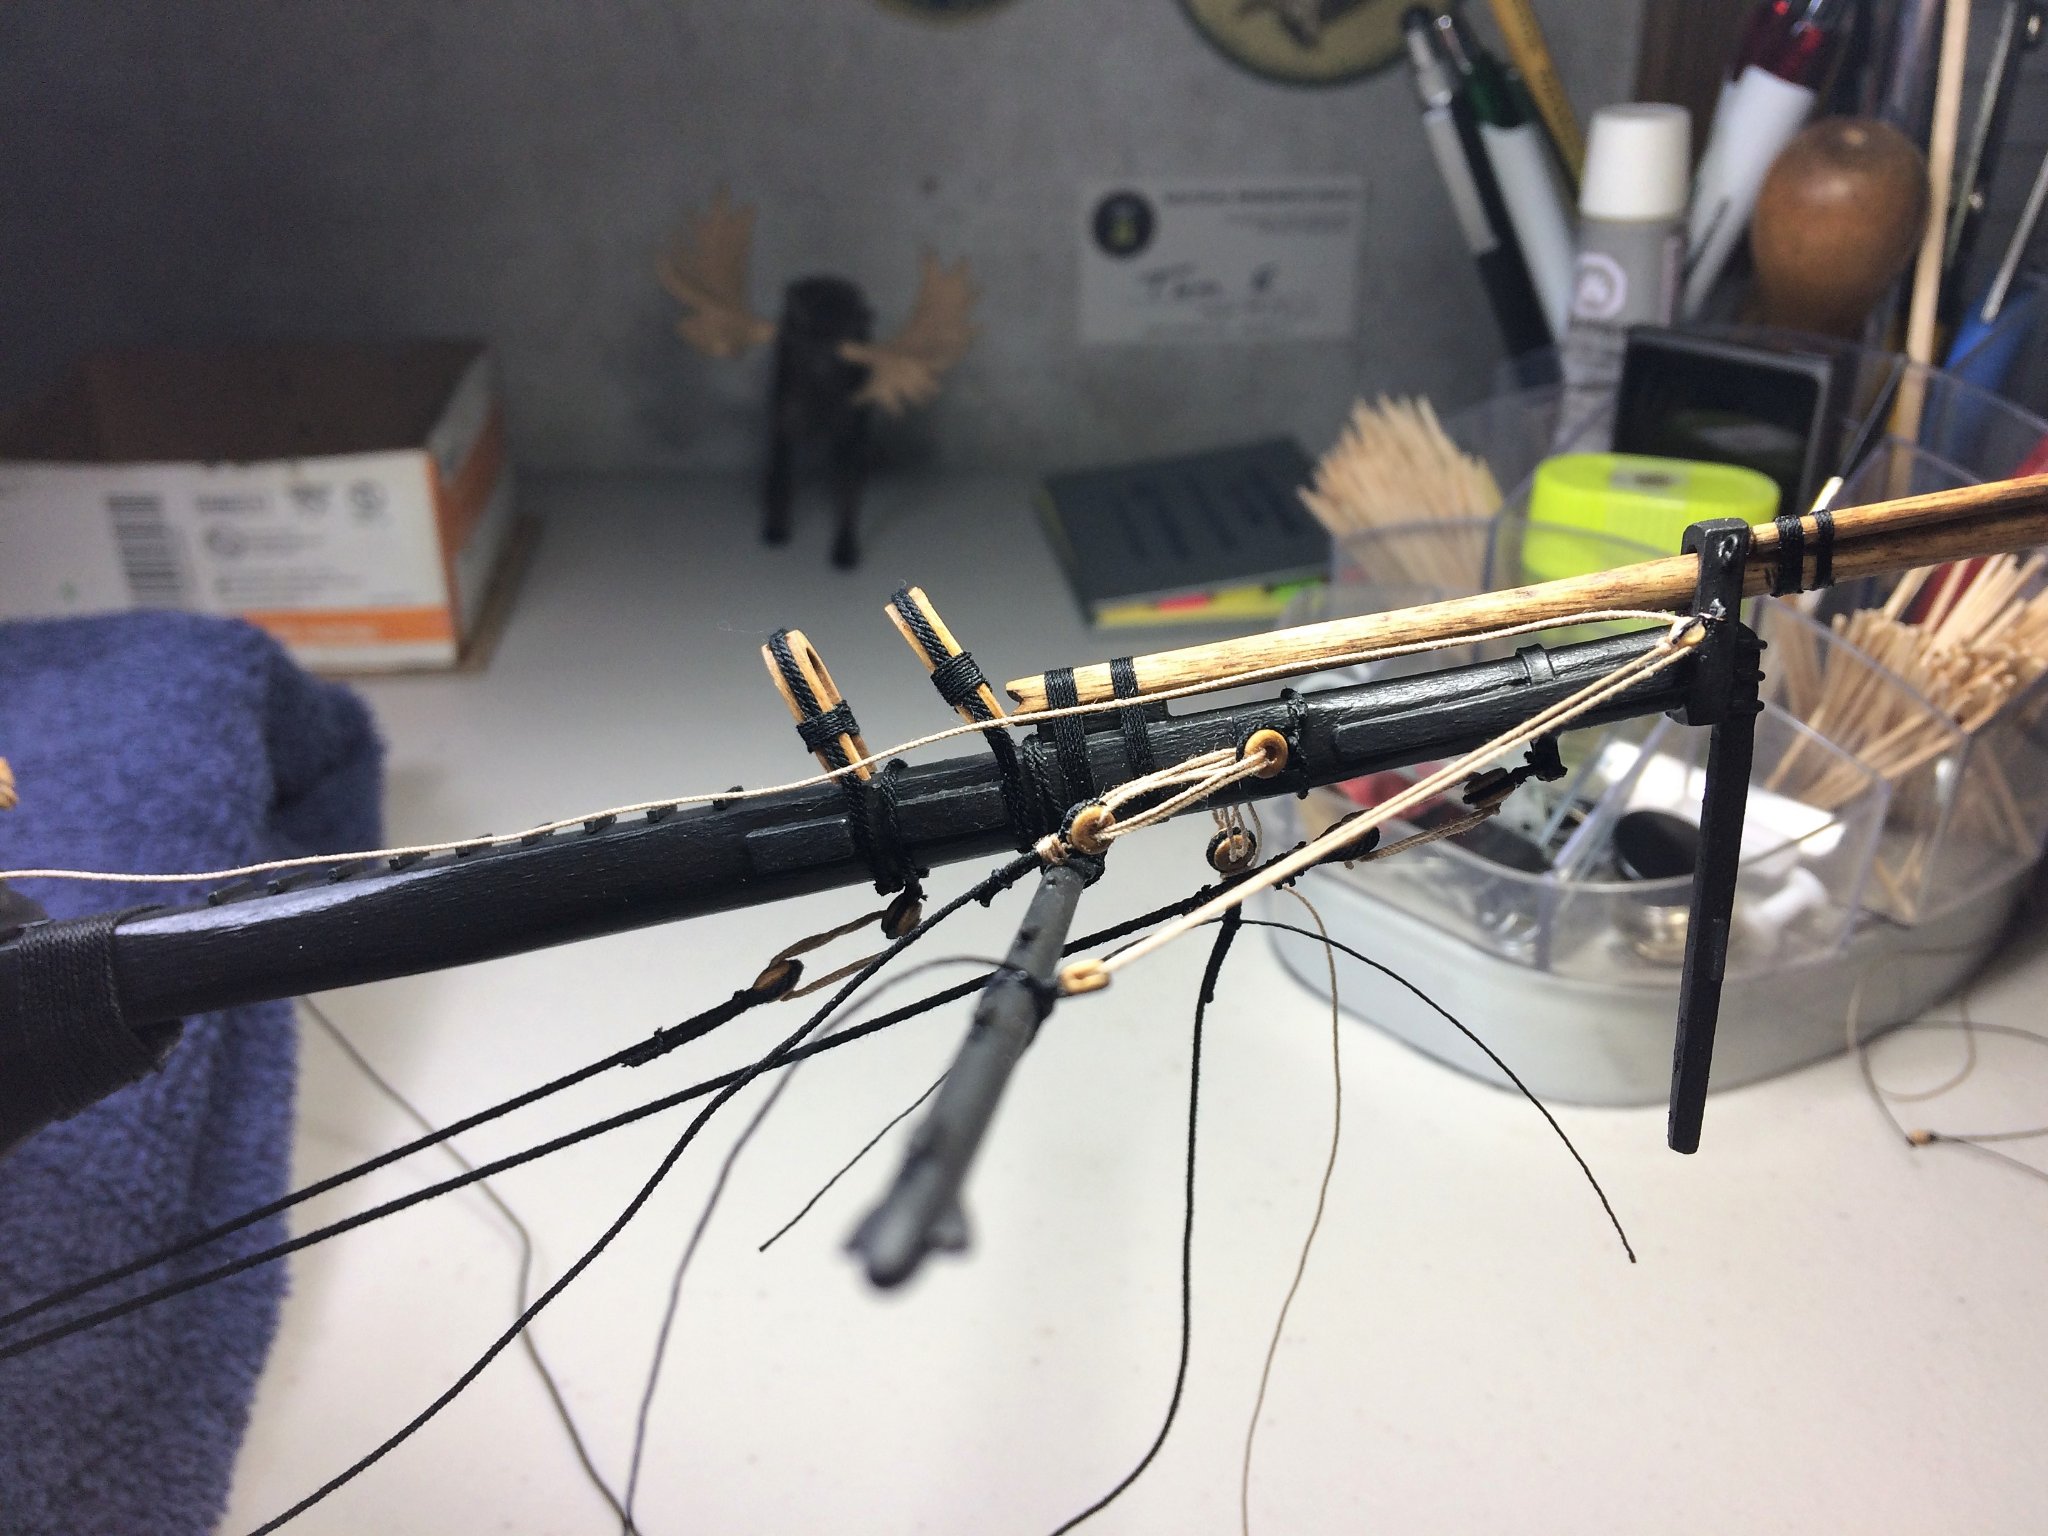
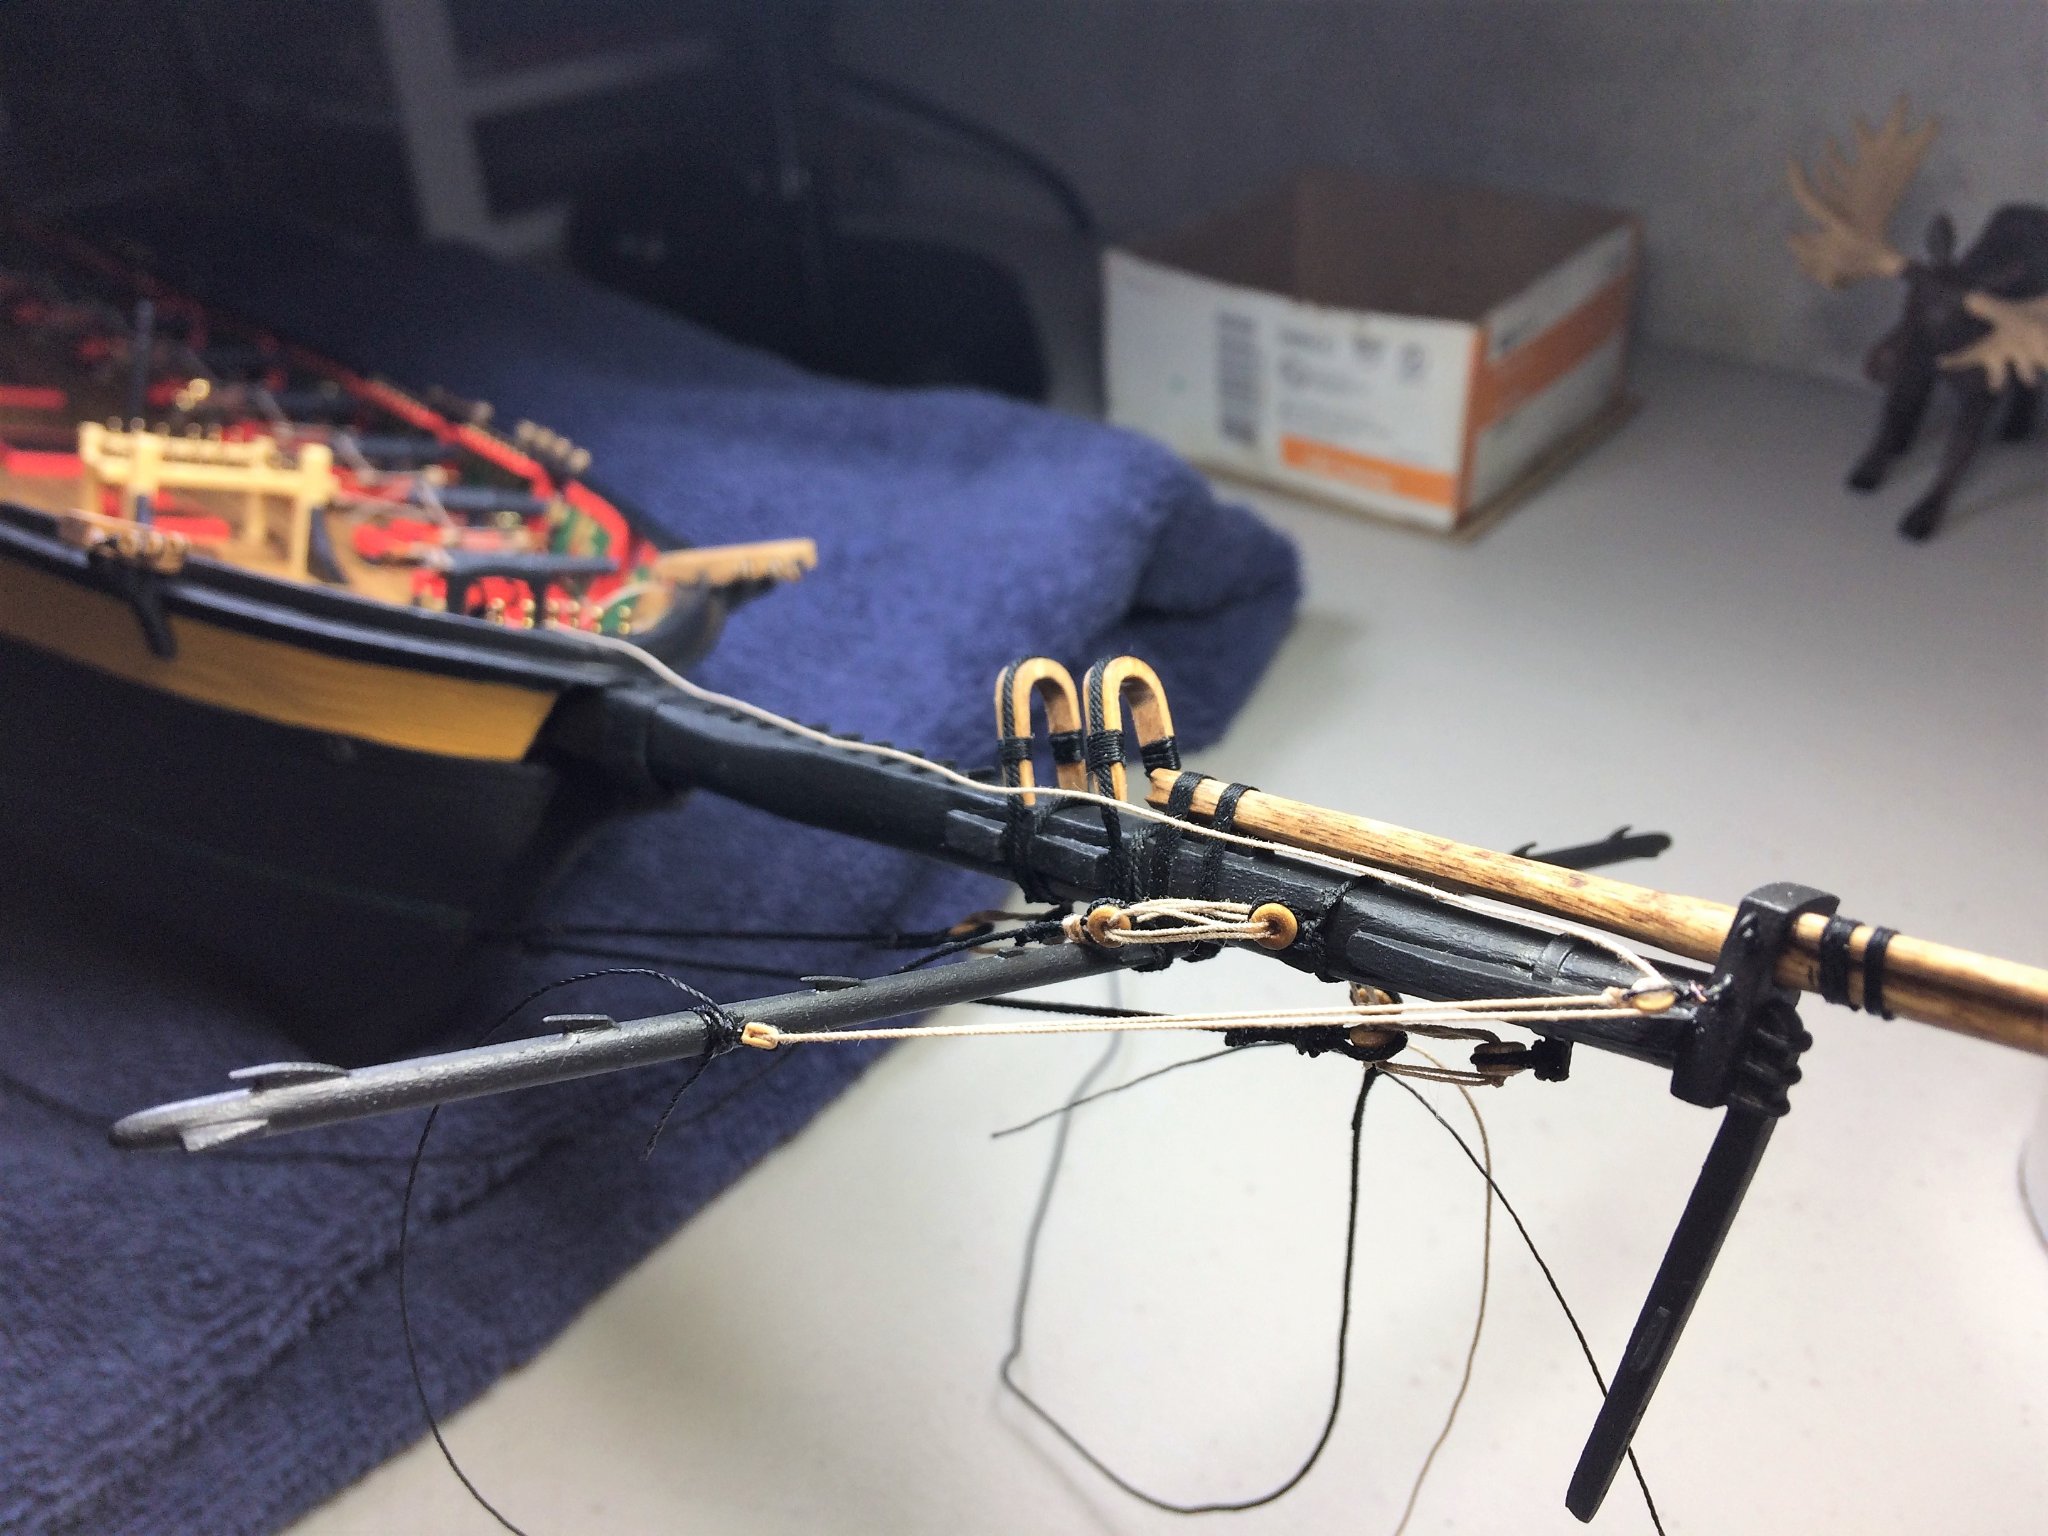
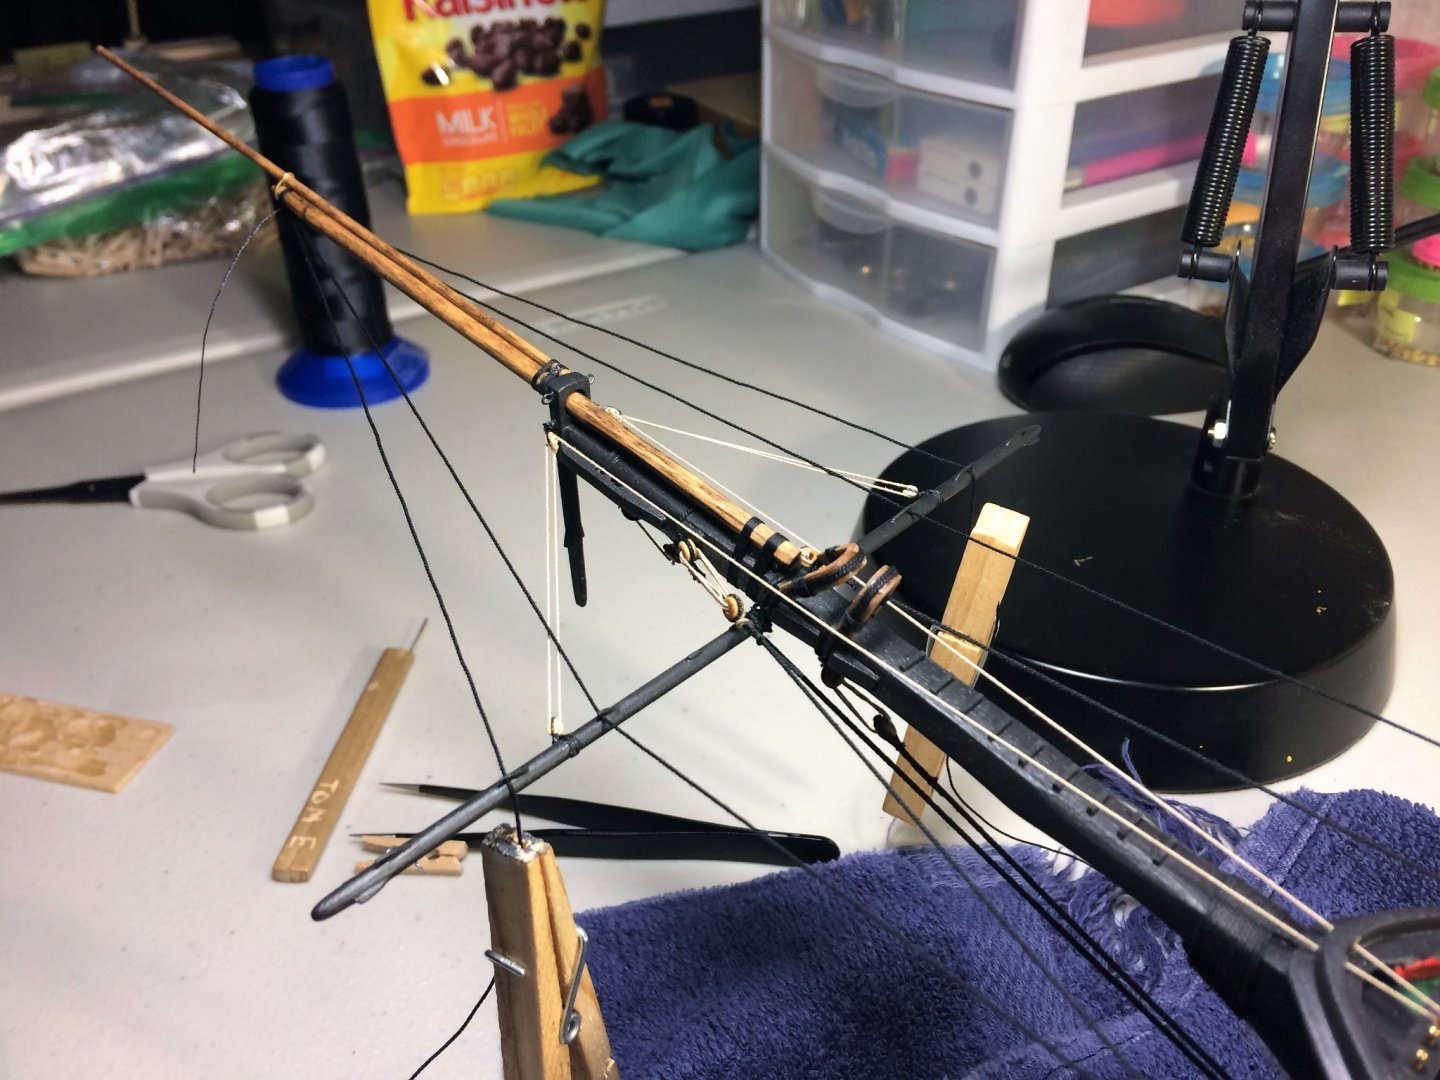
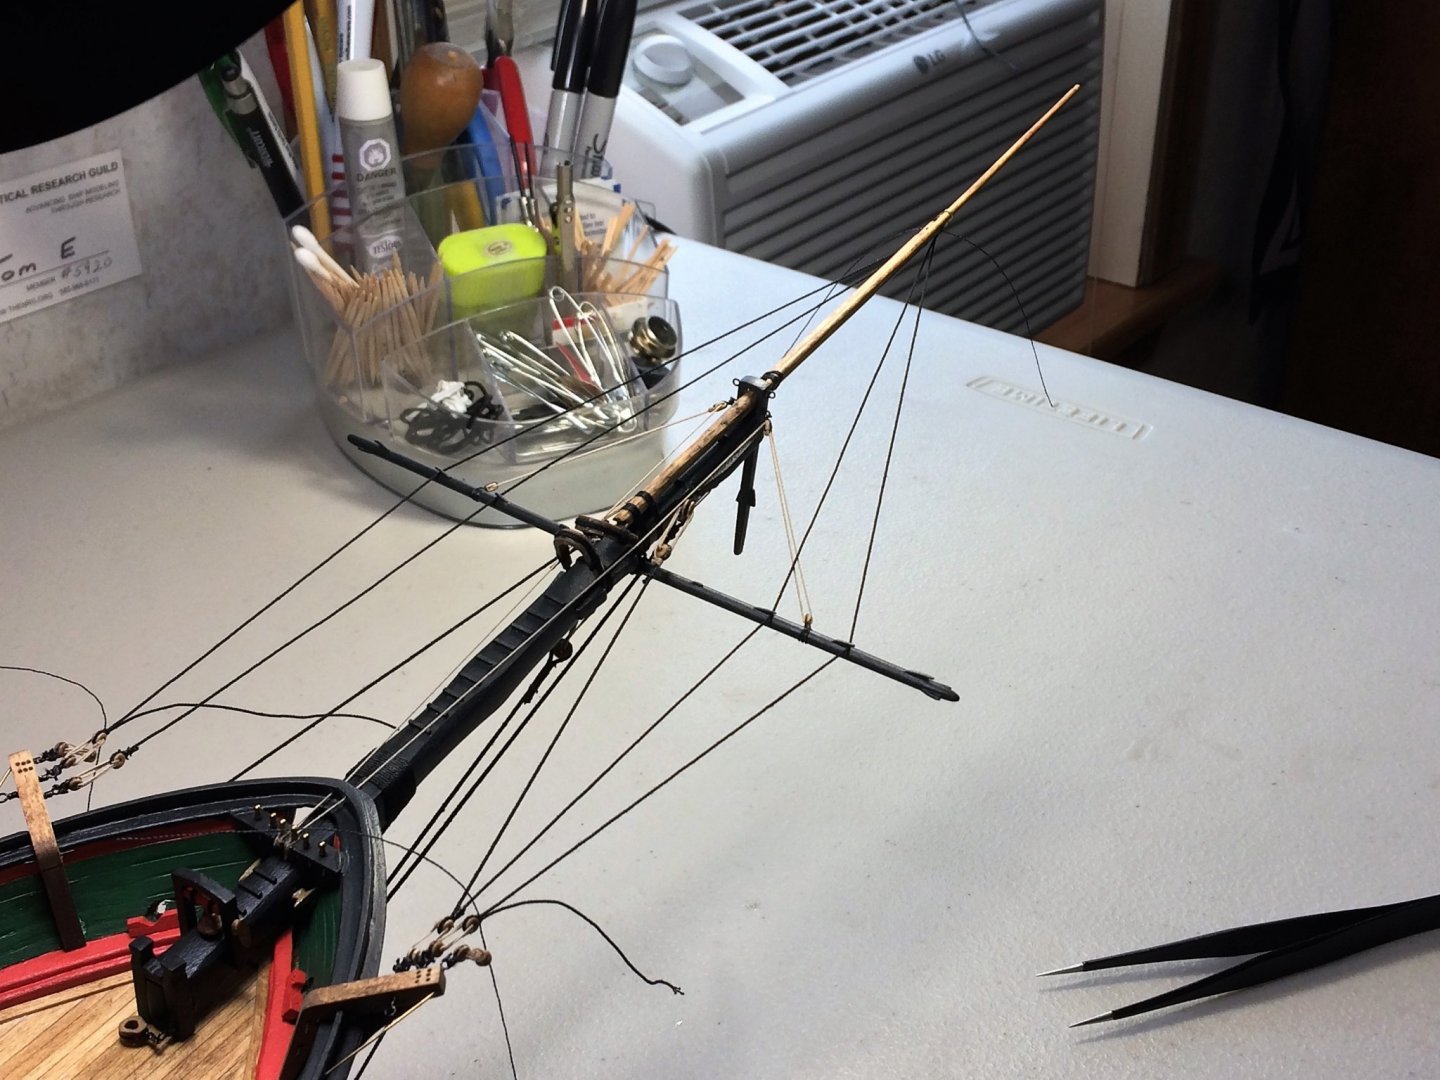
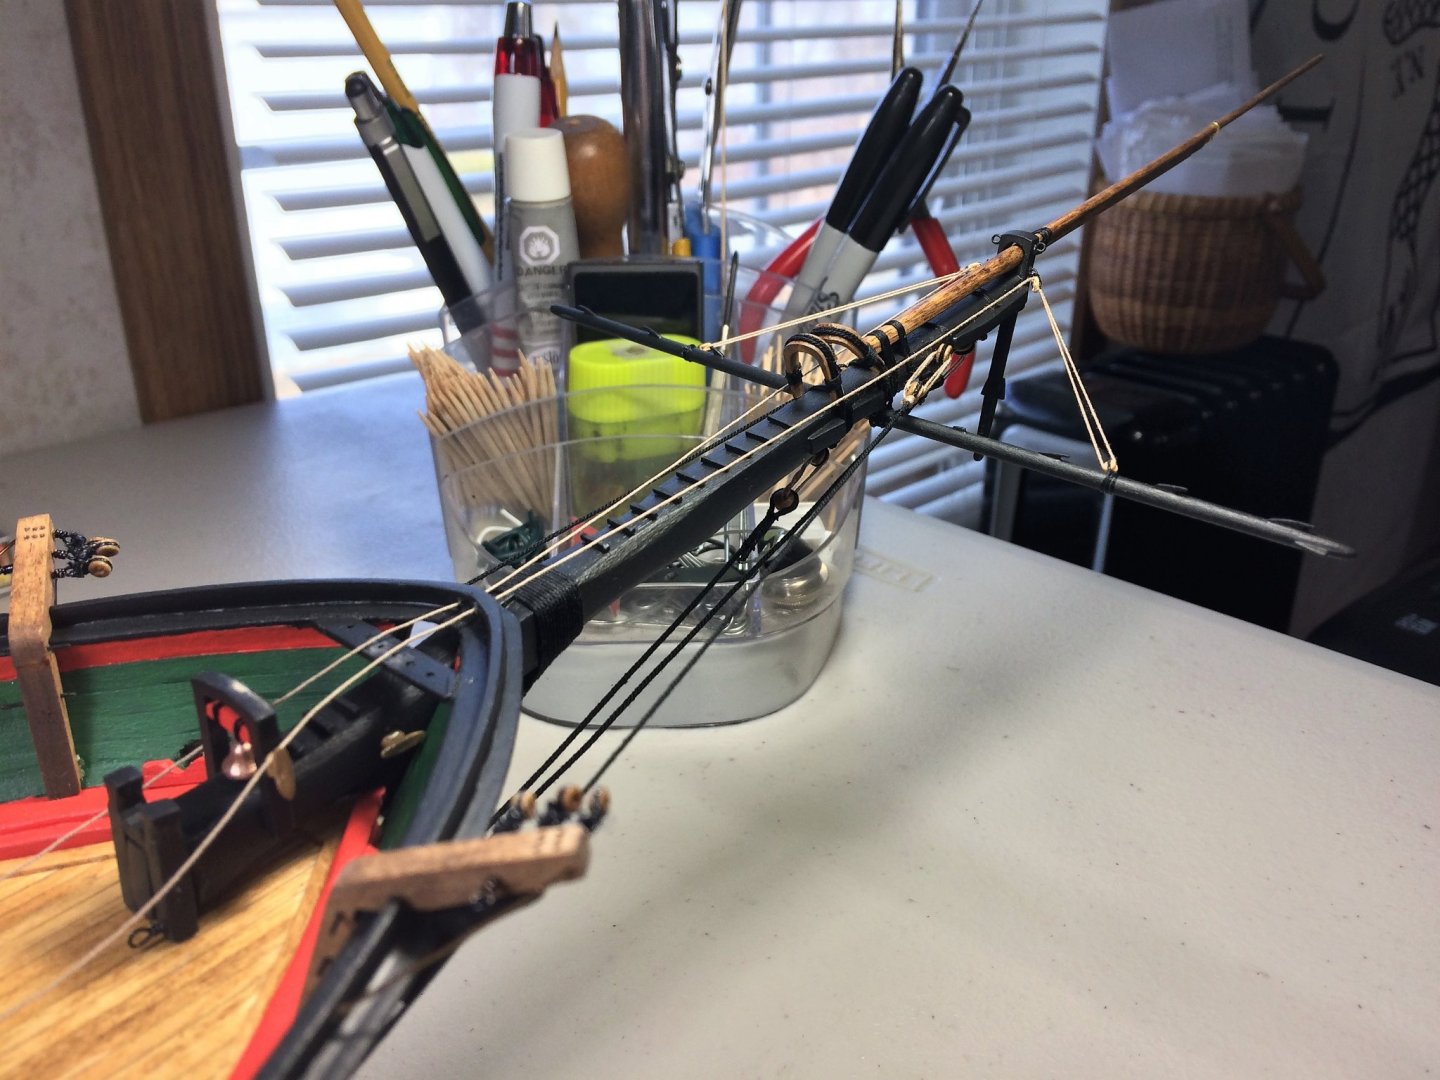
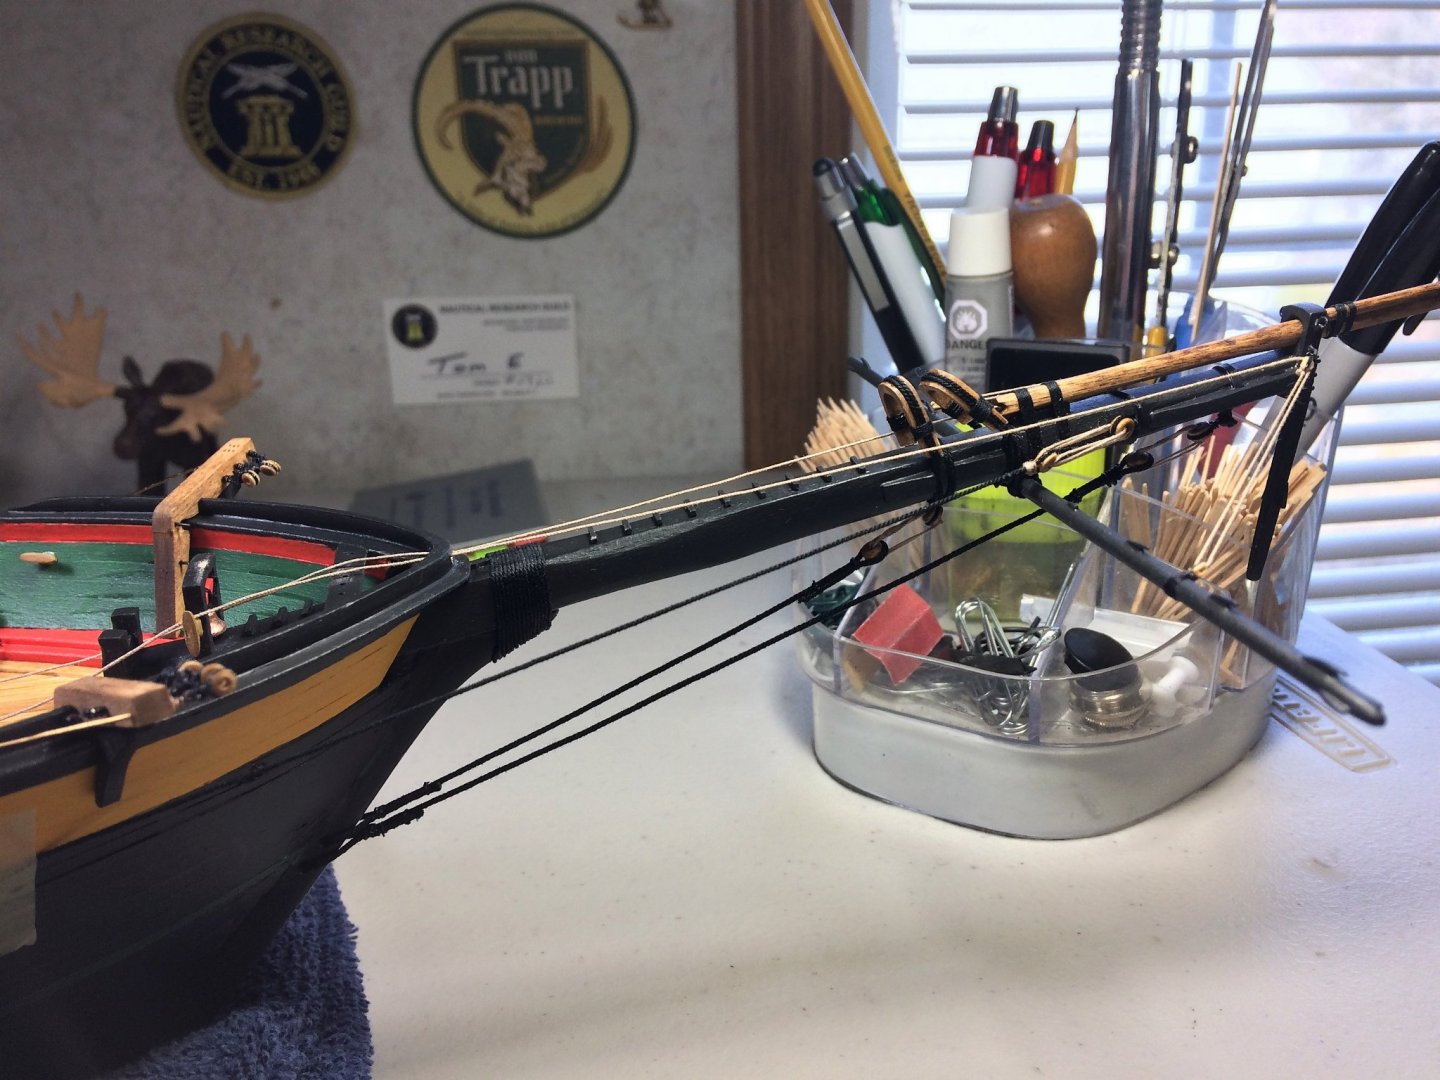
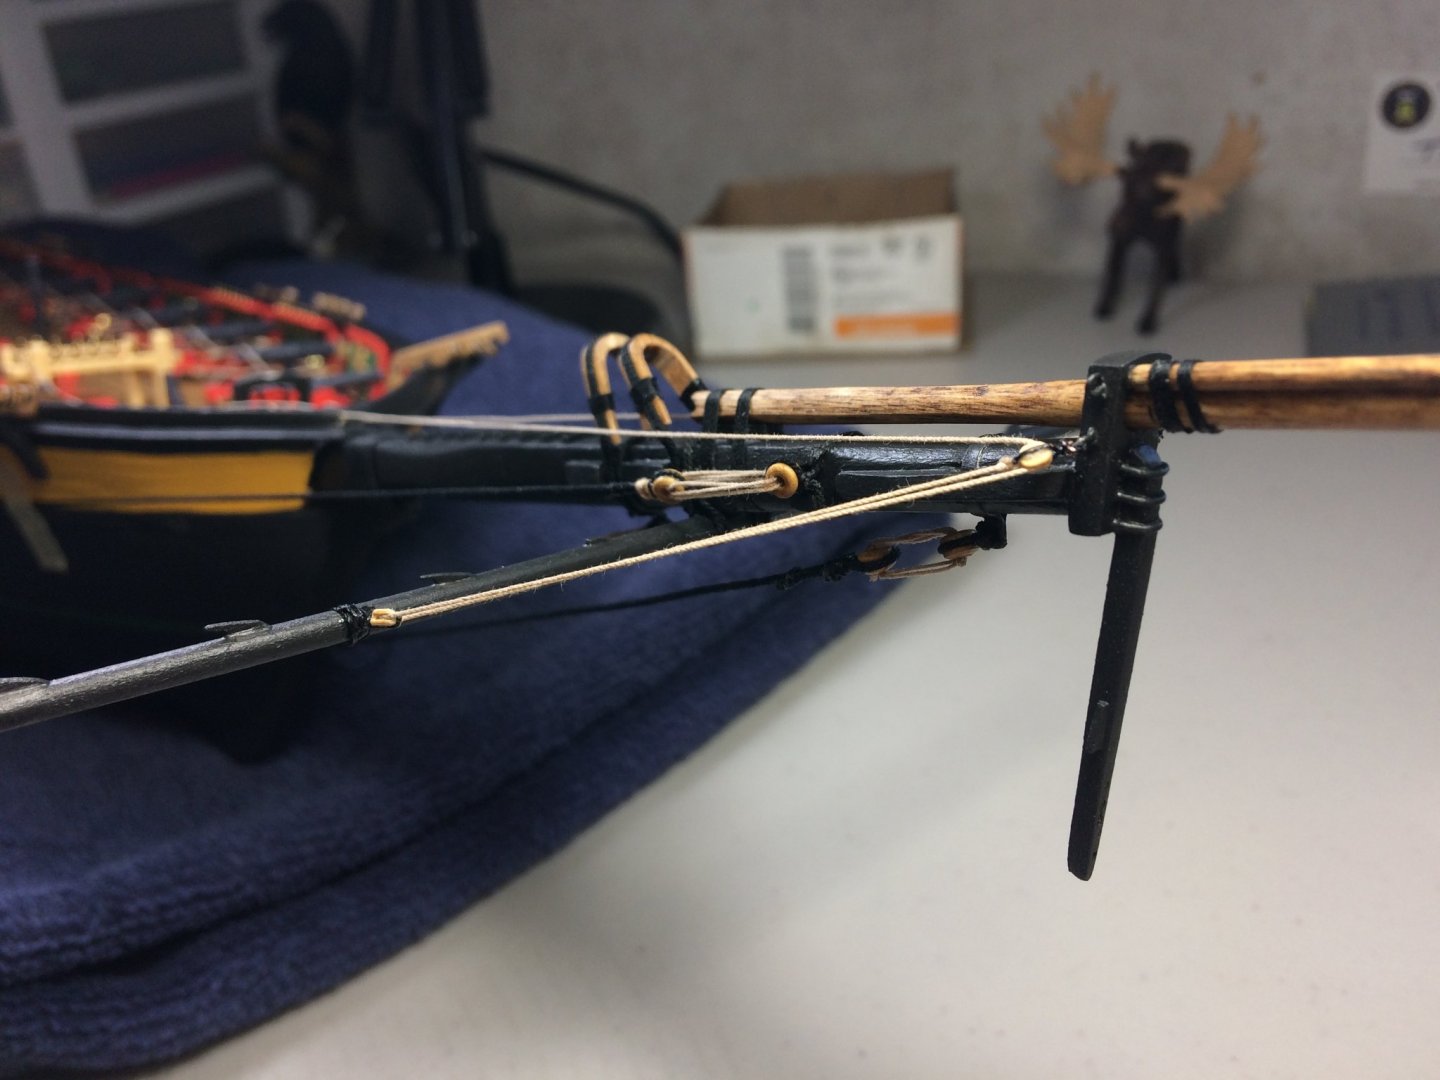
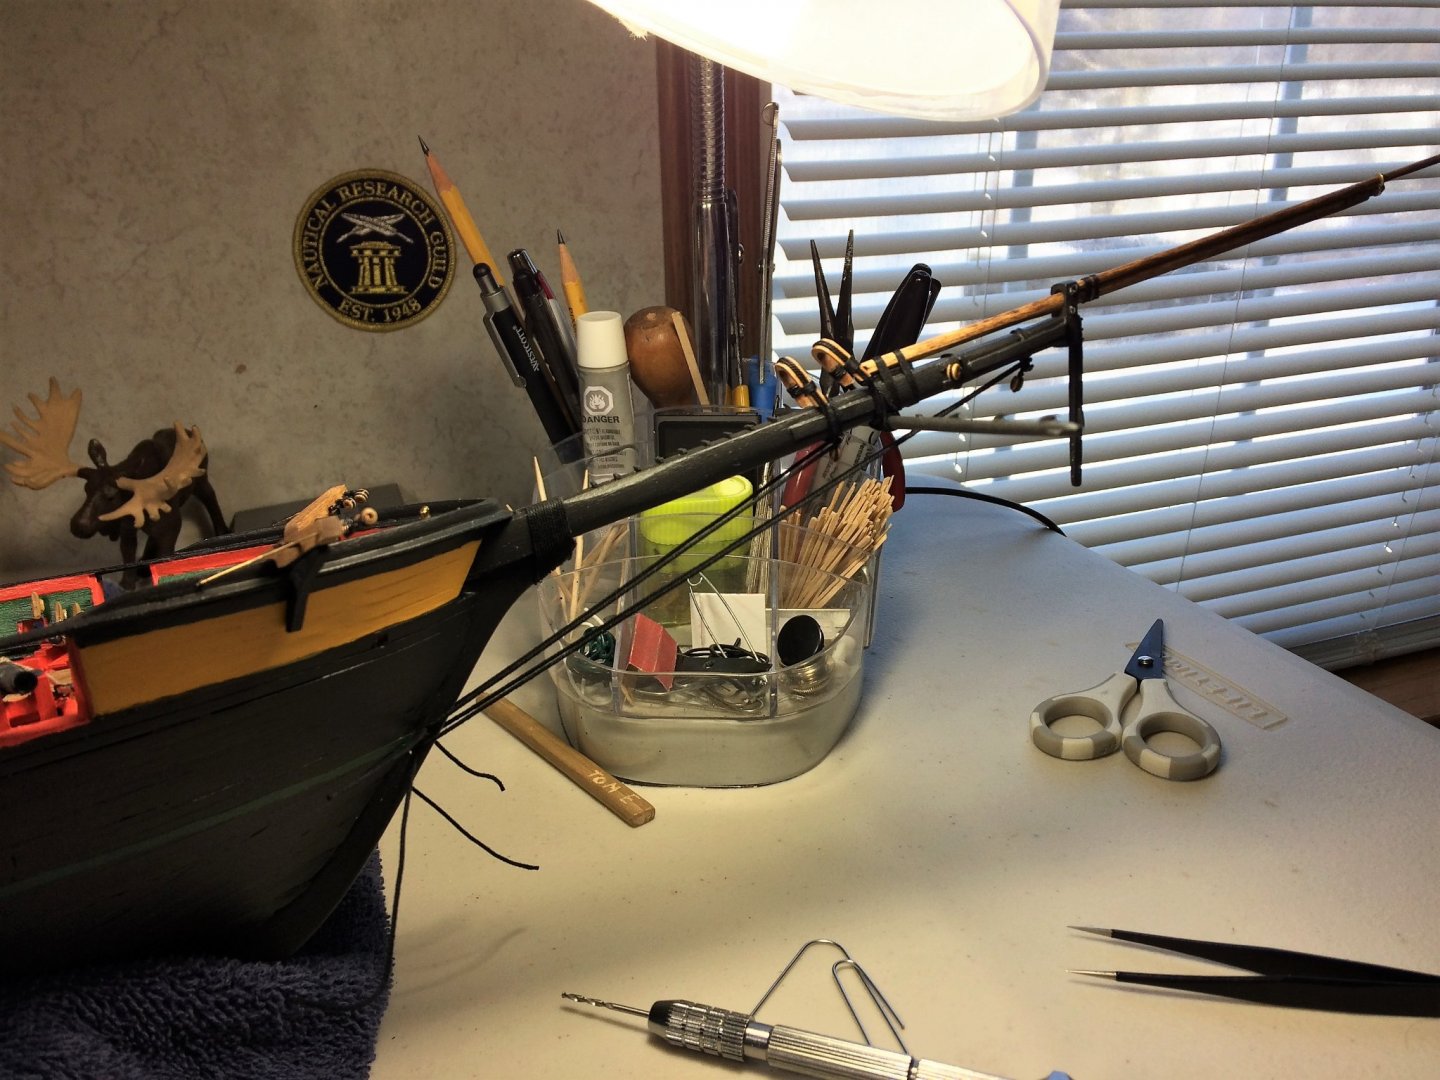
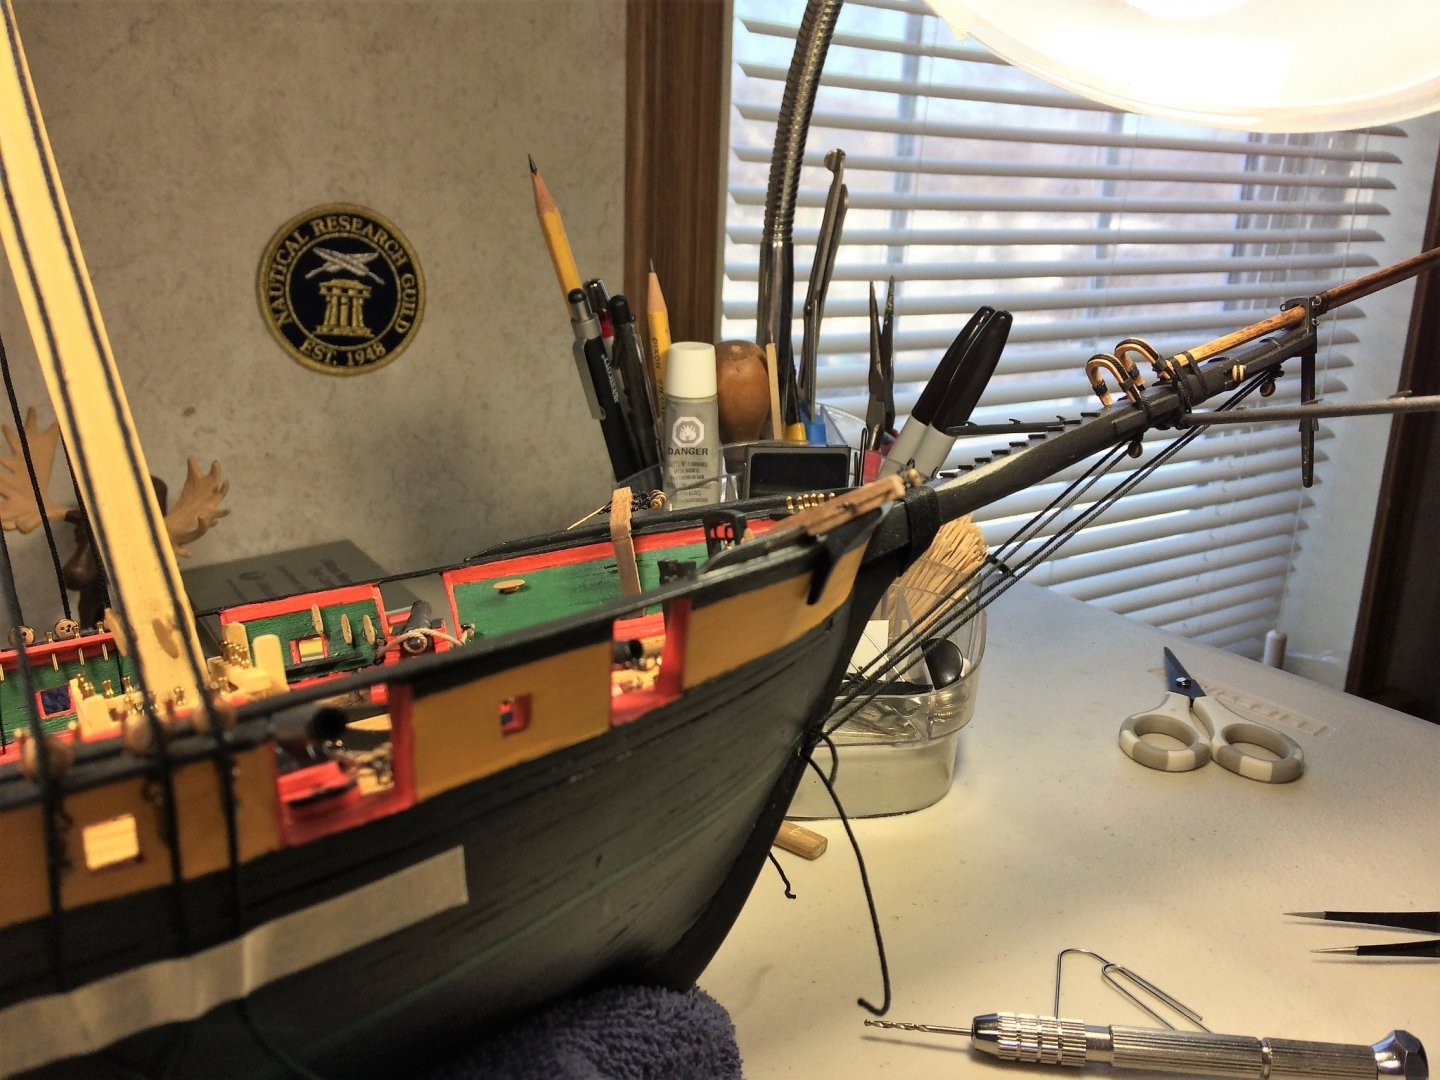
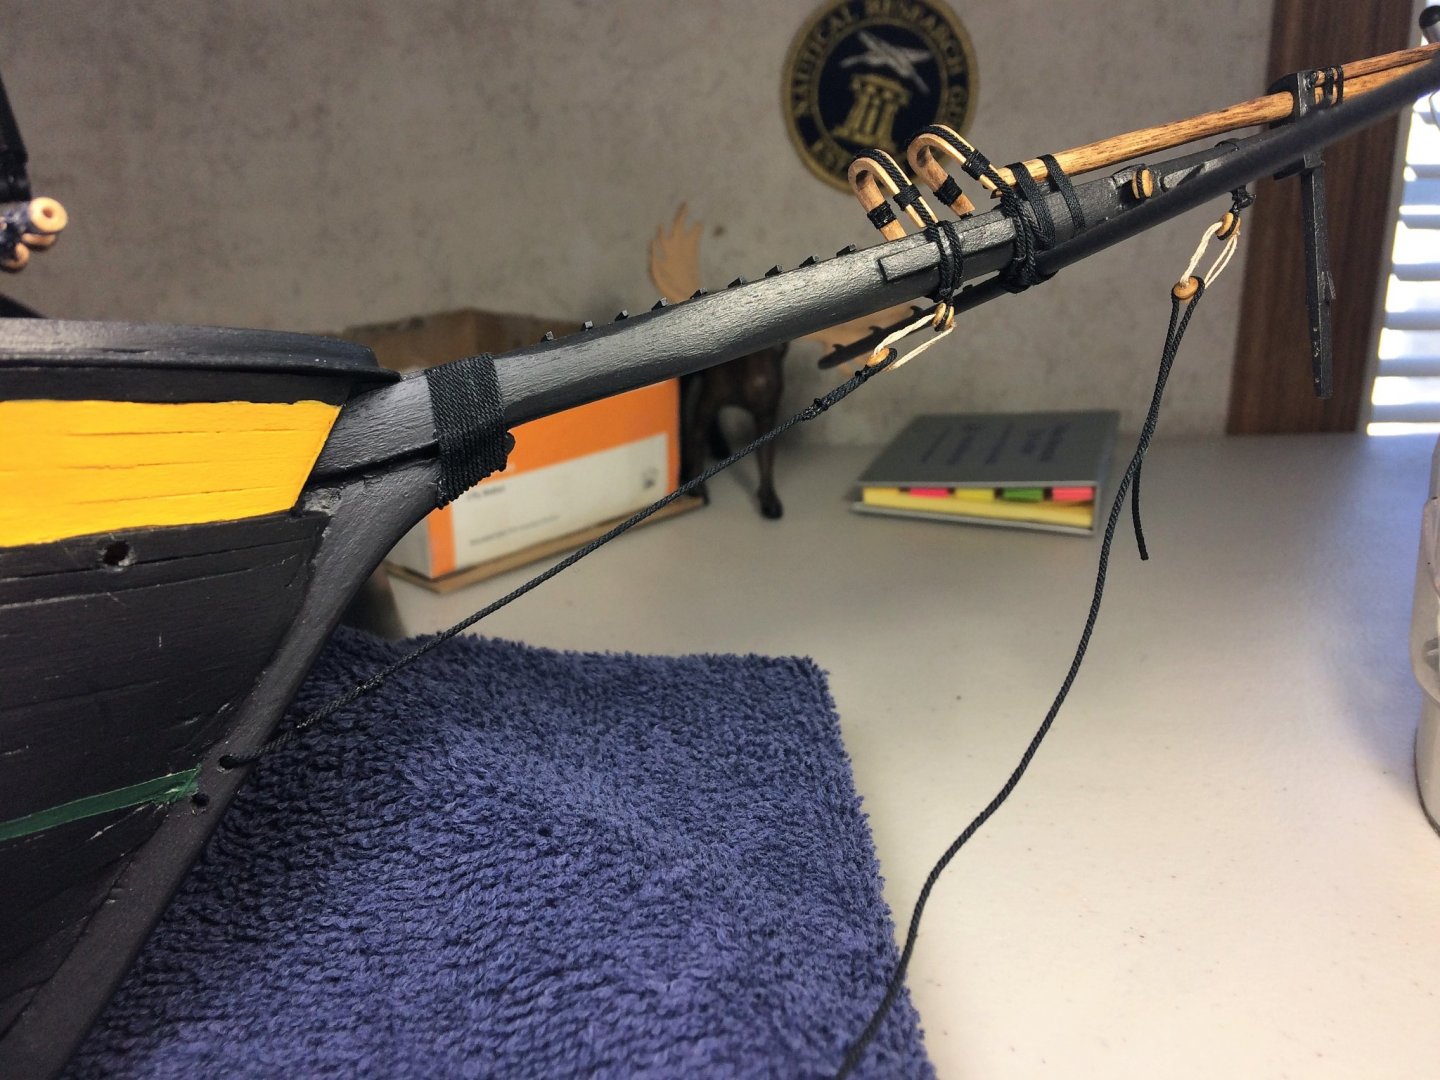
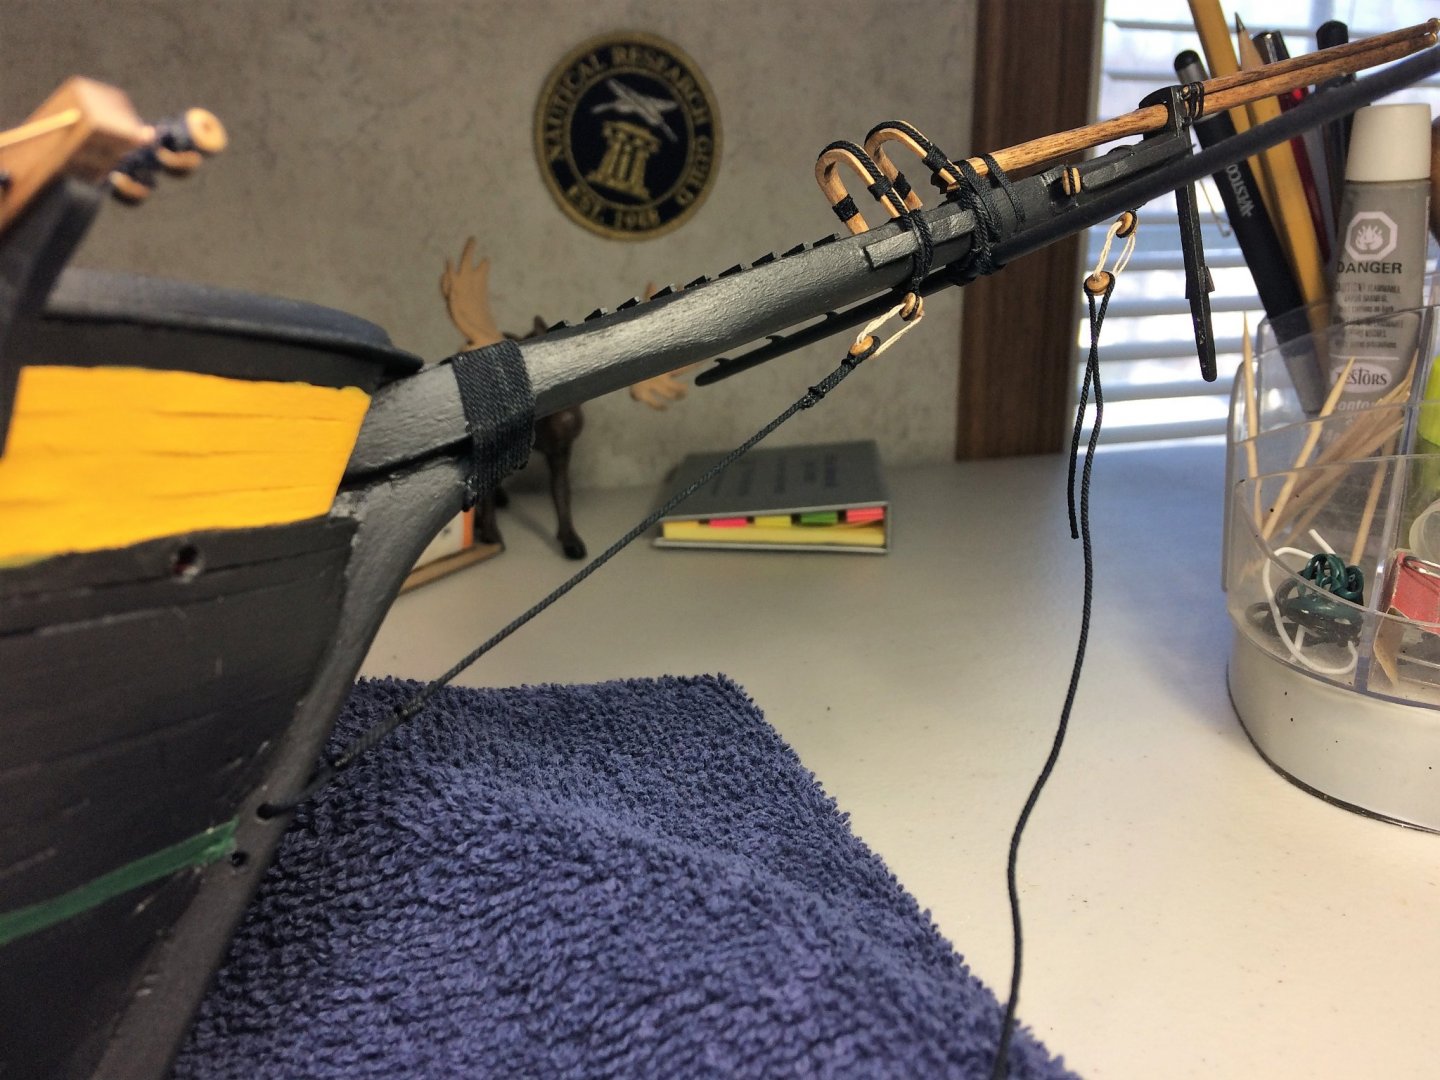
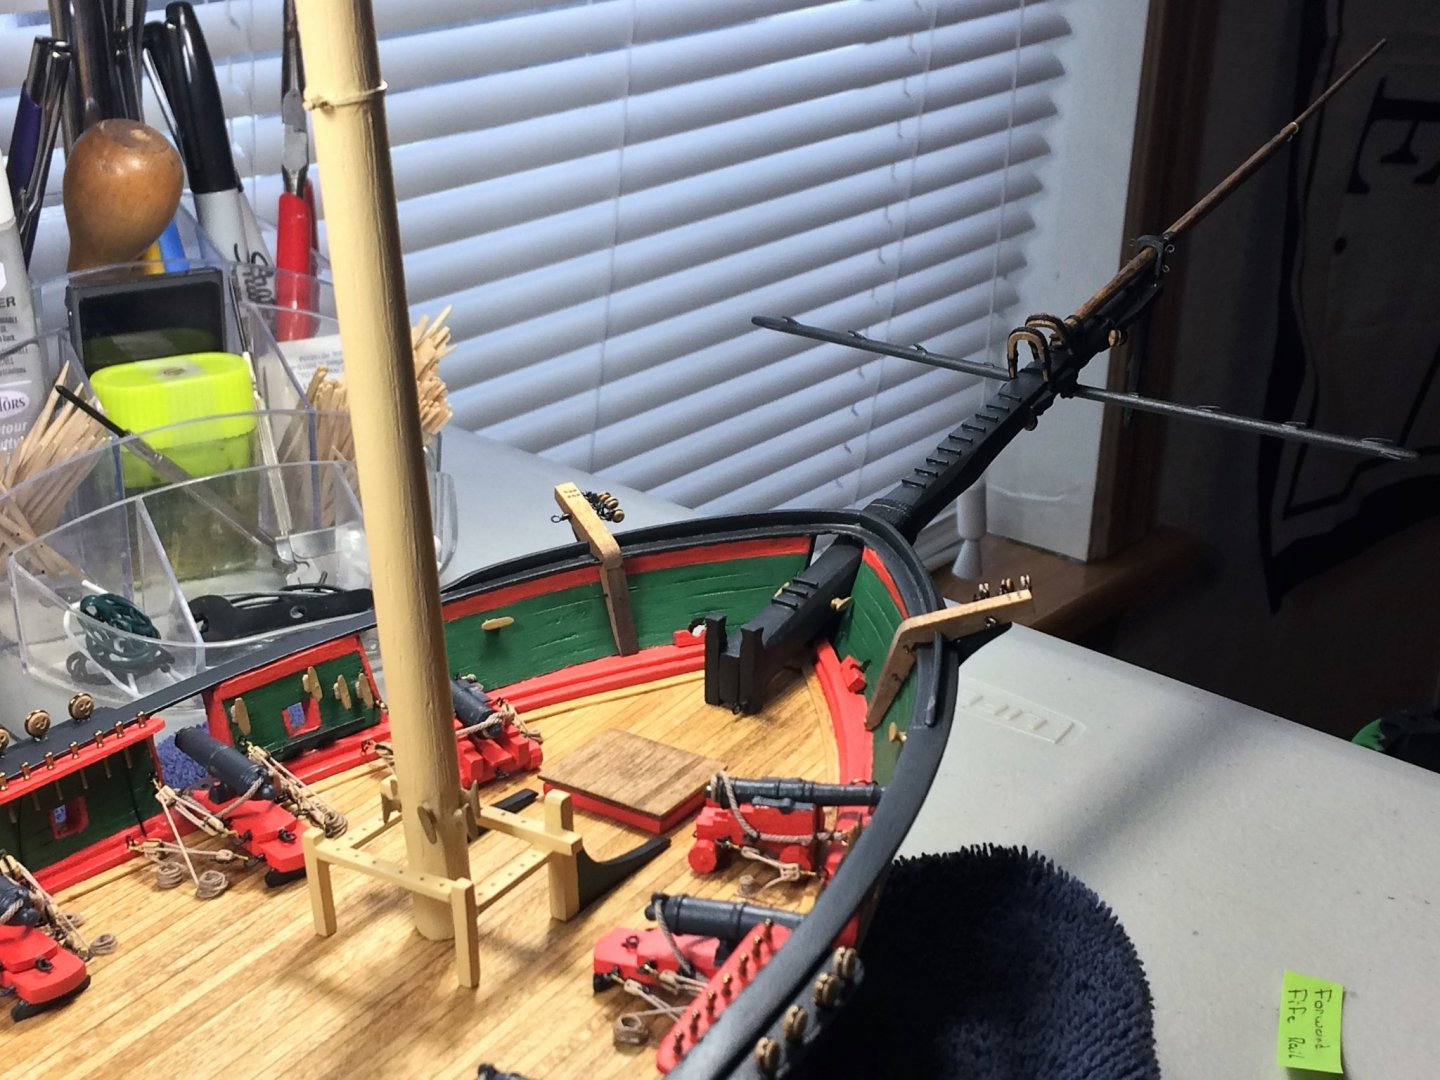
Evening, Quiet Thursday night. Treated myself to a pizza as I got my covid booster shot. Feeling full, watching football pre-game, figured Niagara could use an update. The Bowsprit rigging continues. Working from the inside out, the Flying Jibboom Guy was installed last. It's amazing how just a little bit of rigging can really fill out a section. All black rope is from Syren. Staying with my "inside then move outwards" mentality for the rigging. I installed the Jibboom Martingale to their appropriate lanyards port and starboard. Sorry for the blur, no professional photographer here!!! When other parts are drying, I tend to have another project ongoing. I've been really diving into prepping the masts with blocks and such. I started with the lower yard lifts for the Main and Fore masts. I just couldn't help myself and "attached" the Course yard. Just to see how it looks. I think I have a pleasing alignment with everything. Suppose time will tell. I do see the Course yard is backwards in the pics. Won't be attached that way!!! Stay safe, help a neighbor Tom E


-
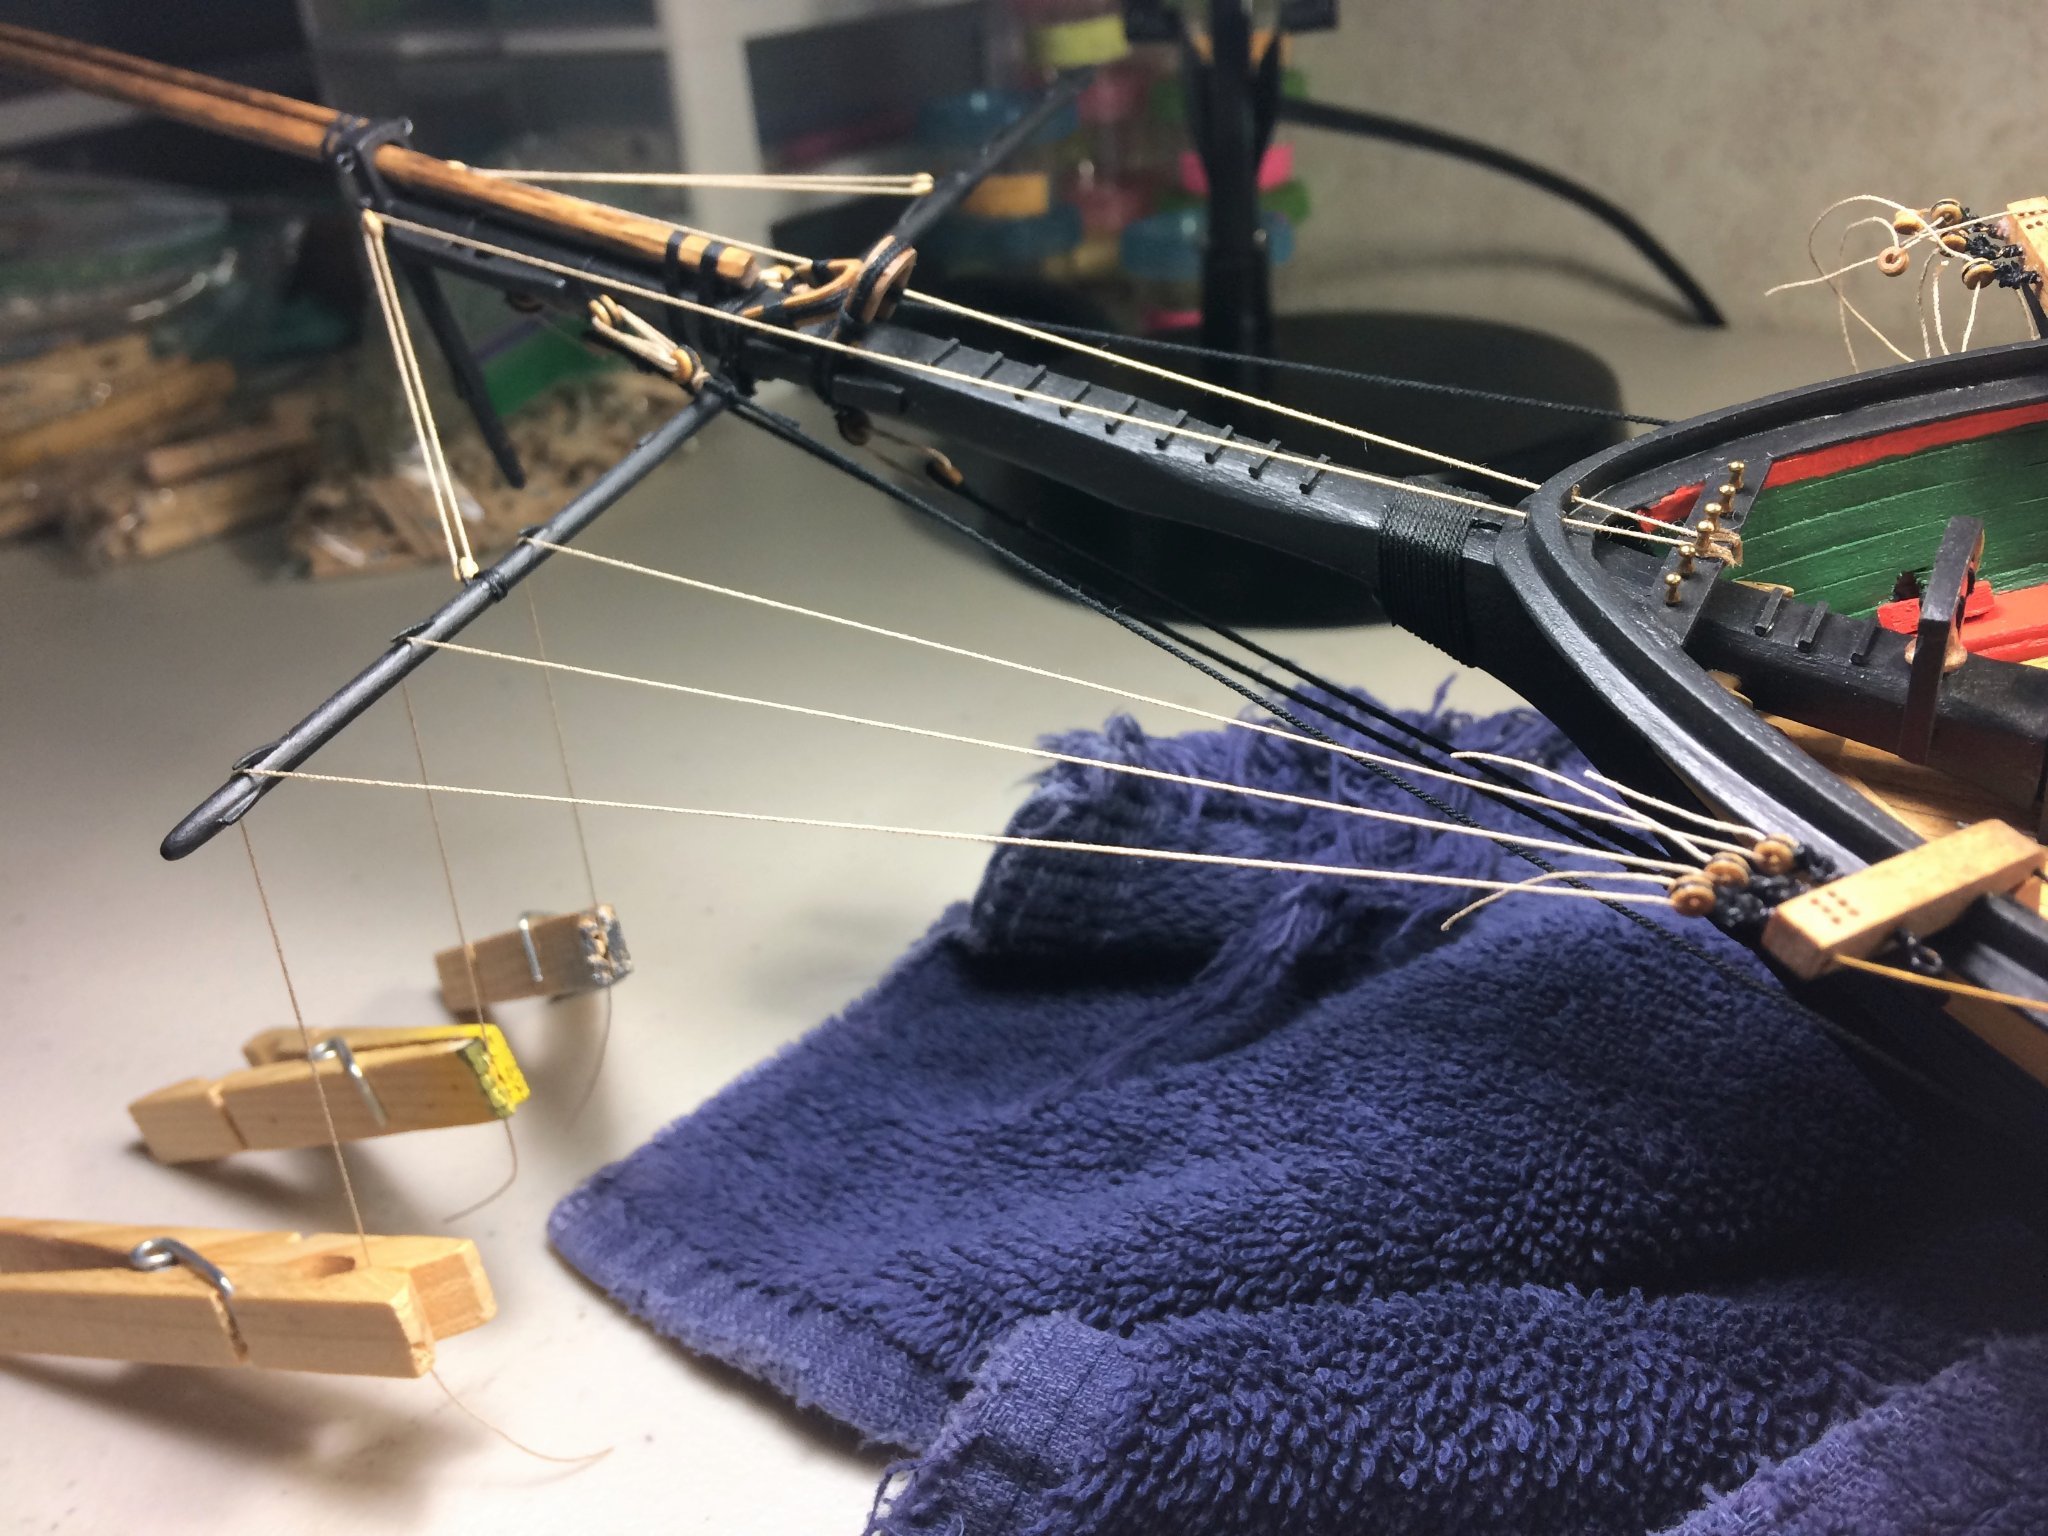
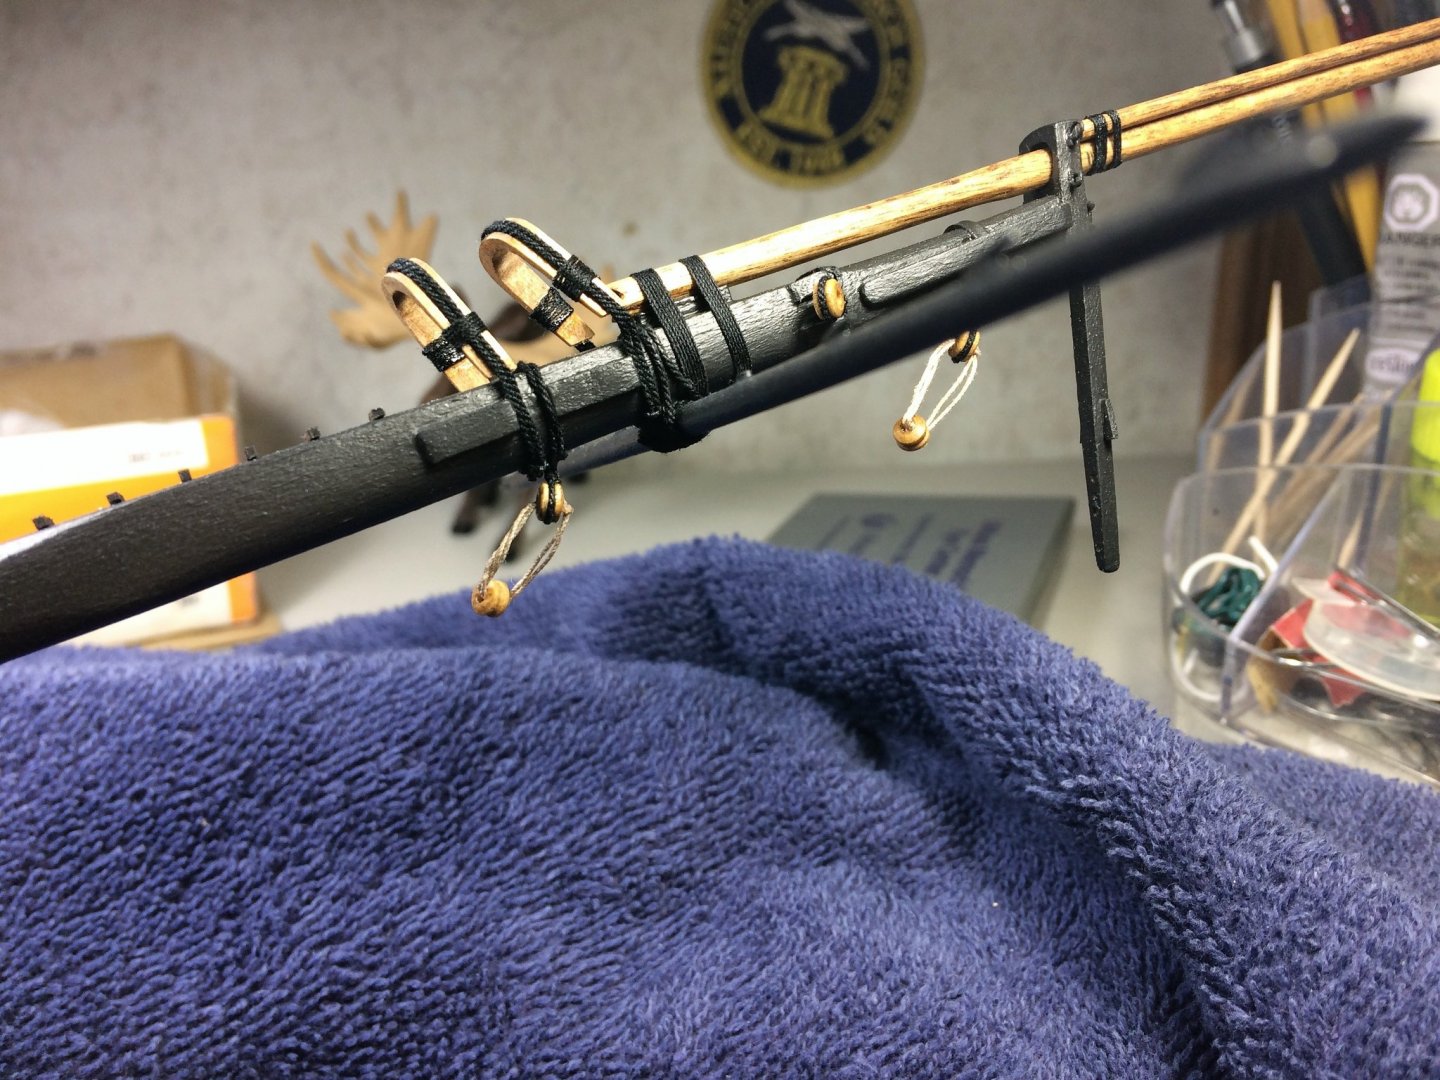
Evening, Hope everyone is well. Busy Saturday getting chores done. Nice roasted chicken and potatoes in the oven. While that cooks, Niagara needs an update. Thanks for the kind words BD. Since I wrote that last update, the Sox made a great playoff run, probably some of the best baseball I've seen in a while. But, as we say with the Red Sox....There's always next year! During spring training, every single beat writer called this year a "re-building" year. The Bowsprit rigging continues. Working from the inside out, the first jibboom guys are attached. Using .018 Syren black rope. Using a fairly healthy length of rope, attached at the Jibboom guy it's self, then attached to pre-made lanyards on the catheads. Rinse and repeat, working my way outwards. When I get to the flying jibboom guy, I'll use a slightly smaller .012 black rope. I noticed some "rub" with the jibboom guys and the spritsail yard lifts. Nothing bad, I can live with it. Also, when I tighten things up the jibboom guy does come off the spritsail yard. As mentioned before, I'm attaching things to pre-made lanyards. I used this method as I thought it would give me the best results when aligning the lanyards on both sides. A little snaggle toothed, but both sides line up well....mostly. The first lanyard is all fuzzy, my first one. The one behind it was my second, a bit better. Stay safe, Tom E


-
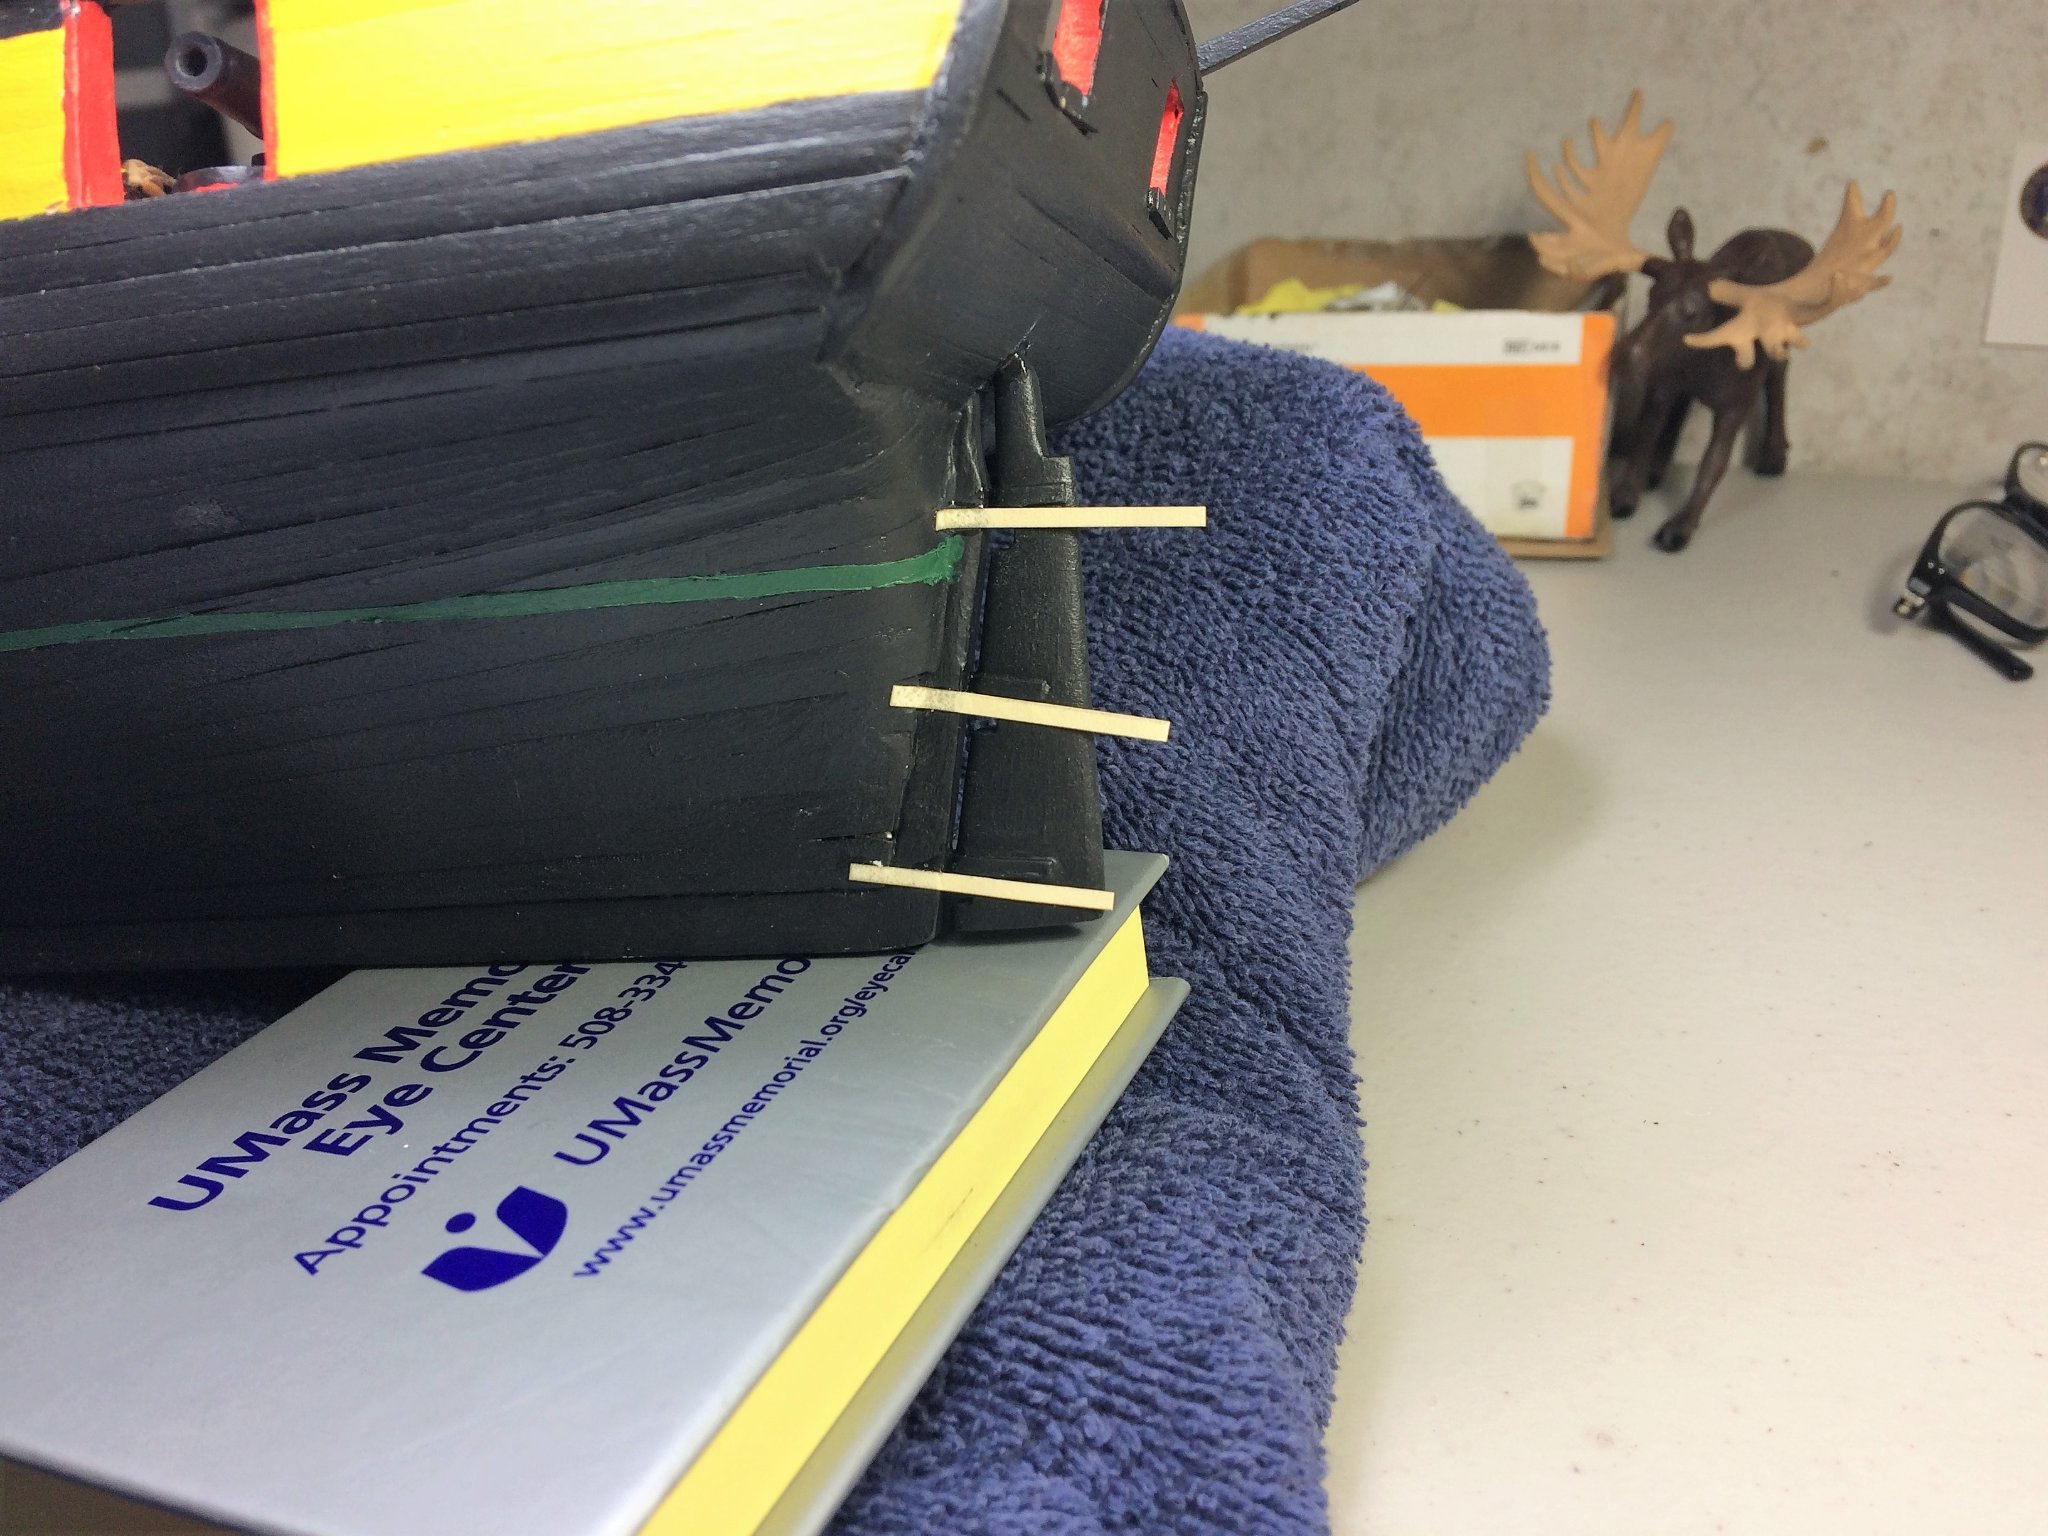
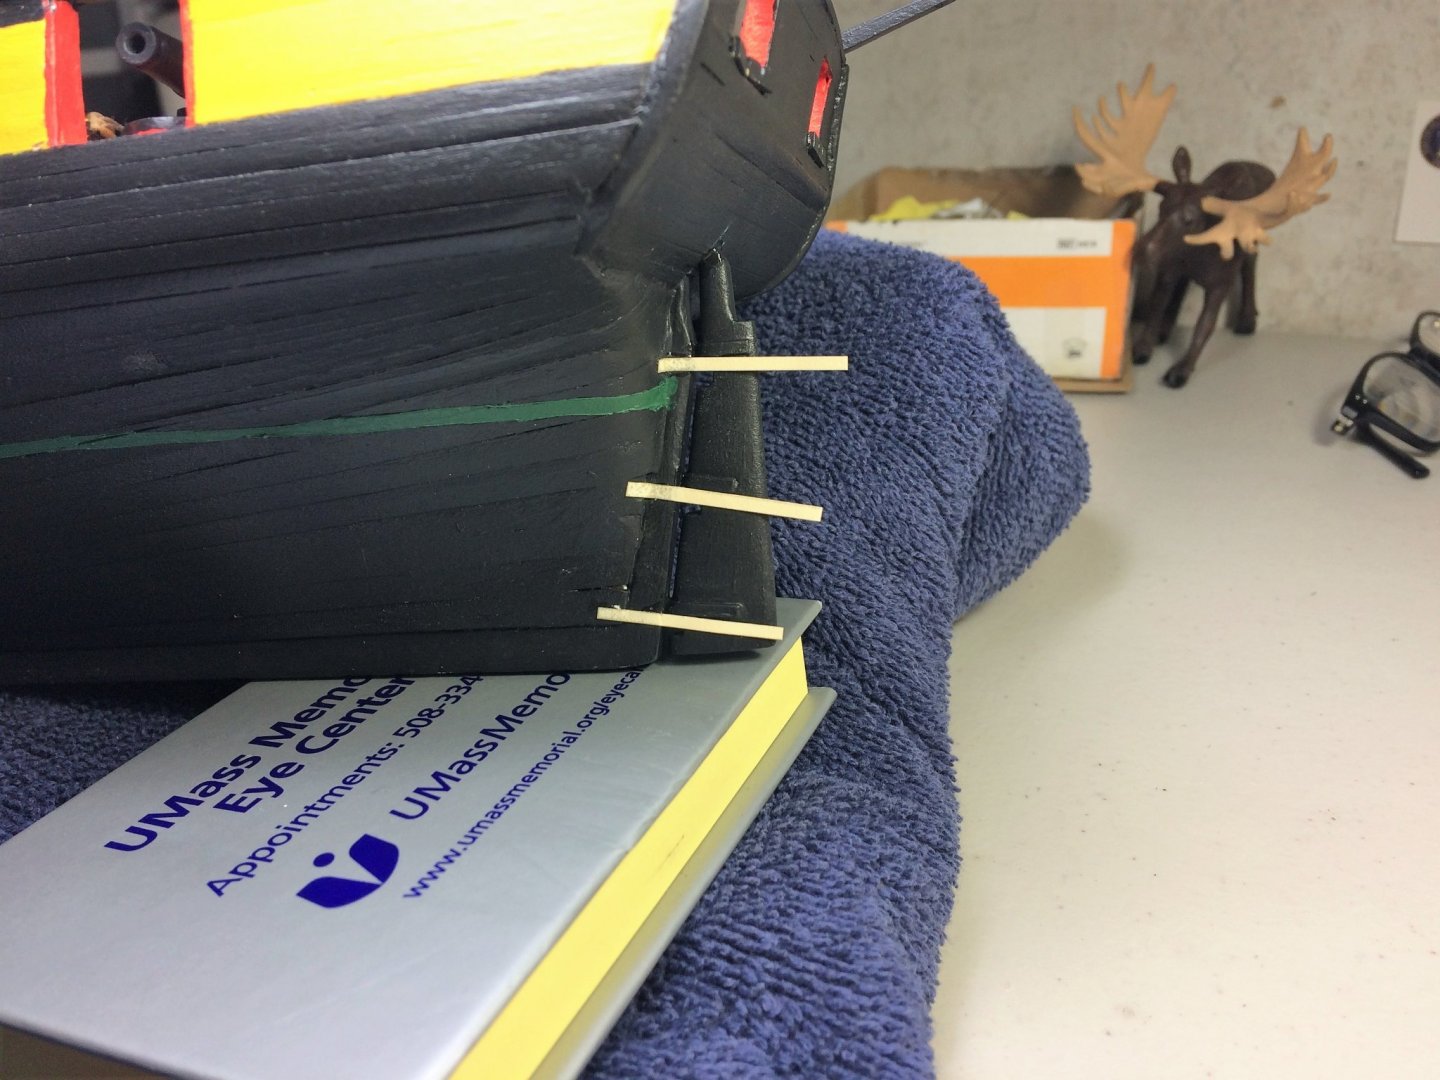
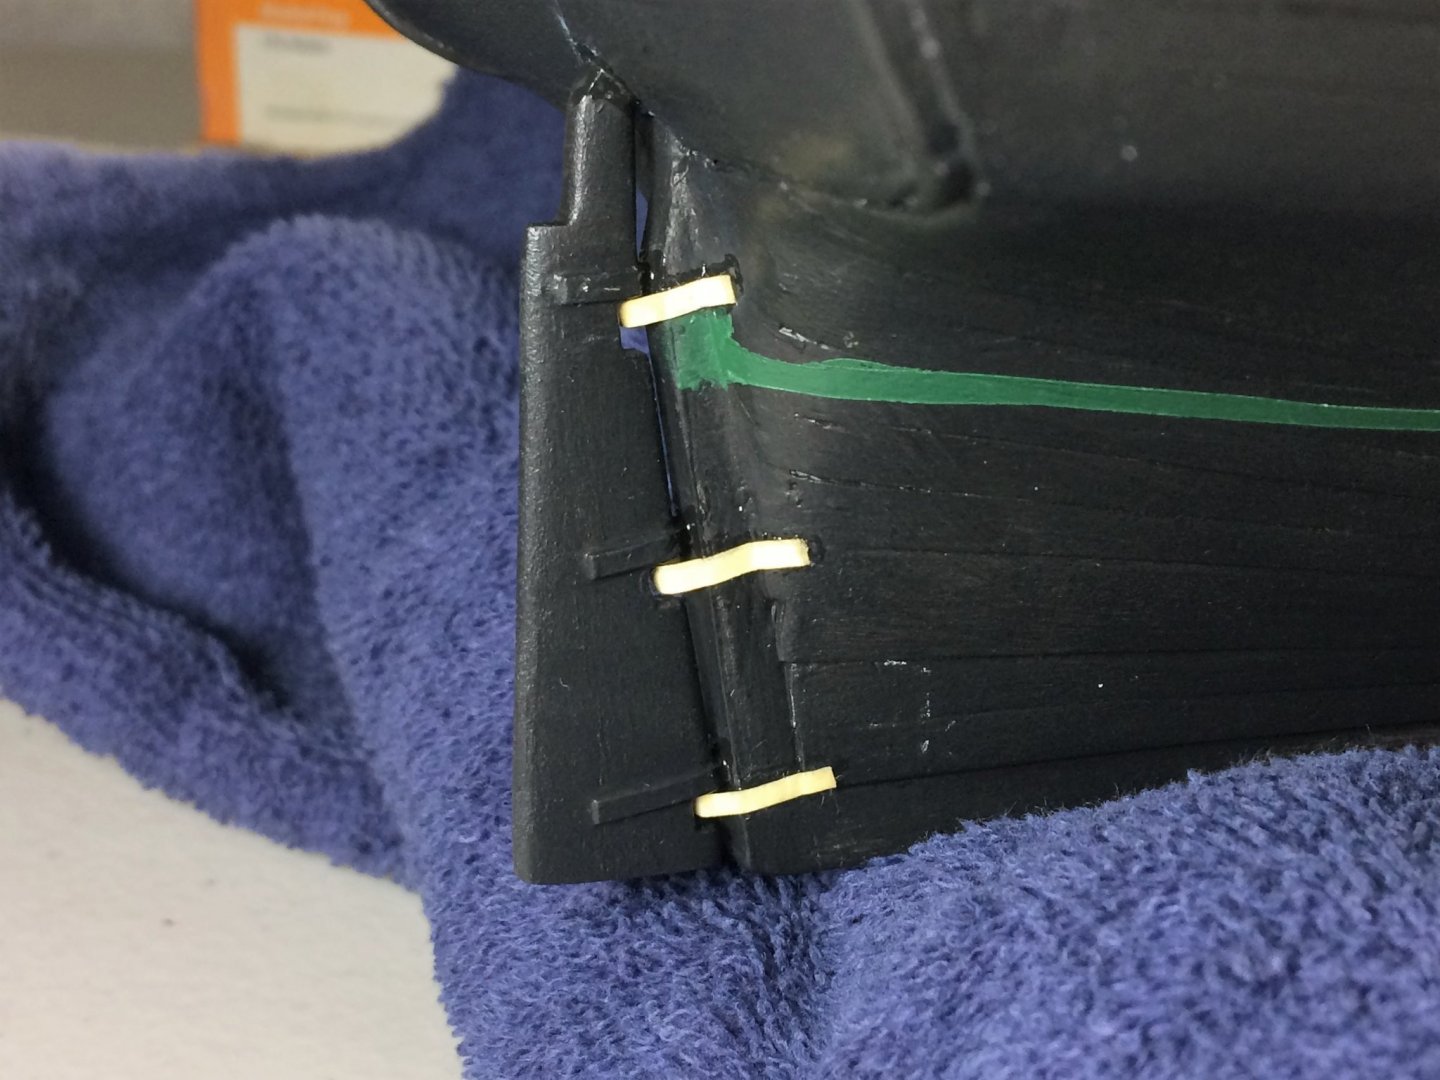
Evening, Hope everyone is well. Quiet night on the couch, thought Niagara could use an update. A lot more time in the shipyard recently. Cooler temps, absolutely awesome playoff baseball right now (GO RED SOX!!!), you tend to stay in. The ropes are done on the stanchions. Everything will be trimmed and painted. I finally put the rudder on. No idea why I waited so long. Maybe somewhere in the back of my mind I thought I may keep knocking it off. I used card stock to represent the pintles and gudgeons. Always remembering, the rudder hangs on the ship, the ship does not hang on the rudder. Wrapped around to the other side, trimmed and anchored with CA. These where easily painted over and blended nicely into the hull. The boot strap and glue shine were cleaned up as well. Moving on from the rudder, I started forming the bullseyes and lanyards for the jib boom guys on the bowsprit. Below is just the rope used for the lanyards, just thought I'd stretch it forward and see how things line up. Looks good so far. All rope is from Syren. Be good Tom E


-
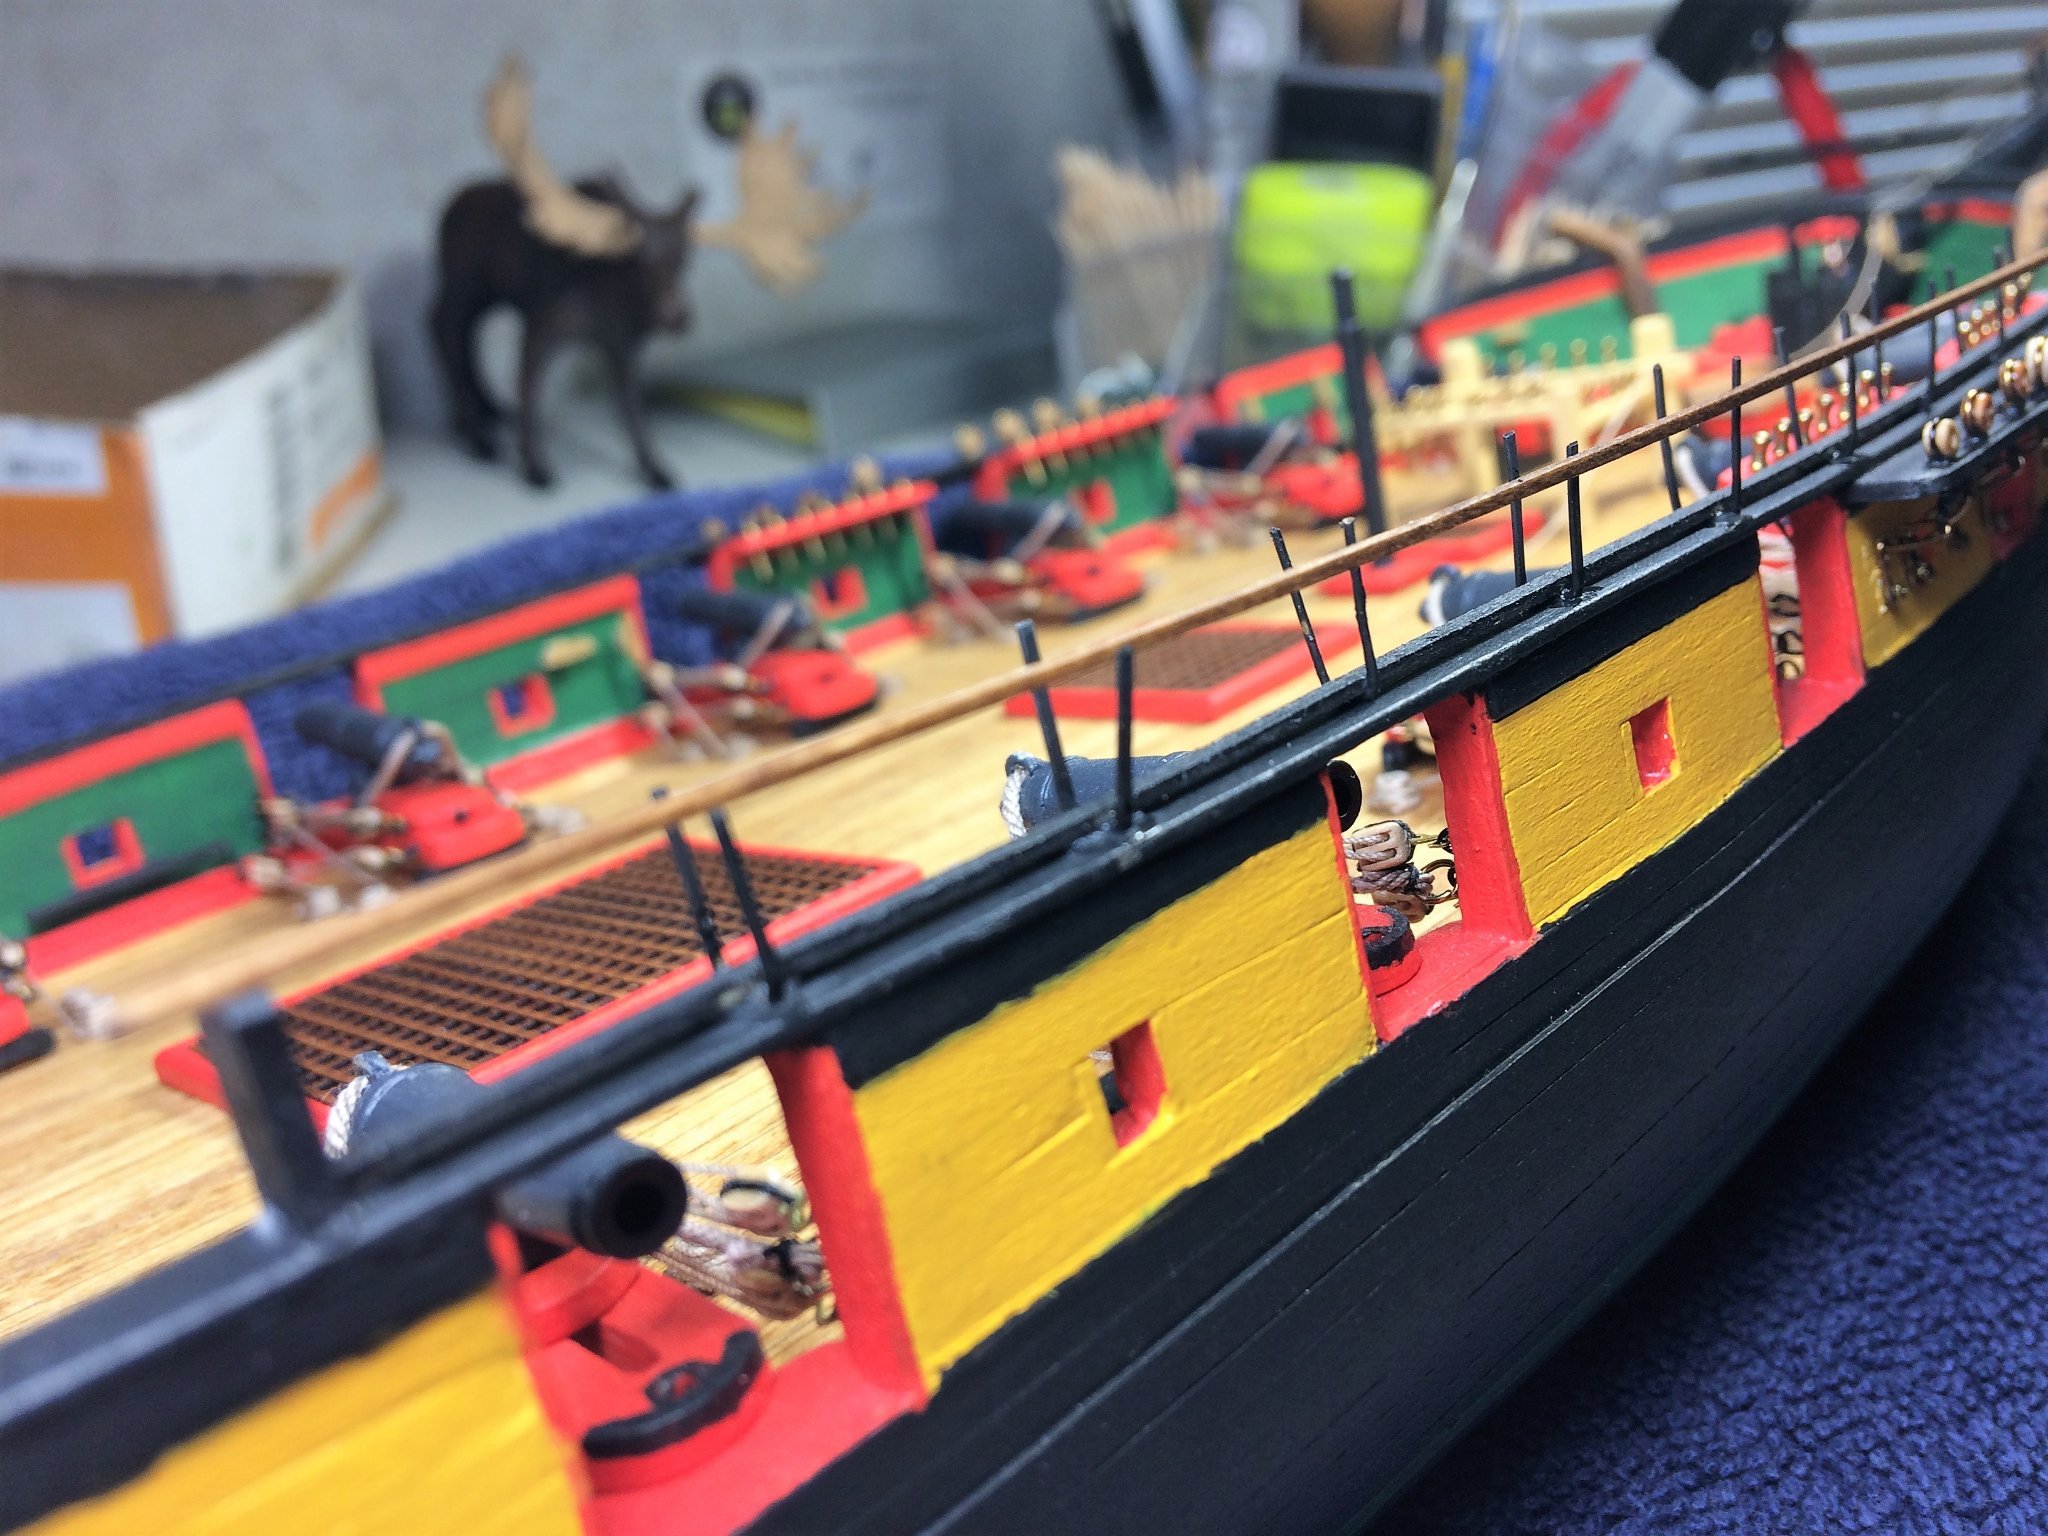
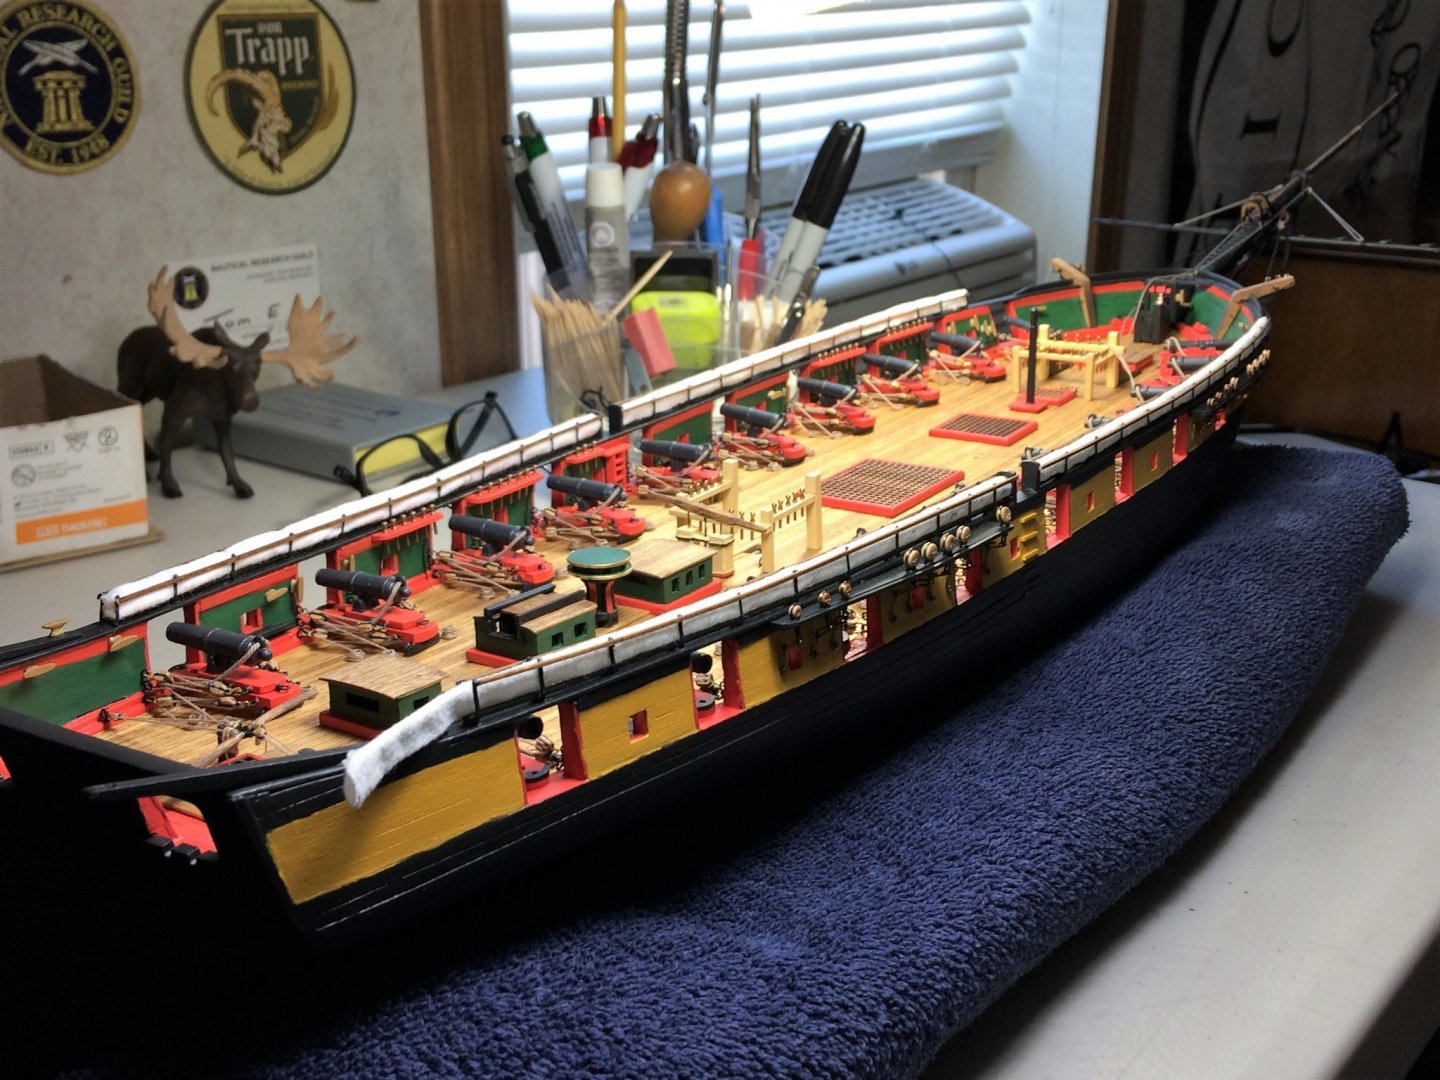
Evening, I cant believe it's almost two months since I last updated. Although summer time fun has been hindering my build, I have been building! I have finally finished the hammock stanchions. Harder in my head, but not easy either. You have to be creative to get them to curve with the main rail. My "spine" holding the stanchions is holding very well, and mostly covered by the hammock material. Beside the rudder, which is next, the superstructure is basically done. It's time to really start putting some rope, masts, and yards on this ship!!!! Weave it all together! Never did I ever think I'd get this far. But, I've said that many times so far already I've already started weaving in the rope connecting the stanchions. Not using anything special here, need very small diameter line and the bulk stuff should serve here well. I had to place her in precarious angles to have two free hands. My eyes constantly checking the Bowsprit area. Don't want to hear that dreaded wood cracking sound. I've been thinking about a more permanent base. Below, I have a chunk of basswood from Michaels, bought probably on some random trip thinking I may use it somewhere. Maybe give it a good sanding then stain it. I'm thinking a stain a bit darker than the main deck. Not absolutely sold on this method right now. I have time to chew on it. Stay safe Tom E


-
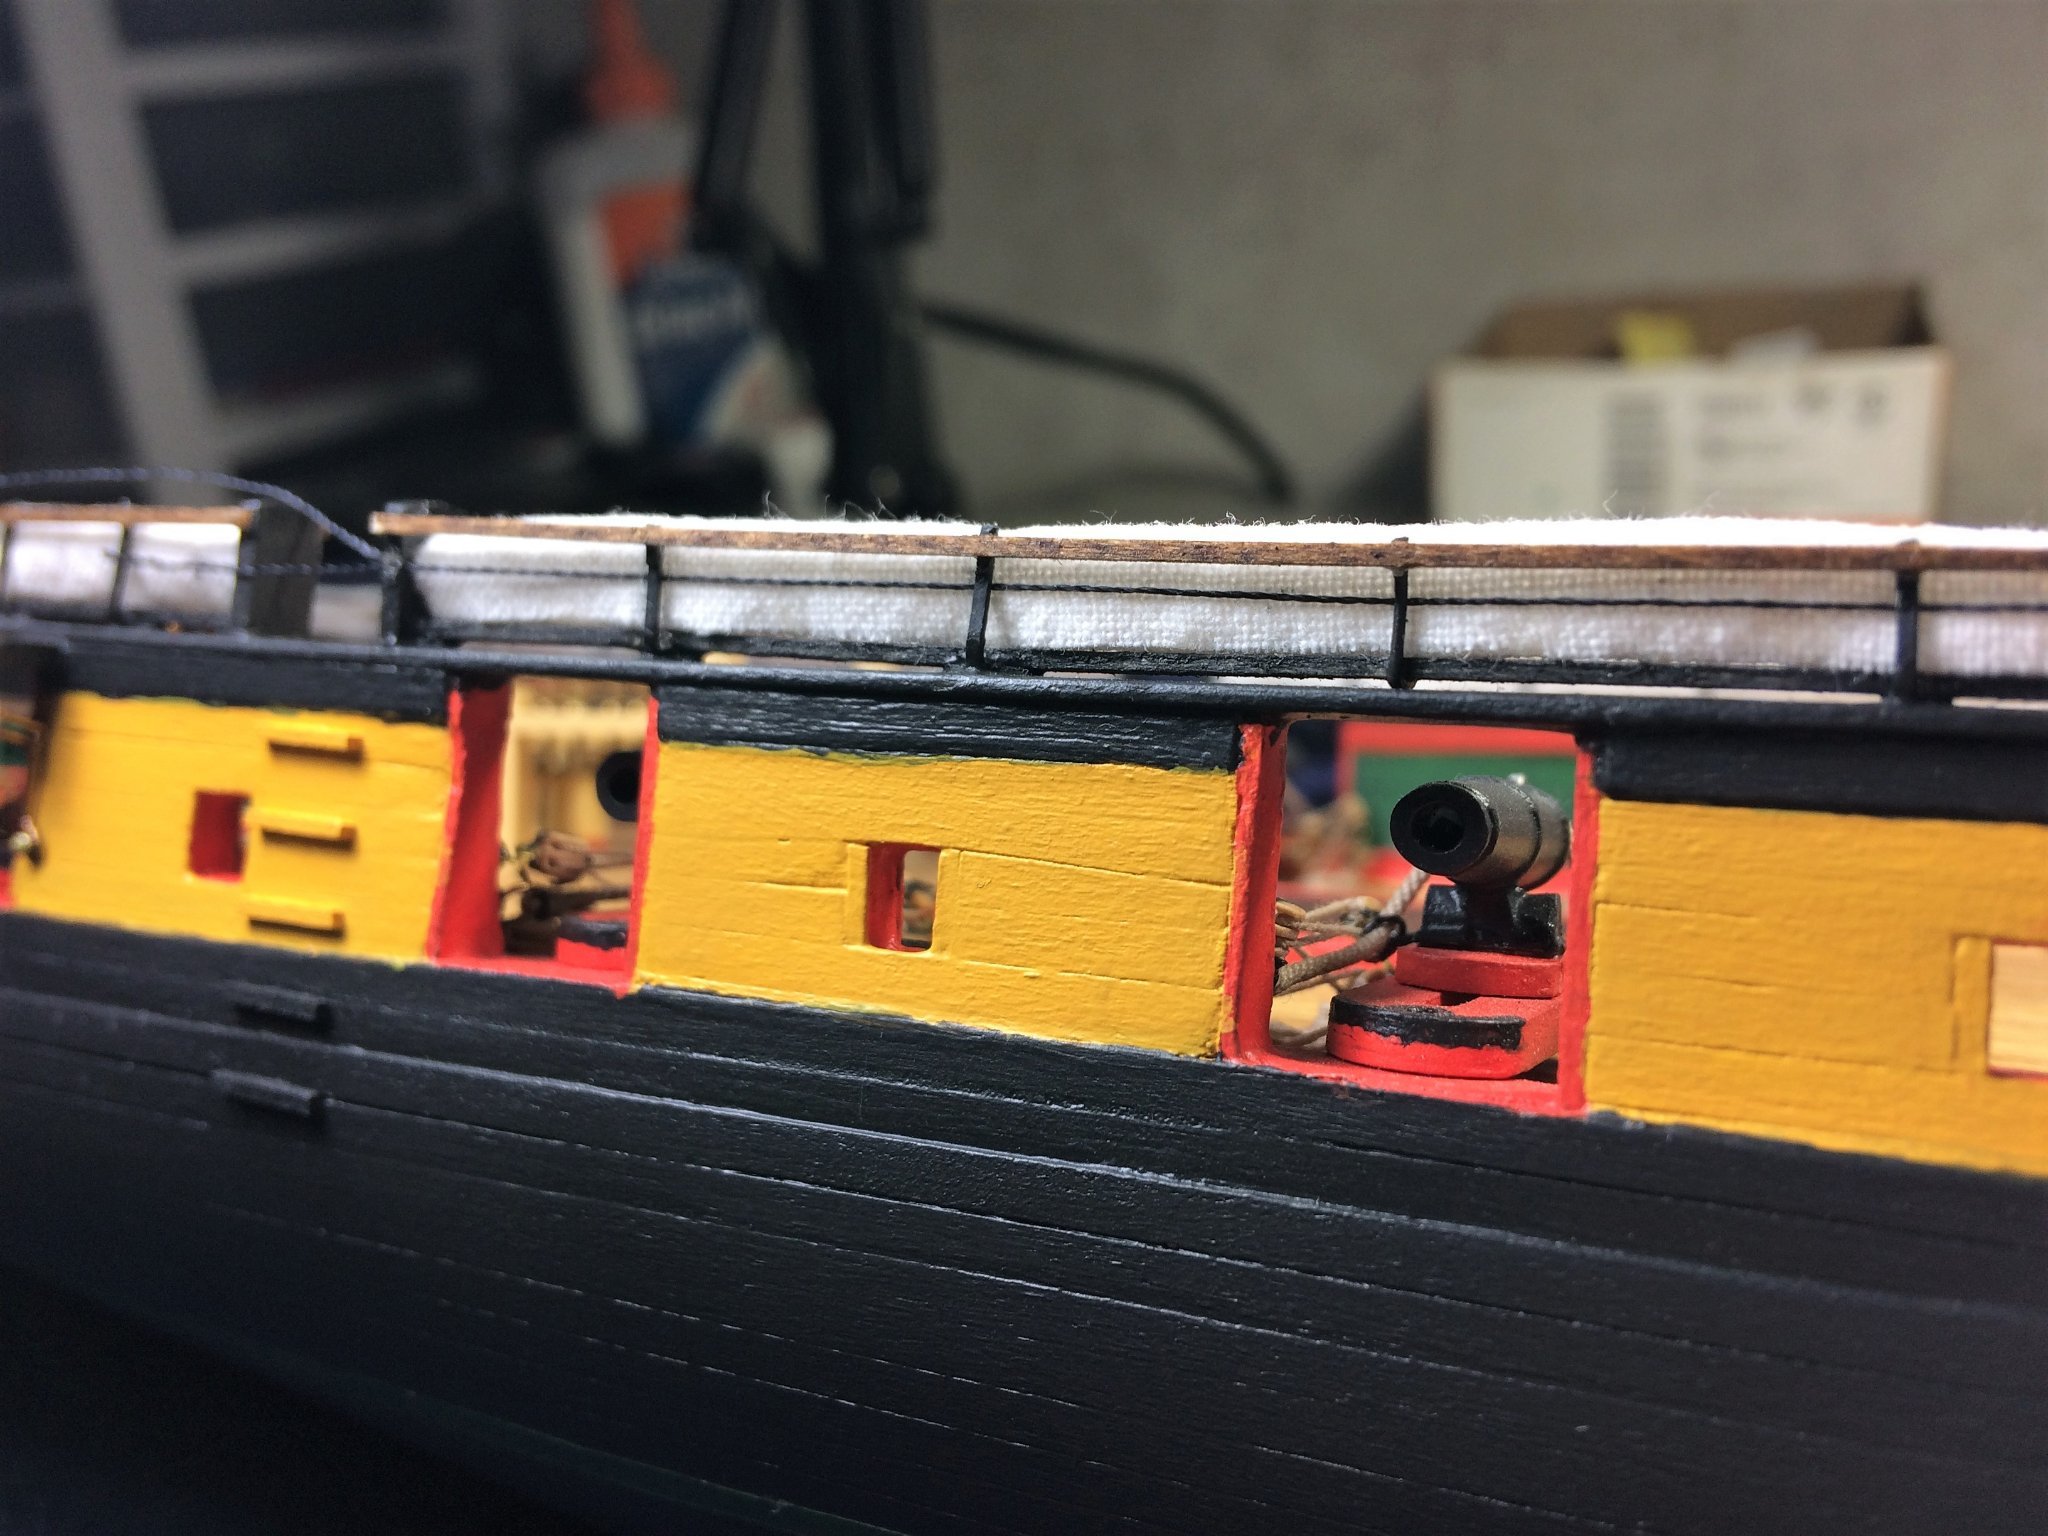
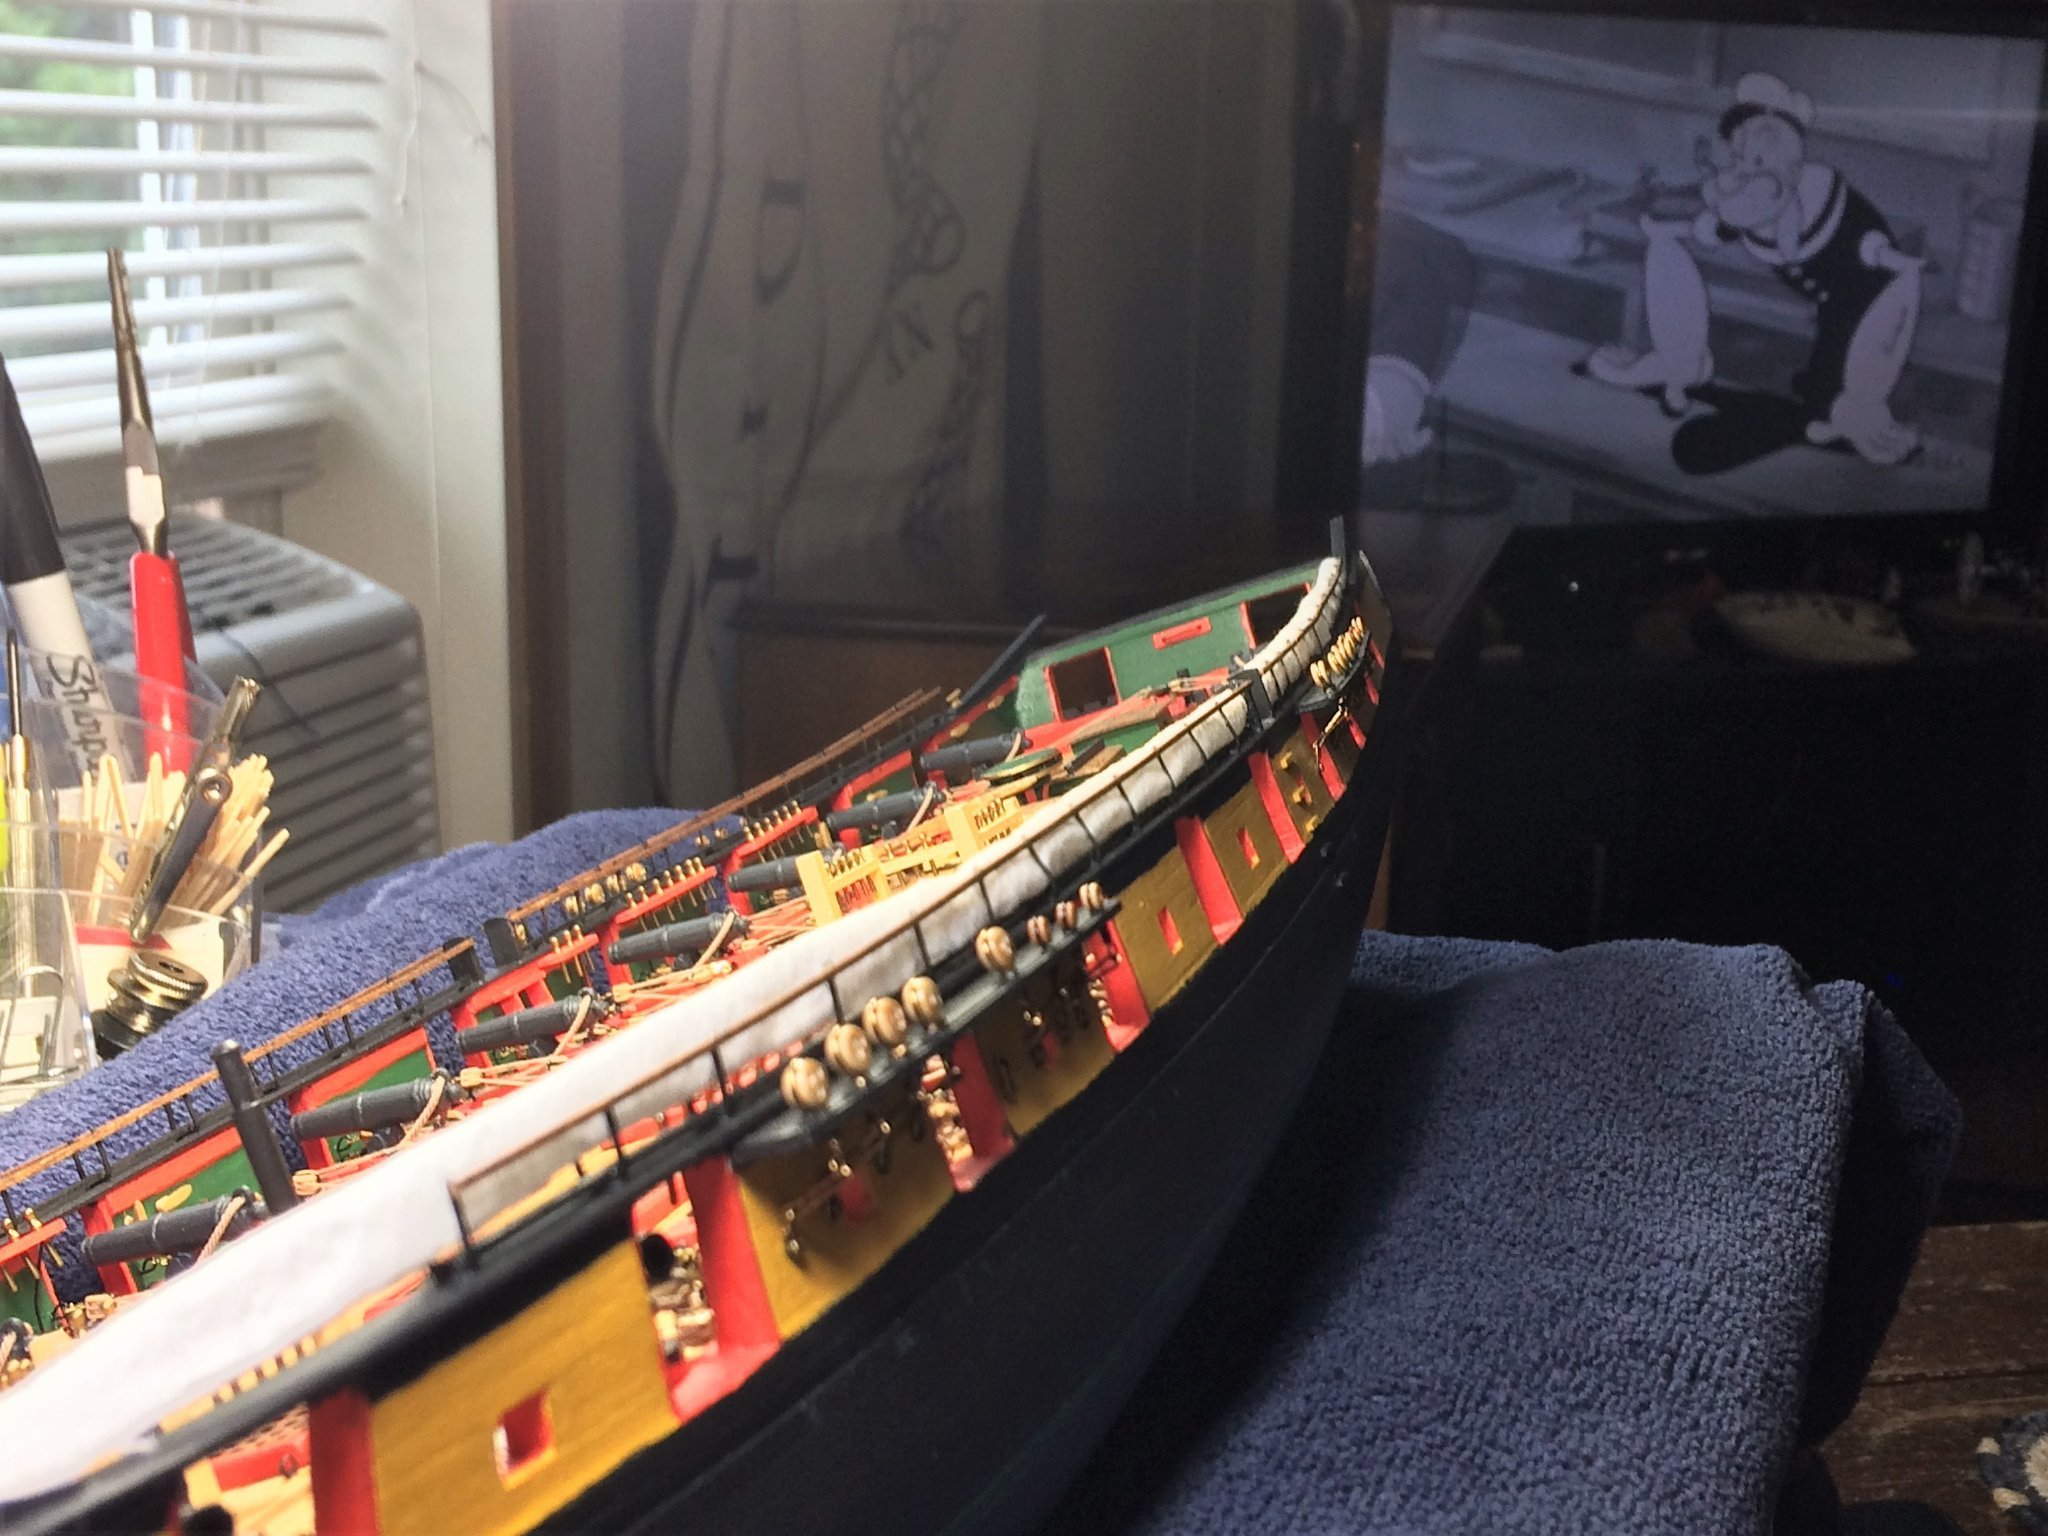
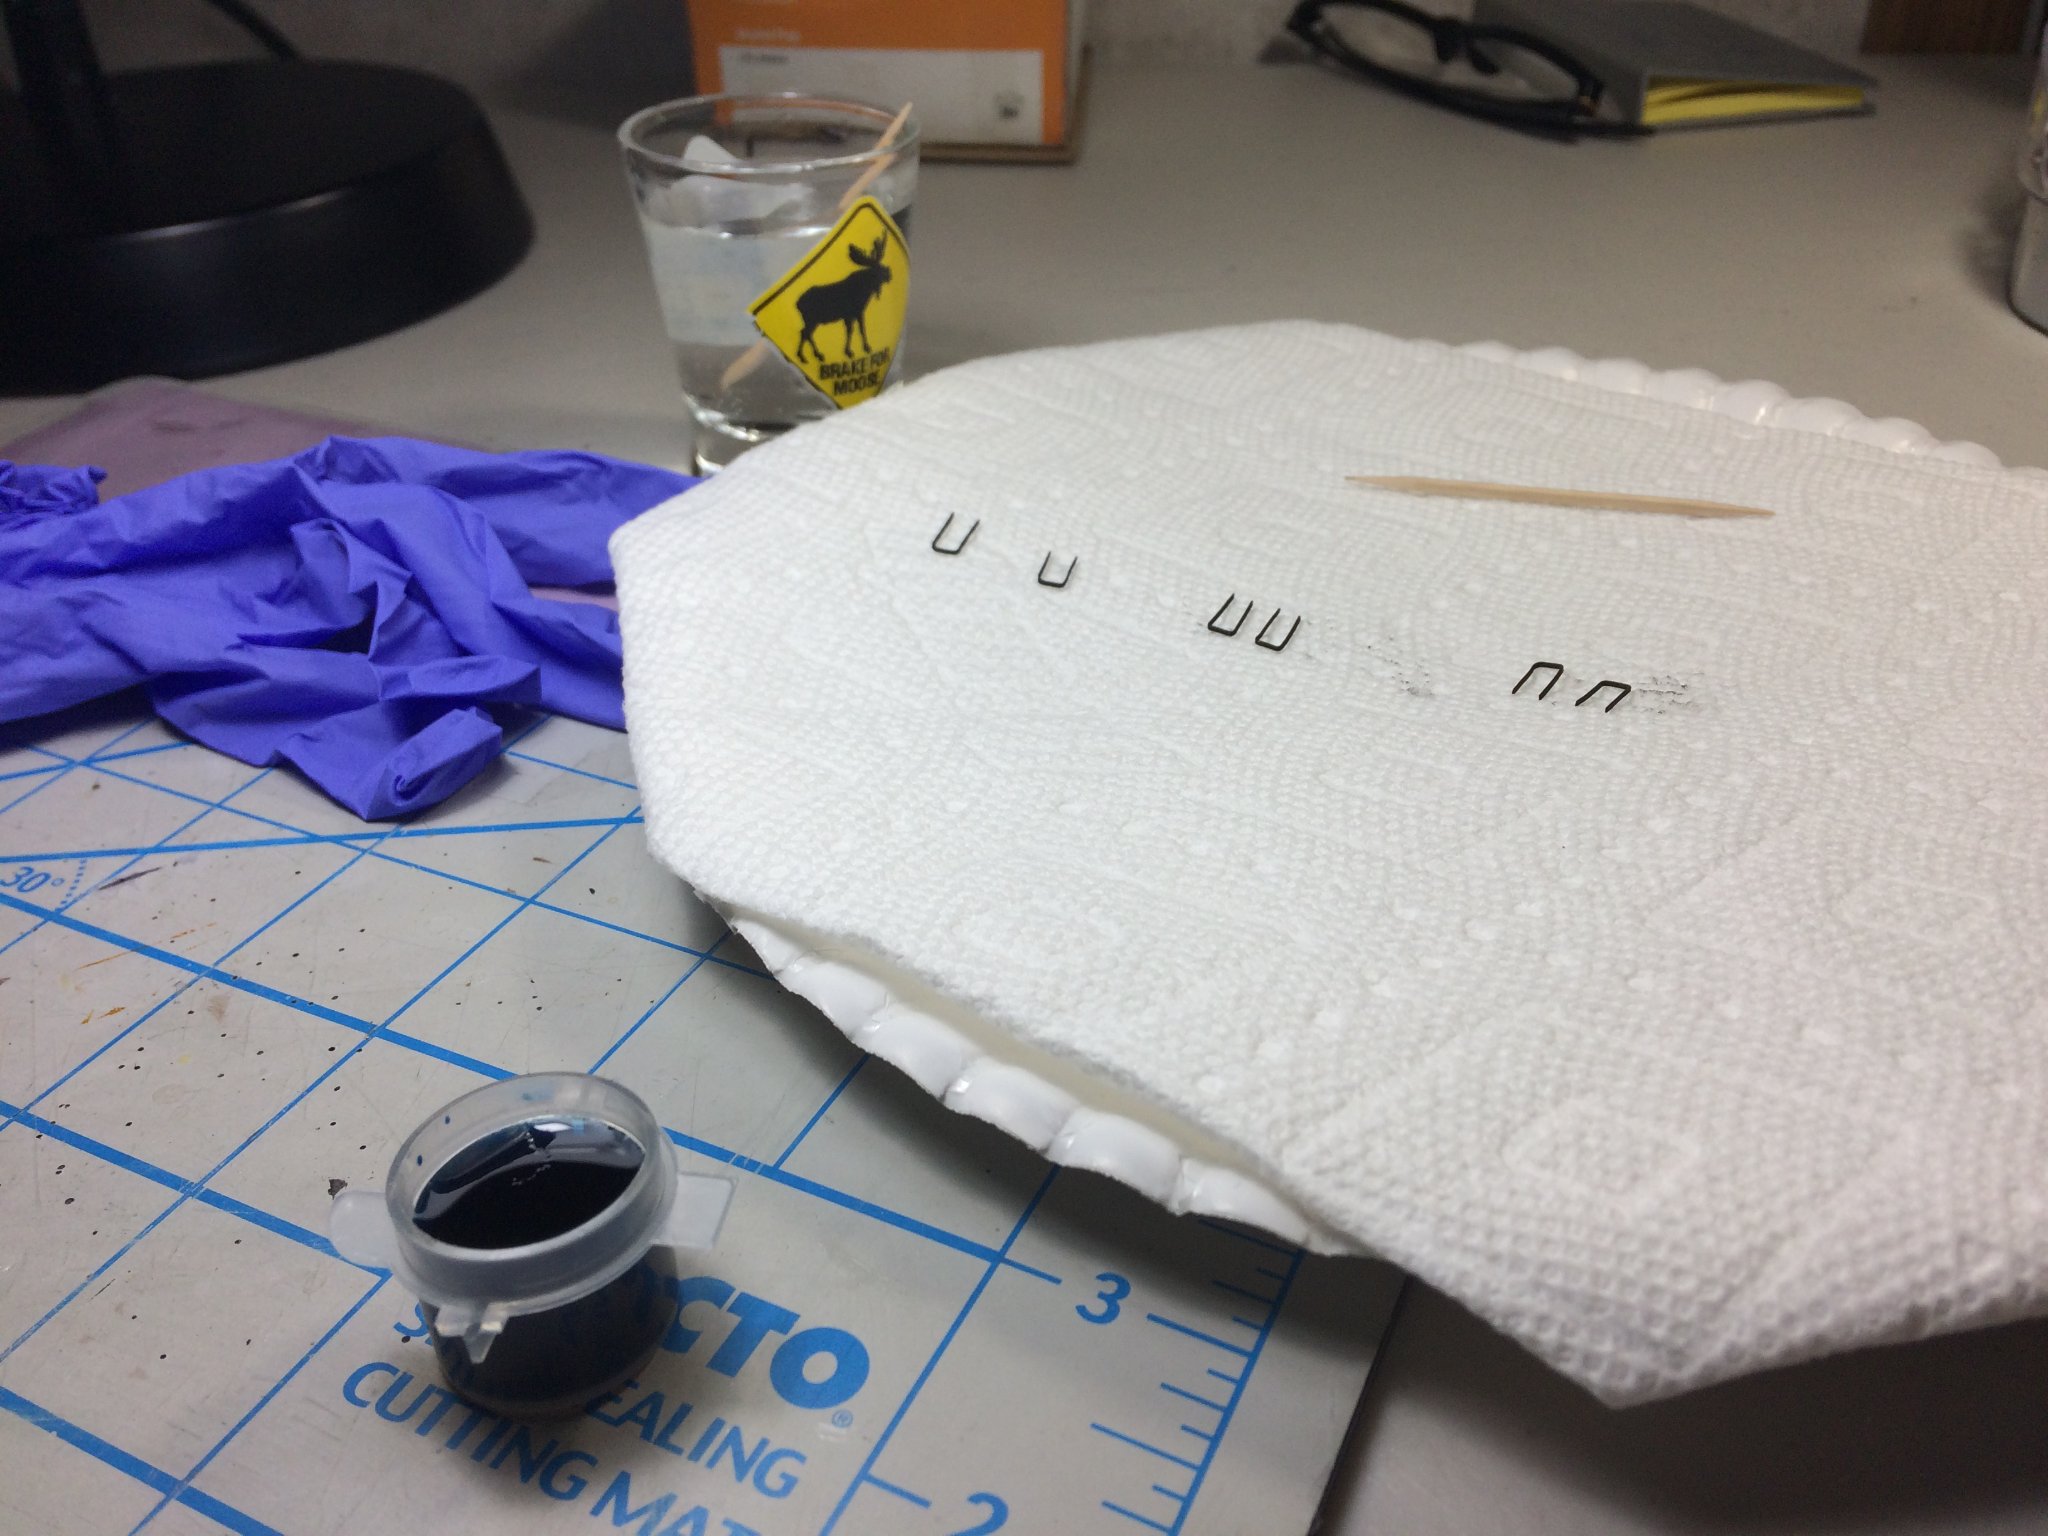
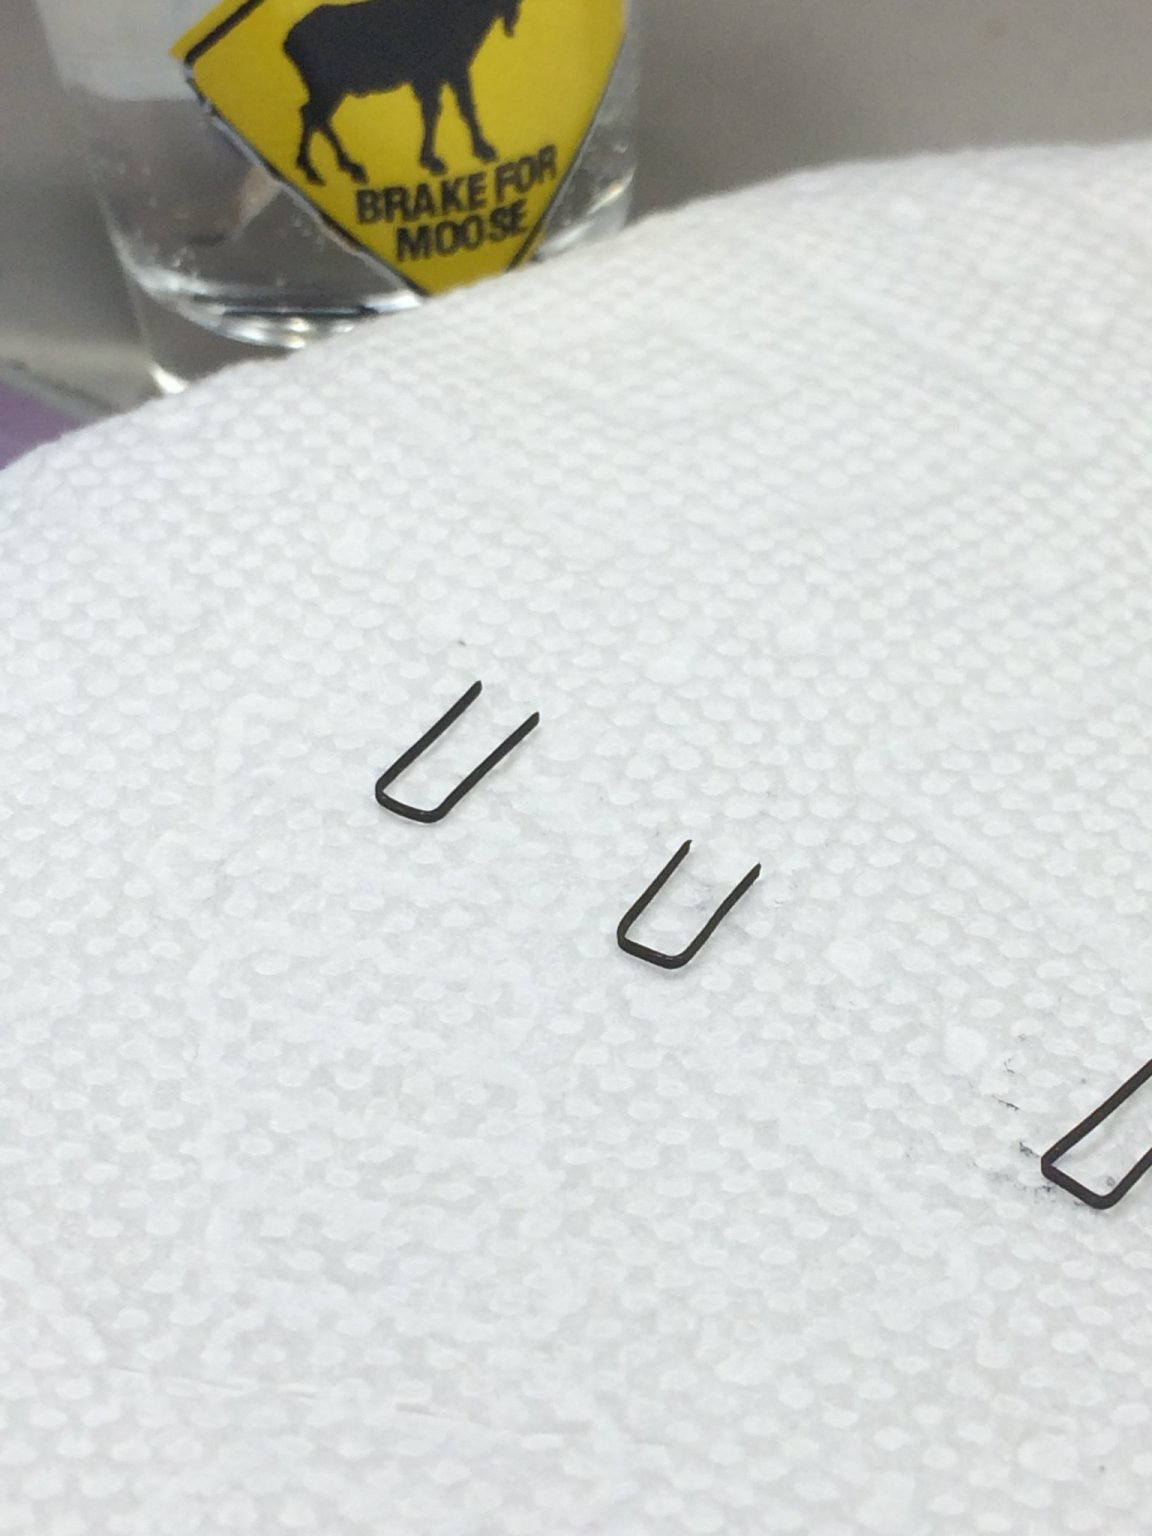
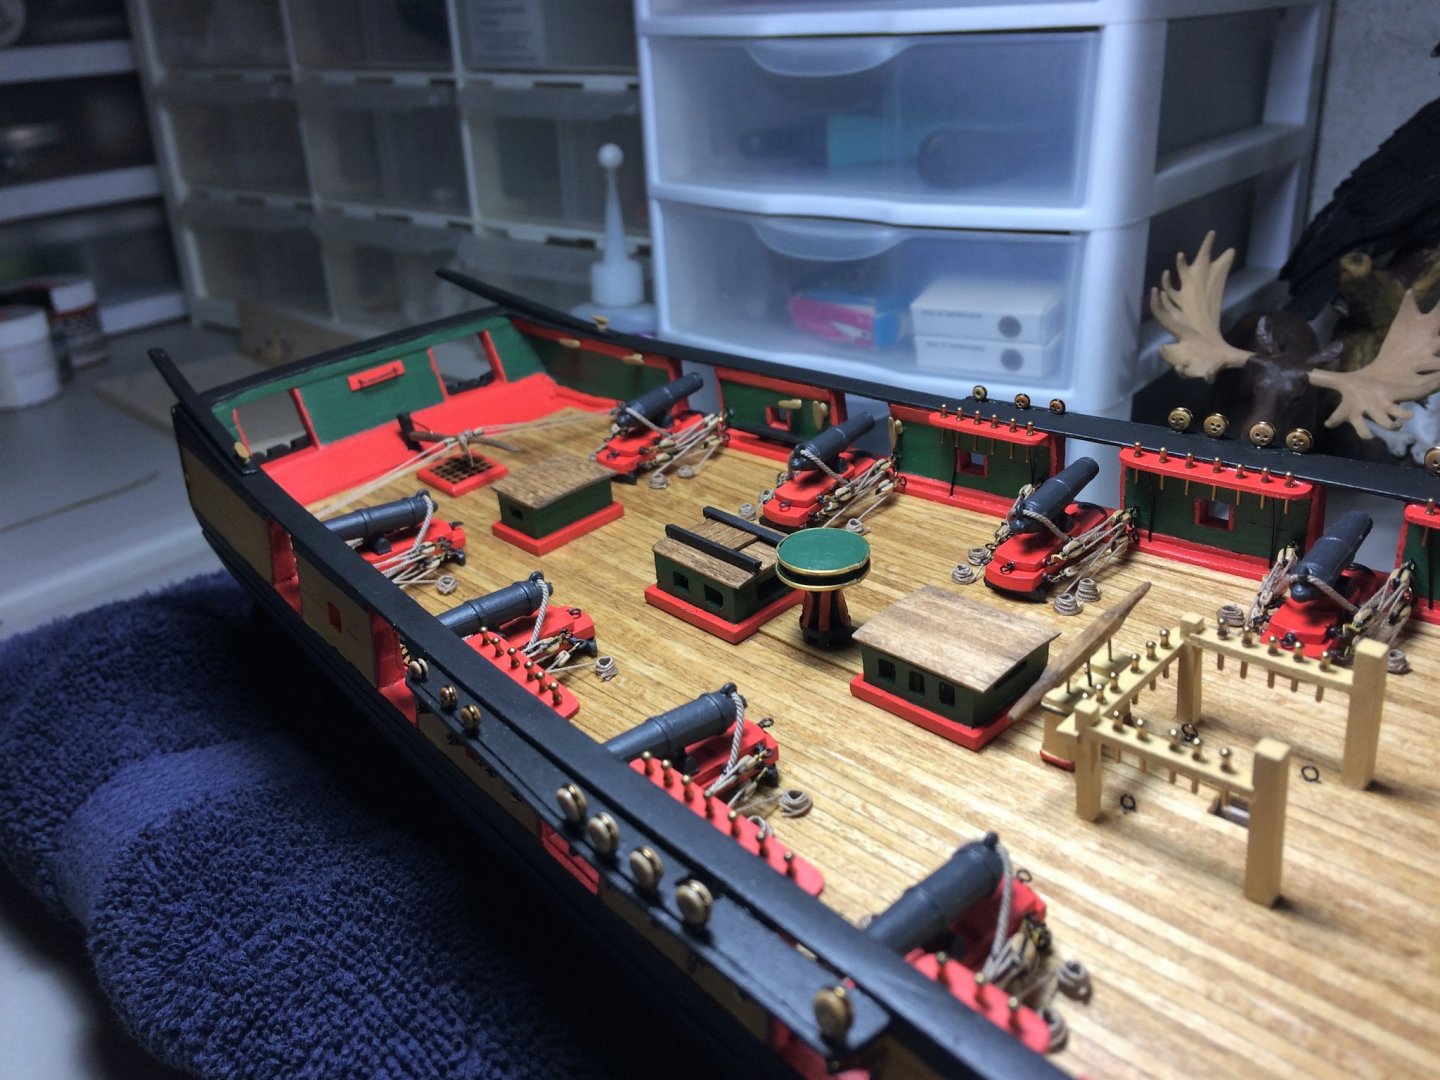
Evening, Hope everyone is well. Niagara continues, but not very quickly during the summer. Had a rainy stretch these past few weekends, so some time in the shipyard. The Hammock stanchions continue. Using a kitchen towel, small lengths were cut and rolled into "tubes". Kind of a stuff and puff approach. If you look at the background in the below pic. I had a visitor looking in on my ship. Popeye himself!!!!!! Looks like he's looking at my ship....and he's an expert!!!!! I can guarantee this pic was from a Saturday morning. Local station plays the good cartoons every weekend morning. The stanchions may look a bit wonky. The stanchions themselves are somewhat easily bent and will be adjusted later so the shrouds don't interfere and match the curve of the bulwarks. I should have these finished soon. For some reason I haven't put the rudder on yet and have started the process. Should have pics soon. Stay calm and model on Be good, Tom E


-
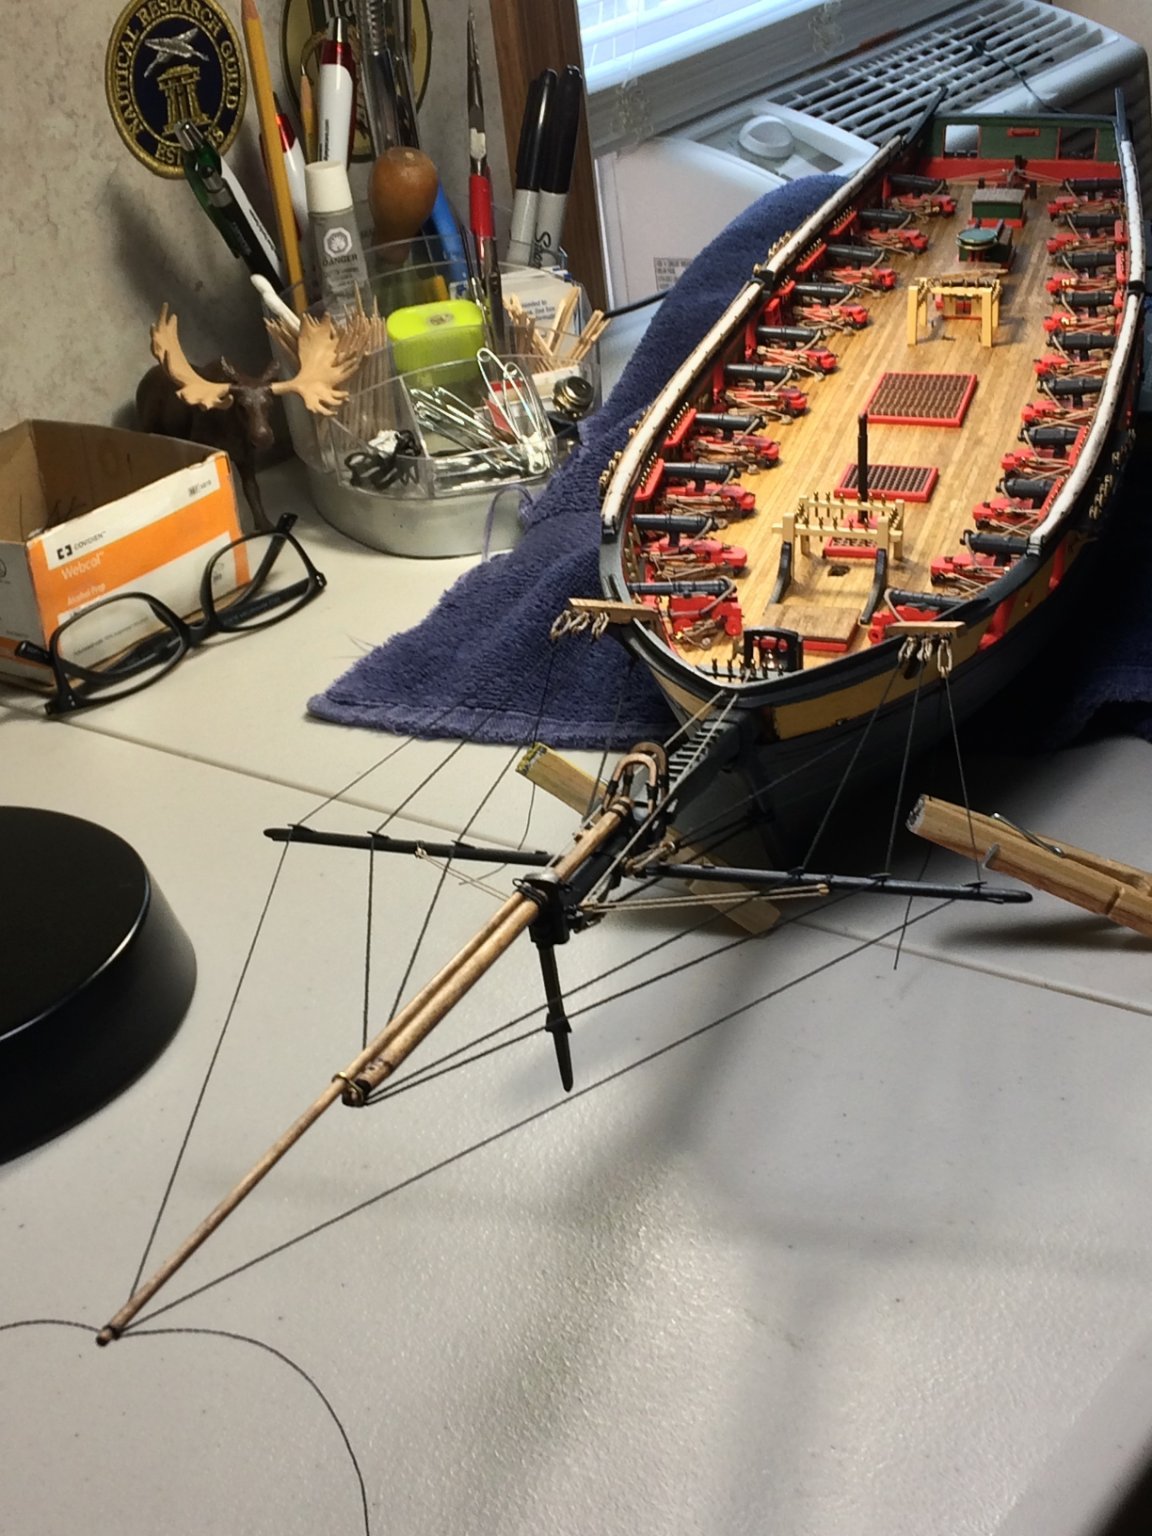
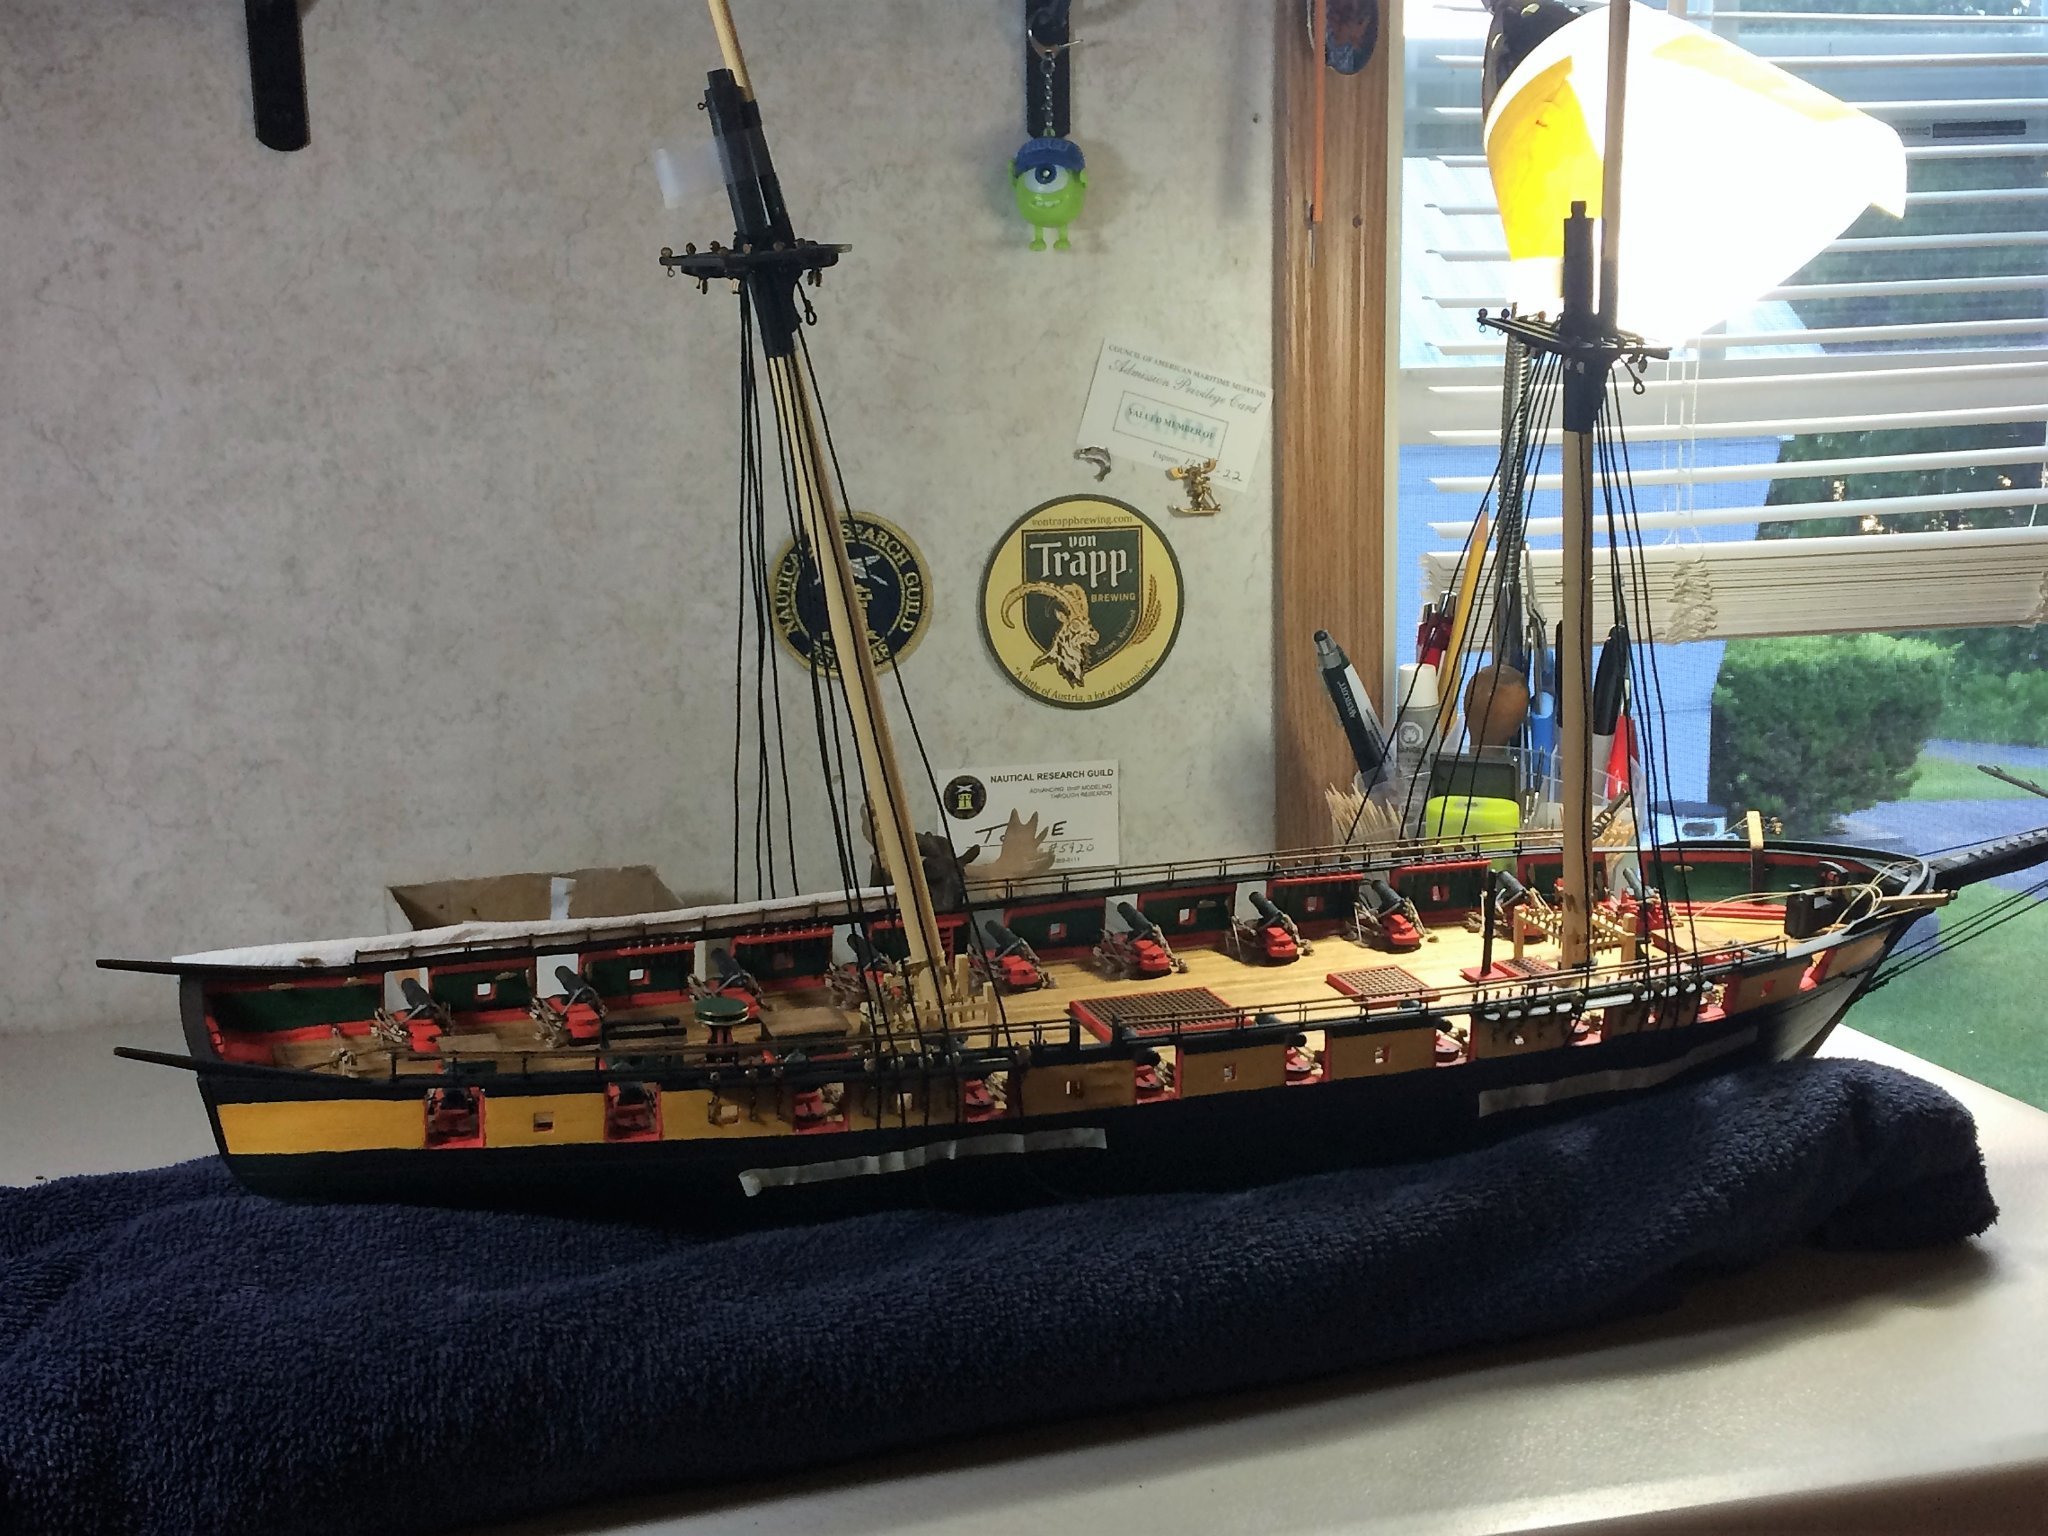
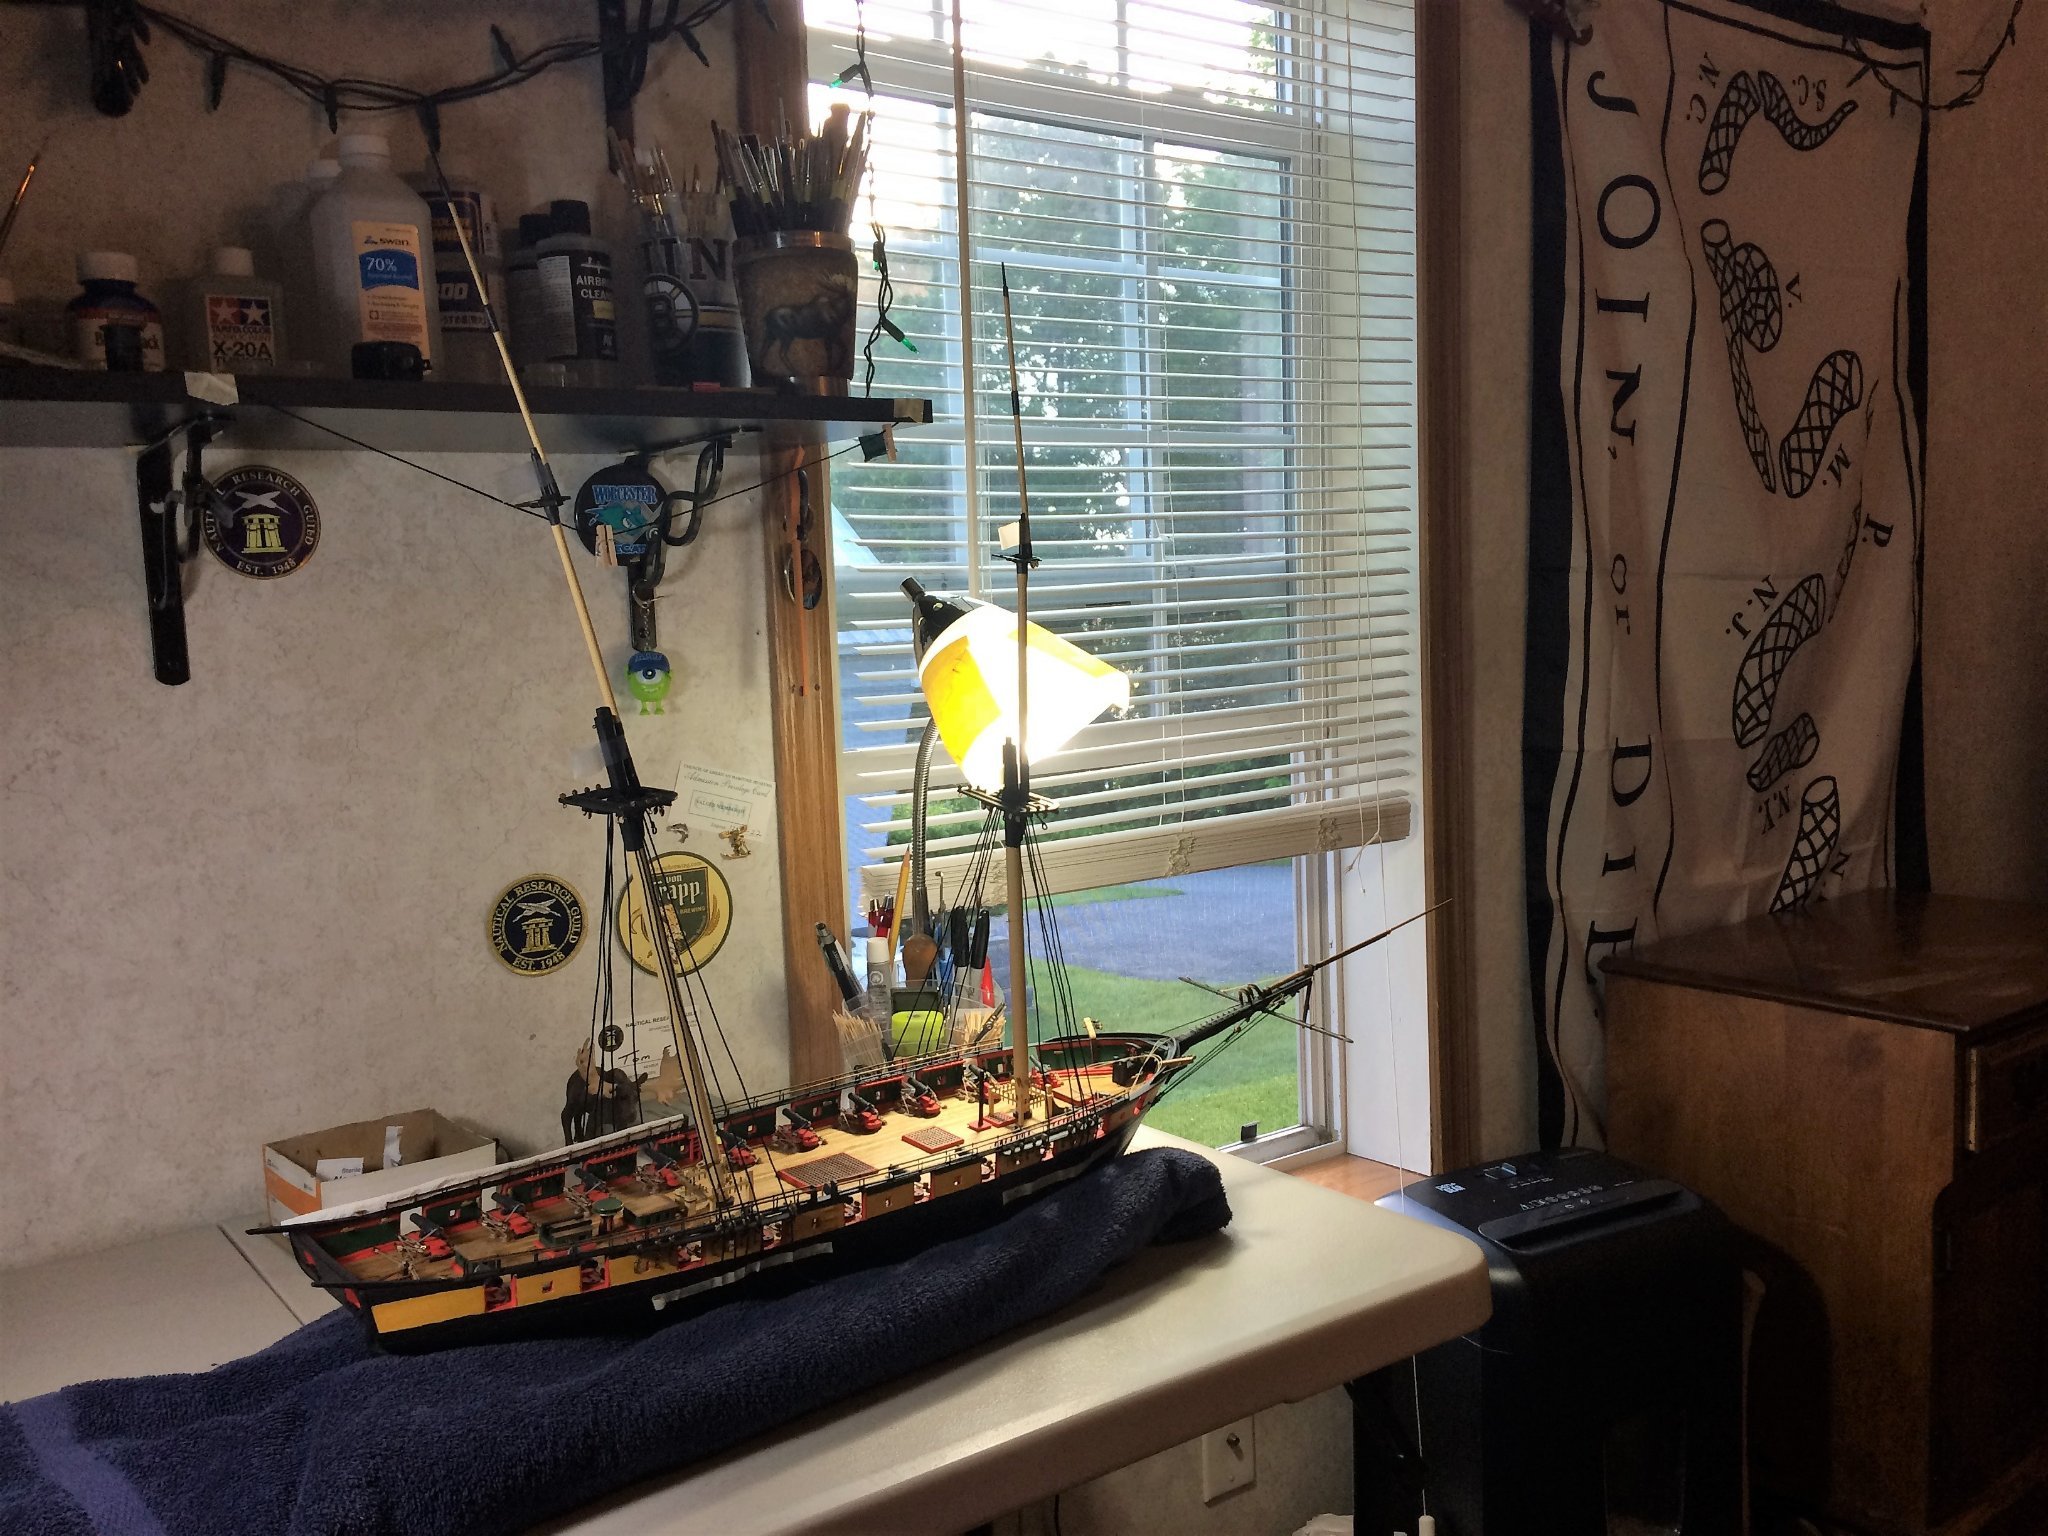
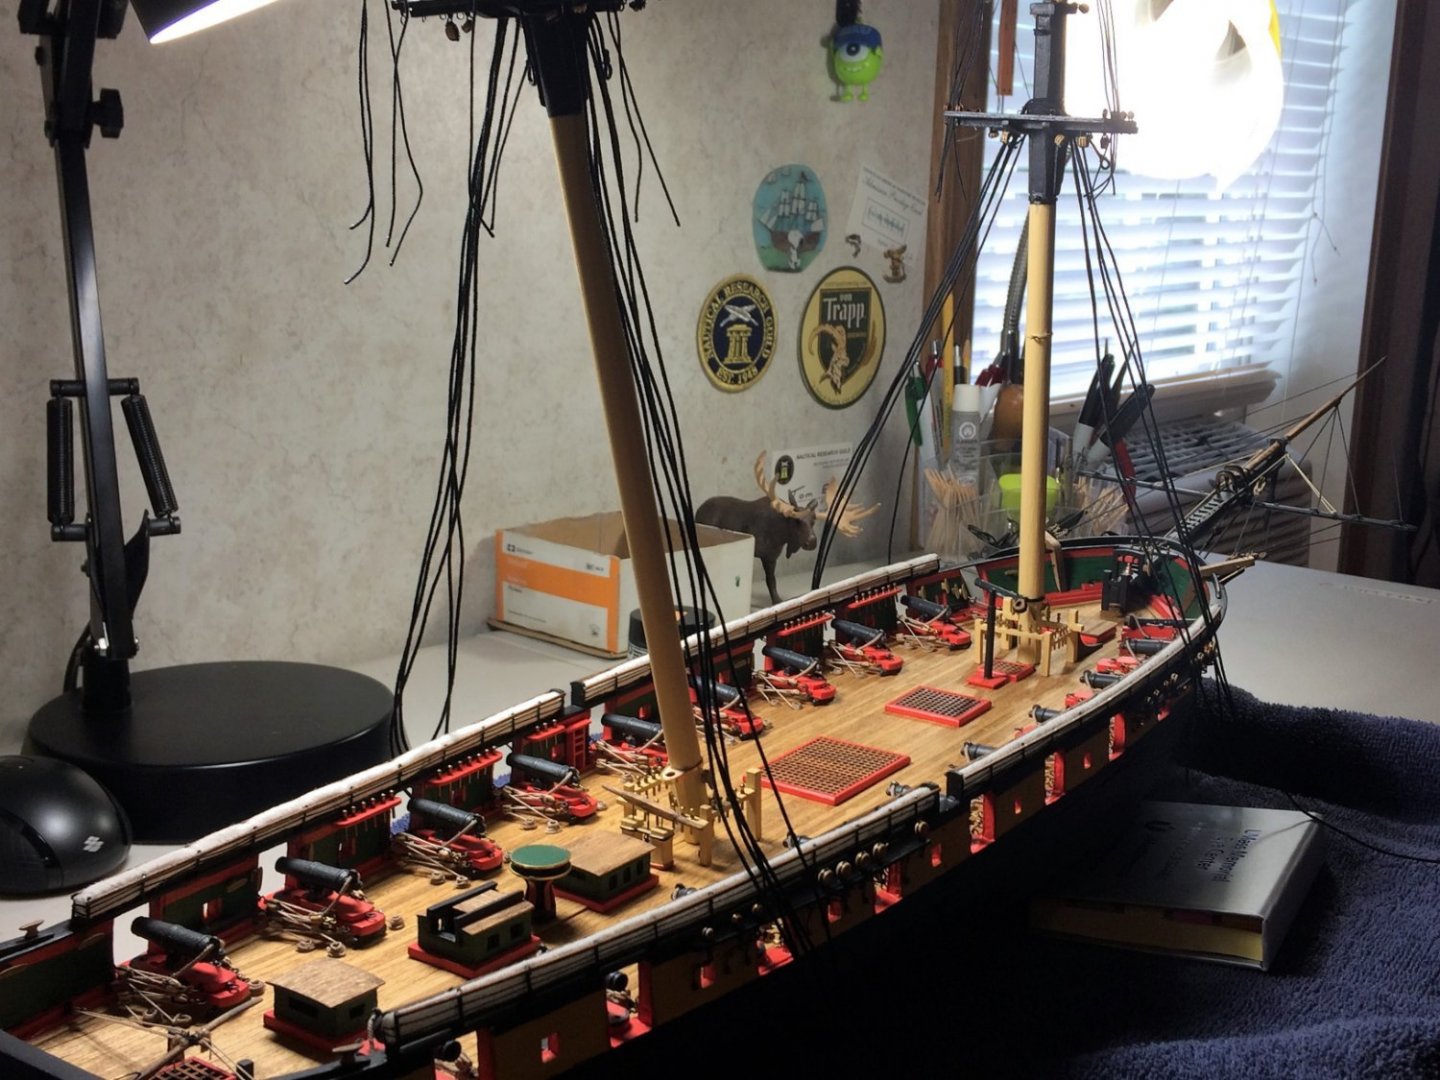
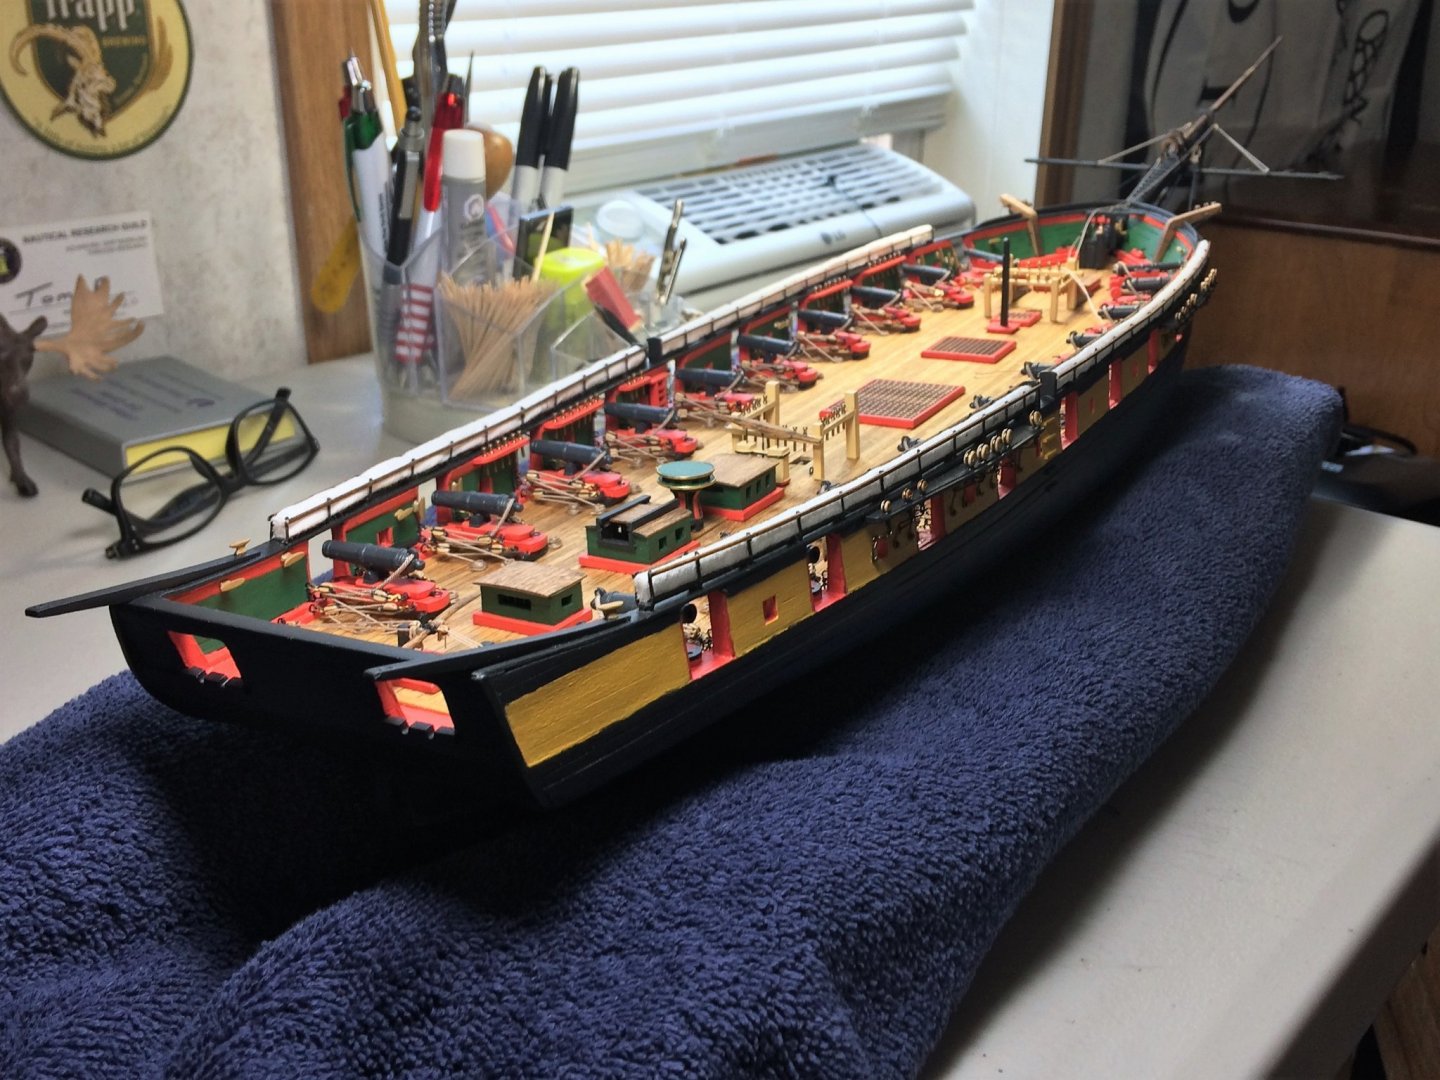
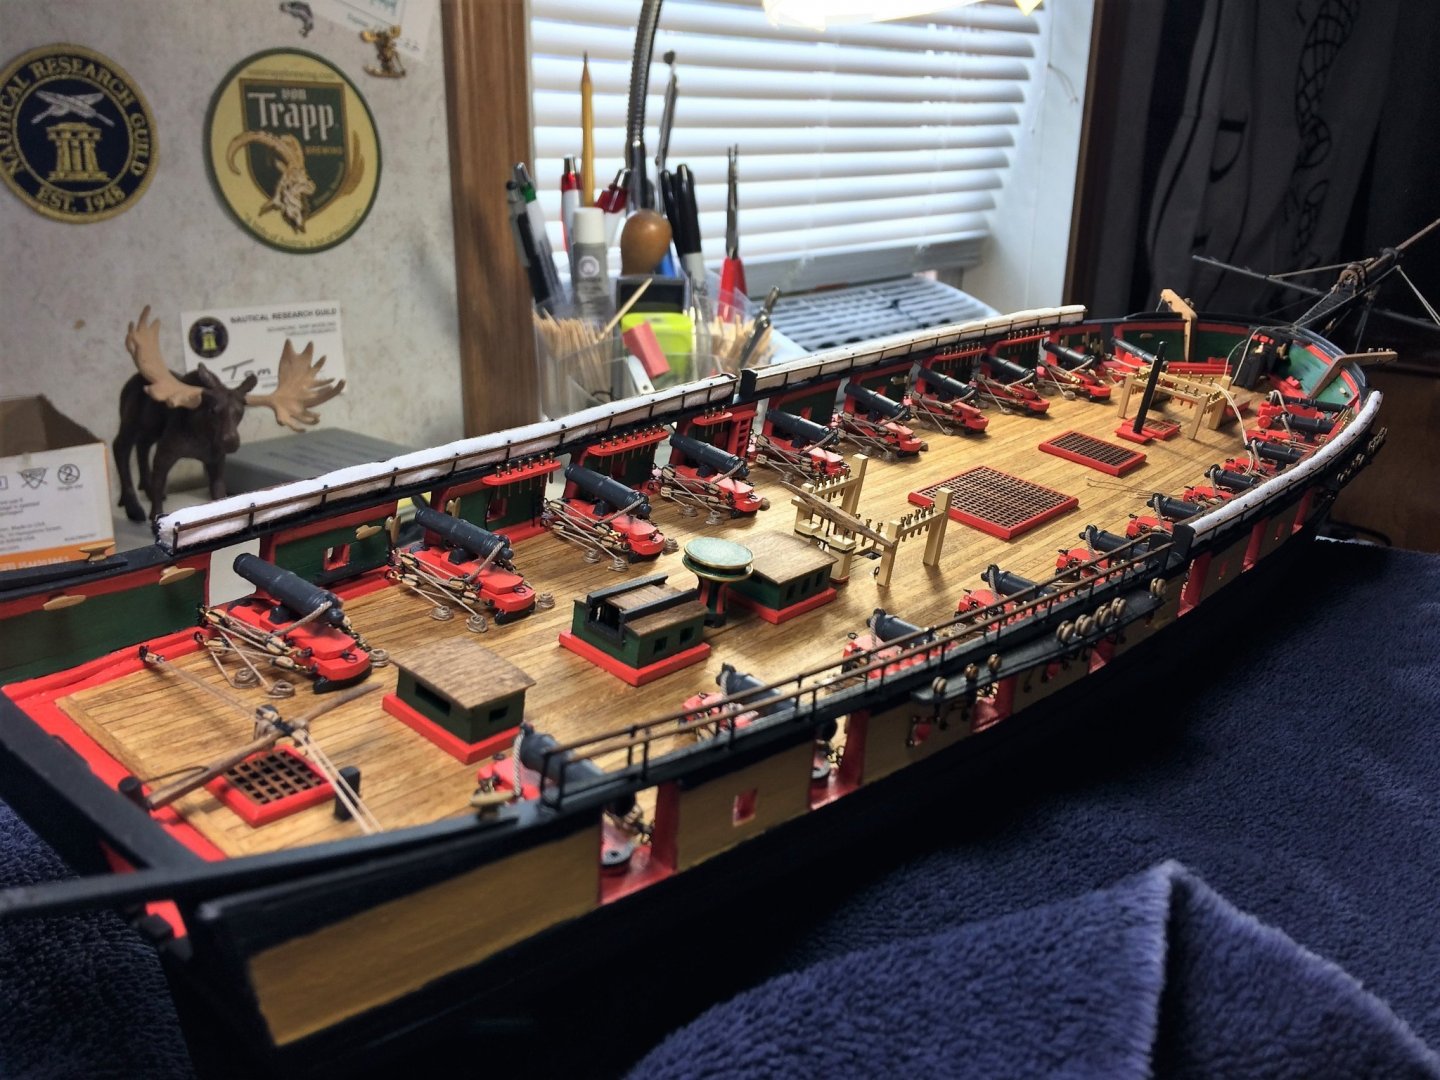
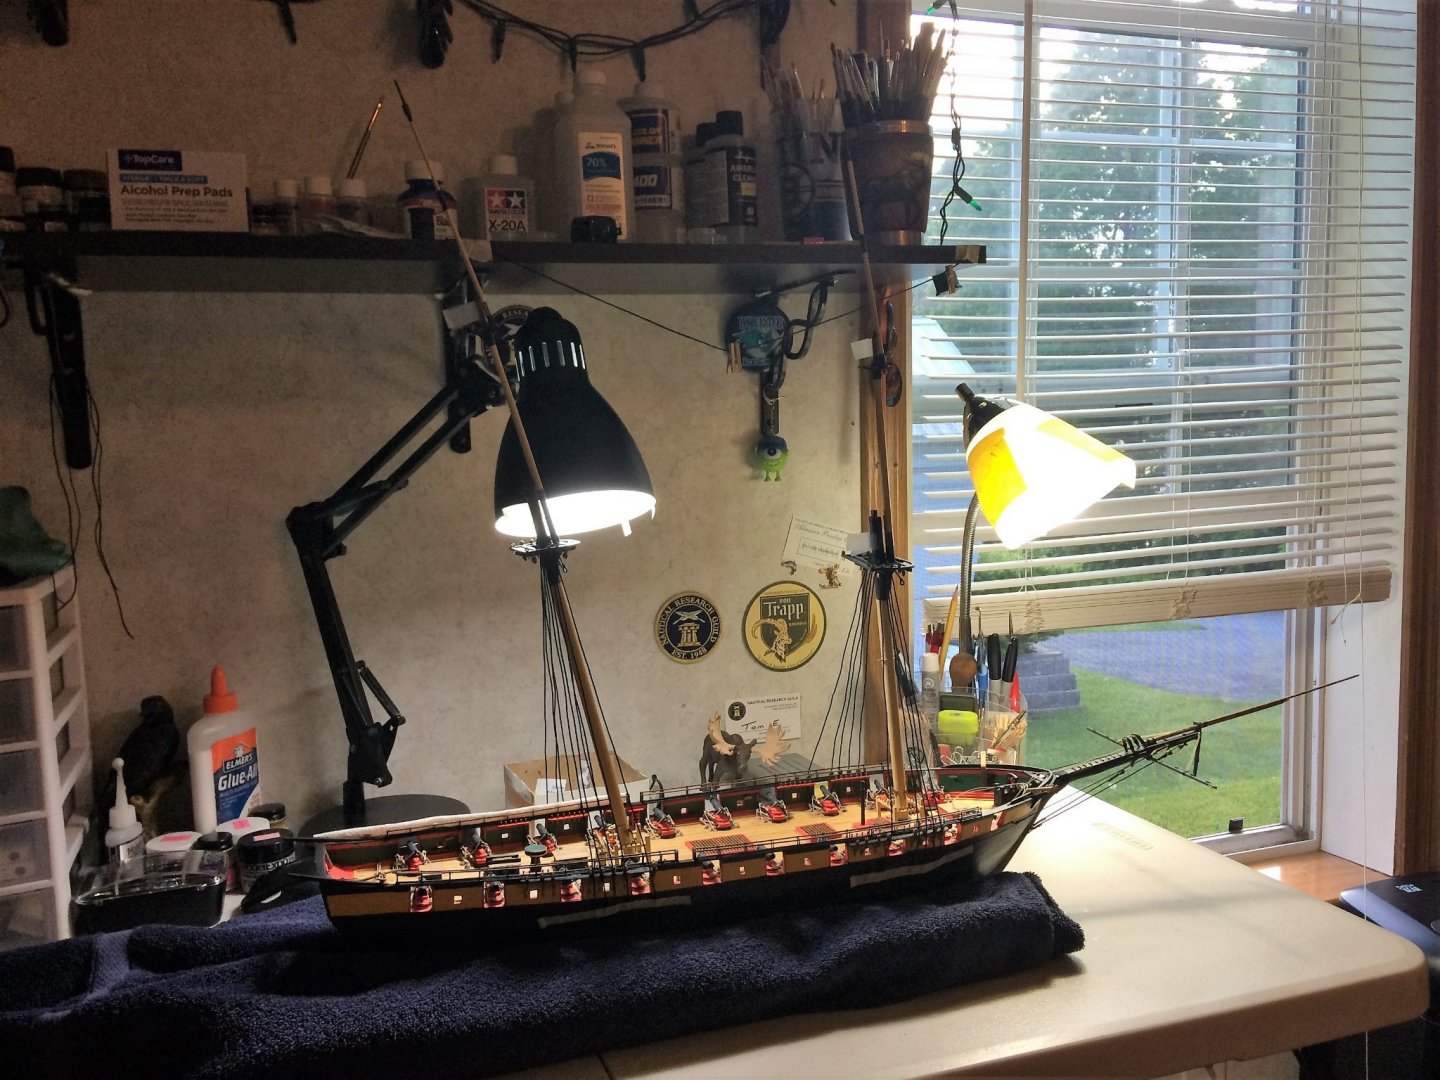
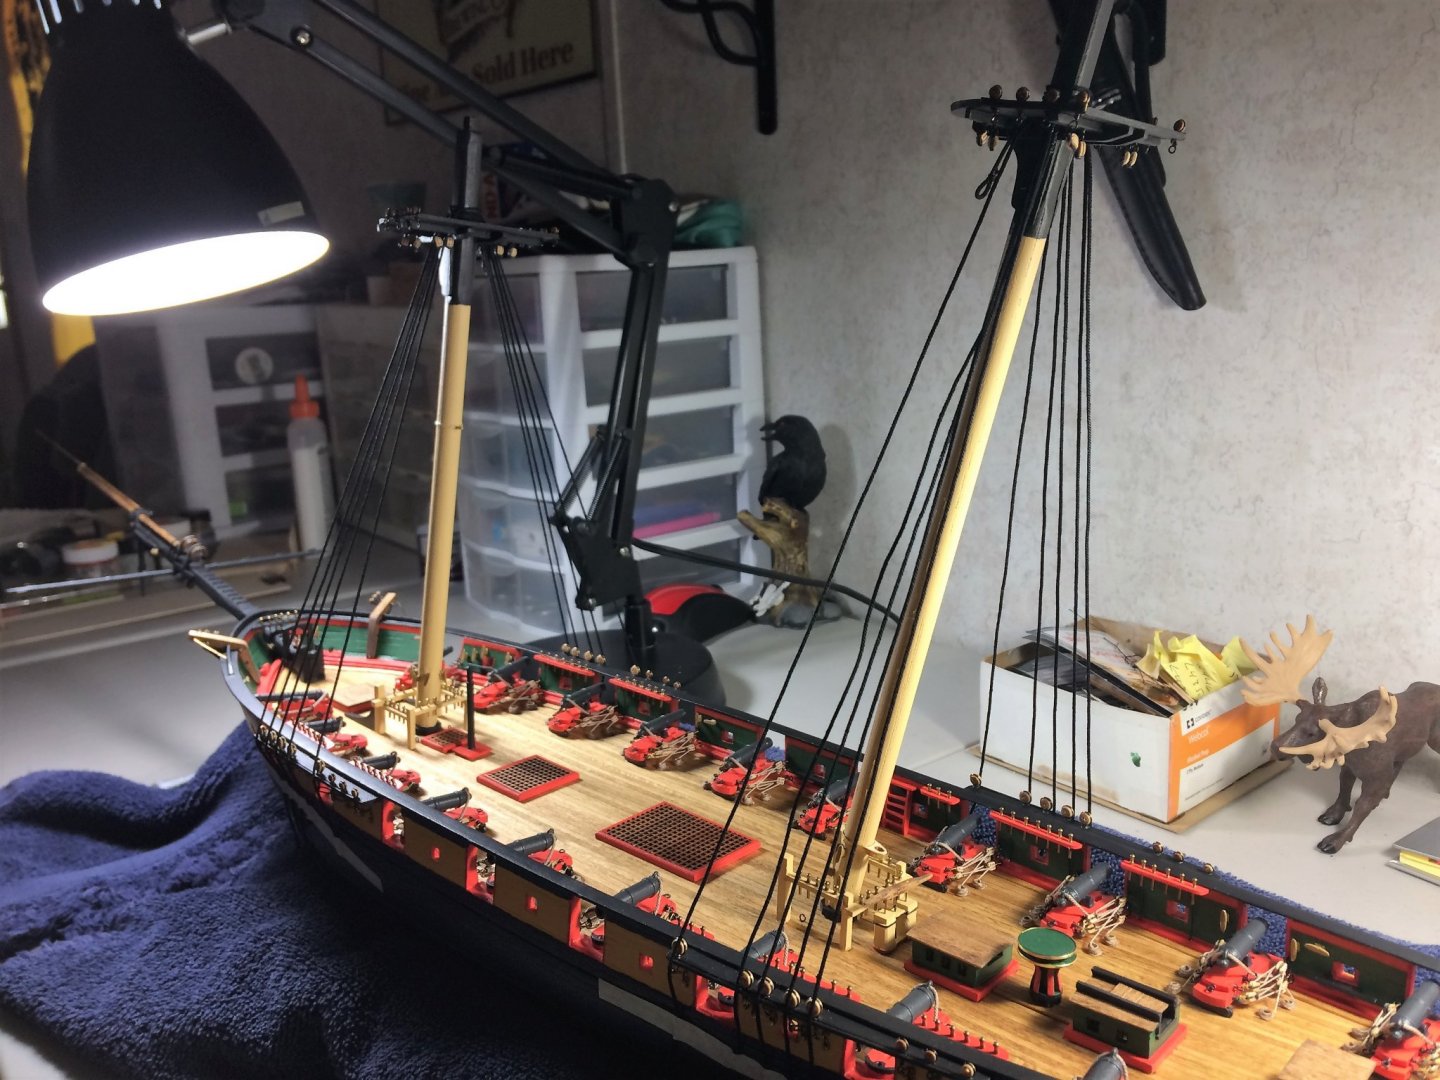
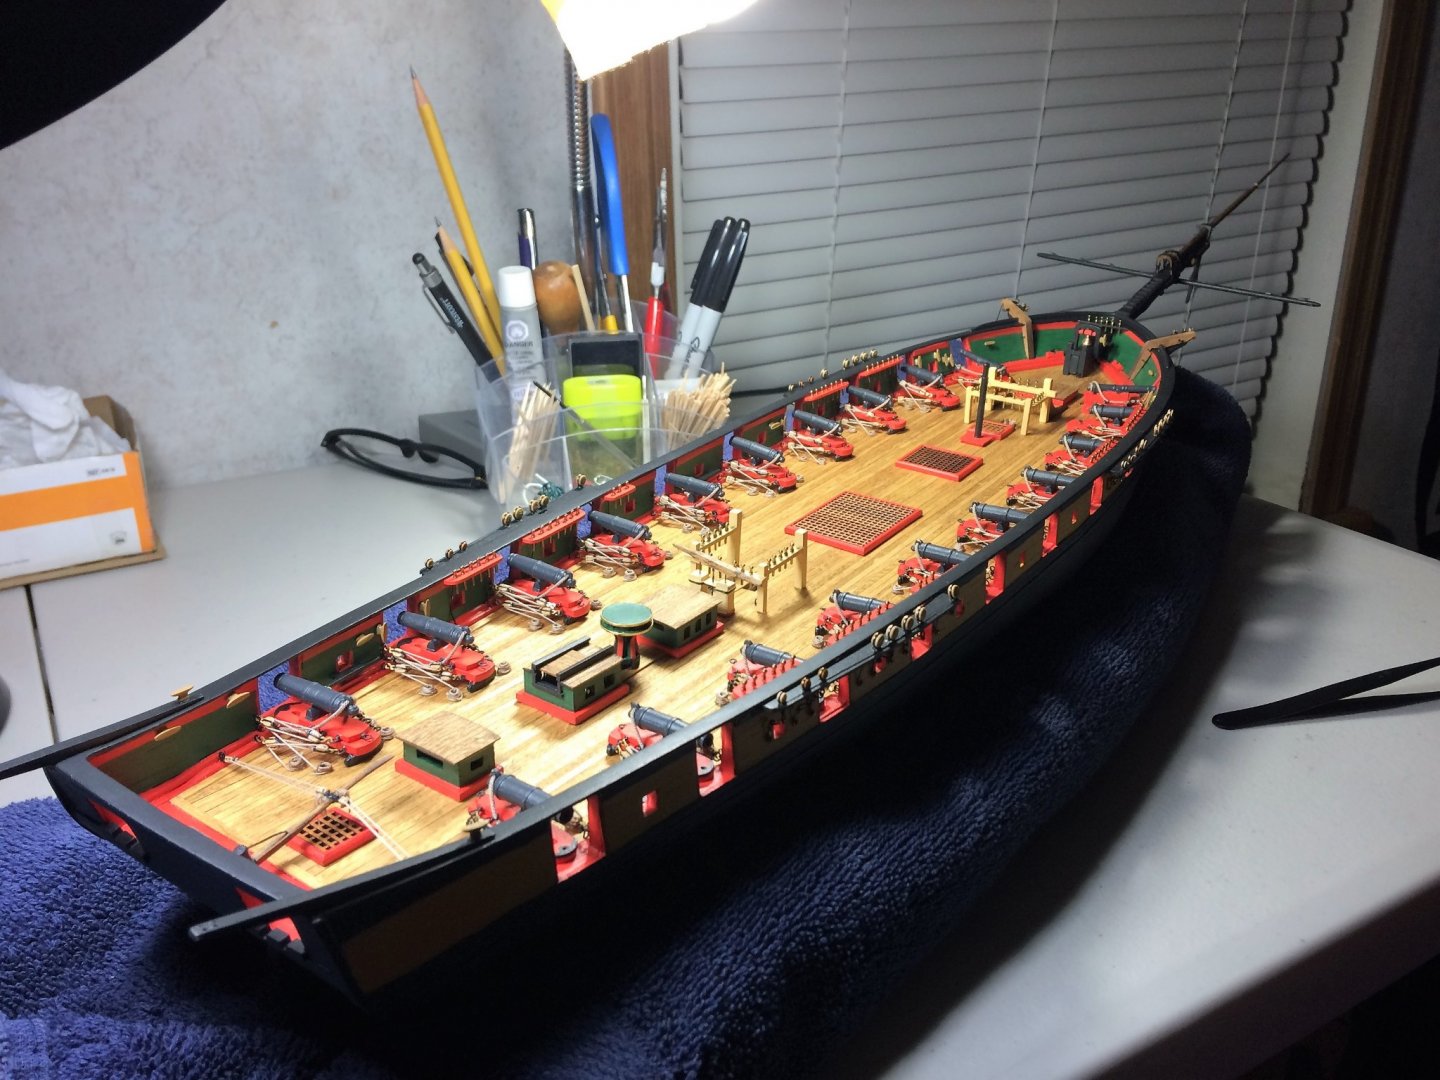
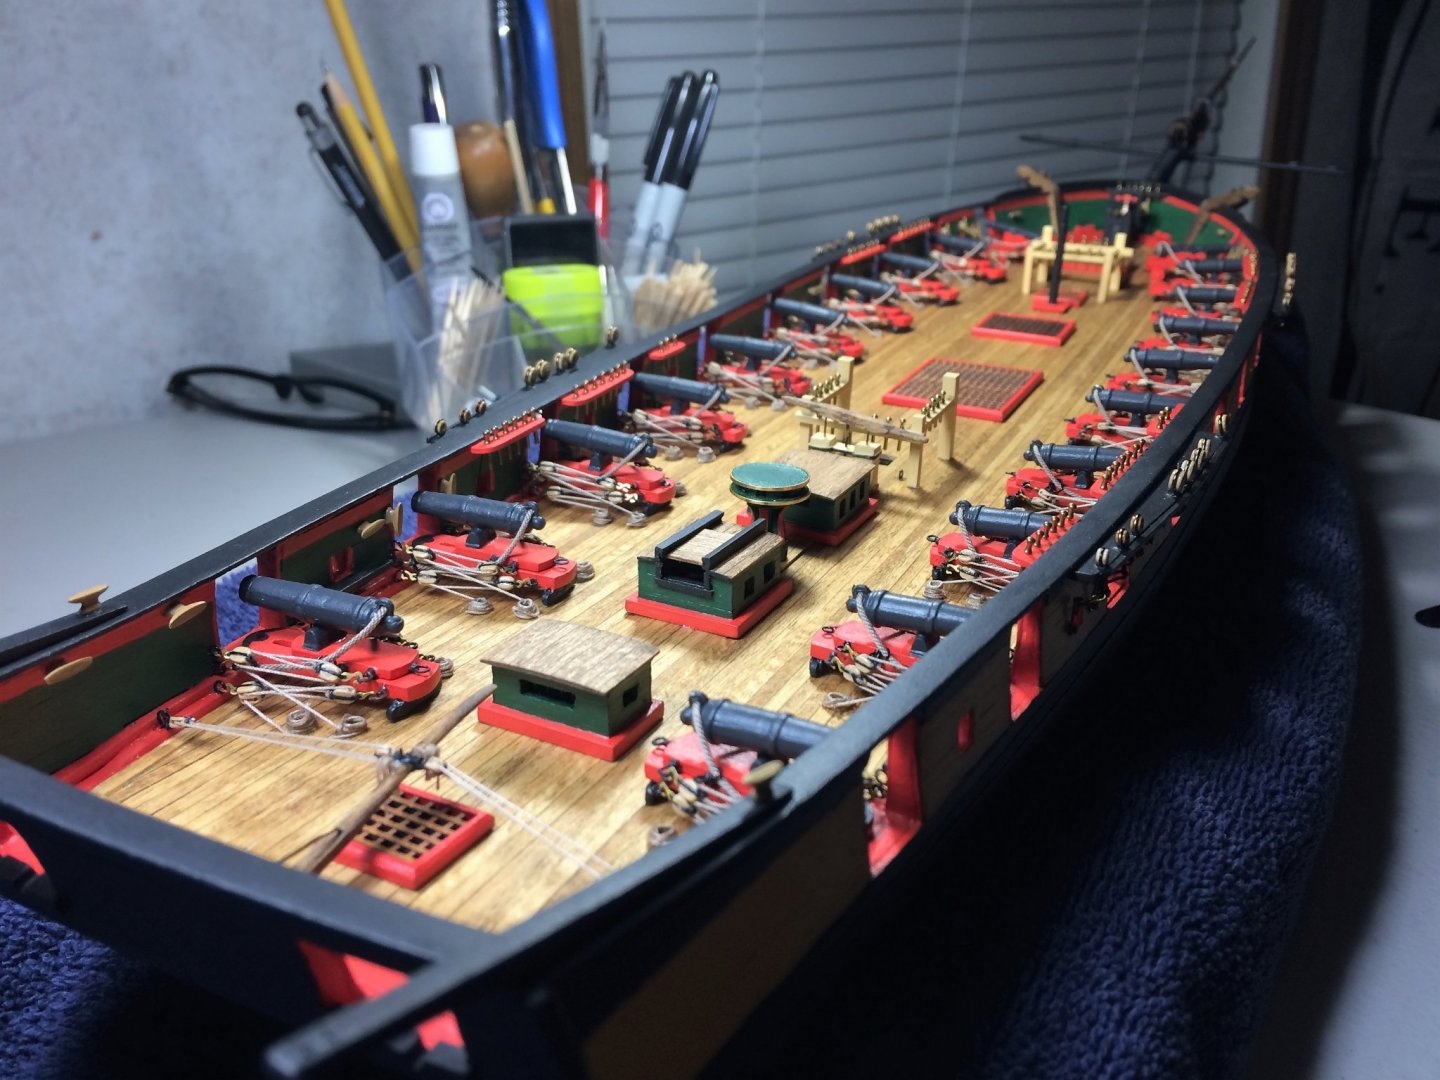
Morning, Hope everyone is well. Hazy, hot and humid today. That means some friends over for grilling, swimming in the lake, Red Sox play the Yankees.....classic summer day!!!! Maybe a few cold beverages! Anywho, Thought I would put Niagara together with friends coming over. Show her off a little bit. She's a big girl, growing up right in front of me. I haven't put her together like this in quite some time. I didn't hang the Yards, seemed like too much of a risk for something happening. I was able to see that the Fore and Main shrouds do clear the hammock stanchions. No rub that I've seen so far. That may change as things get rigged in. I'll be watching it. If there is rub, the stanchions can be bent/adjusted. Once the stanchions are done, the Bowsprit area will have my main attention. Then masts after that. Anchors, boat davits, yards are all made. Just didn't think it warranted putting them on. You forget how big of a model she is when it's all broken down into sections. Stay cool! Tom E


-
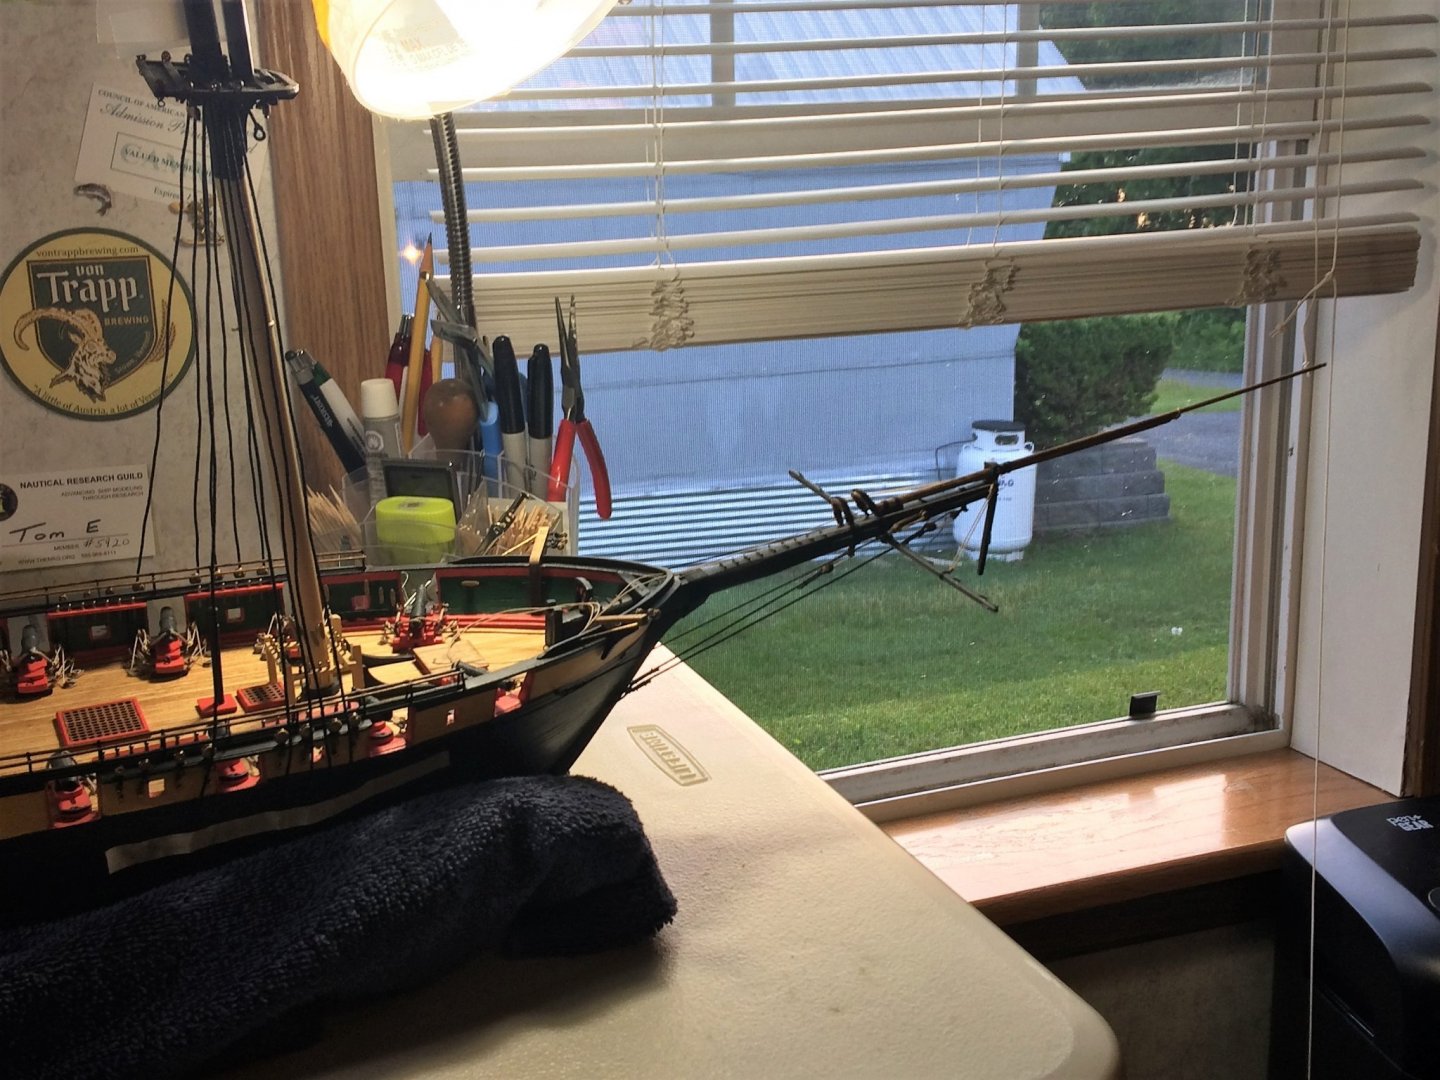
The view out of your window is just slightly less impressive then your ship. Both beautiful. She's really coming together. This is one of Bluejackets newer kits...color me impressed. Tom E
-
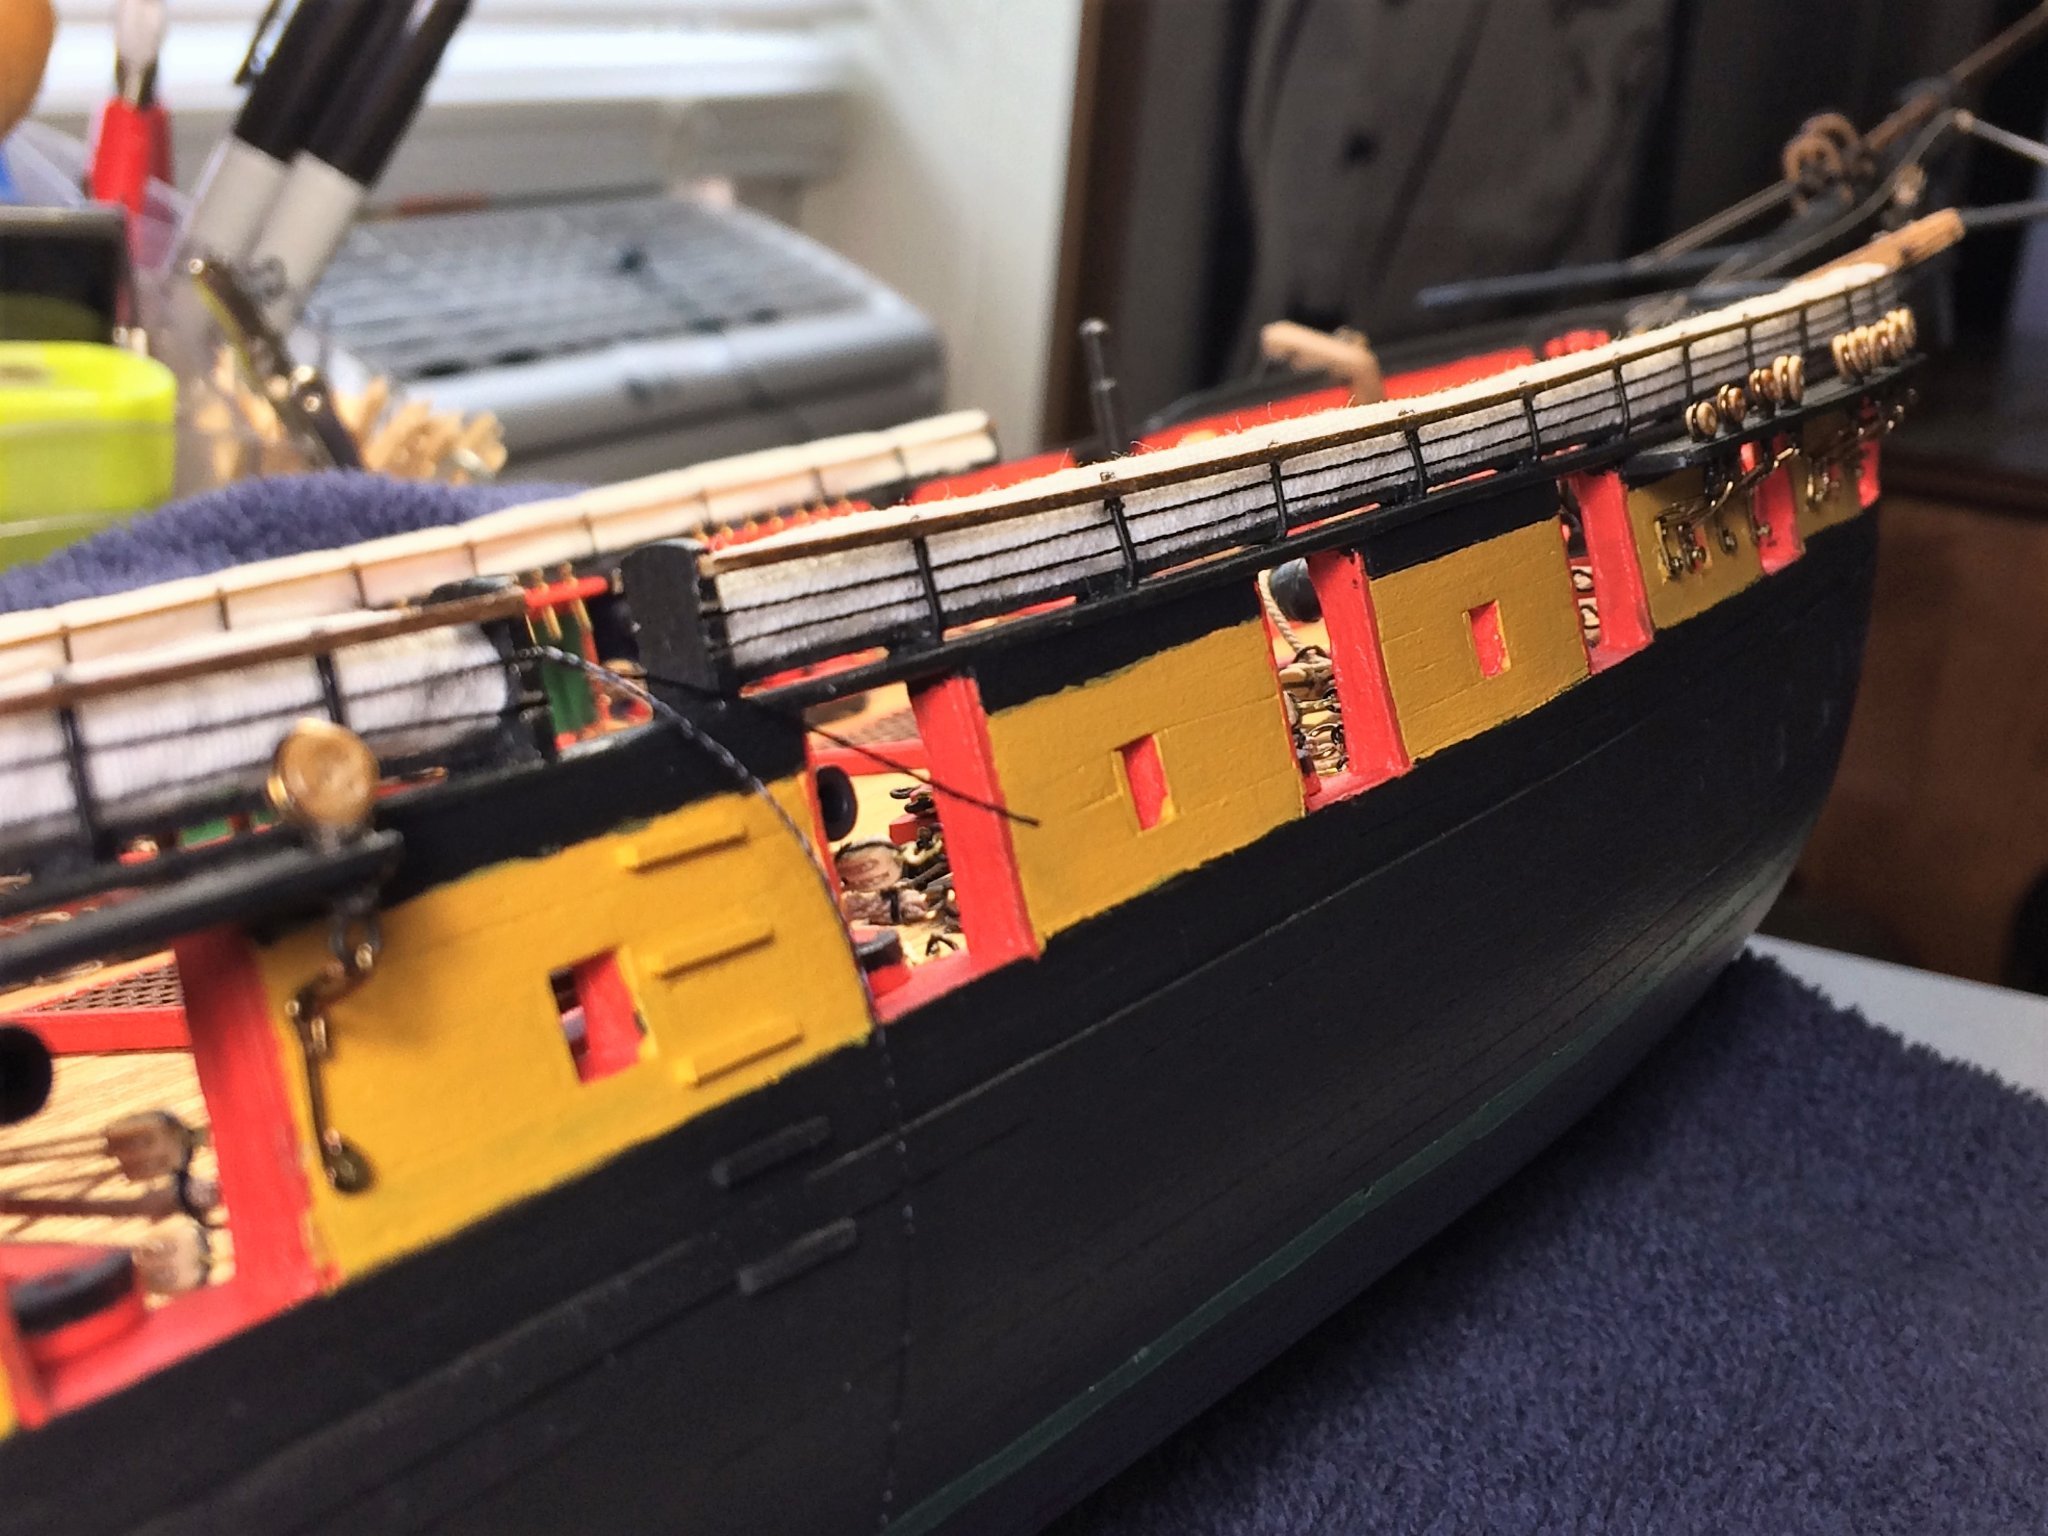
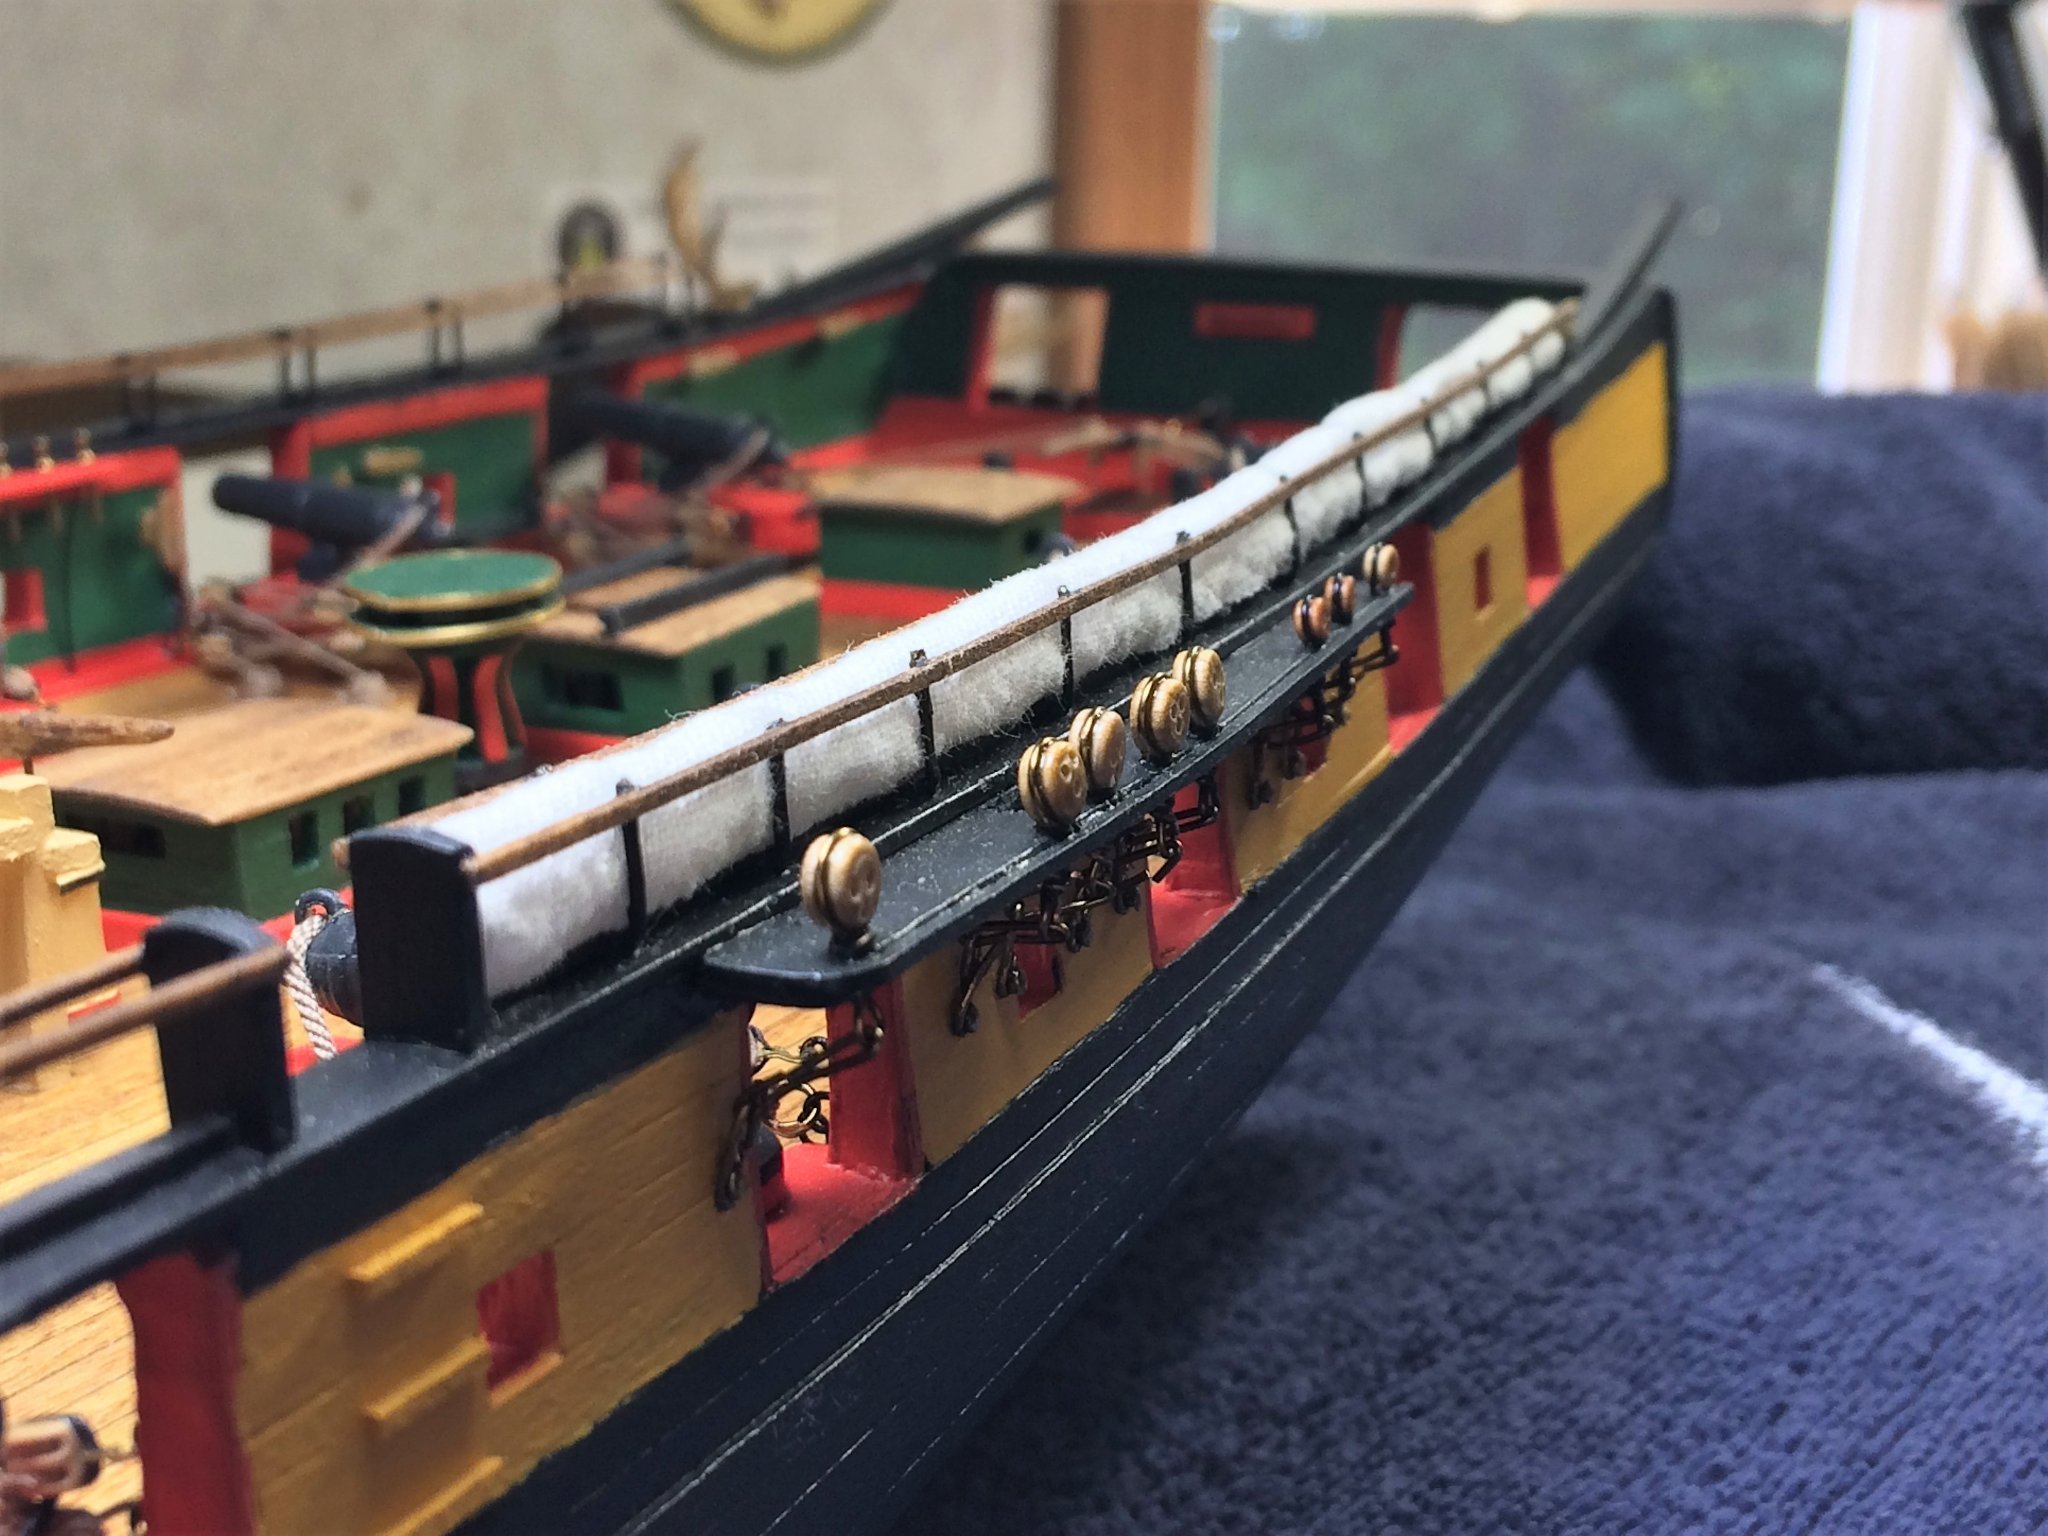
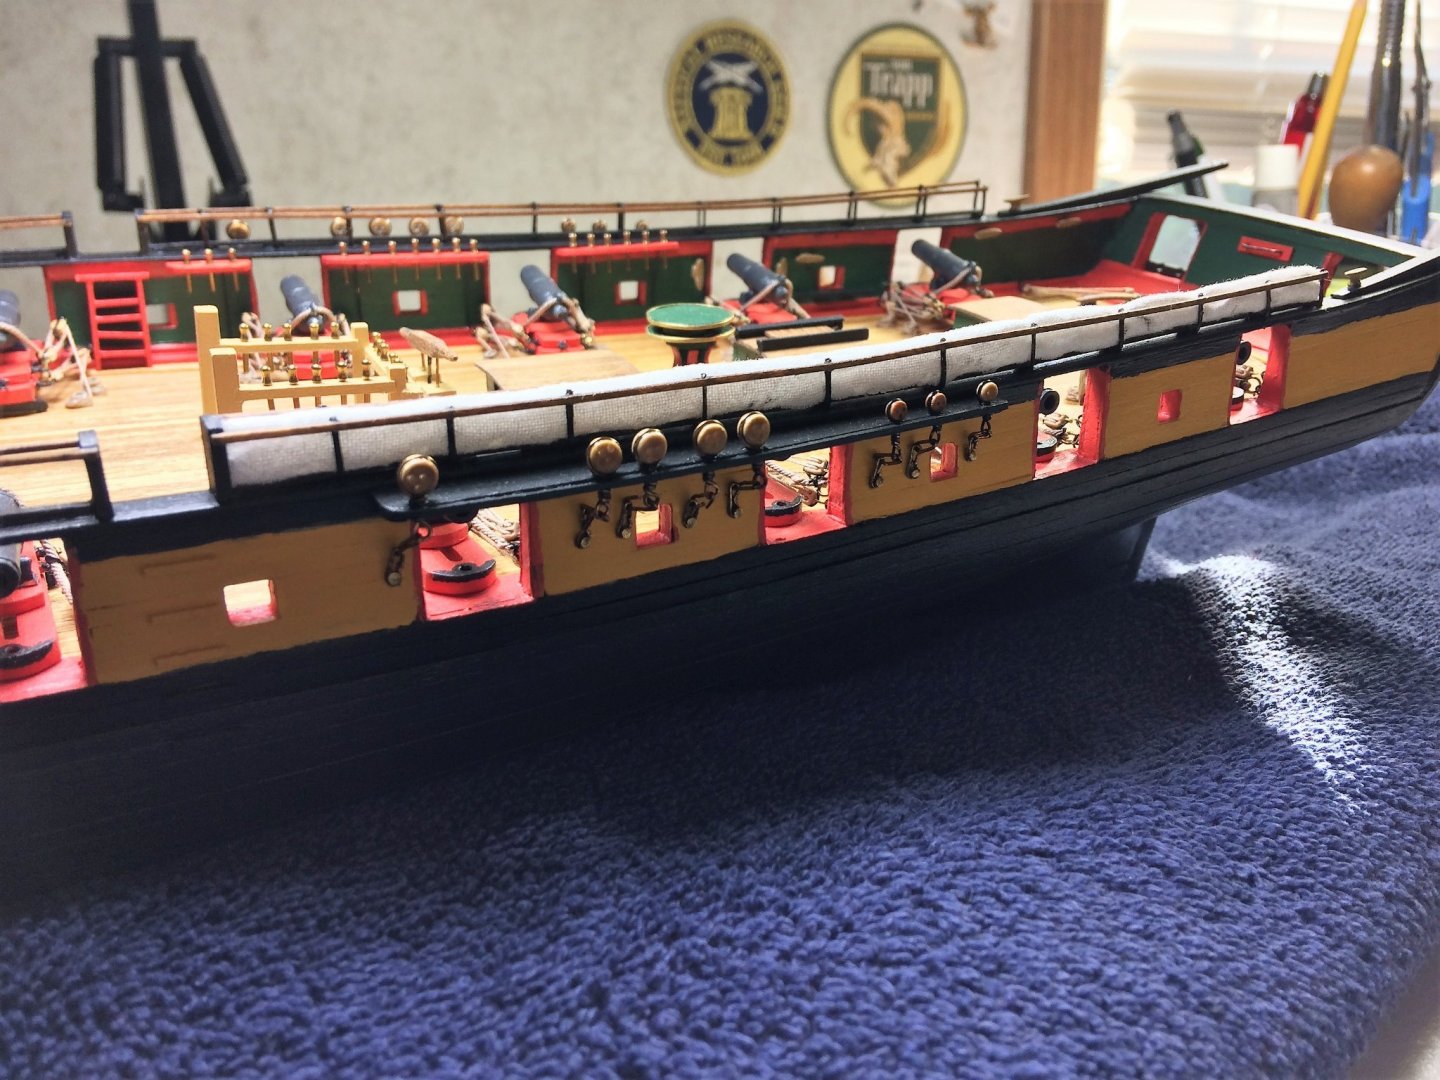
Evening, Thanks for all the "likes" folks....I see you watching! Much appreciated! Mike, I plan on using a single piece, cover looking, filling in the stanchions. I was looking thru your build, reading about those. What popped in my head was.......Heck no! God bless ya Mike, I don't think I could make all those. They do look awesome, but....dang! With the stanchions glued down, I moved to attaching the wood strips that run the length. If I remember correctly, I used 1/32x1/32 strips. Just a tick smaller than what the plans recommend. These were stained with an "Early American" stain from Minwax. Basically, a bit darker than the main deck, that's why I went with it. It's also the same stain used for the Catheads, Jibboom and Flying Jibboom. Started by attaching them at the wood stanchions near the boarding steps. Then, one by one, went down the ling gluing the wood strip to the stanchions. The stanchions were easily bent/adjusted to the angle of the Bulwark and to meet the wood strip. Surprisingly, after the wood strips were attached it gave this piece a lot more rigidity. I was cautious about adjusting the stanchions too much, but in the end, everything has held very well to this day. The extra length of the stanchions will be trimmed off once everything is glued together. The wood strip is starting to take the curve of the ship, and nothing is under too mush pressure/strain. Pleased so far. Everything will get a touch of paint to cover some nicks and glue spots. But, a lot will be covered by the hammocks. Go Red Sox!!!!!!......sorry...gratuitous plug for my Red Sox. There playing the New York Yankees tonight. Tom E


-
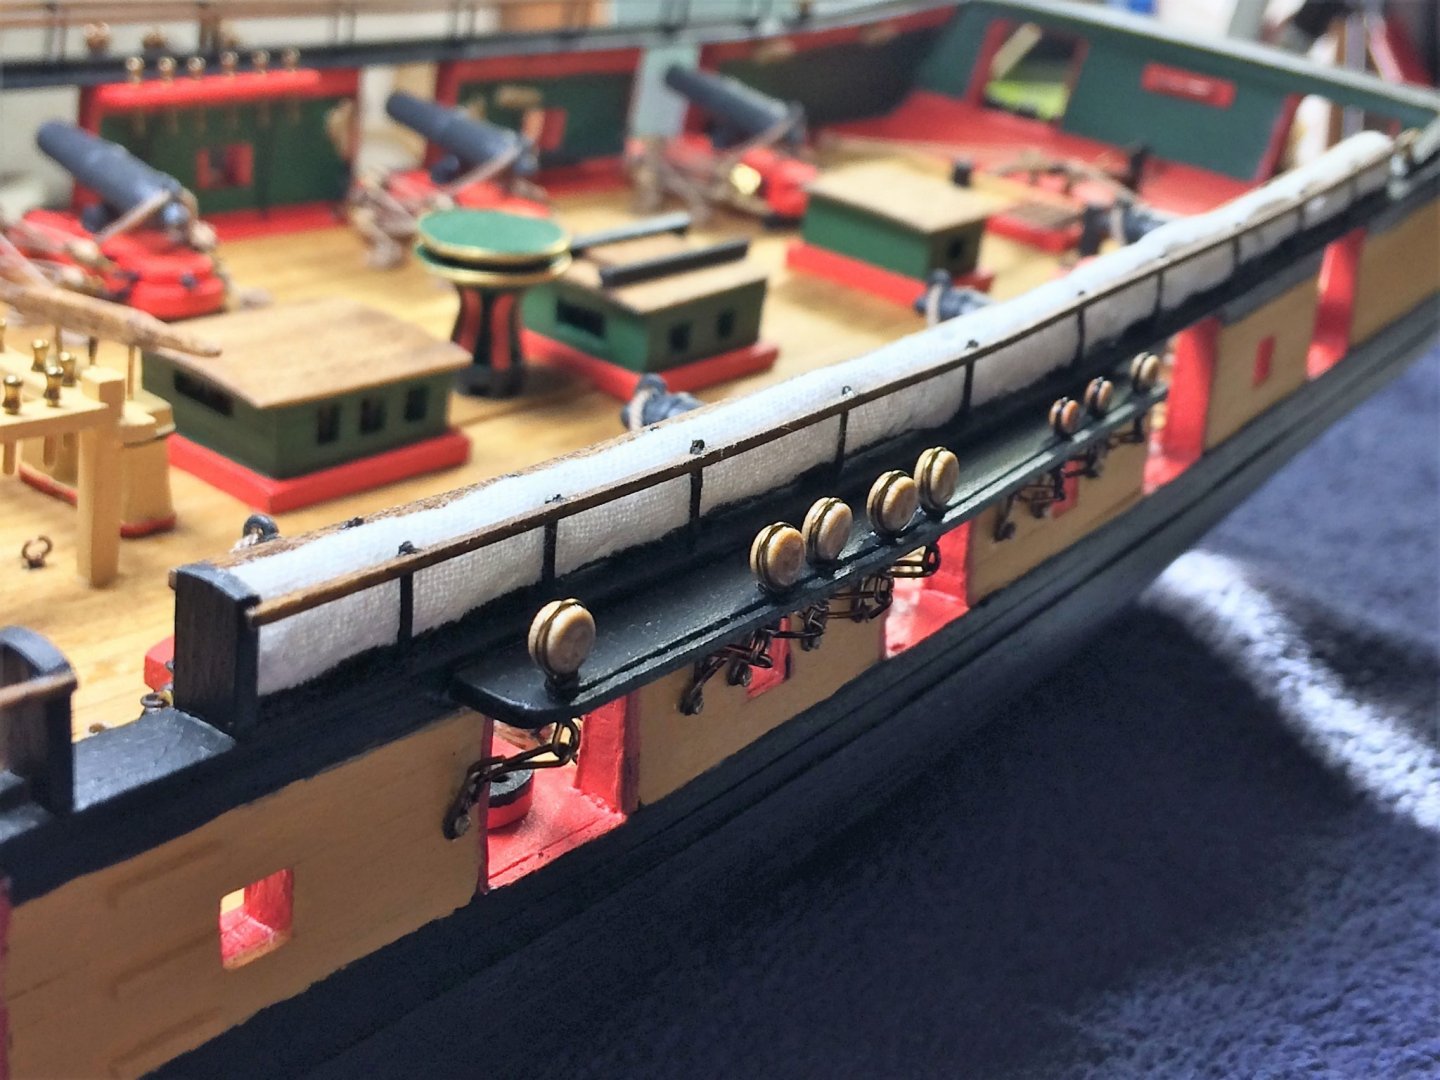
Evening, Wow how time does fly during the summer. I cant believe it's been two months since I last updated my build. Sheesh!!! Summer time fun does take me out of the model shop. I have been building, just not as much. The hammock stanchions continue. I attached the metal stanchions to a thin, flexible strip of scrap wood painted the same as the main rail. The glue spots do look nasty, but they do cover up well with some paint, and the cloth hammocks should cover a lot as well. Most of these were started where that section started out as straight. Glued in place and let sit overnight. I want a nice tight bond as I curve the rest of the set up to match the curve of the main rail. As you can see below, a little overhang at the front end. The back end has been glued in place. Then, taking my time, and gluing one or two stanchions at a time it slowly took the curve of the rail. It sits really well. The metal stanchions still have there flexibility and can be bent to match the angle of the bulwarks. The wood strip it's self will be covered by the cloth hammocks. Speaking of the hammocks....I have been chewing on what type of cloth to use. Cheesecloth was way to thin, t-shirt like material was not thick enough either. I was looking for a thicker than normal cloth, burlap was way to thick. Then, out of now where, I'm in the kitchen with a white towel in my hand and it hits me like a lightning bolt. The kitchen towel was the material I was looking for! If I ever need another King Arthur brand kitchen towel, their headquarters are in Vermont, five minutes down the road from where I work. Easily replaced. Also, with no Admiral right now, no dissent was heard when it went missing from the kitchen!!! Model on and stay safe! Tom E


-
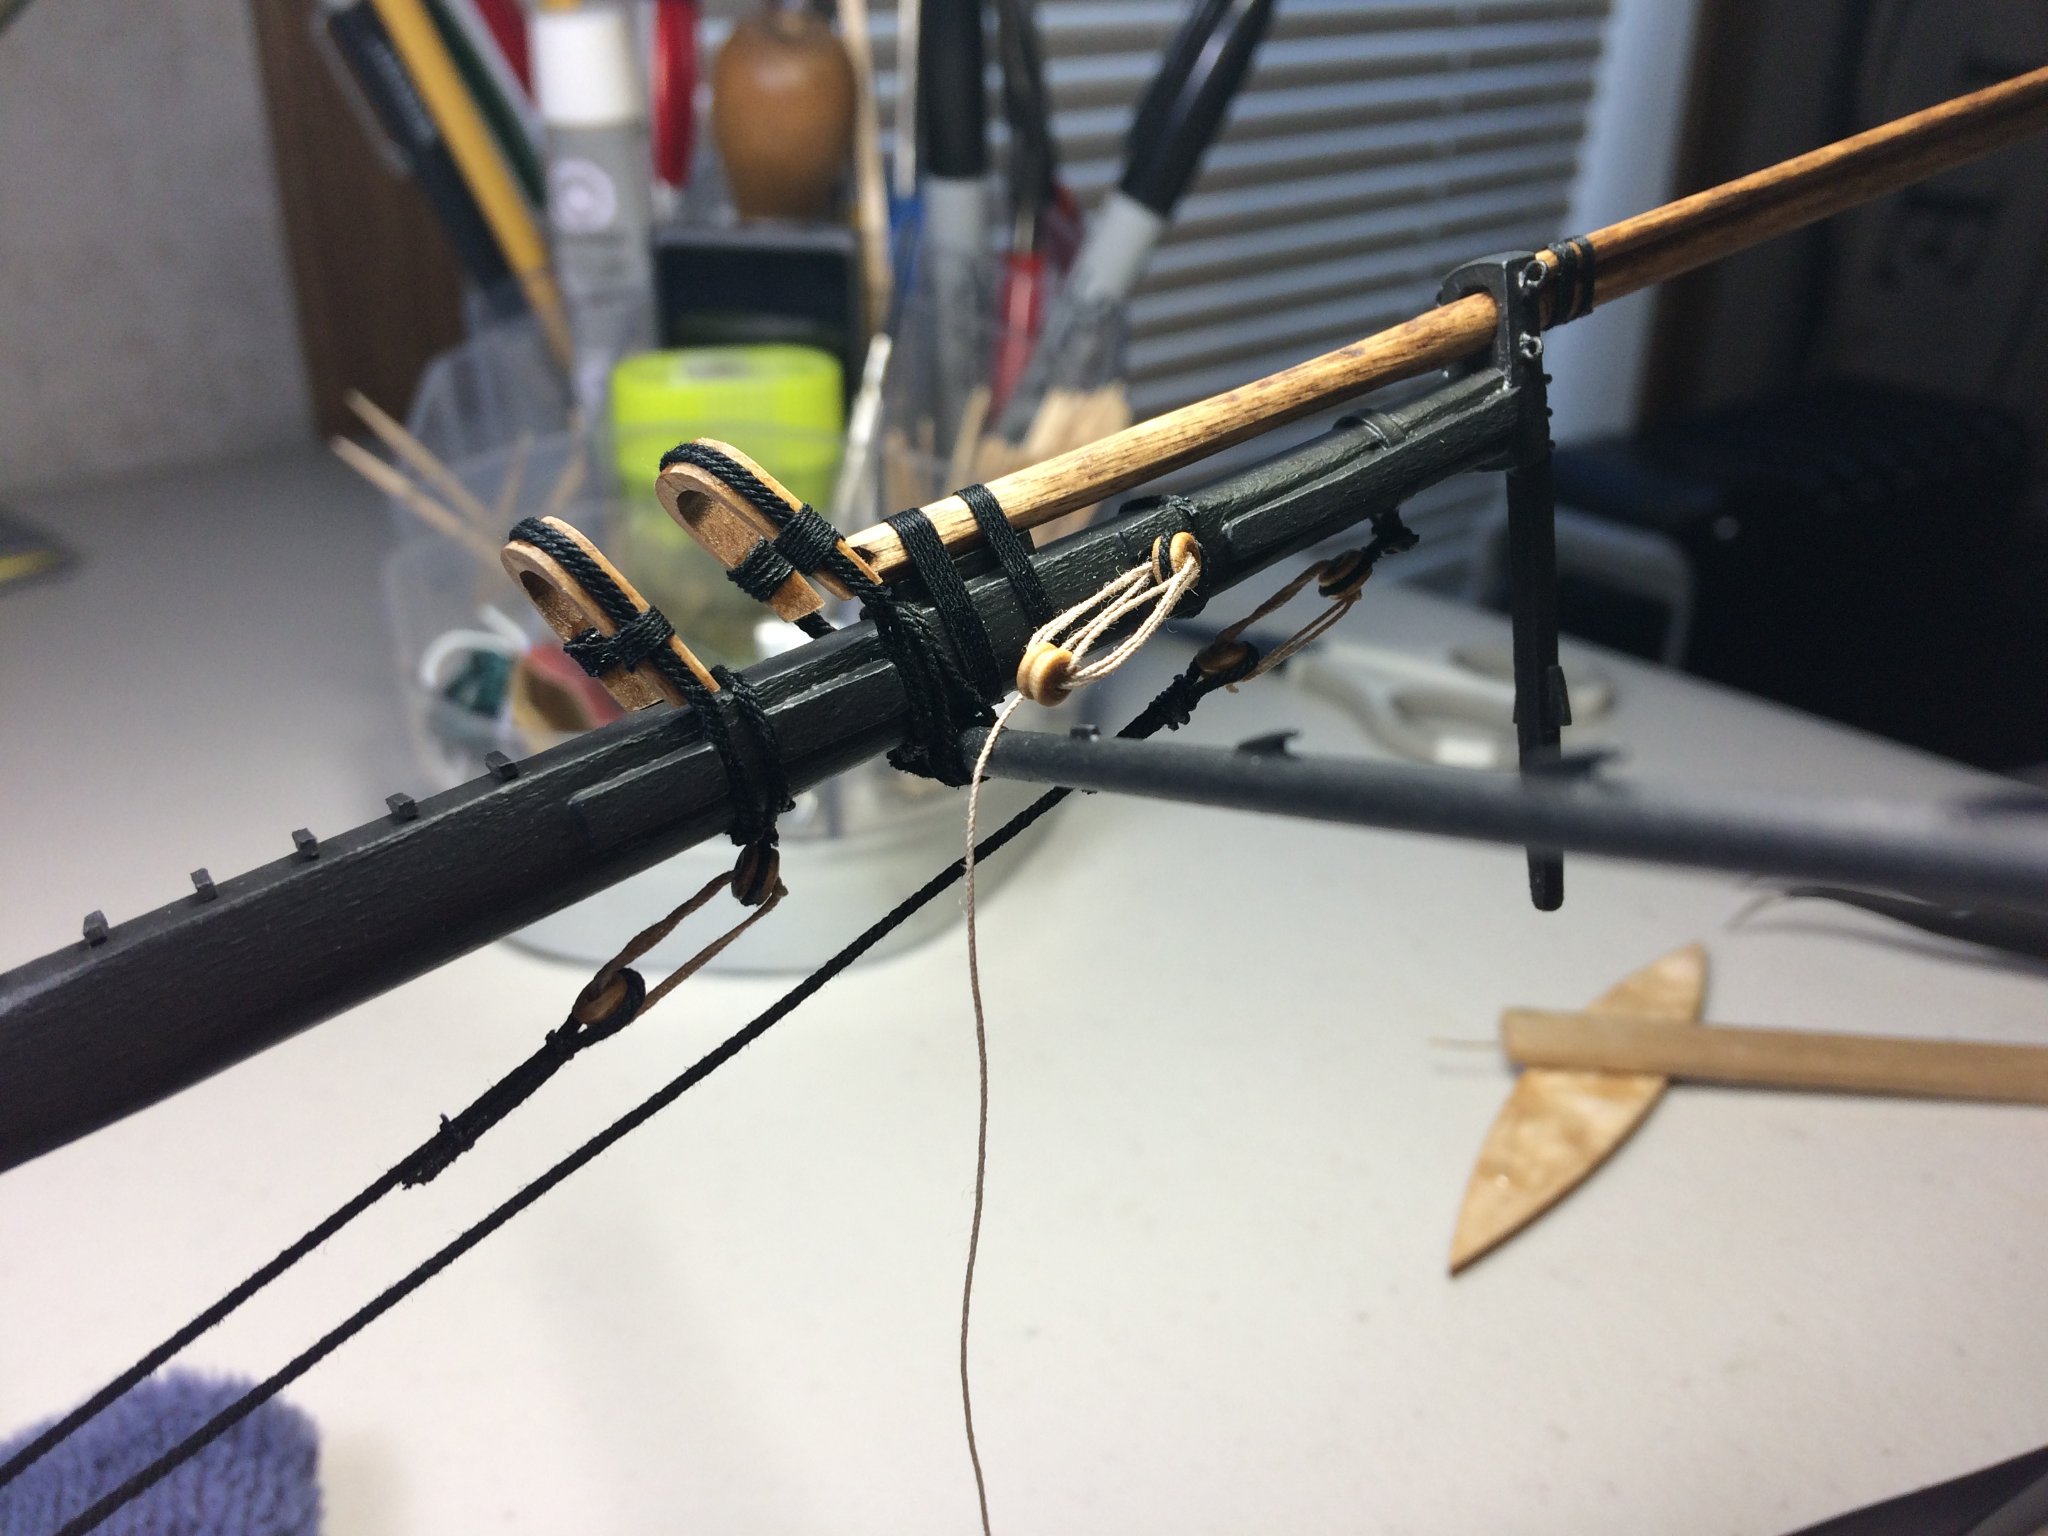
Evening, Hope everyone is well. Quiet night, watching the Boston Red Sox, thought Niagara could use an update. Alan, I appreciate the comments, thanks! Cant say I'm doing much to the photos. All I use is my iphone 5 camera and when I download them I crisp them up a bit thru the computer. I must be hitting the right buttons! Thanks to all those hitting the "like" button! The Spritsail Yard Lifts are done. The most difficult part of the whole process was putting the holes in the Main Rail leading to the pin rack. Wish I had done those prior. If you look closely, the holes are a bit wonky, and the top of the ships bell is showing a wear mark from twisting the drill, the latter is easily fixed. I used a length of Syren .012 Tan rope for the lifts. The contrast between the black and tan ropes really make them pop. I'm seriously considering buying a Ropewalk. I so truly like the look of this rope over the kit supplied stock. There a real authentic look to it. There a slight touch of the lift ropes on the ends for the fore main and preventer stays on the Bowsprit. I can live with it. With the lifts in place, I feel confident about installing the Bowsprit shrouds to the hull. Once the Bowsprit shrouds are attached, the Jibboom Guys will be next. Stay safe! Tom E


-
Wonderful build, truly! Just seeing those Narragansett cans brings back so many memories. We called it "gansett", and it was nasty stuff. Well it was back in the late 70's early 80's. It was my first sip of beer every kid gets from there parents or grandparents, usually during a family event of some kind. I think it's for sale again, but I've never tried it. Tom E
-
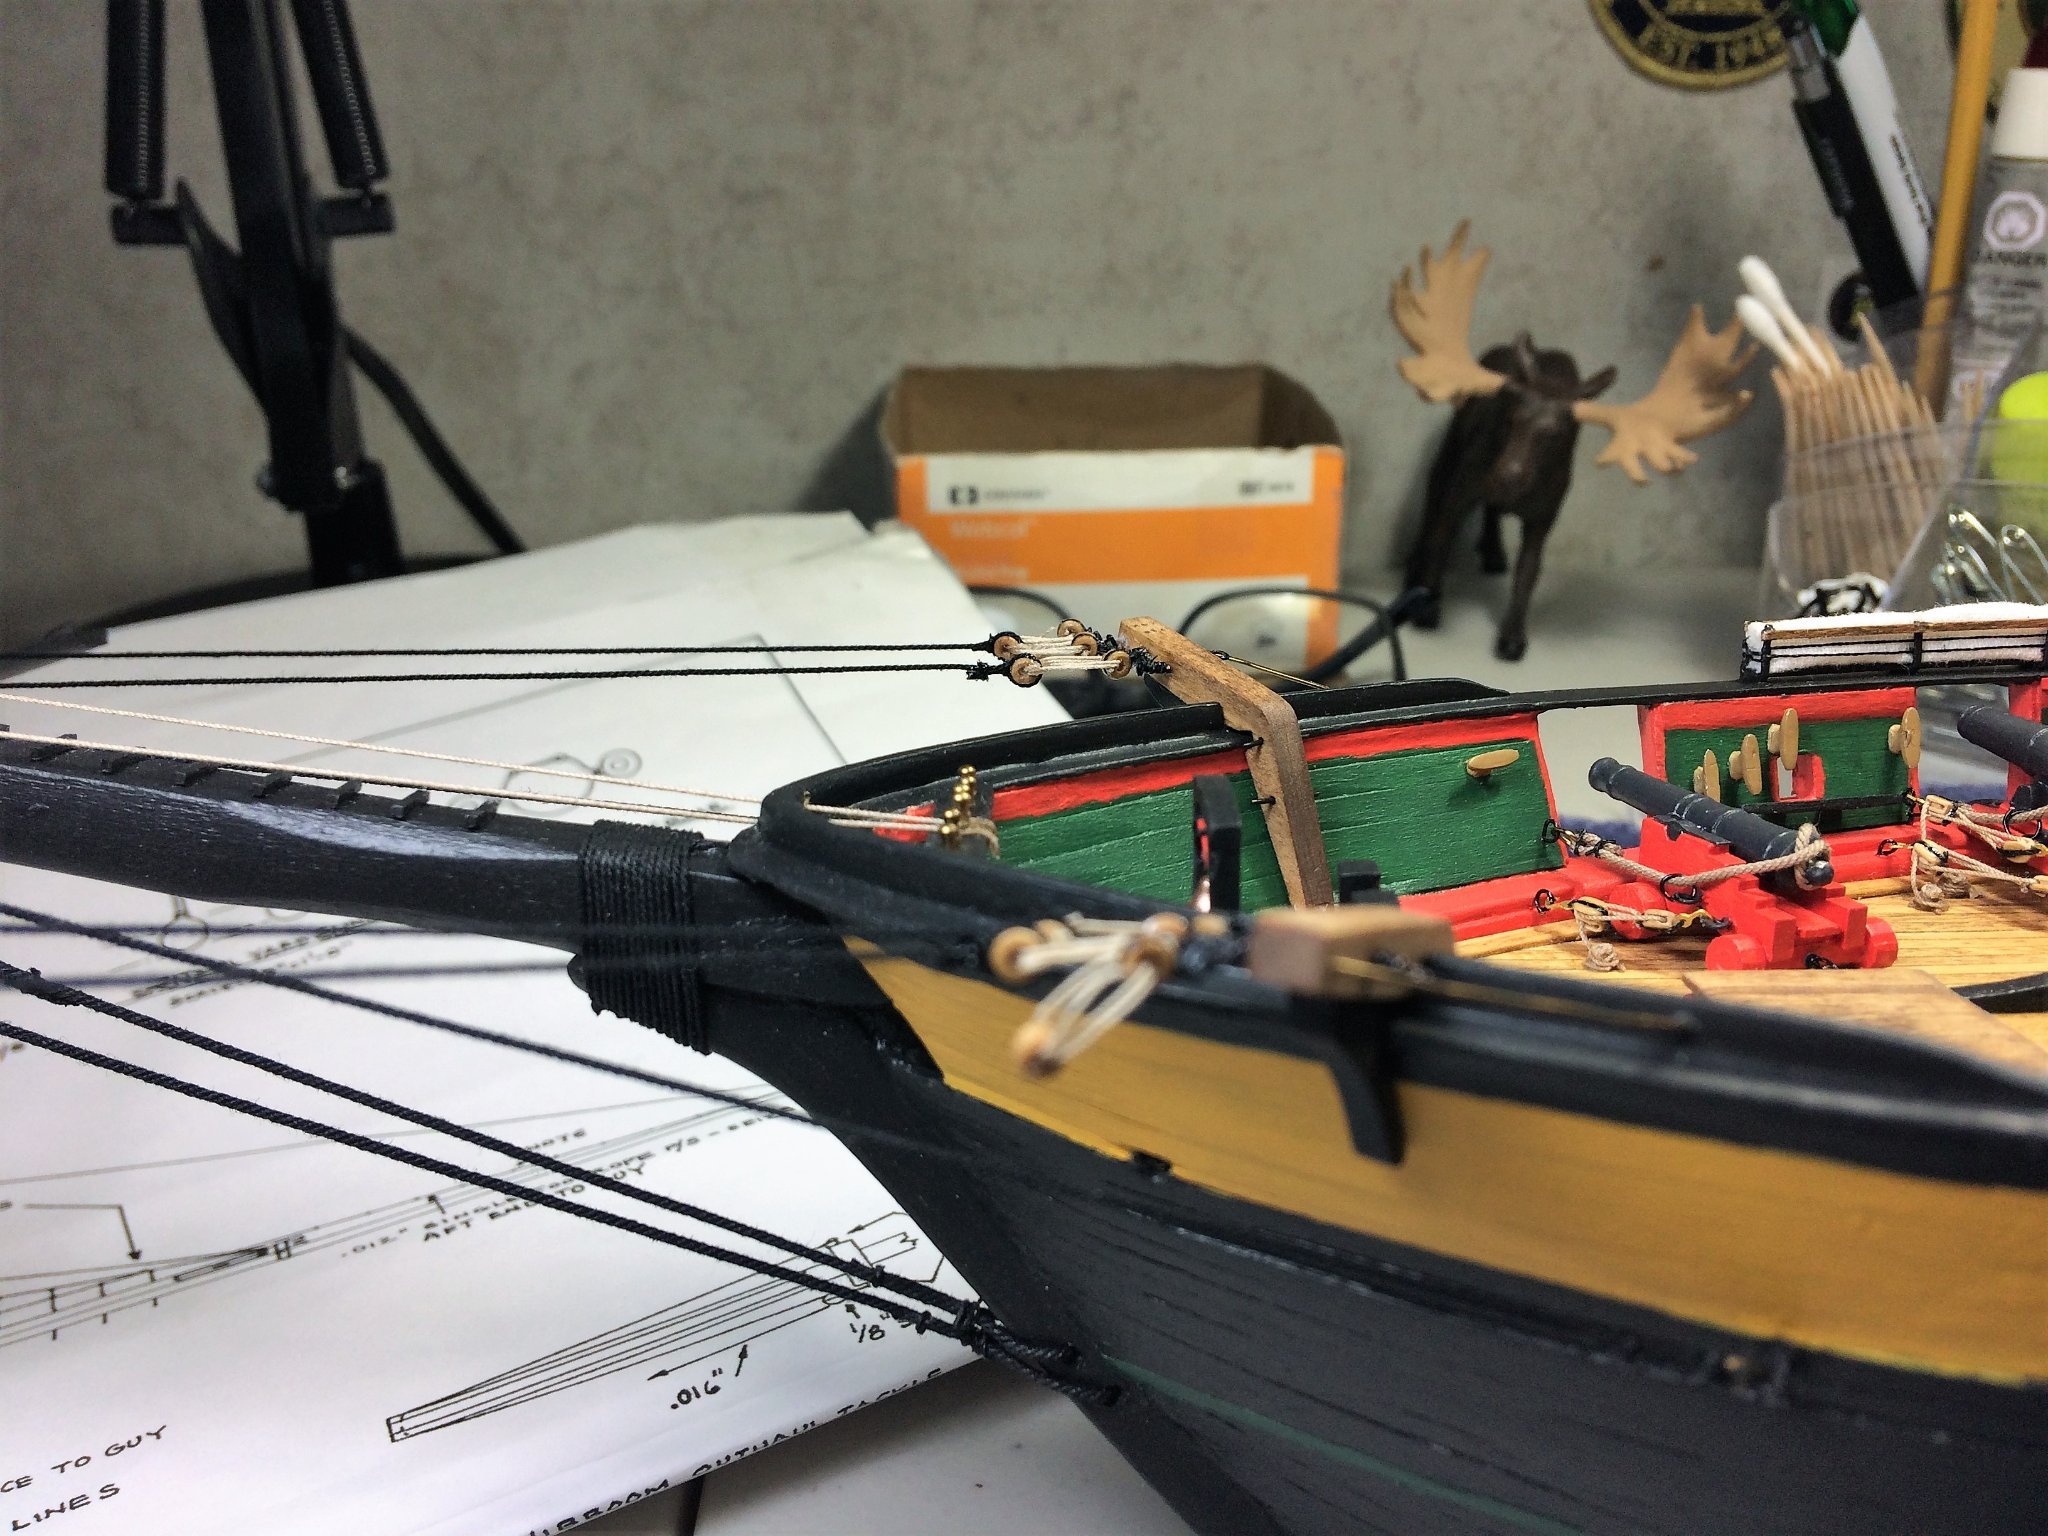
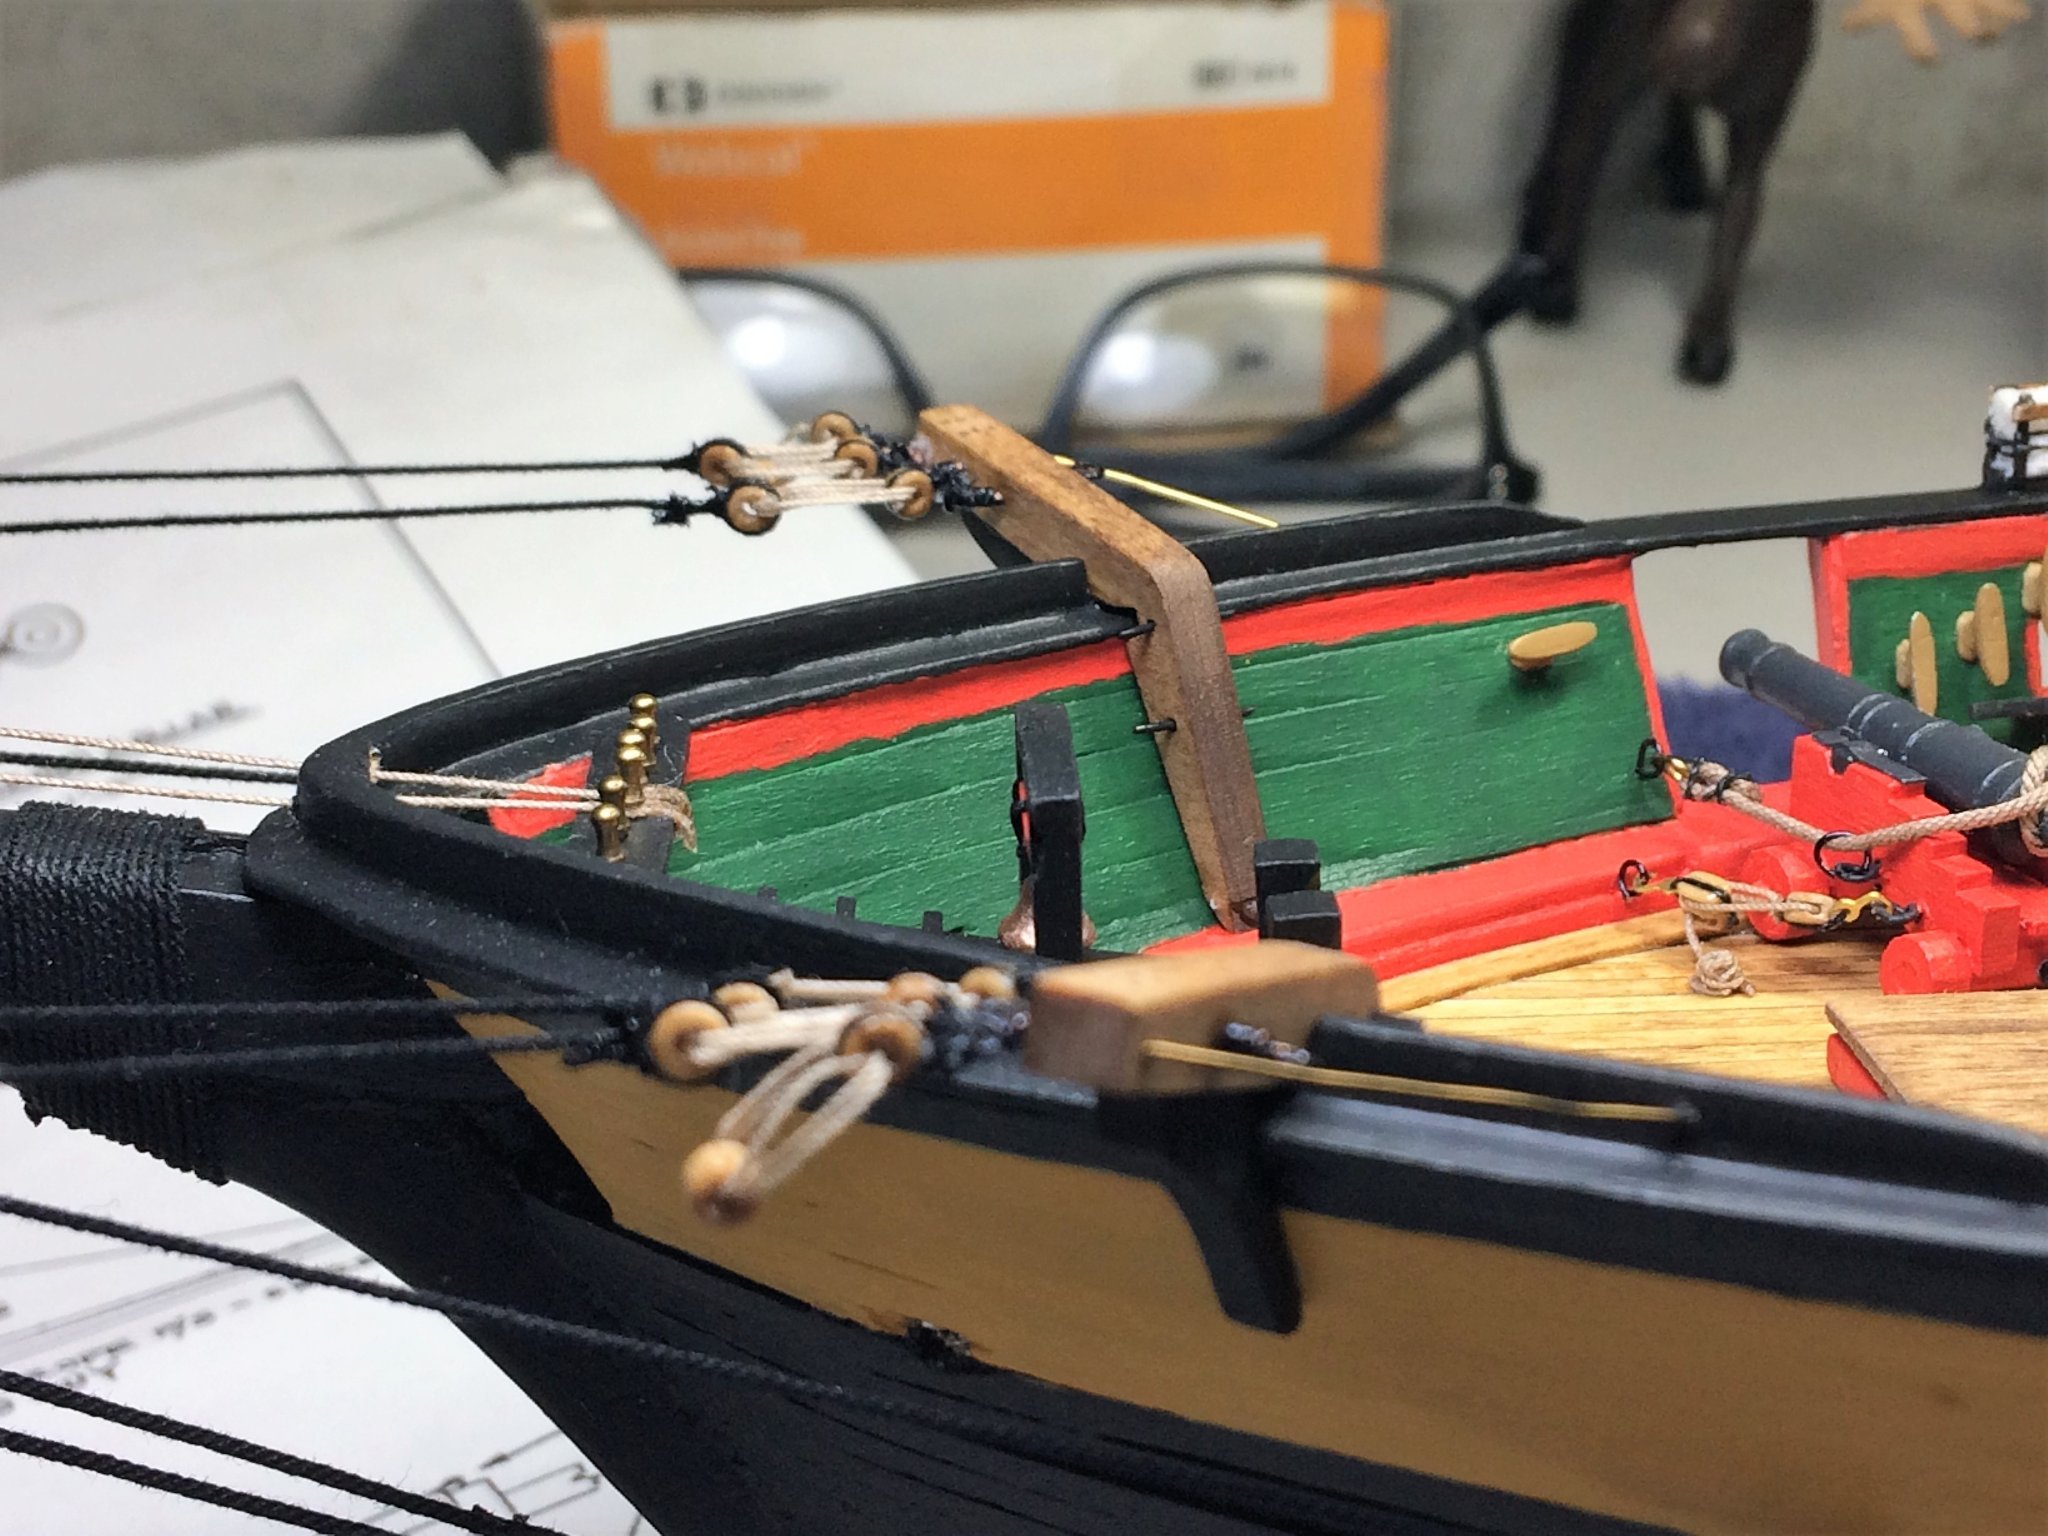
Evening, Dinner is done, belly is full, Bruins hockey on TV, feet up......... Niagara needs an update. While the hammocks stanchions are in process I like to work on other aspects of a build to keep things fresh. Change it up a little. Thought I would start rigging the Bowsprit. Starting with the Bowsprit shrouds. Using Syren .012 tan rope, lanyards were made to a pleasing distance. Taking cues from the plans, It shows the edge of the bullseyes lining up with the very forward edge of the Spritsail yard. So I went with that. This should keep both sides relatively the same length. A length of Syren .025 black rope was seized at the bullseye. These will eventually be attached at the hull. I also started the Spritsail yard lifts. Taking advice from others, I'm trying to do as much rigging from "the inside out". Work on as much of the inner parts first, working my way outwards. I'll attempt this for the Bowsprit and both masts. It seems logical. These went on easier than I figured in my head.....but how many times have I said that during this build! The one trouble I'm running into is I wish I predrilled the holes in the main rail leading to the pin rack. I have the Bowsprit in front at an angle and the ships bell from behind it and it's been fun to try and get a drill in at a straight angle. Keep washing those hands! Tom E


-
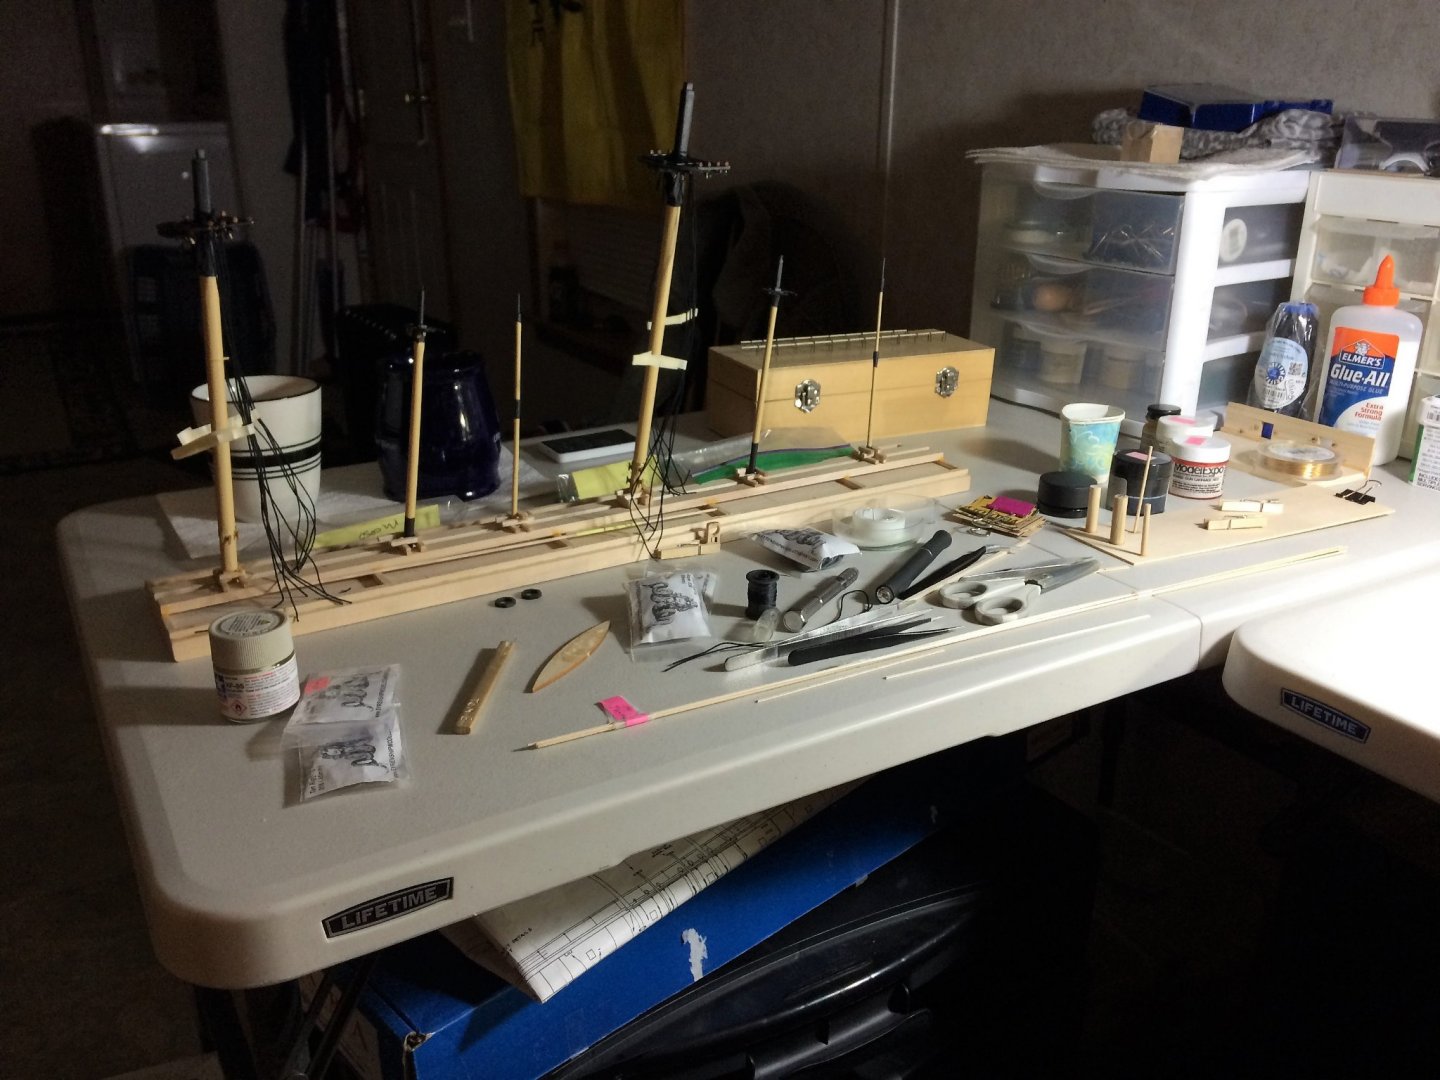
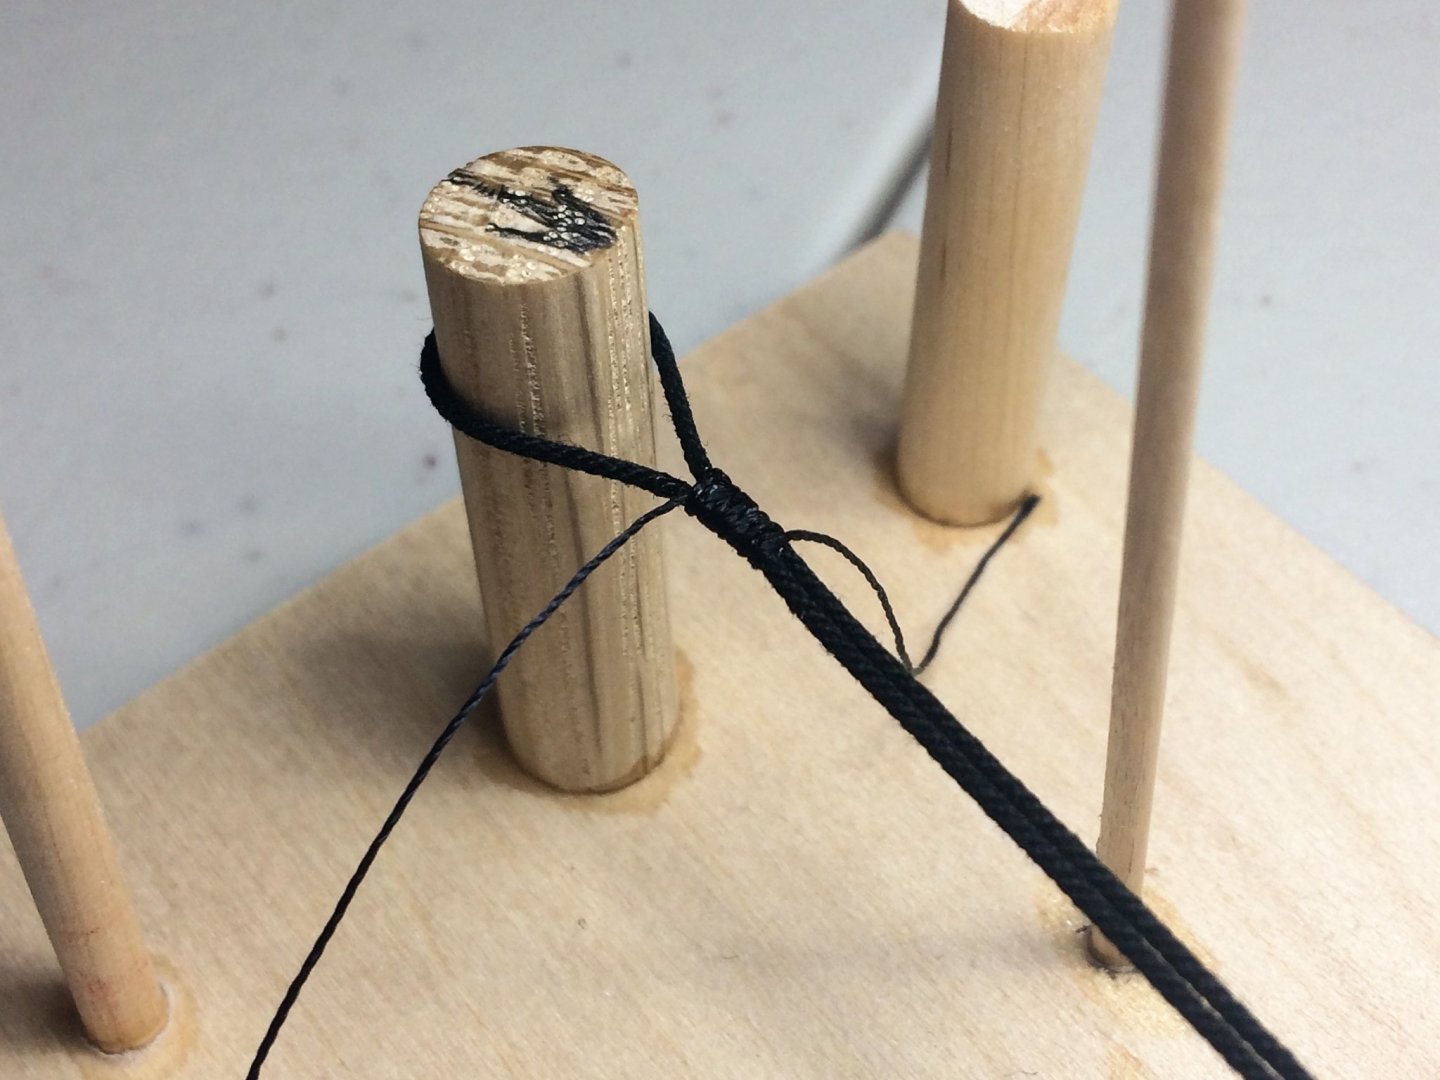
Evening, Niagara is well overdue for an update. Cant say I've been at the modeling table as much as I would prefer. With the warmer weather it's been time to clean up the yard and garden. With that mostly squared away, some building has been done. Mike, I built a "stand" for the masts as I work on them. Works bloody brilliantly! All pieces are easily moved to and from the ship. While trying to wrap my head around rigging, I've really tried to make a push on the hammock rail stanchions. I started with a piece of scrap strip wood and used it as a "spine" for the metal stanchions. The wood strip is thin and flexible so it can curve with the curve of the main rail. It should be covered by the cloth "hammocks" when completed and wont show. You can see below where I made tick marks for placing the metal stanchions. These were measured out using both the plans and the actual ship and then finding a happy medium. What it should do is keep both sides lined up with each other. The pre-blackened metal stanchions are then glued to the wood strip. Making sure the wooden "spine" is glued on the inside, not underneath. The metal stanchions, ultimately, will be the thing that is glued to the rail, not the wood strip. I think most can see where I'm going with this. The entire piece will be painted black. I'm not sure what I'll do for the cloth hammocks inside. Still chewing on that one, but ideas are starting to form. I also started on the Fore main and preventer stays. Nothing to far with these. Measured them out, dipped the ends in CA. Just recently started to fiddle with the open hearts. The hearts will get a good sanding then stained. I've been using a lot of these mini wooden laundry clips I picked up at Michaels. I have three sizes of these clips but these are the smallest. Probably sold as purely decorative, but, they work great with rigging. I was trying to find something other than alligator clips as they have teeth and can "bite" down on rope a bit too must for my tastes. Just sayin! Stay safe! Tom E


-
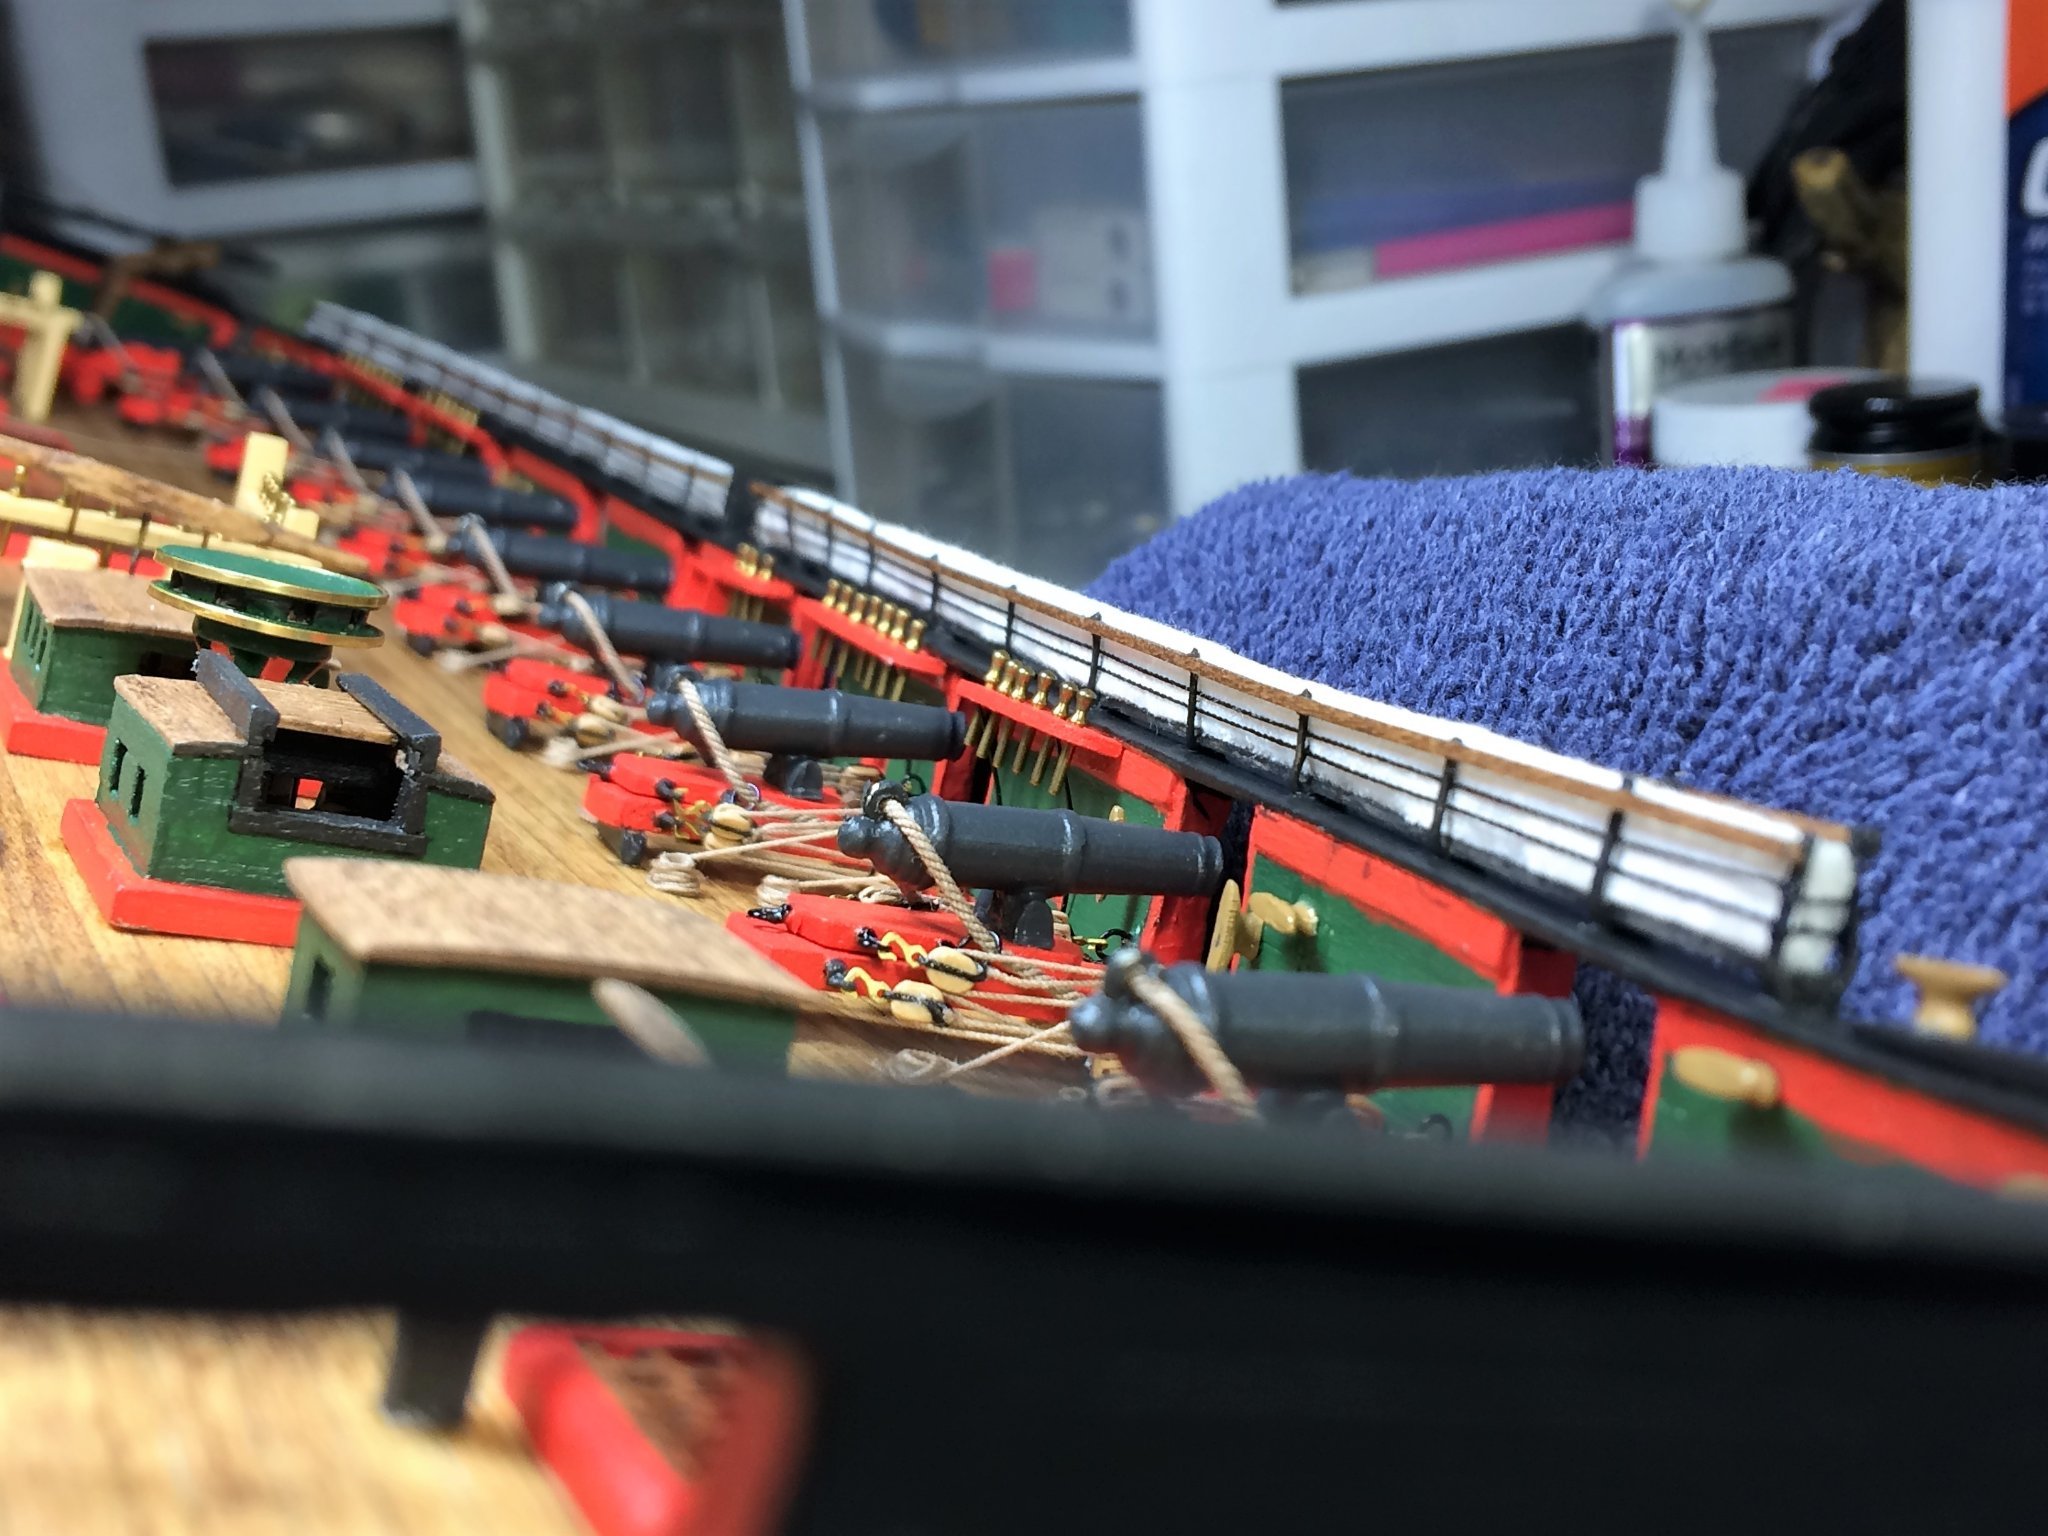
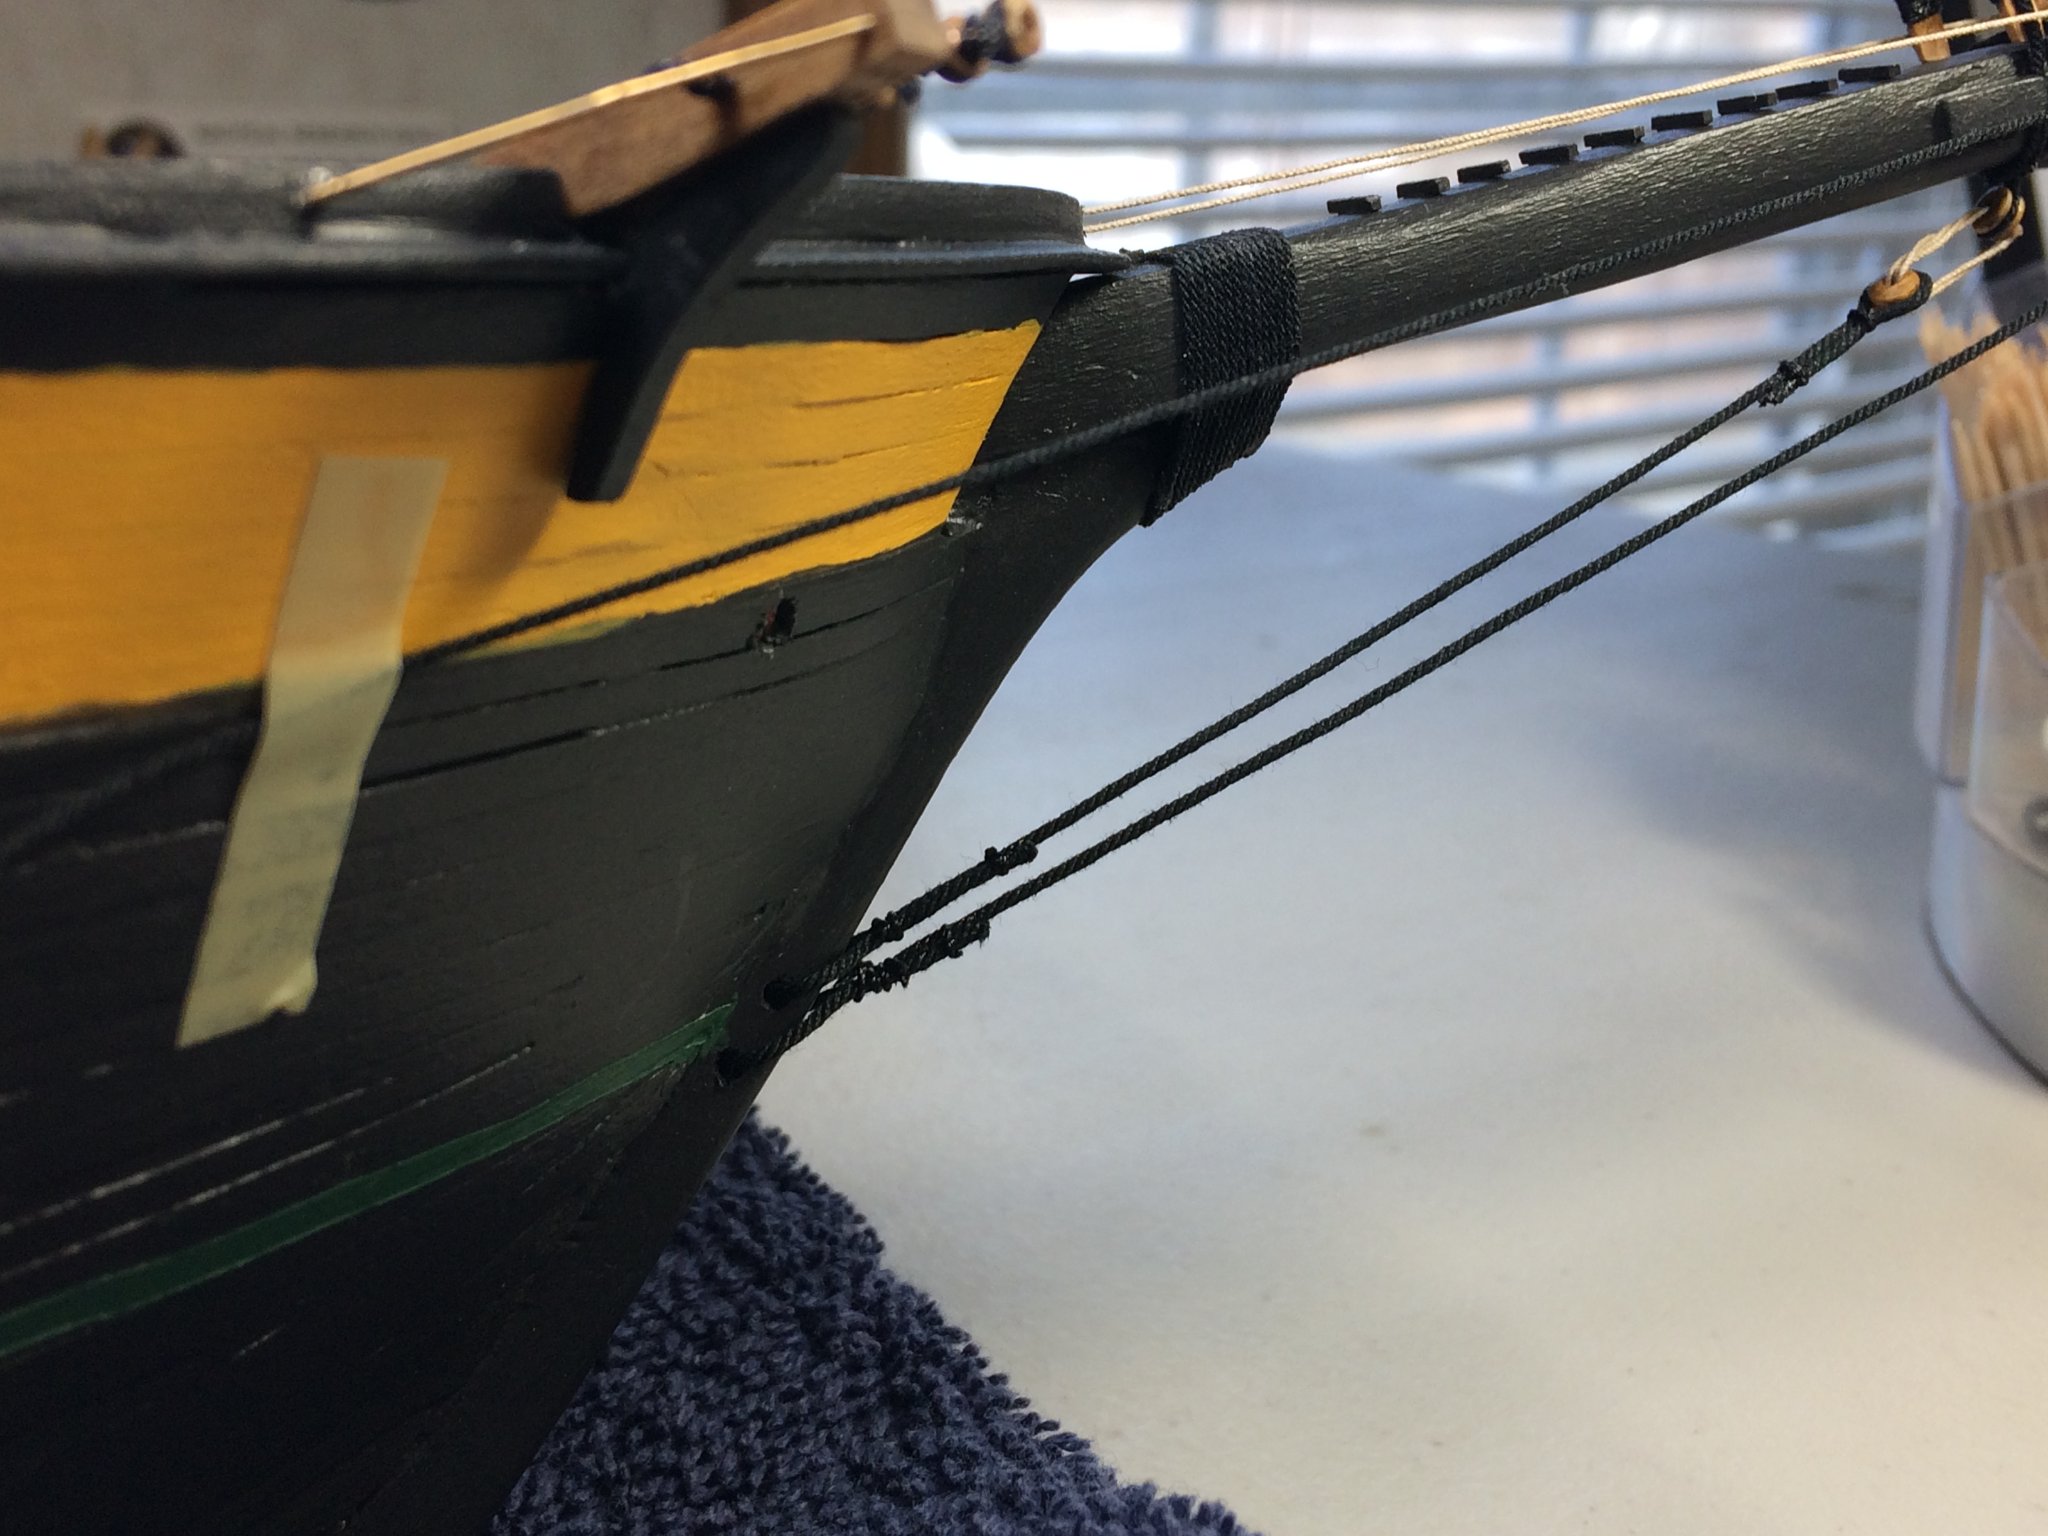
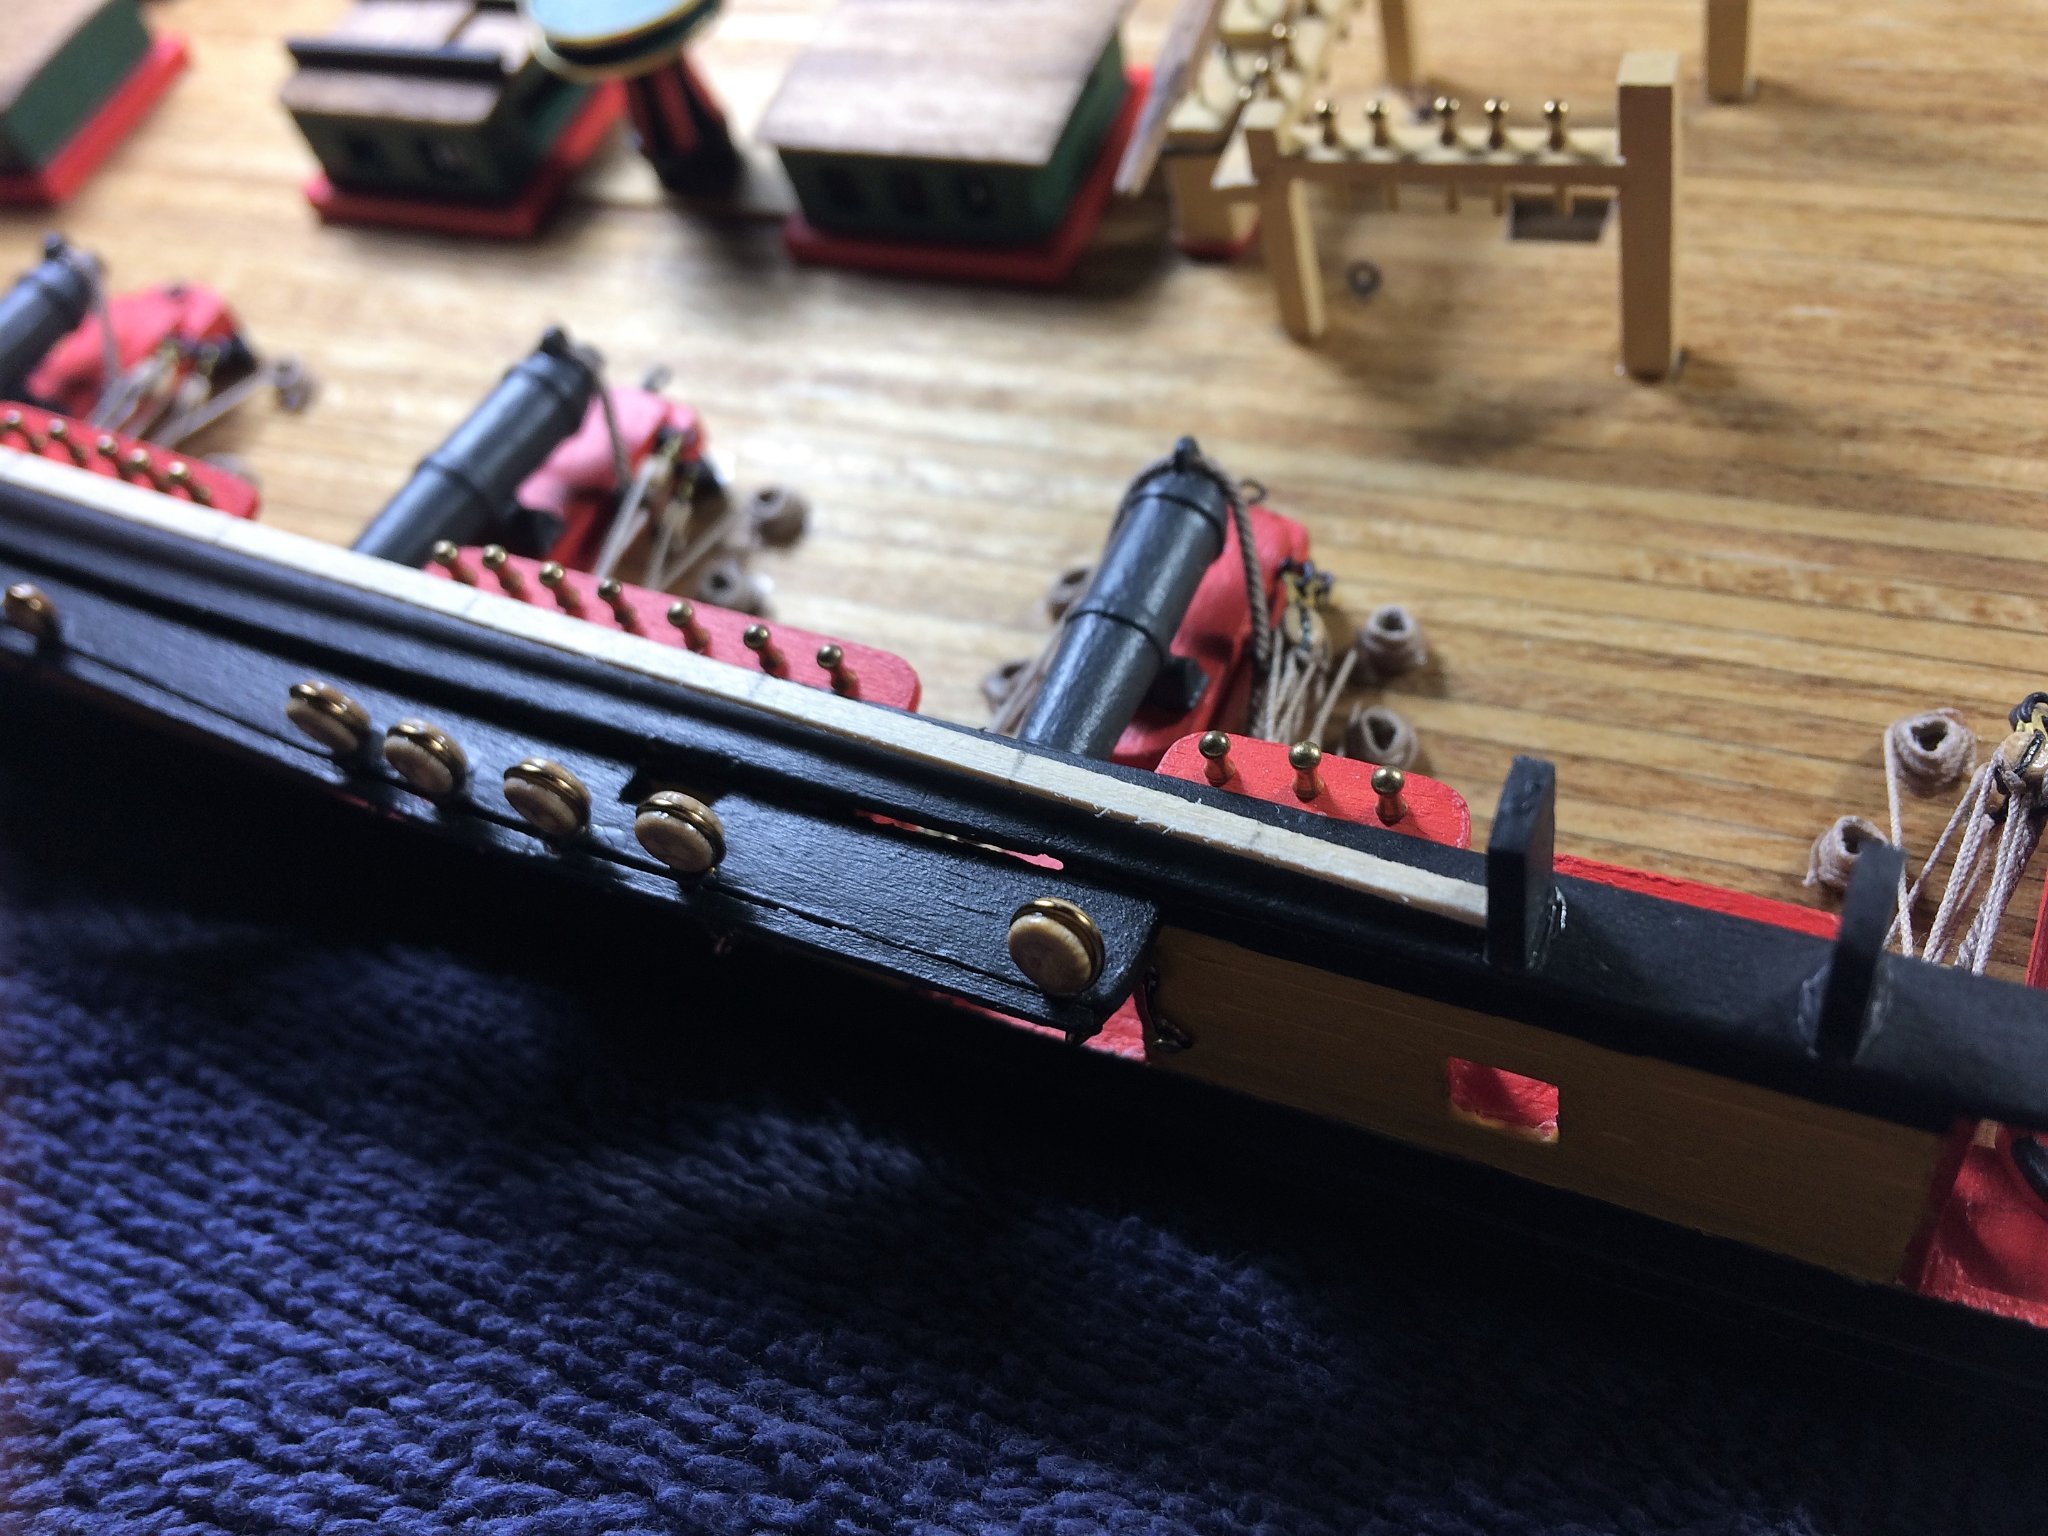
Evening, Hope everyone is well and safe. Pretty quiet around here. Life and work are doing its thing, and a little bit of modeling gets weaved in. Niagara needs an update. Mike, Darrell, Thanks for stopping in, glad to see your still watching over my shoulders. I have been pouring over both of your builds lately. The rigging just seems daunting, and I feel I'm lagging behind in getting her done. I'm being overly cautious about what comes next, and what comes next logically. I need to stop hemming and hawing and keep moving! As a surgeon I worked for would say....."Less chatter, more data!" As towards the hammocks, I have a similar approach and should have pics soon. Christos, Really enjoying your Royal Caroline build! She's a handsome ship. As towards the rear rigging, there is some for Niagara, but I decided to leave it out. It really crowds up the deck, almost too much in my eye. I left out the quoins as well. I just couldn't produce something to scale that looked good. As towards what has been done. The Bobstays are installed. I have seen folks struggle putting these in later when the Bowsprit it's self was rigged. Just seemed logical to install these now. Relative easy approach for these. Measure out a length of black Syren .035 rope. Probably over did it on the length. But it's easier to remove than add on. Some simple lanyards of equal length using tan Syren .012 rope. You can tell the first one I tried is the innermost one. A wicked twist in it. The outer most lanyard, not so bad. The black rope wrapped around the bullseye and seized. Per the plans these should be double ropes, which I did try. Did not produce the results I liked. So, I kept it simple. Two simple seizings, one close to the bullseye, one out a bit. Not too shabby, I think. These bullseyes are from Model Expo, not included in the kit and bought separately. I think with these in, I can start to rig the Bowsprit, which in turn should allow me to start some of the upper mast rigging. Spring is coming! Tom E

-
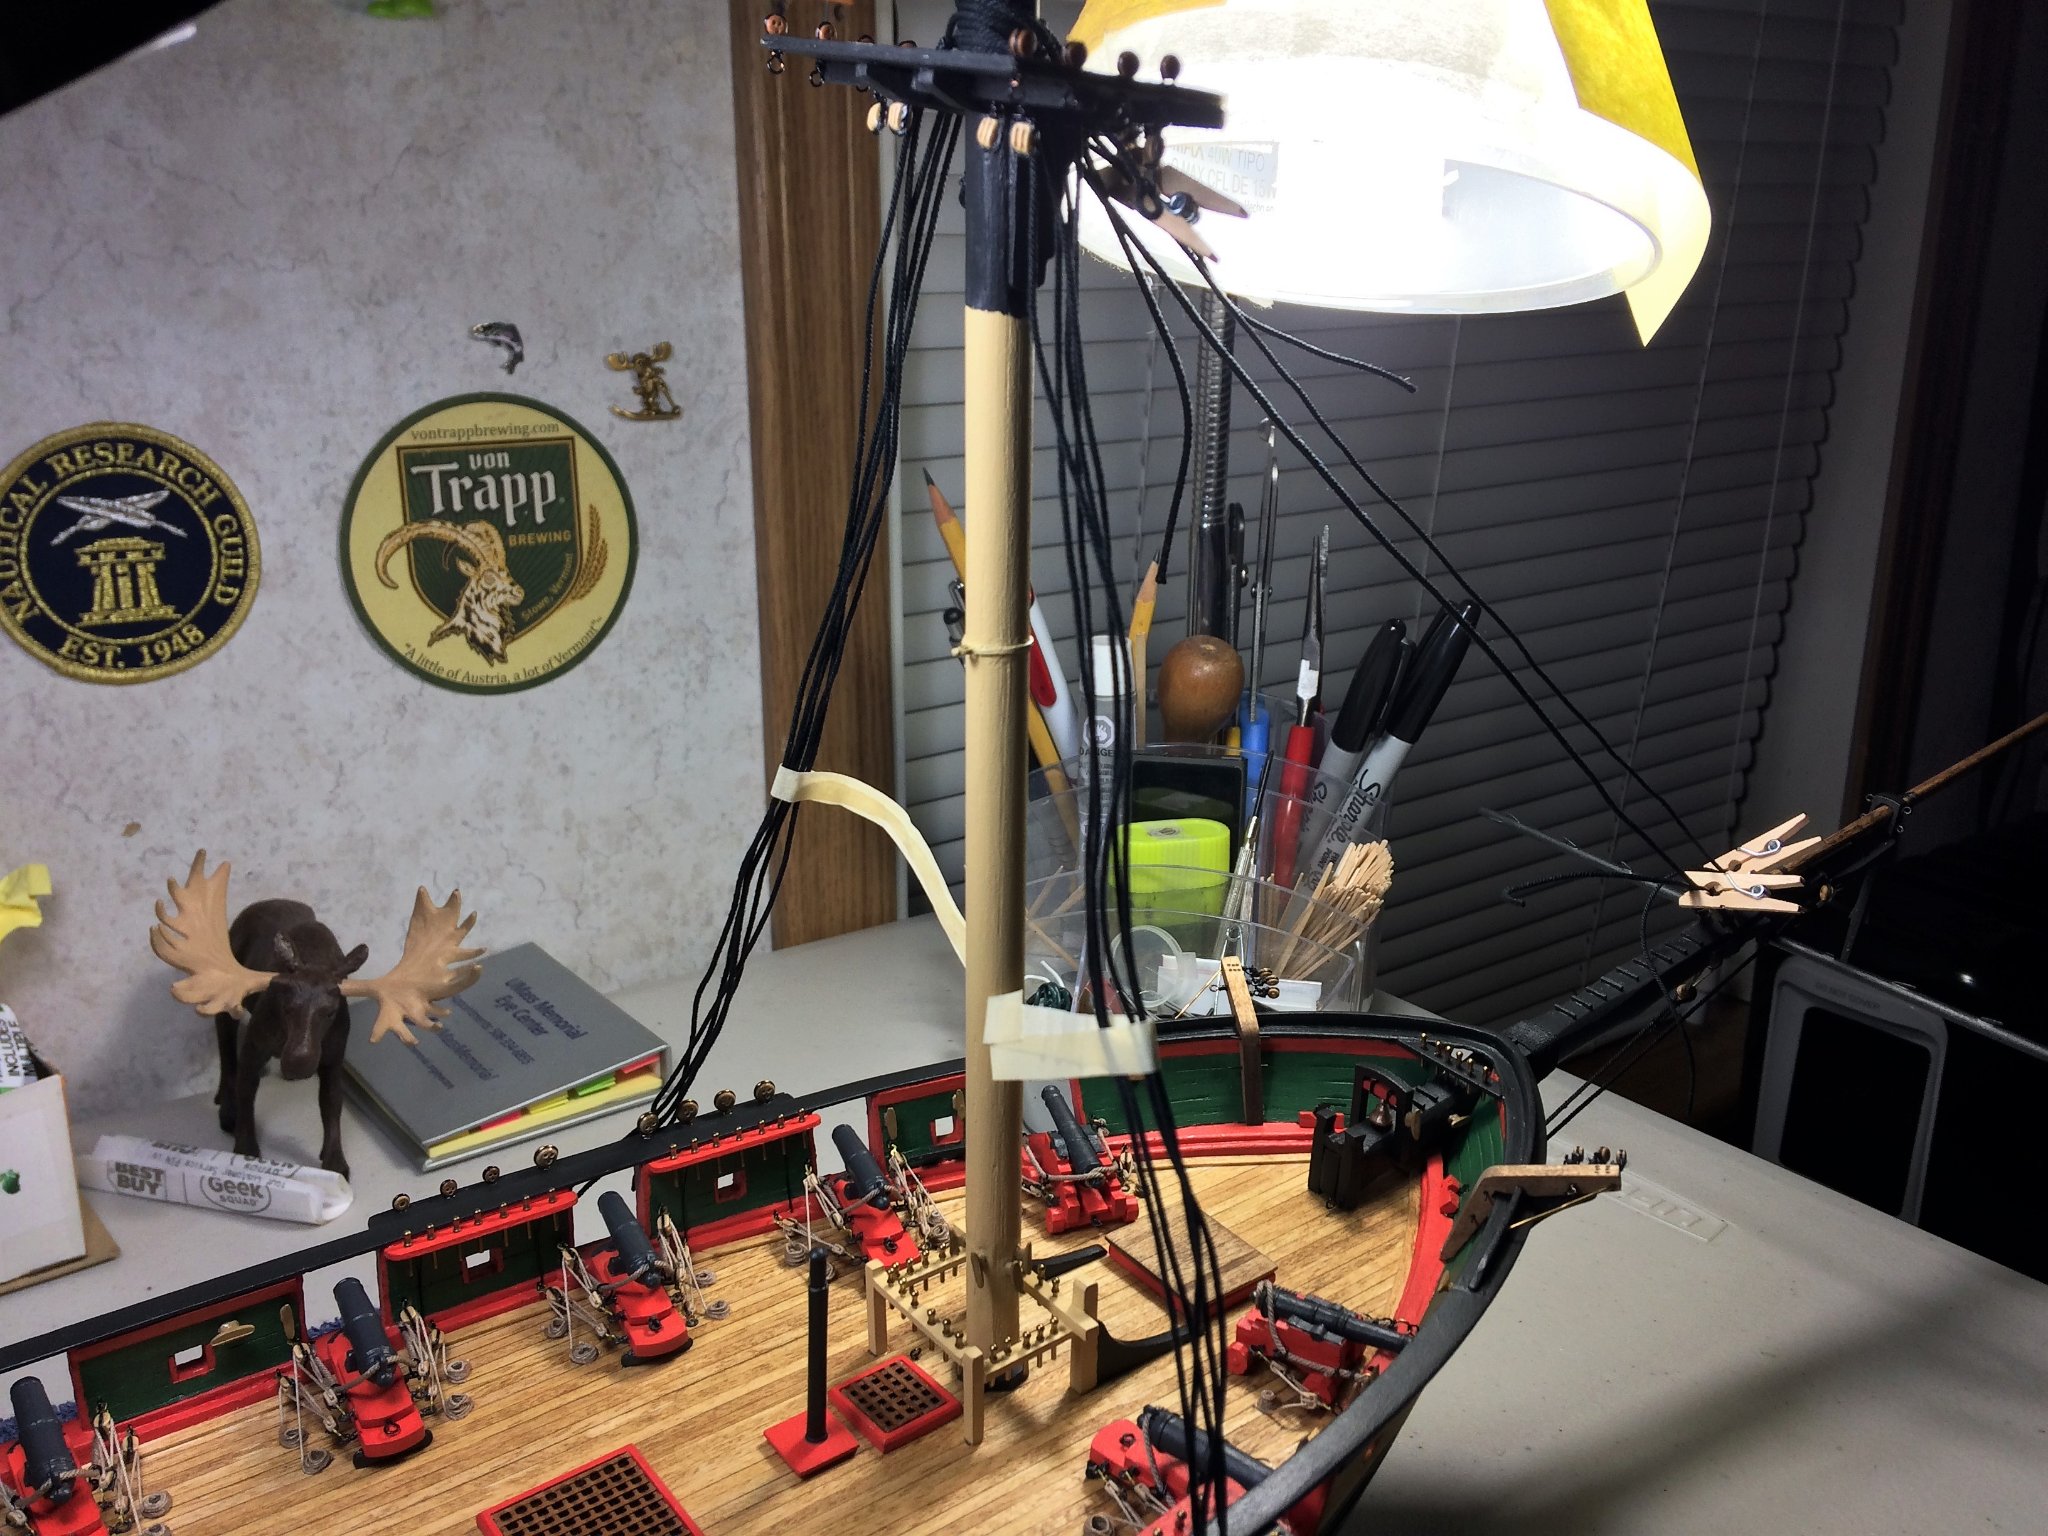
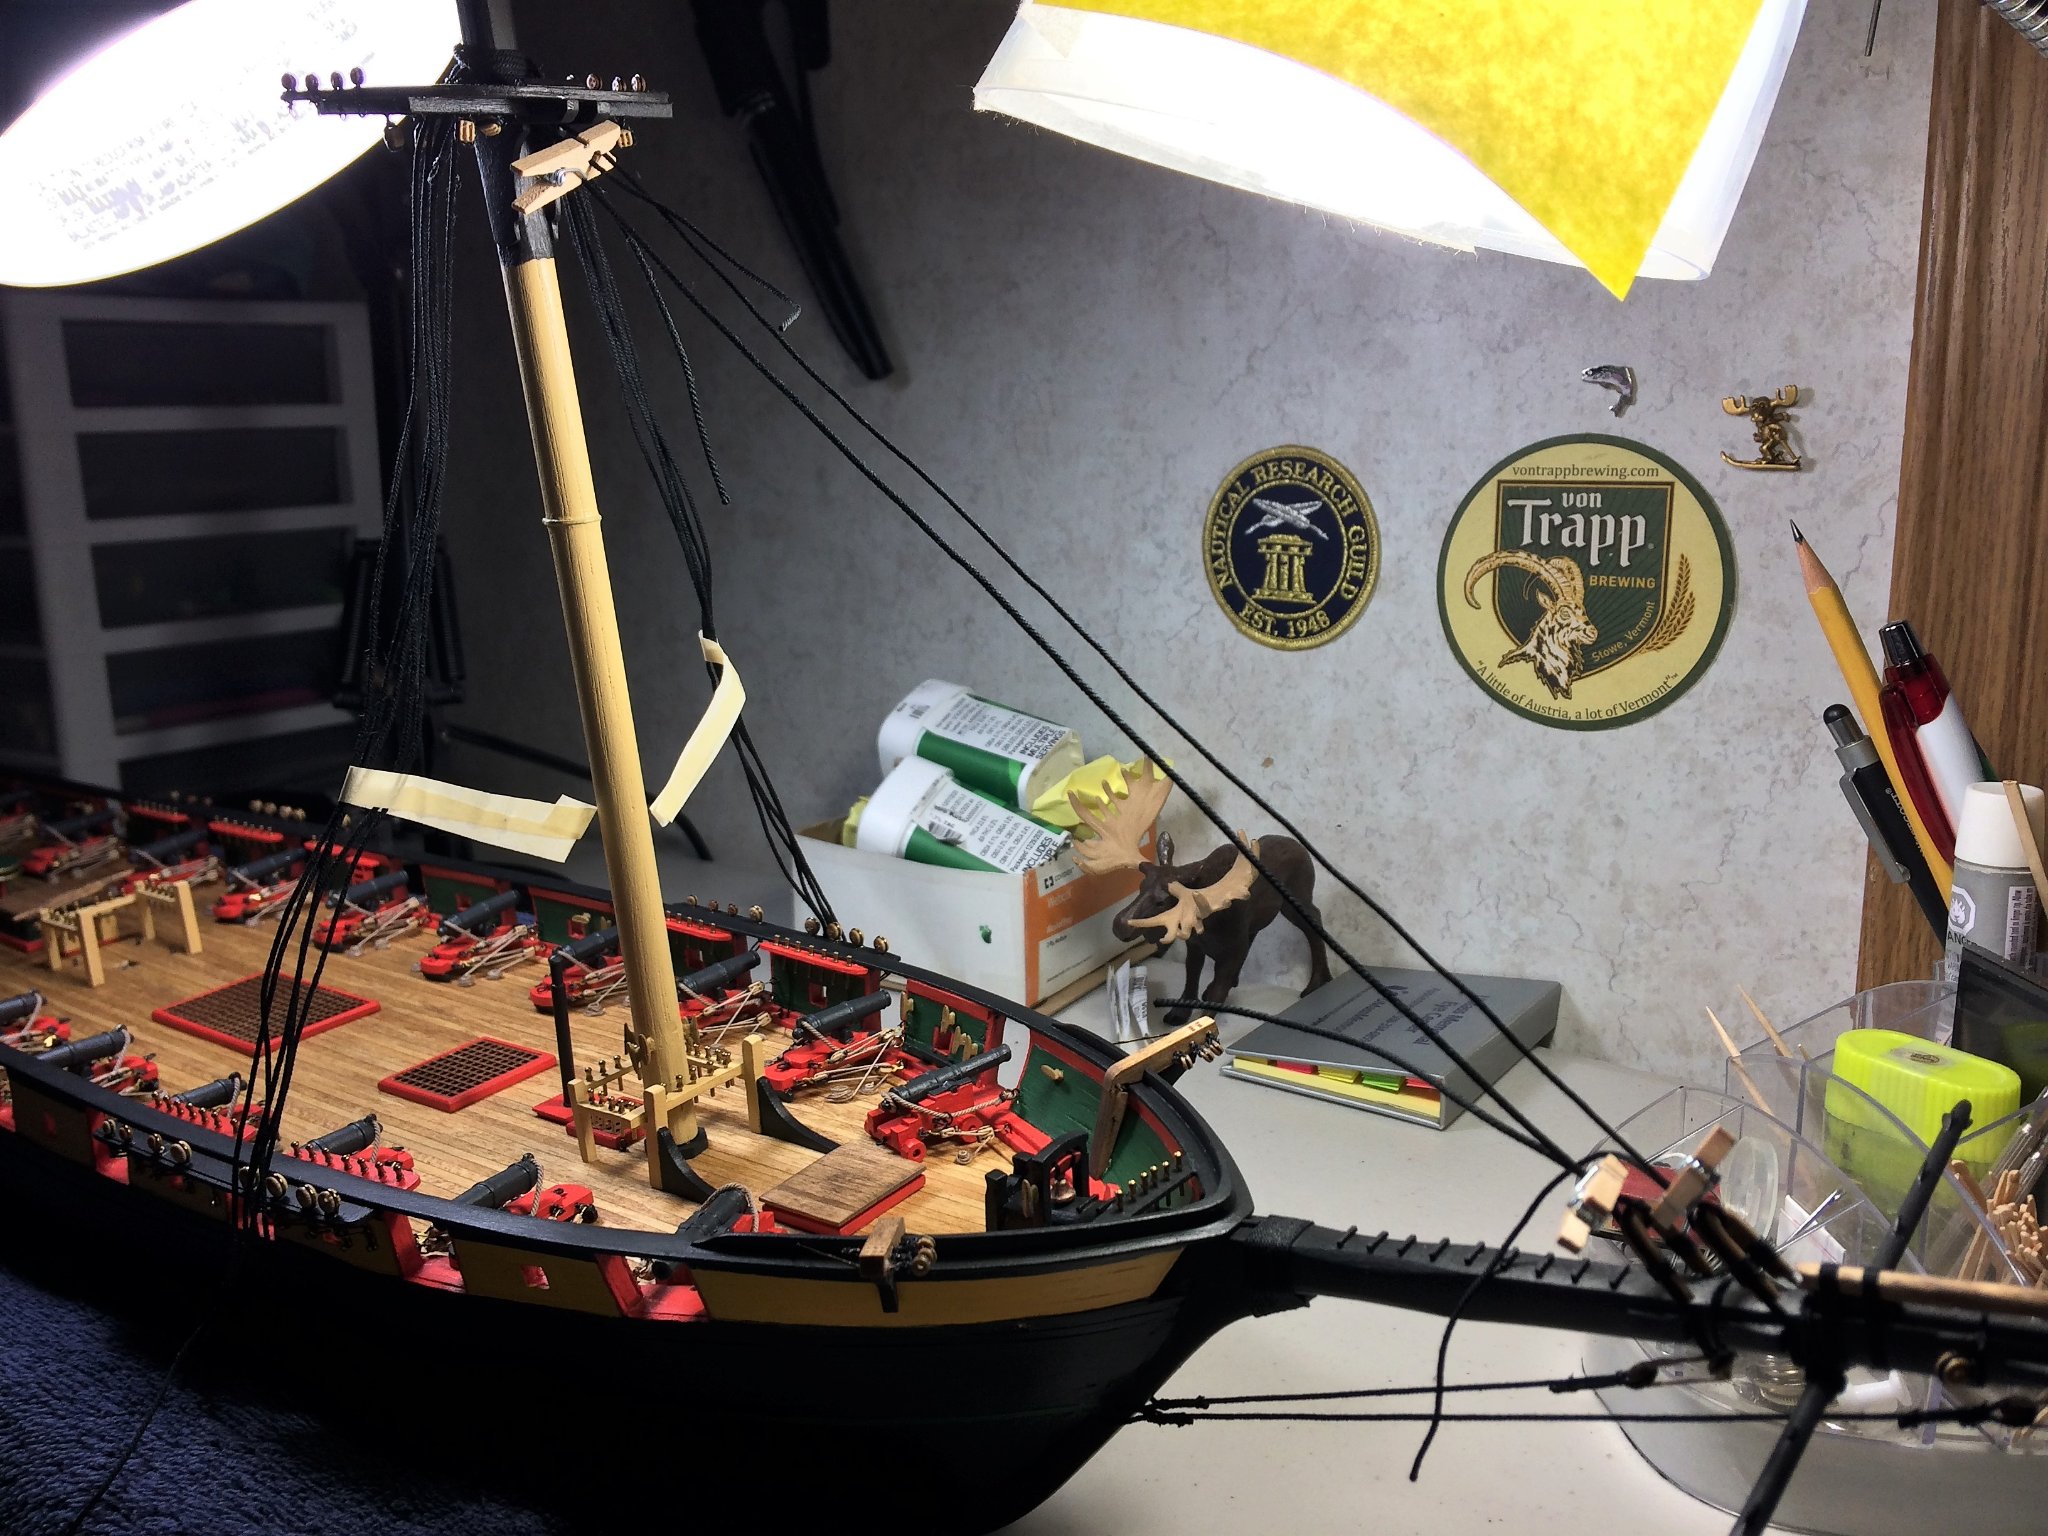
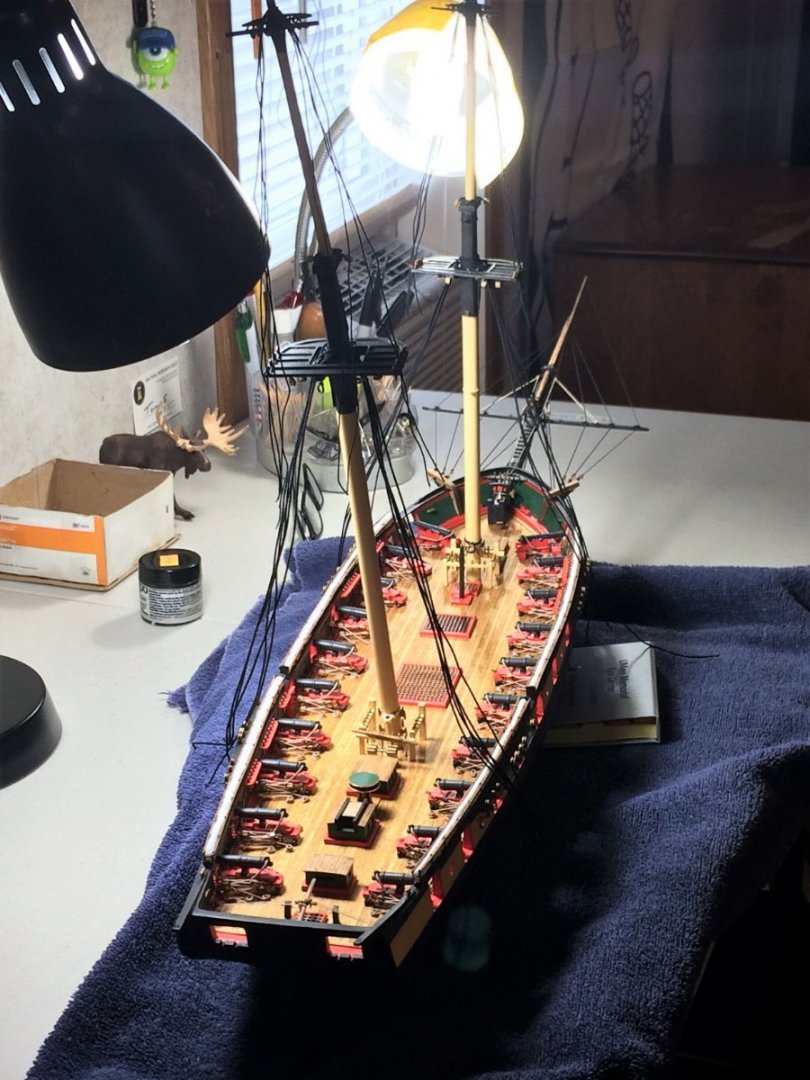
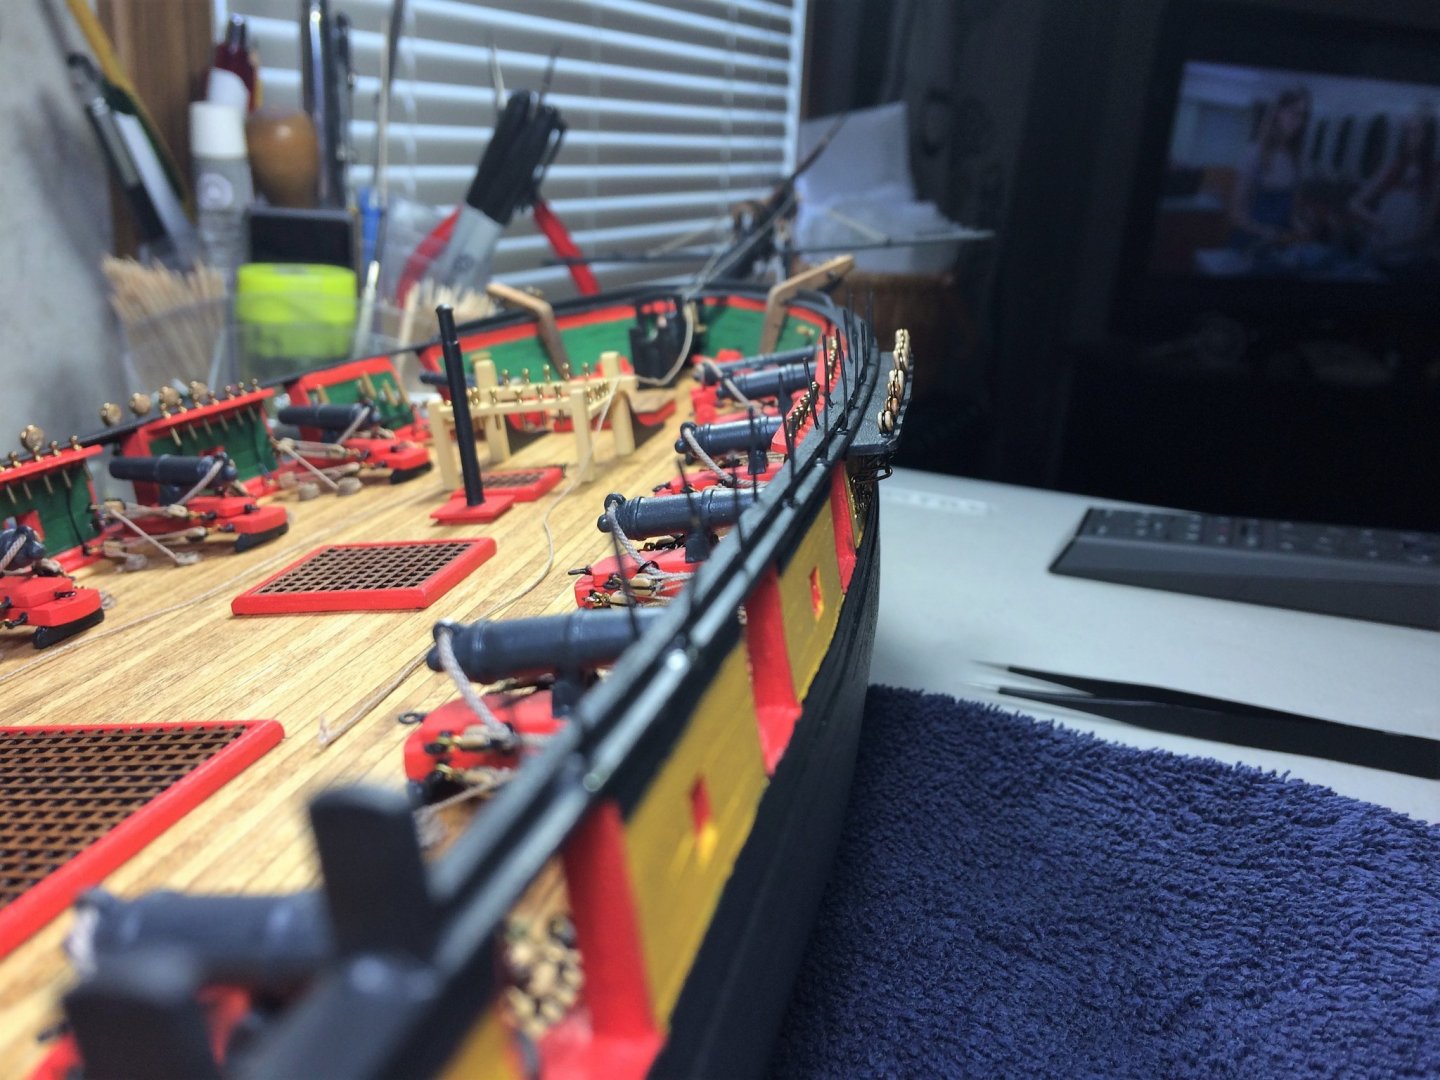
Evening, Quiet night, ready for a Friday and the weekend. Gonna be so cold out this weekend, I'll just have to stay warm and toasty in the Shipyard. Take one for the team kinda thing. Well, that's the initial plan. Thanks VT for the compliment, much appreciated. Niagara now has full sets of lower shrouds. Once I got a hang of things on the Fore mast, the Main mast shrouds kinda fell into place. I'm not saying they were easy, but once you get a "feel" for the rope and how to work with it, I just felt like pressing on. Nothing is permanently installed, so the rope may look loose. Attaching these to deadeyes is a bit down the road right now. Simple strips of Tamiya masking tape lock things down for now. I could probably get away with regular tape, but don't wanna take that risk with the paint job. So far, taking it on and off, no paint pulled off at all. Always keeping the Hammocks rail in mind. Looks like there should be good clearance for them under both sets of shrouds. It's absolutely amazing how busy the ship gets just with a few ropes. Never did I think I would get this far. Stay warm Tom E

-
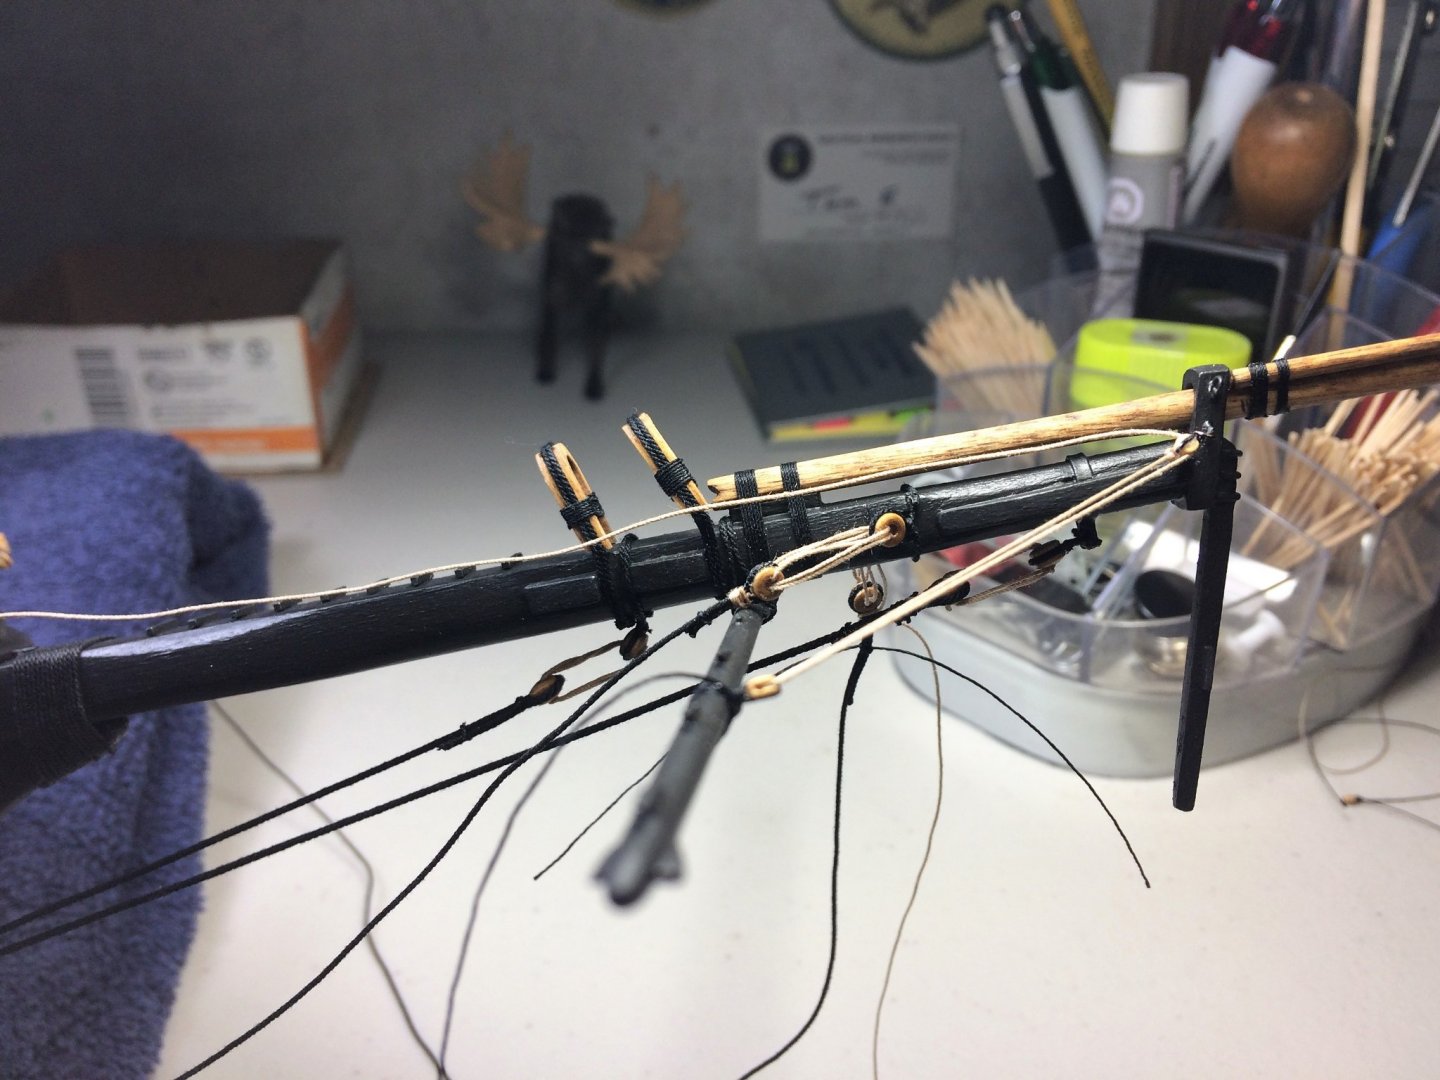
Evening, Hope everyone is well. Hot cup of tea in hand, comfy on the couch....Niagara needs an update. John, That's some great insight as to how blackening works, I did not know, I'll adjust the way I work with it. Thanks! Luckily, I work in health care and I tend to come home loaded with gloves and alcohol pads I keep stashed in my pockets. I have a healthy supply!!!! I continued on with the Fore mast shrouds. Port and Starboard leading shrouds are done. My servings are somewhat primitive compared to others. I'm still learning this craft, should get better! Maybe somewhere in the future I can make an investment on a serving machine. The jig I made for these is proving invaluable. It's the tension that makes wrapping these "easy". I think at one point, I tried to wrap them so they would look like a "French braid". Didn't work so well!! Once the leading shrouds were done, I kinda got the hang of working with rope. Just kept on going and the rest of the lower shrouds for the Fore mast were made. There's some Tamiya masking tape holding them down. Fore and Main stays and preventer stays will probably be made next. Then, work my way up the masts. Looks like I should have good clearance for the Hammock rails under the shrouds. Should have more on these soon. I'm trying an approach where I fabricate these off boat and should just drop into place......should. Ready for baseball season!!!!!! ⚾ Stay warm, Tom E


-
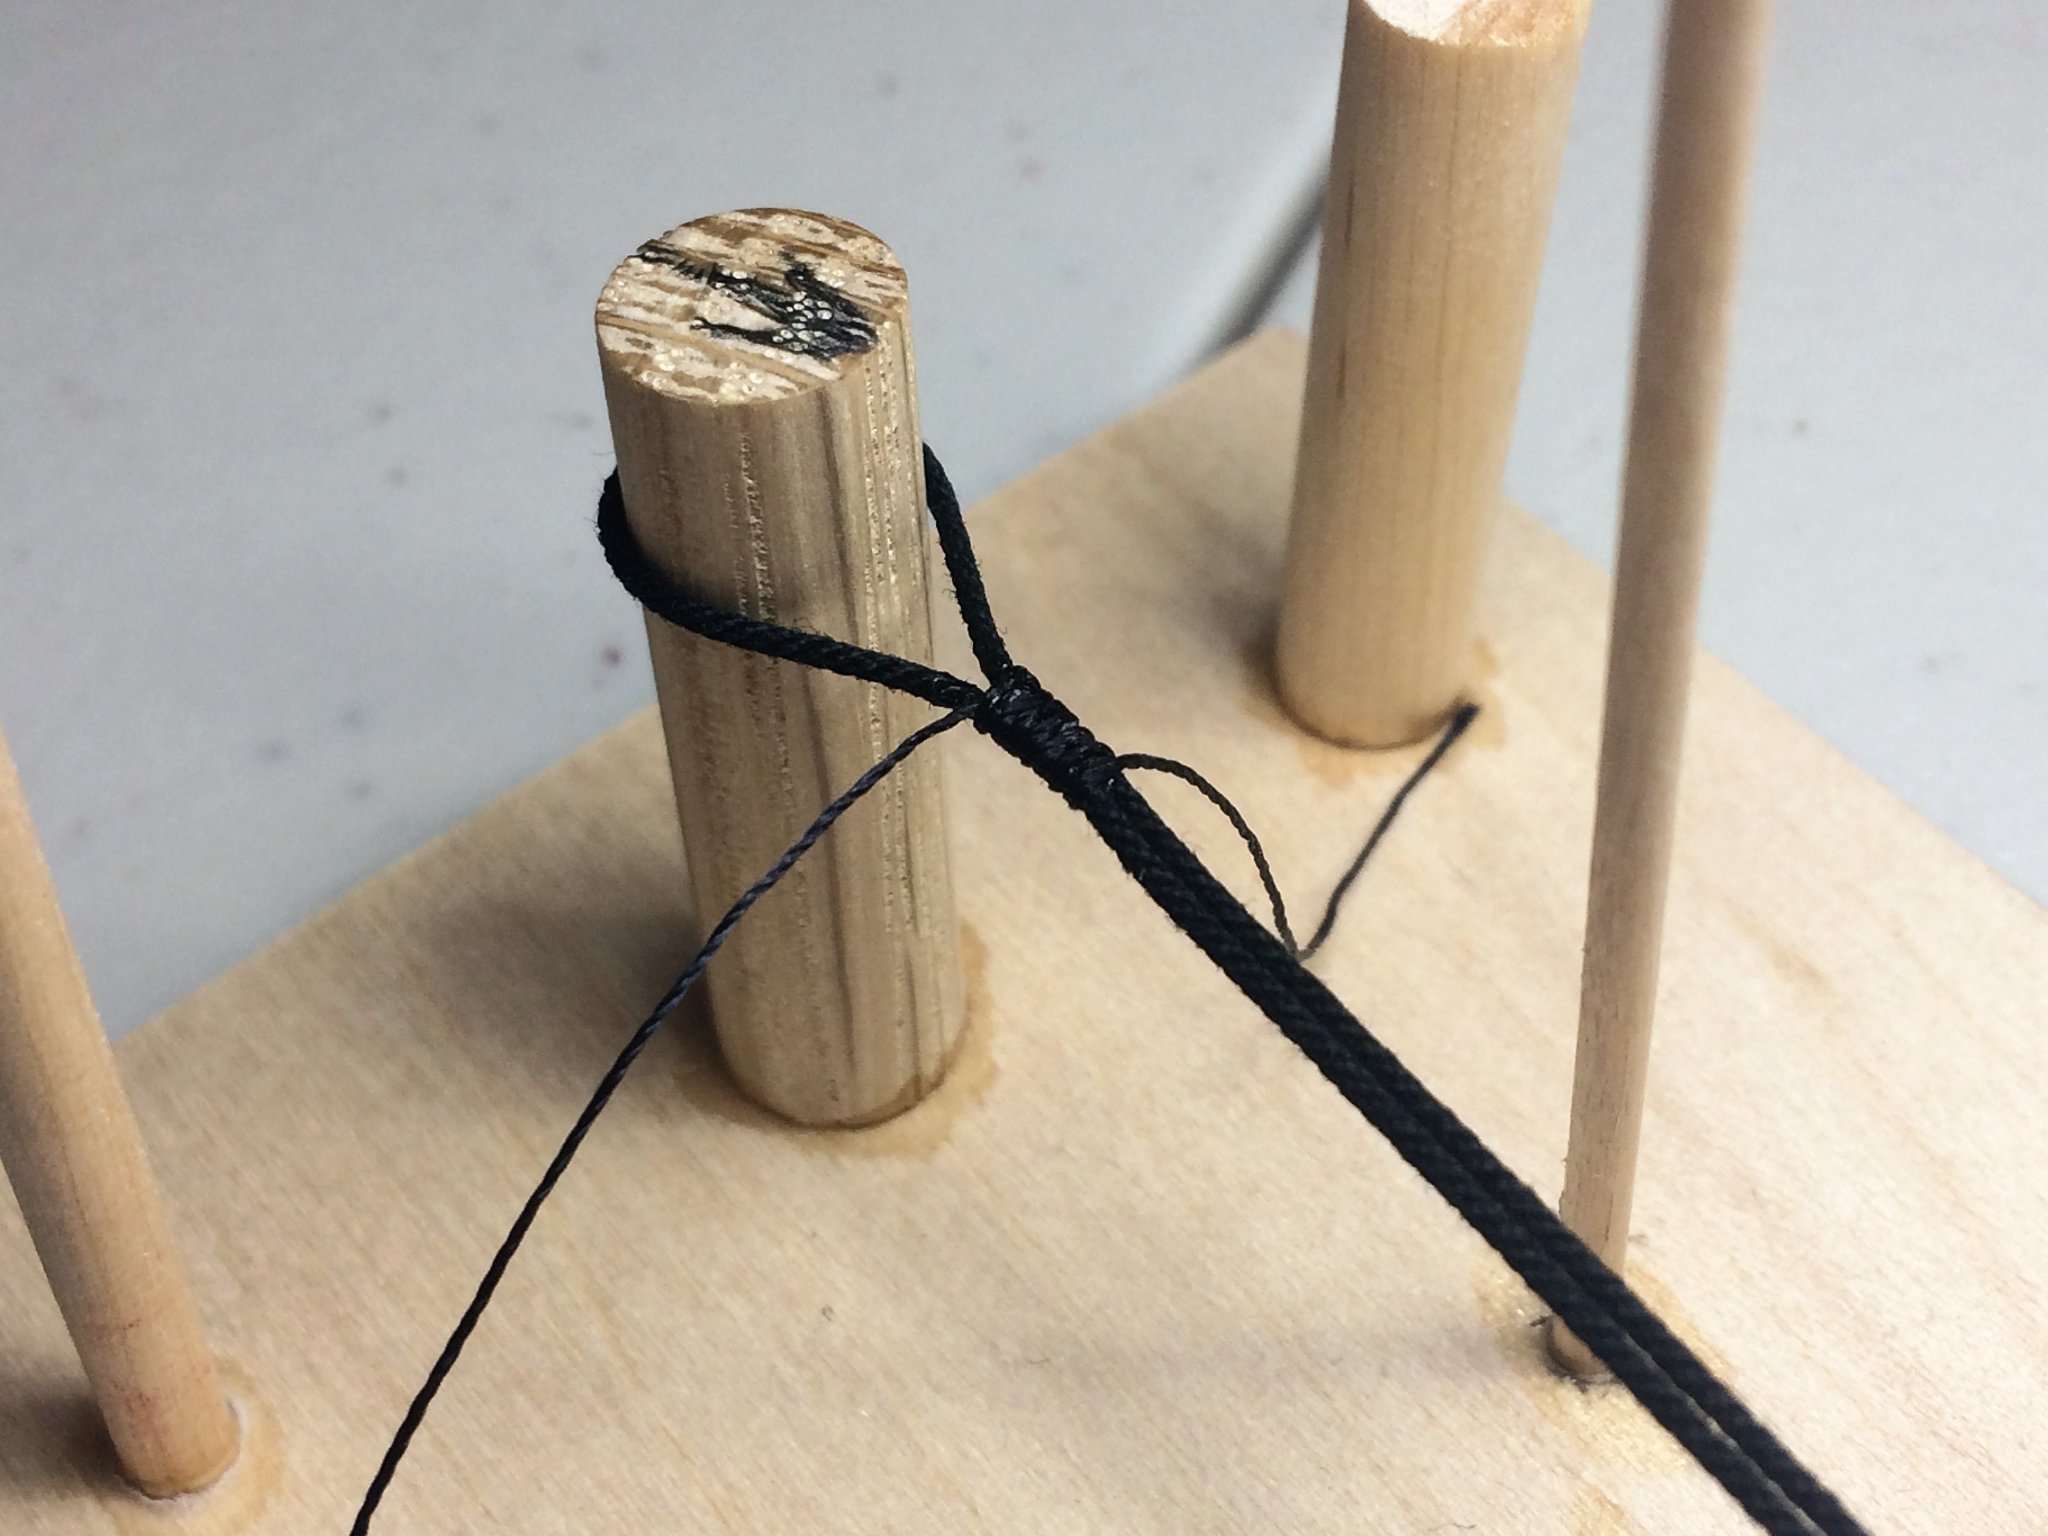
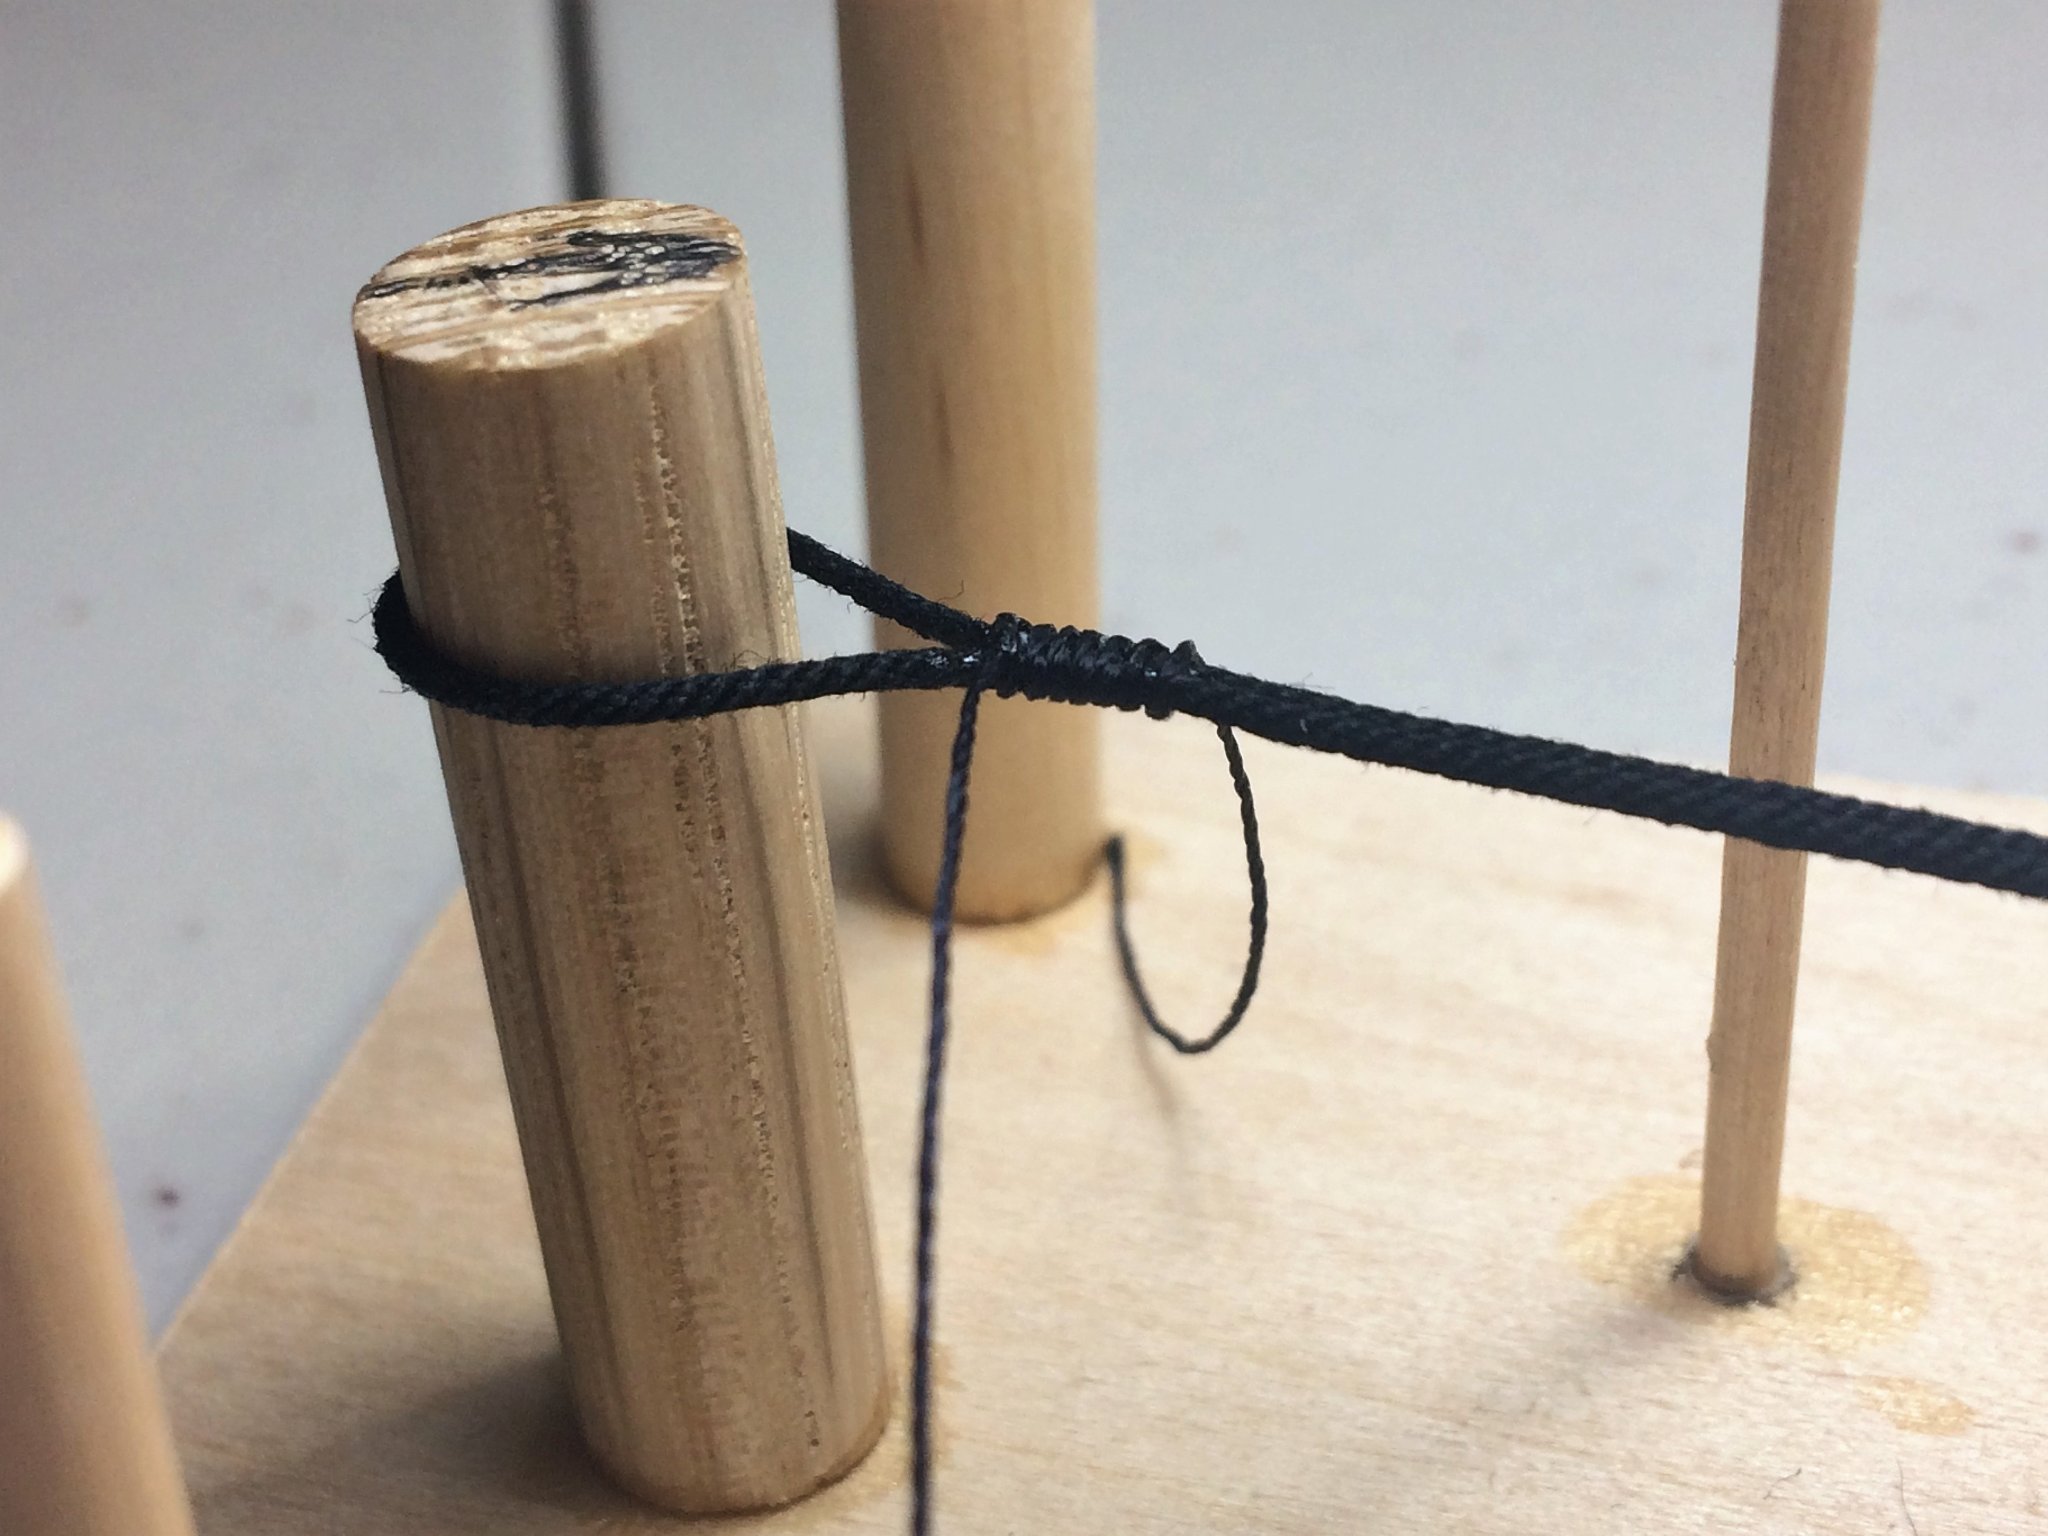
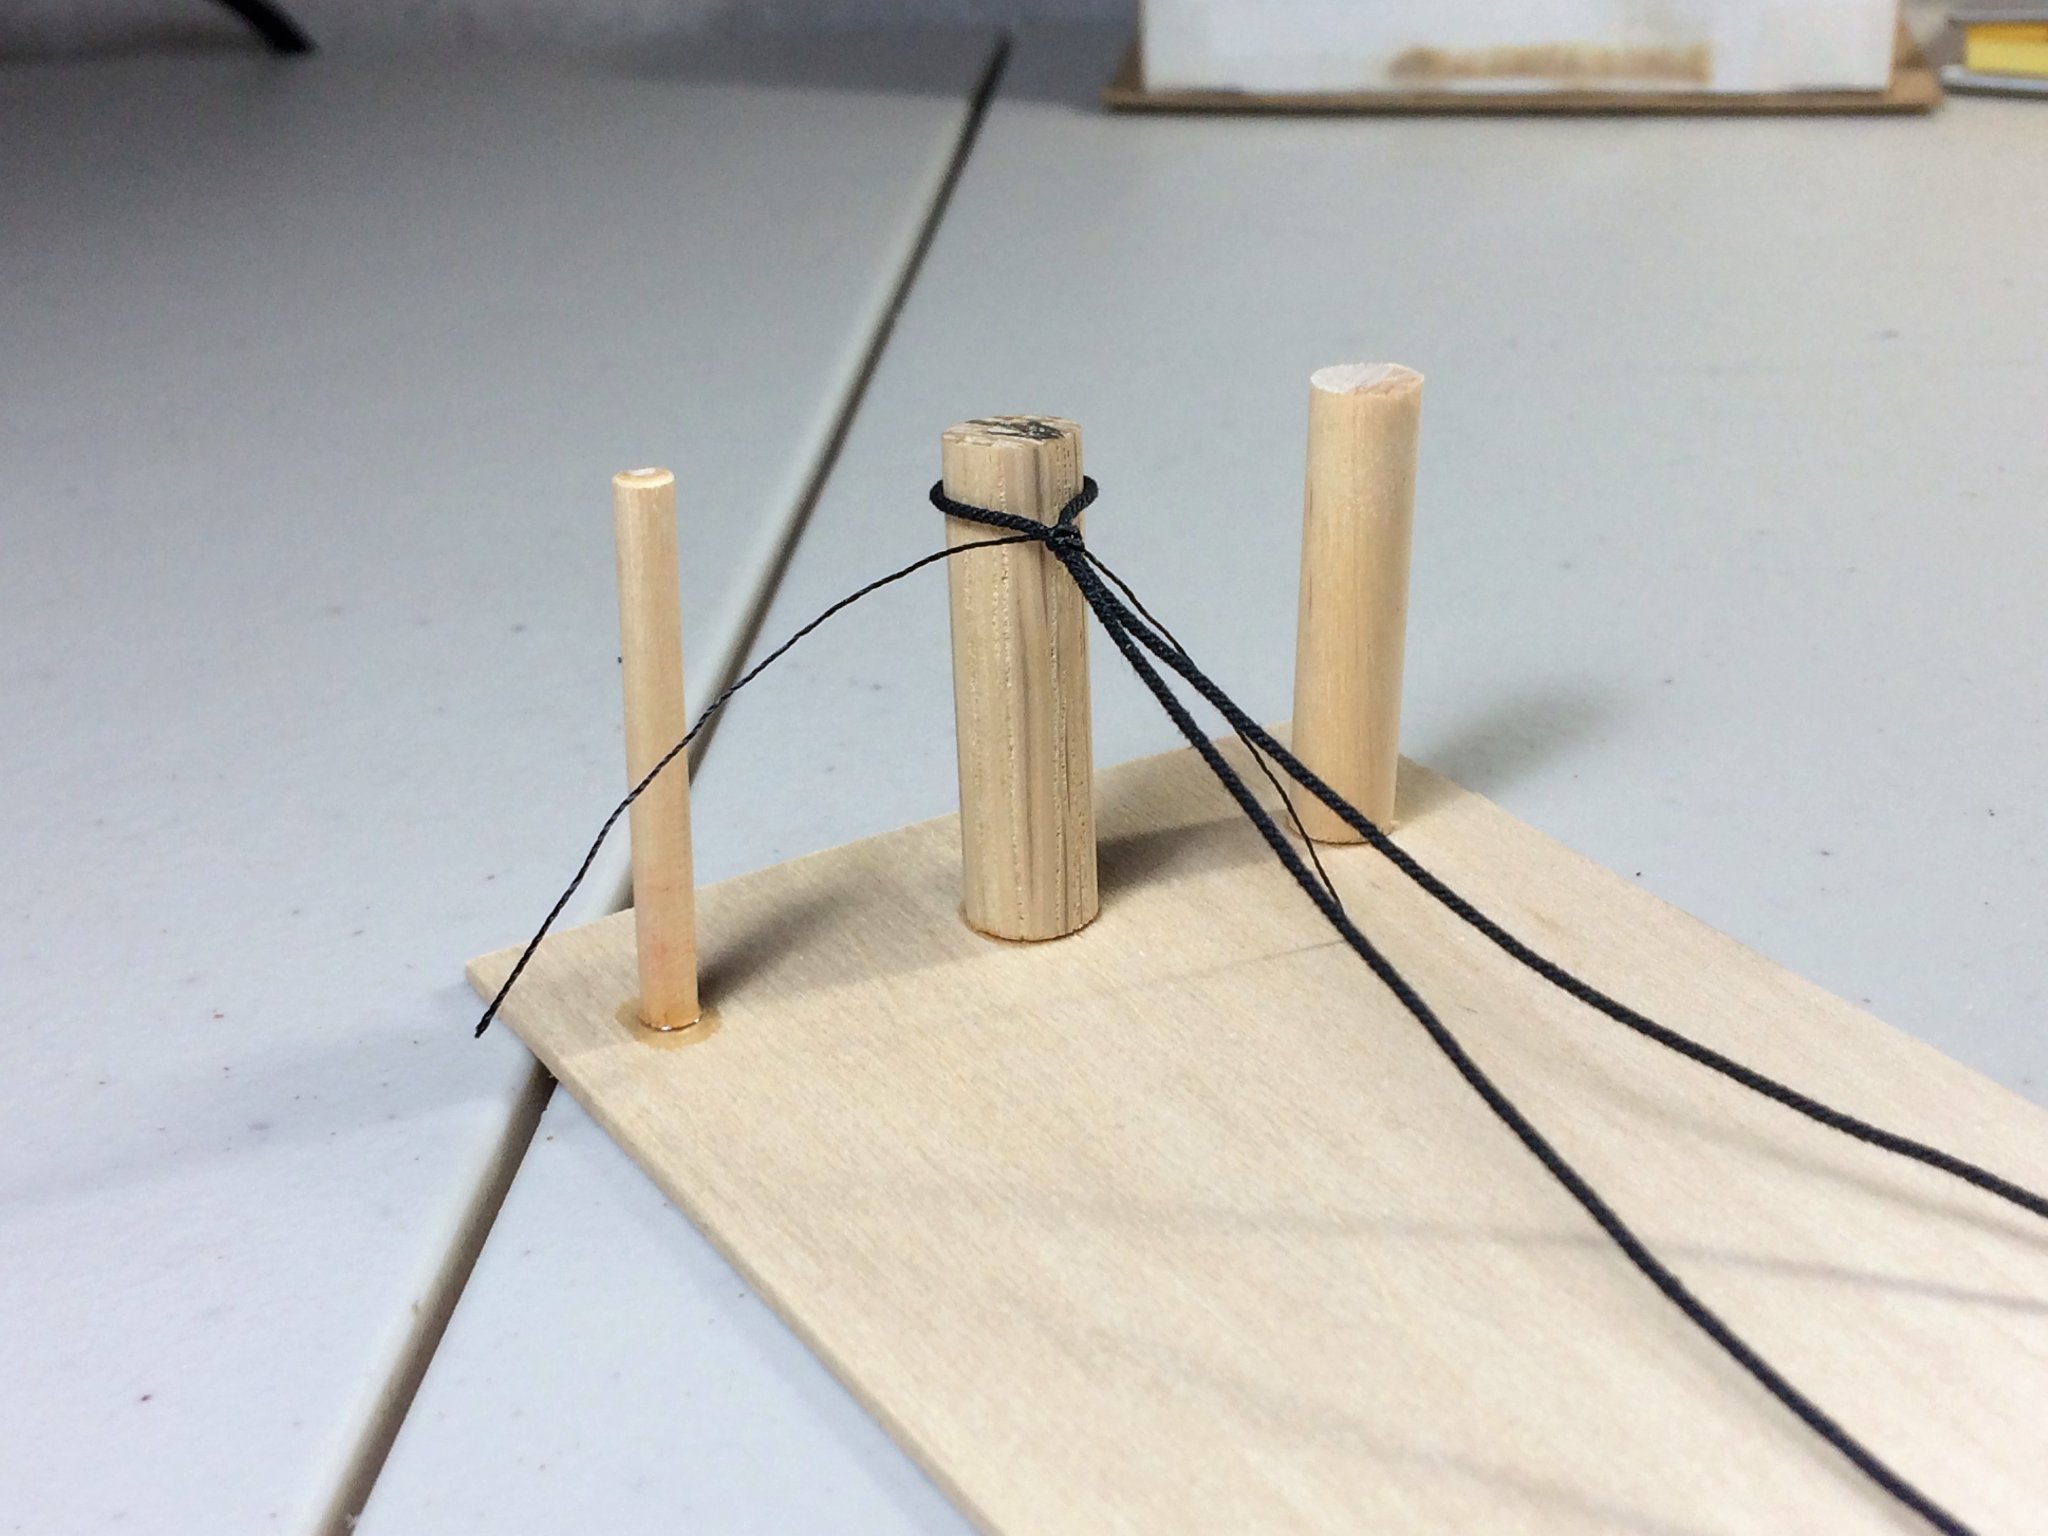
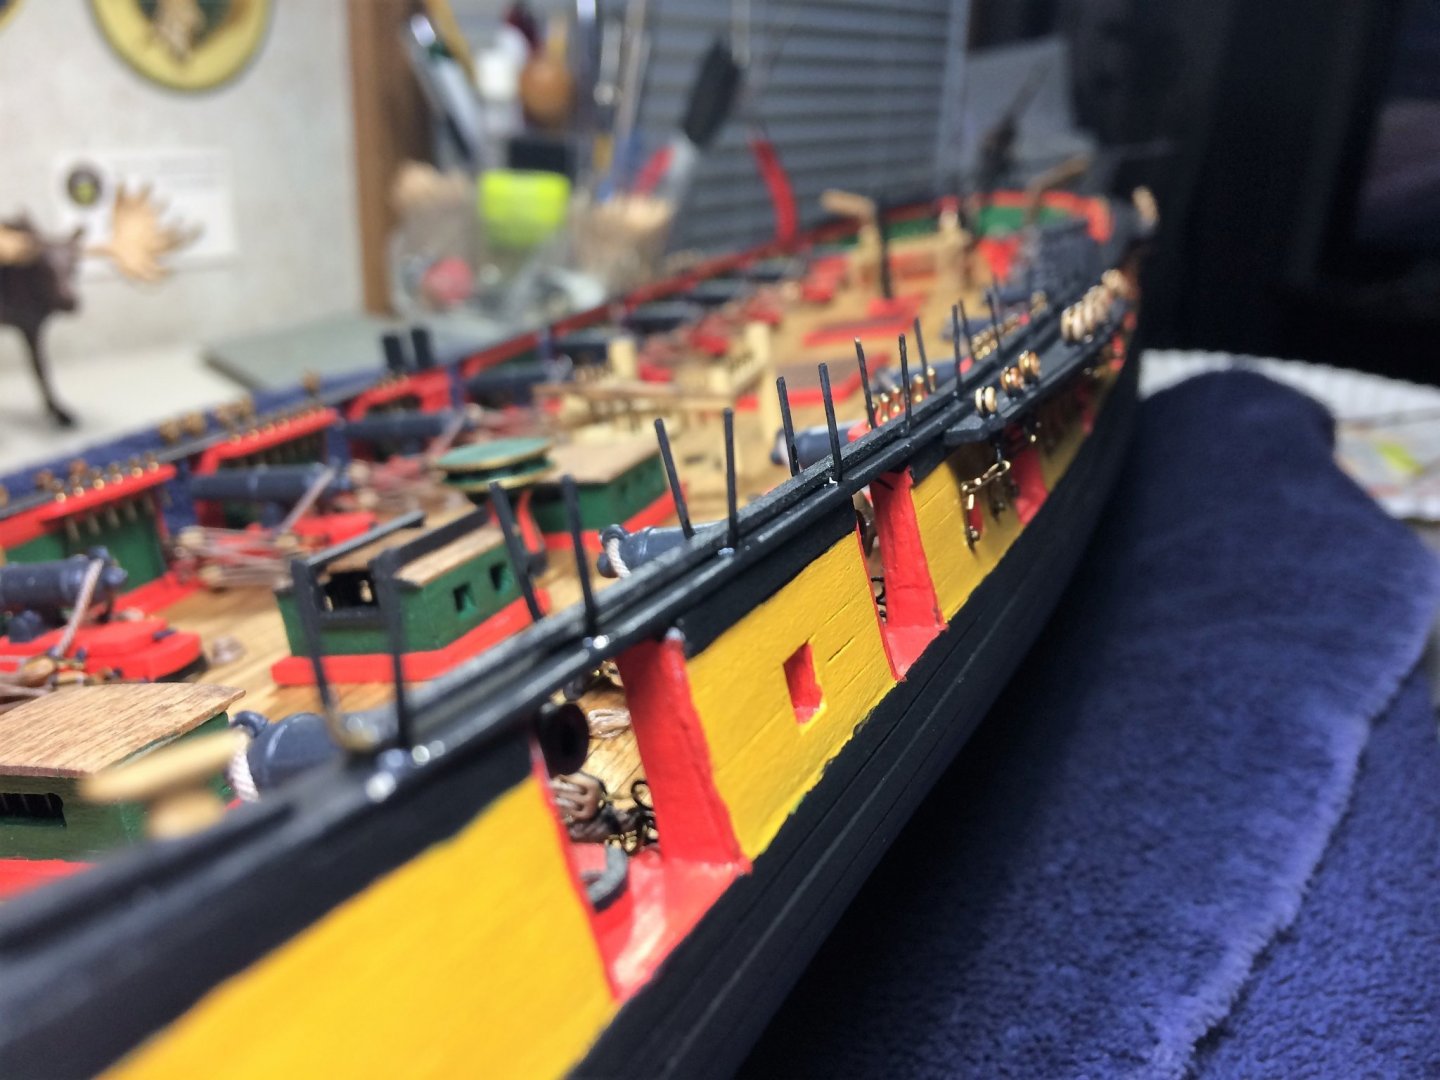
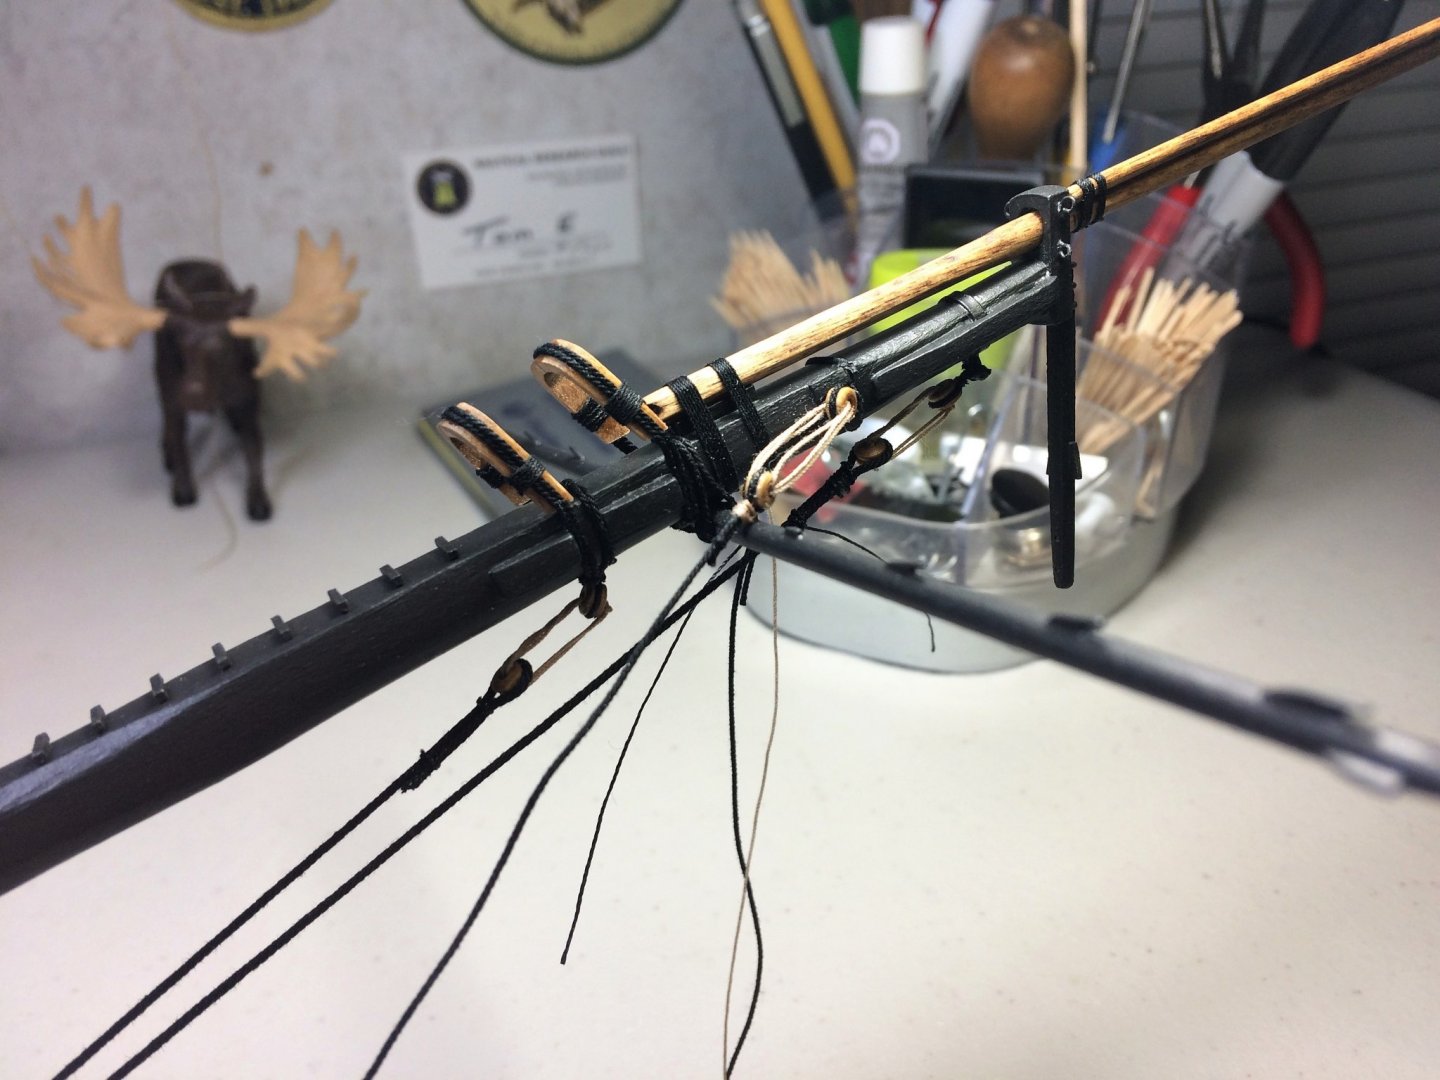
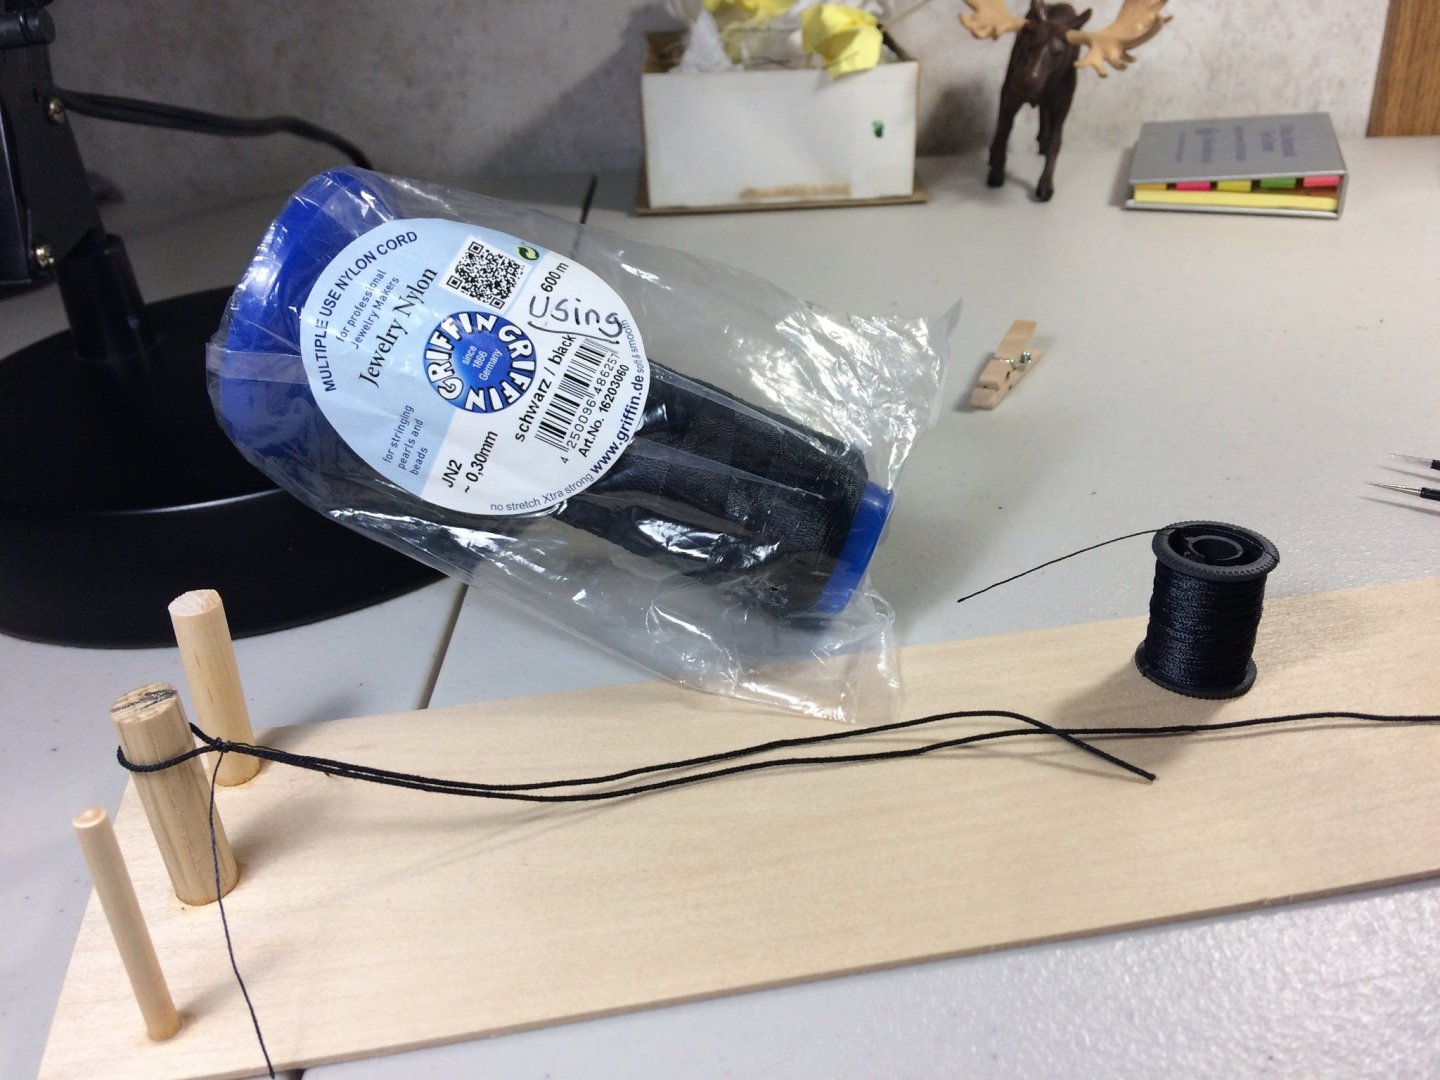
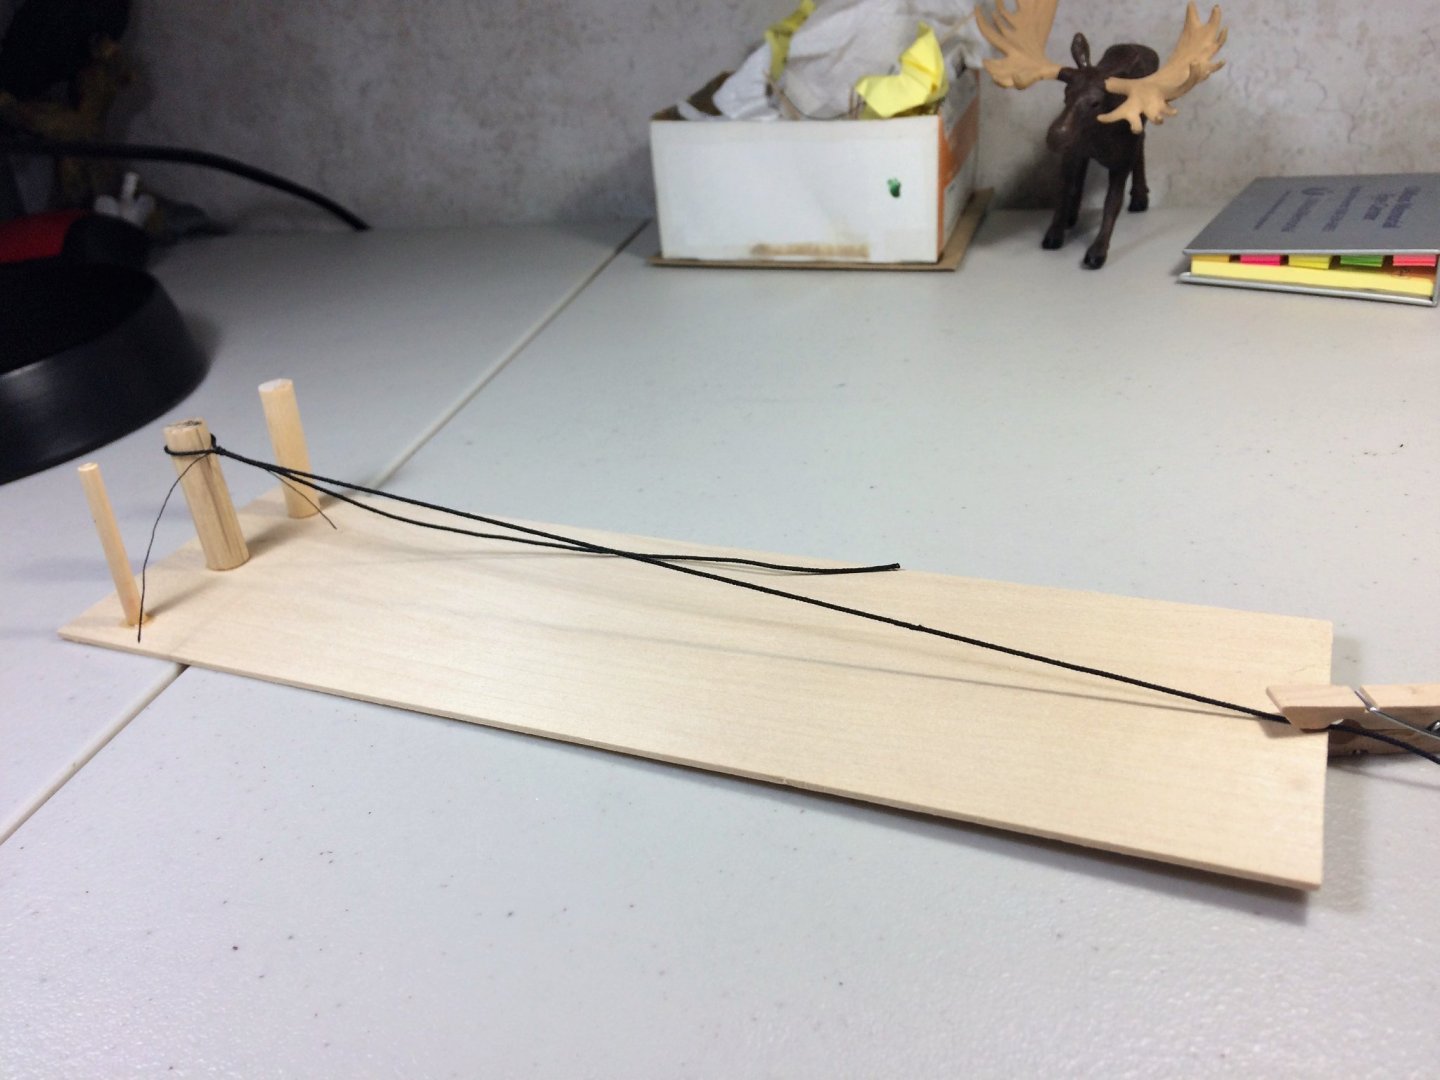
Evening, Hope everyone is well. It's a quiet night in New Hampshire, it's snowing outside, watching the Boston Bruins play the Pittsburgh Penguins, comfy on the couch..... Niagara needs an update. I'll start with a minor overlook. As I was planning the lay out for the hammock rails I discovered there are in fact two boarding ladders!! One for each side......duh! Nothing fancy, took care of business. Well, feeling saucy (and intimidated) I took a small leap into rigging this ship. I really just wanted to get a feel for using rope. How stiff is it, does it curl, does it unwind.......etc, etc.... I made a simple little rig to start tying some shrouds for the Fore Mast. Keeping the rope tight was my main objective with this rig. I don't have any special serving machines, and will have to be done by hand.....and a little patience. Literally learning how to rig as I move forward. I used three different sized dowels in anticipation of different sized masts. I'll be using black Syren rope for all the standing rigging. When I first bought this kit, I slowly started to replace the kit supplied rope with Syren rope. When Chuck announced they wont be making the black rope anymore, I bought a few extra packs before they were gone. Should have plenty.......should... Being the first shroud on the Starboard side, I made a Burton pendant per the plans. Not too shabby. I'll get better. It's official. Niagara has her first piece of rigging!!!!! Nothing is permanently installed, everything is removable, and as much as possible will be done off model. Mask up! Tom E

-
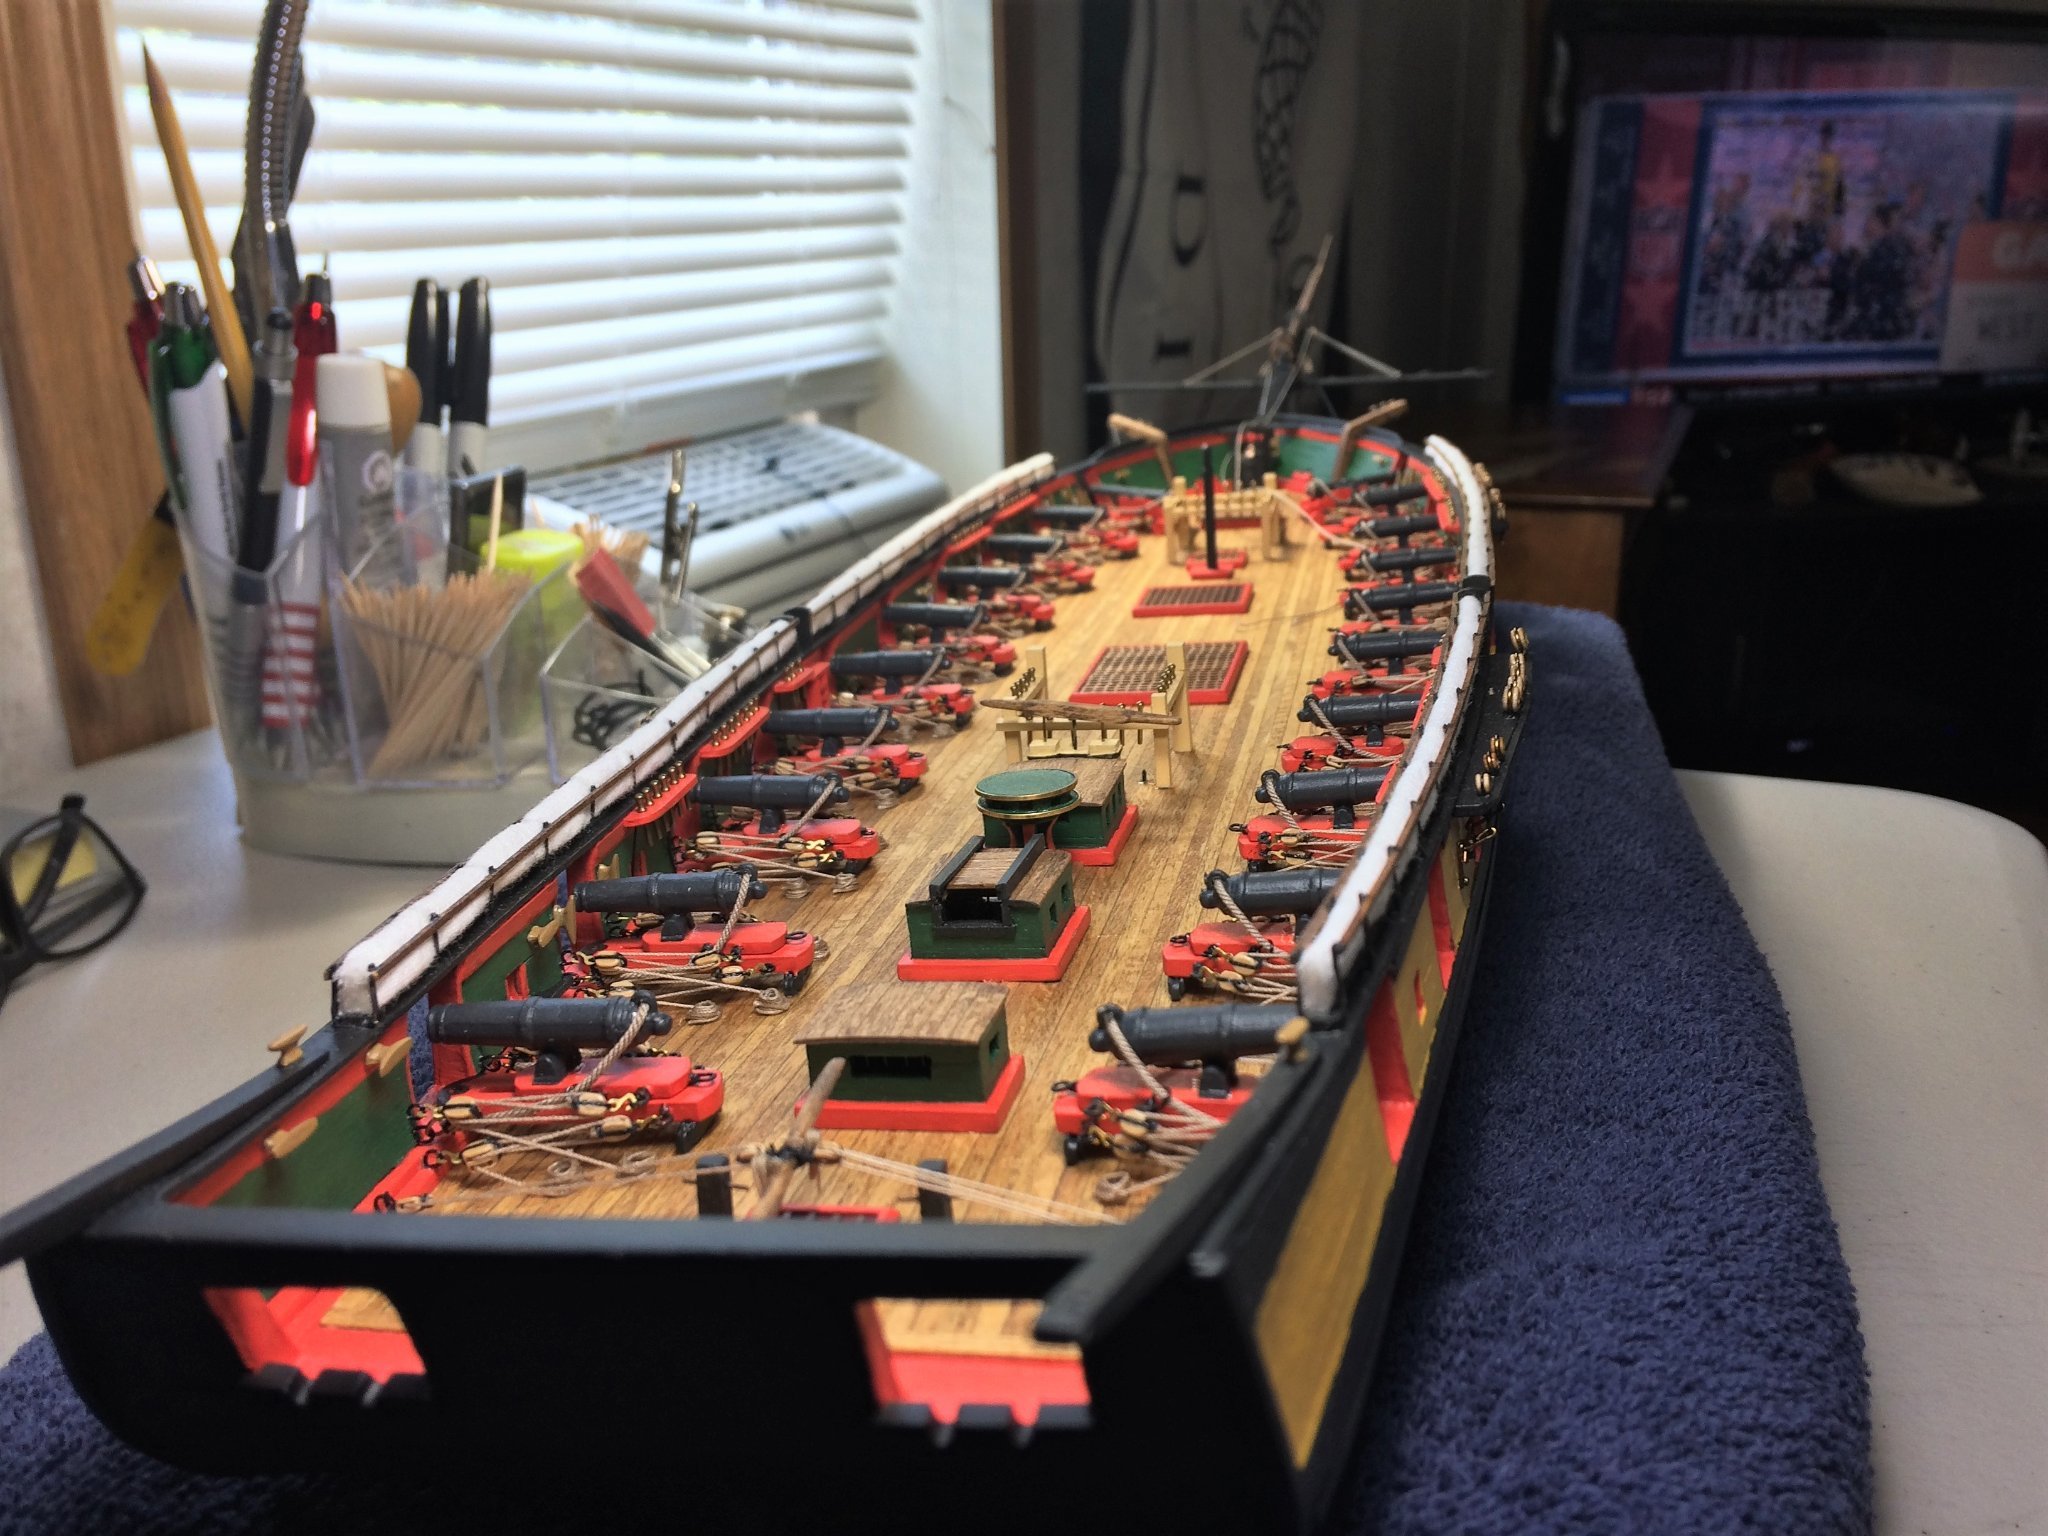
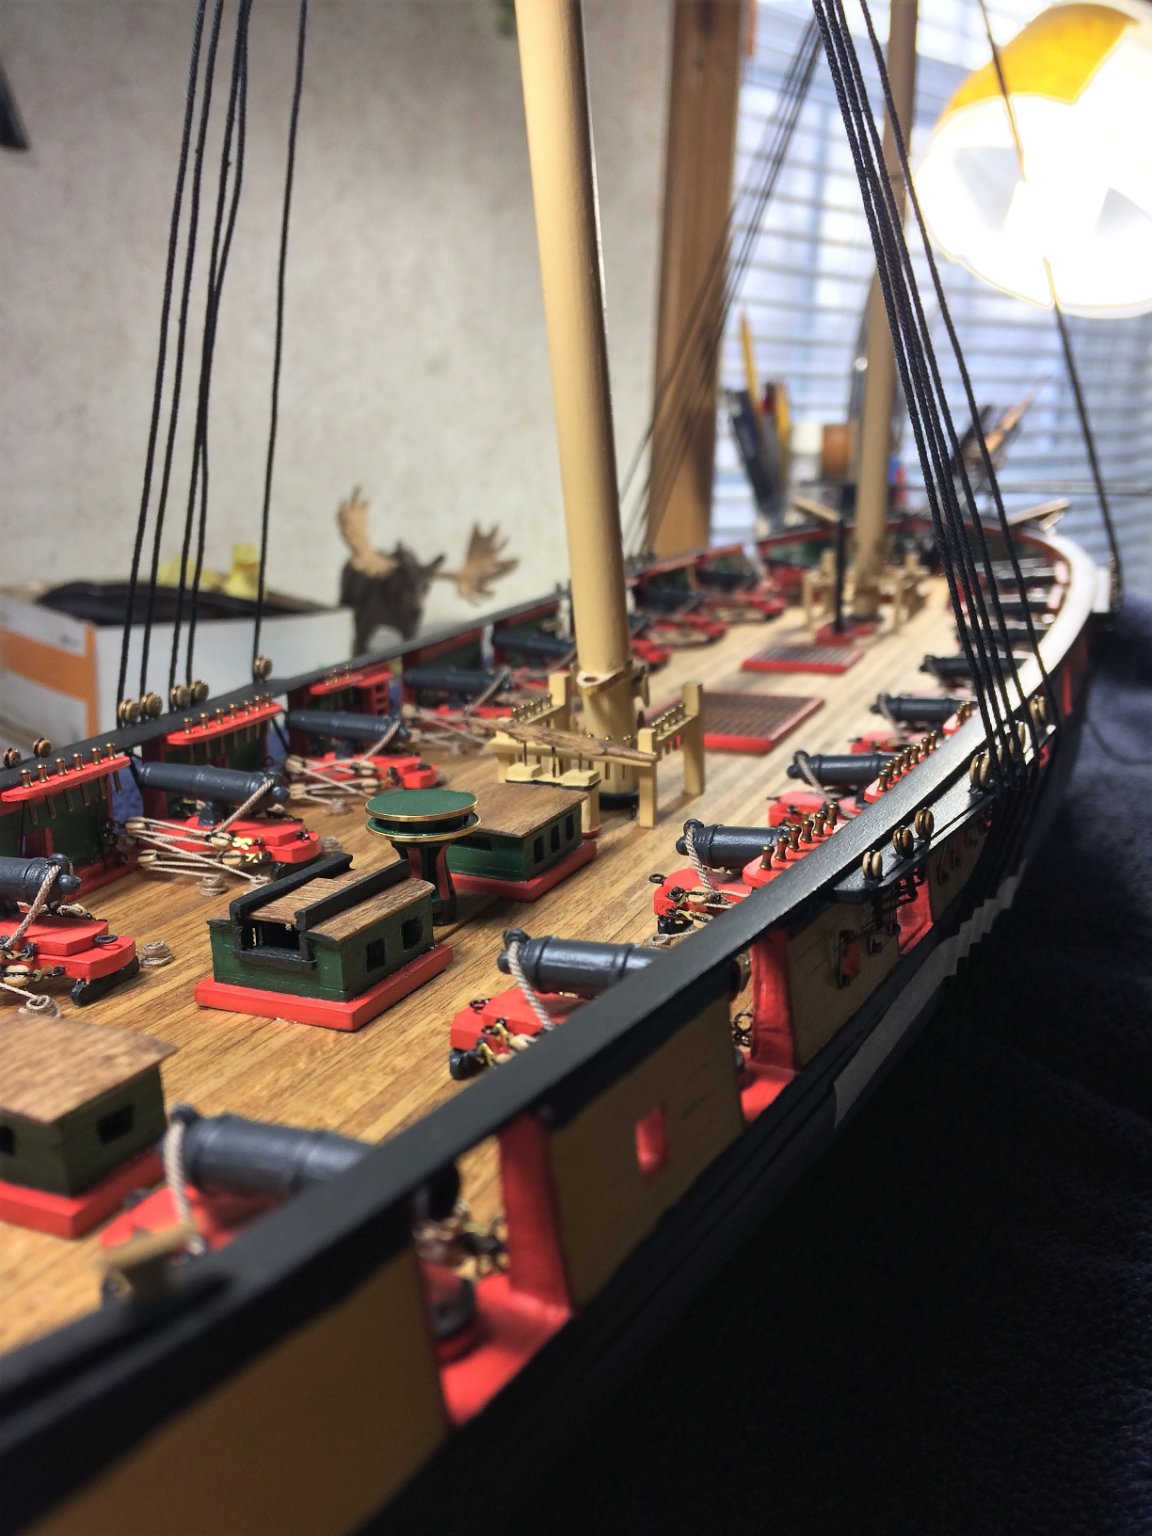
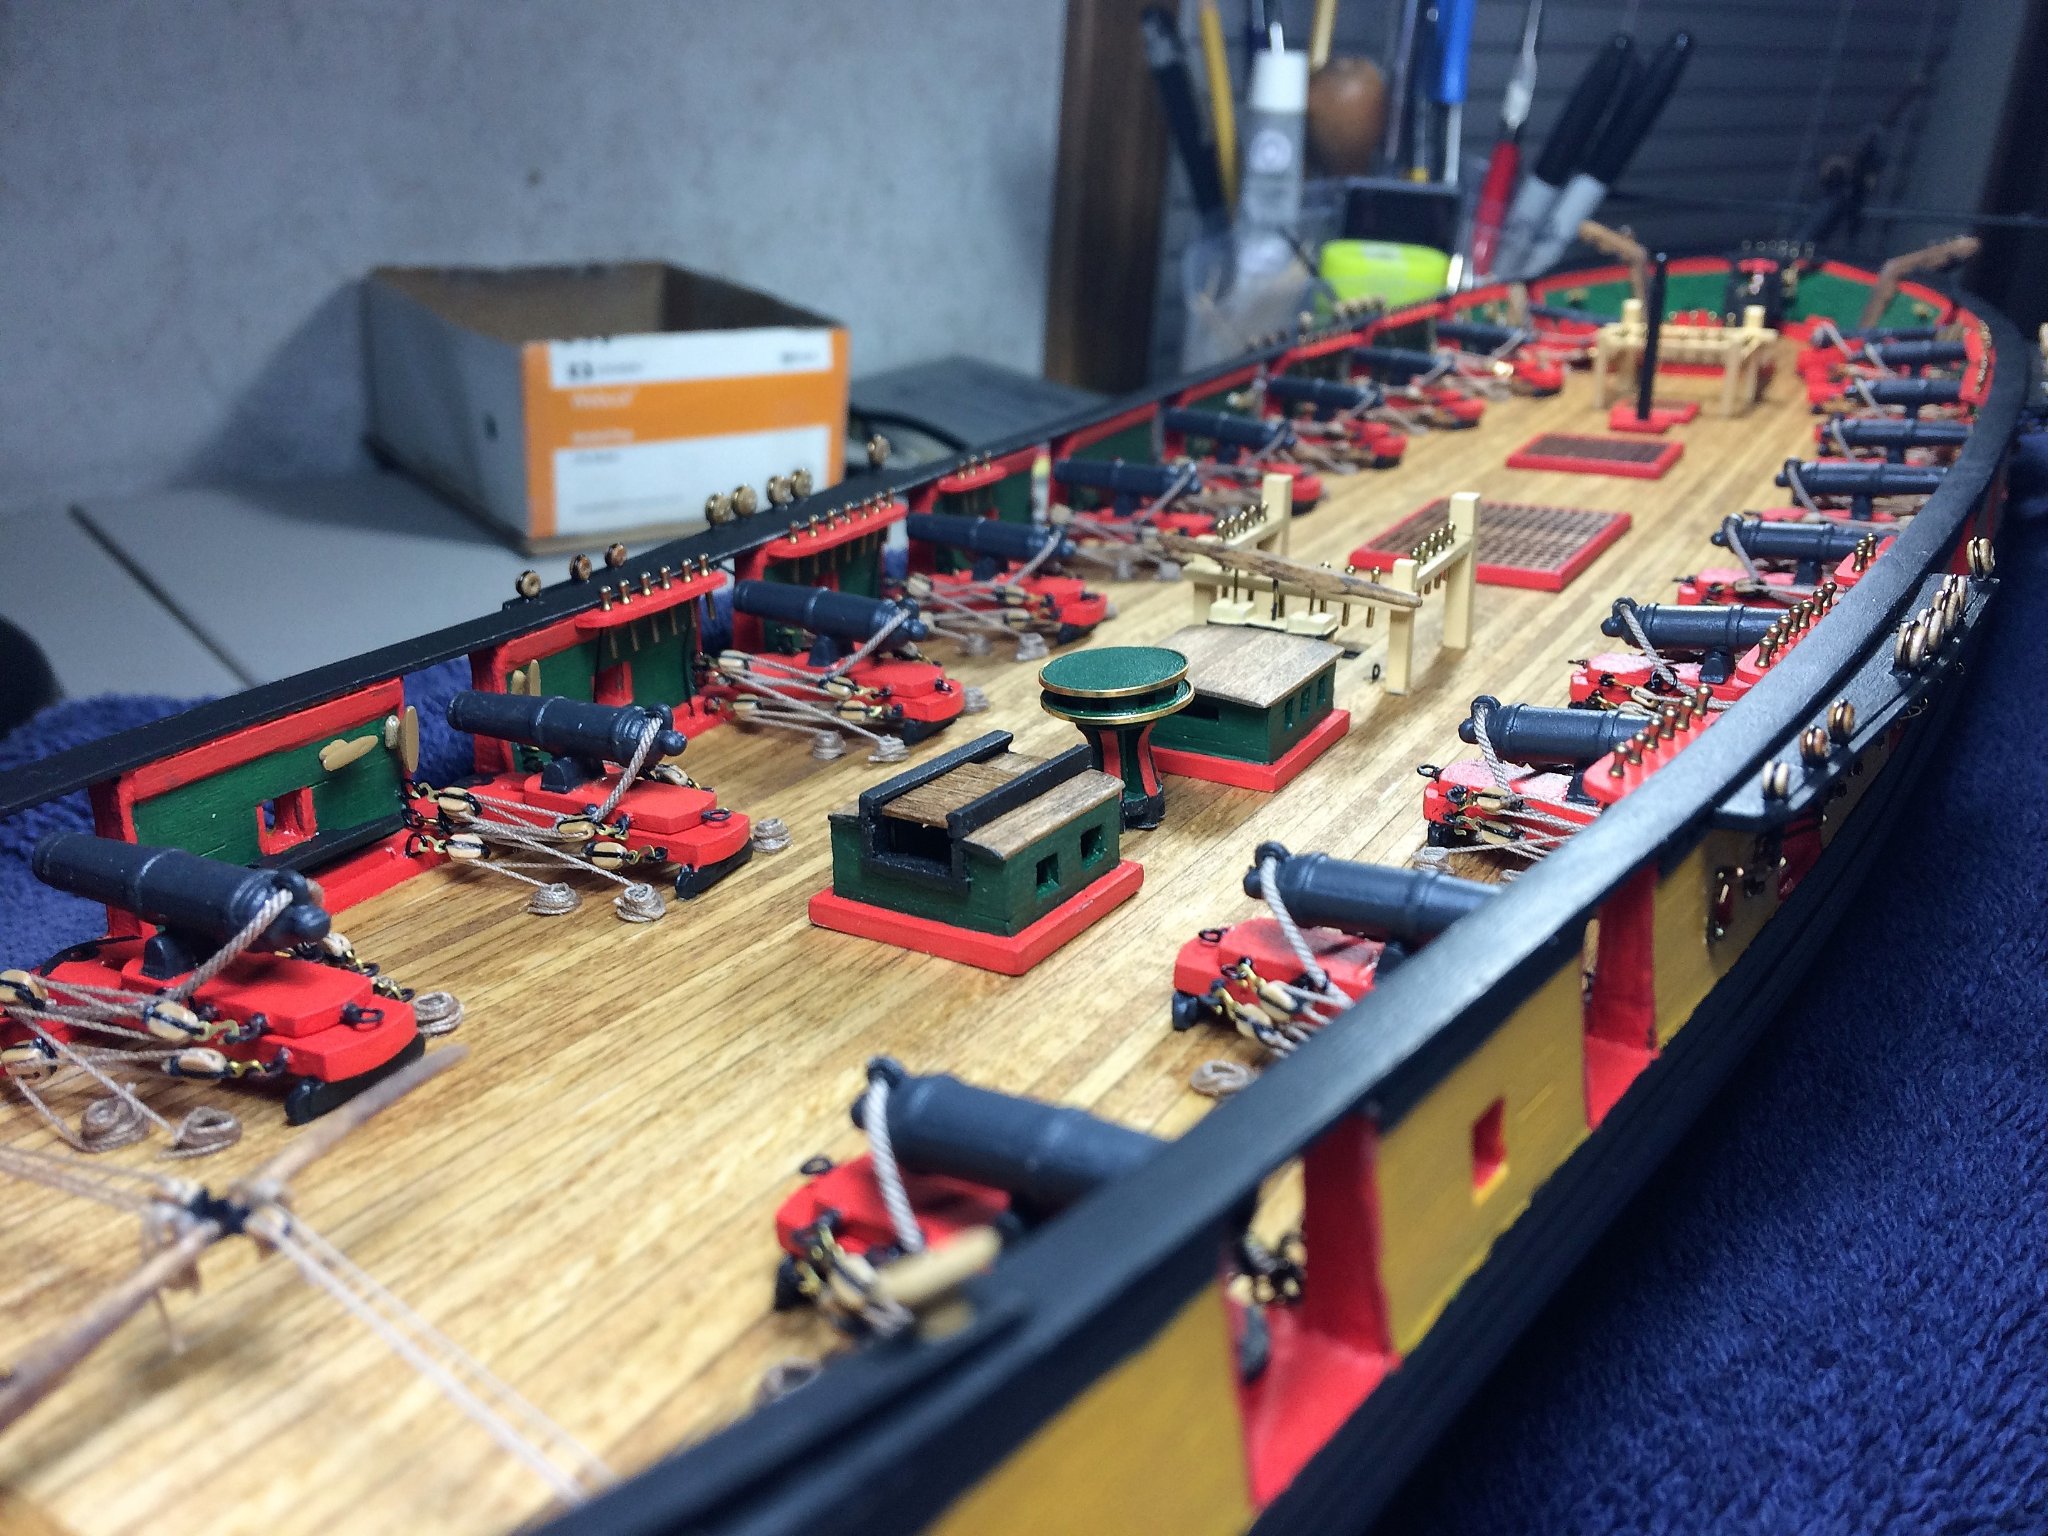
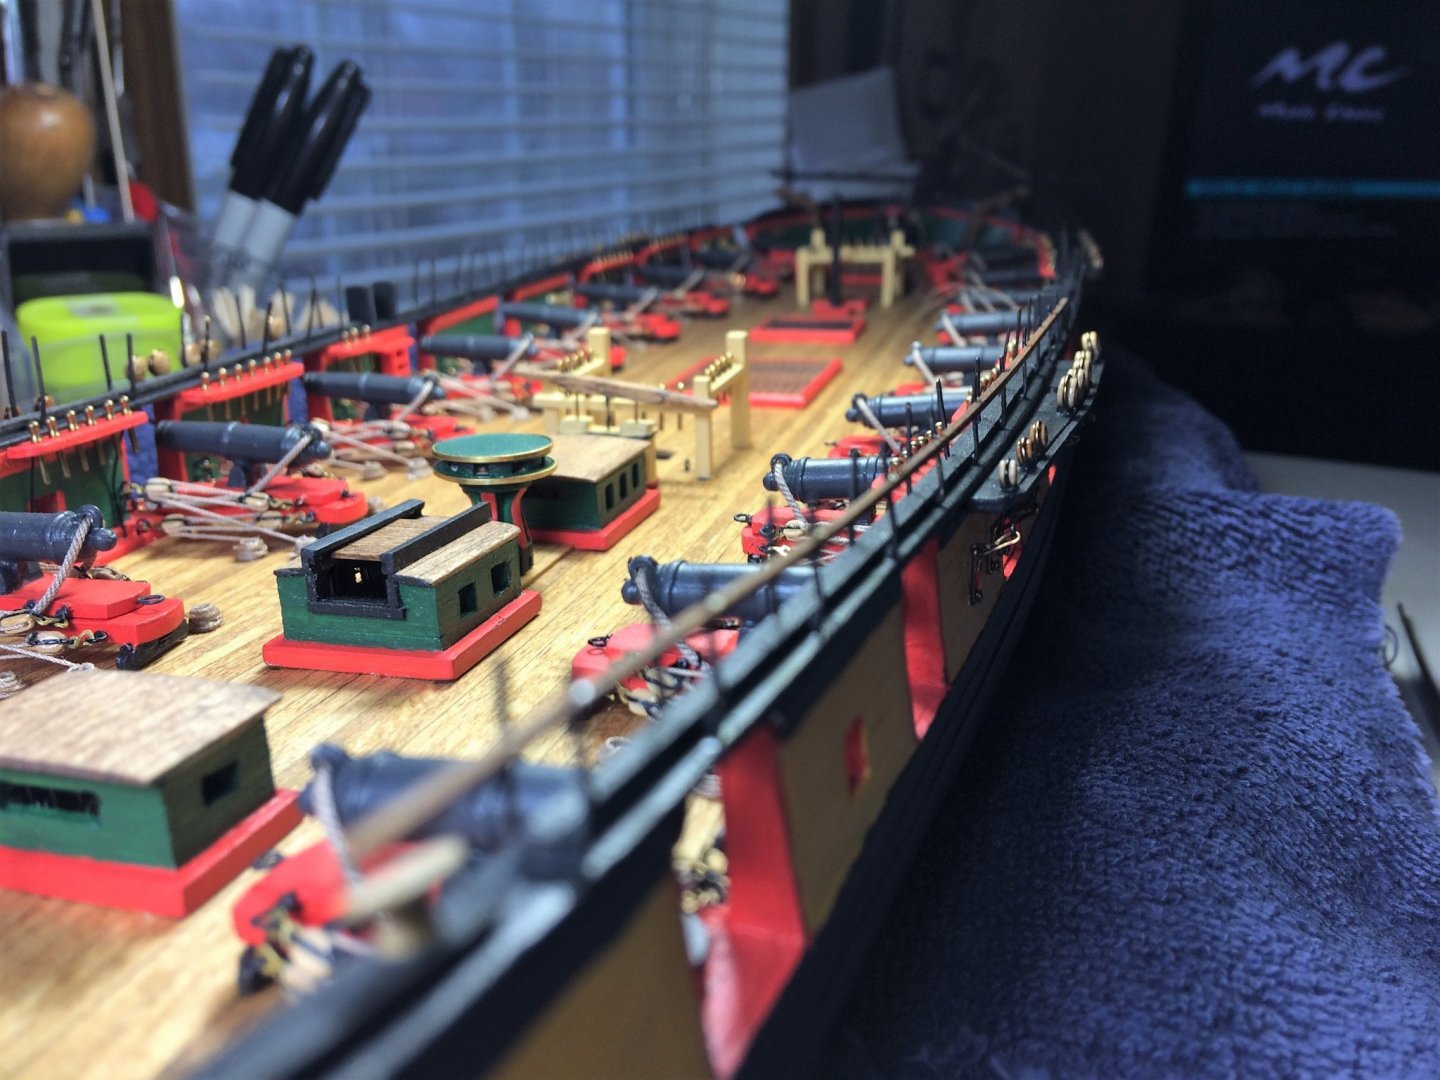
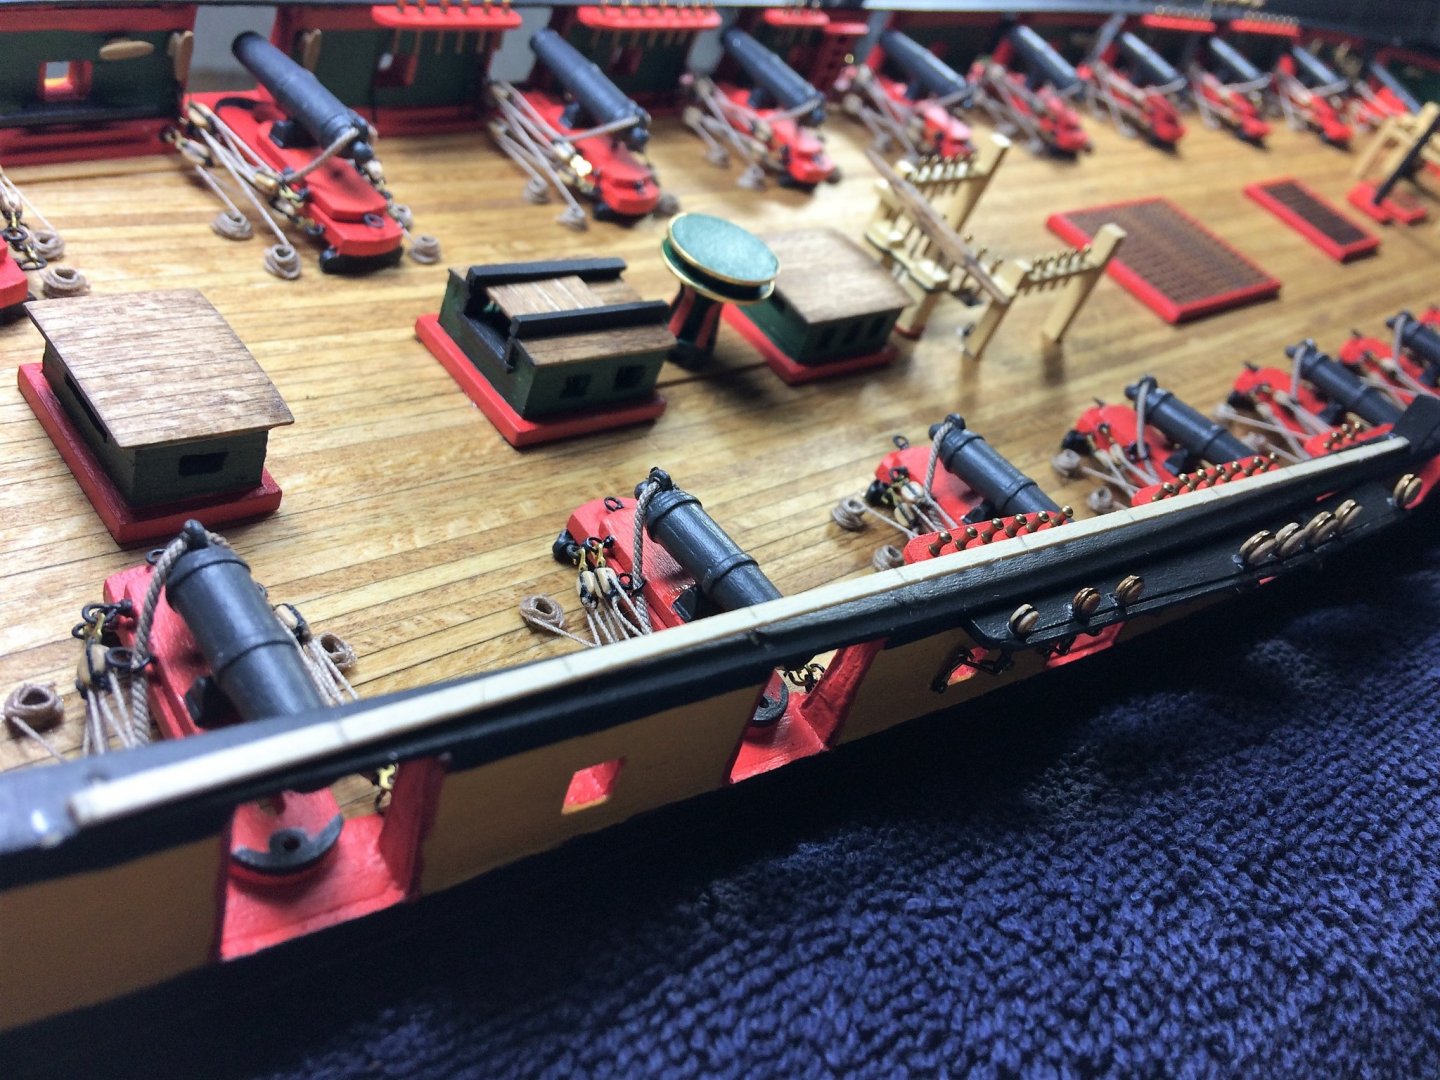
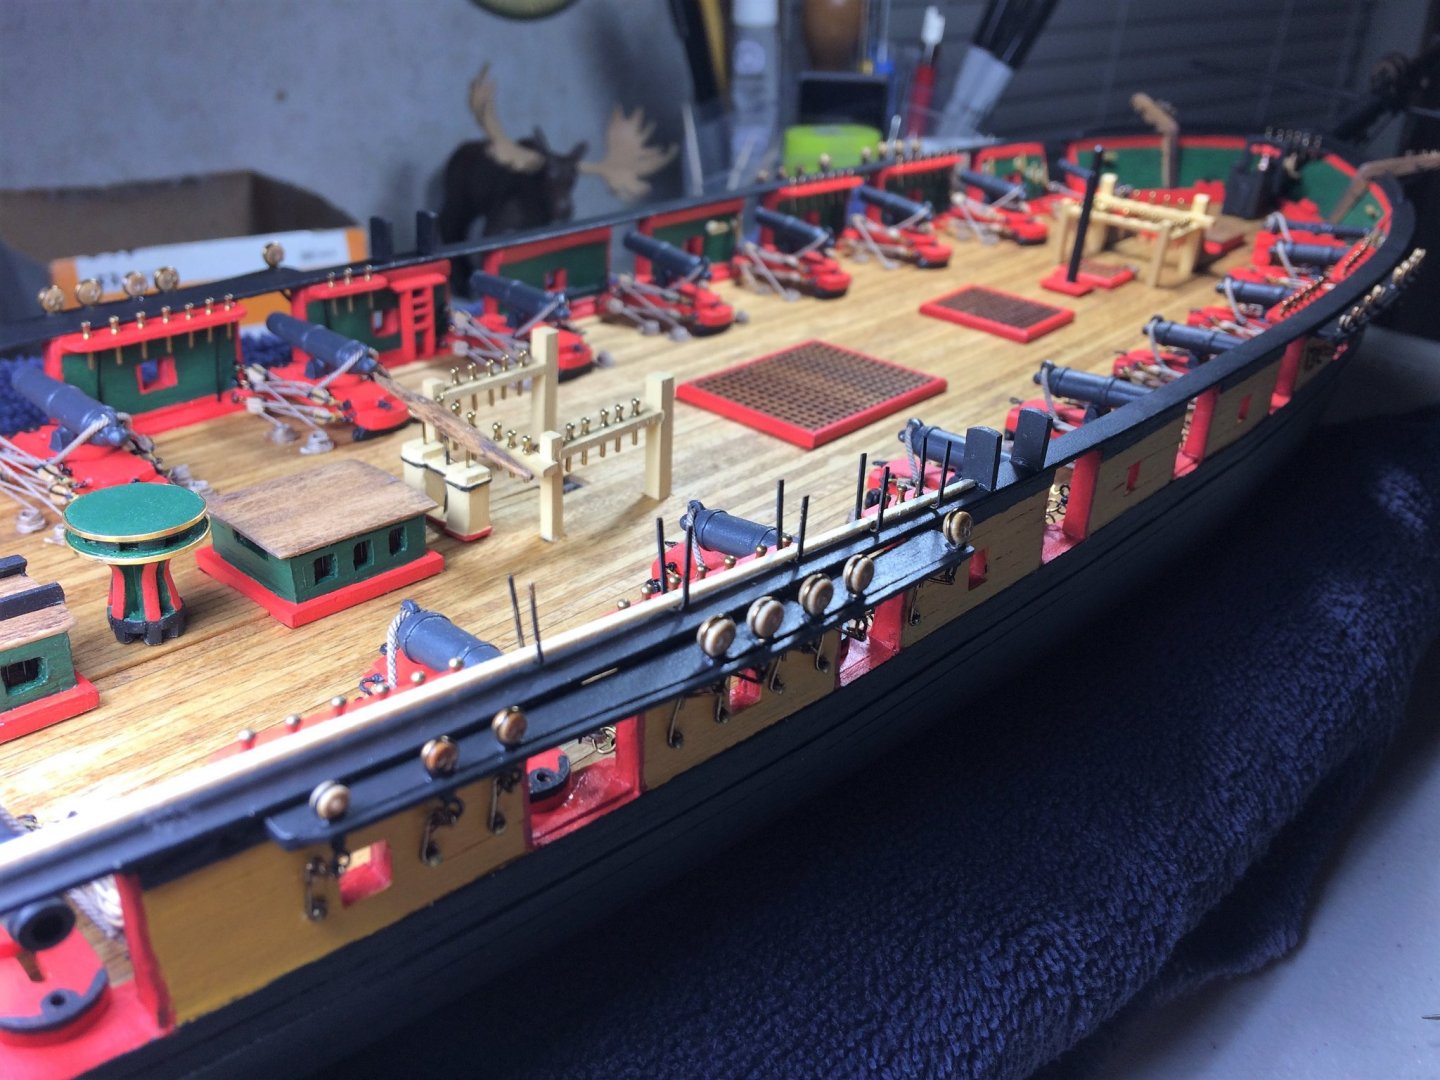
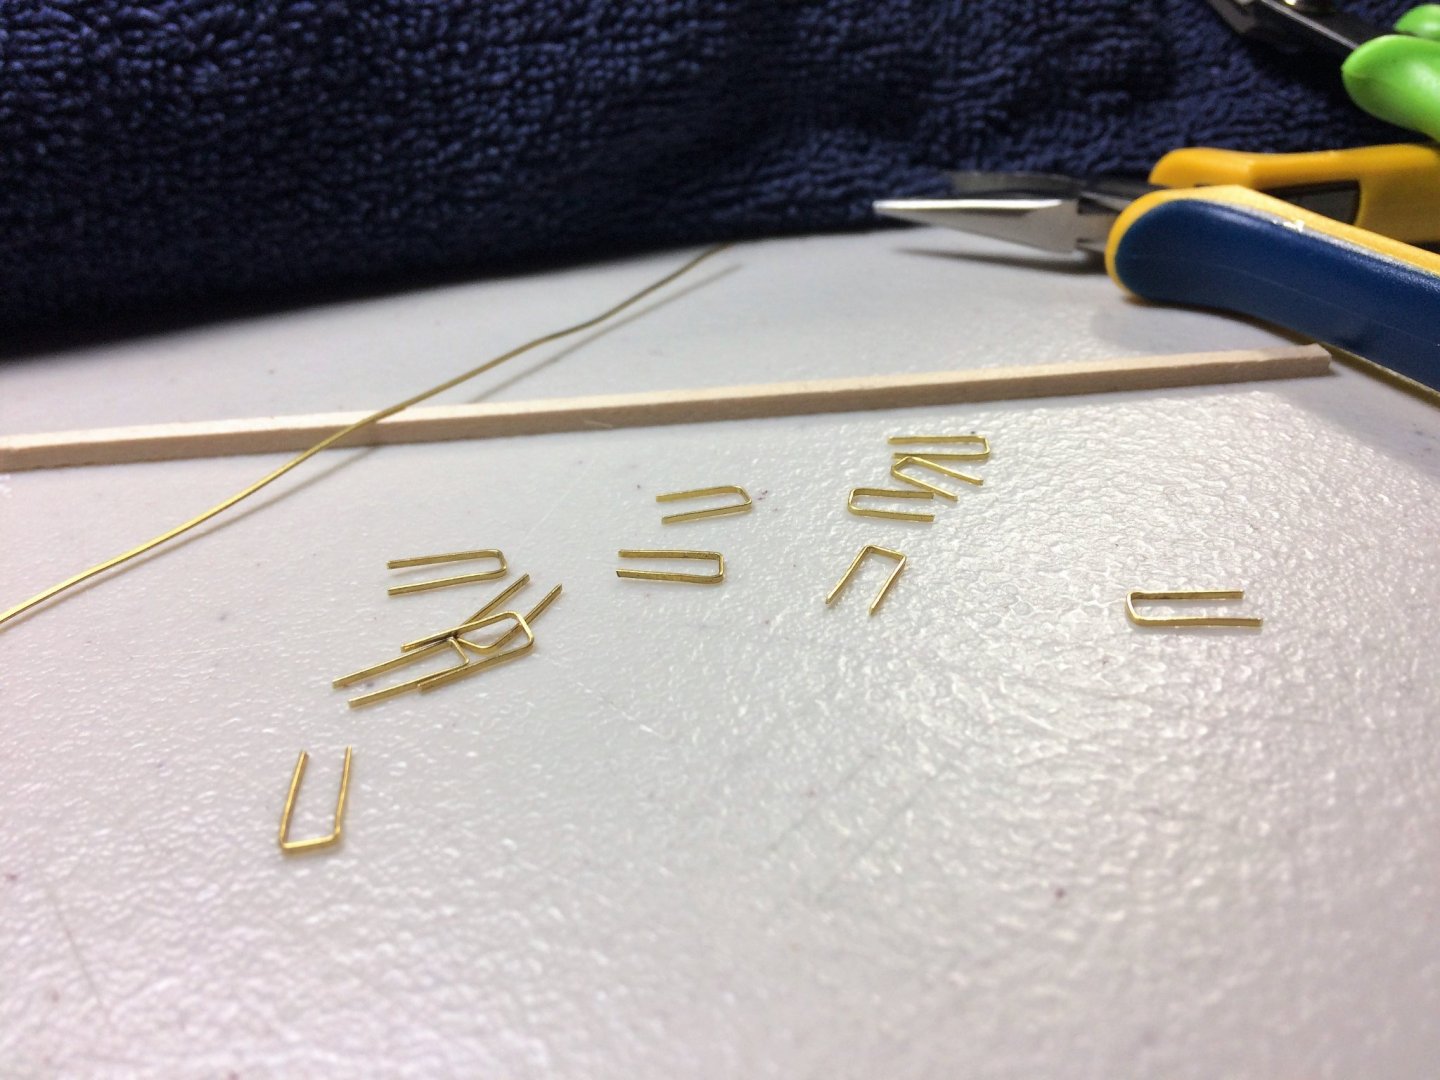
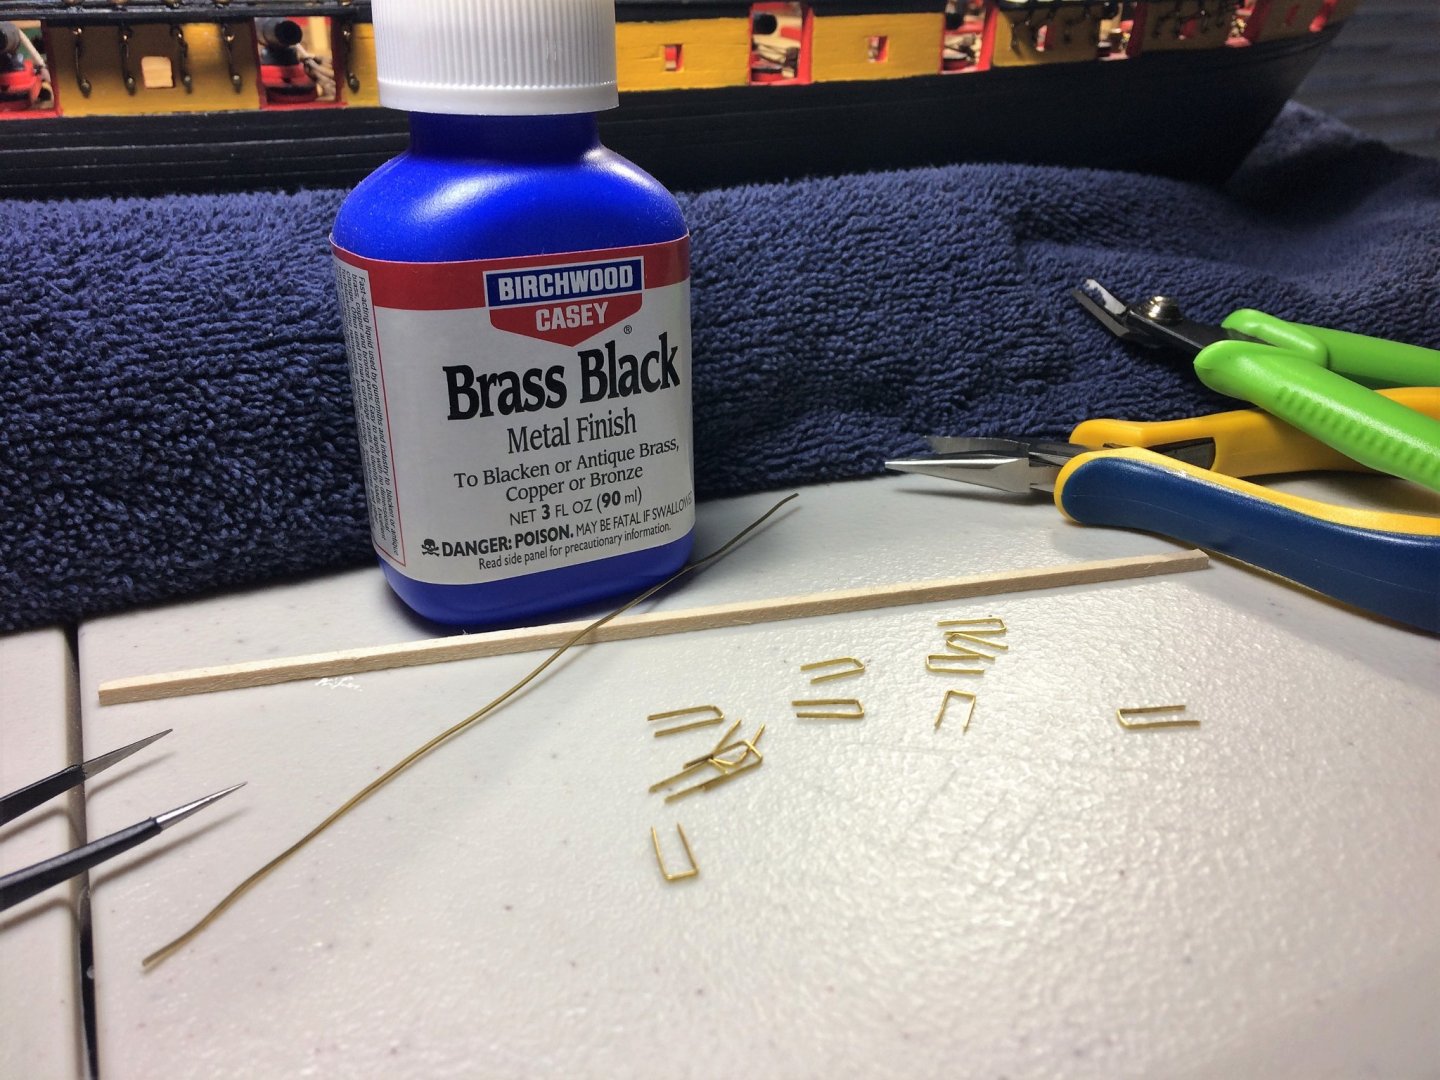
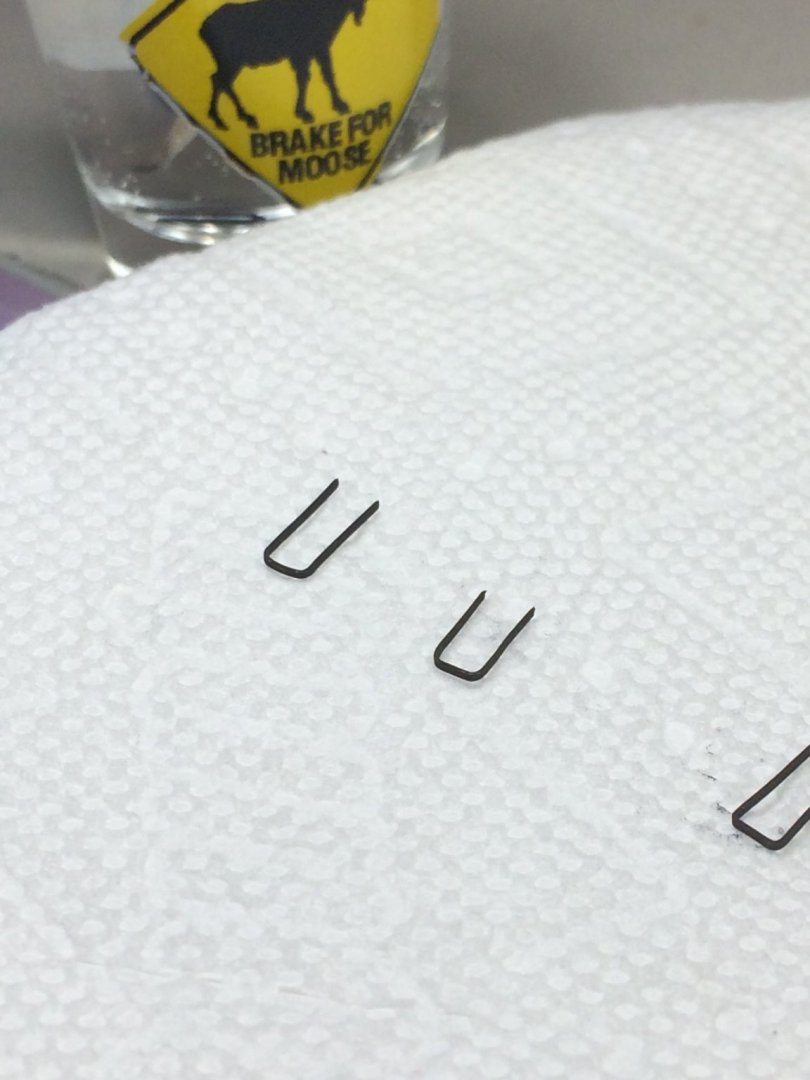
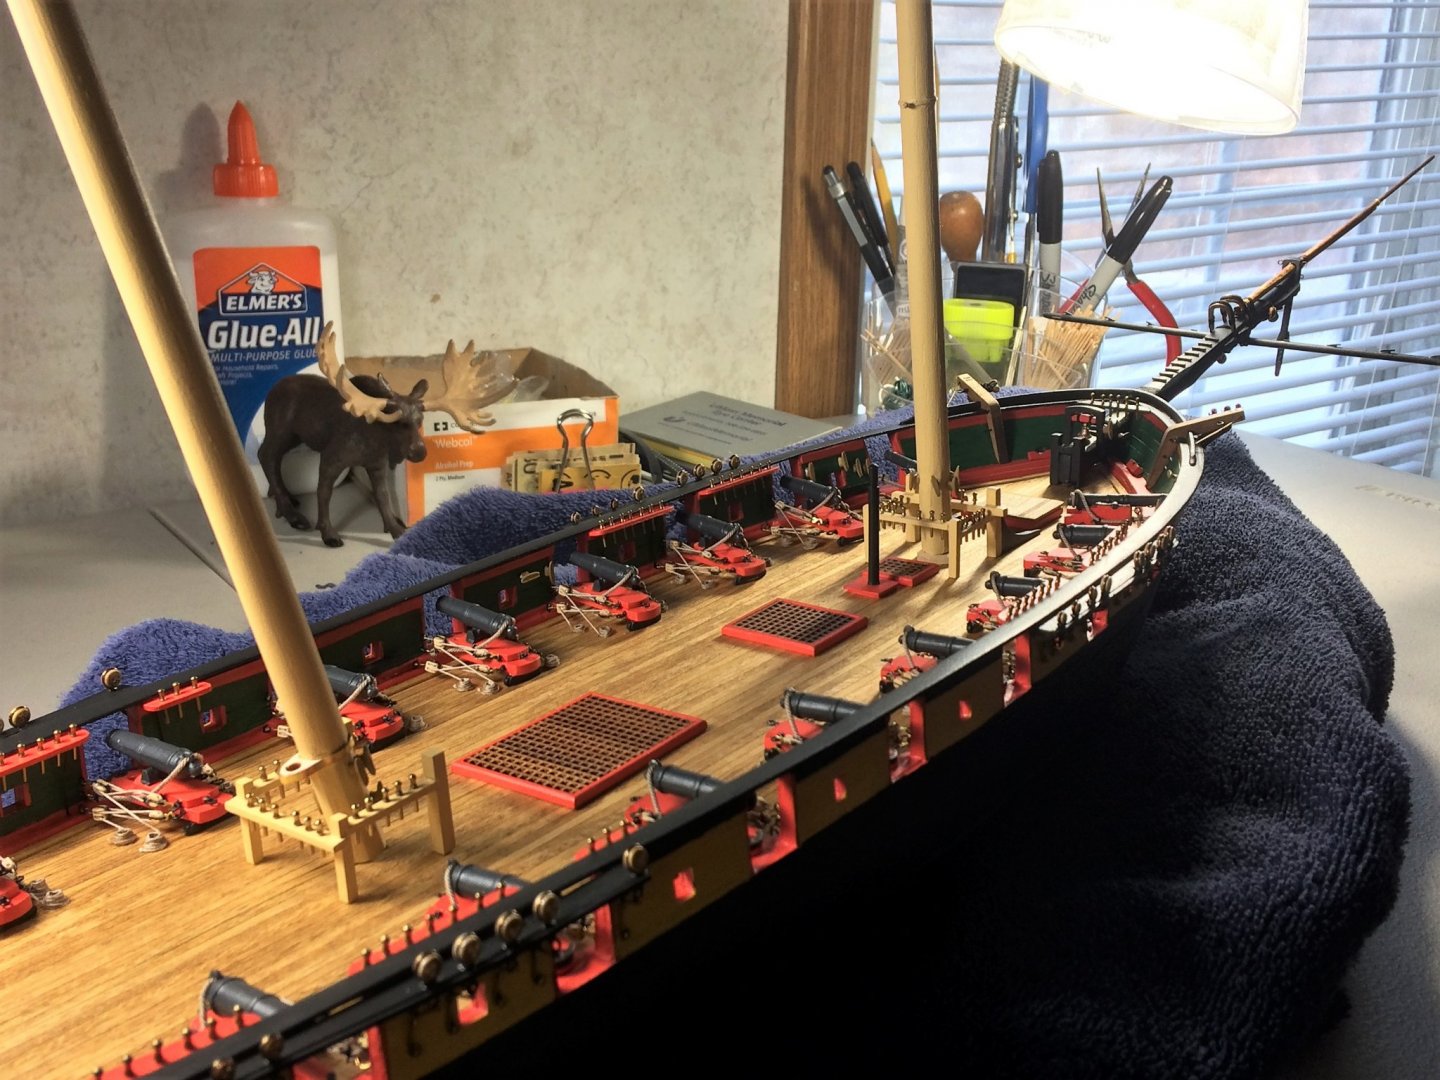
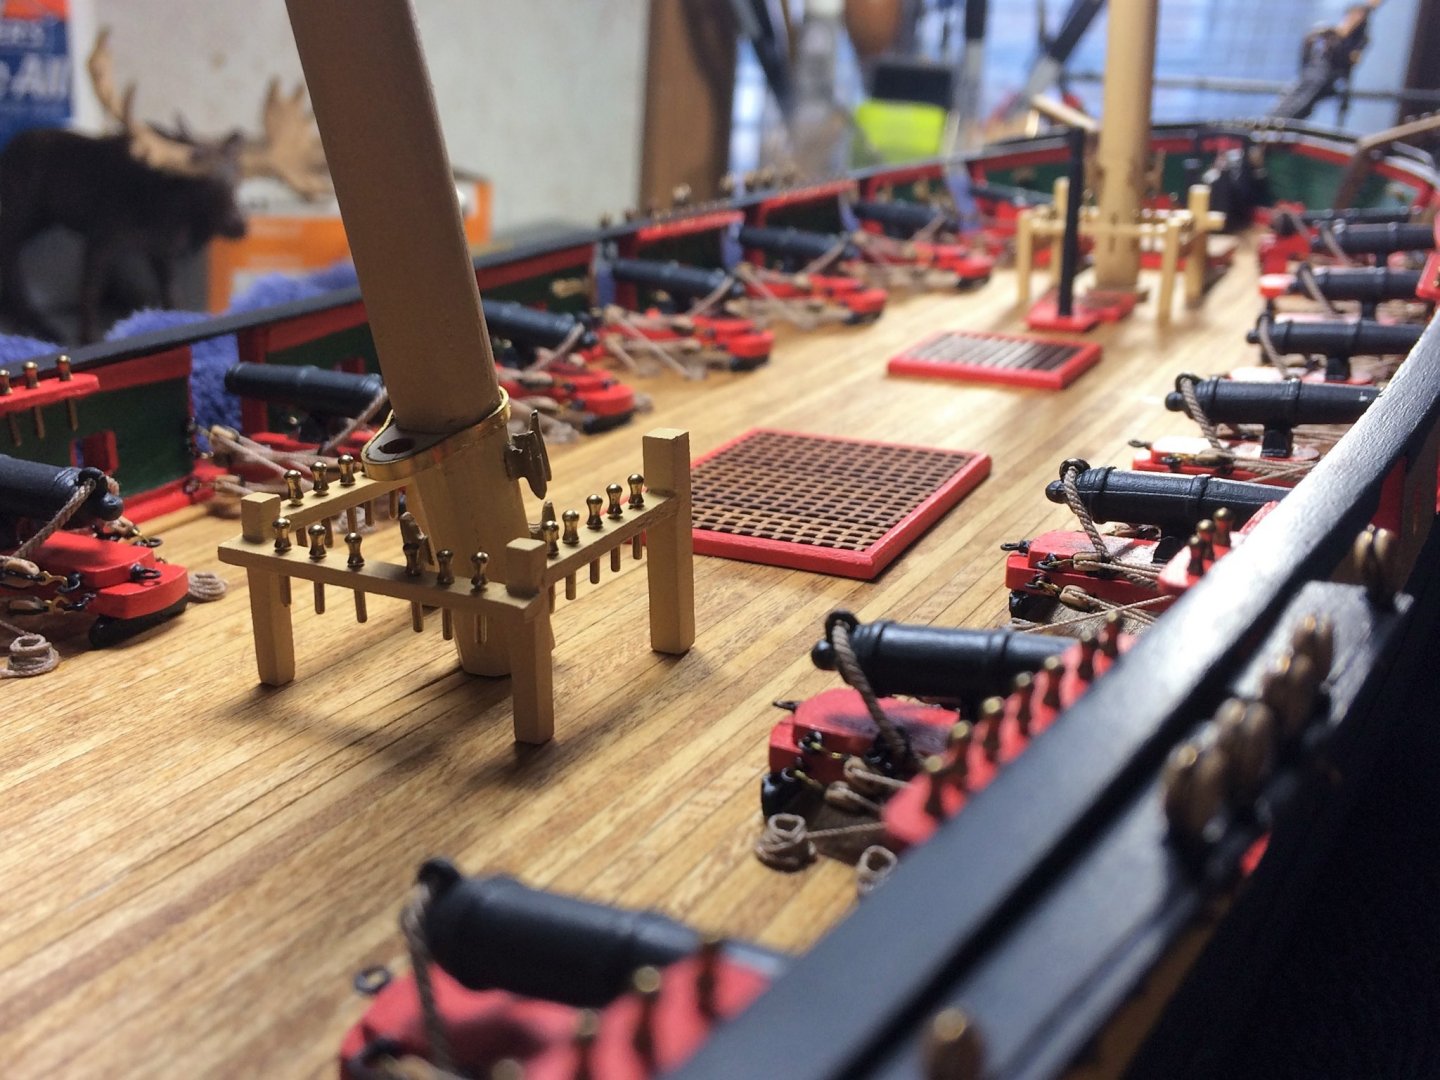
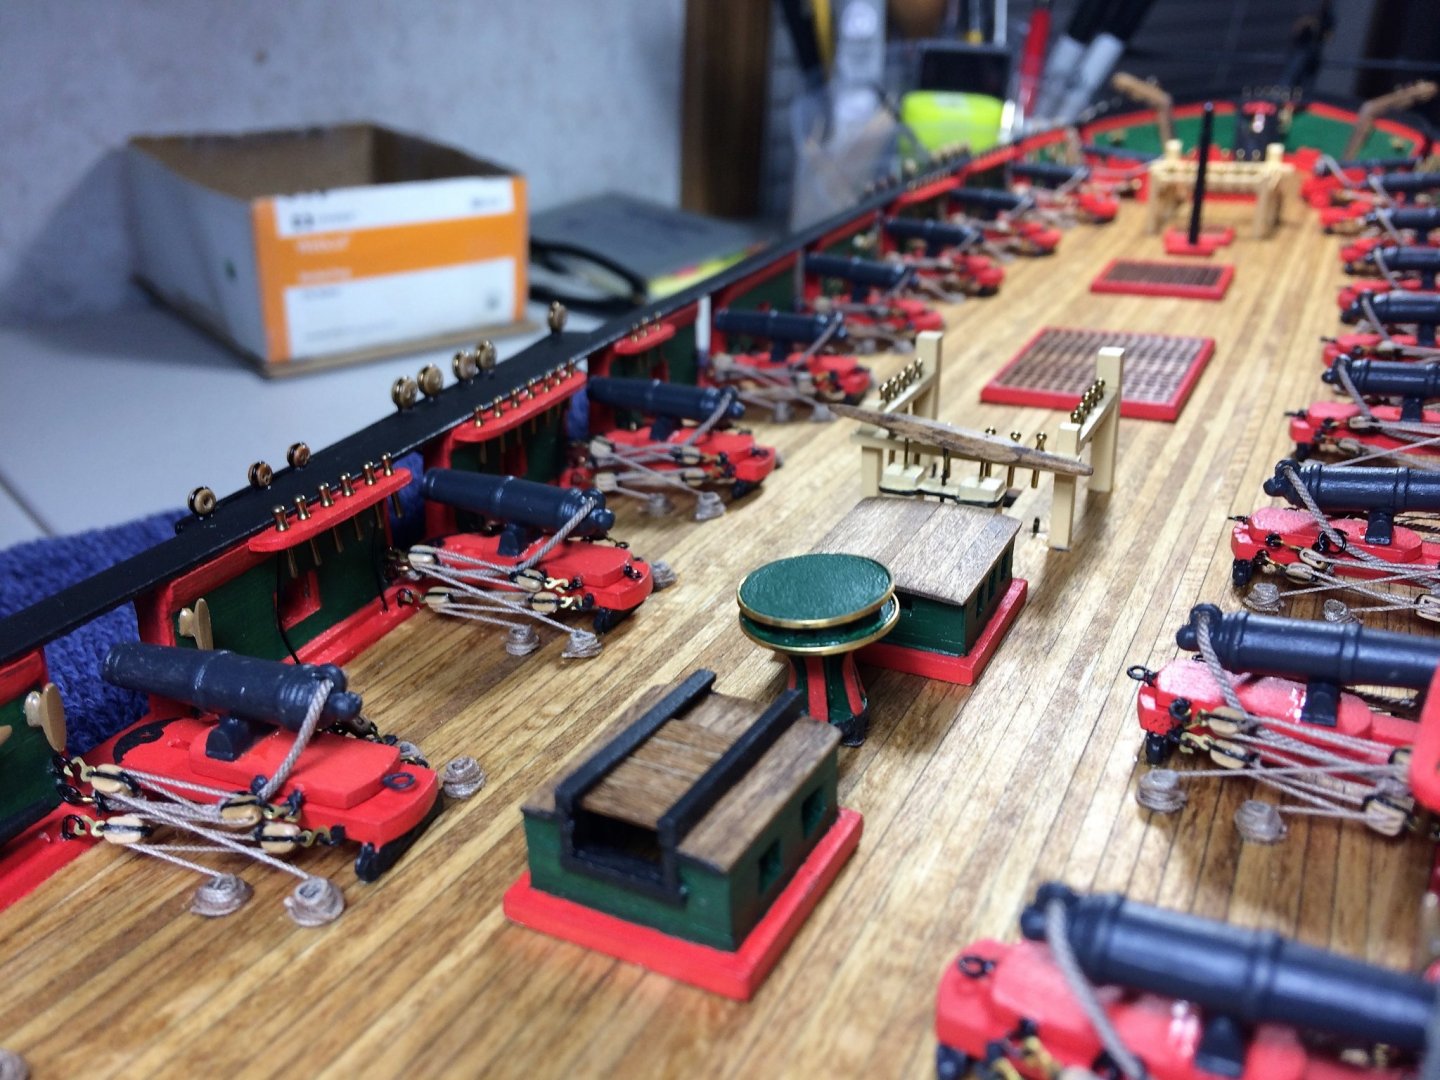
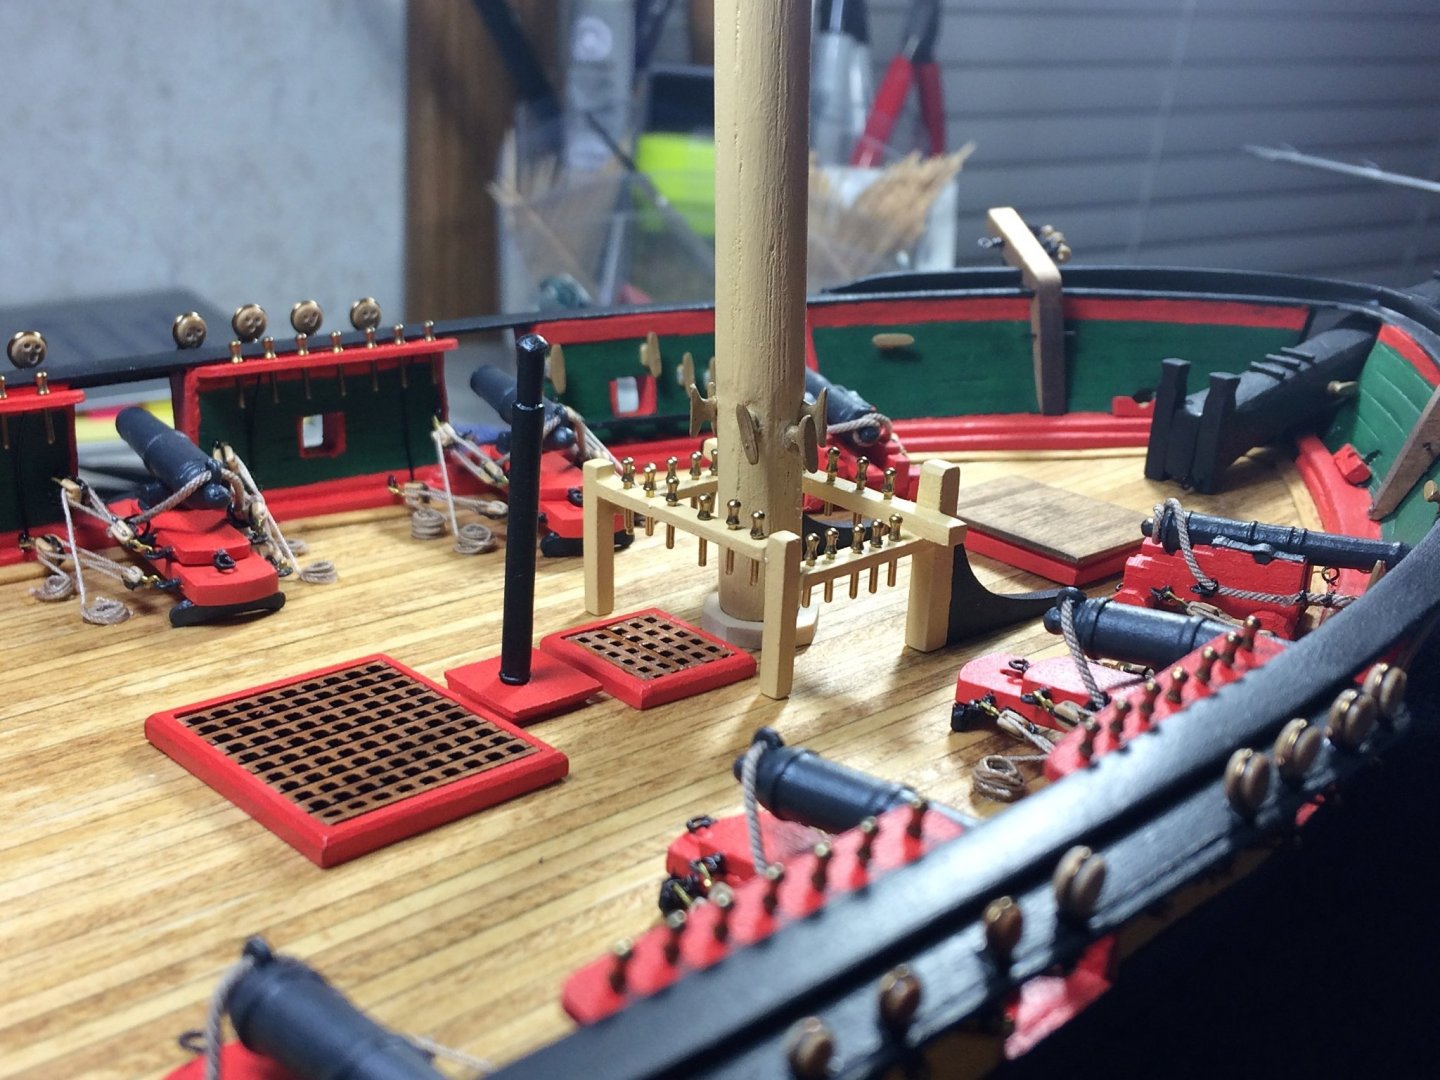
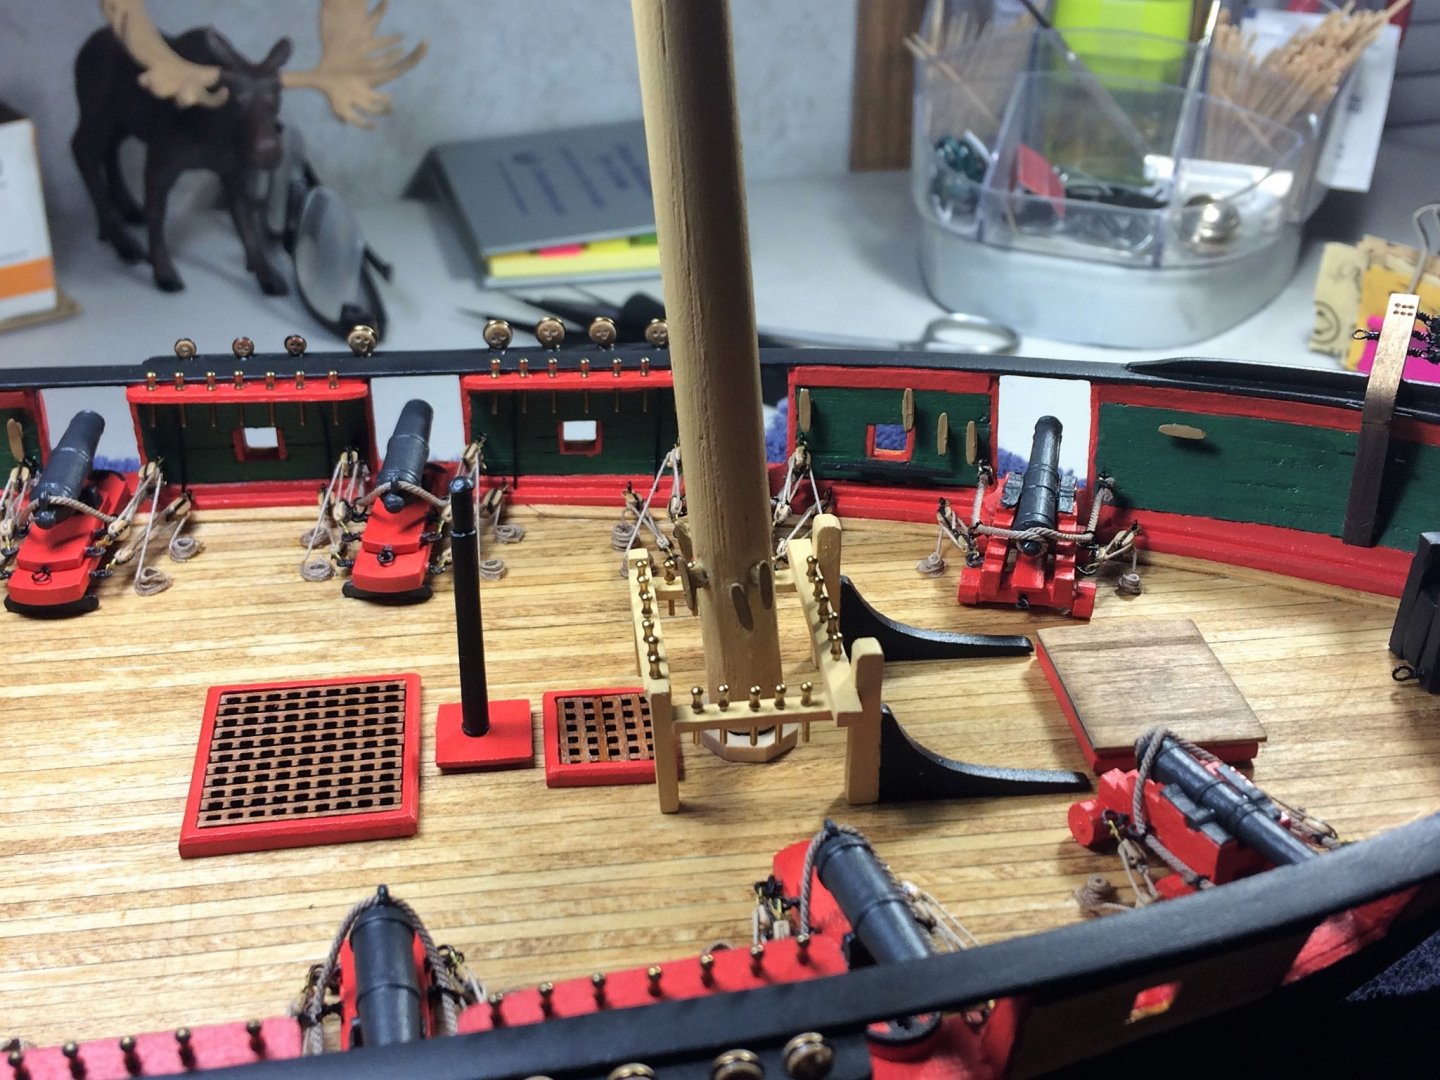
Hello Christos, Thank you for the kind words! I am currently 49, with no underlying conditions, so it was more frustrating than anything. I missed a week of work....did I really "miss" work? Well, maybe financially, but, I'm a saver when it comes to finances. Save it for a rainy day. To be honest, I did spend a fair amount of time working on Niagara. Speaking of, Niagara needs an update. I've started to wrap my mind around the Hammock rails. Using kit supplied brass strip, I essentially pre formed the stanchions. Using a square piece of scrap stock, I found a piece that was an appropriate size to wrap the brass strip around to form the basic shape. Then used pliers to square off the bends, make them look presentable. I'll use Birchwood-Casey Brass Black to finish them off. I think most of us know the ritual. I tend to keep them in the brass black around 2-3 minutes, then rinse in water. This stuff reminds me of the "dip" they use to kill cartoon characters in the movie "Who Framed Roger Rabbit"!!!!!🐇 I do like the look after the "dip". But it sure does rub off easily. Does that mean I'm not leaving them in long enough? All of the deck furniture has been permanently installed. There are a few bits on either side of the Tiller that need to be made. I really need to start thinking about rigging, it's staring me square in the face! I know some builders tinker with the deck houses, grates and the like. I'm just following the plans. I left the doubler slats under the Capstan the same stain as the deck. Be good, Tom E

-
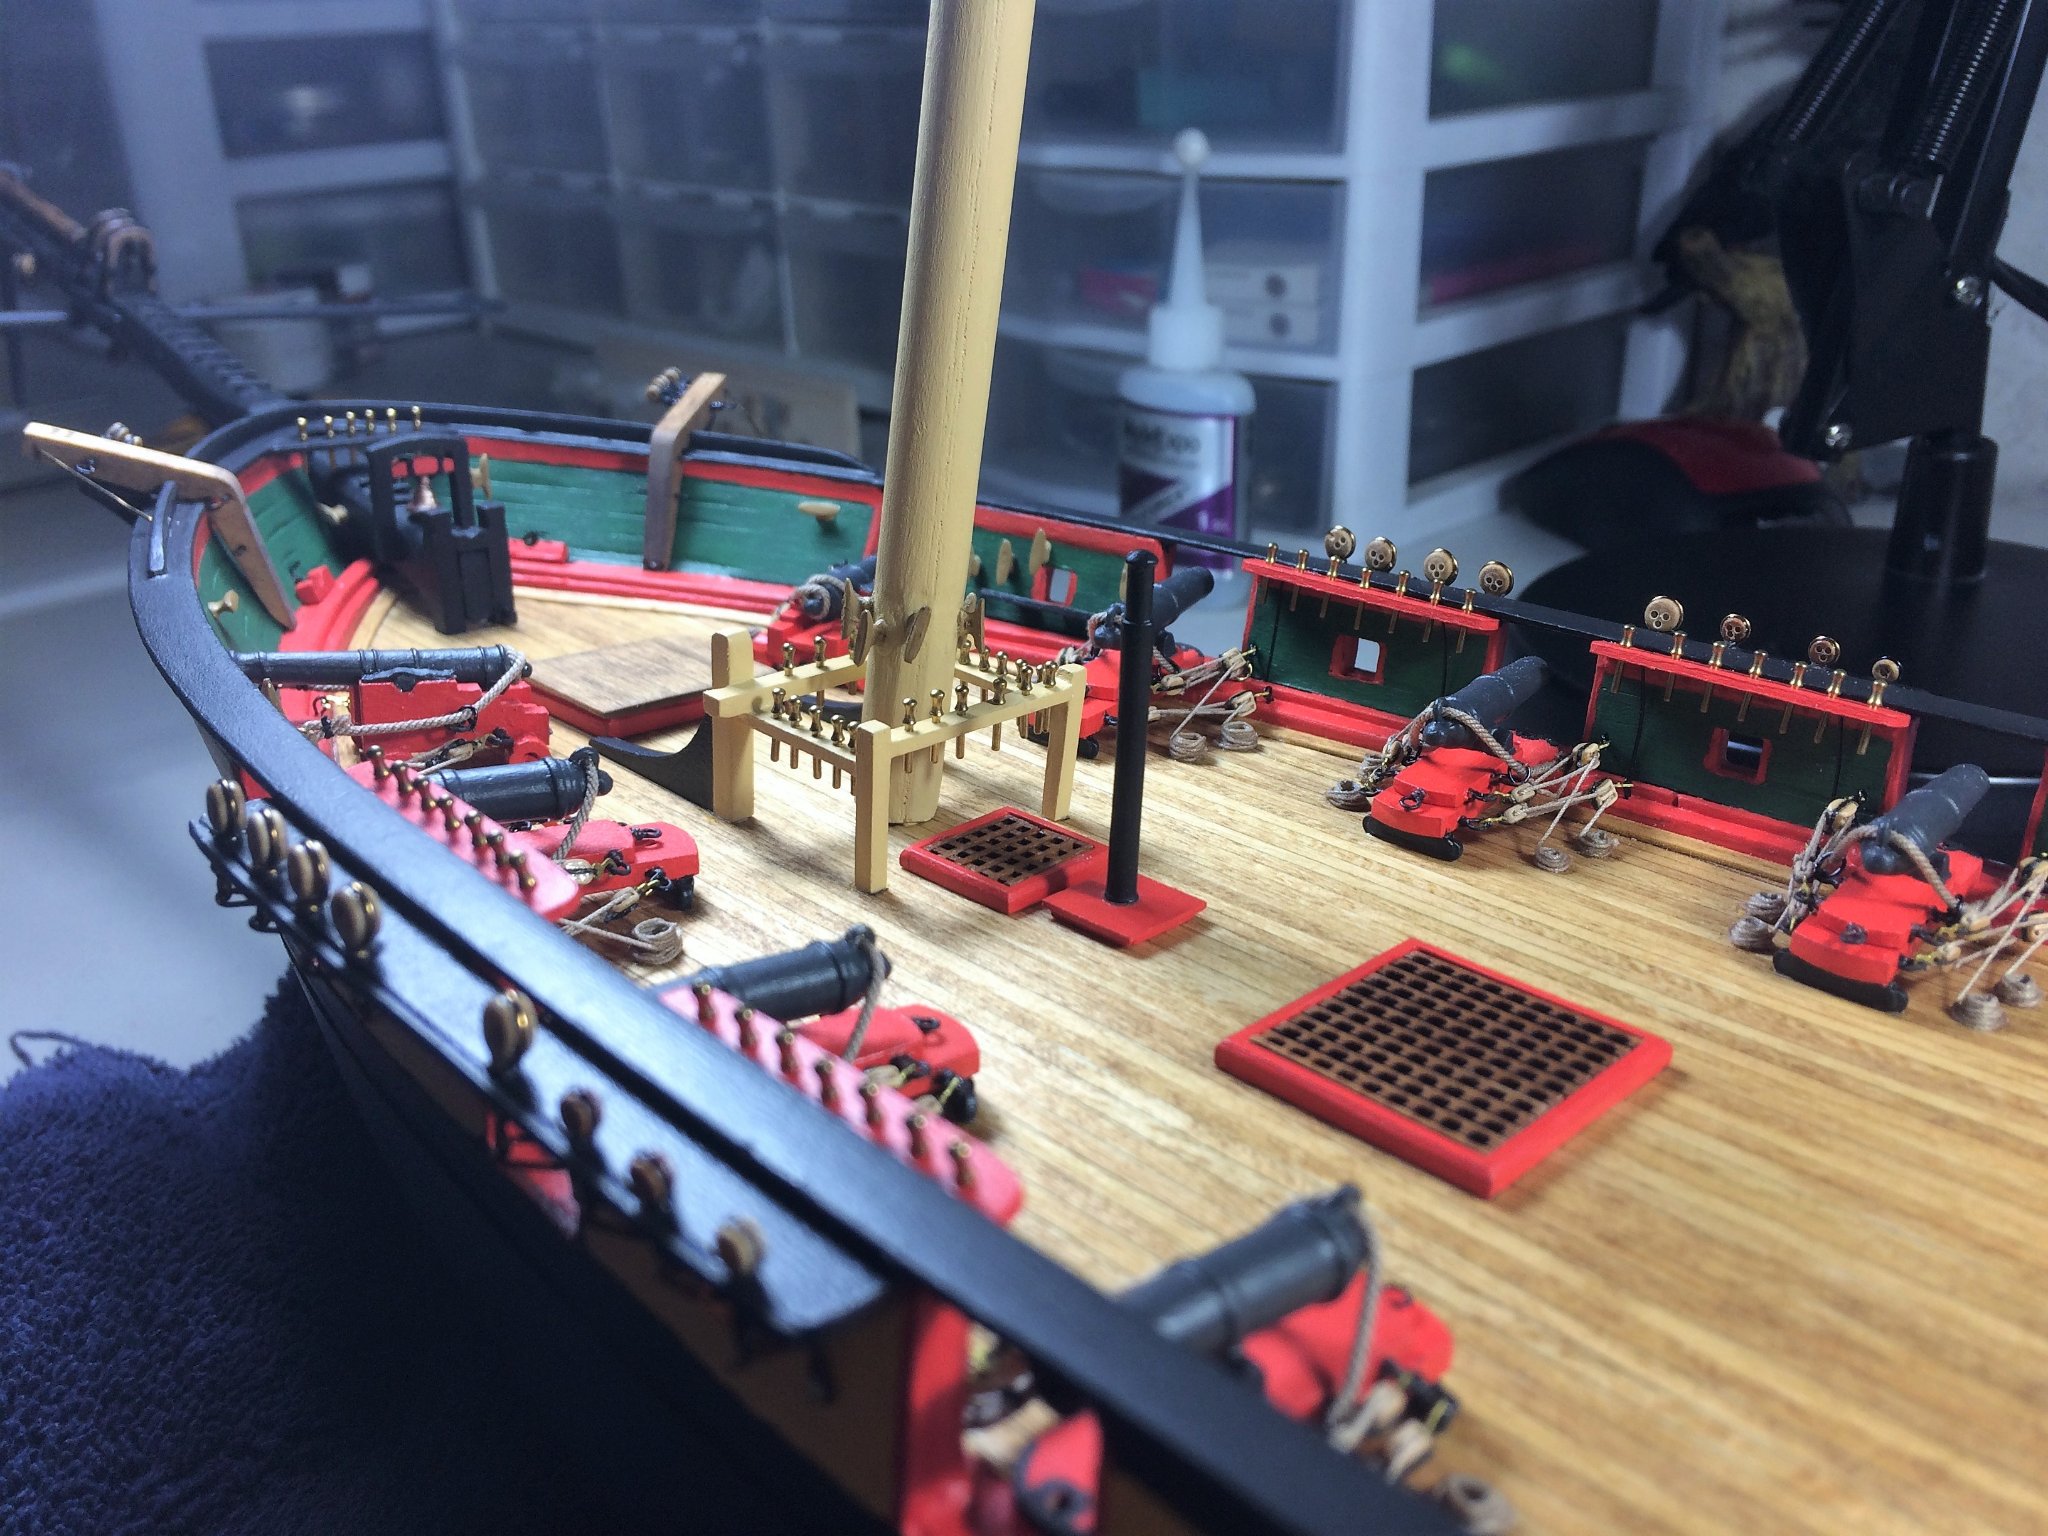
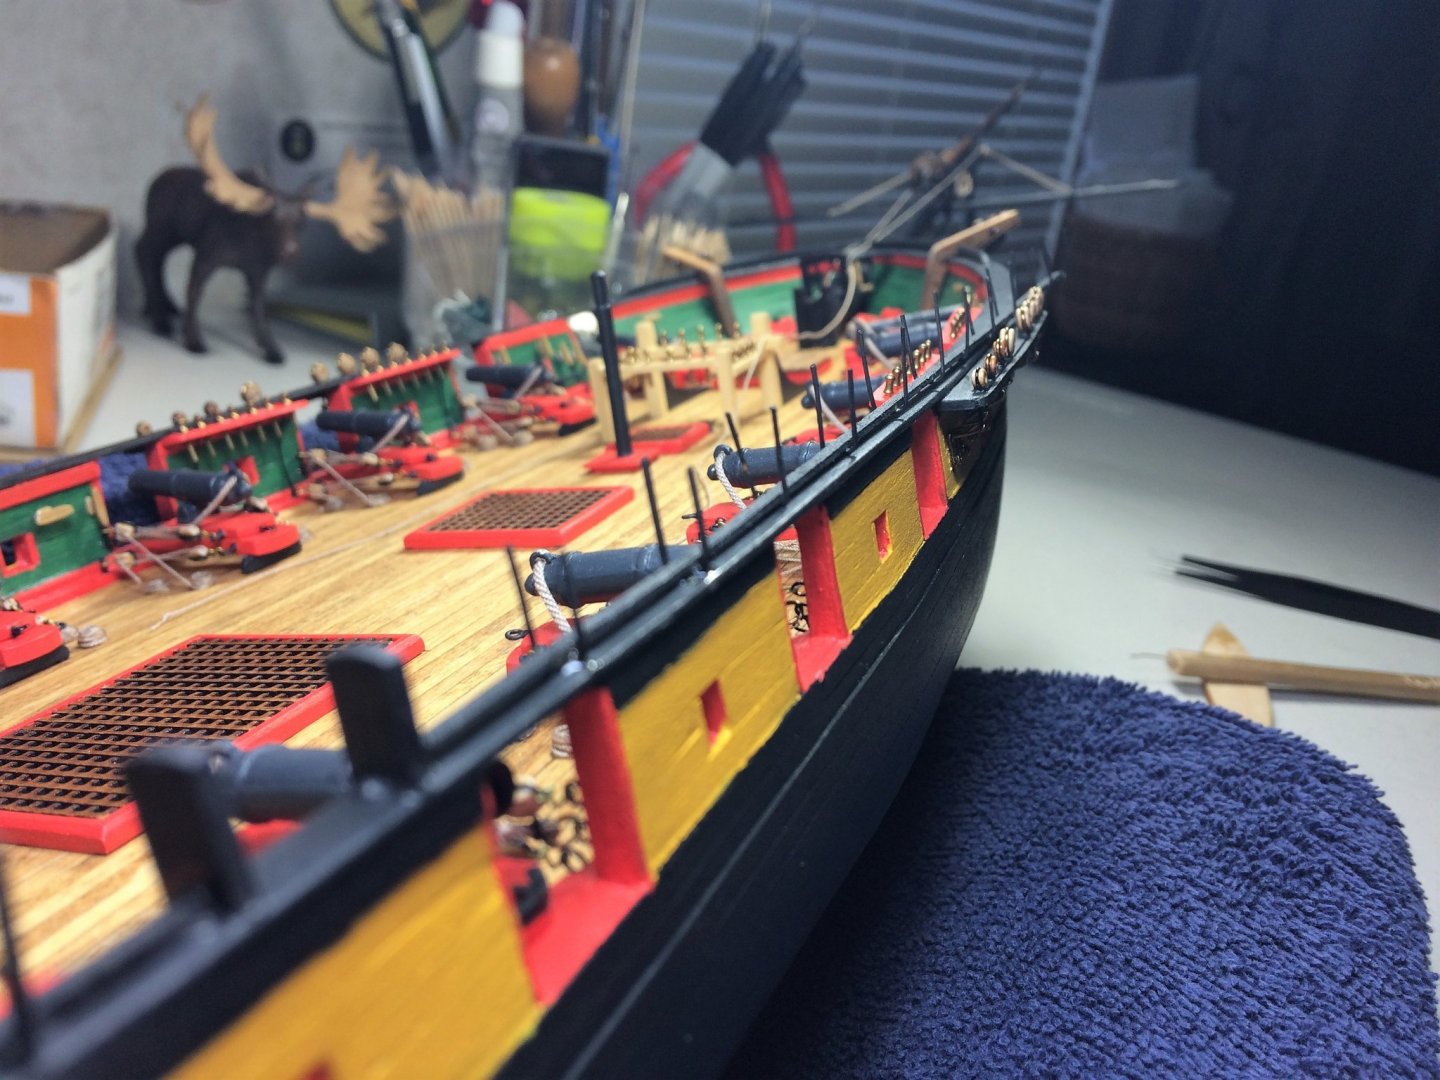
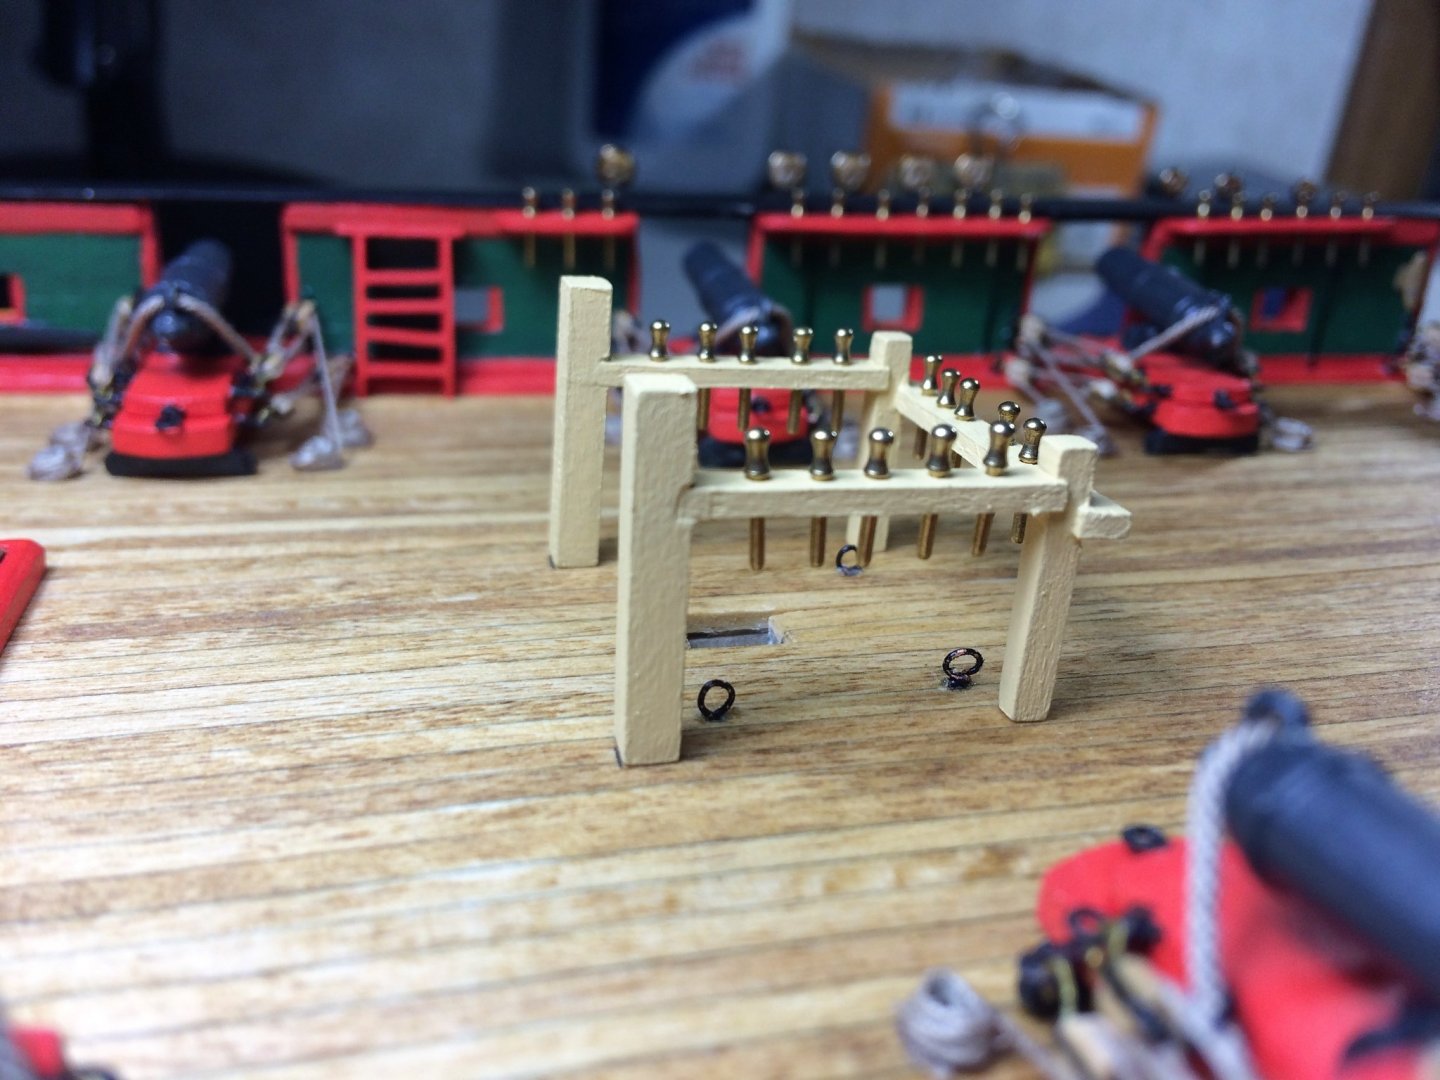
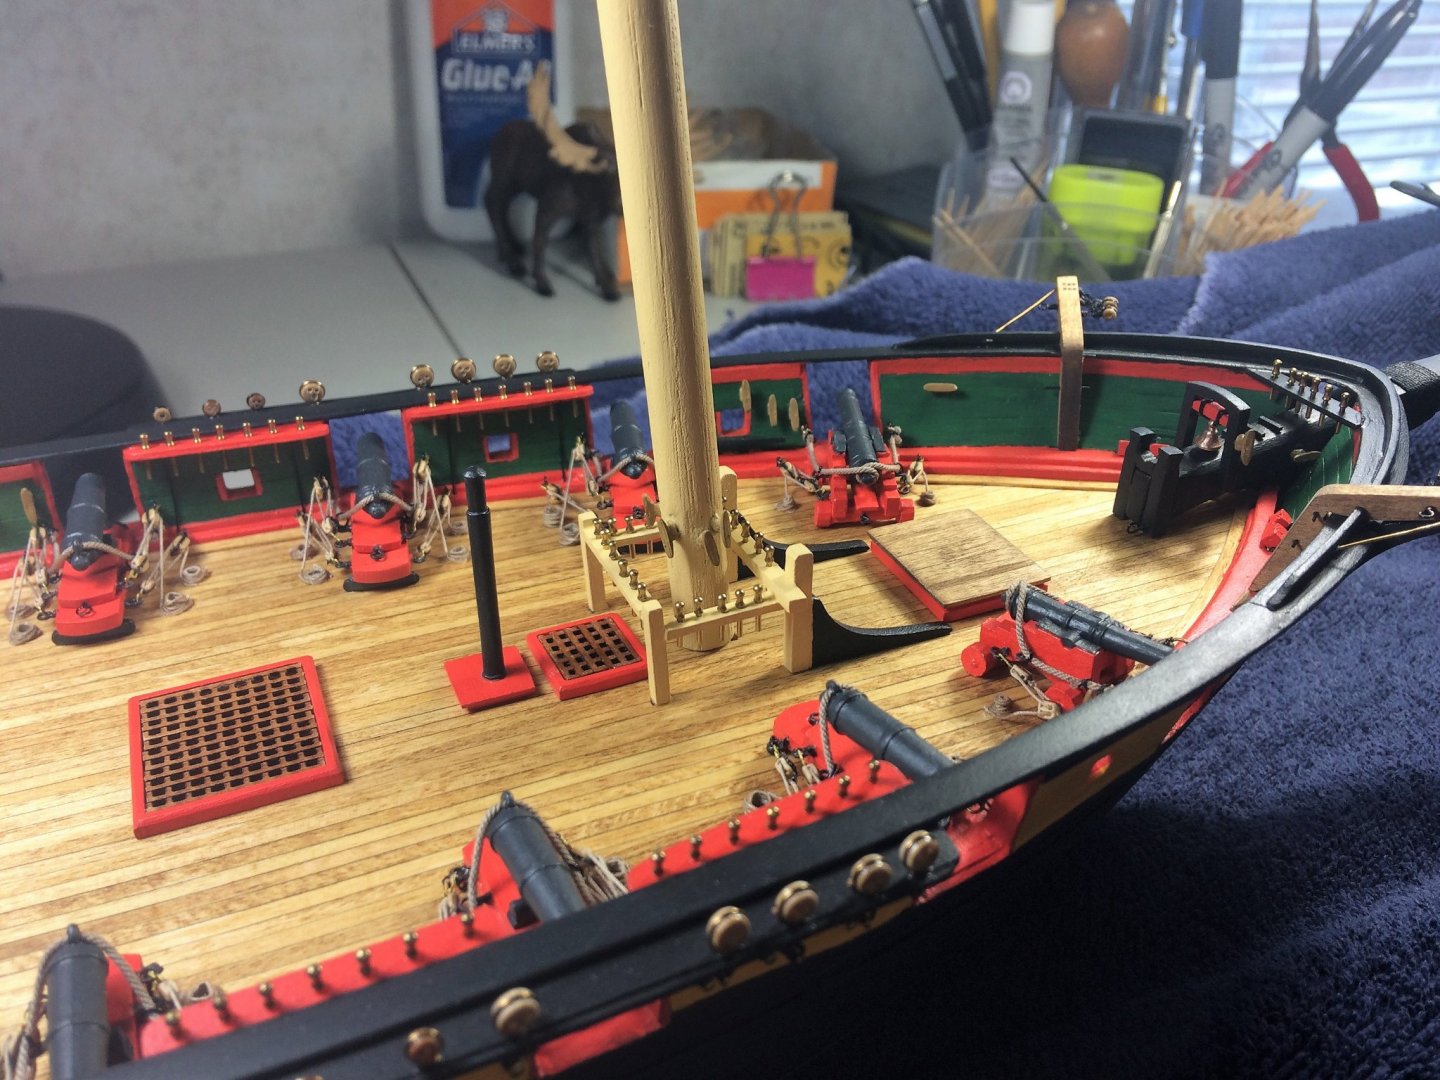
Morning, Been a while since I updated Niagara. Since my covid test finally came back negative, it's been back to work for me! Did have a nice break at Christmas, and with no family plans this year, I had a lot of time to build. The deck furniture continues. Everything from the Main hatch forward has been installed. It was when I was fiddling around with the Main Fife rail, I realized there are a few eyebolts in the deck that needed to be installed. Both pinrails now have eyebolts. They may be a bit big, but I'm hoping that will make rigging these a bit easier....we'll see. Once the eyebolts were in, the rest of the furniture, up to the Companionway, were fixed in place. The Capstan will be last to be glued in. I need to make the doubler slats for the deck. The plans say to use 1/32x1/16 strips, then I'll stain similar to the deck. I should have pics soon. Happy New Year!......hopefully a better year for everyone!!! Tom E

-
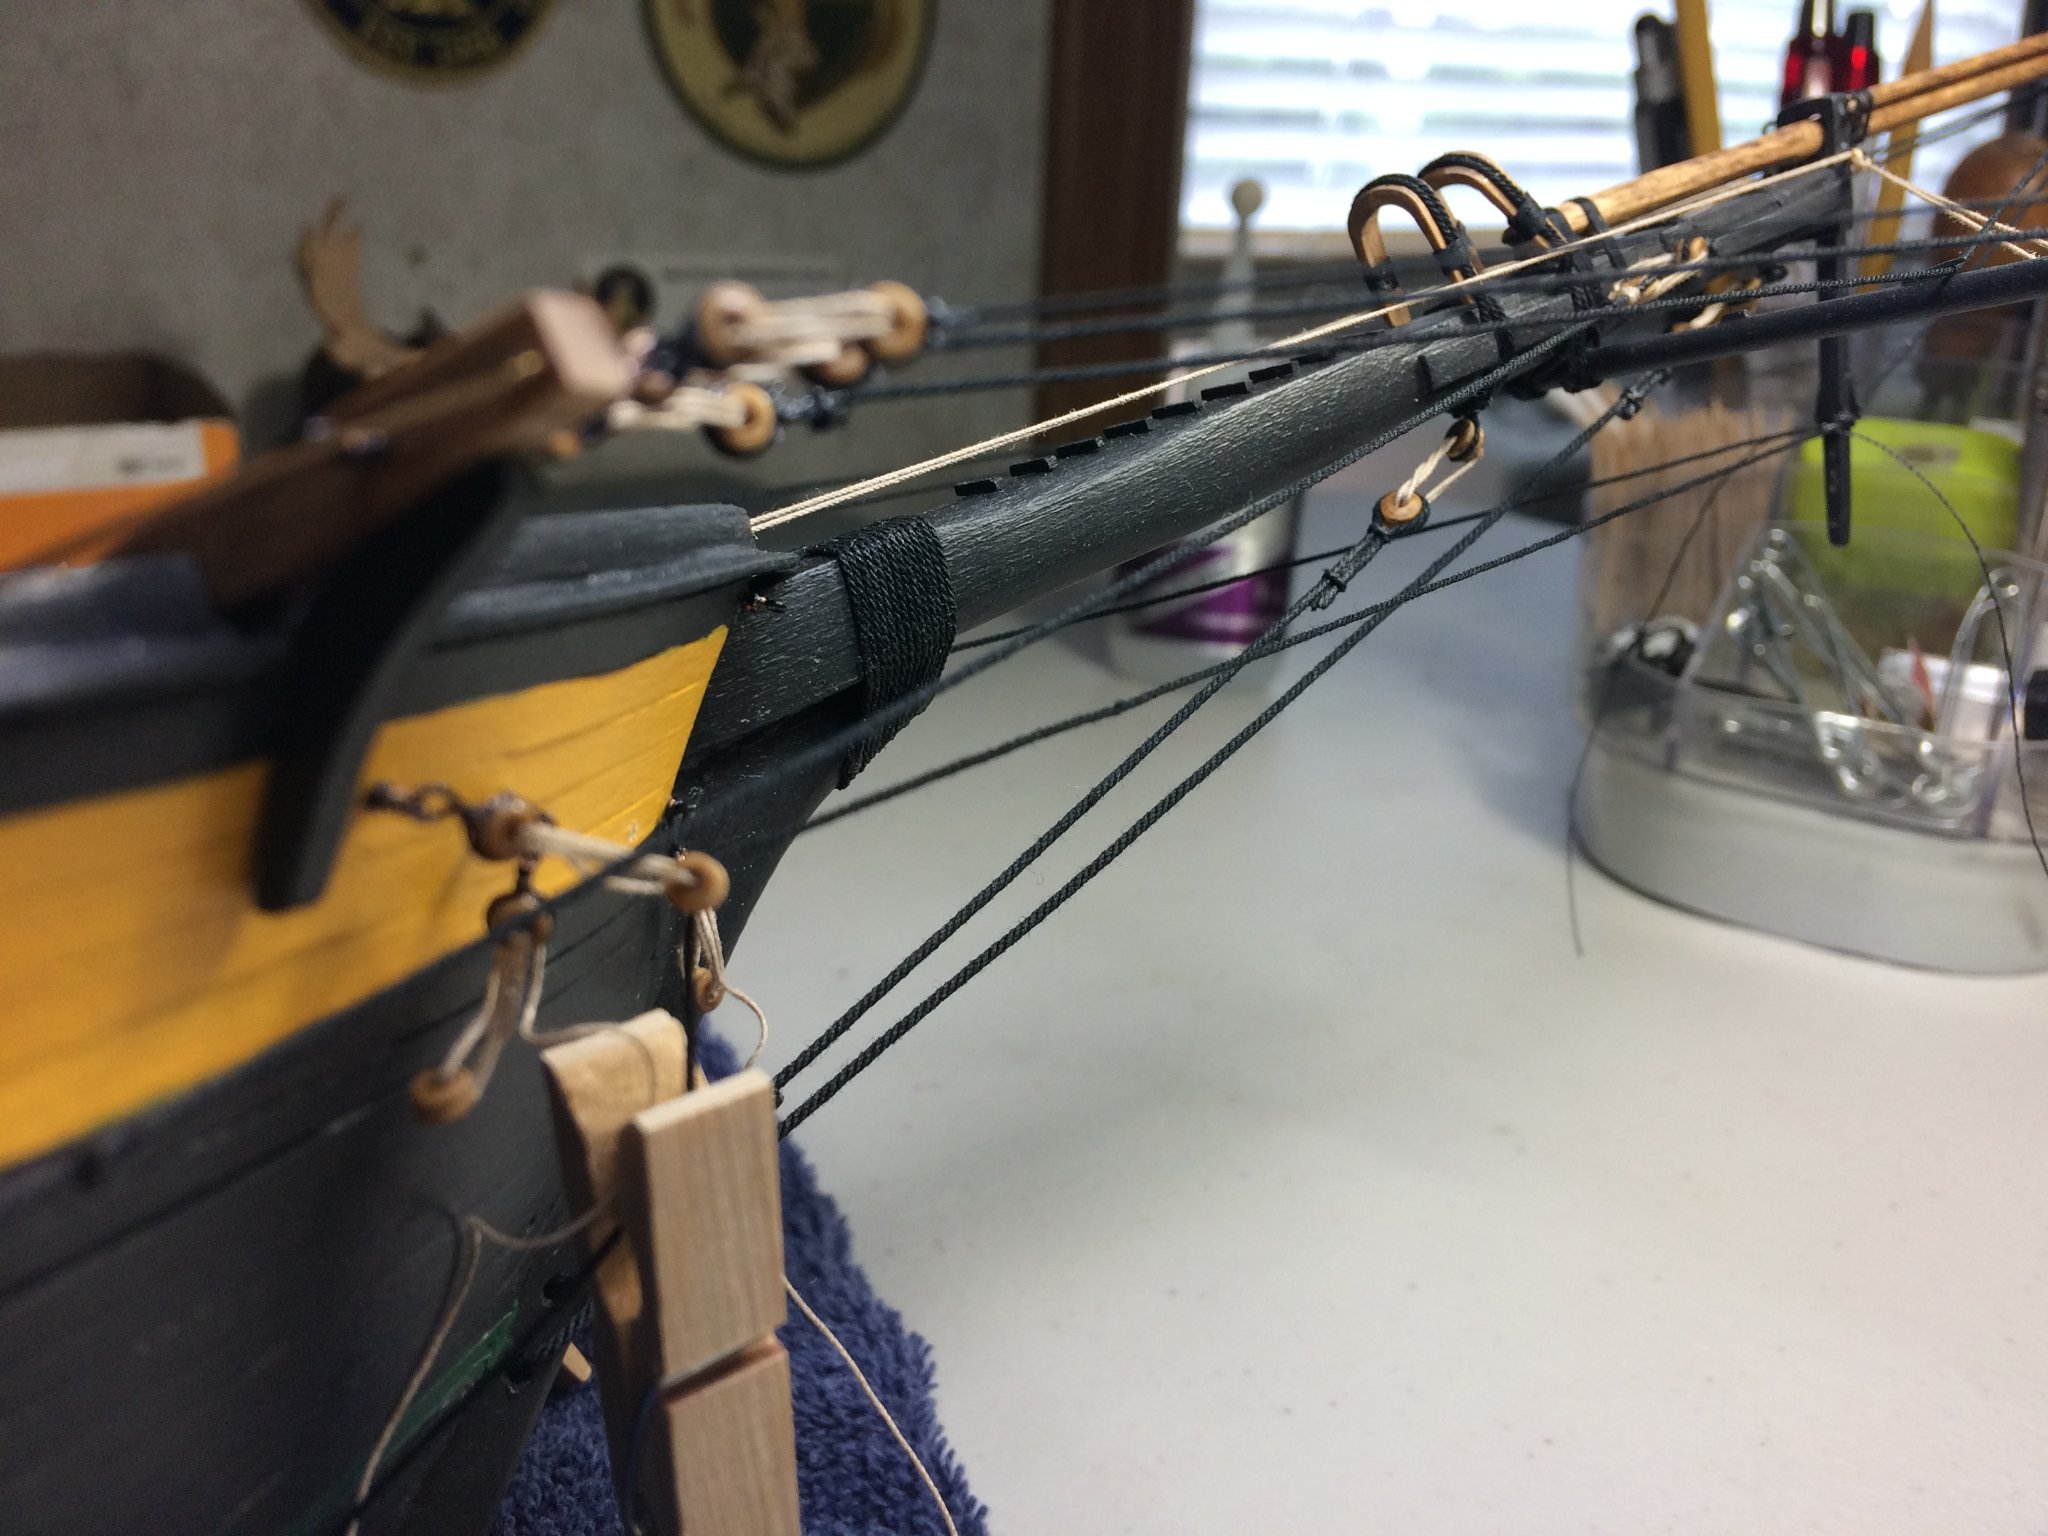
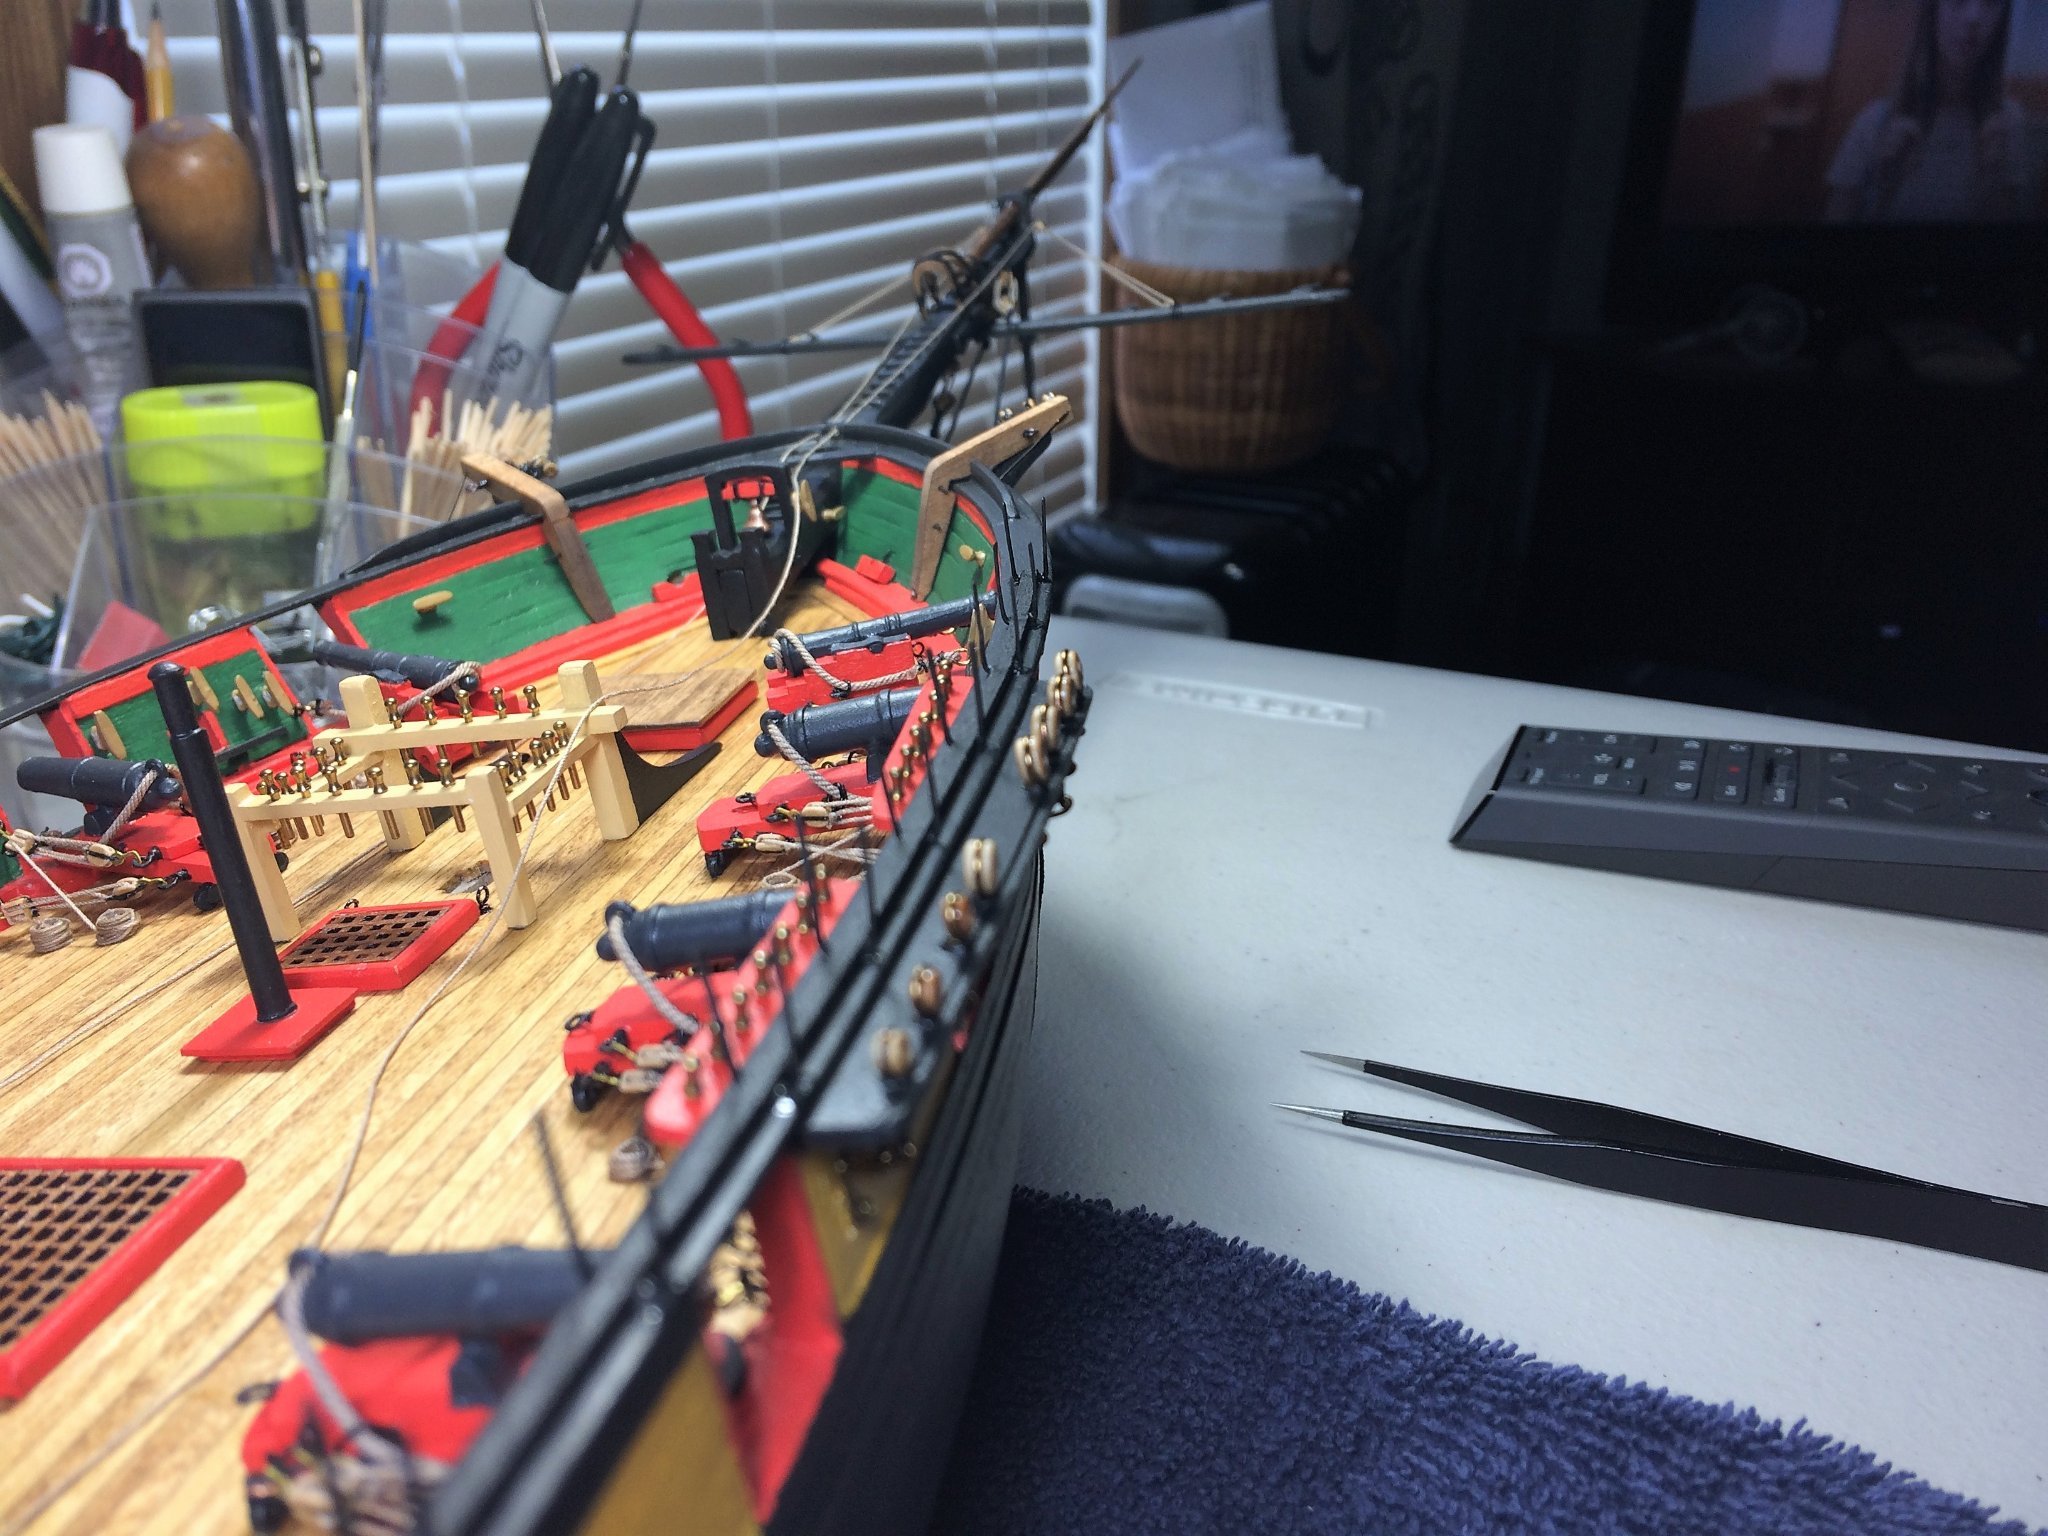
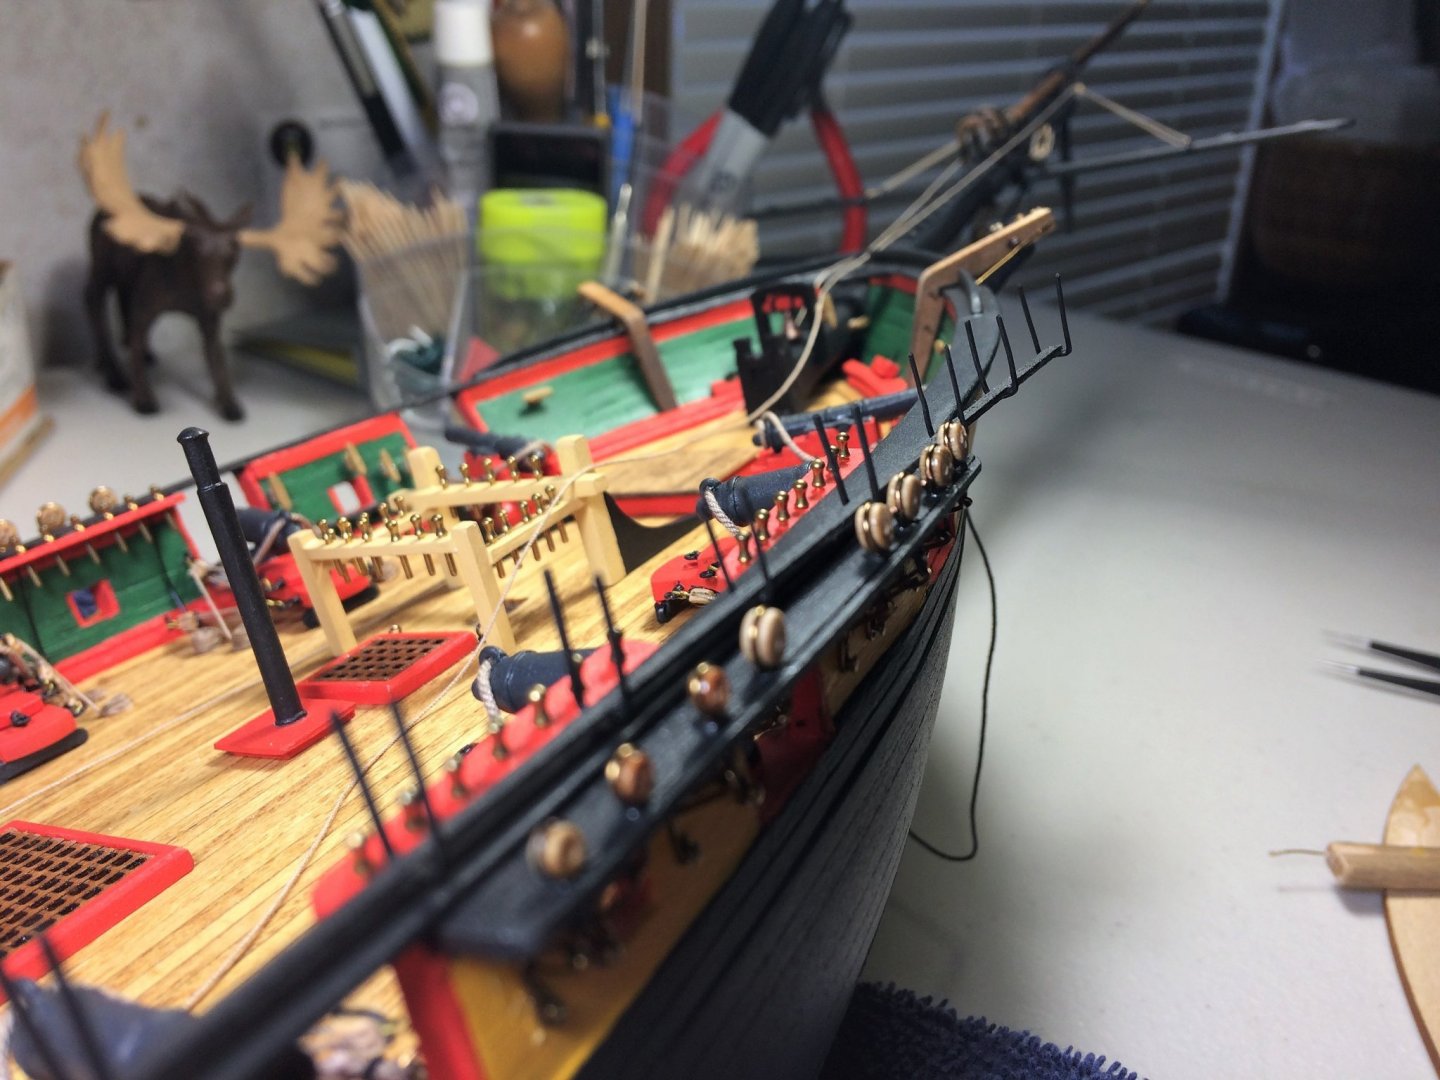
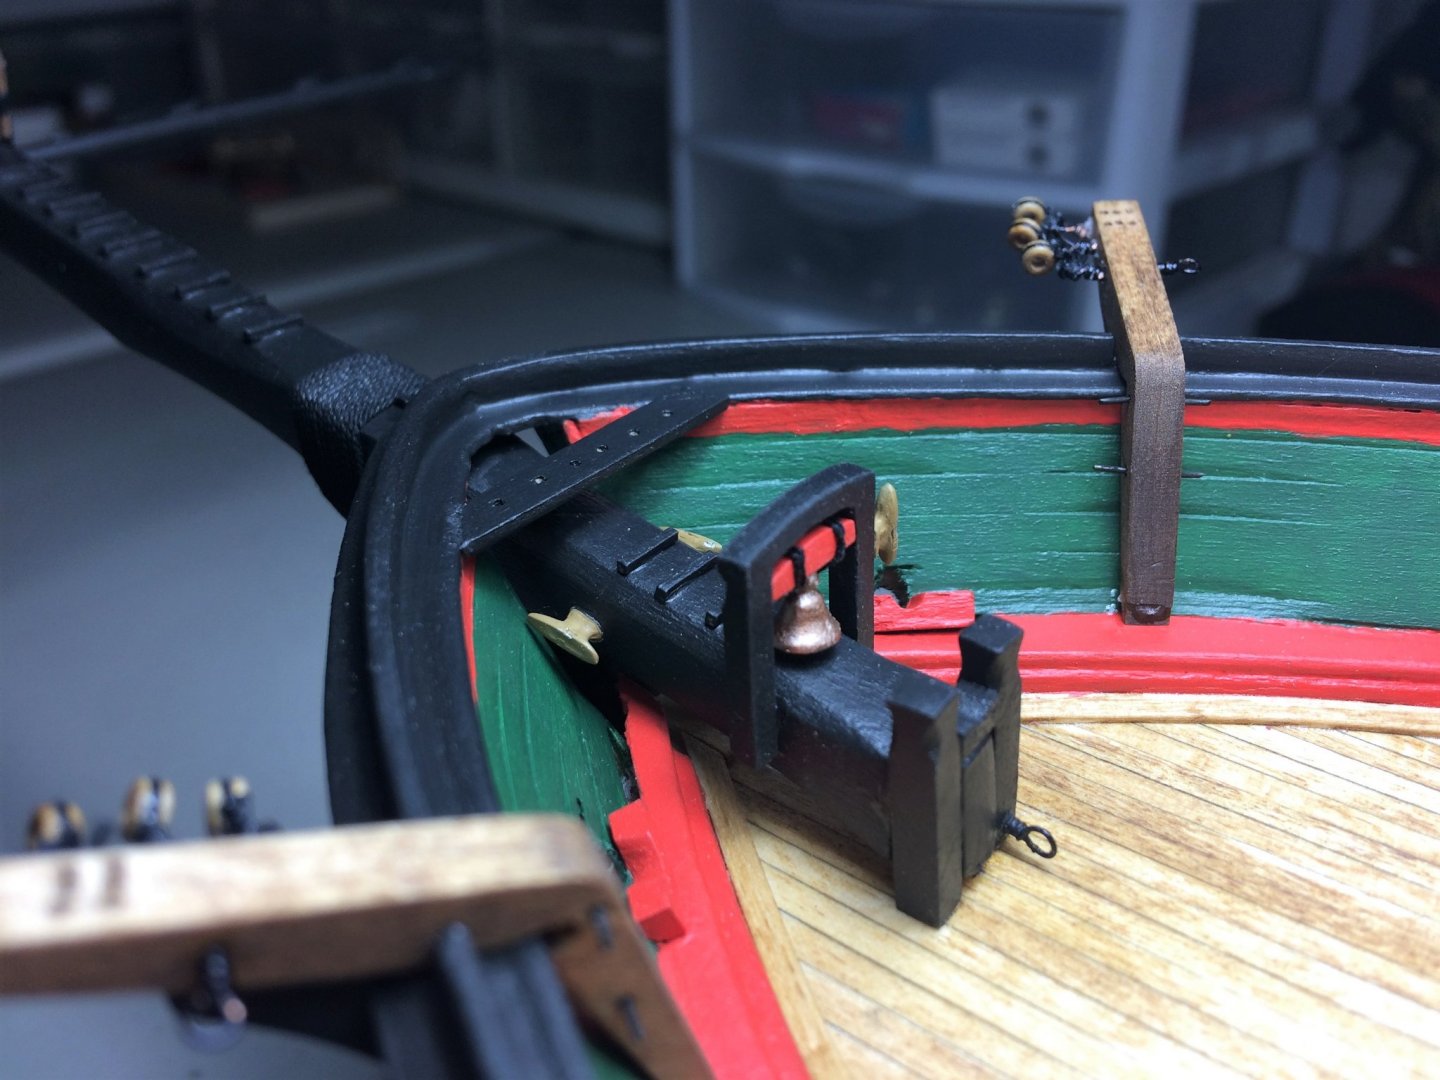
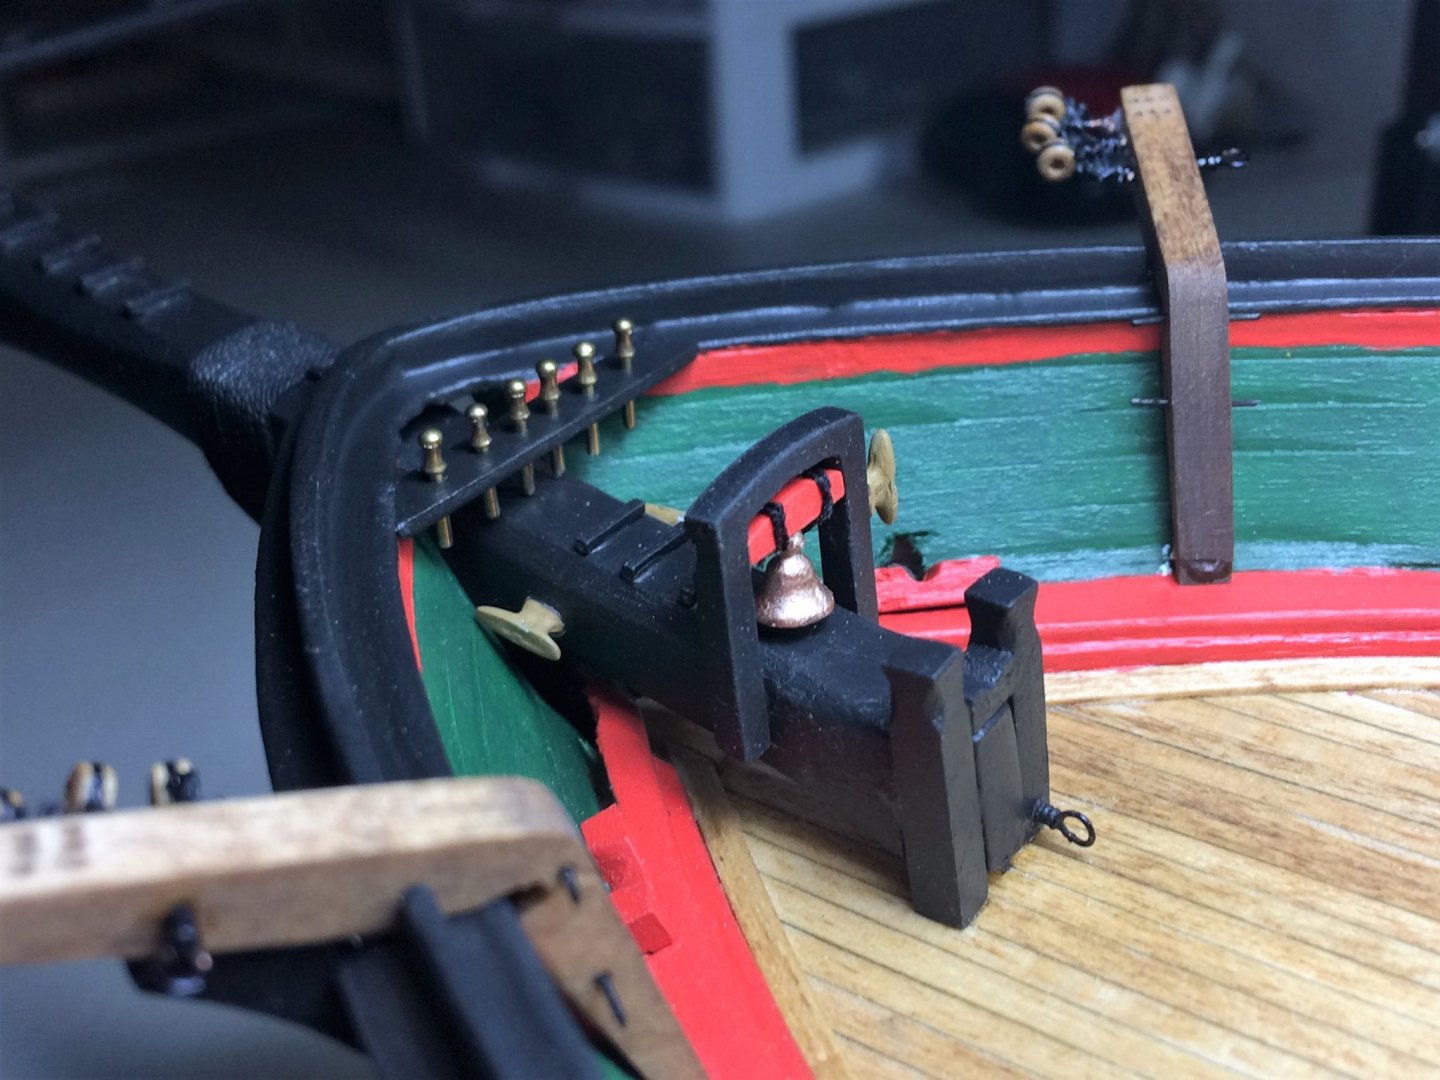
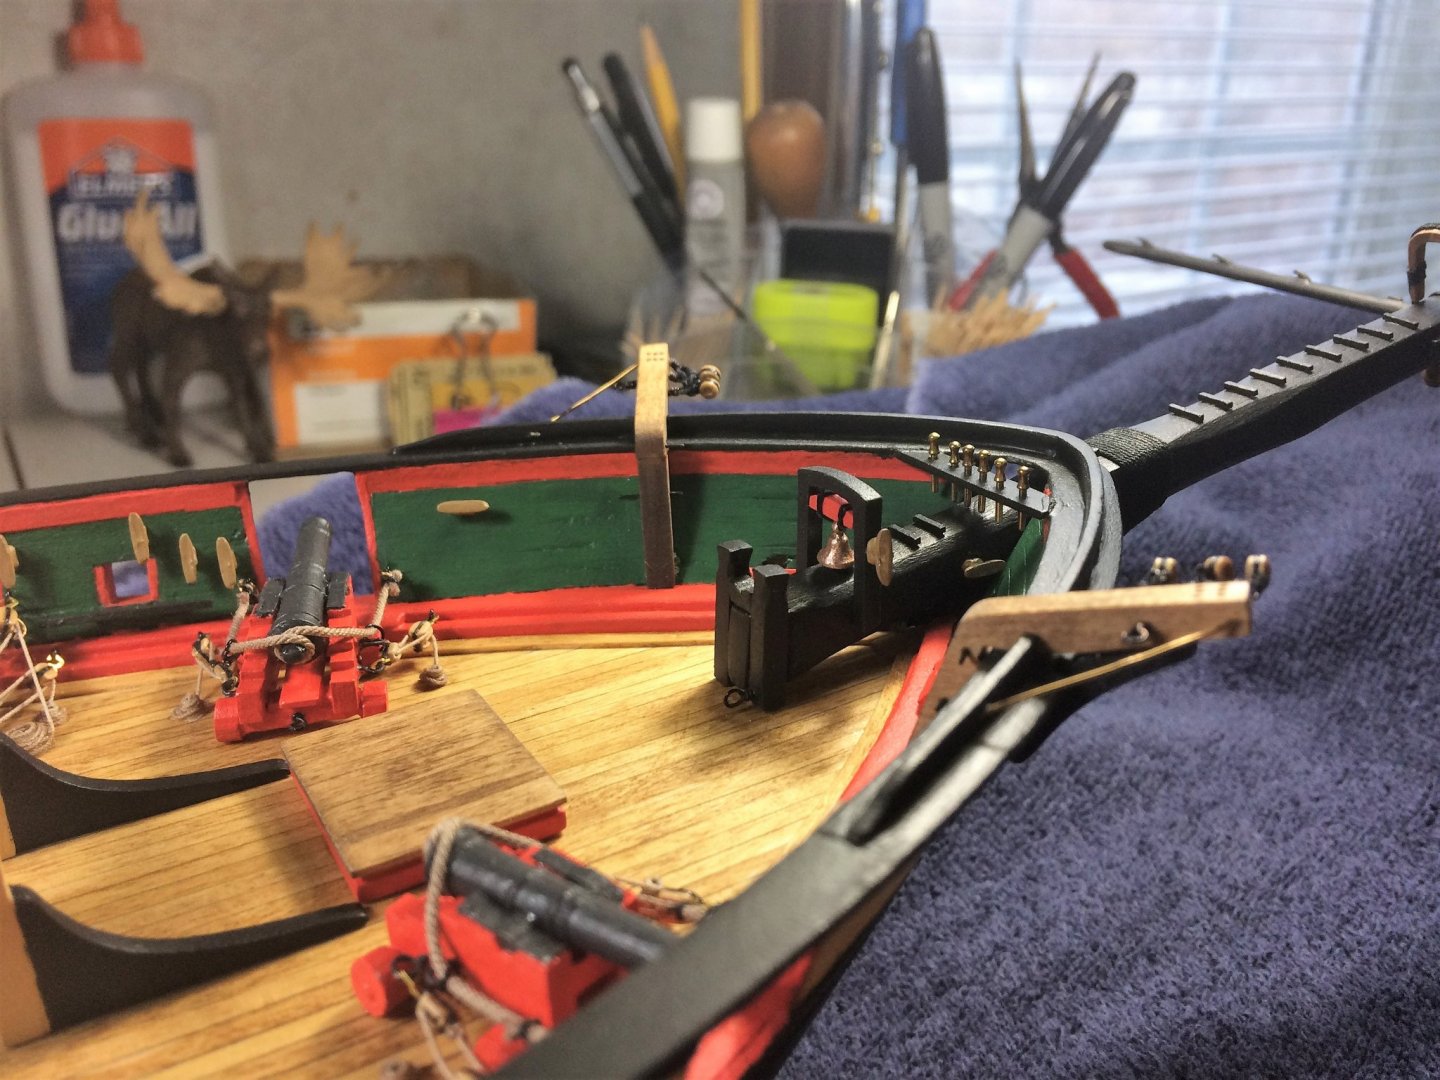
Evening, Well, still waiting on covid testing from Monday, I've lost a week of work just because of a back log of tests. Sheeeesh, what a year! When you don't have much else to do while in quarantine, to the Shipyard I go! The Gammoning is on. A little tricky. Have to be especially diligent when bringing the rope up from the bottom while wrapping it around. If you didn't hold it in place long enough where I had laid some glue, it had a tendency to roll out of place. Luckily I saw what was happening early. The ships bell and bow pinrail have been installed. With belaying pins. The Bow area is starting to fill in. Tension rods have been added to the Catheads. A little wonky looking in the pic, but much nicer in person. Now to start working backwards with the rest of the deck furniture. Forecastle hatch, forward Fife rail, galley grating and stack, then Fore hatch. All in good order. Nothing glued in just yet. Wash your hands! Tom E

-
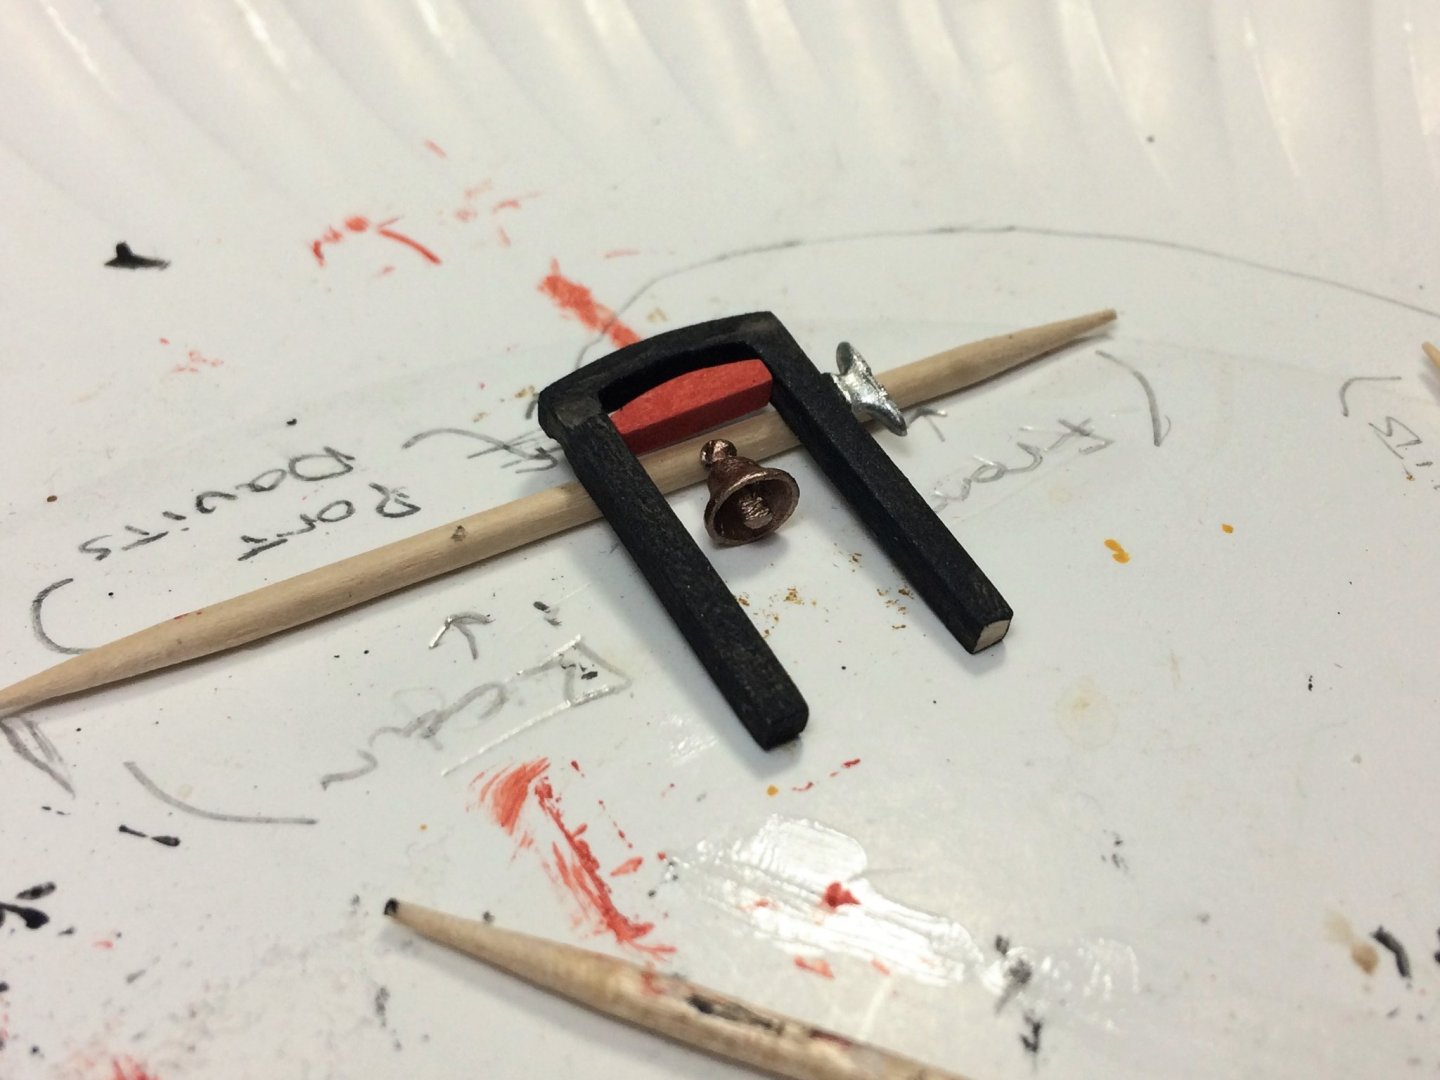
Morning, Well, still waiting on my test results. Until then, have to isolate. That clears up a lot of time for building! Feeling much better from the initial illness that drove me to get tested. Felt like a really bad hangover. Anywho.....marching on.... Starting to bring together the ships bell. I left the two outside pieces purposely longer, and will adjust the length once ready to be installed. You can see where I'm going with this. The Bowsprit bits are in. For some odd reason, I roughed these out back when I was initially building the Bowsprit. That was almost two years ago, and I was actually able to find them! Cleaned them up, paint, and in they went. With the Bowsprit area coming together, time to start working backwards. The forward Fife rail and Forecastle hatch will be next to install. Nothing glued in just yet. The Galley grating and stack, as well as the Fore hatch, are close behind. The forward mast wedge has been shaped. Not sure if I'll go red or black with the wedge. The deck is stained, and i feel that if I stain it it will just get "lost" on deck. I'm leaning towards red as all the coamings for the hatches are red, yet black would break that up a bit, hmmmmmm.... She's coming together. Still more work to be done to the Bowsprit area. The Bow pin rail needs to be made. I'd like to get this done before attaching the ships bell. Be good! Tom E


-
Thanks Gentlemen! So far, feels like a flu. Aches, cough, sniffles, fatigue, no appetite. Lots of chicken soup and fluids. Being in healthcare they kinda freak out these days when you say you don't feel well. I was kinda "escorted" to the front door, and told to get a test and stay away until I get the results. Which sounds like 2-5 days right now. Tom E
-
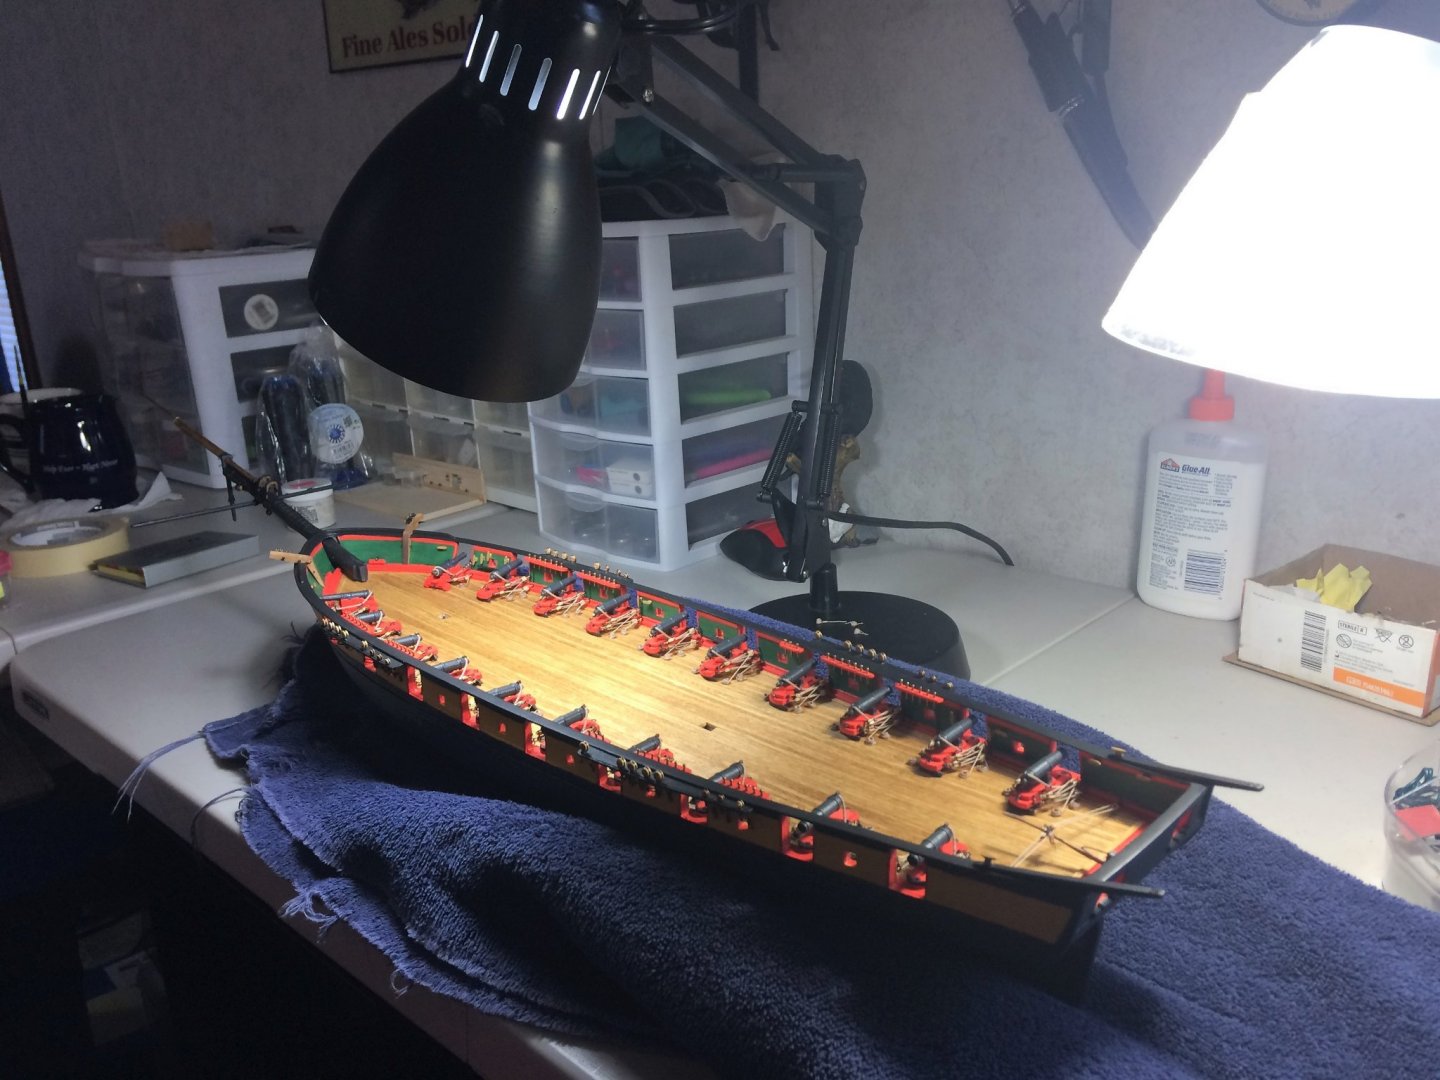
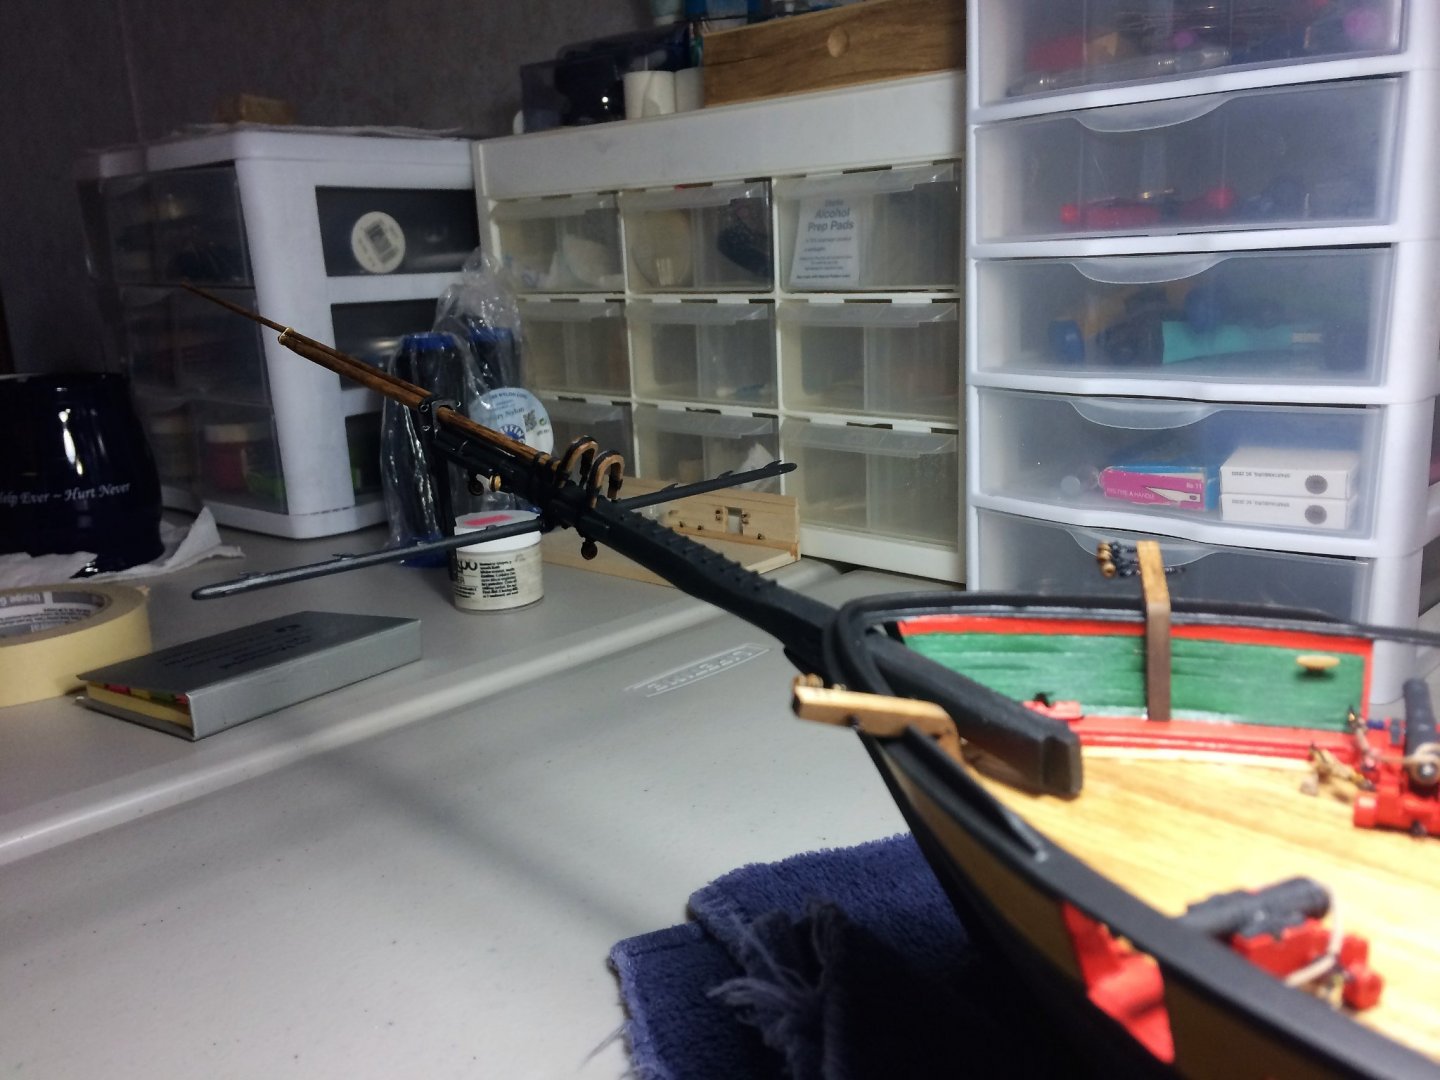
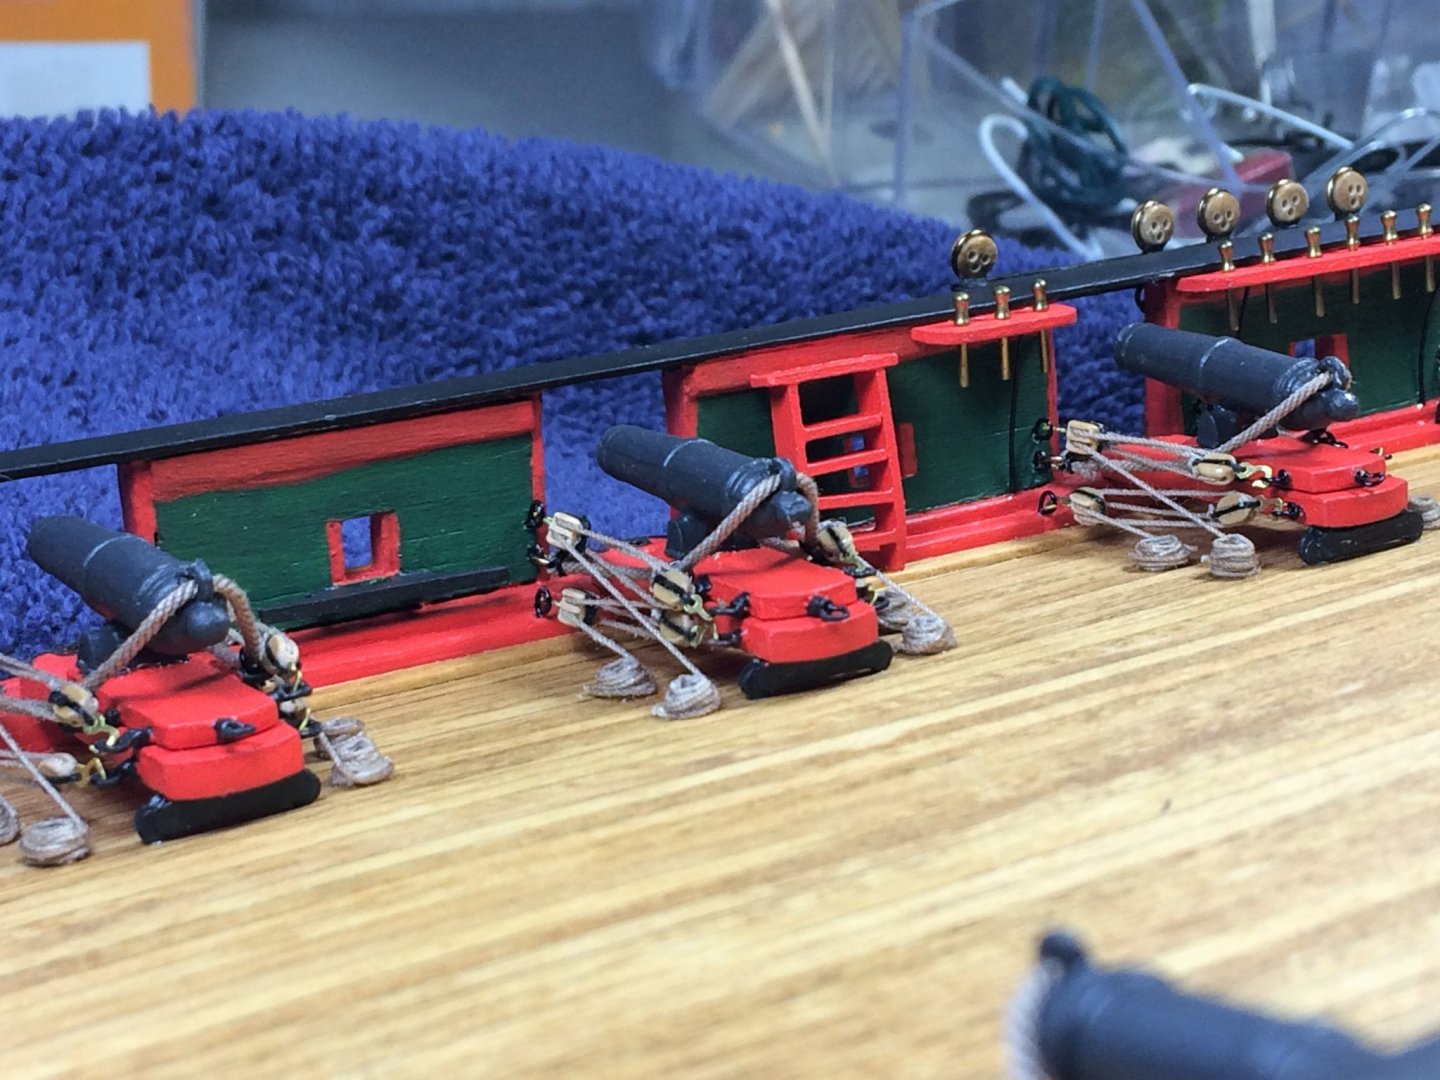
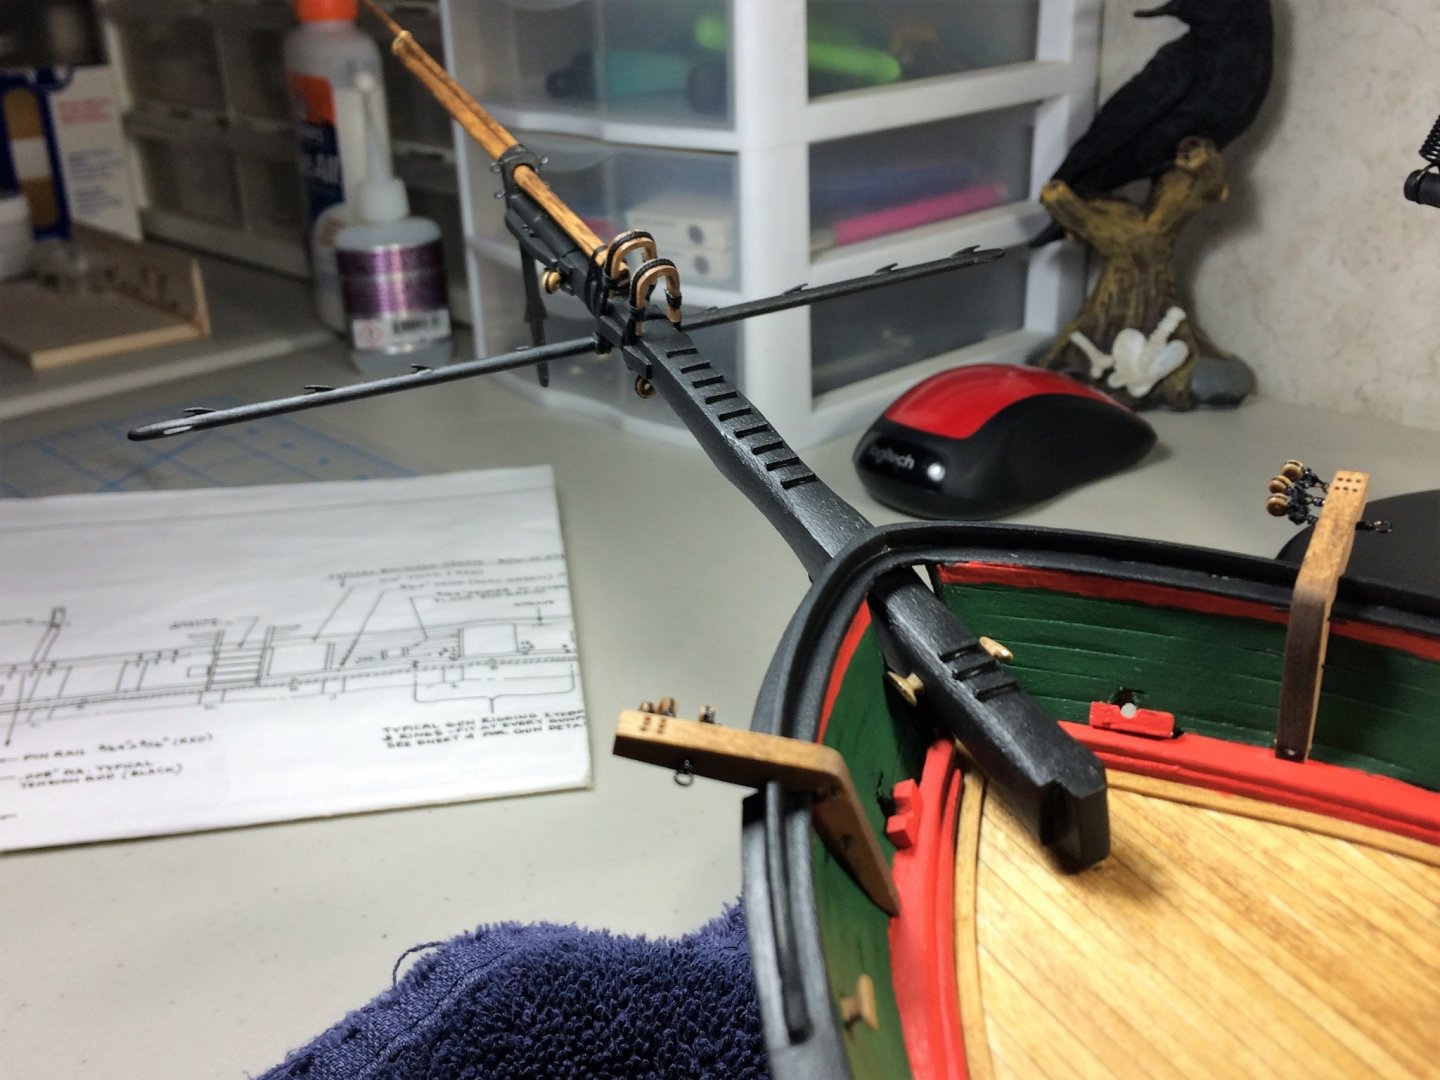
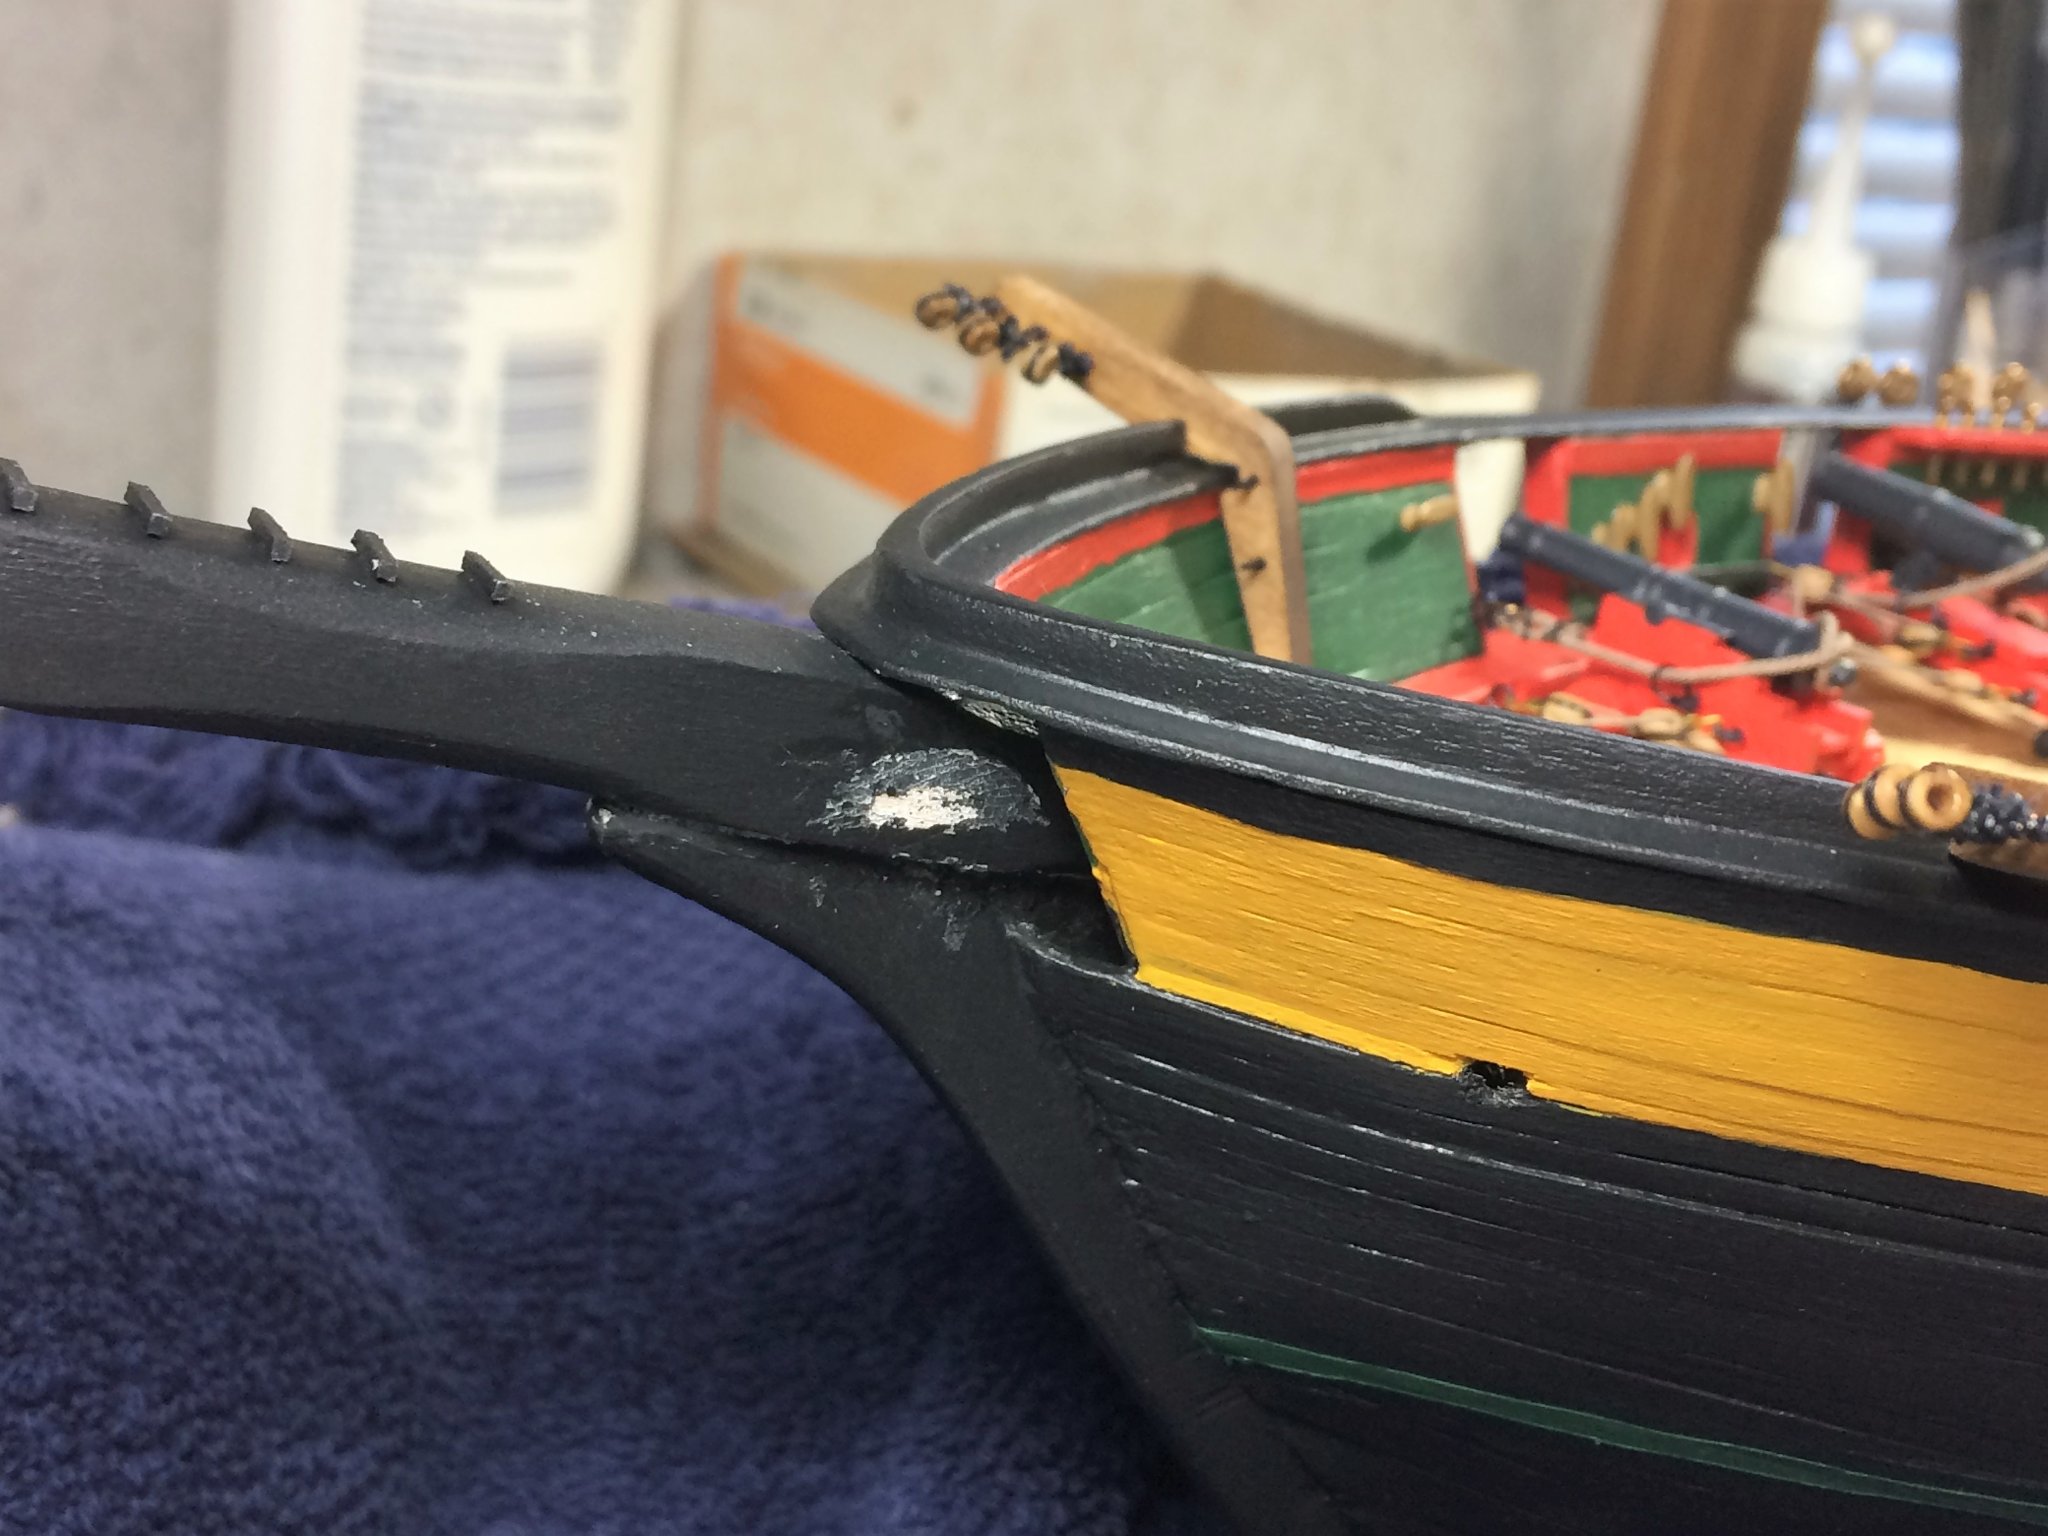
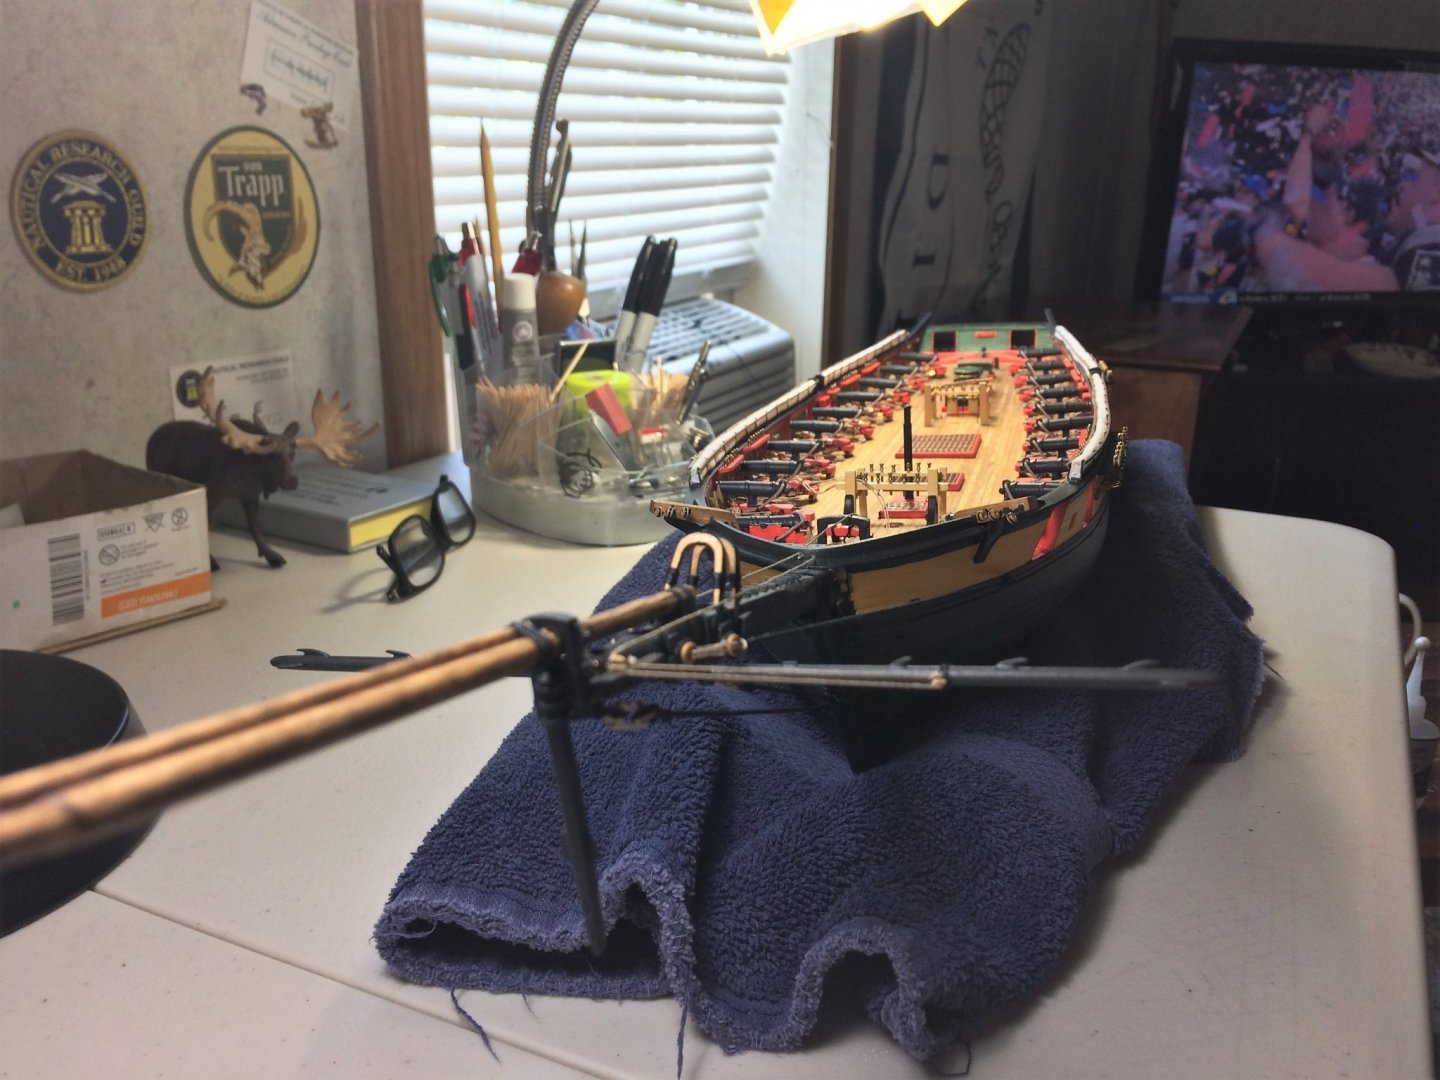
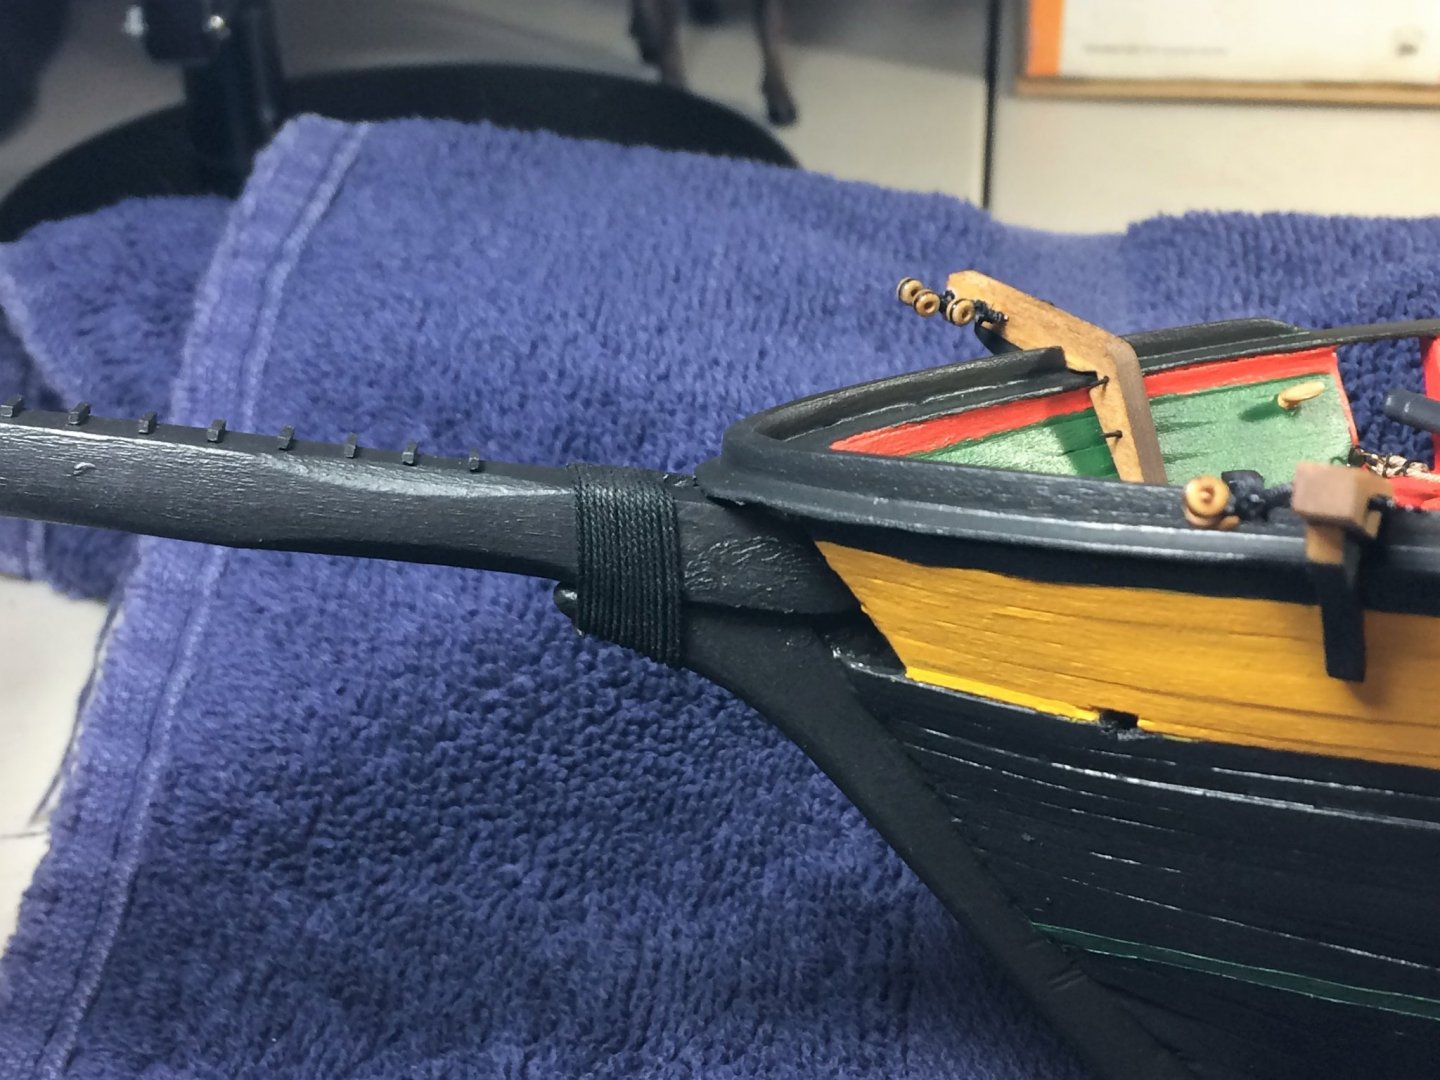
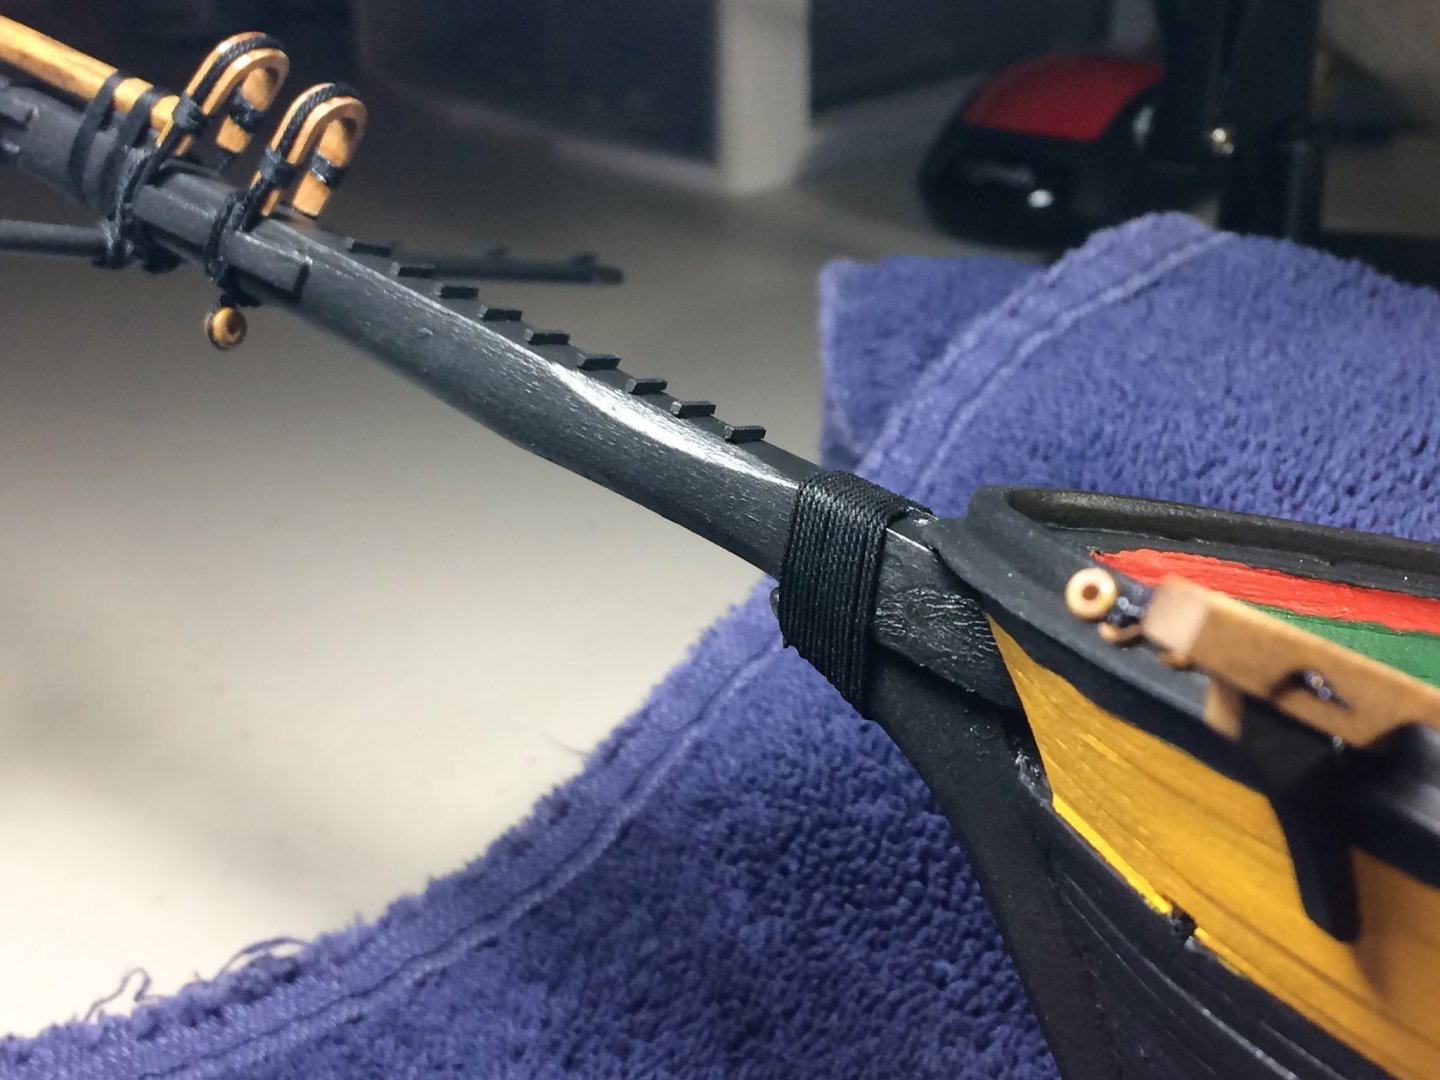
Evening, Well, this was unforeseen, may have a bit of time on my hands for building. Was not feeling well, work sent me to get a covid test, and cant go back to work until I get the results. Oh well........lets keep building. The Bowsprit, Catheads and rear Davits are all permanently installed. She's looking good now! The model has expanded in length and need to be mindful so not to snap off a Bowsprit! Its amazing how installing one piece changes the dynamic of working on and around this ship. Hopefully there will be many of these moments as she comes together. We can safely say I left a little piece of me on this ship. While holding the Bowsprit, letting the glue set, I must have put my thumb in some glue and quickly became attached! Took a fair amount of skin when I pulled! The boarding ladder has been installed as well. Fit nicely among the carronade block and tackle. A few holes were pre drilled in the Bowsprit for the cleats. These, and the foot treads, couldn't be installed until after the Bowsprit was installed. Mask up! Tom E