HOLIDAY DONATION DRIVE - SUPPORT MSW - DO YOUR PART TO KEEP THIS GREAT FORUM GOING! (Only 24 donations so far out of 49,000 members - C'mon guys!)
×
Tom E
-
Posts
469 -
Joined
-
Last visited
Content Type
Profiles
Forums
Gallery
Events
Everything posted by Tom E
-
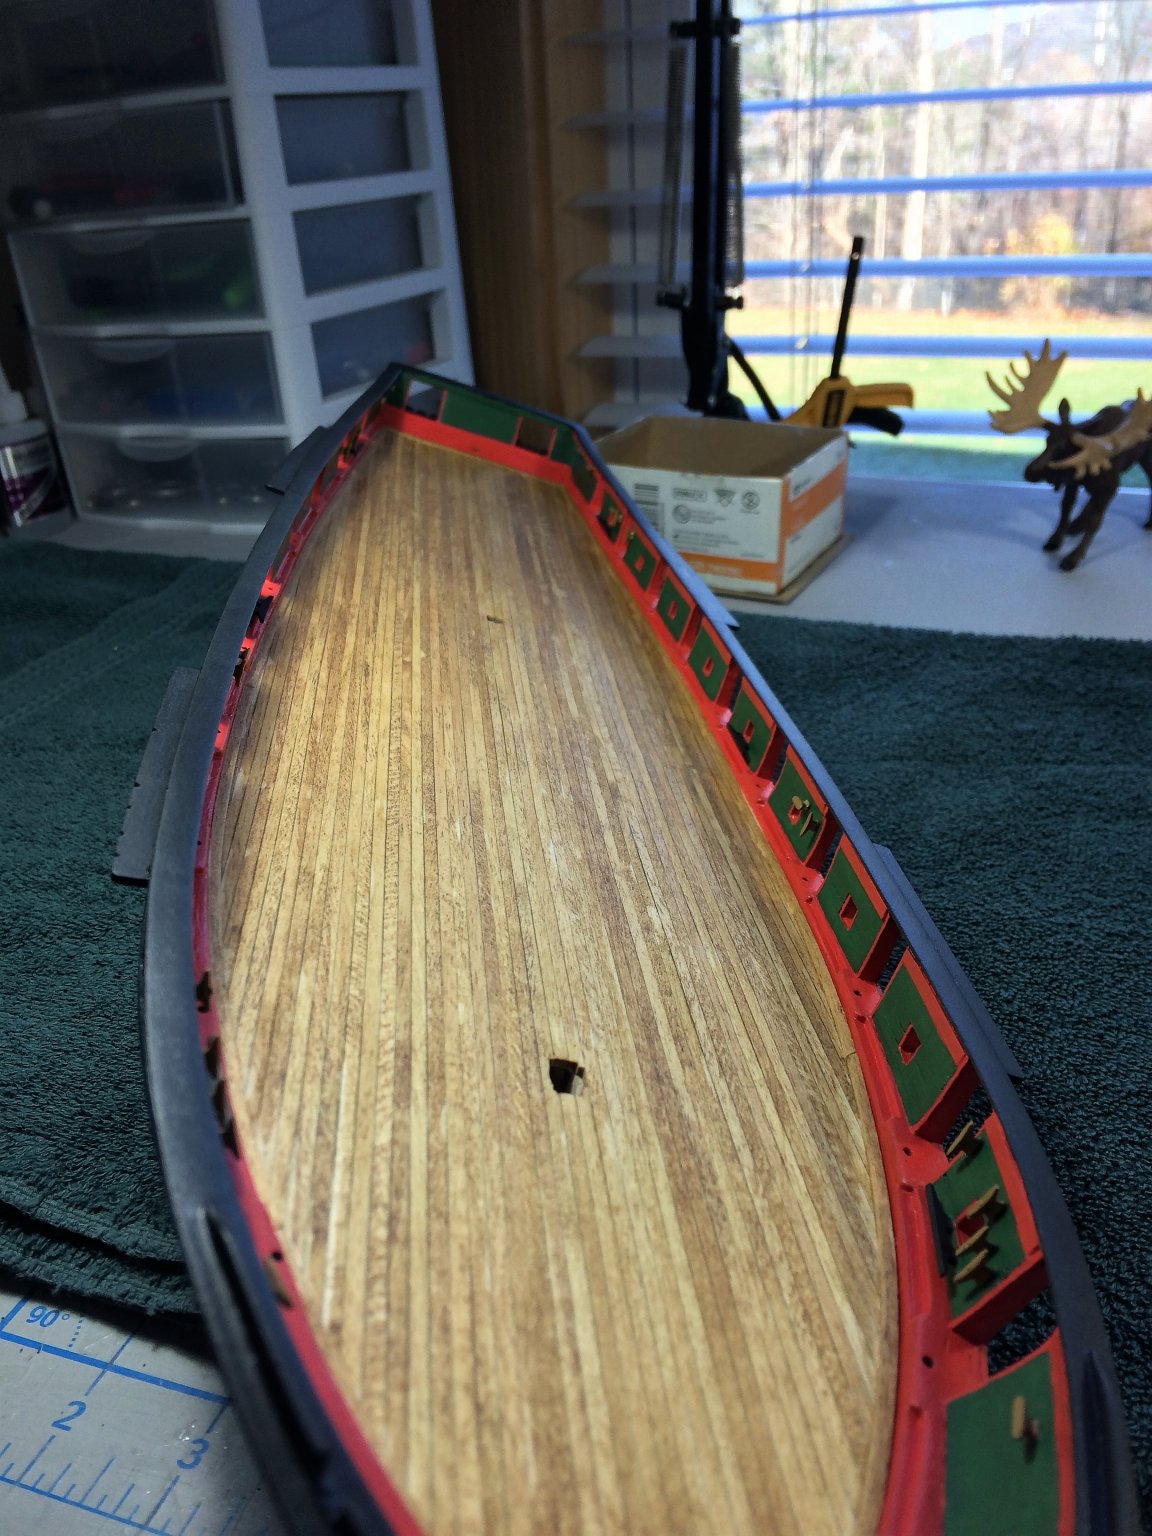
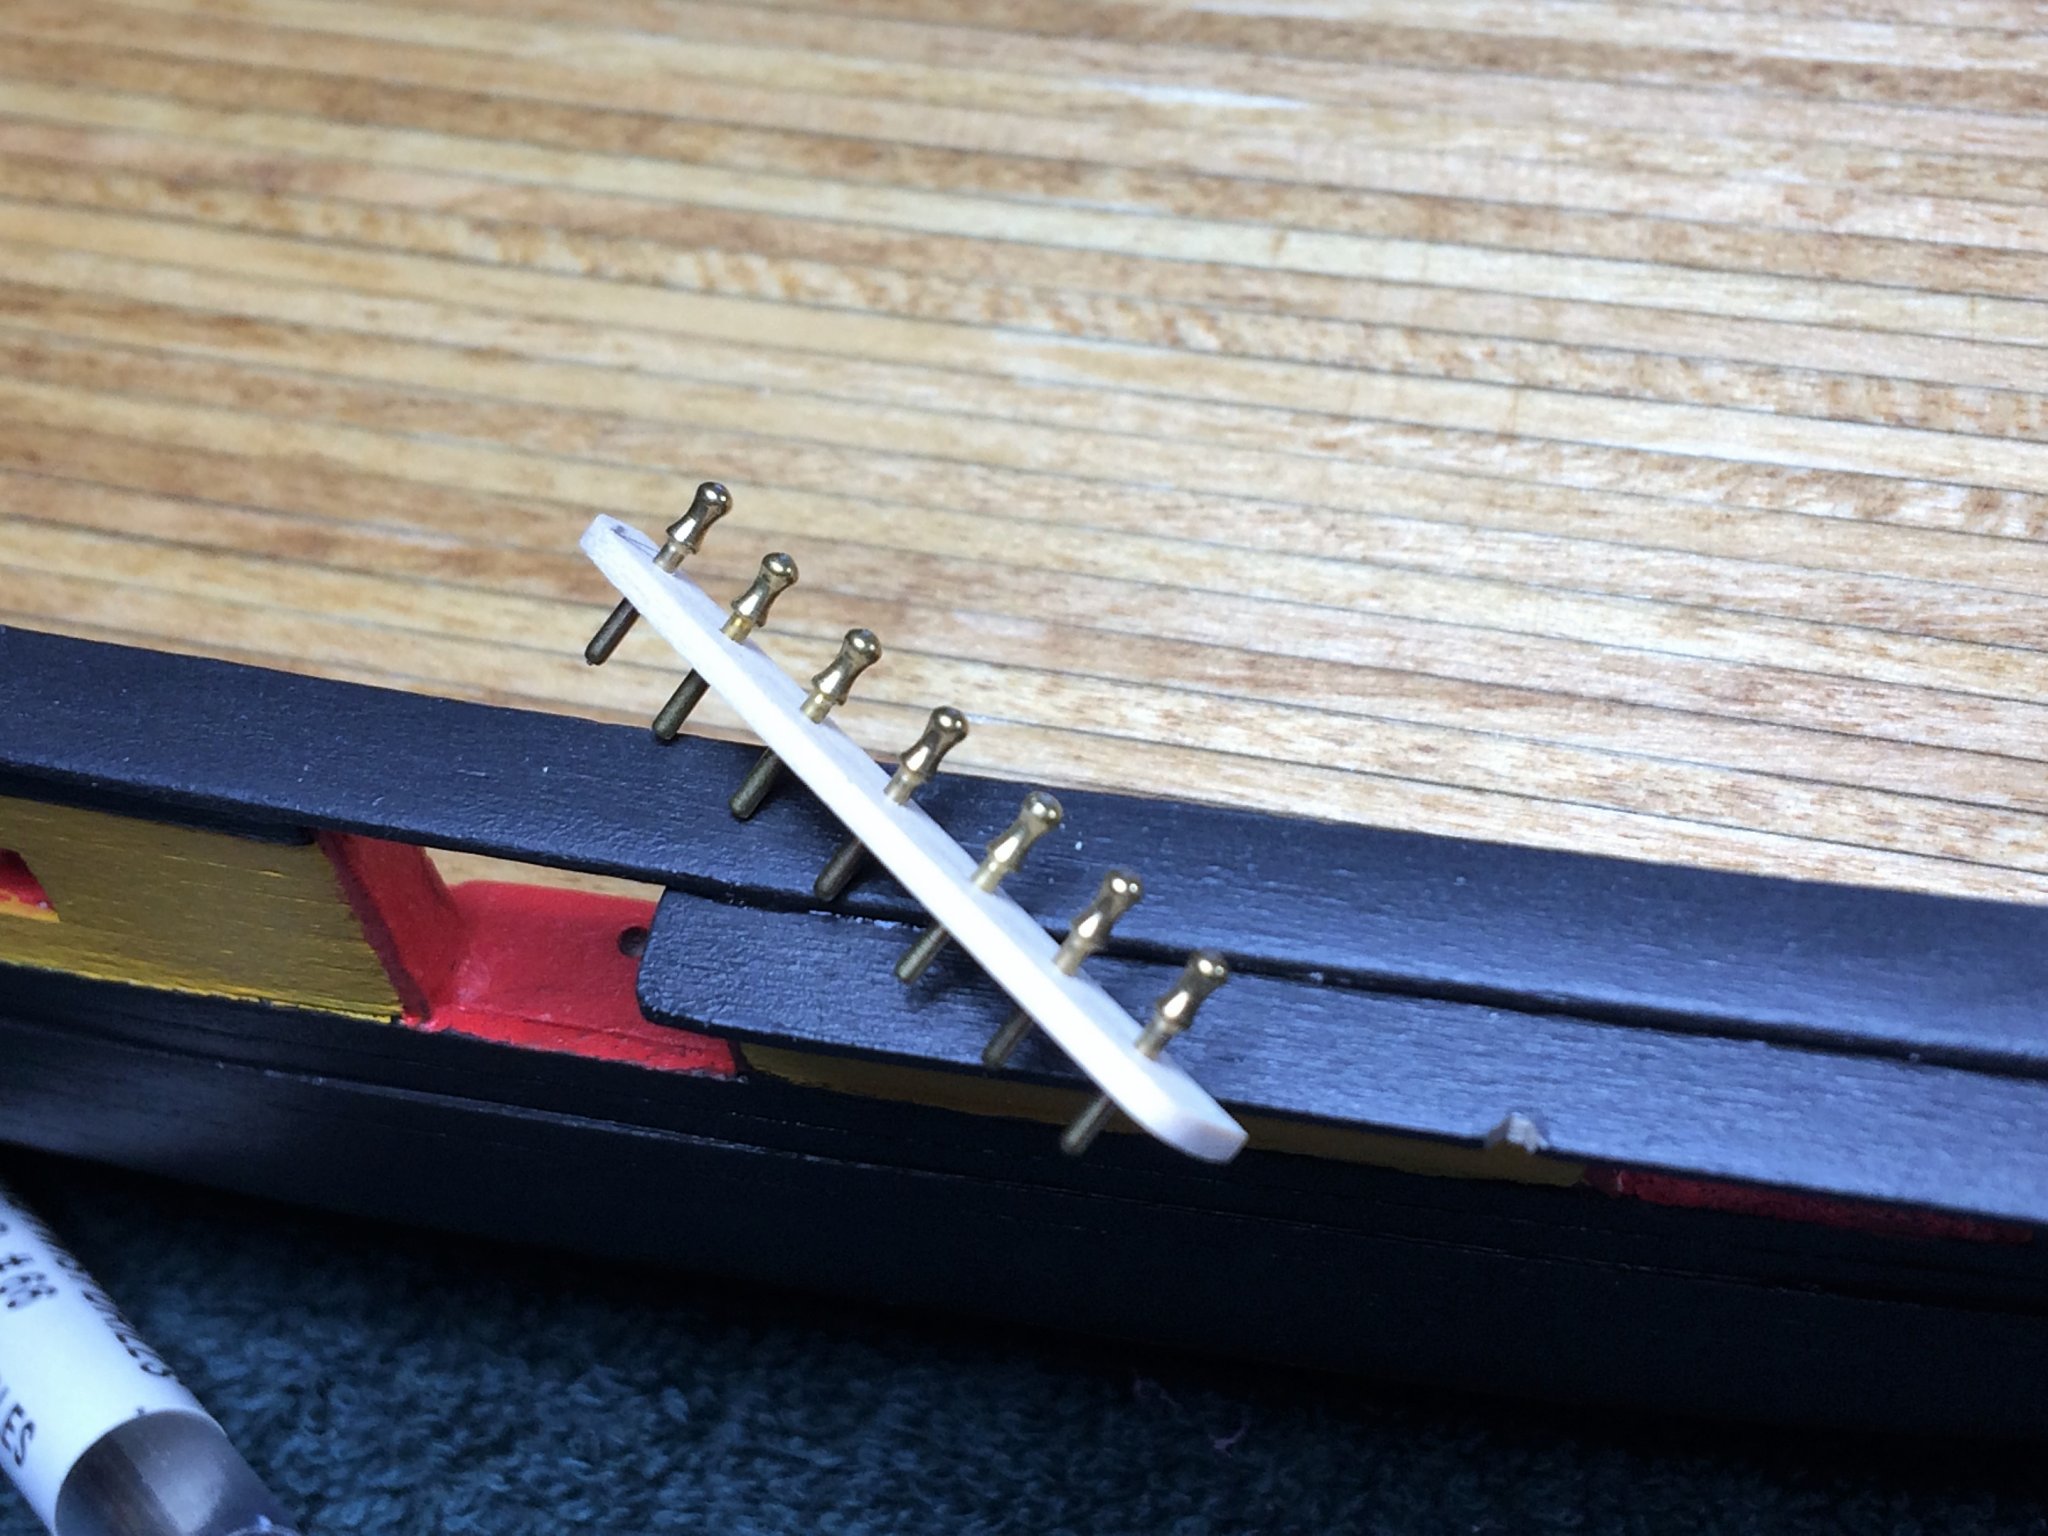
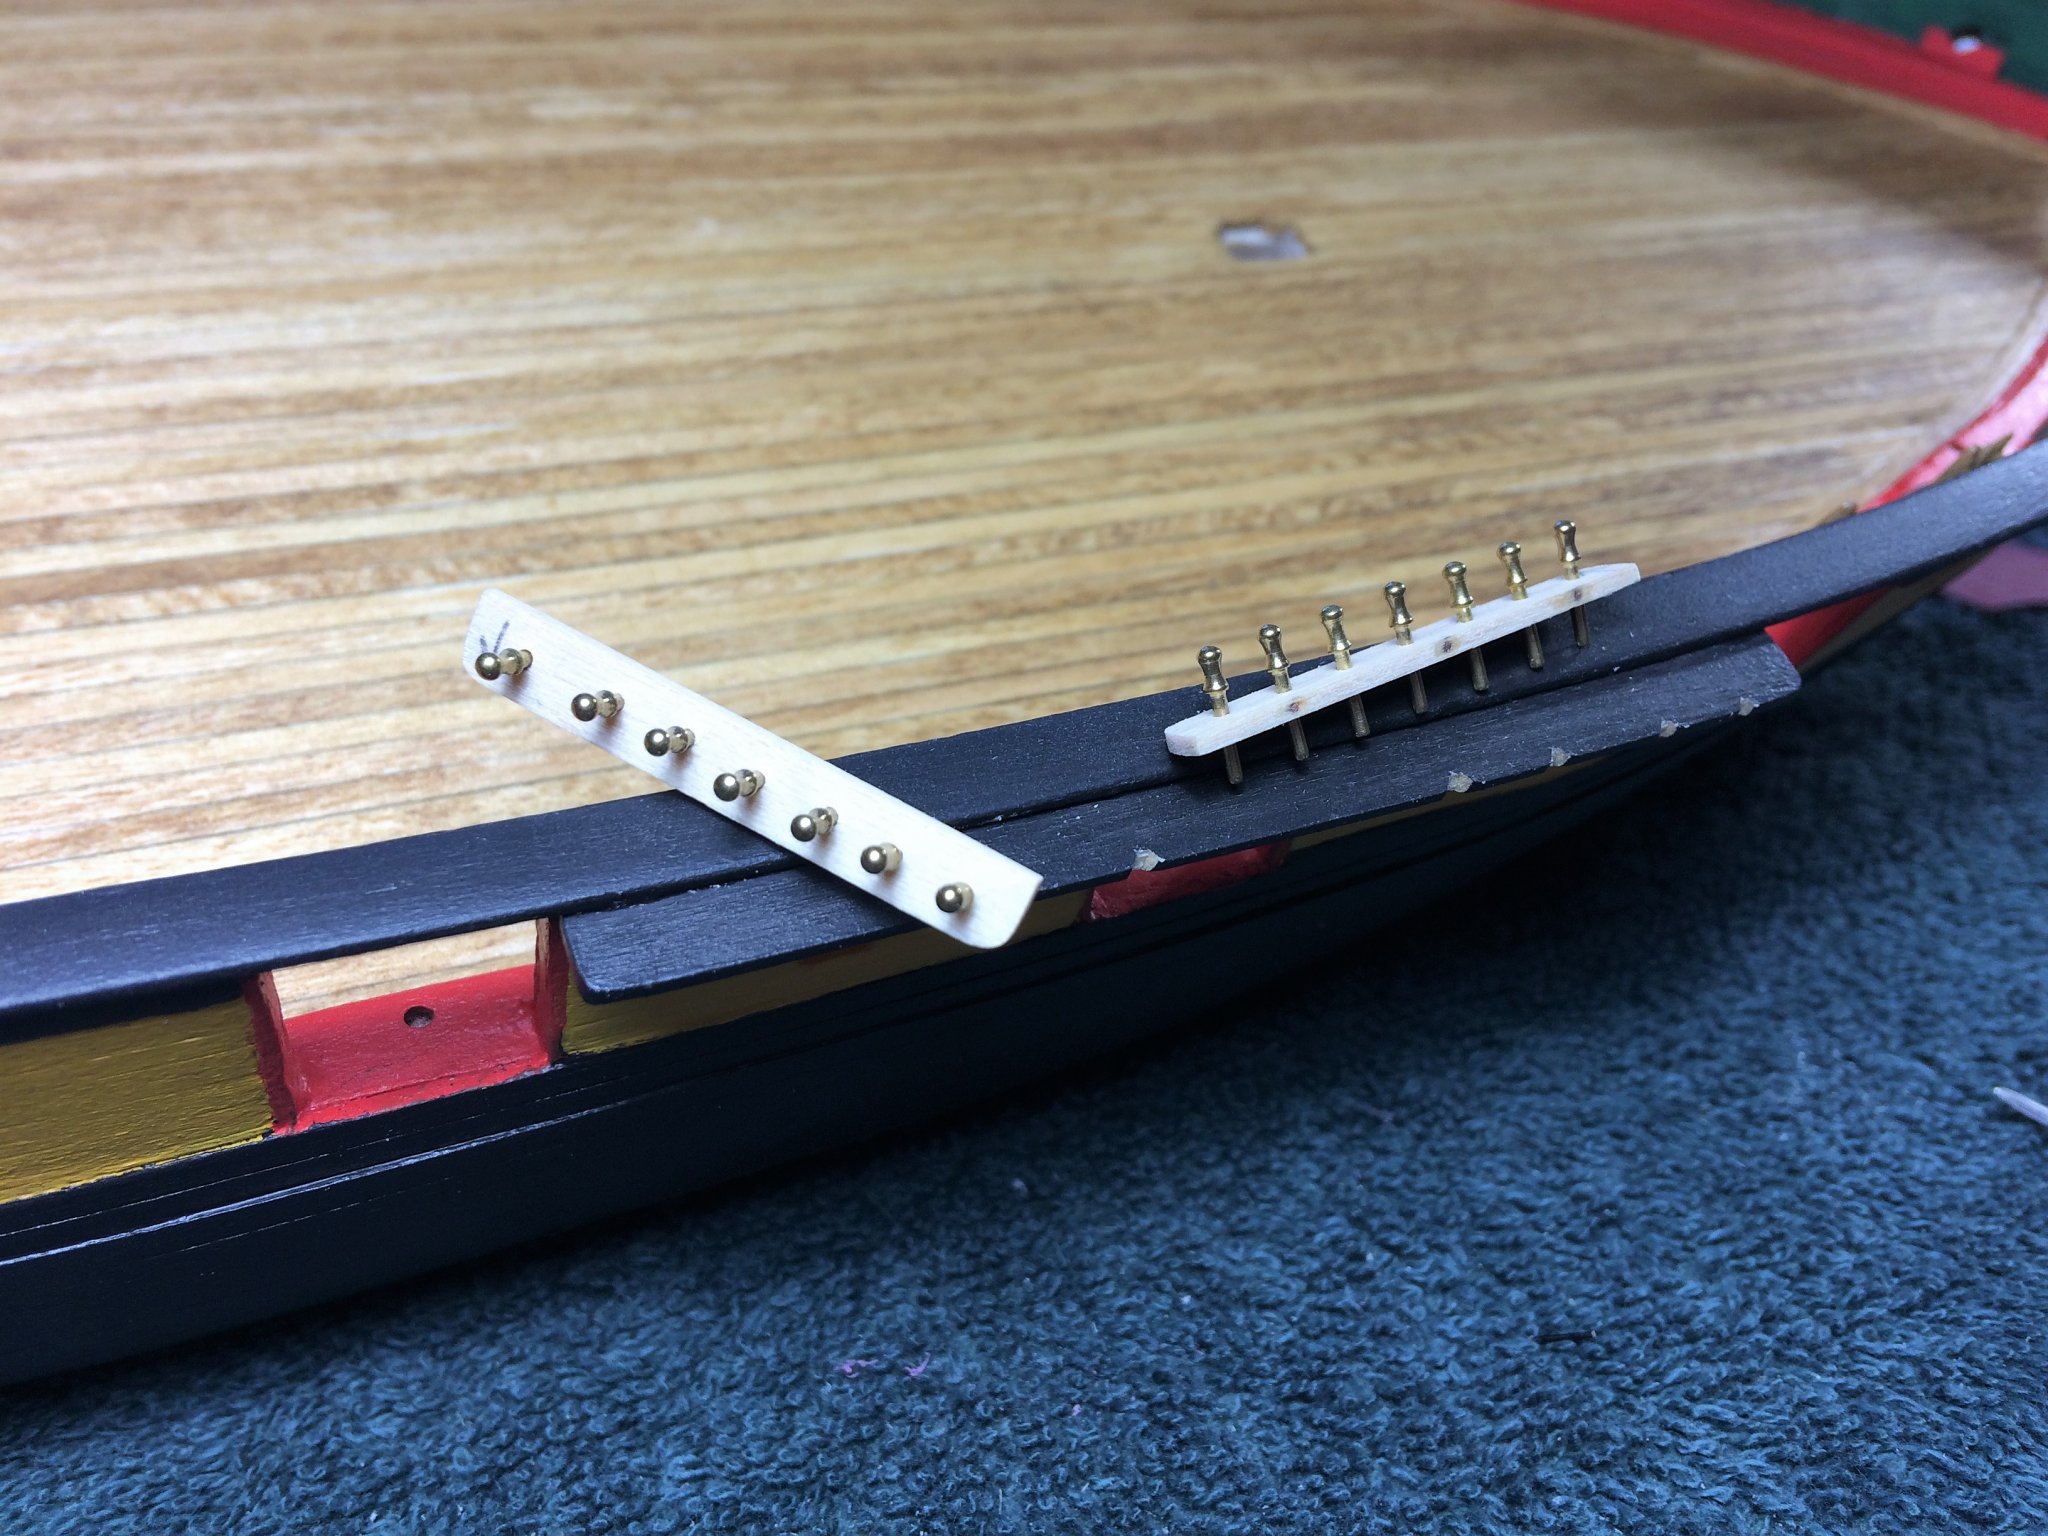
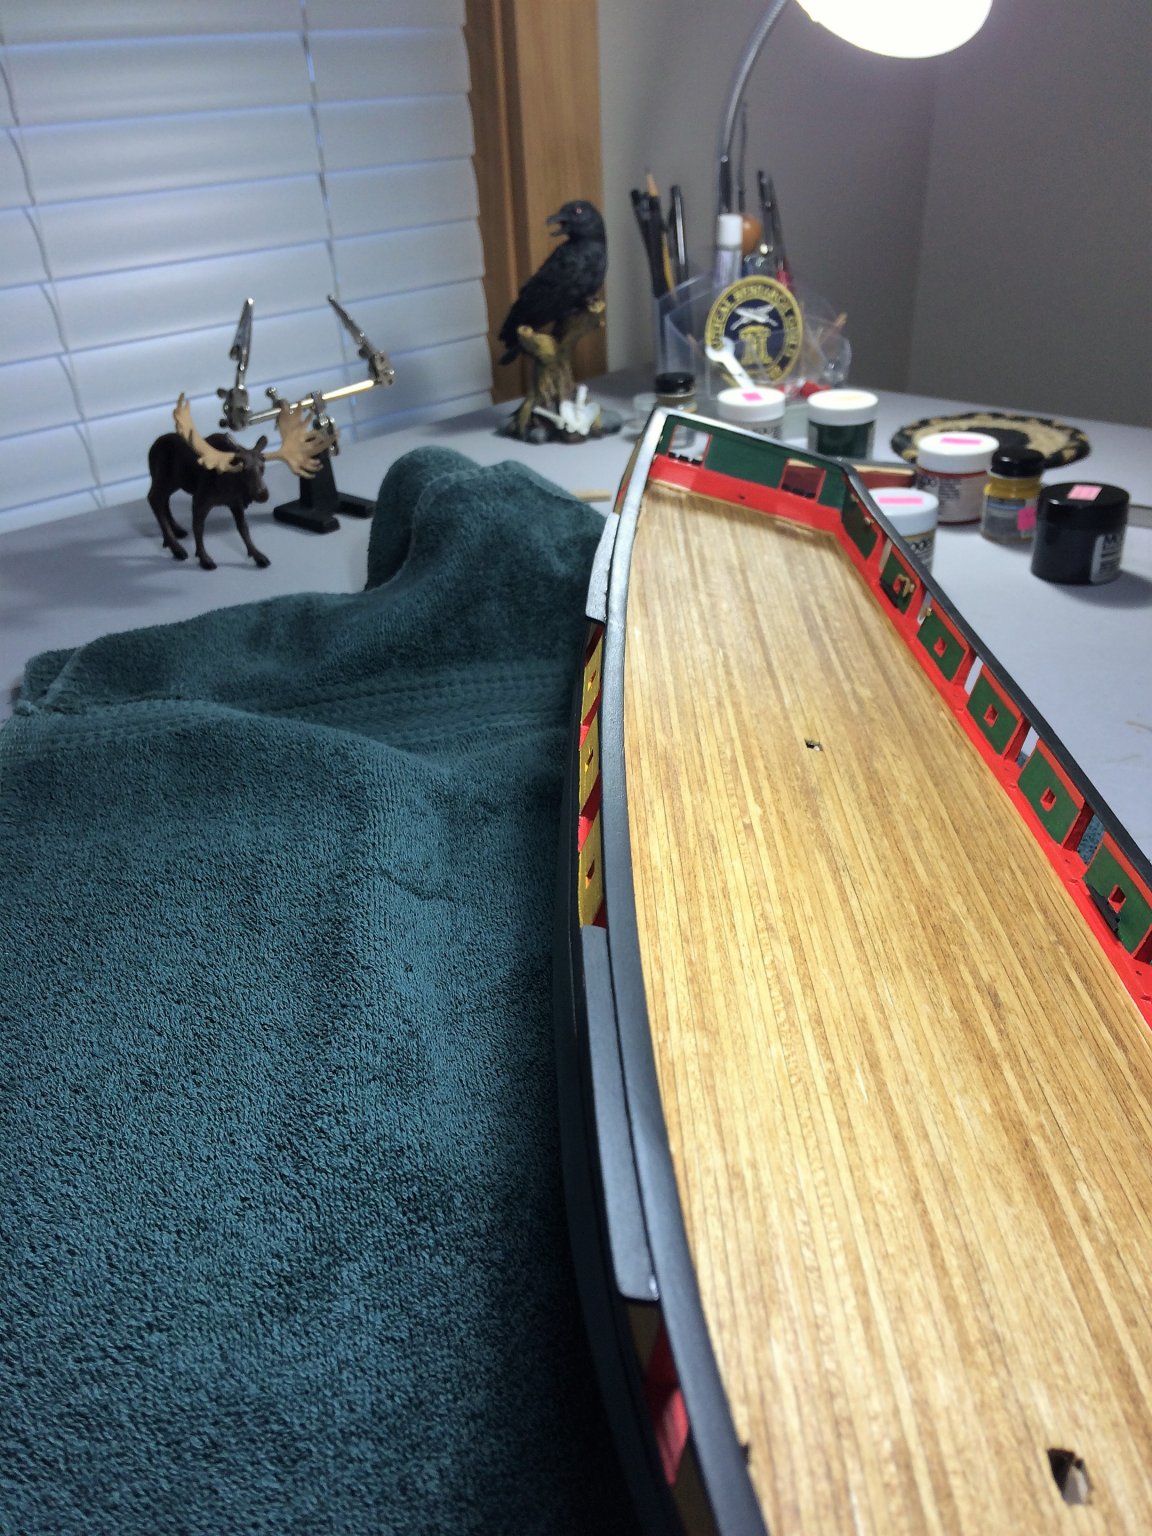
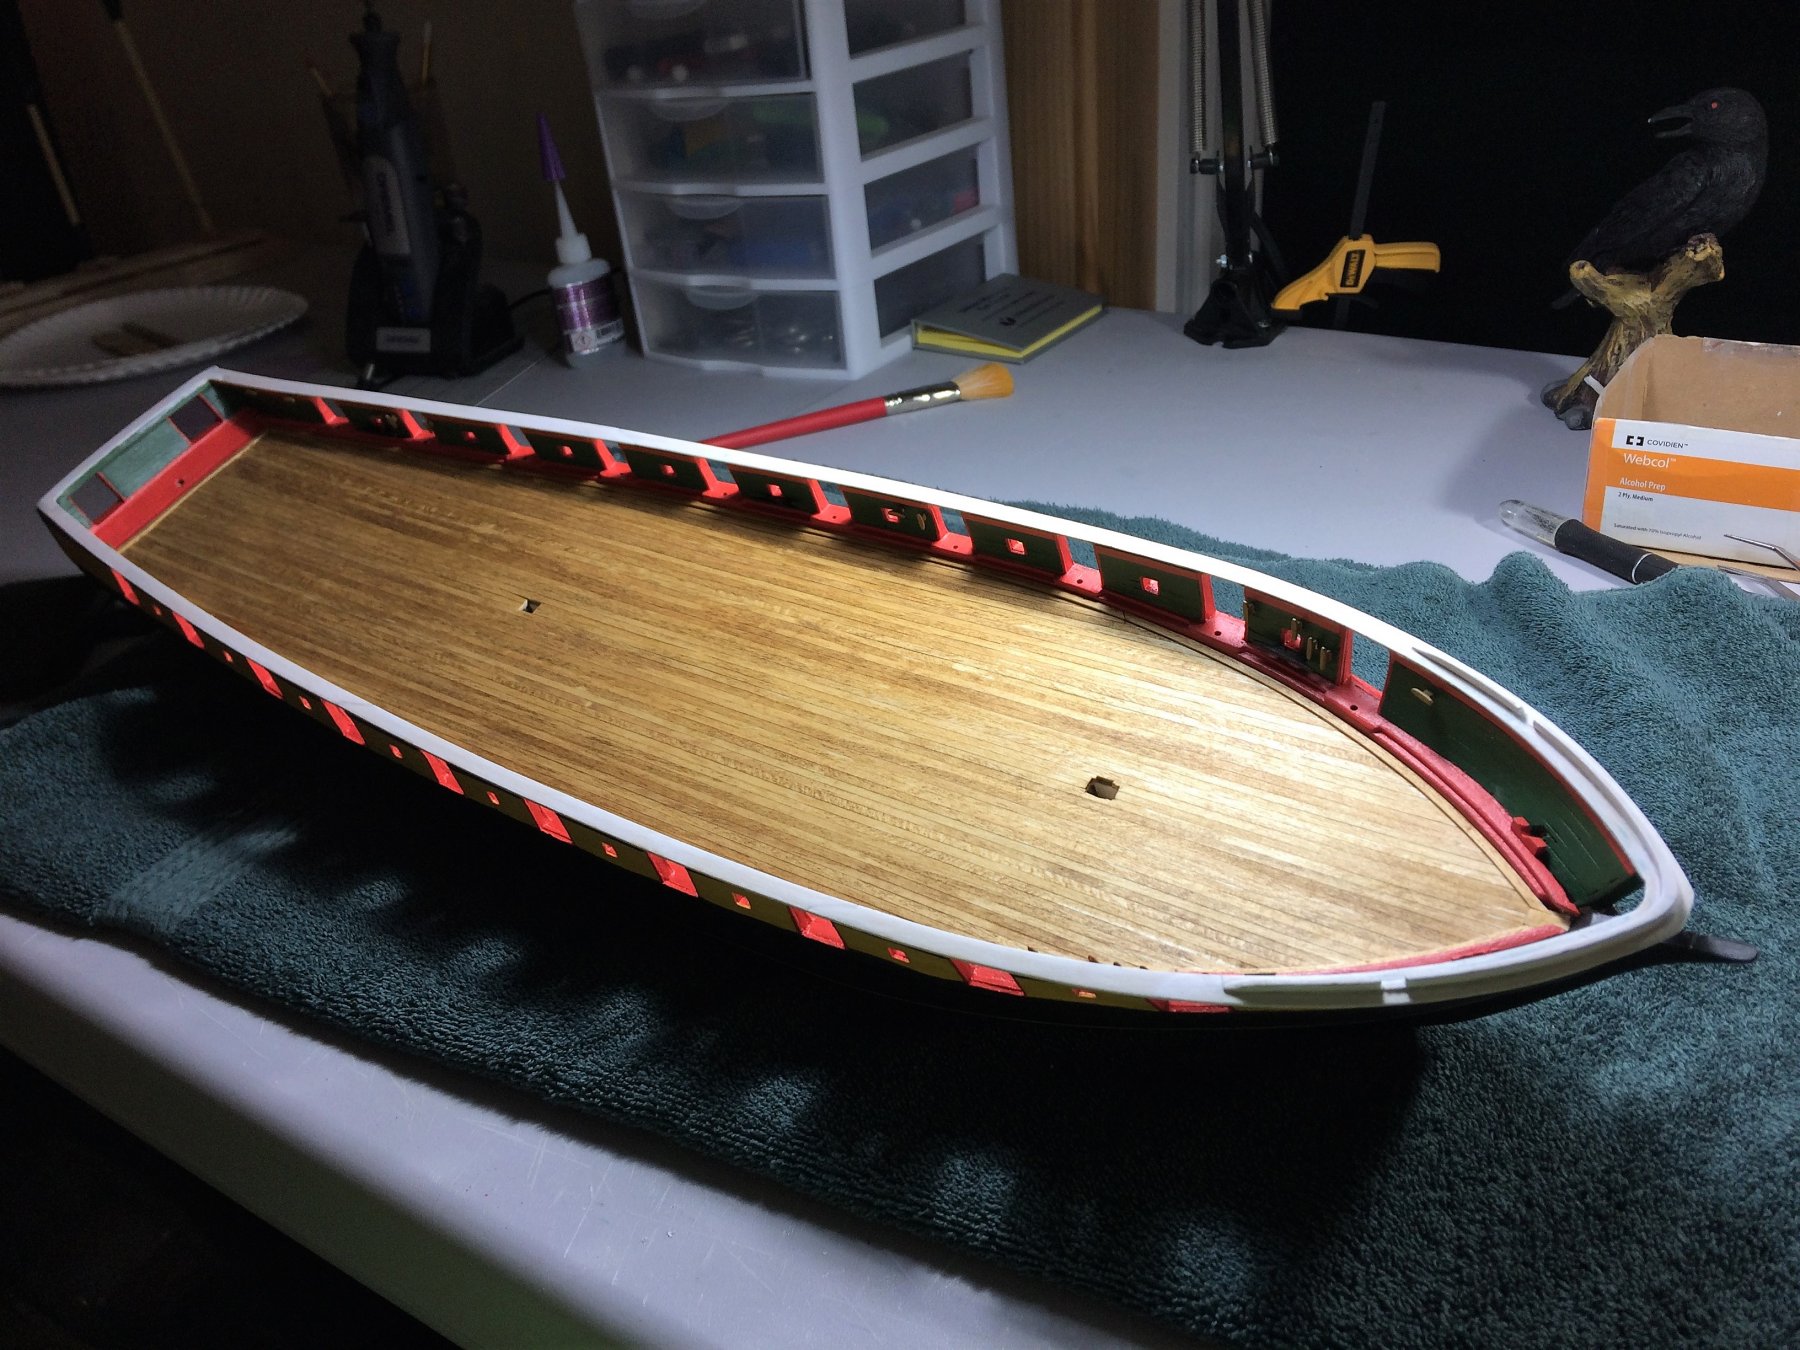
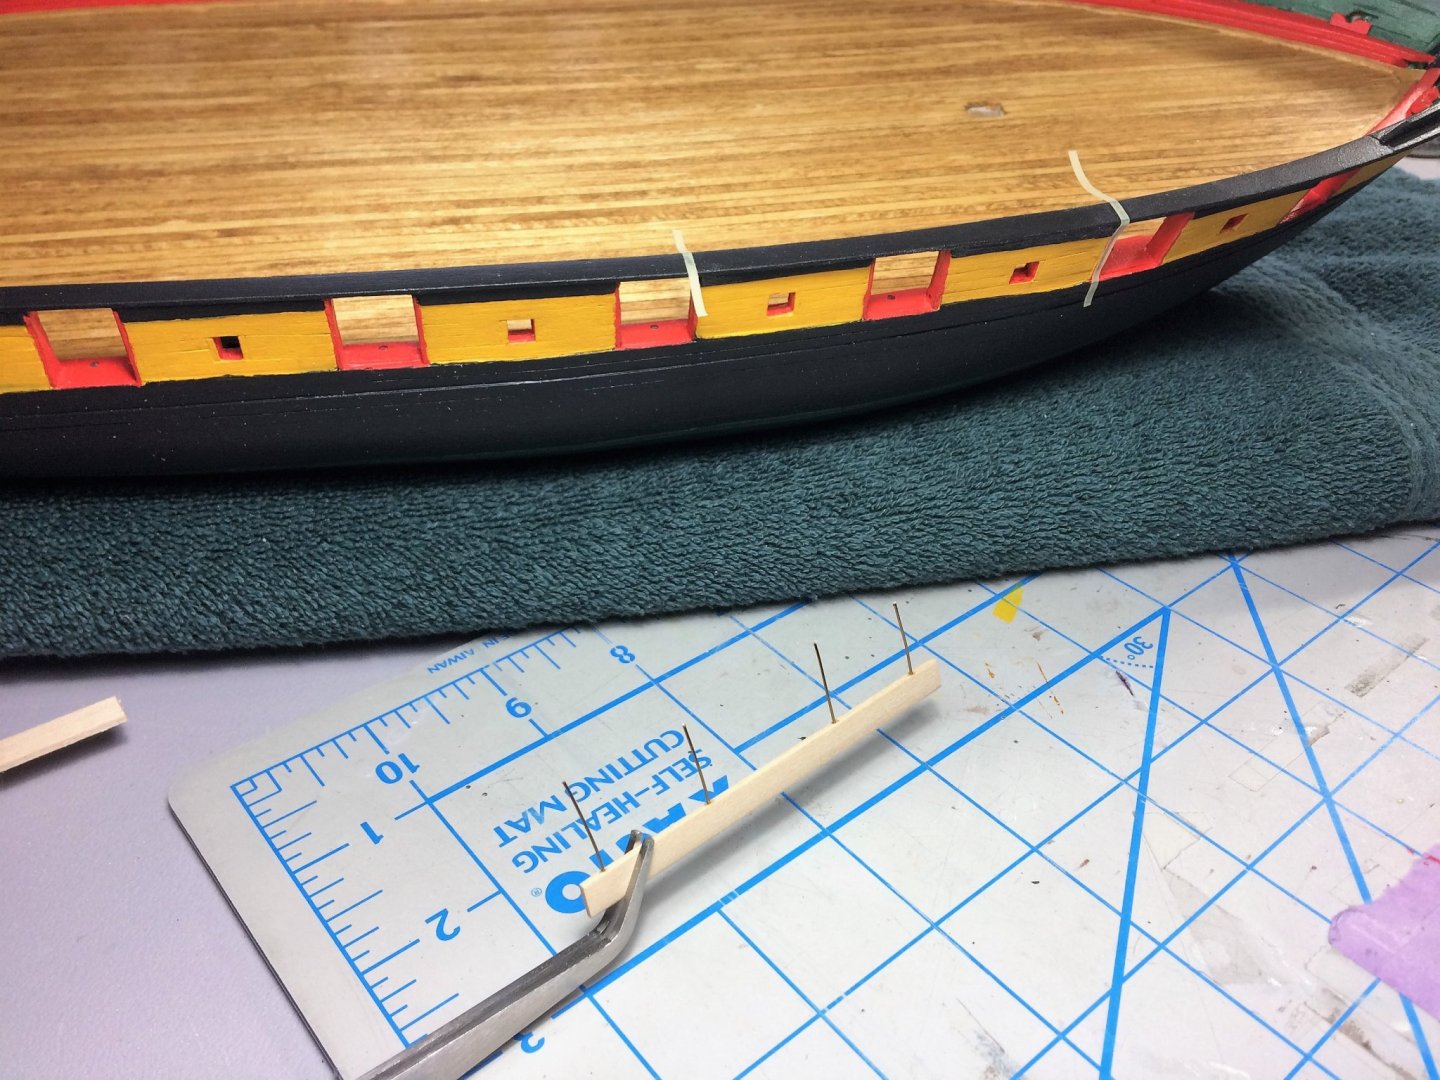
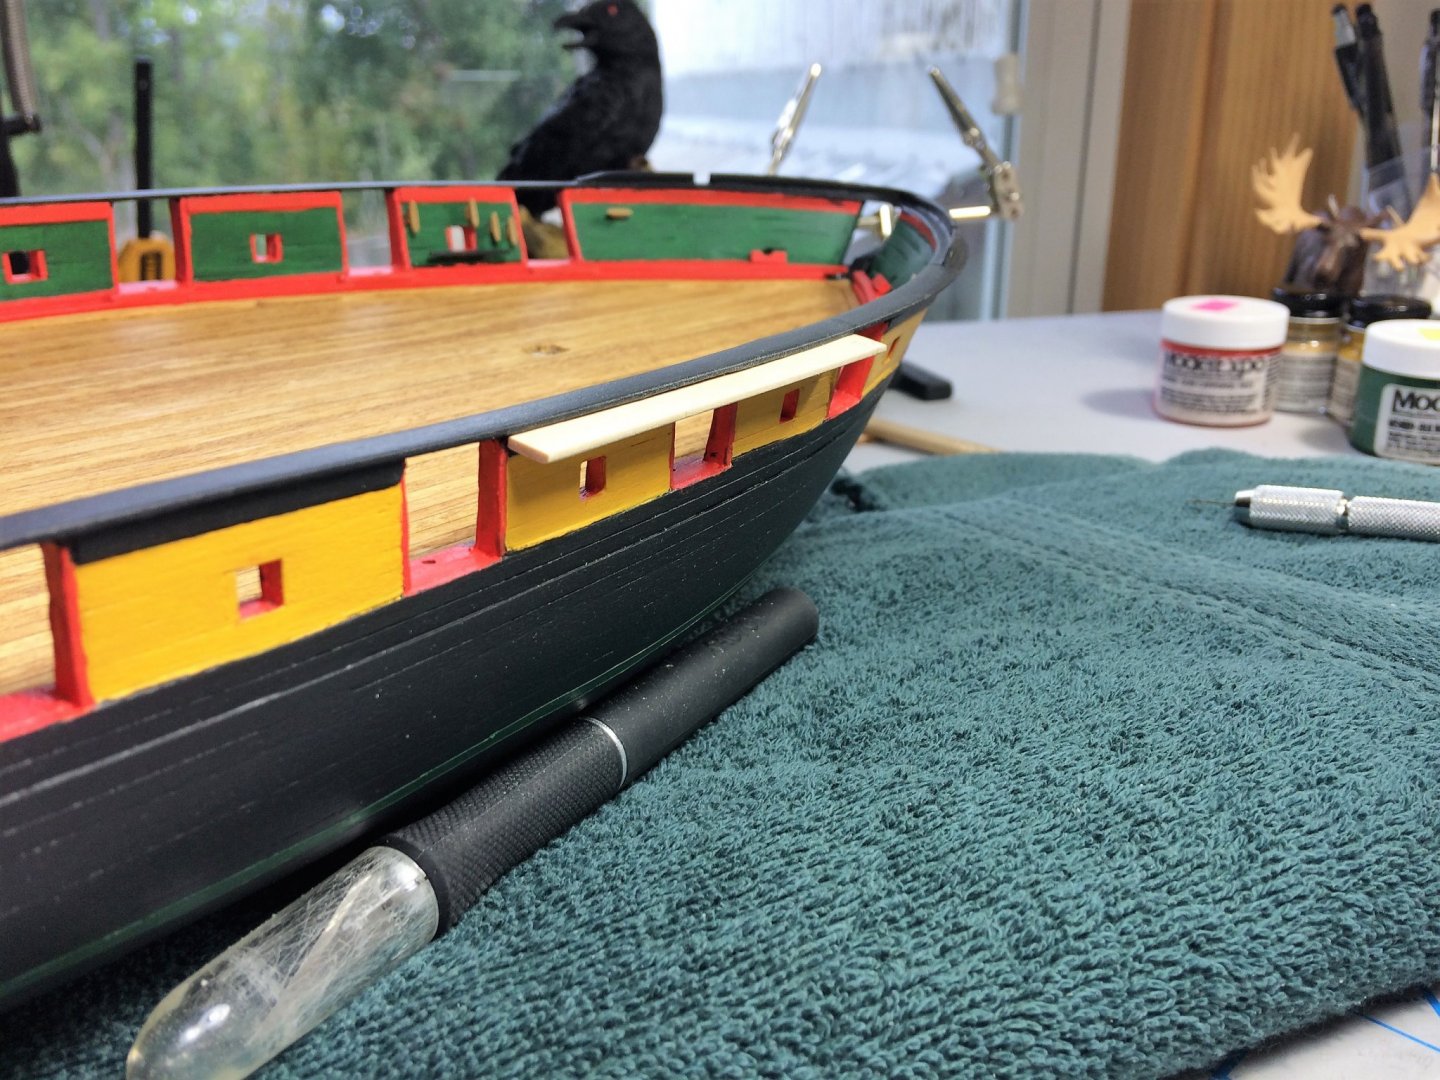
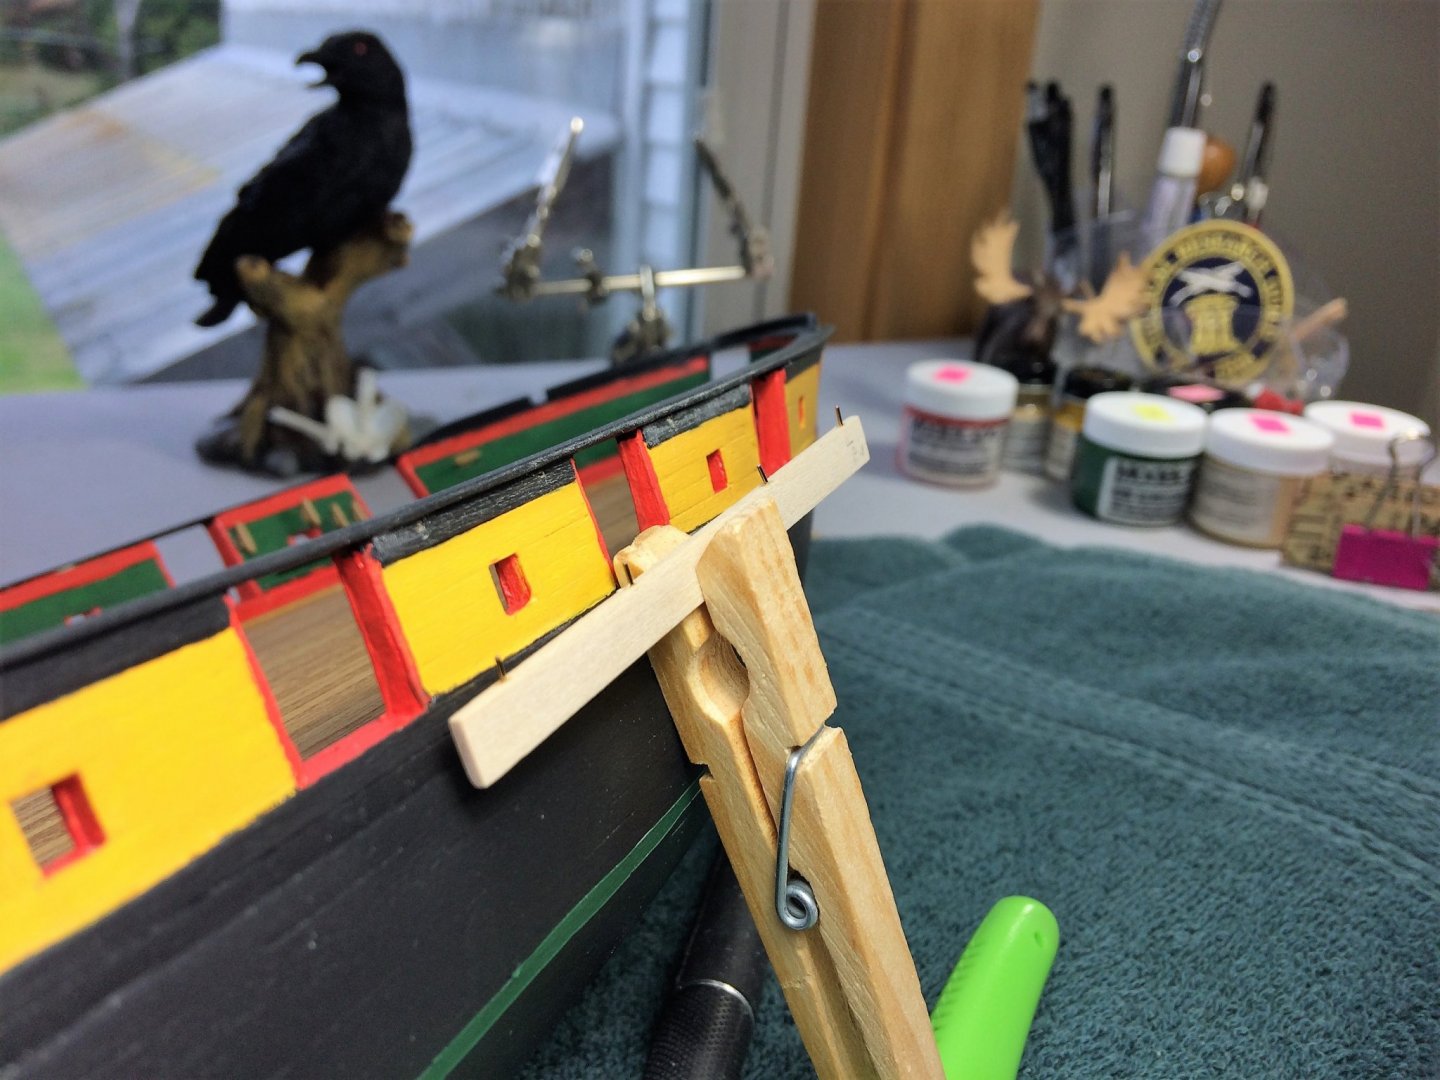
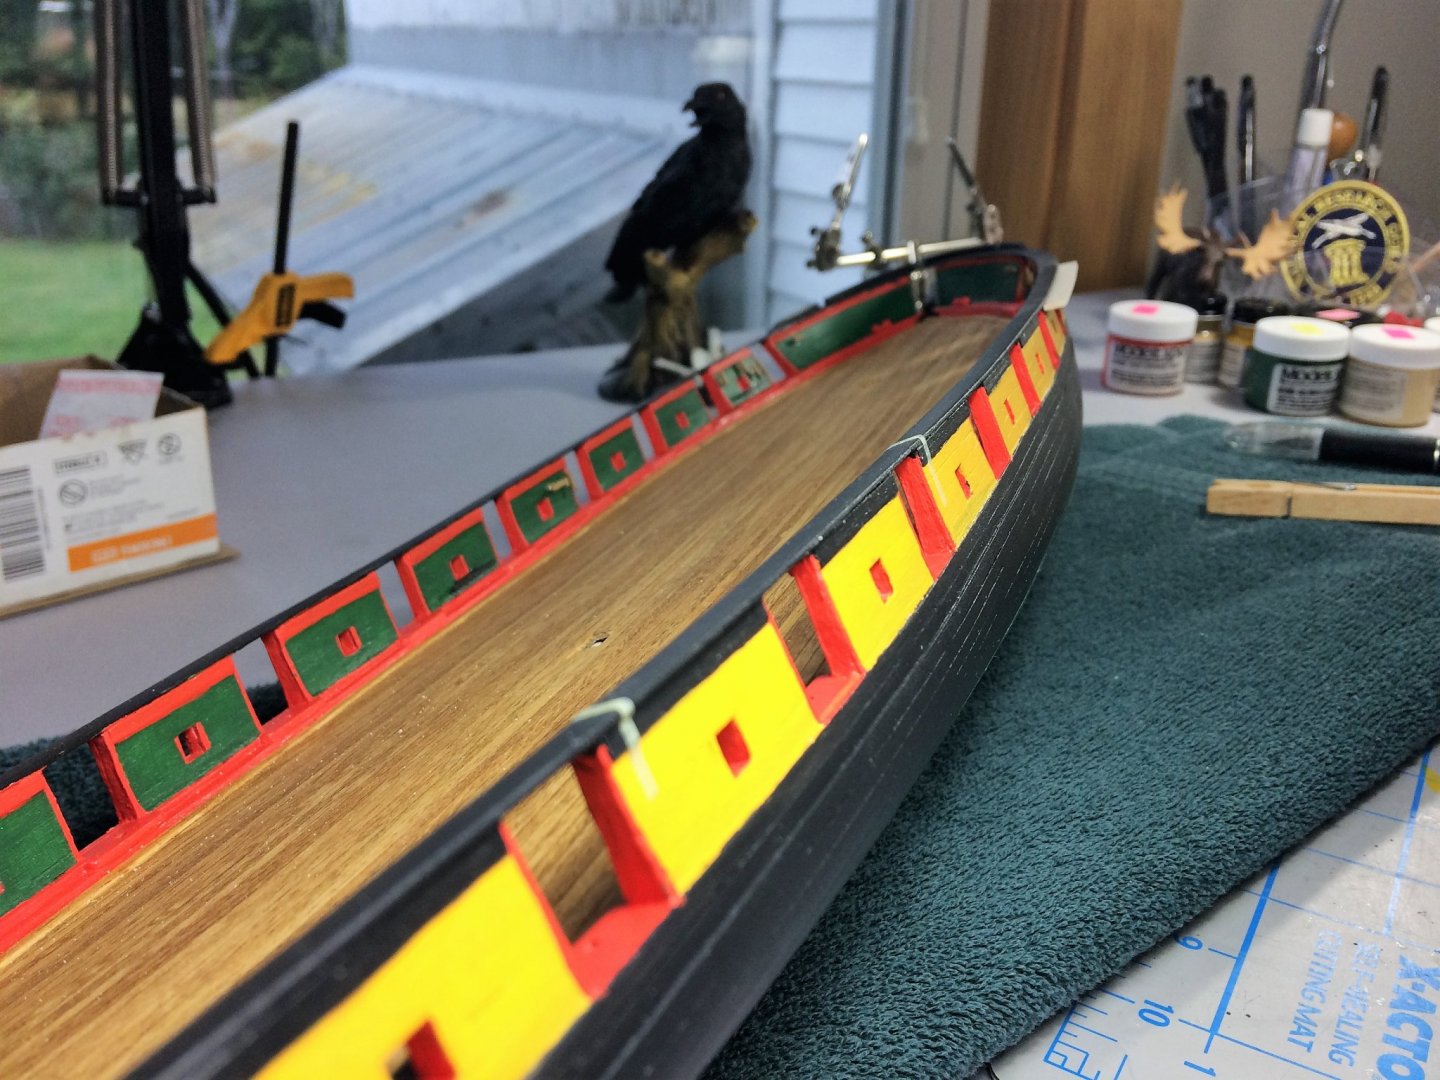
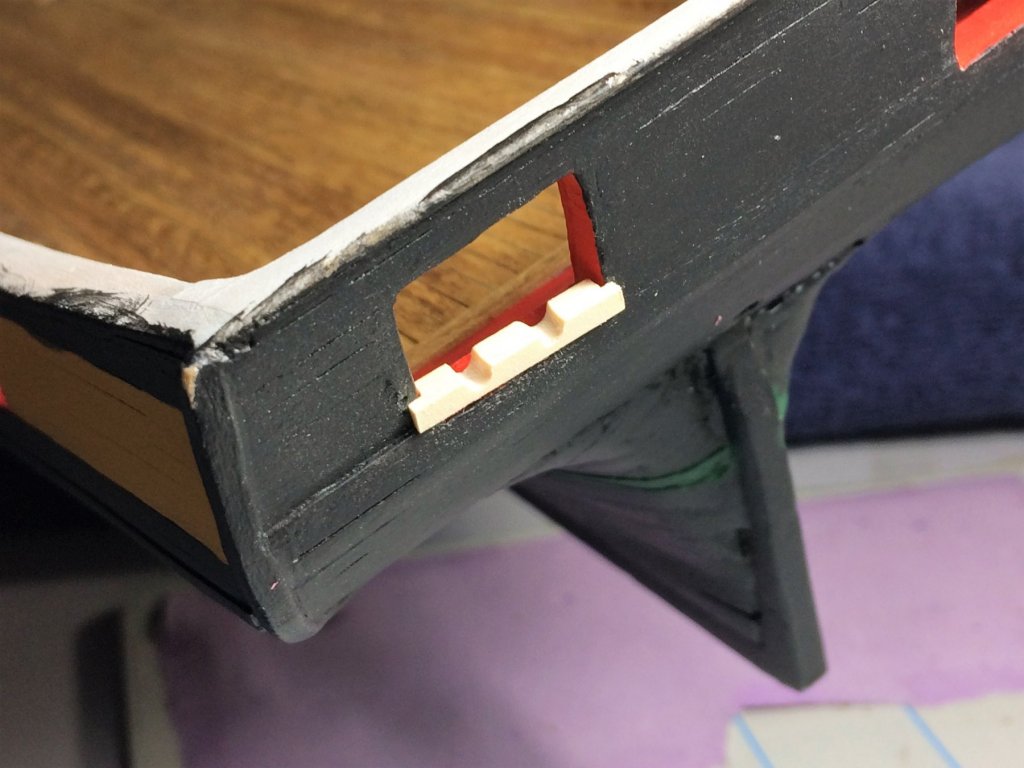
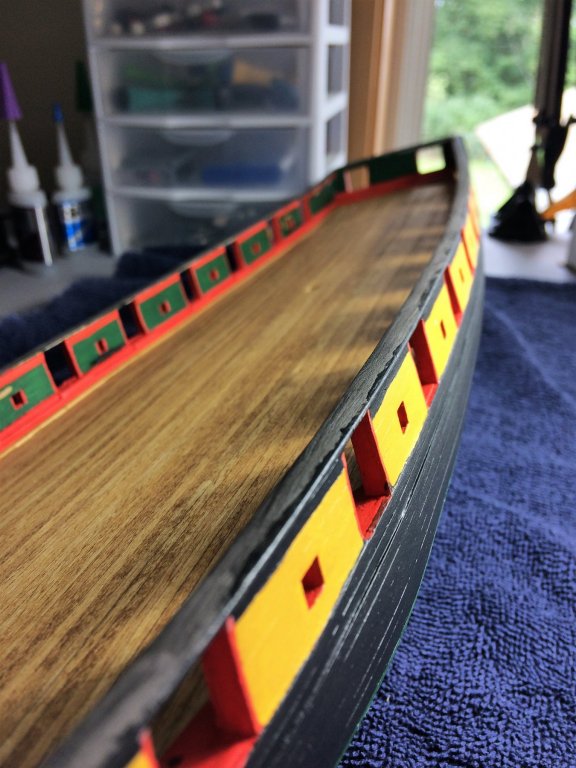
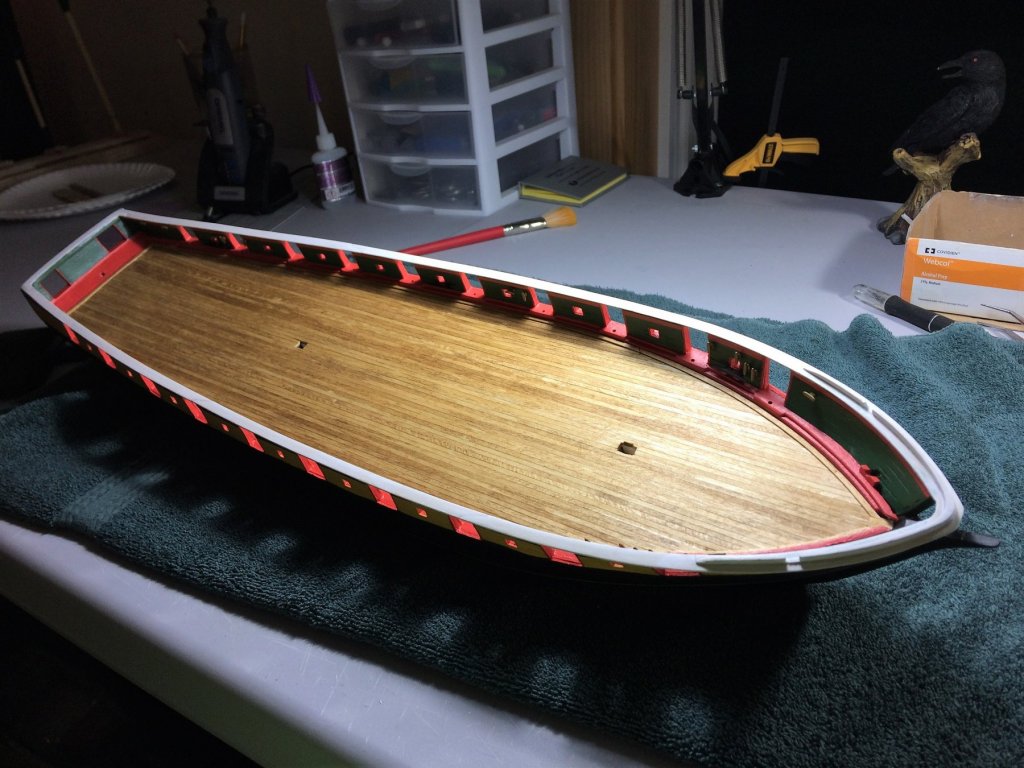
 Evening, Did some work earlier today, so small update tonight. The Shipyard is now officially closed for the Patriots game! Below, all four Channels are now installed. Not too shabby. Some have "tick" marks for the Deadeyes. There not broken. I've held off of the final coat of black paint for the Main Rail and Channels until all Deadeyes and other hardware have been located. Plus, should cover some glue stains! Build the Starboard side front Pin Rails. I plan on painting these red as per the plans. These were more difficult in my head. The Pins are tight, but tight enough where the woods not stressed. Go Pats! Tom E
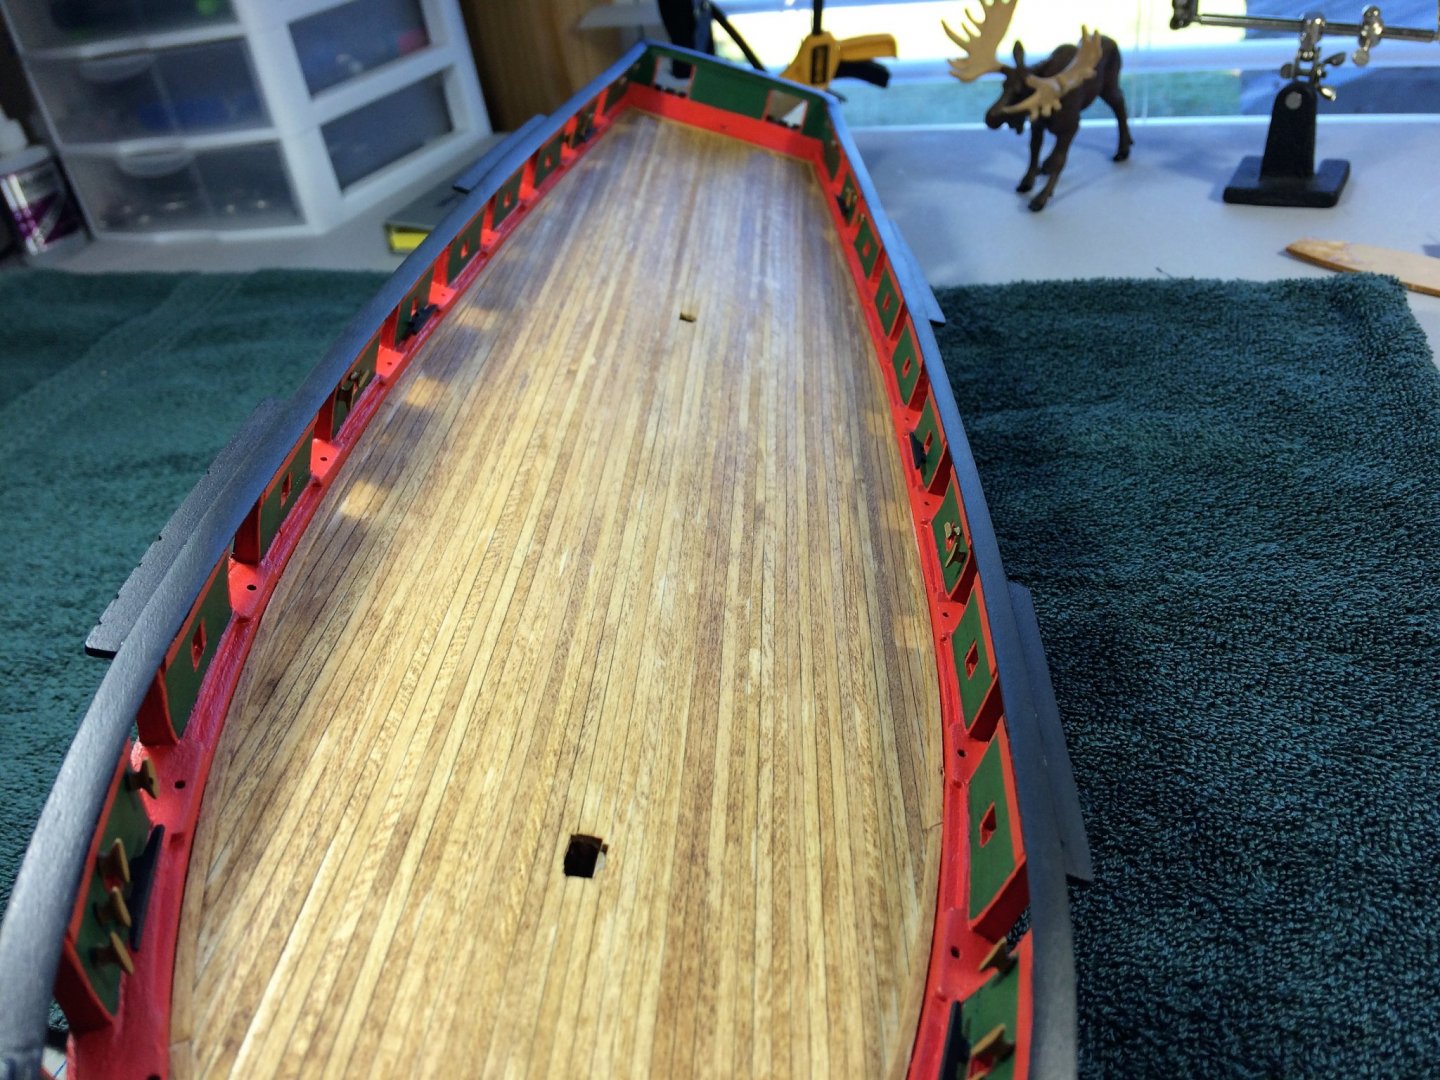


-
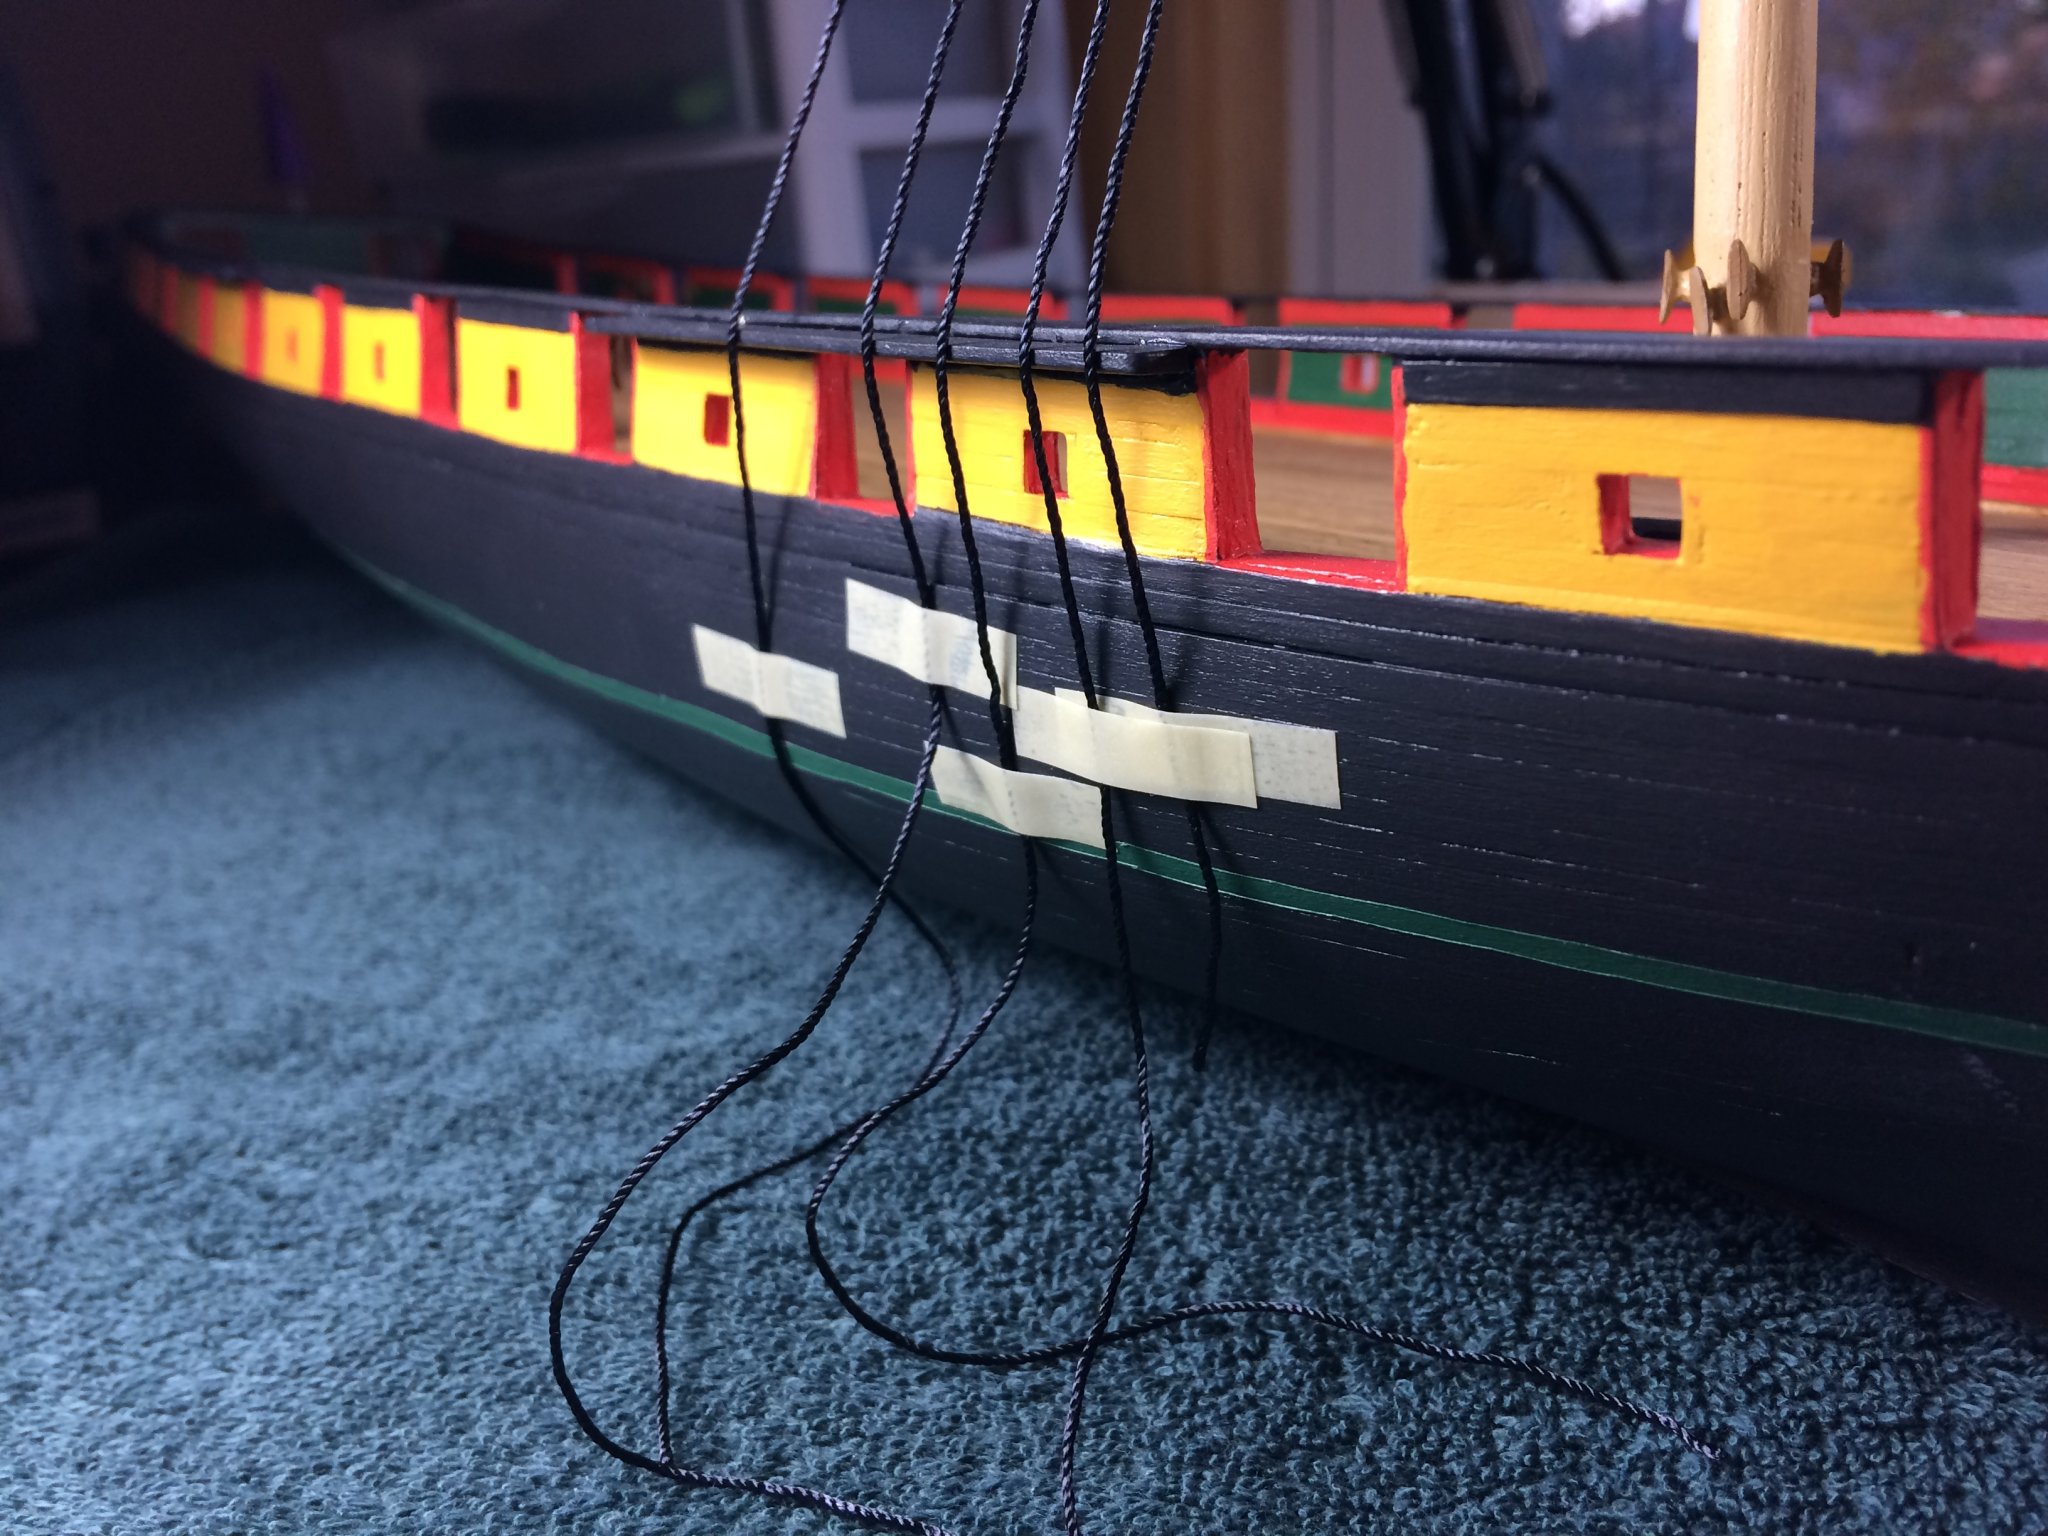
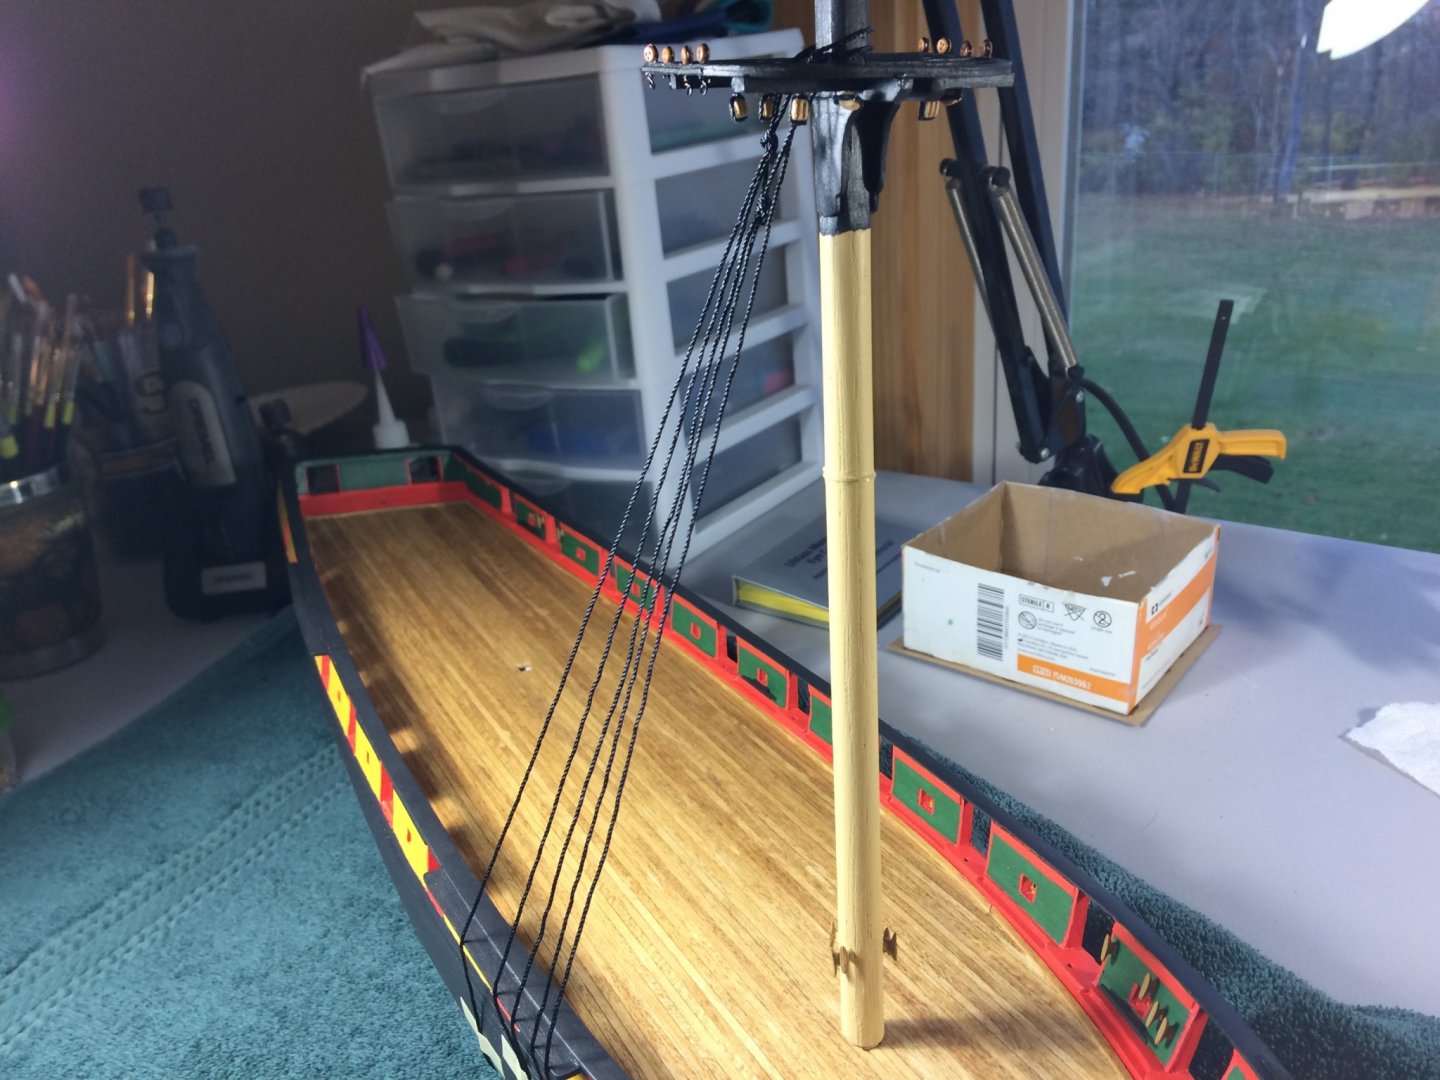
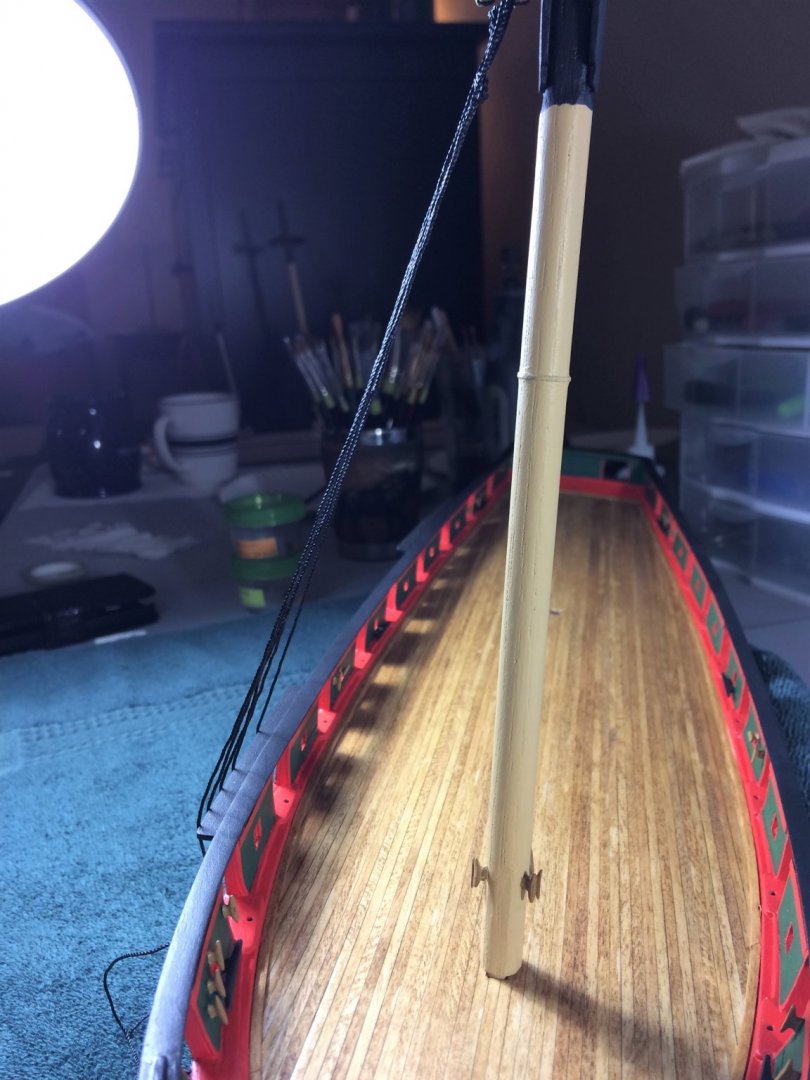
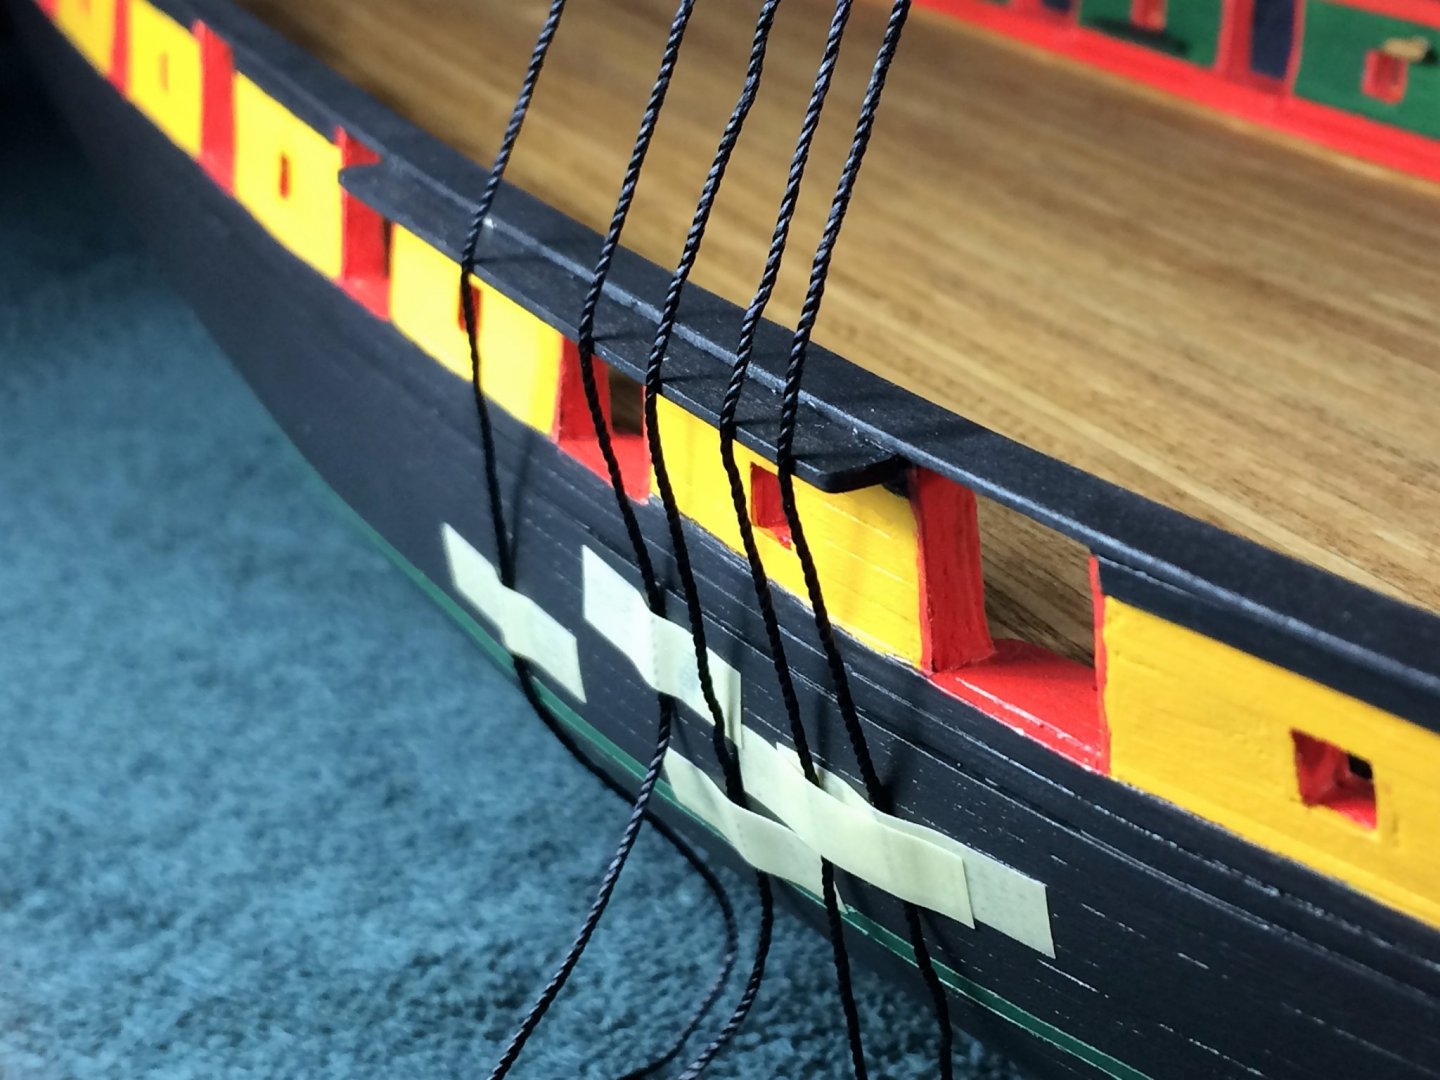
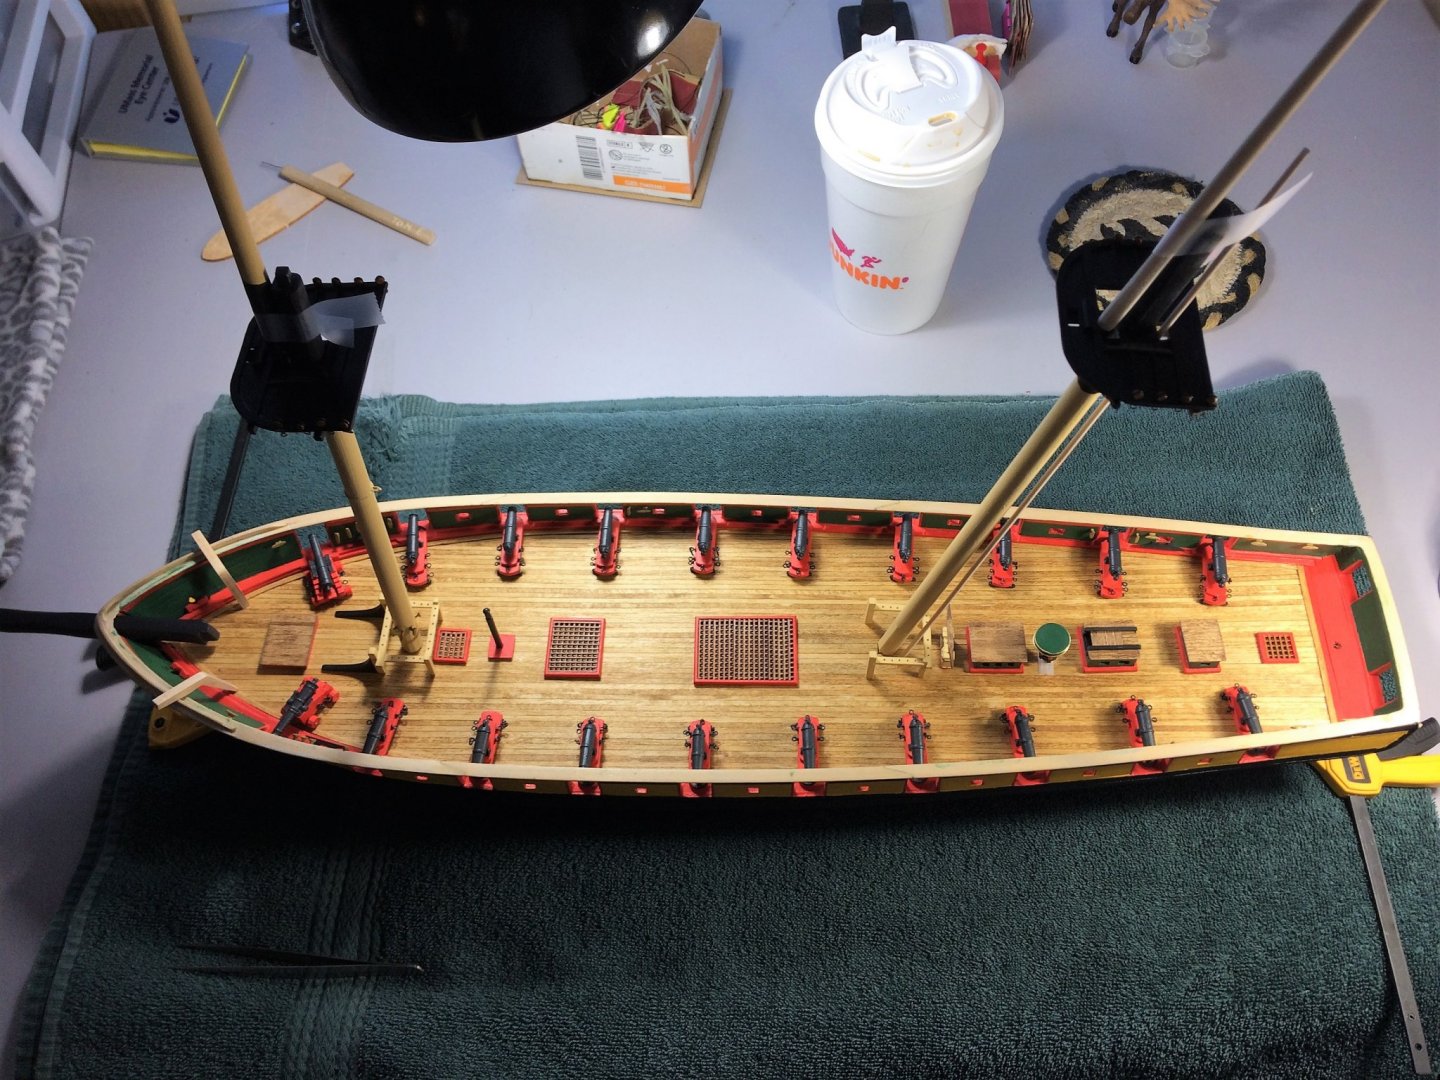
Evening, Chores are done, nothing on TV, time for an update. I've installed all of the hardware for the Main and Fore Course Yards. These received a good sanding. As of tonight, they have a coat of primer. Eventually they will be all black. A little bit of a milestone for me. Shrouds have appeared! I've never been this far with a build before! Granted, there not the real shrouds that will eventually be strung, but it looks cool! I used kit supplied rope for the fake shrouds. It's approximate to the same size Syren rope that will be used in the end. These can be re-used for all the Channels. Below shows, what should be, good clearance on the inside of the Shrouds. I cant remember off the top of my head, as I'm writing this, if the Hammock rails go under the Shrouds. They were anchored down with Tamiya masking tape. Worked as well as one would expect. Then lined up in there sensible locations. Keeping in mind spacing, not blocking portals, and the like. Small nick marks were made where the Deadeyes will be installed. A keeper strip will cover this eventually. Tom E


-
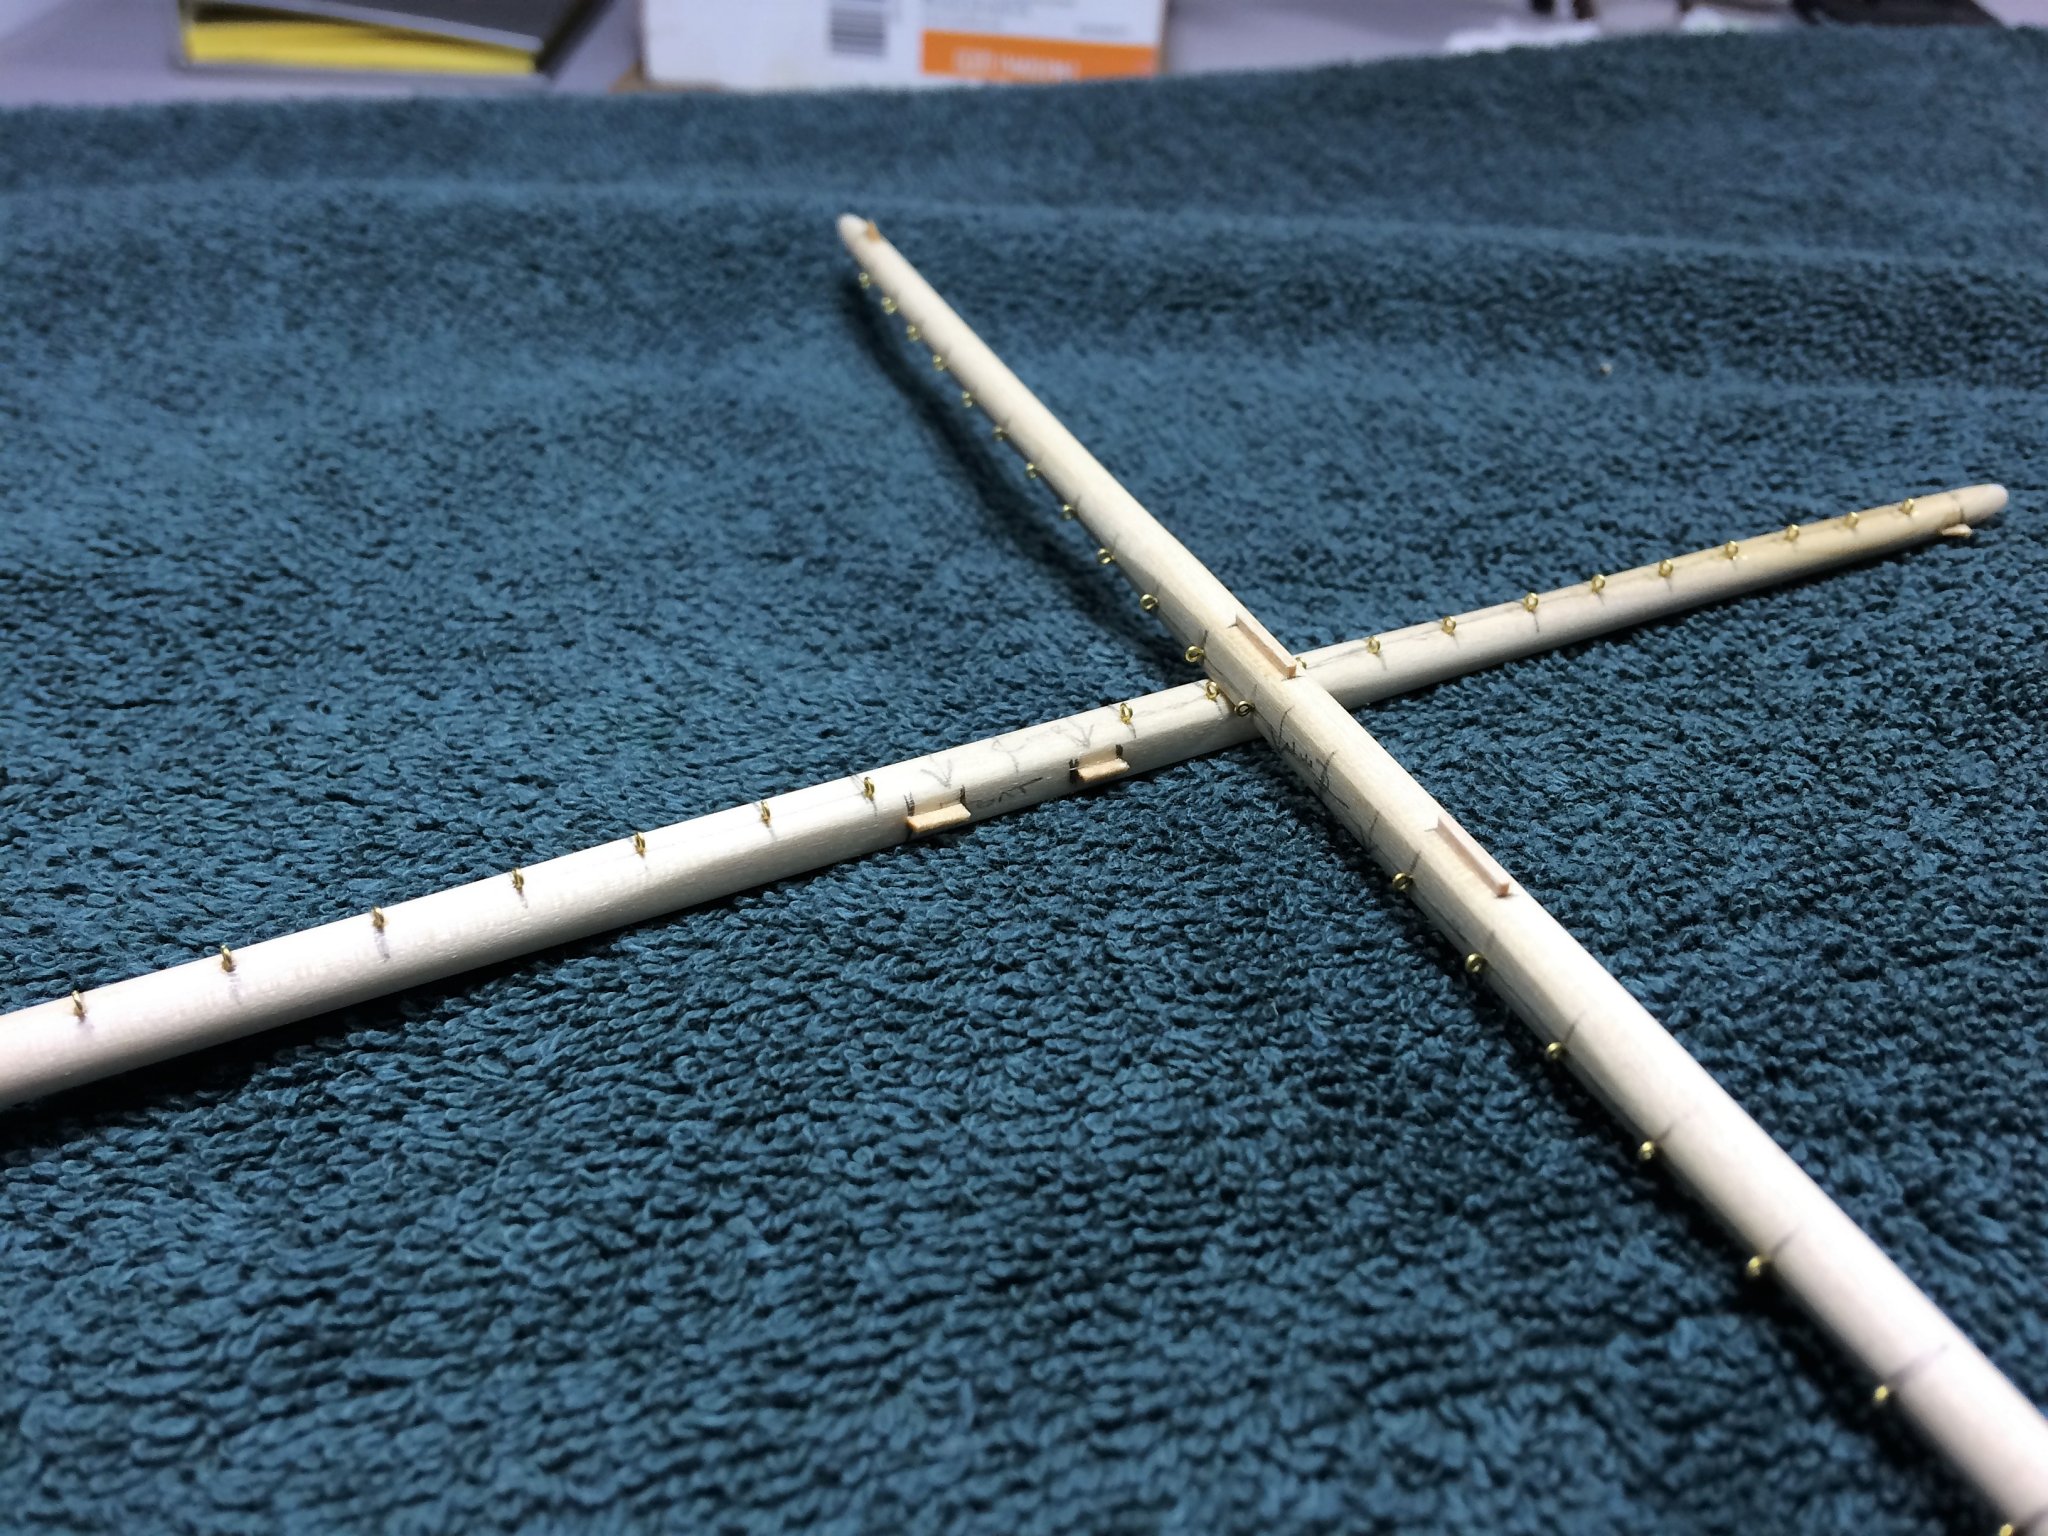
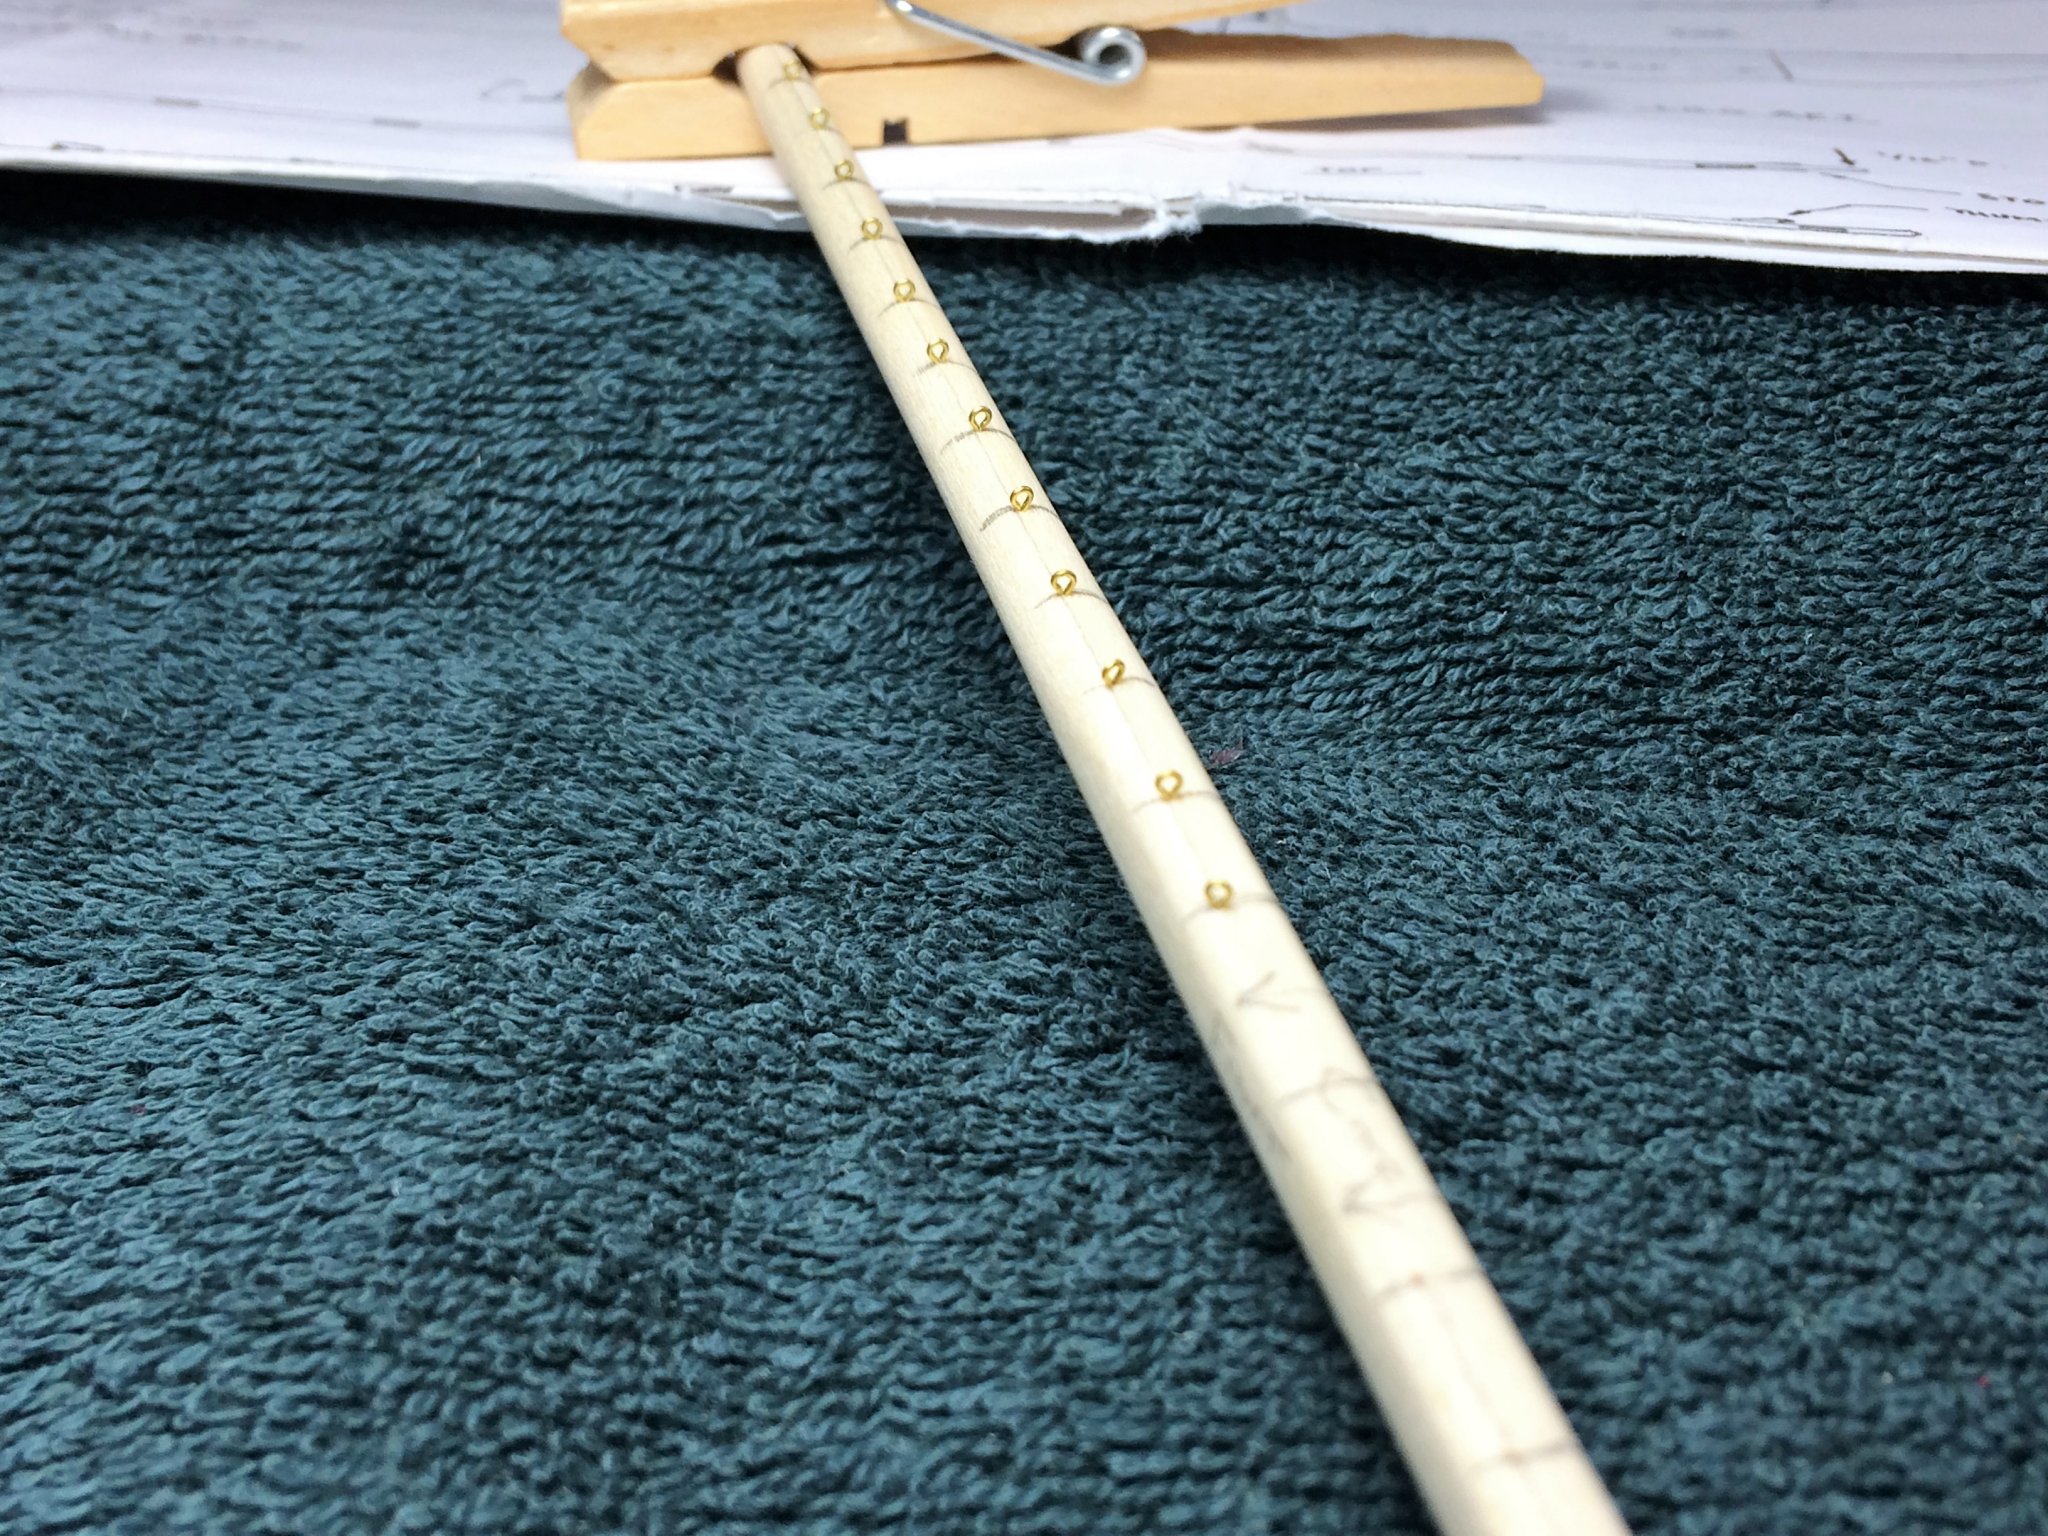
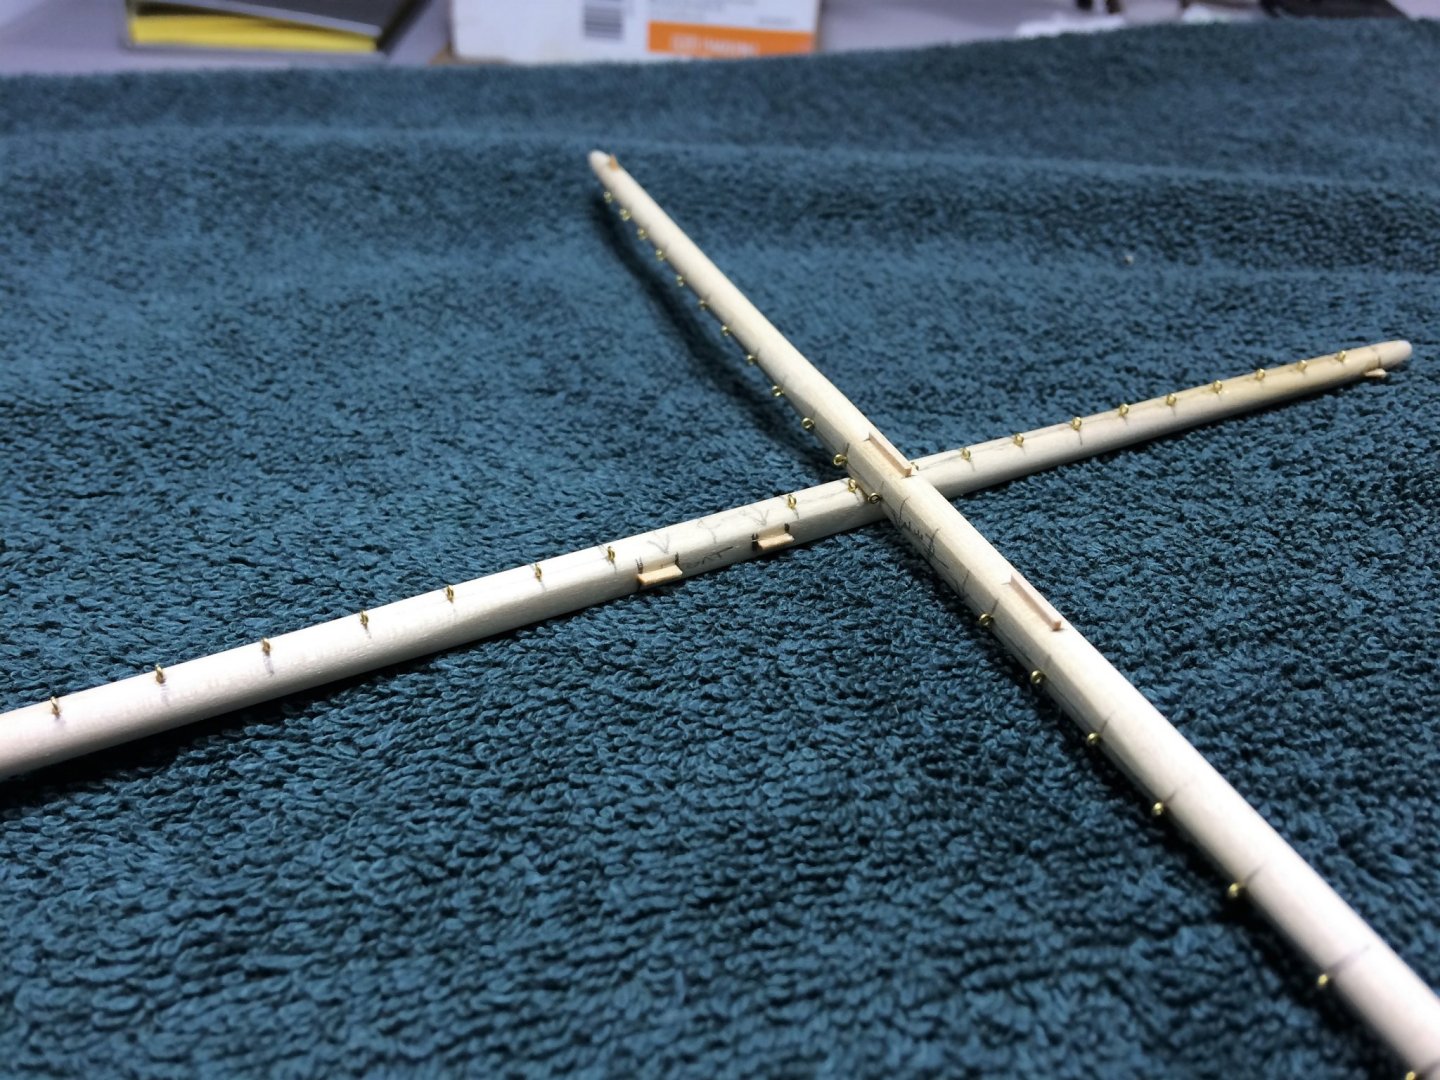
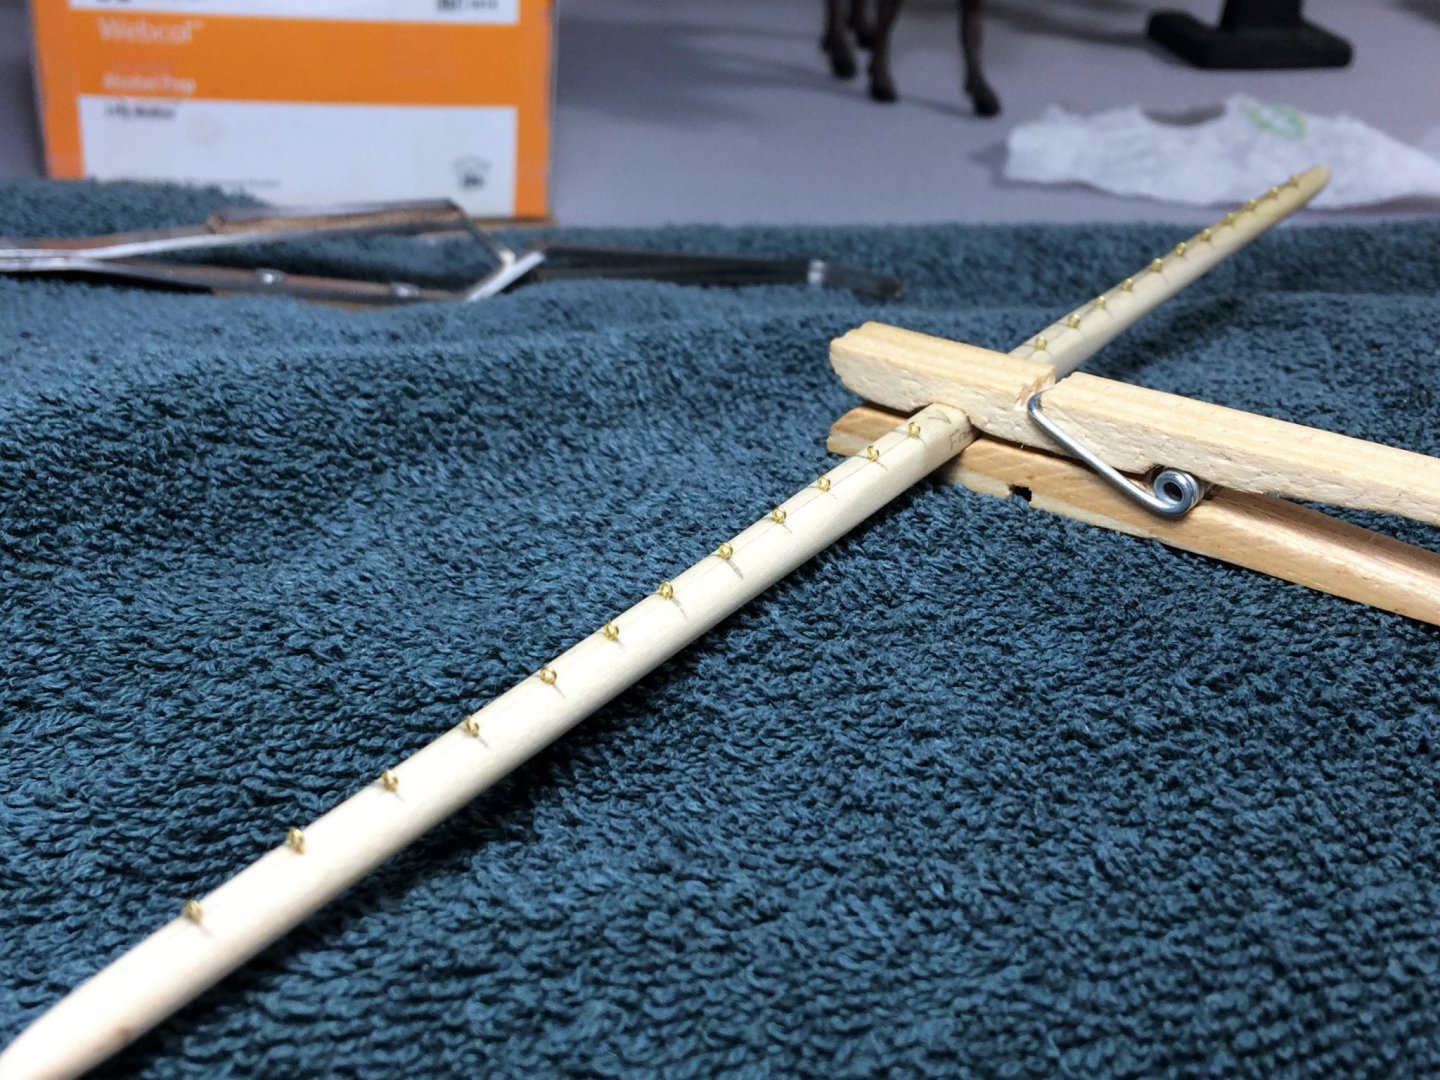
Evening, I'm having one of those weekends where more ship building gets done than chores. Good times, good times! Since I'm spending all this time in the Shipyard, an update is needed. The Fore and Main Course Yards have been marked for the Jackstay eyebolts. All transferred from the plans. The camera seems to add 10lbs to the Yards. They just don't look this beefy in person! A series of holes, then kit supplied small eyebolts. I figured I would use these for all the Yards. I can make eyebolts, but they would not look as uniform. Drill em and fill em! Both sides. Chocks and other items will be added, a good final sanding, then off to the paint shop. I also finished re-installing the blocks on the Fore Topmast. I'll do the same for the Main Topmast next. The smaller blocks, I think, are used if I rig it with sails. Since I'm not, these may not even be used. To thread them would be near impossible. I left some wiggle room though. Tom E


-
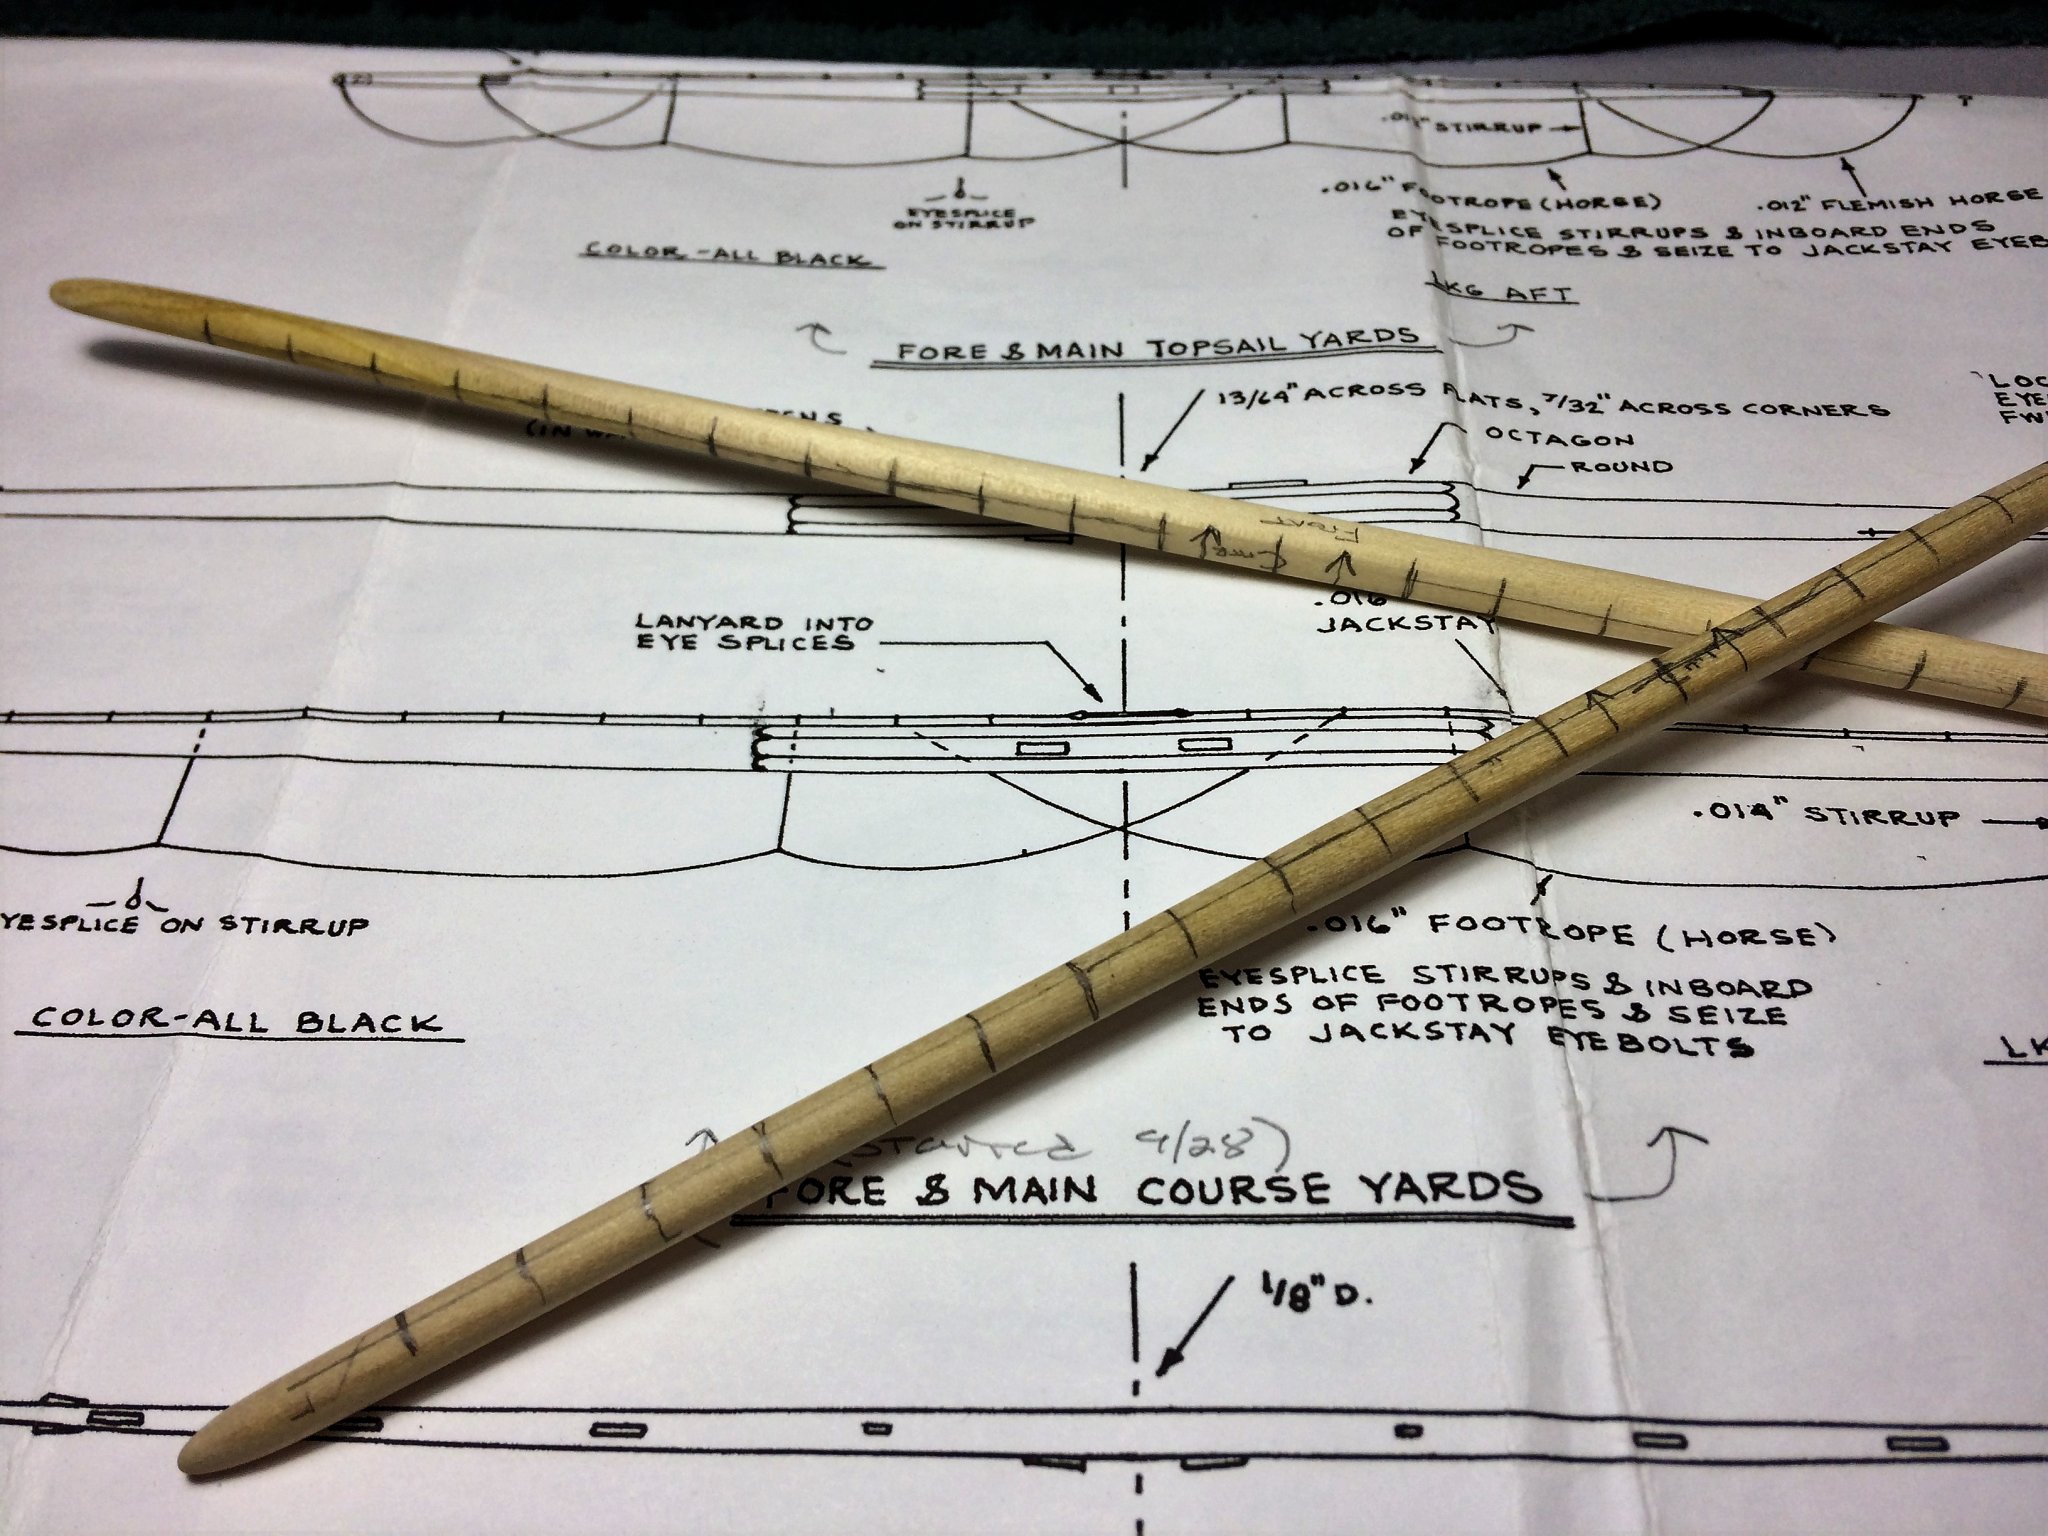
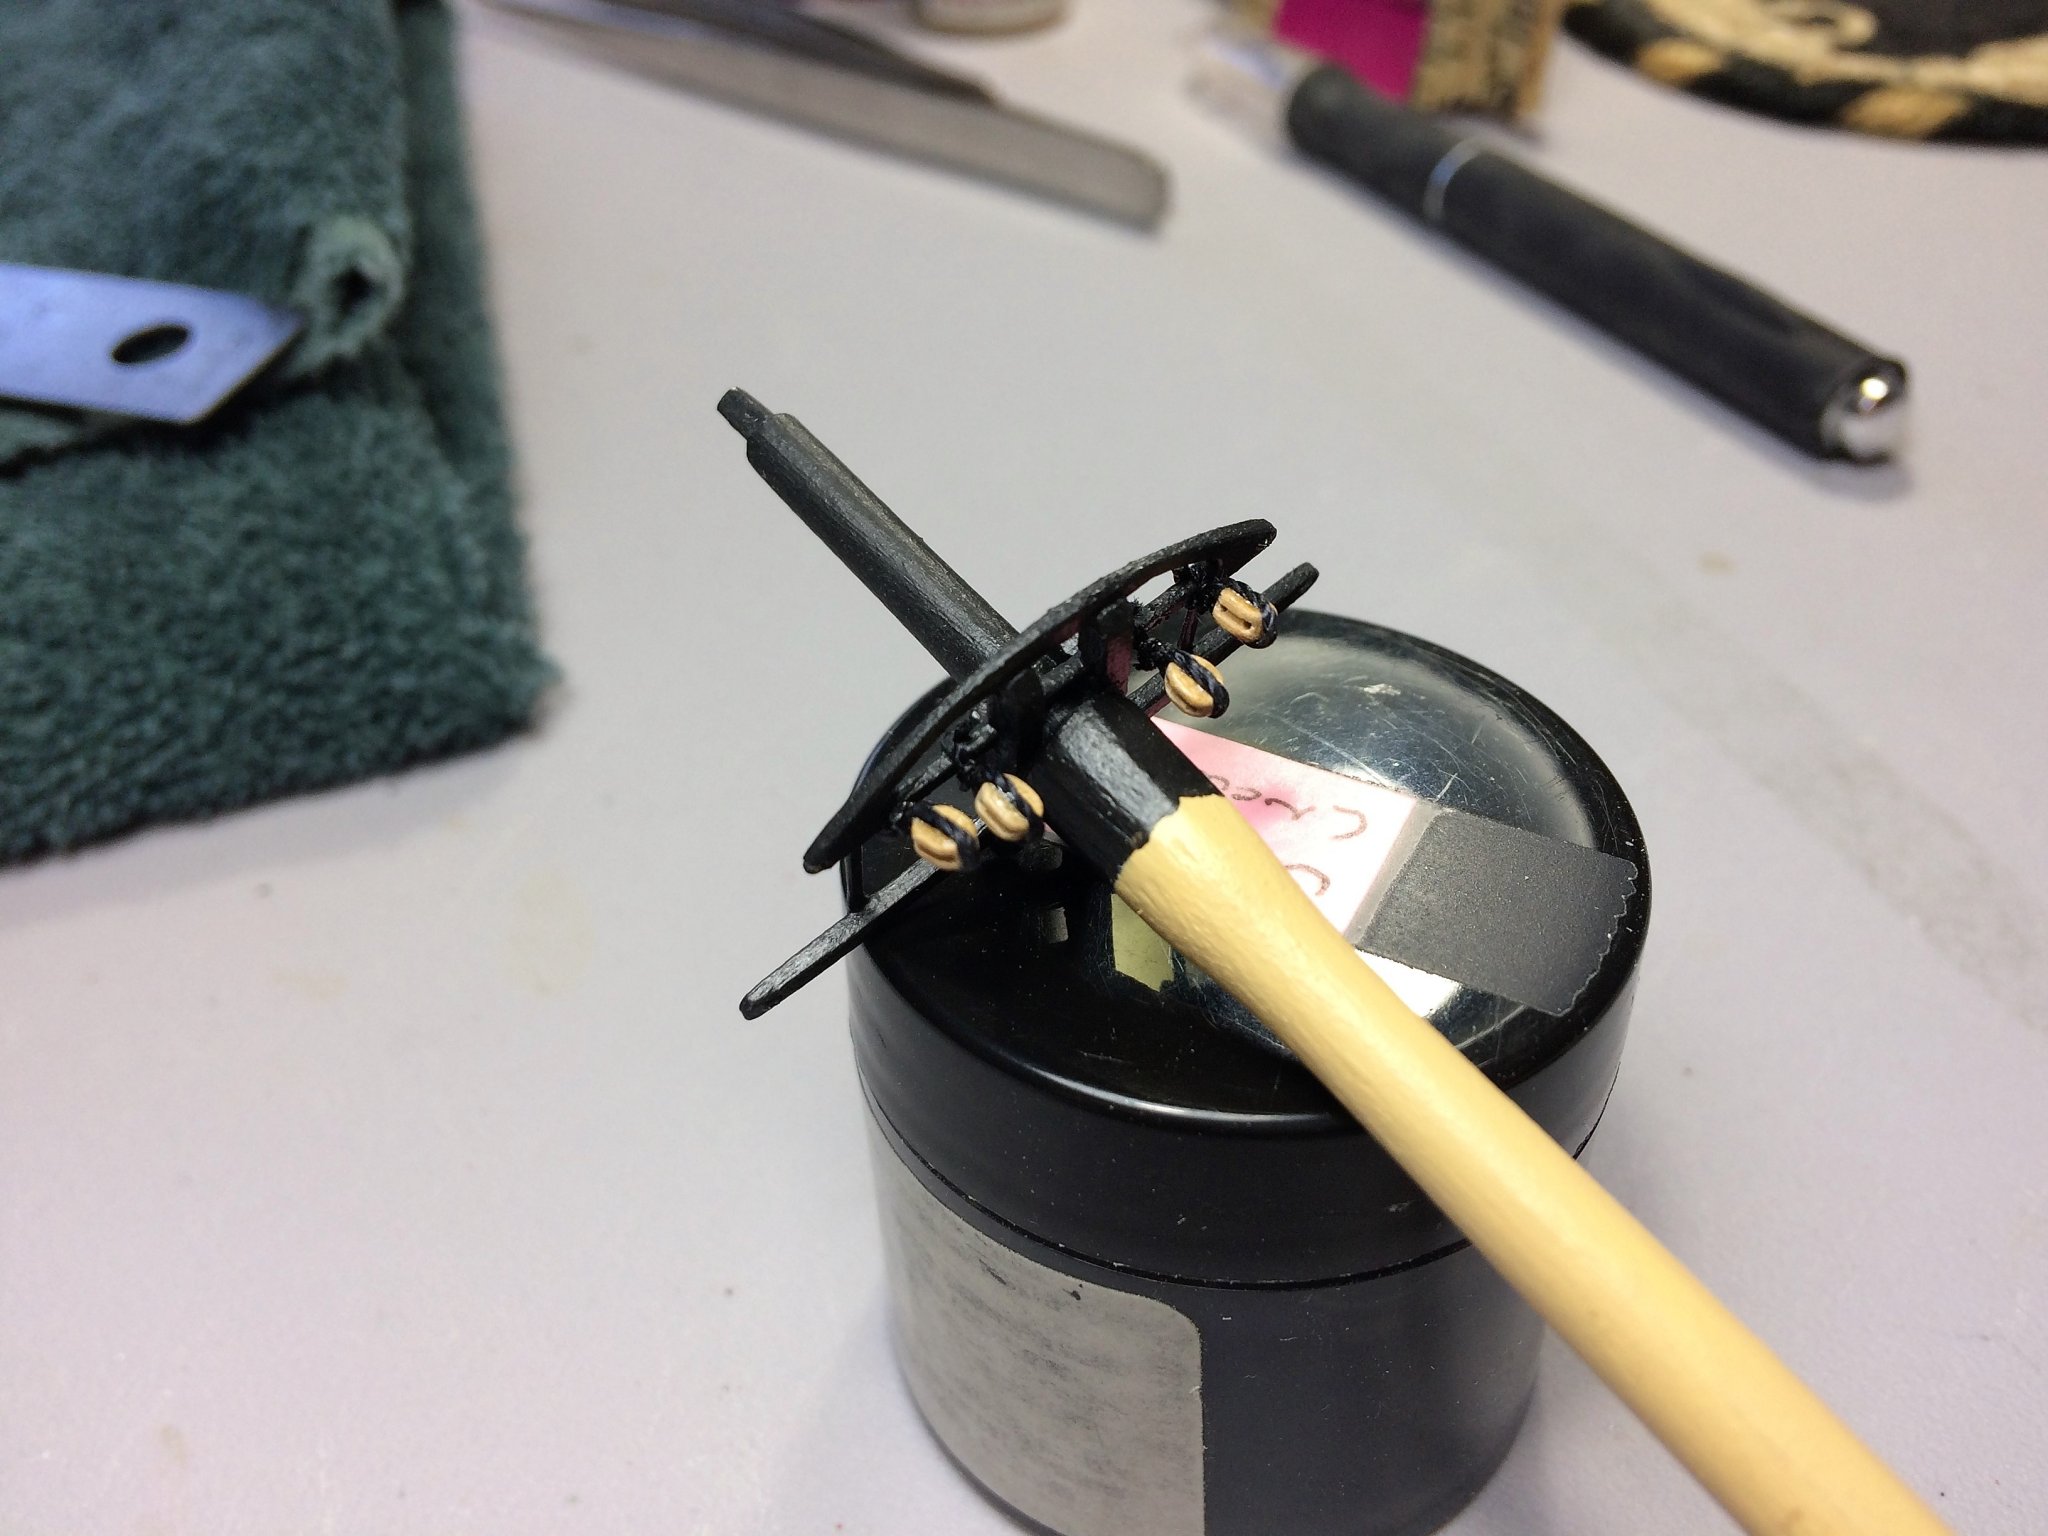
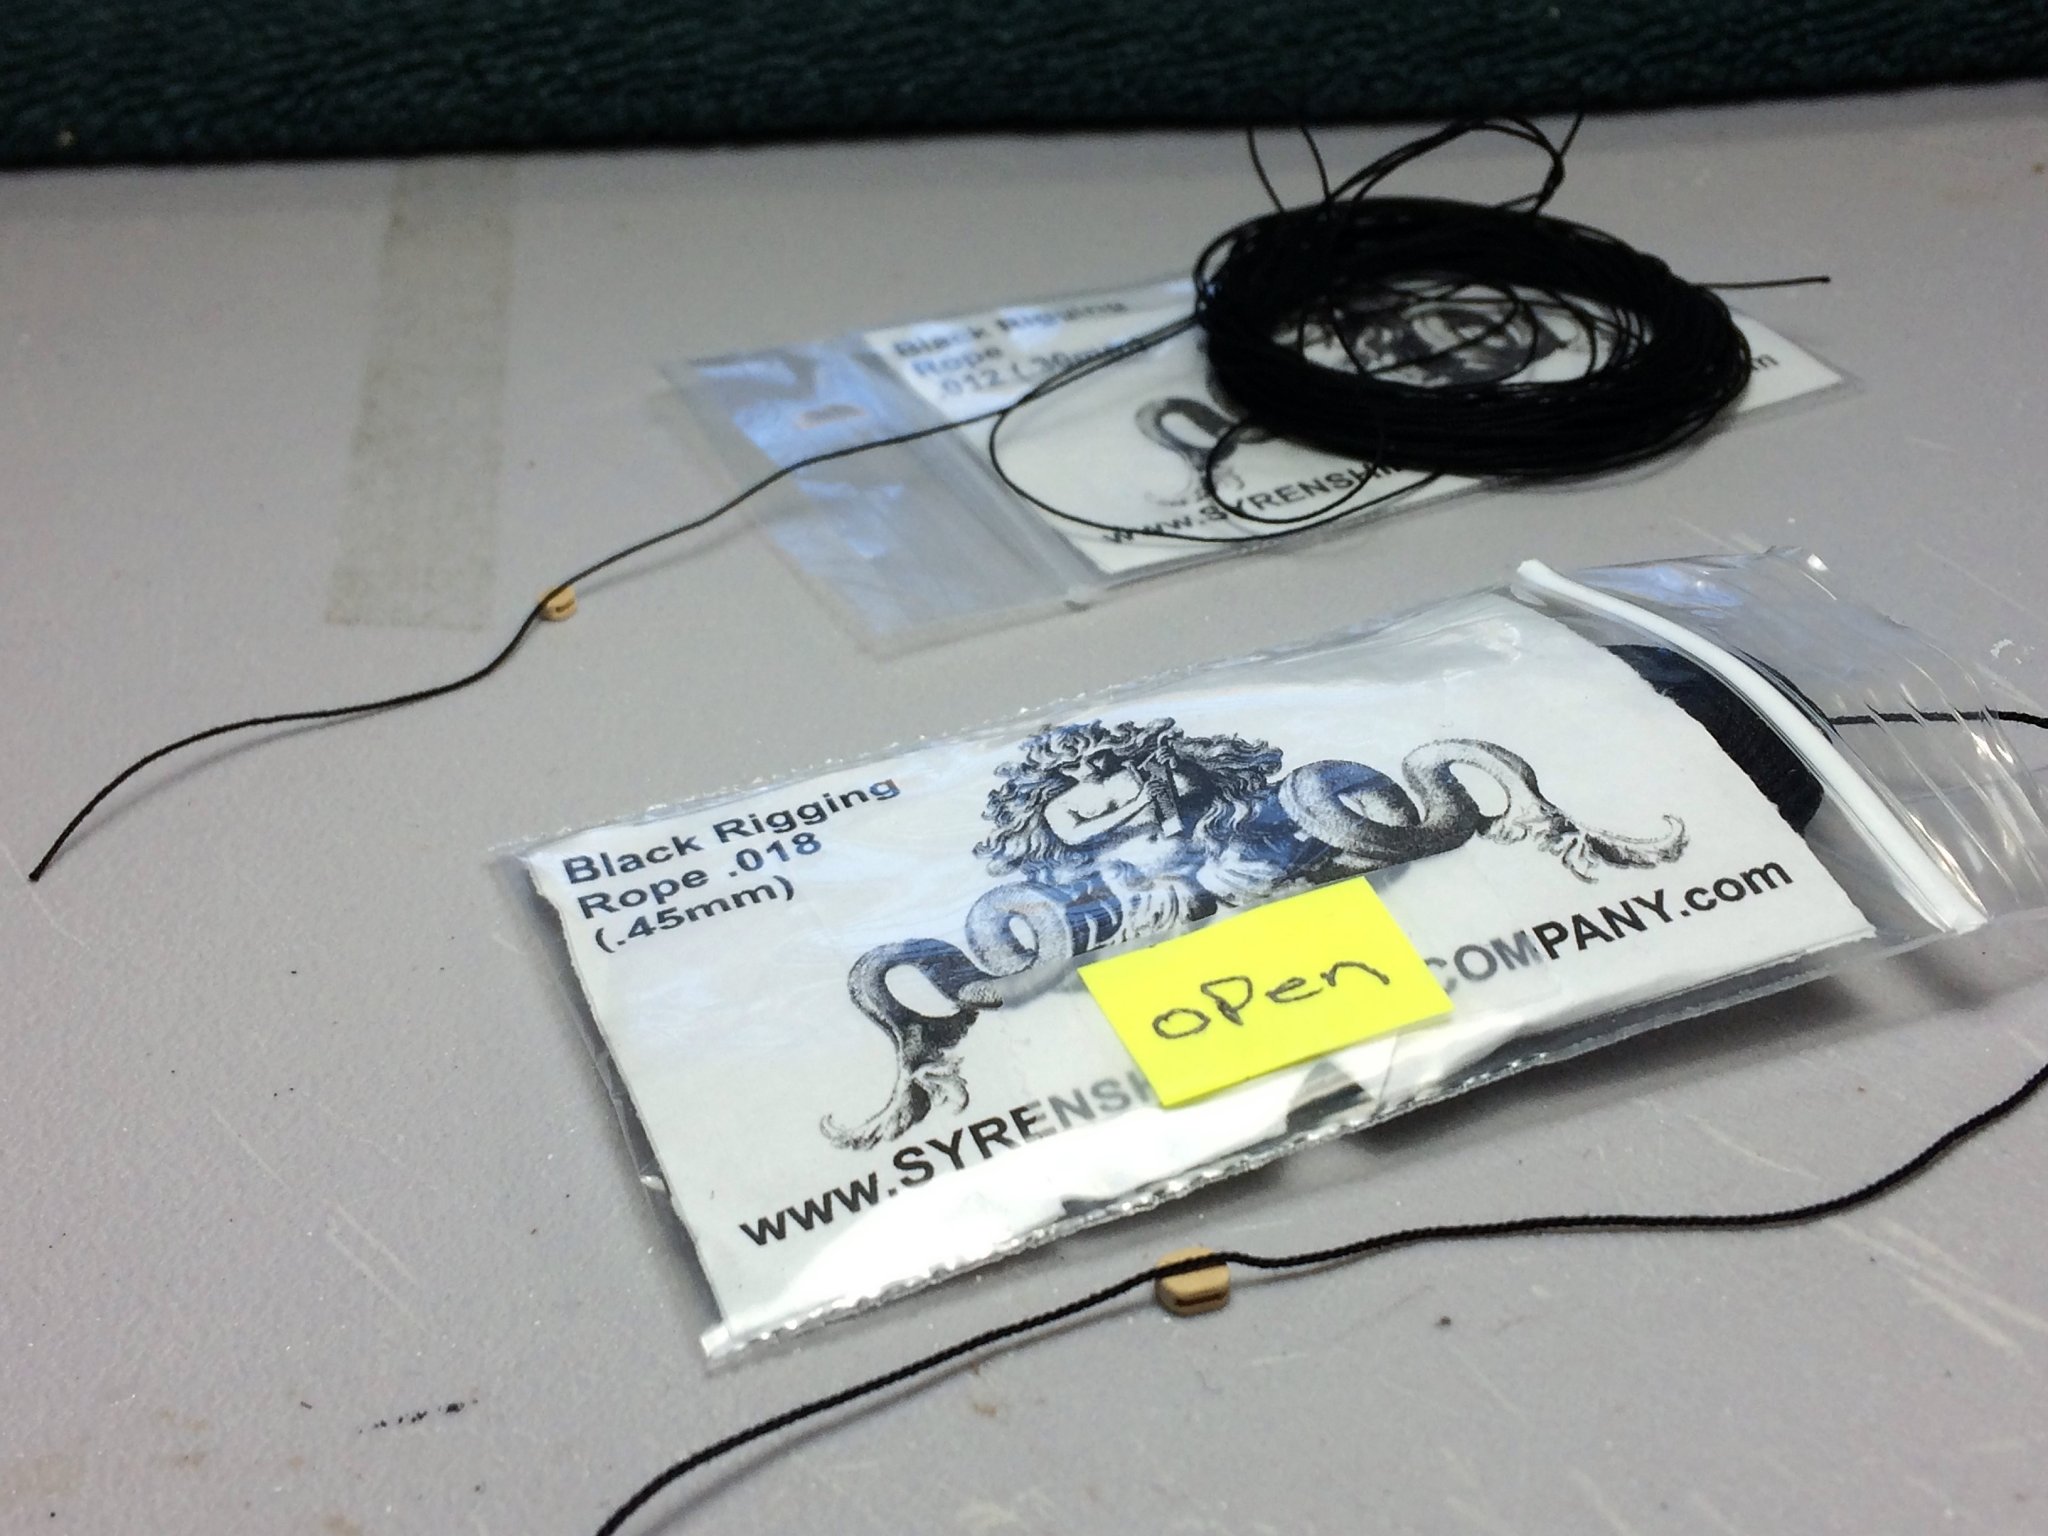
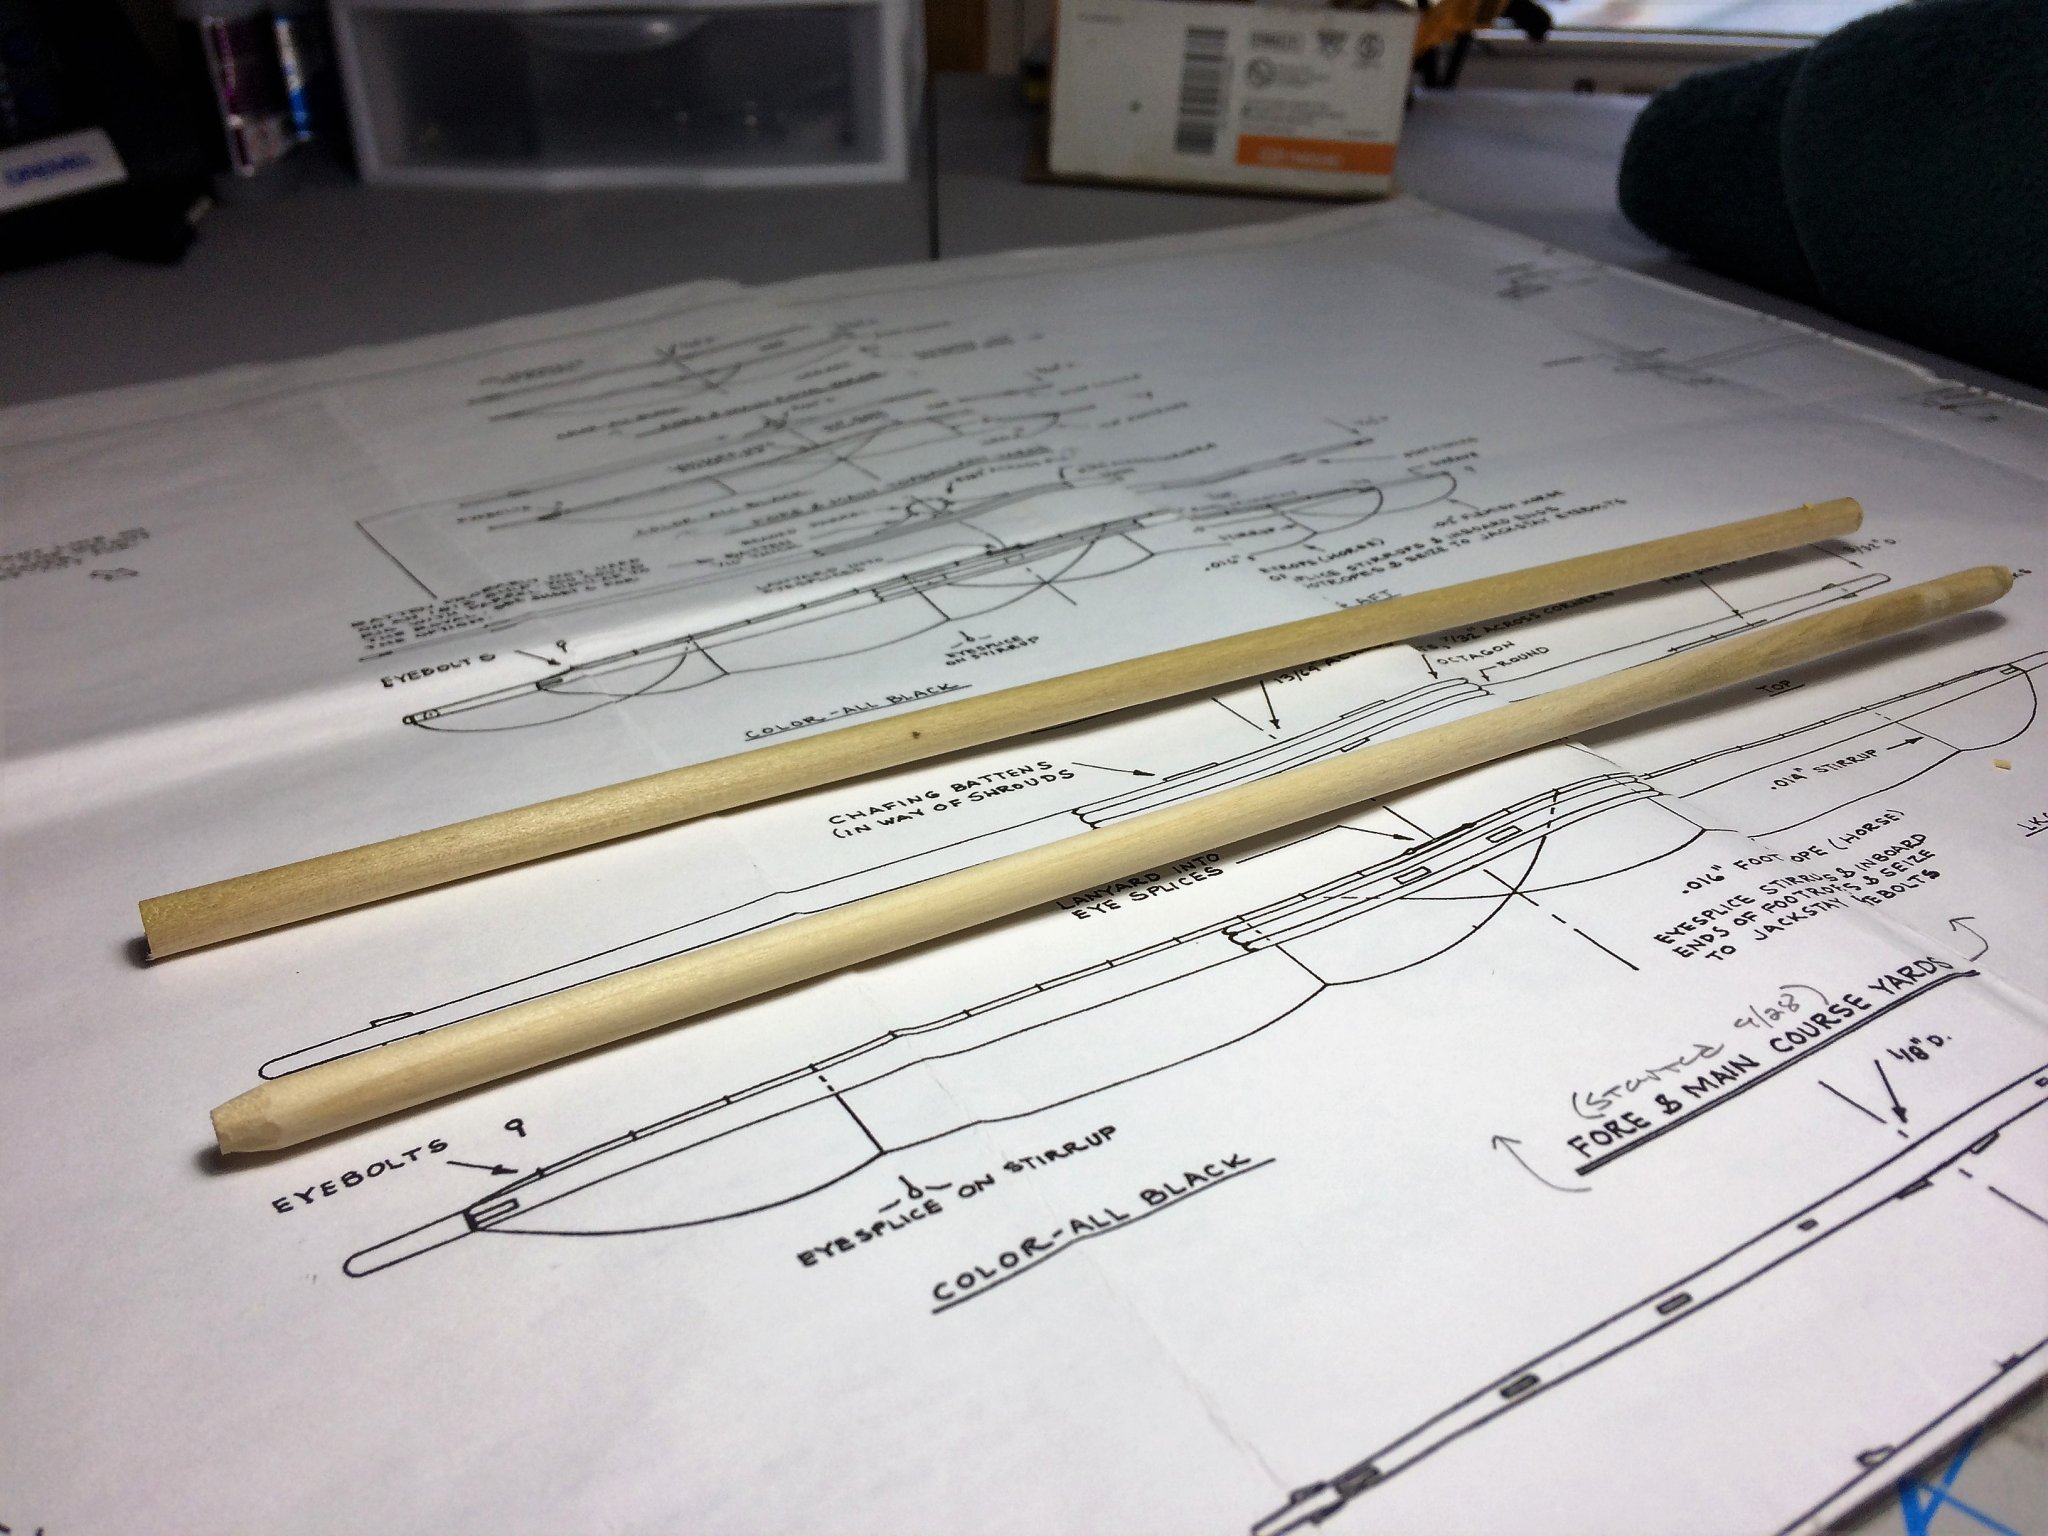
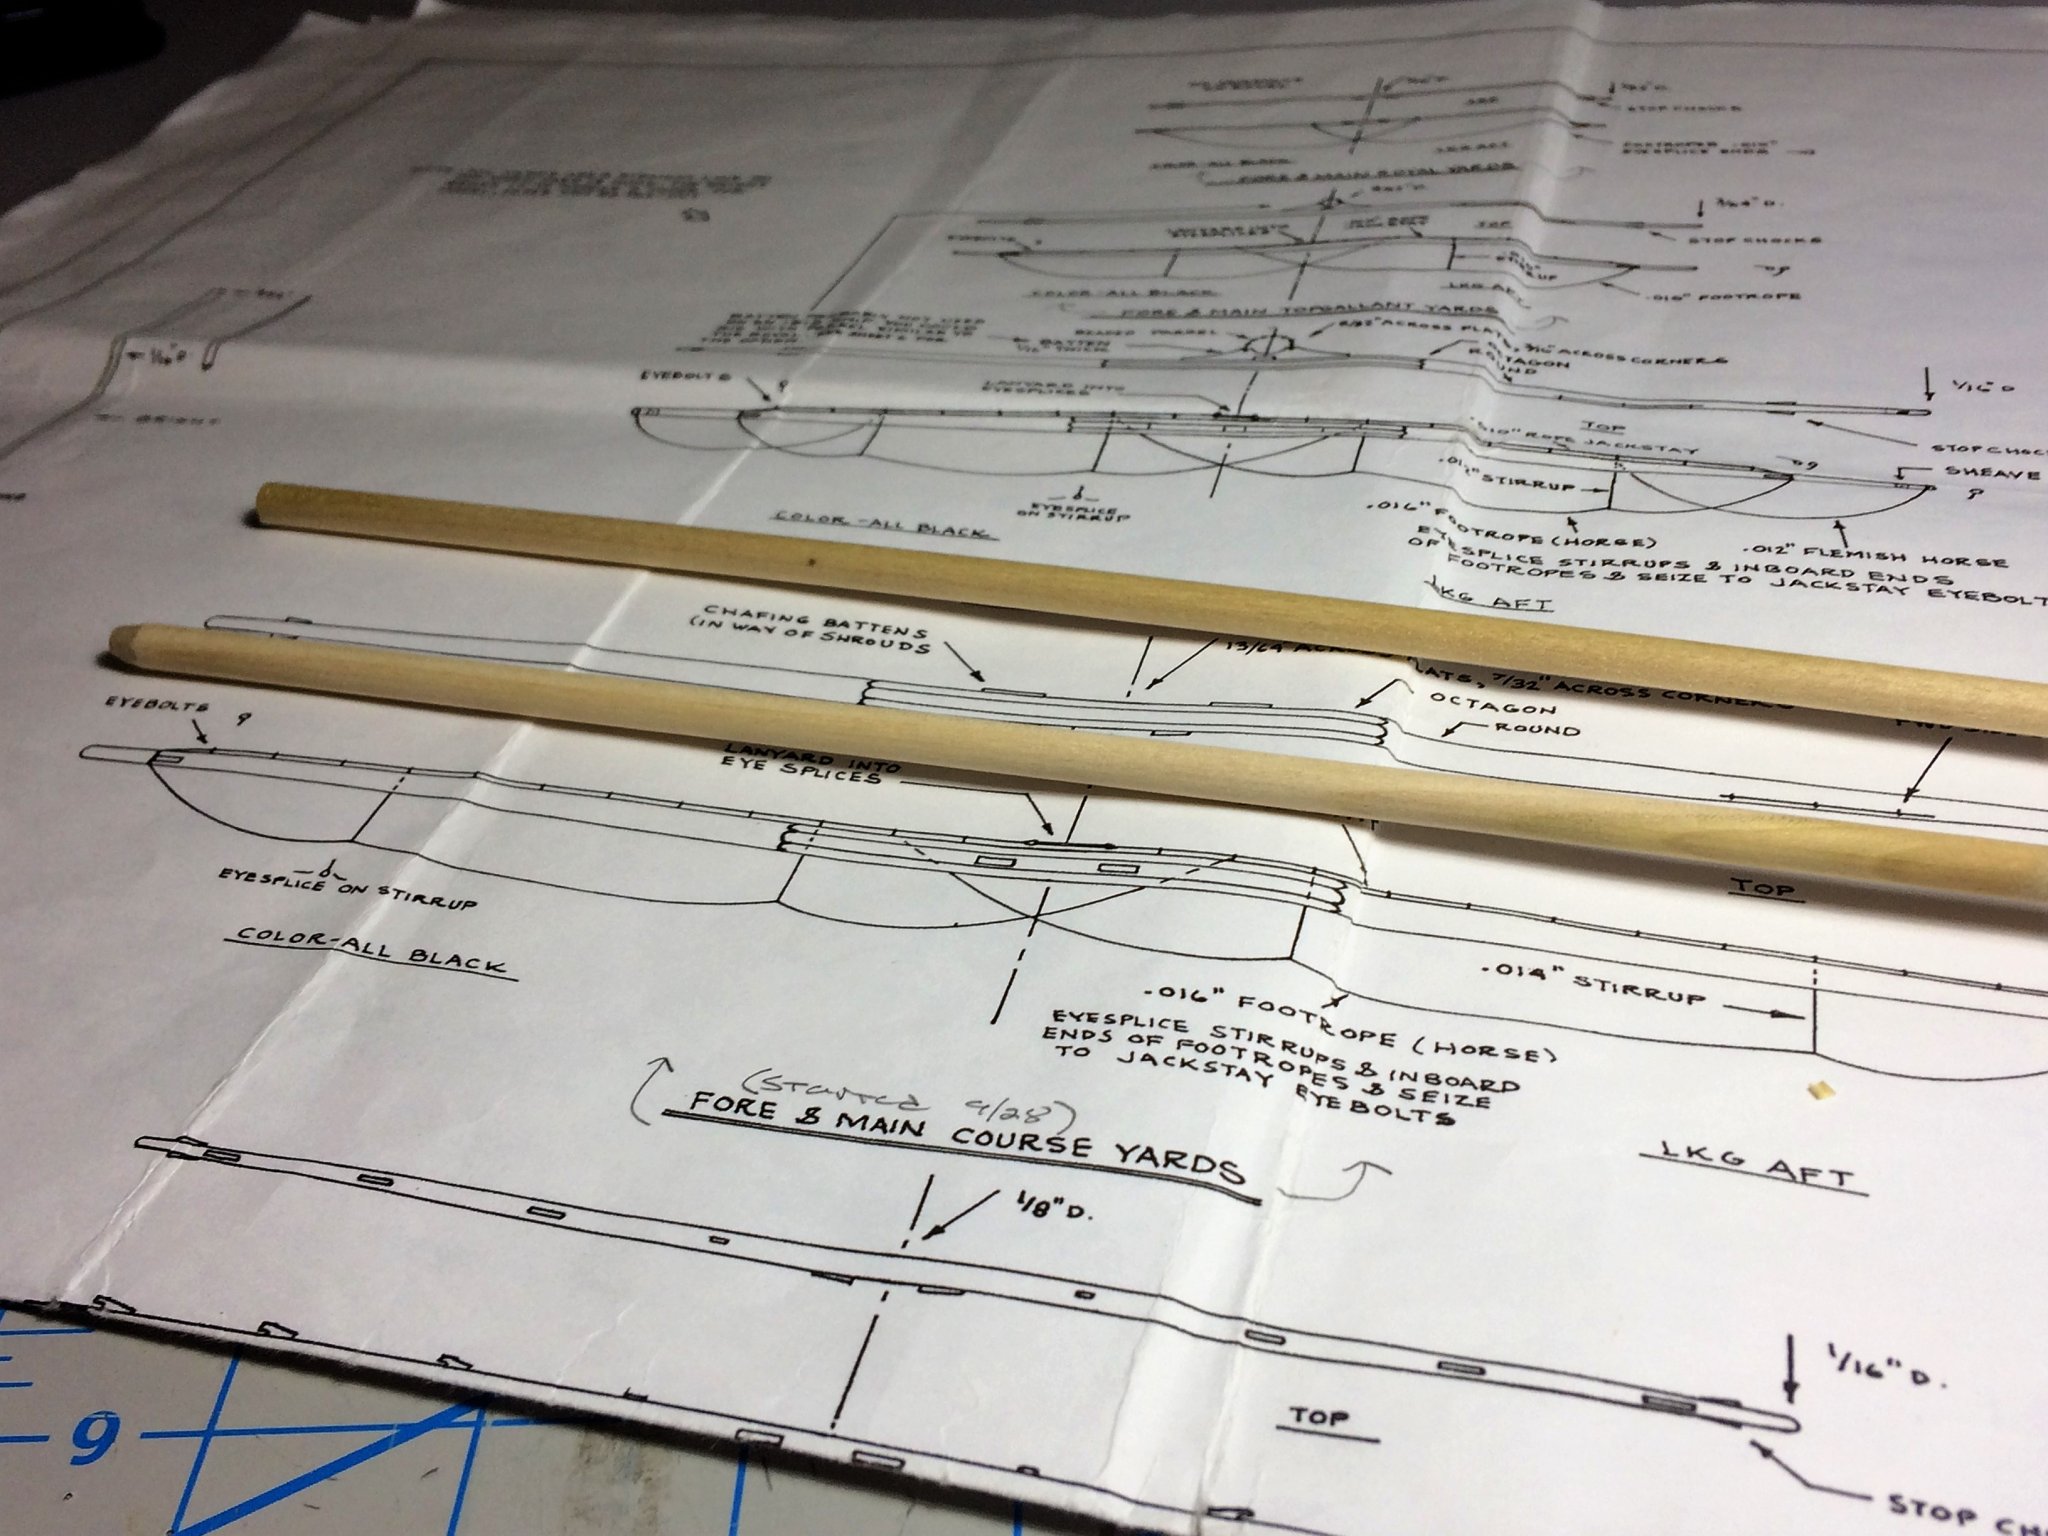
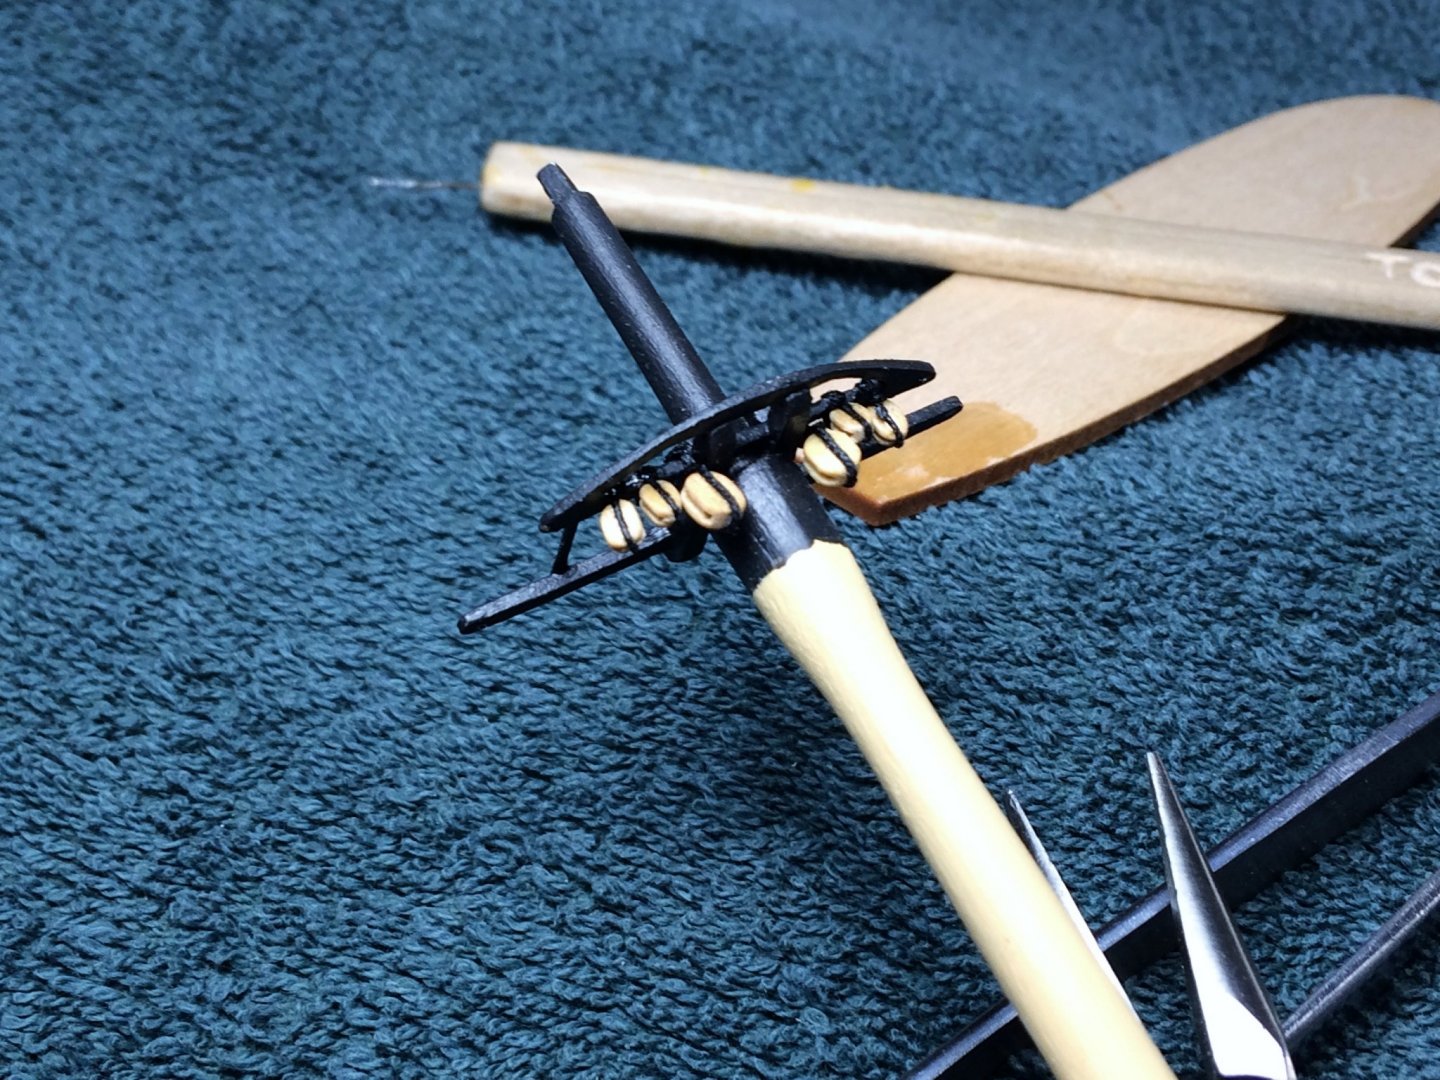
Evening, Had the day of from work today...….did some building! I don't know how many cups of coffee! Wishing I was in New Bedford for the NRG Conference. I'll get to one eventually I'm constantly studying the plans looking for blocks and things to install, we all probably do it. I noticed on my Fore Topmast that I had installed the 1/8 single blocks for the Leech lines, but, also needed a 5/32 single block each side for the Topsail Course Yard truss. Below is the original way I rigged it. I haven't rigged the Main Topmast with its blocks yet. What I learn here will be translated to the Main Topmast. So, I stropped four 1/8 single blocks and two 5/32 single blocks. All Syren blocks and rope. I managed to place a healthy order with Syren for Black rope when they stopped making it. Should have more than enough for the Niagara. The usual process. I stripped off the old ones. While I was stripping the blocks, I ended up giving the entire mast a good going over with a mini Dremel and some sand paper. It needed to be thinned out big time! Fresh coat of paint as well. Then started re-installing the blocks as I have interpreted them. Is this correct? It's tight, but looks right for what will be in this area of the ship. I angled the blocks kind of away from each other, so that If I do actually rig these things, I might have a snowballs chance in heck! The holes in the blocks were cleaned out really well prior to being stropped. The Main and Fore Course yards continue. I think I lucked out with dowels. I have heard about some warped dowels in these kits. These don't seem to bad. The camera puts more curve to them then they actually have. Or maybe my rookie eyes just don't see it yet!!! Measurements were taken from the plans. I managed to sand in the square section in the middle. I may keep this square for now. Sand in the octagon shape once other things are installed. Jackstay eyebolts and small chocks will be next. Thanks for lookin! Tom E


-
Thanks Jesse, That's Model Expo paint. The Niagara paint set they sell. This bottle is probably more water than paint buy now. Incredibly thick in the beginning, needs lots of water to thin it out. I've been using the same bottle over a year now, just keep adding water. Just need an extra coat or two. Tom E
-
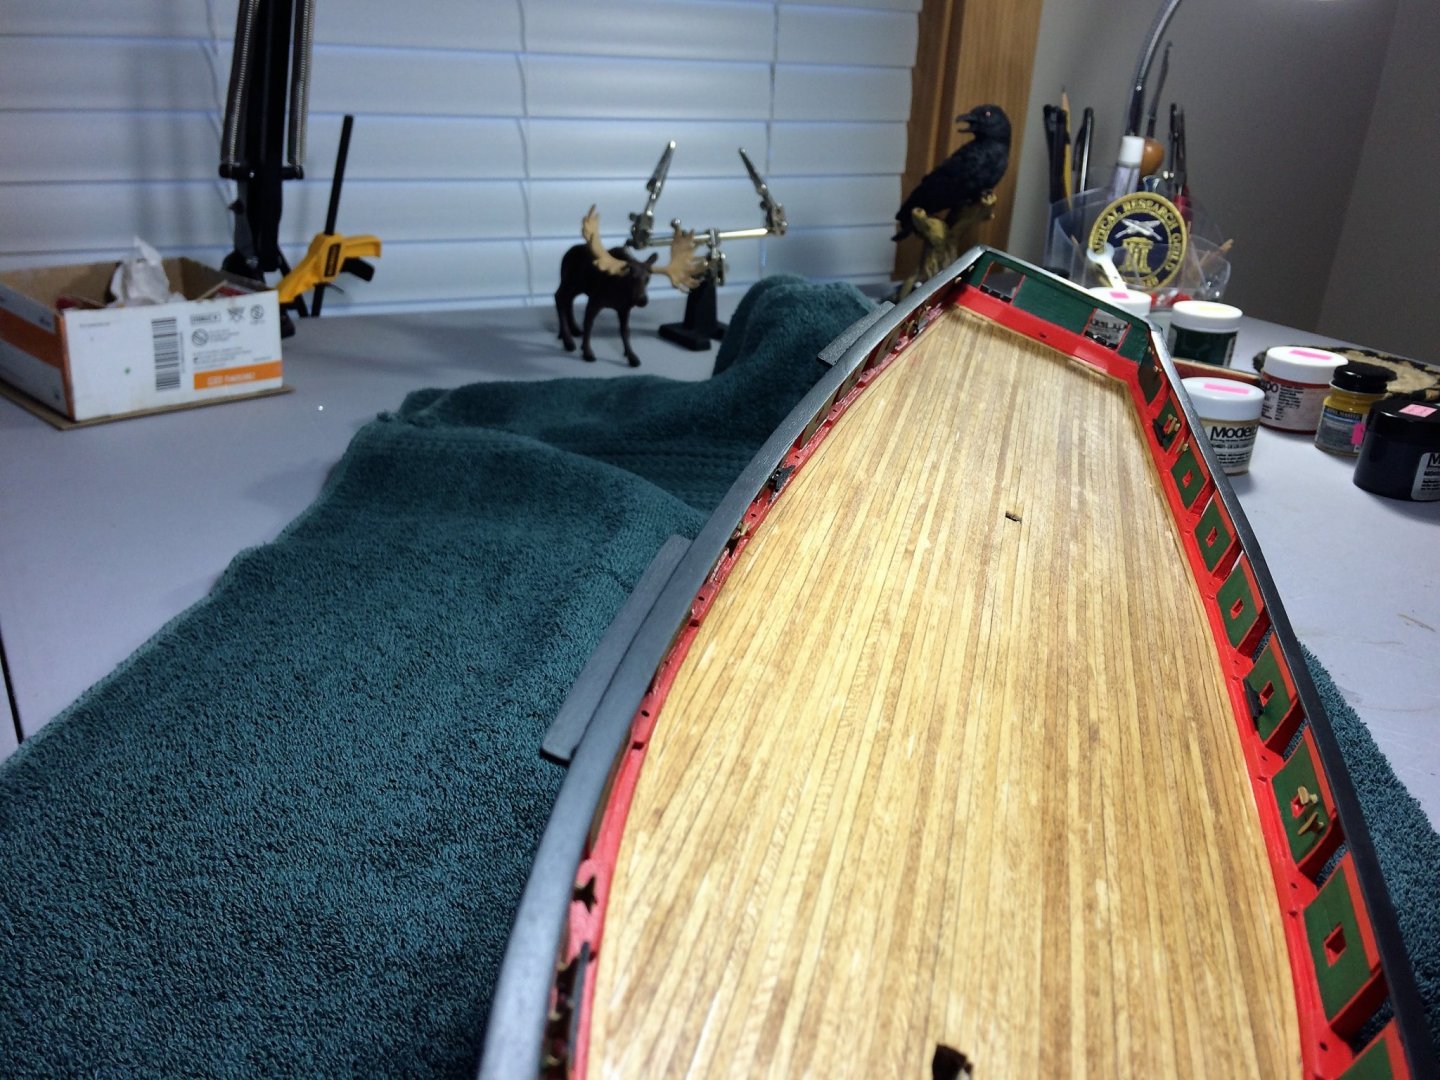
Evening, Quiet night at home, Bruins game on TV, time for an update. Gary, I have seen that method with the square stock. I did ponder on that approach but stuck with the kit dowels. I lucked out, they were relatively straight. Very little warp. Although, shaping has been deliberate and a slog so far. Trying not to remove too much at once. Should have some pics soon. Other things have been worked on while shaping Yards. Been doing a lot of painting lately. Mostly black. I did install the Starboard side Channels. Not too shabby! They curve pleasantly with the curve of the Main Rail...…..for the most part With these in place, I can temporarily install the Main or Foremast. Then start marking where the Deadeyes and support chains go. After the Deadeyes are located and rigged, just prior to installation, the Channels and Main Rail will get there last coat of black paint. The Port side Channels should be installed by tomorrow. Support bars underneath need to be added. There will be a keeper strip of wood at the end of each Channel. Tom E

-
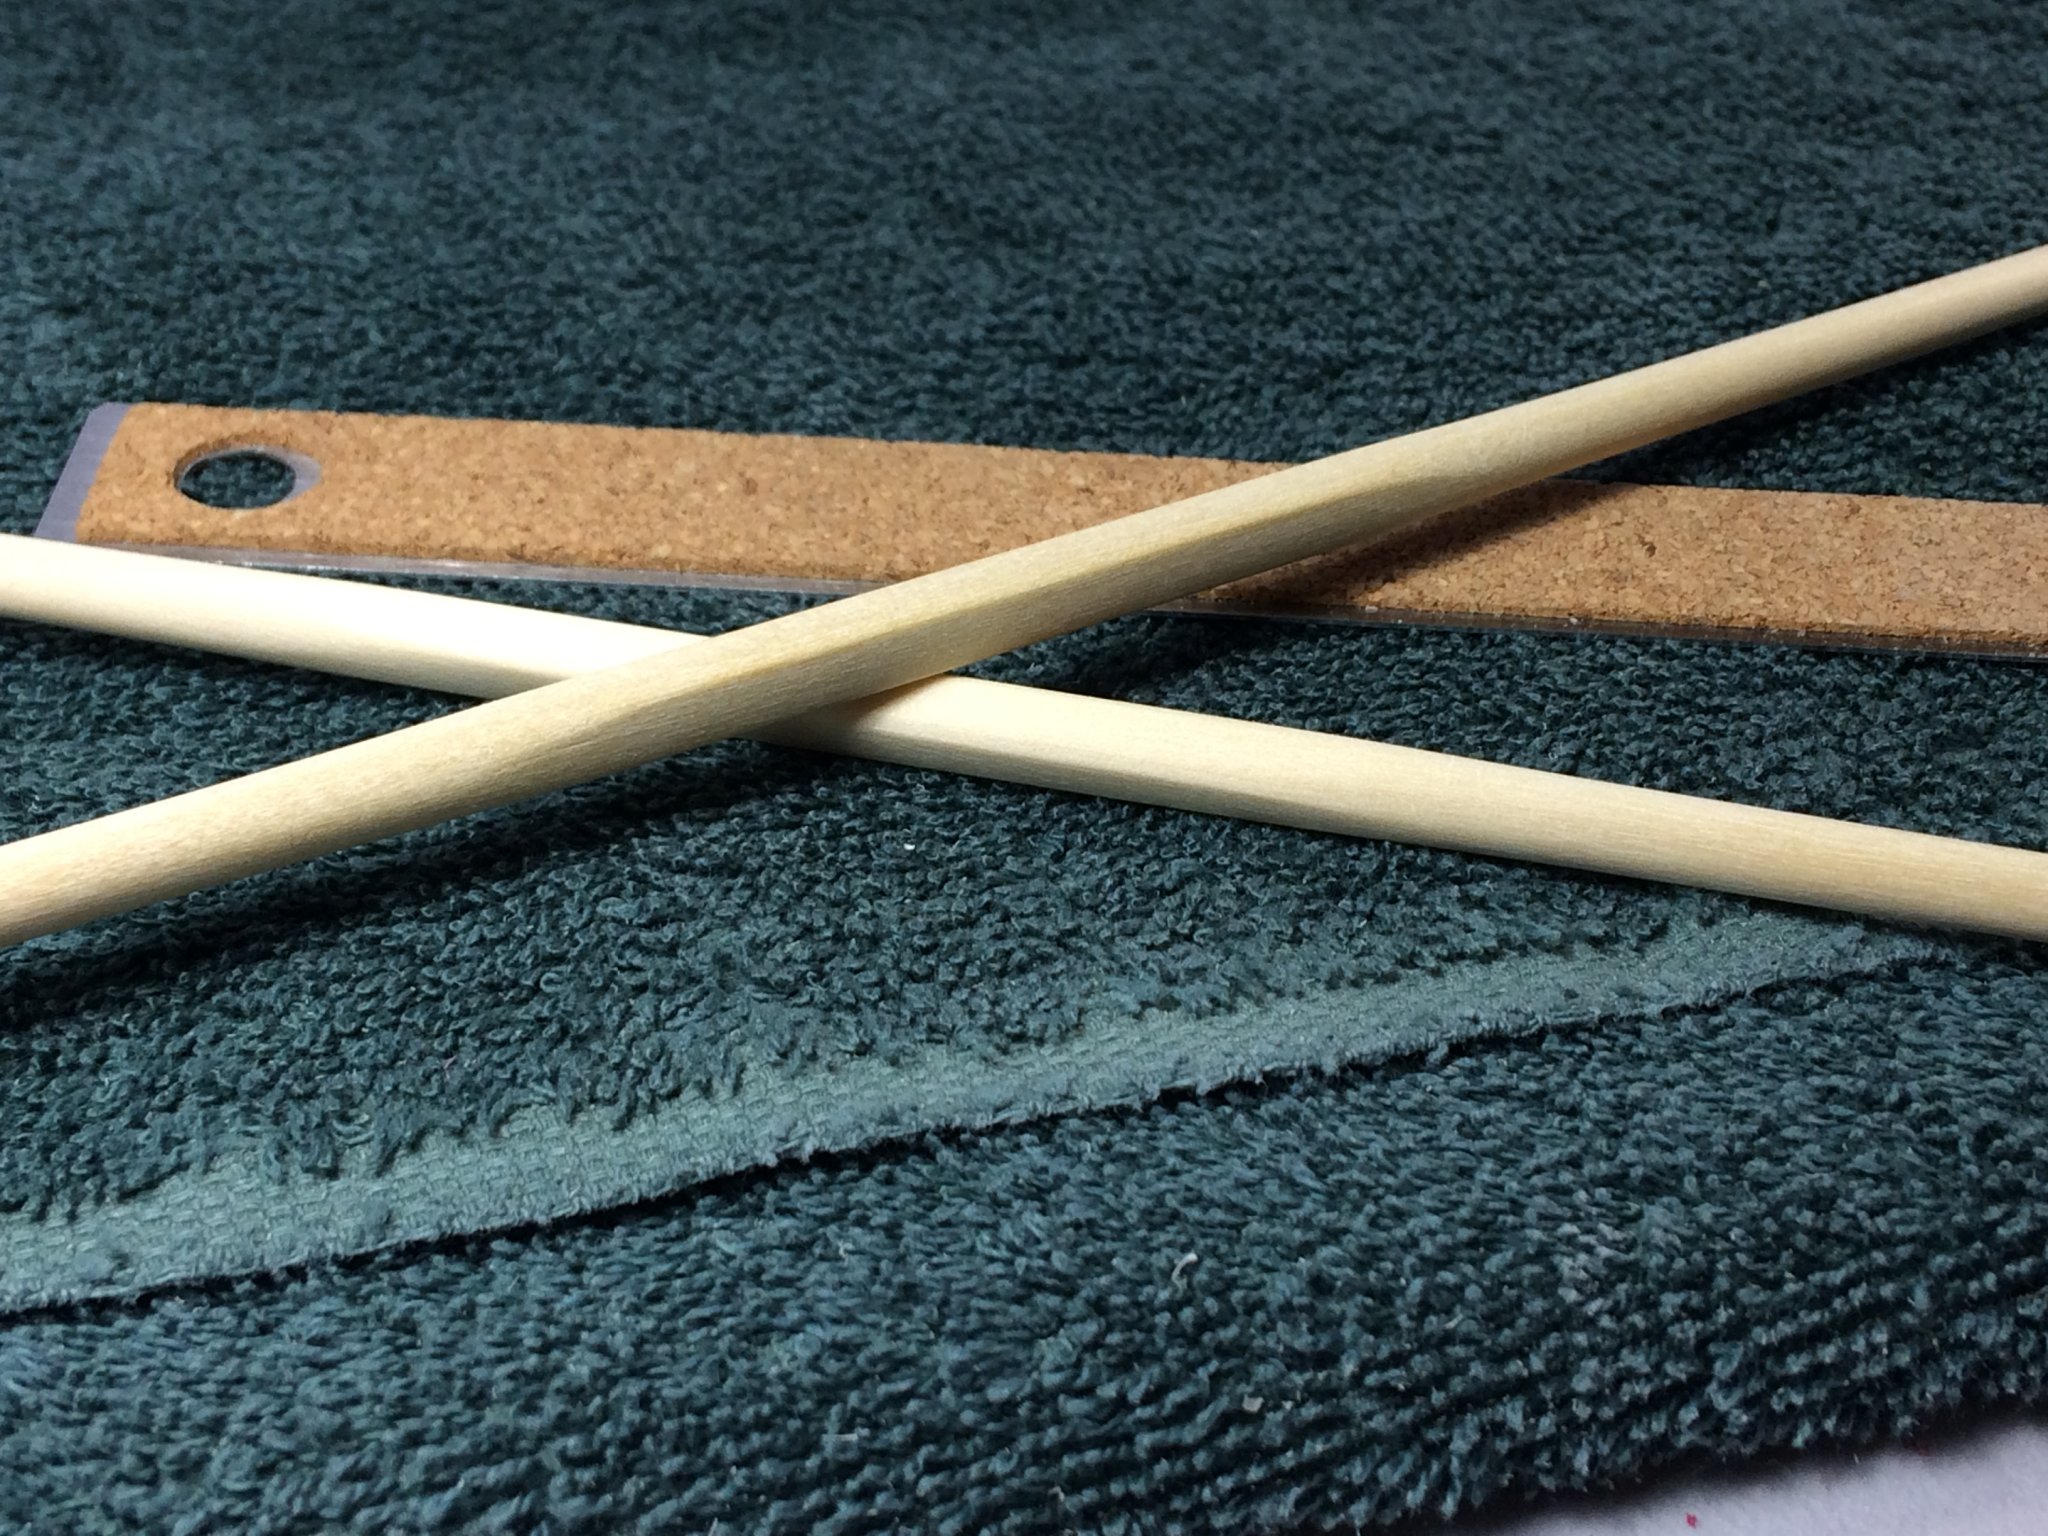
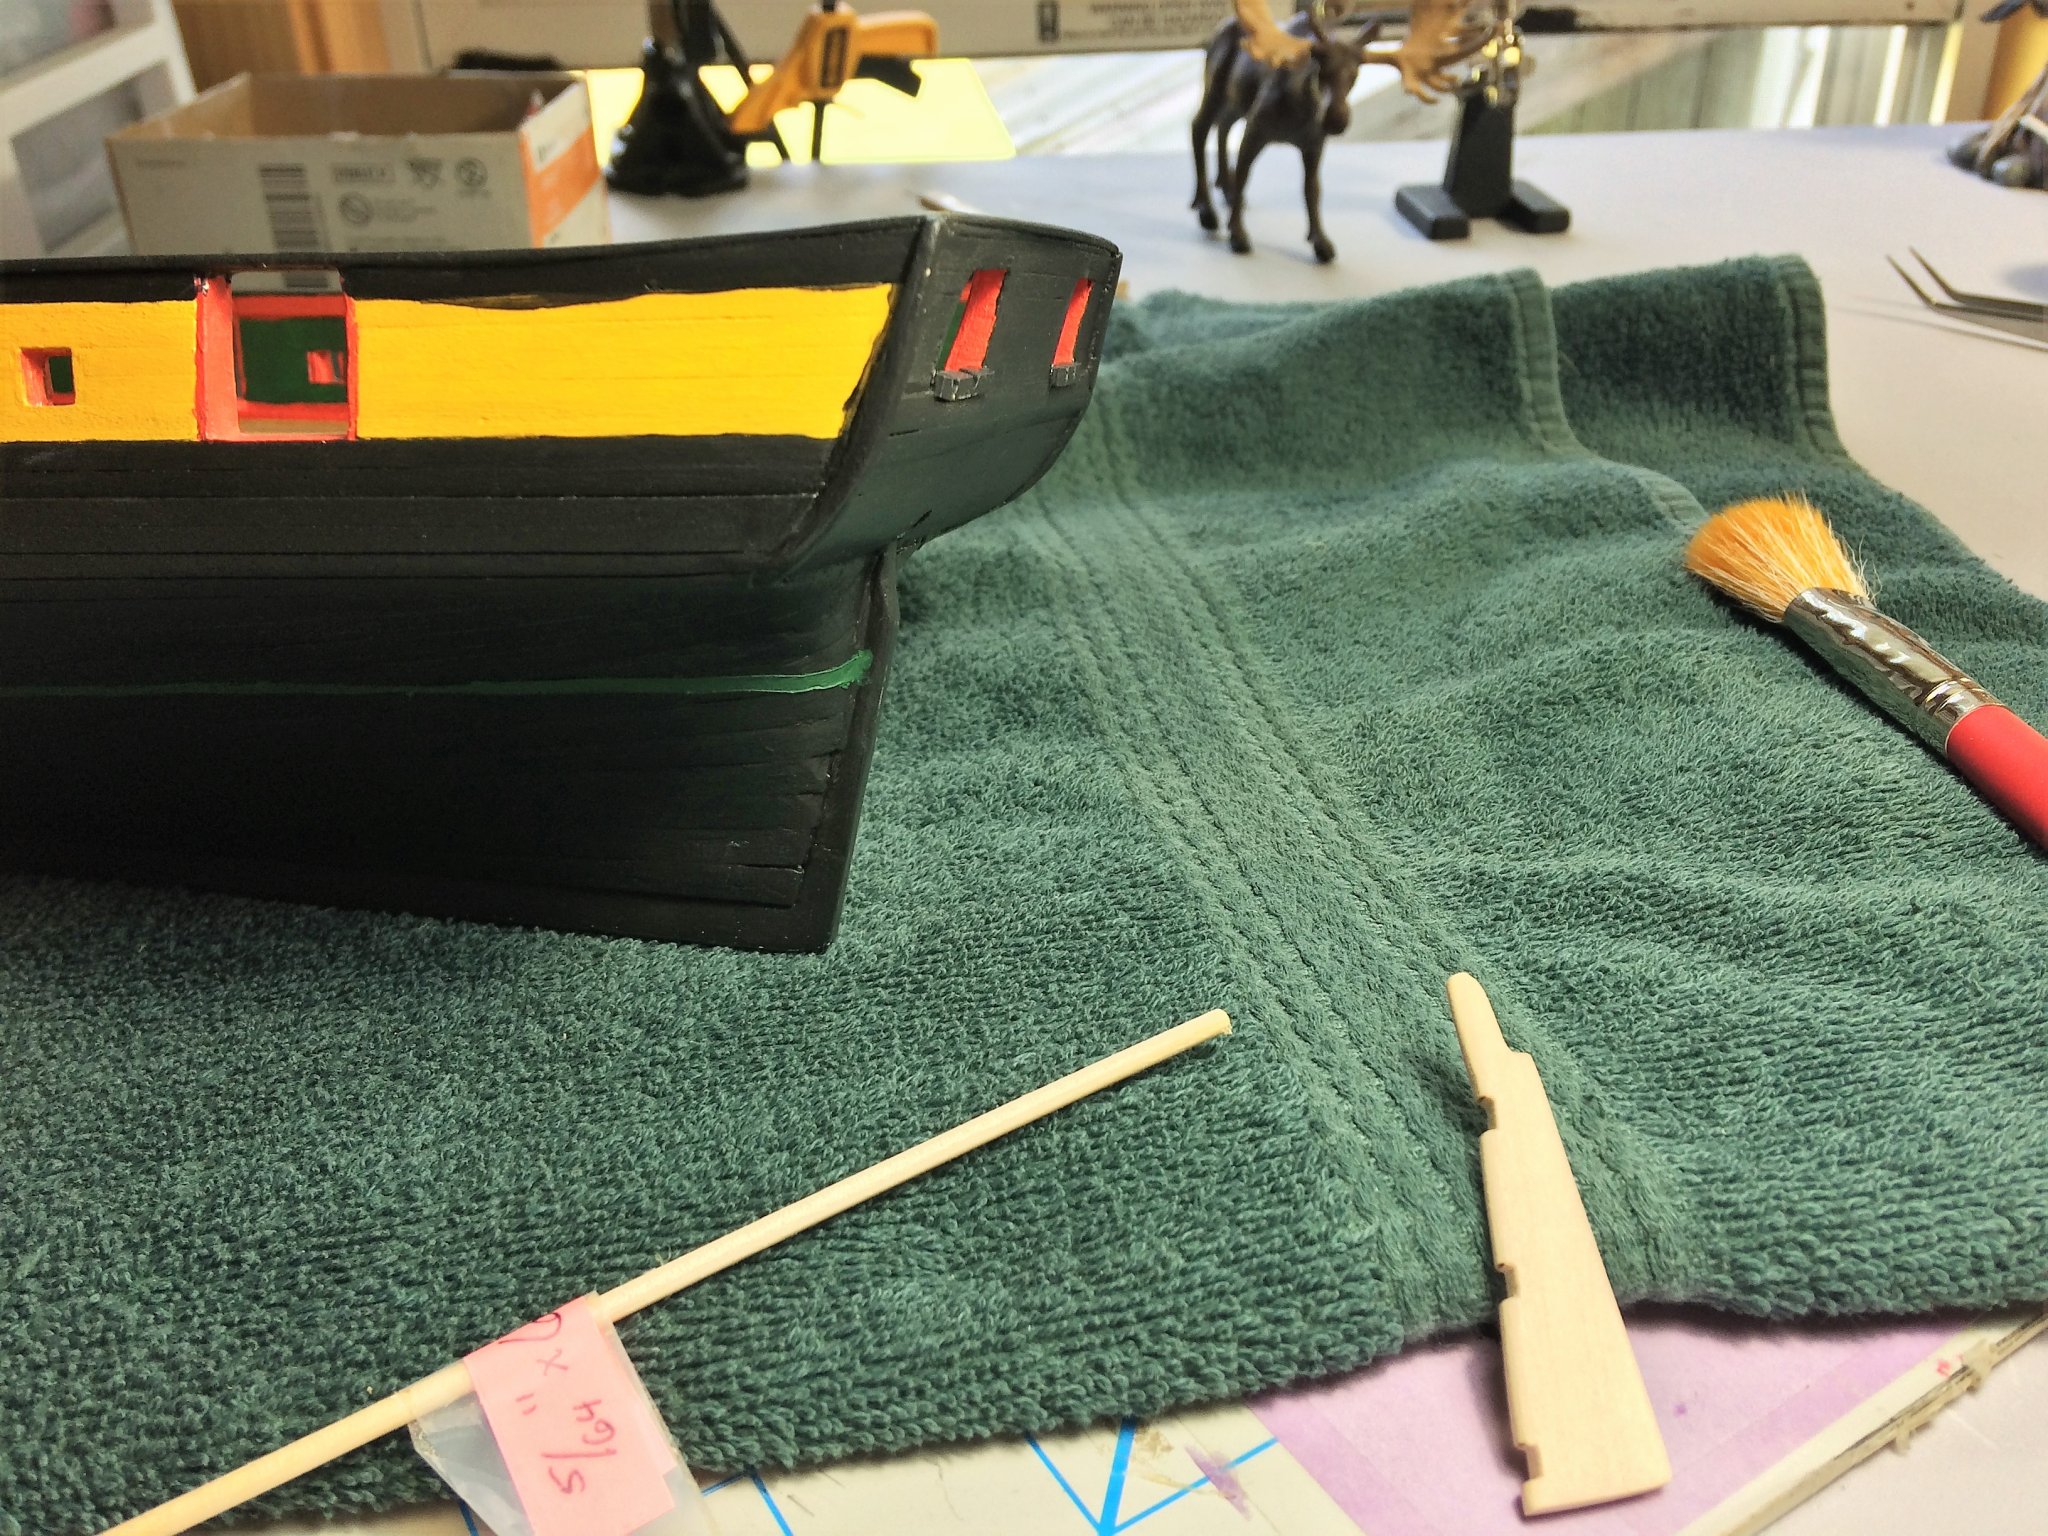
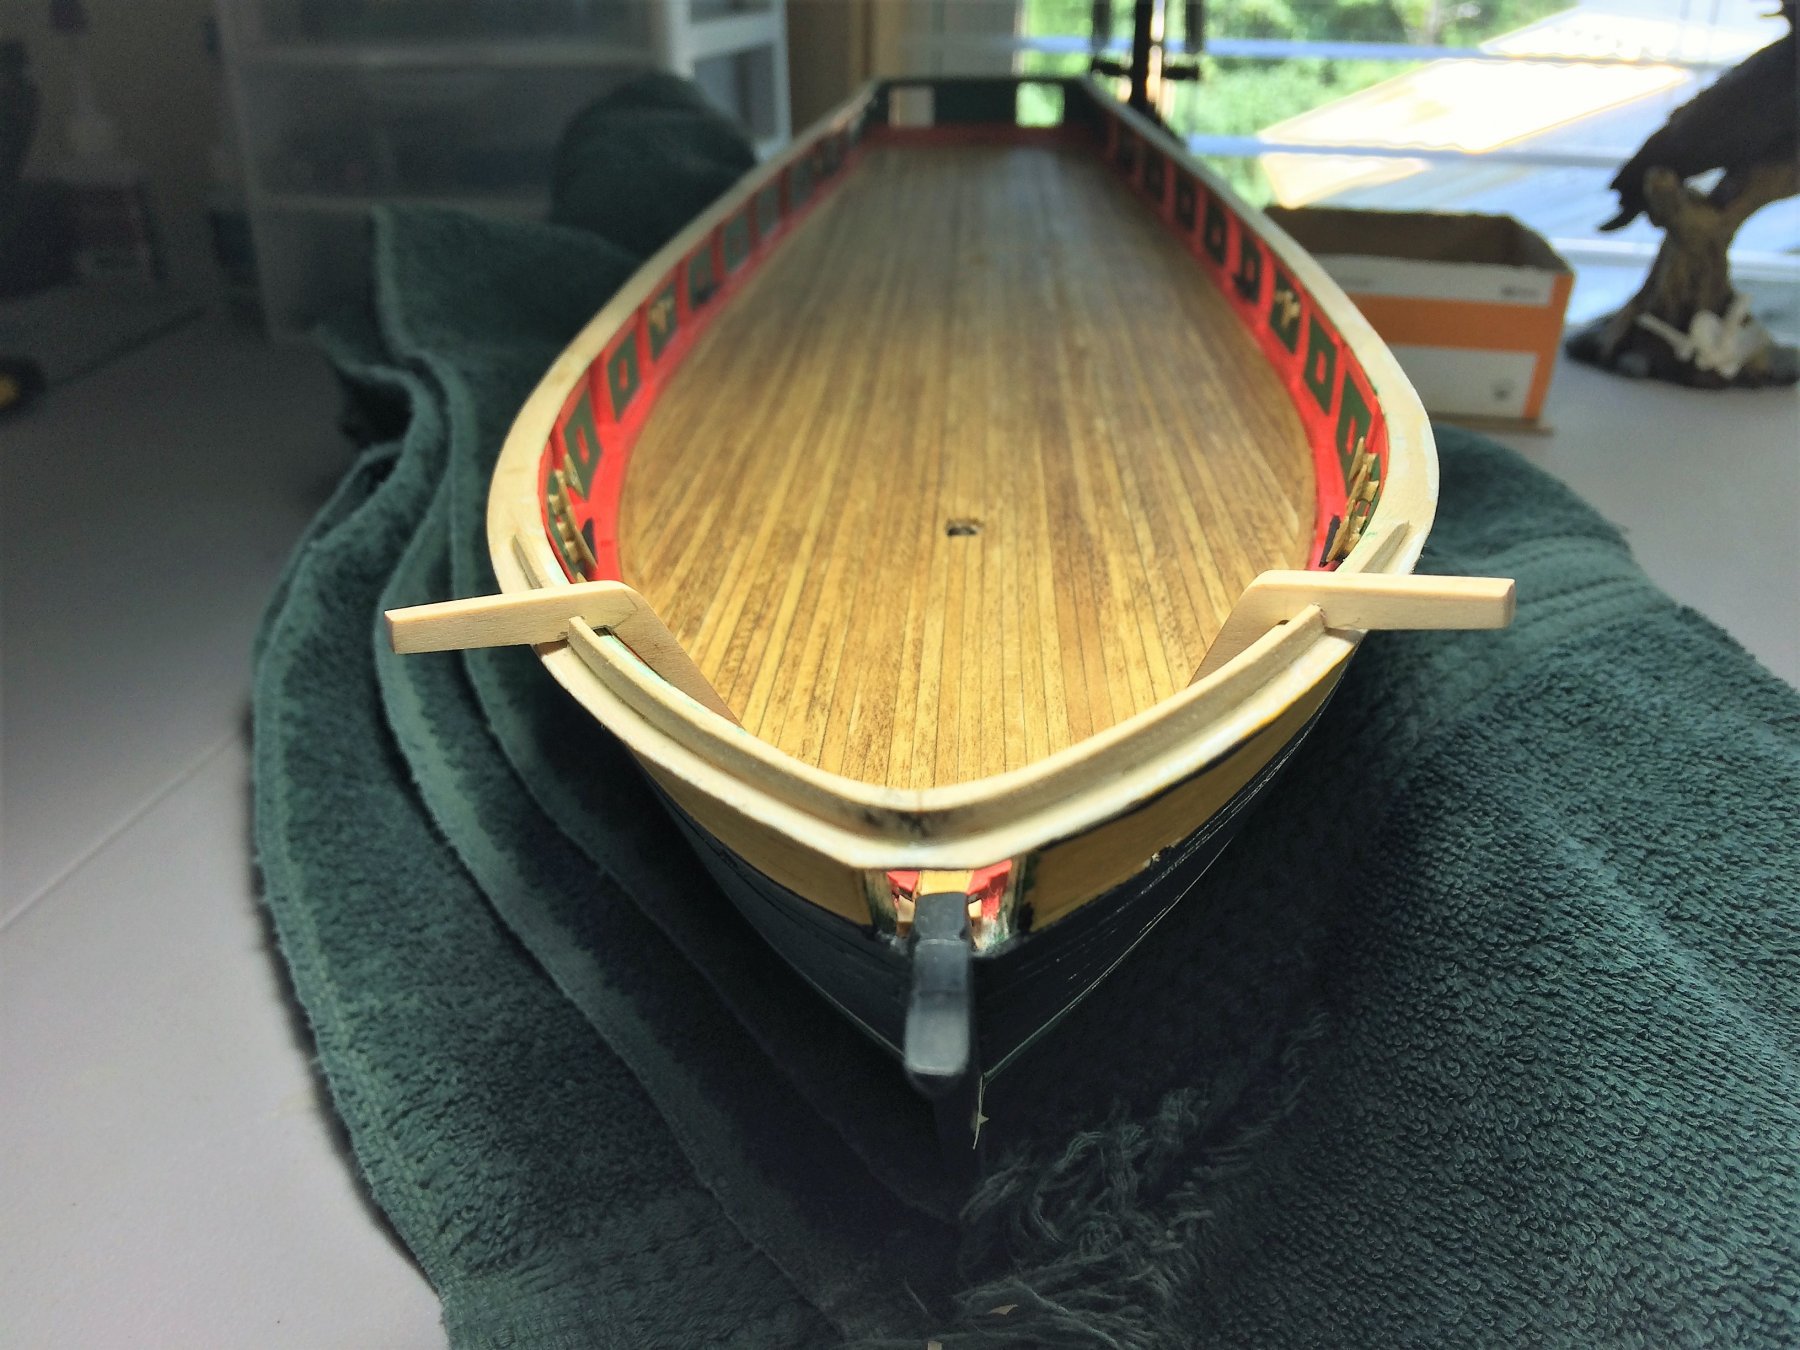
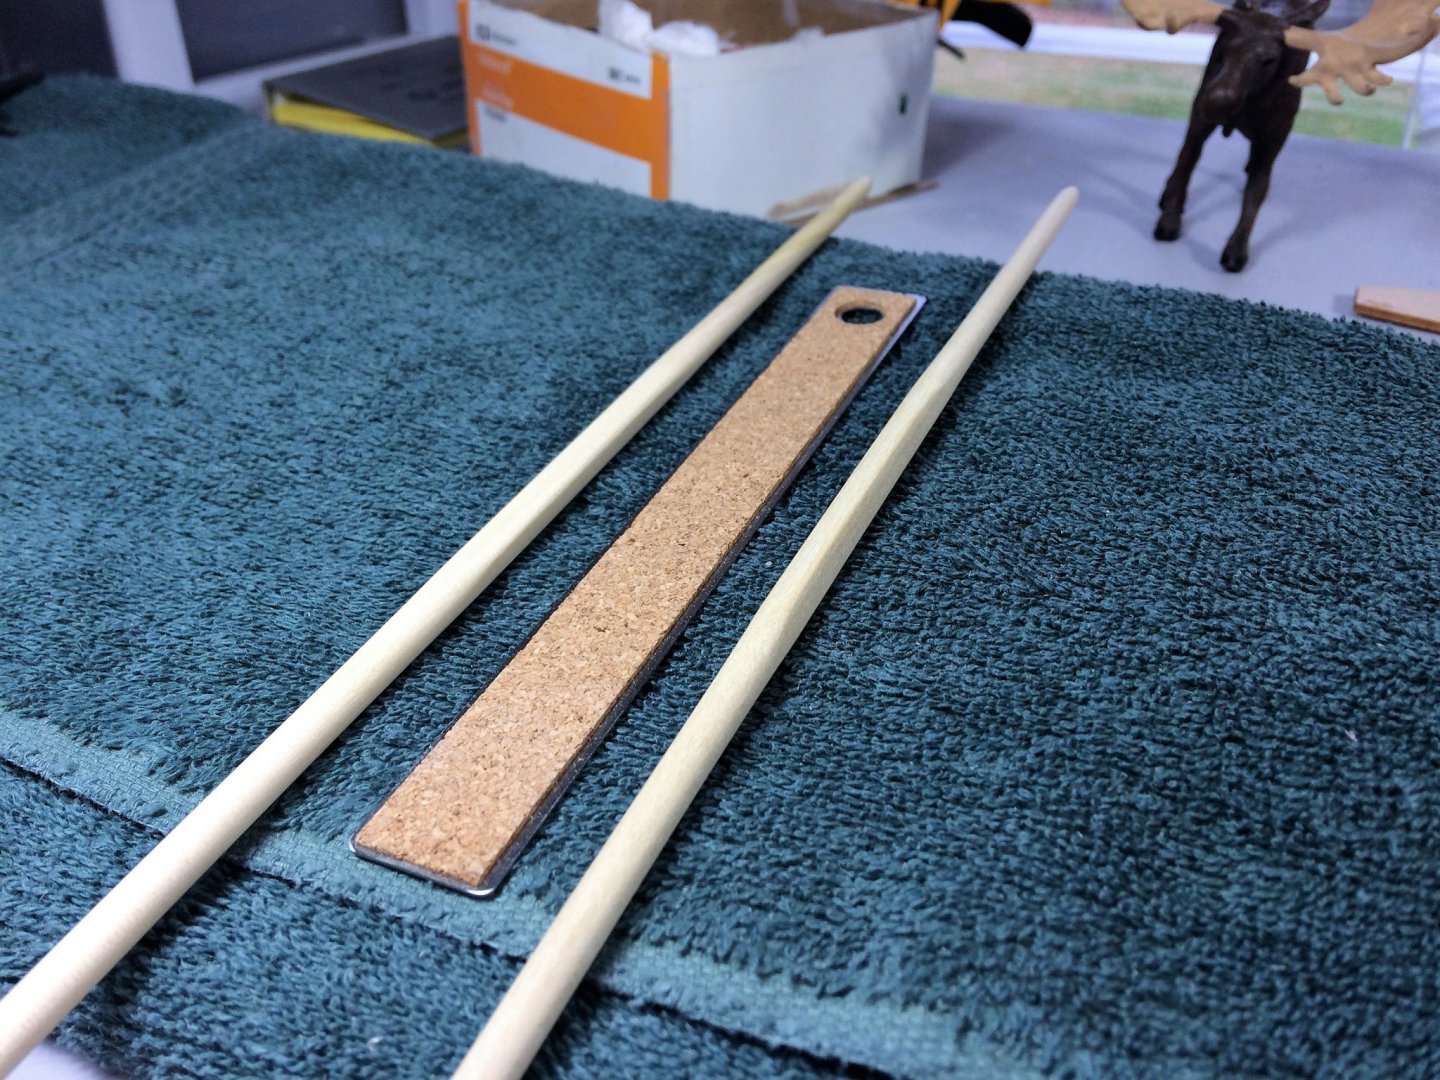
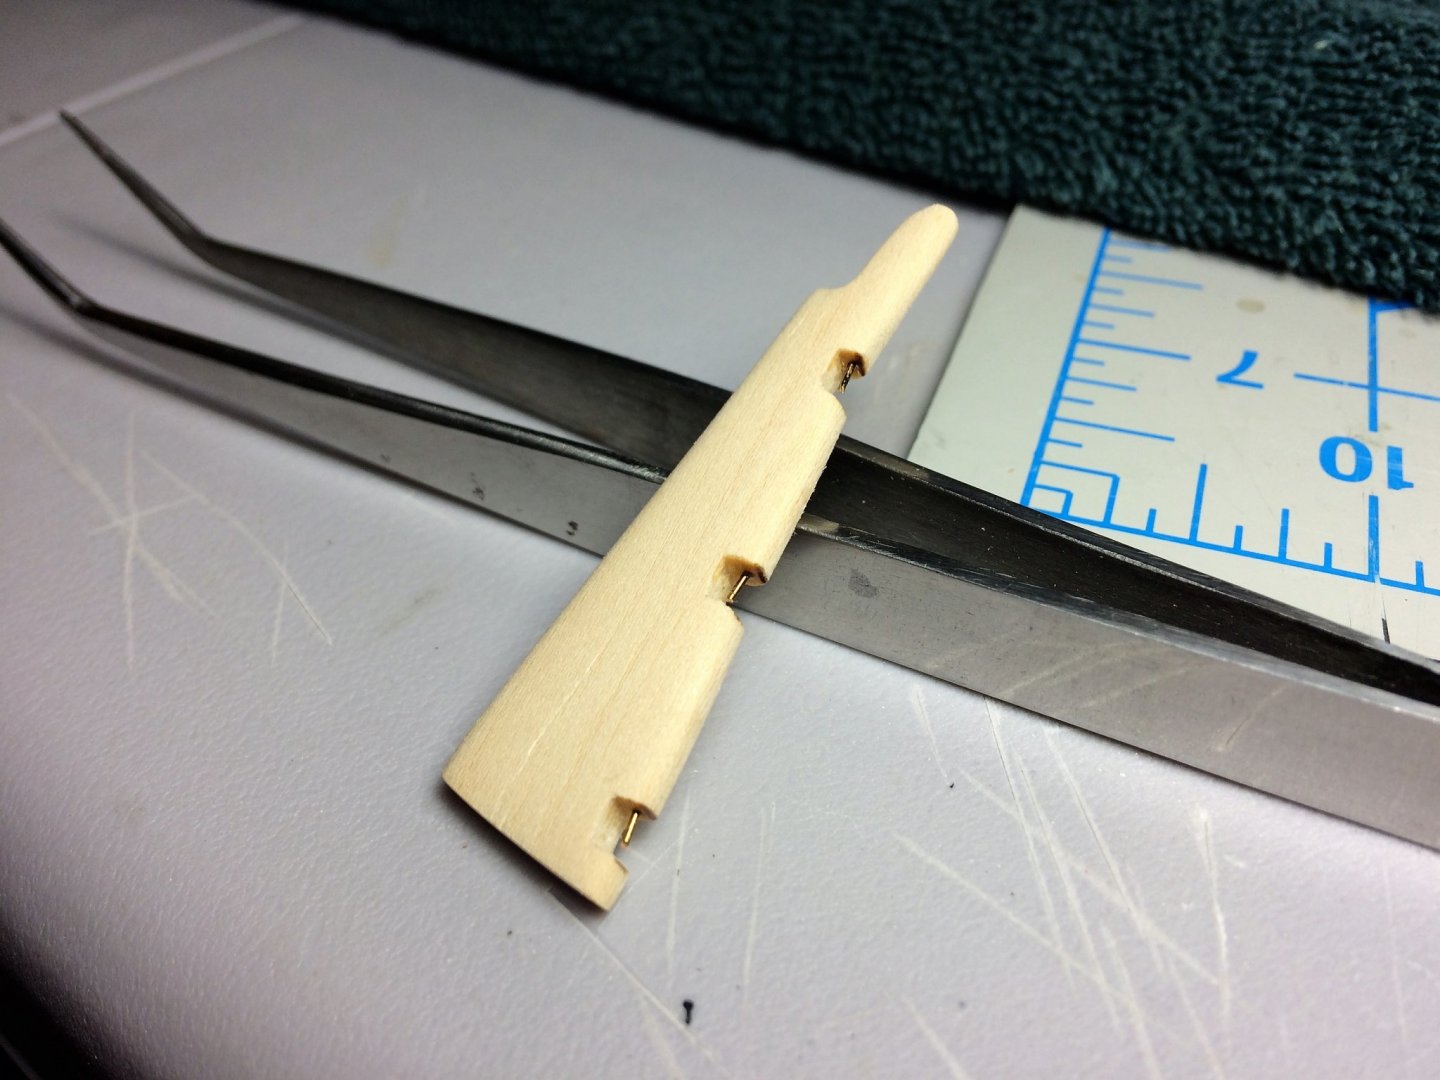
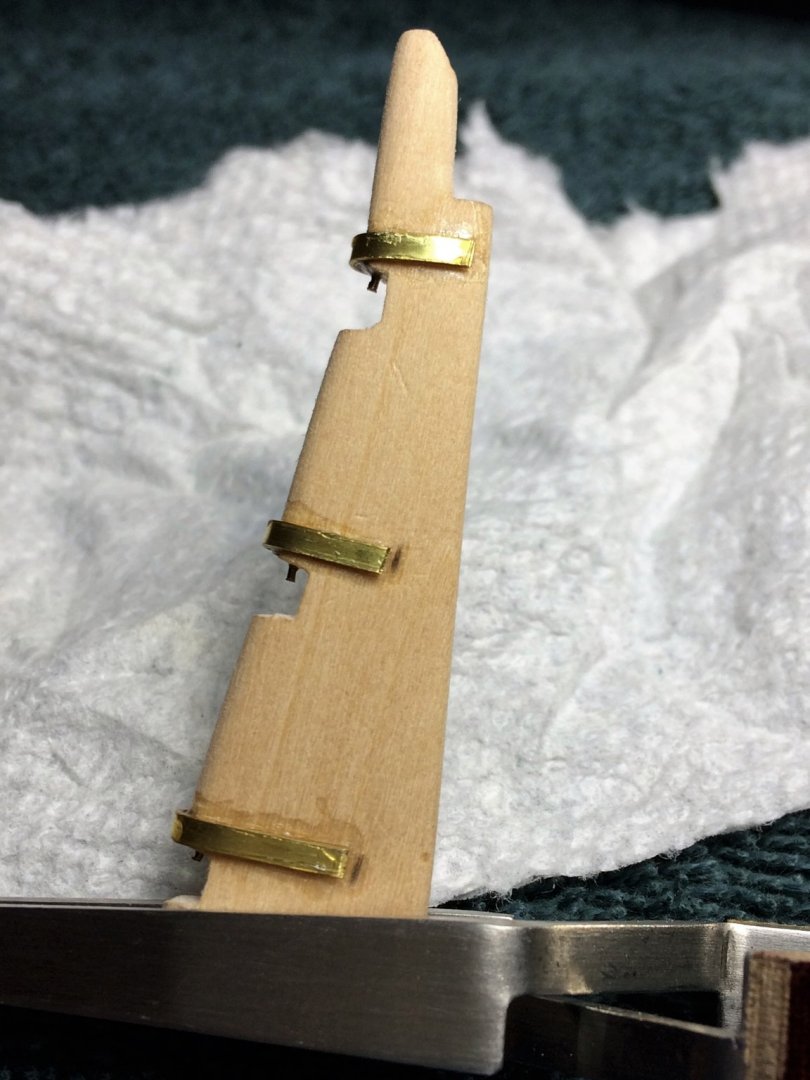
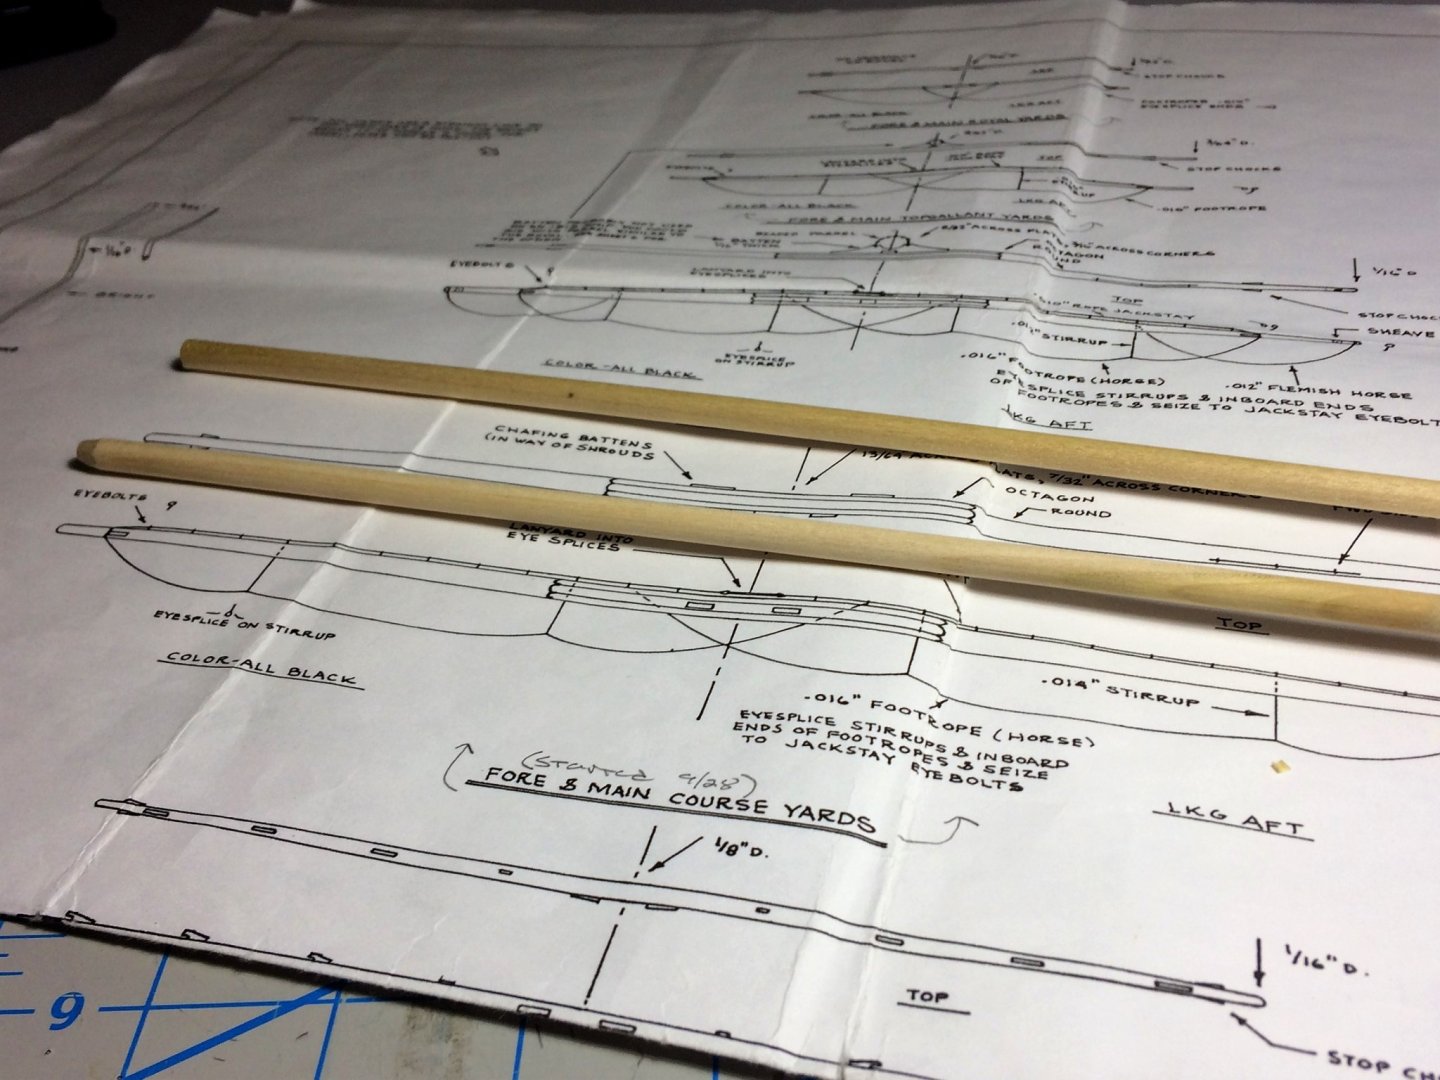
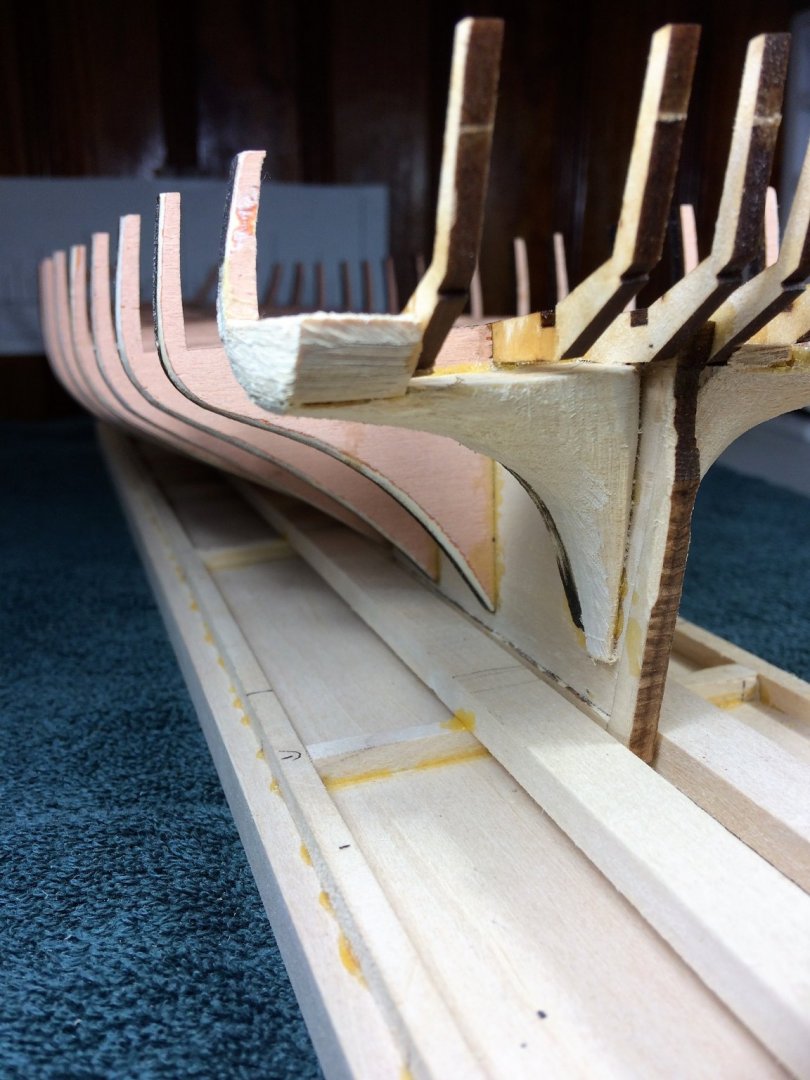
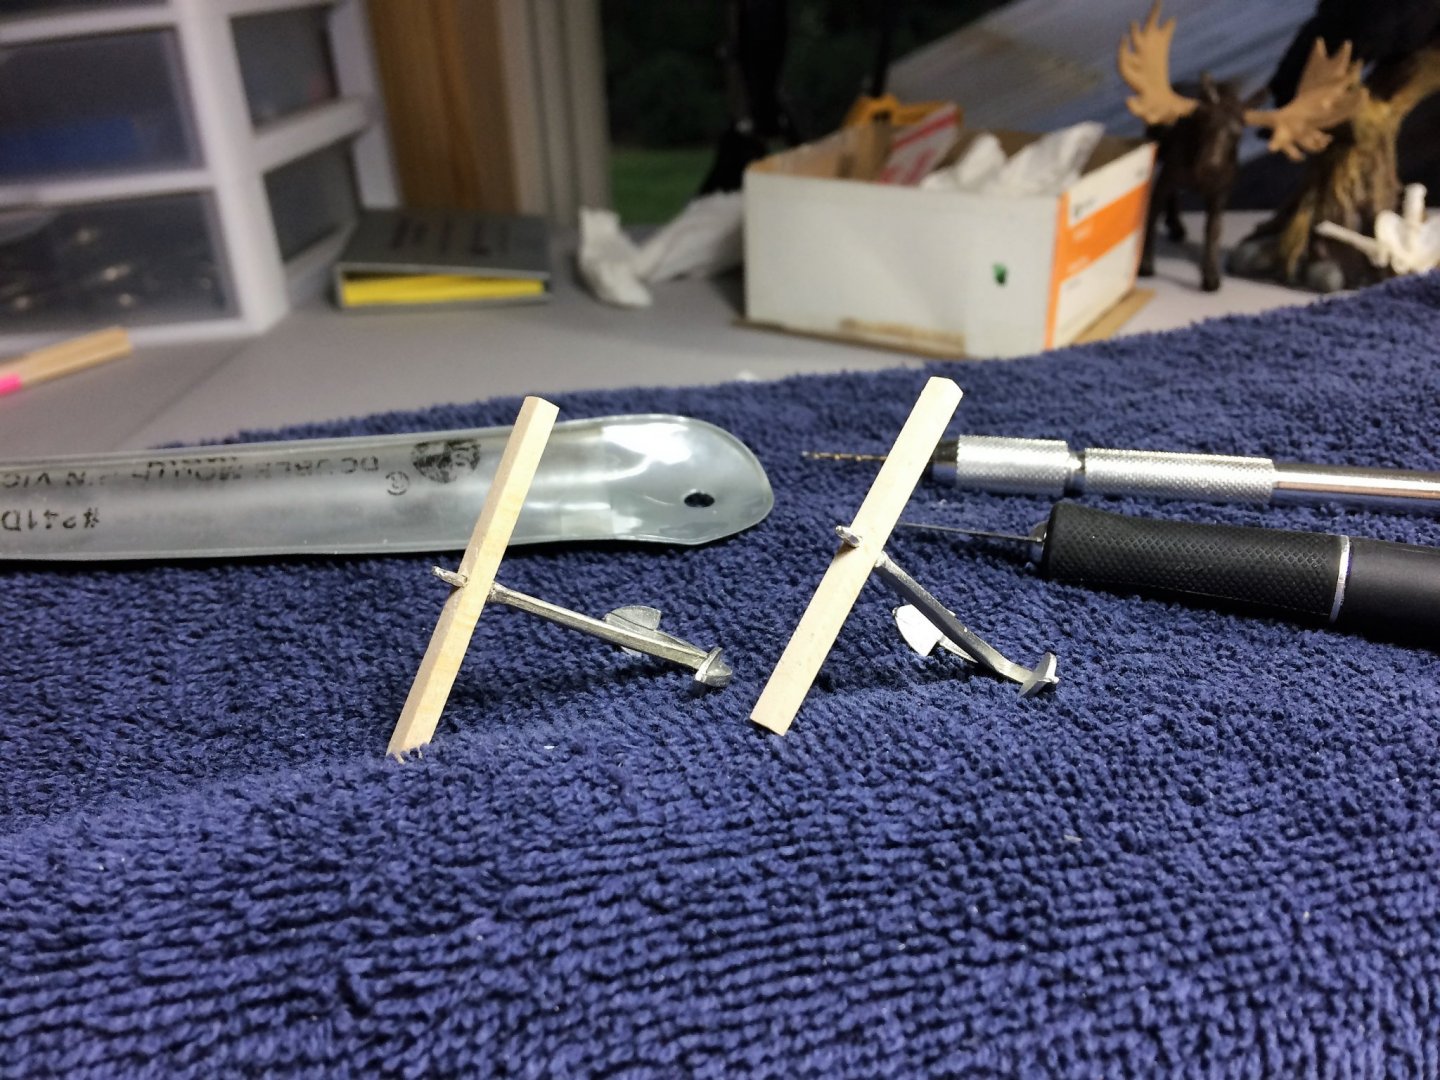
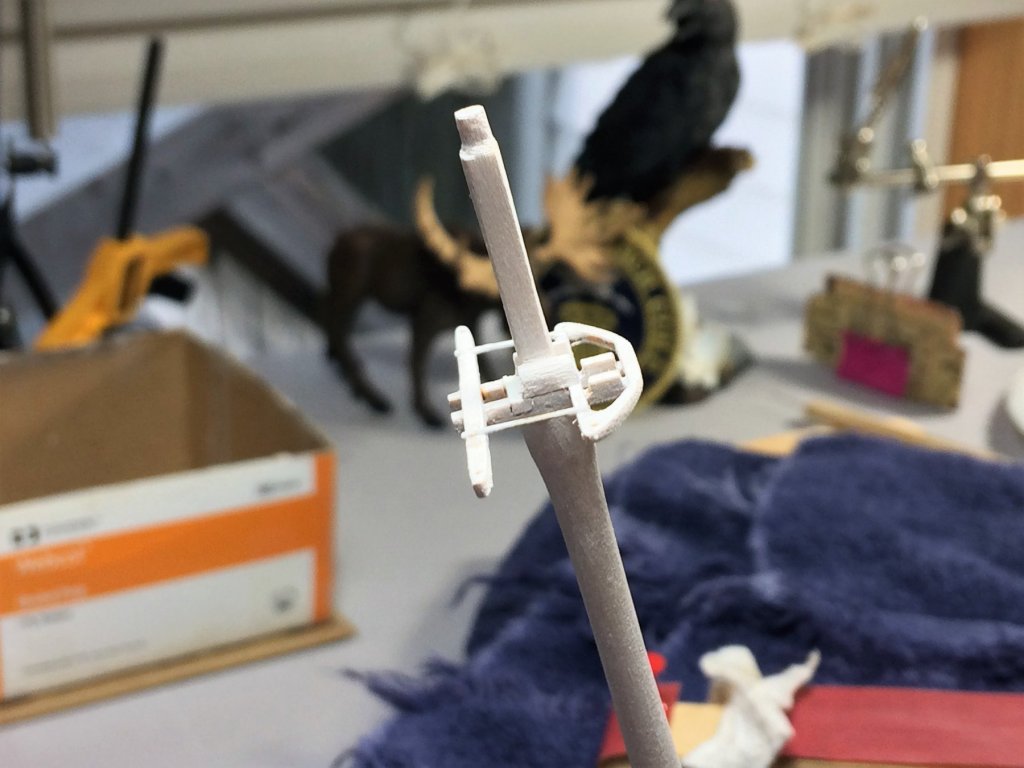
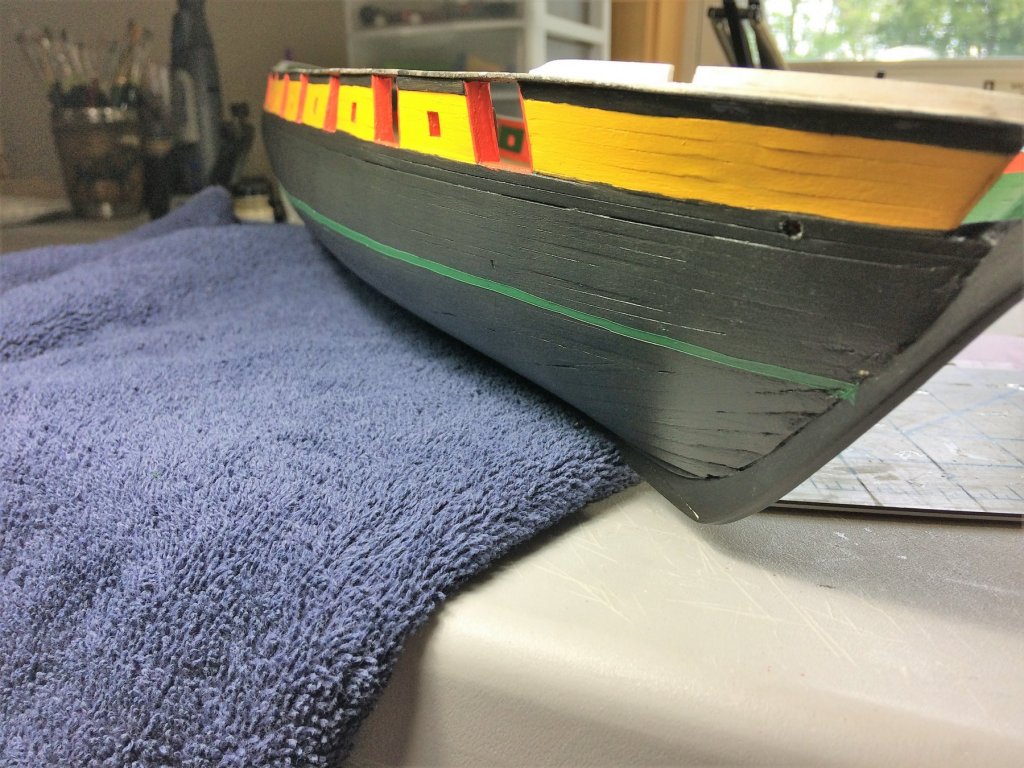
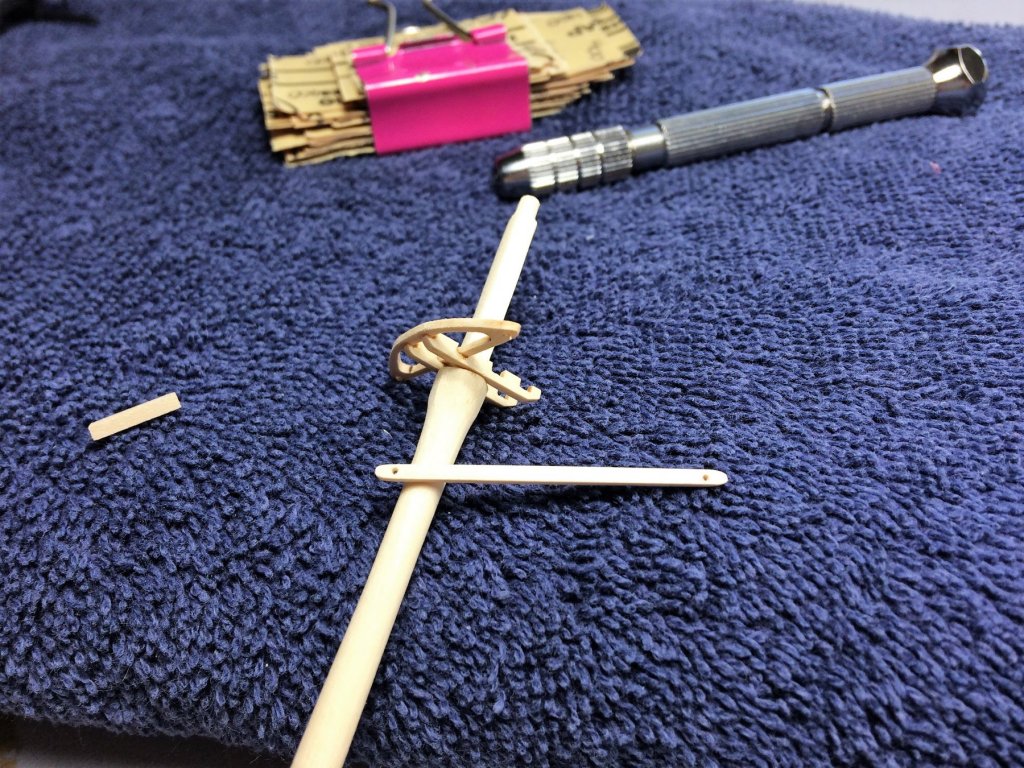
Evening, Hope everyone is well and busy in their Shipyards. There's a chill in the air, must be Fall. Probably the best time to build, I think. I really knuckled down and started the Rudder. The outside/hull of the ship is basically done. Some paint touch ups and I'll be ready to install said rudder. I think I learned the below trick from the 18th Century Longboat kit. Drill some basic holes for small bits of wire. Then wrap the brass piece around the wood. Gives it a nice footprint for the glue. Sand it back into shape, get rid of the glue tracks, and its ready for primer, then black paint. Looks like one of them tall fellas on Easter Island!?!? but that could just be me! In the below pic, several things going on. Rudder has its coat of primer. The Tiller I stained the same shade as the deck Furniture. The piece on the far right is improvisation. The rear end of my ship is not steep enough to fit the Rudder stock and go thru the body of the ship. Instead the Rudder will be glued in a natural angle below, but wont go all the way up thru to the deck. It cant. The round wood stock will be glued in the rudder hole in the deck. The Tiller will be attached to this piece. "Appearing" to be connected to the rudder below. I may add a piece of wire inside "connecting" the rudder to the post. Its the best fix I've come up with for said problem. I have started the Main and Fore Course Yards. Essentially tease the Yards out of the dowels. The dowels supplied were quite good. Very little warp, and what is there I can work with. They'll look waited down if I do it just right. I have no lathe. Mostly by hand. Just sandpaper and a mini Dremel, which actually helps quite a bit. Once the basic length is there, mark the smaller landmarks, like where the Octagon shape is. Then start shaping. If your not paying attention they can get wonky, but so far so good. Tom E


-
JS, Great build, really enjoying it. Lord knows when I'll ever get to my Connie kit. I have the MS version as well in my stash. I just wanted to chime in about your eye post surgery. I work with eye surgeons, have been for 15+ years. Not an MD, I'm what's called a COA. You would have met a guy like me when you first met with your surgeon, well prior to surgery. Probably did a full eye exam with you before hand. Eyes heal at there own pace, which can be kind of slow. If your surgeon has you doing a regimen of post-op eye drops, (some surgeons do some don't), follow that schedule to the letter. If it gets itchy, which means its healing, keep those hands out of there! Try not too scratch it. Tom E
-
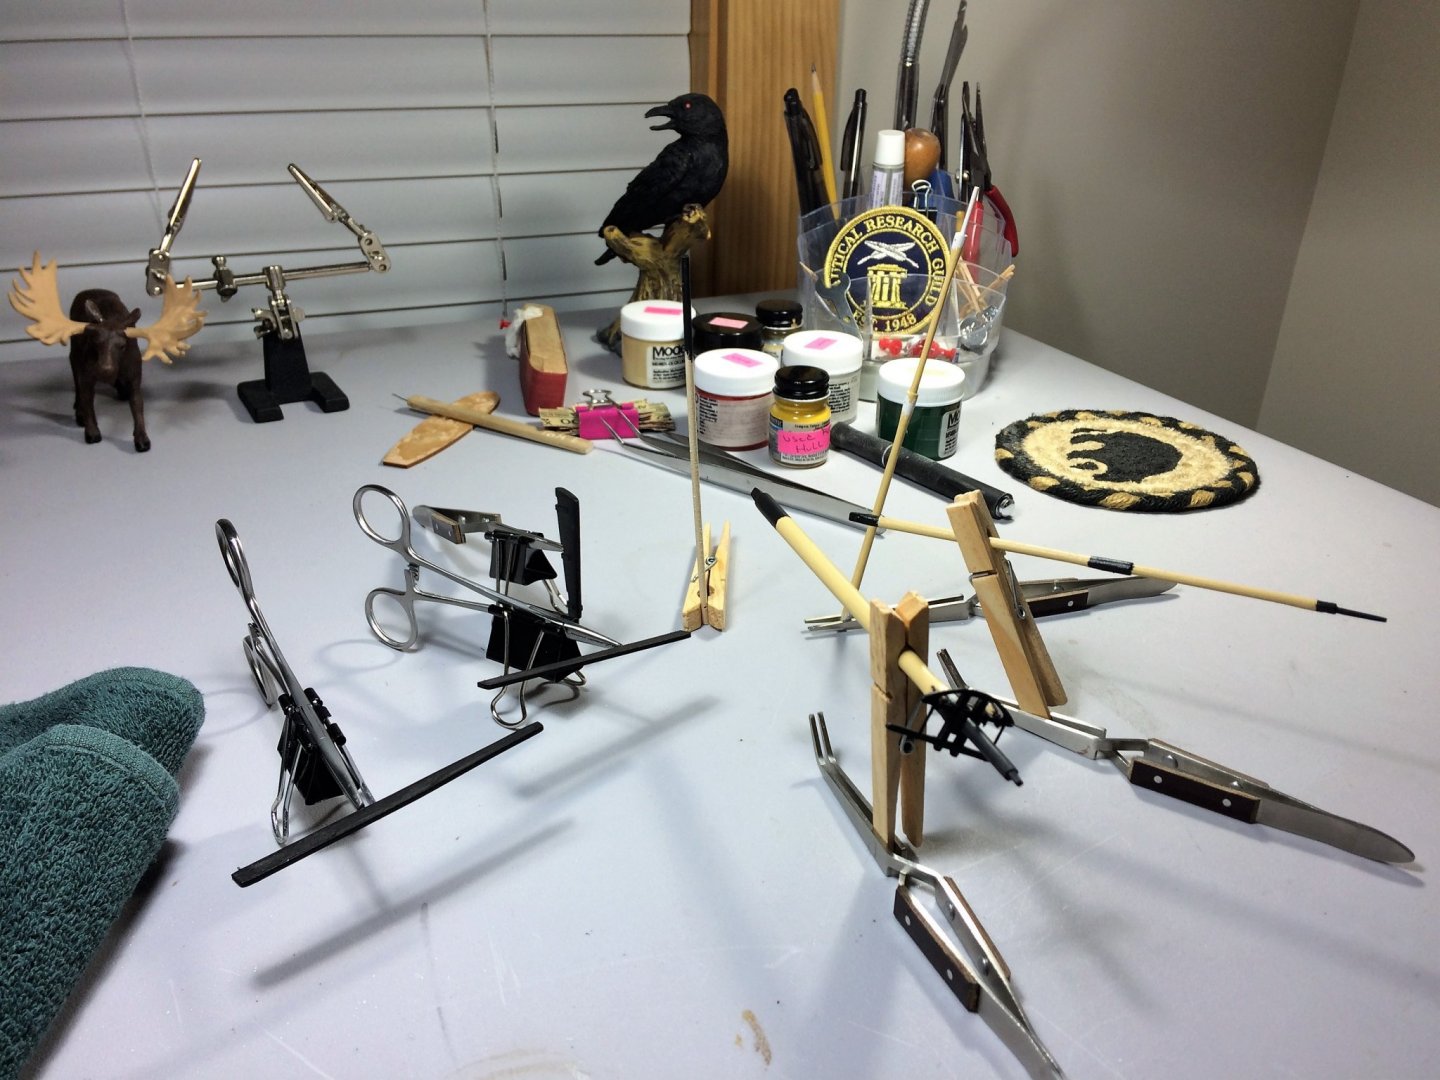
Jeffrey, I agree with you about the pins. So rarely use them myself. I just cant stand seeing holes. Even planking a hull that will eventually be painted, I wont use them. Unless absolutely necessary, which does pop up once in a while. I'm a clamp guy. Use them on almost everything. From big plastic clamps to small surgical hemostats, cant have enough. I'm assuming the Toe rail needs to go where the deck edge and side of the hull meet. Strategically placed rubber bands work equally as well. Great looking ship, enjoying the build. Tom E
- 35 replies
-
- 1
-

-
- yankee hero
- first build
- (and 2 more)
-
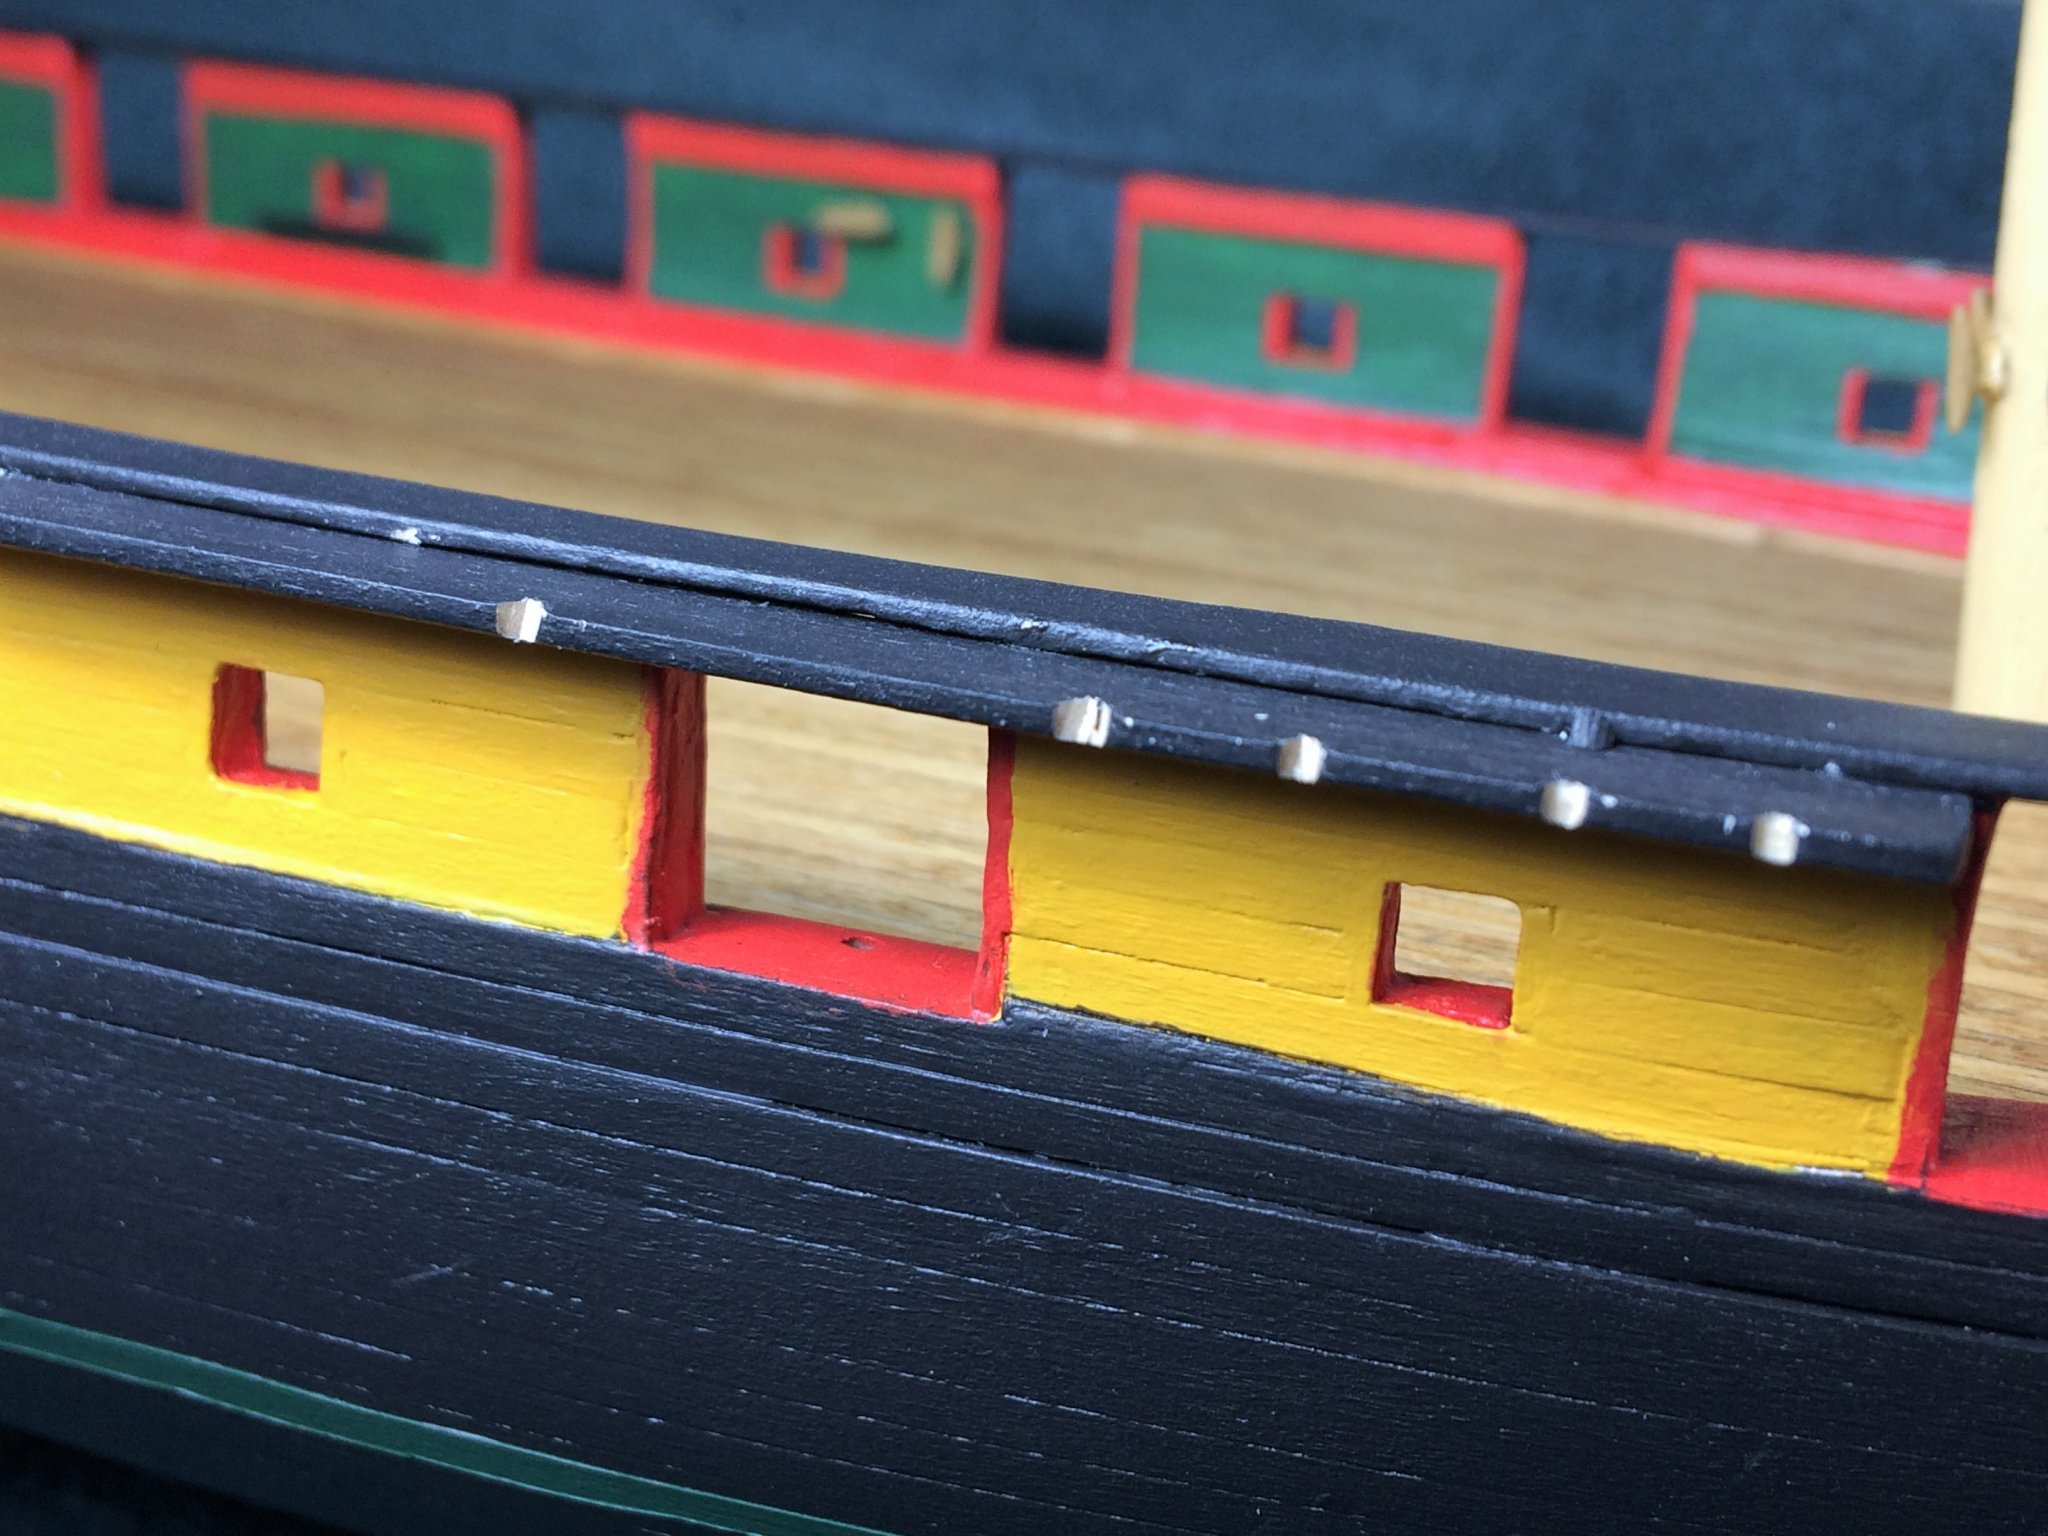
Evening, Hope everyone is well. Work does continue on the Niagara. Not as much as I like though. Been busy with friends and family. Fall in Northern New England tends to attract visitors! In between road trips, I started working on the Channels. Started with the Fore Starboard Channel. I used some Tamiya making tape to mark off where they will be installed. This saved me from constantly checking and re-checking the plans. Inner edge from one piece of tape to the other inner edge. I also installed some wire for added strength when it is finally installed. The final wire pieces will be trimmed. The Channels will first be installed as one unit. Then, Using some rope acting as a shroud, I want to mark where the Deadeyes should be. I want to see where they lay before I start making divots for the wire stropping. Make sure they have a pleasing angle and don't lay in front of a cannon. Once the Deadeyes are installed. The Keeper strip will be installed. Holes were marked and drilled for the wire pieces. Should add some strength to it......hopefully!!!!! I REALLY don't want these pulling out when finally rigged. Was on a roll and started the Aft Starboard Channel as well. They were generally shaped to the curve of the ship. Then shaped further to match the curve of the ships rail. Tom E

-
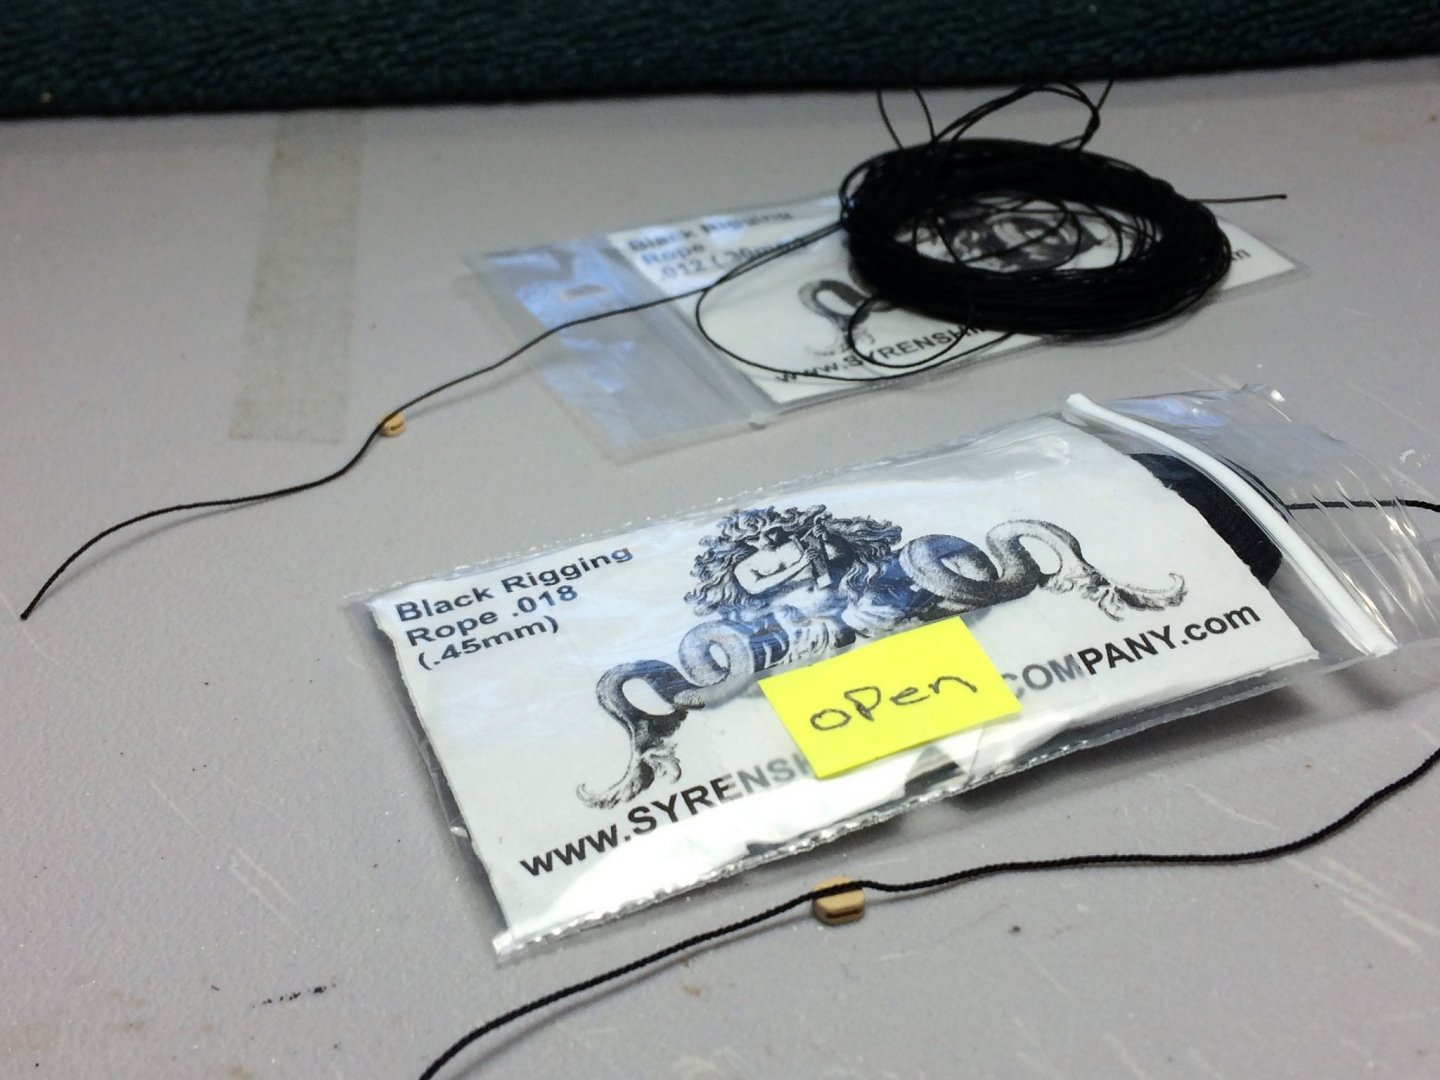
Thank you for the kind words gentlemen. No pics yet, but I started the Channels today. Harder in my head than in practice. May have the Starboard side done this weekend. Christos, That rope is from Syren Ship Model Co. The stuff is amazing. I've dealt with rope unwrapping after you cut it, but not this product. There is some unwrap, but if I need to sharpen up an edge, I use CA as well. Tom E
-
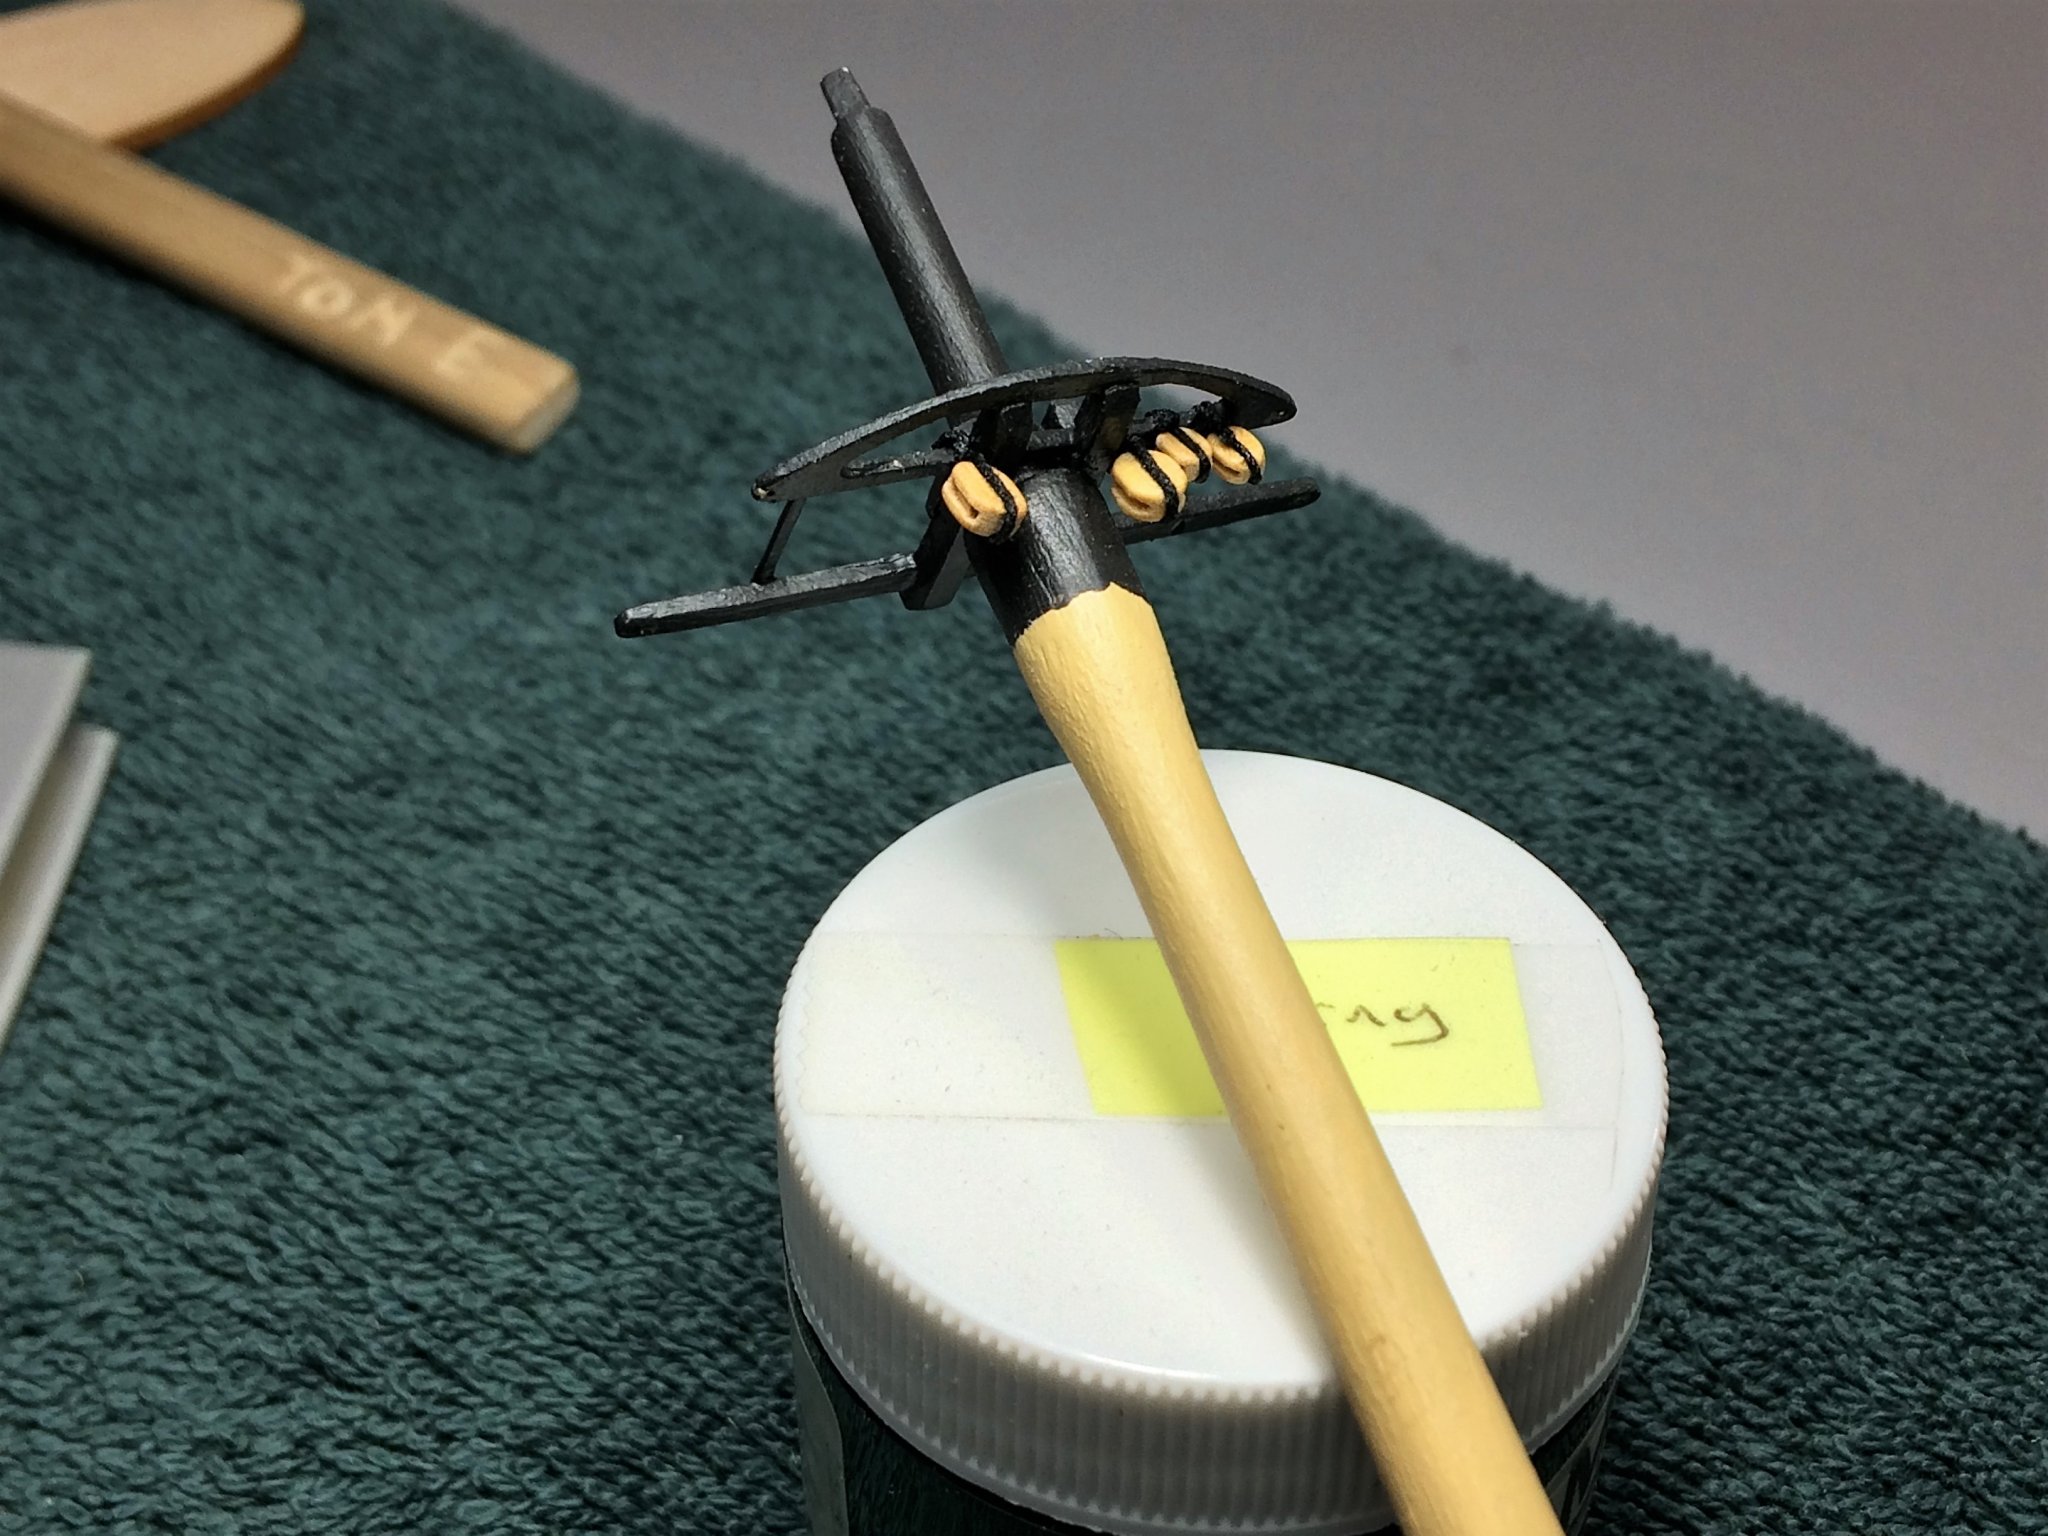
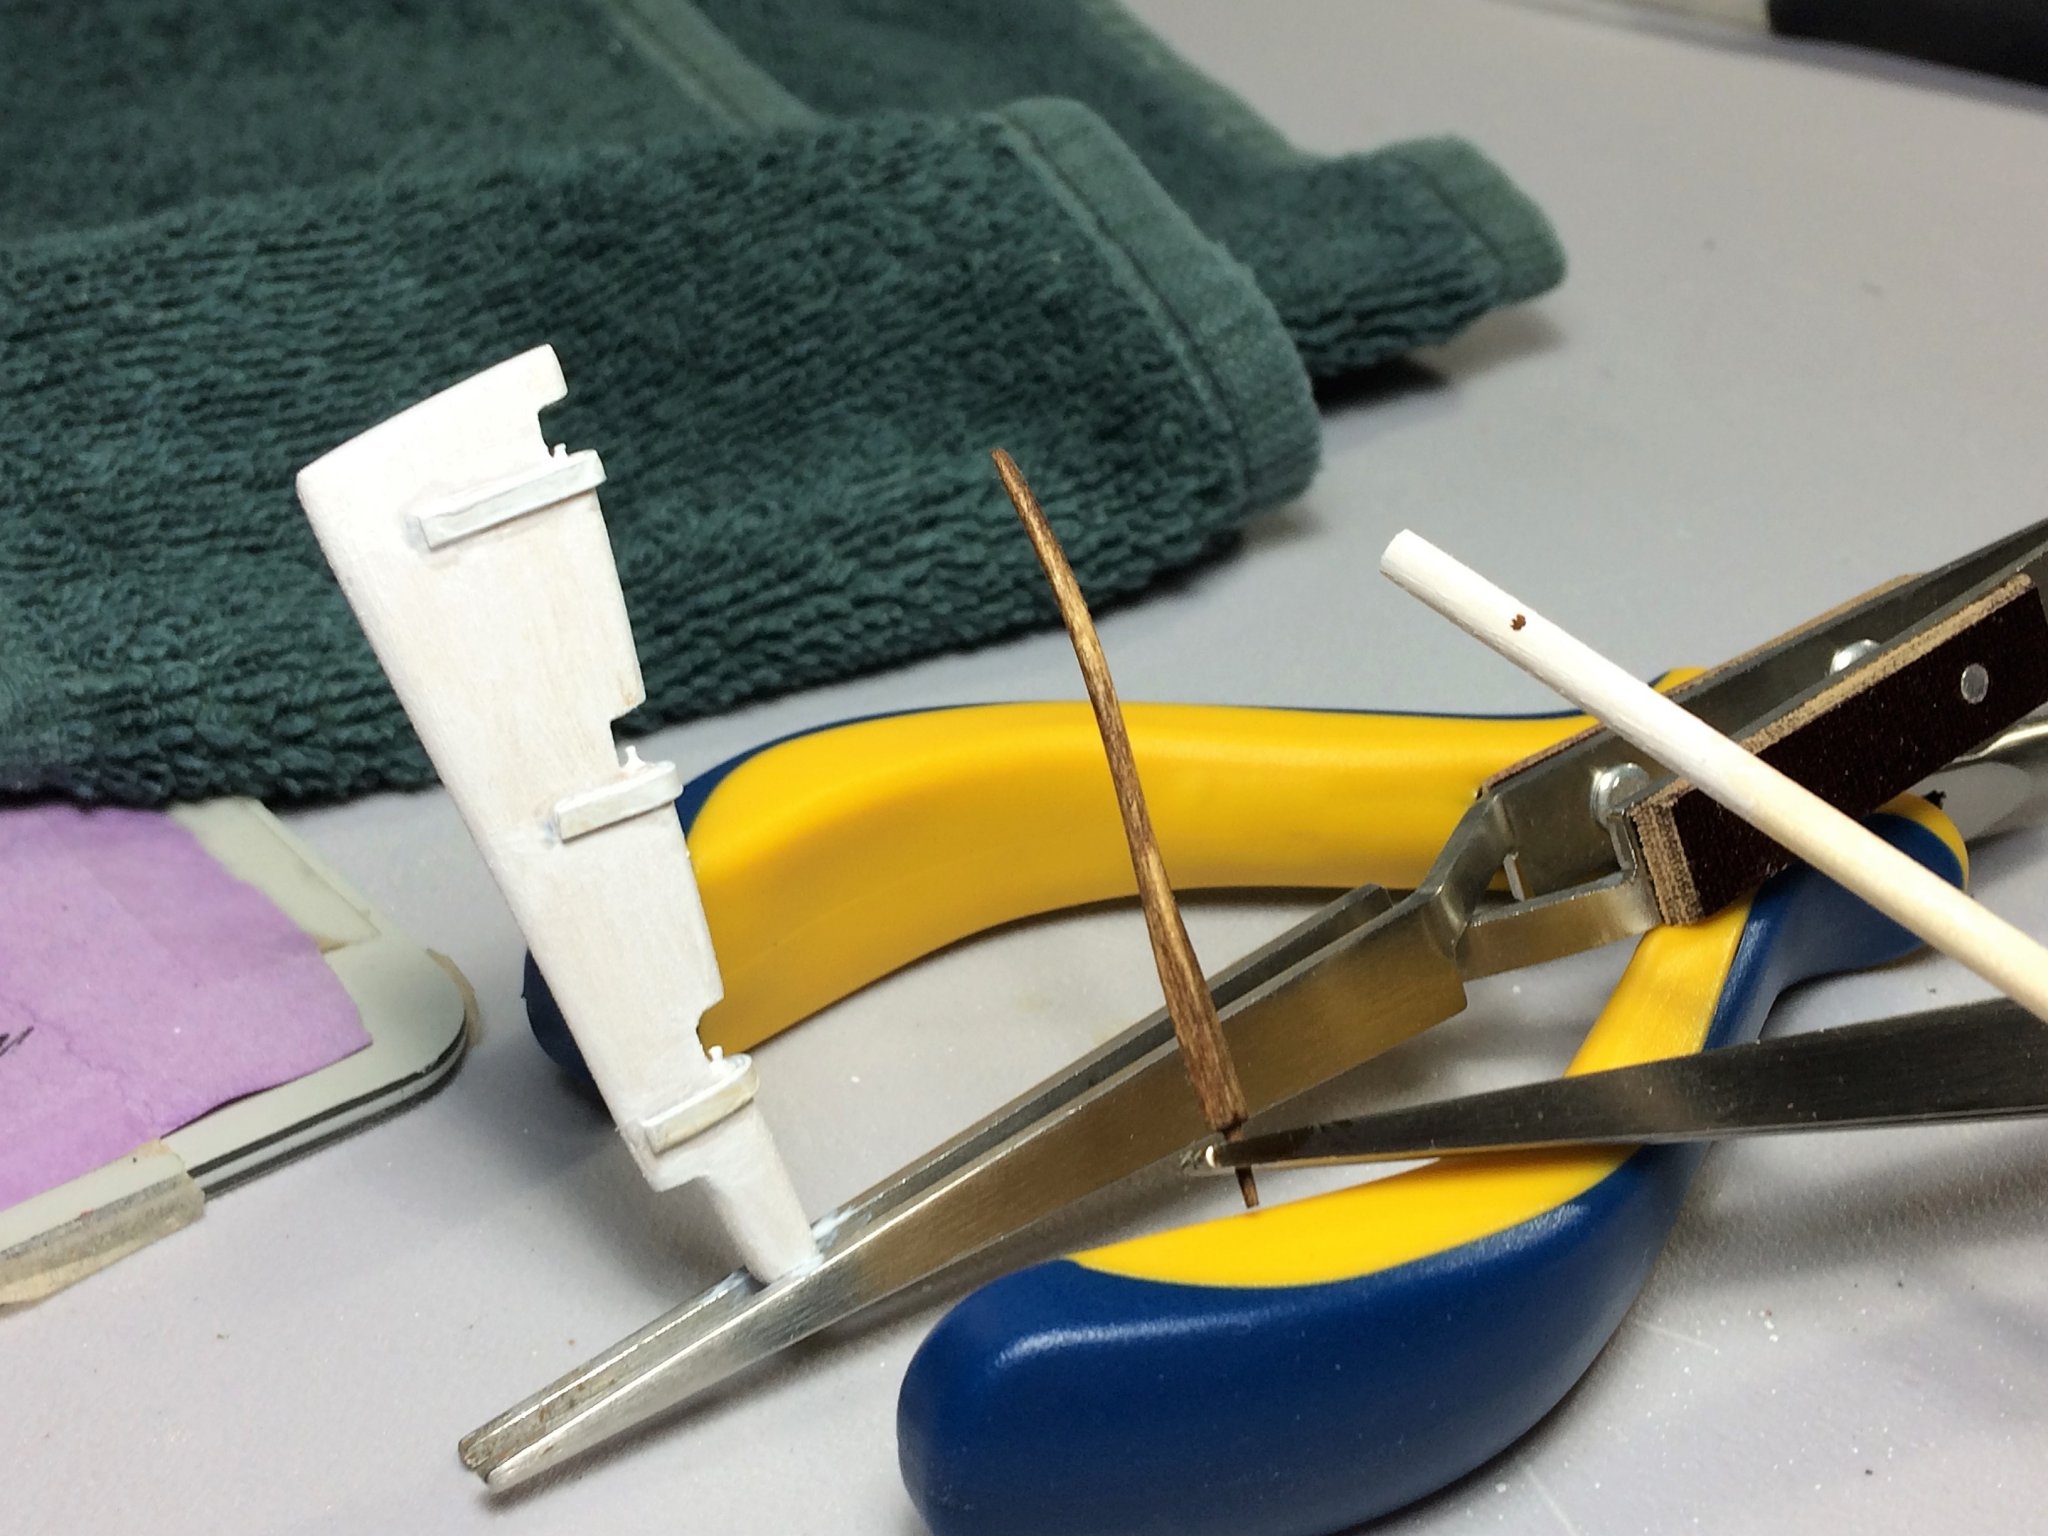
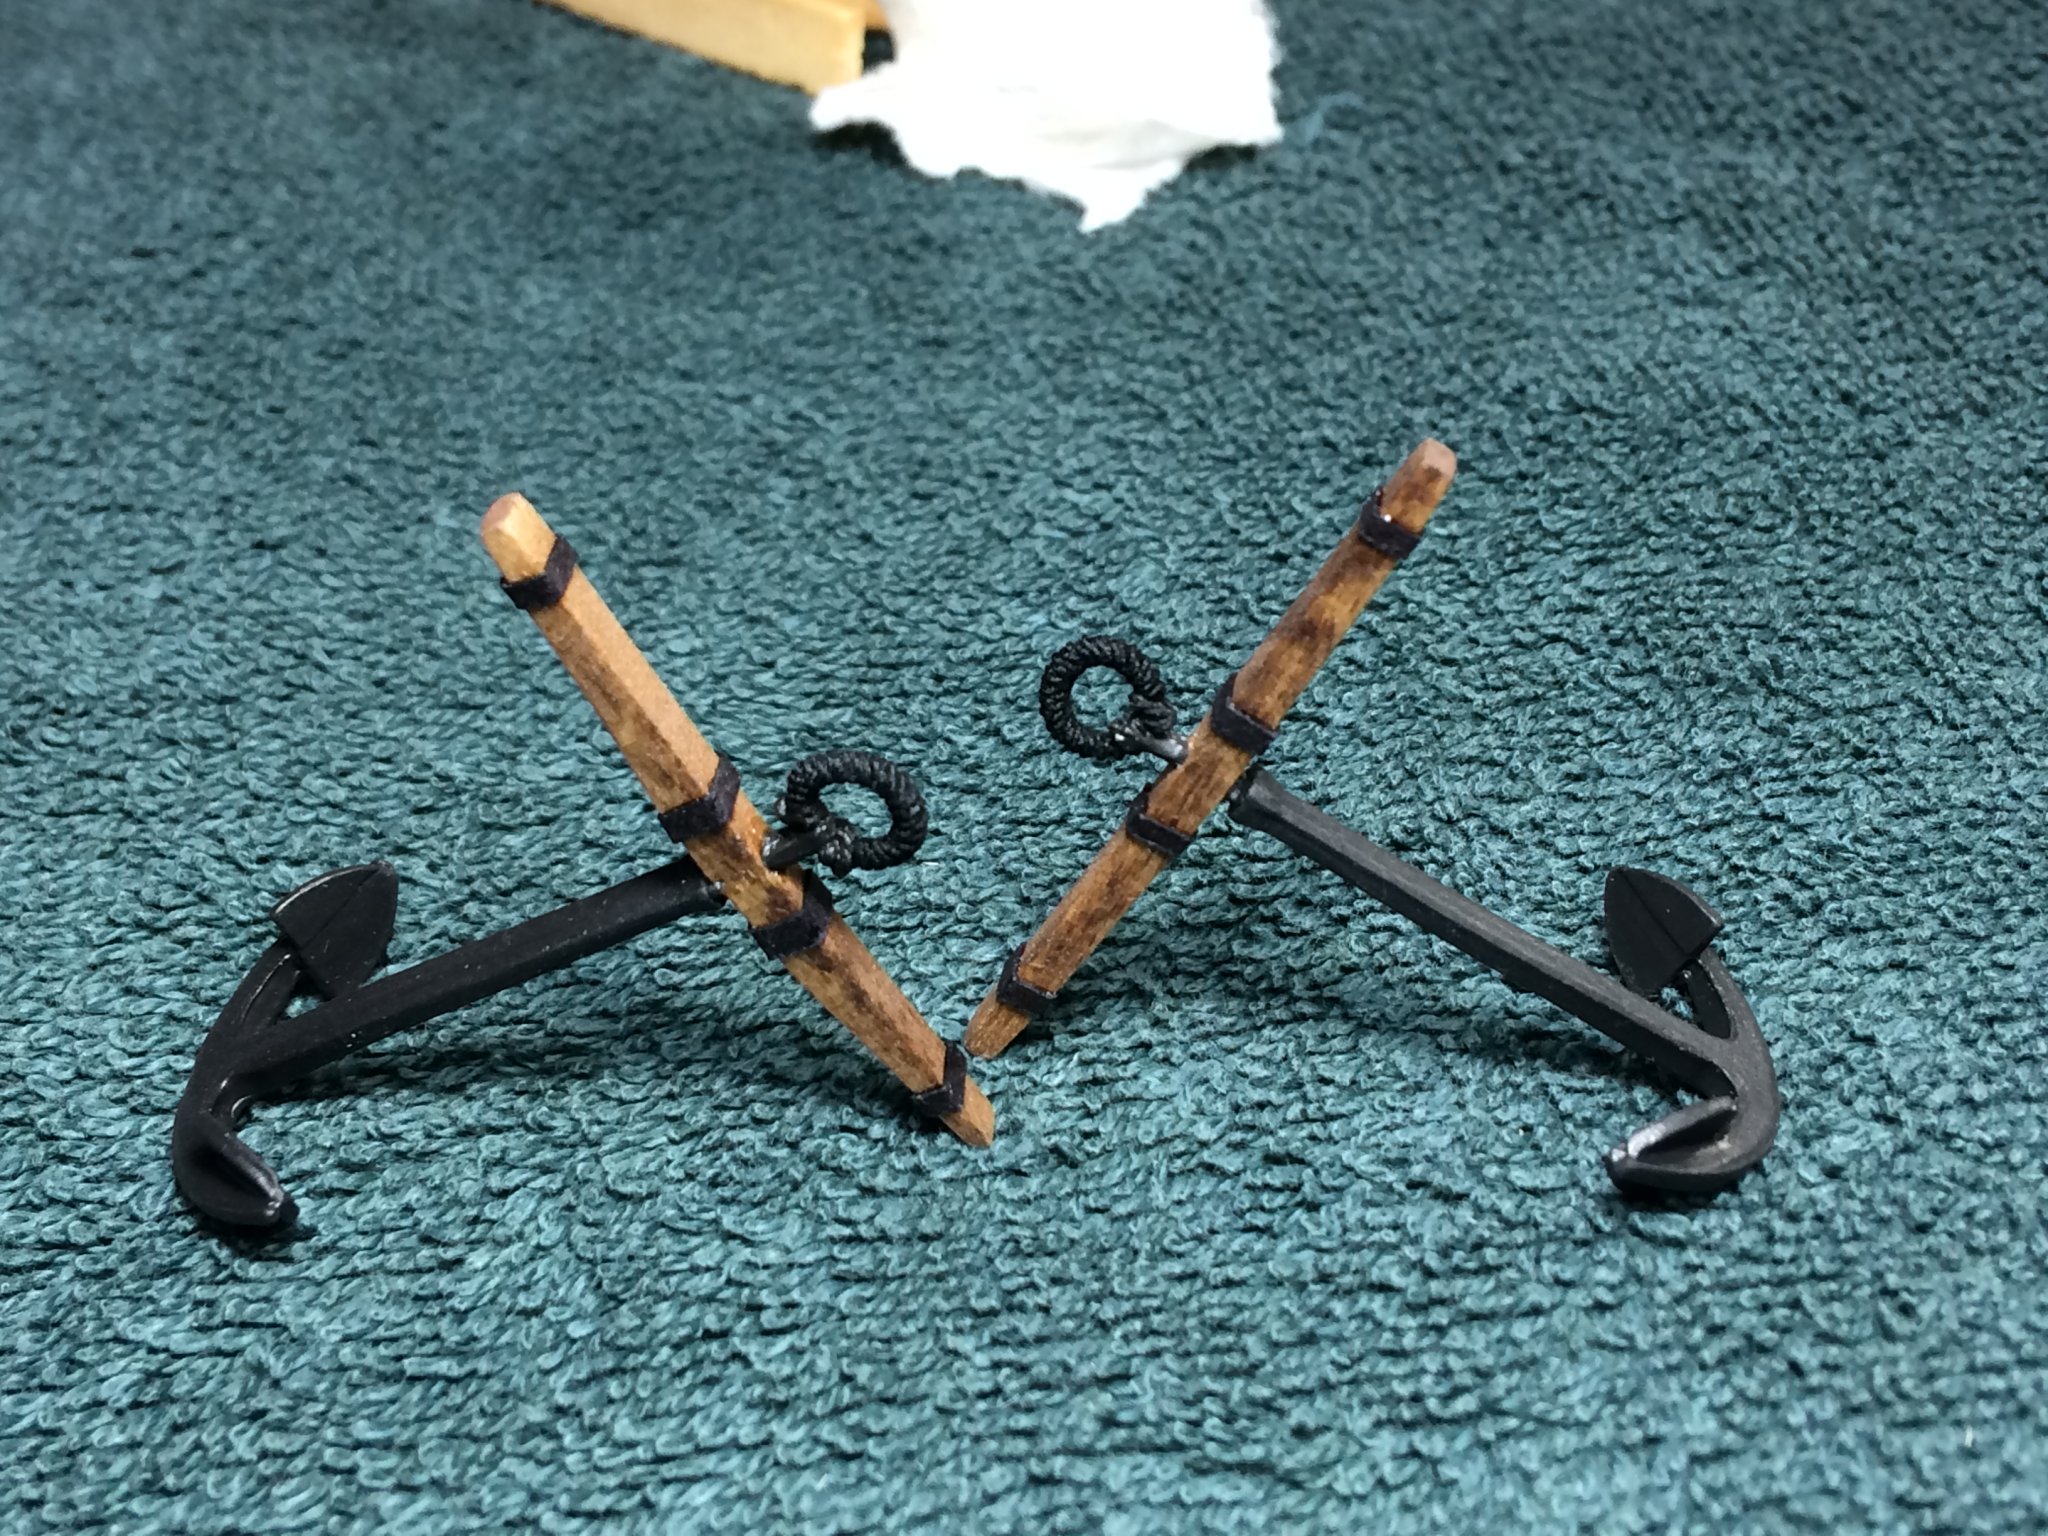
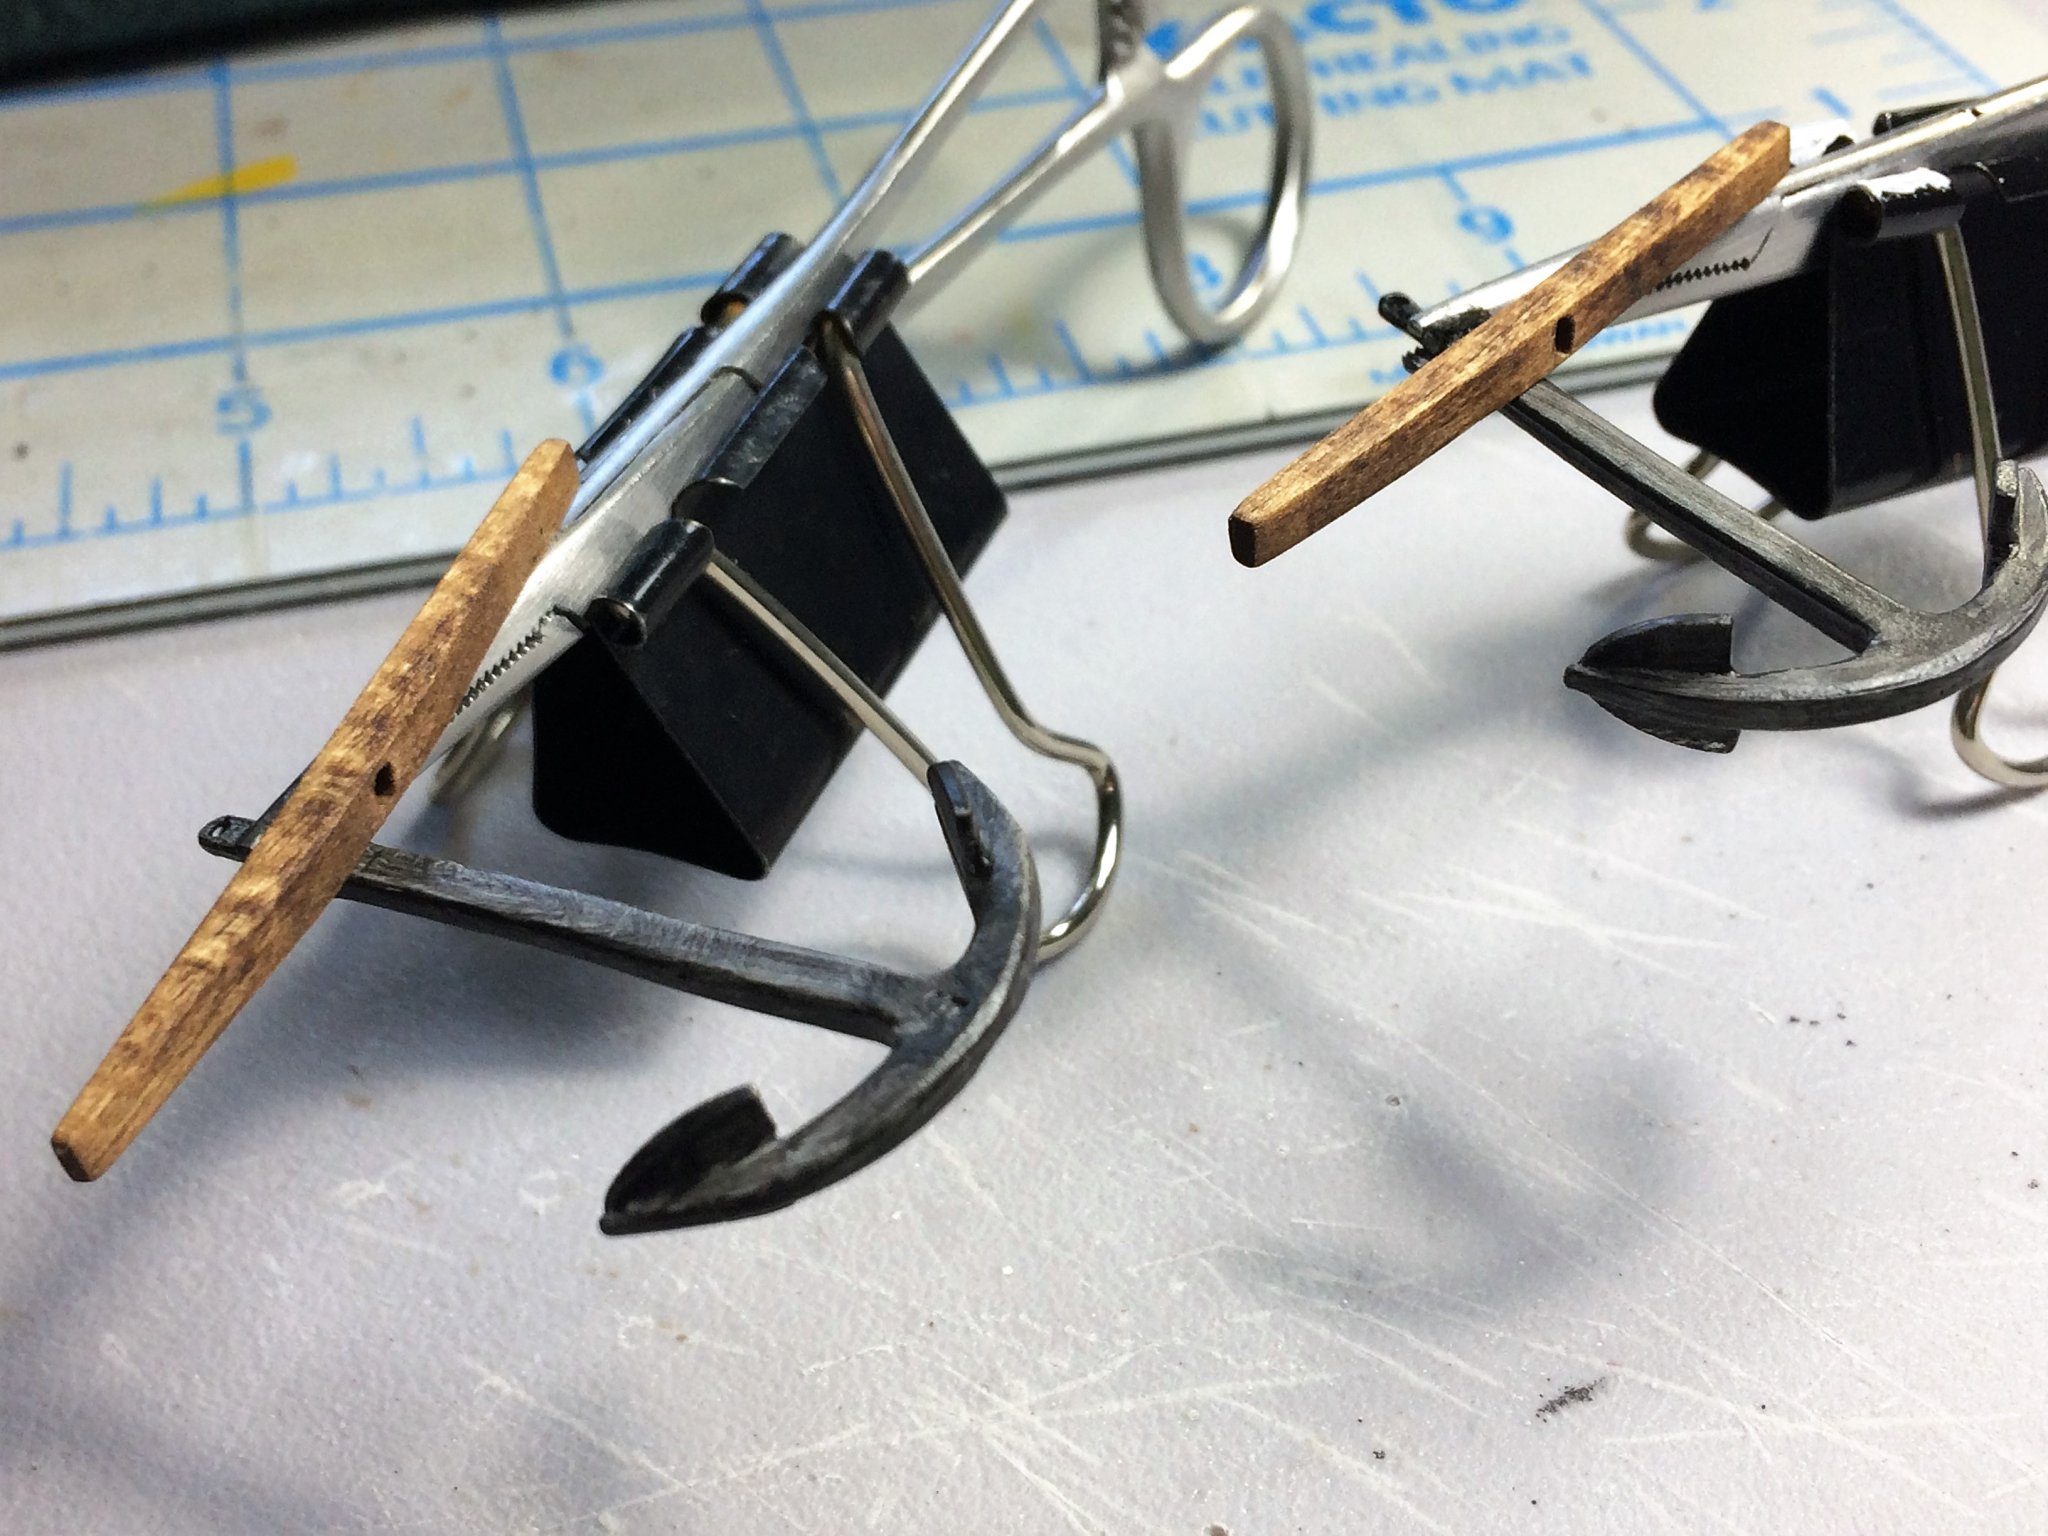
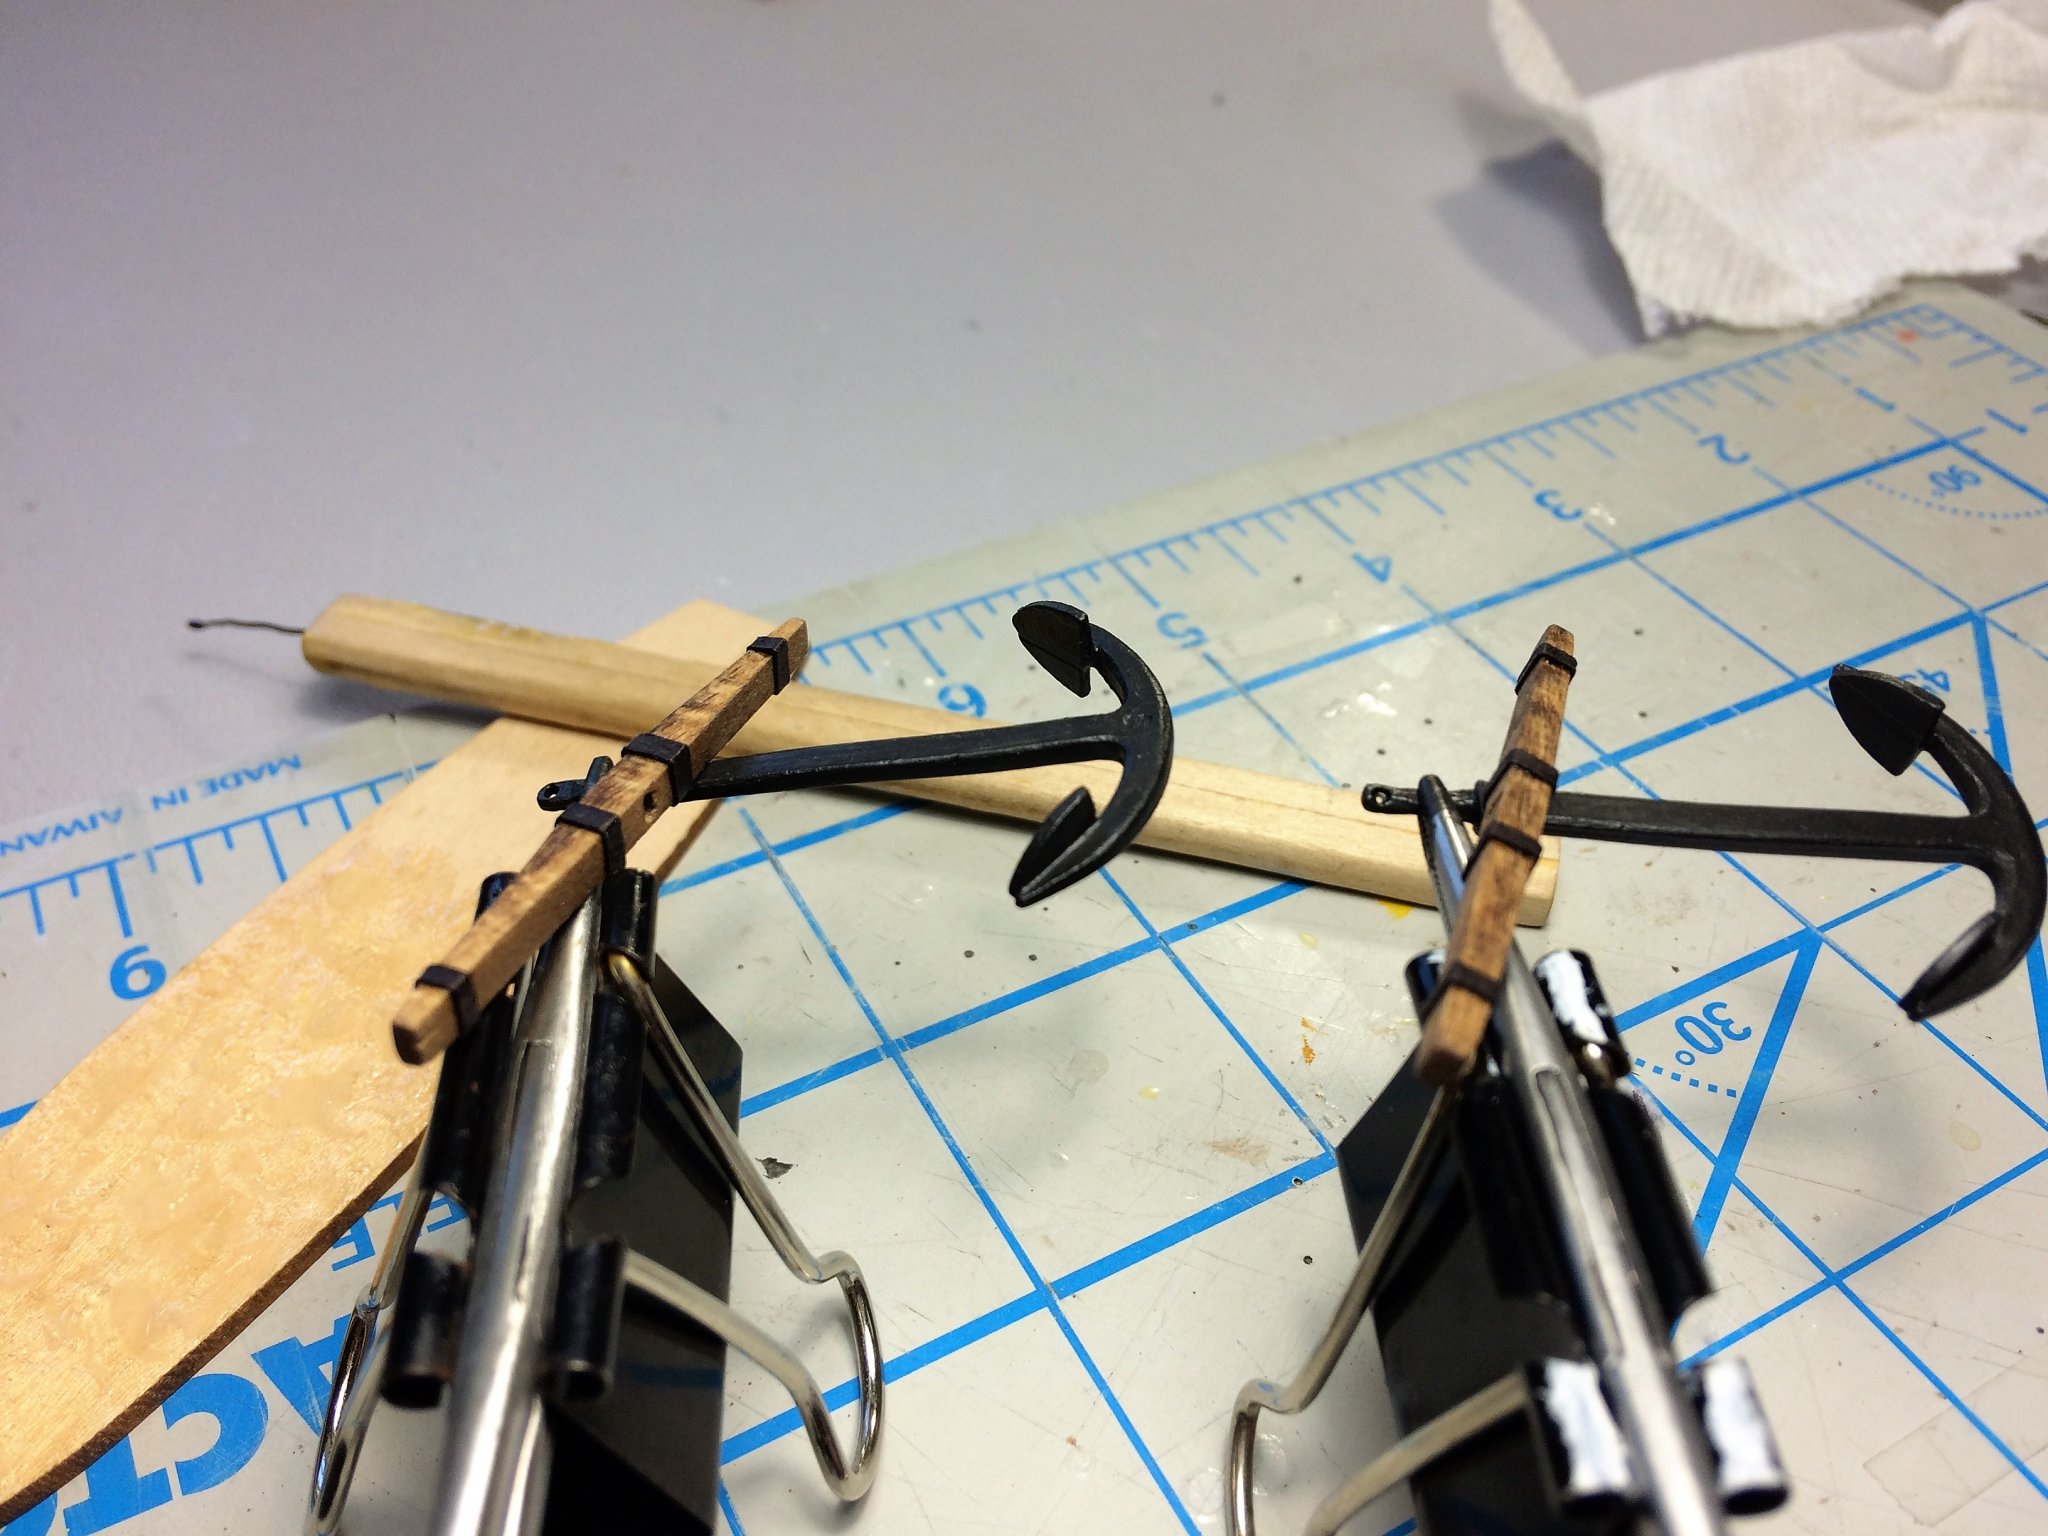
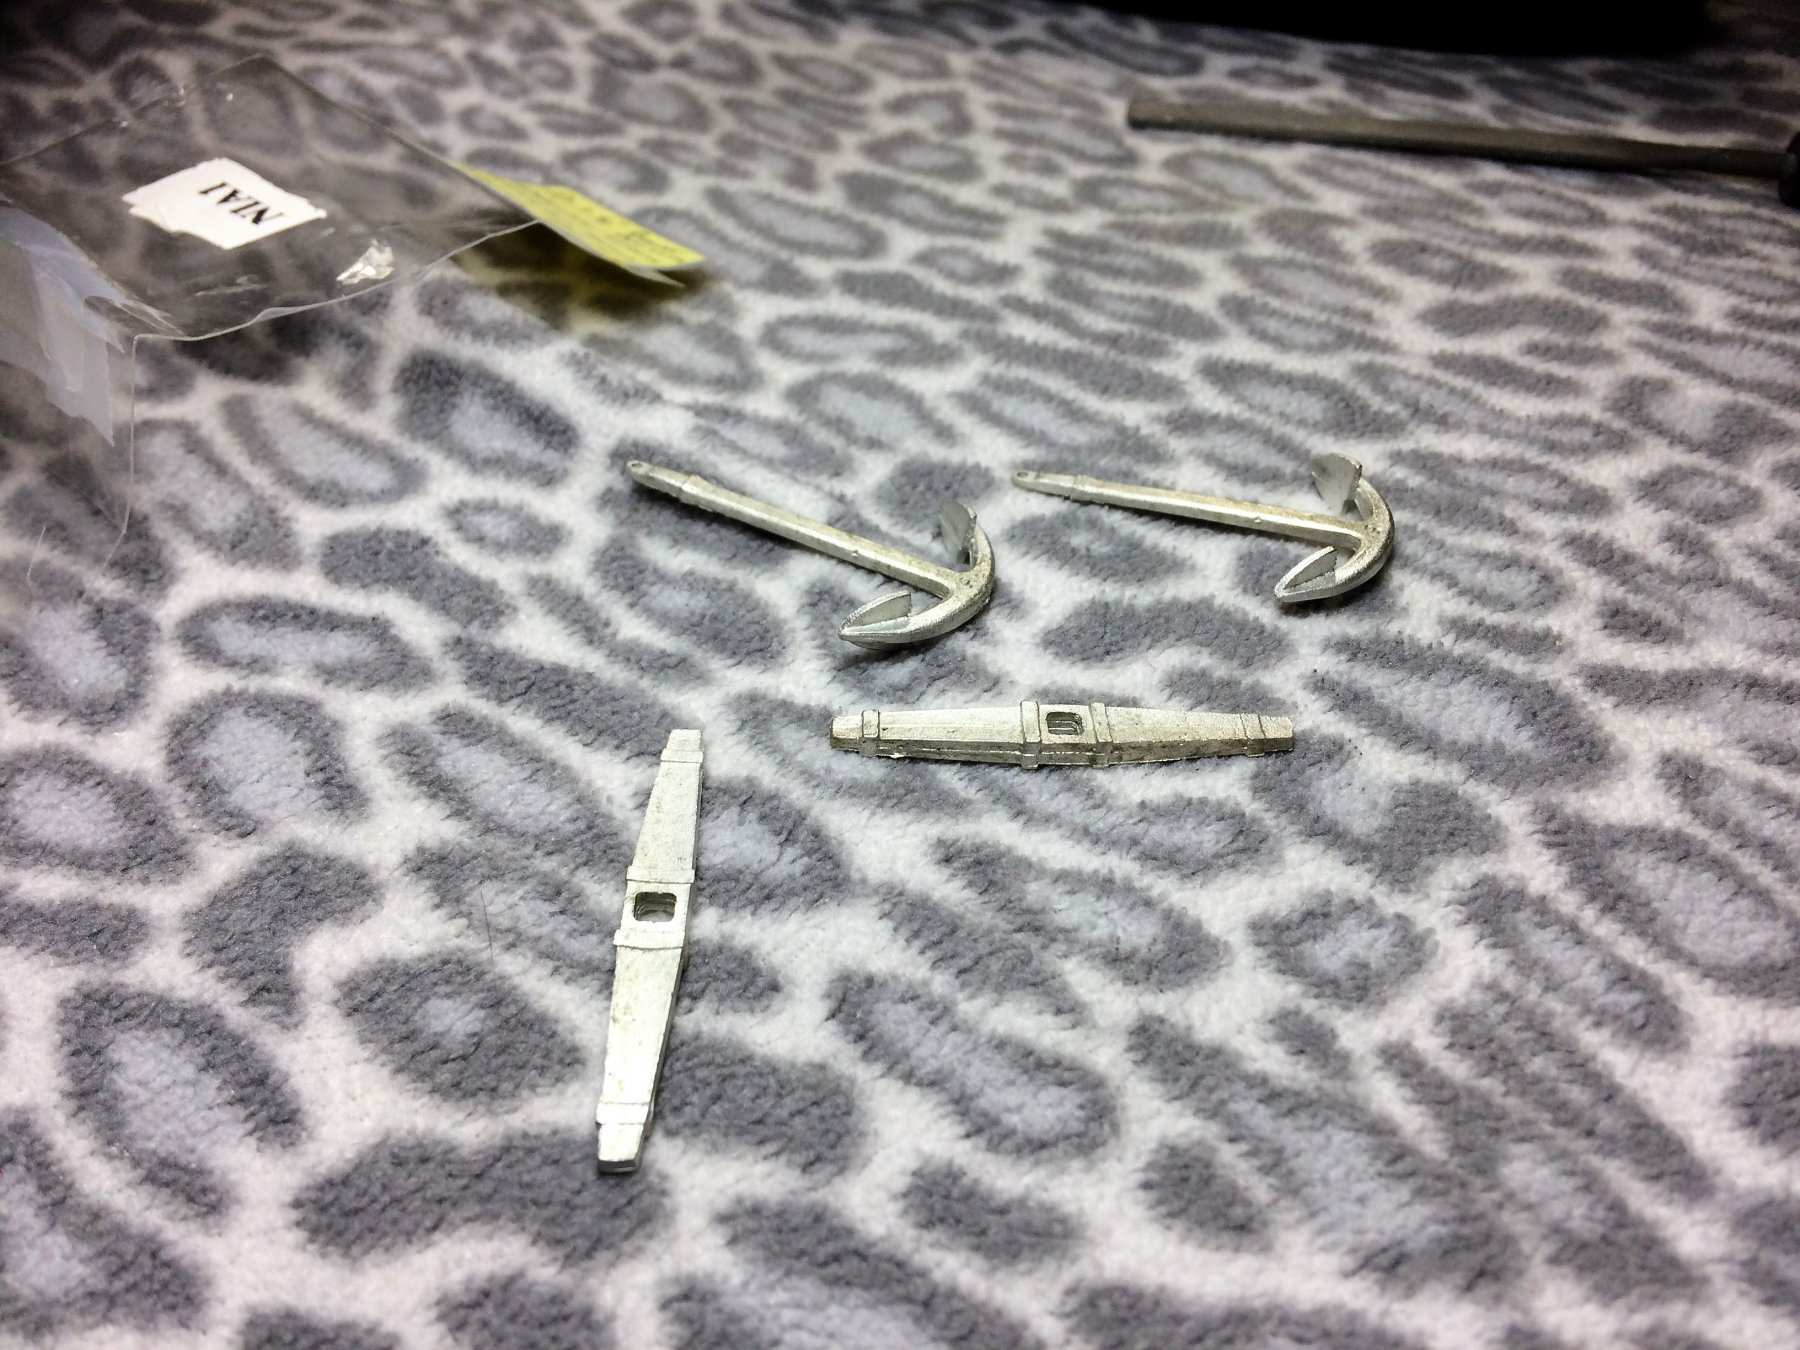
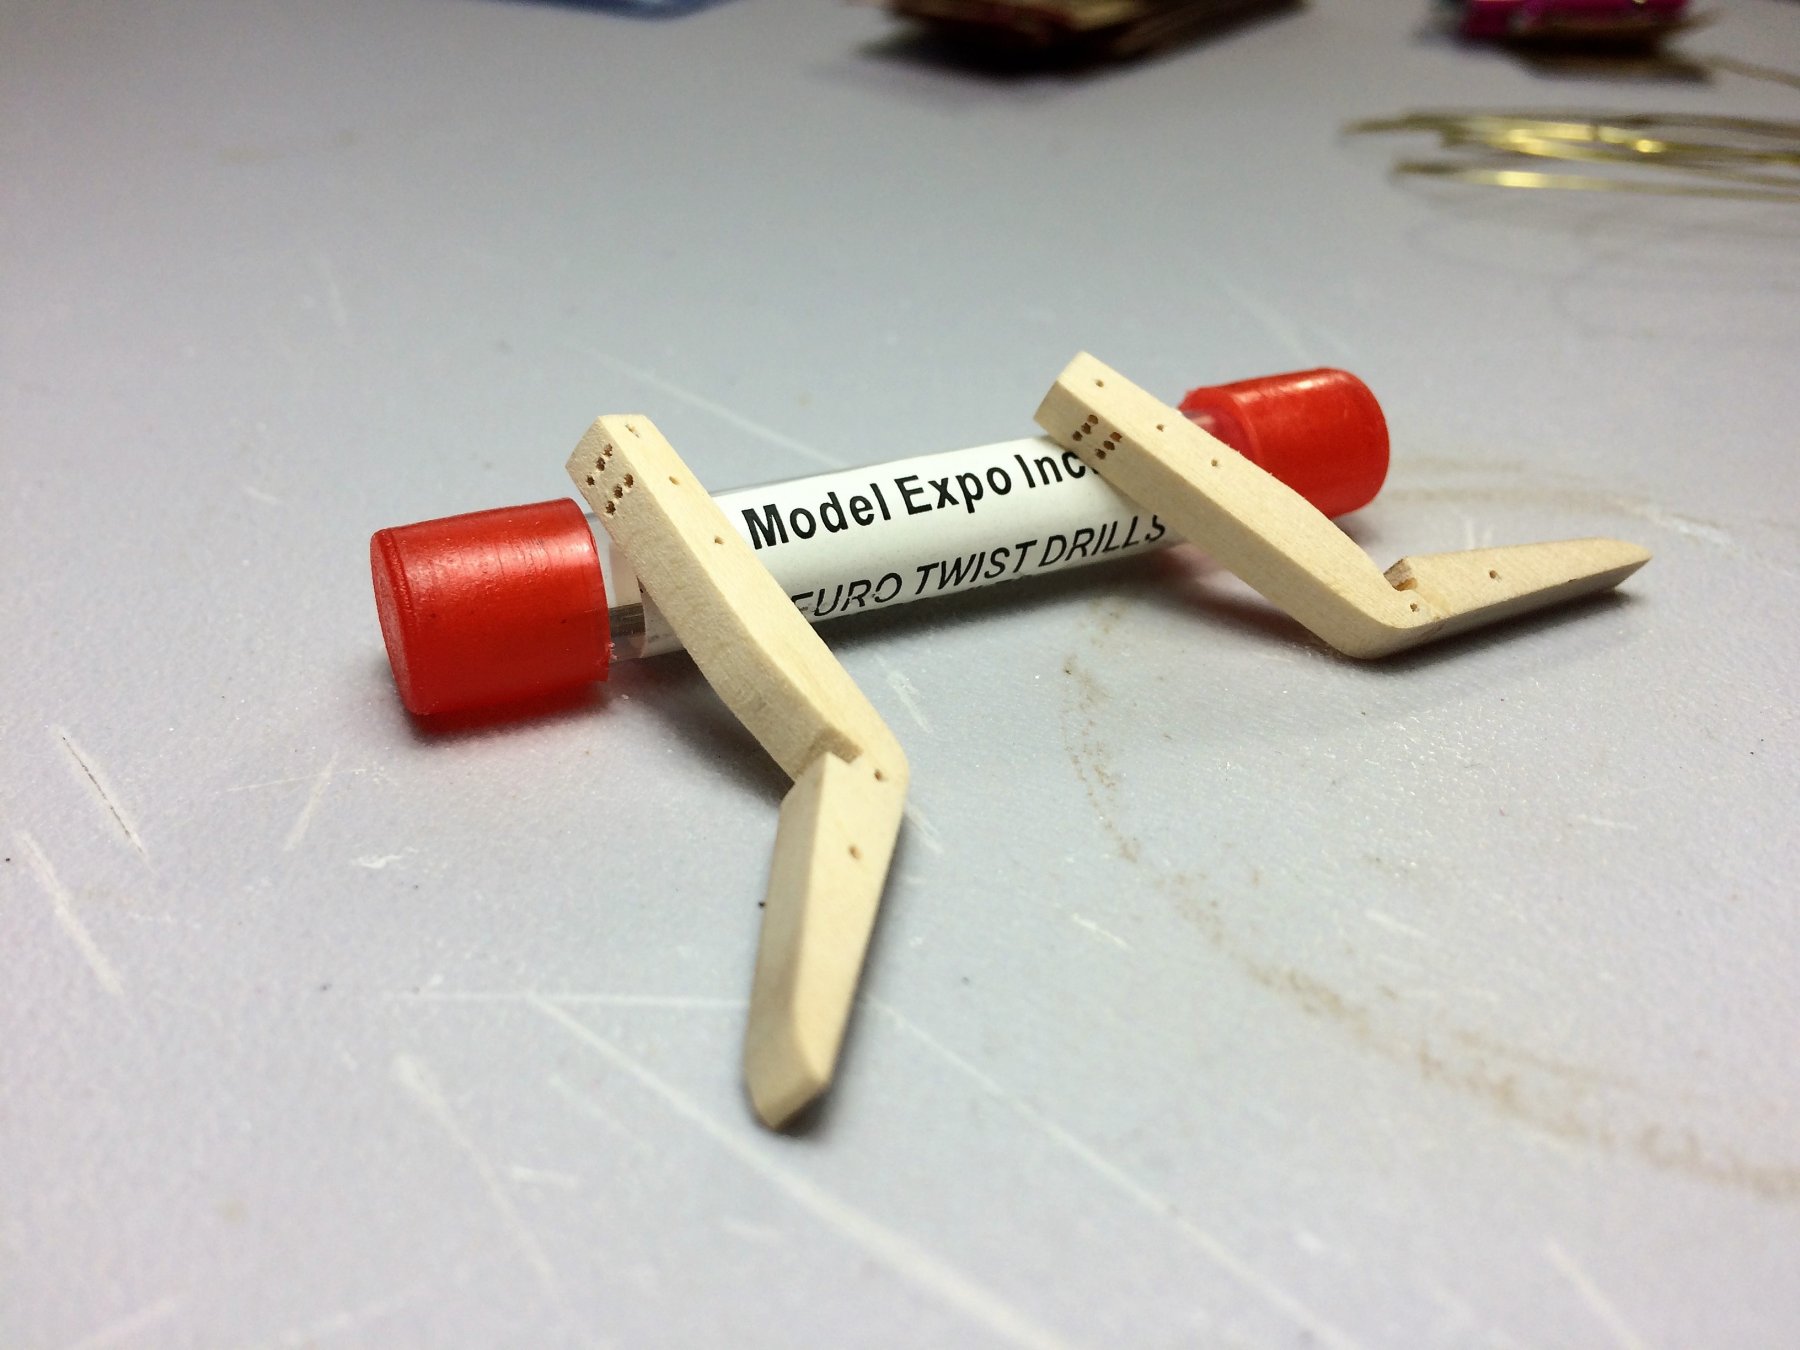
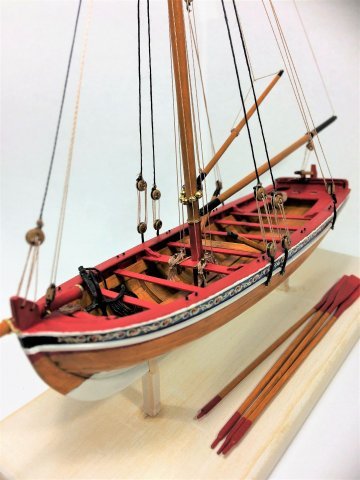
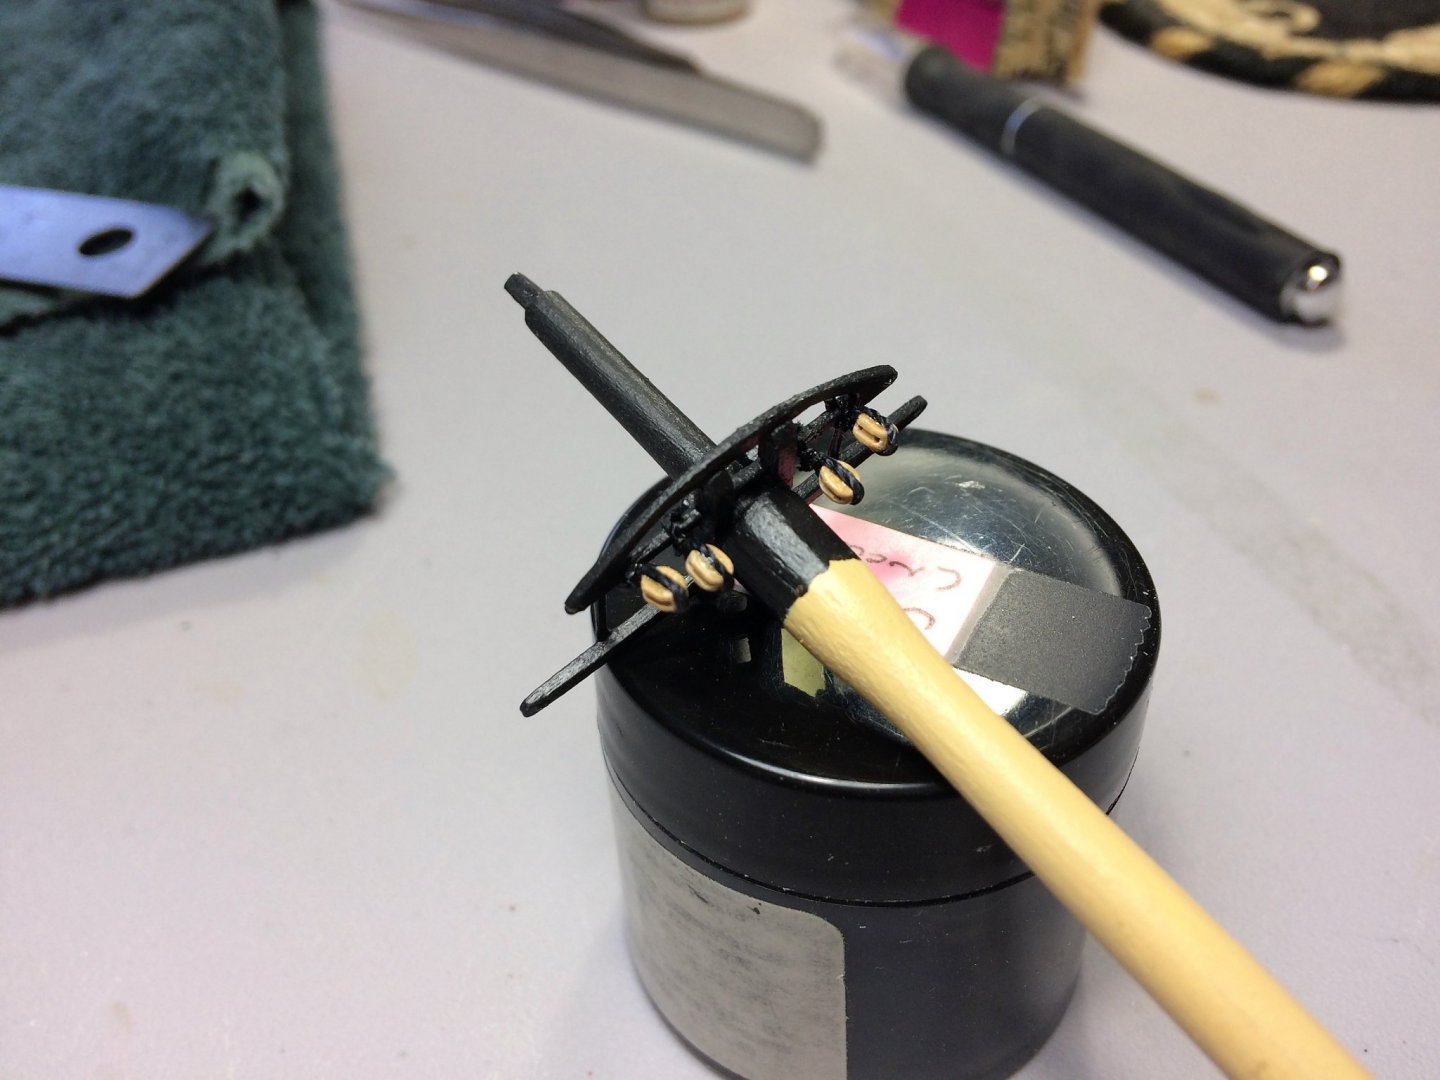
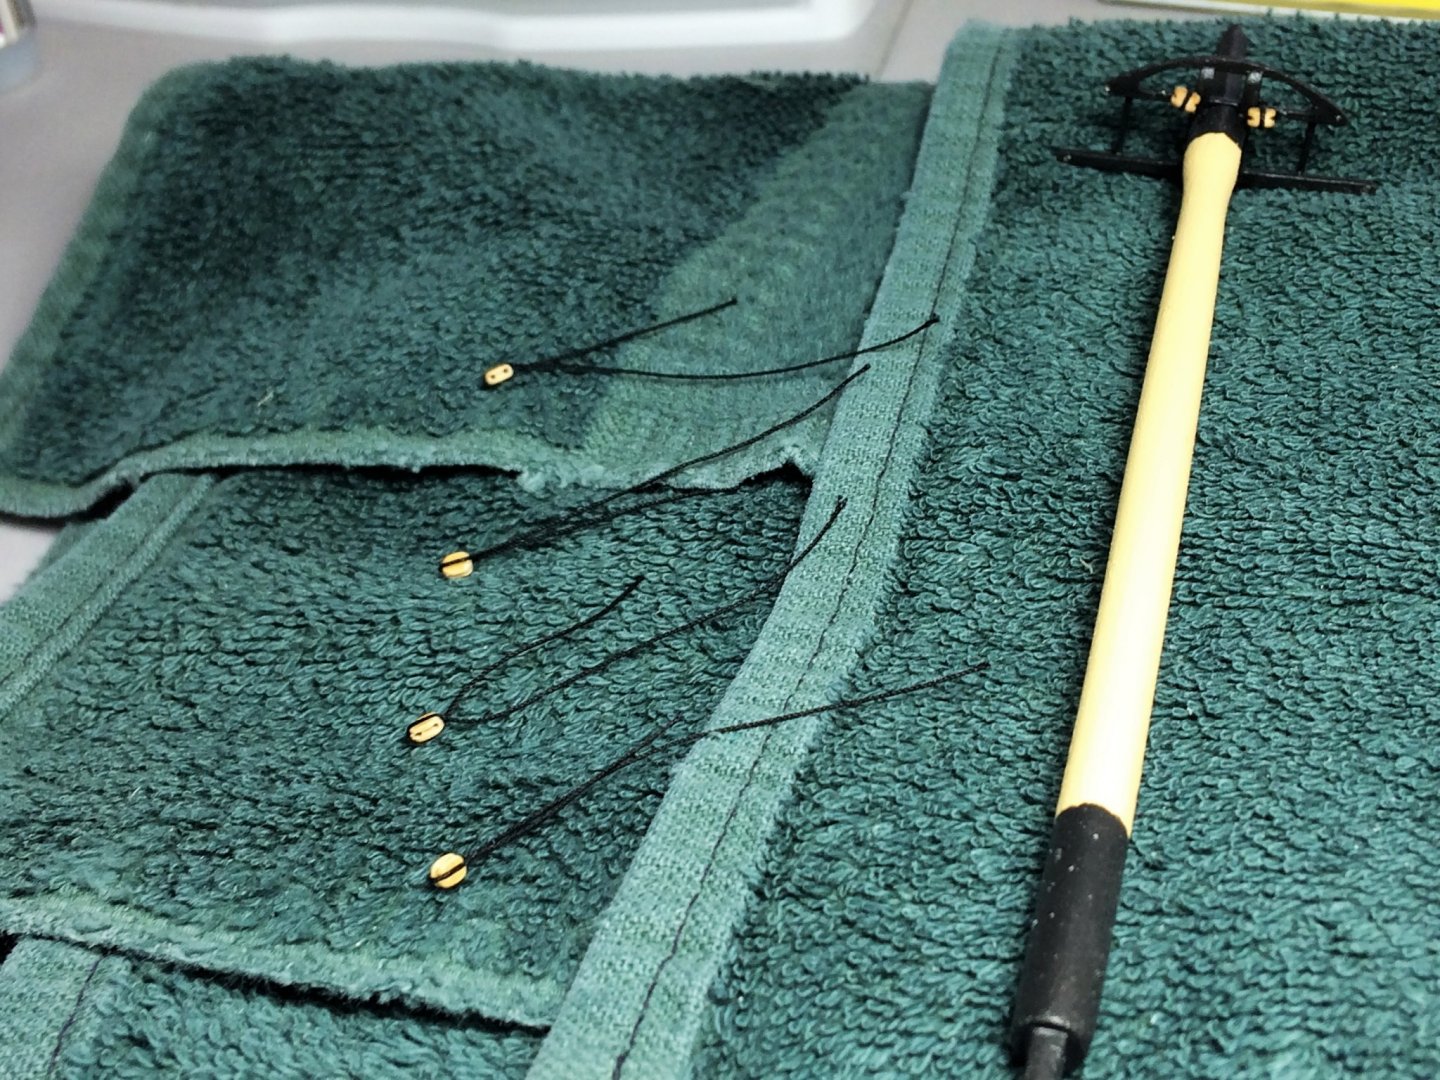
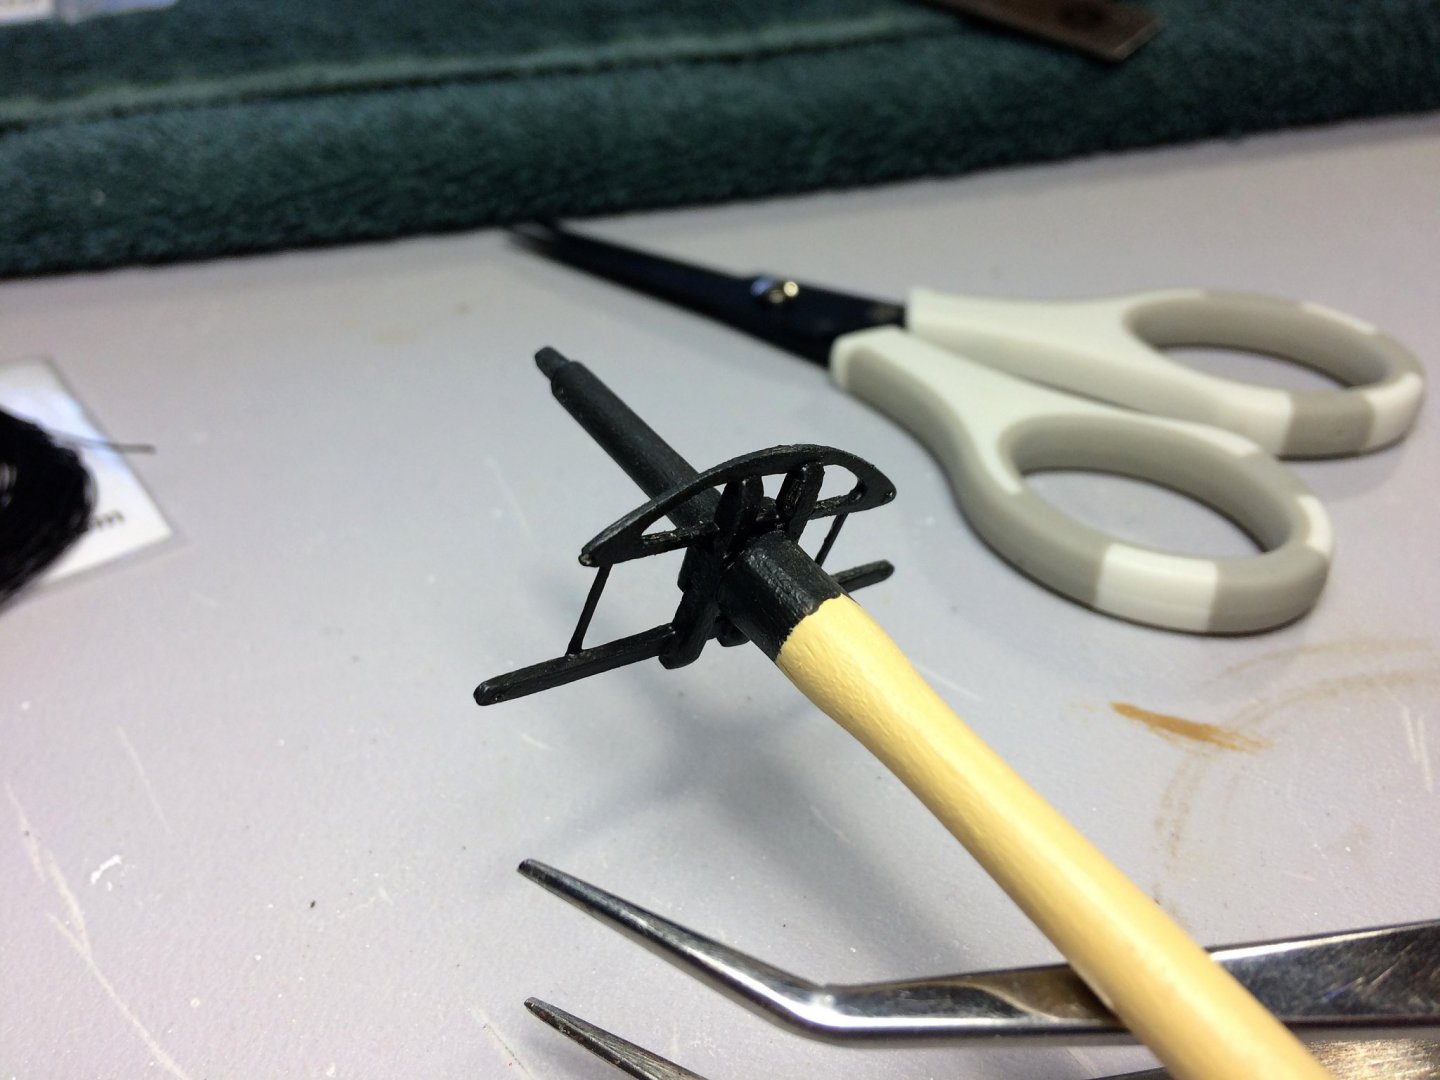
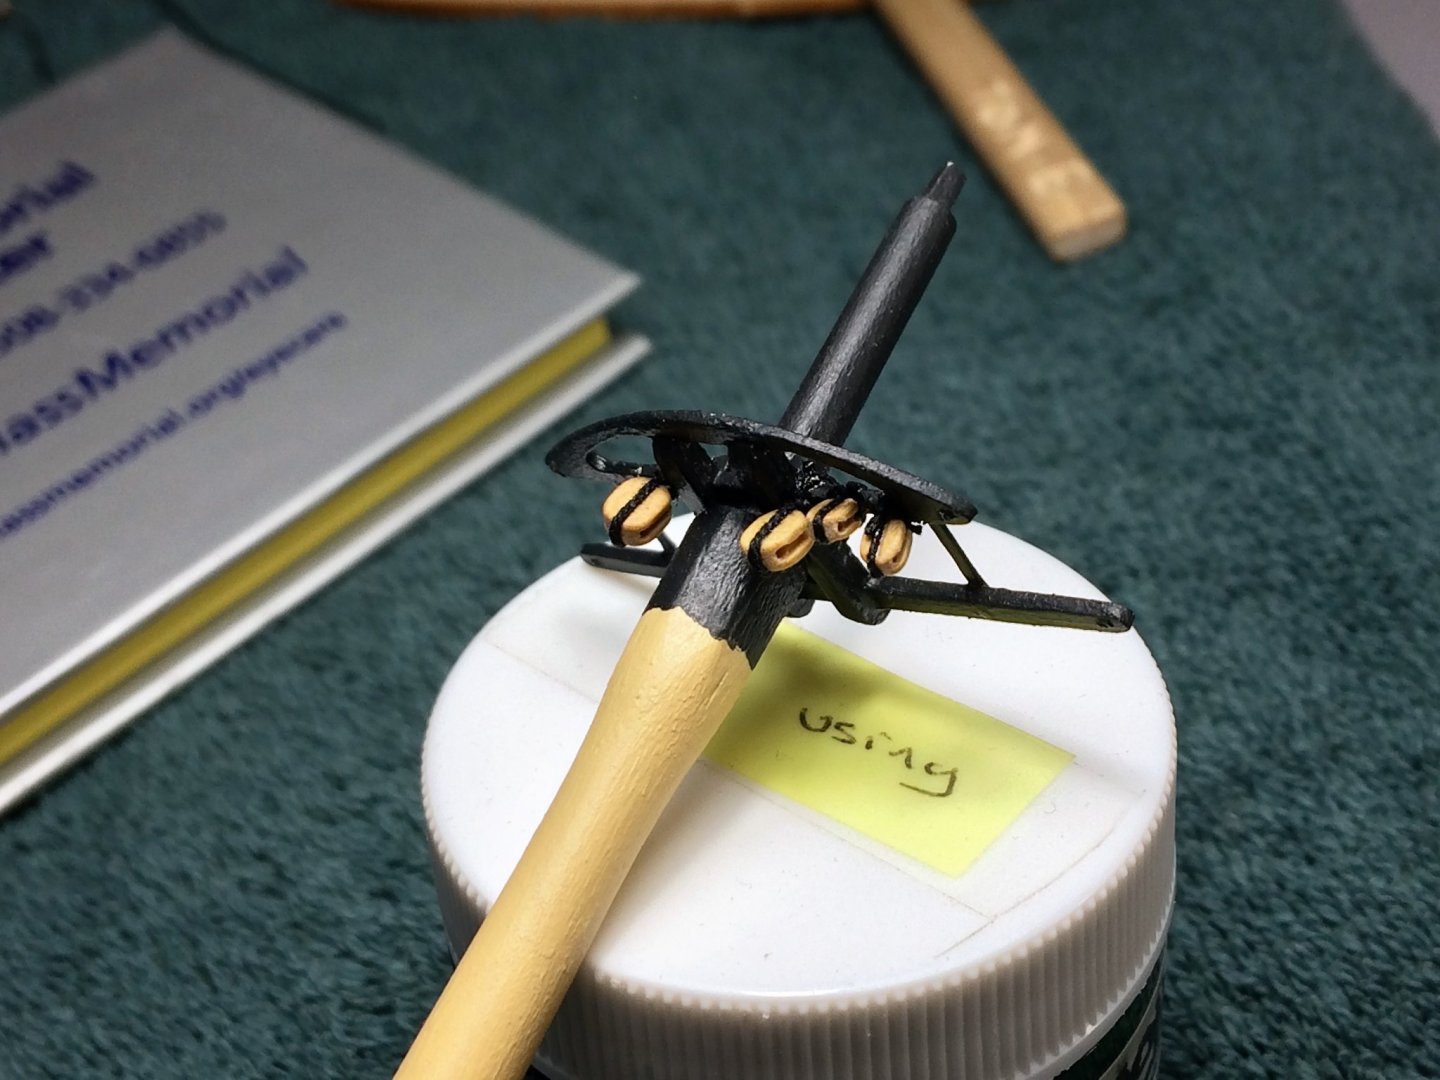
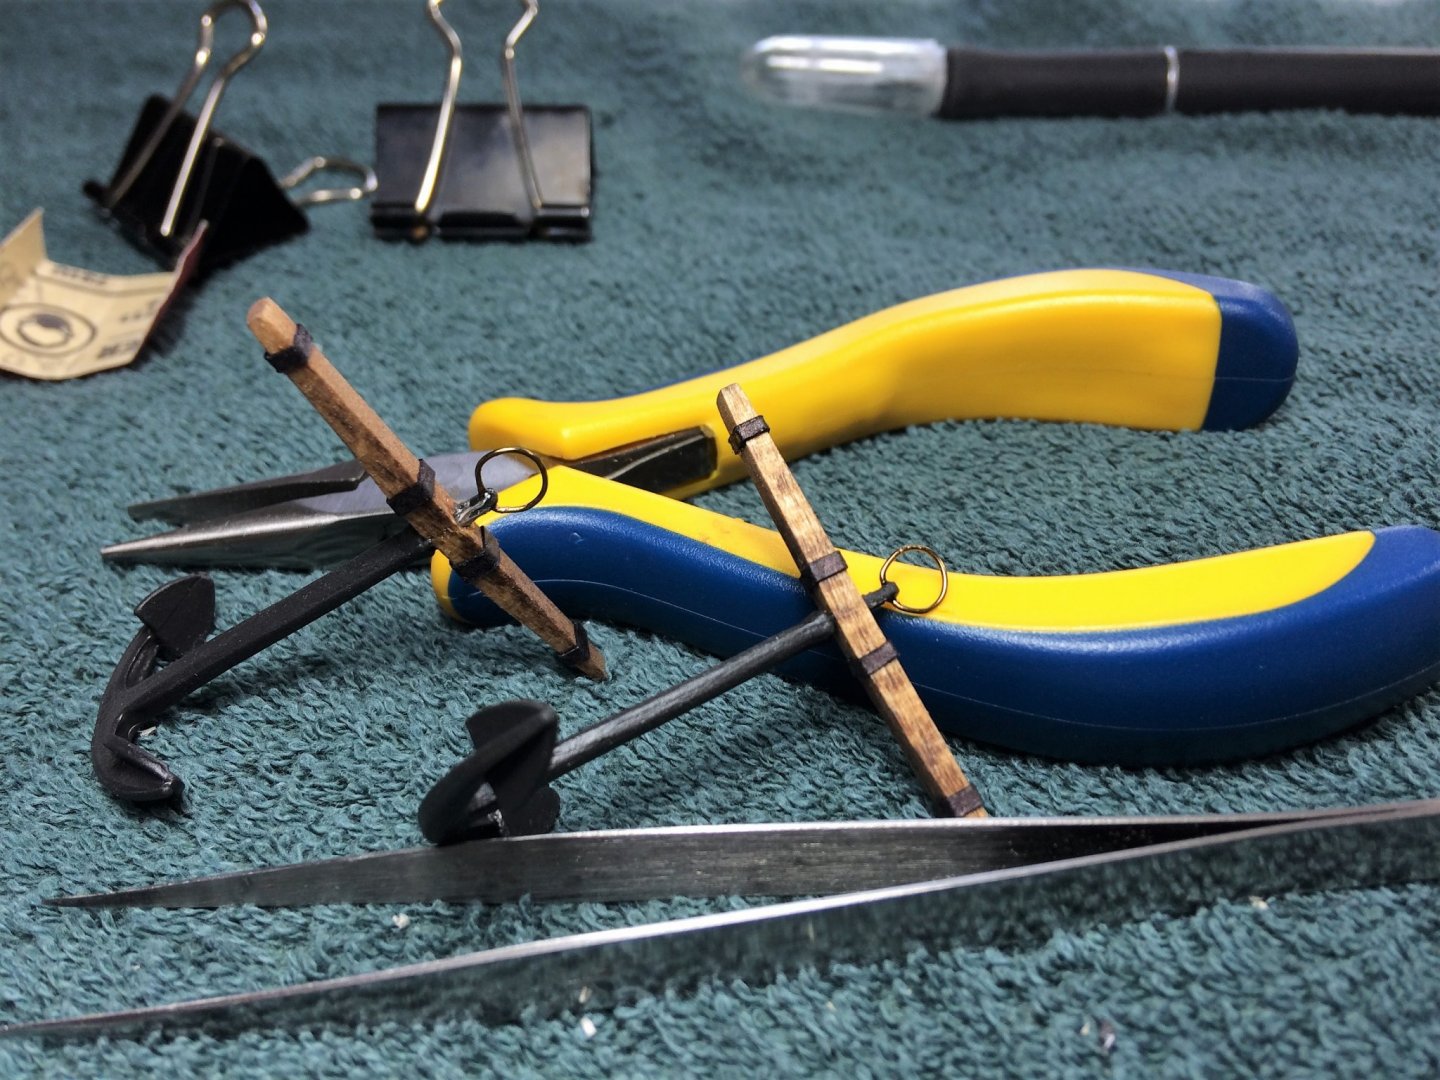
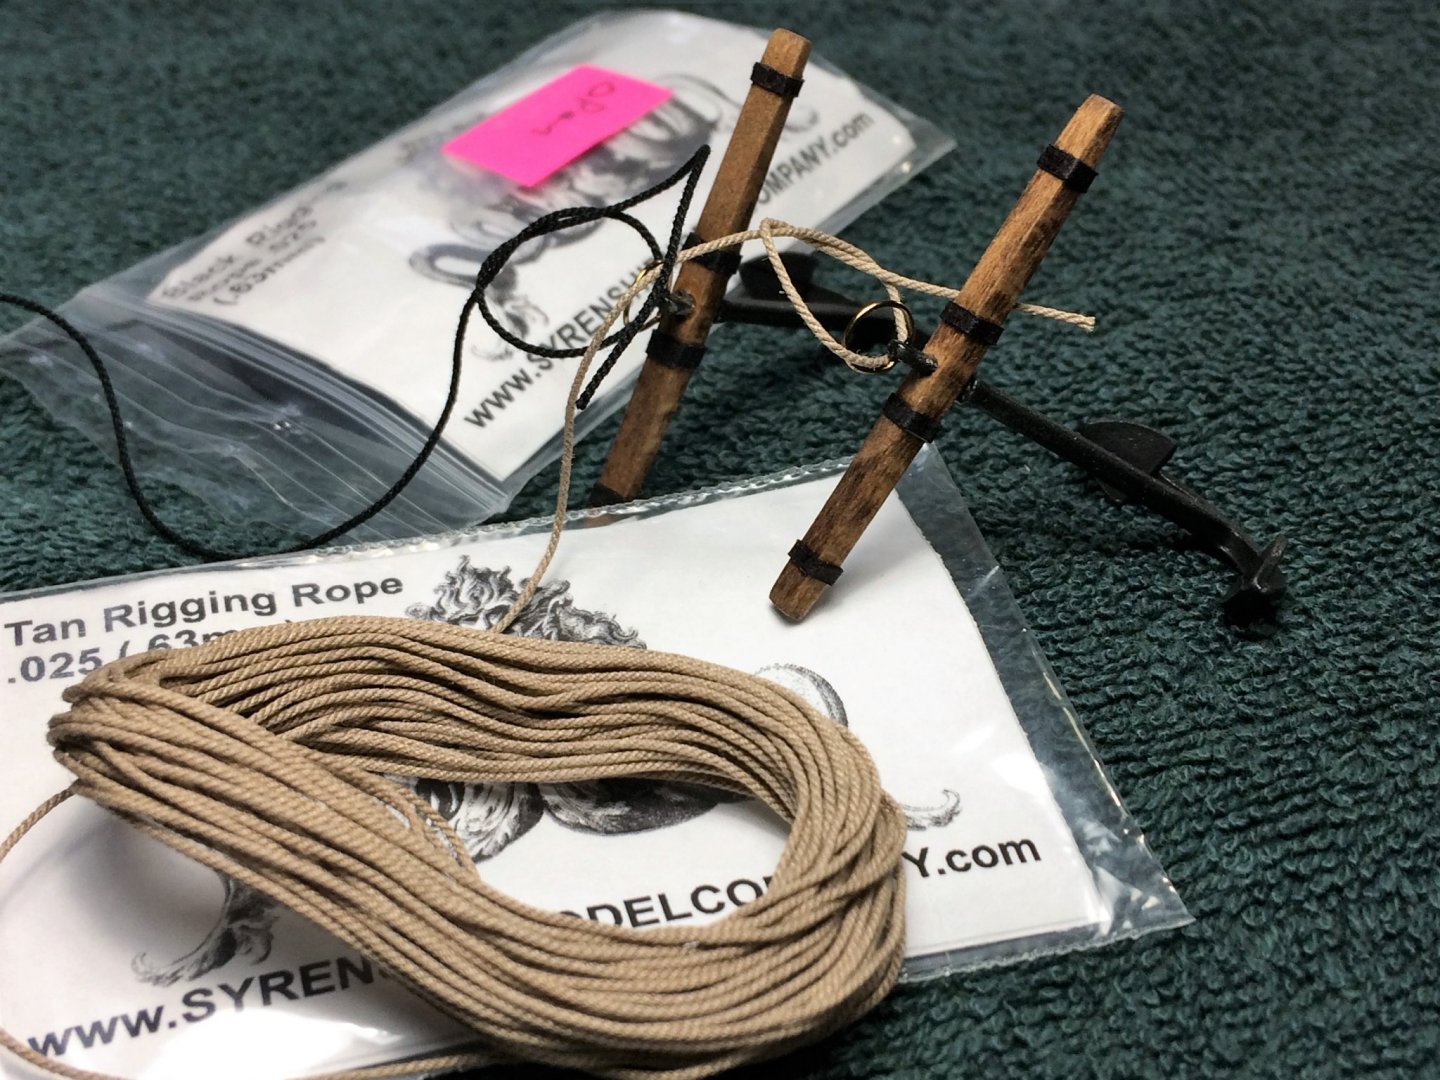
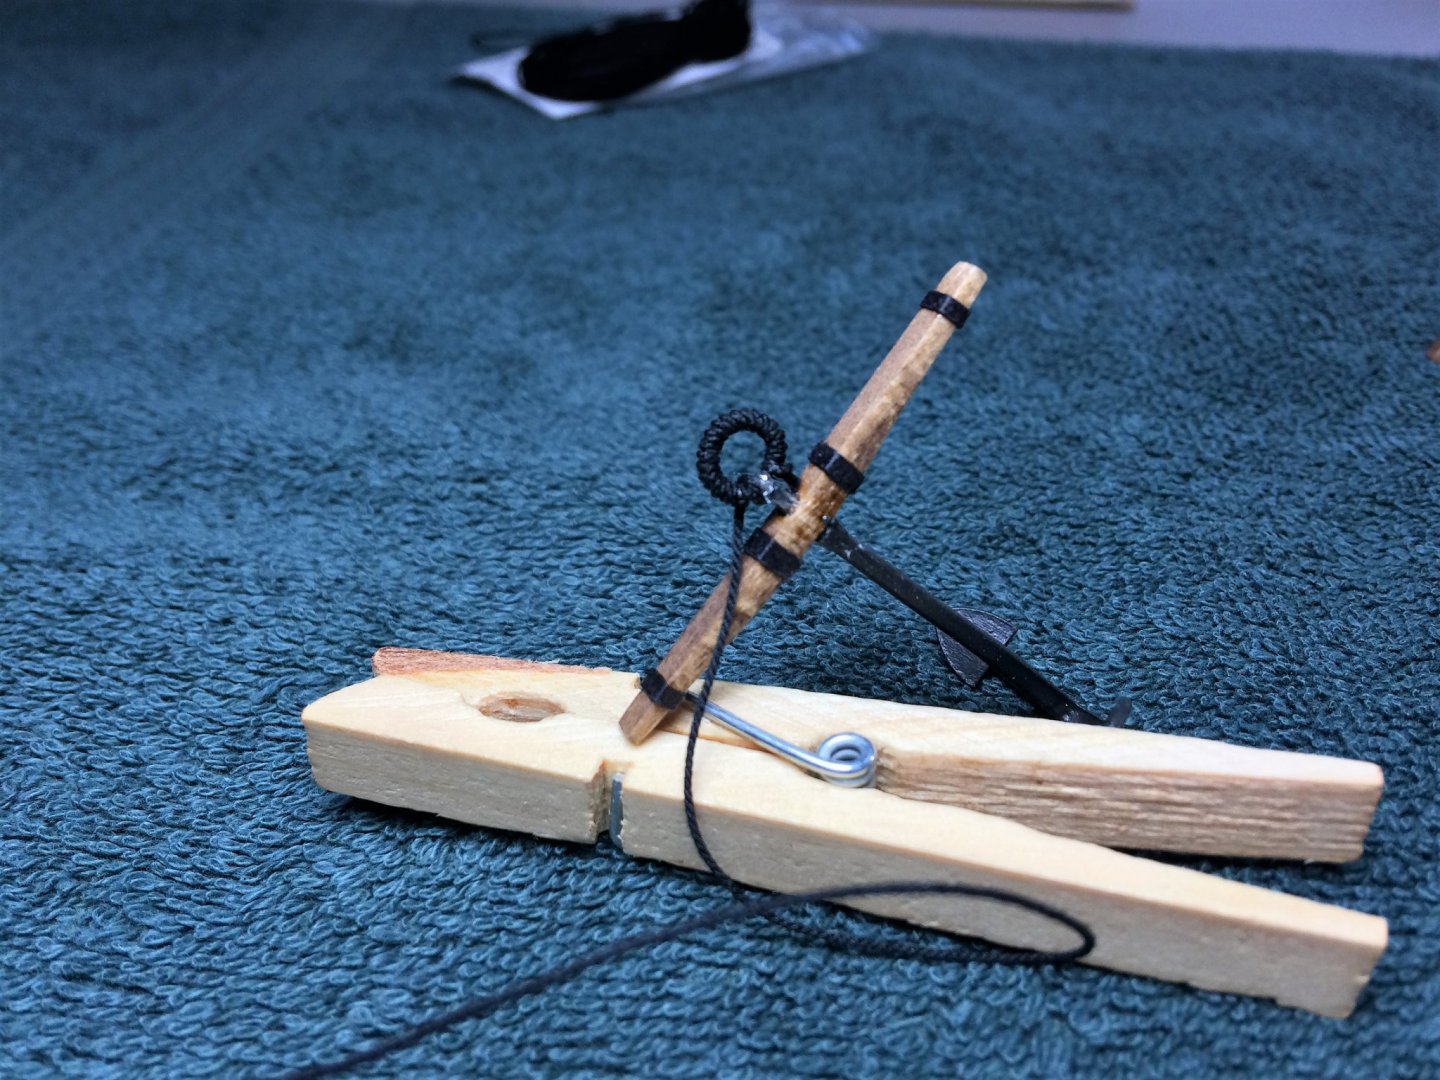
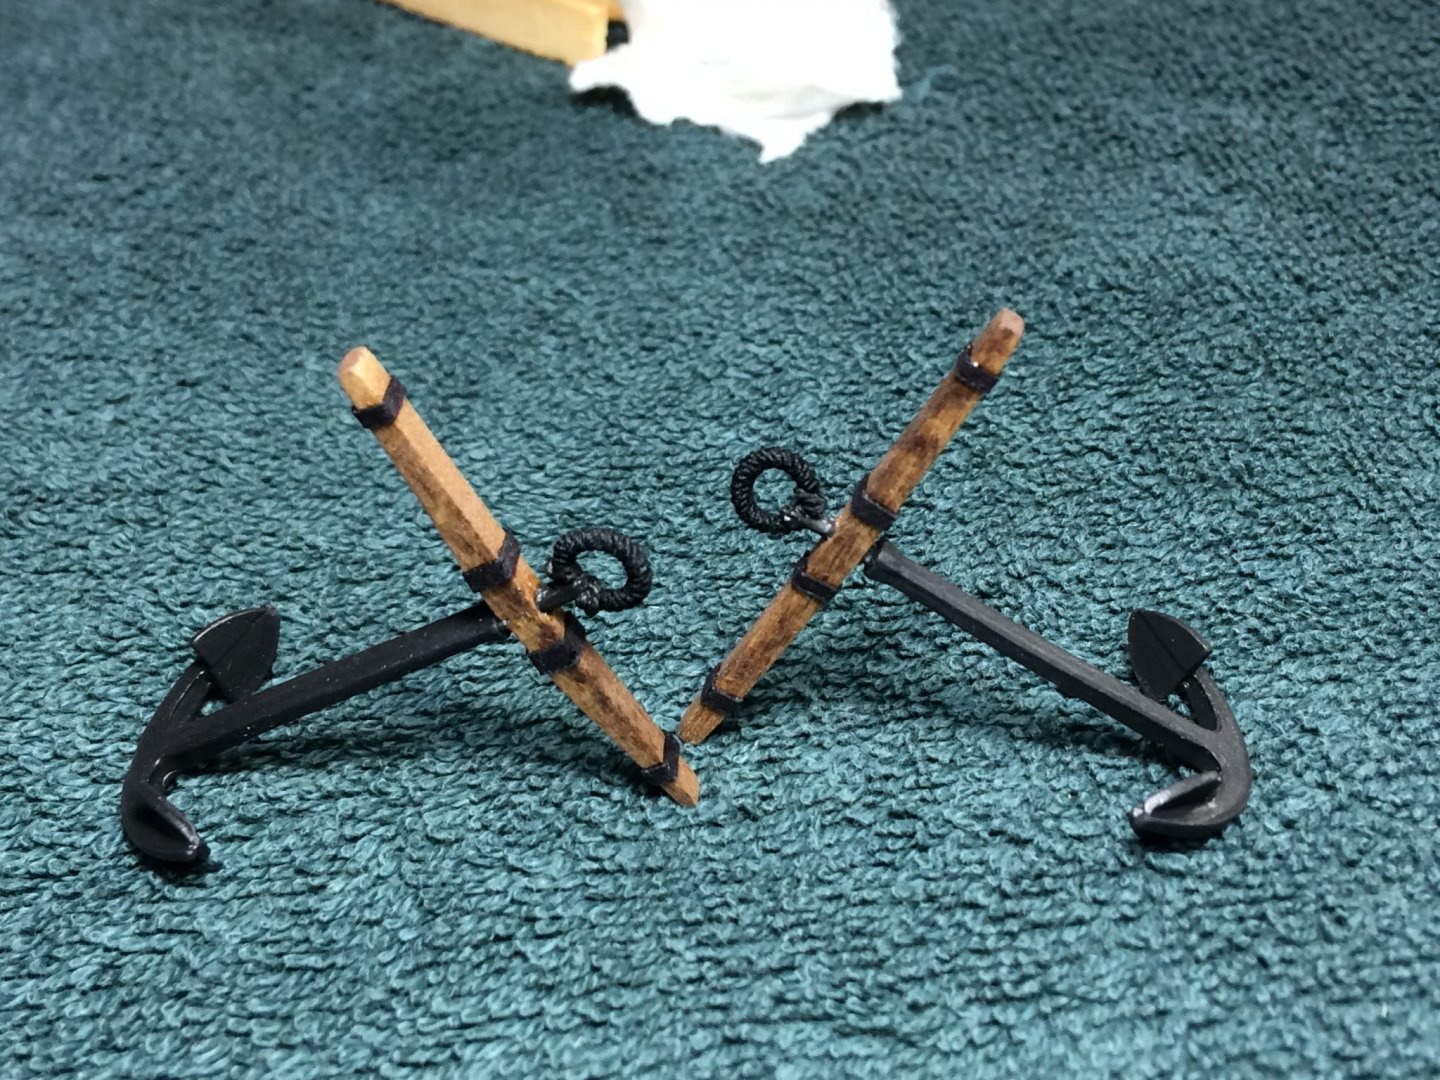
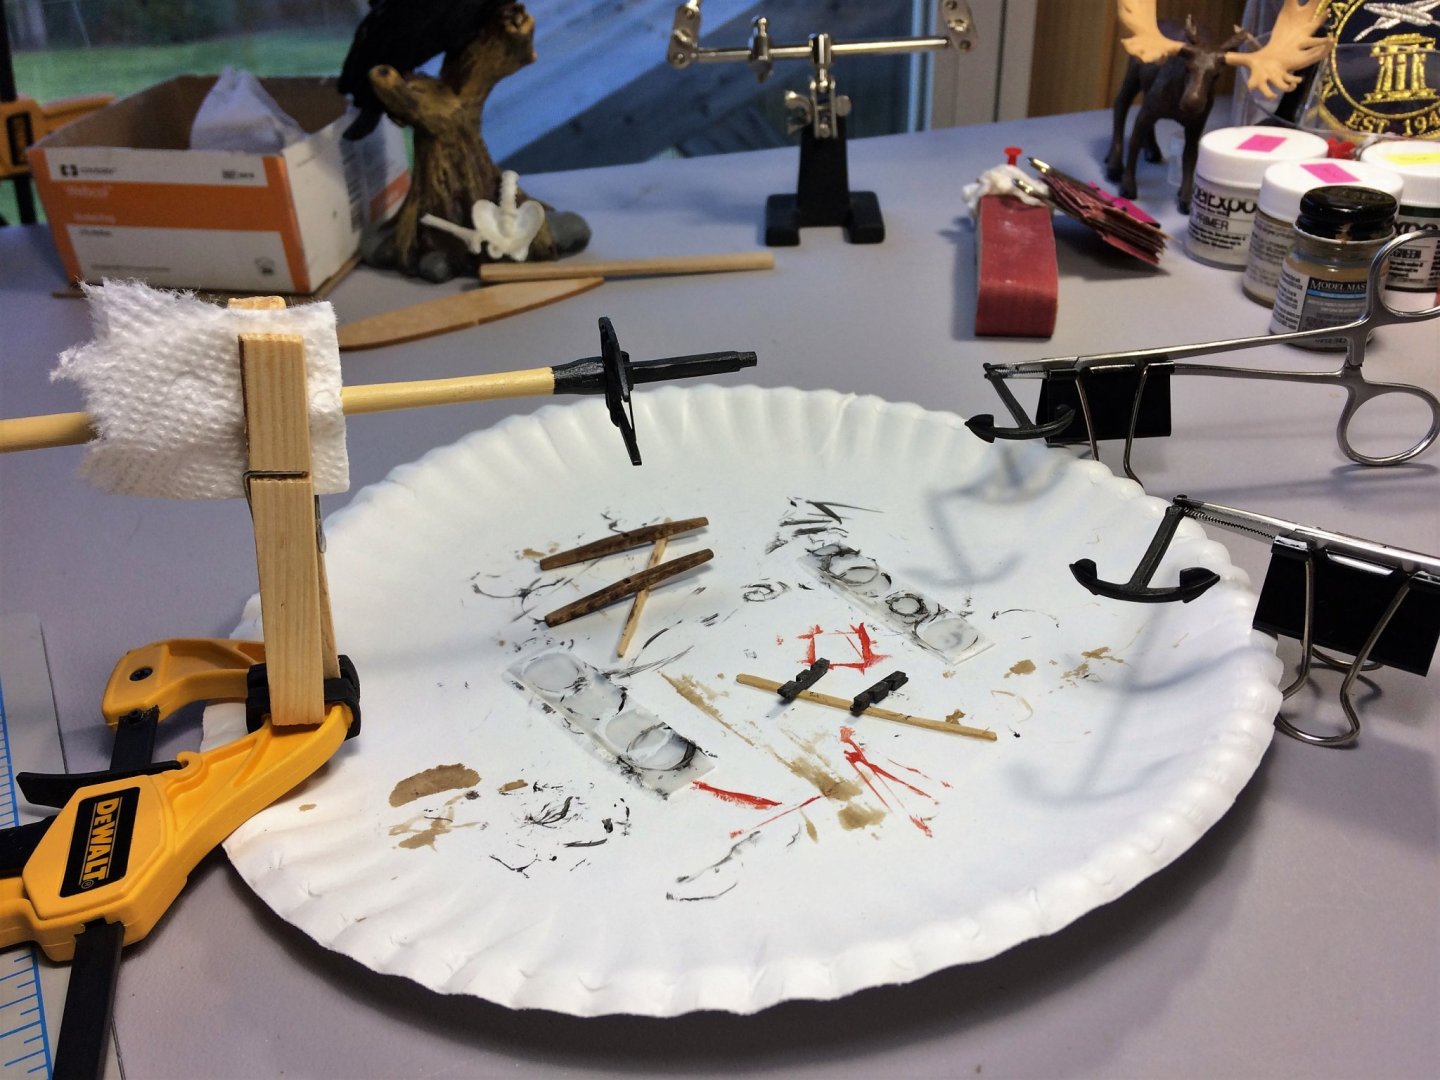
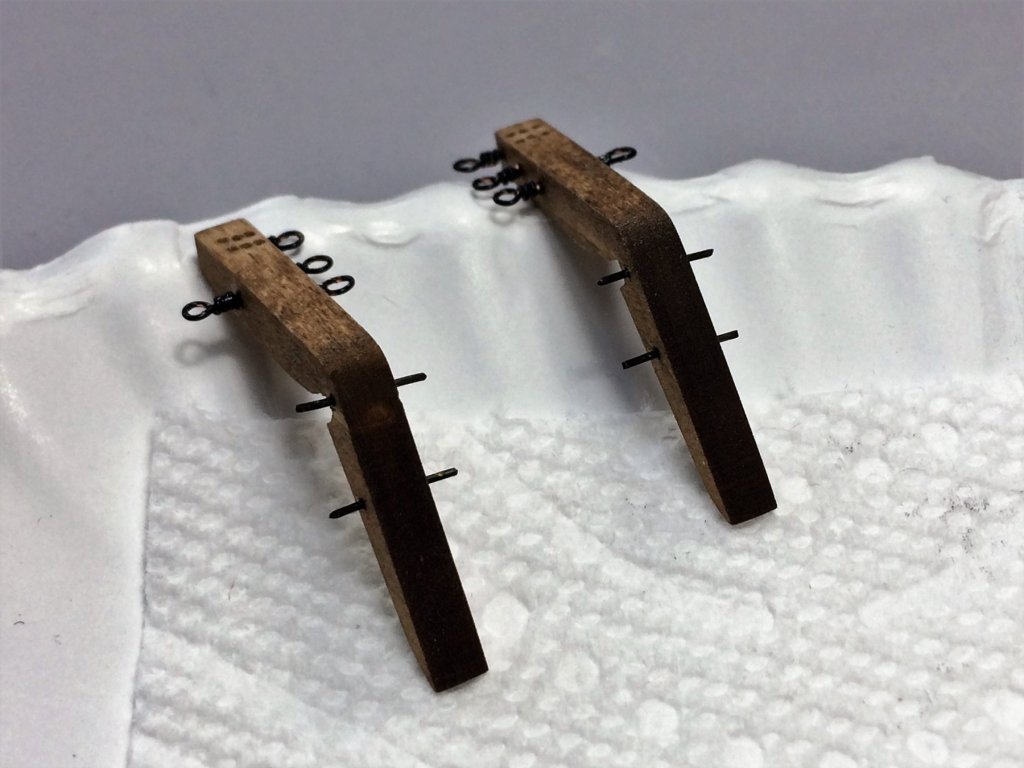
Morning, Hot cup of coffee in hand, the house is quiet, thought I'd share an update. Well, the below pic should look familiar to all builders. That horrible snapping noise as you know your putting too much pressure on a piece. I was lucky tho! I was able to kind of "wrap" the wood stock around the metal shank. with some CA glue it firmed up nicely. In the below pic, the left anchor, just below the ring you can see where the 2 pieces meet. Not too bad, I can live with it. When I hang it, I'll keep that seam out of sight. I used some 24G wire to form the rings. I dabbled with the idea of wrapping the rings with a Tan rope. I decided to stick with a black rope for the rings. A little lumpy, but acceptable. I'm going to lightly brush some black paint to calm down some of the shine. Not much, but just enough. I'm calling these done. I cant believe that I've been on this build for two years!!!!!! Never did I think I would keep at it. The below is a little walk thru history. Two years ago. One year ago. Present. I may not be the fastest builder, but I like what I see so far. Thanks for watching! Tom E


-
I only broke one! But luckily it was the very first one and I learned that lesson quick. Was real careful with the rest. Knowing my luck, I figure I'll snap one when rigging. Tom E
-
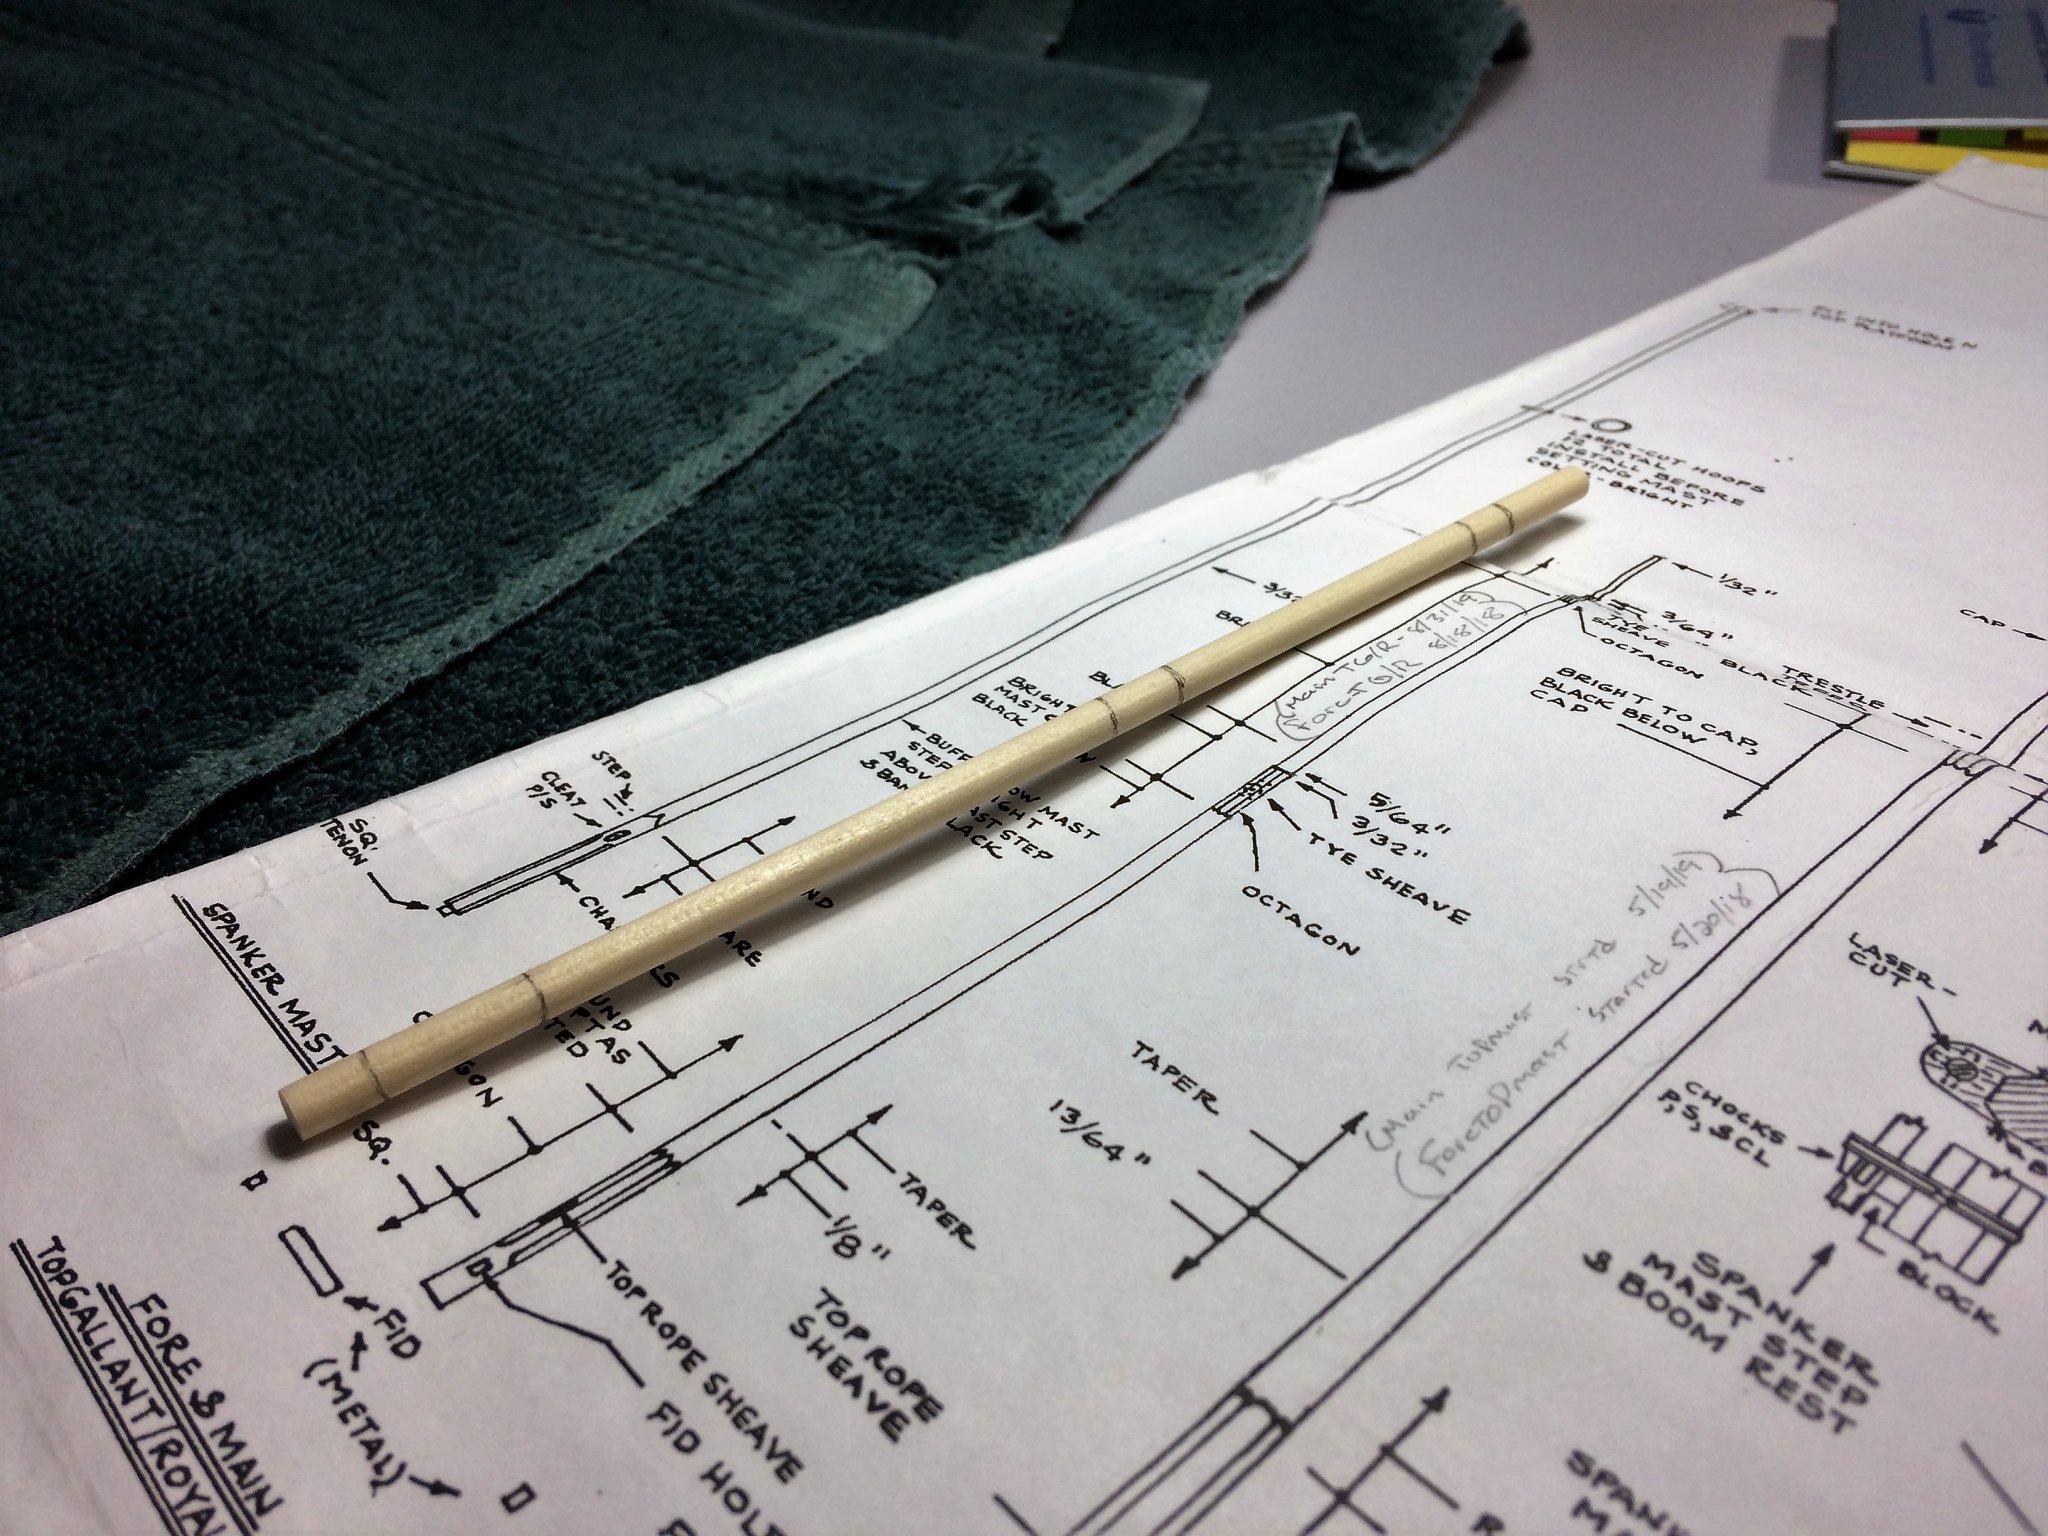
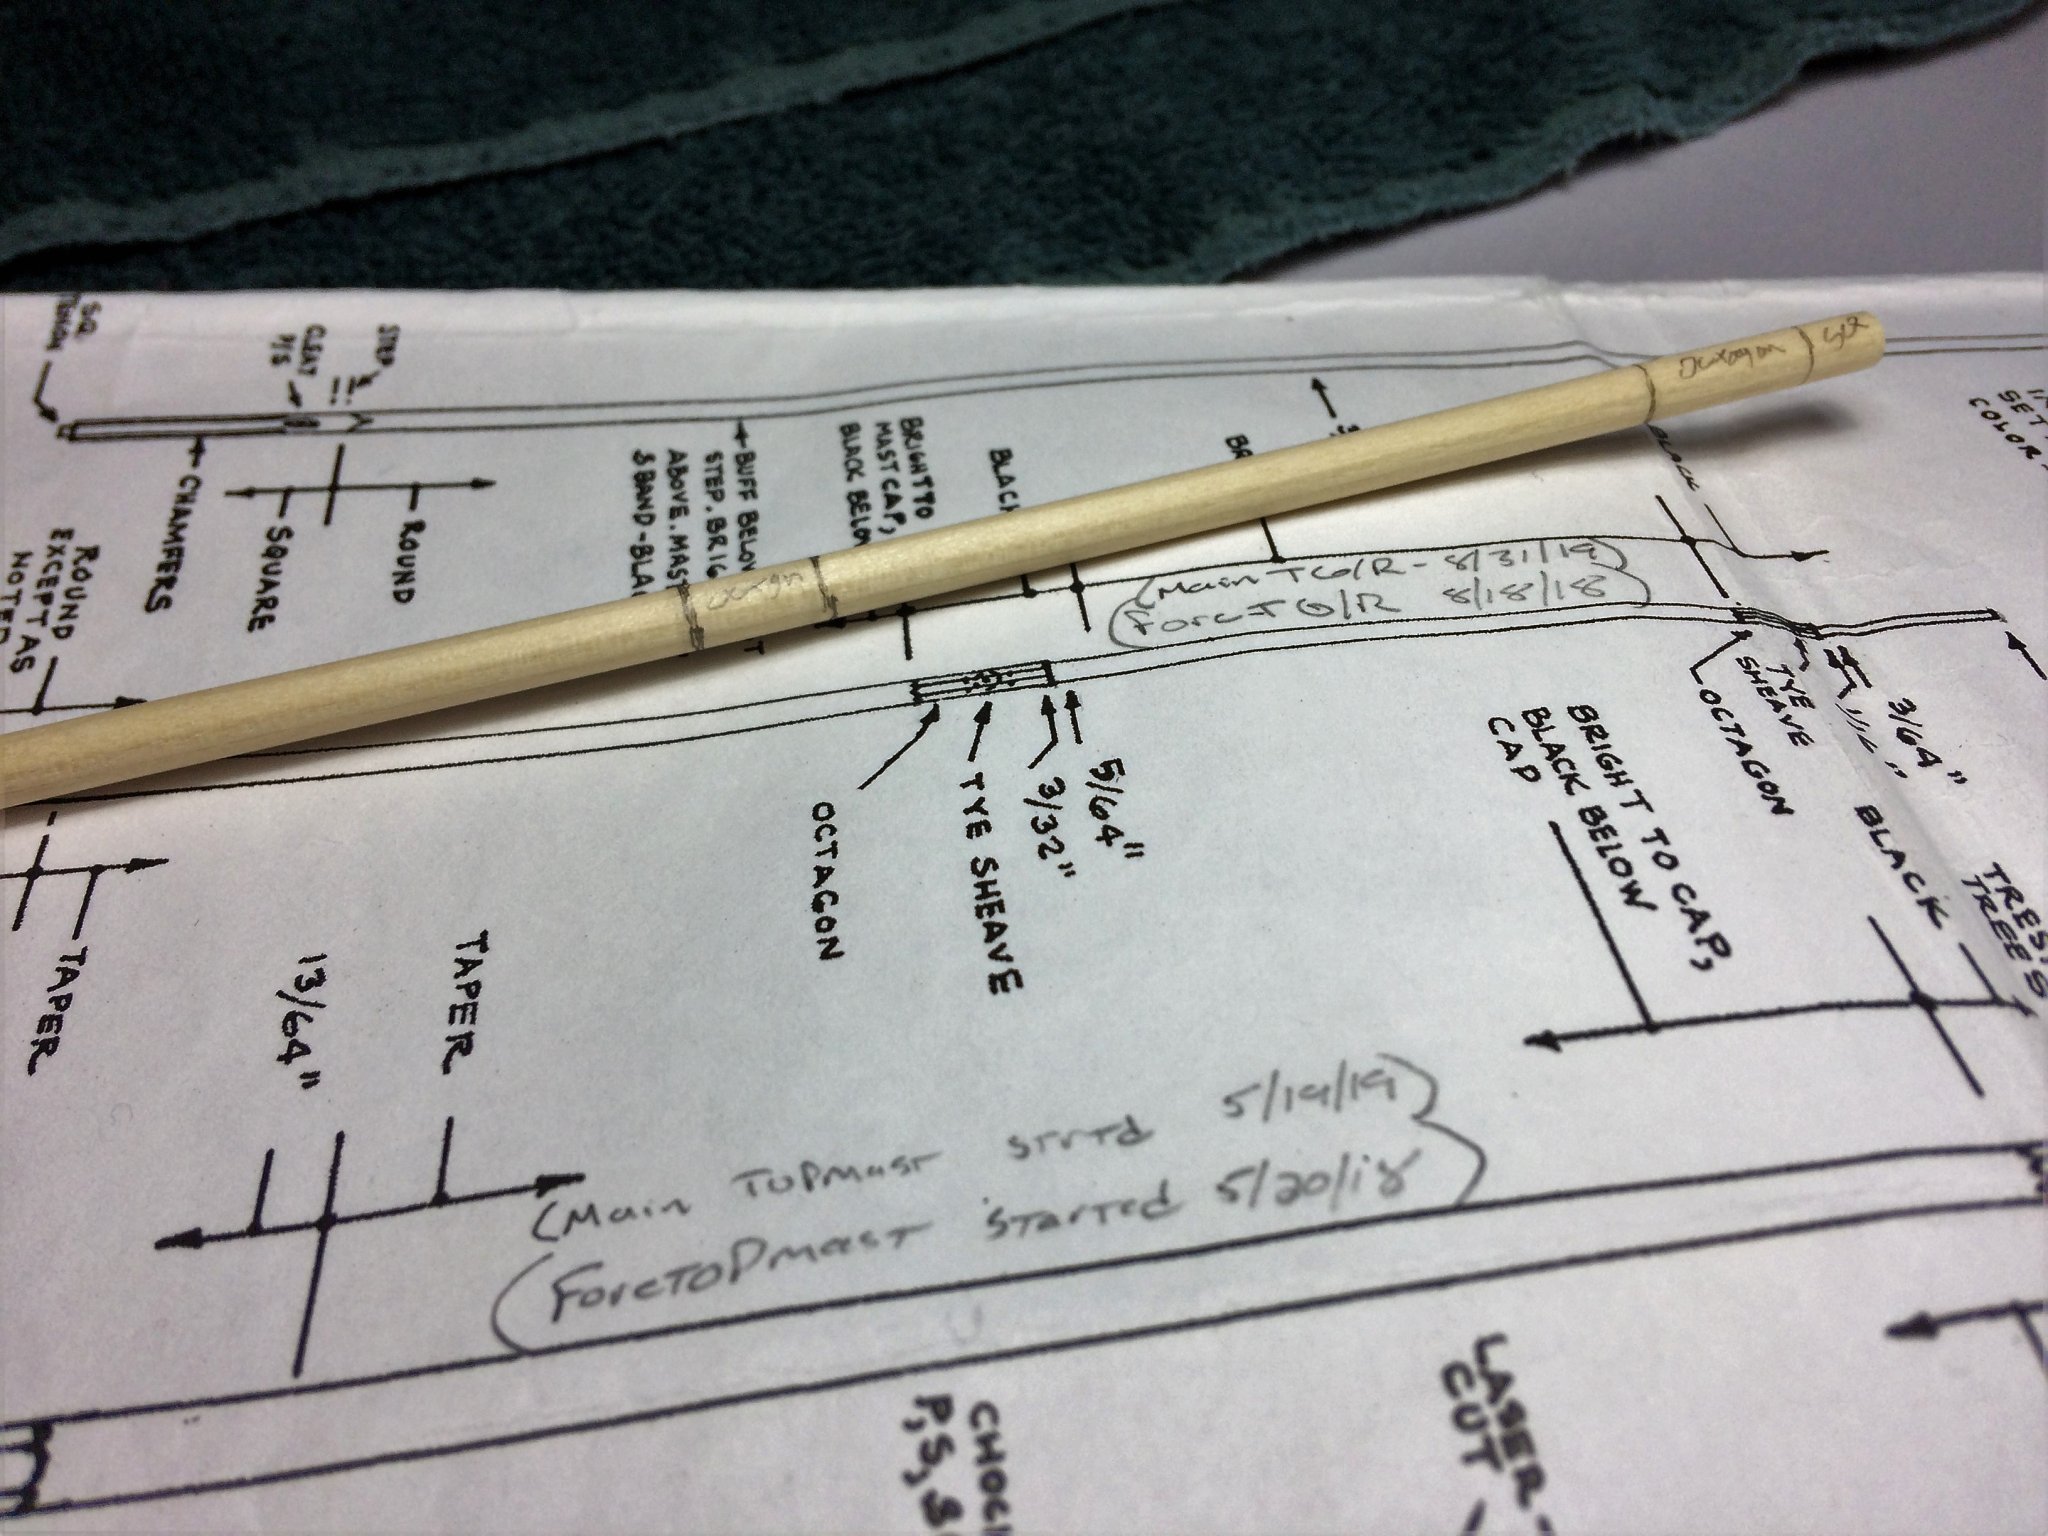
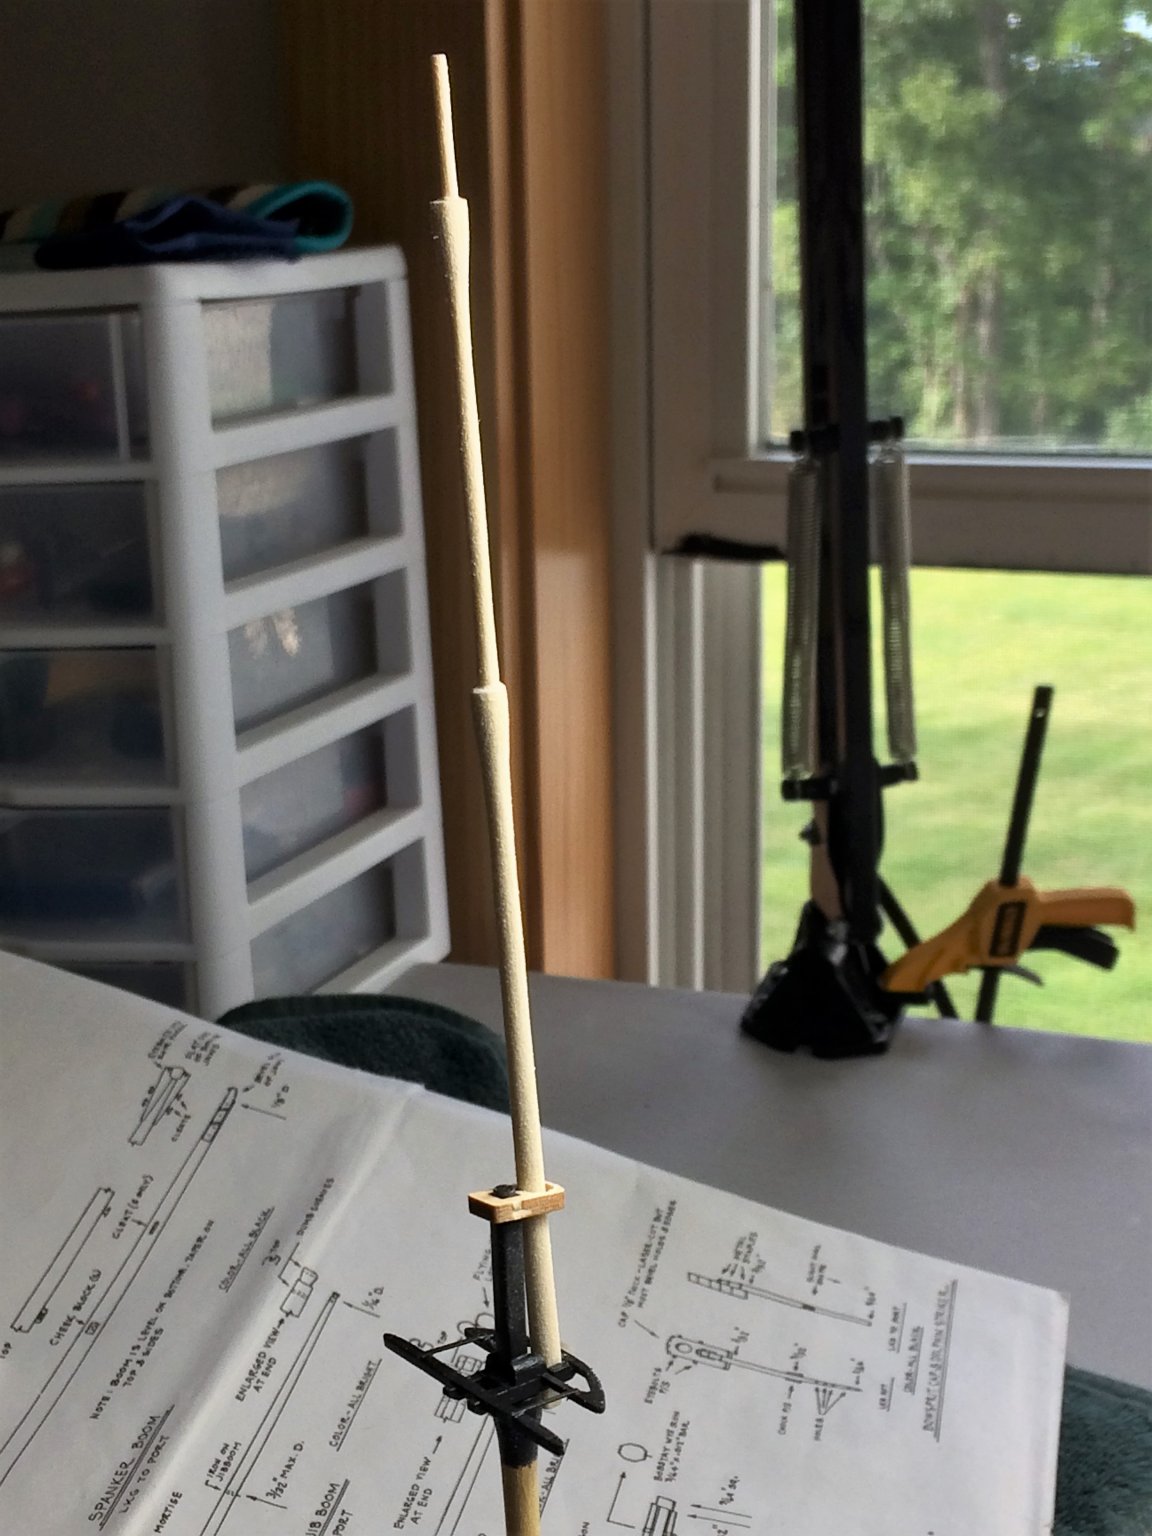
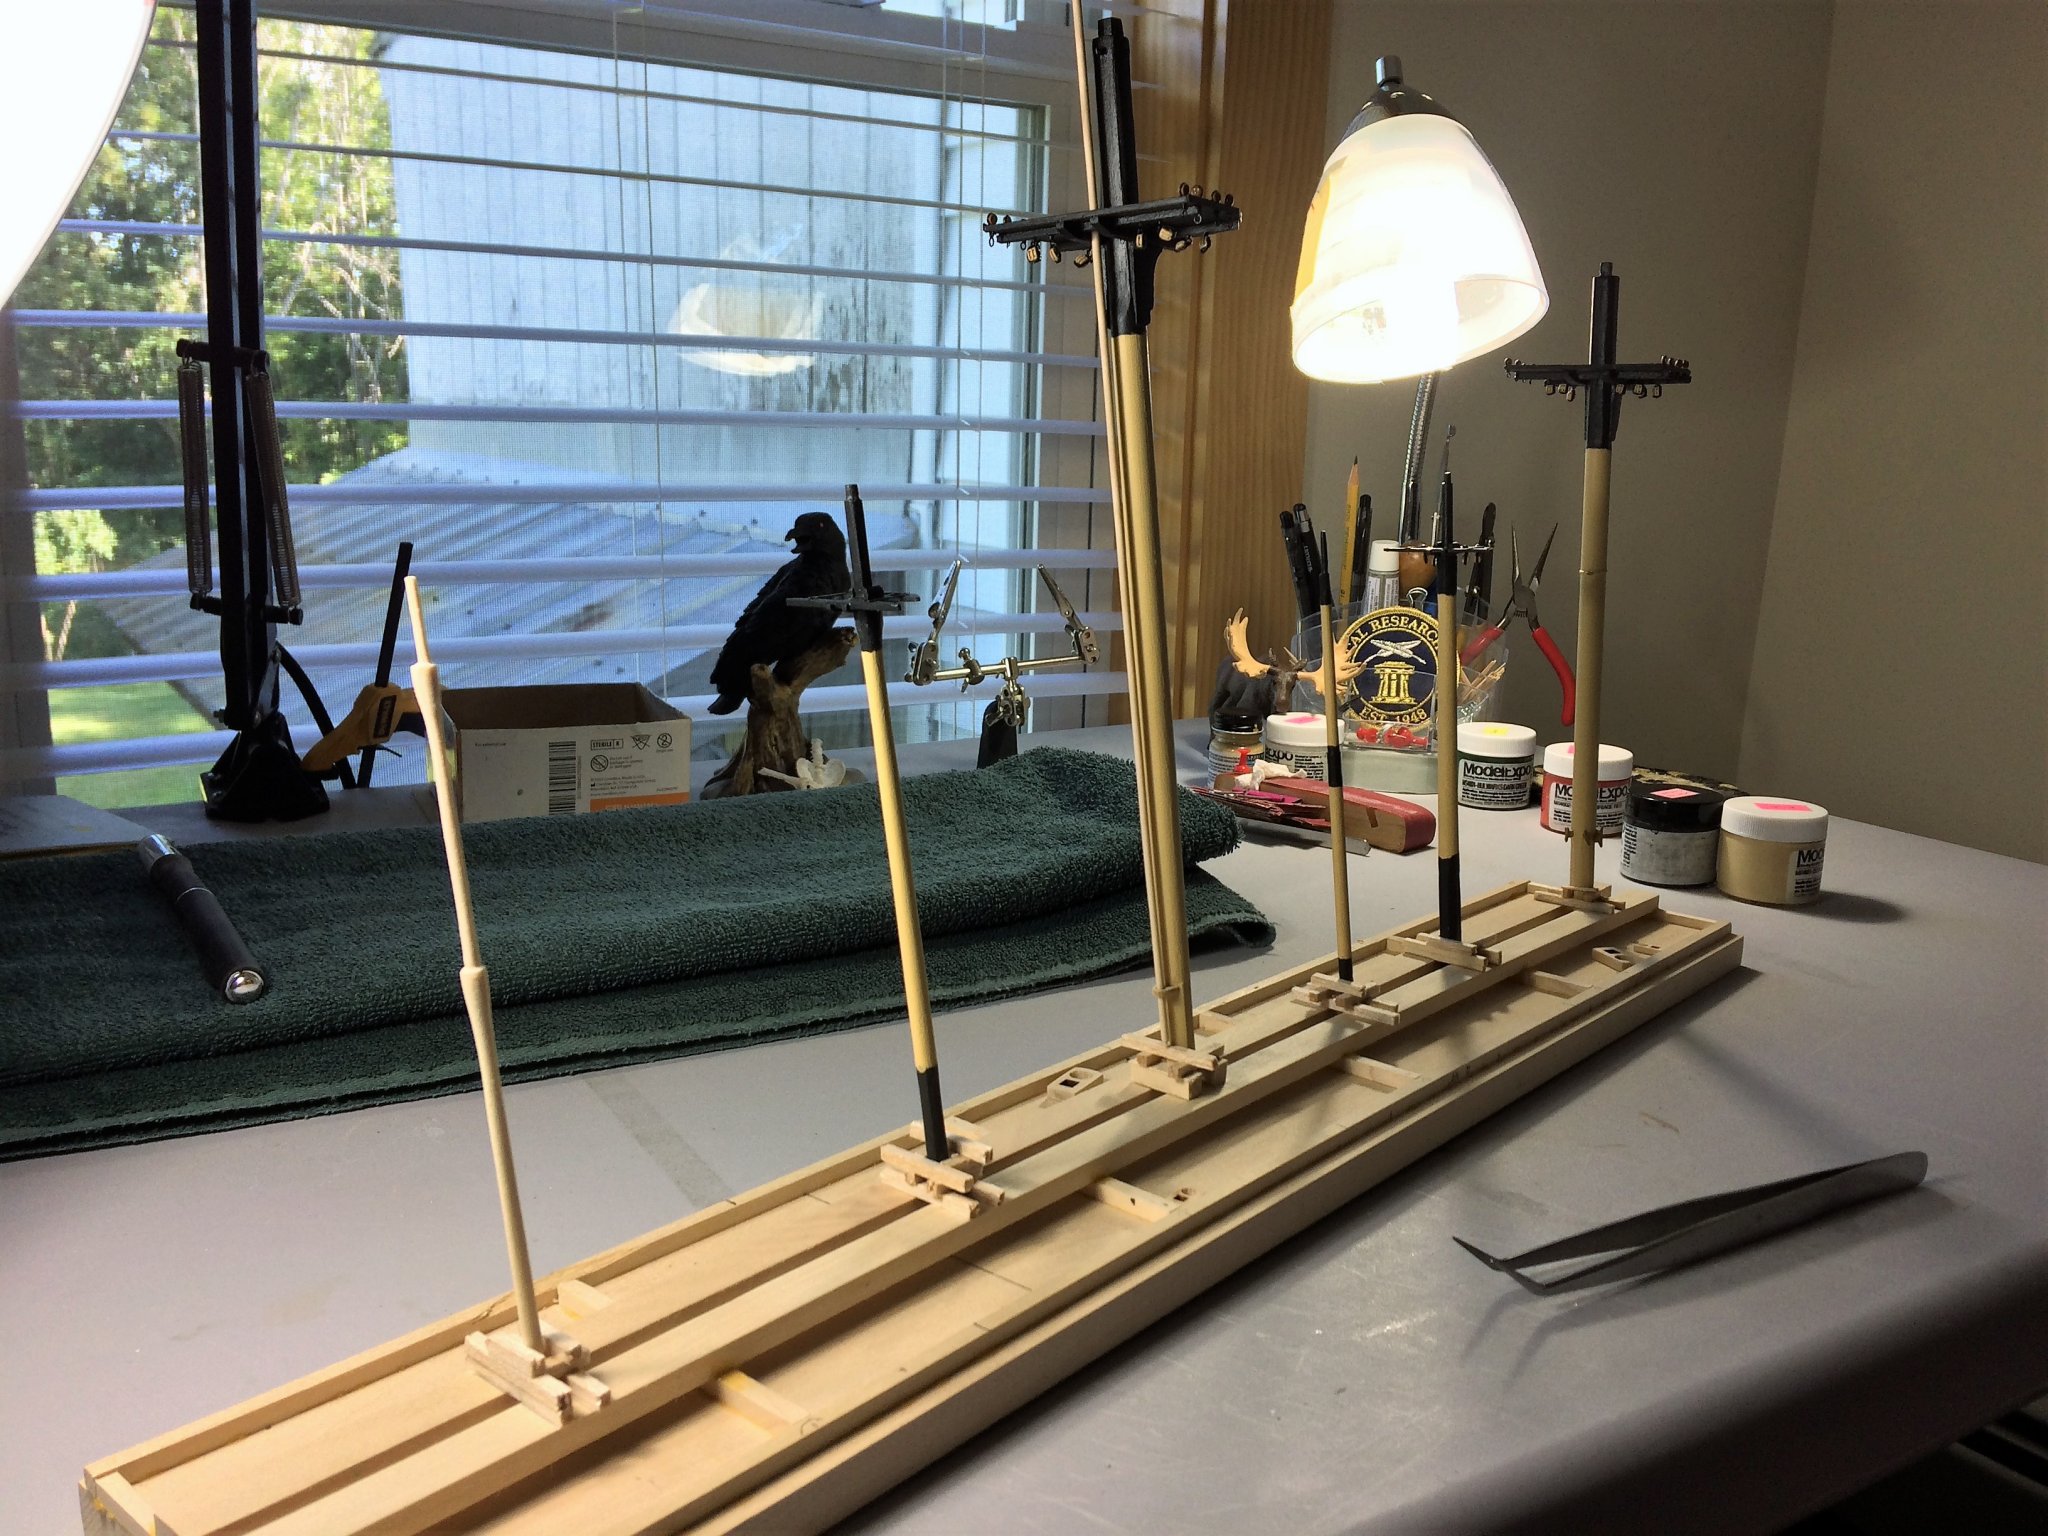
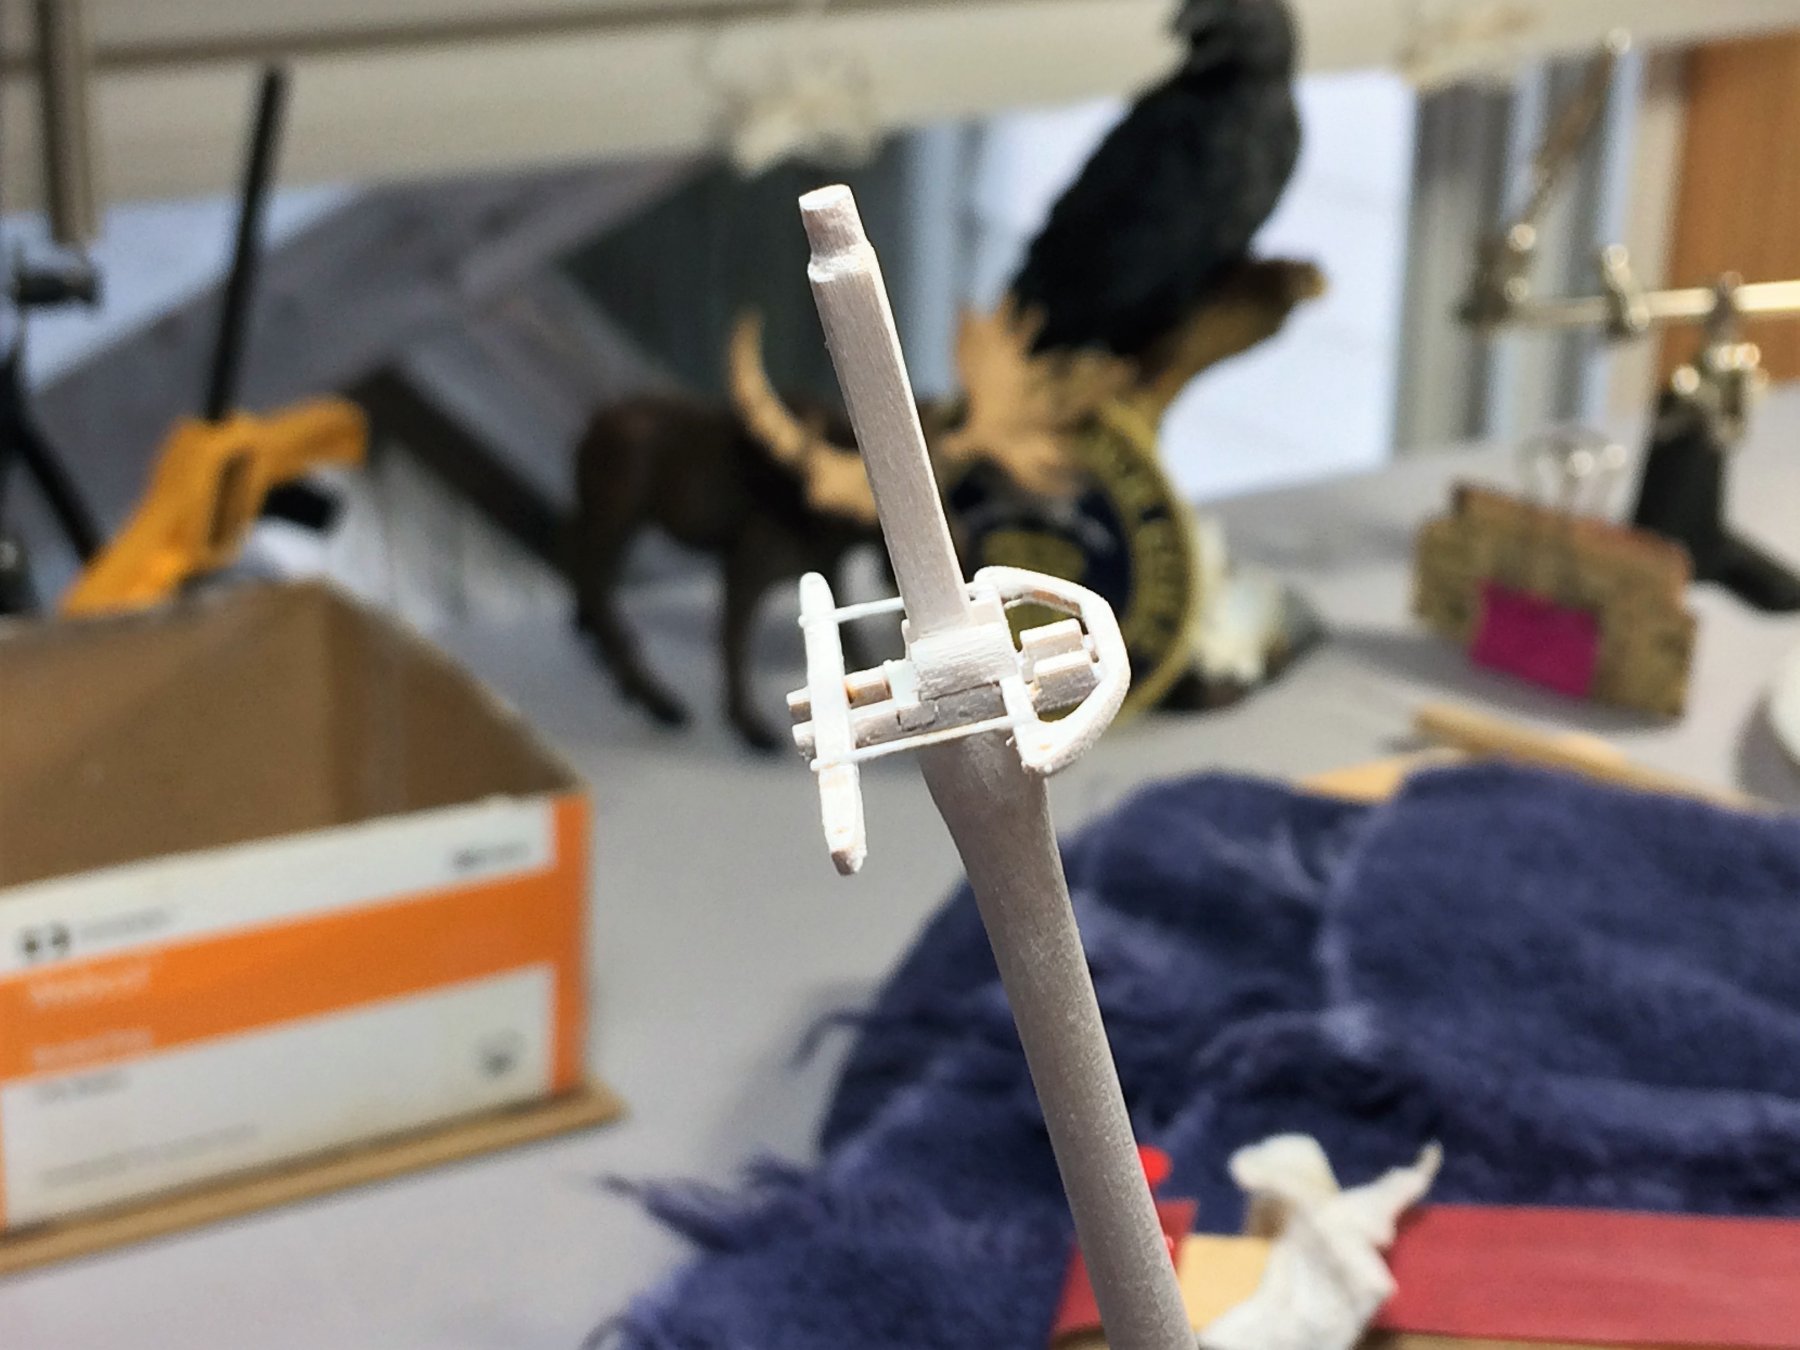
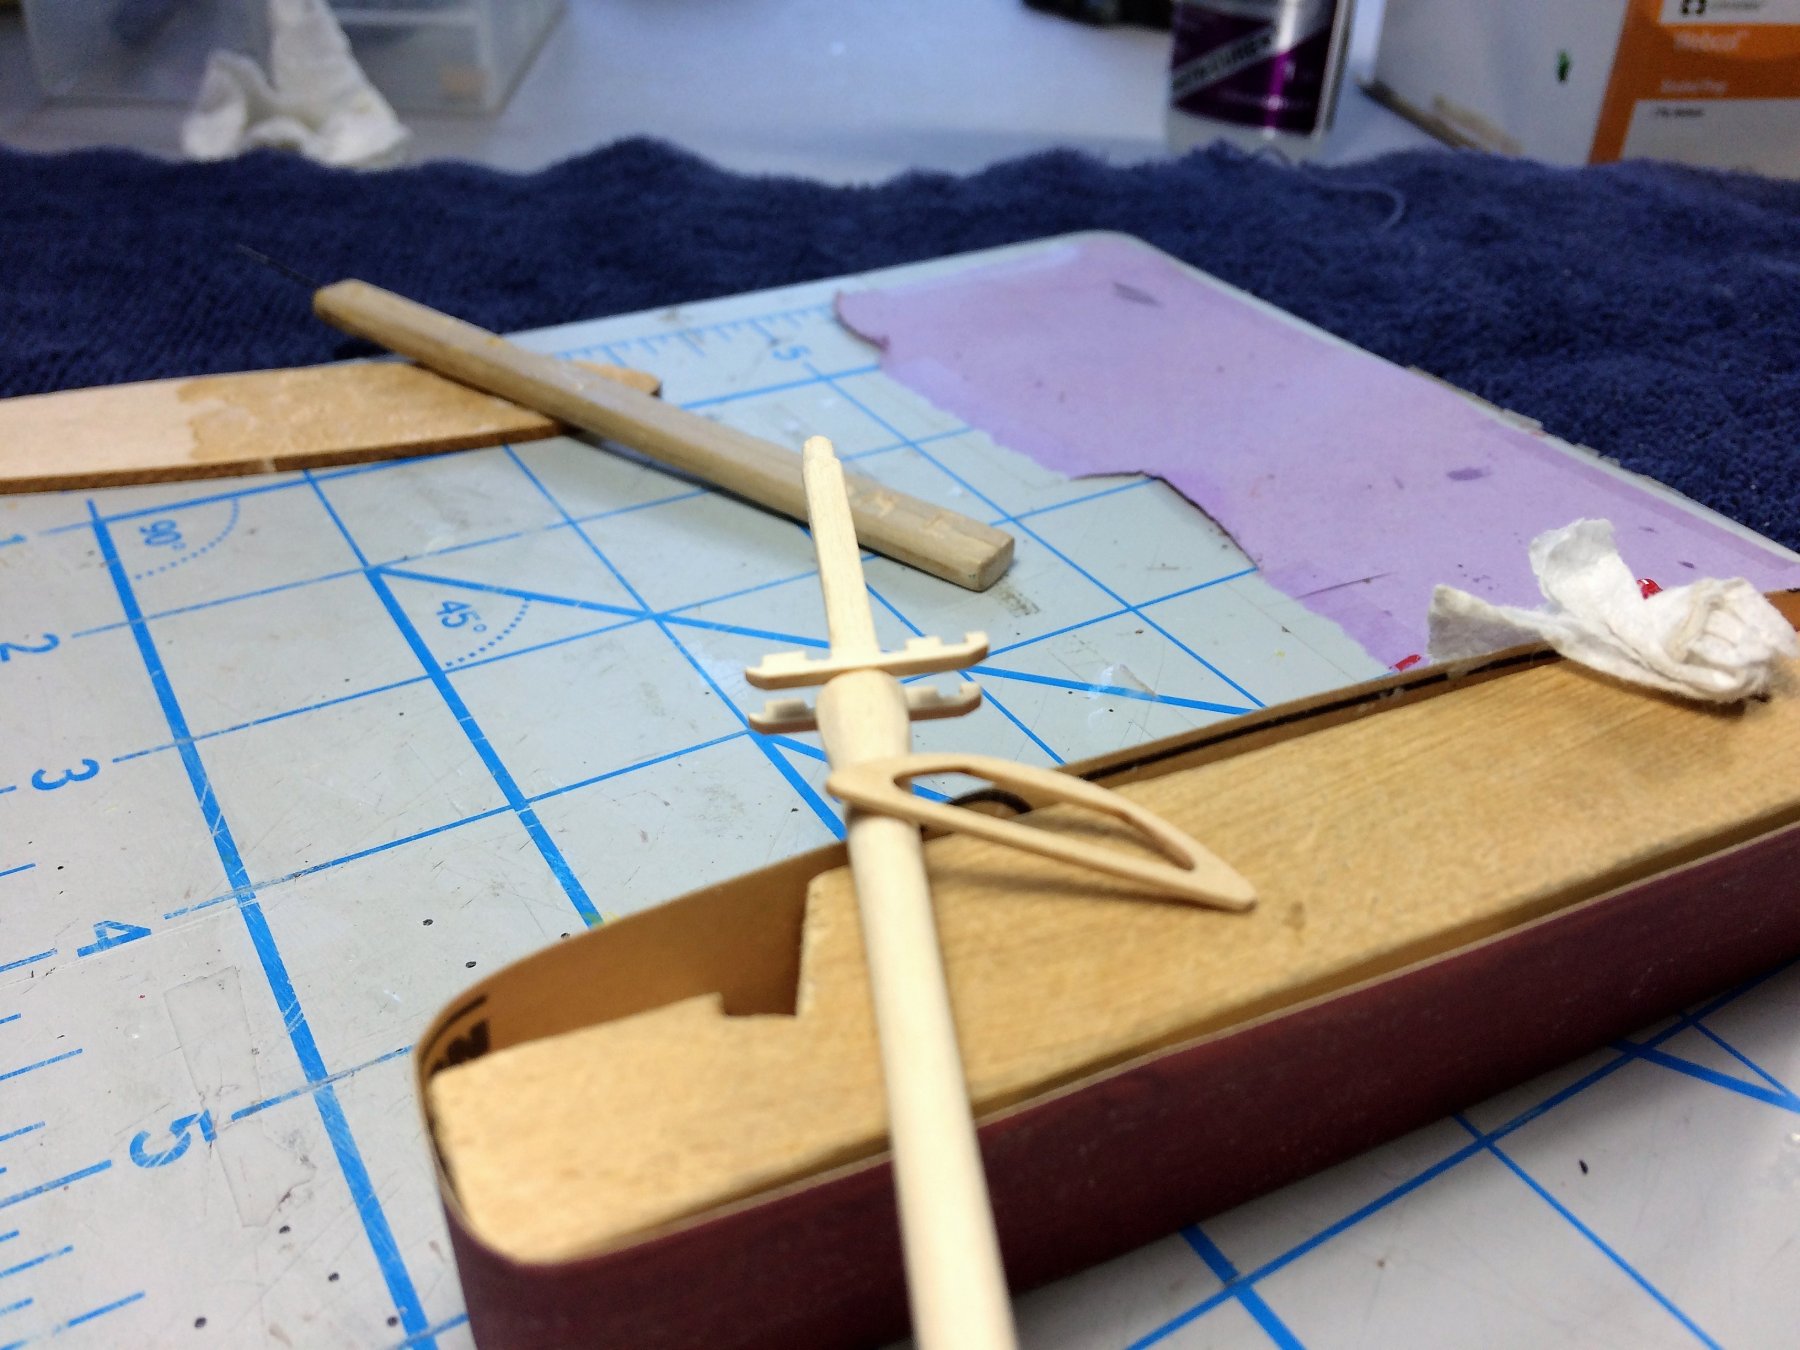
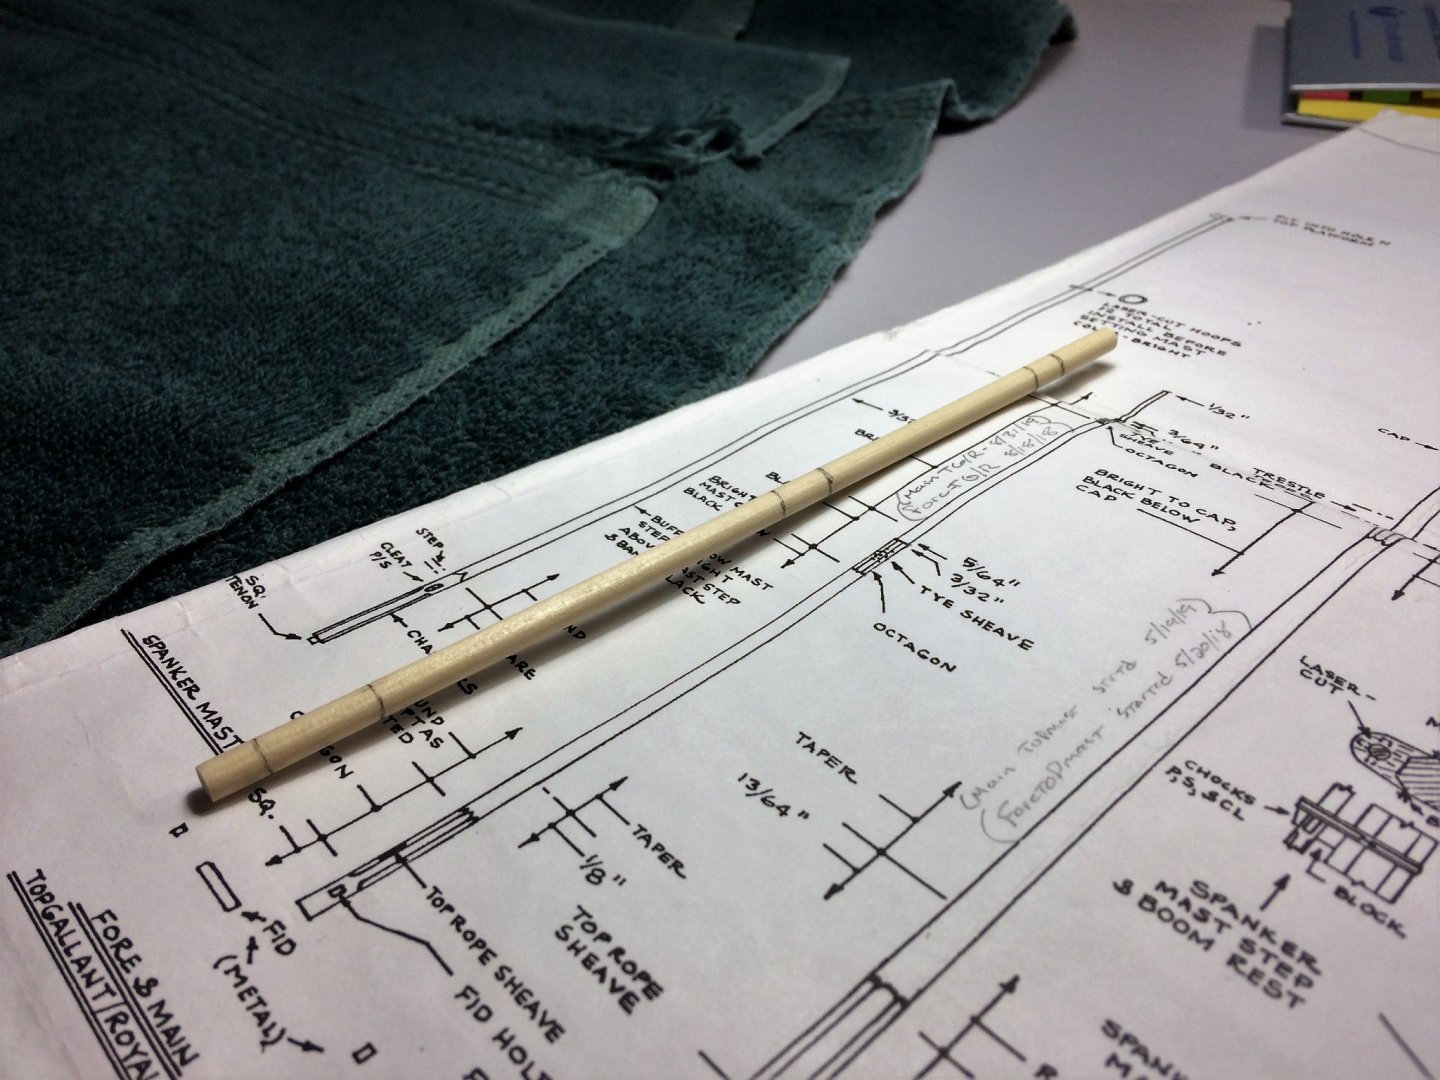
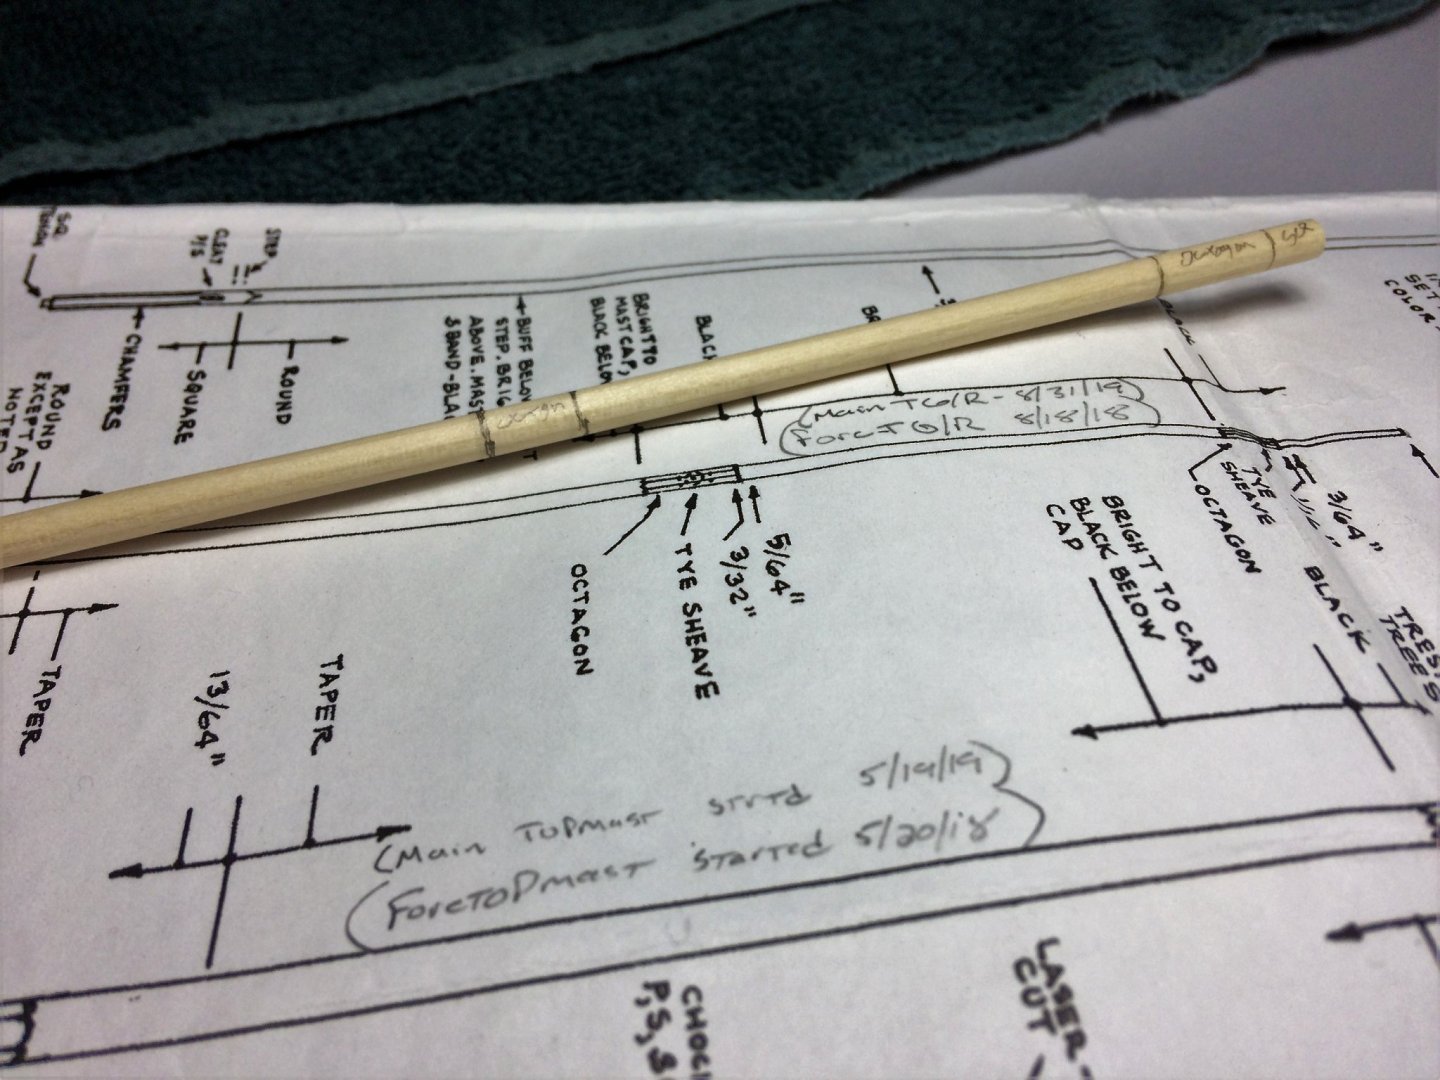
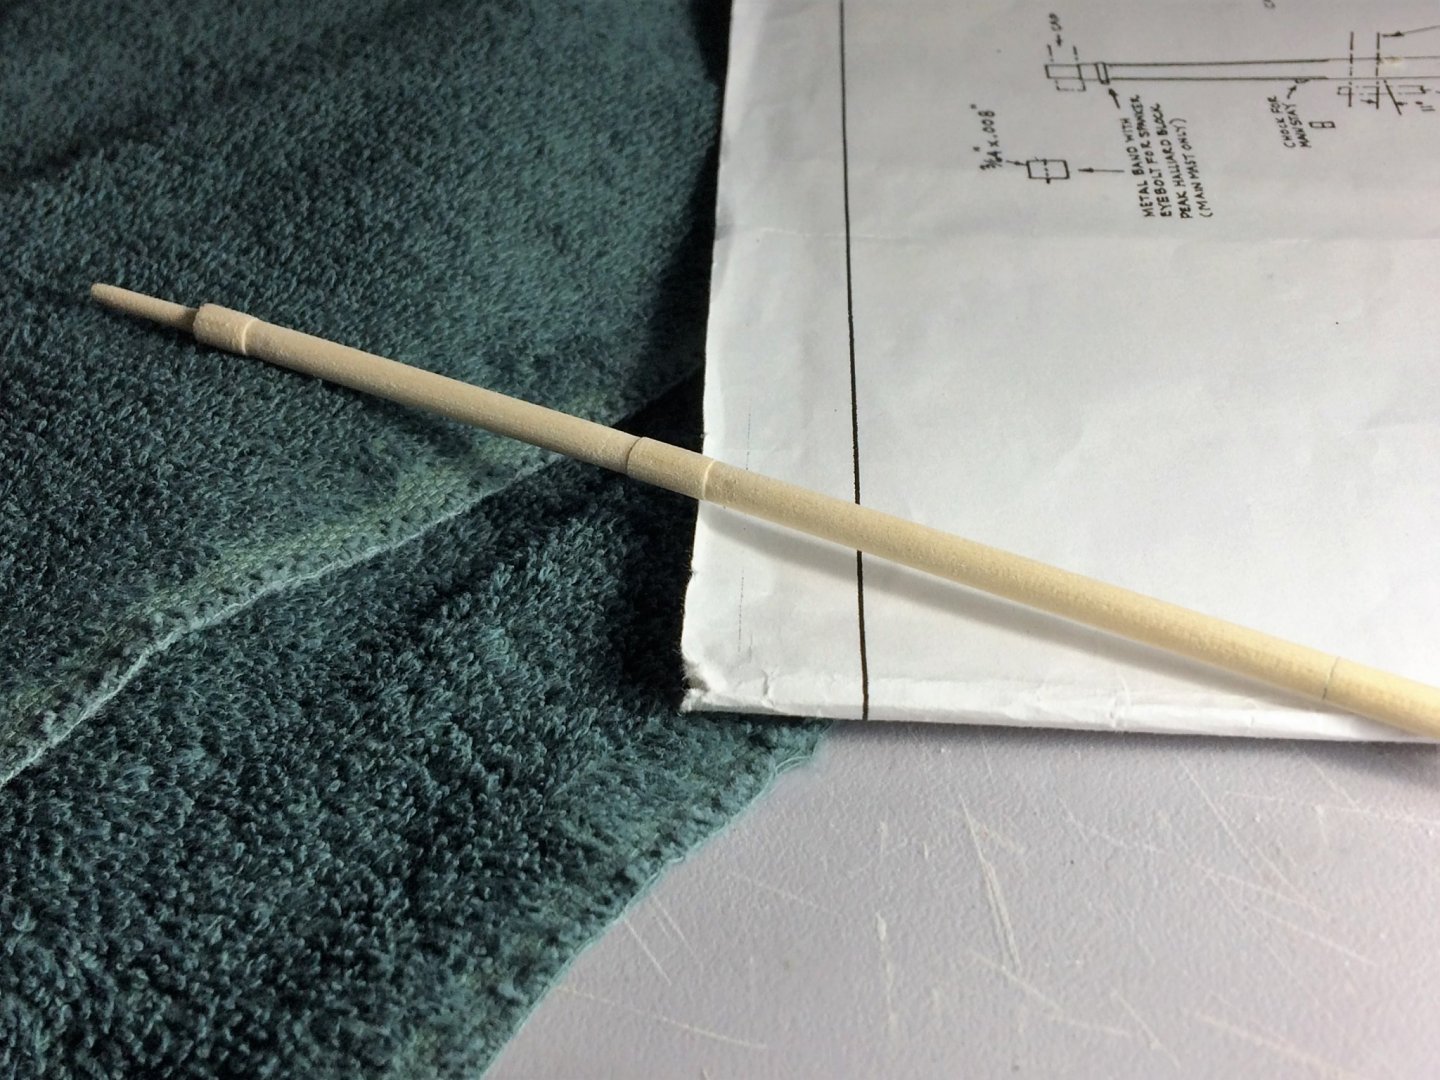
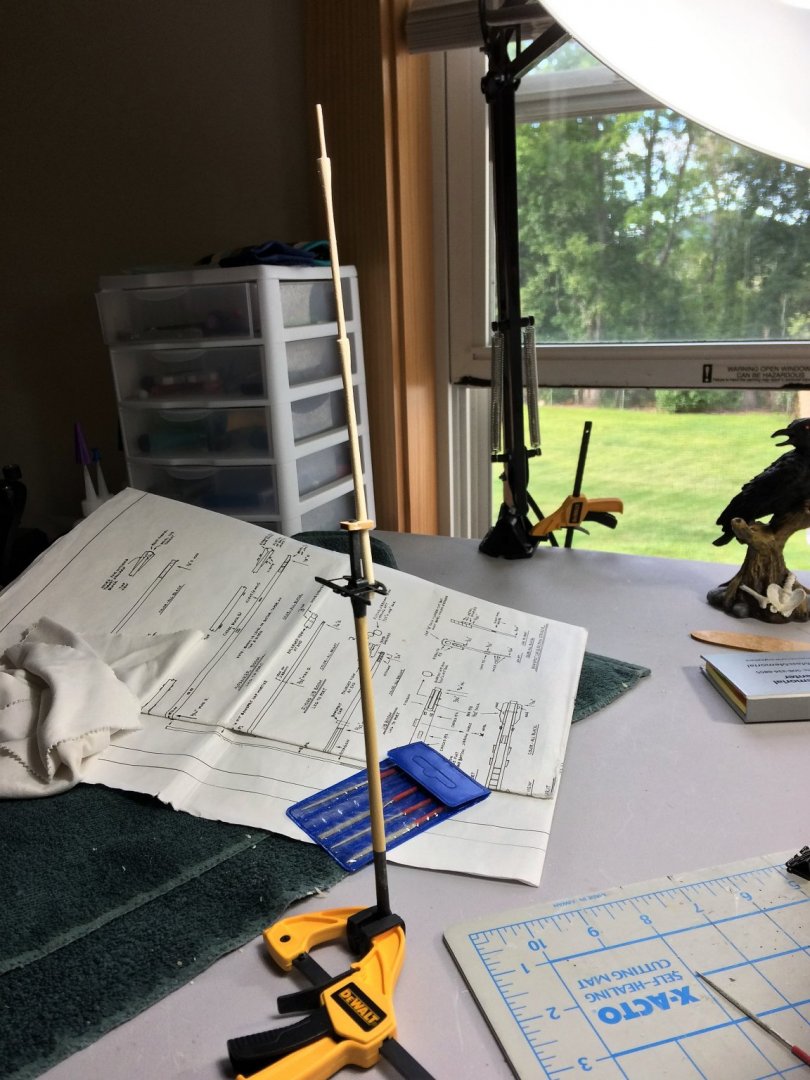
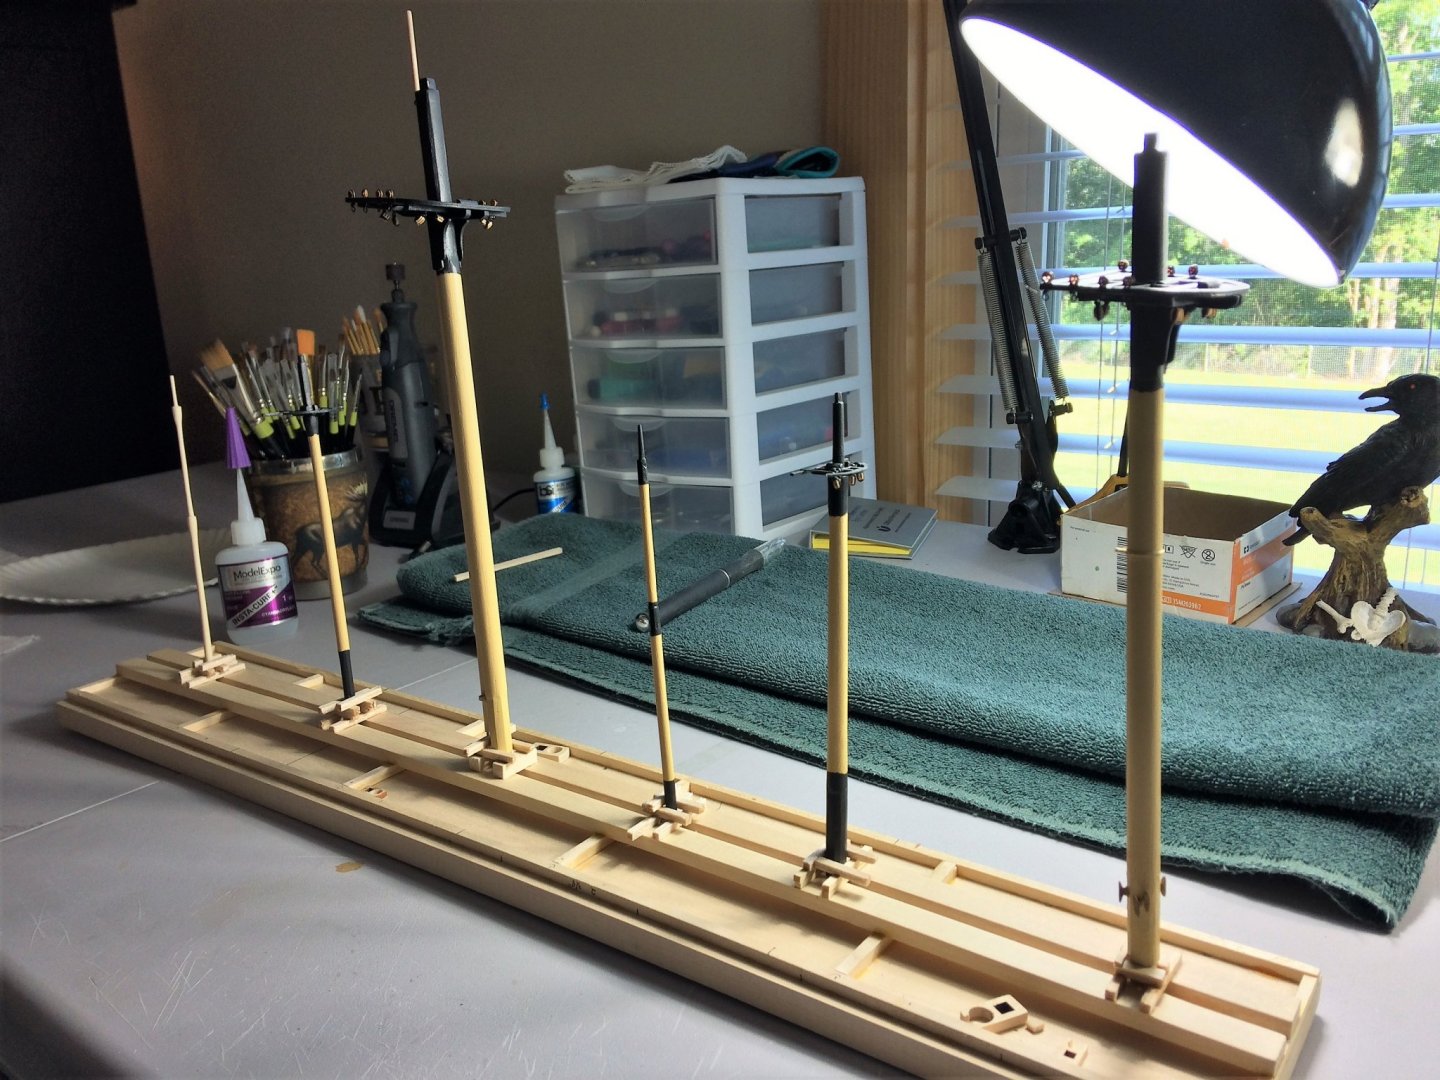
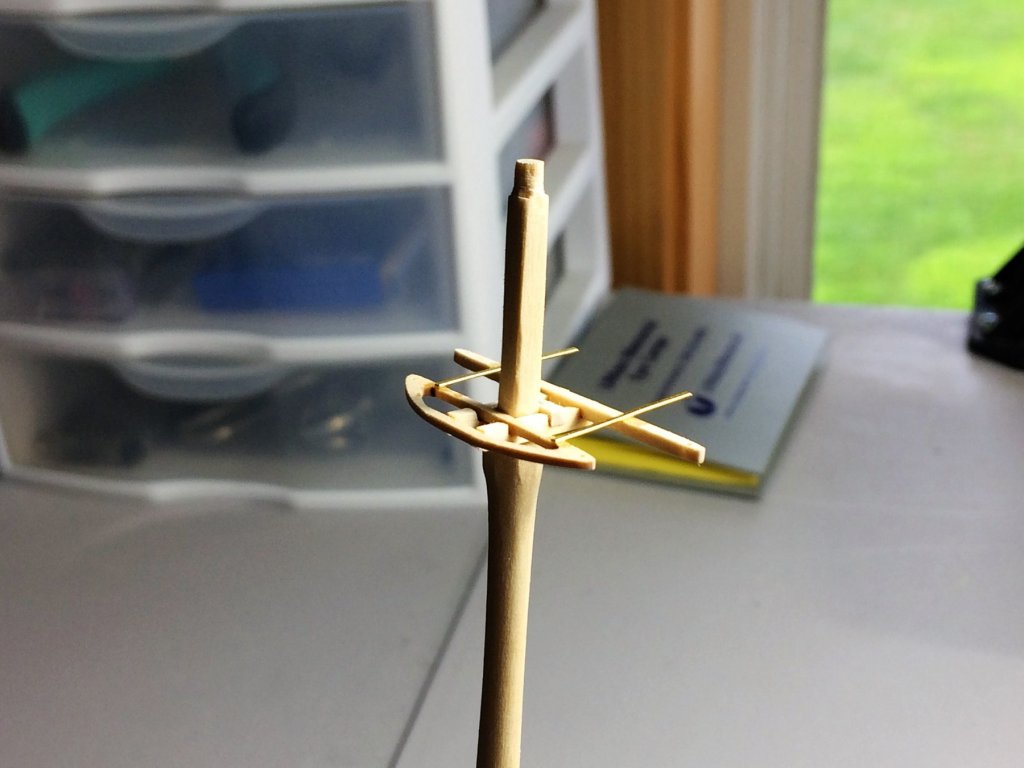
Evening, On the couch, cold drink on the end table, Red Sox playing the Yankees at Fenway on the tube. Thought I'd share an update. Gary, I took a look at the tip you gave. Your right, It's a few steps before I get there, but I see what you mean. With the wire it should give the piece some "backbone" and limit the twist. I should be starting Yards soon. I started the Main TG/Royal Mast. I start by marking off certain features then start shaping. If you look at the plans, I mark the date of when I started a certain piece. Don't know why, Just do. But, Sadly, It's taken a year from when I started the Fore TG/Royal to when I started the Main TG/Royal. Little bit of a snails pace here!!!! Oh well, no rush. Generally start to cut in certain features, then continue to slowly shape/sand. Having no belt sander, lathe, or the like, It's all by hand. Always checking the fit with the Main Top Mast. She's still a bit rough, but will slowly smooth out into its final shape. I now have a full compliment of masts! Little bit of a milestone in my head. The board for the masts should prove invaluable when I start rigging. Thanks for watching! Tom E


-
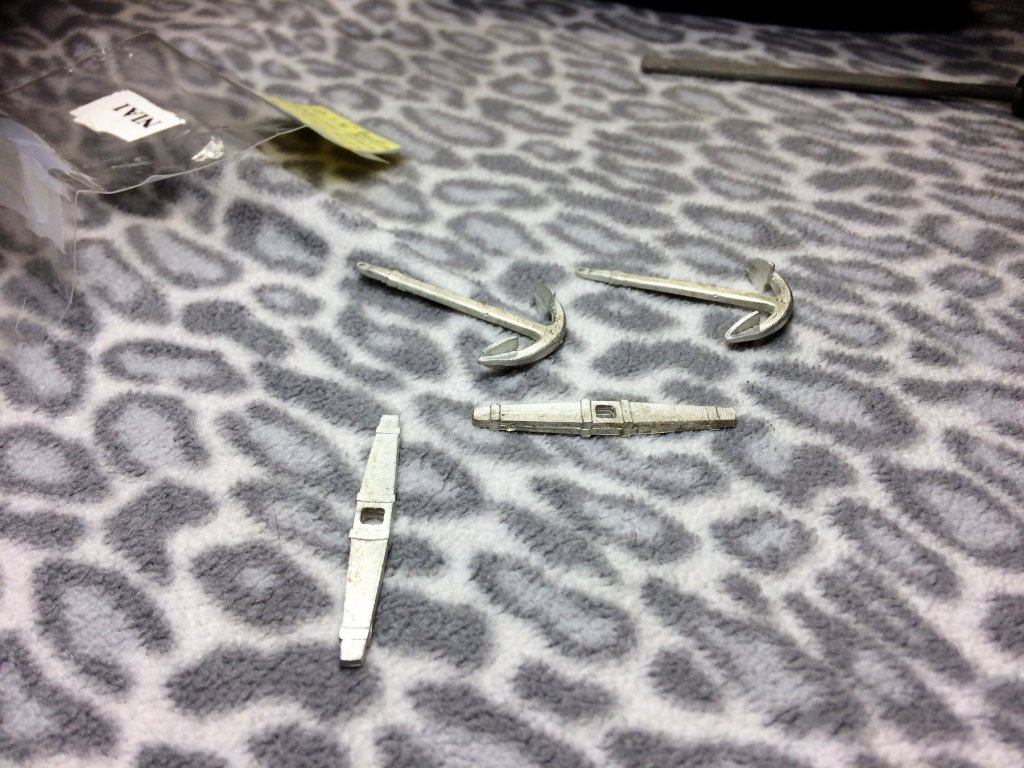
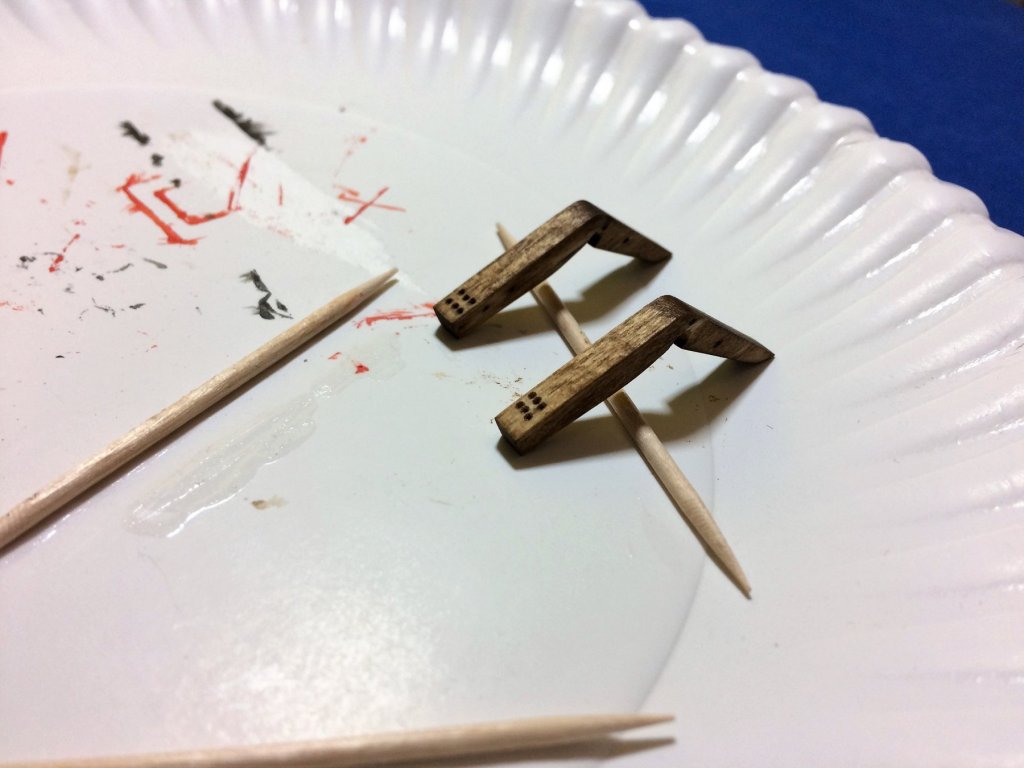
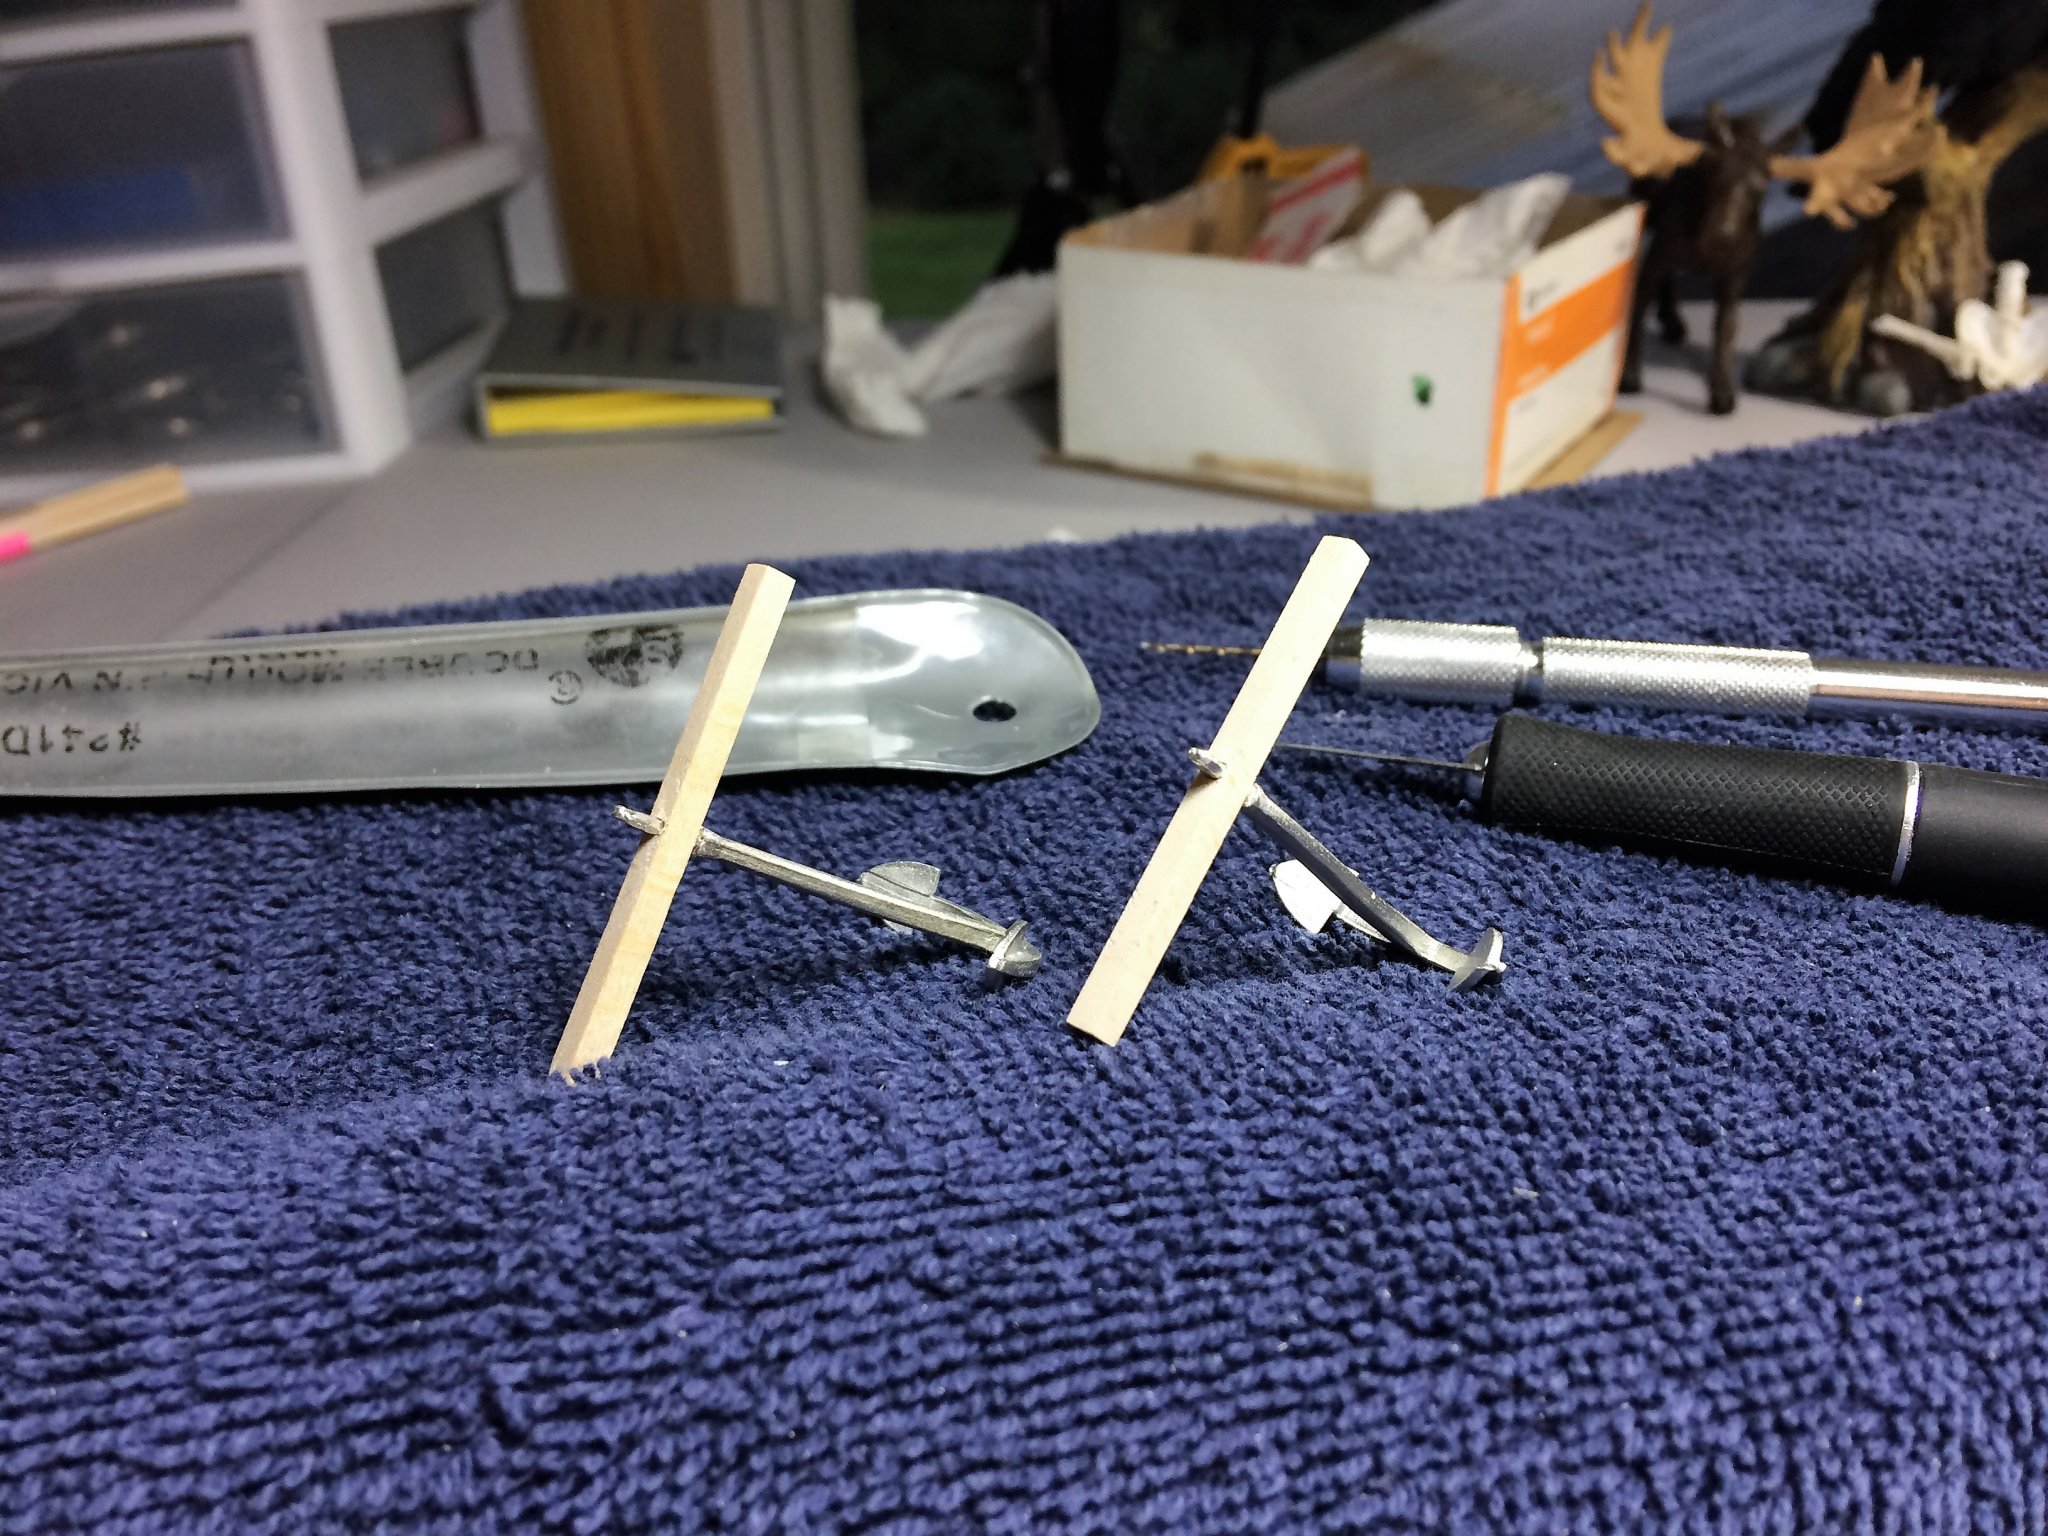
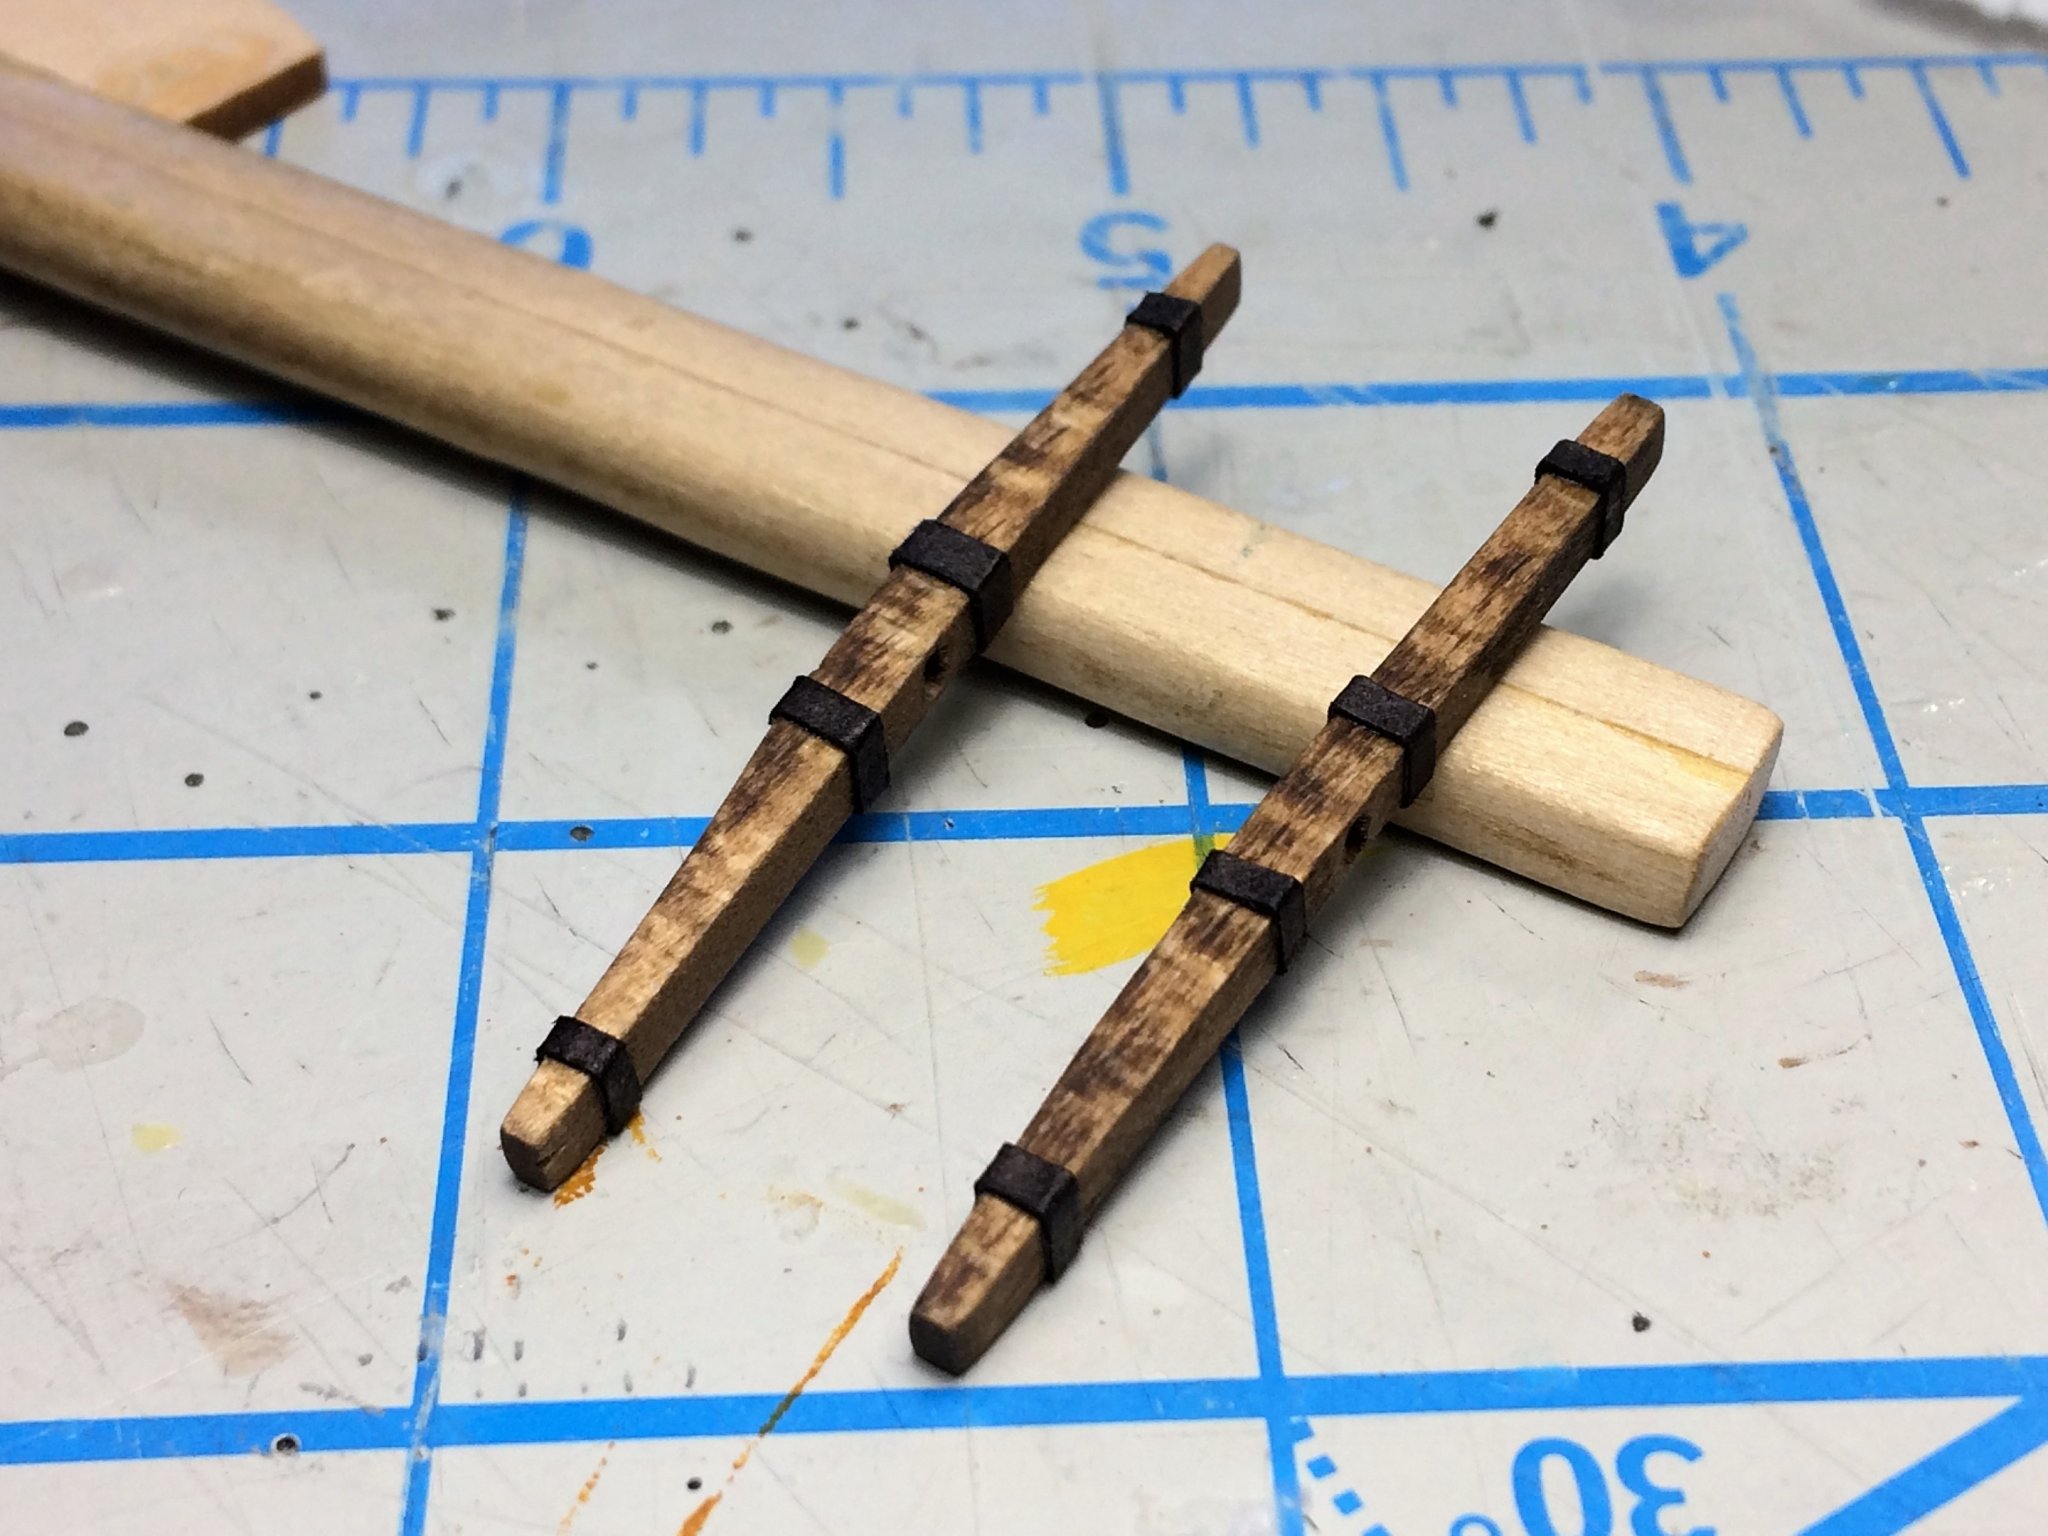
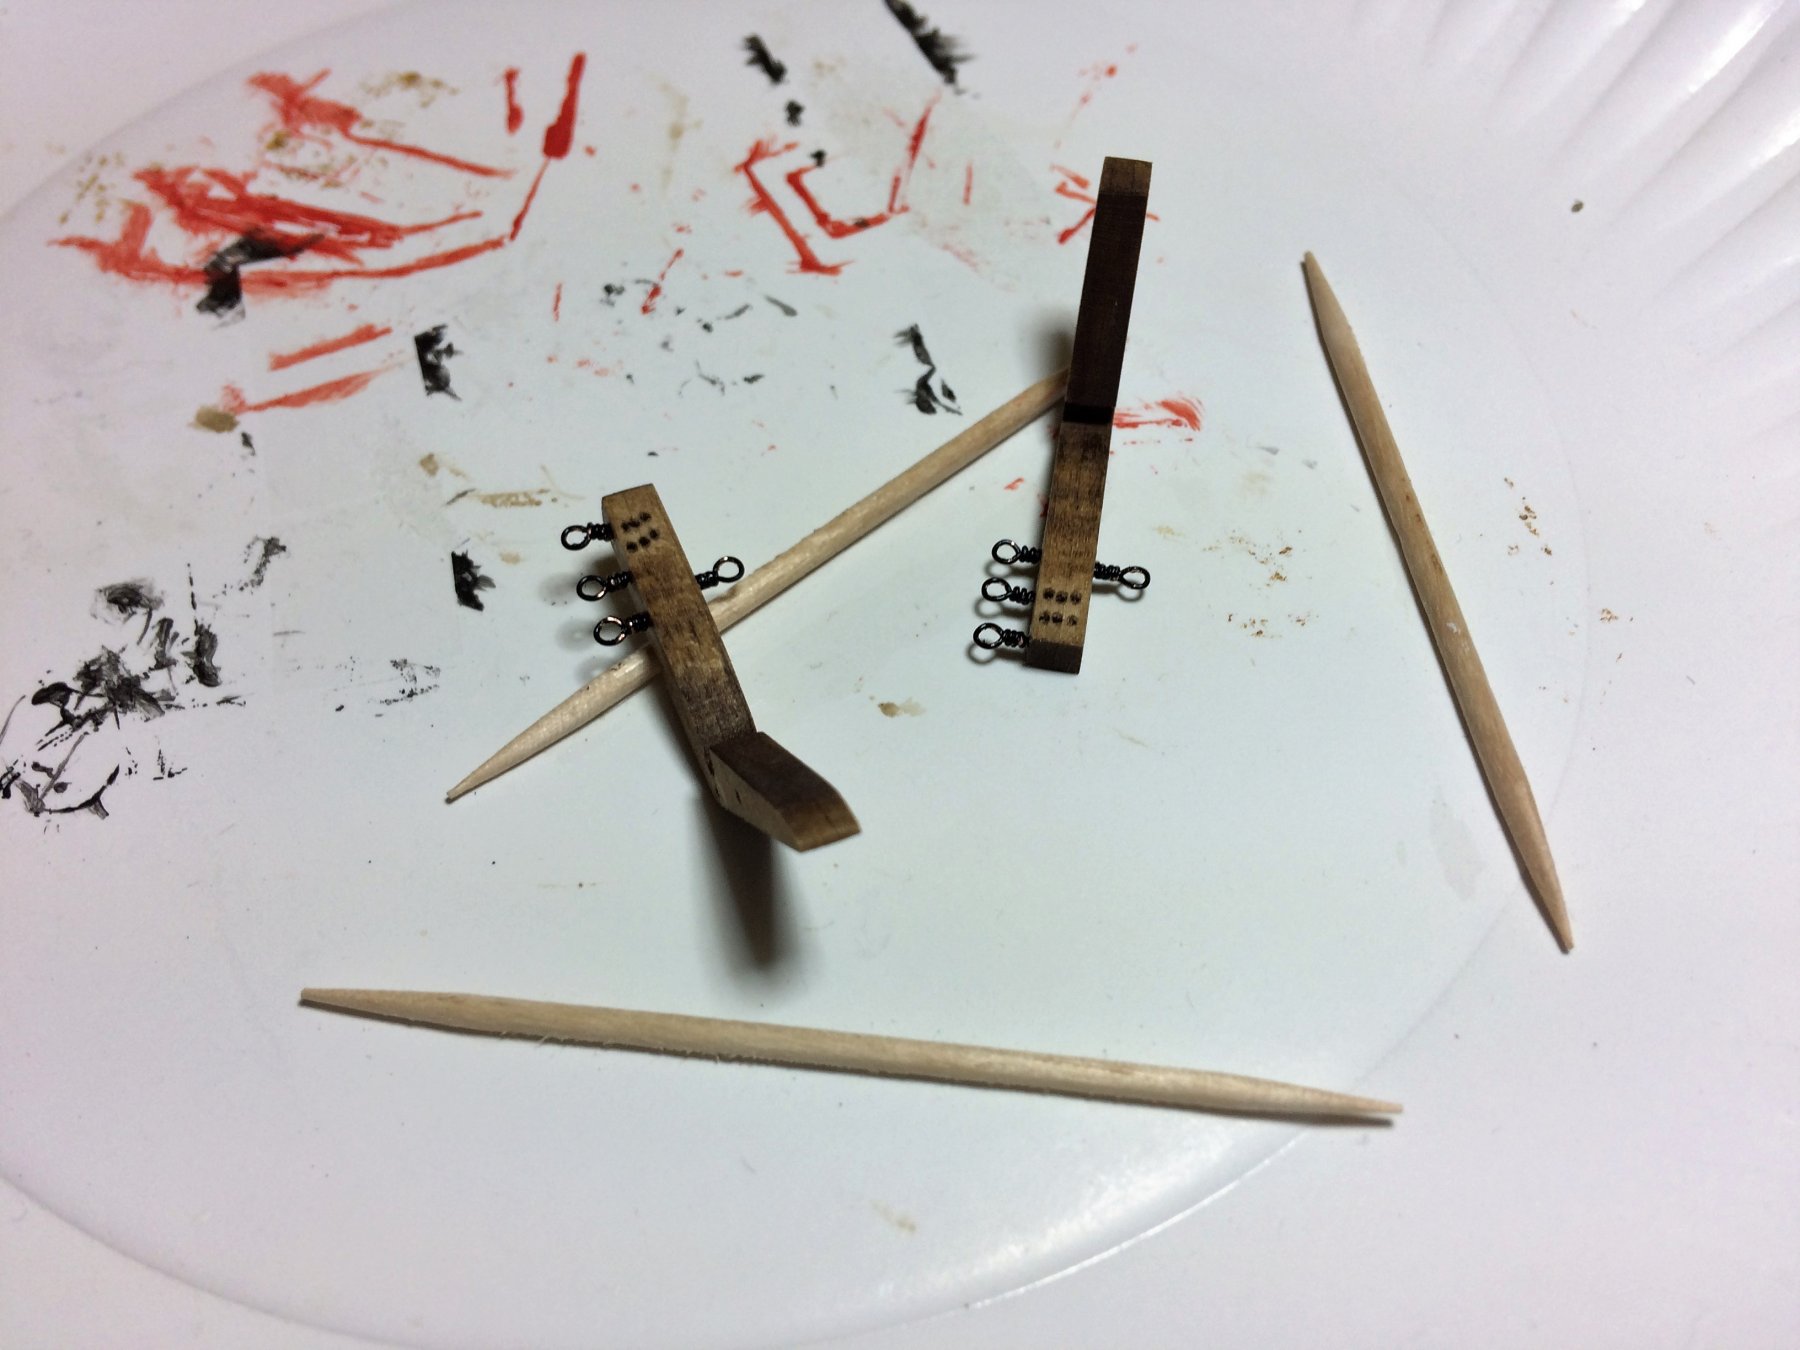
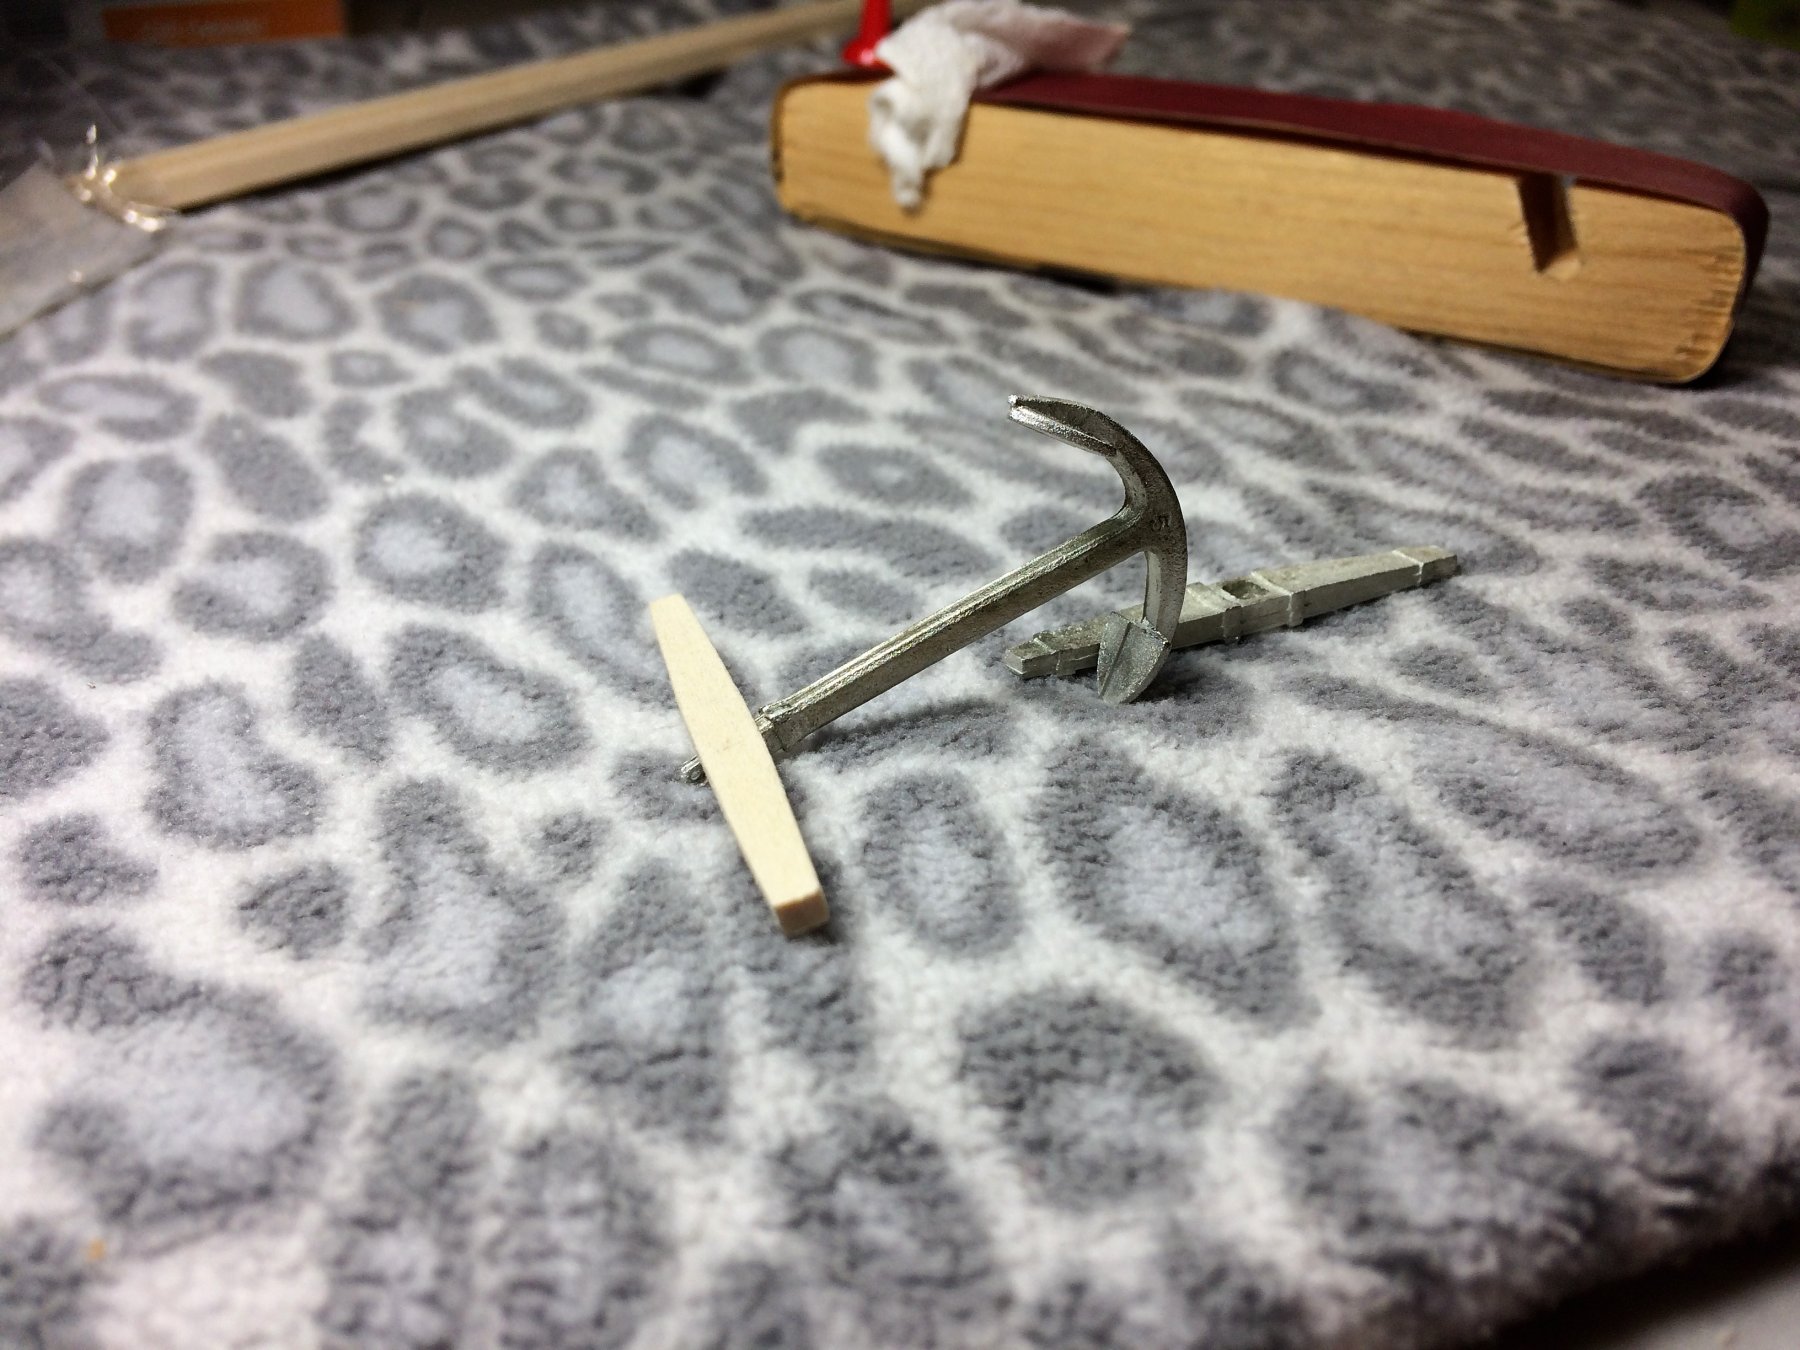
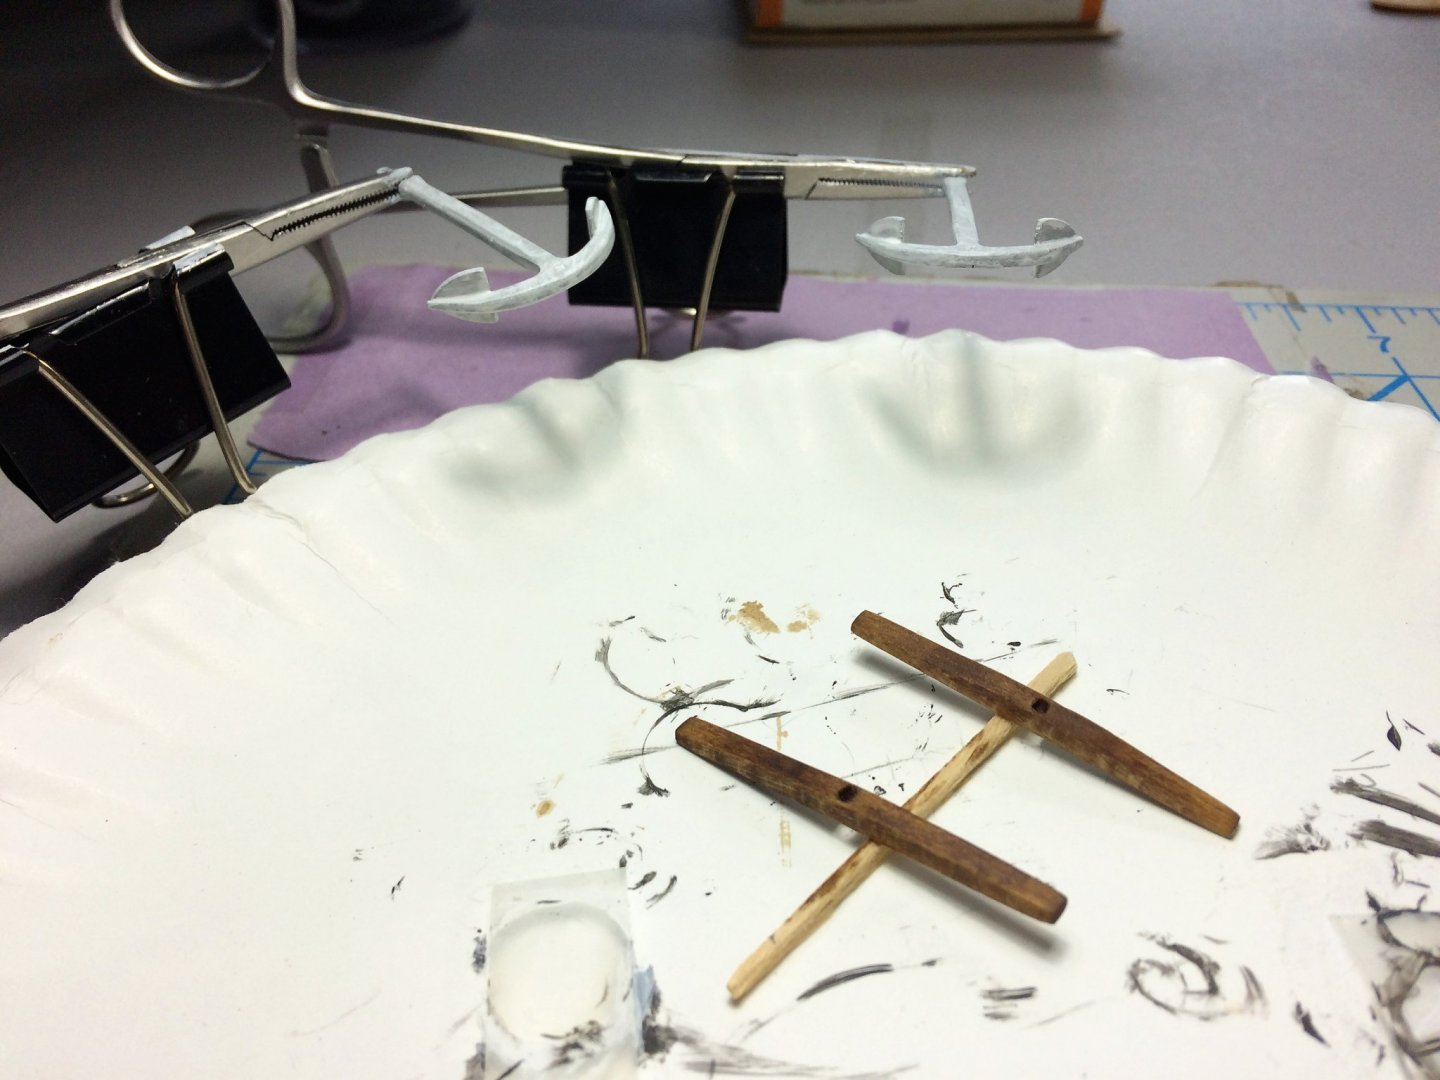
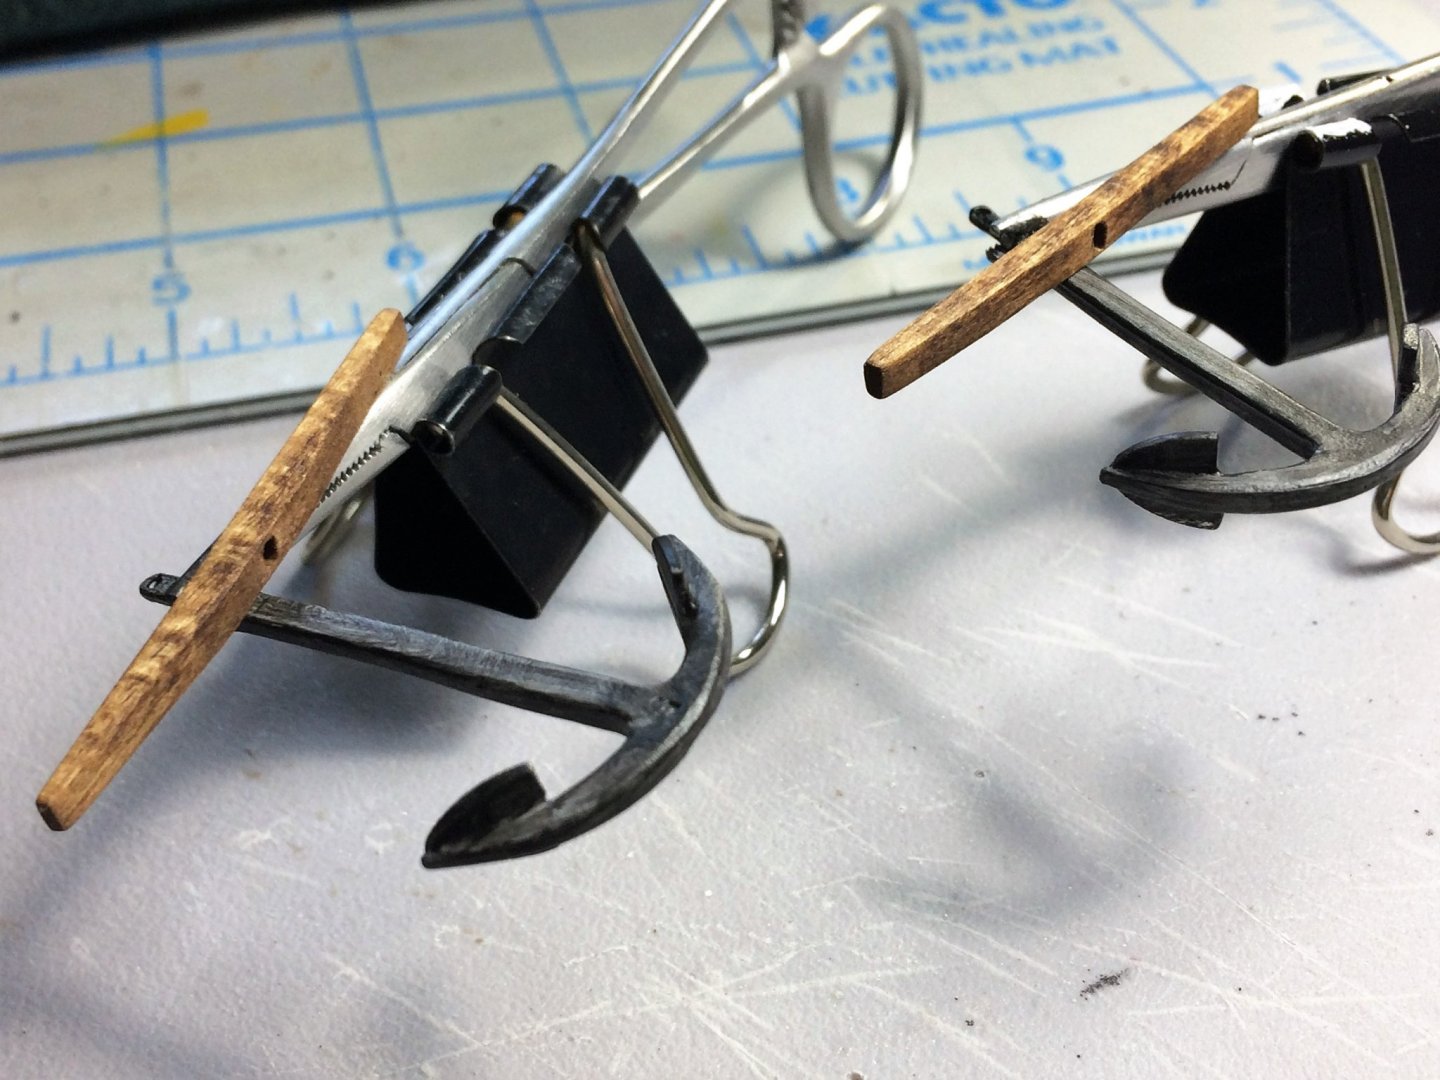
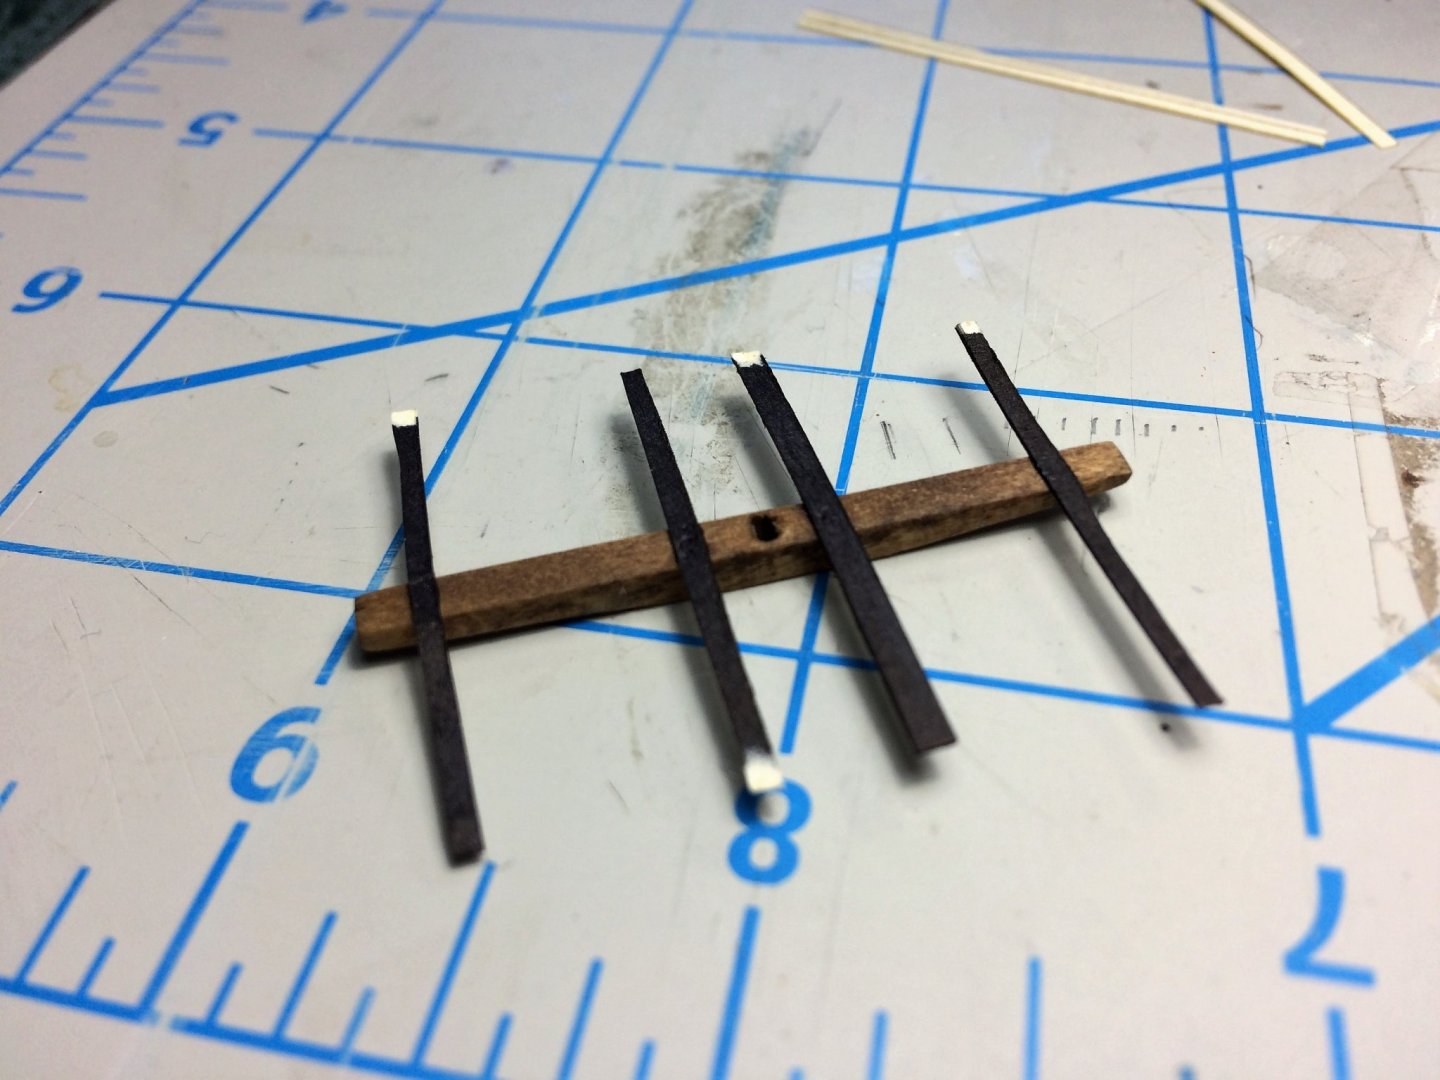
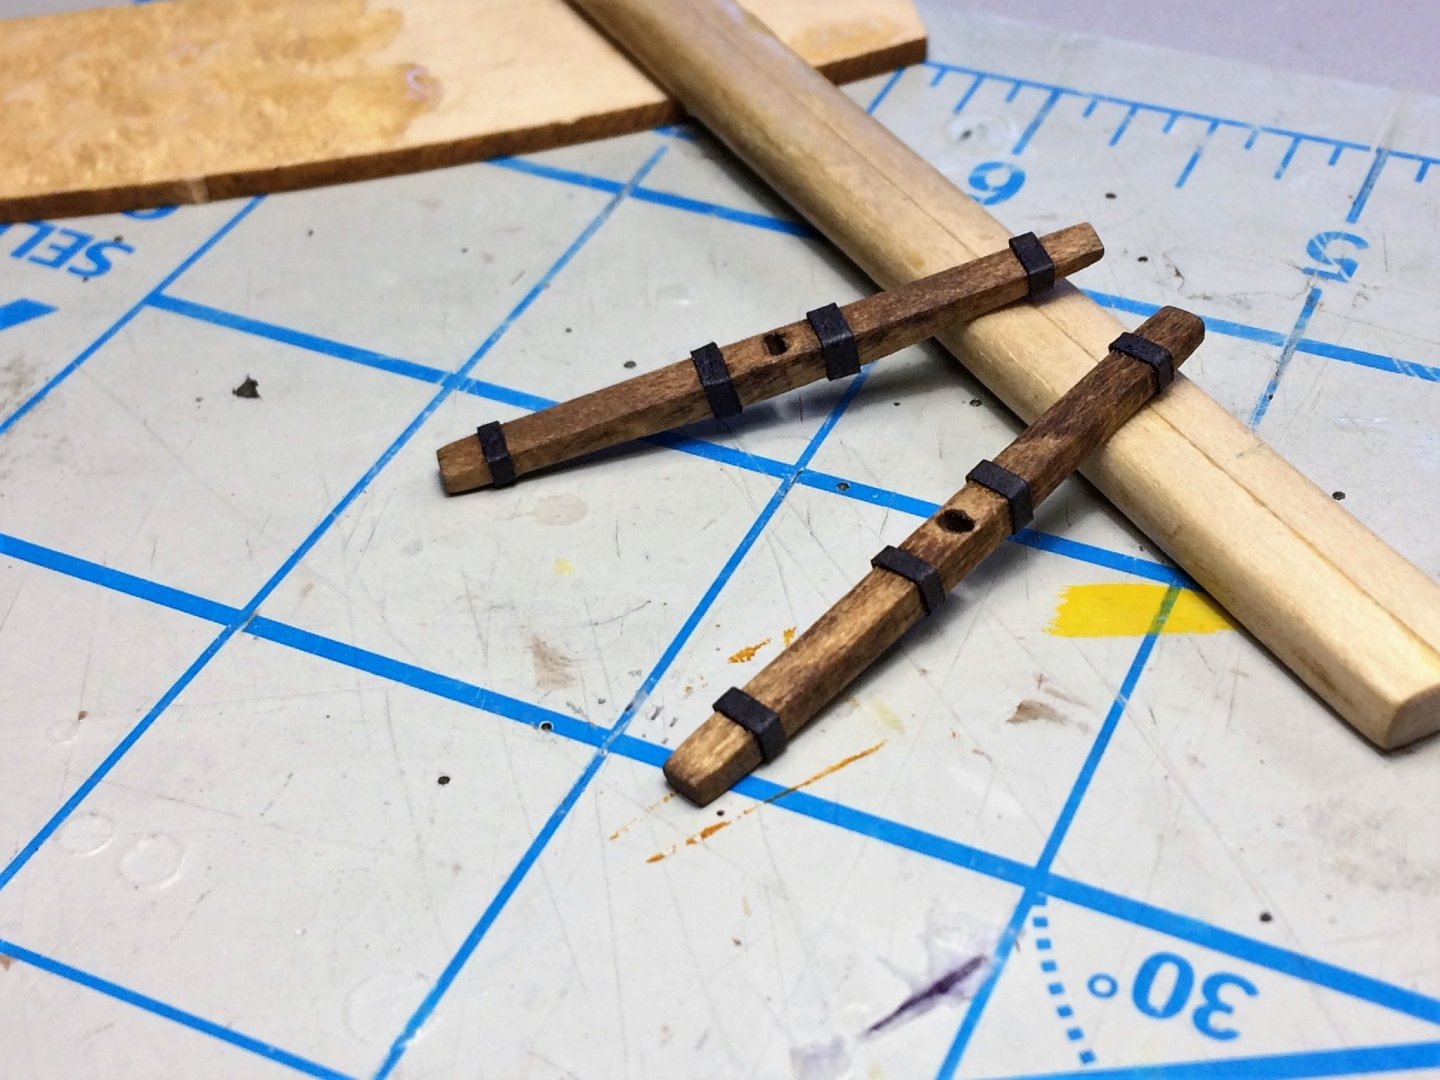
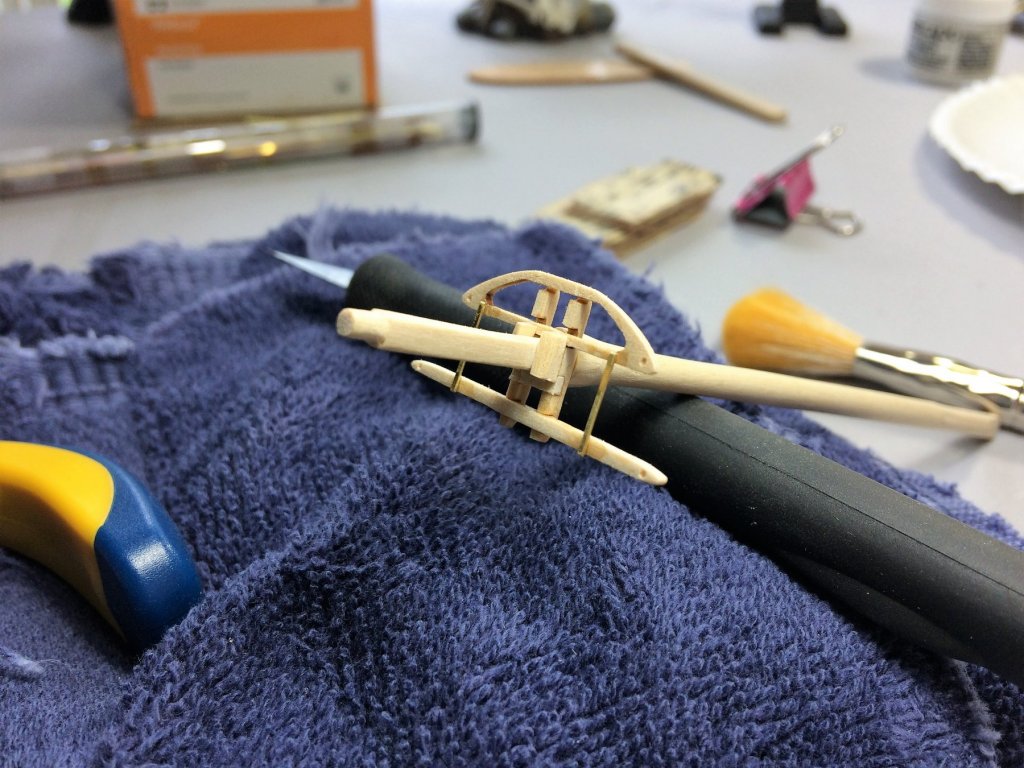
Evening, Thought I would update. A lot of painting going on recently. Thought I would focus on the Anchors while other things dry. A while back I decided to use wood for the anchors. The metal ones from the kit can be used, but I just didn't like the look. Anchors were primed, the wood was stained. I kept the stain the same color as the deck furniture and Catheads. Its called "Early American" and is just a tick darker then the stain used on the deck. Hopefully provide a pleasing contrast. Starting to come together. I've seen this trick else where. Used card stock for the straps on the wood. Wouldn't even call it "card stock".....I took a chunk from a manila folder. They were "painted" black with a Sharpie. A tiny smear of CA glue and they easily attached. I was surprised to see little to no soak thru from the CA glue. Each strip was slowly worked around then trimmed where they met. The Sharpie black works really well with the stain of the wood. I'm really happy with the way the "card stock" trick worked. This was my first attempt at using it. There not quite finished, but below you can start to see where I'm going with them. They need to be attached, then a ring for the top. I've seen others wrap the wire ring with rope. I plan on doing the same, it's a nice touch. What's a good gauge wire for the ring? Long holiday weekend coming up, and I have absolutely no plans. I see the normal chores getting done early, and some serious time in the Shipyard! Tom E


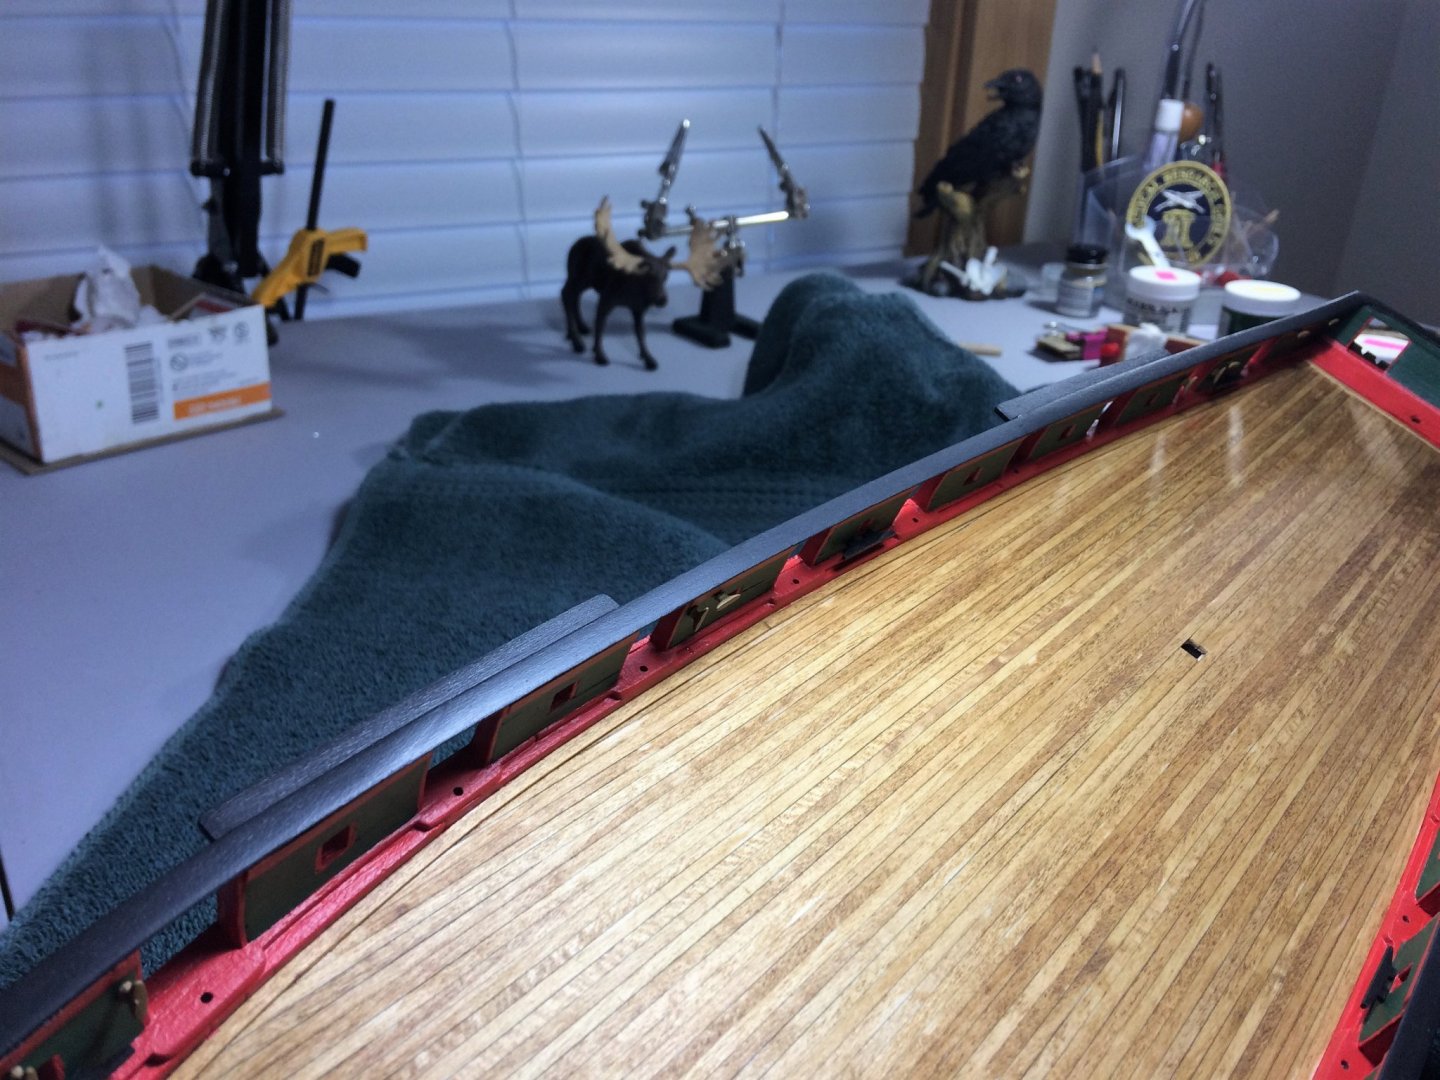
-
Evening, A quiet night at home, Red Sox on the TV, time for an update. The Catheads were finished off with the brass rods. These were blackened with Birchwood-Casey. They were such a good fit, I used no glue. If they slip later on, I'll add a dab of CA. The eyebolts are glued in. I may add the Bullseyes to the 3 eyebolts facing the Bowsprit before installing, just feels logical. The Main Topmast was primed. After the Main Topmast, all that's left is the Main Topgallant/Royal mast to build. Then the Yards will be started after that. While the Yards are being built, I hope to be at a stage where I'm mounting Cannon and furniture to the deck. Rigging after that?!?!?!?!? 😨 After a good dry, It has it's coat of buff. As much as I'm trying to stay away from the Buff paint, I'm still using it for the masts. In my little mind, I was thinking if they were dark colored masts, the rigging will just blend right in and be hard to see. The very top and bottom will still be black. I started shaping the Mooring Chocks. These weren't too bad, but a good pair of reading glasses were needed! These will be painted black. The Main Rail also had it's first coat of black. With successive coats, the paint "lines" coming from the underneath should get covered. Tom E


-
Awesome subject Awesome build Awesome outcome!!!!! Tom E
-
Congratulations Gary, Really looks great! Tom E
-
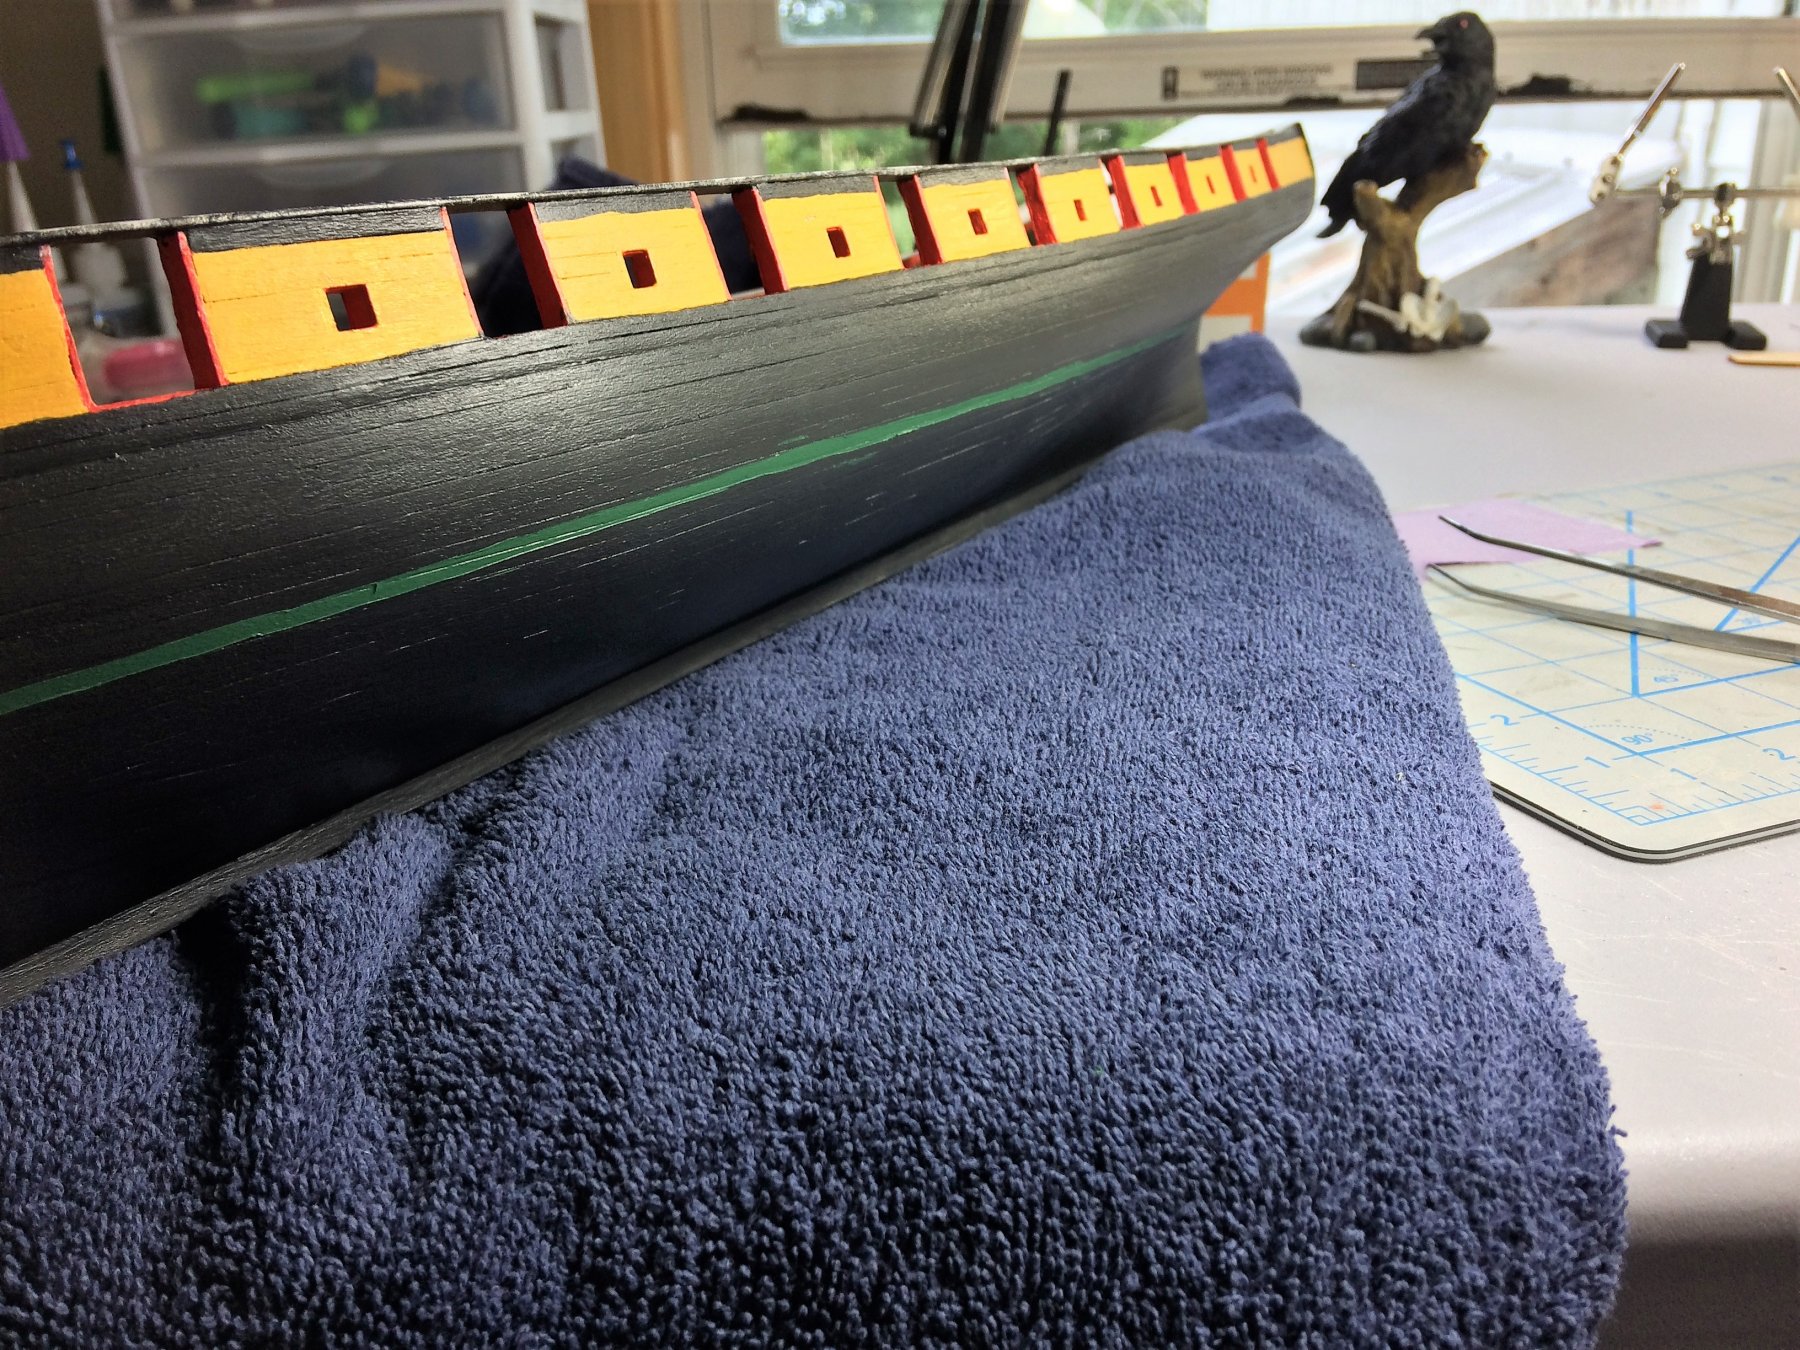
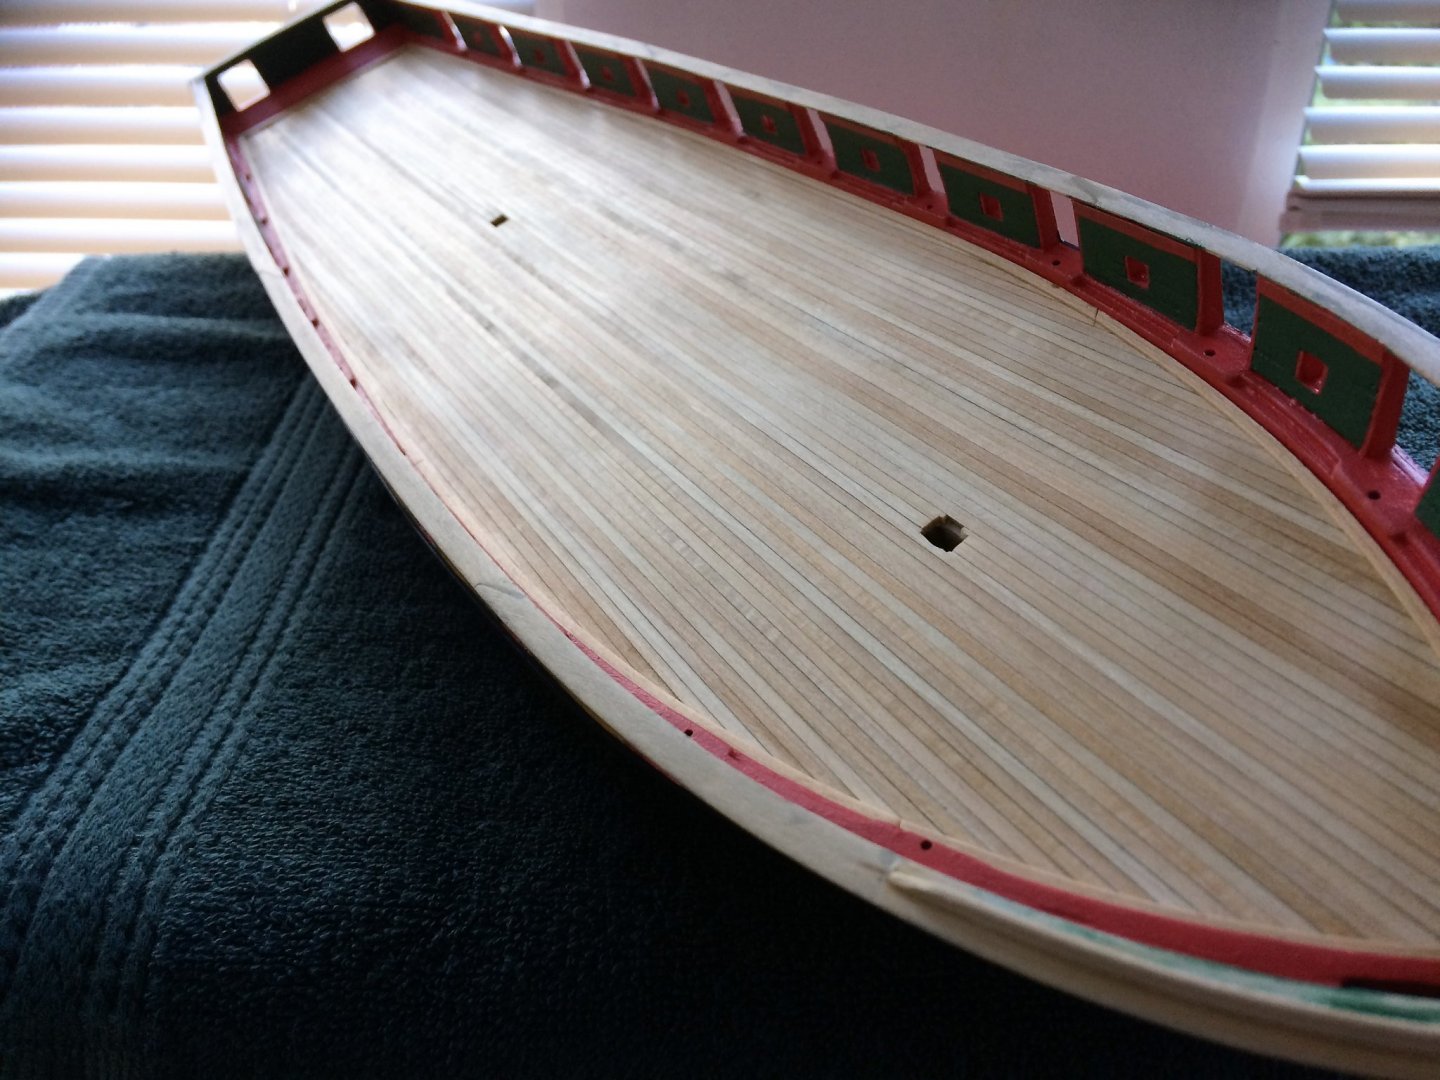
Evening, Quiet night, thought I would update from this weekends activities. I have tried to build a Binnacle, but it was a comedy of errors and ended up slicing my thumb. Not bad, but enough of a hint from the Universe to move on! Since the beginning I've been trying just to follow the plans. I know there not very accurate but I'm learning with this kit. Hopefully in future builds, with some added experience, I can add some nice touches. I continued piecing the Main Topmast Crosstrees together. Really kept an eye on the alignment. The Futtock Shroud holes were drilled prior to gluing. Brass strips were added. Chocks have been installed. These will get a good sanding to bring down there size and a nice smooth edge for Shrouds. As of tonight, It has a coating of Primer and will dry for a few days. The masking tape finally came off of the Bootstrap. Not bad for my first one! It's a bit wonky, but I can work with it. Touch ups will certainly help. I used Tamiya masking tape. Not one piece of black paint was pulled up. Worked really well. The Main Rail is slowly being painted. In the below pic, you may see where I've had to start. Looking at the Cannon ports, the top portion of the ports specifically, the underneath needs to be painted first. I think I'll get better results If I paint the underneath and edges first, then the top of the rail. Thanks for watching! Tom E


-
That's a beautiful ship. Well done. Tom E
-
Jim, Impressive ship, really looks great! I see the Mary Taylor sneaking into my stash of models. I've never tried a Bluejacket kit, but, the results do speak for themselves. Looking forward to your next project. Tom E
- 60 replies
-
- 4
-
-
- mary taylor
- solid hull
- (and 2 more)
-
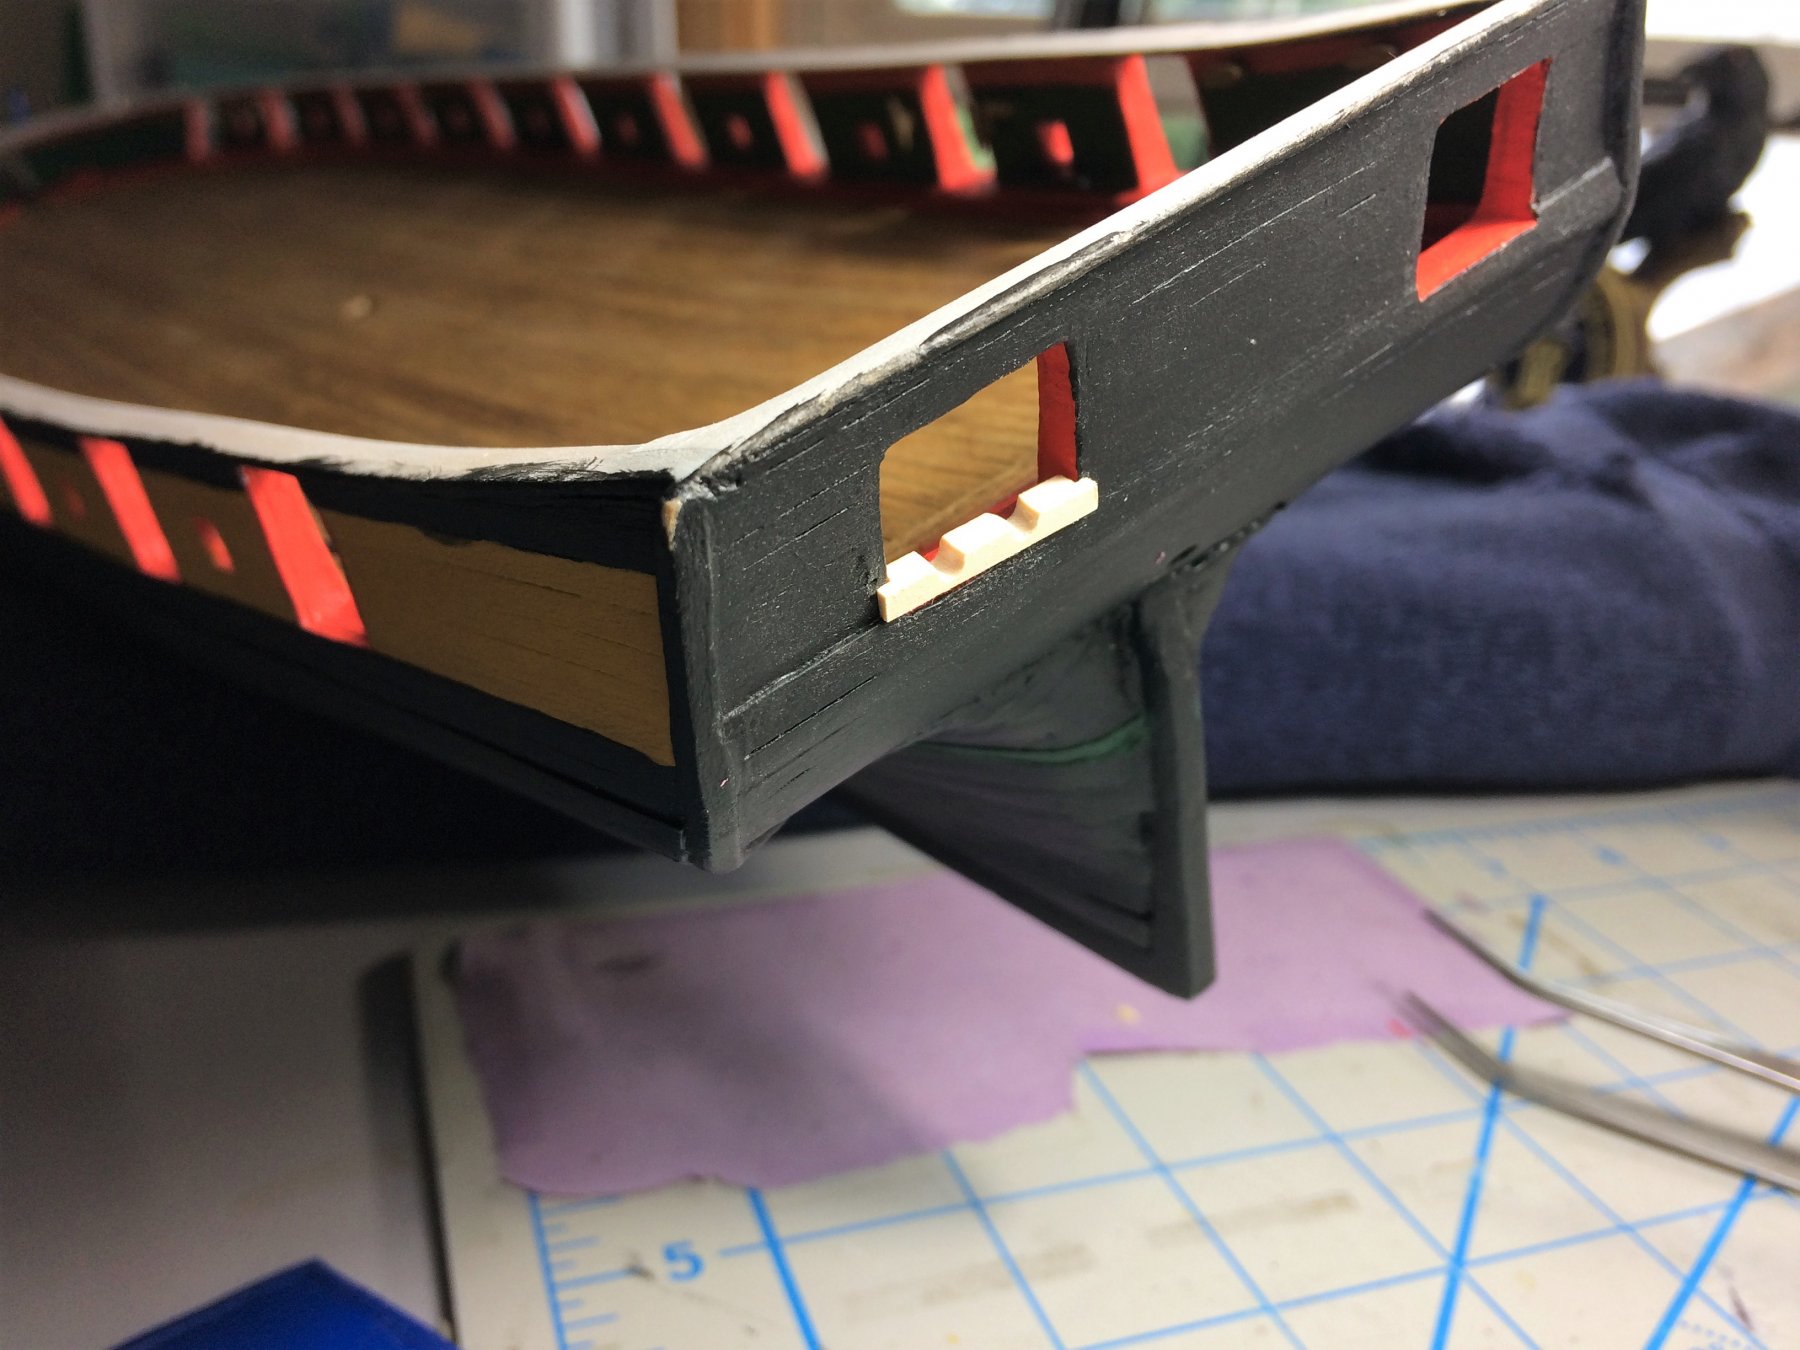
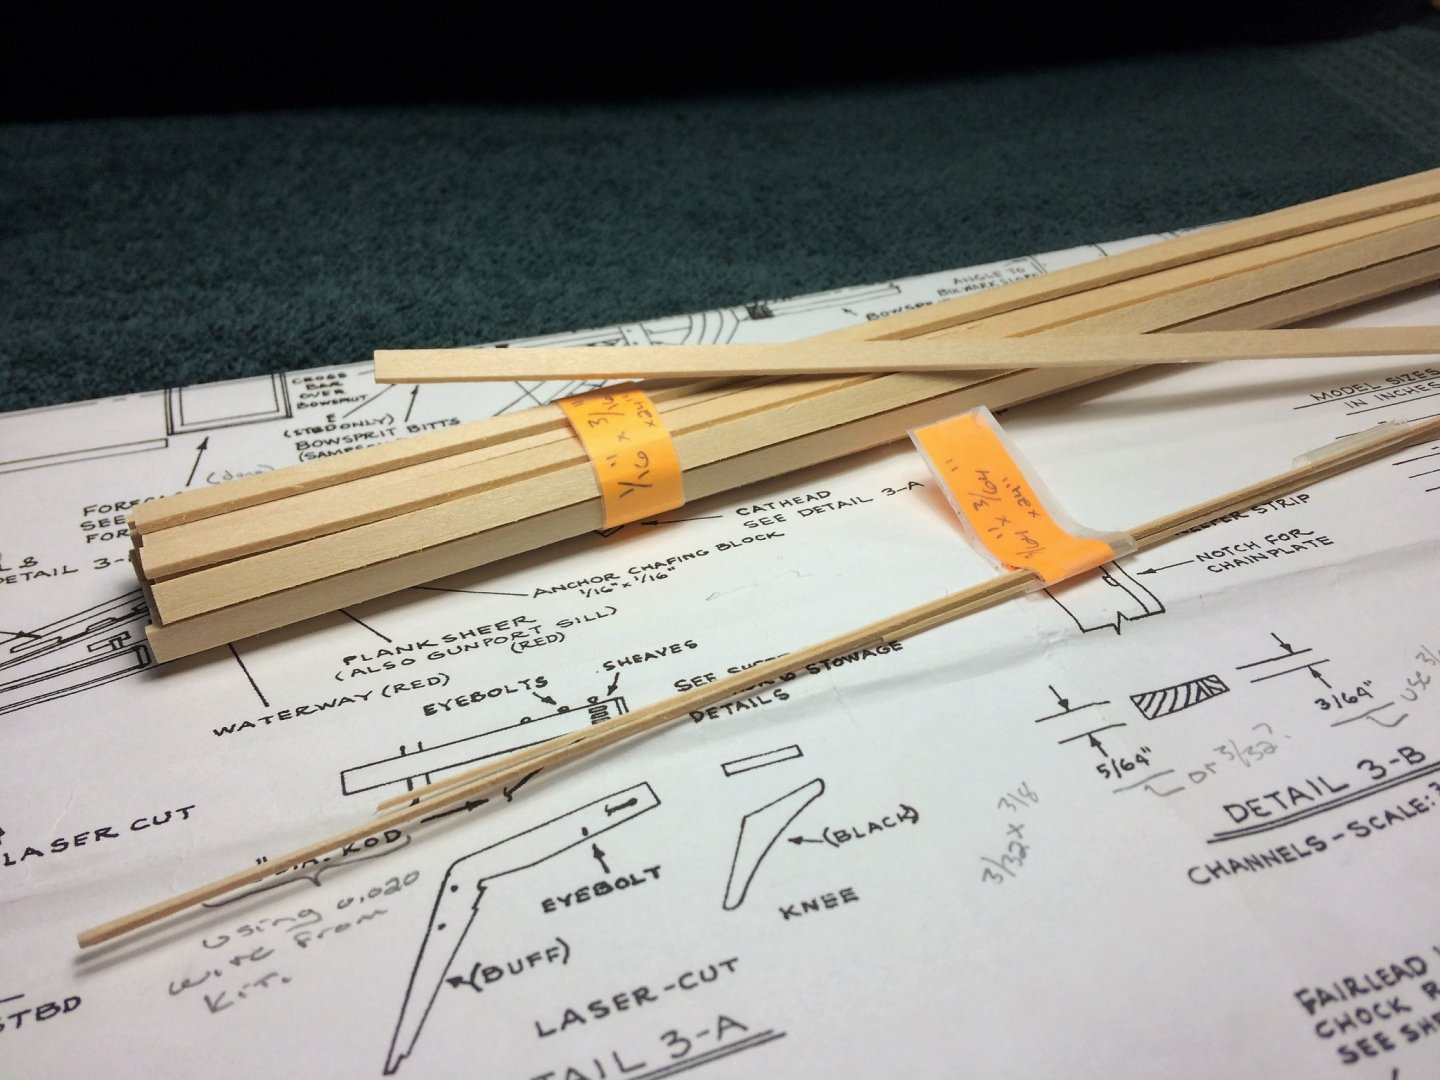
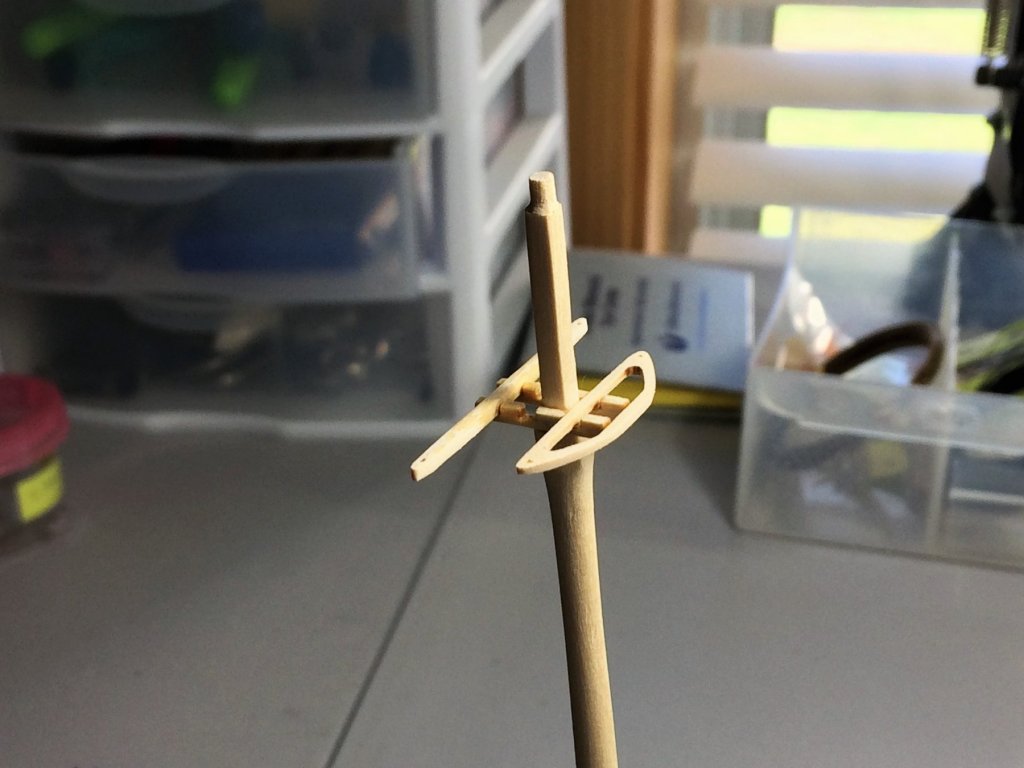
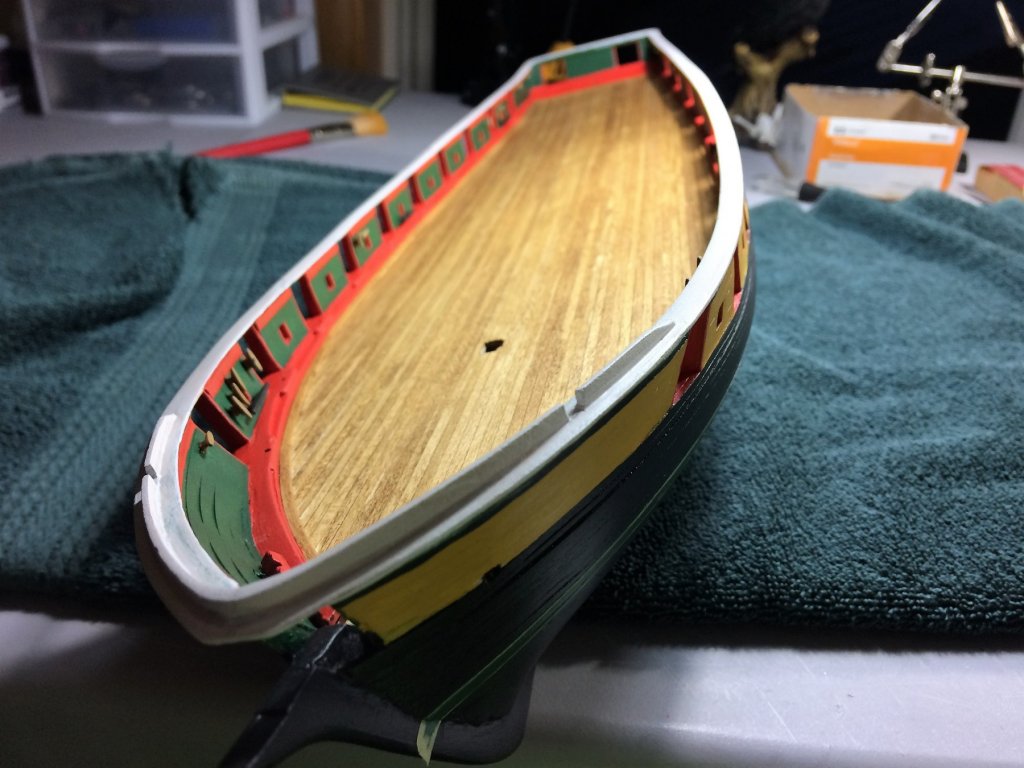
Evening, Since this most recent heat wave has finally broken, one can actually turn on an oven, cook dinner, and not heat the house up! Being that it is a nice comfortable day, and maybe I'm pushing it, but a nice roast turkey, potatoes and stuffing for a proper Sunday meal. The house smells wonderful! 🦃 While all is cooking, time for an update. I've gotten some great work done this weekend. Since I cut the openings for the Cat heads, time to get the Main rail painted. I started by priming the entire rail, this will dry for a few days. I'm going with a black Main rail. Being my first build, and If I had the foresight, I would have liked to have stained the rail. But It was covered in glue streaks and paint. So a good sanding then primed. The black should cover blemishes. The Catheads have there Eyebolts. These may look big/clunky, but I'm going with strength and functionality. Looks like they may have a fair amount of strain on them when rigged with bullseyes and rope. I've also started building the Main Topmast Crosstrees. Fragile, but pretty straight forward. I was hoping to get the entire Top Mast done and primed before the end of the weekend. But being zealous in my sanding I snapped one of the Crosstrees. Not all the way thru but I could see where it cracked. Placed a drop of Thin CA to soak into the crack and will let this sit. No paint this weekend. Tom E


-
Evening, Thanks Gary, really enjoying your Niagara! Really coming along nicely. I saw how you had trouble with the masts and not enough room for all the ropes at the cross trees. It has me re-thinking what I have so far, but I think I have it figured out. Started looking at the Anchors. Kind of a side project while other things have my main focus. I'm going to replace the Britannia stock with wood. Looks so much better. The metal pieces will need a clean up. I also made cuts for the Catheads. I was insane keeping these things aligned. Measured, measured then re-measured, constantly checking alignment with a small ruler. Wish I had pics of it, quite the process! The Catheads received a good sanding, and all appropriate holes for the hardware were drilled. Was REAL careful with those Sheaves at the head. Slightest curve to the drill bit and you could come out anywhere! They were then shaped to hug the Bulwarks at the Main rail. They were then stained an Early American. Same stain as most of the deck furniture and parts of the Bowsprit. I should have the eyebolts and brass bars installed shortly. The brass bars I'm going to blacken with Birchwood-Casey. Tom E