MORE HANDBOOKS ARE ON THEIR WAY! We will let you know when they get here.
×
josh44
-
Posts
112 -
Joined
-
Last visited
Content Type
Profiles
Forums
Gallery
Events
Everything posted by josh44
-
Binker by Omega1234 - FINISHED
josh44 replied to Omega1234's topic in - Build logs for subjects built 1901 - Present Day
Strong work, Patrick! Binka’ looks like the proud papa to the rest of the family. -
Igor, thank you! I was just reviewing and enjoying the gallery of your many excellent past posts!
-
Thank you, Igor. I hope you don’t mind me saying this, but I review your posts as inspiration to take my projects to a higher level! I have many new ideas and am excited to share them.
- 28 replies
-
- 3
-

-
- alaska
- sloop of war
- (and 2 more)
-
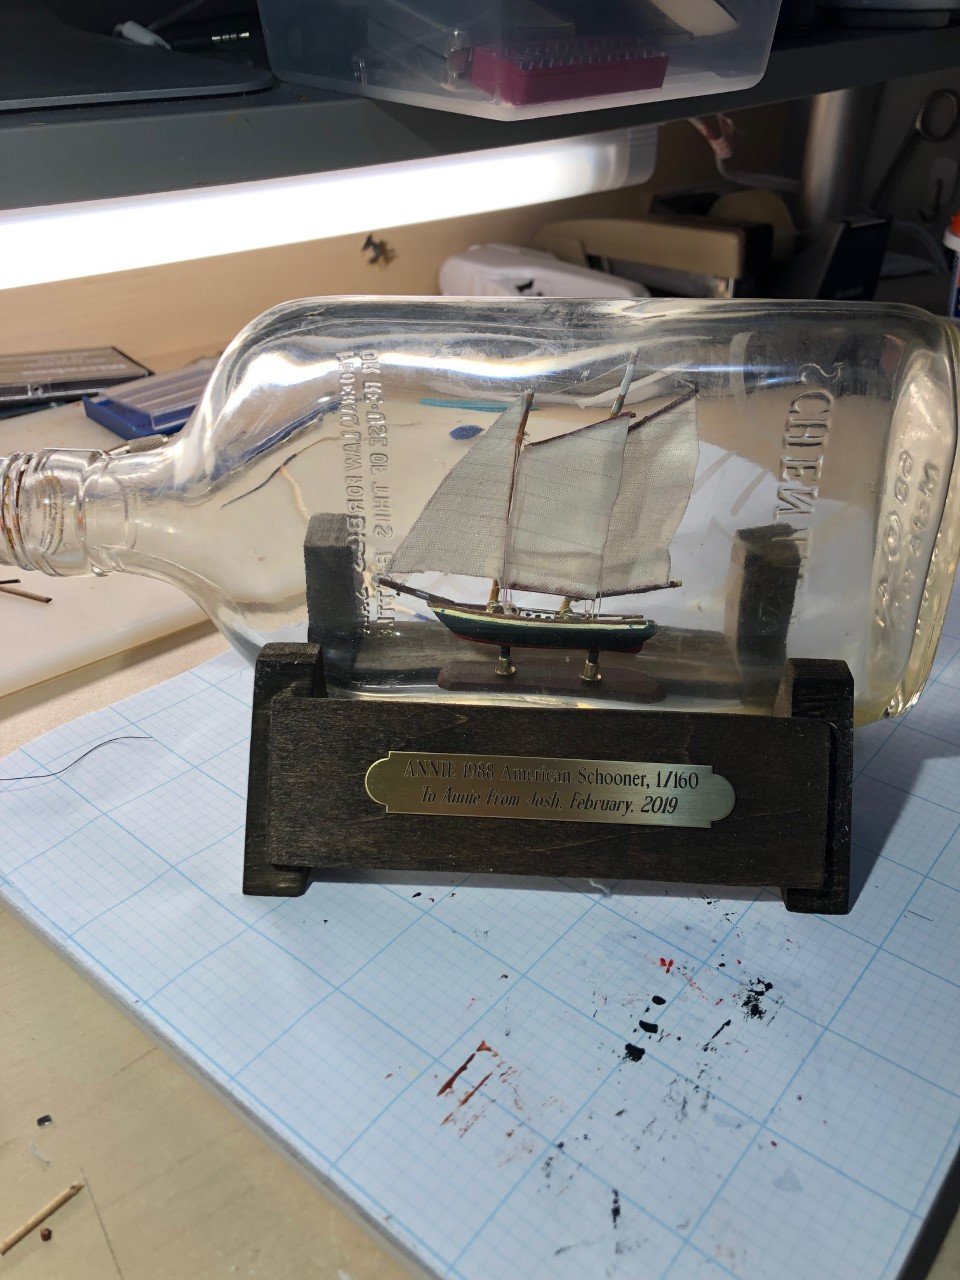
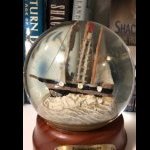
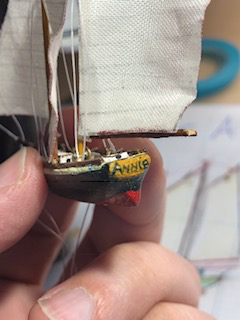
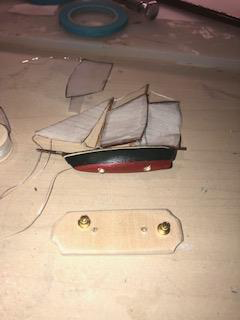
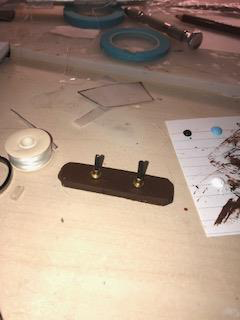
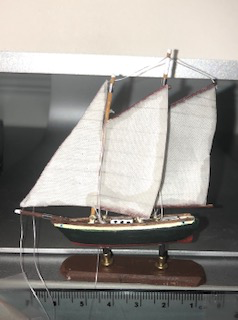
She's all done: I make a little stand, stain it with jacobean, and apply the brass plate! Tomorrow I give away the Annie to Annie! (She works with me so i'll get to visit!). Thanks for reading!! -Josh
-
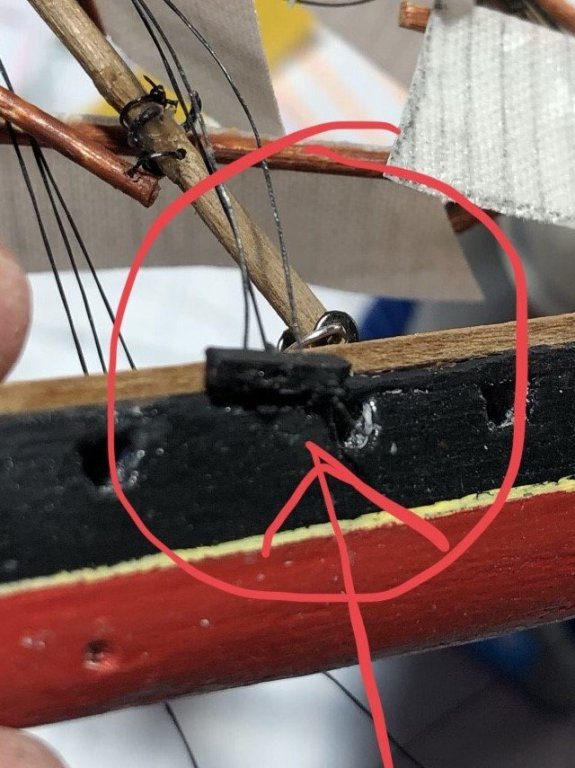
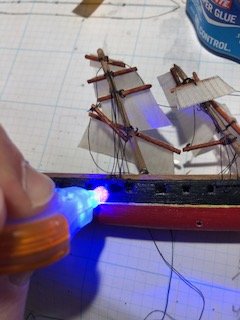
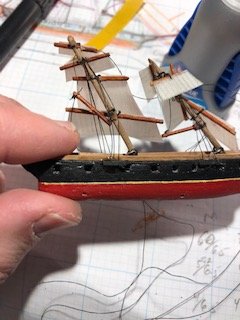
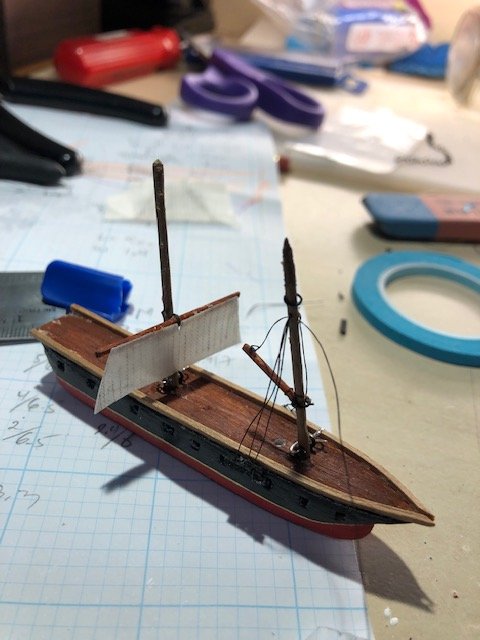
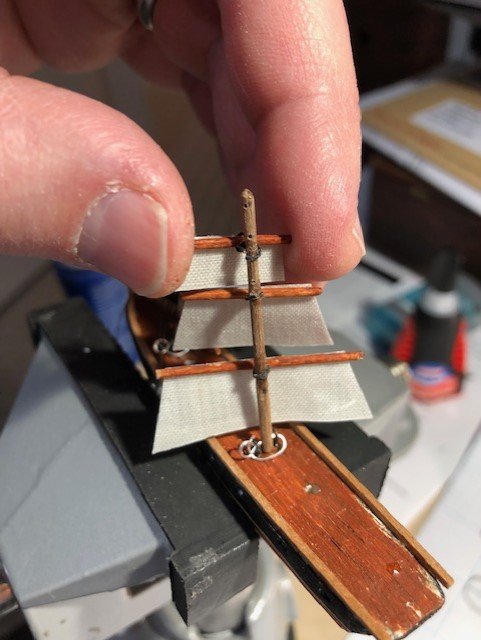
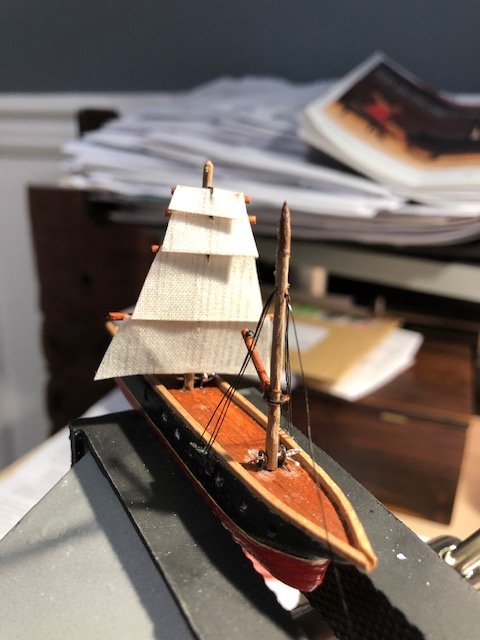
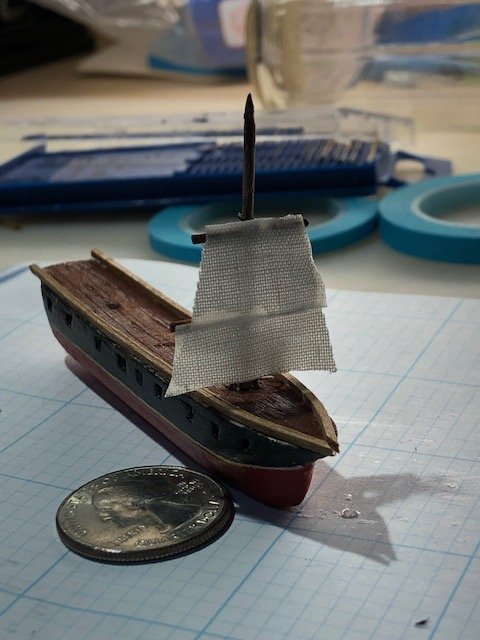
Well, Redoing the Foremast and all four sails with the shrouds and gaff in place was no small headache, but the end results were worth all the eye straining. For the Main mast, the gaff was added, plus her shroud lines and belaying racks. But each of my SIB posts would not be complete without some form of break or malfunction; The starboard mainsail belaying rack pulls off after the shrouds are set: No worries. I have a new toy: Bondic - a liquid plastic welding product. Squirt some of the liquid pre-plastic and then expose to its UV light pen for about 5 seconds, and it instantly sets into plastic without mess. Much easier than CA in some instances. After the bondic! (no, I dont work for them). Has anyone used this type of product yet? So far, its very cool and works well. Fore and main masts are set; the bow is prepared with a pin vise hand drill and so the bowsprit is glued in. Some of the running rigging is brought through: I decide to start it from the gaffs. The Main gaff needs a little anchor by way of a flattened cord end. Next stop: Mizzen mast, spanker, and tacks.

- 28 replies
-
- 4
-
-
- alaska
- sloop of war
- (and 2 more)
-
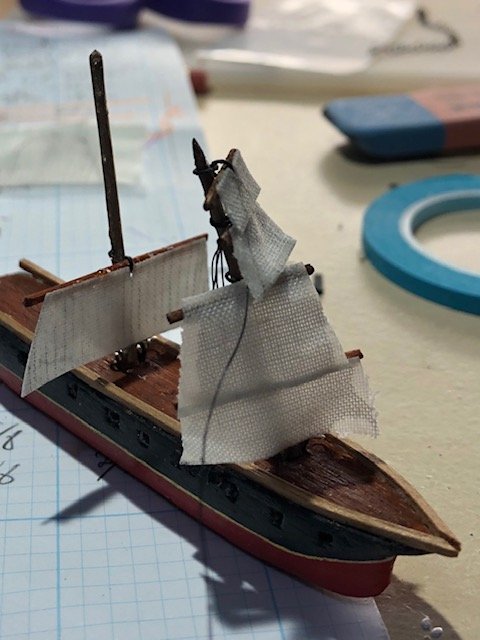
I'm excited about this post because it gives a sample of the error and fixes that can occur with SIB. After the formast and sails were installed, I put on the shroud rigging. Fortunately, the real Alaska has what looks like large belaying rack external to the ship. I prefer these over drilling holes in the sides of the ship. I usually do three runs per side. then I moved on the the main mast and sails.. I tried a new technique for the main sail, drawing patterns on the muslin, and coating the entire sail in CA. So here was my dilemma: The Main sail looks so much better than my completed - but sad, shaggy, and too narrow quite frankly! - foremast and sails. A good problem I suppose, one that required denuding the foremast of its sails and then completing the main sails till it looks much better.
- 28 replies
-
- 4
-
-
- alaska
- sloop of war
- (and 2 more)
-
QUICK-FIND INDEXES to BUILD LOGS FOR KITS
josh44 replied to Dan Vadas's topic in - Index of all kits by brand and subject
Amazing - thank you! -
QUICK-FIND INDEXES to BUILD LOGS FOR KITS
josh44 replied to Dan Vadas's topic in - Index of all kits by brand and subject
Hi Danny, regarding the Signature - so I tried to copy and paste in the links to my ships, but it put in the pictures as well - a little to clunky, and not what I want. How do I set up a hyperlink to my builds but without the picture? like everyone else.... thanks! -
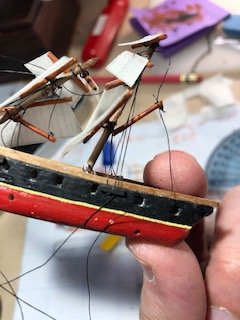
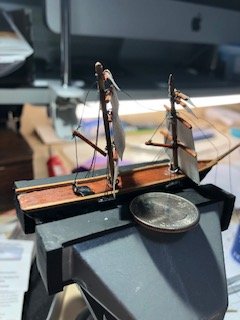
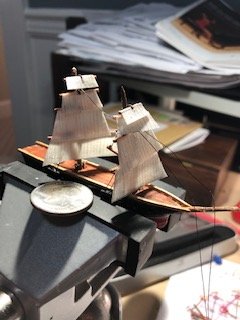
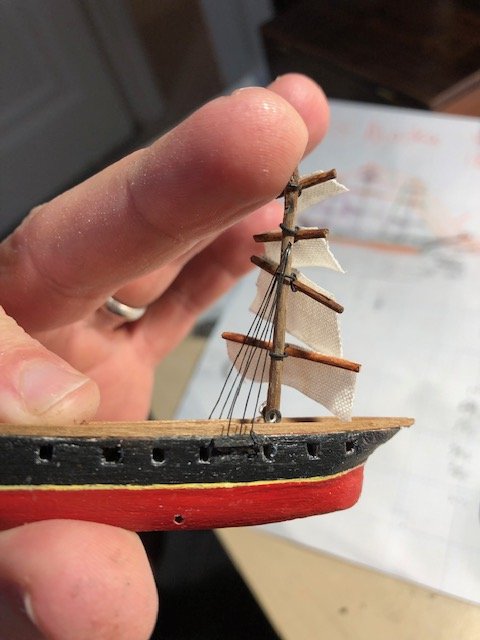
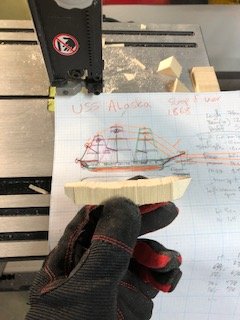
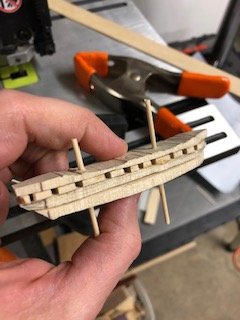
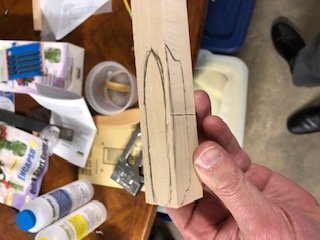
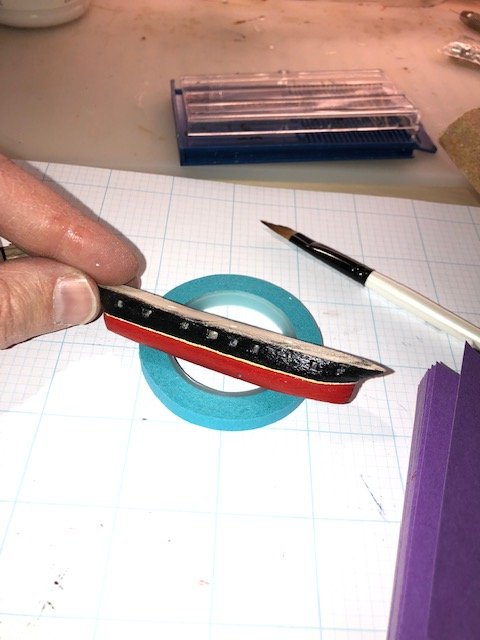
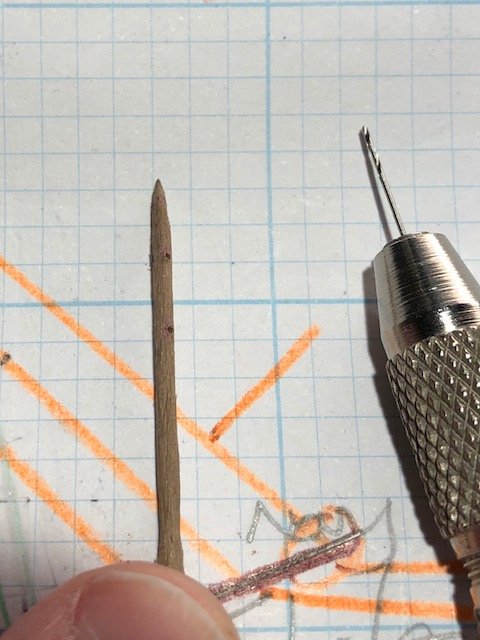
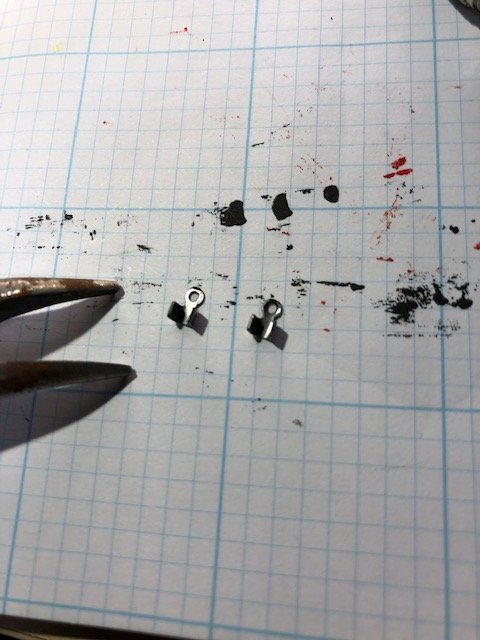
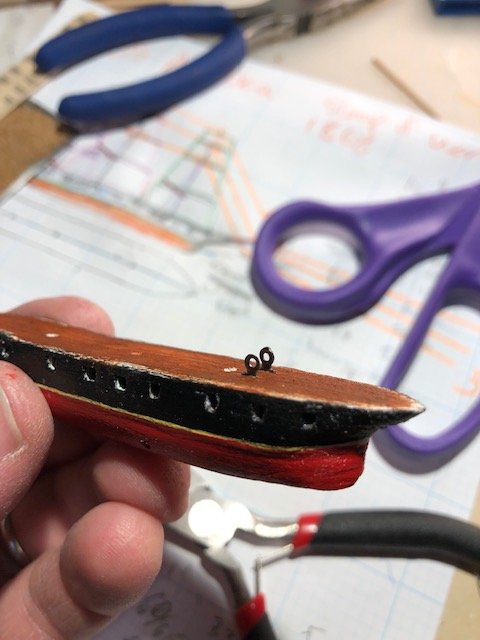
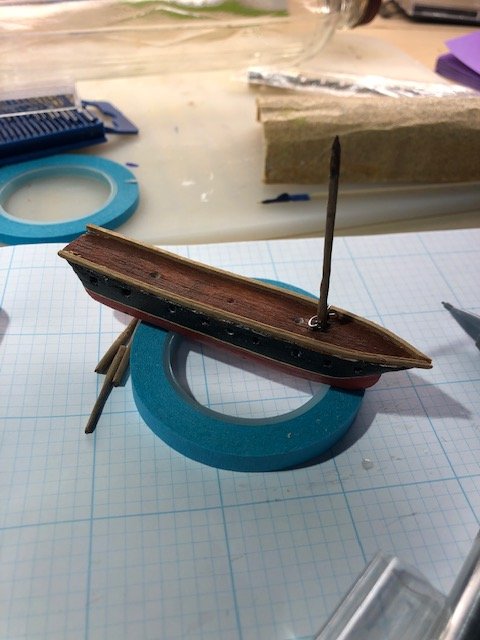
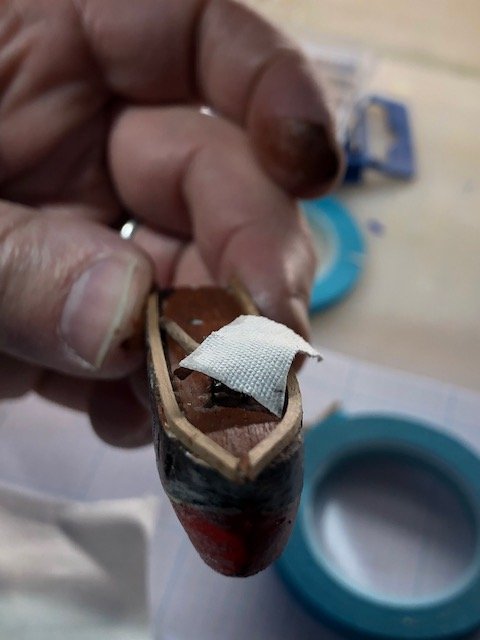
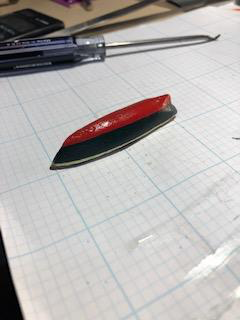
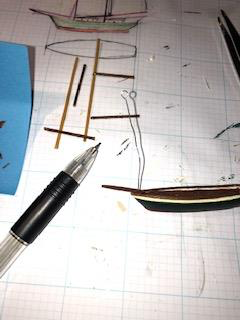
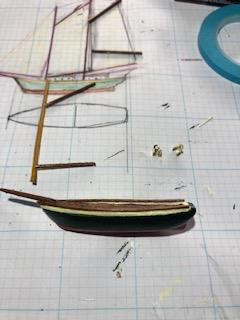
Hull blank and general outline Not much out there to guide me on the details of USS Alaska, other than pictured above. So I looked at similar sloops-of-war from that era, including built from the same shipyard. These included the USS Austin, Eerie, Constellation and Portsmouth. After about 2 days research - life is cheap with SIB! - I cut out the hull blanks from bass. For the square gun holes / port holes - what are these called? - I was inspired to to cut them out instead of just painting them black; to do this I make saggital slices of the hull. I wich I had done that from the start. Mine became a clunky hybrid of hull blank + saggital slices. After tons of sanding and redos and repainting, I settled with this look. I made the hull deeper and more square on purpise - this time ia m going to try the silicone sea as was perfected by IgorSky - I need a big broad hull for purchase of the rubber and silicone glue. the Foremast How I make the mast hinges - cord ends for bead works, straightened and clipped. till you get this. A solid, smooth mast hinge is critical to my piece of mind with these little guys and gals. I added some mahogany strips for bulwarks, and a scratched painted faux deck. A real strip deck was just not in the cards for this one. The Bulwark cleans her up nice enough. I been going crazytrying to figure out how to better attach square rigged yards to the masts. I founf some tiny chain link in the beading store, cut two links and... secured with a little CA But how does she lay down? Very easily! and again.
- 28 replies
-
- 5
-
-
- alaska
- sloop of war
- (and 2 more)
-
Thanks Patrick! I am really excited about this one. Been giving all the gaff and yard hinges a lot of thought: I have a few new ideas, and something is bound to do the job better than tying all those wobbly knots. Viewing the other posts on this site has really inspired me to elevate my process.
- 28 replies
-
- 3
-
-
- alaska
- sloop of war
- (and 2 more)
-
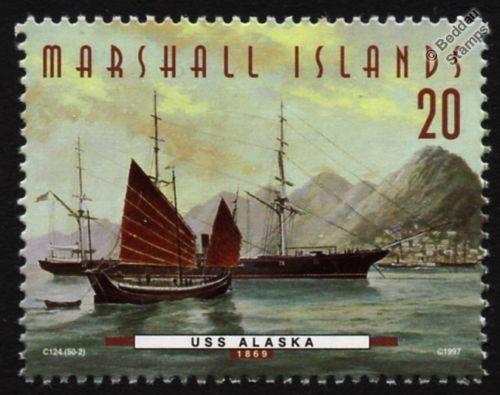
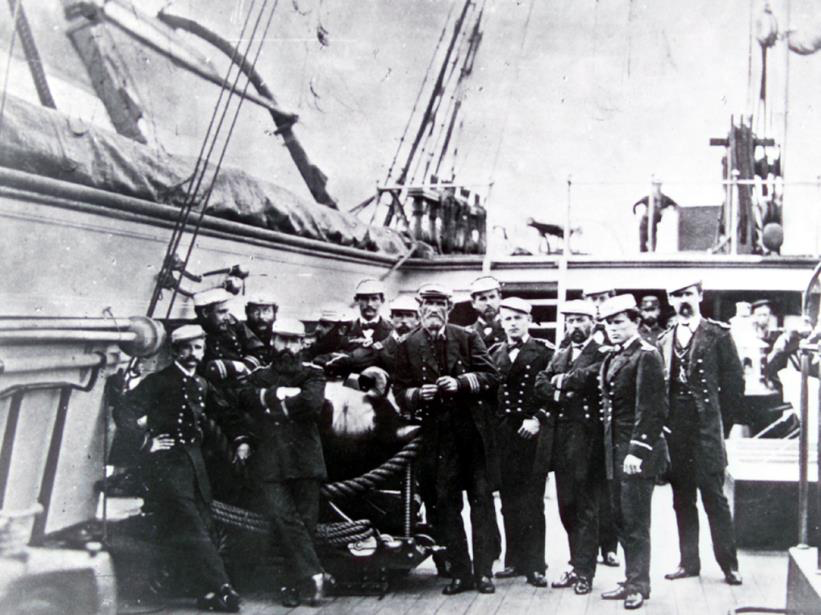
Not sure, but I do see what you mean. I found a couple other pictures, none terribly helpful with the model, but still: Cool commemoratove stamp, and the original crew! I presume thats Cmdr. Homer Blake in the middle. https://www.naval-history.net/OW-US/Alaska/USS_Alaska2-Officers-1880.jpg
- 28 replies
-
- 4
-
-
- alaska
- sloop of war
- (and 2 more)
-
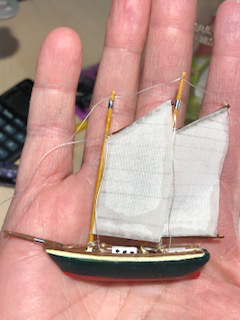
I am choosing this as a gift for my friend, Brynn, who is from Alaska. Couldn't find too many ships named Brynn, and i kind of like what is going on with this particular ship. Apparently, a sloop-of-war is not a sloop that I think of in the civilian or recreational sense (eg a single gaff-masted cutter); rather a sloop-of-war I believe could be any unrated (ie under 20 guns?) two- or three-masted ship. The two-masted sloops-of-war were typically configured often as either main-mizzen-ketch or fore-main-snauw. This USS Alaska is a three-masted square-rigged ship, was the first of four US Navy ships named after the territory / state, and was launched in 1868. As far as pictures, i found these two dreary ones, and i suspect that they only hint at the splendor she would carry when at full sail: https://en.wikipedia.org/wiki/USS_Alaska_(1868) https://www.history.navy.mil/our-collections/photography/numerical-list-of-images/nhhc-series/nh-series/NH-63000/NH-63526.html If anyone can refer me to any other photos or pictures of any kind, then i would be grateful. Otherwise, i will do what SIB builders do, which is to blend two shots reverence with one shot imagination. (Fair warning - if someone produces authentic picture with hideous colors, or all gray, then i might balk and choose my own). With three masts, four yards each, gaffs on each mast, and a bunch of lifeboats, this will be fun! Will probably look for a thinner sail material than i had with the Annie. Thanks for reading!
- 28 replies
-
- 7
-
-
- alaska
- sloop of war
- (and 2 more)
-
Haha - that’s sounds good too, but I meant a mini bucket and bottle for the tiny folks who will be enjoying the ride on the yacht! Cheers!
-
Patrick, really cool work! The detail is inspired. Did i miss the ice bucket with champagne, , or are you waiting for the official launch? -Josh
-
QUICK-FIND INDEXES to BUILD LOGS FOR KITS
josh44 replied to Dan Vadas's topic in - Index of all kits by brand and subject
oops - now I see that you are updating the index in batches, not rolling. sorry for not reading enough. -Josh -
QUICK-FIND INDEXES to BUILD LOGS FOR KITS
josh44 replied to Dan Vadas's topic in - Index of all kits by brand and subject
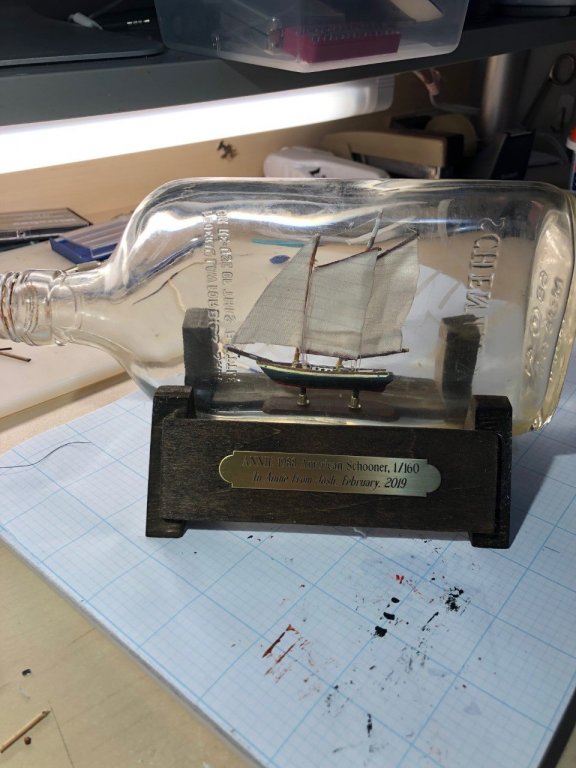
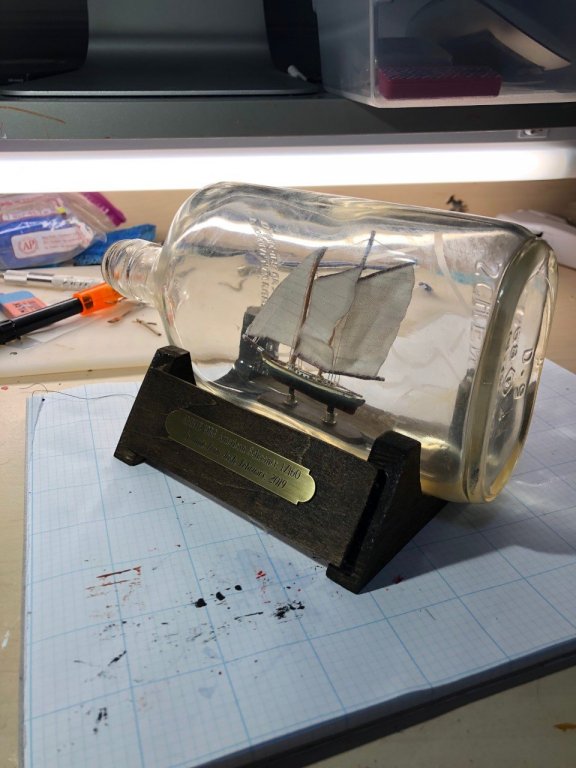
Hi Dan, I am almost finished with my first build log - scratch -ship in bottle -Schooner Annie. How do I get it onto the index? When I finish the build log, how does the index get updated as FINISHED? Also, how do I list my current builds and FInished builds, like the post above me? thanks much! -Josh -
Thank you, Patrick! Yes each SIB launch has its own challenges. Part of the joy and sorrow of this strange hobby. Cheers, till next time! -Josh
-
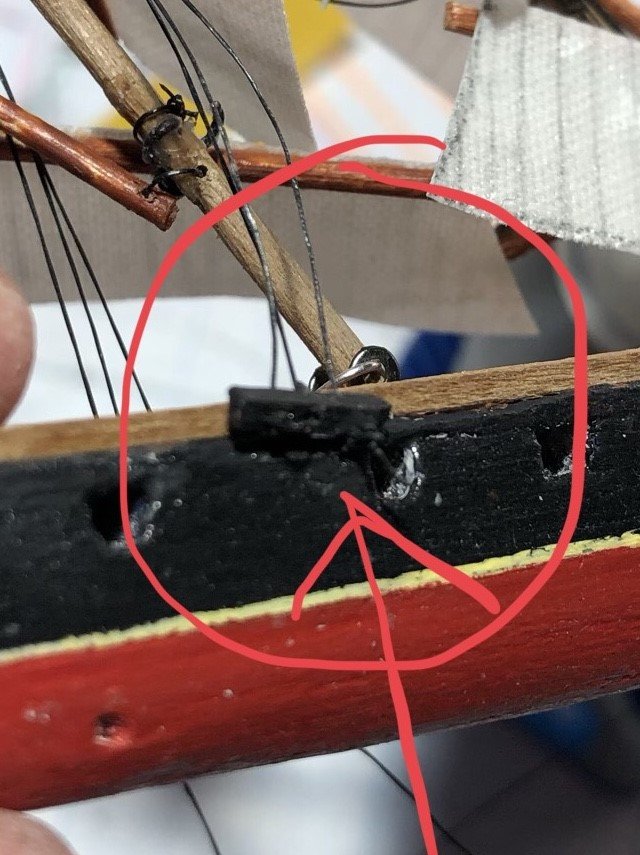
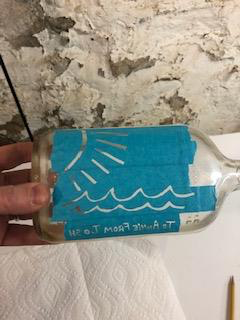
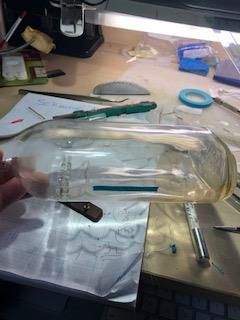
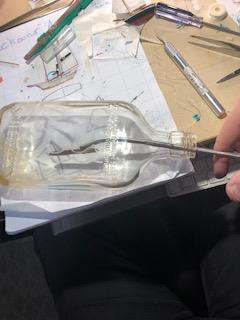
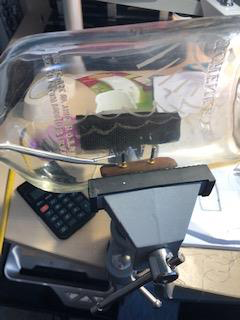
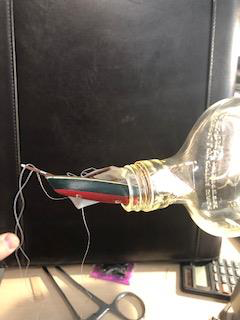
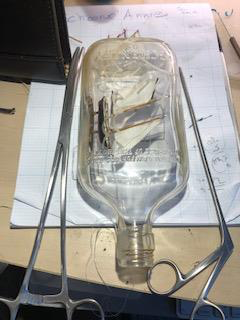
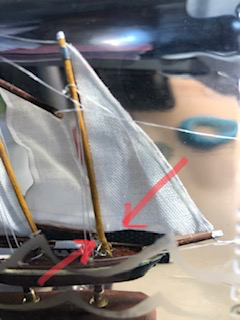
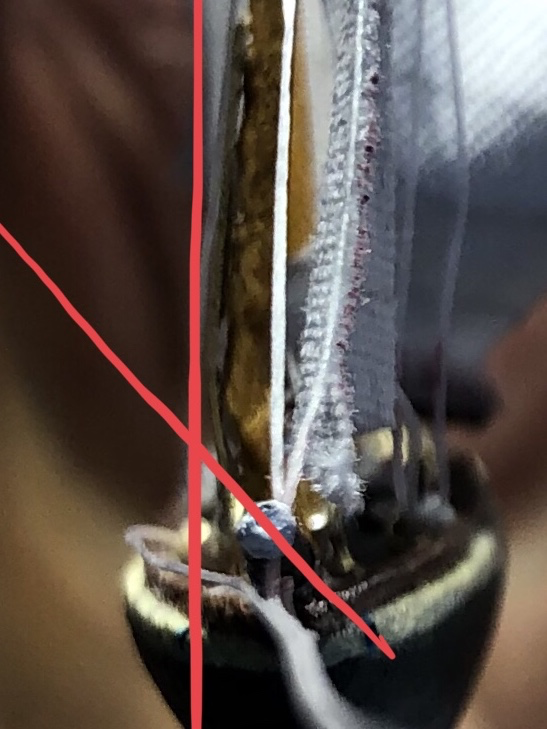
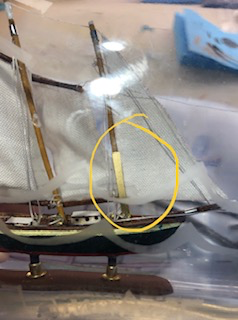
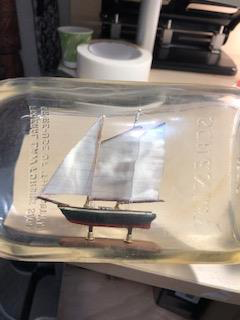
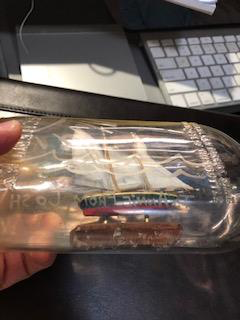
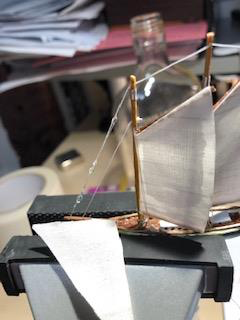
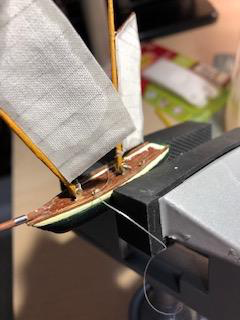
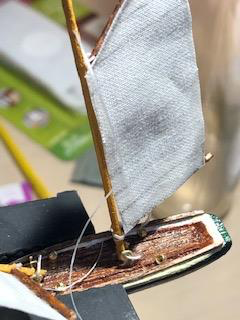
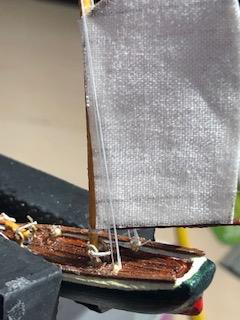
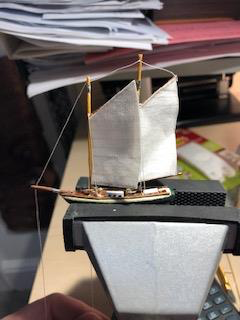
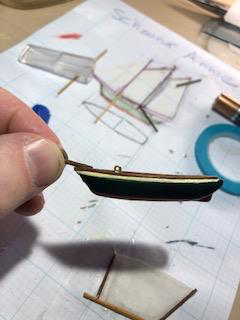
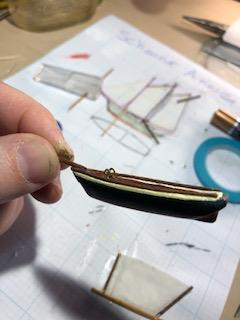
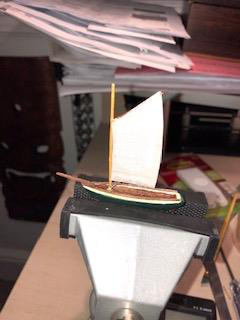
Bottle Work and Repairs - This is going to get messy. The Schooner Annie is ready for her launch. I tried a new trick this time, using glass etching to add some interest to the bottle - a few waves and a cartoon sun. The ecthing came out fine on the posterior glass, albeit hardly visible. I undestand - and apologize! - that this firmly puts my project at risk for kitsch, but I knew that her recipient will apreciate any degree of detail and thought. Initially I had thought originally to try a silicone sea in the wonderful manner of IgorSky, I havent figured out the coloring of that, so I decided to present her on my standard little pedestal. Furthermore, the Mrs and kids here do not approve of my clay oceans. Having the proper tools really helps. Launching my initial kit ships with coat hangers was a disaster. Hartman Alligator forceps - not too expensive on amazon! This is as small as I can paint. I first tried etching with an electric etcher, but that didnt work well. It's crunch time! The muslin sails with Loctite CA became too stiif for the small thin gaffs and masts. No loud snaps or cracks, so that was encouraging, however, there were many critical threats to come... Sometime need two hartmans to see what's what. Diagnosis: Dislocation of the Foremast from the Fore Gaff! Inside the bottle! The patient is ready for surgery. I plan to thread this hole in the fore gaff. It is not large. Money shot: Required two Hartmanns All seemed fine until I noticed this other little beauty: Foremast fractured just above the hinge. Not sure whats keeping it together.... Head on view in the bottle: That's a 45' fracture! I braced it with some spare brass on the 'leeward' side of the ship. After about a million other minor repairs, cheats, nips and tucks, she's all set! From the Lee side- the silly etching and the etched inscription can be seen. Shes gonna love it! Not perfect, and I have some major gripes with the stiff sails, gaff placement, and of course my ill-advised choice of thin masts and gaffs. But she'll definitely do, and I learned a lot on her. At a later date, I will close out the log when I build the stand and get the brass plate. 😁


-
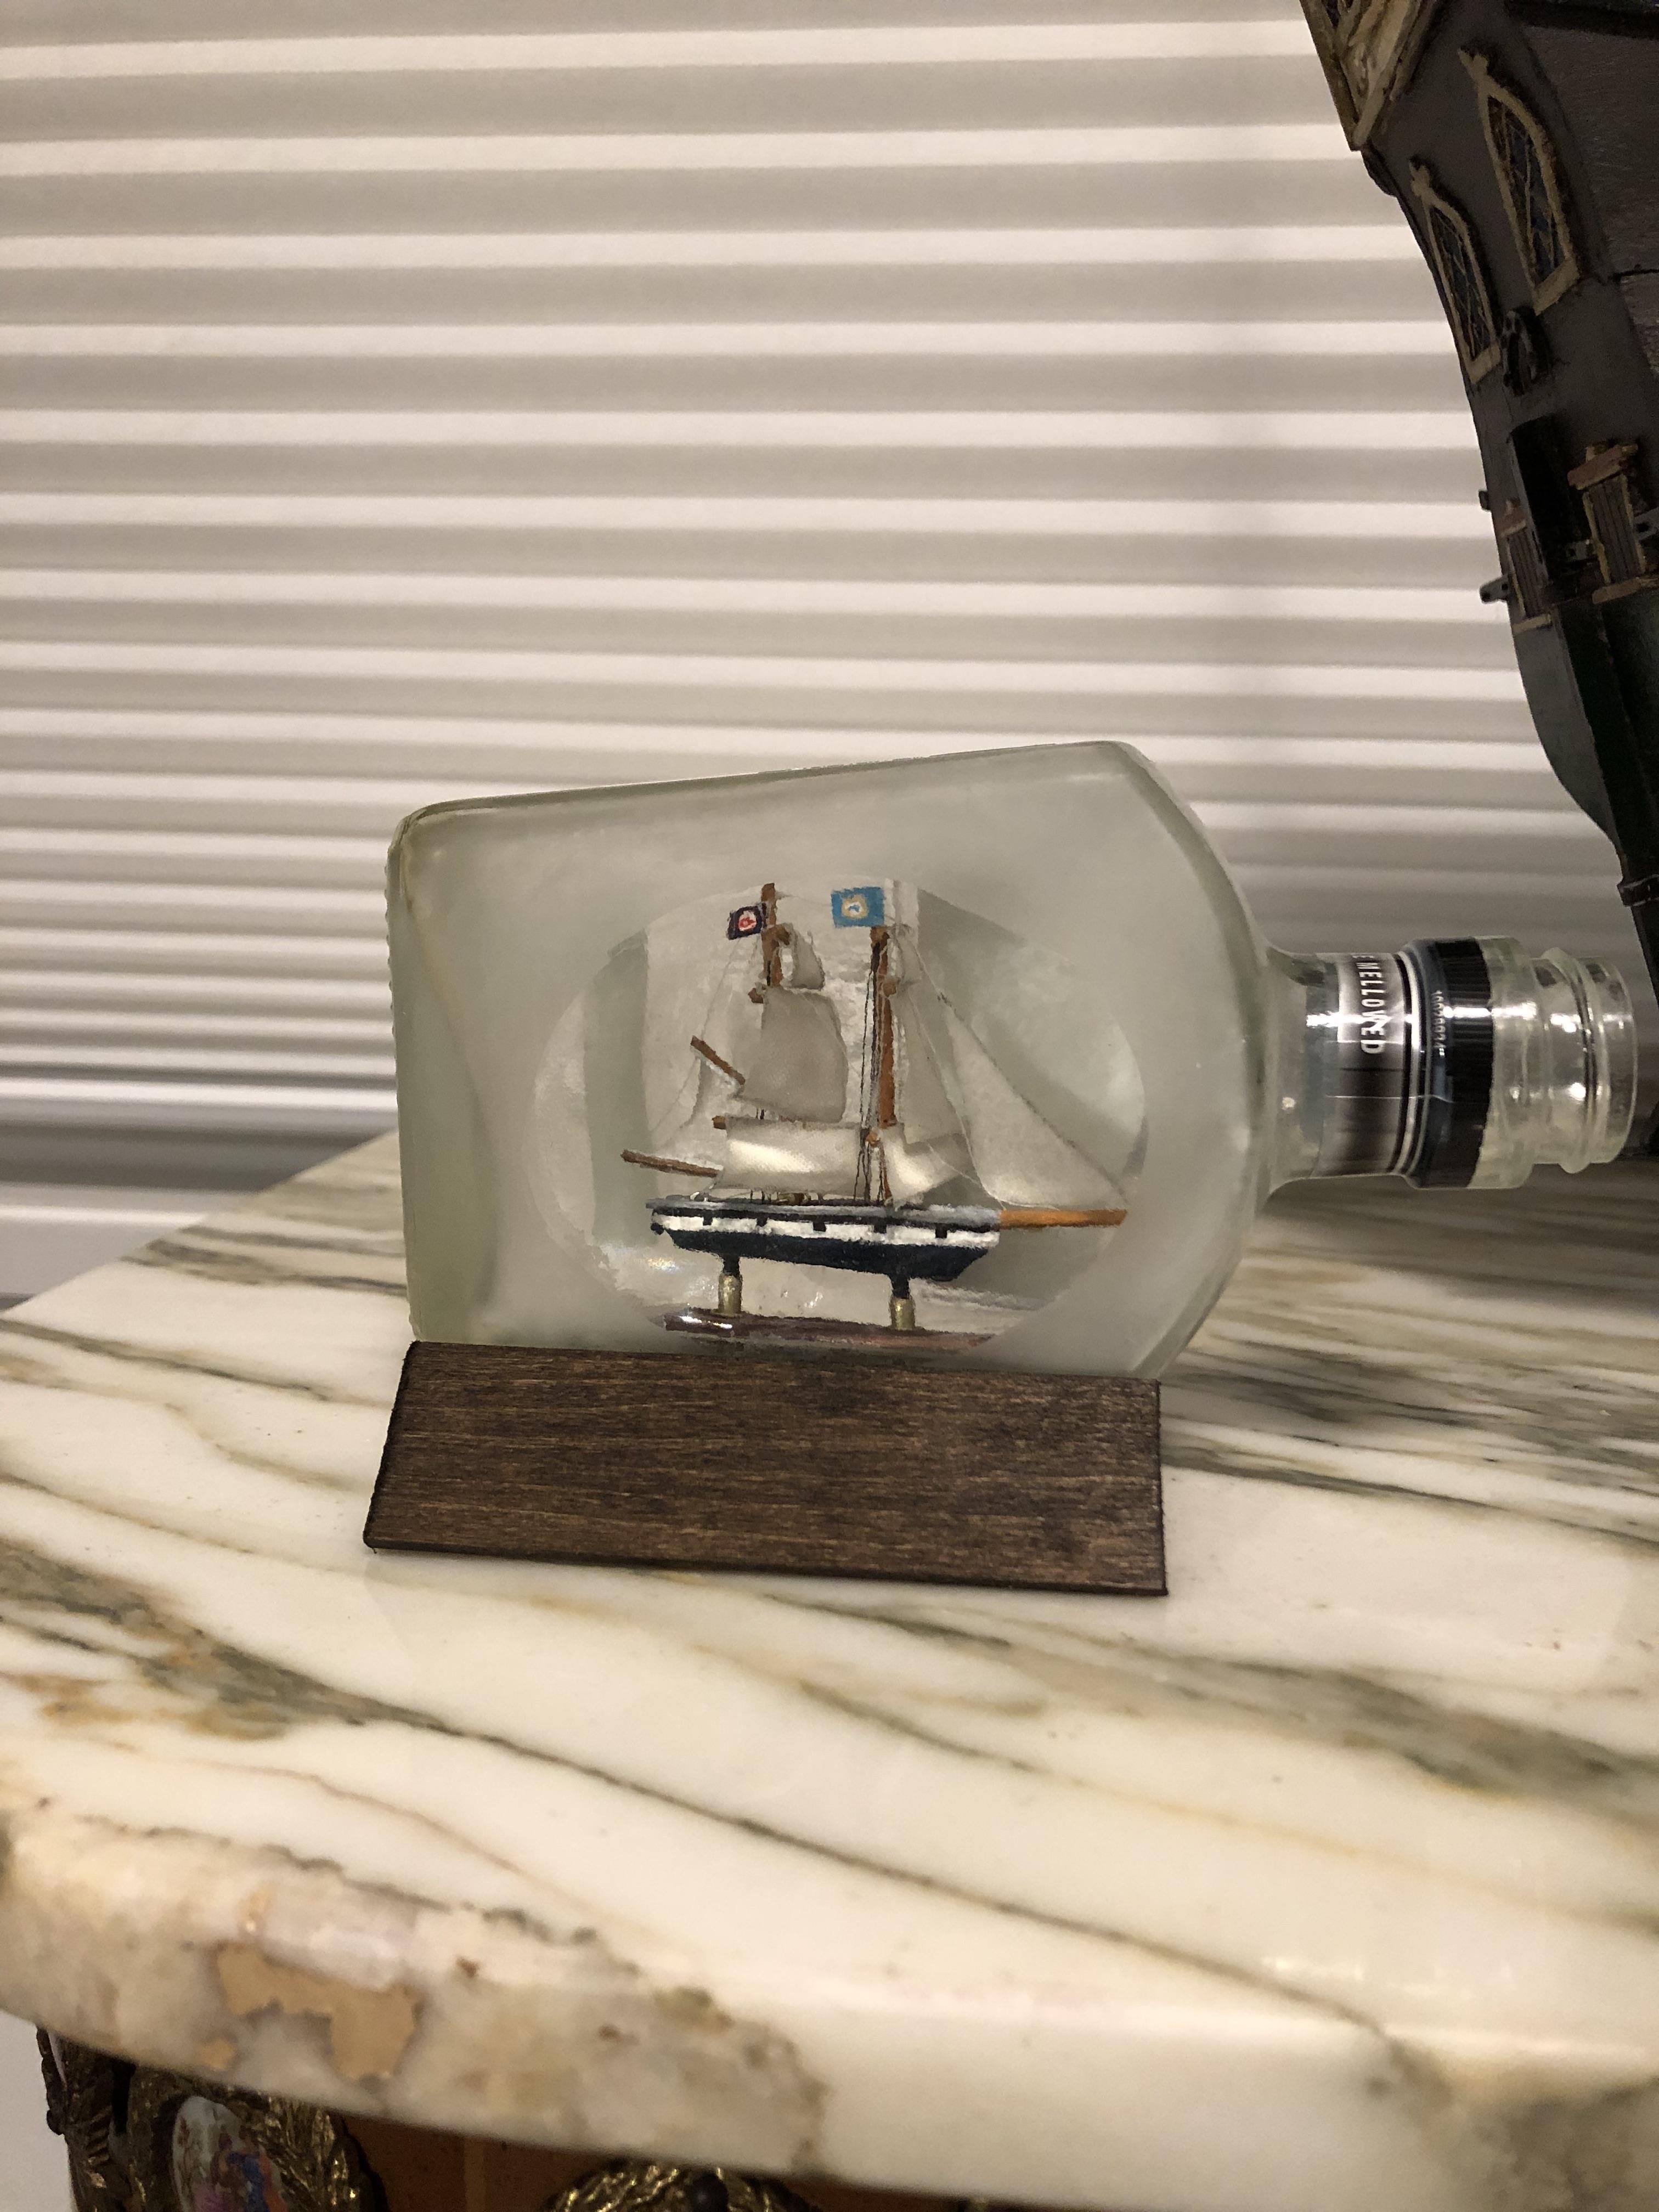
Hi Igor, Your work is really wonderful. Thank you for sharing it with us. Very inspiring! I hope you don’t mind if i ask: how did you tint the silicone sea? The rubber mixture doesn’t mix well with most colorings. Also, I agree with Cog^ - you created a great sense of proportion and drama. Don’t always need to fill up the bottle space with the ship. Thank you! -Josh
- 131 replies
-
- 4
-
-
- bottle
- the old man and the sea
- (and 1 more)
-
Thanks Patrick, One of the things I like about bottled ship building is that within only a few weeks, your little project can go from scratch to hatched. The next post will be interesting, as the launch into the bottle always brings unexpected and unwelcome challenges.
-
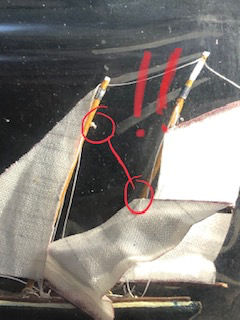
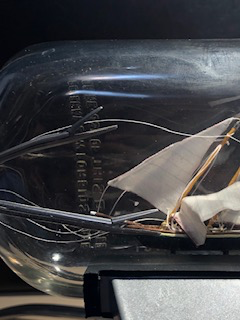
At this point, things are looking fine, but with only one running rig line from the main gaff, I worry about not having enough straightening power on the foremast. I bite the bullet and decide to drill another small hole - this one afore - above the foremast shroud hole. This will simply attach to the foremast and run parallel with the jib line, and down to another hole on the bowsprit. I glued the jib onto its line - this time applying the glue directly to the thread. Still trying to figure out the best way to adhere the sail cloth to the lines. Glue stains are bothering me quite a bit. A few more touch-ups are required on the deck house, sail edges and masts. Then its ready for the pedestal. I made a rookie mistake by forgetting to drill the pedastal holes in the hull prior to doing all the sail work. (Cut the blue wire. But not before you cut the red one!) I got the holes in fine, but probably not employing OSHA best practices. The pedastel is cut and carved from 1/8" bass, and then gussied up with brass eyelets and black dowels. One tip I learned the bad way is to let all the CA dry and cure before putting the ships in the bottles; otherwise you are at risk for "blooming" - the white precipitation of the excess CA onto the inside of the bottle and all over ship. Like a deadly frost. Here she waits, while the bottle gets prepped, and the CA sets. Next will be bottle work.
-
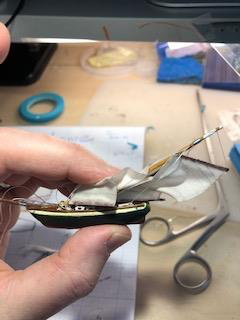
I made the main mast the same as the foremast. Cord ends were fashioned into hinges for the mast. I found some silver plated bead tubes for the masts and the bow sprit. For the 2 shroud lines I used brass crimp beads as pass throughs for the thread, instead of drilling more holes in the railing. This worked out great, keeping the shroud holes below the deck level; except the bead on the starboard foremast isnt glueing properly tonight. For this model I am really trying to keep it simple, with few rigging lines, both standing and running: 1) because it's a simple small schooner and I dont want to junk it up, and 2) because the masts I chose are really weak, and I am already seeing some stress fractures - cant afford to be drilling and tugging any more than the minimum. In fact I might get away with a single running rigging line from the main gaff up and fore to the bowsprit. The deck houses are on; attention to small detail definitely not my sstrong suit, but itl'll do. My baby's almost all grown up! For anyone reading this: Please correct me when I misuse any terms. I am learning, so please feel free to educate me. Next: the jib sail, then the base and bottle work
-
Welcome Jeff, I am a recent new member. This is a very welcoming and supportive community!
-
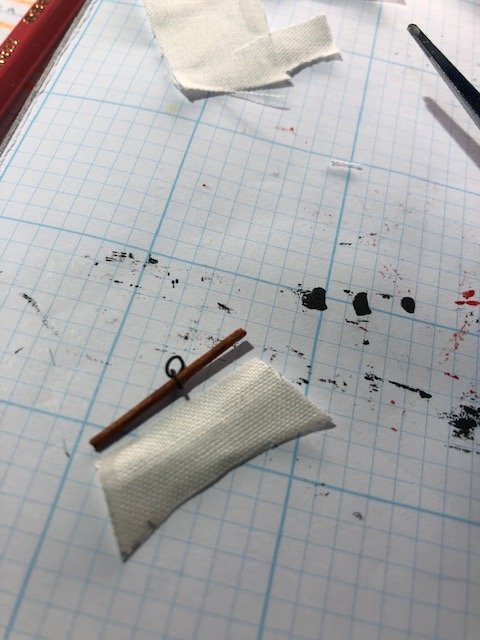
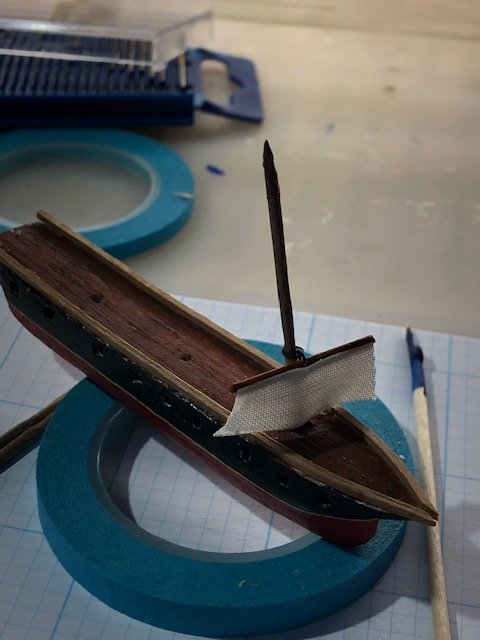
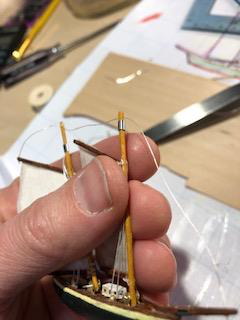
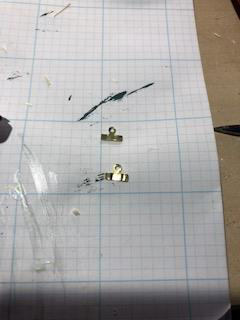
Preparing the masts and sails After a few extra coats of acrylic, and a coat of medium gloss varnish, she is looking better. Masts and gaffs were fashioned from 3/64" dowels; previously I thought them too flimsy, but I got bolder after I laid down a few coats of super glue. My first main mast splintered after I drilled the final hole for the gaff, but I glued extra and drilled more carefully. The bowsprit I shaved from a stouter dowel, since this will be taking more strain. I secured it to the deck with a tiny wire nail. Tiny holes are drill into the masts and gaff at precise points with a pin vise hand drill, using jewelers bits, typically around 0.5 mm. These are for the standing rigging (to attach mast hinge, booms and gaffs, and shrouds), as well as for the running rigging (which is pulled through holes to help raise the masts in the bottle). Booms and gaffs are knotted twice - on this ship I am using simple nylon thread. Sometimes I Use silk or fireline, depending upon the job! I measure out and trace sails on to a bolt of muslin. After I glue the edges with CA to minimize shredding. For this simple schooner I simply glue the sails to the boom and then the gaff. I dont like the traditional methods to fold down my masts, and am always looking for ways to improve upon how the masts collapses. For now I have settled on making my own tiny hinges from cord ends, found in beading and crafting stores. I use 2 two to make one hinge: I pry open the arms to make it flat, then clip off the extra wings and base then I jam them into small slots which I carved in to the deck. and then I can pass a wire through (a tiny drilled hole in) the base of the foremast! So far, so good... but everything always comes down to the launch in the bottle. I will repeat the same with the Main mast, then will work on the deck houses, and the rest of the rigging. In a few days...
-
Hi Patrick, Thank you! Yes, I’m pleased so far. I think she’ll shape up nicely. Cheers backachya, Josh