MORE HANDBOOKS ARE ON THEIR WAY! We will let you know when they get here.
×
josh44
-
Posts
112 -
Joined
-
Last visited
Content Type
Profiles
Forums
Gallery
Events
Everything posted by josh44
-
 Thank you, Steve! I will try to capture the moment, but as you all may know, we probably shouldn't over estimate how civilians feel about our builds... <insert whaddayagonnado emoji here!>
- 11 replies
-
- 3
-

-
- pirate ship
- bottle
- (and 1 more)
-
thanks, Patrick! It was a fun build - until the octopus exploded. looking forward to more of your builds.
- 11 replies
-
- 3
-
-
- pirate ship
- bottle
- (and 1 more)
-
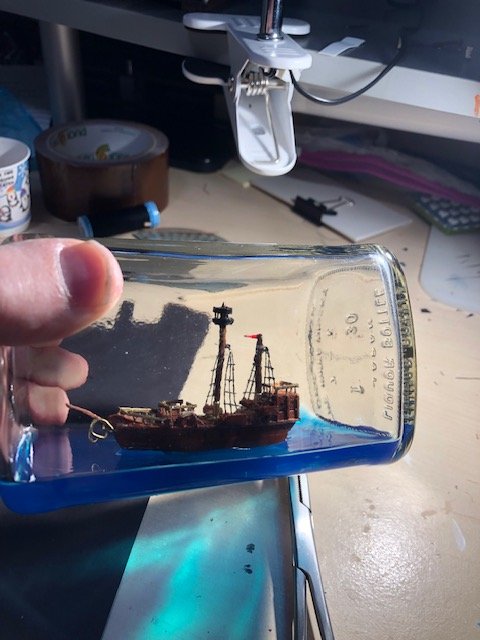
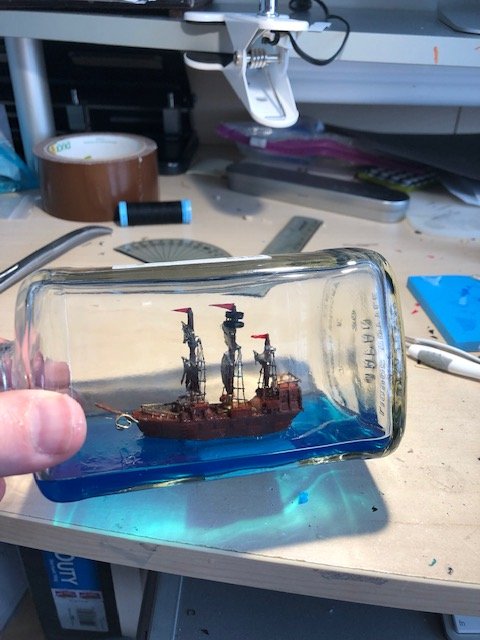
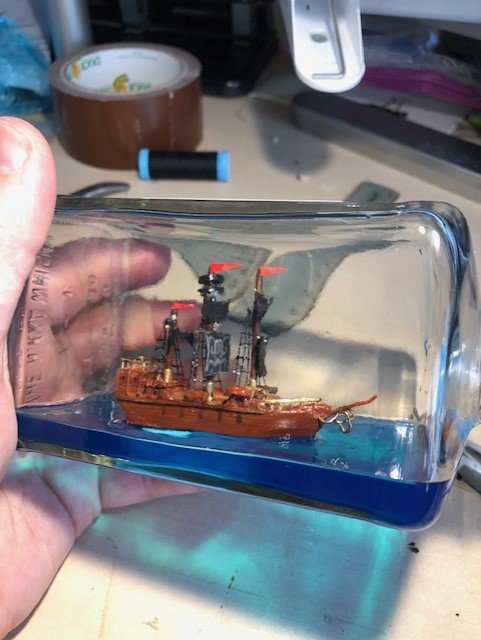
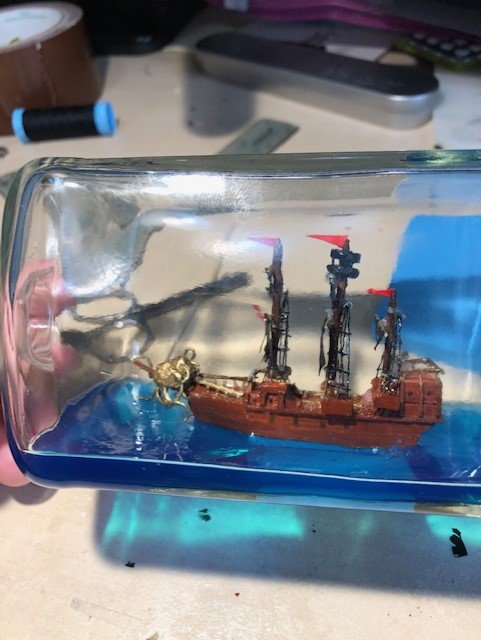
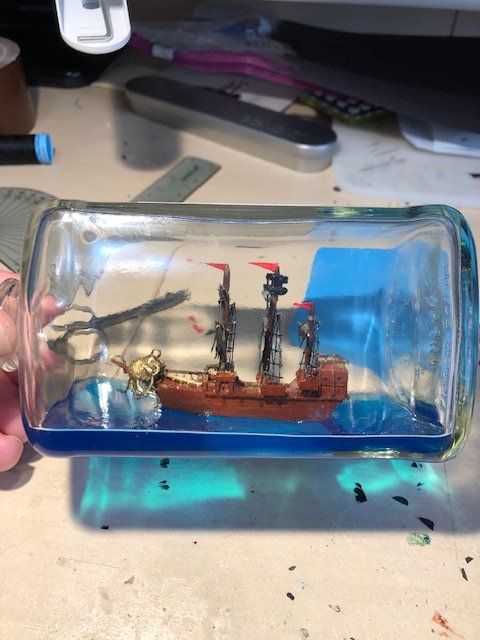
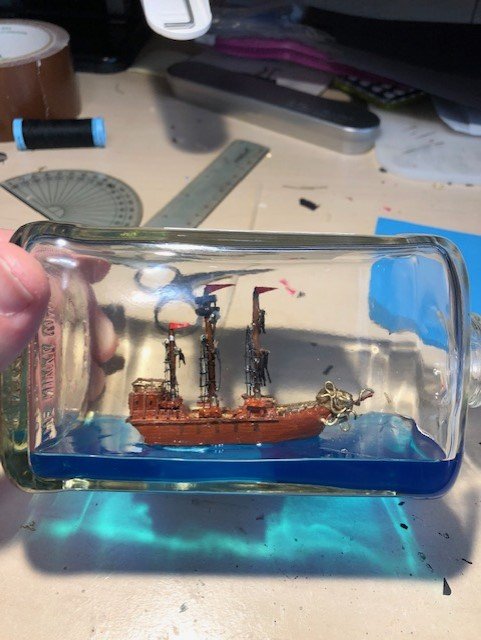
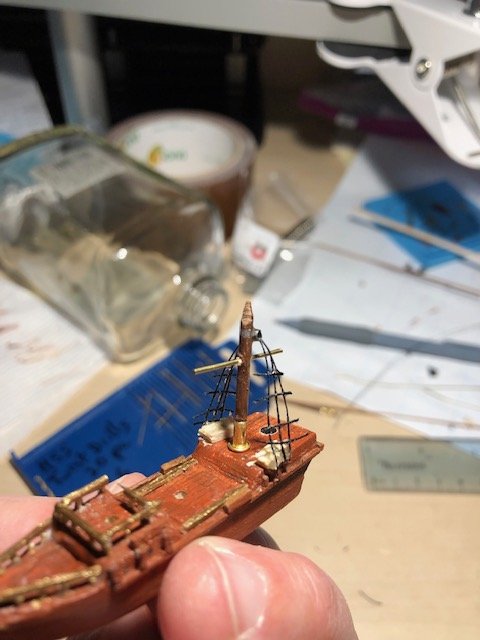
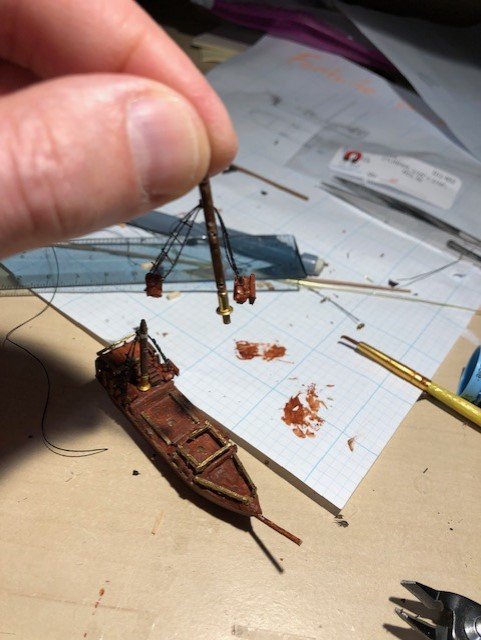
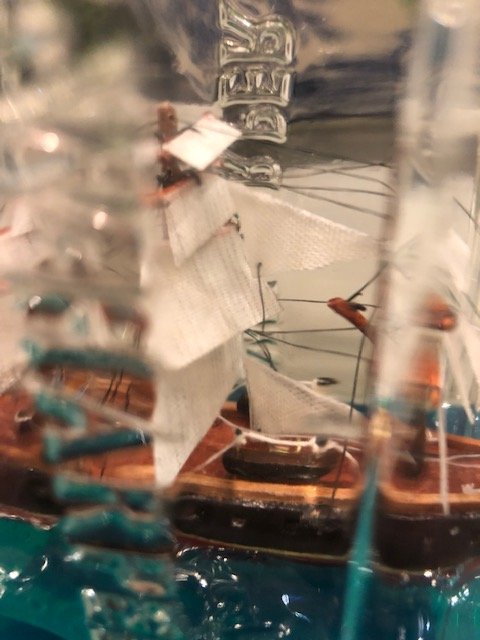
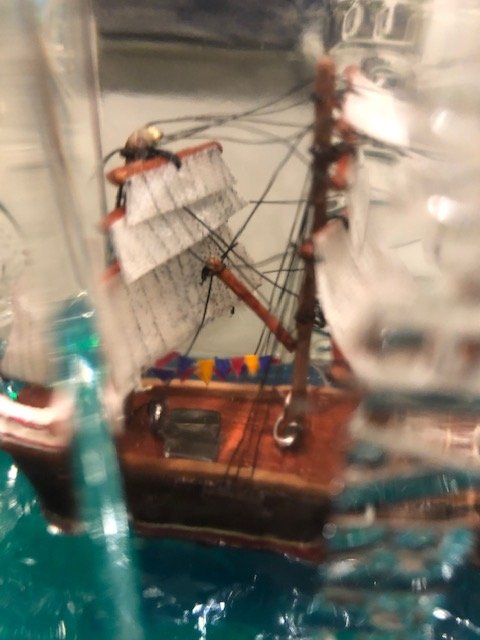
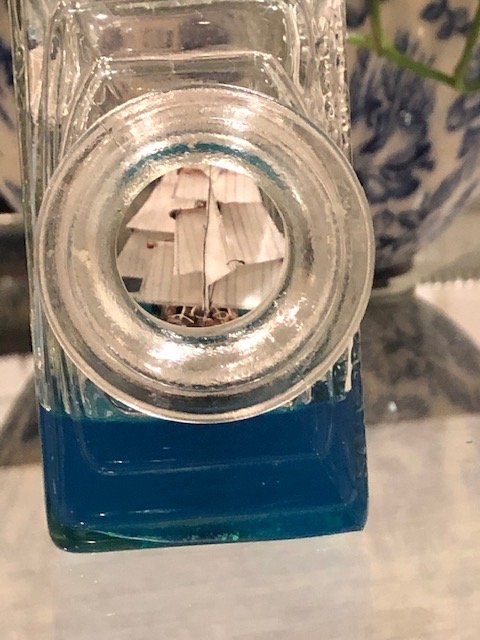
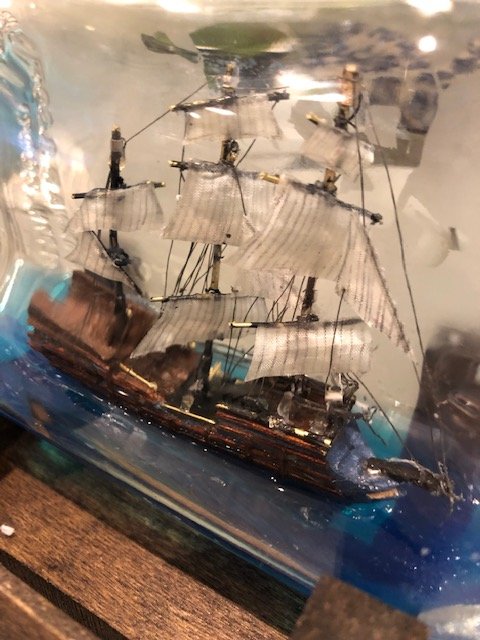
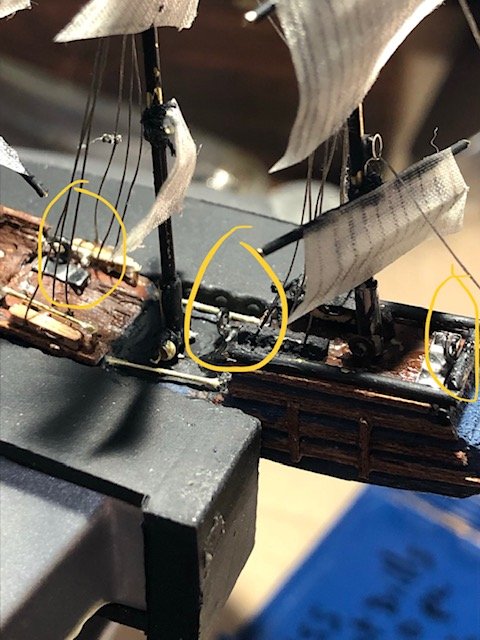
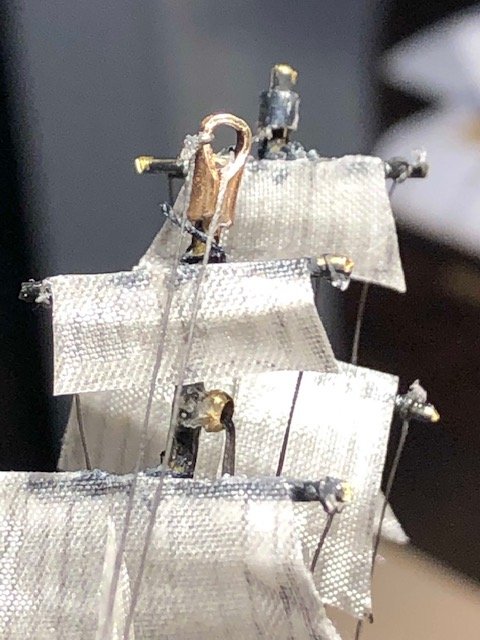
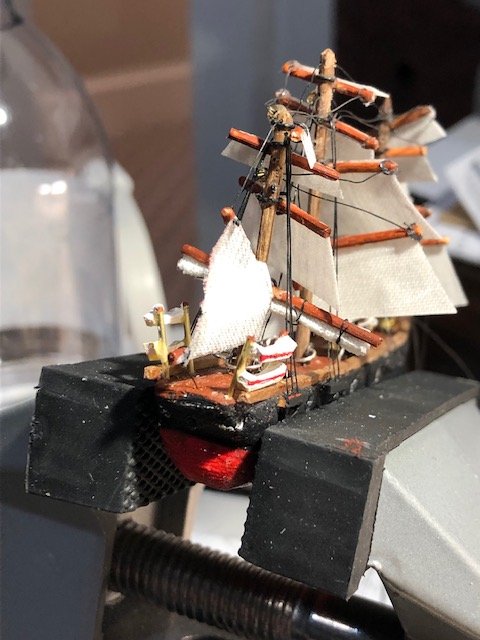
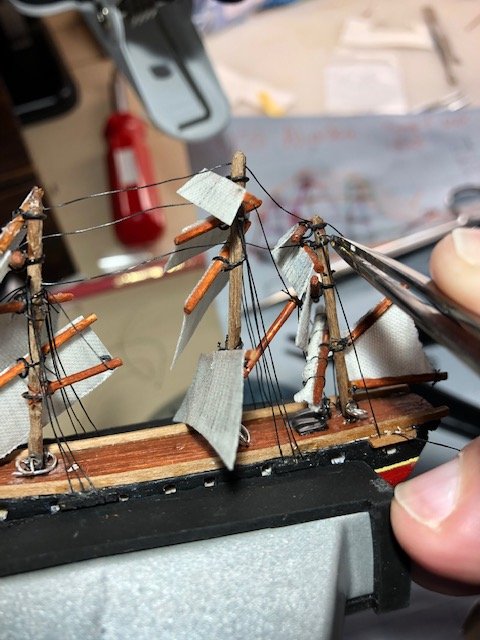
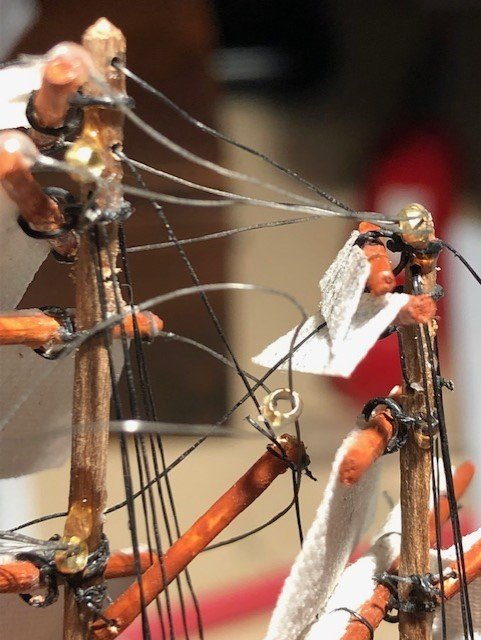
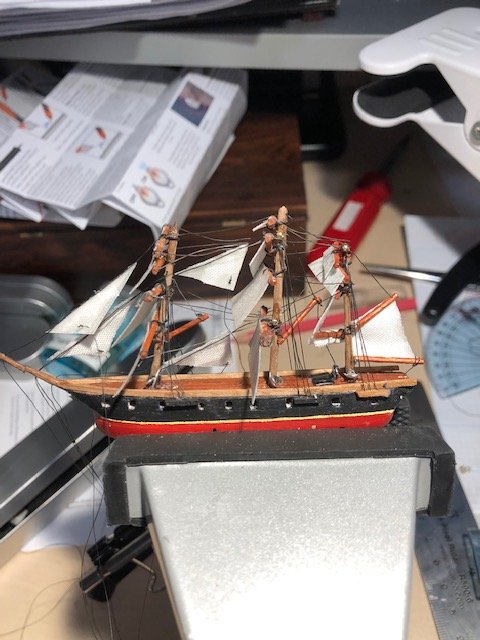
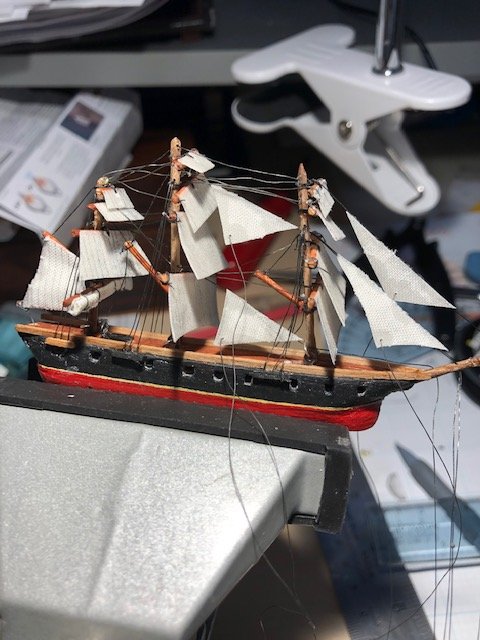
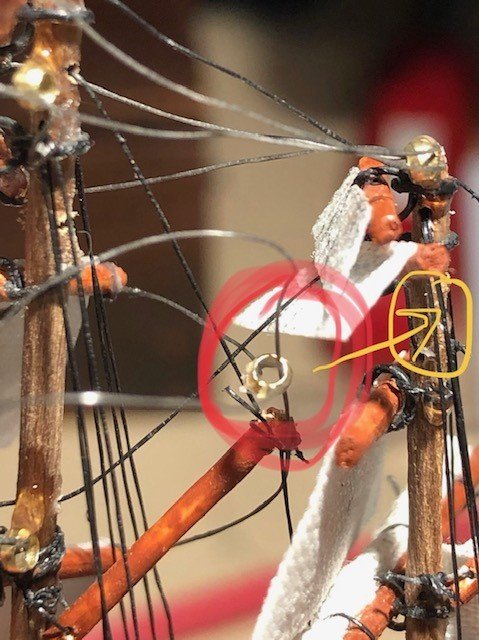
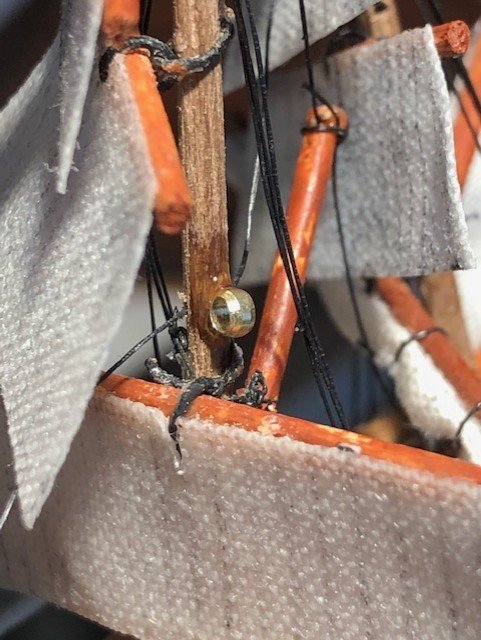
The Home Stretch! So I definitely hit a few snags with the in bottle work - Shocker, I know!! But first I can show that the little magnets workes just as planned: First the sterncastle snapping right on! IMG_8271.MOV Then the Mizzen mast with the magnetic shroud planks - also finding their mates. IMG_8273.TRIM.MOV Looks like this. What I did not plan well enough was how to attach the yards to the masts. I anticipated simple glueing, but the yards didnt really stick to the masts as I had thoughtl and they fell dozens of times. And since my Silicone Sea was still a bit wet, the yards, sails, and sometimes masts, kept falling into the liquid rubber ooze, until everything on the ship was coated in a thin patina of goo. It did give it a salt sprayed look I suppose... Fianlly after far more hours than I cared to spend, I figured out to drill a few small posts to support the yards. I was going for a drill-free buils, but it was not to be. I added the pendants. But - the octopus figurehead didnt go on so easily and eventually after too many attempts, fell apart!!! <Very sad Bitmoji, indeed!> Eventually I figured out to attahc the larger half, and then glue the other. But my original octopus really did mimic the fortnite ship; now, it resembles a giant, golden meatball with spaghetti!! The spaghetti and meatball octopus figurehead!! My nephew is gonna love it! Thanks for reading!
- 11 replies
-
- 7
-
-
- pirate ship
- bottle
- (and 1 more)
-
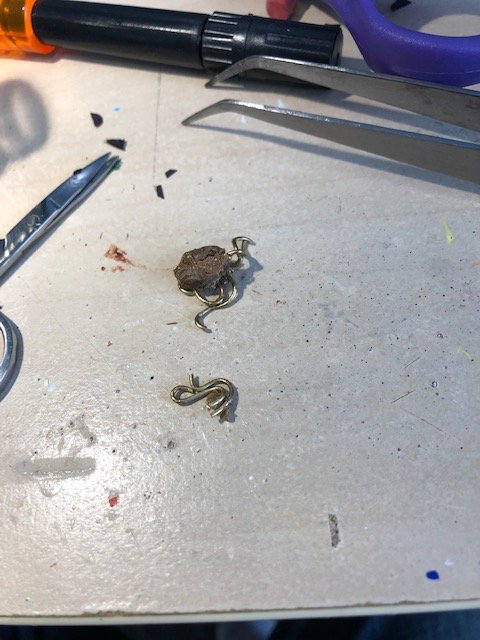
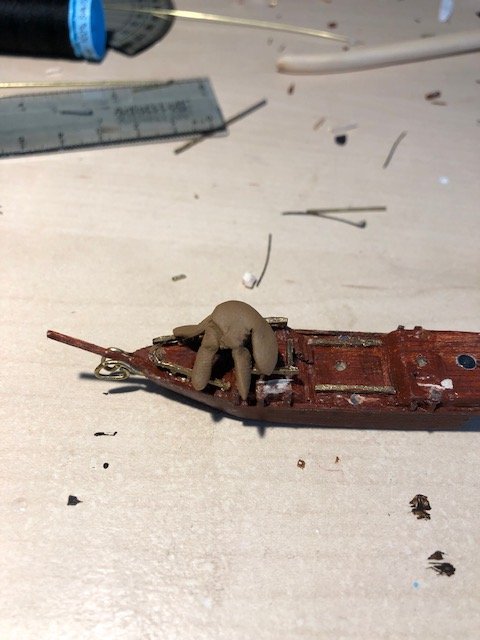
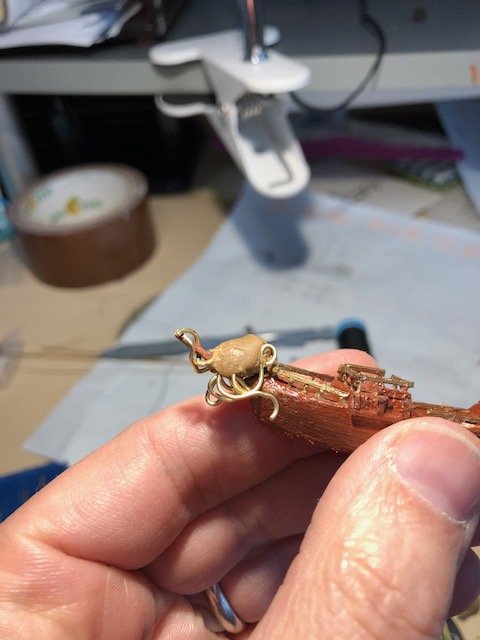
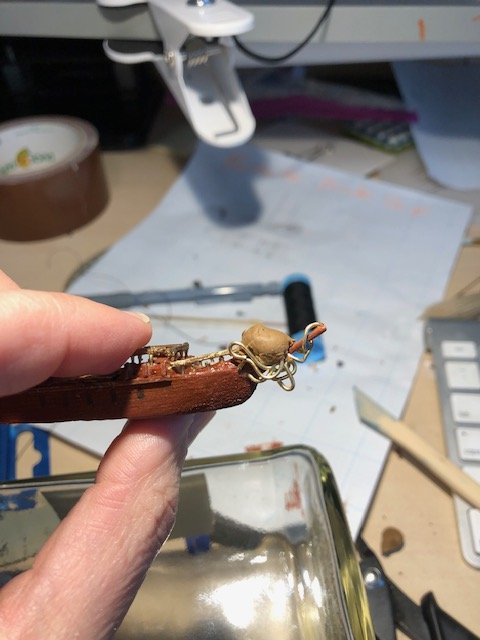
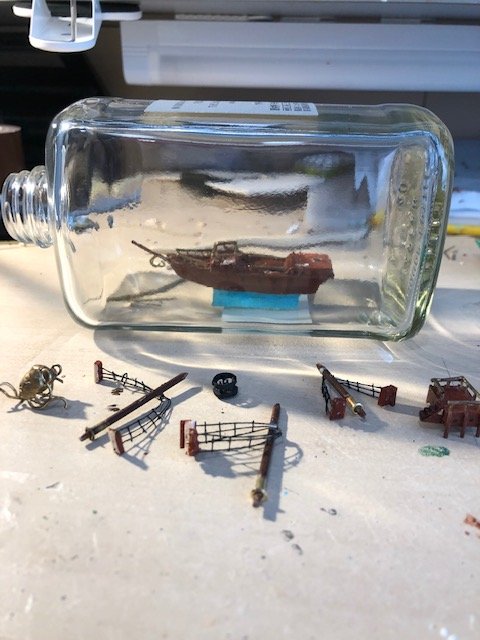
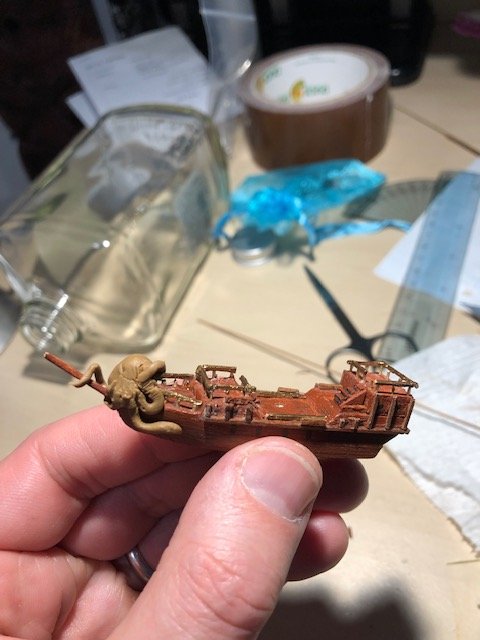
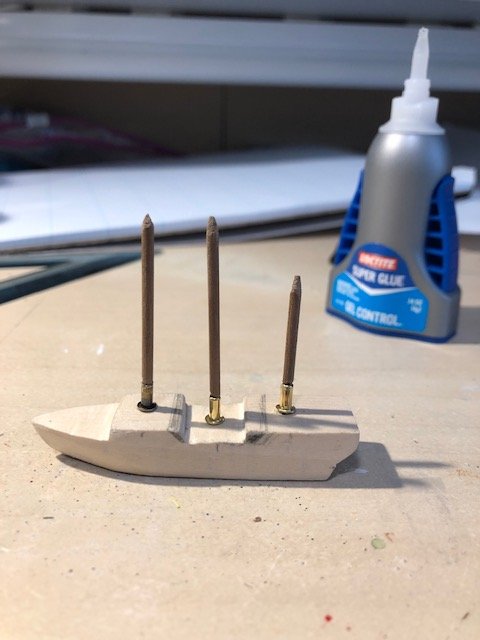
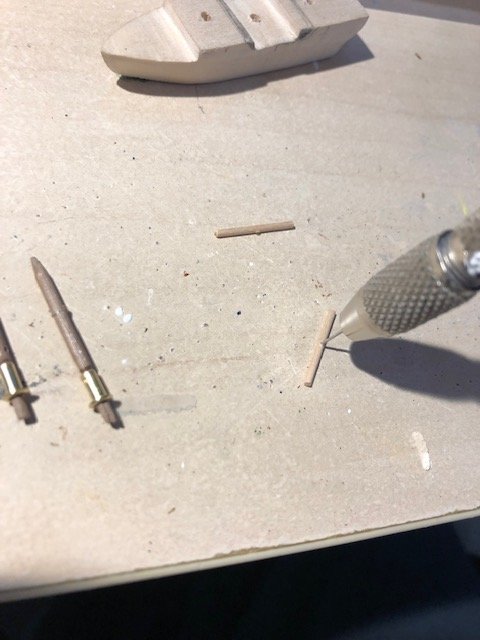
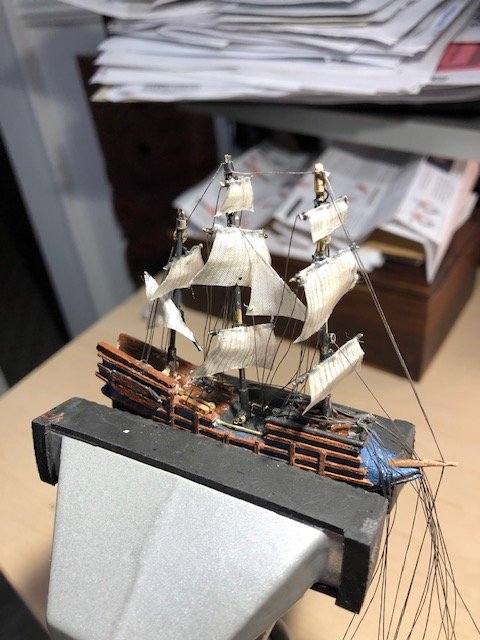
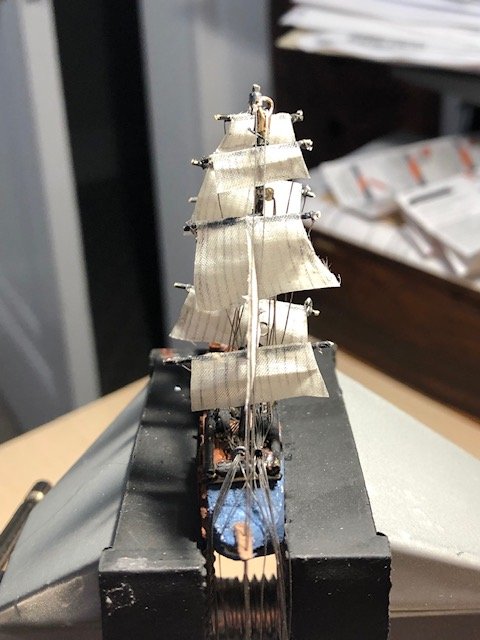
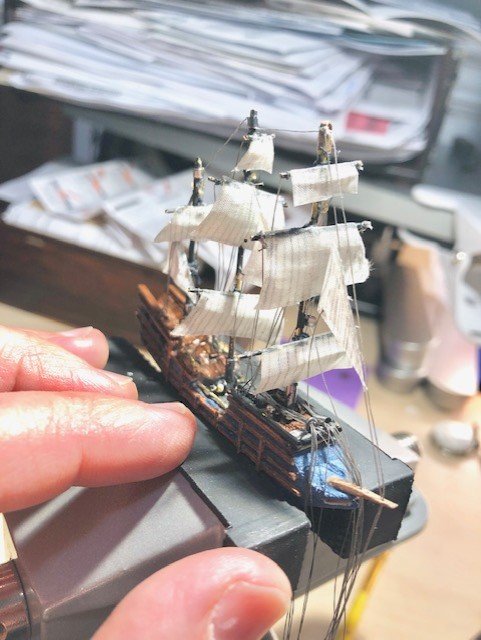
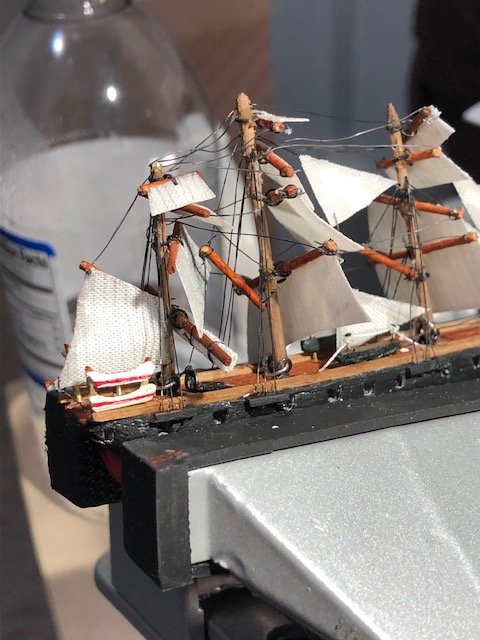
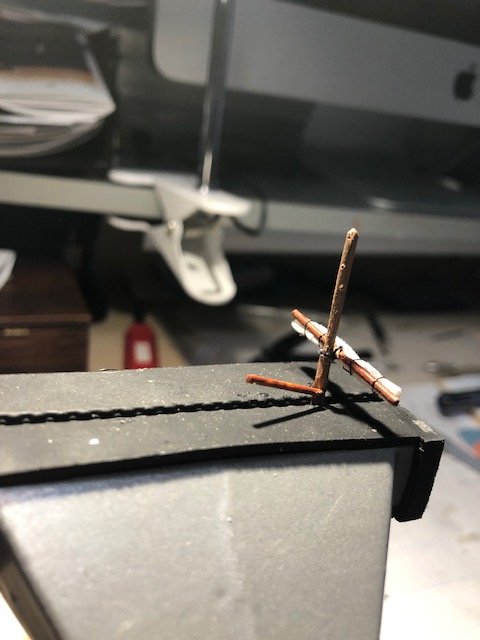
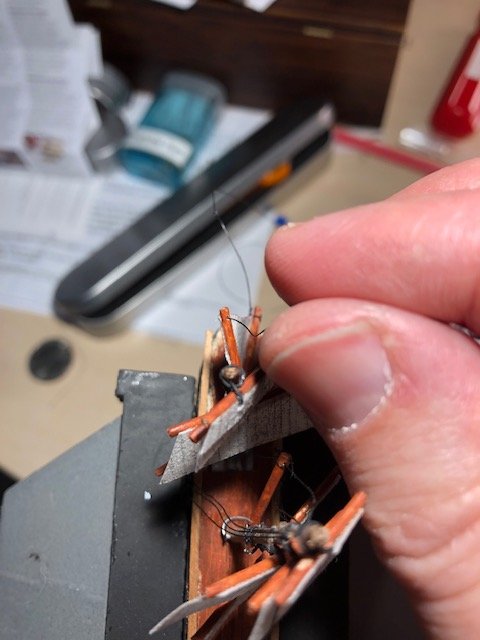
After a seven day hiatus - which feels like 18 months for this impatient builder - I am ready to proceed and approach the launch. As mentioned, the absence of rigging makes the ships construction simpler, but also challenging in a novel sort of way. I planned to make well-designed prefabricated parts, and hopefully assemble them all convincingly, once the ship was inside the bottle. I was really stuck on how to make the octopus figurehead. I started with clay, but was really struggling with the arms: This speaks for itself. Then I had the idea to use small brass rods for the arms. I was considering painting the brass arms brown to match the "real" ship from Fortnite. Instead, I took poetic license - which is often a SIB prerogative - and painted the whole figrehead bronze. Instead of mounting the always-confounding rods to raise the ship the proper height, I simply plastic welded a block of wood, painted the approximate color of the forthcoming ocean. At this point I was very happy with my magnets for the main and mizzen masts and shrouds. But having run out of said magnets, I decided the lightly glue the fore shroud planks for the construction, then lovingly rip them off. The ship passed easily through, and was CA'd to the mounting block. And here she sits, with most pieces at the ready. Next and Lastly: I will insert the pieces from aft to fore, and attach masts with sails as I go. Hopefully the figurehead will slide right on...

- 11 replies
-
- 6
-
-
- pirate ship
- bottle
- (and 1 more)
-
Igor, I can’t wait to see what you do! Those hinges for the masts and yards are beautiful.
-
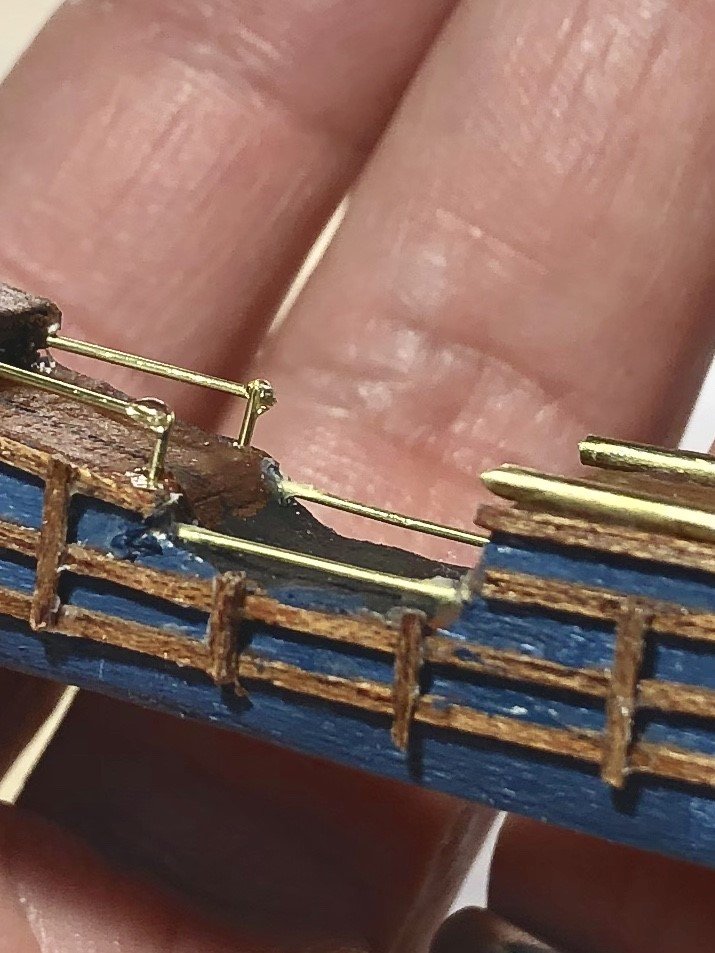
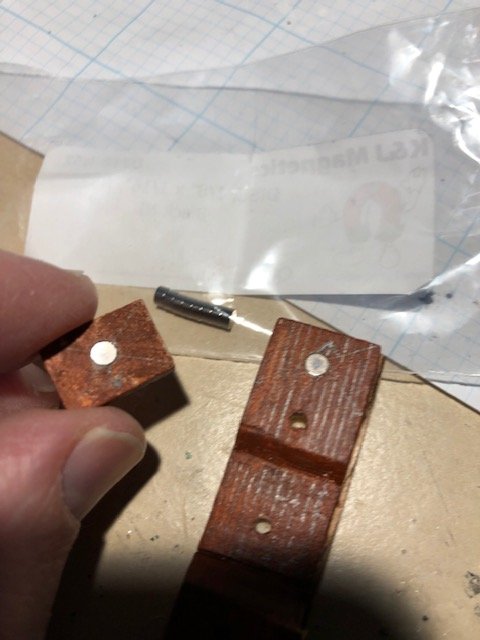
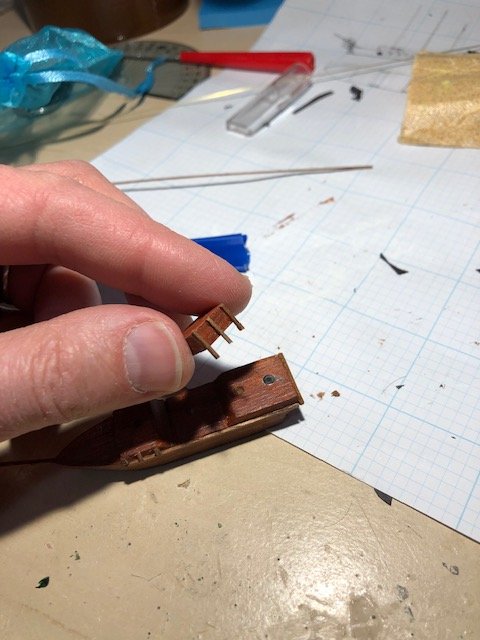
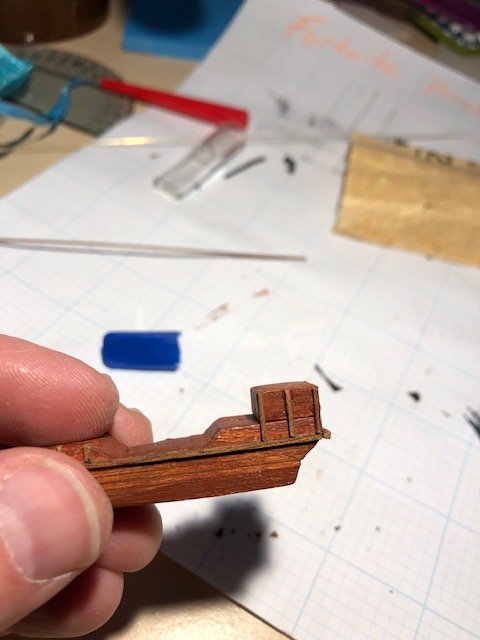
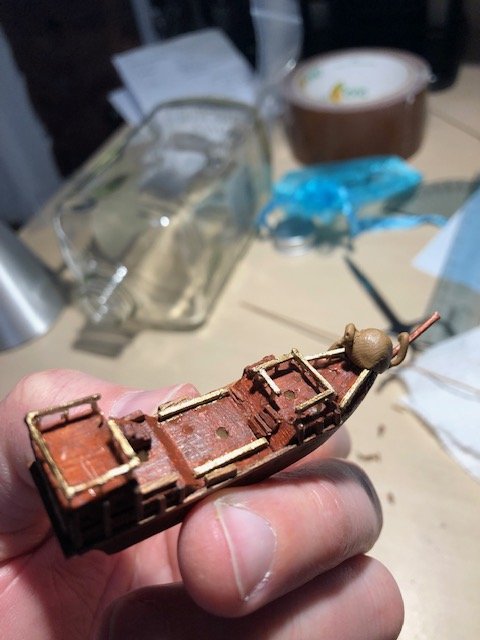
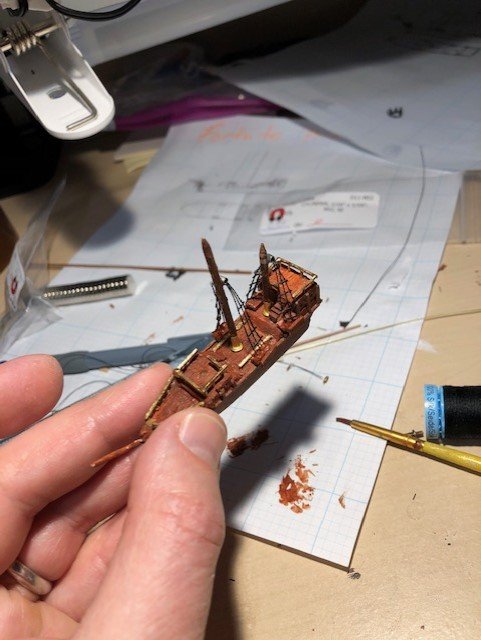
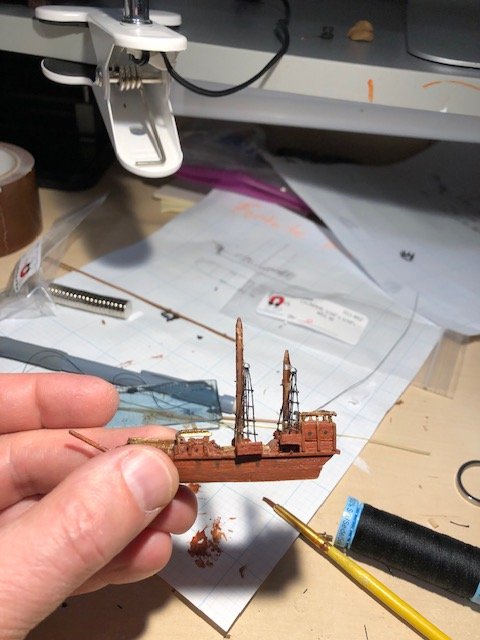
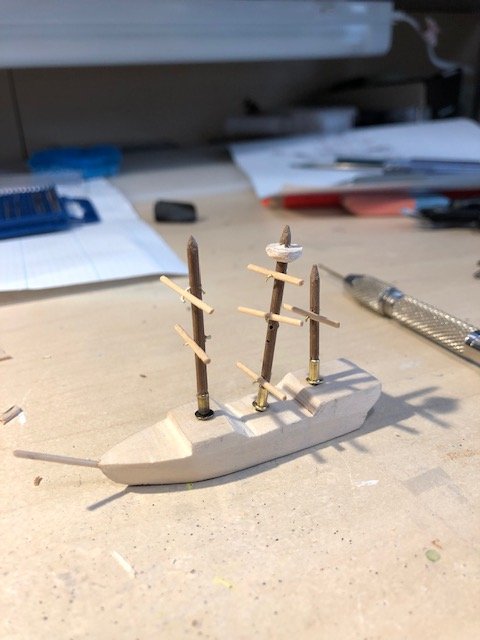
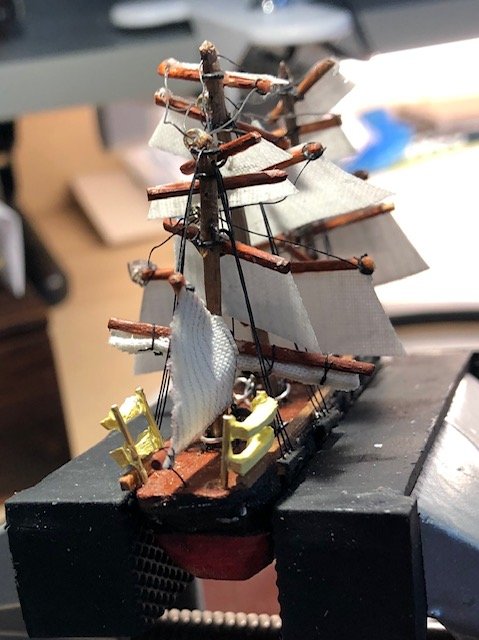
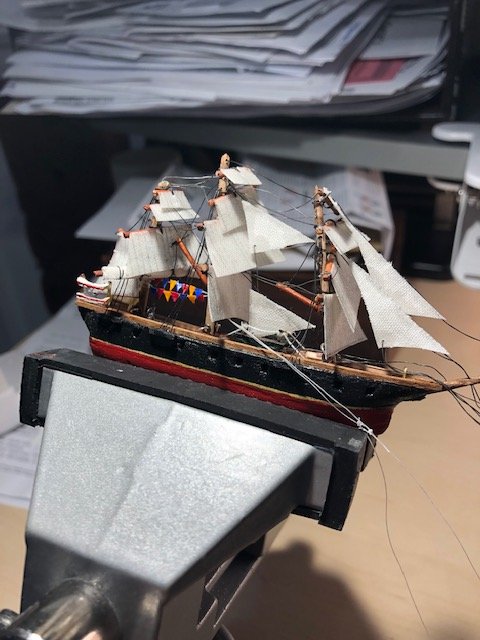
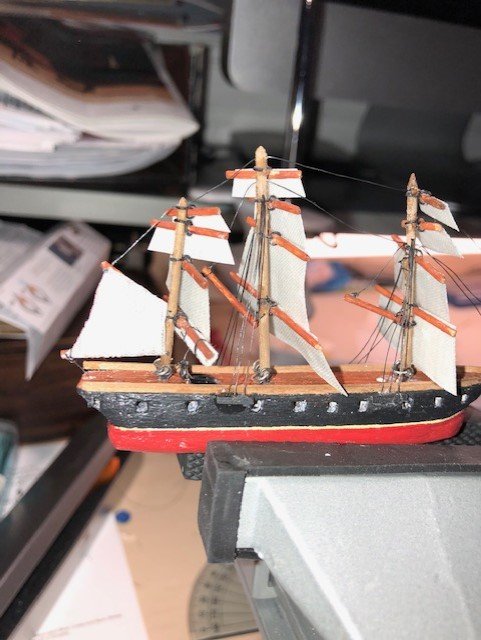
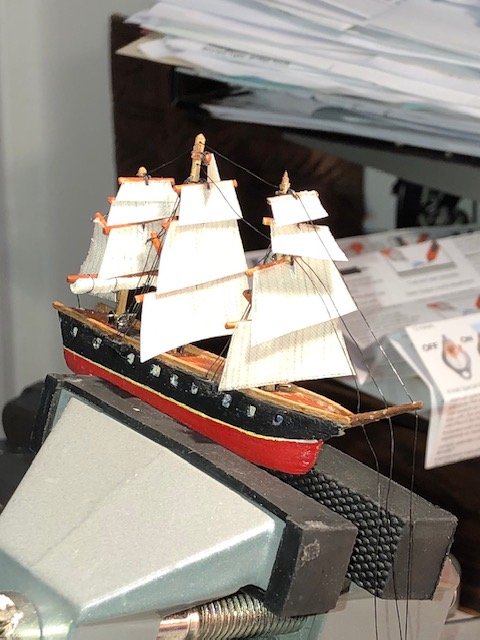
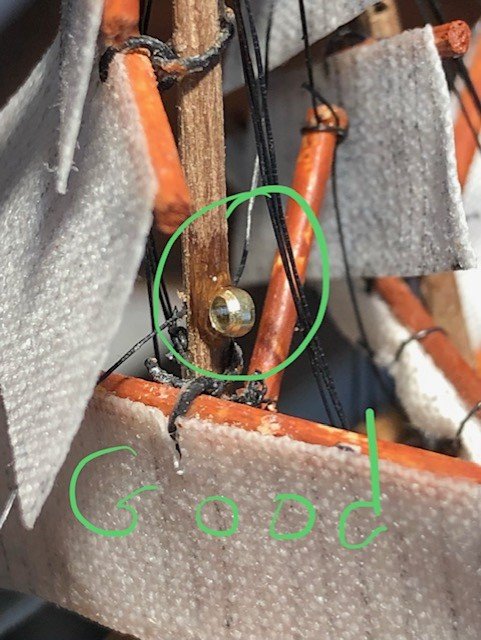
So for this ship, I needed to figure out how to raise masts without the use of rigging as pulleys; and also how to build a taller and wider ship than the bottle neck of only 17mm. The answer is arriving in the form of tiny magnets! 7/16 x 1/10" disc magnets to hold the sterncastle to the quarterdeck! snaps right on! Will make assemly inside the bottle much easier! Miniature details are not my bag, but it'll have to do. An initial attempt, with railing and the octopus at the bow. I couldnt mimic alls the teensy tiny rails, so I chose instead for the illusion of beautiful rails, by using woodens strips painted with iridescent bronze. For the mizzen shrouds here , I decided to attach them via tiny 1/16 x 1/16" magnets to the quarter deck. For the main deck shrouds: the same 1/16" magnets sunk into the main deck. These are the corresponding magnet planks that will be attached to the Main Mast Shrouds. Here they are - waiting for another magetic match! They snap right down into place! Where we are so far. The idea is to make as much assembly inside the bottle as easy as possible, without all the glue and such. Yards (with sails) will be glued to the masts, once the latter are fixed in the bottle.
- 11 replies
-
- 6
-
-
- pirate ship
- bottle
- (and 1 more)
-
Haha! Incredible miniature work: Belt buckle, dread locks, and a functioning scabbard!! So great!
- 52 replies
-
- 8
-
-
- jack sparrow
- pirate
- (and 2 more)
-
Igor, it’s So great to watch your work unfold! Really a pleasure!! My favorite pieces are the tiny belaying pins, and the top of the crows nest - a perfect tiny circle in wood. Can’t be easy to do!
- 52 replies
-
- 4
-
-
- jack sparrow
- pirate
- (and 2 more)
-
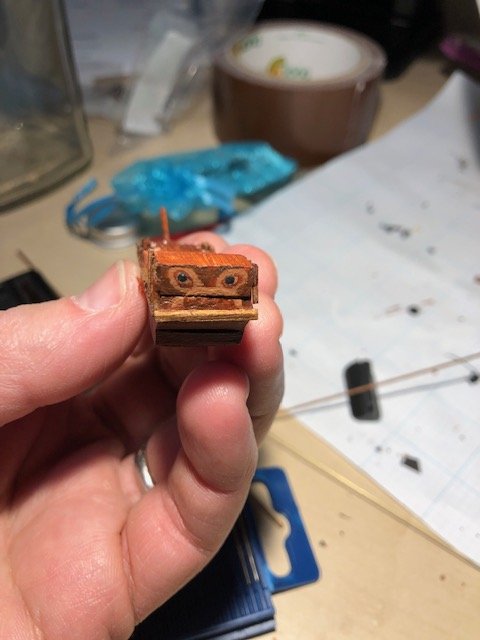
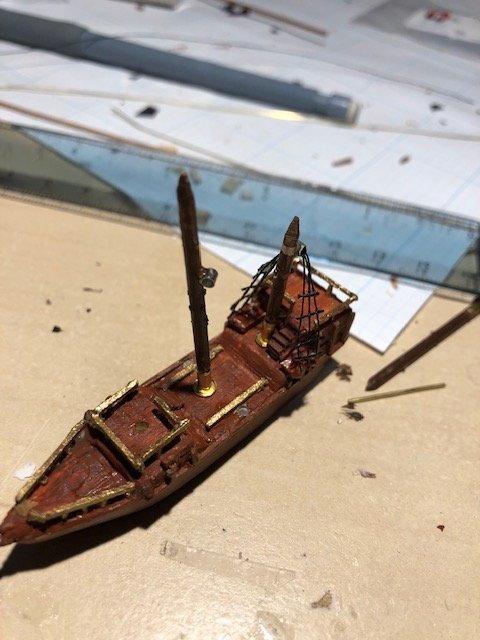
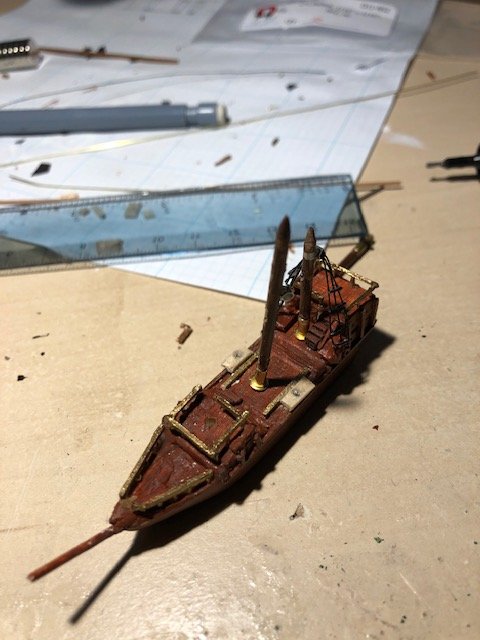
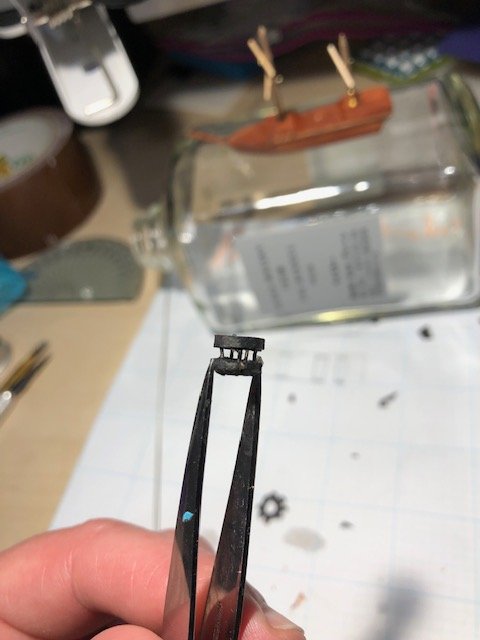
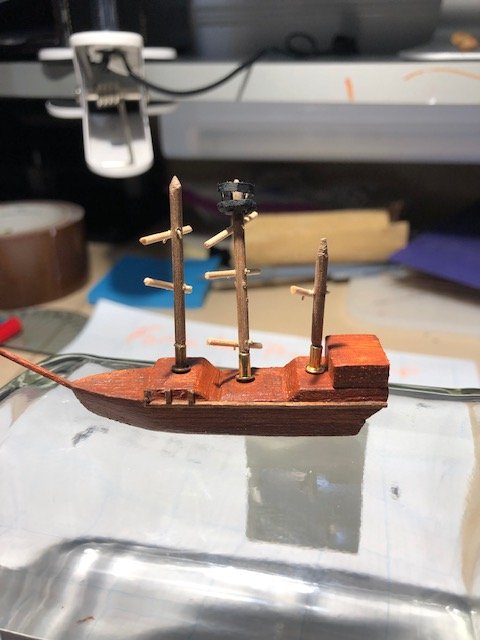
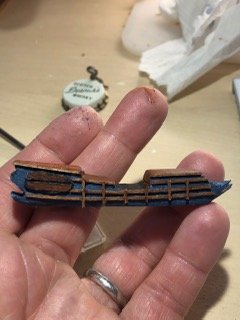
I keep 1/16" dowels as the masts. Brass eyelets do just fine. No hinges for this baby! I think these are 3/32" dowels - the smallest I have found. Fine for small yards. I really struggled with the crow's nest. Many botched attempts with bass wood, balsa, and card. Ship is painted with primer. Burnt Sienna, and scratched / etched on planking. I figure the planking on the "real" ship is animated, so its ok for me to animate it as well. 1/32" cherry strips will do much of the side ribbing. ANYONE KNOW WHAT THAT SIDE RIBBING ON A SHIP IS PROPERLY CALLED? Oh yeah - and that blob of clay will eventually become the octupus on the bow! Crow's nest: A hybrid of balsa base, brass rods, and card top. Too thick? It'll do for now. The sterncastle is made separately. I will do all the trimmings and decorations as one piece; but fully loaded, this ship won't fit into a bottle which sports only a 17mm aperture. I have a new plan to help me better assemple the ship inside the bottle, without the messy glue. Next: Railing, stairs, and sails... maybe
- 11 replies
-
- 6
-
-
- pirate ship
- bottle
- (and 1 more)
-
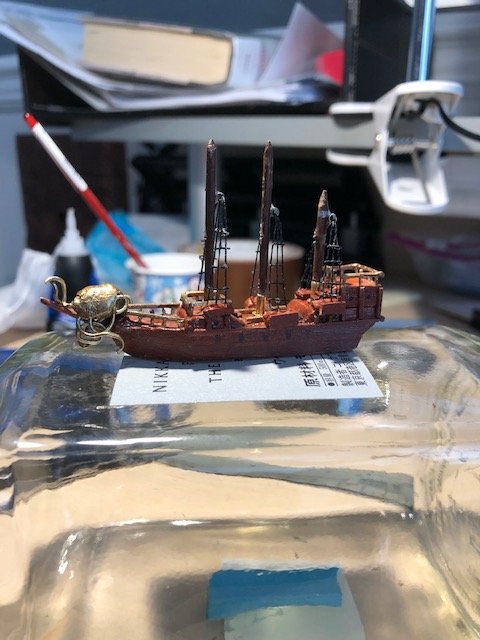
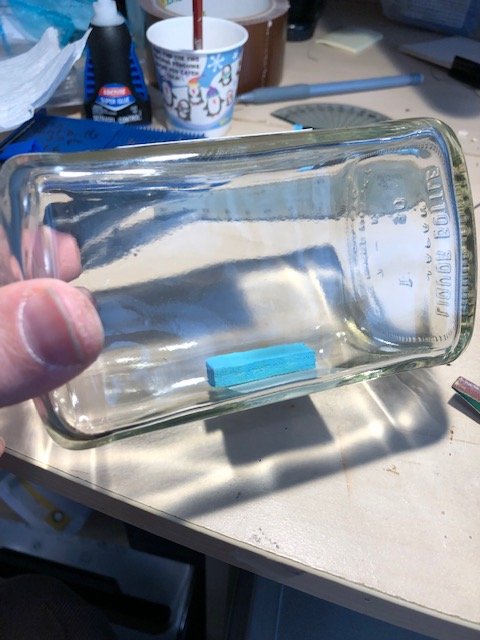
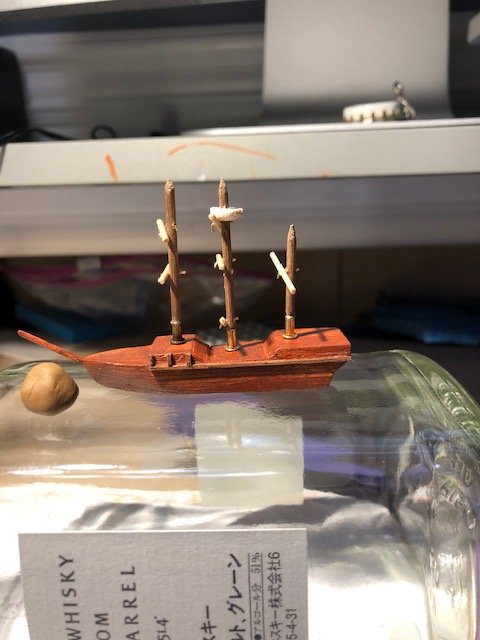
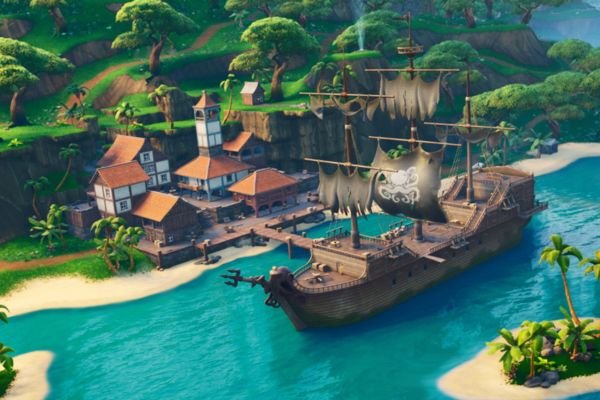
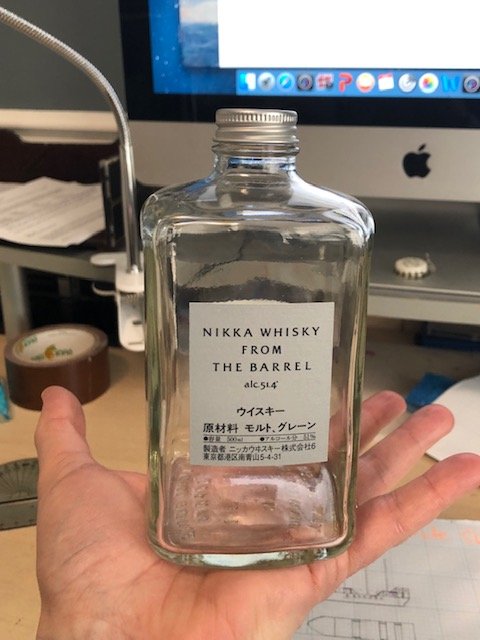
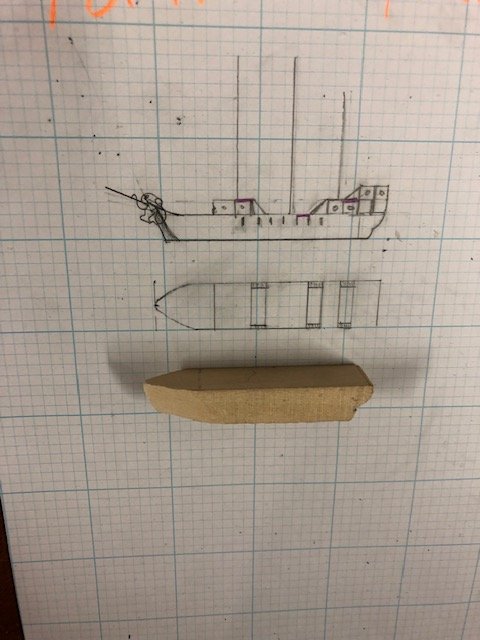
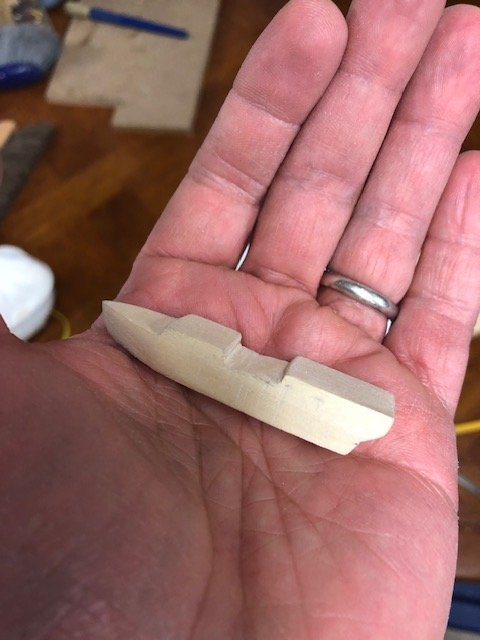
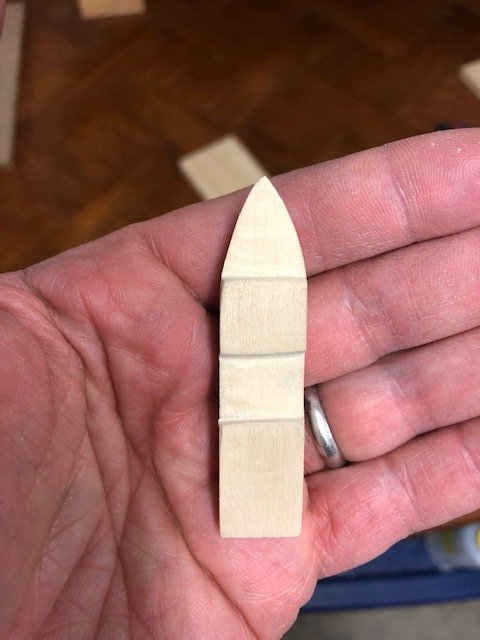
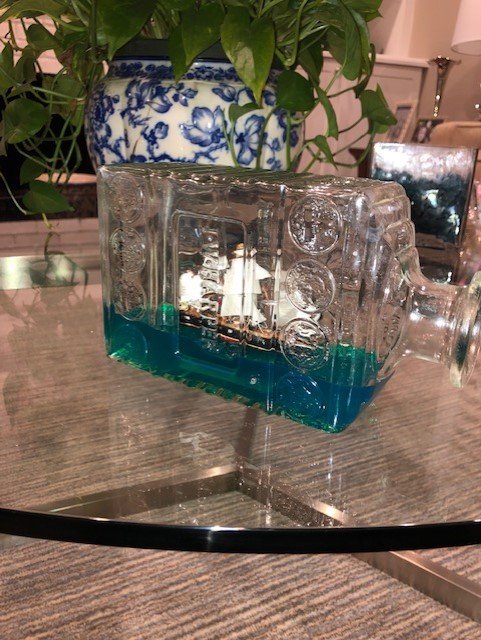
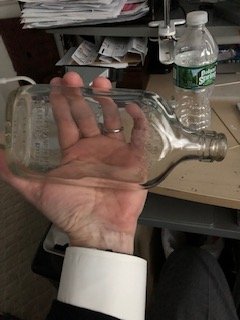
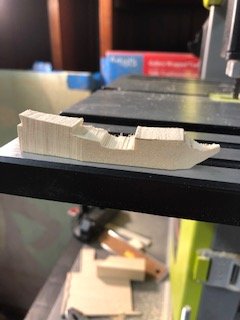
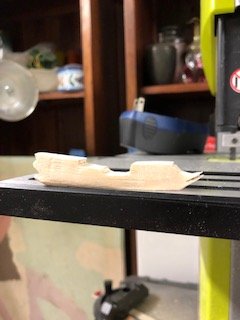
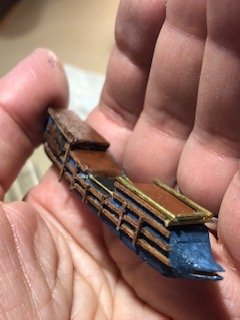
I needed a few weeks to get clean from my addiction to build logs for MSW. But now its time to feed the monkey on my back.. I'm going to make another gift - this time for my nephew Max, also for his Bar Mitzvah. Like many boys his age, Fortnite is a way of life. (If any of you dont know what Fortnite is, then I would surmise that you probably dont have a 9-19 year old human boy in your your life's orbit.) I am choosing the Fortnite Pirate Ship for him. This Ship is rather boxy, with lots of straight lines, and basically no rigging except for shrouds ratlines. Dont ask me how it is sailed, or even how anyone gets up to the crow's nest: It's a computer game ship, and Fortnite knows best! Since it is animated and fictional, it is liberated from certain restraints of physics and reality. This can be a good thing for the SIB builder: fewer rigging lines to tangle, and simpler sails (Yay!!). But it can also get a little fanciful and tricky: I mean, look at the railing, and all the detail on the hull; and the octopus on the bow! This japanes whiskey bottle is just boxy enough!! The plans and hull blank from bass wood. Will add the top of the sterncastle later on!

- 11 replies
-
- 8
-
-
- pirate ship
- bottle
- (and 1 more)
-
I'm looking forward to this build and will be following!
-
Thanks Igor! I Hope to see some more of your great projects!
- 28 replies
-
- 2
-
-
- alaska
- sloop of war
- (and 2 more)
-
Patrick, Love that crew:guest ratio on the OKTO! Looking forward to seeing those dining room ceilings in miniature!
-
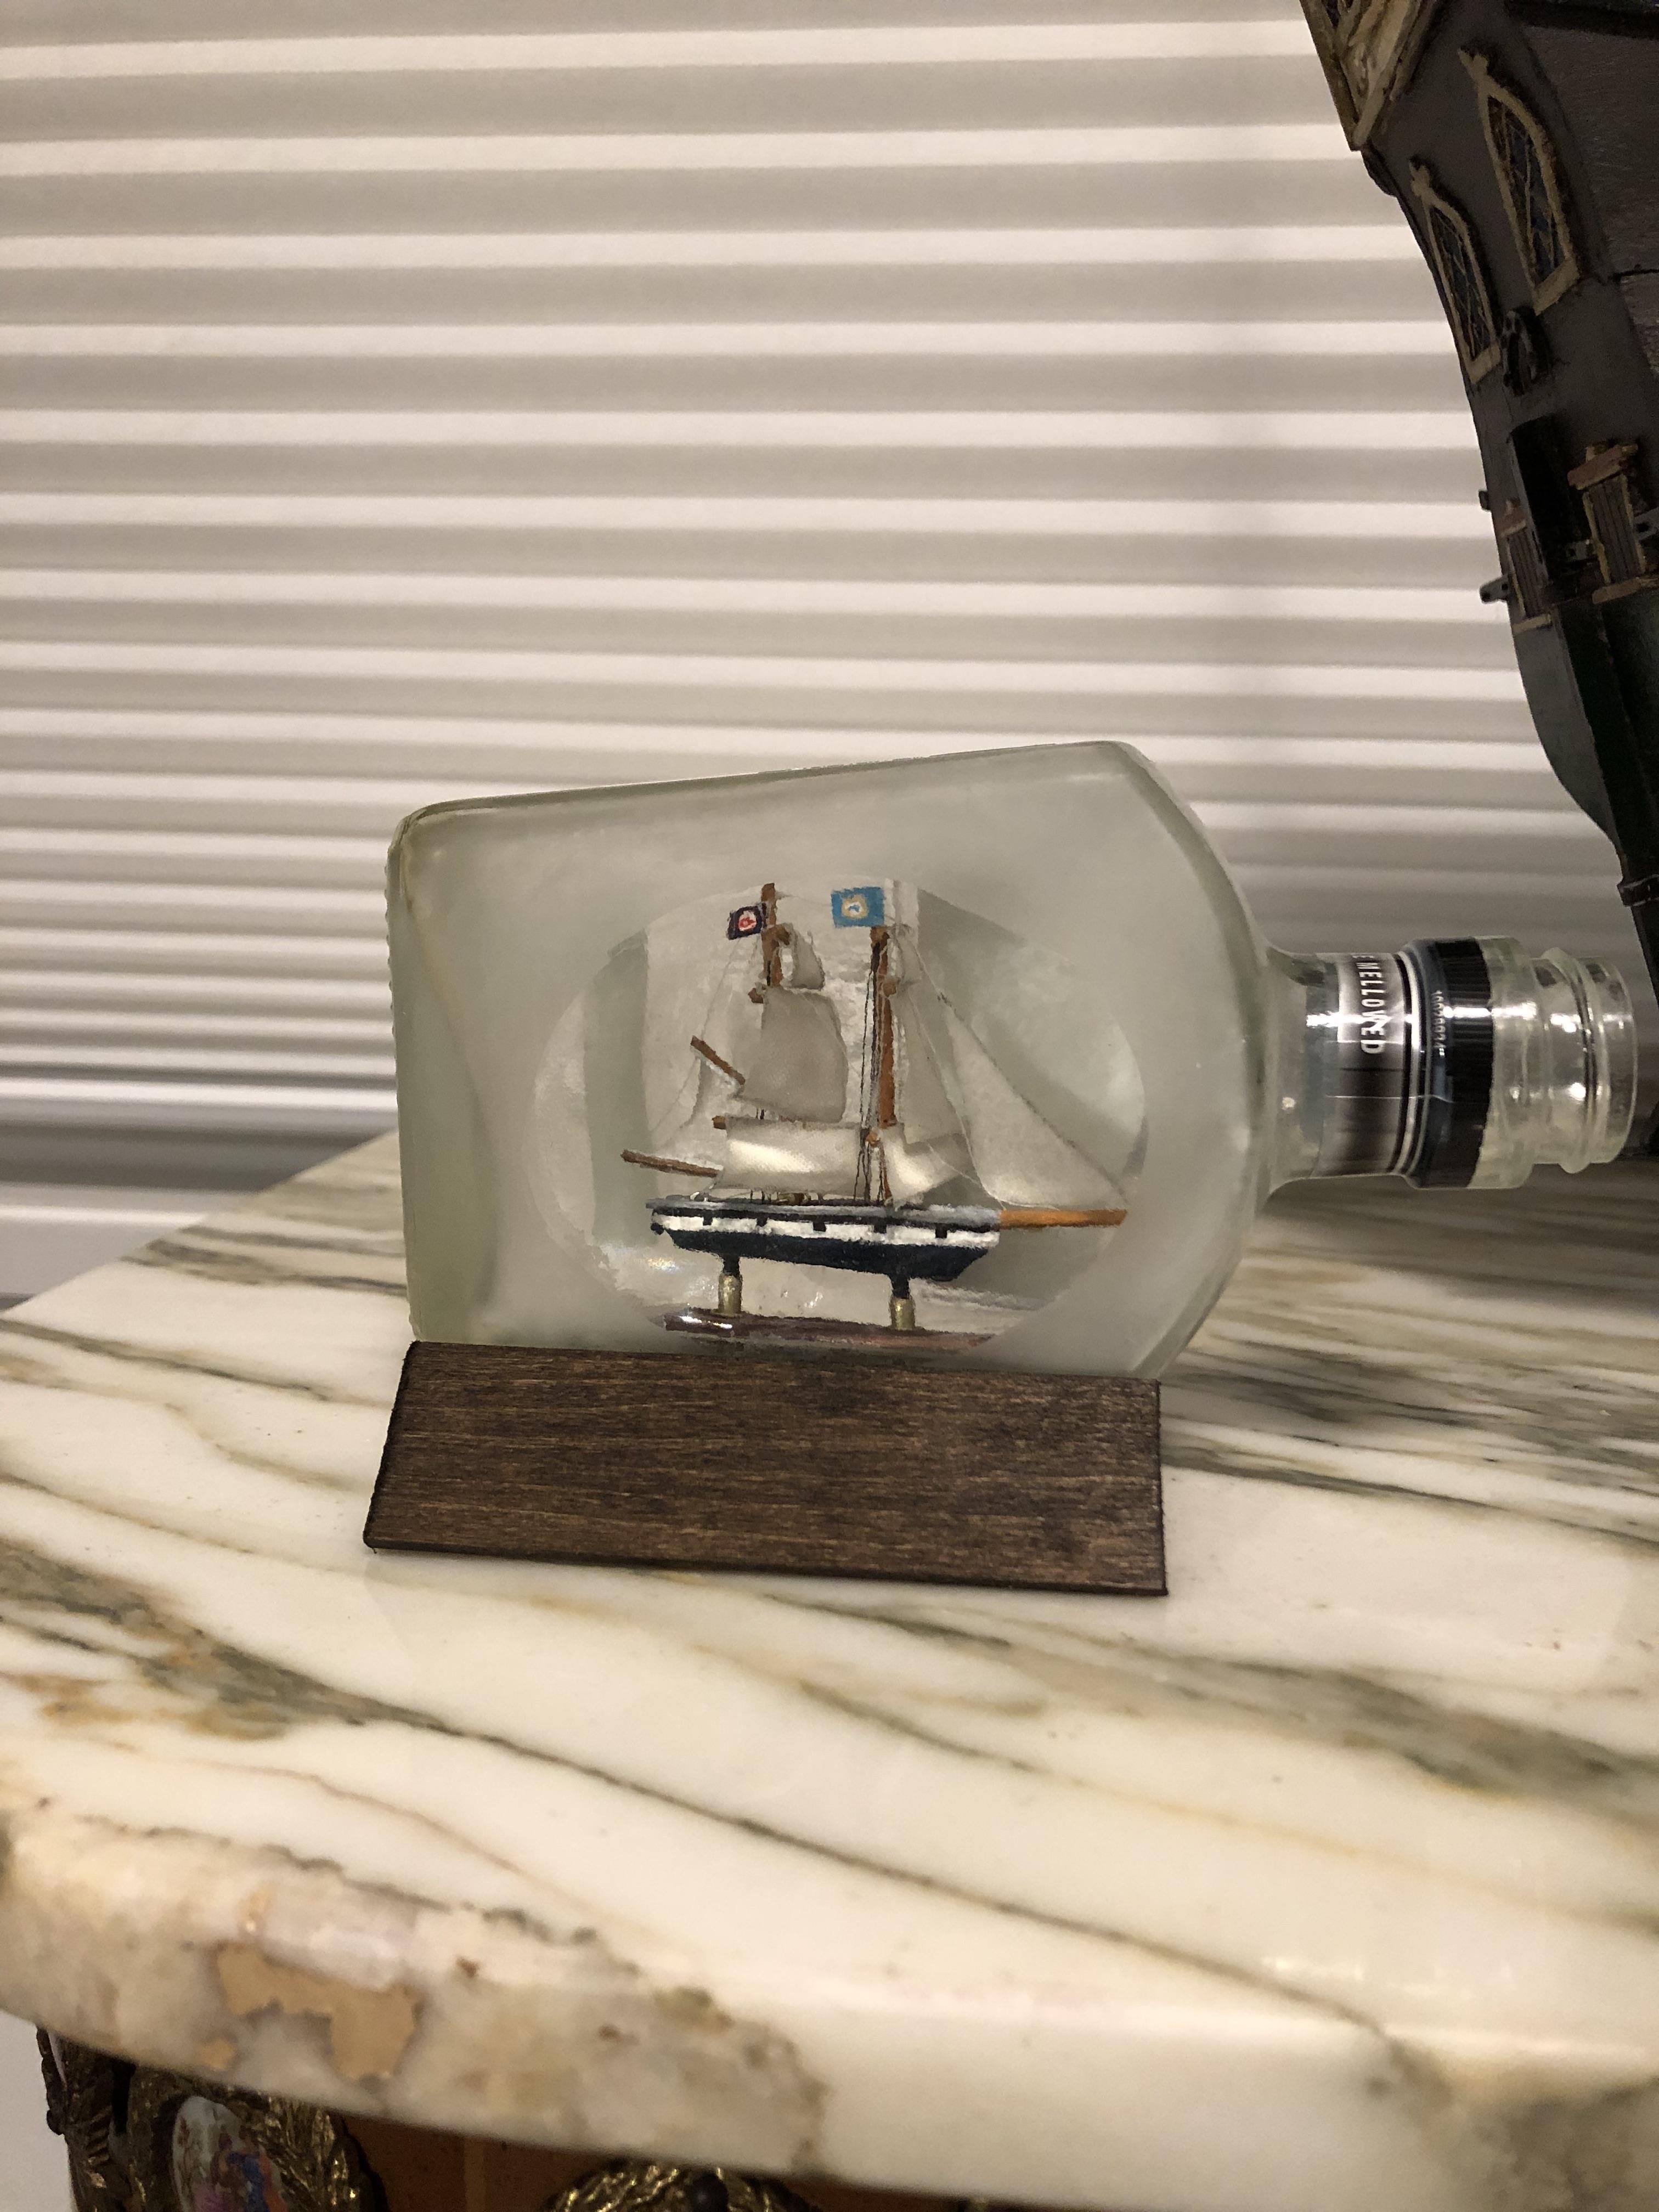
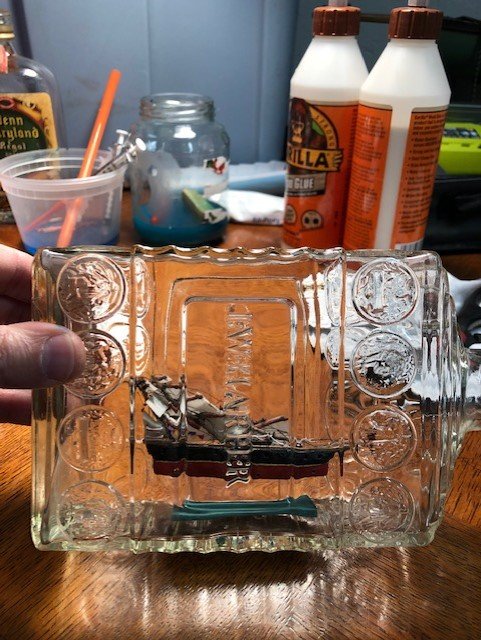
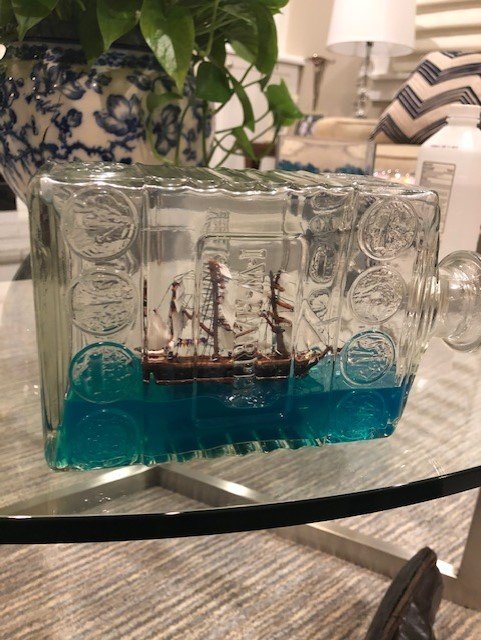
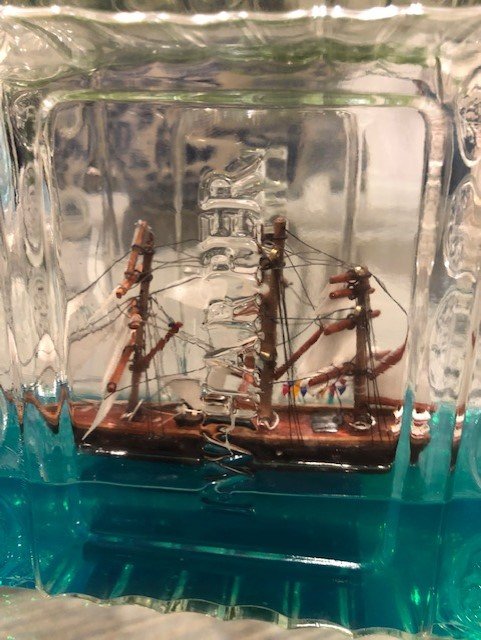
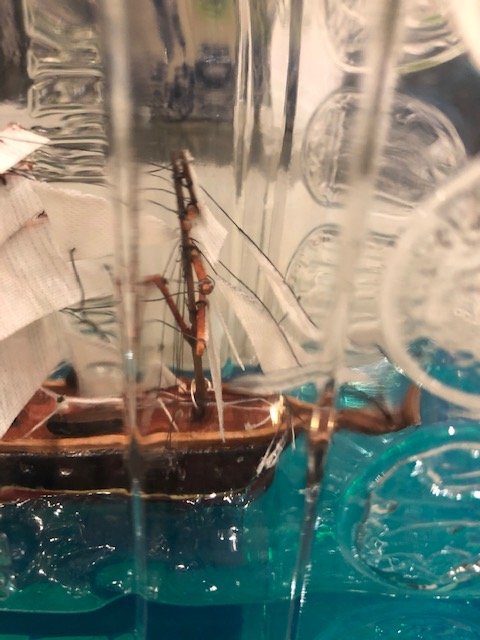
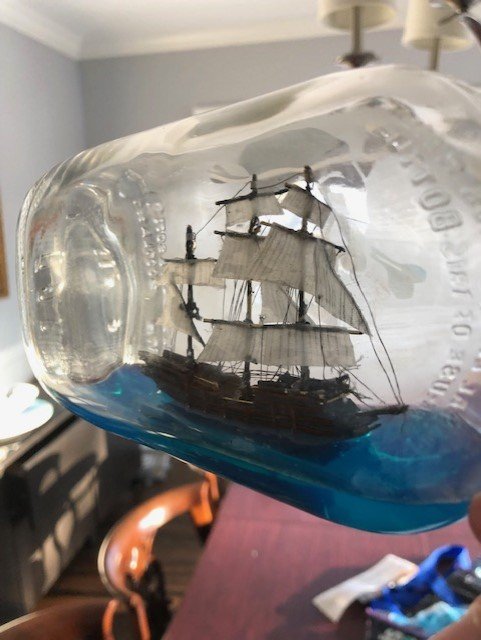
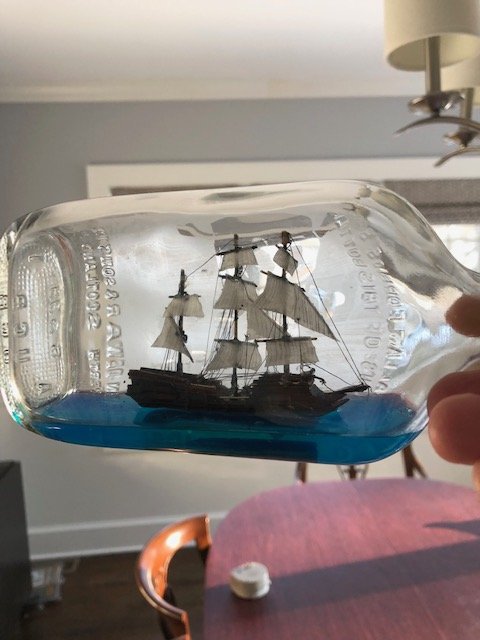
Launch: After completing the Flying Dutchman I could now return my attention to the Alaska. All she needed was the Launch. Pedastal plastic welded to the inside with Bondic - much better than AC for this job! No sticky glue flopping all over the place. I chose this WH Harper Decanter for the job. Its definitely fussy and obscures the view, but I wanted to give it a try. Acrylic dowels in the pedastel won't stand out in the semi opaque silicone sea. In she goes! Not so much snapping of spars this time - the aperture was a generous 2.5cm. I chose this bottle ahead of time, knowing that this would be a bulky job, not amenable to a super-flat collapse. The only break was the bowsprit - fixed with bondic, while she was breeching. waiting for the Encapso-K silicone.A mix of blue and green silicone pigment. thank you IgorSky! from the Back / Lee side. All the rigging stayed intact and fairly taught. The foresail and Jibs. Mainsail and fore lifeboat. Mizzen and pendants. All in all, I'm pretty pleased. Although the detail on the glass is a bit distracting - especially in photos - in person it tends to draw your eye in to look closer. So in that way it quite unexpededly makes the viewer pay attention a bit more to what's inside. (At least with the Wifey and kids). I learned a lot between this and the Flying Dutchman. Still encountering some major issues with the yard hinges, Finished Sail product (although these sails came out bigger and better than the FD), and positioning the ship on the pedastal posts. The silicone is pretty easy to use, and the looks are kiff! Will take a break for while. Have some more ideas for the next go-around. Thanks for reading!
- 28 replies
-
- 5
-
-
- alaska
- sloop of war
- (and 2 more)
-
Thanks, Mark! My current SIB path is described by two principals: Having a good plan, and having a better plan to recover from disasters. Trying to improve on the former to rely less upon the latter.
- 10 replies
-
- 2
-
-
- flying dutchman
- bottle
- (and 1 more)
-
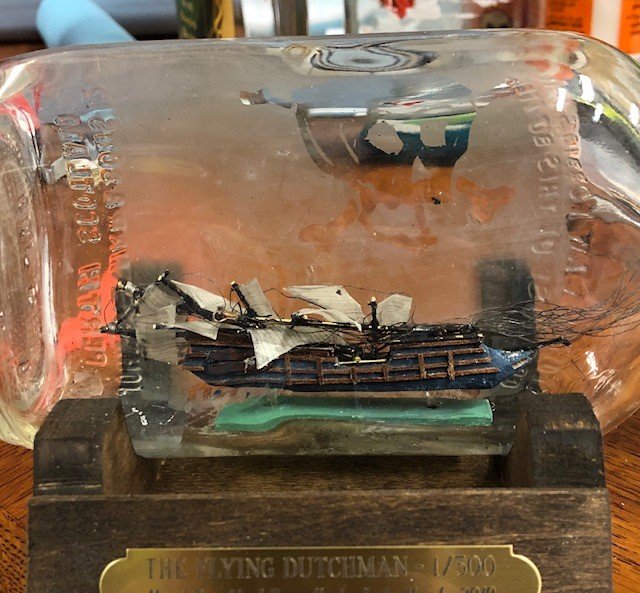
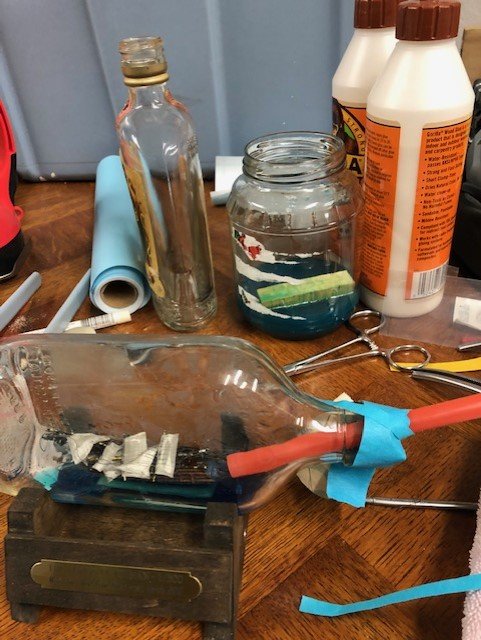
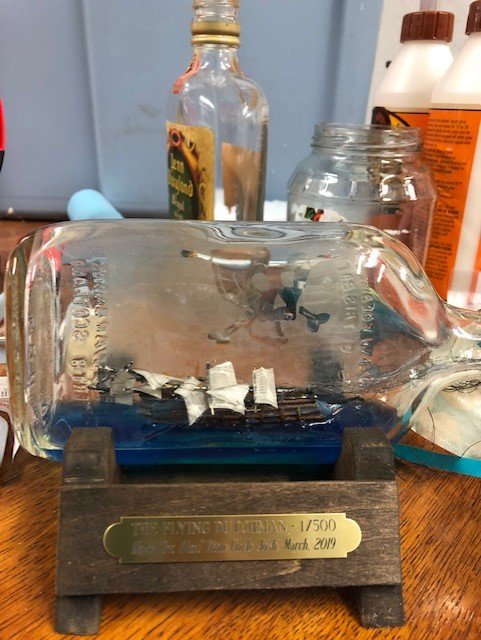
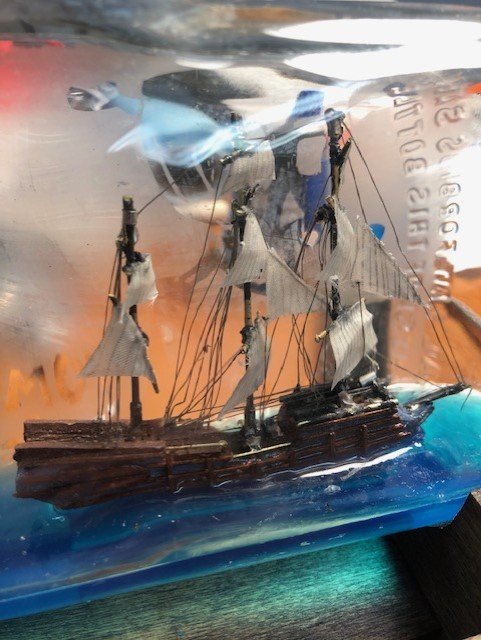
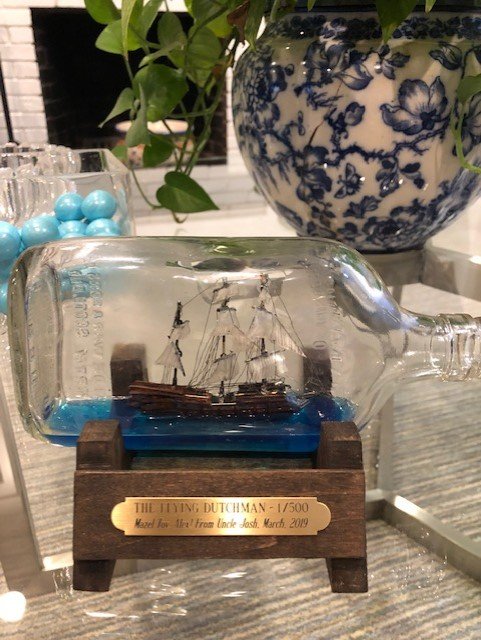
Launch In you go! Something's gotta be busted pretty badly. Dripping in the silicone Waiting for it to set Sadly, all the shrouds got torn off their bead passthroughs. The bowsprit broke her nose. Finally, righted, and afters tons of internal repairs. It was a rush in 8 days, but I'm pretty pleased. The silicone sea definitely helped - thank you Igorsky! I have to work on bigger, blooming sails. And i need better hinges for the yards, to prevent all the problems which occur when i collapse the masts. Anyway, my nephew will like it! Thanks for reading. Next I will complete the Alaska.
- 10 replies
-
- 6
-
-
- flying dutchman
- bottle
- (and 1 more)
-
Thanks! Was definitely a rookie mistake. And I got very lucky. But virtually everything is fixable with SIB. Every project is fleeting and disposable - I suppose that’s why I like it. Very different from the big beautiful master ships being built on this site by master craftsmen.
- 10 replies
-
- 1
-
-
- flying dutchman
- bottle
- (and 1 more)
-
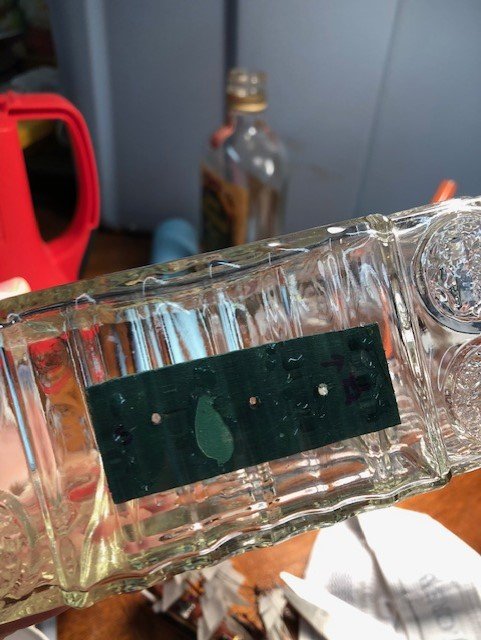
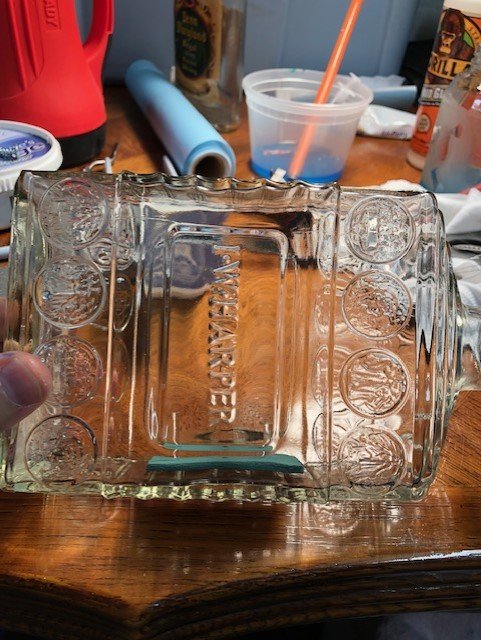
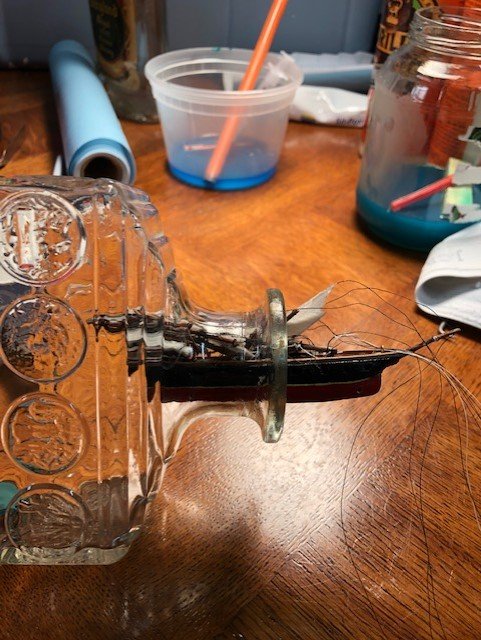
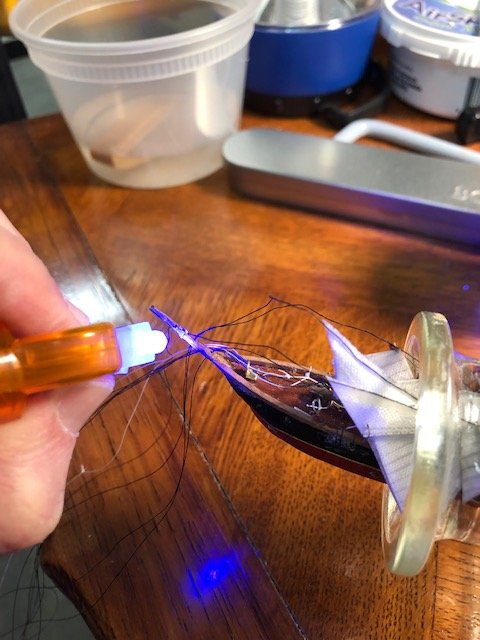
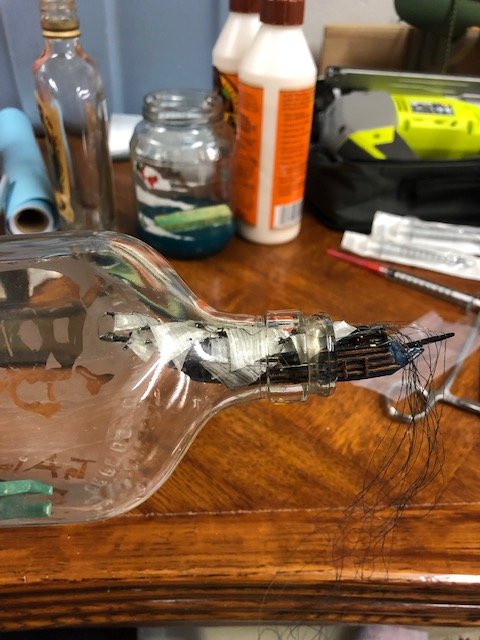
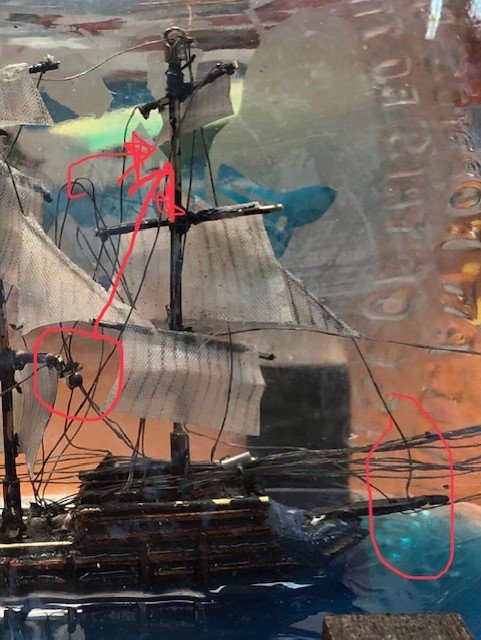
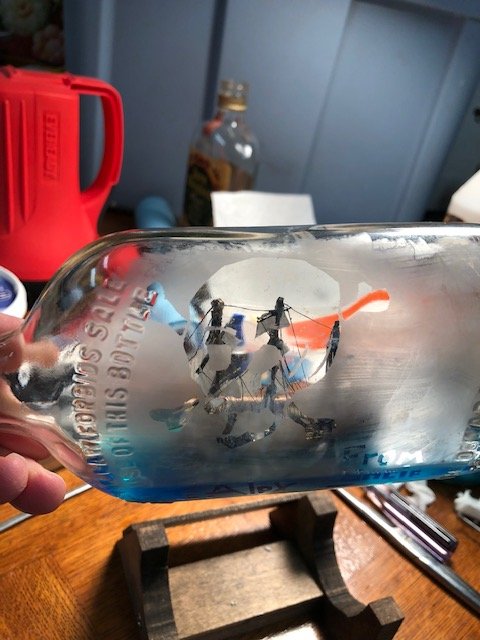
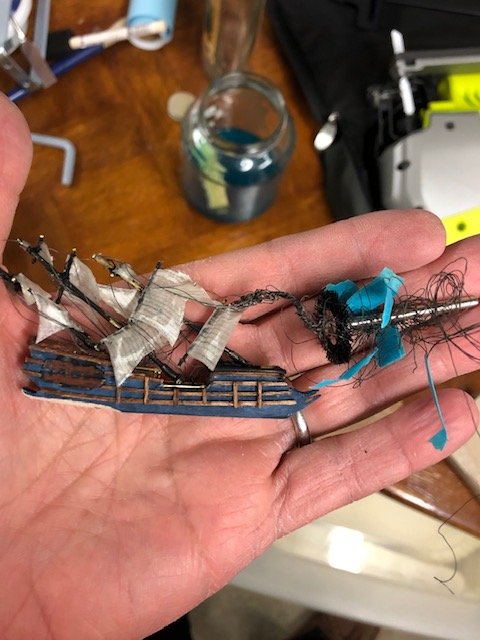
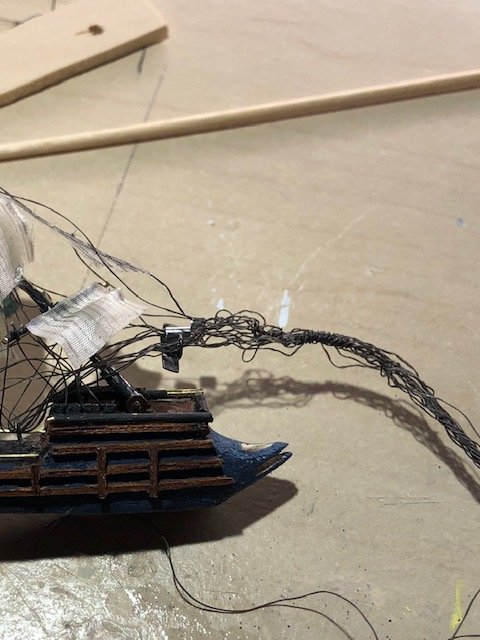
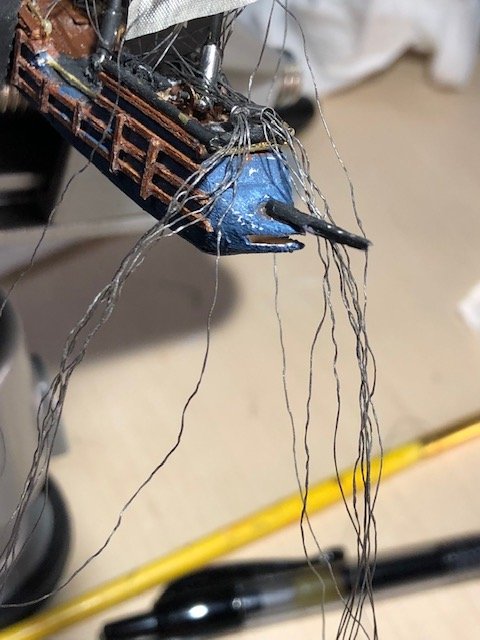
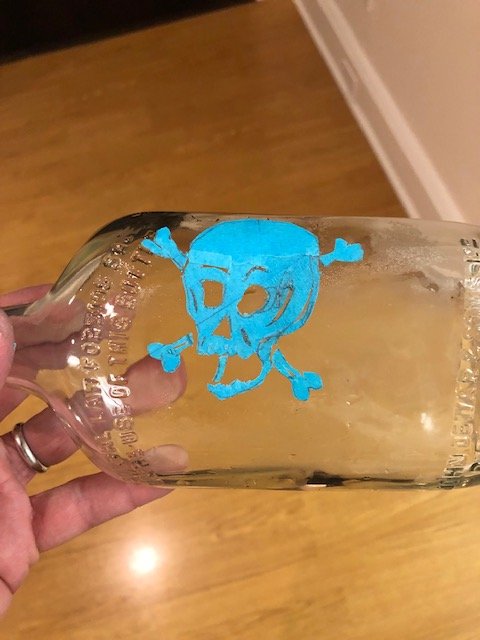
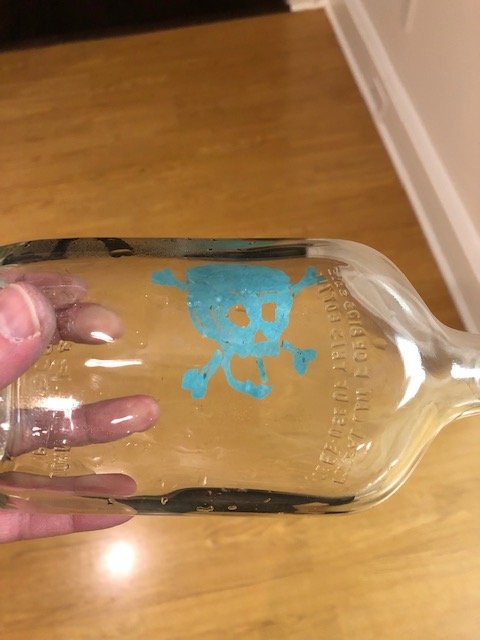
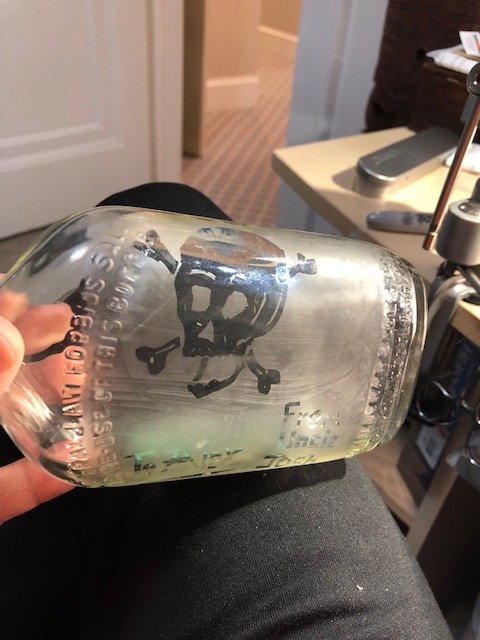
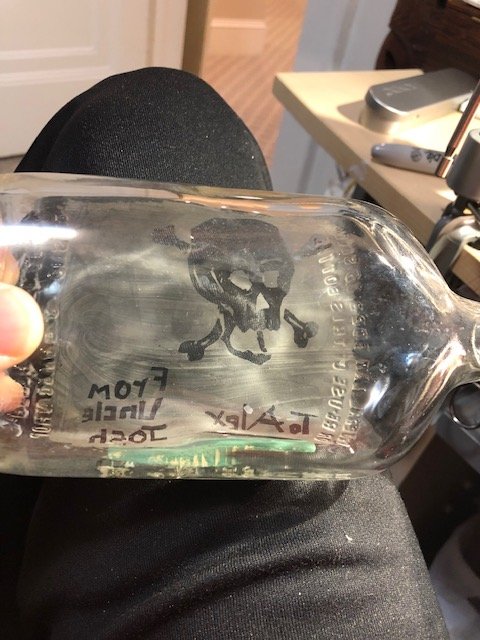
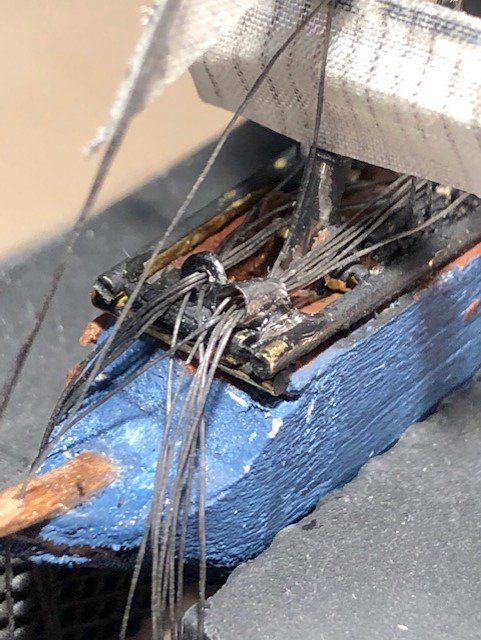
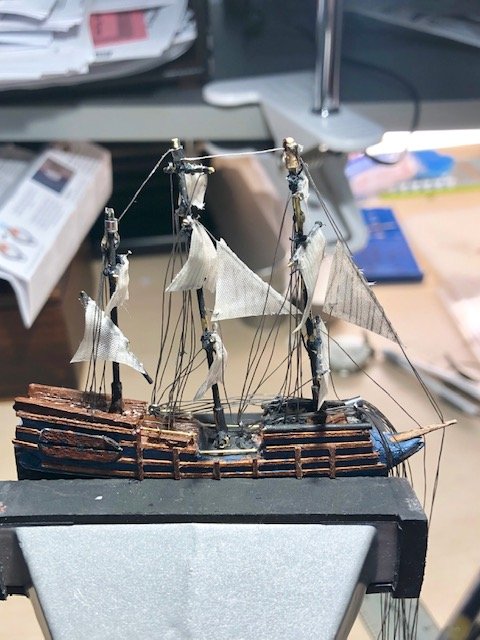
A cyclone hits, recovery, and successful bottle etching: Well, with 3 work days left, I was prepping the ship for launch. I did some paint touch ups, and then decided to use the soft brush on the dremel to clean her up nice.... A spinning tool going at 6,500 RPM and 20 lines of running rigging do not mix!! Totally devastated bow, pass throughs, and all the running rigging, all snared up into the brush and axle. Fortunately, the masts, yards, and shrouds were all intact. I was able to untangle everything, and rebond the bow pass though. She got a brand new bow sprit - this time black - and a Perm!! Somehow, recovered. On a lighter note, my experiment with glass etching came out well. In my minds eye, this pirate ship in a bottle should be haunted by a looming skull, with jaw agape. I applied craft tape to the lee side of the bottle, drew out my design, cut away the outlines, and applied glass etch cream. Rear / Lee side as viewed from the front The rear - the engraved message to my nephew is read from the back. How it'll look from the front. Tomorrow I have to get her in the bottle, on a stand, and pour in the rubber. After the silicone sets over 24 hours, That will only leave 1-2 days to right the masts and tighten the lines.

- 10 replies
-
- 4
-
-
- flying dutchman
- bottle
- (and 1 more)
-
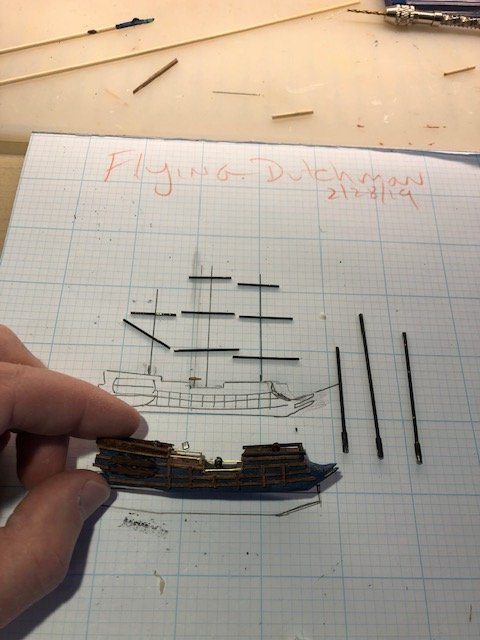
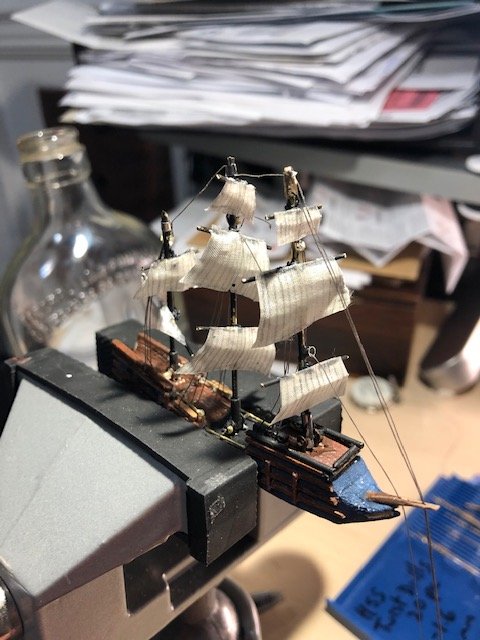
Thank you Dan ^ !! I took my own advice, and decided that I really wanted to build up and highlight the sterncastle as much as the bottle would allow: I used a dremel to grind down the decks, to allow the masts more room to fold back. In addition, I shaved down some of the keel at the stern - stealing bottle neck space from the hull and giving it to the deck. Lastly, I painted black the brass rails on the bow, to hide their shine and distraction. Proportion of the masts and spars drivs me crazy. I found some perfectly sized brass rods -- unfortunately I havent found them predrilled, so that adds another challenge. Still, their sizes isare great for these projects. also some bead cord ends for the mast bottoms / hinge process. No holes in the masts was tricky, so had to use a combination of knots and beads. Was struggling with how to set up the tack / brace lines to help square the sails. I set down three cord ends as pass throughs: some strategic placement of beading ends and pass throughs: Where we stand now, with tons of running rigging spilling out ove the bow. But they will be glued and cut in the end. I'm pretty happy, especially in the short time. Still struggling with the sails - I went back to satin becuase the muslin would be too thick for the narrow bottle passage. (as it is, things will be very dicey come time for bottling). Have to apply CA to the sail material to prevent shredding when cutting, and i think the CA makes the material contract a bit. I wish the sails came out bigger and more imperious. Oh well, next time! Thats one of the beautiful things about SIB - if you dont like it, then scrap it, or get ready for the next project - It can be here in under two weeks!! For all intents and purposes, the ship and rigging are complete. Brass plate is already ordered. Will need to make and stain the stand. Next: Bottle etching and silicone launch. Four work days left.
- 10 replies
-
- 2
-
-
- flying dutchman
- bottle
- (and 1 more)
-
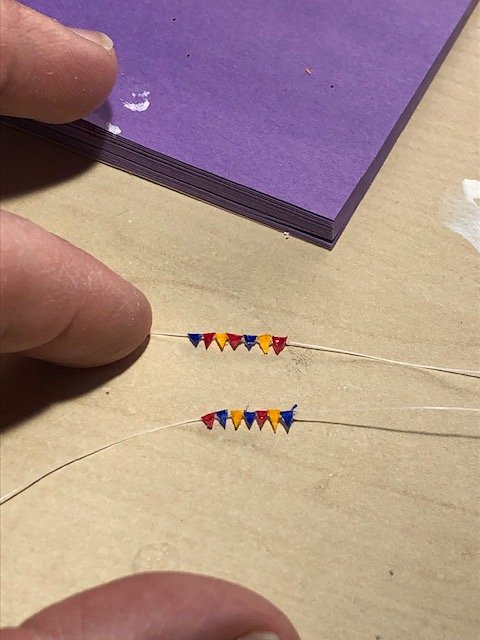
Thank you, Daniel! I was pleasantly surpirsed with pendants. I colored three small swatched of paper, then cut a bunch of tiny triangles with an exacto blade, and glued the best ones onto some thread. Then coated with CA for some heft and gloss. I got sidetracked with my new project The Flying Dutchman, so launching the Alaska is geting delayed for another week.
- 28 replies
-
- 1
-
-
- alaska
- sloop of war
- (and 2 more)
-
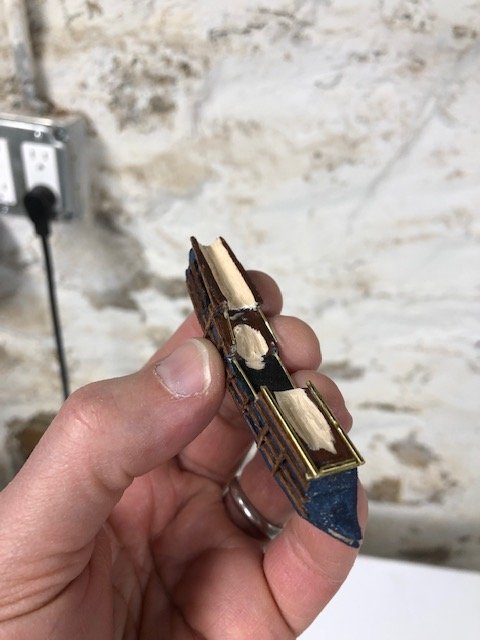
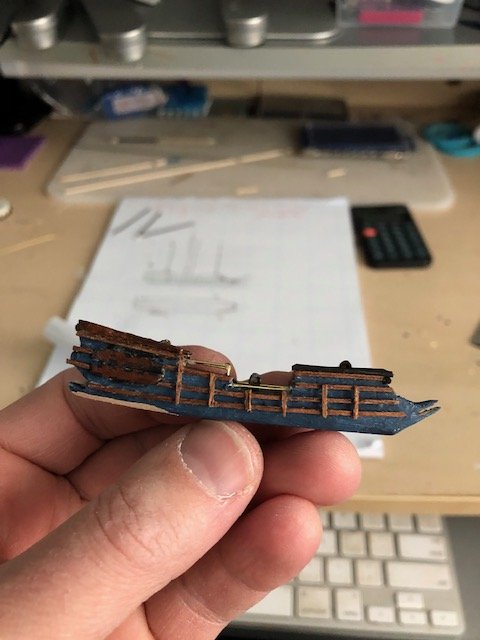
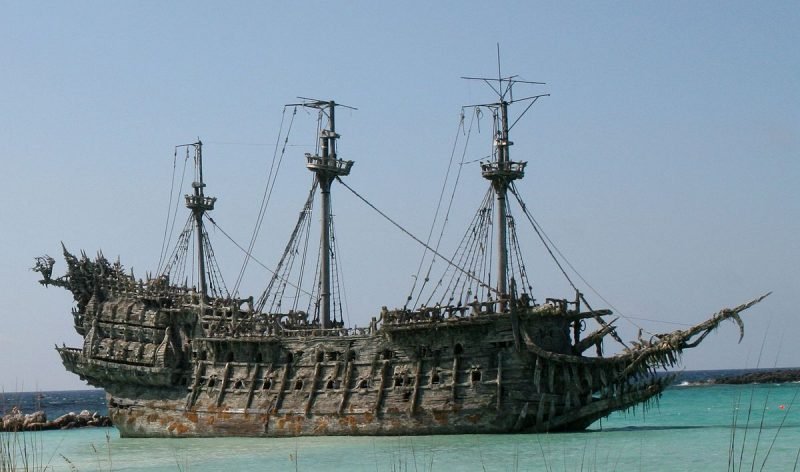
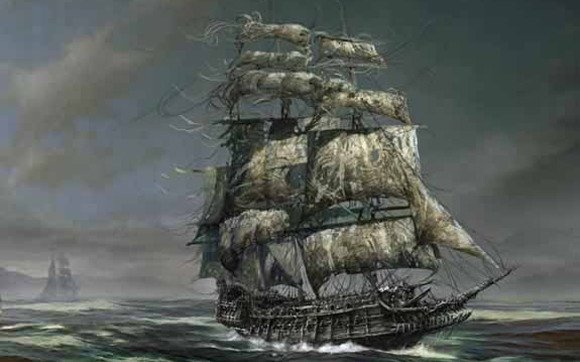
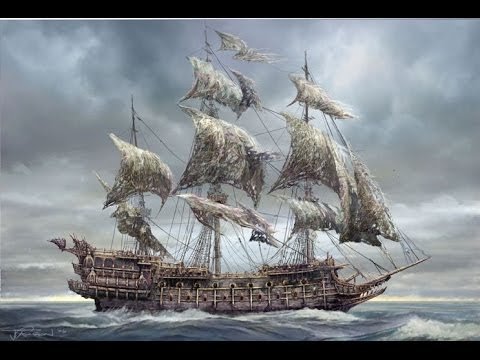
So, I was about to spend a couple hours launching the USS Alaska, when Wifey reminded me that I promised to make my nephew a SIB for his Bar Mitzvah Birthday - arriving in 8 days. I had been keeping my eye on some pirate ships, and decided to go with the fabled Flying Dutchman. I love the the sterncastle, and the ridiculous, ghoulish bow. I had to get crackin'. I chose a classic whickey bottle. But with a 1.65cm aperture, getting the ship in will be 'toight! Hull blank, then sanded and cut down. Unfortunately, due to the bottle's narrow neck and the fact that I will have the three masts fold aft, it will be hard to build up a proper sterncastle. (For future similar SIB, i will build up the sterncastle's bulwarks only, but have decks remain at the level of the lowest deck). I like the brass effect, but i built up the forecastle too much, diminishing the classic profile. Oh well. a good start for one night. still tons of work to do in a short time. Next: Masts, Yards, and Rigging. 7 Days left...

- 10 replies
-
- 2
-
-
- flying dutchman
- bottle
- (and 1 more)
-
Thanks Patrick! I’m very pleased with the pendants since tiny scale is typically not my bag - those chunky life boats testify to that. Im still truly wondering if the real Alaska had pendants or laundry or something else... they look kind of ragged and misshapen. Cheers! -josh
- 28 replies
-
- 1
-
-
- alaska
- sloop of war
- (and 2 more)
-
Completion of main ship work, rigging, lifeboats, and pendants: Going by the few available photos, it looks like the Alaska had 2 darkly painted lifeboats mid ship, and 4 lighter ones aft. Not sure why I initially chose yellow for the aft lifeboats. I bought some great, 0.8mm brass rods which I used as their rack. Eventually, better taste prevailed, and I repainted the banana boats white with a red stripe. The life boats at mid ship I chose a jenkins green, supported by 0.5mm brass rods Making and attaching the tiny pendants. I chose primary colors. Not sure what they would have been in 1866. It wasnt laundry, was it??? After a couple of weeks in and out of the craft vice, she gets a little sand down, a fresh coat of paint and acrylic vanish. My SIB only have a finite number of times I can drop the masts without things breaking or popping or going too slack. Top-gallant sails driving me crazy... Next: acrilyc stand and the silicone sea.


- 28 replies
-
- 5
-
-
- alaska
- sloop of war
- (and 2 more)
-
Mizzen mast, tack / brace lines, jib, and stay sails: I keep the mizzen sail furled Birdseye view of gaff threading standing tall working on the mizzen shrouds probably the second time around (since I accidentally cut them all the first time). I plastic welded some brass crimp beads to the lee side of the main and mizzen masts, so that they could serve as pass-throughs for the tack / brace lines from the fore and main sails, respectively. Of course, one of the beads toreoff during a trial of collapsing the masts not good. But Fixed with a new set of line and plastic welding. I opted for a jib and fore stay sail, plus 2 main stay sails, and zero mizzen stay sails and zero tack / brace lines for the mizzen mast - its getting kind of crowded in there and I cant junk it up any more. Next.. the life boats, and clean up.

- 28 replies
-
- 5
-
-
- alaska
- sloop of war
- (and 2 more)