


W4LKR
-
Posts
33 -
Joined
-
Last visited
Content Type
Profiles
Forums
Gallery
Events
Posts posted by W4LKR
-
-
I'm long overdue thanking jwvolz, Yorky, Retired guy and CPDDET for the incredibly helpful feedback on the stanchions. The photos are so helpful. My plan at this stage is to remove the frame stanchions after installing the fake stanchions and bulwarks, but before installing the main rails. There are at least two or three different ways to skin this cat and get results that I would happy with, but doing it in that order feels the most doable to me personally. Seeing the photos on Suburban Ship Modeler swayed me I think.
For the past week I've been sanding and faring the bulkheads with varying amounts of success. Overall it's going well I think. My homemade sanding block is about 3" long with an 80 grit strip stapled tightly around it. I'm changing out the strip regularly. This block can span a max of two bulkheads. Longer might be better but I'm taking it slow.
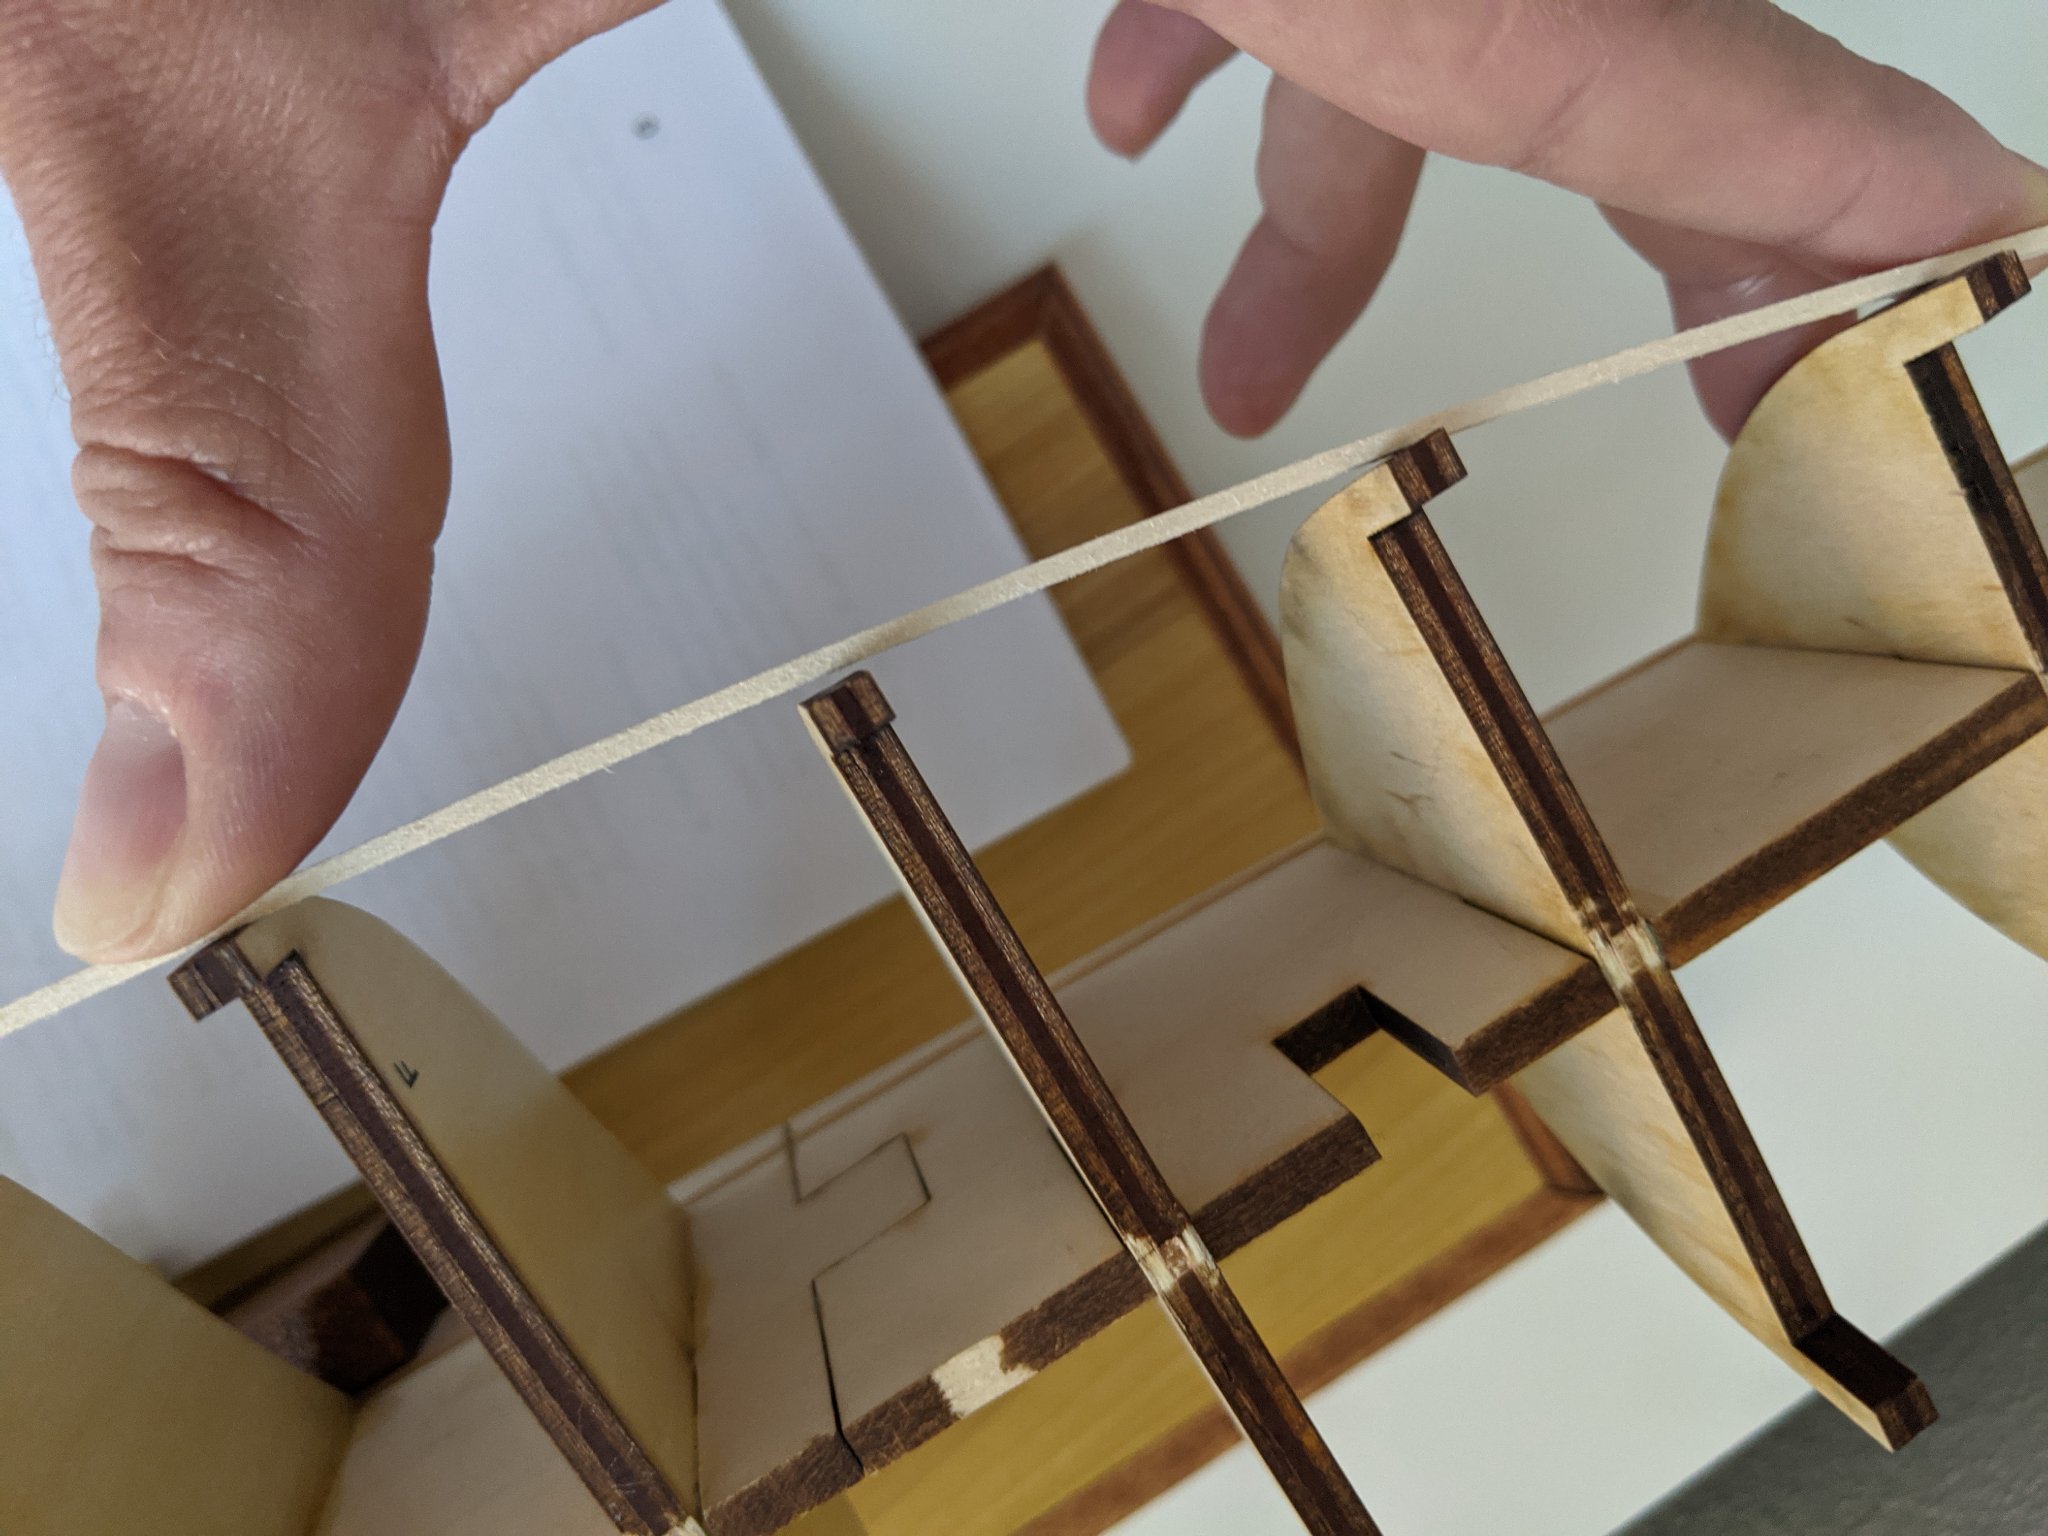
I knew there would be a need to shim some bulkheads to fill gaps. One of these gaps is larger than I expected (circled below). I've definitely got some shimming to do before I'm anywhere near ready to start planking.

-
Those parts look great. By the way I own the same Rikon grinder. I've mostly used it for restoring traditional woodworking tools, putting bevels on chisels and plane irons, and buffing rusted parts. I've never had a problem with it. If you ever want a piece to have a somewhat burnished look, a wire wheel can do it.
-
I looked through RetiredGuy's build log of MSW Bluenose. Thank you for referring me to his build. It appears to be a top-notch job and is a source of inspiration. Looking at his stanchions though, I couldn't find any photo or mention of removing the bulwark extensions and installing stanchions in their places. Every photo in his log that shows a close-up of those areas shows the bulwark extensions still there. Later on he even paints them. To my eye his bulwark extensions and stanchions are indistinguishable from each other. This is probably a testament to his modeling abilities.
-
Thanks everyone for the advice about removing the bulwark extensions. I was concerned about them looking different than the others but I never considered removing them, especially after the bulwarks are in place. So what is the technique? Do you use some temporary attachment between the extensions and the bulwark so you can cut them free out from under it later?
-
12 hours ago, Yorky said:
Gary Brinker has posted a great build diary of his Bluenose build on YouTube. It's very detailed and answered lots of my dumb questions and really felt like I had someone was holding my hand. I REALLY recommend that you watch them.
I ran across Gary's video series when I was researching the Bluenose kit and have really enjoyed the parts I've watched. He's entertaining and you get the feeling he's just being himself and wants to share his passion with others. I've been watching the videos as I progress through build.
-
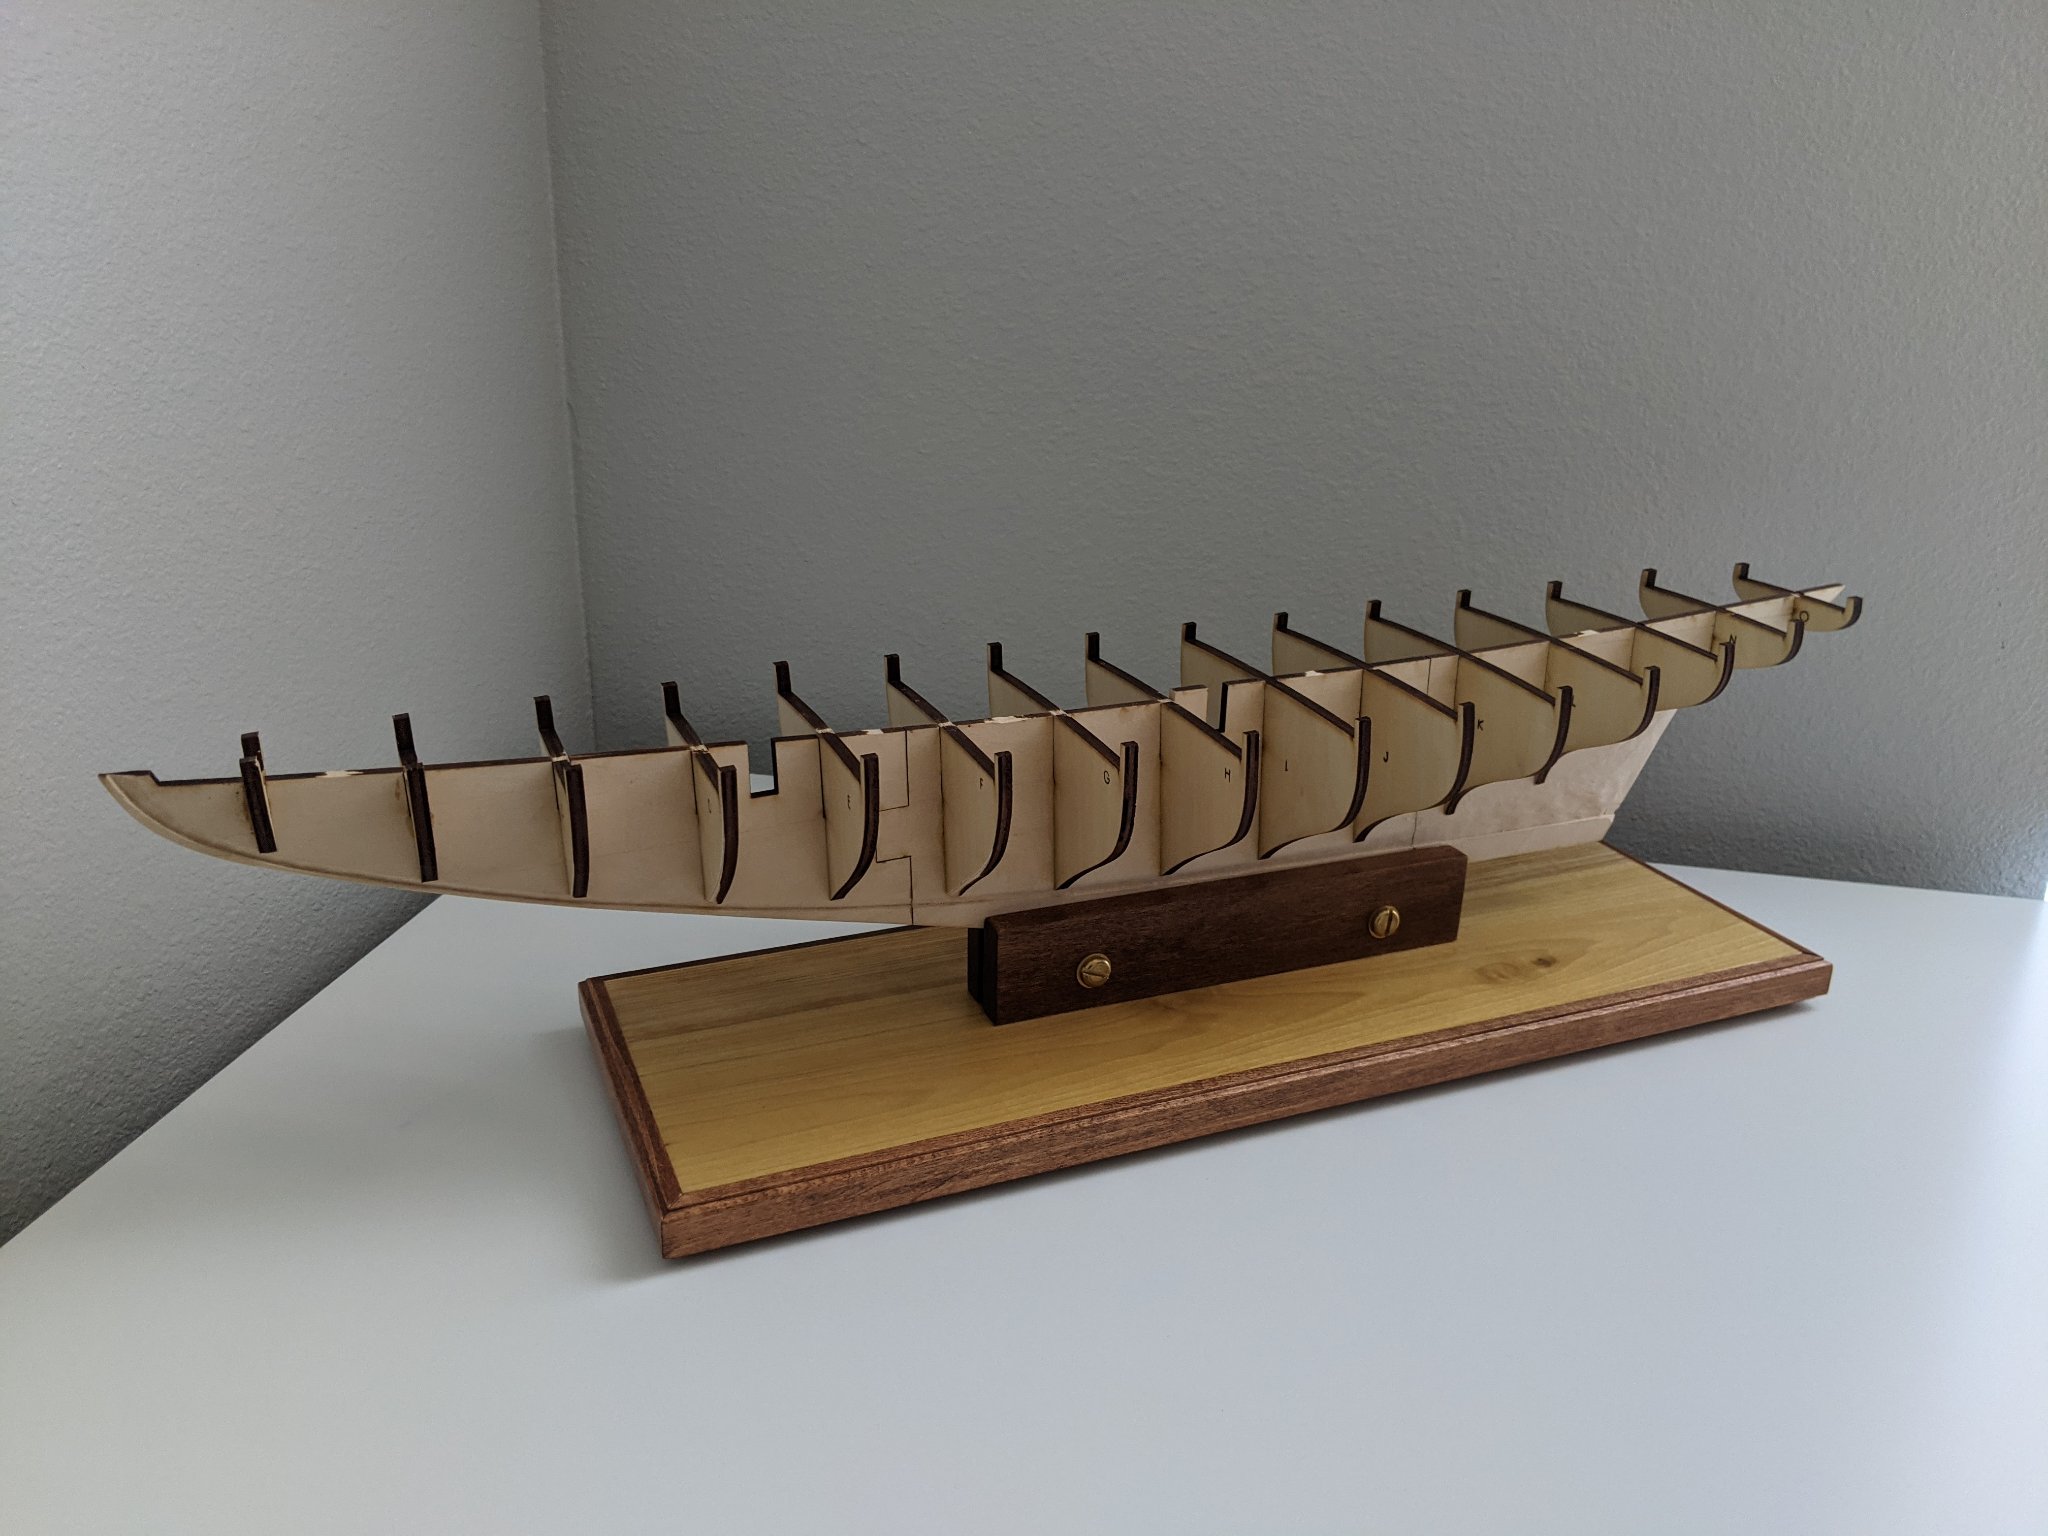
Batons have been added between all bulkheads except the forward-most two (A & B). I can tell how much stronger the entire model is after completing this step. It seems that one or two of the bulkheads have been pulled just slightly out of square with the keel. I'm making note of these little mishaps but not necessarily committing to fixing them in this build. I want to avoid making this mistake in the future but I'm uncertain how much trouble it will cause me going forward.
Next up is continuing to trim back the bulwark stanchions. Bulkheads A thru D have already been cut back to be 1/8" thick from the 3/16" thick bulkhead material. I paused this work to install the batons. Once I finish the stanchions it will be time to address the bulkheads that don't reach the bearding line.
After that, it will finally be time to begin sanding bevels into the bulkheads. I'd be lying if I said I wasn't still very intimidated by that process.

-
Thanks Yorky. Regarding #2, I've just finished installing the batons. I'll post some pics momentarily.
It's good to know there's ample extra material in the kit. I may end up shimming the bulkheads with spare decking or planking materials, but before I go that far I'm going to attempt a wood putty fix. There's only three bulkheads that need it and I'm hopeful it will be less work.
I think this makes four of us who are currently building Bluenose kits. I'm looking forward to following your build as well.
-
That's going to be a great setup. I'm looking forward to seeing what you're able to create with the milling machine.
The metal parts in my kit are similarly rough. I have a 3D printer so I've considered sketching some replacements in CAD and printing them, then painting with a metallic enamel to simulate metal parts. But having the ability to make real metal replacement parts would be way better.
-
Thanks Ron, appreciate the encouragement! Congrats on starting your Bluenose! I look forward to following your progress and learning from your build.
Another build I have followed is CPDDET's Bluenose. His kit had the exact same problem with the rear bulkheads not reaching the rabbet line. He fixed the issue by applying wood putty to extend just those bulkheads downward a fraction of an inch, then faired them as normal. I think I'm going to do the same rather than apply shim material to the entire bulkhead edge.
-
I'm considering getting the Amati Keel Klamper. For anyone who owns or has used one, is the base heavy enough that it stays put when light force is applied to the model? Or do you have to screw it down to the workbench to really get the most benefit?
-
I'm a bit of a tool nut as well. For me there's a higher level of satisfaction when I'm able to make something using a tool that I also made. My homemade keel clamp is nicer to look at than it is to use I'm afraid. Well, for certain tasks I'm sure it will be fine, but right now I'm needing something that holds the keel at two points further apart so it doesn't flex as much. I'm afraid I'm going to crack something the way it's clamped right now.
Oddly enough the Amati Keel Klamper is hard to find in stock. Maybe there's a boom of new modelers in 2020. Once all the jigsaw puzzles sold out, the people turned to models.
-
I wanted to ask about your keel clamp. Early on in the project I noticed you were using a homemade clamp based on a mini tripod with ball head. That same thought went through my head a couple years ago but I ended up making a clamp without the ball head. I'm not real happy with how mine works so far. Then I noticed you switched to what looks like the Amati Keel Klamper in a few of the photos. What made you switch and how do you like it so far?
-
4 hours ago, JerryC said:
I think you may have installed some of the bulkheads backwards, such as the intende forward side to the rear. Some kits advise having the forward bulkheads with the numbers on the face of the bulkhead facing forward and the bulkhead letters facing rearward. Doesn’t help with your difficulties at this point, but your getting great advice from others here.
I was afraid I'd swap them accidentally so I did label them all. Fortunately with this kit each bulkhead was engraved with the letter. I took it another step by coloring in the engraved letters with ink. Since they are uniform thickness I don't think it matters which face of each bulkhead is forward vs aft. This photo shows how the profile of the rear bulkheads are markedly different than those forward. I'm pretty sure they are all in the right locations.

- Canute, GuntherMT, Robby The Brobot and 1 other
-
 4
4
-
47 minutes ago, ERS Rich said:
Have built quite a few plank on bulkhead and solid hulls. True POB is “harder” or has more problems than a solid hull. However they can be overcome. In my experience bulkheads have had fit problems. The beauty of wood is, if wood is missing, it’s easy to add, and if there is too much, sand it away.
As GuntherMT explains above, the bulkhead problem is solvable.
In my experience with POB, letting the planks lay easy across the bulkheads is important. Realize the board can be bent to fit the frames and it can be twisted, but it can’t be bent along the edge very much. A minute amount of edge bending to set against a neighboring plank is Ok. Edge bending to close a big gap deforms the board.
So there will be stealers to fill gaps and planks will be tapered. Failure to taper means the plank will need to be edge bent to fit. So if you find you are edge bending it’s time to taper.
Avoid hollows by edge glueing the board to it’s neighbor during installation. Install a board by applying wood glue to the plank edge, then placing dots of CA on each bulkhead. Start say left to right, left end on bulkhead, then moving right apply light pressure to push the board against it’s neighbor, at next bulkhead press board into CA, apply pressure, etc. Fix the board to each bulkhead one at a time. Left to right.
Enjoy your first kit!
Thanks for the reminders about tapering. There is so much to getting this right. I appreciate the way you've explained it.
Maybe I'm opening a can of worms but I'm going to ask anyway - is there any benefit to using CA vs wood glue? In my mind the wood glue gives you plenty of time to position the piece before it sets compared with CA, but they make some slow drying CA (relatively speaking). I'm thinking of the gels I've seen over the years that take up to a minute to set compared with the instant glues that set in 3 seconds or less. So far I've only used wood glue on this kit but I'm tempted to try a slower drying CA when affixing the planks to the bulkheads. The process you describe above sounds good to me. A dot of CA on the bulkhead, press and hold, wait a minute, move on to the next bulkhead....
QuoteNote I’ve noticed that once the model is finished and on it’s stand, underside hull or planking imperfections are less noticeable. The viewer is looking in from the side and down.
Especially true with this kit as the hull is painted
")
- Canute, Ryland Craze and mtaylor
-
3
-
1 hour ago, No Idea said:
I agree that shimming will solve the problem. However just double check that the correct frames are in the correct slots first 👍. I made this error once and it took me a few days to realise what I had done 😂
That would certainly cause some issues! I have double-checked and they are in the right sequence. One of the first things I did after removing each bulkhead from the part board was to label them with ink. As long as I don't forget my ABC's, I'll be ok.
- Ryland Craze, mtaylor and Canute
-
3
-
20 hours ago, Don Case said:
I'm new at this so this is more of a question. Is the bulkhead offset. ie is it too big on the other side of the ship?
No it's pretty much identical on both sides. The bulkheads are all symmetrical and the notch for the keel is perfectly centered. Almost all of them slipped into the notches in the keel such that when they bottomed out in the notch the top of the bulkhead was even with the top of the keel. These aspects of the laser cutting seem to be spot on. I think several of them just come up short in their height.
If I was more experienced with model building and was more concerned with minute accuracy than I currently am, I would probably make my own bulkheads from solid wood using the plans. But that's not really my goal with this model. It's my first build and I'm just enjoying myself. I can overlook the imperfections and inaccuracies.
-
6 hours ago, vaddoc said:
You could maybe paint the edge of the frame so that you know how mush is taken off.
I've seen people do that with POF. In my case the laser cutting process left a uniformly darkened edge face to every piece. I plan to sand most of it off and use that as my indicator. But with a few of the bulkheads I'll have to shim them and will probably mark those with ink as you've suggested.
QuoteI think your questions show you are on the proper path, the hard one...
Thanks, and I don't expect it to be easy. If it were then I wouldn't enjoy it as much. There's just a lot of ambiguity with this beveling process.
- Ryland Craze and mtaylor
-
2
-
8 hours ago, Jaager said:
The moulds are either plywood or MDF? MDF is beyond the pale. Plywood is just terrible about the working characteristics of the edge faces. End grain is bad.
Yes the bulkheads are plywood. It's pretty dense stuff to my eyes. I've worked with all kinds of plywood in furniture making and construction projects. This material is very dense, thin ply stuff. Maybe there is just as much glue as wood in it. I don't expect to love sanding it. I don't love sanding anything.
QuoteIf you use your imagination, you should see that the entire gap between each mould can be filled with a continuous series of these 1/4" layers. With this sort of support, only a single layer of planking is needed. But, this pretty much needs a power scroll cutter ( scroll saw or 9" bandsaw ) and a disk sander or drum sander to perform that much work.
This does make sense and is effectively what will be done behind the last (or aft-most, is that a word?) bulkhead. A solid block goes between it and the transom, fully filling that void. Looking at build logs and videos of POF models I definitely appreciate the advantages of that approach. More frames, more coverage of the hulls contours, smaller gaps. A POB kit is what I am working with so I would like to persevere and enjoy the kit.
-
Here are the two bulkheads where the gaps exists. I'm trying hard to hold the plank across multiple bulkheads either side of the gap. Maybe this will close naturally as the bulkheads either side are beveled down, but even if it does, this bulkhead will only touch the plank on an edge. I don't know what else to do but shim it and then bevel afterward.


-
33 minutes ago, allanyed said:
If you could post some photos it may help get you some suggestions.
Here are some examples.

- mtaylor and Ryland Craze
-
2
-
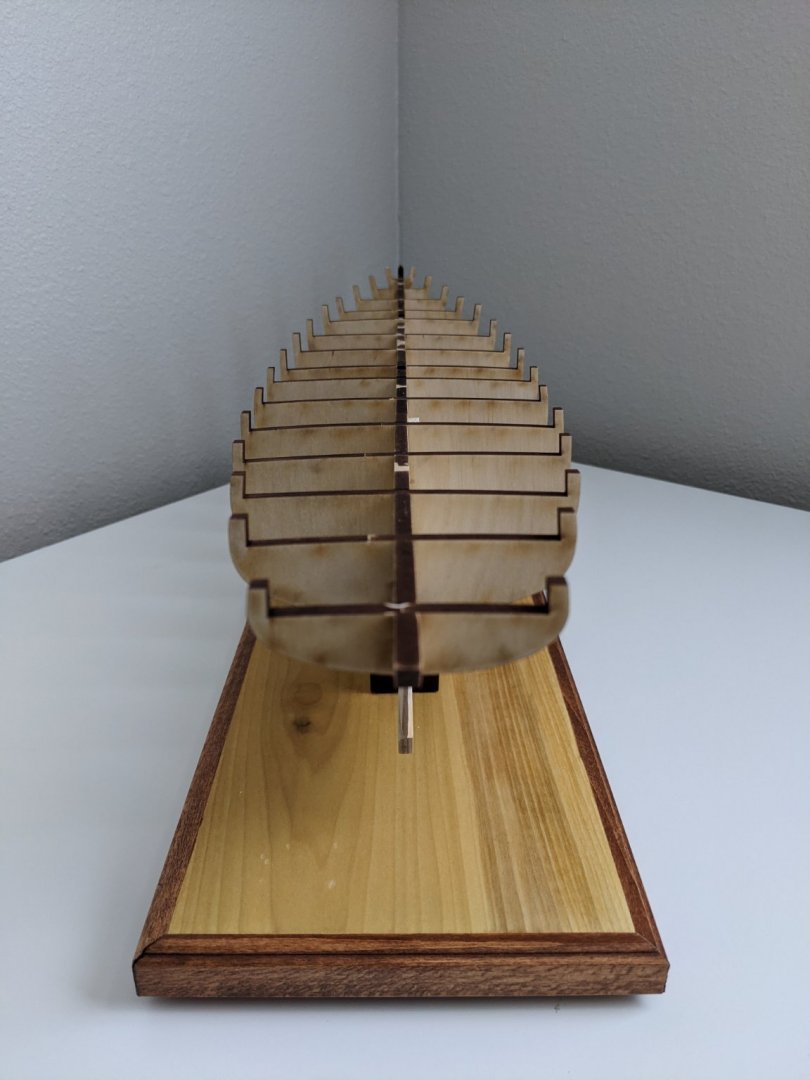
I’m currently building the MSW Bluenose. This is my first wooden ship model. Thus far I have assembled the keel, created the rabbet below the bearding line, and installed all bulkheads.
For some reason I’m very intimidated by the process of fairing or beveling the bulkheads. I’ve read and reread the instructions as well as the sections on bulkhead fairing in the LSS practicum by Bob Hunt. It all makes sense on paper but in practice I don’t think I understand the technique well enough to start. I am especially hesitant because many of my bulkheads do not extend all the way down to the bearding line even though they are perfectly flush with the keel at the top. As I look at all of the installed bulkheads I have three types of issues:
1. Bulkheads that do not touch the bearding line at all. They stop above it by as much as 1/8 inch.
2. Bulkheads whose aft edge only touches the bearding line, but the forward edge does not. This is happening with some bulkheads that are between the midpoint of the keel and the stern.
3. Bulkheads whose forward edge hangs below the bearding line while the aft edge touches it. This is happening with some bulkheads that are between the midpoint of the keel and the bow. This situation seems like an expected challenge and is really the only one that is addressed in my reading. Beveling these bulkheads correctly will shape them to match the curve of the bearding line.
There seem to be lots of tutorials, guides and videos on planking, but I’ve not found much on the topic of preparing the bulkheads to receive the planking. I could not find a single video on youtube or elsewhere demonstrating the actual sanding of bevels into the outside edges of the bulkheads. So I wanted to ask some questions here.
What sanding tools/aids are recommended for sanding across the the parts of the bulkheads that are well above the bearding line, away from the keel? I would appreciate specific recommendations for after market sanding blocks, jigs, etc. I did wrap a scrap piece of 1x2 in some 100 grit sandpaper and took some light passes. This strikes me as a poor technique though. The sandpaper isn’t adhered the block and tends to bow outward away from the hard surface even though it’s creased at the edges. Maybe I need sticky backed sand paper attached to a smaller block?
How does one sand a bevel into the bottom “tips” of the bulkheads where they touch the bearding line? This seems difficult using the same tools that are well suited for higher up regions of the bulkheads. A sanding block won’t fit unless its too small to hold. I’m curious what works for experienced modelers.
How many bulkheads should my sanding ‘thing’ touch at the same time? 2? 3? I’ve considered using an emory board, those tongue depresser sized sanding boards. One would probably contact at least 3 bulkheads on my Bluenose.
The instructions and the LSS practicum both recommend laying a plank along the bulkheads frequently while fairing to detect gaps. What I’m confused about his how many bulkheads the plank needs to contact when doing this. The location and size of gaps change depending on how many bulkheads are contacted.
How do you know when to stop sanding?
Lastly, with issue number 1 I listed above, I’m assuming the only thing to do is add shim material along the entire bulkhead edge?
Thanks.
-
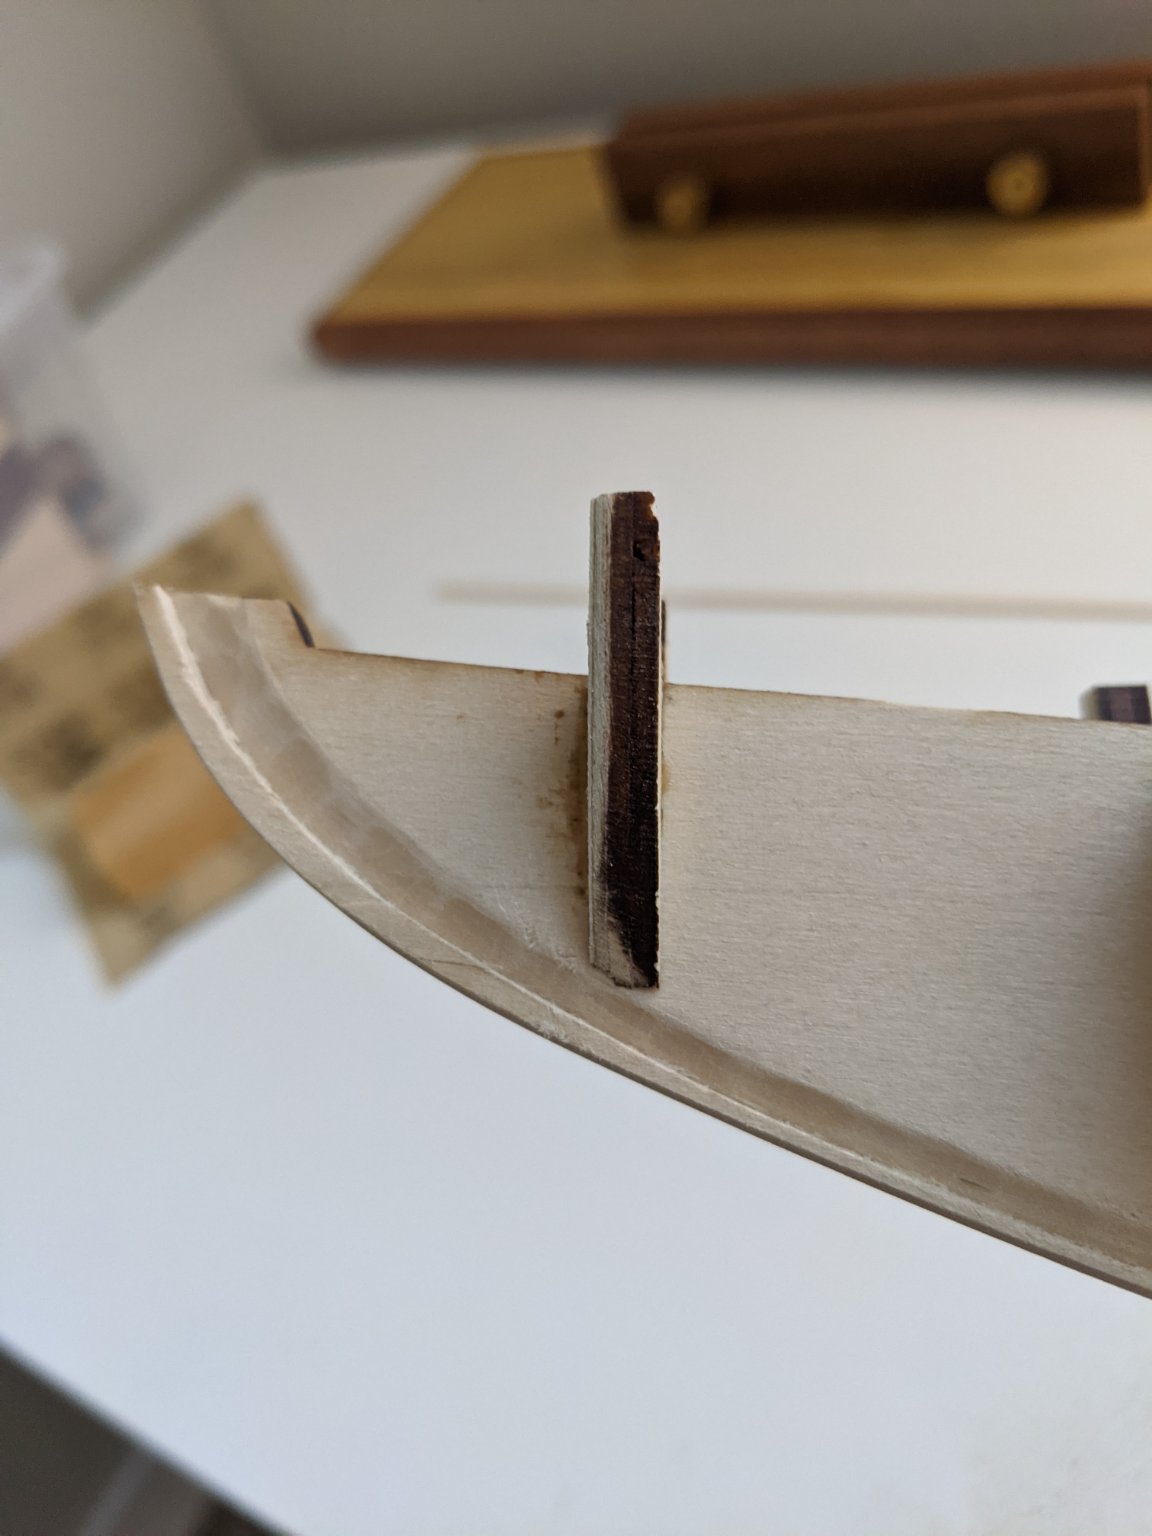
Issue 2 of 2 is that at least a couple of bulkheads fall short of the bearding line. Bulkhead K is near center in the photo below. I feel confident the bearding line is in the right place and it's the bulkhead that ends to high above it. My expectation was that most if not all bulkheads would overshoot the line and need significant fairing but in the case of this kit it's maybe half or less. The middle bulkheads are smack on the line and they need the least fairing to boot. But as you can see in the photo, several bulkheads just barely touch the bearding line with the aft edge. I'm unclear on what's needed here. Shimming is certainly possible followed by fairing the shim material on the forward edge mostly.
I could use some suggestions on adding shims. I hesitate to use kit materials as I don't know how much extra stock is included. A trip to the craft store for thin basswood or balsa strips is probably in order?
Issue 3 of .... 3, is that I really botched the sizing of that added block in the photo. The keel needed some additional support and I think this added material was recommended in the practicum I was following. But wow, I really made it too big and created additional sanding work for myself.

-
And we're back. My Bluenose finally sees the light of day again. After a move from TN to FL, lots of home improvement (excuses excuses), I finally unpacked this box and am getting setup to continue.
Issue 1 of 2 is visible in these photos. The keel has warped a tad. I'm not sure if I am going to worry about it. Some spacer blocks placed strategically between bulkheads might sort it out. The warpage was either there to begin with and I missed it or it happened in storage/transit.

-
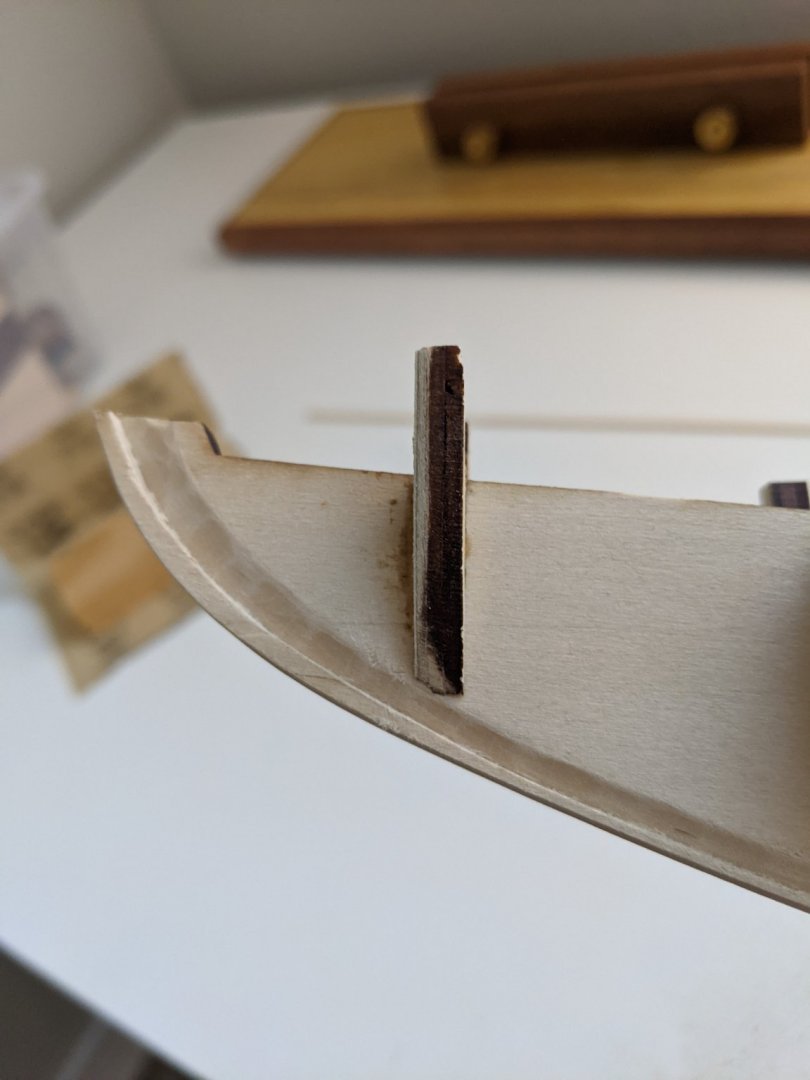
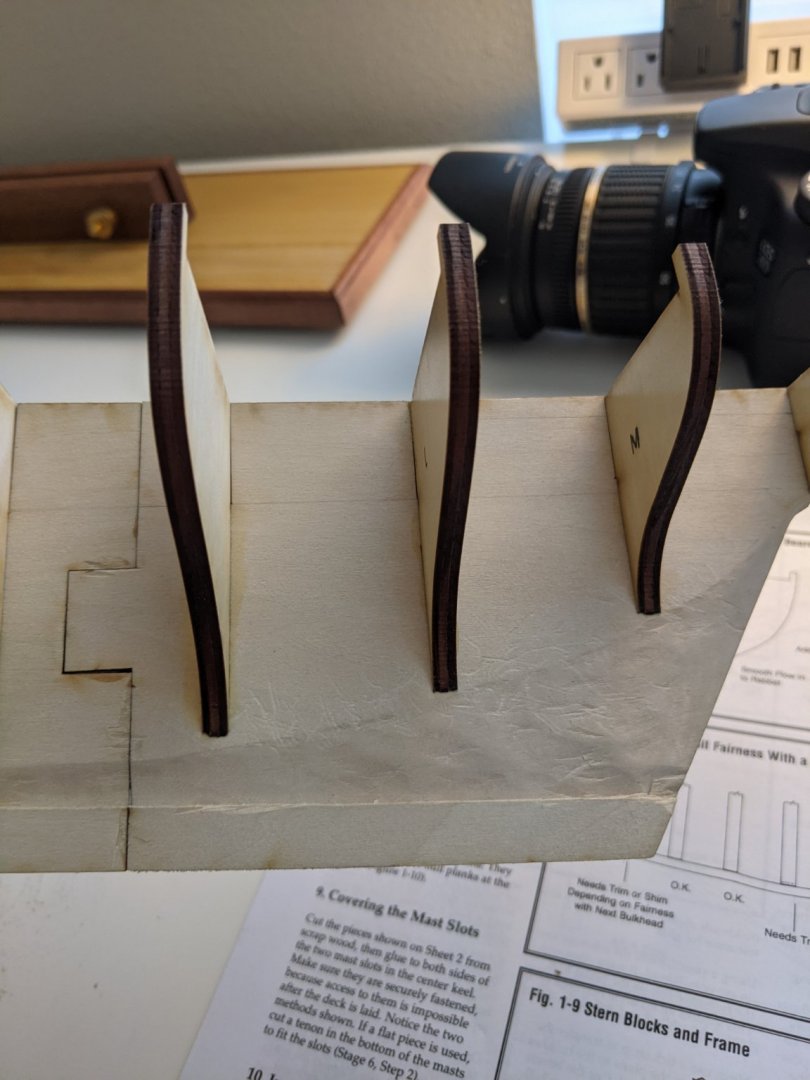
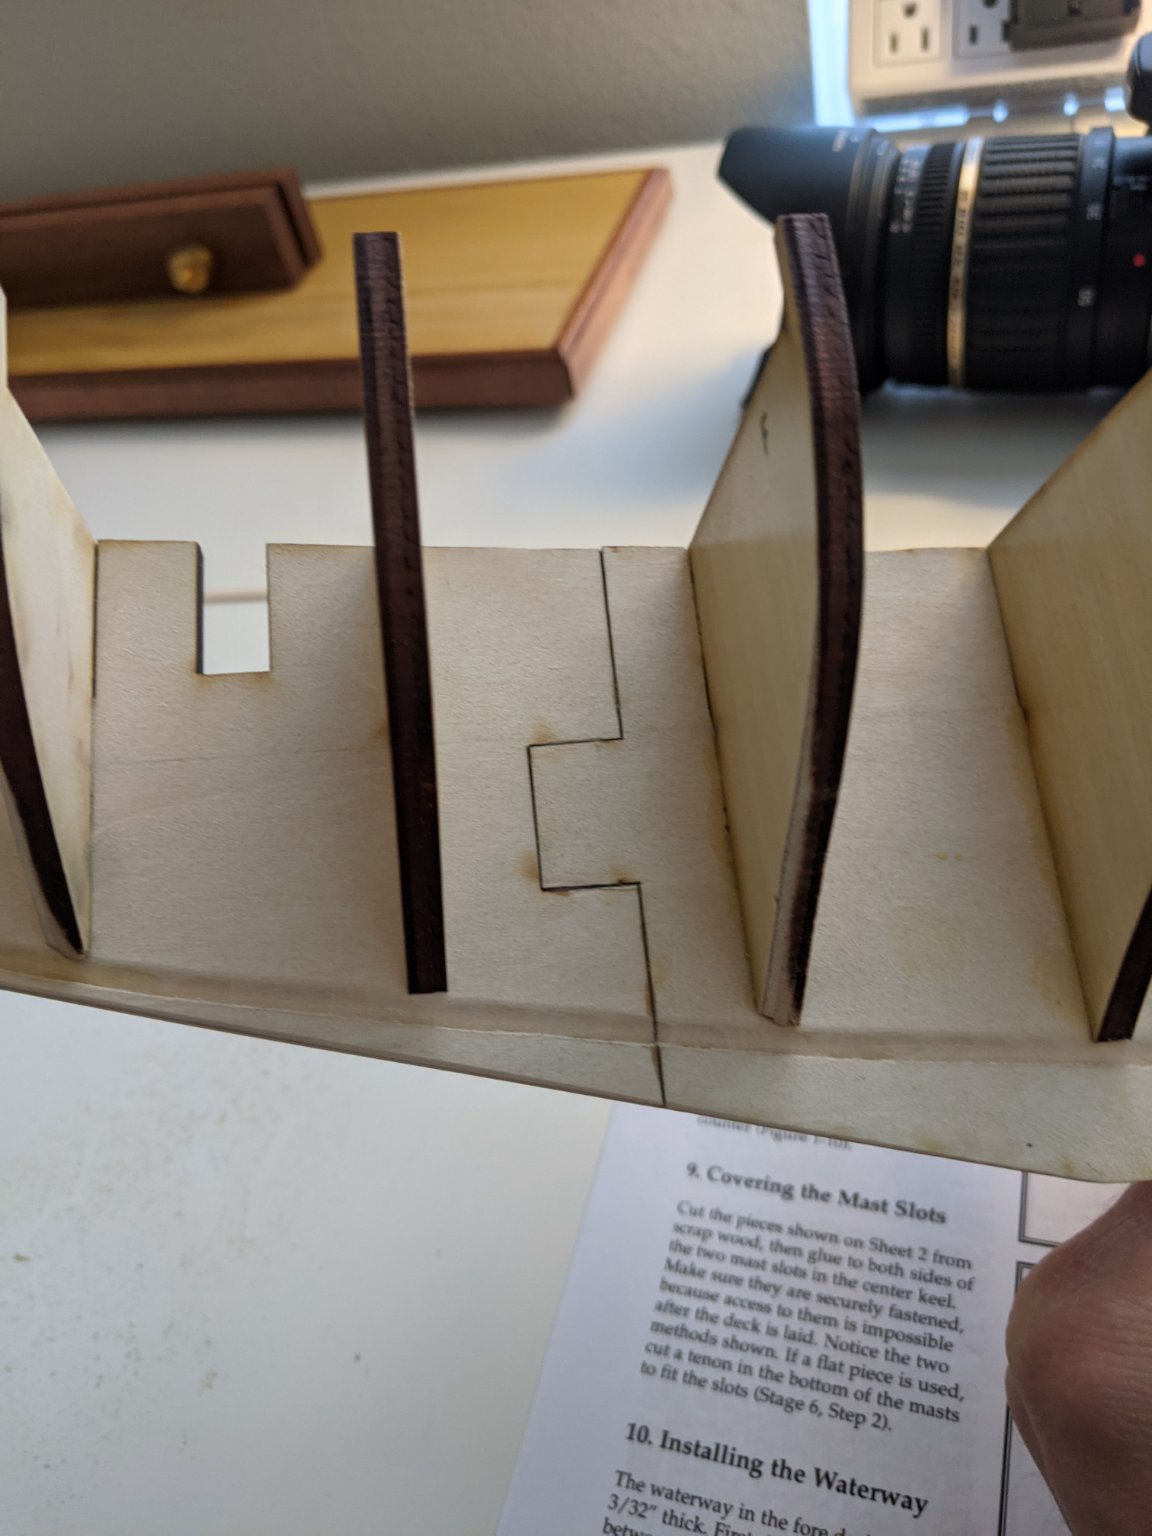
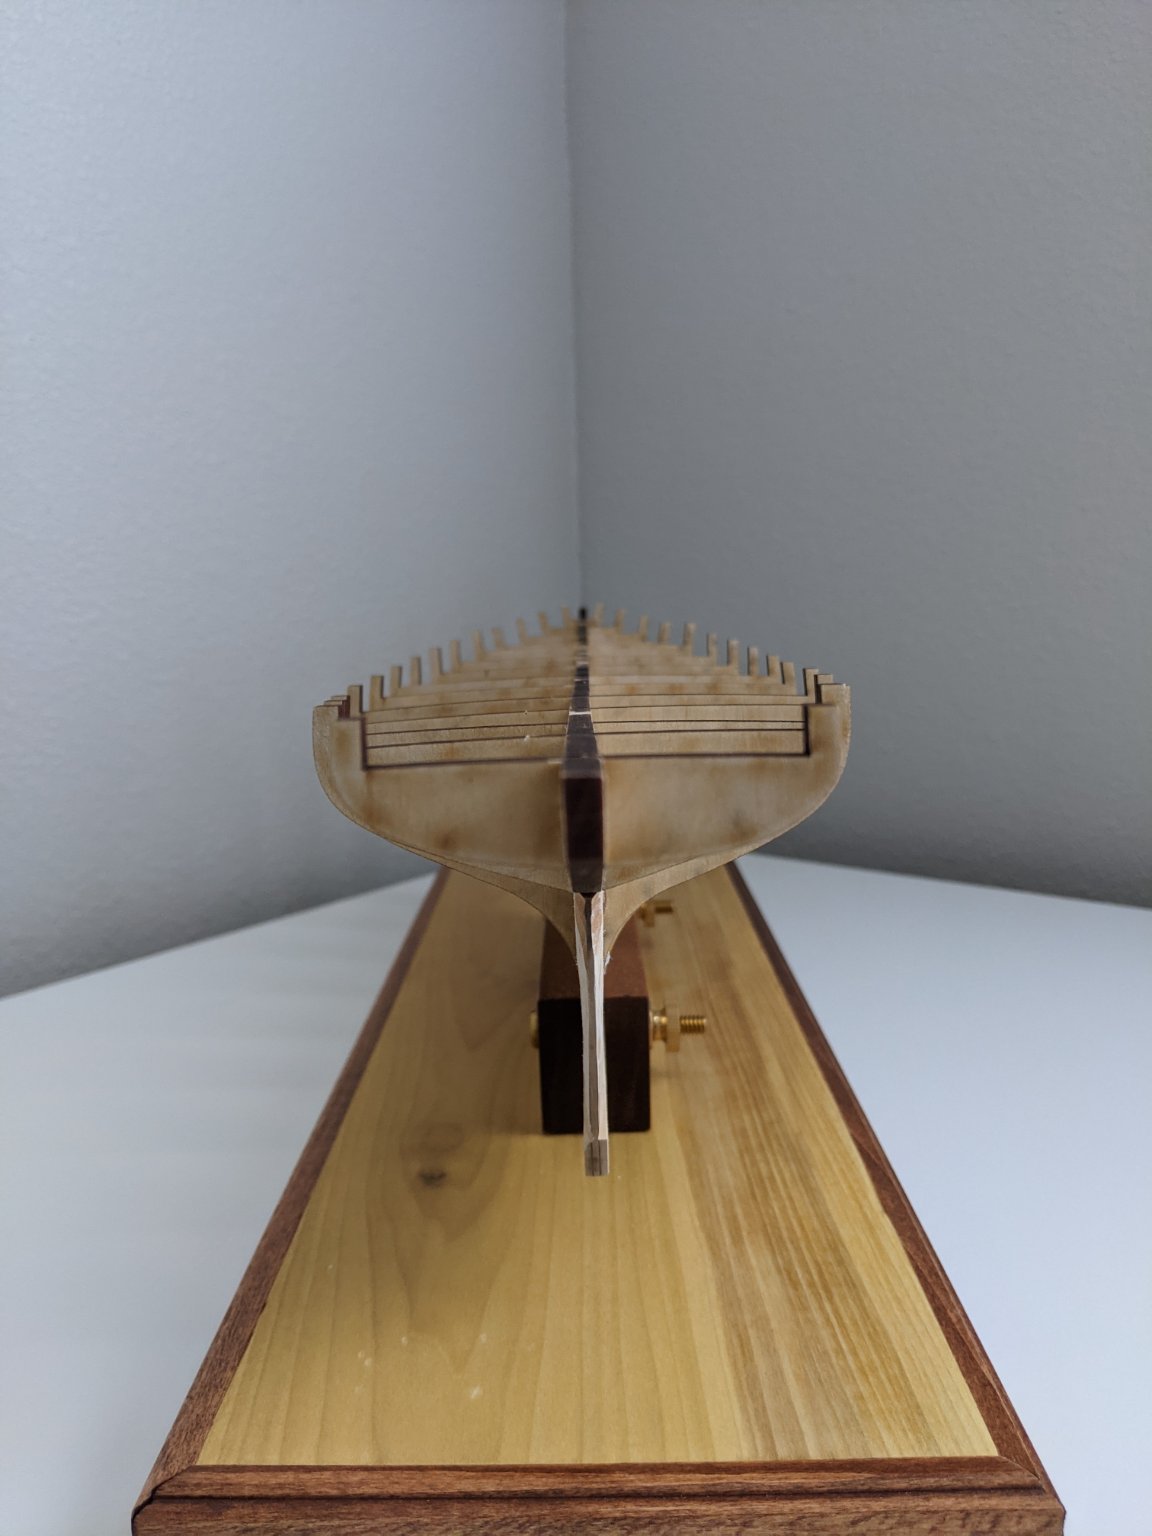
It's been a while, but I'm finally working on this model again. I found some time this past week to finish installing the bulkheads. They're not all fared yet but a few are started. After the glue dried I noticed in the instructions they call for the stanchions to be trimmed down to 1/8" wide from their stock thickness of 3/16". It doesn't specify which side (forward or aft) the excess wood should be removed from though. I'm following Bob Hunt's practicum from LSS which doesn't specify either (or maybe I didn't read carefully enough). The practicum's full size photos do show trimmed stanchions with material removed from the aft side of each stanchion. For anyone familiar with this kit, is there a guideline or something I can base this decision on? My concern is that if I choose wrong, the fake stanchions that come later will have alternating spacing that aren't equal. I've looked at another build log where the material was removed from the aft sides, just like LSS shows, so I'm planning to go that route unless I hear or learn differently.


Bluenose by W4LKR - Model Shipways
in - Kit build logs for subjects built from 1901 - Present Day
Posted · Edited by W4LKR
It's becoming apparent how much easier things would have been if I'd gone ahead and shimmed the bulkheads before starting to sand the bevels. At the time I didn't think I could identify which bulkheads would need shimming until after beveling, and maybe that was true, but in hindsight I think I'll be able to tell with my next build. Shimming an already beveled bulkhead is not easy! More on that later.
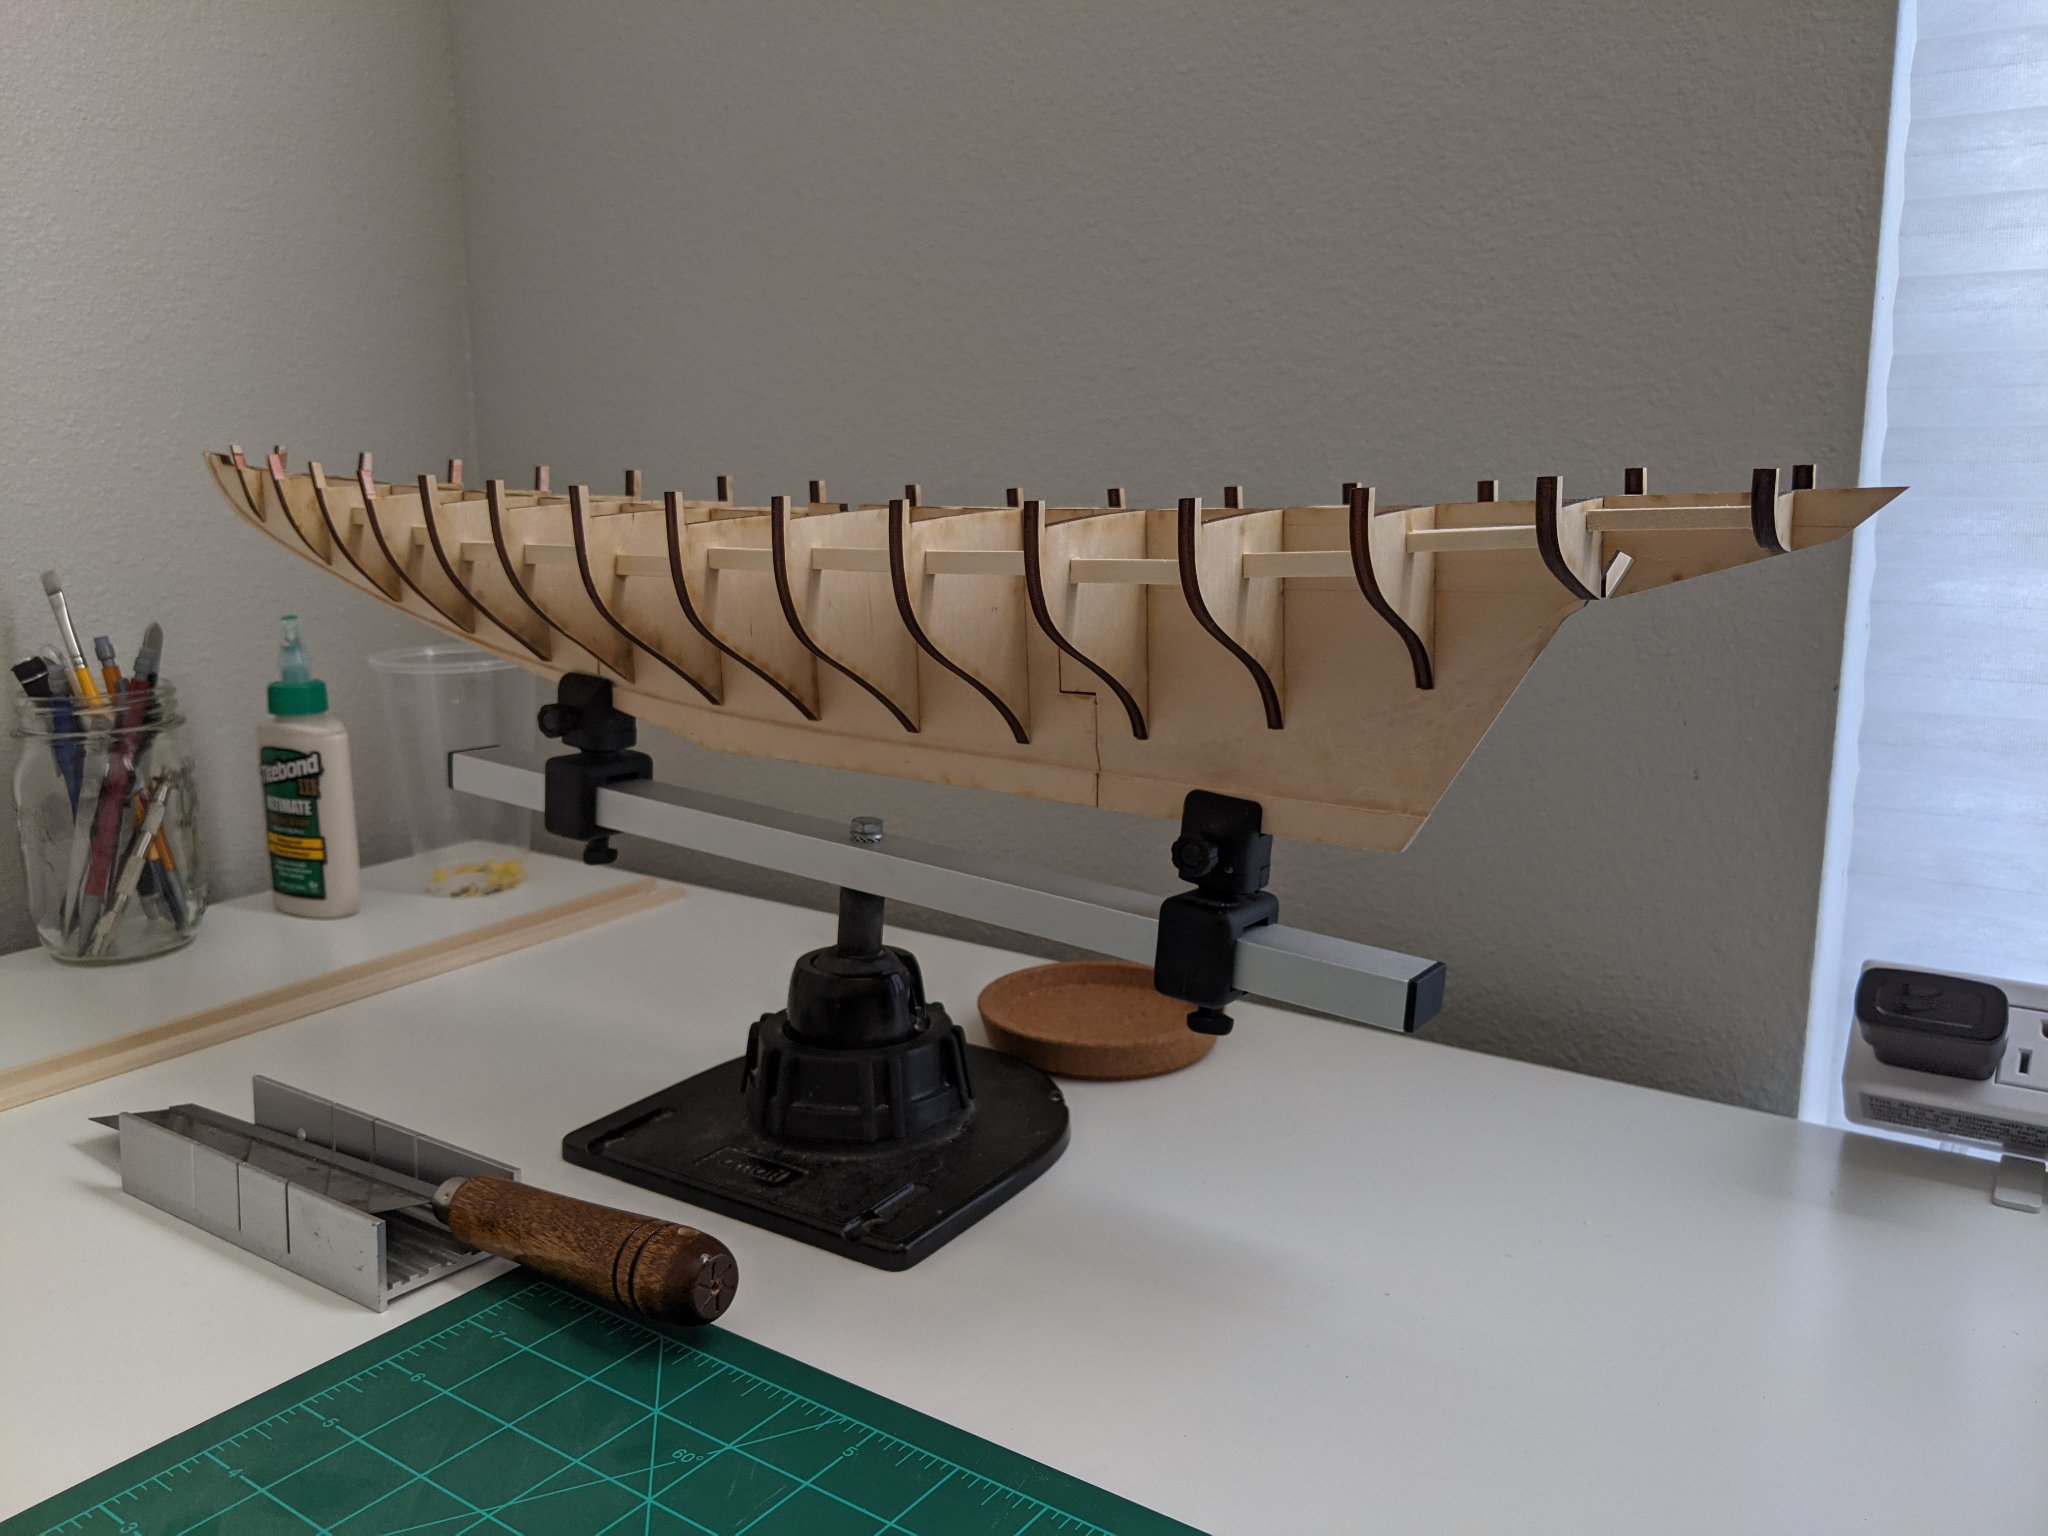
Right now I'm bouncing back and forth between attempting to shim the bulkheads that need it and prepping the stern to receive the stern blocks. I've beveled and carved out the bulkhead that straddles the gap where rudder will go. When I run a test strake along these aft-most bulkheads it seems to create the right contour. I guess I won't know for sure until the stern blocks are installed and properly shaped. Several of the starboard bulkhead edges forward of O and N (pictured) have yet to be beveled.
After taking this photo I realized the mistake I made. Bulkhead N, which straddles the gap above the rudder, wasn't supposed to be sanded back to be flush with the forward side of the gap. I don't know why I thought this was necessary. Looking back at the instructions and practicum there's no mention of doing what I did. In fact, the practicum shows the horn timbers installed between bulkheads N and O with no sanding to N like I've done. I think I've created another challenge for myself. Attaching the horn timbers will be more difficult with bulkhead N shaped the way I did it.