HOLIDAY DONATION DRIVE - SUPPORT MSW - DO YOUR PART TO KEEP THIS GREAT FORUM GOING! (Only 13 donations so far - C'mon guys!)
×


Rcboater Bill
-
Posts
167 -
Joined
-
Last visited
Content Type
Profiles
Forums
Gallery
Events
Everything posted by Rcboater Bill
-
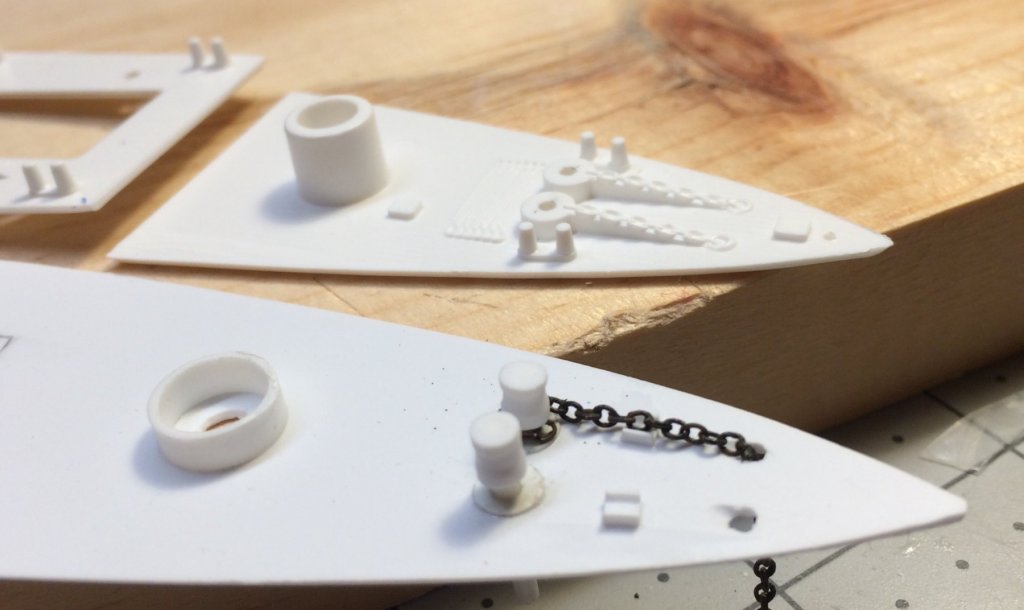
 And a close-up of the almost-finished scratchbuilt foc’sle and the original kit part for comparison... Very happy with how this turned out!
- 35 replies
-
- 11
-

-
Yesterday and today I worked on the display base. The base is a piece of 1/2” thick poplar, with 1/4” square bass keel blocks. I primed and painted the base, but not the blocks. Plan is to airbrush a thin coat of brown to unify the color... Here is the model being test fitted. I’ll have to sand a little bit of a valley down the centerline to accommodate the keel...
-
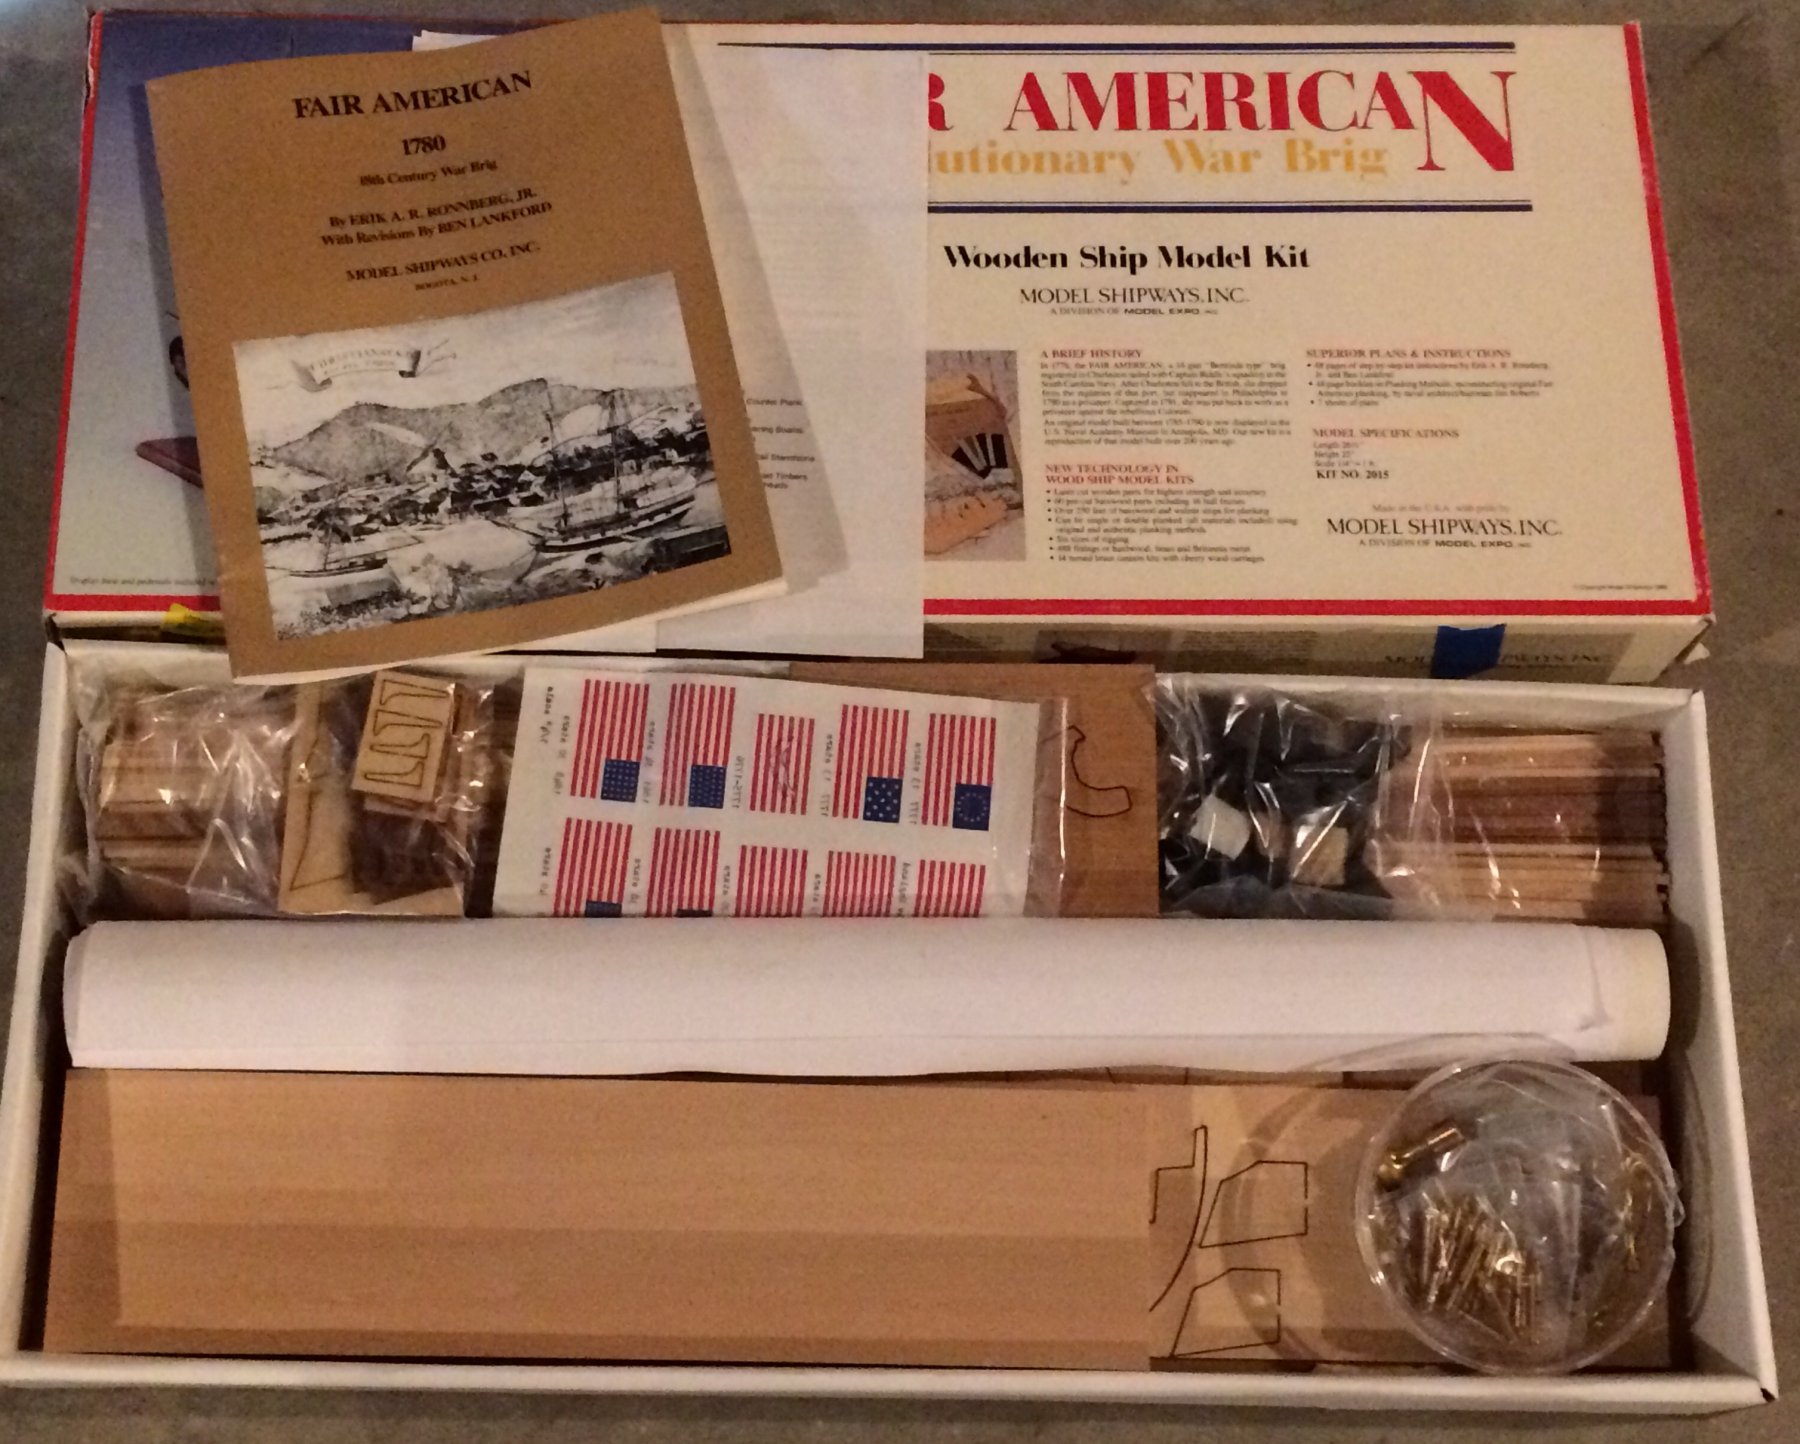
I have an unstarted Model Shipways Fair American kit that I’ll never get around to building, so I thought I’d offer it here before going to “Fee-Bay”.... Kit has been opened, and the parts my have been fondled a little. (I’m the second owner, so I’m not sure how it was originally packed.) But it looks complete to me, and was represented as such from the guy I got it from. Shipping is at cost from New Hampshire, USA. I’ll provide an exact quote to serious buyers, but I’m guessing shipping will be around $20 for domestic postage, as a rough estimate. PayPal is preferred, but a USPO Money Order is ok, too. This is the first time I’ve posted anything for sale here, but I have bought and sold lots of stuff on other forums, including HyperScale.com and RCgroups. I also have a 500+ feedback (100%) rating on eBay. Questions? Please ask! -Bill


-
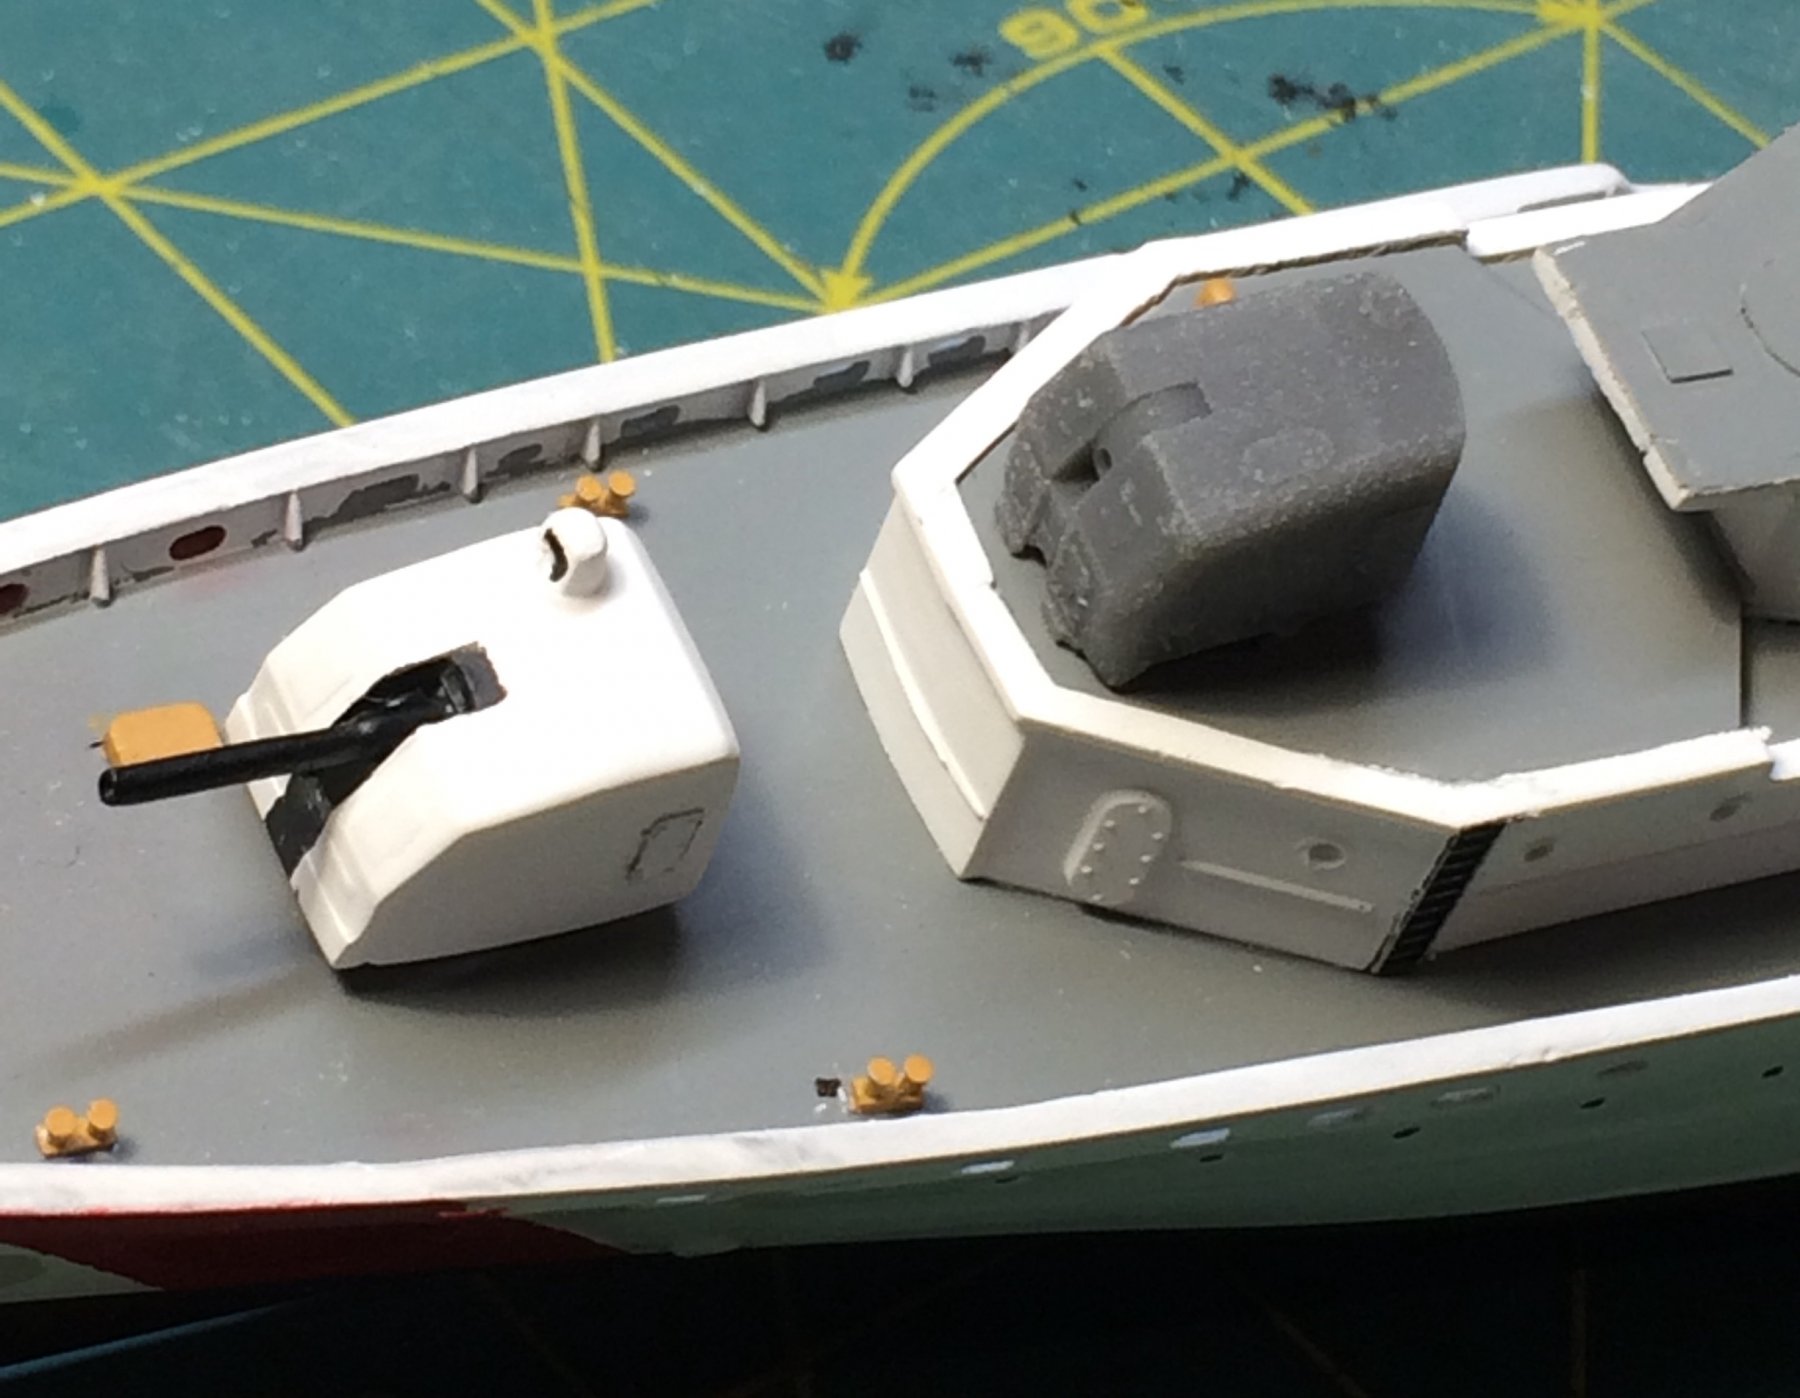
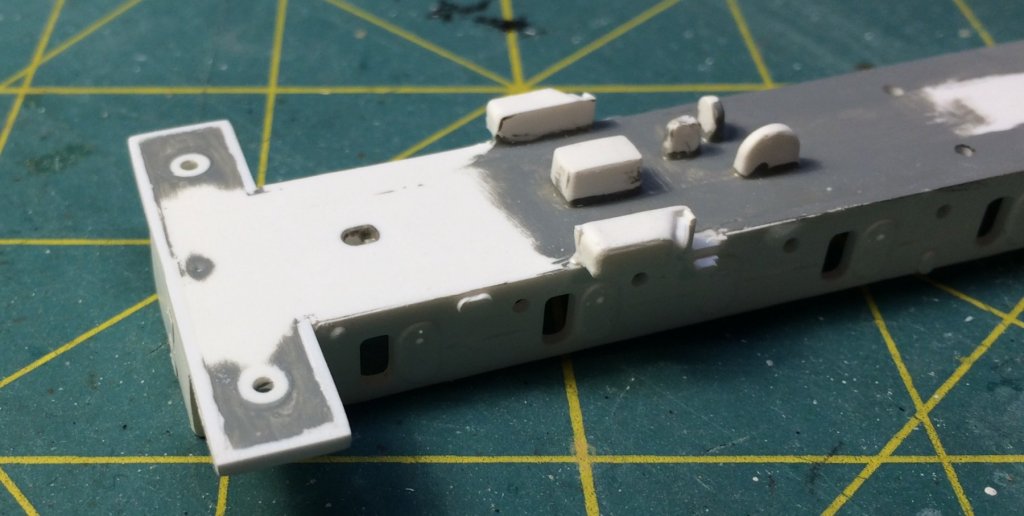
Another catch-up post— about the 5”/38 turret... I saw that Model Monkey offers a 1/300 scale turret set for the Taney kit- you get two in a package (but no barrels.) I ordered them and they came quickly. They are nicely made, and show how far off the Revell turret is. Compared to the MM 3-D printed turret, the Revell one has some issues: - In profile, the two turrets are about the same size. But from the front, the Revell turret is noticeably wider. - It is square when looking at it from above- it is missing the taper- the back of the turret is not as wide as the front. - the gun is centered on the face of turret, and should be offset to the right. - the turret has the Gun Captain’s observation hood, which most, but not all, of the class photos seem to not have. So what am I going to do? Keep the kit turret! Here’s why— my new, custom deck was made long before I found out about the replacement turret, so the base I made was sized for what I now realize is a too-wide turret. The correct turret won’t fit. About all I can do now is to sand away the observation hood....or not. I found one picture of the Duane with it.. http://duaneassociation.com/Plymouth-74-042.gif

-
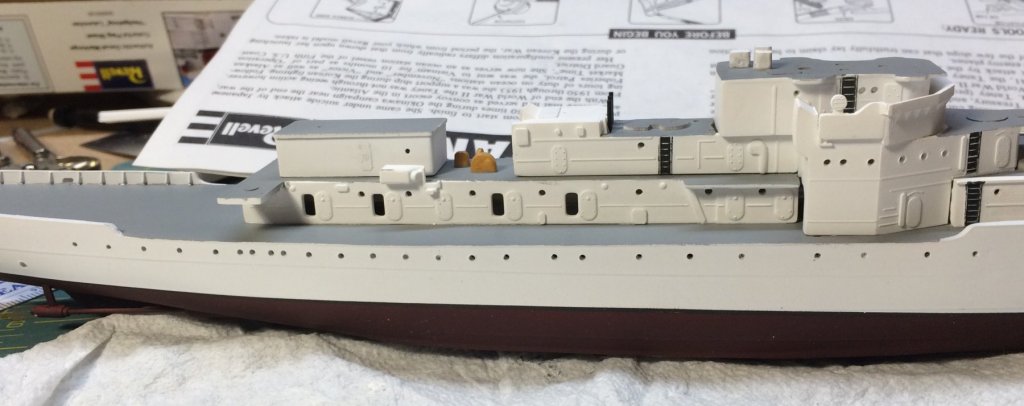
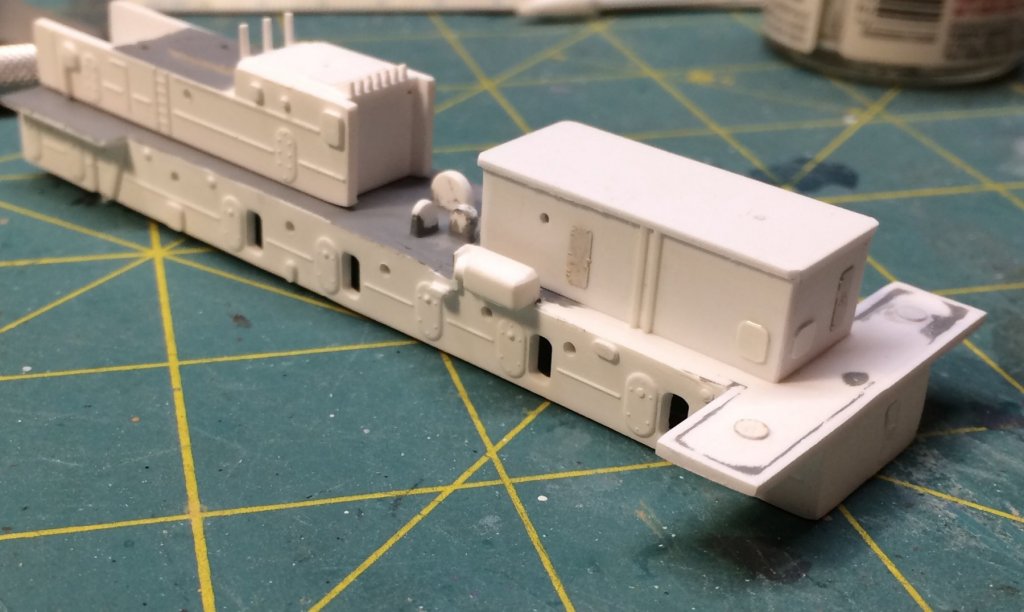
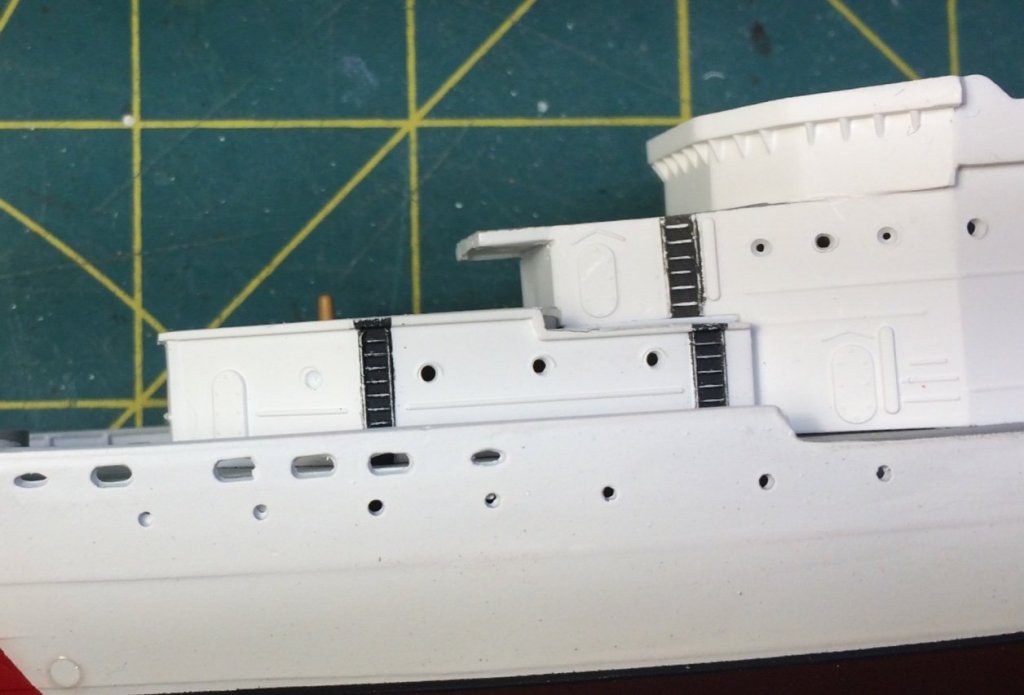
The 01 deck balloon shelter/ stack base and the pilot house have been installed. The new radar room/ ET shop aft is being test fit. The “box“ was too tall at first, so I took about 3/32” off the height- now it matches my drawings.
-
Working on the rest of the main deck and 01 deck structures... Sometime after the Korean War, the ships all got a tripod mainmast for the air search radar, with a radar room under the mast on top of the aft end of the main deckhouse. The Revell kit doesn’t have any of this, so I’m going to try to make it.... First, I cut the various pieces of “detail” off the aft end of the 01 deck with a fine saw, then sanded it flat. Getting rid of it does get me out of having to fill a bunch of sinkmarks! The new structure is just a simple box made from sheet styrene, with extra PE doors and bits of styrene for detailing. Should look OK once it is primed and painted.

- 35 replies
-
- 10
-
-
I have been working on the superstructure lately. I used my razor saws to cut off all the molded in railings everywhere they appeared. There has been lots of filling, sanding, priming, and painting. Lots of masking, too- every little sub-assembly has white on the vertical sections and gray on the decks. One feature of the ship was the black stripes behind the vertical ladders. They were painted black there because it would be impossible to keep white paint looking clean from all the black toed scuffs from the crew climbing up and down those ladders all the time! I decided I would do more harm than good if I tried to sand away the molded on ladders to replace them with PE parts. So instead, I masked the ladders and airbrushed them black. (Actually a grey-black, as pure black is too stark in this scale.). After it dried I used the edge of my knife to scrape away the dark paint, letting the white on the raised ladder show through. I rather like the effect- and it looks better in person than in this extreme close-up!
-
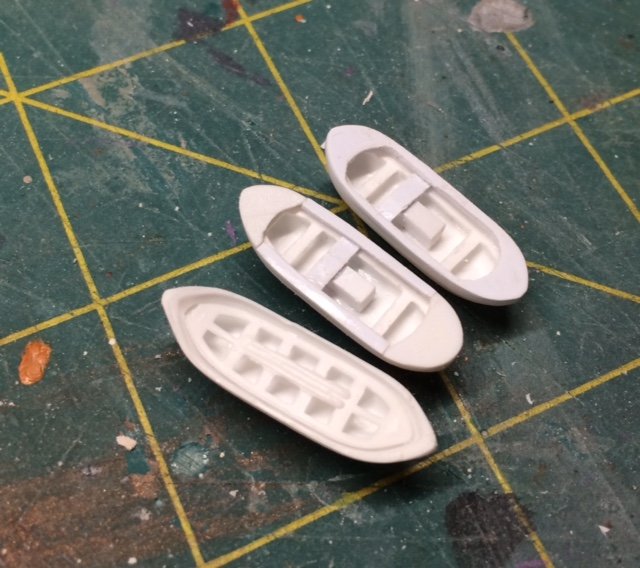
One last catch-up post to get this thread up to date..... While waiting for the paint to dry, I did some work to improve the small boats. The kit comes with four WW-2 era boats, including three open whaleboats. I took a shot at reworking two of them into something that looks more like a USCG 26’ Motor Surfboat (MSB). Some sanding to reshape the hull and the addition of scrap bits of styrene made a big difference...
-
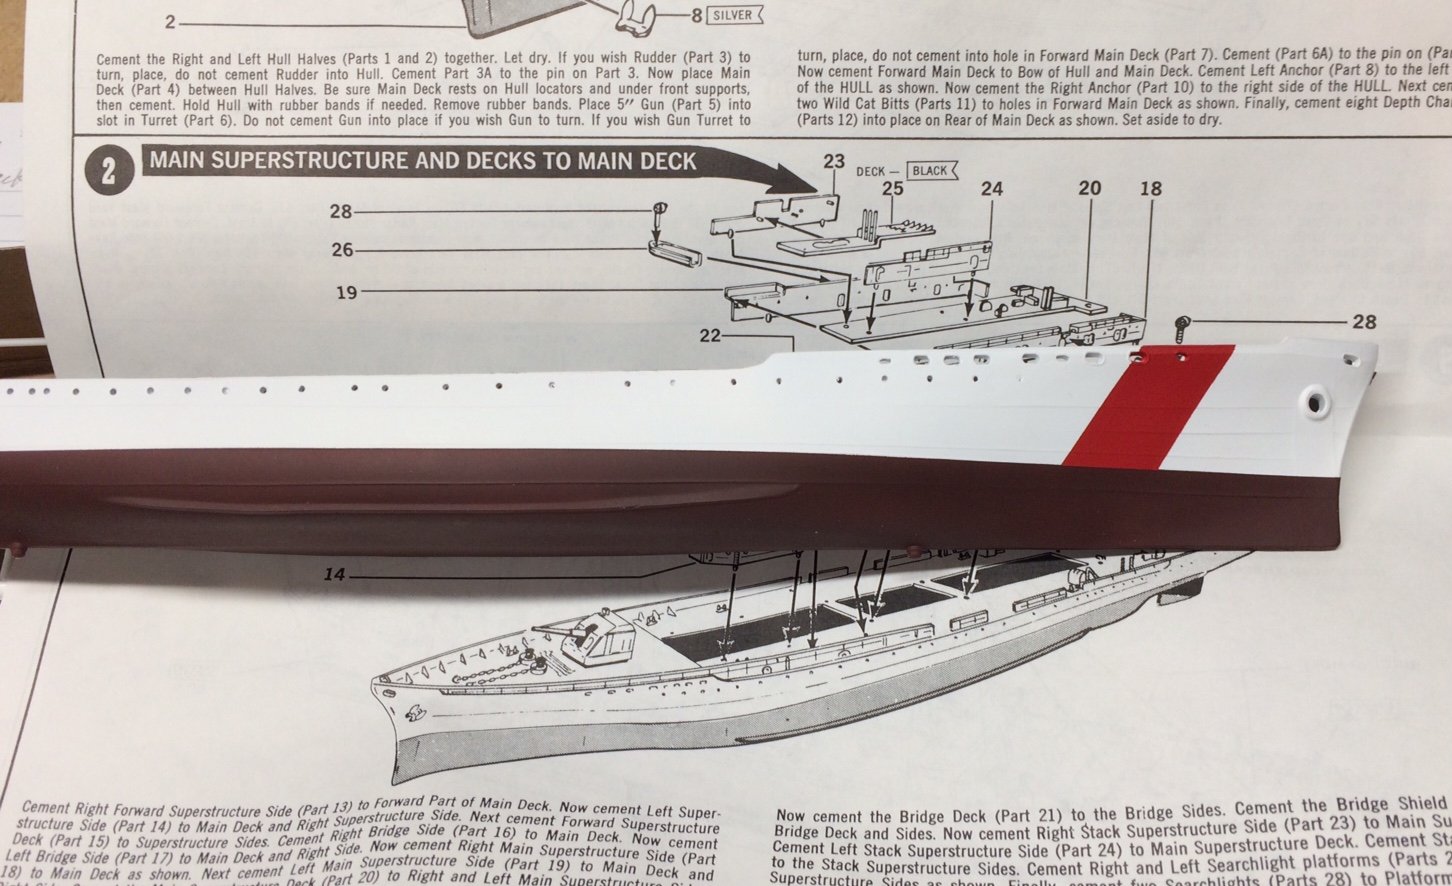
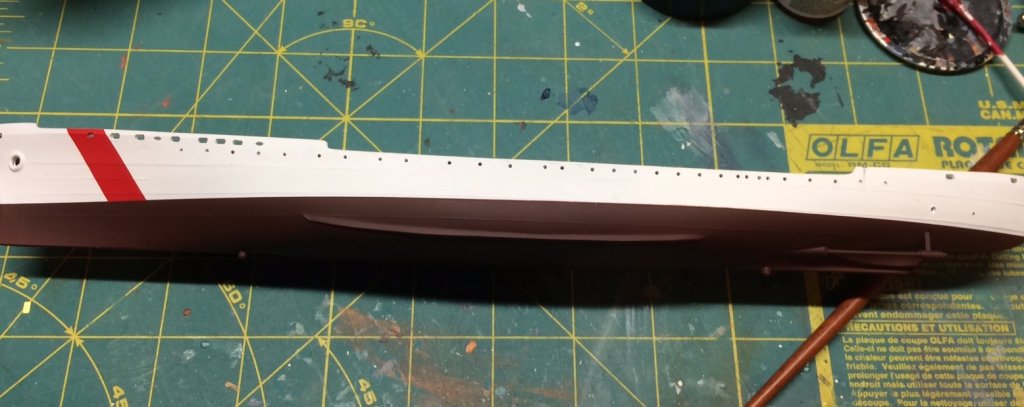
I masked and painted the CG "racing stripe". Coast Guard Red is a red-orange color (FS 12199), which isn't available in any model paint colors. (CG Bob says that ModelMaster Chevy Engine Red is the closest.) That color is only available in enamels, so I kept looking. (I ended up using a color from the Citadel gaming line-- a scarlet with a bit of orange tint to it. The photo makes it look darker and redder than it is in person.) After I applied it to the model and removed the masking-- I realized that I had made the stripe about only 2/3 as wide as it should have been. So I ended up remasking and re-painting. Too narrow:
-
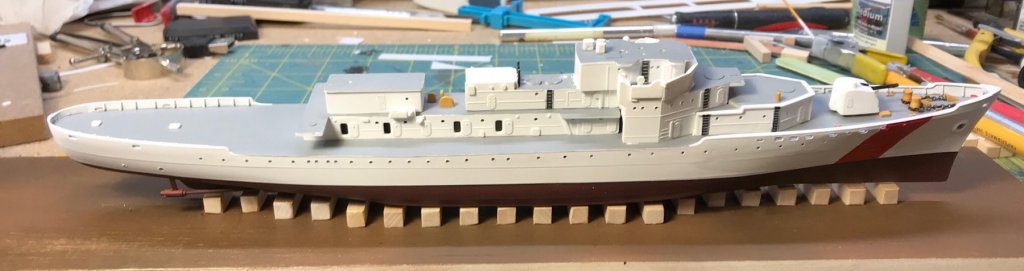
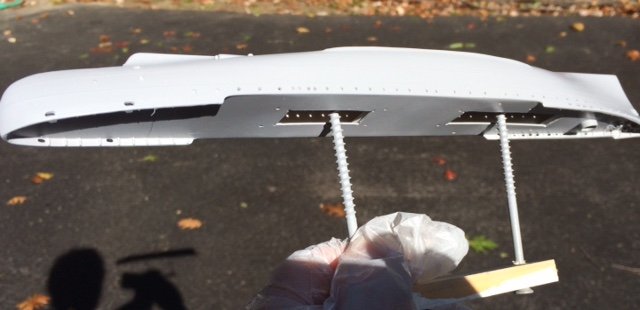
The hull is glued up with my replacement deck. I epoxied a strip of 3/4" square basswood in the bottom of the hull, to serve as an anchor for whatever mounting (pedestals, keel blocks, etc.) I end up using for the finished model. An advantage of the blocks is that I can also mount a handle to make it easy to hold the hull while painting... The hull was primed with Tamiya rattlecan fine white primer, then airbrushed with Tamiya flat white and hull red.
-
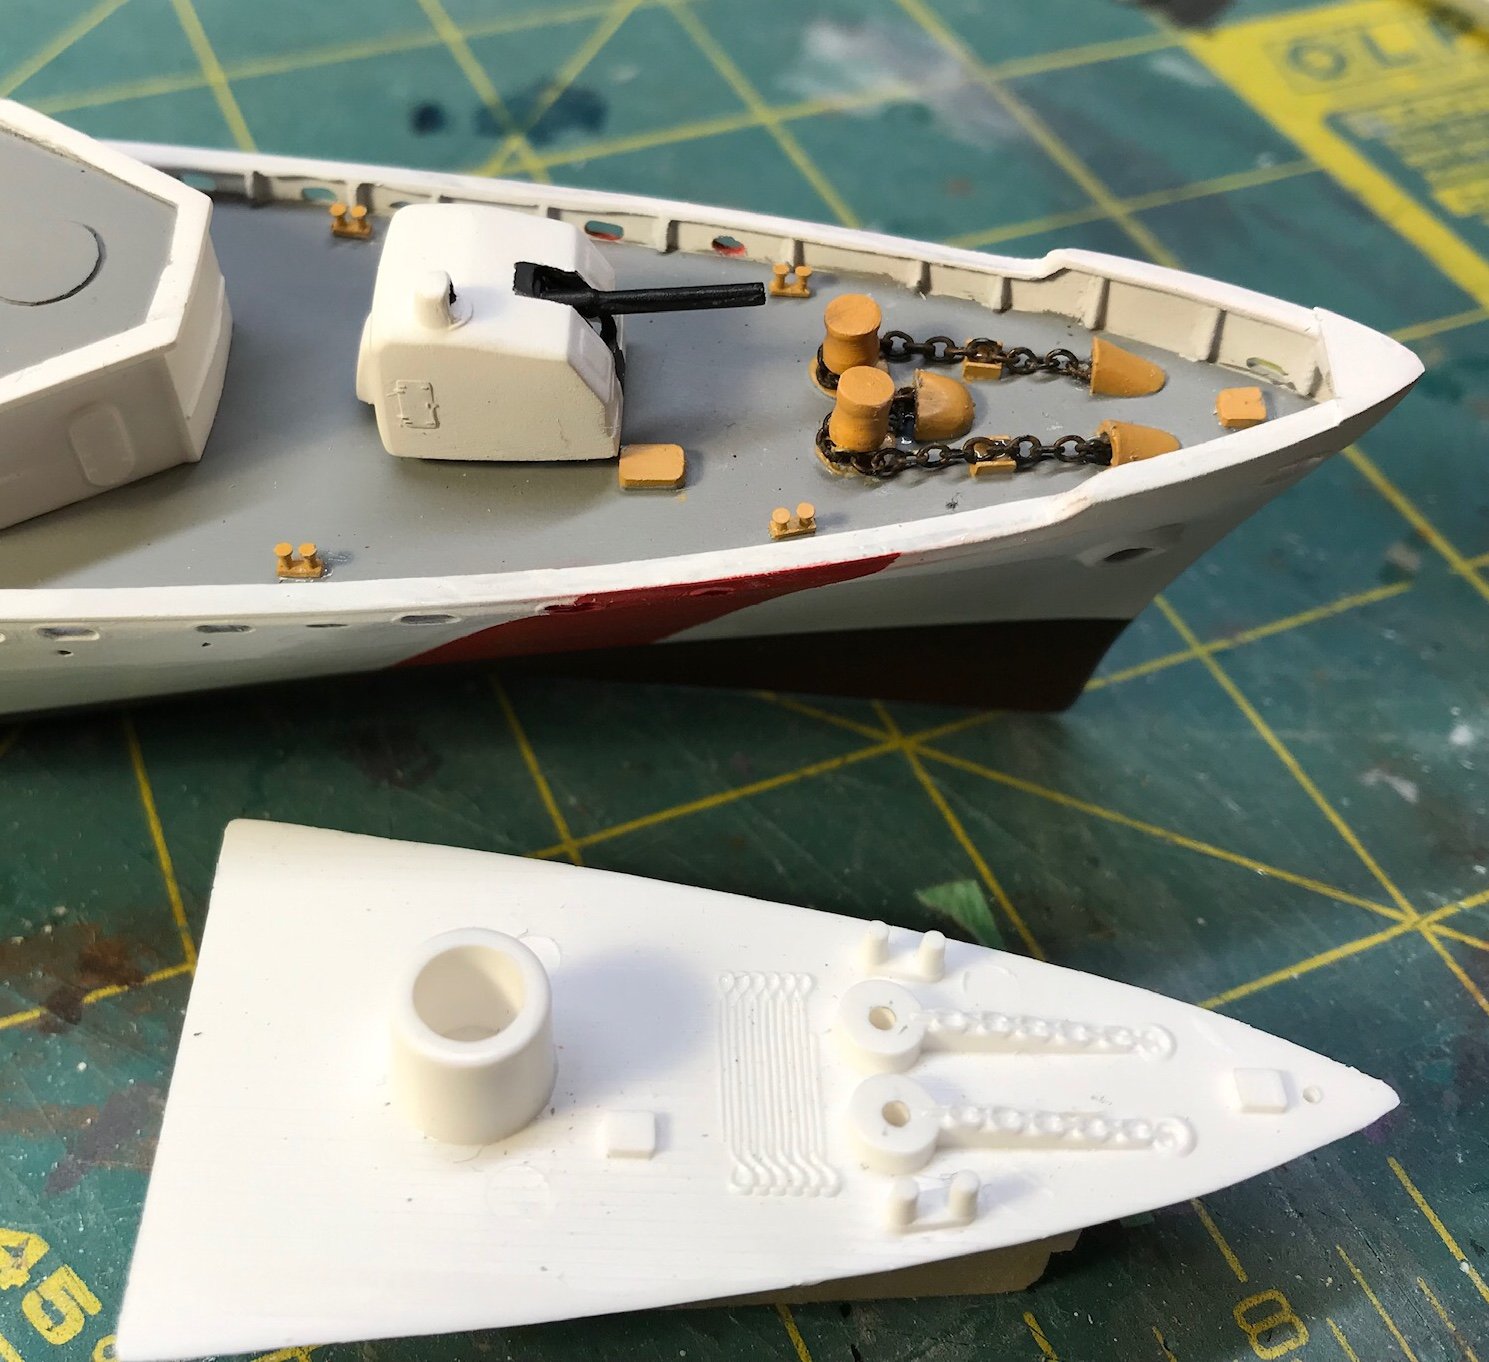
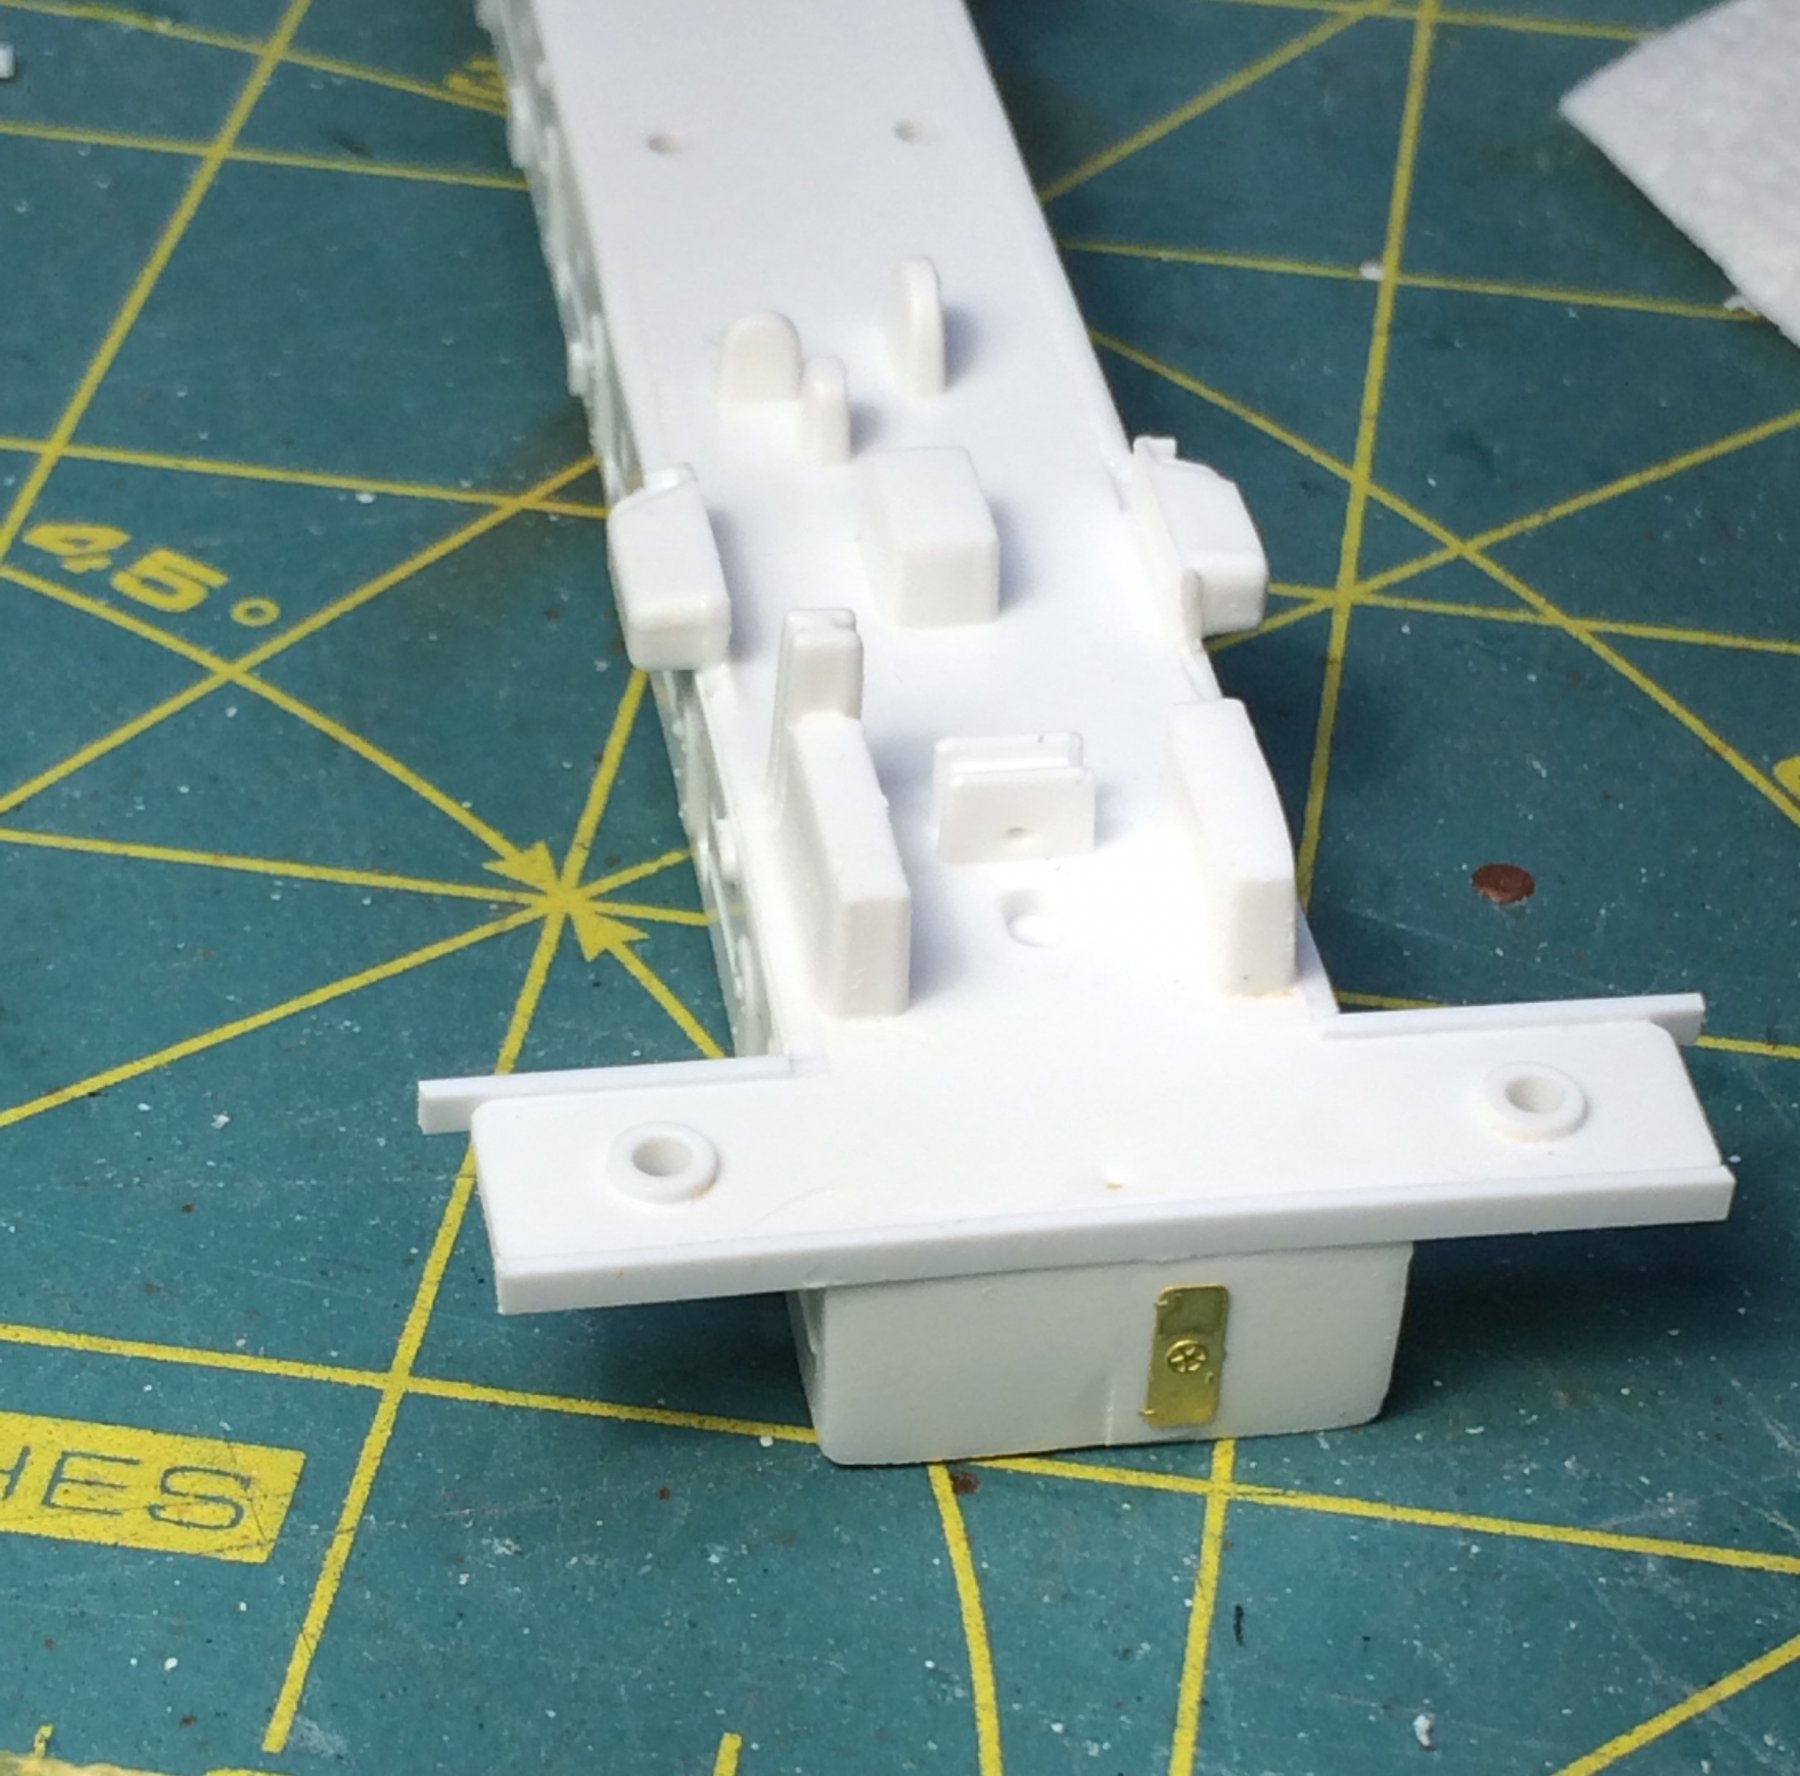
Some early work, showing the new one-piece deck. I started with the foc’sle, as that was the area requiring the most scratch building. I wasn’t going to glue up the deck and hull halves until I was OK with this... One of the reasons to make my own deck was the desire to replace the foc'sle anchor handling gear with something better. Here is a shot of the new deck in the foreground, with the kit's original two part deck in the background. (You can see the “truncated cones” bitts, too.) At this point, I still need to add the access ports in the deck where the chain goes down to the chain locker. The replacement chain came out of the scrap box. It isn't standard navy stud-link chain, but it still looks a heck of a lot better than what Revell molded into the deck....! I also made the capstan drums from some scrap styrene- I glued a piece of tube over a piece of rod, and then clamped it into my cordless screwdriver to turn and shape the piece with files and sandpaper.
-
The kit’s main deck has fine raised wood planking detail, but the wood decks were gone later in the ship’s career. The deck is covered with oversize, clunky details— there is a poor representation of the anchor handling gear, and bitts and bollards that look like oversized traffic cones. The deck also has various oversized locating ridges for other parts, lots of which I won’t be using. Rather than try to carve and sand all this away, I decided to just make a new deck from .040 sheet styrene and add new details. My model won’t have any depth charges, so the deck extensions aren’t needed, either. I also filled in the stern ports. I ordered a few 1/350 scale parts- I’m going to use resin bitts to replace the traffic cones. I figure that 1/350 scale cruiser bitts make fine 1/300 scale Destroyer sized bitts!
-
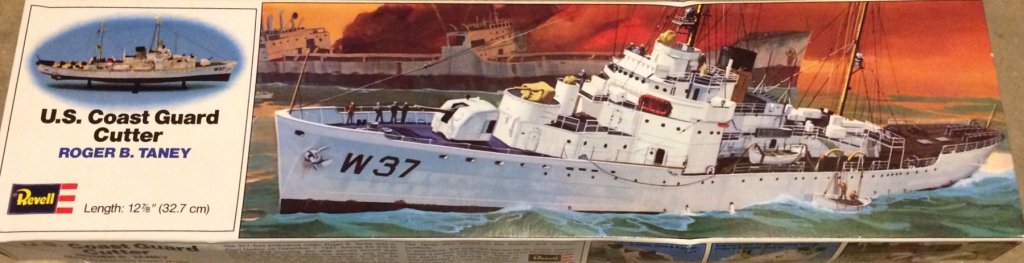
The 327s went through a lot of changes over 50 years they were in service. The kit isn’t an accurate replica of any of the class at any given time, though it was originally released as the Campbell from the Korean War era. There are a bunch of changes I’ll be making to build the 1970s-1980s Duane. But the basic shapes are pretty good... Gold Metal Models does have a detail set for this kit- I’ll be using at least some of it (railings, for sure) to replace the infamous Revell “railing walls”. My goal for this build is to make an improved, more up to date model, but not necessarily an absolutely accurate one. I will create a model that looks like a 327 near the end of active service, but there are lots of little things I won’t be correcting, as this is supposed to be a relatively quick build....
-
This old kit doesn’t seem to have a lot written about it, so I figured I might as well document my ongoing build. I started this as a build thread over on the Ships forum at Fine Scale Modeler, but I figure there isn’t a lot of overlap of readership between the two sites, so I’ll post it here, too. ( I do see that Fright is doing the same thing with his Lindberg Lightship Nantucket build.) The first several posts will be to document the work that was done over the last month or two- once I get the posts caught up, updates will be further apart! The molds date from 1956- the kit is one of Revell’s first attempts at a real scale model- their previous efforts had been the (now infamous) flat-bottomed models that were better for “sailing” on the bedroom floor. The kit represents the Secretary class cutters from the Korean War era. The kit was sold as both Campbell and Taney over the years, with no change to the contents except for decals. The model is about 12.5 inches long, and is one of Revell’s box-scale kits, at 1/305 scale. The seven “Secretary class” Cutters were built in 1936-37, and were 327’ long. The Alexander Hamilton was lost in WW2, but the other six served from 38 to 50 years! They were named for former US Treasury Secretaries (the Coast Guard was part of the Treasury Dept until the 1960s). The ships initially carried the full name such as “Roger B. Taney”, but the names were shortened soon after. The William J. Duane was named after the 11th Secretary of the Treasury, who served under President Andrew Jackson. The ship entered service in 1936, and was decommissioned in 1985. This Revell kit is certainly not up to modern standards, but it is the only one on the market. I never sailed on a 327 in my time in the CG— but a good friend and classmate was on the Duane did, so that’s why I am building it as the USCGC Duane in her circa 1980 fit.
-
Lots of people are downsizing or liquidating grandma’s furniture, there are lots of Knick-knack/collectibles display cabinets on the used furniture market these days! It is a great way to keep our builds dust free. I got a nice case similar to yours, but only 4 feet tall, at a consignment store for a similar cost. My Dumas USCG Lifeboat has a nice home now. I am enjoying following this build- thanks for taking the time to share it with us.
-
Light gray decks, white bulkheads and overhead. Here’s a link to the Fine Scale Modeler review of the Merit 1/200 scale plastic kit, for reference... http://www.finescale.com/product-info/kit-reviews/2015/07/merit-international-uss-yorktown-cv-5 -Bill
- 12 replies
-
- 2
-
-
- enterprise
- revell
- (and 1 more)
-
Bluejacket Shipcrafters is one source- search for “glued-up decking”.
-
Thanks- the chisel idea has promise. I had thought about a using a scriber, but that might tear the wood fibers, plus it would be easy to overshoot the stop lines — a chisel solves both those problems.
-
I have some of those commercially available sheets of planking- the ones with the thin black lines to simulate the caulking between the planks. You find these in the simpler kits, and they are also sold separately. They generally look pretty good, and hit the 80/20 rule, which is good enough for me in many cases. (80% of the look for about 20% of the effort, compared to doing it the “real” way.) A problem with them is that all the “planks” run the full length of the sheet, which looks a little odd, especially on longer pieces. Is there a trick for adding in lines to simulate plank ends? A pen is too dark, and the ink bleeds into the grain. Maybe there’s a pencil that would work? I was going to try a variety of colors and hardness options, but then I thought this may be a wheel that has already been invented.....? TIA for any advice... -Bill
-
+1 on the recommendation to use Epoxy resin. It is more sensitive to mixing- you need to be careful to get the resin and hardener amounts equal. Polyester resin is easier to mix, but stinks to high heaven.
-
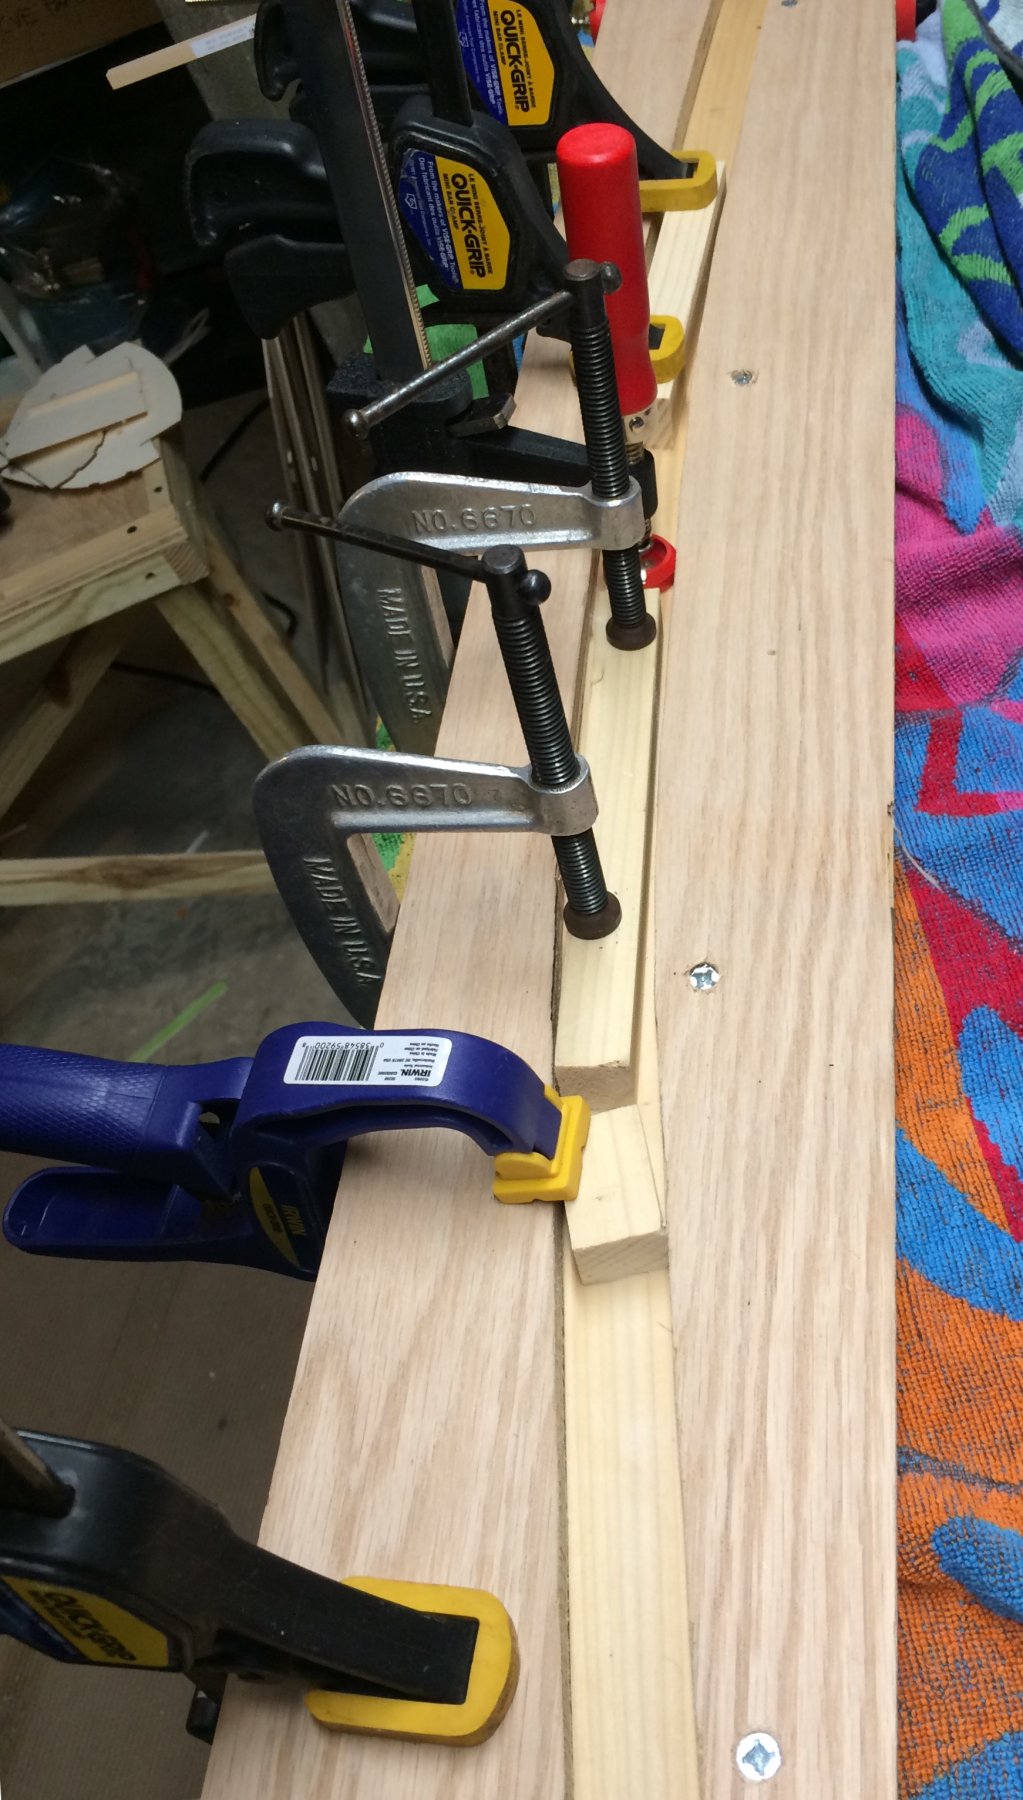
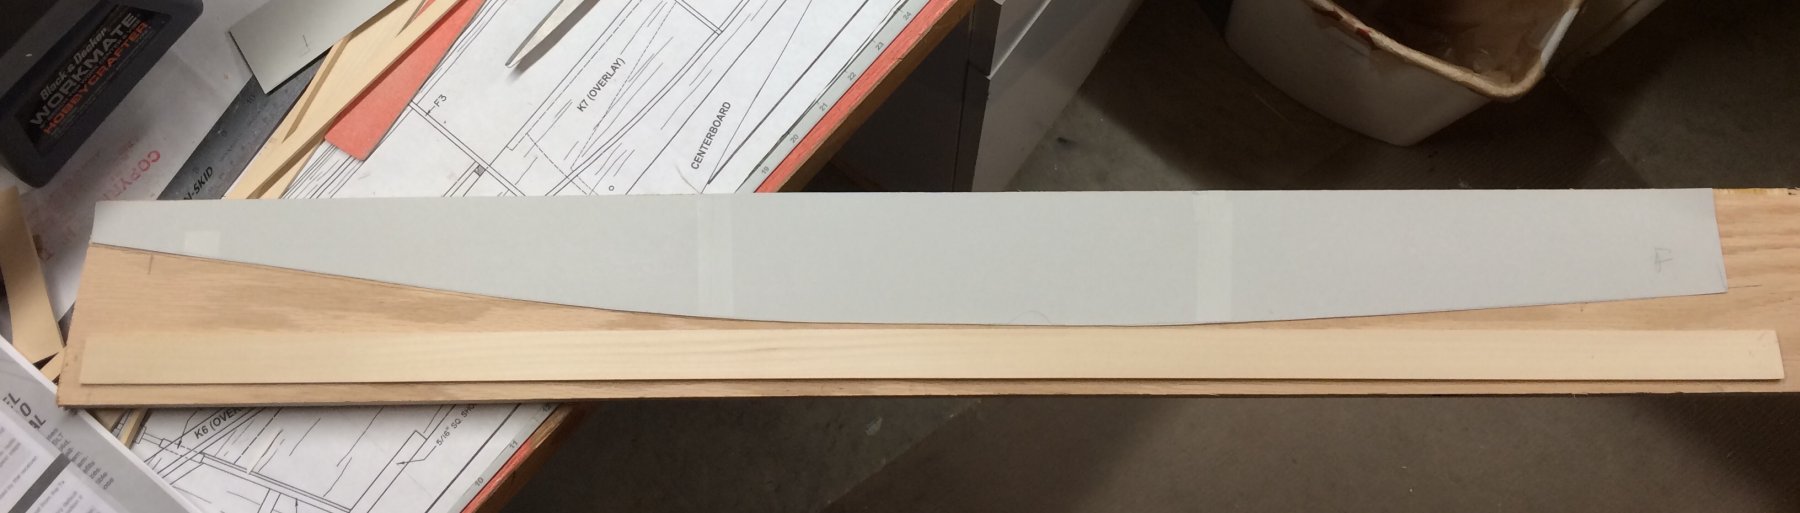
In the last two weeks, I have had no time to work on the model- but I have been thinking about a.solution for the sheer planks. I’m going to try making a bending jig using some scrap plywood left over from a bookcase project. Tonight I made the cardstock template, to use to cut the ply. The picture shows the template and the piece of 1” wide wood resting on the 3/4” ply. The wide plank needs to bent to that curve! I will use the the bandsaw to cut the curve, to make the jig..

- 41 replies
-
- 3
-
-
- muscongus bay lobster smack
- BlueJacket Shipcrafters
- (and 1 more)
-
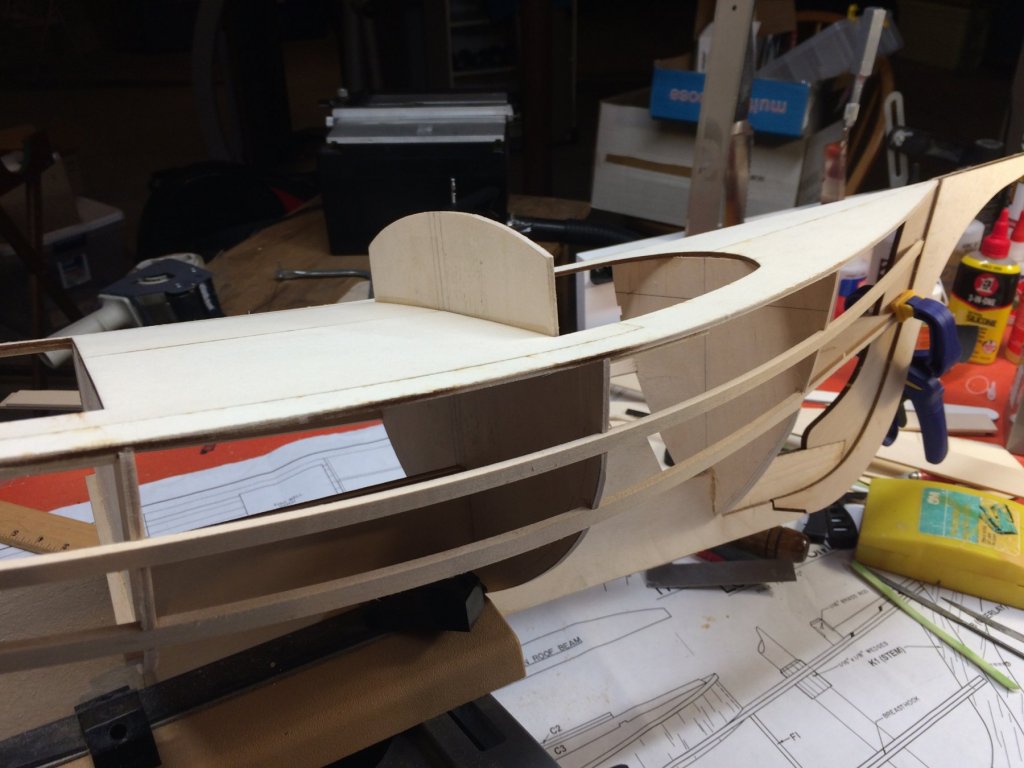
Lots of stuff on the domestic project list lately, so I have only gotten in a few hours in on the model over the week or so... The bulkheads and deck deck are all assembled and true. I have started to fit the battens that were intended for use as an aid in getting the bulkheads aligned. I have started some preliminary fitting a couple of planks, to get a feel for what planking will be like. The instructions have you start planking with the sheer planks which are 1 inch wide. I don’t see how that is going to work- the hull has a fair amount of sheer- I can’t see how I’ll be able to bend a 1/8” x 1 inch strip of basswood (48” long) against the width of the piece, no matter how long I soak it! ( It needs to be about 2.5 inches off in the middle.) Scaled up, the kit parts equate to a 30’ boat that is getting planked with a 1”x 8” sheer plank, with the rest of the planking being 1x3 material. That doesn’t sound unreasonable, but I do wonder if an 8 inch wide plank would be bent that much in a small boatyard. Is a 4” wide plank (1/2 inch on the model) reasonable for a boat from the 1870s? Going to to have to think about this a bit....
- 41 replies
-
- 3
-
-
- muscongus bay lobster smack
- BlueJacket Shipcrafters
- (and 1 more)
-
Nic, Good to hear - I know you can’t fix a problem you don’t know about. I am pleased with the kit so far— the supplied materials are very nice, and the quality of your laser cutting is superb! -Bill
- 41 replies
-
- 2
-
-
- muscongus bay lobster smack
- BlueJacket Shipcrafters
- (and 1 more)