HOLIDAY DONATION DRIVE - SUPPORT MSW - DO YOUR PART TO KEEP THIS GREAT FORUM GOING! (Only 13 donations so far - C'mon guys!)
×


Rcboater Bill
-
Posts
167 -
Joined
-
Last visited
Content Type
Profiles
Forums
Gallery
Events
Everything posted by Rcboater Bill
-
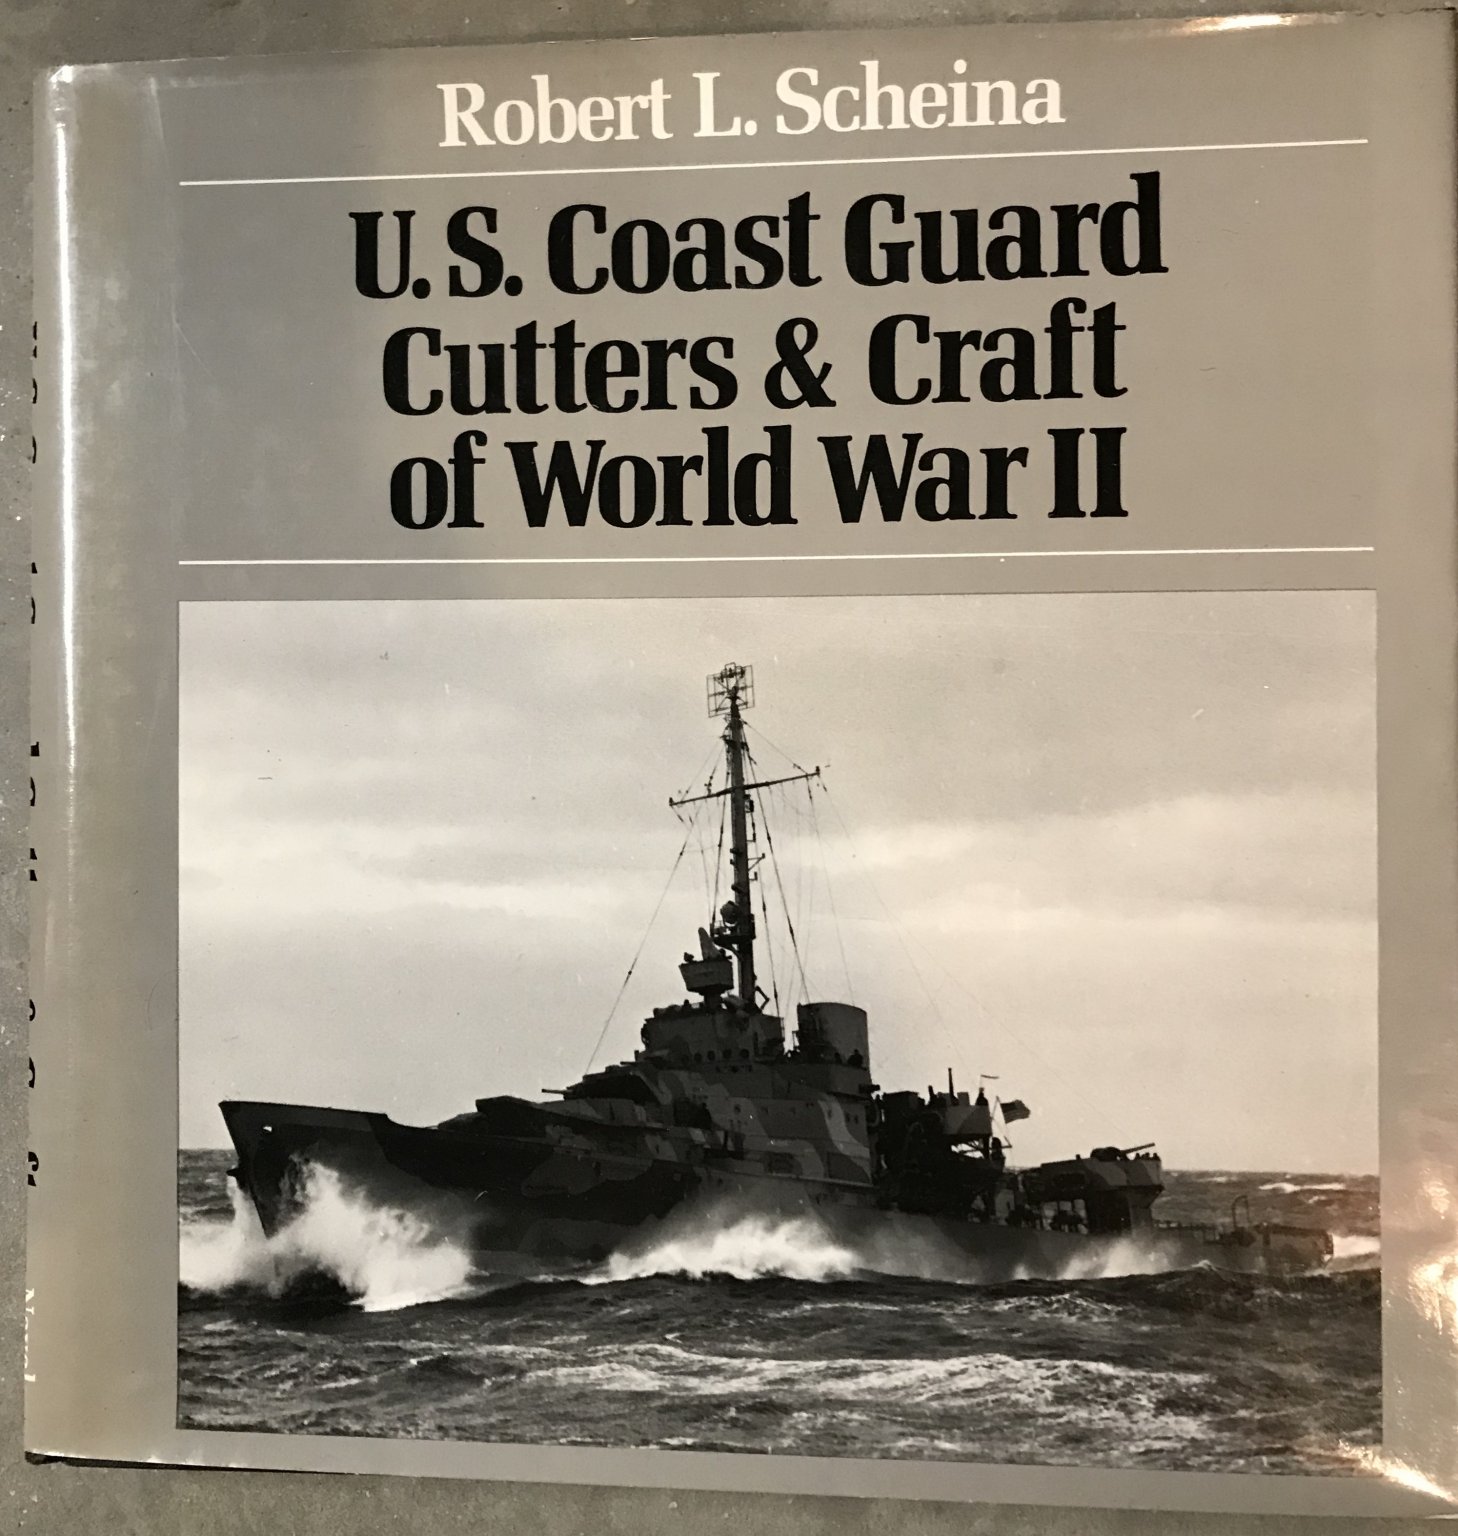
 1. U.S. Coast Guard Cutters & Craft of World War 2. The classic reference book by Robert L. Scheina. Book is in good condition, with dust jacket, with typical shelf wear. Used copies of this book typically go for $30+. This is an extra copy, so I’m letting it go at a big discount. $18. 2. The Mary Rose: The excavation and Raising of Henry VIII’s Flagship, by Margaret Rule. Hardcover with dust jacket, good condition, some shelf wear. $5 3. The National Maritime Museum, edited by Basil Greenhill. (copyright 1982). Softcover, Good condition some shelf wear. The type of book sold in museums, full of photos and descriptions of the collection. These books are generally a bit pricey when purchased at the Museum gift shop. This is an older book, but still full of lots of great photos. $3. Notes: Books come from a smoke free home. Buyer pays shipping from New Hampshire. Figure $8 to $10 to most CONUS locations via Priority Mail, and half that or less for book rate, if you don’t mind waiting. PayPal preferred, other options can be discussed. Use PM to reach me... -Bill


-
- 2
-

-
John, Glad you like the Duane! I built the model for my old friend and classmate who reported aboard Duane in Portland in ‘81 as an Ensign. That’s why I picked Duane over one of her sisters. My next 327’ project will be a 1/96 scale (40”) RC model, based on the Scale Shipyard fiberglass hull. I haven’t decided which ship, yet. One option is Duane in her 1940 Greenland Patrol fit, with the embarked floatplane on the fantail. Another option is Taney at Pearl Harbor, or one of the class in WW2 Atlantic convoy fit..... with 5 decades of service for the class, it is hard to pick one! —————- Bob, I’ve never seen a Dumas 40 footer kit in person, but I do have the 44 from the same era. Those old kits are products of their time, with heavier plywood parts that need some cleanup. The boats are reasonably accurate in shape, but some of the old cast metal detail parts are a bit plain. These days you can find a lot of better fittings online. The 36’ MLB is a nice kit. The ply frames are laser cut and fit well, and the instructions are superb. The kit does simplify a few things to make it easier for novices to build, but those parts can be improved if you wish. If you look on the RCgroups.com scale boats forum, you’ll find detailed build logs for the Dumas kits, including my build of the 36500. Be sure to look up “CG Bob”’s build of the 36 footer- he is the one that caught the couple of dimensional errors in the cockpit area and showed how to fix them. You’ll also find builds of the 44 and even the old 40 footer kit... Thanks to both of you guys for the nice comments! It is nice to see fellow Coasties on the site! -Bill
-
I would recommend giving us a few more details....😁 The scale isn’t enough- what ship, or how big of a model? A Nimitz class carrier is 1100 feet long, while a WW2 Escort Carrier is under 500 feet. Are you building a 27 inch long model, or a 5 footer, or something in between?
-
Twisting blade on MicroMark saw?
Rcboater Bill replied to Rcboater Bill's topic in Modeling tools and Workshop Equipment
Thanks guys! I think that solves my issue. Next step- order a new blade! -
Twisting blade on MicroMark saw?
Rcboater Bill replied to Rcboater Bill's topic in Modeling tools and Workshop Equipment
To answer some questions: It is a Micromark #80463 Tilting Arbor Table Saw. Except for this one anomaly, The saw has been trouble free. The blade is on tightly, and I checked to make sure the blade wasn’t trying to tilt- it was firmly locked in vertical. ( And the zero clearance insert would stop the blade from tilting more than a degree or two anyways!) The blade it came with is very fine-toothed. I hadn’t really thought about the number of teeth- I guess I sorta assumed it was the standard “general purpose”blade the saw shipped with. But maybe not...? When I get a chance, I’ll try a few more tests... Thanks for the advice so far!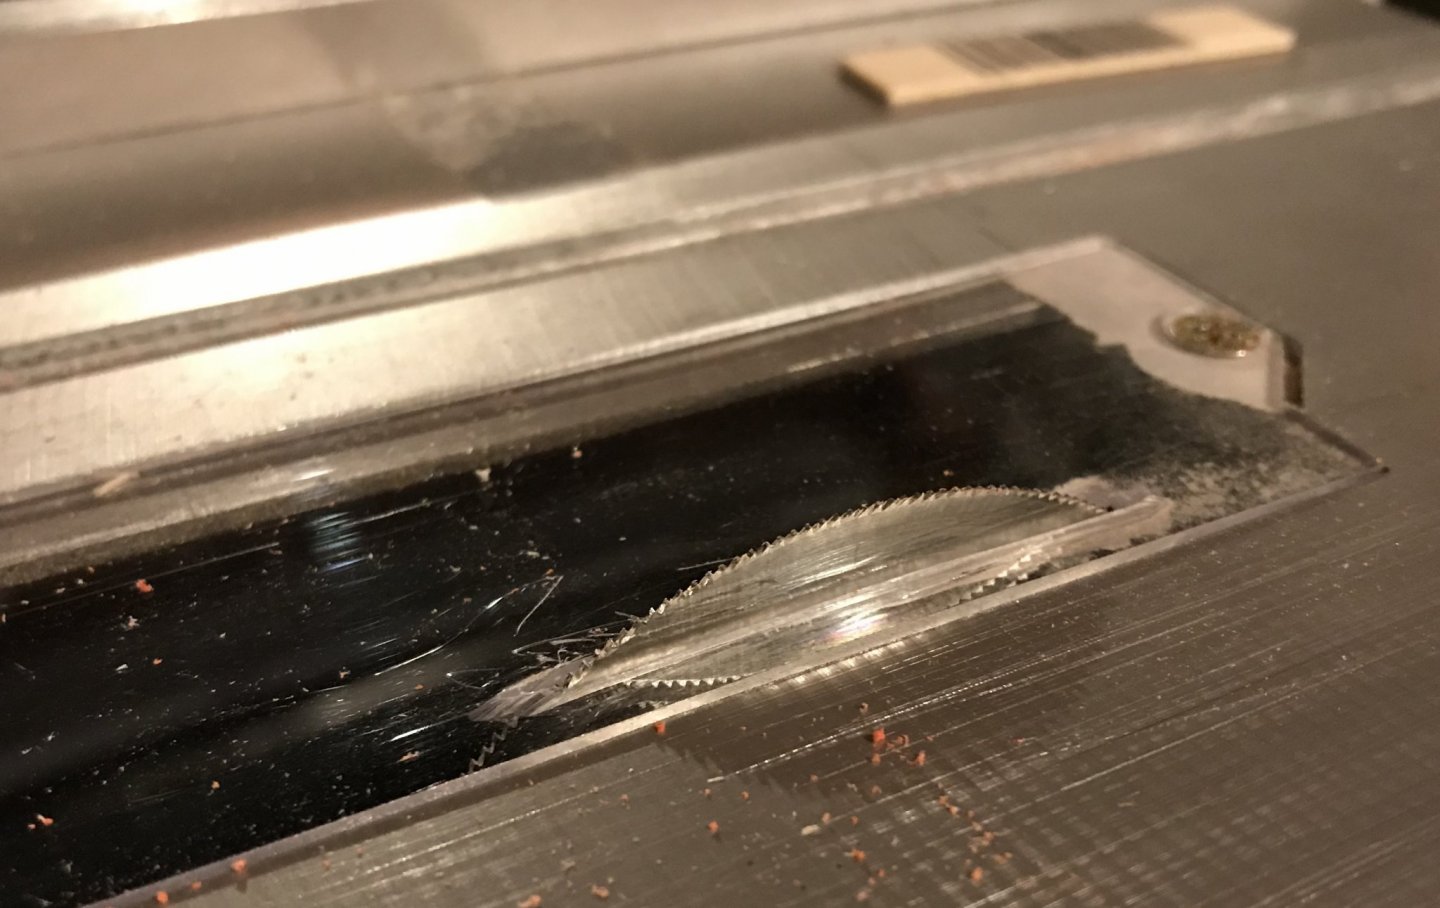
-
I have a Micromark table saw that was given to me. It seems to work fine for pretty much every thing I’ve cut to date, with one exception. I had a piece of 3 mm hobby plywood that was 13 inches long and 4 inches wide. I needed to cut it in half, lengthwise, to make two 13x2 pieces. I started to cut the wood, feeding it slowly so that rpm stayed up. As I got about 4 inches into the cut, I could see the blade was clearly off course- it was twisting a bit and now cutting a line not parallel to the fence. I backed the piece out and checked the settings again. The fence was parallel/square to the table, and securely set at each end. I’m using a zero-clearance insert. So I’m wondering- is this “ normal”? Is ply that thick just too much? I have no issue cutting similar-sized basswood or acrylic, or even cutting smaller pieces of that same ply- like cross-cutting a piece that is an inch wide. Just wondering what others may have experienced....
-
Homemade Styrene rack
Rcboater Bill replied to Rcboater Bill's topic in Modeling tools and Workshop Equipment
I wish I could find a “ hull- shaped” storage tube! 😉 But seriously, the really thin styrene strips flop over like a leaf on an ornamental grass plant. That’s why they need to be in a narrow tube. -
Homemade Styrene rack
Rcboater Bill replied to Rcboater Bill's topic in Modeling tools and Workshop Equipment
I got mine from these guys: https://store.cleartecpackaging.com/clear_en/ I ordered the 12” thin wall tubes, and bought plug caps to seal the bottoms. Minimum order quantity was 100, but 100 from Cleartec was cheaper than buying 50 from someone else. Also, these guys will send a free sample- It came in a few days. I asked for a plug as well- they sent that too. I was glad I did, as the plug’s outside diameter is about 1mm or more larger than the tube itself. I needed to make the holes a little bigger, so they’d fit. I used a laser cutter to make all the holes, but would have used my drill press if I didn’t have access to a laser cutter. I know it maybe seems like overkill, but it was fun to make something useful for the hobby area while practicing with the Lab’s laser cutter. And I find that an organized workbench stays cleaner, which makes it a more inviting place to spend time... -Bill EDIT: In my original post, I said the tubes were 44 cents each. They are actually a lot cheaper- about 25 cents apiece. But after buying the end plugs and paying for shipping, the total order was about $44. I still have another 50 left, which I’ll use to make a rack for wood and brass & aluminum rod. -
Homemade Styrene rack
Rcboater Bill replied to Rcboater Bill's topic in Modeling tools and Workshop Equipment
I added a few improvements to the rack - I added intermediate “steps” so each of the four rows is on a different level. I also added a second set of holes at the bottom, to keep tubes from sliding about. Finally, the labels I had used didn’t have enough “stick” , so I replaced them with better colored ones. Tubes, rods, strip, square, and special shapes all have their own color code. Next I think I’ll make another for strip wood...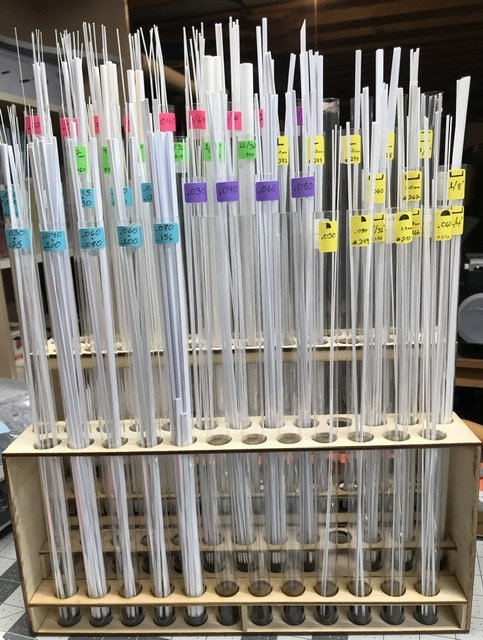
-
I do a lot of scratchbuilding, so I have a shallow drawer in my work bench/desk that is is full of those long skinny packages of Evergreen strip styrene. (I have another drawer full of similar brass and other metals, and another for wood.) When I need something, I was rummaging around trying to find the right size, which is of course the only one I can’t seem to find. There had to be a better way to organize this! It seemed to me that storing them vertically would take up less space, so I was thinking about some kind of rack. Someone pointed out that the really thin stock will droop if sorted vertically, so that got me thinking about using tubes. Looking at a typical package of Evergreen Strips, I realized that the packaging takes up a lot more space than the small contents. That made the idea of small tubes seem even better, and they can fit pretty close together, which means a smaller footprint for the rack. I made a rack using the MakeIt Lab laser cutter, cut from 3mm hobby plywood. I made a two-tiered rack that will hold 50 plastic tubes. I found a packaging company that sold the tubes for about 44 cents each. The tubes are 9/16” outside diameter. The rack is about 13 inches wide and 4 inches deep, so it doesn’t take up much space on the workbench. The tubes are a foot long, so the 14 inch long strips protrude a bit, making them easy to grab. I can toss the shorter pieces back in, and the clear tube will let me see them in there. When needed, I can pull out the desired tube to dump out the shorter pieces. I have spent about $25 total on this project, but now I have exactly what I wanted. This should save me money over time, as I’ll know what I have and won’t be buying duplicate packages because I couldn’t find the one I already had! -Bill

- 8 replies
-
- 18
-
-
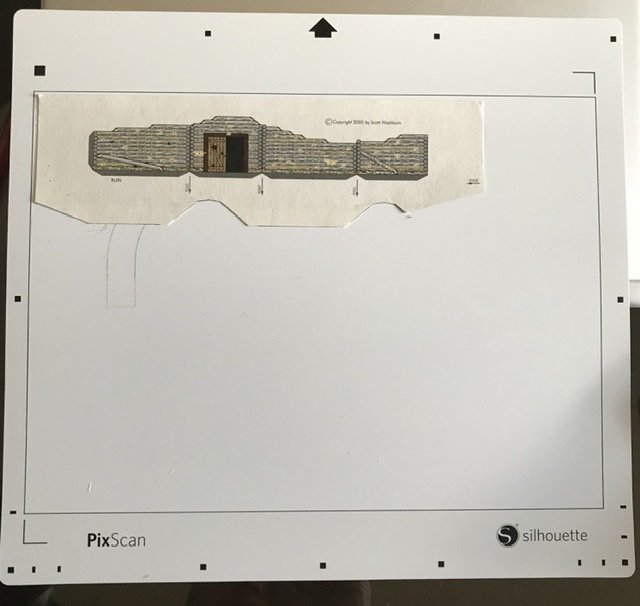
I acquired a Cameo4 about 2 weeks ago. I'm learning to use the machine.... The pixscan tool is pretty powerful. I did a test using a simple paper model. I took a section of a commercially printed 15mm (1/100) war game structure (wrecked house) cardstock model, put it on the sticky scanning mat, and took a photo with my phone. I then imported the photo into the Silhouette Studio software, and used the “trace edge” feature to find the outline. I then loaded the mat with the paper model still in place into the cutter, and it precisely cut the item out! This was a learning exercise- it would have been quicker to just cut this simple item out with an X-Acto knife. But it shows some interesting possibilities..... The powerful feature is that you aren’t limited to just cutting out the exact item shape you scanned. Once it is imported, you can take the outline of the item you generated and manipulate it, paste it into another file, and then cut it out on a different material. A couple of examples come to mind: 1. Scan parts of a decal sheet, maybe scale it up if needed, and then cut masks for painting the insignia and letters. Scan a generic letters or national insignia sheet, and you now have a library to cut masks in whatever scale you need. I have a clubmate who has done something similar-- he has the previous generation machine. He was building a specific 1/48 jSpitfire, using an aftermarkmet decal sheet. His problem was that the sheet had an error- the fuselage squadron letters were the wrong color. So he made a mask and painted them in the correct color instead of using the decals. 2. Scan a paper model, and then cut parts of it on a different medium, say thin styrene. This has me very intrigued- I have a need for a 1/96 scale Curtiss SOC-3 floatplane to go on the stern of an RC model. My only options in 1/96 are a (heavy) resin model or a “print at home” paper model. The paper model is a lot lighter, but won't be as sturdy or moisture-resistant. Cutting at least some of the model out of .010 styrene instead of cardstock has potential....! Here’s the photo of the simple model on the Pixscan mat I imported into the software...
-
You can also find a wide variety of geared motors from companies supporting the robotics hobby. ServoCity is m current favorite....
-
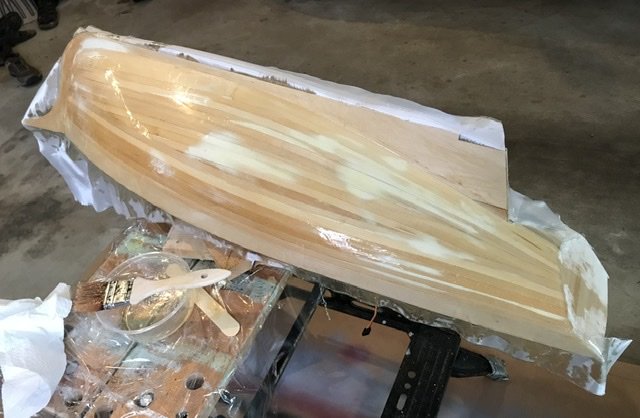
Finally got the starboard side of the sailboat fiberglassed. (Portside was done back in early November.). I may not get much more done until spring- next step is a thorough sanding, which means resin dust, which means it will need to be done outside. Winter in New Hampshire is not generally a good time for that sort of outside activity!
- 41 replies
-
- 2
-
-
- muscongus bay lobster smack
- BlueJacket Shipcrafters
- (and 1 more)
-
Thanks, I really enjoyed it! The great thing about these old kits is any improvements makes them better- you really can’t make them worse! I enjoyed the scratchbuilding aspect of it a lot.
-
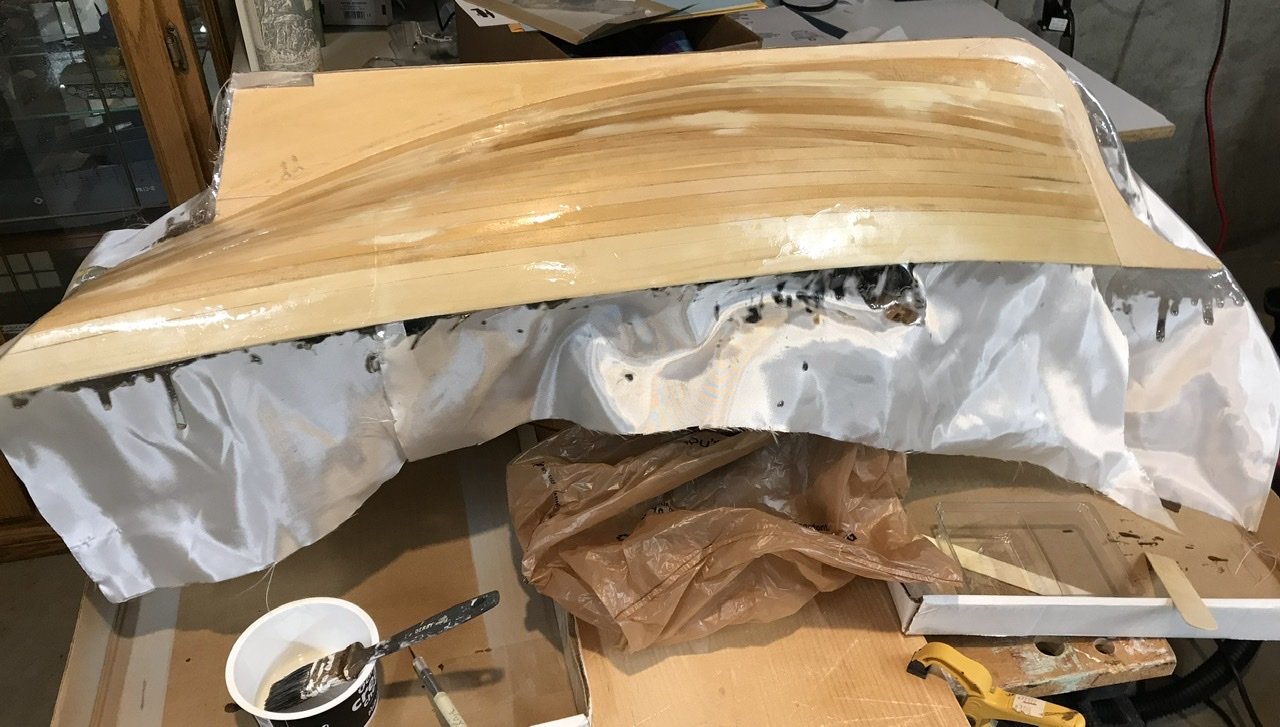
Finally got some time to focus on the model- Applied 2 oz. fiberglass cloth on the starboard side. After the epoxy cured for about 90 minutes, I went back and trimmed the excess with a sharp knife. Will let it cure this week, and then hopefully do the port side next weekend...
- 41 replies
-
- 2
-
-
- muscongus bay lobster smack
- BlueJacket Shipcrafters
- (and 1 more)
-
Steve, Congratulations on a successful maiden voyage! That little pool doesn’t do the model justice- it would be great to see it running on a proper pond! If all else fails, bring her to the Boston area, and join us on the 24th of August! We’re having a club sailing session and picnic that day. (Hey, it is only a 3 hour trip from Albany!) Interesting report on the ballast- do you know how much the model weighs in sailing trim? Was she stable with some of the ballast removed? In any case, ballasting a ship with that much top hamper a quarter inch or more below the painted waterline may help it sail better. -Bill
- 446 replies
-
- 3
-
-
- zebulon b vance
- deans marine
- (and 3 more)
-
Haven’t accomplished a lot, but here’s a shot of the hull after two rounds of filler and sanding. I’ve just applied the third (and final, hopefully) light coat of filler to a few spots that needed a bit more. Next will be a final sanding to prep the hull for the fiberglass...
- 41 replies
-
- 2
-
-
- muscongus bay lobster smack
- BlueJacket Shipcrafters
- (and 1 more)
-
Steve, There is a guy named Luis, from Spain, who does fabulous work creating 3-D printed figures. He has a huge range of figures, including WW 2 era sailors, in scales from 1/144 to 1/16. He has a bunch of stuff on Shapeways, and is now printing some on his own, too. The best part is that he will do custom work. When I needed crew wearing standard Navy kapok life jackets for my USCG 36’ lifeboat, I asked if he could take his 1/24 scale PT boat helmsman and lookout, scale them up to 1/16, lose the side arms and steel helmets, and add soft hats. Two weeks later a set was posted on Shapeways for purchase! You can see his stuff on Shapeways.com- his name is Holden8702, and his “ store” there is called Panzers vs Tanks. He is also on Facebook as Holden8702, and is selling some of his stuff directly, avoiding the Shapeways markup. If he doesn’t have what you want already, you can contact him and ask. He might even be able to make a set of “Exercising Nurses” using your photo! He is highly recommended- lots of guys are buying his stuff. I have personally bought bought his large scale figures, and a bunch of his 1/144 scale crew for my Escort Carrier. -Bill
- 446 replies
-
- 3
-
-
- zebulon b vance
- deans marine
- (and 3 more)
-
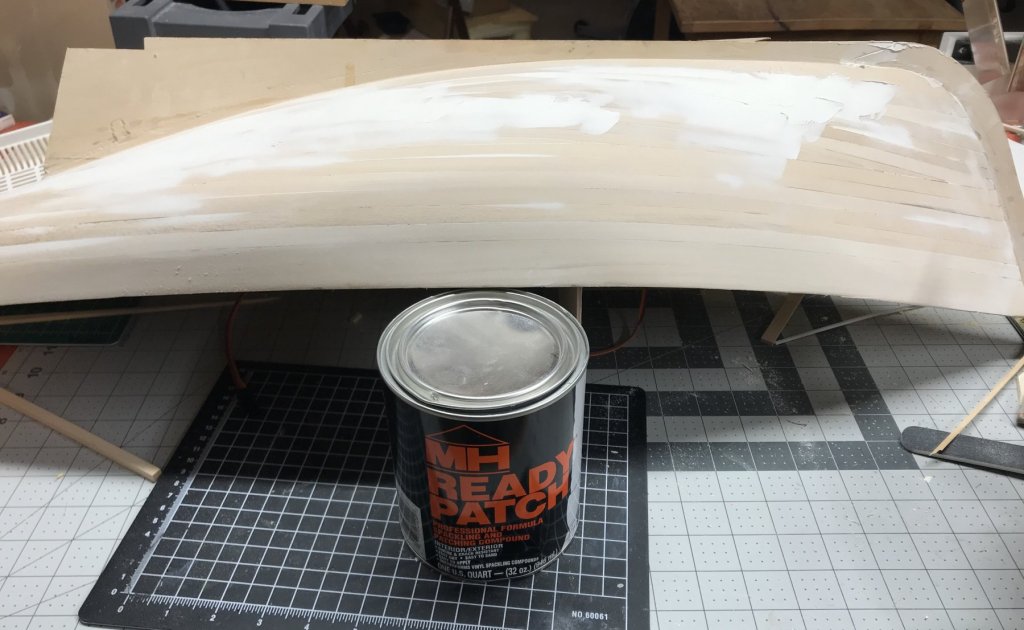
No photos today- but I have made great progress this weekend sanding and filling the hull. Steve- thanks for that tip on the MH Ready Patch- that stuff is great! I applied it with a nylon putty knife, almost like a thin-as-can-be skim coat on a plaster wall. I then used my electric 1/4 sheet power sander to sand most of it away, leaving the gaps and valleys filled. I still have a bit of work to do, to prep the hull for the next major step- the layer of fiberglass.
-
Steve, Thanks-- I'll check that Ready Patch product out. For me, water exposure is not really a concern, as the hull will be getting a layer of fiberglass, sealing everything in.....
-
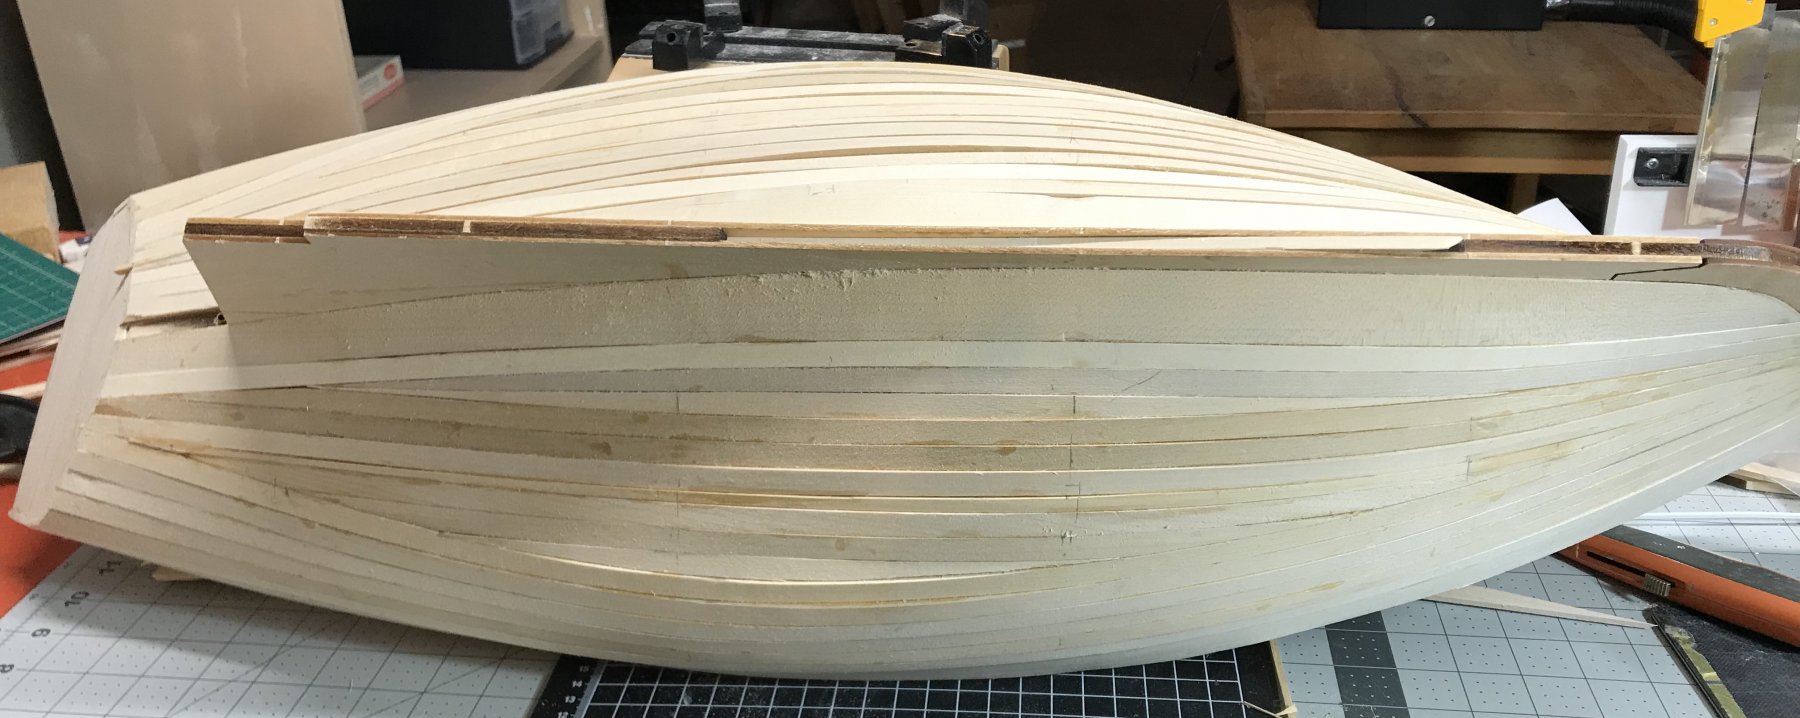
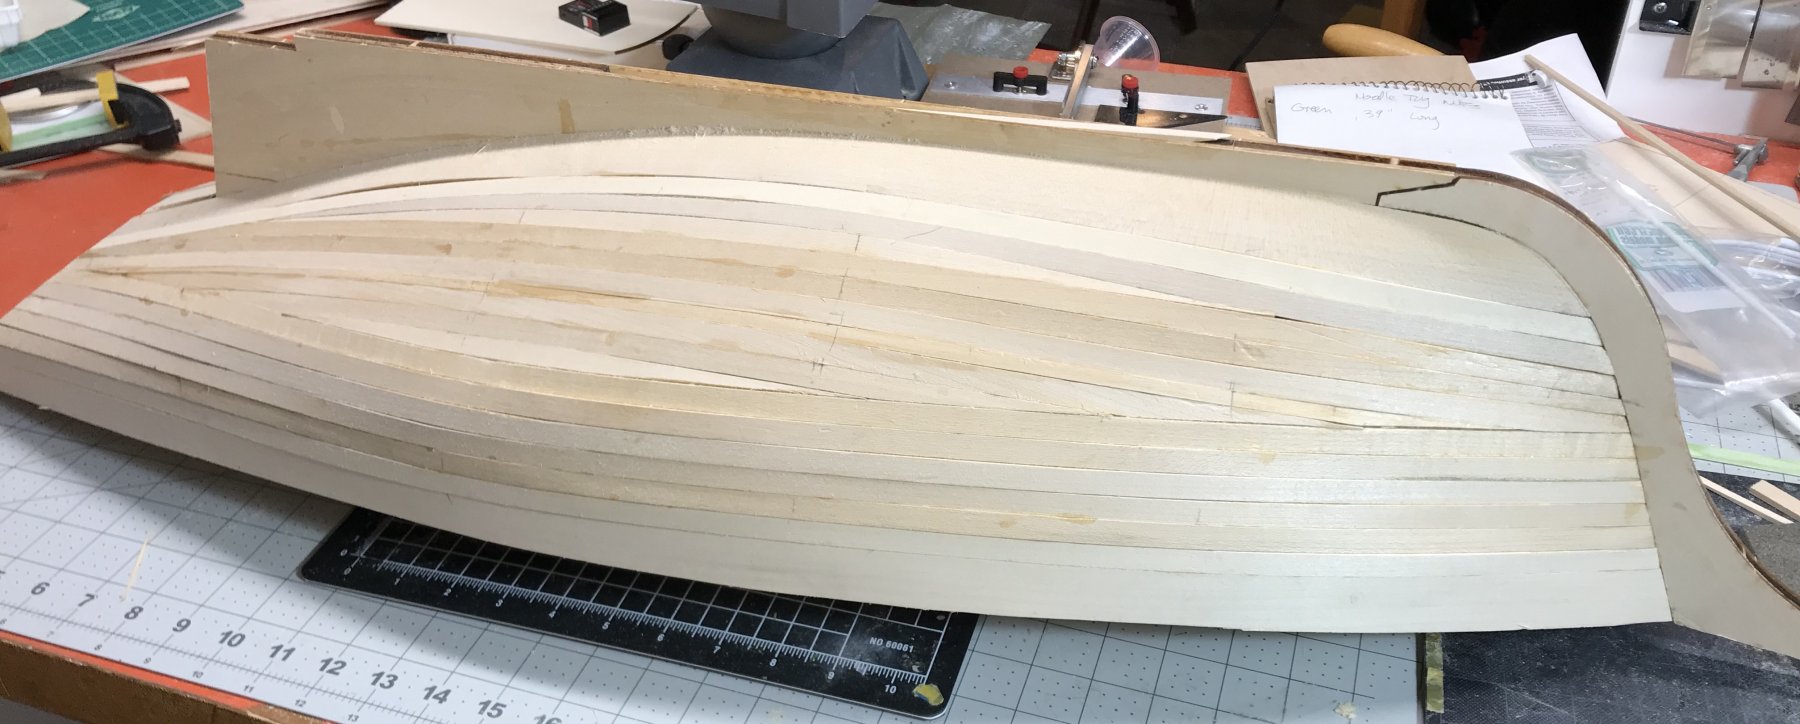
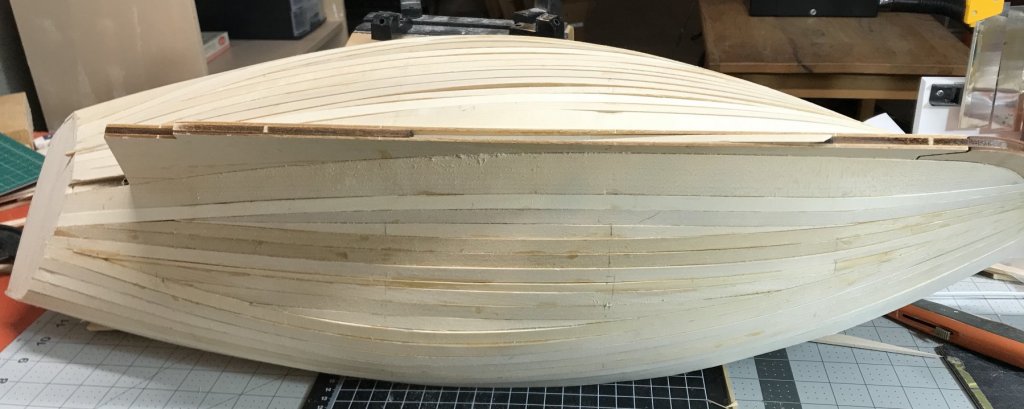
Hit a major milestone last night- the hull is planked! I started kit on August 30. Now, 10.5 months later, the hull is planked! It was a tedious process at times, but the main reason it took this long was that it was a long cold winter, and I didn’t spend much time in my basement workshop. Don’t look too closely- there are a bunch of planking sins committed over the winter! I knew I could get away with them, as the next step is a thorough sanding to smooth the less-than-perfect planking joints, followed by a coat of fiberglass...

- 41 replies
-
- 5
-
-
- muscongus bay lobster smack
- BlueJacket Shipcrafters
- (and 1 more)
-
Steve, Once again, I get to chime in a little too late to be truly useful! Regarding your paint spill- I learned the hard way years ago, so now I never paint from a bottle on the bench. I set the bottle inside a roll of electrical tape- it fits snugly, and the roll keeps the bottle from tipping over when (not if) I bump into it. ”Been there, done that, ruined the tee-shirt!!” -Bill
- 446 replies
-
- 6
-
-
- zebulon b vance
- deans marine
- (and 3 more)
-
Steve, You asked: “Apart from lettering and an anchor, both of which will be done later, the ship is ready to turn to work on the port side, the masts, the awning and deck furniture (is it all furniture or are cleats, chocks, rope reels and such considered something else?).“ Those items are all considered to be “fittings” by most ship modelers. “Deck furniture” is literally the things the passengers sit on. -Bill
- 446 replies
-
- 3
-
-
- zebulon b vance
- deans marine
- (and 3 more)
-
Steve, If you don’t have film canisters, small pill bottles work well, too, to contain the shot while sorting out how much ballast to add. If you are going to use ziploc types of bags, be careful not to put too much in. The seams in those bags won’t last long with a couple of pounds worth of shot in them! As Lou mentioned, be sure to secure ballast and batteries so they can’t move about. I make it a practice to roll my model 90 degrees (on the bench ) and give it a couple of mild shakes, to make sure nothing inside shifts about. I might have said this already, but I’ll risk repeating myself: One of my club mates almost lost his tug. He was hit amidships (“T-boned”) by a model belonging to an inattentive skipper. The collision did no damage to his sturdy hull, but the force of impact and resulting roll caused the big SLA battery to fall over against the model’s side. The resulting list put the model’s cabin/ deck joint in the water. With no real coaming , the model started to leak, worsening the list, letting in even more water. Fortunately, the model was close enough to shore for the skipper to wade out and save it —he got there just as the model was on her beam ends and going down. A collision, a motorboat wake, a strong gust of wind — all can play havoc with a model with lots of top hamper if it catches you broadside. -Bill
- 446 replies
-
- 6
-
-
- zebulon b vance
- deans marine
- (and 3 more)
-
Steve, I bought a 25 pound bag of lead shot decades ago, still have a third of it left. I remember how surprised I was to see how small of a bag it came in. I have a bunch of 35mm film canisters, I filled them with shot- each one weighs close to a pound! It makes it easy to control the lead, to add/ remove it when trimming a model. When I’m happy with it, I then mix up a slurry of lead and glue and pour it into place. You don’t have to use (expensive) epoxy- waterproof woodworkers glue will do the job, if you pour in layers. You just don’t want the shot rolling around inside the hull!
- 446 replies
-
- 2
-
-
- zebulon b vance
- deans marine
- (and 3 more)